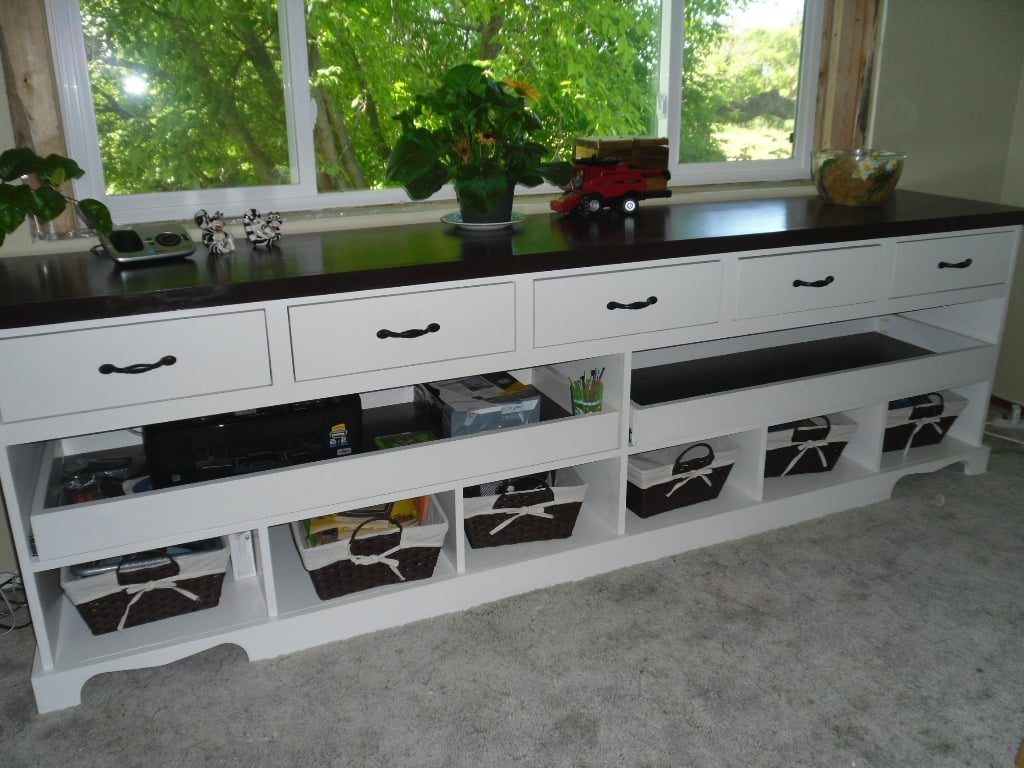
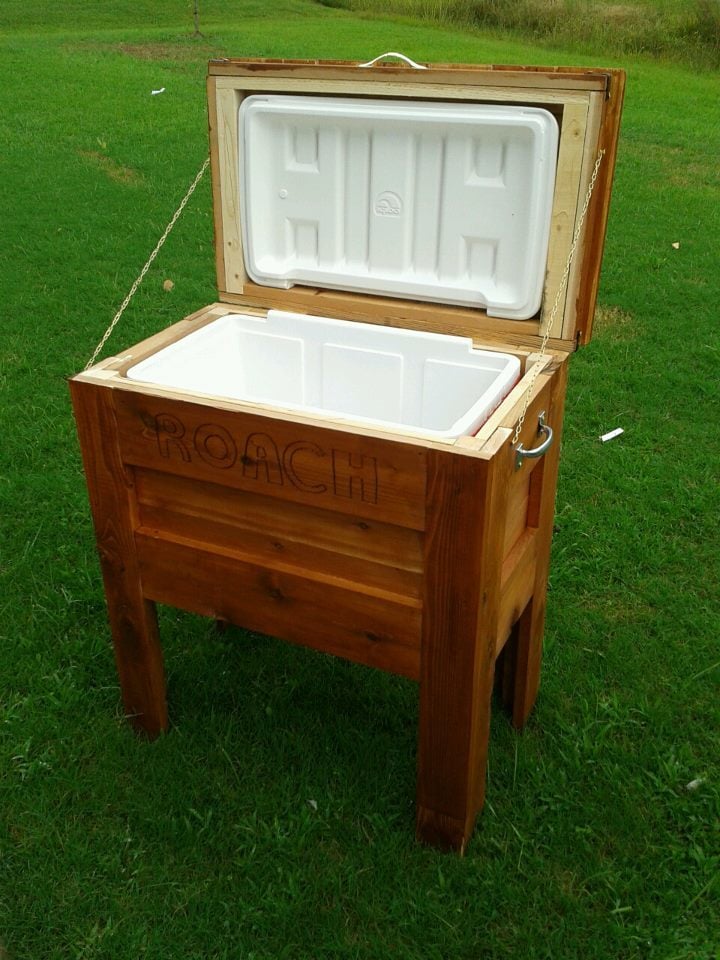
Community Brag Posts

CaitCouch

Submitted by Anonymous (not verified) on Tue, 09/13/2016 - 09:31

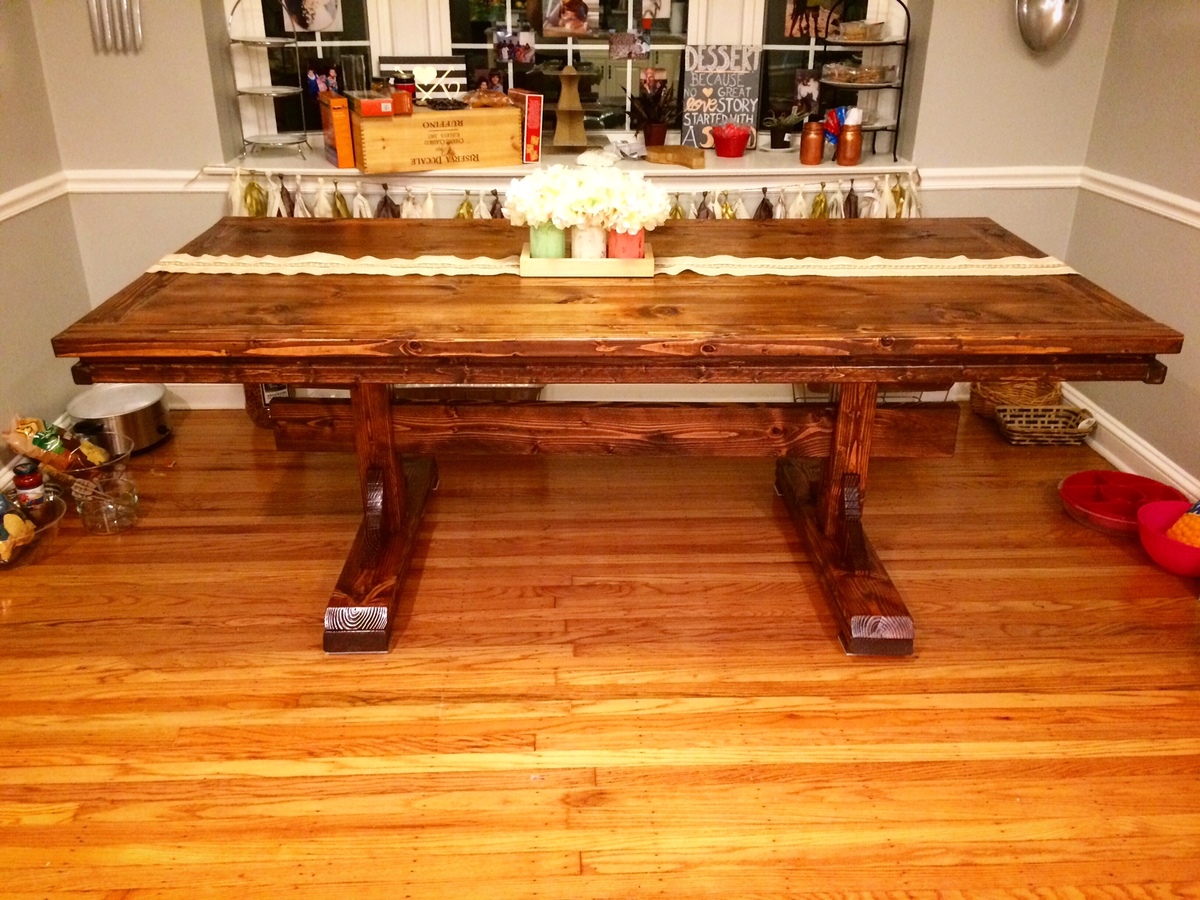
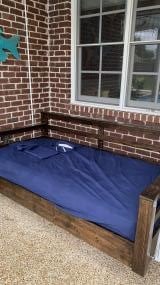
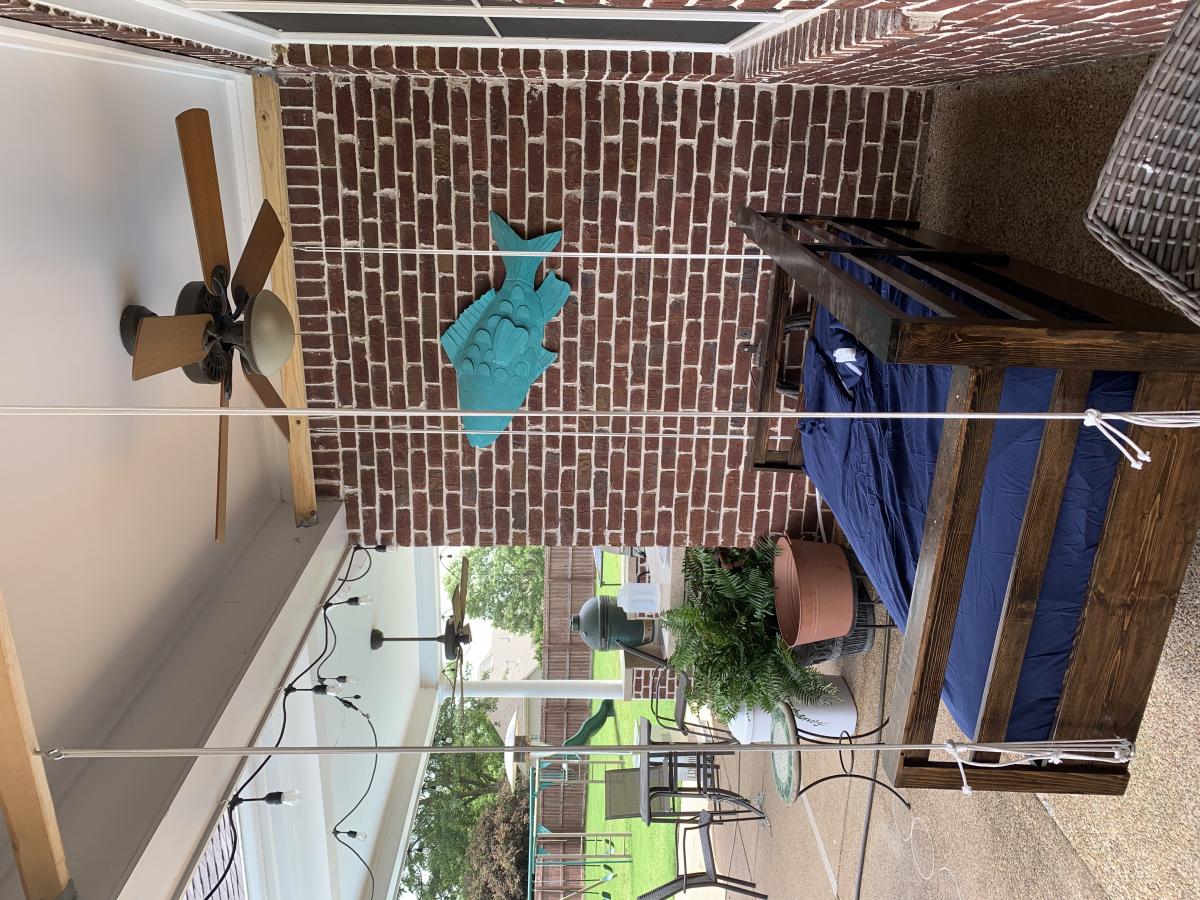
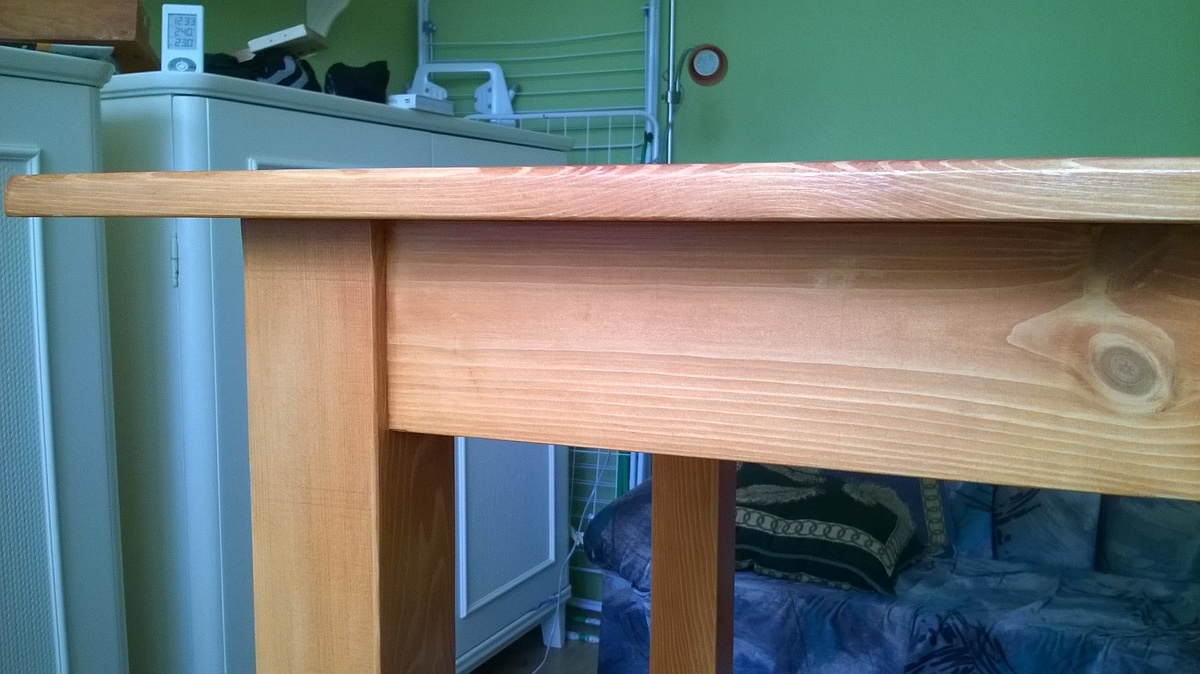
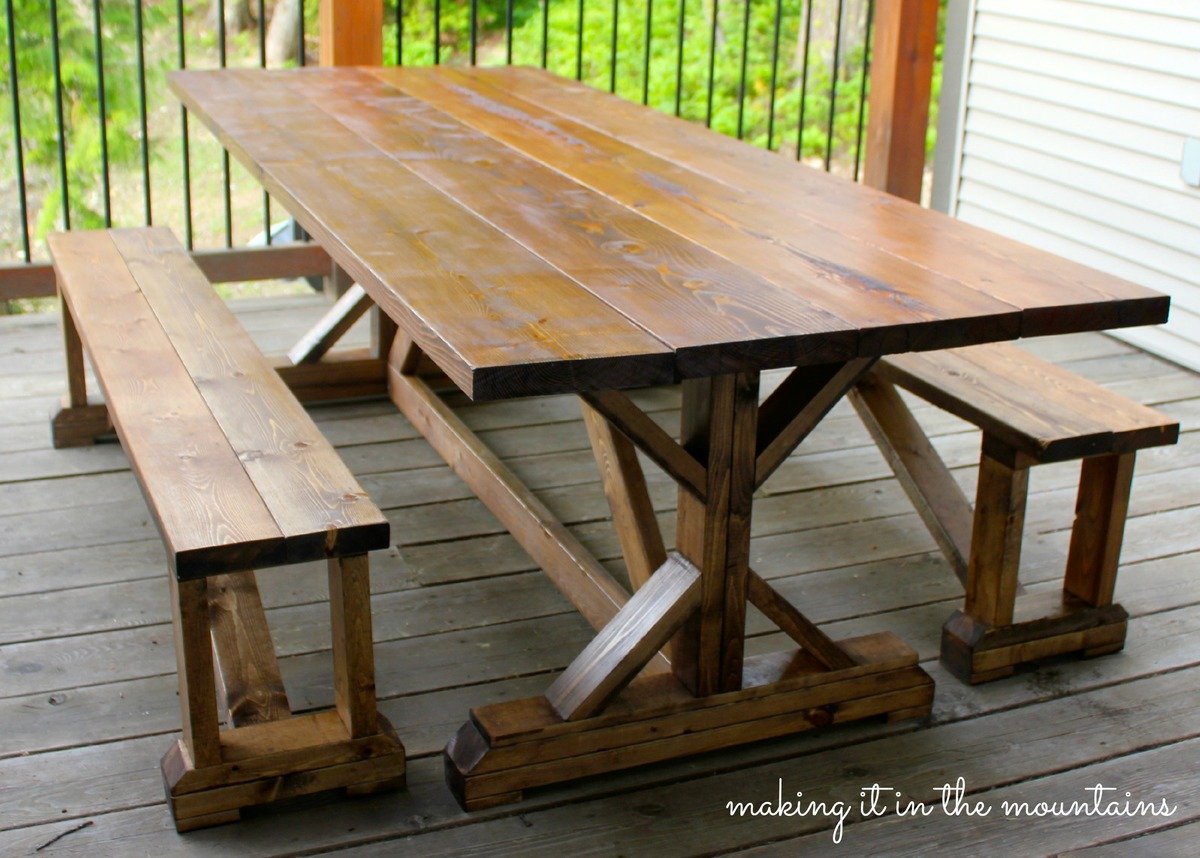
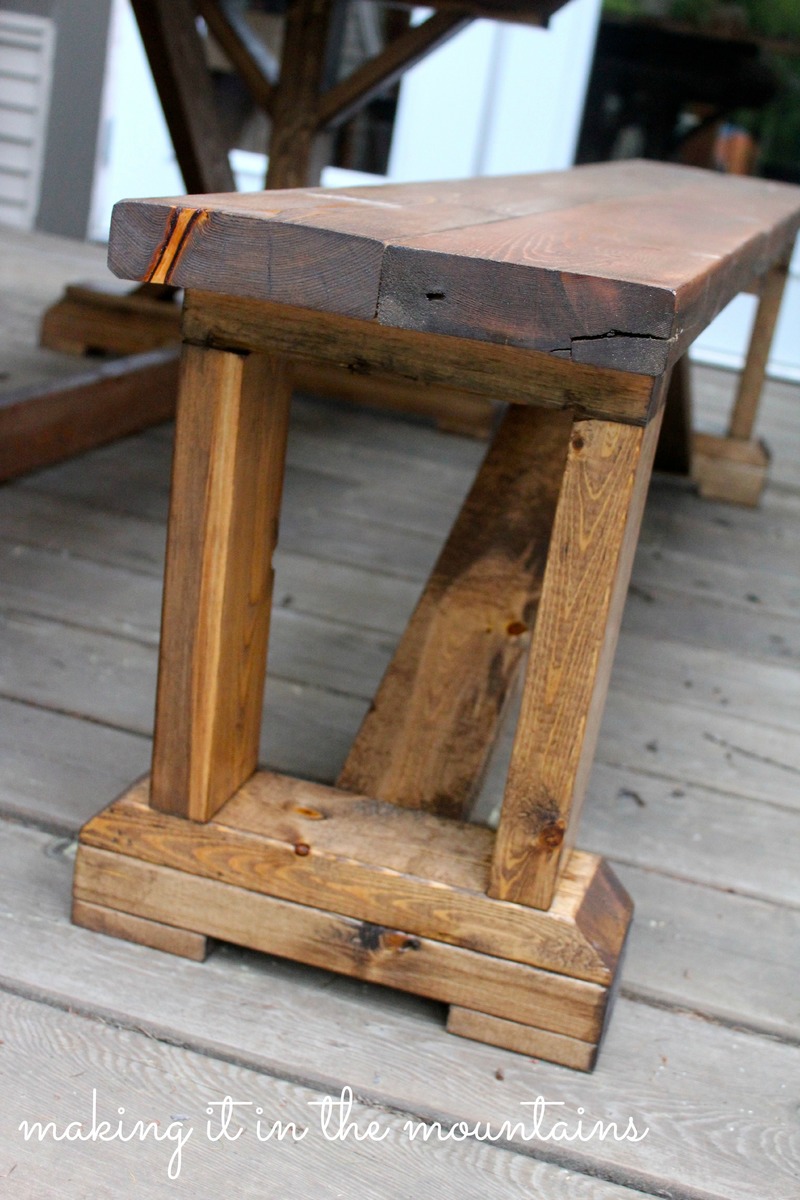
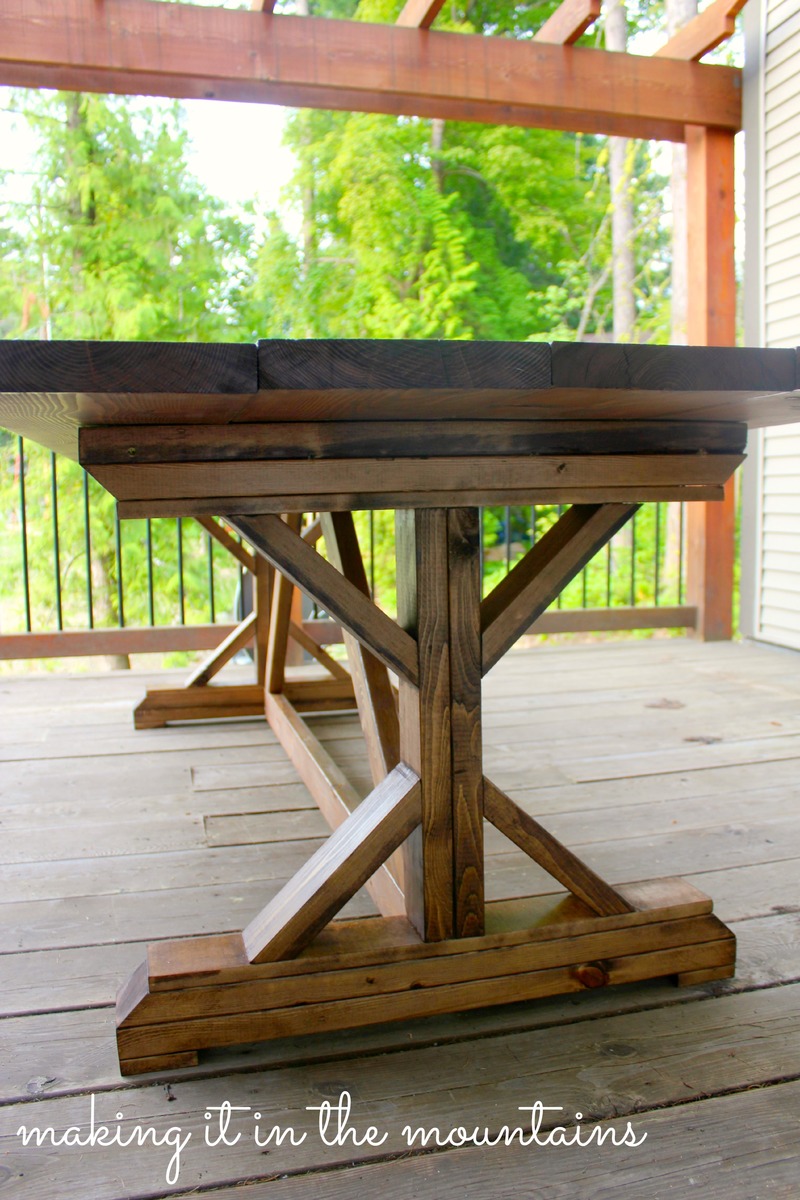
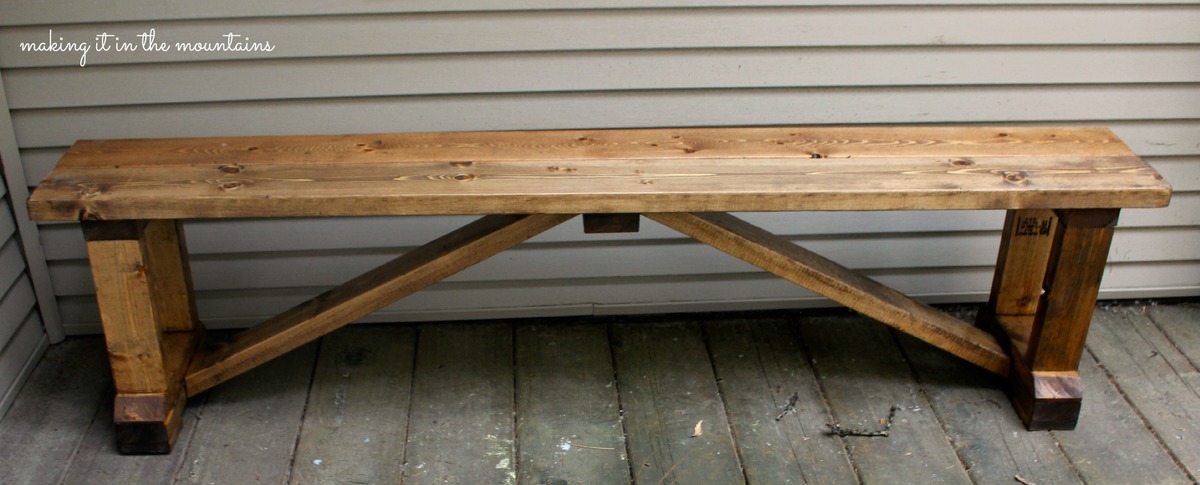
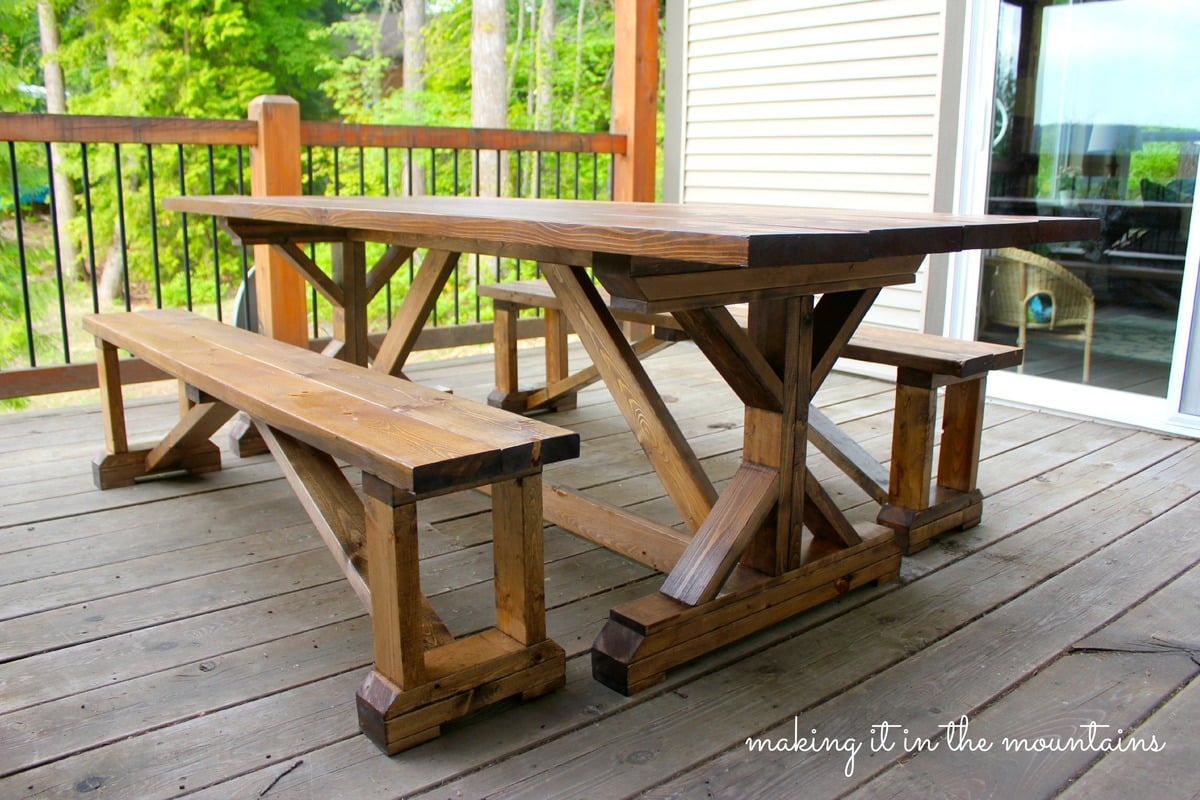
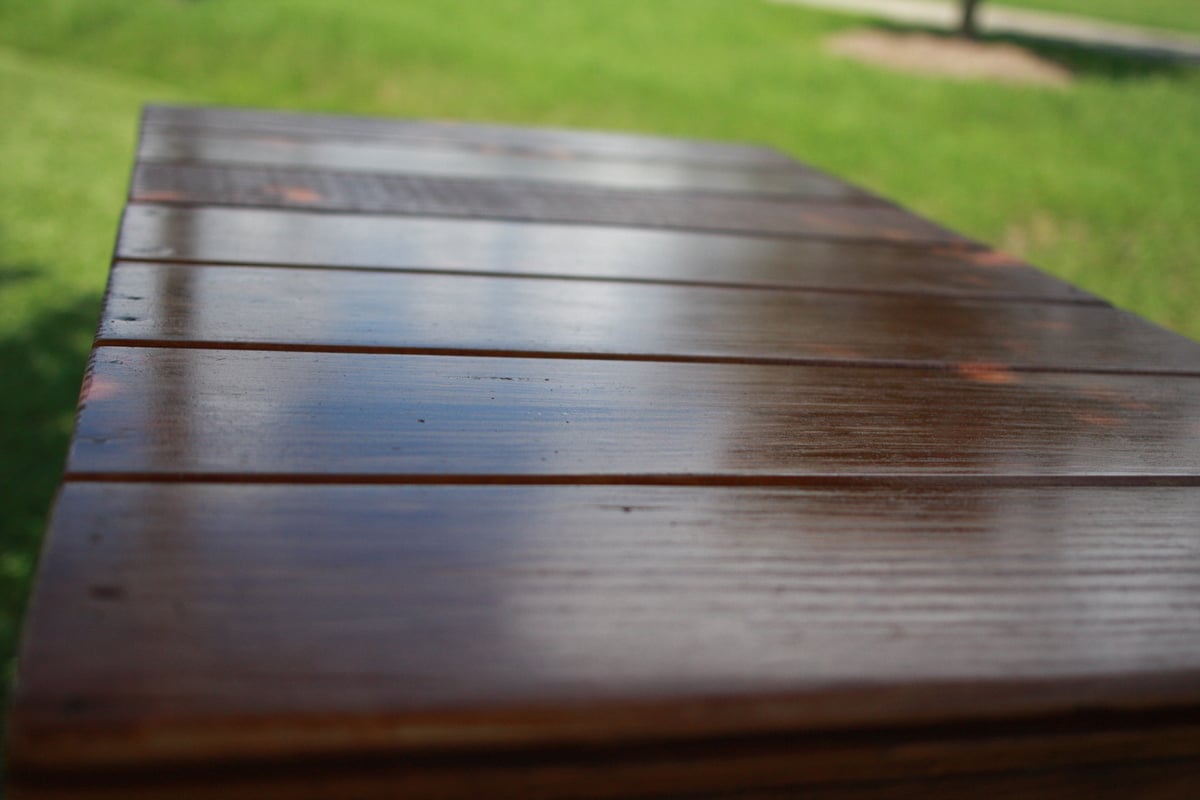
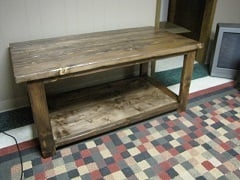
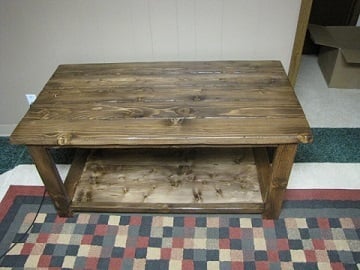
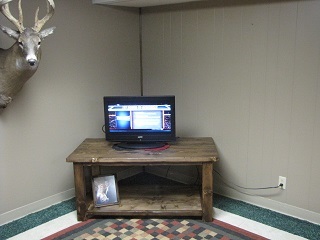
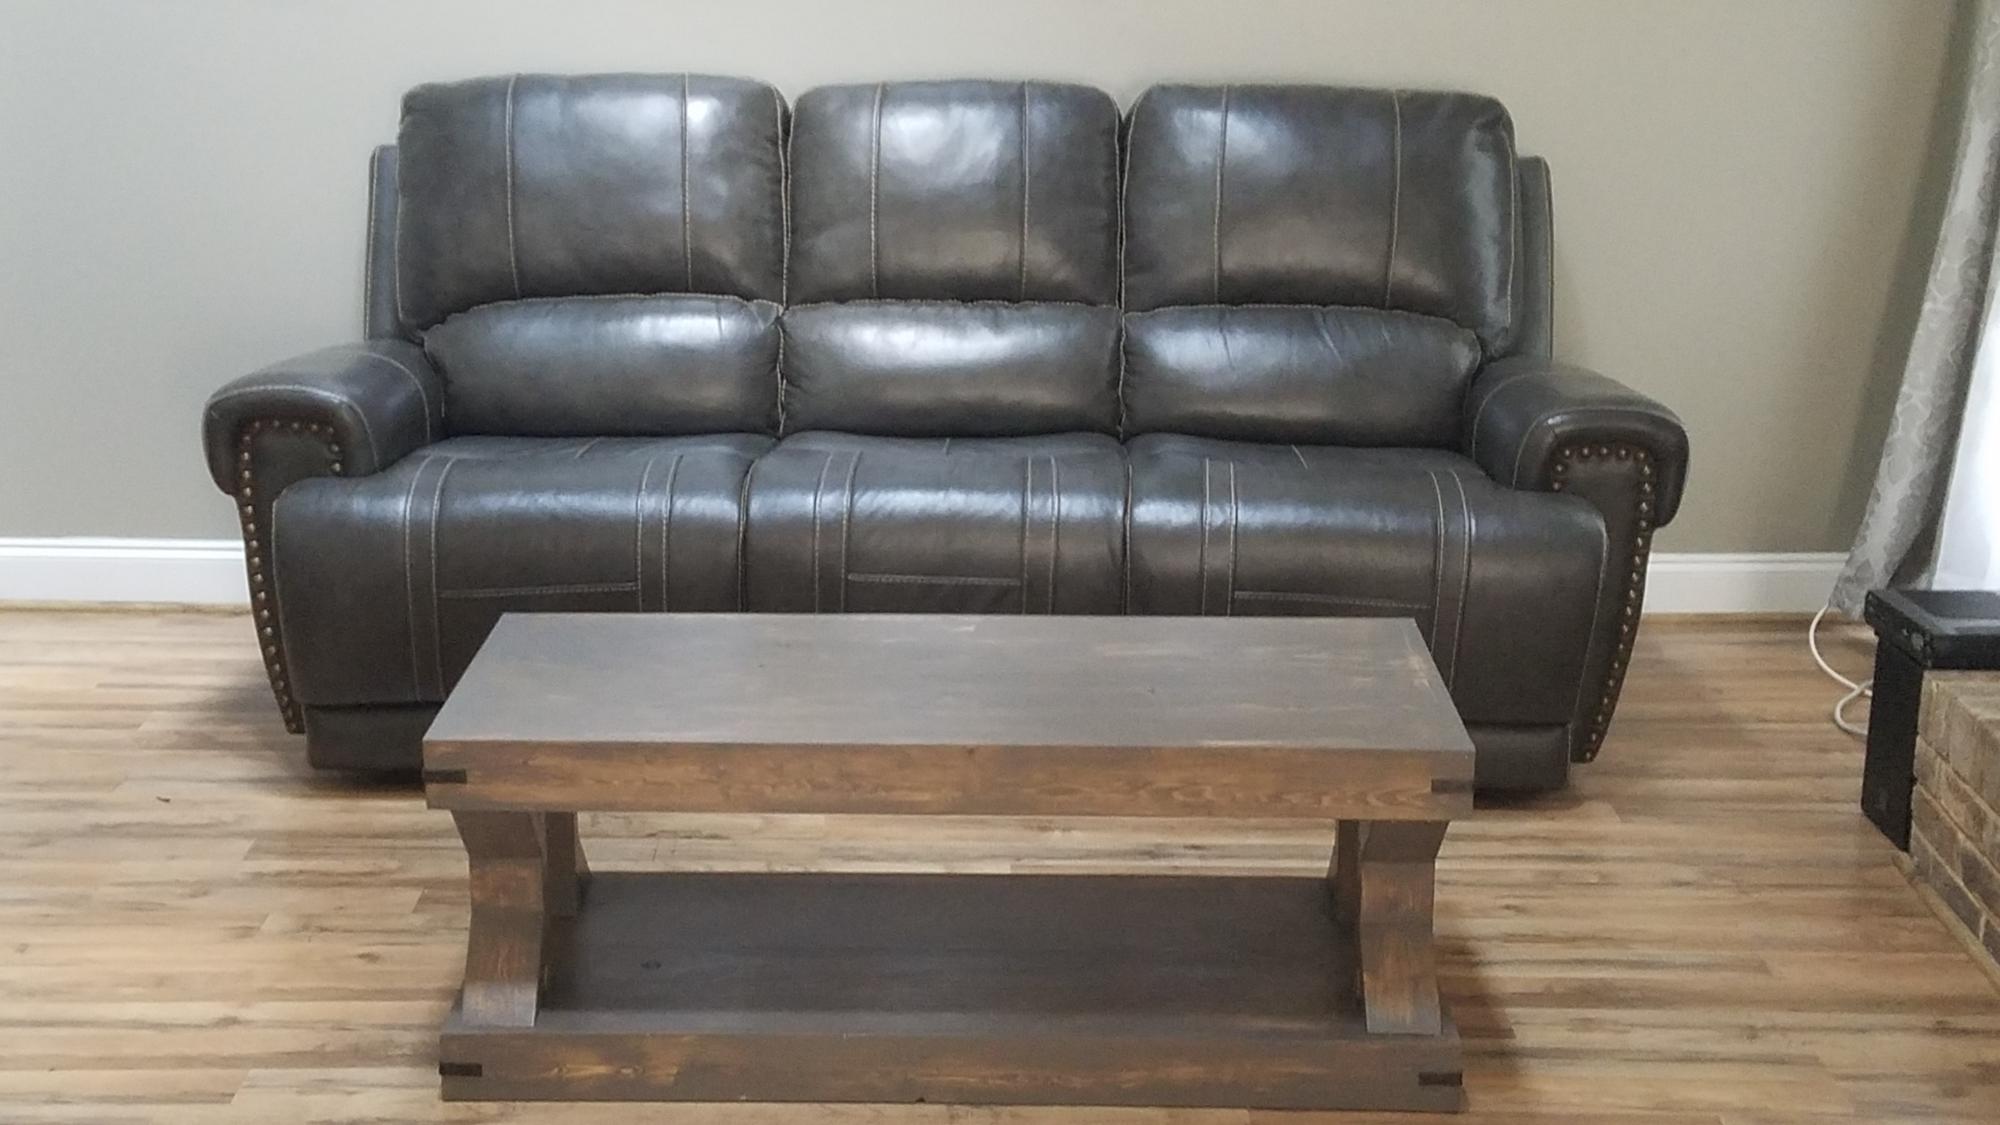
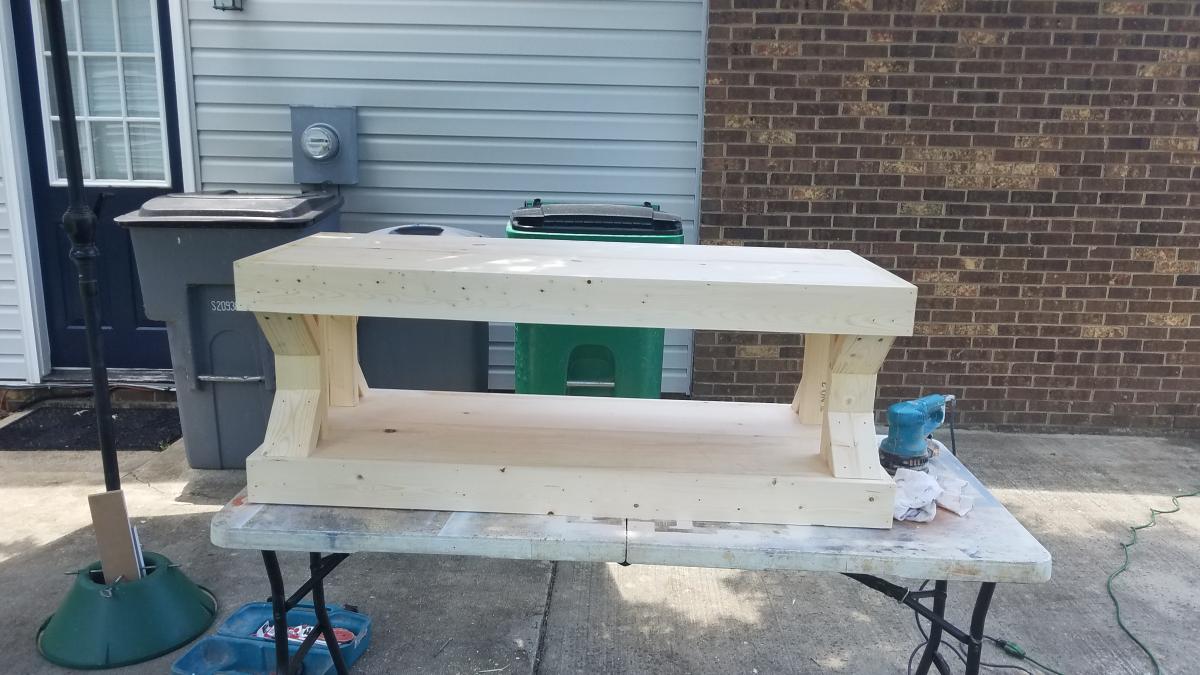
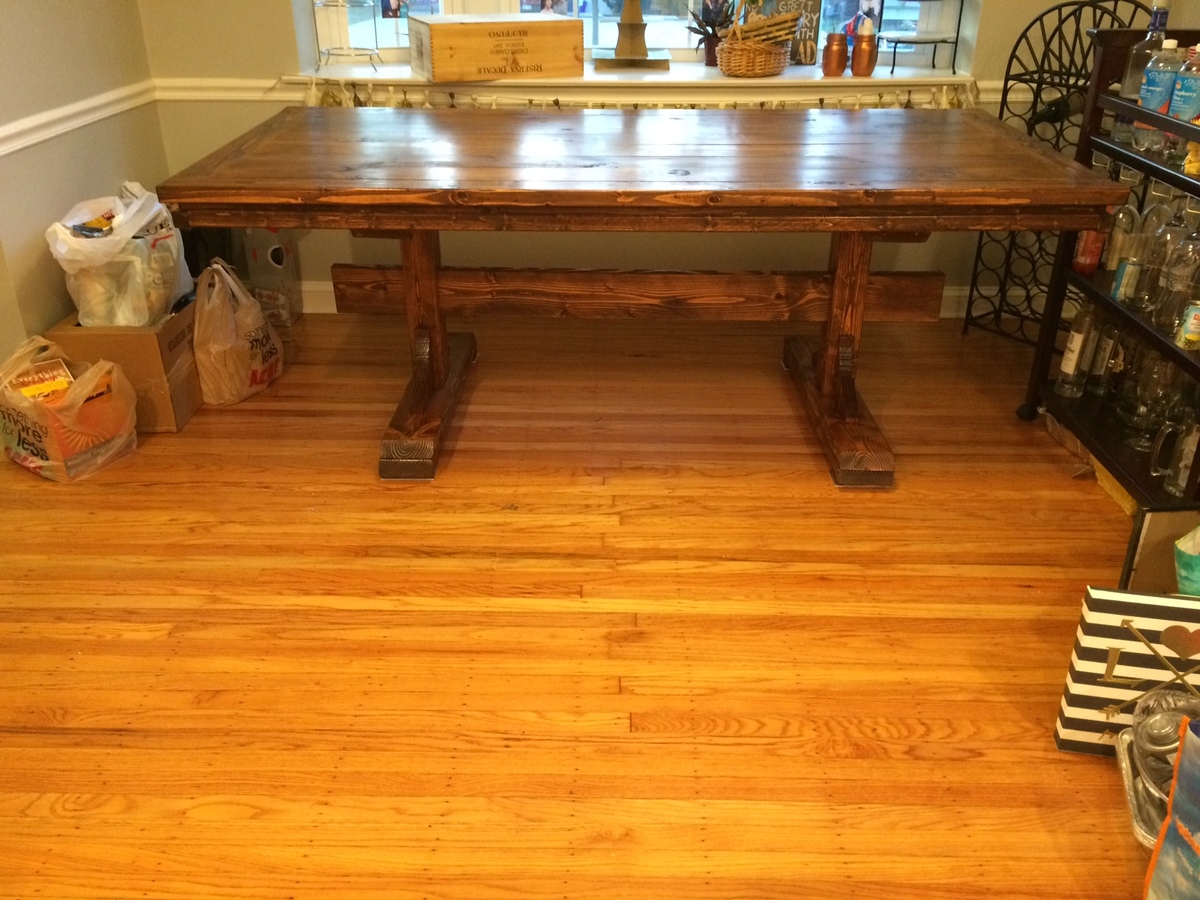
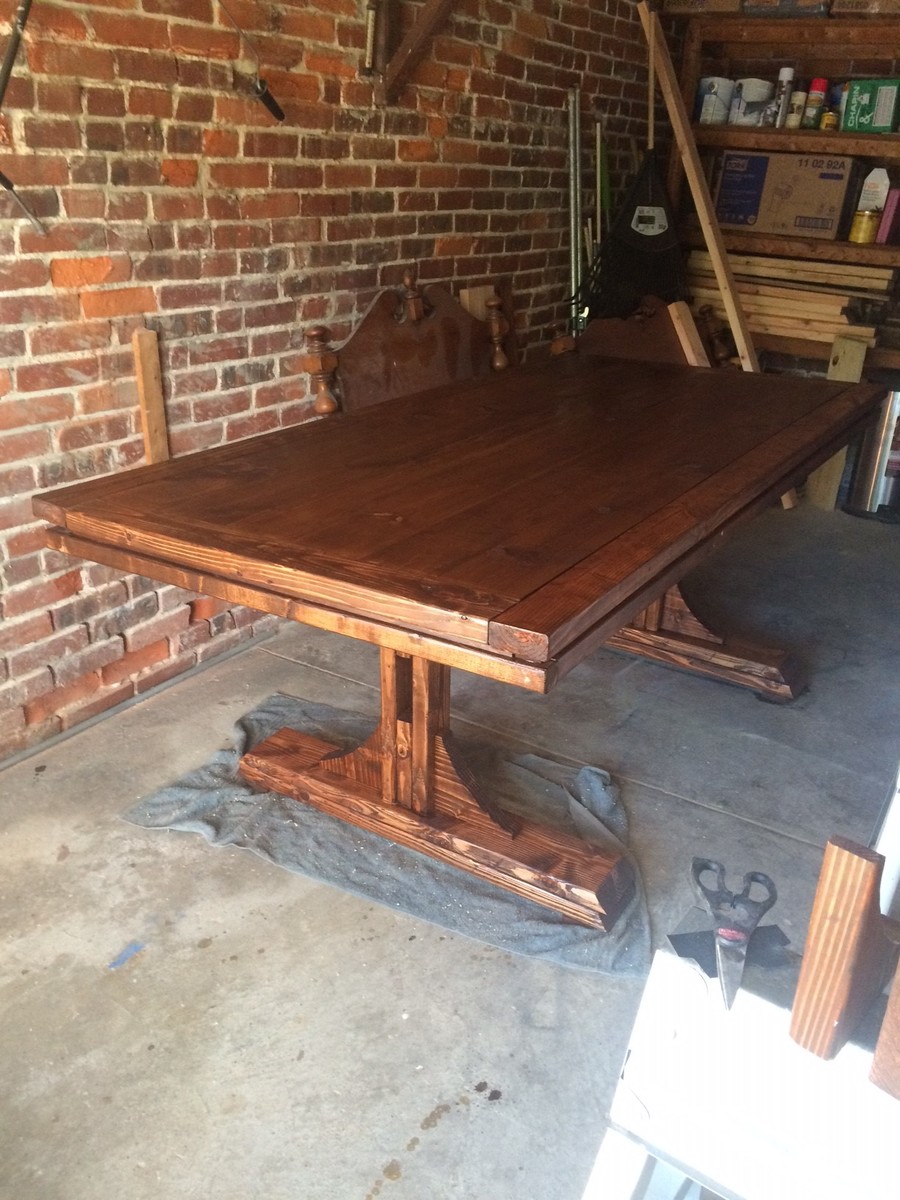
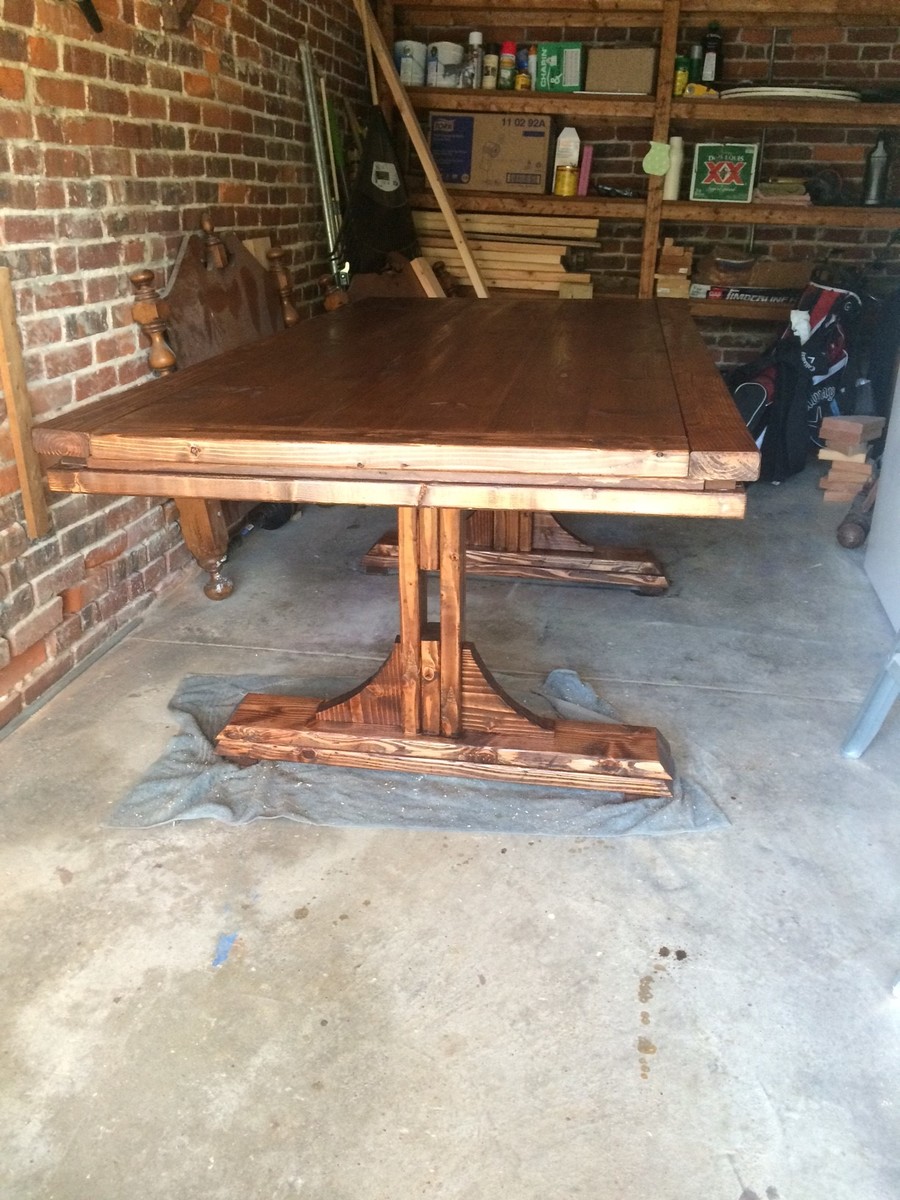
We altered our plans as my dining room could only accomodate a 7 ft table! This was out first DIY that was this large of an undertaking and we love the way it came out. If we can do this as woodworking novices you can definately do it! 

Estimated Cost
$150 in the philadelphia area including wood, screws, stain, and finish another $75 if you need to rent a mitre saw.
Estimated Time Investment
Week Long Project (20 Hours or More)
Finish Used
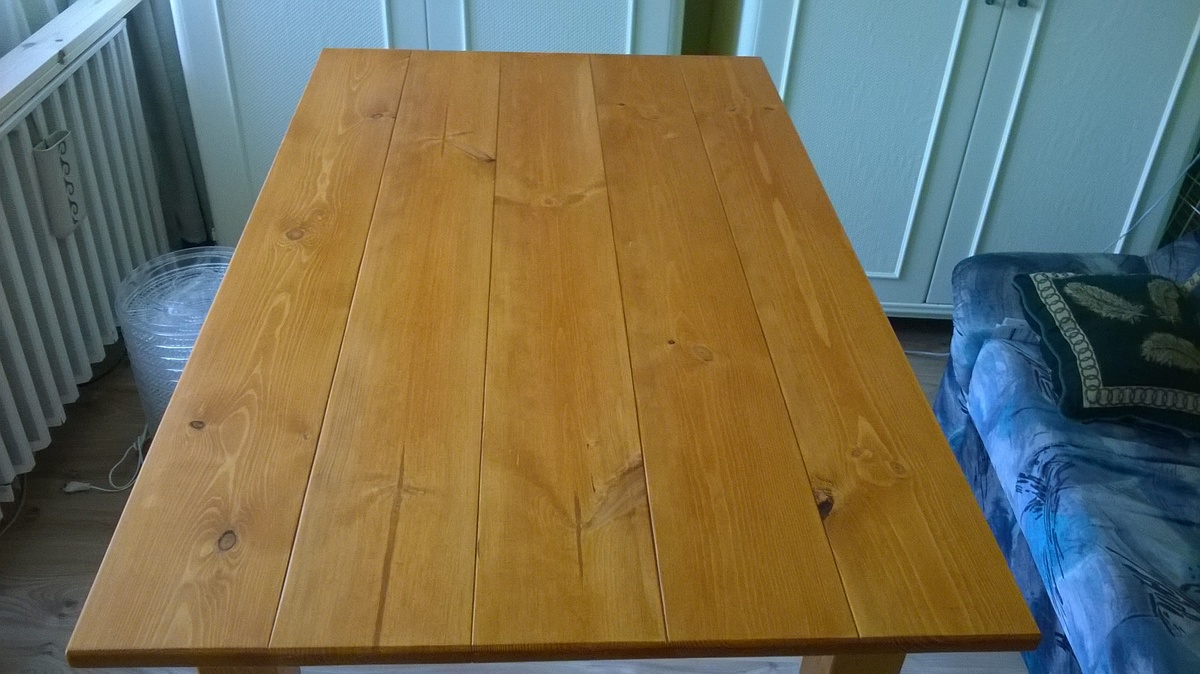
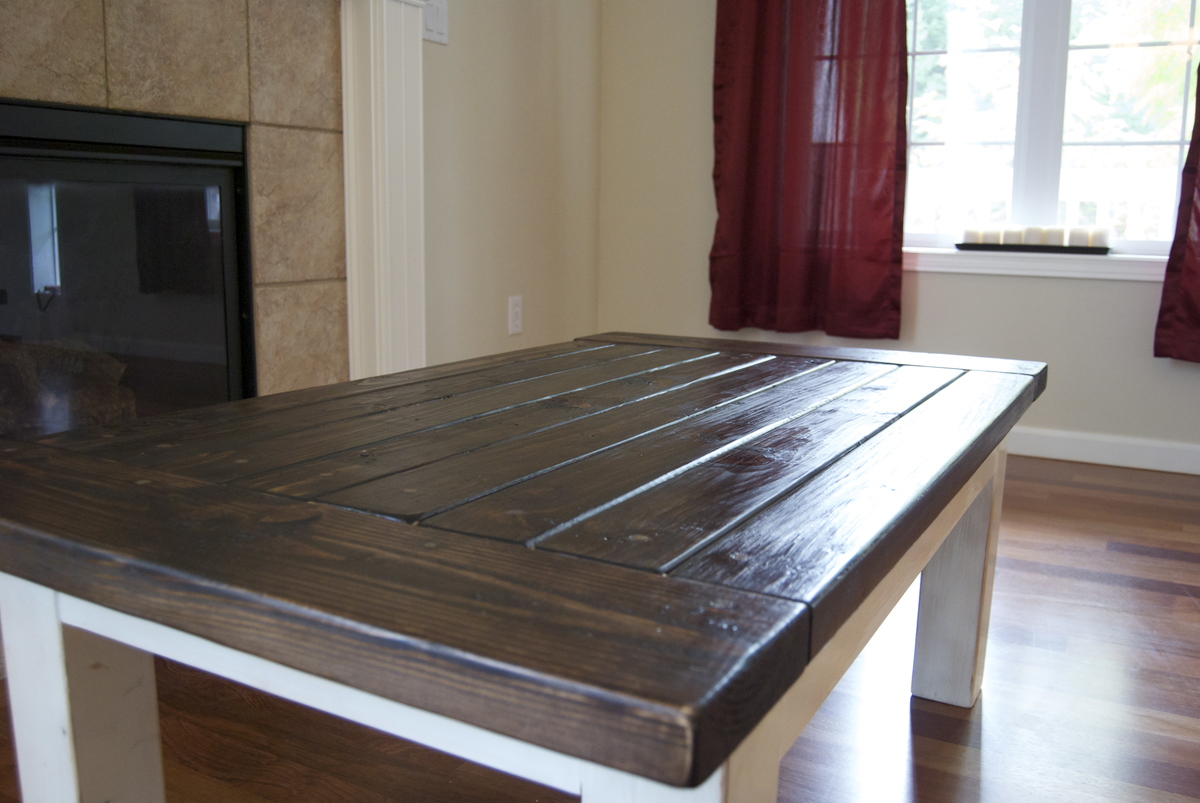
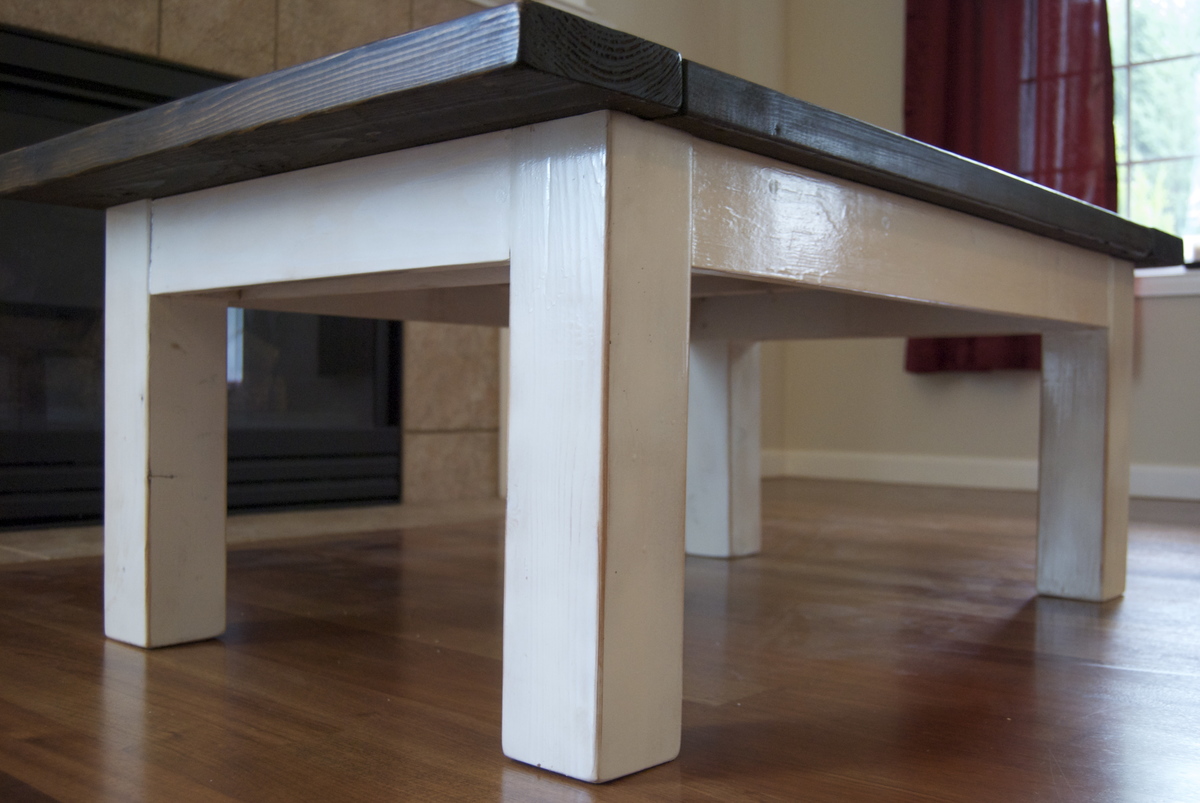
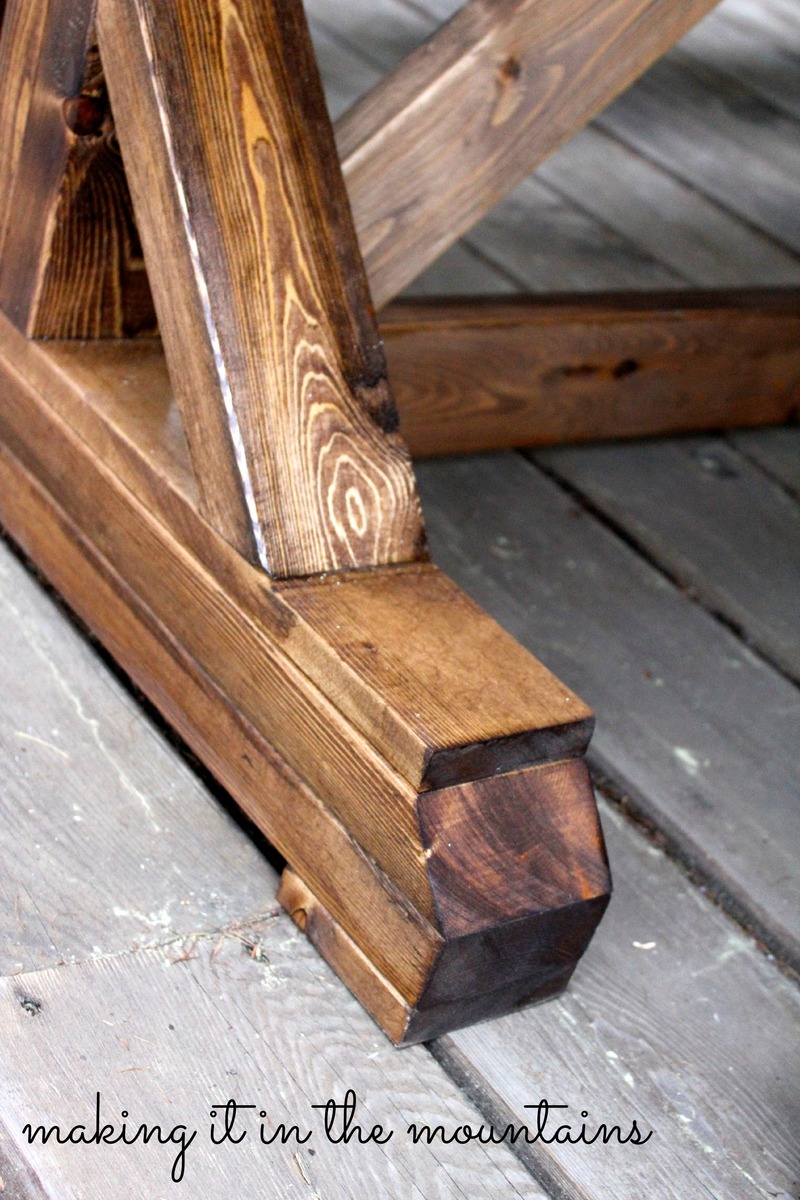
Sanded down the table starting with 150 grit, followed by 220, then 320. Next, MinWax English Chestnut (1 coat- painted on and sat for 5 mins and then wiped off with rags- we didnt time it just about 5 mins - did the top first- then sides- then the legs one at a time to make it more manageable) followed by MinWax Satin Matte polyurethane (2 coats- 5 hours between coats and then sit for 48 hours untouched)

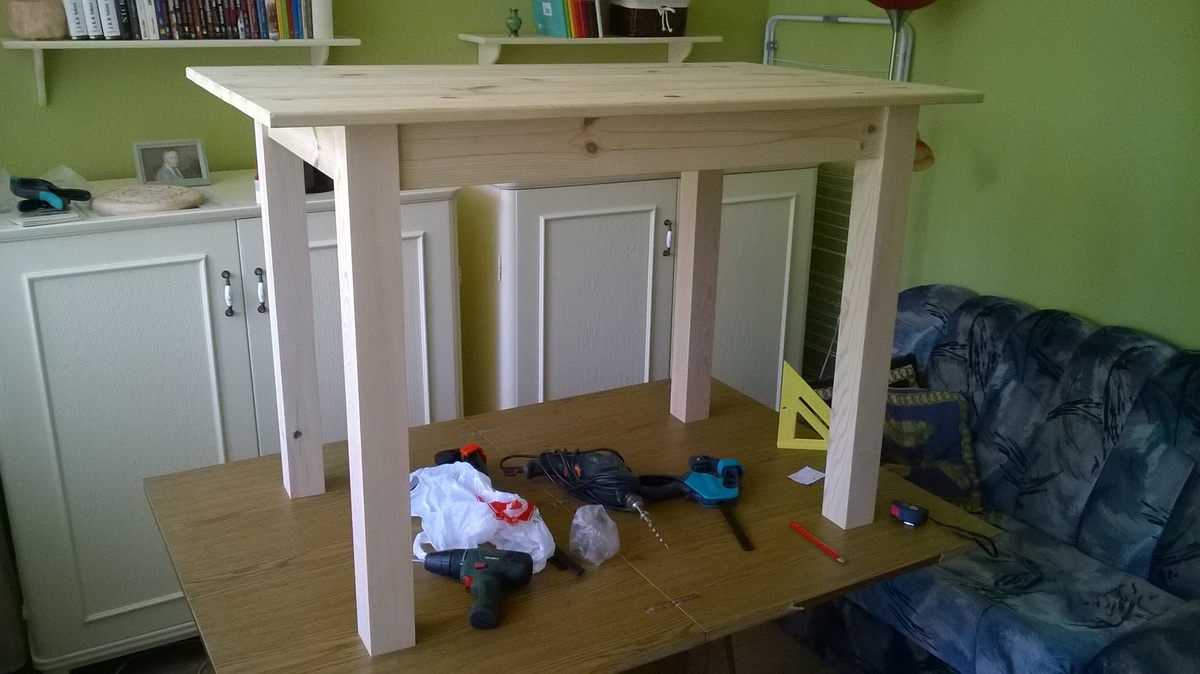
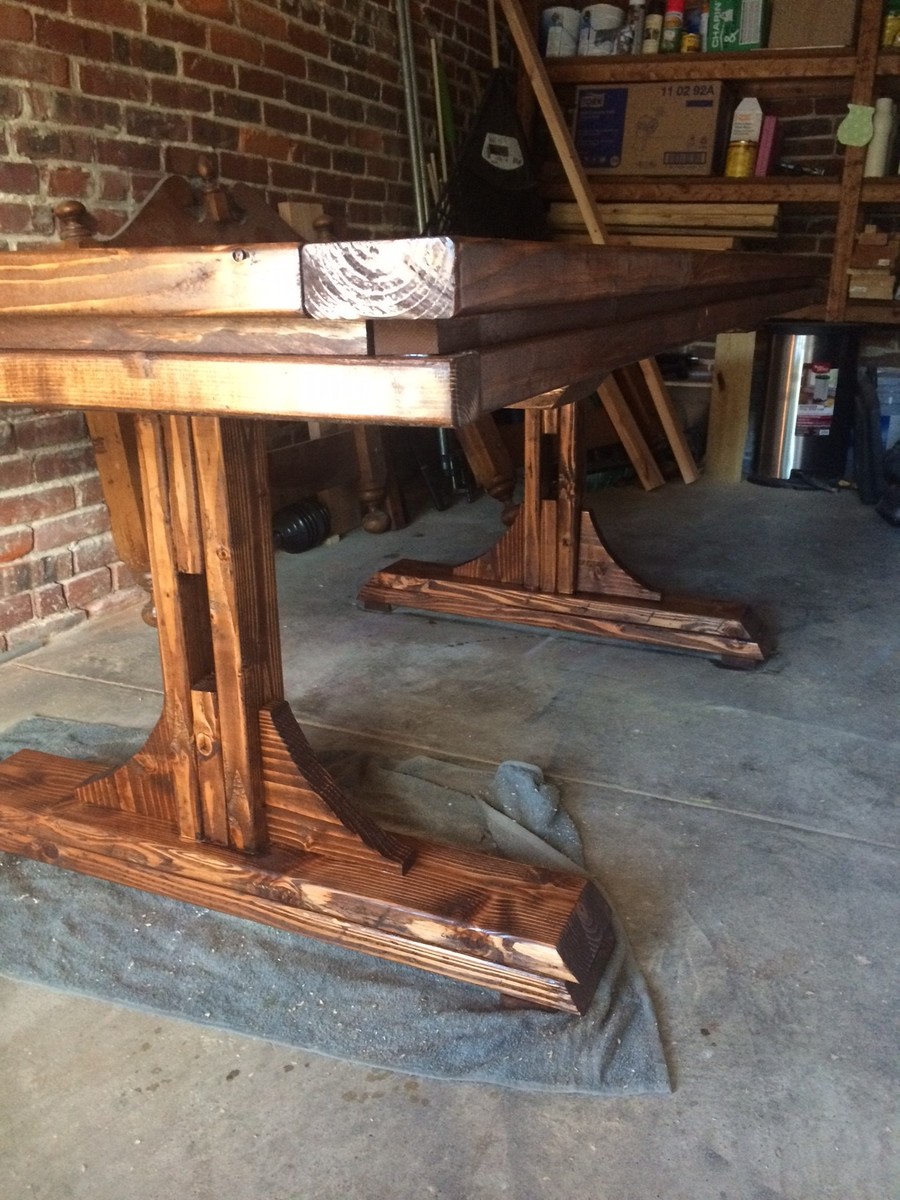
It was suggested to us that before attaching we should sand, stain and seal the legs. We didn't follow this advice from a friend and we should have!! being down on the ground with the table is all together was very hard on our backs and bottoms (and were in our 20s!). that is the only thing i would have done differently.
Recommended Skill Level
Beginner

Bed porch swing

Submitted by Anonymous (not verified) on Sun, 06/28/2020 - 09:45

Utilized your plans for this porch bed swing! Looks great on the porch. Couldn’t find anything solid in the ceiling to hang it from so I installed my own joists with rafter hangers attached to the walls. Should hold long term.

Built from Plan(s)
Estimated Cost
$80 in Wood and $20 in stain and polyurethane
Estimated Time Investment
Weekend Project (10-20 Hours)
Finish Used
Spar Urethane
Mocha stain
Recommended Skill Level
Beginner

Mom's fancy California King

Submitted by danaxboo on Sat, 08/25/2012 - 08:58

Mom's Fancy Farmhouse in California King, Glazed.

I used the headboard measurements from the original plan, and the width/length measurements from the California King plan. My first plan was to distress (above picture) and I loved it, but when I brought it downstairs it didnt really match... So I repainted and Glazed :) Not to bad for buying my first "power tool" less than a month ago!!

Estimated Cost
Under $250 (paint, stain, hardware, wood, everything!!)
Estimated Time Investment
Day Project (6-9 Hours)
Finish Used
Antiqued white, glazed with Jacobean
Recommended Skill Level
Beginner

Farmhouse dining table with straight legs

Submitted by isti799 on Wed, 06/18/2014 - 22:12

I'm homemade woodworker. This is my first job!

Estimated Cost
100 $
Estimated Time Investment
Weekend Project (10-20 Hours)
Finish Used
2 coat waterbased stain ( trilak vekonylazur)
3 coat+1 coat tabletop waterbased furniture varnish (Trilak vizes butorlakk)
Recommended Skill Level
Beginner

Comments

West Elm Wall Cubby Knock Off

Submitted by Mike F on Sun, 09/18/2016 - 06:15

My wife found this post on Pinterest and asked if i could build it.  The hardest part was cuting the angles wit the jig saw because i can never get it to cut square and i have a little OCD about that sometimes.  I ended up using my table saw a little.  I would not recommened that though.  If i had acess to a band saw stand that would have ben perfect.

Estimated Cost
Around twenty dollars
Estimated Time Investment
Afternoon Project (3-6 Hours)
Finish Used
I used two different stains, provincial and special walnut.
Recommended Skill Level
Beginner

Narrow Cottage End Table from Scraps

Submitted by kmgoff30 on Tue, 06/30/2020 - 16:55

I loved this project so much!! The best part of it for me was I didn't spend any money! I literally used scrap boards I had from rehab projects I had completed around my little cozy cottage. Some of the boards were already painted in Polar Bear by Behr in gloss finish. The other boards are unfinished common boards. Including this room I finished 2 weeks ago!

Estimated Cost
0
Estimated Time Investment
Day Project (6-9 Hours)
Finish Used
Some of the boards are natural and some are painted with Polar Bear by Behr in gloss finish.
Recommended Skill Level
Intermediate

Our first build!

Submitted by helenc on Sun, 06/22/2014 - 04:05

This is our first build. Instructions were easy to follow but we didn't go much on the bottom center drawer runners!
I love the second layer of slide out drawers we use for the printer , paper and electronic gadgets!

Estimated Cost
not sure
Finish Used
birch plywood painted white and top stained walnut and all coated with poly
Recommended Skill Level
Beginner

Comments

spiceylg

Wed, 06/25/2014 - 05:37

Love this. What great mods and you even tackled drawers for a first build?! I'm too chicken and still haven't tried. Especially love how you used slide outs in the middle. Clever!

Sofa

I modified the back slightly to have 2 beams across otherwise pretty close to your design

Estimated Cost
£50
Estimated Time Investment
Afternoon Project (3-6 Hours)
Finish Used
Ronseal Dark Oak wood stain

Coffe Table

Submitted by tmunds on Tue, 08/28/2012 - 22:16

After the high of finishing my first build (http://ana-white.com/2012/08/farmhouse-table-rustic-table), I was quick to find my next fix. My mom was so impressed with the table, she trusted me to build her another piece of furniture for our very empty new home. She liked the look of this coffee table, so I adjusted the dimensions to meet her needs and away I went. It was pretty fun and not too difficult. It was a little more time consuming that I had anticipated, but that was mostly due to the two different finishes on the legs/apron and the top.

Built from Plan(s)
Estimated Cost
$50
Estimated Time Investment
Day Project (6-9 Hours)
Finish Used
For the legs and skirt/apron: Sanded 120 grit then 220, painted with Rust-Oleum heirloom white (spray paint, one coat), then sanded down on the edges to get the distressed look.

Table top: Minwax Dark Walnut (One Coat brushed on pretty heavy, then wiped off the excess after 15 minutes).

Finished with three coats of Minwax Water Based Clear Gloss Polyurethane (Brushed), sanding with 220 grip sandpaper between coats.
Recommended Skill Level
Beginner

DIY Pottery Barn Inspired Table

I cannot believe how easy and inexpensive it was to get the Pottery Barn look for SO MUCH less!

Estimated Cost
$150
Estimated Time Investment
Weekend Project (10-20 Hours)
Finish Used
Minwax stain in Special Walnut and Minwax exterior finish.
Recommended Skill Level
Intermediate

Outdoor Wooden Cooler

An Outdoor Wooden Cooler is the perfect way to accent any deck, patio, or garage. Can be made from Cedar, Pressure Treated, Cyprus, etc. Sizes can vary from small 28 qt coolers to Large 120 qt coolers capable of holding hundreds of drinks. These coolers can be themed for your favorite sports team, favorite hobby, or anything of your choice. Engraving or wood burning is available.

Built from Plan(s)
Estimated Time Investment
Weekend Project (10-20 Hours)
Finish Used
Stain, painted, distressed, etc.
Recommended Skill Level
Intermediate

Comments

sgilly

Fri, 08/31/2012 - 09:52

Well, actually, two. My beer loving son-in-laws would love this, and Christmas is coming! Do you happen to have any "step-by-step" directions you'd be willing to share? I can figure out the dimensions but it would be really helpful to read - or see - the components and how you put it all together.
Thanks for sharing!

Adam_Scheetz

Fri, 09/28/2012 - 11:41

I had to make a new page because of some password issues. Thanks for comments. I have no plans yet, I've built so many it's sort of muscle memory now. Shoot me an email at [email protected] and perhaps I can help.

And no, the lid style I like is nothing more than some tongue~n~groove boards cut to length, attached with pocket holes and nailed to the lid frame. Tongue~N~groove is optional of course, you could just use regular boards.

sgilly

Fri, 09/28/2012 - 11:58

I really appreciate your response. And, I did indeed send you an email!
I have a bunch of cedar milled and planed by one of my son-in-laws. He'll be thrilled to see that I've made something he can use for his favorite beverage!

rustic x coffee table

Submitted by RyanK on Fri, 06/27/2014 - 14:14

I modified the rustic x coffee table plans. I did not need a coffee table, but I loved the looks of this plan. I actually needed a TV stand for our basement, so I made this instead. I kept all of the dimensions the same except I made it 4" taller. I also took out the side "x's".
I used regular pine boards from Lowes. I bought a Kreg Jig, Kreg clamp and screws to get started, so my initial cost was pretty high just gathering all my supplies, as this was my first build.I wanted a rustic, worn look, so I chipped the wood, made fake cracks, etc.
I used Minwax Walnut Gel stain, and then went along the edges, over the cracks and knots with an Ebony stain. 2 coats of satin poly.
Can't believe how well it turned out. Next project is going to be the matching end table. Don't laugh at the size of the tv, it is all we have for the basement. We will be planning on getting an 55" for it and the kids to enjoy.

Built from Plan(s)
Estimated Time Investment
Weekend Project (10-20 Hours)
Finish Used
Minwax "Walnut" Get stain with Minwax Satin poly.
Recommended Skill Level
Beginner

Scrap wood storage bed.

Submitted by Anonymous (not verified) on Tue, 09/27/2016 - 03:32

This bed is perfect for my small house. I used plywood for the drawers and made the 10" deep. I also burnt the wood paneling instead of using a dark stain. I'm so happy with how it turned out!

Estimated Cost
$250
Estimated Time Investment
Day Project (6-9 Hours)
Finish Used
Polyurethane
Recommended Skill Level
Intermediate

Modern Farmhouse Coffee Table

Submitted by rodtinsl on Mon, 07/06/2020 - 18:33

Really enjoyed this build. My wife and I love this table.

Estimated Cost
$60
Estimated Time Investment
Afternoon Project (3-6 Hours)
Finish Used
Briarsmoke

Reclaimed Wood Tidy Up end table

Submitted by baskelding on Mon, 09/03/2012 - 09:24

I was given old reclaimed wood from a house built in the 40's or 50's. Old rough cut pine 1x12's. I cut the wood to size to match the plans, however, I did have to modify the plans due to the actual true dimensions of the wood. After assembly, I appled 2 coats of shellac to the entire table. It may need a few more coats, but not wanting a glossy finish, I left it alone. Splinters were and are an issue, and the shellac did help to hold down the splinters.

Not having the 2x2 legs required glueing the 1x's together and glueing a veneer to the sides. If i had the legs the project would have taken less time.

Estimated Time Investment
Weekend Project (10-20 Hours)
Finish Used
Shellac - 2 coats
Recommended Skill Level
Beginner

Comments

brookifer86

Sat, 09/08/2012 - 14:30

I love what you did with this, and that you used salvaged wood. The legs would totally fool me, I'd never know that they were pieced together!

Haley platform bed/reclaimed wood headboard/rustic x leg table

i made this king size head board using Ana's website and for the bed frame i used Shanty 2 Chic's website. i just had to convert the measurements to king size when cutting the boards. thats a rustic x leg end table next to the bed, i built using Ana's website also.

Estimated Cost
$100-$120
Estimated Time Investment
Afternoon Project (3-6 Hours)
Finish Used
watco danish oil dark walnut
Recommended Skill Level
Starter Project
Back