Outdoor Side Table
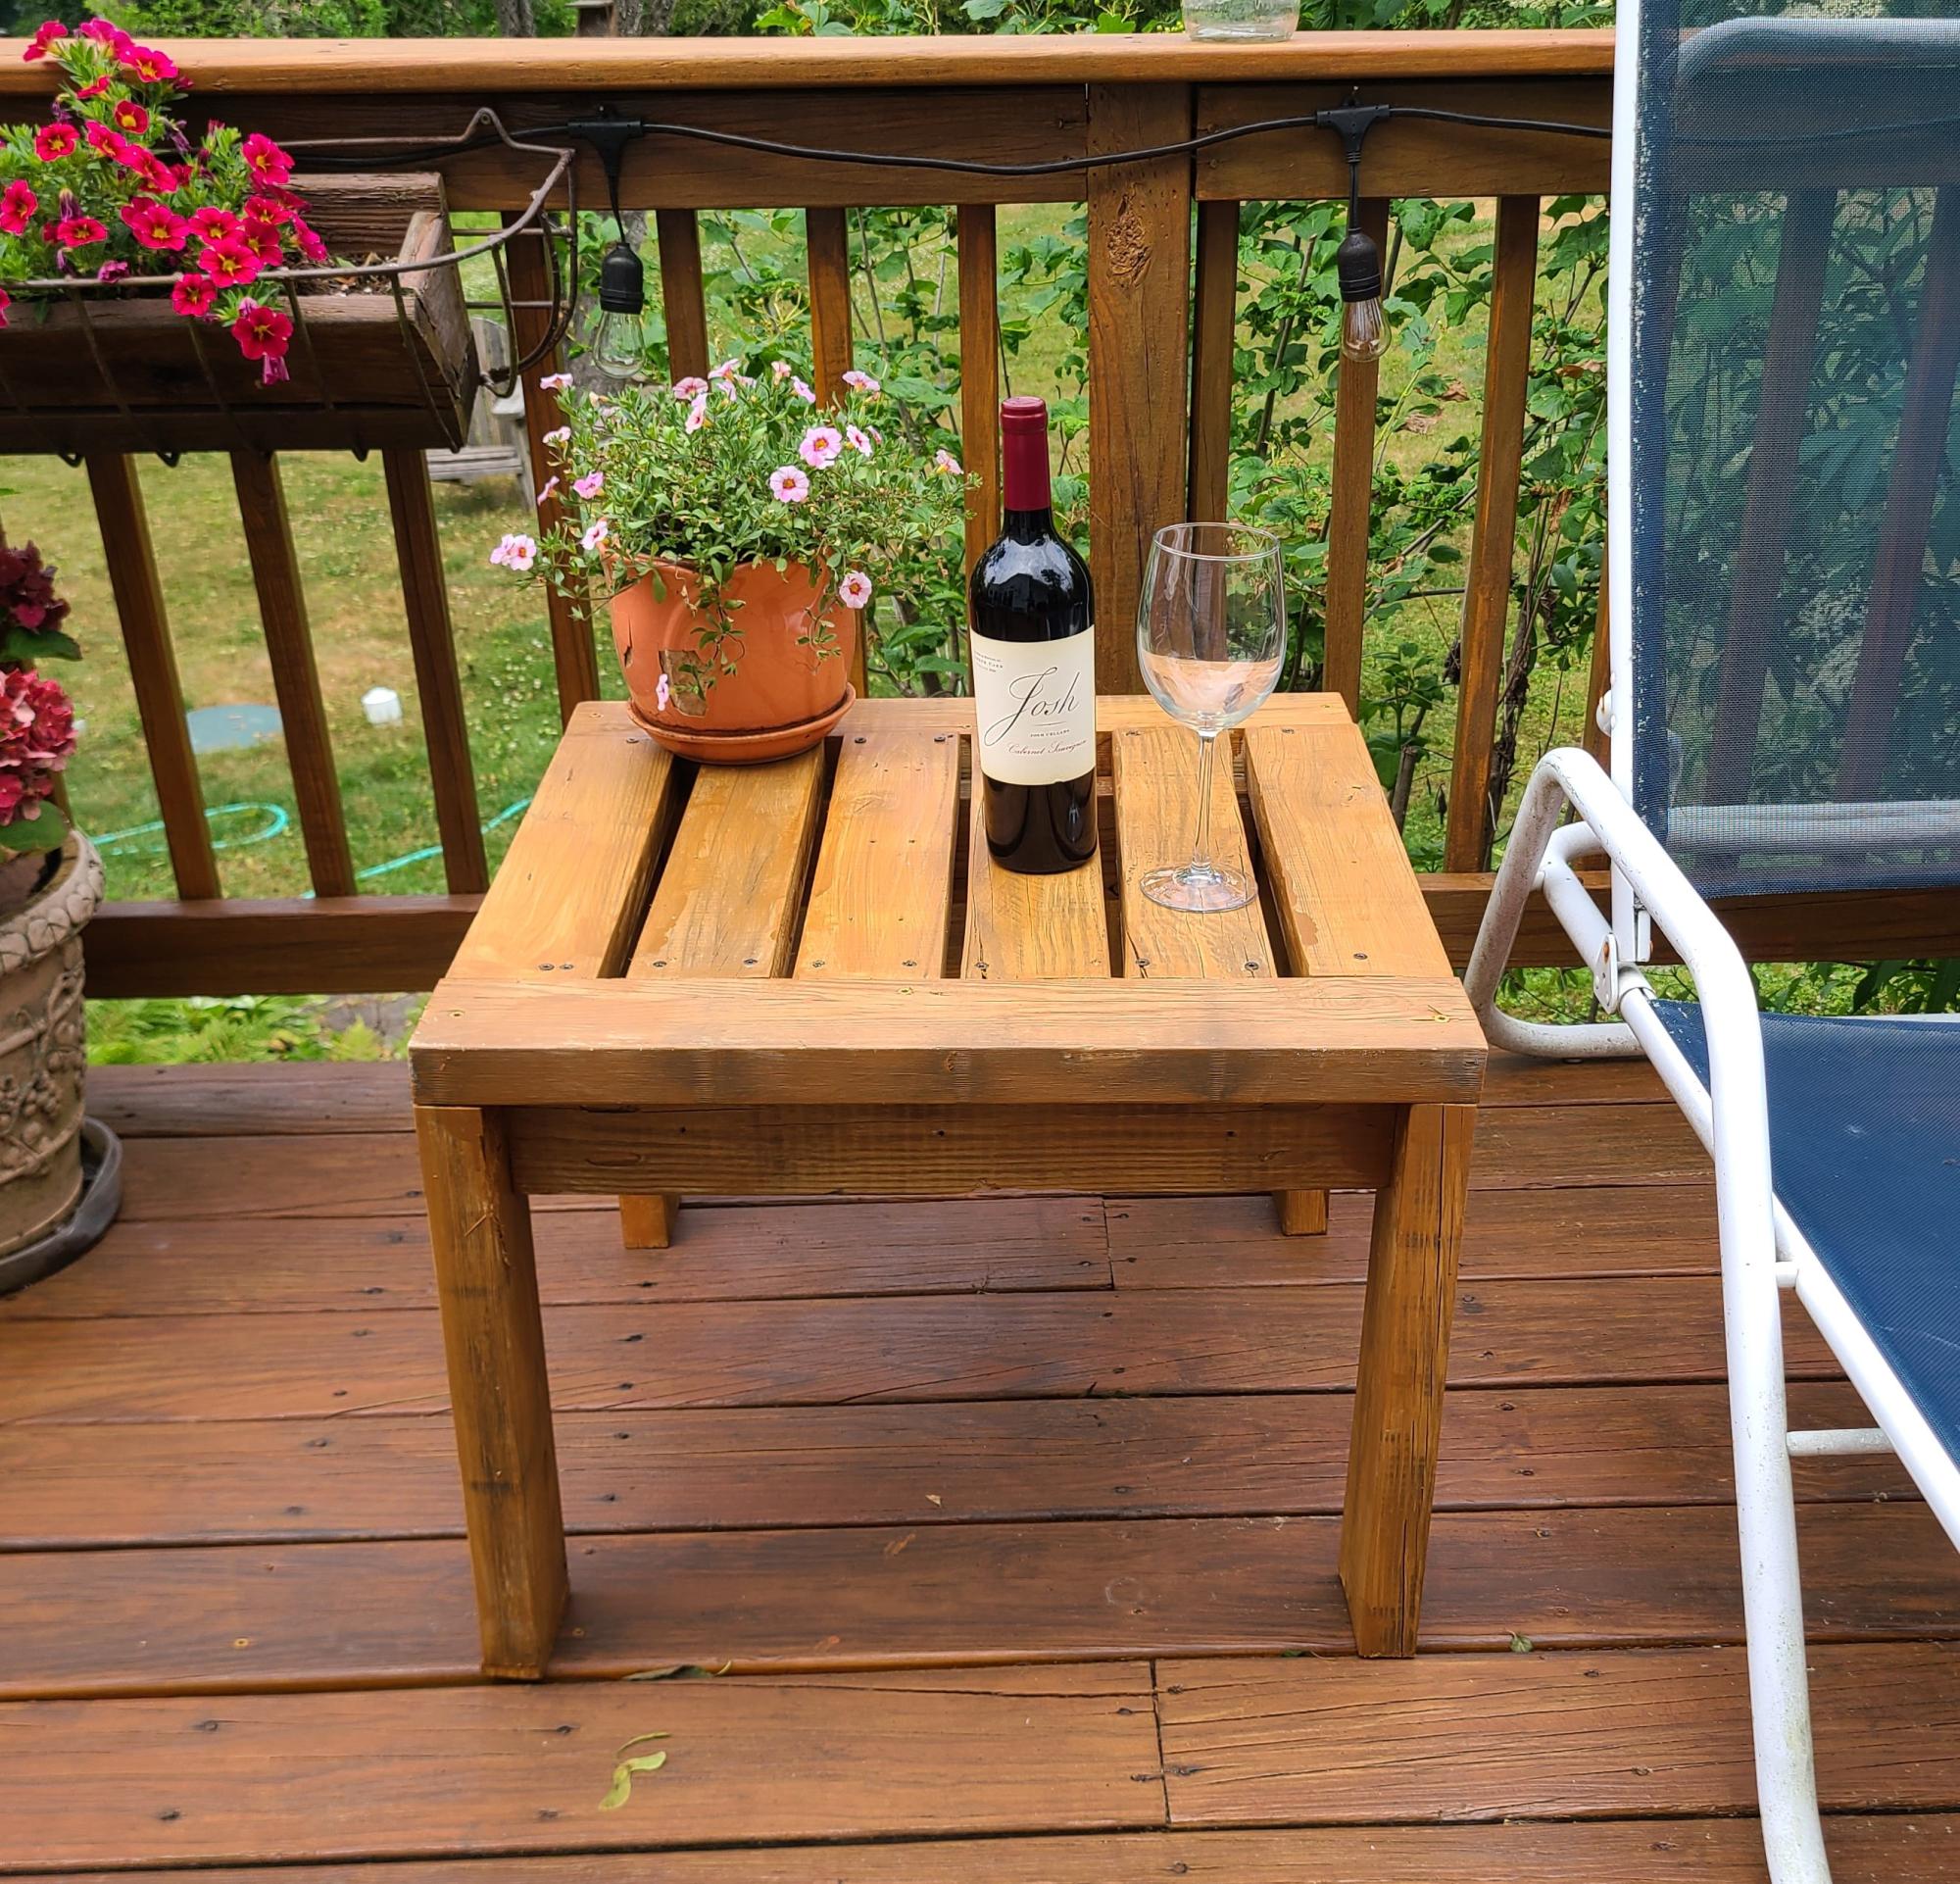
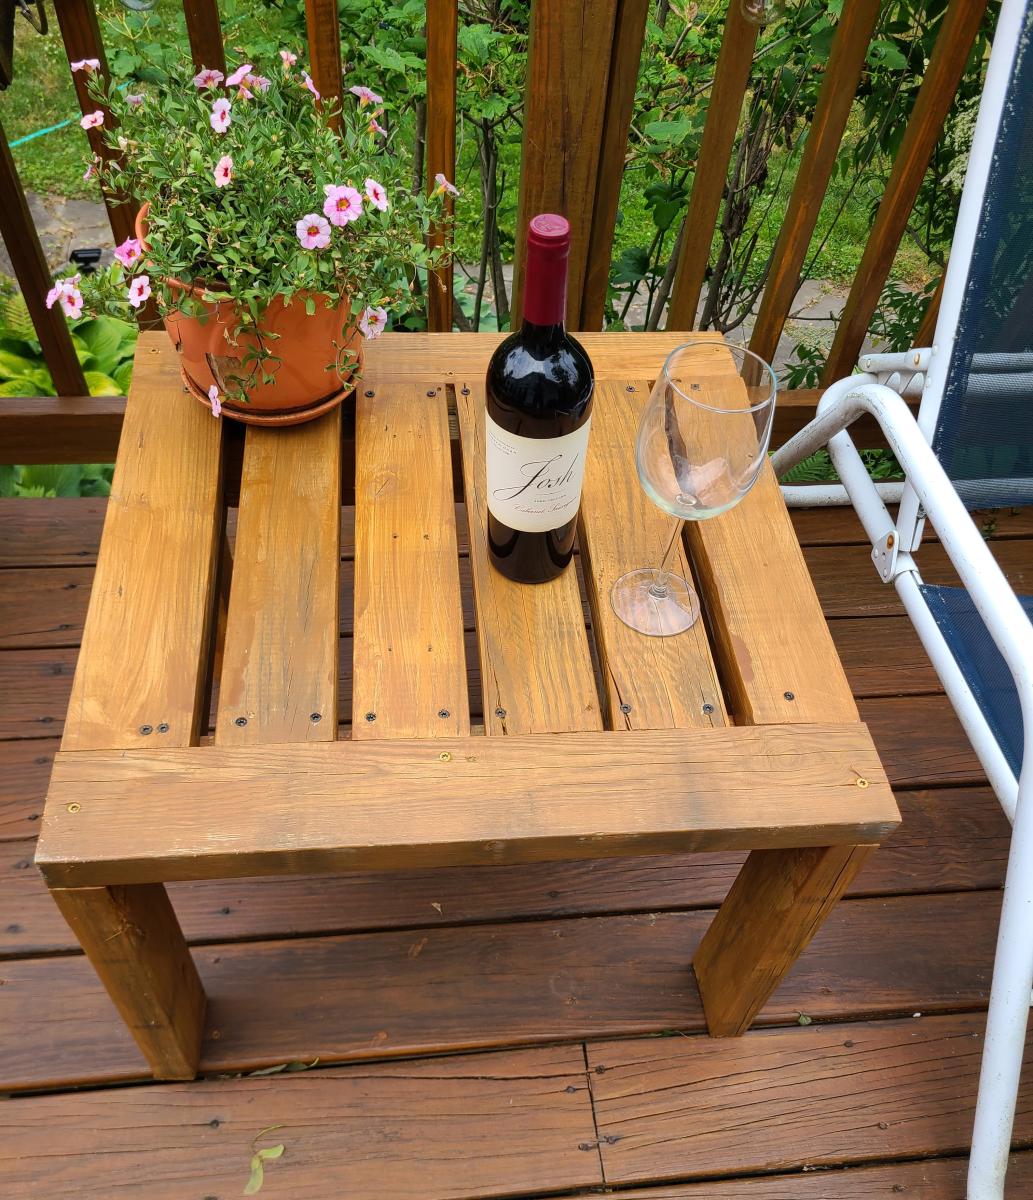
I built these deck end tabled from reclaimed decking.
Greg P
Built from Plan(s)
I built these deck end tabled from reclaimed decking.
Greg P

6'x6' with 12'' Treated Sides, 1x4 and 1x6 SPF tops/seats and 2x4 Brace under Seats to accommodate the 6 foot span. Sanded and Painted.
Completed in 2 days, couple hours each day, sanded/painted all boards before assembly.

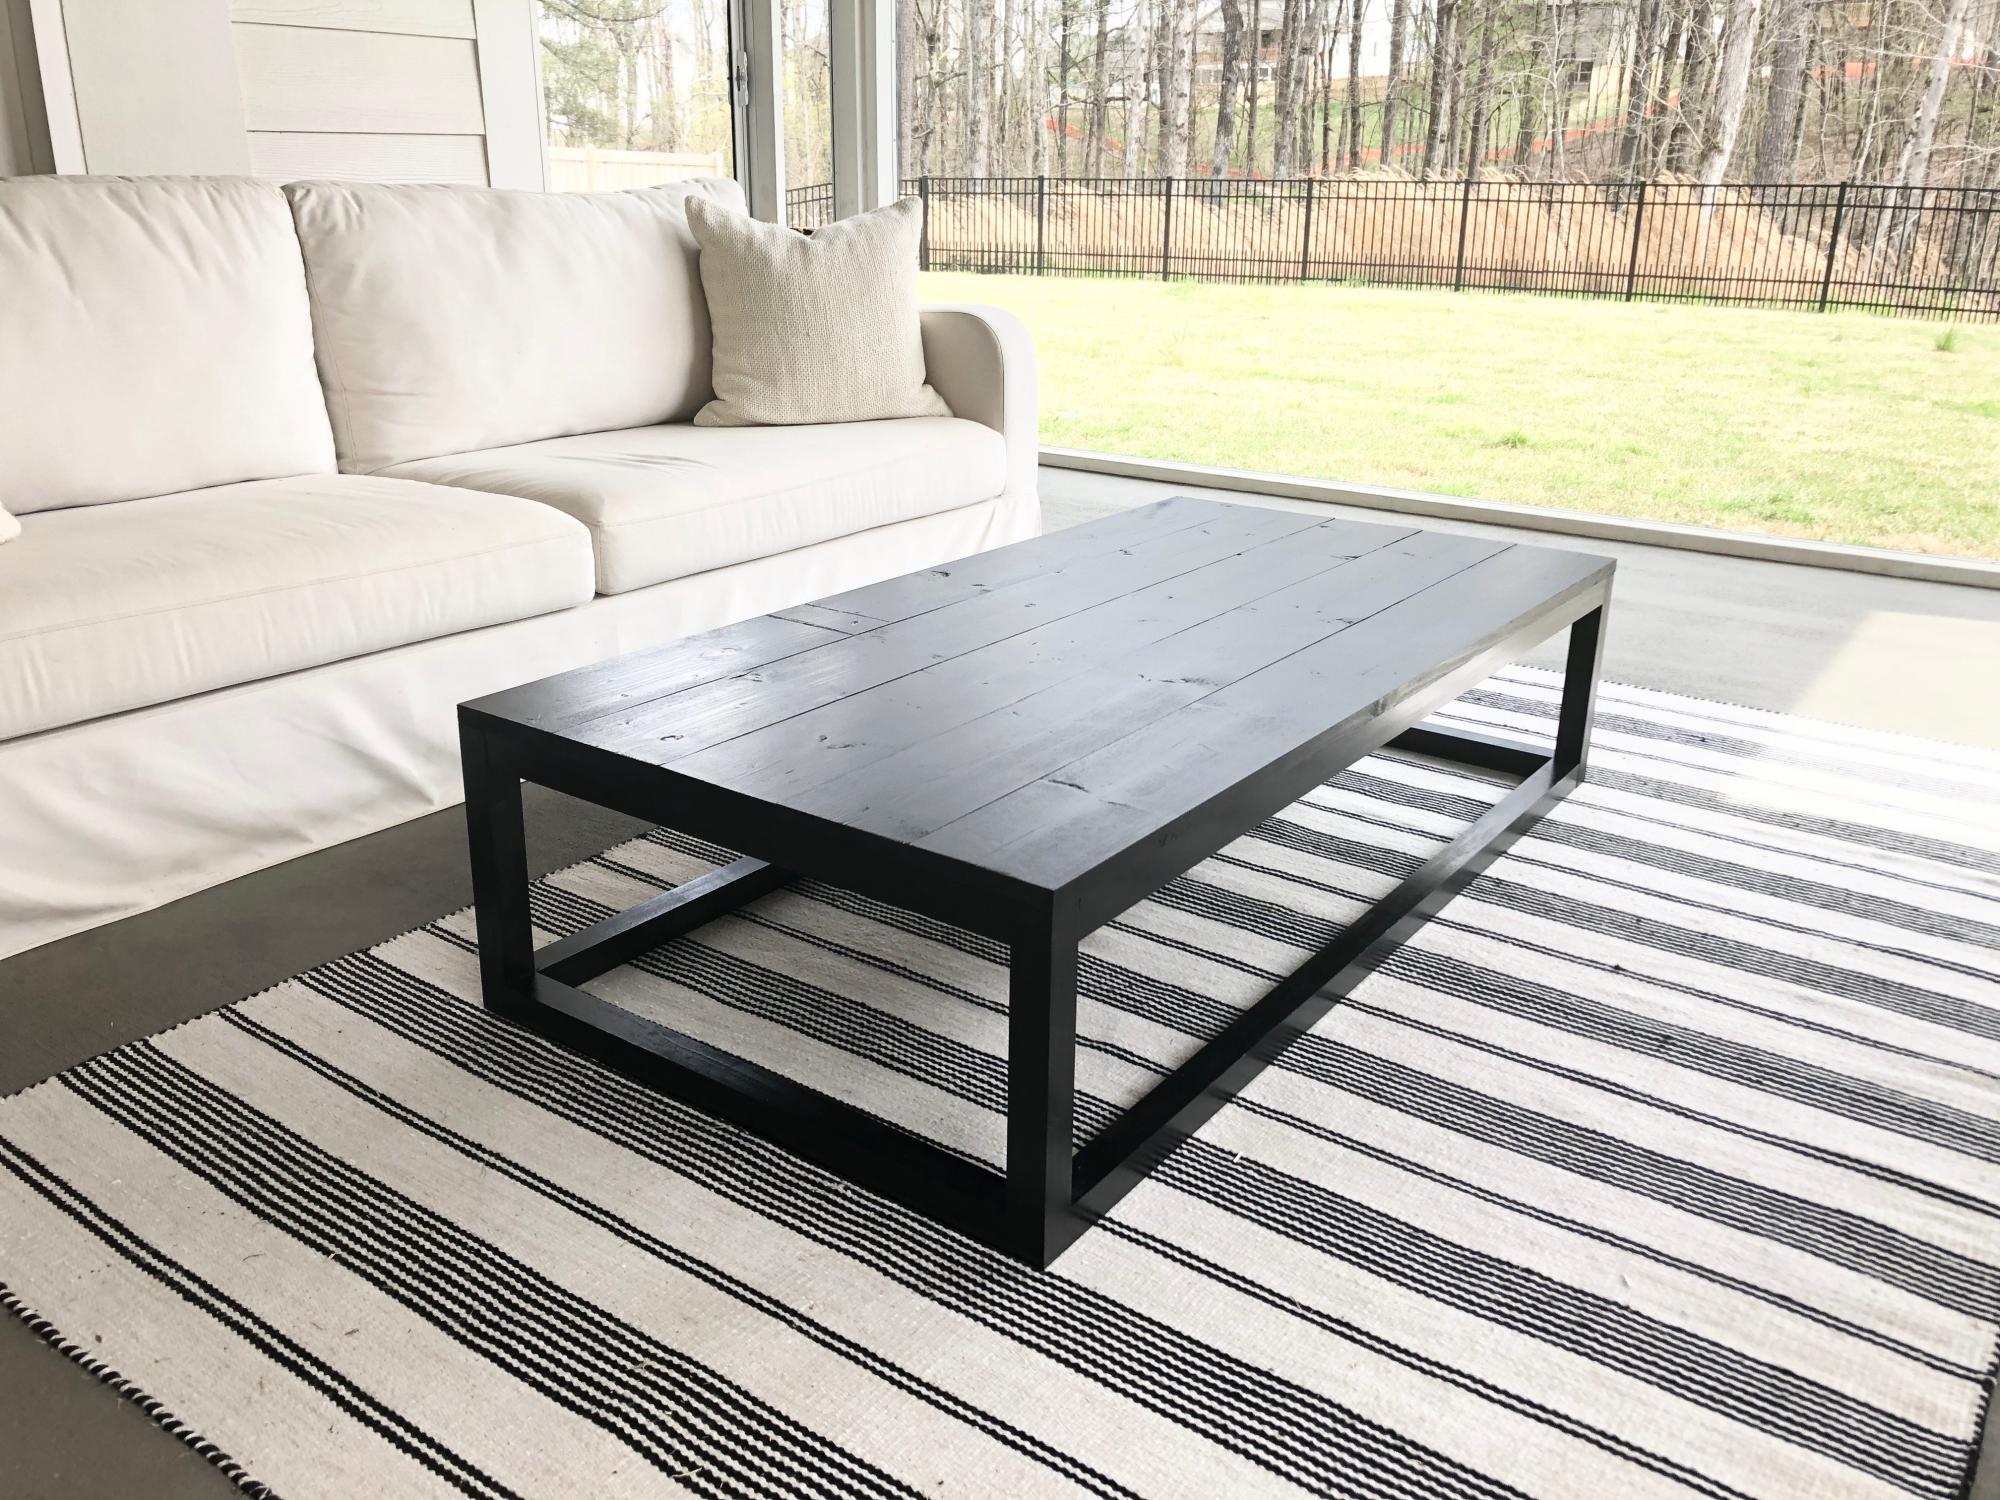
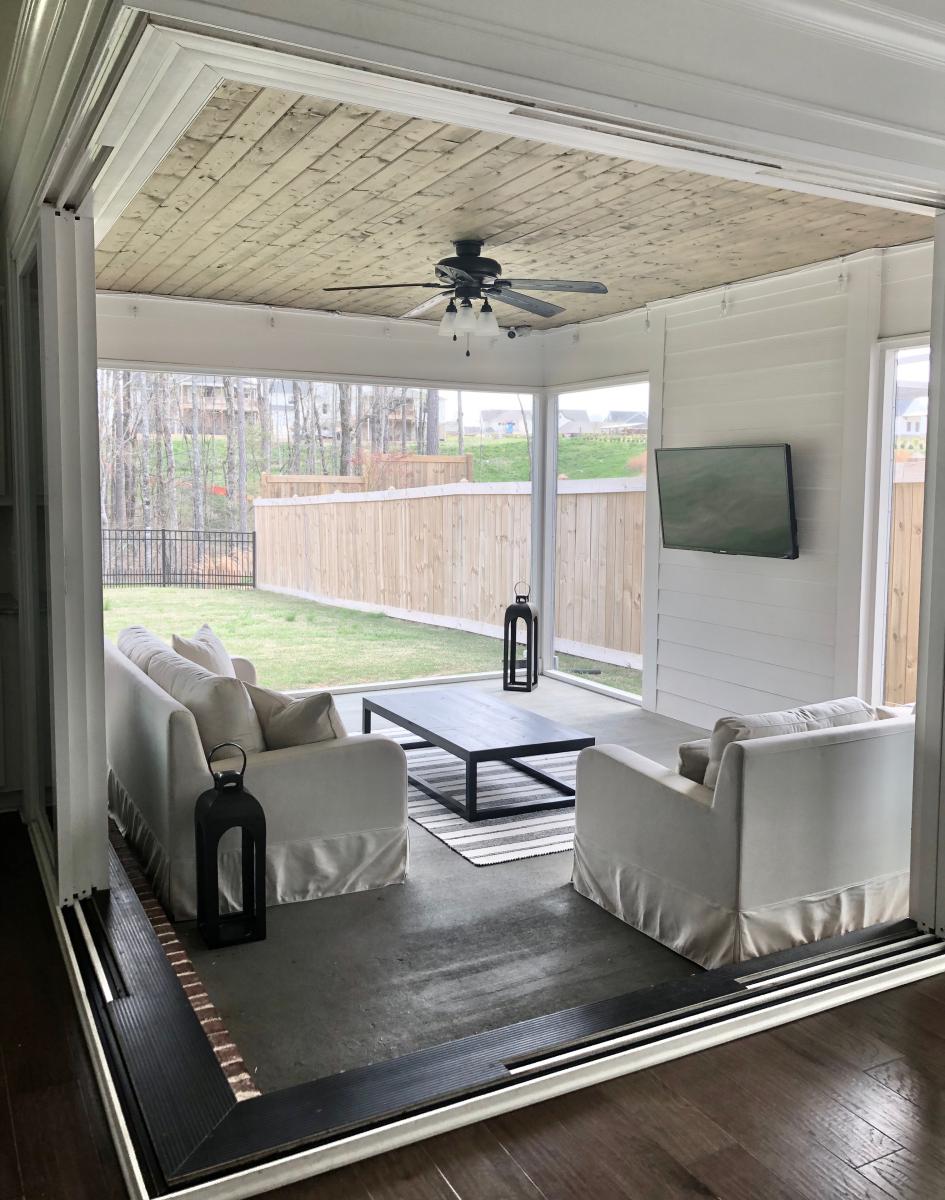
Great coffee table by April!
For the Finish:
First I lightly burnt the wood. The base is minwax in ebony. I actually sprayed water on the wood and used a damp cloth to apply.
The top I used random spots of regular satin paint in grey, a couple shades of blue and an olive green and a chalk paint white. Then sanded it down removing most of the paint and stained it with minwax provincial. And went over some of the edges with the ebony.
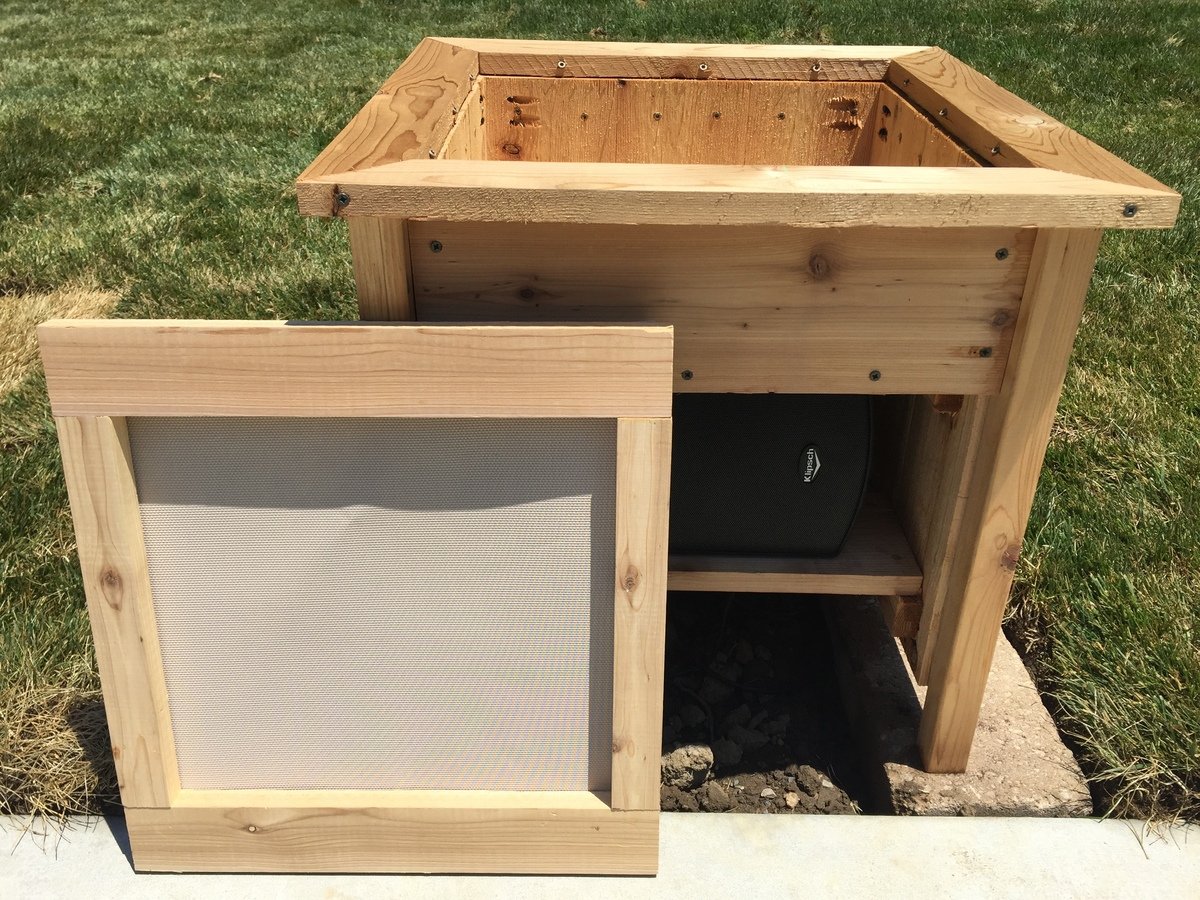
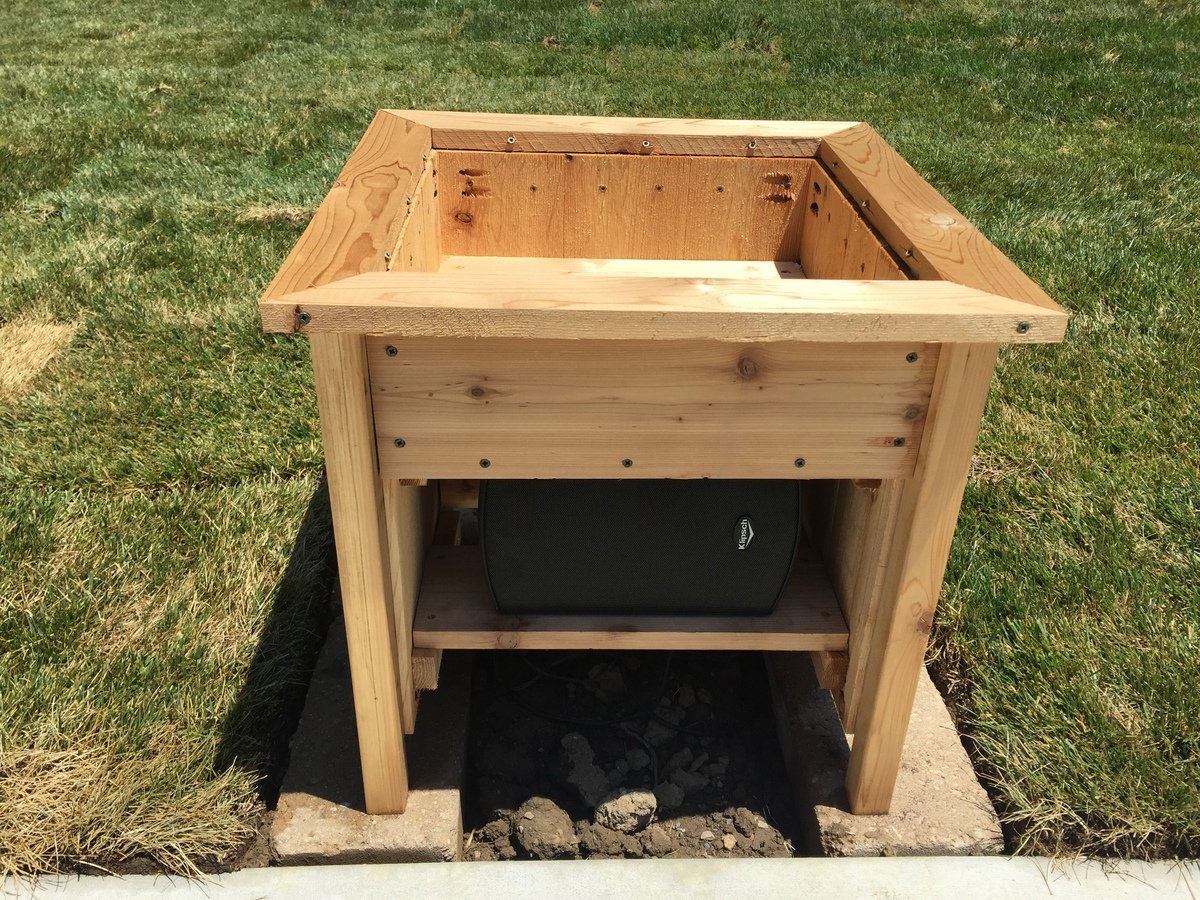
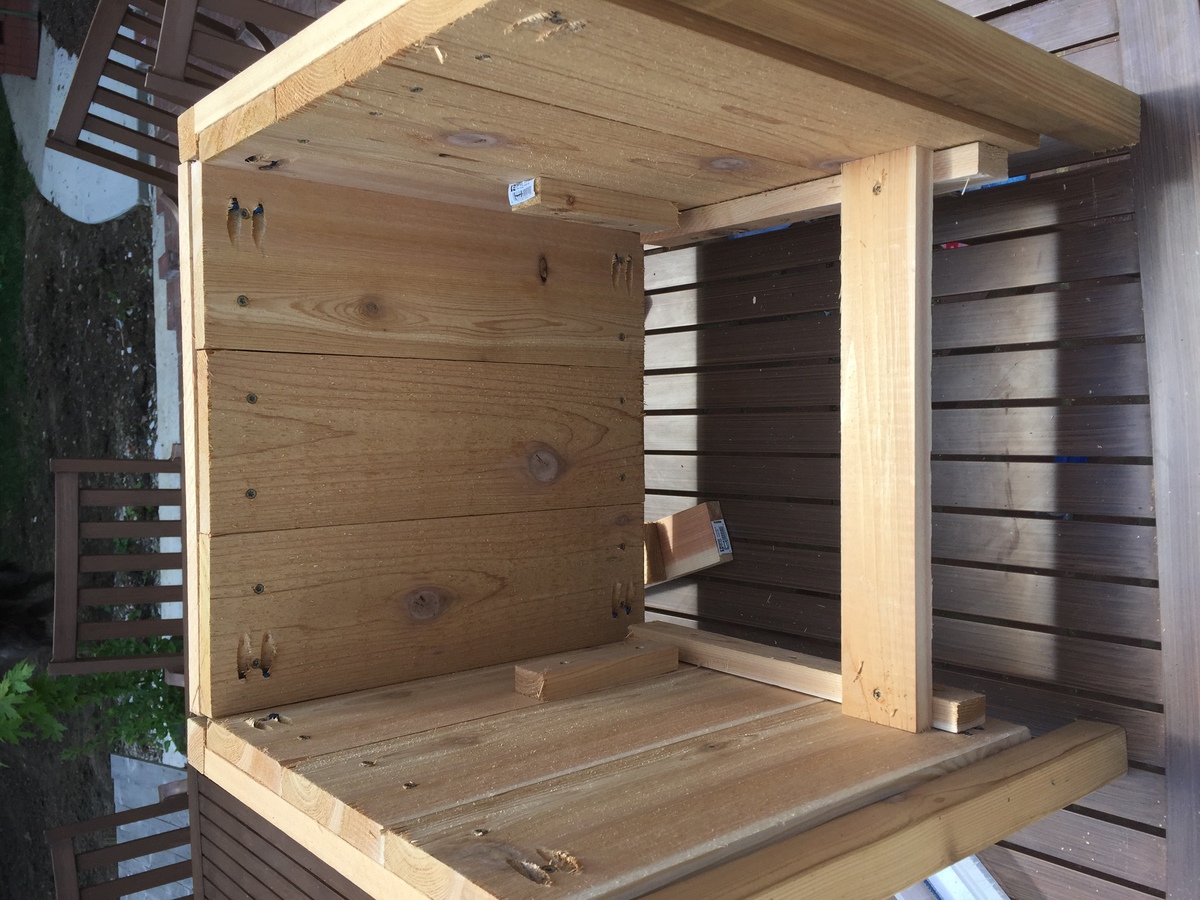
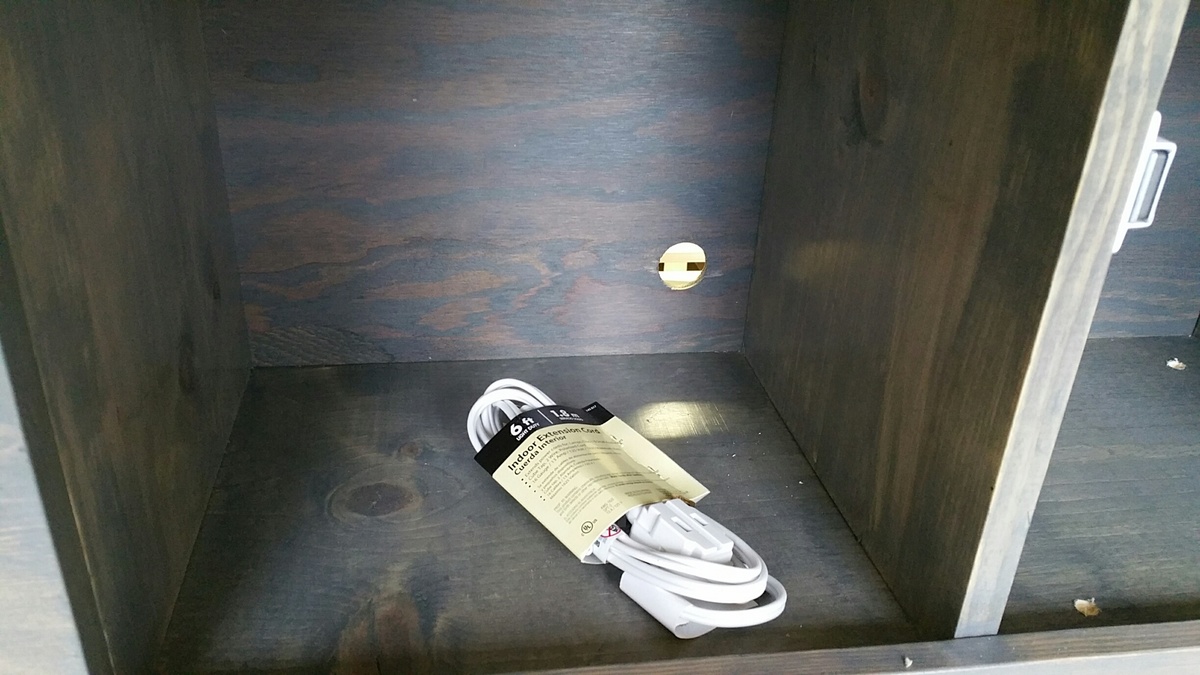
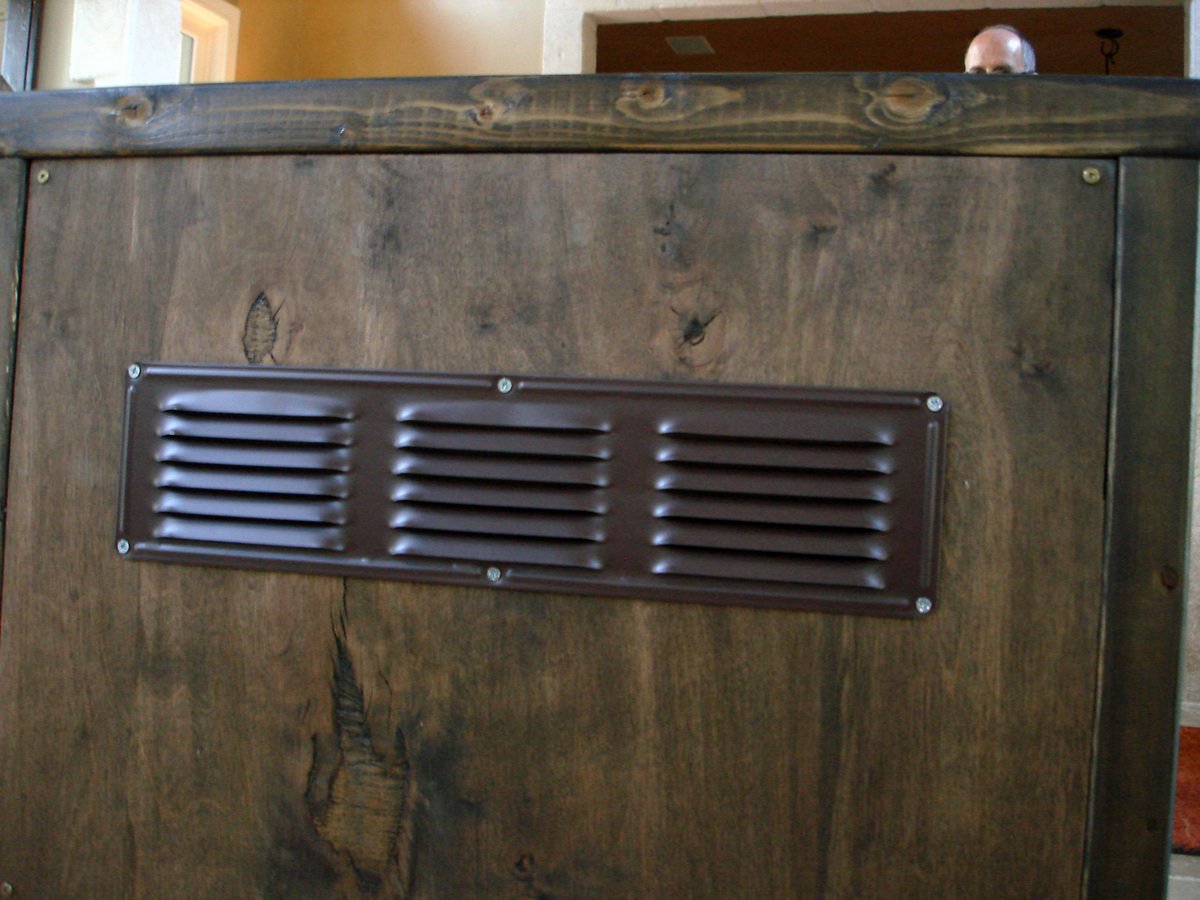
We just put in a pool and I needed something to hide a pair of outdoor speakers. I used Klipsh AW-525 speakers.
Basically I raised the bottom of the planter enough to fit the speaker under and had to add a few framing pieces to secure the speaker mount to. The mount attaches to a vertical board and the weight rests on a horizontal board. The wiring comes up from below.
The front panel uses vinyl mesh from Sailrite.com to hide the speaker but allow sound out. Imm planning to hang it with magnets if it doesn't distort sound too much.

Inspired by Ana White project, but assembled with tencions and mortises, without screws.
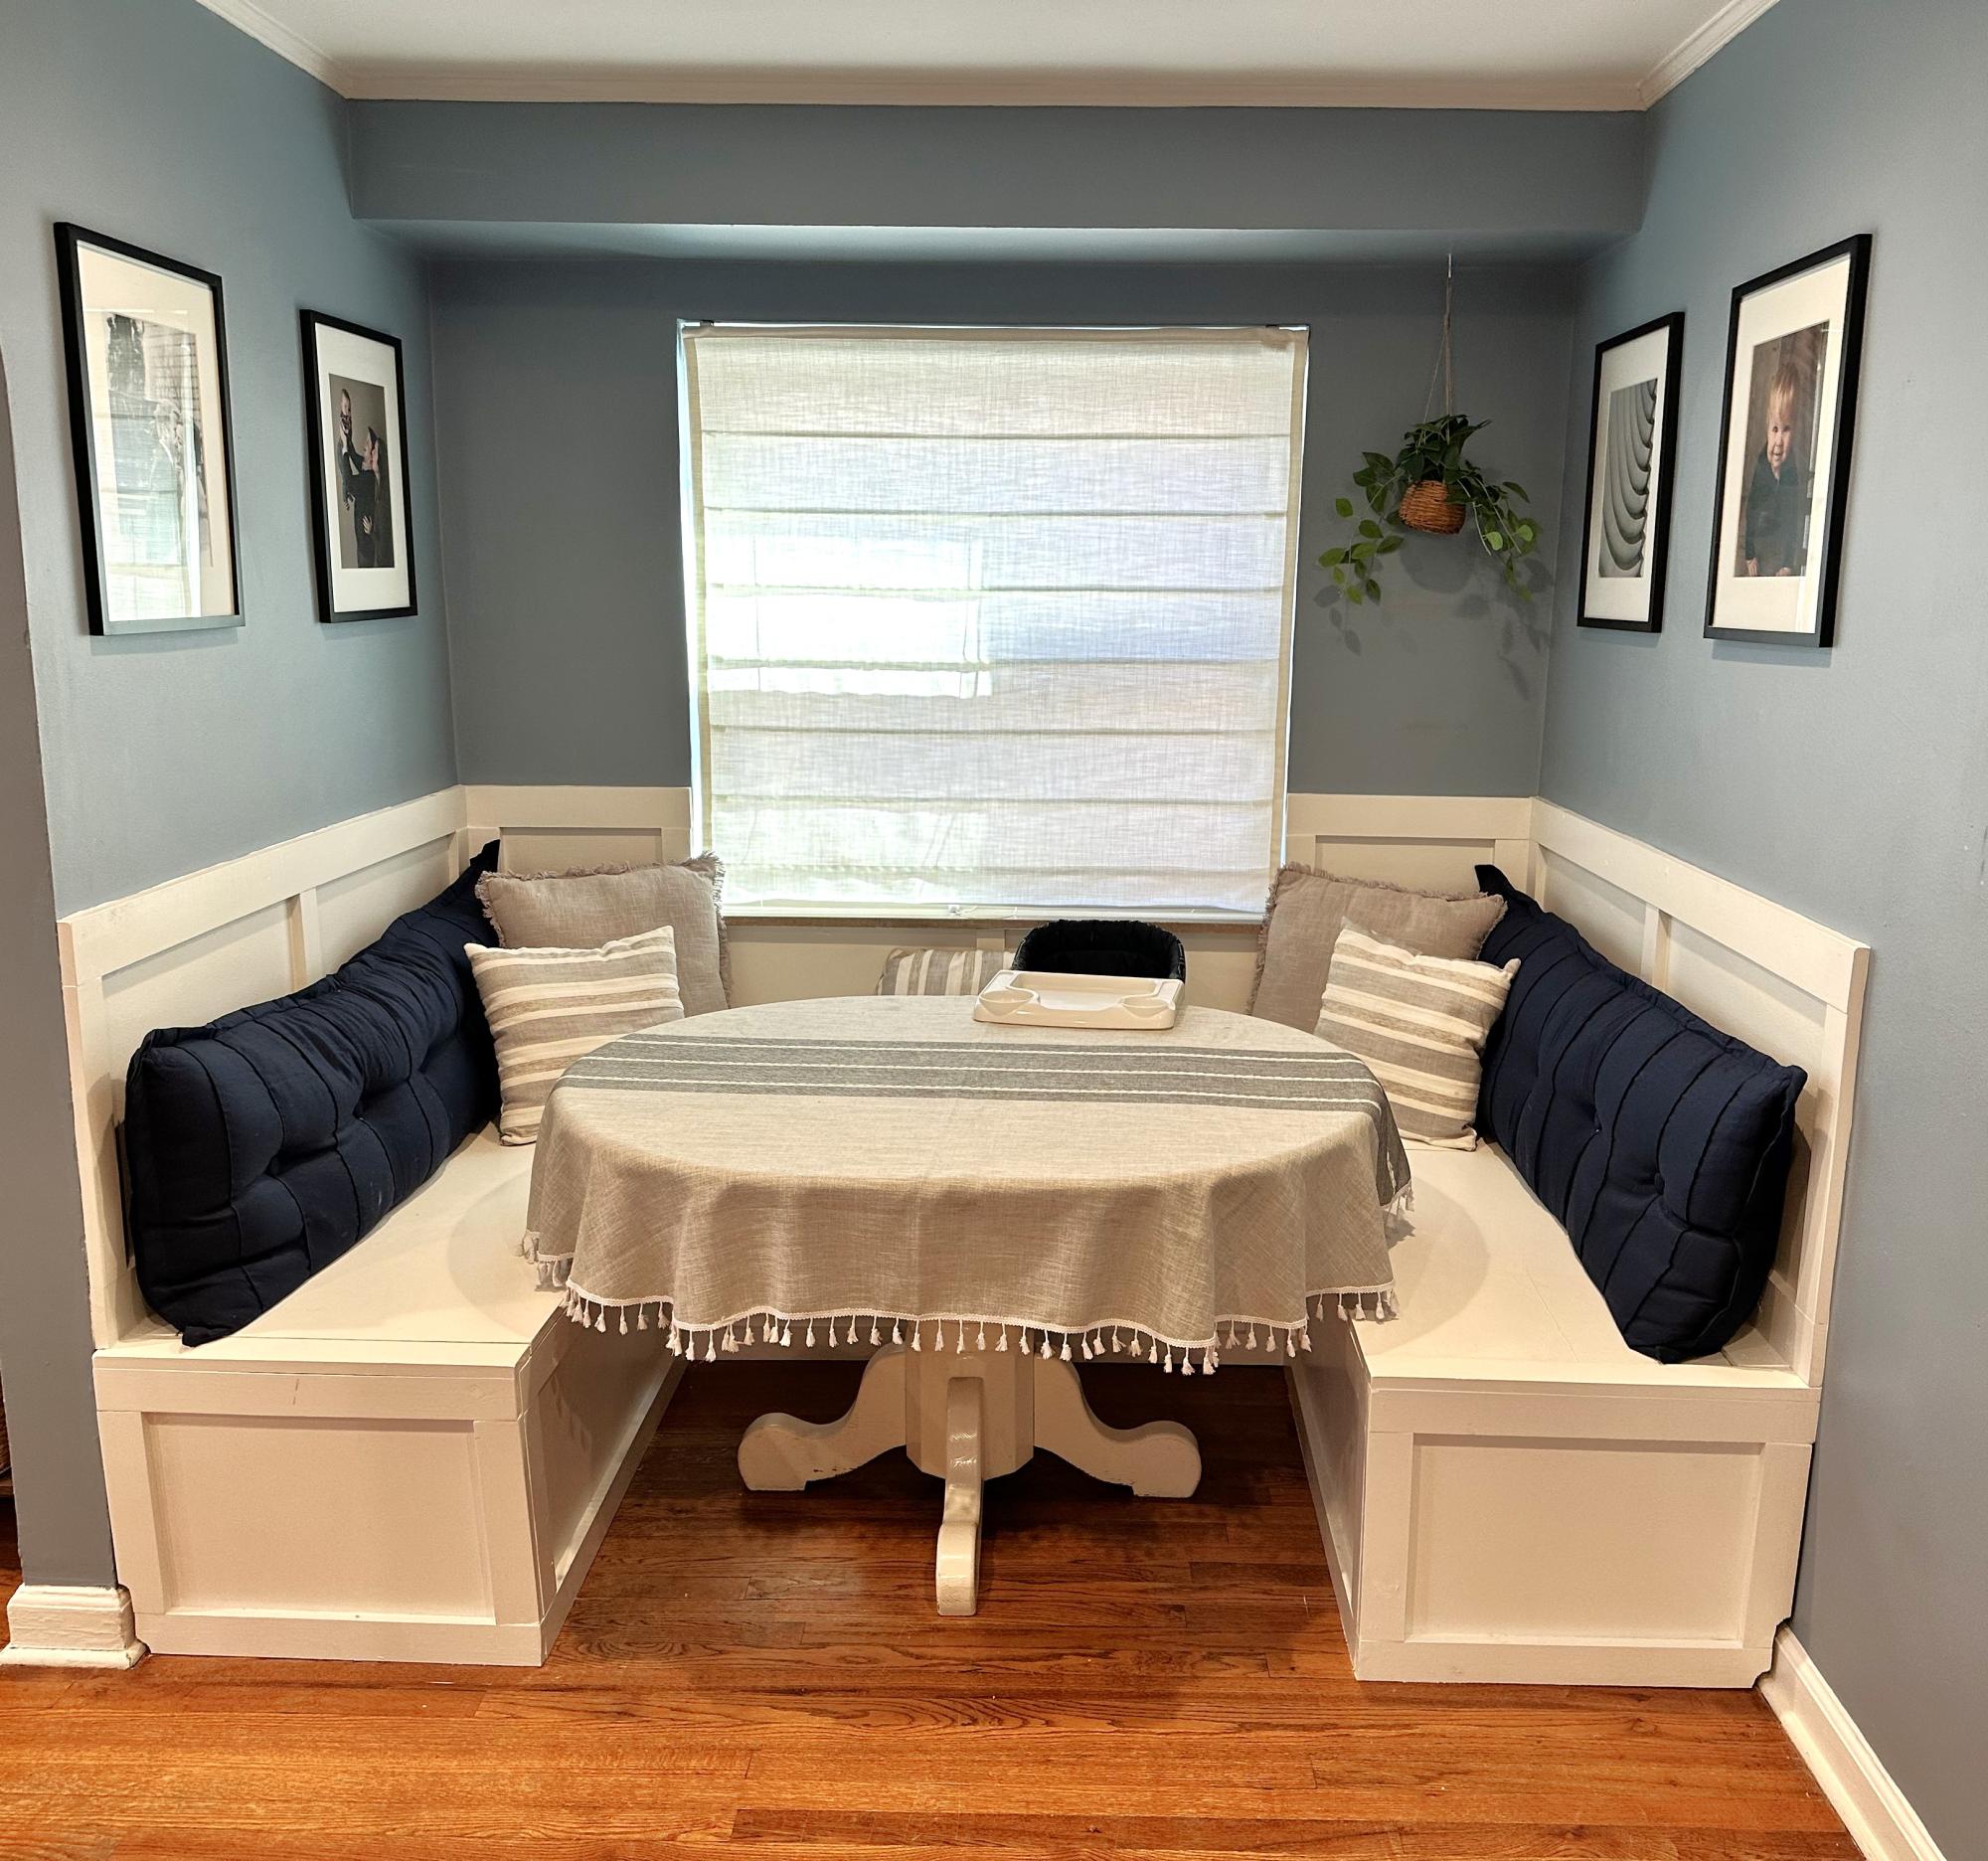
We love our new banquette so much! Thanks for the plans!!

I build the bar table with an x-base and created some stools using part of the plan. We really wanted backs on the stools so I made them up!
Wed, 11/14/2012 - 18:16
Hard to believe that you are a beginner. Fantastic work. Keep it up and the whole home will be furnished.
Sat, 04/13/2013 - 13:47
I'd love some information on the backs. My husband has a bad back and it's a necessity, but I'm a beginner and not sure how you did it/
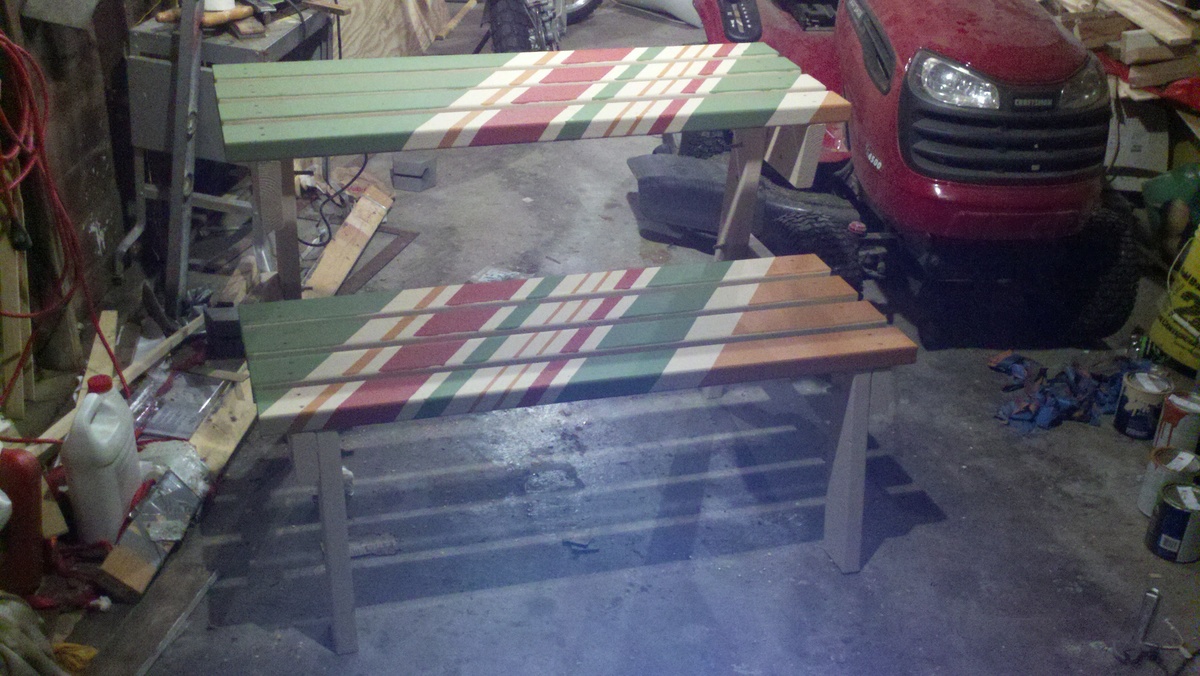
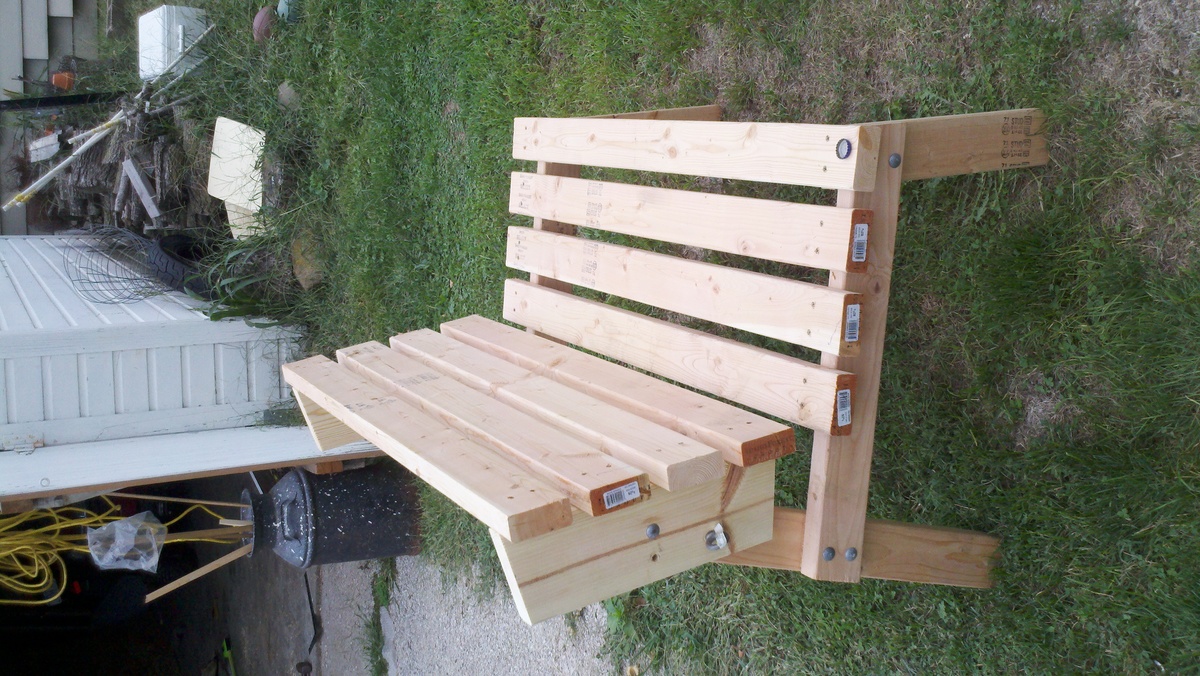
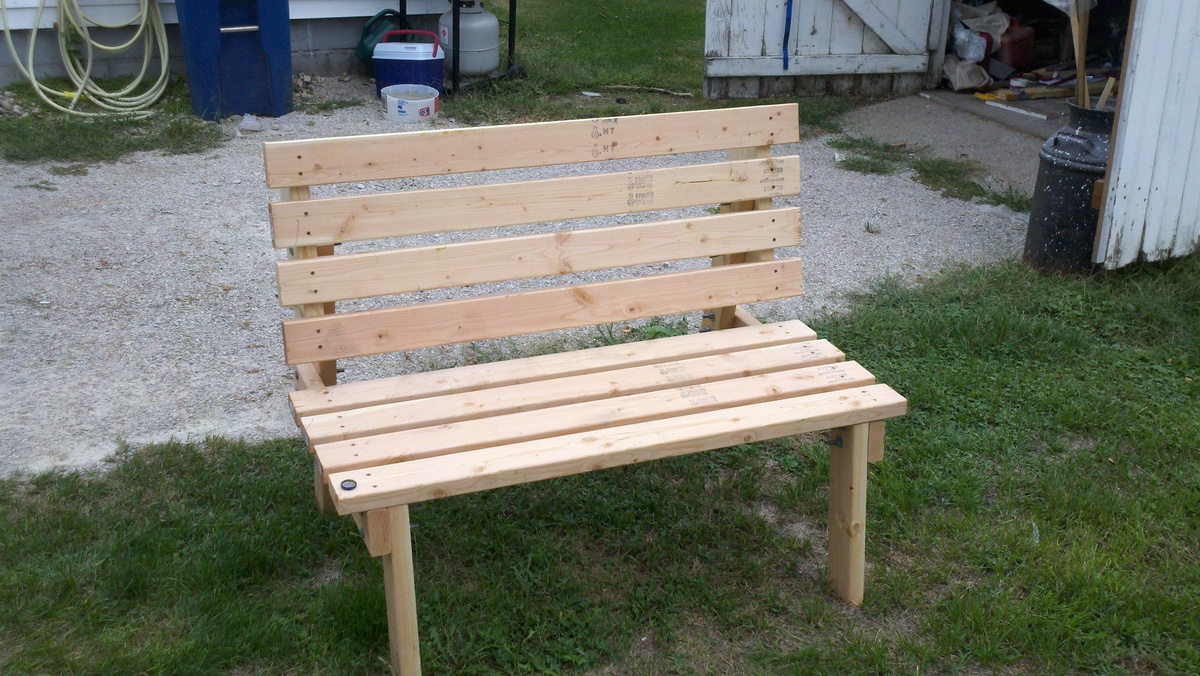
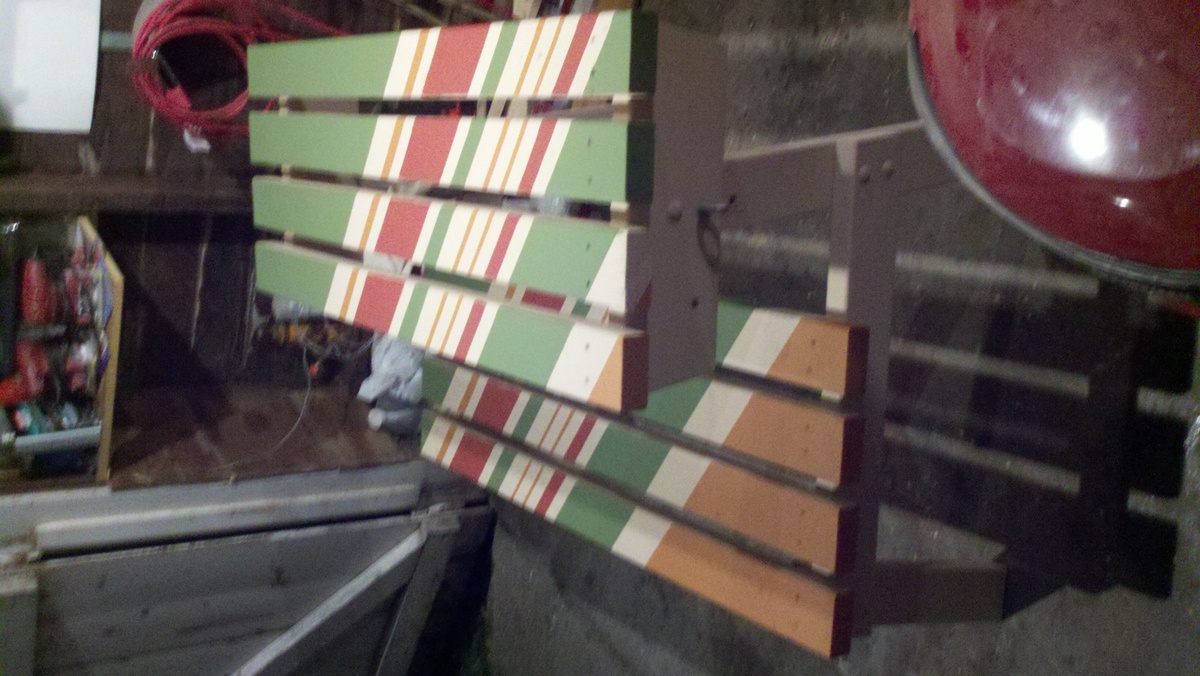
A nice summer project that is good for relaxing and eating outside.
Built with
7 - 2x4x72"
1 - 2x6x8
galvanized hardware
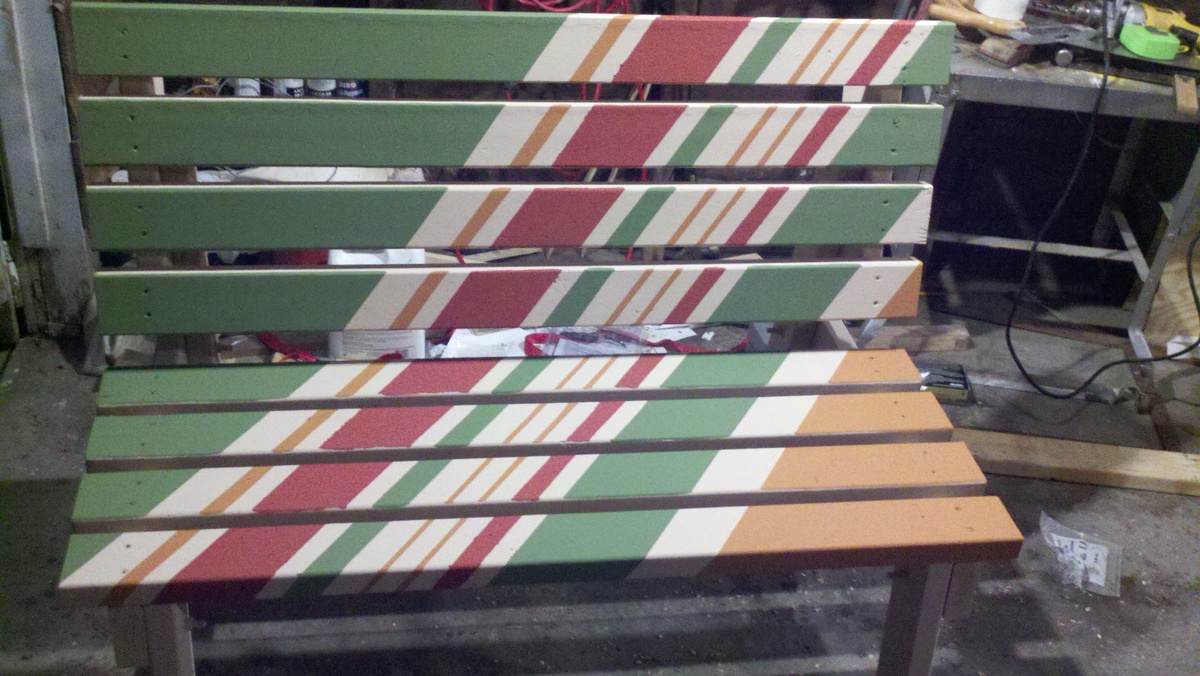
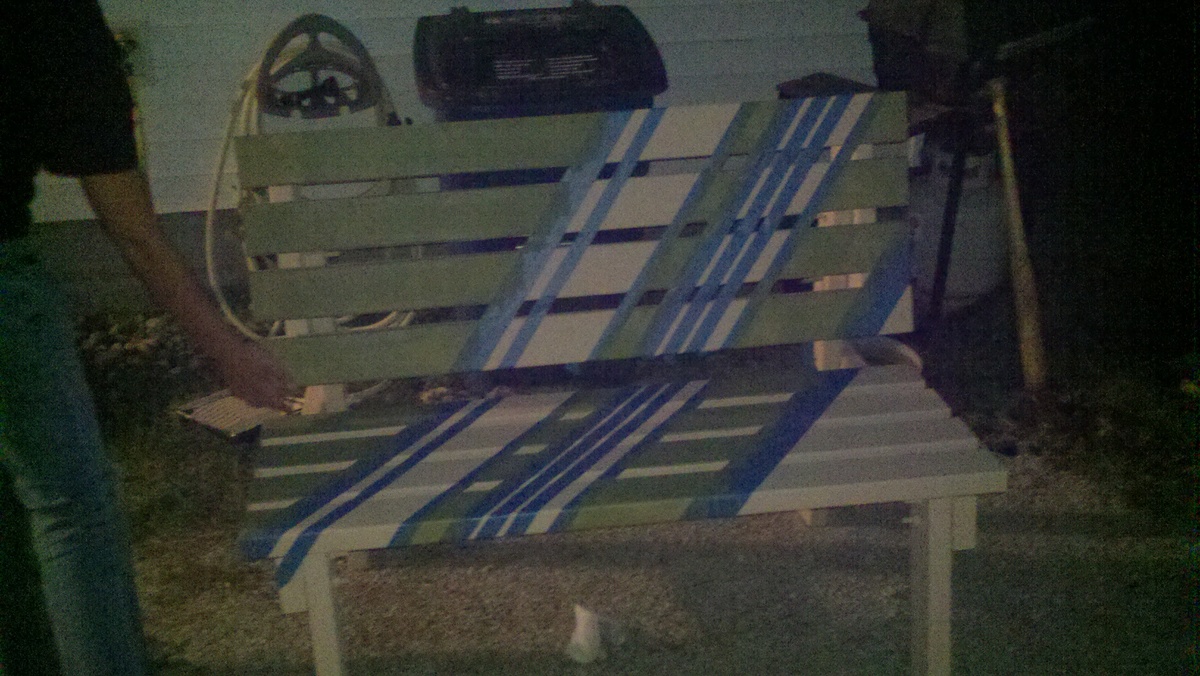
Started with a light base paint and taped off diagonal sections.
Next time we would lessen the gap inbetween 2x4's.
I modified this plan from square to rectangular to fit my space. It is exactly what was needed! Modified size: 27.5" x 55"
Sat, 11/07/2020 - 11:19
Looks perfect in your space! Thanks for sharing:)

Modified the design to allow me to roll lawnmower directly in the end. Fun project.

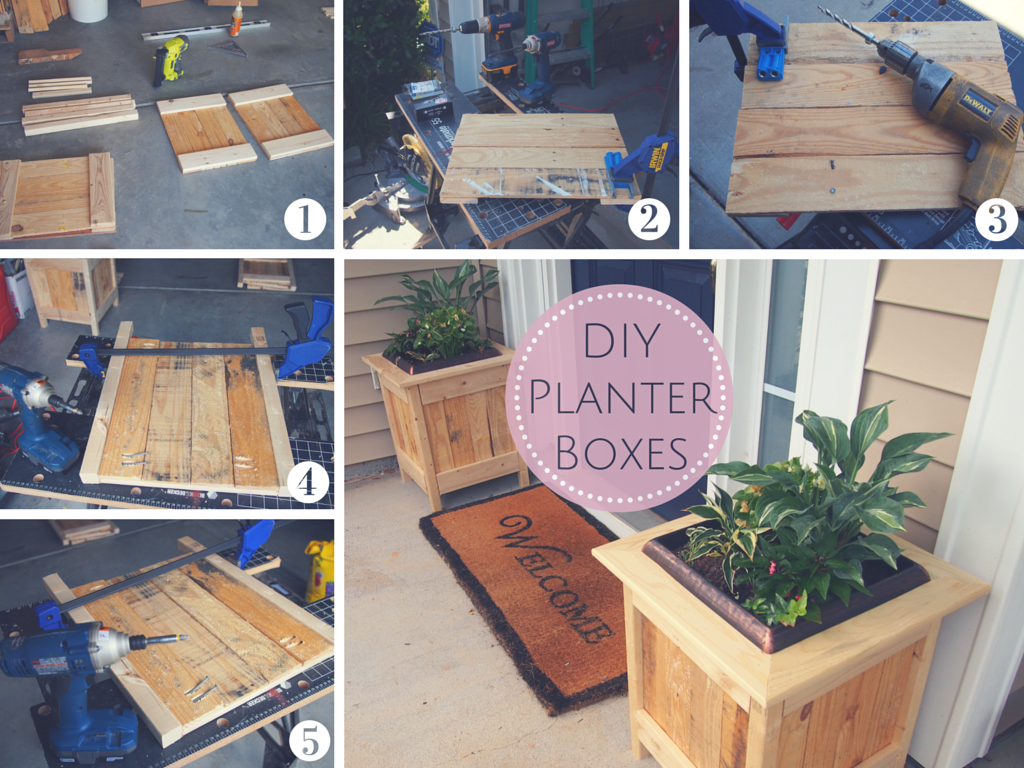
We picked up a couple 14.9" square plastic garden planters from Home Depot and ended up creating some wood planter boxes from pallet wood for them to sit in.
I didn't add up the cost of these boxes, because we had most of the wood and only needed a few pieces, but I'd say they were definitely less than $10 a box.
We altered our dimensions to fit our HD planters so they would slip in for a snug fit and made the legs flush with the top of our sides. We build a simple frame for the top, which allowed the lip of our HD planters to sit firmly on top.
Something I didn't do, but wish I did: fill in the cracks with wood filler. There were a couple places that really could have used it, but I was in a rush and decided to skip it. They turned out great, but could have been even better had I taken an extra 30 minutes. On an off weekend, we are going to use wood filler in the seams, sand them down, and do a second coat of white paint.
Can't wait to plant these with some mums for Fall! :)

This entry table I made from wood I got from a recycle center of wood products. It’s been in our entry now for several years. I have only basic tools-no planers and jointers, etc. I do have a fold up table saw that I use once in awhile. I enjoy working with natural /live edge and or construction grade materials. Always impressed with the items Ana has built. Good job Ana😁👍
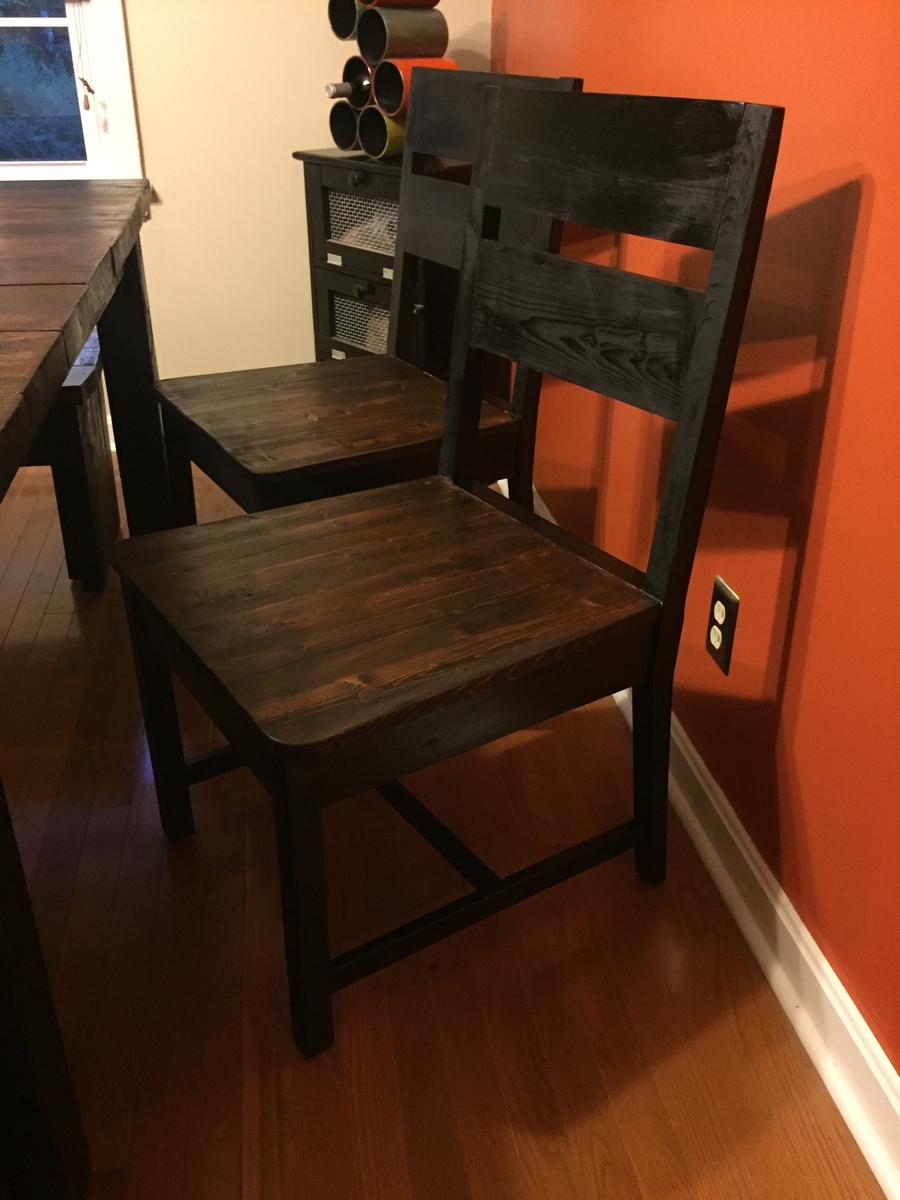
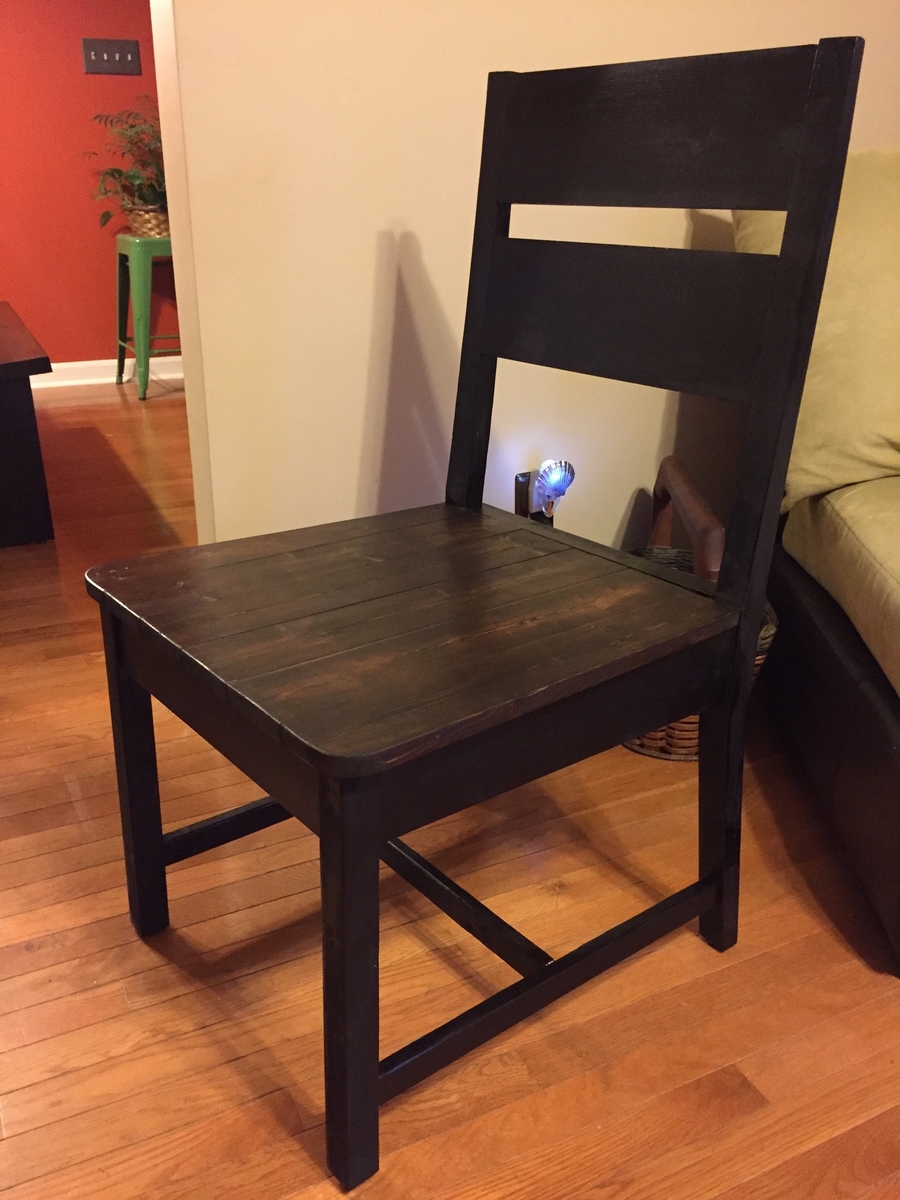
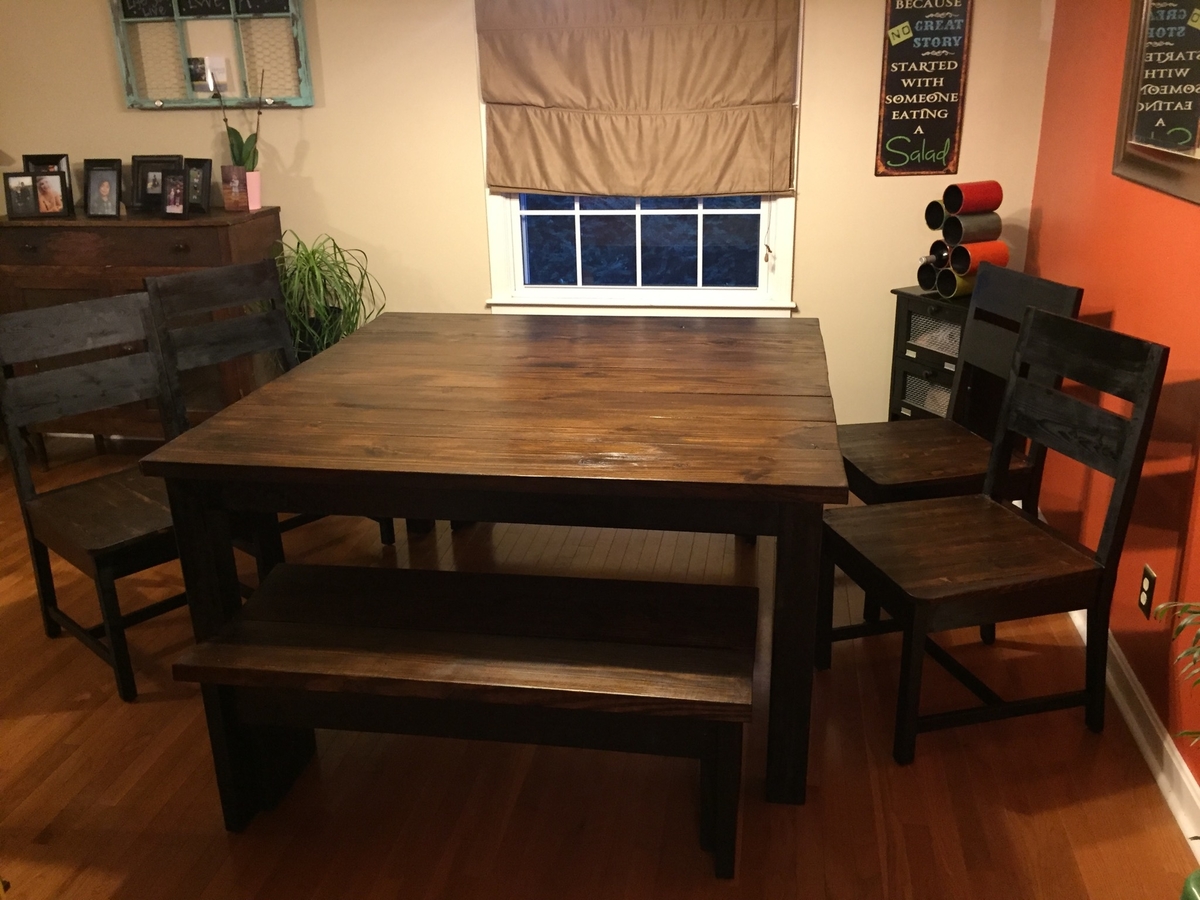
This was my first attempt at making furniture...but it turned out GREAT! My fiance was about to buy a VERY similar dining room set for $1300 before I stopped her and insisted that I could build it myself, finish it to match our kitchen/dining room, and save a TON of money!
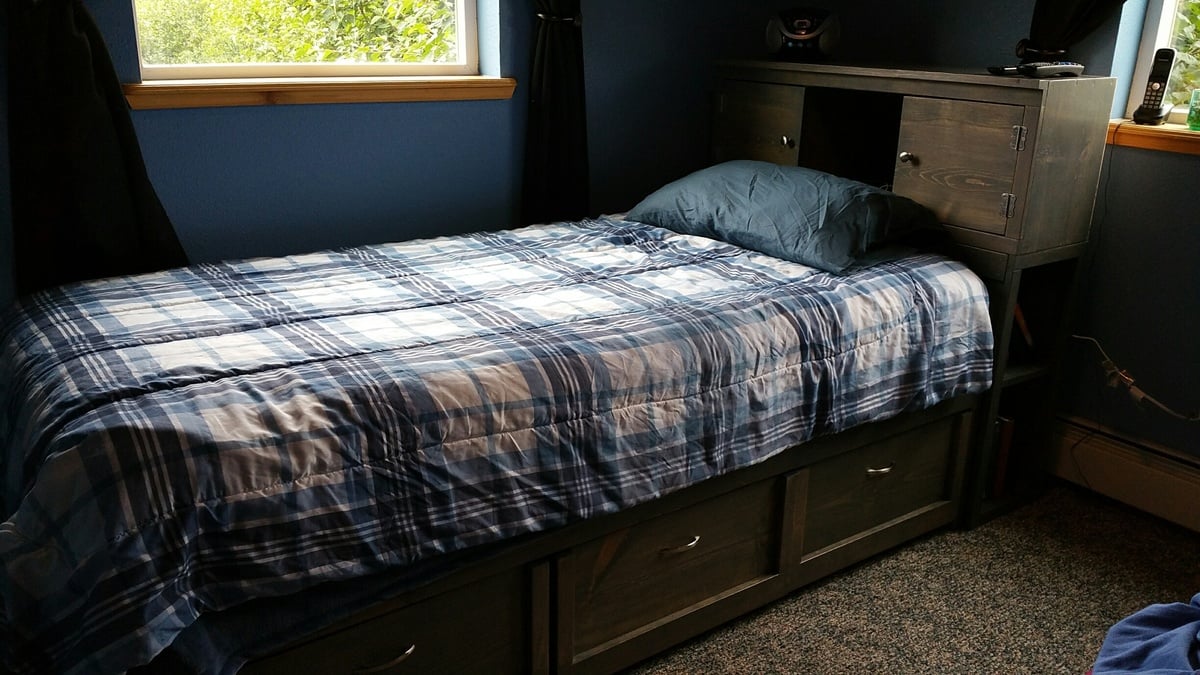
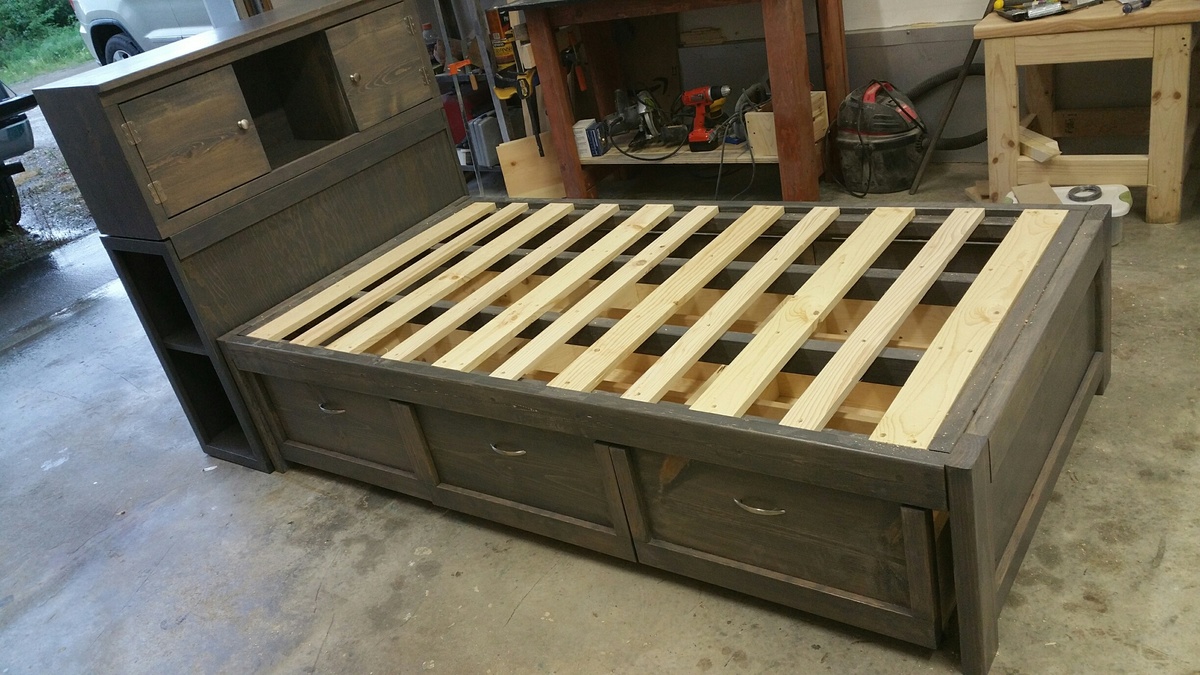
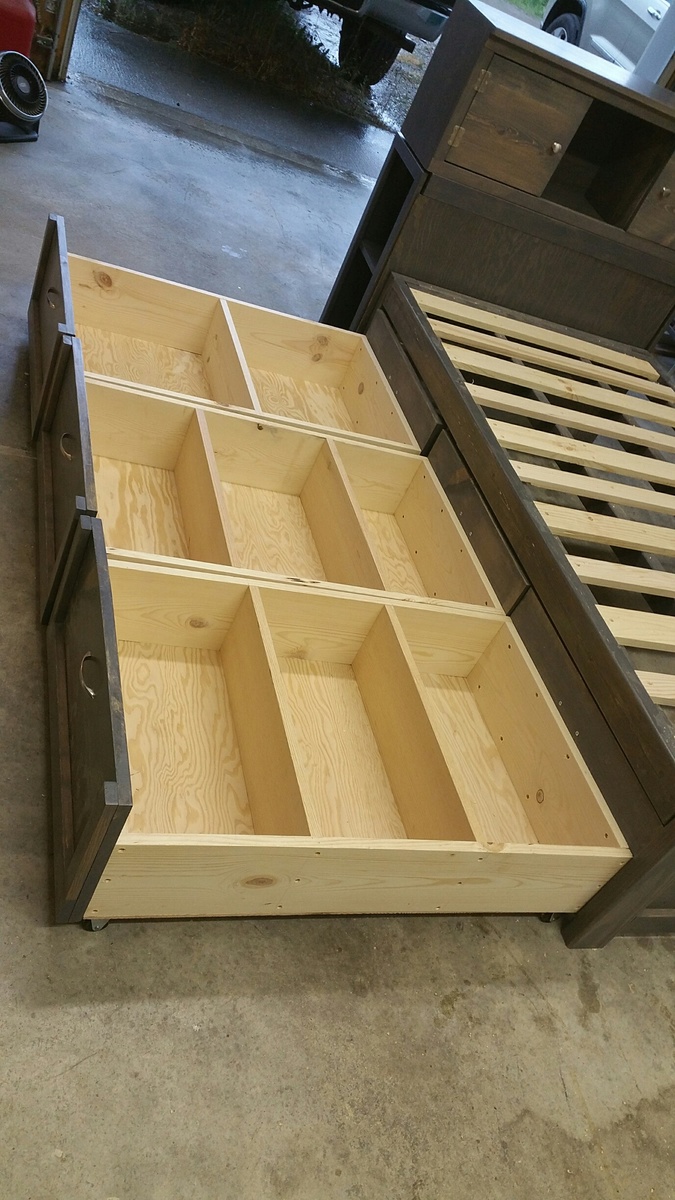
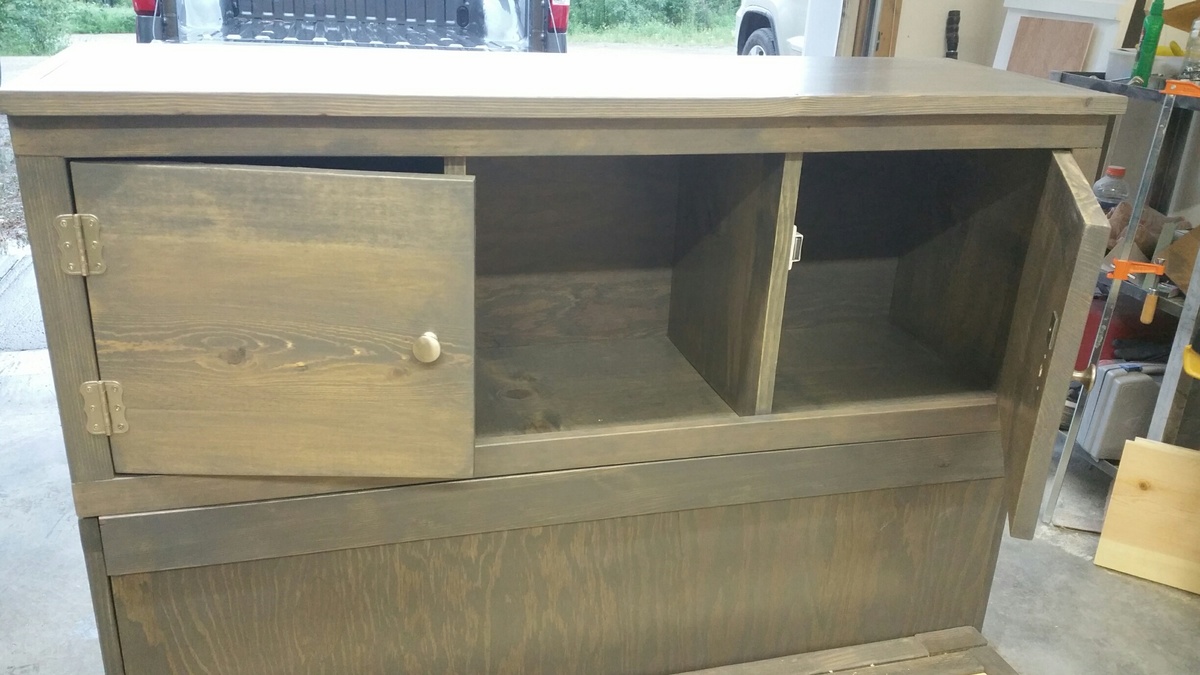
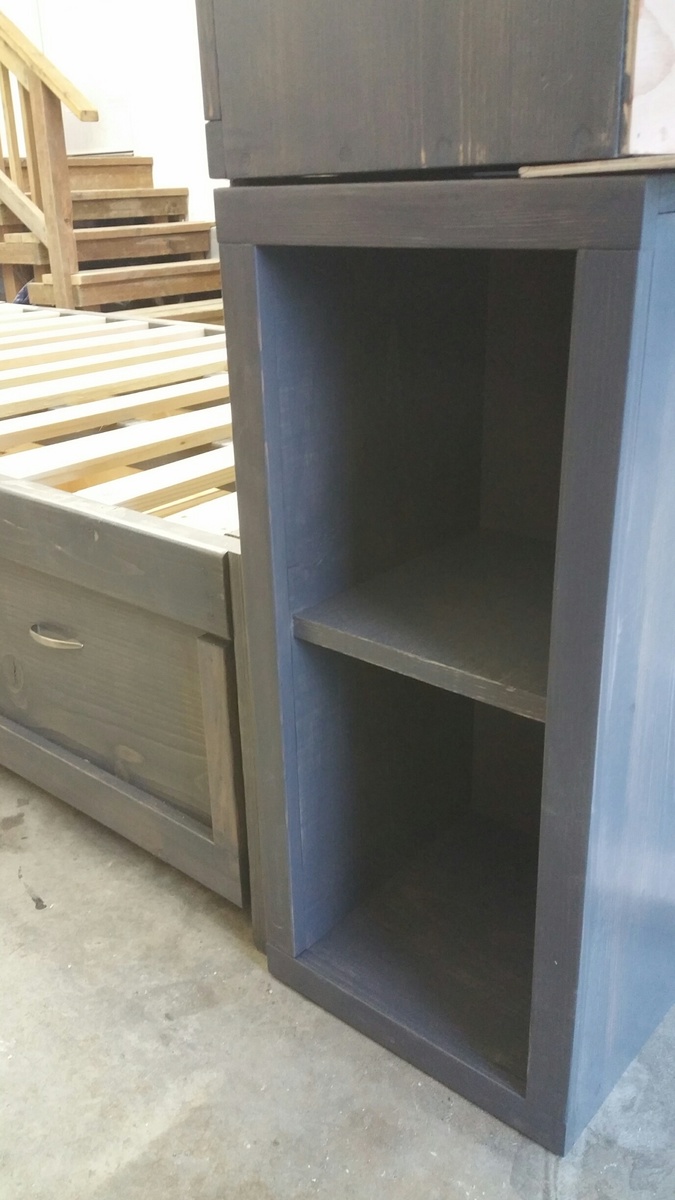
I combined Ana's plans for Daybed with Storage Trundle Drawers and a Storage Headboard with a Small Hutch.
This is my 3rd daybed with storage drawers. It's such an easy build and gives so much extra space. The entire project took about 40 hours. I used Minwax stain in Classic Grey and three coats of polyurethane. For the drawers, I used 1.5" casters. I drilled a hole through the back of the headboard to feed cords through. Then I put the whole thing in the back of my truck and drove 500 miles for the final assembly. :) In the provided photos, some of the pieces are flush because I hadn't permanently attached them.
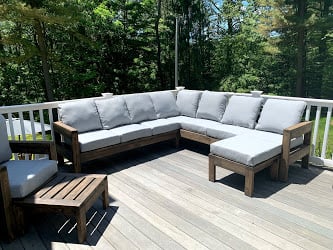
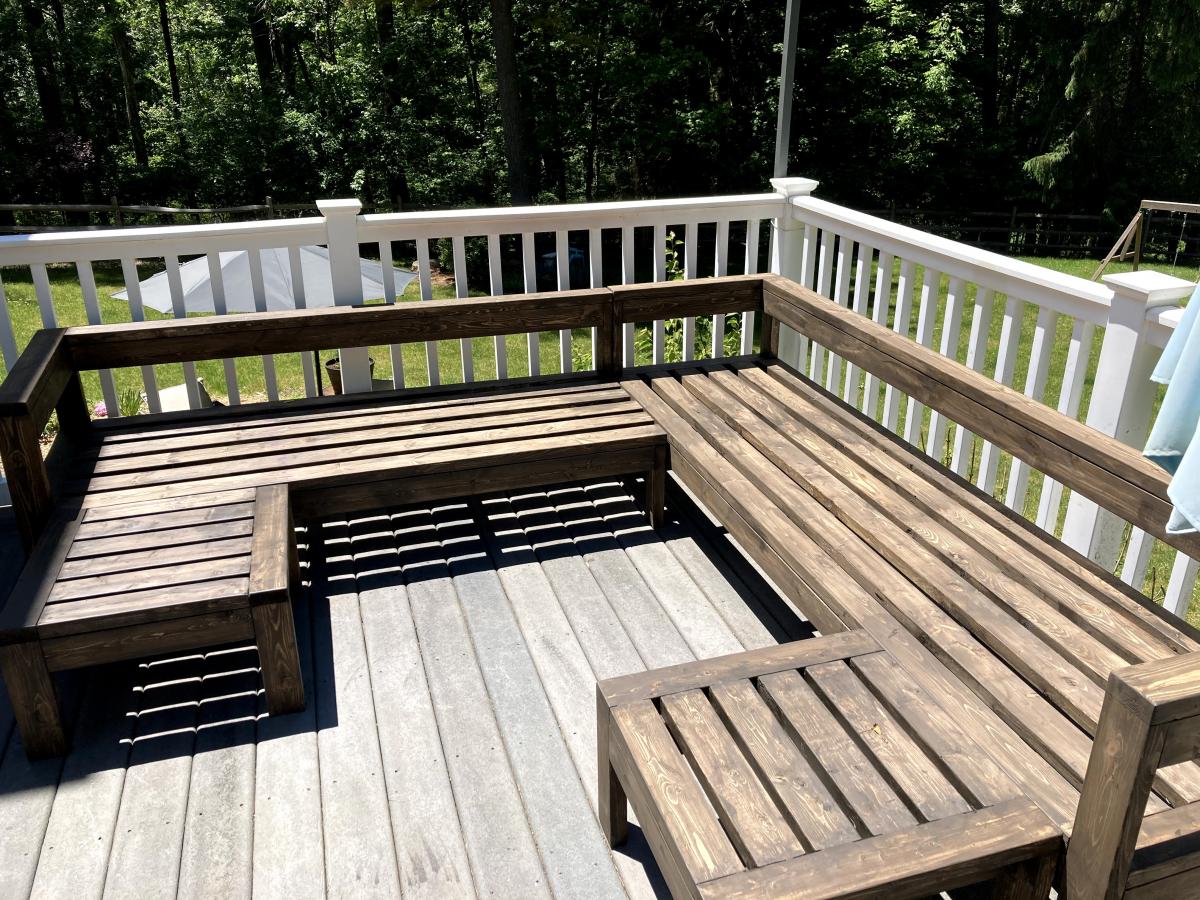
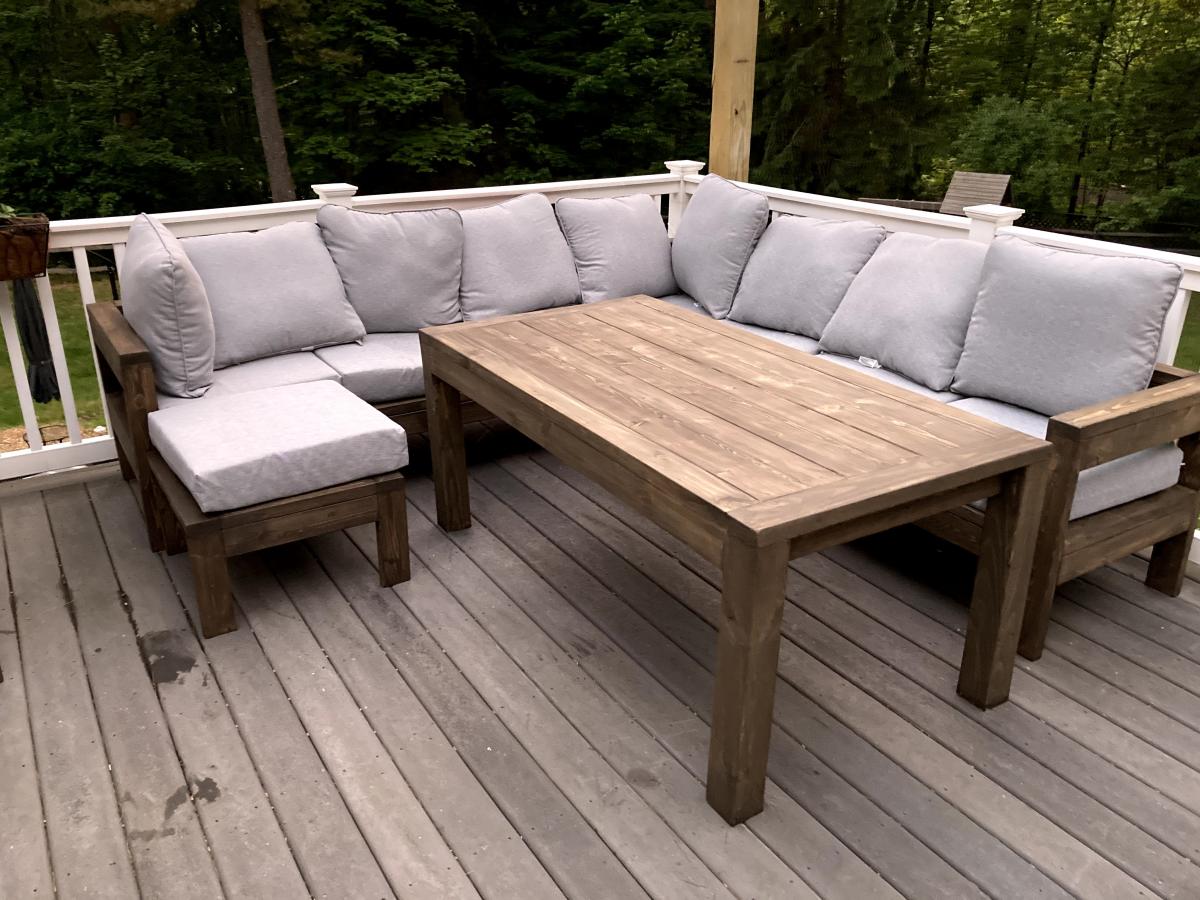
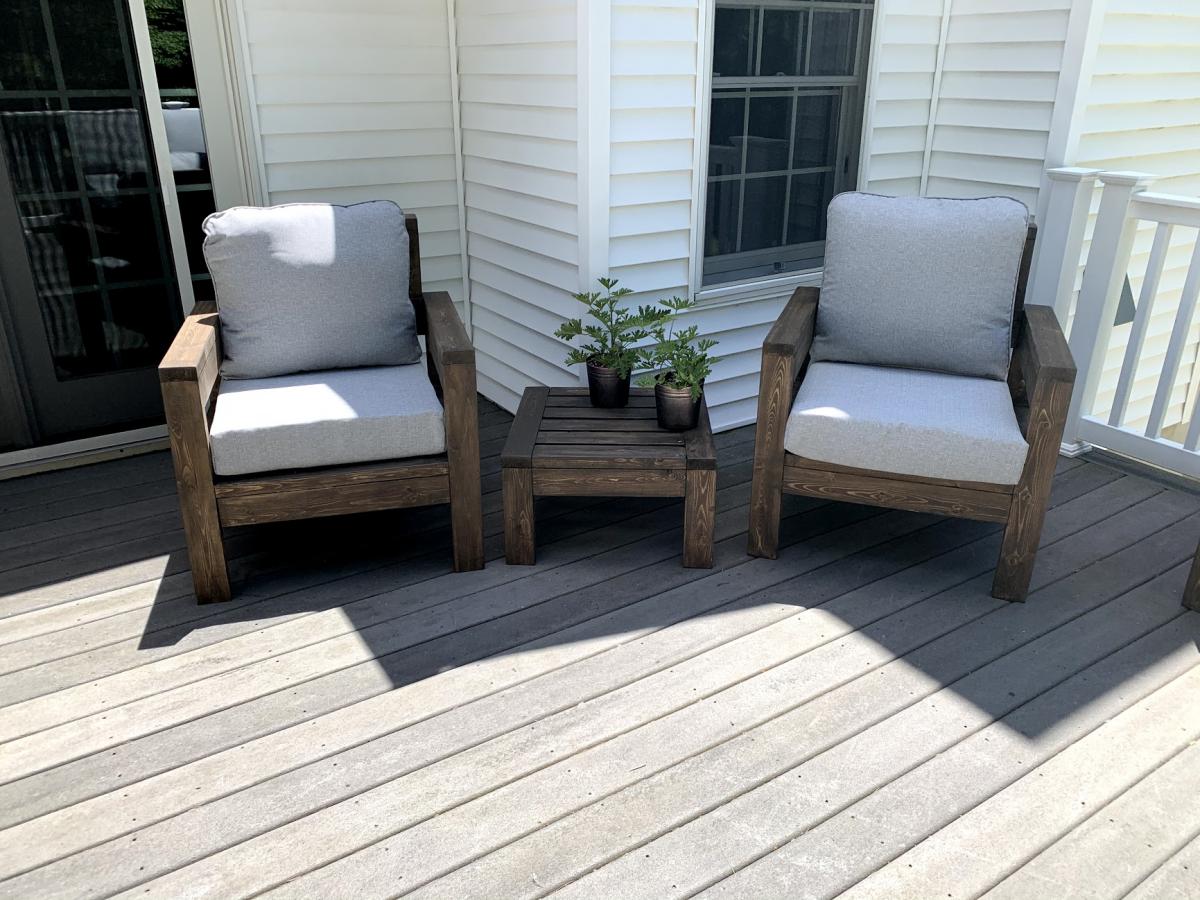
We were looking for outdoor furniture for our deck, and for the size and amount we needed it would have cost us at least $2000. We really like the idea of having an outdoor sectional that we can also use for dining, and we had trouble finding a set we liked. We found Ana's plans for the 2x4 Outdoor Sectional, and i loved the look. After seeing what others have done with the plans, I thought I would be able to modify it to get everything we needed for much less cost than buying a set.
We ended up extending the size of the 2x4 outdoor sofa by one 24" section, for a total length of 96". I then used the same design to make two outdoor chairs, just reduced the length to 24". I modified the 2x4 outdoor coffee table plans to create two ottoman's that can be moved around to make the seating more lounge style Finally, I modified the coffee table plans to make a 5 foot outdoor dining table. All in all, it took about a week and I couldn't be happier with how it turned out!
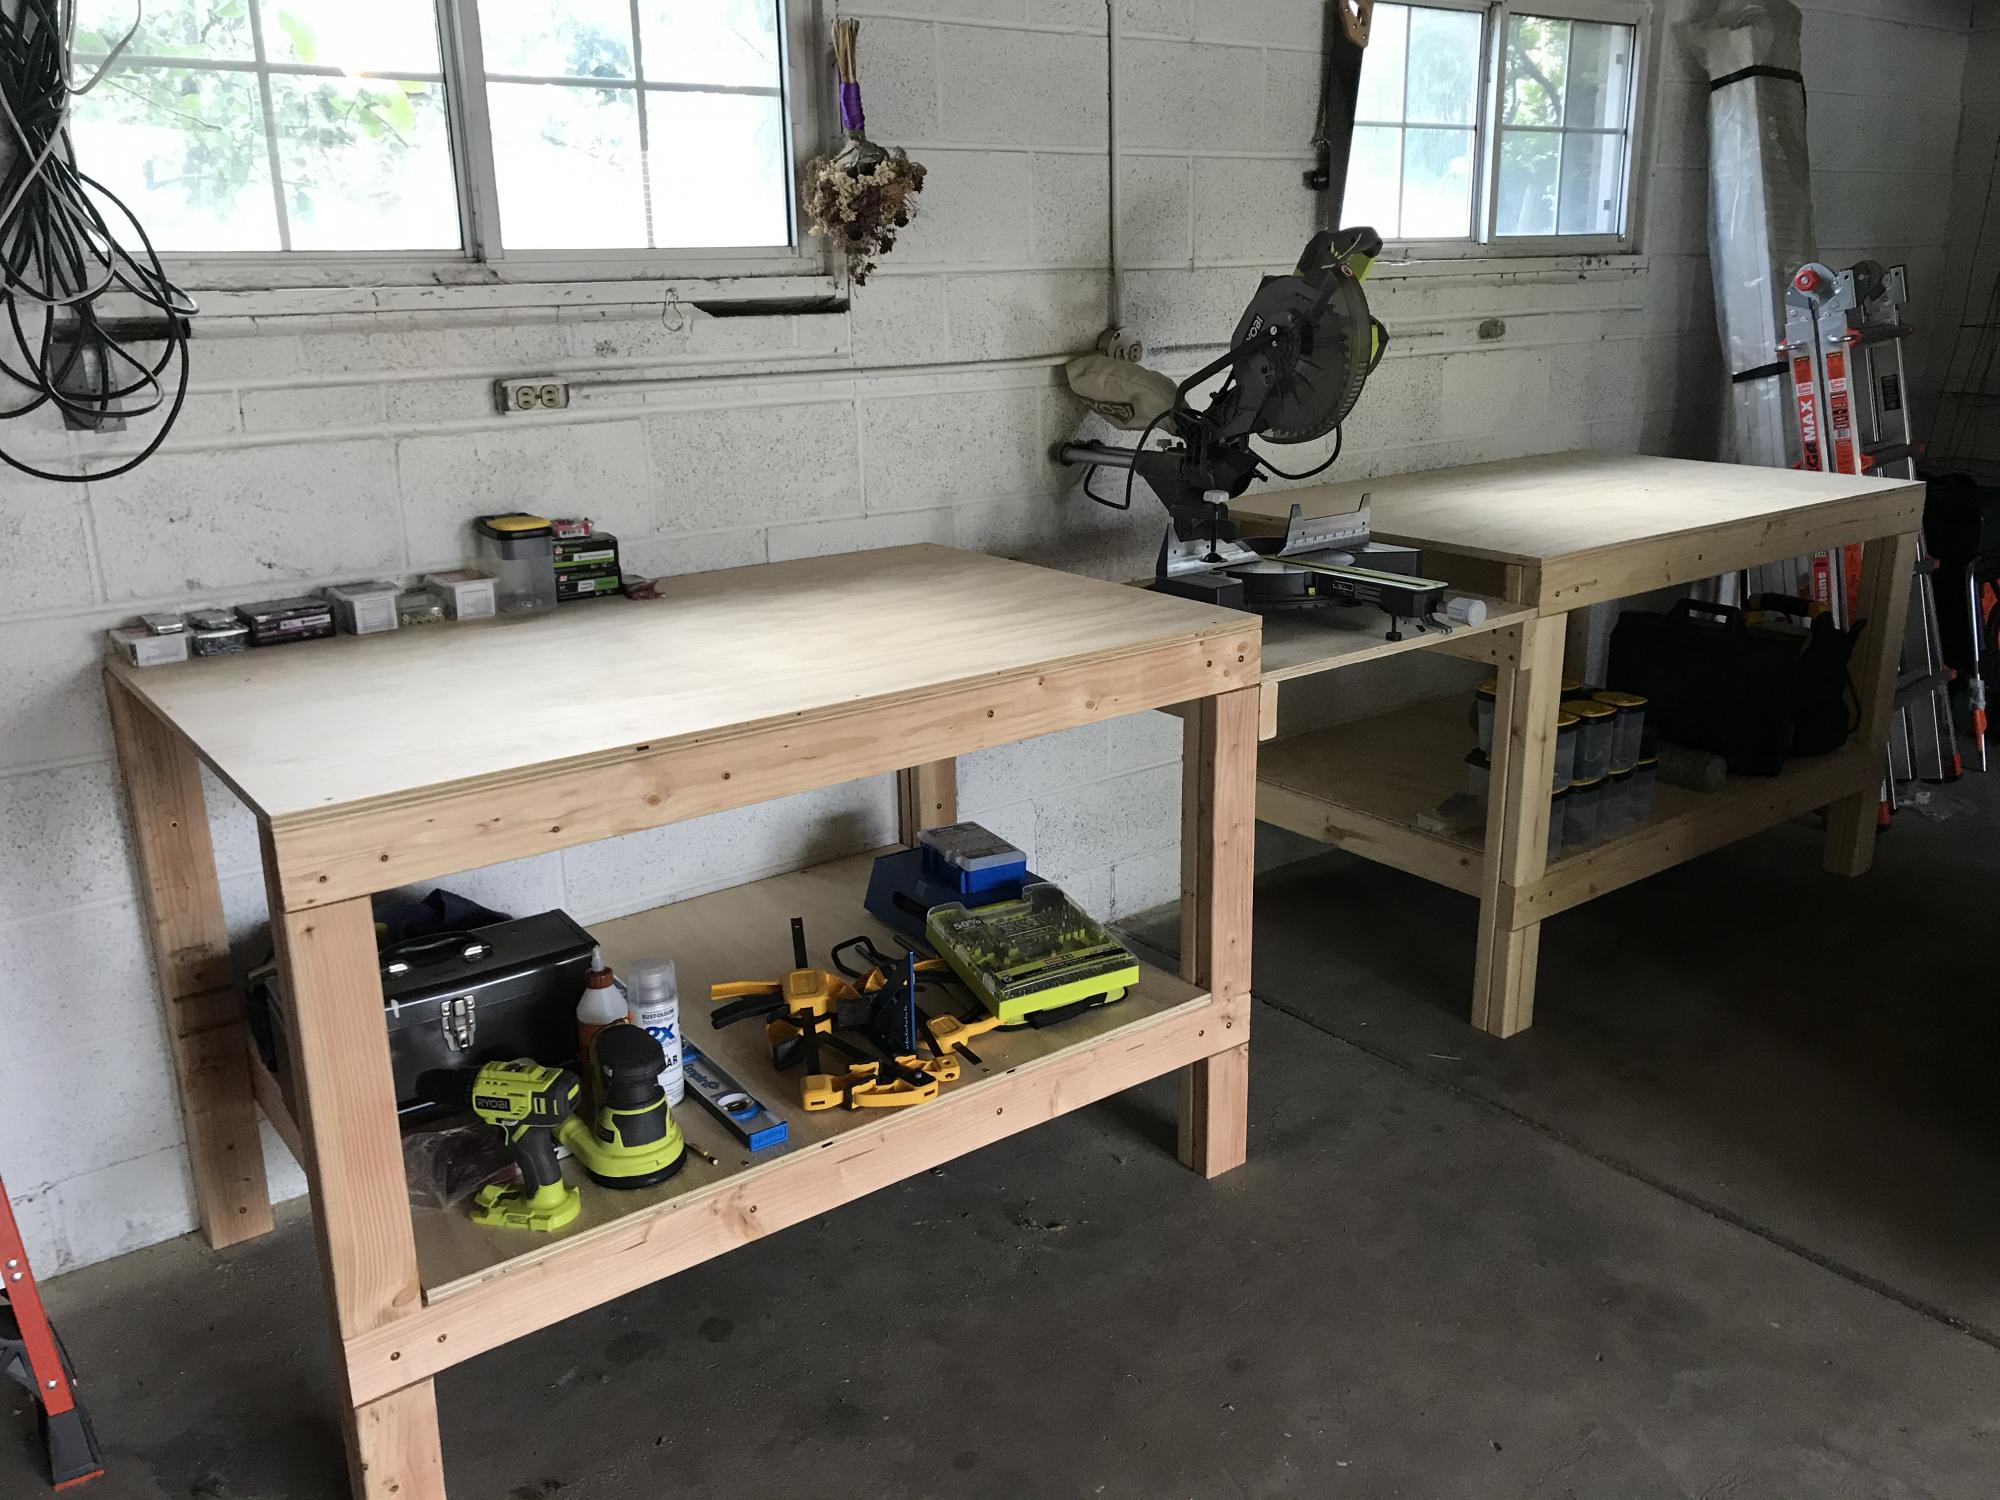
Built 2 of the workbenches for our garage. The plans made assembly very easy and quick. We had Home Depot cut the plywood to size.
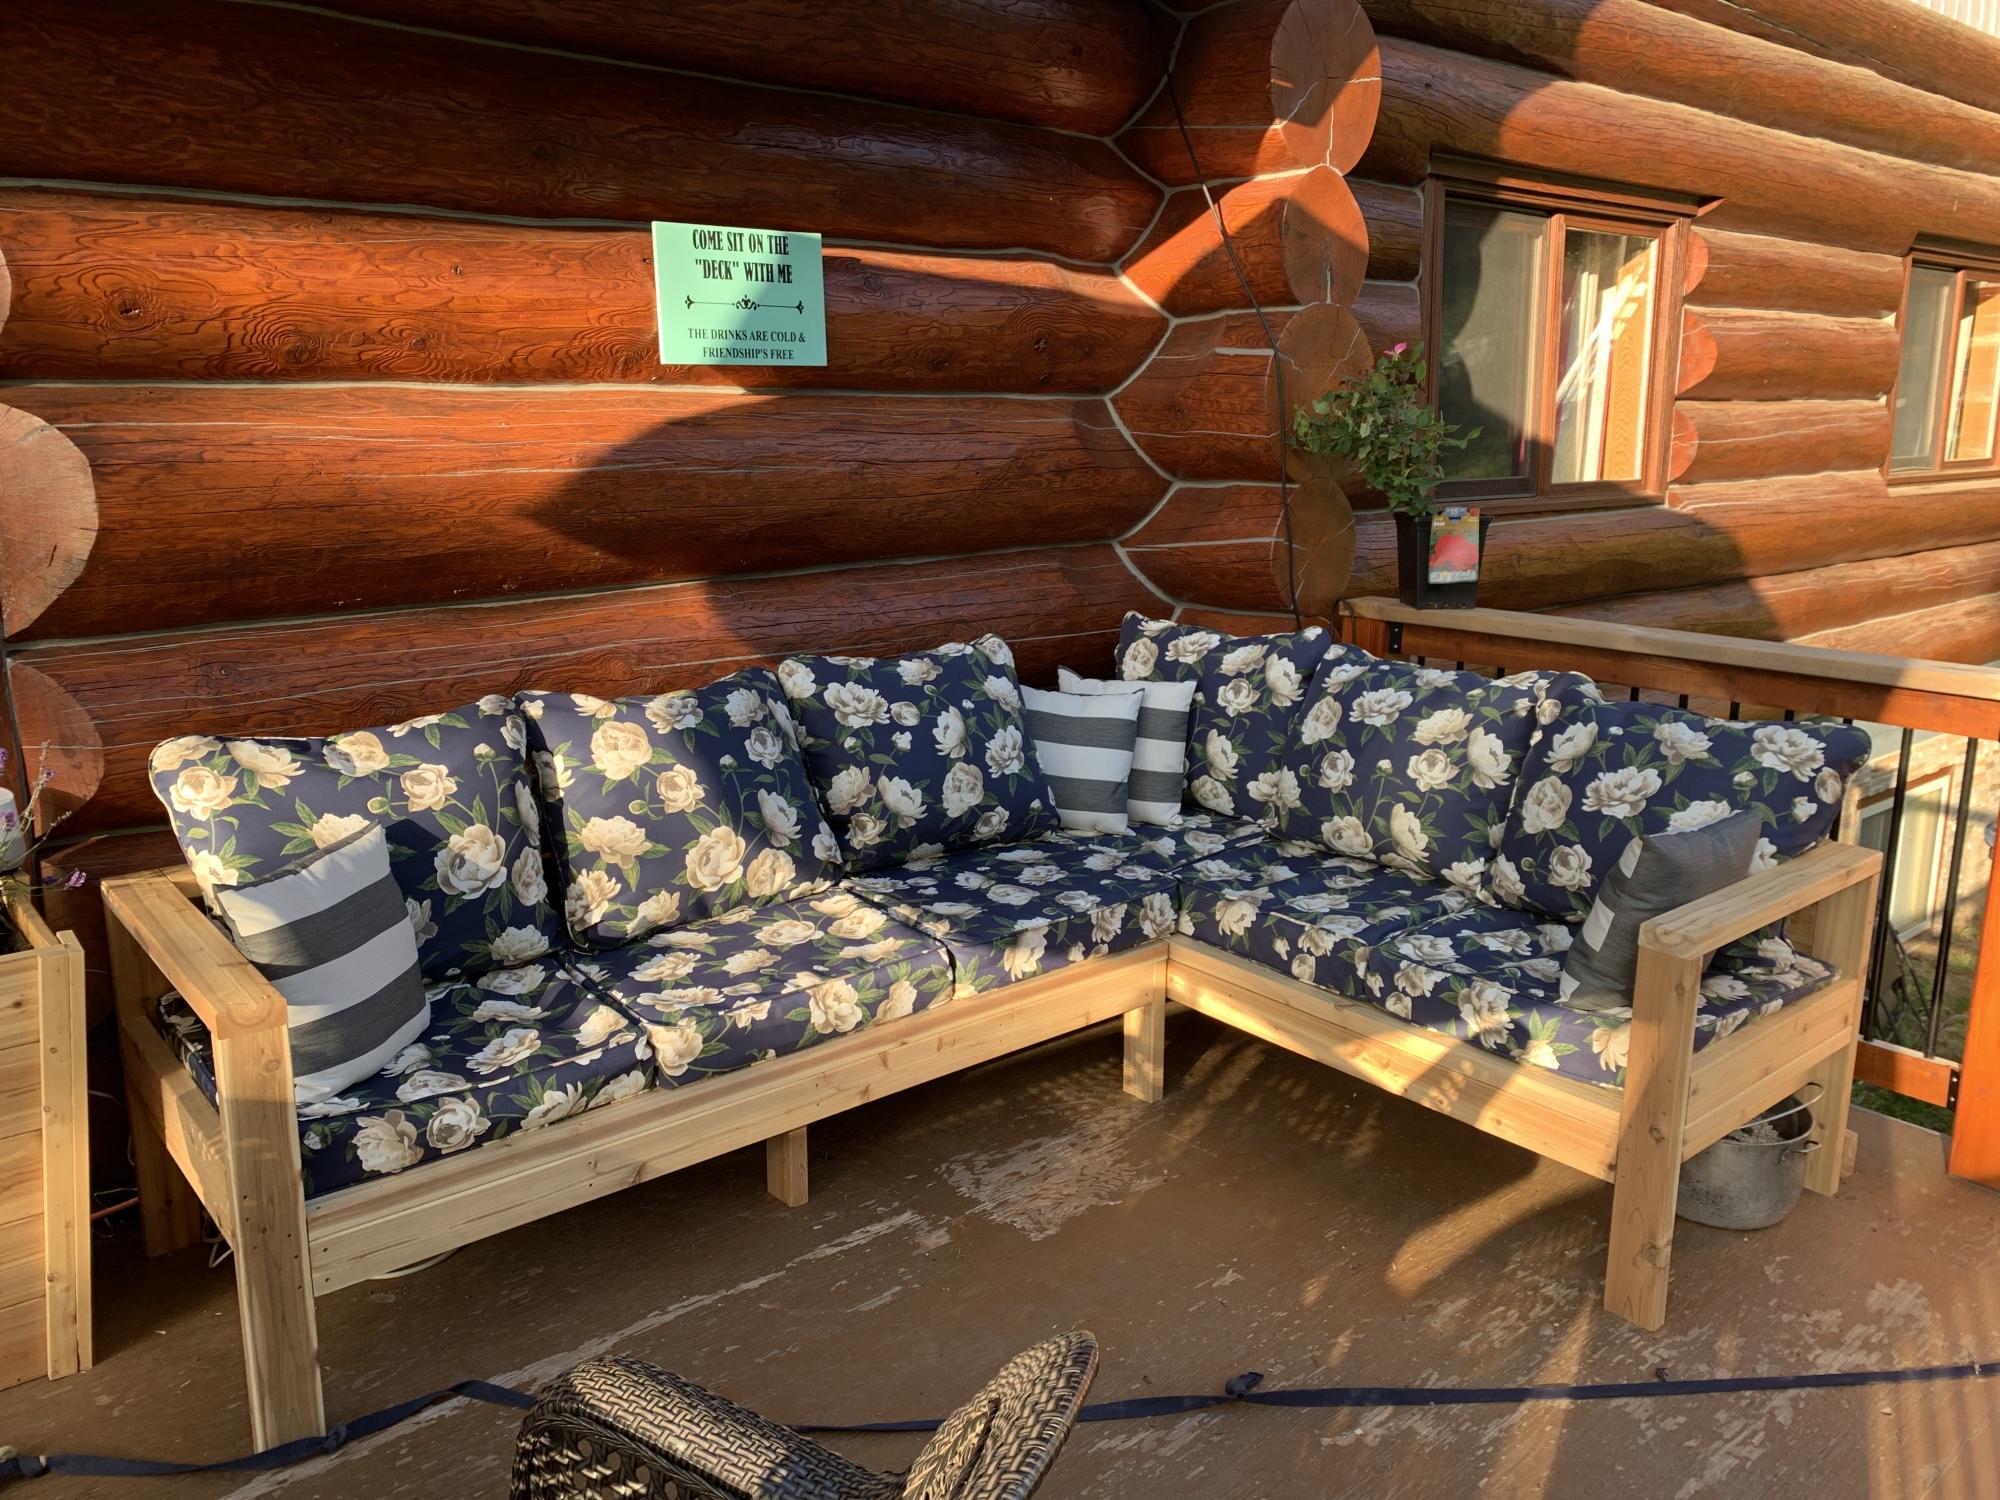
Loved this project. The third one I have completed from Ana’s projects. Took about 3.5 hours to complete both. I used 2x4 cedar. I did add an additional piece on the back of both sectionals as I found the cushions I bought would slip down the back.

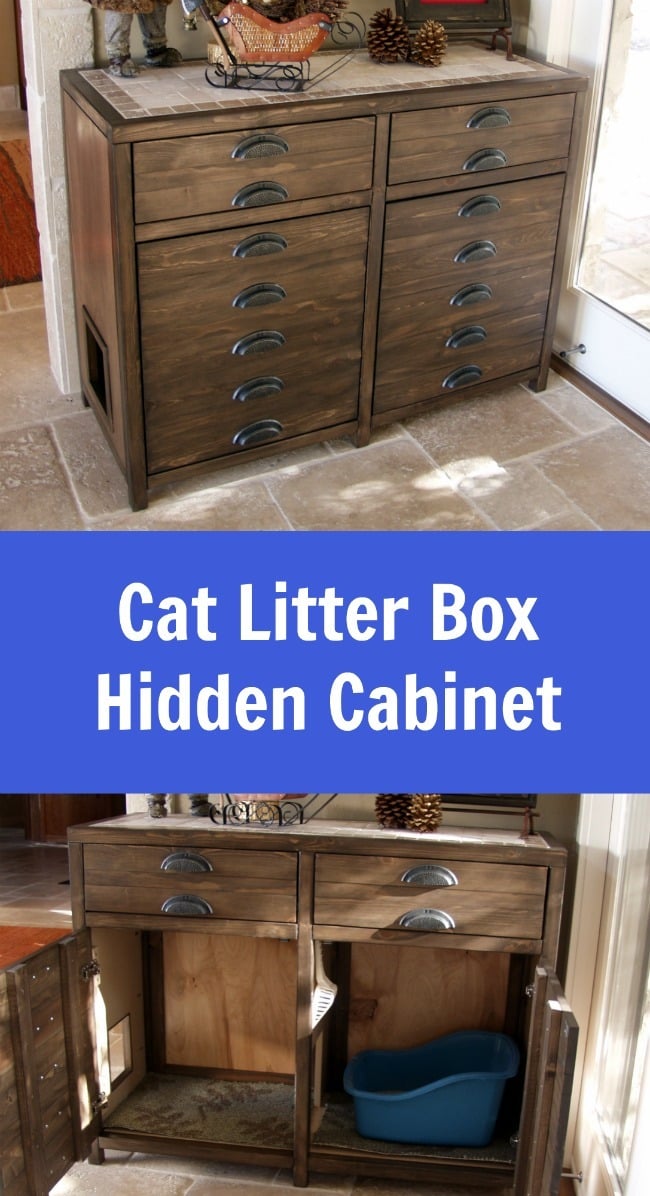
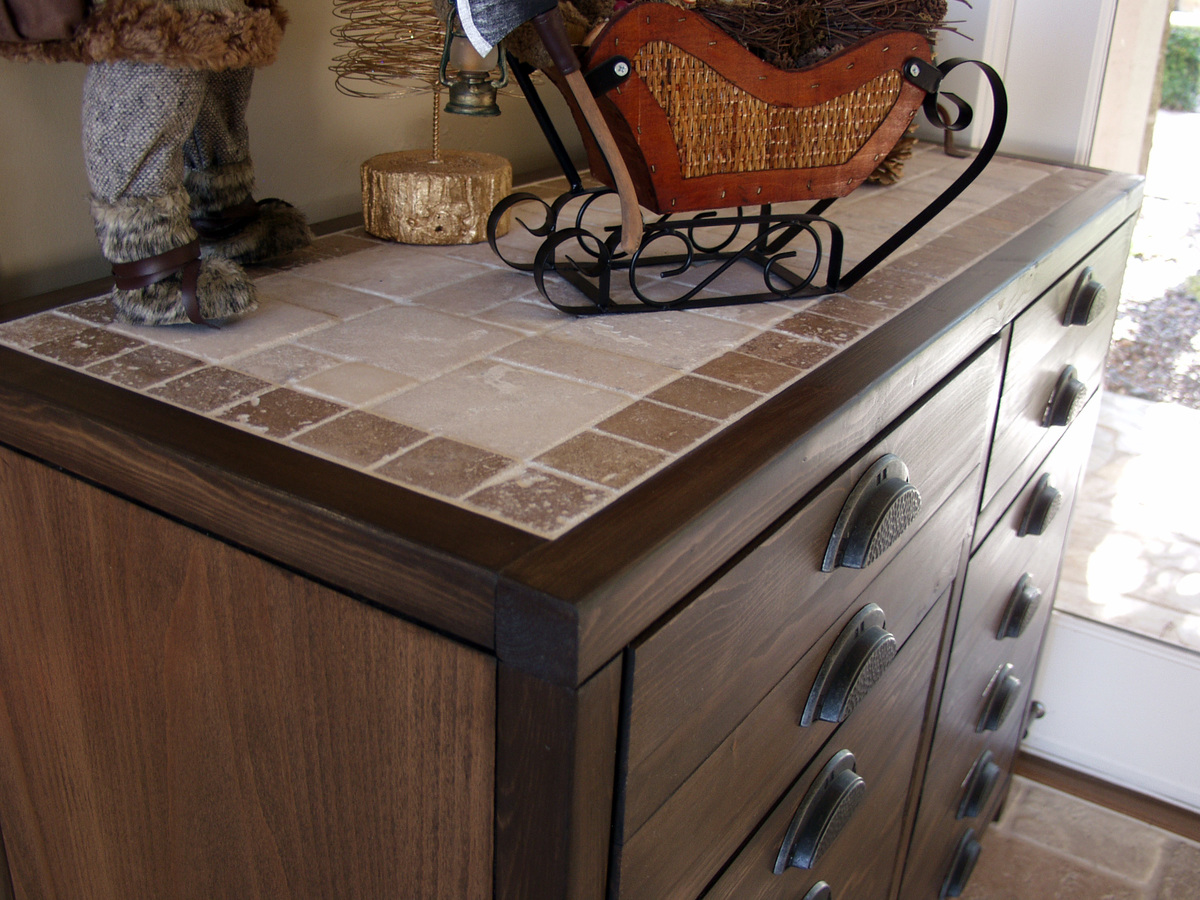
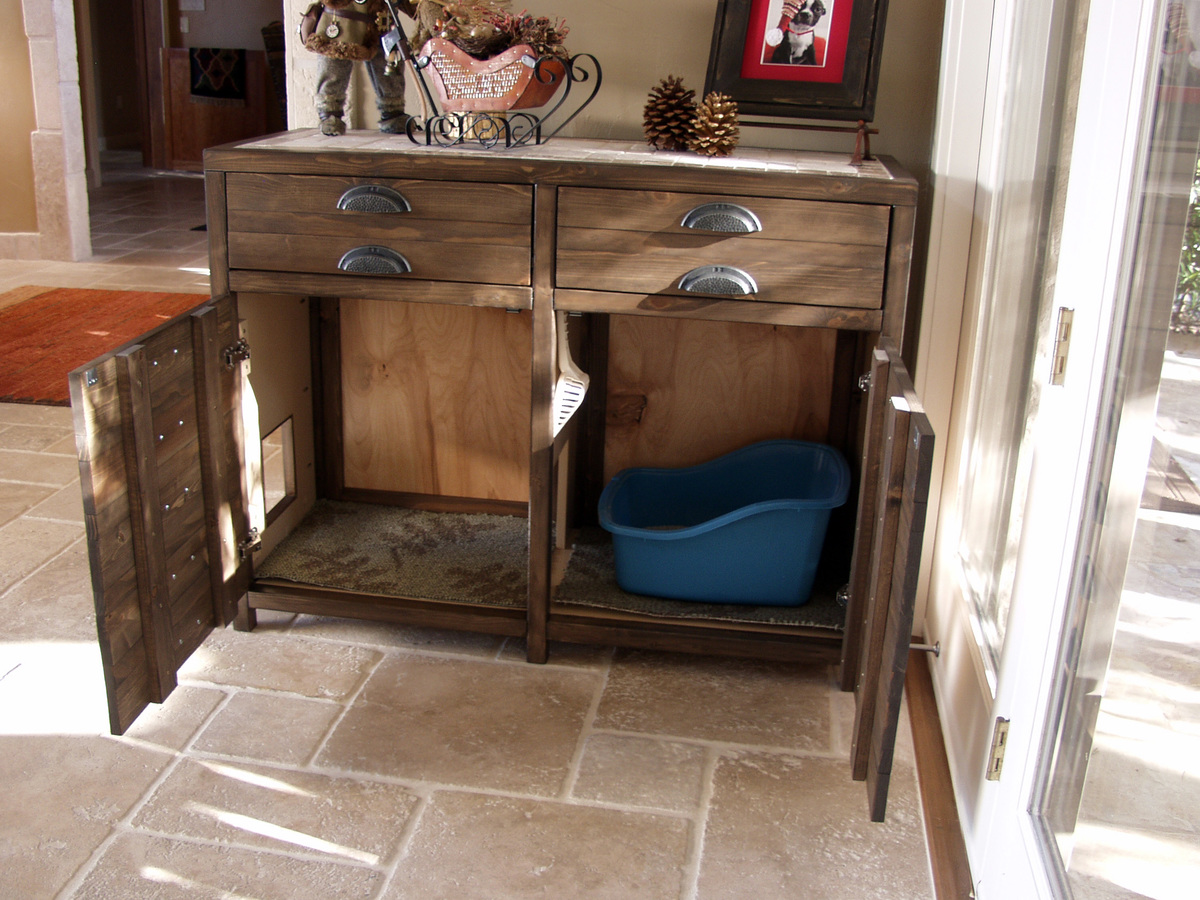
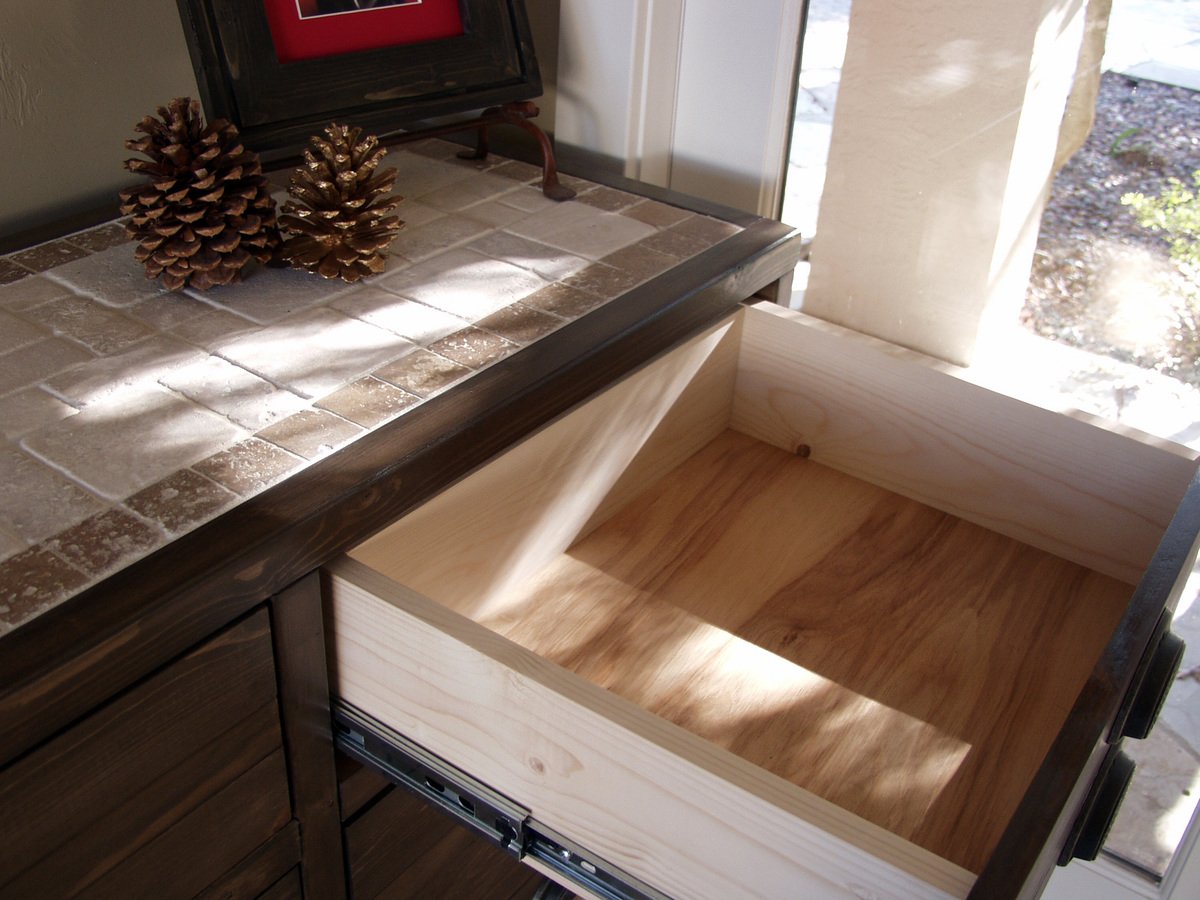
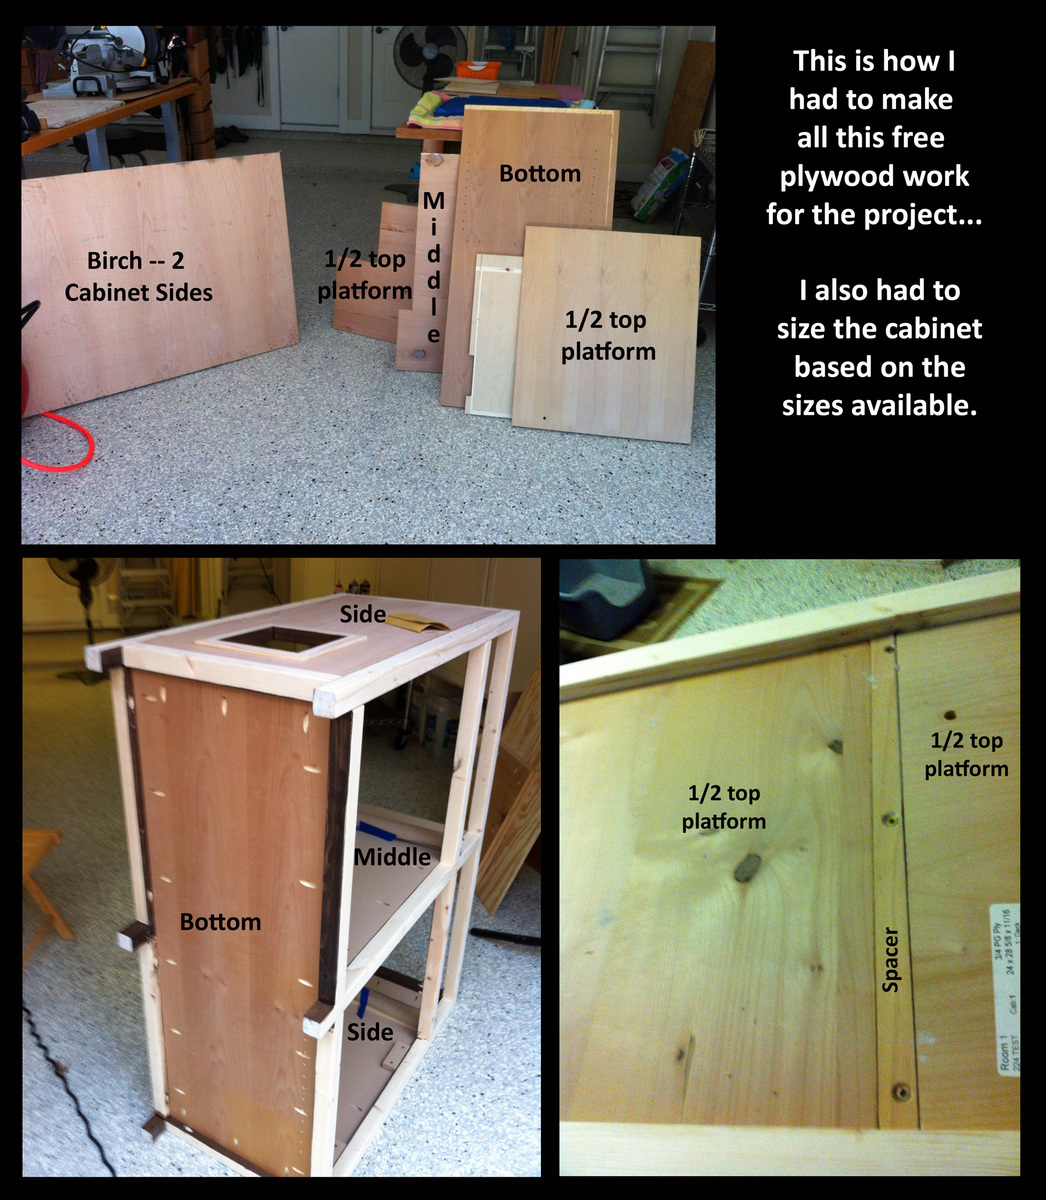
I had been wanting to build something to hide the litterbox for a long time. When I saw the Printer's Console plan, I knew this was the perfect plan for a cat litter box furniture. I loved that Jen Woodhouse's version was completely modified to her bar plan, so I thought I could modify for my litterbox idea. I modified the plans on size, as I was trying to use a bunch of mis-matched plywood. I also modified it to include a cat door, a cat passageway on interior panel, a vent on the back behind one of the drawers, and the stone top. I built a frame on the back to house the backing as an inset piece, as I didn't want it to be seen at all. I learned a very important lesson during this build. Not all 1x3s are created equal. Once I got my doors assembled, they were too big for the opening. I couldn't shave off the tiny amount needed, and couldn't make anything work short of starting over with 1x4s, sawing off a small amount, and cutting down the # of "drawers" (and handles). I wanted the inside to be fully finished (because cat pee on raw wood would not be good!). I had to finish certain "planes" prior to putting the thing together. I used kitchen and bath paint on the inside floor and sides for easy cleanup. The stone was carryover from construction on our house 12 years ago. The handles were an amazing deal @ $1.81/each .
Sun, 11/25/2012 - 09:51
That is a fantastic idea and the table top is beautiful.

Mon, 11/26/2012 - 09:38
That is the most beautiful litter box I have ever seen!
Mon, 06/17/2013 - 12:23
Love your use of the buffet. Our family has discussed making a piece of furniture like this for our smaller dog. Nice to see someone has done it! Our big dog has scheduled feedings but our little dog would prefer to be a free feeder. Poor thing chokes down his food in our pantry listening to our big dog breathing under the door waiting for him to finish. When he is done we open the door and the Big, greedy dog bolts in looking for left overs. A family member has to wait patiently for the little dog to finish so he can escape the pantry. I really don't want a doggy door in my pretty swinging bi-fold doors to my pantry which is also access to our kitchen.That would be a pain to have to keep closed all day. But this buffet idea is super cute! Thanks for the inspiration.
Fri, 01/09/2015 - 22:01
I know this is an old post, but I'll ask anyway
I love this piece and am in the planning stages for ours. Thank you for sharing!
I am Wondering how you went about the table top. Did you install a 3/4 ply on top but not flush, allowing room for mortar and tile? If so how much room did you allow for the tile/mortar? 1/2 inch? How did you keep the surface of the tile level and uniform? Lastly, did you seal the tile with anything when you finished?
Aesthetically, the tile top really sets this piece off and I really want to make my own.
Thanks

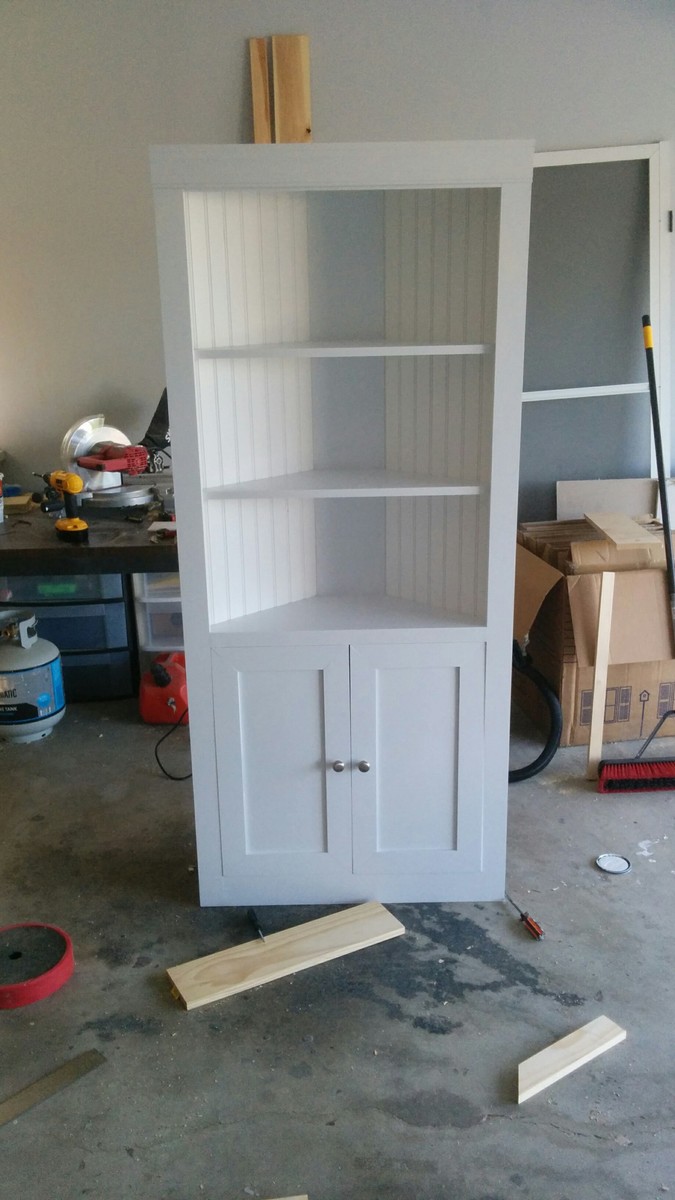
Basically eliminated the bottom shelf to gain more space and built this as a "built-in". Fortunatley for us this room is the right size and we just screwed it into the wall studs.


Thu, 11/20/2014 - 09:18
Thanks for the money saving tip on the plywood!
I have upper cabinets in my laundry room too and was wondering how to get a storage pedestal in there. This is a great use of space. Looks great too. Thanks!

Fri, 11/21/2014 - 09:20
That's a great use of materials that may be discarded! Nice job!

Tue, 03/24/2015 - 10:34
Did you also fasten ledger boards to the side walls for side support? Or is the rear ledger board and front legs enough to support the front corners?
In reply to Side supports? by Dimarc67
Wed, 03/25/2015 - 12:11
Also, any gotchas to keep in mind when trying to avoid drilling into the plumbing in the back wall?
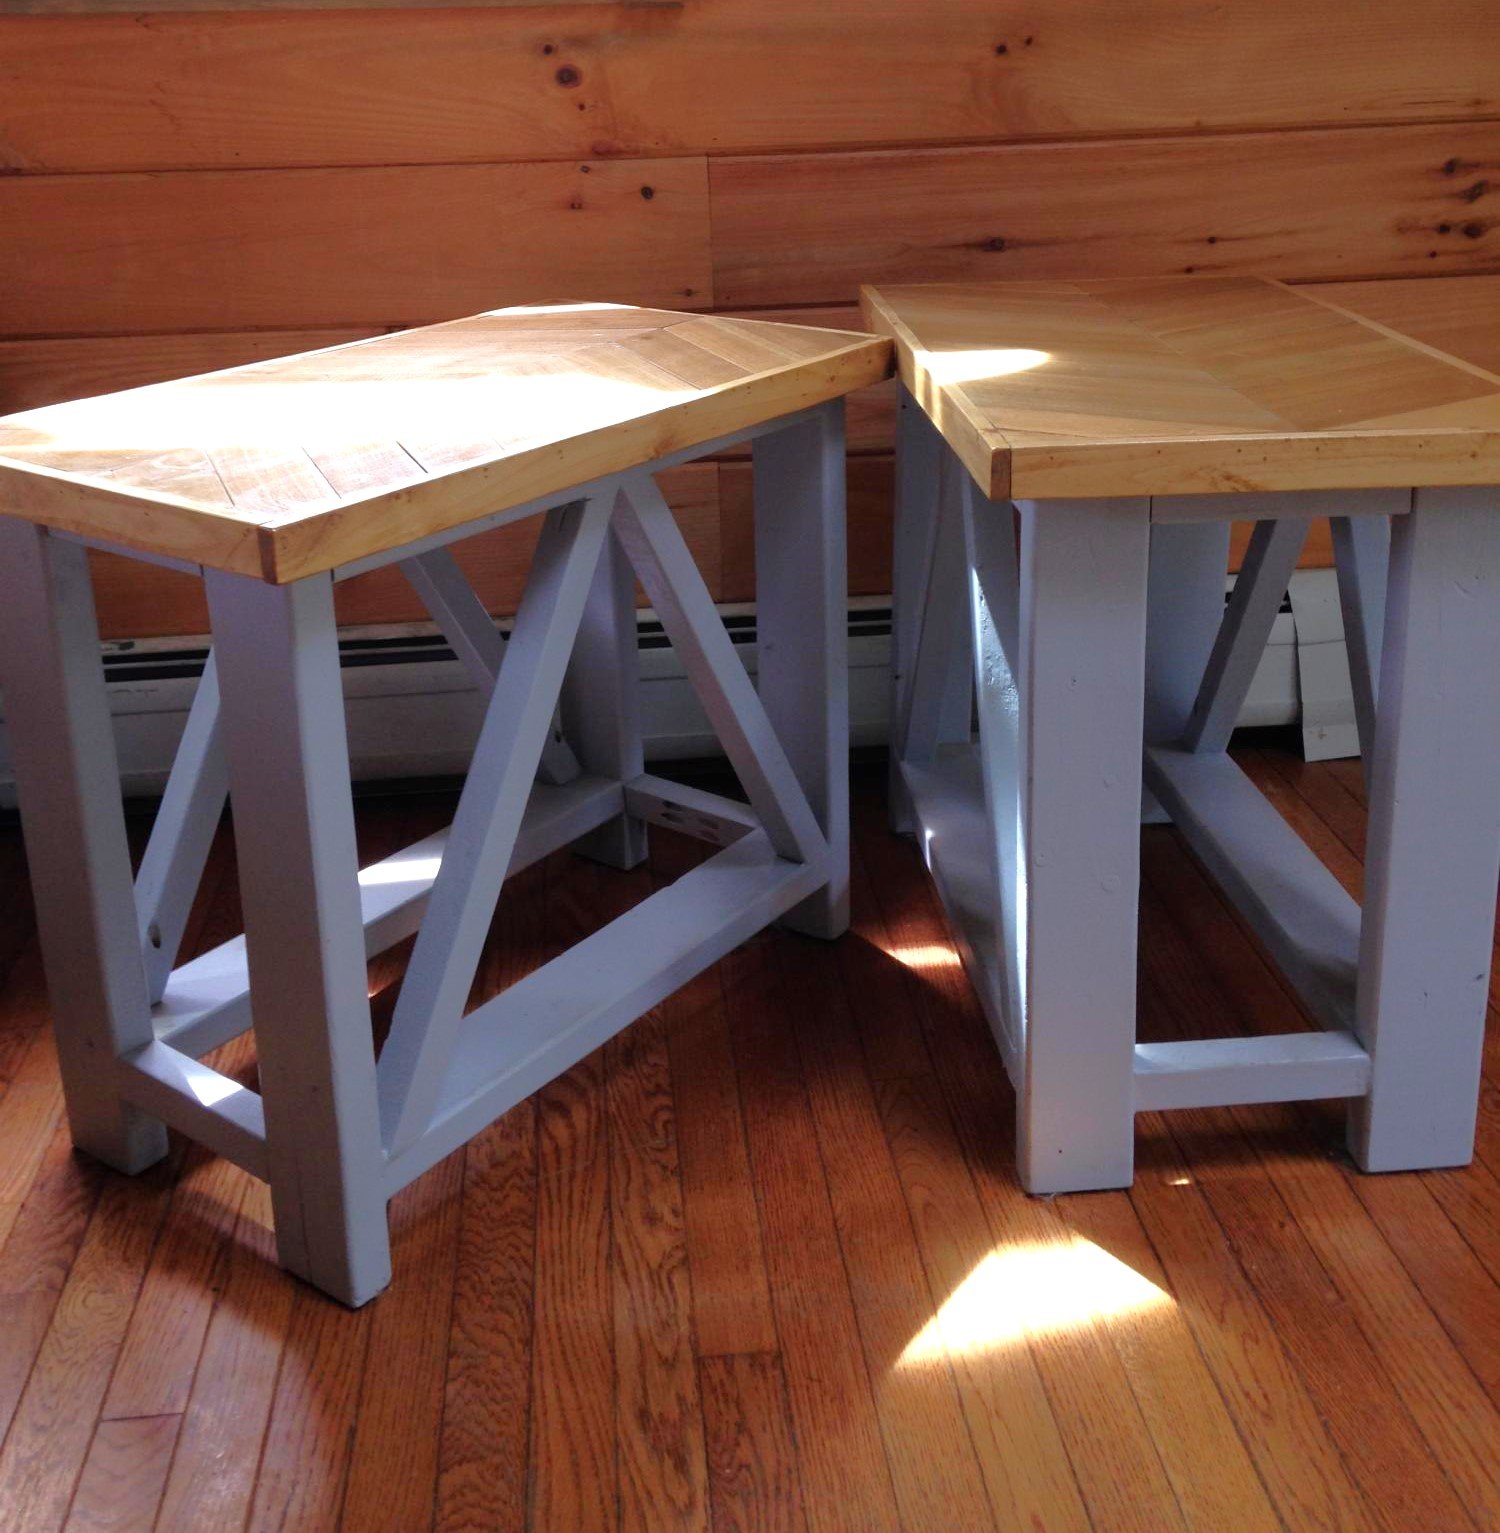
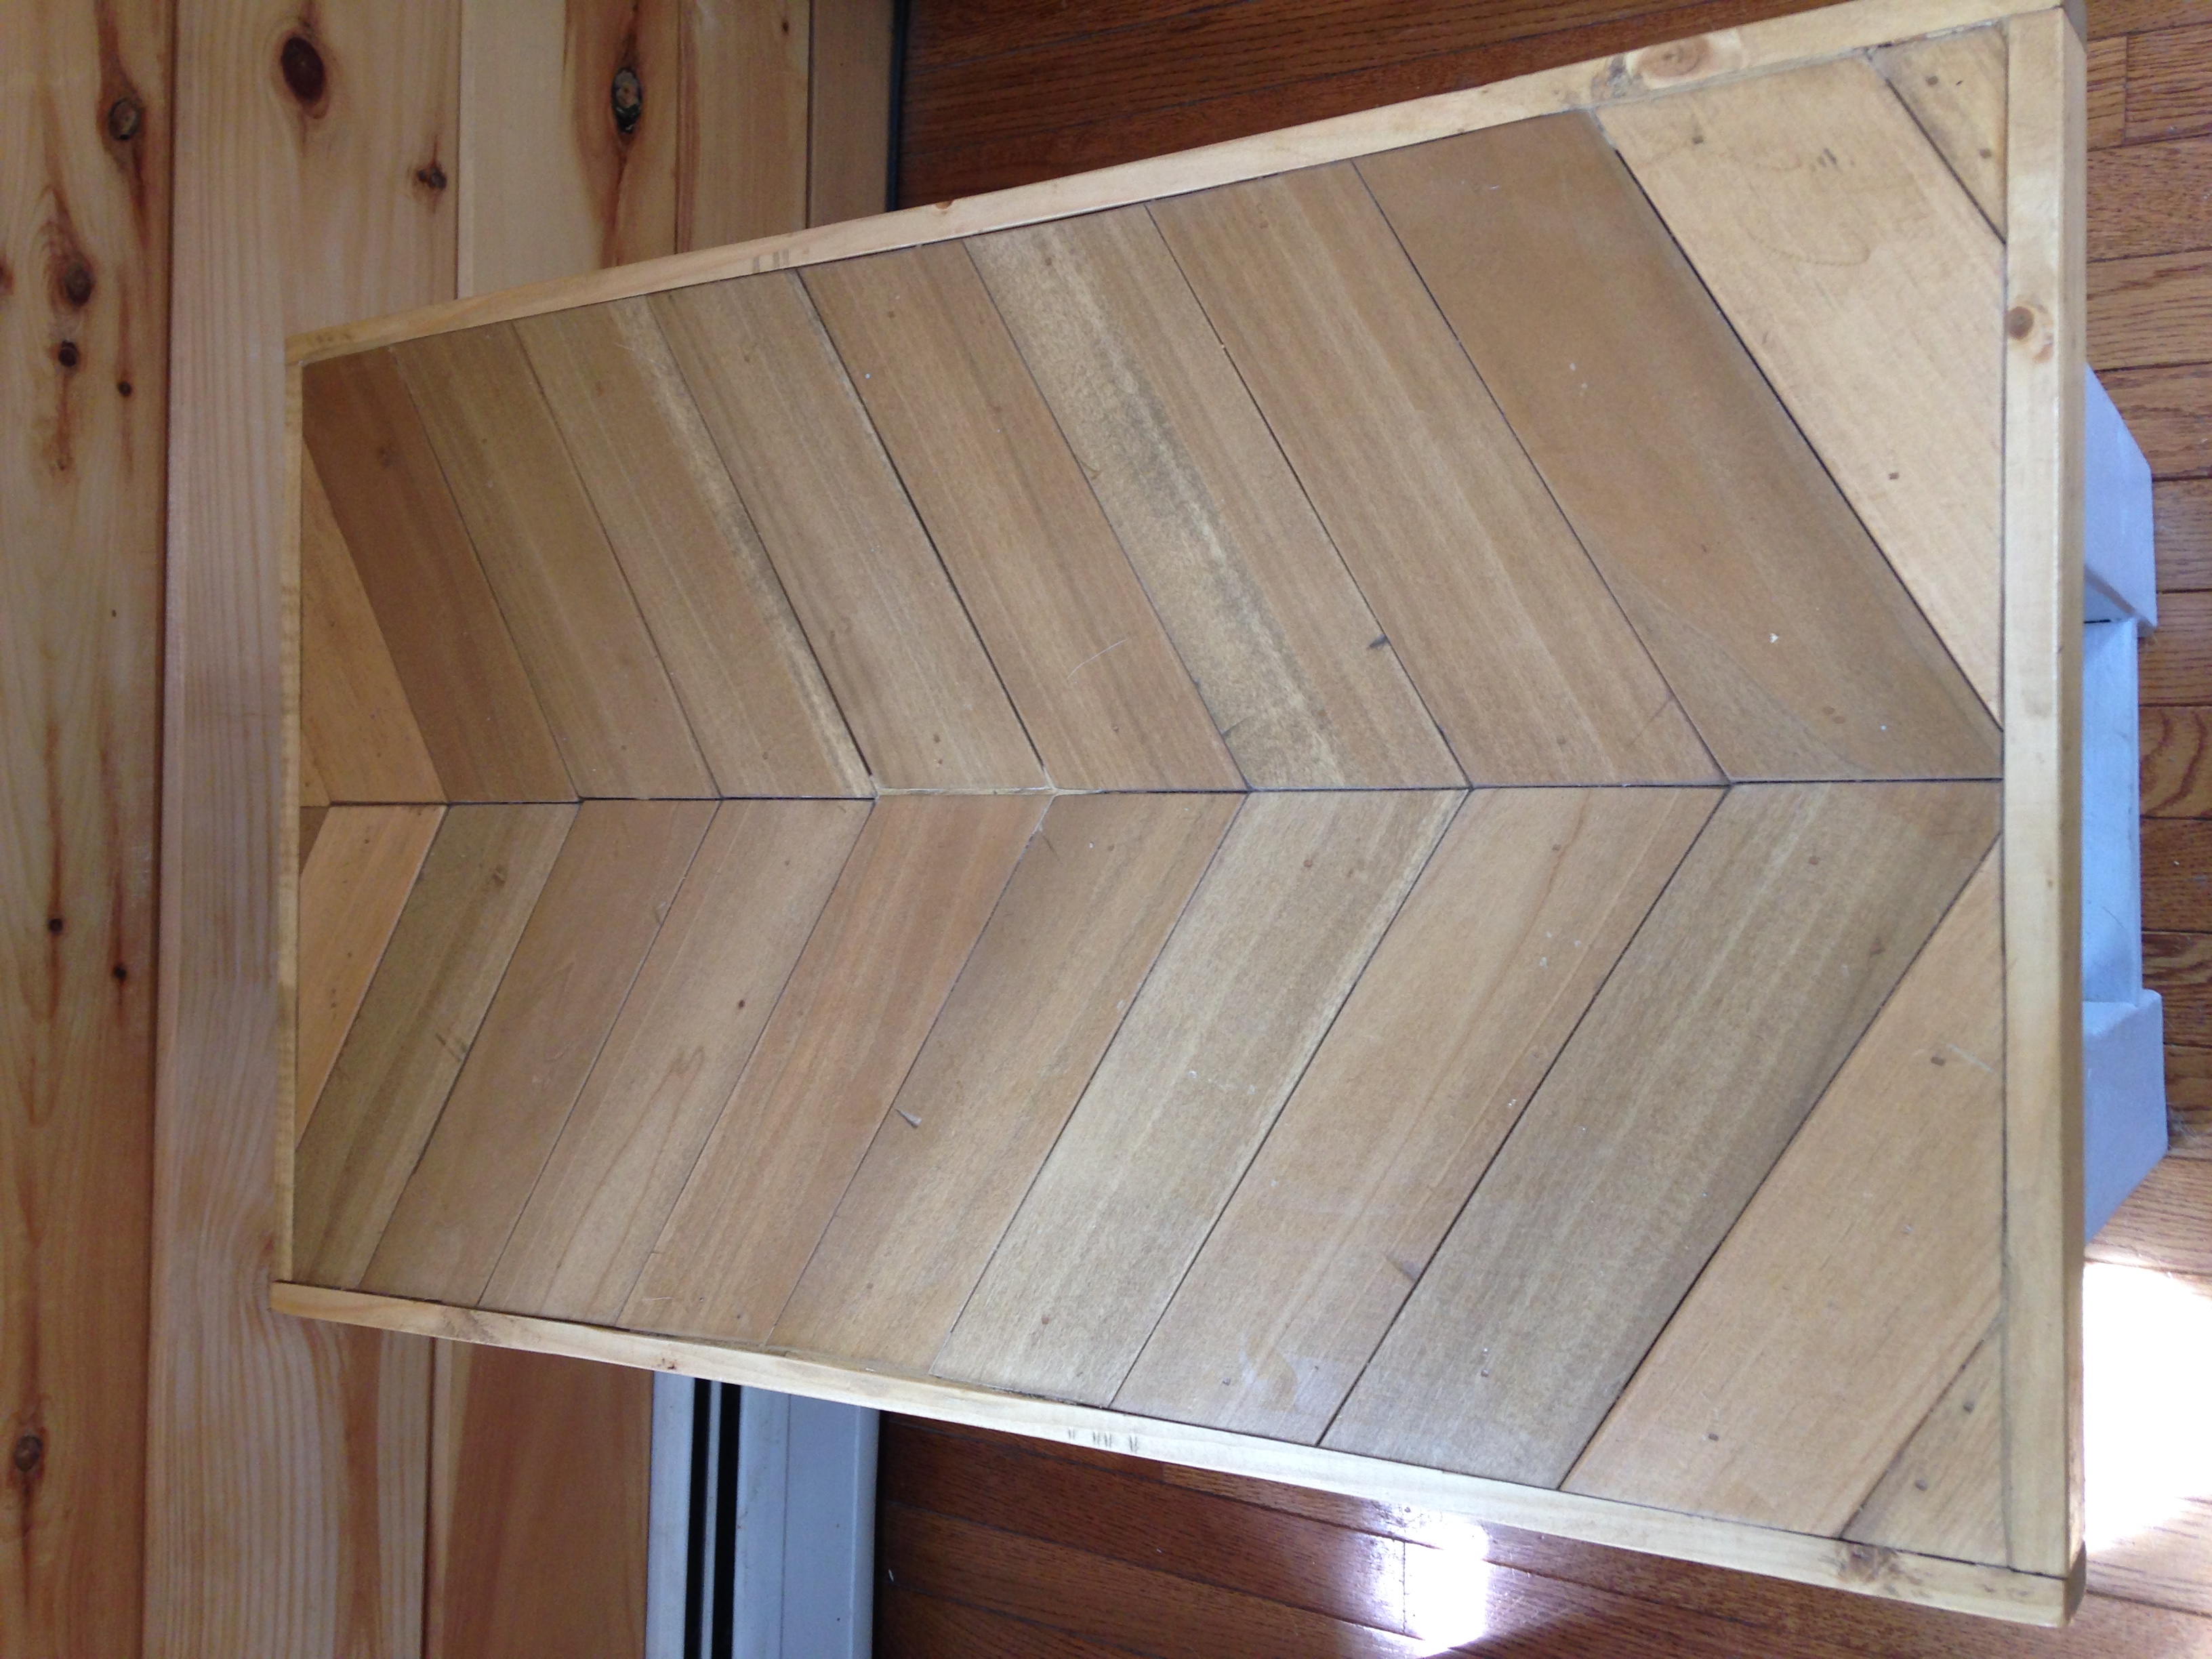
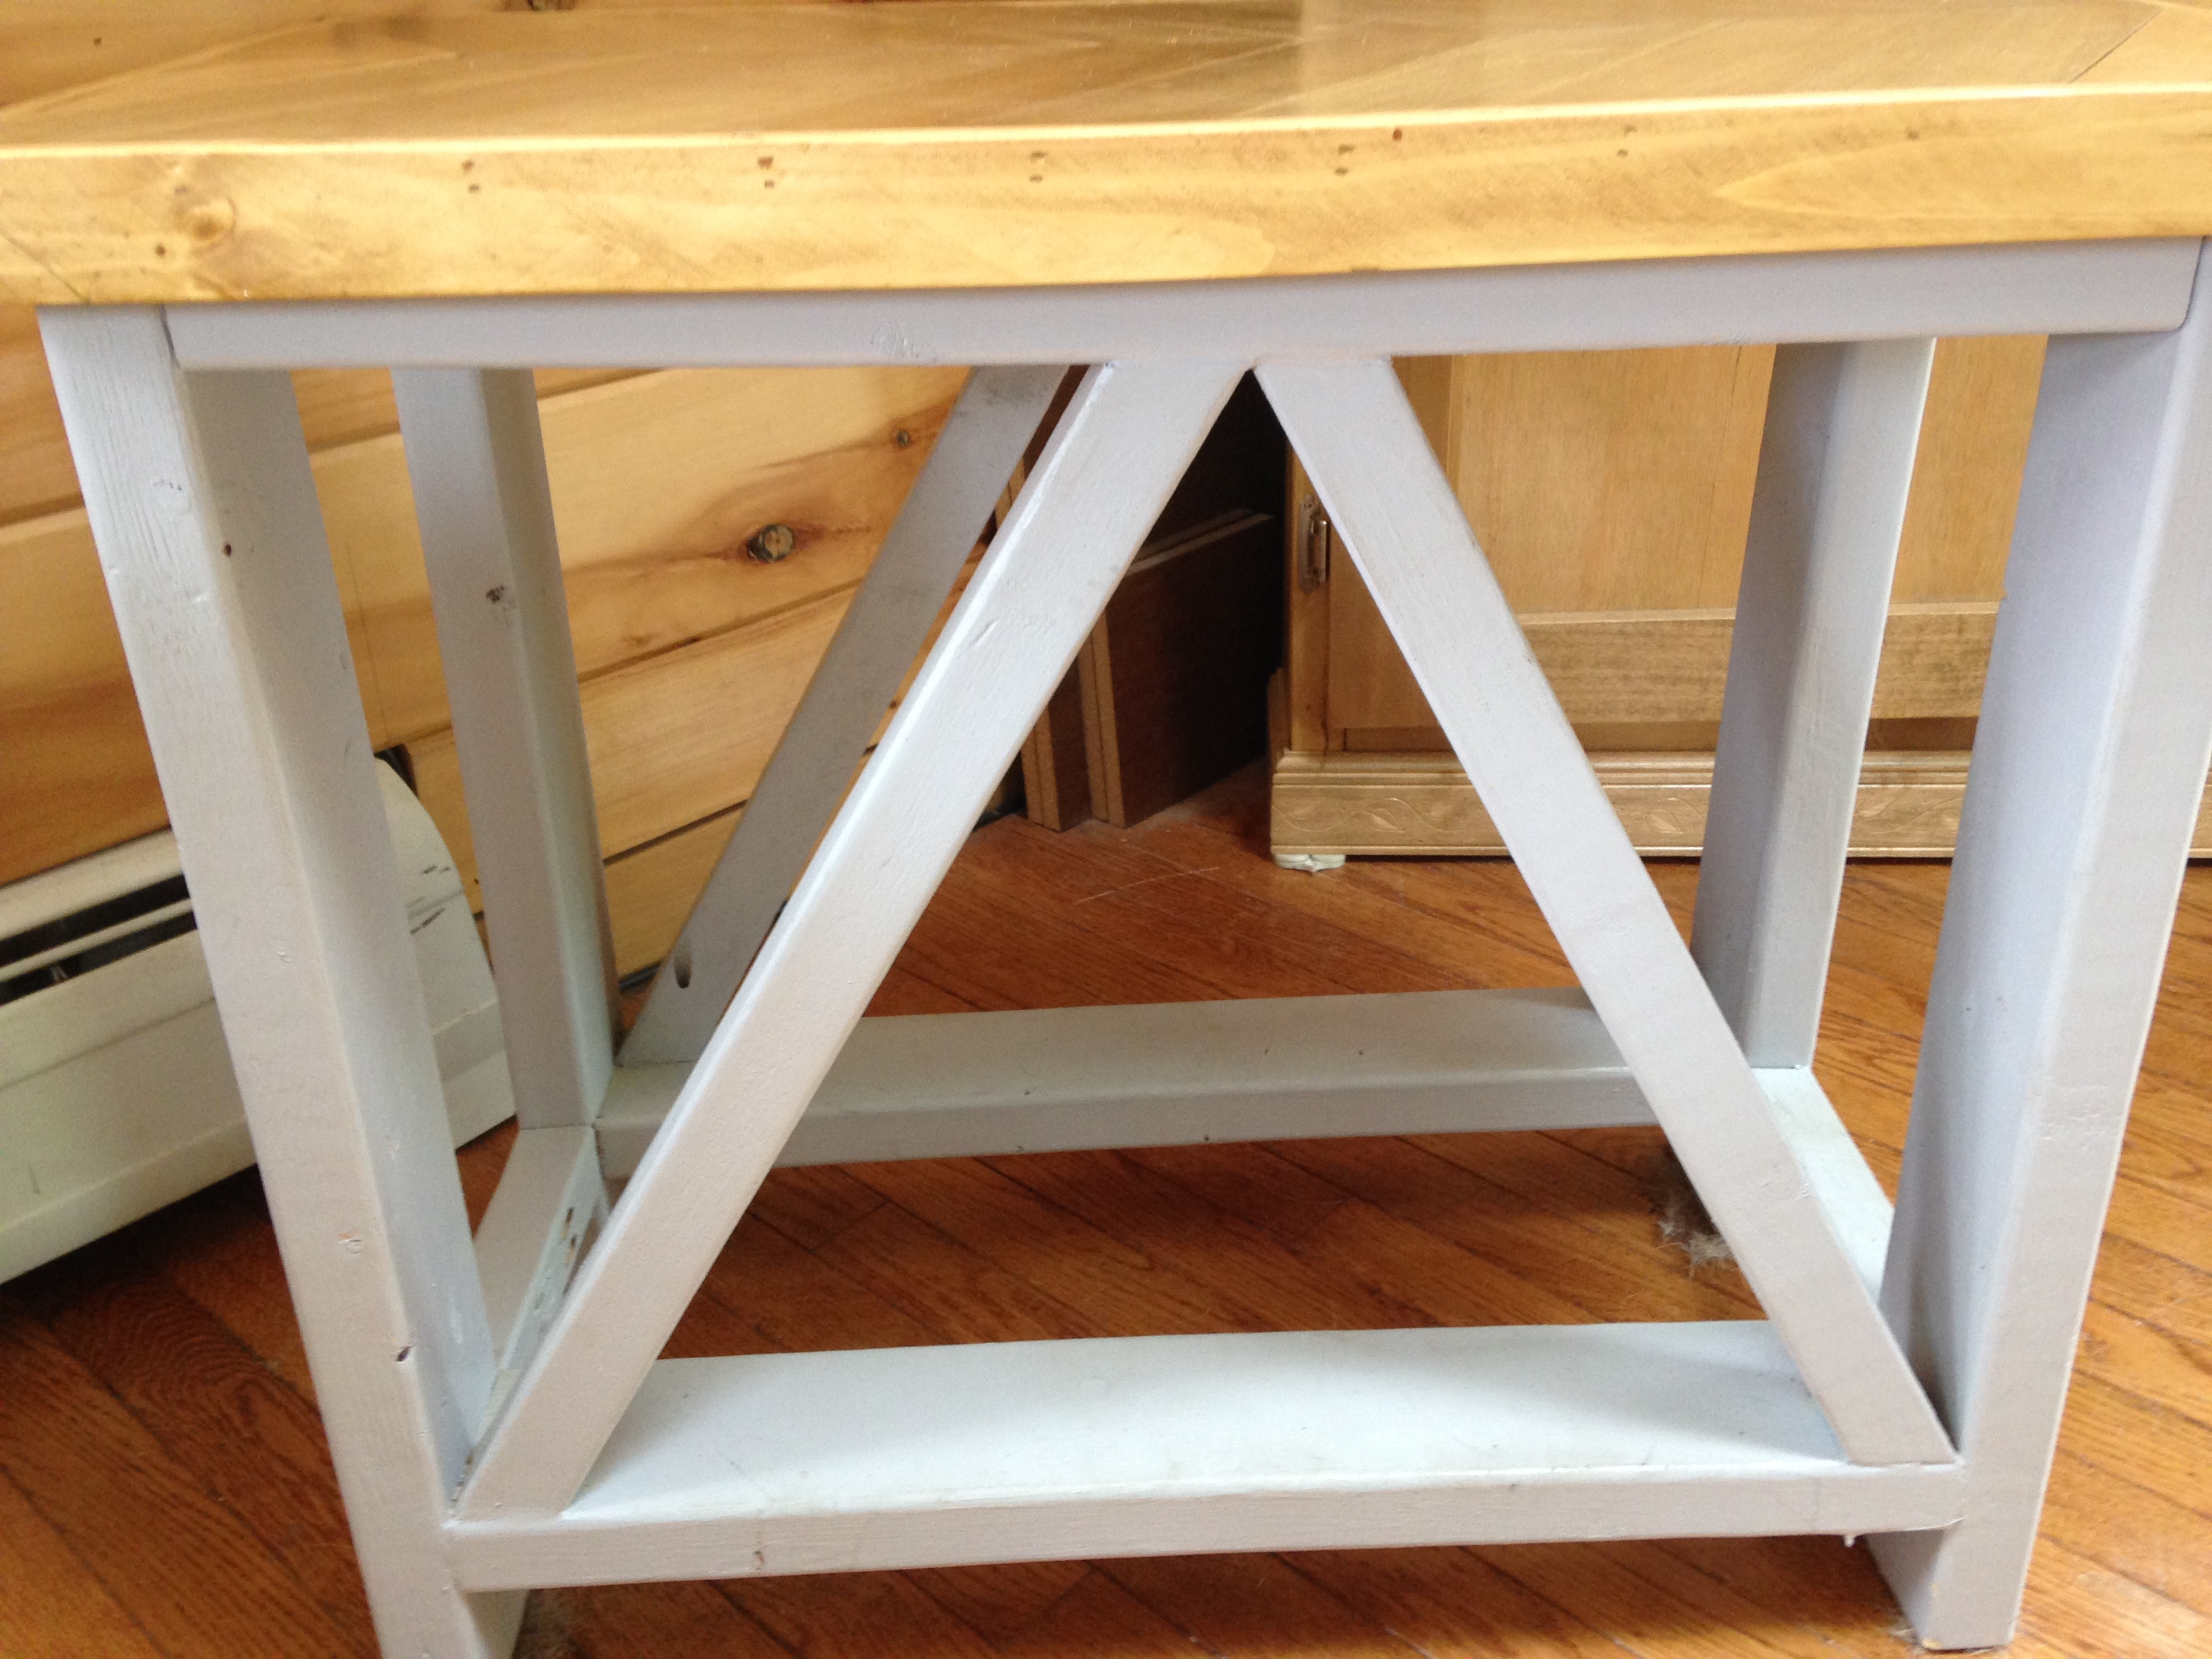
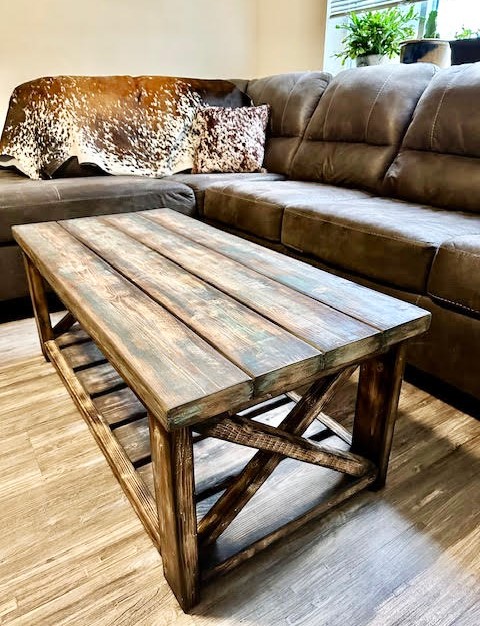
From the rustic X end table plan, I made mine slightly taller and a little more narrow to fit my space. Also decided to do a chevron top