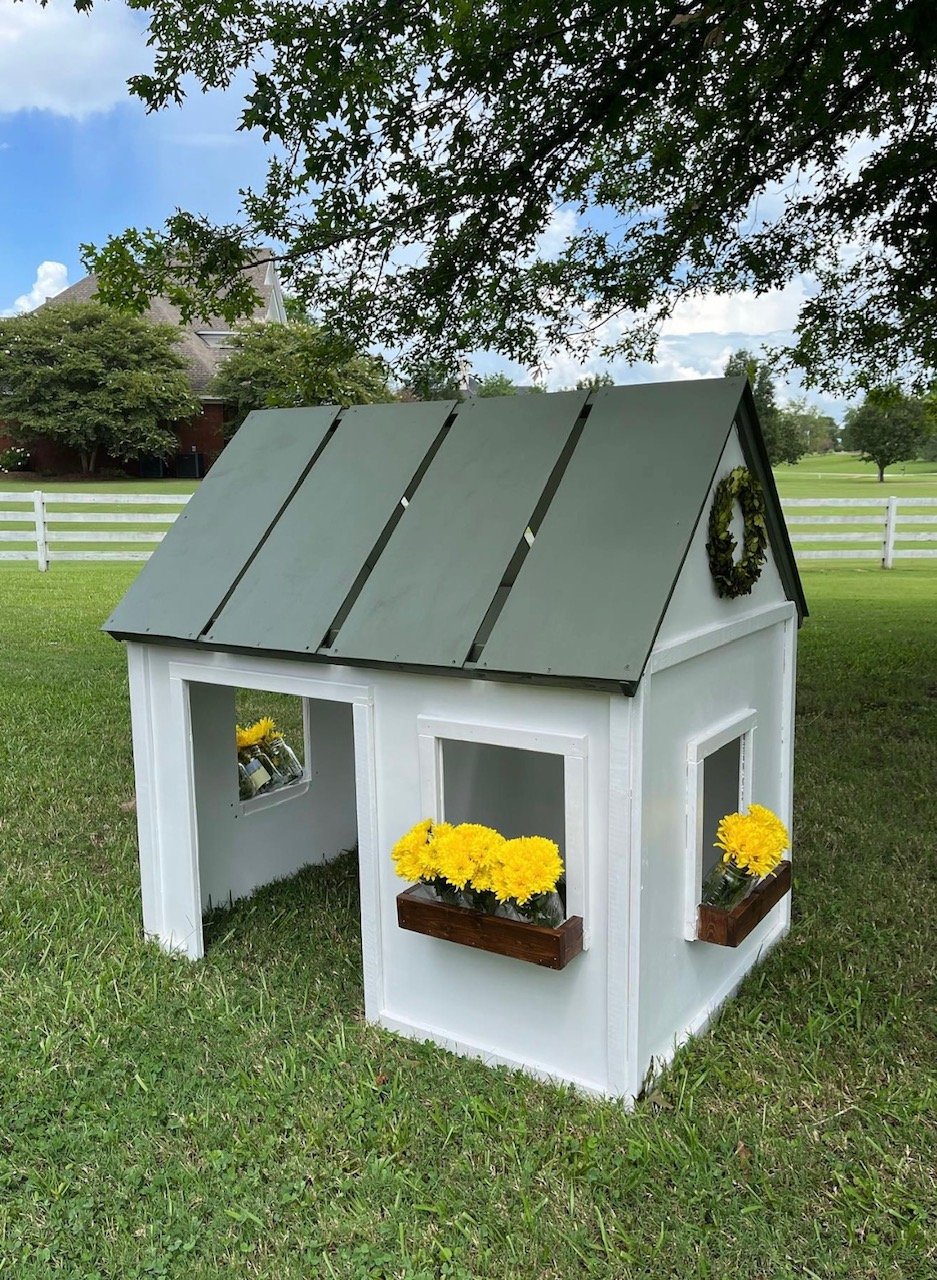
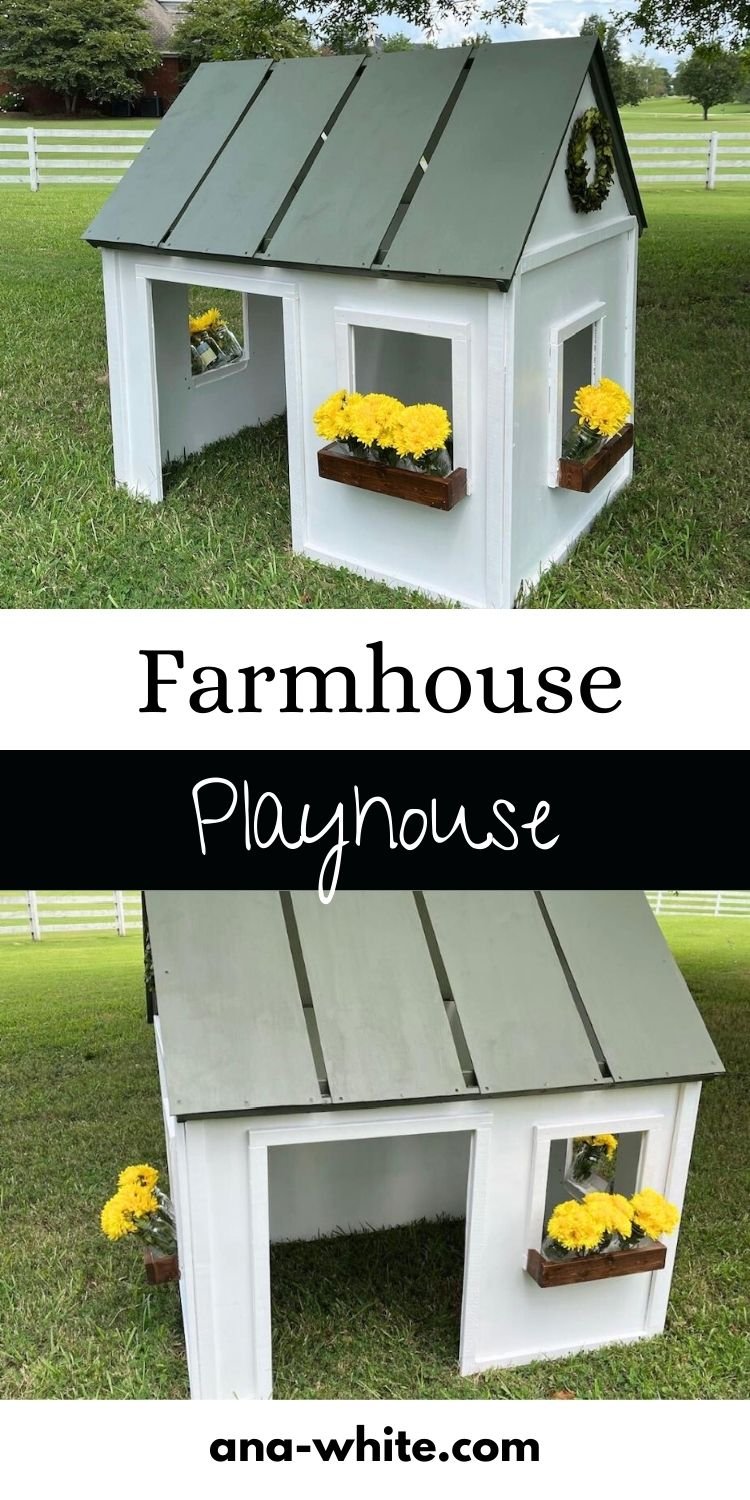
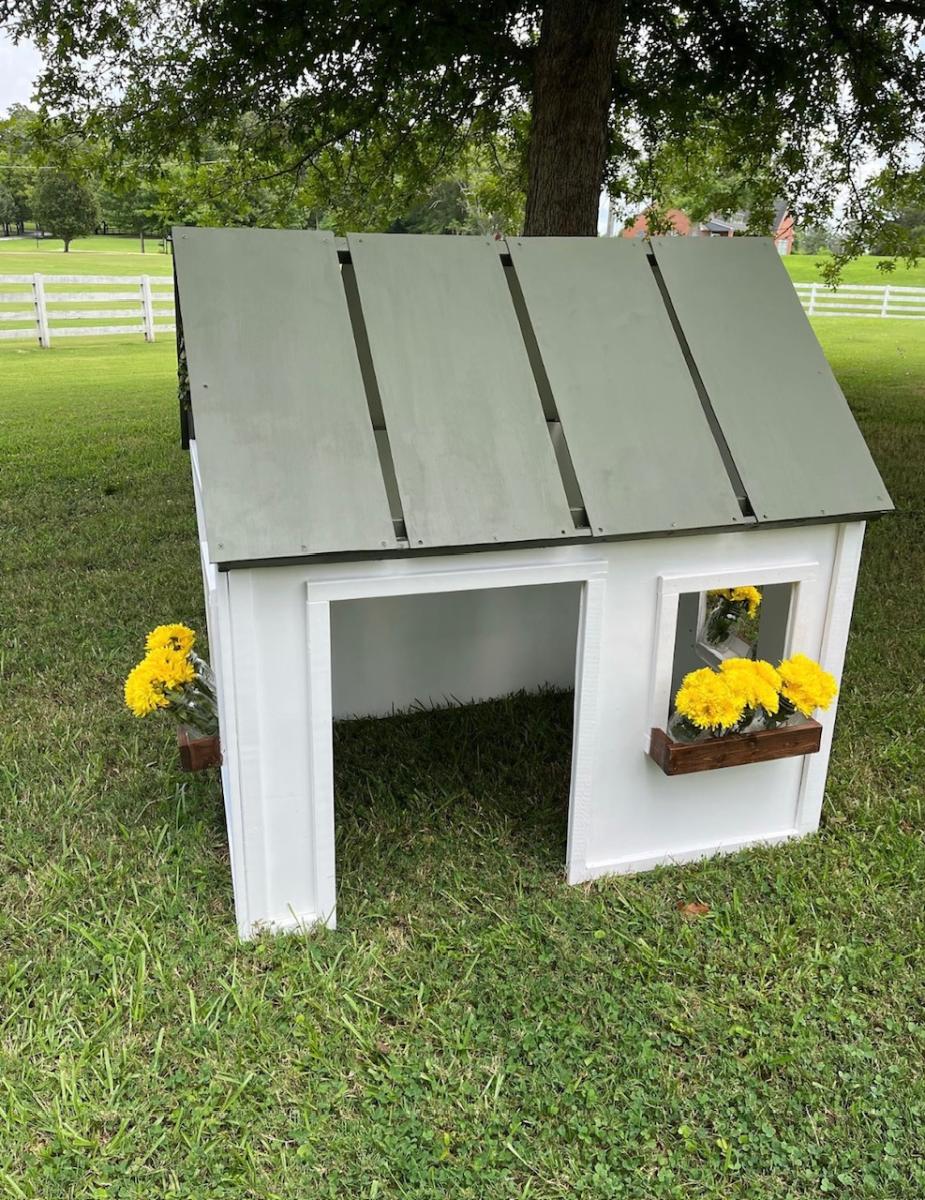
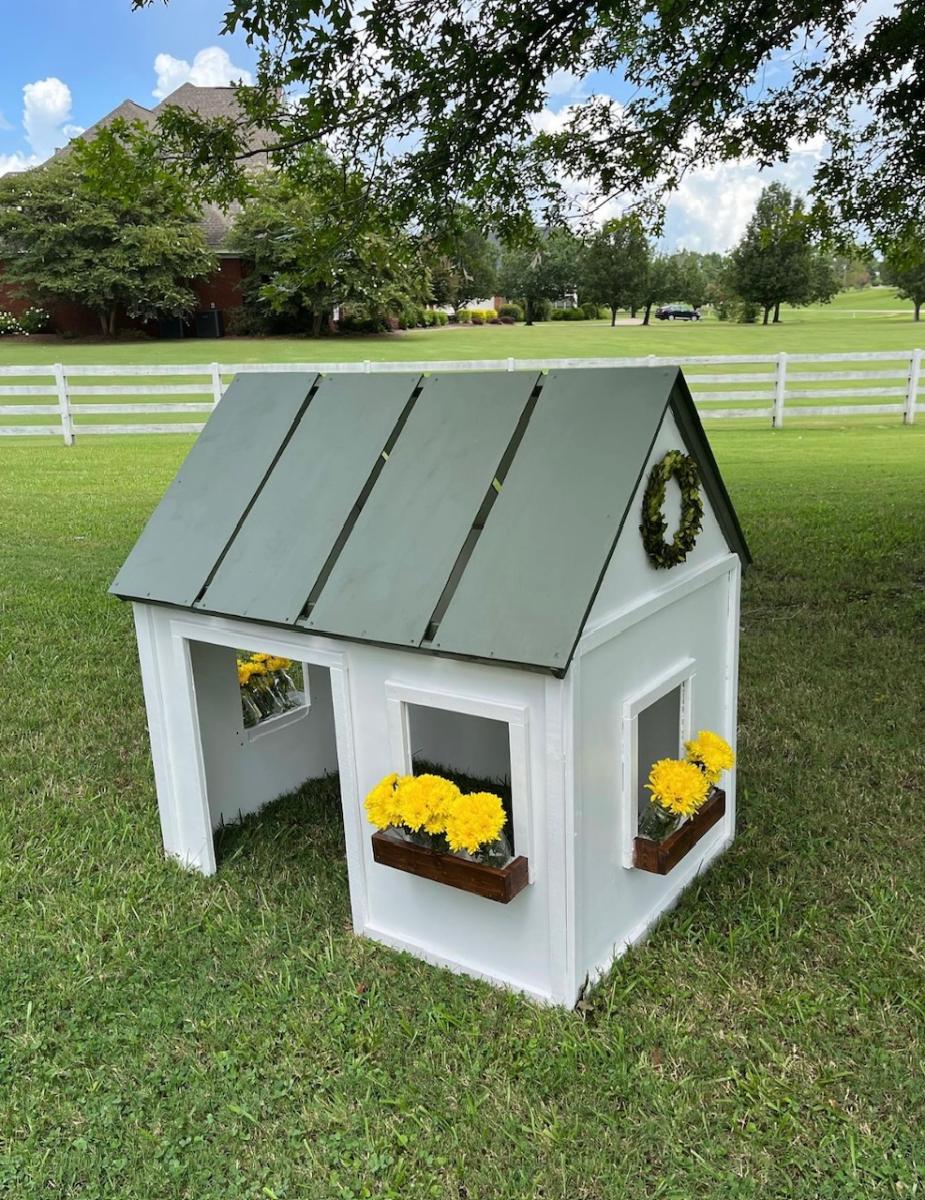
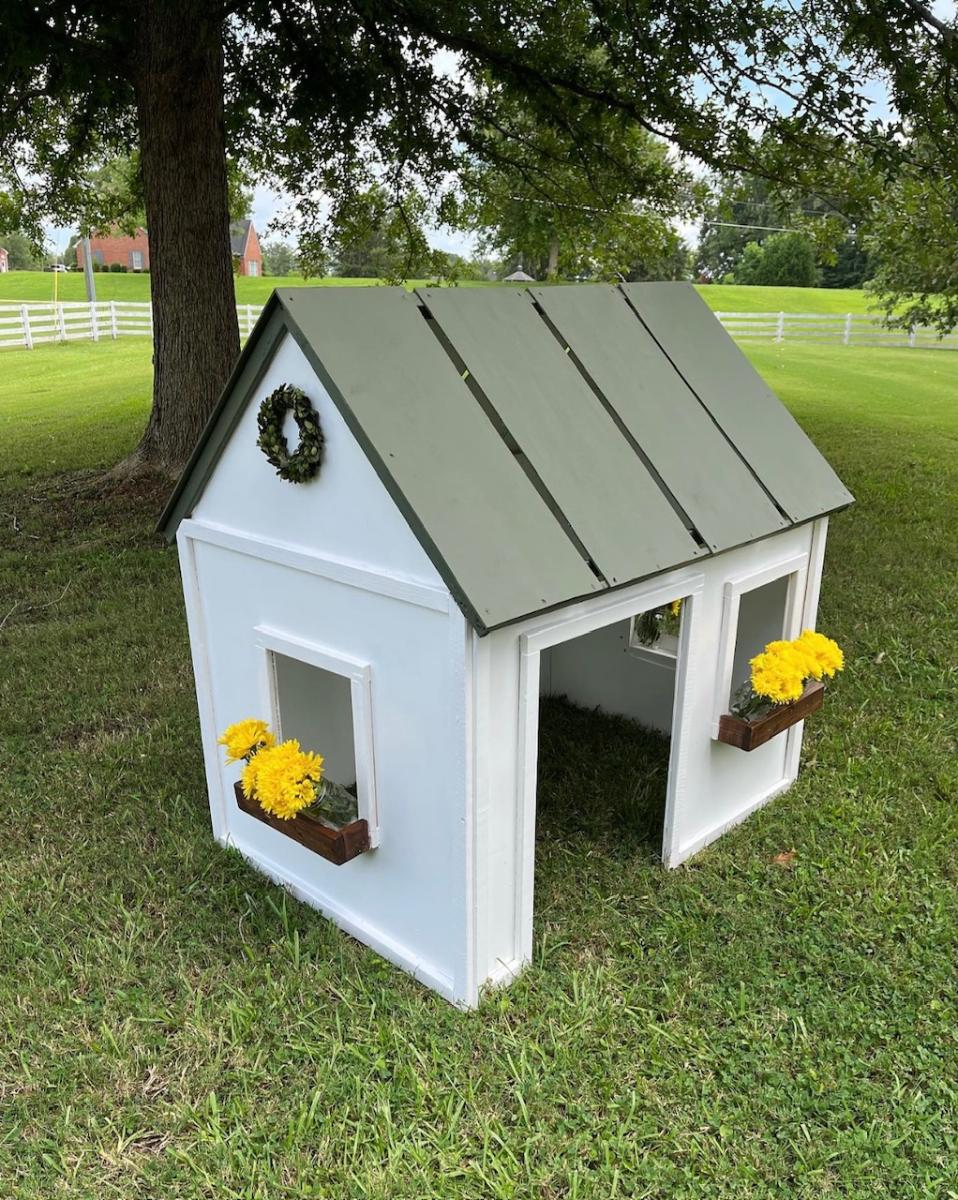
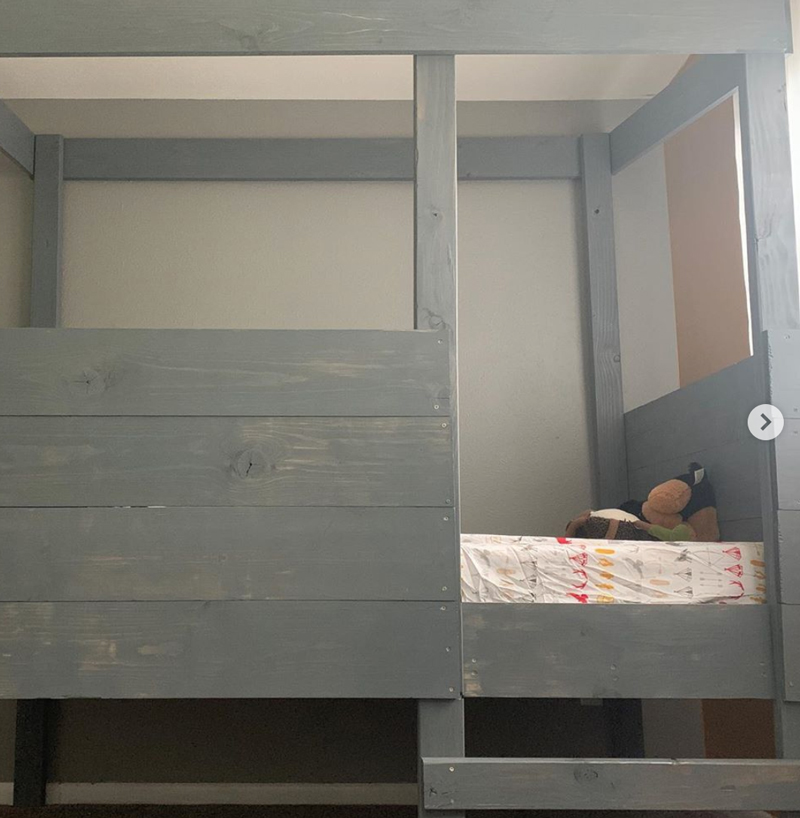
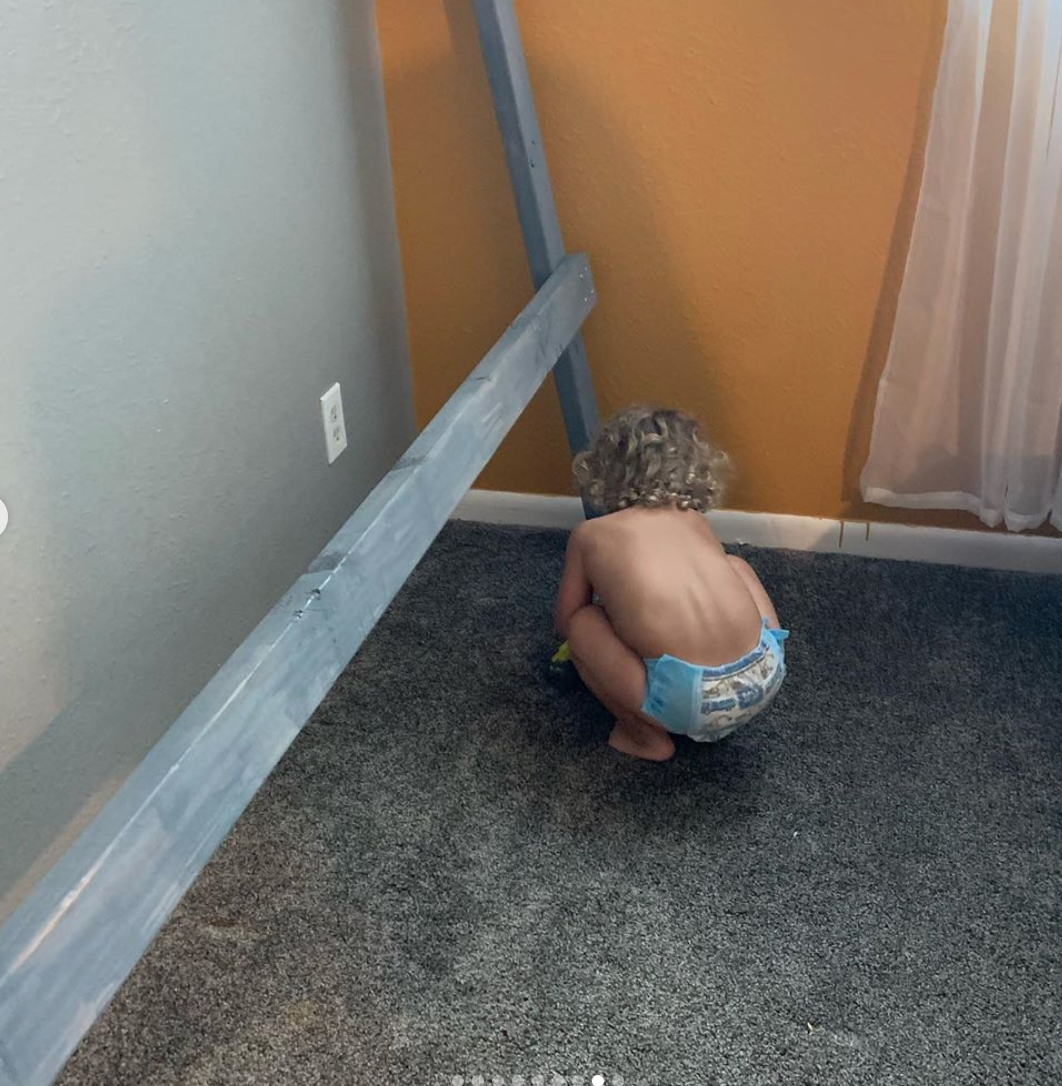
Farmhouse Playhouse
Built from Plan(s)
Seasonal And Holiday
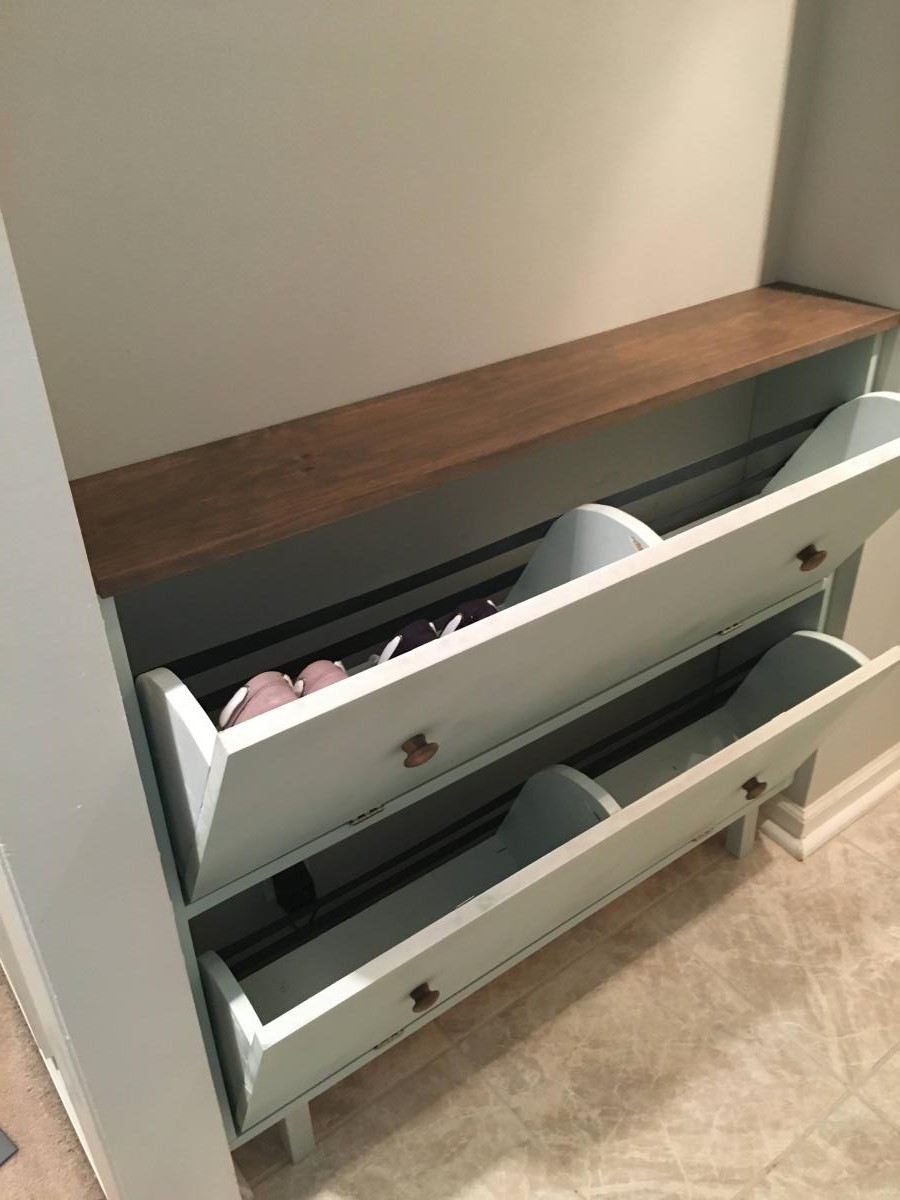
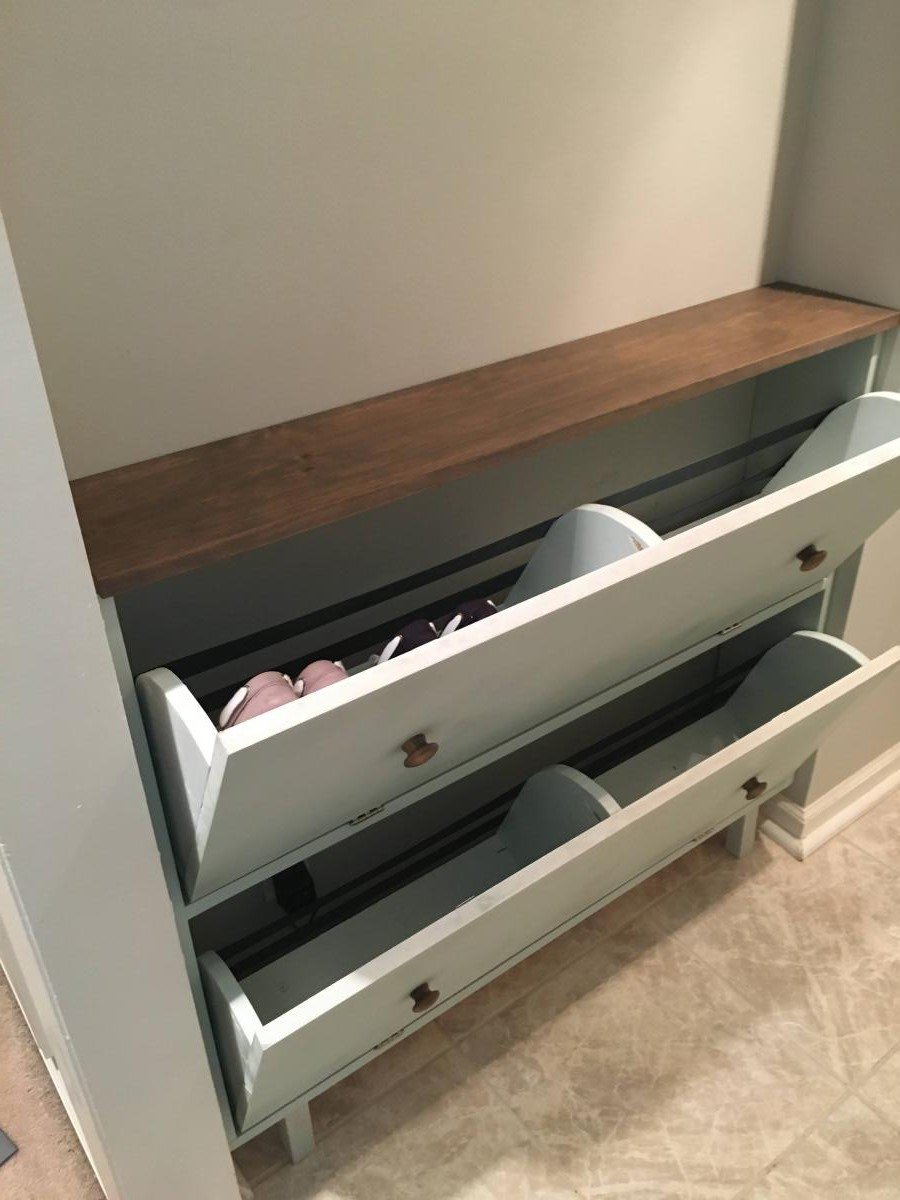
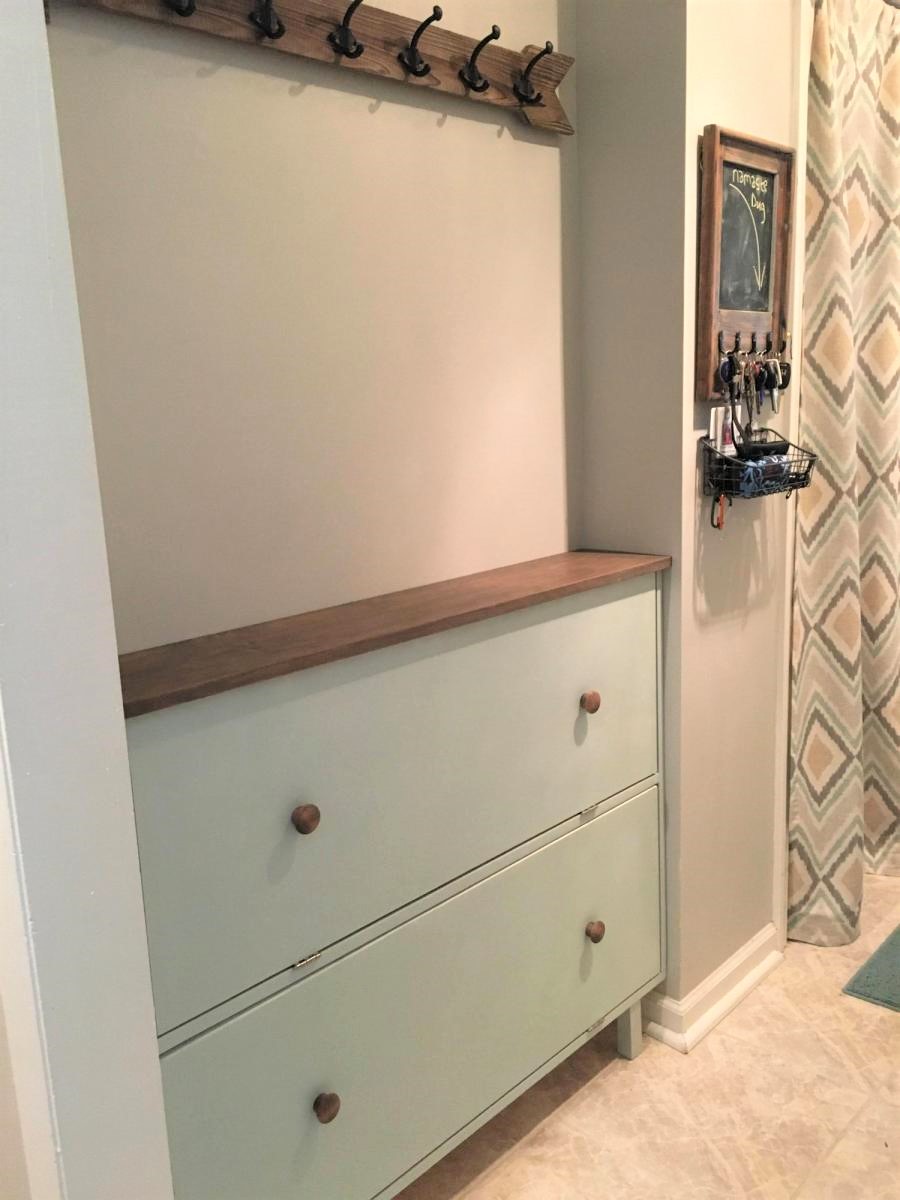
I had this space in my mudroom that was a perfect spot to make a custom shoe dresser. I adjusted the plans I found on this website to custom make storage for shoes. Now this weird little space is functional.

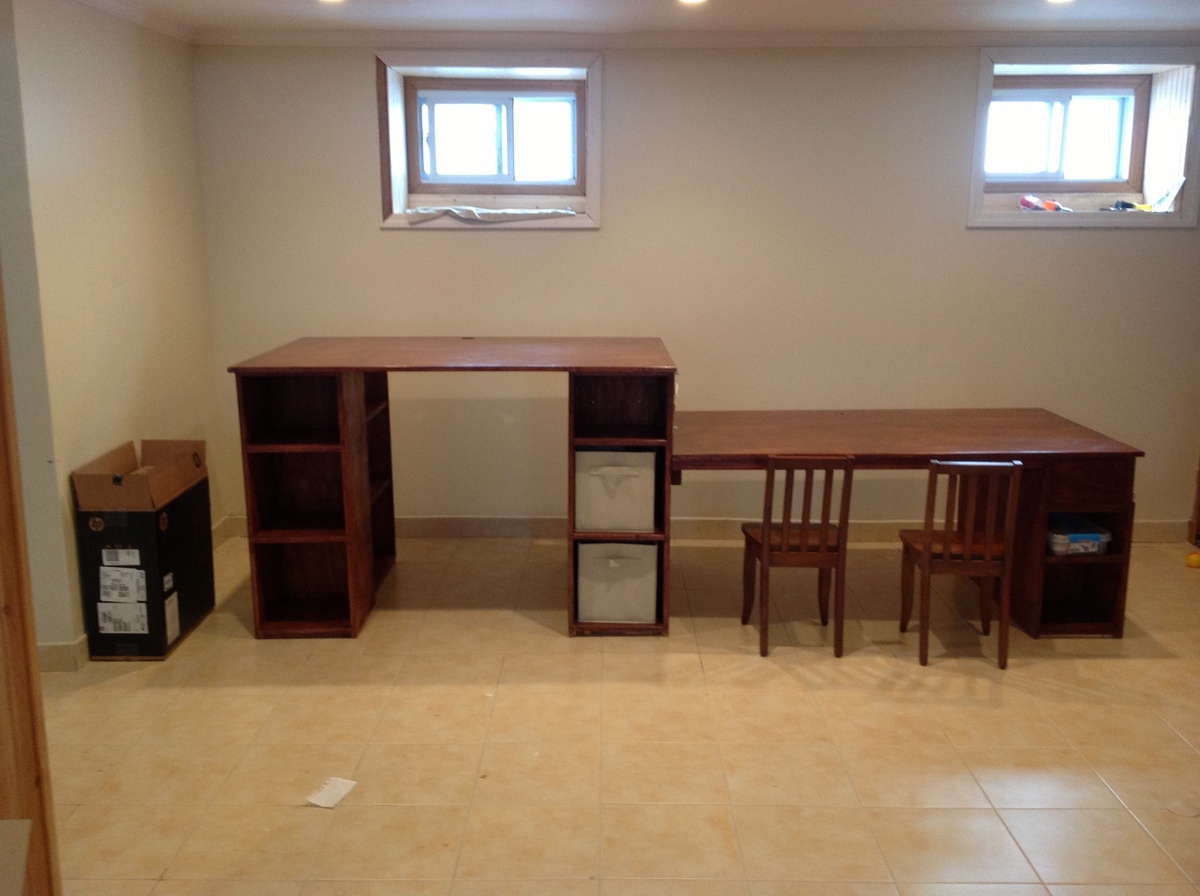
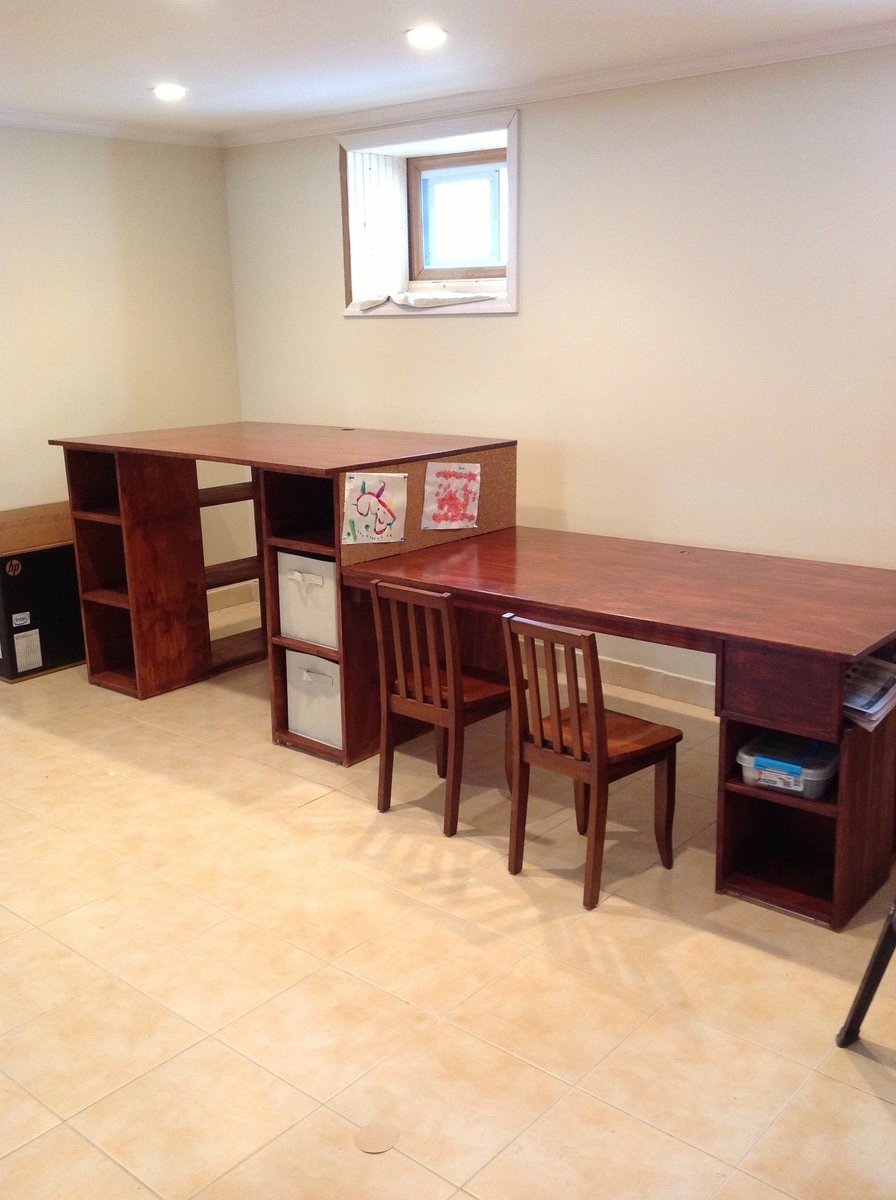
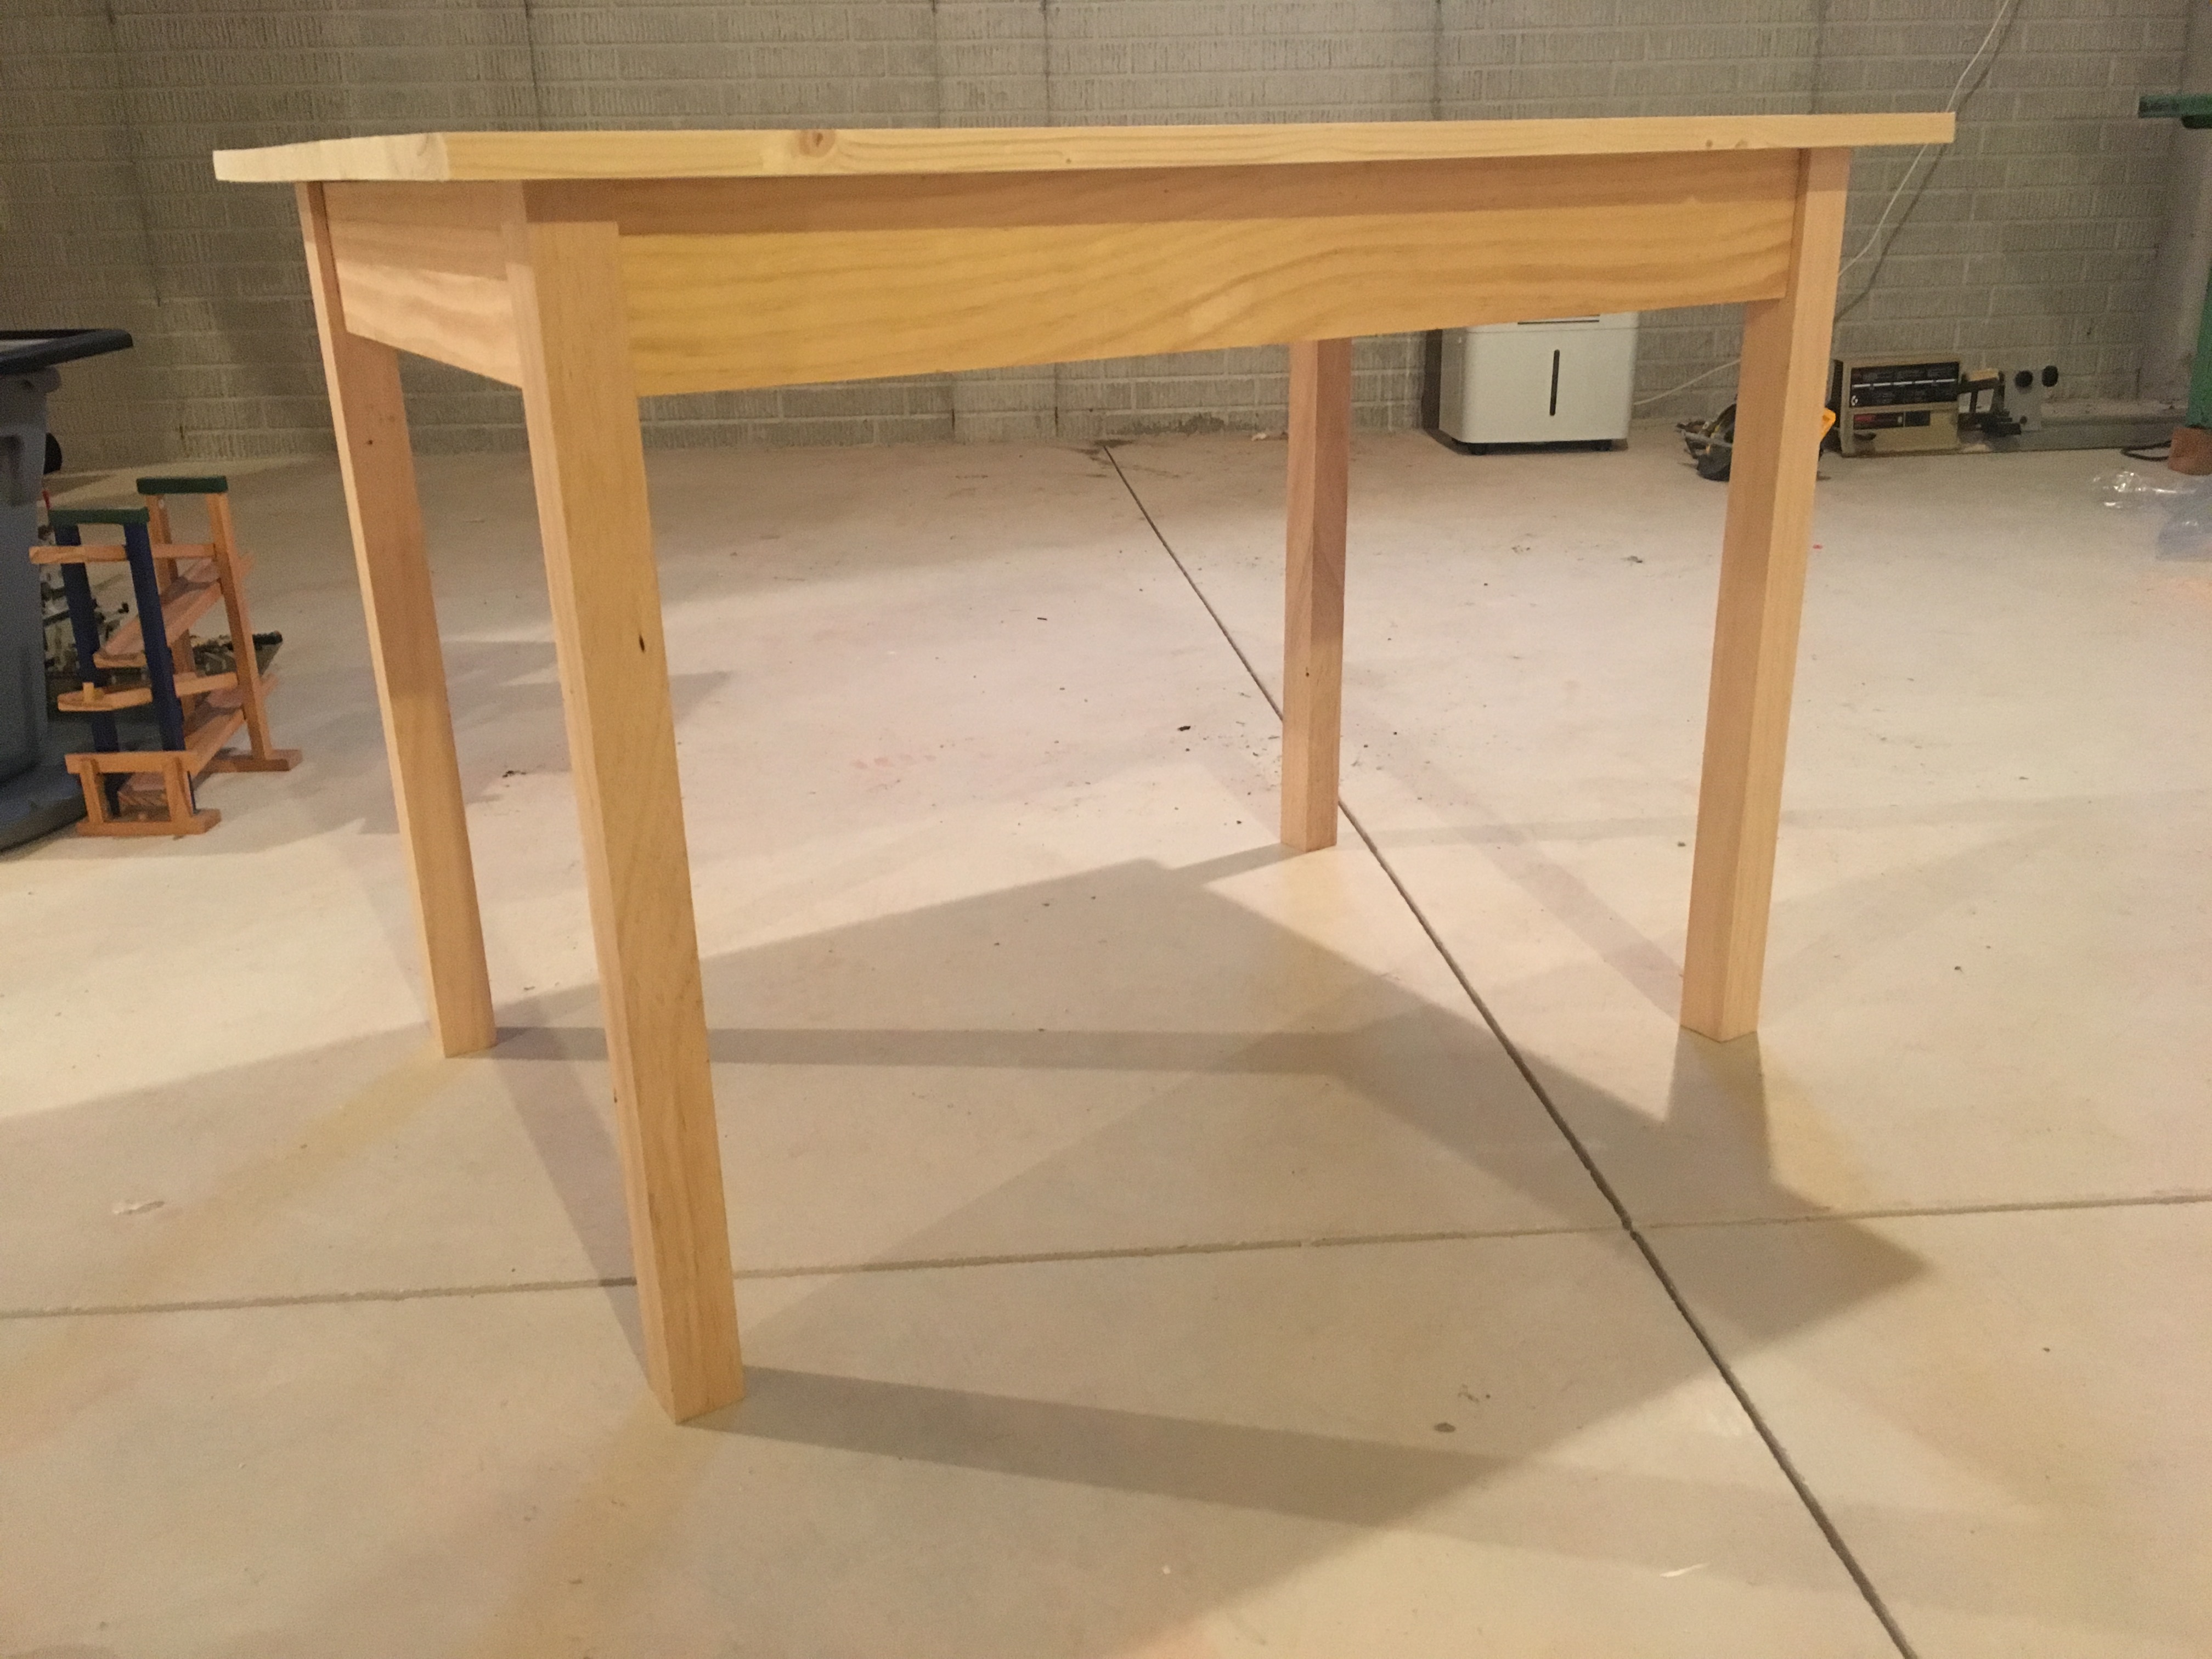
This was our first build, with help from my dad we used the plans for the modern craft table and added a side table for the kids to have their own crafting space and storage.
Tue, 02/12/2013 - 15:57
I love this! It's so cool that you put the kids table on the side of your table. Great job, and it looks fantastic!

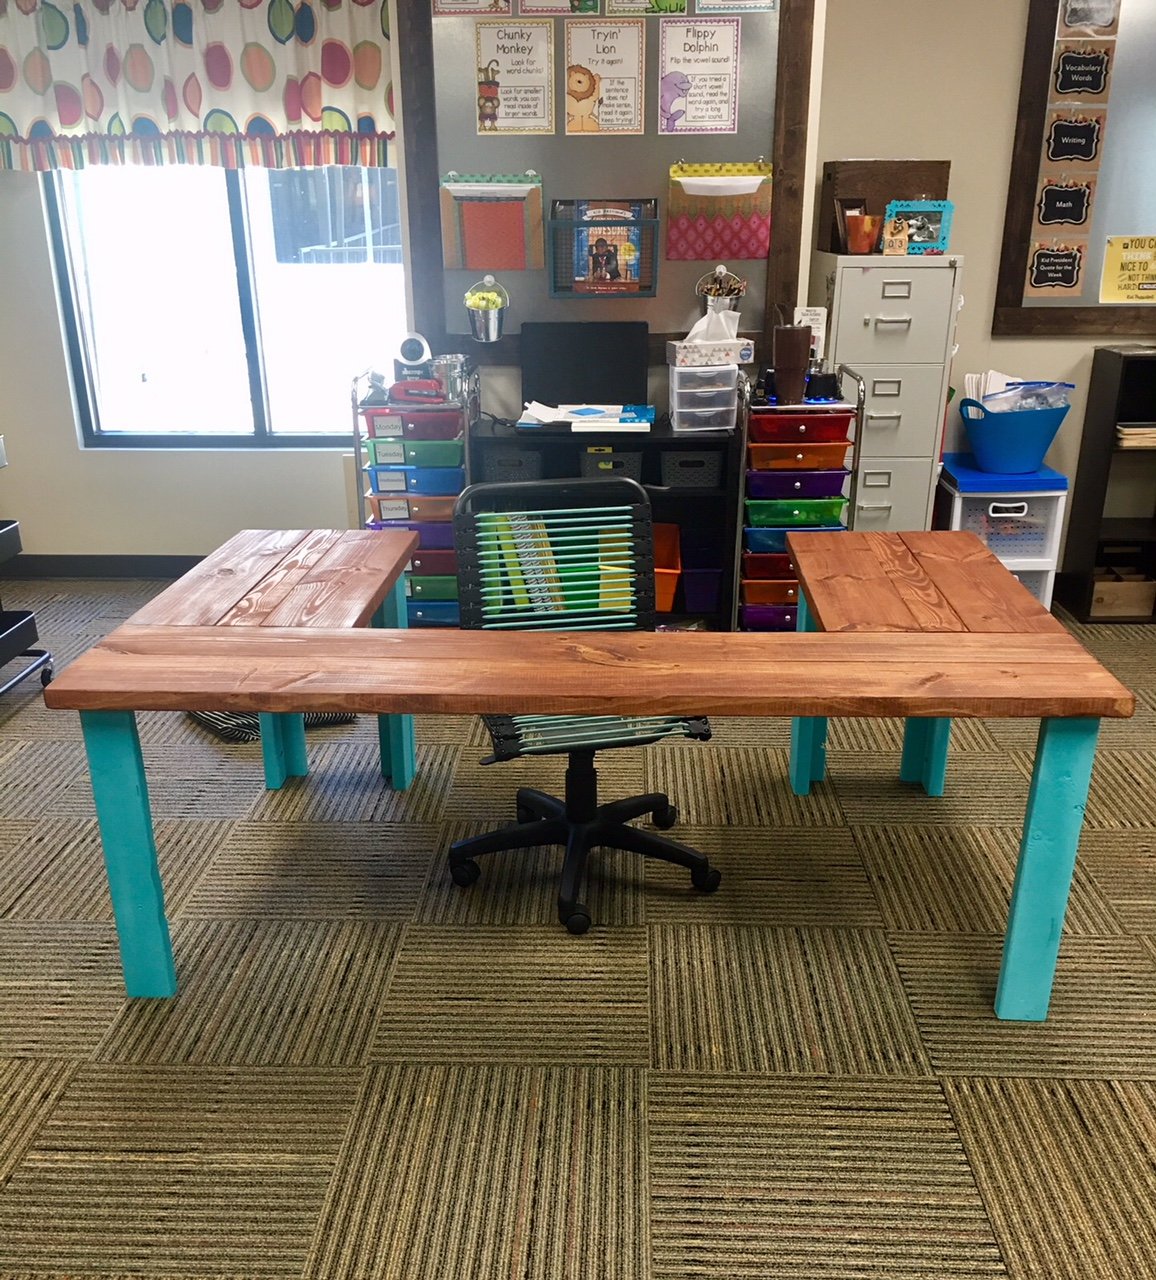
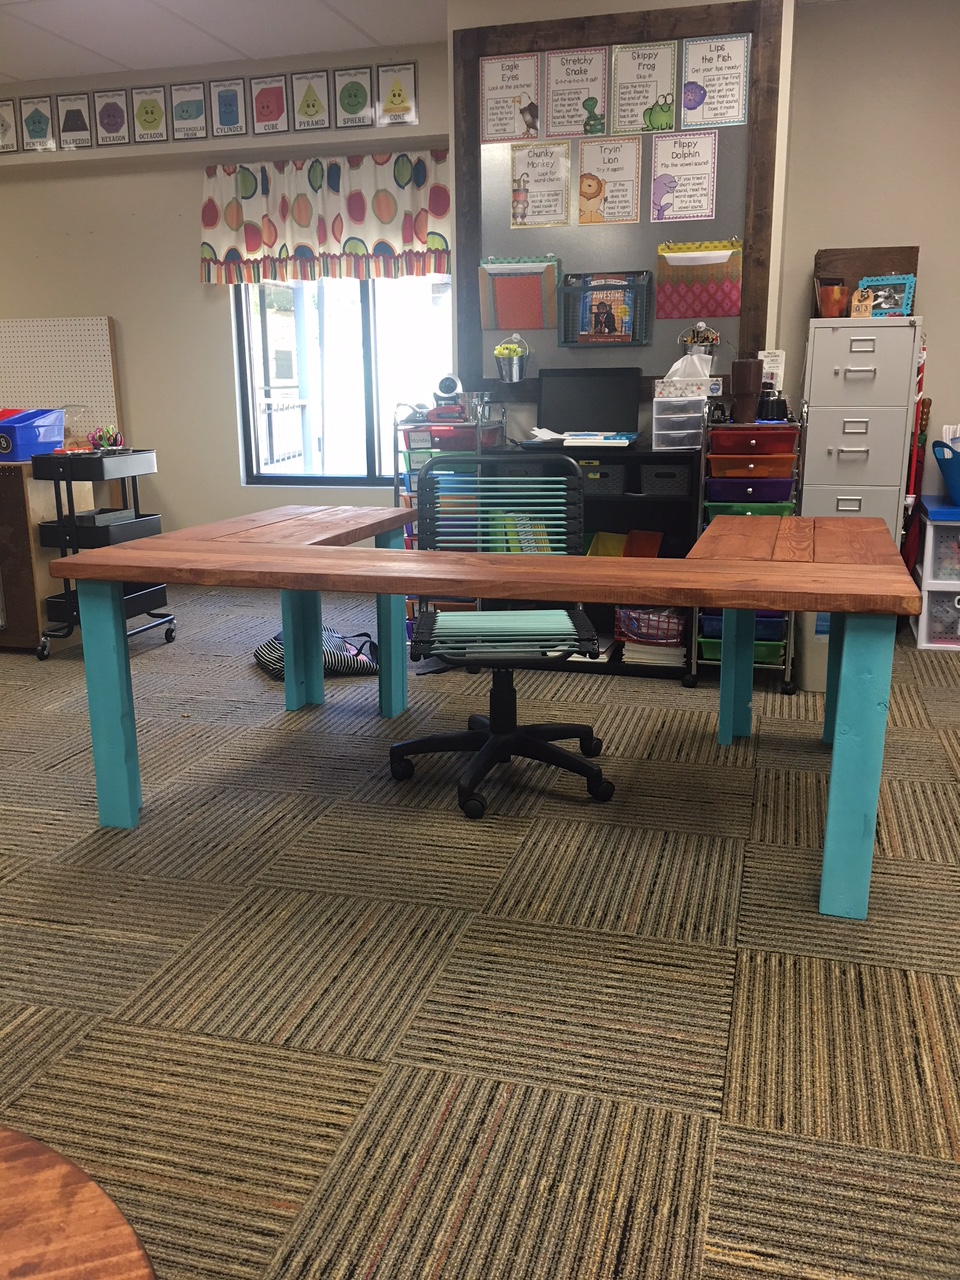
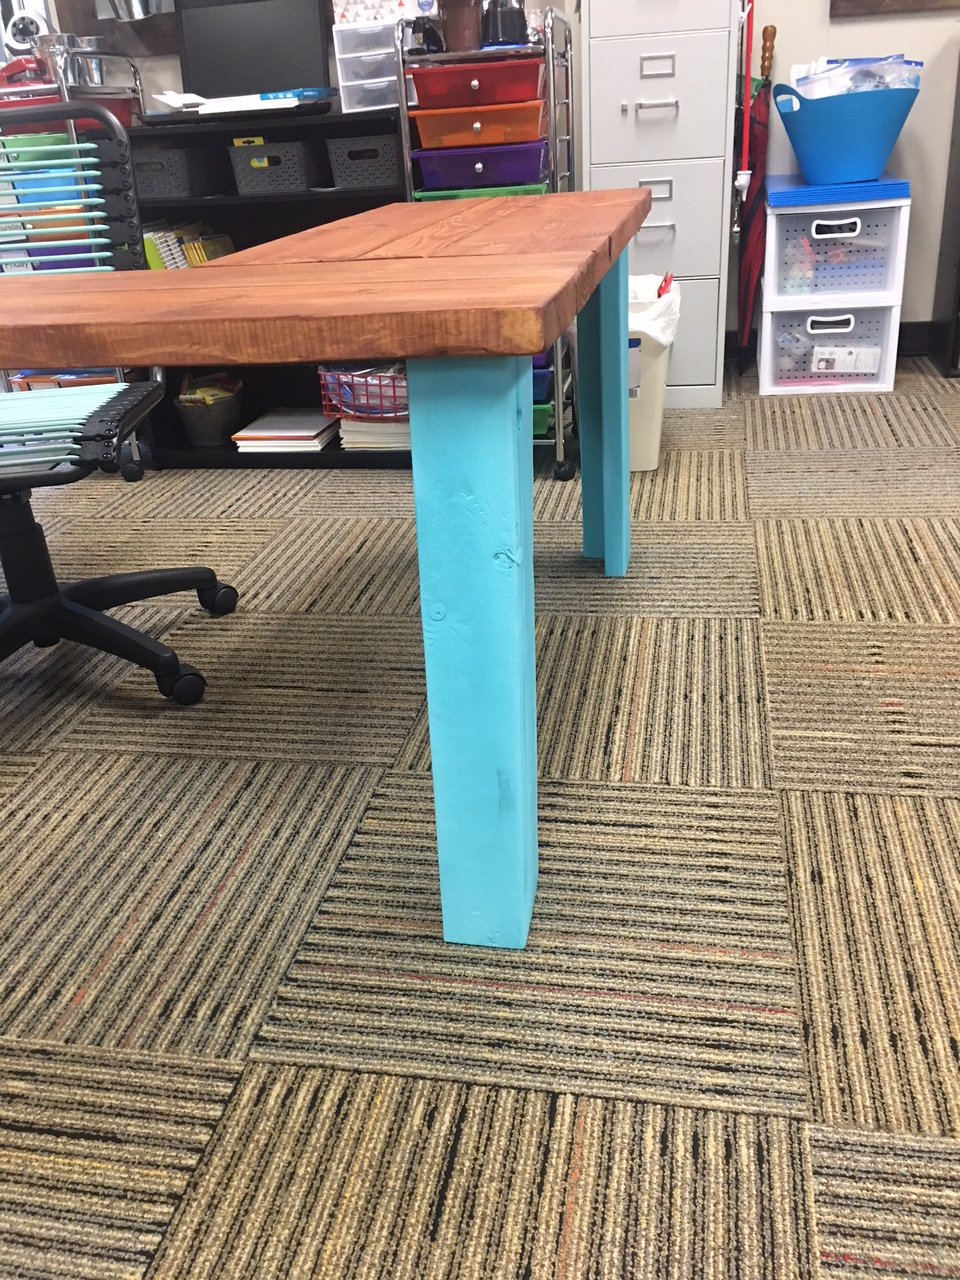
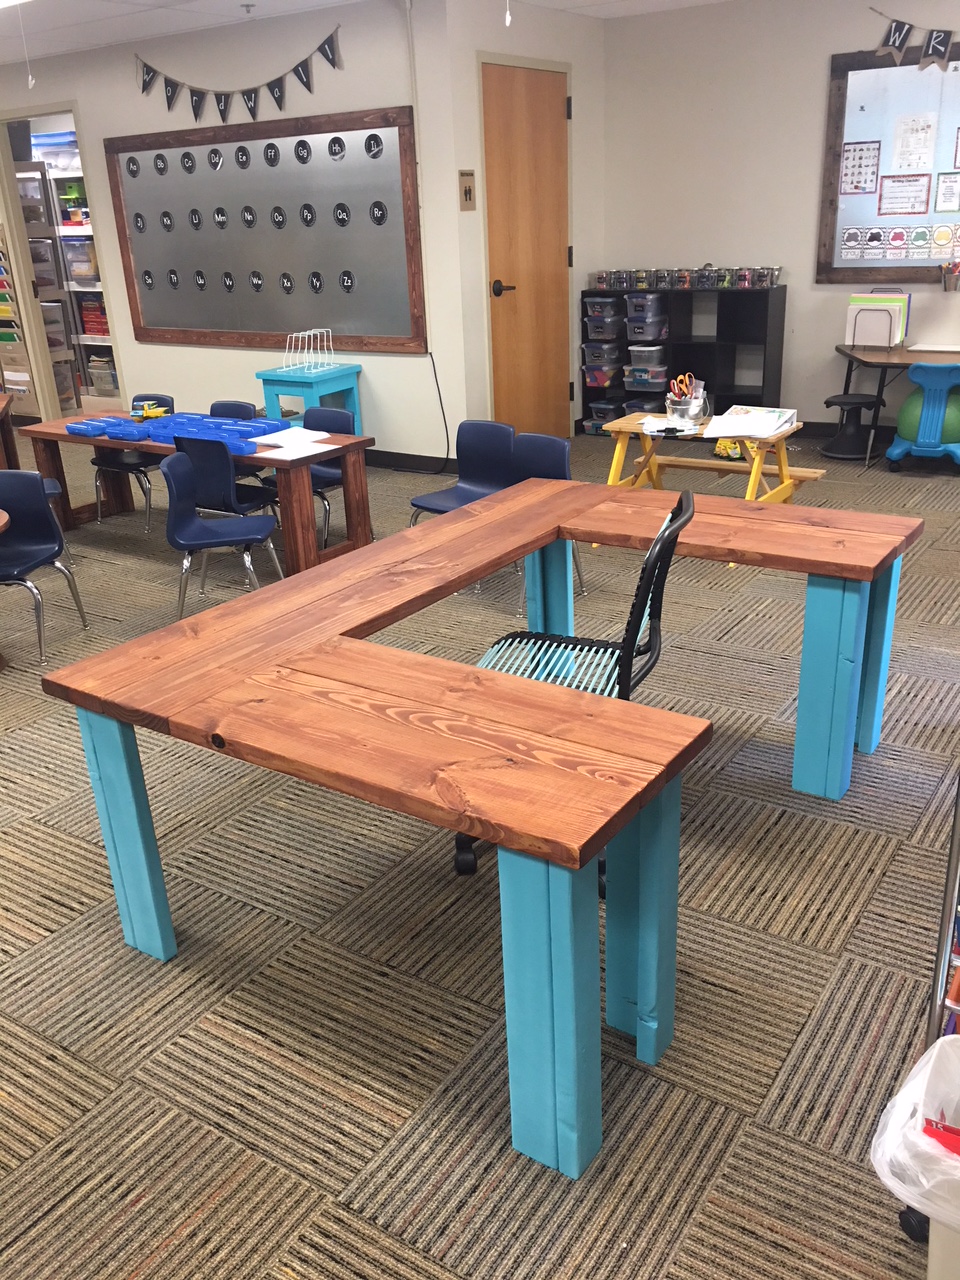
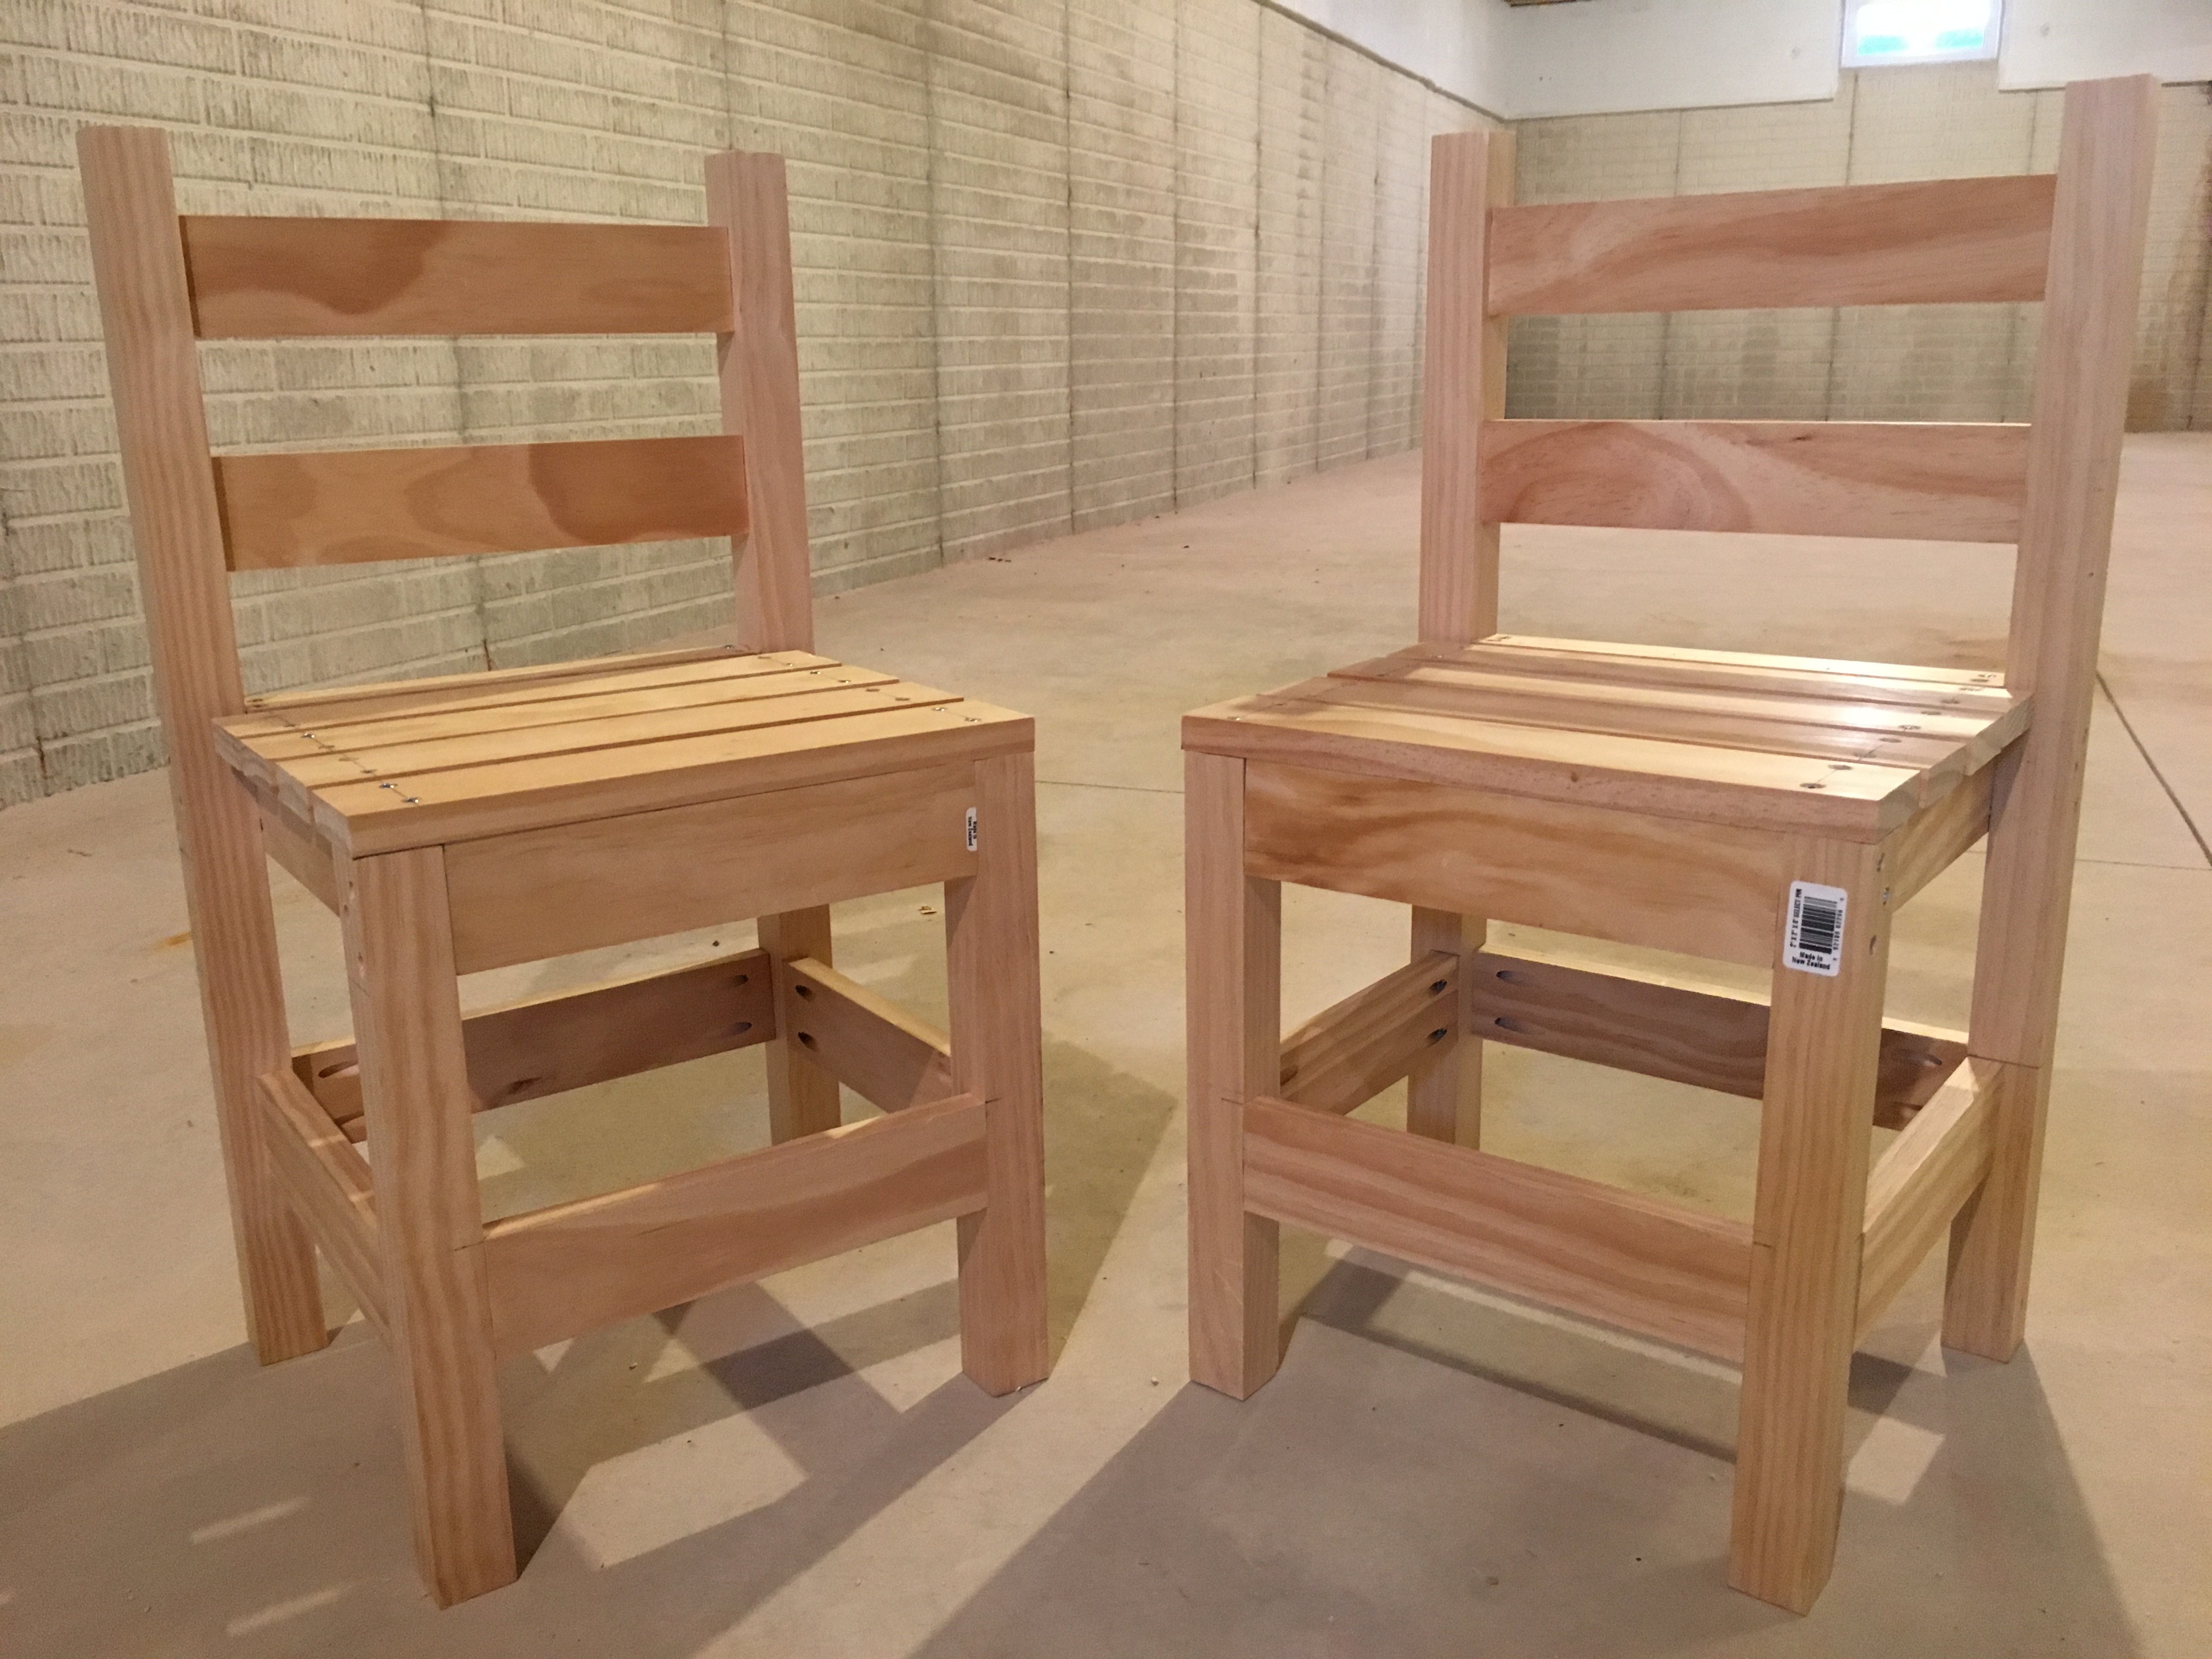
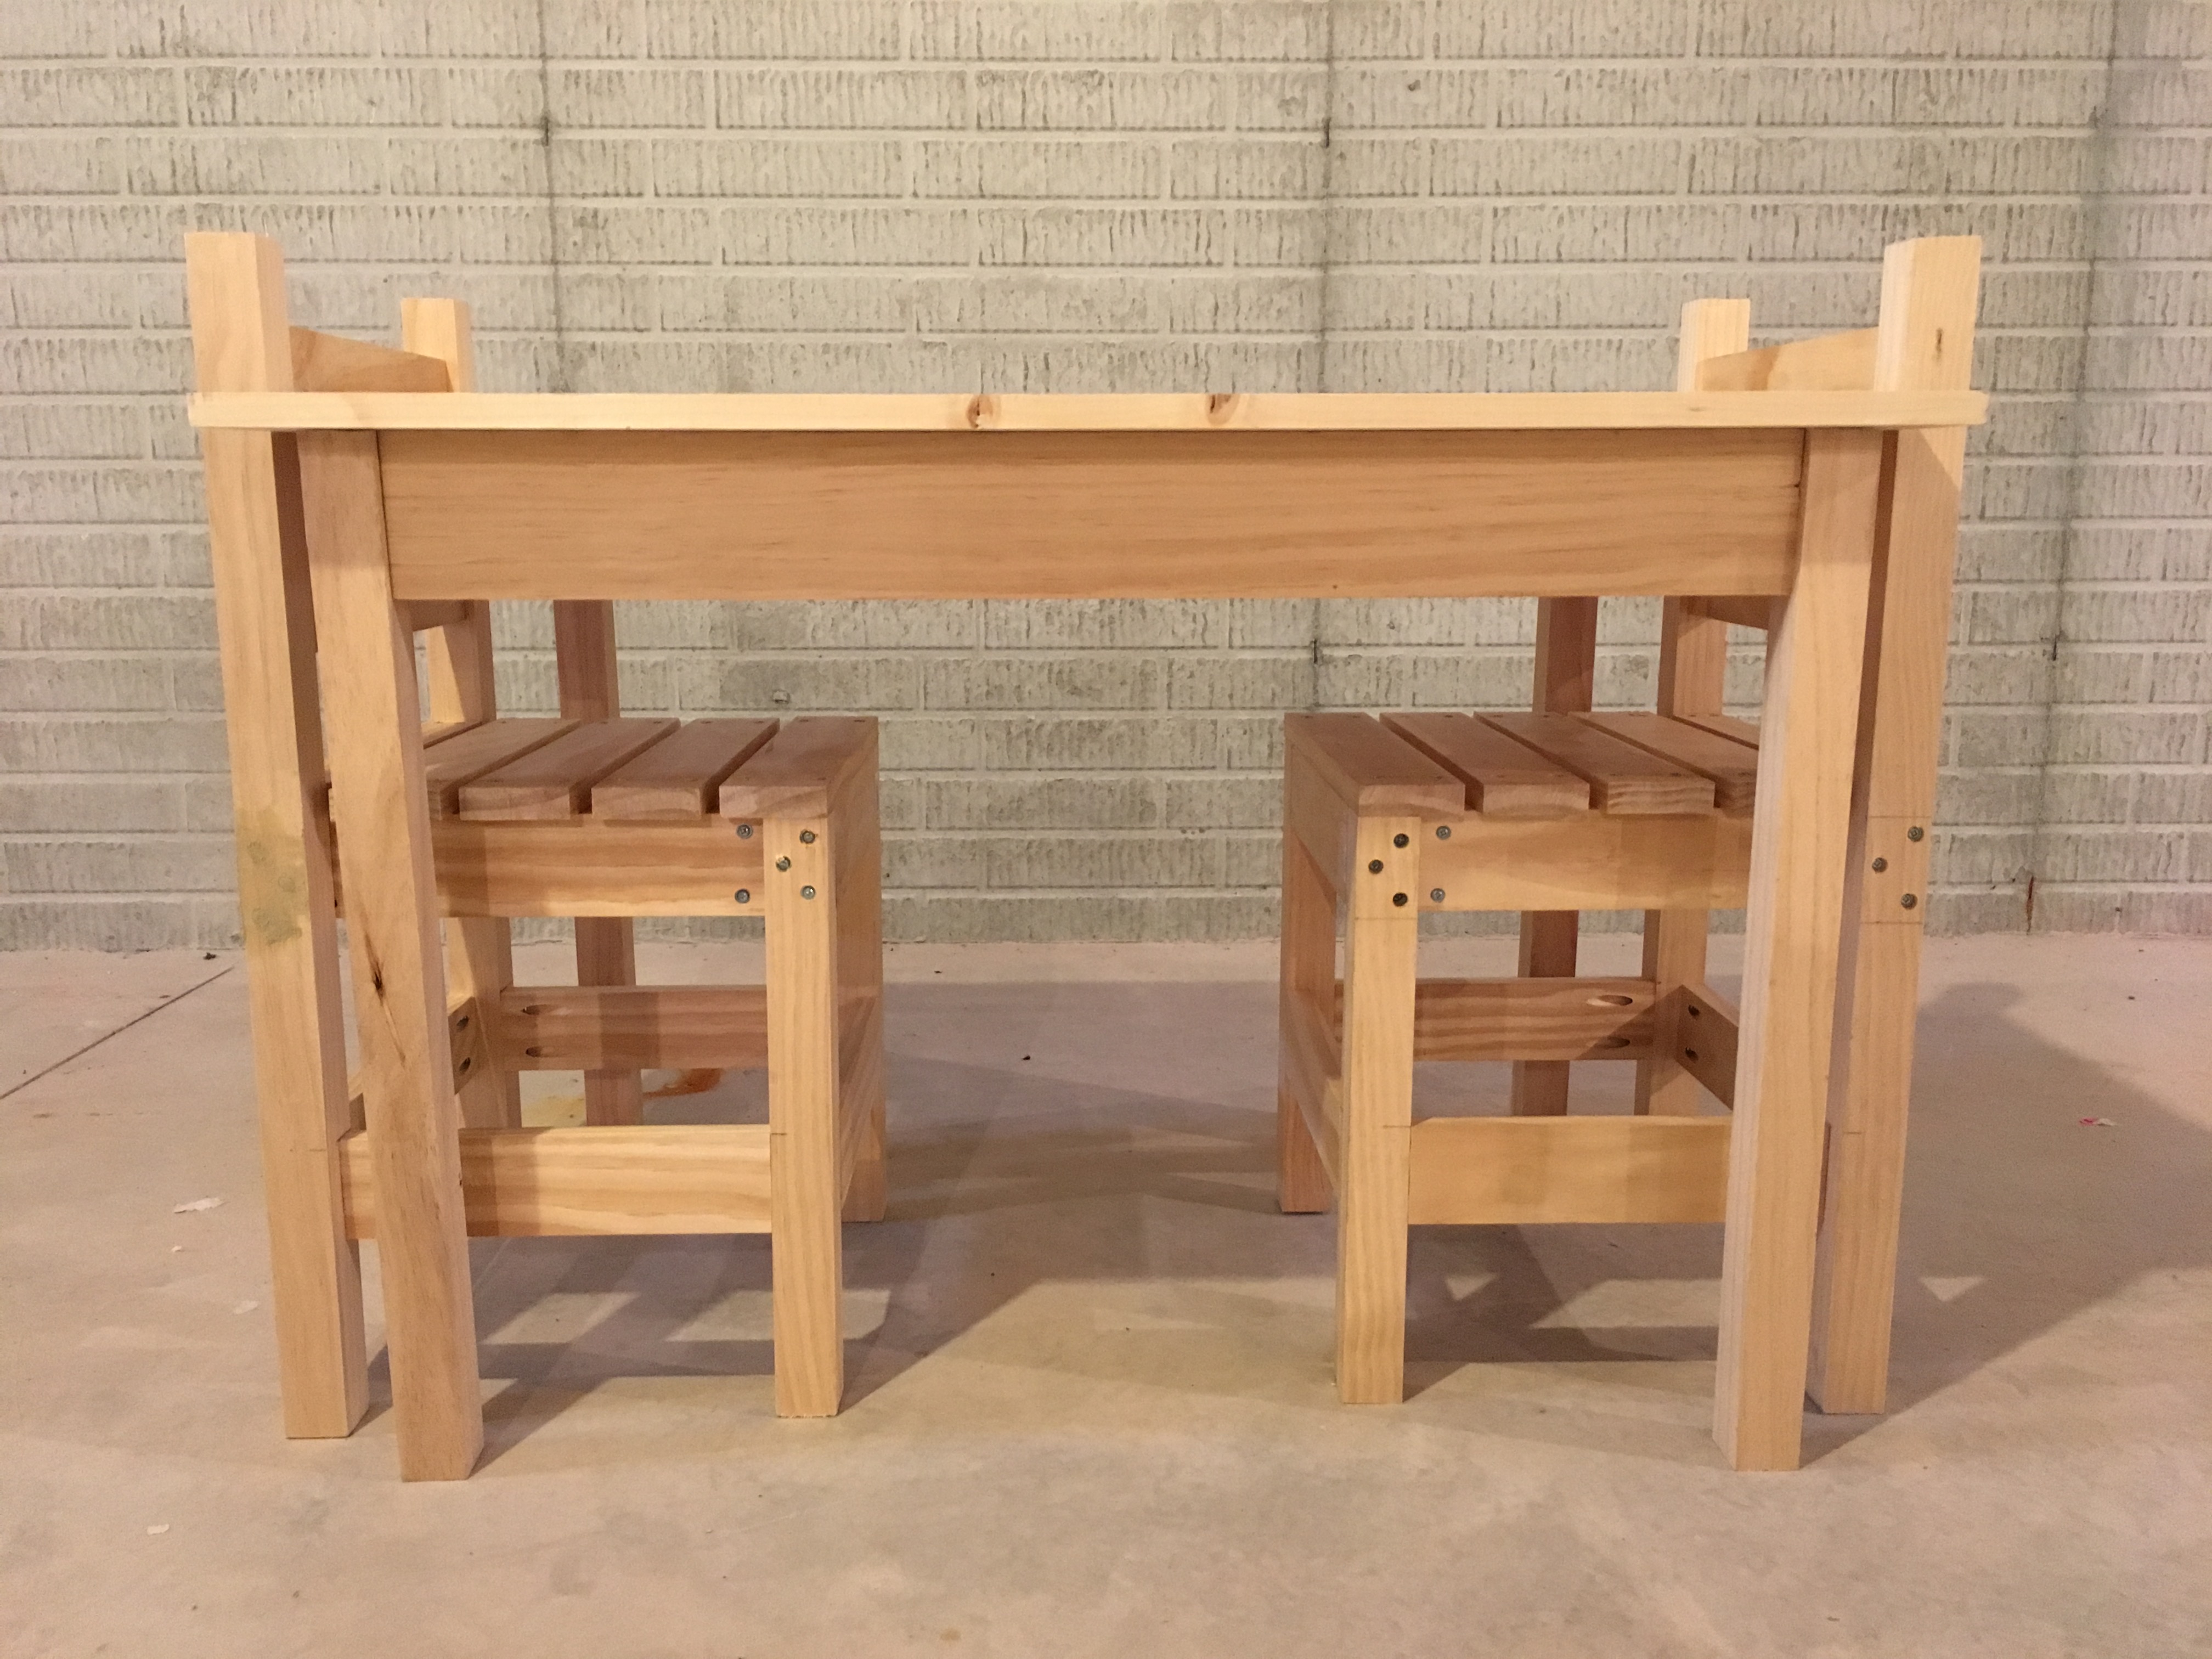
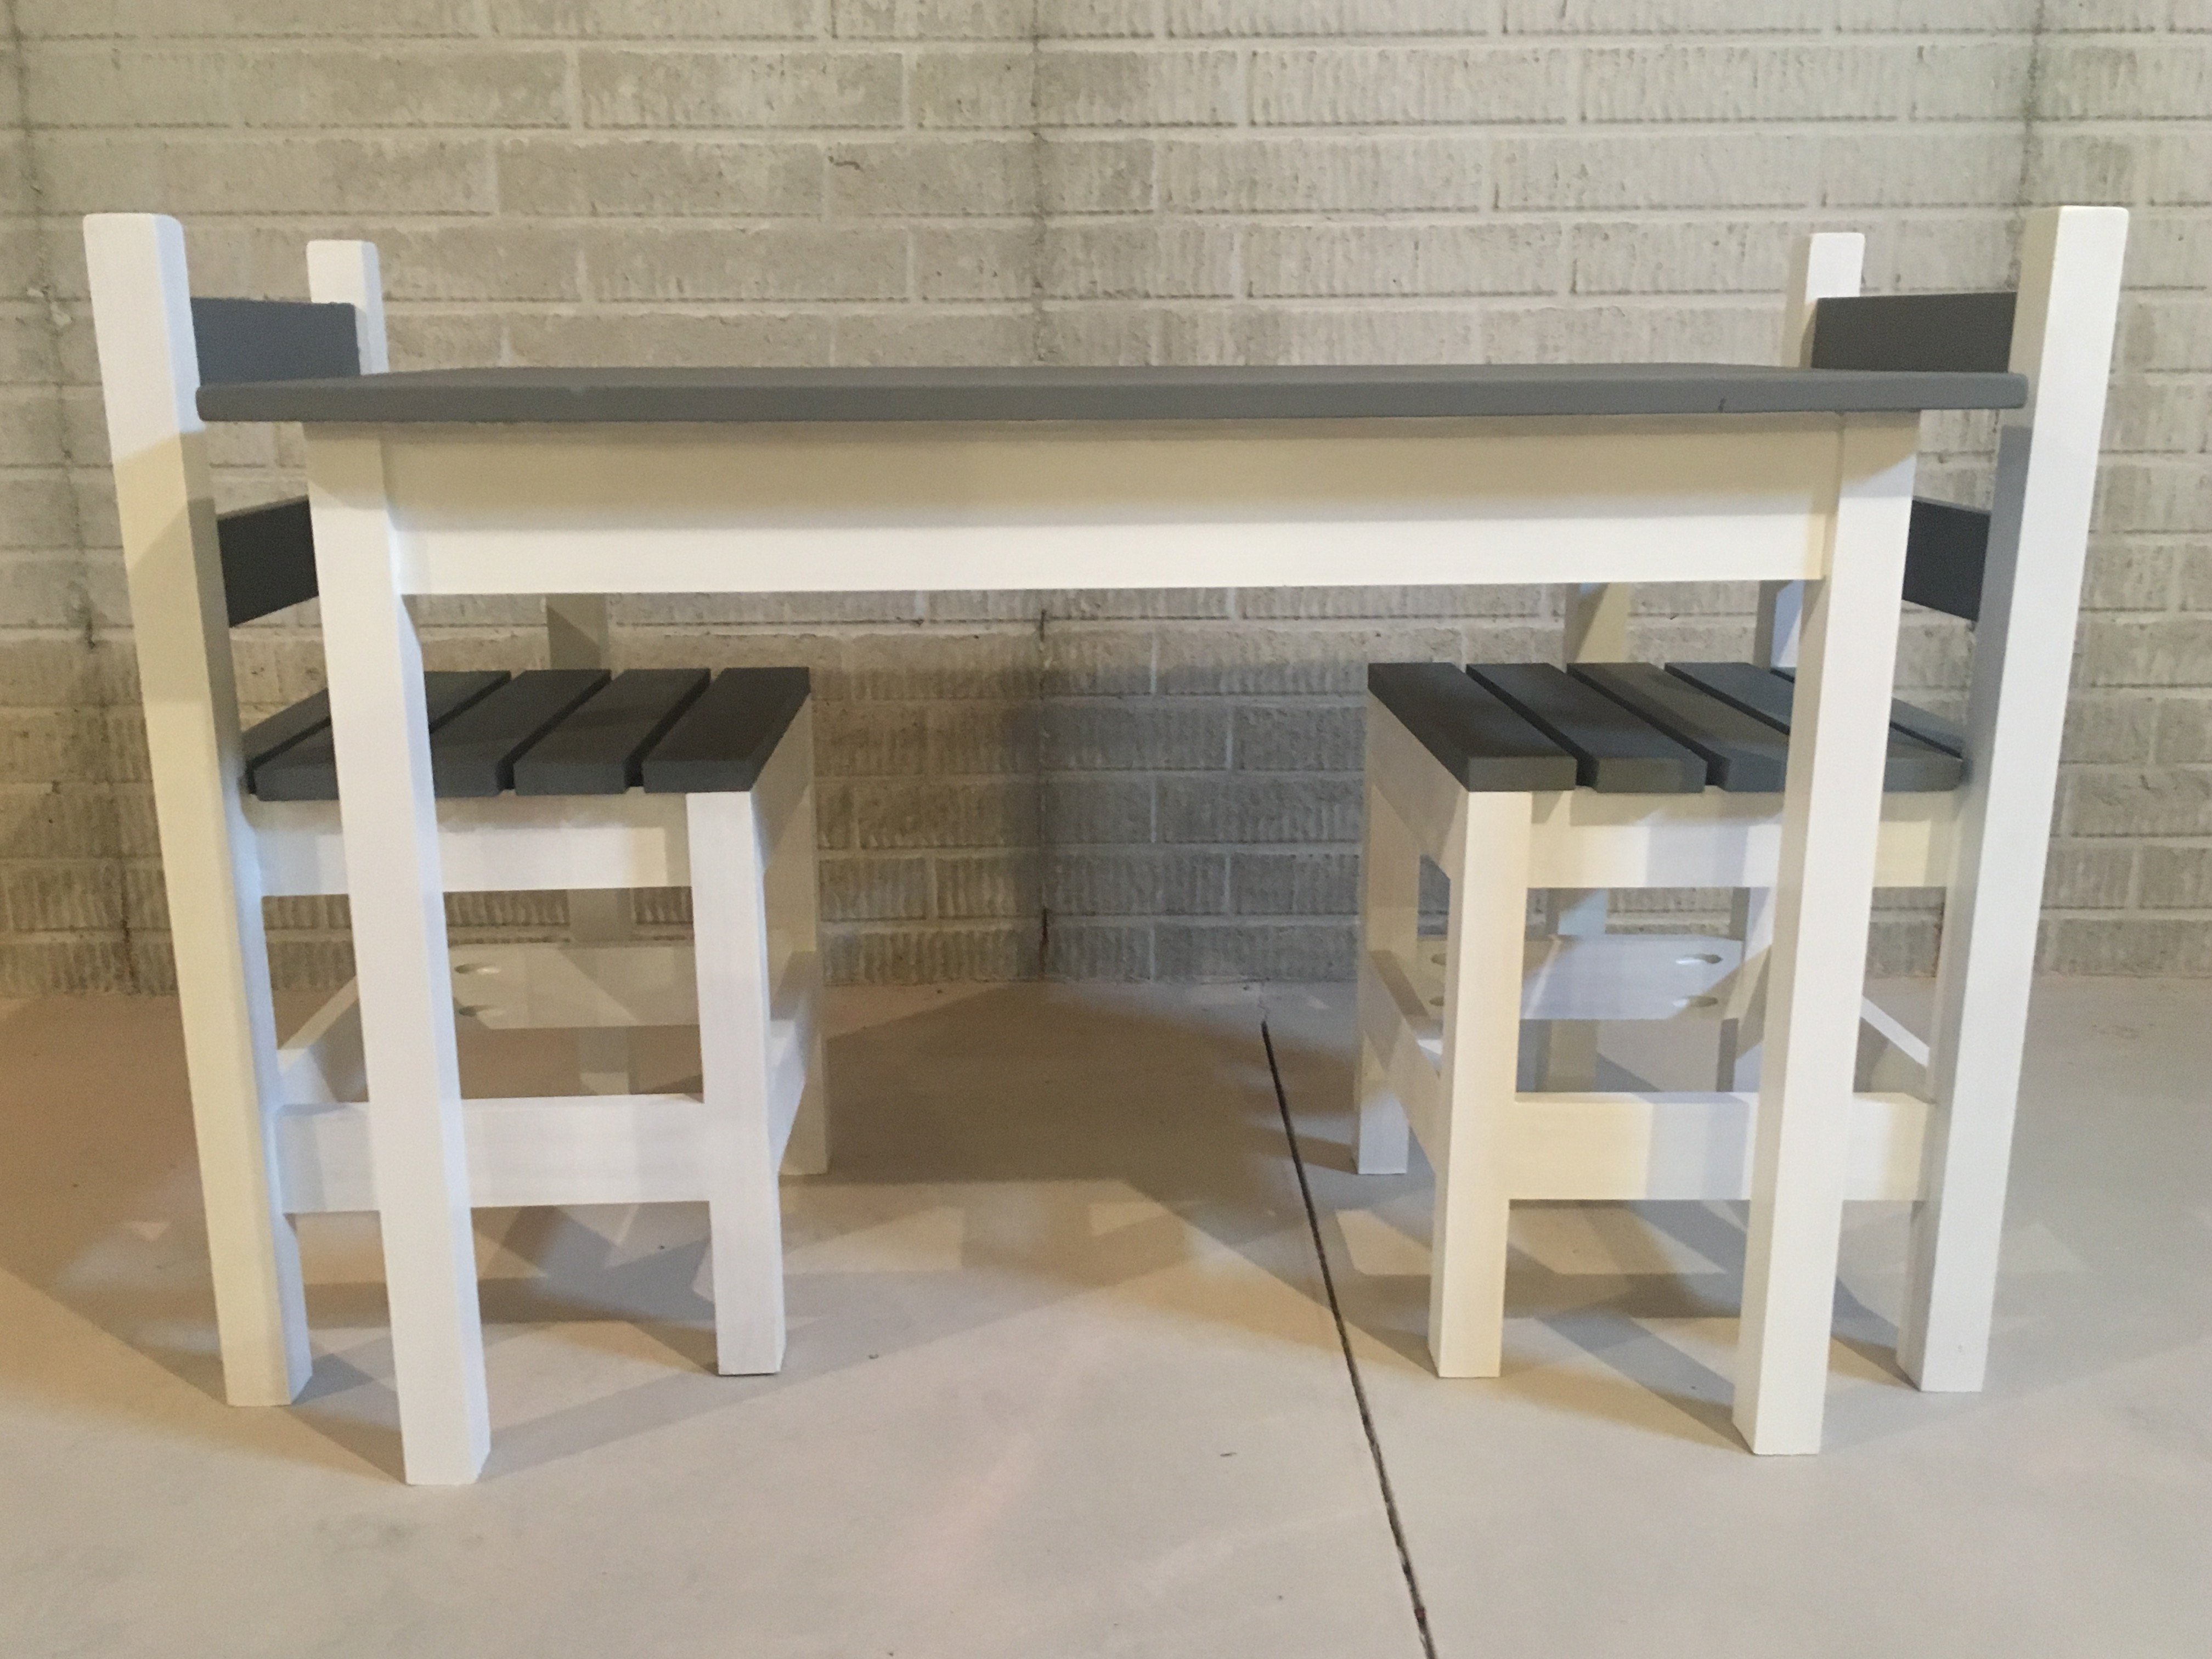
Been a while since I had time to actually build anything worth posting about! My wife wanted some items for her Kindergarten classroom this year, so built several items, most inspired by the Farmhouse family.
Sat, 06/29/2019 - 05:47
I love this! Can you give me the plans and list of materials for constructing it?
Sun, 06/30/2019 - 12:33
I am also a teacher and would love to build this desk for my reading class. Do you have plans?
Mon, 07/01/2019 - 18:05
I love this table for my classroom. Can you share the plans or the dimensions?
-Stephanie
Sun, 07/07/2019 - 09:46
I would love plans/dimensions for this! I was thinking I could also paint the top with wipe off board paint.
Sun, 07/07/2019 - 14:59
I would love to make one for my classroom. Can you share the plans and materials list for this table?? Thanks!!
Mon, 07/08/2019 - 19:11
I am looking to make this for my fourth grade classroom - can you provide the dimensions you used? Thank you so much.
Wed, 07/10/2019 - 11:59
Love this!
I would love this for my classroom! Can you share the plans and materials.
Thank You!
Mon, 07/22/2019 - 18:25
Anyone have any luck with figuring out the dimensions??
Thu, 07/25/2019 - 17:20
Has anyone gotten the plans for this table? I have contacted Ana White and tried other ways also. I would love for someone to share.
Thank you
Teri
Mon, 08/19/2019 - 12:09
I am guessing the corner posts are 2 x 4s, the top is 2 x 10s. It looks like the width is 6’ (looking at the floor carpet tiles being 24” square). So 2 - 2 x 10s side by side for the main part of the desk top and 2 - 2 x10s perpendicular on each side of the chair. I guess the height is subject to choice and the length of each side would also be subject to choice or to the length of the 2 x 10s to be economical.
an educated guess would be 4 - 8’ 2x10s for the top and 6 - 6’ 2 x 4s for the legs?
Anyone else have any input here? Open to suggestions.....
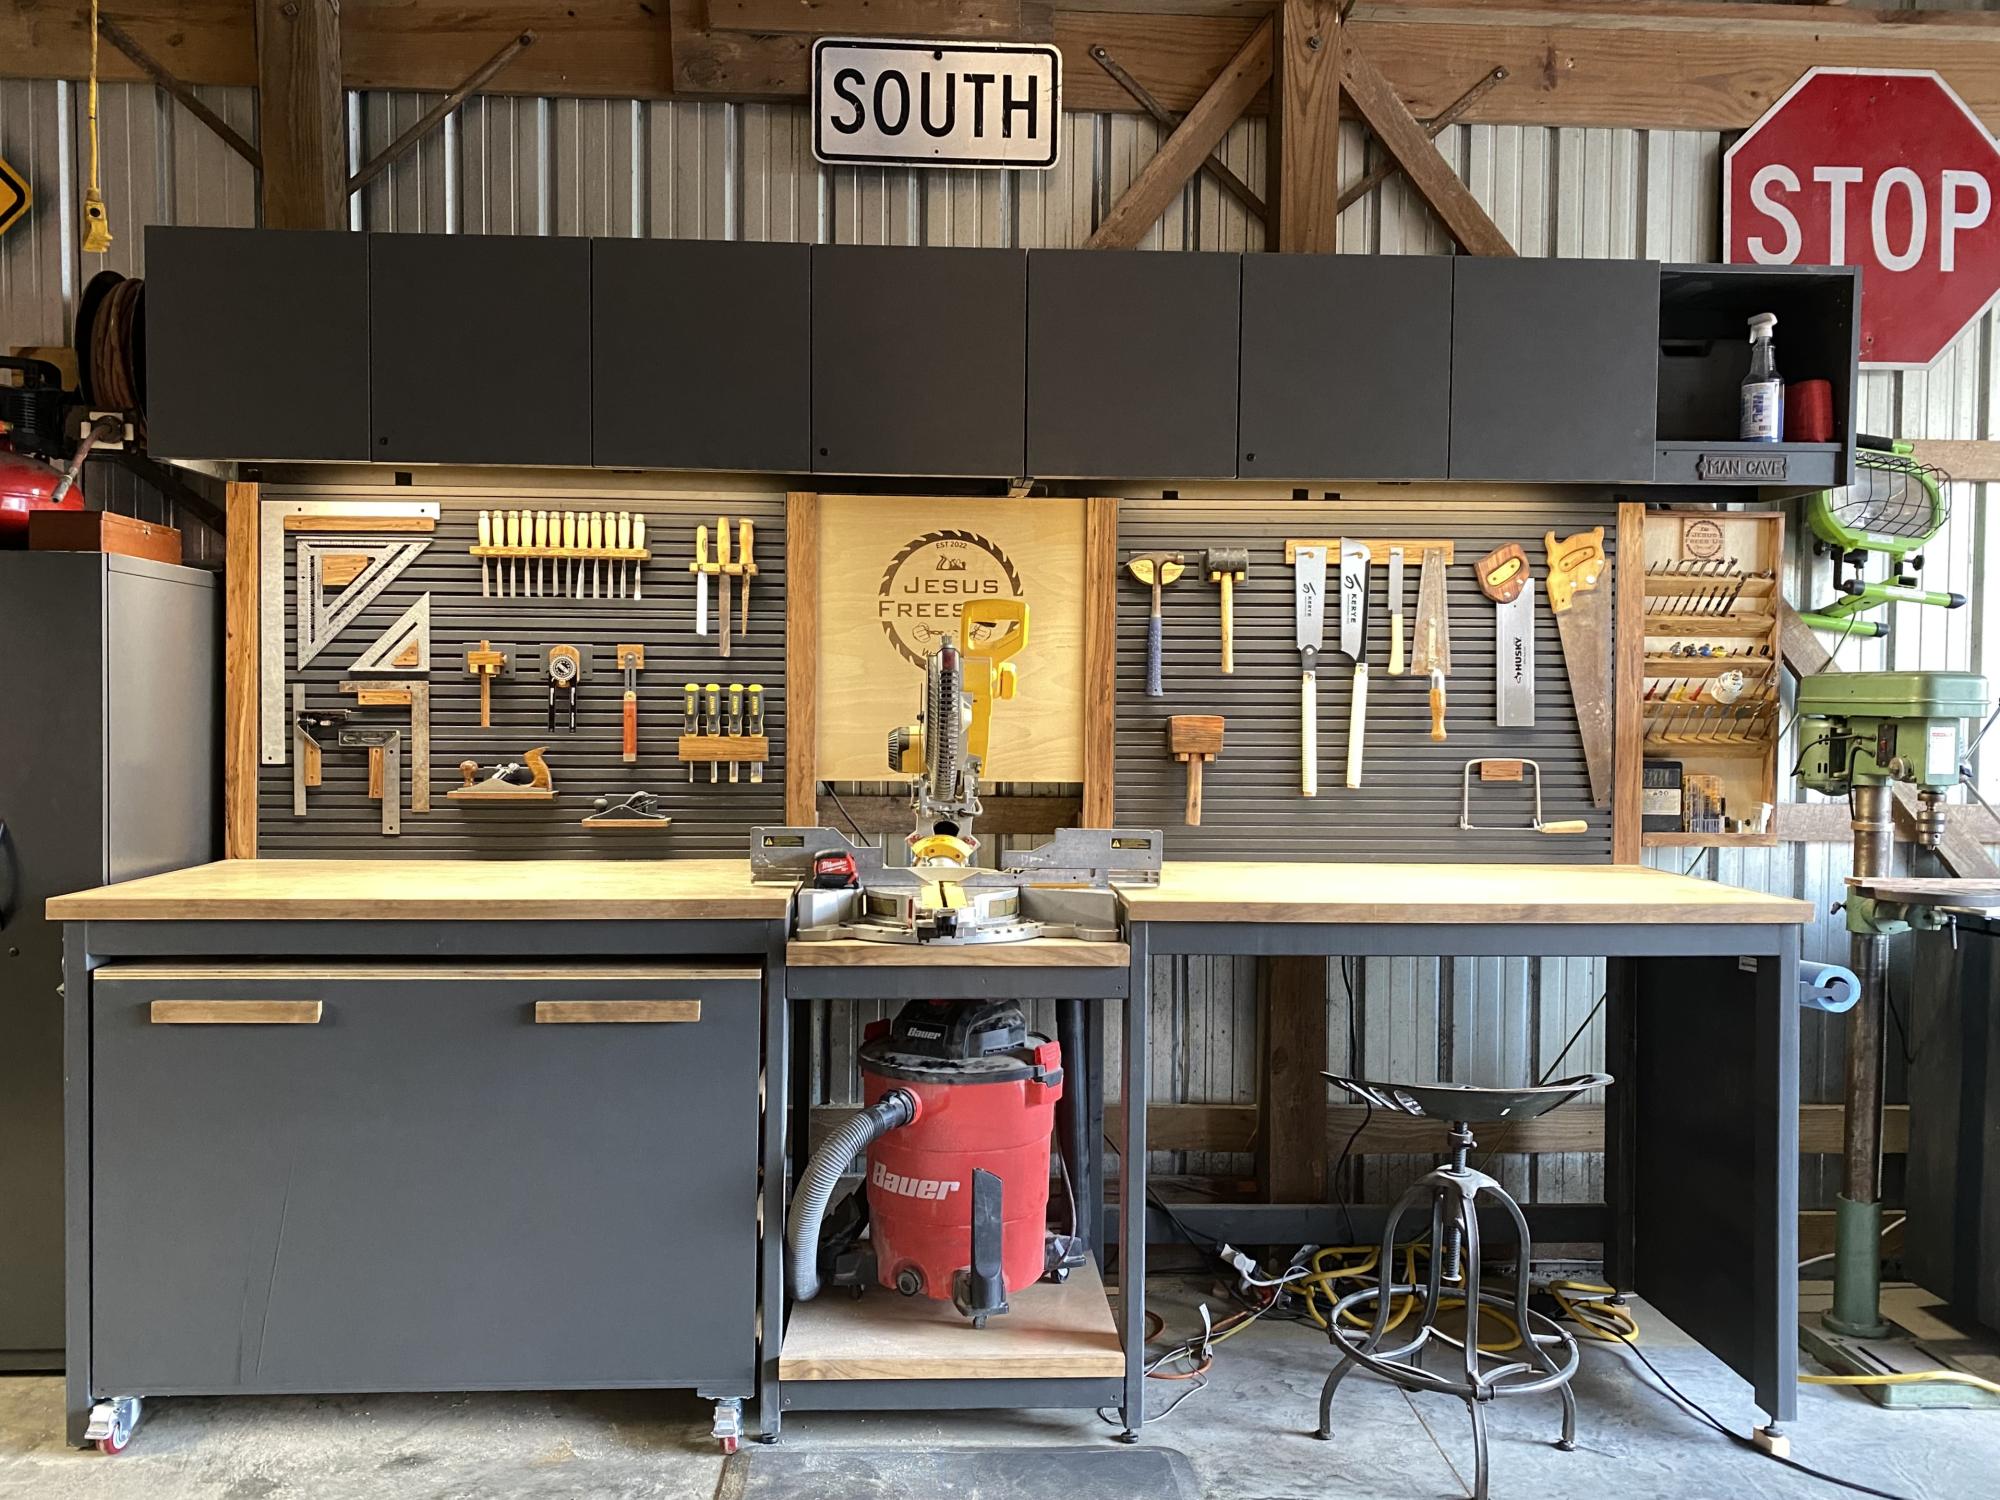
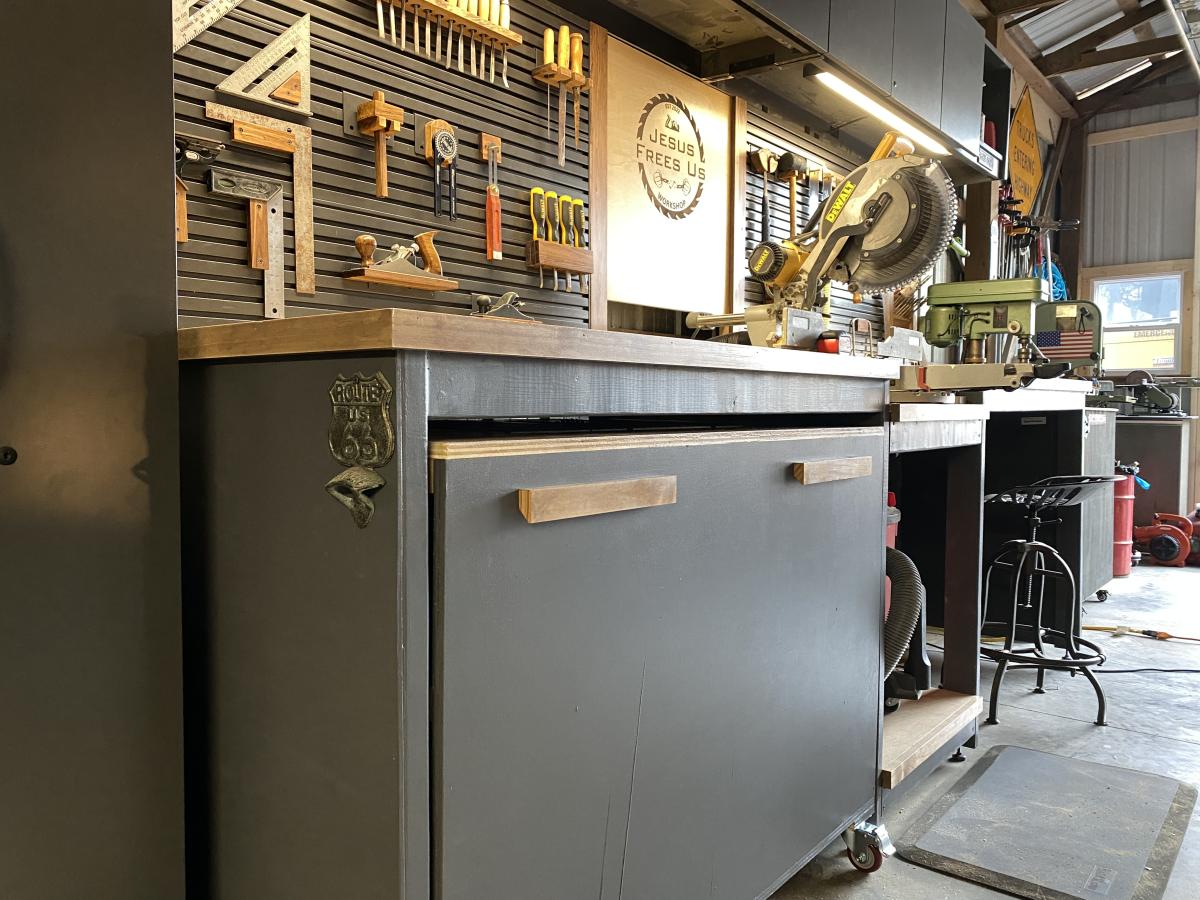
This plan is exactly what I needed for my workspace. I ended up adding some slat wall pieces and cabinets above from cubicles in an old office nearby that closed down for a tool wall and storage. I left the right opening empty due to how unlevel my floors are. I may close it in later with drawers or cabinets, but it will be my sitting workspace for now. I trimmed out the edge with 1x2s and painted and stained everything for aesthetics.

Mon, 03/06/2023 - 17:36
WOW, this looks so good! Thank you for sharing your amazing work.
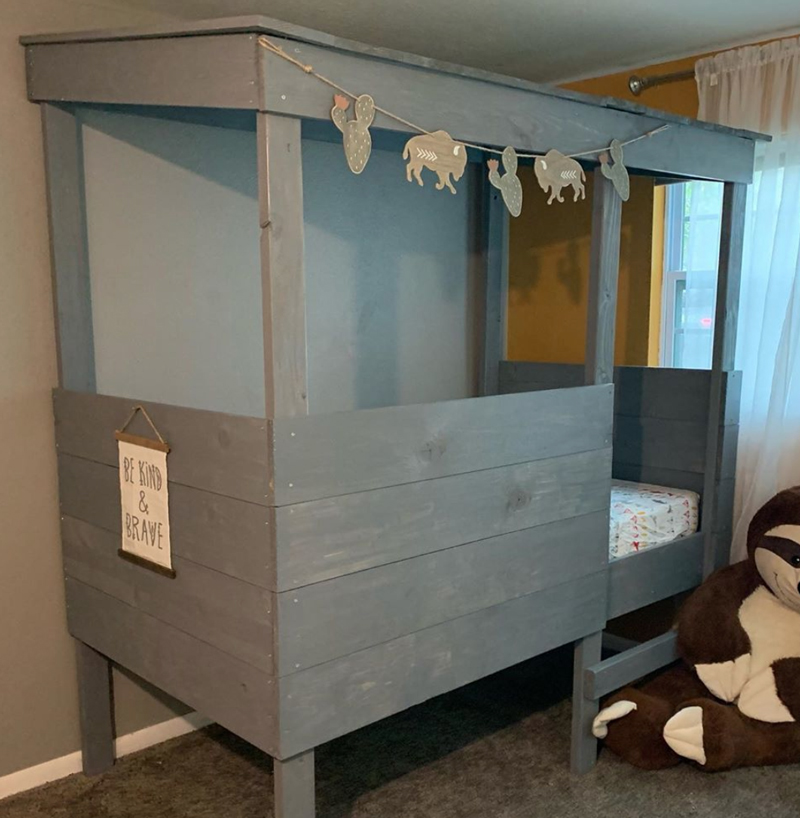
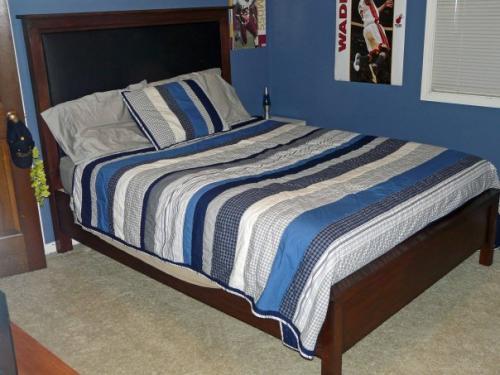
My boys LOVE this bed. I am making one for my other son who shares the room next so there will be two matching. They take up almost the whole room but they look so cute and double as play space in and under the bed so it works!
It took about 2 days to build and I had help from my husband and friend to make construction easier and cuts and staining more efficient.
One problem I had at the end was screwing in the roof boards. I hadn't thought about the fact that my ceilings are low on my old ranch house and could barely get the screwdriver in the space above the bed, so I had to tip the bed over to make it easier. Next time I may predrill the screws til just before breakthrough so I can fit the drill above.
Also those boards around the bed are probably the most expensive piece - if I didn't want the second bed to match exactly I would wonder if 1x6s wouldn't have been more economical.
I did sand and stain before assembly which made things much easier. I used my standard weathered grey stain.
The sheets are Pillowfort : Rustler's Ranch twin set. The sign and banner hung on the bed I got from Hobby Lobby.


Sun, 08/04/2019 - 21:54
Thank you for submitting! This is awesome!
That is a smart suggestion to swap 1X6S for the siding that could save a lot of money.
very much appreciate all the photos and the details!
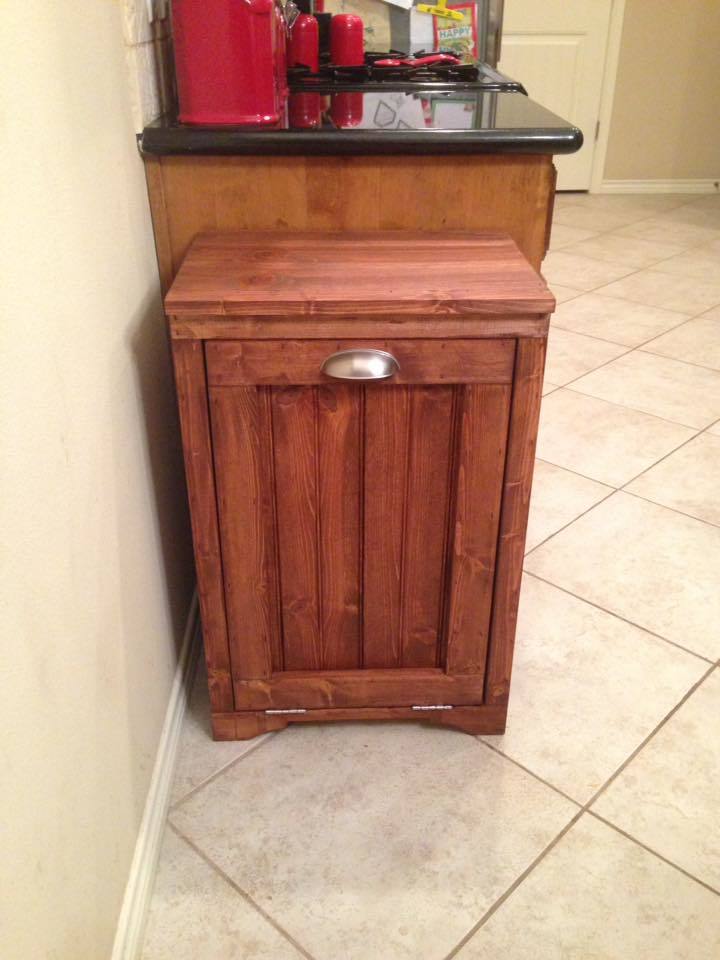
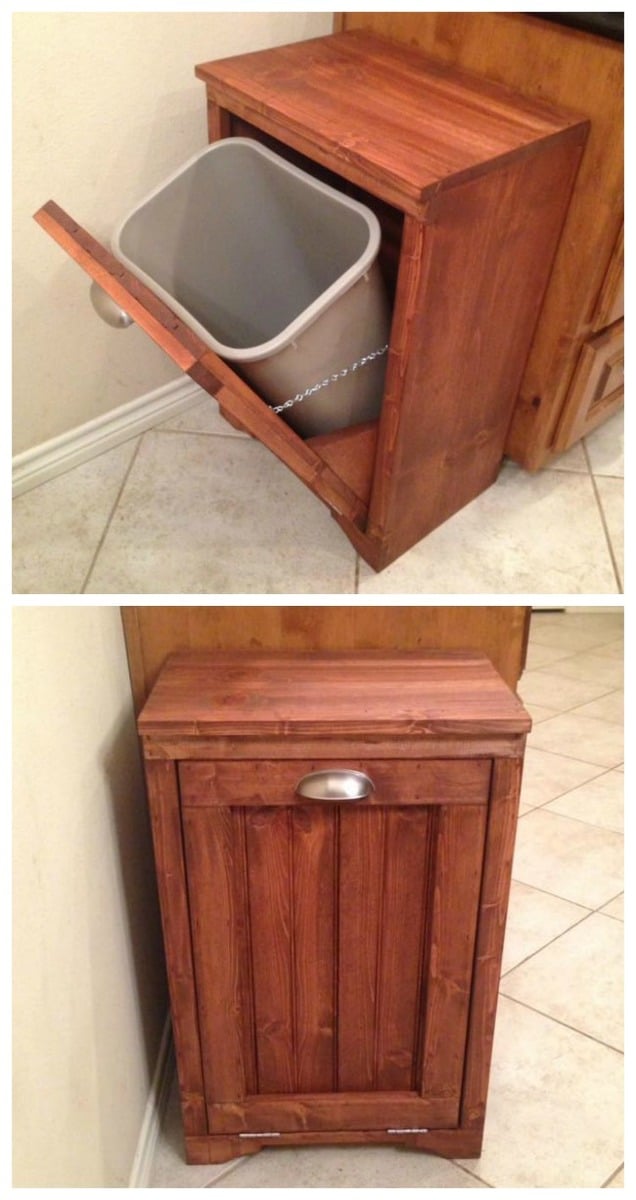
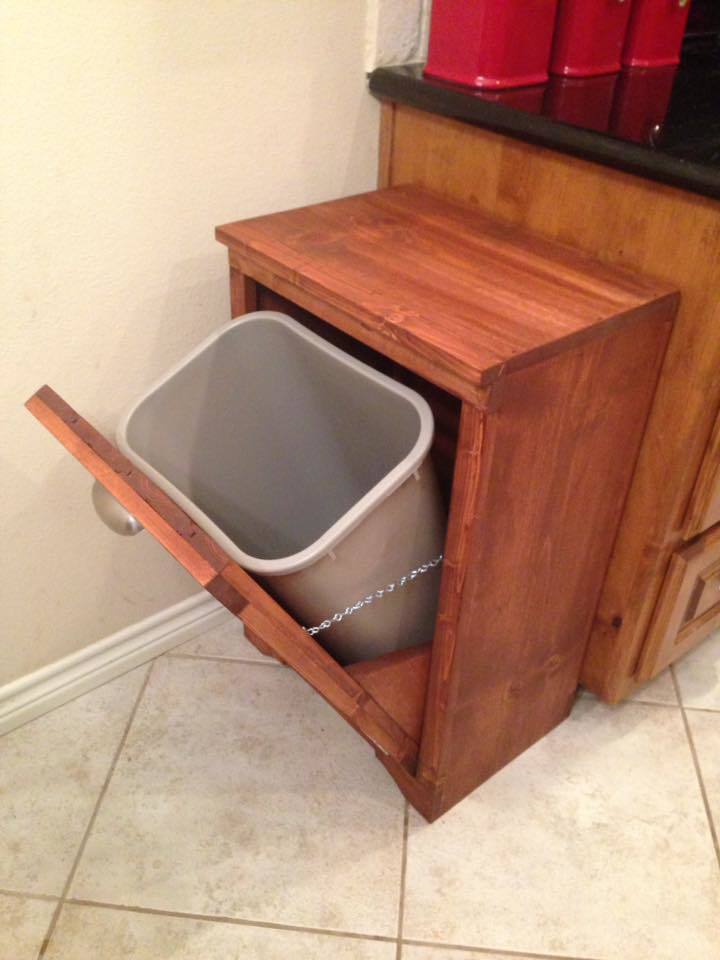
After 7 years of our trash can sitting out in the open, my wife decided we needed to do something about it. I saw the plans for this tilt out wooden trash bin, and slightly modified it using tongue and groove for the face panel.
I made this table and chairs for my 1 year old nephew. He is still a little small for it but the table and chairs are both very sturdy. The table top is a one piece, 24 x 36 ,edge glued pine board. I used the one piece table top as an alternative to screwing the 3 boards together. I followed the plans for the table for the most part. As for the chairs, I followed the plan to build the seat base. For the legs of the chairs I took advise from carongirls' table and chair brag post and used 2x2's. I used 1x3's to stiffen the chair legs. I also lengthened the table legs and chair legs by 2 inches.

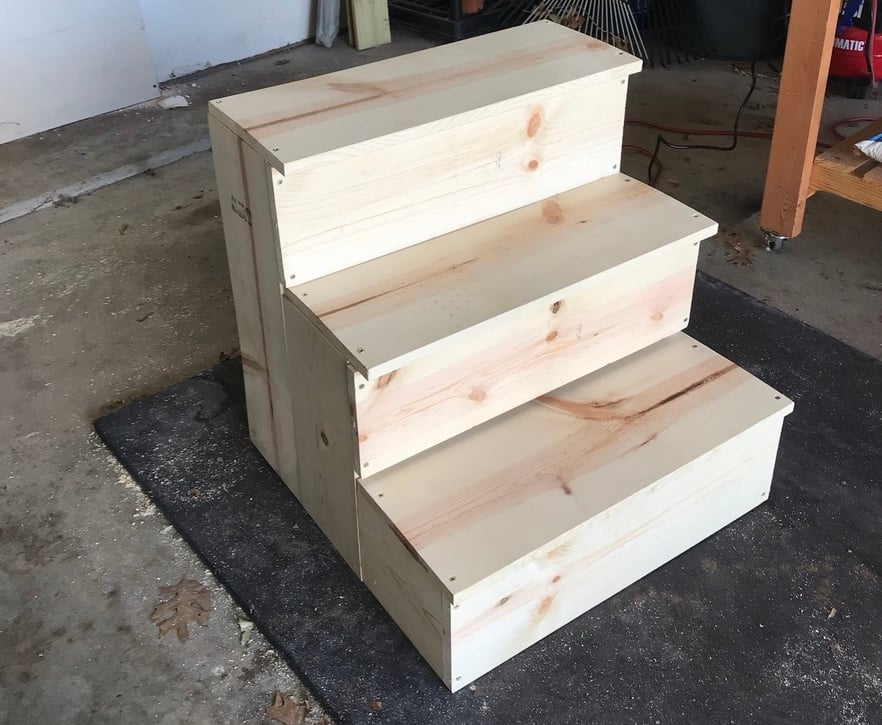
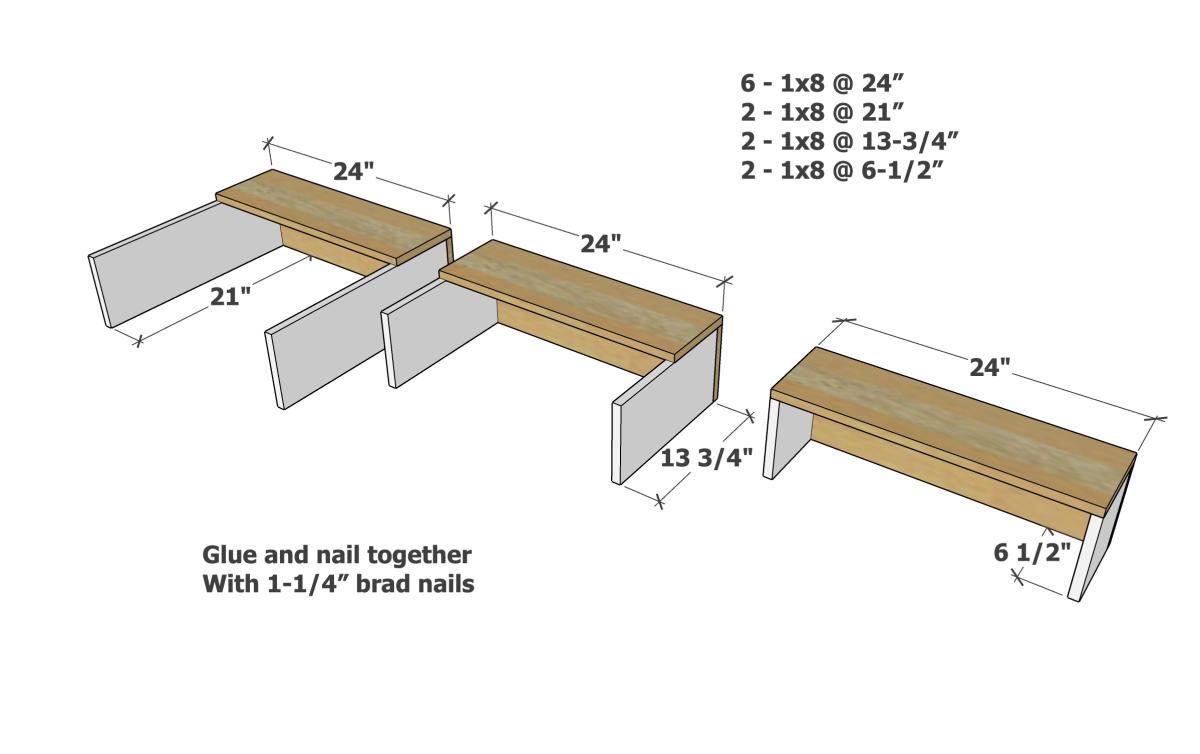
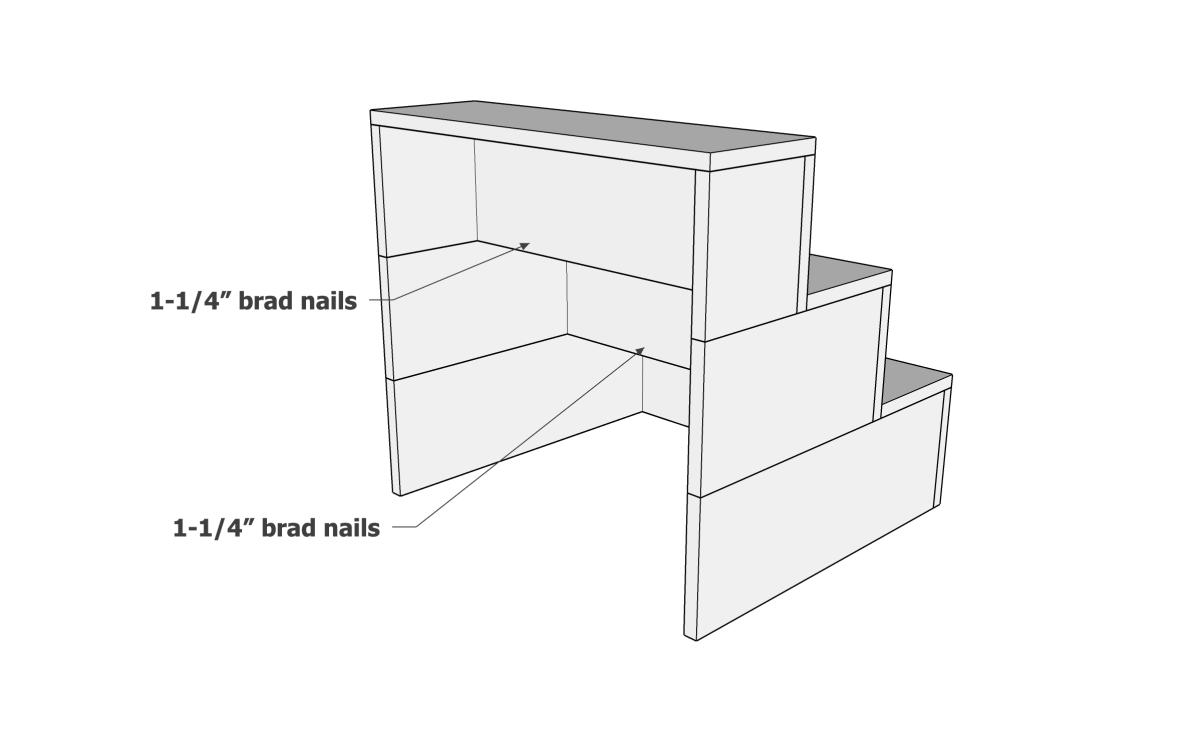
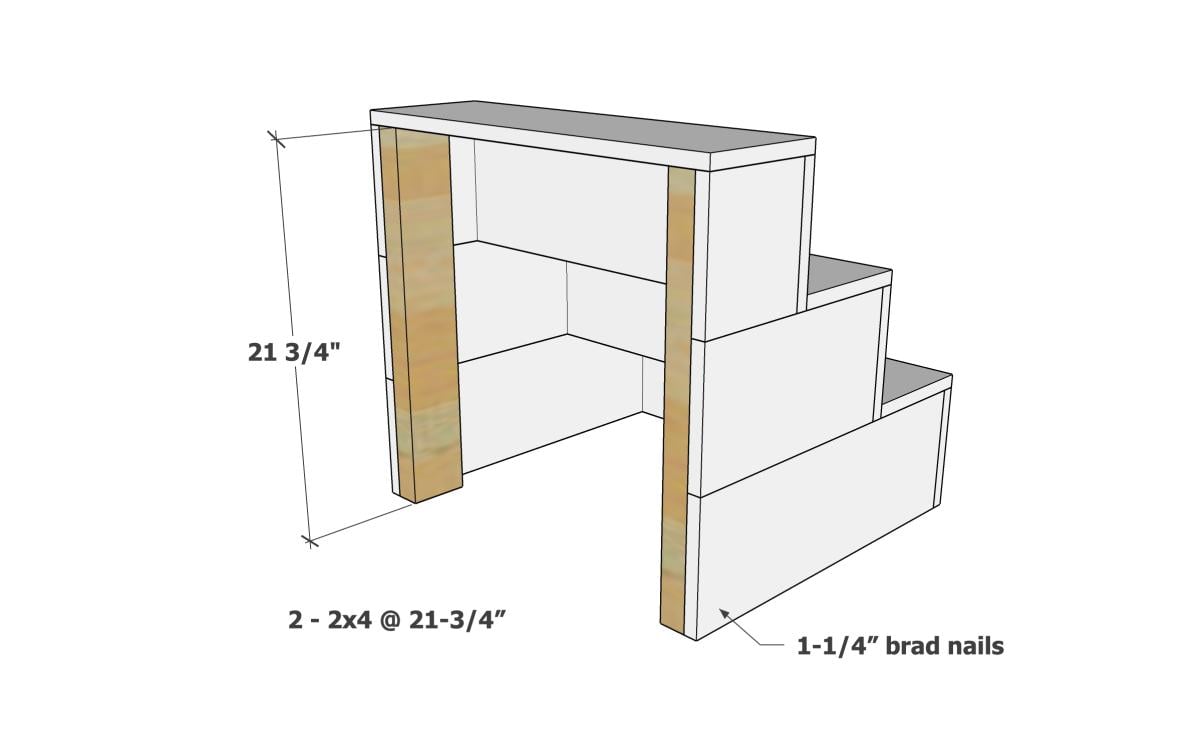
I needed sturdy stairs for my 2 60lb dogs. My bed is 33 inches from floor to top of mattress. So, this is my very first project completed by myself! Custom size pet stairs 24inx24inx24
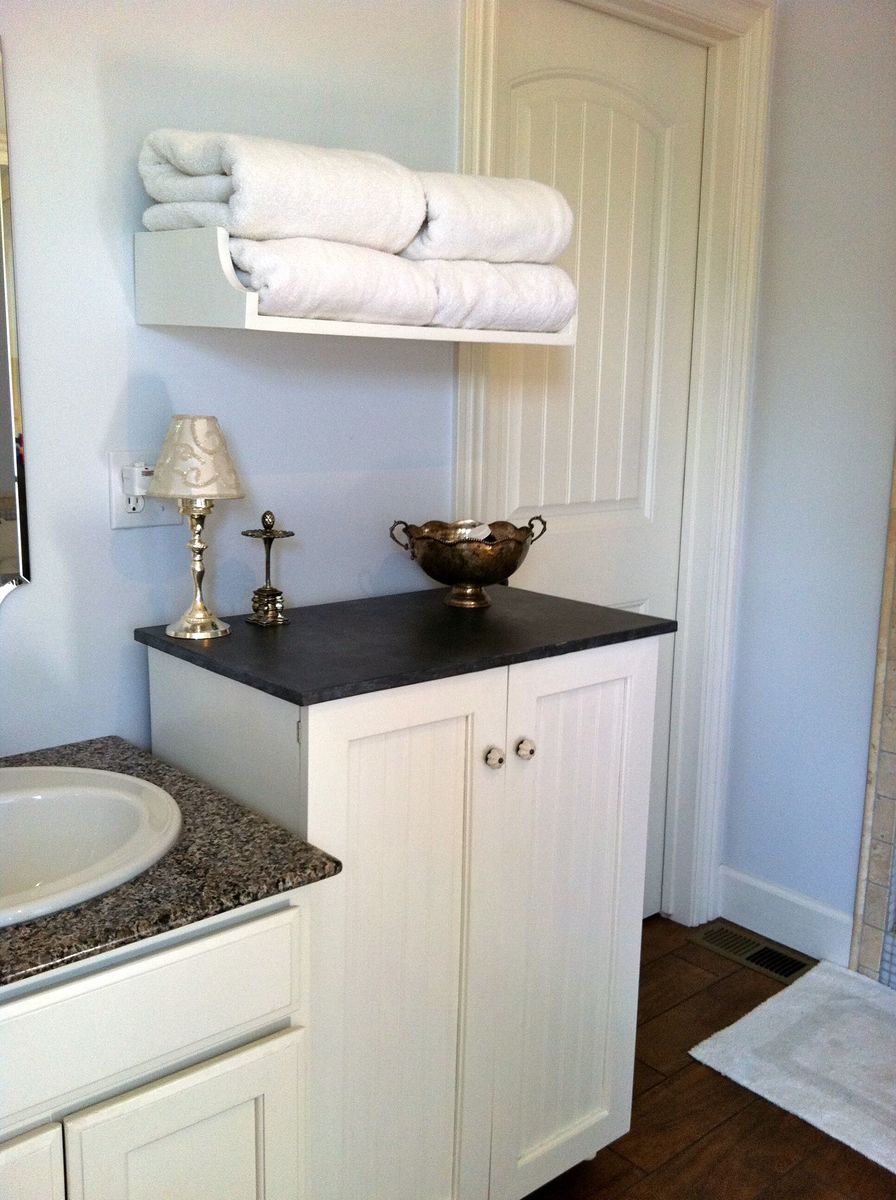
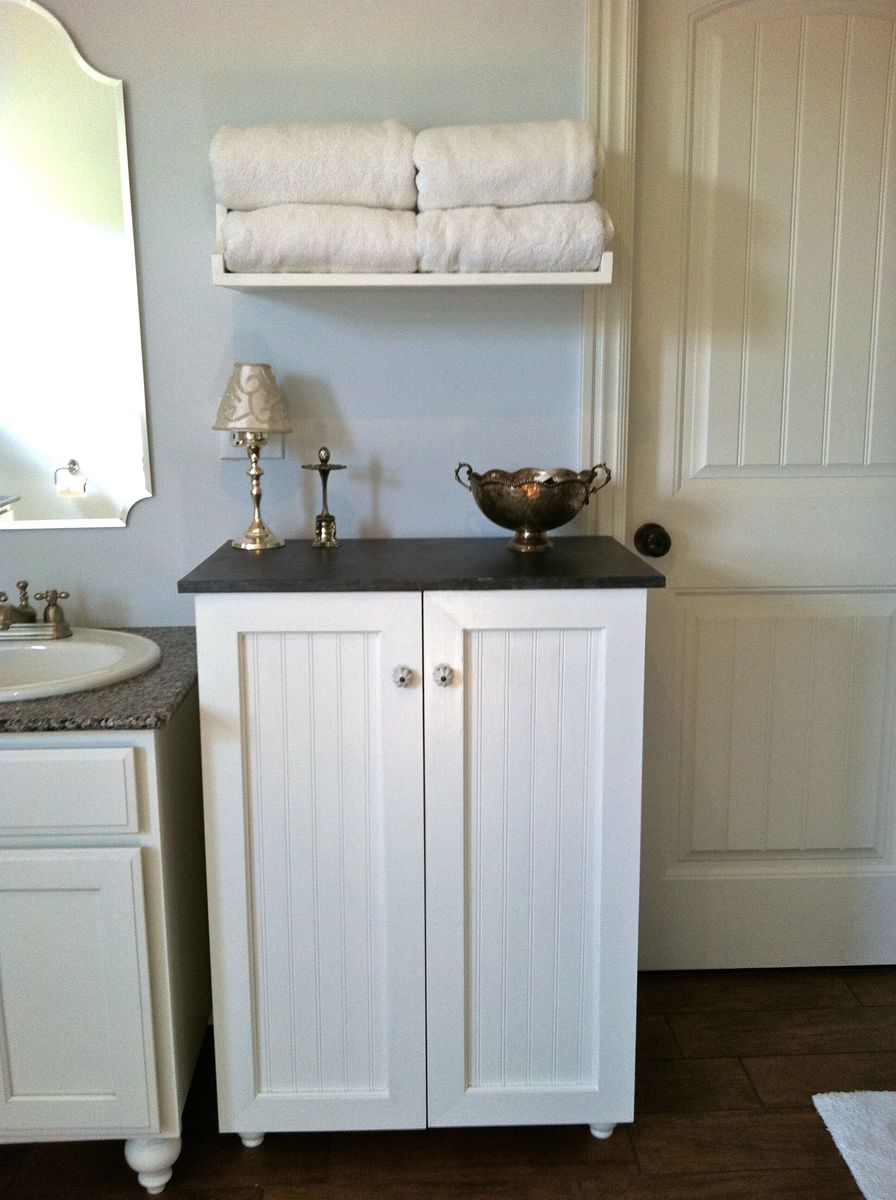
I wanted to use our laundry basket dresser as a collector for dirty laundry in our bathroom, and wanted it to have doors so it would blend in better. I also made the shelf above for our towels. It is painted white with a faux-zinc finish on the top. I made the top slightly larger so it would overhang and added cute little bun feet. My talented friend Carli helped me build the doors (and by helped I mean I handed her things while she impressed me with all her tools and skills!) and frame.

Fri, 07/29/2011 - 23:37
this is perfect! i totally need a bunch just like this! I love the added doors!
Tue, 10/11/2011 - 20:42
Would you mind sharing the dimensions for this cabinet? Love this idea!!!! Great job!
Wed, 01/11/2012 - 08:29
I love this idea! I will have a new bathroom soon and I think this will get used! What are the dimensions, or what style cabinet would you suggest to look for? TIA!
Fri, 02/17/2012 - 05:57
The dimensions are the same as Ana's plan: http://ana-white.com/2010/11/laundry-basket-dresser except that the top is slightly bigger (3/4" overhang on front/sides) to look more like a countertop. On the doors we just made a frame w/ angled pieces, routed a notched line on the back & glued/nailed some beadboard in from the back. Sorry I can't be much more detailed on that, a friend did most of the doors for me!
Sun, 02/19/2012 - 07:42
I actually got the plywood to do this project and I was going to add doors. I looked at the baskets suggested but it seems they would stick out the front. I was just curious, did you use different baskets that would fit inside the cabinet or did you make the cabinet slightly deeper?
Sat, 02/25/2012 - 05:36
Actually I discovered the same problem after it was built. I just didn't put a back on and they stick out a tiny bit in the back. I actually kind of like it that way because it lets some air in (being in the bathroom and putting towels in I could see it getting mildewy without much circulation). But if I had gotten the baskets first I probably would have made it about 2" deeper, then leave some open space, but not all, on the back.
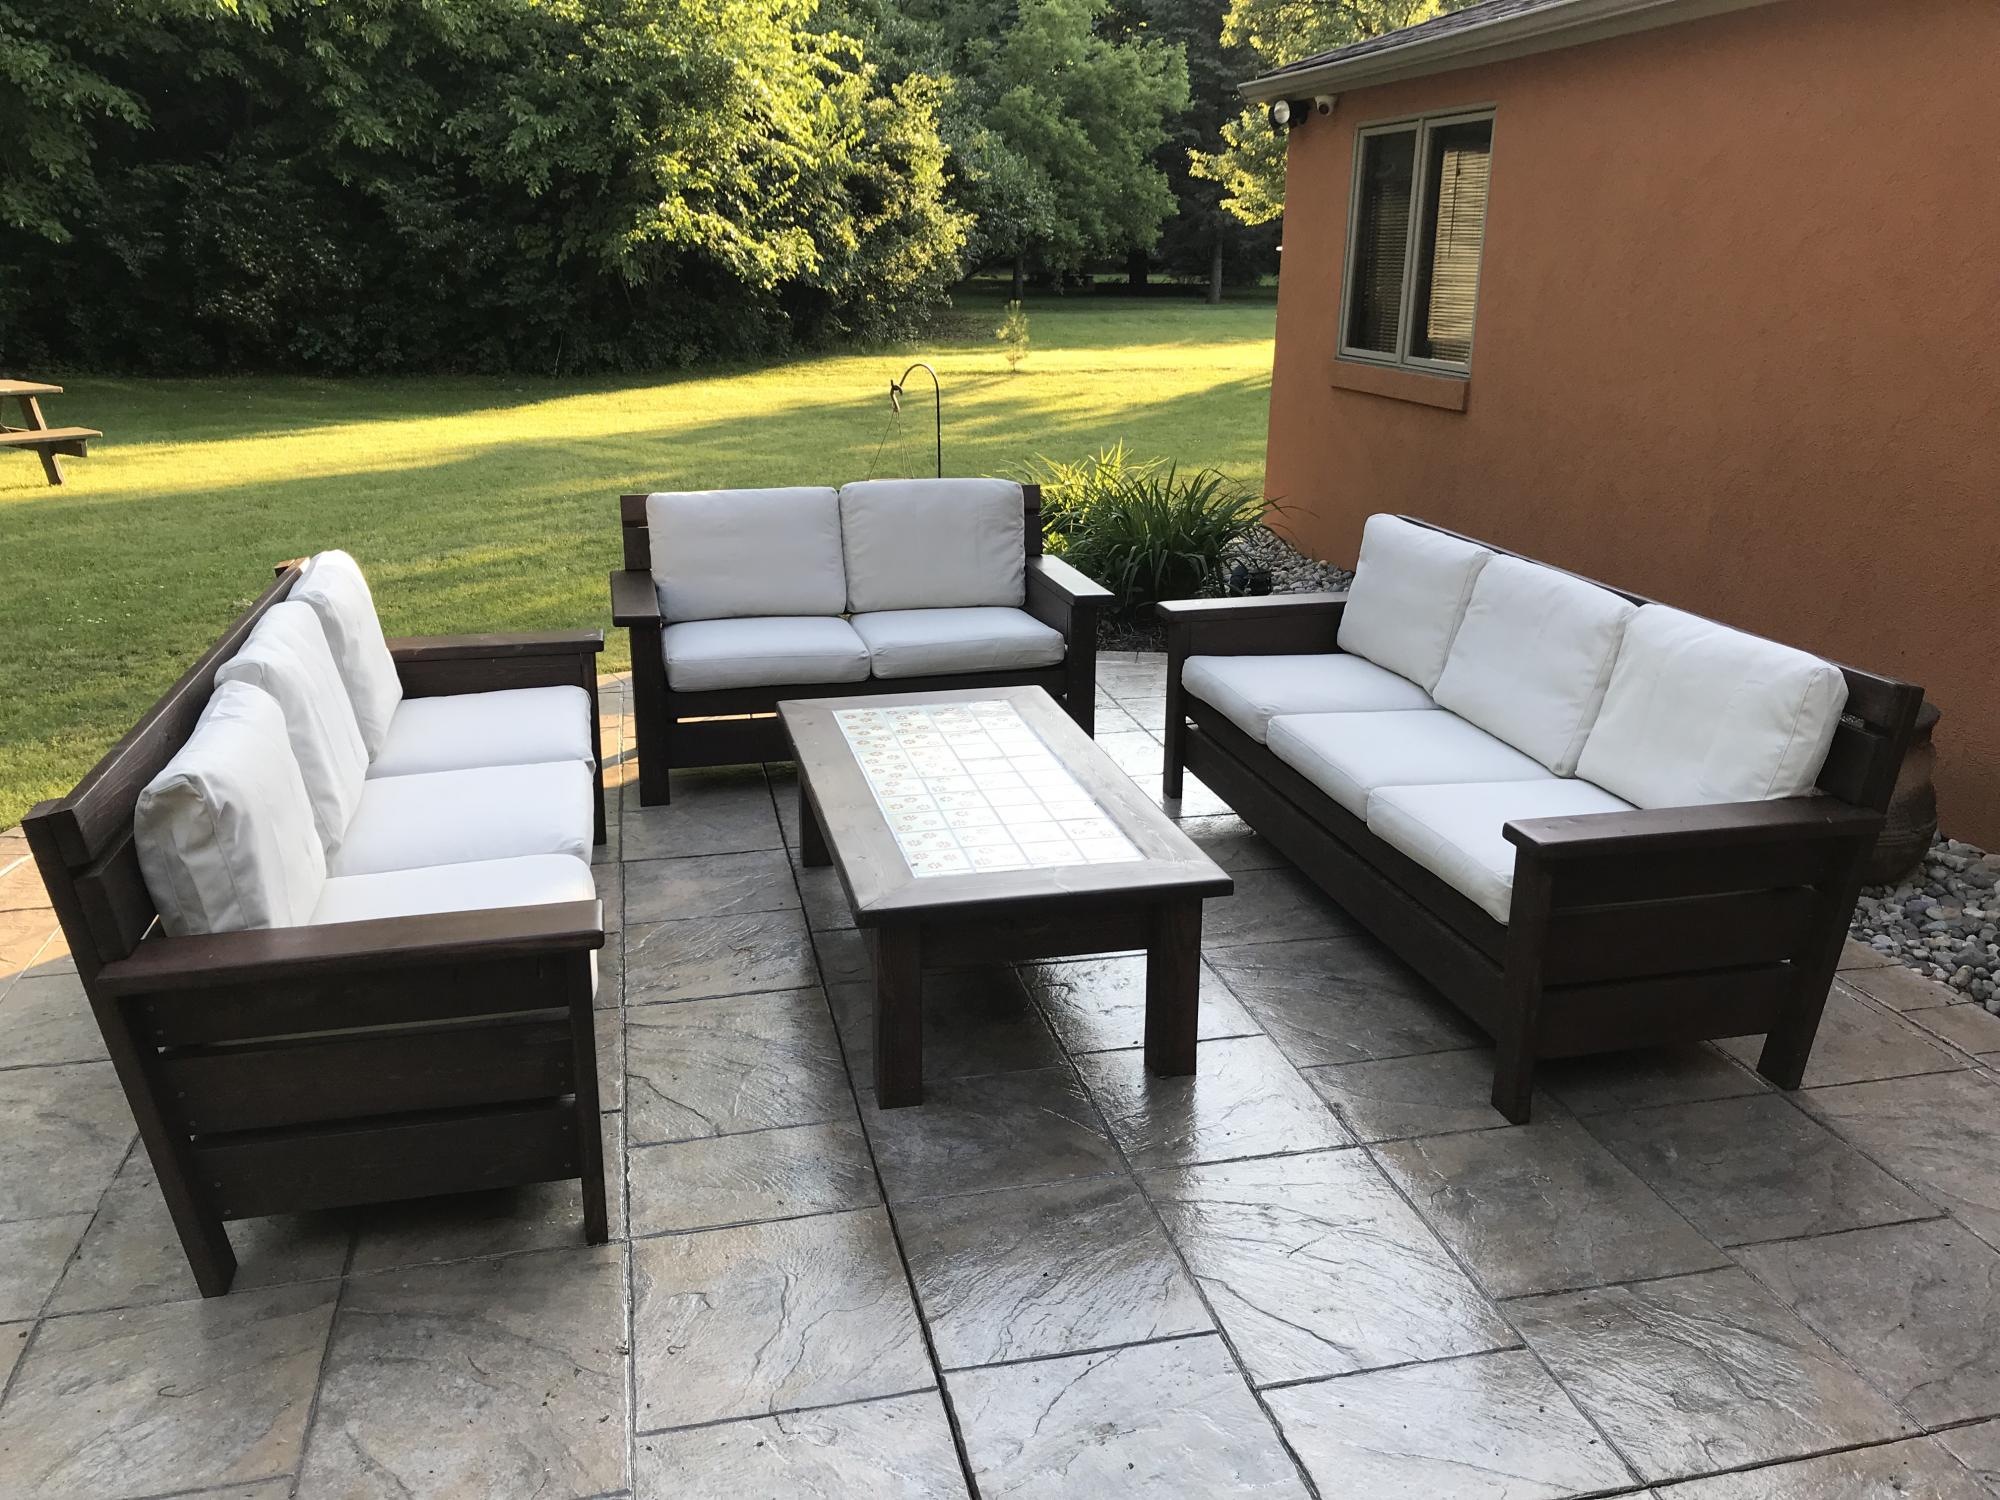
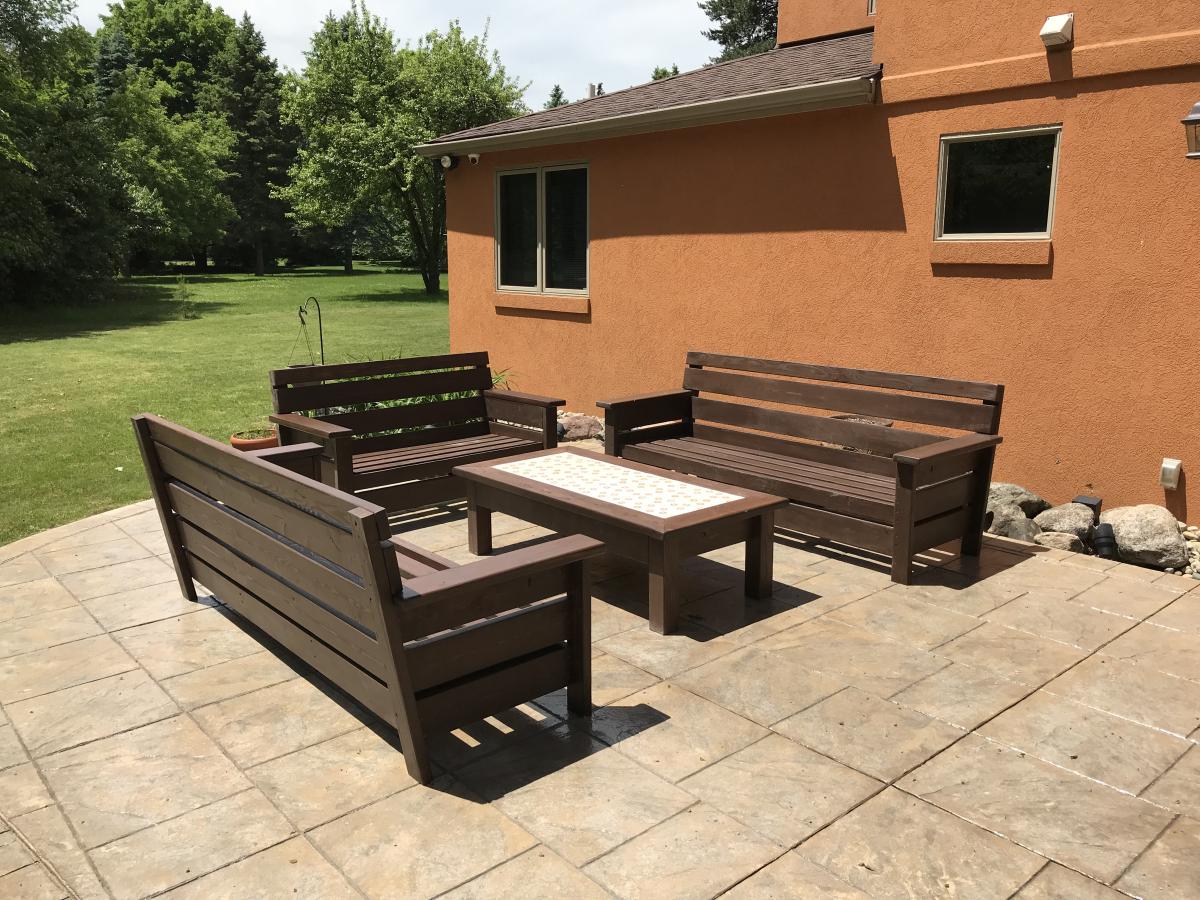
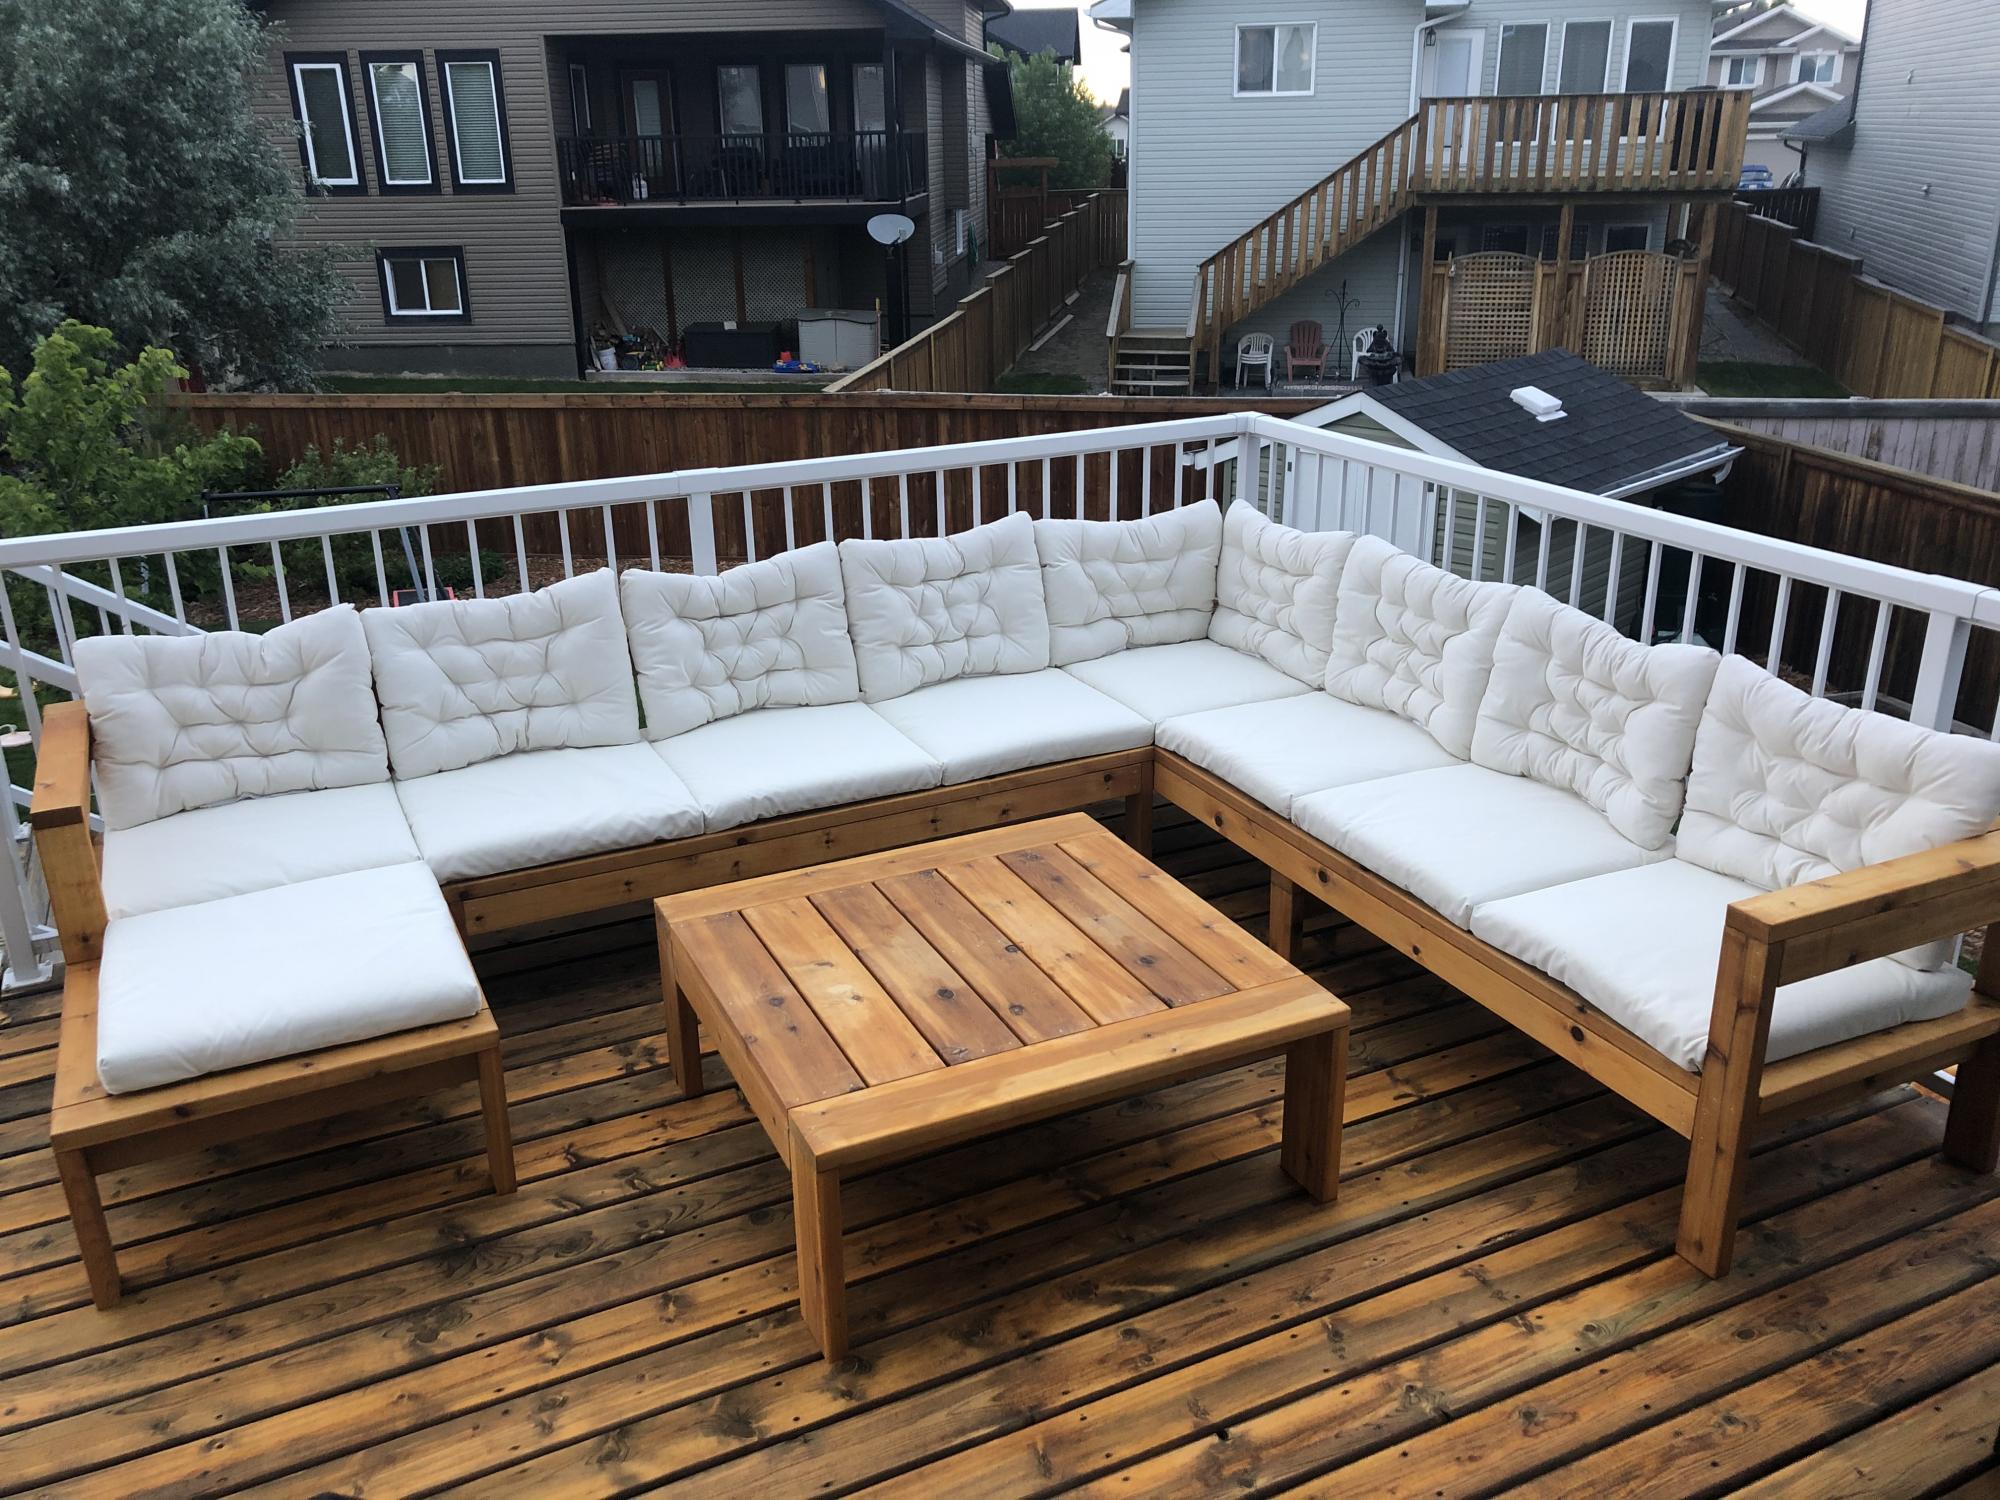
I created two sofas, a love seat and a table by modifying the modern chair. I added a back extension, tipped the back back 10 degrees, and angled the seat platform down a few degrees. Considered doing Adirondack arms, but my wife preferred the rectangular shape. The table is a variation of the 2x4 patio table (base construction similar), but we substituted pine 4x4 legs for the 2x4s, and implemented a 2x6 "picture frame" around Mexican tile on top.
I used pocket screws to attach the arms to the sides, and also to hide screws on the table "picture frame".
All-in-all, I would say this is an elegant-looking patio set that should last quite a while. Very solid, very heavy to move around (my only complaint).
We plan to add some colorful throw pillows.

Wed, 05/13/2020 - 06:38
Like the changes!
What is the angle of the chair/sofa back 110 degrees?
Thanks
In reply to Angle of back? by KeithMatthews
Wed, 05/13/2020 - 06:39
Oops just saw it at the top, sorry.
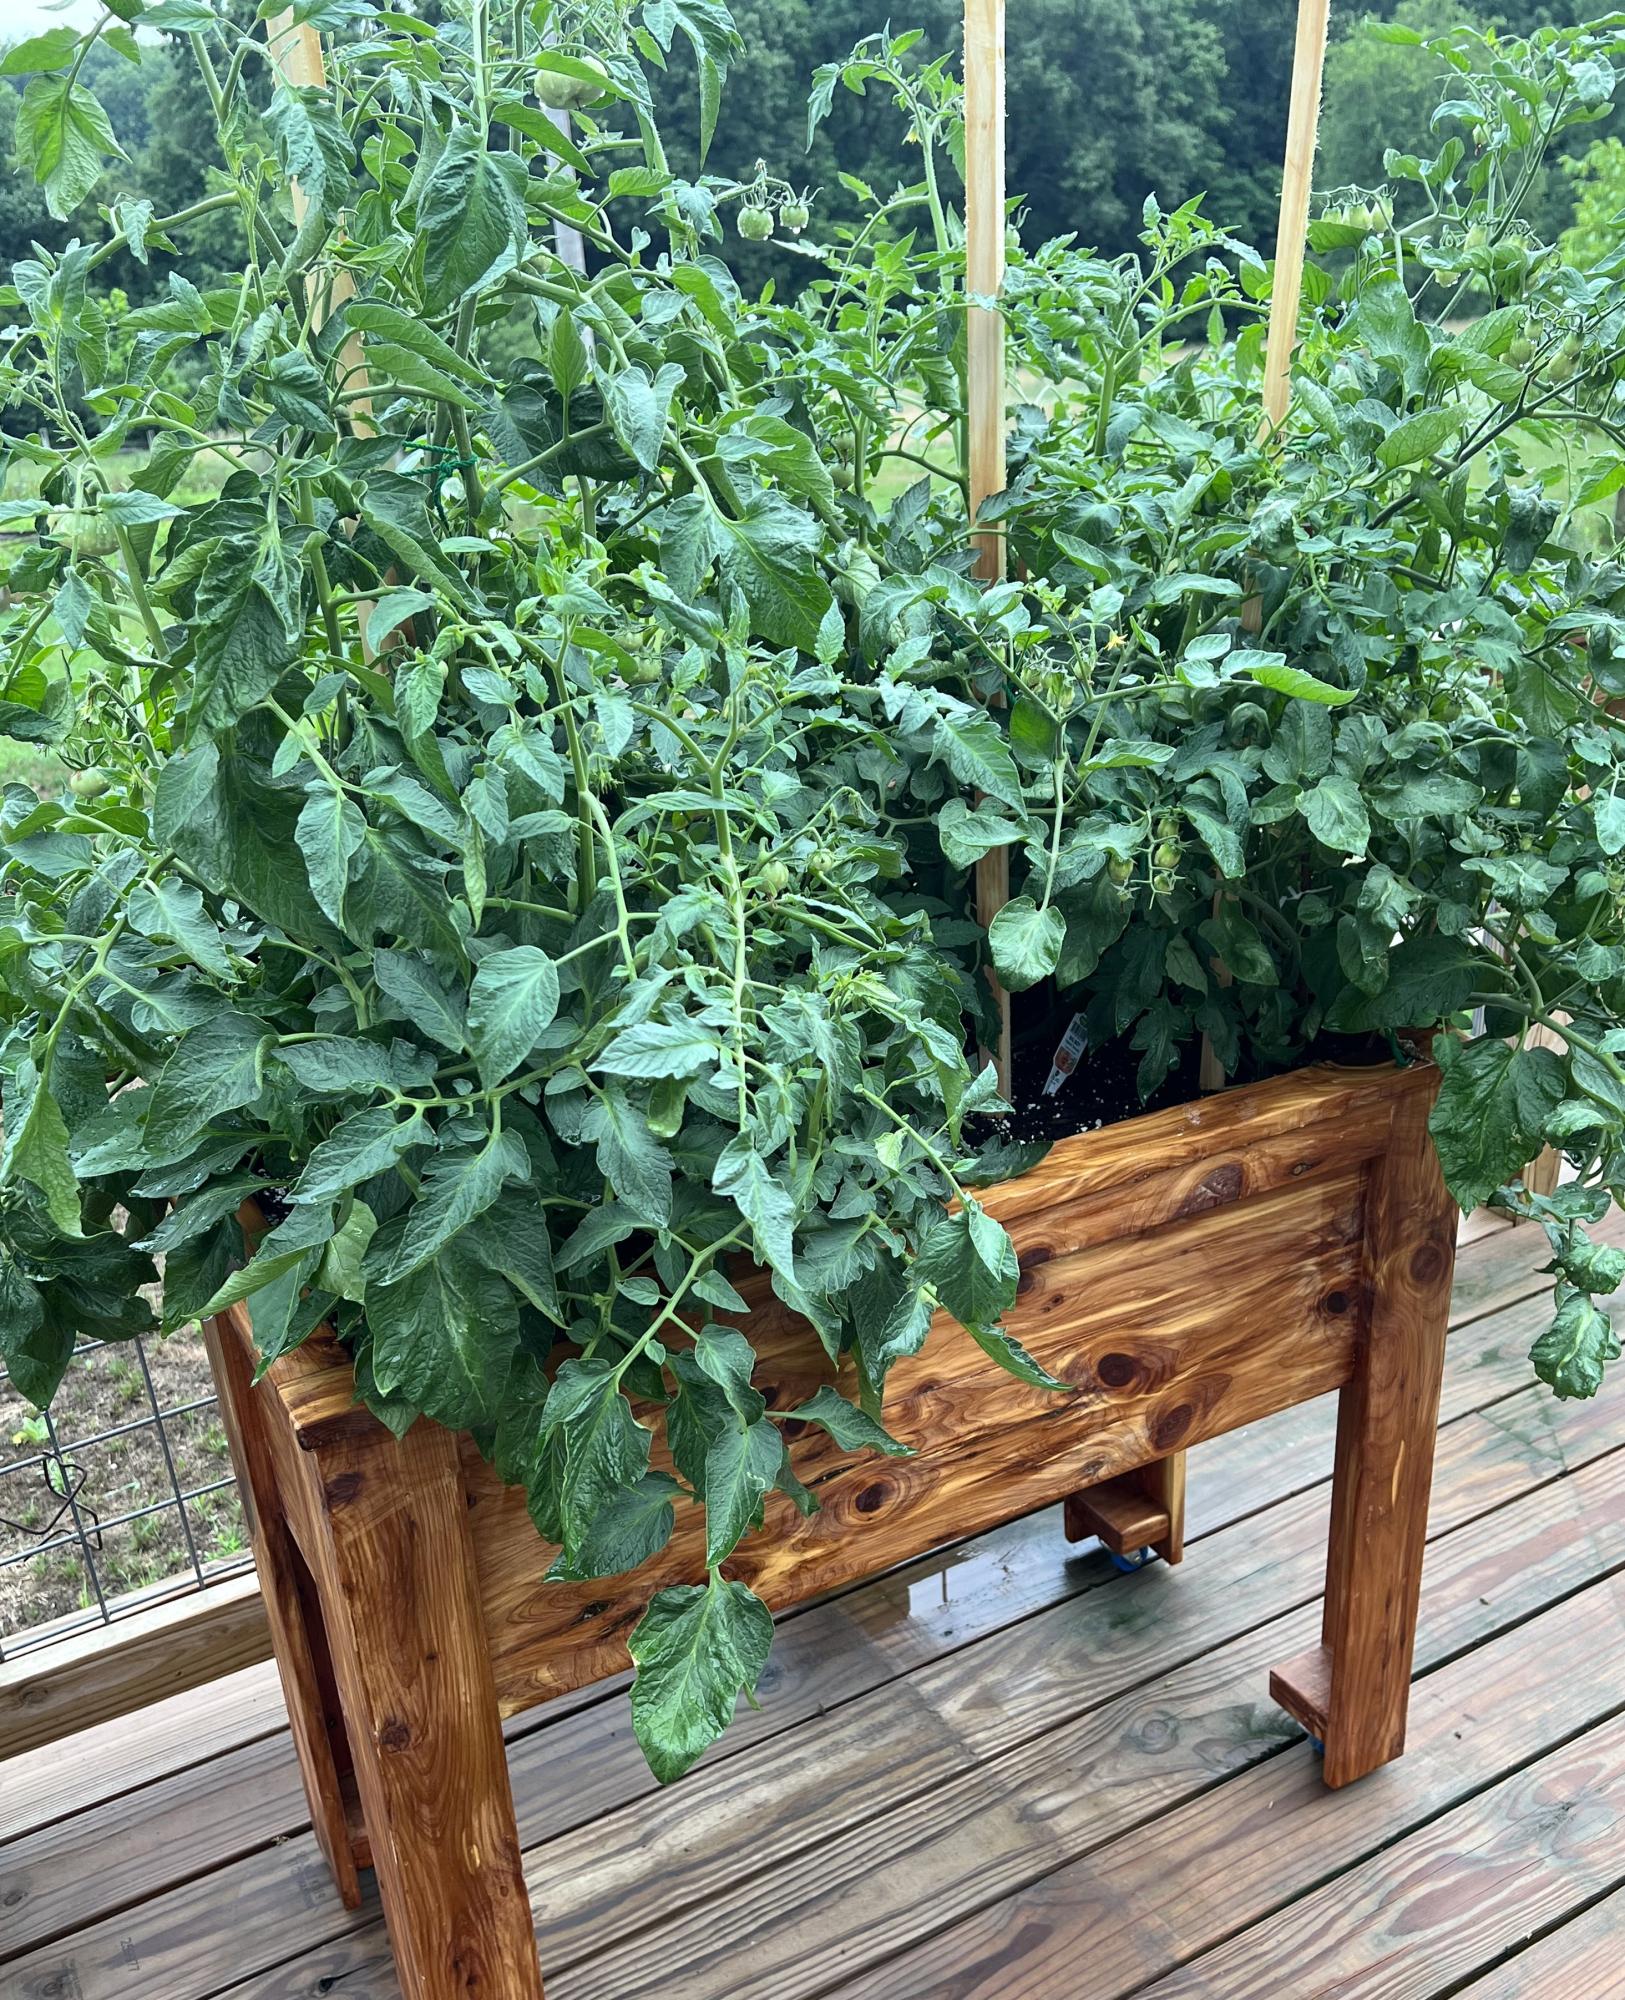
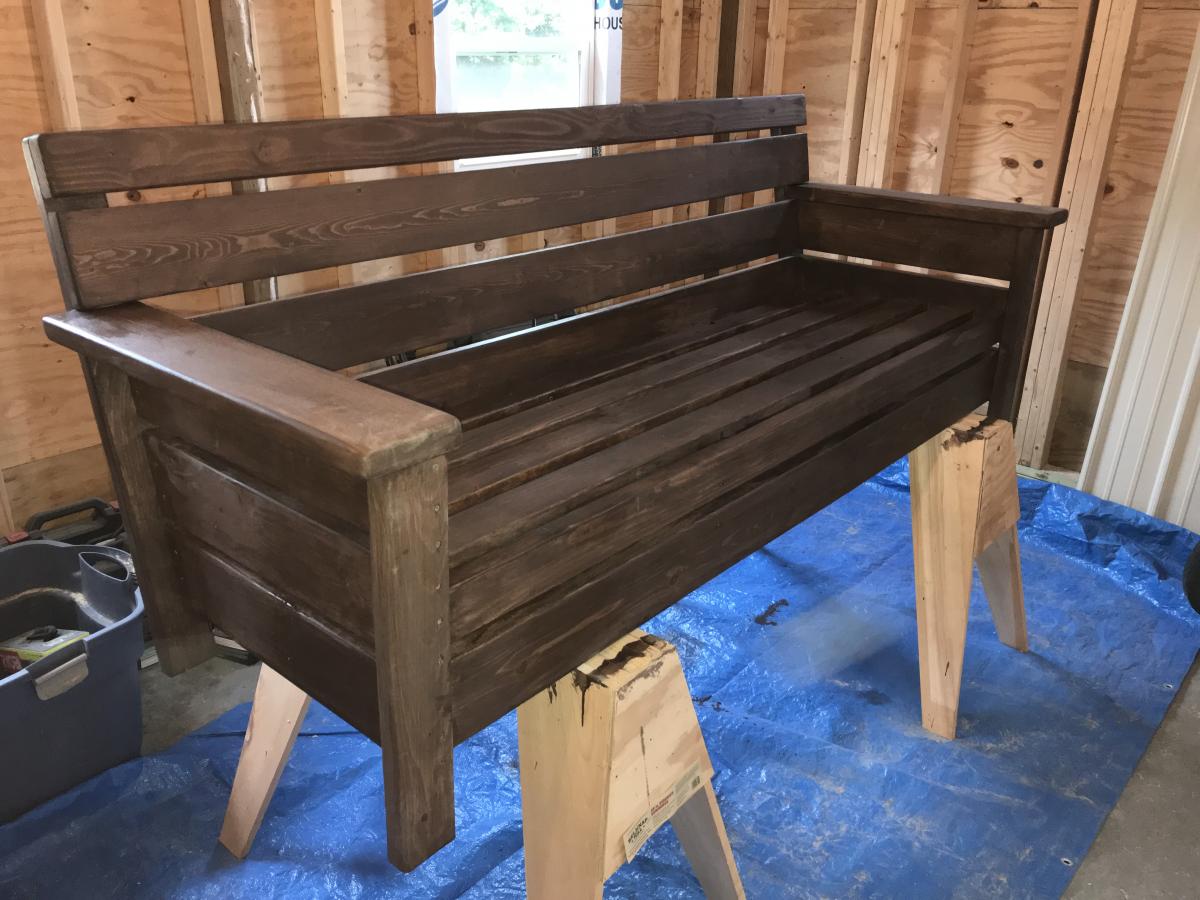
I saw your raised garden box and decided to make it for my wife so she could garden on our deck due to medical problems. She absolutely loved it.
The only thing I did different was I added casters to the legs so it can be moved easily on the deck.
Thank you very much for the idea and plans. We really enjoy them.
John Sterzick

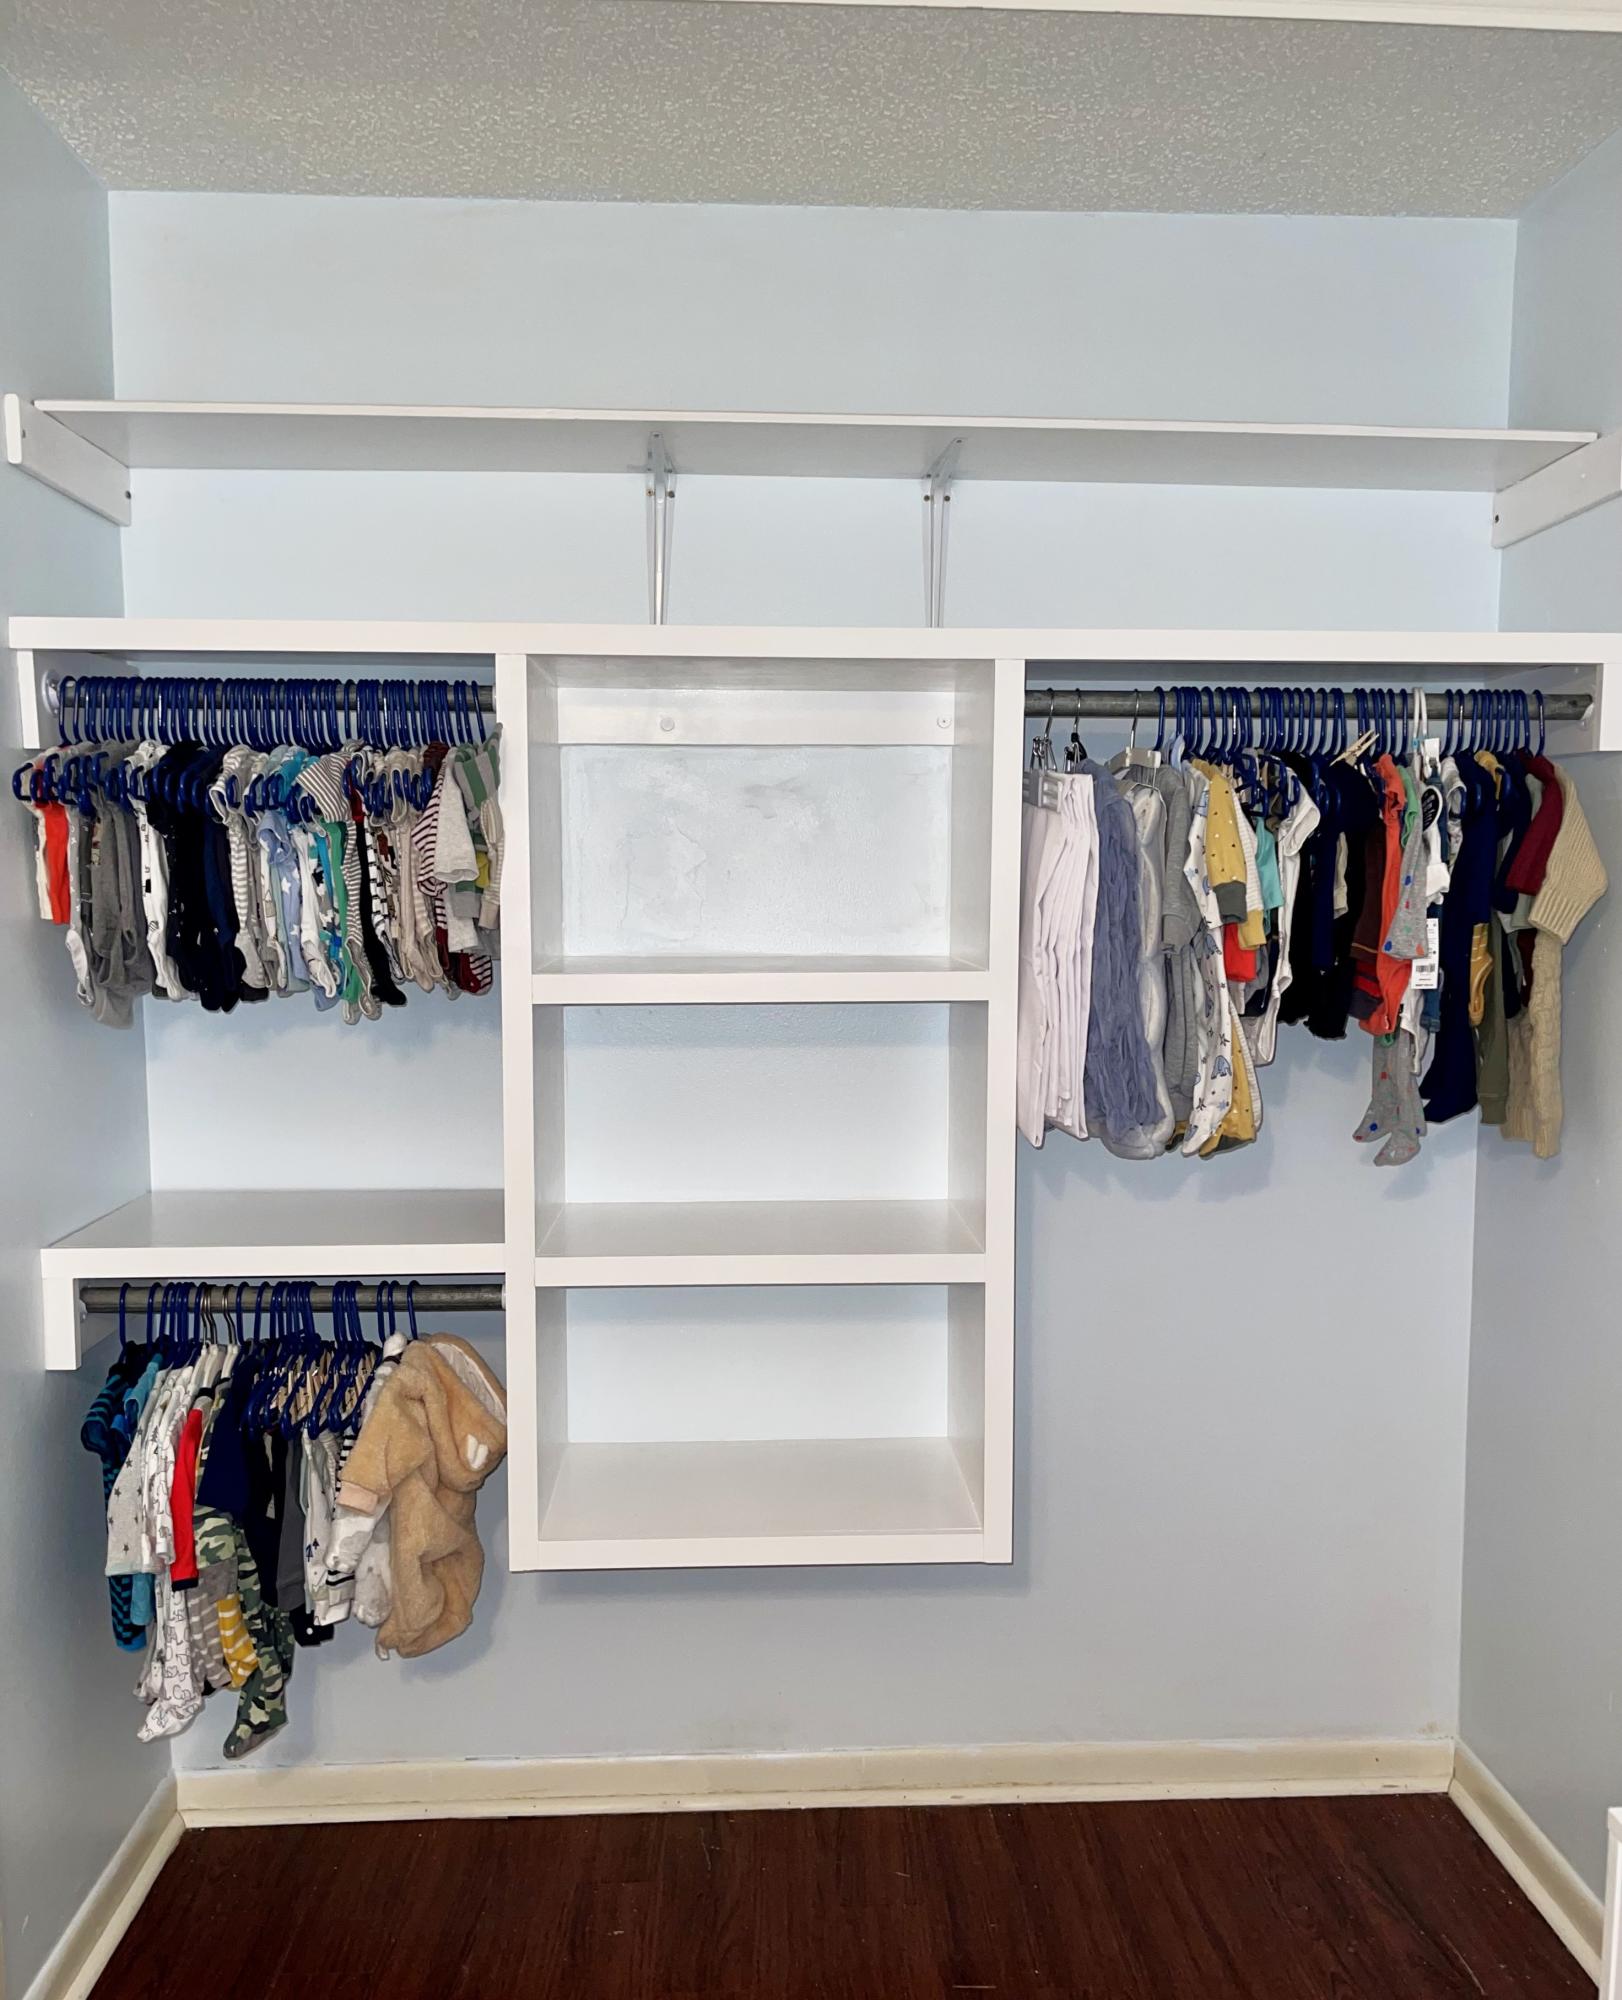
This project is based on the floating closet tower build. This is the first time I’ve attempted a renovation project of this size, and I feel satisfied with the results. I did not purchase my boards from shelf help, I cut mine from a sheet and a half of plywood. Thank you for providing your plans for free. They are very helpful for beginners like me!!
Charity P
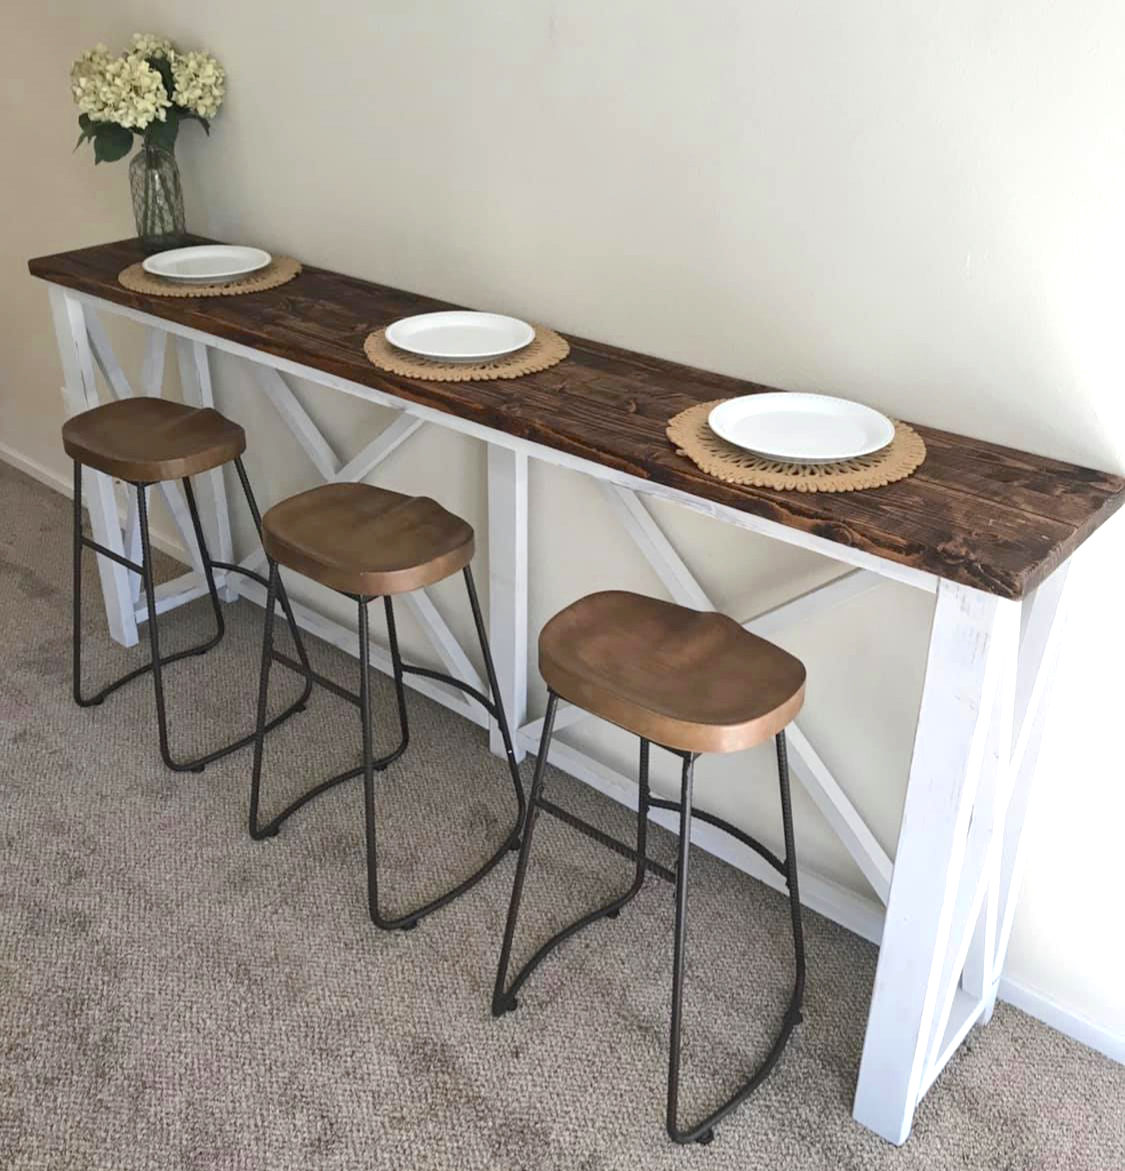
Hand made breakfast bar check us out on Facebook marney Marie
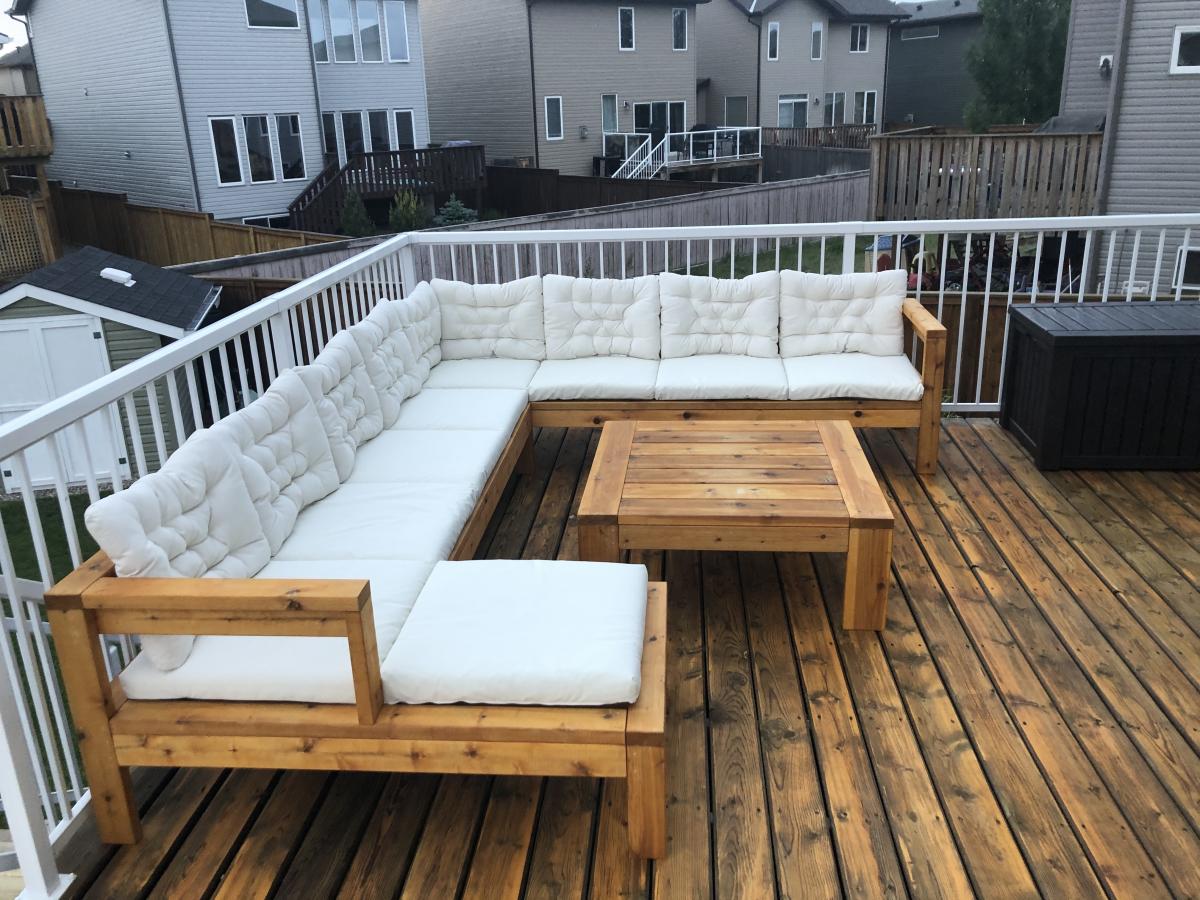
Modified the plans of the outdoor sofa and sectional piece to create this set, then added cushions from IKEA.
Wed, 02/21/2024 - 10:27
I'm building the sectional this weekend, and saw your addition to the end piece and am going to steal your idea. Very nice.

I made this in an afternoon. Loved this project. It is made with 2x4's using a Kregs Jig and mitre saw (plus additional tools like a drill and square). This was my frist time using the Kregs Jig and I am sold!!
The free plans were taken from another website. They are very detailed and there is even a video (I recommend it as he gives a great tip for making sure the back stays equal/level to each other before putting the back on). Even though you can build this by yourself, I did have help for the heavier sides once they were assembled. I plan to build the additional side table soon and finish them both with sanding and staining when the weather seems less iffy for rain.
If you are looking for a good beginner project that doesn't take forever or have complicated steps, this is your project.
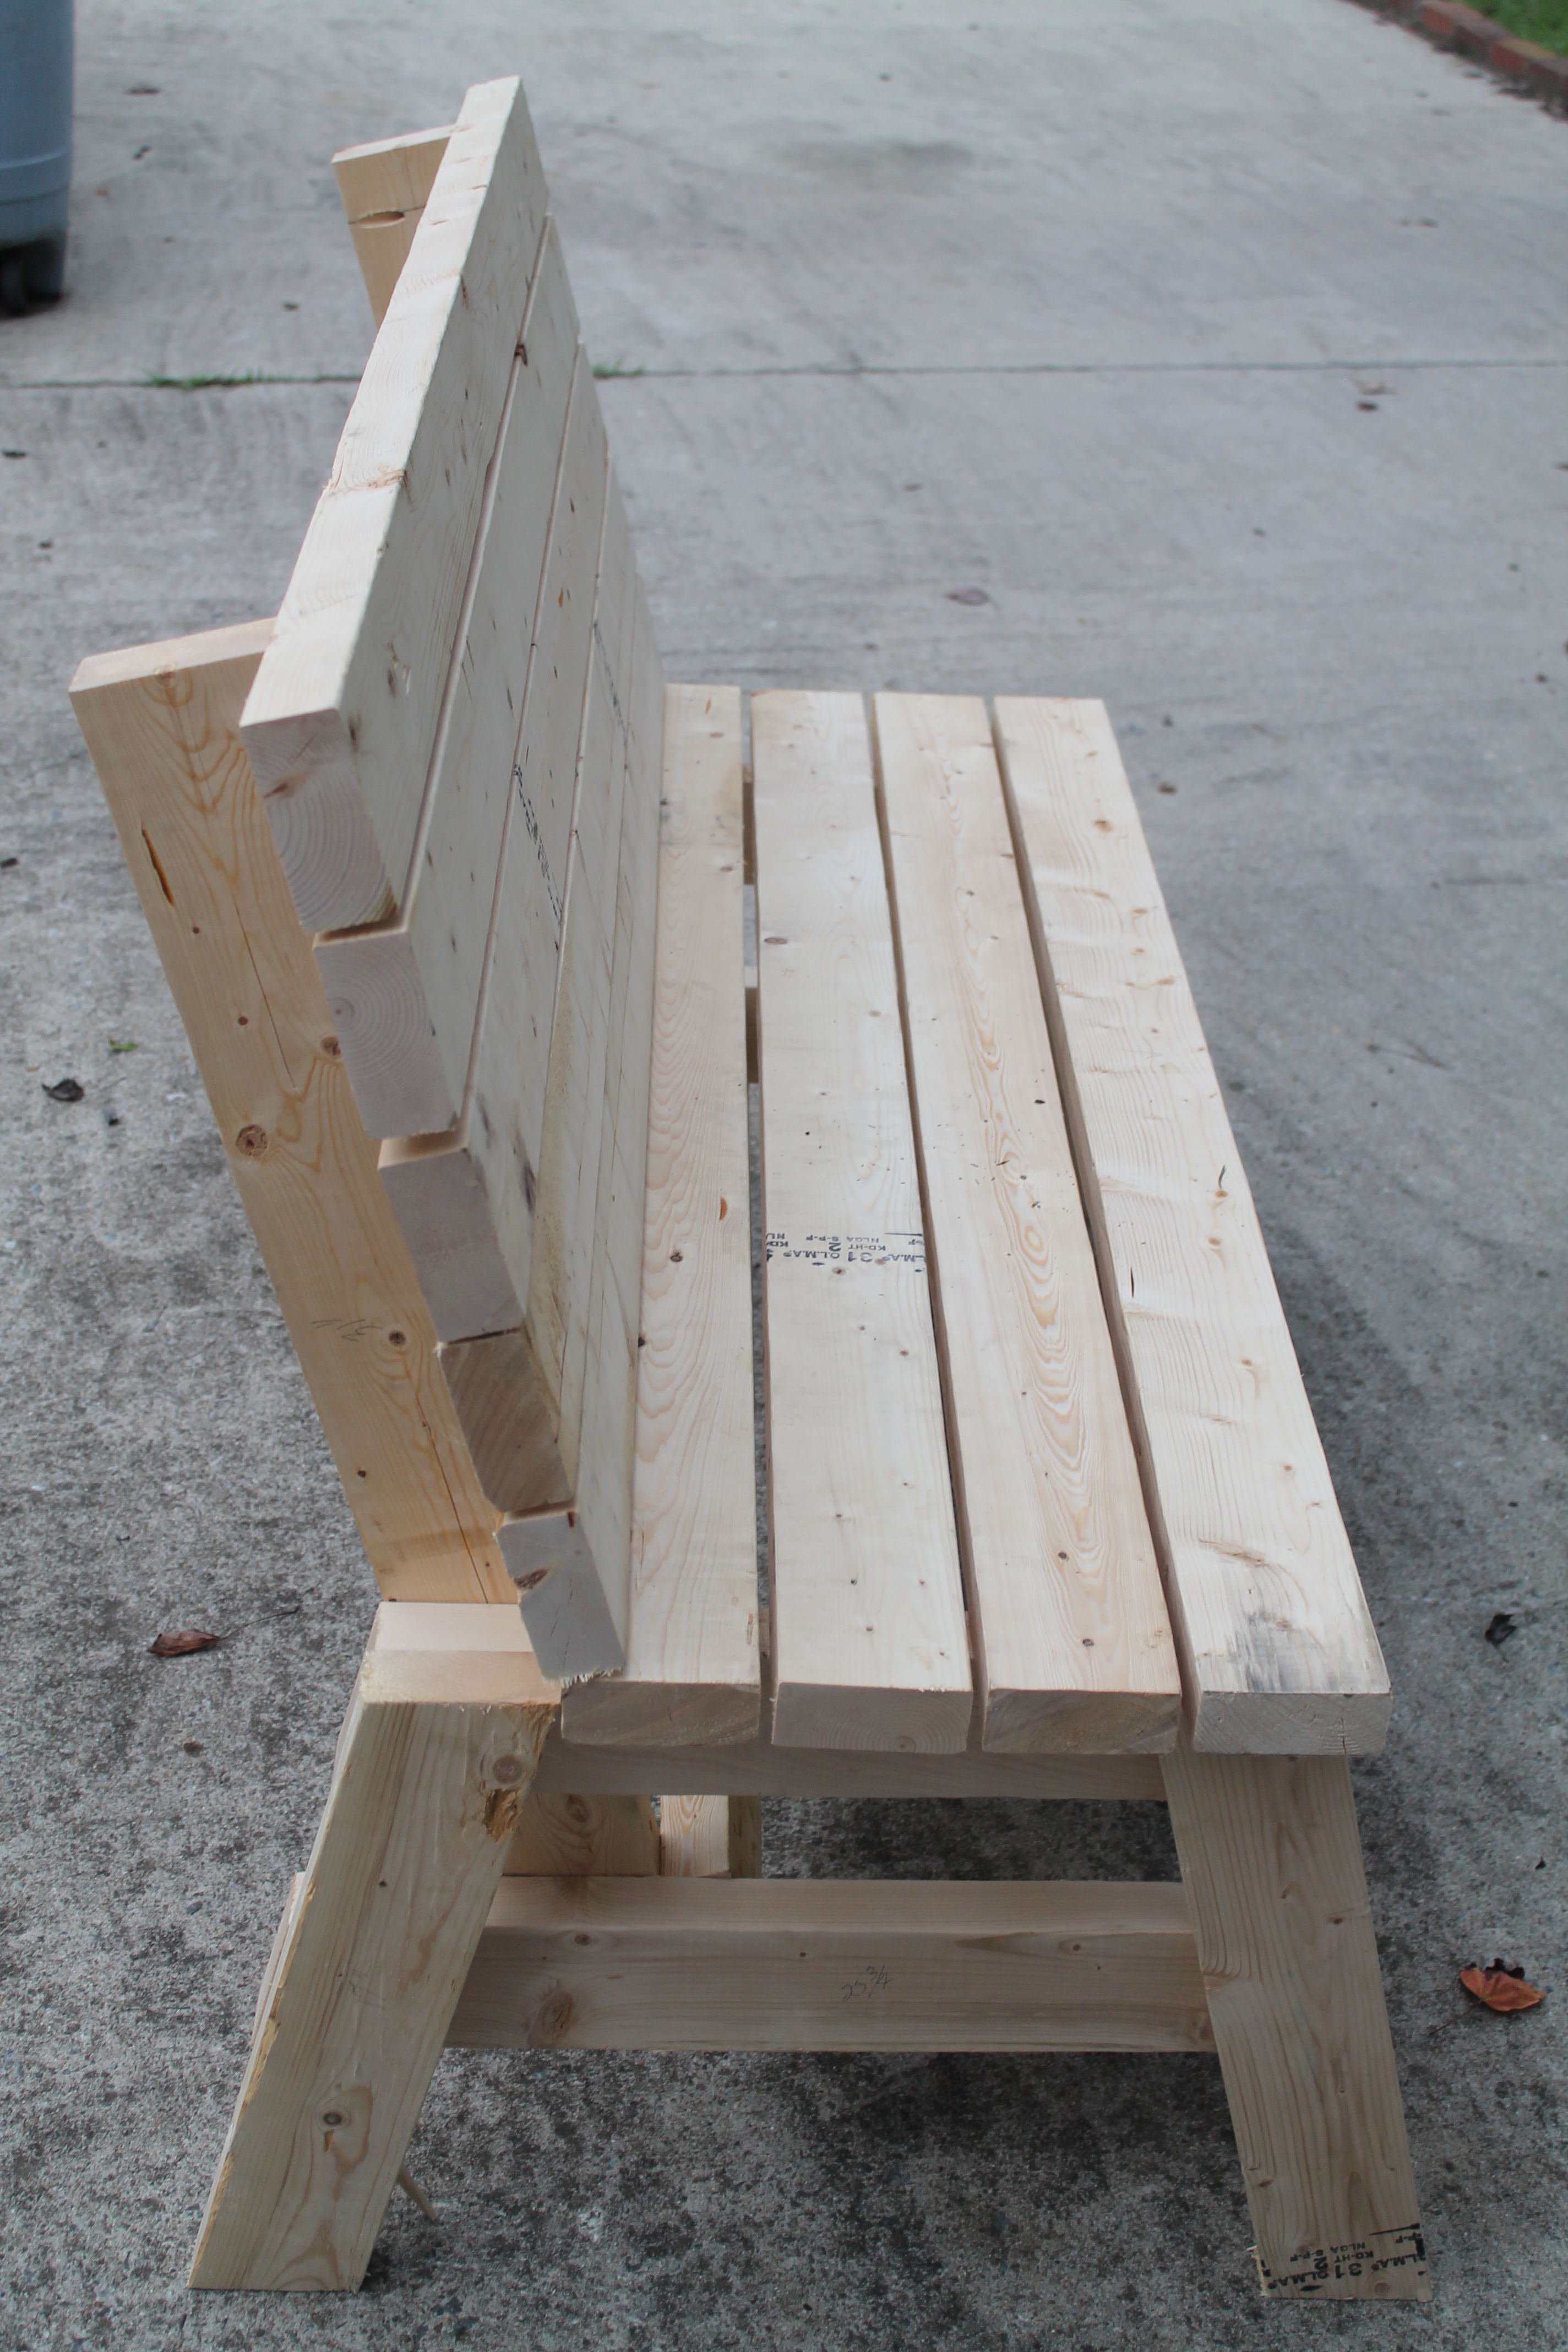

No modifications to original plans.

We have considered buying a cedar-lined chest to store blankets, towels, etc. for many years. However, we couldn’t find one that came close to matching the Knotty Pine bedroom set that we had in our master suite.
Hence, our design criteria was quite simple; match the bedroom set and have a chest sturdy enough to support our Beagles as they peer at the squirrels outside the window.
We used plans / ideas from several different chest designs which were readily available on the internet. Most of those plans were using hard woods such as oak. Those plans called for a hard wood framing with ¼” oak plywood for the panels. Since we needed to use Knotty Pine to match the bedroom set, we used 1” Knotty Pine for framing and Knotty Pine ¾ ply w/ Kreg Screws and copious glue to strengthen the construct. We finished it off with locally available 3/8” cedar T.G. planks. It is very heavy and very strong! This project was done entirely w/ Kreg Screws and no router rabbeting for the panels.
We learned the following while doing this project:
· When using soft woods, always put the power sander on the wood before you start the sander. Otherwise, you can get scratching / sander burns that don’t present themselves until staining begins.
· While very strong, ¾” plywood is very heavy!
· When using plywood, it is recommended that you stain both the visible and non-visible sides of each piece where glue is not to be applied. Otherwise the chance for delaminating increases dramatically.
60 hours work and $350 to build.


Mon, 12/15/2014 - 12:40
Beautiful chest. I better get busy and make one.

Aloha!
I was inspired by what I saw on Ana's website. My daughter was obsessed with the PB Teen version of the loft bed, so I tweaked the plans here to make it more like the $2500 bed from the catalog!!!!! Yikes and don't even get me started on what the shipping to Hawaii would be....It was well worth the effort! My daughter loves her new loft bed...Now if I can just figure out a way to get the dog to love the high bed!!!
Cheers, Tina
Sat, 06/22/2013 - 02:57
Aloha Tina!
You did a great job! I was wondering, how high is the bed, room and clearance? We also live in Hawaii and my daughter's room is small. Any feedback on what modifications you made would be greatly appreciated! Mahalo!
Tue, 06/25/2013 - 13:35
Hi Dawn,
Yes, my daughter's room has low clearance, so I tweaked the loft bed height.
I determined what top clearance I could maximize that would allow my daughter to sit up in bed comfortably, but it will be tight as she grows. She's 5 feet now...
Then I tweaked the desk area height as well to maximize without too much of a struggle to get into the area.. I hope this reply is helpful..
Floor to ceiling height is 96 inches. desk area has clearance of 56 inches and from the top of the mattress to ceiling has a clearance of 28 inches.
Aloha, Tina
Tue, 12/17/2013 - 16:06
Im having a problem finding the plans for the teen loft bed shown above. any direction would be appreciated! Thanks!
Tue, 12/17/2013 - 16:59
HI! There are no plans for this loft bed.. I used the plans on this site and just literally DIY'ed to fit my needs.. Sorry I know this doesn't help you much…
If you have a specific question, maybe I could help…
Aloha, Tina

We went off the Farmhouse table and bench design but had to customize the length of the table and bench so that it fit in our kitchen space. The table was our first ever project and we made a few mistakes but learned from them and built the bench and are hoping to move up to the Farmhouse bed and then the fullstorage bed.

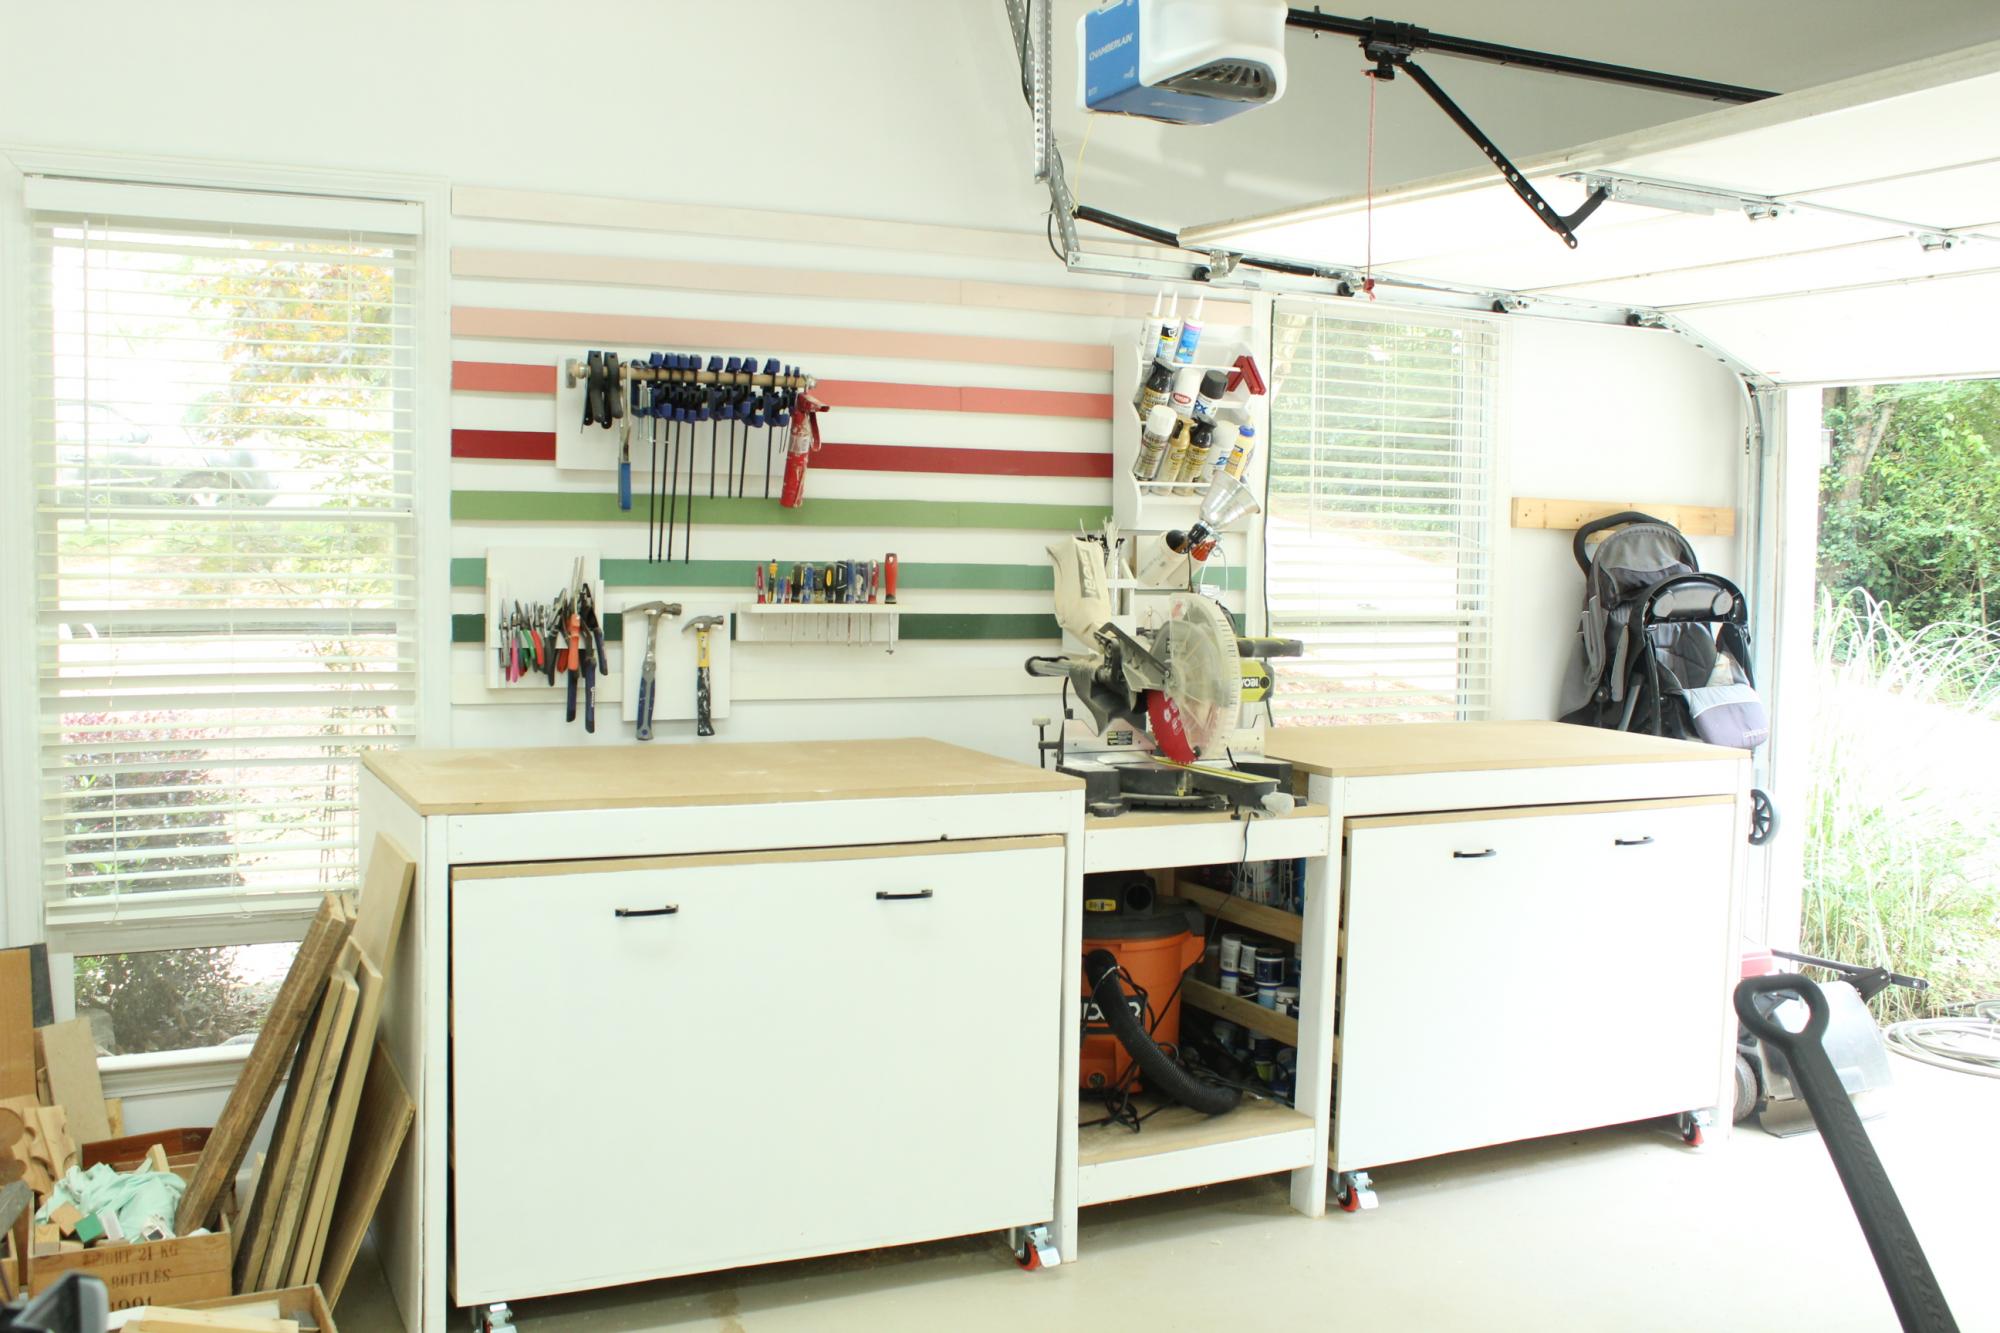
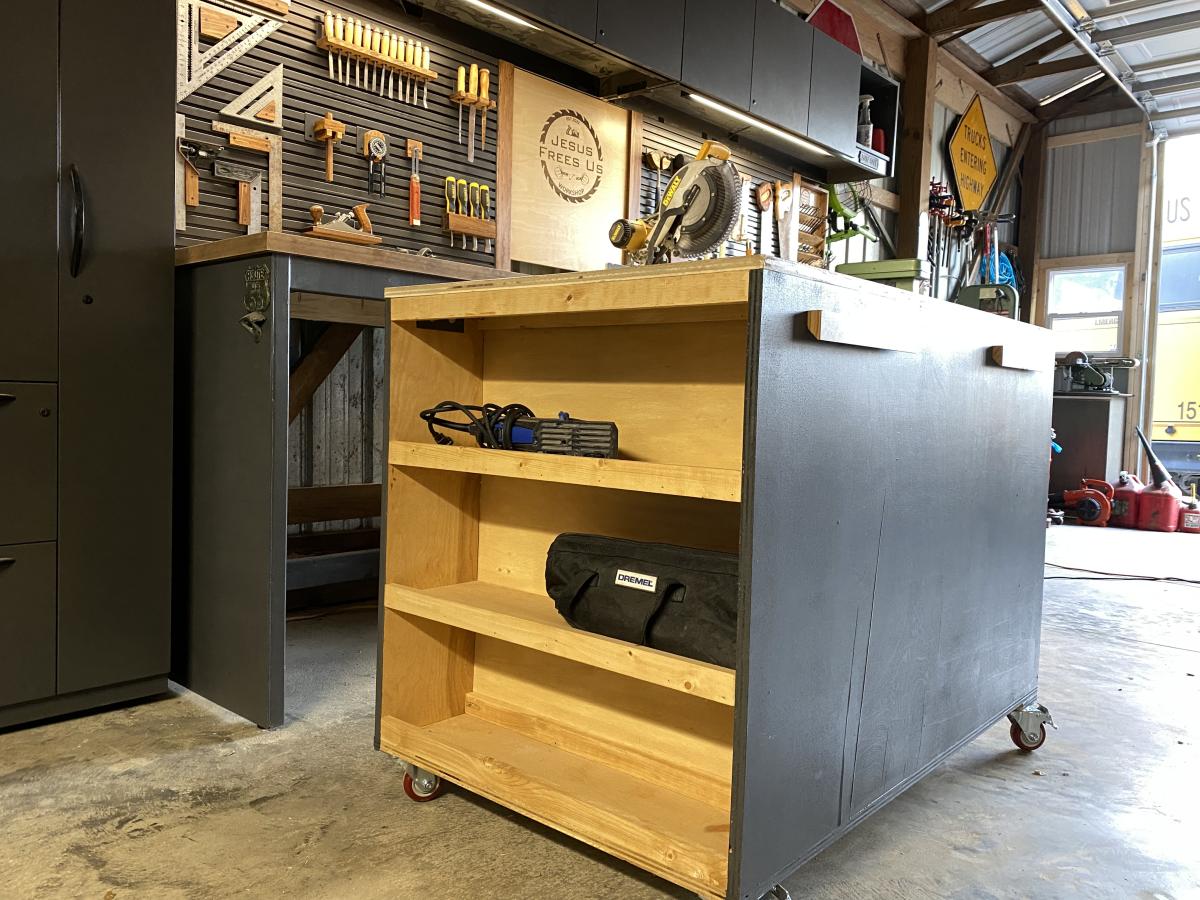
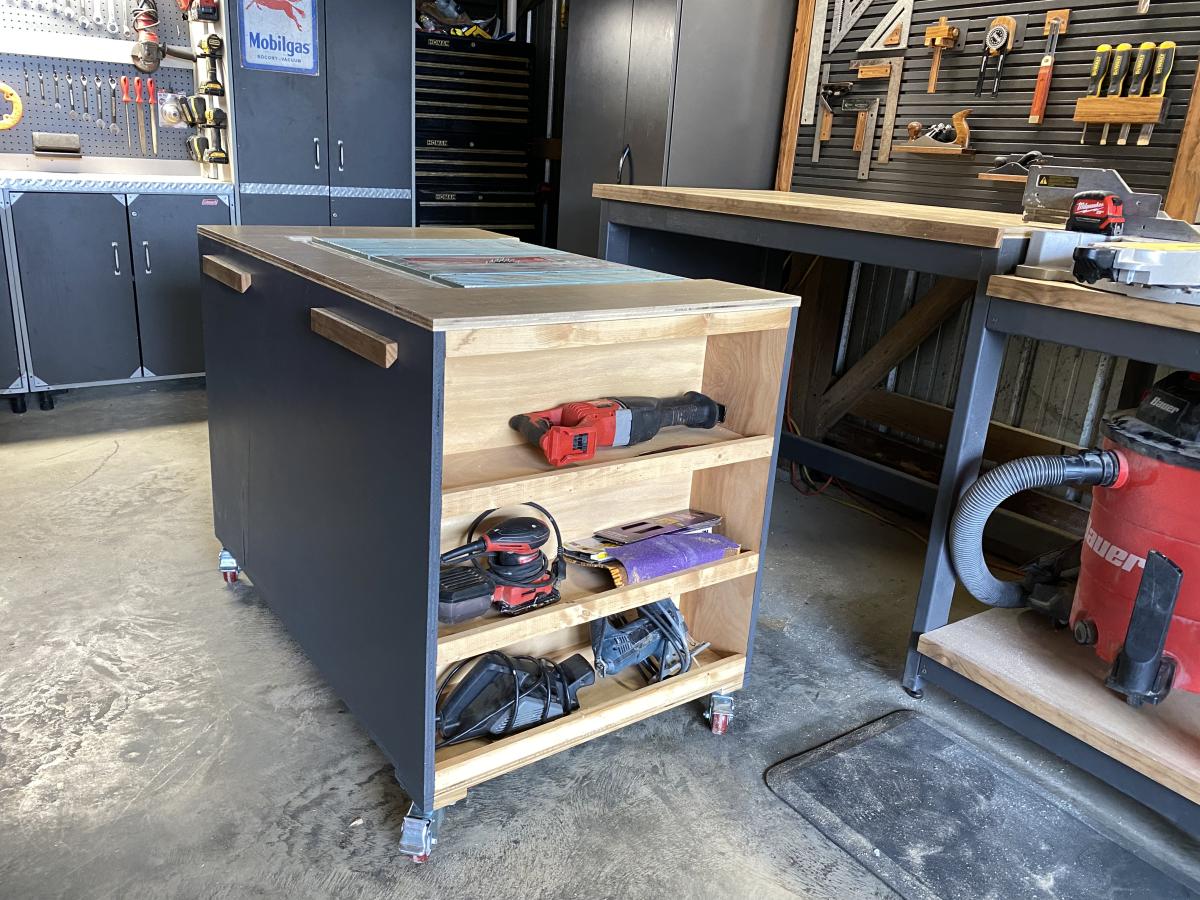
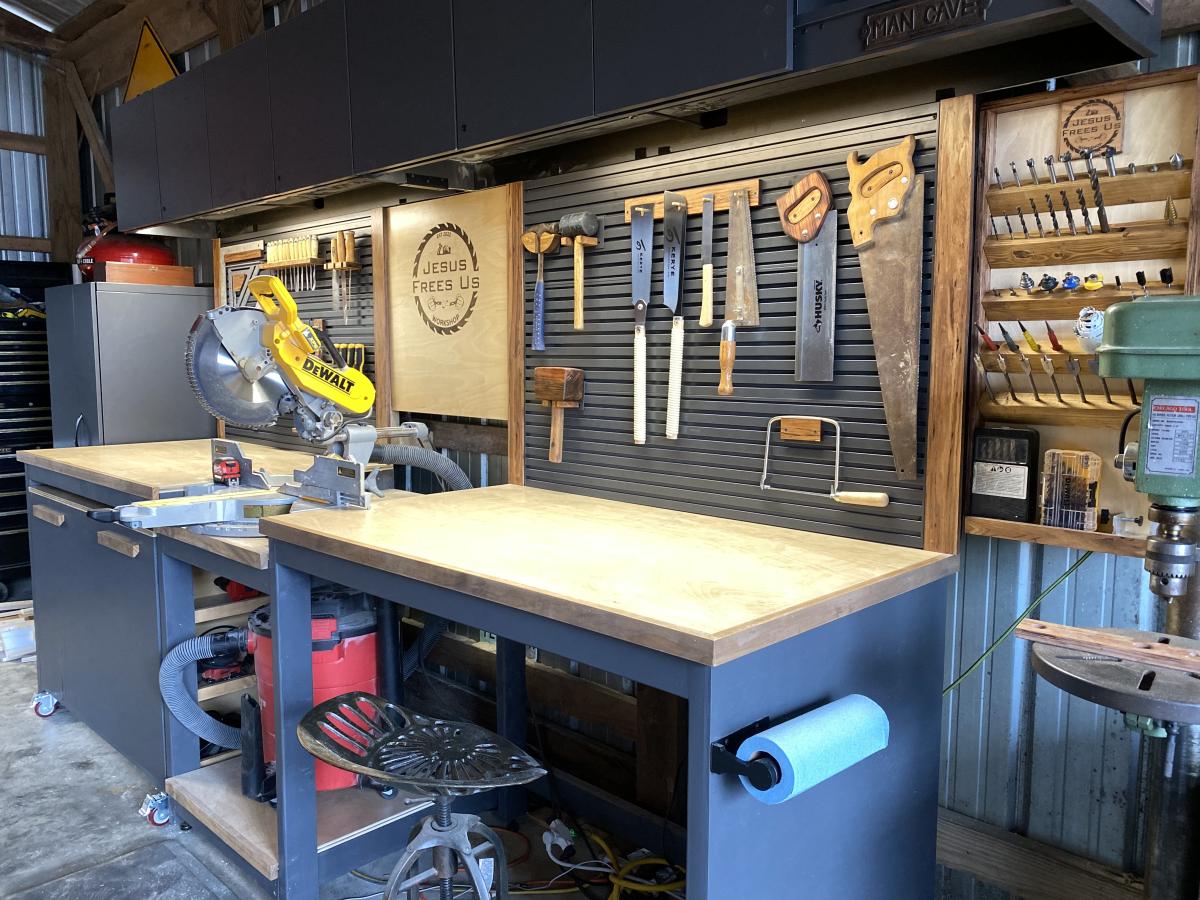
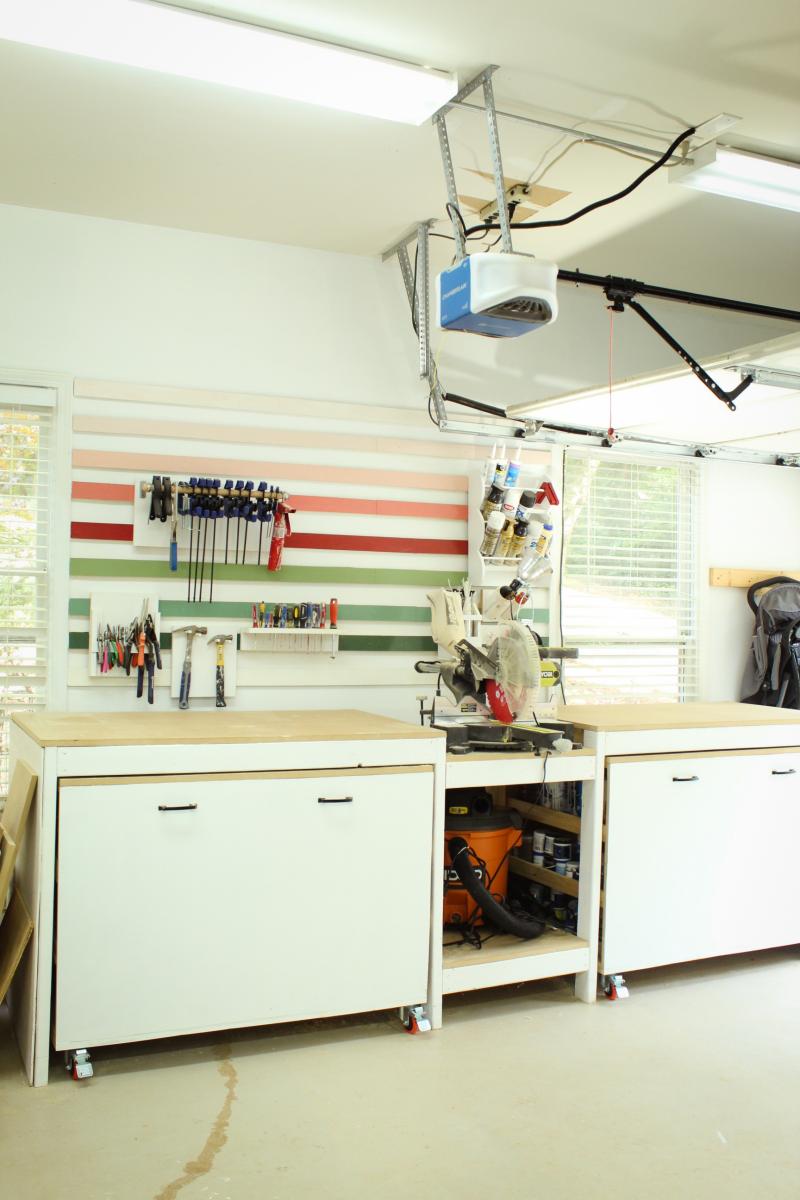
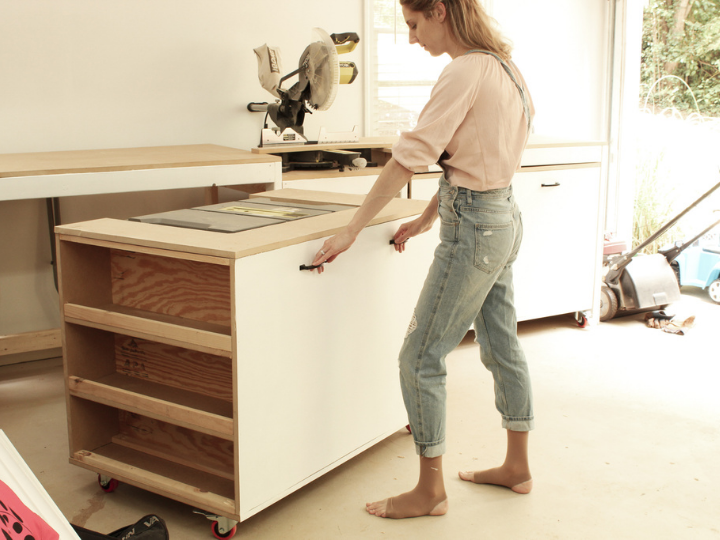
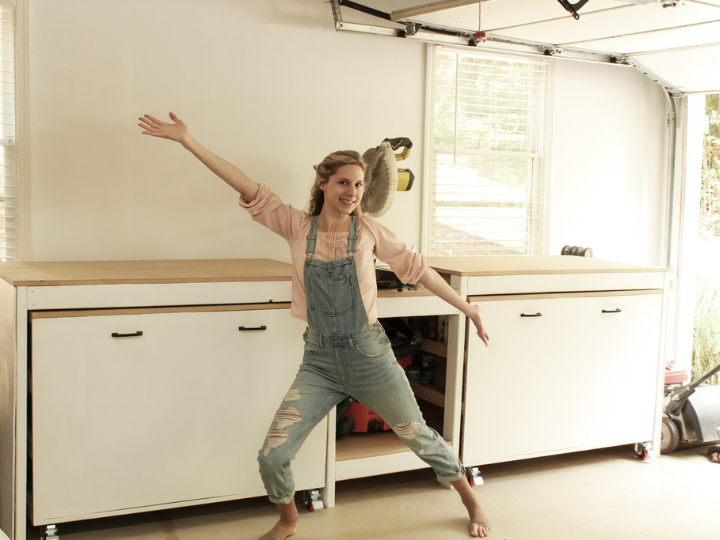
I love, LOVE my built-in miter saw stand! No more using my saw on the cold cement floor. I took others' advice and used pocket hole joinery to connect the bases. It was a lot more solid with this modification. I also secured the top and bottom of each cart with additional screws around the perimeter to prevent separation. I used MDF instead of plywood because plywood is crazy expensive right now! In retrospect, it would have been better to splurge on plywood since MDF splits easily and is more sensitive to temperature changes. I painted the front of the carts Chantilly Lace by Benjamin Moore and attached the hardware using an old cabinet jig leftover from a previous project.
Tue, 07/27/2021 - 11:47
WOW, wonderful job! Can't wait to see all the projects that come from your awesome space, thank you for sharing.