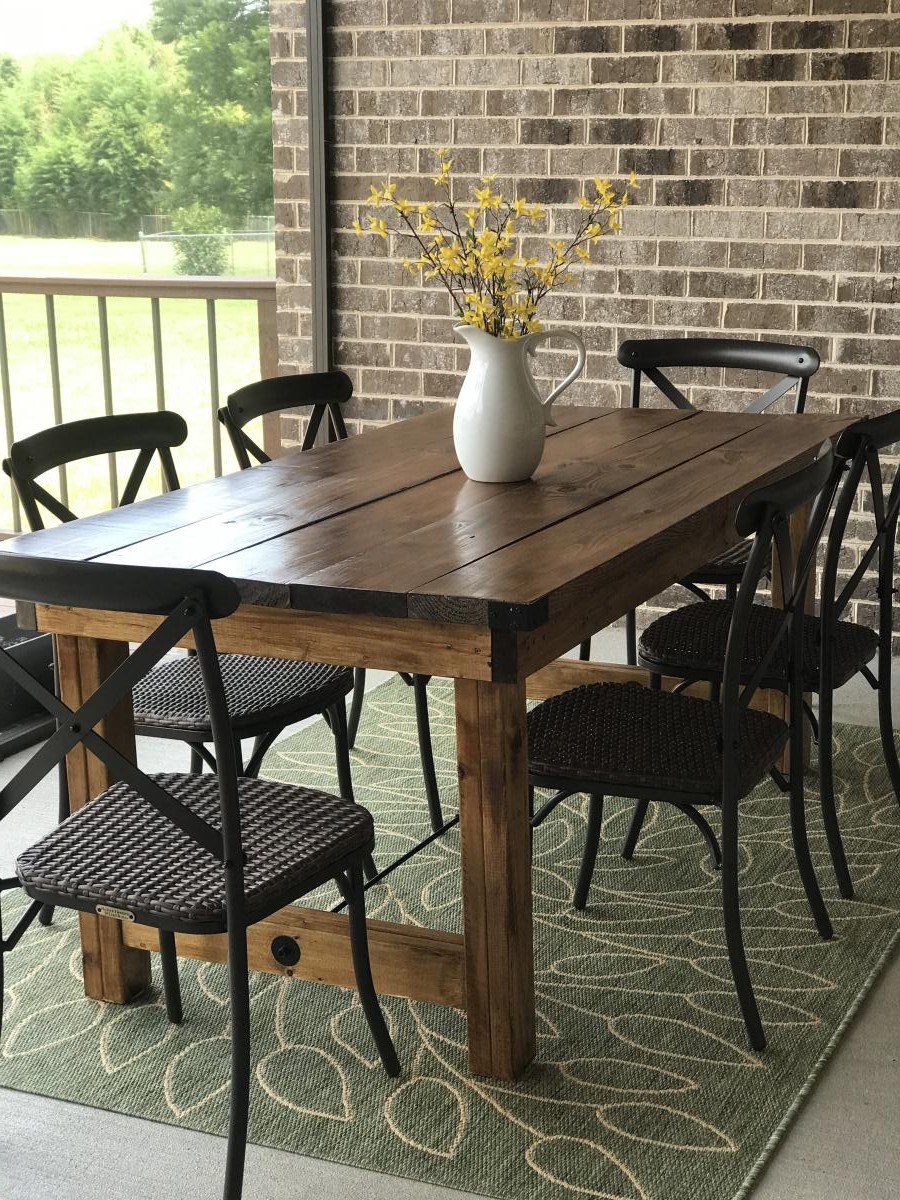
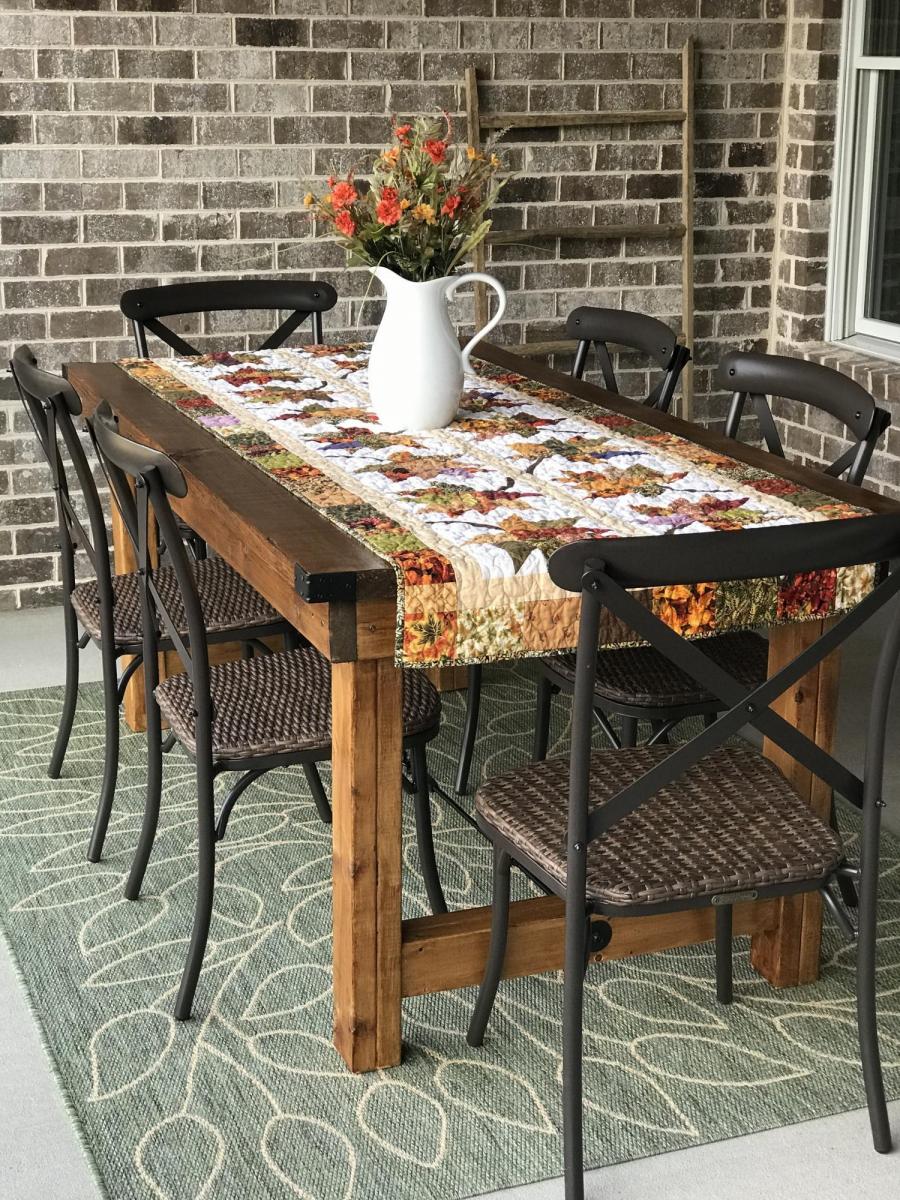
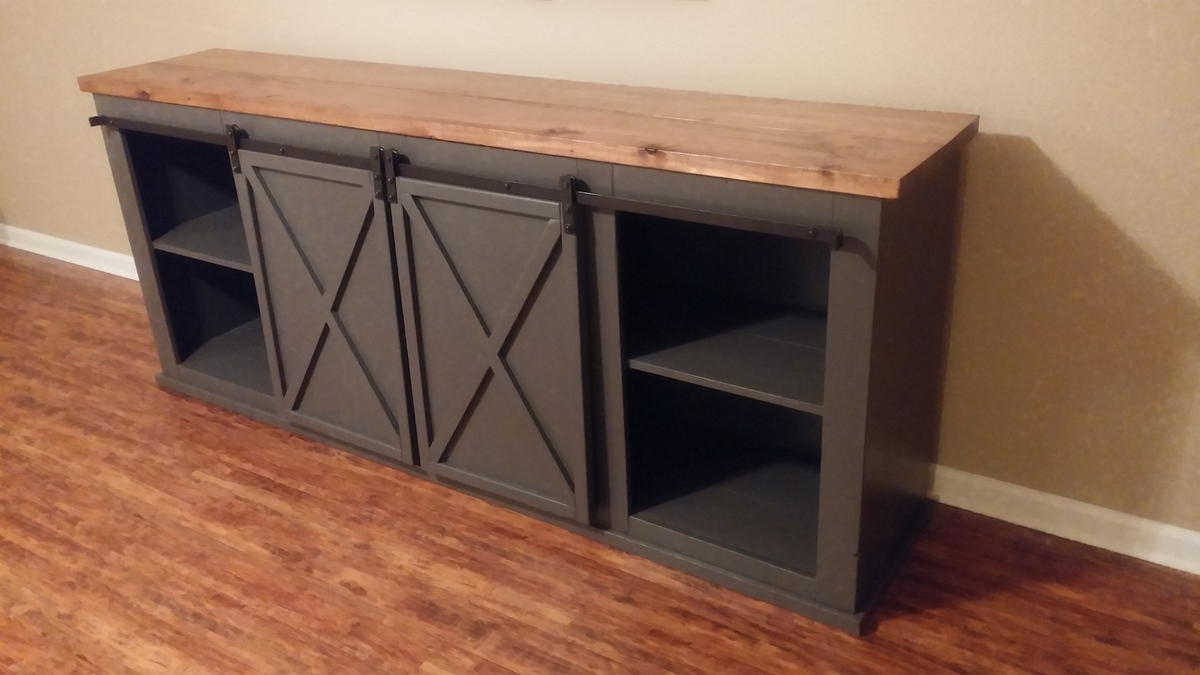
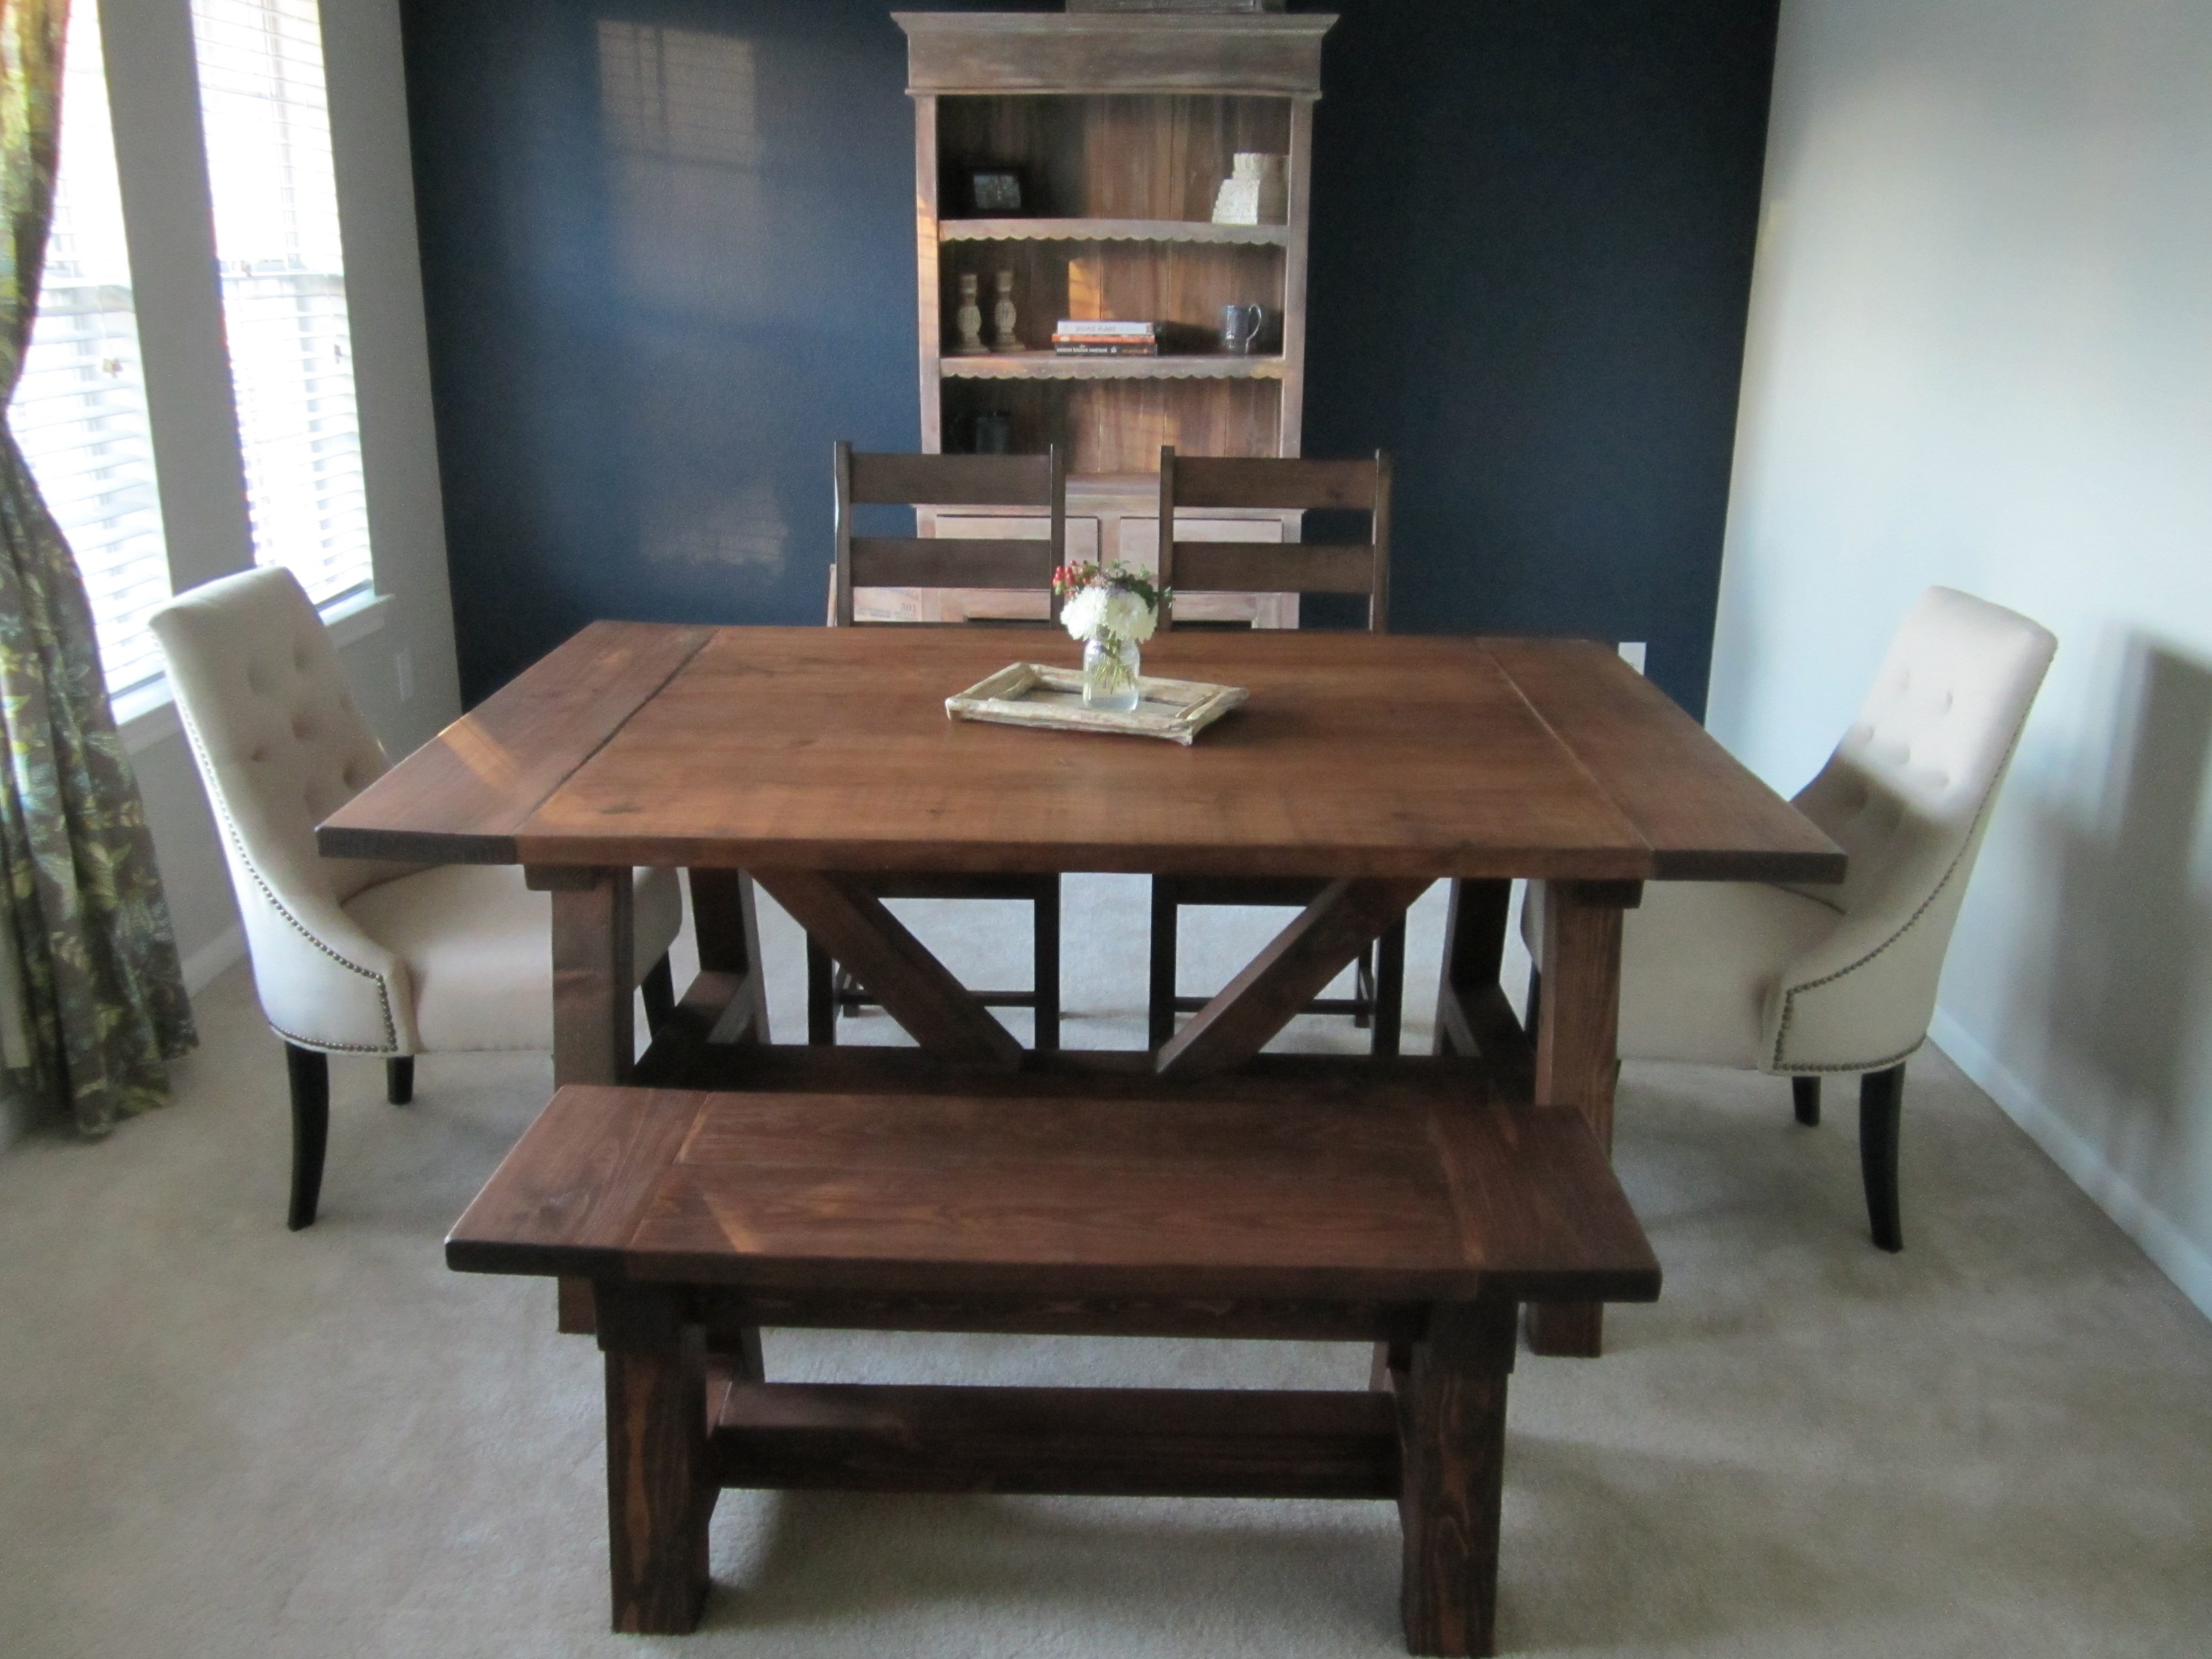
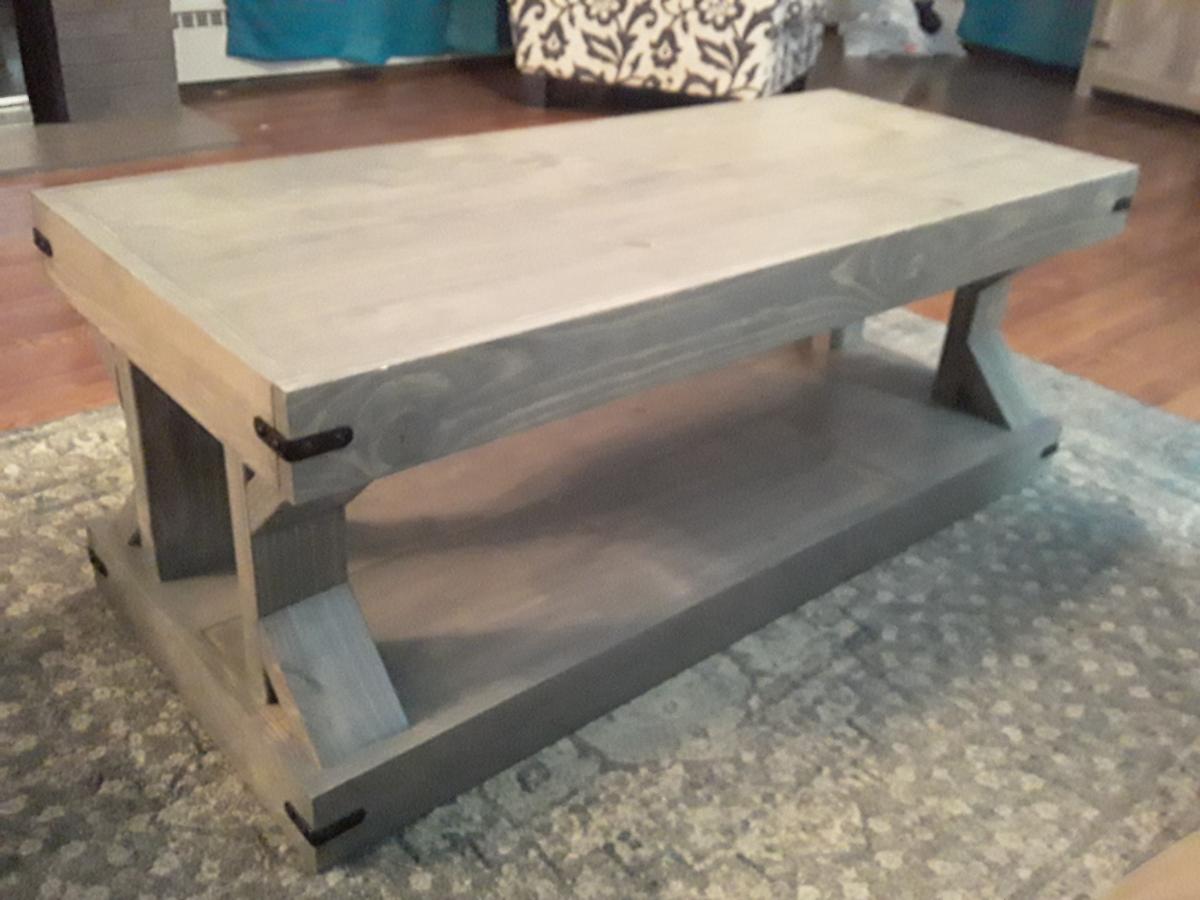
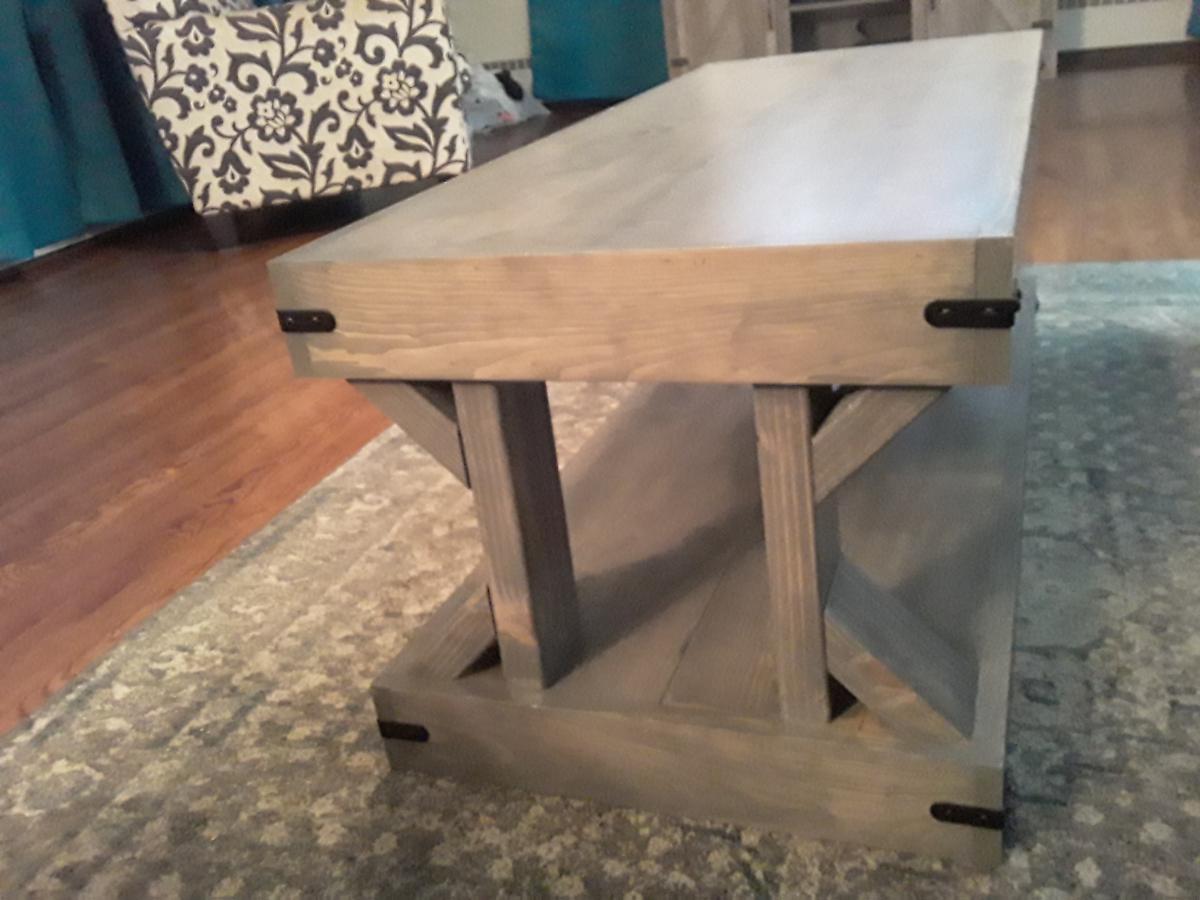
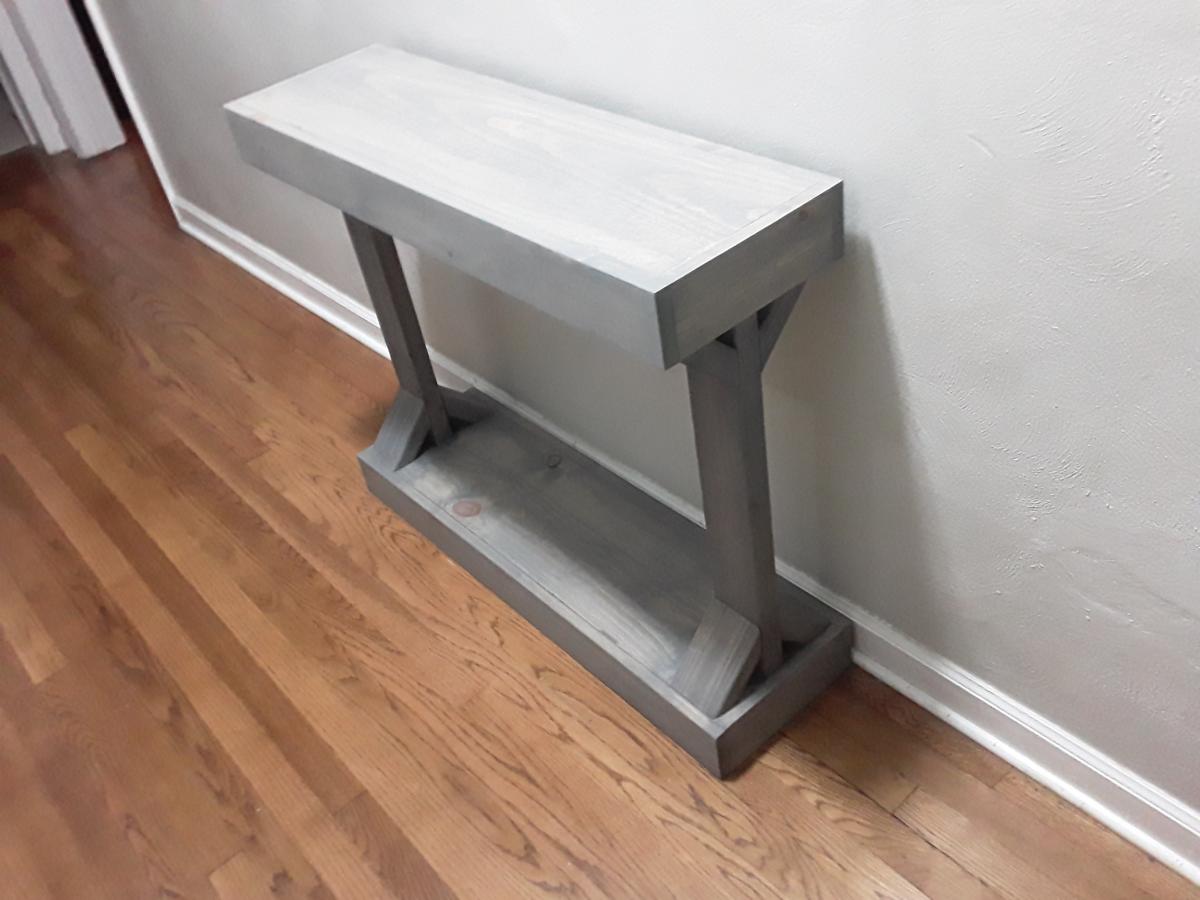
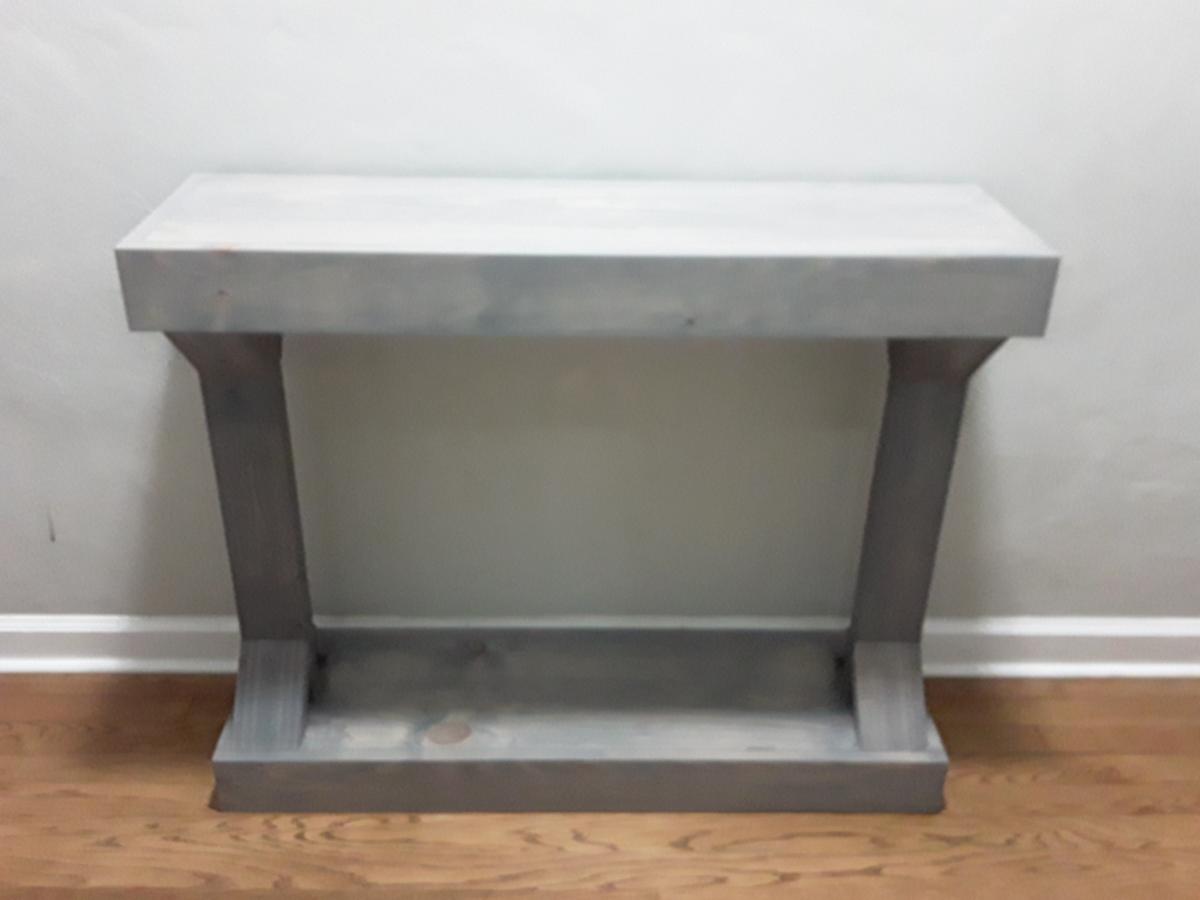
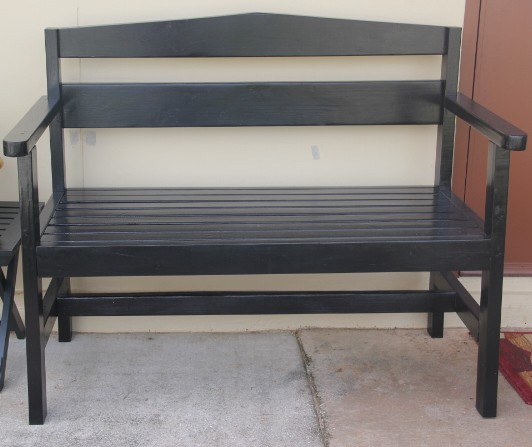
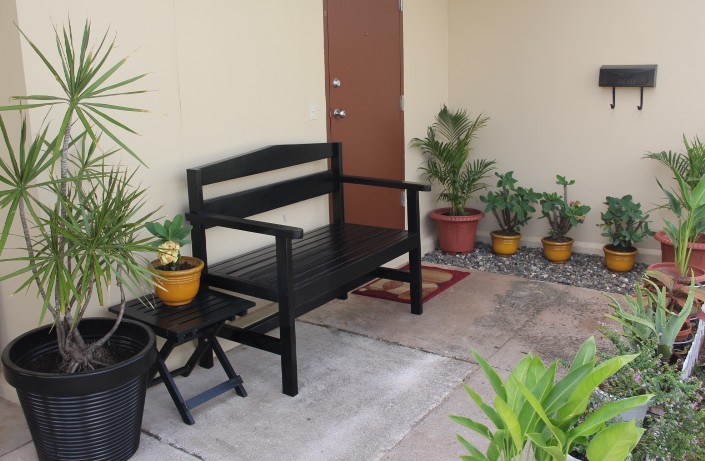
Community Brag Posts

Outdoor Table

Submitted by Anonymous (not verified) on Wed, 10/02/2019 - 16:19

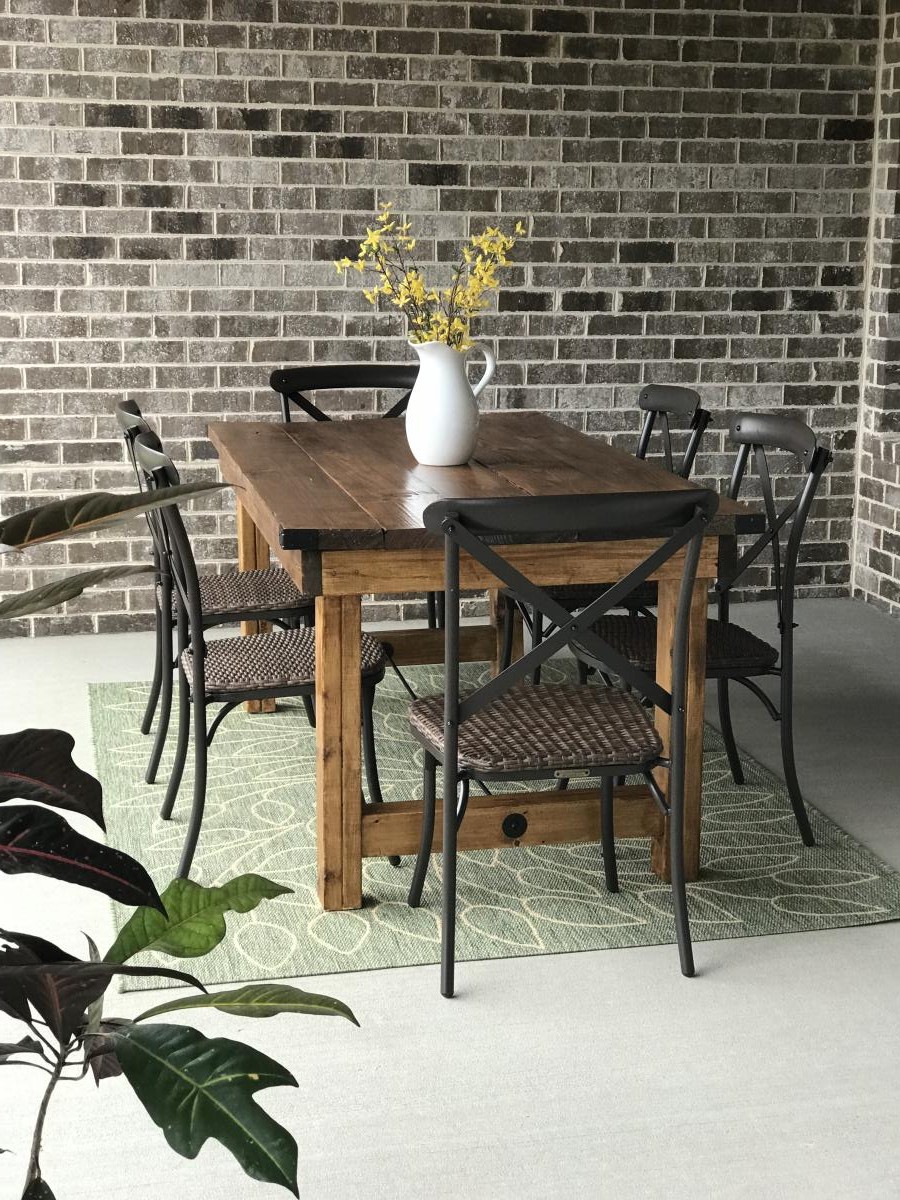
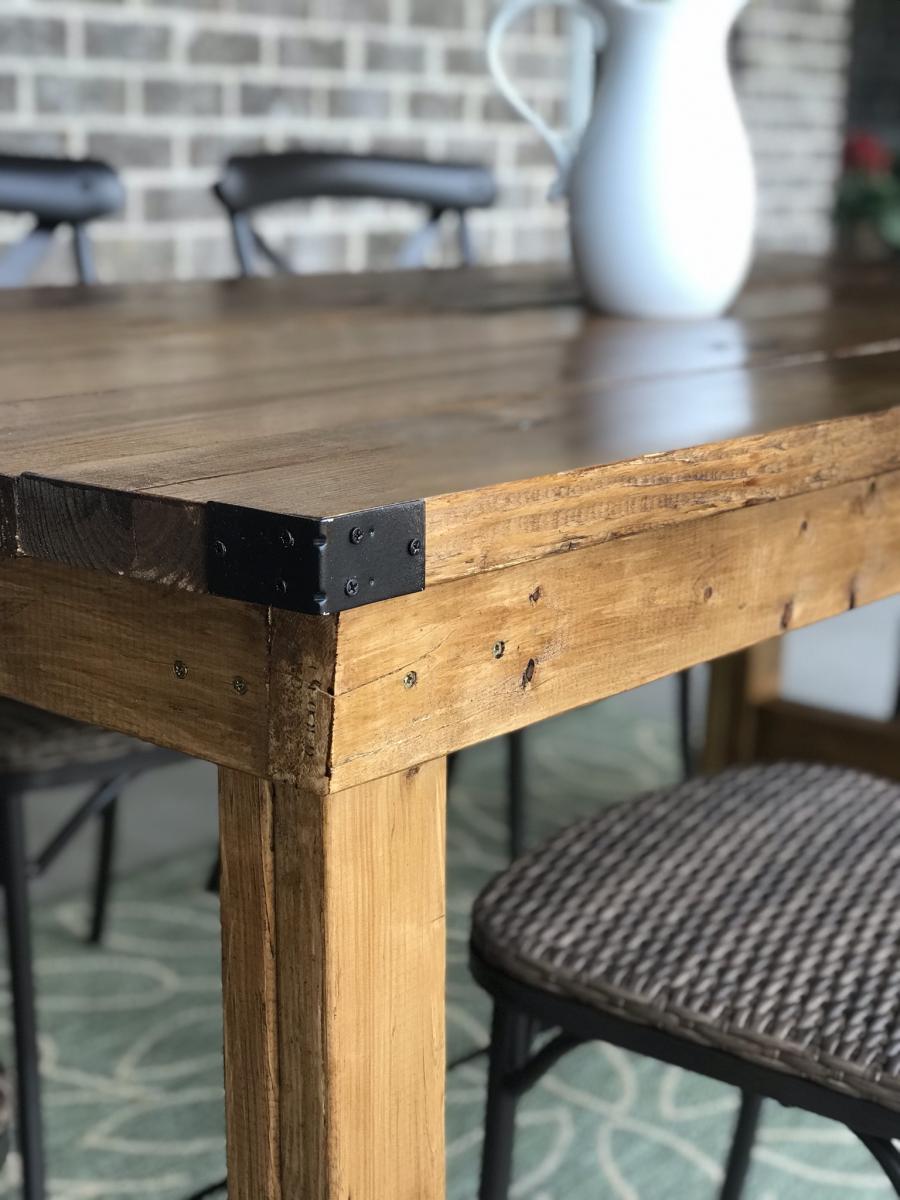
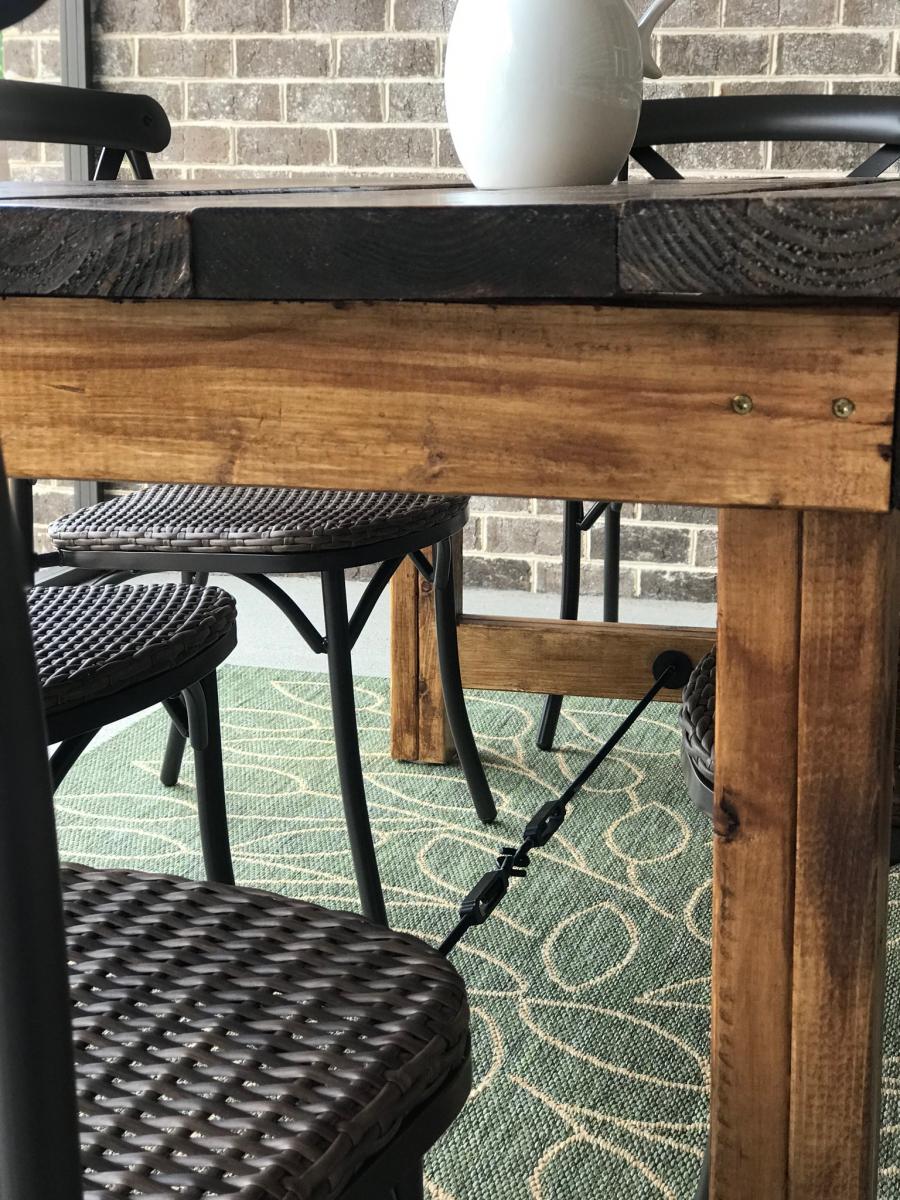
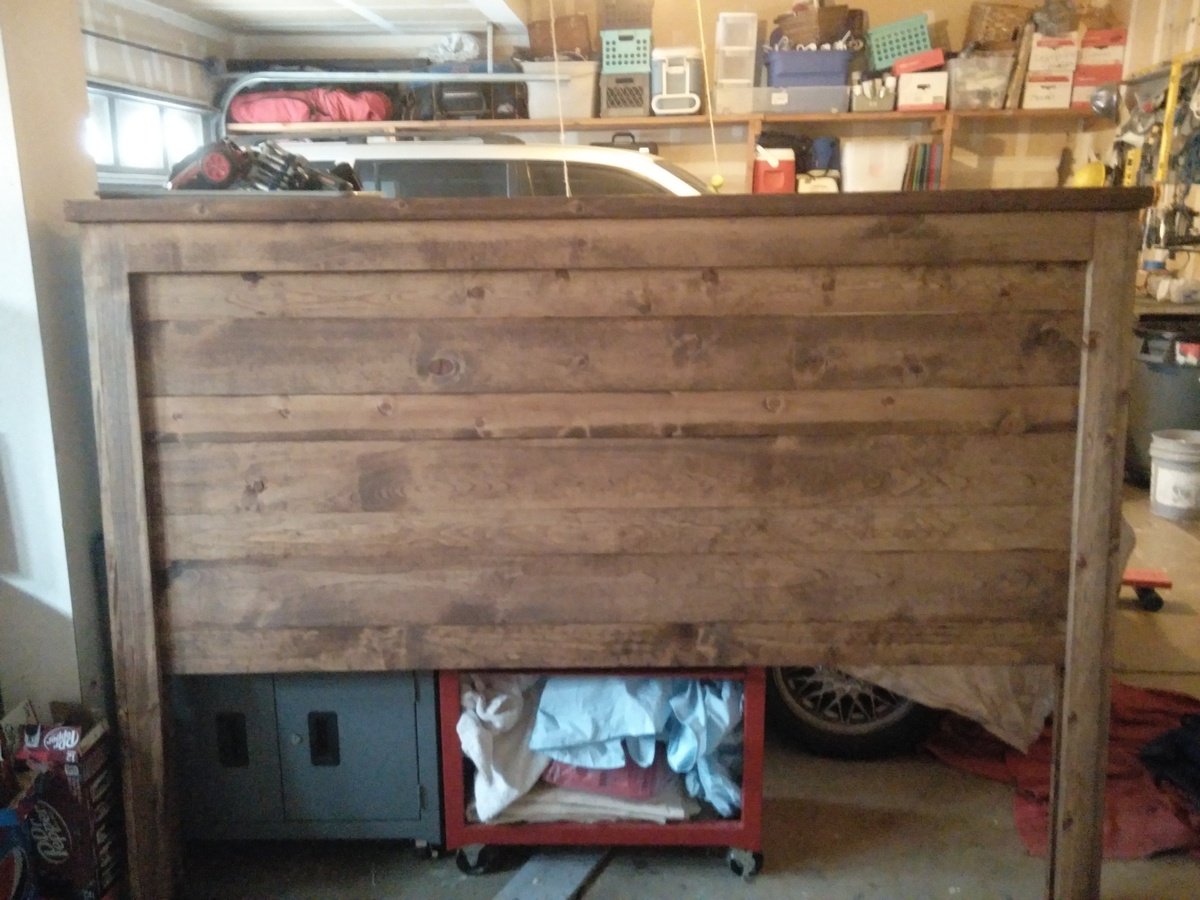
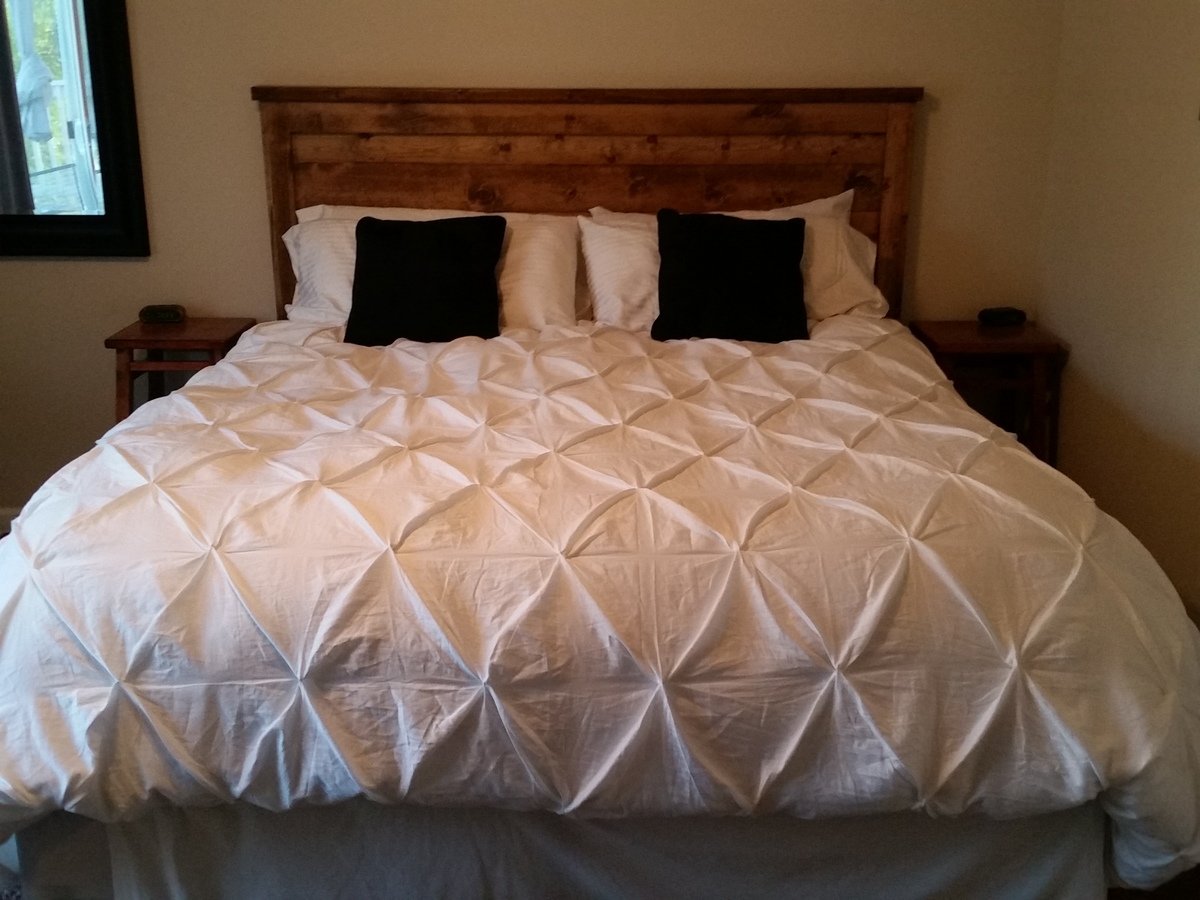
Made this outdoor table with Lowe’s lumber. Added some industrial accents like the metal rod and turnbuckle underneath and the metal corner brackets in each corner of the top. Spray painted the metal hardware black. I did incorporate the pocket holes for the table top.

Estimated Cost
$85
Estimated Time Investment
Day Project (6-9 Hours)
Finish Used
Minwax Polyshades, in walnut.
Recommended Skill Level
Beginner

Comments

Camping life

Submitted by Anonymous (not verified) on Fri, 06/09/2023 - 14:21

This was a great project. Easy to do.. Had to down size the table to fit our trailer…

Comments

Pet Feeder

Submitted by lazyLiz on Thu, 01/26/2012 - 16:48

I am building a TV console and hutch (will be posting soon) and I have left over of small cut of boards from this project. While waiting for my media center to dry, I built this pet feeder.

I have this messy eater dog (weimaraner) who slobbers all over my floor moulding. Worst thing...she bangs the wall with her aluminum bowl when she tries to lick every single bits of her food there is! So, with that story to tell, I designed and built her a pet feeder(inspired by the small pet feeder plan). And no more banging and messy wall!

Built from Plan(s)
Estimated Cost
I'd say $ 2.00 to $5.00 (every materials used were left overs from my media center project)
Estimated Time Investment
An Hour or Two (0-2 Hours)
Finish Used
glossy white paint and drops of colored paint for the name and prints
Recommended Skill Level
Beginner

Wall Jewelry Cabinet

Submitted by stdismuke on Tue, 12/10/2013 - 12:38

My wife has been looking for a jewelry cabinet at local antique markets so I decided to make her one for Christmas. I mostly followed the original plan but added cork in the bottom section so that she could push in earrings that can't be hung from the front.

Built from Plan(s)
Estimated Time Investment
Day Project (6-9 Hours)
Finish Used
Minwax Red Oak for the stain and Minwax Paste Finishing Wax.
Recommended Skill Level
Beginner

Grandy TV Stand

Submitted by imsomark on Mon, 02/22/2016 - 12:34

This was my first woodworking project and I really like how it turned out. The instructions for building the unit were pretty clear and I only deviated from them in two ways: 1) Since I am using this as a tv stand, I added a port (pictured) for xbox / cable box HDMI cables. I painted the port the same color as the unit so it blends in well. 2) To attach the top two stained pieces of wood, I used pocket holes instead of drilling down from the top. That way I didn't need to use any wood filler. I think I used 7 or so pocket holes per board and it seemed to be held pretty well. For the paint color, I copied kbdesigns' unit and used 'Intellectual' by Behr. I don't remember the stain for the wood but the stain is a darker color than it shows in the pictures. As far as the hardware, I modified those plans as follows: 1) I used a vise to bend the aluminum flat bar to provide stopping points for the doors, so they don't just slide right off the bar. I think I bent about 1.25-1.5 inches at the end. I just used a hammer and a vise and the metal bent fairly easily. 2) I drilled four holes instead of three for more support. 3) For the bar pieces on the doors, I made them 4.5 inches instead of 8.5 inches. I liked the shorter look in the original Grandy examples. 4) I used the clevis pins from the pulleys I bought to attach the wheels to the bars. Note: her instructions for the pulley wheels seemed very difficult. I was able to find pulleys on clevis pins that could easily be removed from the wheel casing, or whatever it is called. I found them at Home Depot. I think they were 1.5 inches.

Built from Plan(s)
Estimated Cost
300
Estimated Time Investment
Week Long Project (20 Hours or More)
Recommended Skill Level
Beginner

ipex bookshelf

Submitted by jkolo on Thu, 02/02/2012 - 22:27

Great bookcase. I used a 3" screw through the top center into the wall to add lateral stability. Now it is rock solid. The majority of time was spent sanding and finishing.

Built from Plan(s)
Estimated Cost
$100
Estimated Time Investment
Weekend Project (10-20 Hours)
Finish Used
The all-in-one stain with poly doesn't coat evenly on pine. I ended up stopping half way through, sanding it off, then used a Minwax stain, then Satin poly.
Recommended Skill Level
Beginner

4X4 Truss Beam Table

This was my first project. It's not perfect, but I love the way it turned out! The original plans were too large for my dining room, so I altered the plans to make it a 5-foot table. I actually ended up making it a little bit wider as well by adding an additional 2X10 to the table top to make the table look more proportional. The wider table top has made it perfect for family-style meals! For the finish, I did one layer of Rustoleum American Walnut stain applied with a foam brush and wiped off with a clean cloth after one minute. After the first layer of stain, I sanded the table with a very fine paper and then did two layers of Rustoleum Dark Walnut applied with a foam brush and wiped off with a clean cloth after only a few seconds of setting. Finally, I did three layers of Rustoleum Matte Finish polyurethane.

Estimated Cost
$120
Estimated Time Investment
Weekend Project (10-20 Hours)
Recommended Skill Level
Beginner

Comments

daydra

Tue, 03/06/2018 - 19:15

Your table is beautiful!!! You done a stunning job on it!!! This is the same size that I need for my table but I'm having a hard time figuring out the measurements for the legs and the length of the benches I need!!! My table needs to be 60"x32" would you mind helping me with the measurements of your bench and also of your legs on the table?? I plan to make the table legs the same height as hers but need to make the top board and middle brace to match the 60" top!!

Noah's Modern Dresser

Submitted by Anonymous (not verified) on Wed, 02/24/2016 - 17:31

Thanks so much for this build post.  We actually were about to purchase the dresser that this is designed after, but I couldn't stomach the 900 price tag.  I headed to anna-white.com to see if she had plans for anything similar and voila! the plans for the exact dresser we wanted were here!  

Built from Plan(s)
Estimated Cost
I spent about $300 in materials.
Estimated Time Investment
Weekend Project (10-20 Hours)
Finish Used
I used red oak stain from minwax, and white paint. We coated it all in a rub-on poly finish for durability.
Recommended Skill Level
Intermediate

Comments

Modern Farmhouse Collection tables

Submitted by jeep97jc on Fri, 10/04/2019 - 19:17

Saw this table and had to build it, love it, easy and fairly quick to build, I also built the console table after seeing the finished coffee table. I also want to make matching end tables. Love this site and how easy it is to build projects with the plans, my go to when finding projects,  Thank you

Estimated Cost
$40-$60
Estimated Time Investment
Afternoon Project (3-6 Hours)
Finish Used
Minwax Classic Grey, Rustoleum Polyurethane Clear
Recommended Skill Level
Beginner

In Drawer Knife Block Includes Steak Knife Storage

I watched your video and modified mine to take up less space by using 1 x material instead of 2X material, and I cut a notch in the top to allow steak knives to store on top.  Once a cut a notch, then I used my table saw to create the space where the steak knife blades fit. 


From there, lots of sanding and gluing. I made the plywood base about 1/4” shorter than the depth of my drawer so it could be easily placed inside my drawers that don’t fully extend out. 


I finished it with pre-stain conditioner, stain, and then an oil/beeswax blend (used for cuttting boards) applied with 0000 steel wool for a super smooth, satiny finish. 

Angie 

Built from Plan(s)

Wine Rack

Submitted by Bredimi on Tue, 02/07/2012 - 15:35

I loved the Holman Entertaining Shleves from Pottery Barn, however, I didn't like the price. Taking the $10 ledge plans and modifying them, I set out to make my own. I used a 1 x 10 (bottom), 1 x 6 (back) and a 1 x 3 (front). They are 23 7/8 inches long to get the 3 shelves out of 6 foot boards. To get the holes to hold the top of the bottle, I used a 1 and 1/4 inch forstner bit. Since I had gift cards left from Christmas I splurged on the wood and bought the select pine.

Built from Plan(s)
Estimated Cost
I had gift cards, but my out of pocket expenses for the 3 shelves was $22.89
Estimated Time Investment
Afternoon Project (3-6 Hours)
Finish Used
I painted them Valspar Lincoln Cottage Black
Recommended Skill Level
Intermediate

Comments

babysteps

Tue, 01/14/2014 - 10:55

I love your adaptation of the original design. I have been looking for an example of someone who made this plan into a wider shelf. Has it held up well? I was worried about the stress on the joints when you make it deeper. Has yours handled the weight of the bottles?

Loft bed

Submitted by Anonymous (not verified) on Sun, 02/28/2016 - 18:35

I loved making this bed. This was my first experience using a Kreg Jig and it was great! We added three inches to the height of the bed so that my daughter could stand up for the next two years or so without bonking her head. We opted for rungs instead of stairs to save more space. We also used 2x4s cut to width for bed slats instead of a bunkie board.

Estimated Cost
$90 for all lumber, wood condition, stain and PH screws
Estimated Time Investment
Weekend Project (10-20 Hours)
Finish Used
Minwax wood conditioner
Minwax Ipswich Pine
Recommended Skill Level
Starter Project

American Girl Doll House

Submitted by Anonymous (not verified) on Sun, 10/06/2019 - 18:59

This Project was a Challenge mostly because of its size. Standing 6ft Tall and 4ft wide it was hard to handle at times but easy enough and fun to build.
I followed Ana's Three Story American Girl or 18" Dollhouse plans.
We also made the American Girl or 18" Doll Sofa or Couch.

Estimated Cost
$150
Estimated Time Investment
Weekend Project (10-20 Hours)
Finish Used
I used White Latex Paint and Walnut Mini Wax stain for the floors
Recommended Skill Level
Beginner

Planters for Steps

Submitted by Anonymous (not verified) on Tue, 06/27/2023 - 12:10

Very happy with how these planters turned out. Beautiful with red Geraniums and ping wave petunias.

Built by Dave

Built from Plan(s)

Comments

Factory Cart Coffee Table

Submitted by Syndee on Fri, 02/10/2012 - 22:11

(Sorry my photos aren't the best, there is a black spot on my lens which shows up on some pictures.)

I had a lot of fun making this! I'd been wanting a vintage factory cart for over a year when I found this plan on Pinterest which led me here. I wanted to get a rustic industrial look so I made the table in the picture from the Ana White site that is stained and not the green one. After getting the base built, my husband and I decided we wanted it taller (since we have a dog who would love to sniff at whatever we put on it). And while I'm at it, why not add some storage? So I added more 2x4s and attached them to both the base and additional 1x6s. I put the 1x6s on the front and both sides, leaving the back open. I flipped the whole thing over, put the casters on and added plywood to the bottom of those 2x4s. then added two small boards give support to the plywood, which created a storage shelf. I then sanded and stained it and finished it off with two coats of semi-gloss poly. I did not counter-sink my screws or used wood filler as I was going for the rustic industrial look and I love the way it looks. It is very sturdy, too. I have moved it all around, slid it on its side trying to get some decent pictures and its just as sturdy as ever.

Built from Plan(s)
Estimated Cost
< $100
Estimated Time Investment
Weekend Project (10-20 Hours)
Finish Used
Stain color is Kona. Two coats of poly.
Recommended Skill Level
Beginner

Comments

A letter shelf

A built these shelves for my nieces birthdays. I reversed the color schemes to keep them separate. The plans provided are great! I would certainly use the added 1 x 2 supports if hanging on the wall because the shelf is heavy (about 14 pounds).

Built from Plan(s)
Estimated Time Investment
Afternoon Project (3-6 Hours)
Finish Used
Valspar paint sample from Lowes
Recommended Skill Level
Beginner

Garden Bench

Submitted by sidman on Tue, 02/14/2012 - 02:50

When I saw this we had to build it. Hope you like!

Estimated Cost
45.00
Estimated Time Investment
Day Project (6-9 Hours)
Finish Used
Painted black with a poly coating.
Recommended Skill Level
Starter Project

Comments

Margaret Kubiszyn (not verified)

Tue, 02/14/2012 - 07:11

I love this, but the link to the plans is broken!

Beach Cottage Dresser

Submitted by Emendia on Mon, 12/23/2013 - 23:18

This was my first dresser. The original plans say to lay the dresser on its back and center the drawer fronts then nail in place; in my opinion it is faster and more accurate to hold them in place and have a helper nail them in place. Also, the original plans suggest a certain jig for installing the slides which requires a locking c-clamp to hold the jig in place. Well, in my opinion the locking c clamp, along with a magnetic small torpedo level is faster and easier than the jig. A six in steel rule with a slider clamp is also helpful.This was fun project - learned a lot!  Thanks Ana & Patrick!

Estimated Cost
$250
Estimated Time Investment
Weekend Project (10-20 Hours)
Finish Used
DIY chalk paint, knobs from World Plus Market, and lightly distressed along edges so antique white primer would show through along edges. Base for chalk paint is latex plus calcium carbonate. Be sure to dissolve chalk in water before mixing into paint! I did two coats of antique white tinted primer, followed by two coats of chalk paint, then sealed with wax Also, the chalk will whiten your final color, so buy paint a couple of shades darker than what you would like your final finish to be.
Recommended Skill Level
Intermediate

Comments

Emendia

Tue, 12/24/2013 - 08:23

Oh, another lesson I learned: The drawers are made by attaching drawer fronts to the boxes. This makes the front 1.5 inches thick - this means most drawer knobs won't fit unless you use a Forstner or spade bit to bore a hole on the back side of the drawer face - in turn you may need to do this before you assemble the drawer!

Full Length Mirror

Submitted by AndyH on Fri, 03/04/2016 - 18:03

A $10 Mirror framed out with some 1 by 2, 1 by 3 and 1 by 4.

Stained black and then 2 coats of white paint sanding after each to give a rustic/antique look.

Estimated Cost
$35
Estimated Time Investment
Day Project (6-9 Hours)
Finish Used
Stained in black and then two coats of white paint sanded between coats to give antique finish.
Recommended Skill Level
Beginner