Community Brag Posts

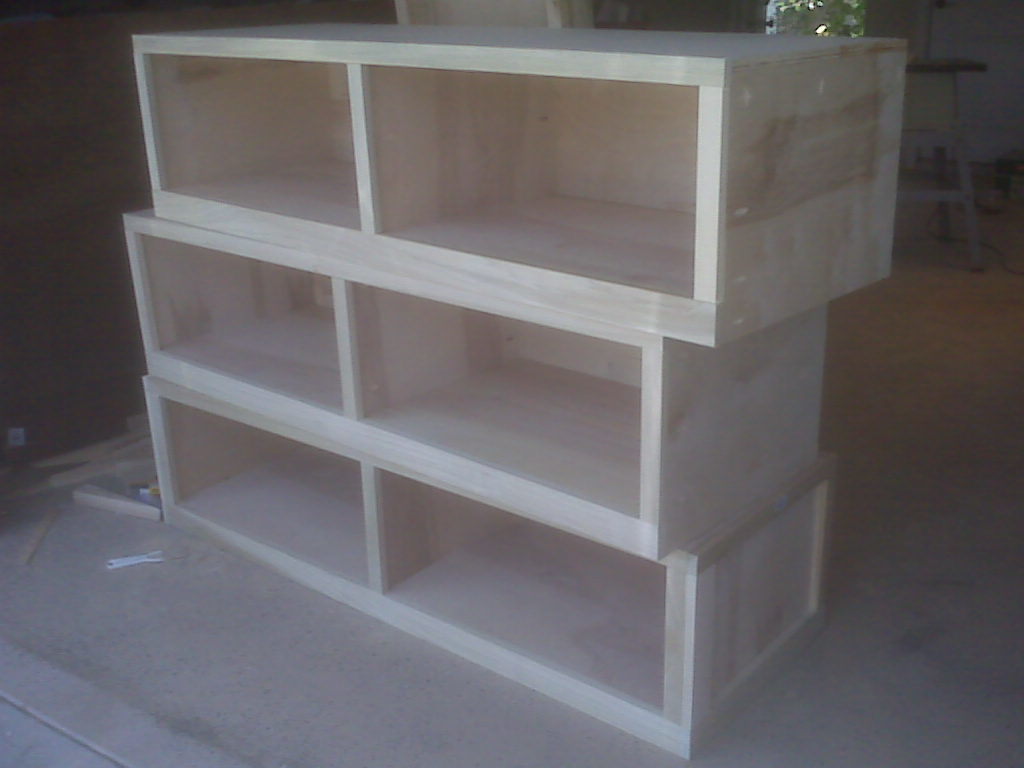
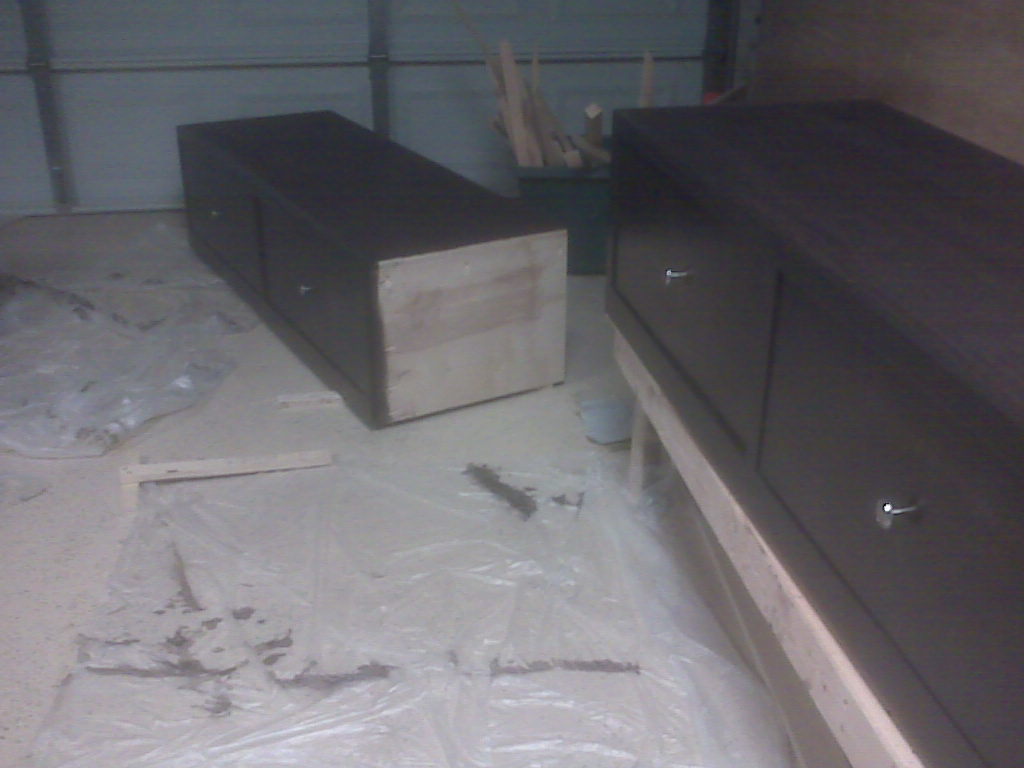
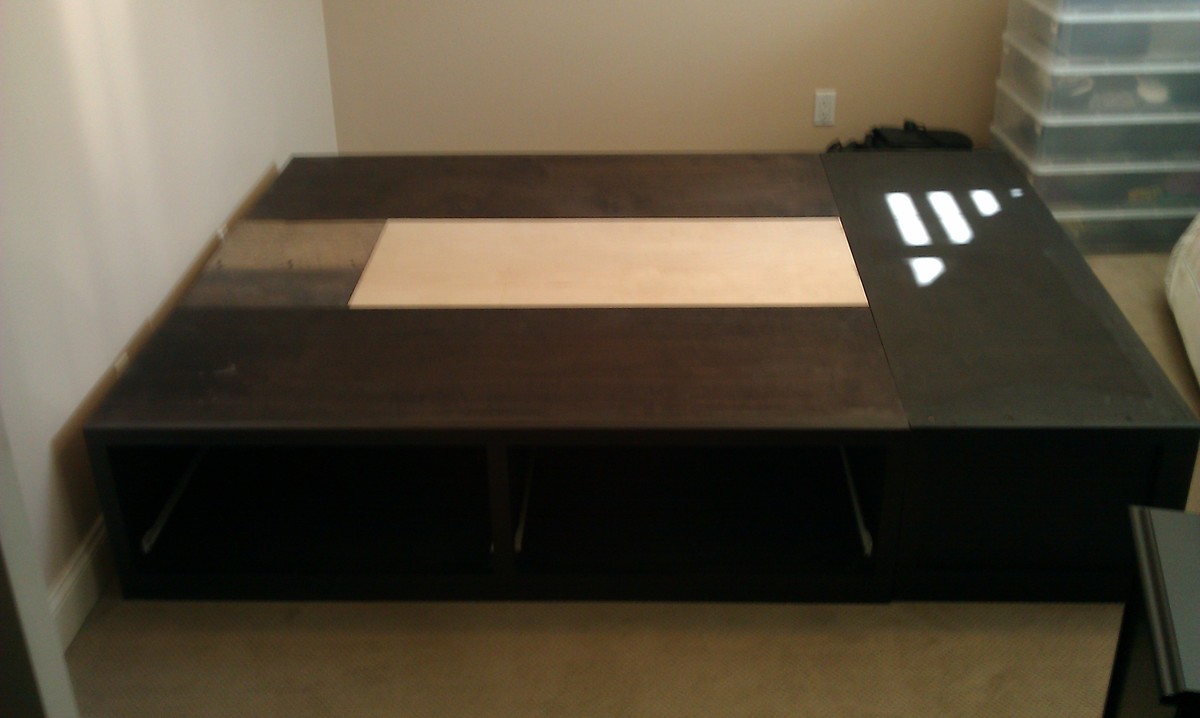
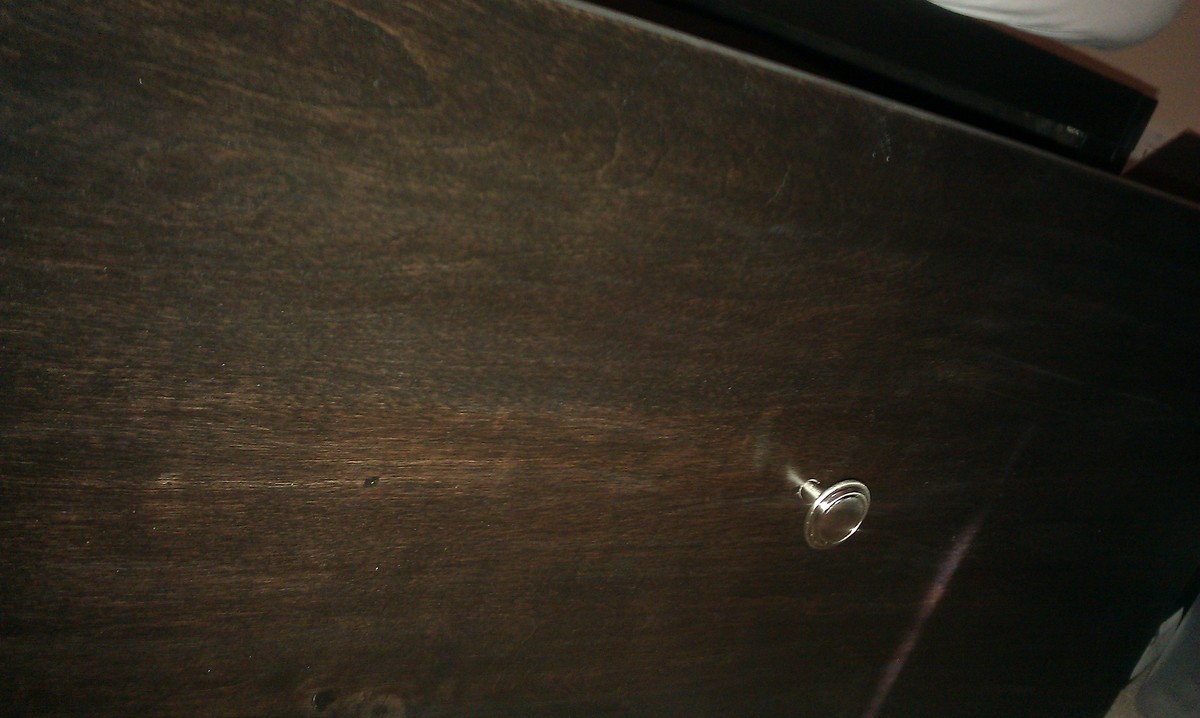
Queen Storage Bed - done!
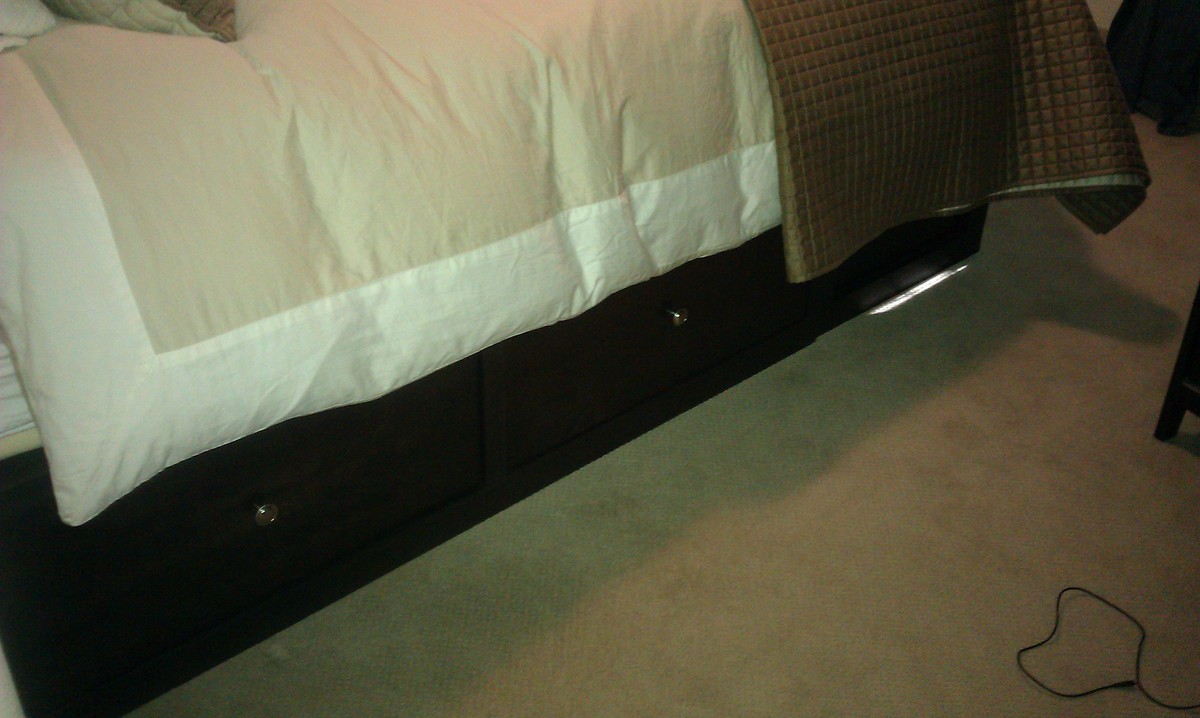
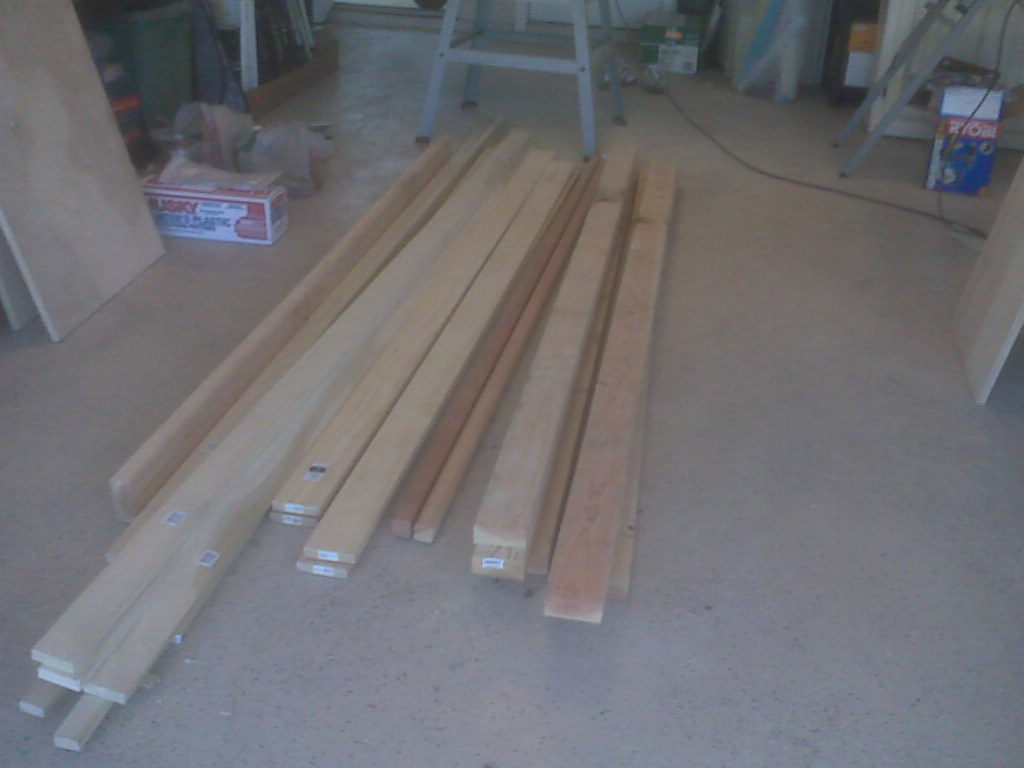
I was so excited to start the Queen storage bed - but then I had all that lumber and the cuts weren't perfect, and my measuring skills need work, and I don't fit into 12 x 18" spaces, and my vision isn't great to begin with and I certainly can't see into those dark, dark spaces!
But, in the end, I had fun, and the drawers work, the finish turned out well, I still have all my fingers, my bruises are about gone (2 weeks later, for goodness sake!) and, most important, my son and his wife say it looks great, is sturdy, and the drawers work! Whew!
Next month I'm doing the twin sized version for my daughter - and no drawers, yeah!
Built from Plan(s)
Estimated Cost
$400
Estimated Time Investment
Week Long Project (20 Hours or More)
Finish Used
Valspar Espresso stain, 3-4 coats, sanded between first 2 coats, then just applied to darken the color. Light sanded before applying first coat of minwax poly, light sanded again, applied 2nd coat of poly, and then added a 3rd coat of poly (no sanding before)
Recommended Skill Level
Intermediate
Comments
Sat, 08/13/2011 - 19:34
Beautiful!
Well for all the problems with fitting into the spaces, seeing, and such, it turned out beautifully!! Well done! I
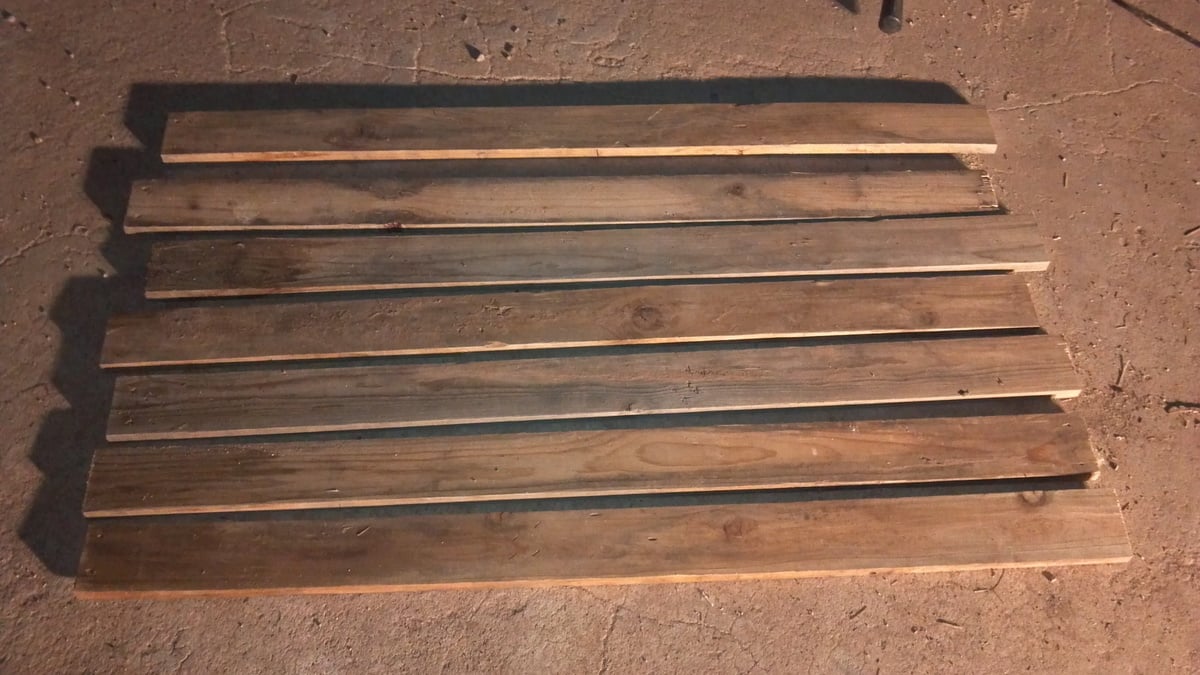
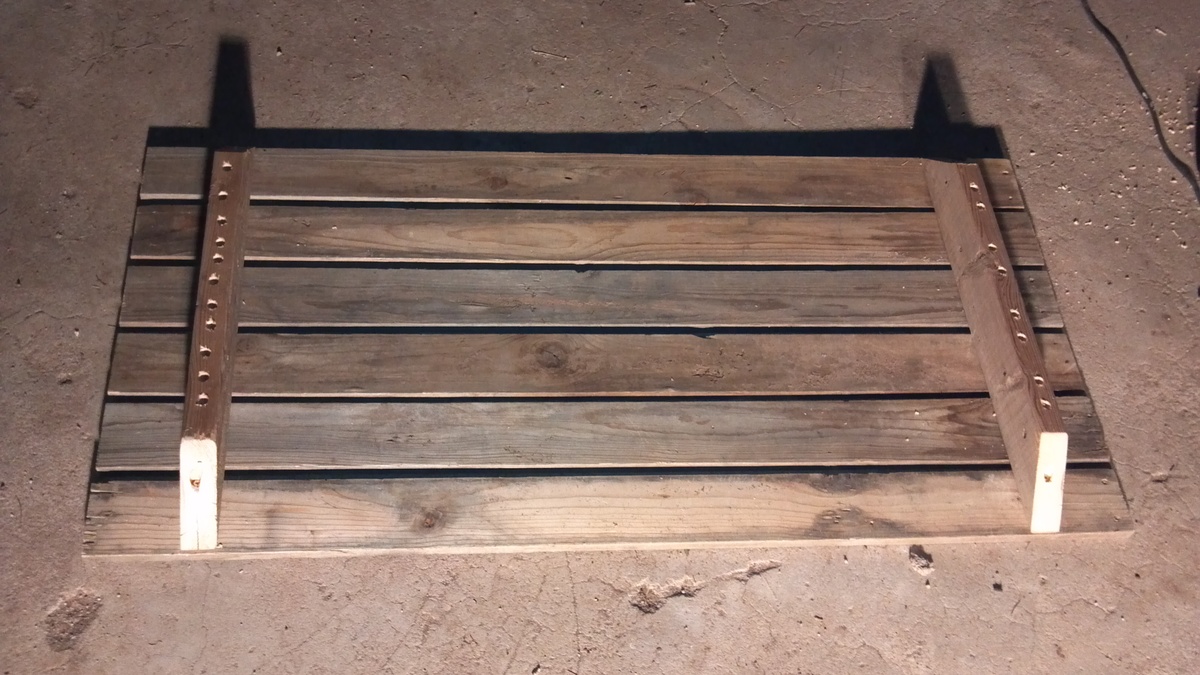
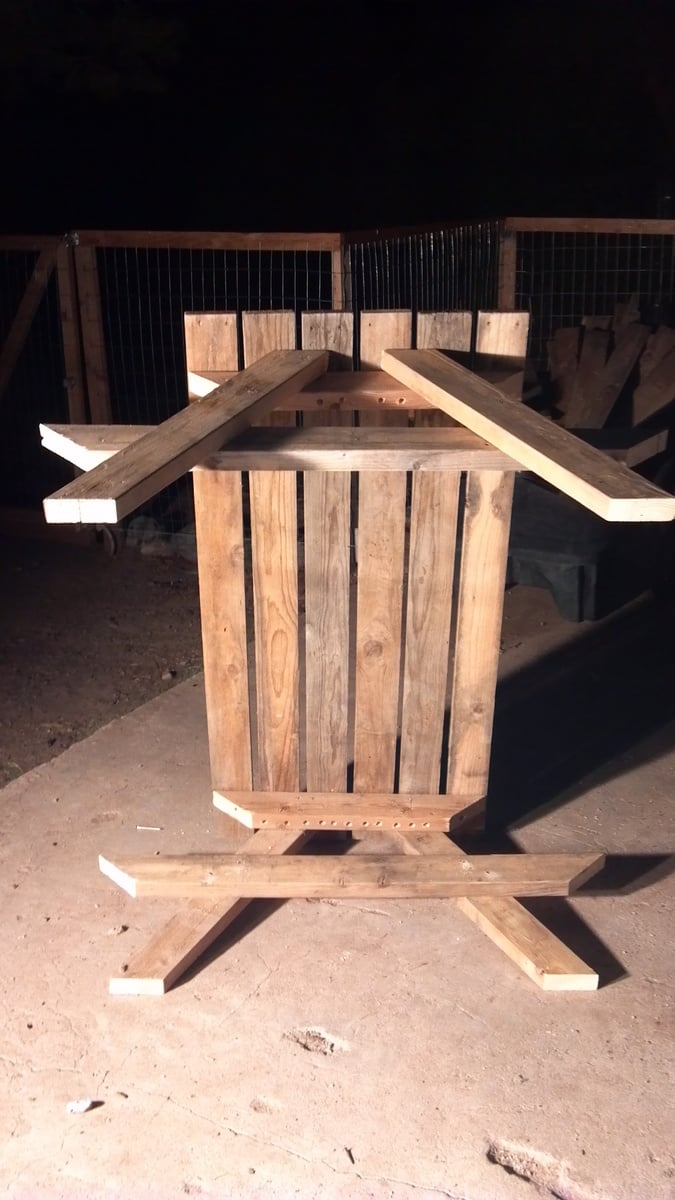
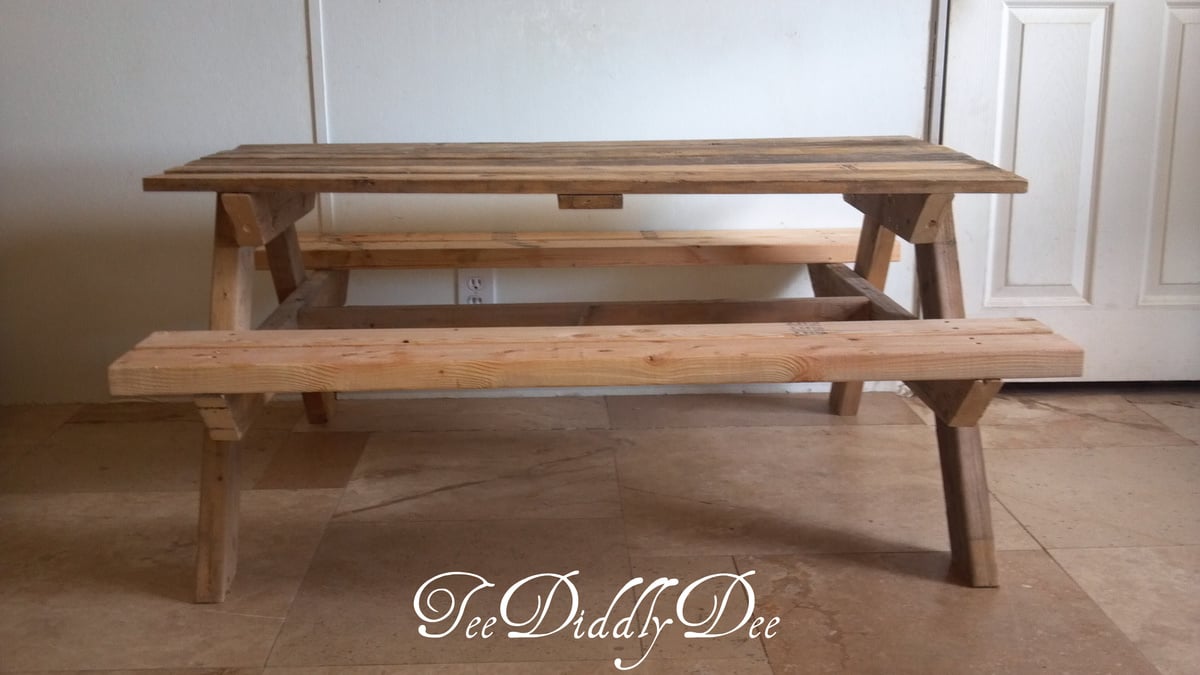
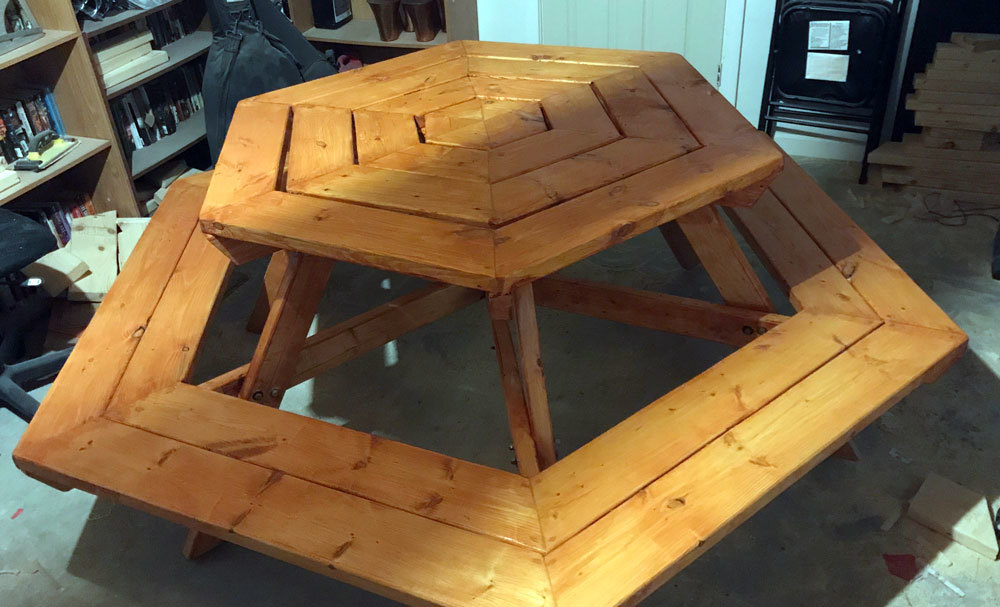
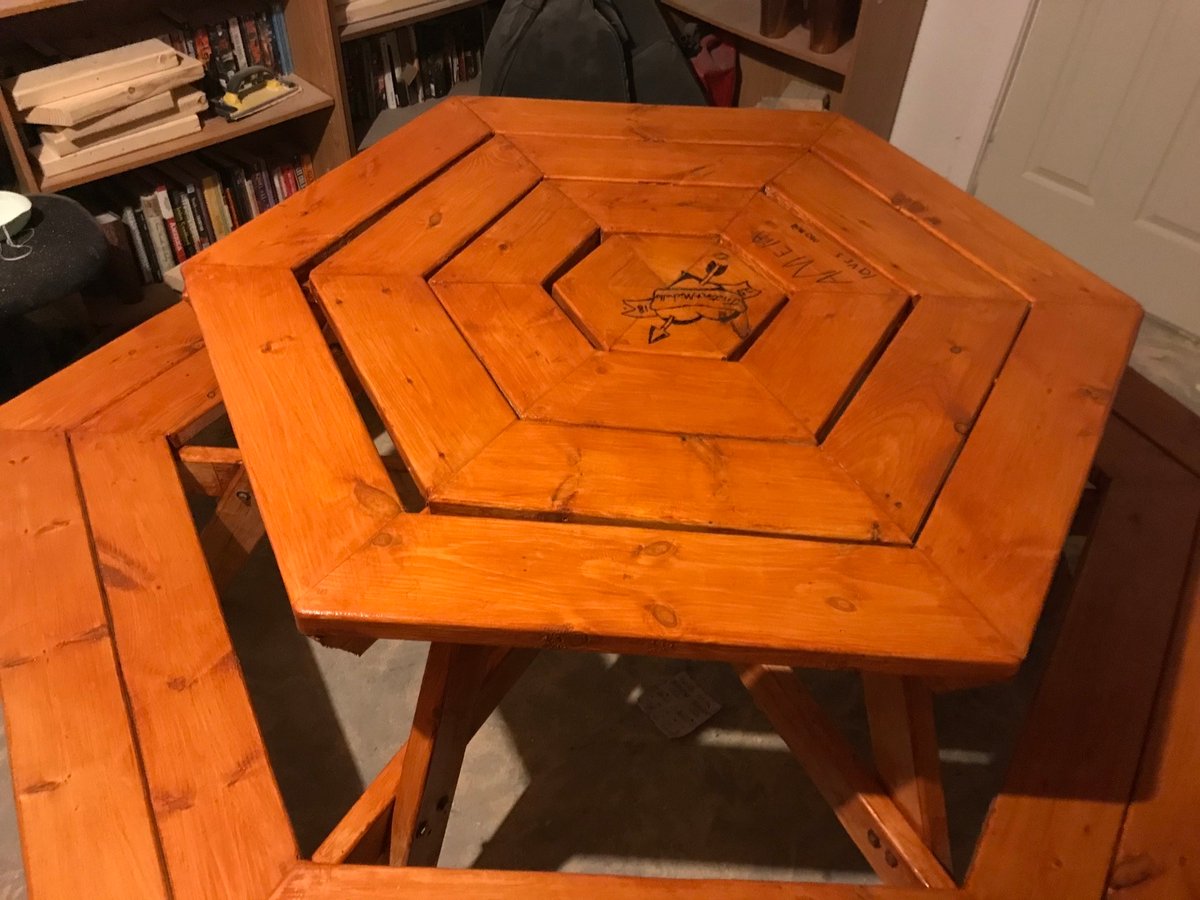
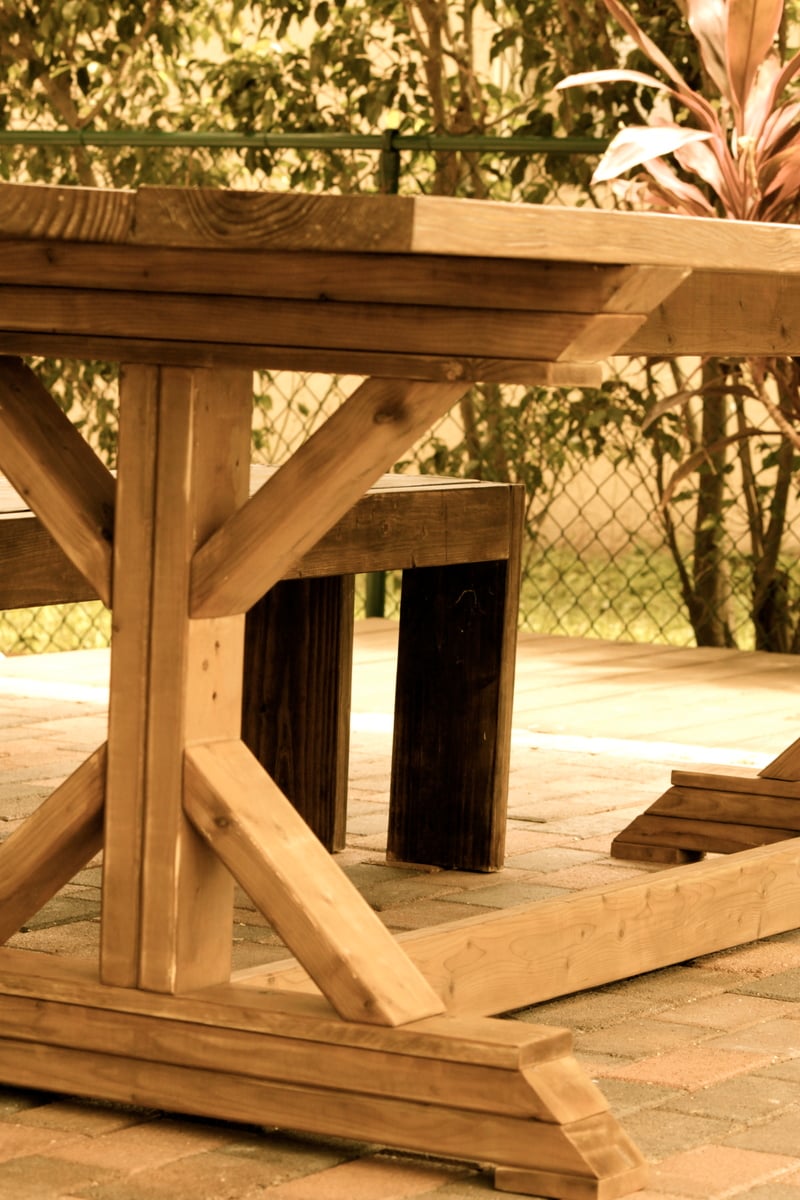
How to build a kid size picnic table out of old recycled pallets
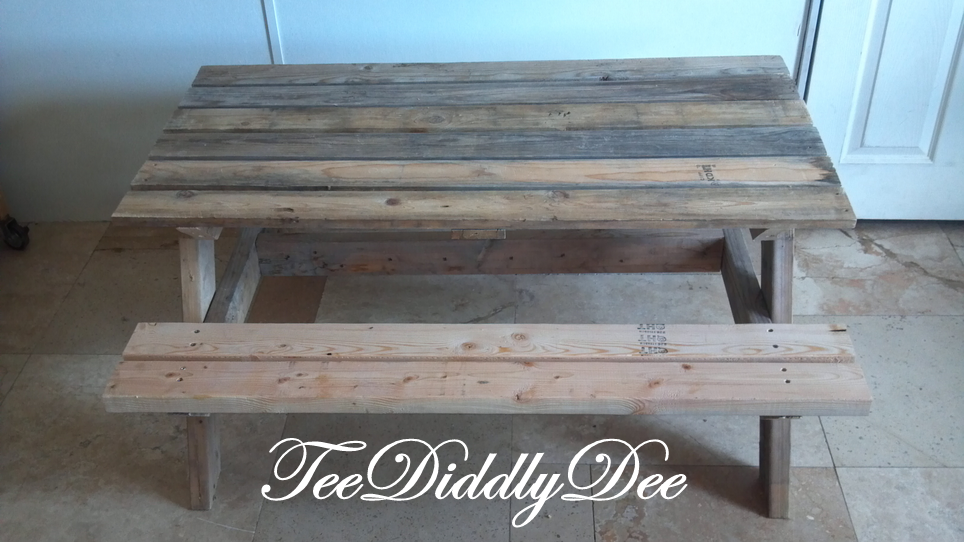
I needed a place for my daycare kids to sit and eat at lunchtime. I stumbled upon the bigger kids picnic table on Ana White, so I just had to build this!
Since I am on a tight budget, I once again searched my ol’ pile of wood outside and found most everything I needed except the tabletop pieces in which I found an old pallet and used pallet planks instead for the top. Since the pallet planks are a lot thinner than 2x4s, I put a brace underneath the tabletop which made it very sturdy.
I have the whole tutorial with lots of pics at http://teediddlydee.com/how-to-build-kid-size-picnic-table-out-of-old-r….
Built from Plan(s)
Estimated Cost
$30
Estimated Time Investment
Afternoon Project (3-6 Hours)
Finish Used
I just sanded the rough spots and finished with a clear, natural color.
Recommended Skill Level
Beginner
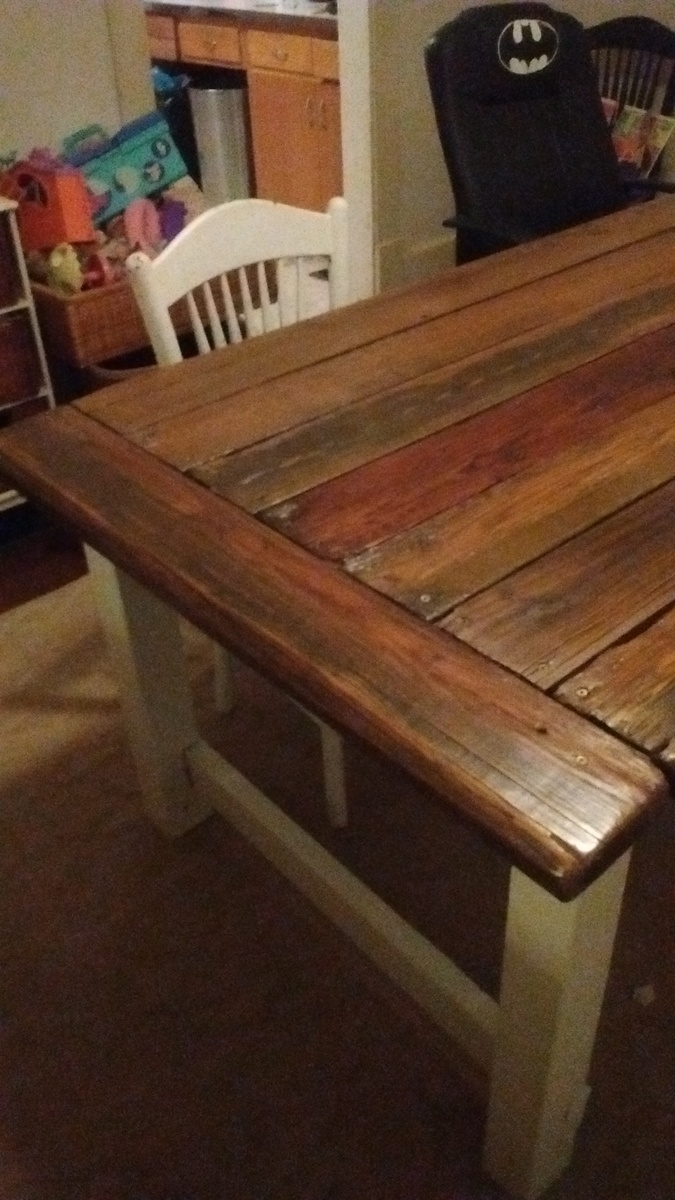
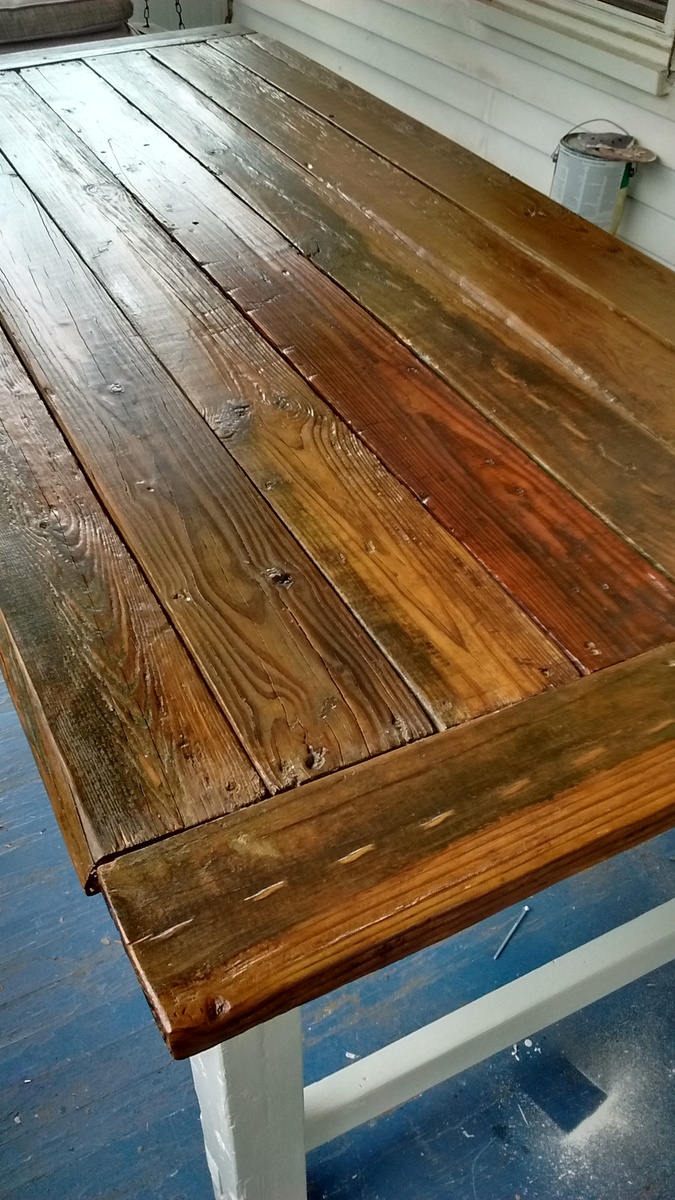
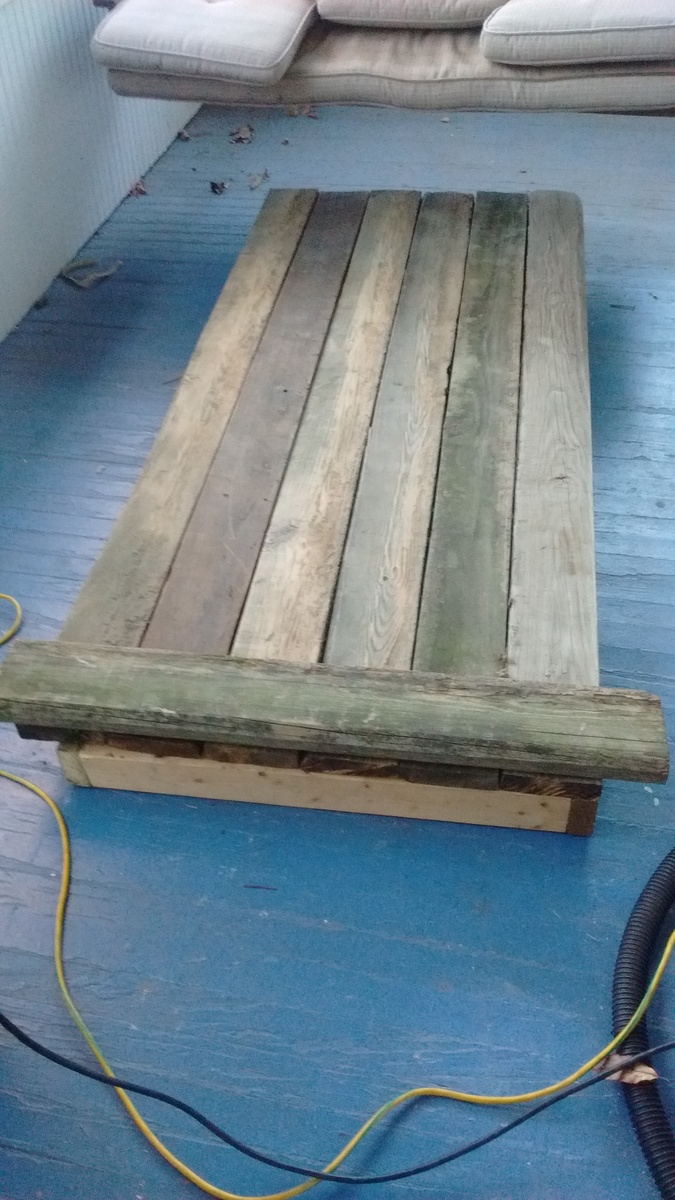
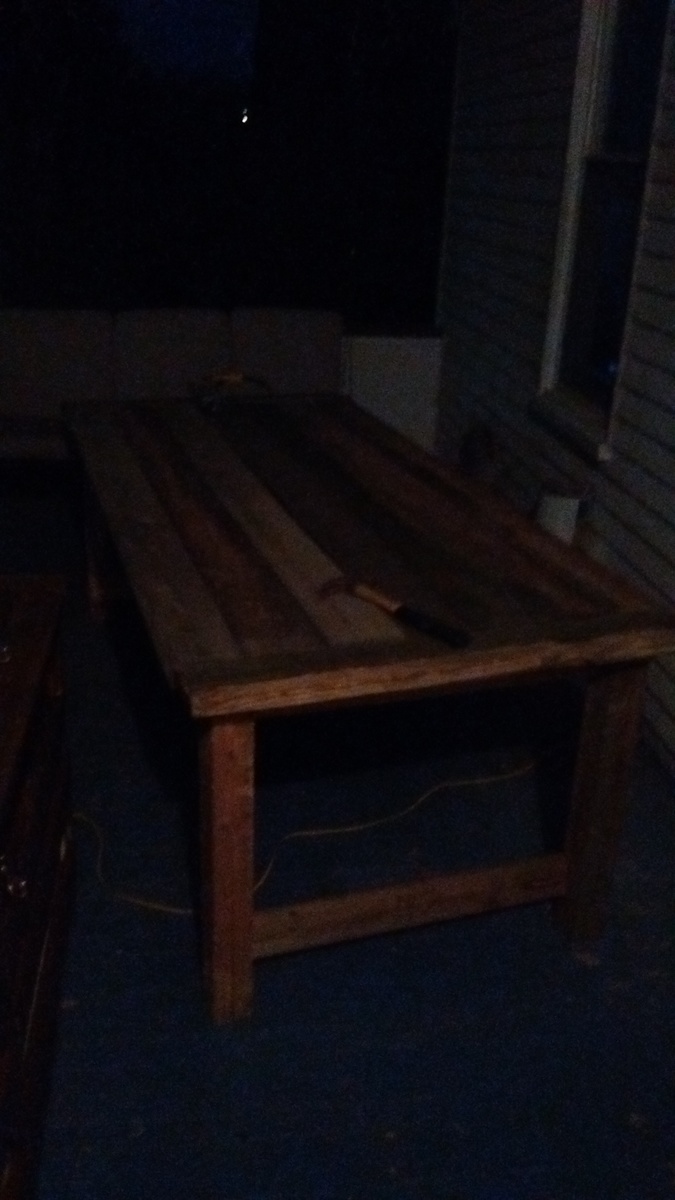
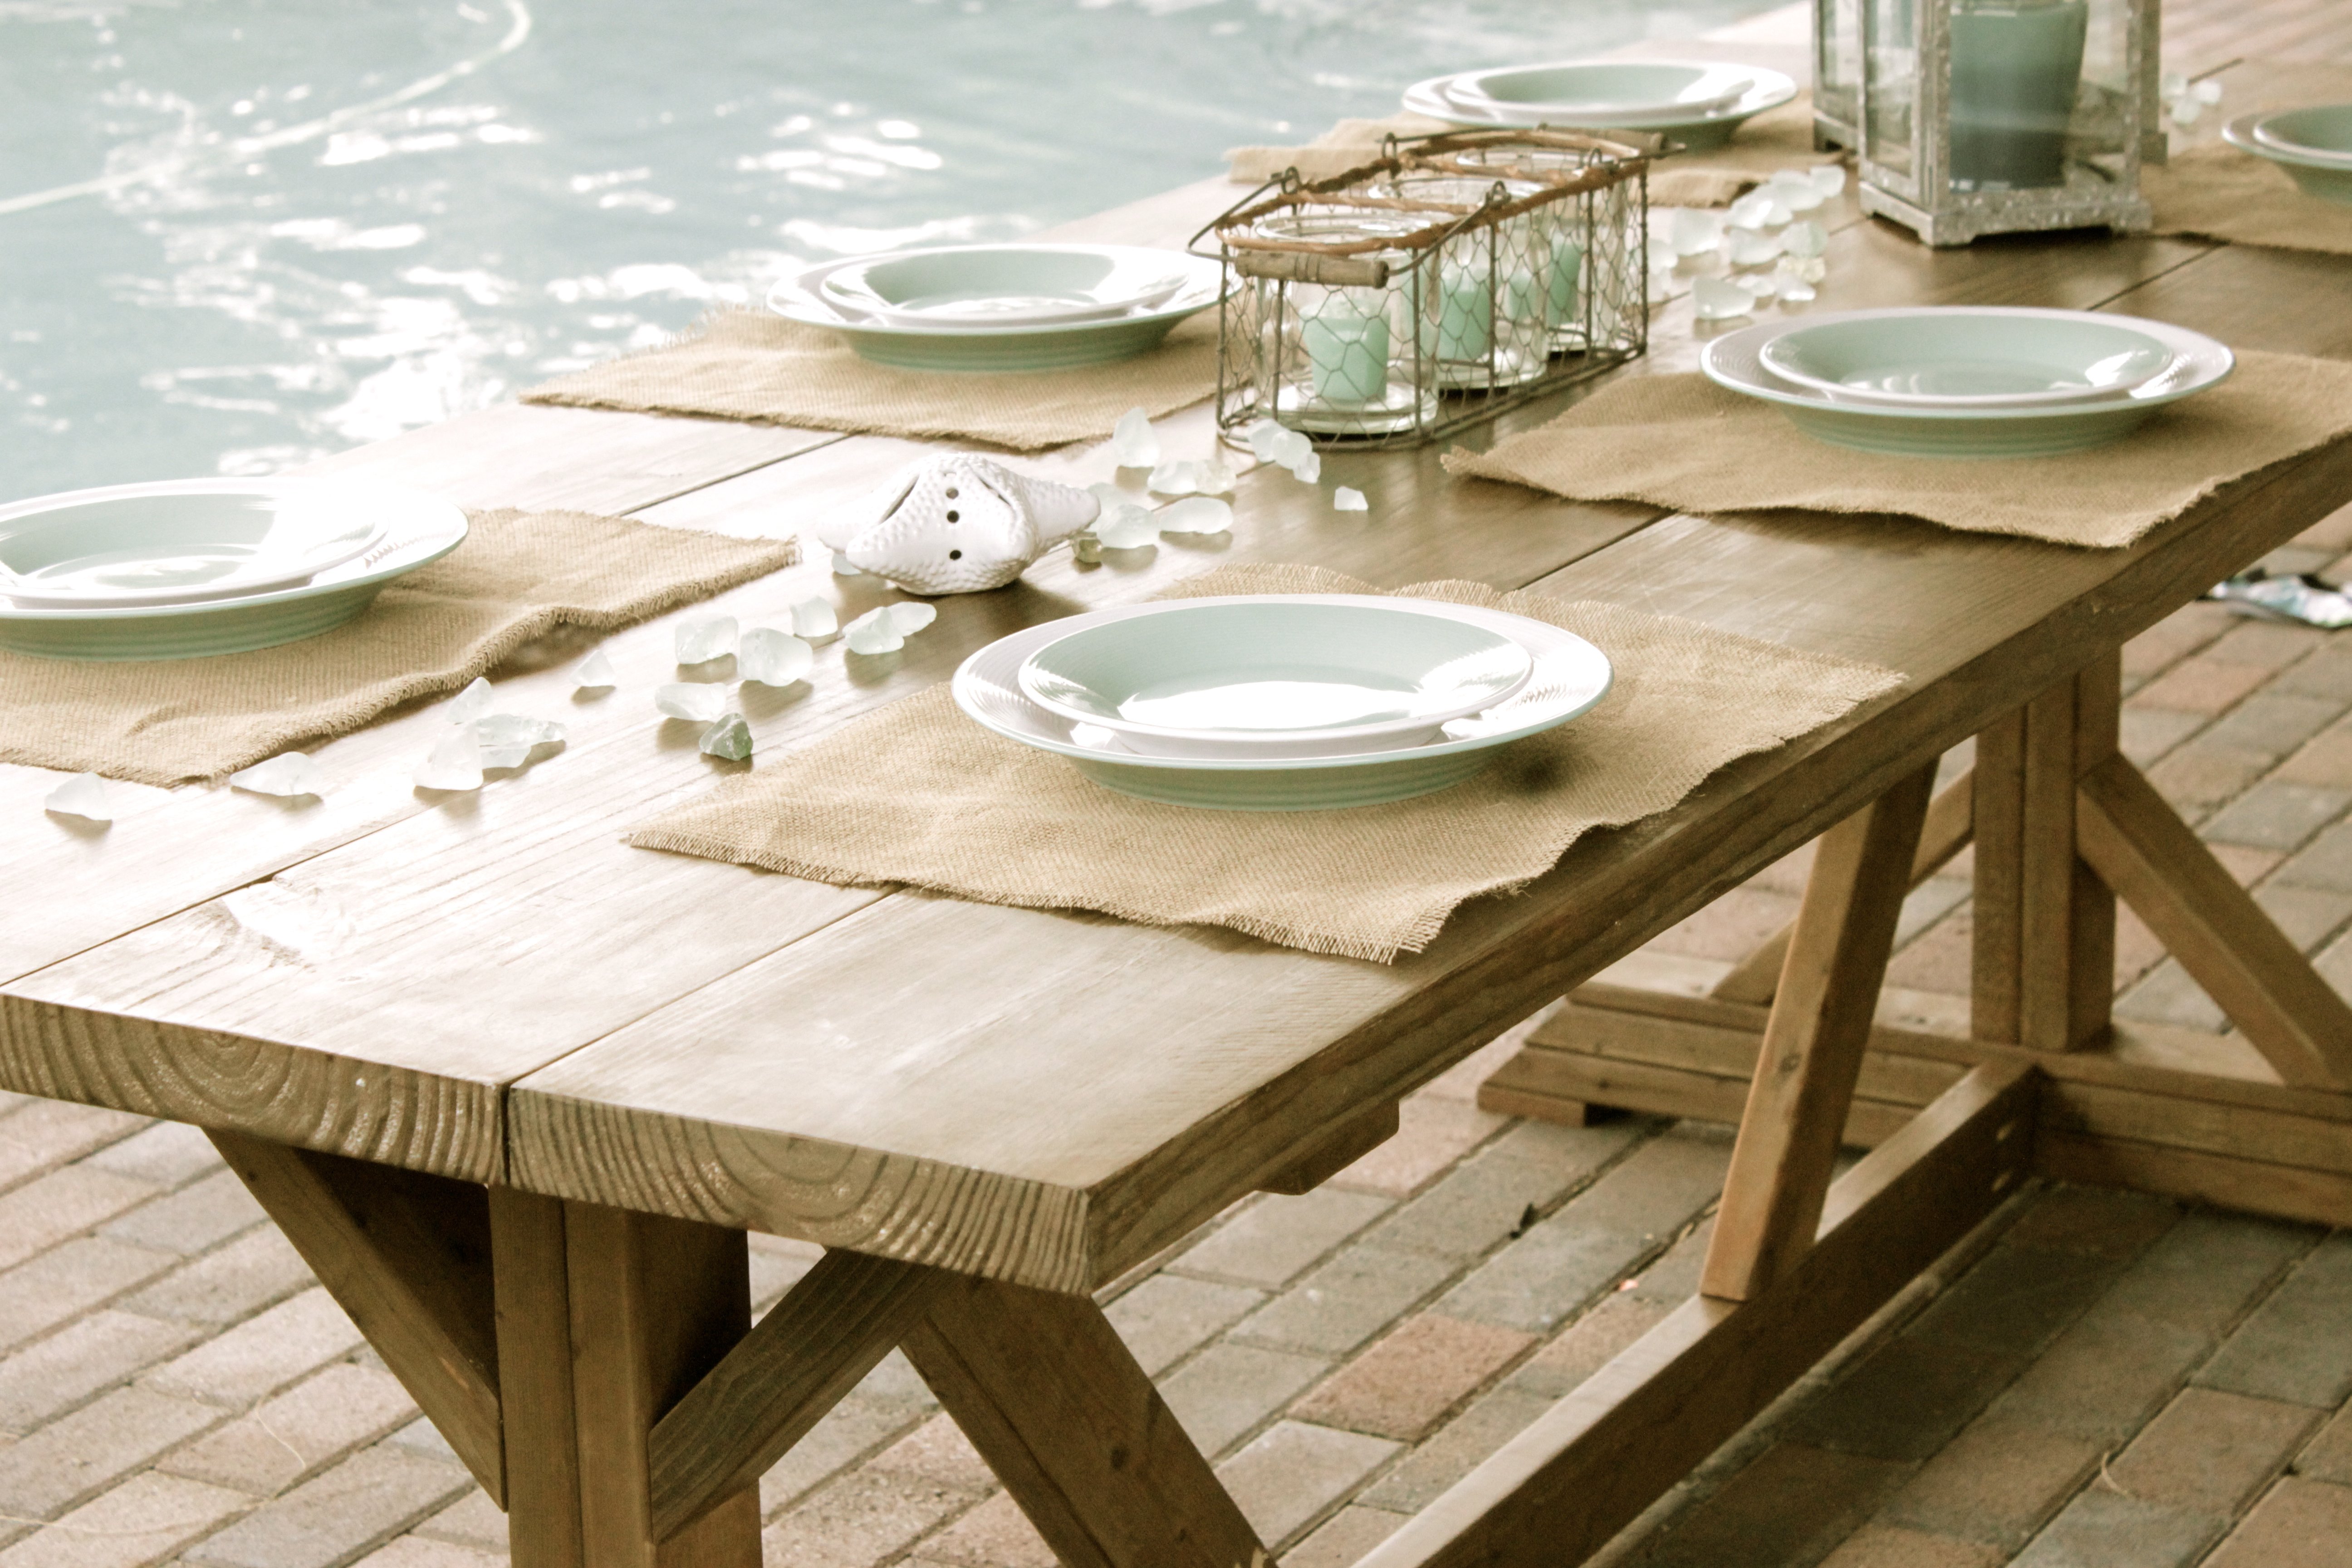
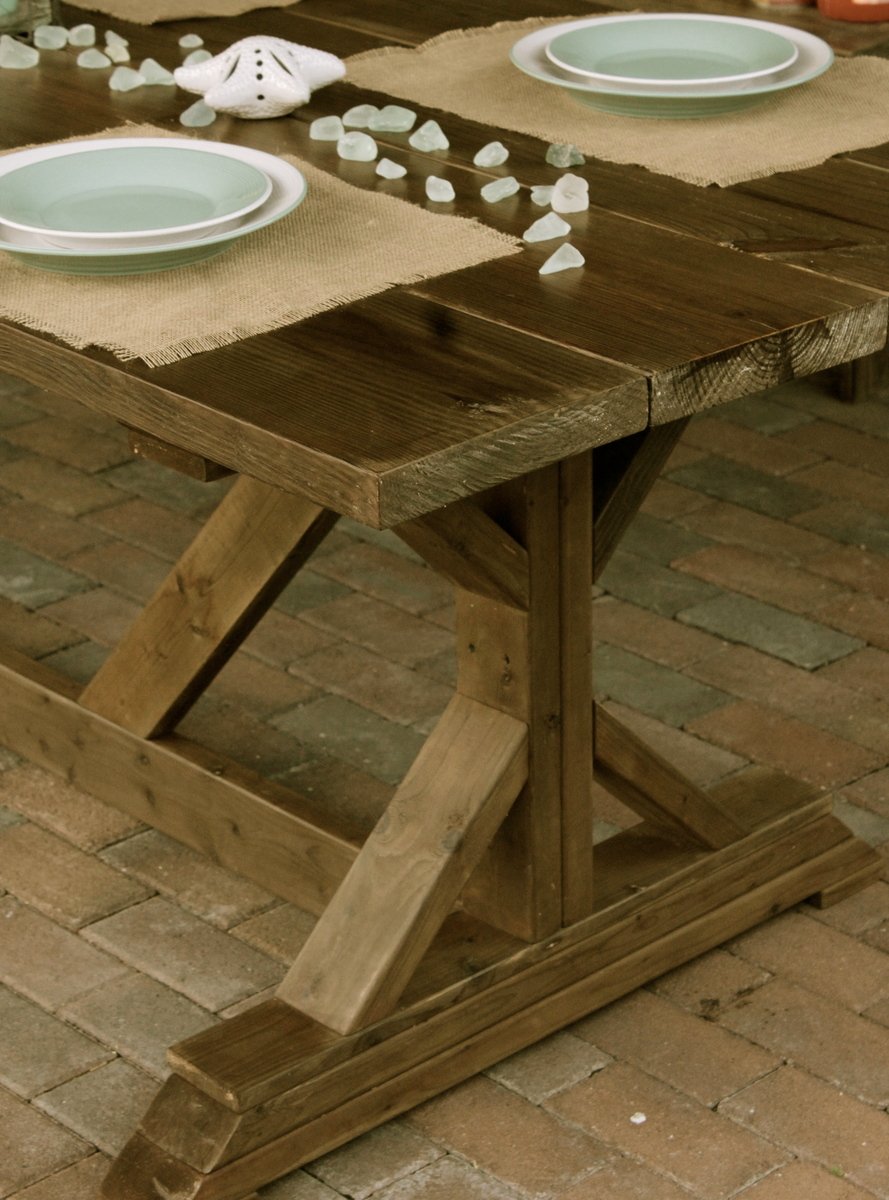
Reclaimed beauty
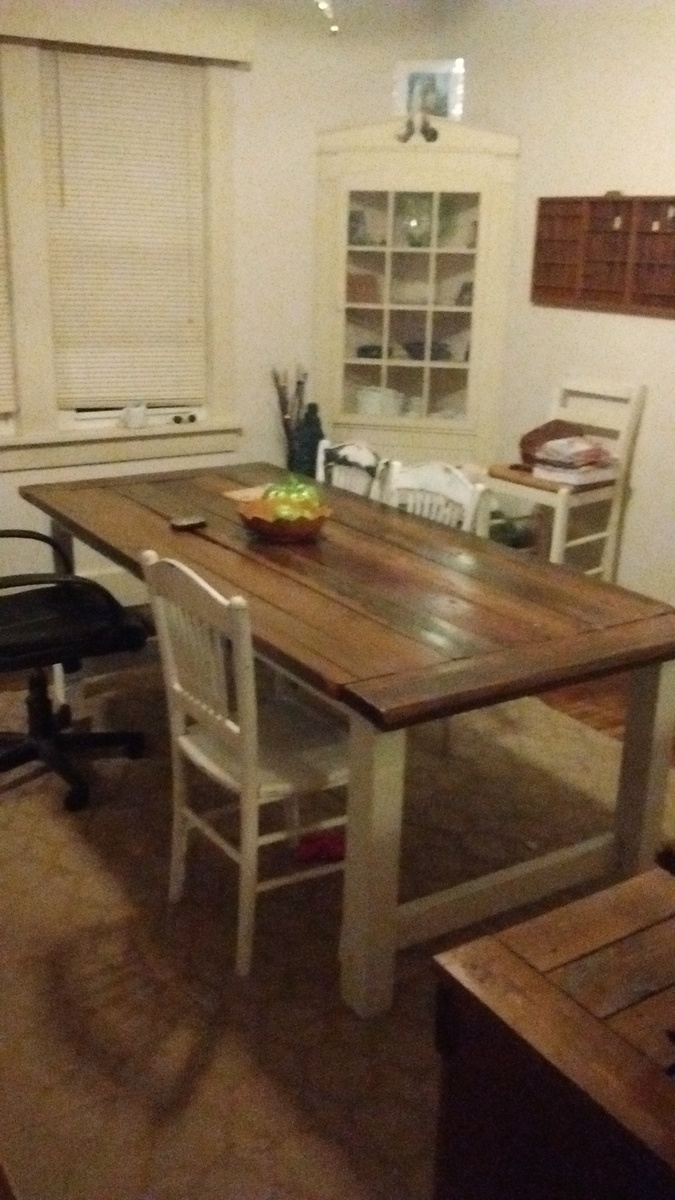
I started the project on a Monday and moved the table into the house on Thursday afternoon. All wood used was reclaimed. I shortened the length of the table by 9 inches due to the length of the reclaimed boards. The dimensions are 87 x 38.5 x 30. I used a colonial maple stain brushed on then rubbed in with a cloth. Then I applied several coats of Polycrylic clear satin. The stain was $1.50 from the Habitat store and the poly was found in the house we recently moved into. I spent about $15 on wood screws.
Built from Plan(s)
Estimated Cost
$20
Estimated Time Investment
Weekend Project (10-20 Hours)
Finish Used
Colonial maple and Polycrylic clear satin.
Recommended Skill Level
Beginner
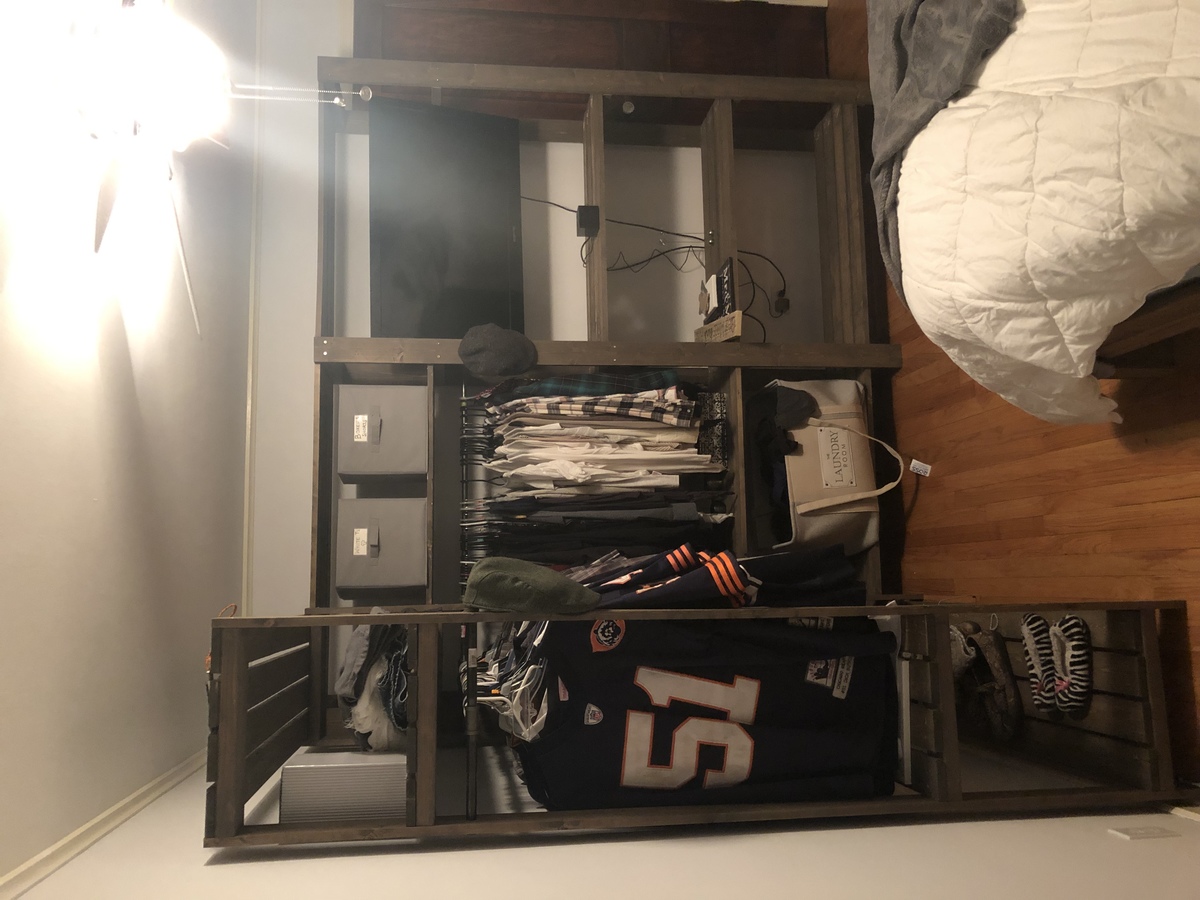
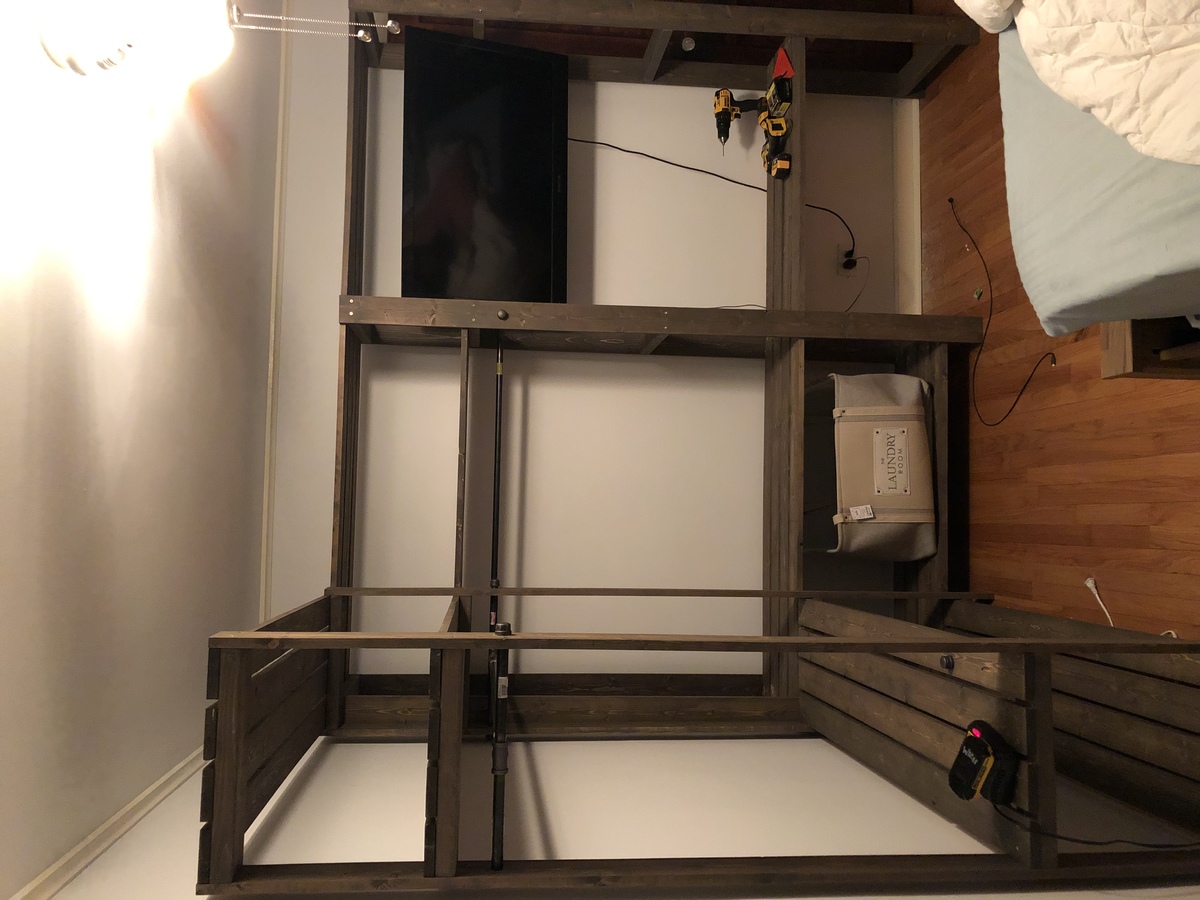
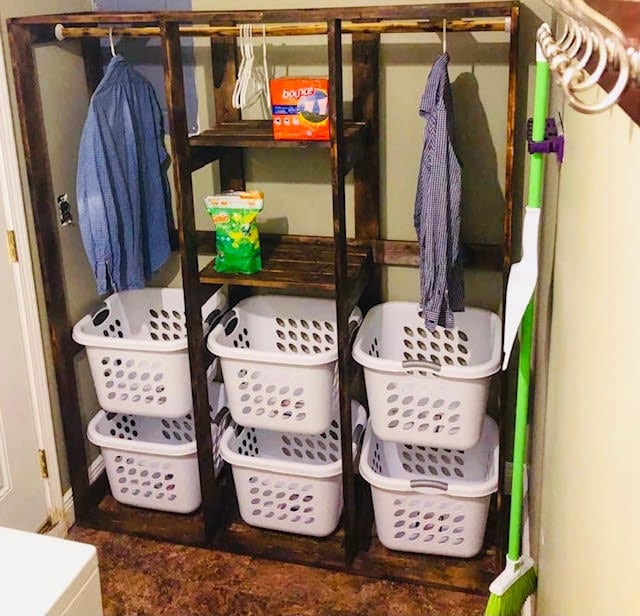
Wooden Slat Closet
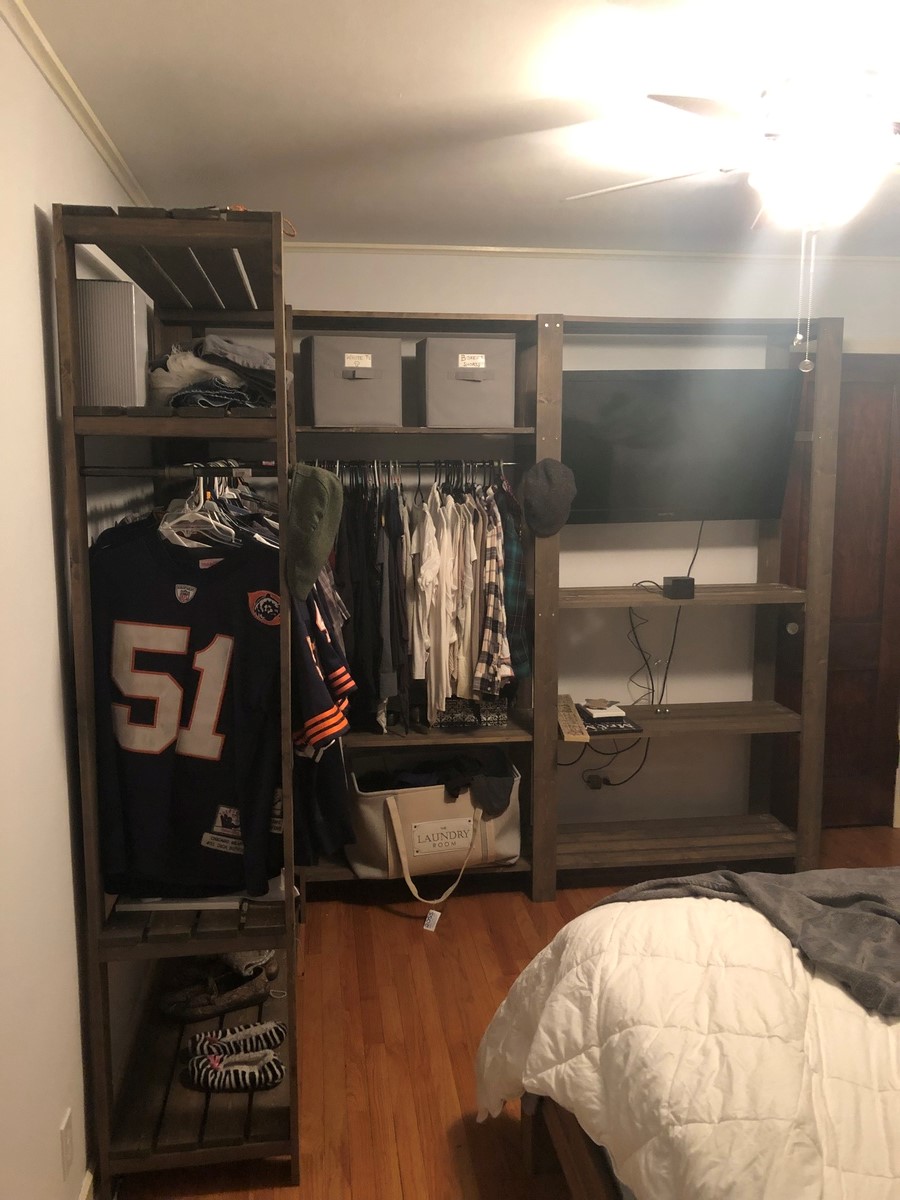
This was my take on Ana’s great idea and plans. My wife and I were in need of closet space in our small master bedroom and this worked out perfectly, plus it looks great! To gain some additional storage (and because I thought it would look cool) I decided to build the unit around our wall mounted tv and added 3 additional shelves. Sanding and staining all the board was by far the most time consuming. Assembly was a breeze. For anyone looking to build a large unit like this I recommend having a decent sized working area in order to stain all the boards and set them out properly to dry. Thanks Ana for the awesome design!
Estimated Cost
$200-$250
Estimated Time Investment
Day Project (6-9 Hours)
Finish Used
Varathane BriarSmoke
Recommended Skill Level
Beginner
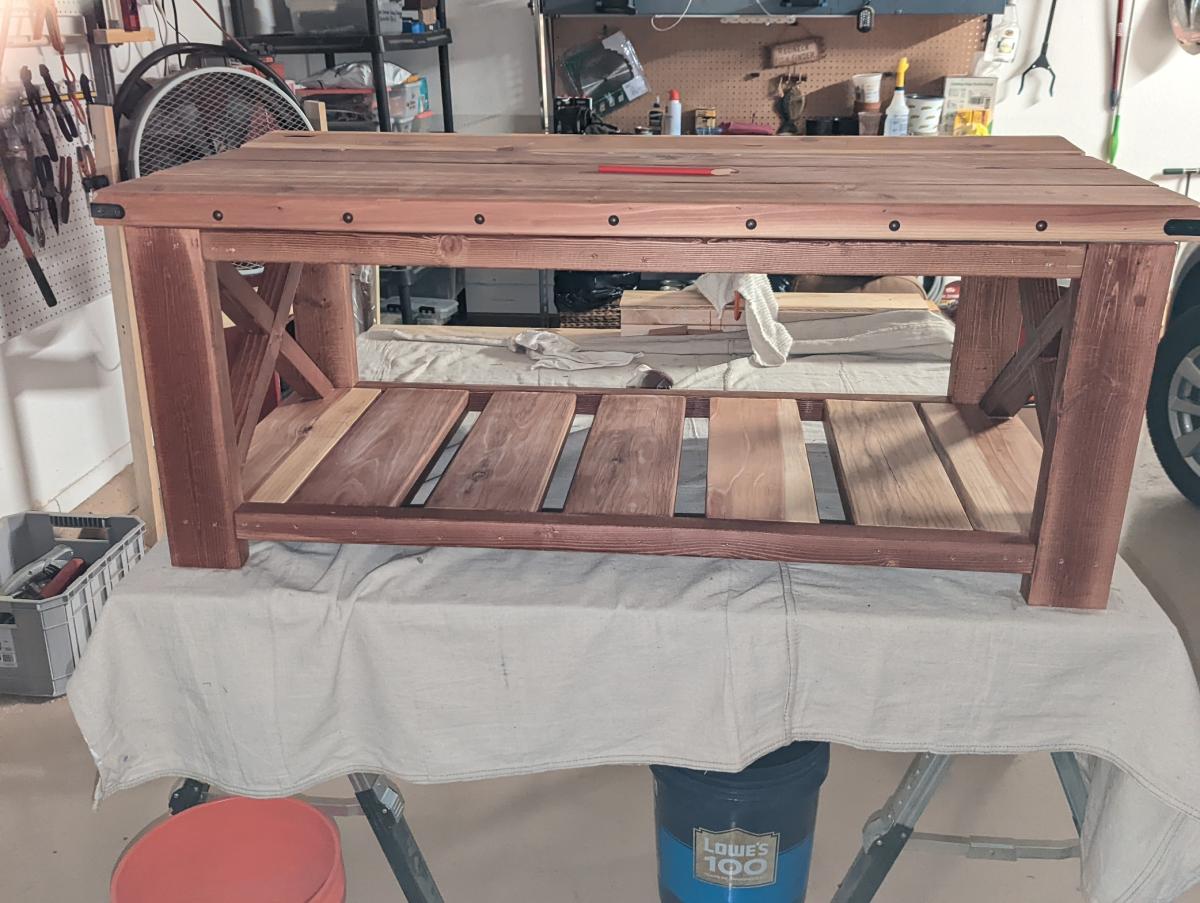
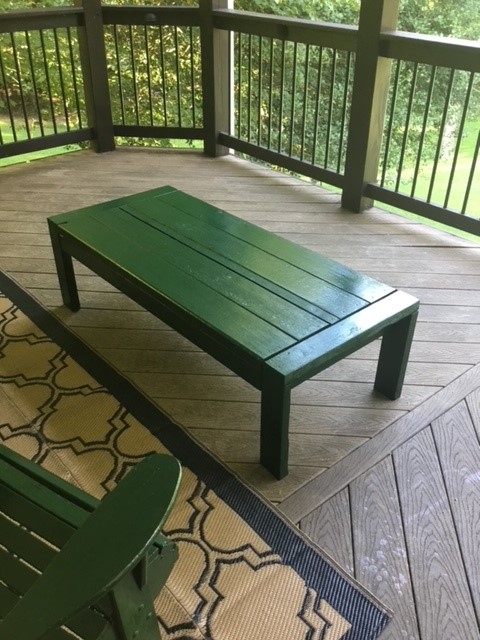
Farmhouse Coffee Table
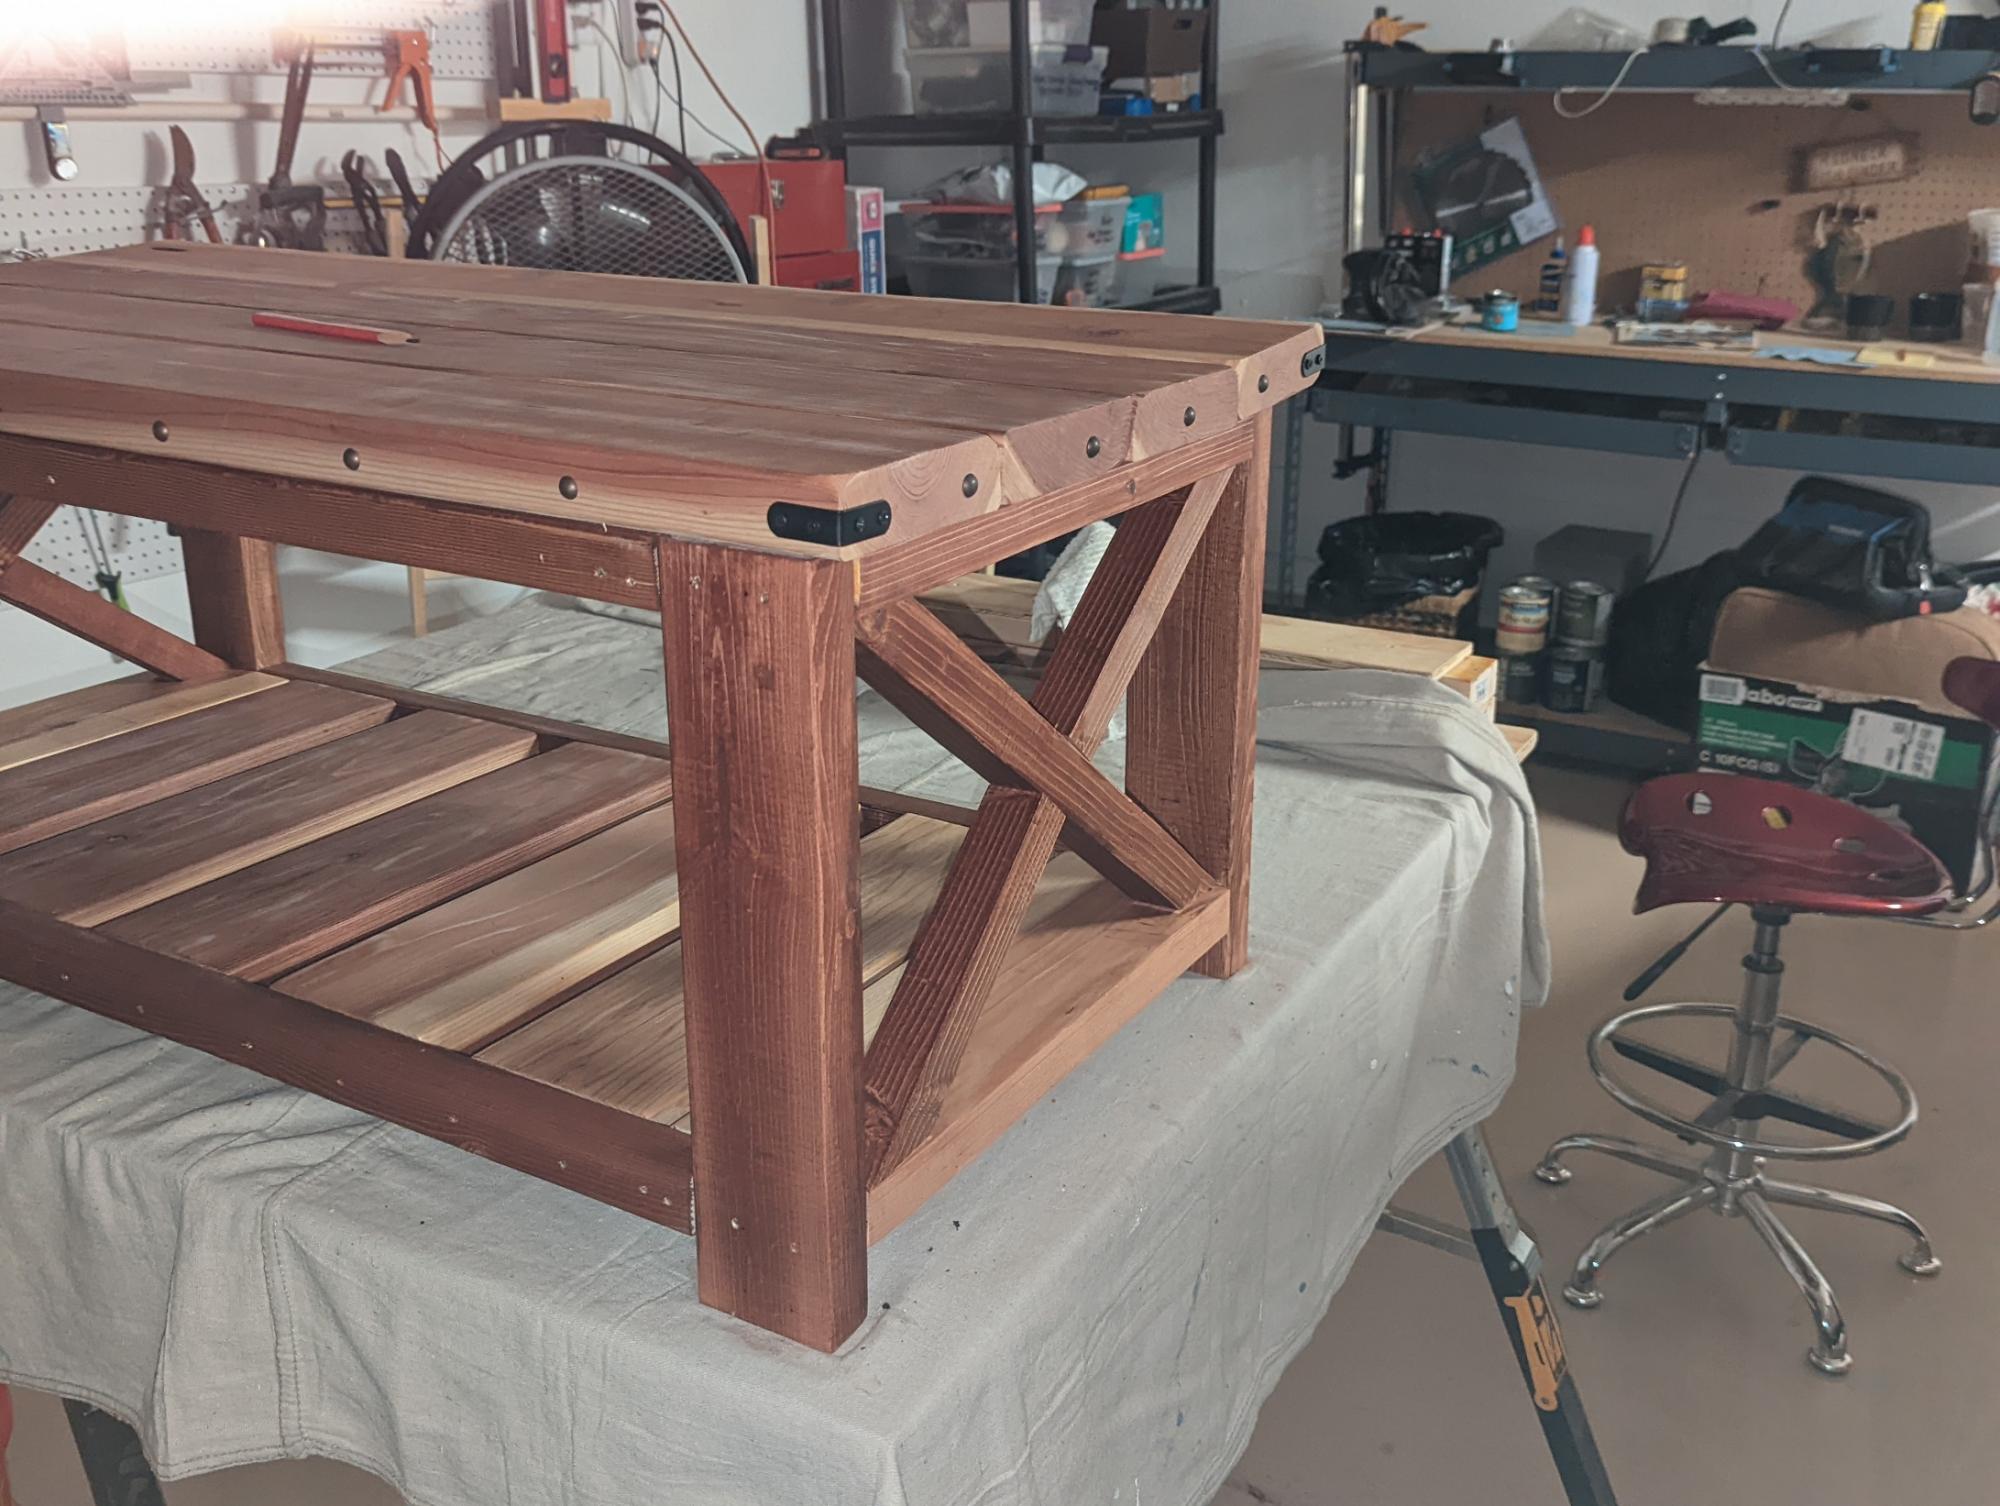
I really had a lot of fun with this project Ana, so thank you for both the plans and that YouTube tutorial. Built almost exactly like your plans, with the exception of those nail heads I added around the perimeter. Decided to use redwood for the 2x6's, and that seemed to add more wood beauty, but I also ended up with one board that was slightly bent. I fixed that with some wood filler. Finished with clear shellac.
Comments
Tue, 08/16/2022 - 11:01
Gorgeous build!
Love all the extra details and gorgeous wood, looks fantastic!
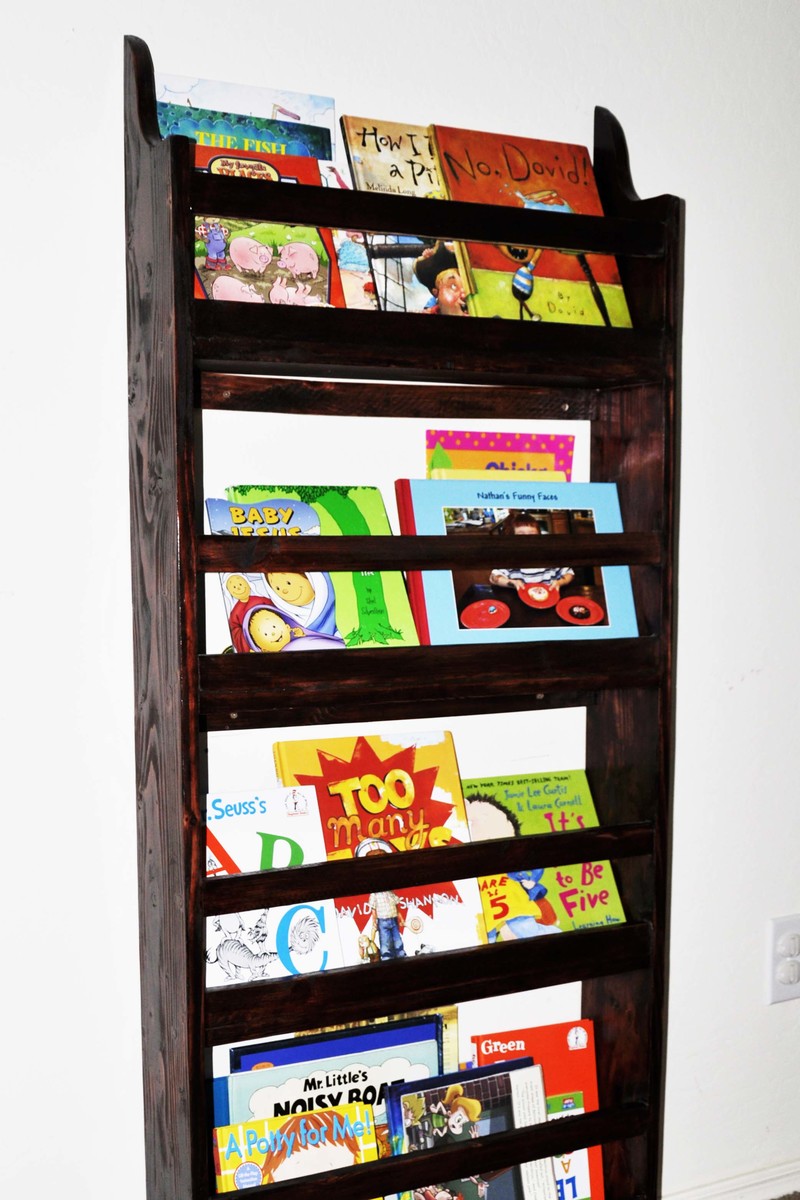
Flat Wall Bookcase

This was my very first Ana project. It probably took me three times as long as it would take anyone with any experience. That said, we love it! I have since made two more for friends! No need to look too close, there are plenty of mistakes.
Built from Plan(s)
Estimated Time Investment
Afternoon Project (3-6 Hours)
Finish Used
I used miniwax water-based red oak and topped with two coats of polycrylic.
Recommended Skill Level
Starter Project
Folding Chalkboard
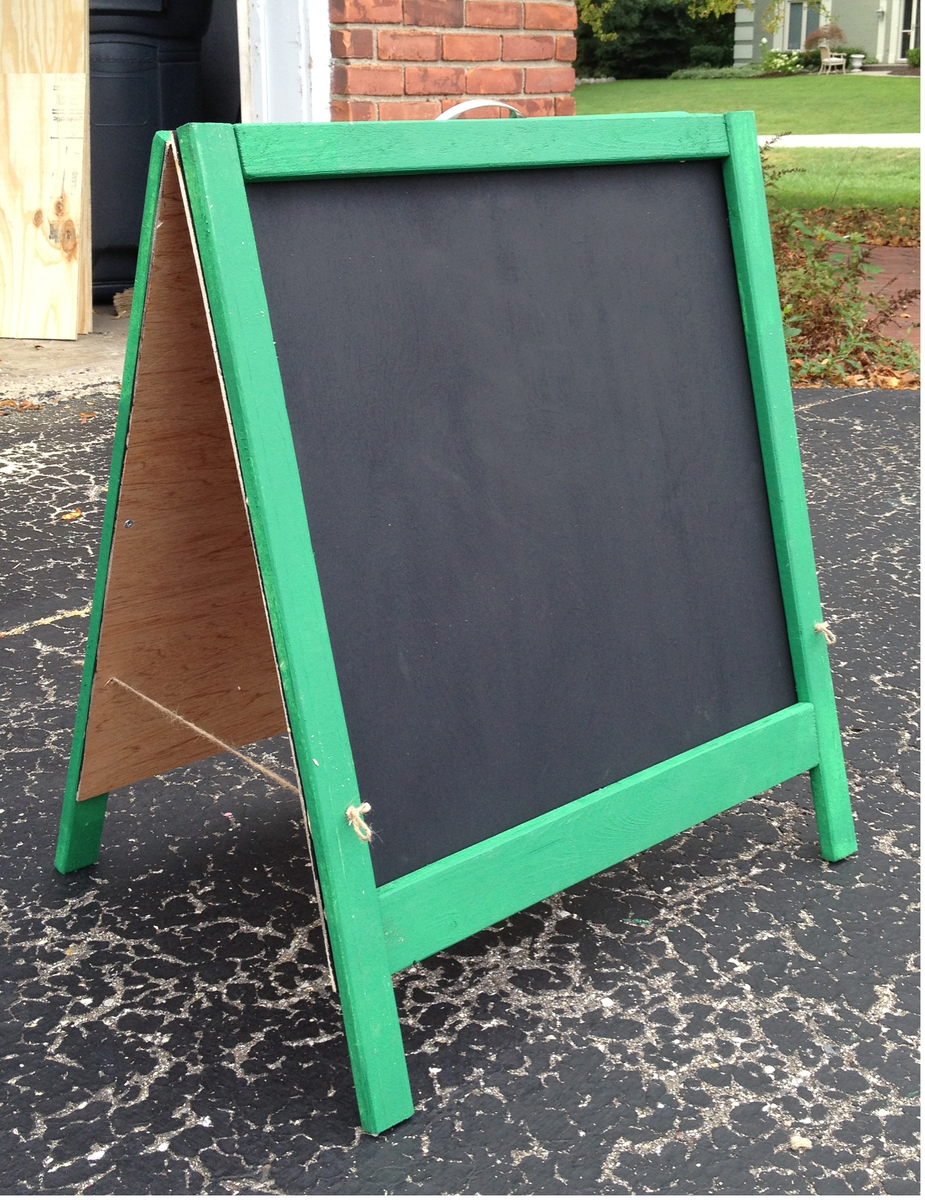
I bought two pre-cut 1/4 inch panels and adjusted the dimensions of the trim to fit the panels, using 1x2's and 1x3's. I painted before I assembled, which was where the most time was spent. Thanks Ana for another great project!
Built from Plan(s)
Estimated Cost
I'm guessing $15 including the hardware and chalkboard paint.
Estimated Time Investment
Afternoon Project (3-6 Hours)
Finish Used
left-over interior green paint and chalkboard spray paint (Rustoleum)
Recommended Skill Level
Starter Project
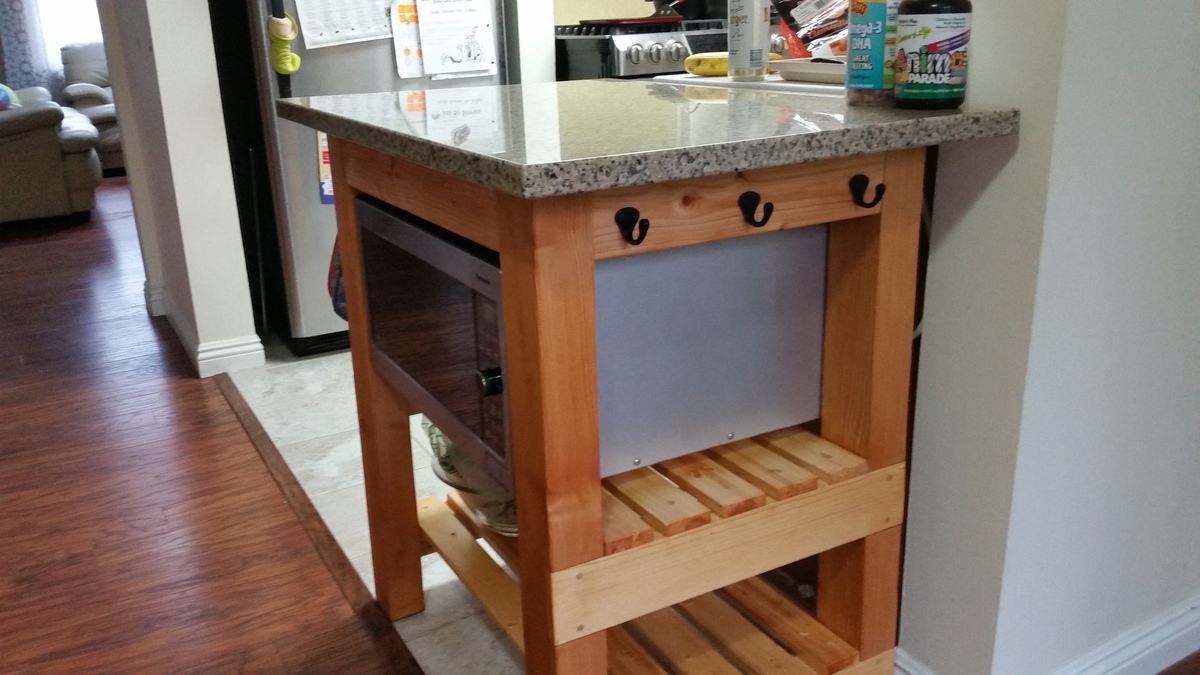
Granite Top Kitchen Island
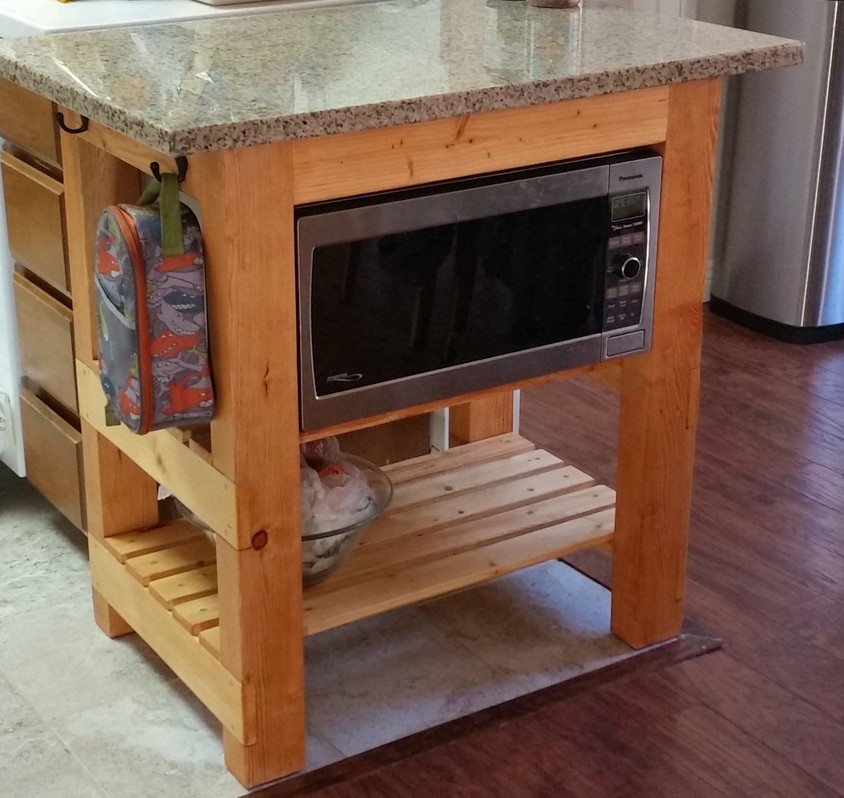
Dued to my small kitchen, I used 3x4's instead of 4x4's for the legs. I did away with the drawers, and went with two shelves instead. I lower the first shelf to fit my microwave. This freed up my counter space, which was nice. I stopped by a local stone yard, and picked up a thickest piece of granite they had, and had them cut it 36" x 24". I used Minwax Polyshade White Oak for the stain, and picked up some cast iron hooks from Amazon. All together it came out fairly nice. The only regrets is the wood filler I used wasn't so great, and it didn't stain well.
Built from Plan(s)
Estimated Cost
$130 granite slab, $30 for lumber, $8 wood stain and $14 cast iron hooks = $182
Estimated Time Investment
Weekend Project (10-20 Hours)
Finish Used
Minwax Polyshade White Oak
Recommended Skill Level
Beginner
Corner storage beds
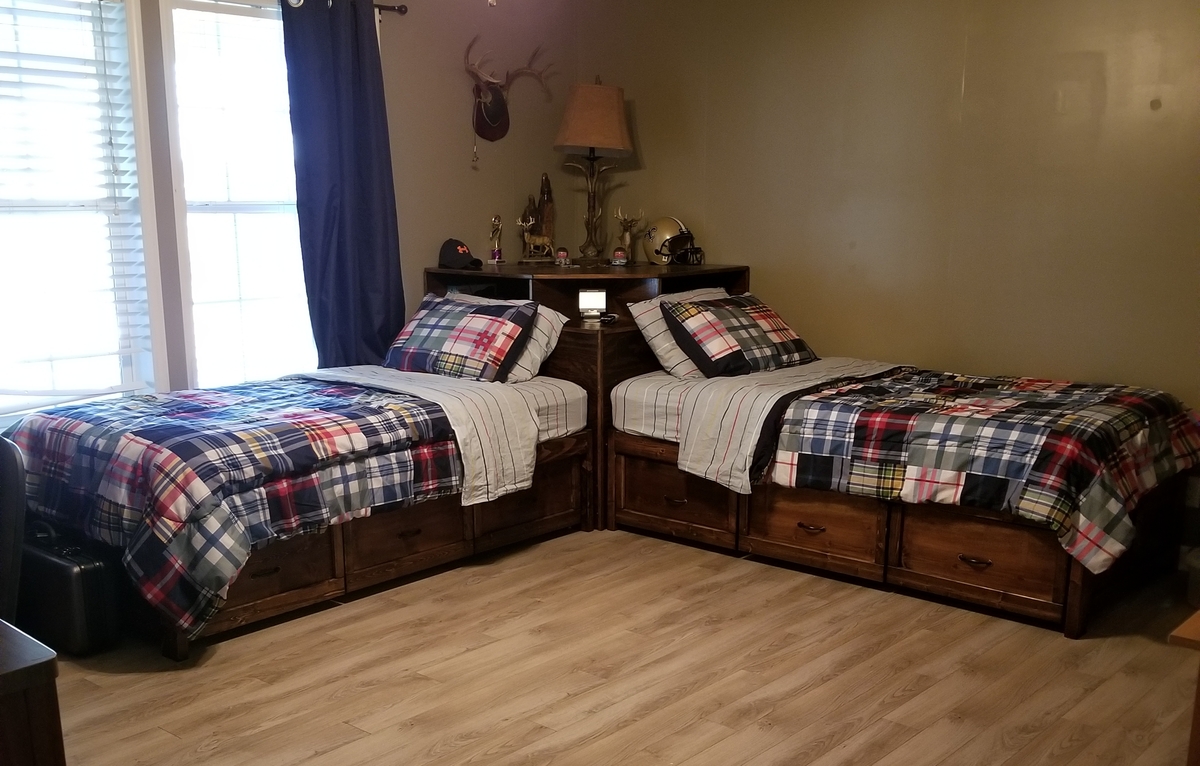
Our boys share a room and needed new beds. We wanted to keep as much floor open as possible, so these 2 plans came together perfectly!! They have large drawers that store all of their clothes so theres no need for dressers. We put a surge protector inside the hutch so they can easily plug up and charge their electronics. Best beds ever!!!
Built from Plan(s)
Estimated Cost
$700
Estimated Time Investment
Weekend Project (10-20 Hours)
Finish Used
Red mahogany
Recommended Skill Level
Beginner
Coffee Table
Here is a coffee table I built using the plans from Ana and wood from an old picnic table. The plans were perfect and the coffee table turned out well. I used the 2X4 coffee table plans - http://www.ana-white.com/woodworking-projects/2x4-outdoor-coffee-table - I had to make a few cutting adjustments in order to only use the reclaimed wood from the picnic table but it still turned out great.
Comments
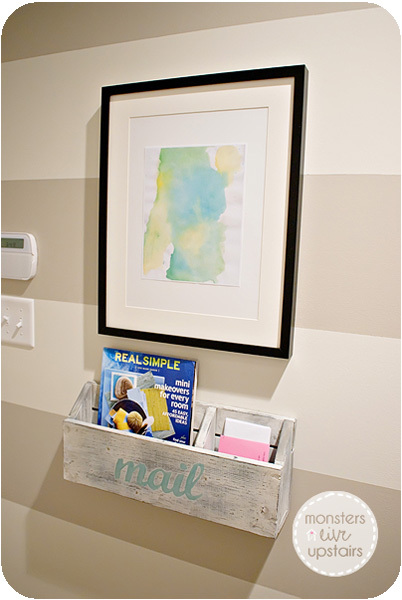
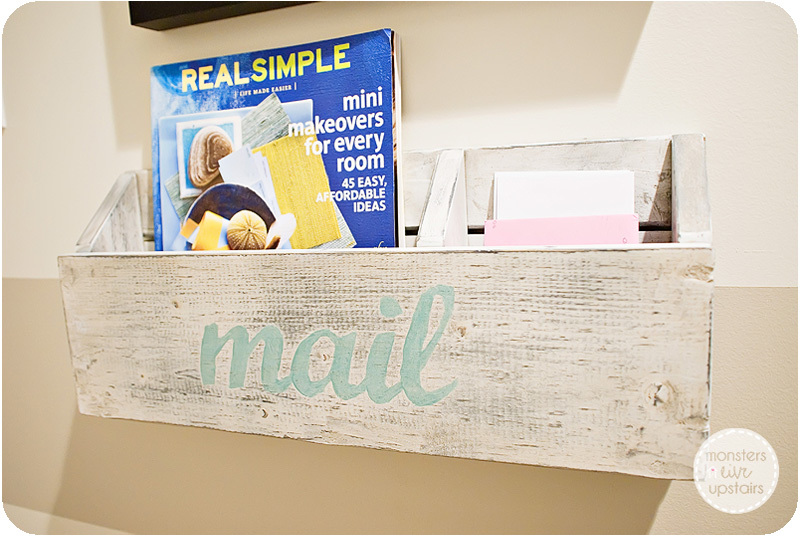
Mail Organizer - a modified version of the numbered cubbies
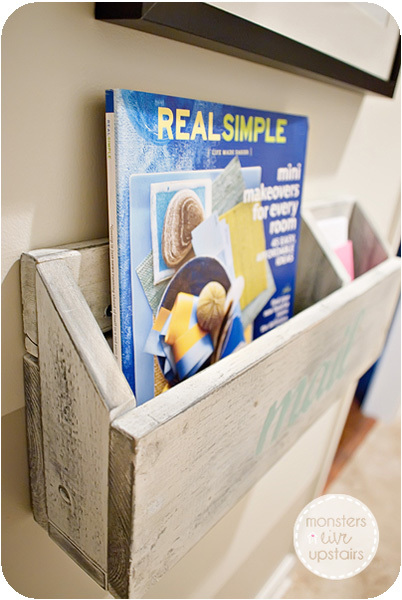
I was in desperate need of a mail organizer and knew when I saw the the plans for the numbered cubbies that it would be perfect with some modifications. The best part of this project was that it was free...all from scraps and done in less than a couple hours.
Built from Plan(s)
Estimated Cost
FREE - totally made from scraps and paint I had around the house
Estimated Time Investment
An Hour or Two (0-2 Hours)
Finish Used
A coat of black spray paint and then a coat of white. I painted on the letters and then sanded everything. I used a brown/gray glaze to tone down the white.
Recommended Skill Level
Starter Project
Comments

Fri, 08/19/2011 - 16:03
This is exactly what i've
This is exactly what i've been needing, thanks for the idea!
Sun, 08/28/2011 - 20:13
Dimensions
Kelli224 ~ This is so cute! How long did you make it and how tall in the back and front?


Wed, 08/31/2011 - 15:22
Thank you! This little box
Thank you! This little box has really been handy and keeps everything so tidy. EmileeA - It is 19" long, the back is 8", and the front is 5.5". The divider is 11.25" from the left side. Hope that helps!
Tue, 12/17/2013 - 17:31
Question
hi there! I ve been working on a small cubby shelf similar to this and was interested in seeing how /where you joined the boards- ex. The front board (5.5ft) to the dividers... I don't see and nails or screws! I'm guessing you applied wood filler atop the nailheads. But I'm having trouble joining my boards and if you can kindle let me know where you attached the front board to dividers w nails or was it just glue?!? Thanks so much!
Simple white potting bench
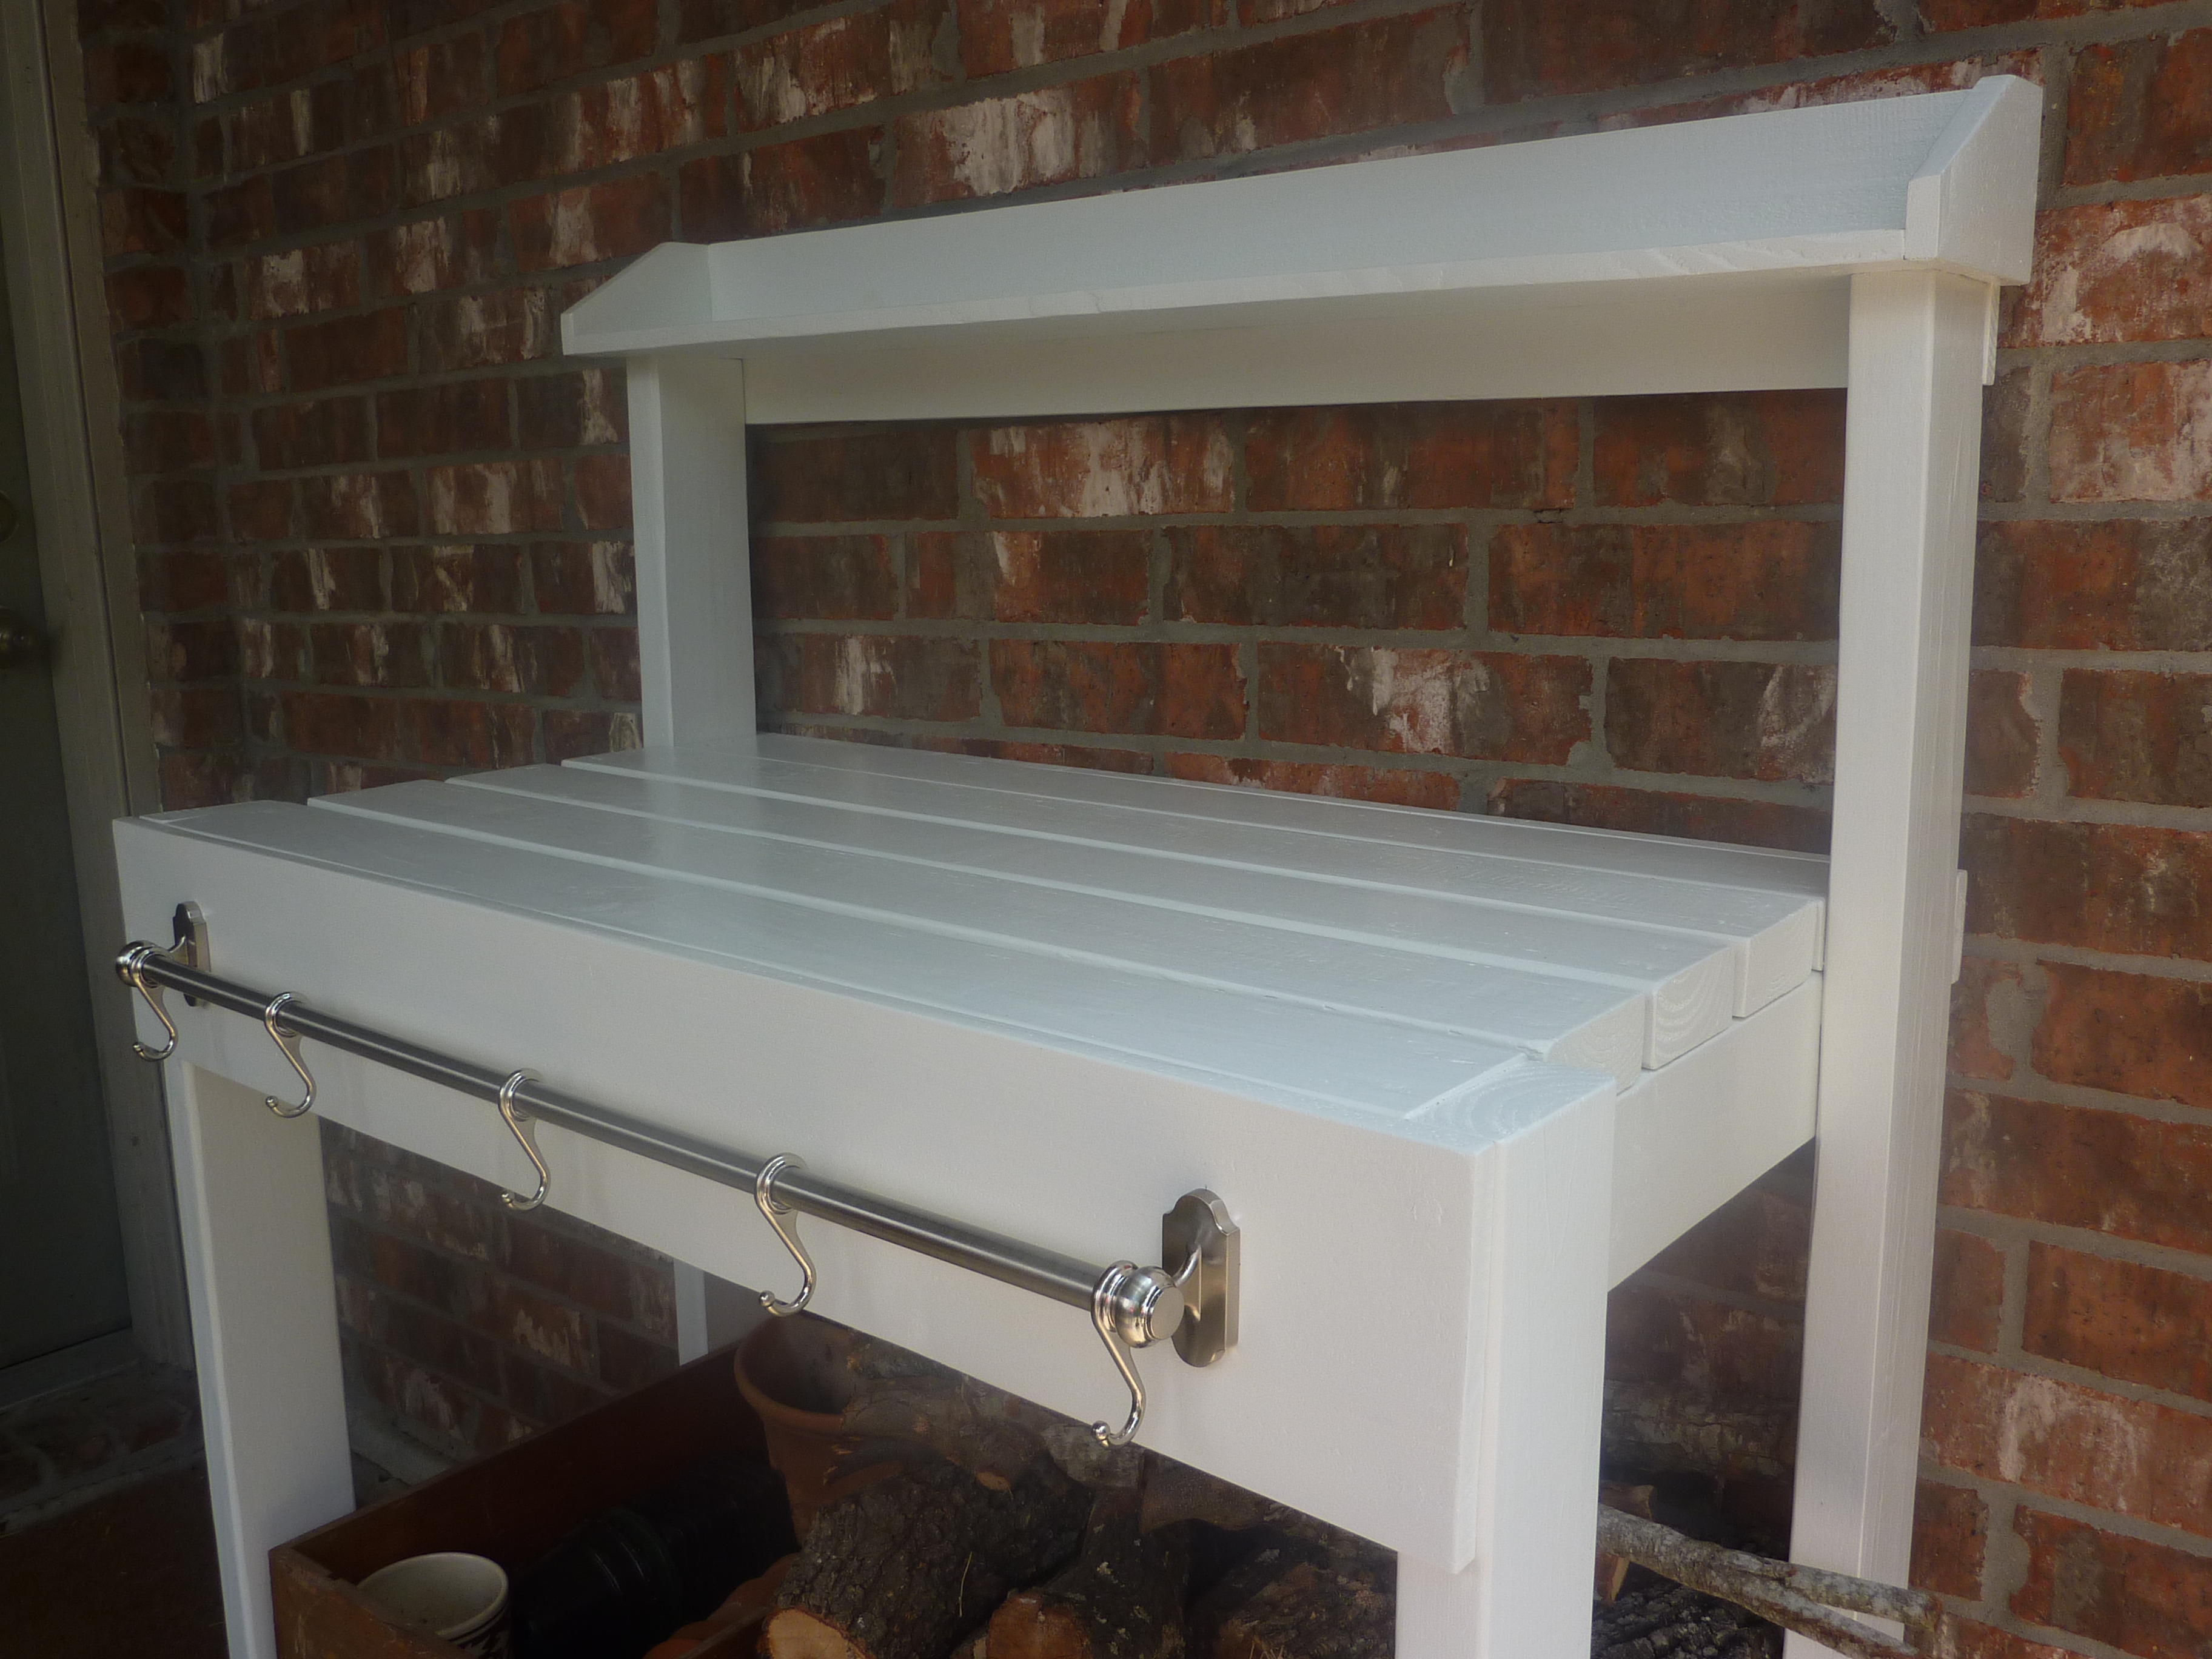
Finally, a place to corral all of the stuff on the patio!
What we really needed was a wood rack and buffet/usable surface for the patio, but this potting bench fit the bill perfectly because:
1. It's sturdy enough to hold all that firewood
2. I had all of the supplies already (2x4 scraps, leftover paint, screws, etc)
Free and easy? Yes, please!
Only real change is that I added an apron to the front of the top shelf, and used well-sanded fence slats for the top shelf instead of a regular 1x6 (it's what was in the garage already).
The towel bar is from Ikea. That was also an extra that was already on hand.

Built from Plan(s)
Estimated Cost
$0 (made from all leftovers from other projects)
Estimated Time Investment
Afternoon Project (3-6 Hours)
Finish Used
Some exterior white paint that was already in the garage. Pretty sure it was Behr brand paint.
Recommended Skill Level
Starter Project
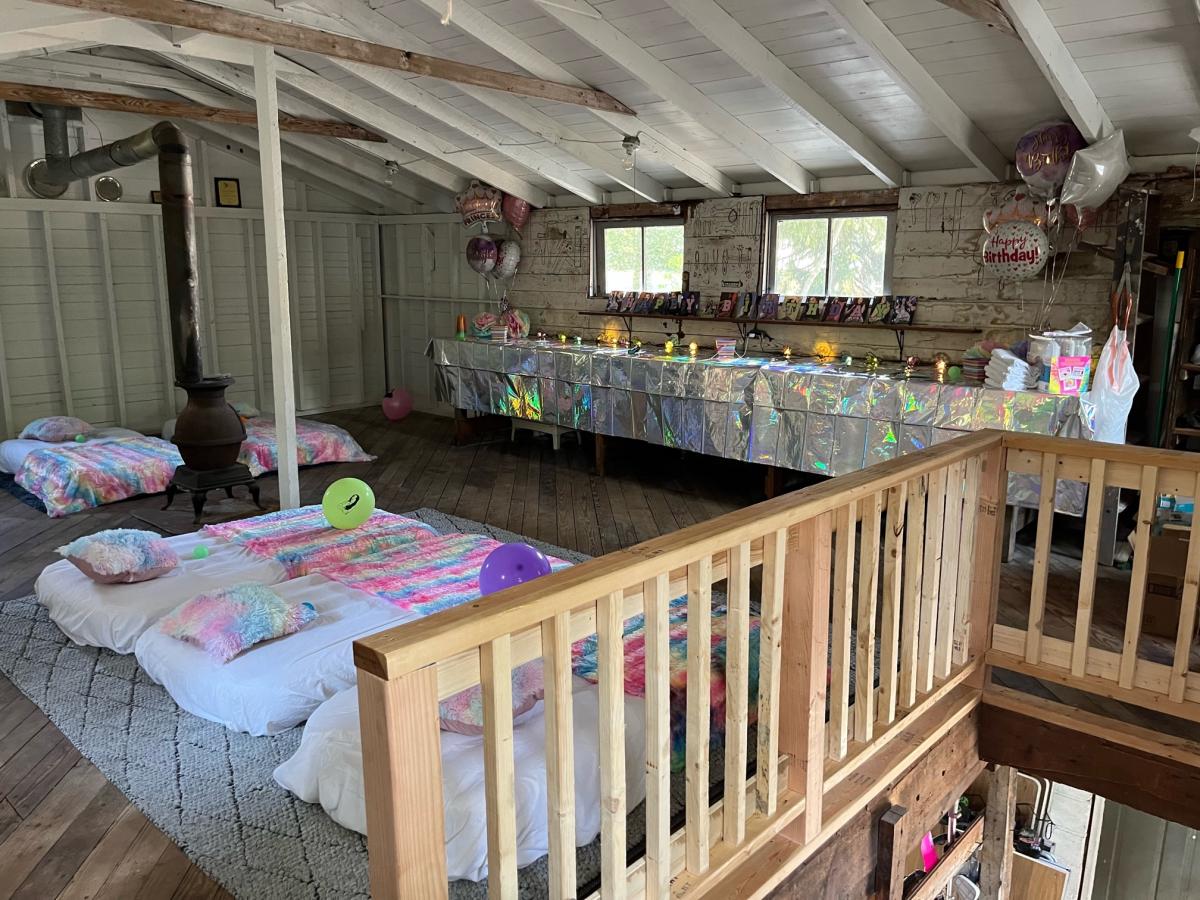
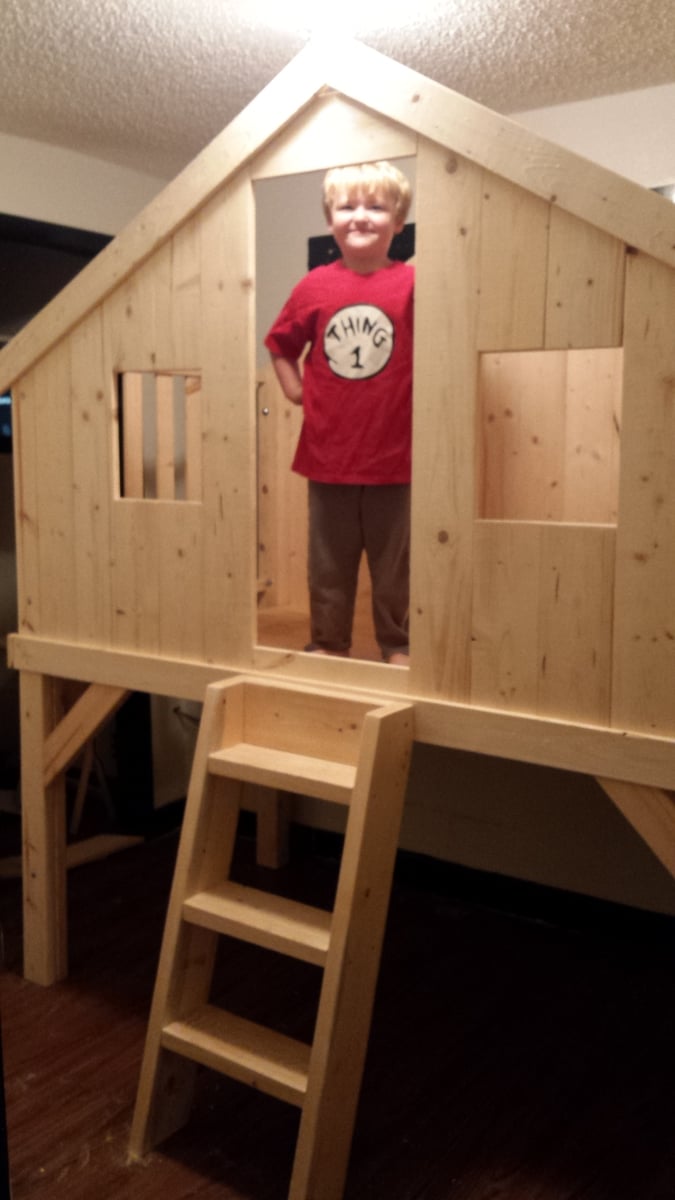
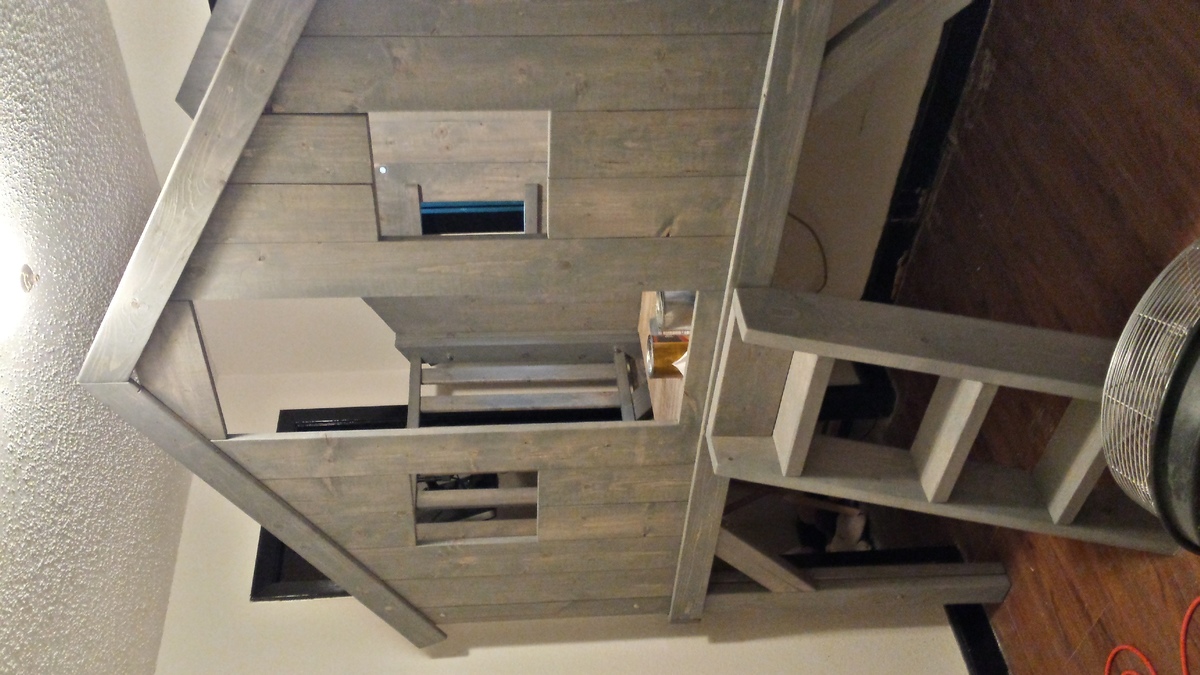
Club house bunk
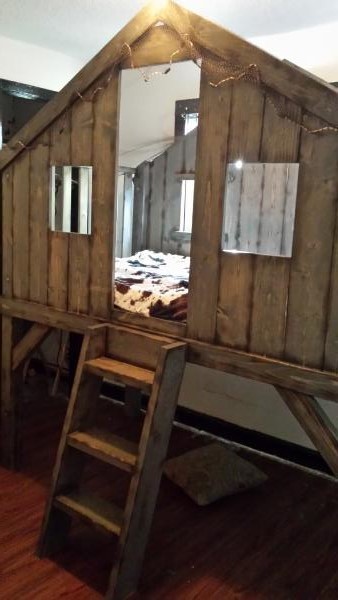
Built for our 4 ur old son.. We all love it and had fun together!
Estimated Time Investment
Weekend Project (10-20 Hours)
Finish Used
Weathered Minwax
Recommended Skill Level
Intermediate
Comments

Fri, 10/30/2015 - 20:13
I love this bed. (It's
I love this bed. (It's definitely on my to build list.)
Awesome table.
Made for my wife for a Christmas present. Awesome project.
Built from Plan(s)
Estimated Time Investment
Day Project (6-9 Hours)
Recommended Skill Level
Intermediate
Floating bed
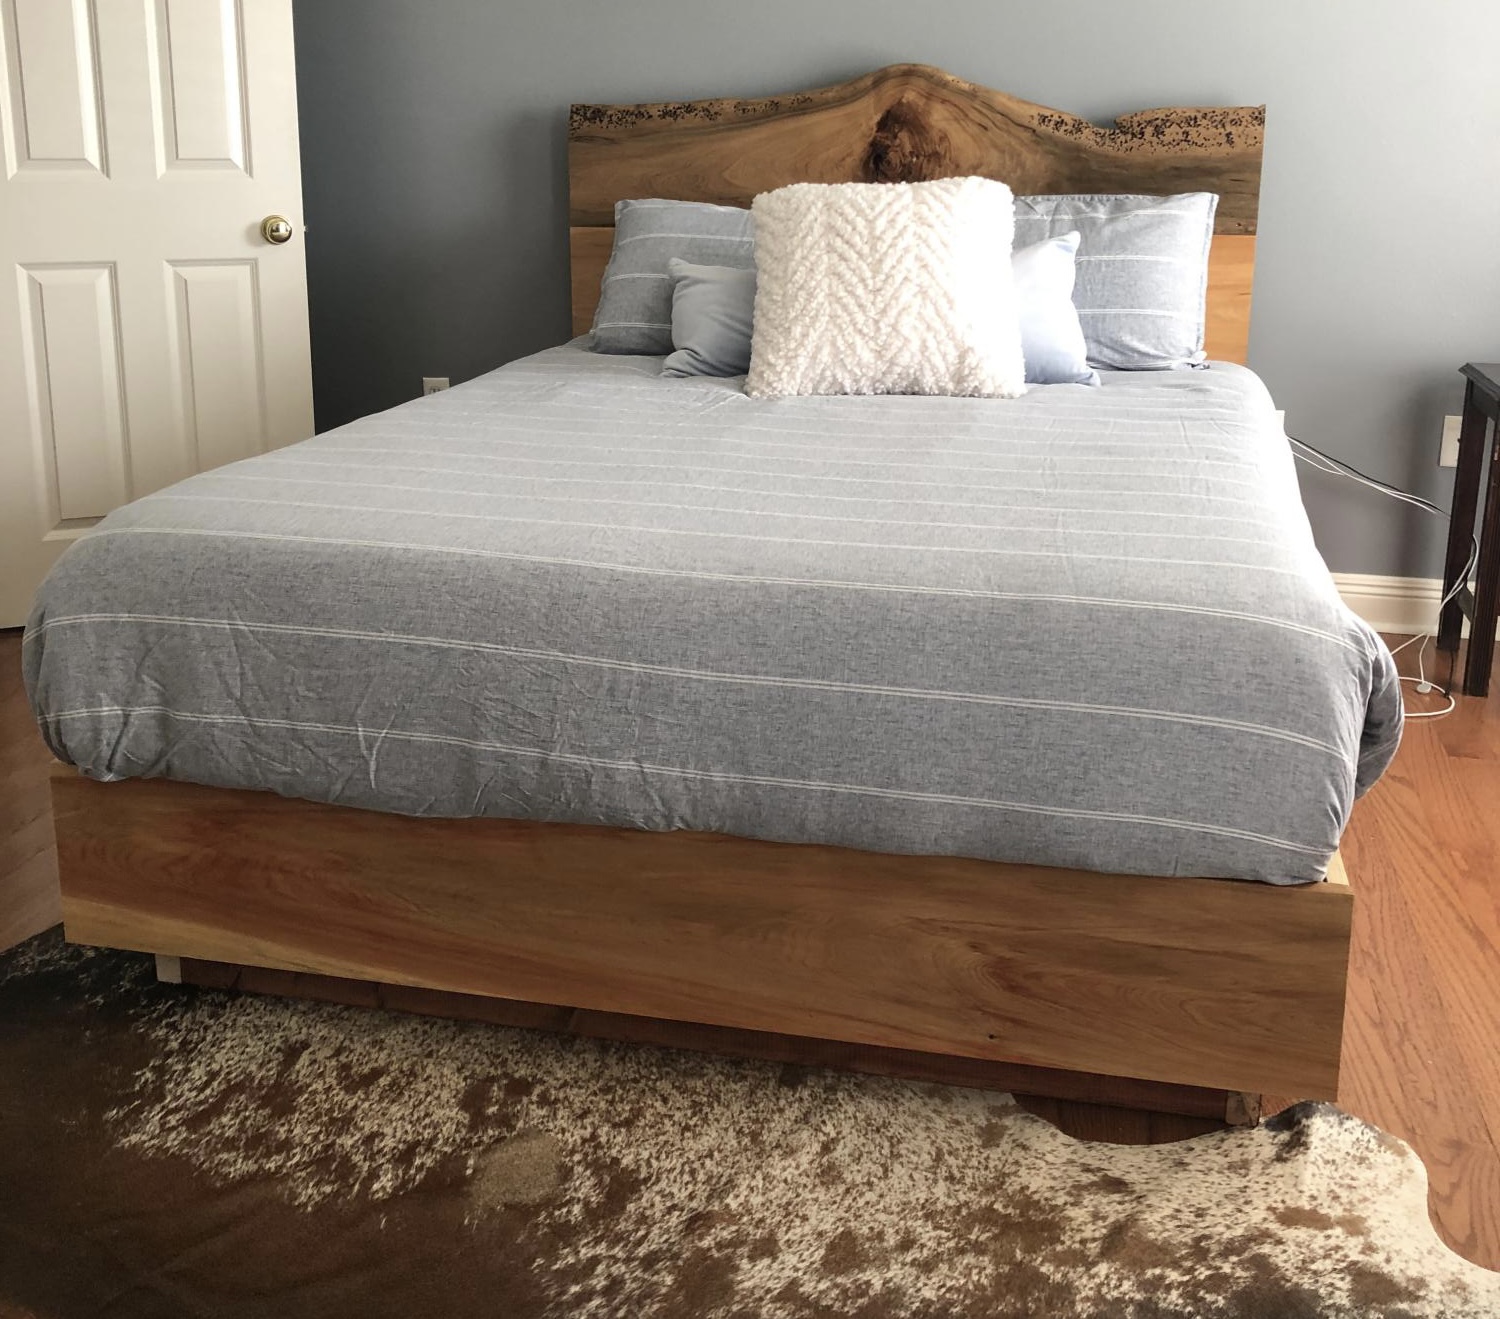
My son needed a new bed and he was interested in a live edge Cypress headboard. We were able to make this one!
Built from Plan(s)
Comments
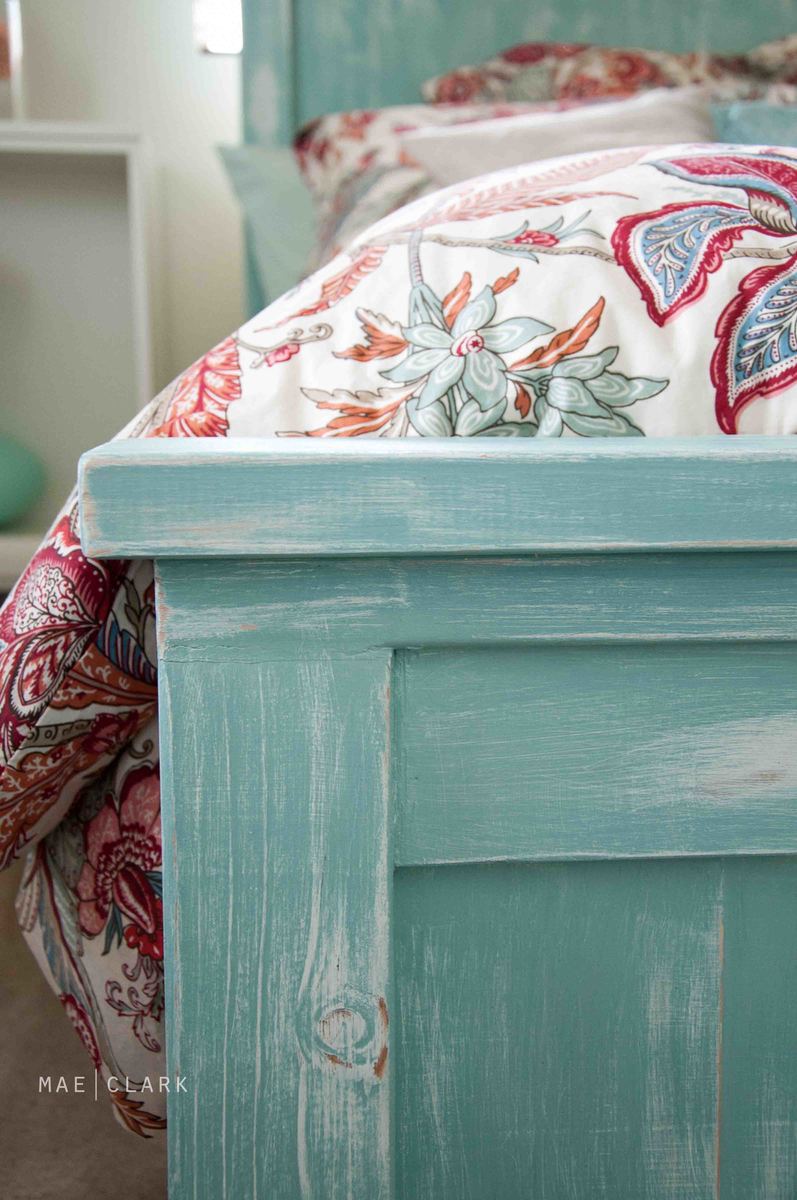
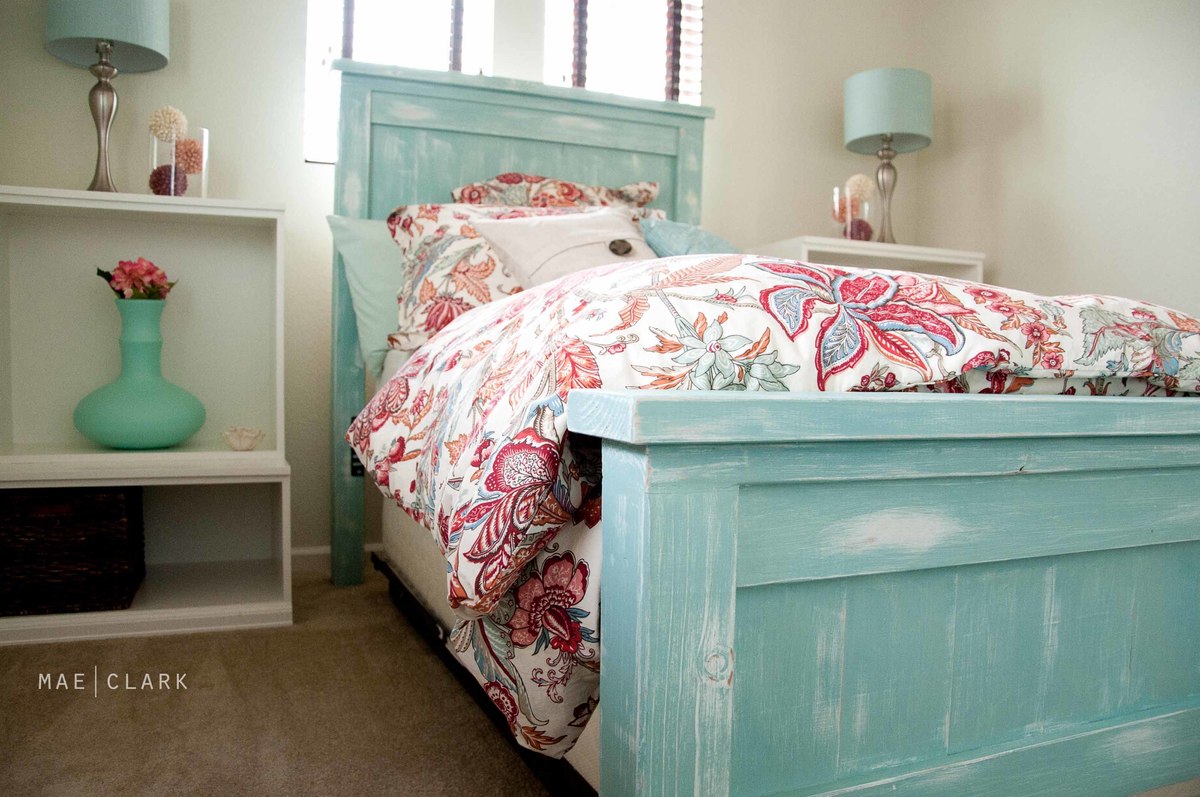
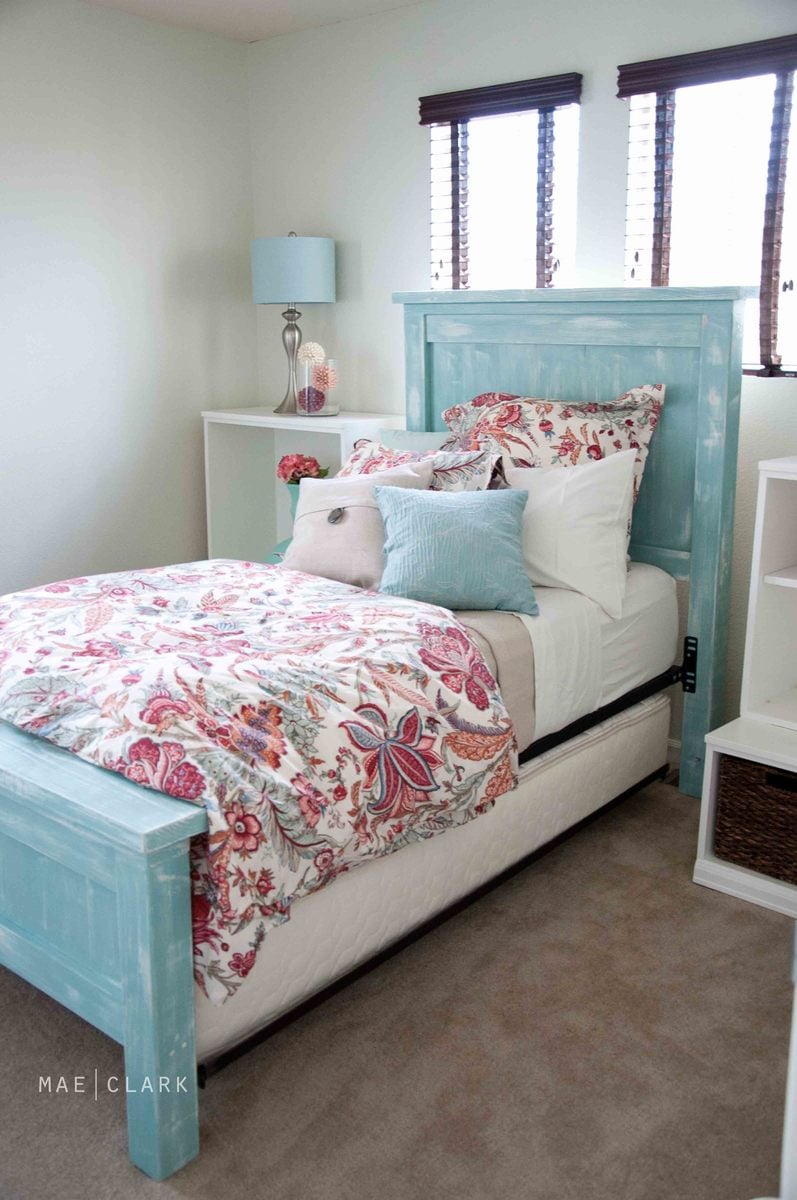
Twin Farmhouse Bed - A Beachy-ish Version

I decided to start on the project of converting my daybed to a twin farmhouse bed five days before I had a house full of company - genius! The hardest part was finding the 4x4 posts at the Blue store and deciding what length of screws to use. It's hard to say how much time I spent on it, as I was finishing up 46 other projects during the same time, but I would guess the build took about ten hours, and the finishing maybe three? This finish really is one of the easiest I've done to date. A quick coat of white/cream semigloss, another quick coat of turquoise semigloss, an hour of light sanding and wa-lah! I apologize for the poor photo quality - I borrowed a friend's camera lens to get wide-angle shots in my teeny guest room and the lens apparently wasn't made for my camera - whoops!

Built from Plan(s)
Estimated Cost
$150
Estimated Time Investment
Weekend Project (10-20 Hours)
Finish Used
I believe the white was Mascarpone by Benjamin Moore and Palladian Blue by Benjamin Moore. A single light coat of each, then distressed lightly with a sanding block. I didn't use a sealer, but that may change if I decide the raw finish isn't good enough. It seems to be great right now!
Recommended Skill Level
Beginner
Comments
Sun, 08/14/2011 - 08:57
Love the finish!
I absolutely LOVE the finish! Once I figure out which of Anna's beds I want to build, I will try to copy your fabulous finishing job. Thanks for sharing.
Sun, 08/14/2011 - 16:30
Beautiful!
I love the beachy look. You did an amazing job. I have a day bed that I hate and I'm thinking this is a perfect solution. Thanks fir the inspiration.
Mon, 08/15/2011 - 05:36
This bed is GORGEOUS! Great
This bed is GORGEOUS! Great Job! I think I need to get building and make 2 for my little girls :-)
Mon, 08/15/2011 - 08:41
I love the finish! I'm making
I love the finish! I'm making one of Ana's beds for my daughter and may copy your finish technique, but use a pink (her favorite color) instead of blue.
I also noticed that you used the bedframe for the siderails instead of making them. Did you just screw them in to the posts?
In reply to I love the finish! I'm making by Miasmom (not verified)
Mon, 08/15/2011 - 19:25
Thanks! I just used the
Thanks! I just used the hardware that was used to screw the daybed into the original posts to attach it to the farmhouse headboard and footboard. Pretty easy! I plan to fashion a coordinating bedskirt to hide the trundle underneath.
In reply to bedding by designdoctor
Tue, 08/16/2011 - 19:52
Yup, Pottery Barn. The
Yup, Pottery Barn. The Deirdre Organic duvet and sham.
Mon, 11/21/2011 - 15:03
About your trundle
I was curious to know what your mattress is on for the trundle? I will be attempting the same thing, but was going to put the mattress in a wooden box on castors. Yours looks more friendly! Thanks for your time. Excellent job.
Trish
Fri, 02/10/2012 - 09:01
Primer and Top Coat??
Hey Amanda... this is beautiful. I'm hoping to try this type of finish on a bed I am working on now. How does it seem to be holding up without a sealer? You didn't use any primer, correct?? Thanks. Really beautiful work.
Sat, 02/18/2012 - 07:29
Paint Color
I love the color so I went to the paint store bought palladian blue) by Benjamin Moore but it sure didn't look your color. It was more of a weathered gray look. Which was nice too but definitely not the same. Are you sure that you used palladian blue?
Mon, 04/23/2012 - 11:50
My Favorite!
Absolutely beautiful, and such an inspiration. I think the color is stunning, and the weathered look you created is just perfect. It goes so well with the bedding too. I would love to have the exact same thing in my own house!
X Dining Table
I built this table a year ago just never got the chance to post pics. It was an easy build.

Built from Plan(s)
Estimated Time Investment
Weekend Project (10-20 Hours)
Finish Used
It's been so long I cant even remember exactly :/ but I believe I started with the vinegar steel wool mixture.
Recommended Skill Level
Beginner
Comments

Sat, 09/07/2013 - 17:16
Beautiful!
Your table looks beautiful! Love the finish, and the way you arranged and photographed it is wonderful, great job!
Laundry Basket Closet
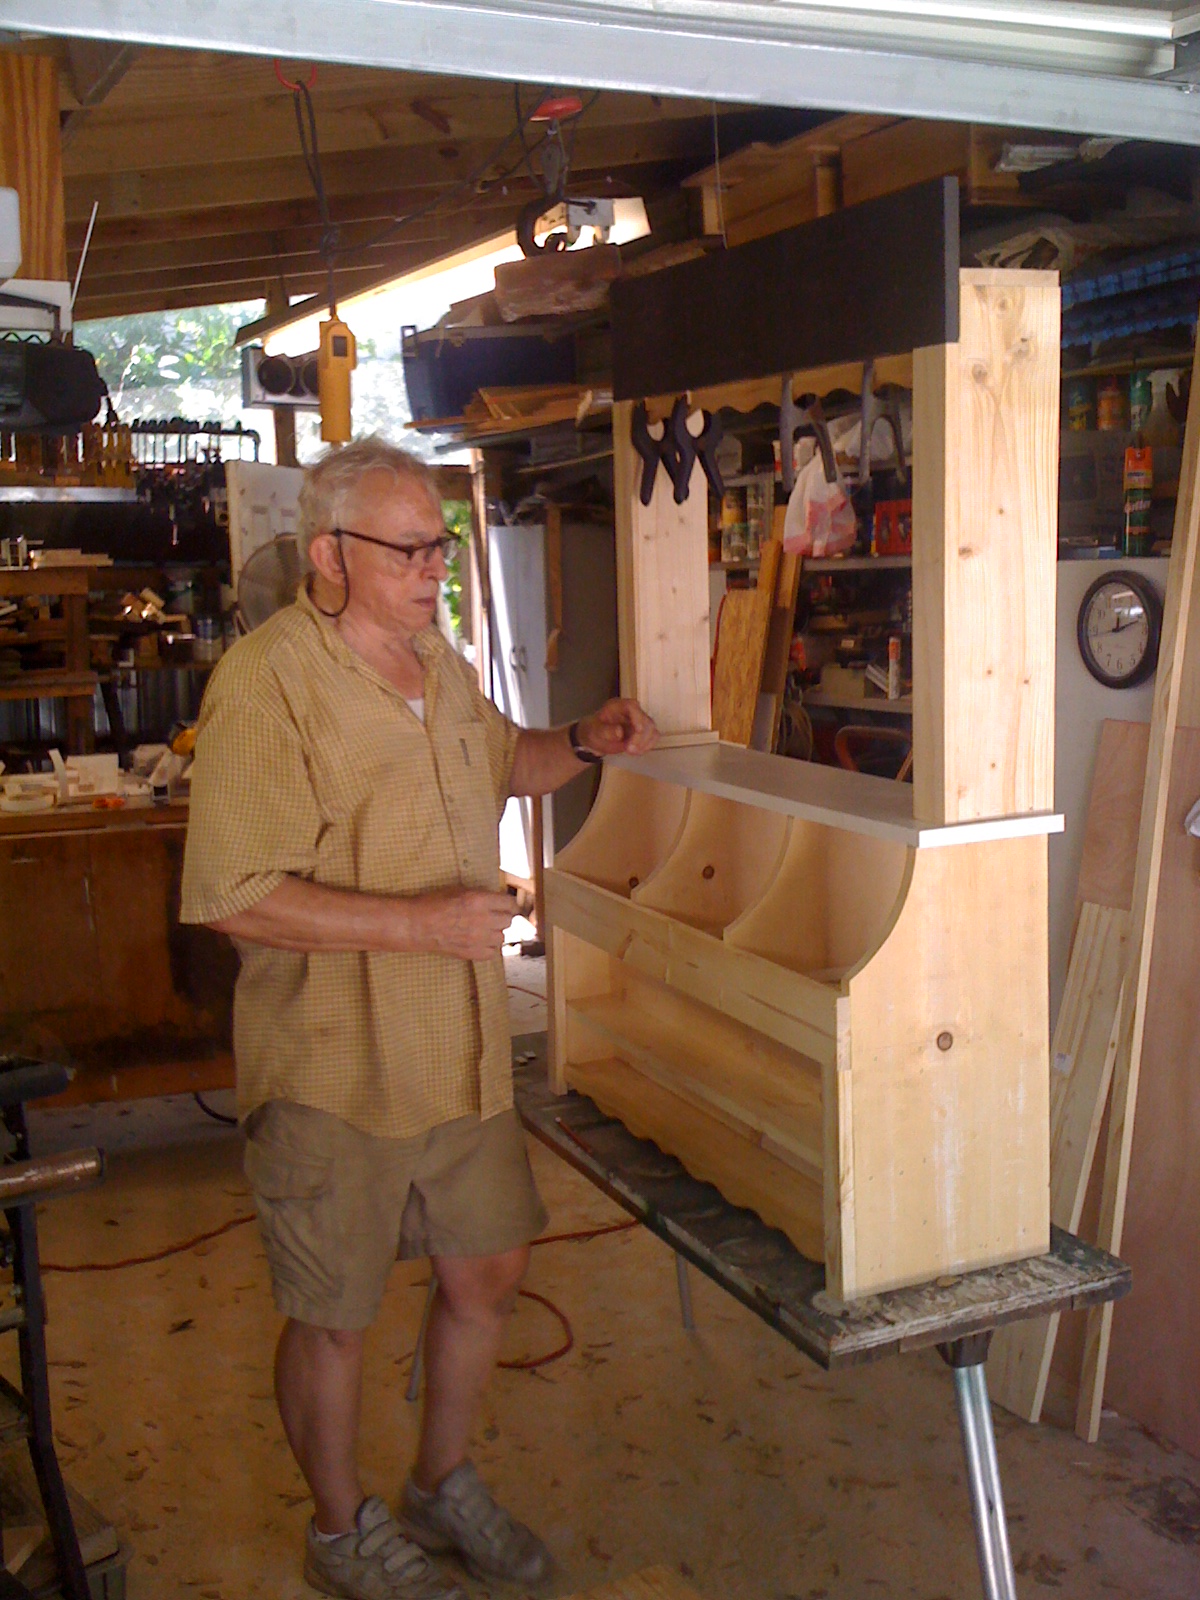
Michael's Bug Bakery
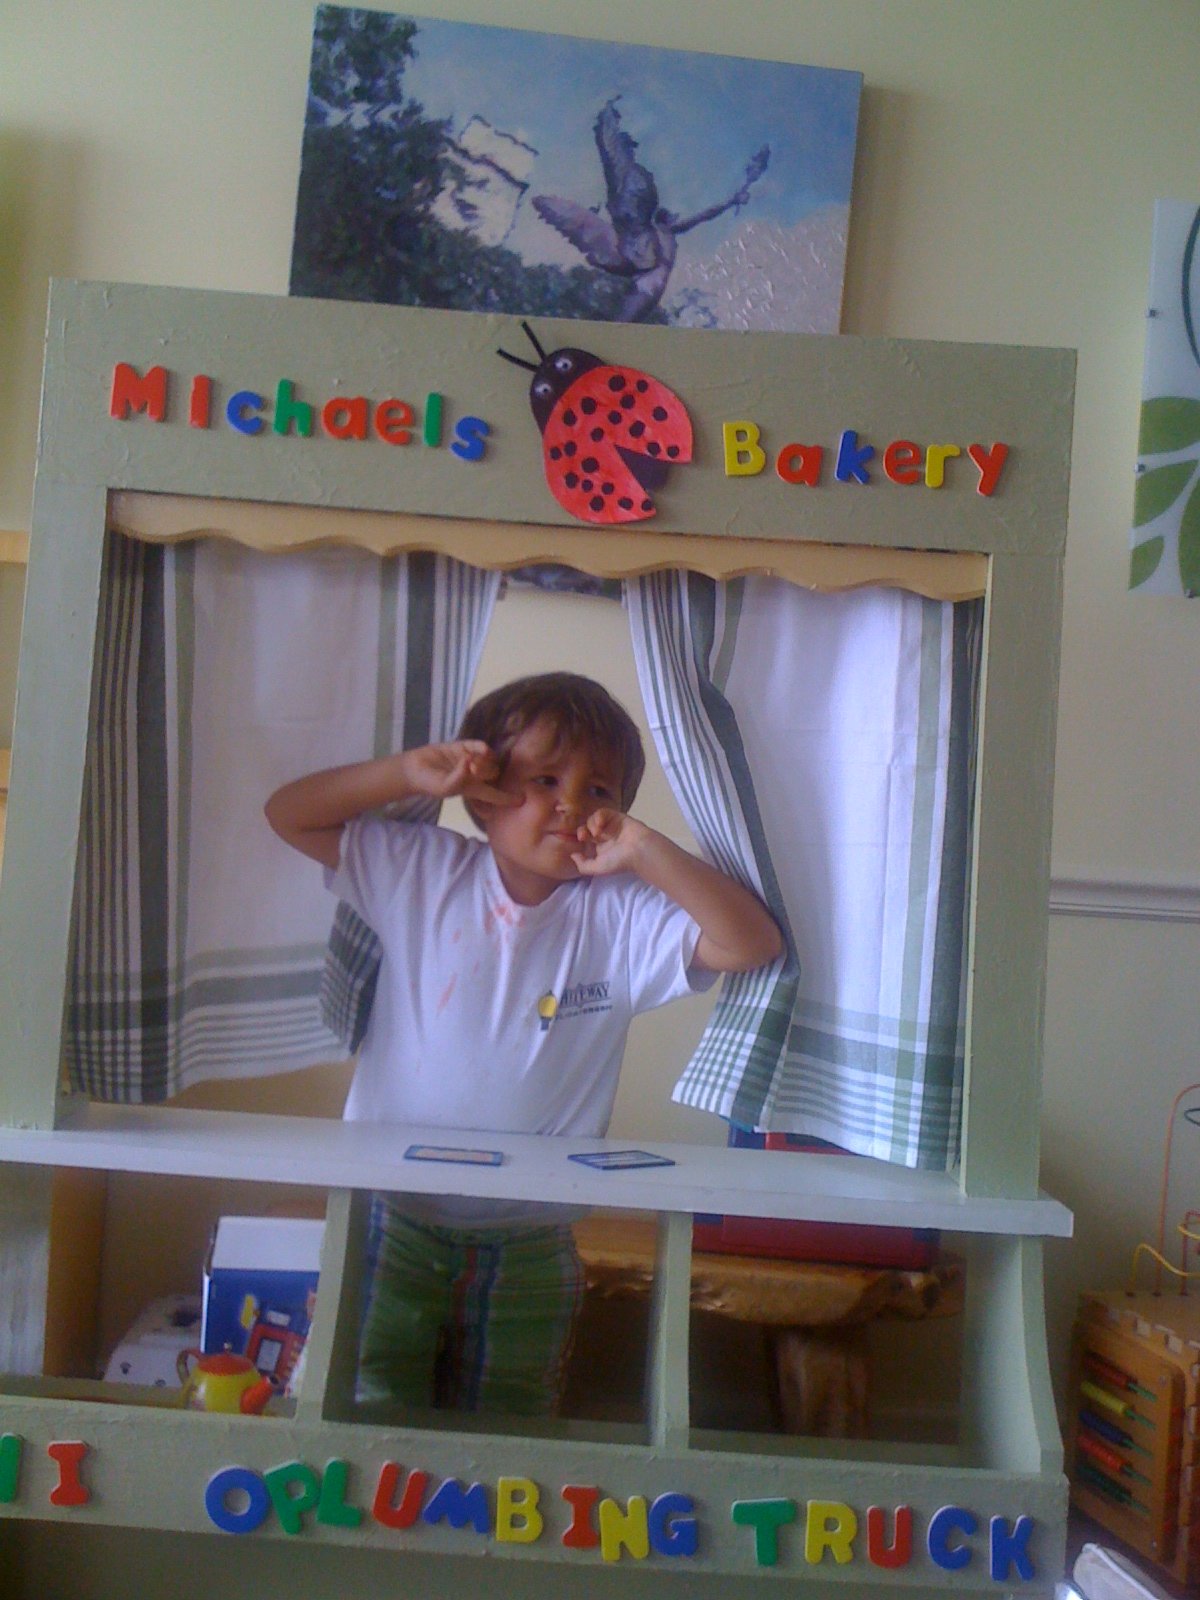
We let my son choose whether he wanted a modern store bought play market or whether he wanted help Mommy and Padre (my dad) build one for his 3rd birthday present. We used magnetic primer so he can change the name whenever he wants and added some trim and some tea towel curtains! He loves it!

Built from Plan(s)
Estimated Time Investment
Day Project (6-9 Hours)
Recommended Skill Level
Intermediate
Comments

Storage Bench
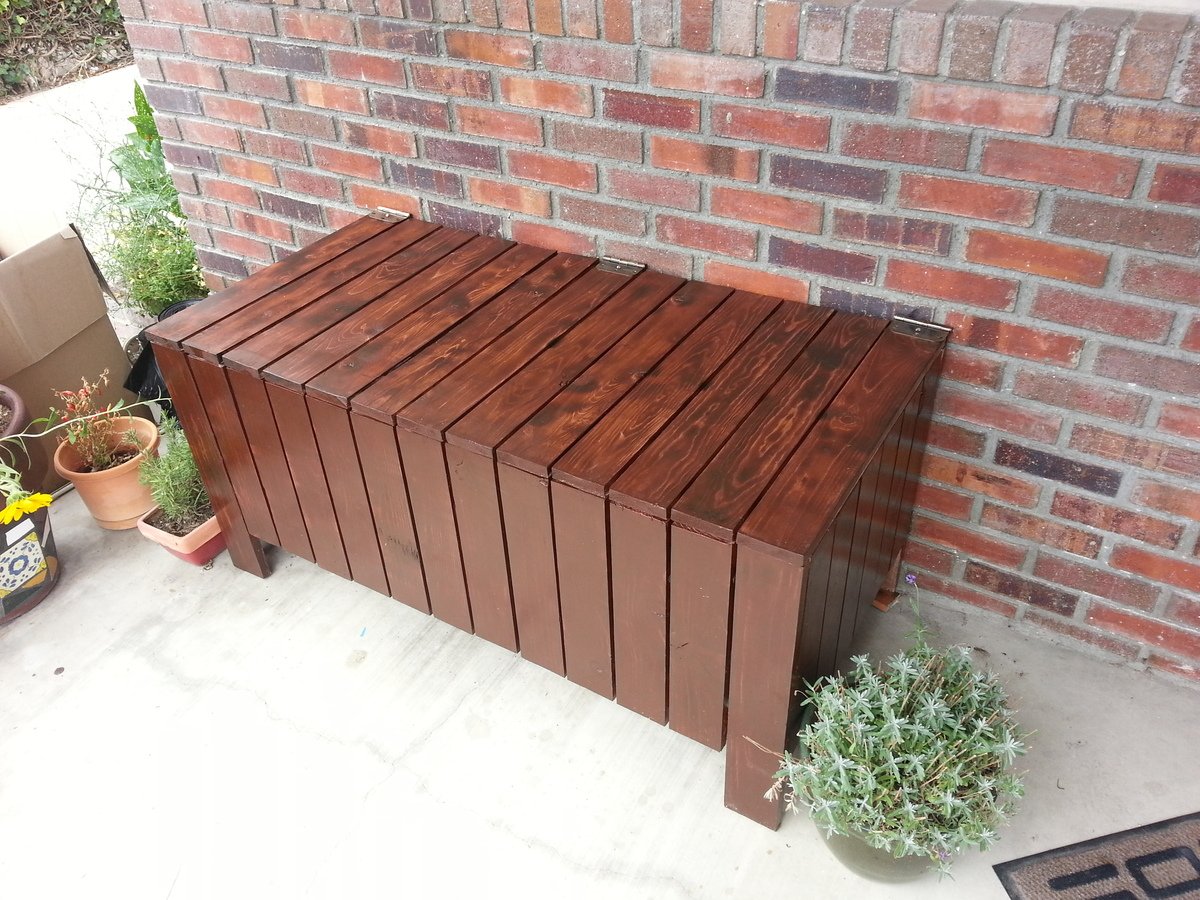
Burnt the wood with a torch before staining and used really cheapo pine.
Built from Plan(s)
Estimated Time Investment
Afternoon Project (3-6 Hours)
Finish Used
Varathane Red Mohagony followed by Boiled Linseed Oil.
Recommended Skill Level
Beginner