Essential Adirondack chair

Like this chair! Changed the 3 1x10's on the back to 4 1x8's ripped down to 6 ¹⁵/¹⁶

Like this chair! Changed the 3 1x10's on the back to 4 1x8's ripped down to 6 ¹⁵/¹⁶
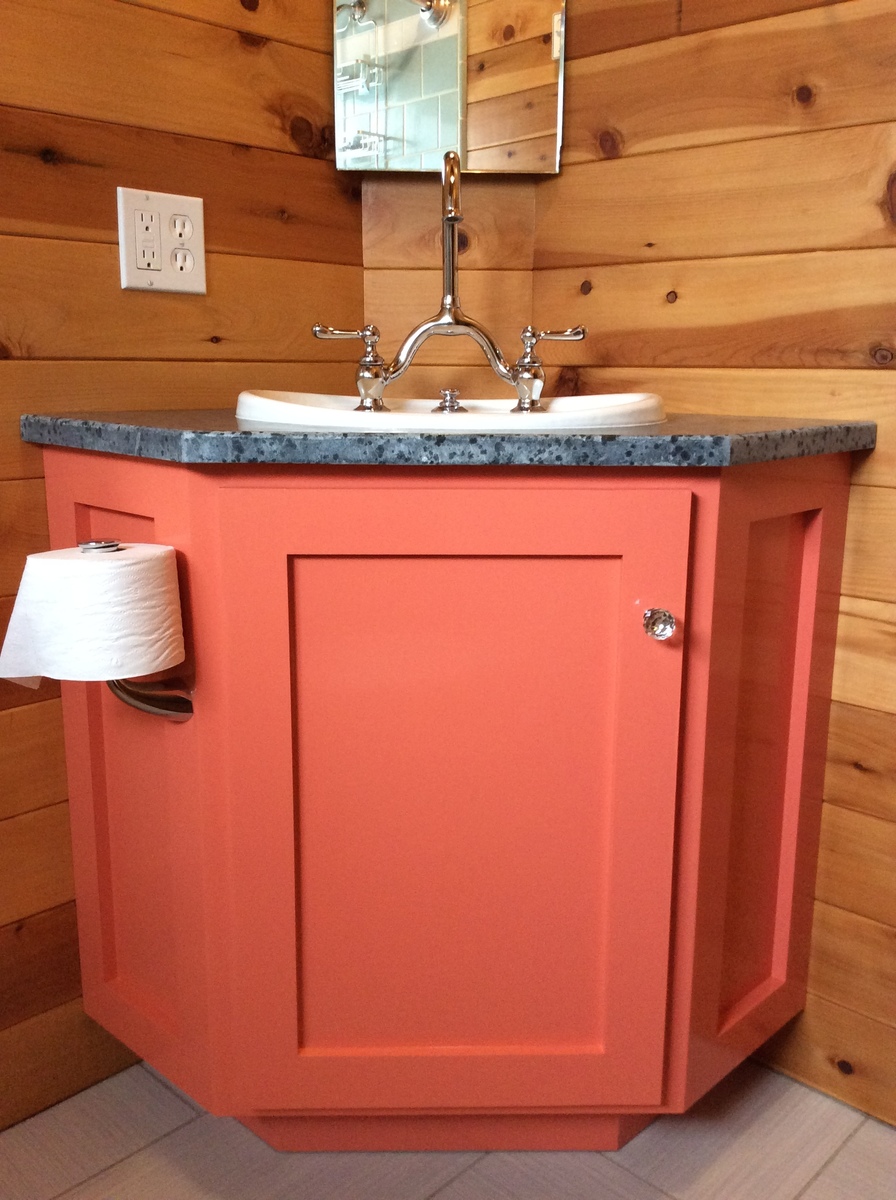
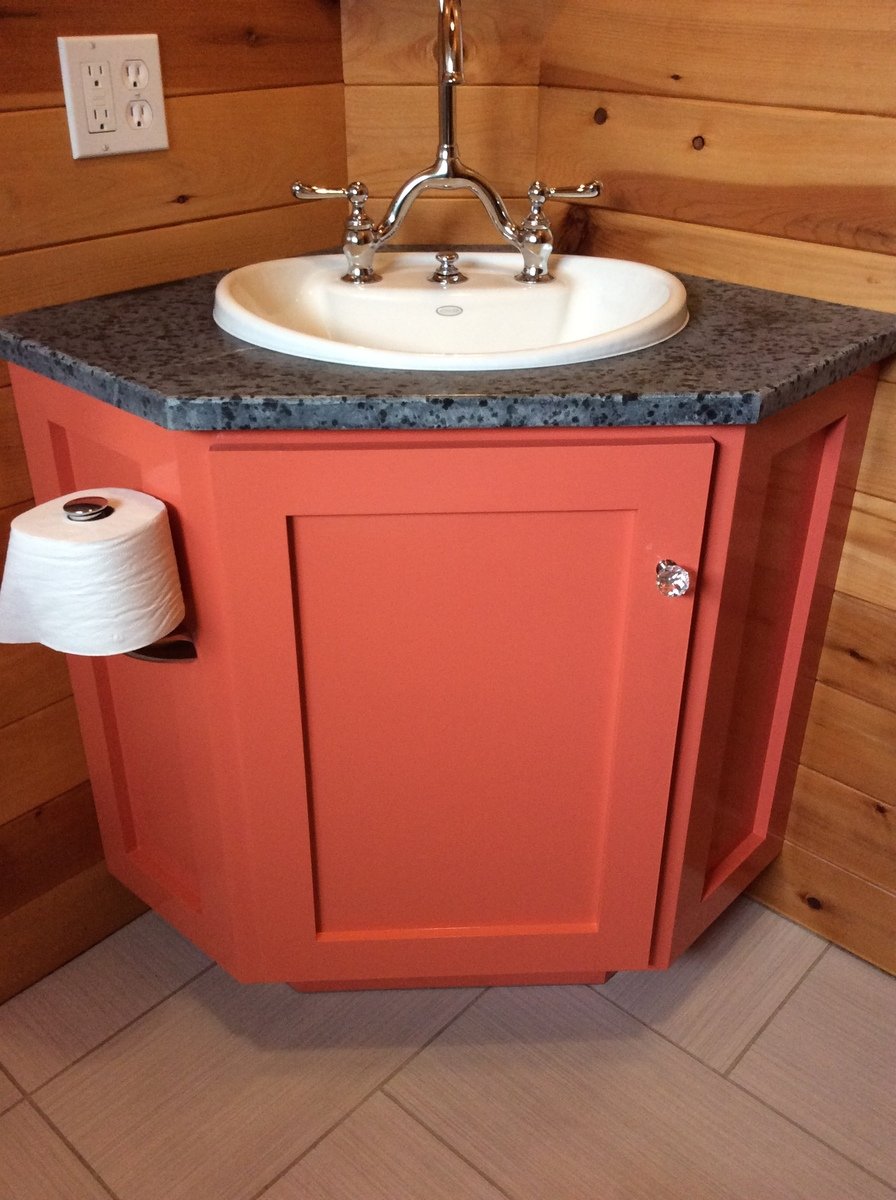
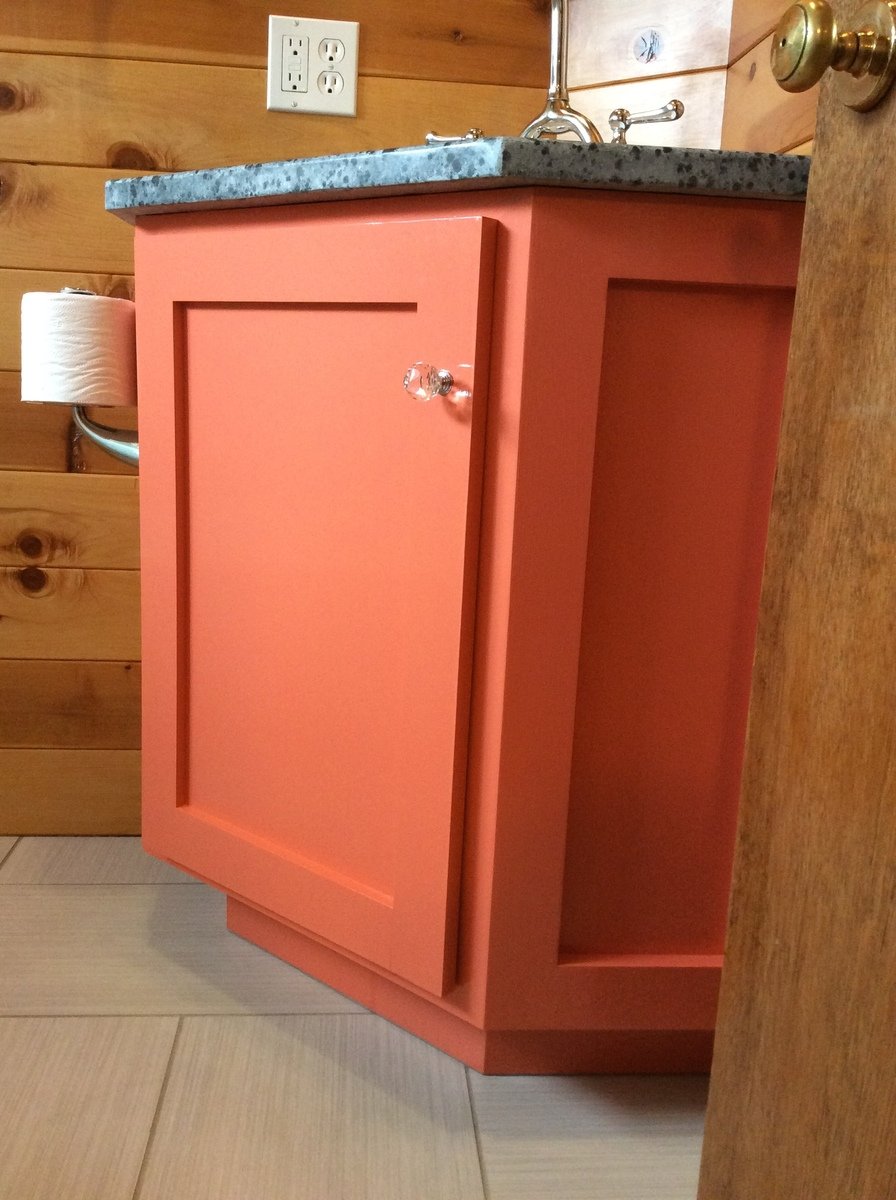
This project started because a corner bathroom vanity that fit my space requirements and budget did not exist. A plan specific to what I exactly needed also did not exist. After combing through what plans I found online, the Wall Kitchen Corner Cabinet best matched what I wanted. I modified it with the Momplex Sink Base Kitchen Cabinet in order to turn it into a sink base.
But, there was a problem. I hadn't actually built anything before. In order to get at least one project under my belt, I built the Vintage Step Stool. It turned out great, so I figured I was ready to go! Strangely enough, after spending about $100 and several weekends picking away at this project, it was done! It looked great, even. Then, I moved the vanity into the bathroom and realized that, while it may have looked great, it wasn't very square. Lesson learned was that this is a two person project. It is too difficult to keep things square and screw at the same time when there is only one person.
At this point, everyone was tired of having to use the kitchen sink to brush their teeth and wash their hands, so we needed to get this project done. $100 later, we had more material. Since I had figured out what needed to be done with the first vanity, let's call it our prototype, the second vanity went together REALLY quickly.
Within a few hours, it was pieced together. Since it was going to be painted, we used Bondo to cover up our imperfections. Yes, of course there were imperfections. While much better than the prototype, it still was only my third woodworking project. Sanding, caulking, and priming took another hour or so. A few coats of the finish paint went on, followed by a couple more coats of a clear sealer, and it was done.
We moved it into place, screwed it to the wall, put the soapstone countertop on along with the sink and faucet, and it truly was complete. Sink is Kohler, faucet came from our local Habitat for Humanity store and I'm not sure what brand it is, and the soapstone came from soapstones.com. If we had oiled the soapstone with mineral oil, it would be a very dark gray.

I made a couple of additions/modifications
I also made a couple of side tables and foot stools for the chairs. A total of four chairs, two tables and two foot stools for the deck set.


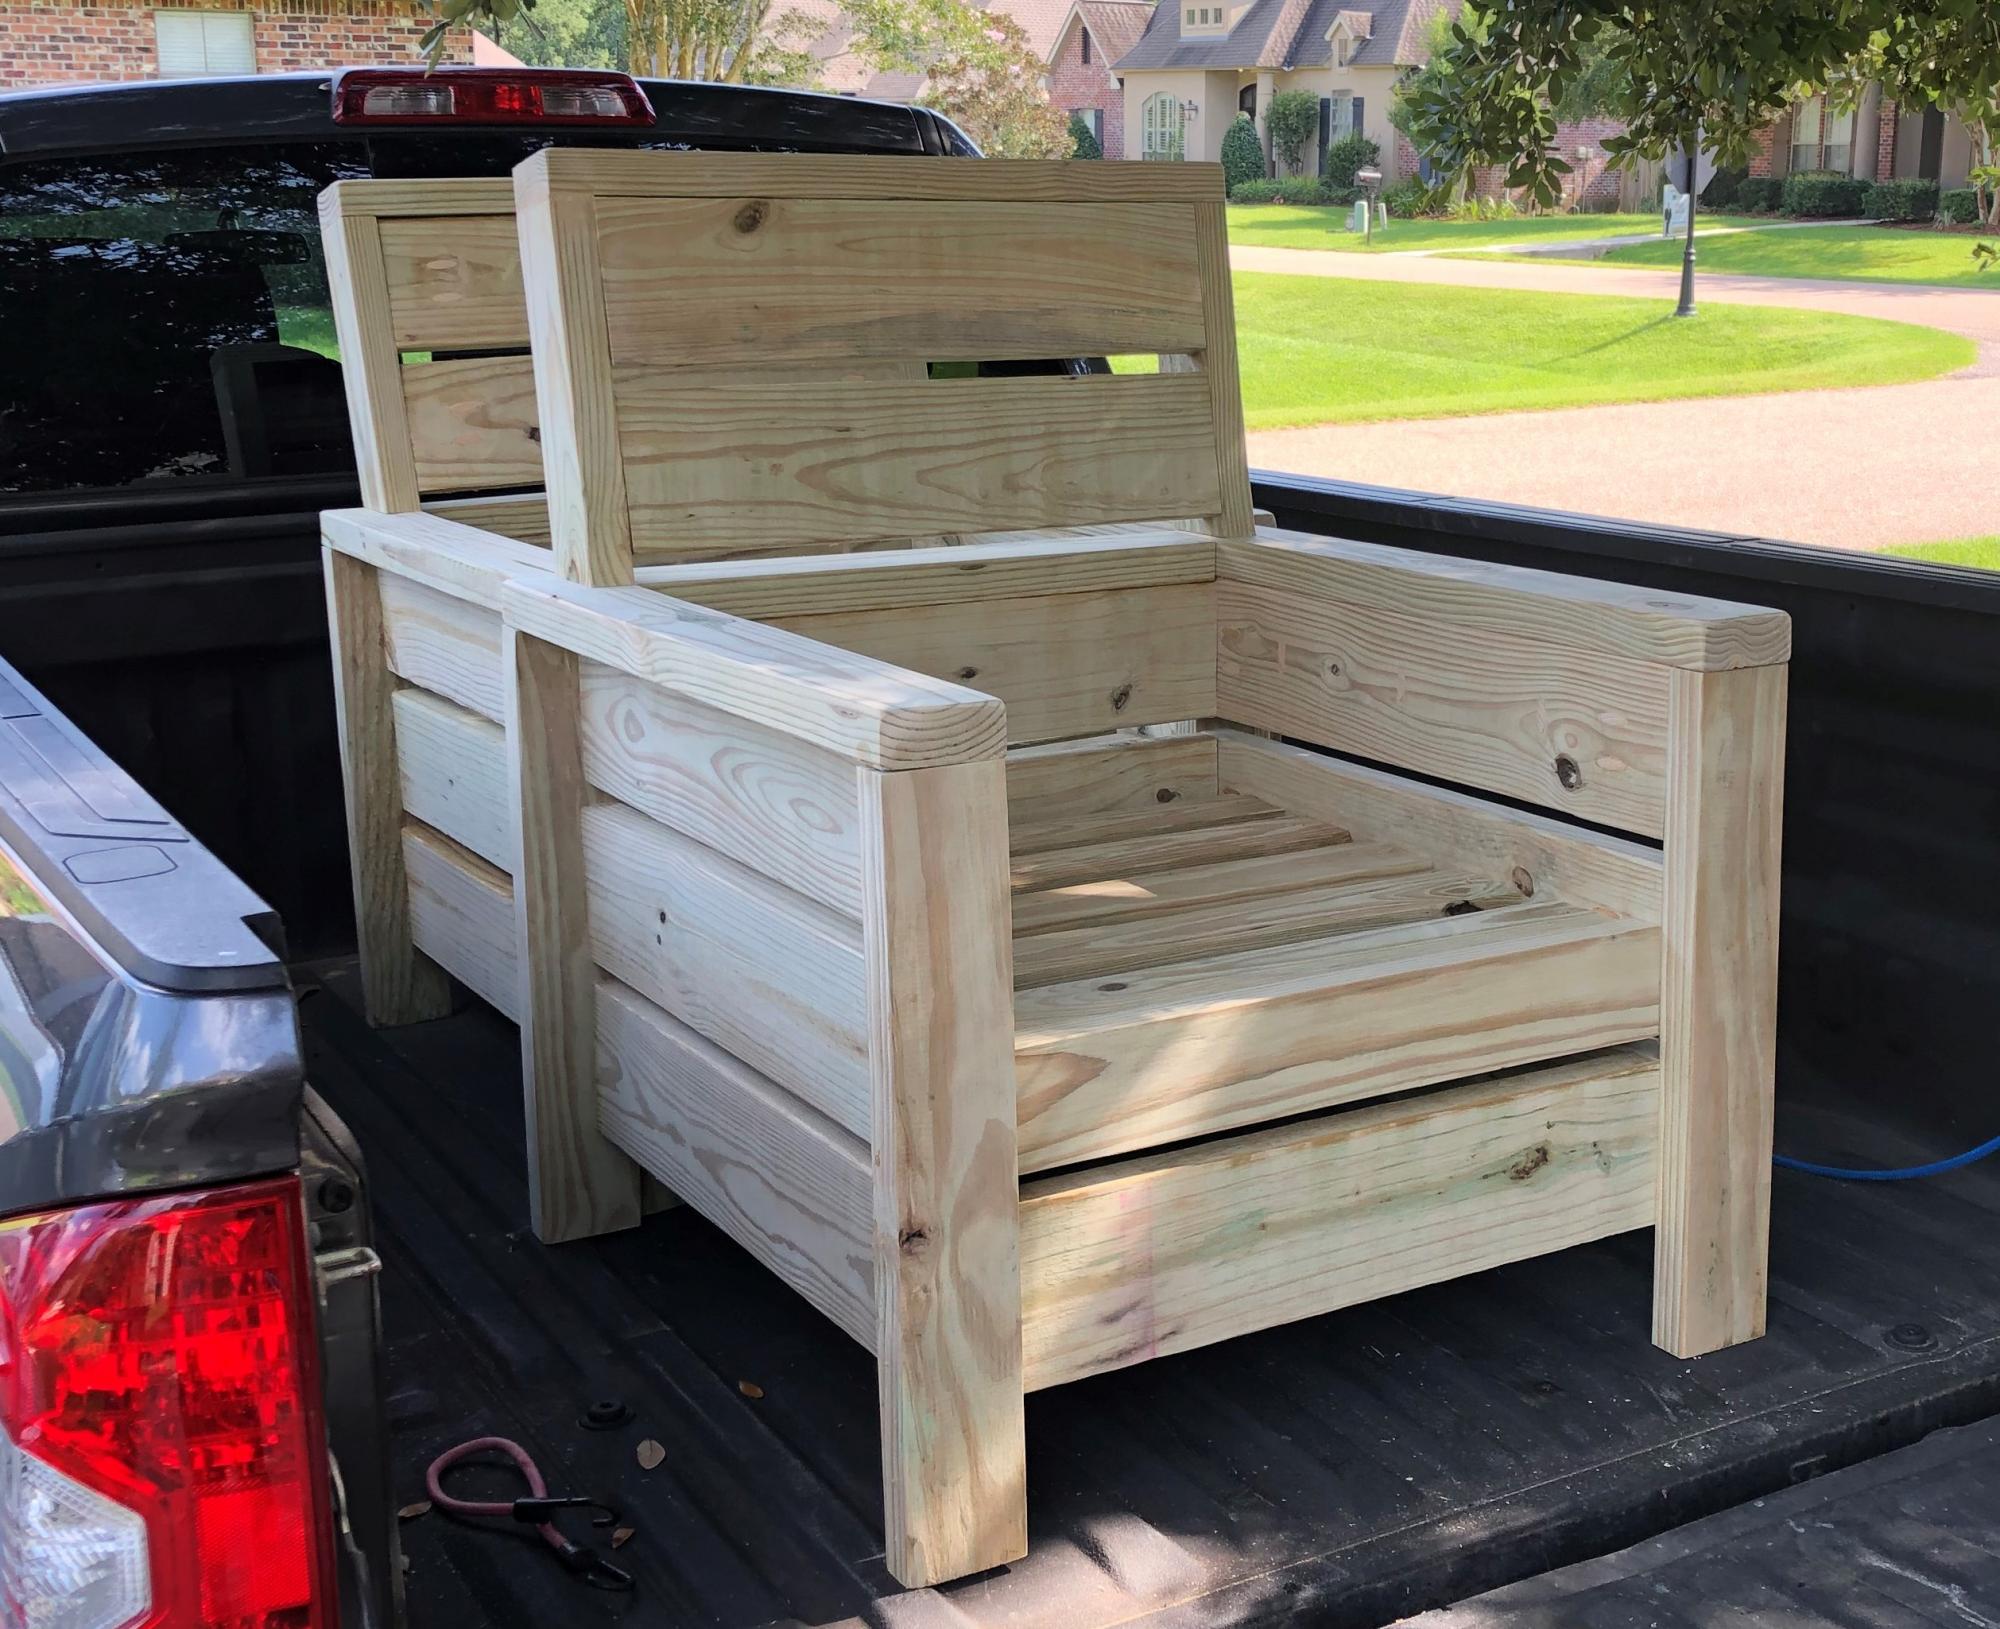
Per request of my wife, I opted to add a backrest to the chair. I feel as though my backrest design keeps with the style of the original build. I accomplished this by cutting the 2x4 vertical arms of the backrest at 13 inches with a 10 deg miter cut at the base. This allows you to keep with the 3/4" on the 2x6 backrest slats. I finished it off with a 2x4 top plate. I'd also note that I made slight modifications to the plans to accommodate 24" cushions.
Made with western red cedar from Lowes. So pretty!
Wed, 08/21/2019 - 09:00
Did you use any kind of finish on the cedar? I’m making one as an indoor end table.
What grit sand paper did you use?
Looks great by the way. Excellent job!
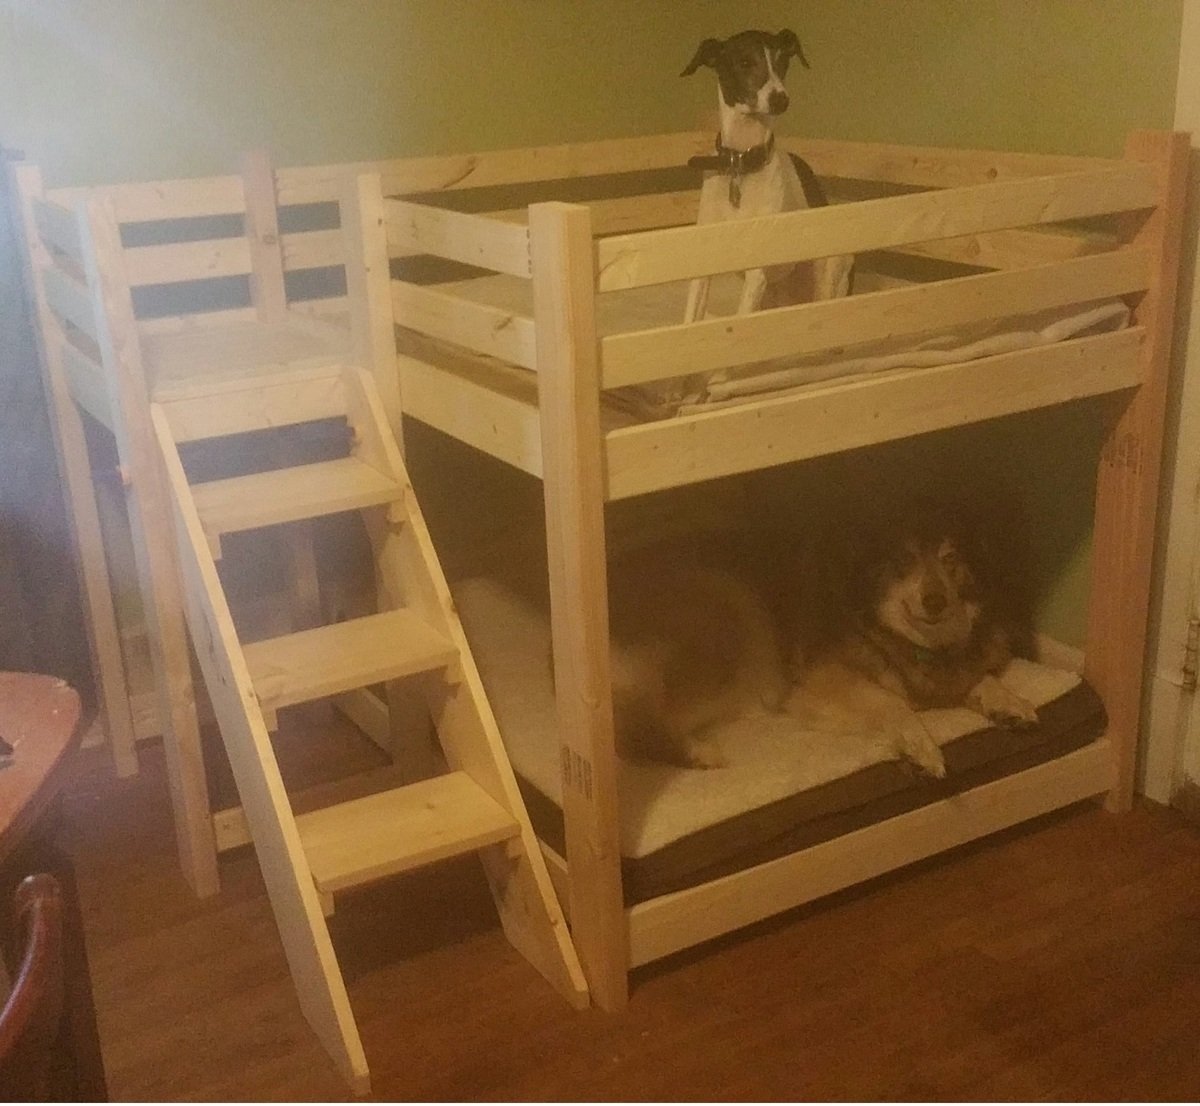
We’ve been looking around for some plans for a doggy bunk bed for a while now, but couldn’t find anything that we liked so I decided to build it from scratch. This is a huge bunk bed that was built based on the size of our larger dog’s bed which is 44 x 35. This was pretty simple to build although the stairs we’re quite challenging as I have never done them before so if I can make it, anybody can.
I must stress that before I found Ana’s website about 6 months ago I could barely cut a piece of wood straight. Over this time I have made several things based on the easy to follow plans on this website which ultimately gave me the confidence to go it alone and build this bunk bed. Friends and family are shocked at some of the furniture I’ve made and some don’t even believe I made them and think I’ve bought them from IKEA. My wife has got a list of furniture she wants to make now including a TV console, an armoire and a twin bed for one our daughters. Every spare second I have now is spent is making furniture and I LOVE it.
For anybody who has never built anything and is apprehensive to do so I would just say, do it. Grab what you need and dive right in. You may get frustrated and scream a bit at first, but the reward at the end is well worth it and each project you do will get easier and easier. Be warned though. The better you get, the more people will pester you to make things for them.
Thank you, Ana.
This was made using cheap 1 x 3 and 1 x 4 furring strips for the railings and bed slats, 2 x 4s for the posts and 1 x 10 board for the stairs.
Sun, 12/31/2017 - 08:26
trying to find the plans on how to make this bunk bed

We altered the original plan by enlarging the sandbox (approx 5' x 6') which made for wider benches that can comfortably seat an adult. The benches and back rests are three boards deep instead of two. We added 2x12 supports under the benches for additional support, as well as another 2x4 support in the middle of the backrest.


Tue, 04/14/2015 - 20:00
I just love seeing pictures of these built! Makes my heart swell :-)
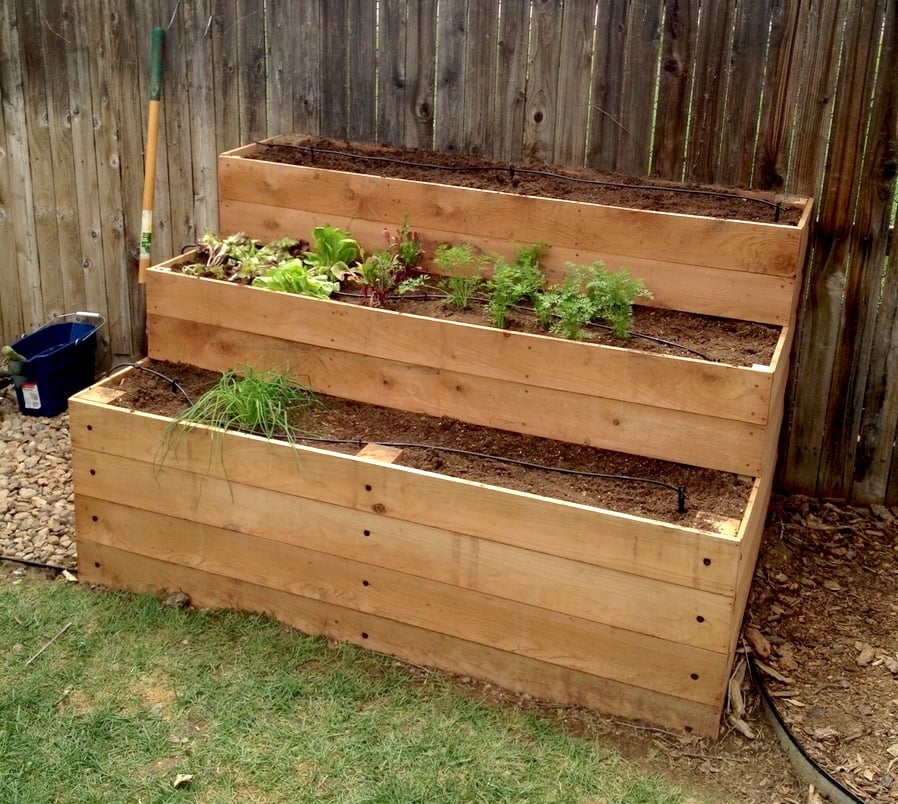
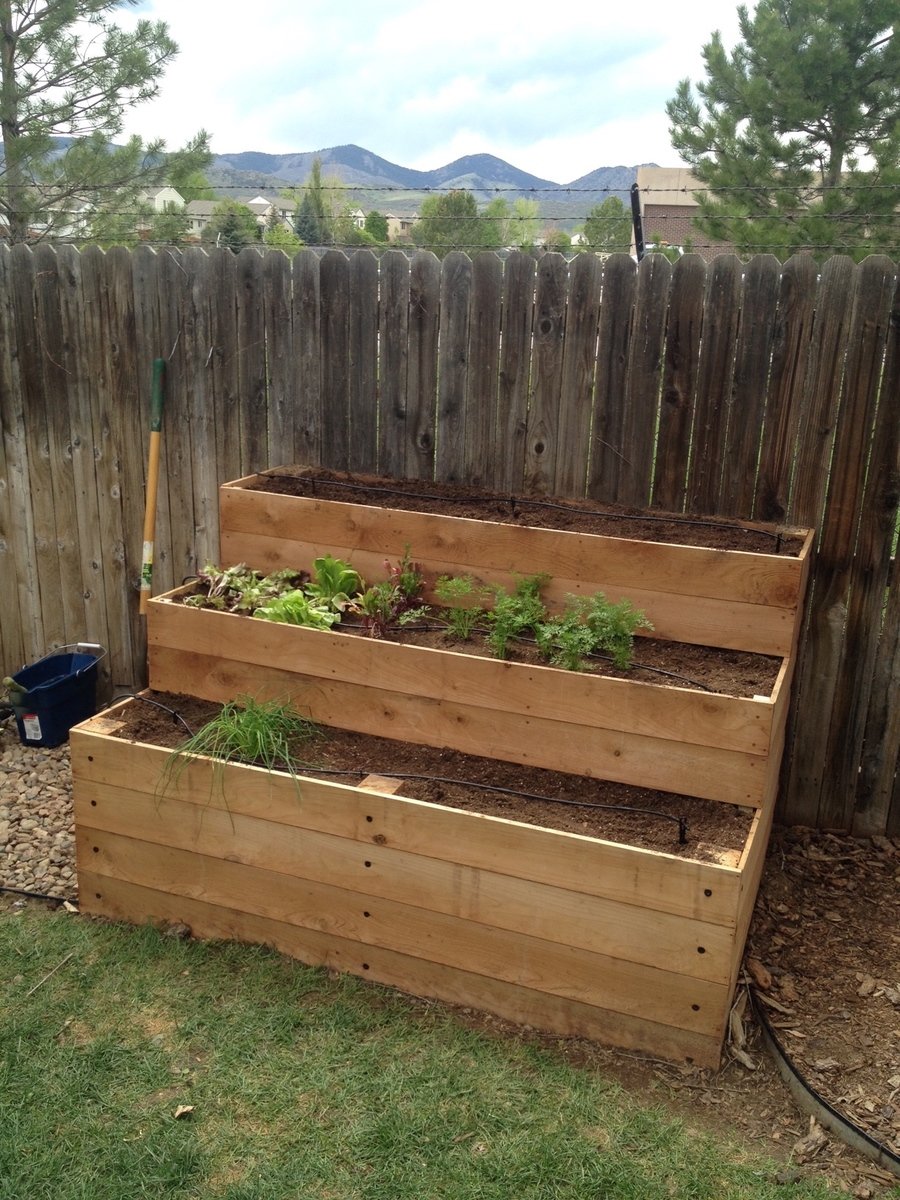
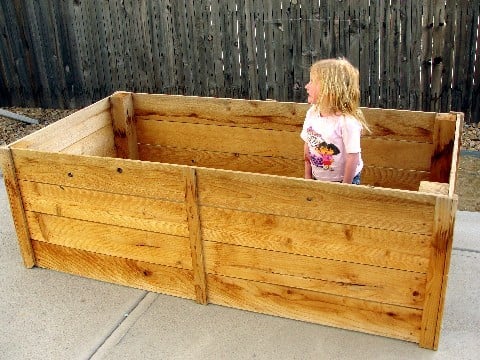
Steps:
1) Cut the boards to the specs below or adjust to your space
2) Kreg Jig the cut boards along each of the sides (length wise and on the ends) for attaching and making a box.
3) Make 3 separate boxes, don't assemble until you move to location. I used 4x4 cedar posts in the corners of the base box to add stability. I used 2x2 pine in the front corners of boxes 2 and 3 for stability. Install these after the dirt has been added so you can hammer in as a stake, attach with screws on front and sides. I created 2 stakes for boxes 2 and 3 and added to the front to prevent bowing when the dirt is added.
Box Dimensions:
1) (base) 70.5" L x 46 W x 4 cedar boards high
2) 70.5" L x 32 W x 2 cedar boards high
3) 70.5" L x 16 W x 2 cedar boards high

Well, I started with one chair and finished with a full set. Not bad for a first timer. Definitely room to improve. Little tip if you're going to make this amazing set... raise the backs as they are too low with thicker cushions. I built a casing to go on top after the fact. Pretty happy with how it all turned out. Thanks Ana for the plans... now onto the next project!


Fri, 04/28/2023 - 08:41
Very nice workmanship. I'm curious as to how comfortable they are with the straight 90* backs? Let me know please at [email protected]. Again nice workmanship.
Fri, 04/28/2023 - 08:41
Very nice workmanship. I'm curious as to how comfortable they are with the straight 90* backs? Let me know please at [email protected]. Again nice workmanship.

Thank you Ana for the great plans! We adapted the project for wood we had on hand. It is only 40 inches wide instead of 42”. Our widest pallet board was only 40”.
Thank you for continuing to inspire us! We made two couches a couple of months ago. Great plans!


For my brother's 35th birthday, I helped him build a fence and side deck on his house. Using the leftover lumber scraps and screws, I adapted the DIH Adirondack chair plans to build this for him. He wanted a big, sturdy chair with a wide arm rest that looks "rustic". I used 4x4 and 2x4 post scraps, deck boards, and fence pickets. I also widened the seat just a bit for comfort. This is definitely the perfect chair for him!
Thu, 08/08/2013 - 14:47
This chair is wonderful!!! I love the mods - really something special! Thanks for doing this project and sharing! Ana
Fri, 08/09/2013 - 14:38
Thanks! I always enjoy building with your plans, and it was a bonus that I didn't have to buy anything to build this, since I used leftover materials.

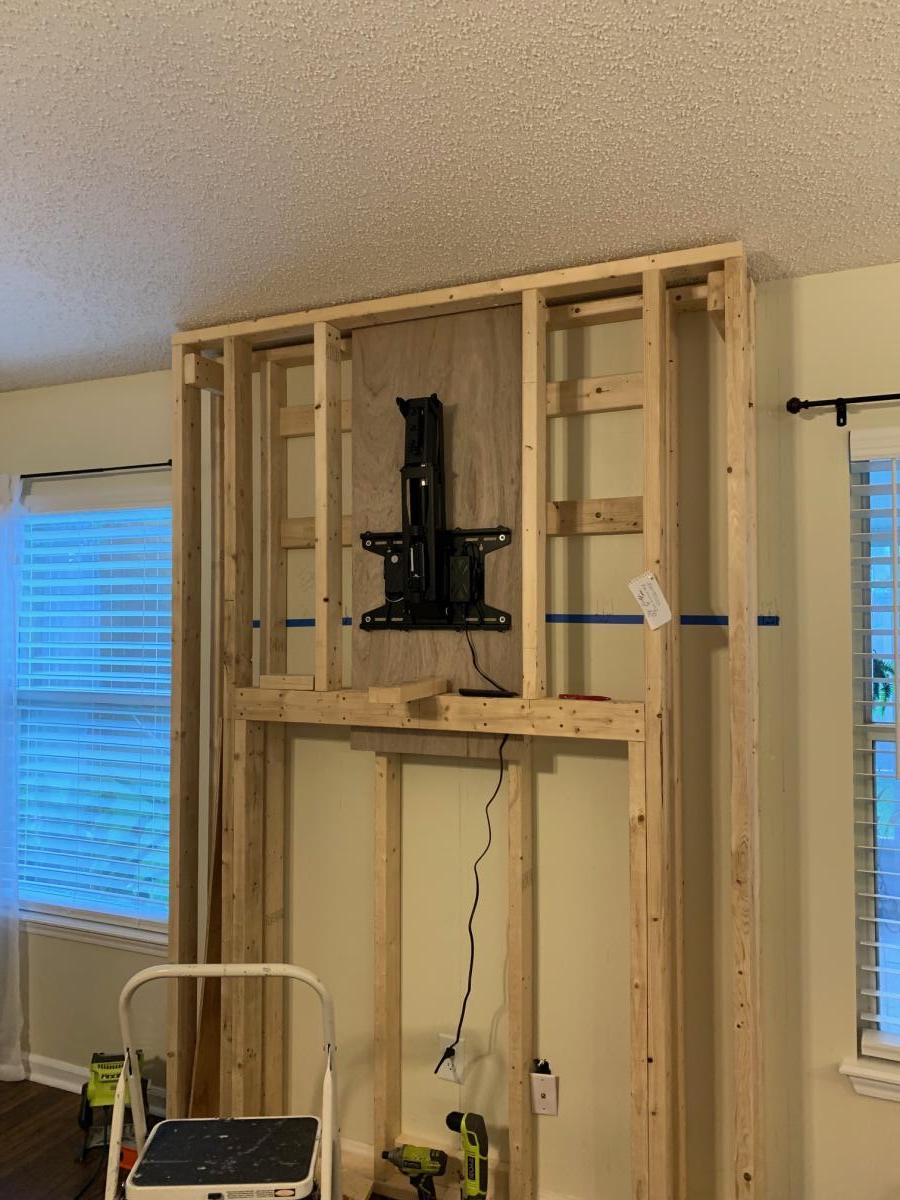
This is a very custom fireplace that I built for my wife as a 40th wedding anniversary gift. It is built around a Samsung 55” Frame TV and a Vivo motorized mount. The motorized mount allows the TV to be lowered to a better viewing height than the standard above mantle position which is usually too high for comfortable viewing.
In order to maintain the flush mount effect with the TV in art mode, I recessed the mount into the fireplace. That required building a “back” frame for the TV mount then the outer frame for the surround. I covered the outer frame with ½” OSB then ship lap. The mantle and hearth is made from Poplar with walnut stain and Polyurethane satin top coat. The hearth opens for storage.
This was sourced from several different plan sets with a lot of customization and input from the Technical Support Staff at Vizo-US.


Thu, 02/16/2023 - 09:46
Happy Anniversary!
This is a beautiful, well thought out project.
I was hoping someone would do the recessed mount, and you nailed it! It's so much better with the tv flush like yours.
Also love the motorized mount.
Thank you very much for sharing photos.
Ana
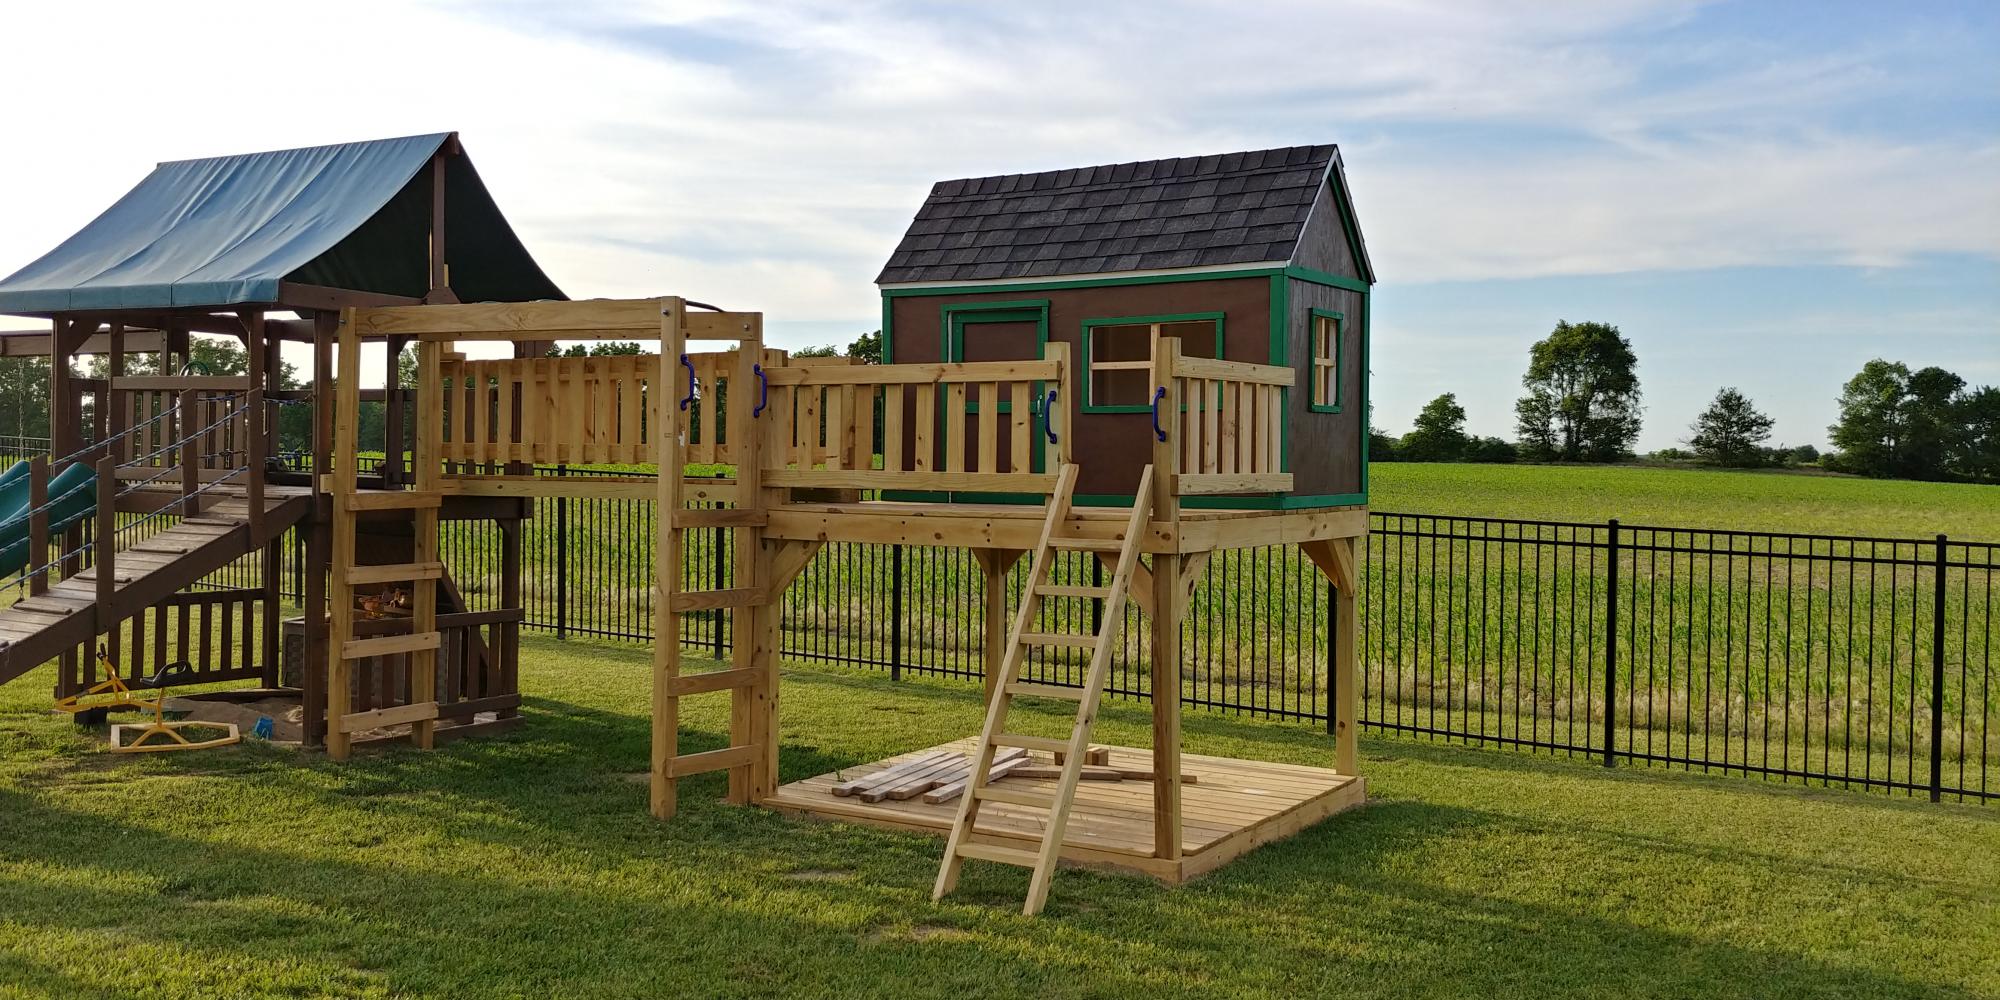
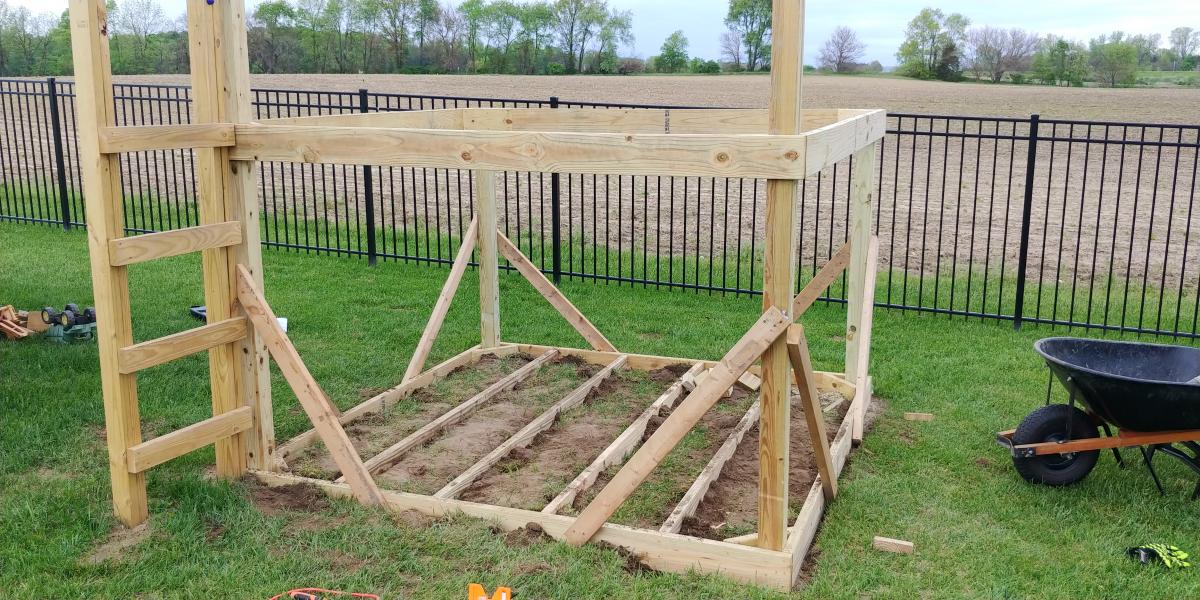
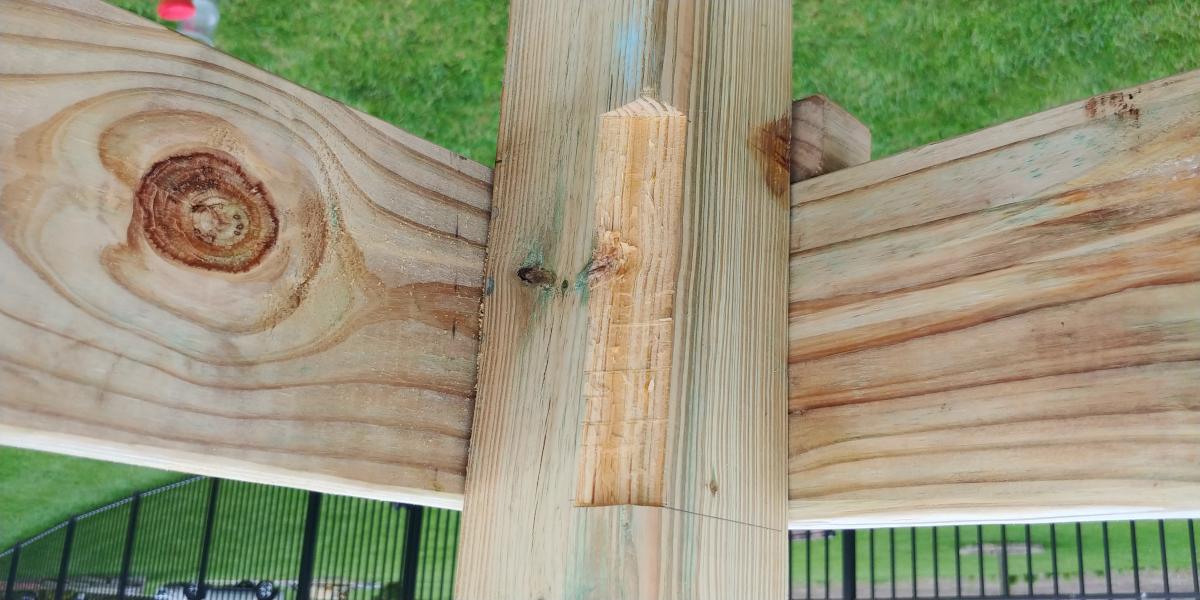
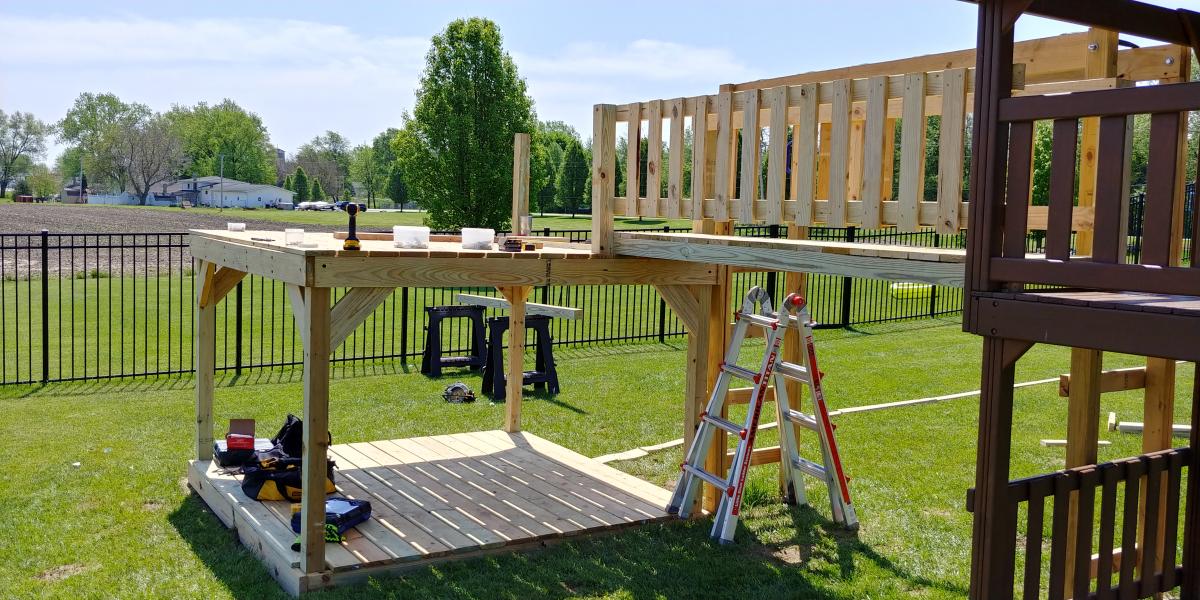
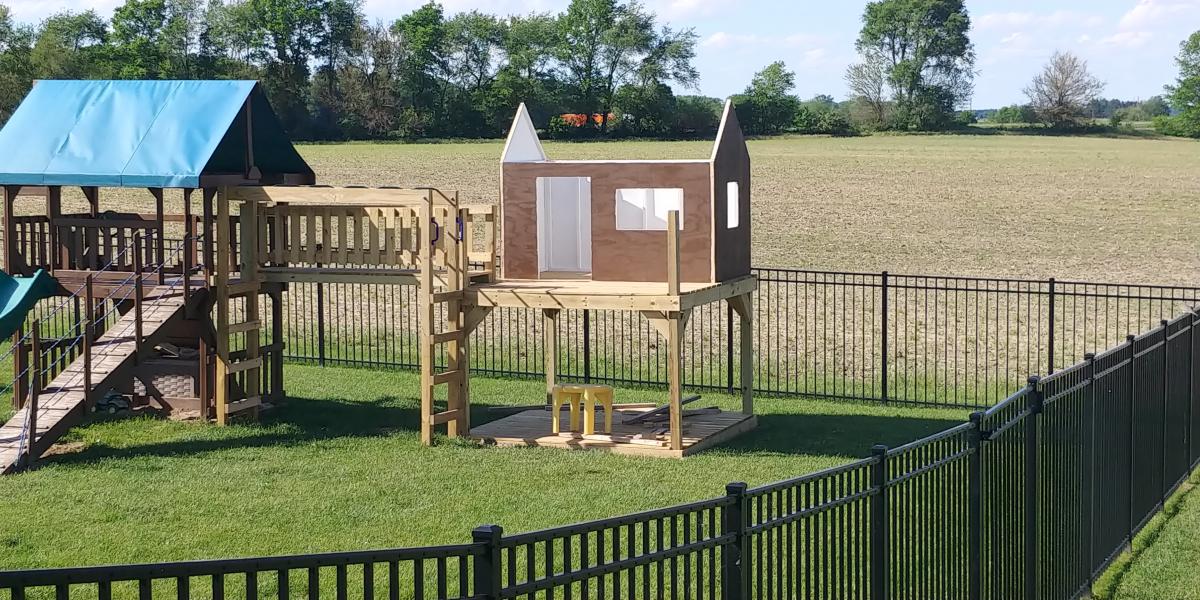
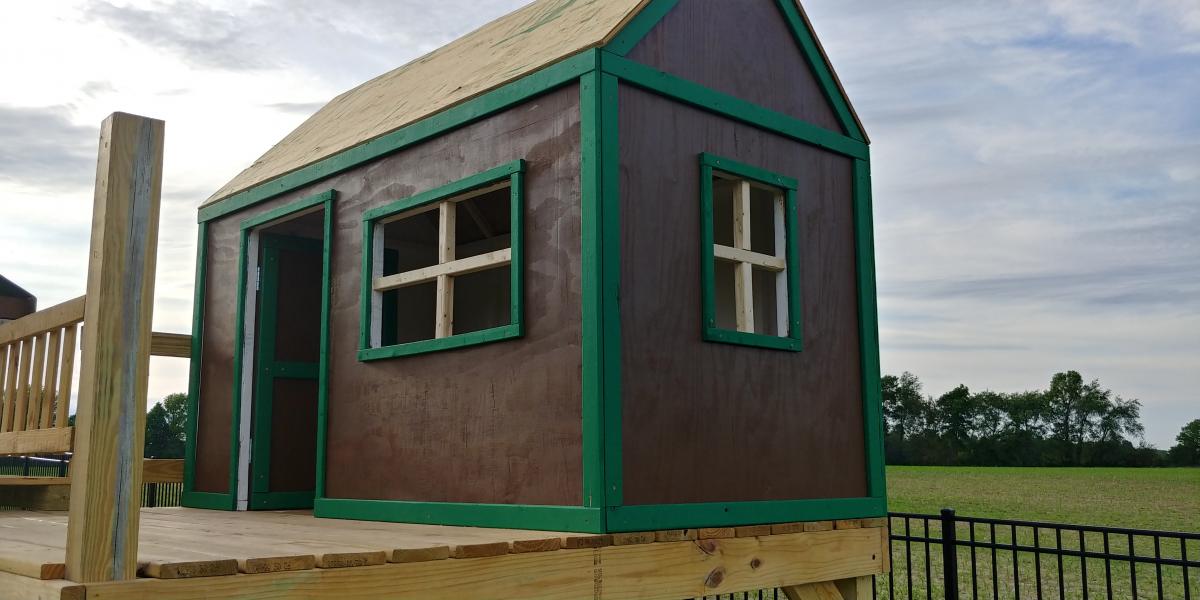
Decided our old play set needed an addition, landed on these plans of Ana's. Sat on them and mulled them over for months. Once the wife said something about adding on to it I made the purchases needed. Connected the two platforms with a bridge. I used 4"x4"x10' for the runners, same boards as the decking for the platform of the bridge(5/4"x6"), 2x4's and 1x4's for the railing. If you look at the 3rd photo, I had to chisel out the 4x4 post to get the 2"x6"x12" support to fit correctly. This should measure 2"x6"x13". Another change I made was to cut the bottom and top trim pieces longer on the front and back sections so that the trim would cover the framing of the gable end walls (see last photo). my son wanted windows so I faked in some windows with scrap 2x2's. I used 2x6's as supports from the 4x4's to the 2x6 framing (see photo 3) I added the monkey bars about a month before deciding to do the platform/deck and playhouse. The ladder is based loosely off of a couple of plans I found online. I was able to do all of this work myself except for the roof. Need my dads help to lift the plywood, he then helped me with the rest of the roof.
I didn't build this shoe dresser because I particularly needed one, but it looked so lovely that I couldn't resist.
- I modified the plans by building 3 bins instead of 2 so it could hold more shoes.
- I decided against the dowel stick and opted for hinges instead, which were surprisingly not too difficult to assemble. I found that I didn't even need the magnets after installing the hinges as the doors stay closed.
- I used 7" chains on both sides of each bin instead of a belt to make it extra sturdy.
- I added two back legs.
Et voila! This is the end result. I'm very pleased.
PS. Those flopping bins are a pain when you're trying to build!! An extra pair of hands is definitely recommended.


Fri, 07/05/2013 - 22:49
Pretty :) Good Job. Now if I only had the space for one thats 10 rows high :P I like the stain color too. Shanty 2 Chic always uses Rust-o-leum. I think its called dark walnut. Dont quote me though. I love the stain and spray paint combo colors they use.
~Melody
In reply to Nice Job by SoCaliforniaMel
Sat, 07/06/2013 - 20:00
Rust-o-leum, that's the one!
Yes, if only every woman could own a 10-row cabinet for all her shoes! :)

We were looking for outdoor furniture for our deck, and for the size and amount we needed it would have cost us at least $2000. We really like the idea of having an outdoor sectional that we can also use for dining, and we had trouble finding a set we liked. We found Ana's plans for the 2x4 Outdoor Sectional, and i loved the look. After seeing what others have done with the plans, I thought I would be able to modify it to get everything we needed for much less cost than buying a set.
We ended up extending the size of the 2x4 outdoor sofa by one 24" section, for a total length of 96". I then used the same design to make two outdoor chairs, just reduced the length to 24". I modified the 2x4 outdoor coffee table plans to create two ottoman's that can be moved around to make the seating more lounge style Finally, I modified the coffee table plans to make a 5 foot outdoor dining table. All in all, it took about a week and I couldn't be happier with how it turned out!

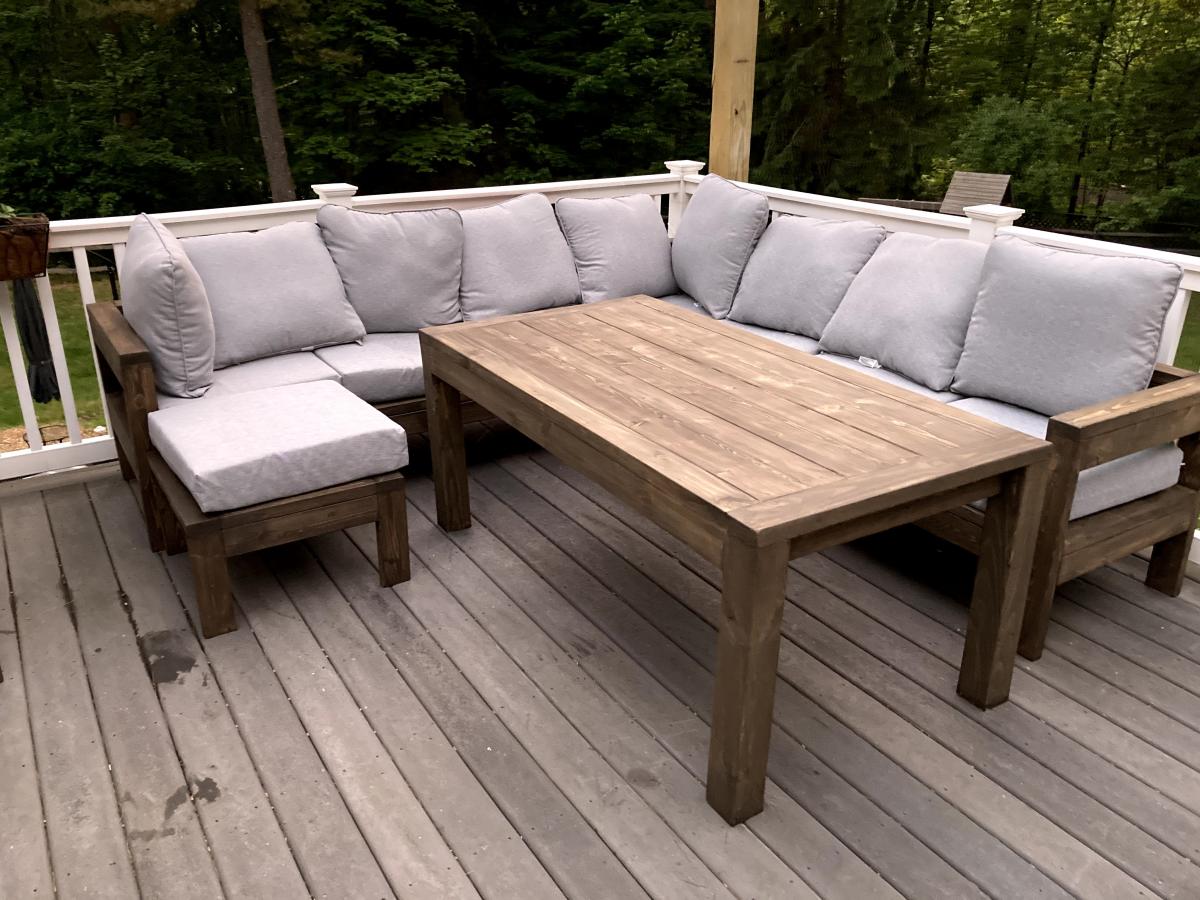


Followed your plan but added extra 1 x 2 trim to the sides, feet made from 1 × 3 and 1x 3 trim around the top


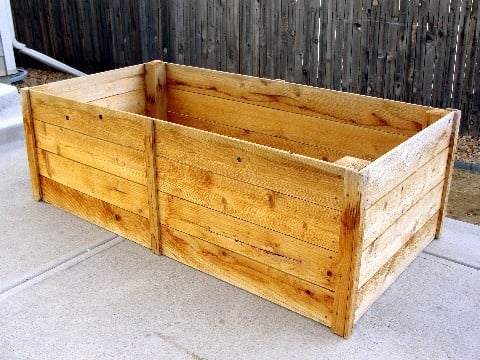
I made these last summer for my sister. And she didn't even use them yet! Very easy to make. She did want them taller, so that is the only modifacation I made. We're hoping the bunnies won't notice all the yummy veggies up this high :) I know, probably wishful thinking. Makes a great kid corral too.
We had pool toys and nerf guns all over our porch! I decided to build a locker system for all of it! I already had the bench, so I modified the plans a bit to fit around it. I also added extra hooks for wet towels and goggles to be hung up to dry. Some of the hooks are large bolts that we had laying around the tool shed. They actually hold wet towels in place better than store bought hooks ;)

Great Plan! Loved how easy it was to build and how little the cost was.
Tue, 07/28/2020 - 09:52
Did you use decking screws or pocket holes for the visible portion of the couch?
Sun, 08/01/2021 - 18:40
Looks amazing! What method did you use (pocket holes, dowels, deck screws, etc) to join the visible portions like the arms?

Ana doesn’t have a plan for a catio but she does for a playhouse and a cedar shed made from 2x2’s. I sort of combined my knowledge from making her plans over the last 10 years and came up with this for my cats. It was fun to make!! My baby kitten is loving it. I used garden fencing and stapled it to the outside and pocket holes for the walls. I made each wall individually like the playhouse then connected them once in place.


Wed, 06/09/2021 - 12:36
Thank you for sharing! My daughter wants a cat for her birthday but it can't be inside due to our son's allergies. Roaming outside isn't really an option because we have coyotes. We are going to use one of these in combination with an underground electric fence.
Comments
Ana White
Mon, 05/25/2020 - 11:48
Love the two tone!
Love the two tone!
LaneJames
Thu, 07/21/2022 - 20:25
Love the color scheme!
Love the color scheme!