Community Brag Posts

Chicken Coop with run

Submitted by Anonymous (not verified) on Sun, 01/31/2016 - 19:36

It took a while to come together and made several modifications but it is a great coop and was a major selling point of the house when we were relocated.  I had added a main tray under the roosts and a door to srape the poop out.  This made keeping the coop clean very easy.  

Built from Plan(s)
Estimated Cost
$800
Estimated Time Investment
Week Long Project (20 Hours or More)
Finish Used
Chicken Coop
Recommended Skill Level
Intermediate

Sliding Barn Door Console

Submitted by Anonymous (not verified) on Tue, 02/16/2016 - 12:14

We wanted to build this piece for so long, but couldn't find 1/2" metal anywhere. Mind you, we live in a pretty small town. We finally just decided to use 1/8" Metal, which works just fine in my opinion. We followed the rest of the tutorial, but I find that they don't go over how to install the metal at all. That needs a tutorial all on its own. We improvised with what we had here in our small town. We ideally wanted to find old metal, but that didn't happen. So we bought new steel, spray painted it & then beat it up so it looked more vintage. 

I'd say hanging the barn doors & the track is the longest part for sure. 

Built from Plan(s)
Estimated Cost
300 ( We live in Canada, so everything is much more expensive here )
Estimated Time Investment
Day Project (6-9 Hours)
Finish Used
Top is stained in our Beachwood ( colors mixed from the Minwax stains ) Bottom is painted in pure white. Hardware is black & beaten up
Matte Polyurethane finish.
Recommended Skill Level
Intermediate

Comments

DIY Wood Outdoor Chair with Deep Seat Cushion

Submitted by Anonymous (not verified) on Thu, 08/10/2023 - 12:27

Using just basic tools, I was able to build this super comfy outdoor chair for the fraction of the cost. With a couple of modifications, Ana White's design plan made for a perfect fit for the new deep seat cushions I had found on fb marketplace.
 

Seasonal And Holiday

Modified Adirondack Chair and Bench

Submitted by jont on Thu, 03/29/2012 - 19:11

Decided we needed some outdoor seating. Added a few modifications to make it more my own.

Built from Plan(s)
Estimated Cost
$100 for both including the paint
Estimated Time Investment
Week Long Project (20 Hours or More)
Finish Used
Exterior paint and primer mix - not sure what to call the color, maybe a neon green.
Recommended Skill Level
Intermediate

Comments

Cedar Top Modification

Submitted by Anonymous (not verified) on Sun, 05/01/2016 - 16:45

We needed a compost bin to replace the pile forming in a corner of the yard. We referred to it as "The Buffet" to reflect how much our new puppy enjoyed digging through the scraps. 


I I substituted cedar fencing to top the bin instead of the plastic sheeting. I just liked the way it looked and it was more cost effective. The most difficult part of the project really is wrangling the chicken wire. It's sharp!

Estimated Cost
I spent about $75 on materials for the project. I spent about another $75 on things like screws, a new staple gun, some waterproofing stain, etc all of which I have left overs and can use again.

I used treated lumber and a waterproofing deck stain. This is not for an edibles garden. I'm just using the soil to fill in low spots around the yard. If I was building it for a veggie garden I would have used all cedar wood with no stain or a natural shellac.
Estimated Time Investment
Day Project (6-9 Hours)
Finish Used
Thompson waterproofing deck stain. Brushed on.
Recommended Skill Level
Intermediate

Green House

Great little project from your site!

I put PVC to the ground vs the metal siding and added a heat sink in the middle with some old computer fans.

Built from Plan(s)
Estimated Cost
$1,300
Estimated Time Investment
Weekend Project (10-20 Hours)
Finish Used
PVC
Recommended Skill Level
Intermediate

Comments

Niccador

Sat, 05/23/2020 - 17:23

That PVC heat pipe intrigues me. Can you share a little more about it? I'm assuming it pulls hot air from the upper vent, and cools it down via the section of pipe below ground, sort of like a natural A/C. Keeps things from gettting too hot during the summer months?
Kinda looks like you'd frequently trip over it though. I'd probably have run the lower exhaust right up by the edge of the door frame, or a corner.

Ultimate workbench

I absolutely love this build. I did end up using pocket holes for the carts to make them slightly stronger. I also had to do custom work on the top of my table saw cart due to rack and pinion fence. I routed the the plywood tops with a slight round over and waxed them smooth. I plan to add a dust collection hood around the miter saw and then install an inset stop block for the miter fence.

Estimated Cost
300
Estimated Time Investment
Week Long Project (20 Hours or More)
Finish Used
Wax
Recommended Skill Level
Intermediate

Comments

rjcarr1911

Fri, 07/24/2020 - 16:08

Very nicely done! It never even crossed my mind that the cart would need modifications to fit that table saw. That's the exact same table saw I've had my eye on, and I plan on purchasing any day now; so that is definitely good to know! My project is still a work in progress. I currently only have one cart built.

Do you have enough room to adjust your miter saw to make 45 degree cuts from the position pictured? Or do you have to move it forward in order to clear the work bench frame? I only ask because that's what I have to do with mine at the moment. I have to have it all the way forward on the shelf. I am considering making the miter saw shelf a little bit wider to remedy that minor issue.

Modern Adirondack

Submitted by Anonymous (not verified) on Wed, 06/10/2020 - 10:10

My wife and I were tired of the cheap plastic chairs but not wanting to spend a fortune. I came across Ana’s site and these great plans so I gave it a shot. Everything was pretty straightforward. I decided to use 1x6’s for the seat and back slats instead of 1x10’s. I also used dowel rods instead of wood filler to close all of the screw holes and I Roy fed the edge of the front seat slat one the router. I’m currently working on a partner for this chair with some adjustments (Making it 2” wider and using pocket hole and other techniques to hide the screws).

Estimated Cost
$40
Estimated Time Investment
Afternoon Project (3-6 Hours)
Finish Used
Minwax English Chestnut stain.
Valspar clear deck/outdoor furniture sealant.
Recommended Skill Level
Beginner

Comments

DIY Sofa - Storage Sectional

Submitted by LittleG on Thu, 08/09/2012 - 15:38

Basically I took Ana's plan and tweaked it to create a diy sofa, a love seat, and a corner piece to make a sectional. All 3 pieces have the same basic design and function (they all have a storage compartment), although the corner piece, because of its placement and the thickness of the seating cushions, doesn't open unless the couch is opened first. We purchased custom cut, 6" thick foam cushions for the seats (we bought the XL-38 foam from https://www.buyfoam.com/, but if we had to do it again, we'd go with the XL-28 as the 38 is VERY firm). We also used upholstery fabric instead of a paint drop-cloth to cover the couches. The foam and upholstery fabric upped the overall cost significantly. Other changes from Ana's plan, I used 15/32" OSB because the 1/4" plywood just felt too flimsy (I'm a large guy). I also added I bolts to the underside of the seat before the foam and upholstery so I could add a stress relief rope to prevent the kids from opening the top and dropping it and ripping out the hinges. I used piano hinges as they seemed to me to provide the most support. Finally, I ended up using 1x2s for the base trim since I couldn't find any 2x2s that were straight and finish-ready, then I added router detailing to provide some visual interest. I used 3" pieces of 4x6 for the feet and added matching router detail. Additionally, I used T-Nuts and bolts to make the feet and base trim completely removable.


Built from Plan(s)
Estimated Cost
$1300
Estimated Time Investment
Week Long Project (20 Hours or More)
Finish Used
Minwax PolyShades Espresso
Recommended Skill Level
Intermediate

Comments

masmith38

Fri, 10/23/2015 - 11:11

Love this!  Totally want to think hard about doing this instead of buying when time for a new couch comes. Job well done, and the storage is a total plus.  

Chased

Sun, 05/15/2016 - 21:15

Where can I find the plans to this or the cut list

mikeyb

Mon, 10/03/2016 - 18:11

Awsome job!!! question? is that a typo on the cost to build??

mikeyb

Mon, 10/03/2016 - 18:12

Awsome job!!! question? is that a typo on the cost to build??

albertmick30

Mon, 08/17/2020 - 07:46

It is superb blog and i really appreciate your blog. It is because i always like the informative blogs. You did a great job and thanks for sharing.I am impressed by your post. It contains very informative data and i gain a lot information from it. It is very useful for me. Thanks for sharing and keep on sharing that type of posts.The Mobile App Developer Dubai provides good service you visit here site https://www.mistersaad.com/

Modular office sewing/craft table

Submitted by Anonymous (not verified) on Thu, 07/25/2019 - 17:58

We built three base units-each with different storage options and used the corner desk plans. Then created our own long desk top using a 6ft long board and using a jigsaw to create an open space for the sewing machine. 

Estimated Cost
$300
Estimated Time Investment
Week Long Project (20 Hours or More)
Finish Used
Semi gloss paint-behr paint and primer in classic silver. Polycrilic semi-gloss top coat-3 coats with wet sand before final coat.
Recommended Skill Level
Intermediate

Comments

Adirondack chair from Pallets

Submitted by Anonymous (not verified) on Fri, 03/24/2017 - 19:42

I decided to try and use the plans on Ana's site but with a twist. I wanted to limit myself to using only pallets. I think it turned out great! I can't upload all the photos because they exceed the maximum size limit. If I was able to you could see how each chair is slightly different and has a lot of character. I finished them with a waterproofing oil which I highly recommend over other finishes. 

Estimated Cost
$10 for screws.
Estimated Time Investment
Afternoon Project (3-6 Hours)
Finish Used
Cabot oil
Recommended Skill Level
Beginner

Comments

Simple Outhouse

I built this outhouse to go with a dry cabin I'm working on, and also as an emergency backup for my house. I used treated lumber on the base/deck and splurged on T-111 for the siding. I wanted to use greenhouse polycarbonate for the roof, but found a piece of metal roofing in my shed that was exactly the right size so I used that instead. I thought about doing a fancy cutout on the door but ended up going with a half moon because it was easy. I'm thinking about cutting out stars of different sizes all over the rest of the door to let in more light. I'll trim and stain it next summer.

Built from Plan(s)
Estimated Cost
$450 - I used T-111 which is $40/sheet here in Alaska. I also used treated lumber where recommended and stainless steel screws.
Estimated Time Investment
Weekend Project (10-20 Hours)
Recommended Skill Level
Beginner

Comments

CH

Mon, 01/13/2020 - 15:25

WHAT HAPPENS TO THE 'STUFF' THAT YOU DEPOSIT IN THE TOILET?  I DIDN'T READ ANYTHING ABOUT DIGGING A PIT/TREATMENTS, ETC.  PLEASE LET ME KNOW.  THANK YOU!  CH.

Double Wide Cedar Fence Picket Storage Shed

Submitted by moosmani on Mon, 11/11/2013 - 03:12

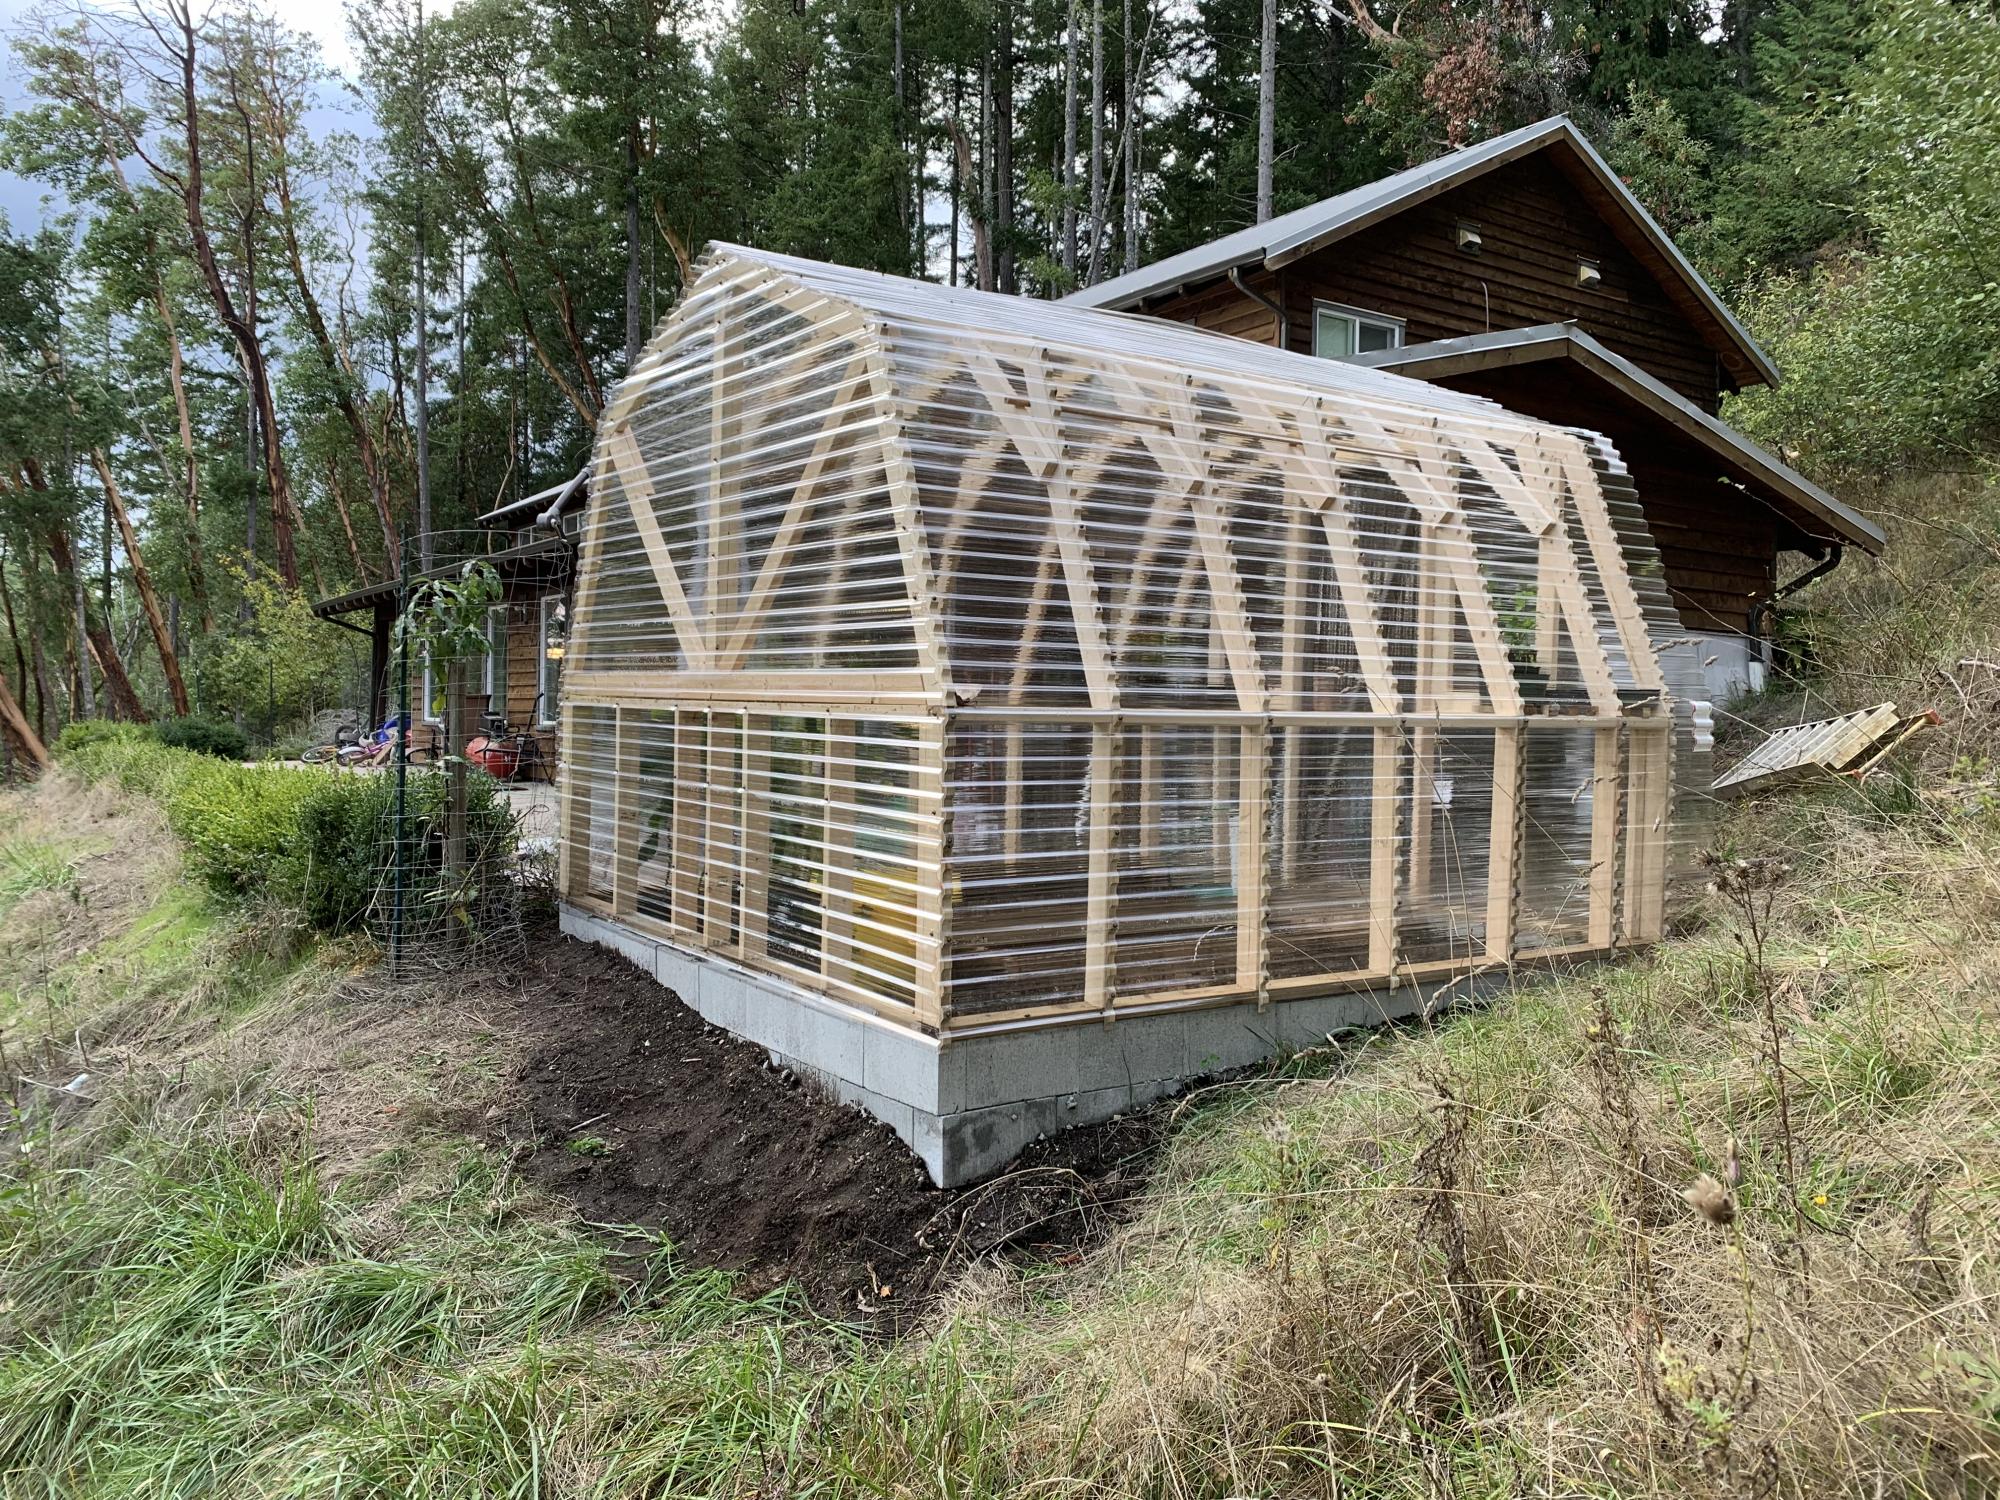
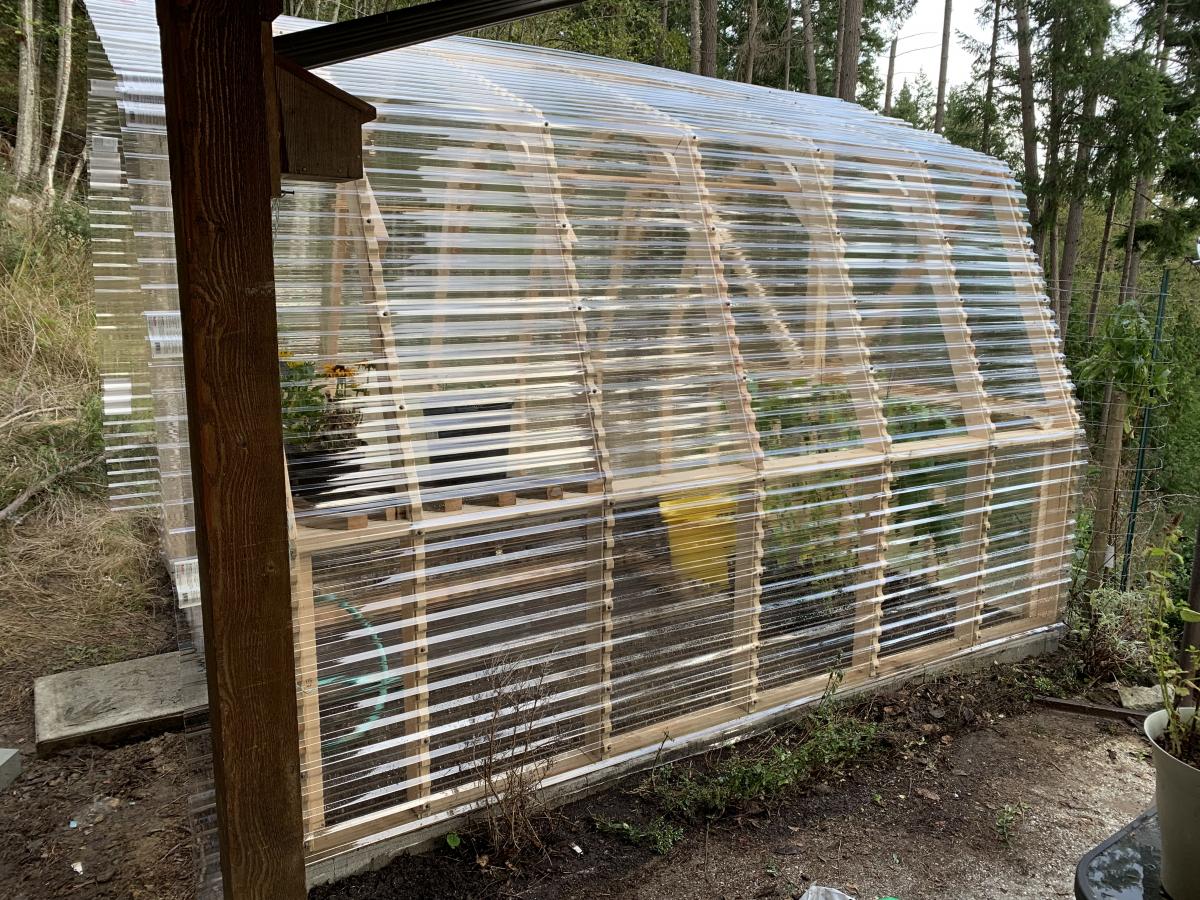
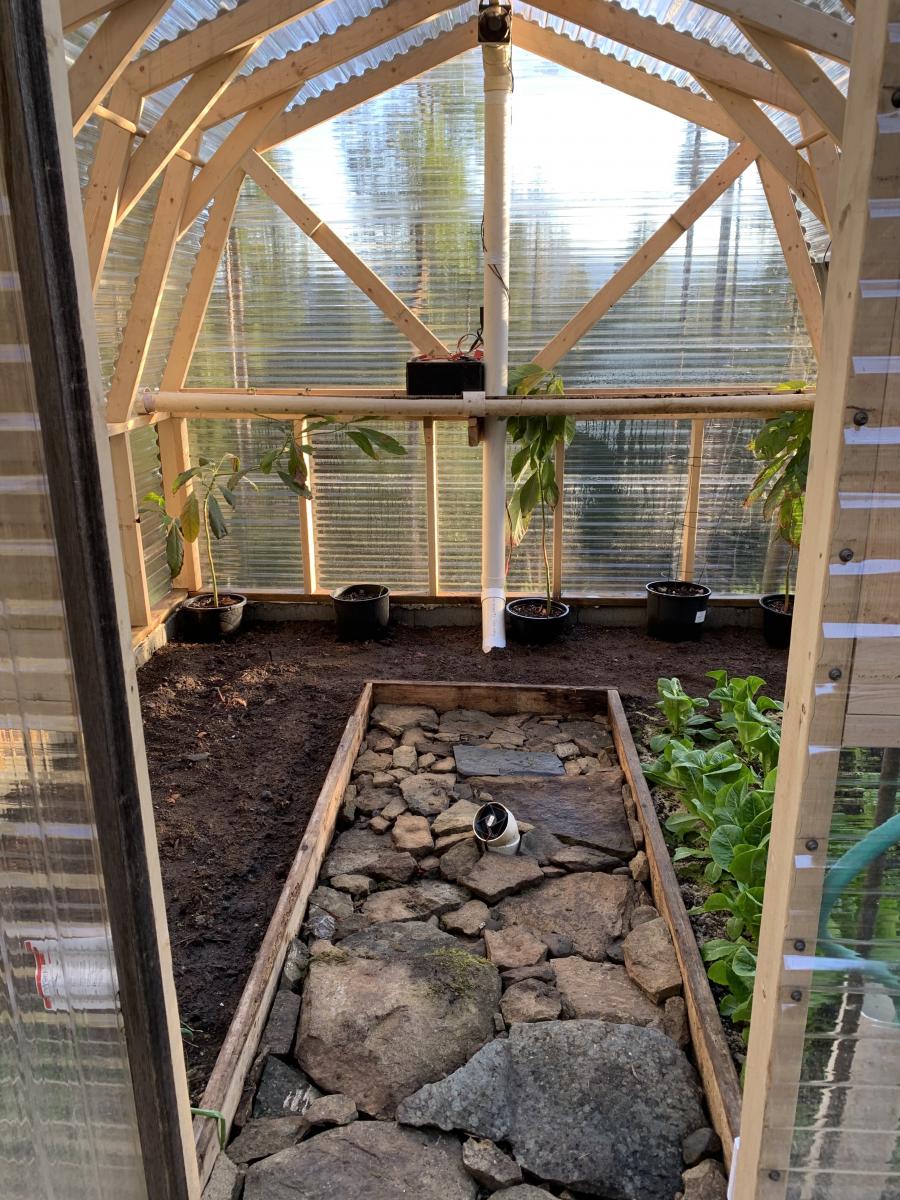
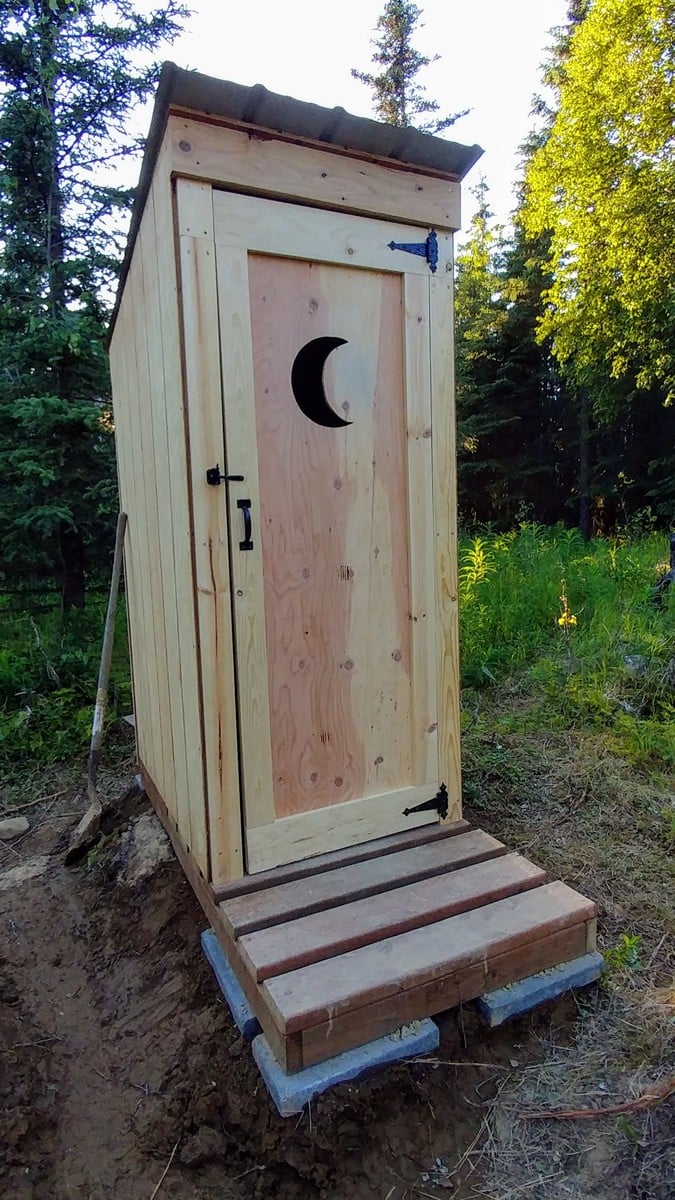
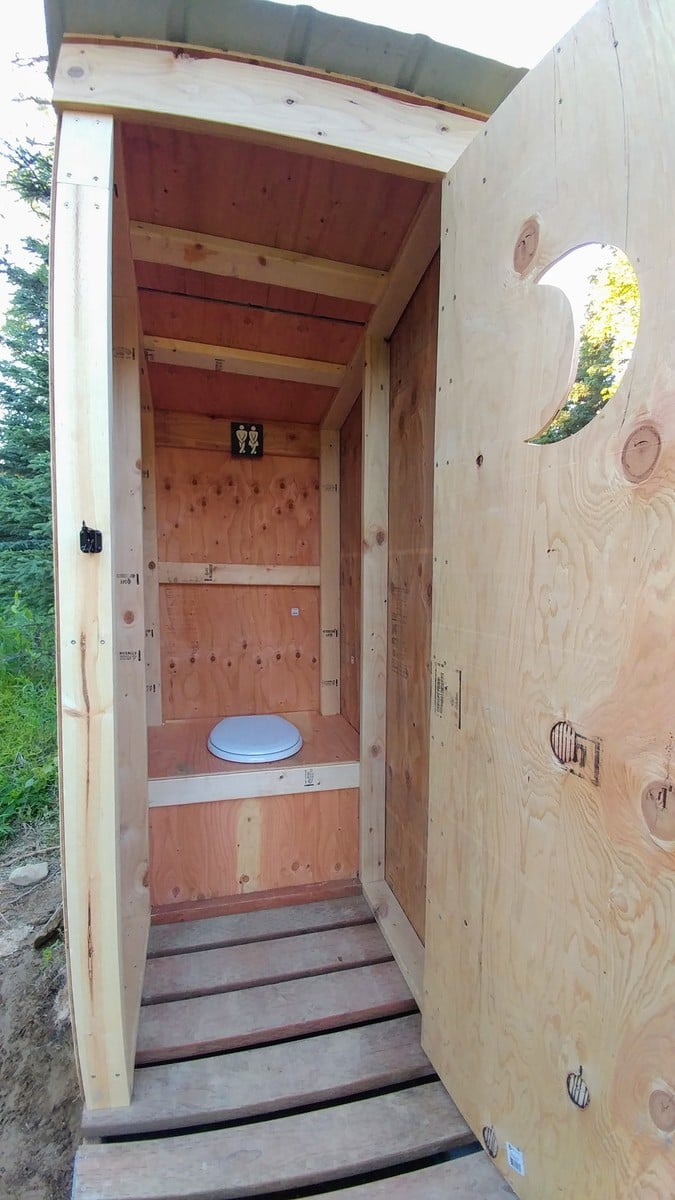
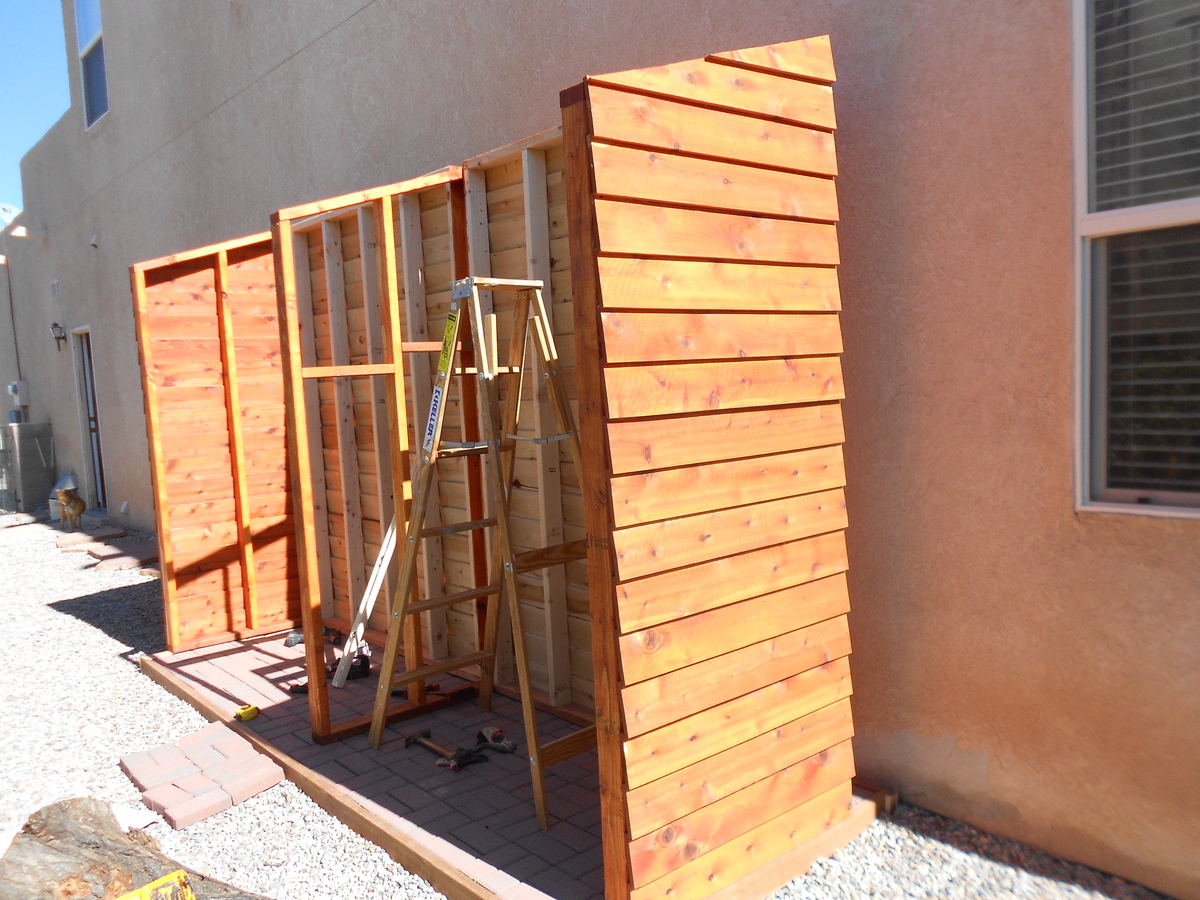
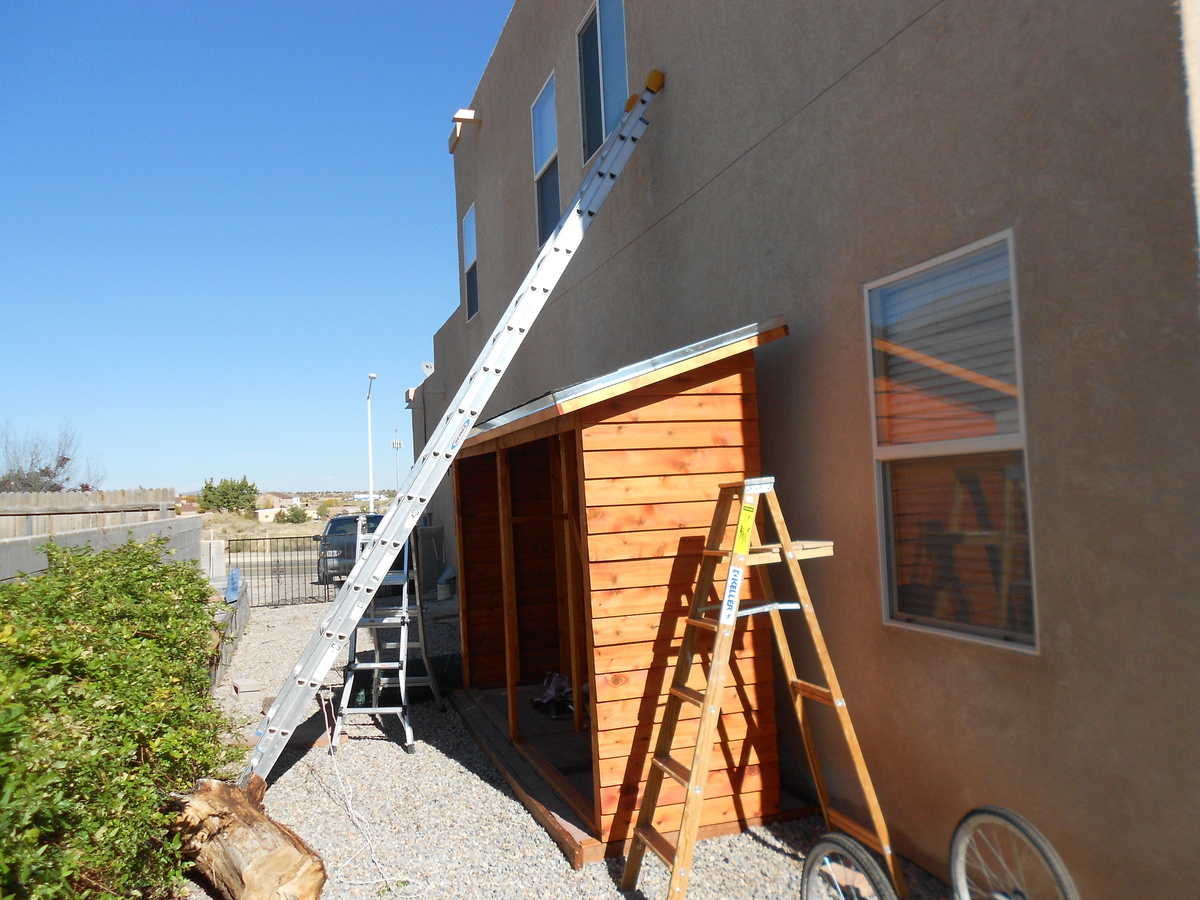
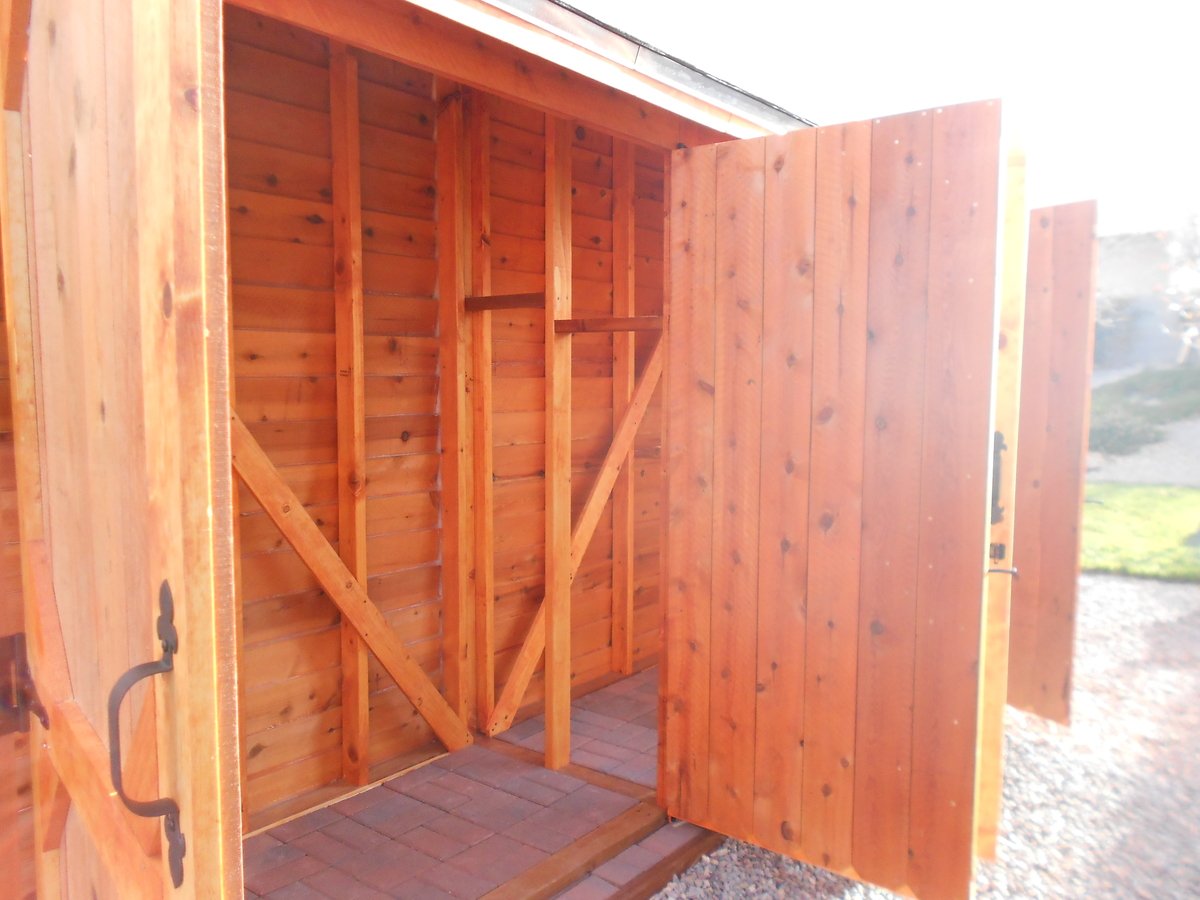
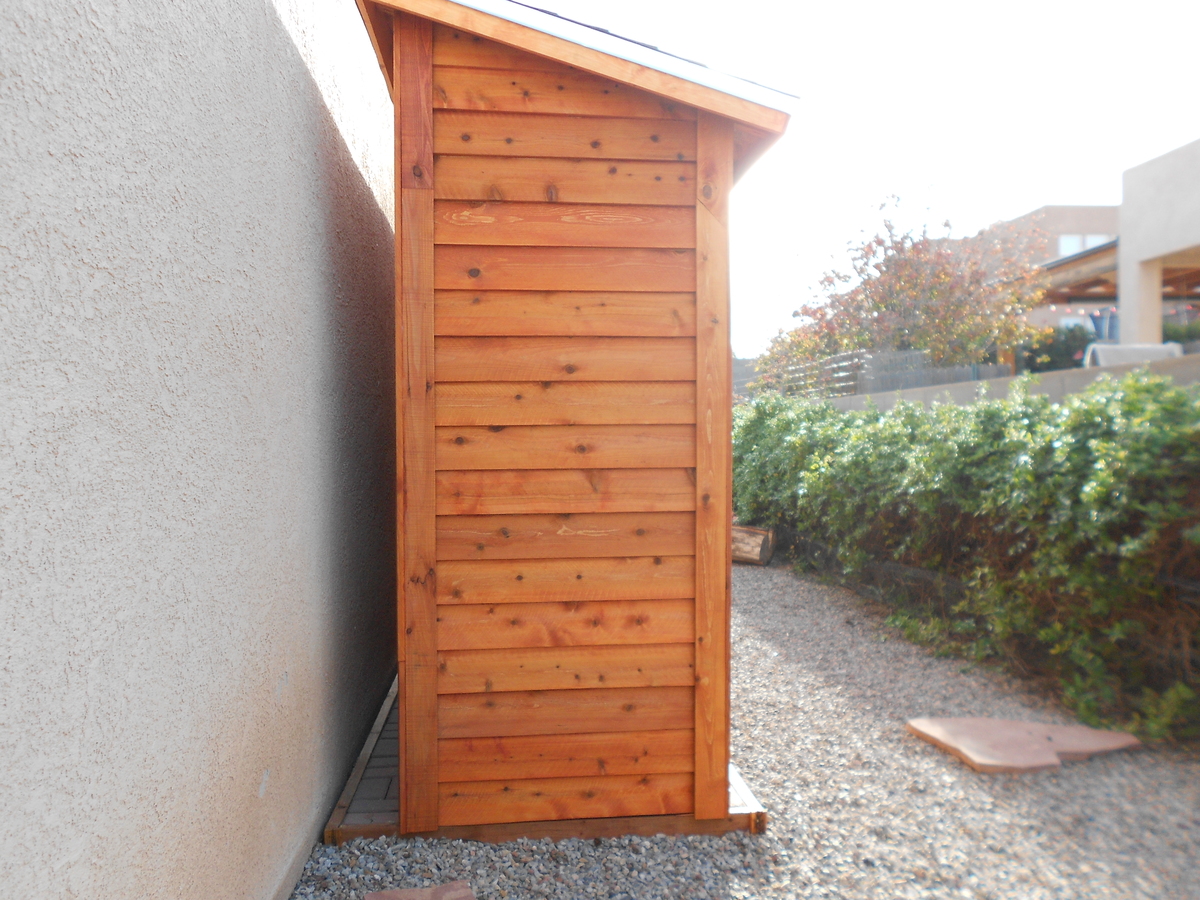
I read and studied every comment and brag post about this shed. I must have read the plans a hundred times before I got up the courage to tackle it. It’s a very attractive and affordable shed design. I thought a double wide version would be perfect for our long, narrow side yard, and it is! I mostly stuck to the plans except for a few things. I made it 10” taller overall so there would be plenty of head clearance under the doorway. That was a very easy modification. I used 2x4s for the walls instead of 2x2s because we have high winds in our area. That modification was a little bit more challenging, but I planned it out and it worked! Also I used 2x6s for the headers instead of 2x4s. I also added 2x4s at the thresholds because I couldn’t image making it stay square without them. I basically made two sheds joined by a common wall in the center. I did not increase the depth, mostly because I was afraid to mess with the angles and how that would change the pitch of the roof. Joining two sheds together meant that I didn’t have to put the exterior pickets on the middle wall. But it also meant that I had to build 4 doors. Yuck. They were difficult to get lined up and level, but I was amazed it actually worked and that all the doors operate properly and smoothly. I was questioning the wisdom of my decision to do 4 doors while I was in the thick of it, but now that all the work is done, I love that I can open all 4 doors and have easy access to absolutely everything in the shed. Very convenient! I told my dad I was building a shed and he recommend that I add cross braces. It seemed sturdy enough without them but it certainly can’t hurt. My dad knows everything about building and I know nothing, so I took his recommendation. If I were to do this again, I would overlap the cedar pickets by 1” instead of ½”. My pickets were not quite wide enough. I could swear they shrunk after I applied the stain/uv protection. I used liquid nails along each lap but it didn’t hold. Where the glue DID hold tight, the wood split lengthwise. Anyway, for whatever reason, gaps appeared and I spent a fortune on clear silicon applied on the interior walls to make it water tight. I had to keep going back for “just one more tube.” So with hind sight I would have been better off just buying a few more pickets and increasing the overlap. Another thing I might do is make it deeper. I decided against it initially because I was worried that increasing the depth would make it flimsy. Now I don’t think that would be a problem. This shed is sturdy. I can’t say thank you enough. Great plans and a great website! I am completely hooked.

Built from Plan(s)
Estimated Time Investment
Week Long Project (20 Hours or More)
Recommended Skill Level
Intermediate

Comments

moosmani

Mon, 11/11/2013 - 14:56

I kept every receipt from caulking gun to stains and brushes. I just now added it up and it came to (cringe) just under $900. But I have lots of left overs for another shed and it's still a huge bargain. Other sheds that are similar to this plan are much smaller and start at $1,999 and up! I think it was well worth it to have a sturdy bargain shed that's also beautiful.

t0mpr1c3

Sat, 01/22/2022 - 23:01

It looks great with the stain. I think your Dad's advice was good. Also I like that the heavier timbers add rigidity to the frame.

Seasonal And Holiday

My Simple Outdoor Lounge Chair with 2x4 modification

I modified this chair with 2x4's as the base and 2x2 for decoration on arms, this is prior to sanding and finishing

Built from Plan(s)
Estimated Cost
$15-$20 dollars, depending on local lumber prices and finishing options.
Estimated Time Investment
An Hour or Two (0-2 Hours)
Finish Used
Unfinished
Recommended Skill Level
Beginner

Comments

RandyW

Sat, 06/13/2020 - 16:33

I always take my sander to the sharp edges and round them off

The Gíaffe TV Stand

Submitted by Anonymous (not verified) on Thu, 02/06/2020 - 09:55

The Gíaffe Free Standing TV Mount. Handcrafted and engineered to use its center mass to deliver strength and balance for tv sizes 30-60". Display your television without detracting from your home's decor. The Gíaffe Free Standing TV Mount is the perfect solution and its rich finish will be perfect for any house/office room.

Estimated Cost
$109
Estimated Time Investment
Day Project (6-9 Hours)
Finish Used
Stain - Dark Walnut - Varathane - 2 Coats
Finish - Water Based Polyurethane - Varathane - 3 Coats
Recommended Skill Level
Intermediate

Comments

2x4 Outdoor Sectional Sofa

Submitted by lknolan2 on Sat, 04/18/2020 - 20:19

Great Plan! Loved how easy it was to build and how little the cost was.

Estimated Cost
$200
Estimated Time Investment
Afternoon Project (3-6 Hours)
Finish Used
Outdoor deck stain by Valspar in Canyon Brown
Recommended Skill Level
Beginner

Comments

jwood4

Sun, 08/01/2021 - 18:40

Looks amazing! What method did you use (pocket holes, dowels, deck screws, etc) to join the visible portions like the arms?

Seasonal And Holiday

DIY Modern Chicken Coop

Submitted by Anonymous (not verified) on Mon, 05/20/2024 - 12:00

Almost 5 years after we moved into the country onto our Hamstead of 3 acres, I finally committed to building our chicken coop. Last year, my husband brought home a ton of lumber used for shipping. I started tearing it down and slowly, over the past few months, I built this perfect coop for our 6 little chicks. It required a ton of sketching and planning, adjustments, and do overs, but it has come together so well. Thanks and shout out to the plan from Ana White and the brag post by @blackgirlbythesea

Built from Plan(s)
Seasonal And Holiday

Sandbox with built-in seats in our playhouse

Submitted by Anonymous (not verified) on Thu, 09/10/2020 - 10:55

The base of our playhouse felt like the perfect spot to use the sandbox plan with built-in seats. The bench seats actually fold flat to create a lid for the sandbox when it’s not in use. I followed Ana’s plans exactly and used the list of materials she provided. The only modification I made was eliminating the back supports. It was not necessary for me to add the back supports since we have the playhouse posts to support the back of the bench.

Built from Plan(s)
Estimated Cost
$60
Estimated Time Investment
Afternoon Project (3-6 Hours)
Finish Used
Stain
Recommended Skill Level
Beginner
Seasonal And Holiday

Outdoor storage box

Submitted by mdsandell on Mon, 09/18/2017 - 10:46

I modified the plans slightly to go taller so it could fit a standard propane tank. I also added a hinged lid based on an image I found on Pinterest that did something very similar. I still need to sand and stain it next weekend.

Like others, I had a little trouble keeping the fence planks from splitting when screwing them to the 2x2 legs, since there was about an 1/8” gap between. I tried to find some scrap to fill in the gap and didn’t overtighten the screws. The lid was made entirely of 1x3”.

Built from Plan(s)
Estimated Cost
$35
Estimated Time Investment
Weekend Project (10-20 Hours)
Recommended Skill Level
Intermediate