Box Frame Coffee Table with Lift Top
Really fun coffee table - my first foray into furniture! I think I will be adding the bottom shelf for added weight and storage to keep the table top tidy.
It was a race building and finishing the console before my daughter started crawling, but just as she learned to wander around, we were able to hide all of our tv/dvd/receiver cords within this console. Drilled holes in the back and tucked the power strip and cords in a plastic box inside the cabinet doors.
Used a jigsaw for the first time, which was fun as the saw created the neat designs on the feet at the bottom.
For the finish, we wanted a color that could pull off a distressed/modern shabby chic while matching the stained class windows in the house that we just bought.
This was my first time creating doors, which did not run smoothly, but ended up somehow working.
Sun, 02/10/2013 - 18:56
You did such a beautiful job on this! I wasn't even interested in this plan until your brag post caught my eye. I would love to build this but, I'm kind of nervous because it will only be my second build and the instructions don't include the drawer or the doors. Did you use the general instructions for building your doors? I love the color I would use this in my dining room with a drawer, I have a shallow space on one wall that it woud fit perfectly.
Rhonda
Tue, 02/12/2013 - 14:34
It was only my fourth project, so I would not be too frightened about tackling this plan, but the doors were definitely the trickiest part. After I finished building the frame, I built the doors to size using leftover 1x2s and beadboard plywood. I measured the doors so they would leave about 3/16 space between the edge of the door and the window in a full inset. However, I spent approximately one full night confused and frustrated because I bought the wrong hinges. Now that I understand from trial and error the differences between cabinet door/hinge design (I found a webpage describing the differences between inset and overlay hinges here: http://www.rockler.com/articles/understanding-hinges.cfm), if I had to do it over again, I would probably design overlay doors instead of inset doors (which seem to be a little off). If someone else could add more suggestions about building and installing doors, it would be greatly appreciated.
Tue, 02/12/2013 - 16:07
Thanks for the link I will definately read it before I build. I love how everyone shares their experiences here, good and bad!
This is my first full sized table project. I wanted to make an inexpensive dining table with nice looks and this one fit the criteria. I deviated from the plans by making the legs frames and the middle truss using rabbit and dado joinery. As a result the middle truss and leg frames did not have to be fastened together with any screws. This design modification made it easier to build in the garage and be able to move easily into the house for final assembly. Top is made of SPF lumber stained to match the natural colour of the cedar legs and truss frame. Thanks Ana for the inspiration to build this beutiful piece.
Thu, 12/11/2014 - 17:11
Love how you rounded the edges of the 4x4s and taylored the cross beam underneath. Just simply fabulous
Fri, 12/12/2014 - 11:07
Great job on this build, looks fabulous! Thanks for sharing!
Mon, 07/24/2017 - 05:24
Hey Dangerdad! Wife and I bought cedar for the base and have all sanded, but are torn on how to stain. I liked your table, and was reading your description of your finish. Did you stain your cedar? You say you stained the top to match the natural cedar, so am thinking maybe you just sealed it without any stain?
Could you clarify? Thanks so much!
Thu, 11/02/2017 - 11:39
sorry for the late response. I didn't have to stain the cedar at all. Just applied a natural satin poly finish. Hope yours turns(ed) out good!
Mon, 07/24/2017 - 05:25
Hey Dangerdad! Wife and I bought cedar for our table base and were discussing how to finish it. Did you stain your cedar? Your write up seems like you may have just finished it and not stained at all, and only stained the top? Just curious
Thanks so much!
I saw Anna's slatted bench (and other members brags) and thought I could adjust the design for some hot tub steps.
The design is simple but effective, (but very heavy).
It is slightly more complex and the cuts need to be pretty accurate, (which mine weren't), but you can sand away most mistakes.
I ended up putting adjustable height feet on each leg. This assists with height but also keeps standing water off the wood.
Anyway, I put see through grip tape on the steps to avoid accidents and overall it does the job.
Thank you for the plans! I love the way my headboard came out! I couldn't figure out how to cut the on piece of moulding to get the angles to work, but I think I resolved the issue nicely with the blocks for it to die into.
As the dolls I have were very small I scaled the plan to half size, and finished with some leftover garden paint.
This is by far the most complex piece that I've built off of Ana's site, and the first time I've done drawers or doors on anything. Thanks so much for the awesome plans! Be sure to check the supplies list carefully - I ended up bringing a lot of lumber back to Home Depot. But this is by far my biggest "win" in furniture making so far!
Wed, 01/13/2021 - 09:31
That looks great! It looks like it was meant to be in that spot. Nice work!
built for grand daughter for christmas
Tue, 12/16/2014 - 15:42
This is a beautiful project. :) I especially like the scroll work on the top and bottom. Nice attention to detail.
This was my first big build and I love how it came out! Thank you Ana White for amazing and straightforward plans to follow for both the farmhouse table and benches.
Lego table with removable top, hidden storage, shelf. 44.5”w X 20” deep X 18.5”h
This is by far my favorite build. I couldn't be more happy with it! I spent several days on this. The majority of my time was spent on the finish. It really is a great plan if you are just getting started.
I saw http://www.ana-white.com/2013/02/plans/wall-kitchen-corner-cabinet and knew this was the project I wanted to do in our new home. The side cabients are from http://www.ana-white.com/2013/12/plans/36-wall-cabinet-double-door-momp… project, redesined to fit the wall-kitchen-corner-cabinet plans. This was my first cabient build. Still have to install doors. I am happy way it came out and so is wife.
Thanks Ana for your great site and plans. My next project is the storage sofa :D
I used the rustic X sofa table and modified for my wife's vision. She wanted an entry table but like most of the look of the rustic x series. However, she did not like the X for the area so I took those off. I still used the same dimensions however for just about all of it. My wife wanted drawers, you know because making something from scratch isn't hard enough so we might as well make changes in the middle of the build...hahahaha. I used pocket holes for almost all joints but placed them in places that would be very hard to see. I jointed the one bys to make the top seamless. I also modified the length to 60 inches to fit in our space. Finished it with Briarsmoke stain and a few coats of water based poly. The drawers added a little bit more to the final price, but it was well worth it.
The table took us about 6 hours to cut and put together. The cost was about 65.00. I used the walnut min wood station and did 2 coats. Lots of coats of polycyrlic. Love this table.
I needed bunk beds for my girls and found the camp loft bed - perfect! I liked how it used all 2x4s and 2x6s... made it easy to do everything with the chop saw. I customized the bed by lowering the overall height so that the actual bed is only 3 feet off the ground, and then I still had plenty of room for a mattress underneath for my three year old. I was strapped for space so I made the deck half the size so that the stairs stayed in between the bunk bed posts. I also added a little fence to the side of the deck since it's not up against a wall. I am so happy and proud of my work and I thank-you SO much for these wonderful easy-to-follow plans :)
Sorry, the pictures are on their side. I used the Rustic X console table plans, but left out the X and made it taller and wider. I didnt have a stripper nor enough skinny wood to lay the slats on the shelf like that did in the video, so each of those slats are held up by pocket screws. Whew! Will avoid doing that again if possible! I did, however, stain BEFORE i built and that made all the difference! Also for the top I used a quality piece of compressed wood which bumped the cost $20, but seeing that a cage was going on top, i wanted a solid piece to hold any shavings. I also added a railing so the cage would stay in place. My neighbors LOVE it and I'm just super happy with how the stain job came out. It was actually a fluke, I think I failed to stir it completely on the first coat and when I was touching up it got waaay darker so I just rolled with it and made it two toned. LOVE the result and not sure if I can pull it off again haha
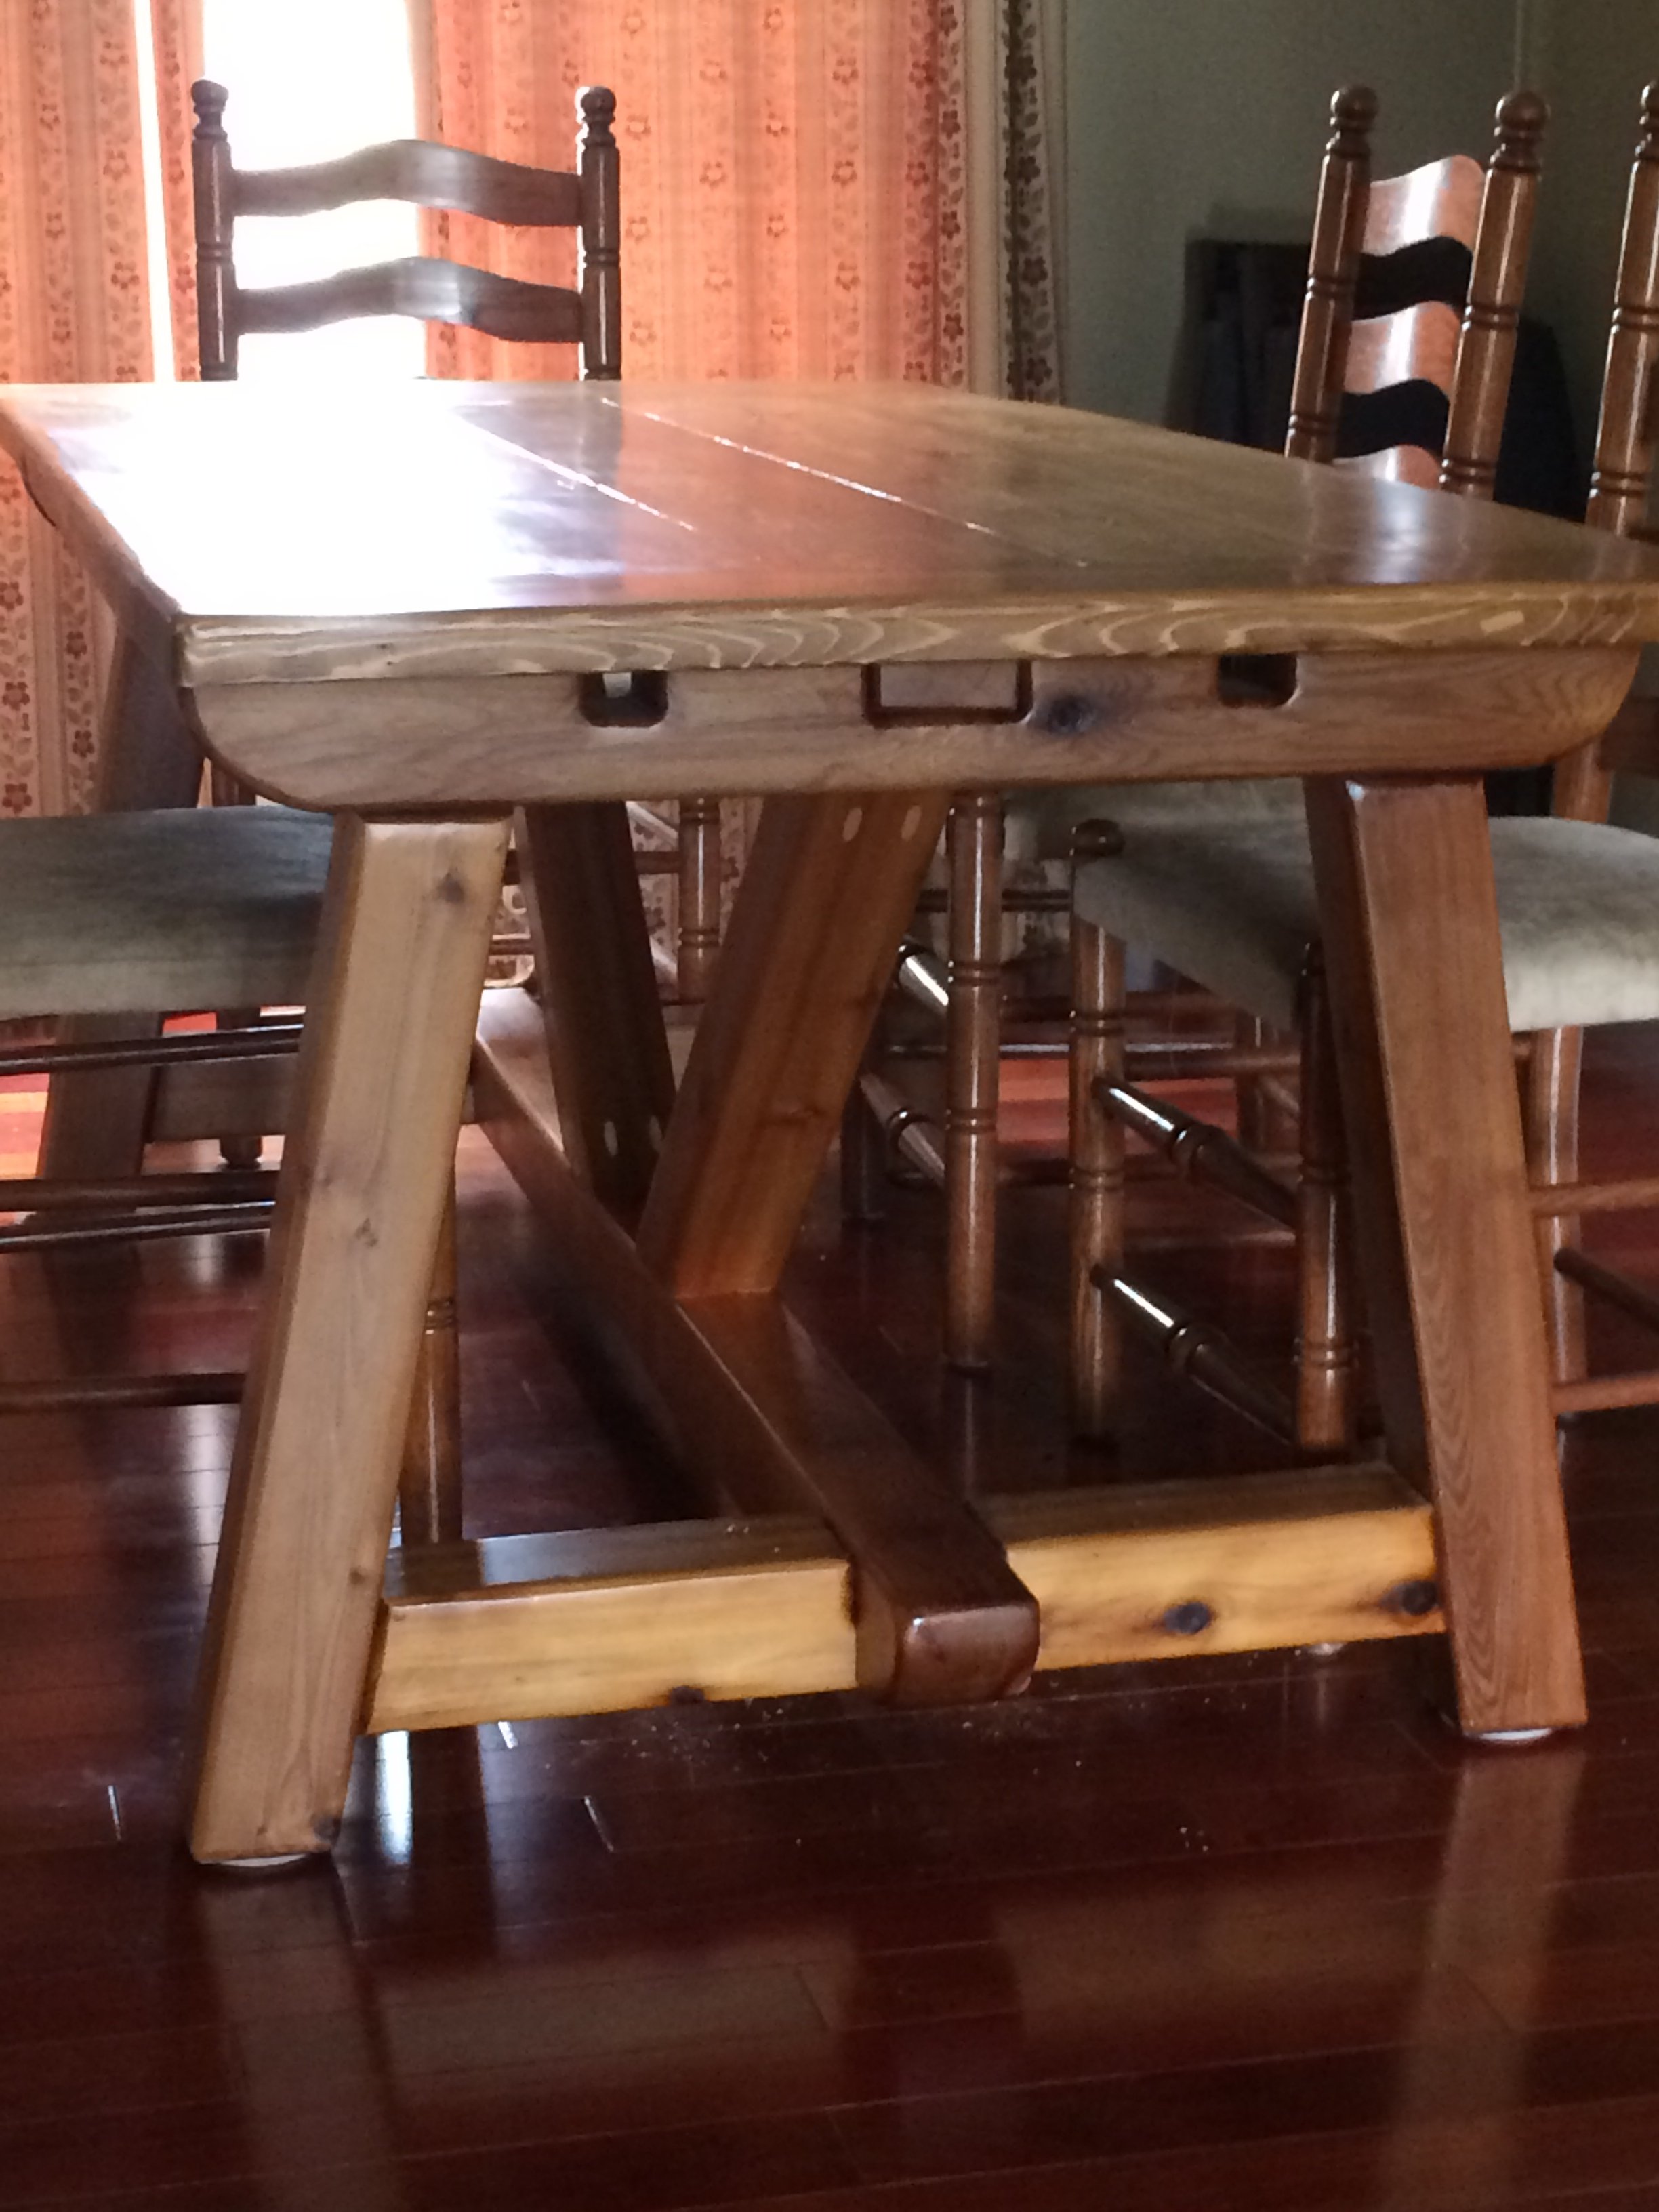
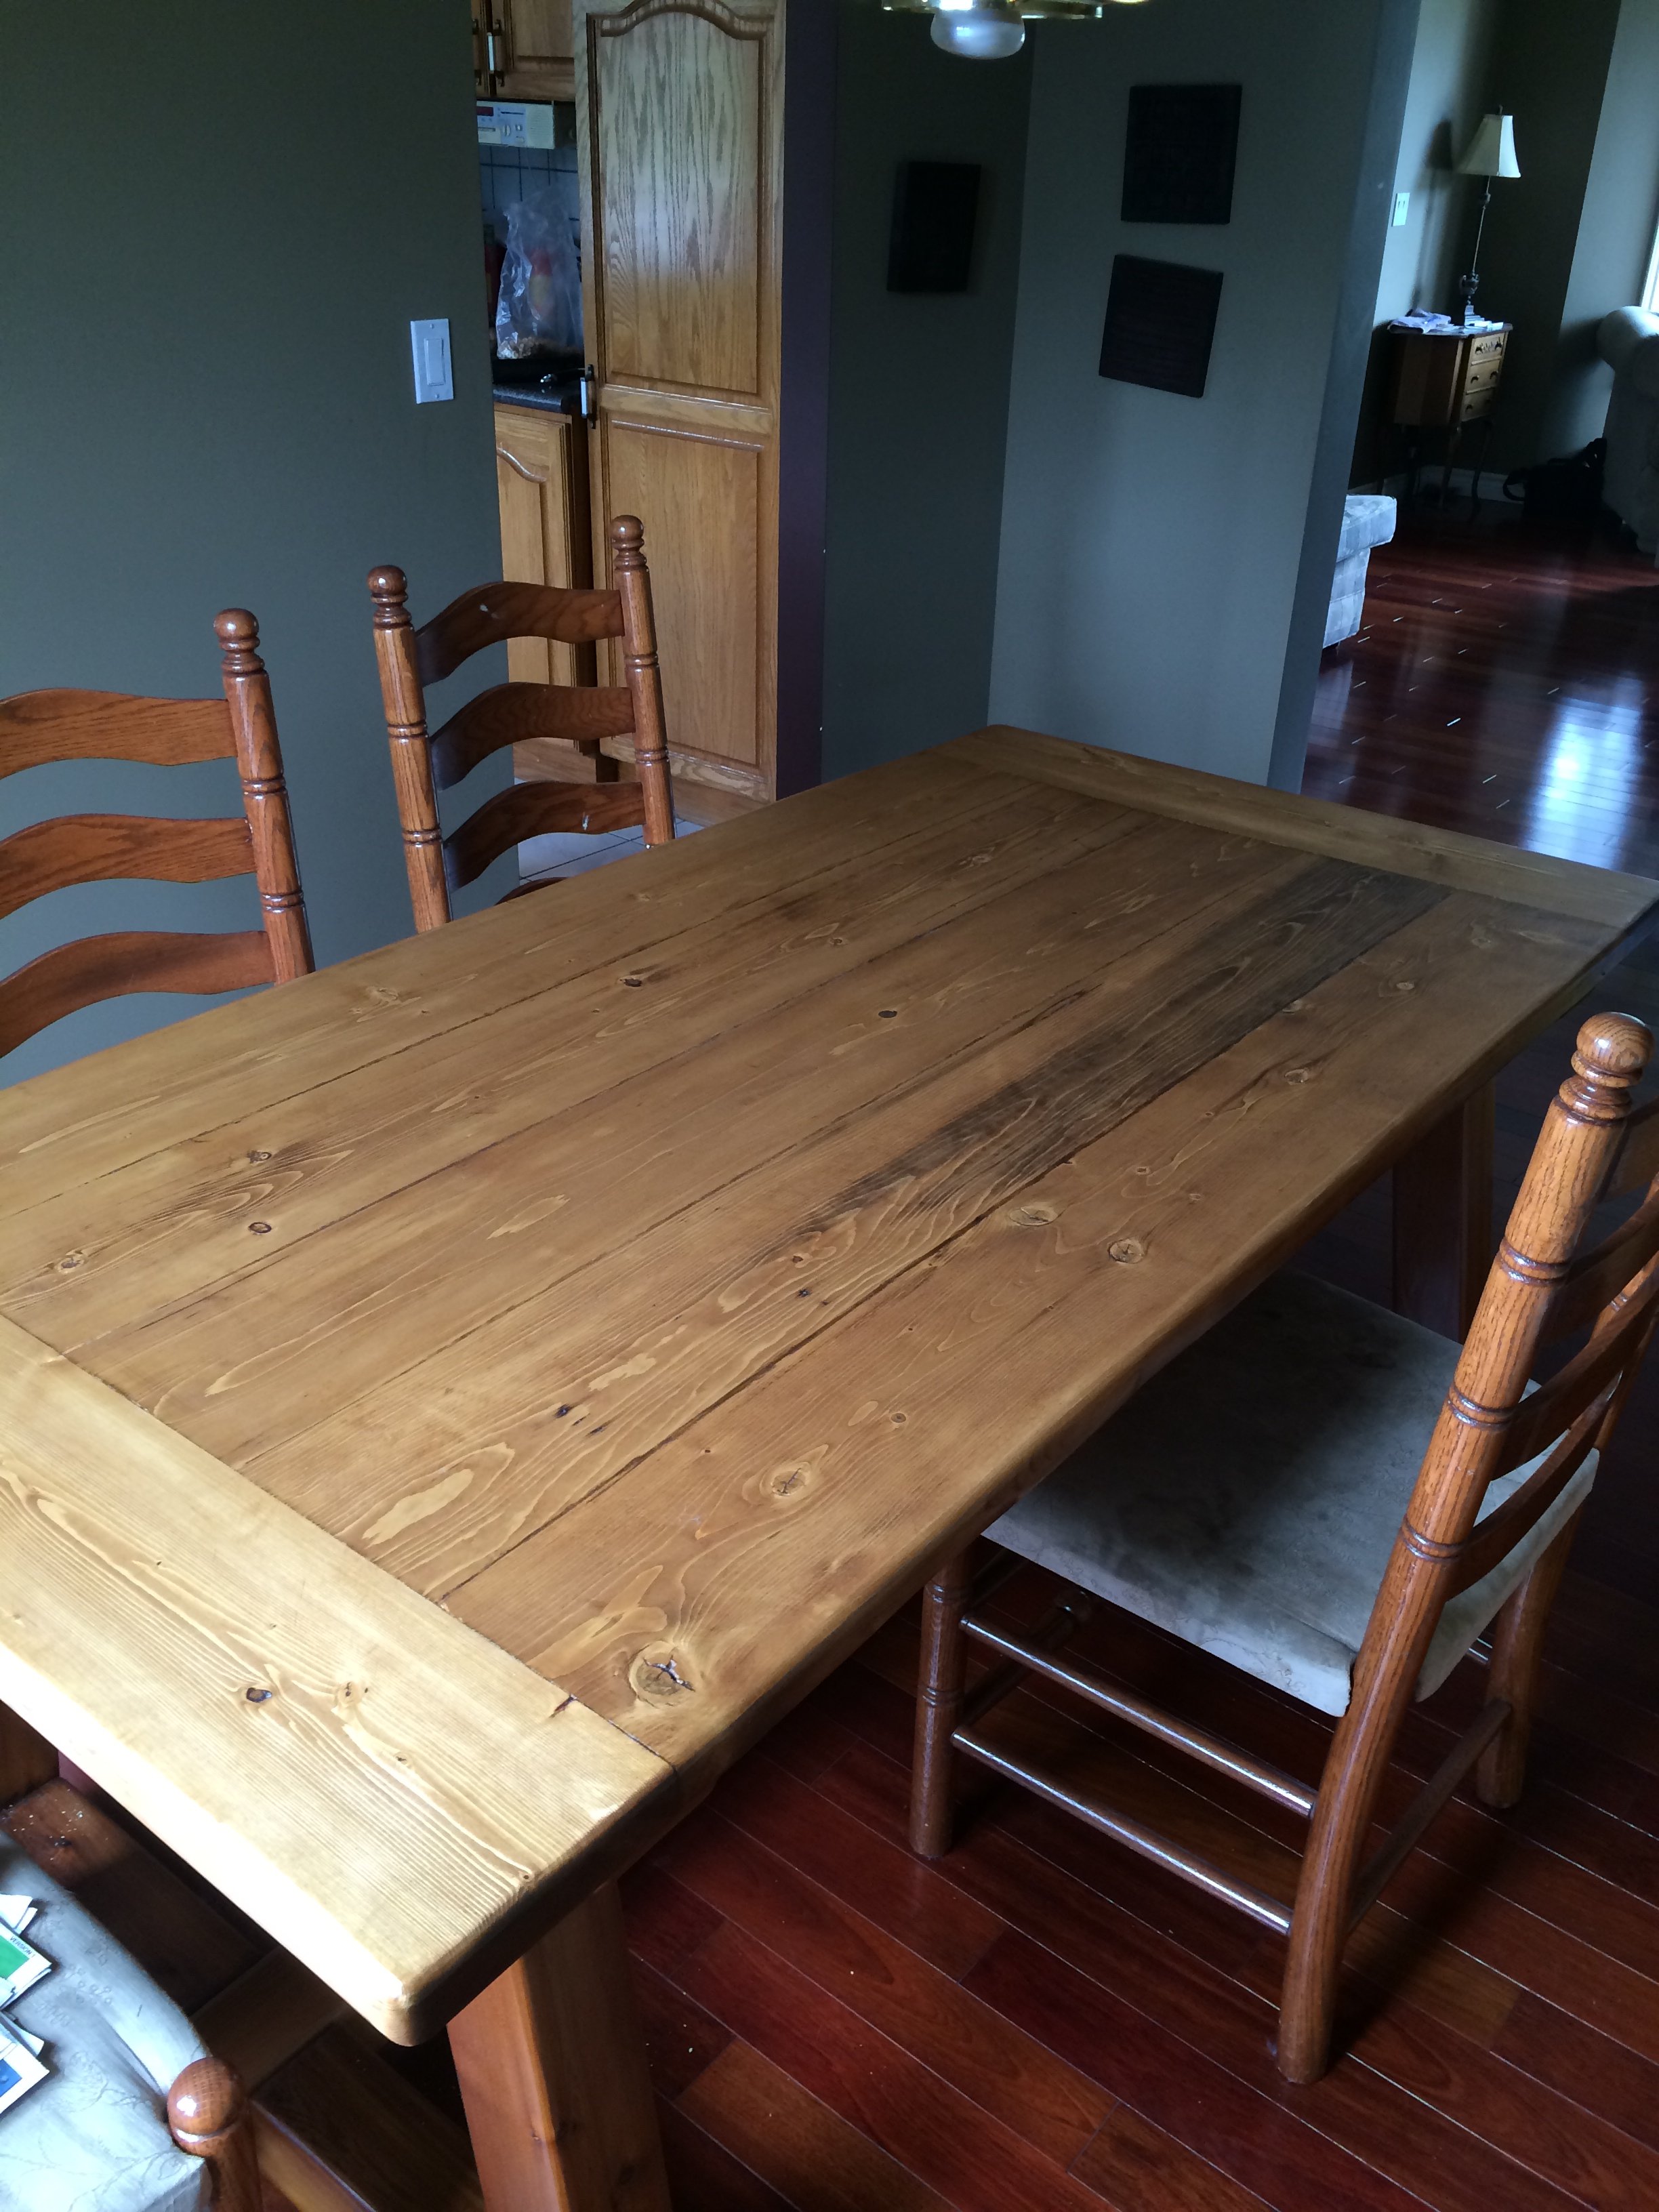
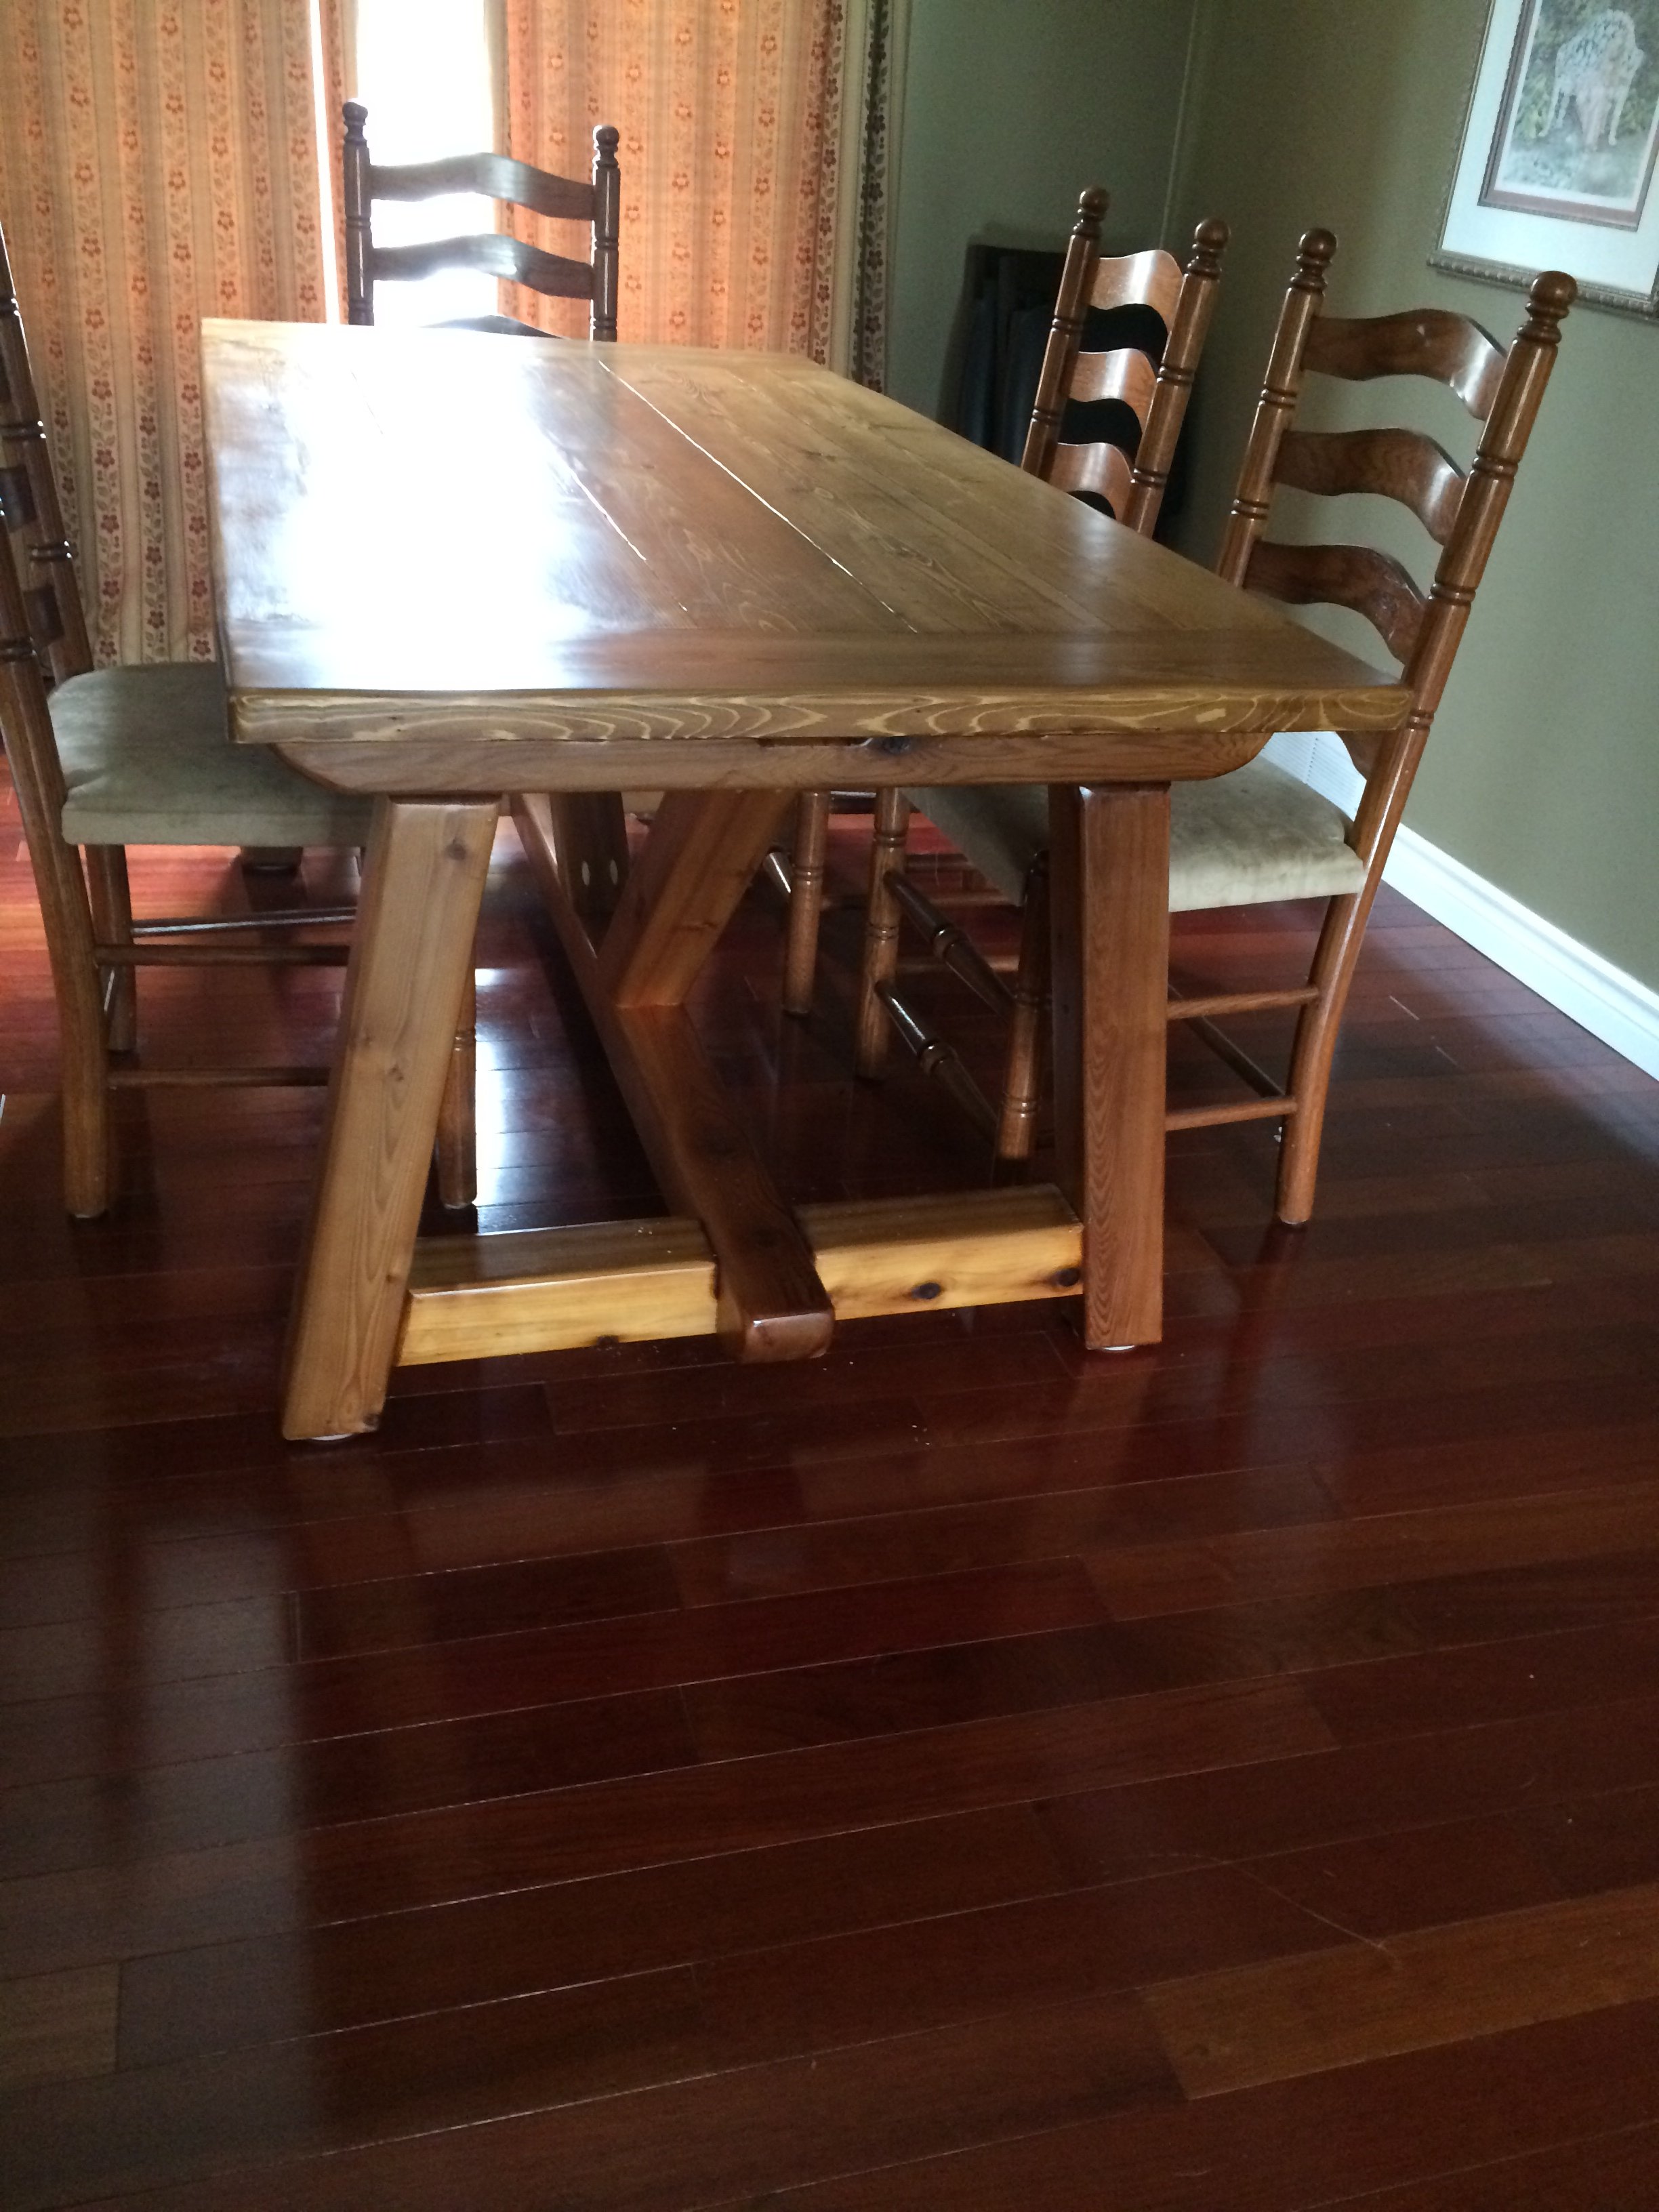
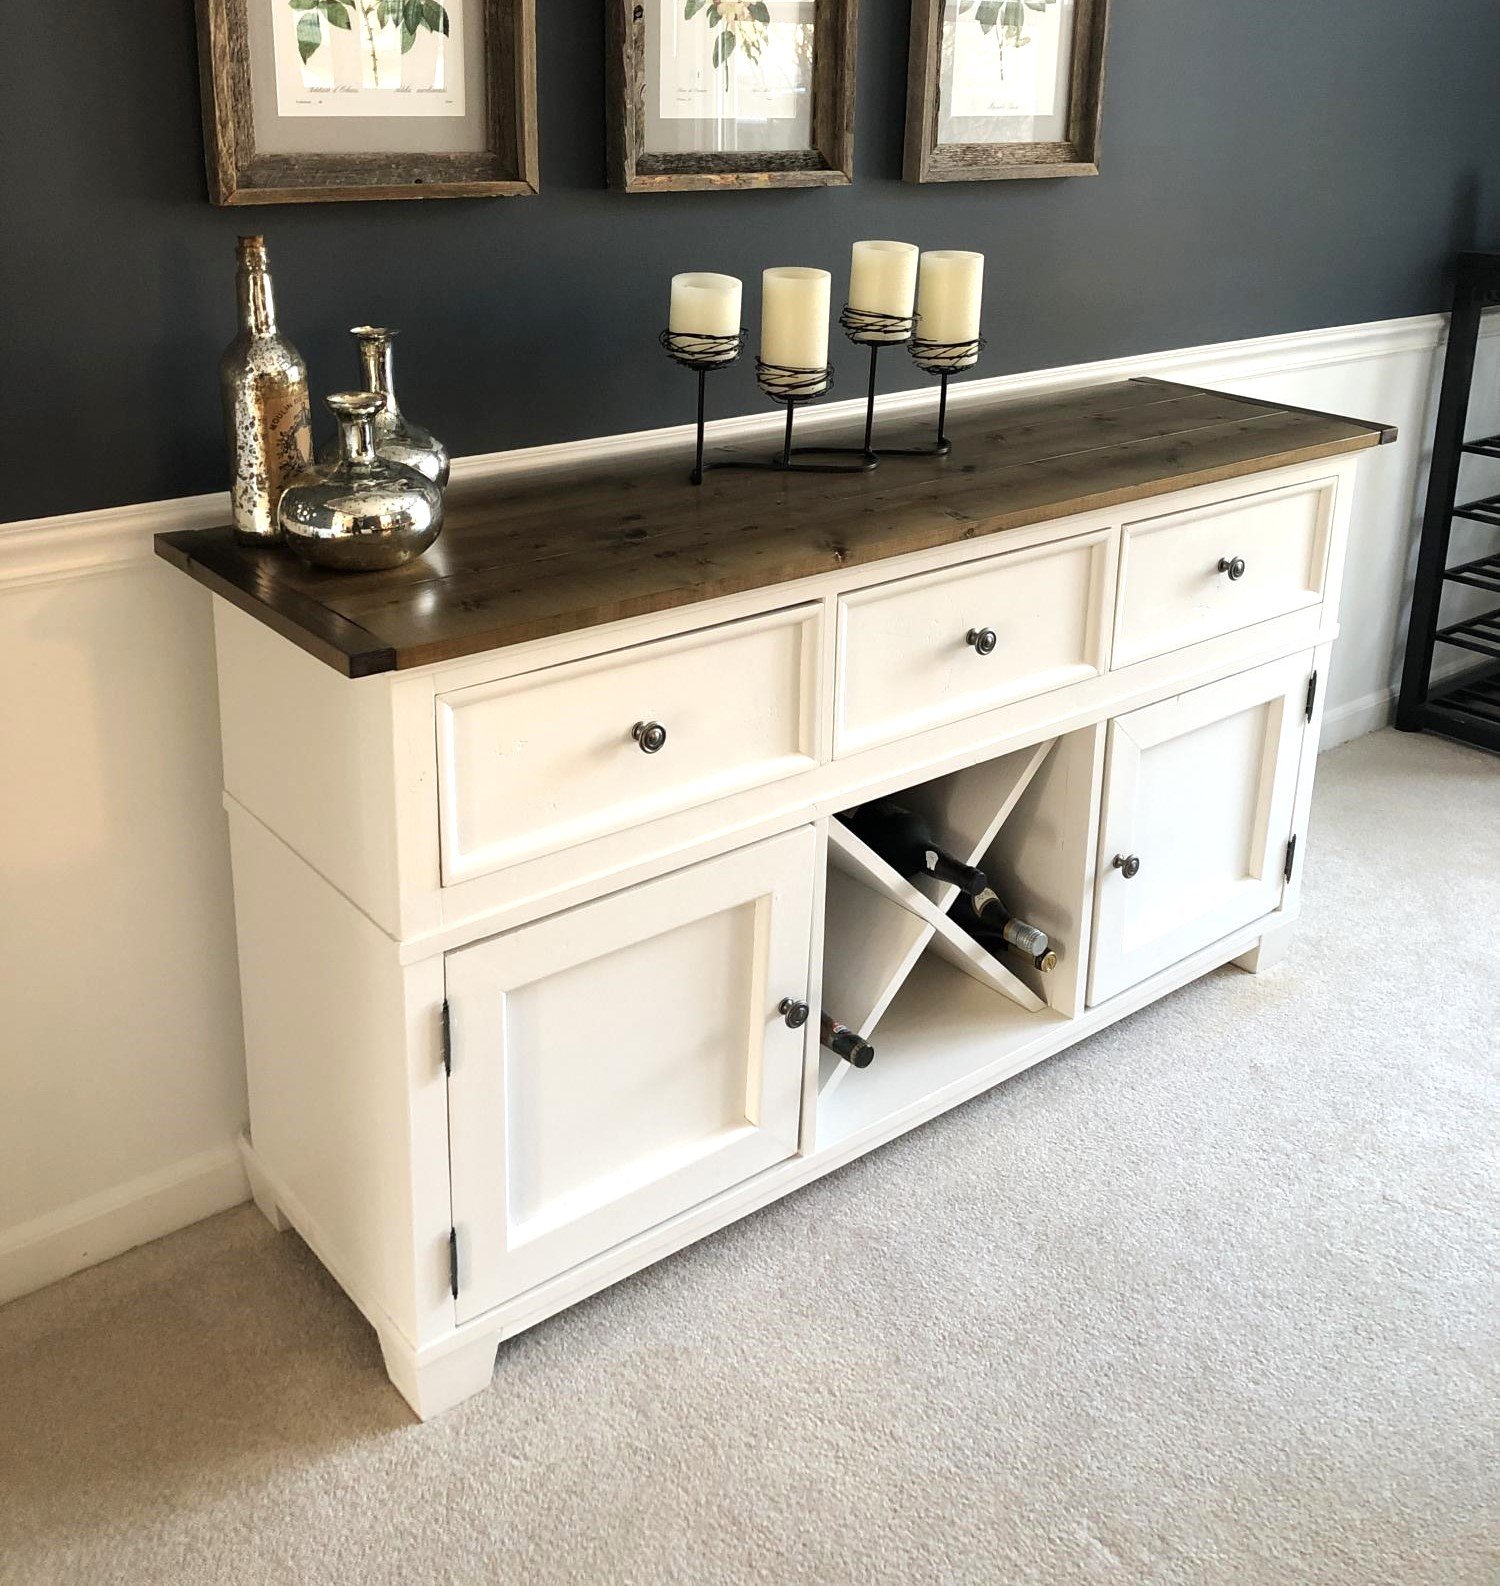
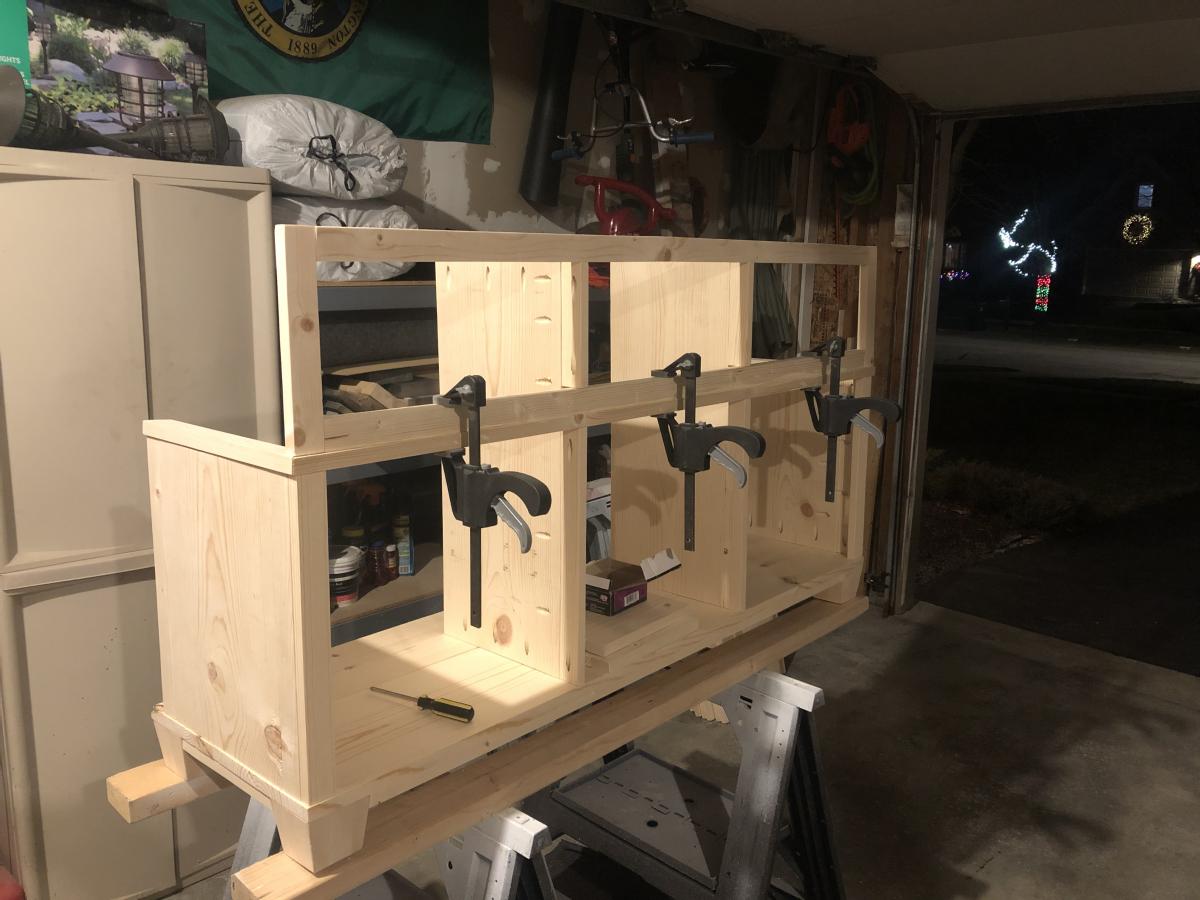
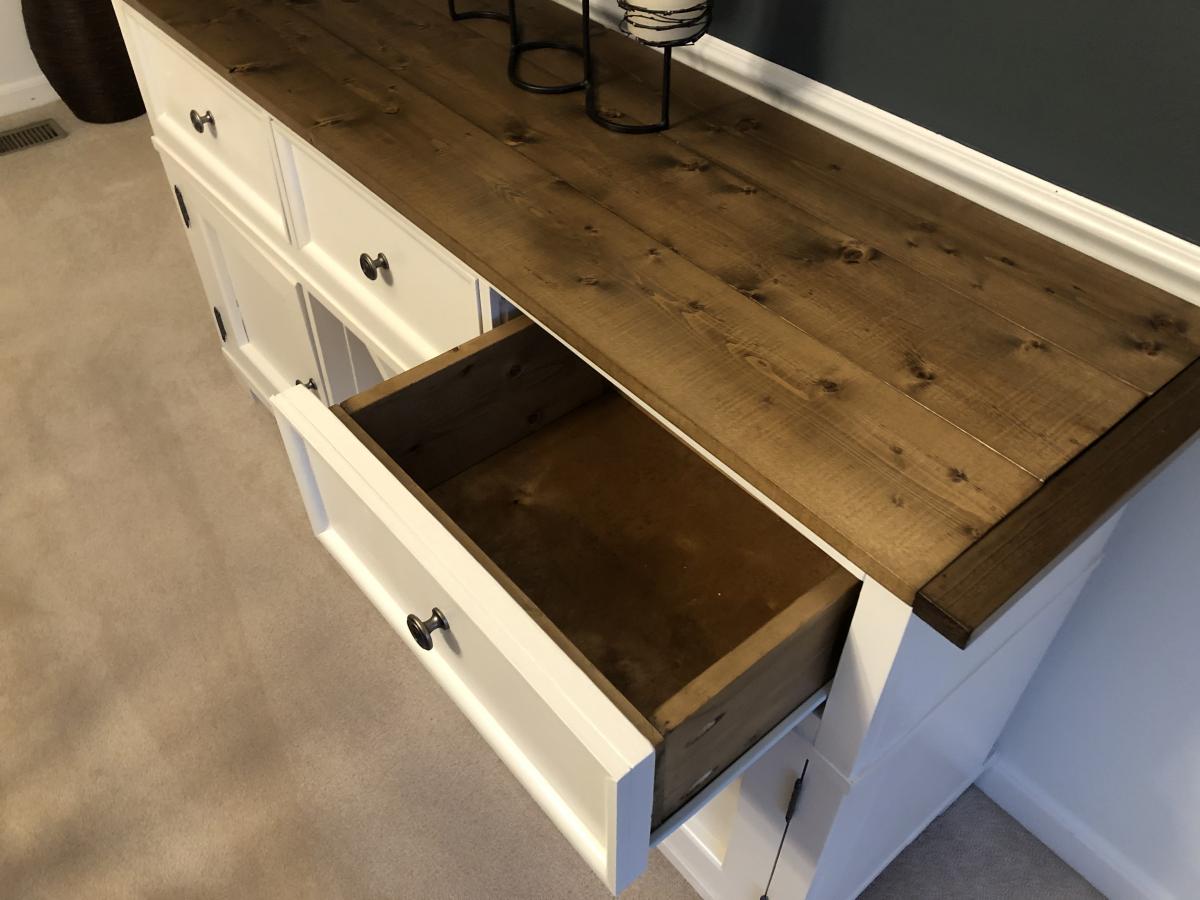
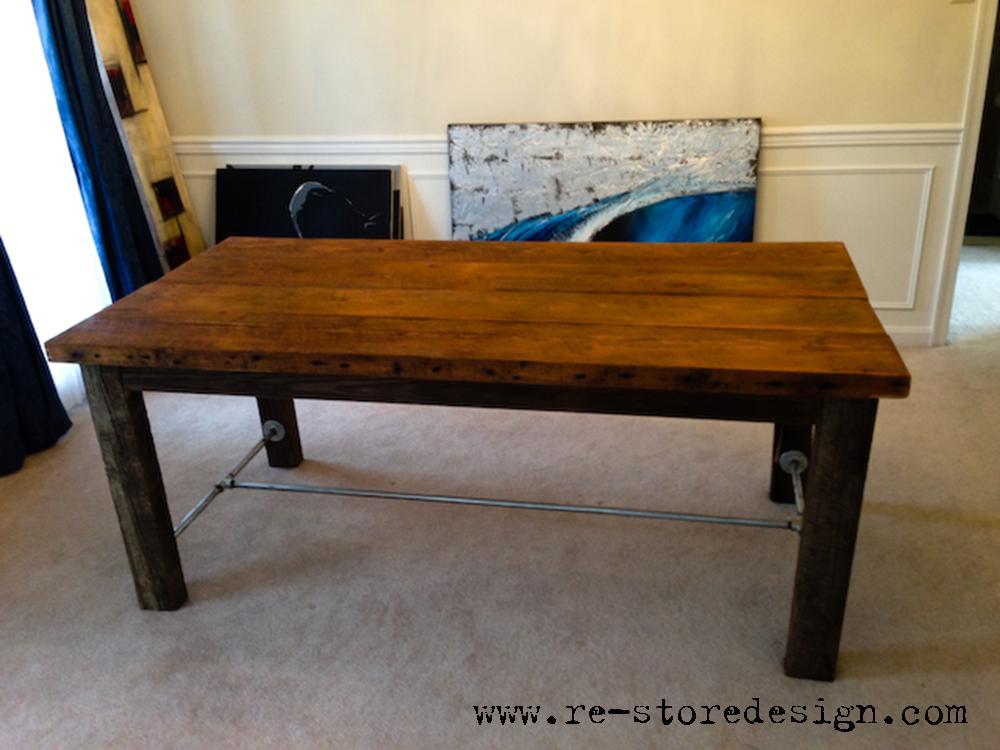
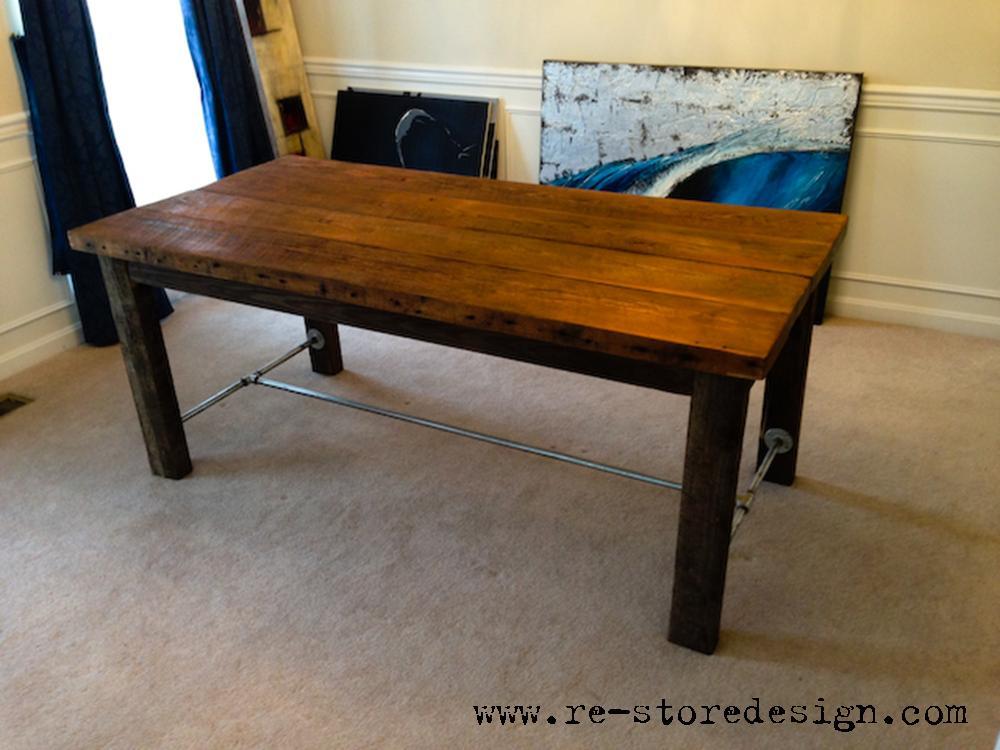
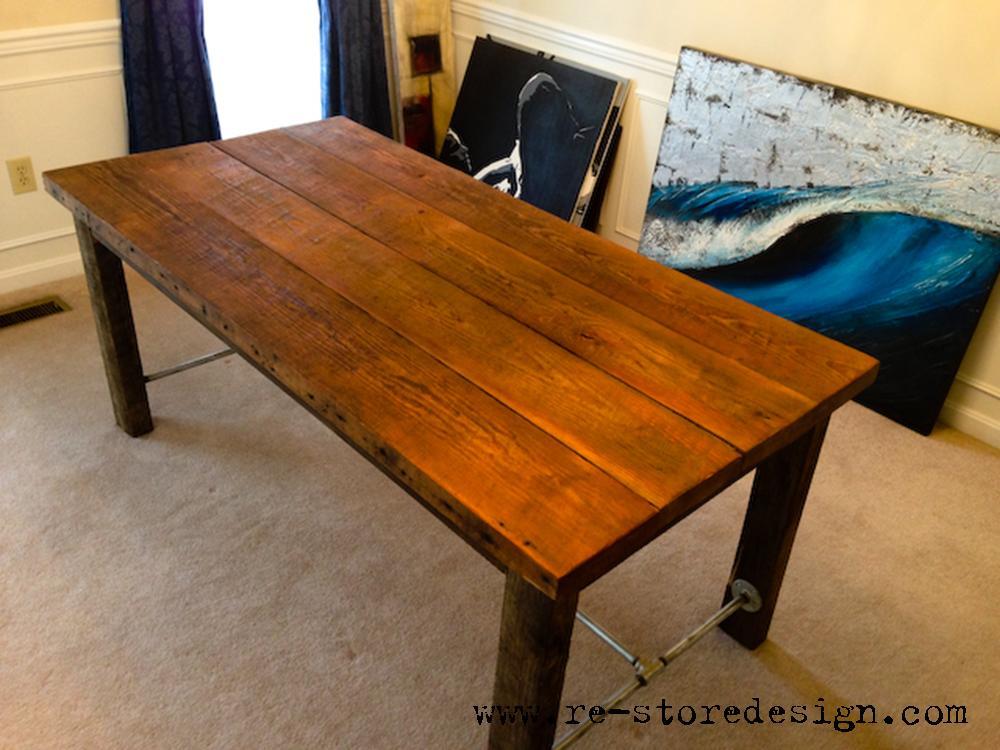
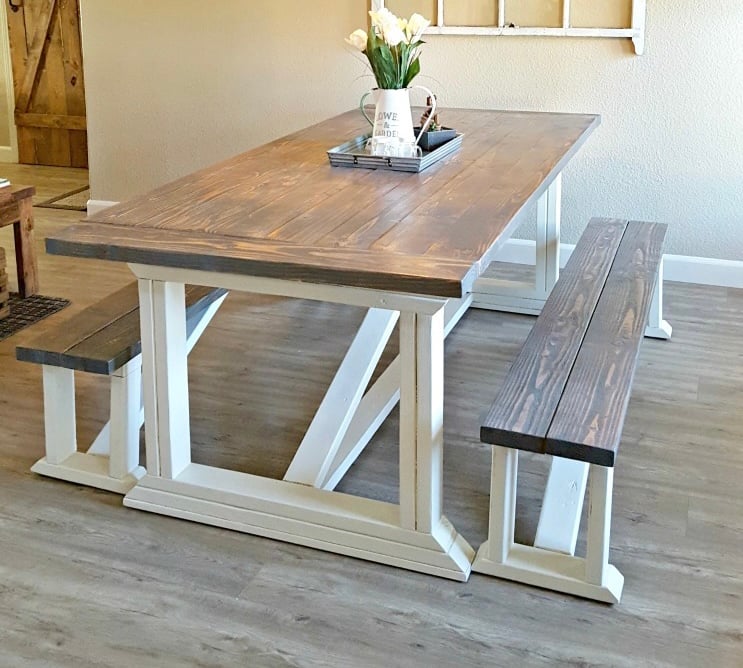
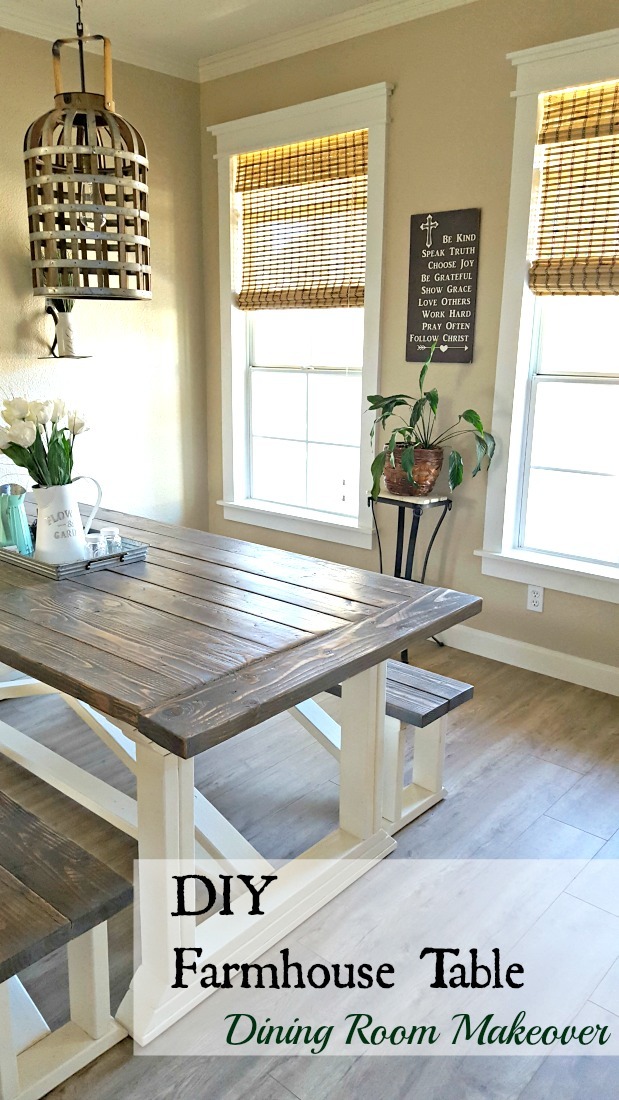
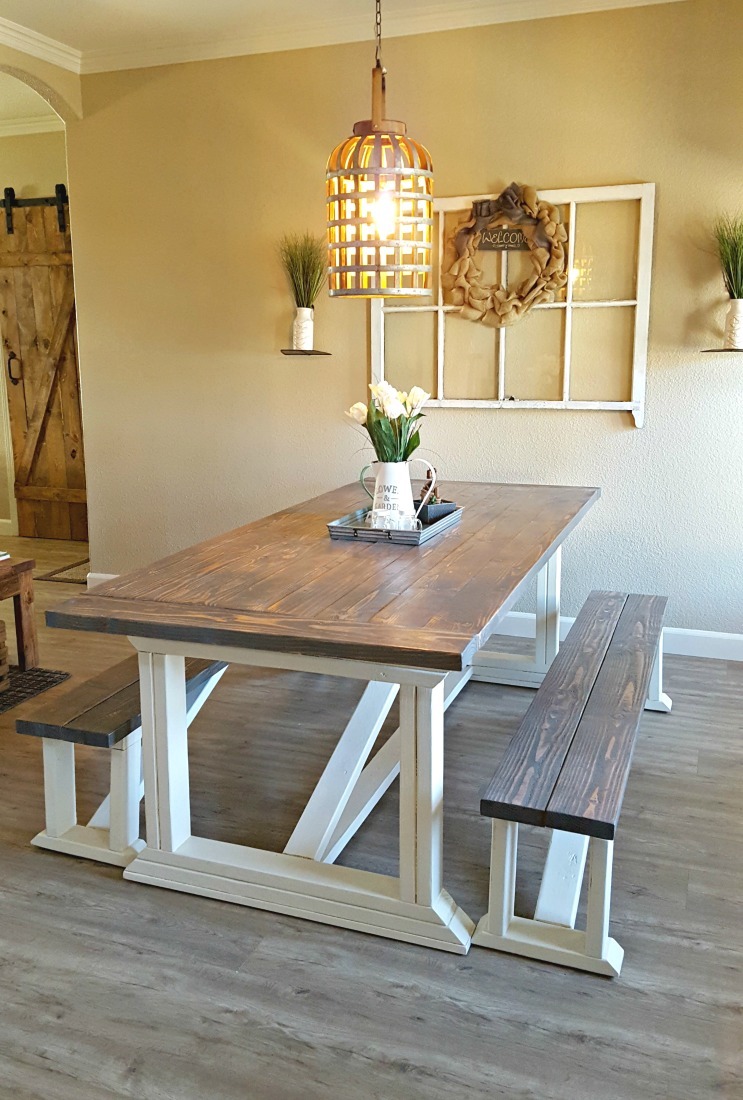
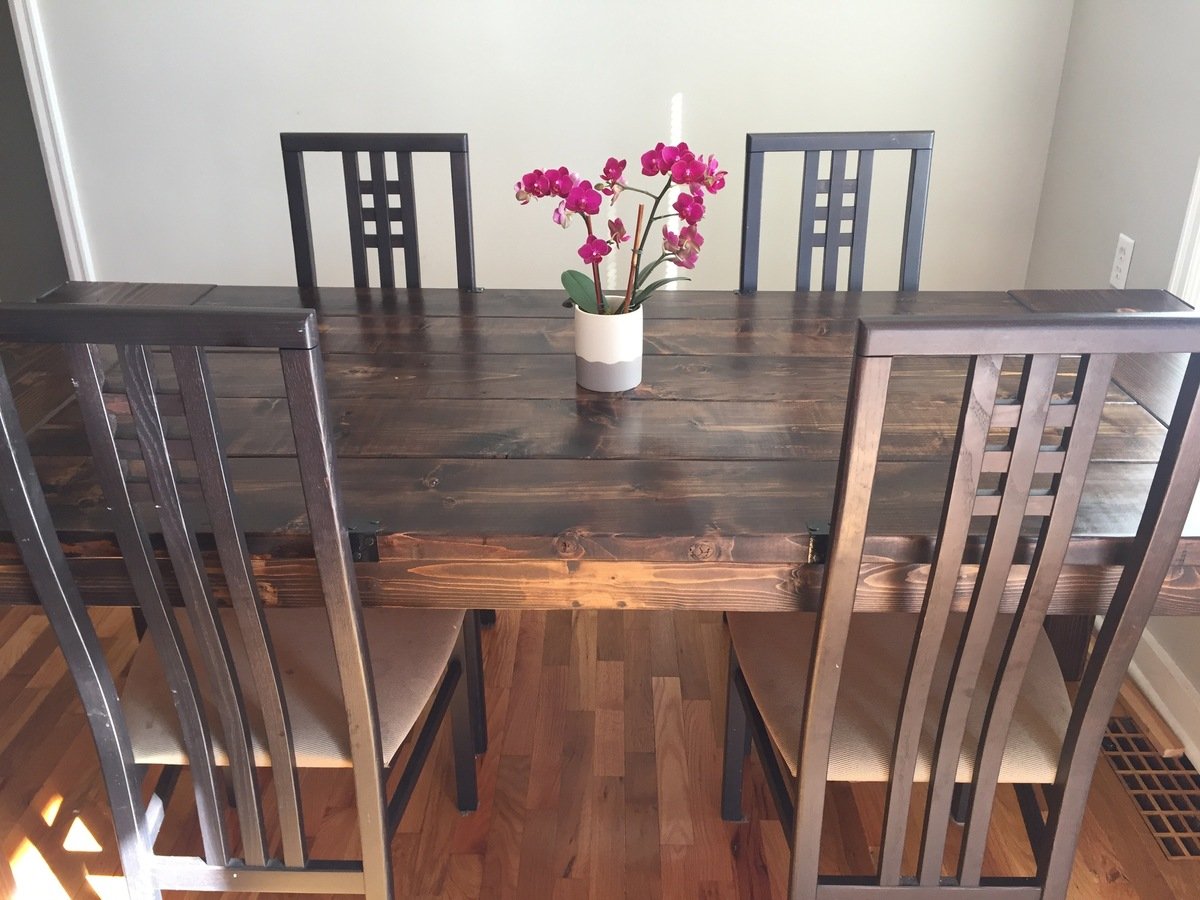
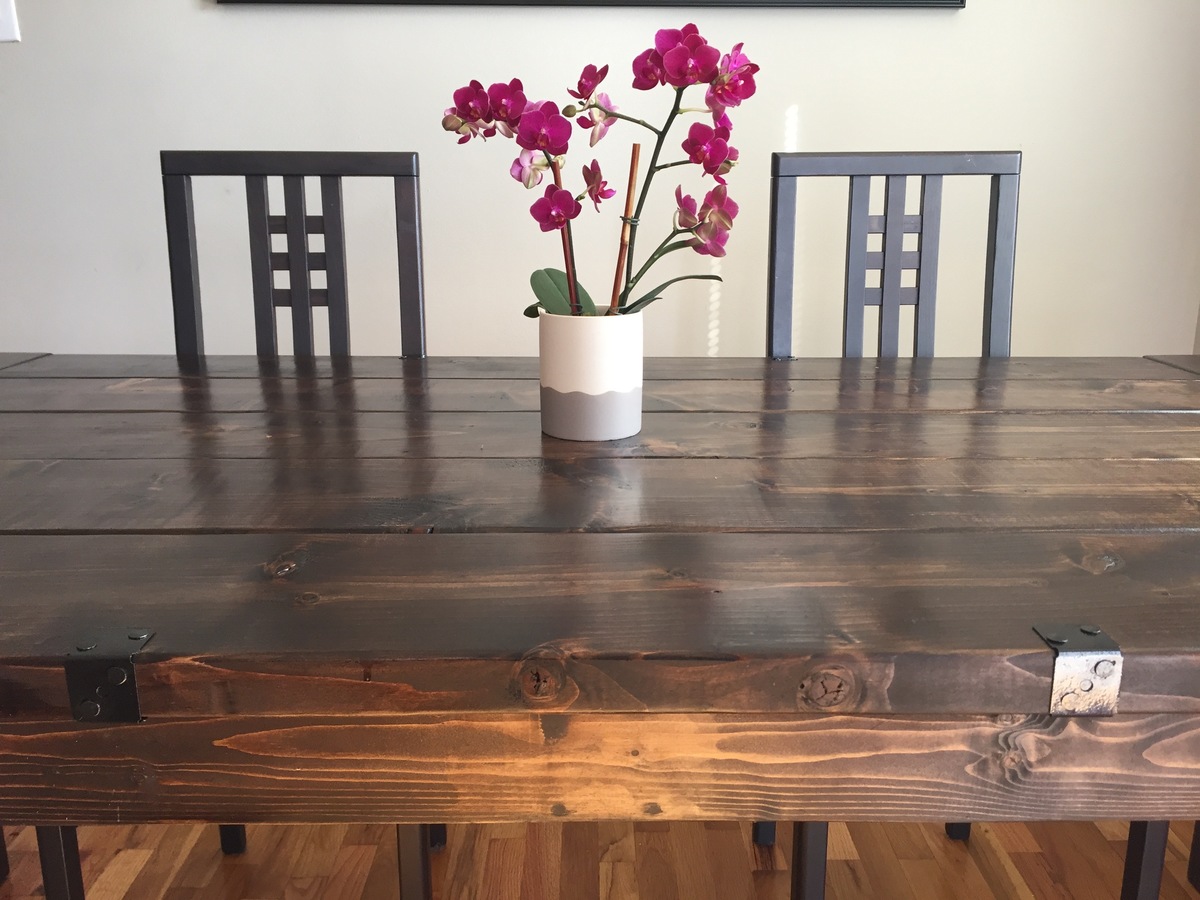
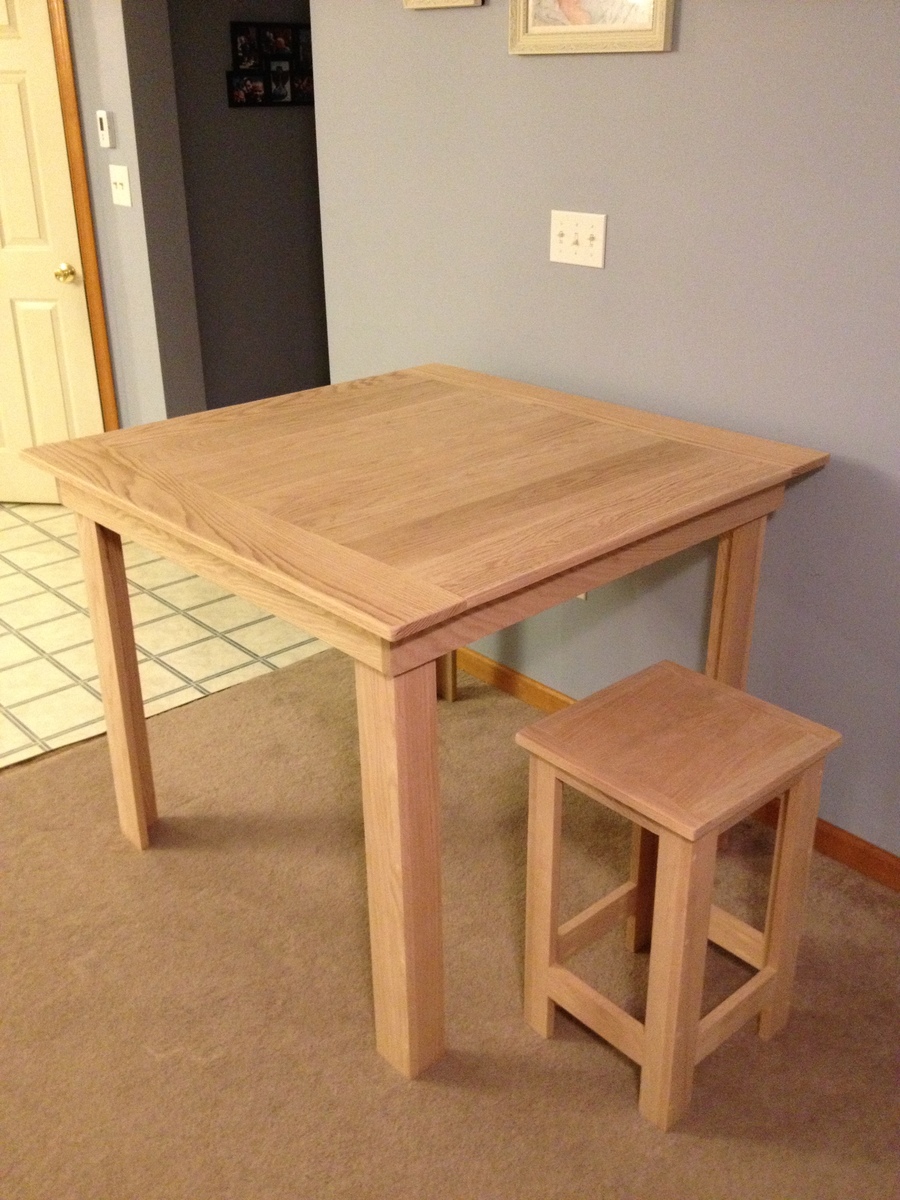
After searching for a table i liked in stores the ridiculous prices for real quality tables made me just resolve it by building one myself. I have three boys under 10 so i knew I also wanted it to be sturdy and resistant to as much wear and tear as possible. Therefore I chose to use oak for this project...although more expensive it is so much harder and will hopefully last longer :)
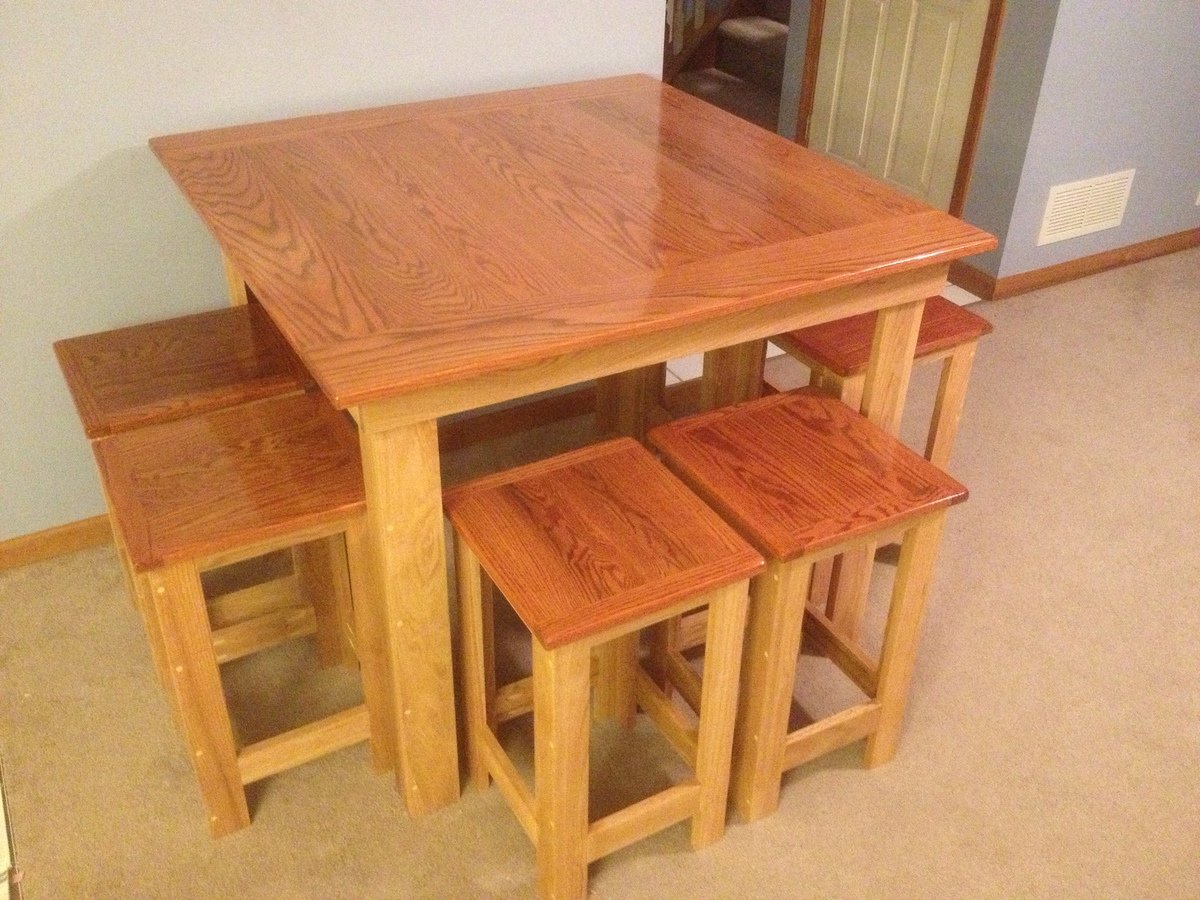
ok, so I used some examples that Ana posted and some customer projects and combined them to create this table. I also made stools to match and so thankful I did (another brag post) because they are very sturdy with no tipping factor like regular store bought stools.
I probably spend a total of $600 on the table and 6 stools, but it was swell worth it and you cant buy a table like this in the stores for less than $1200 and that is with crap laminate wood that chips and then its ruined. So I feel this was a smart investment (plus I get the enjoyment and fulfillment of making it )
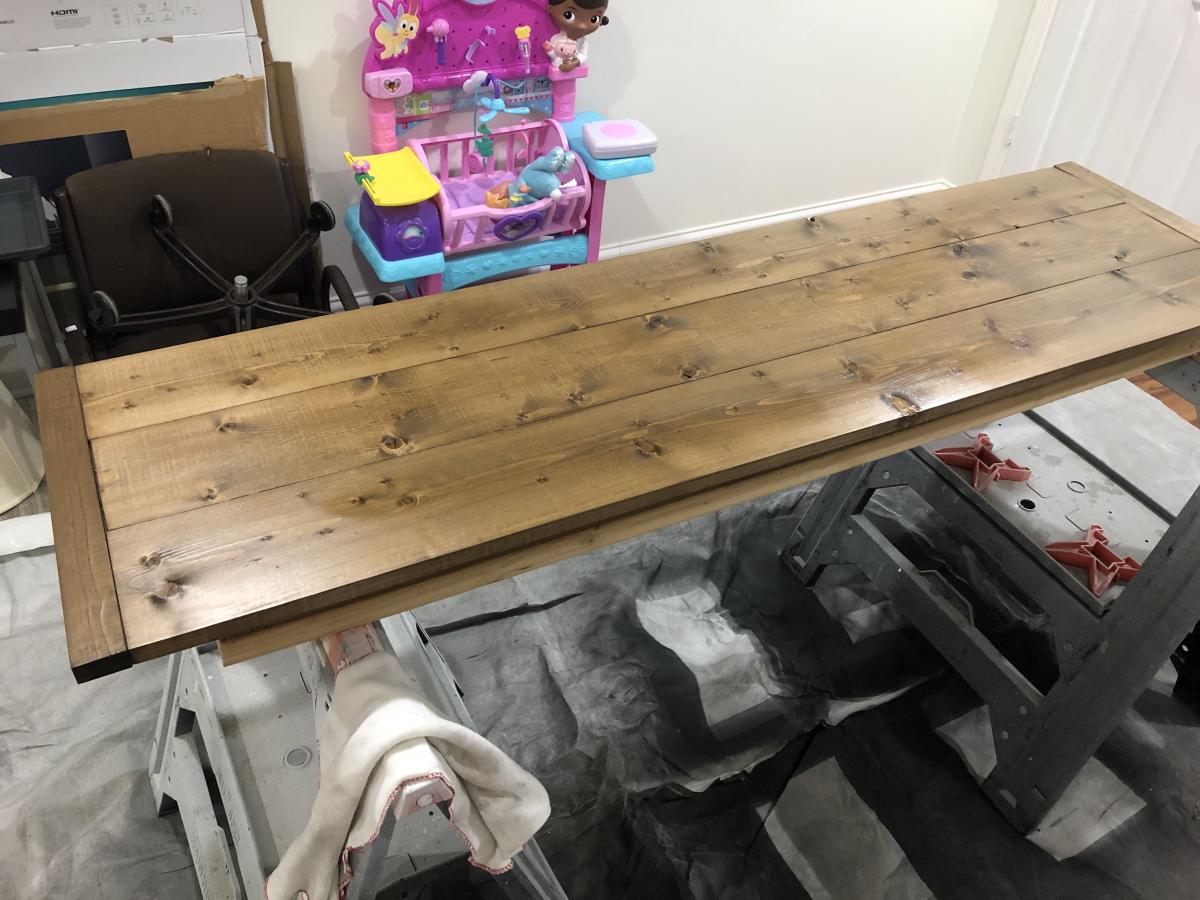
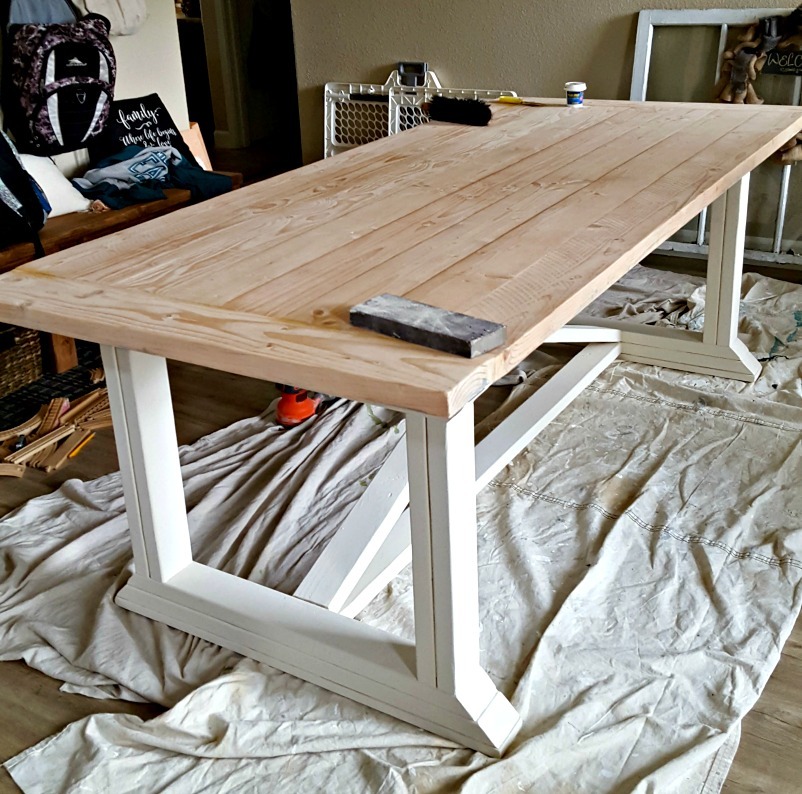
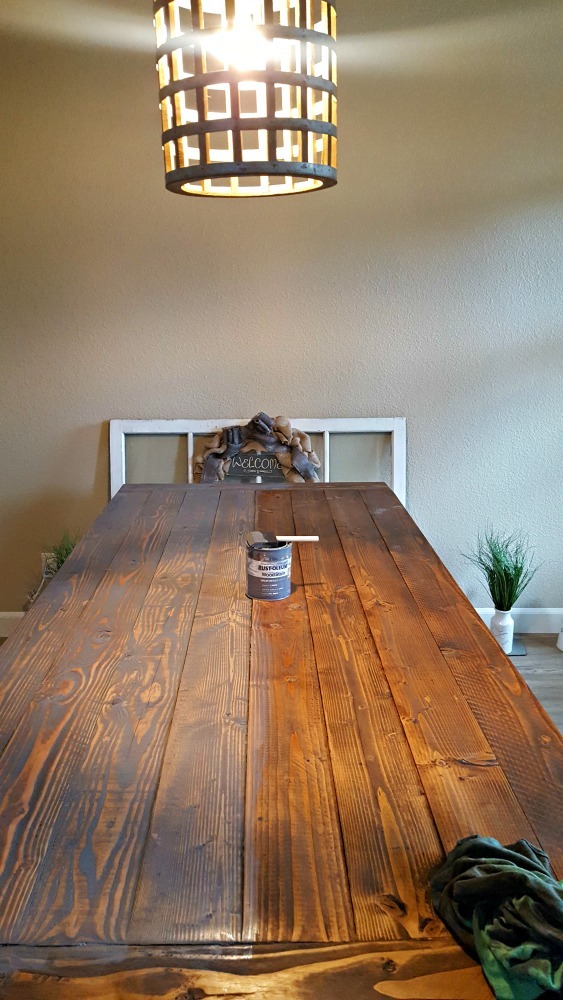
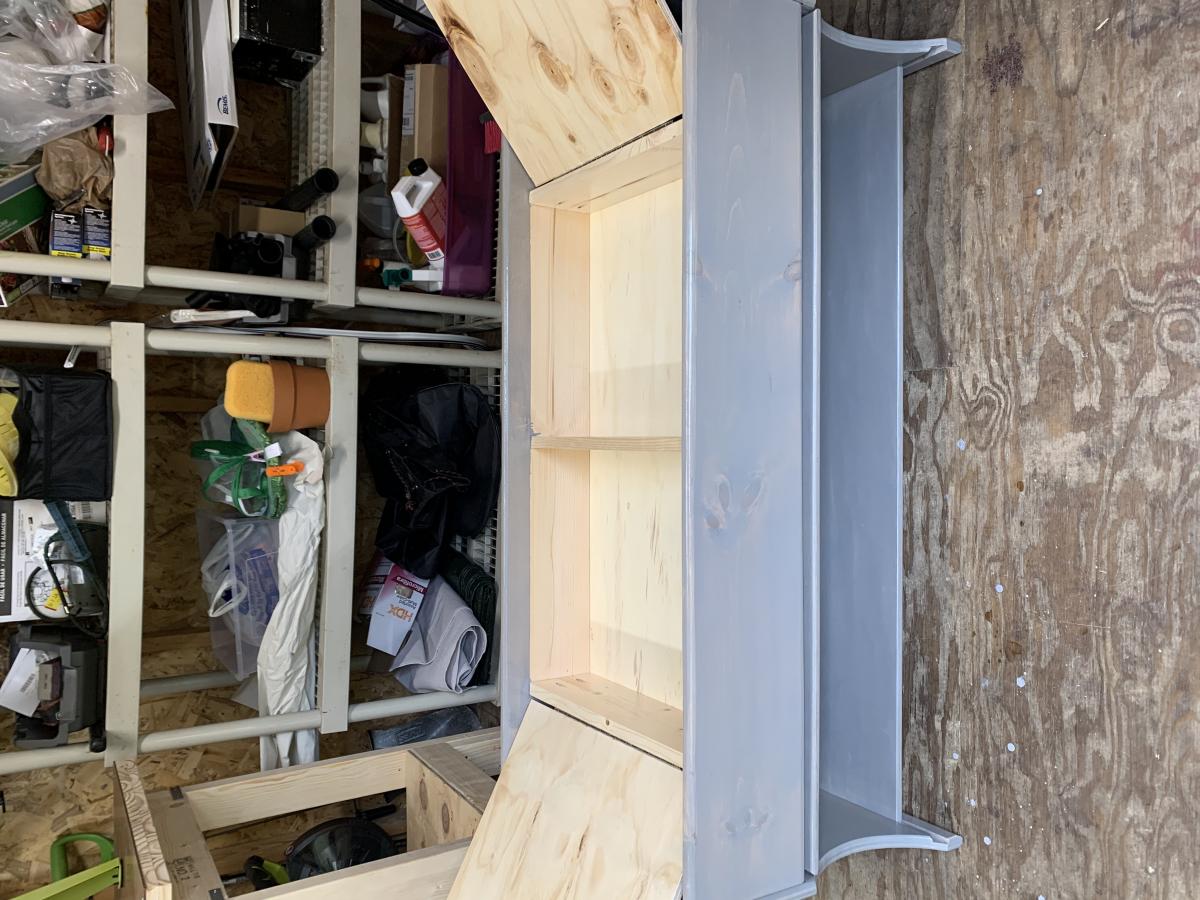
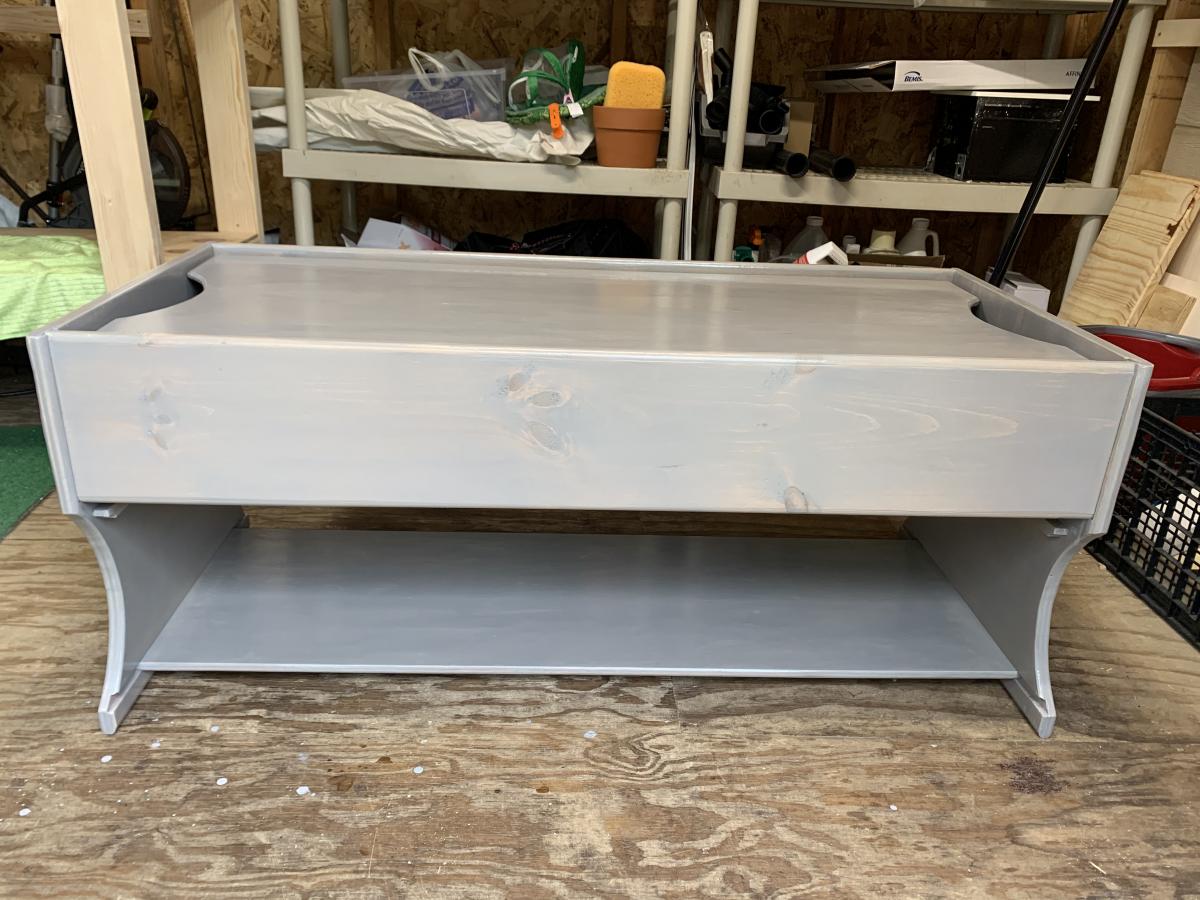
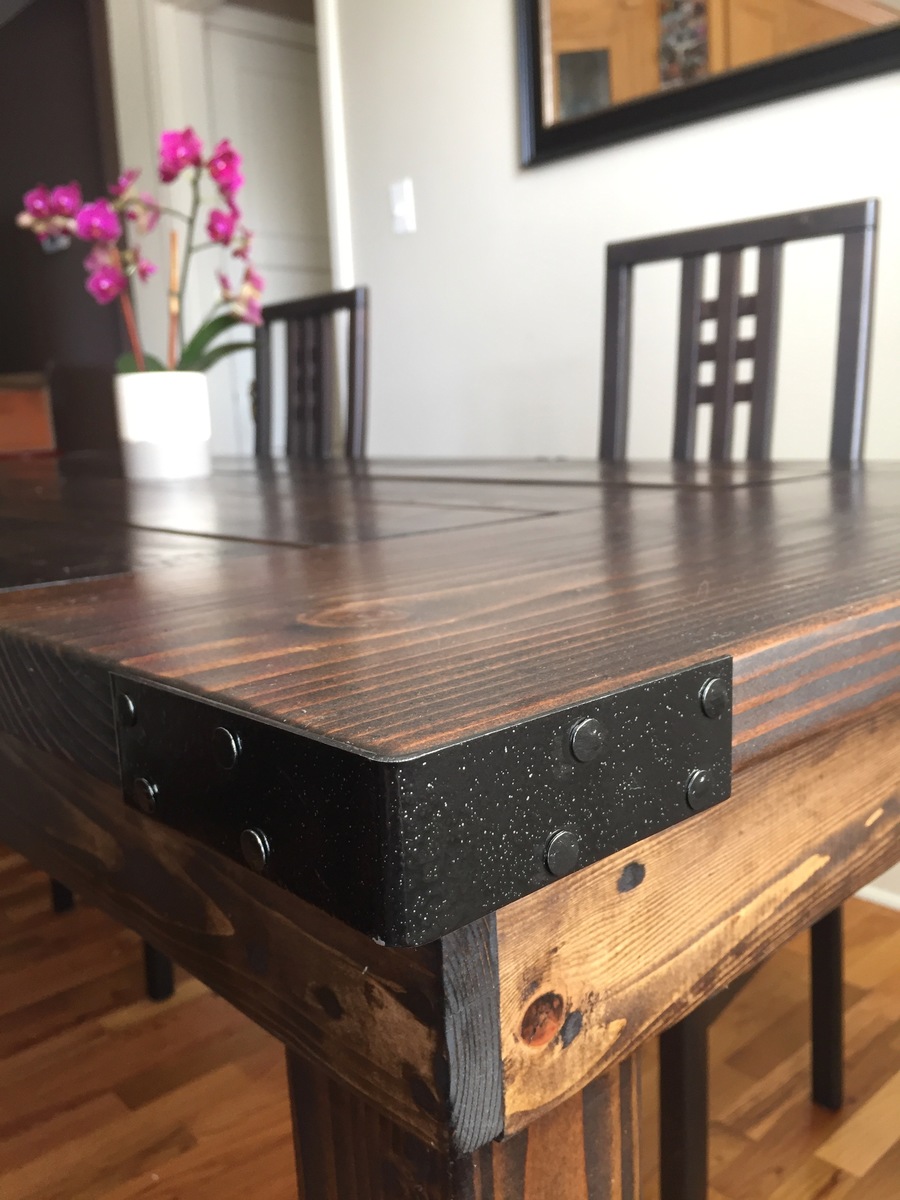
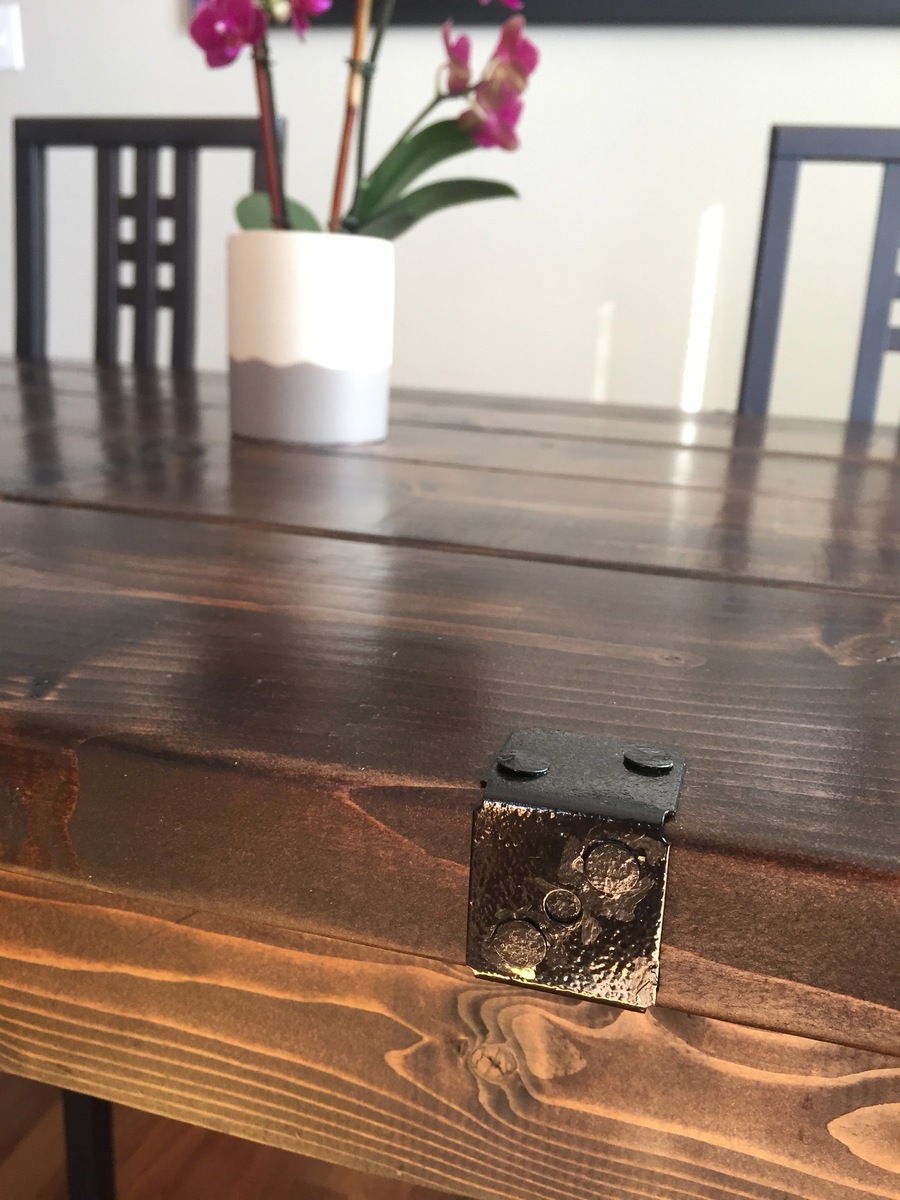
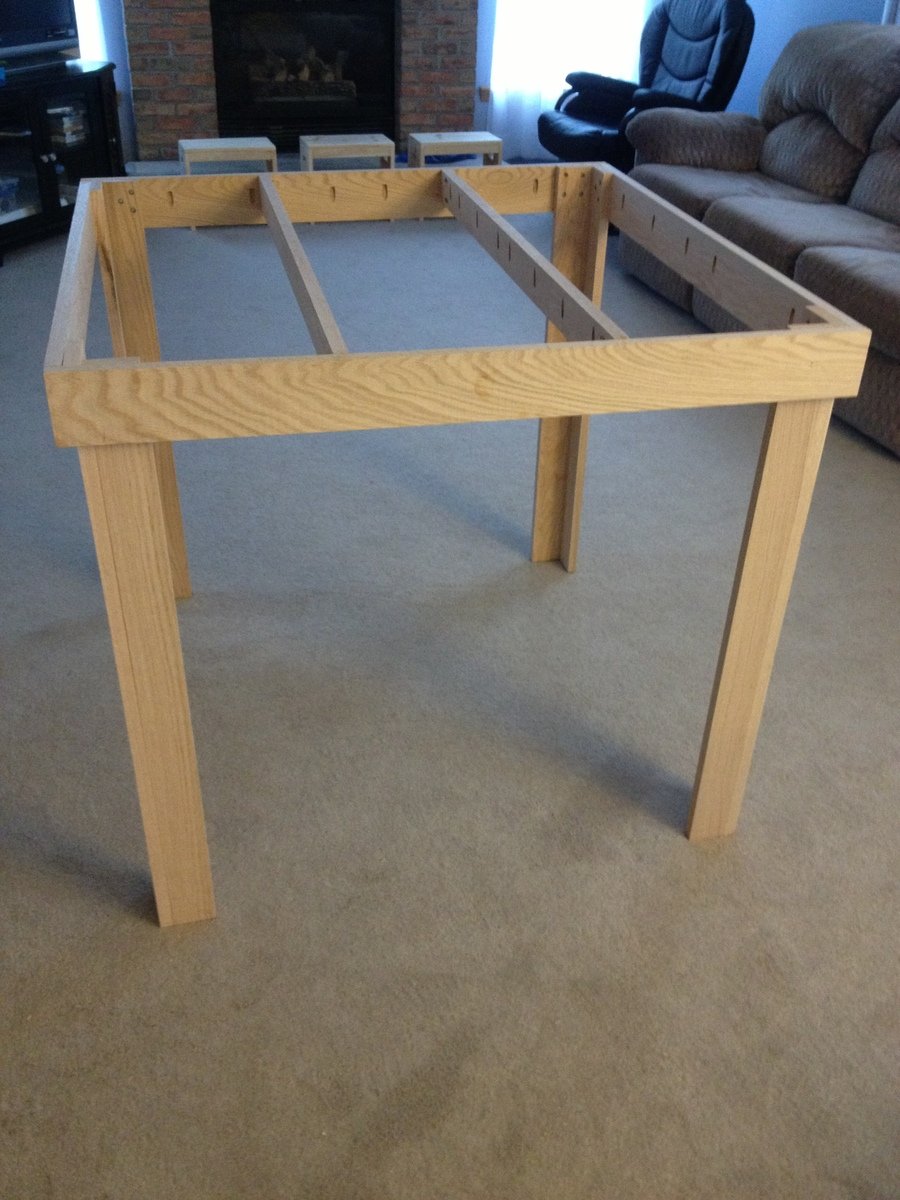
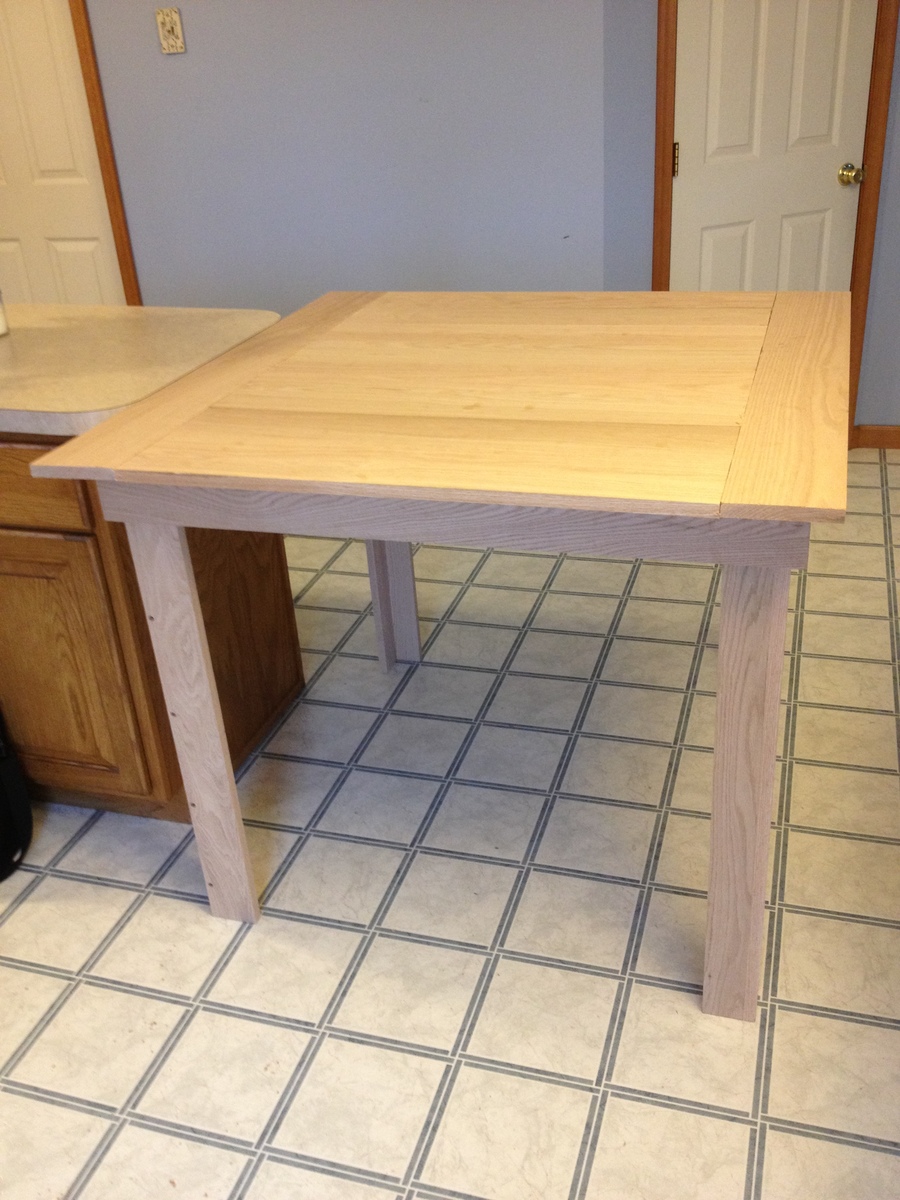
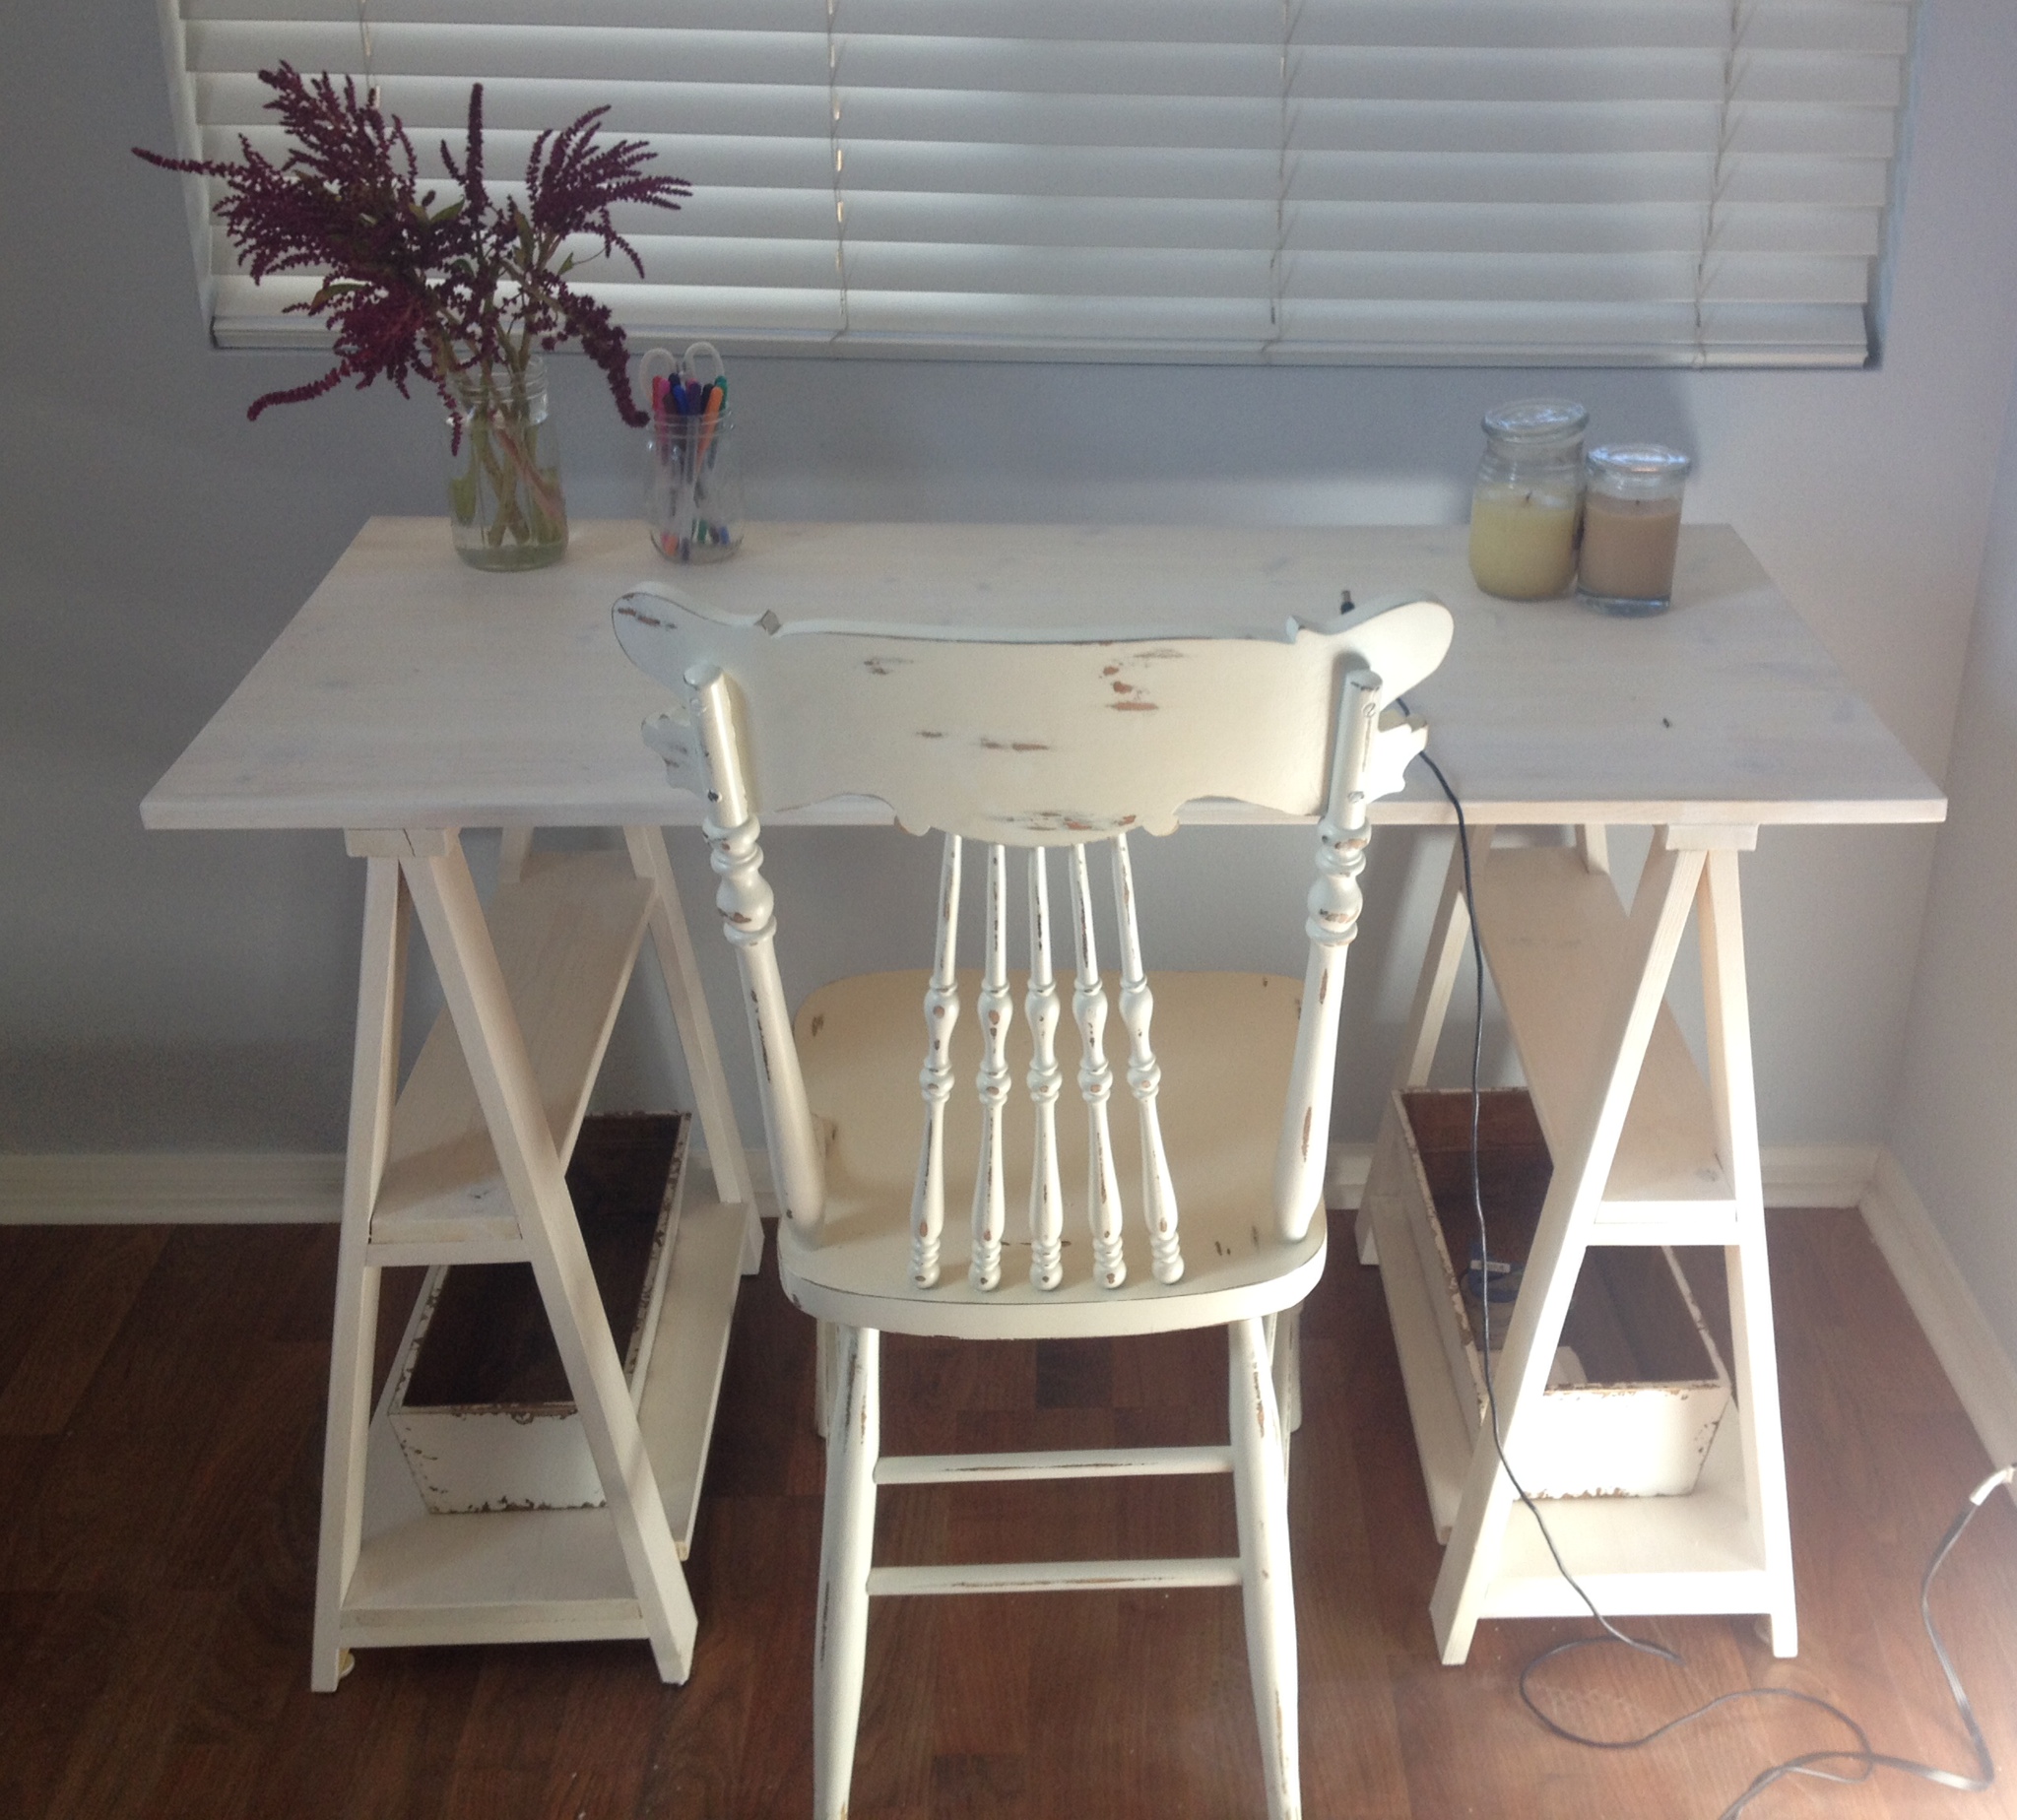
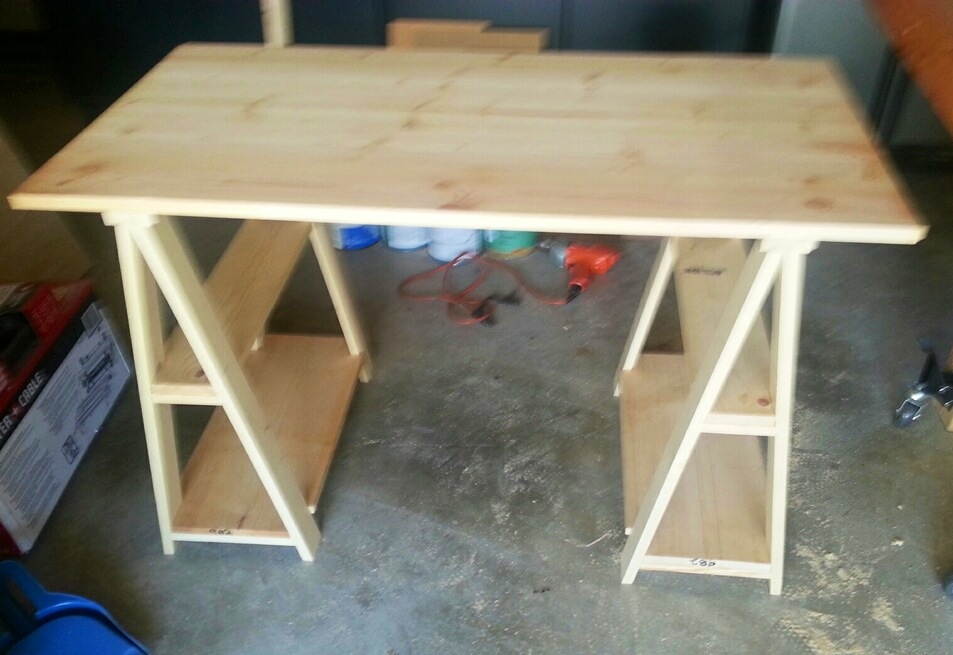
I did not finish painting the leg portion yet, but love the way it is turning out...I did by the Kreg jig finally as well and it is well worth the investment! so much easy, and secure joints.
My boyfriend followed Ana's plans to construct me a Sawhorse Desk for my office. To complete the look, I gave it a healthy coat of whitewash stain. More photos can be viewed on my blog: http://shawnaleeann.com/2014/09/22/we-came-we-sawhorsed-we-conquered/.
Comments
Ana White Admin
Sat, 01/02/2021 - 13:21
Love the finish!
It looks amazing, thank you for sharing!