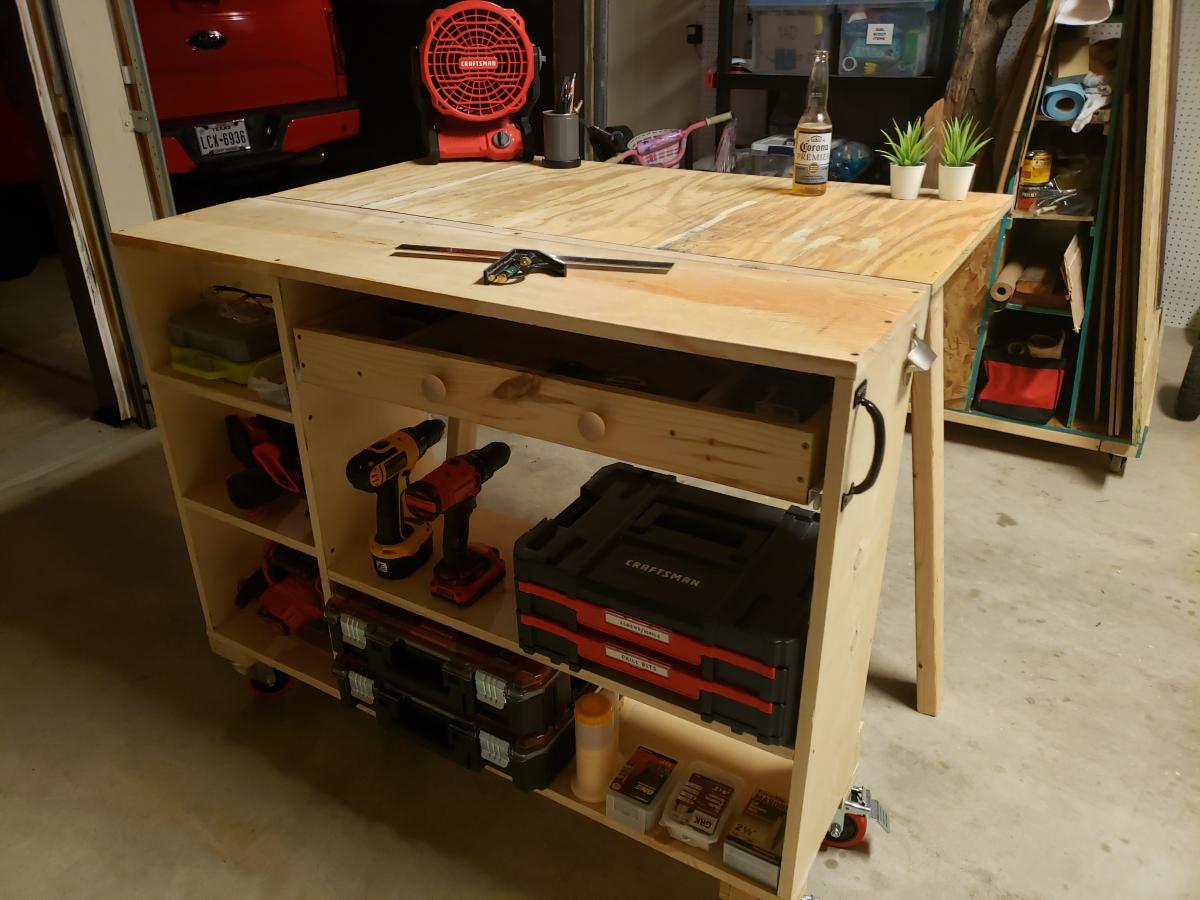
Folding Workbench
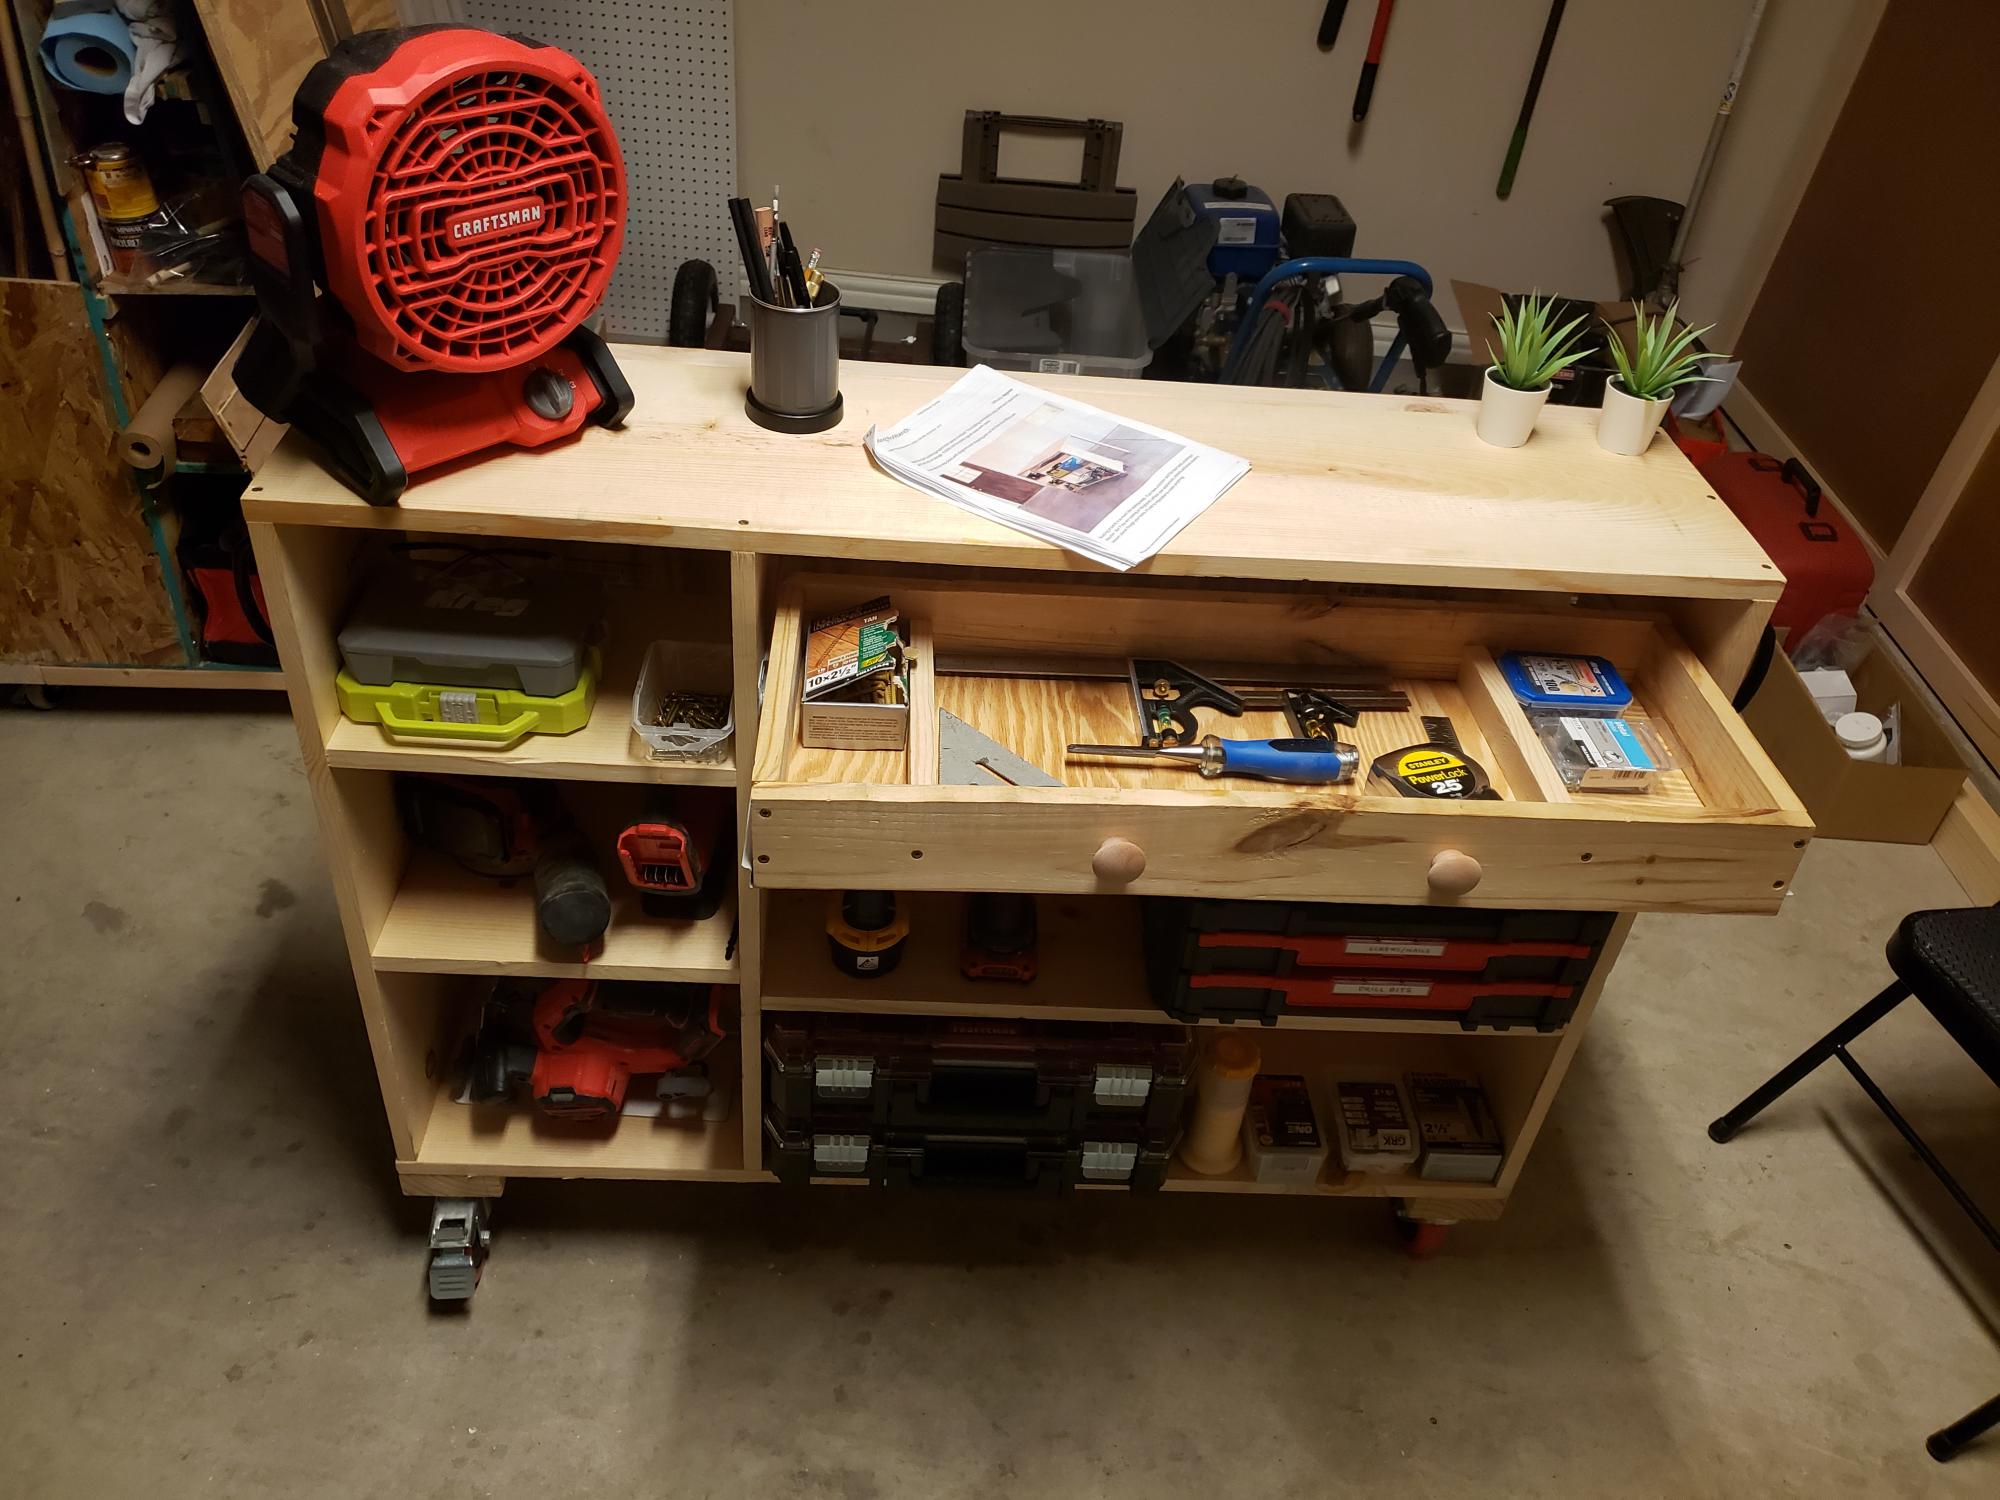
Made a folding Workbench for my small workshop.
Built from Plan(s)
Made a folding Workbench for my small workshop.
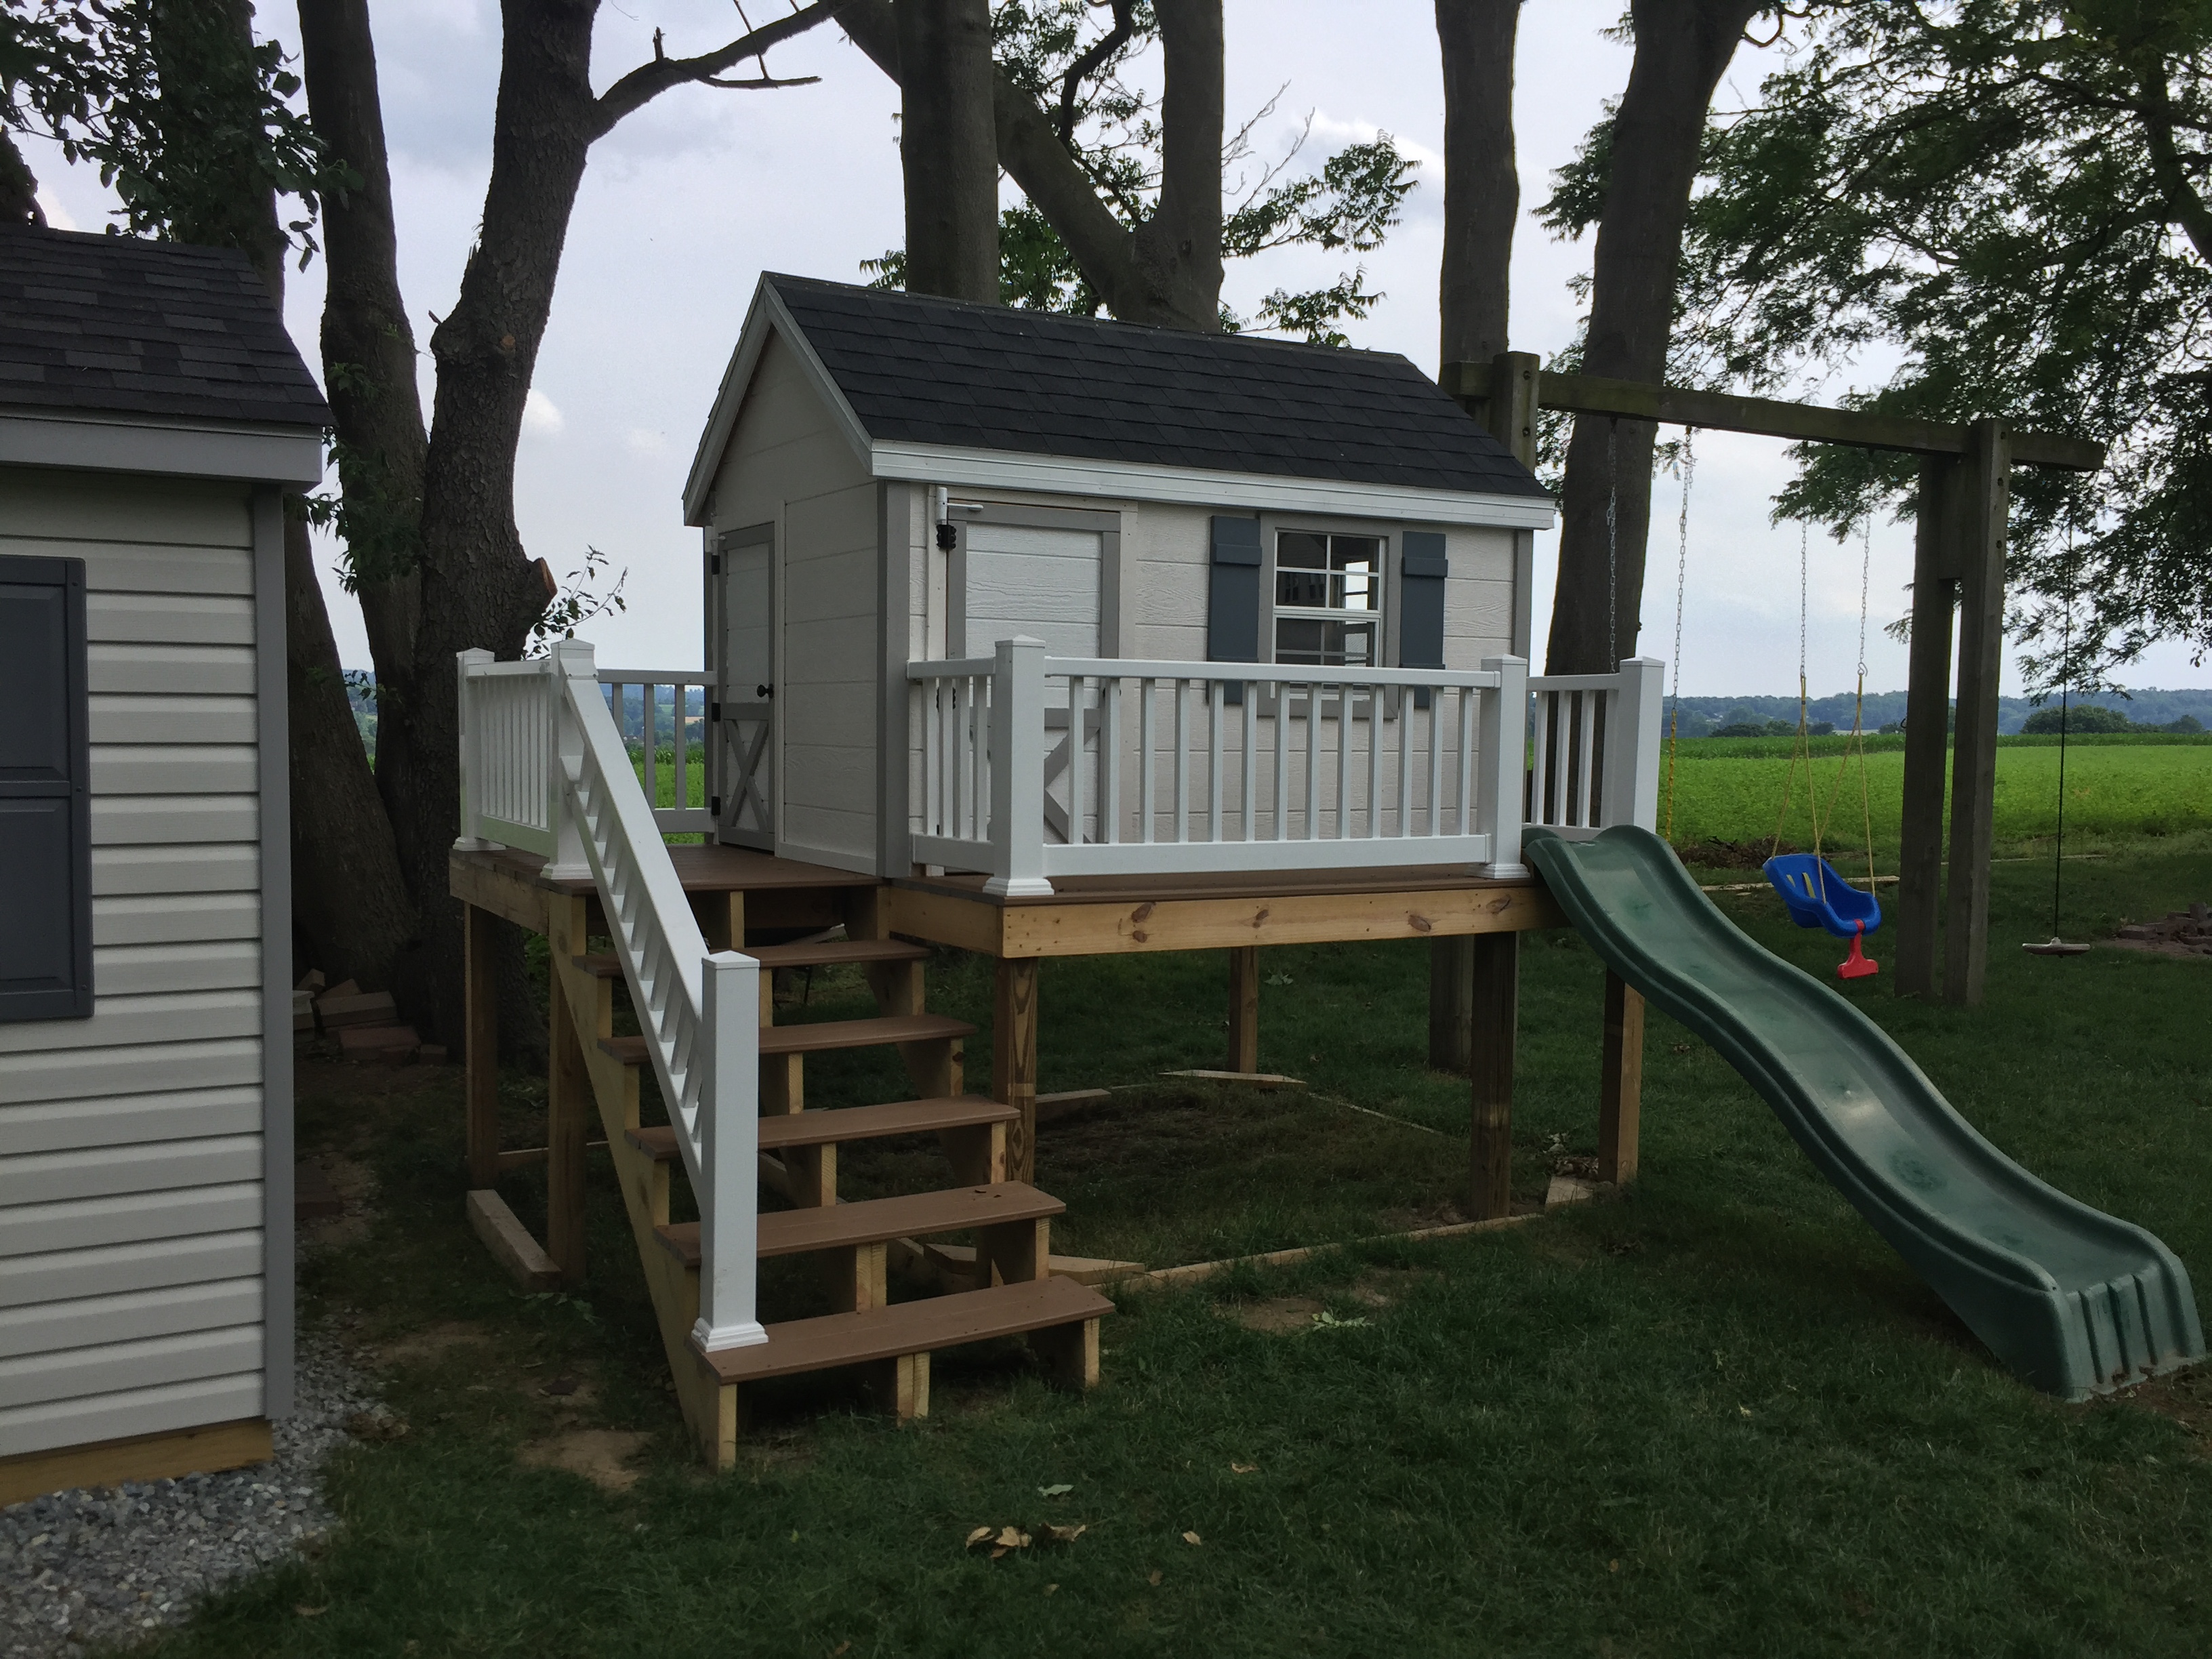
This playhouse was built by my 4 year old son and I. We used the general plans and even added the drop down desk. Most of it was built using my miter saw stand, another great idea by Ana White!

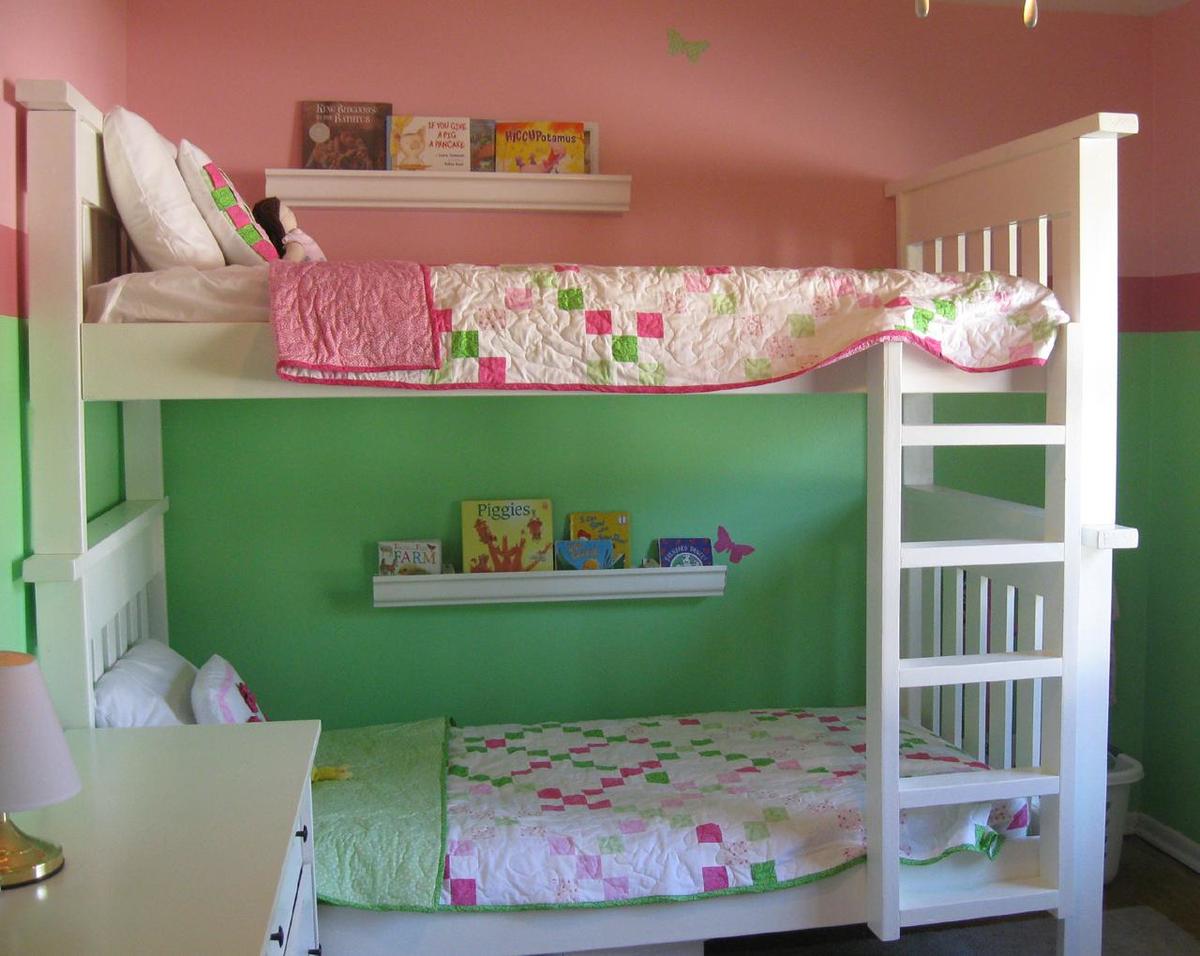
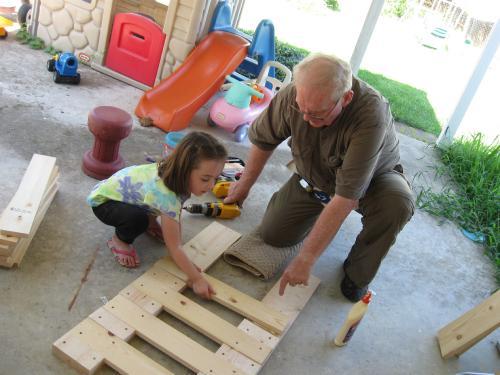
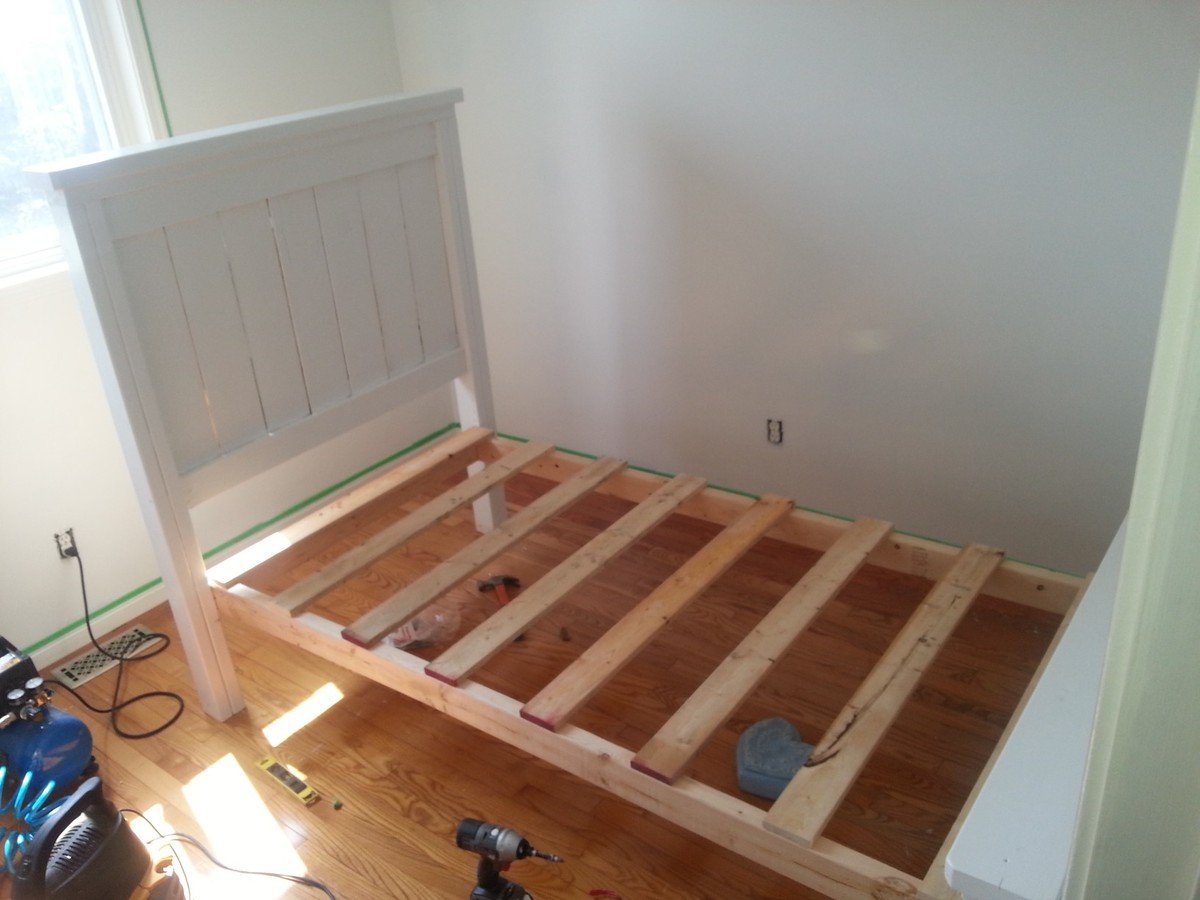
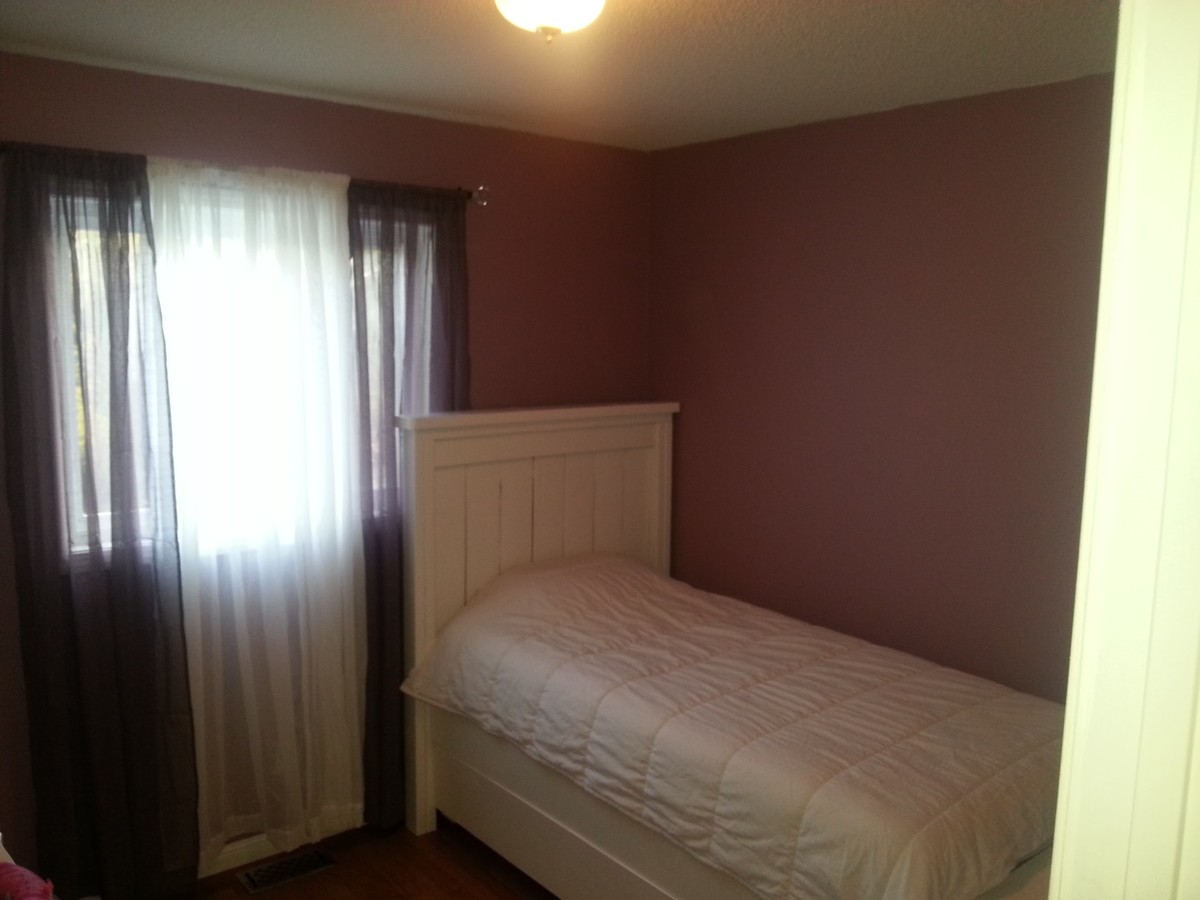
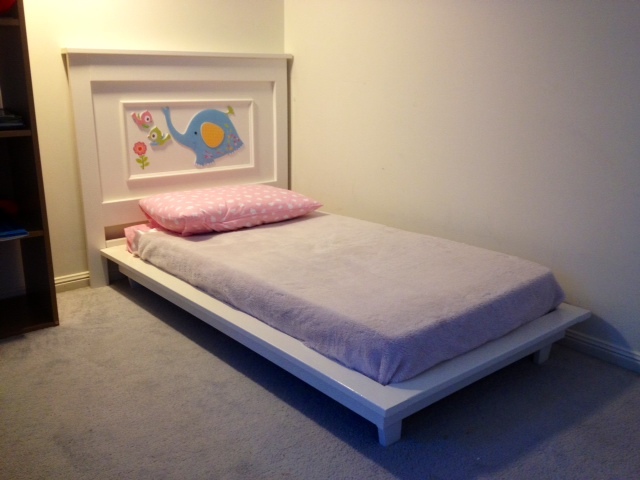
I redid this whole room for less than $600! Make sure you take your time with cuts and fitting. I did this with my father in law (my daughter even got to help out!), and it's less than perfect due to some rushing! More details on my blog.
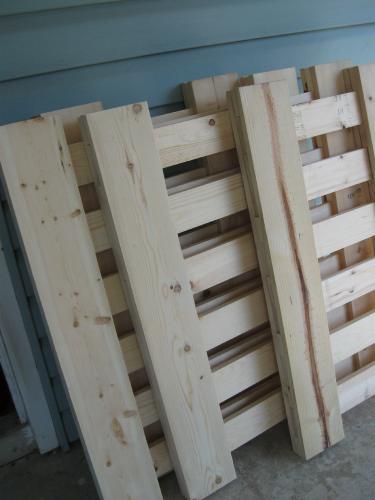
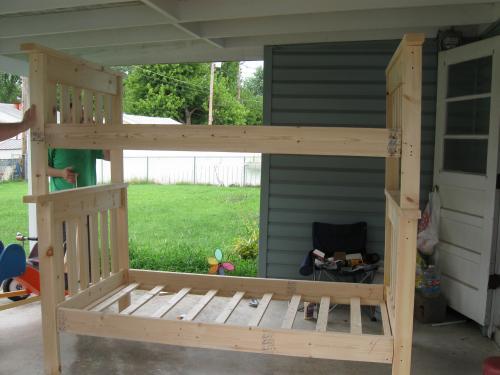
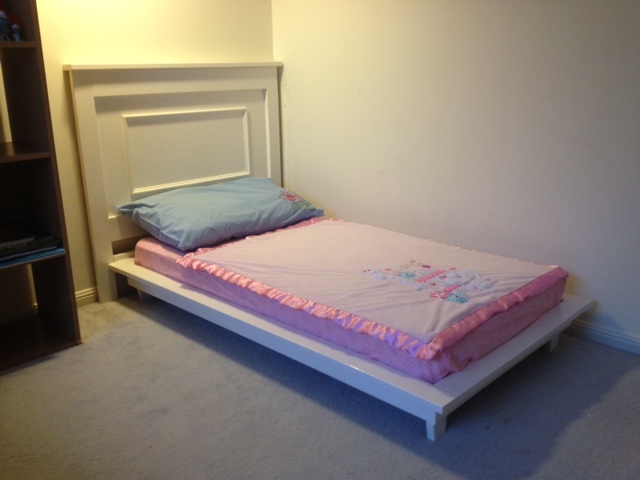
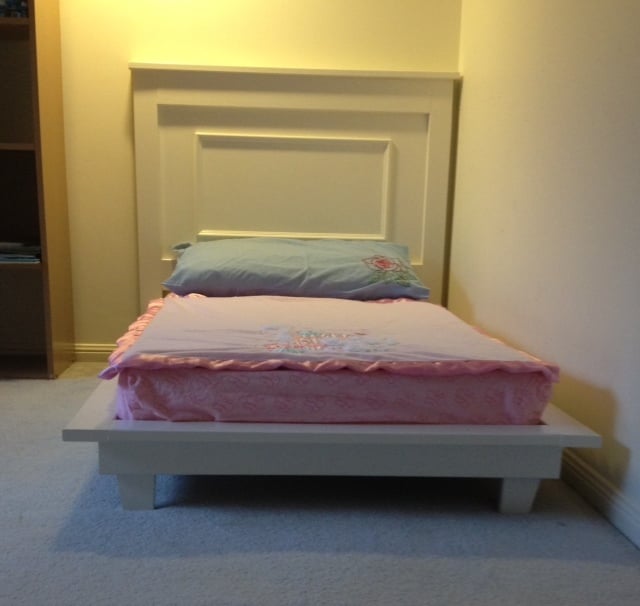
I also couldn't find any 4x4's. Instead of doubling up on 2x4's, I just used one. That allowed me to change the tops of the head/foot boards to only 48" instead of 50 1/2. You can get enough for a head and foot board out of one board this way.
After looking at a TON of bunk bed ladders online, I designed my own. Just some leftover 2x4's. The sides are 47 1/2 inches long, and the rungs are 13 1/2 inches long. It's screwed to the bunk bed from the back so you don't see the screws.
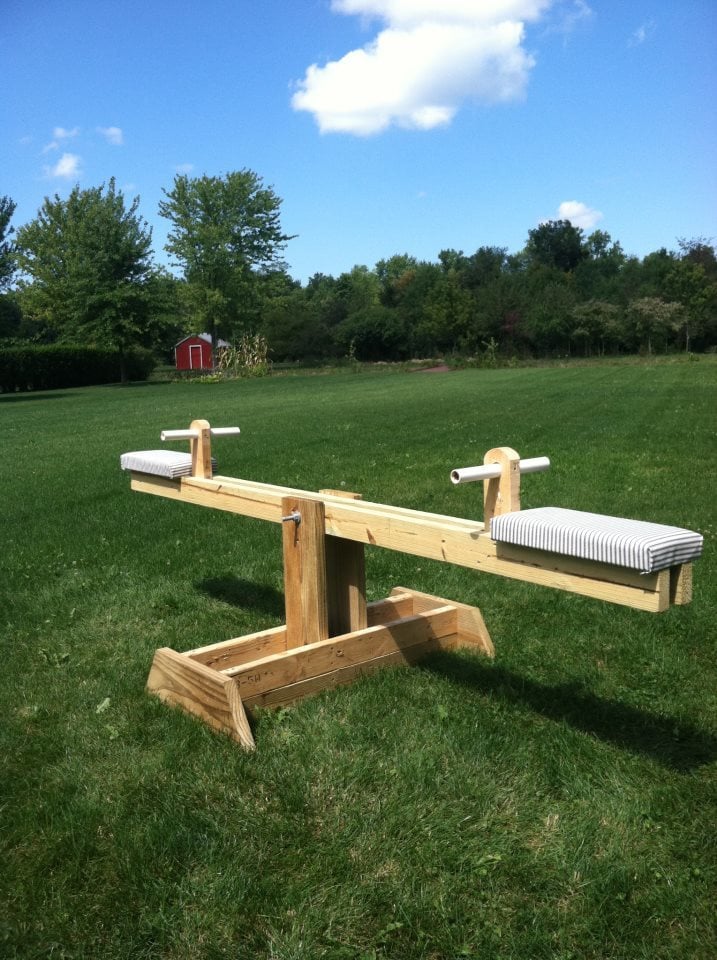
This is one of the cheapest projects for my kids I have ever completed!! And the most rewarding. I think everyone of my neighbors has been on the teeter totter...including adults :) My kids just love it and I am thinking of making a few for my nephews for Christmas. I was able to find all the wood I needed in my scrap pile. I had the PVC pipe and bolt already also so all I had to make a trip to the store for was the foam for the seats. My son helped me build this in an hour. I liked the unfinished look so I just sprayed it with a little Thompson Water Seal. Thank you Ana White!!

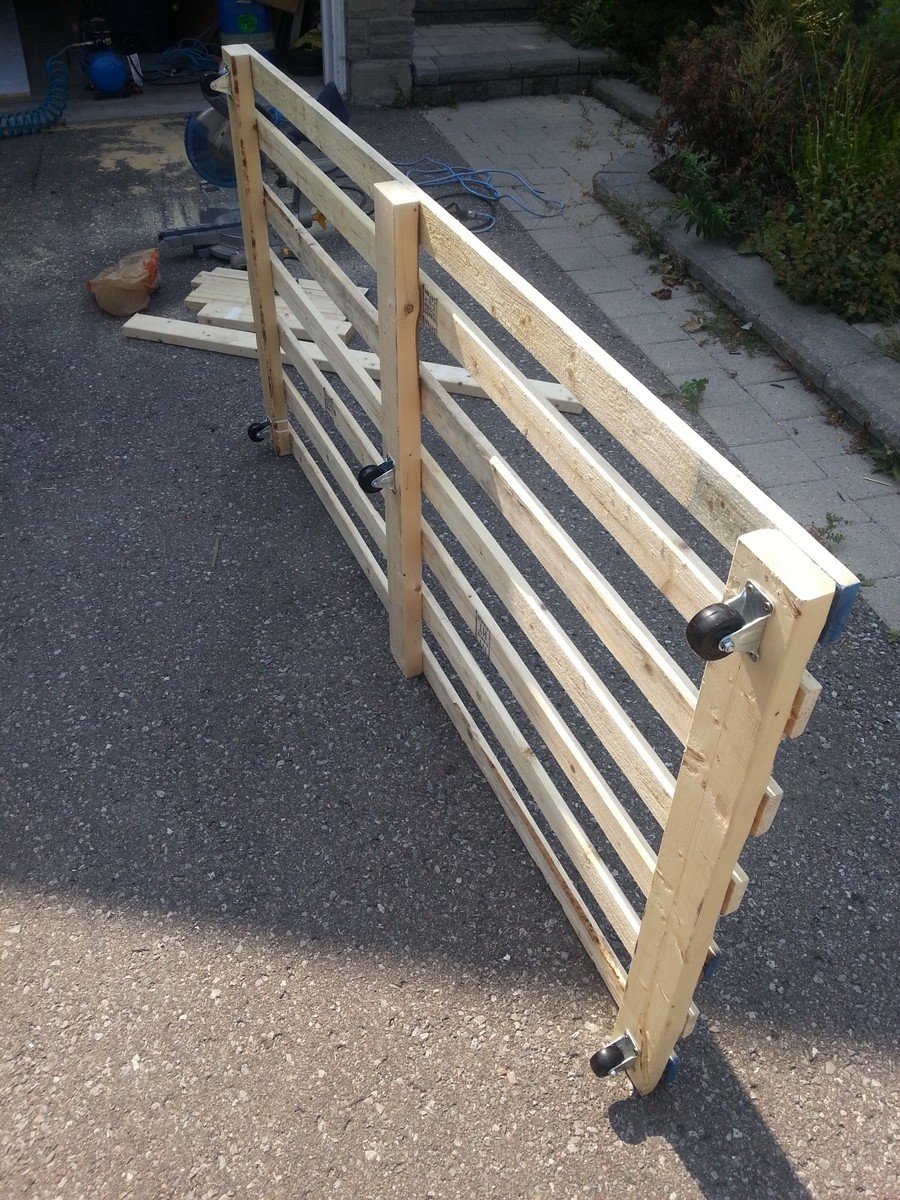
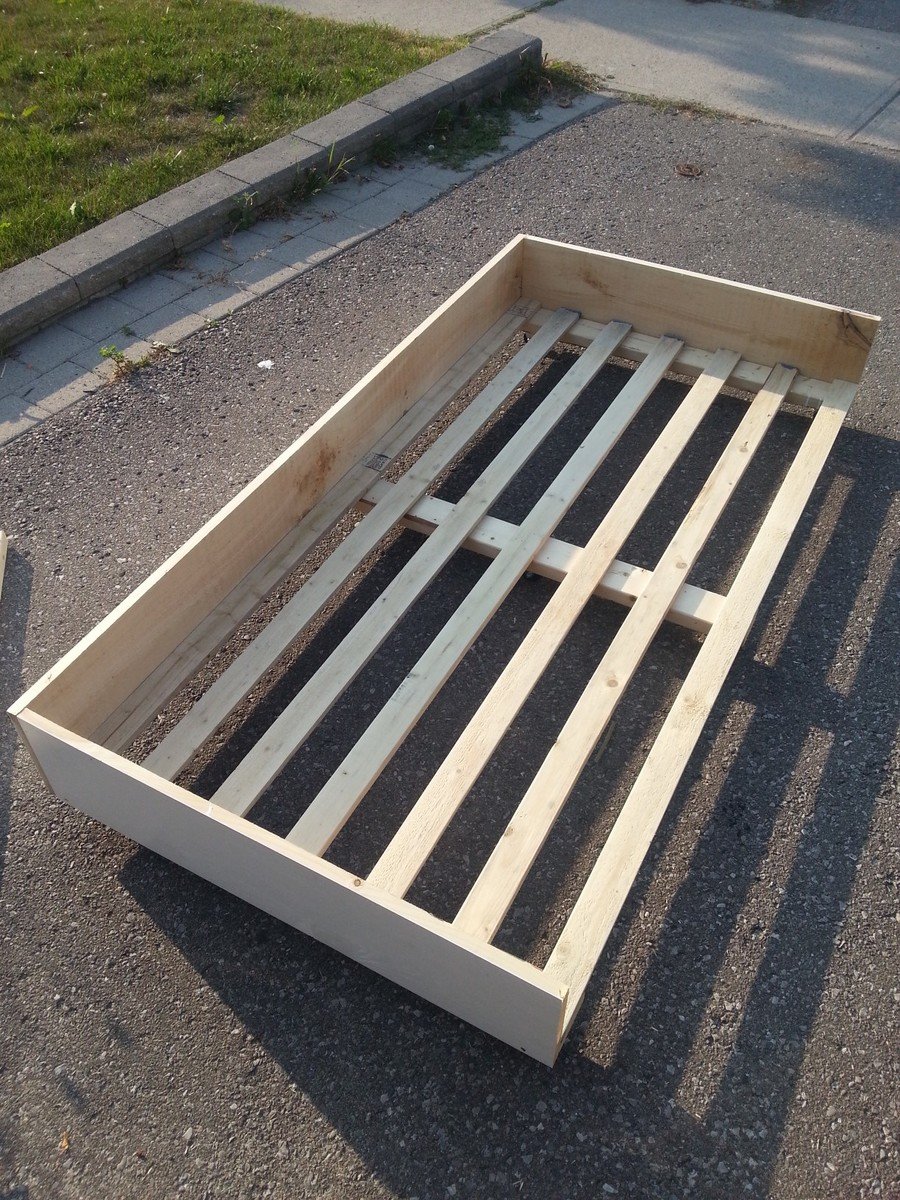
Took the farmhouse plan and added a Trundle. Was initially going to build two farmhouse beds for my two girls, but thought adding the Trundle would free up some much needed floor space. The girls love it!

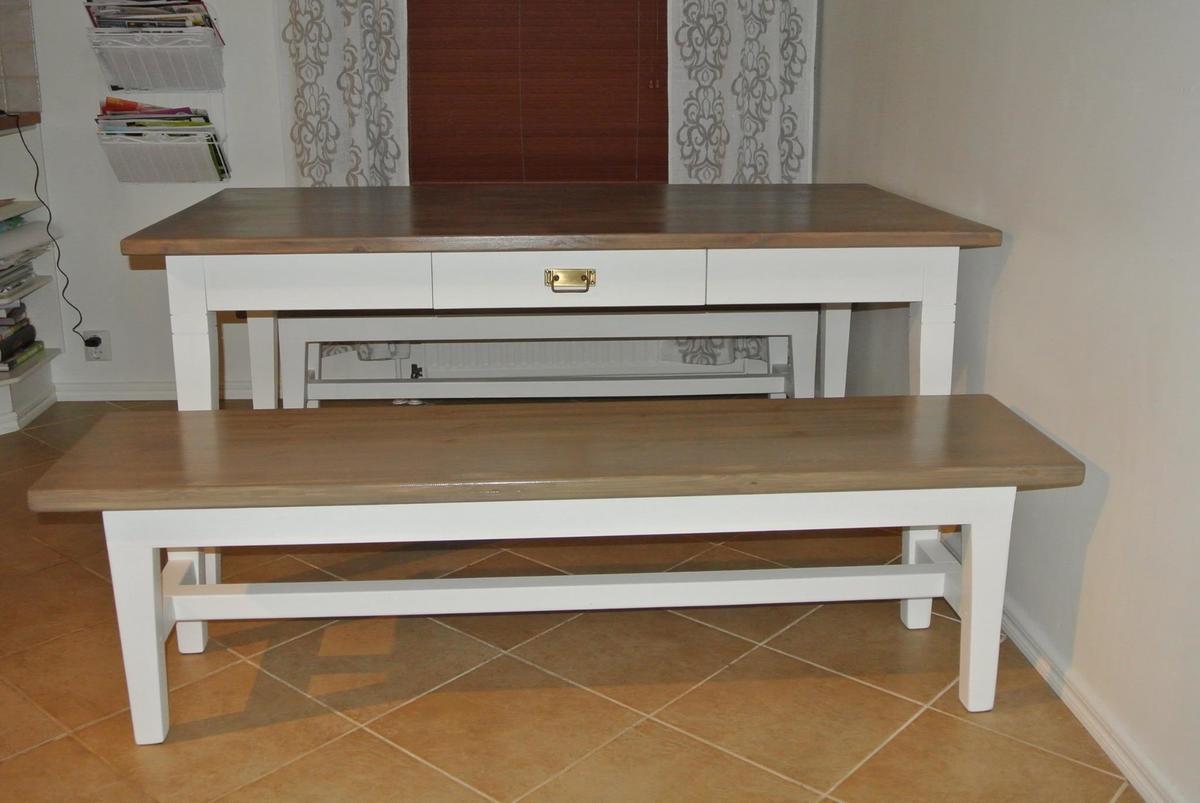
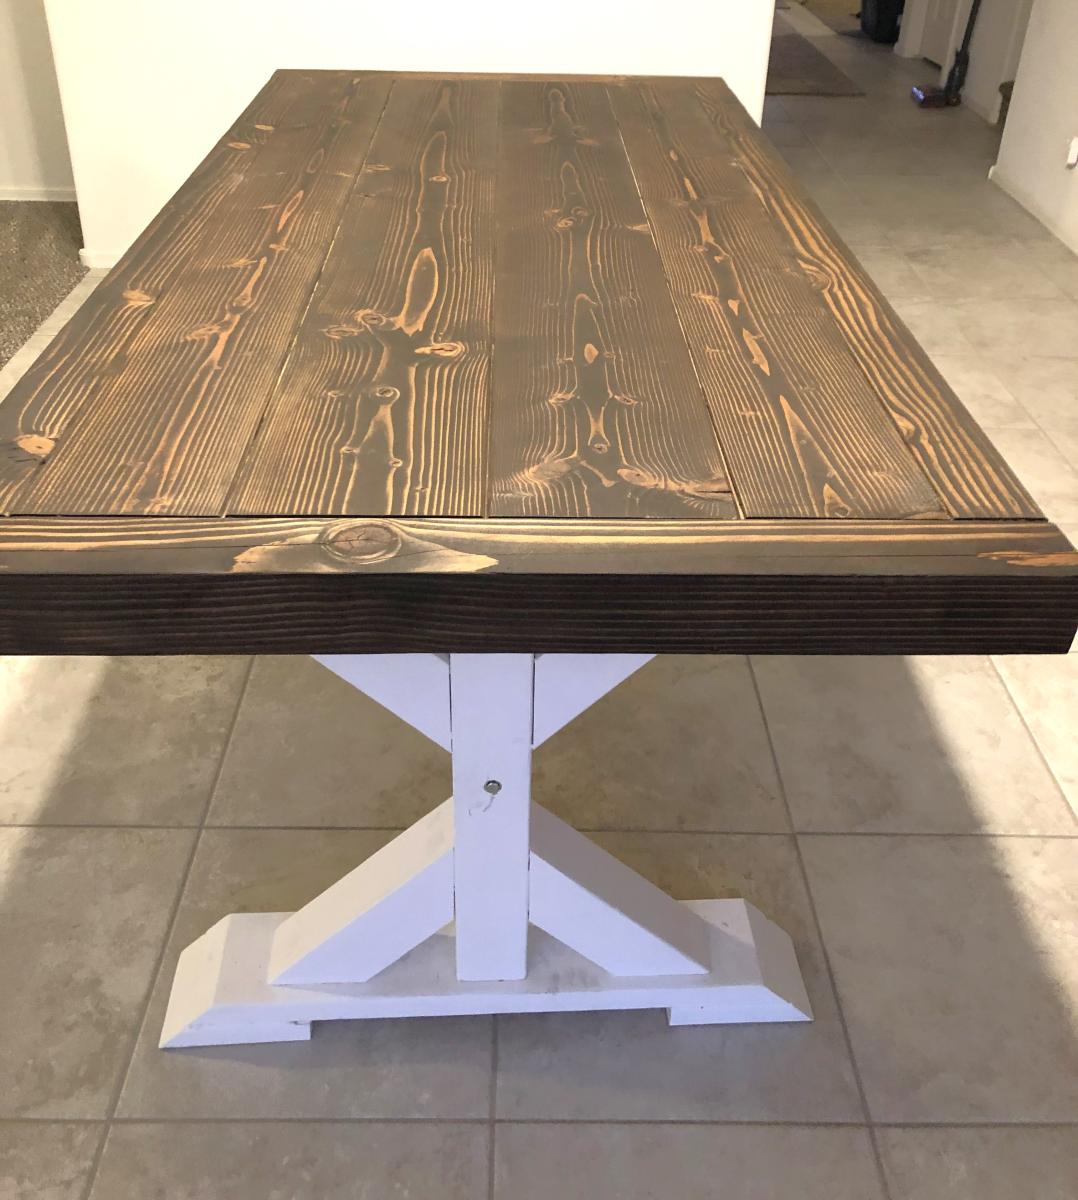
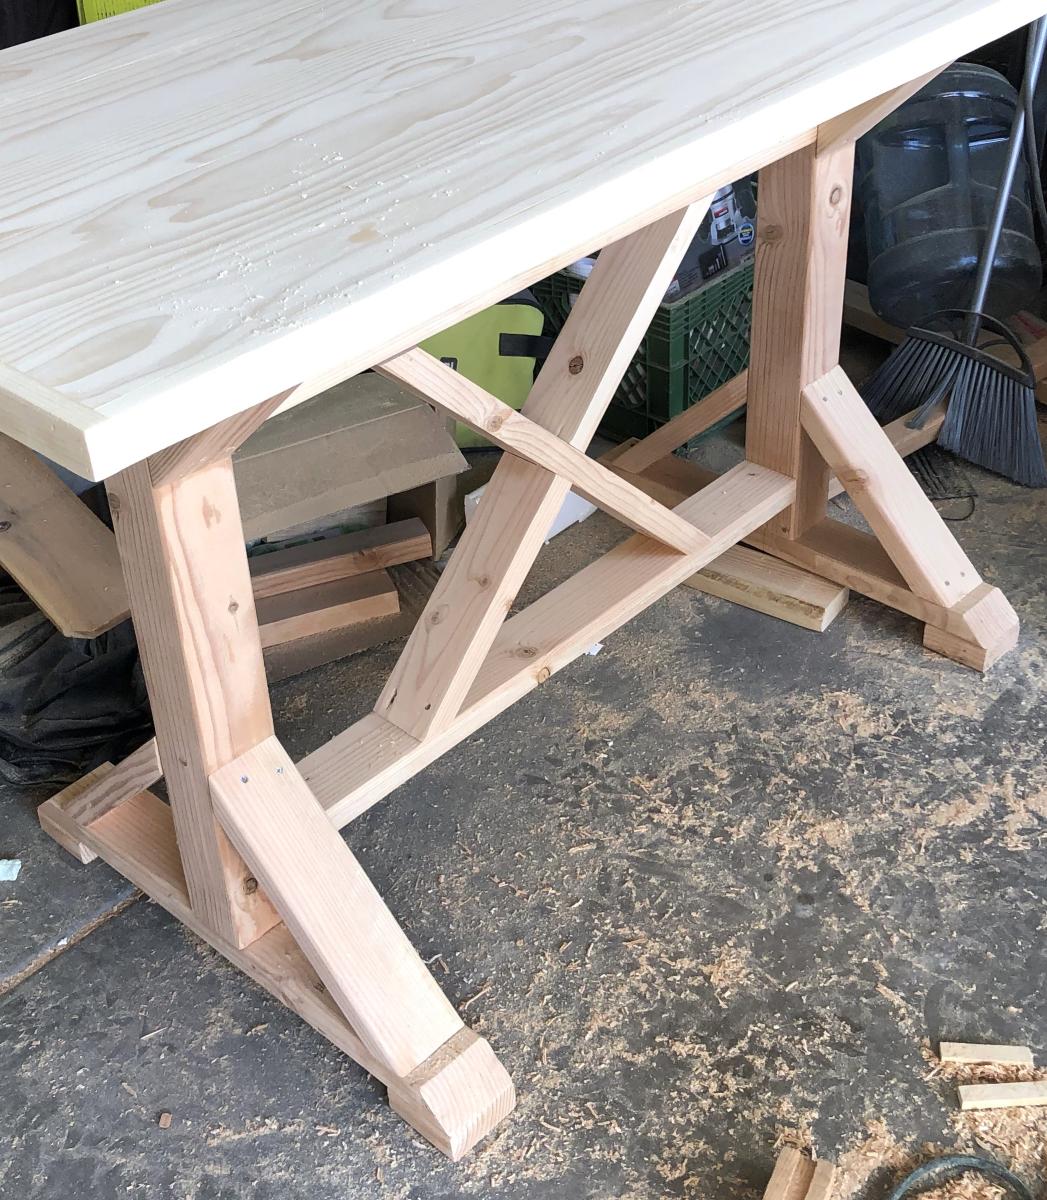
This table was quite simple to build. The hard part was the sanding and the painting/staining. It is sturdy. I also like that I can sand or touch up stain if it is ever damaged. Most store bought tables don't have that ability since the table top is usually a veneer.
Step by Step Summary on my blog - http://thequaintcottage.blogspot.com
Sat, 07/09/2011 - 18:47
Your paint job for the legs is awesome. I went to your blog to look at the whole process. Great work. The colors for the legs and top go together beautifully. Wonderfjul job! :) J
Sun, 07/10/2011 - 17:45
Thanks! I really didn't know if all the colors were necessary or if it would turn out how I pictured it in my head, but I just posted a close up pic of the finished leg and hints of the colors show. It is as close to I could get to weathered boards without waiting years to make them.
In reply to plans by grandeb3660
Sat, 09/03/2011 - 18:22
I added the plans to my blog, the link is above.
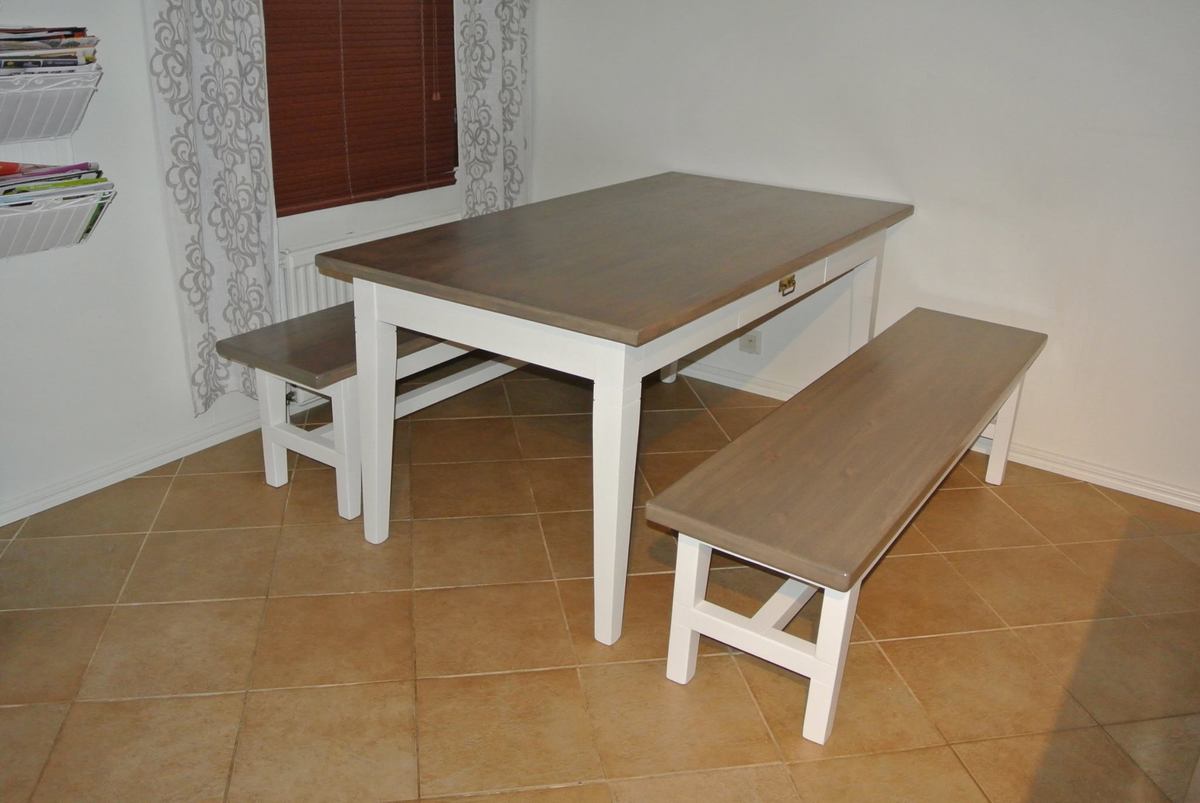
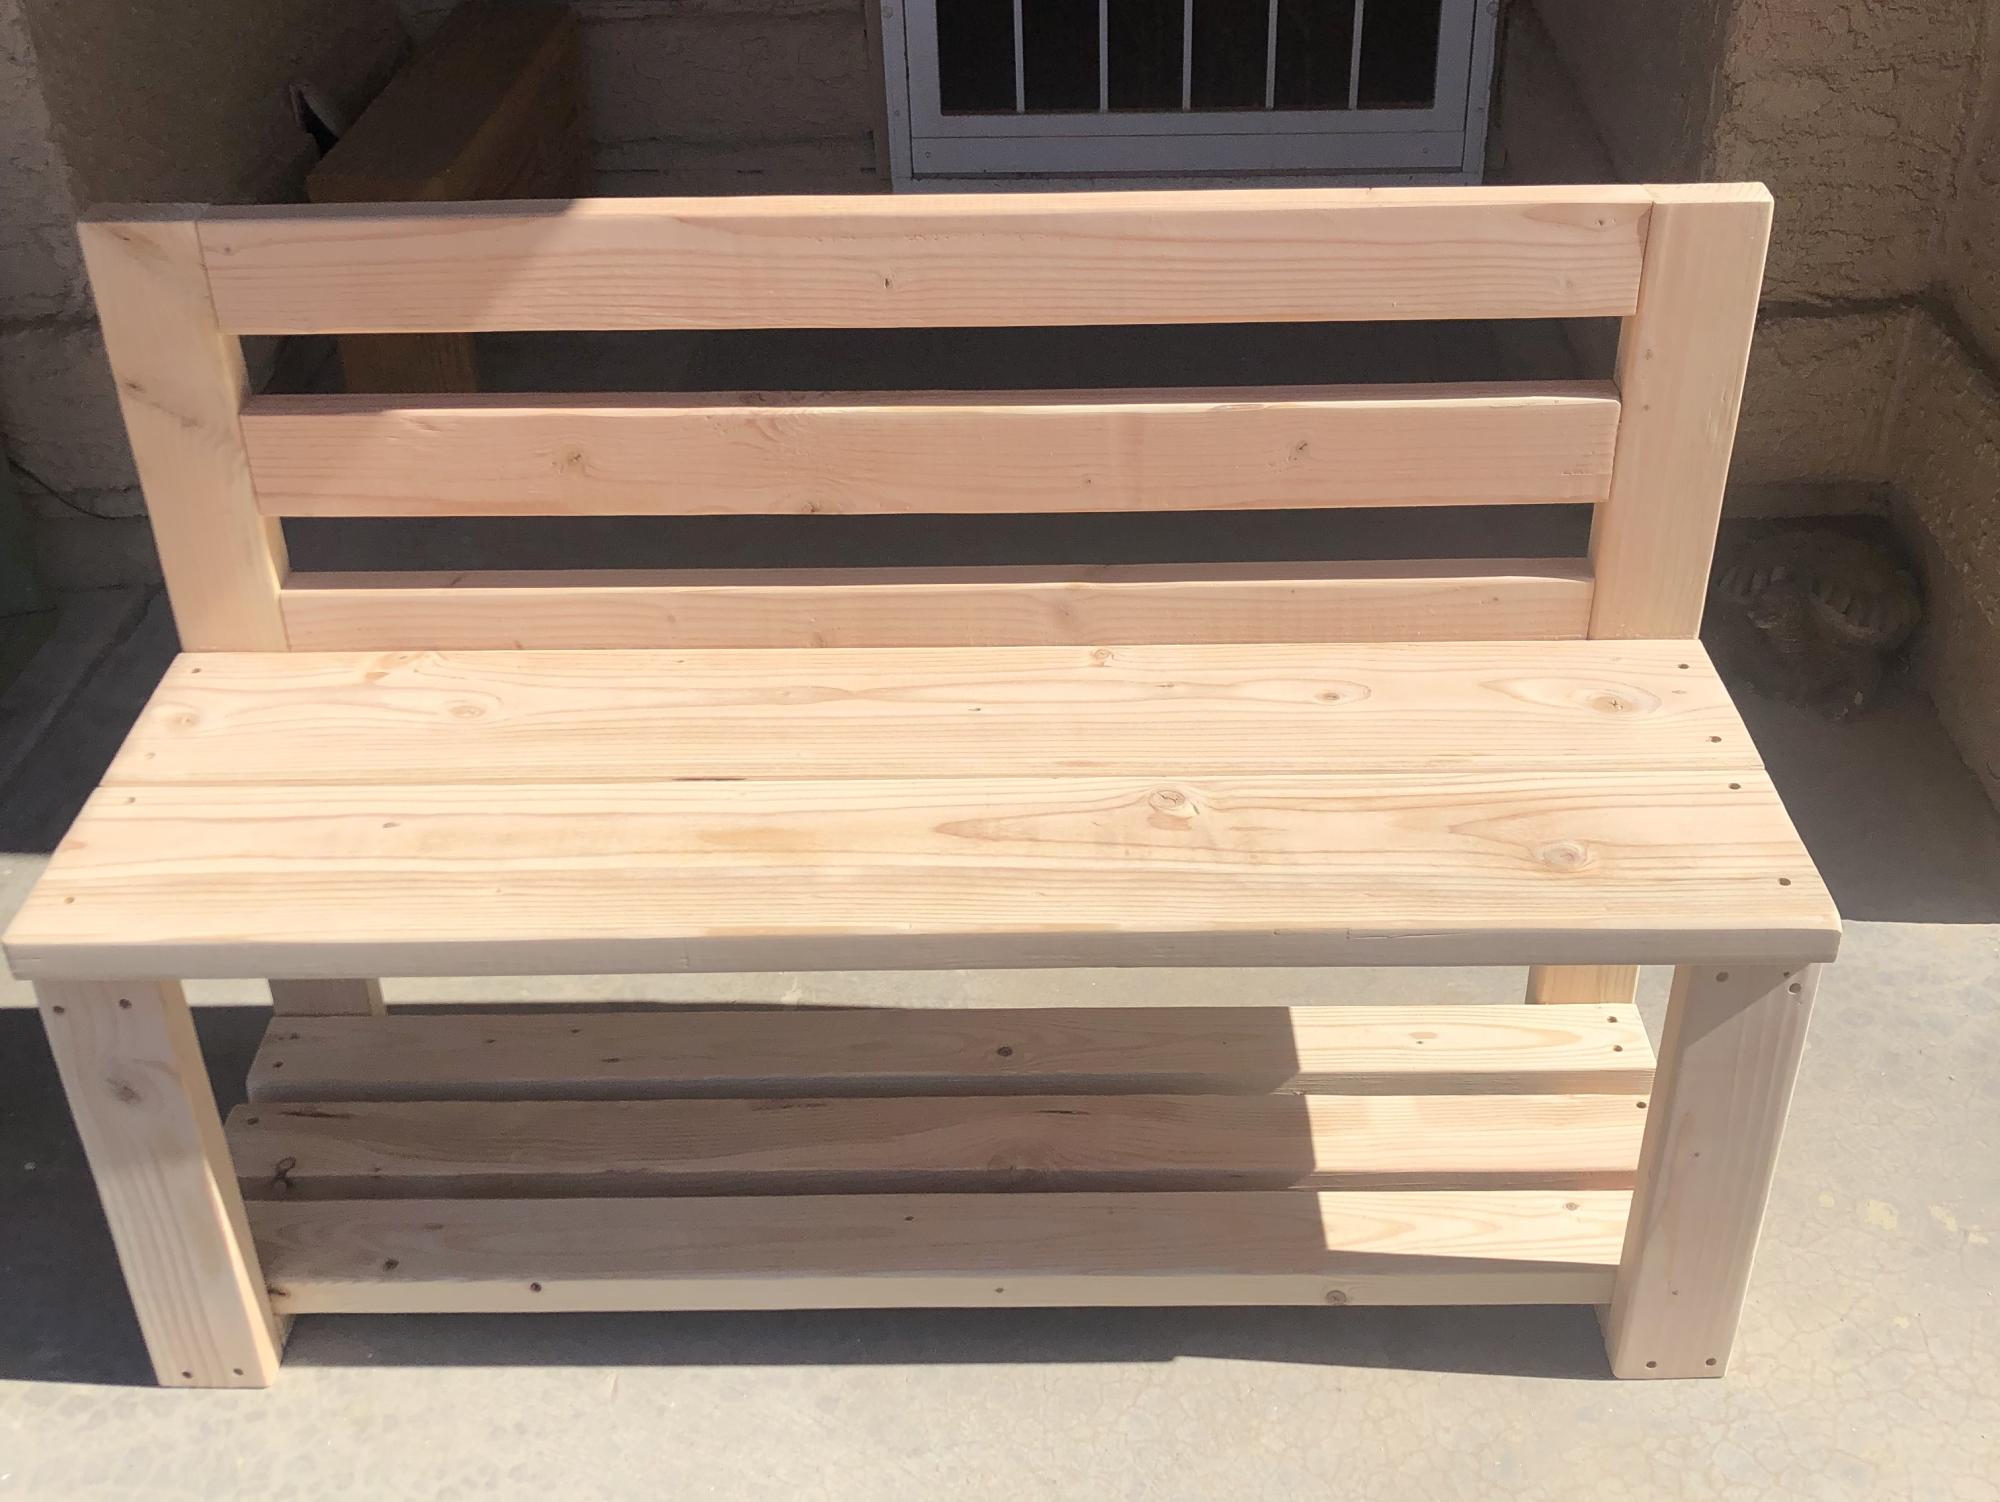
I've fixed up an old table and borrowed Ana's plans for farmhouse bench. I've modified them, and this is the outcome.
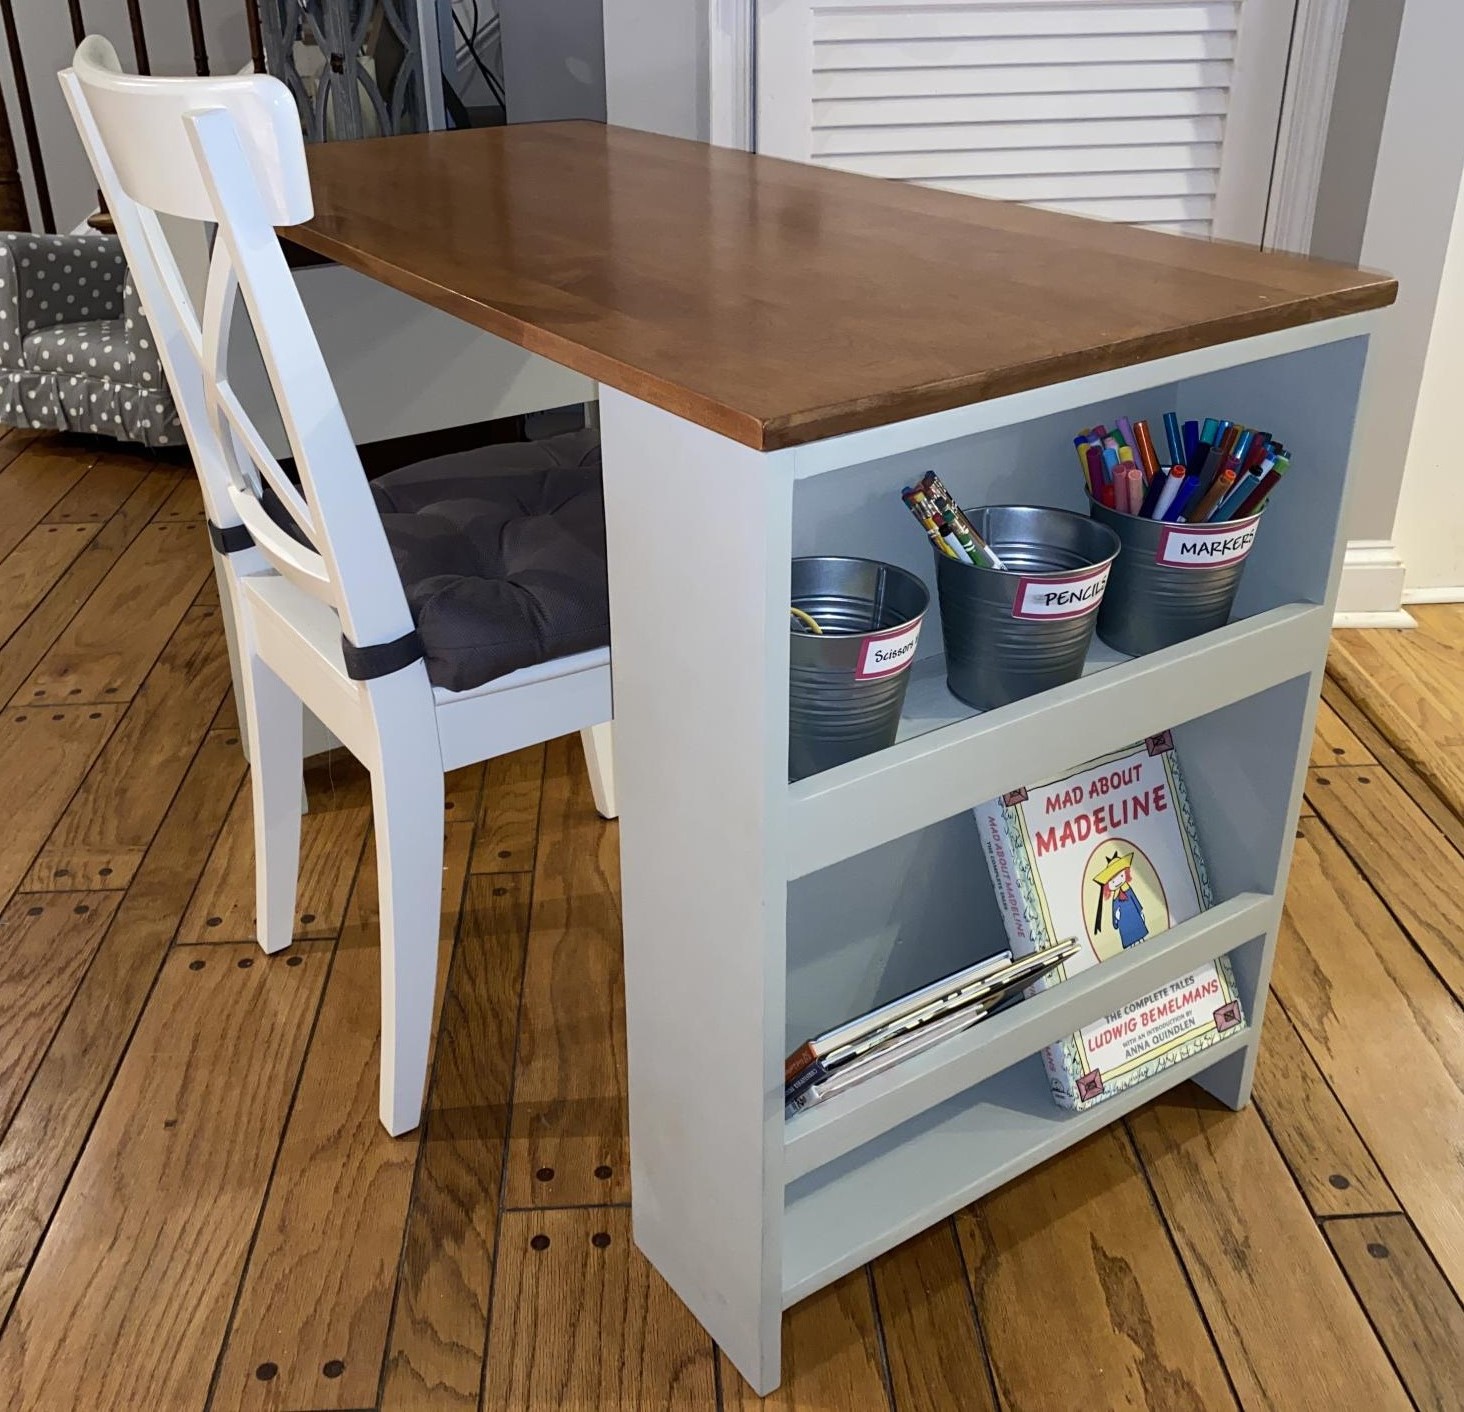
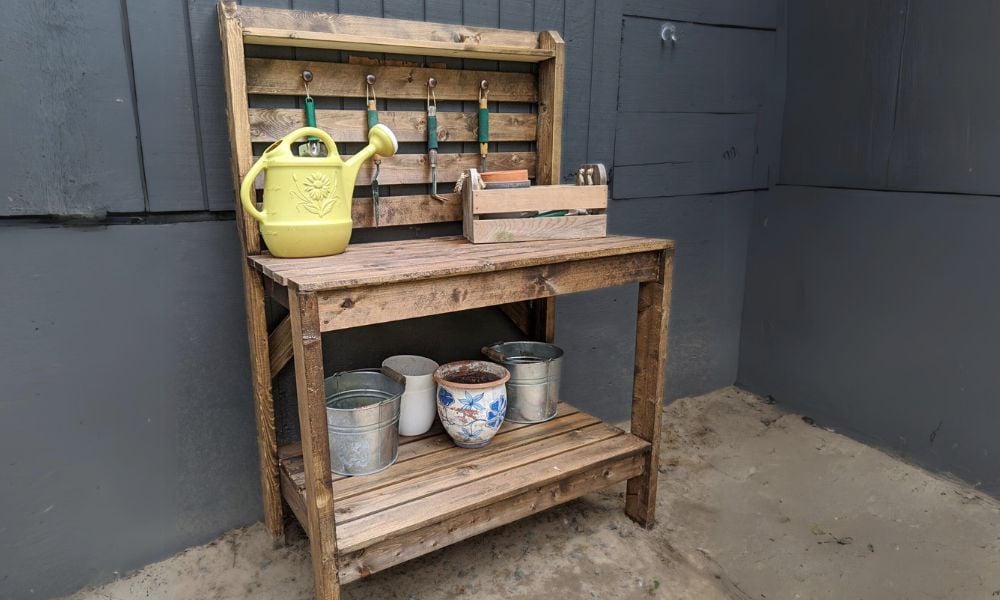
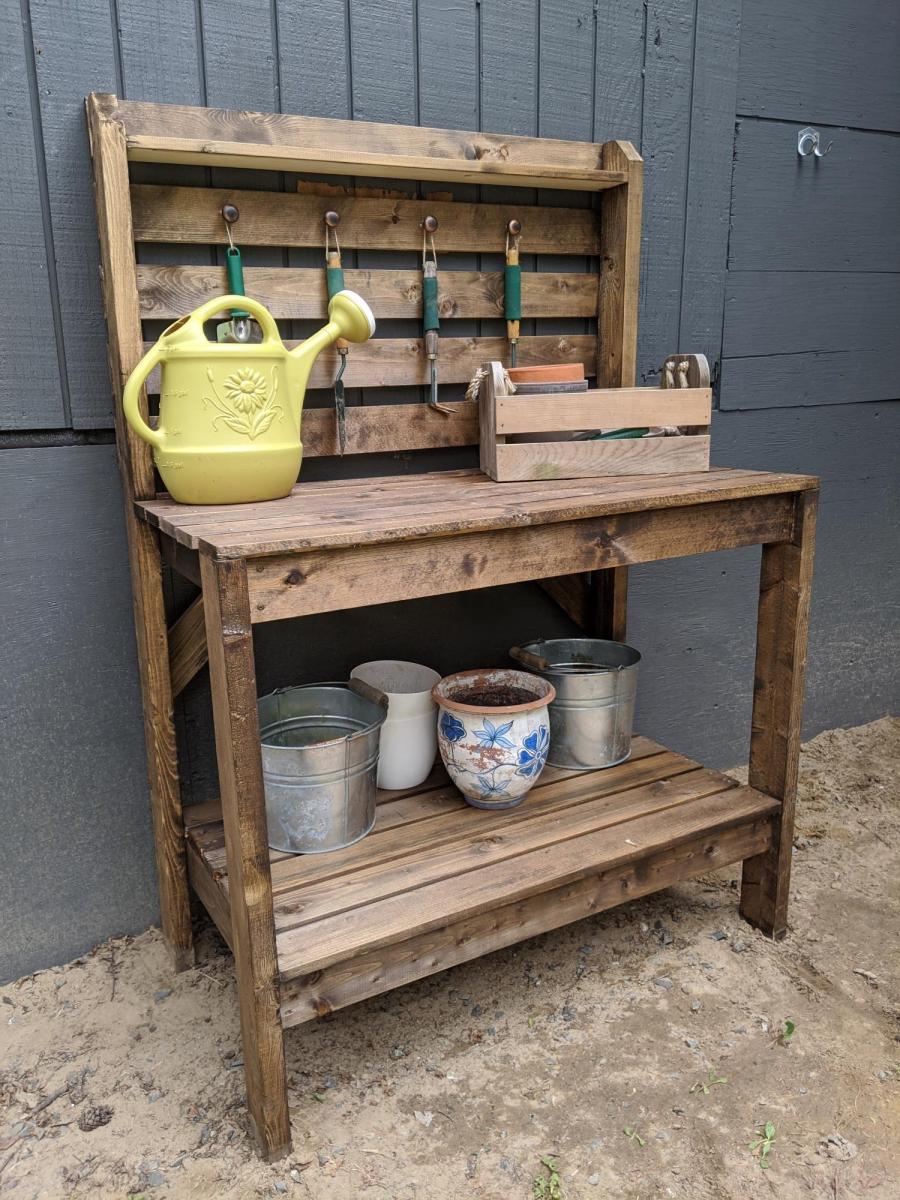
I modified the plan to allow for wider shelves on the legs. I also made the width of the desk 22” instead of 24” to accommodate the size of the repurposed coffee table I used for the desktop.
Mon, 01/09/2023 - 18:49
Love everything about this table from the repurposed top to the color choice! Thanks for sharing.
First build and totally happy with result . The excitement and smiles of our 18 months old grand-daughter was worth every effort !
Thu, 10/24/2013 - 01:42
Thank you Ana for sharing your resources and providing the encouragement to try new things .

Thu, 10/24/2013 - 13:20
Love this bed! What a super cute room for your grand-daughter! Looks totally professional, would never guess this is a first build -- Great job!

A friend of mine wanted a new queen bed in a rustic, weather grey look. I have built many projects from Ana's site and decided on the Farmhouse Bed. The plans were perfect and building the bed didn't take me long. The time consuming part was the finish. I really wanted an old, weather wood look so the entire bed and night tables were first stained with a dark Kona stain. Once this dried I applied two coats of a watered down (50:50) light grey paint. The thinner paint made it easier to sand. Once this was completely dry I used a medium grit sanding sponge and selectively sanded everything. This took a while. Once complete I carefully cleaned all pieces and then applied three coat of semi-gloss varathane. The bed is incredibly solid with the 2 x 4 slats and will last a few generations. As always great plans from Ana.


Some 2x and 4x Wood Projects
Lee Lape

I made this coop twice as wide like Ana suggested since I have 4 chickens and wanted to make sure there was some extra wiggle room in case “chicken math” got the best of us. I made a nesting box to mount on the outside. I also used plywood for the sides like Ana did in the video. I installed a Run Chicken automatic door that opens at sunrise and closes at sunset. I added some hasps and clasps to make sure all my doors would close tightly. I put hardware cloth across the top before installing the roof panels. I stapled and buried hardware cloth around the perimeter for predator protection. I also spray painted the hardware cloth flat black so that it would be easier for us to see inside the coop. I stained the rest of the wood with Varathane Semi-Transparent stain, color “Carbon Gray.” I also added some roosts and cedar shingle siding for some extra protection during our New England winters at to match our house. Working 2-4 hours a day, off and on, with a bum shoulder and weak hands, this took me about a week! Thanks for the great plan, Ana!


I love my new Ana White designed greenhouse! It was amazingly easy to build and the material shopping list ensured there was very little waste or materials leftover after the build. I can’t wait to get started using it.
Bill Crabtree
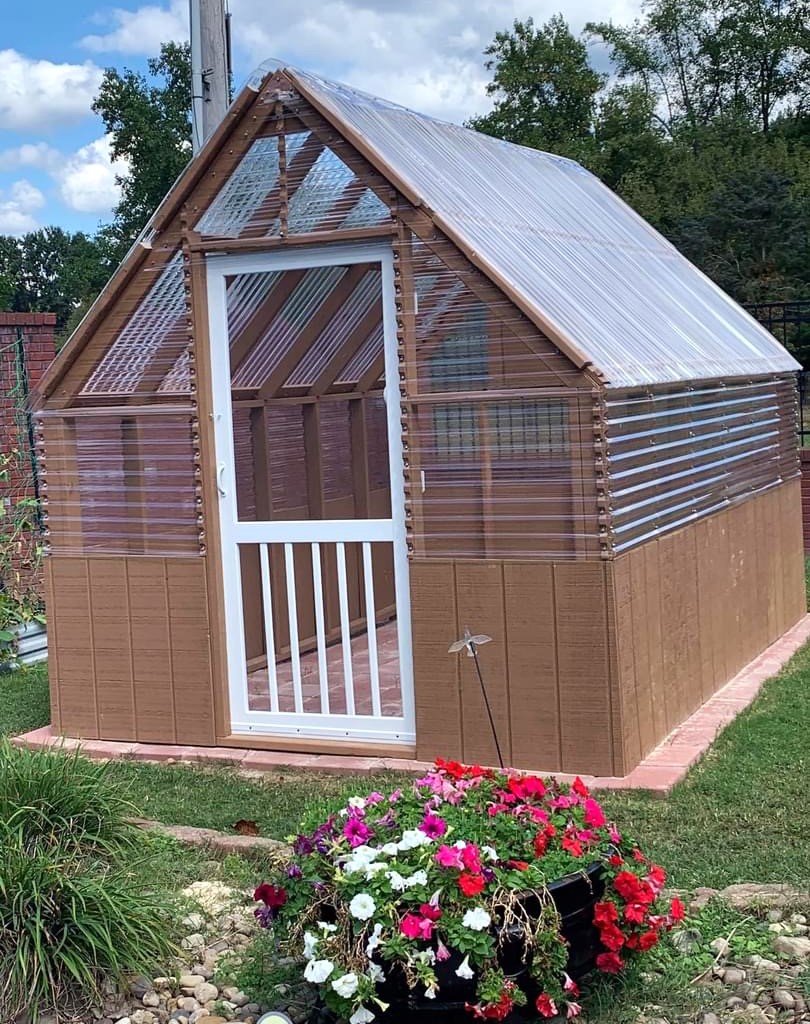
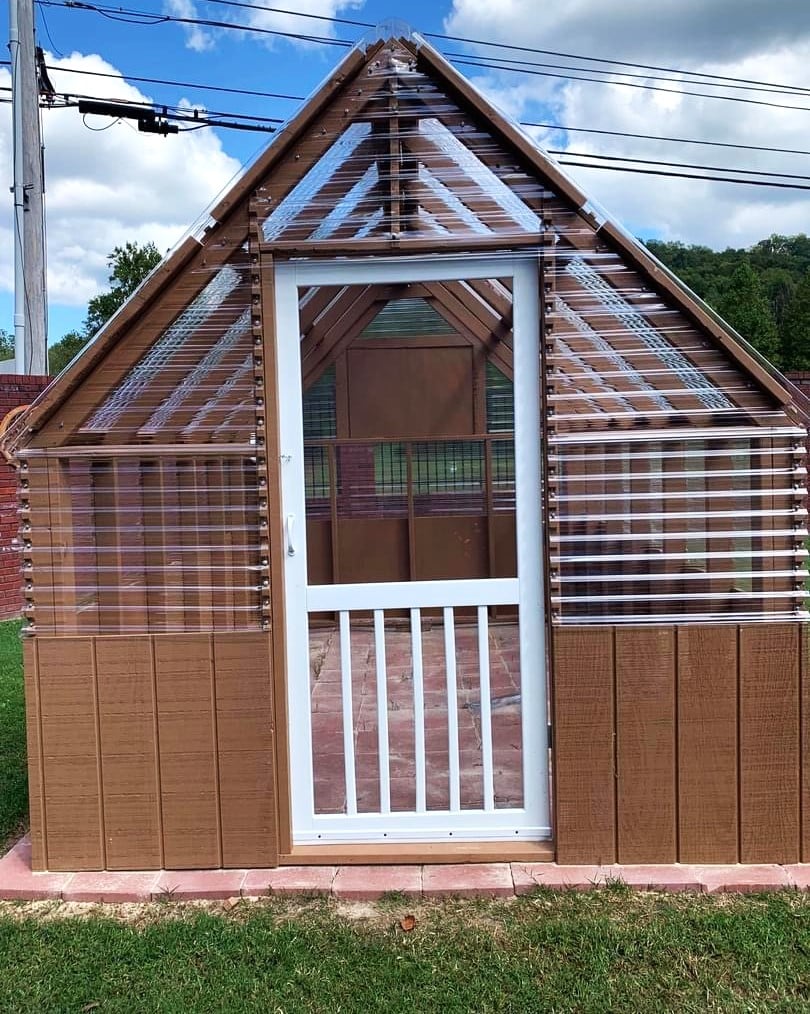
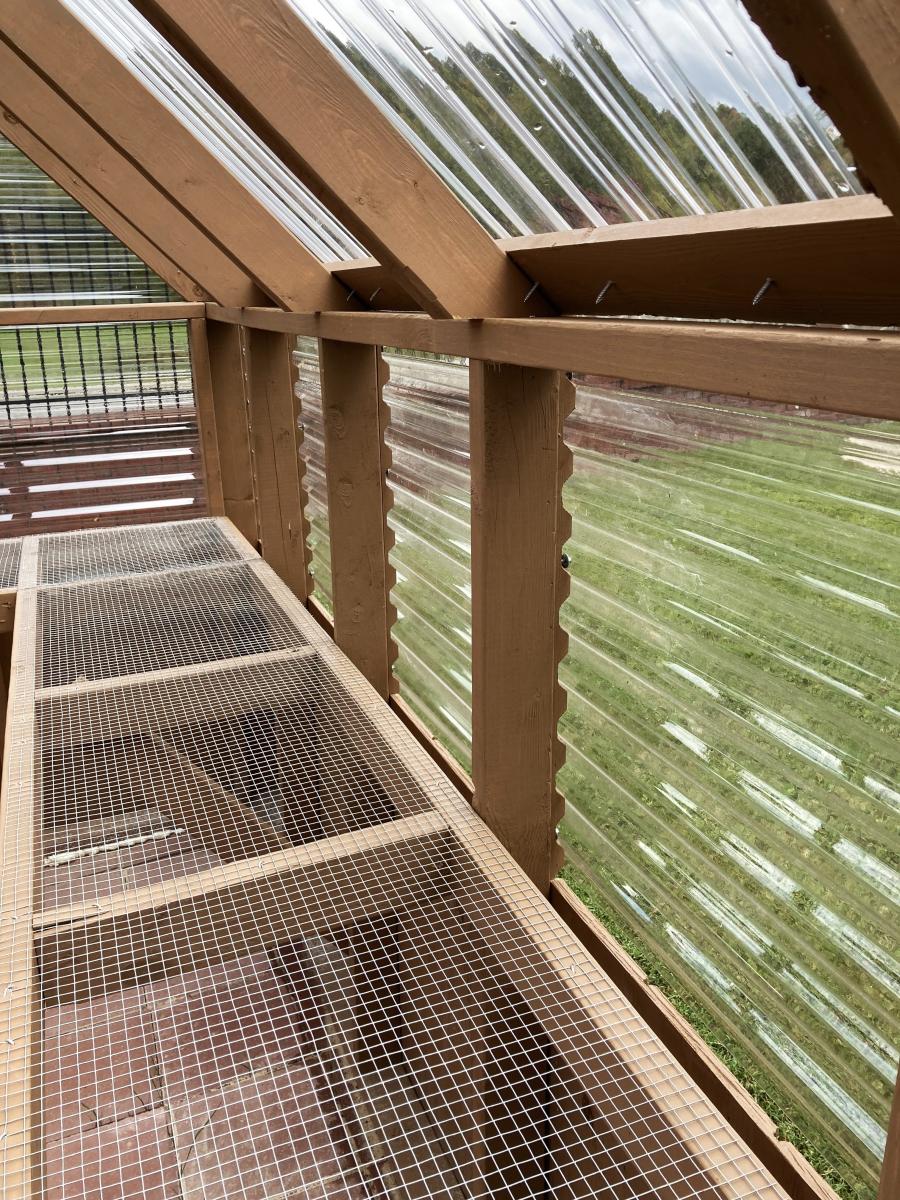
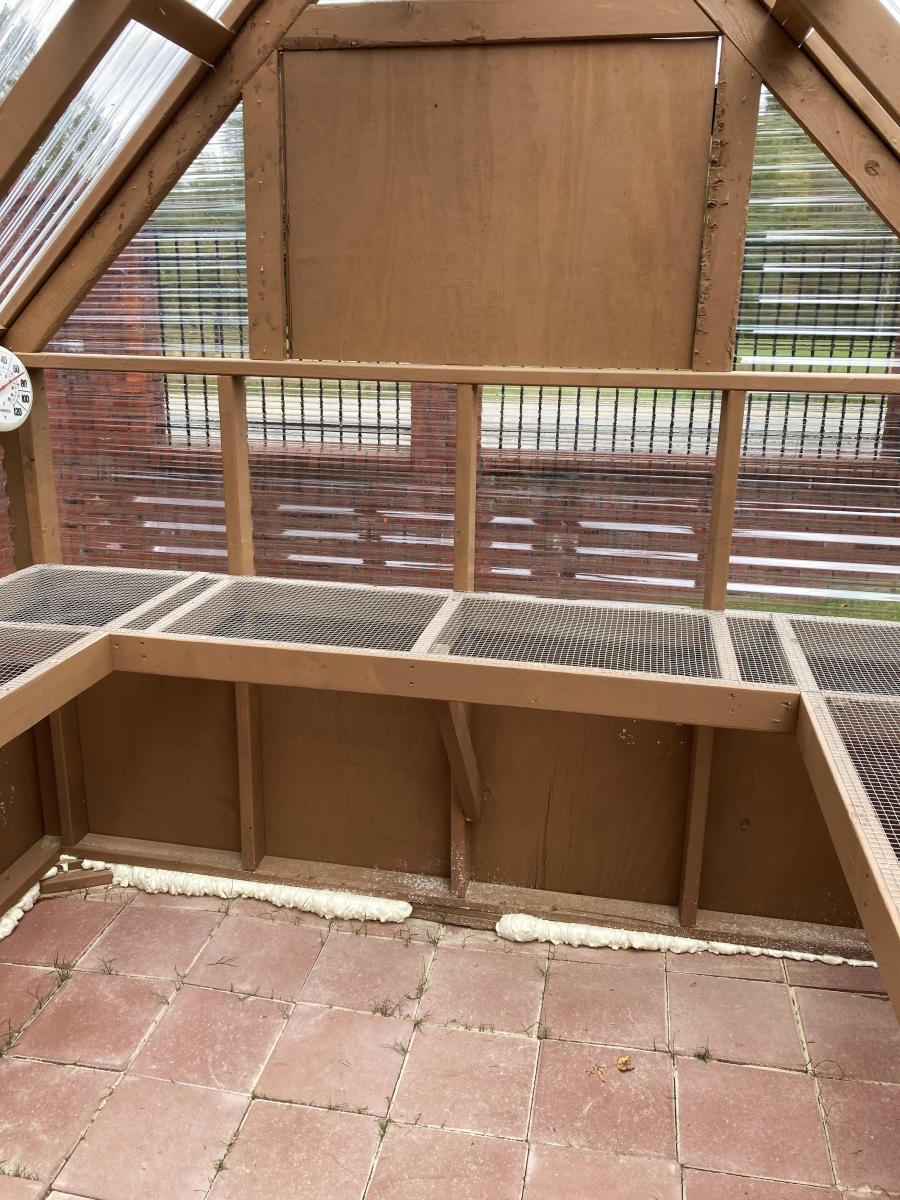
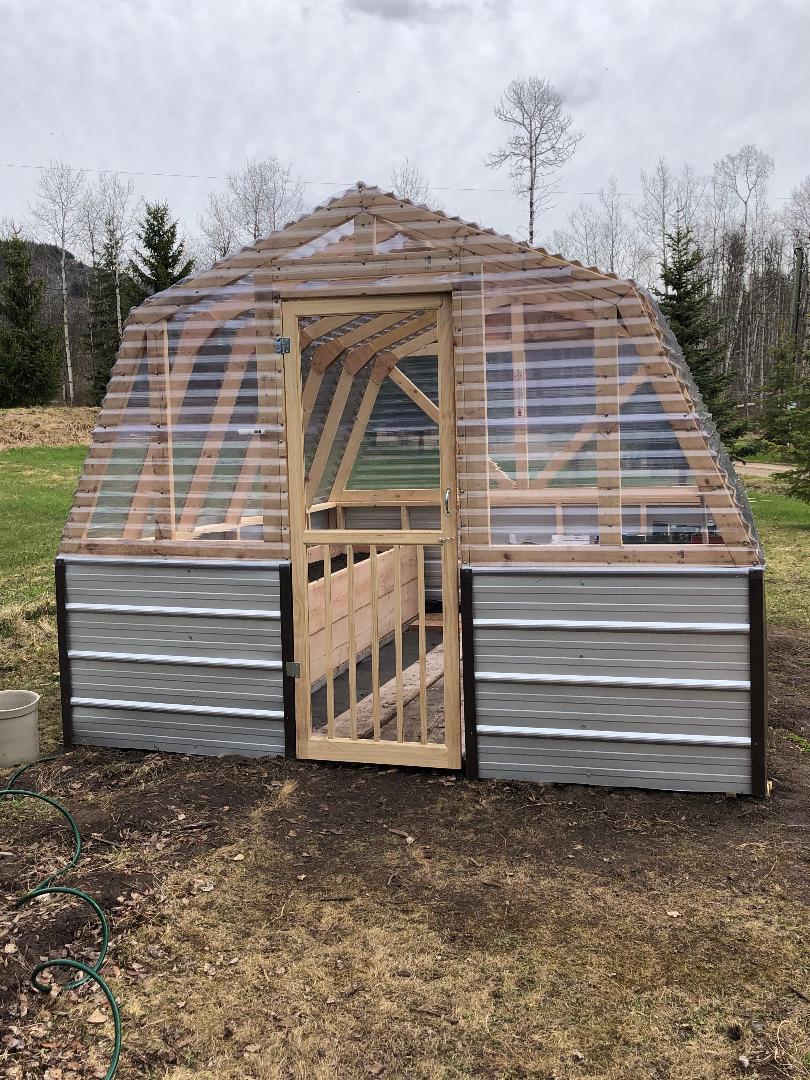
When the Covid quarantine hit we decided to build a greenhouse - it's been on our To Do list for 9 years. The DIY Greenhouse was the first design I found via Google search and it looked so easy and has all the materials listed so we just had the materials delivered and dived right in! It took us 5 days, about 4 hours per day. The smartest thing we did was borrow a mitre chop-saw. There's a lot of 22 degree angles to cut. Other than that it was easy peasy as long as you follow directions. Also got a skill saw blade that cut both the plastic and the tin. It cost us about a grand Canadian, but the closest kit I found online was smaller and was $1500 US. I'm already growing stuff in it and the temperature here in Northern BC gets below freezing at night (around -1C) but everything is ok. The current temp outside is 15, but it's 30 in the greenhouse. We cut a few vents in the back wall panel to allow for airflow and I'm going to purchase a solar muffin fan to move the air a bit. Highly recommend this unit!

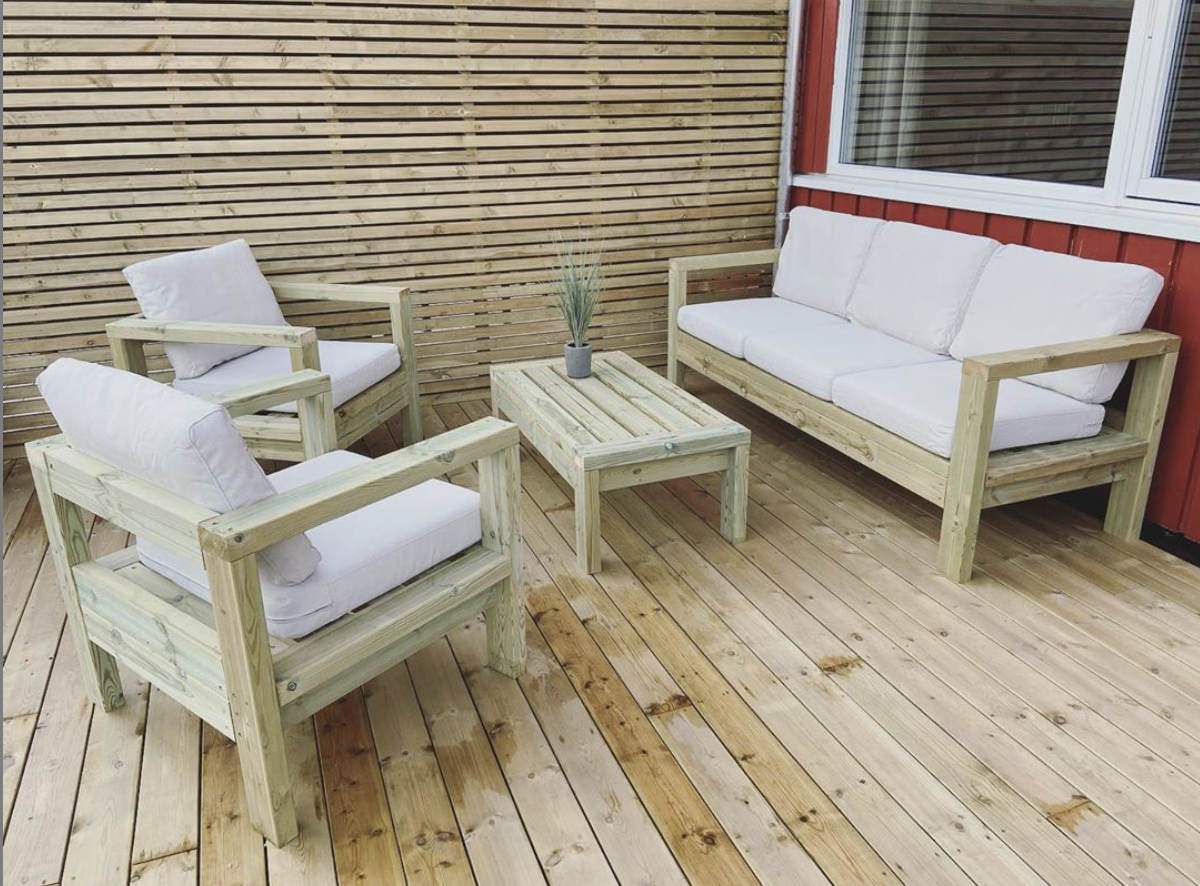
So, we decided after not finding any outdoor furniture, that why not make them! So this is the result, made a few changes to the size and measurements so the pillows from IKEA, would fit perfectly. Now we are waiting for them to be ready to oil/paint. We also made the chairs with the sofa plans, so happy we did that. Thank you so much for the plans! We are so happy! IKEA pillows name are: Sitting pillow - FRÖSÖN/DUVHOLMEN 62cm by 62 cm. Back pillows - FRÖSÖN/DUVHOLMEN 62cm by 44 cm.
Loved this project! The plans were so easy to follow, even for a begginer. Thank you so much!
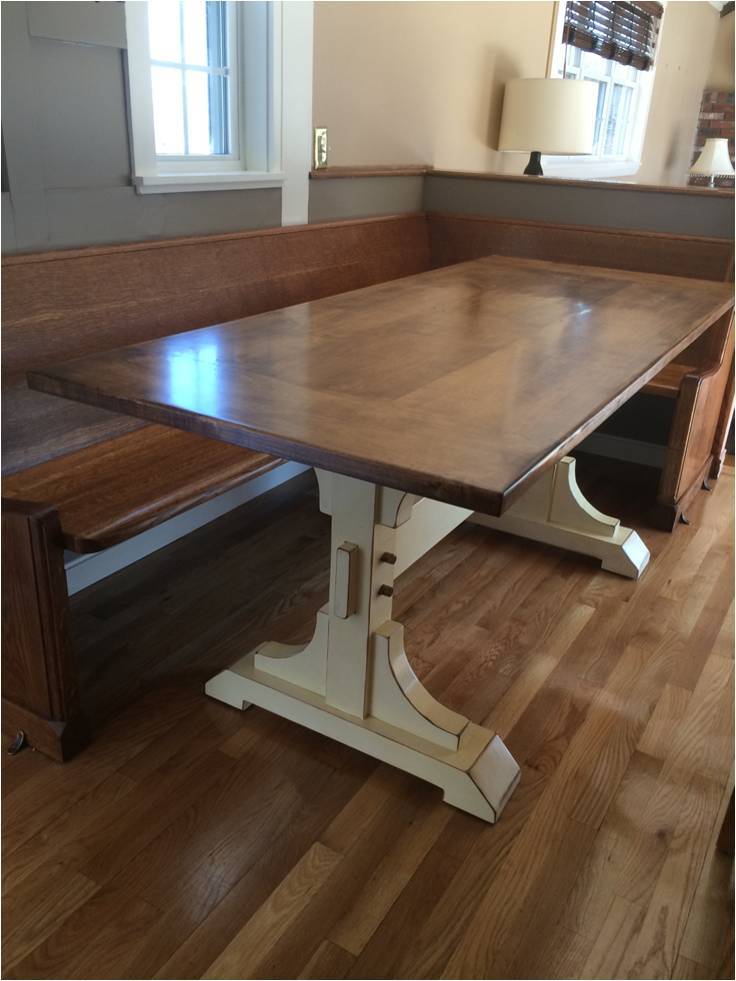
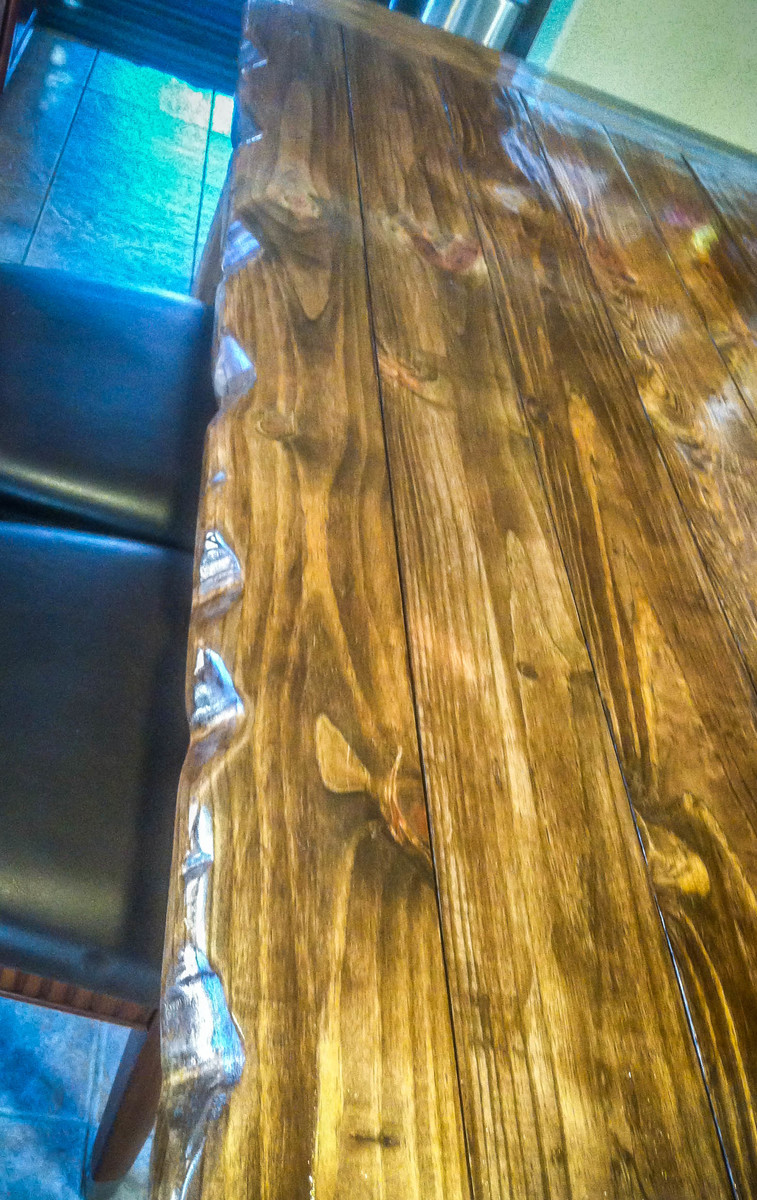
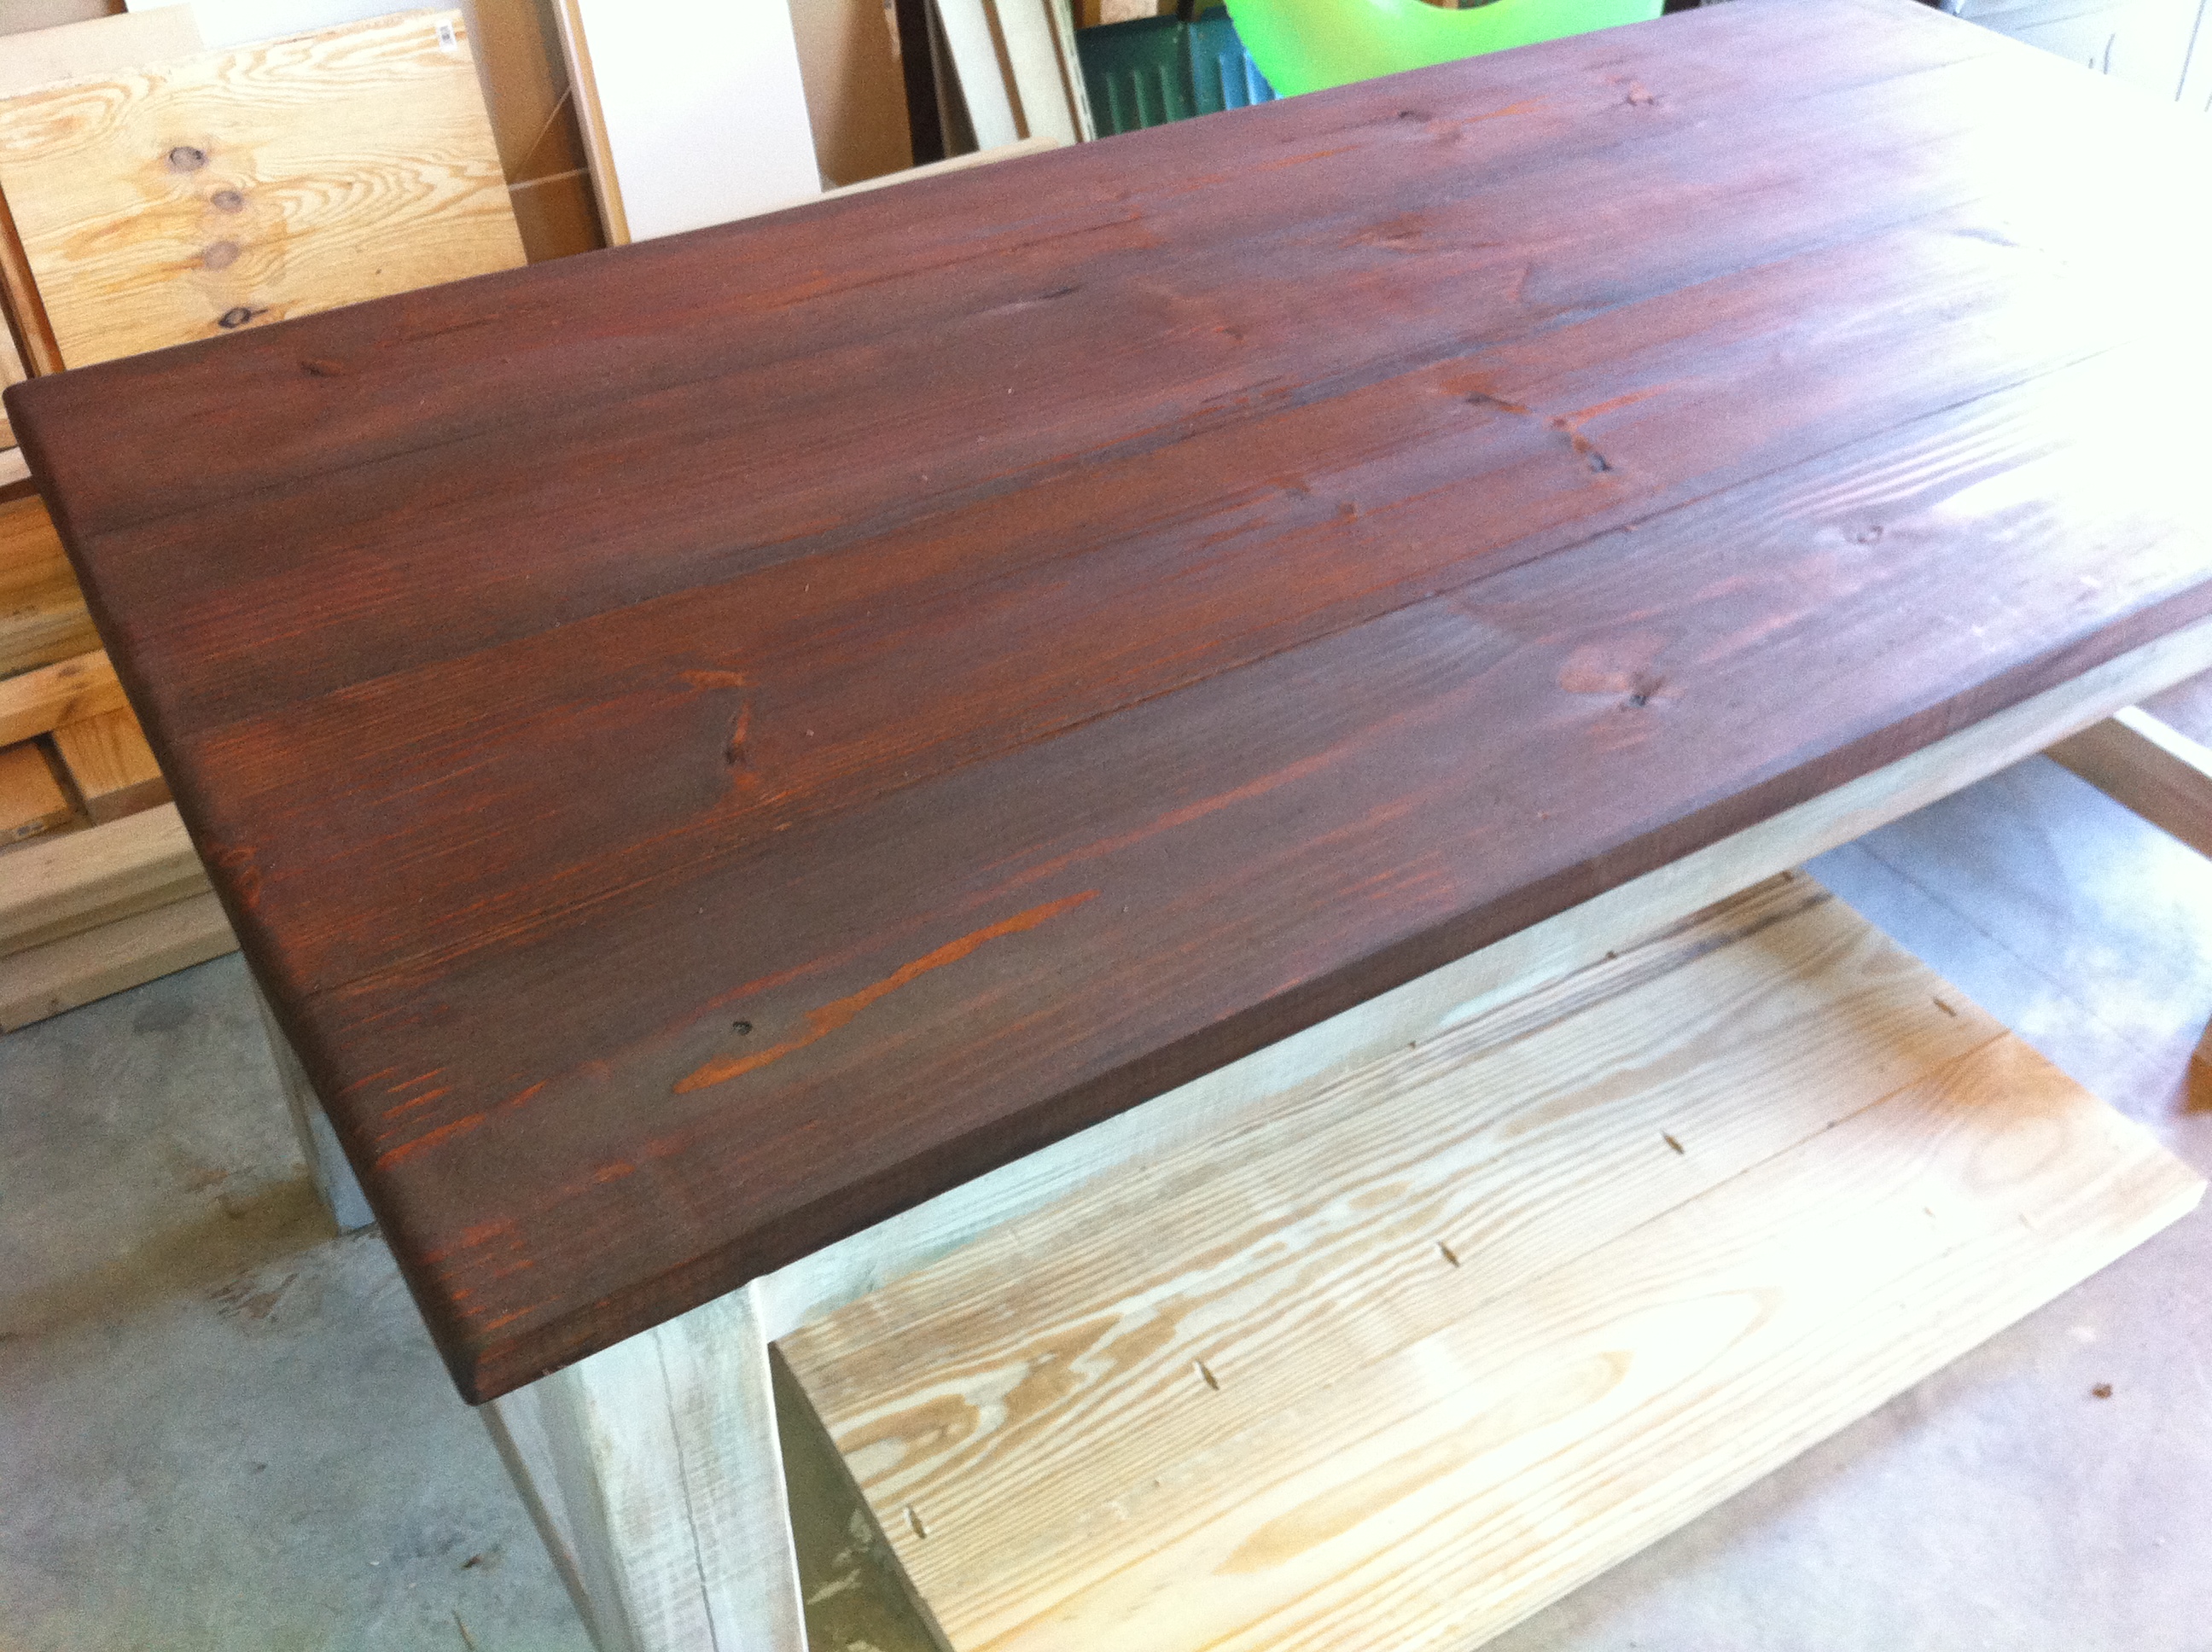
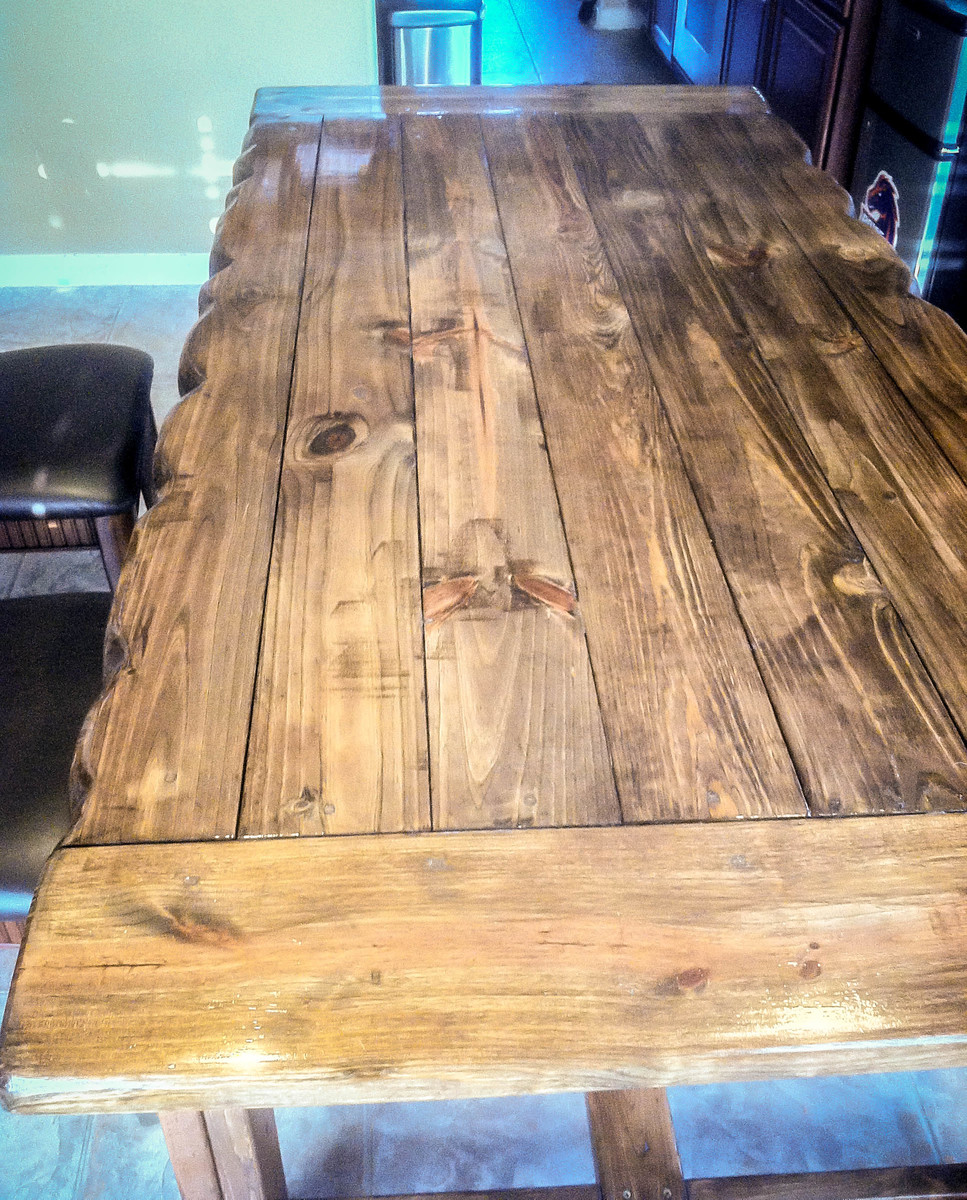
Farmhouse table made from distressed (worm hole) maple.
My neighbor was able to get me the 5/4 distressed maple for about $2/bd ft - I ended up buying 100 board feet and had plenty leftover. The finished board feet for this project was about 60 if I remember correctly. So the $200 was the bulk of the expense. The only other costs were sand paper, I bought a Kreg Jig, screws, Minwax Marker, paint, stain and urethane (much of which I already had).
It came out better than I anticipated. The antique white finish was not difficult at all.
Tip - When following the instructions for the finish here, I applied the first coat of urethane with a brush almost immediately after applying the Minwax marker to all of the sanded edges. I did this in haste, but ended up with some unexpected results that really added a nice touch. The stain from the marker incorporated a bit into the urethane as I brushed it giving it an antique, yellow hue. At first I thought I made a big mistake, but it turned out to add a really nice look.


Mon, 05/19/2014 - 07:29
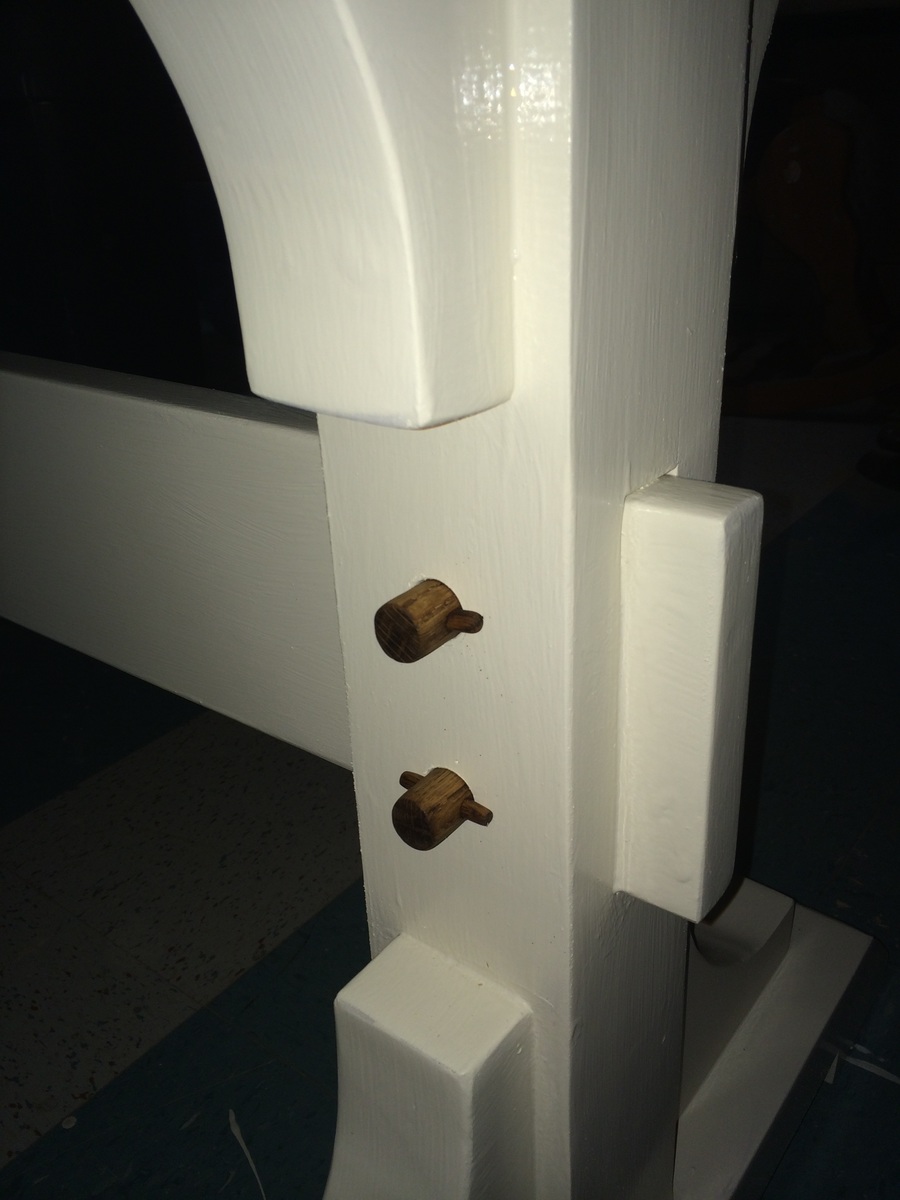
CSaintD - The top can be removed as I did not glue it. I set 3 dowels on top of each of the 2 legs so that the top would always lign up correctly if disassembled and reasembled. The stretcher could be removed, but would probably cause some damage to the finish as it was a tight fight when I finished it. The stretcher would be removed by removing the dowel pegs that I fabricated on each leg.

In reply to Disassembly by g82martin
Mon, 05/19/2014 - 08:21
Thanks. I really like the dowel pegs on the legs/stretcher. Very nice top finishing as well. Did you square the boards to get them to be so smooth when joined?
Mon, 05/19/2014 - 08:26
I cheated a bit on the top. My neighbor who got me the wood works in a furniture reupholsery shop. He planed and joined the boards for me, which saved me a good amount of time. I'm confident I could have done this at home with my table saw, miter saw and hand plane, but what he did in 2 hours probably would have taken me 10.
Fri, 08/05/2016 - 20:35
Love the dowels you added! Planning on building this exact table pretty close to your dimensions and have a very long church pew as well! Trying to decide between L-ing my pew and cutting to straigjy 6'. Do you mind sharing the dimensions of your pew? And how did you miter the pew?
Tue, 01/21/2020 - 09:40
Beautiful table. I love the pegs added to the legs and stretcher, they add a historic detail lost in a lot of today's building techniques
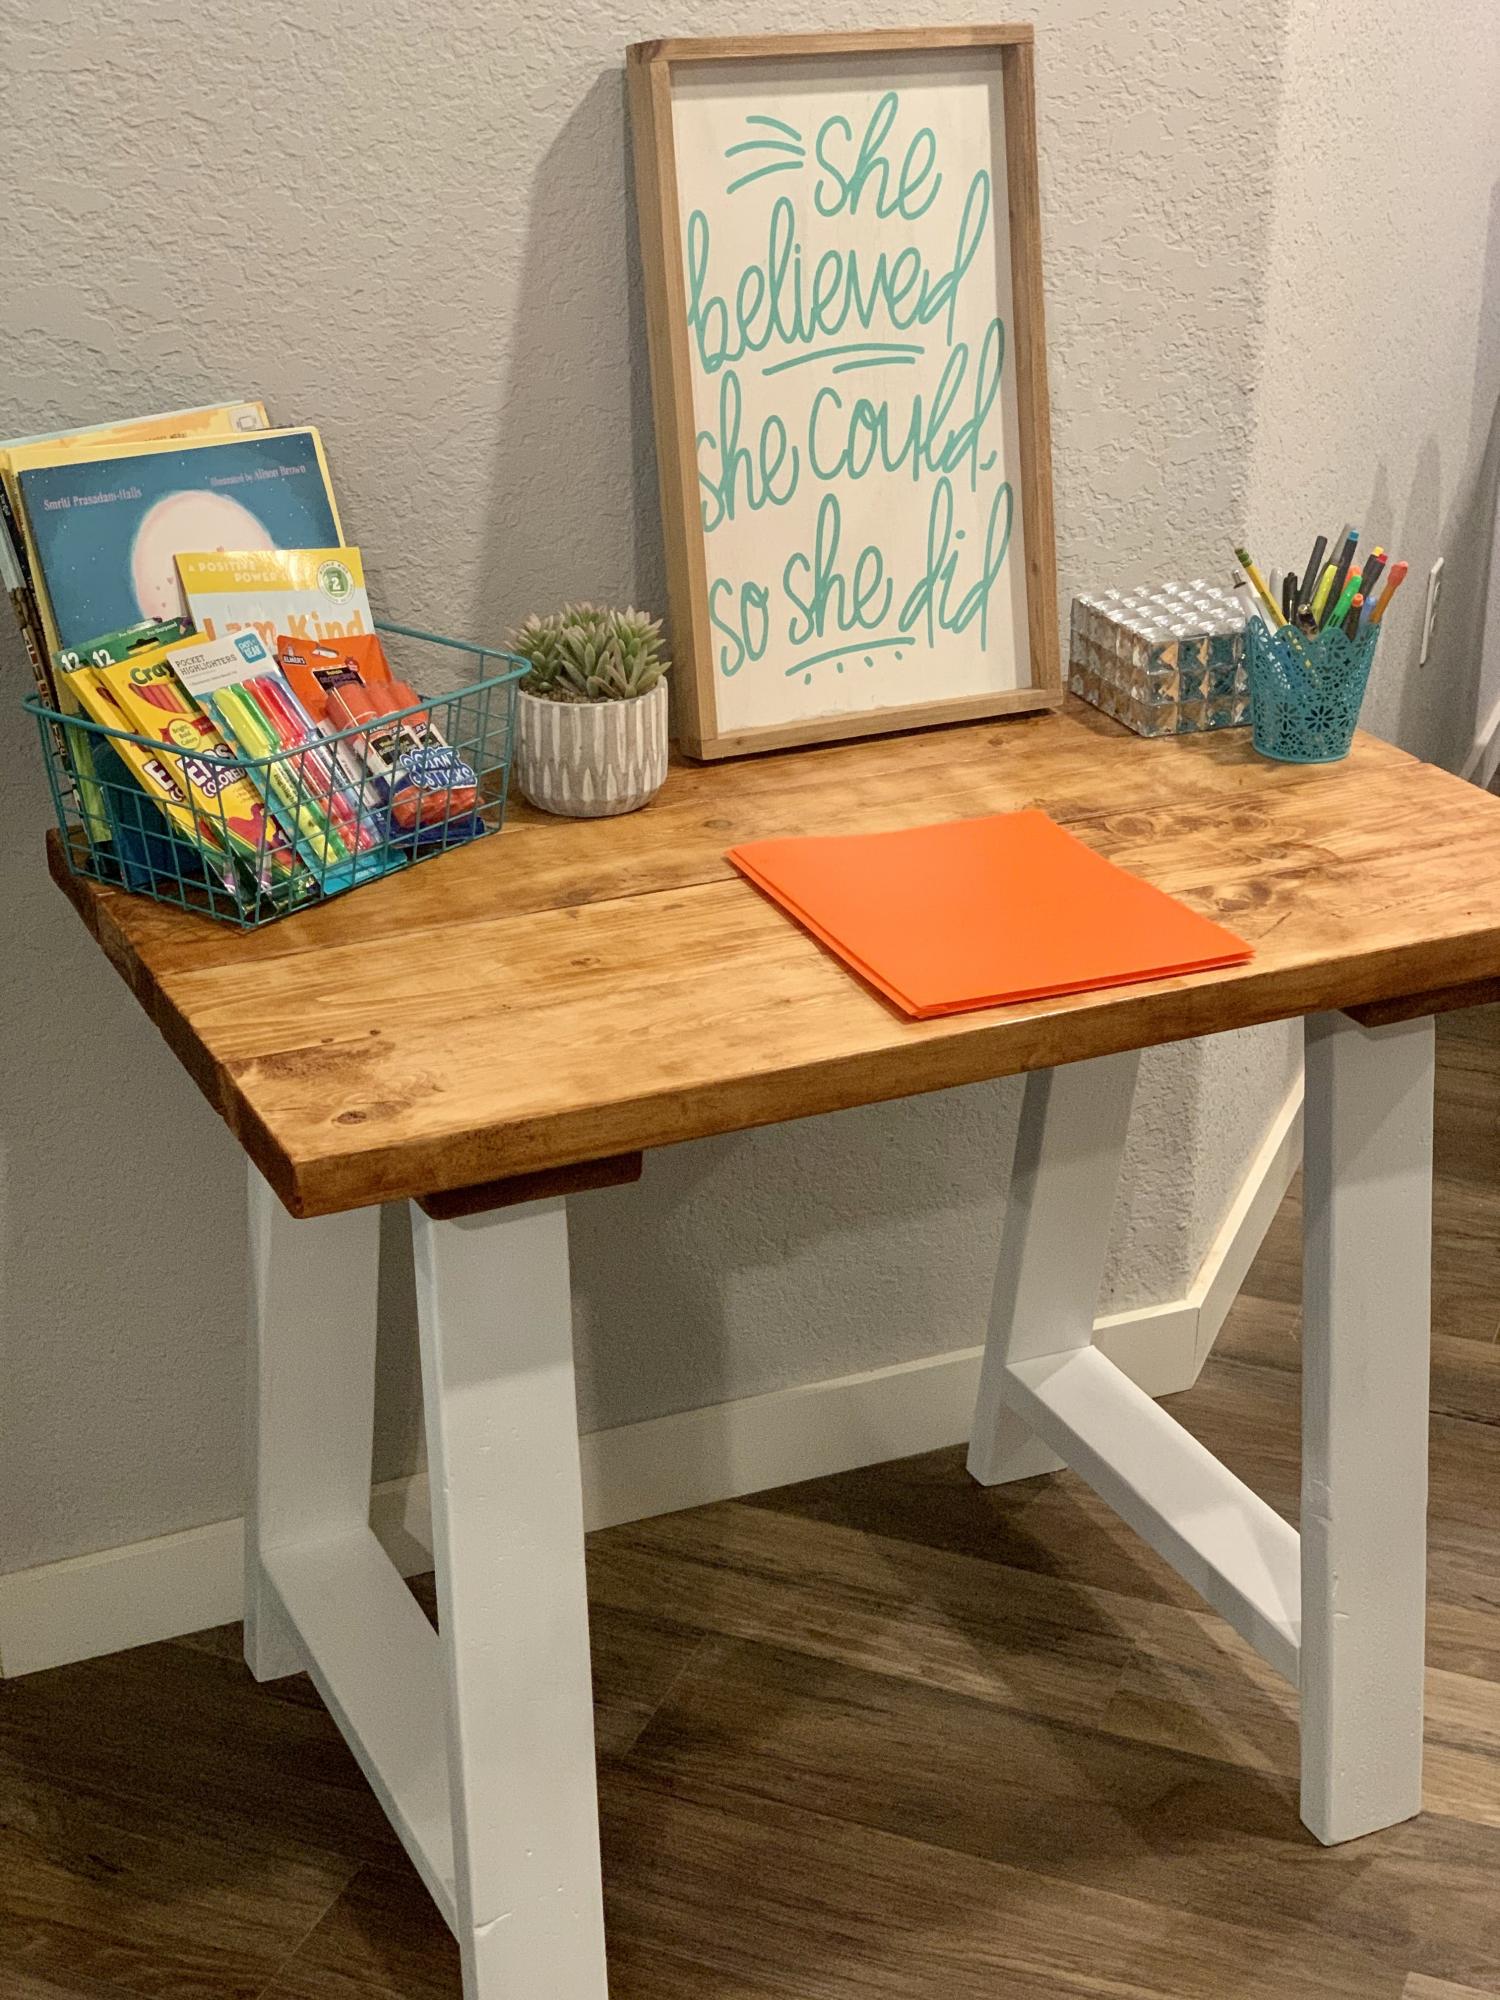
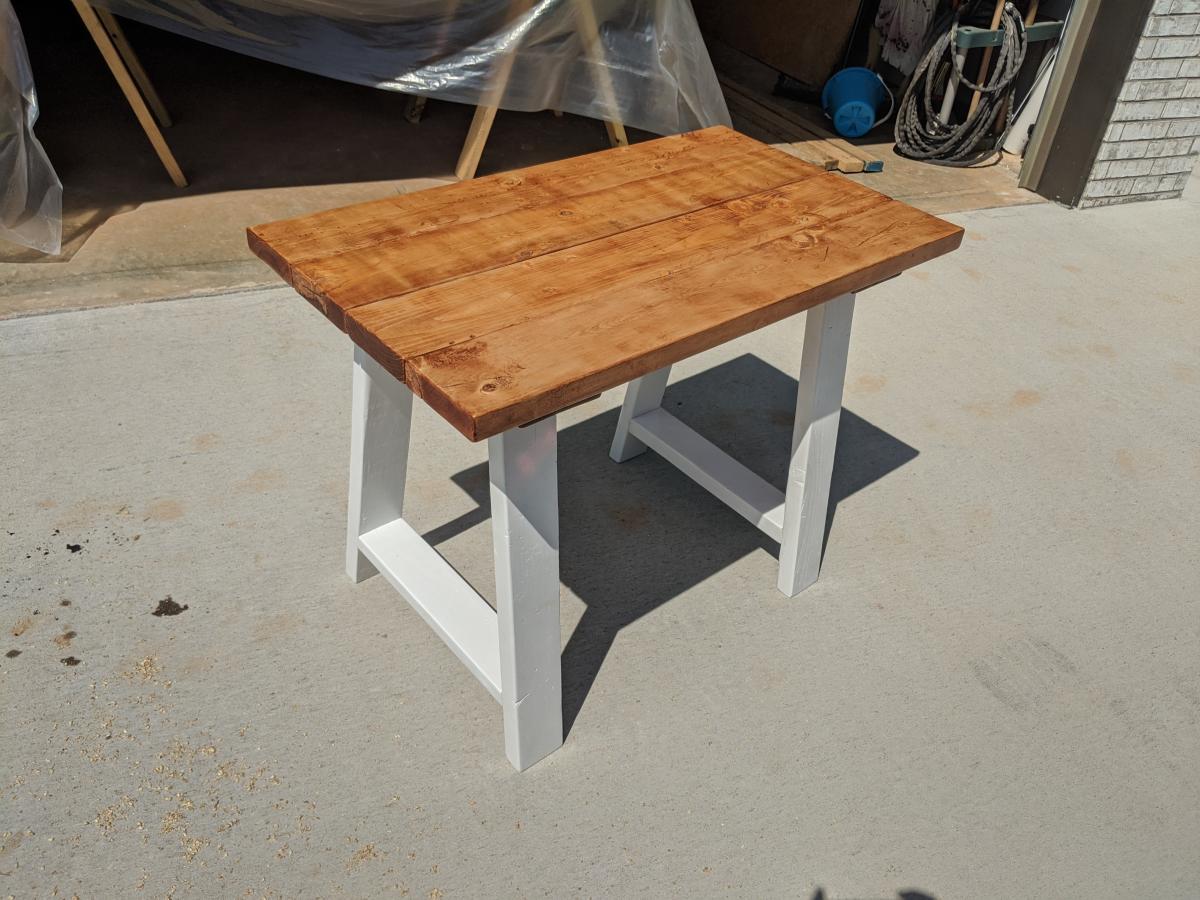
Made this desk for someone who's kid had to do virtual classes due to COVID-19. Quick and easy plans.
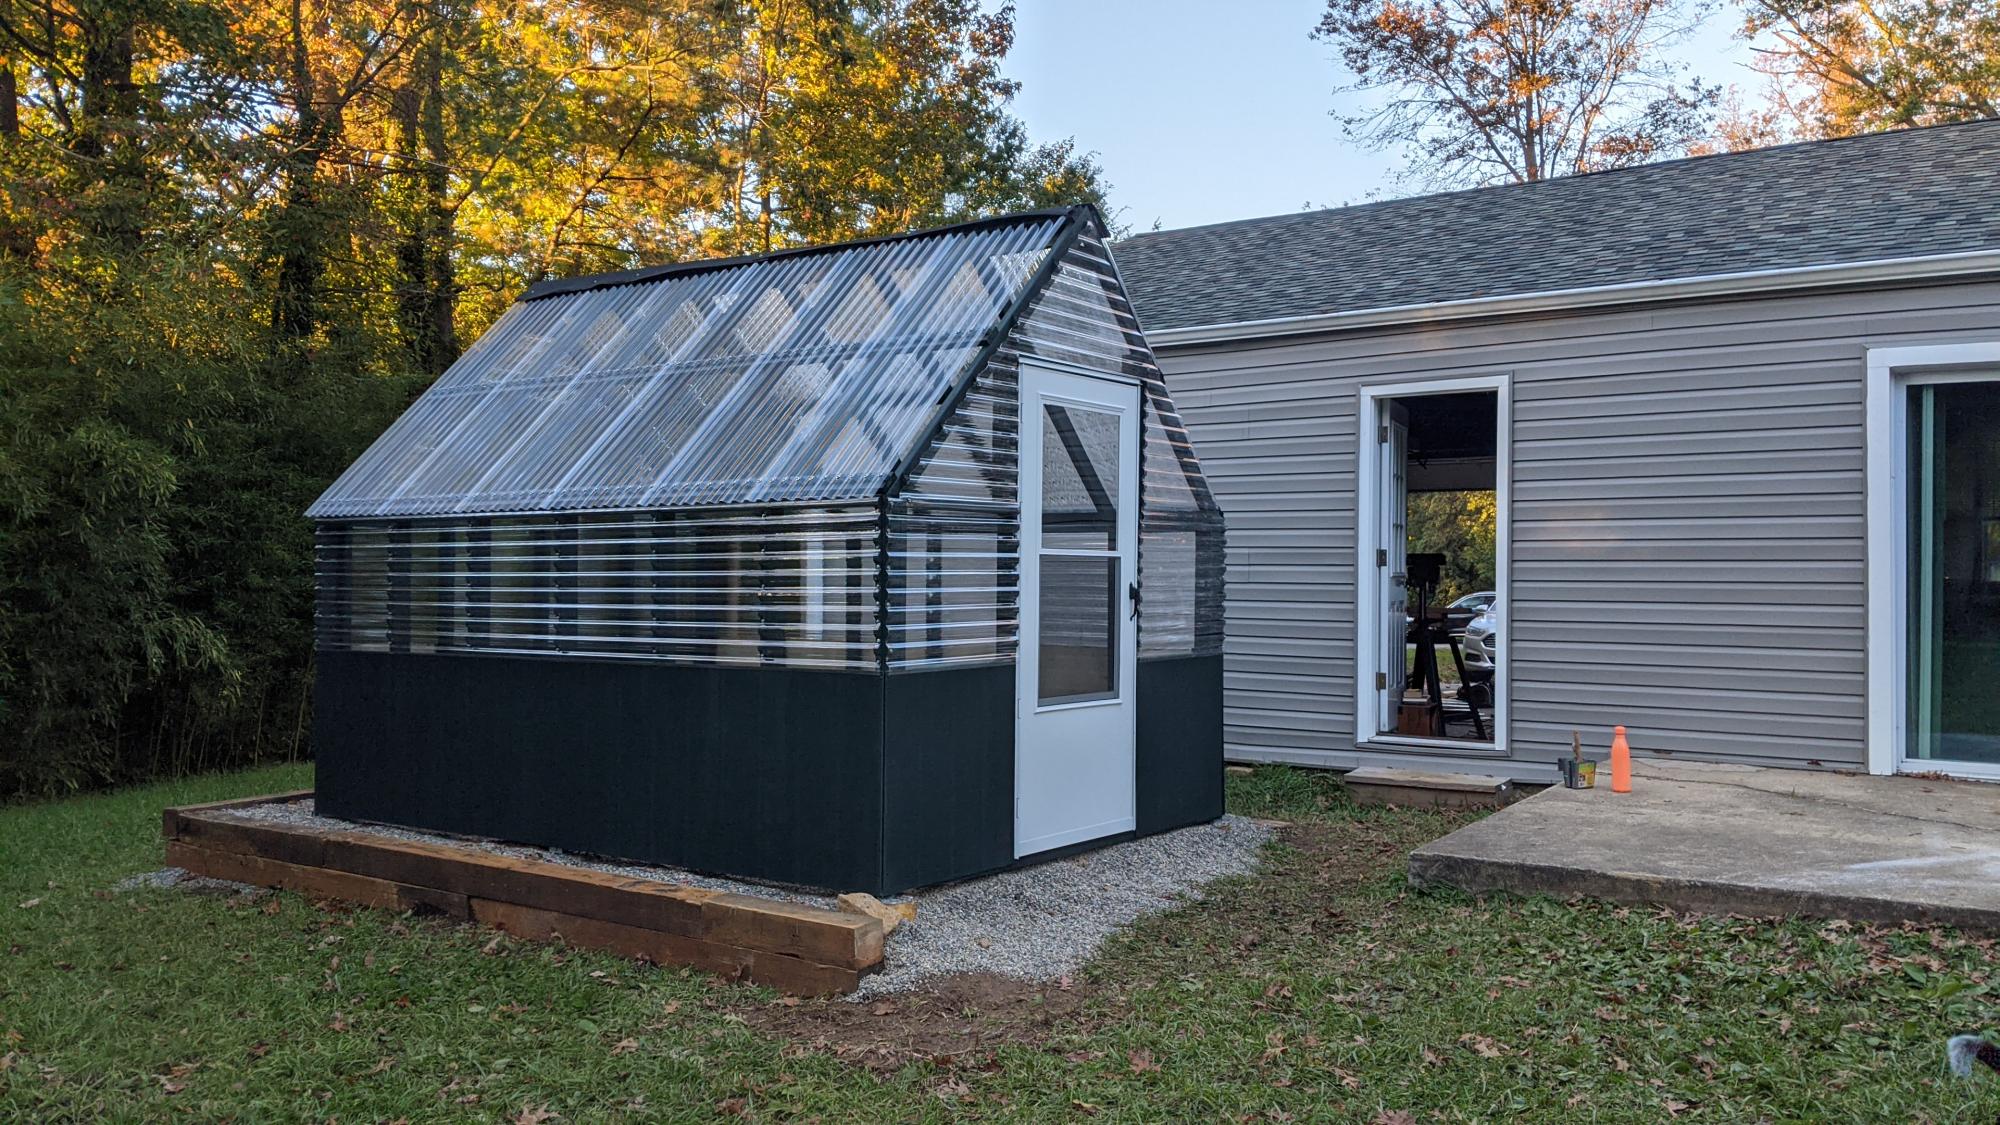
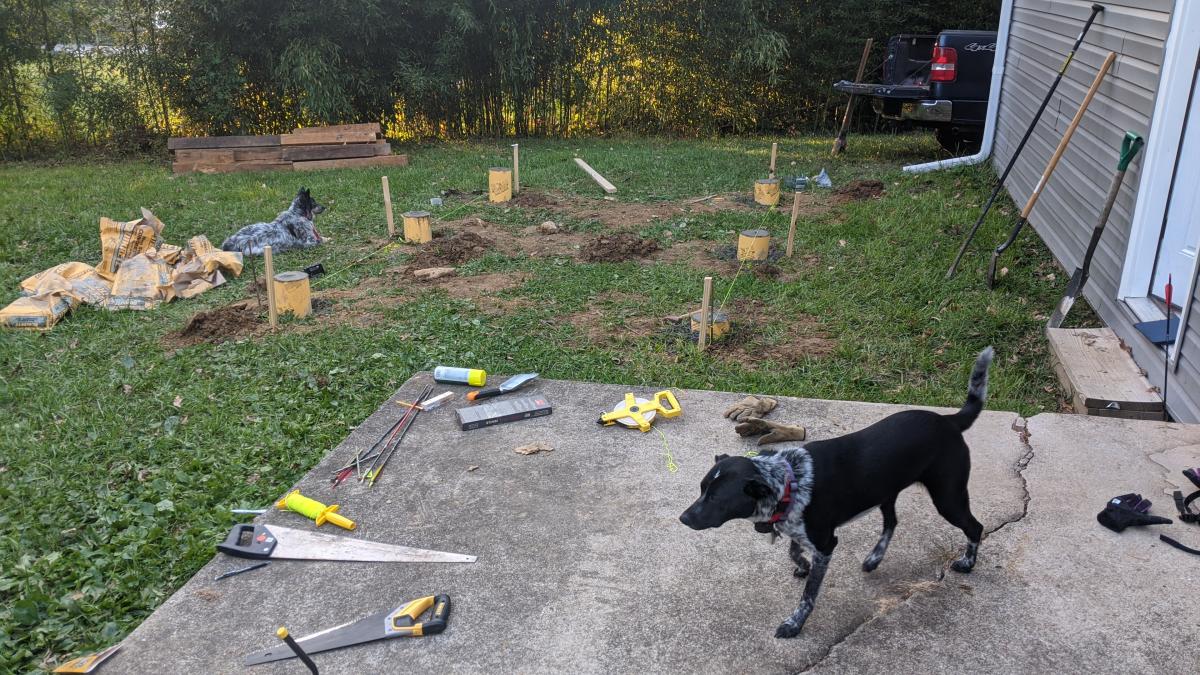
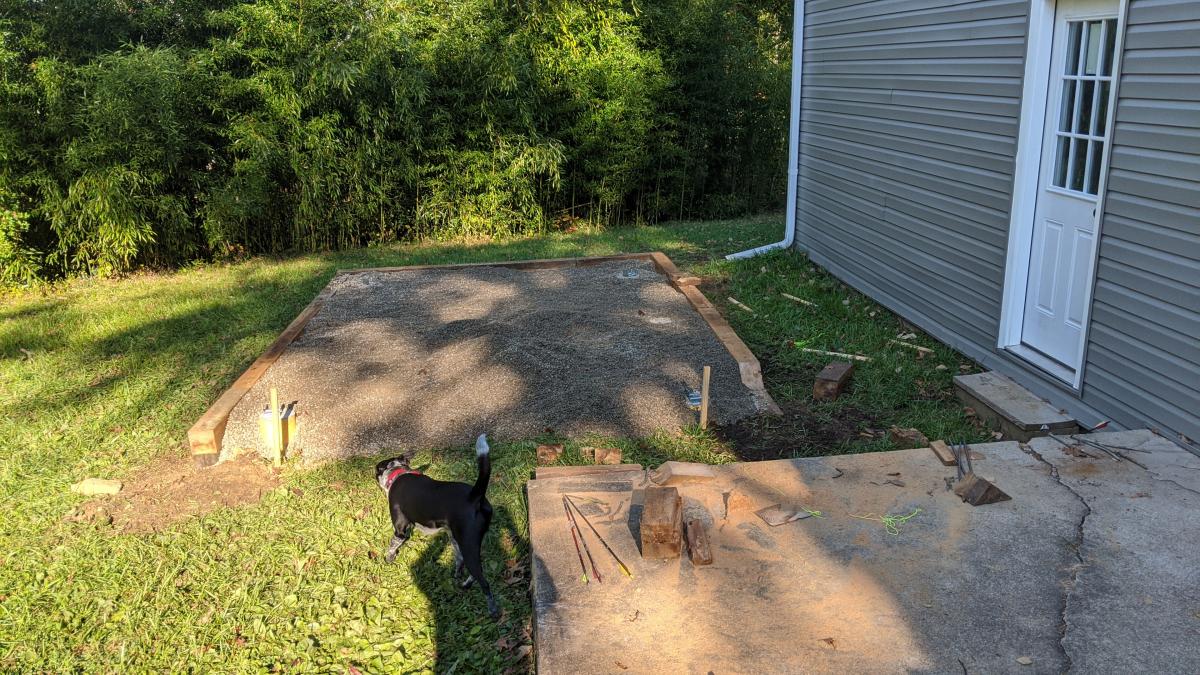
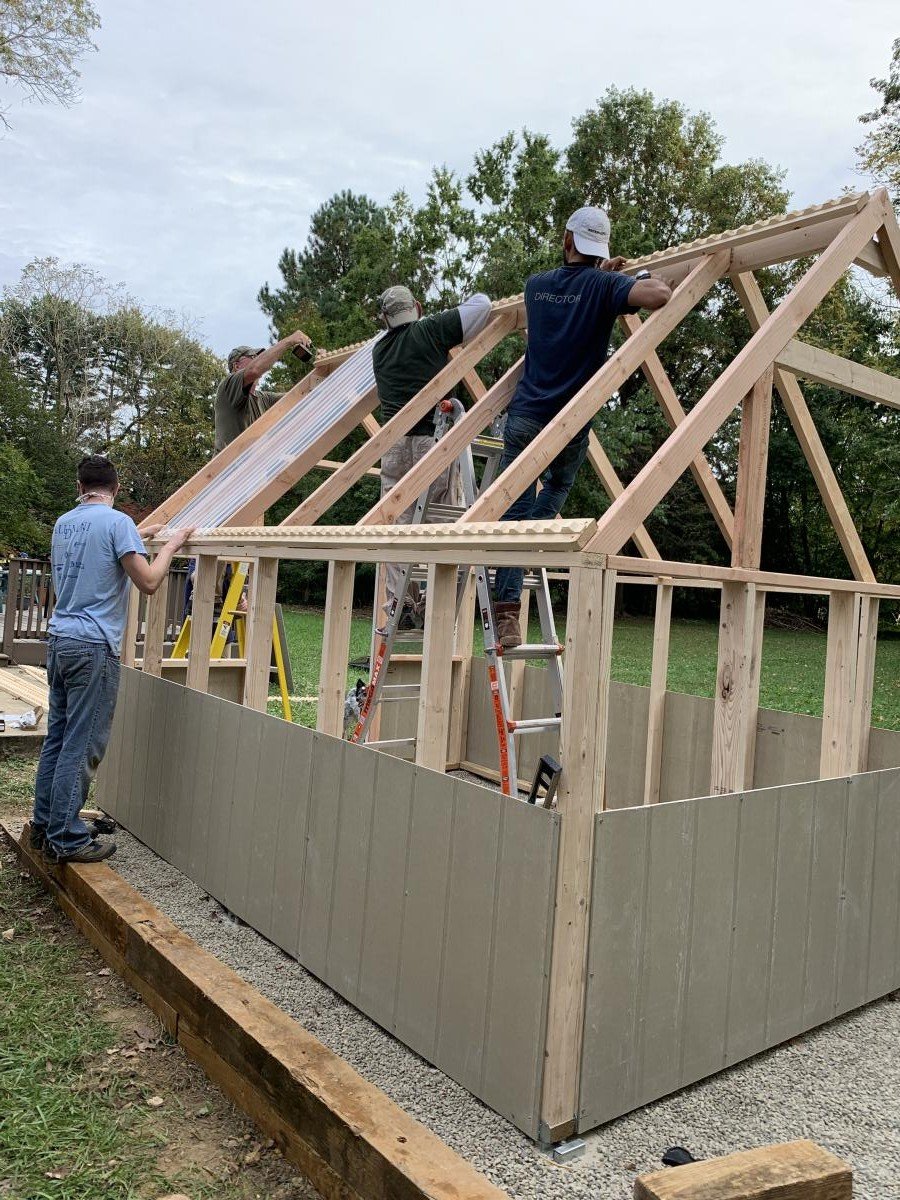
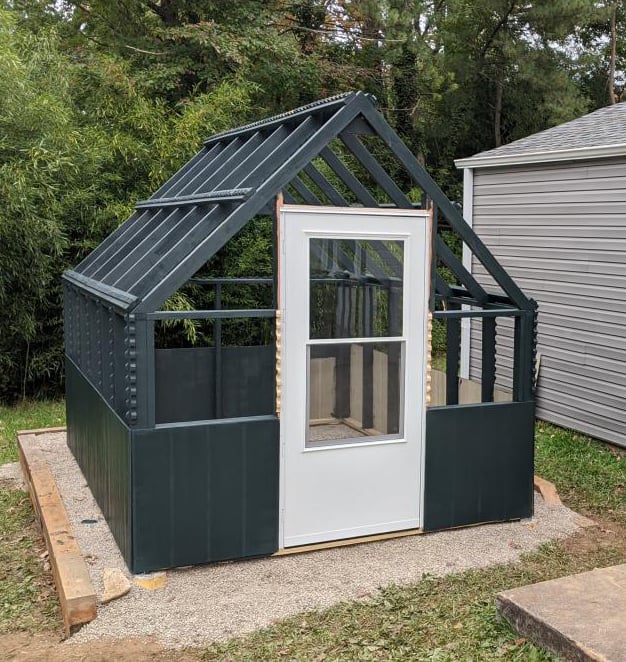
With the help of friends and family, we managed to build this greenhouse rather easily. We had to start with the foundation since the spot we chose was not an even grade. We did this by filling sono tubes with cement and leveling each off so the greenhouse would have a solid place to sit. We then built out a frame around the outside of the cement tubes with some reclaimed 6x6's. After that, we filled the space with 5 tons of river rock and then got to work! After the foundation was ready putting the rest of the house together was a piece of cake. The frame was so easy to put together. We had a few minor kinks to work out here and there, I won't say this house came out 100% perfectly, BUT I am so happy with the end results. We chose to paint it a deep green color as a final touch. So far we just moved a few potted plants from our deck to the greenhouse for the winter. It has been working very well to keep the plants cozy during the colder days we've had. Eventually, I plan to build a potting station, shelving, and most likely a garden bed for winter harvests.

Mon, 11/09/2020 - 09:52
The foundation looks great the greenhouse looks amazing! I'm sure fun was had building it too:) Thanks for sharing.
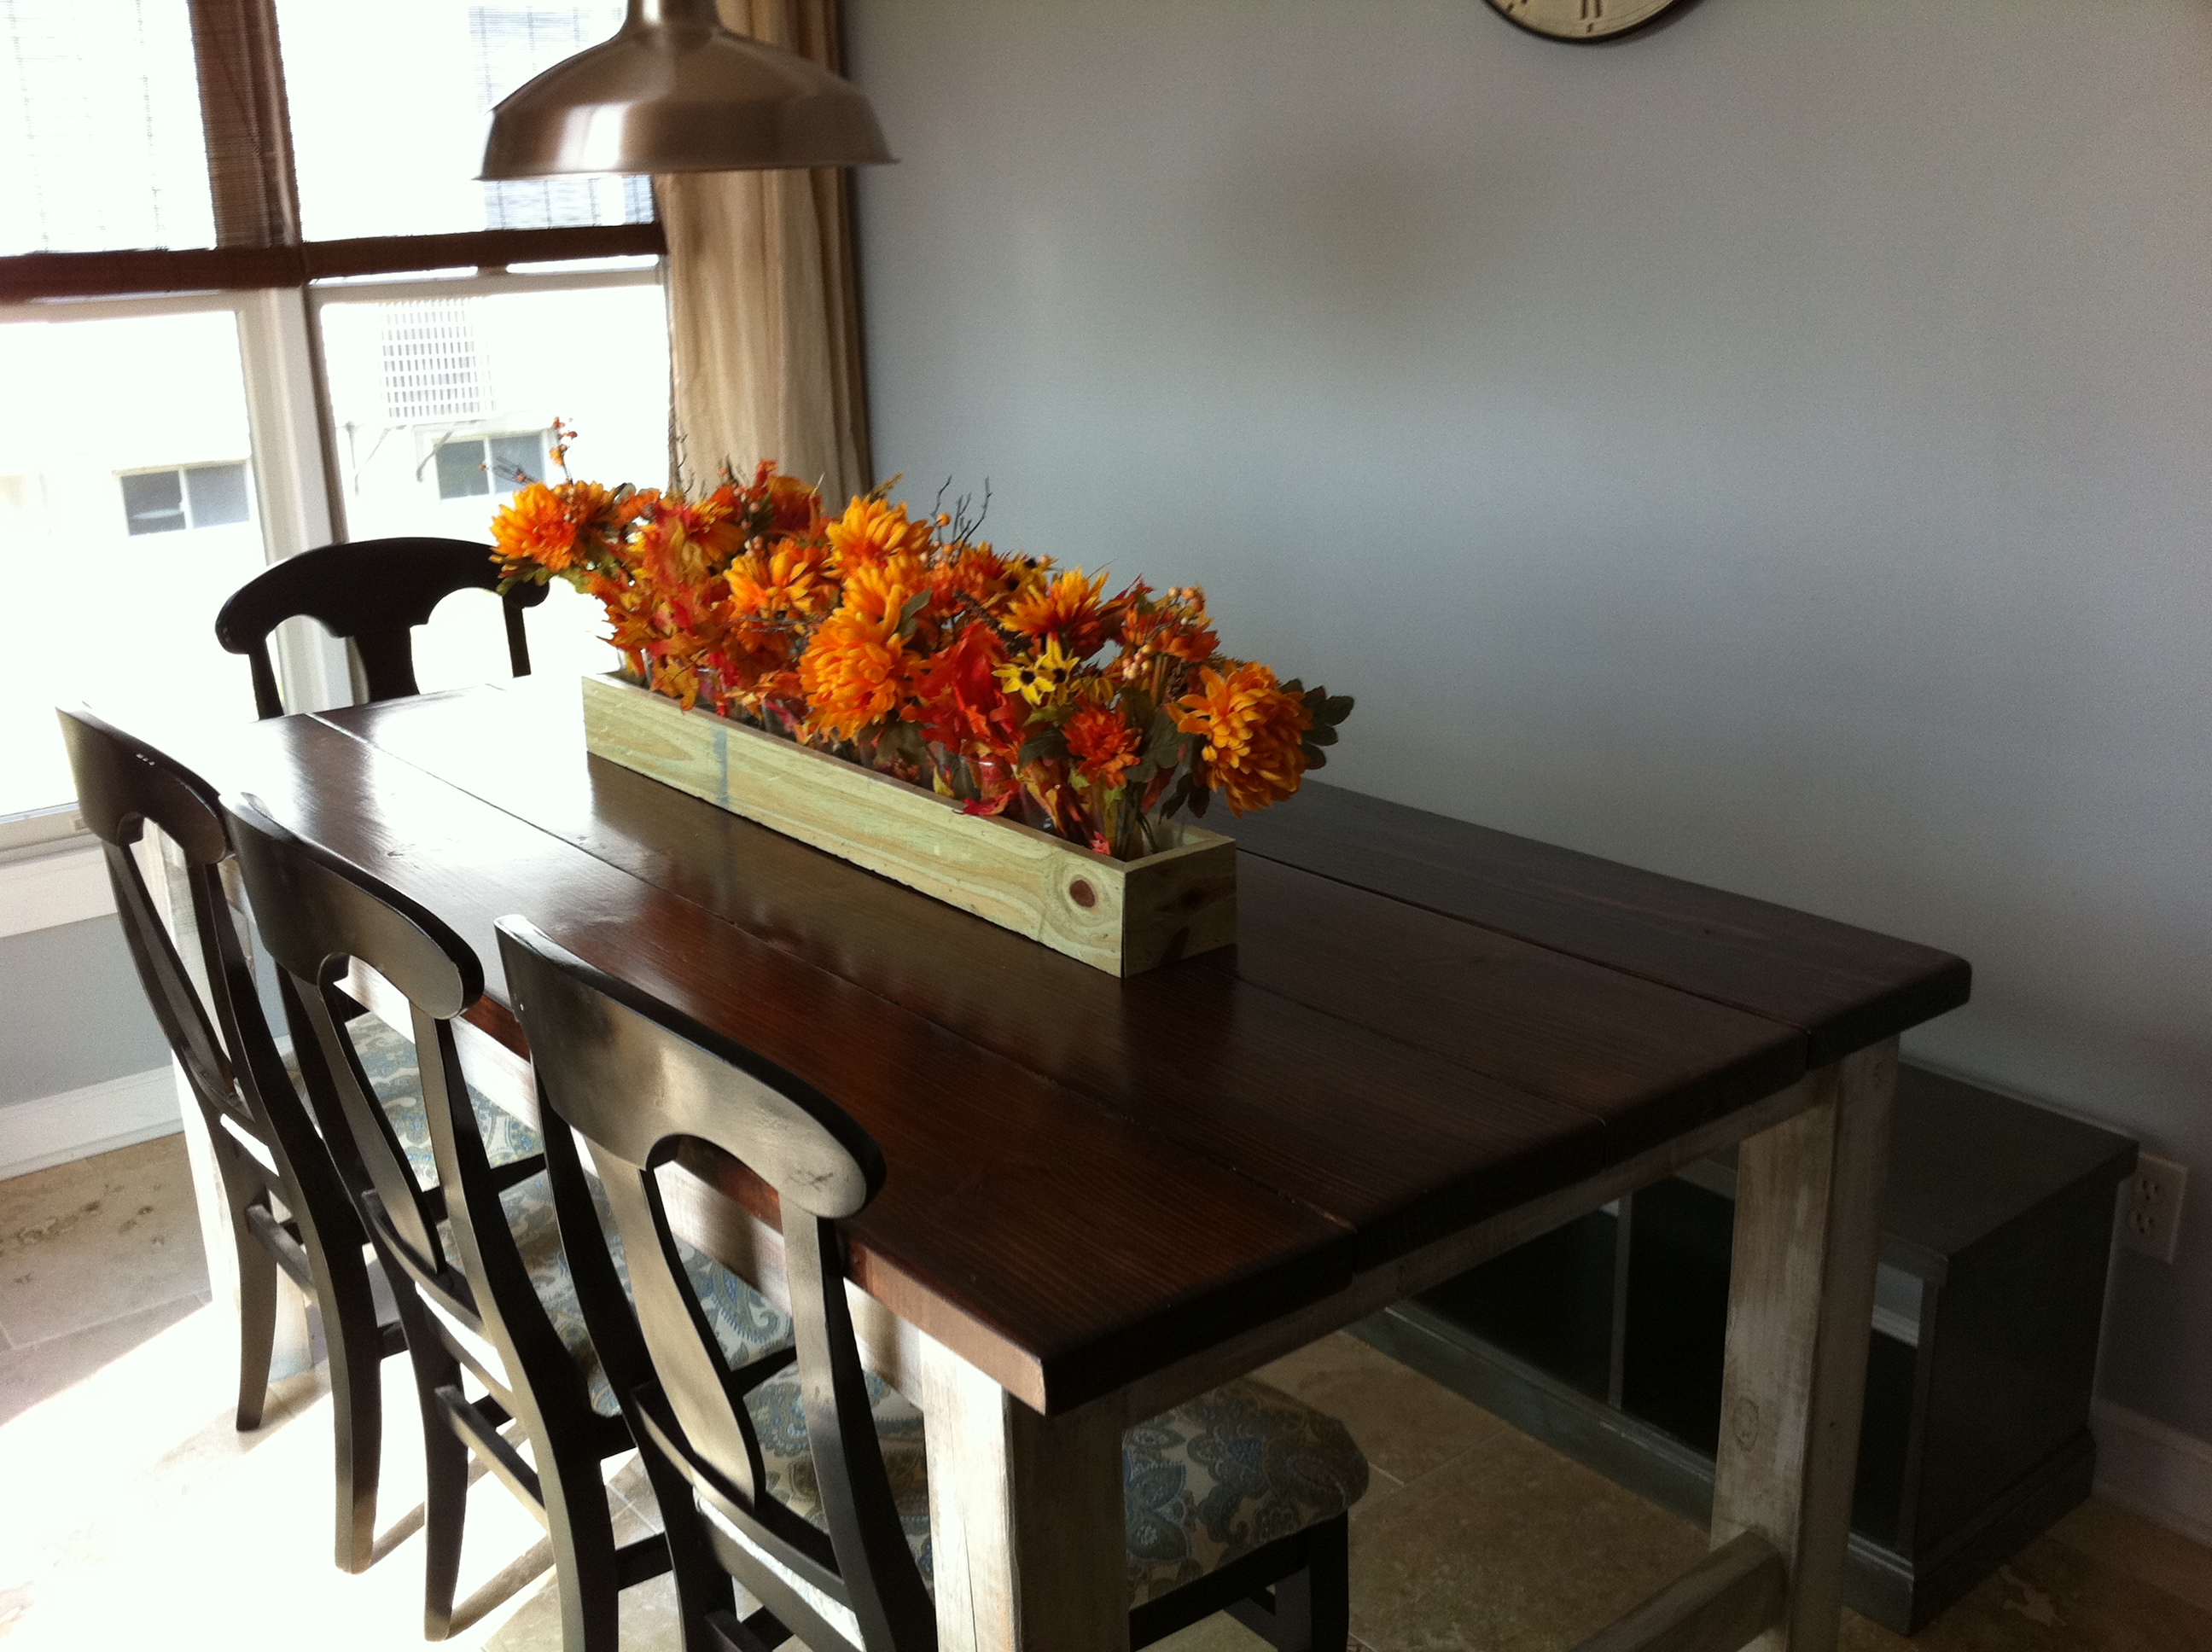
The table is one that I have been waiting for my husband to retire from the Marines to make me. We moved so often while in the military that I knew there was no need to buy expensive furniture just to get damaged. When I found the plans for this I was thrilled.
The edges of the table have been sanded to resemble the worn weathered look.
Please forgive the pictures. I will retake soon.