Community Brag Posts

Place to put all the toys I buy my grandson...
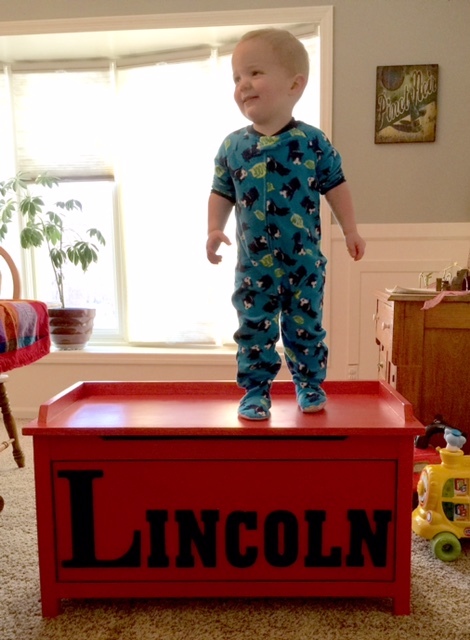
Enjoyed building this. Quite simple but well received. Thanks, Ana. - Dick
Built from Plan(s)
Estimated Time Investment
Weekend Project (10-20 Hours)
Recommended Skill Level
Beginner
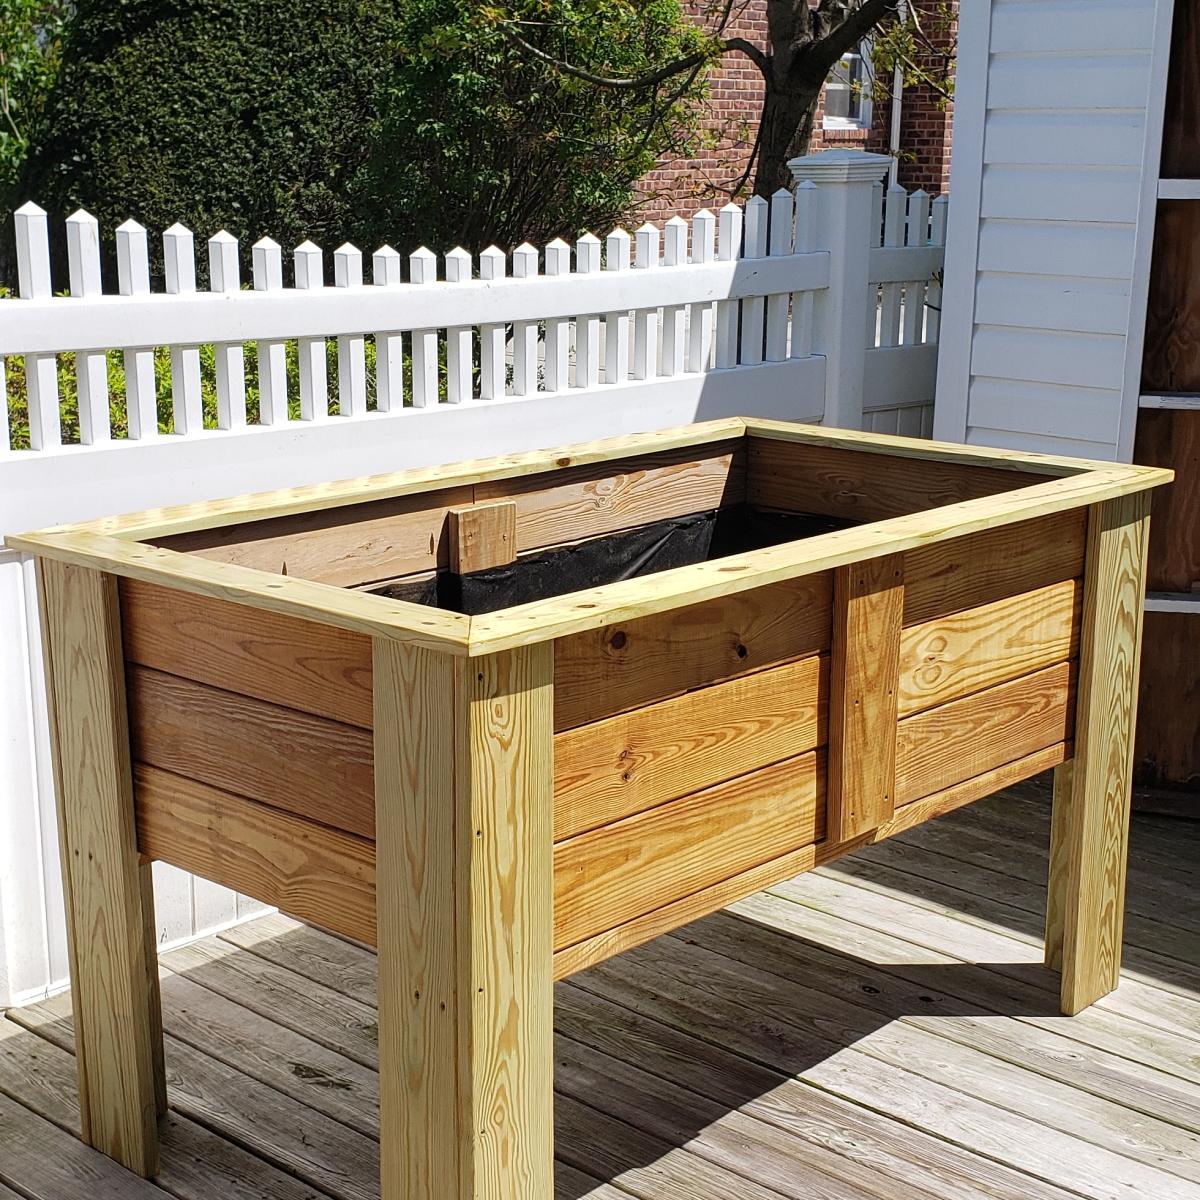
Standing Outdoor Planter
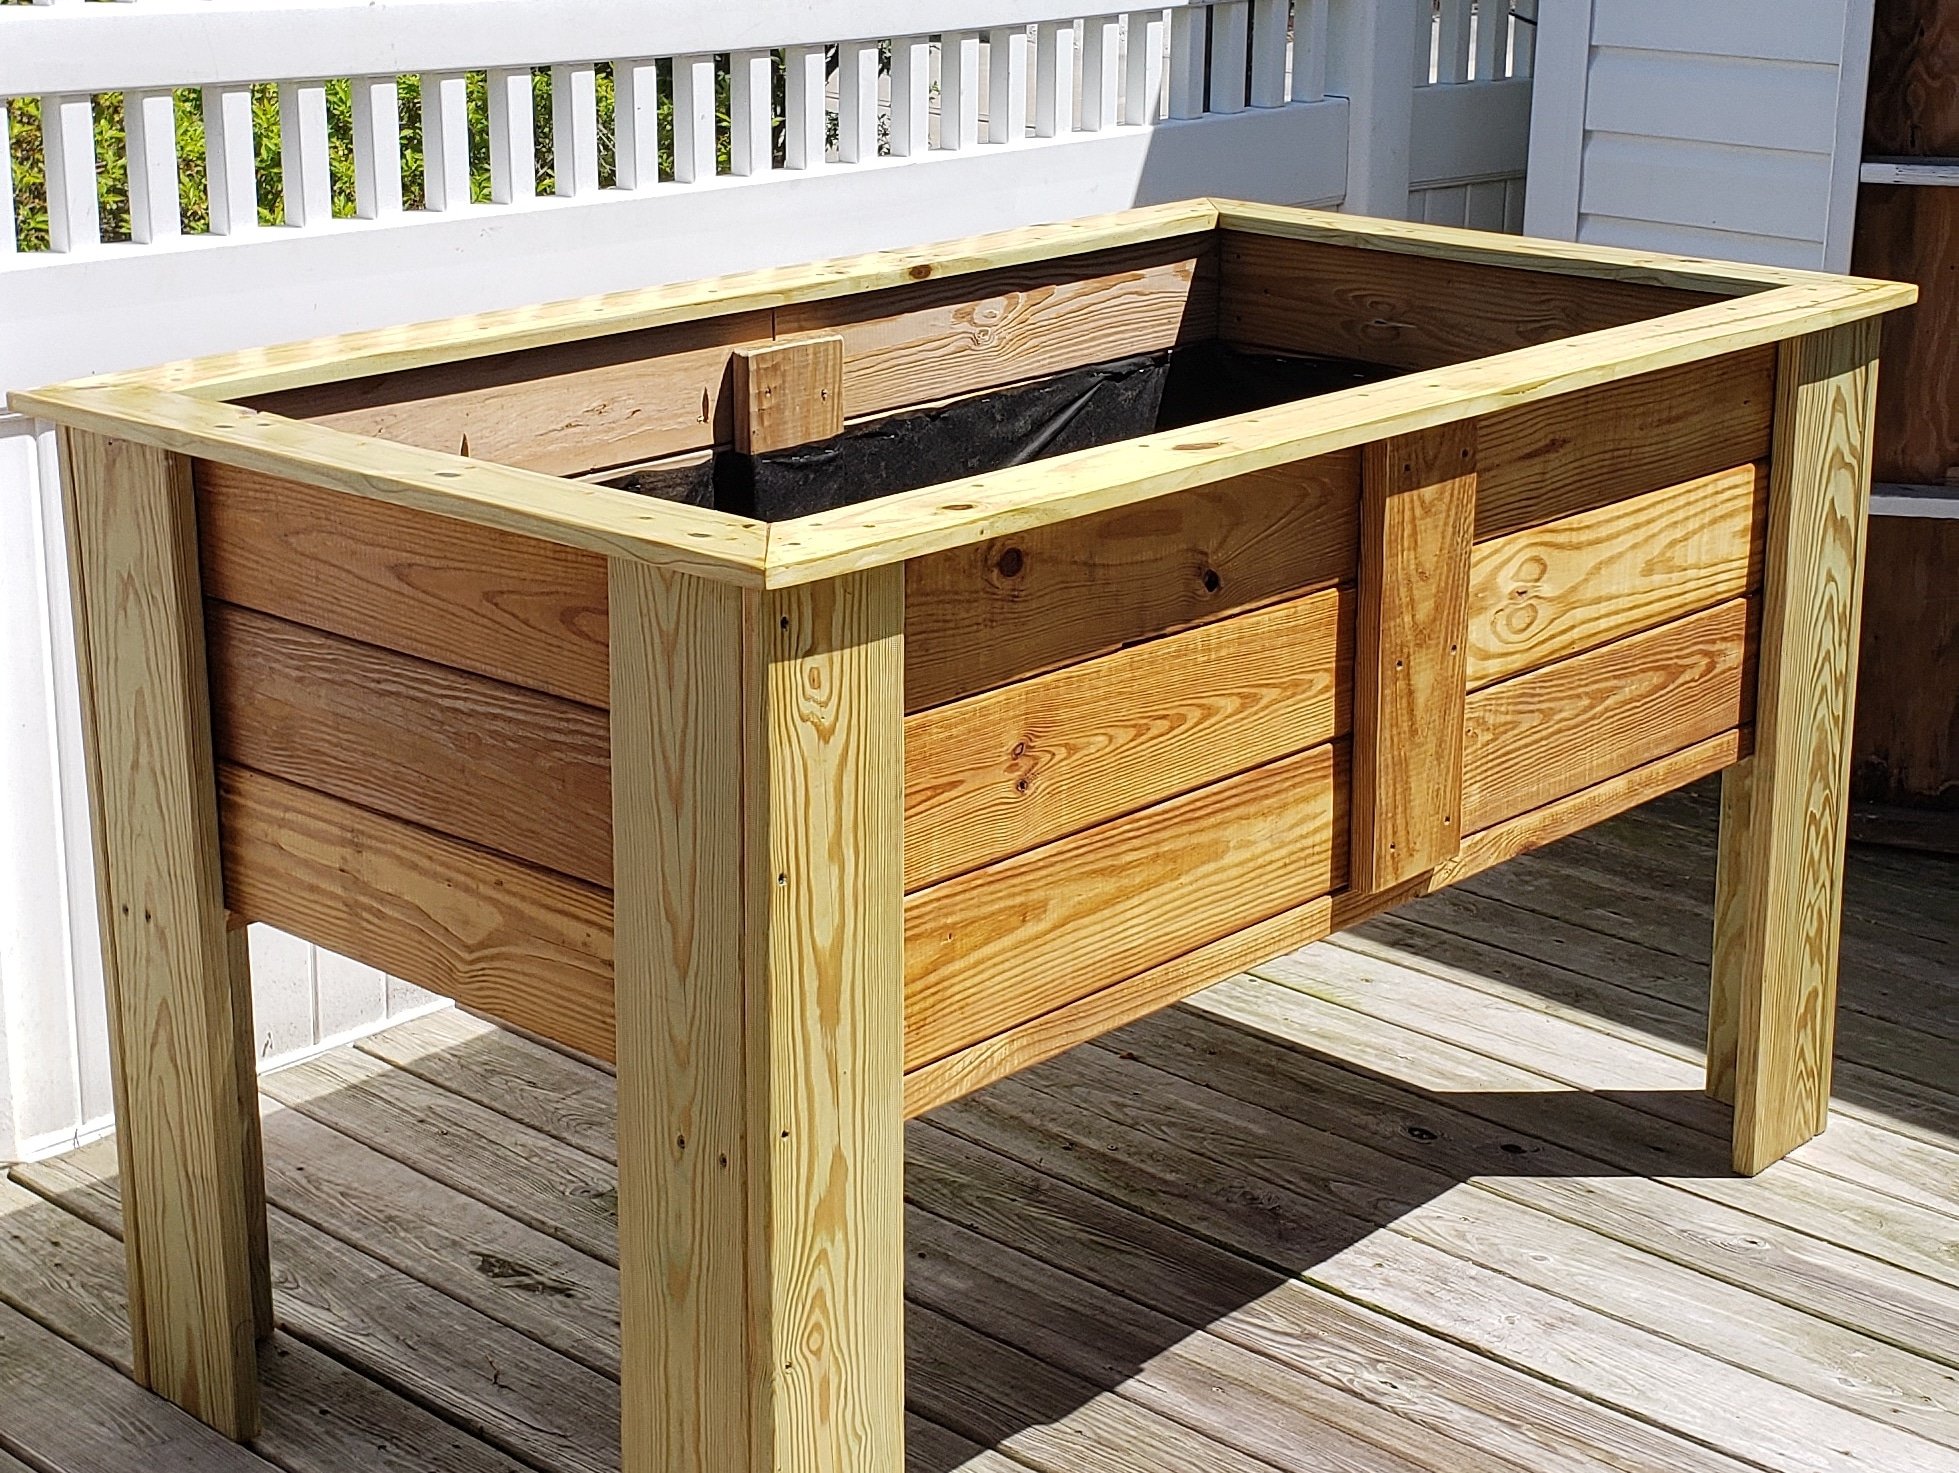
A friend of mine has issues with her knees but loves gardening so I built this to allow her to continue gardening. She loved it.
I didnt follow any particular set of plans I watched several you tube videos and combined different ideas from the videos to develop my own plan.
Built from Plan(s)
Comments
Vanity Hutch

Bathroom had a huge mirror. Looked like it required 2 men and a small boy with proper tools to remove it. So a riff off the vanity plan covered 2/3 of the mirror and made for a much nicer look.
Comments
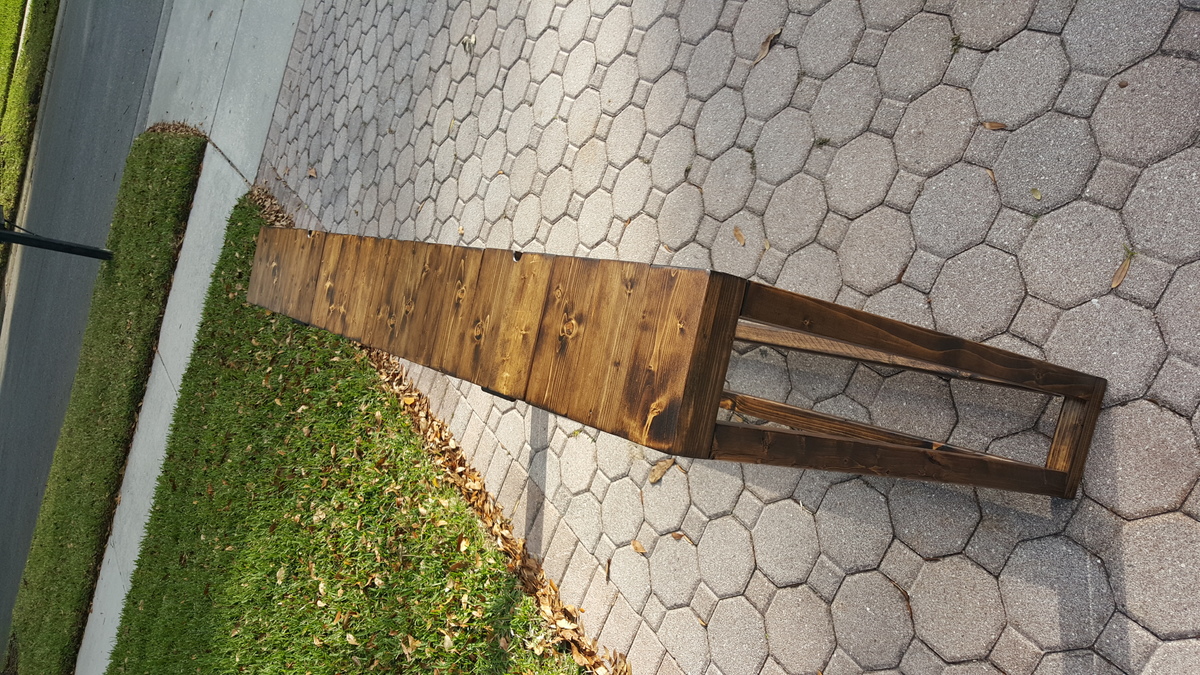
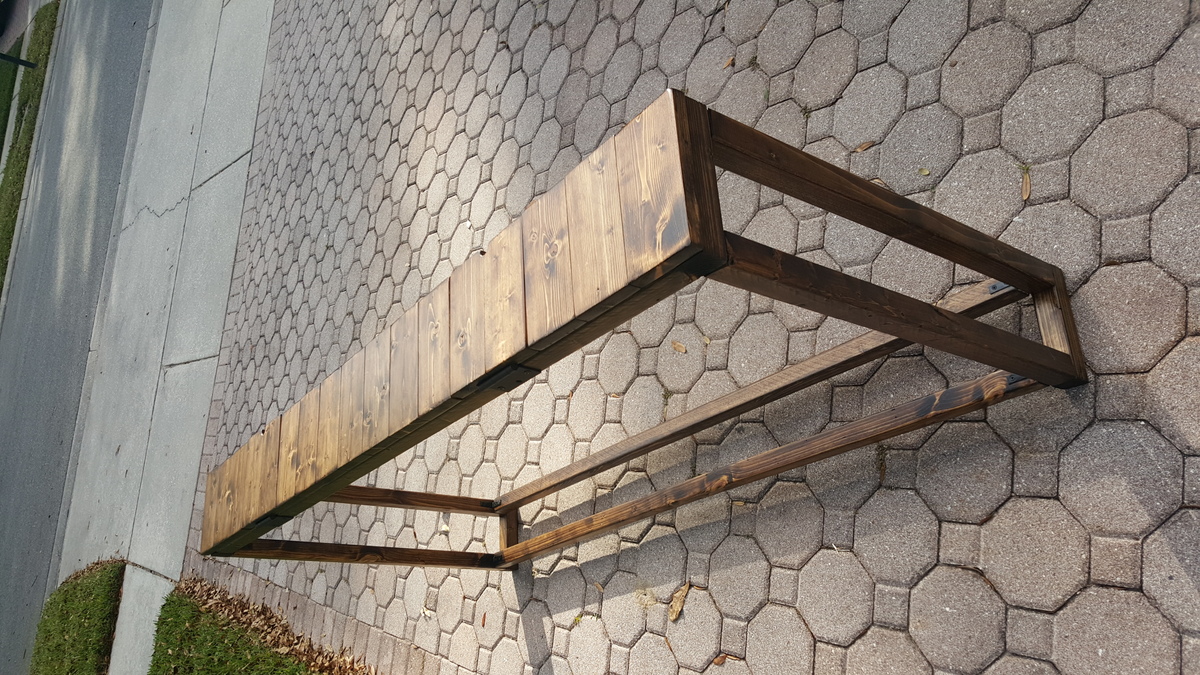
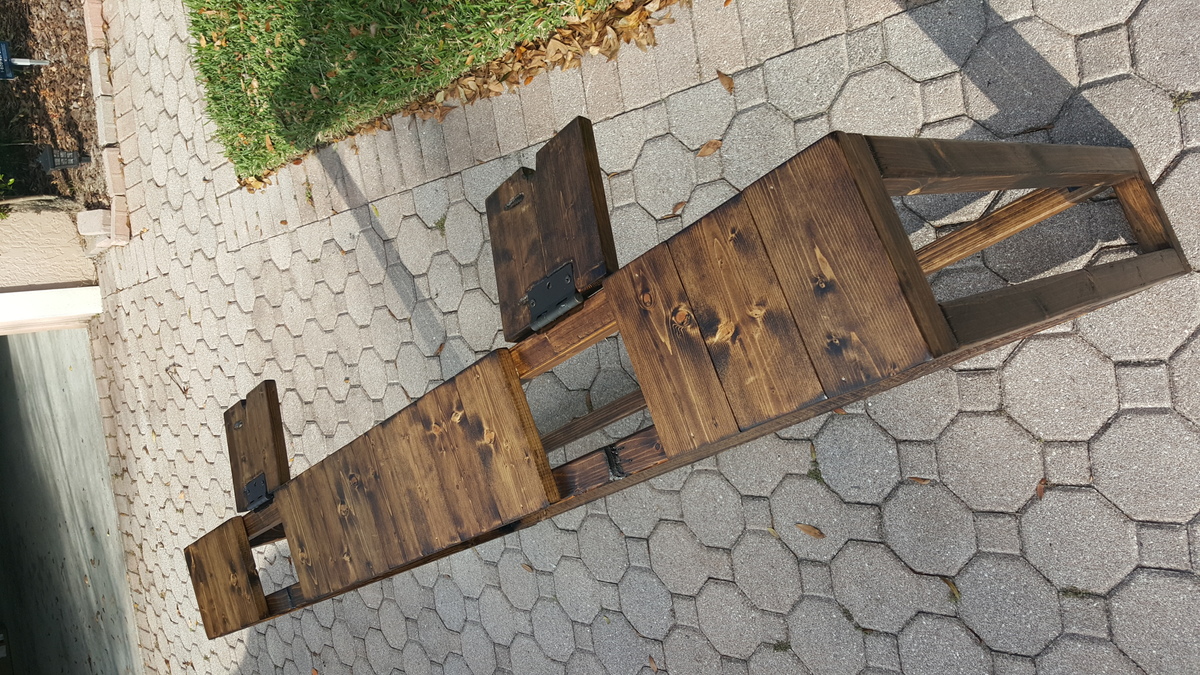
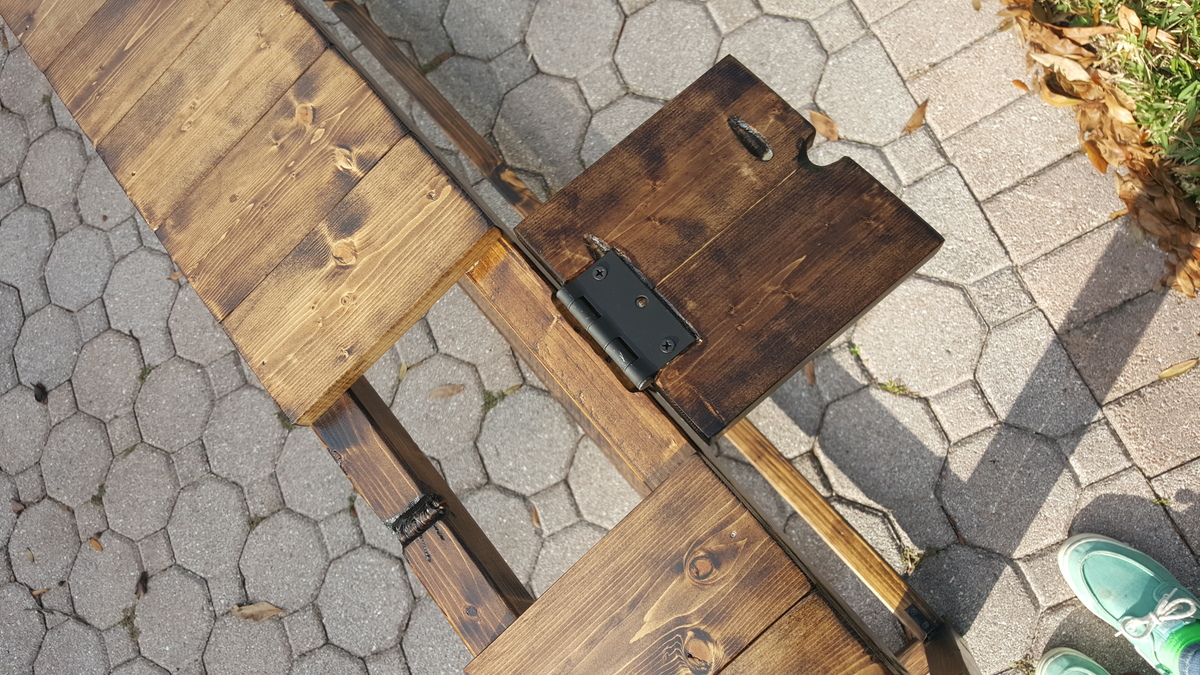
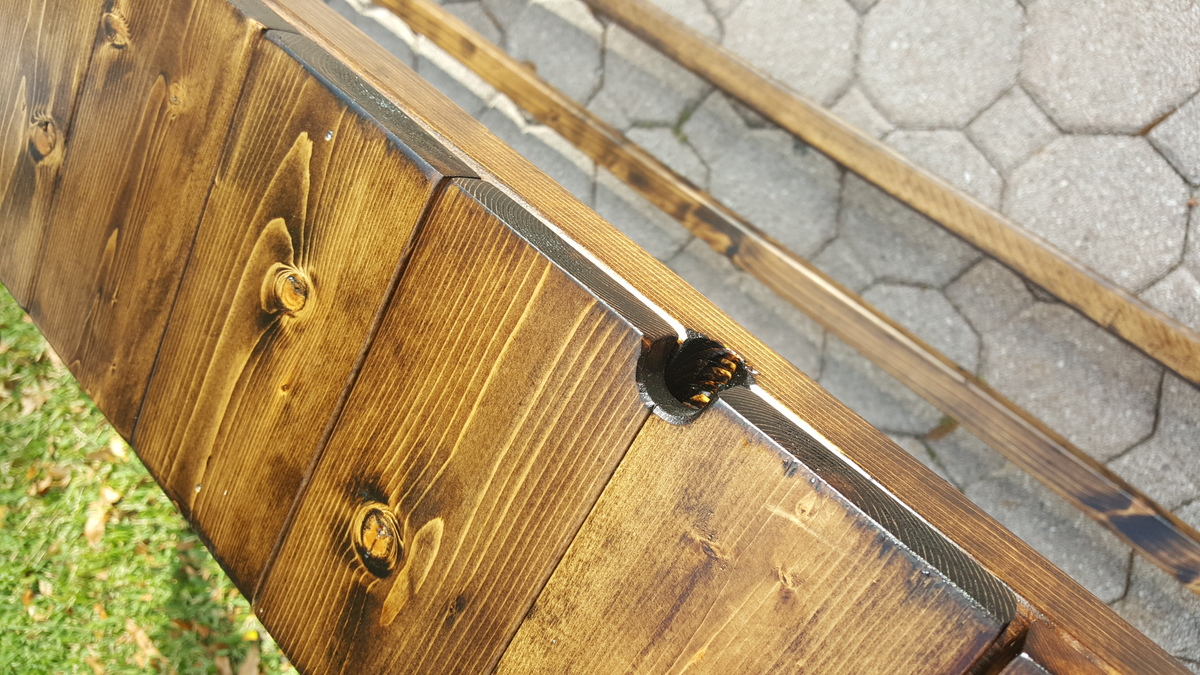
Slatted Sofa Table
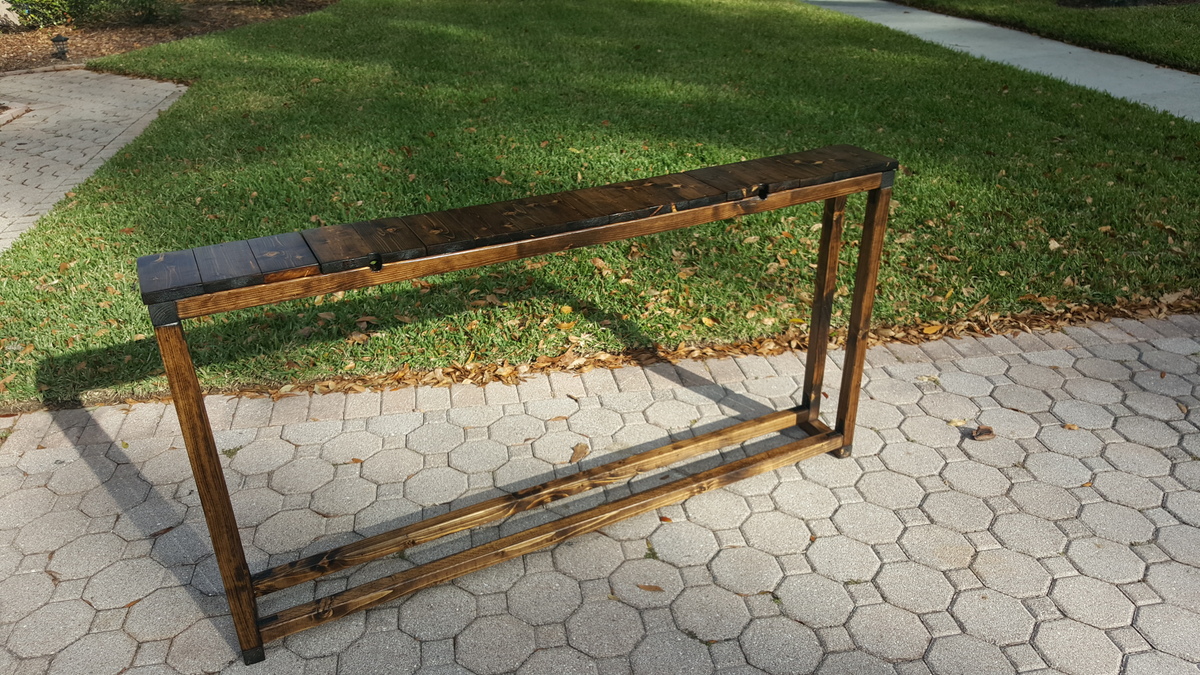
I based this design of the simple Sofa Table by Jenna Sue. Instead of a 2x8 across the top, I opted to use 1x4s side by side. This slatted look matched some of the other items in the house and to allowed me to create two hinged sections. These sections allow for easy access to wall plugs and include small notch for the cables to come through.
Built from Plan(s)
Estimated Cost
$35
Estimated Time Investment
Weekend Project (10-20 Hours)
Finish Used
Minwax Wodd Finish Dark Walnut Stain with Minwax Clear Satin Polyeurethane
Recommended Skill Level
Beginner
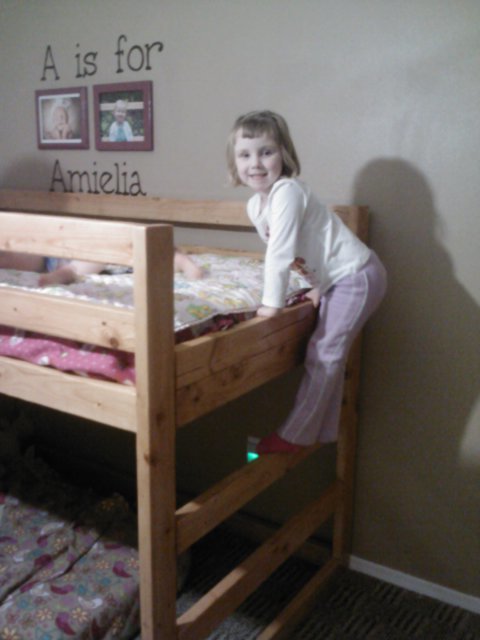
Modified Jr. Loft Bed
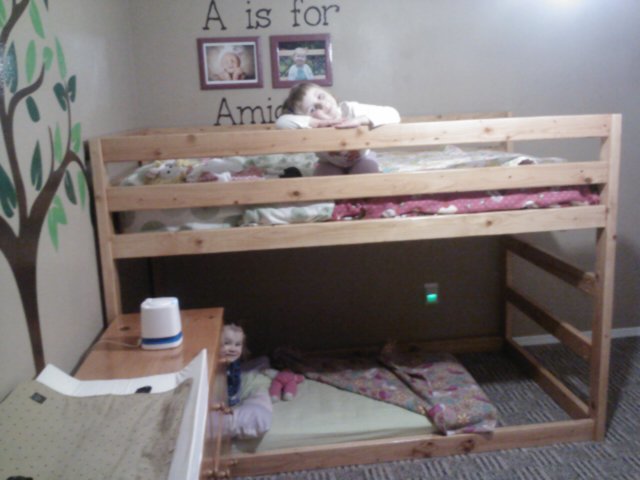
We loved the idea of the Jr. Loft Bed, but made some modifications to fit our needs.
Modifications:
-I didn't really feel the 2x6 railing was needed, so to cut costs, we used all 2x4s. On the end, I put two 2x4s one on top of the other to keep the mattress from sliding off the ladder side.
-Height was a concern for me as my kids are 4 & 2. So I lowered the overall height by about a foot. 54in is the height. Since we are putting my youngest on the bottom (on the floor) we made sure she had enough head room.
-We wanted this to be STURDY and reversible. So we added bottom supports on both long sides to ensure that the frame wasn't going to move. We also added six 2x4 supports under the mattress on the top. I can climb up there to tuck in sheets with no problem.
-We skipped the stairs & landing. I didn't want my kids to be playing on the bed. So we skipped the stairs and just built a ladder into the frame instead.
This was a fairly easy build. We previously built a HUGE Ana White Table. And I felt like I was kreg jigging for DAYS. This was only a few hours of cutting, sanding, kreg jigging, and a simple put together. Staining took the longest! It's a great bed and we're so excited it's finished!
Built from Plan(s)
Estimated Cost
$70
Estimated Time Investment
Day Project (6-9 Hours)
Finish Used
We used Minwax Polyshades. Classic Oak Gloss. 2 coats.
Recommended Skill Level
Beginner
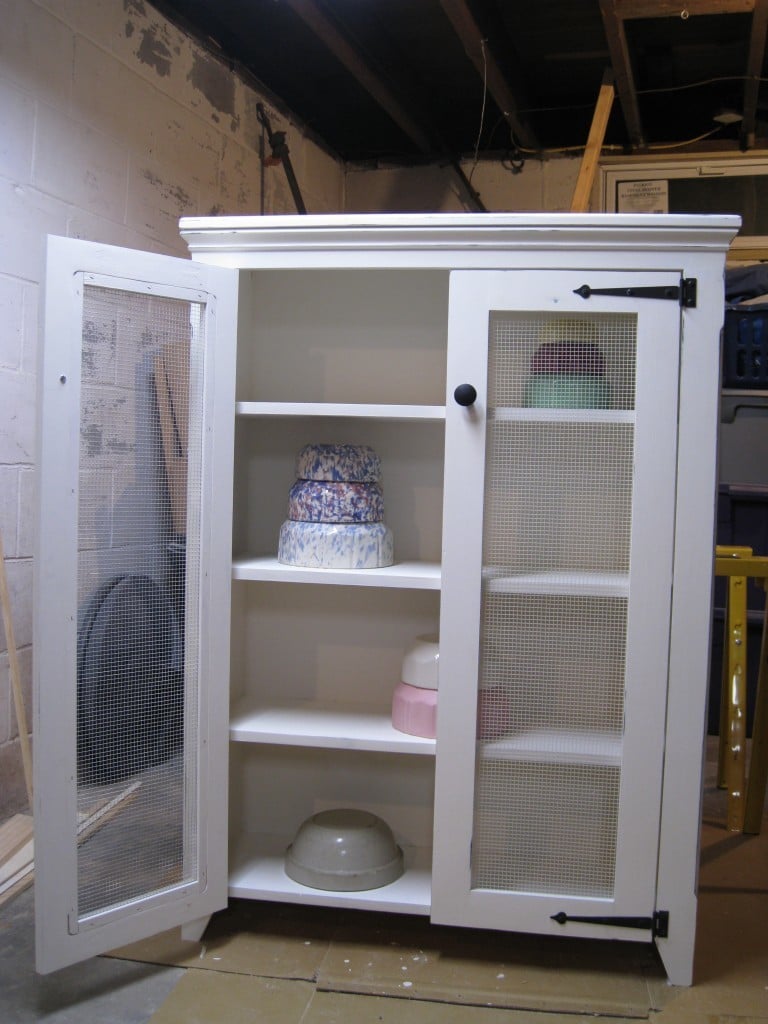
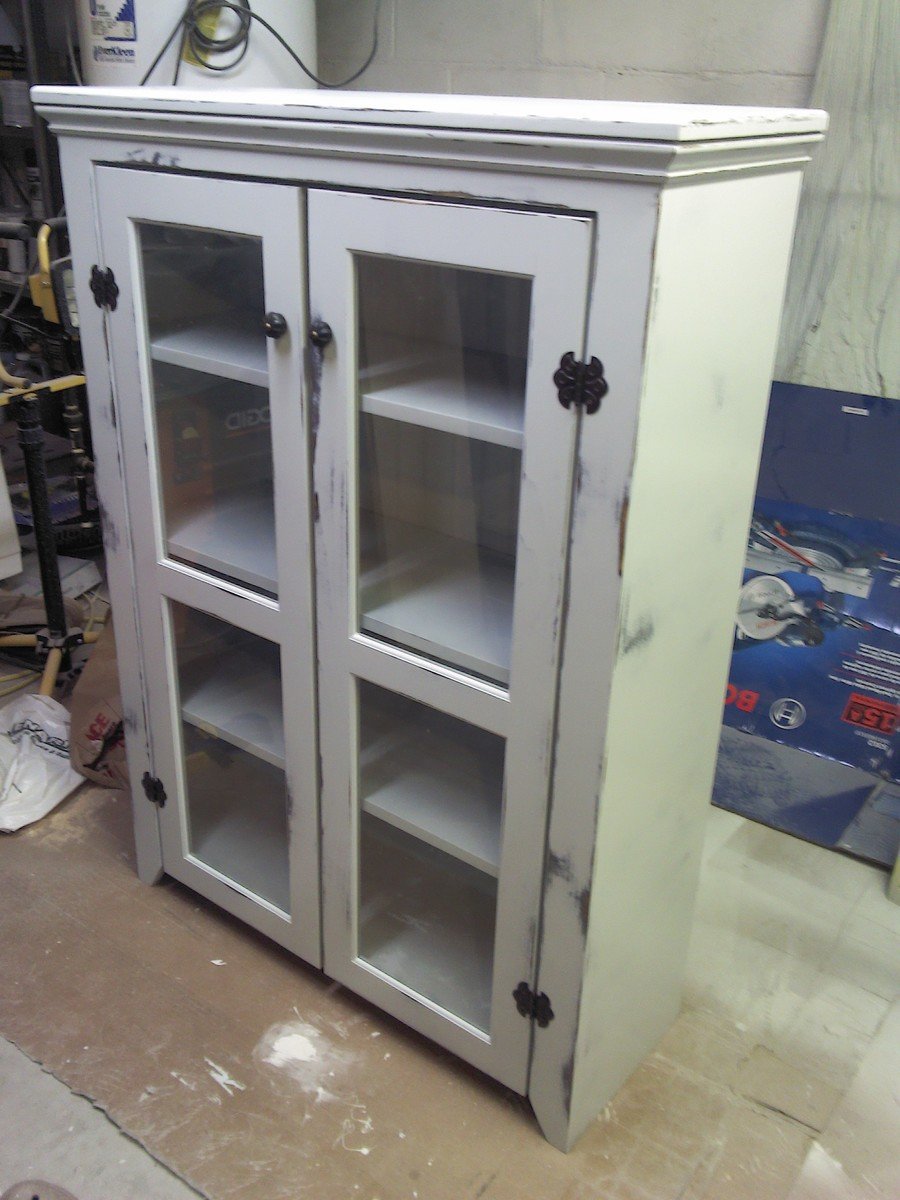
Jelly Cupboard(s)
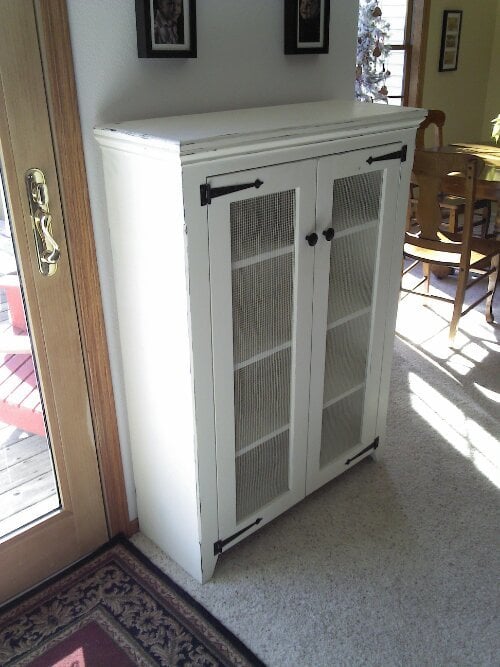
I have built several of these Jelly Cupboards since the plans came out. Everyone really likes them, and they are super fast and easy to build. The last one had glass doors that turned out pretty well. I like to use plywood beadboard on the back to give it a little more character. I also like to use 'hardware cloth' for the mesh type doors (found at farm stores). It usually has openings about 1/8" or less but not as tight as screen, which looks perfect.
Edit: For hardware part numbers and sources please see: http://grvland.com/wordpress/2012/02/07/jelly-cupboard-project/
Built from Plan(s)
Estimated Cost
$50-$100
Estimated Time Investment
Weekend Project (10-20 Hours)
Finish Used
Black Walnut Danish Oil, Wax Free Shellac, Latex Paint (dark), more latex paint (light), sand back, Water-based Poly
Recommended Skill Level
Beginner
Comments

Tue, 12/31/2013 - 00:51
Hinge source?
Really lovely work! I scoured a couple of those pretty butterfly hinges by pure luck a while back, and I know where to find more...but those strap hinges! Where did you get them? I can't seem to find them for a decent price (Ohio).
Tue, 12/31/2013 - 07:15
Strap Hinges
The strap hinges are from Acorn Manufacturing. I had to order them because I could not find anything like them locally. For some reason I can not post links in the comments, but the sources are linked on my blog, grvland dot com (no spaces and a . obviously). Just search there for Jelly Cupboard and you will find the source links in the earlier of the two posts. I will also see if I can add a direct link above.
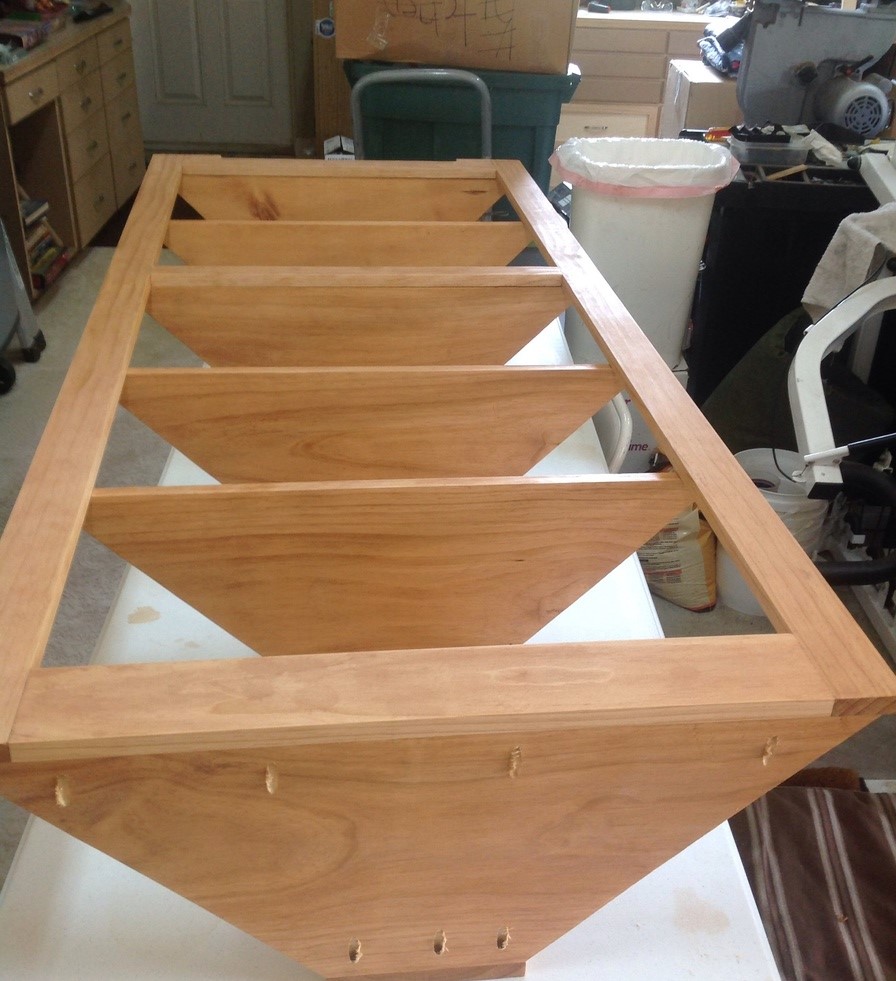
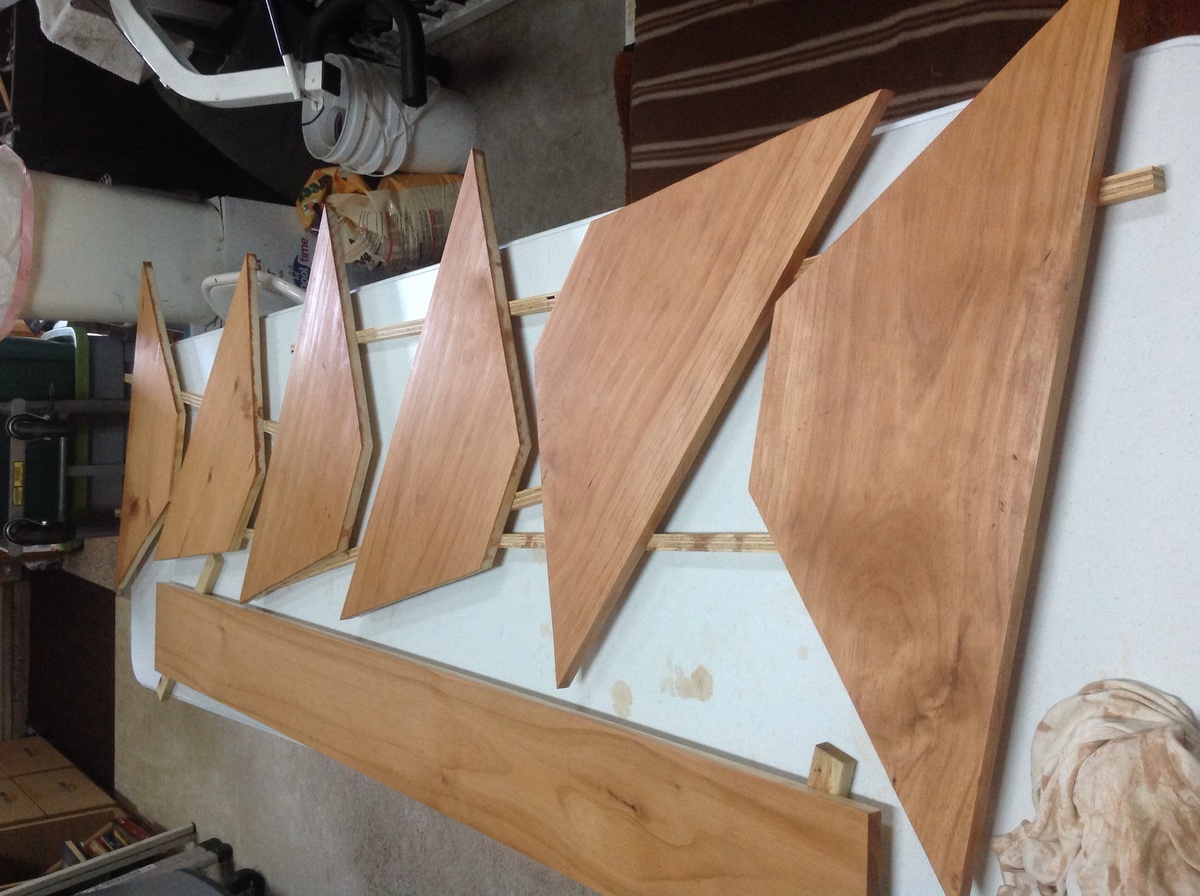
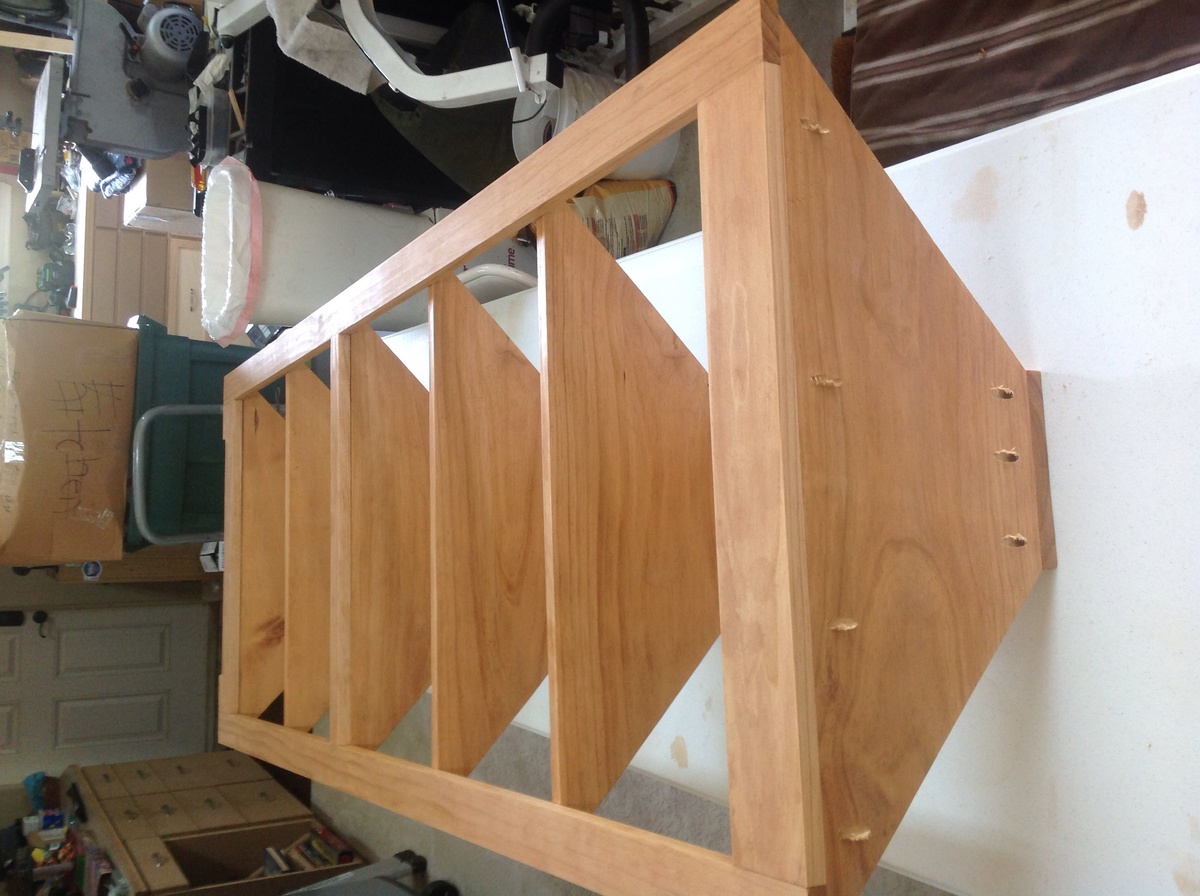
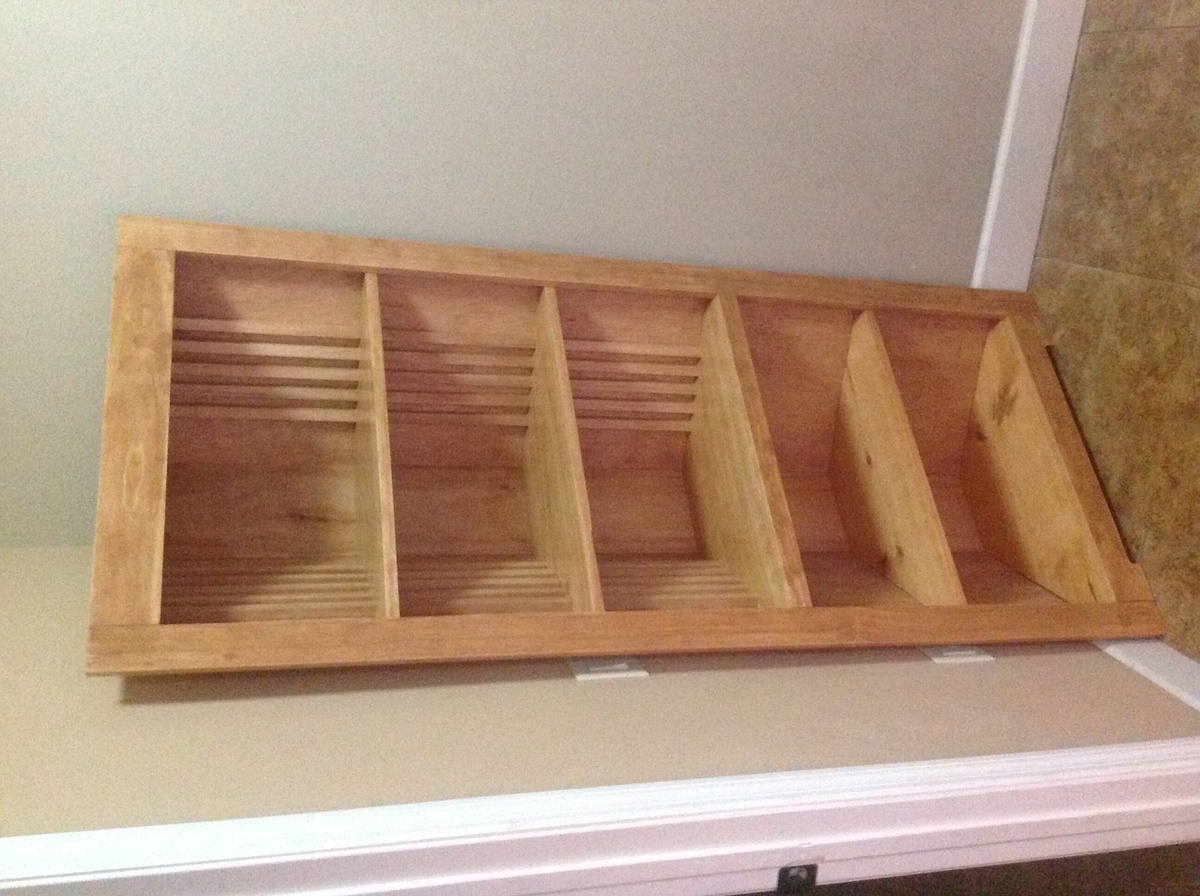
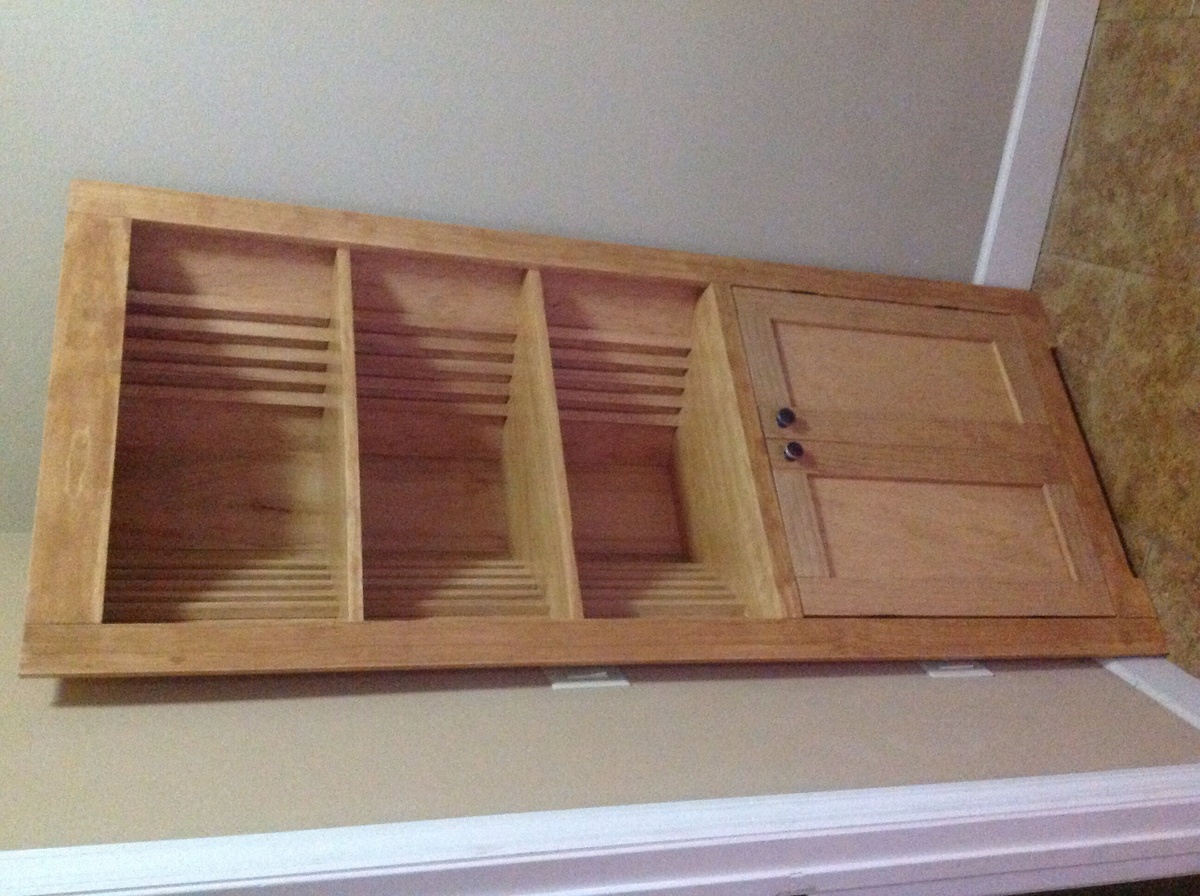
Wood Corner Cupboard
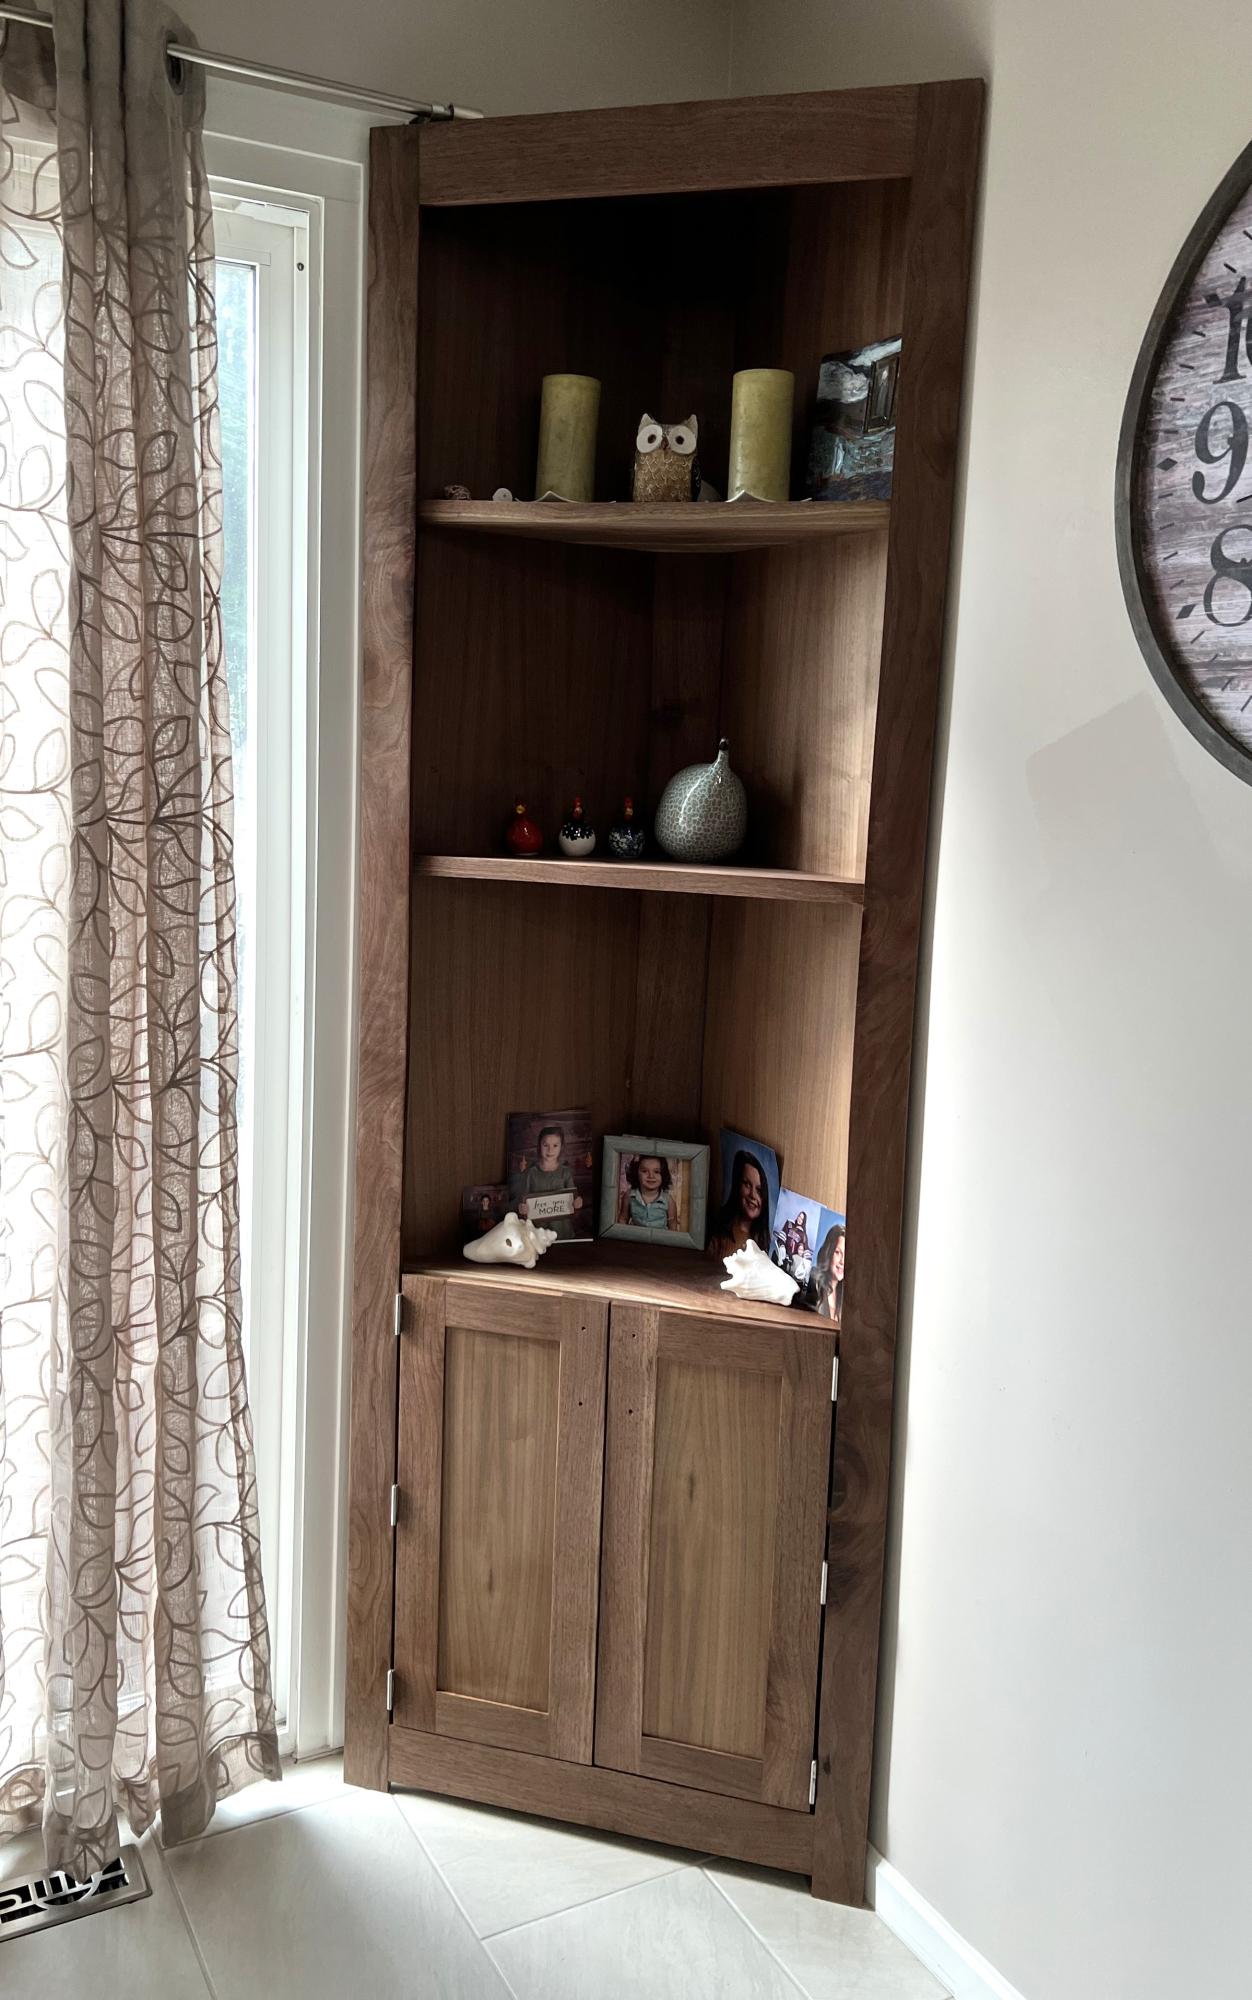
I made this out of walnut, no stain just a clear poly coat to protect the wood.
Jennifer
Built from Plan(s)
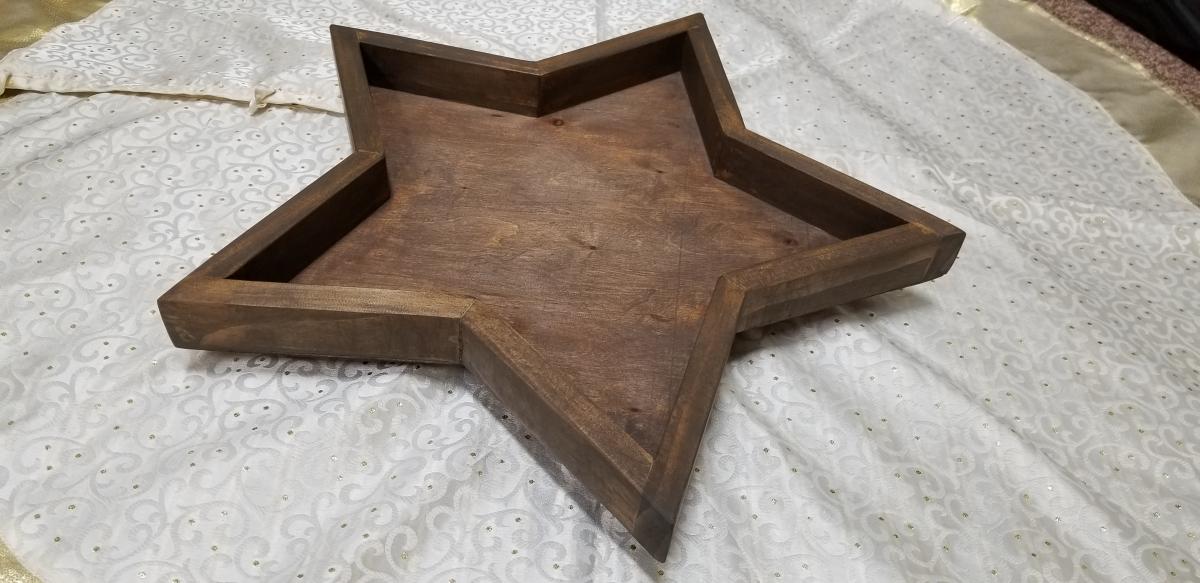
Wood Star Serving Tray
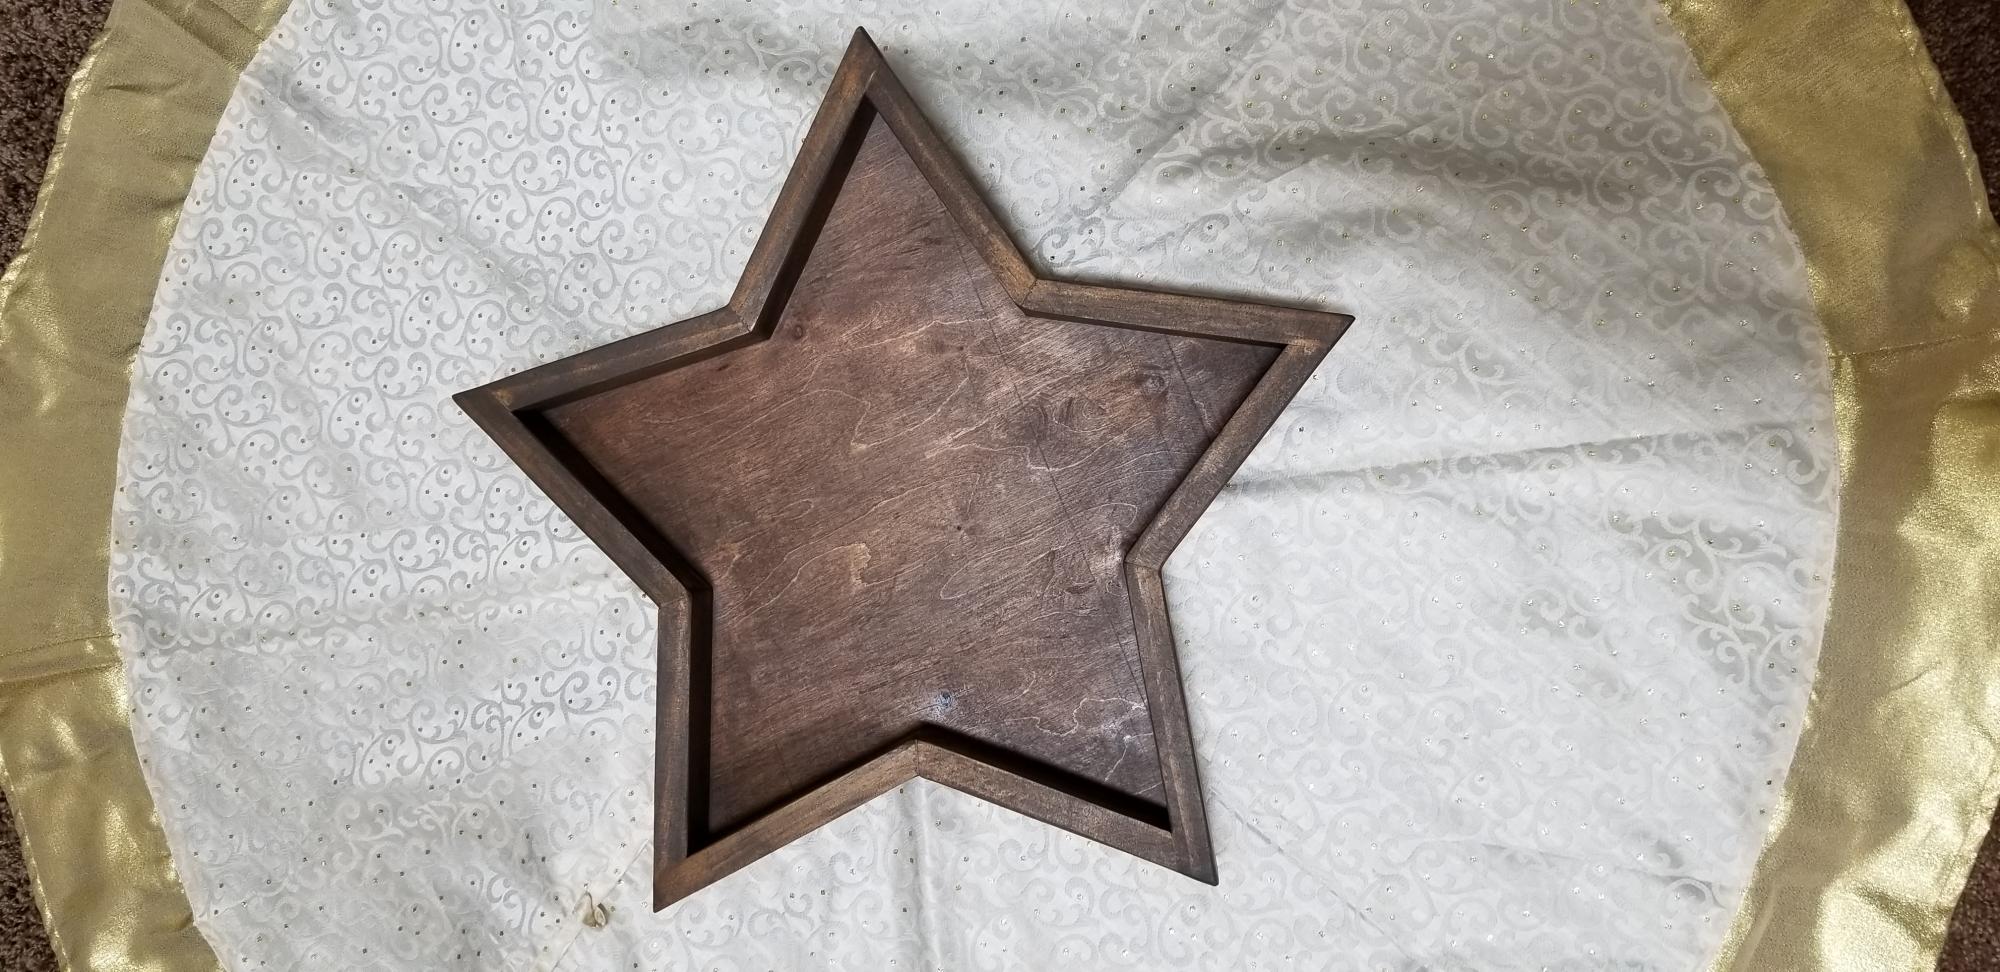
I followed the plans for the Wood Star Serving Tray. I thought it was a little tricky cutting all the angles to the correct length. One tip I would suggest is to mark which end has the 24 degree cuts, since you'll be attaching these joints first. Any gaps in the joints can be filled with wood filler, then sanded smooth. I would say this is an Intermediate level project due to the angles and trying to attach them without the nails popping through the other board. Would be fun doing a set of 3 and painting them red, white & blue for the 4th of July. Thanks for the plans, Ana!
Built from Plan(s)
Estimated Time Investment
Afternoon Project (3-6 Hours)
Finish Used
Stained with Varathane Briarsmoke, then a light layer of Dark Walnut to help give it an aged look. Sealer on top.
Recommended Skill Level
Intermediate
Comments

Sat, 12/07/2019 - 17:51
It’s beautiful! Thanks for…
It’s beautiful! Thanks for the tip on the cut list error I fixed it. I appreciate you taking your time to let me know! Ana
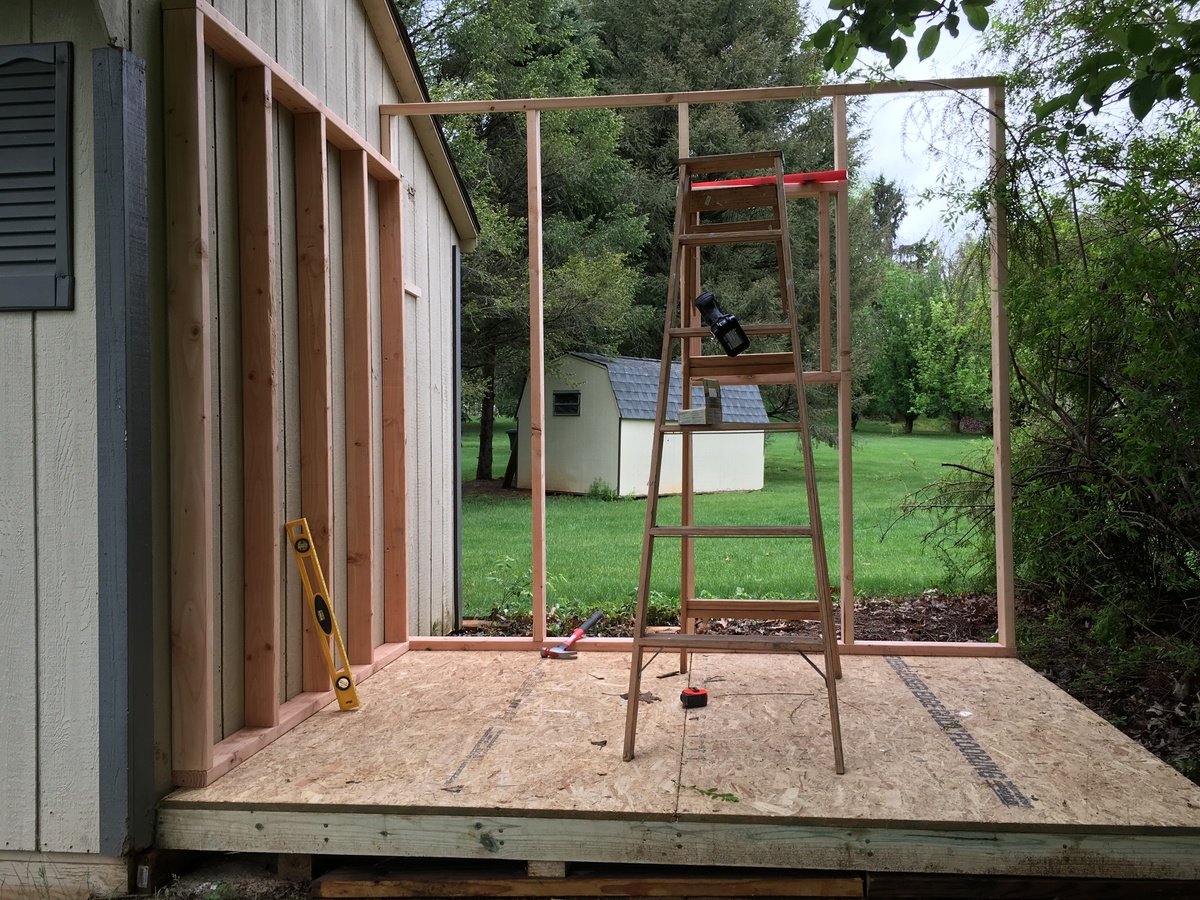
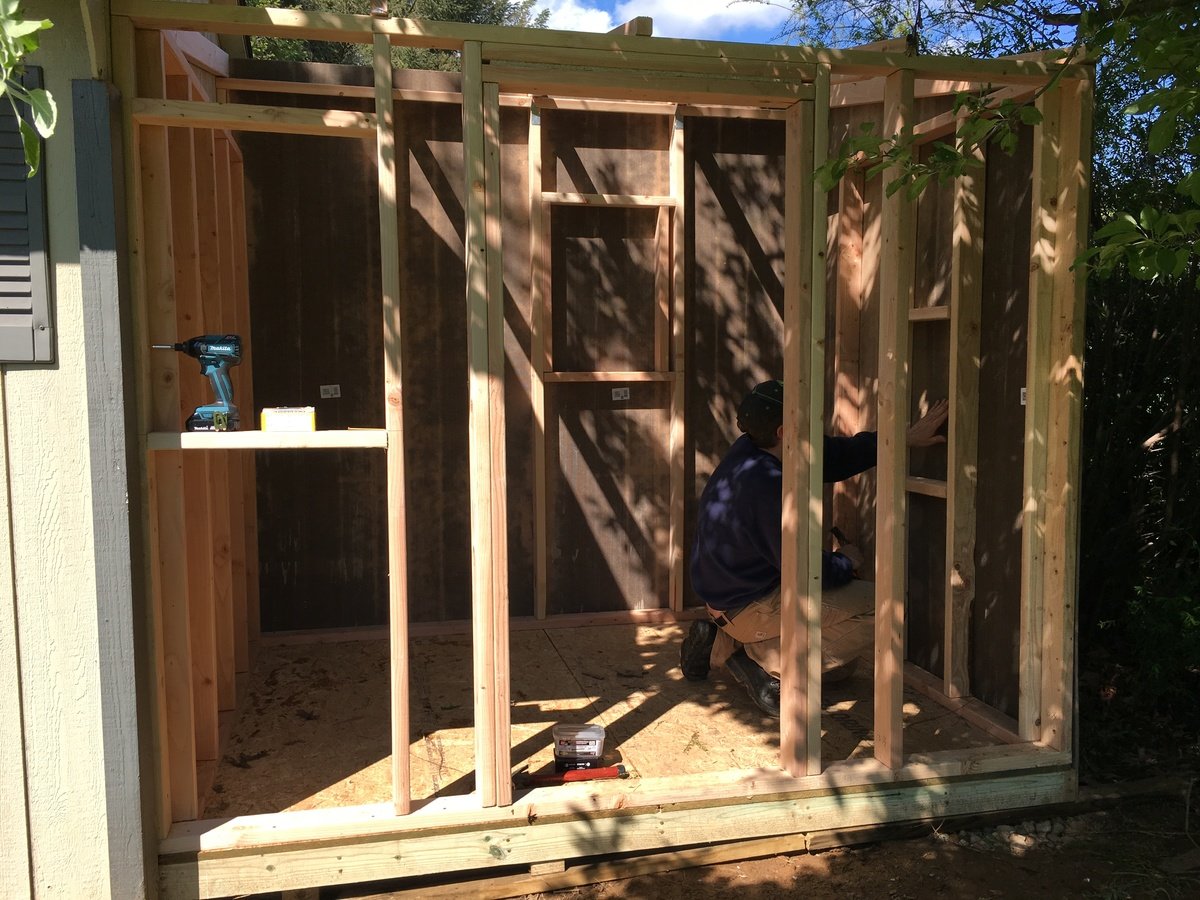
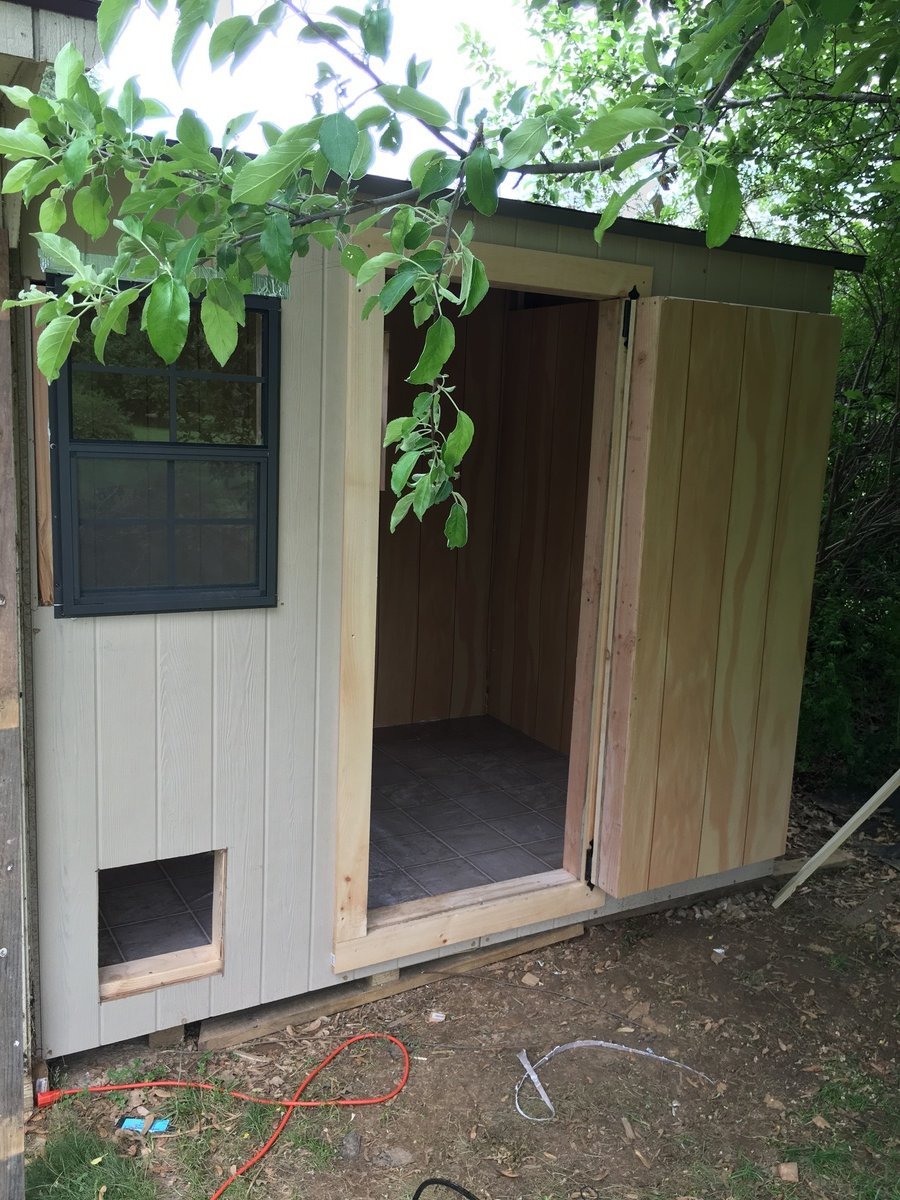
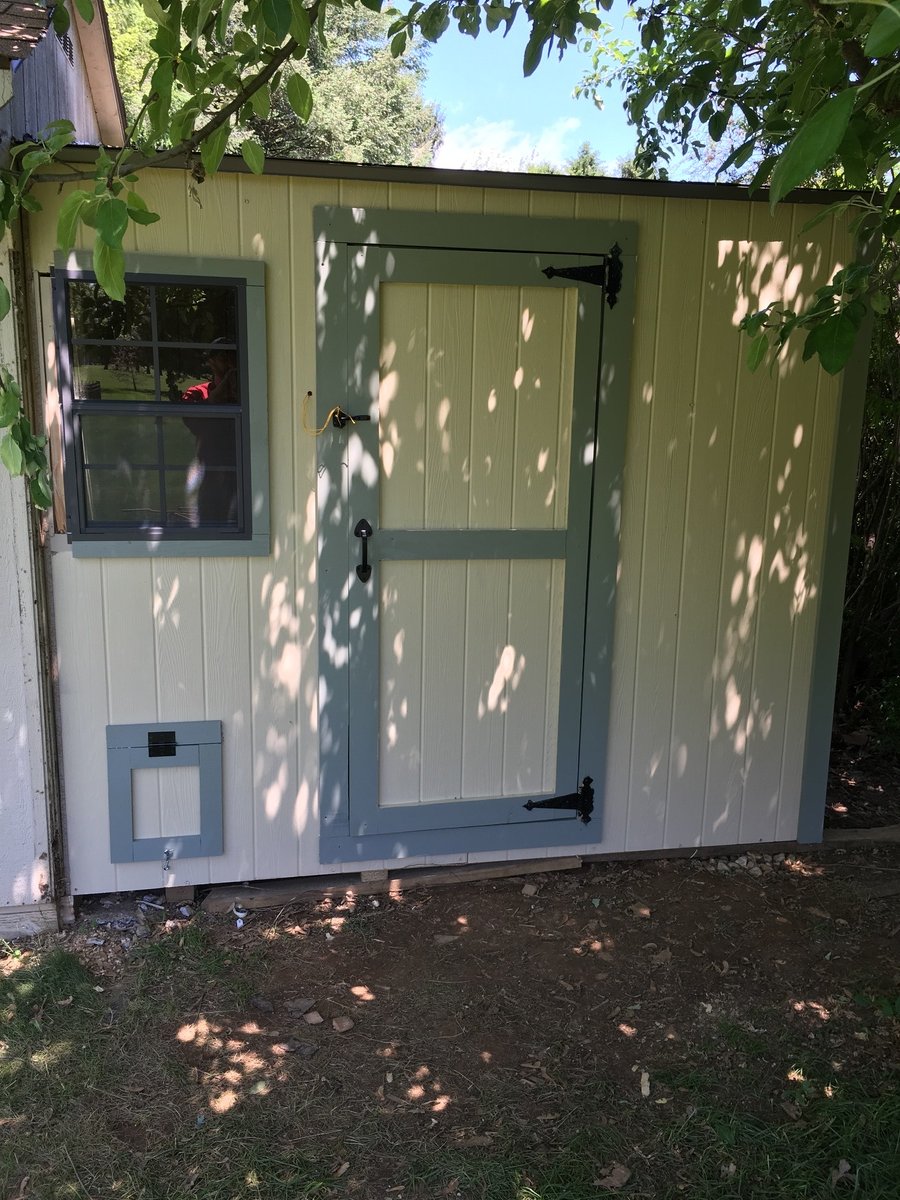
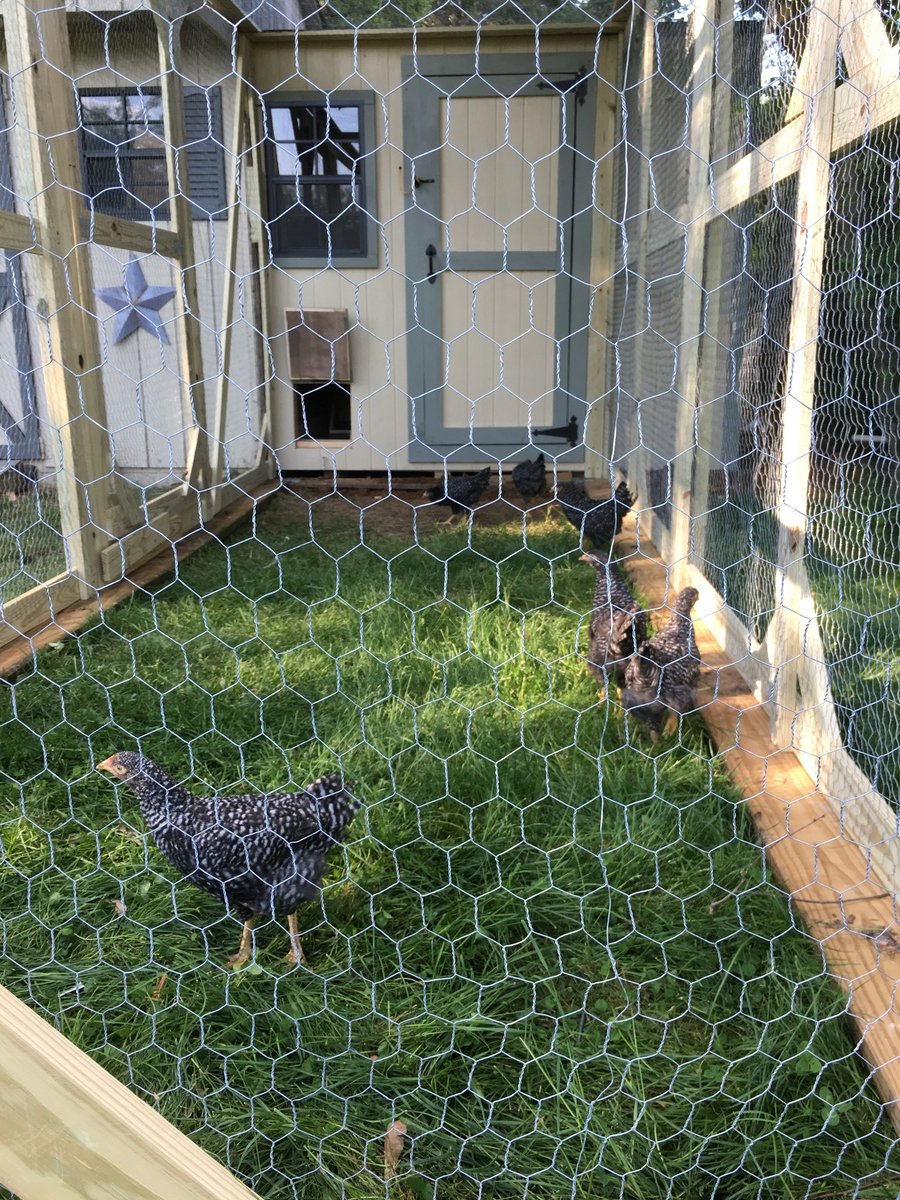
DIY Shed Chicken Coop 6x8
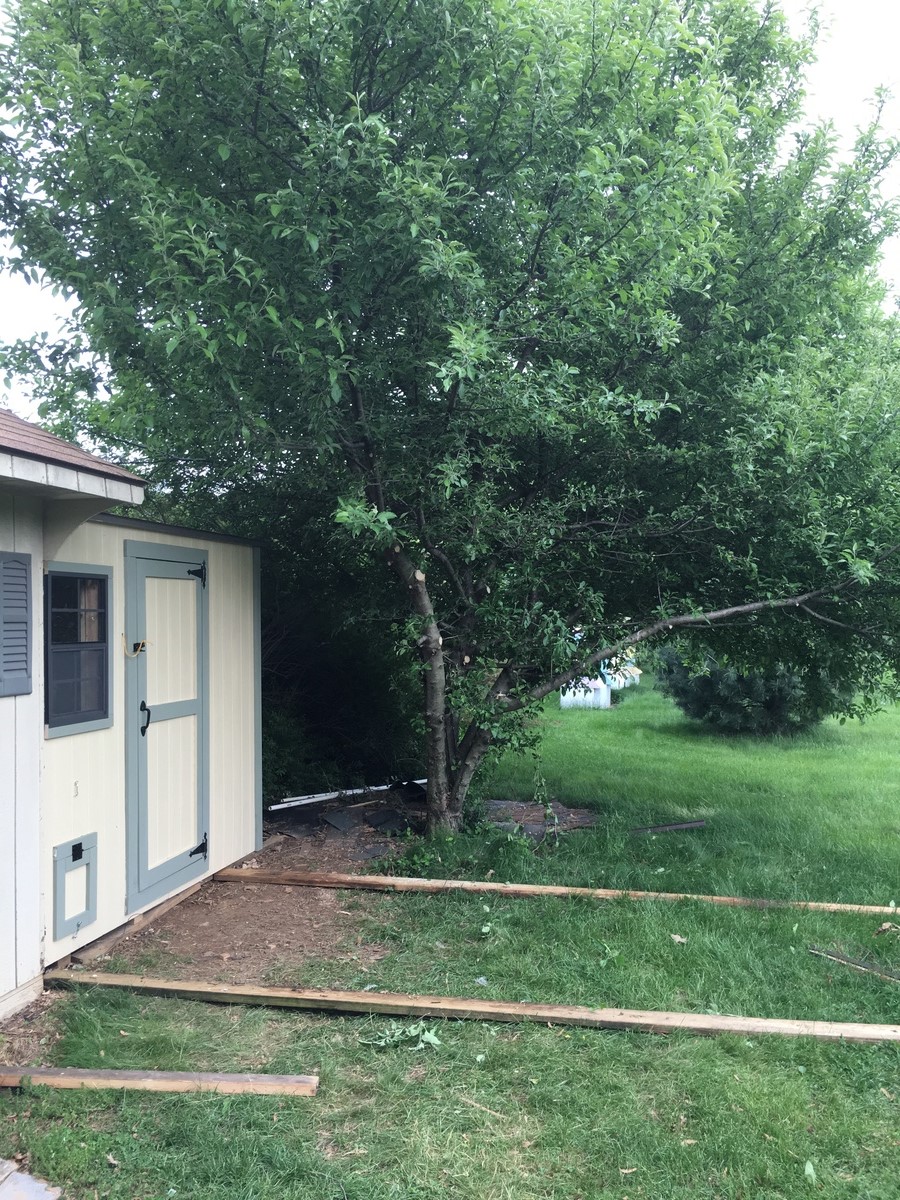
The project was used using the same plans but I extended the floor to be 6 feet wide vice 4 feet the additional 2 feet provided the perfect amount space I wanted. I also added an extra windows to get cross ventilation. I also insulated the coop and put paneling on the walls and lenolium on the floors. I dropped the back wall sheeting 1.5 inches for additional airflow since the shed doesn't have a ridge vent. The plans are easy to follow and easily adaptable.
Built from Plan(s)
Estimated Cost
$700. You may think that is a lot but you will learn a lot. Coops we were looking at were $1,200. This coop was less expensive and bigger and better plus you can say you built that.
Estimated Time Investment
Week Long Project (20 Hours or More)
Finish Used
T1-11 with home depot behr exterior paint.
Recommended Skill Level
Beginner
Comments

Thu, 07/02/2020 - 11:29
Great Coop!
Great job! We are getting ready to build a coop for our chickens which arrive in 3 weeks!
Sandbox with Built-In Seats
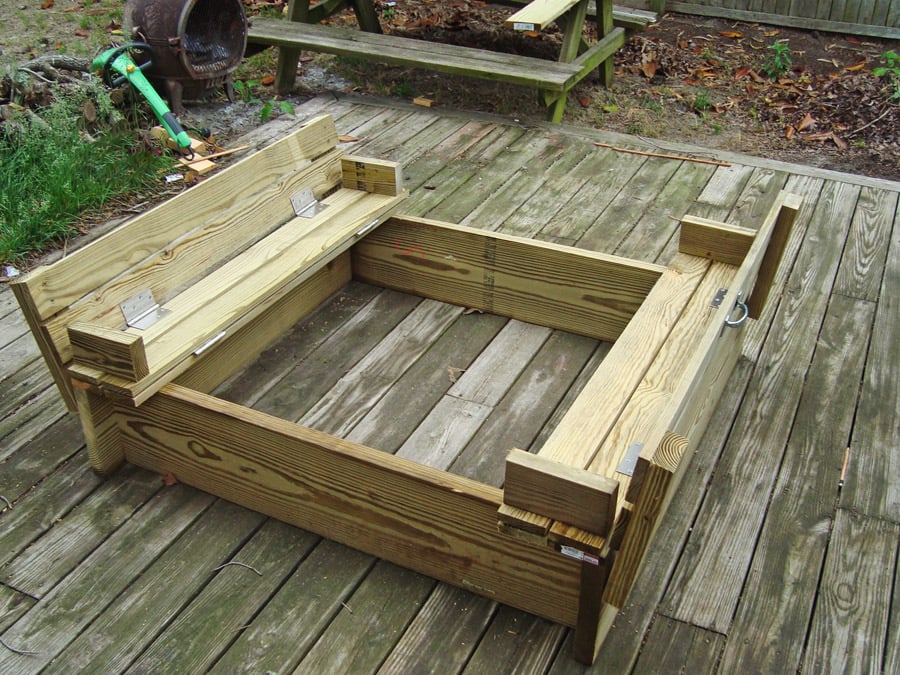
This is a fun project even for beginners. If you have an interest in building a sandbox, and have some tools, I'm sure you can make this easy enough!
I used 2" X 10" wood for my sides instead of the 1" as the plans call for. This gives extra strength and more depth. When you use 2" wood, you will have to turn your 1 X 4's the other way to match the 47½" width, because with the added width of the 2 side boards, your new width is now 49¼". It's not difficult, you just have to match your 1 X 4 X 47½ boards to the proper width. It will turn out fine, they just won't match the plans or pics of those using 1 X 8's for sides.
Sorry, I'm delivering this to my grandson's house for his birthday present, so no sand, but use landscaping cloth under this sandbox, then fill with sand.
One other thing, I'm toying with the idea of matching the angle the backrest is at and re-cut new pieces of 7½" arm rests. I think that may look a little better than the rectangle blocks.
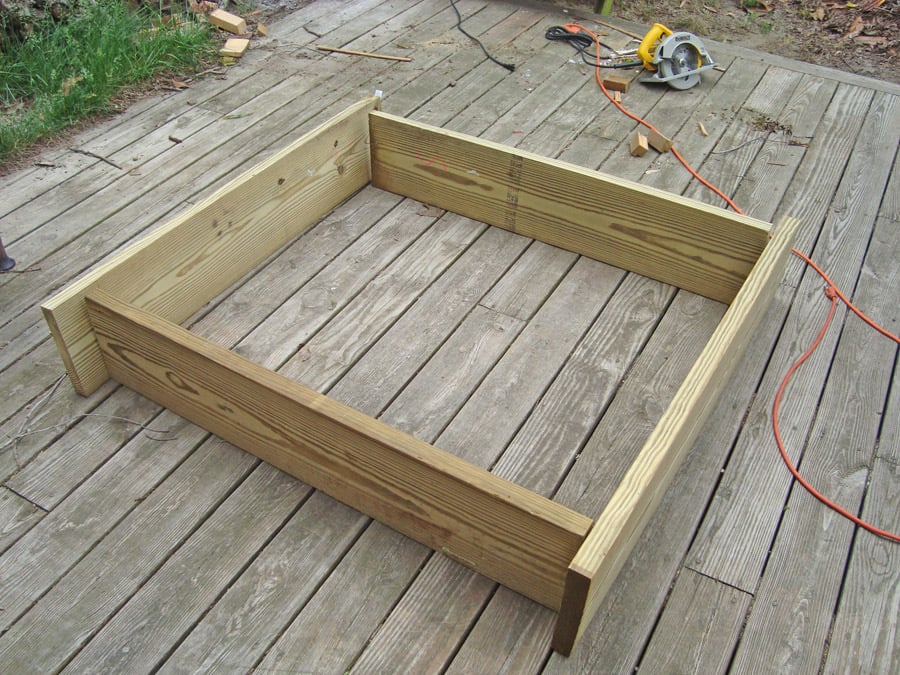
My added pics are as follows:
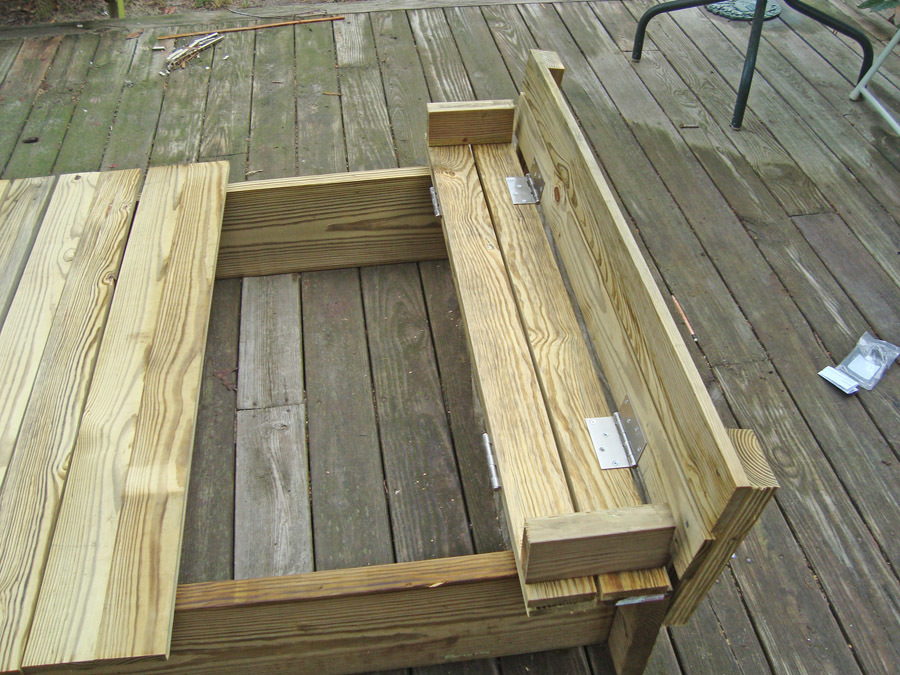
1. The side boards all cut, and sizing up the frame.
2. All other boards are cut; I laid them out for fit before screwing the pieces together.
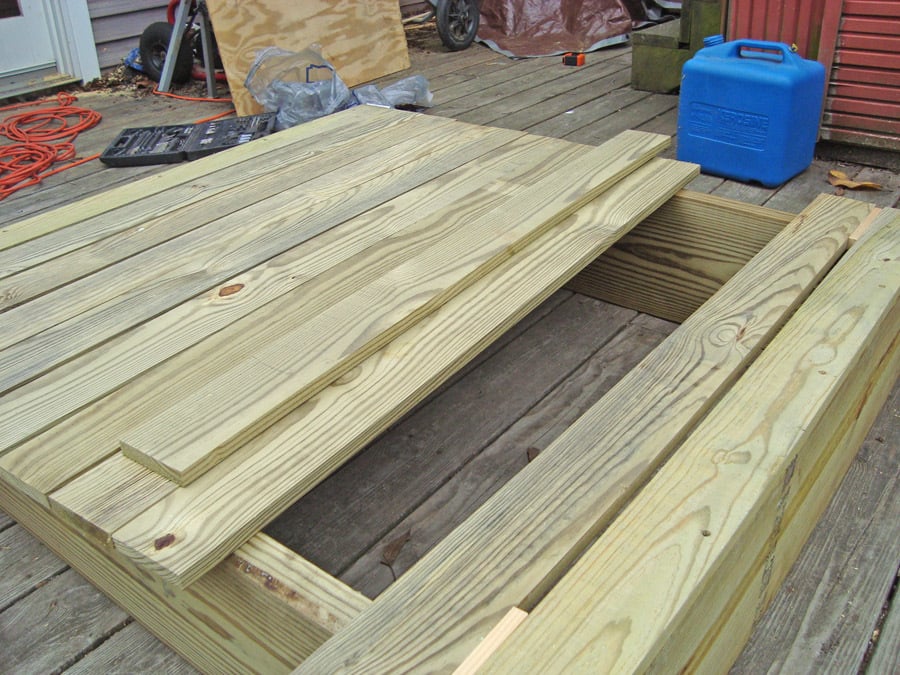
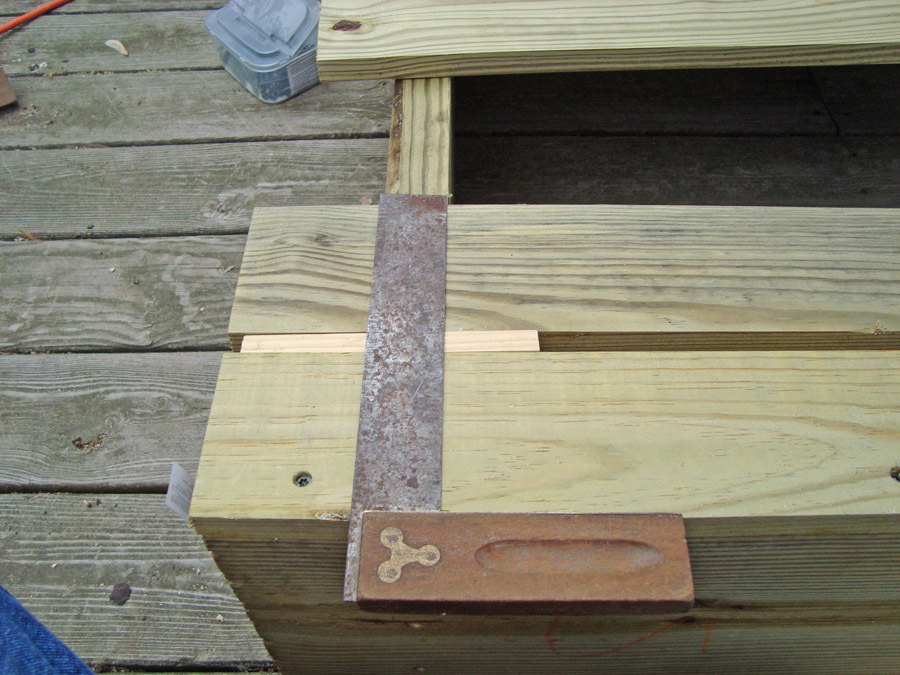
3. Using a square will help you keep everything at the correct angles. Also note in this picture and the next where I used two ½" pieces of wood I ripped to keep the ½" spacing uniform. Just rip any wood to the ½" width, make 2 pieces and butt against the next board on both sides, then screw them down. Makes it VERY easy to keep a uniform gap.
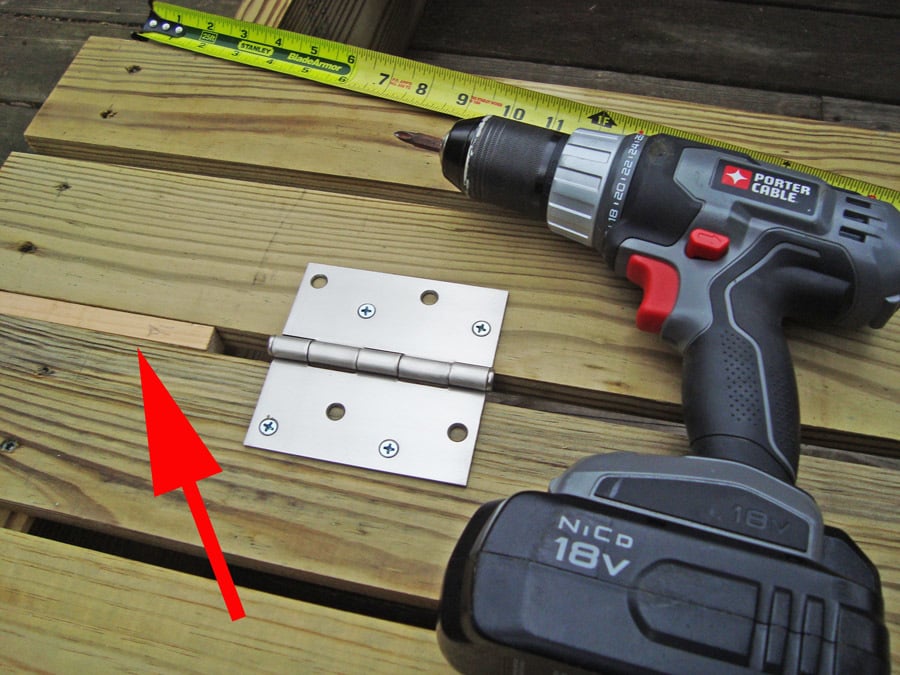
4. This picture shows me using the same "spacer" when putting the hinges in place. The red arrow points to the wood spacer.
5. The first bench is complete, and working fine!!
With the wood I used in my project, I used 2½" self tapping deck screws for the frame and attaching the 1X4's to the frame; I used 2" galvanized for attaching the 1X4's to any 2X4's; and for the hinges, I used ¾" wood screws. Using these sizes prevented the screws from coming through the other side.
I bought everything needed in this project at Lowe's and it was under $90 in costs; this is all the lumber (upgrading to 2 X 10's), hinges, screws, and handles.
Estimated Cost
$90 - Everything purchased new at Lowe's
Estimated Time Investment
Afternoon Project (3-6 Hours)
Finish Used
This is a gift, so I'll leave it to my daughter and son-in-law to use fence or deck stain to match their house. All pics are un-toned raw pressure treated lumber.
Recommended Skill Level
Beginner
Comments

Wed, 05/09/2012 - 16:25
Yay, you figured it out!
I was just going to tell you how to add a brag blog when I saw that you'd already done so! YAY! Your sandbox looks awesome! You guys are all making me wish I had a tolerable yard to put a full-sized box in!!!
In reply to Yay, you figured it out! by Lady Goats
Thu, 05/10/2012 - 13:49
Yeah, you made the plans easy
Yeah, you made the plans easy to follow. It was a lot of fun. I spanned it over 2 days, but still was only around 4 hours of work.
I'm considering cutting the "arm rests" at an angle to match the slope of the back rest. I may play with that this weekend.
Thanks for all the help!
Also, what did you use to make the sketch type pics for the plans? I know you mentioned something about not knowing how to put the hindges on them. If I can help, I can probably do it for you in PhotoShop.... Just let me know.
Thanks again!
Loral
In reply to Yeah, you made the plans easy by Loral
Thu, 05/10/2012 - 14:07
I used Google Sketch-Up
And didn't even think of putting the pics in PS to add the hinges. DUH! Thanks for the idea! ;-)
What do you mean about angling the armrests? So they sit right on the back, instead of the gap?
Thu, 05/10/2012 - 15:42
New Arm Rests
Something like this:
http://www.loraljohnson.com/sandbox/NewArmRests.jpg
I cut these at a 10º angle on both ends and 8" long.
Now, how did you make the "plans" images?? :)
Loral
Happy ladies~ Great EGGS!
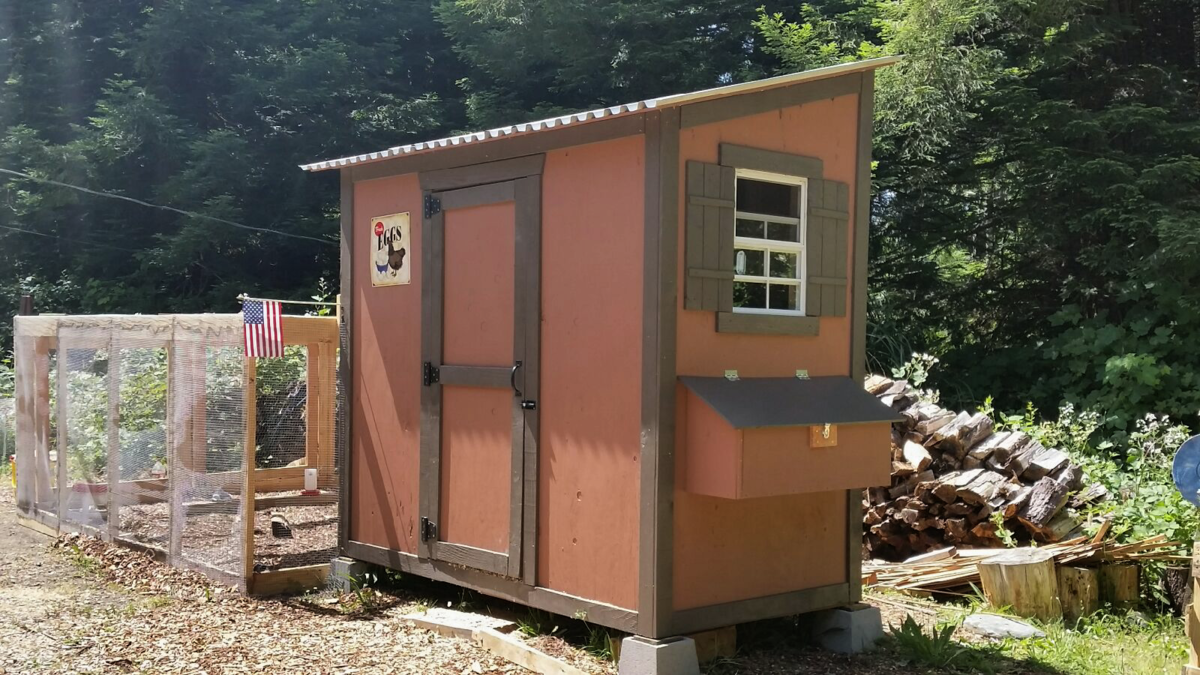
My 7 week old chicks love thier new home
Built from Plan(s)
Estimated Time Investment
Week Long Project (20 Hours or More)
Recommended Skill Level
Intermediate
DIY Outdoor Daybed

I built this outdoor daybed to add a cozy and inviting space to my backyard. It was a fairly easy build, which I managed to tackle by myself. Head over to the blog for more details.


Built from Plan(s)
Estimated Time Investment
Weekend Project (10-20 Hours)
Recommended Skill Level
Beginner
Outdoor Counterheight Farmhouse Table
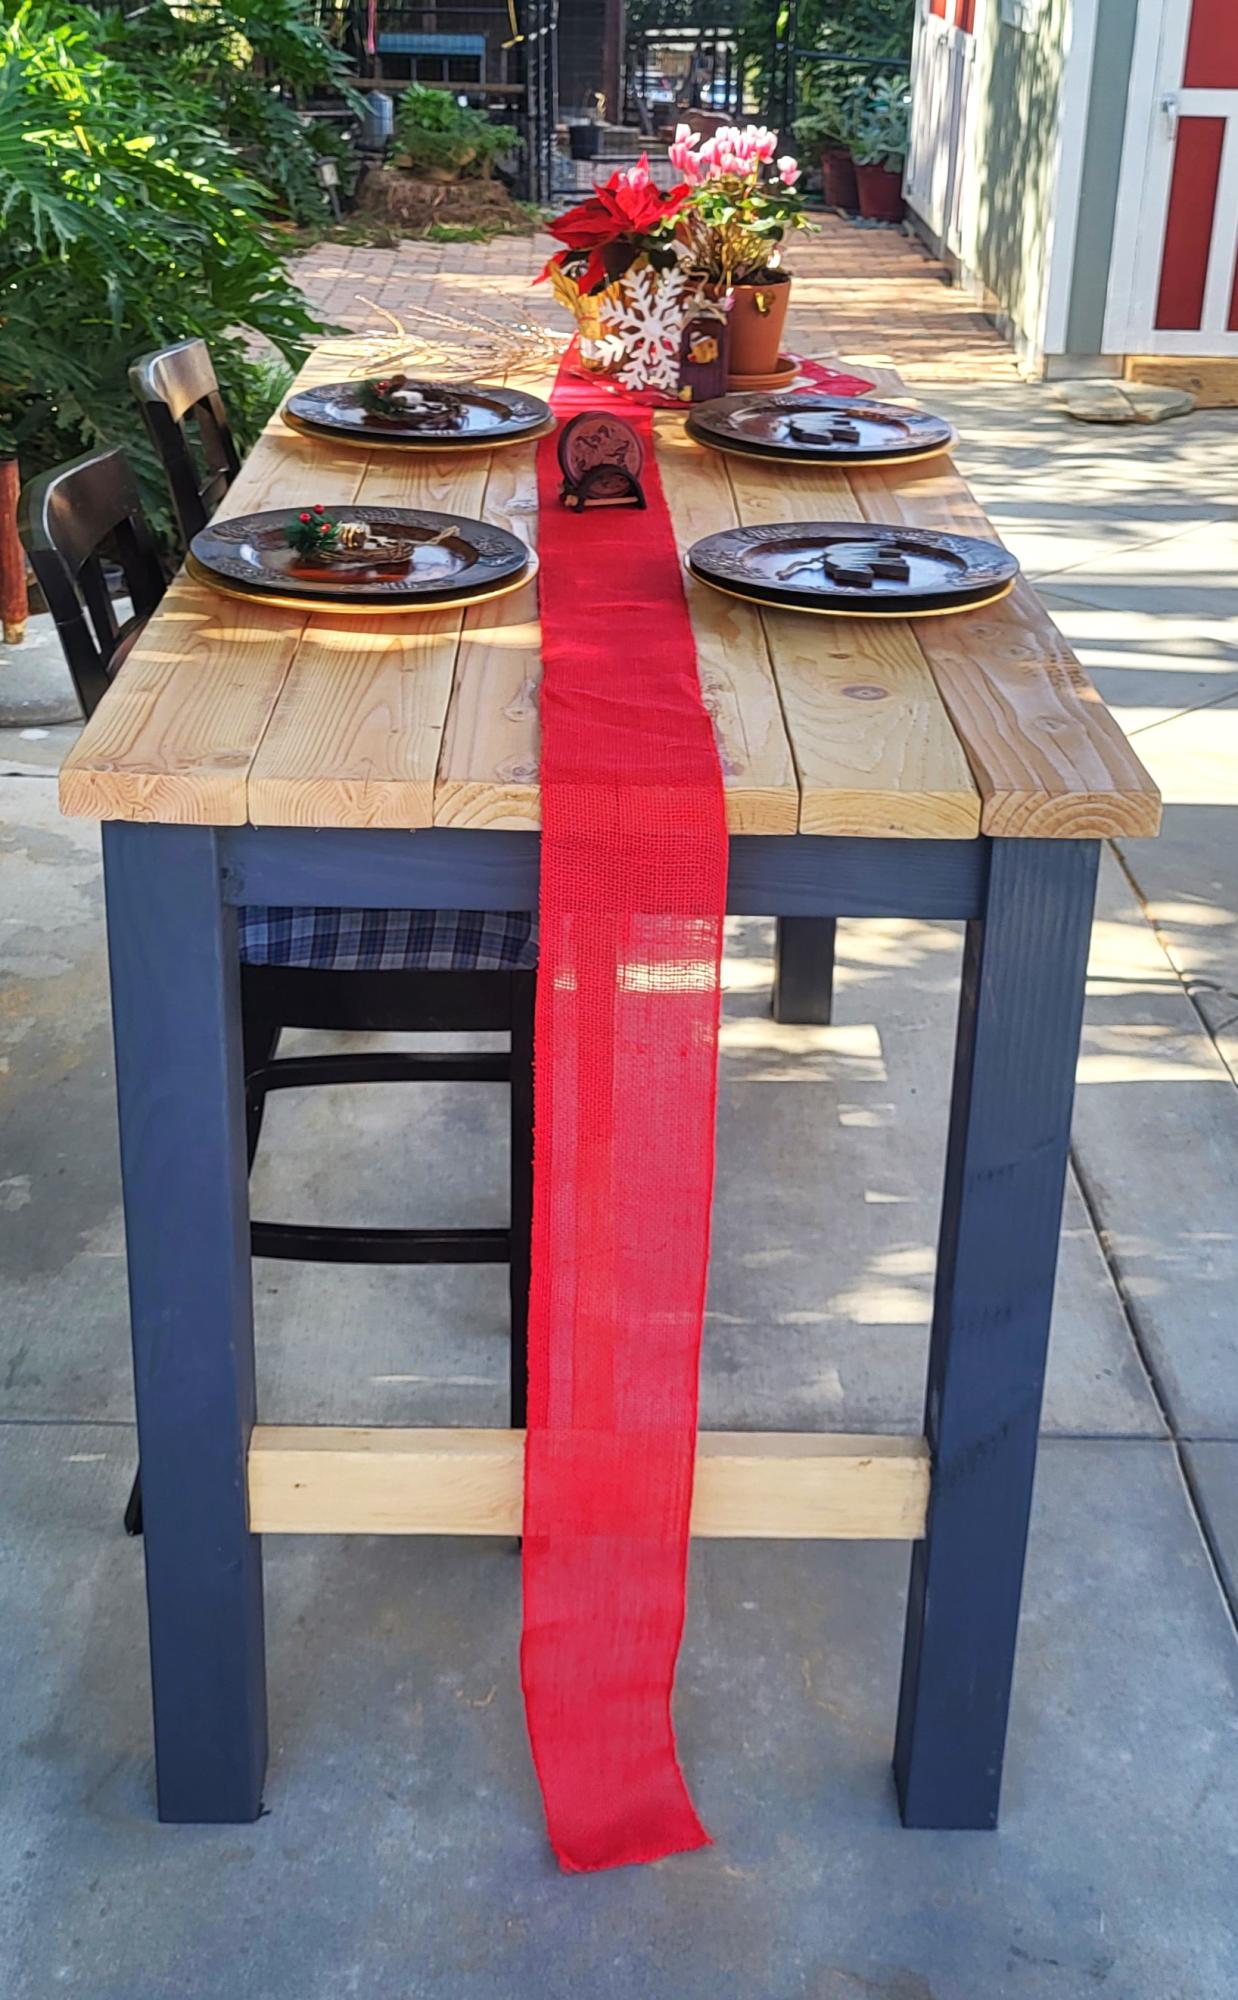
I had so nuch fun making this table. I love how it turned it out.
Mrs. Lasley
Built from Plan(s)
Modern Park Bench
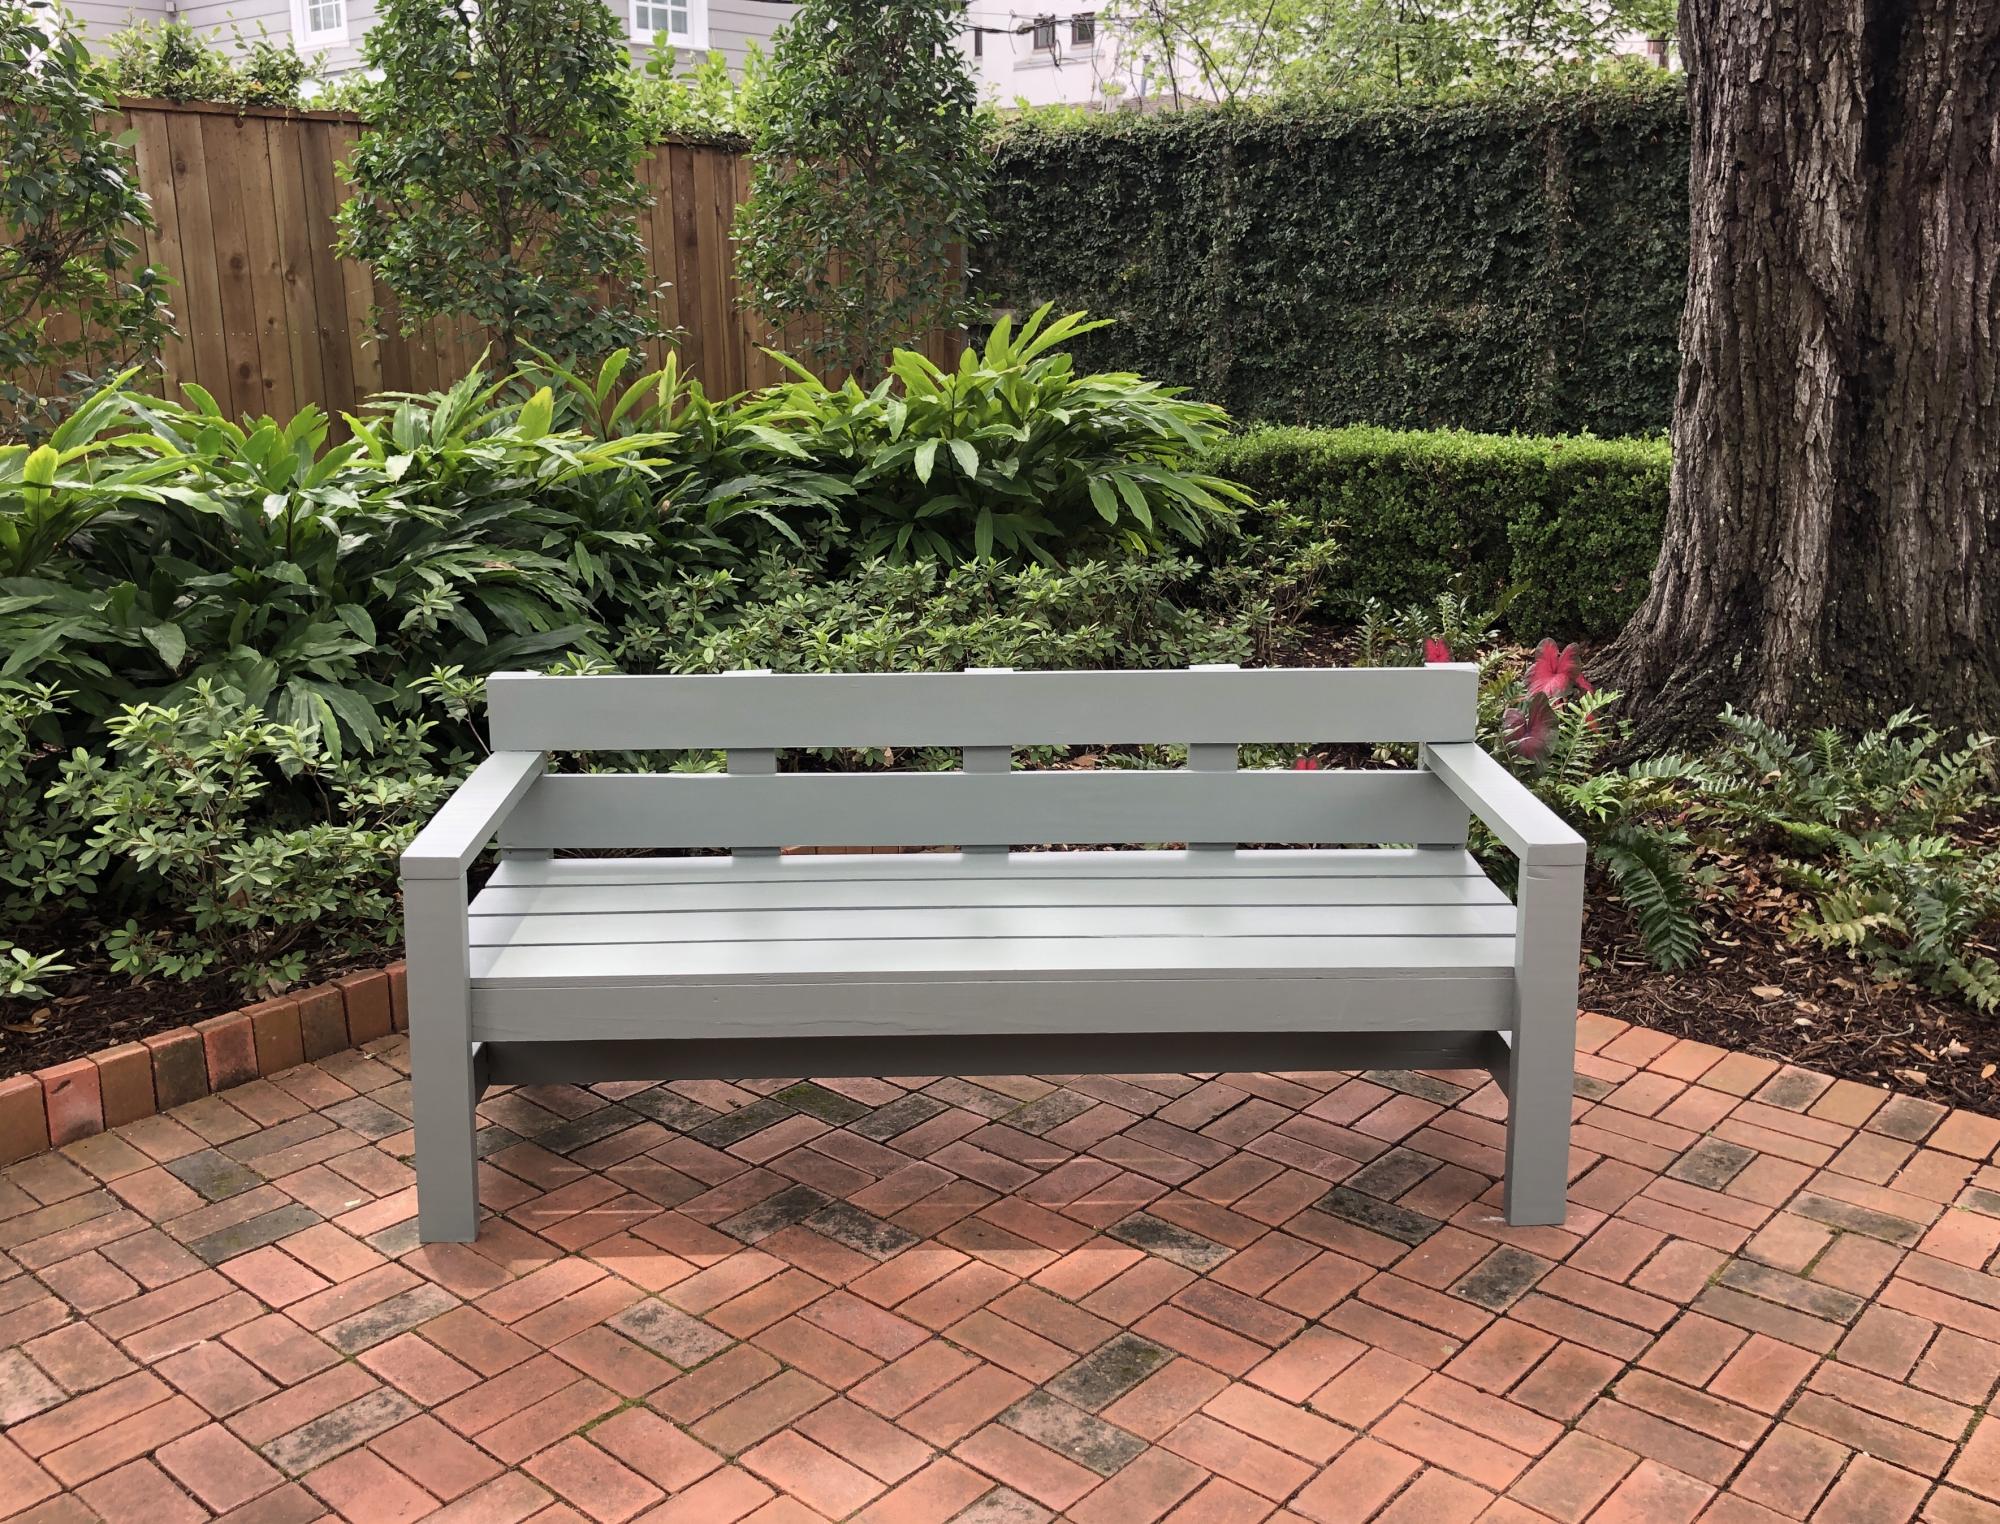
This was one of my first projects. I just used a circular saw but a mitre saw would be better. I’ll look for one soon. It was rewarding, fun and we love how it looks on our back patio.
Built from Plan(s)
Estimated Cost
$200
Estimated Time Investment
Weekend Project (10-20 Hours)
Finish Used
I primed the pieces with Sherwin-Williams exterior latex primer before assembly then painted with Sherwin-Williams Resiliance exterior latex. We chose “Retreat” as our color.
Recommended Skill Level
Beginner
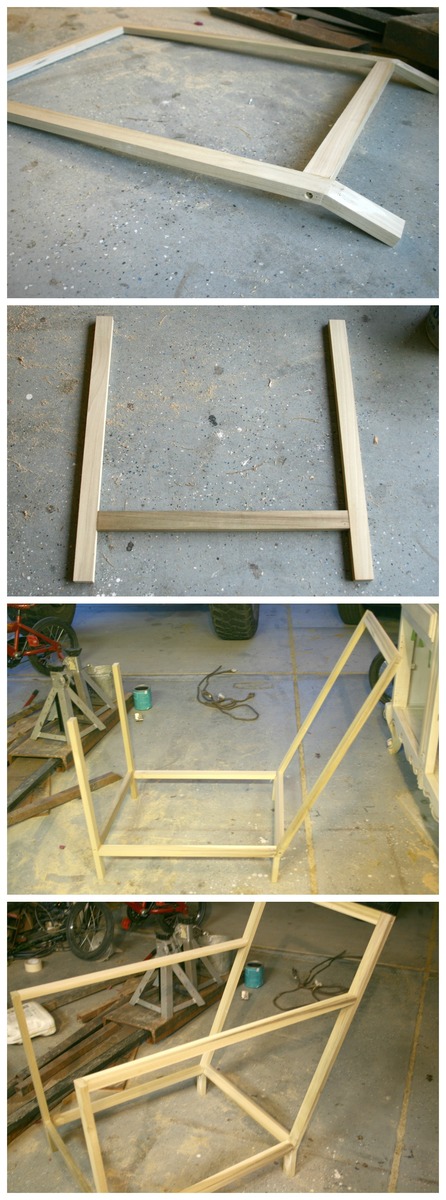
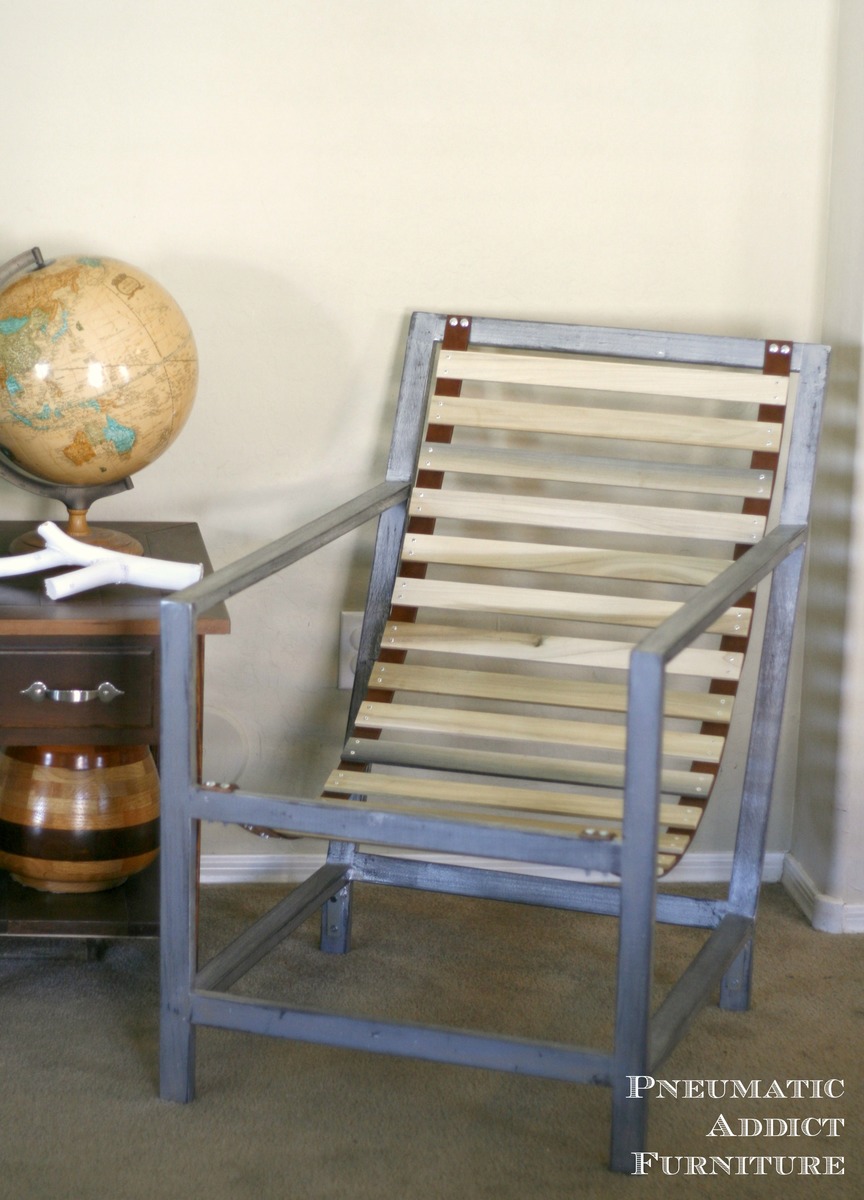
Wood and Leather Sling Chair
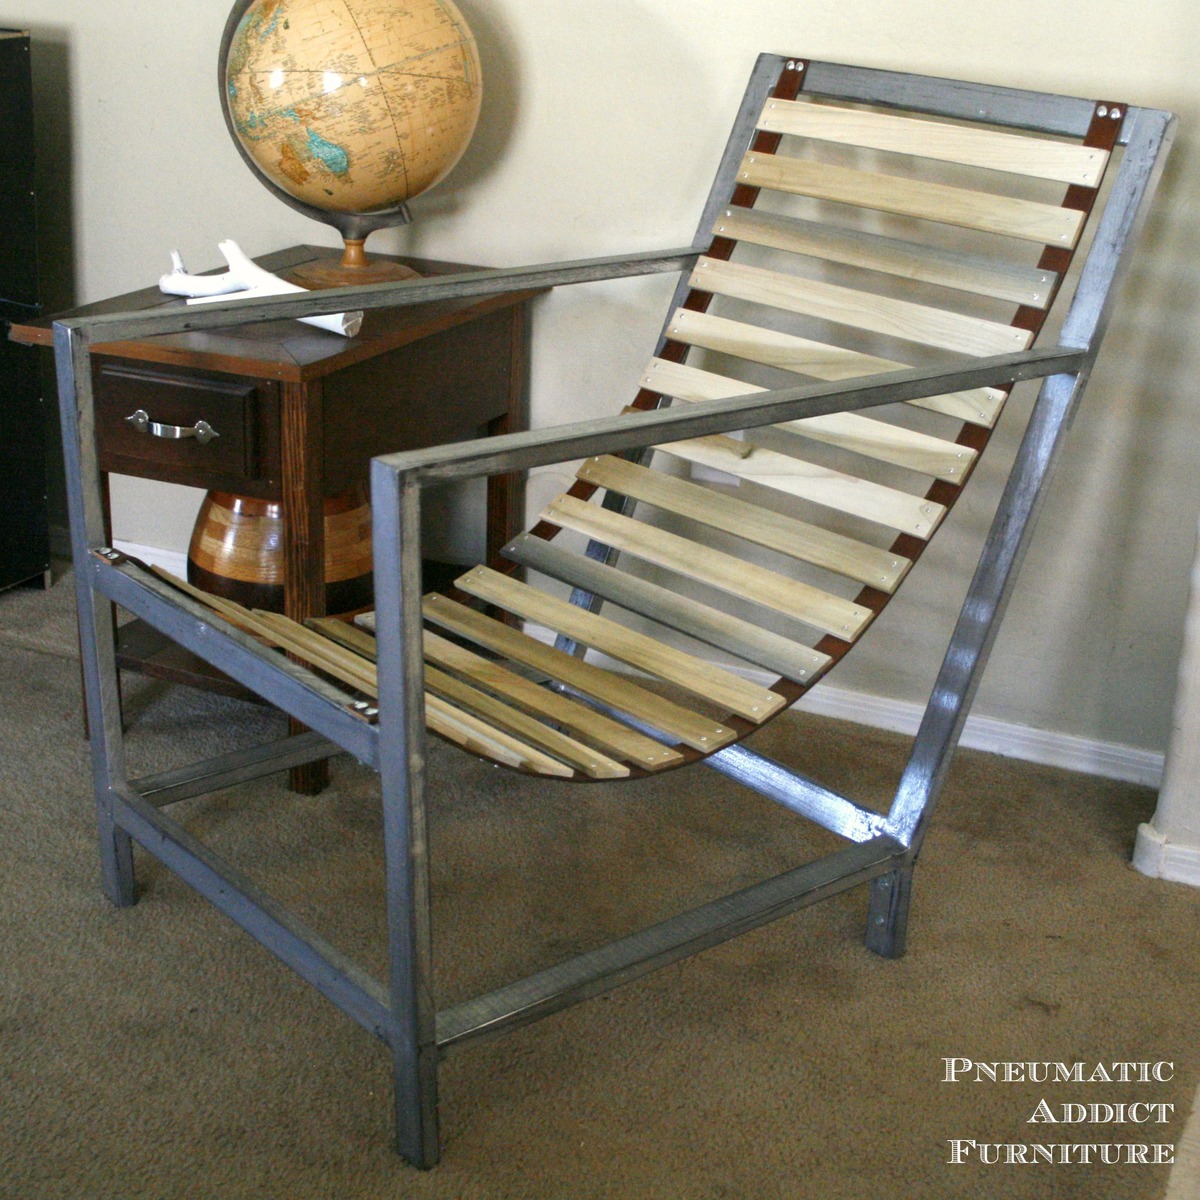
Despite how it looks, this chair was actually pretty cheap and easy to build. The one caveat is that it really needs to be built from hardwood. The minimalist design of this chair requires the strength of solid hardwood. I don't think pine would cut it.
I started by building my angled legs. My chair is nice and lounge-y. If you don't like the relaxed, lounger style, you may want a slightly more shallow angle to your back. The total length of the back is 33". I wanted the leg portion to be 4" tall, so I first cut 2, 33" lengths. Then, measured 4", and cut at a 10-degree angle. I inverted the 2 pieces, and attached them together with glue, pocket holes, and screws.
Once I had my angled legs, I put together my back frame, front frame, and finally joined them together with the armrests and side supports. I used wood glue and countersunk, 3" screws at each joint.
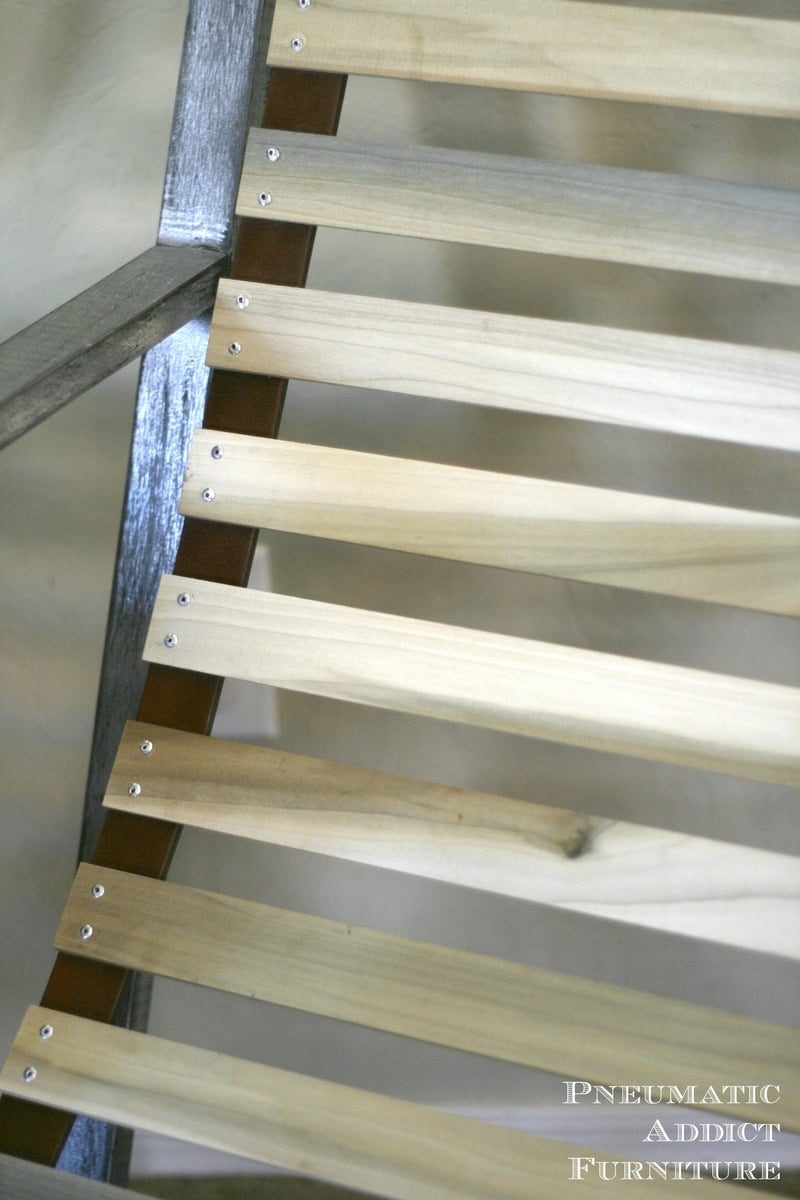
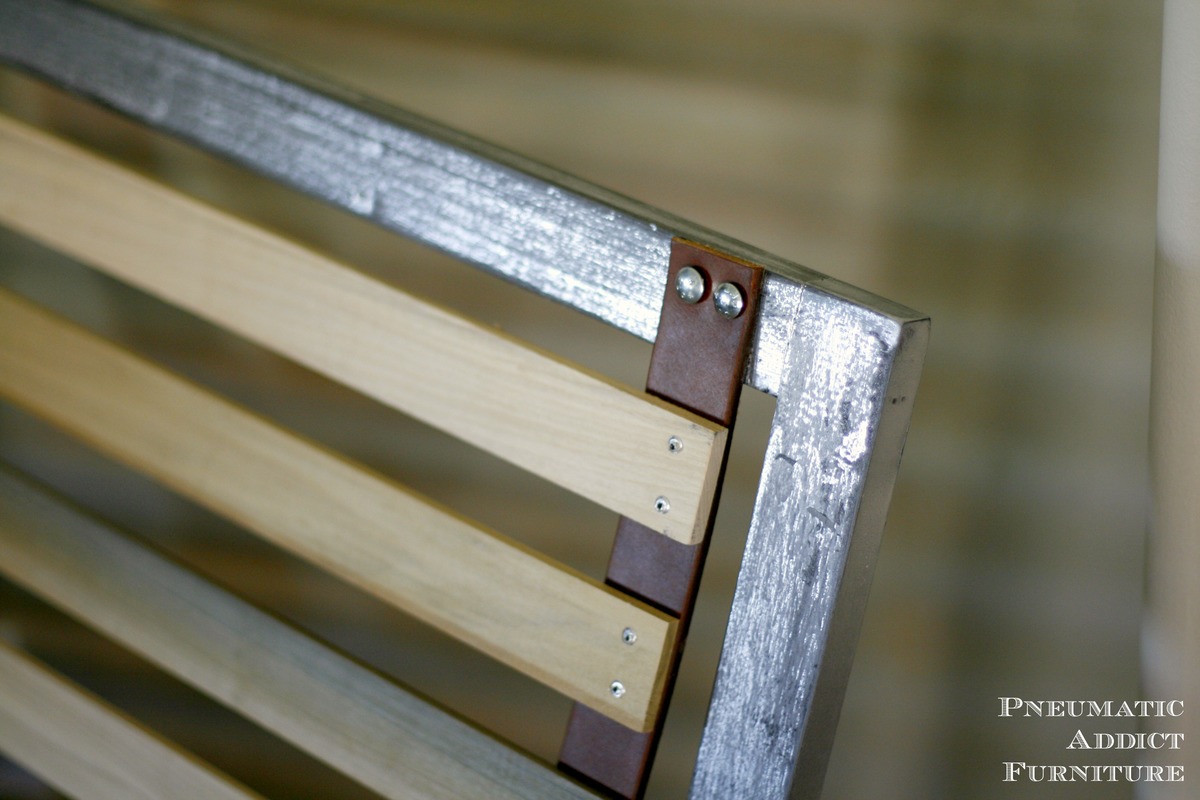
To create the sling, I took two, 52" leather belts, and strung 19" wide slats, 1" apart. I attached the slats to the leather using a pop rivet gun. For this size chair, I used 17, 1.5" wide slats to create the sling. I then attached the sling to the frame using carriage bolts and nuts.

Estimated Cost
$75
Estimated Time Investment
Day Project (6-9 Hours)
Finish Used
I primed the frame with black primer. Then sprayed a coat of Oil Rubbed Bronze by Rustoleum, Next, I layered a coat of metallic silver and distressed to allow some of the darker paint to show through. I sealed the whole thing with 3 coats of satin polyacrylic.
Recommended Skill Level
Intermediate
Comments
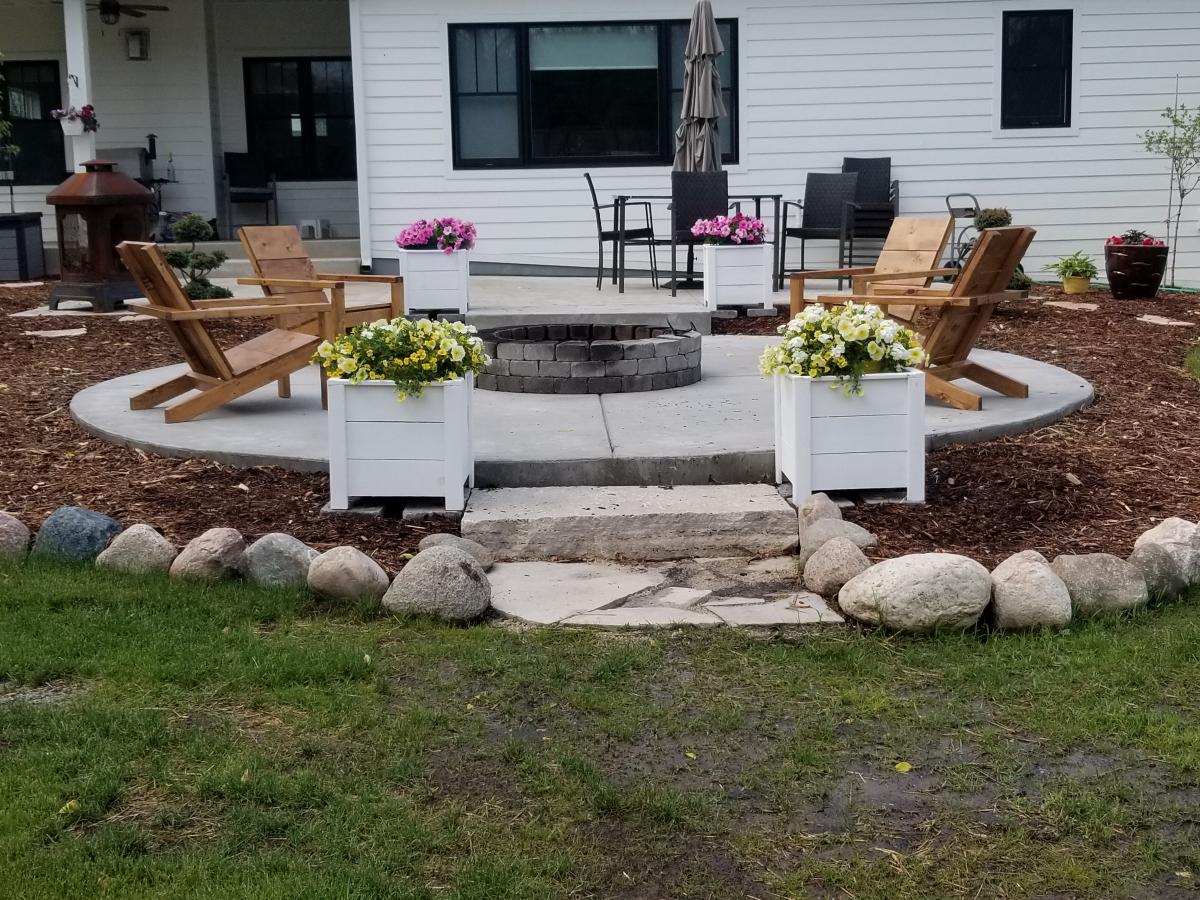
Planter Boxes
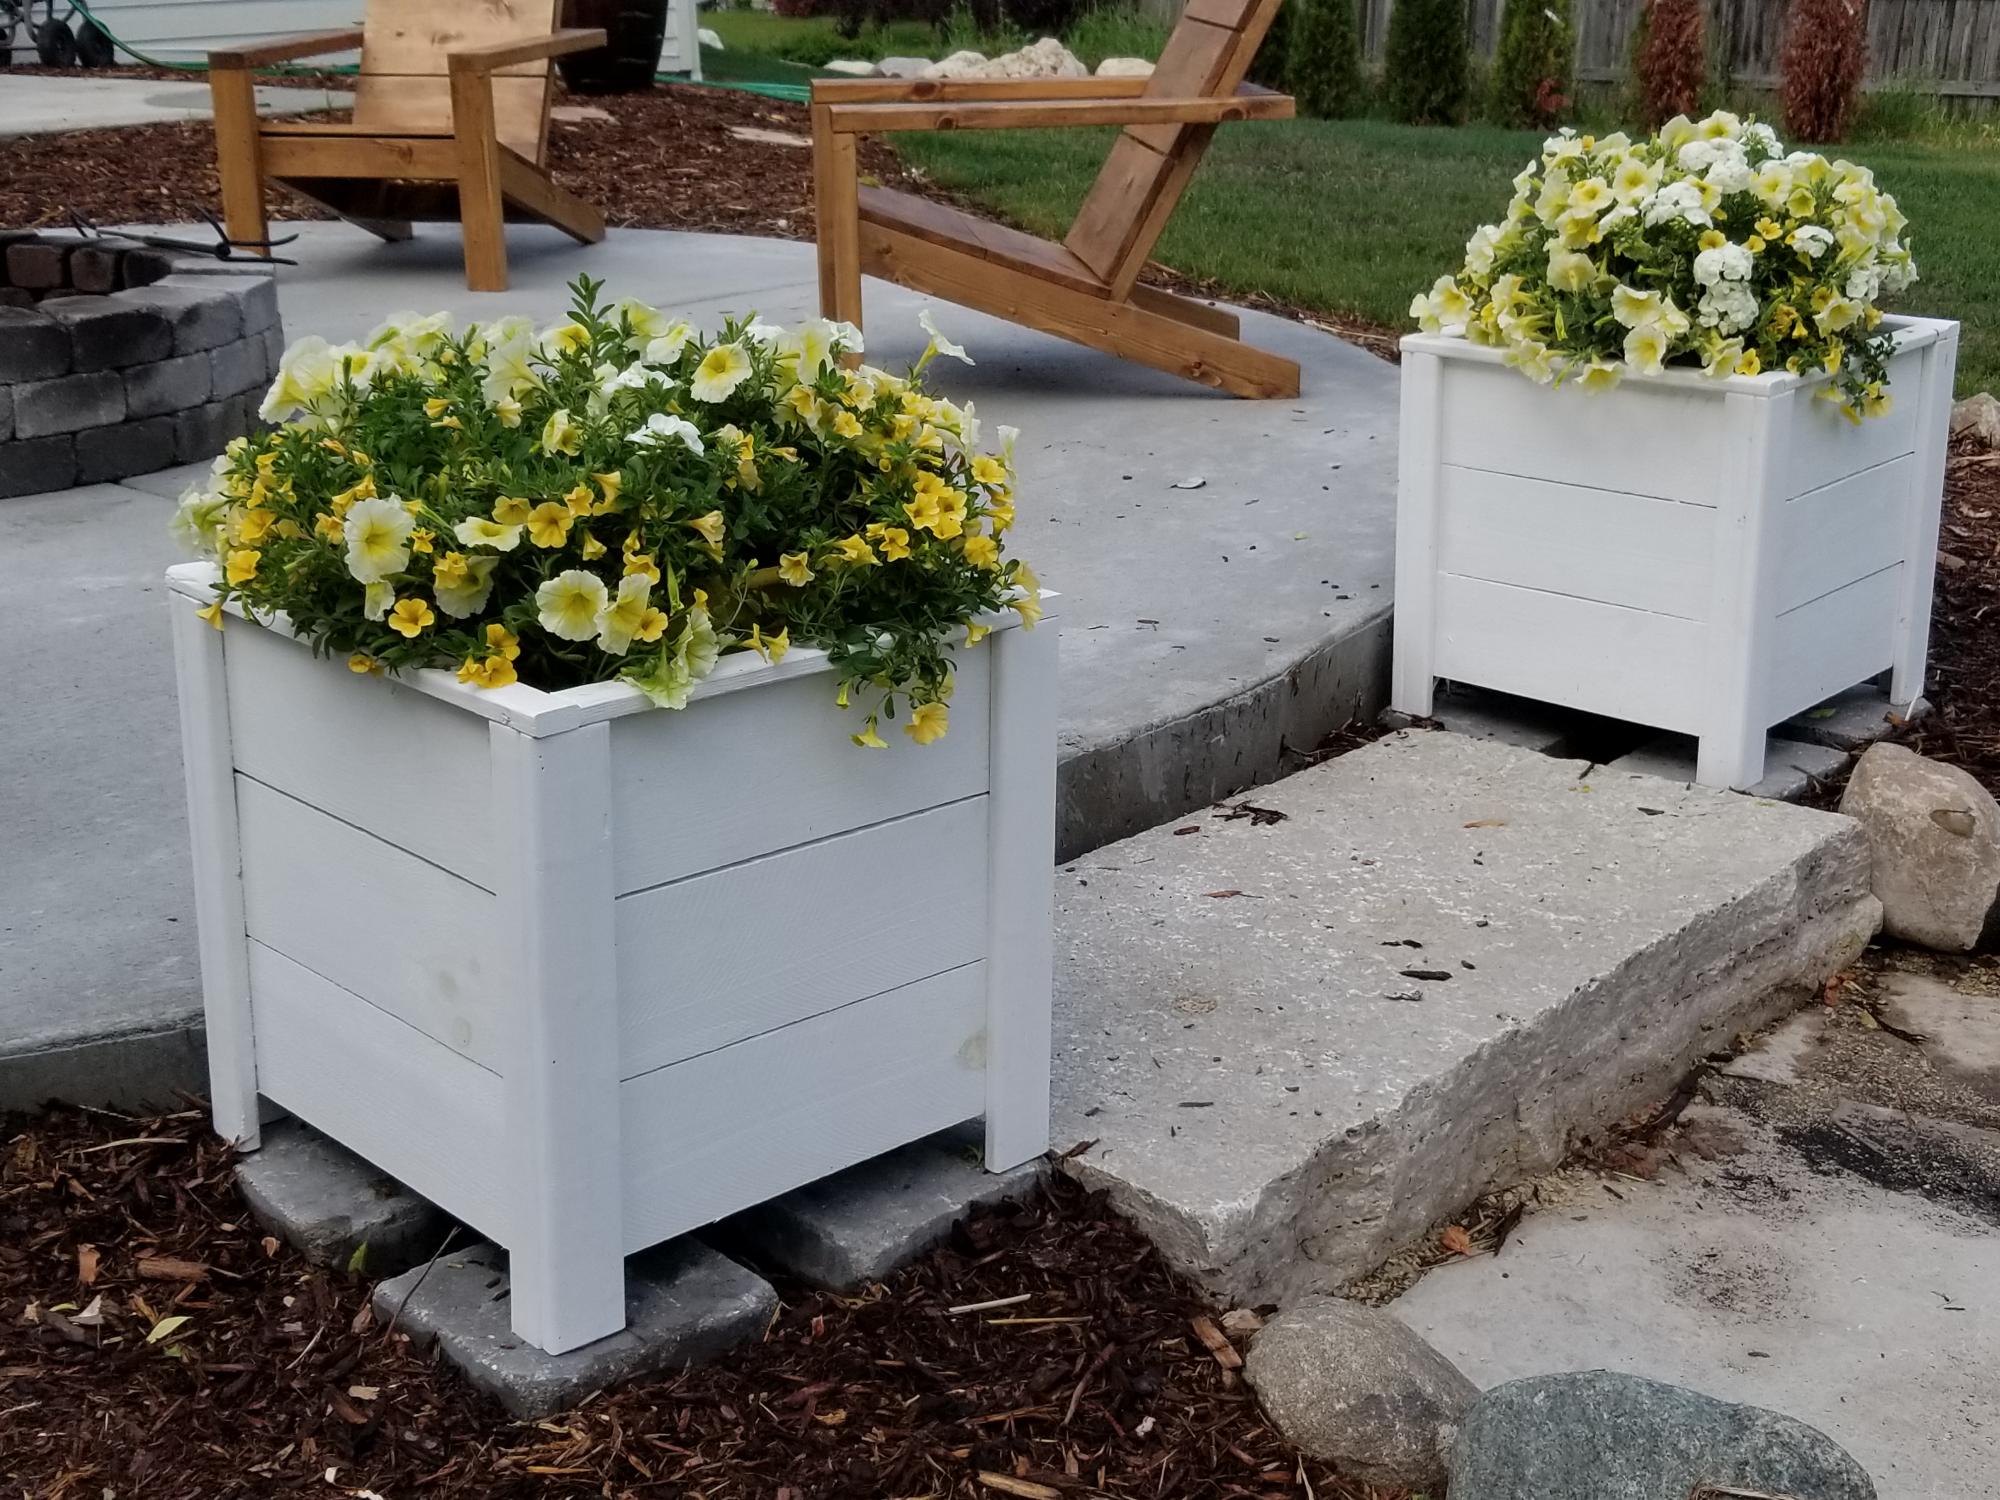
I followed the plan exactly including the suggestion of the fence paint (2 coats). This was a very easy build. It took much longer to paint than it did to build. These boxes are the perfect accent on our new patio/firepit.
Built from Plan(s)
Estimated Cost
$10/box for the wood
Estimated Time Investment
Afternoon Project (3-6 Hours)
Finish Used
Behr Fence Stain (white) 2 coats
Recommended Skill Level
Beginner
Comments
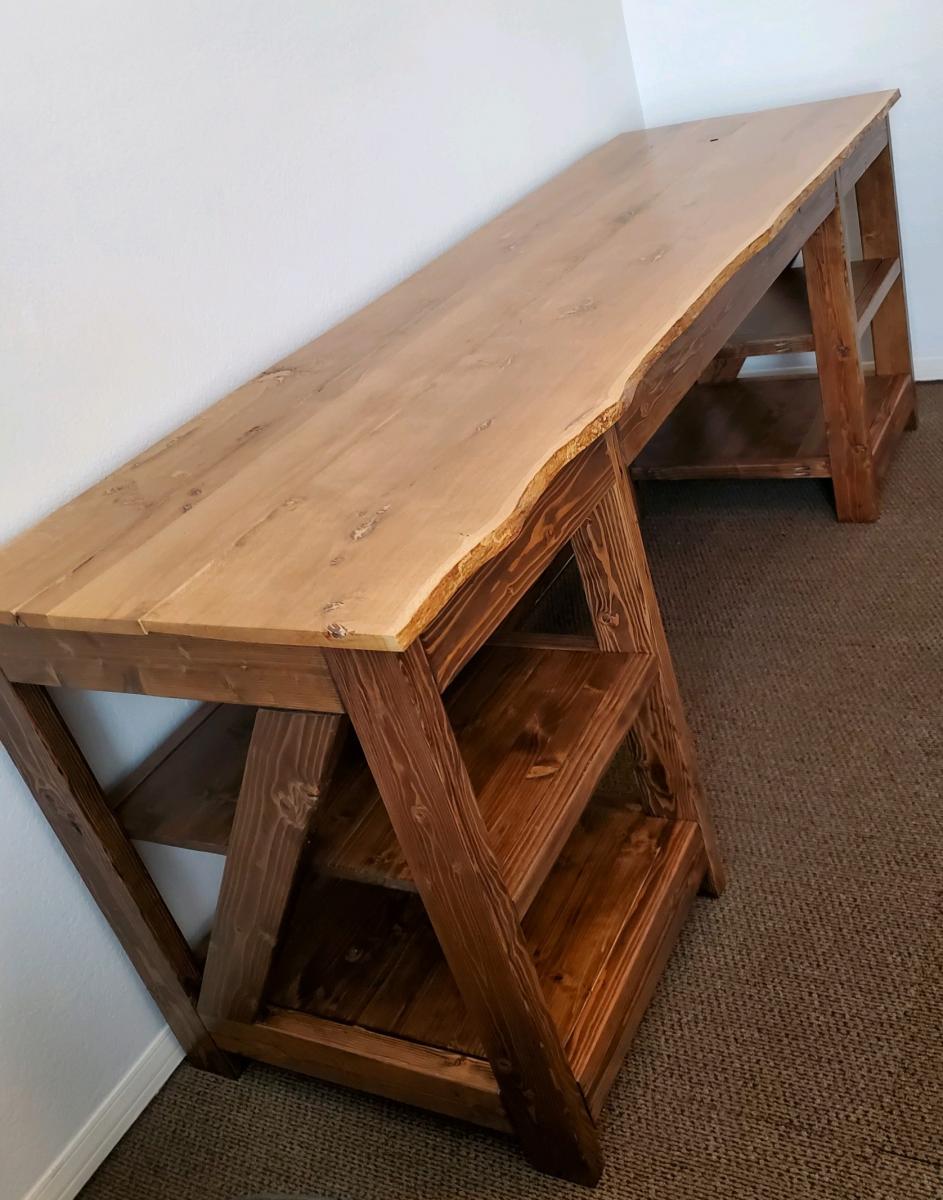
Modified Farmhouse X Desk
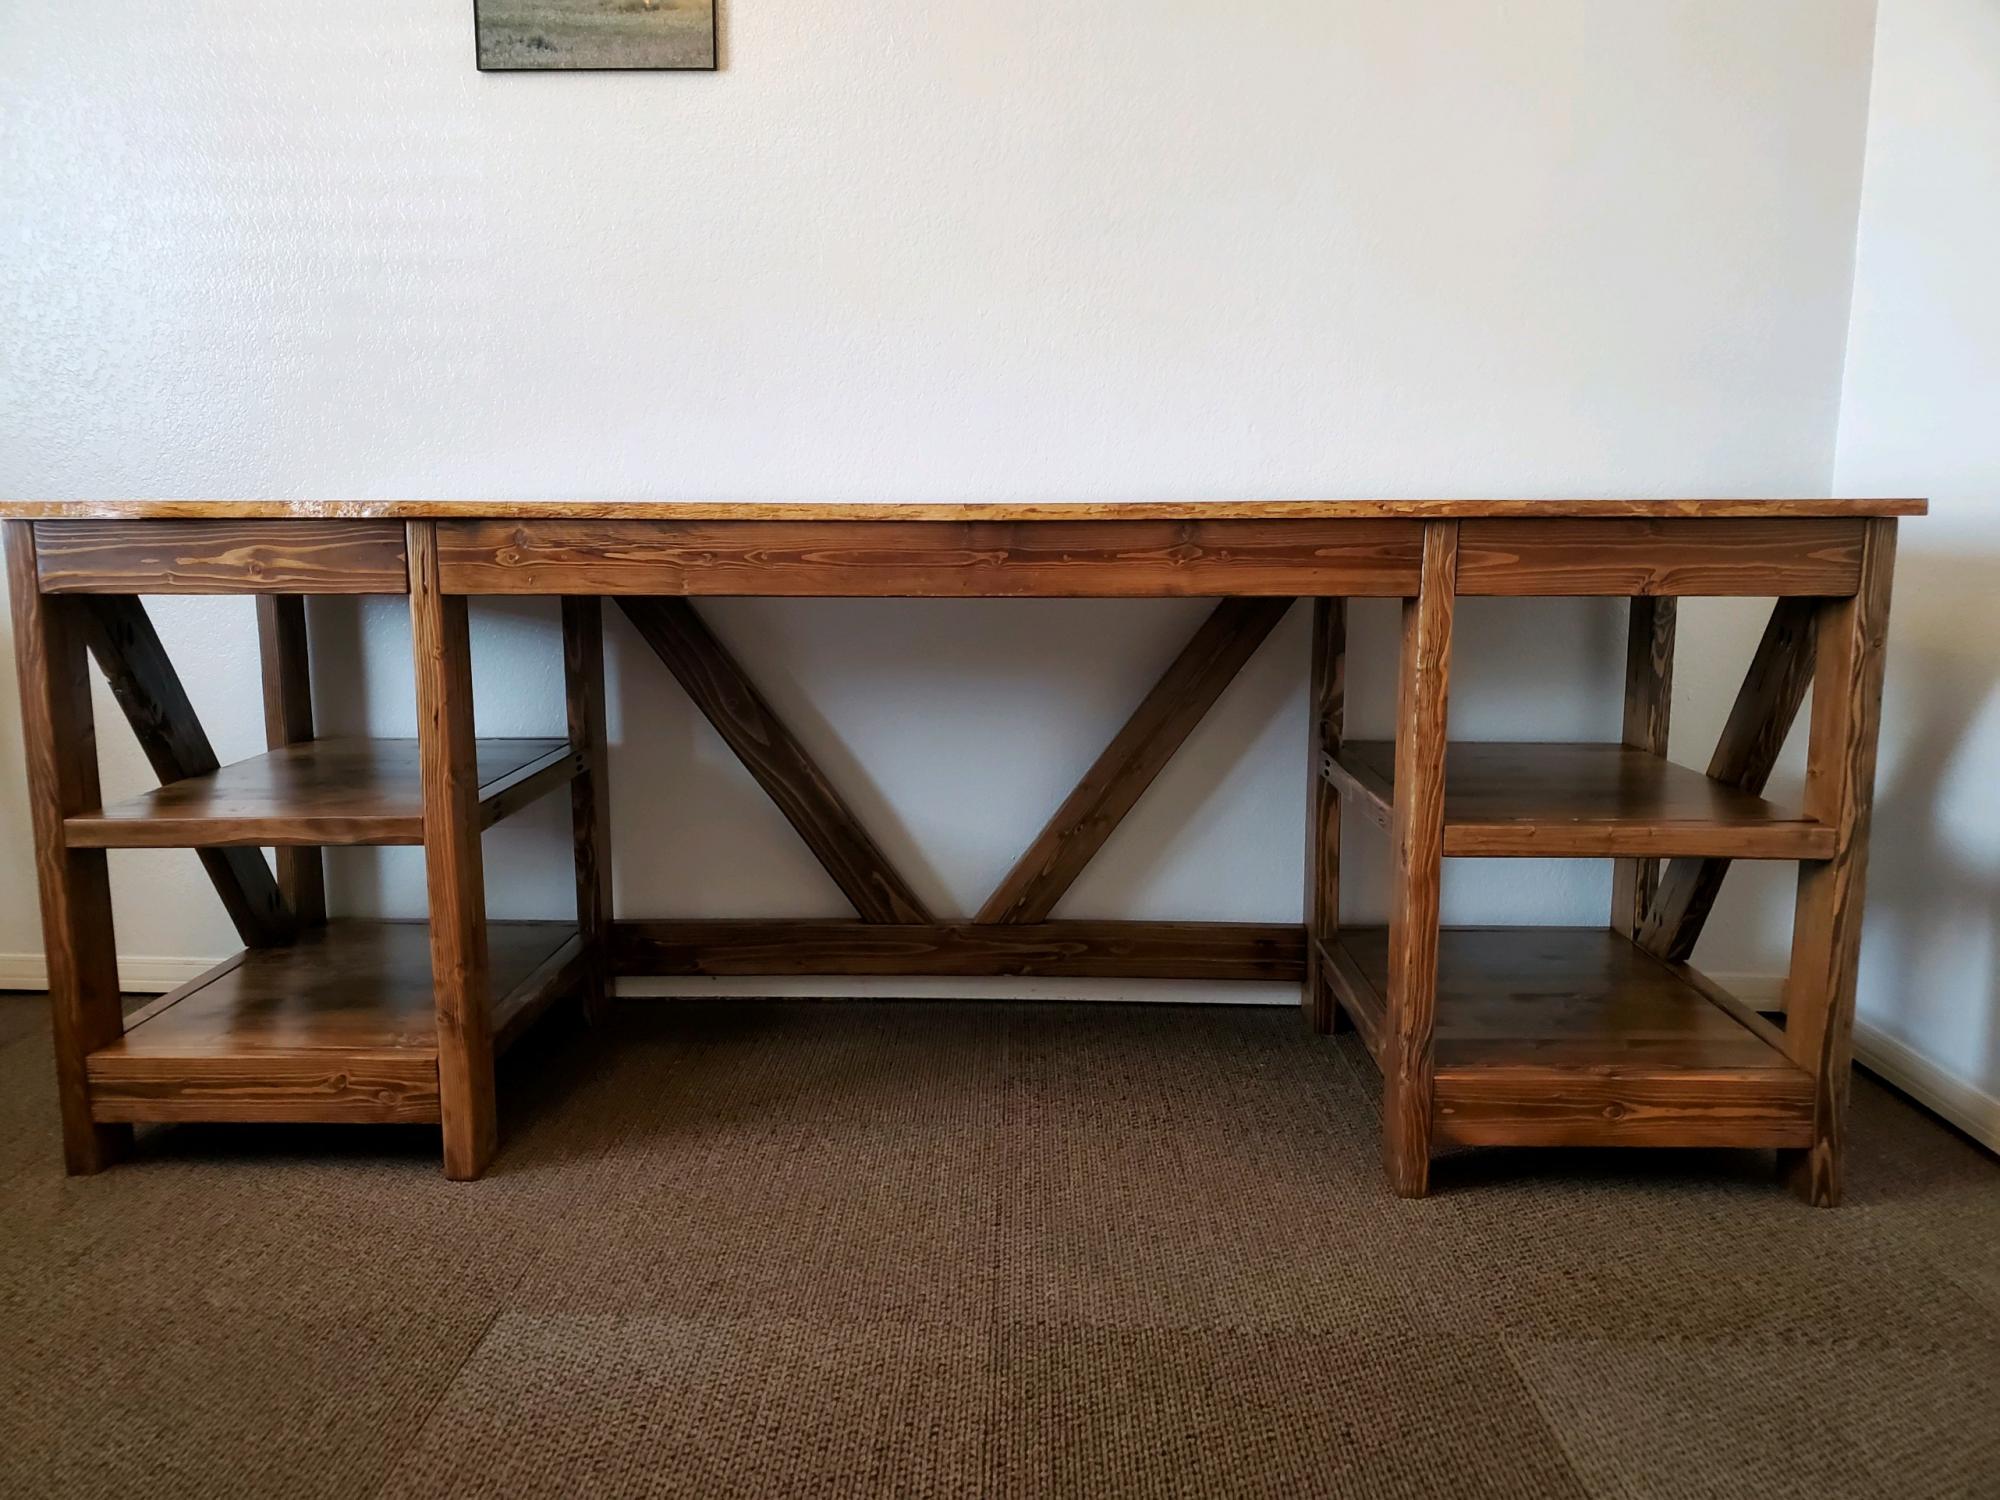
I modified the Farmhouse X Desk plan from Handmade Haven to add the shelving on both ends. I also have a Z on the end instead of the X as that was the way my husband preferred it (it is for him after all). The top is live edge wood which is tricky to work with since the thickness is different from board to board but I still like the way it turned out! The live edge top did add time to the build as well as staining and varnishing as opposed to painting the base.
Built from Plan(s)
Estimated Time Investment
Week Long Project (20 Hours or More)
Finish Used
Minwax Jacobean stain mixed with Special Walnut (had a little of both on hand) for the base and left the top natural. Both coated with Minwax oil modified water based polyurethane.
Recommended Skill Level
Intermediate
Comments
Corner Cabinet
Corner cabinet project based on Ana's plans and adjusted to my own decor and measurements.
Built from Plan(s)
Recommended Skill Level
Beginner
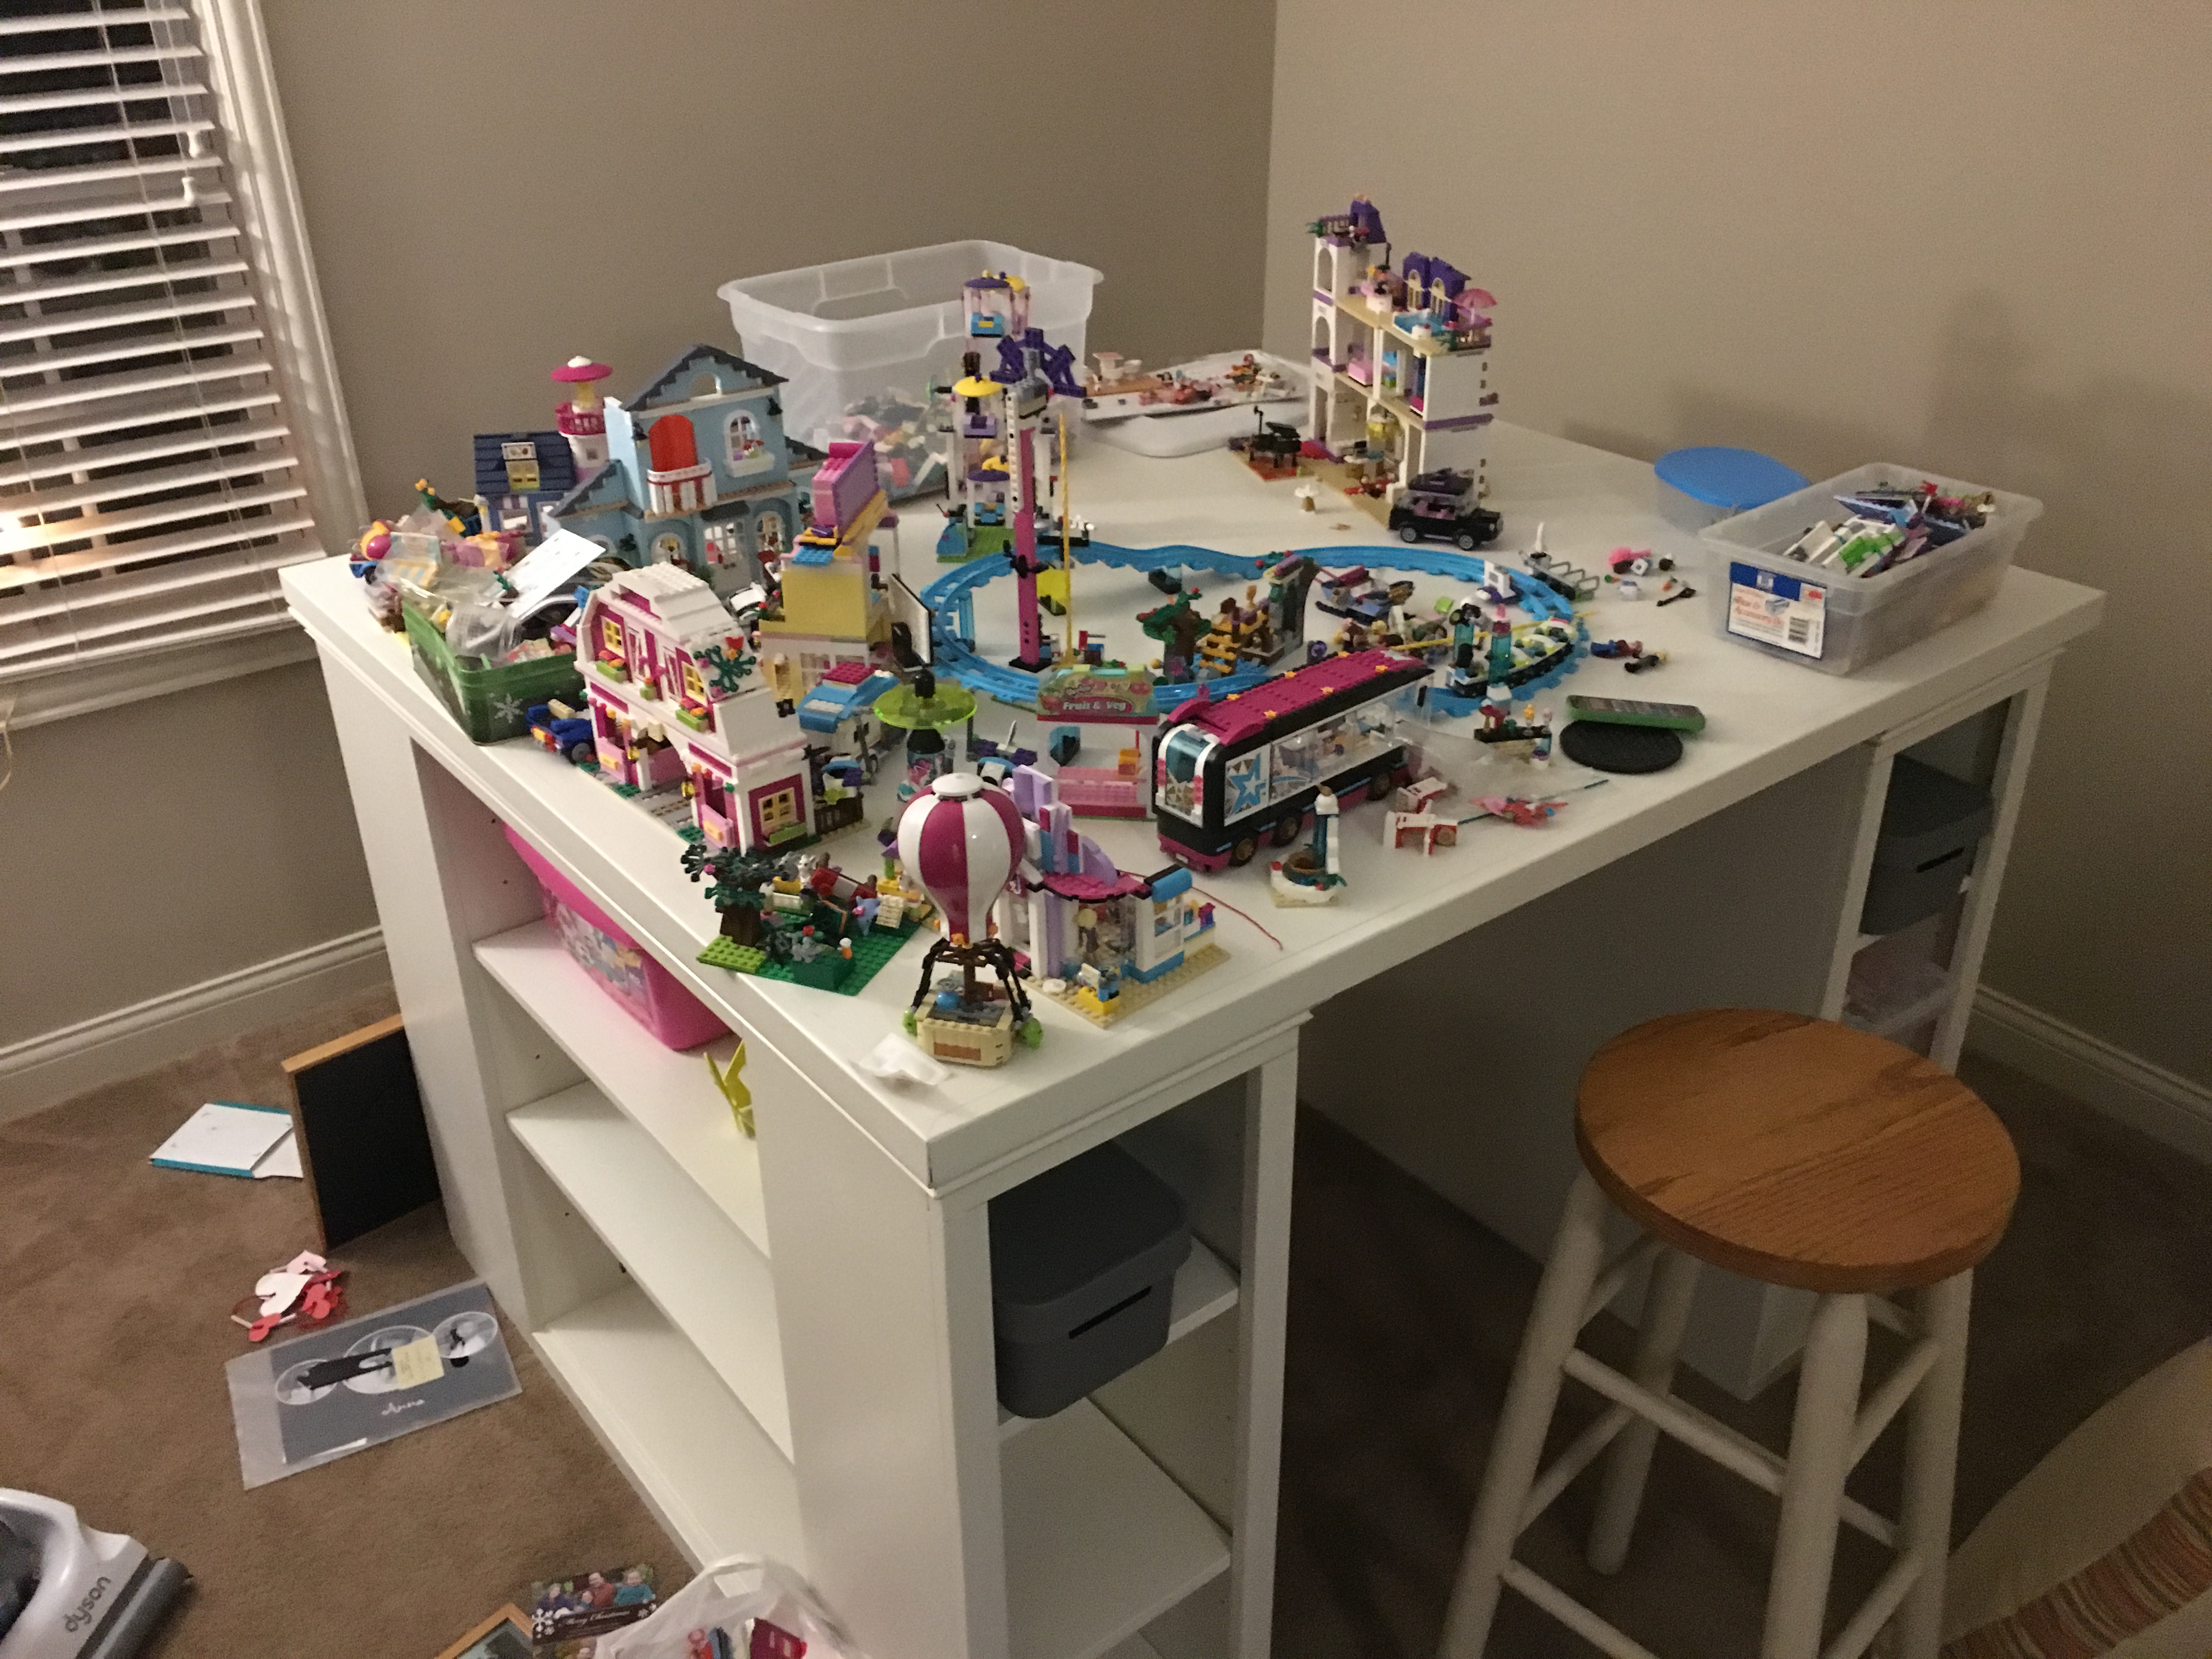
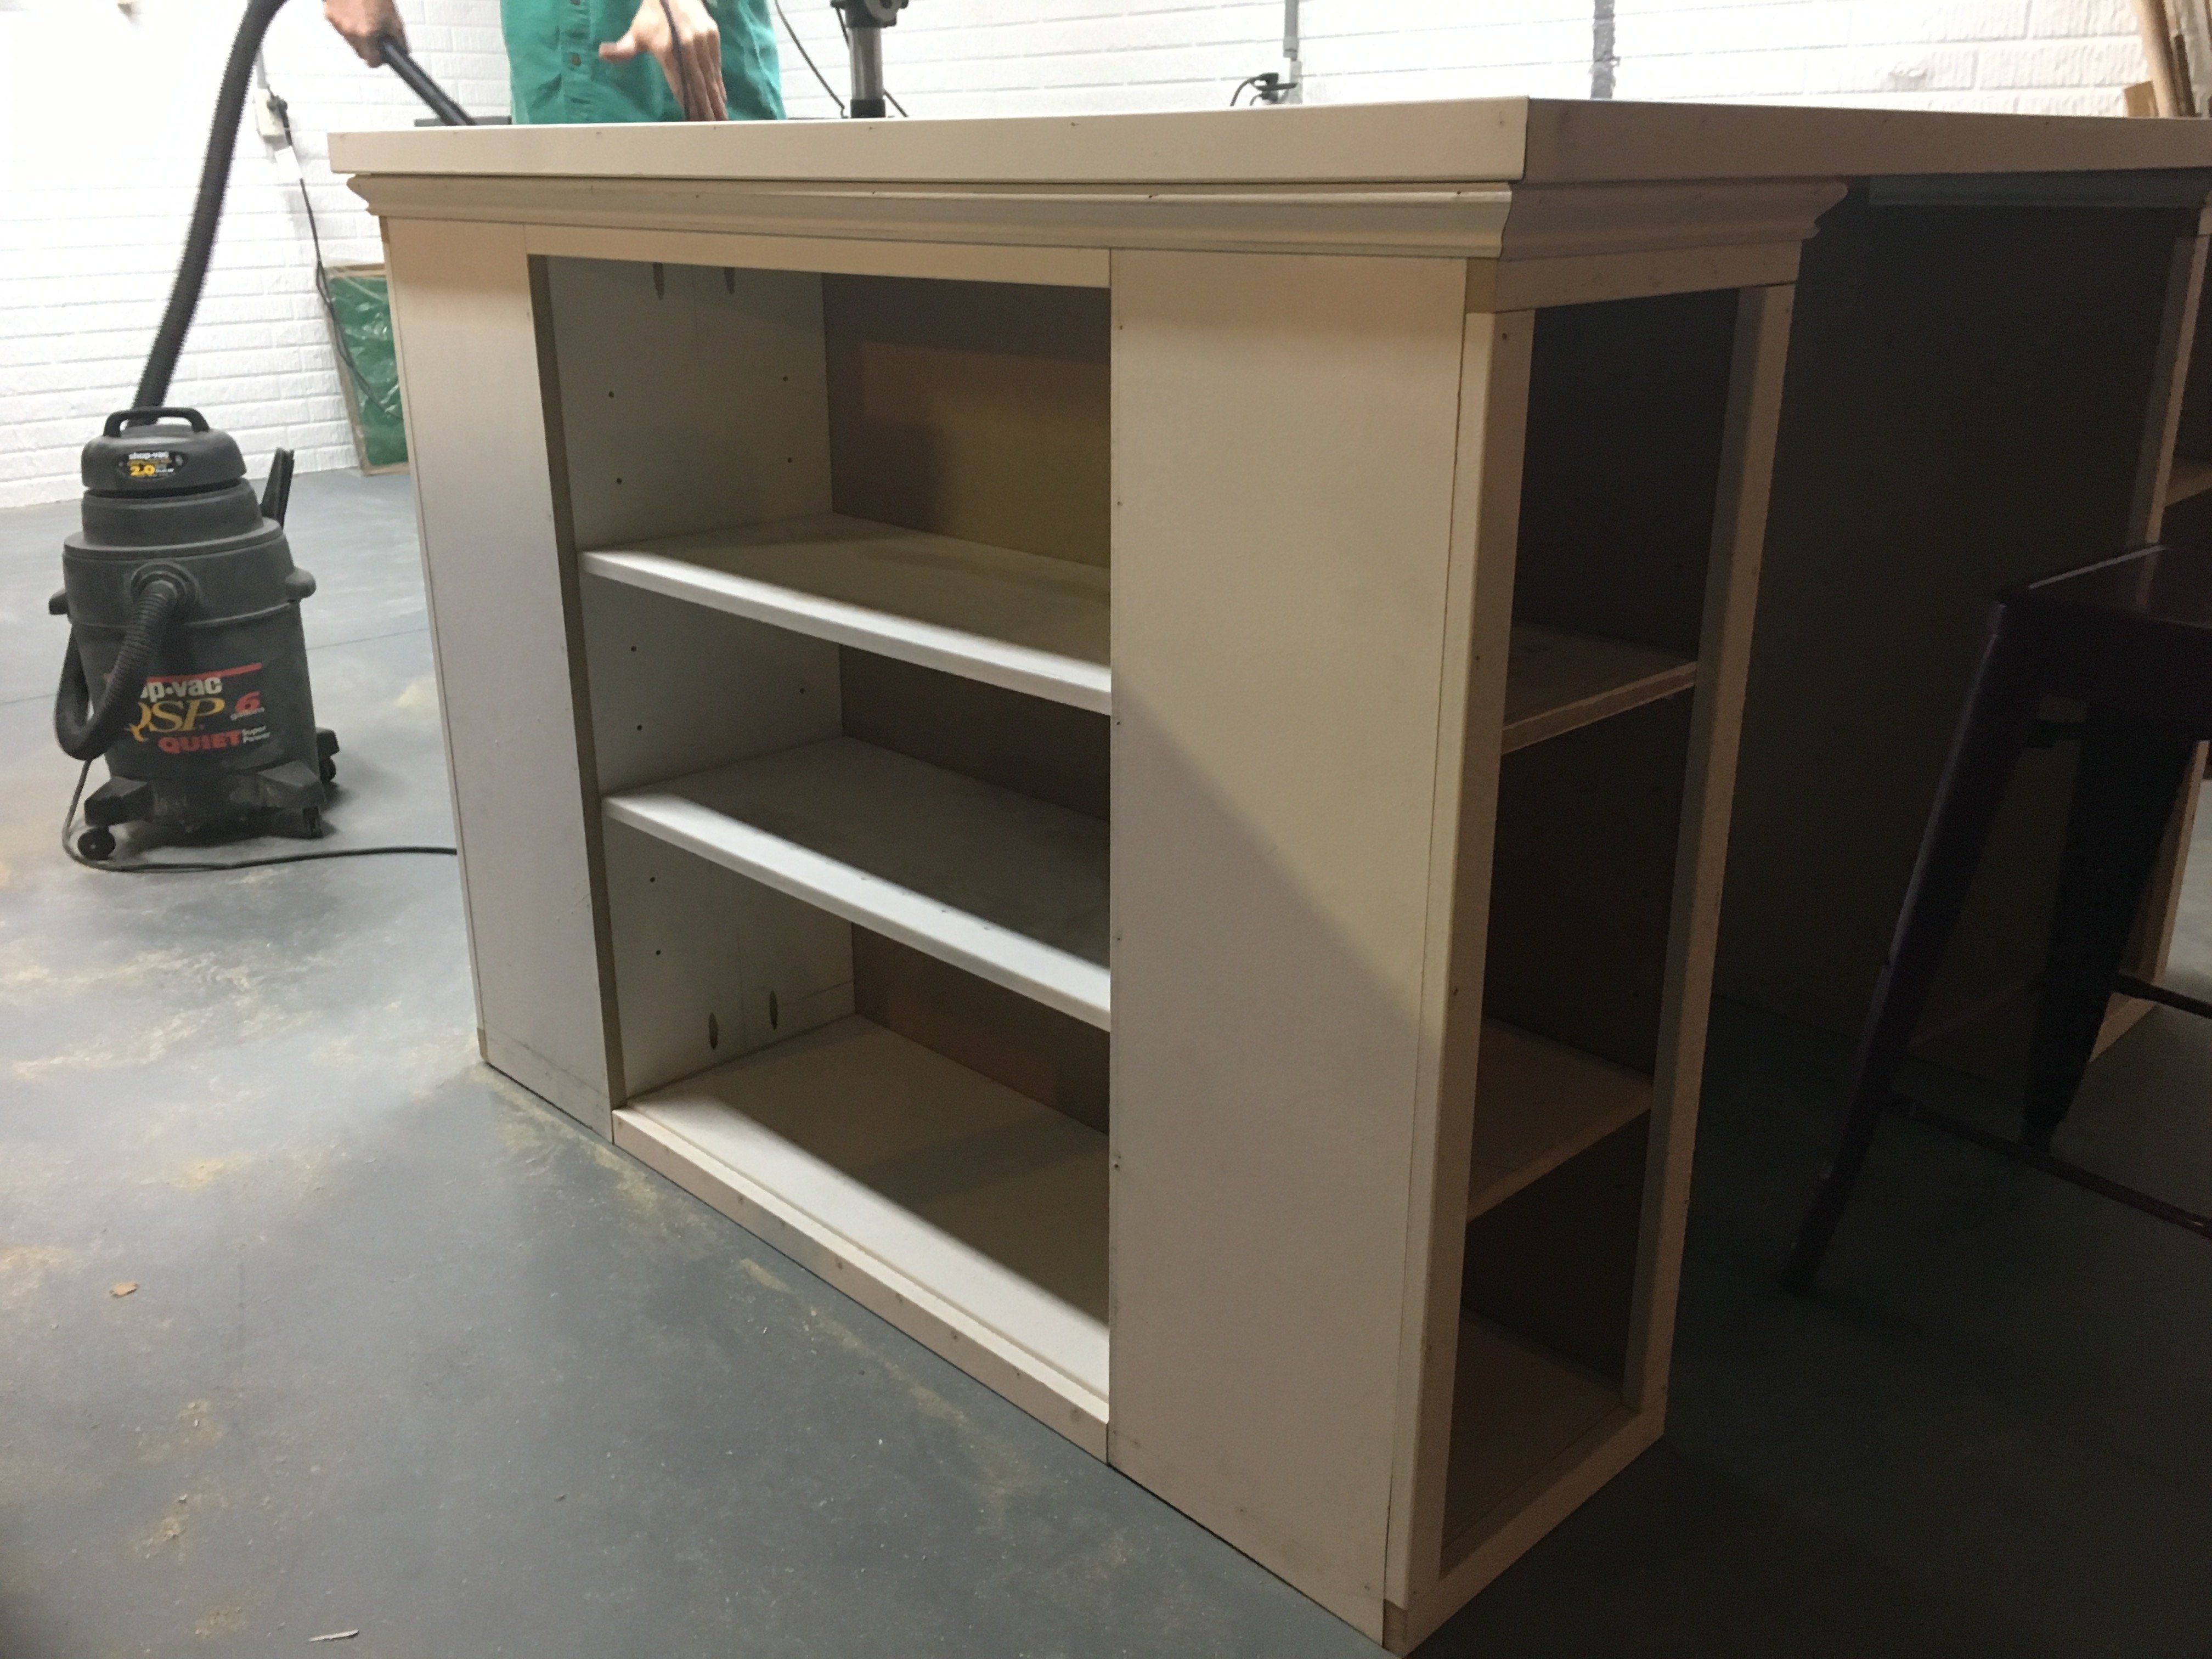
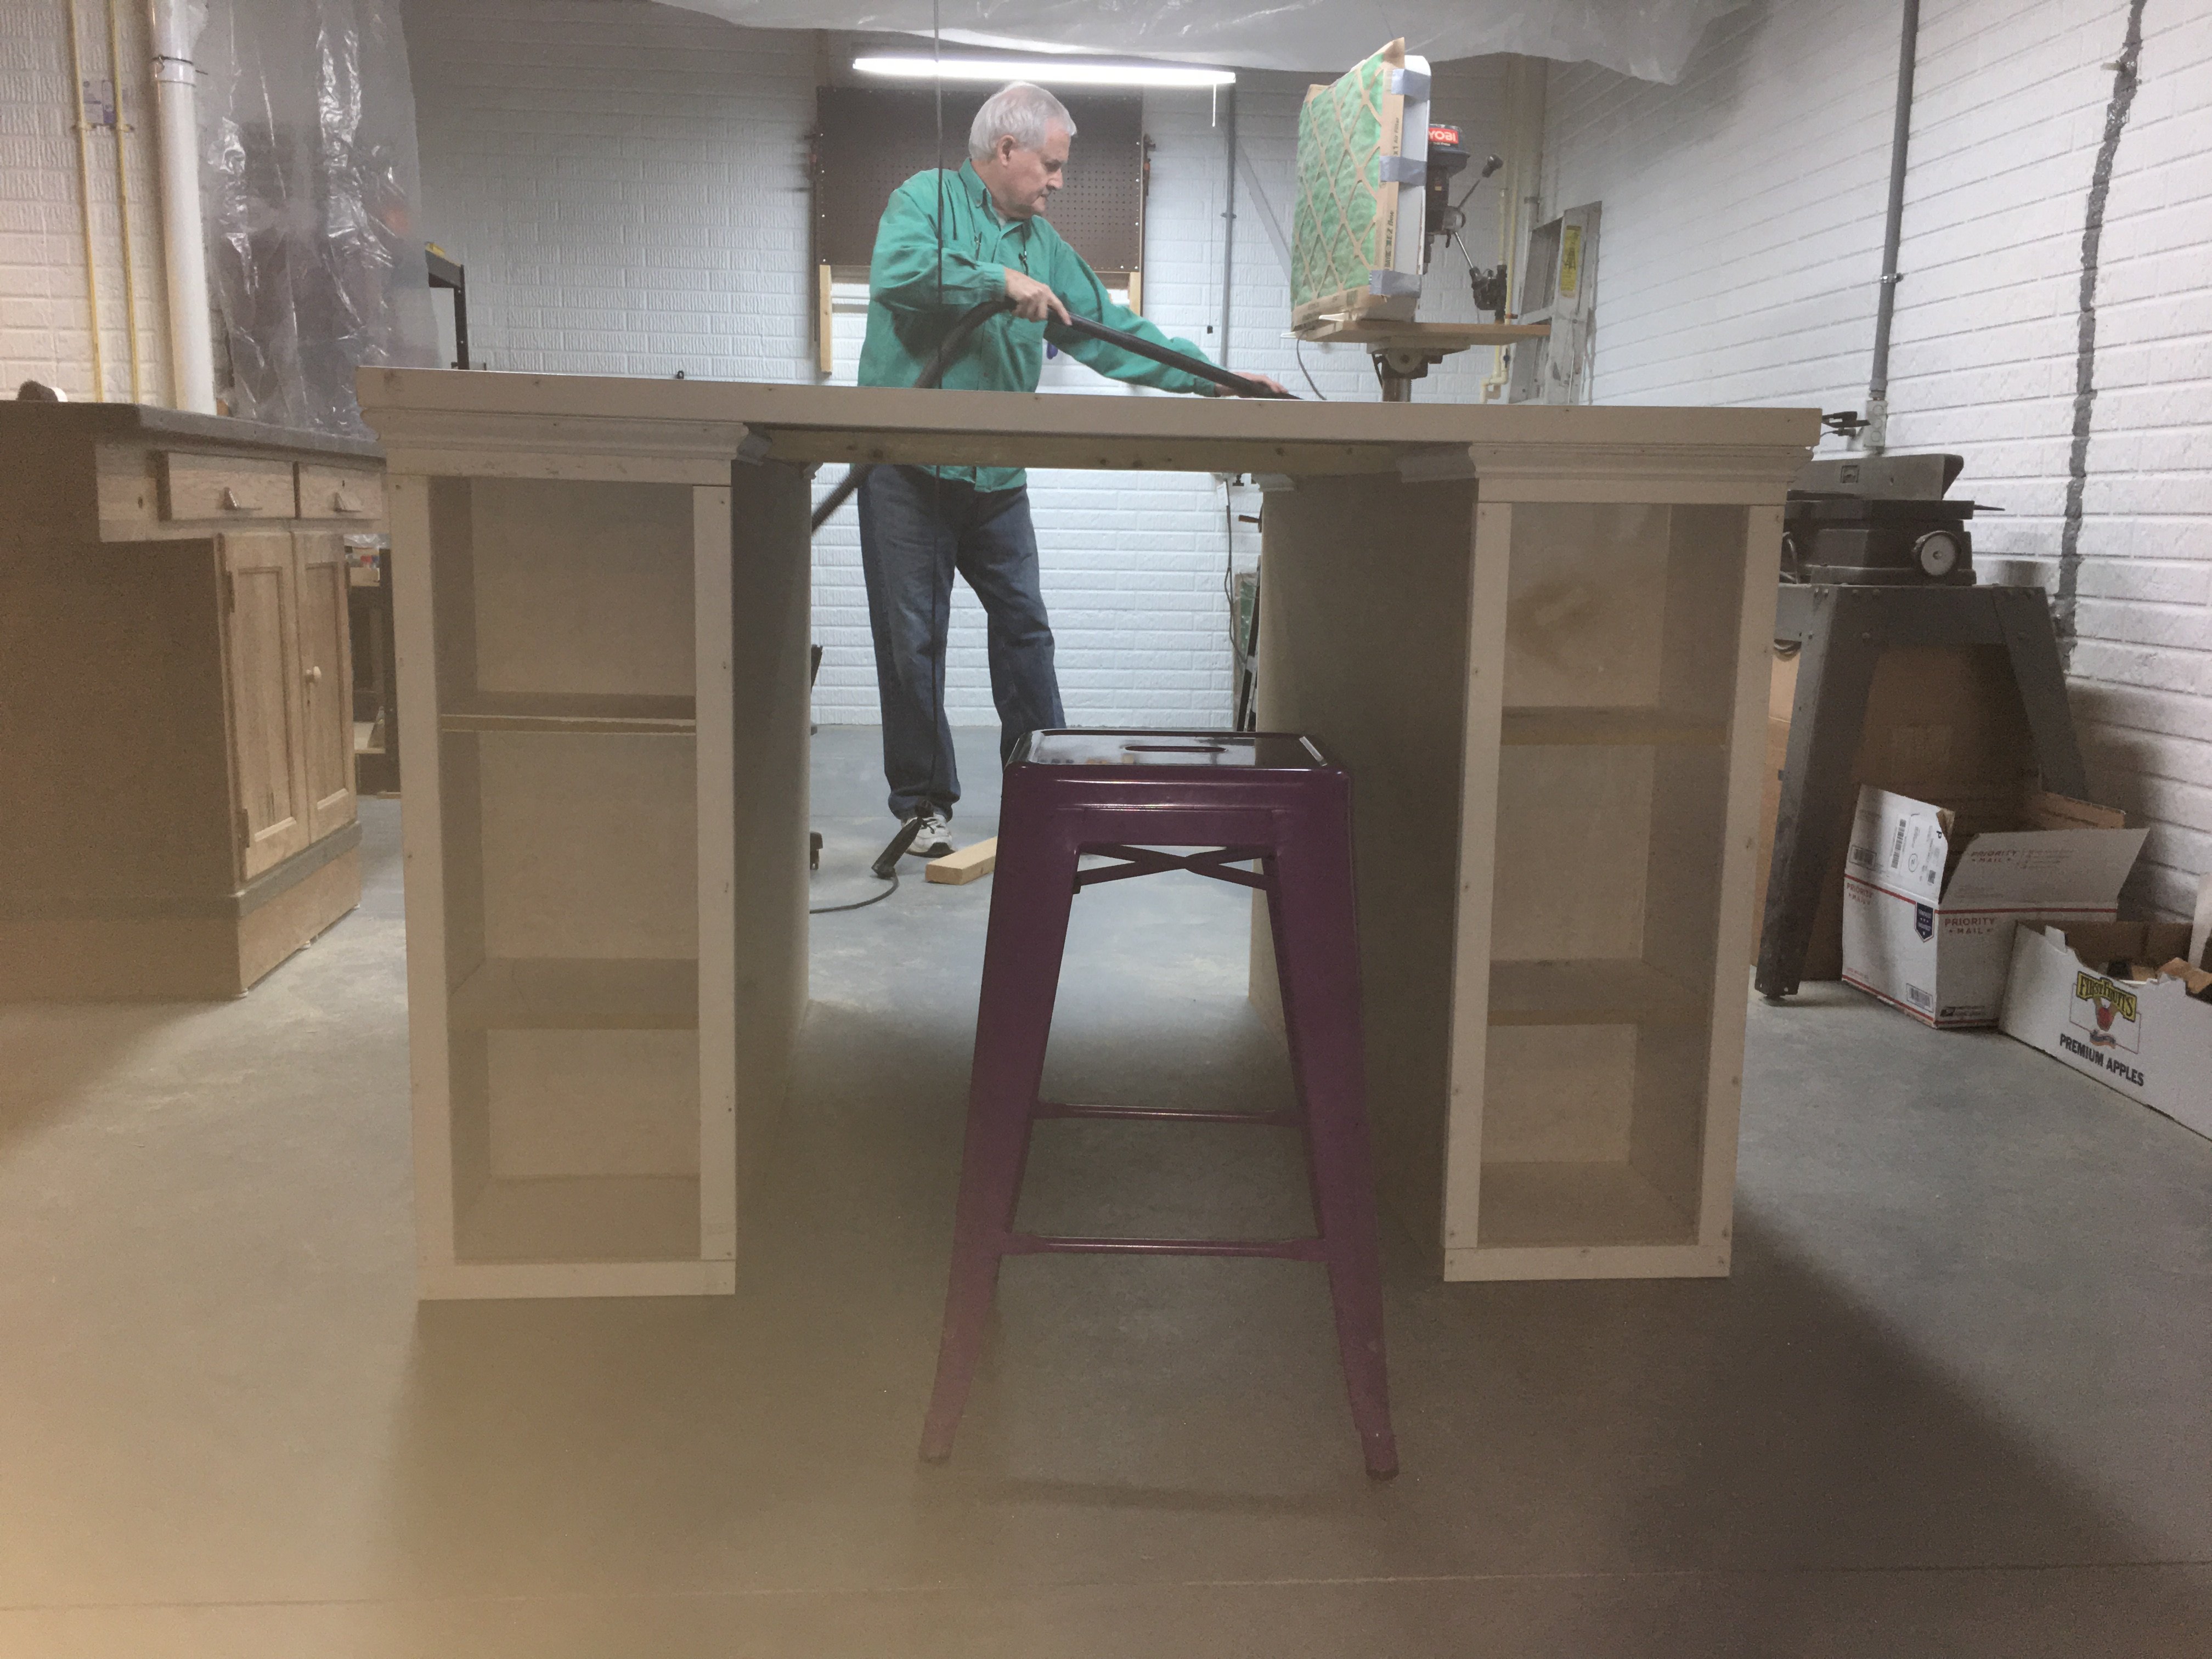
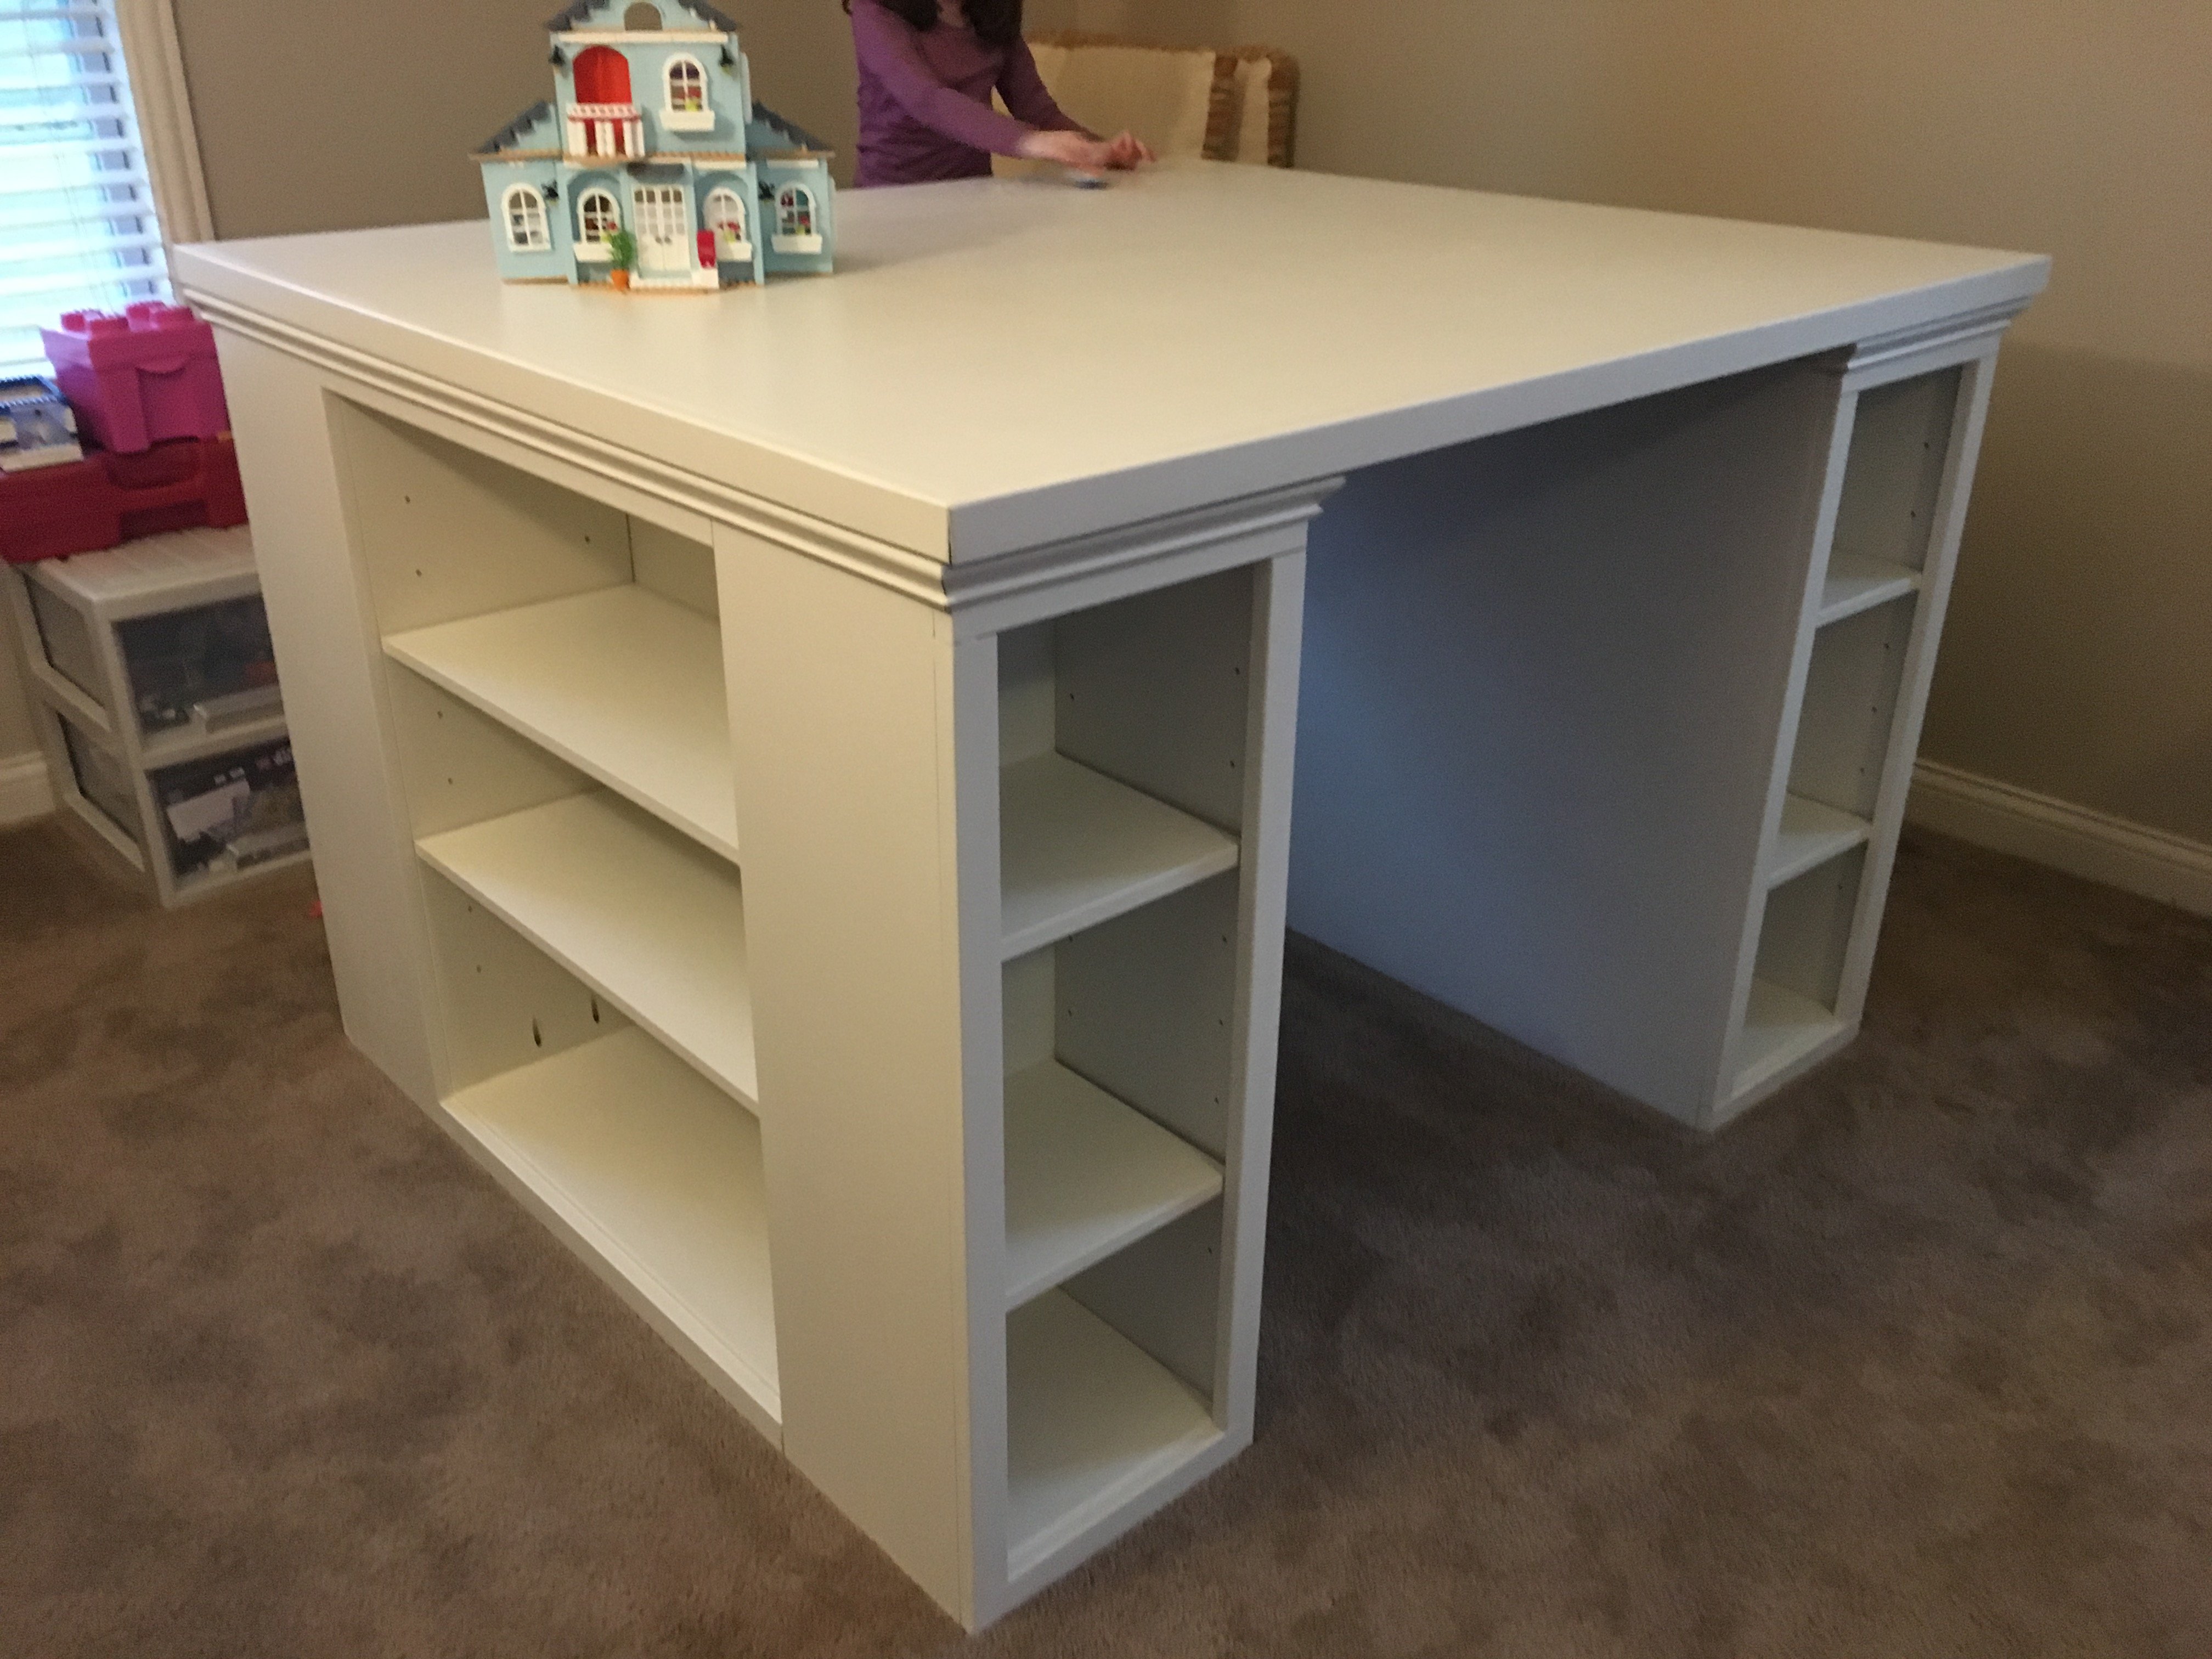
A More Traditional Modern Craft Table
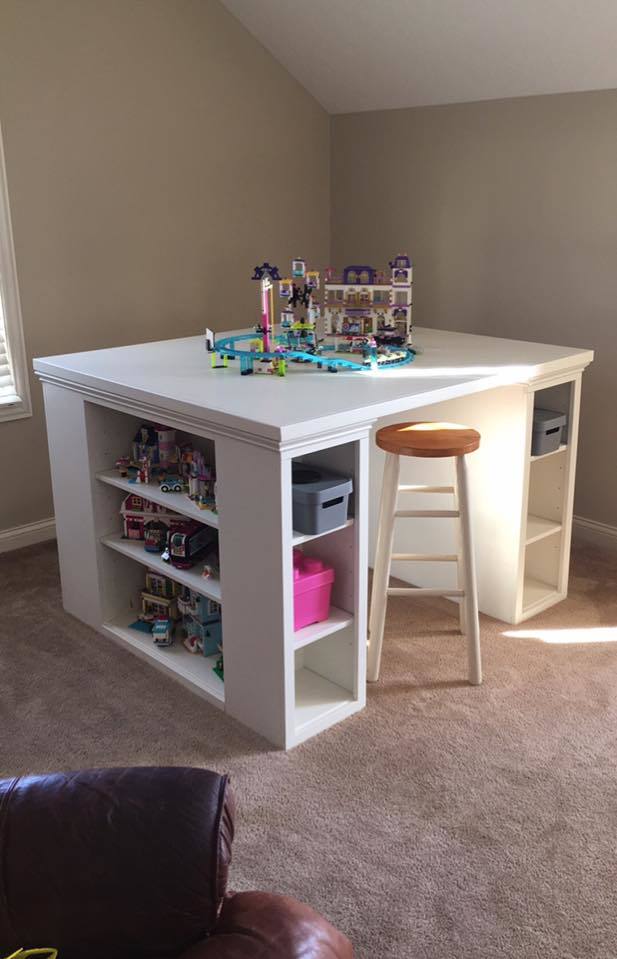
This is my more traditional take on the modern craft table (I guess that means it isn't technically "modern"!). We call it the "Lego Table" at our house. I doubled up the ends like others have so that my two daughters can have their own sides. My wife asked that the there be backs on the side shelves so that items aren't pushed off. I also added trim around the tabletop and molding to give it a bit more traditional appearance. Finally, I made the shelves adjustable.
Built from Plan(s)
Estimated Time Investment
Week Long Project (20 Hours or More)
Recommended Skill Level
Intermediate
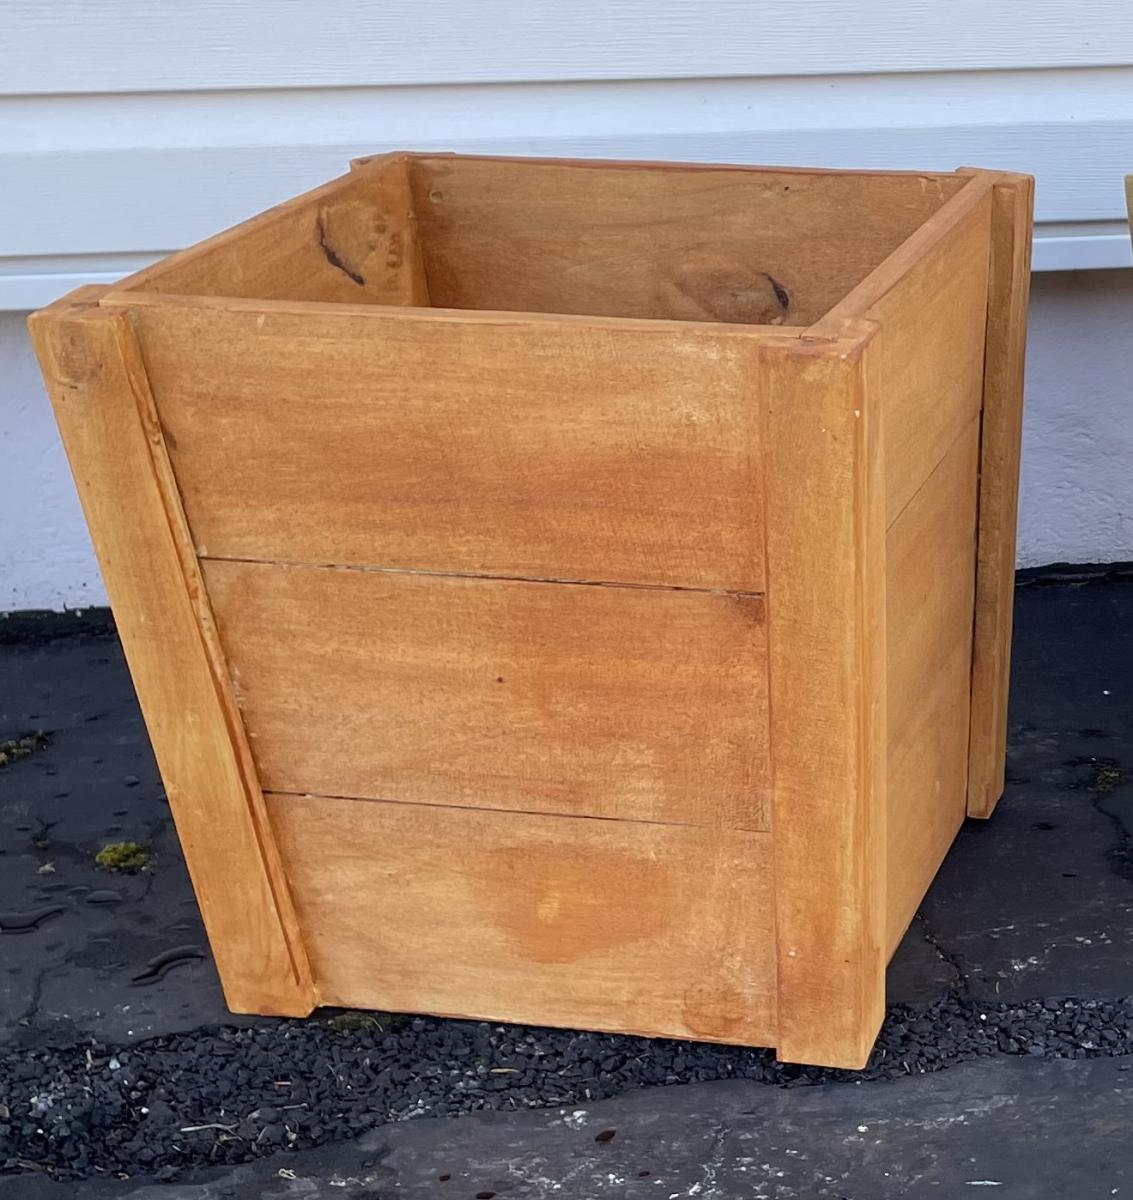
16" Cedar Patio Planter
I created these 16" cedar patio planters using Ana's plans. I bought four 6' cedar pickets from Lowe's for $1.98 each or under $8 for the lot. I used the extra picket to cut our my 1x2s and 1x3s so the whole construction is made of cedar including the pieces to hold a potted plant. I used Behr's clear and cedar finish to complete the job in under 1 hour. Thanks Ana for the motivation.
Estimated Cost
$8
Estimated Time Investment
An Hour or Two (0-2 Hours)
Finish Used
Behr's clear and cedar exterior finish
Recommended Skill Level
Intermediate
Comments
Fri, 03/05/2021 - 11:10
Great use of material!
Looks great and doesn't break the bank! Thanks for sharing:)