Planter Porch Steps
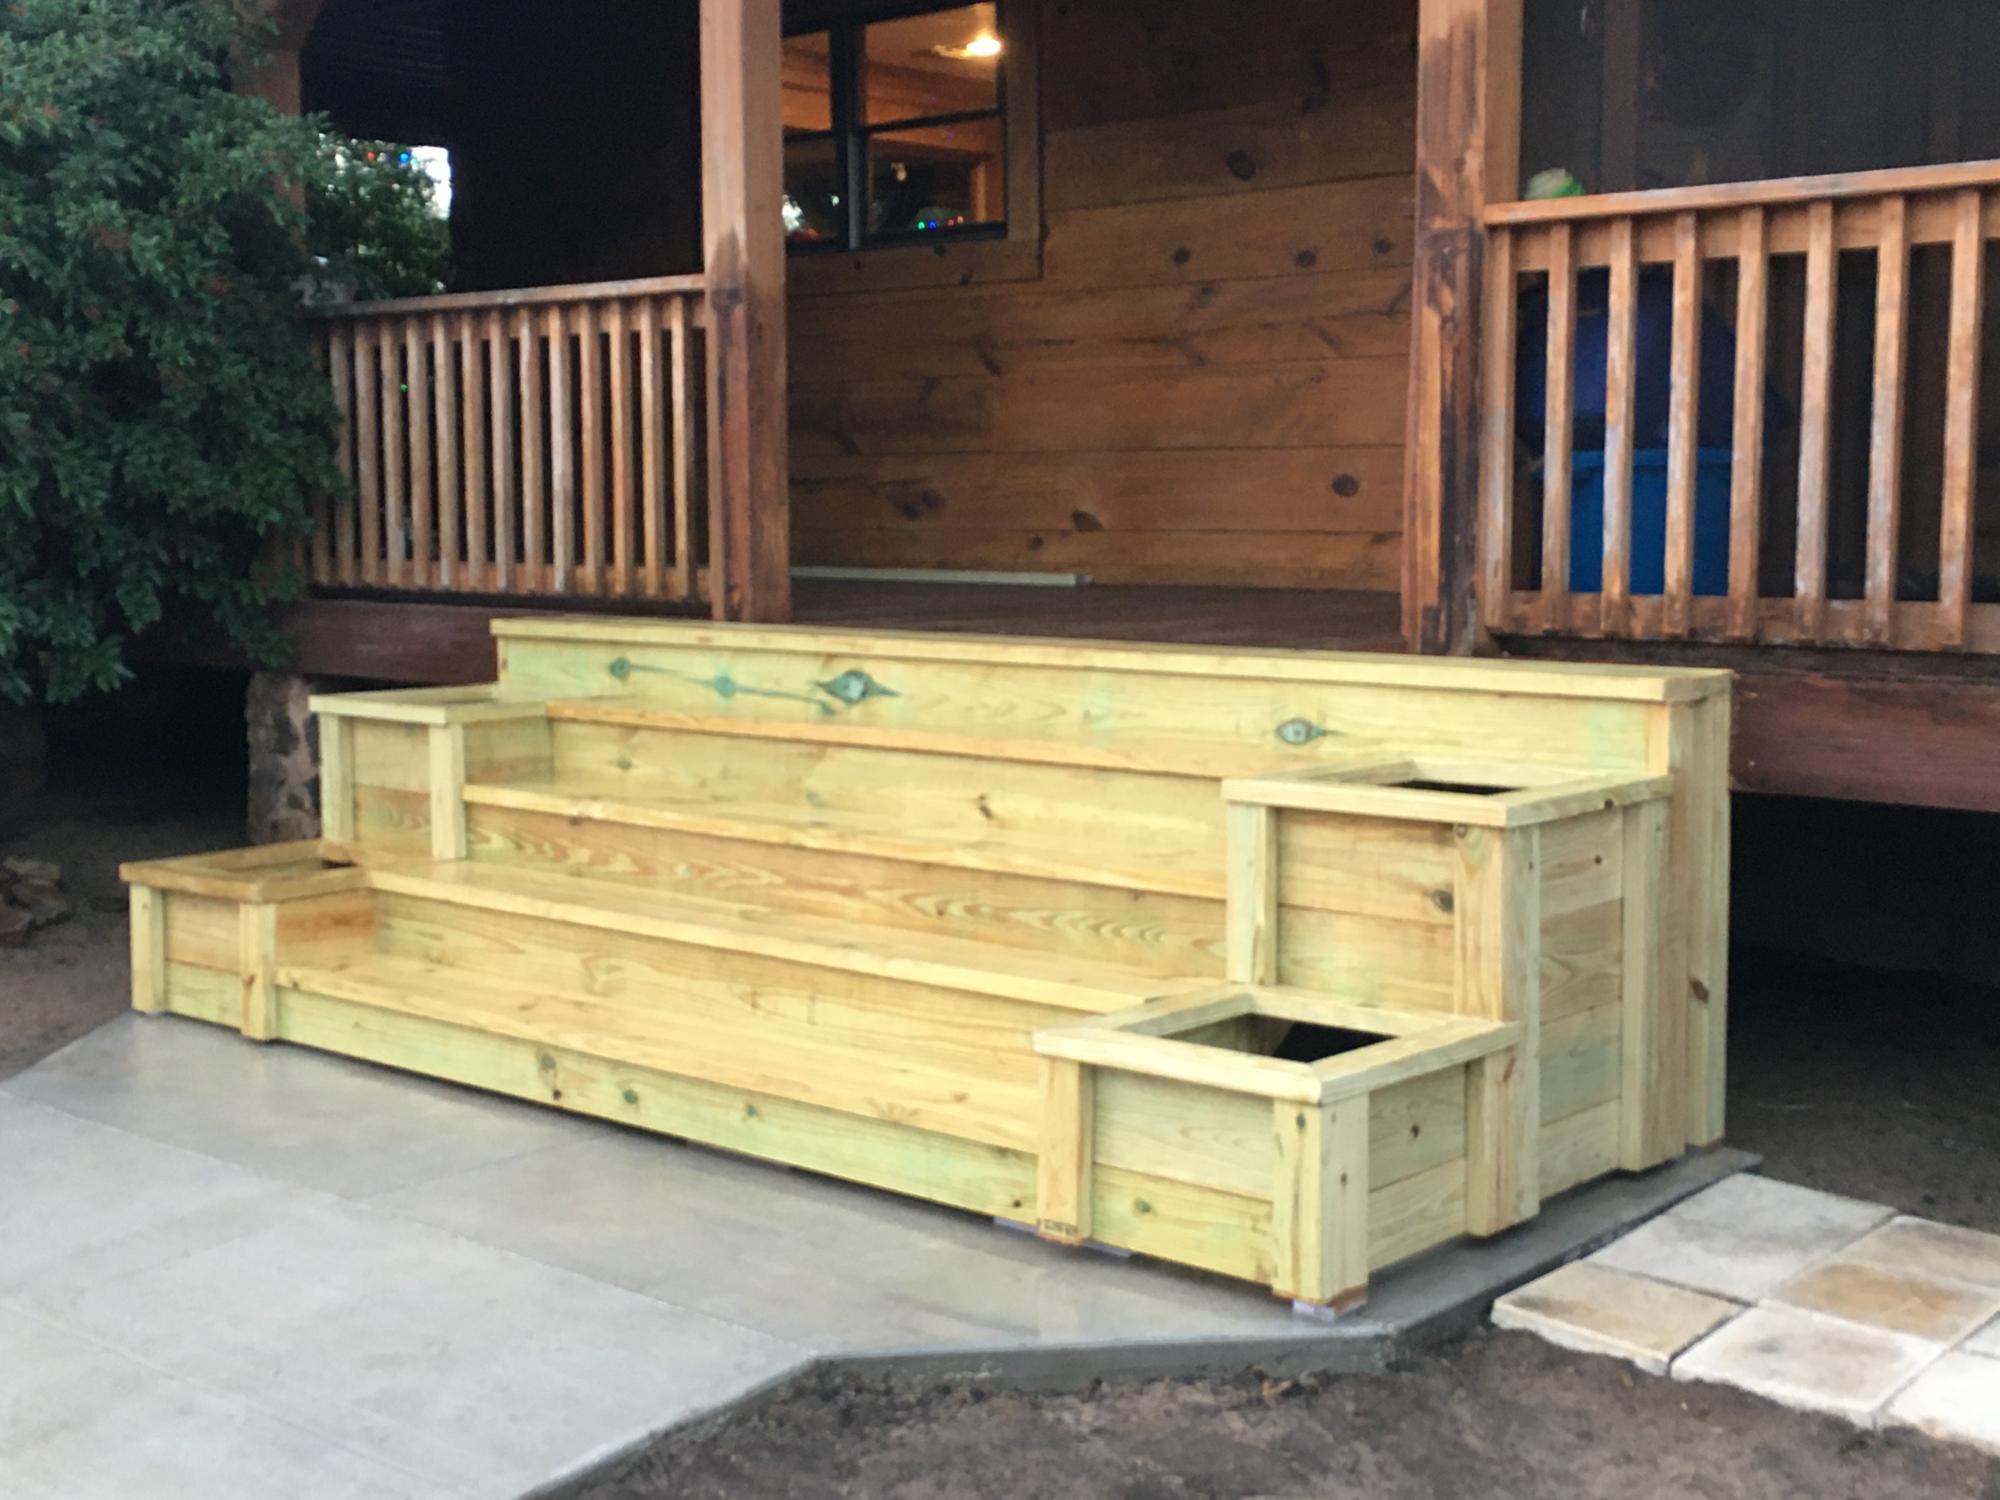
Plan modified to be built on stringers due to hight.
Built from Plan(s)
Finish Used
Pending
Plan modified to be built on stringers due to hight.

I built a big kids see saw using 2x6's all around with a 2x8 seat. The center post is 30"h.


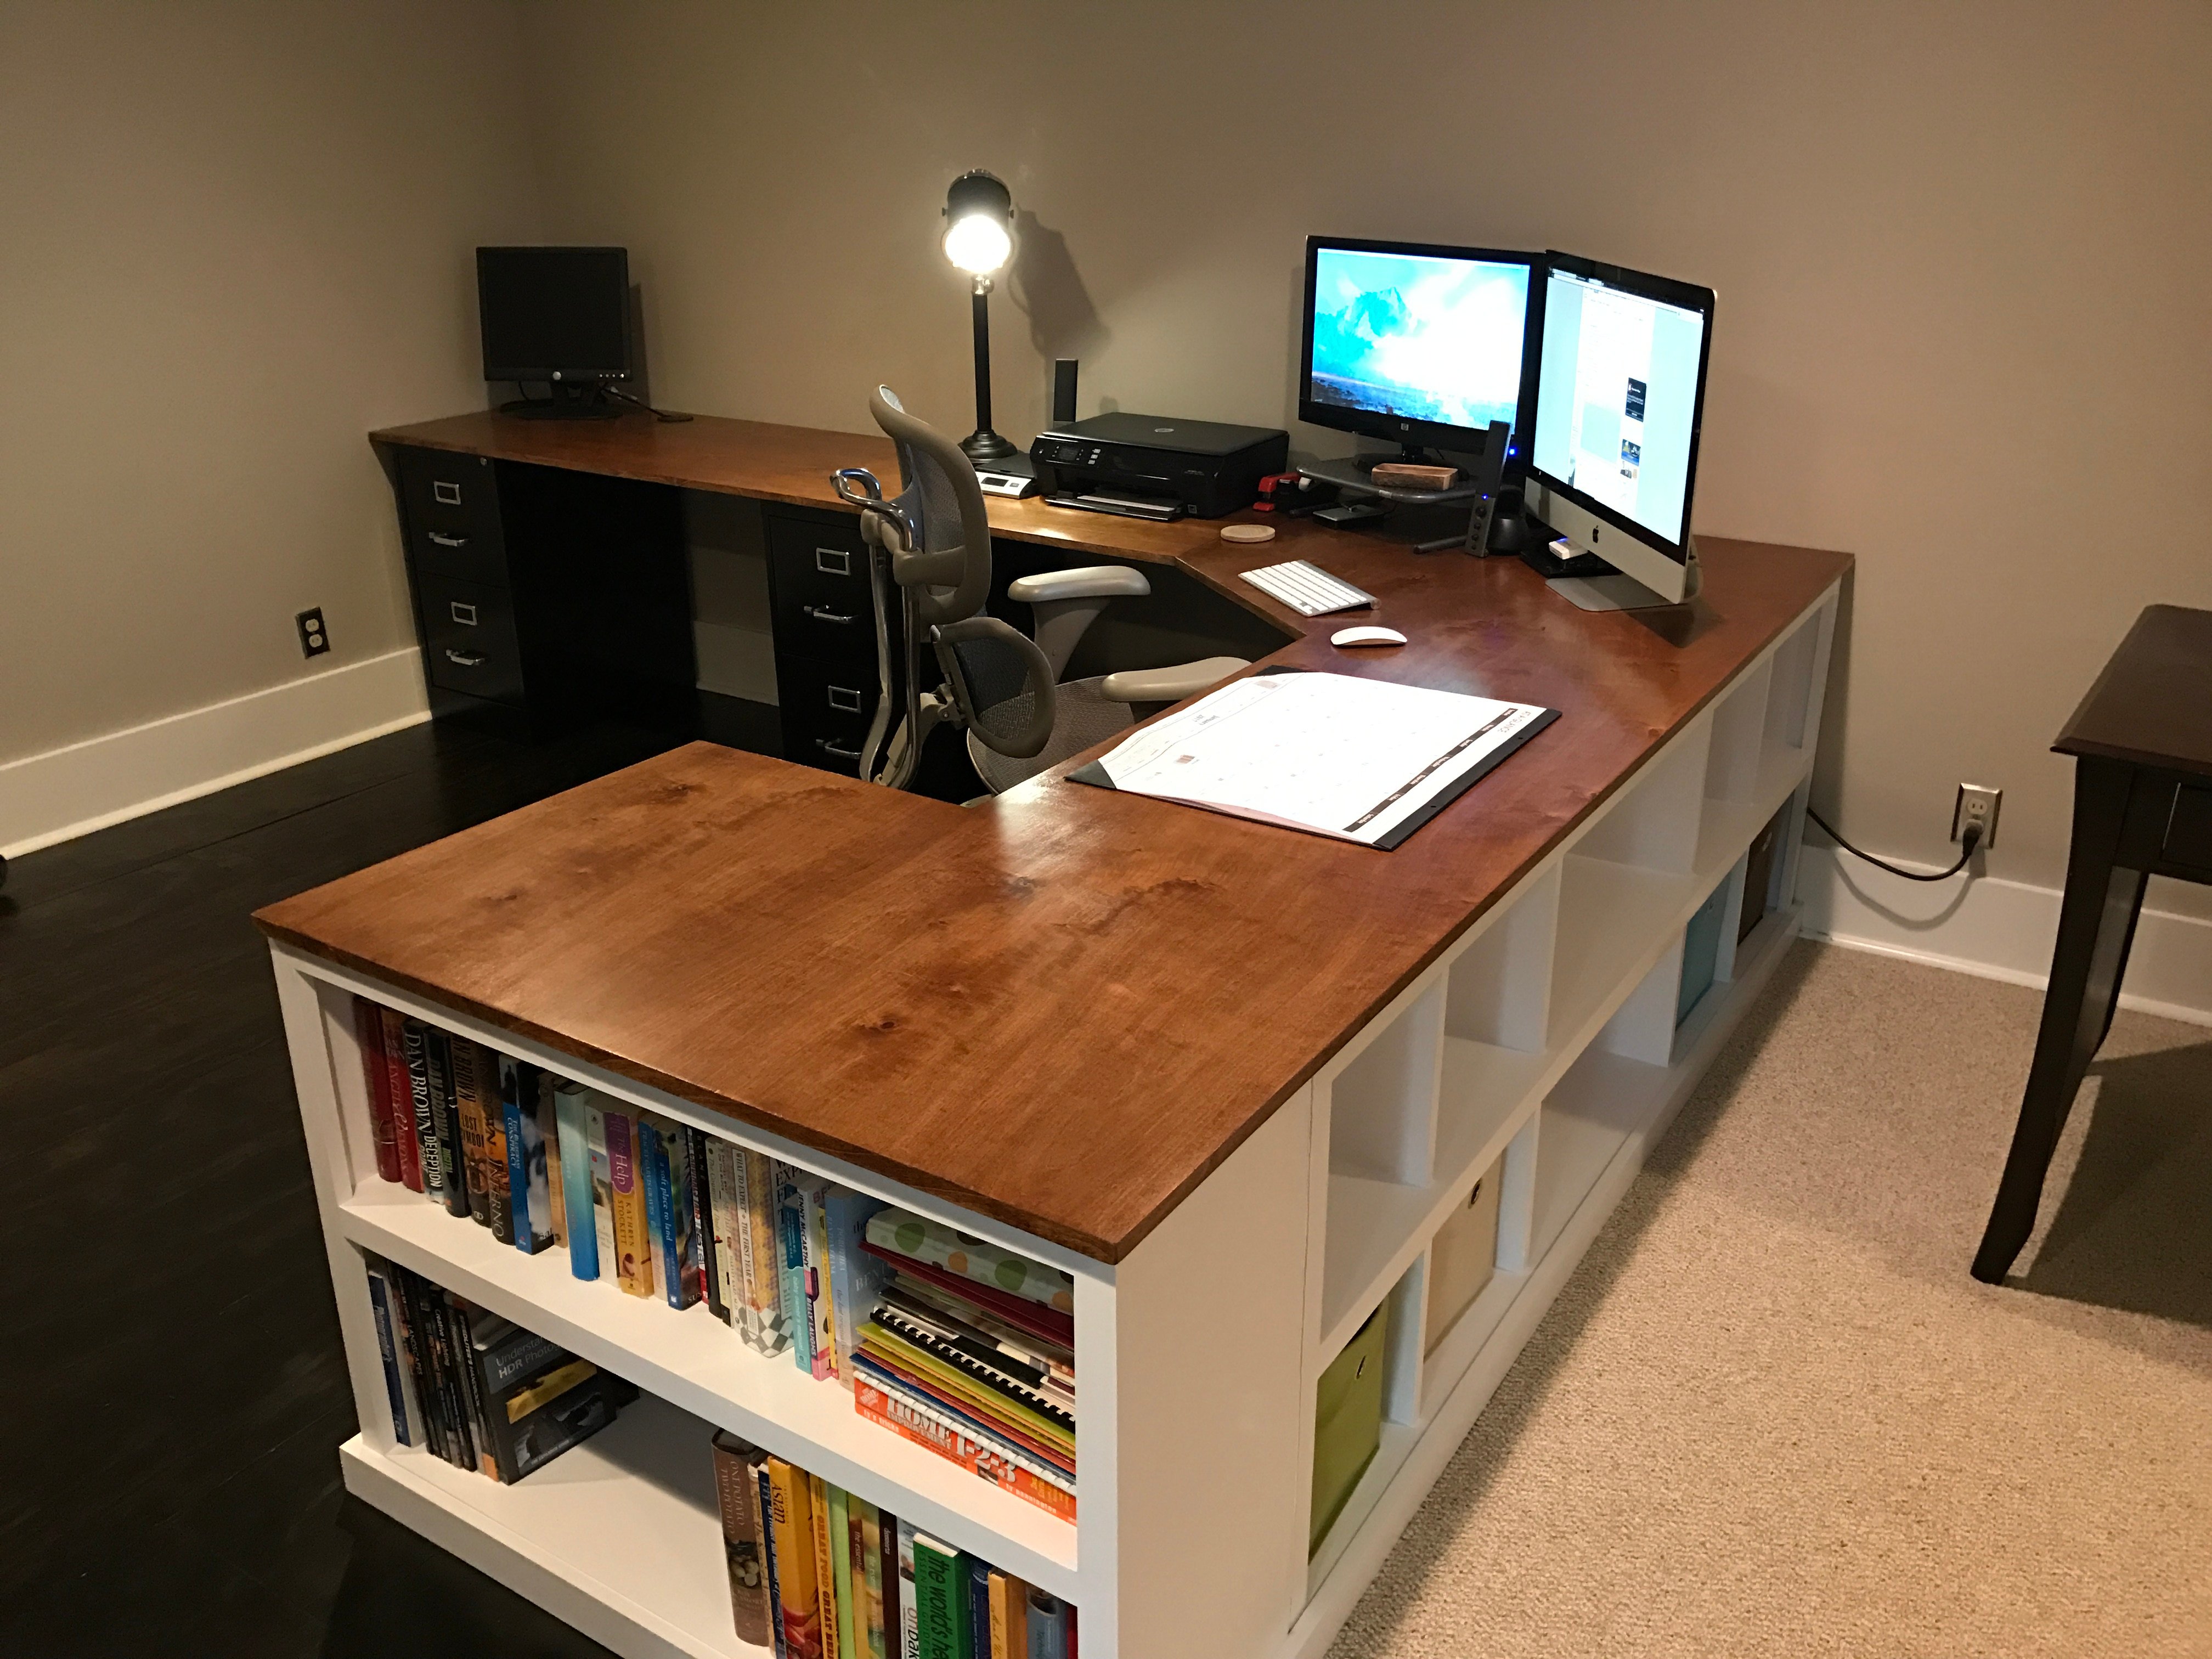
This is a mashup of several plans, combined into one big, bad ass, office desk. I've had a little experience years ago in high school woodworking classes, but haven't really built much since. This reminded me how much I enjoy working with wood. So rewarding to be typing this message at my new office desk!

Wed, 08/19/2020 - 06:25
This is amazing! So amazing could I ask you to share with me what prices from the collection of plans you used and how? I’m looking at your pic trying to figure out how to incorporate the plans you used. I want to build one for myself lol fantastic job!!!!
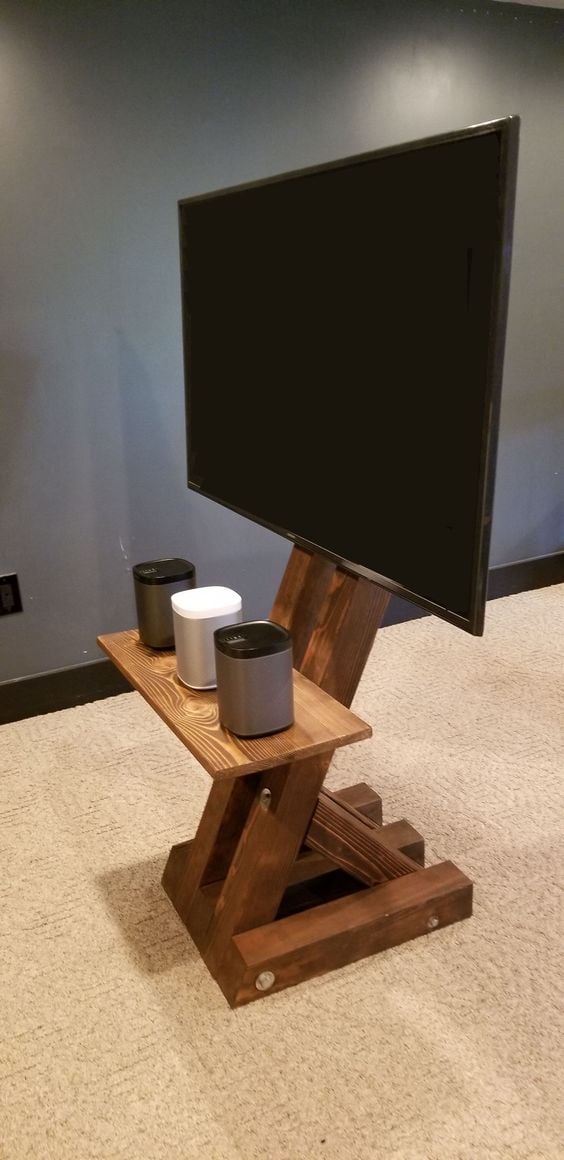
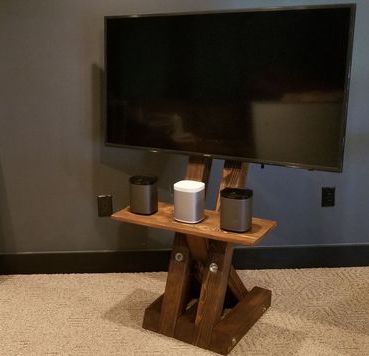
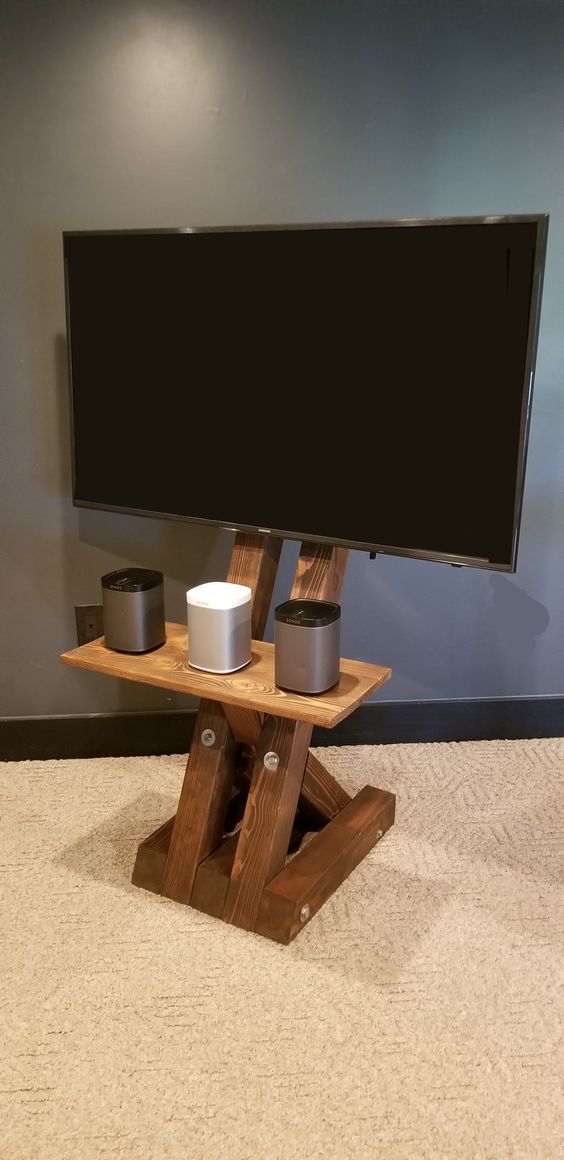
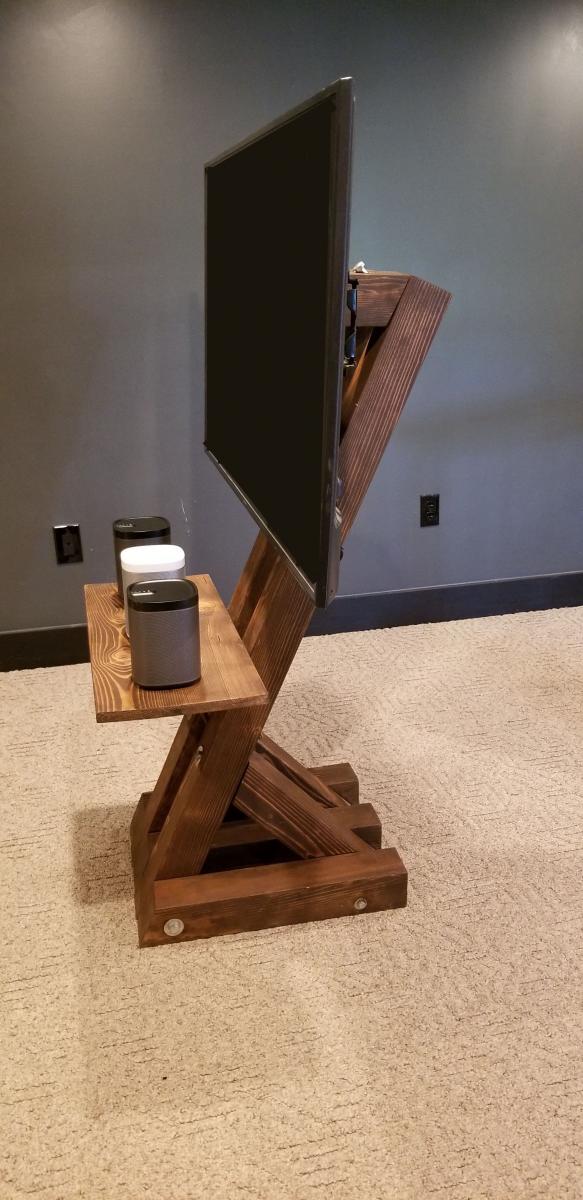
The Gíaffe Free Standing TV Mount. Handcrafted and engineered to use its center mass to deliver strength and balance for tv sizes 30-60". Display your television without detracting from your home's decor. The Gíaffe Free Standing TV Mount is the perfect solution and its rich finish will be perfect for any house/office room.

Wed, 03/11/2020 - 07:16
I absolutely love this!! Are there plans available?
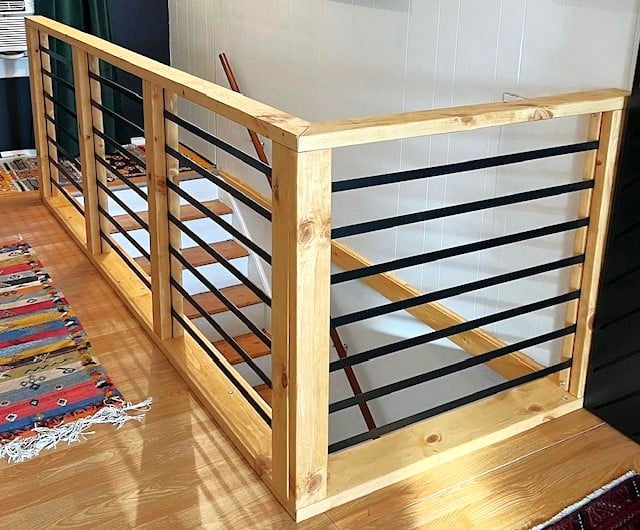
Amazing stair railing upgrade shared by Sara and Chris!


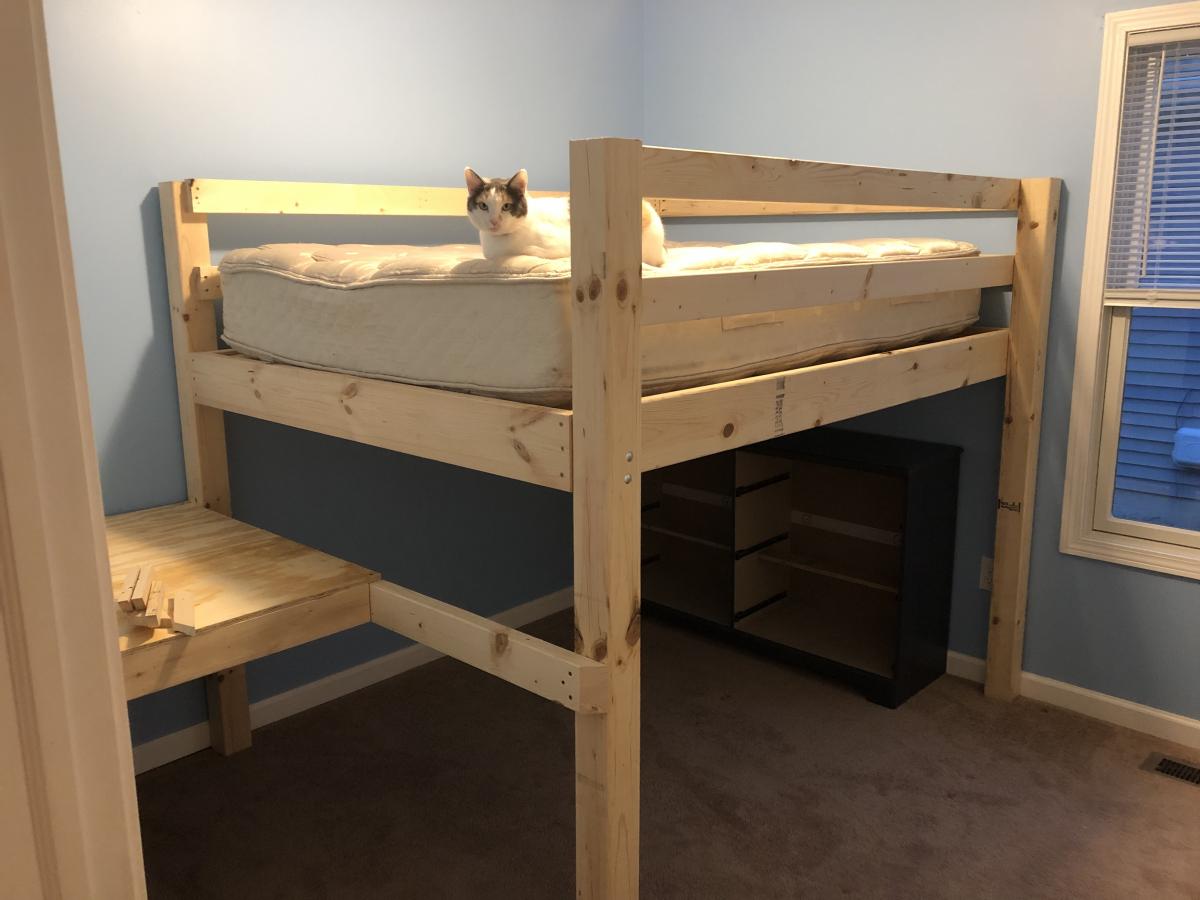
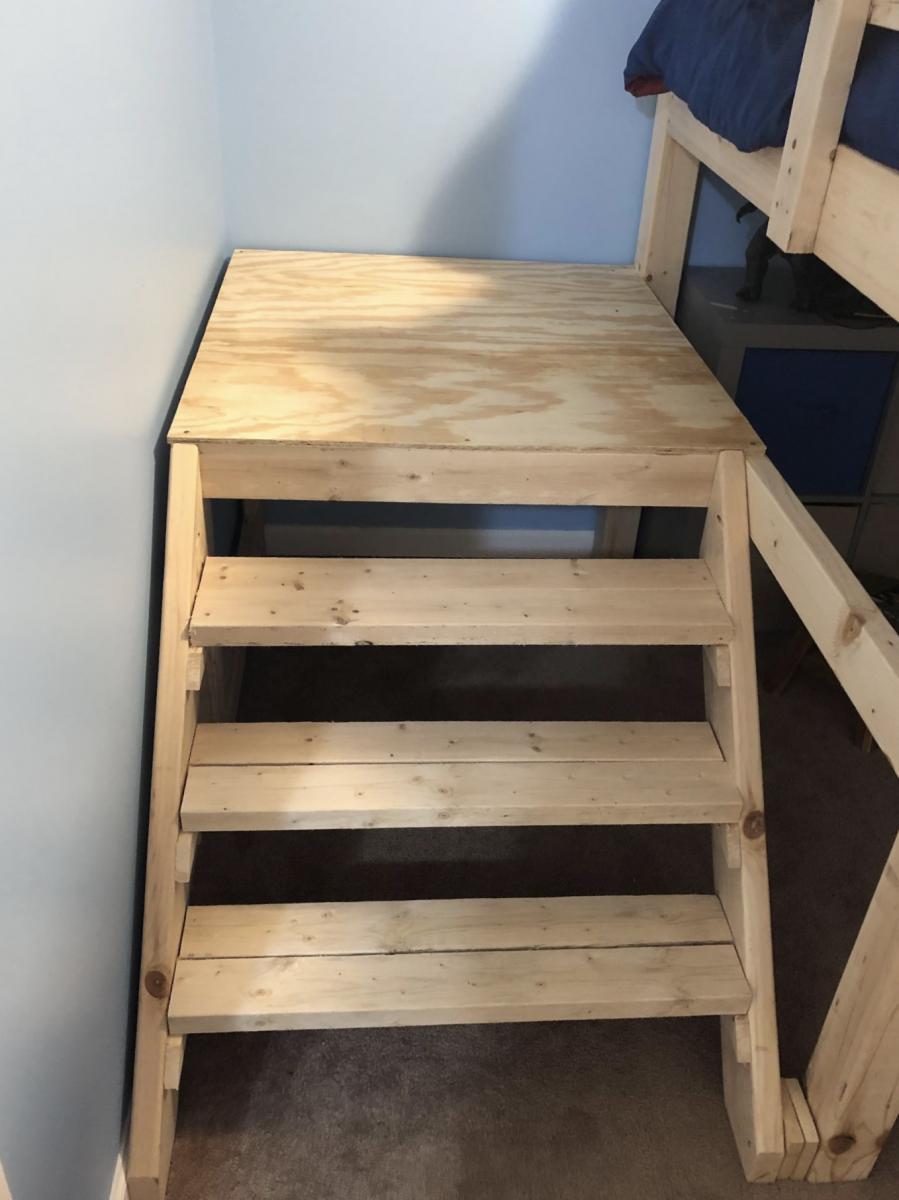
Built a full size loft bed for my kids but wanted something safer than having them climb up and down a ladder so used the Camp Loft Bed plans to add the platform and stairs. It is much easier for the kids. Going to finish by covering the platform and stairs with carpet.

Wed, 10/02/2019 - 09:51
I really like how the platform is only half way so the stairs are inset, this is very smart and good use of space.
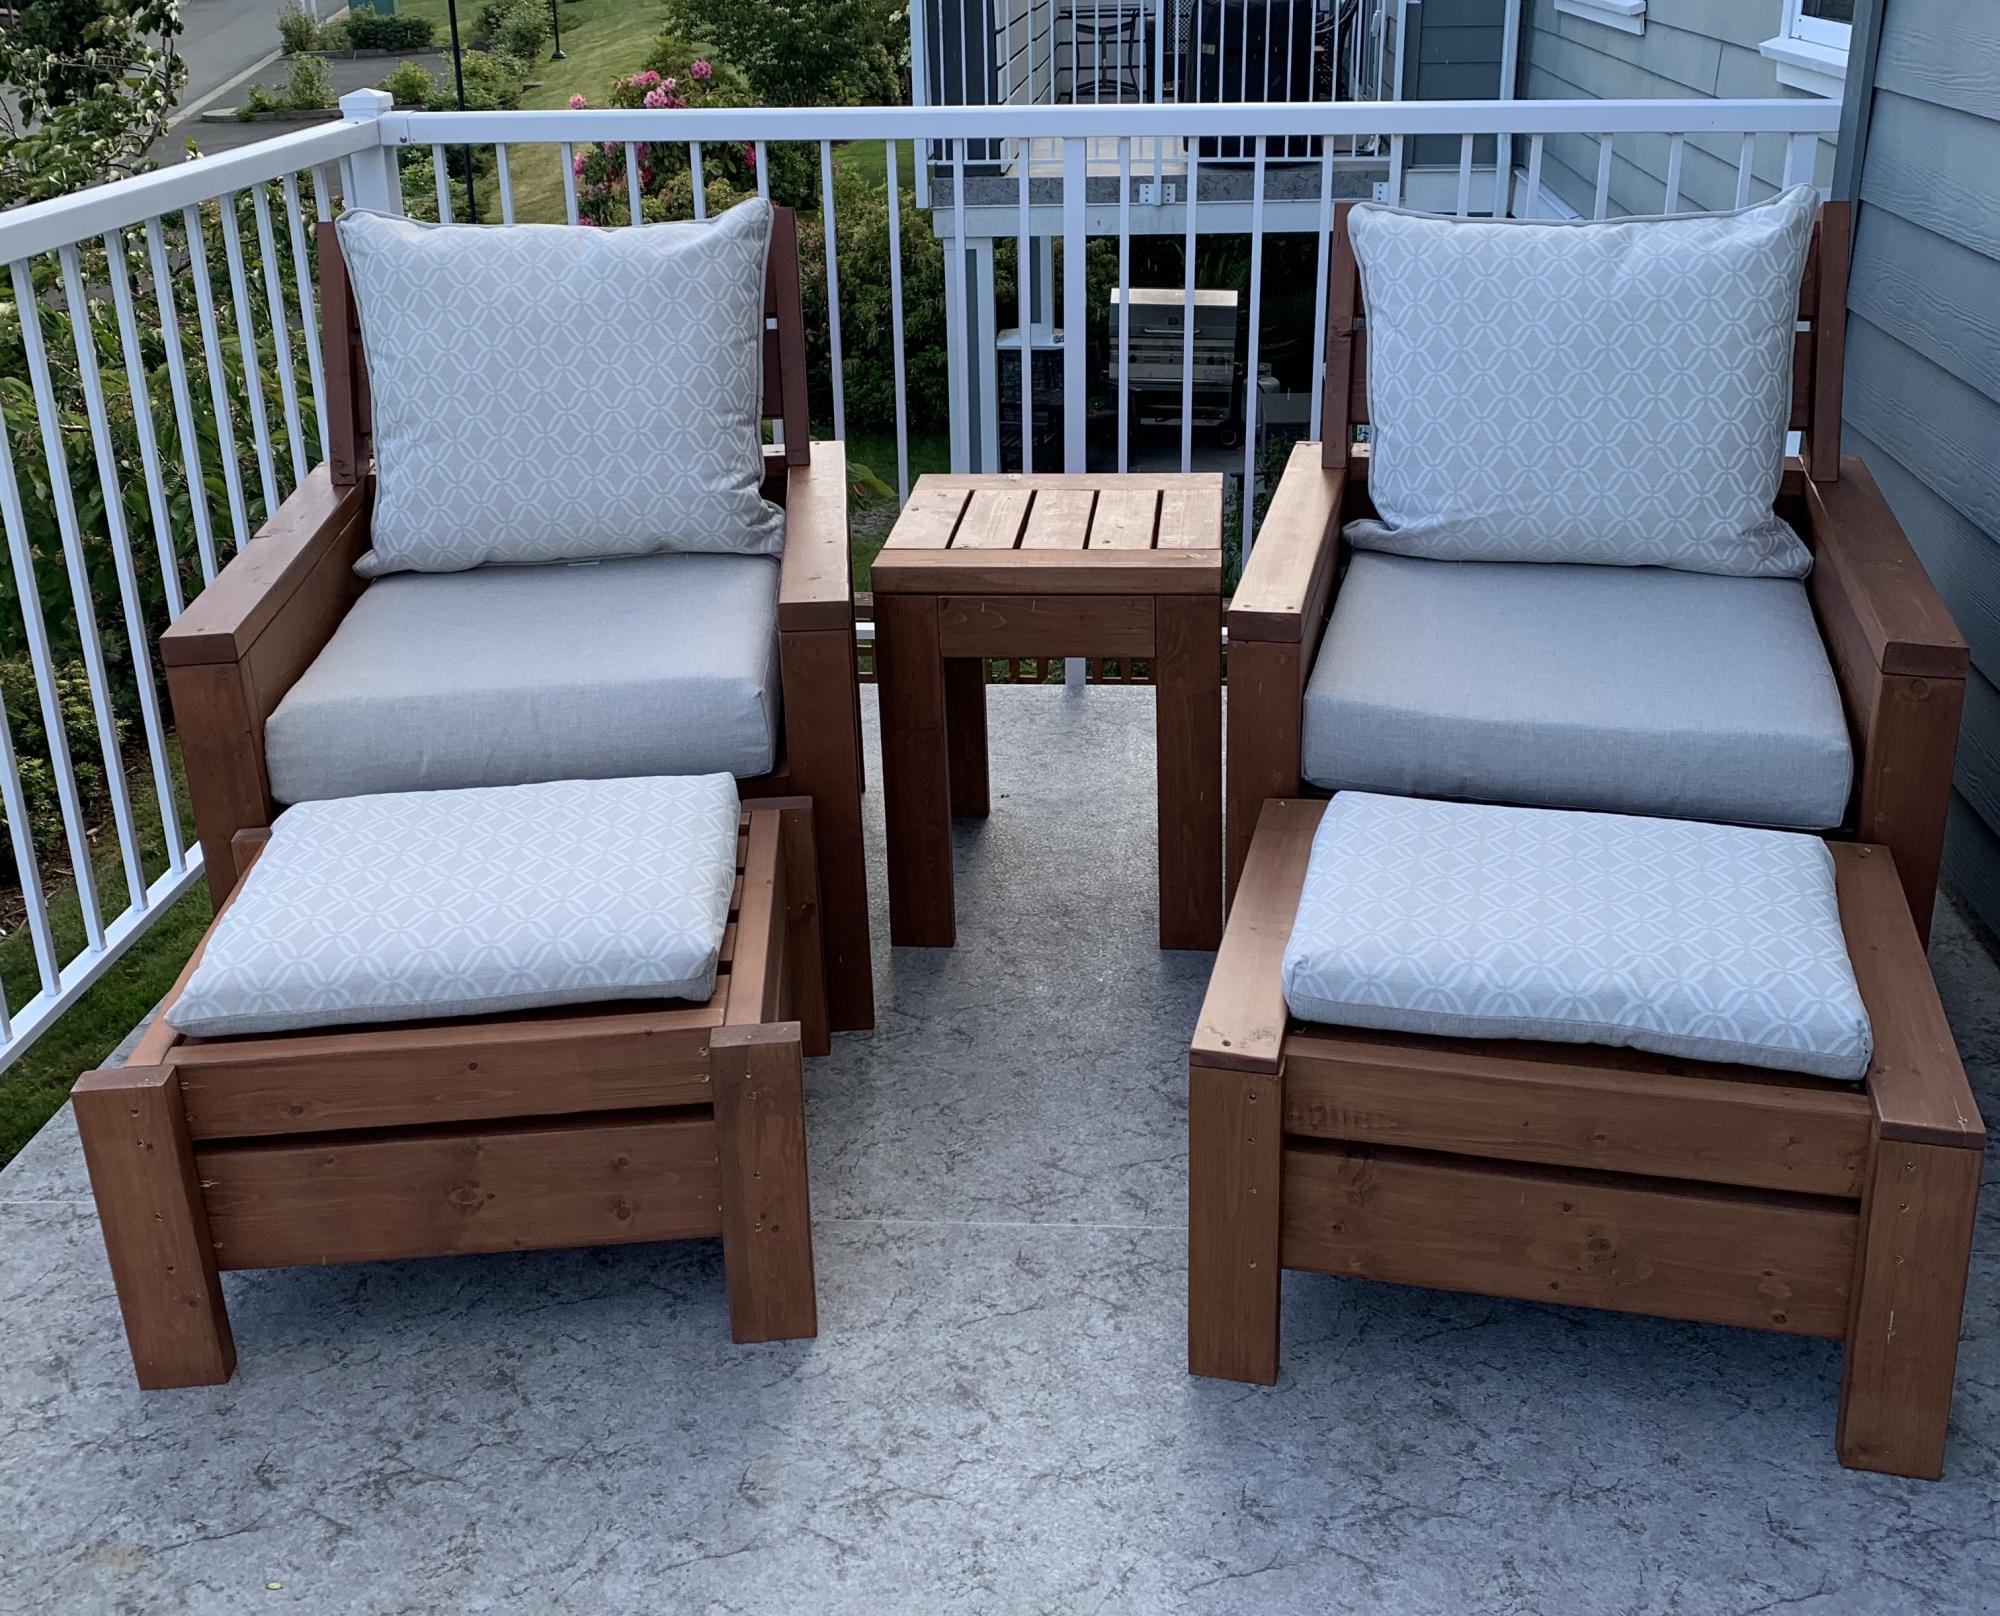
Love these plans! Made a modification and added backs to the chairs. Also, built ottomans to match the chairs which can also be used as additional seating.
Many compliments on the set. Thanks Ana!
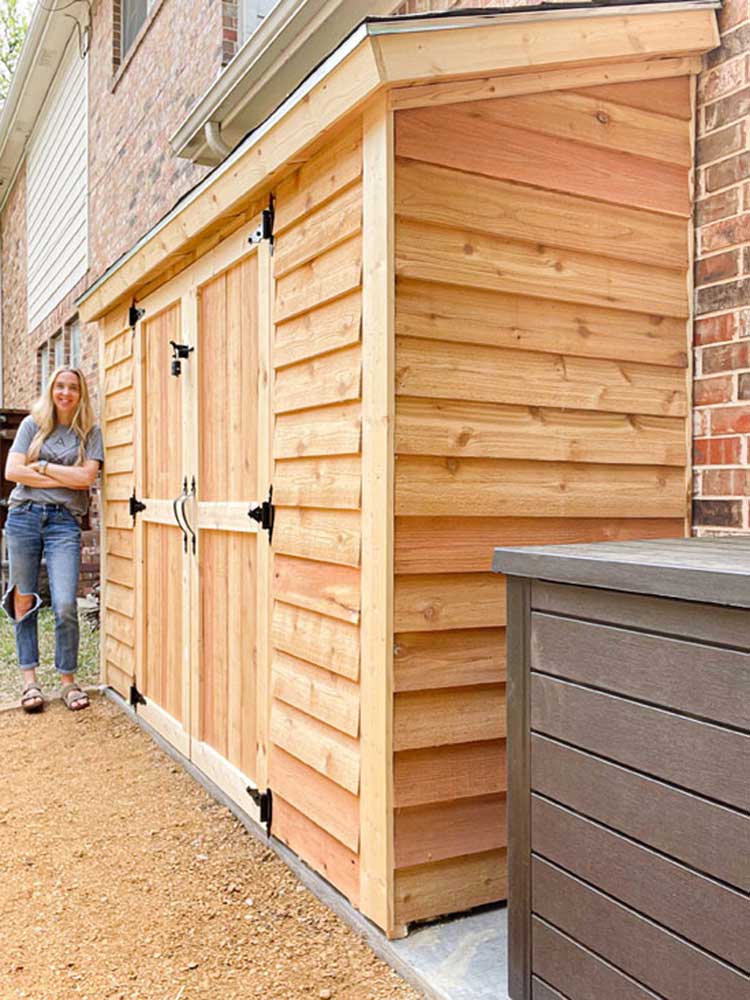
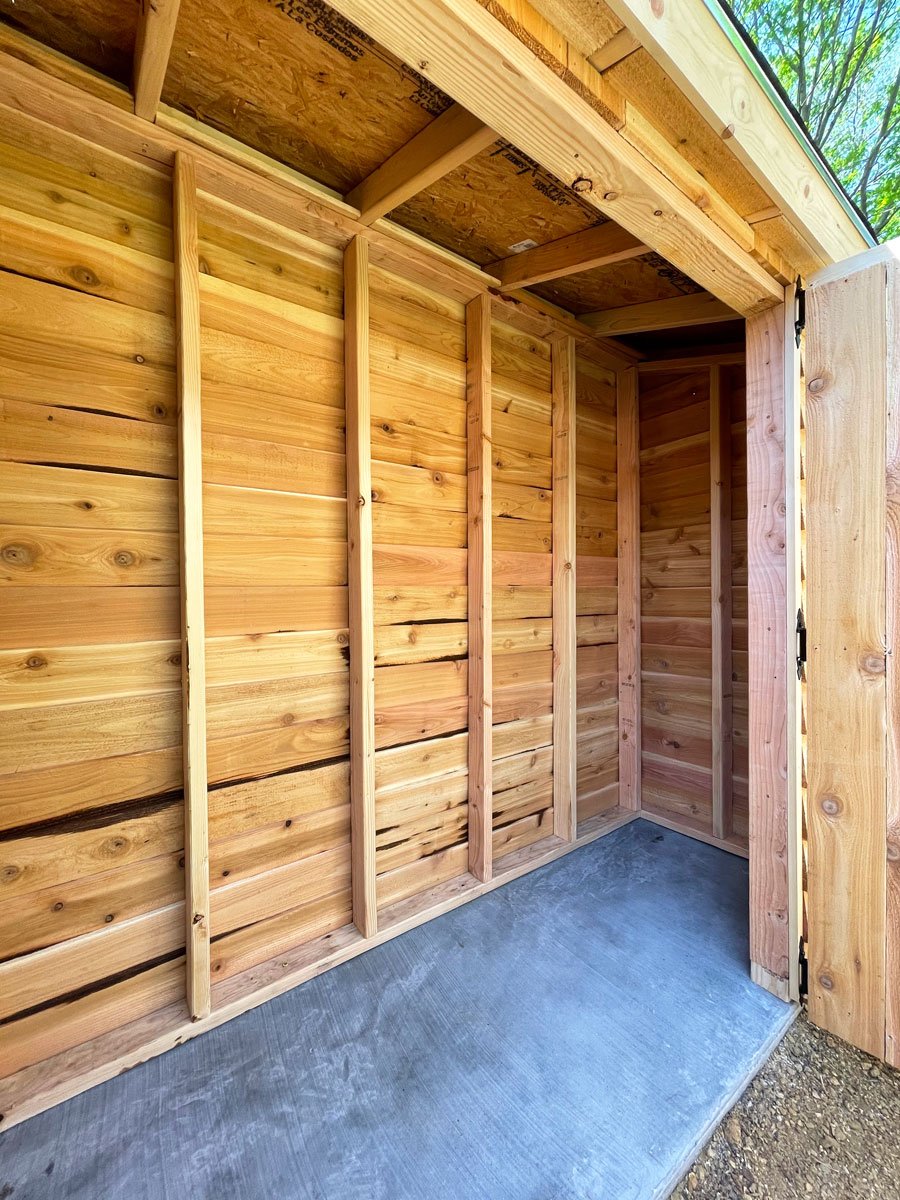
We needed a way to get all of the lawn & garden stuff out of our garage and organized. I found Ana's plans for the Small Cedar Shed & adjusted them to fit our space. We used 2x4s as our studs & added front walls on the sides. Our shed measures 9.5'x30". We had a concrete slab poured for our foundation. We are experienced DIYer's but had never taken on a project of this scale from scratch. This project was much easier than I was anticipating, and we were able to complete it in one weekend! Similar shed kits were way more expensive and not the size that we were looking for. Thank you so much for the inspiration!
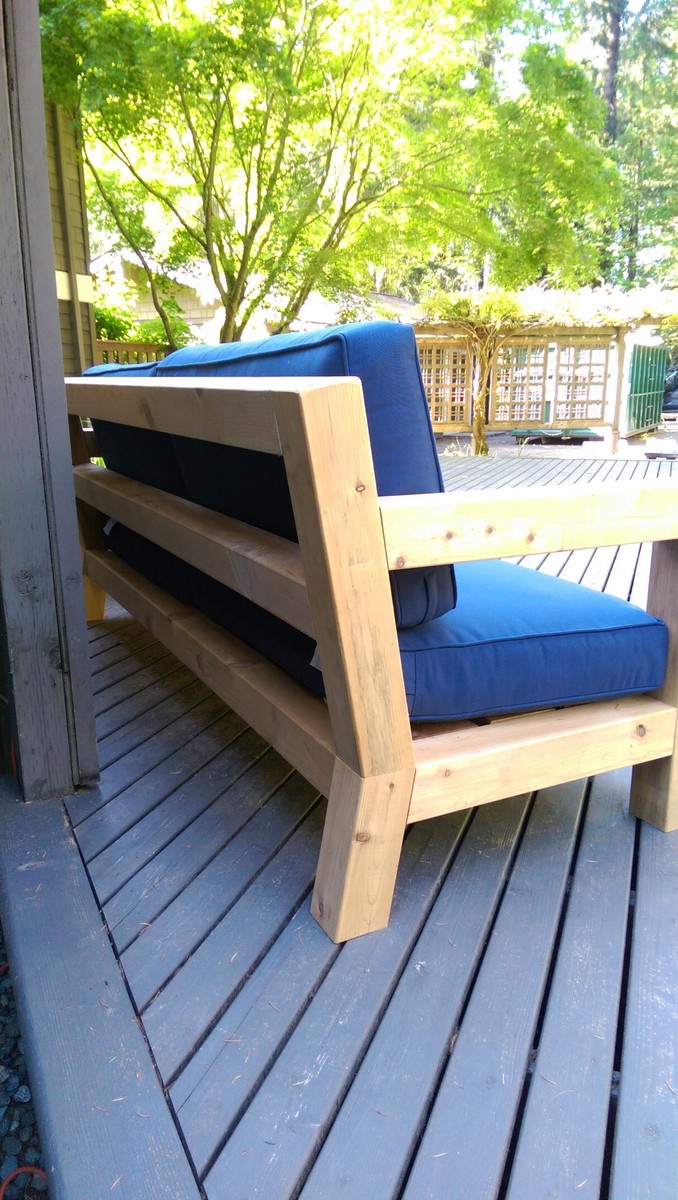
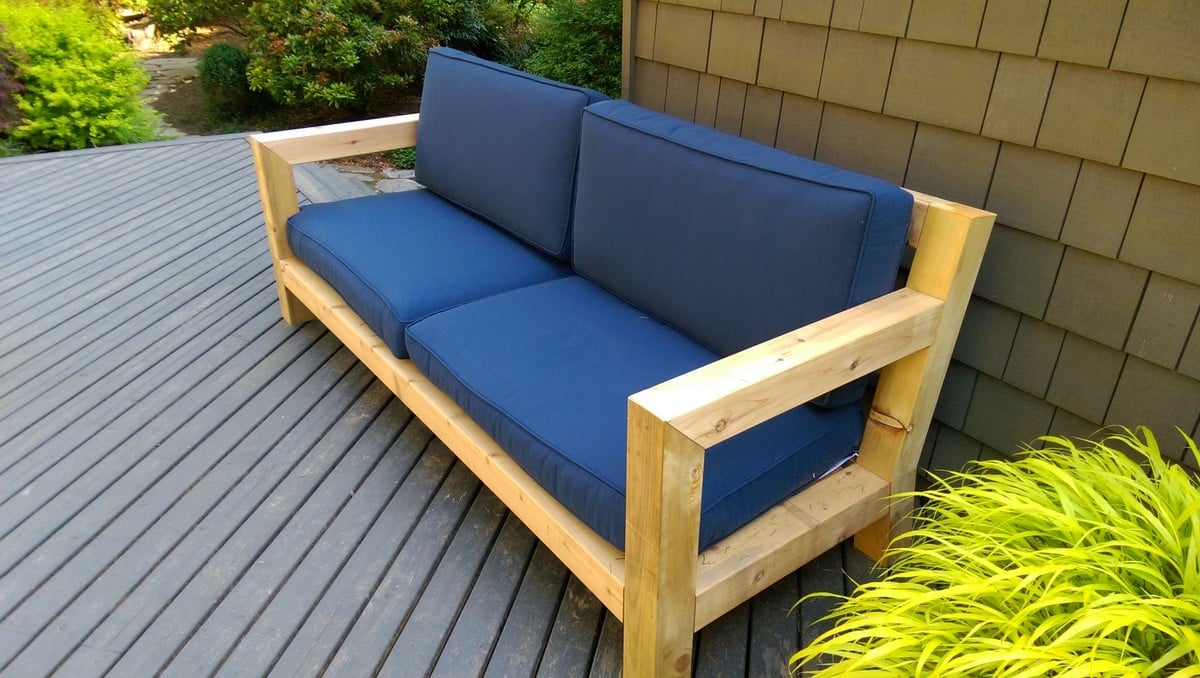
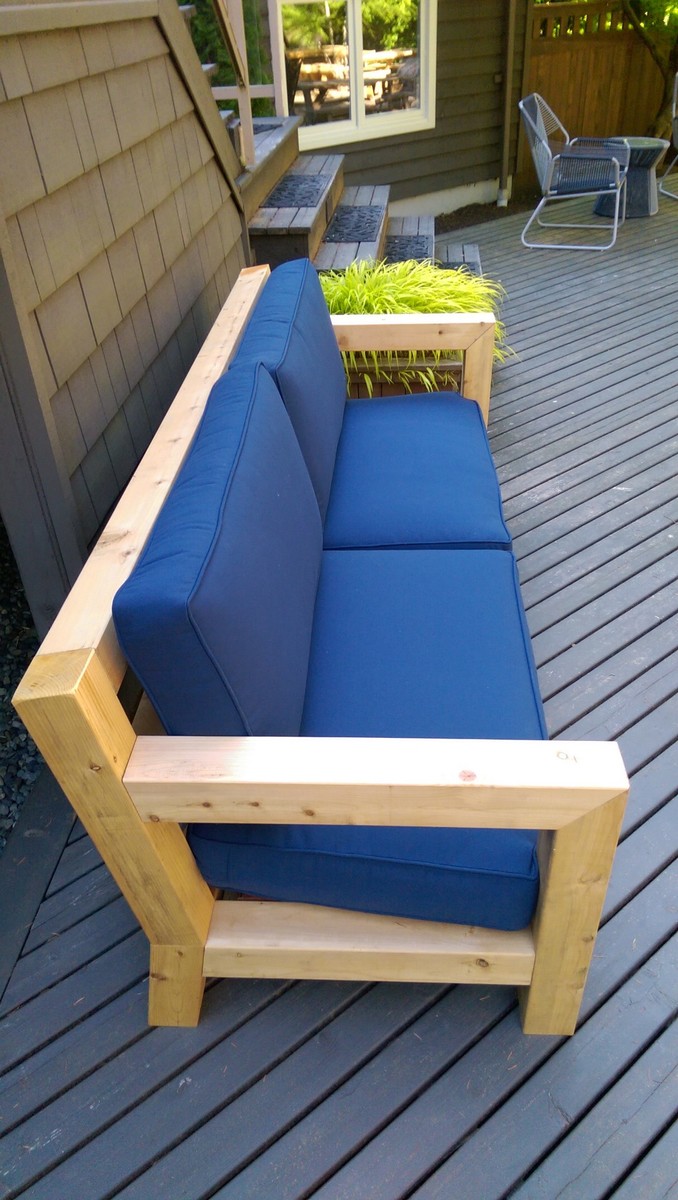
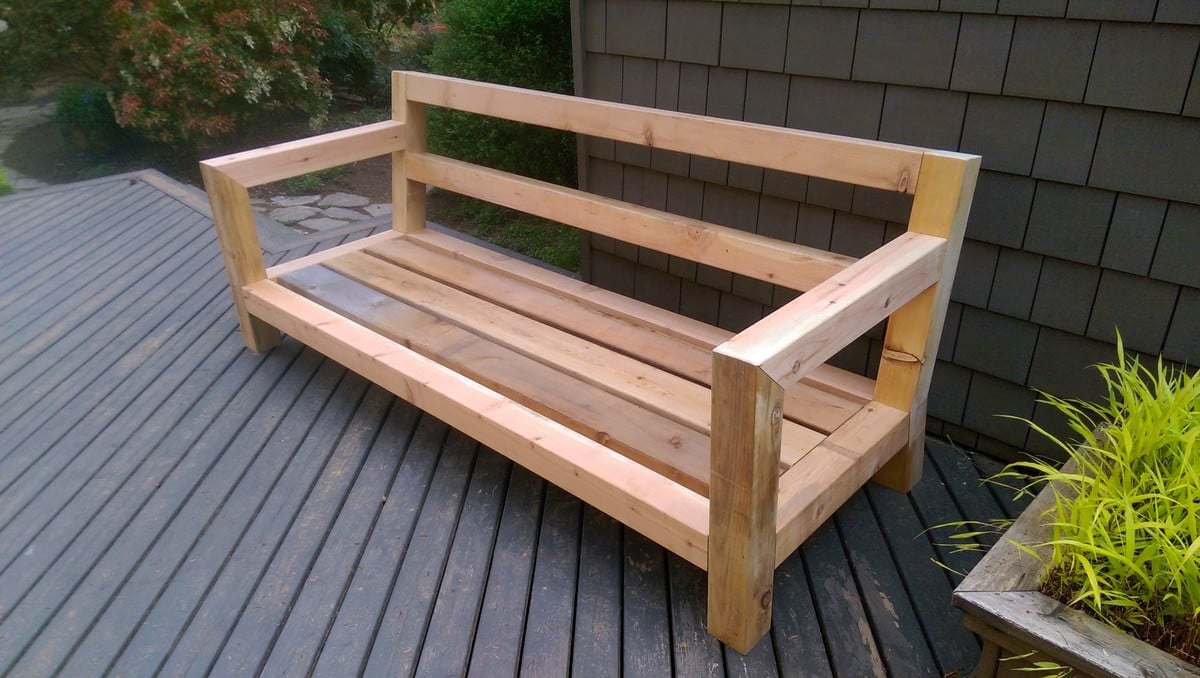
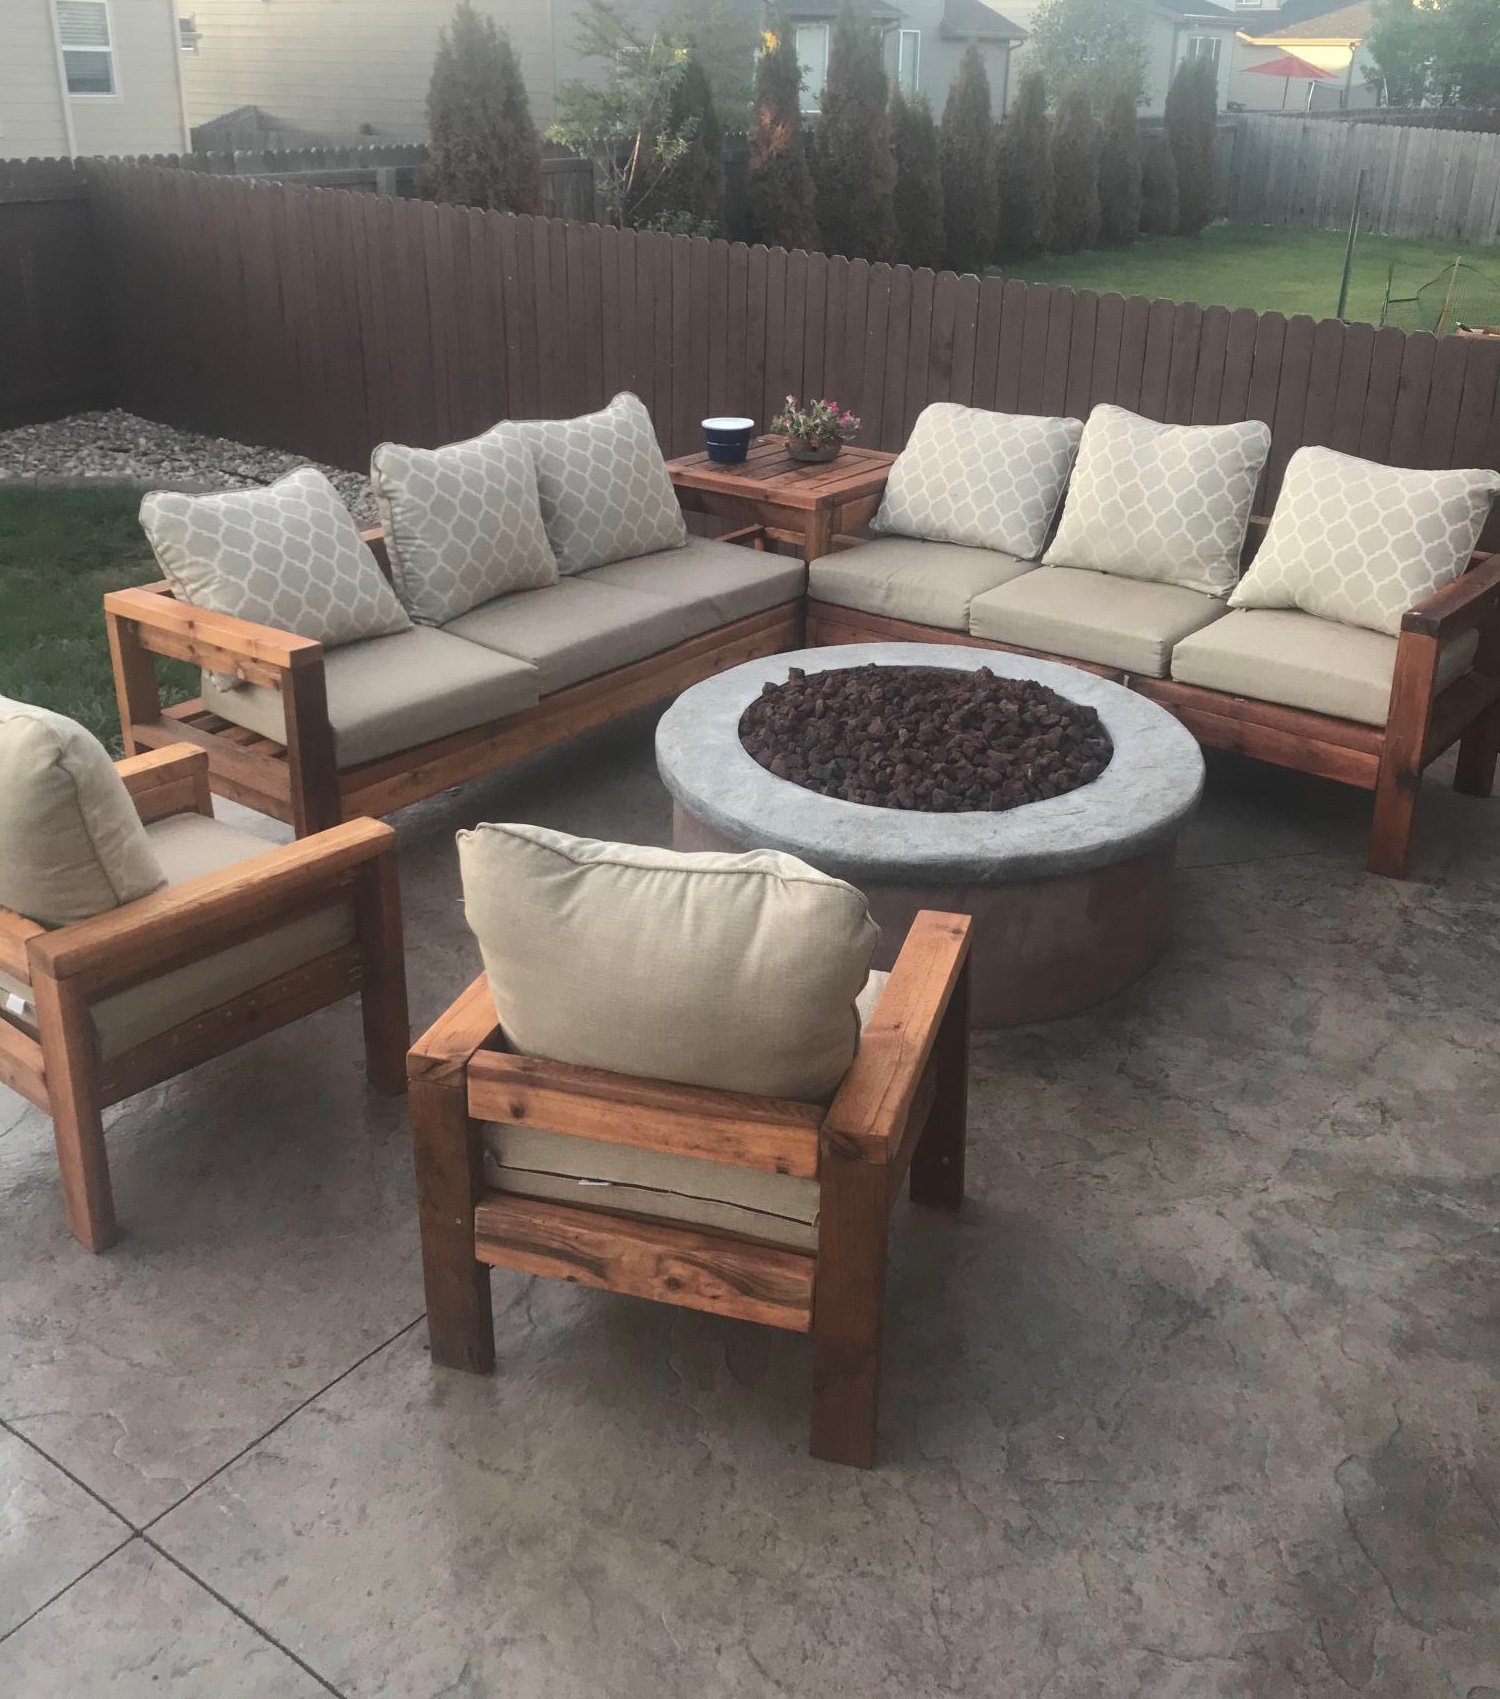
I was in love with the RH Merida set because of its clean lines and modern style. Also, the plan seemed simple enough that I could re-create it without a pattern. The only thing that I did not like about it is the lack of arms. I really like to have a place to put my arm or my beverage :) - so I added arms to the design.

Thu, 05/30/2019 - 18:45
It’s beautiful! Do you have a set of plans that you might be willing to share?
Wed, 05/20/2020 - 10:45
This is Awesome. I'm halfway in the middle as i thought I could complete without plans. Do you have any plans could share. Please....
Fri, 06/19/2020 - 15:54
were you able to get plans? I would LOVE plans too! we want to try and re-create this and would prefer NOT to get stuck!
Fri, 06/19/2020 - 15:55
Would LOVE to get plans, would even pay for them! Found rough drawings online but they are chicken scratch and hard to interpret!
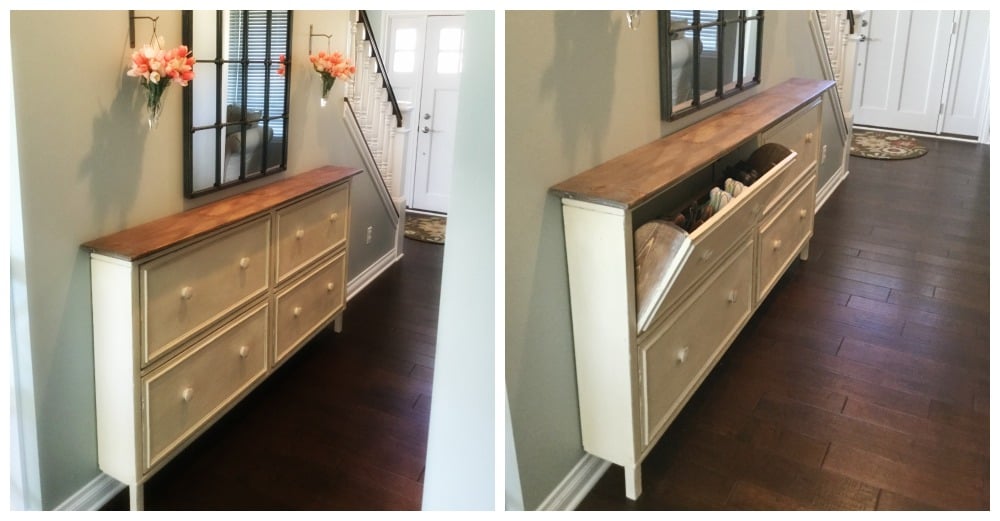
We used the shoe dresser instructions with some modifications to make it longer

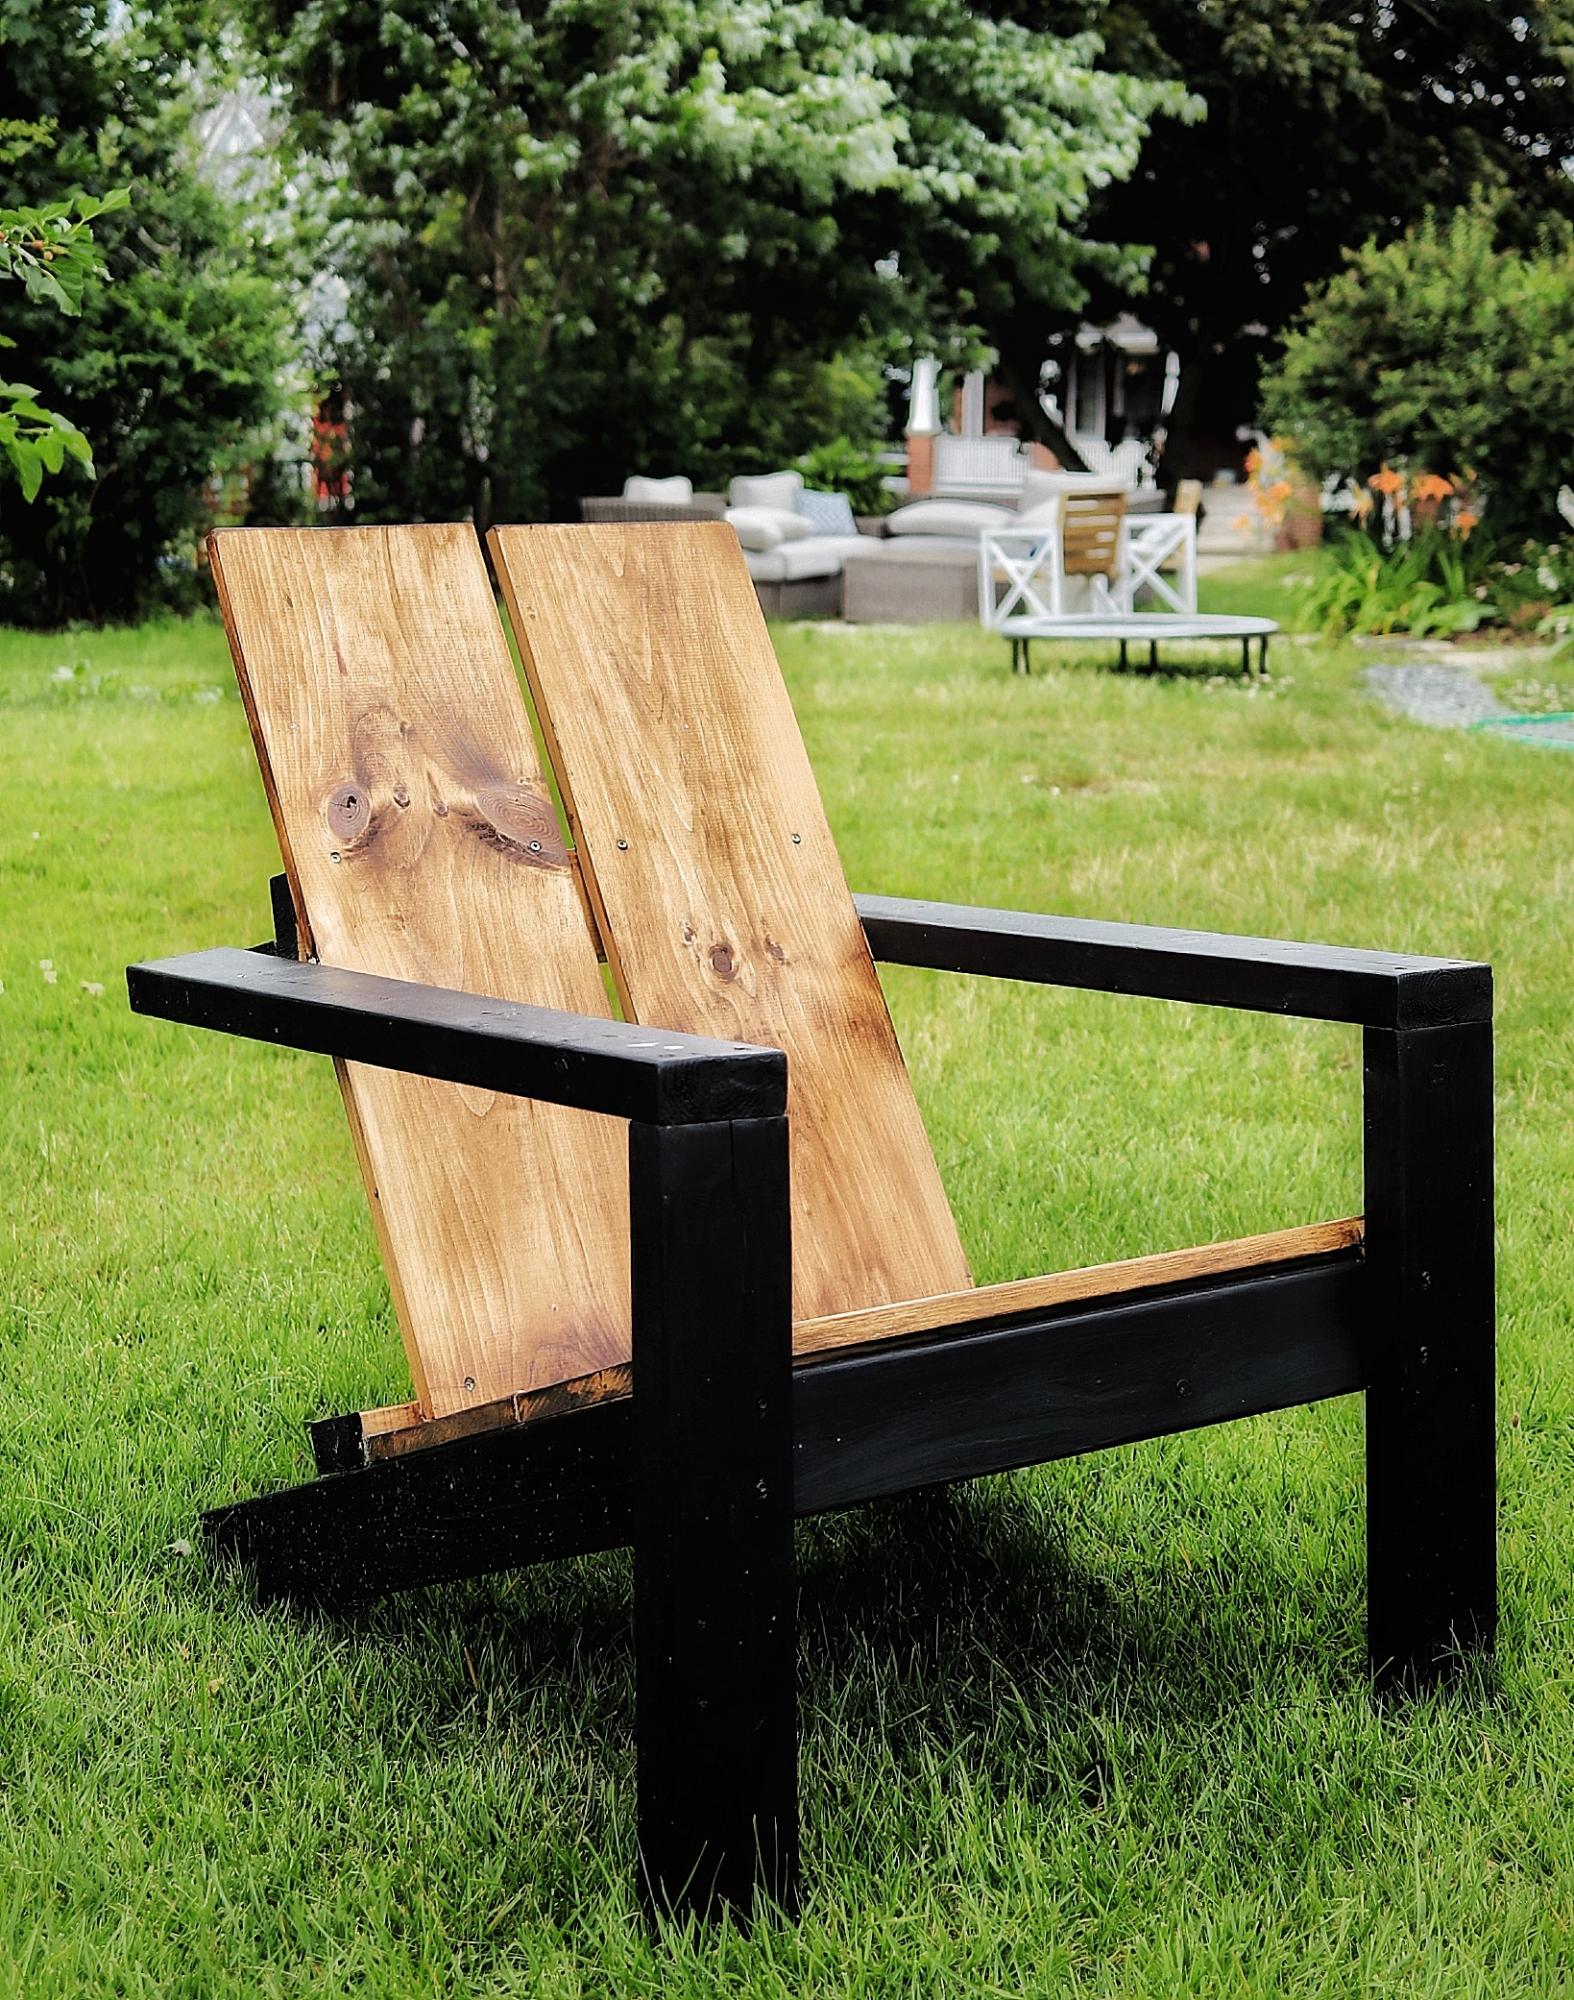
I was so excited to find the plans for these awesome chairs, I’ve built 7 this season already—the modification happened as an accident, but I loved the result !
Thu, 03/04/2021 - 10:59
This is absolutely gorgeous! I love the modification!

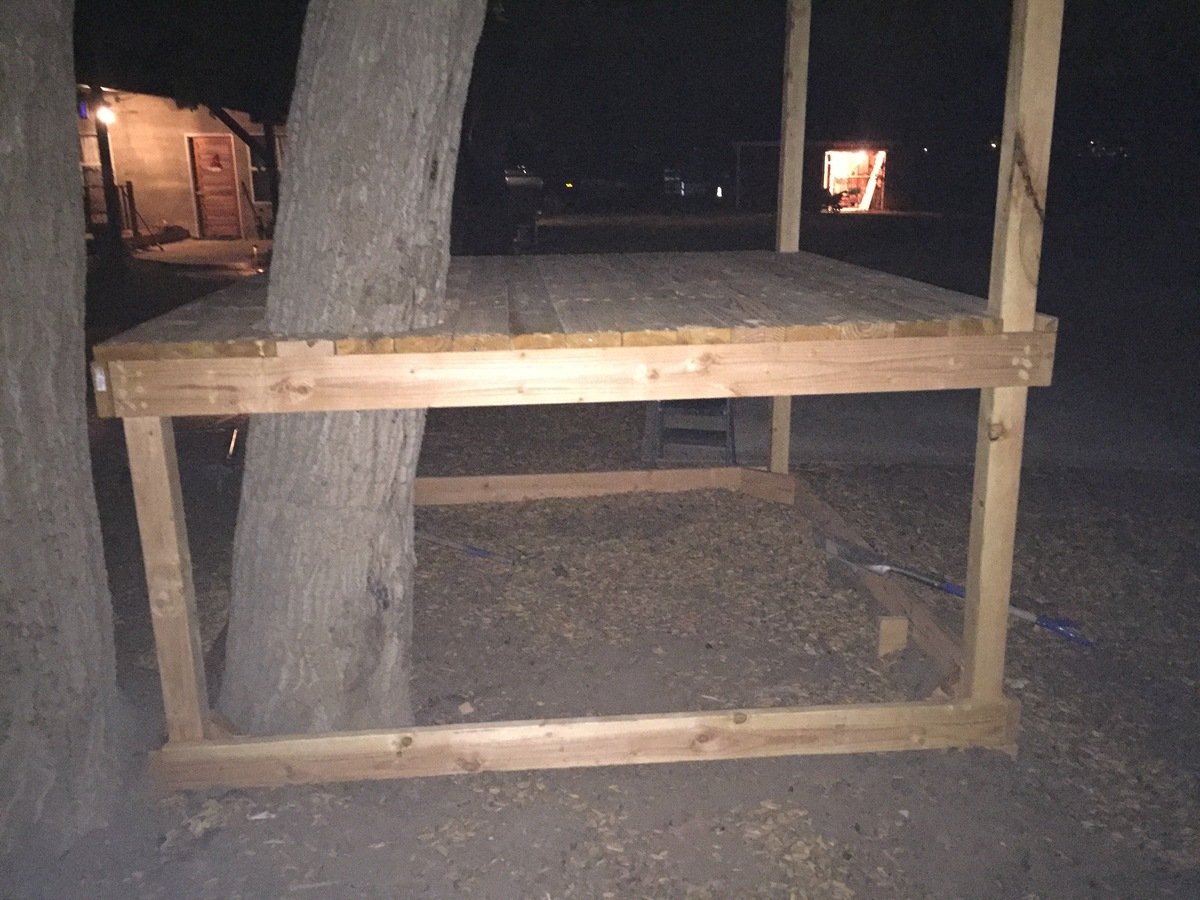
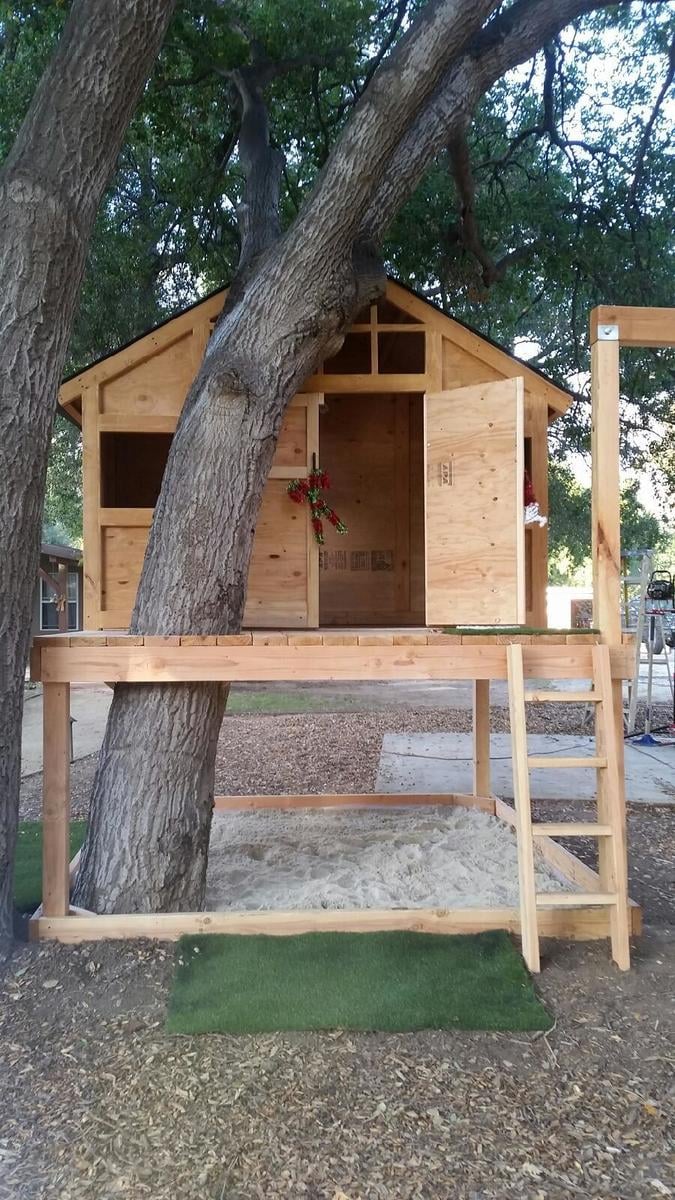
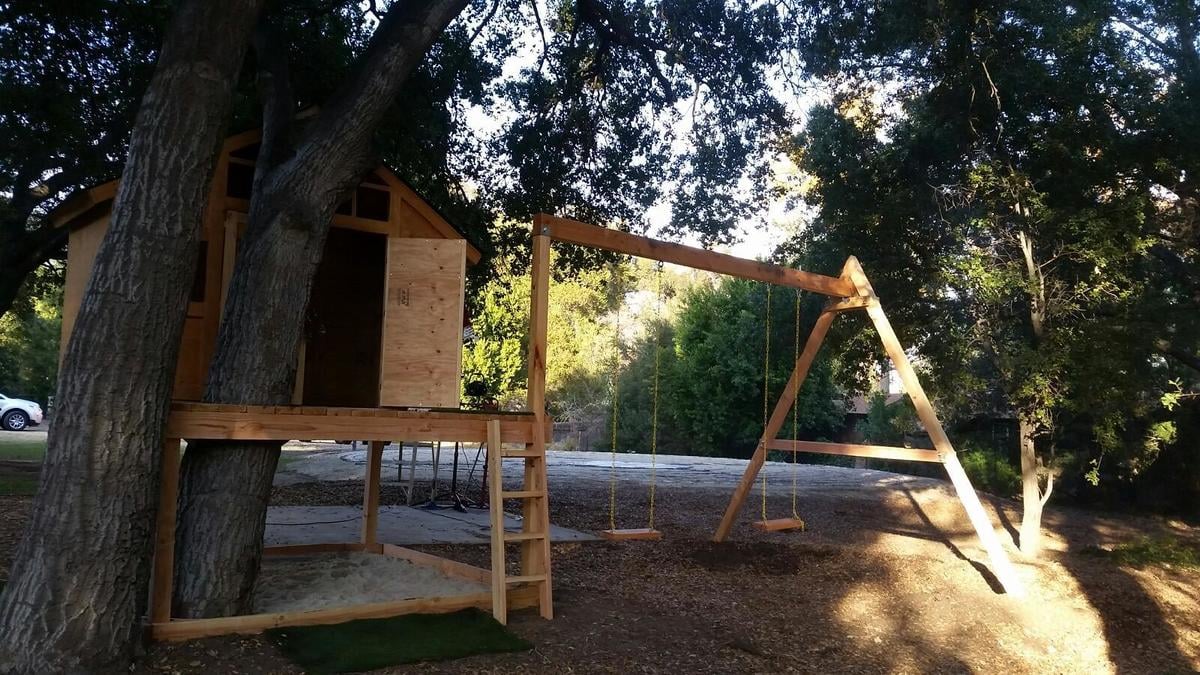
A frame chicken coop with a few modifications- metal roof, insulation and slightly larger second floor.
By Chrystal
This was a fun family project! Thank you!!

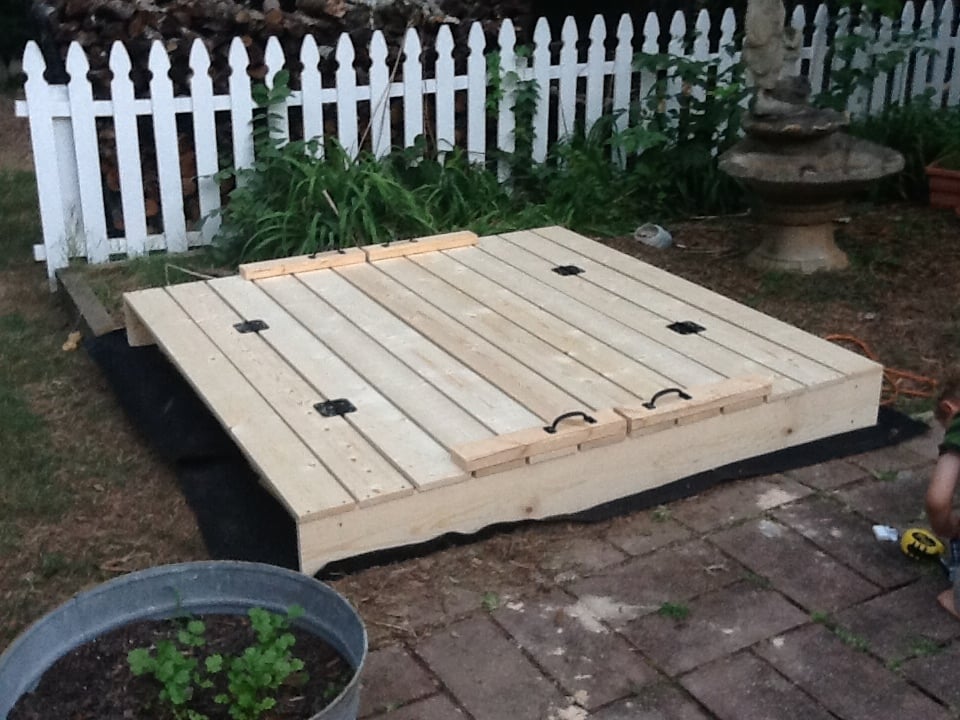
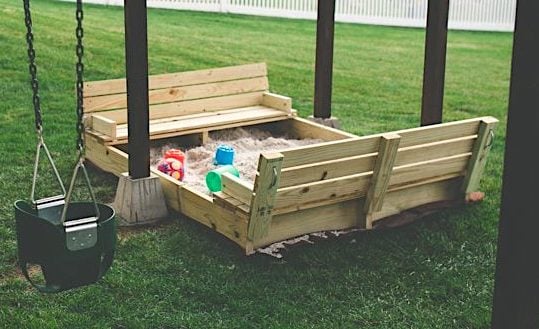
I've been wanting to buy or make a sandbox for my son for a couple of years now. Since seeing this on Ana White I knew I had to make it. My son is 4 yo and I didn't think the 4' square sandbox would be big enough for him, so I made it bigger. Ours is 6' square.
Materials:
4@1x8x6'
12@1x6x6'
2x4 - used leftovers from another project
8 hinges
4 handles
decking screws
Cut lengths:
2@1x8 cut to 71.5 (long sides of the box)
2@1x8 cut to 70.5 (short sides of the box)
did not cut the 1x6 boards (top planks) - actually designed the other boards to fit their length to prevent cutting (saving time) (note that original plan uses 1x4 planks - I used 1x6s so I could use the same number of planks but cover a larger area)
4@2x4 cut to 11.5 (arm rests)
4@2x4 cut to 18.5 (back supports)
followed instructions for assembly otherwise. At my husbands suggestion we put the handles on the sides and can easily open from either side - prevents having to lean over to the middle to open (back saver)
I finished the project in 4 hours including clean up and a couple of small breaks. This is my first Ana White project. It was a lot of fun to build and I hope my son will enjoy it for years to come!
Sat, 09/01/2012 - 20:59
Wow, this is just what I need! I've been wanting to make a sandbox for under the playhouse but the other plan was too small. This would be great for the little guys. Thanks!
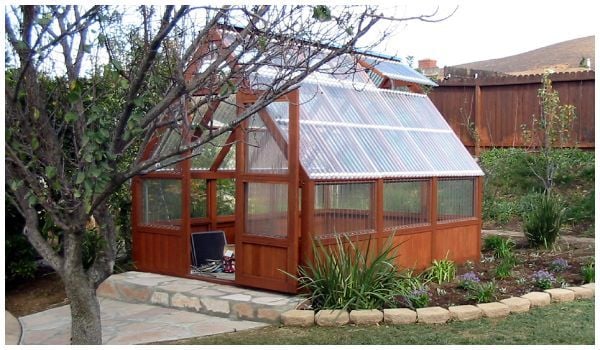
I saw the barn shaped greenhouse plan but preferred a regular roof pitch. I did however incorporate the corrugated polycarbionate as a covering. I find it odd that you guys installed the polycarbonate horizonitally instead of vertically.
Anyway thanks for the info on polycarbonate.
Tue, 09/01/2020 - 17:47
Love this! I really prefer the roofline on your greenhouse. Did you modify Ana's design, or did you get plans from another site? Would love to replicate your design if possible-very elegant.
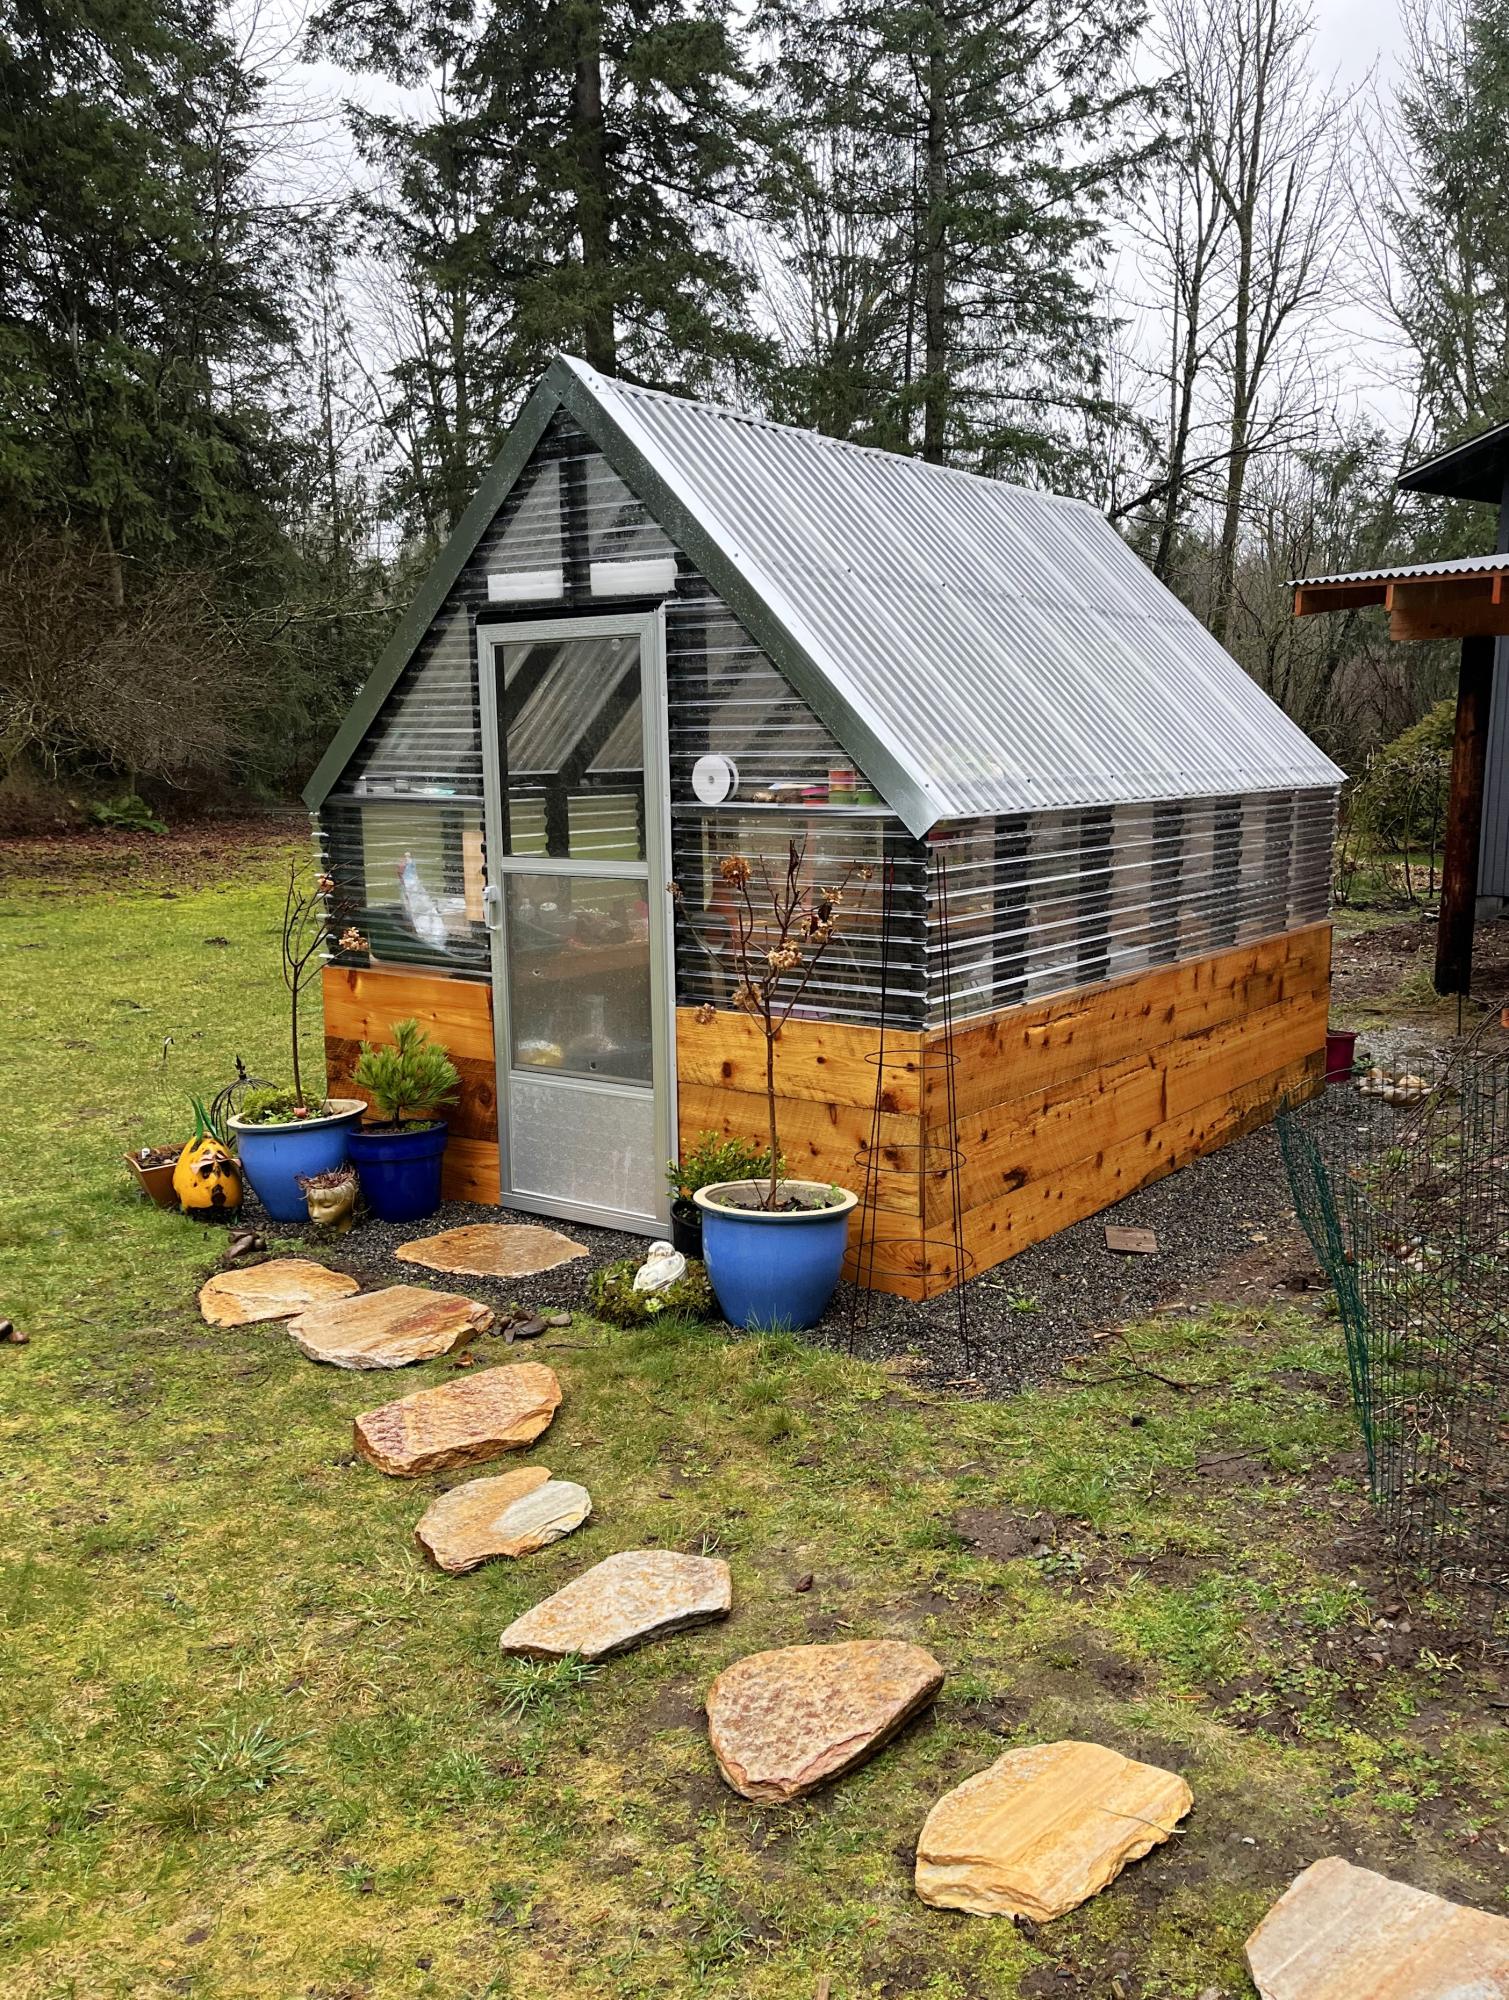
Best looking greenhouse and great size!
Mary McLachlan

Thank you! You've helped me look like a true carpenter who knows what he's doing! My whole family is impressed with my woodwork lately, and now I'm addicted. I've done your seesaw, bar table and stools plus the treehouse in 2 weeks. Thank you for sharing your plans!


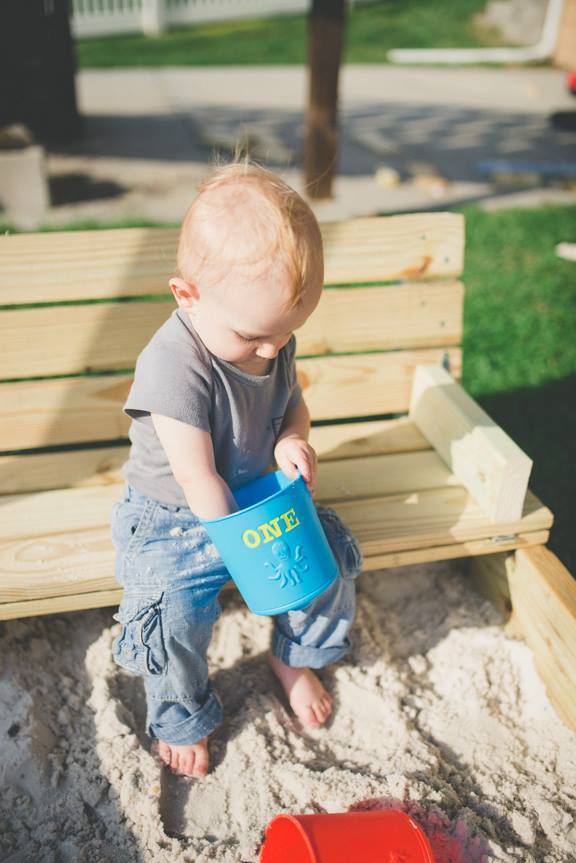
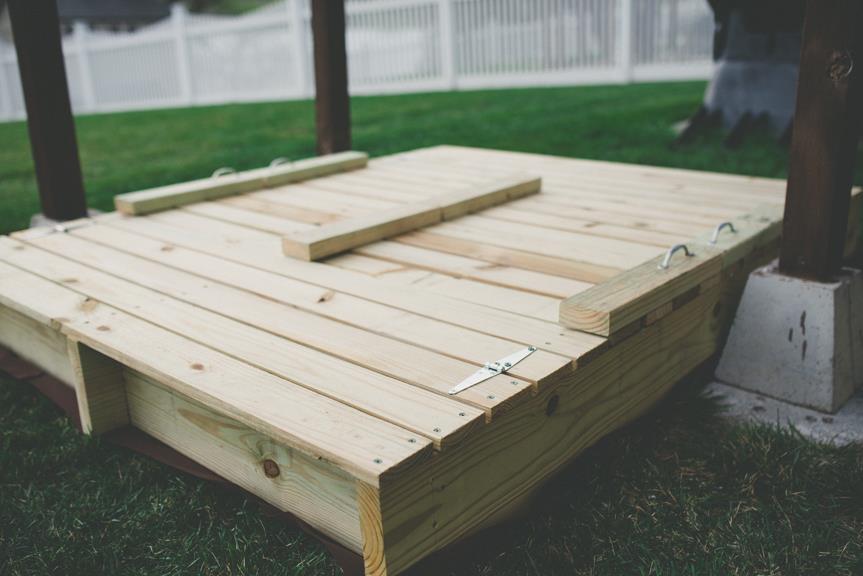
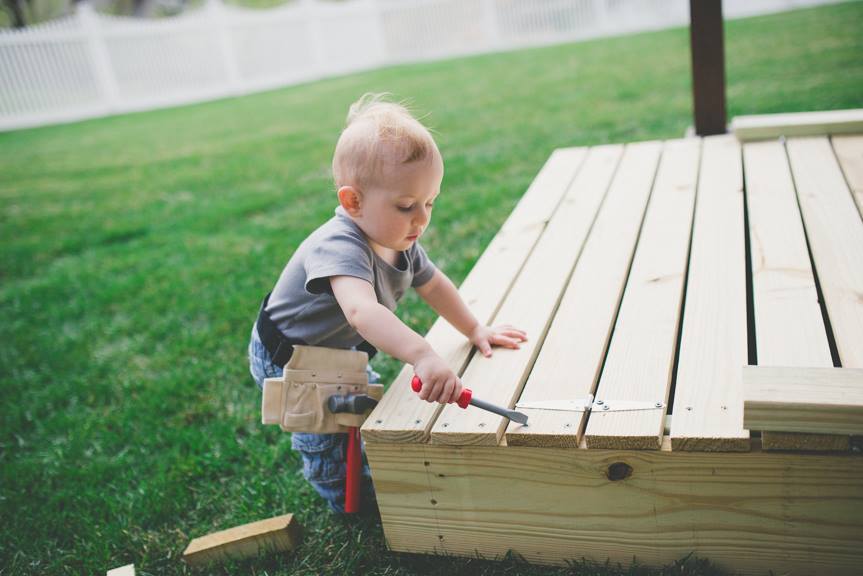
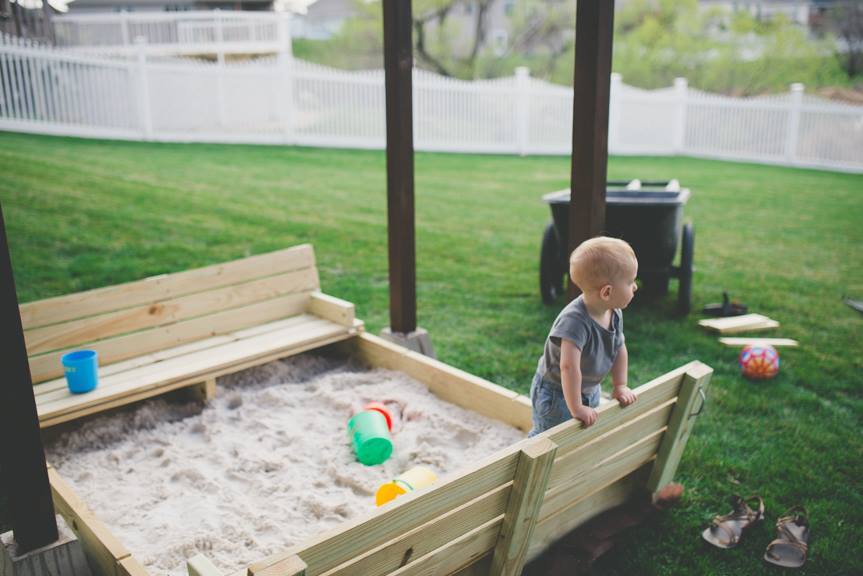
We altered the original plan by enlarging the sandbox (approx 5' x 6') which made for wider benches that can comfortably seat an adult. The benches and back rests are three boards deep instead of two. We added 2x12 supports under the benches for additional support, as well as another 2x4 support in the middle of the backrest.


Tue, 04/14/2015 - 20:00
I just love seeing pictures of these built! Makes my heart swell :-)

We needed a bench to fill the space in our front entry and provide some storage for seasonal gear. We couldn't find anything to buy that would work for us, so when my wife found these plans, I had to try it! Couldn't be happier with the results. We widened the bench by a foot to 84" to fill the space. Basically, it just made each drawer 4" wider. Everything else was built to plan. The most expensive thing was the soft-close 24" drawer slides (~$100). As soon as you go above that 24" depth, they get pricier! It was also tricky to get the drawers to catch properly on the soft-close mechanisms, but I made sure to take the time to get it right before closing it all in. Now I just open and close the drawers for the pure satisfaction of it! I used premium pine plywood for the top and I find it still doesn't give that smooth finish I like, even after sanding. I think I'll create a new top out of joined knotty pine planks later and just attach it to the top.


I love how this bed frame turned out! Everywhere that has stain is cedar and the rest is all scrap spruce. Thanks for another great plan Ana!


Comments
Ana White Admin
Wed, 09/09/2020 - 11:42
Great application of this plan!
This worked out great! Thanks for sharing:)
VGuz
Fri, 07/07/2023 - 15:22
Do you have an illustration…
Do you have an illustration or instructions on the exact modifications you used for this project?