Got my confidence in building back!!!!
I woke up one morning and decided this space couldn’t go on without a day bed. One week later I am standing tall. This is my first intermediate build. Excited to jump into the next project!
Wow, there are some really ugly headboards out there. I was intending to re-do one from craigslist but saw this plan and knew it had to be built! This was our first major woodworking project, and I think it turned out pretty good! And especially for only $45! It was a very easy build with accurate instructions/measurements! Great for beginners!
Wed, 01/04/2012 - 23:49
Just love your bed and nightstand! Really inspiring and I love how you decorate too! Thank you for taking your time to share.
Sun, 01/08/2012 - 07:00
That's a wonderfully polished piece for something with the word "reclaimed" in the title, especially since it's your first. Looking forward to what you'll be doing a year from now if the first effort is this good.
Sun, 06/03/2012 - 15:53
I am new to Pinterest and Ana White, so is there any chance I could get plans for this emailed to me or sent to me at Pinterest?
Fri, 07/13/2012 - 16:29
To get the plans, all you have to do is click on the link next to spot up above that says "from plans" and they will pop up.
This project was quick and painless. I recommend for a beginners project (but expect to get frustrated over building the x's into the side though). I stained our table with the Minwax Classic Gray stain and used the Minwax water-based polyurethane to seal it. I realize that the stain is difficult to see but it is a beautiful stain that has turned into my go-to stain. The stain is not too gray and you can see the natural color of the wood through it. The photo gives the impression a glossy finish. In reality, it is more matte.
I replaced my gas stove, and could not find a 36" wide stove that was affordable, and had the features I wanted. I bought standard 30' stove, but had a gap to fill. Found this site; adapted the filler cabinet to 7 3/4 inches and found the pullout shelving unit. Added a drawer front with a pull, and it is great!
Mon, 02/08/2016 - 11:39
This is awesome! What a great use of space and amazing customization to your kitchen!
My 6 and 8 year old boys helped me build this bench because I couldn't stomach paying $200 for one with 3 little boys. It cost about $40 and it was so easy to do. We are all so proud of the end result.
Table was made from curly maple that was glued into 12" widths to match the panel widths of 12". Client loved the look.
Dress up tower for my 4 yr old daughter to hang her pretty play costumes and princess outfits.
We needed a dining table. We saw this plan and fell in love. It didn't look like it would be impossible for two people who have never made furniture, so we gave it a shot! We finished it over three weekends and couldn't be happier with how it came out. Thank you for the plans!!!
Tips: we were initially skeptical about using regular old lumber, but it came out amazing.
Rustoleum stain and polyurethane...use it!
Sun, 11/24/2013 - 17:15
You did a great job, I love the color and that table top is awesome!
Sat, 11/12/2016 - 09:38
I want to make this table for my son's dining room. Home Depot Yellow pine has curved edges so my question is. How did you get the tabletop so flush without the curves showing on all the wood piece edges? This flat no edge appearence is what I want to make it look less like a pic-nic table.
Handmade coffee table base on Corona plans. Bottom shelf was chagned to wooden slats instead of solid plywood.
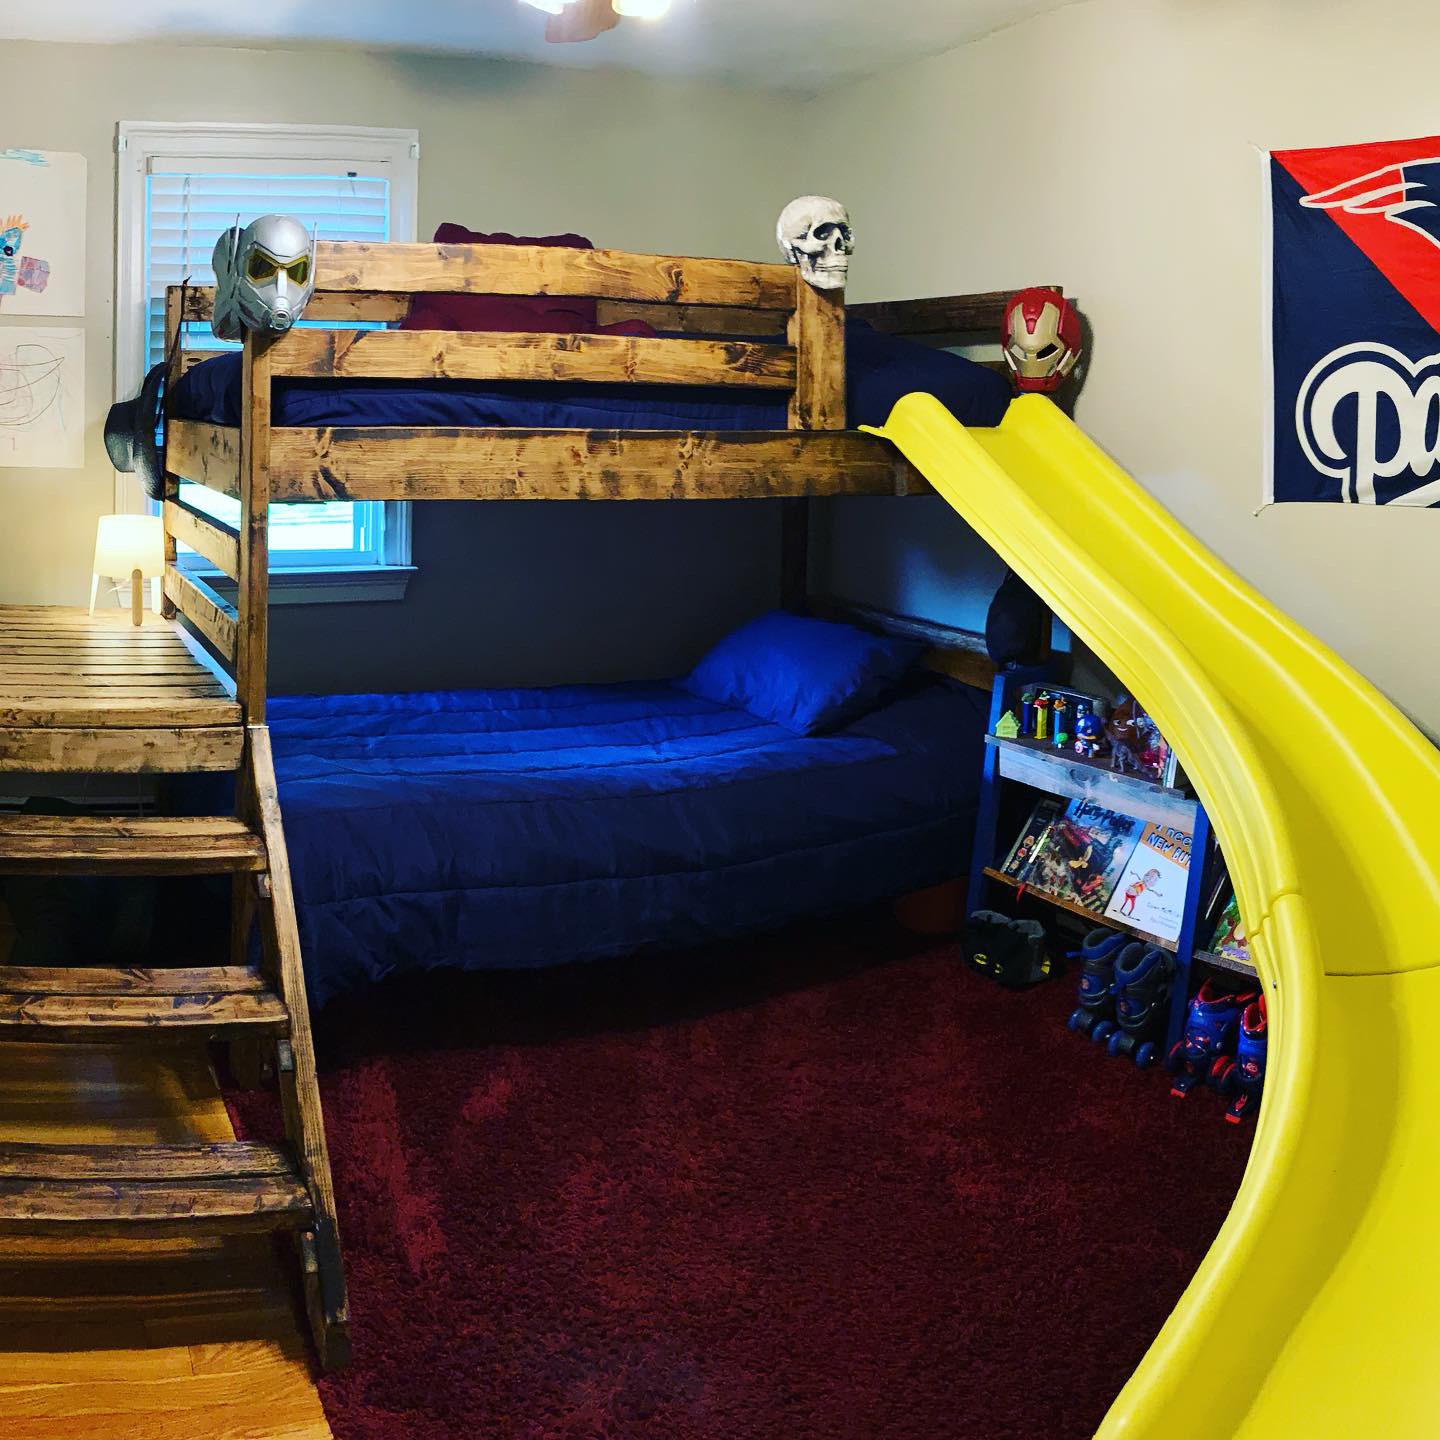
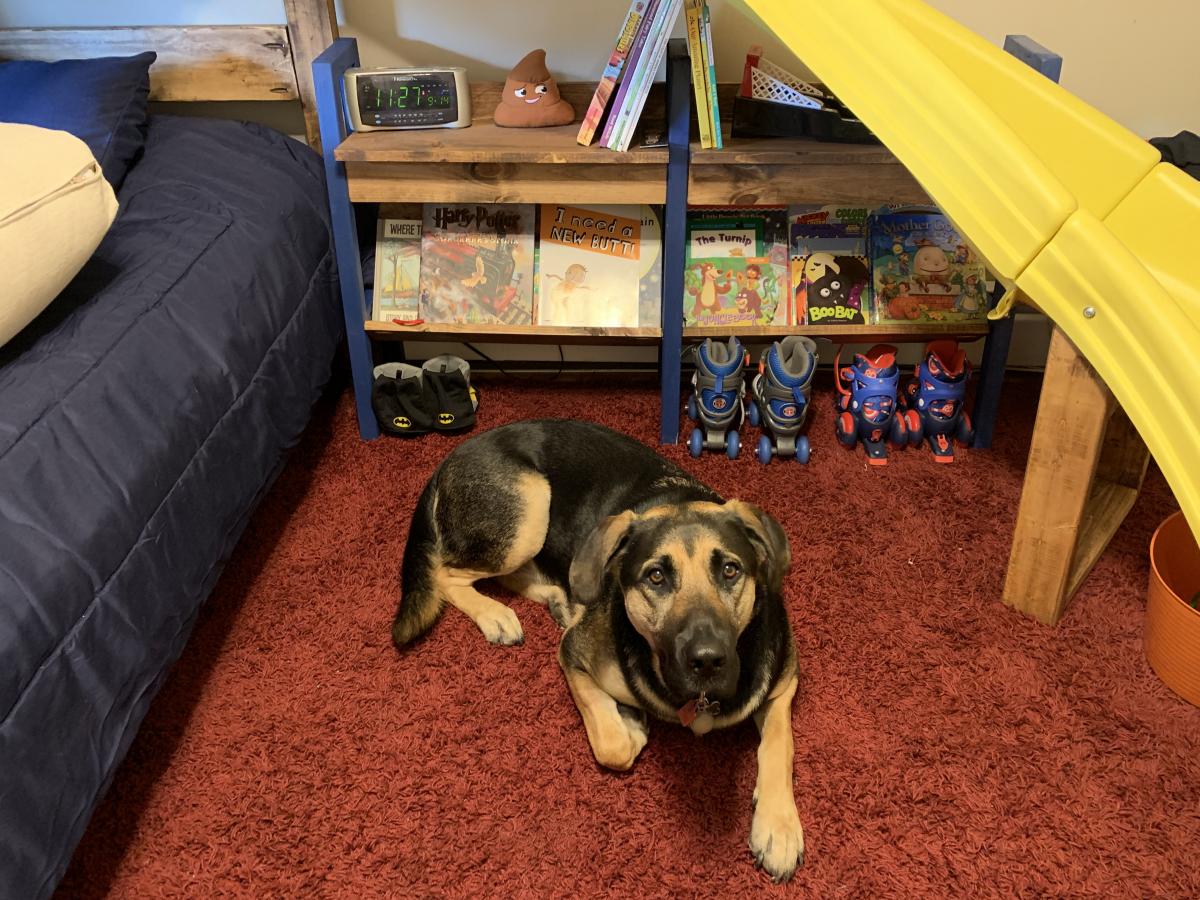
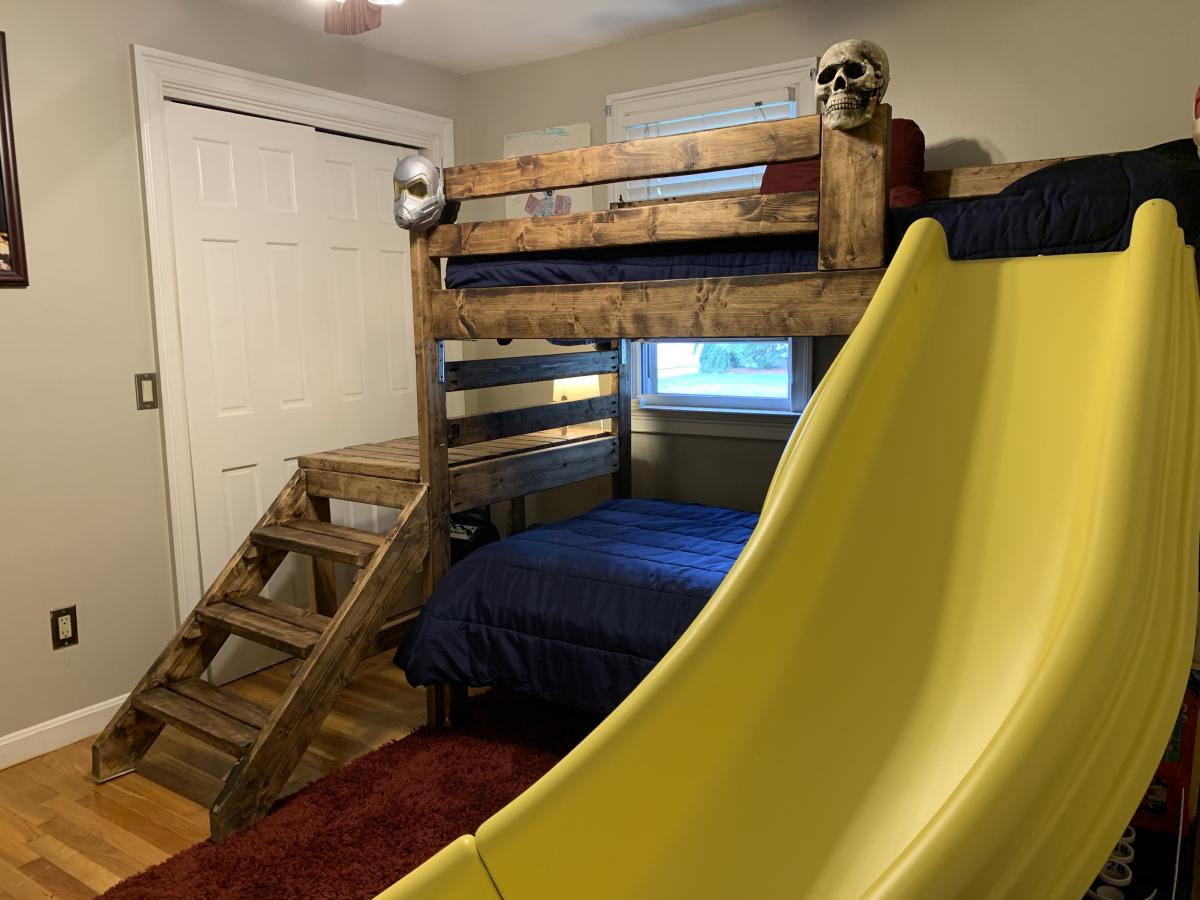
This build was super fun and easy. I modified it slightly with a bottom bunk and outdoor grade slide for my two grandsons. The room is only 10x10 so it pretty much takes up all the space, but I left a good amount of space under the bed (11”) for storage or for the dog to hide.
I attached hinges to the stairs for easy access to underneath, maybe for a hidden fort or more storage. To gain extra support for the beds, I added angle irons to the top bunk legs and 11" 2x4s to the bottom bunks legs for the cross bars to sit on. Both my husband and I tested, and they're not going anywhere, pretty solid.
Thanks Ana & Jared for sharing your talents with the rest of us!! I wish I had room in my home to make every single one of your projects!
🥰,
Alexis
Easy to make. I’m in love. Thanks for the super simple plan to follow.
Modified the kids country to a smaller size to fit in a tight area. The coat rack I did freestyle. Both made from scraps, the metal hangers are antiques that I have been holdiing onto for 20 years.
I loved doing this project and the table came out awesome. But recently with the cold weather Ive noticed splits in some of the wood. Also where the beadboards meet the table top there is shrinkage...any idea how to fix it. I used non treated lumber from lowes.
Tue, 11/26/2013 - 18:49
The moisture content in big box 2xx lumber is relatively high, which is why it's mainly used for framing. Letting the lumber dry and acclimate is the best way to limit movement. Also, if you just screwed the top to the apron without allowing for movement, you will have splits as you're experiencing. It's best to use z-clips, or if you use pocket holes make sure you elongate the holes. As far as fixing the gaps, I'm not sure of a good way that will last.
Tue, 11/26/2013 - 20:46
Your table looks great! Can I ask what stain you used? Thank you
Using Ana's three-storey dollhouse as a foundation, I amended the measurements to create a narrower dollhouse (36" wide) to fit our space.
Followed Ana's plan for the easy ~8 ft Farmhouse table and then I made the counter height for 4 Farmhouse table! I LOVE THEM!!!!!!!!!!!!!!!!
Sun, 09/29/2019 - 06:33
THANK YOU!! You are my inspiration, thanks for supporting us women!
Sun, 09/29/2019 - 06:31
Loved doing these free plans from this website! (Ana's)
I fell in love with the Simple Outdoor Dining Table, but wanted something a bit different. When ewood posted the modified version. I knew that was the one!
My wife and I built this table for our new home. It is a hybrid of the triple pedestal table and farmhouse table top. I modified the table top to give it a little more stability on the ends.
Here is our first stab at building funiture...not too shabby. We built 2 benches with the table!
My husband built us new nightstands for our bedroom. Up next is a bed frame.
Check out this beautiful tapered Ana White planter that I made! Her videos are amazing and simple to follow be sure to check her out.
Alex
Second plan I decided to build from this site, my daughter loves it. She's 19 months old now, but should grow into it fairly soon, she can still climb into it though. Slapped it together in less than an hour. Small modifications from the original plan. I used a 1 x 12 tread (leftover from a previous project) for the seat and back. Painted and sealed it, and let dry over night. Thanks again Ana!
Comments
Ana White Admin
Fri, 05/05/2023 - 11:41
Heck yes!
It looks great, can't wait to see your next project! Way to jump in with both feet:)