Timber Cabin Chicken Coop
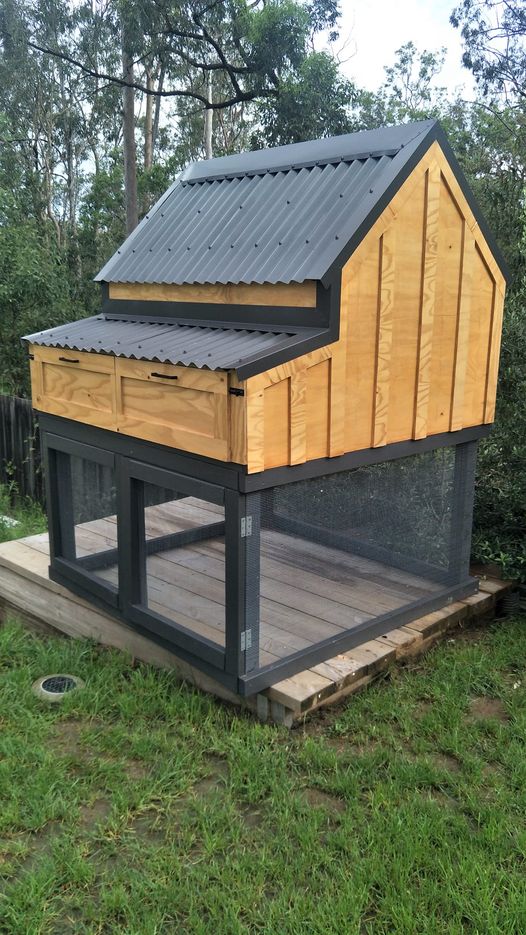
I had to convert all the measurements from inches to mm, but it was worth the brain drain. I didn't add the garden, but extended out the chicken coop. I am thrilled with the results! Thank you!
Built from Plan(s)
I had to convert all the measurements from inches to mm, but it was worth the brain drain. I didn't add the garden, but extended out the chicken coop. I am thrilled with the results! Thank you!
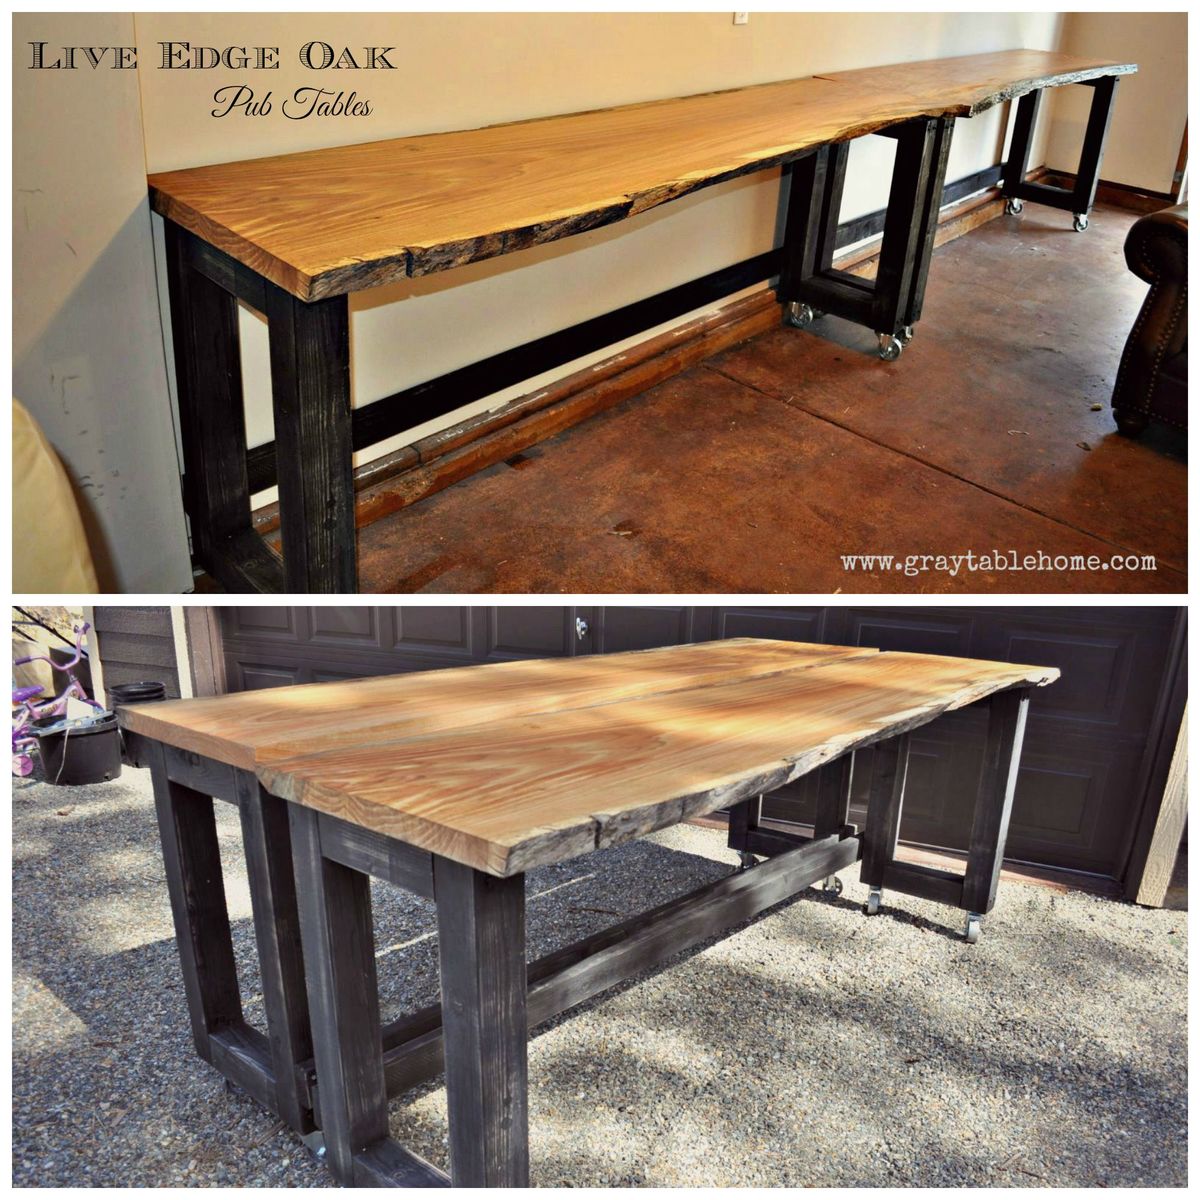
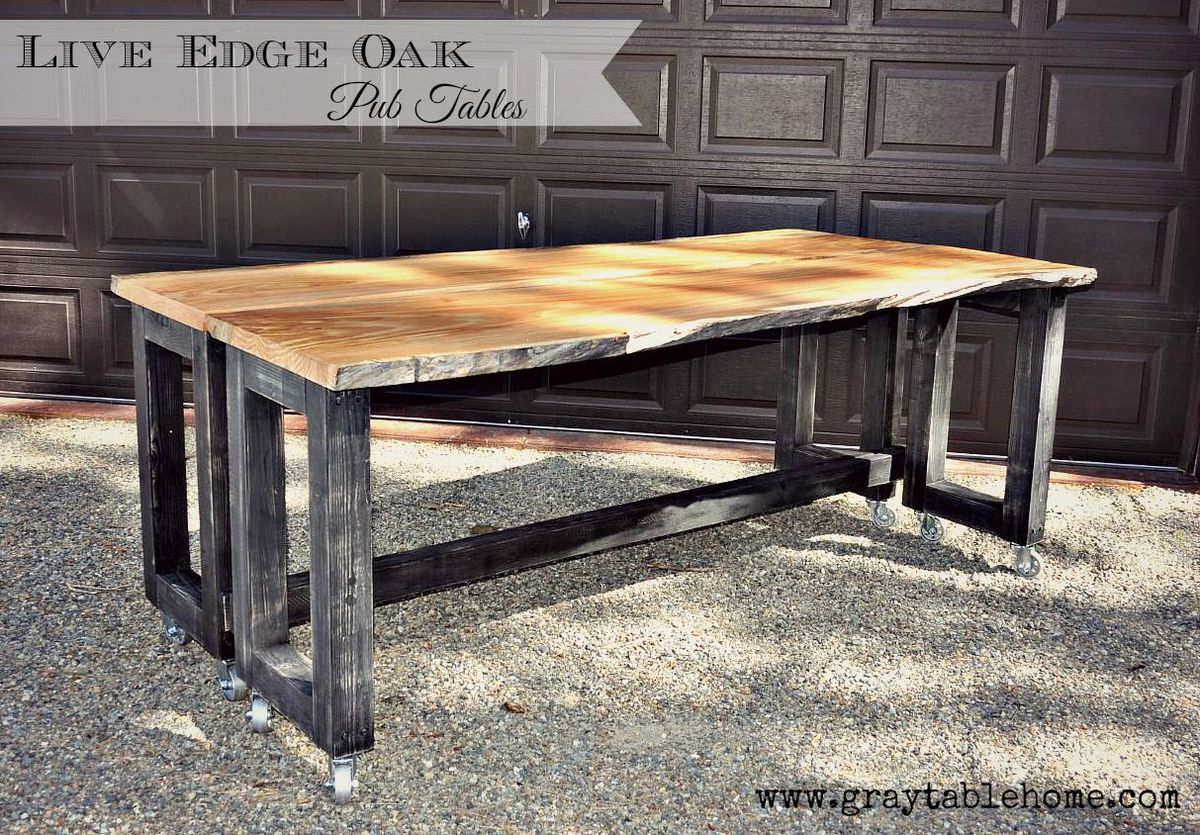
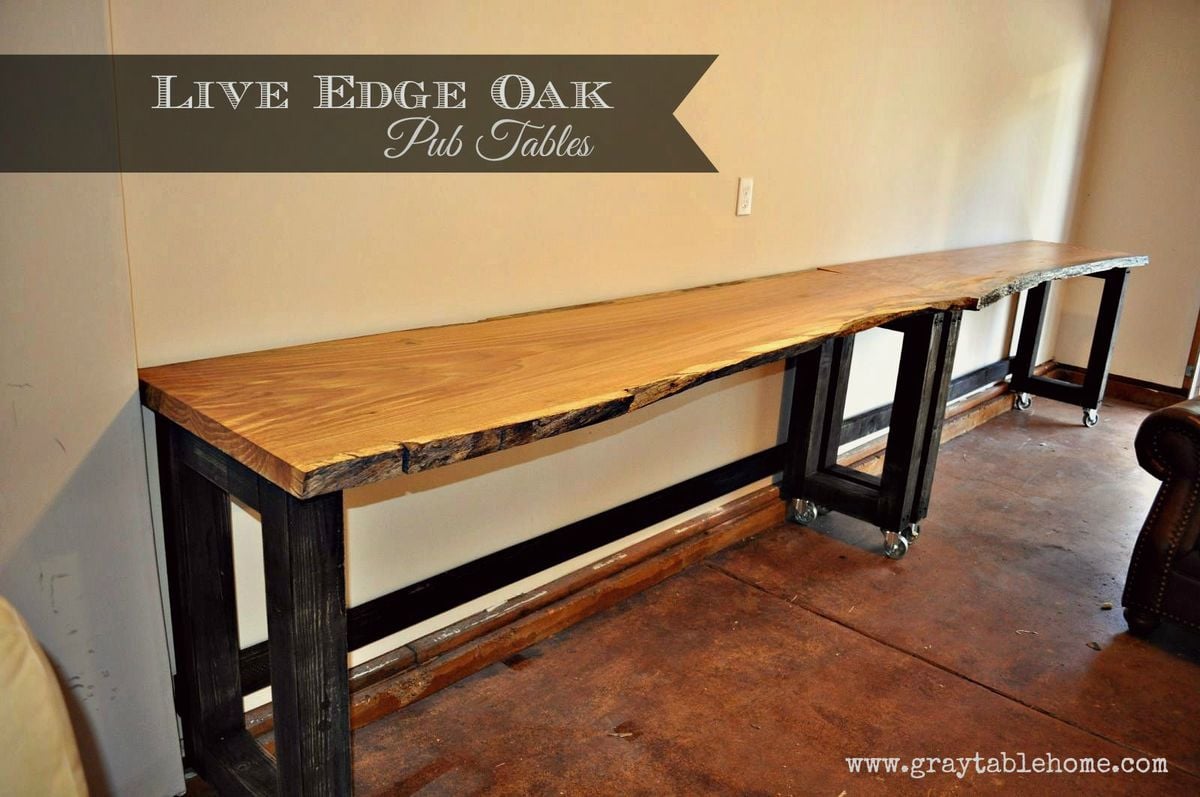
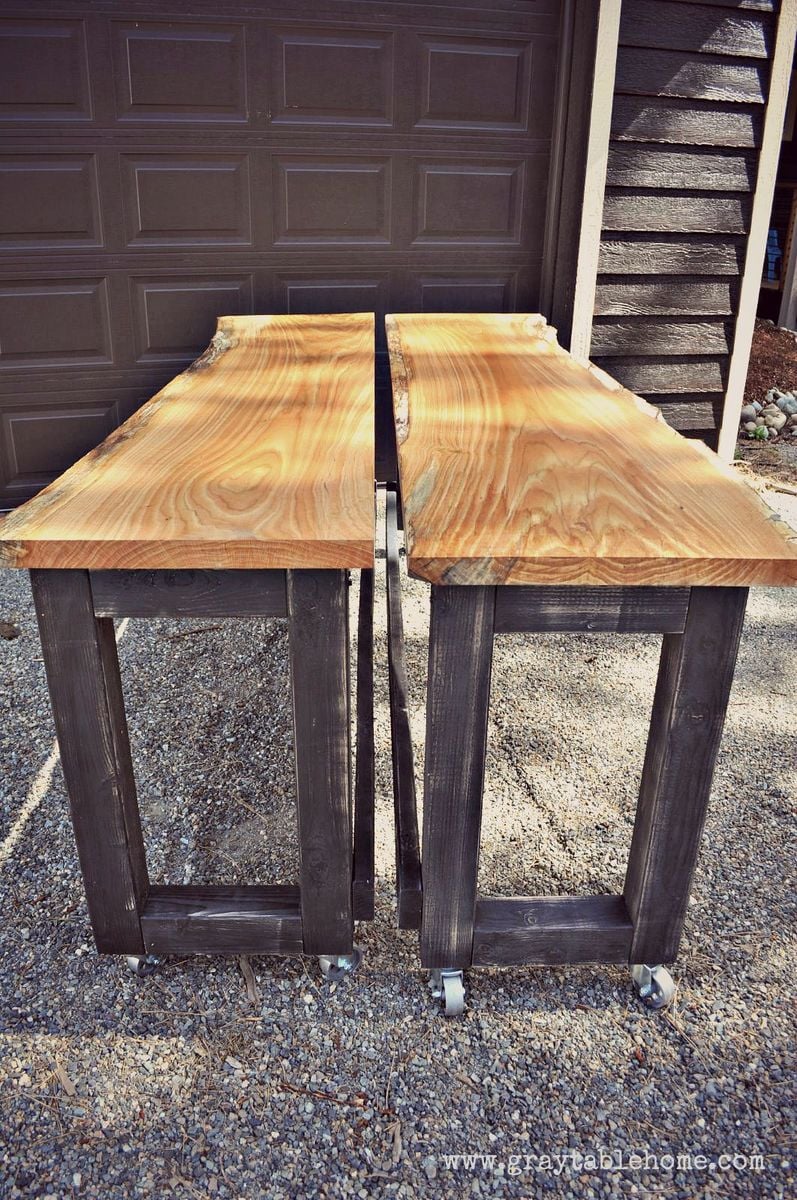
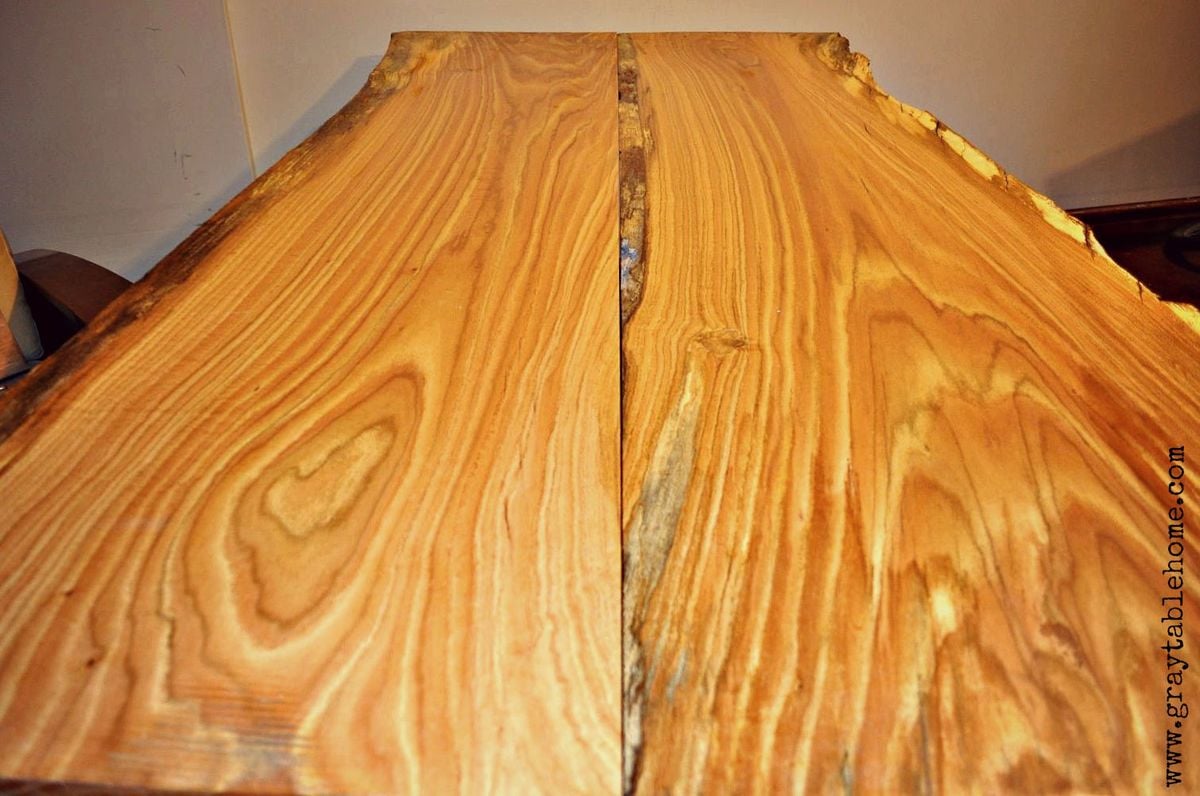
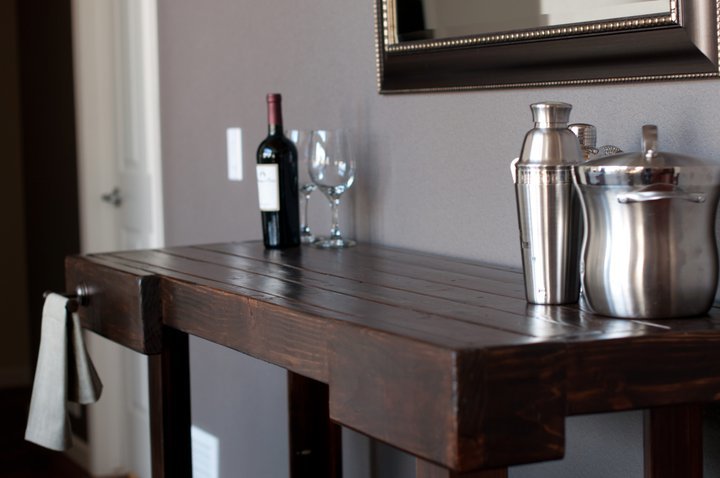
This rustic modern version of a pub table has multiple uses - it can rest along a wall to make a 16 foot long bar, or rolled together to form an 8 foot long pub table. It is standard counter height 36" and will accomodate seating for 8-10 counter stools. If you don't have live edge wood slabs, you can also use construction lumber (2x8s or 2x12s) to achieve similar dimensions and versatile use in a more cost effective way.

Fri, 07/31/2015 - 04:10
Awesome idea! I think I will have to try for a dining table version of this table. Do you happen to have a way to lock the 2 pieces together?
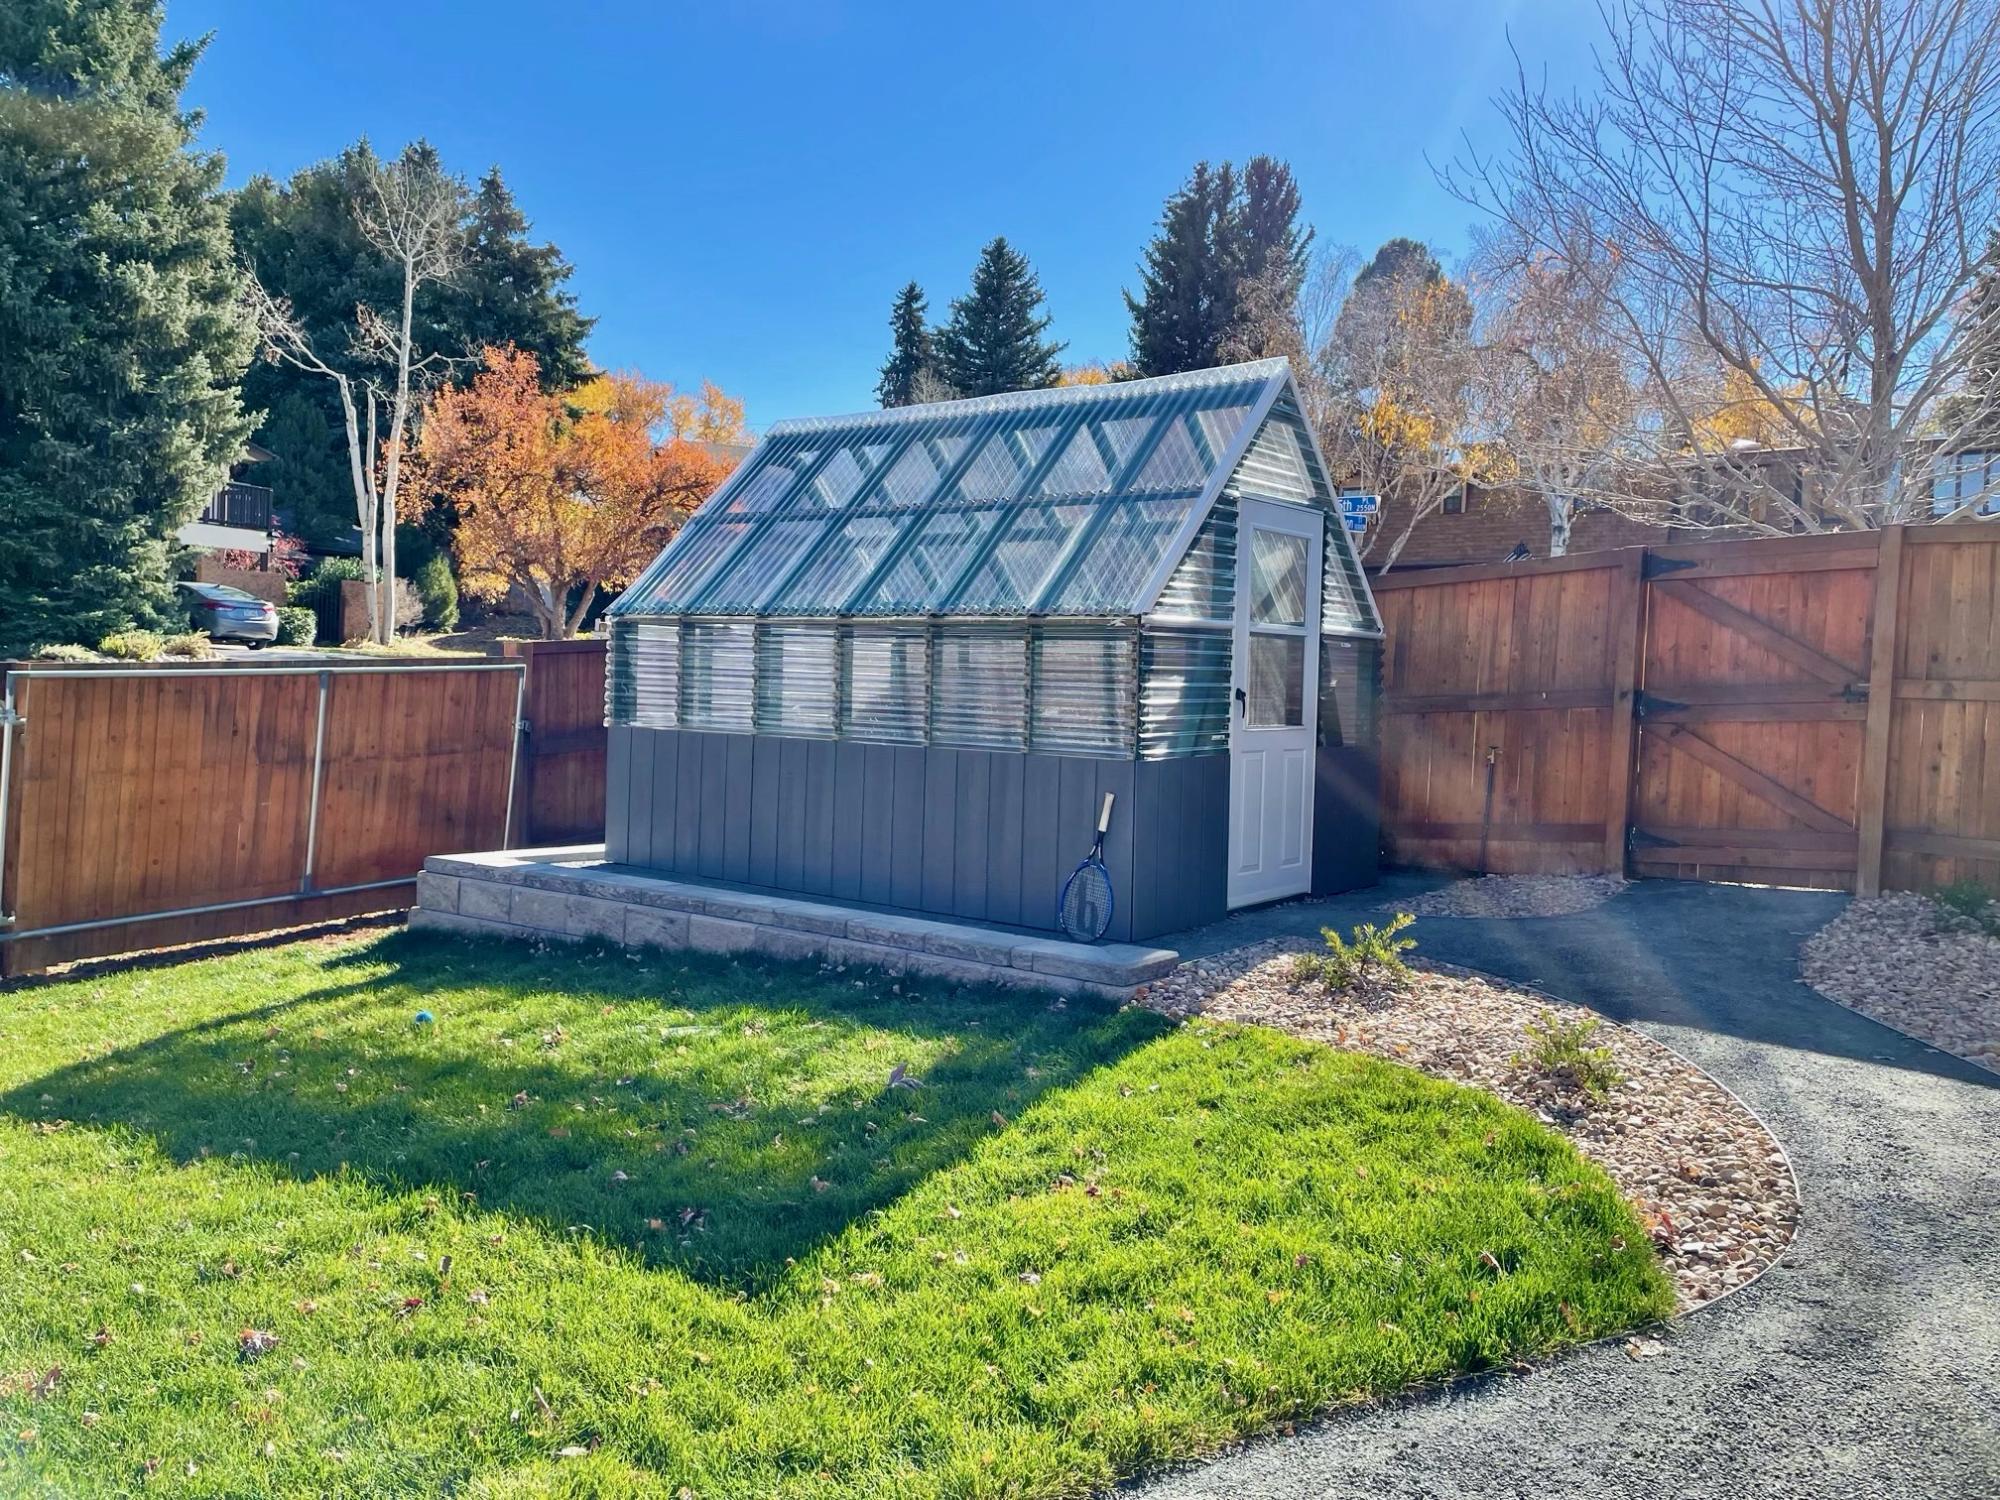
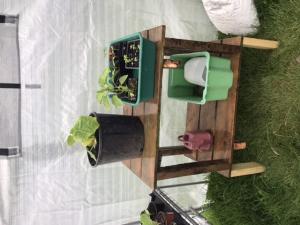
We started this project last fall with the goal of creating a multi use hobby greenhouse with plenty of space for the kids to get their hands dirty. We purchased the Small Gable Roof Greenhouse plans and made our first (of many) trips to the hardware store. Since becoming homeowners in 2015, we've done countless projects but nothing as big as this. We are still very much learning the nuances of greenhouse growing in Colorado, but that has become a fun experience for our entire family. Since completing the structure, I've found that I'm more interested in making the space more functional than I am in actually gardening. I added a shelf built almost entirely from old pallets, a raised cedar bed and solar powered exhaust fan/lights. Luckily, my wife loves spending time in there tending to the plants! As the summer heat sets in, we will face new challenges of how to keep the space cool. Maybe by adding a shade cloth and misters? Regardless of what the "output" looks like we are loving this new hobby and are looking forward to learning new skills!

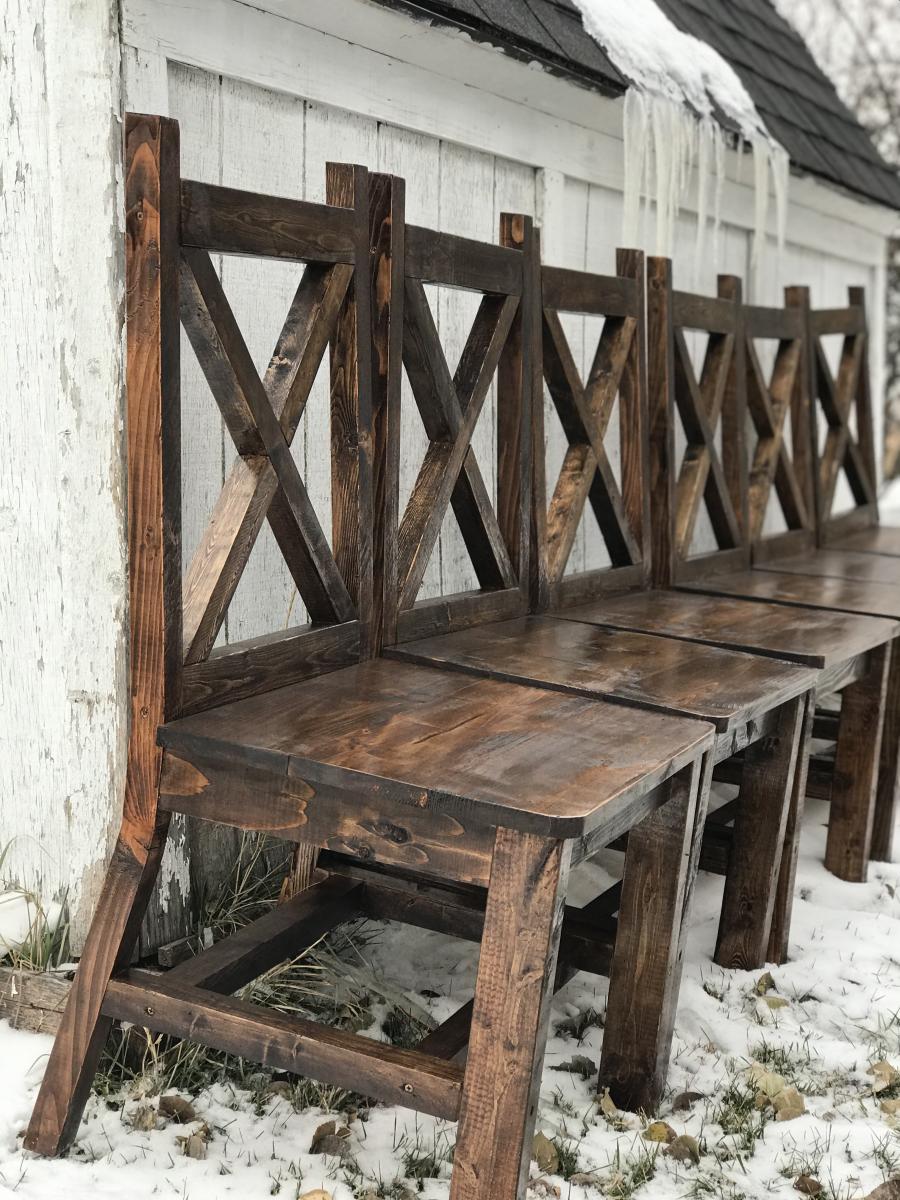
First time wood working project!
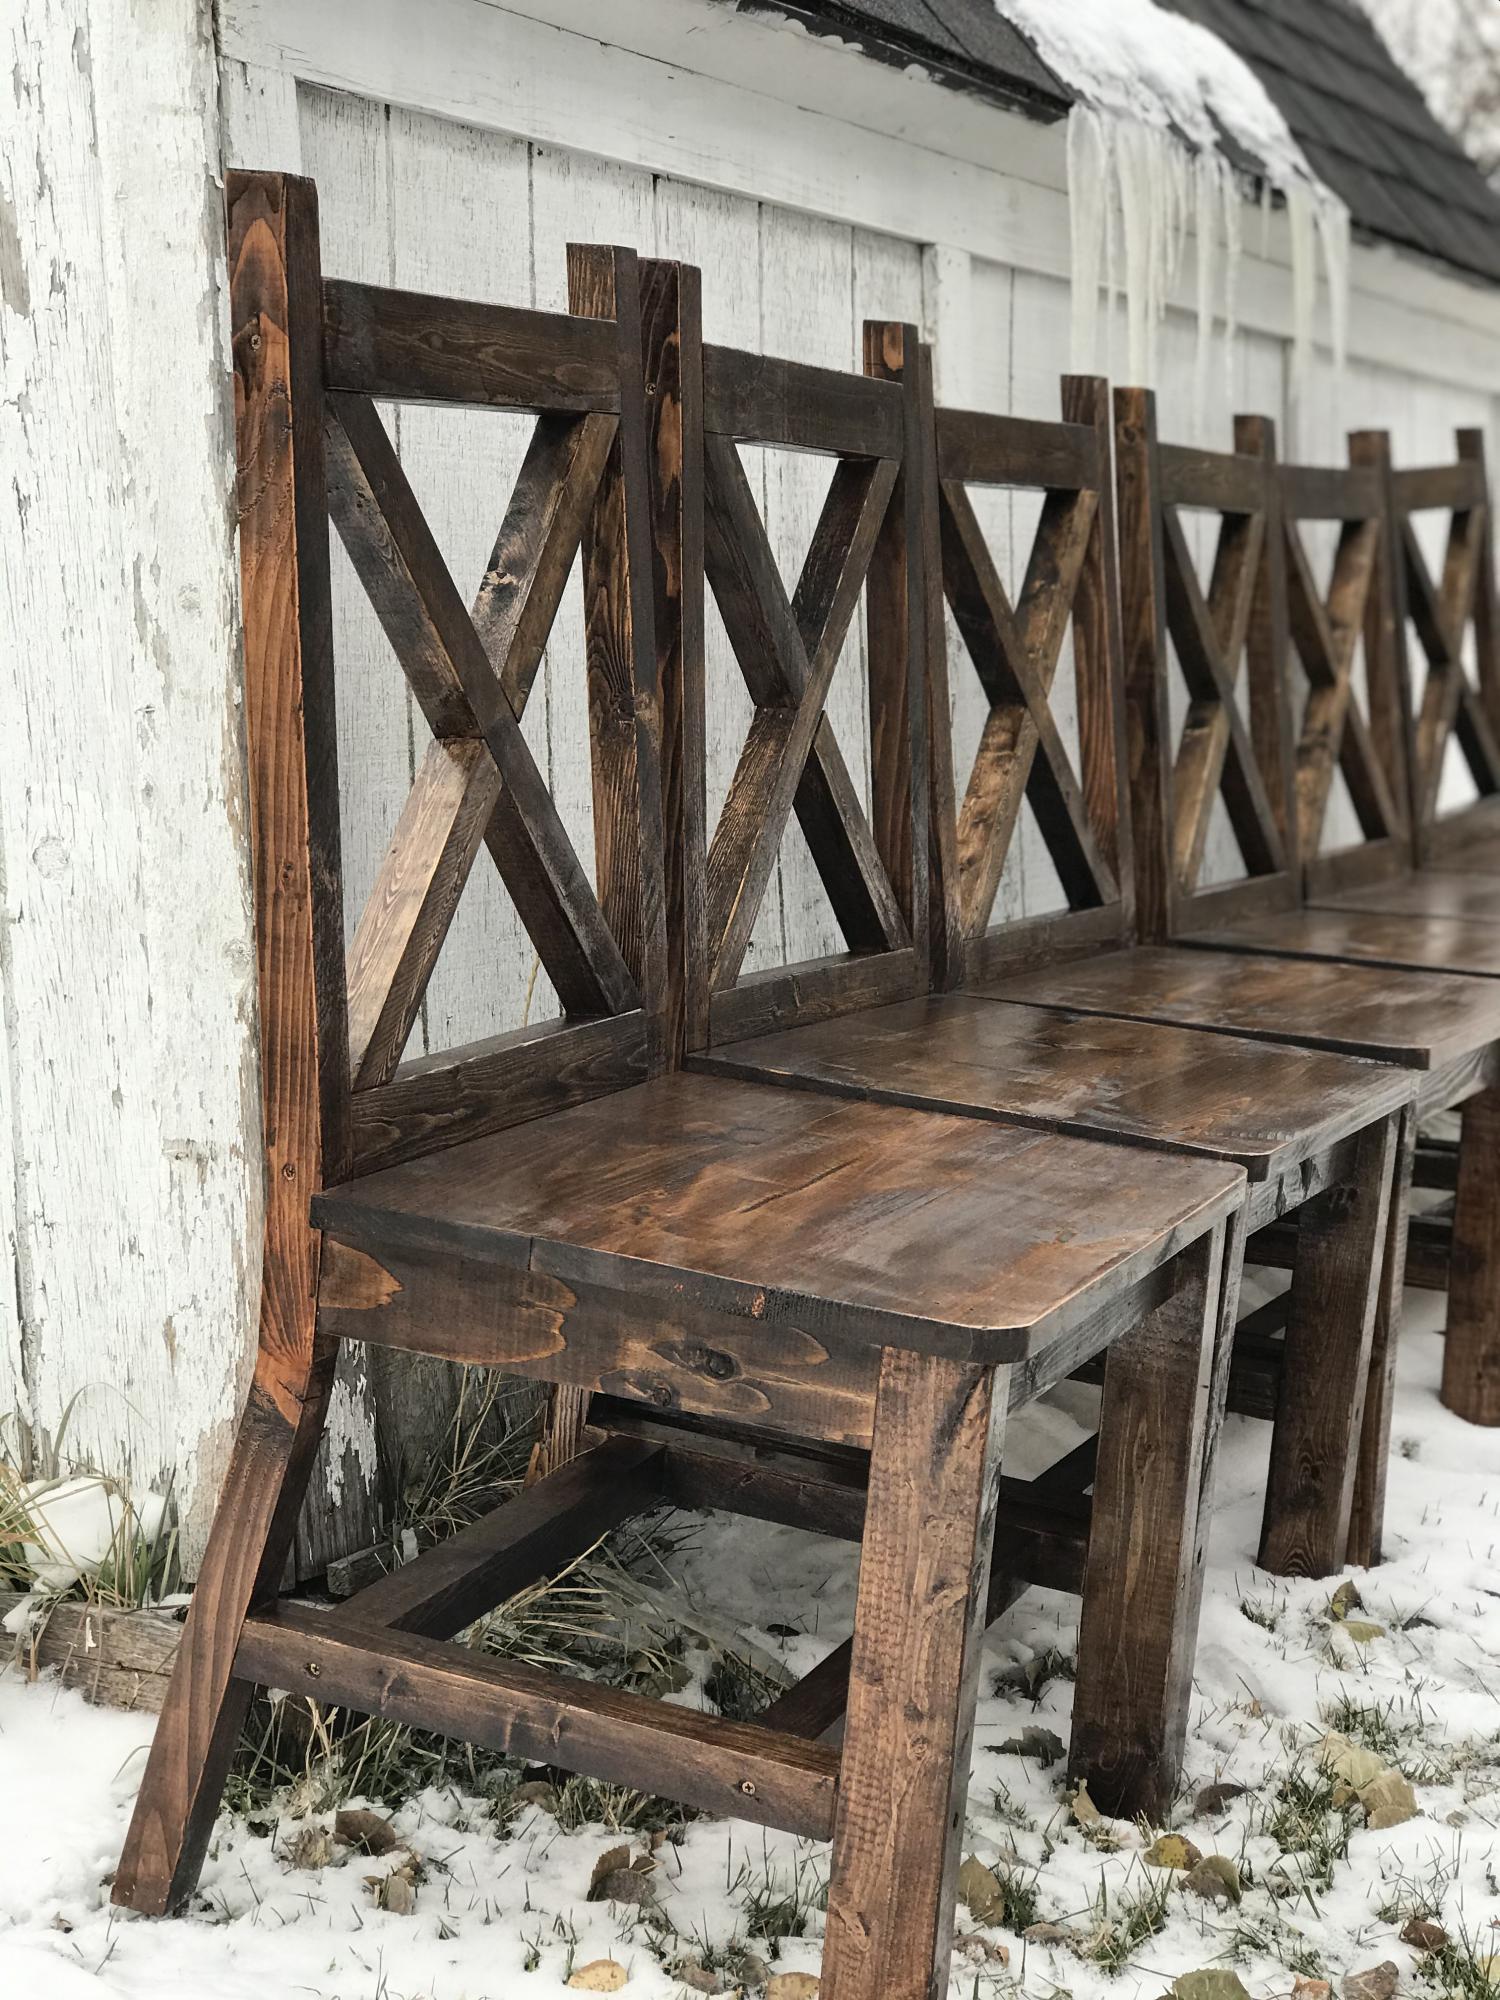
I found a picture of this style of chairs, and I really wanted to make them for my table. I created my own plans and adjusted them until they were perfect. I’ve since made several sets of chairs for other people including this set of 6.
Wed, 12/18/2019 - 07:57
I'd love to make these for my parents, do you have the plans?
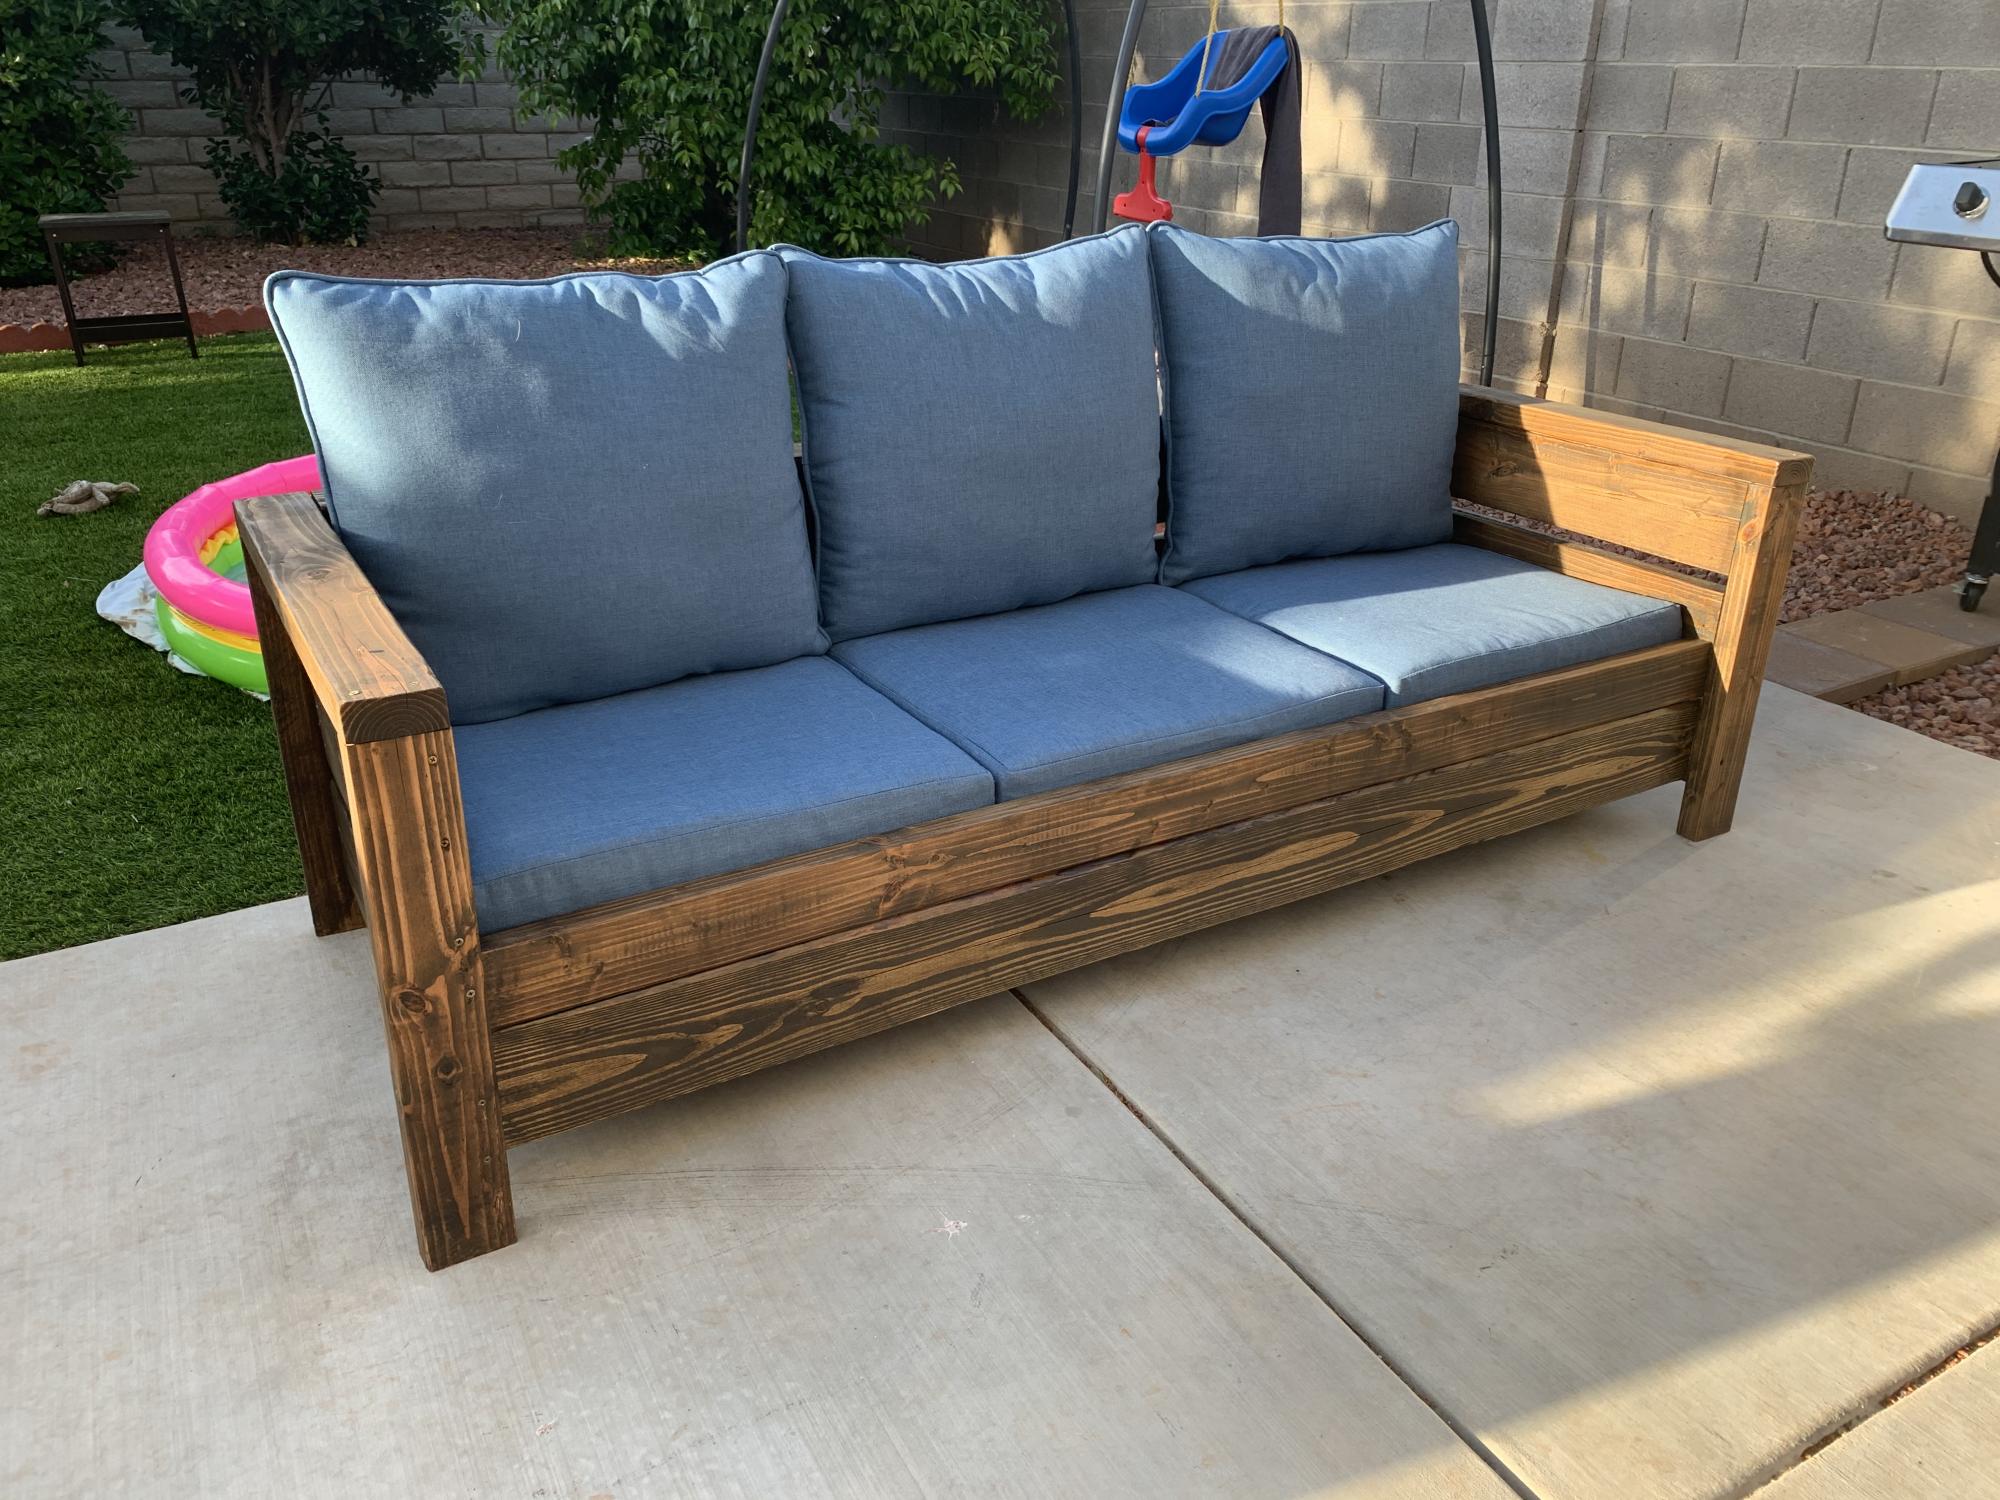
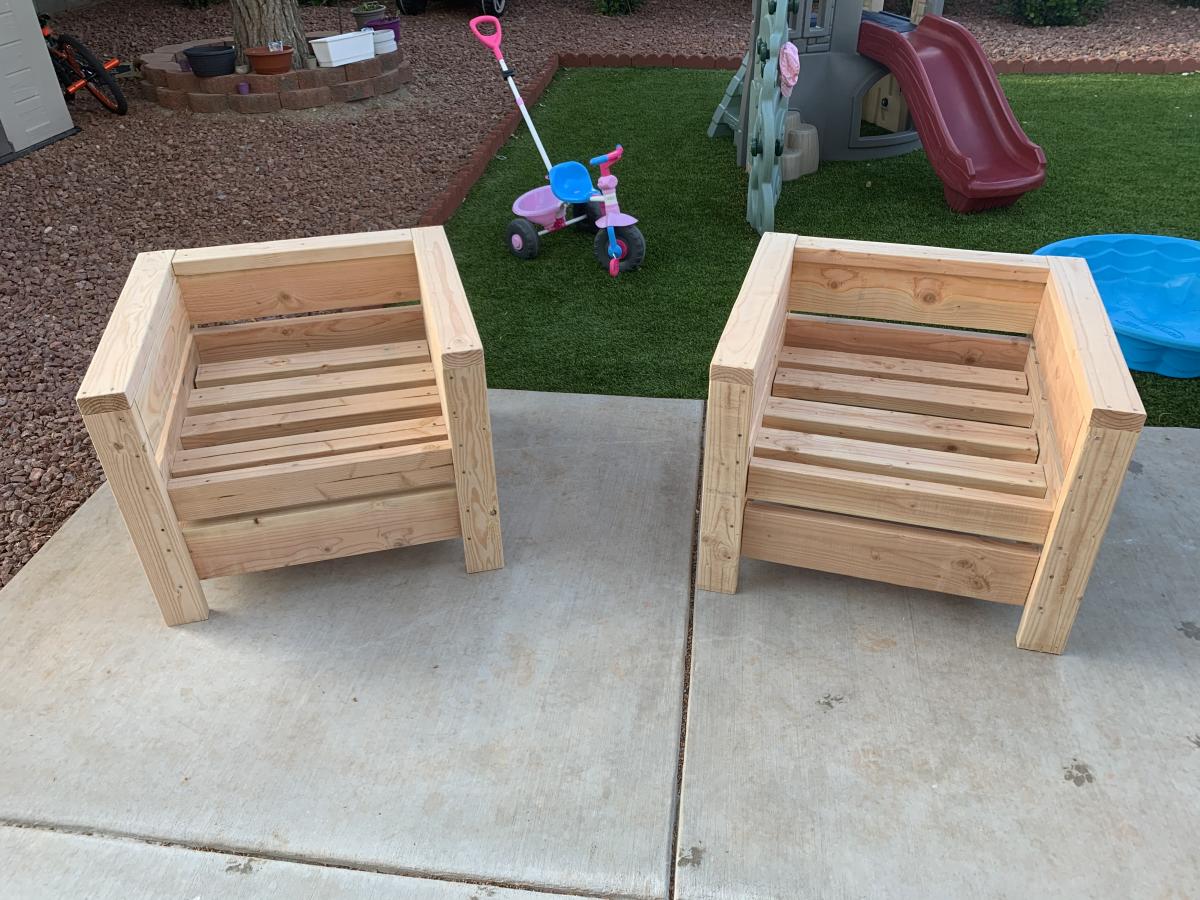
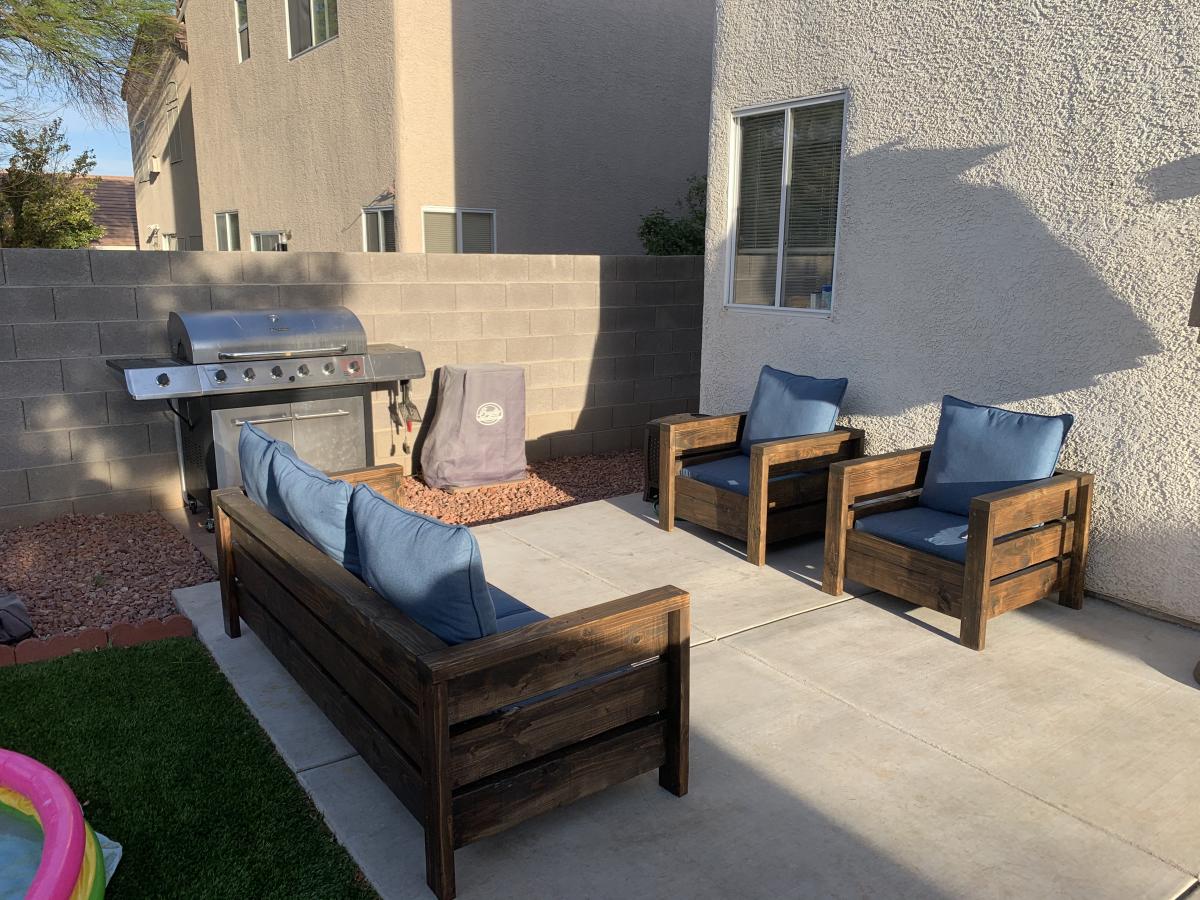
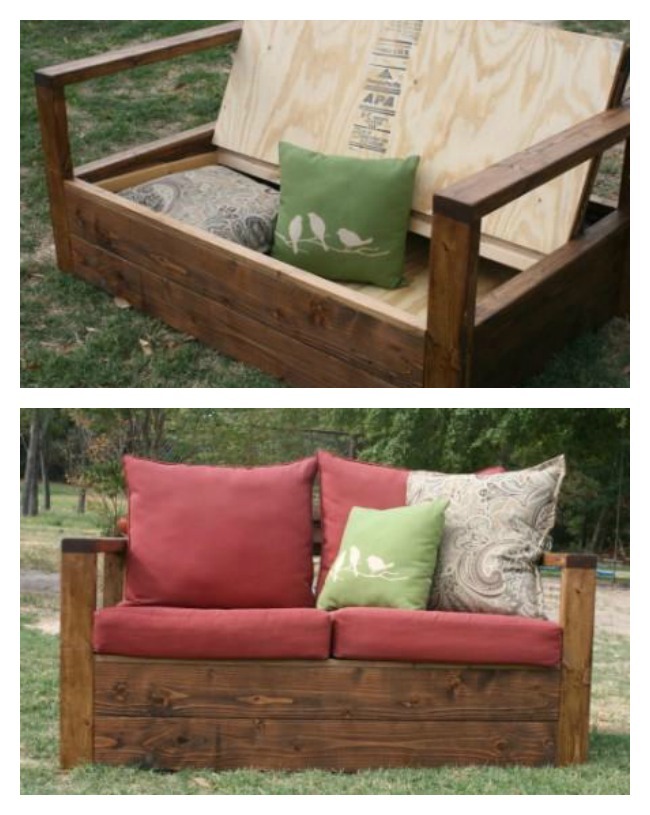
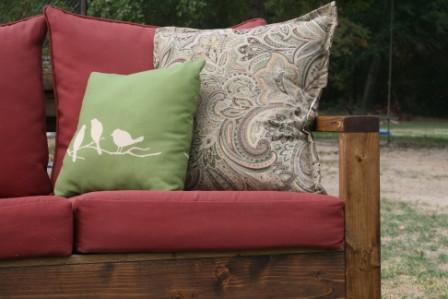
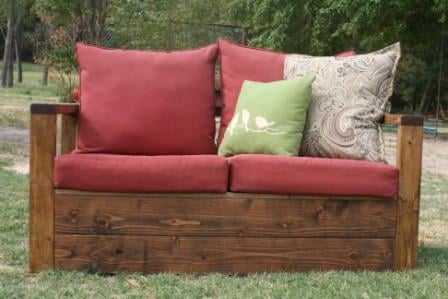
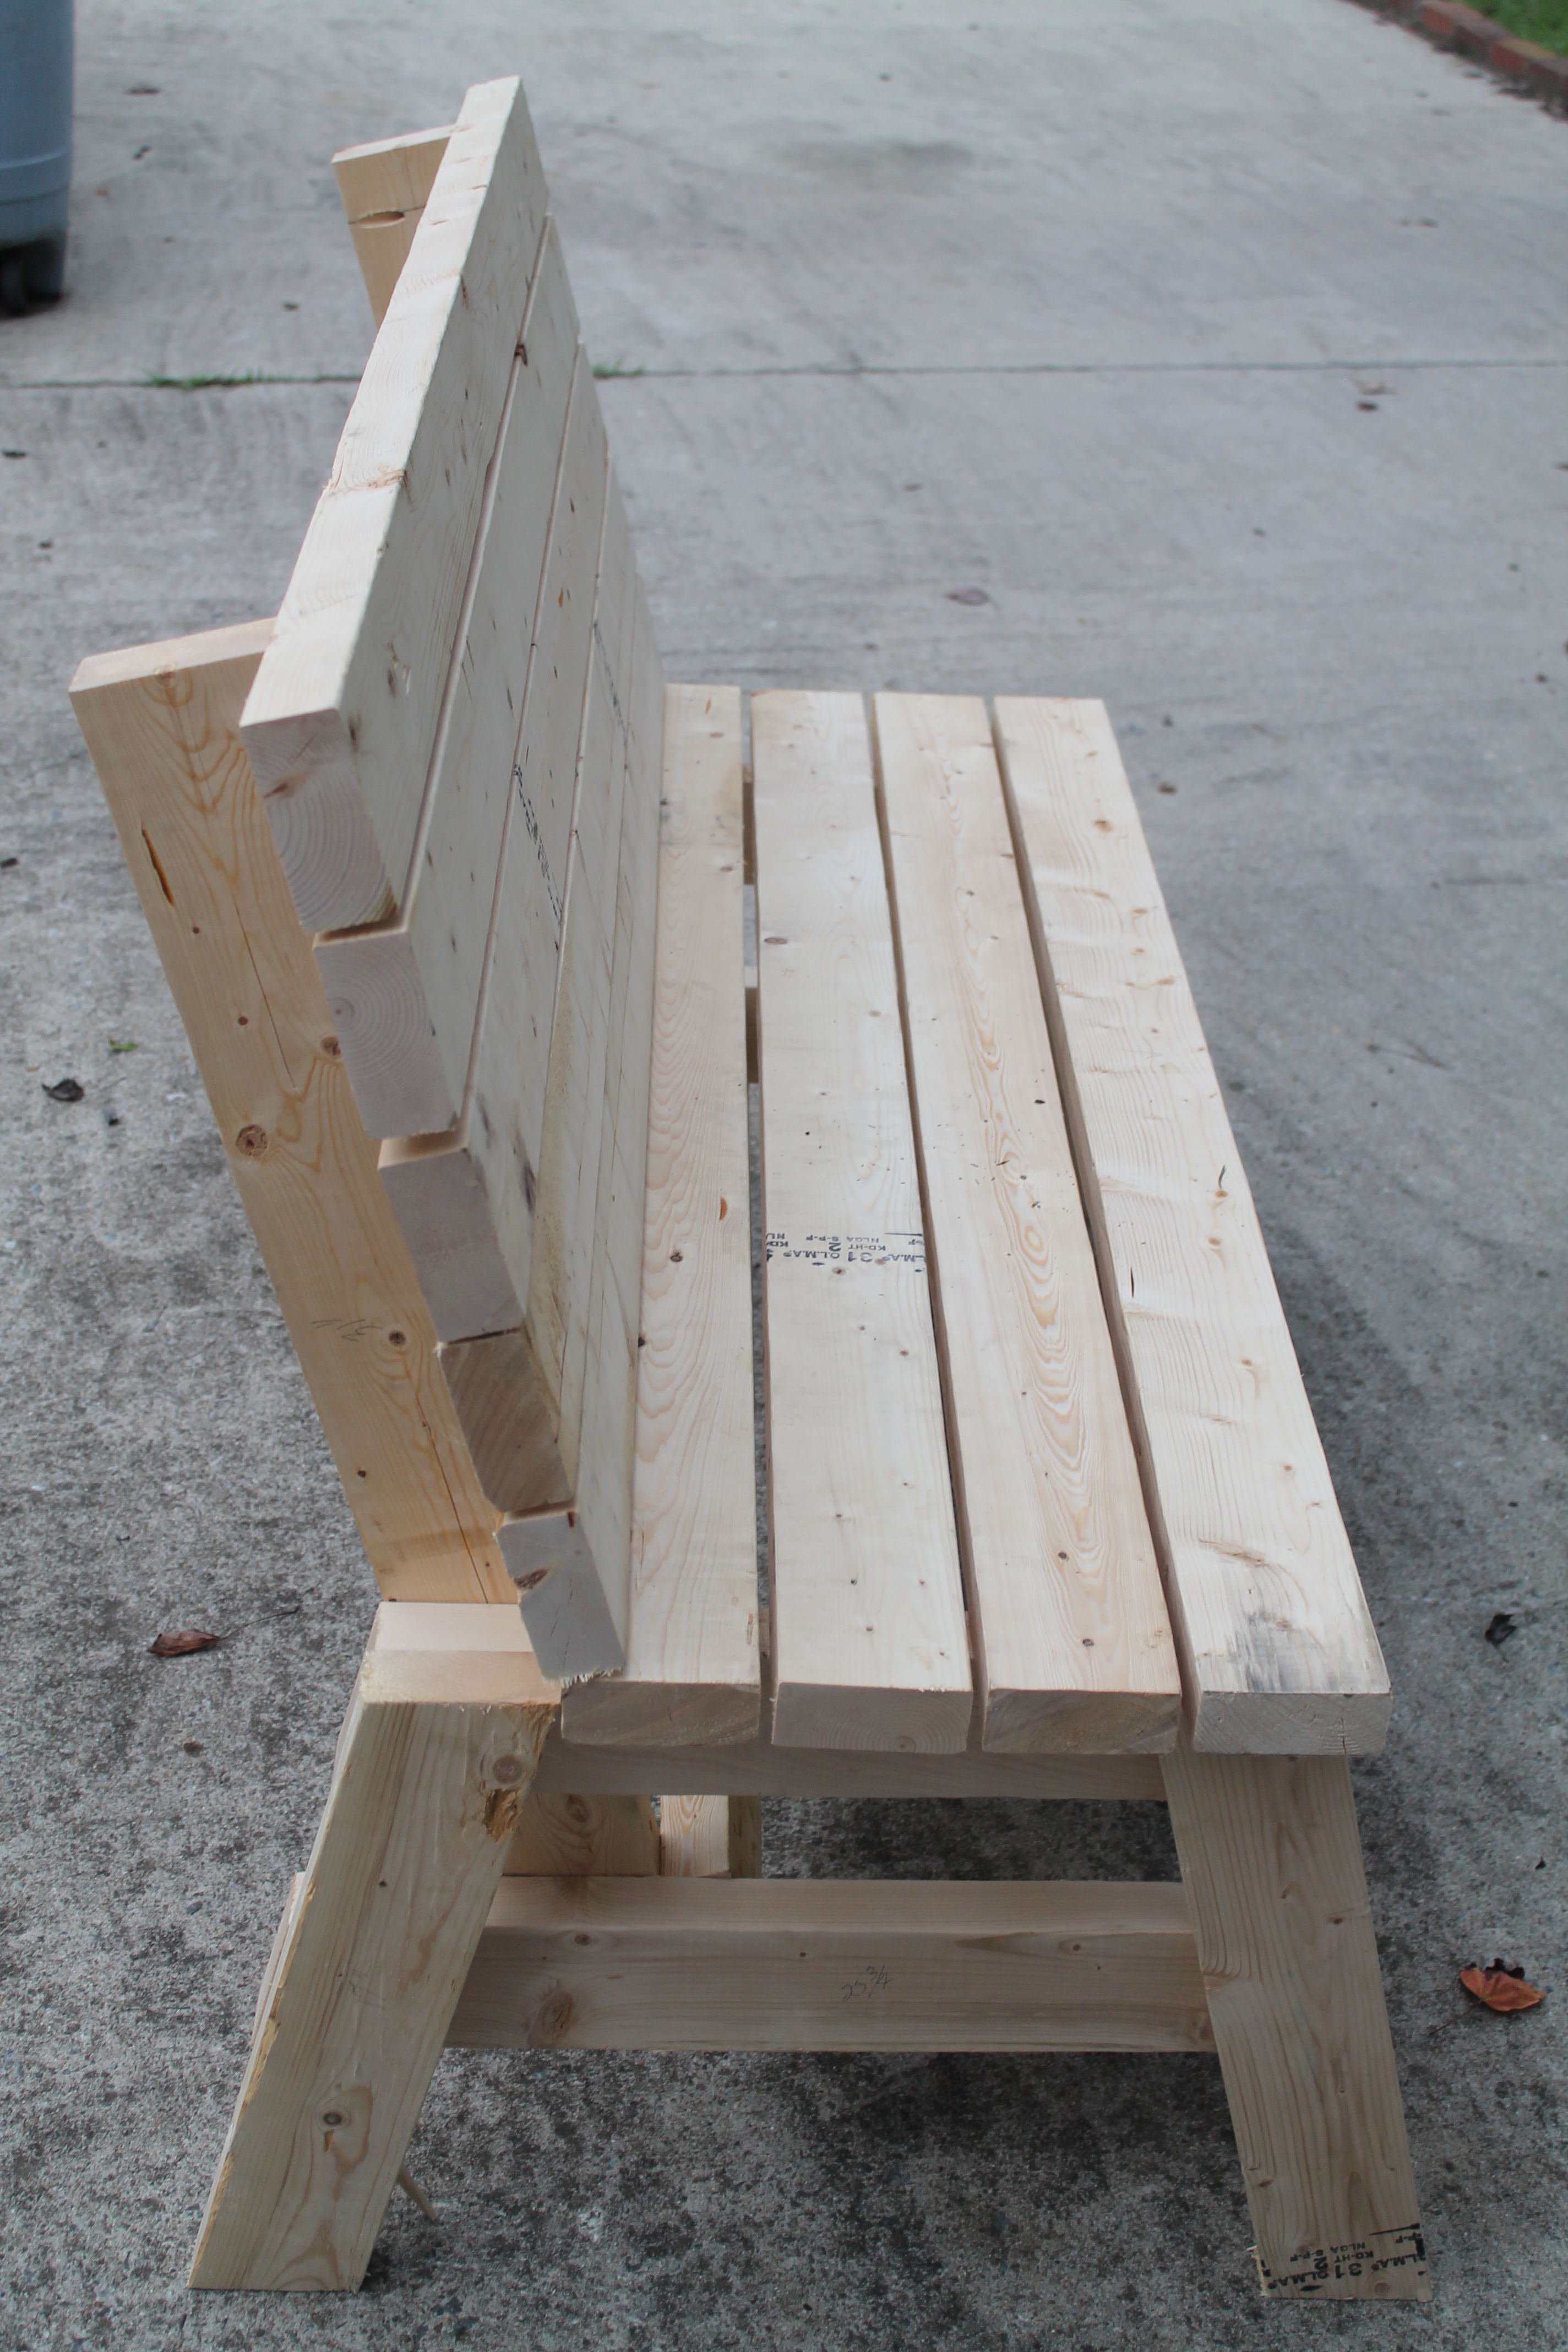
I used the Modern Outdoor Chair from 2x4s and 2x6s plans and slightly modified then to make a 3 seater couch. My cushions(most expensive part) were 24 in x 24 in and purchased from Lowes for $40 per seat. The couch is 79 inches in total length. I also dropped the seat down to the lower level to allow more room for my cushion backs to sit further down into the seat.


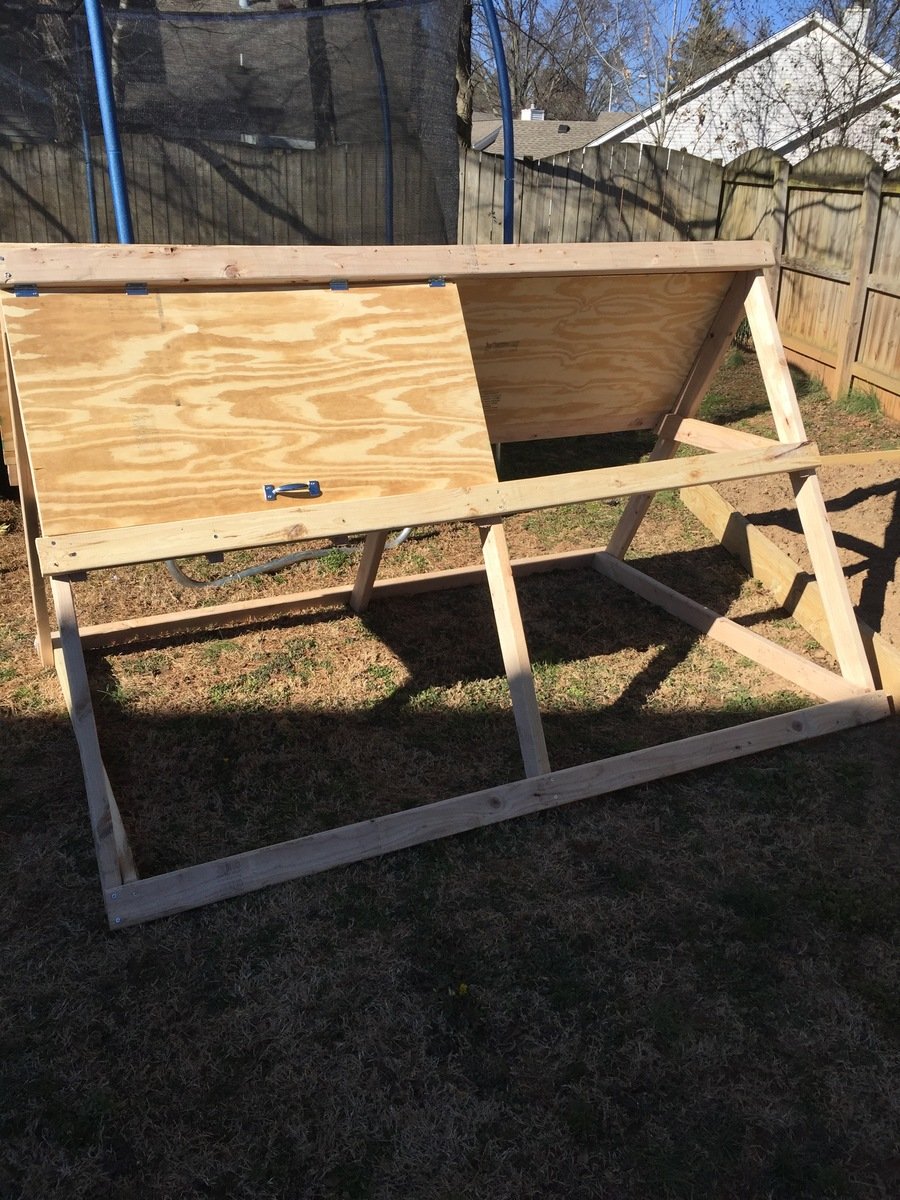
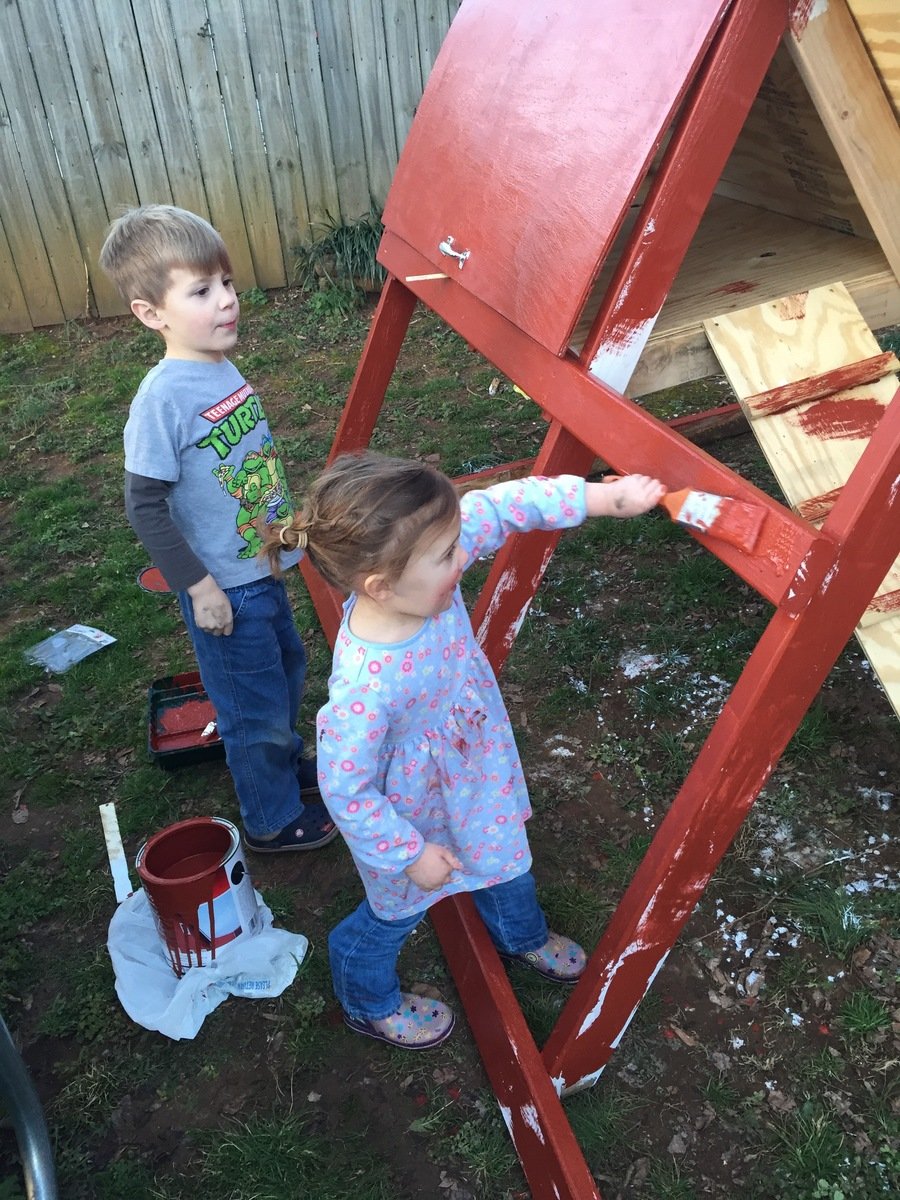
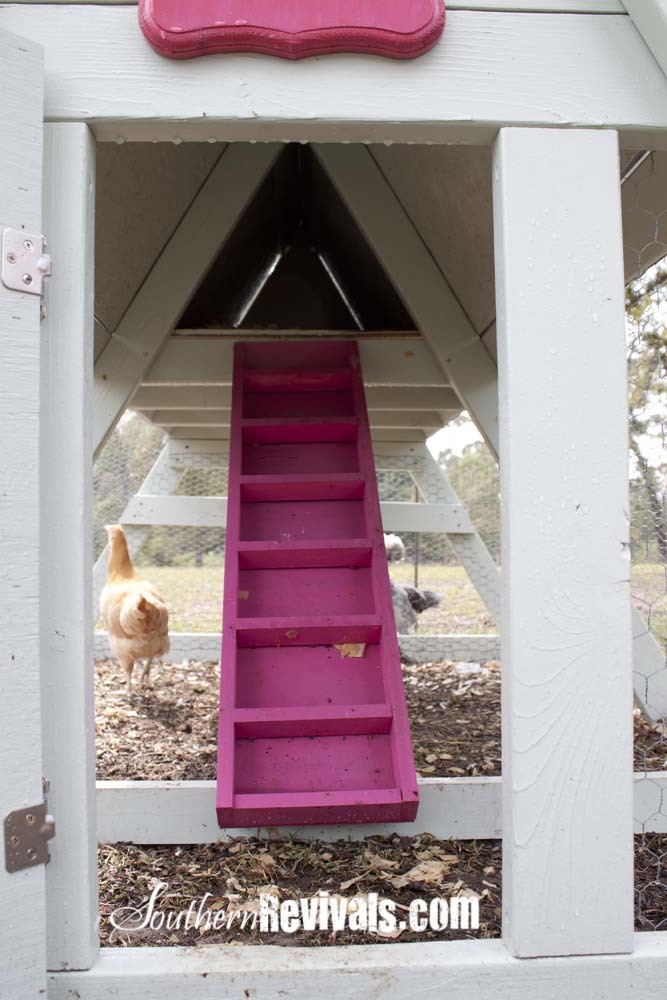
We took Ana's original coop plans and diva'd it up a bit to suit our needs and our climate. We added a pop door and decided to split the roof panels into four, three of which open up. We put the hinges on the top of the roof panels so we could easily prop them open. We also added a brace across the bottom of our ladder for support. Since we added a door I believe our ladder is a bit more steep than in the original plans.
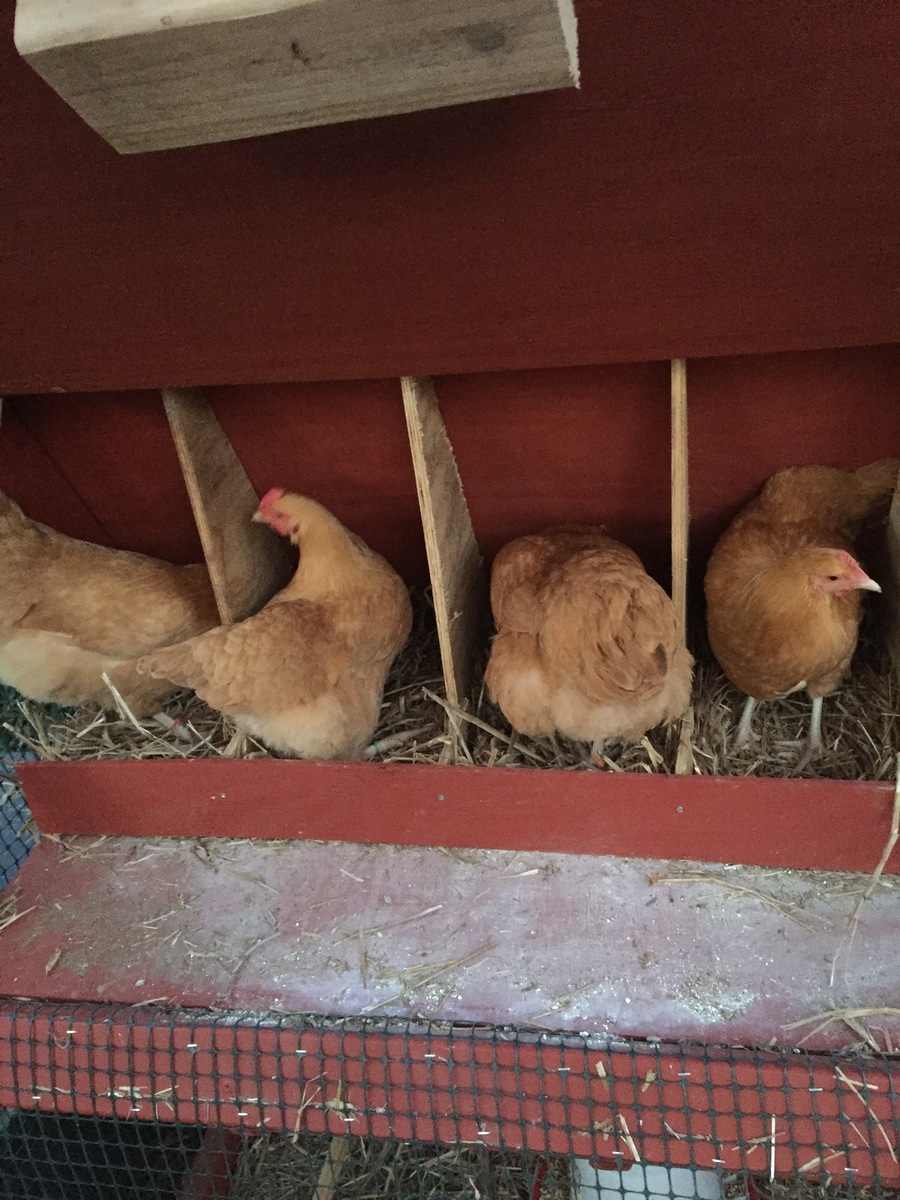
Because we put our hinges on top we added lattice strips inside on the top of the door panels that go just under the 2x4 of the roof peak to keep the rain out. We also used a roof cap for the same reason. We went back and added silicone to the strategic places to prevent water leaking into the nesting box while also being careful not to affect the necessary ventilation.
We used OSB for our roof panels instead of T111 because it's what we had on hand and also because we were going to be painting it.
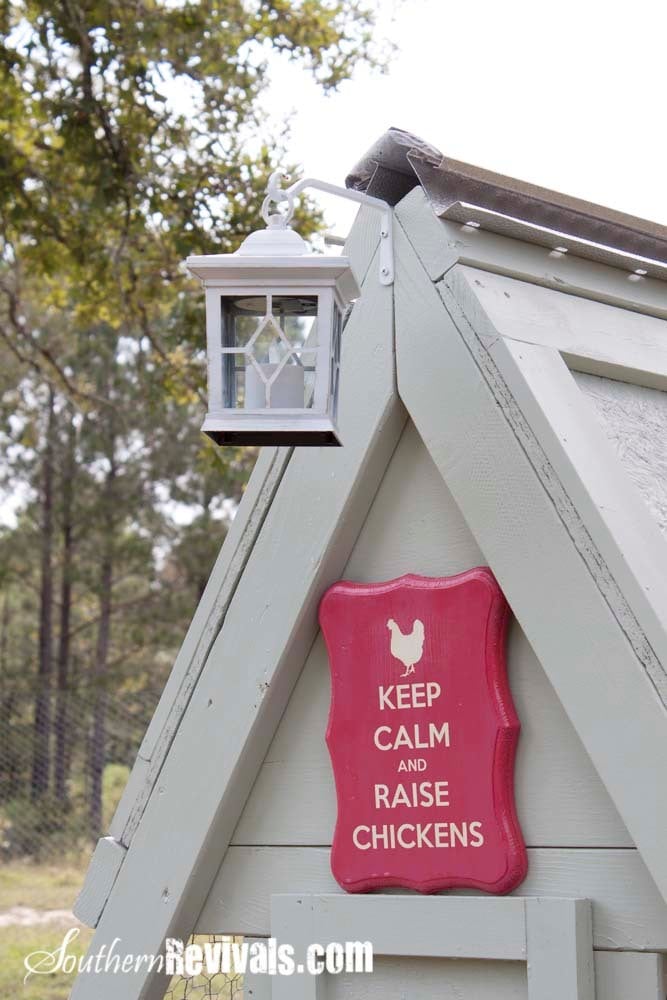
Finally I added handles to each of the hinged panels to make opening easy. And cute!


Wed, 02/27/2013 - 11:11
Love your coop! It's so cute! I need to find a weather vane. We ended up adding a roof cap of sorts - just aluminum flashing really. It does still leak in the nest box, though, which just encourages me to change out the bedding for fresh straw, which is a good thing I guess!
In reply to Love your coop! It's so cute! by anniejw17
Wed, 02/27/2013 - 13:24
Yes mine leaked, too. We added the roof cap and some silicone but that still didn't stop it. So I finally went in and added some screen molding behind the panels in the nesting box. It still isn't quite "leak proof" but it is better. I will share if I figure out how to make it leak proof! Thank You!
Mon, 01/13/2014 - 09:45
These were great plans, thanks for sharing!
I'm new to having chickens so since it's cold now is Massachusetts I'm holding off on getting a couple of hens. The 2 main questions I have are where did you end up mounting the roost? And where did you end up putting the nesting box? I only put a floor on half so was thinking the roost board could be suspended above the ground on the open side. That leaves the 1/2 floor to hold the nest box?? Please any comments on the roost, nest box, watering and feeding systems are welcome.
thx..Bill
In reply to A-Frame Chicken coop Questions by billd333
Mon, 01/13/2014 - 10:03
Hi Bill,
I am actually in the process of writing another blog post about this coop. I have gotten so many questions about the modifications we did and have lived with it long enough to know what I would have done differently. You doing the 1/2 is great and is one of the things I would do differently if we had it to do over again.
I will post an update here as soon as that post is live. In the meantime, feel free to contact me directly at Jamie @ Southern Revivals.com
Thanks!
Jamie
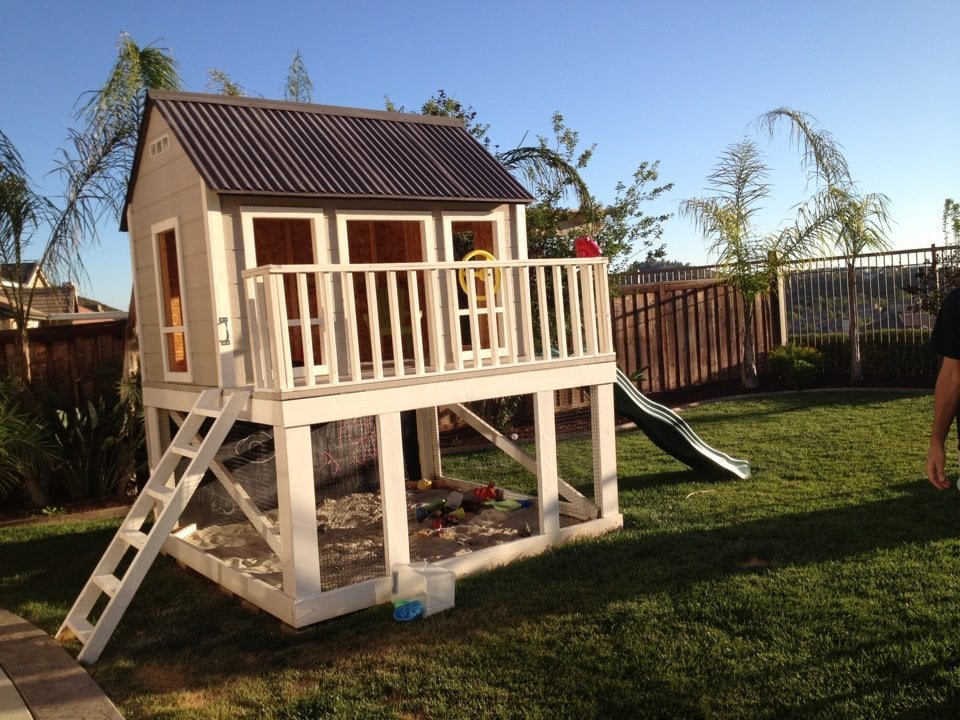
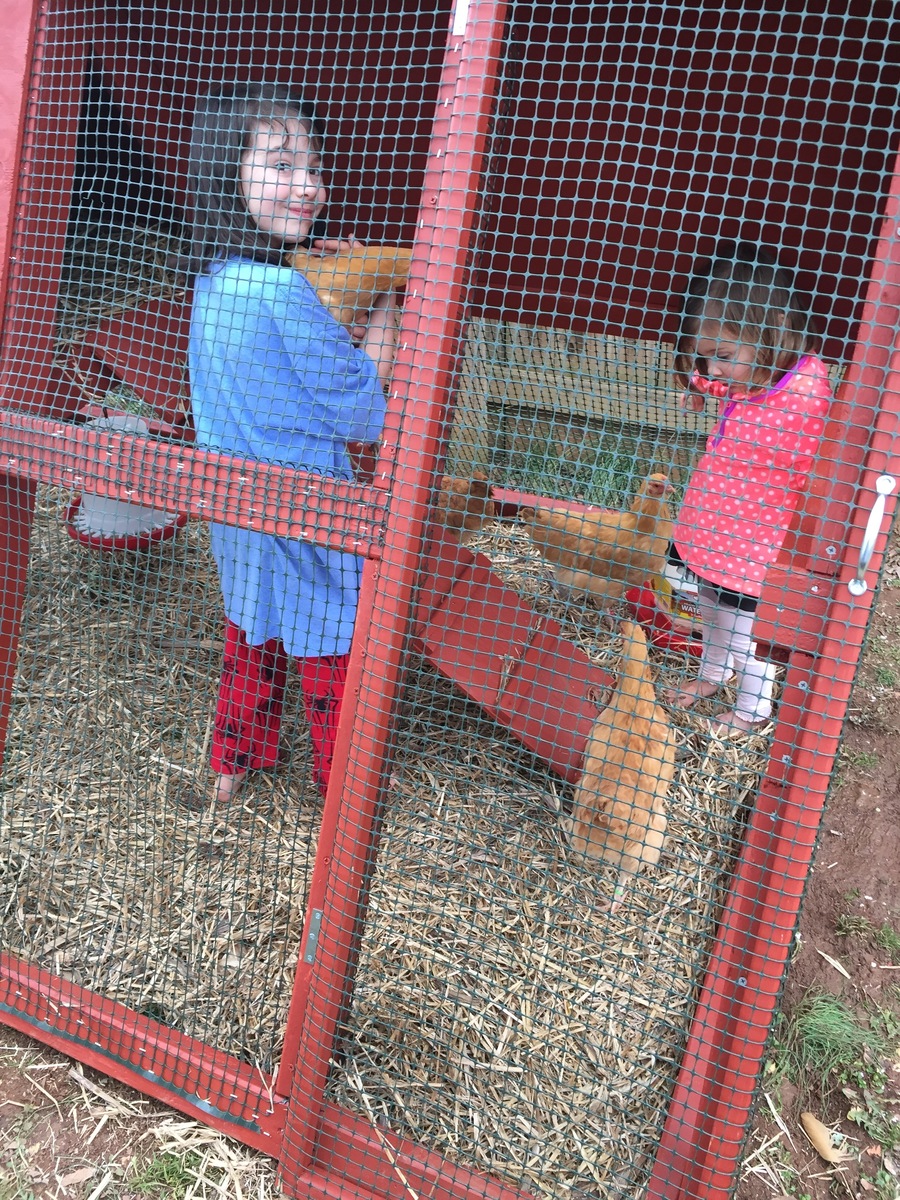
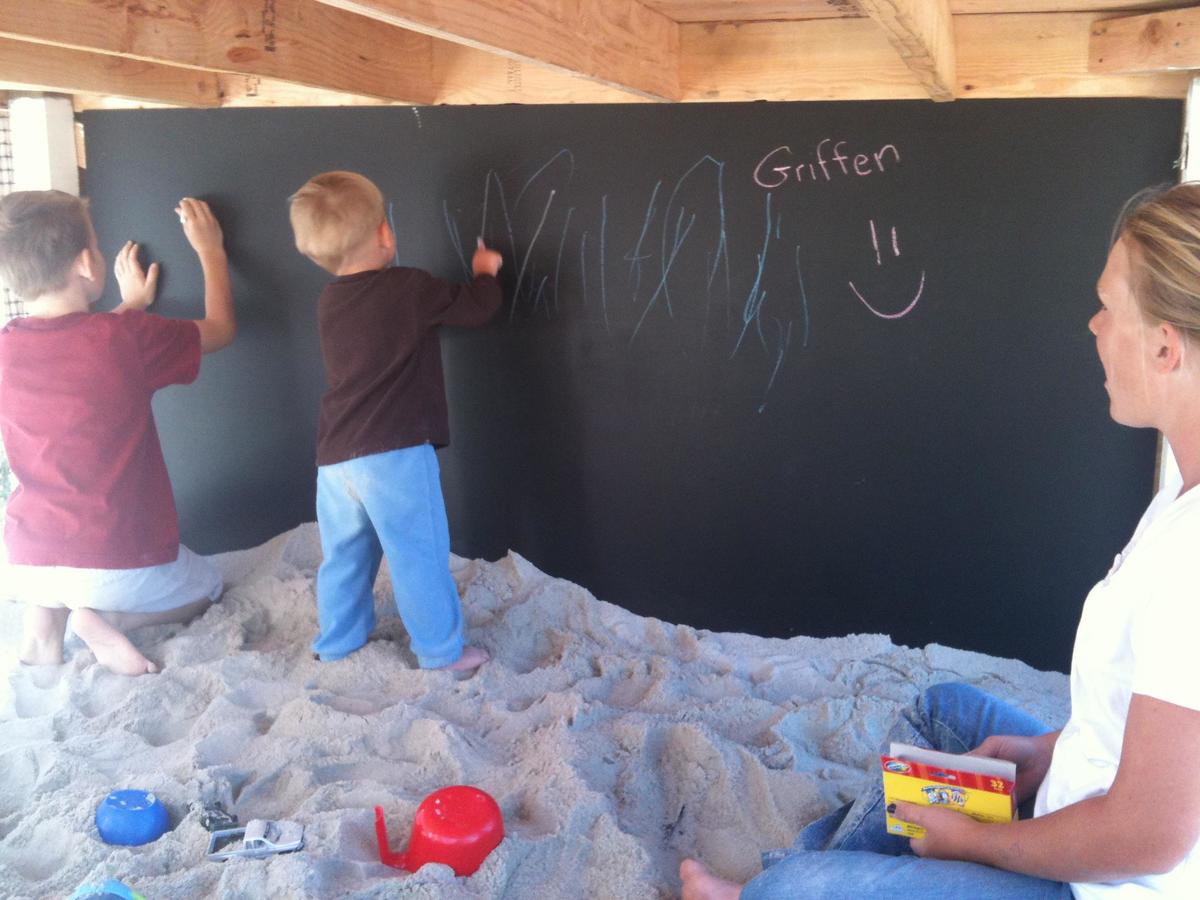
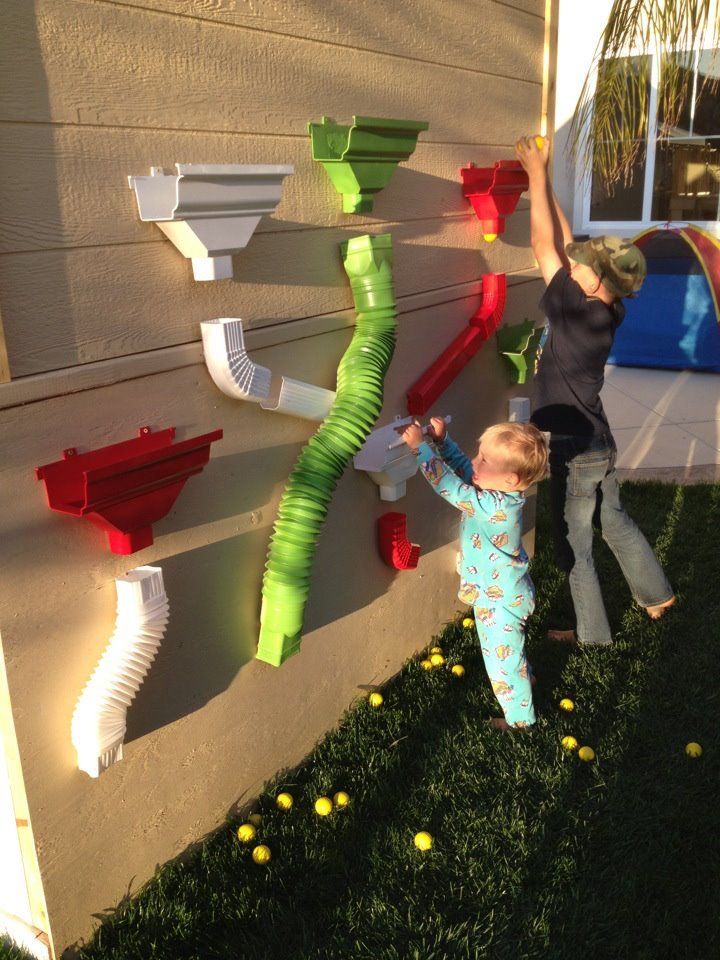
This was so much fun to do! Very easy and I added some personal touches. I made the lower level an enclosed sandbox area with a chalk board on the back wall. On the outside of the back wall, I added a "ball wall" that my kids love. I enclosed the bottom sandbox with plastic "chicken wire" to keep the cats out. :)
Thu, 11/22/2012 - 13:05
This is an awesome build. love the colours too, could you share them with us, including the roof colour. Thanku
Thu, 11/22/2012 - 15:34
Thanks! Glad you like it!
The paint was from Dunn Edwards: Roof was "Louisiana Mud", playhouse walls were "Drifting" and then the white was a snow white from Lowe's.
The slide and accessories were also from Lowe's.
Tue, 04/15/2014 - 09:35
I LOVE this! This is exactly what I'd like to build. Do you have plans you can share with us? I think I'd also like to add a couple of swings on one of the sides too. Thanks so much!
In reply to Love this! by m7hennen
Sun, 04/27/2014 - 08:39
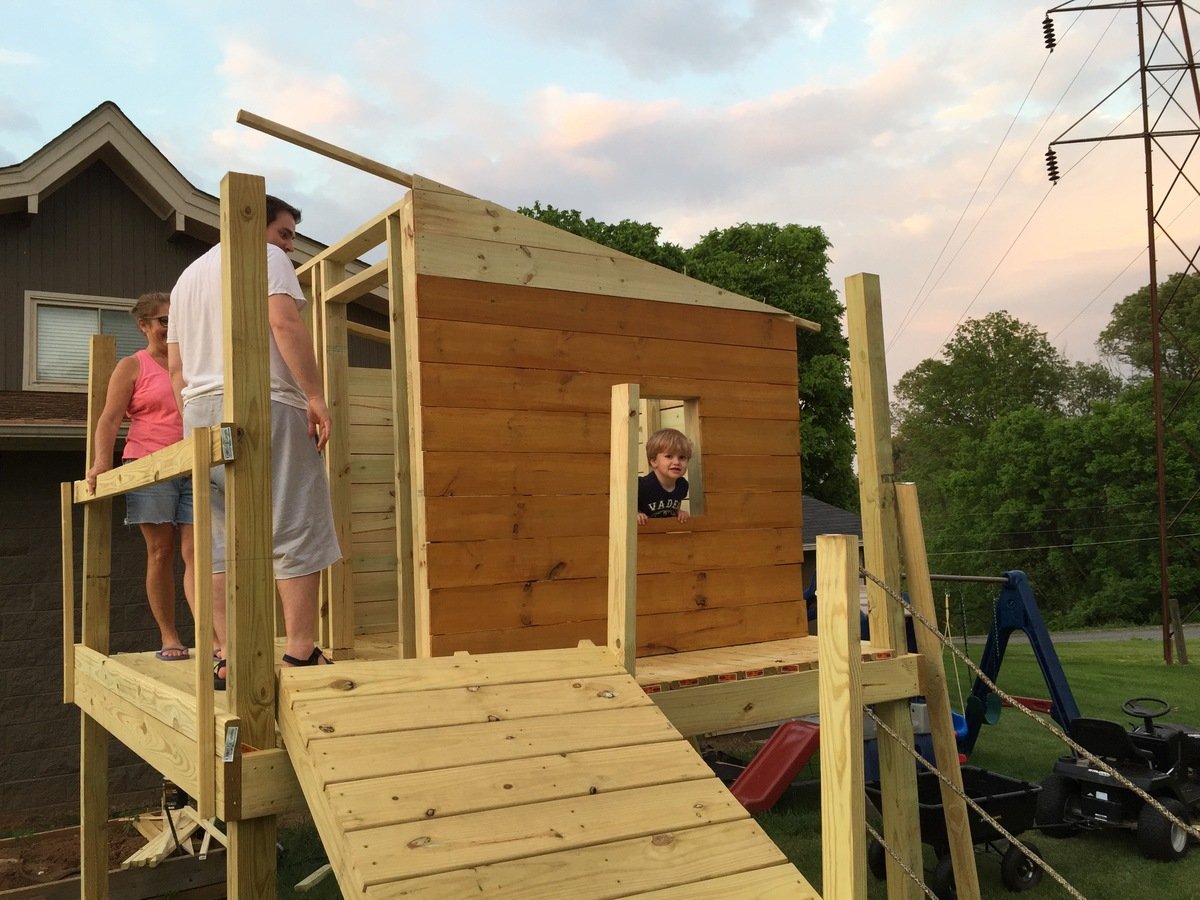
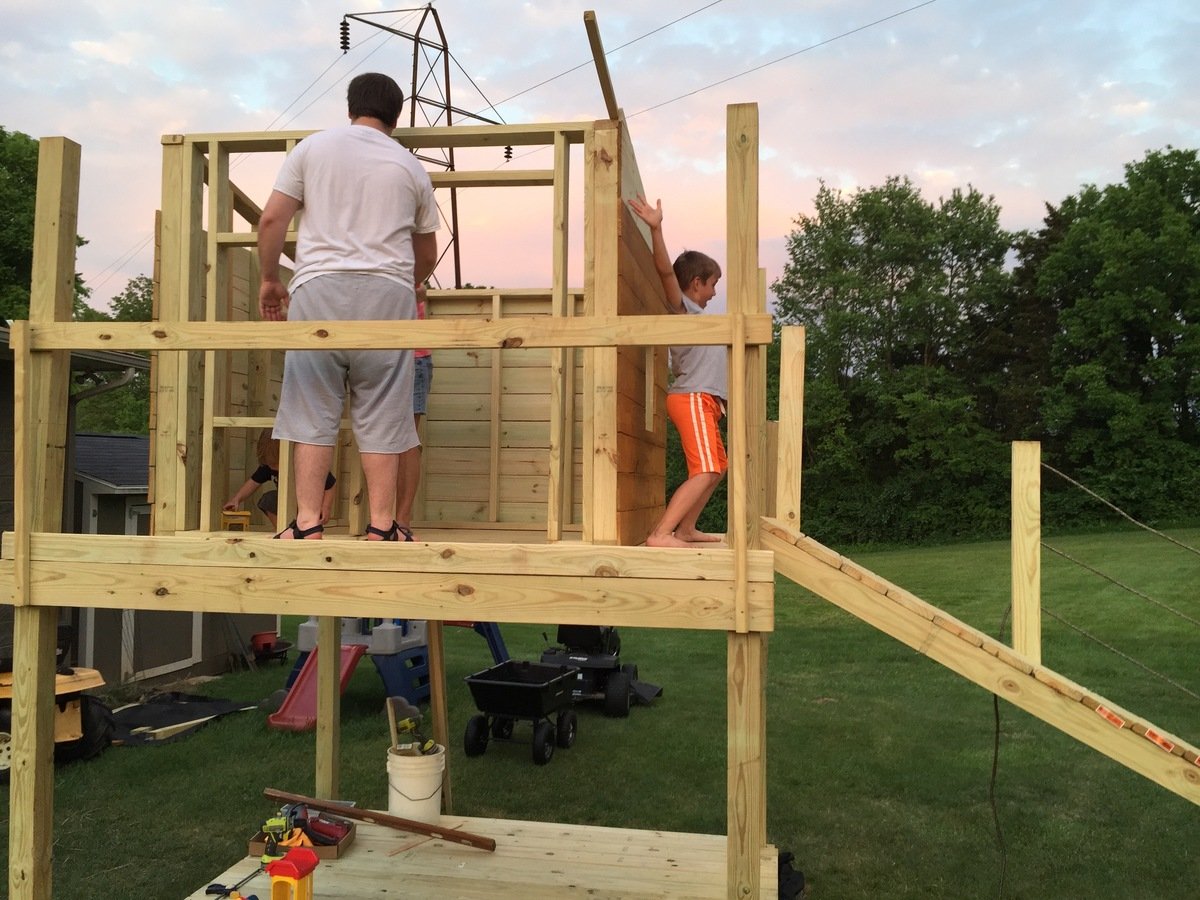
I know I messed with the dimensions a bit but I don't remember exactly. I made the playhouse larger (deeper and taller than original plans) . I also cut the roof line on the deck side for more room. I put aluminum over the wood on the roof and then painted. The Ball Wall was made out of plastic gutter pieces that I painted and we used practice rubber golf balls to throw into them. I hope that helps! We sold that house, so I can't go out and measure it :)
In reply to Plans for Playhouse by Dawnybb
Thu, 05/28/2020 - 15:32
You may not get this as this is an old post. Did you dig post holes? I have older kids and I am thinking about building a plan like this but at a 6ft height. Wondered how much it moves around when there are a bunch of kids on there. The house I will build is also 6 ft heigh.
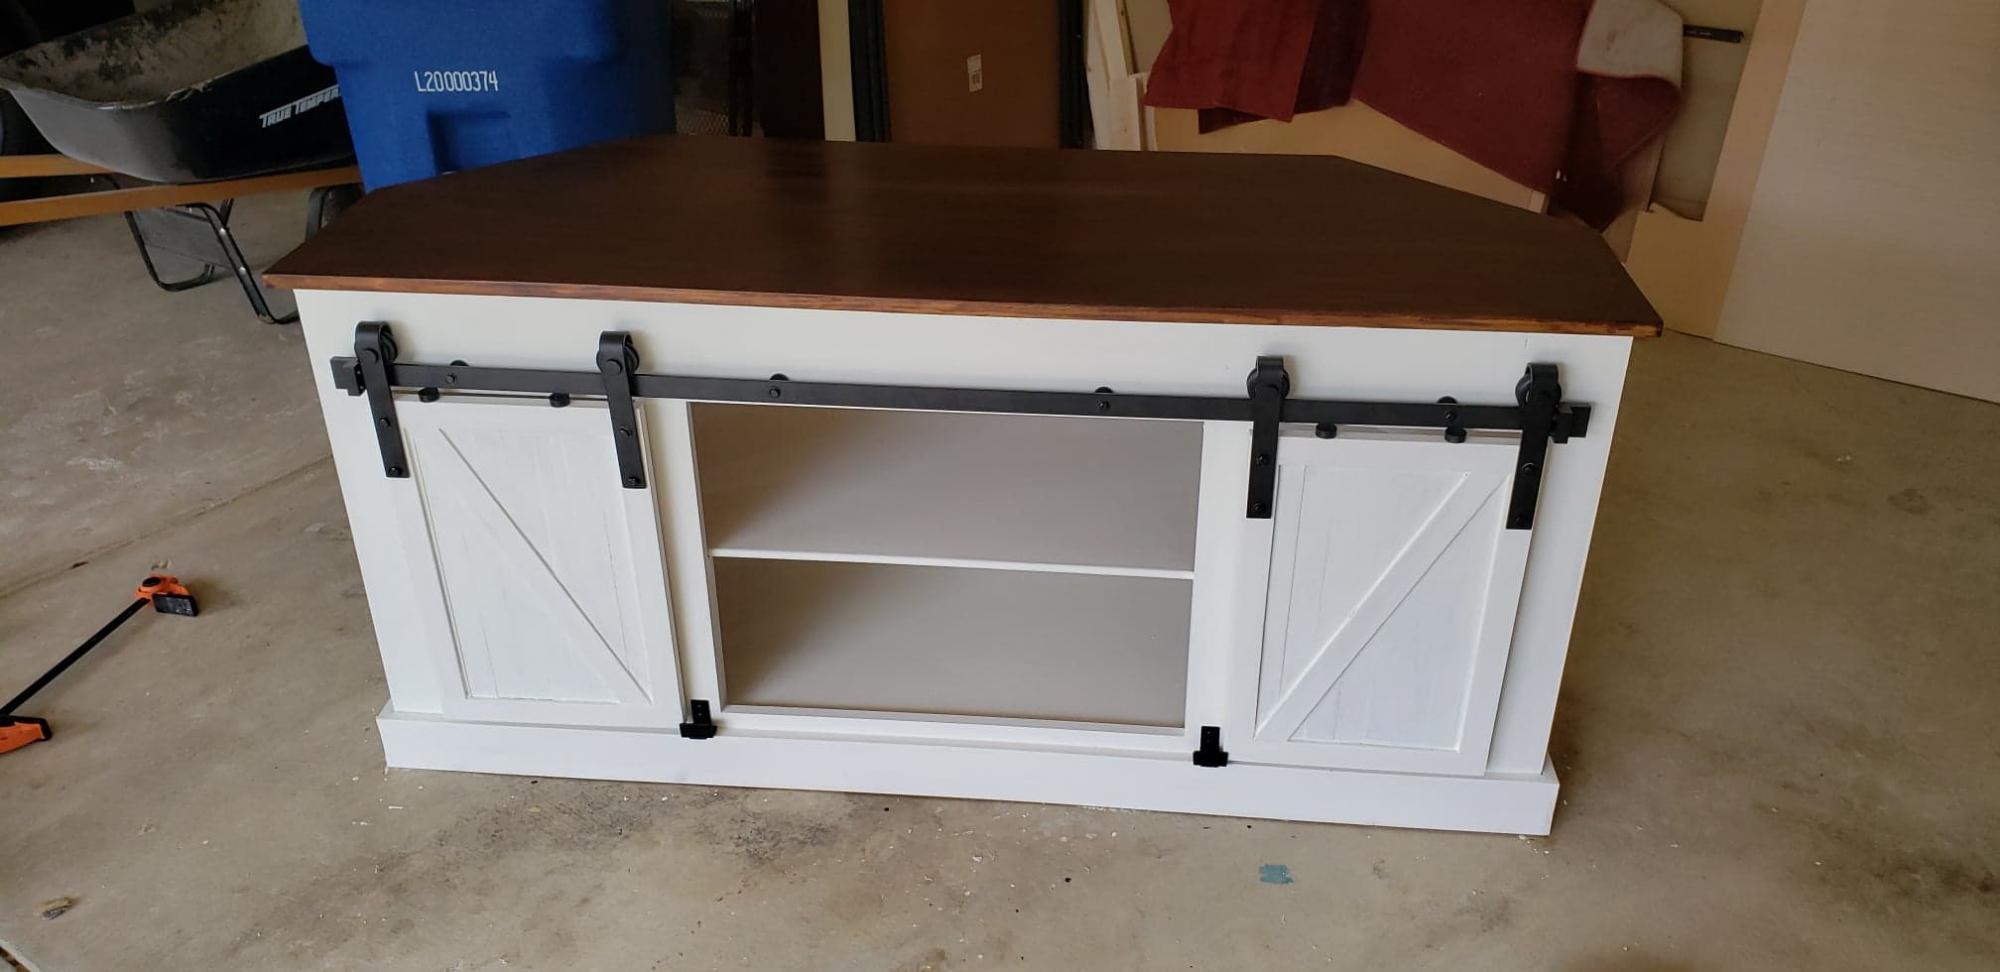
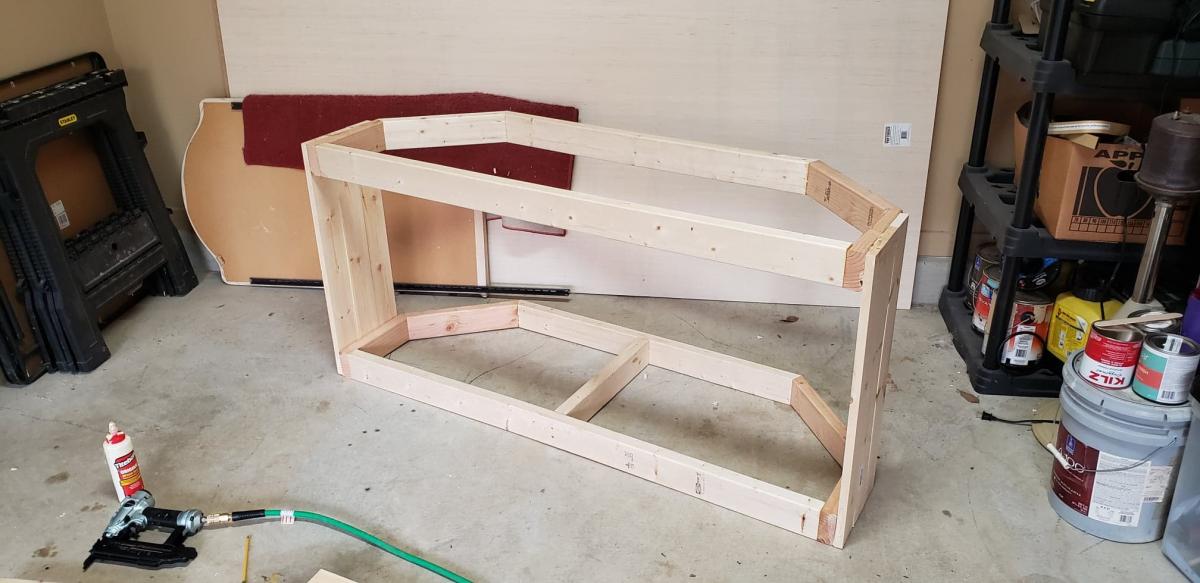
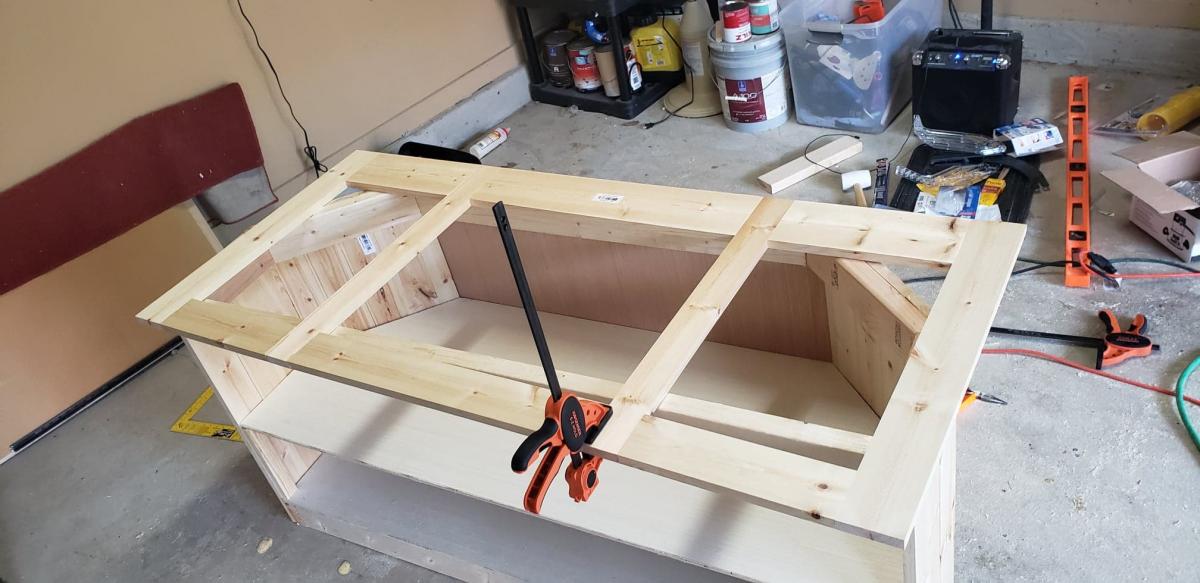
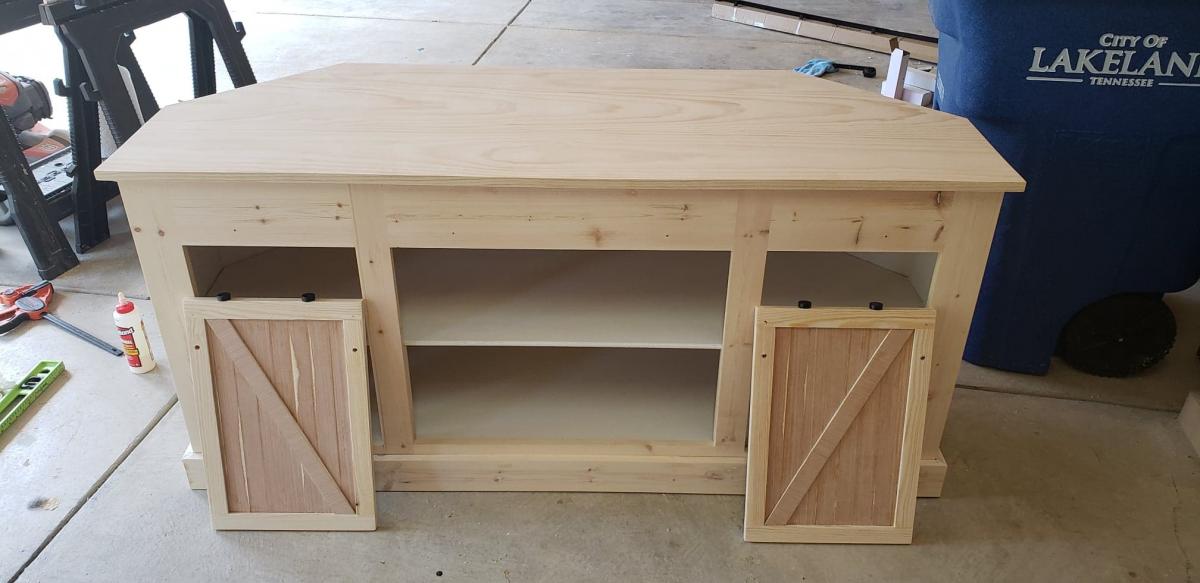
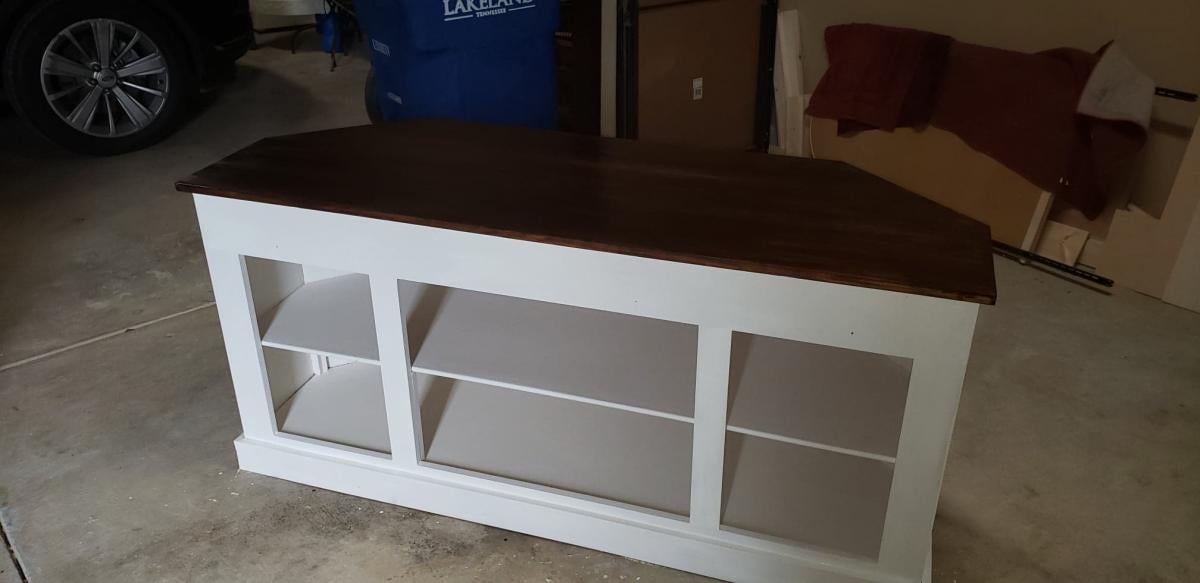
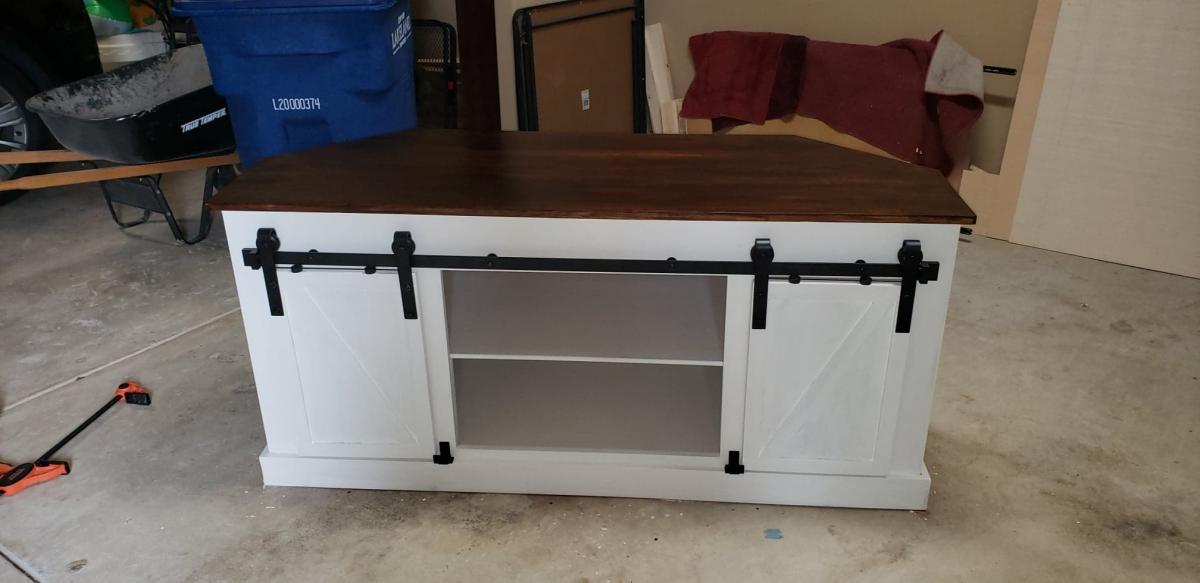
I couldn't find any corner TV stands with the barndoor style that were big enough, so I decided to design and make my own using the Grandy buffet design.

Sun, 05/03/2020 - 17:54
This would be perfect for my house, new look. Also like the idea of the Grandy Barn Door Console, dining room cabinet.
Fri, 03/19/2021 - 10:57
Did you save the measurements/plans? If so, I'd like to get them from you.
Tue, 01/04/2022 - 13:37
I will gladly pay for these plans with the modifications, if someone can send them to me.
Tue, 01/04/2022 - 13:37
I will gladly pay for these plans with the modifications, if someone can send them to me.
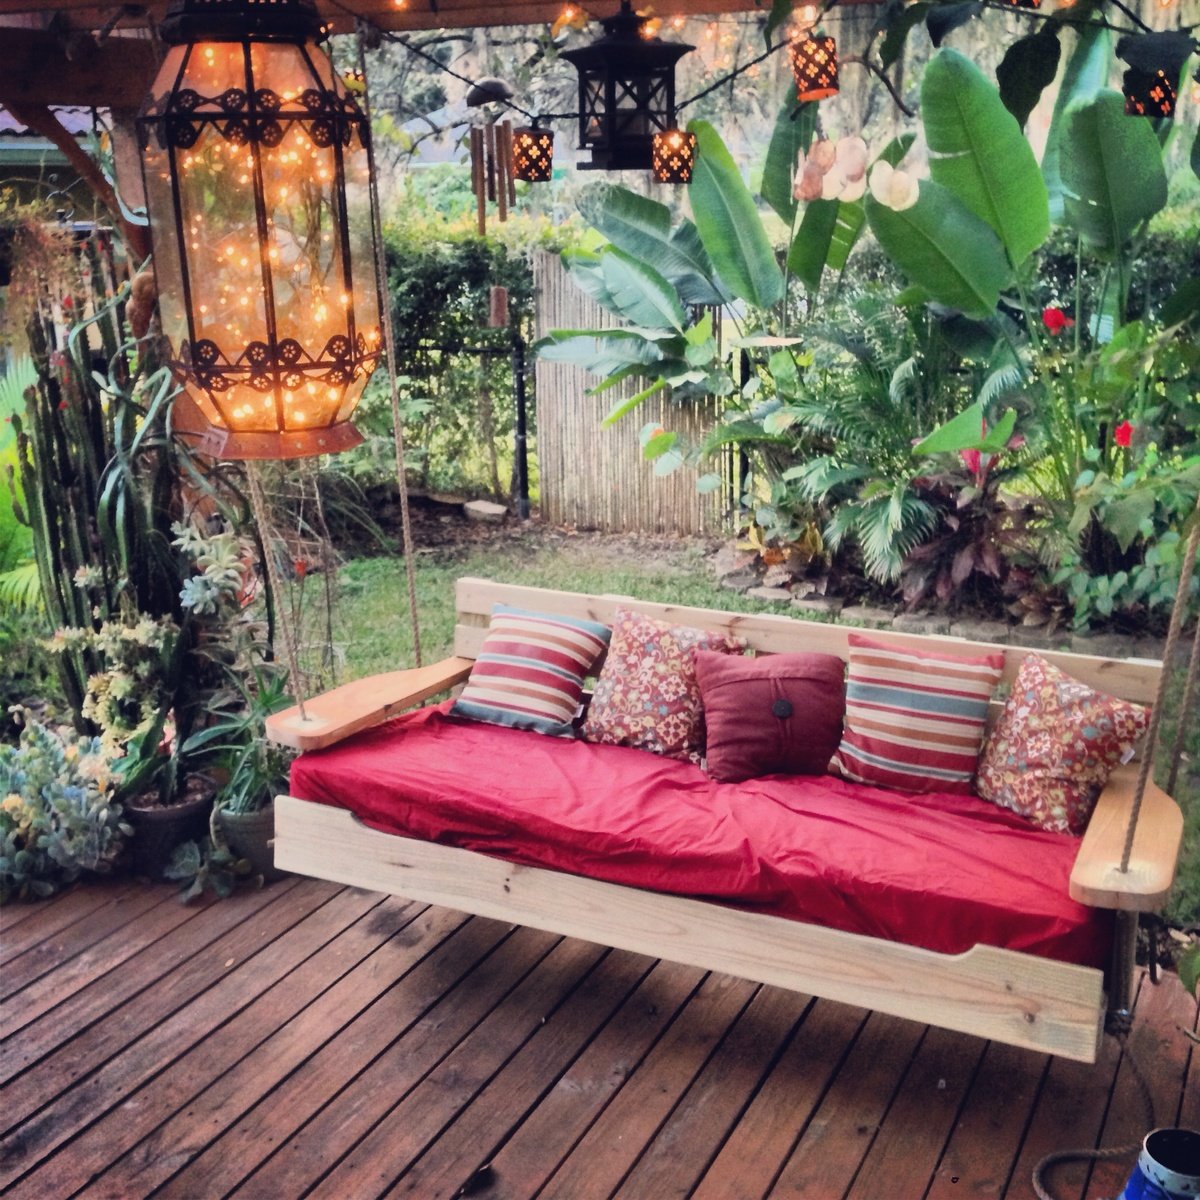
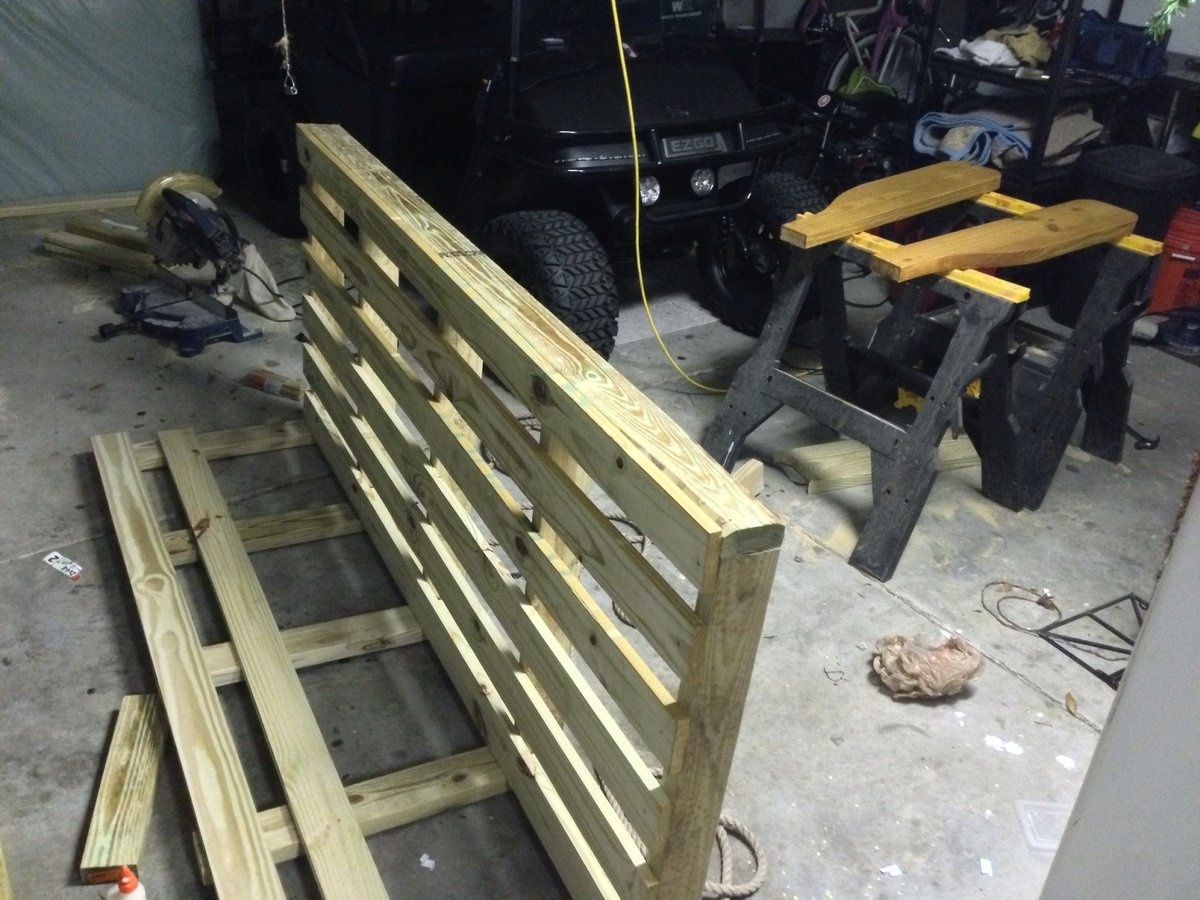
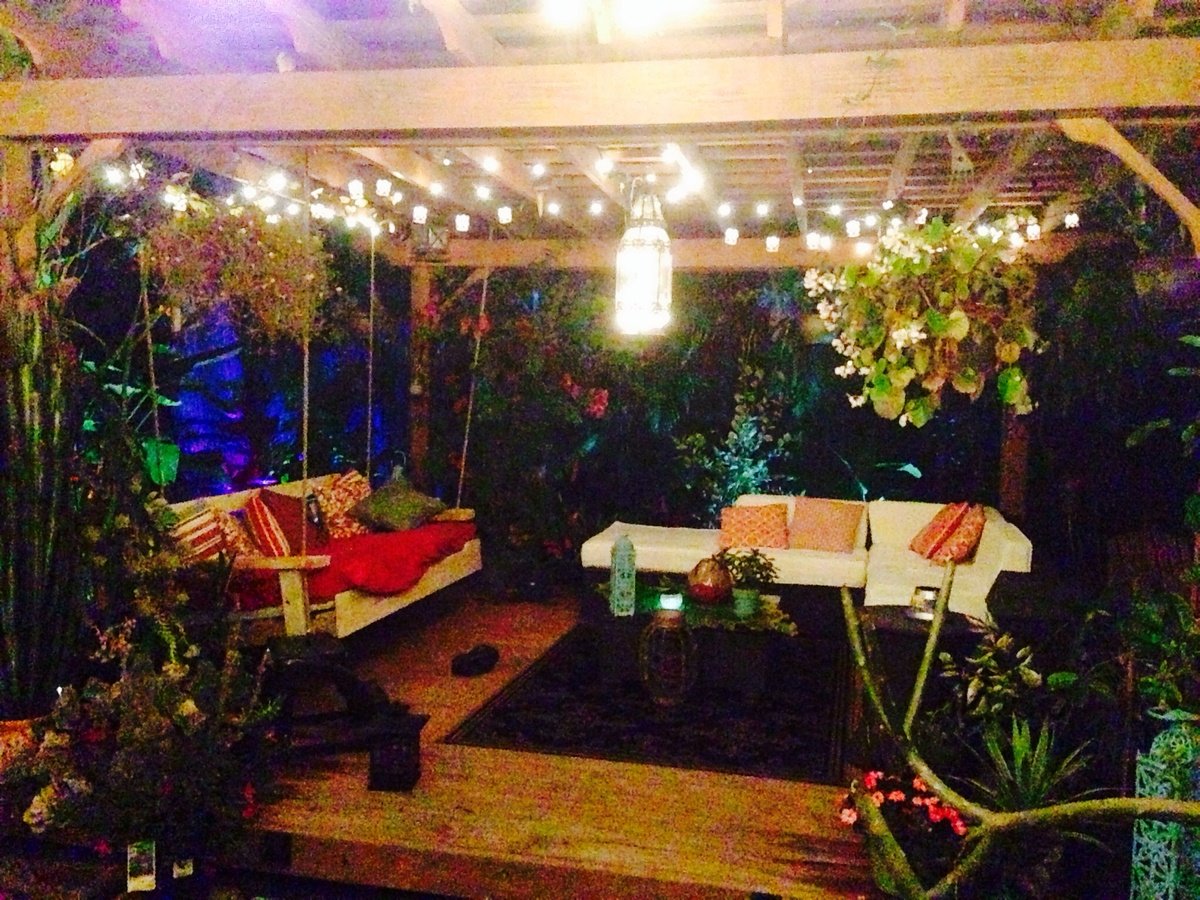
Started off with the original design but enlarged it to fit an oversize single mattress. The mattress cost me $35 from a local faith farm, while the materials came in around $200. I decided to hang under my backyard pergola. Fun and easy project.


Tue, 01/28/2014 - 21:10
Wow this looks so inviting I might just have to make one too! Nice work-- it looks great!
Mon, 04/07/2014 - 22:49
Really lovely! Great job! This will be one of your favorites spots all summer long.
Mon, 07/27/2015 - 22:45
I want this! I just made a couple of plant stands for my front porch. My husband asked me what my next project was, why, a swing bed. (This was only my second project!) I want to put cup holders in those big ole arms! We have a house at the beach in South Alabama, so, you gotta "hydrate." This is an awesome swing. I can't wait to do mine...pillows to rest on, one foot on the concrete pushing me in a slow swing. Cold beverage in my hand or in my cup holder. Yep, southern girl has a new project. Love it!

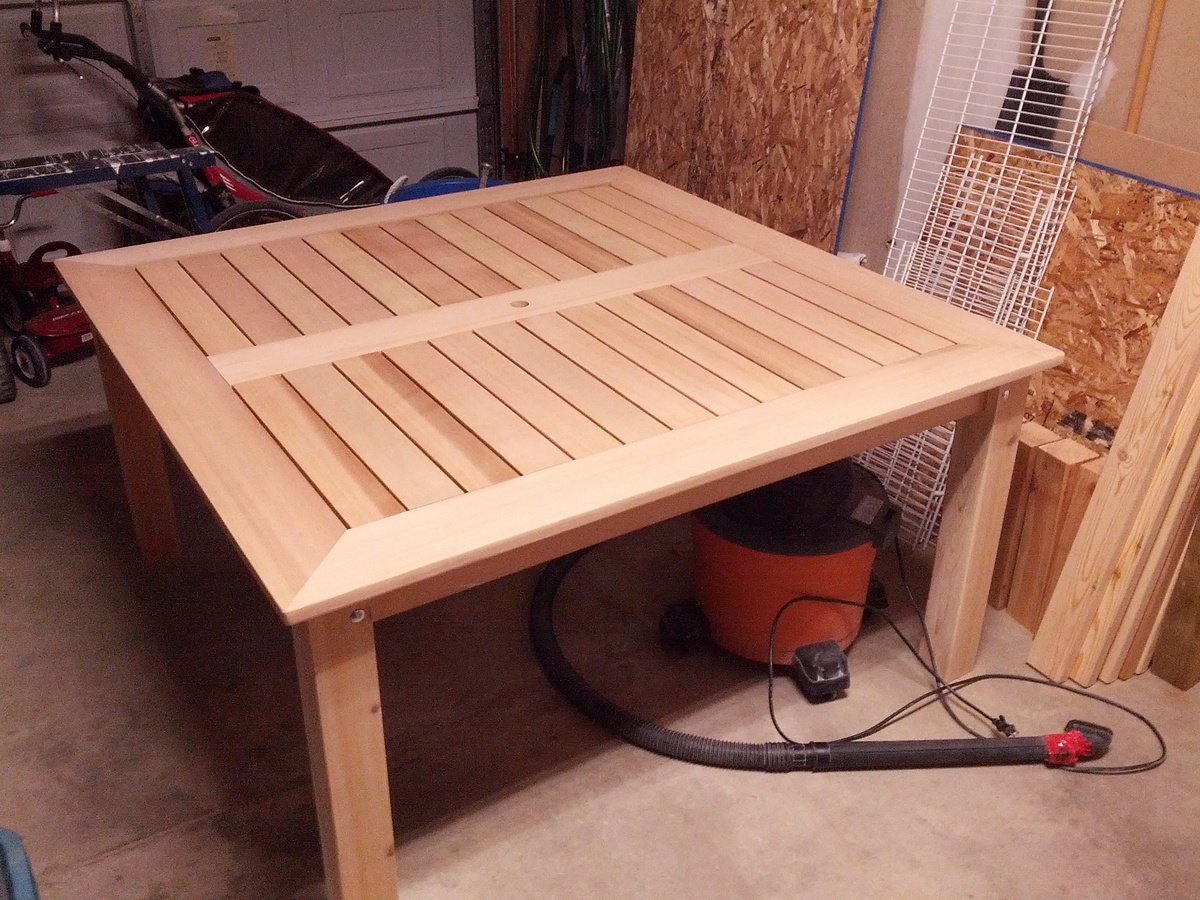
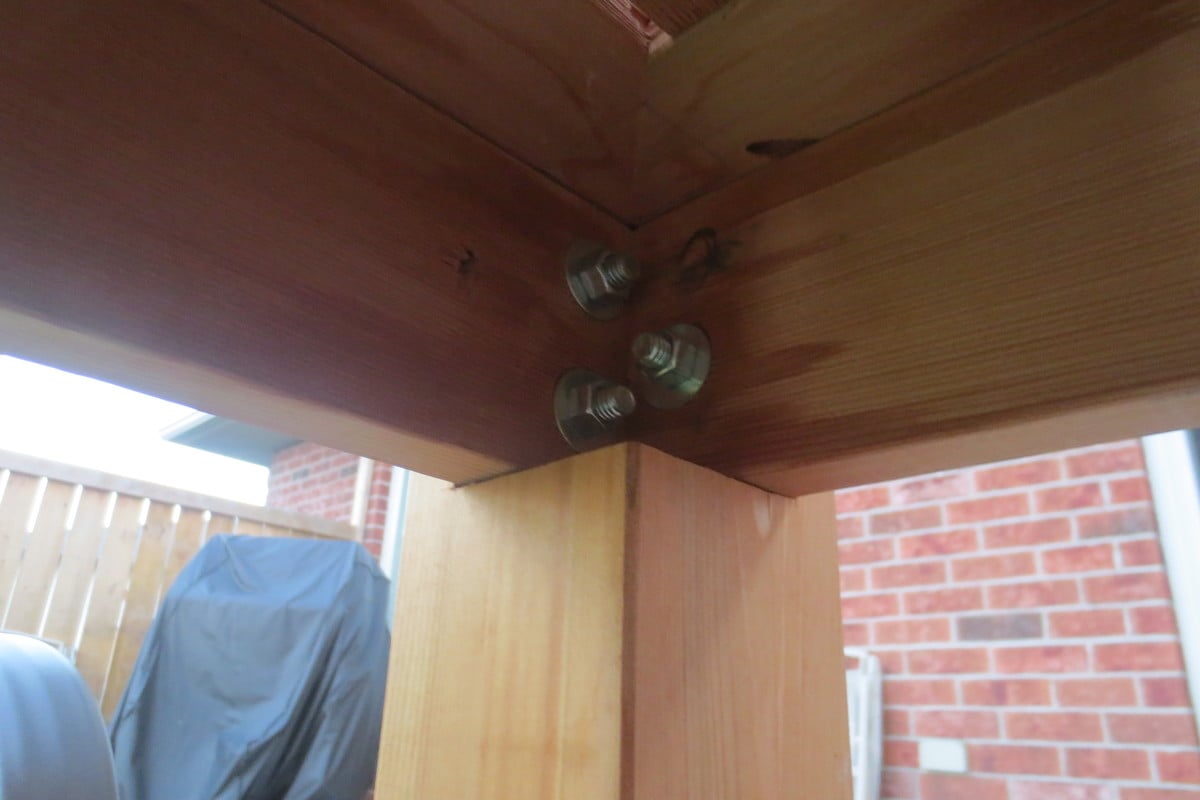
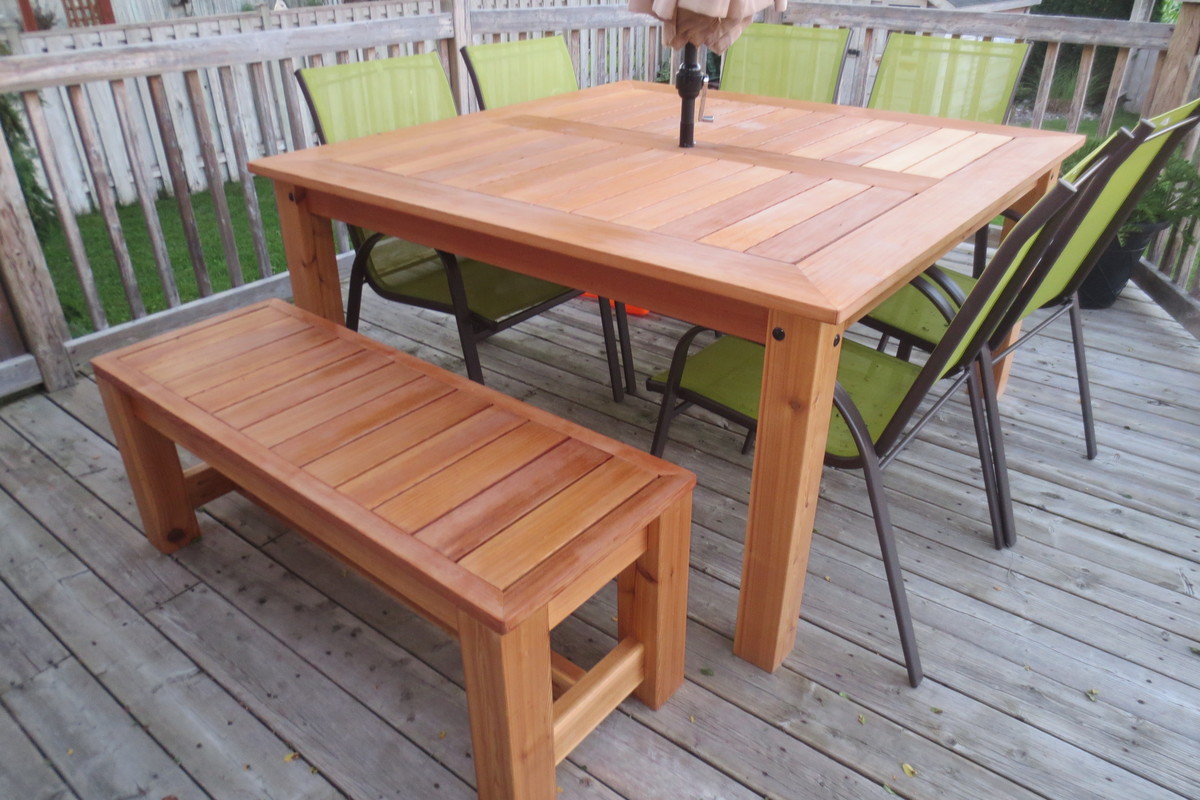
I grabbed this idea from one of the brag posts linked off of Ana's easy dining table post. The entire table top is made from clear Western Red Cedar. The legs are made from 4x4 cedar fence posts (the clearest I could find). The table top is 5ftx5ft. All the joints were made using Kreg's pocket hole kit.I did change a couple of things from the original picture that was posted:
1. I notched out the 4x4 cedar legs to accept the main frame of the table top (which provides the best support possible) and also bolted though the leg and frame. Not to mention it gives it a more finished look than simply putting the legs inside the frame and bolting through.
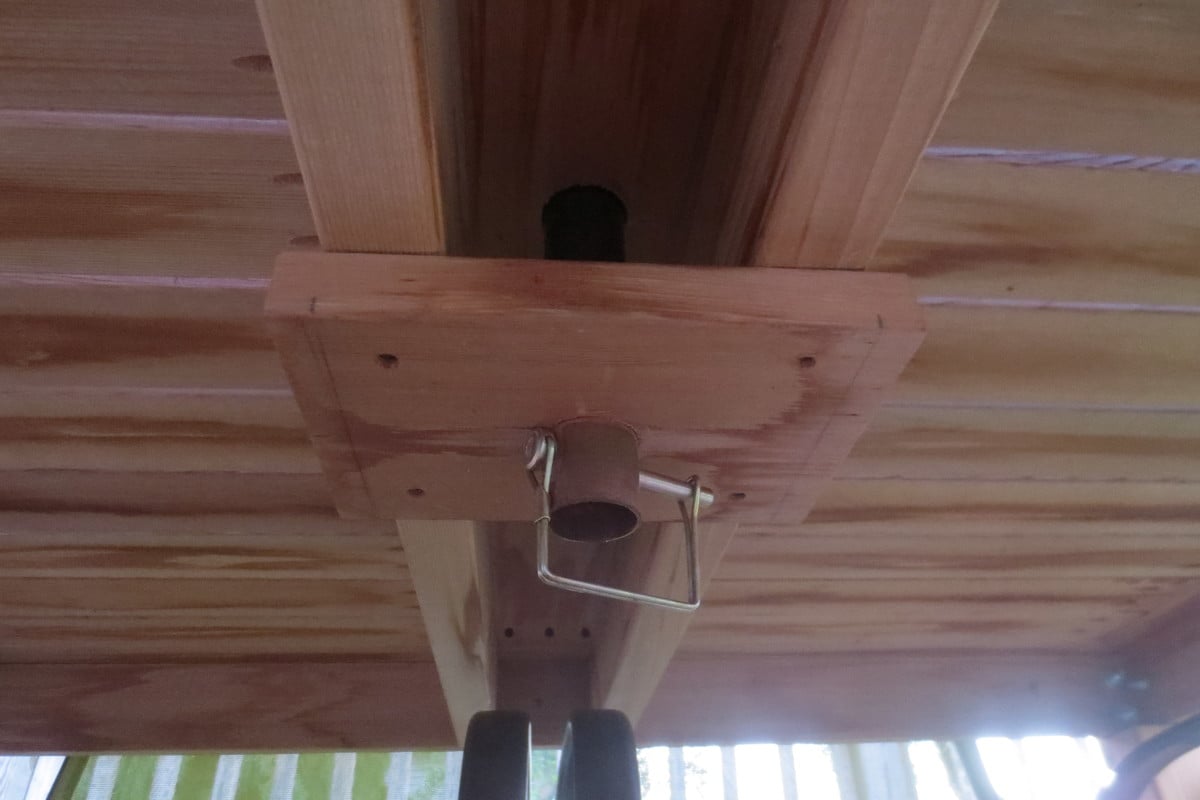
2. I also made a custom bracket to support an umbrella so that I did not have to have bulky umbrella stand under the table (see attached pic)
I finished the table and bench with two coats of Teak Oil. I am not convinced this was the best choice, but it sure did look awesome the first month after it was complete. The colour of the cedar has faded a bit now that it has been out in the elements for two months. Any further suggestions on great finishes that hold up to the weather are appreciated.
Thu, 06/30/2016 - 20:50
I really love this table. Could you provide more details on construction, or post more photos of under the table? What is the table top's thickness? Looks like you used 13 boards 1x4 and the outside boards seem to be 1x8 but I'm not sure. Also, how did you attach the table top to the base ?
thank you, great work!
Michael

I showed my wife the Laundry Dresser featured on Ana White's website and she asked if I could make one for her, but not quite so tall. I also turned the orientation to fit our laundry room space. I used primarily oak from recycled pallets to build the Laundry Basket Dresser. She wanted a work space on top, so folded laundry, empty baskets, etc. all have a temporary resting place depending on the day. From start to finish, it took me about 6 hours. She plans to stain the piece at some point, but its already in use, so I'm not 100% sure that will ever happen until we move or something. ;-) Great idea and laundry room organization!


Sat, 09/08/2012 - 17:39
Great job on this!! I love the open sides!! Thanks for sharing. :-)
Mon, 09/10/2012 - 10:22
I love the open sides, plus it makes it much more feasible to build with scraps repurposed wood, which I love. Thanks for the inspriation
Sun, 10/19/2014 - 06:16
I have a pallet sitting against the garage that would be perfect for this
Looks fab, great job.
Fri, 01/09/2015 - 12:27
Hi, I really like this project but was curious what size laundry basket you are using in the project?
Sun, 06/14/2015 - 20:16
Soooo I made this according to the measurements and no laundry basket I find fit. Kind of dissapointed in the fact that this cool thing I just built doesn't have any baskets that will fit it. Any advice on finding a basket that fits?
Fri, 07/10/2015 - 20:14
Same here. No basket fits. Did you ever find one?
Fri, 07/10/2015 - 20:56
I think the idea is to build it to fit the baskets you have or buy some and build around them.
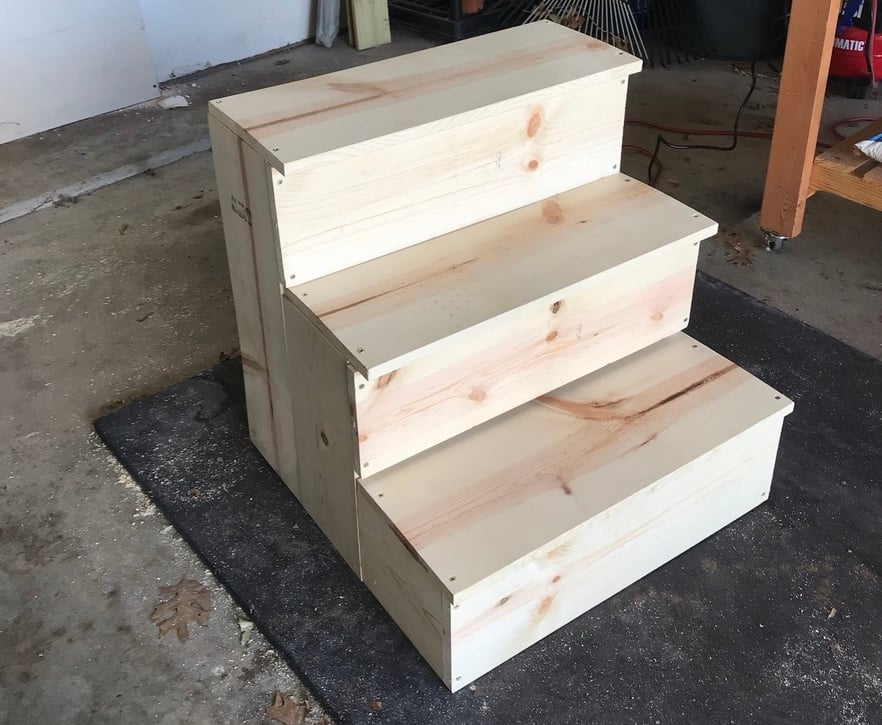
I needed sturdy stairs for my 2 60lb dogs. My bed is 33 inches from floor to top of mattress. So, this is my very first project completed by myself! Custom size pet stairs 24inx24inx24
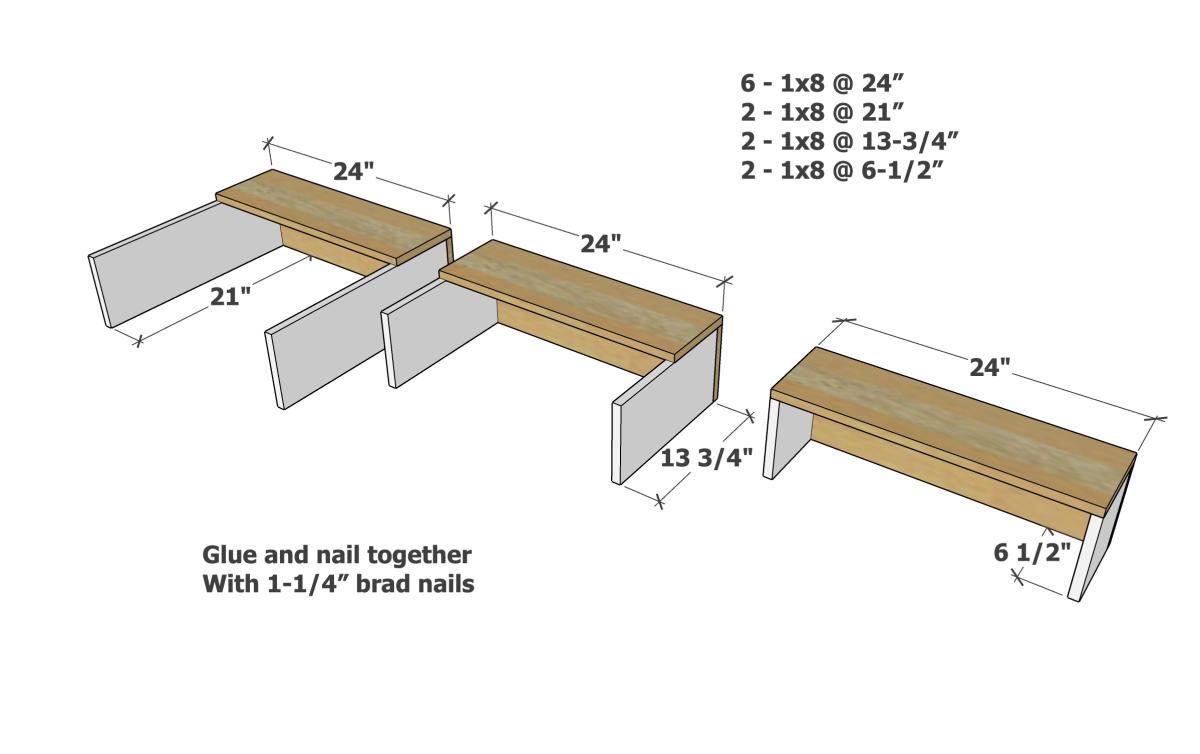
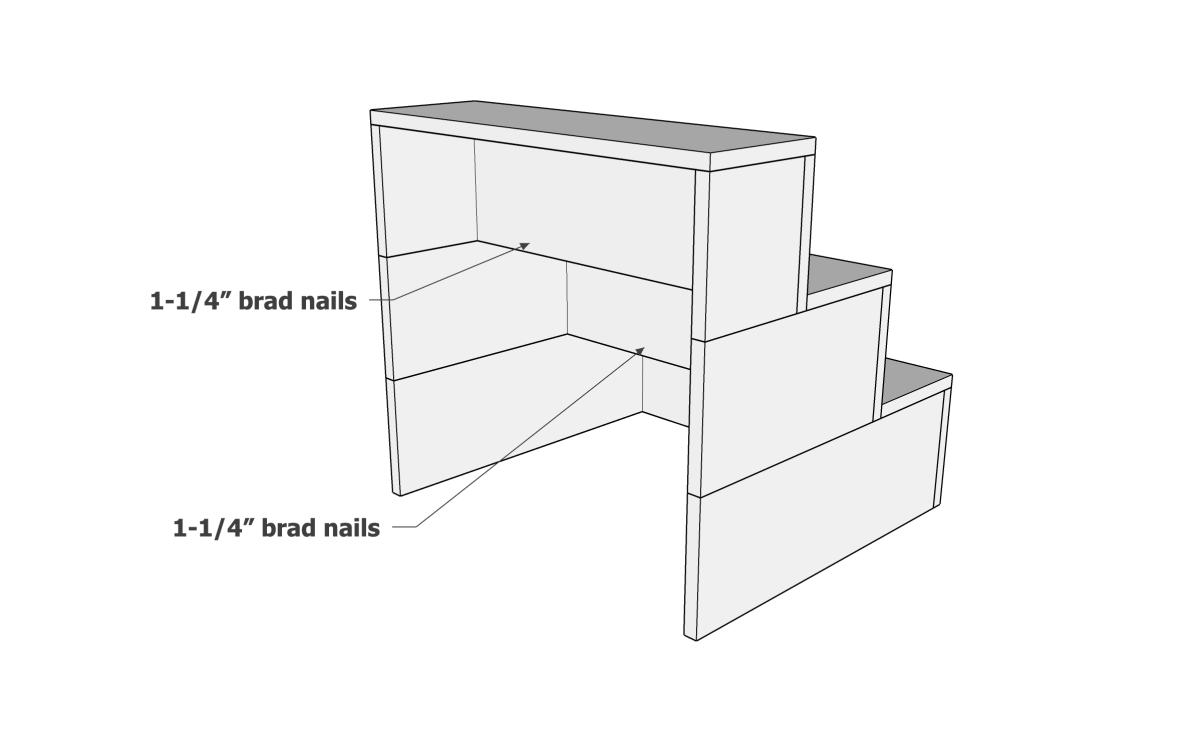
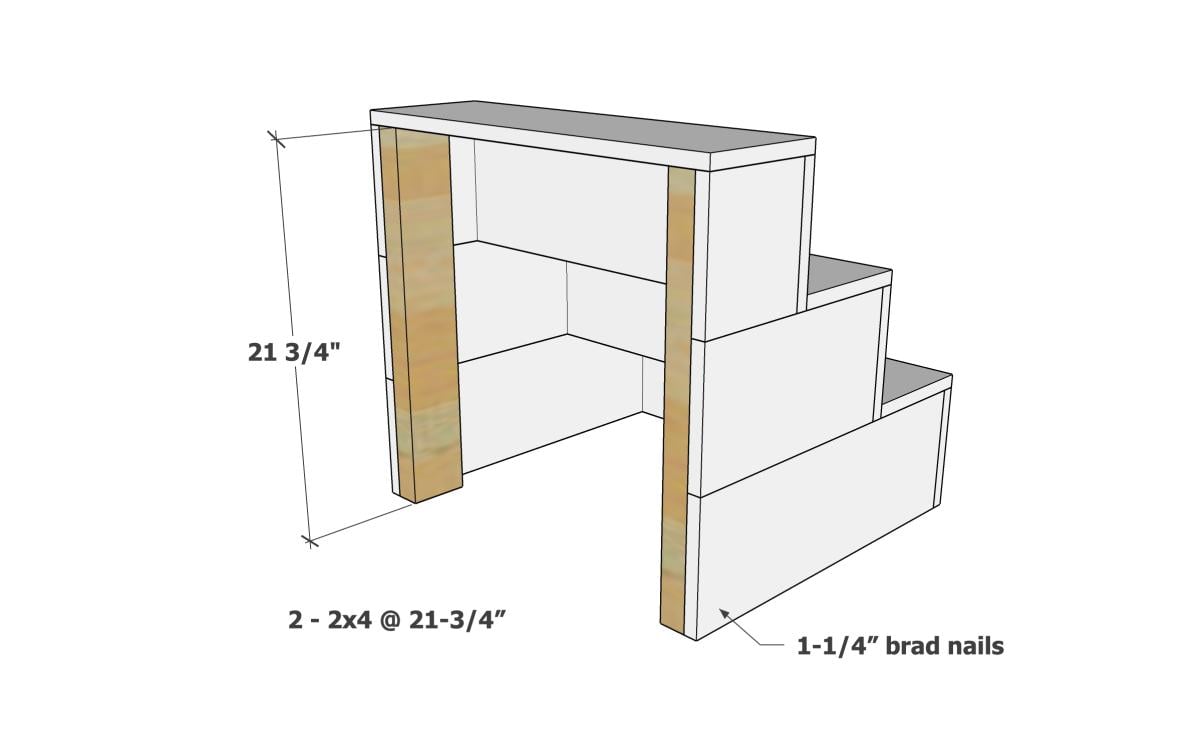

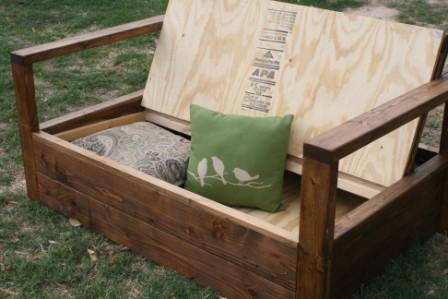
I added storage to the bottom of the simple outdoor loveseat by creating one big board from 2 2x6 boards for each of the front, back, and side aprons using my KregJig. Then I added cleats around the bottom for a sheet of plywood, extra cleats around the top edge for the seat, and put the hinge on the original seat support board.
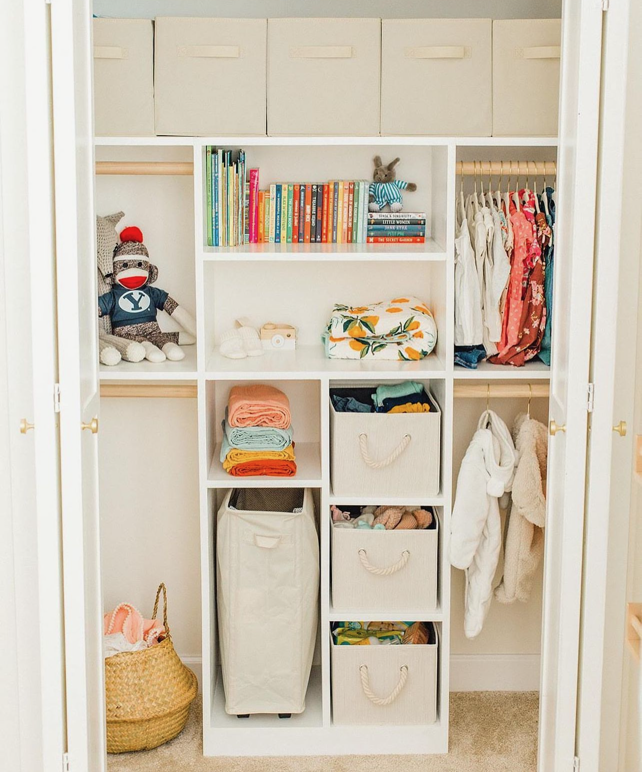
“Just My Size Closet Plan” - Perfect for growing kids and more organization! @thegardnerplace modified the tower to include tucking away the laundry basket, SMART!

I made this in an afternoon. Loved this project. It is made with 2x4's using a Kregs Jig and mitre saw (plus additional tools like a drill and square). This was my frist time using the Kregs Jig and I am sold!!
The free plans were taken from another website. They are very detailed and there is even a video (I recommend it as he gives a great tip for making sure the back stays equal/level to each other before putting the back on). Even though you can build this by yourself, I did have help for the heavier sides once they were assembled. I plan to build the additional side table soon and finish them both with sanding and staining when the weather seems less iffy for rain.
If you are looking for a good beginner project that doesn't take forever or have complicated steps, this is your project.
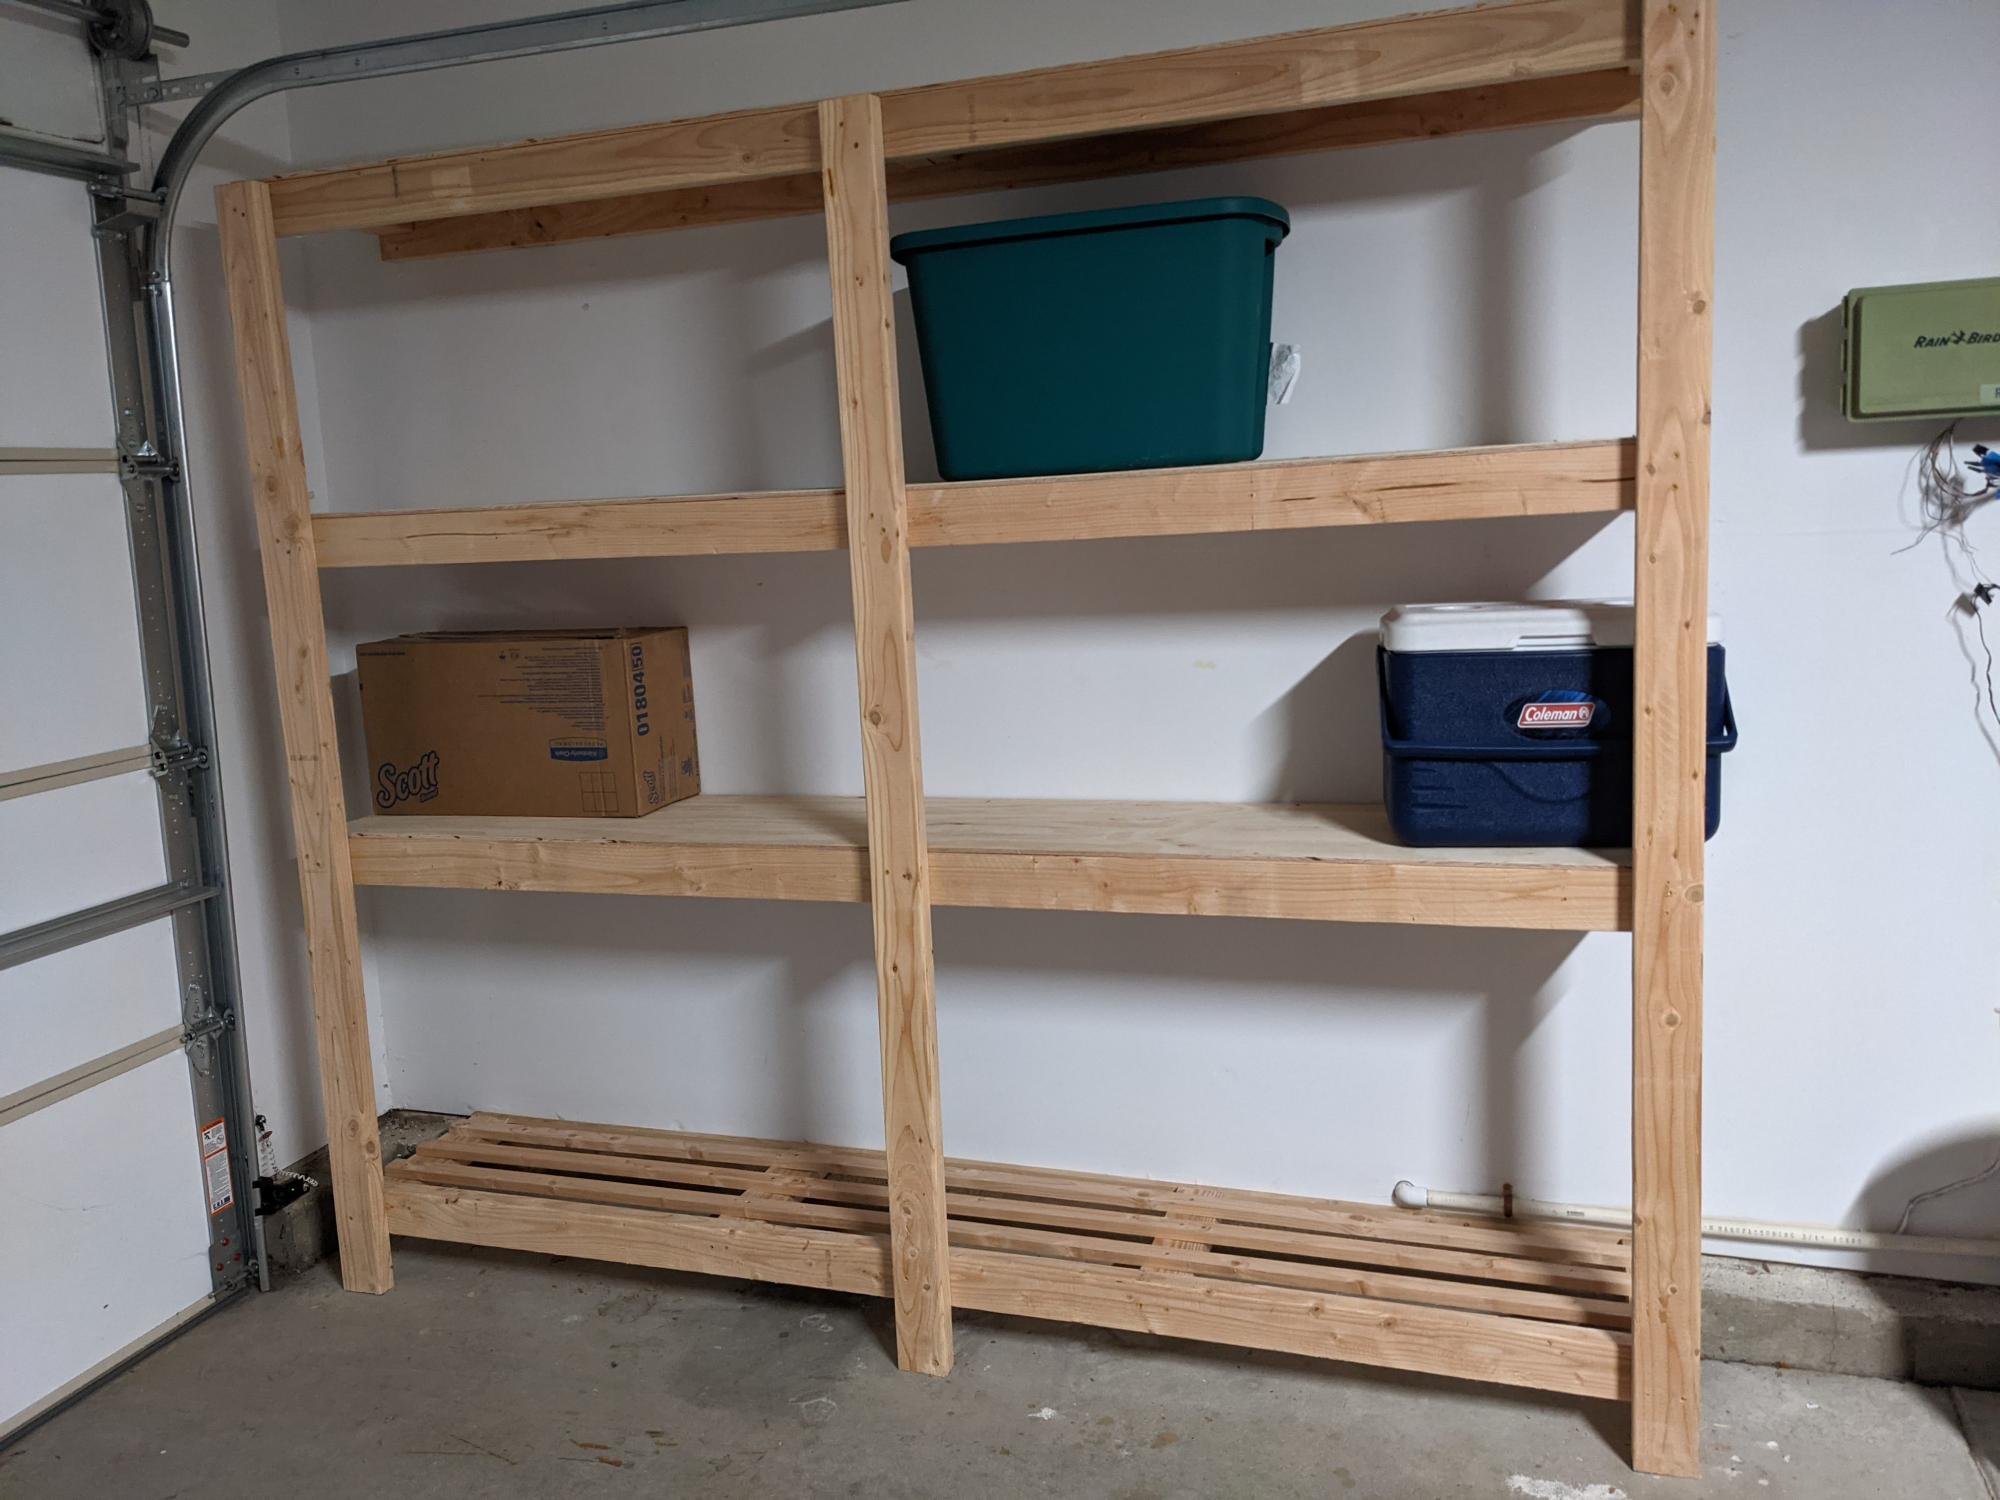
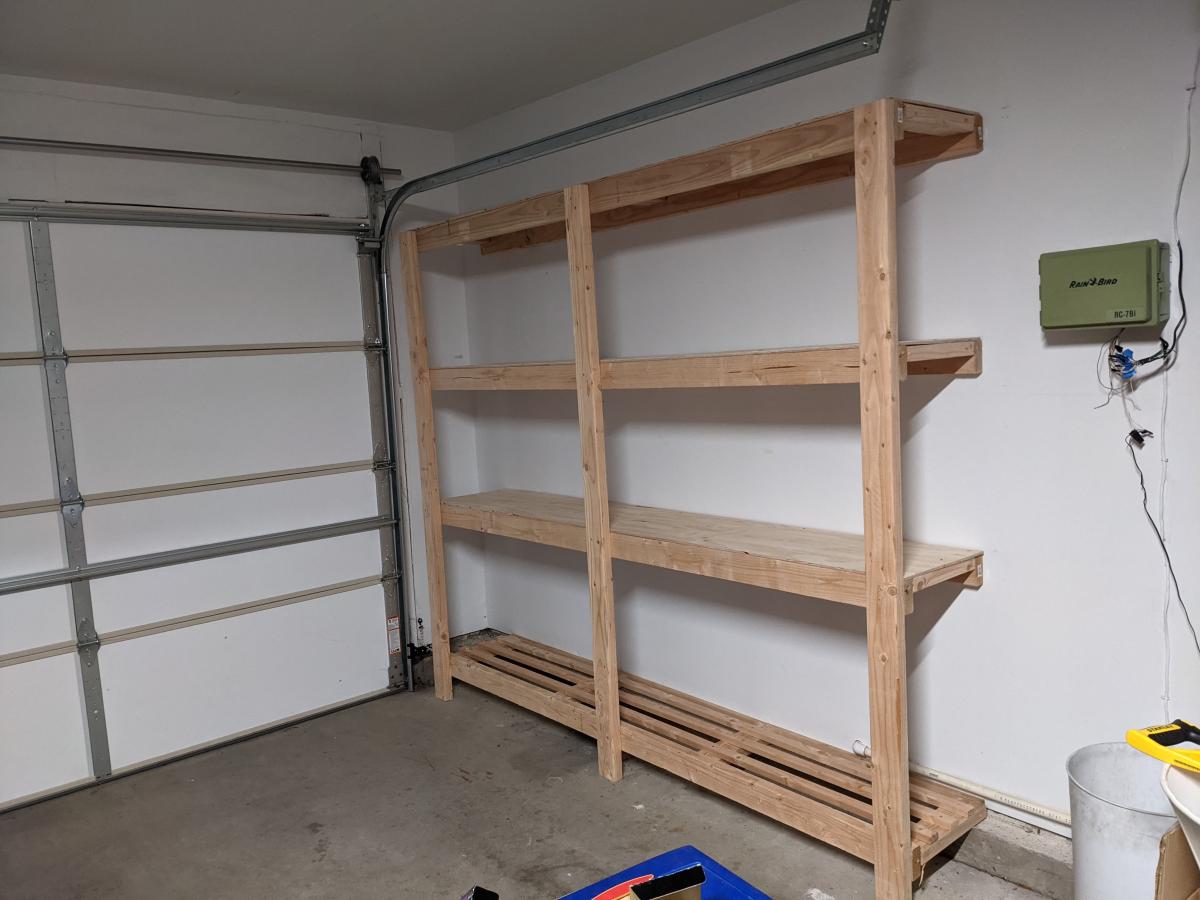
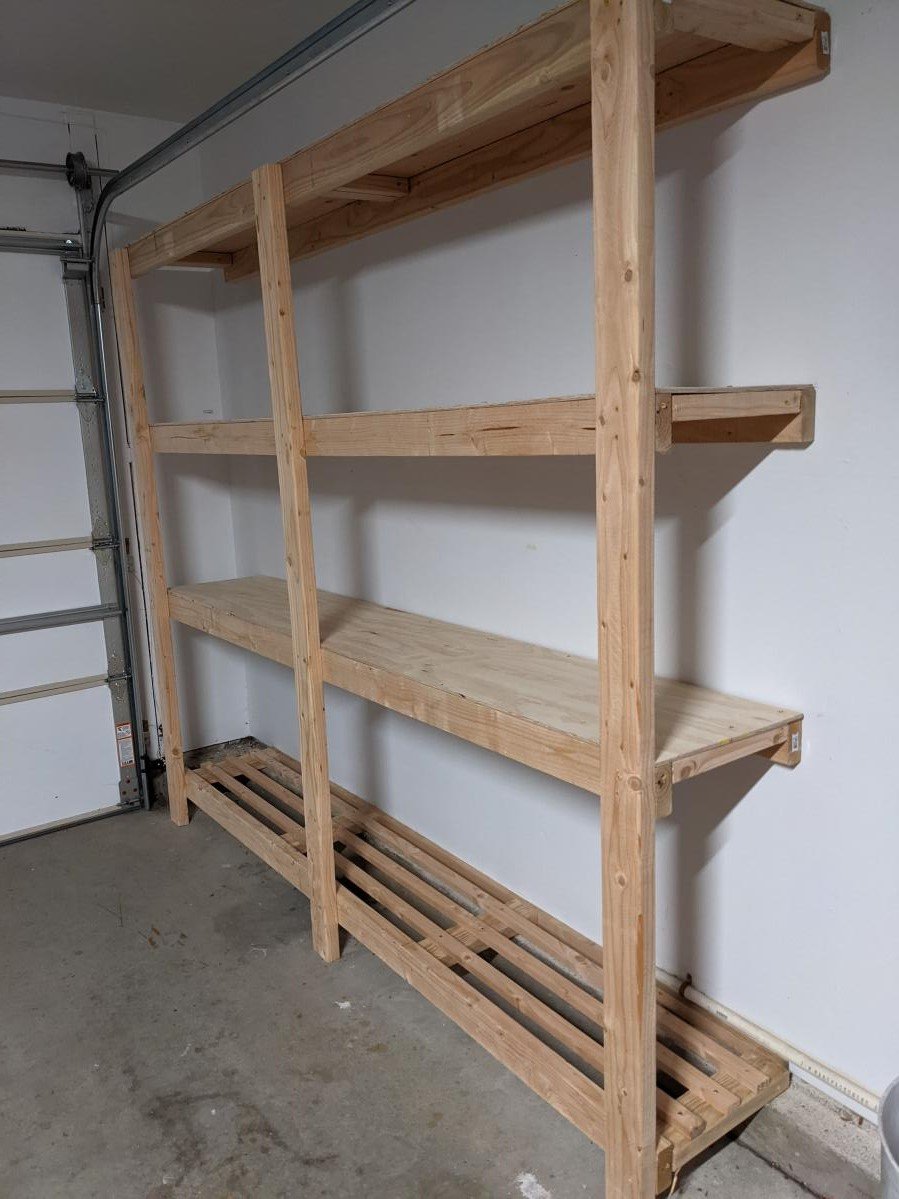
I just made this shelf using 2x4s 8 ft long wood. It is very strong and looks great. My garage size required the shelf to be max 16 in deep, so I used a 1 plywood sheet divided by 3 equal parts for the upper 3 shelfs. Since I made a 4th shelf, I used 3 1x2s for the 4th bottom shelf instead of a new plywood sheet and avoided having extra 2/3 of the sheet around and also saved like 30$ since the 2x1s were only 2$ea. That touch makes it look a bit stylish too so a win win. If you do that, here's a tip: use the outer 2x4s as rails - make sure that the cleats on the lower shelf are placed a bit lower ~ 1in. In such way, you can place the three 1x2 rails at the same level as the outer 2x4s and this you end up having 5 rails total in the shelf. Do use the wooden screws with star head if you can, they were muuuuuch easier to use compared with the regular ones. Note, this shelf is very strong, probably too strong for my needs. For a 8ft long, and my storage needs (camping, Christmas stuff, other lighter things), I'd probably use 2x2s instead of 2x4s. That would save costs, specially since wood isn't cheap these days( I spent ~$150 in materials Jan 2022).
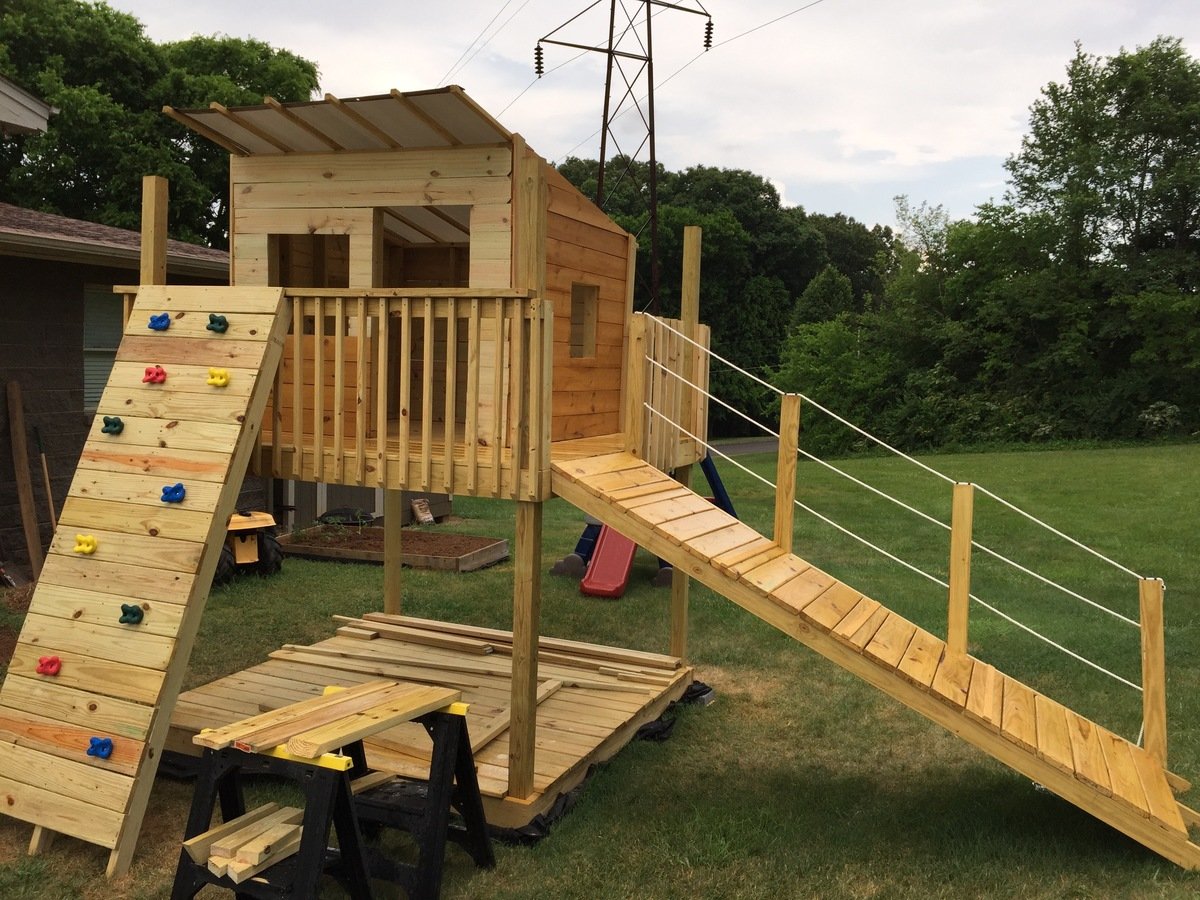
I wanted to build a structure for the kids to play in and on. I used the playhouse deck design and made it 8 feet by 8 feet. The "roof" is removable to provide shade when it's sunny. It's just 2x2 and a tarp - pretty simple, but it does the job. I used treated posts, dog eared fence boards andlots of screws. I stained and built the walls in my garage before assembling it. Once all of the wood at been stained, it came together pretty quickly with the grandkids help...Lol


Tue, 05/05/2020 - 06:43
What is the estimate cost of the entire playhouse with swing?
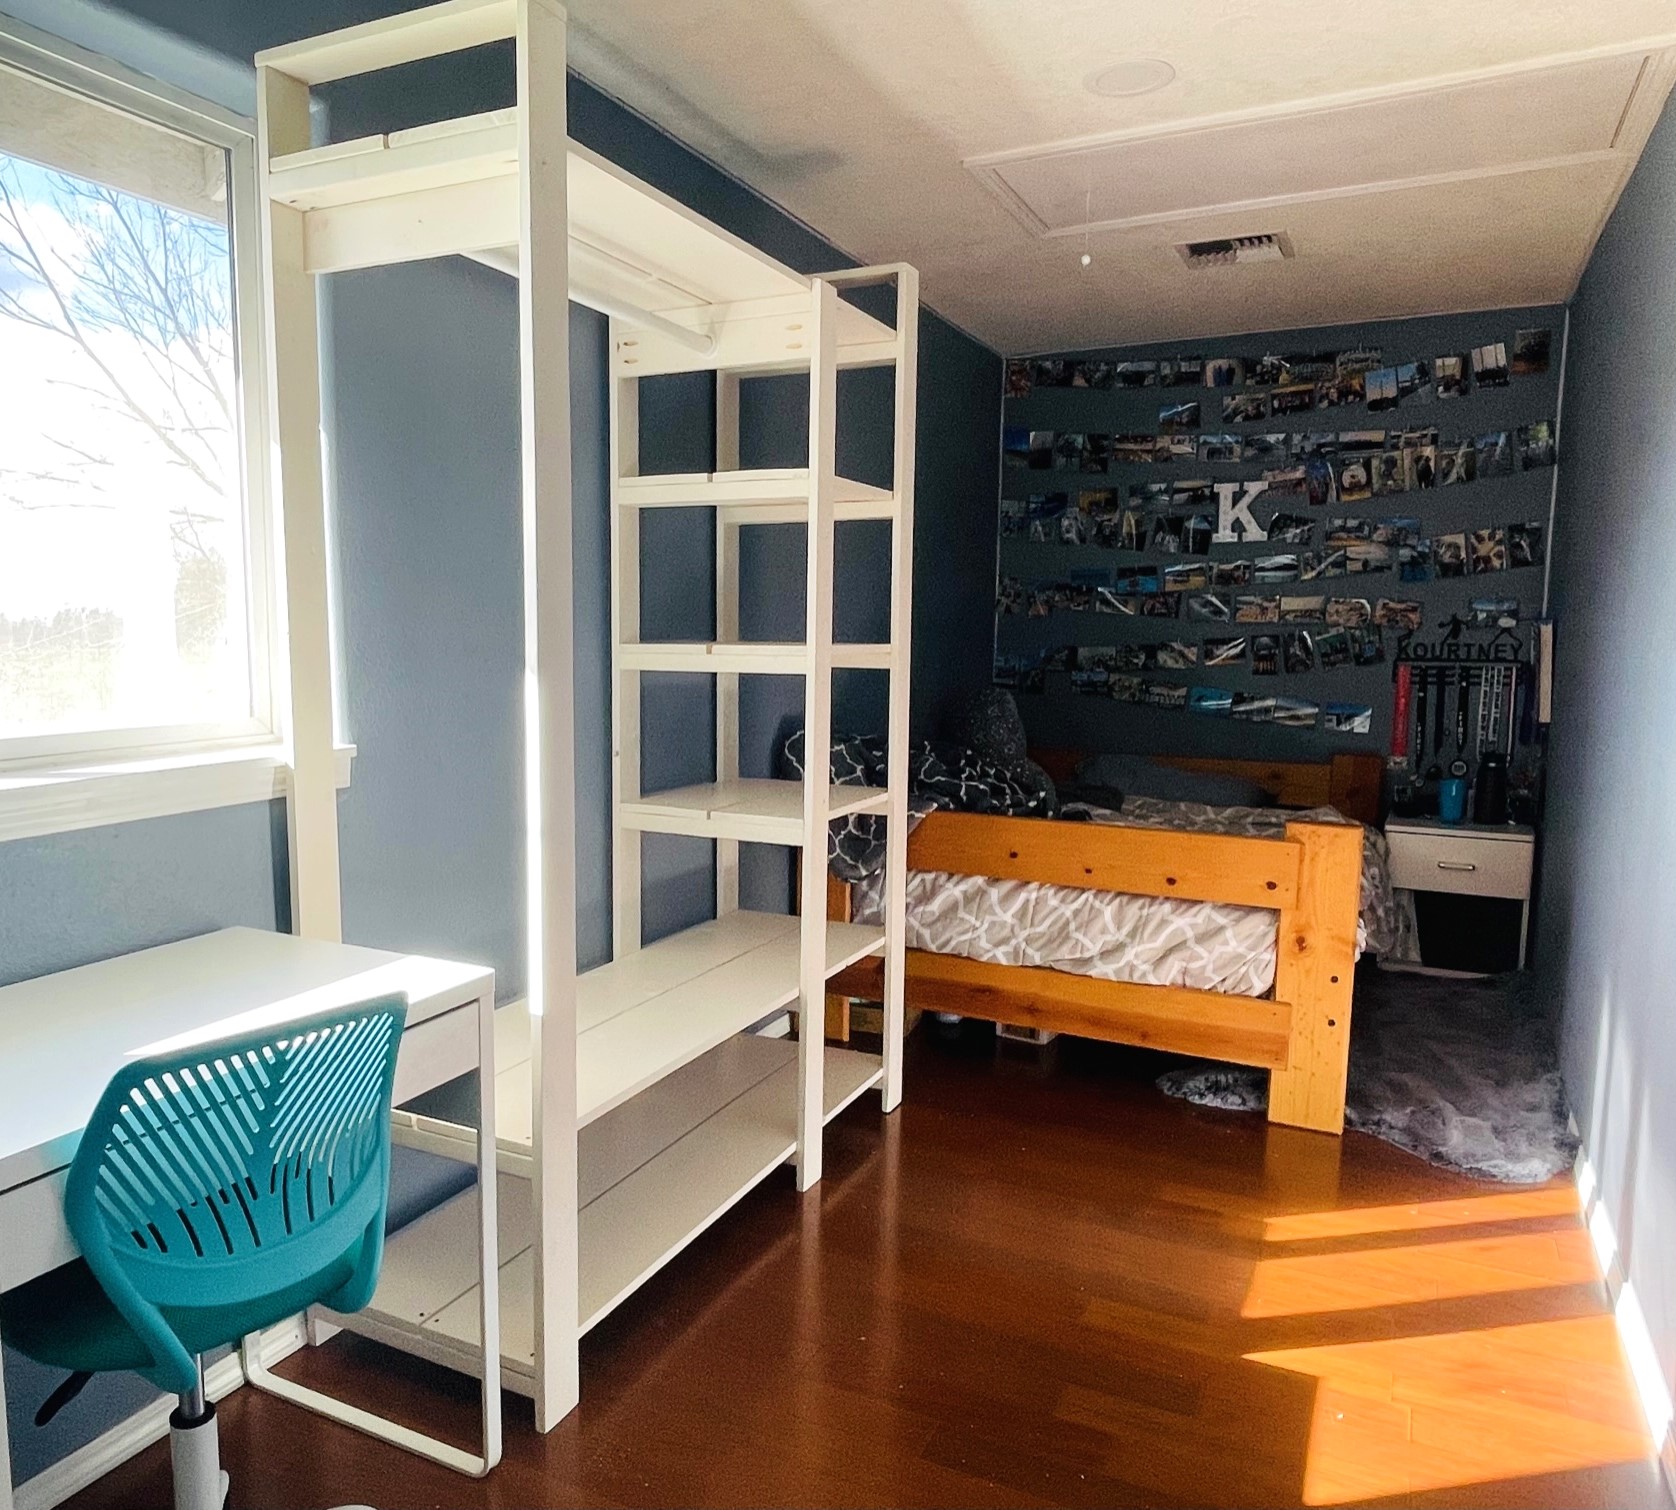
My friend asked if I could build a closet for her daughters narrow room, this worked perfect. I have used this plan many times now and each outcome is different and customized for the space.

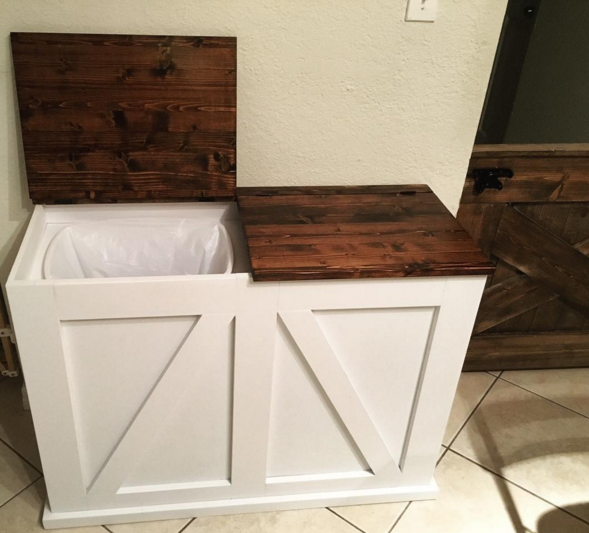
Modified the design a bit to be lift up lids instead of tilt out.
Fri, 02/16/2018 - 17:18
Can you post the specific plans for the lift up trash and recycle bin??
Sun, 05/26/2019 - 18:28
If you could post the plans for this, It would be nice. Great job!
Fri, 01/10/2020 - 05:16
I just love this and would love to have the specific plans for this project!!!

Fri, 01/17/2020 - 20:23
Thank you for the great idea. I’m going to add a third bin and use it for laundry in my bedroom.
Sat, 03/07/2020 - 02:29
I’d be grateful for details, plans, measurements for this project. This is an amazing build, nicely done.With green top looks fantastic and complements the white very well.
Thu, 01/11/2024 - 20:31
To everyone asking for the plans, it's a modified tilt out. It states right there under the pics that it was modified and the original plans are there in red, under "Built from plans"
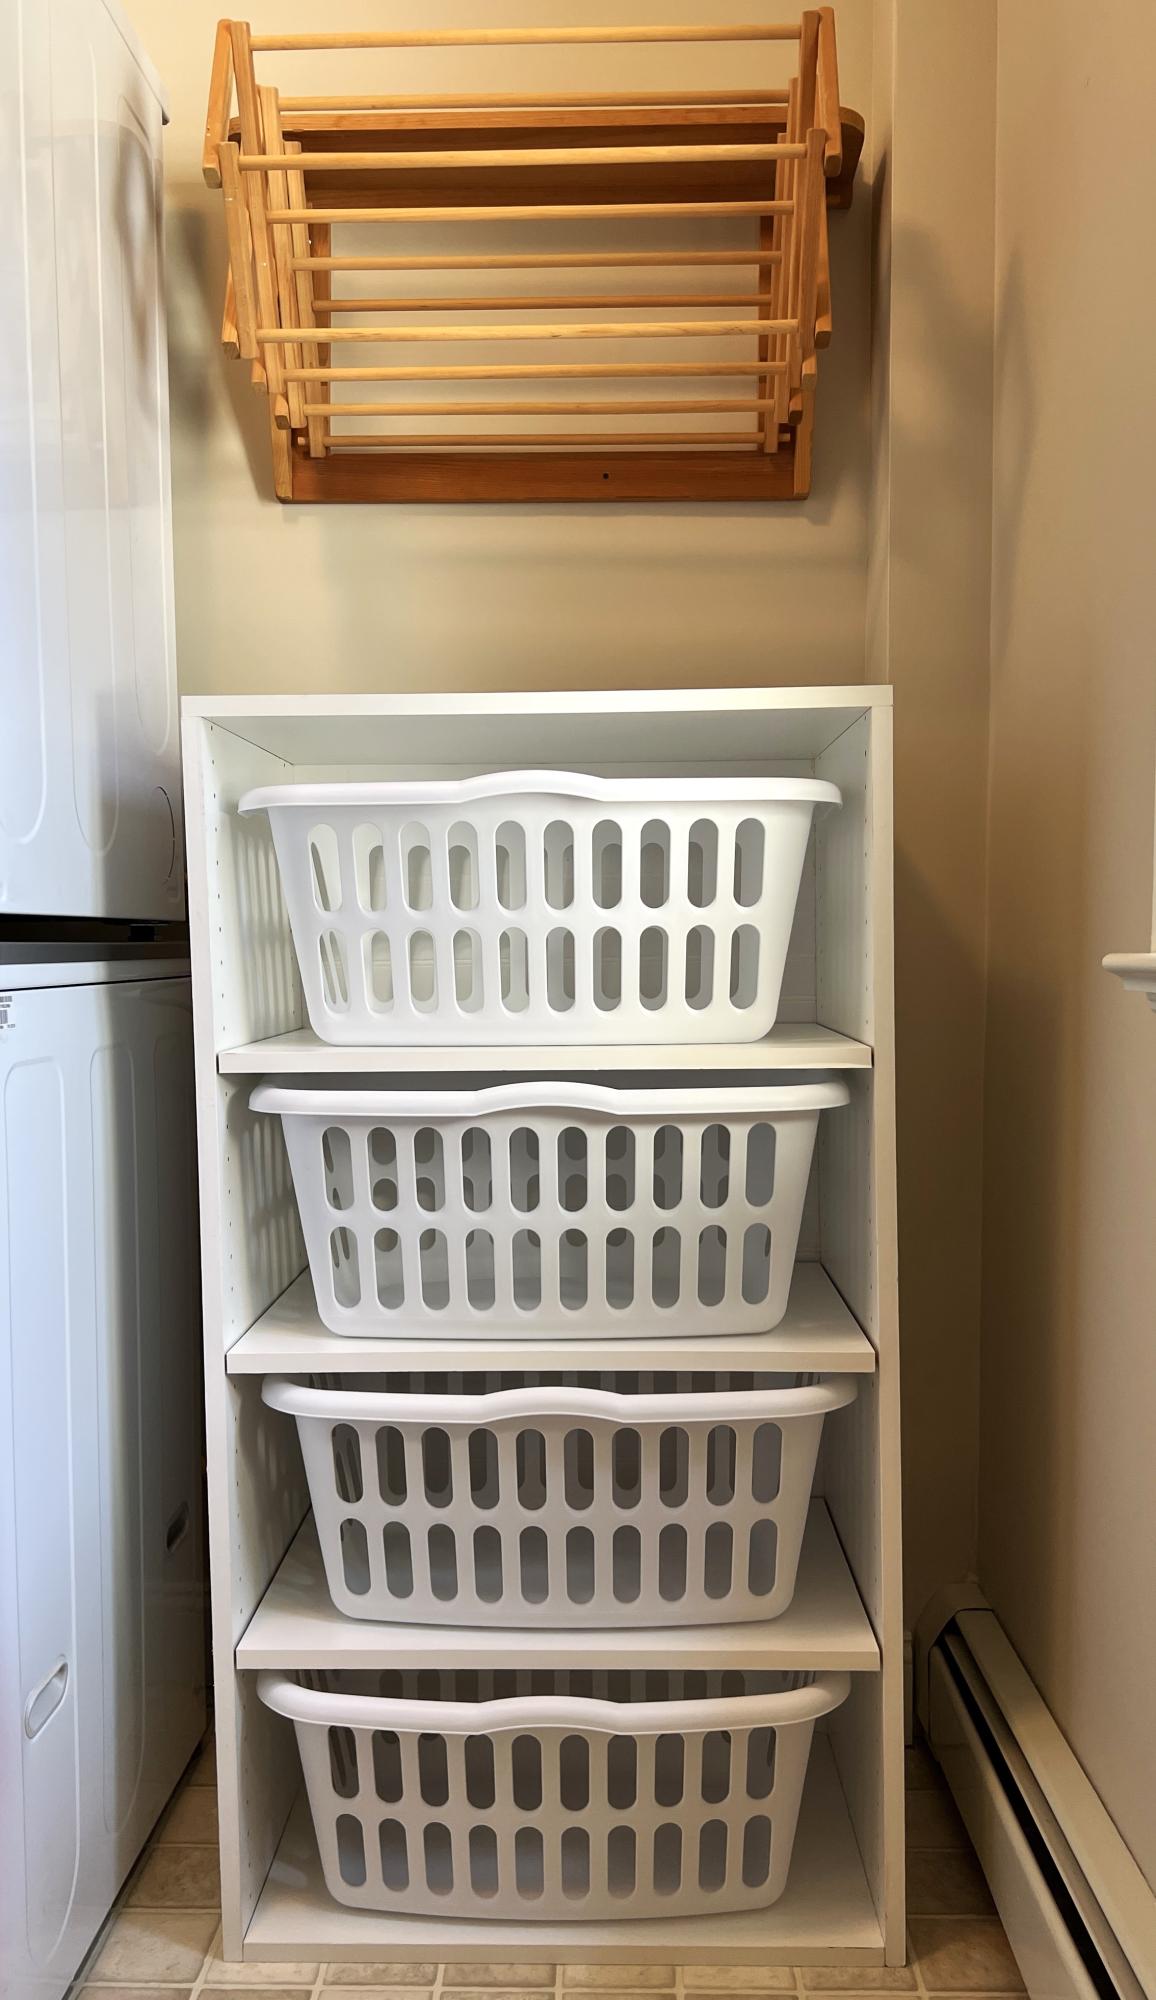
I didn’t want to have to paint or cut the metal angles - plus I wanted 4 basket tall so I used pre-drilled melamine for the sides making the unit 48” tall. Then cut top and bottom same as plans and bought 5mm L shelf pegs and had shelves cut 24 1/4”. Used white wainscot panel for back. Very easy - especially since I had big box store make all my cuts! Just have to make sure you have peg holes lined up at bottom or you won’t be level.
Deb D.
Wed, 09/13/2023 - 09:38
Thanks for sharing, it looks like the perfect fit and solution for your laundry room!
Comments
Ana White Admin
Fri, 12/03/2021 - 07:39
Super nice!
WOW, definitely worth the extra effort, just beautiful! I wish we could offer metric plans, may need to figure that out.
smearedred
Wed, 03/23/2022 - 20:32
Did you change out the 2x4…
Did you change out the 2x4 and 2x6 on the lower half?