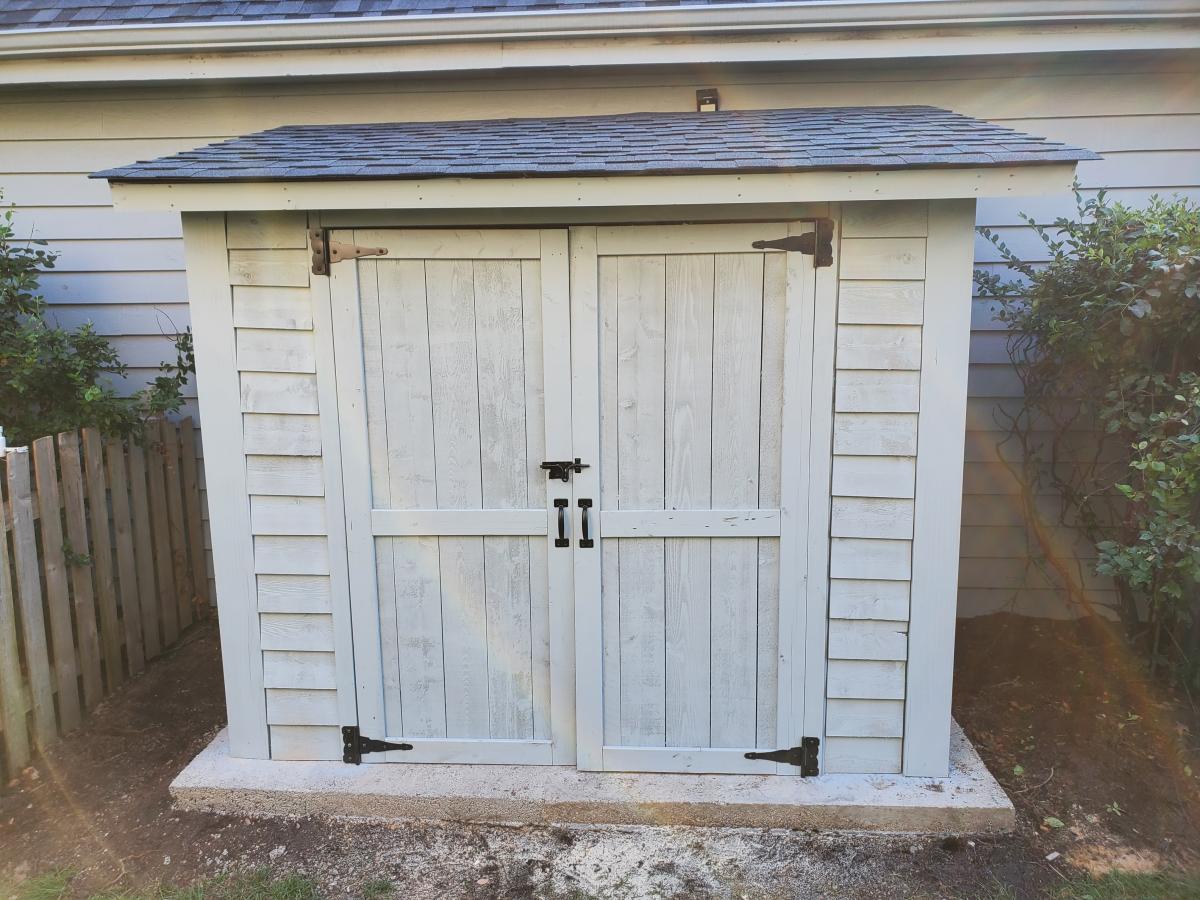
DIY Greenhouse
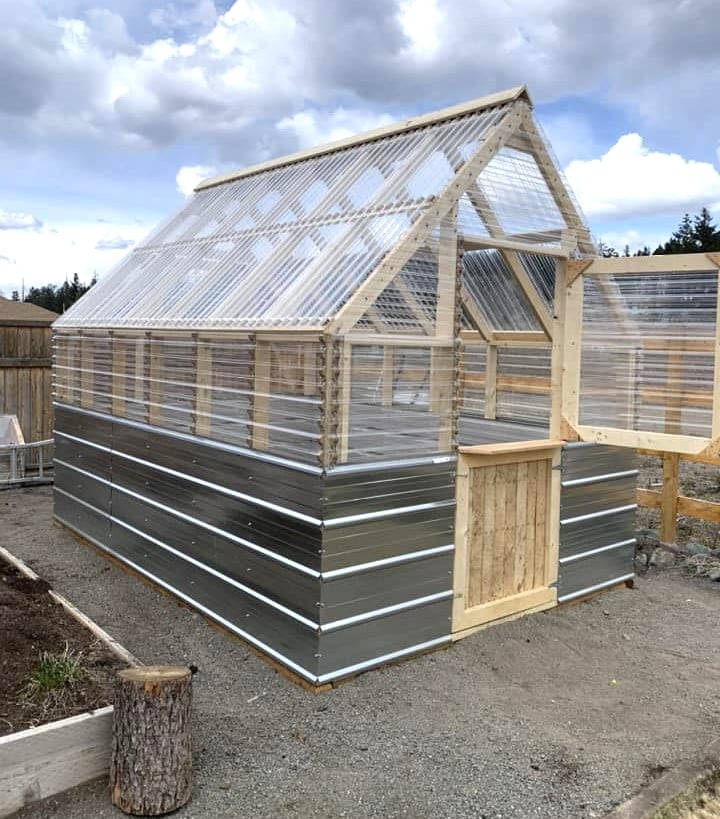
DIY Greenhouse by Trenton Kirby on Facebook!
Built from Plan(s)
DIY Greenhouse by Trenton Kirby on Facebook!
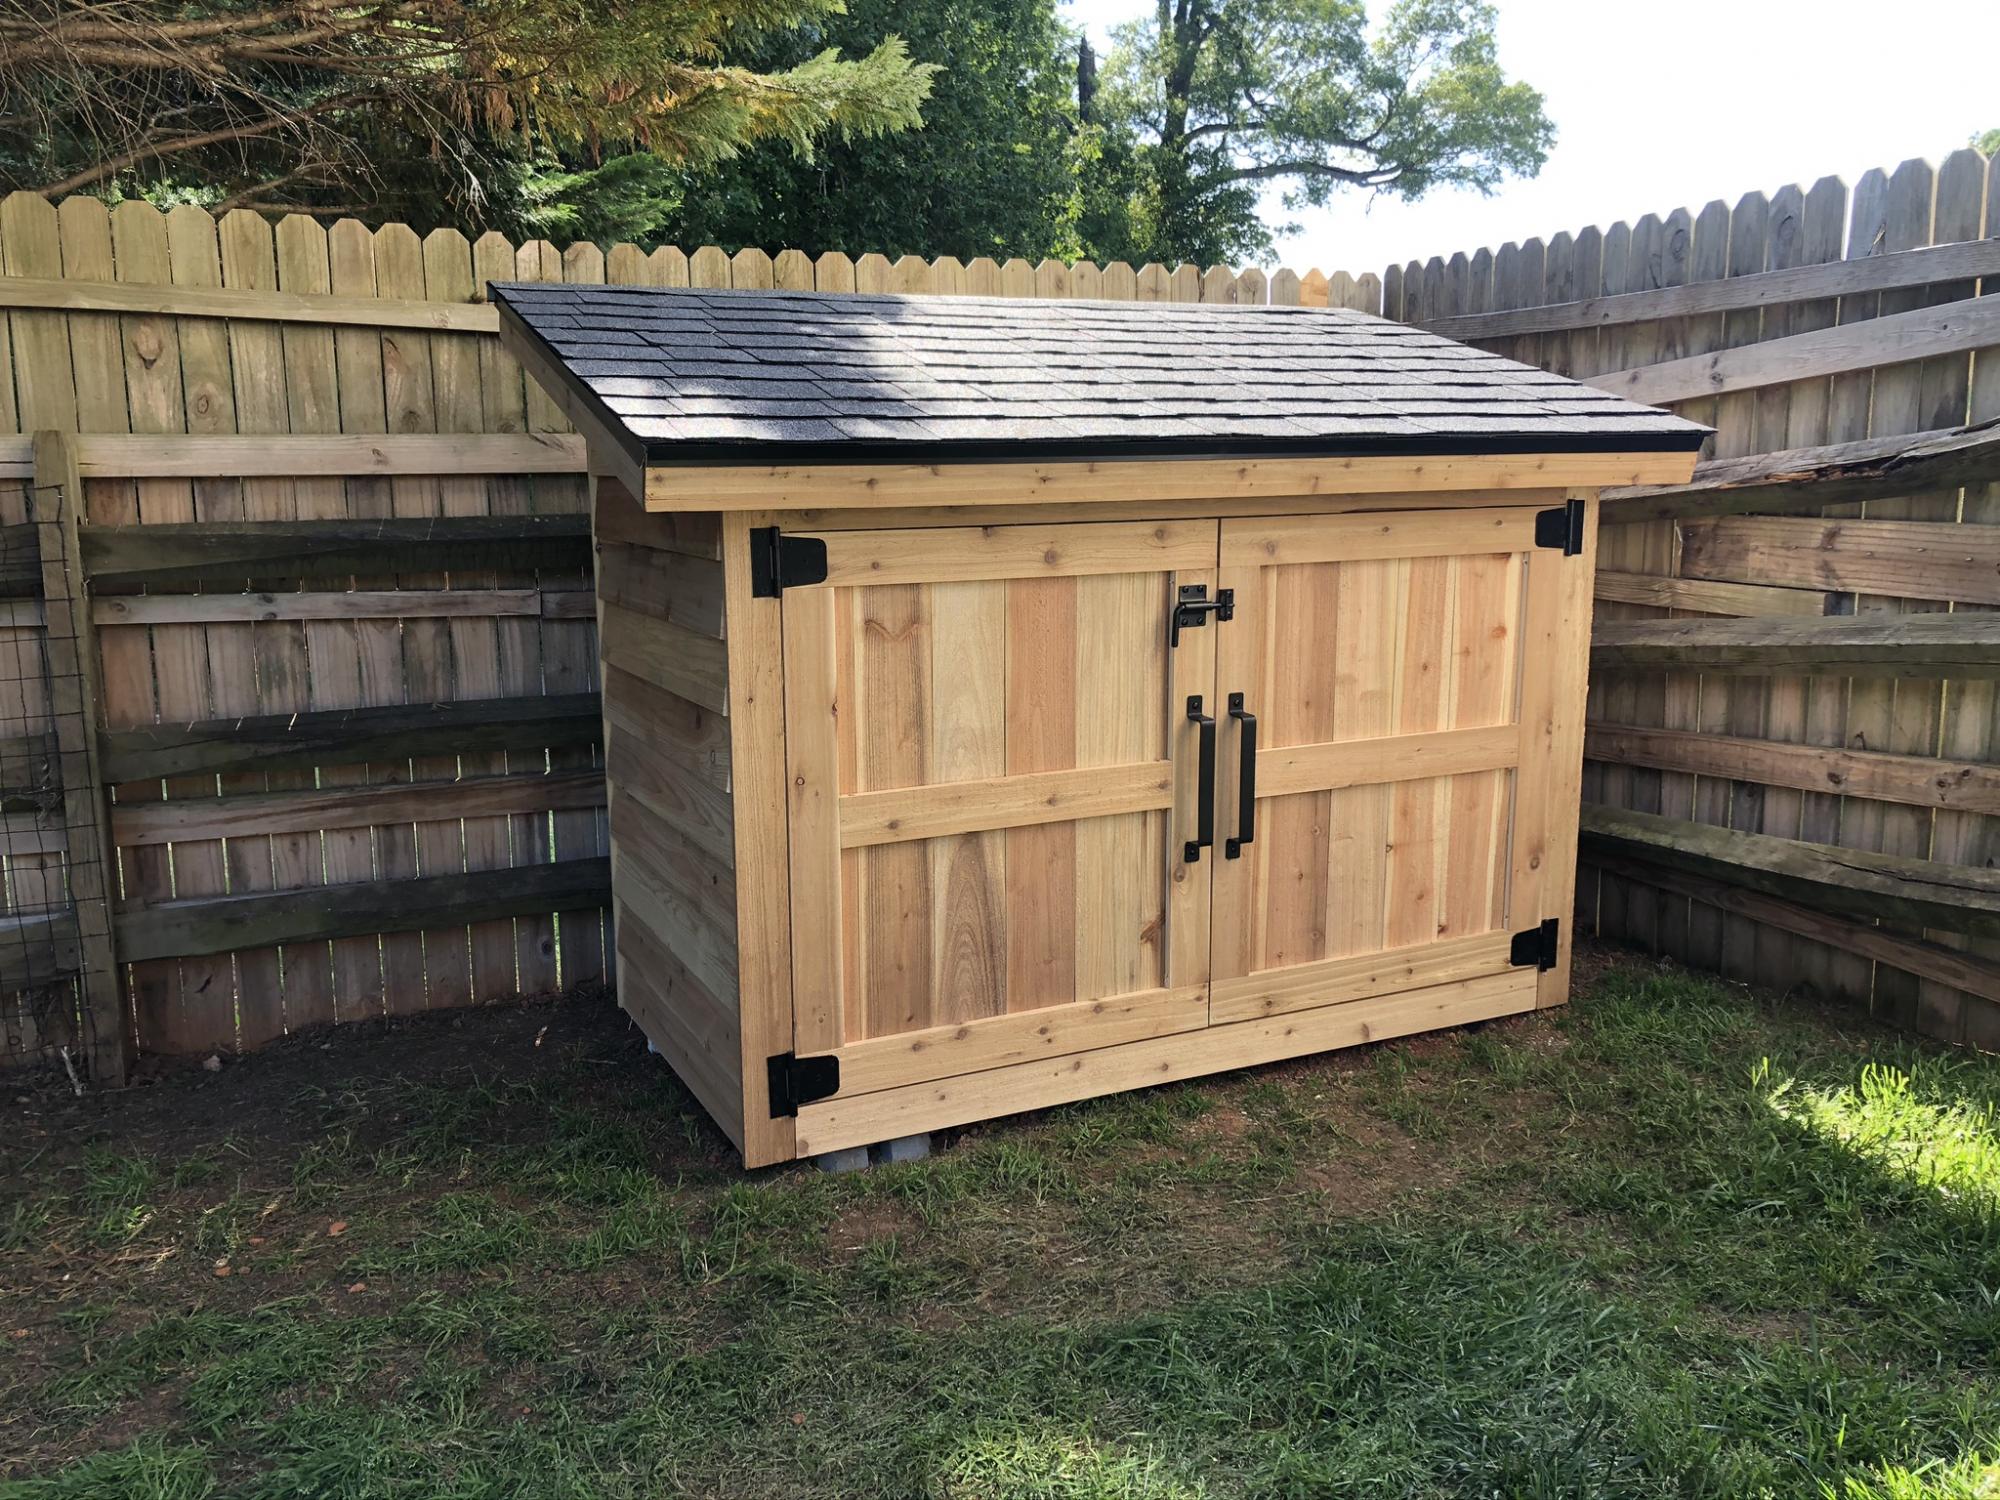
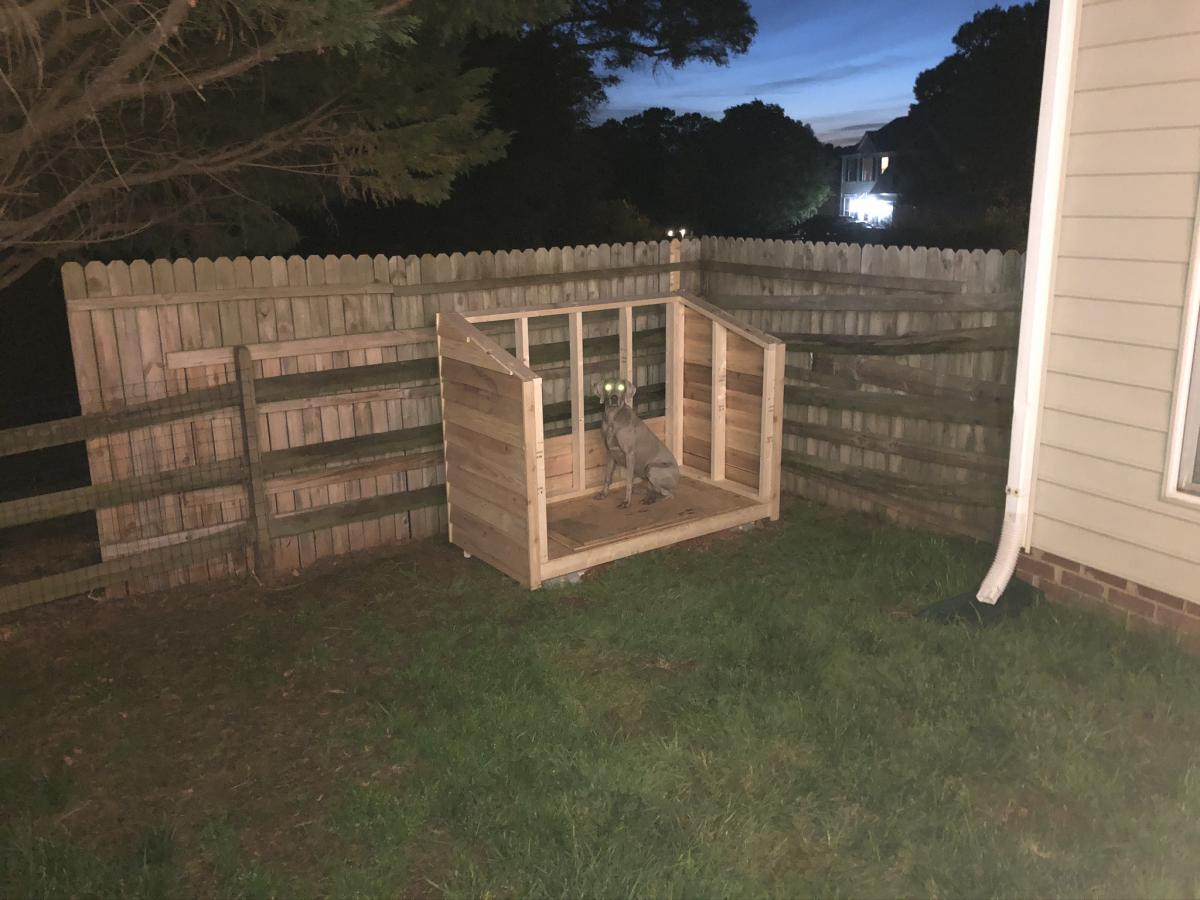
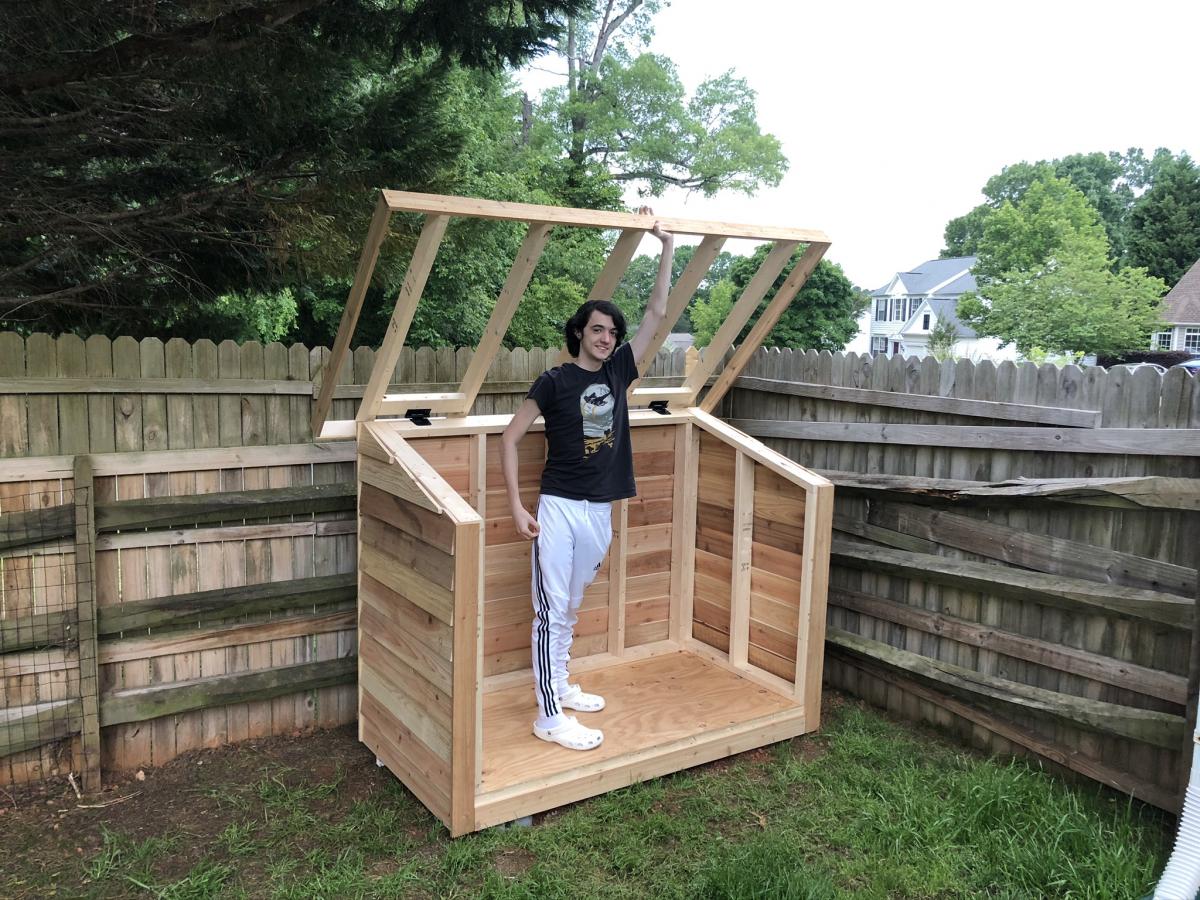
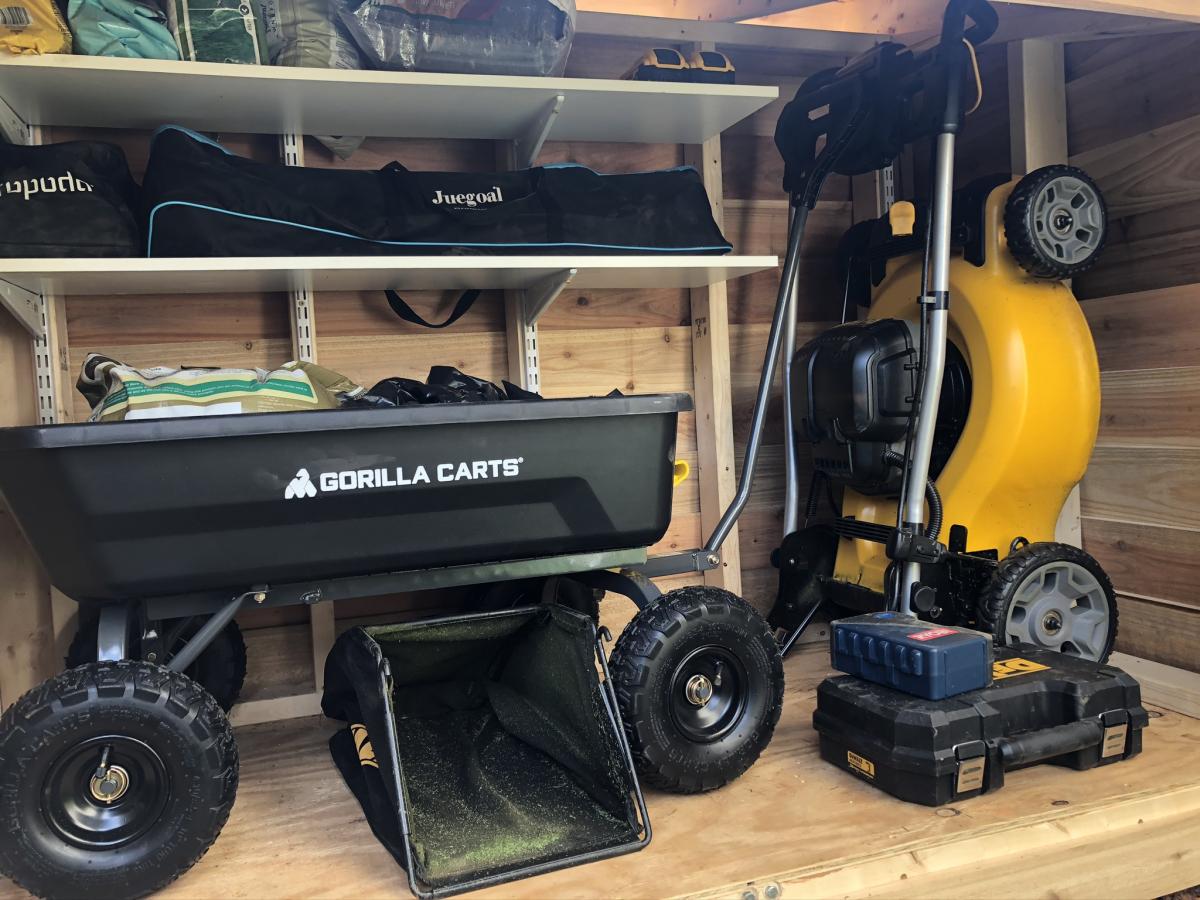
We wanted a shorter version, so that it would hide behind this fence. I just needed somewhere to store lawnmower, wheelbarrow, and a few yard supplies. I started putting the roof on hinges, but the gas struts couldn't support the 170 pound roof. So it's fixed in place (stronger structure anyway). That's why I went with 2x4's for the framed walls instead of 2x2's.

Thu, 06/11/2020 - 17:15
Very Nice modification. Two thumbs up! May I please ask you for the dimensions of the shed?
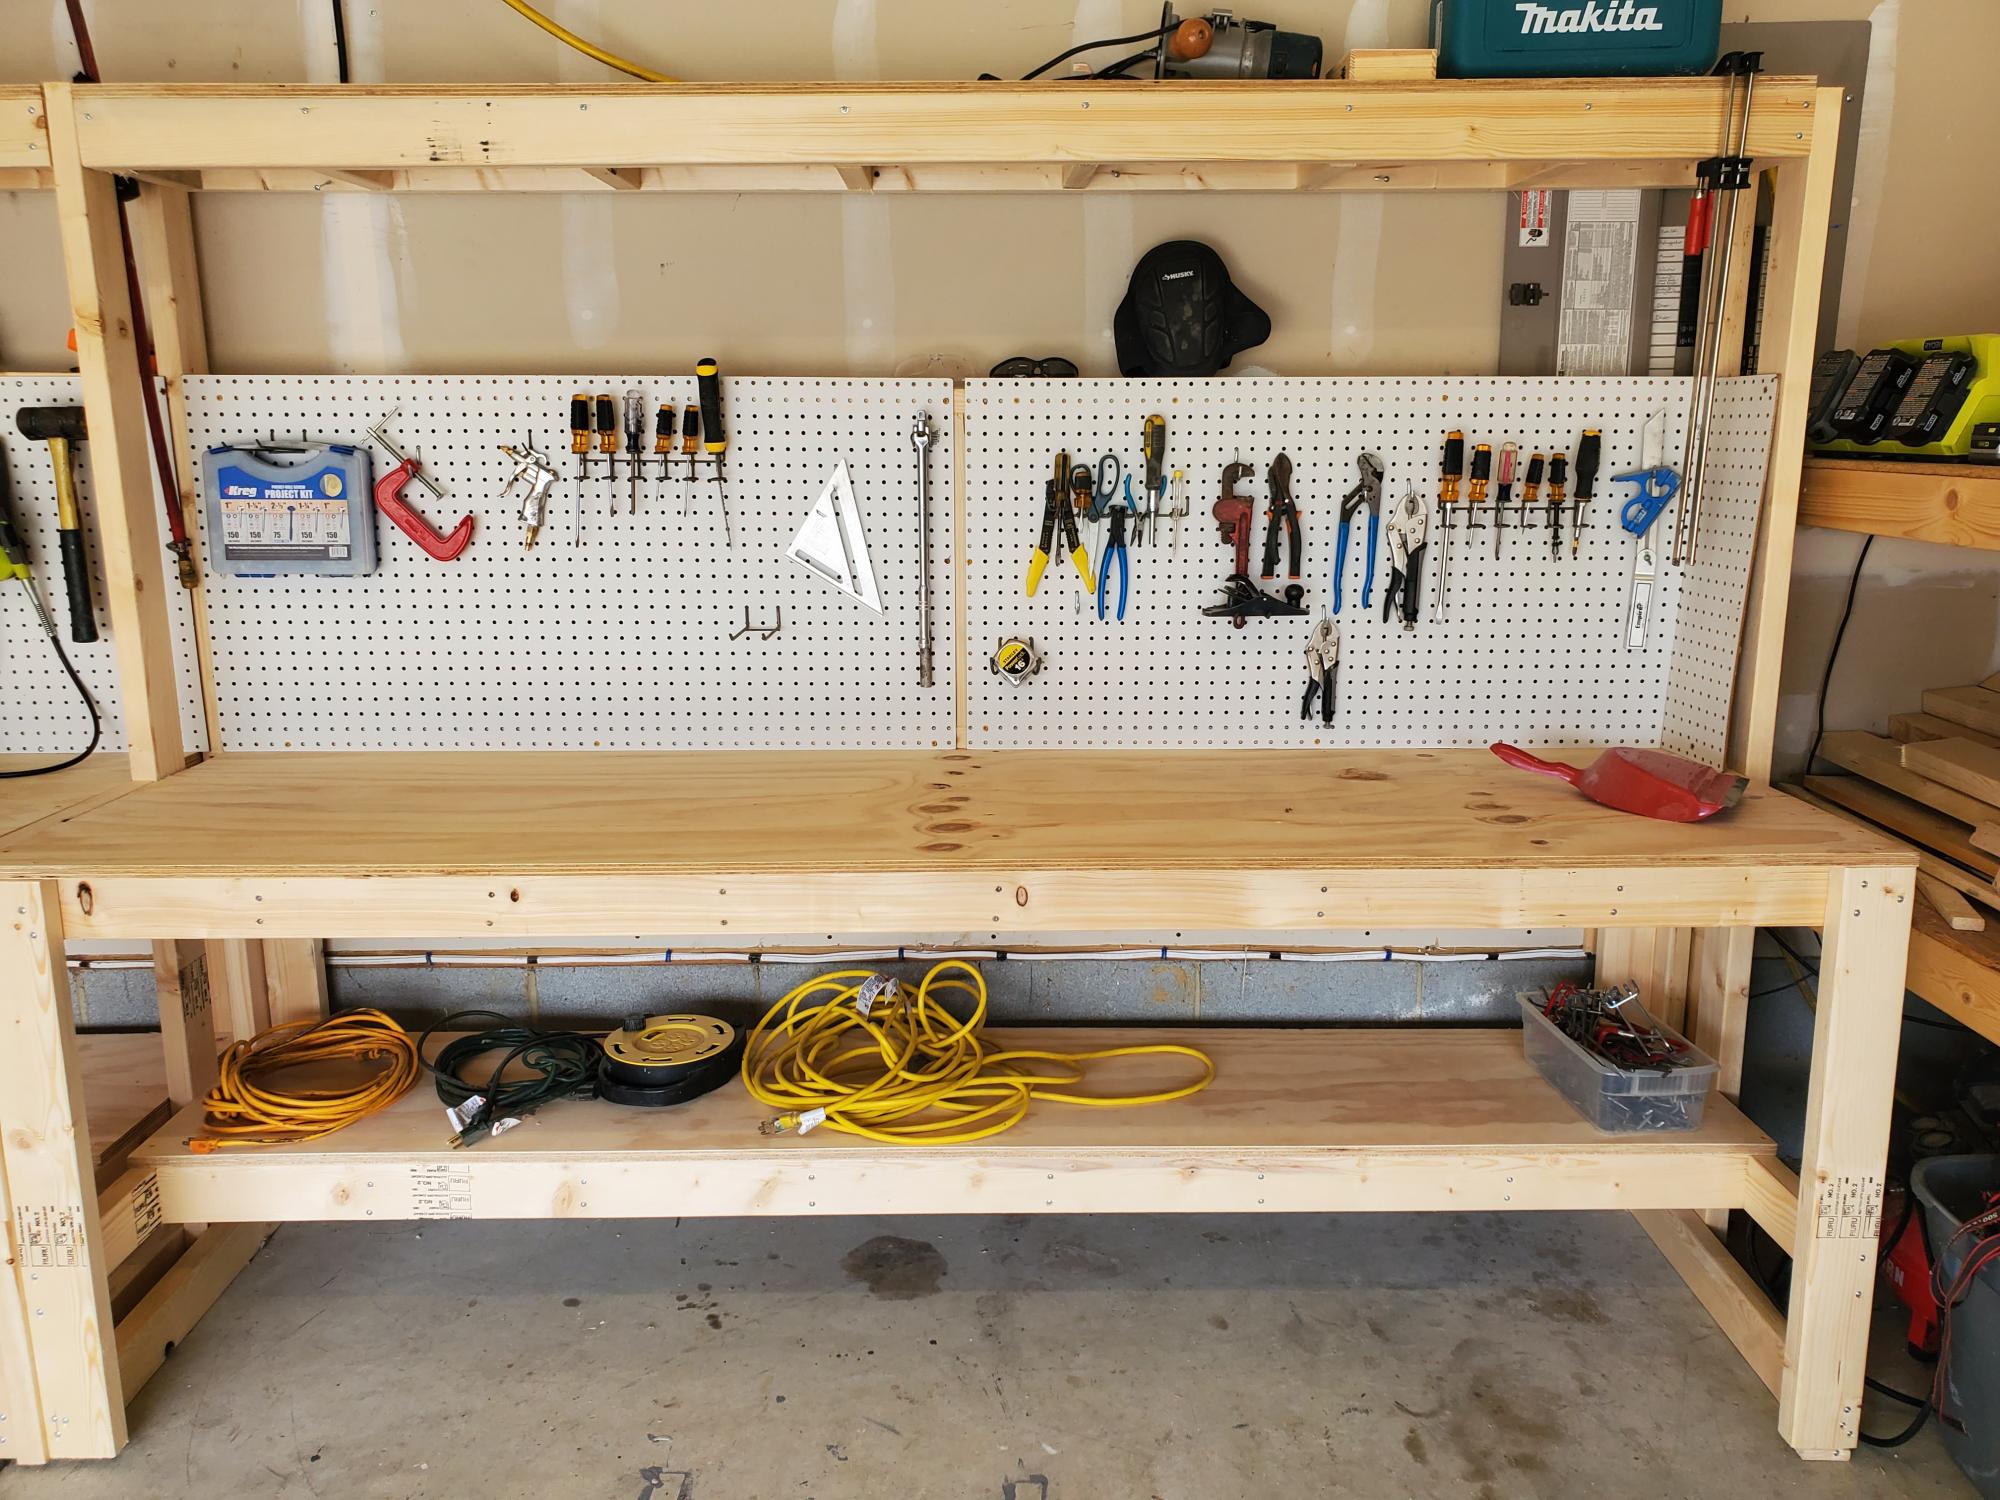
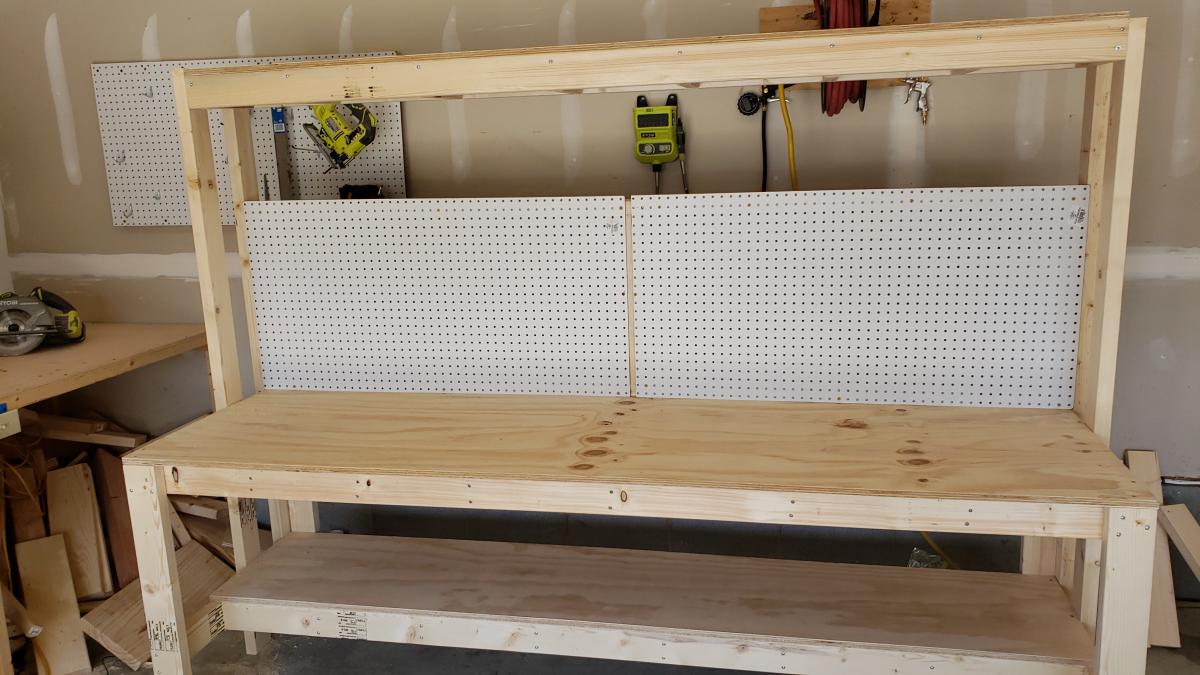
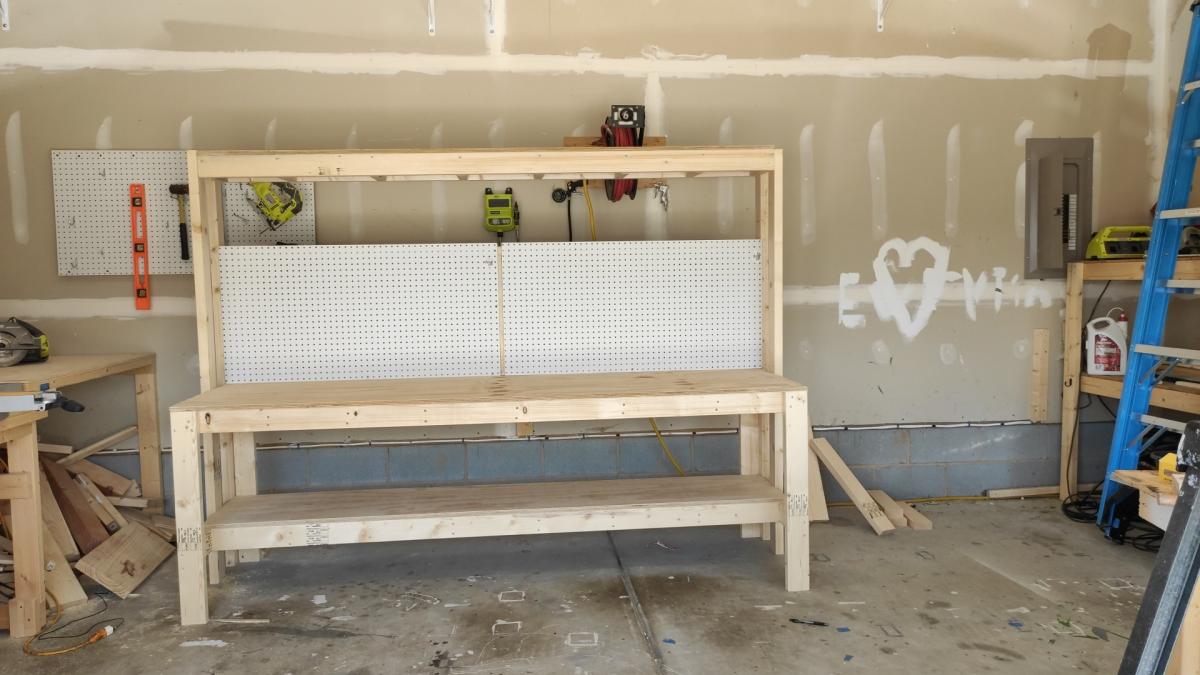
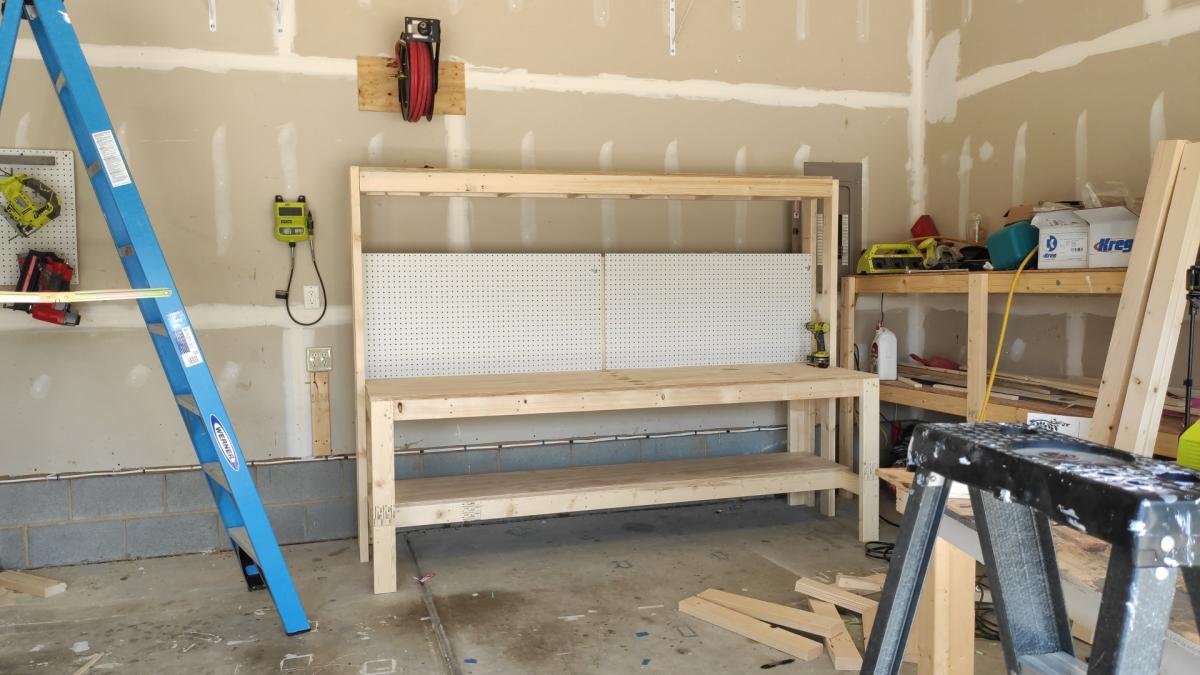
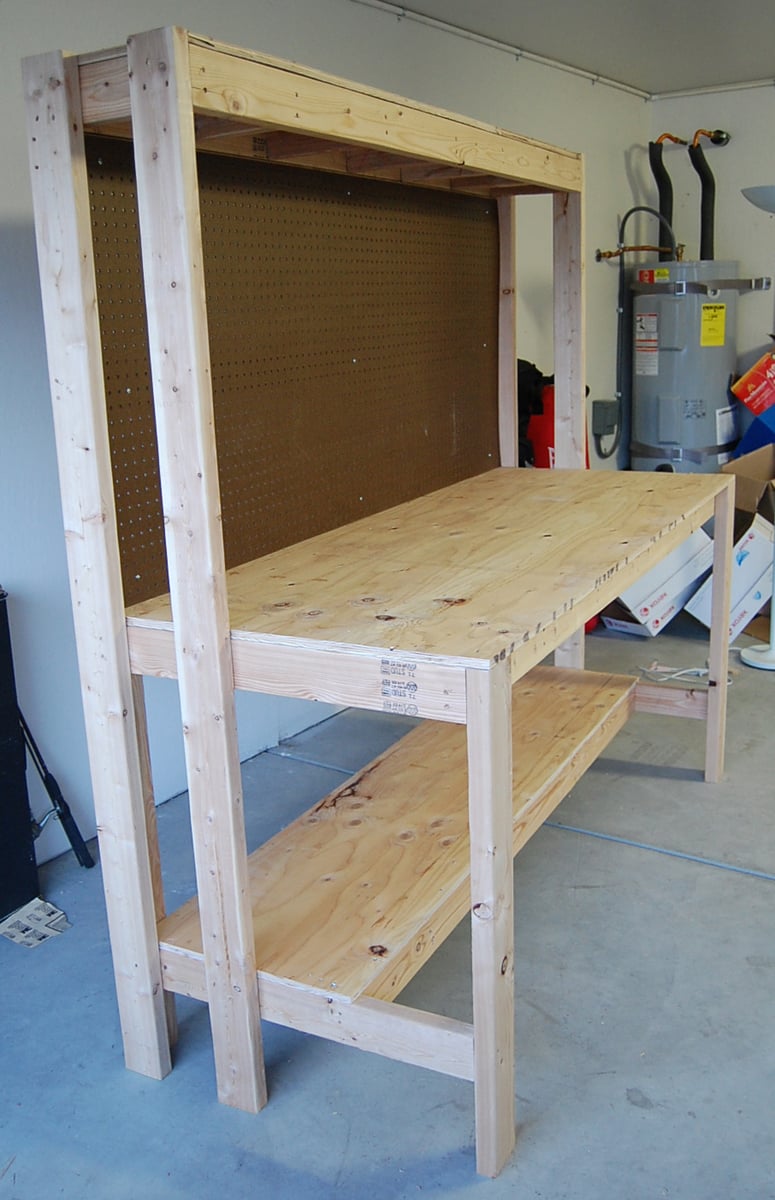
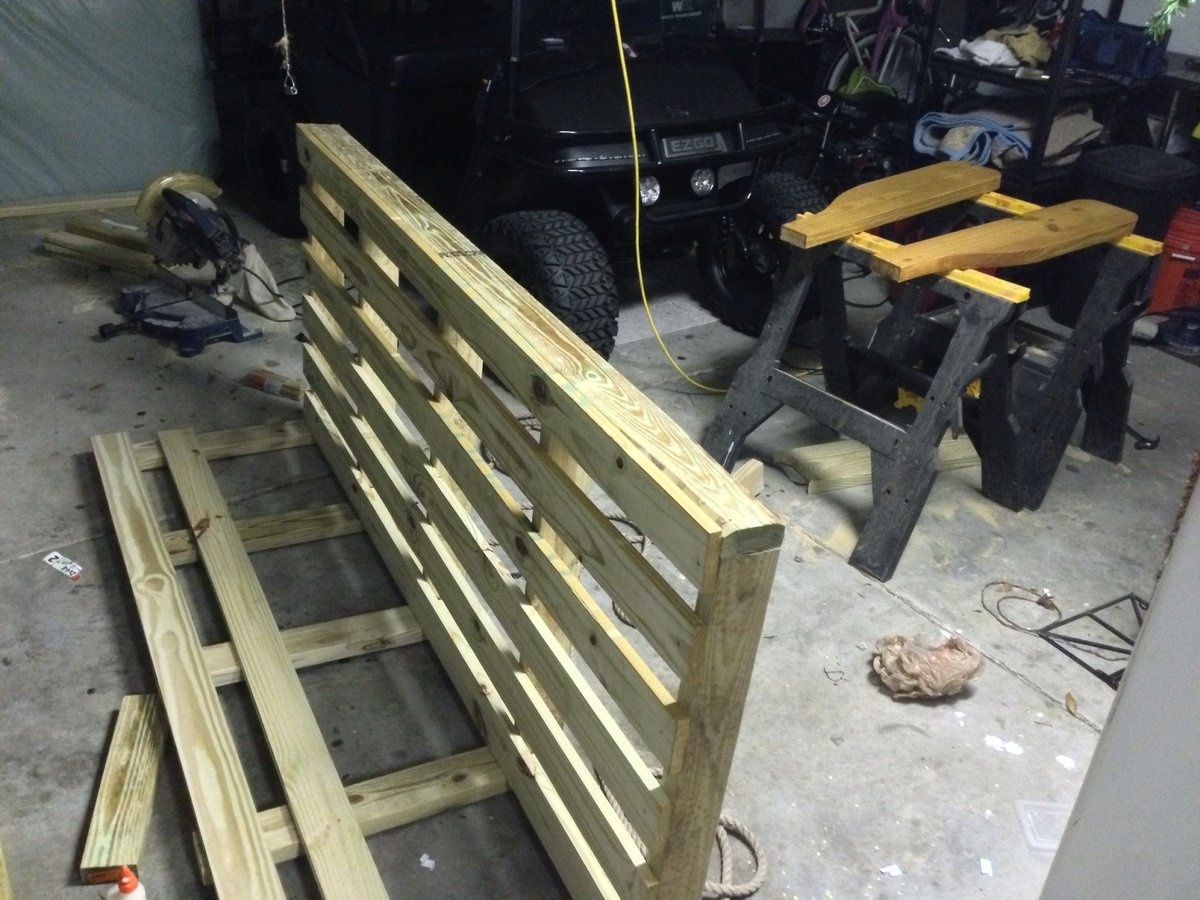
I made a workbench for my garage it was pretty easy. I also made an instructional youtube video if you want to learn how to make it. #diy #workbench #bench
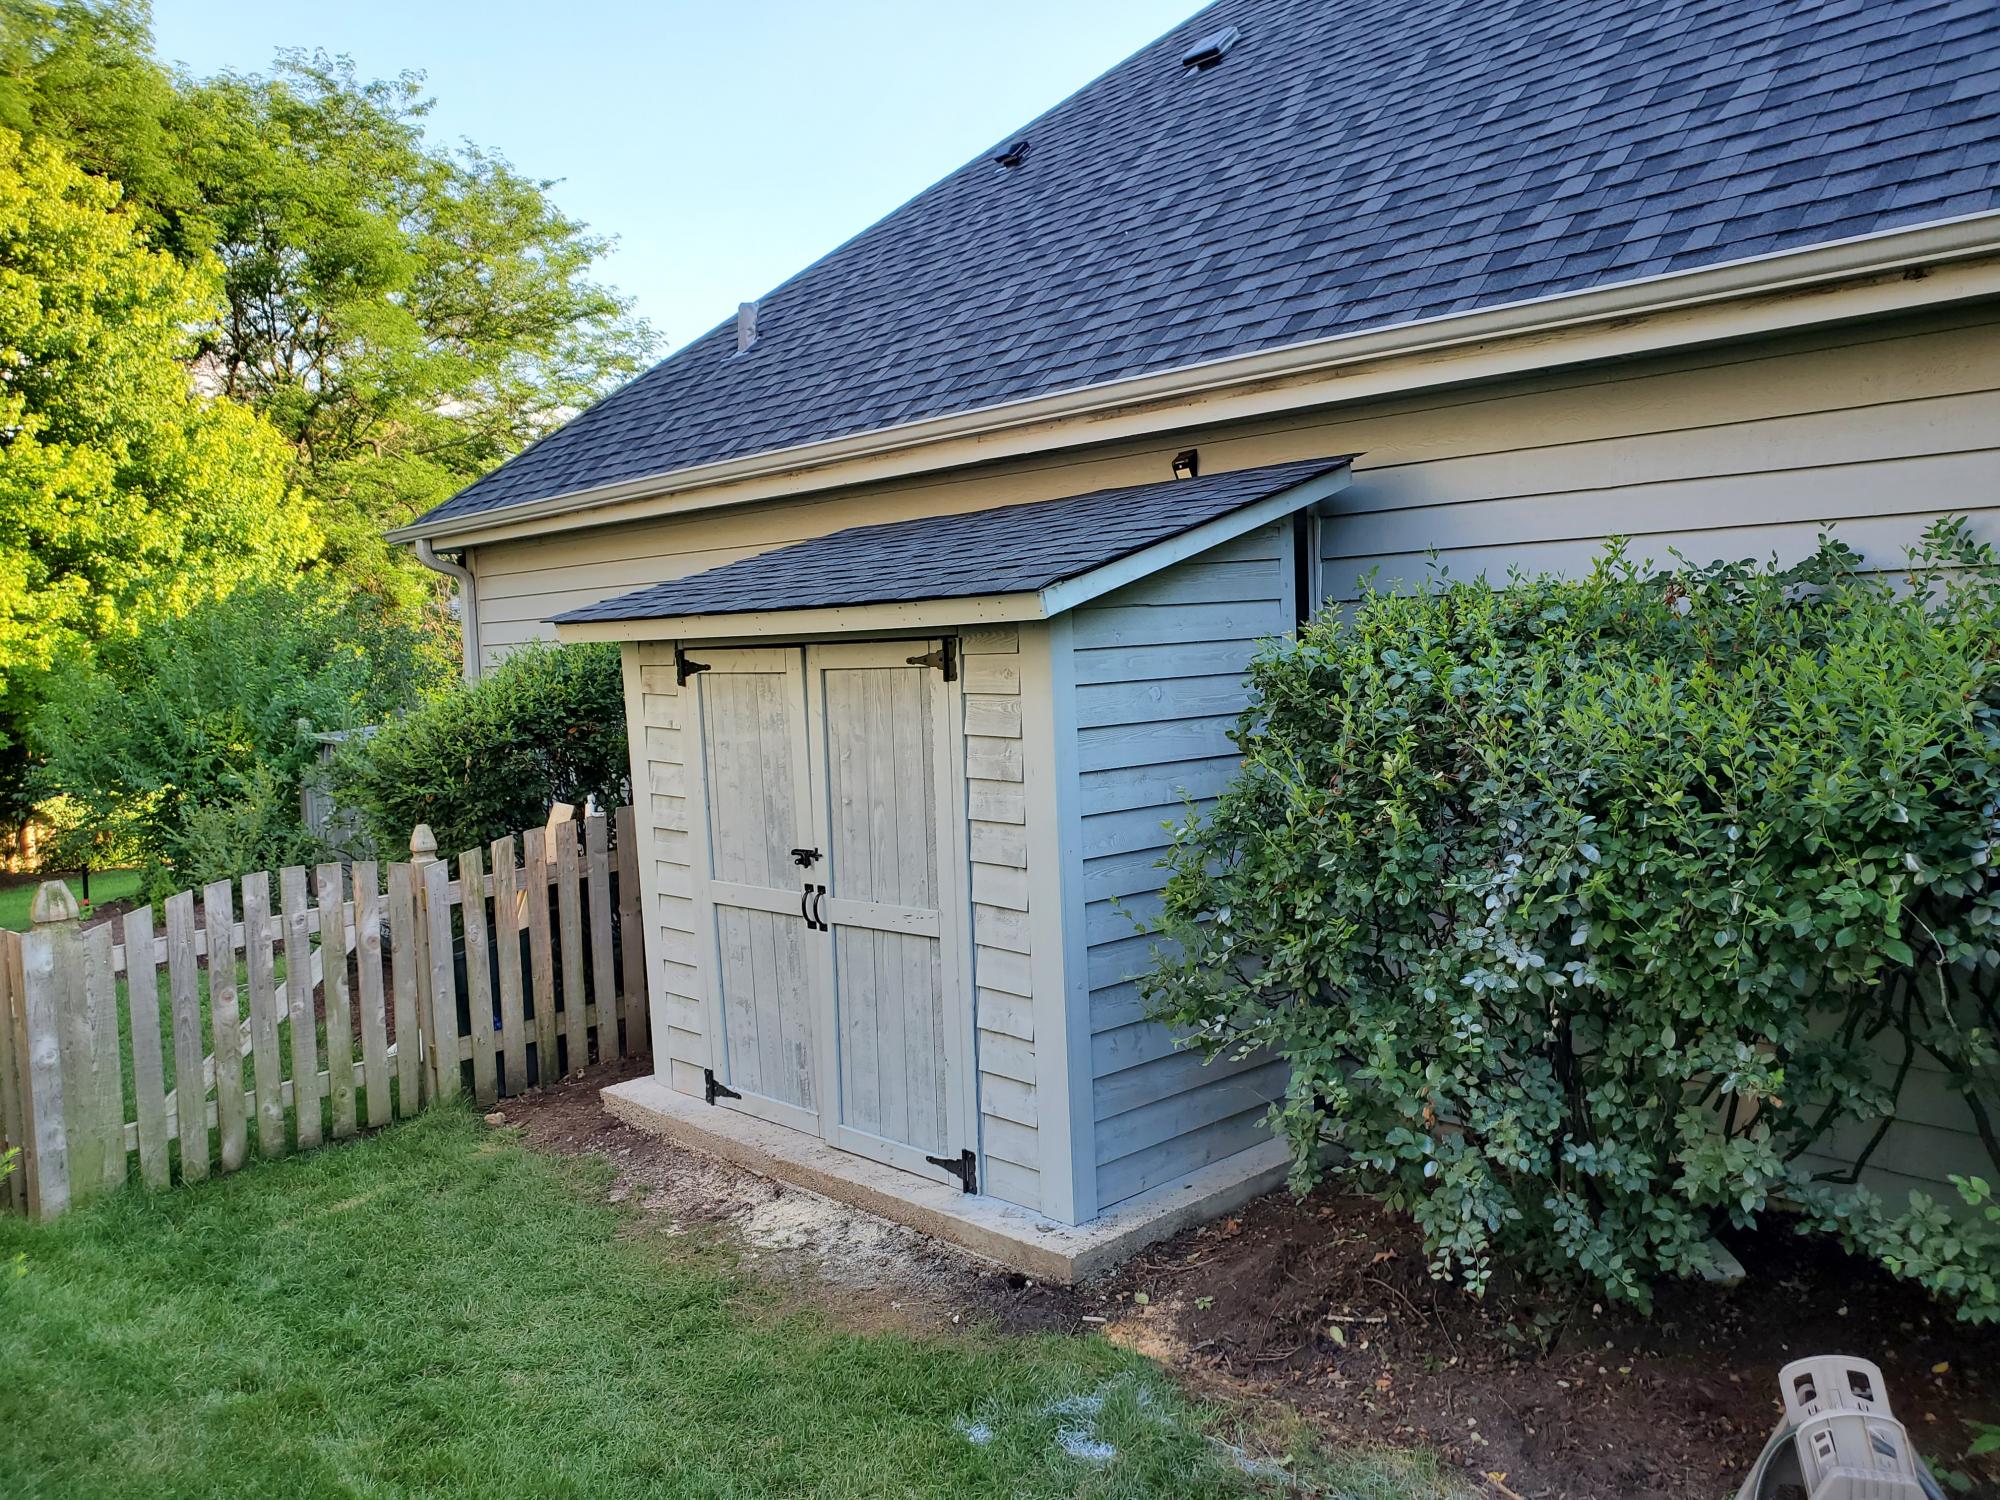
Thank you for the plans, shed turned out great! My association required me to match the siding color, roof color, and anchor to a concrete slab. So I poured 25 bags of 80lbs concrete to make a 9x5 slab. Redid the plans for an 8x4 shed, built the frame with 2x4s and not 2x2's, installed flashing, ice/water shield + felt + matching shingles since I'm near Chicago, and used a flexio finishing sprayer to paint the shed. Saved some $ by using 2 Redwood Grain Fiber siding panels for $22 each at HD.
All in all very happy with my shed and all my dangerous yard tools and woodworking tools can be put away from my toddler.
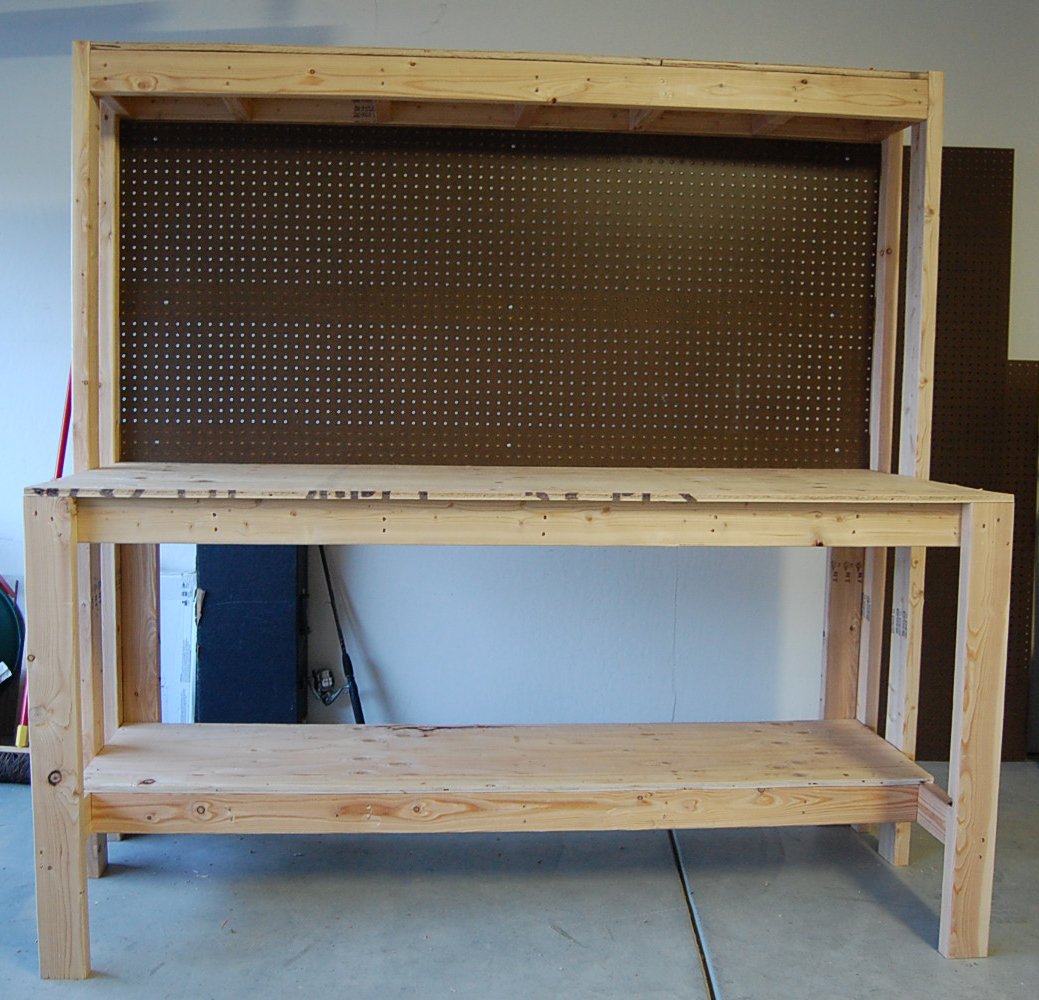
This is our 2nd project - we liked building the bookshelf so much, we decided we're gonna keep going and need a good workbench. Got these plans from the Family Handyman Website (http://www.familyhandyman.com/DIY-Projects/Woodworking/Workbenches/how-…). They claim the cost to be $50, but it was closer to $80 for us - still a GREAT project and easy to put together with the nail gun.
Sat, 04/16/2022 - 07:29
No working link. Cannot find this or the plans.
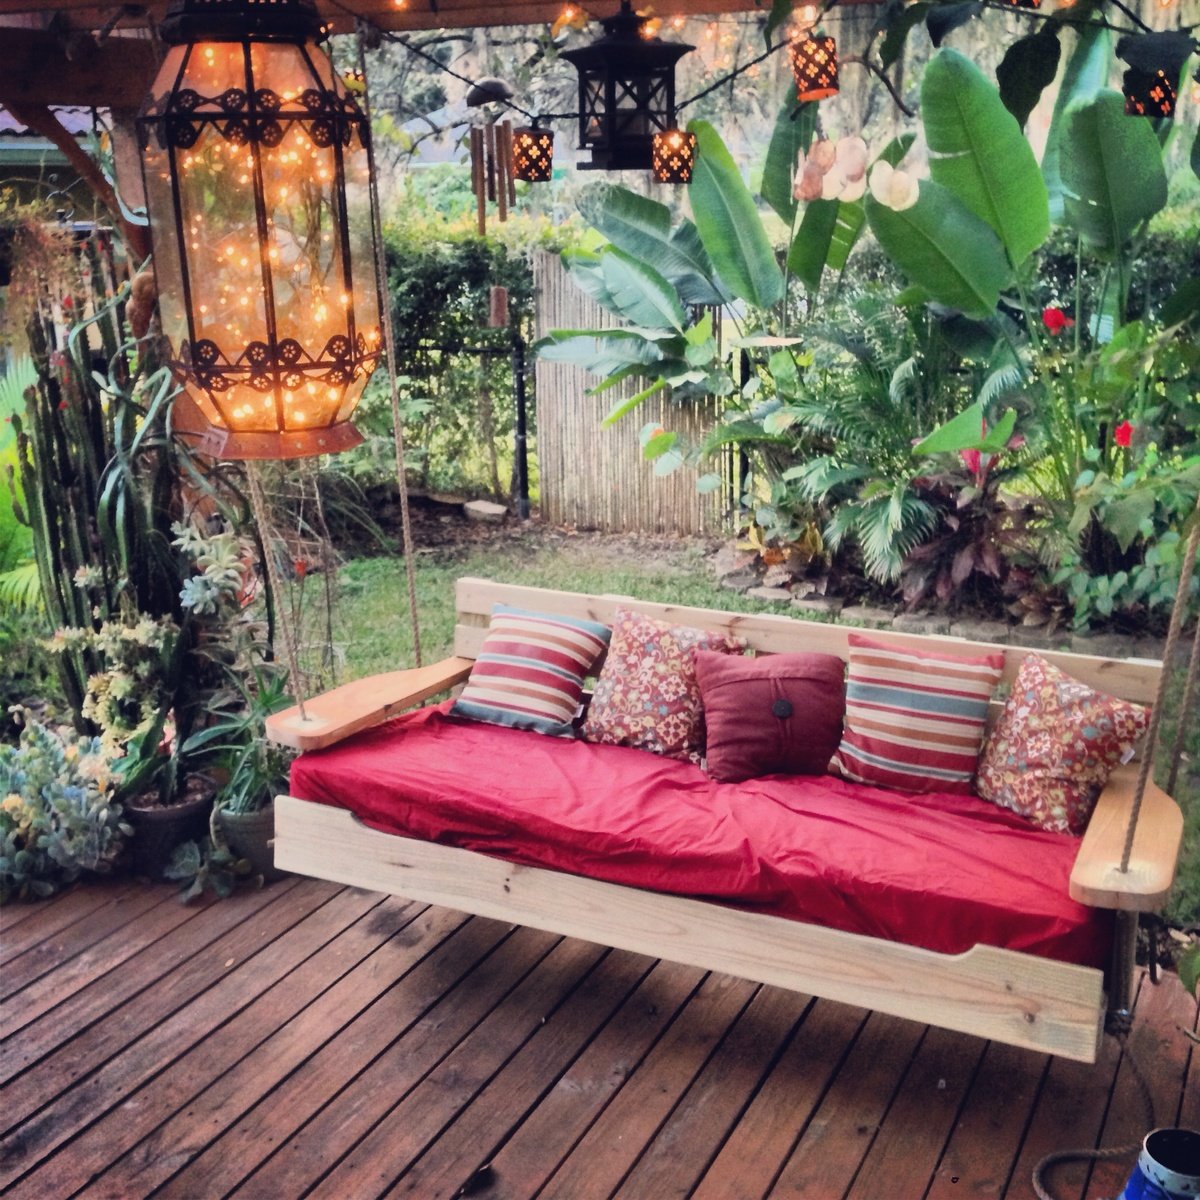
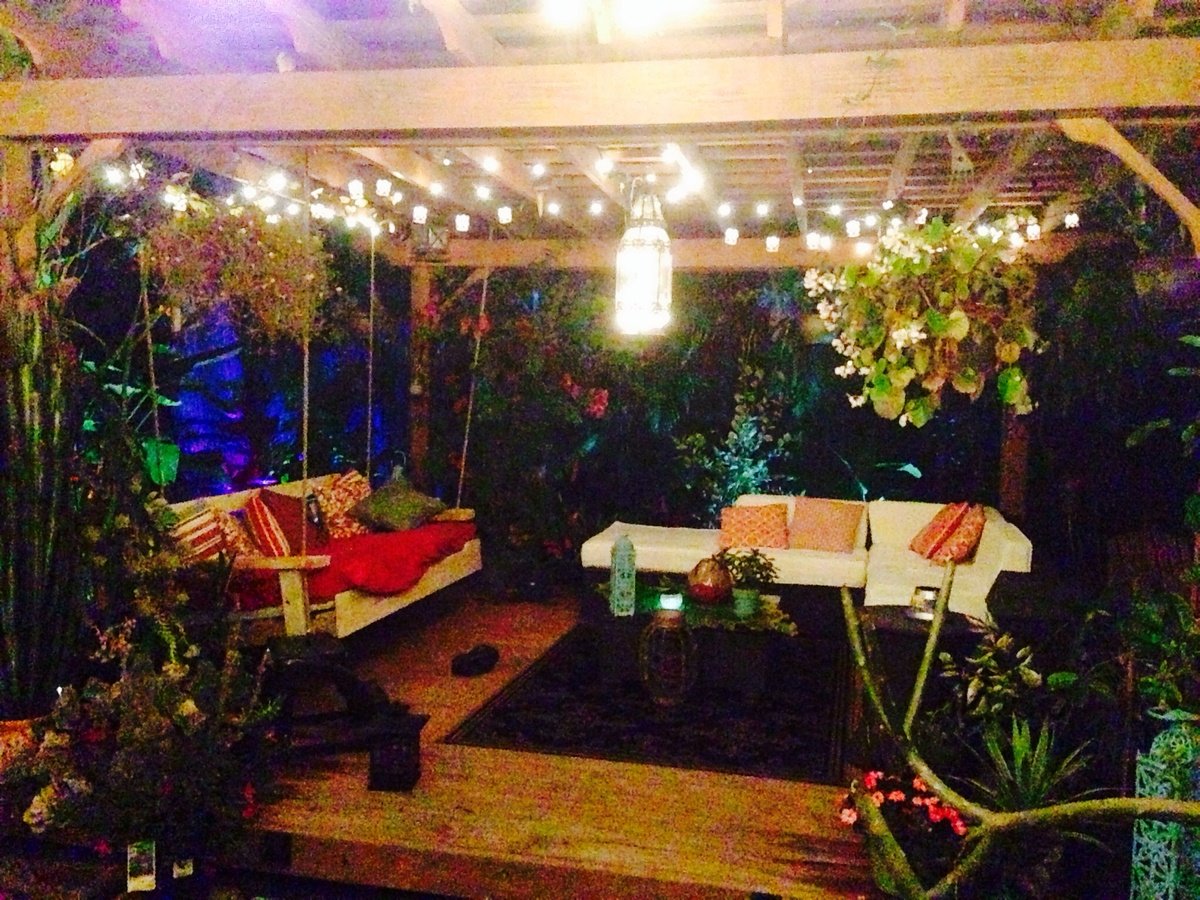
Started off with the original design but enlarged it to fit an oversize single mattress. The mattress cost me $35 from a local faith farm, while the materials came in around $200. I decided to hang under my backyard pergola. Fun and easy project.


Tue, 01/28/2014 - 21:10
Wow this looks so inviting I might just have to make one too! Nice work-- it looks great!
Mon, 04/07/2014 - 22:49
Really lovely! Great job! This will be one of your favorites spots all summer long.
Mon, 07/27/2015 - 22:45
I want this! I just made a couple of plant stands for my front porch. My husband asked me what my next project was, why, a swing bed. (This was only my second project!) I want to put cup holders in those big ole arms! We have a house at the beach in South Alabama, so, you gotta "hydrate." This is an awesome swing. I can't wait to do mine...pillows to rest on, one foot on the concrete pushing me in a slow swing. Cold beverage in my hand or in my cup holder. Yep, southern girl has a new project. Love it!
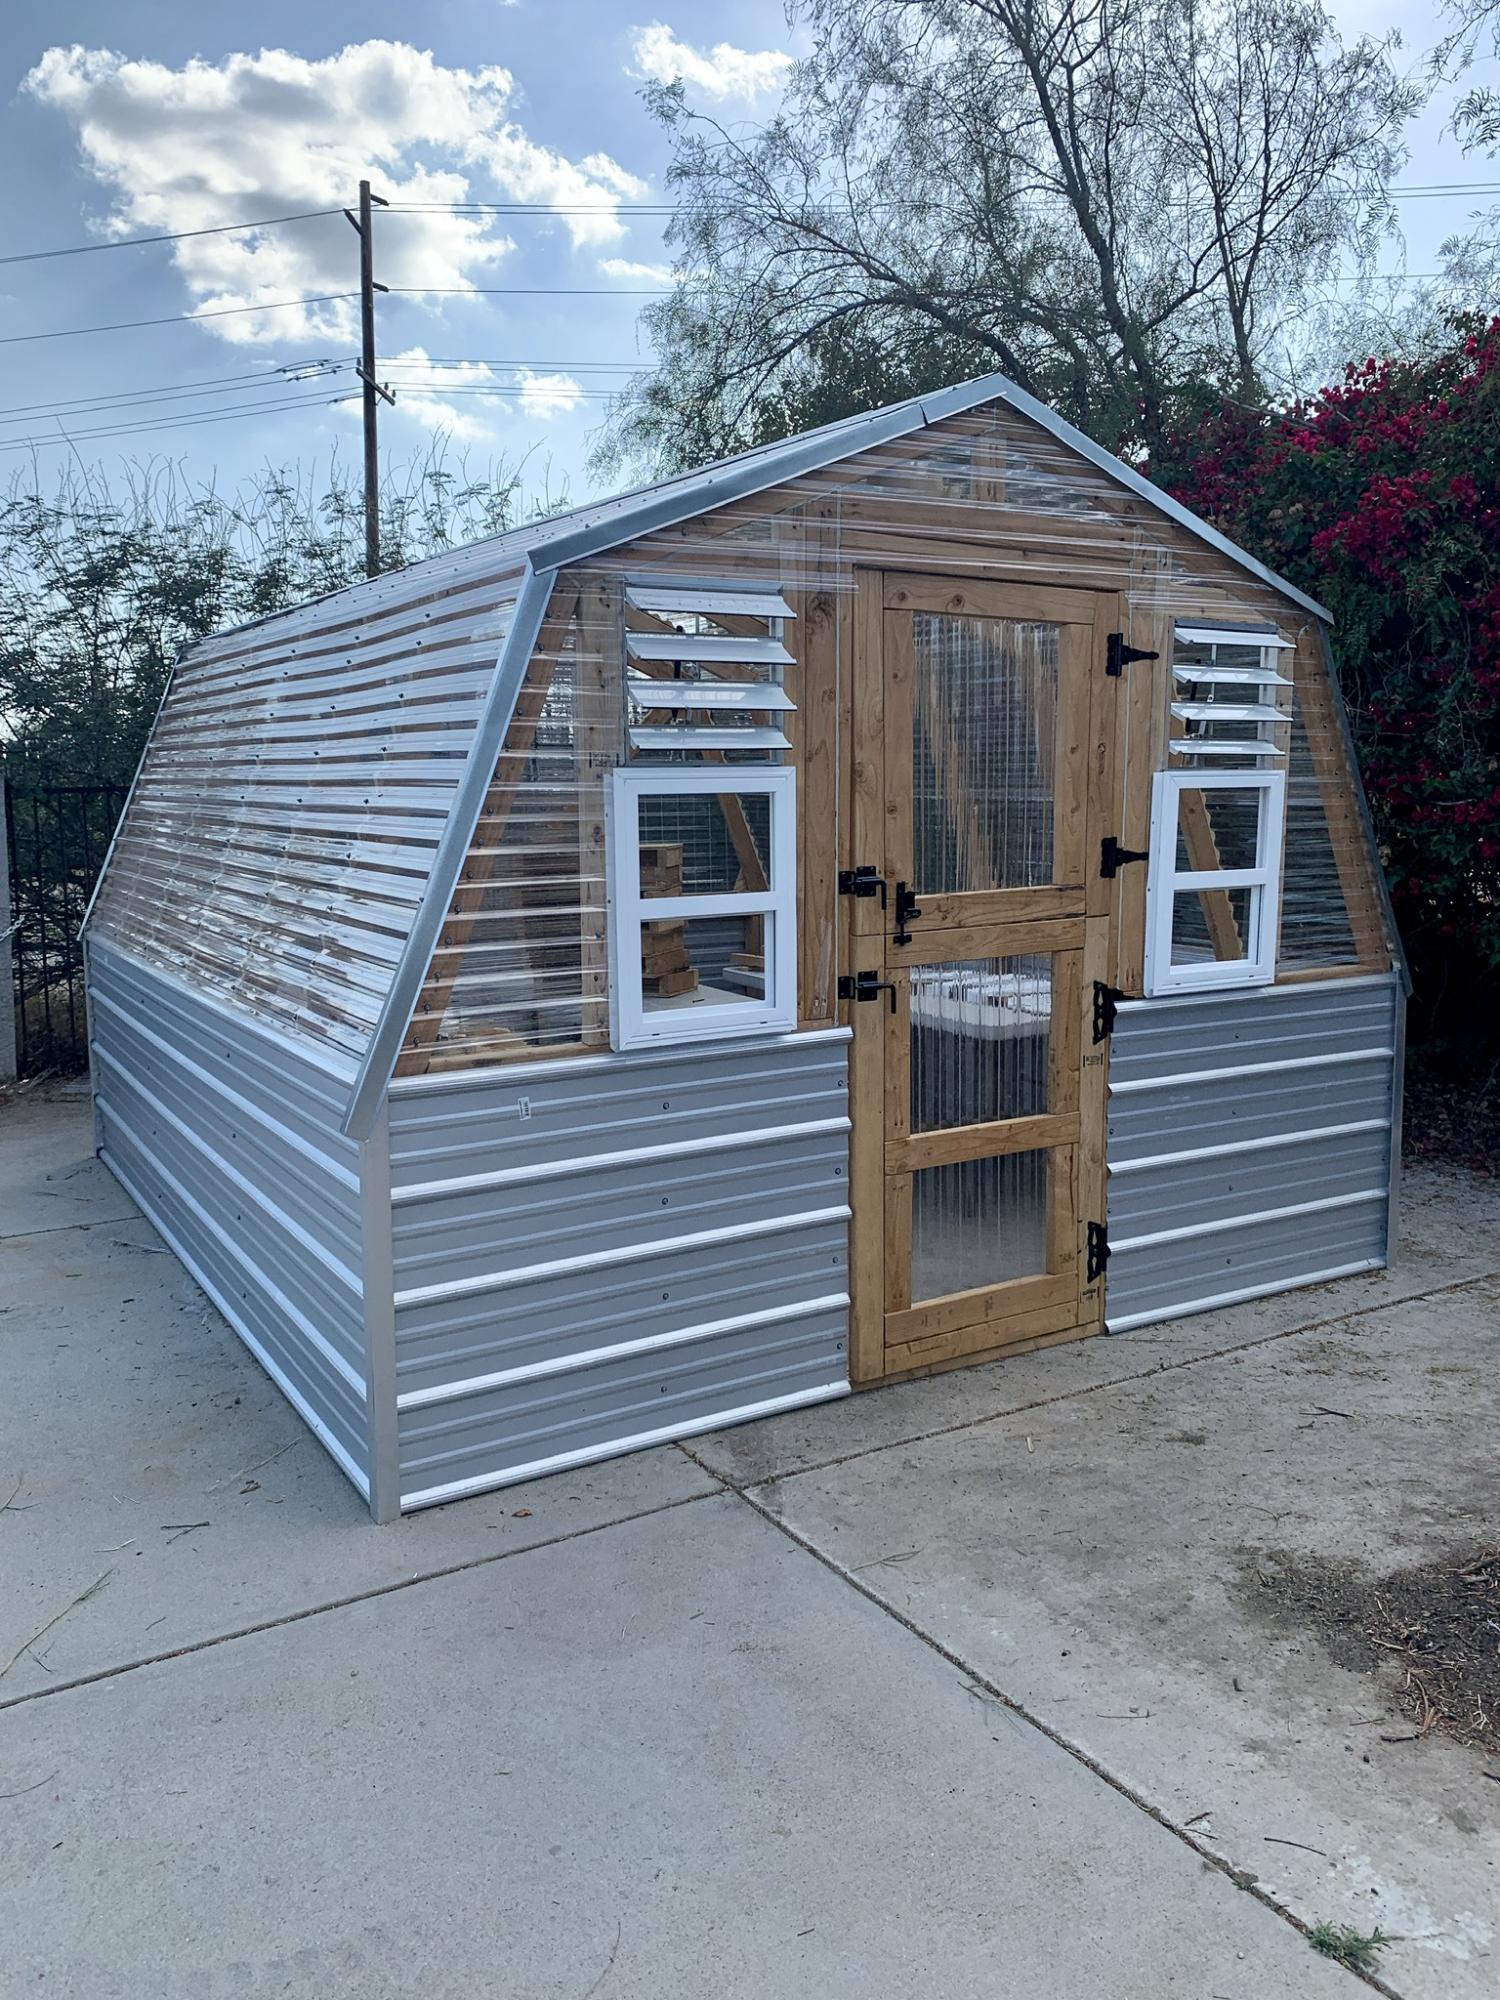
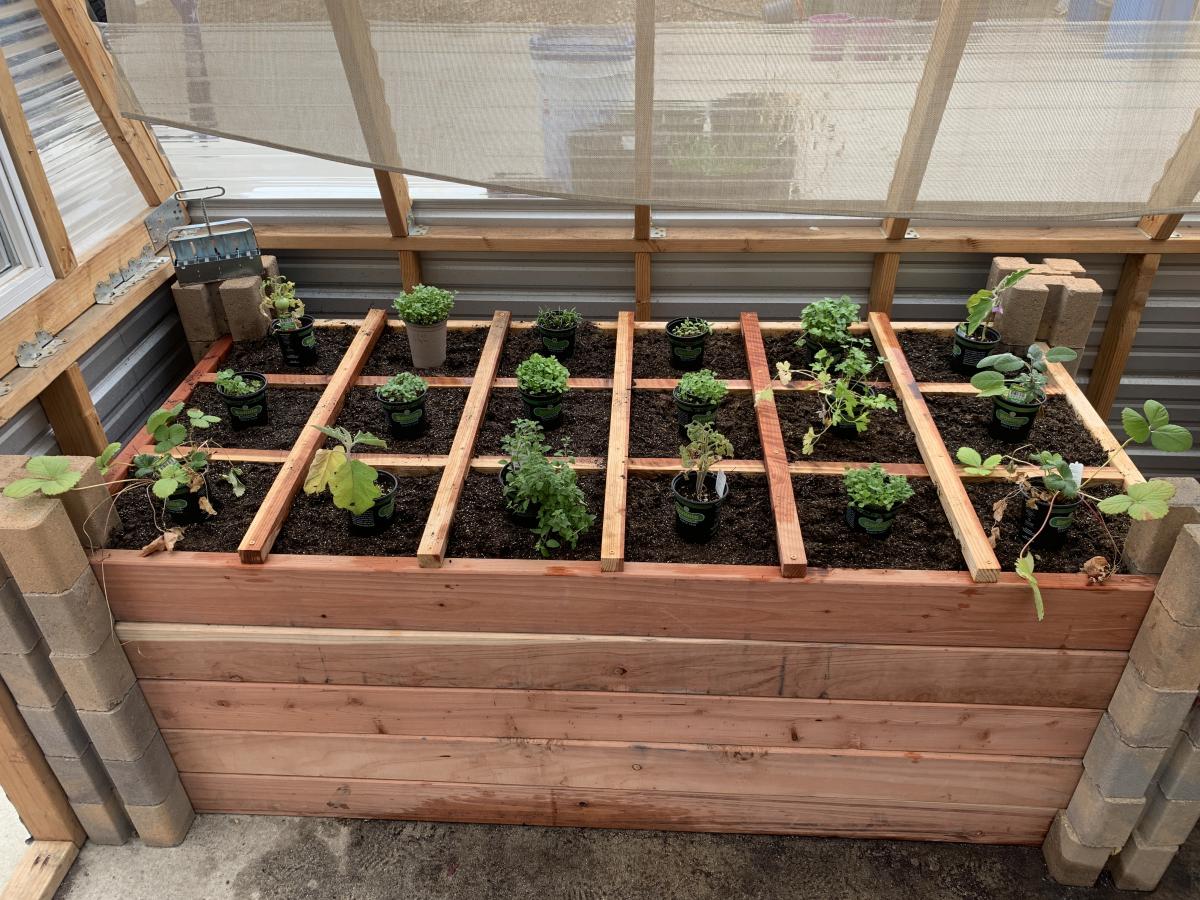
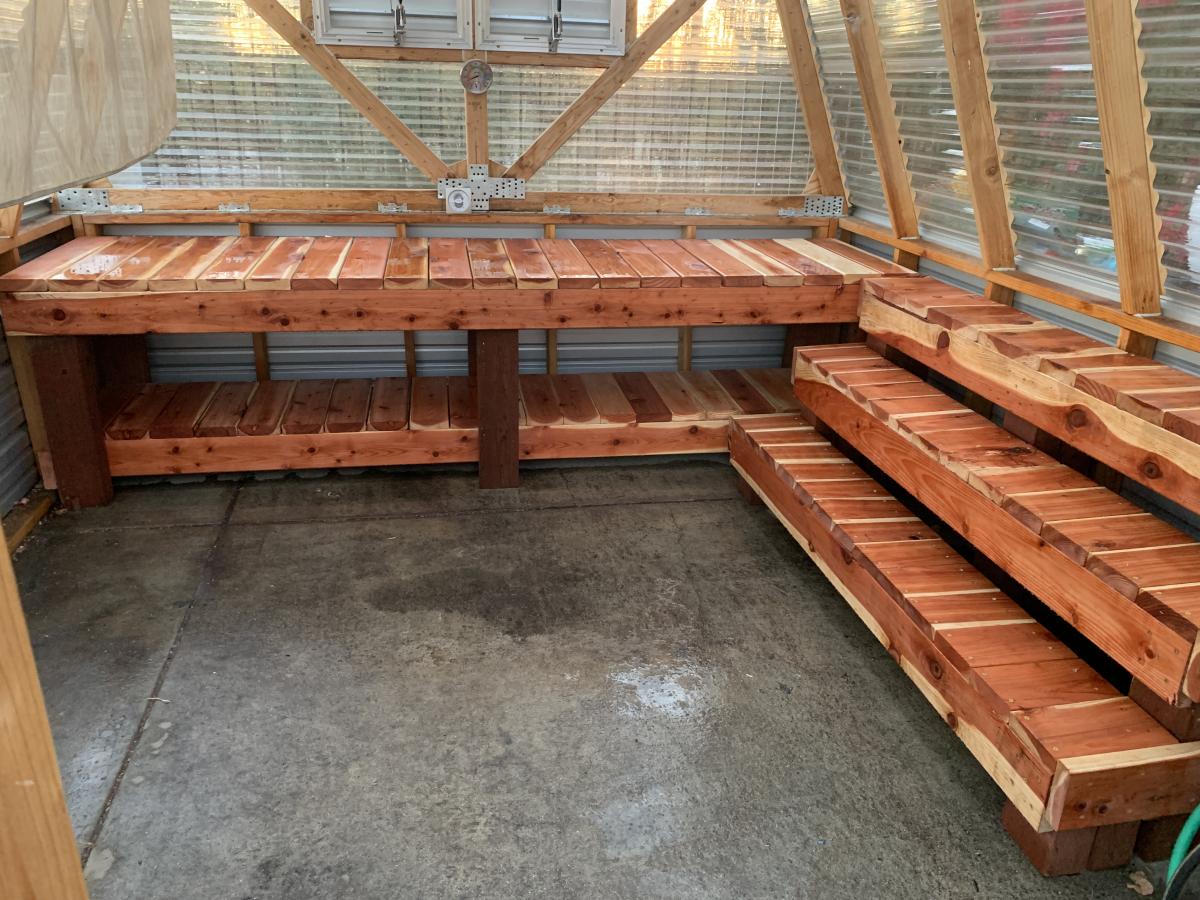
We made some modifications to the greenhouse to include a bench with three levels, a working bench and a square foot garden. We also put it on concrete to keep all the weeds out from the bottom as well.
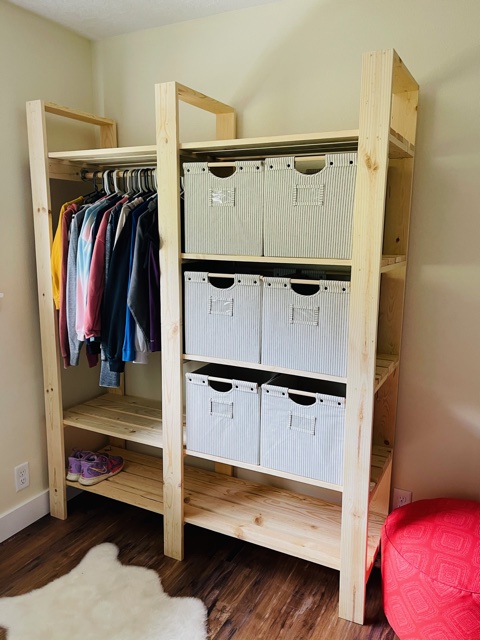
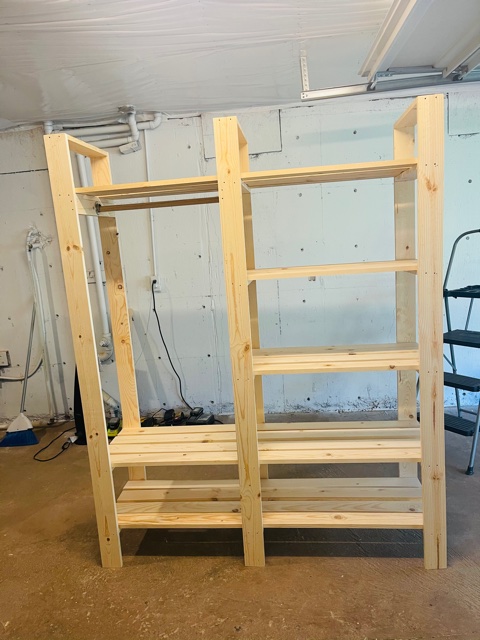
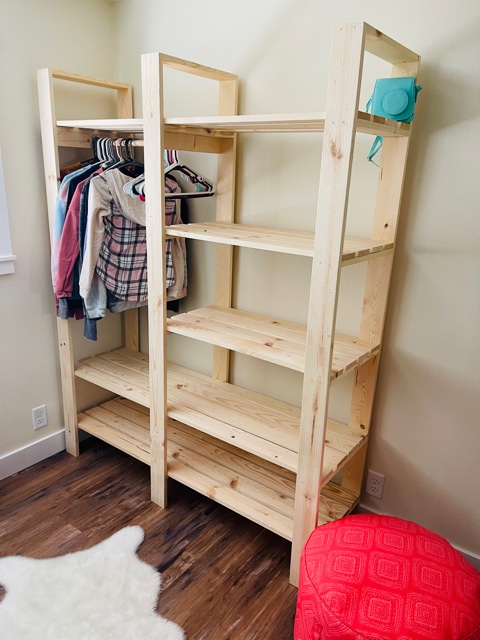
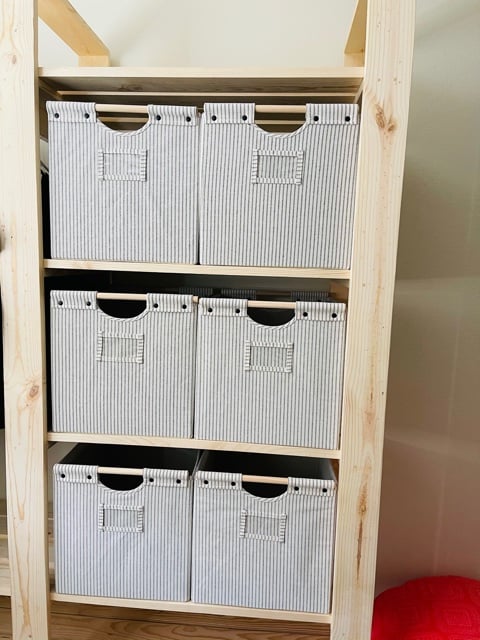
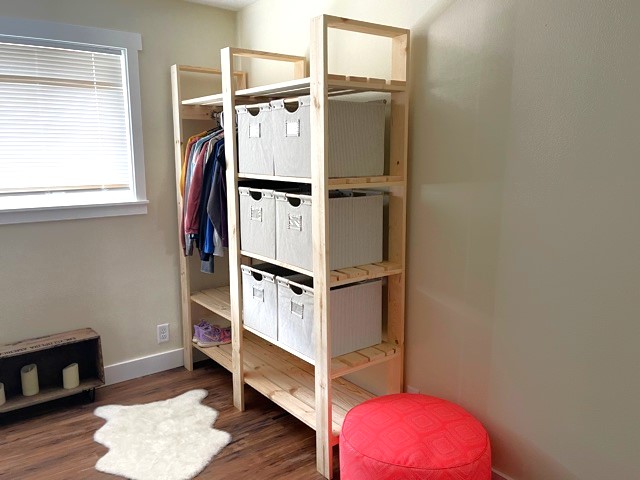
My daughter's room didn't have a closet, so I built one. This only took a couple of hours to build. I found the bins on Amazon and built to fit. It's 60" wide 18" D and 75" tall. I love this plan, it's super easy to modify the size and configuration!
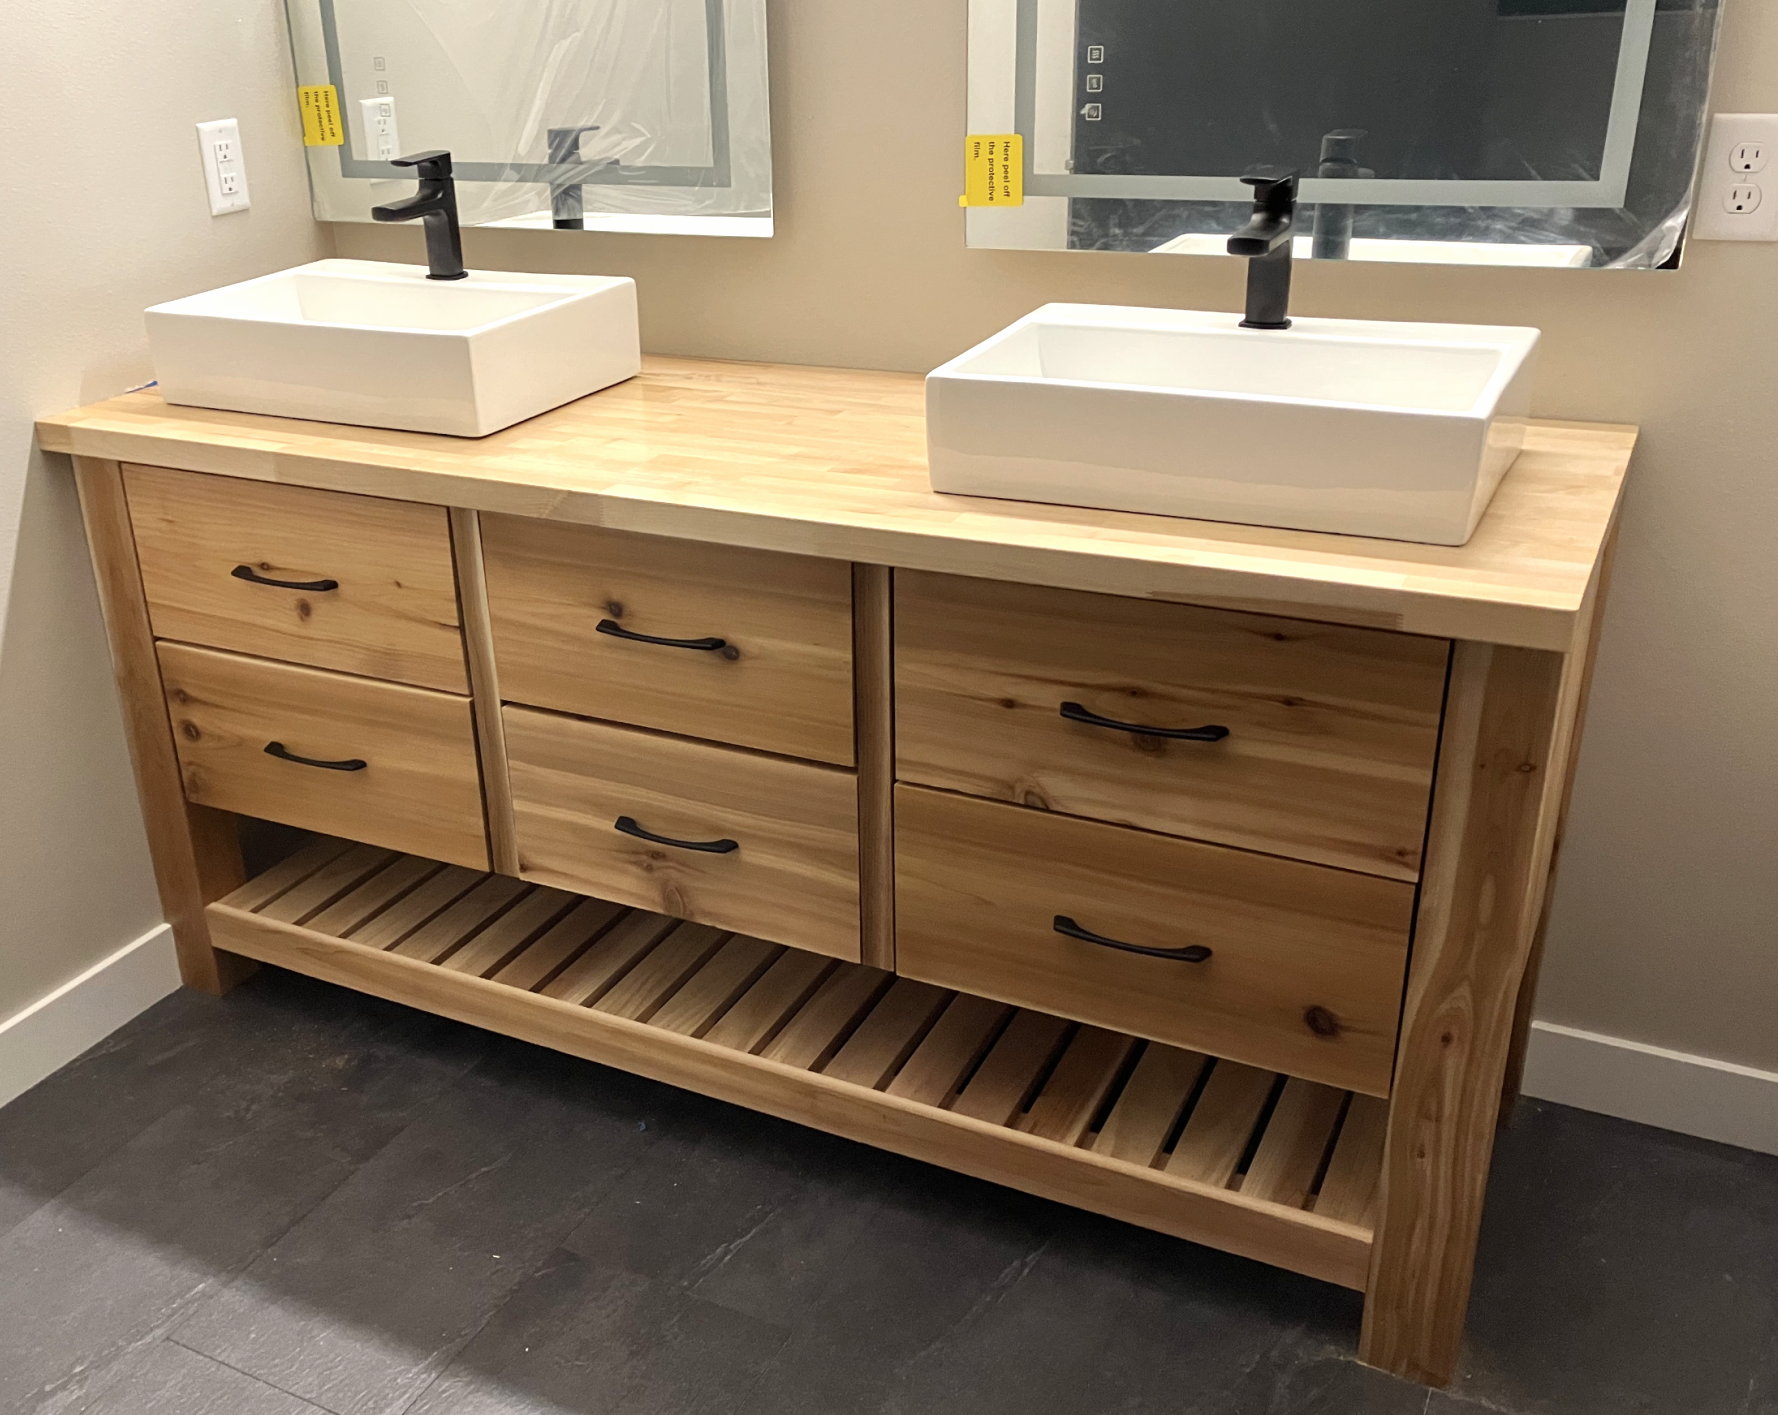
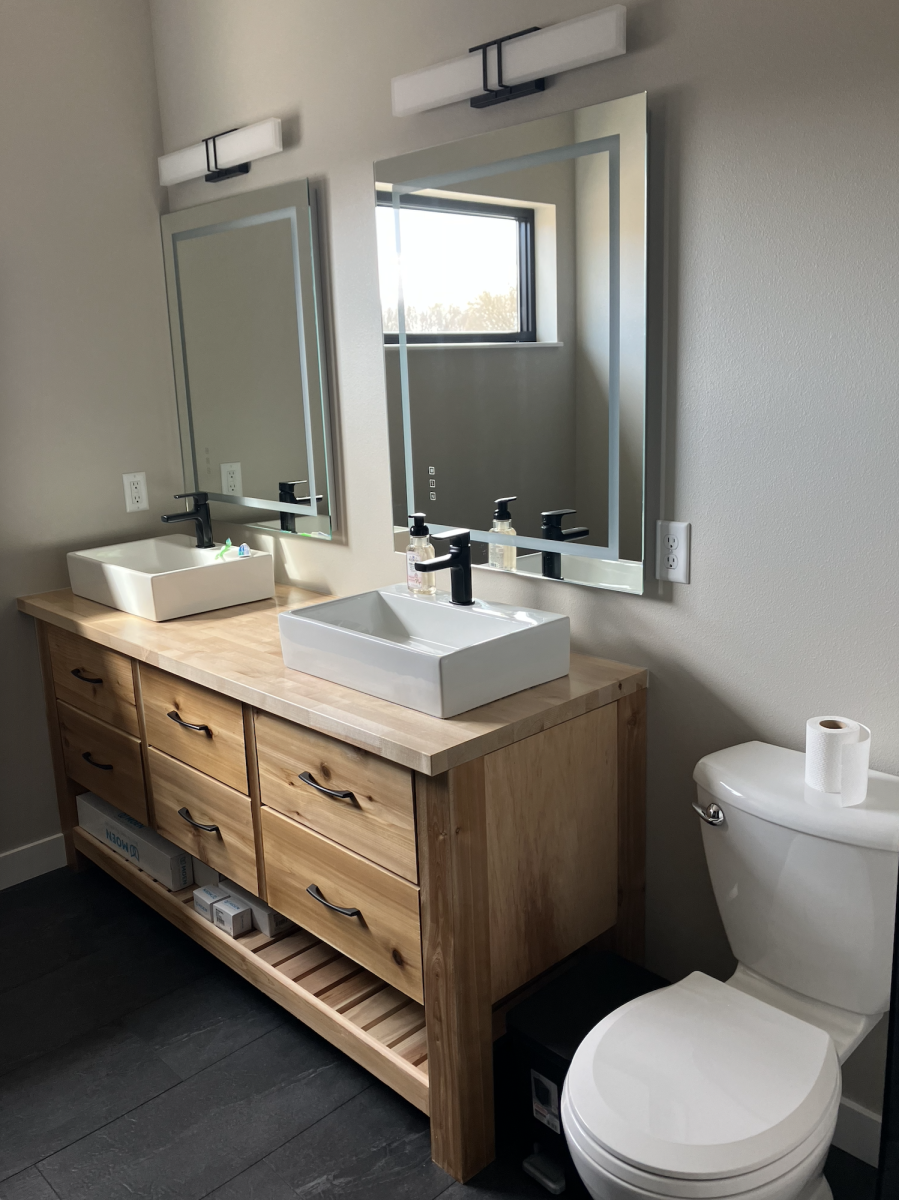
After looking at some terribly overpriced particle board vanities, I found the lovely Rustic Farmhouse Double Bath Vanity plans and decided to go for it. I think this vanity turned out much better than anything I could have bought with the same amount of money, and it will last much longer too!! Thanks Ana!!
Thu, 05/04/2023 - 10:26
Absolutely stunning, thank you for sharing your beautiful createion!

I built this for my daughter after Christmas sinse she had the living room covered in toys. The dimensions are 37" x 18" x 20"
Tue, 01/09/2018 - 05:51
HI Anna,
Can you provide more pictures or instructions on how you assembled this toy box? i want to make one just like it!
Thanks!
Wed, 03/10/2021 - 16:31
Looking at the wall panels they look like the long edge of each panel has a small bevel cut on it. This gives each panel edge a more pronounced or well-defined edge? Is this true? Was it done with a router?

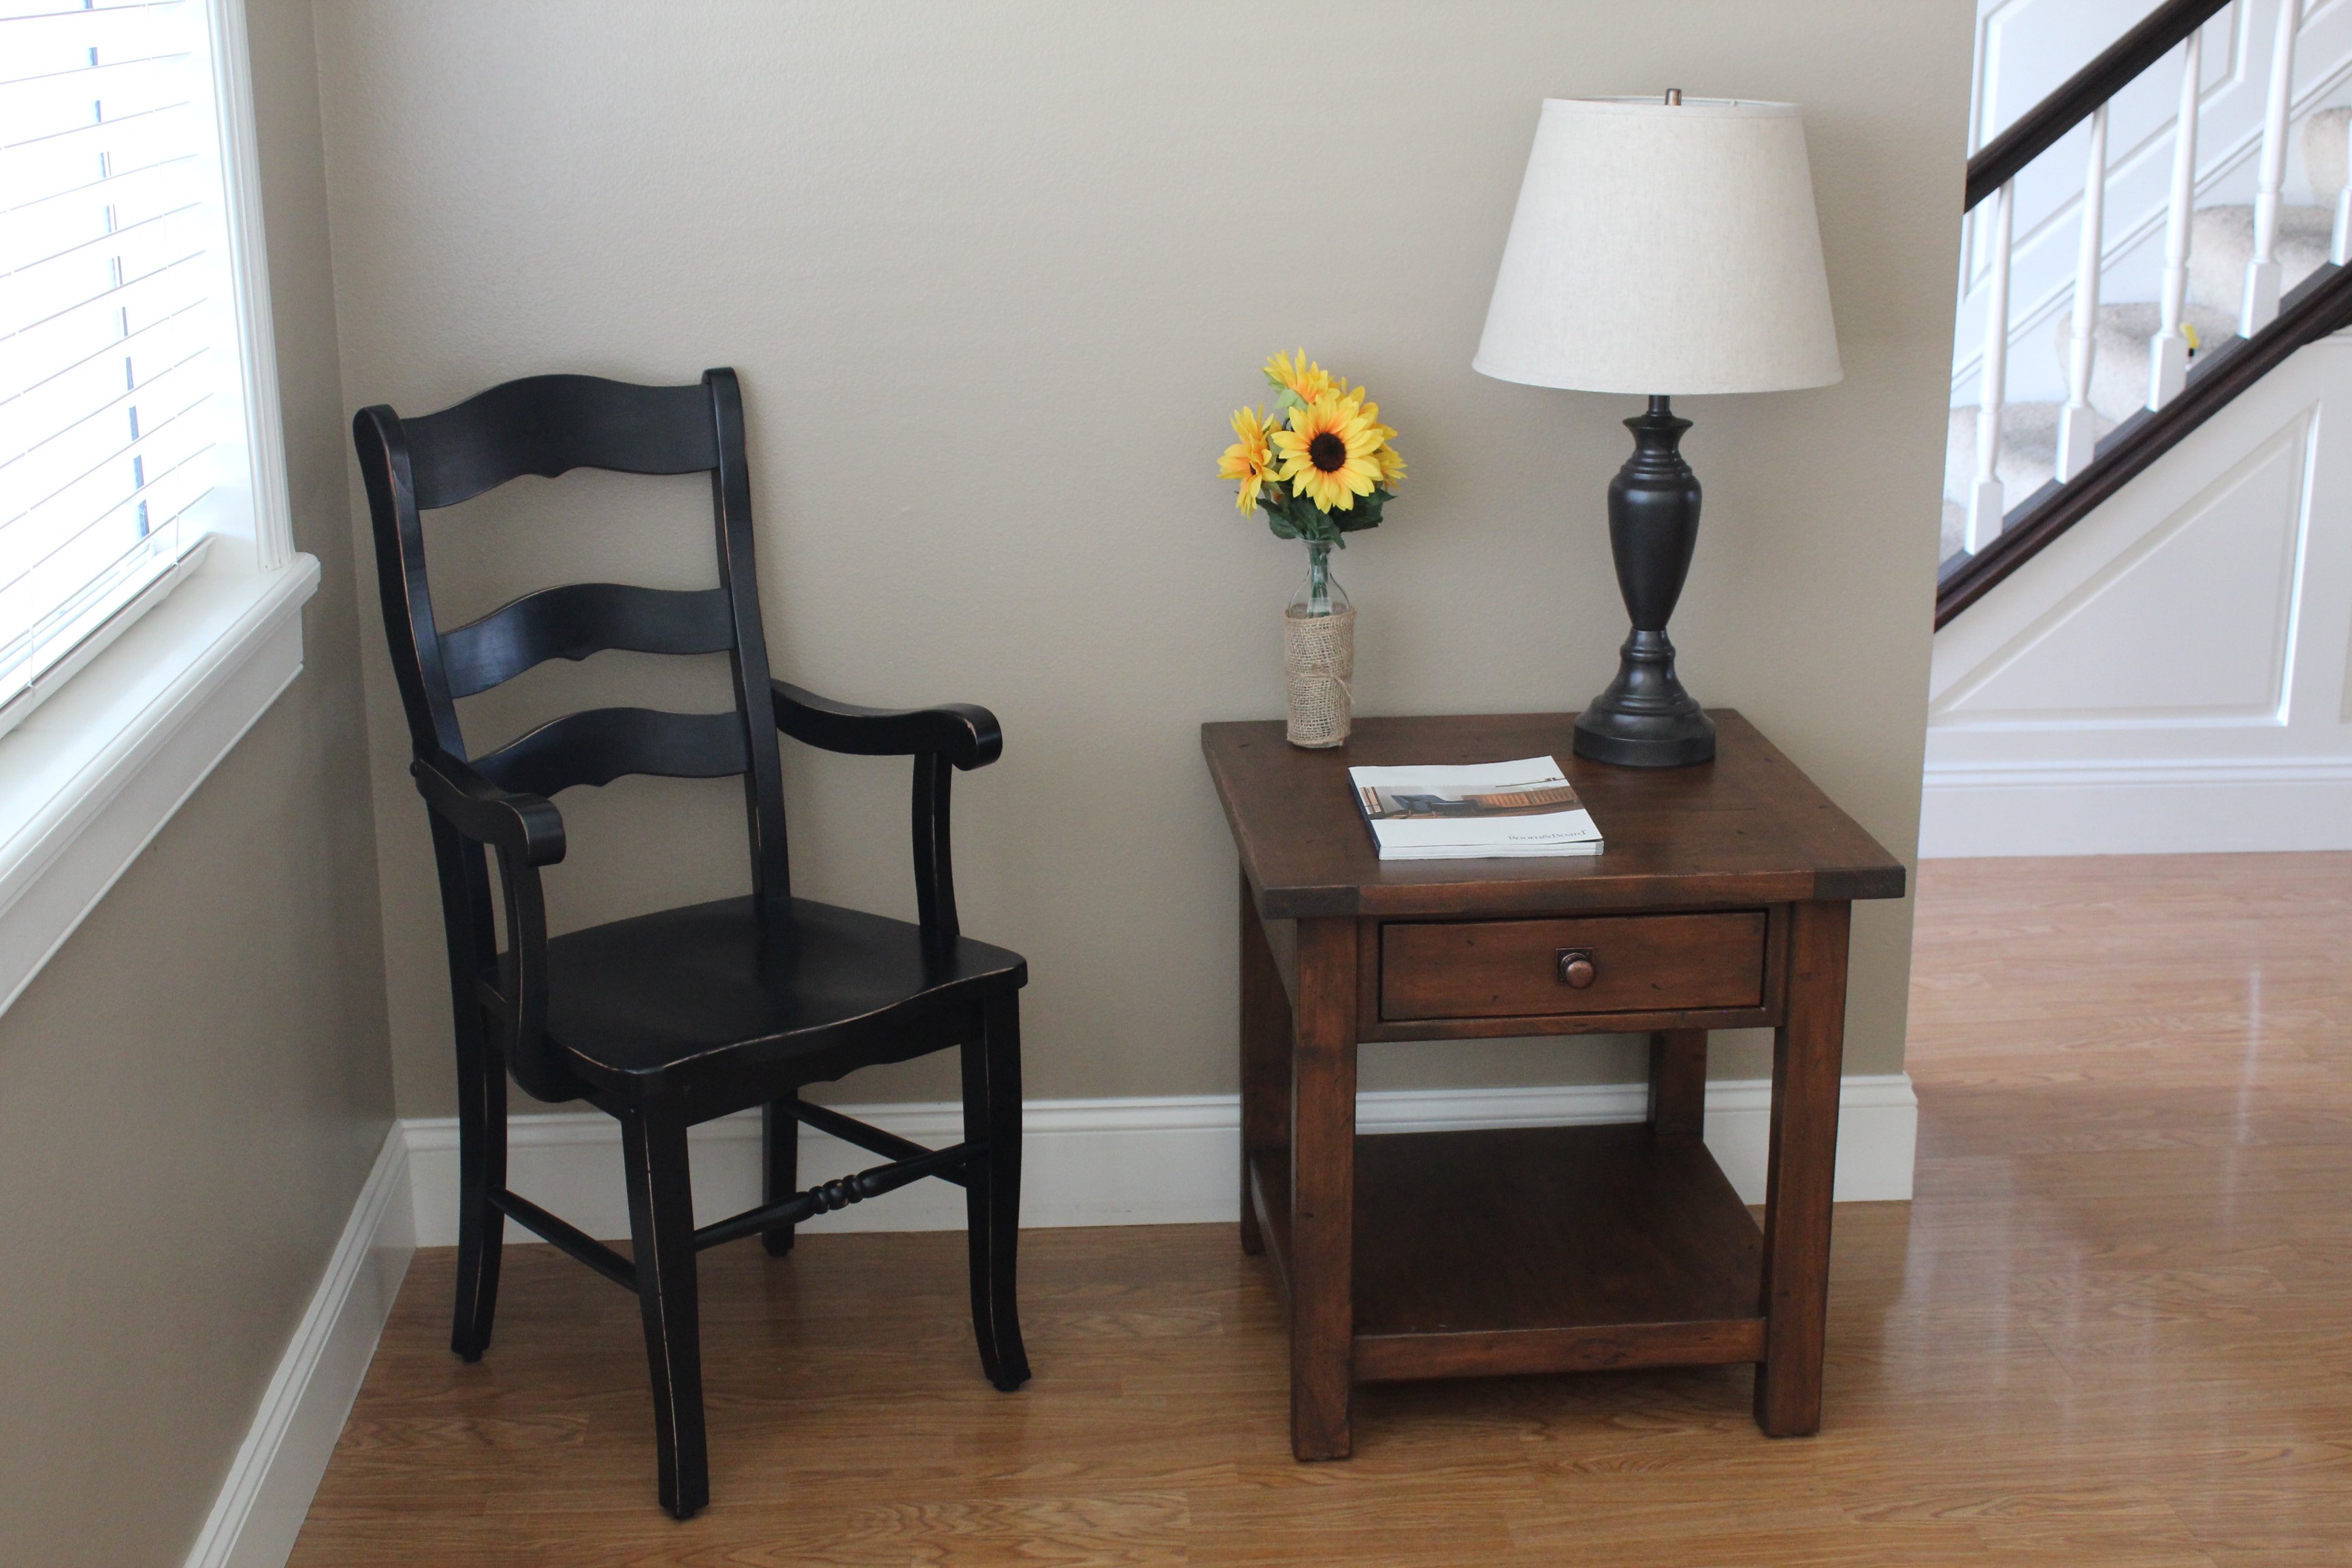
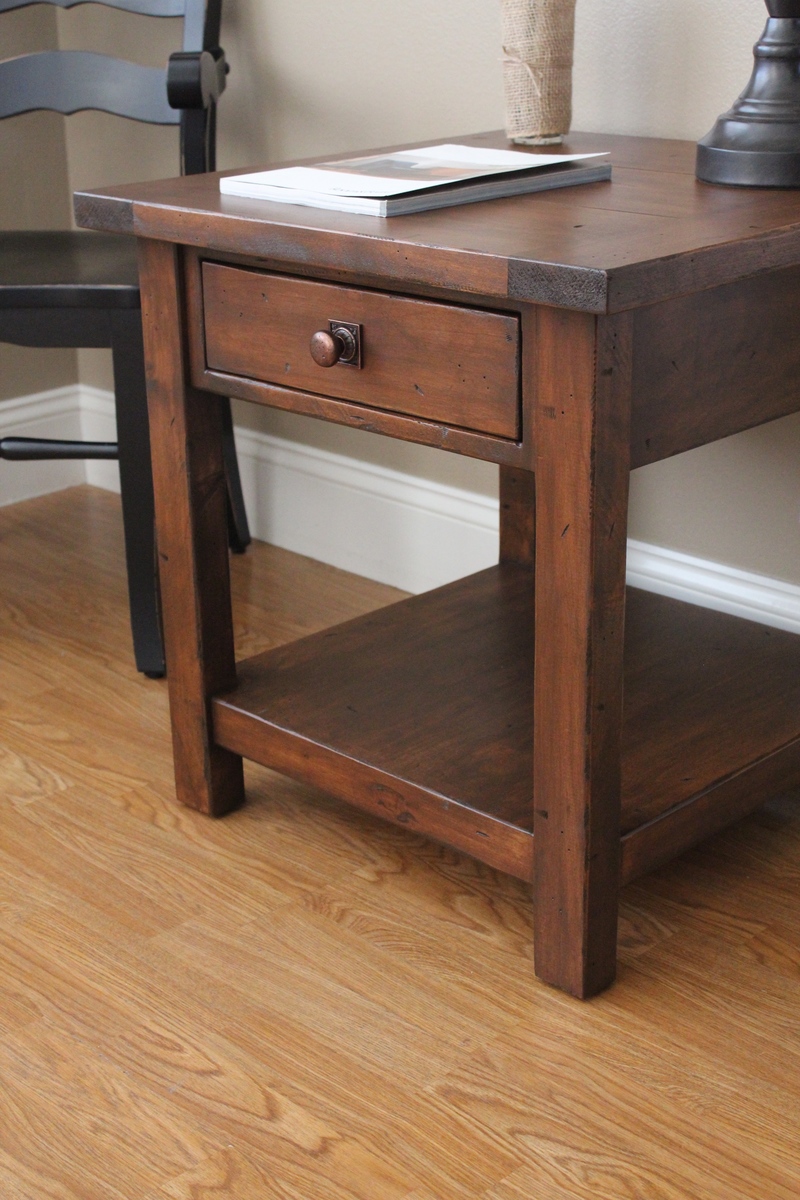
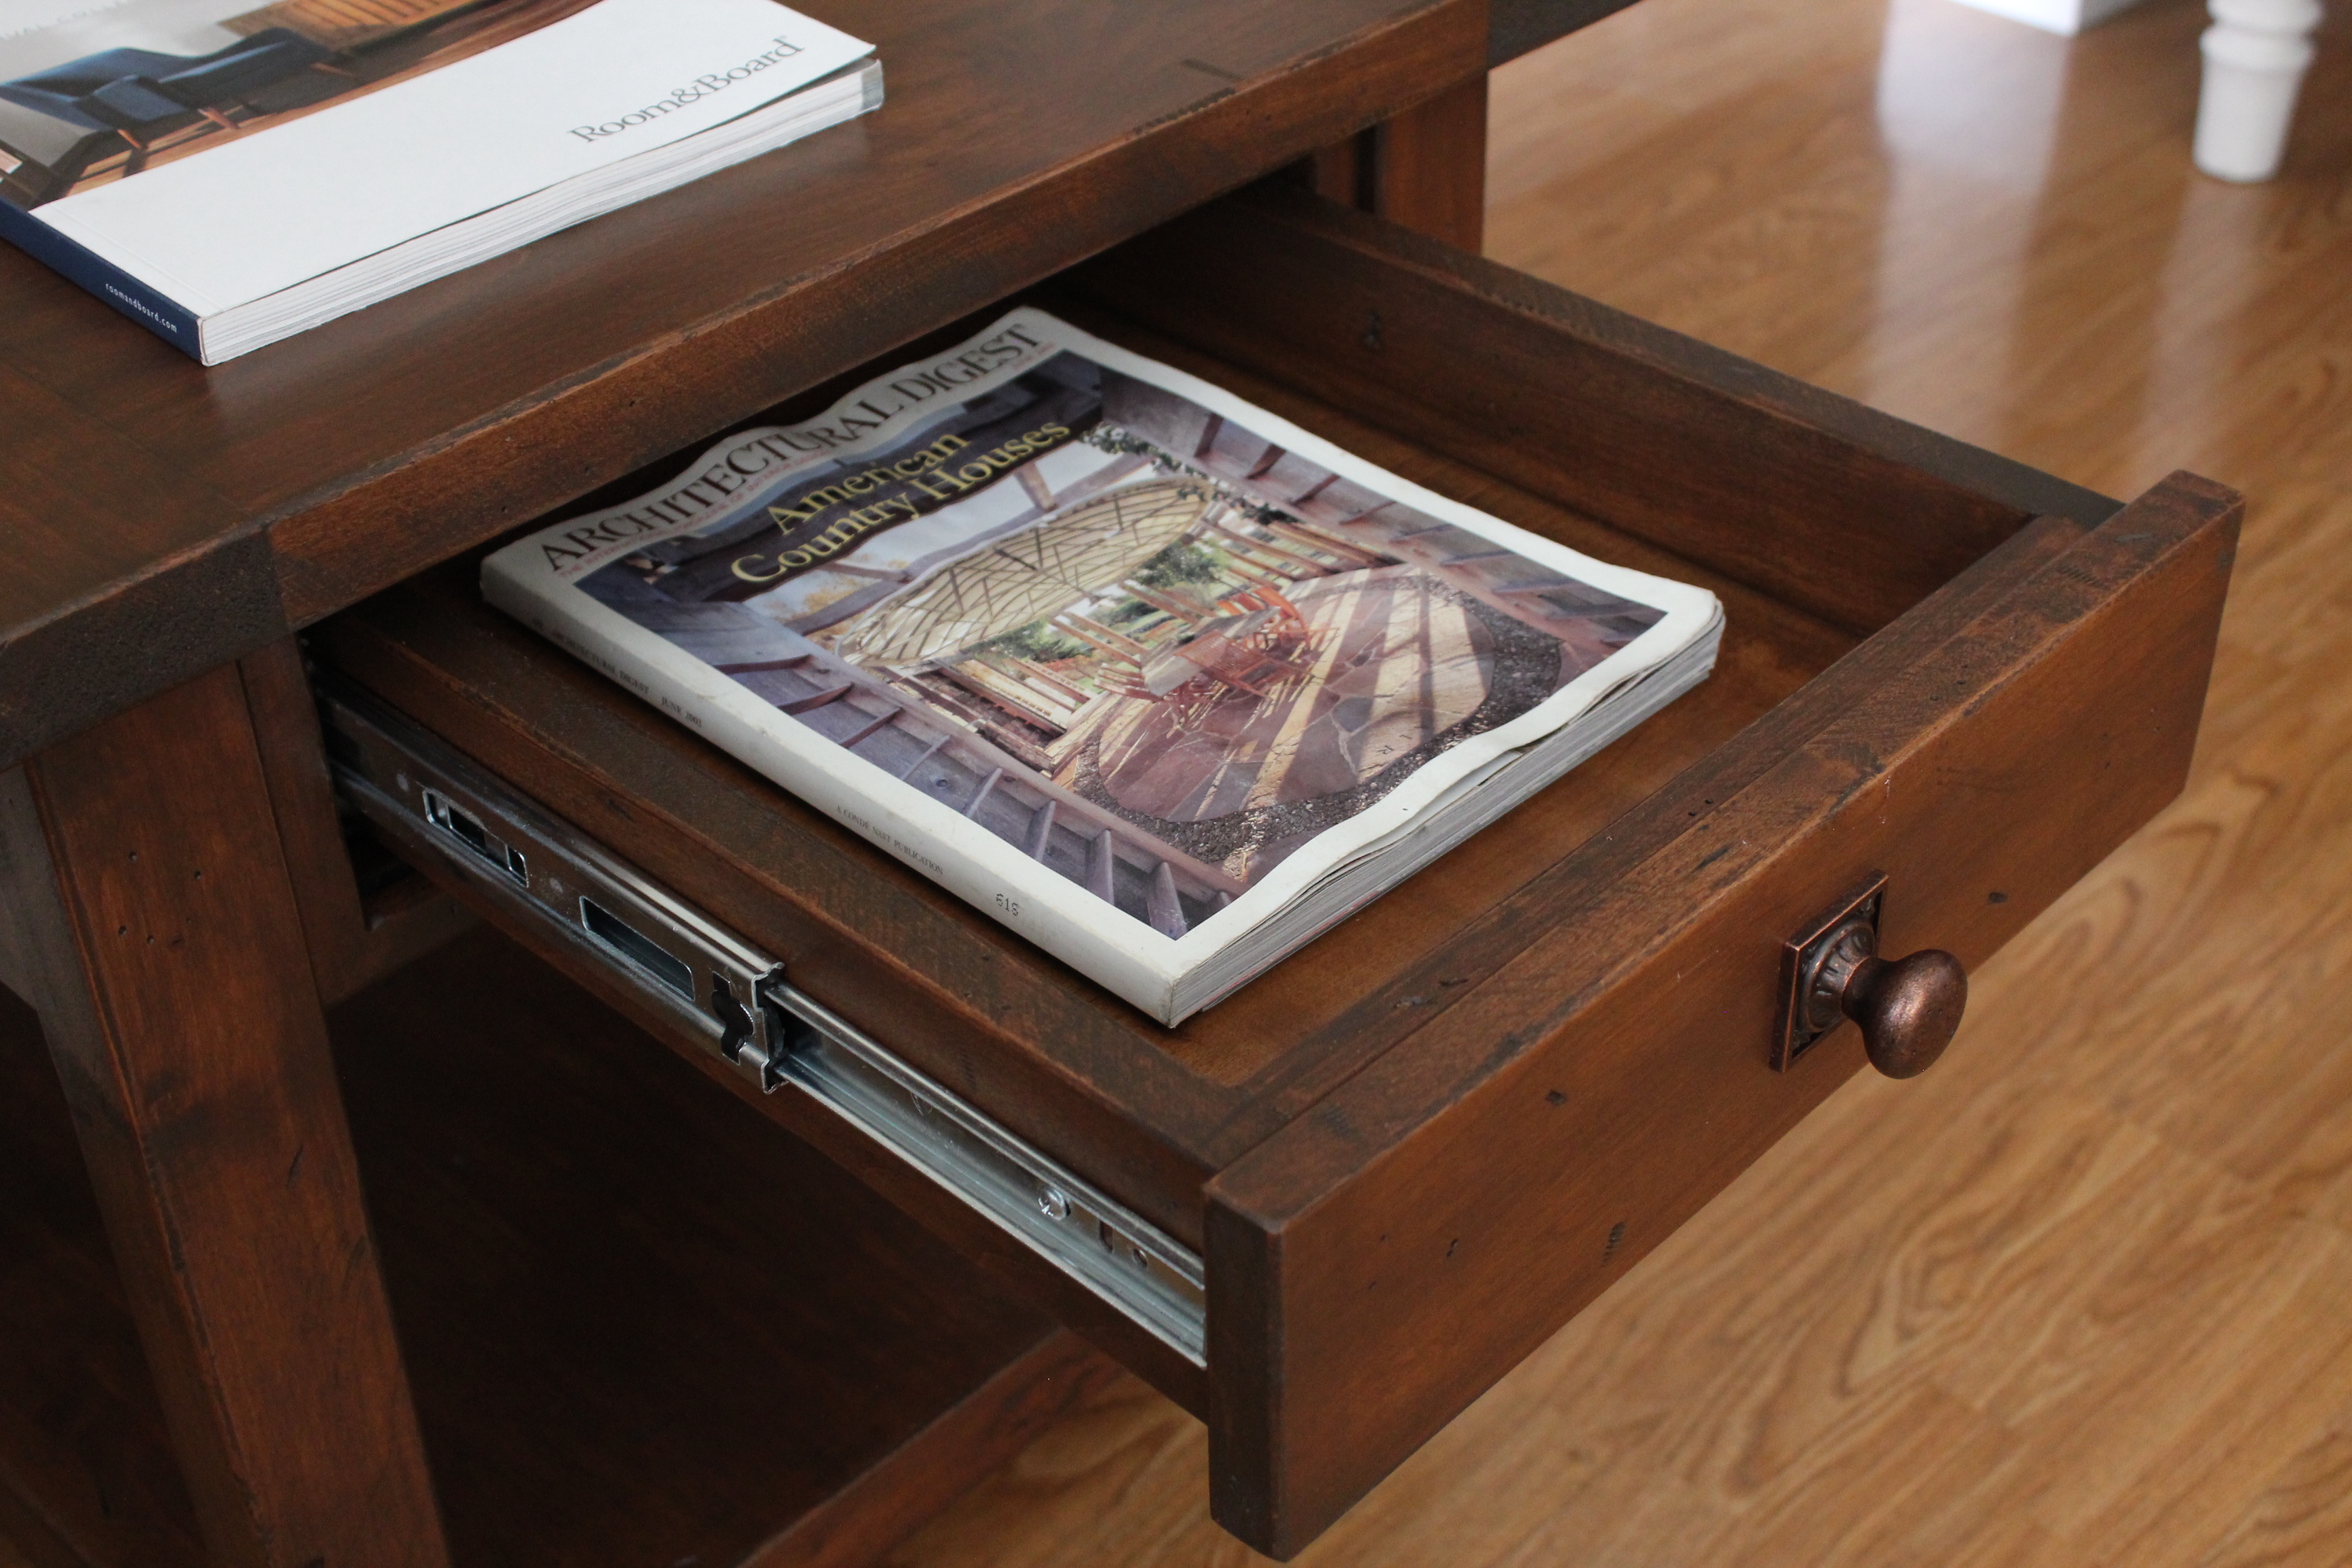
I took the plans for ana white's benchwright coffee table and created this end table. This is an exact replica of the Pottery Barn benchwright end table. The wood was distressed by hand and finished with dye, dark walnut gel stain and three coats of satin poly.
- Brad
Mon, 02/09/2015 - 14:33
Your finish work is phenomenal. Closest I've seen to pulling of the PB finish. What color transtint do you use? Any other finishing tips? I've build a couple of knock off PB pieces, but haven't nailed the finish yet.
In reply to Great finish! by marenras
Mon, 03/09/2015 - 22:10
Hi. Thank you for the compliments. First of all, using Alder vs douglas fir or pine plays a big difference in the finish look, but start with pine and see where you get using this process. I first mix de-waxed shellac with a few drops of medium brown transtint dye. It MUST be de-waxed shellac. Experiment with the amount of dye added. I spray one coat of that shellac and dye mixture on the wood. The shellac seals the wood allowing for even stain absorption and a non-blotchy finish. The dye obviously darkens the wood. Then I apply one to two coats of gel stain. I like general finishes antique walnut color. At the next step I sometimes add a glaze, and sometimes I don't, it just depends on what I am seeing. Lastly I seal the wood with a water based poly. Good luck!

Tue, 03/31/2015 - 10:04
I love the finish you've done on these, and like someone else said it is the closest to PB I've seen yet! I am trying to fix a horrible stain job I did on a project and had a quick question. When you said you sprayed the shellac and dye, do you mean with a spray bottle? Also what kind of de-waxed shellac did you use? I've never used shellac and I see they have flakes and premixed stuff. Thanks!
In reply to Wow! Awesome job! by colleenps
Thu, 04/09/2015 - 15:25
Hi There. Sorry for the late response. The spray the shellac with the dye using a HVLP sprayer. Google HVLP sprayers. They are very cheap and will help out tremendously. I don't recommend using shellac flakes, they can be challenging for a beginner. I use premixed shellac. I use de-waxed shellac because you can apply polyurethane over it. If you plan on applying shellac as a top coat instead of poly you don't have to worry about de-waxed.
Thu, 03/24/2016 - 11:41
This is absolutely beautiful and what I've been looking for to match my Benchwright coffee table!! Do you remember the dimensions you used?
Fri, 01/21/2022 - 09:26
I really like your take on this PB table. It looks like you changed it significantly from the console table plans from which you derived it, and I have a couple questions. First, the legs do not look like 2x4s; what are the dimensions you used? Second, the bottom shelf is much thicker than the 1x12 from the plans; what lumber did you use? And how is this bottom shelf attached to the legs? Square-notched to fit around the corners of the legs?
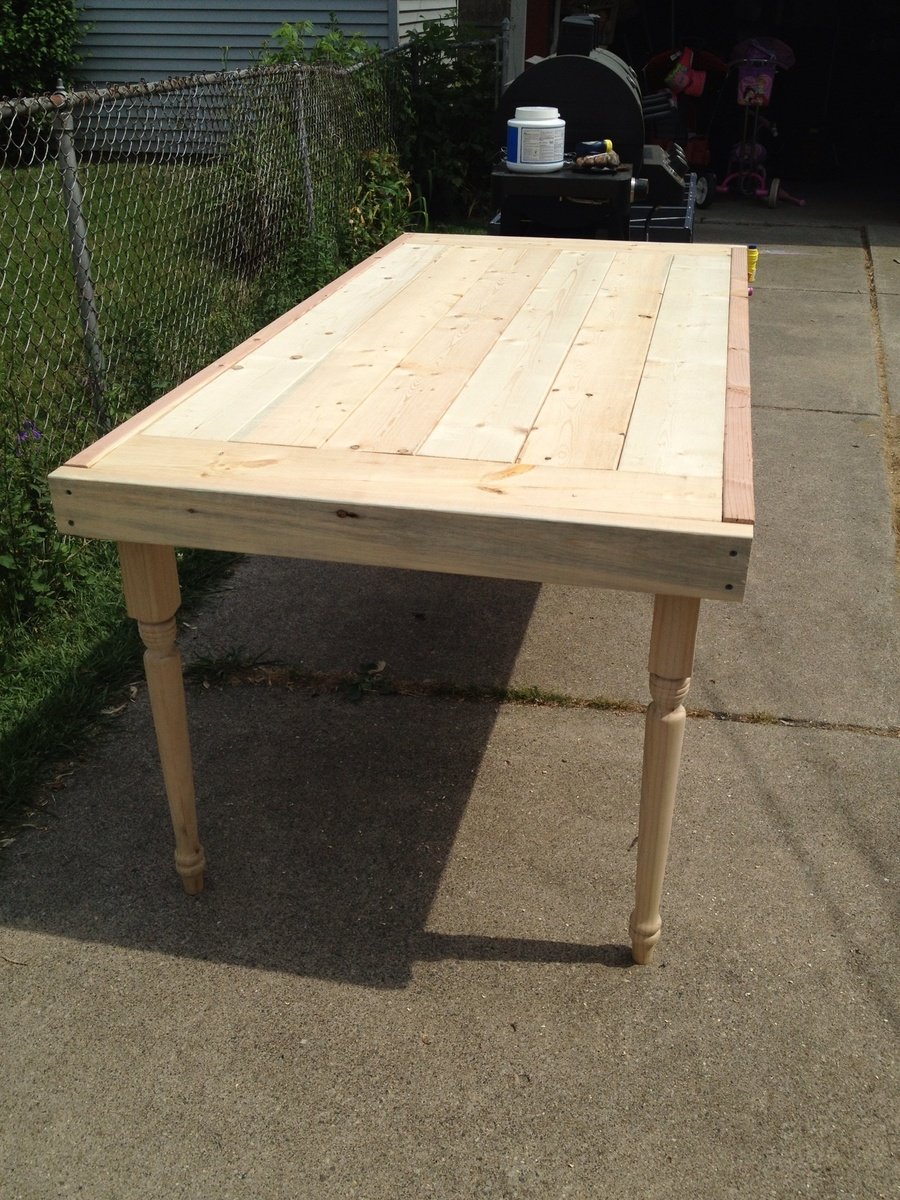
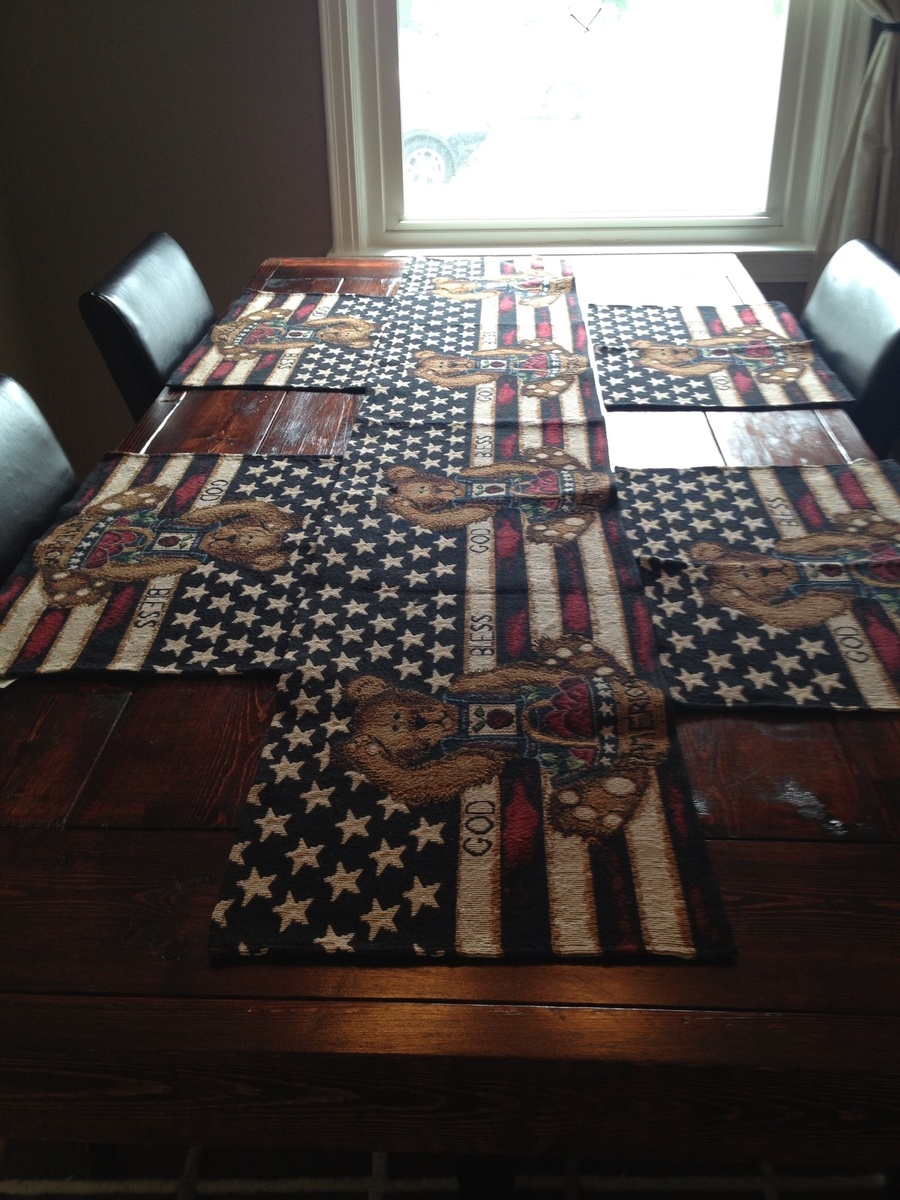
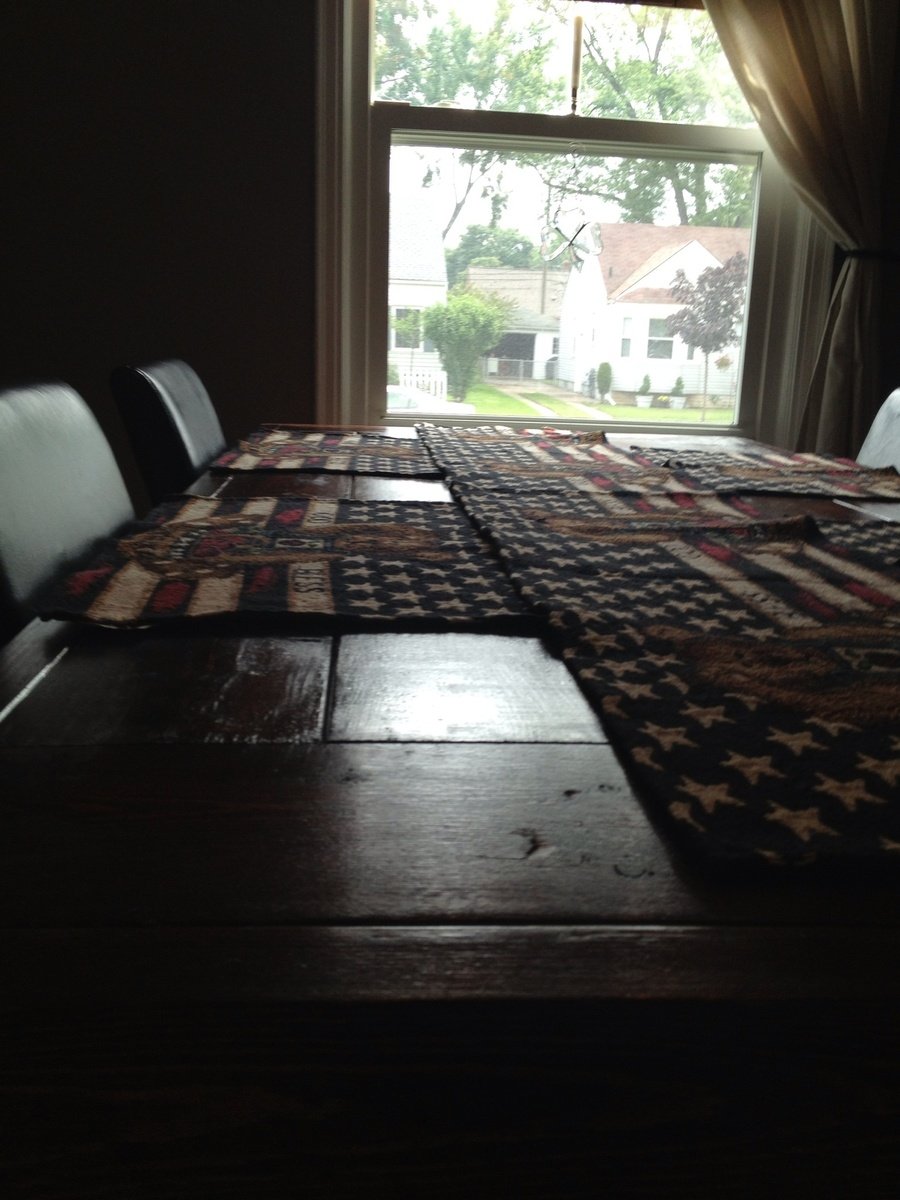
I wanted to attempt making a dining room table. This is my very first woodworking project. I did use store bought legs from one of the big box stores. Your site completely inspired me to just go for it. It's not quite finished. I've got to do all the sanding and staining. I plan to use a mahogany tone stain to coordinate with my brown/black parsons chairs and hutch in my dining room. Finally finished and I think it looks great! It took a lot of sanding to get all the wood pieces even, but so worth the effort. I love the rustic country look.
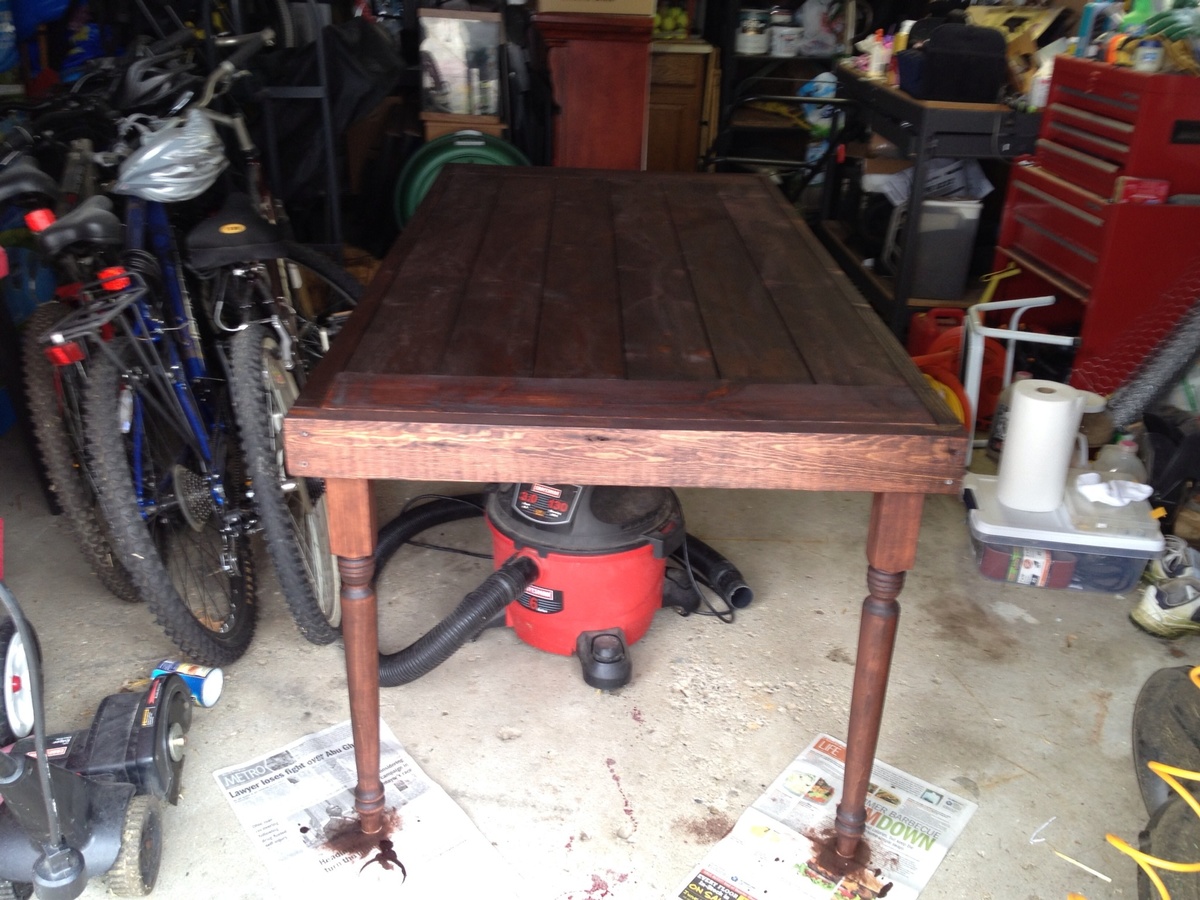
This was my first project from Ana's website and I'm hooked! I'm a beginner, but thank goodness for my Dad's help because I have a lot of learning to do!
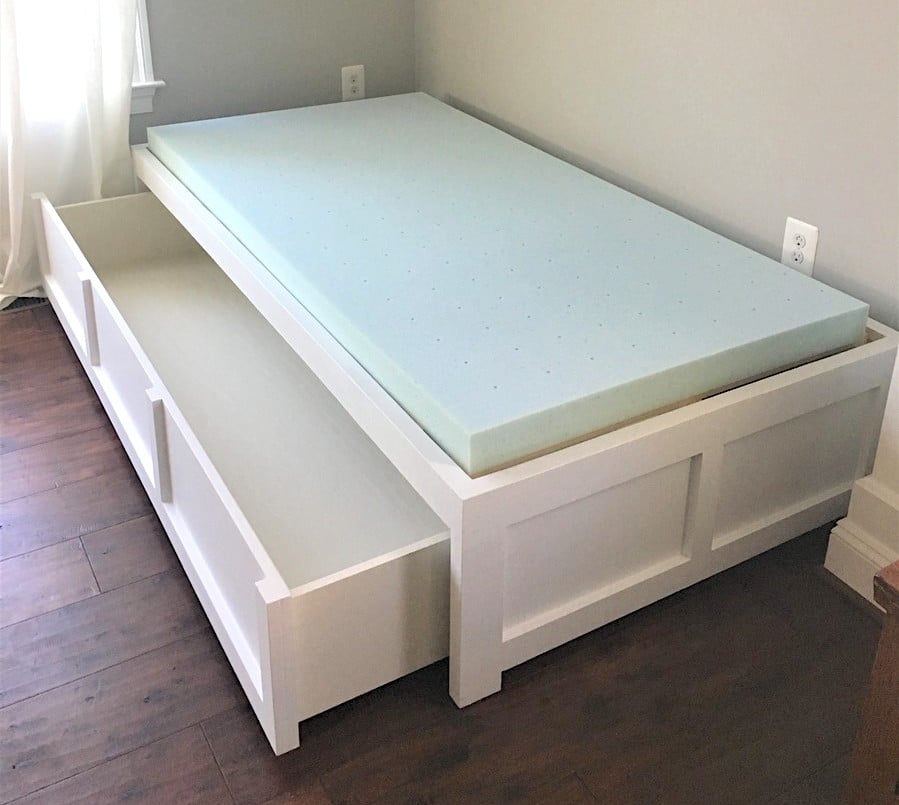
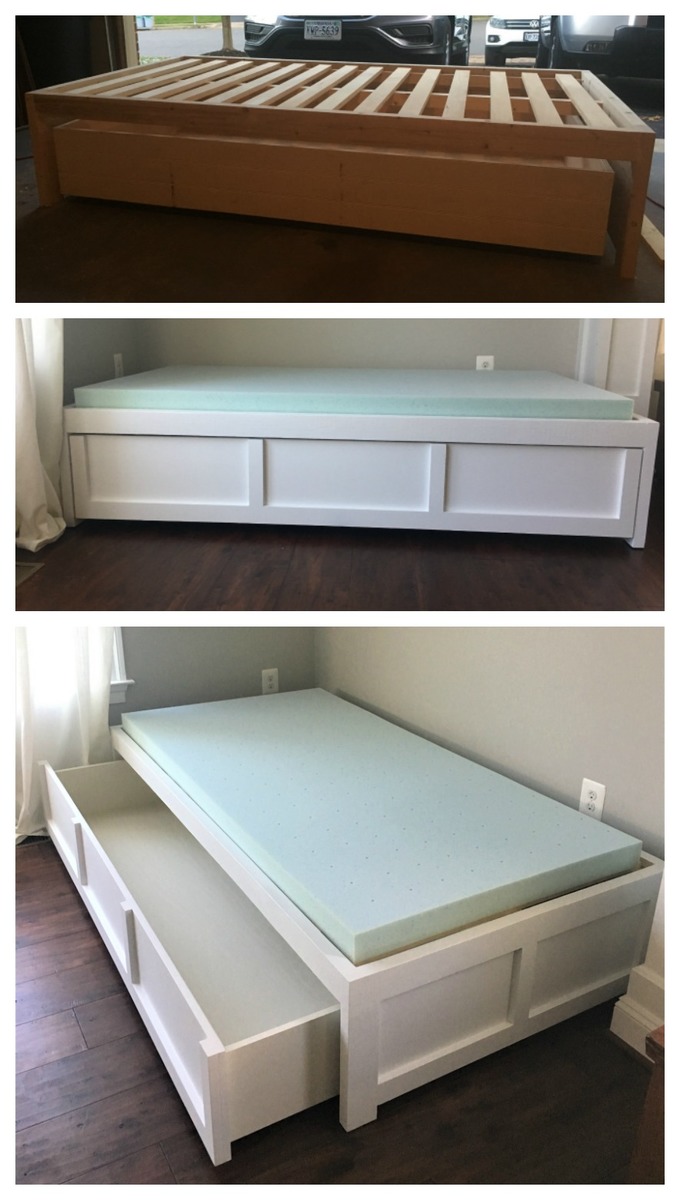
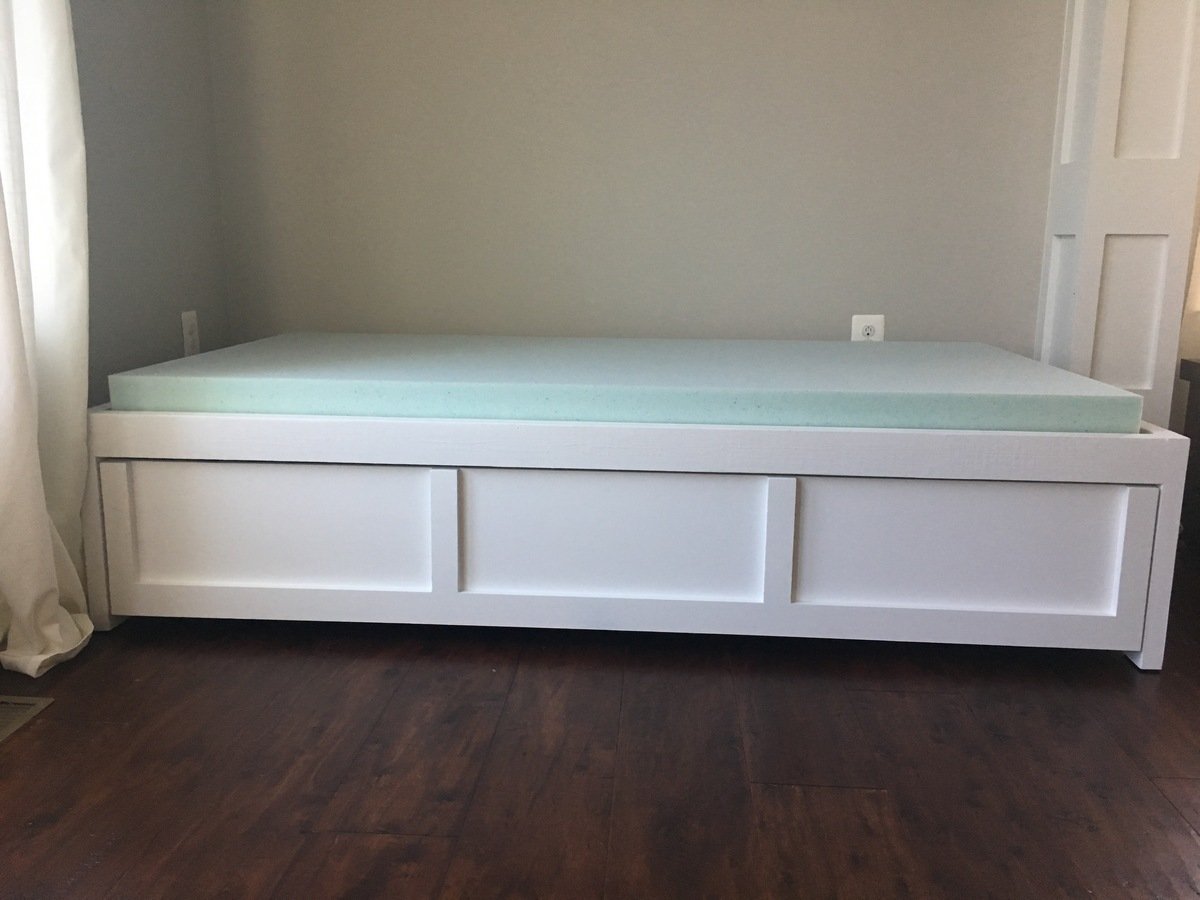
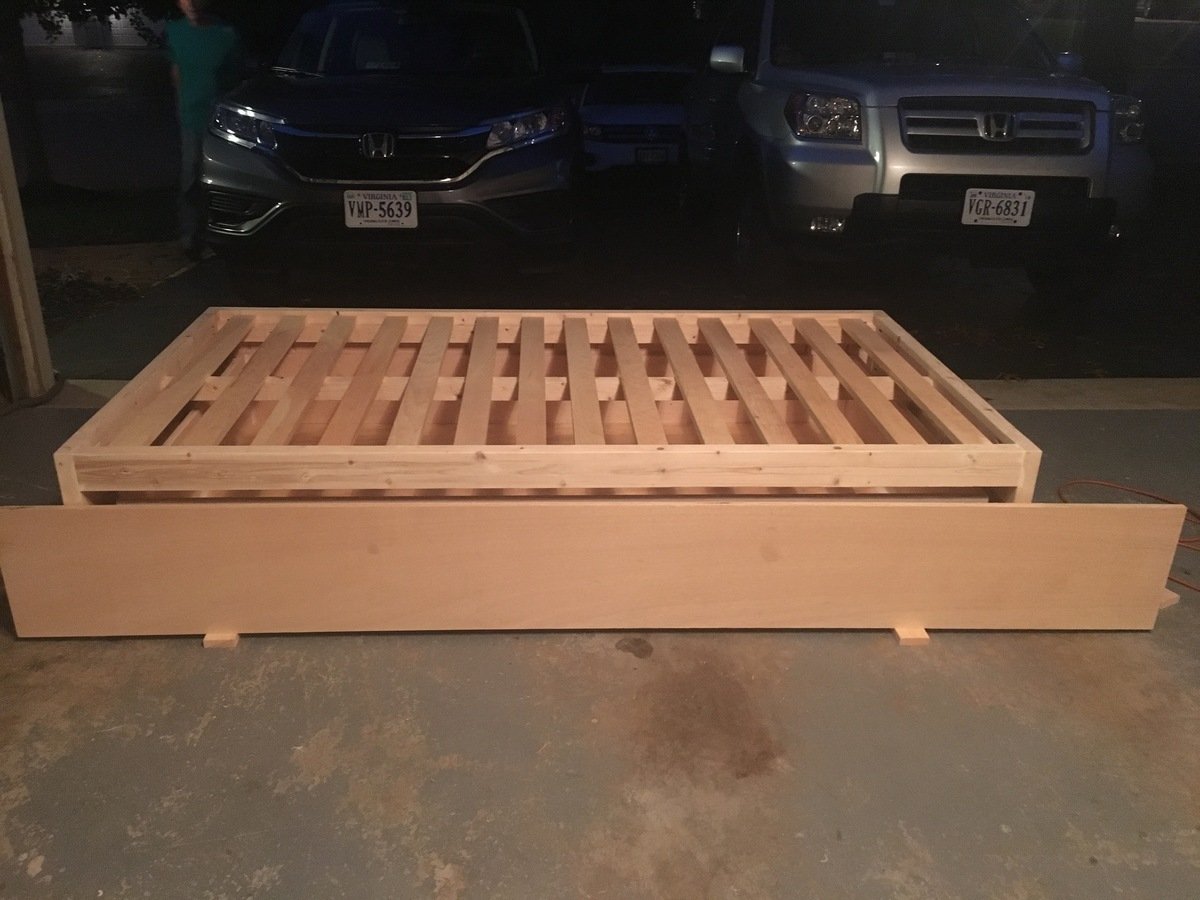
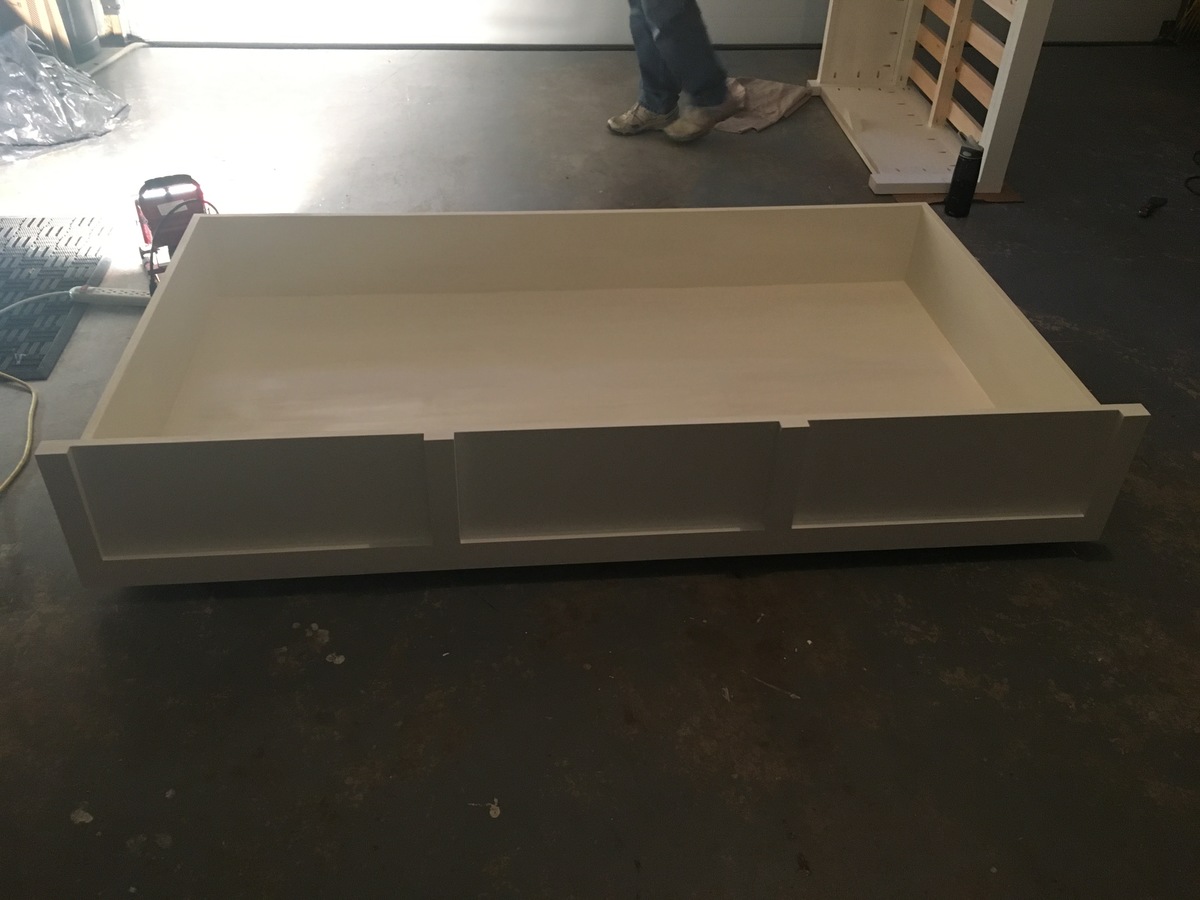
I wanted the drawer to be 1 drawer instead of 3. I feel like it looks cleaner (without having to adjust 3 drawers constantly to make it look good when you push them in). I was thinking the bed could actually be used as a trundle bed in the future too! I use this to store toys right now and it is Awesome!
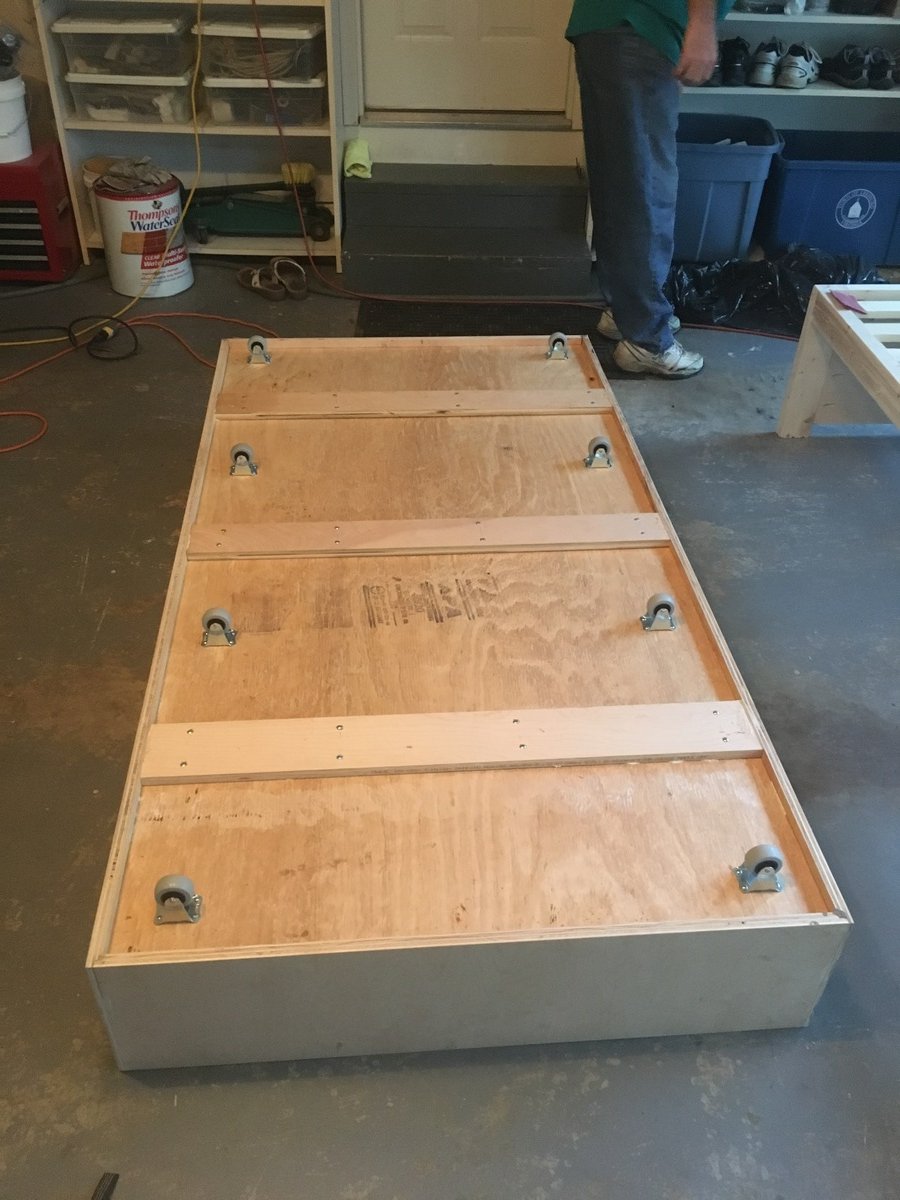
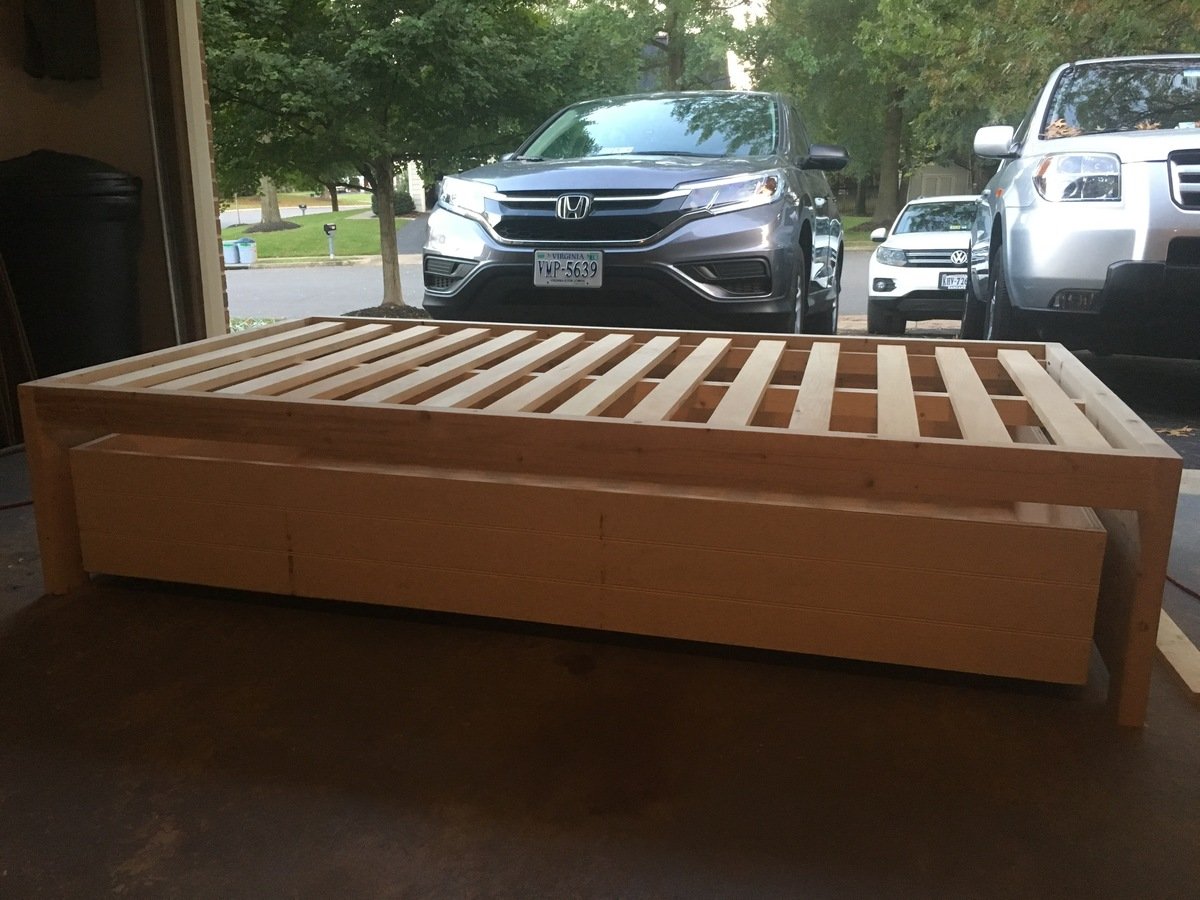
I increased the bed size to fit a twin mattress and increased the height of the bed slightly so that the drawer would be a little bit deeper. We also added a back to the bed and carried around the trim to make all sides look the same. We added a bumper to the back and sides of the inside of the bed so the drawer is easy to push in and fits in snug. Finally we reinforced the bottom of the drawer with more 1x4 boards so that if a child does sleep in it, it would be more sturdy. I now have kids come over and jump into the drawer (literally) and I'm glad we reinforced it.
The changes we made did add to the cost and our time (as well as being newbies), but I think it's worth it and the bed turned out beautiful!
Sat, 01/15/2022 - 08:02
Any chance you have your cut list for this? Will the trundle storage drawer fit a twin mattress in it? Also, you say you increased the bed size to a twin, was the original not a twin too?
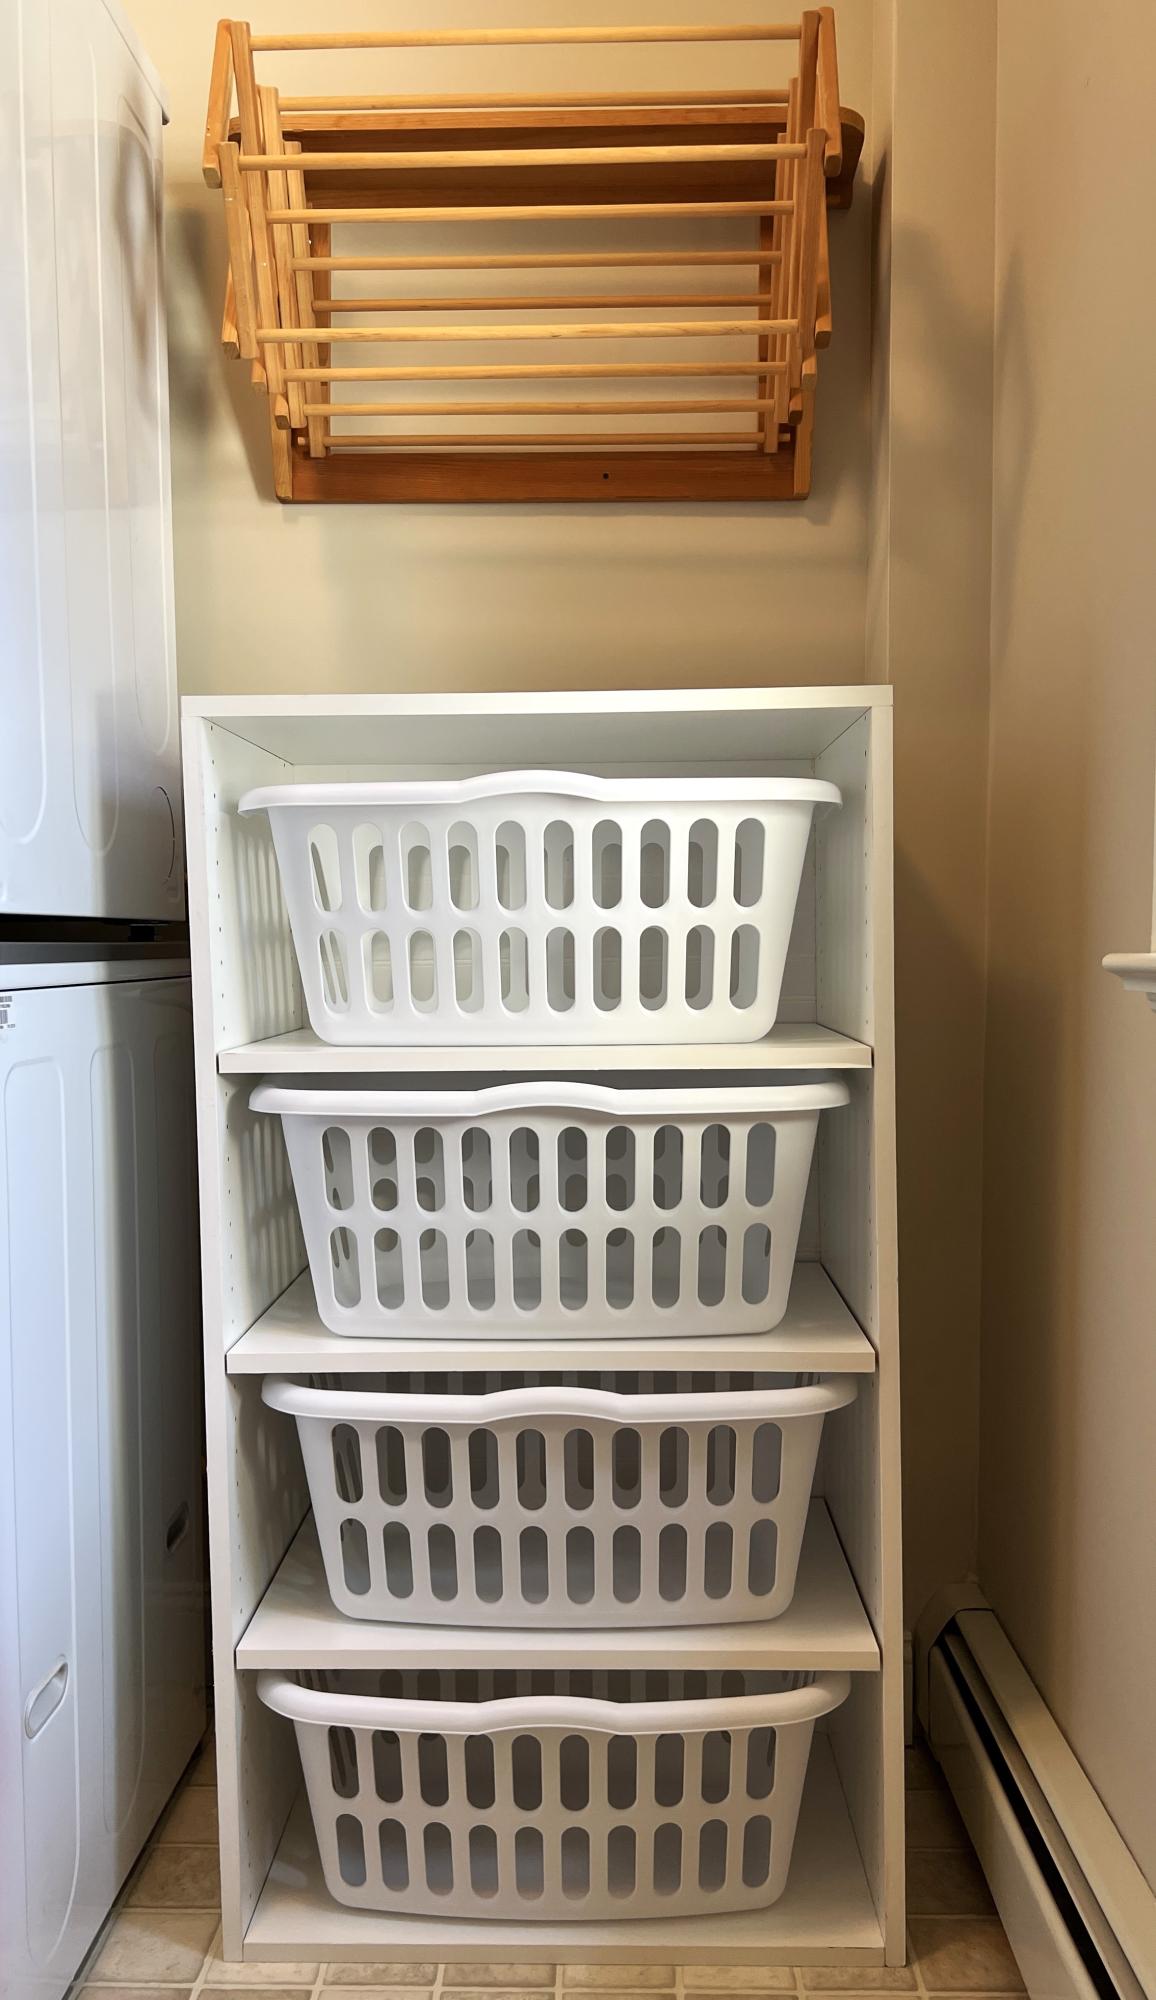
I didn’t want to have to paint or cut the metal angles - plus I wanted 4 basket tall so I used pre-drilled melamine for the sides making the unit 48” tall. Then cut top and bottom same as plans and bought 5mm L shelf pegs and had shelves cut 24 1/4”. Used white wainscot panel for back. Very easy - especially since I had big box store make all my cuts! Just have to make sure you have peg holes lined up at bottom or you won’t be level.
Deb D.
Wed, 09/13/2023 - 09:38
Thanks for sharing, it looks like the perfect fit and solution for your laundry room!
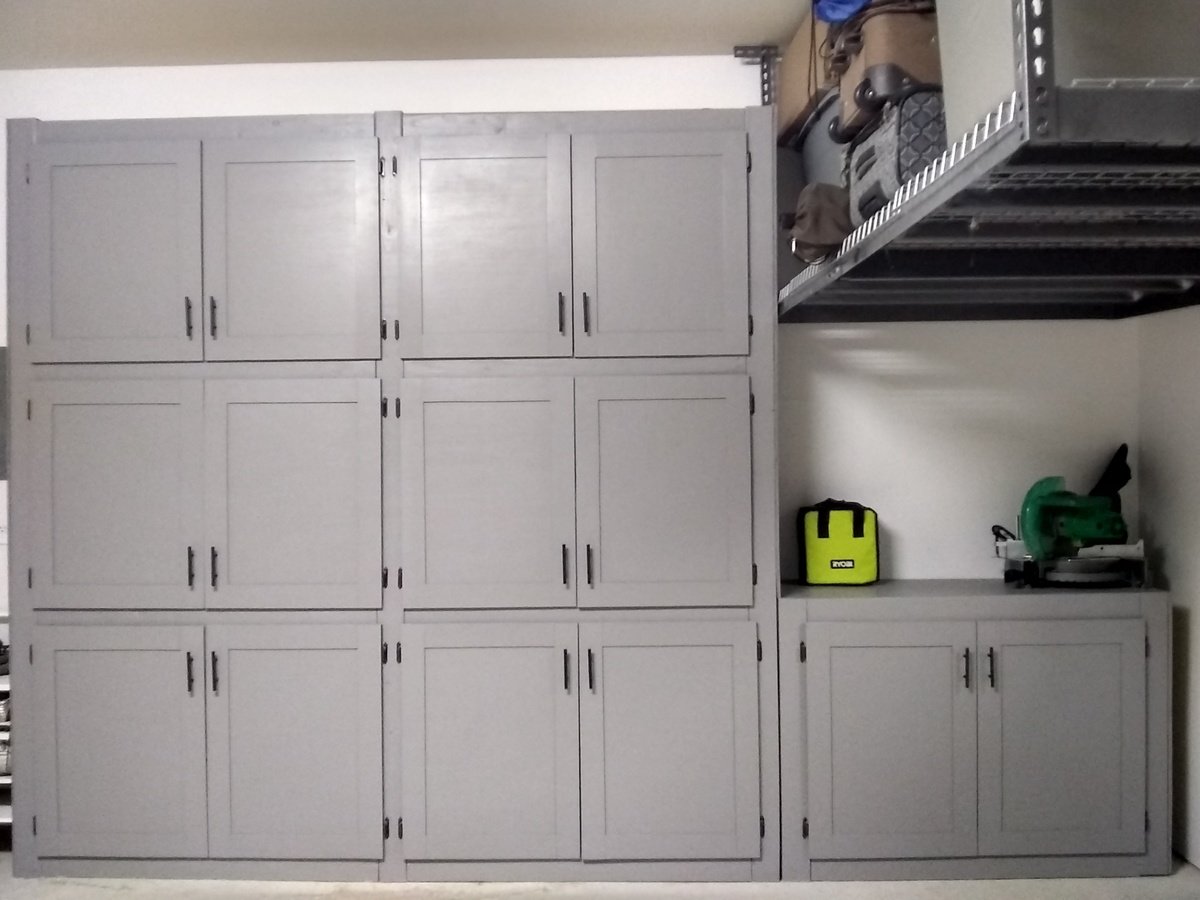
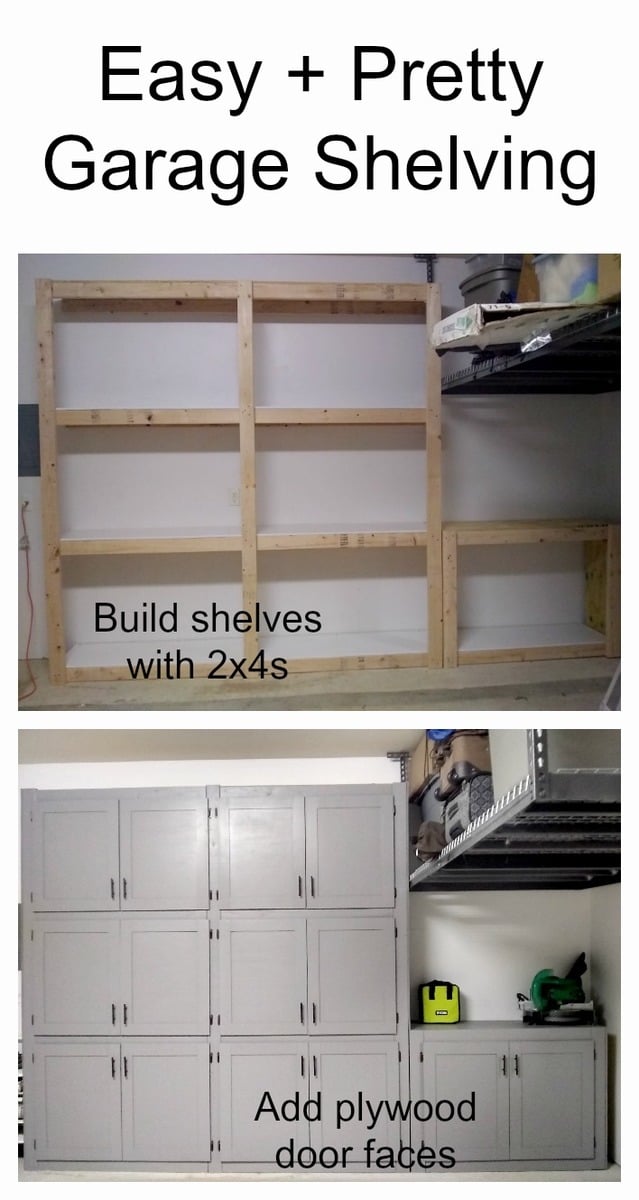
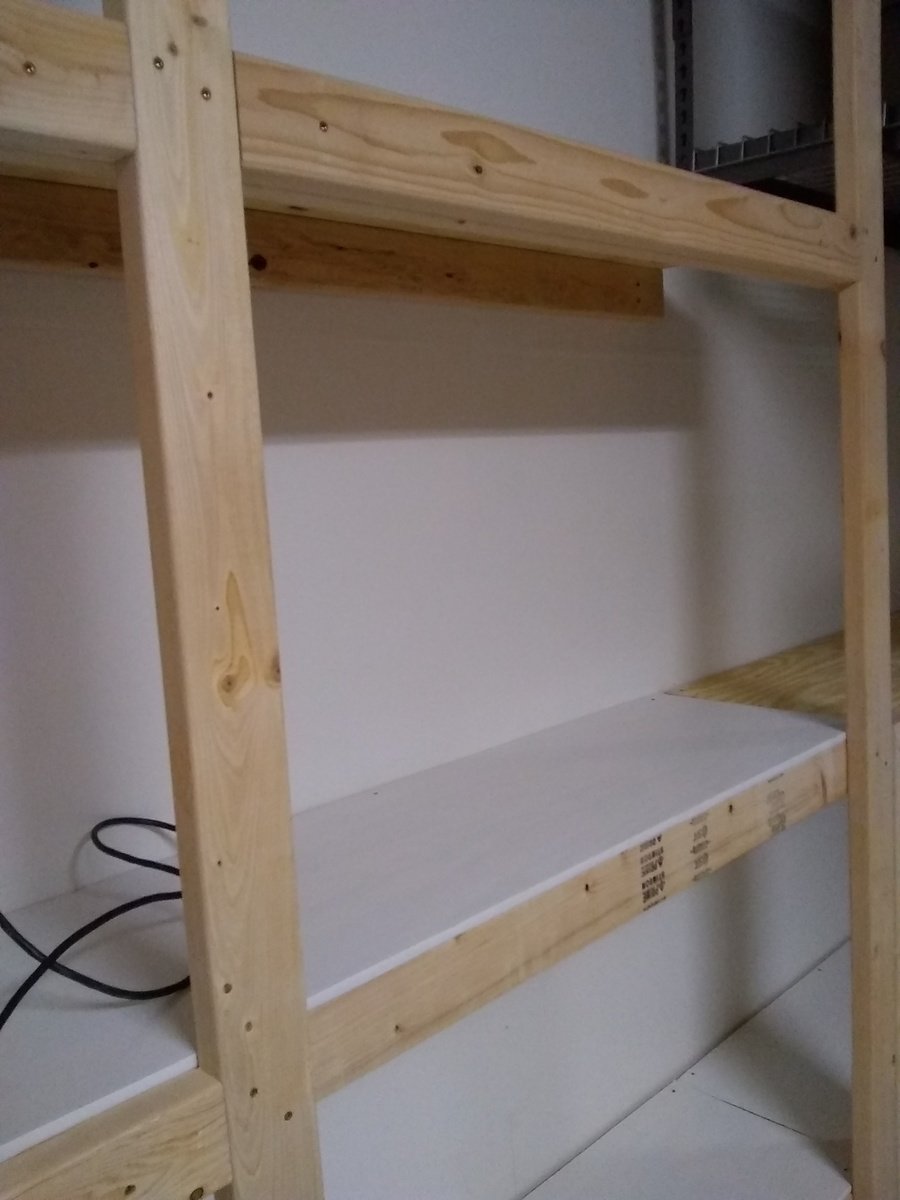
I have been wanting garage cabinets for a long time but couldn't afford them. When I saw these shelves I knew it would be easy to add side panels and create doors for the sections. The size is 8'x8' with the 4'x3' under the ceiling rack. I put a 2"x4" in the middle to divide each section, measured and cut doors from 5mm lauran plywood. I also cut the stiles and rails from the same material to give it interest but mainly to make it thicker to avoid warping as much as possible. I added 2"x4" to create a facing for the doors to rest on. Also used overlay hinges to simplify the hanging as much as possible. I was able to follow the design plan and the only thing I did was add a shelf at the bottom. The cleats were definitely not necessary, it's very sturdy.
Making the doors
The first thing is to learn how to measure for cabinet doors. There are plenty of sites and YouTube videos showing how to correctly measure. If you are doing the same type of doors like I have, with no middle divider, then be sure to pay attention how to correctly measure for those instead of a single door.
The easiest way to make the doors will be getting 1/2 in sanded plywood and use a table saw to cut each door to size. Skip the shaker style trim and put the hardware on and be done. Make sure the hinges will be able to hold the weight of the door.
Unfortunately, I didn't have a table saw but I did have a router and a jig saw, and found a great video on YouTube on how to use a router to cut straight edges without a table saw. I measured out one door and used that outline to cut two identical doors. It turned out that each section was slightly a different width so I had to do two at a time. However, if you have a circular saw you can rig it to make a table saw and make a guide to rip the doors. It all depends on what tools you have available to you.
I have a compact plunge saw and was able to cut the 3 inch strips for the shaker style with it. Honestly, that was the most tedious part and most time consuming by far. That also had to do with the fact that because the plywood is only 5mm thick I cut strips for both the front and the back to make it over 1/2 inch thick to help minimize warping and give the hinges something to grab.
I used the miter saw to cut the stiles and rails to size and a 23 gauge nailer with 1/2 nails and glue to get them on the door. I glued and nailed the front and the back of each side at the same time because the nails are a bit longer than two pieces of plywood. I then turned it over and nailed the other side. The great thing about using a 23 gauge is that I didn't have to fill any holes because they are so small you can hardly see them at all.
The last thing is to use your sander to ensure all of the pieces are even. I used a 60 grit and then followed it with a 220 where needed.
If you want to avoid cutting the strips but still want to have the shaker style, Home Depot sells 1/4 thick Polystyrene flat moulding that will add vertially no weight to the door but the cost can easily add up if you have a lot of doors.
Lastly, if you are wondering why I got such thin plywood that ended up creating more work. The reason is because I wanted to save money on hardware and I didn't trust the inexpensive hinges I got off eBay would hold a heavy door for many years.


Wed, 06/19/2019 - 13:20
What kind of paint did you use? Looks really nice, the whole thing!

Thu, 07/18/2019 - 10:28
This is amazing! Thank you for sharing so much detail on your project too.
Wed, 06/10/2020 - 13:14
Can we get detailed plan of how you made this from the start to end like a material list and cut list.
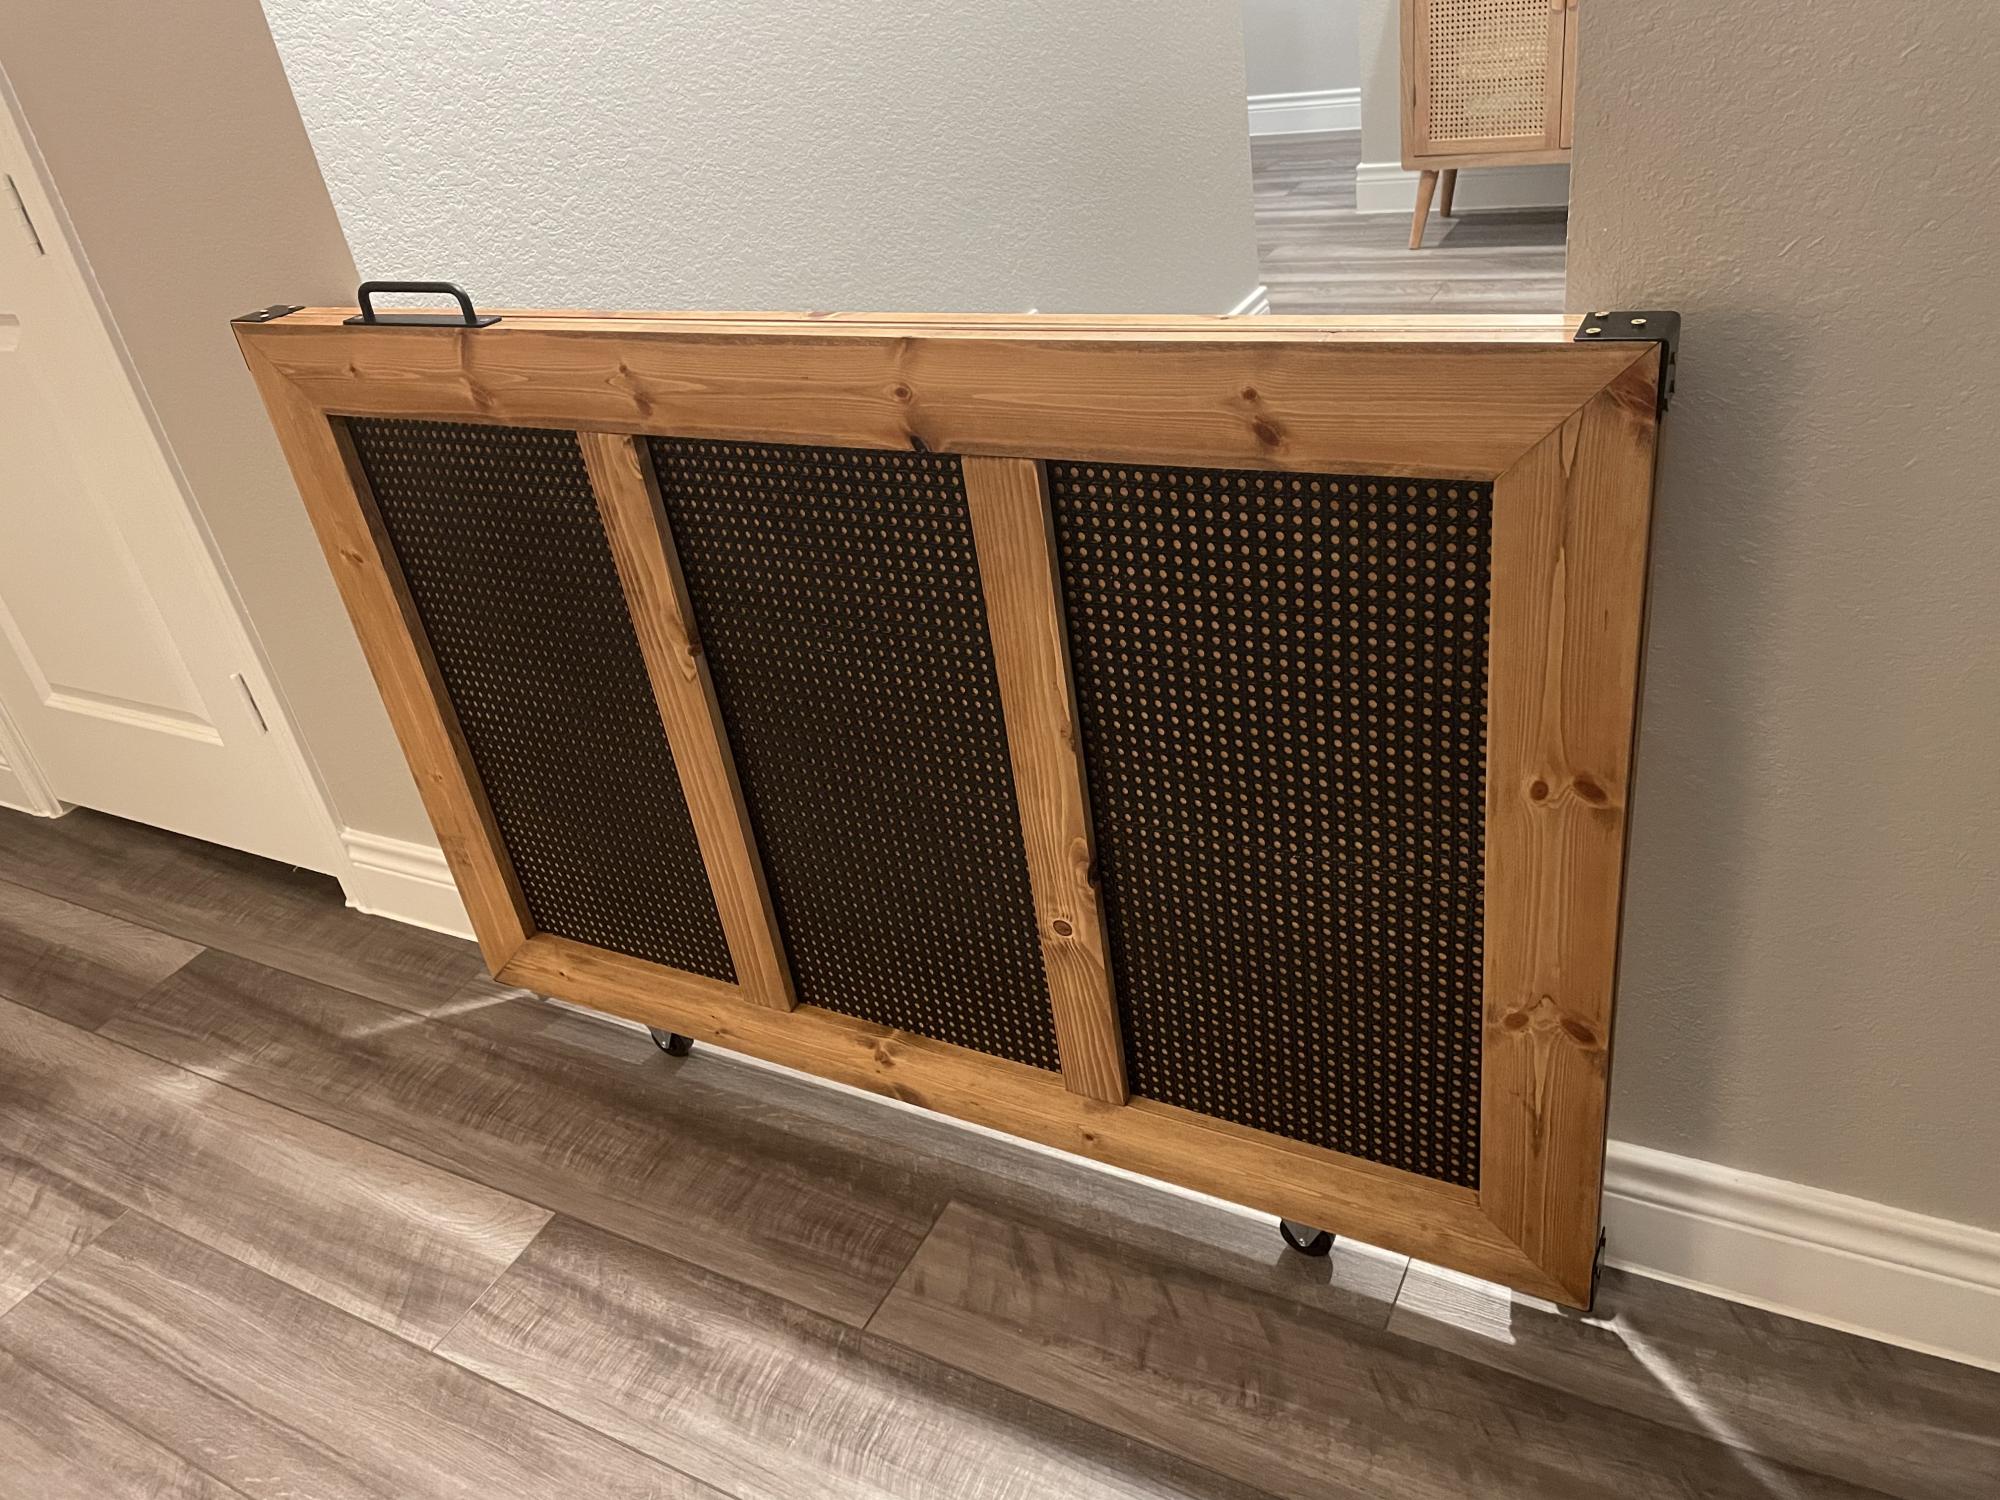
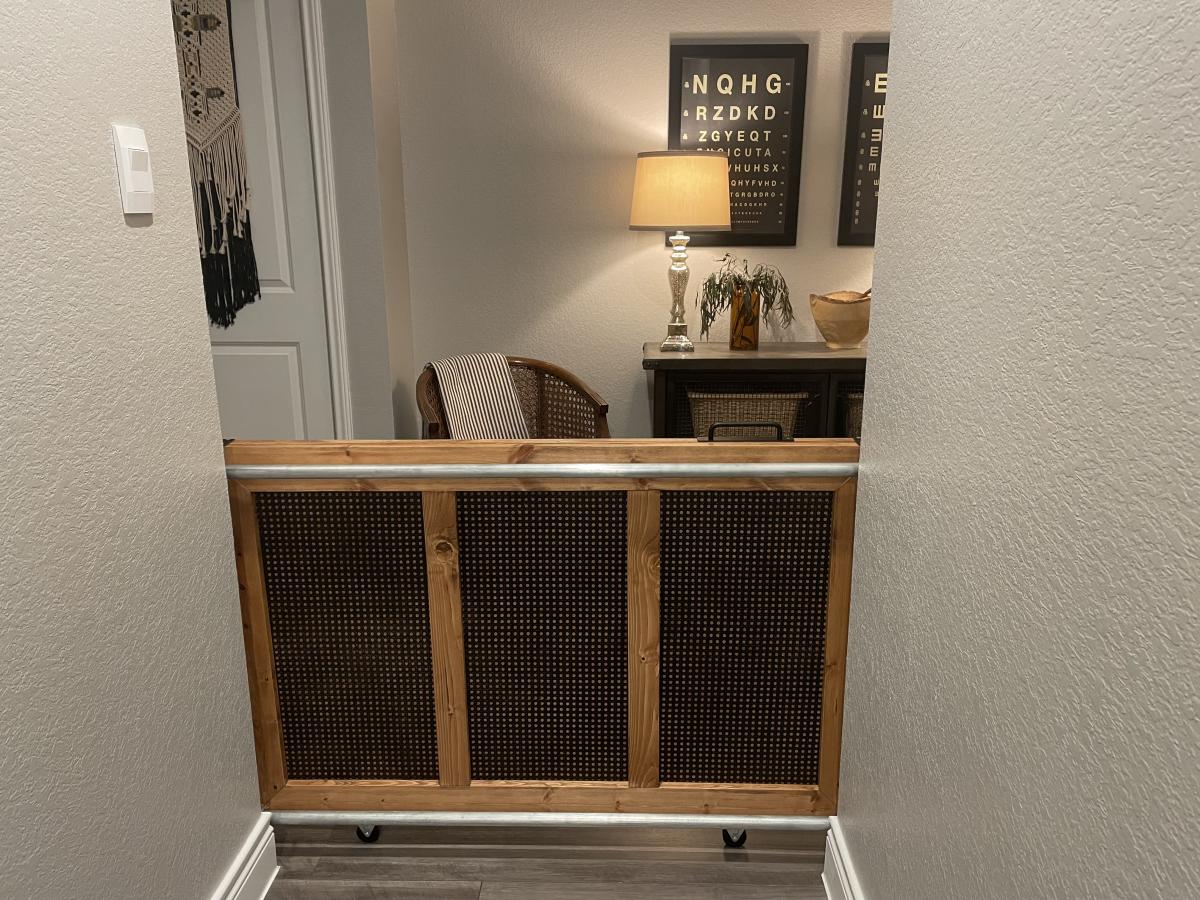
We desperately needed a gate to keep our pets from accessing the rooms, with carpet, in our new home. We originally thought about building a full barn door but, the security system was in the way and it wouldn’t have allowed the light to pass through to our dark entryway anyway. We definitely wanted to steer away from the “barn door looking” gate we did at our last home and wanted to try something more timeless with the sprayed, black caning. We have a very eclectic style. Very vintage industrial, MCM, with pops of RH glam and a touch of BOHO. Sounds confusing but, I needed this gate to take the pressure off of trends we didn’t quite fit in and be easy to use for my teenager. The gate leads to her bed/bath and the guest rooms. The mechanism is not my design but, it’s brilliant, especially for the industrial element to our home. Took me close to 4 days from start to finish. Lost my Kreg jig in our move and was so thankful to a stranger-neighbor that willingly let me borrow his on the curiosity of what exactly I was building. NGL, it felt pretty good when he said how impressed he was with the build. 💞
Tue, 02/28/2023 - 07:16
This looks superb, thank you so much for sharing your super cool gate!
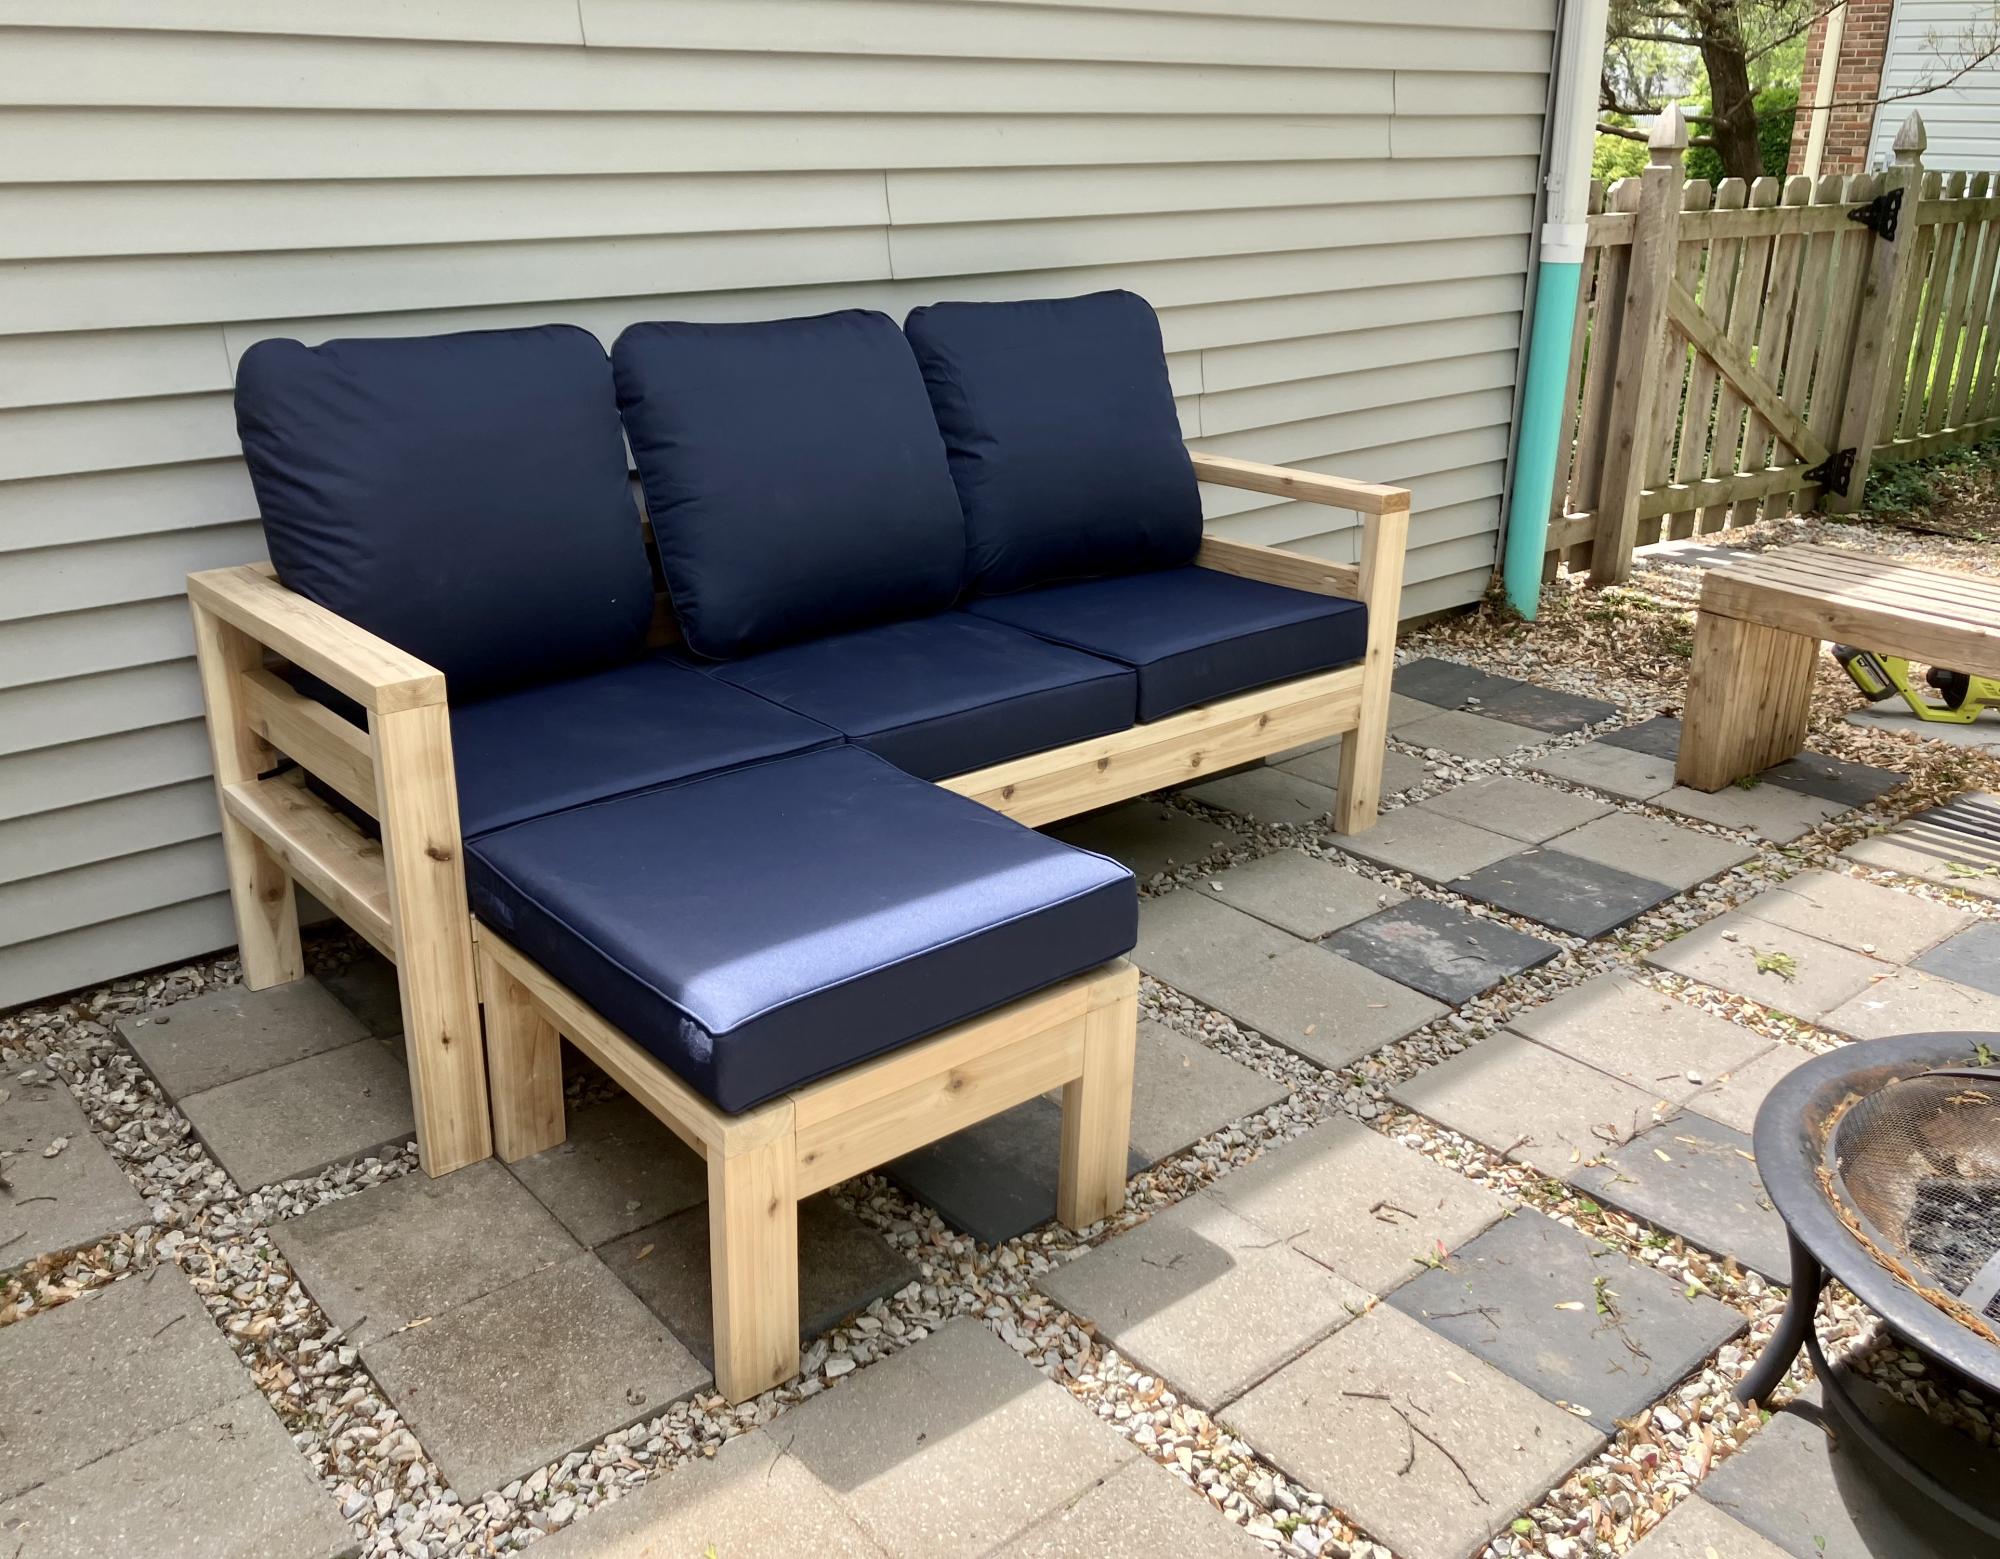
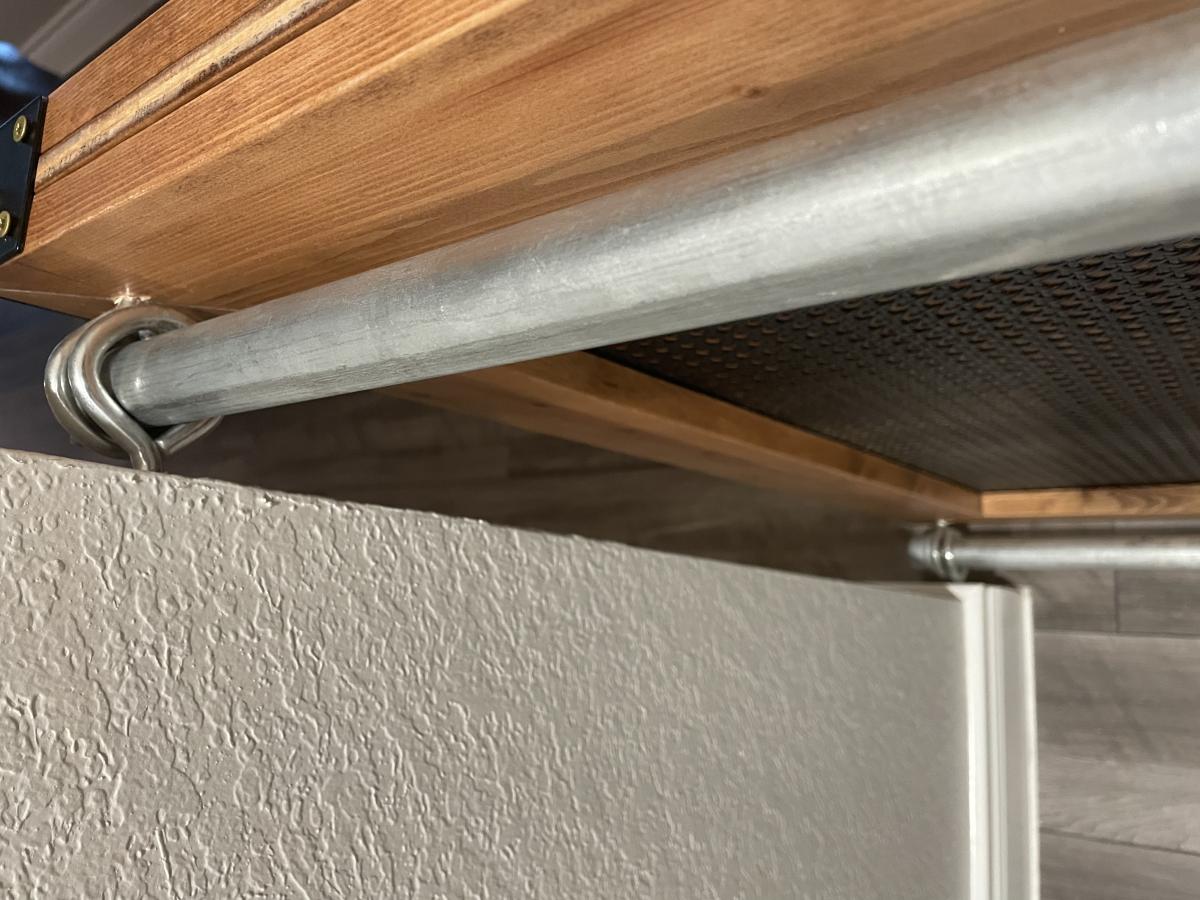
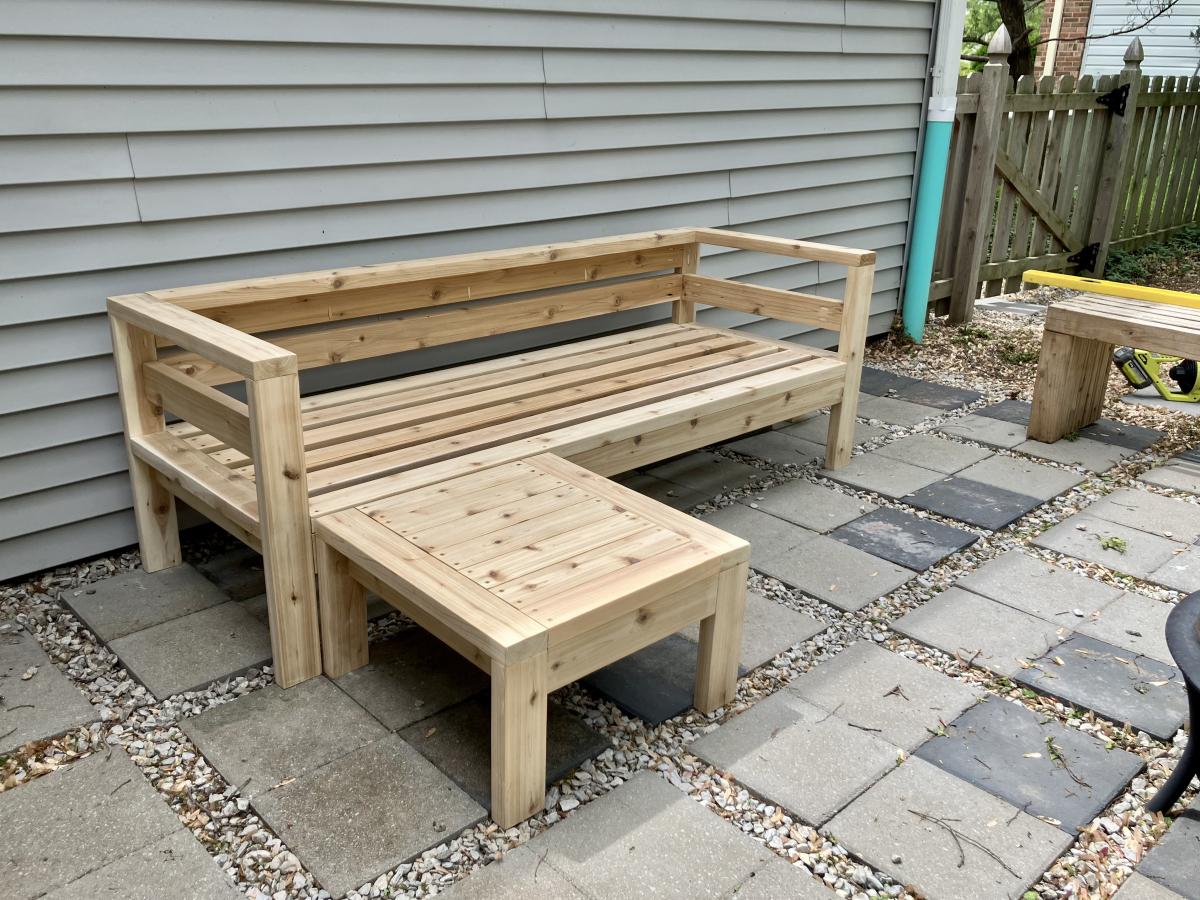
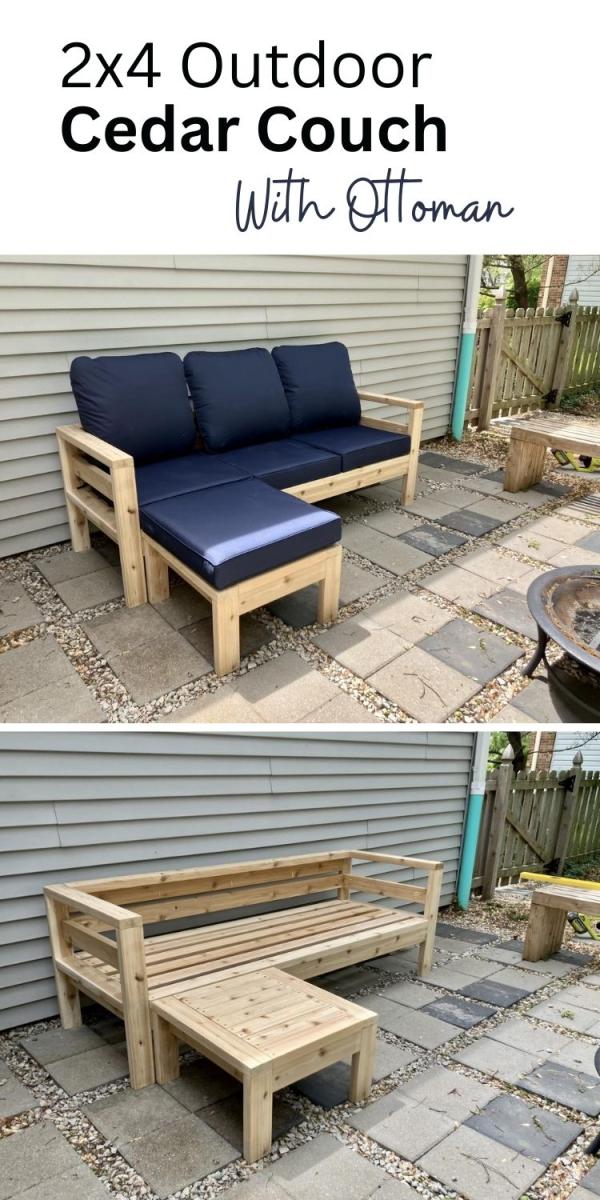
I used pocket holes to hide the screws. I made an ottoman out of the outdoor coffee table plans to my dimensions that can be used as a coffee table when we need it.

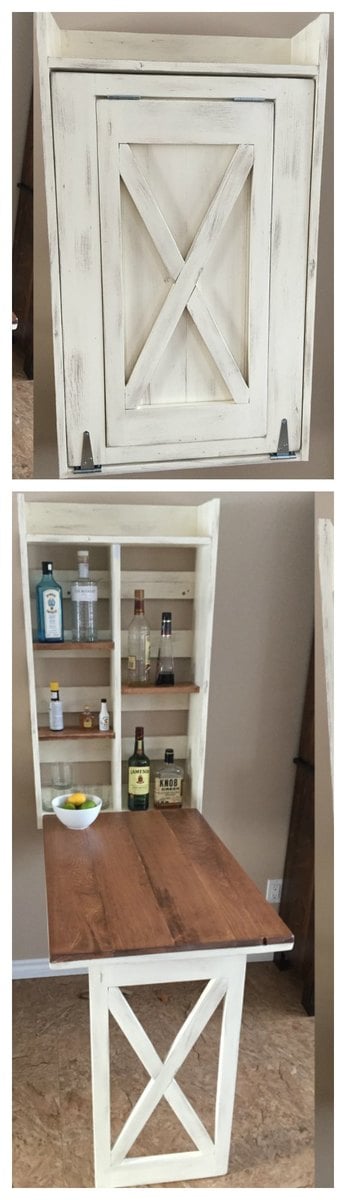
My attempt at the murphy bar featured on this site. Still have to add the sash locks. Added pallet crossmembers at the back, an x in the leg, and a french cleat to mount to the wall.
Tue, 12/31/2019 - 11:49
This looks awesome! I want to help my friend build this for his kitchen. I've looked at the plans in the link & I'm wondering what modifications you made for the X pattern-- how much did it alter the material & cut list?
Would you please share your material & cut list for this?
Fri, 08/14/2020 - 09:28
I don't understand why I cannot find the material list or the instructions for this every link takes me back to the pictures
Wed, 12/08/2021 - 00:27
It is perfect wall management which is used it in small space
Sun, 01/29/2023 - 13:16
Are there plans for this? I'd love to make this. Thanks

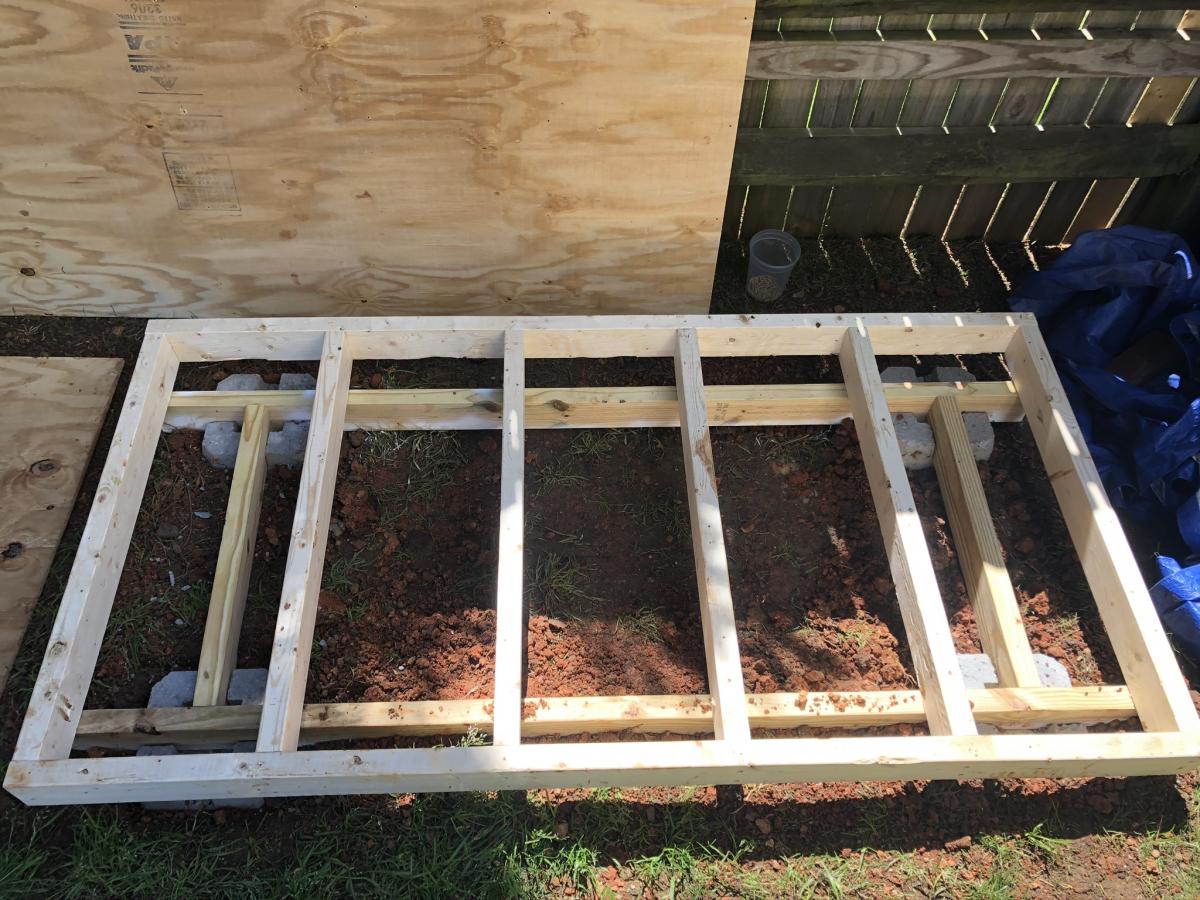
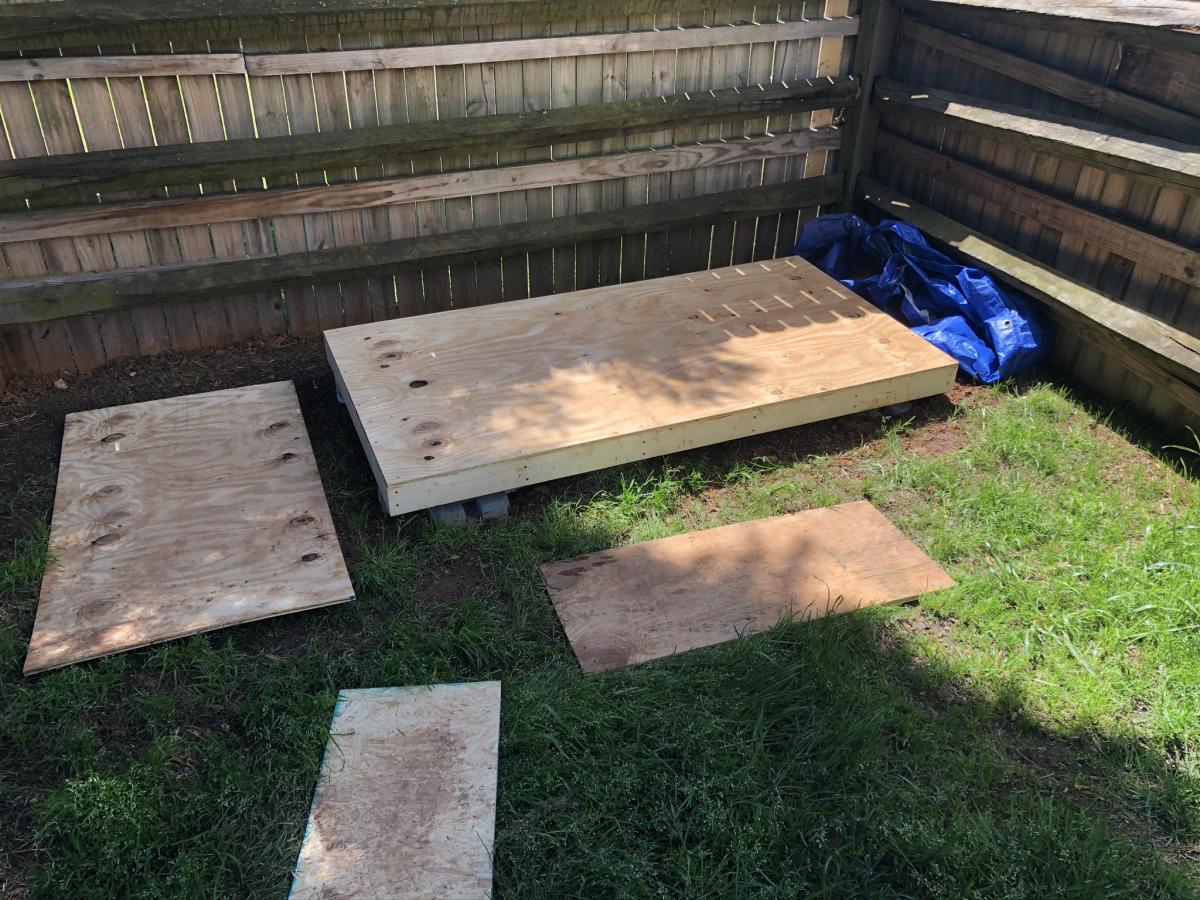
I used the basic framing plan for the project, but extended roof overhangs, added engineered siding / trim and cedar shake roofing. I put 2x4 bracing on for the platform.


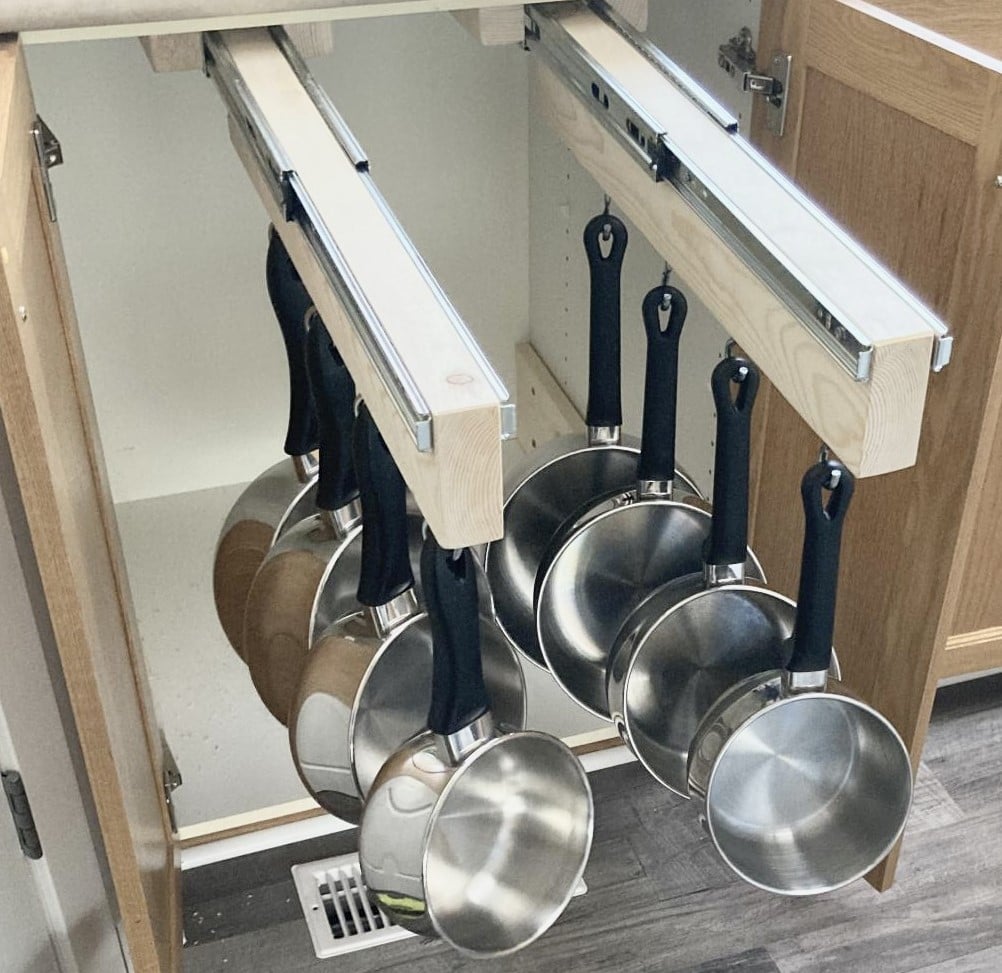
Working off your idea. Added another holder. There will be a bottom drawer for bigger stuff.

One day project with hubby! Wanted a wood set, but couldn’t find a reasonable price. Bought tools, wood, supplies, and cushions for under the cost of one online!