Outdoor Sectional
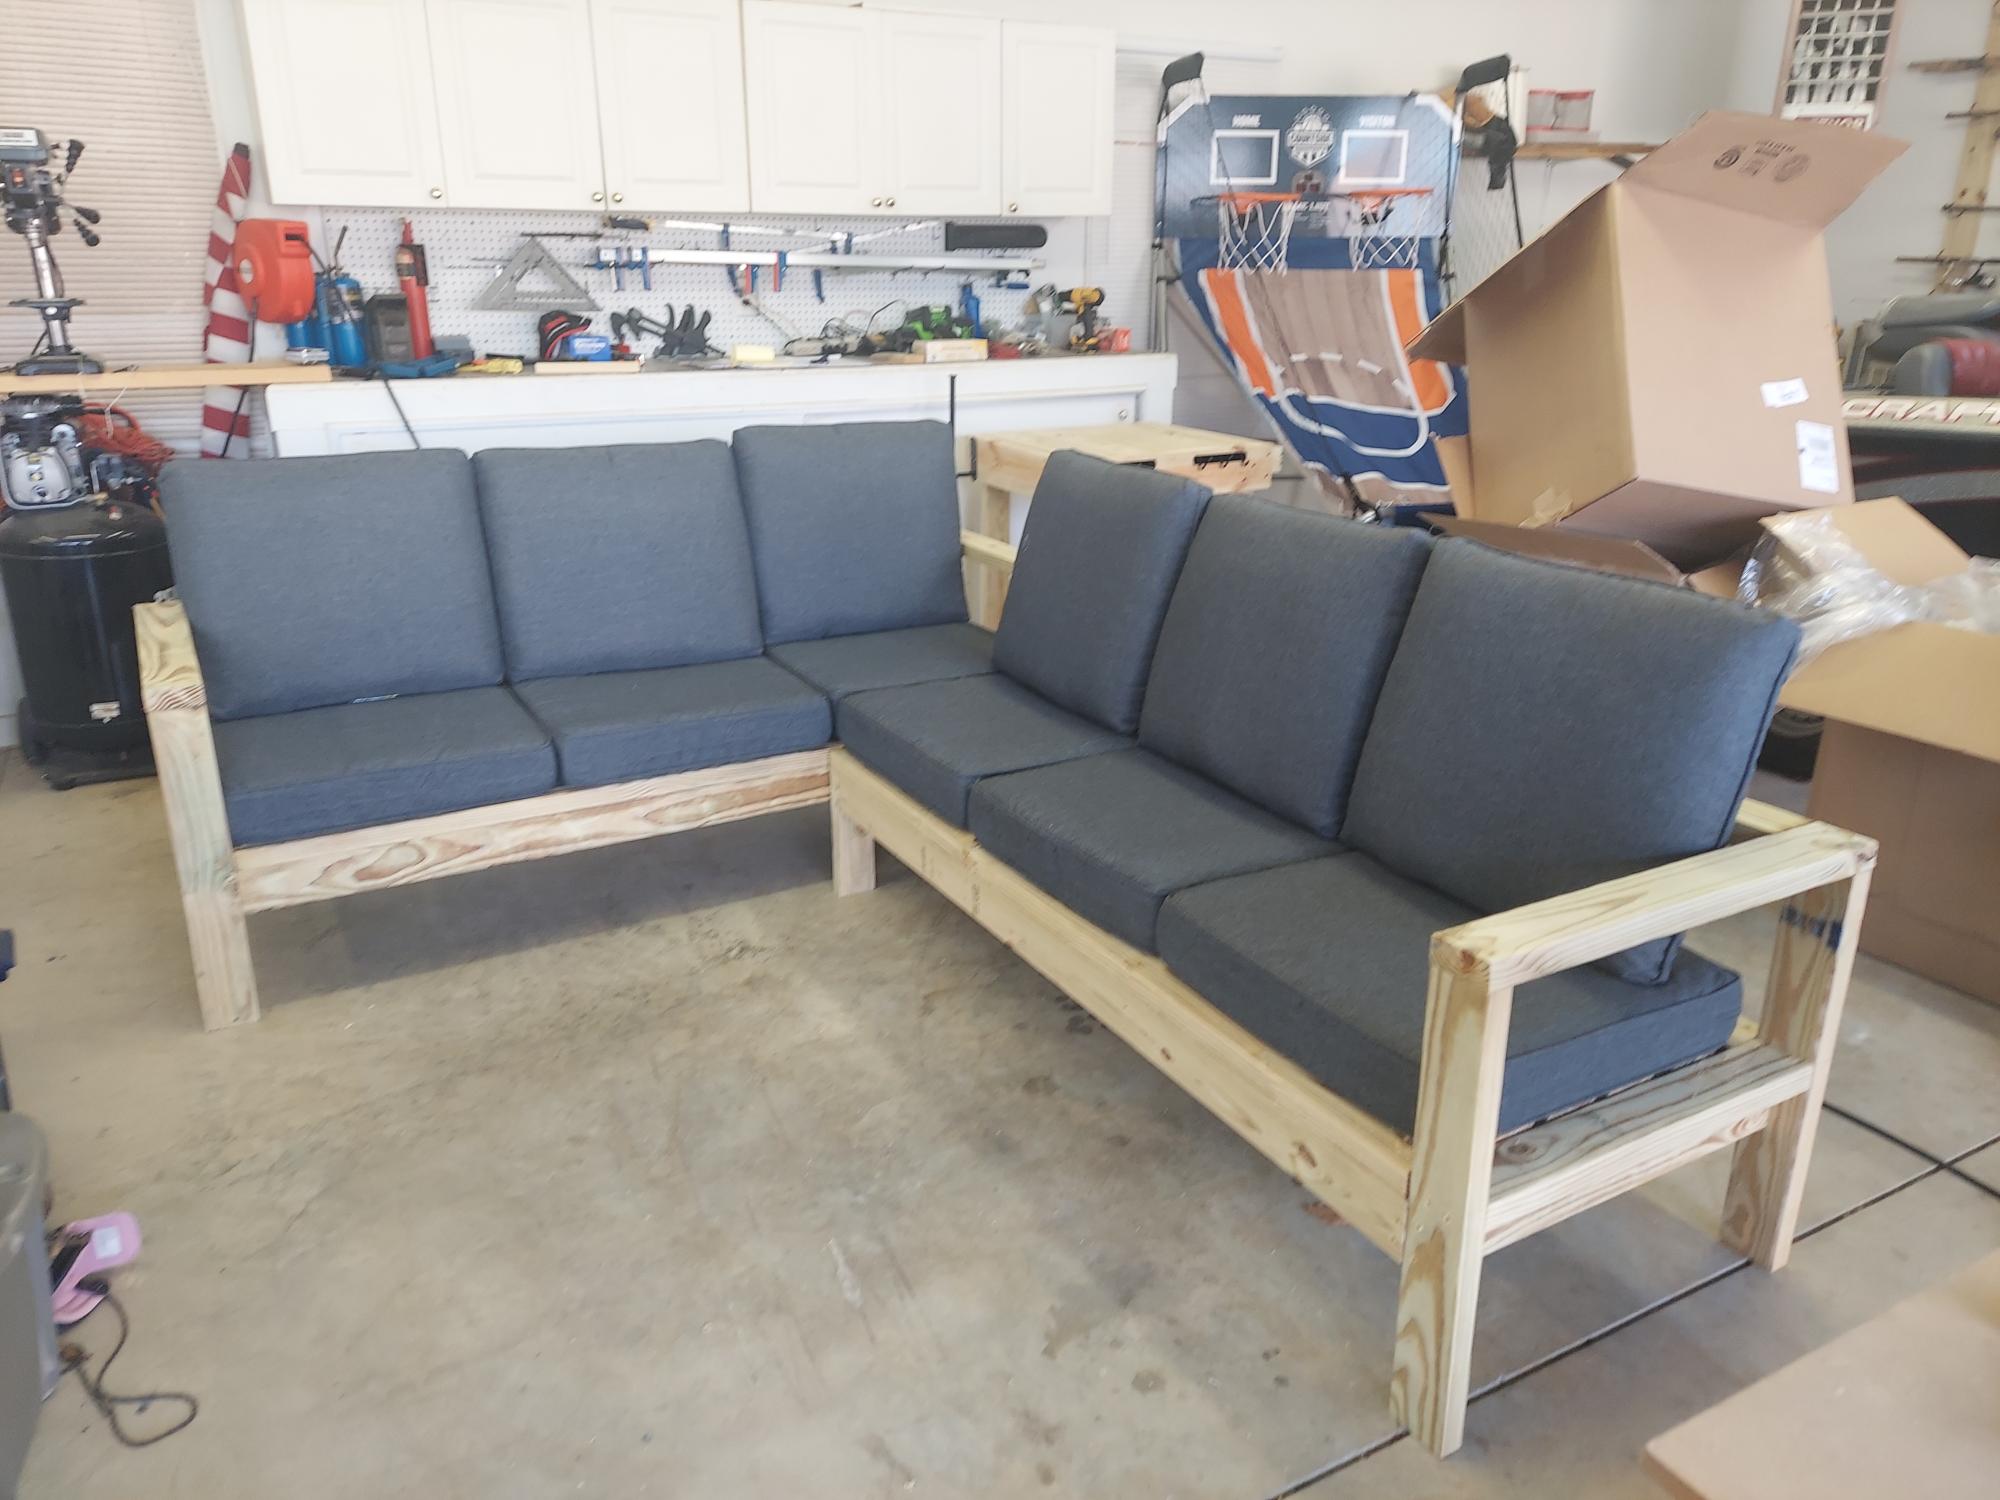
Built this for my daughter in law for Christmas. Turned out awesome. Plans and directions were great!
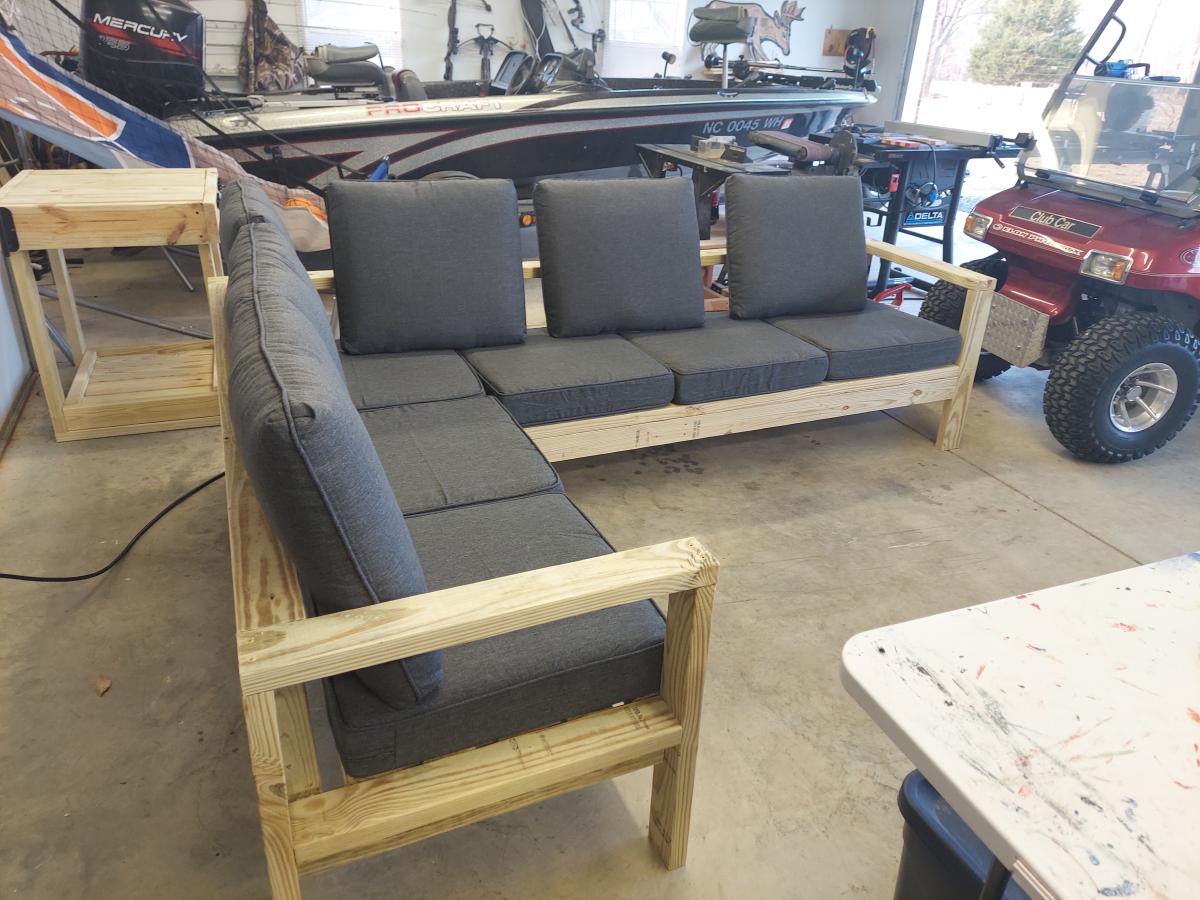
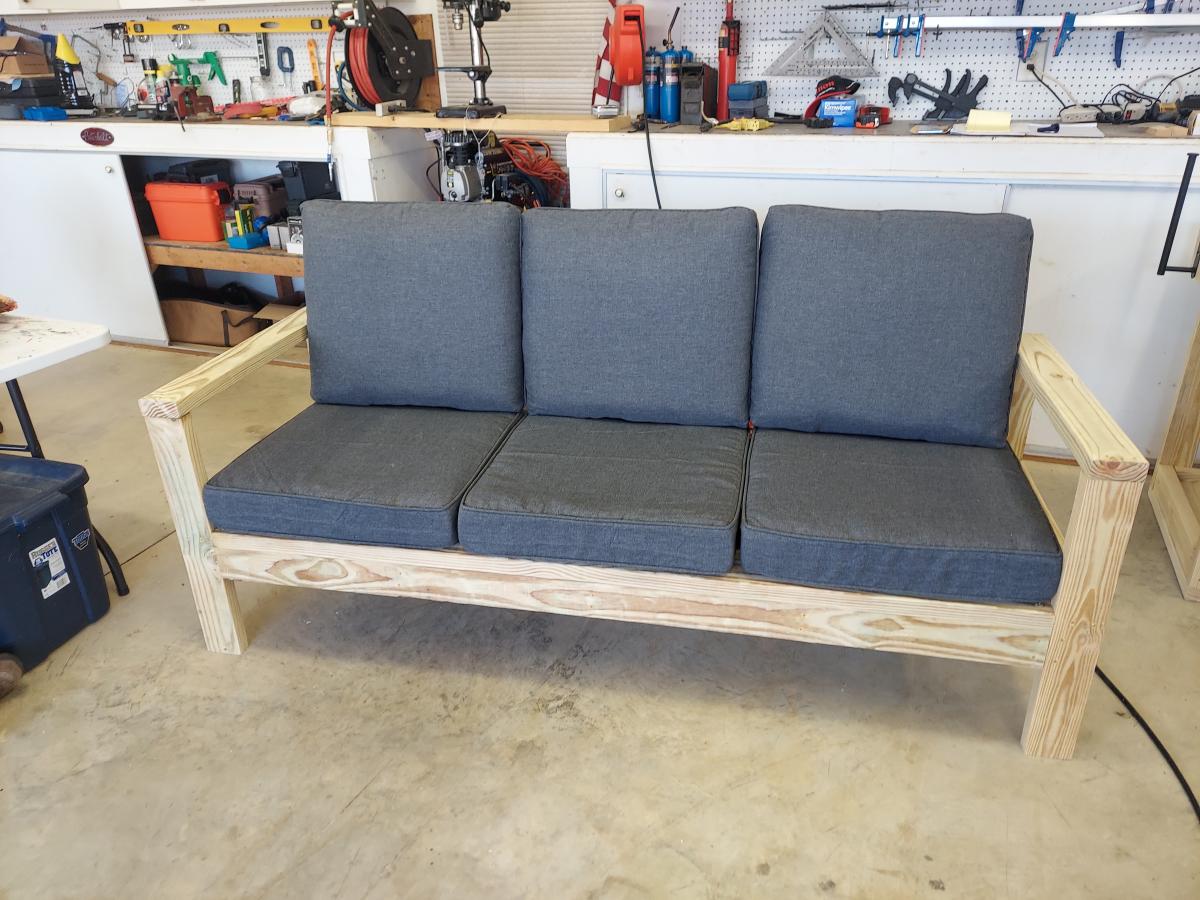
Built from Plan(s)
Built this for my daughter in law for Christmas. Turned out awesome. Plans and directions were great!
(I don't know why my picture is horizontal, it shows up fine on my computer).
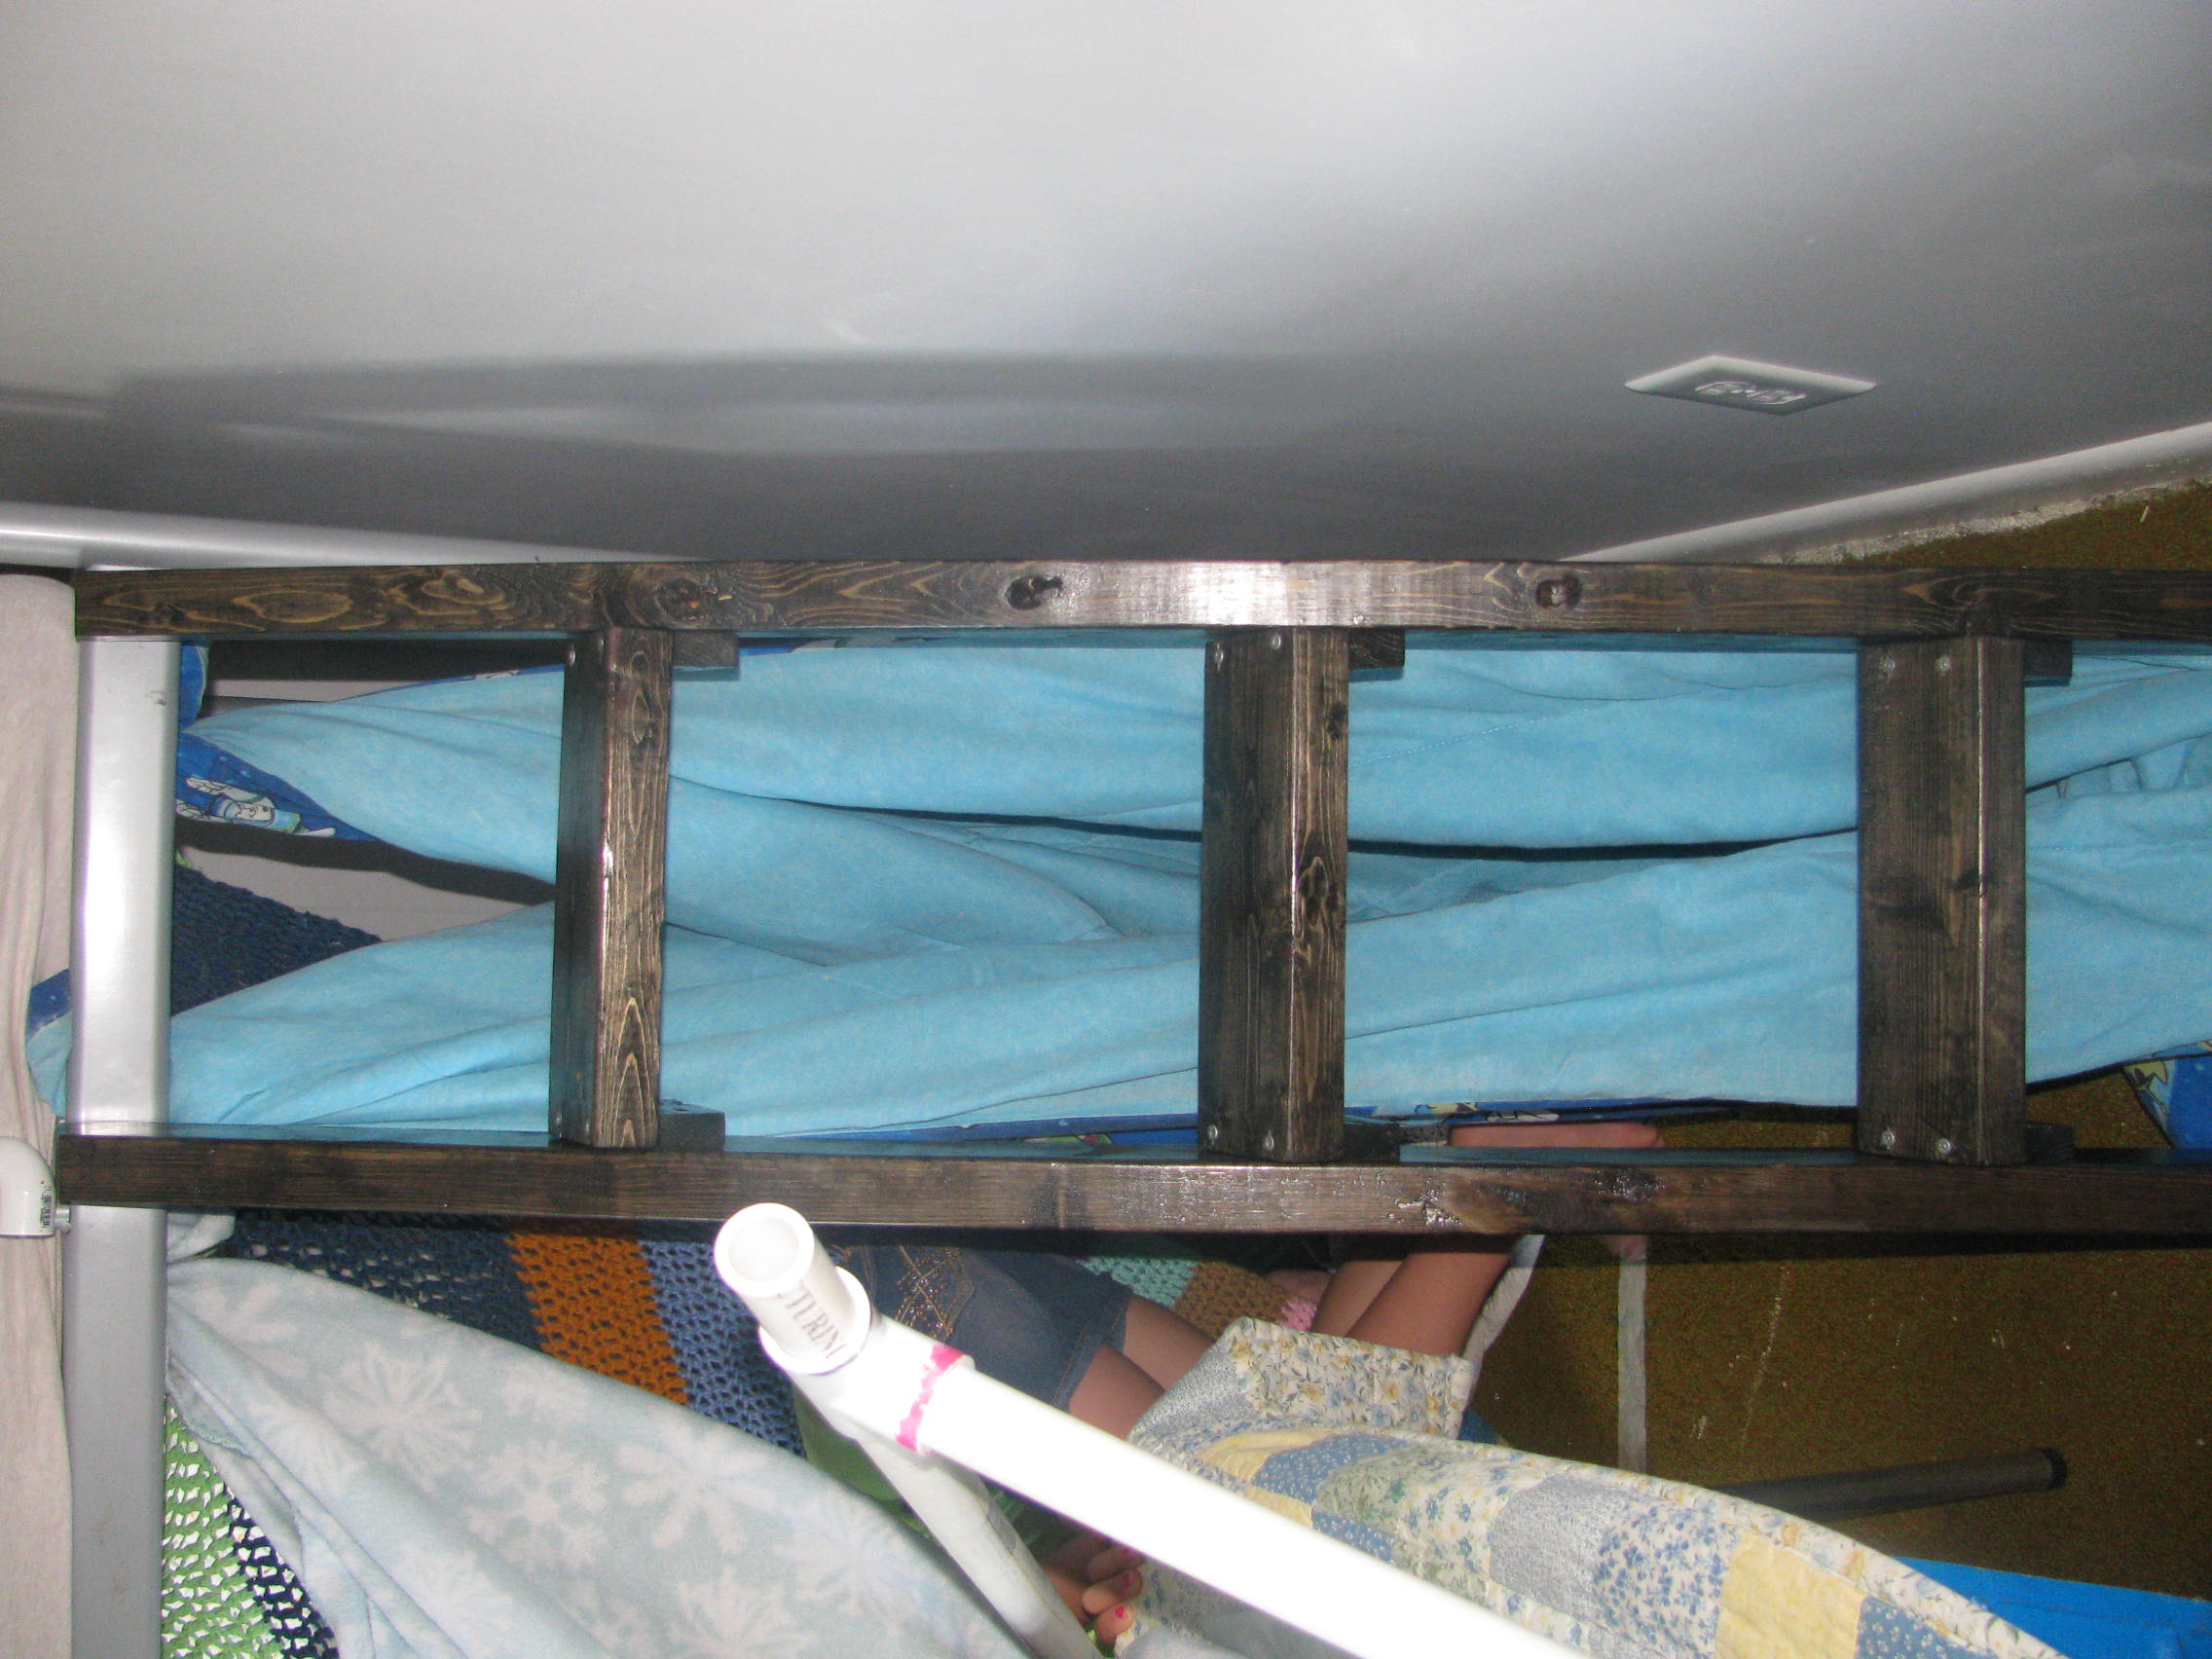
In redecorating my oldest son's room, we needed him to have a loft bed, but all the commercial loft beds are too tall for his bedroom. So then, we thought we would re-work his current bunkbed. In order to use it as a loft bed we had to remove the bottom support rails and that meant we needed a new solution for a ladder (because it was part of the support system). After looking through the site, I decided that this ladder was the best for our needs. The ladder went together smoothly. We had to modify the directions just a bit to make it the right size. We put a set of U-brackets on the end of the ladder to put over the bunk bed. We also drilled through the bed frame and into the ladder for additional support.
Wed, 10/30/2013 - 12:14
Hi there! I'd like to rework my daughter's bunk bed like you did, but struggling to figure out how to raise it. I also need to build a new ladder. Can you offer any guidance on this? Thanks!

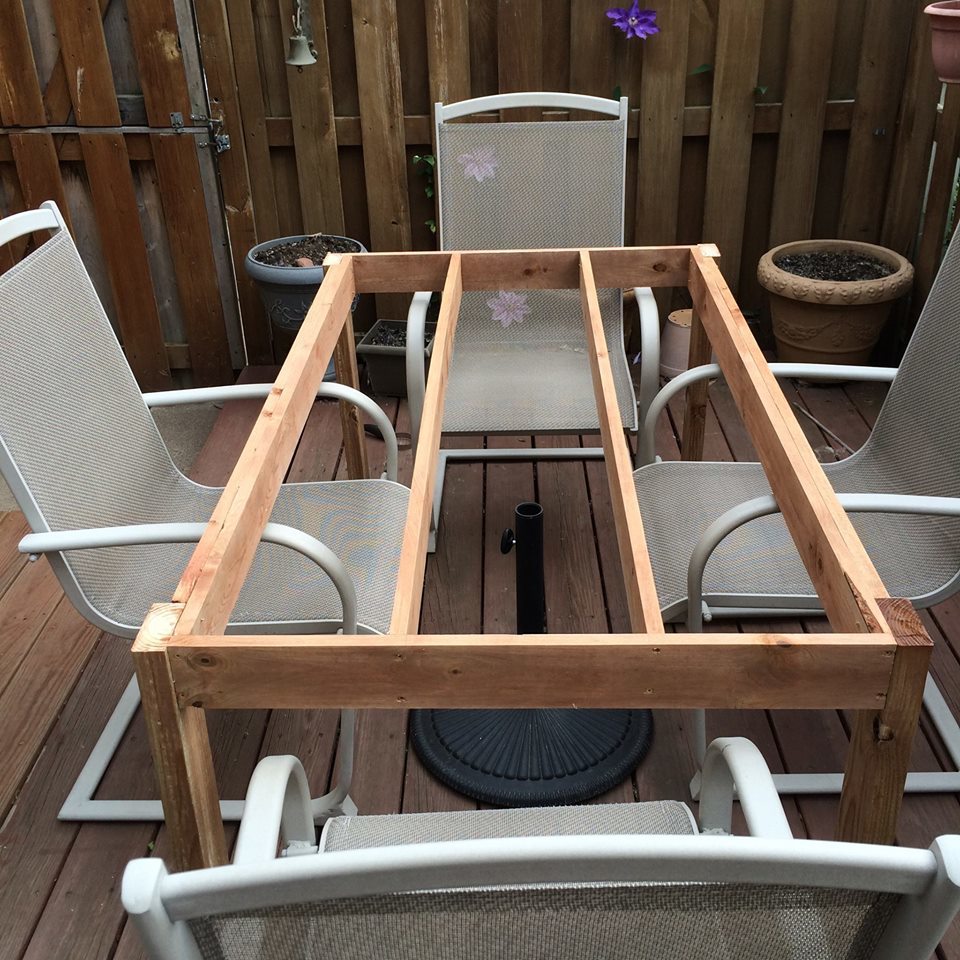
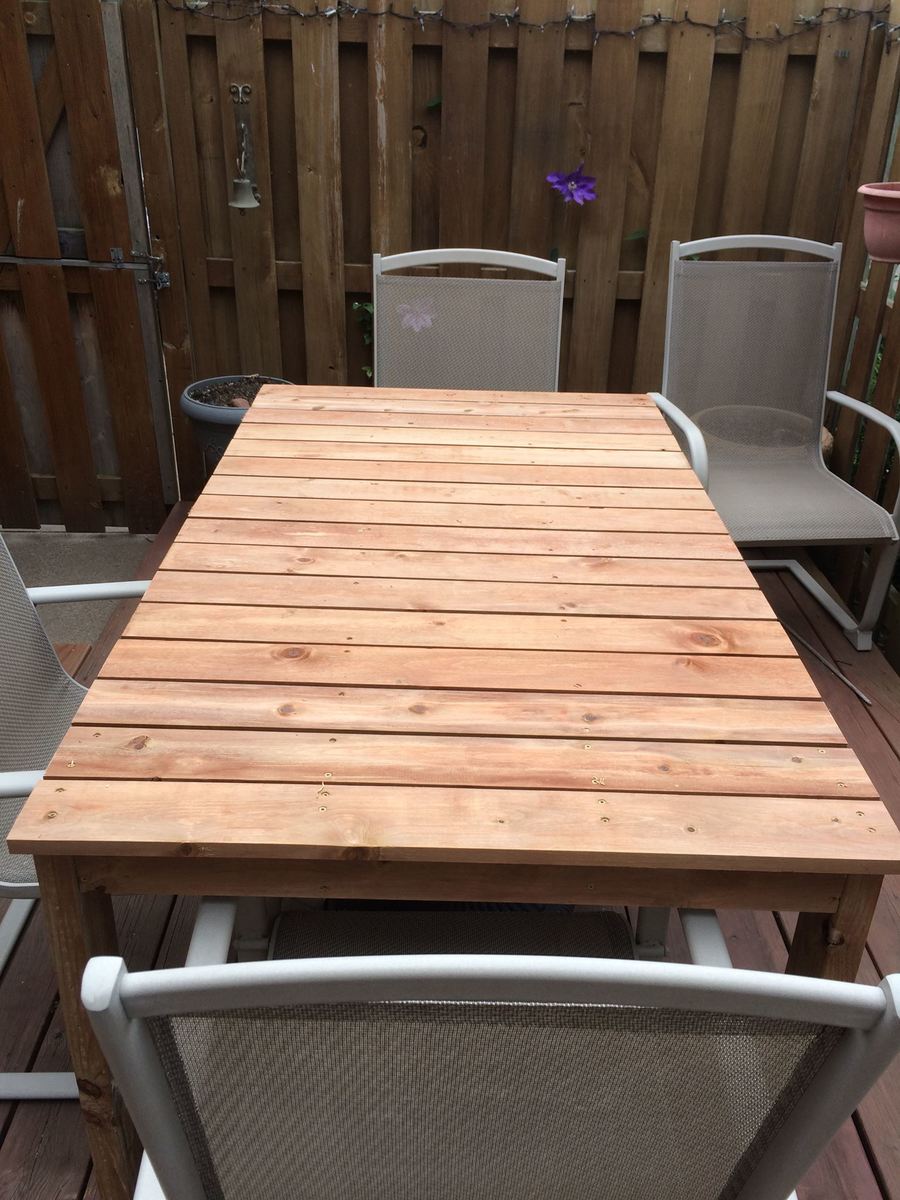
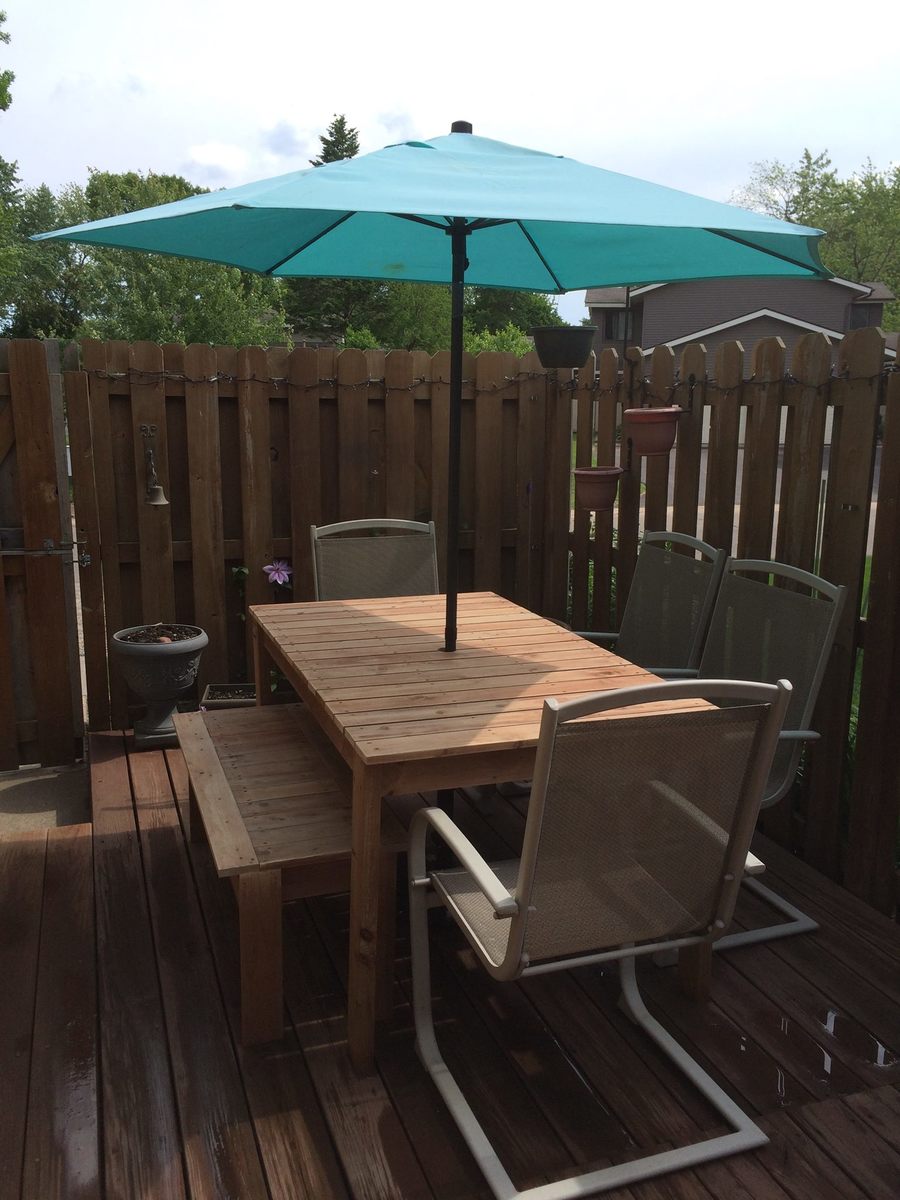
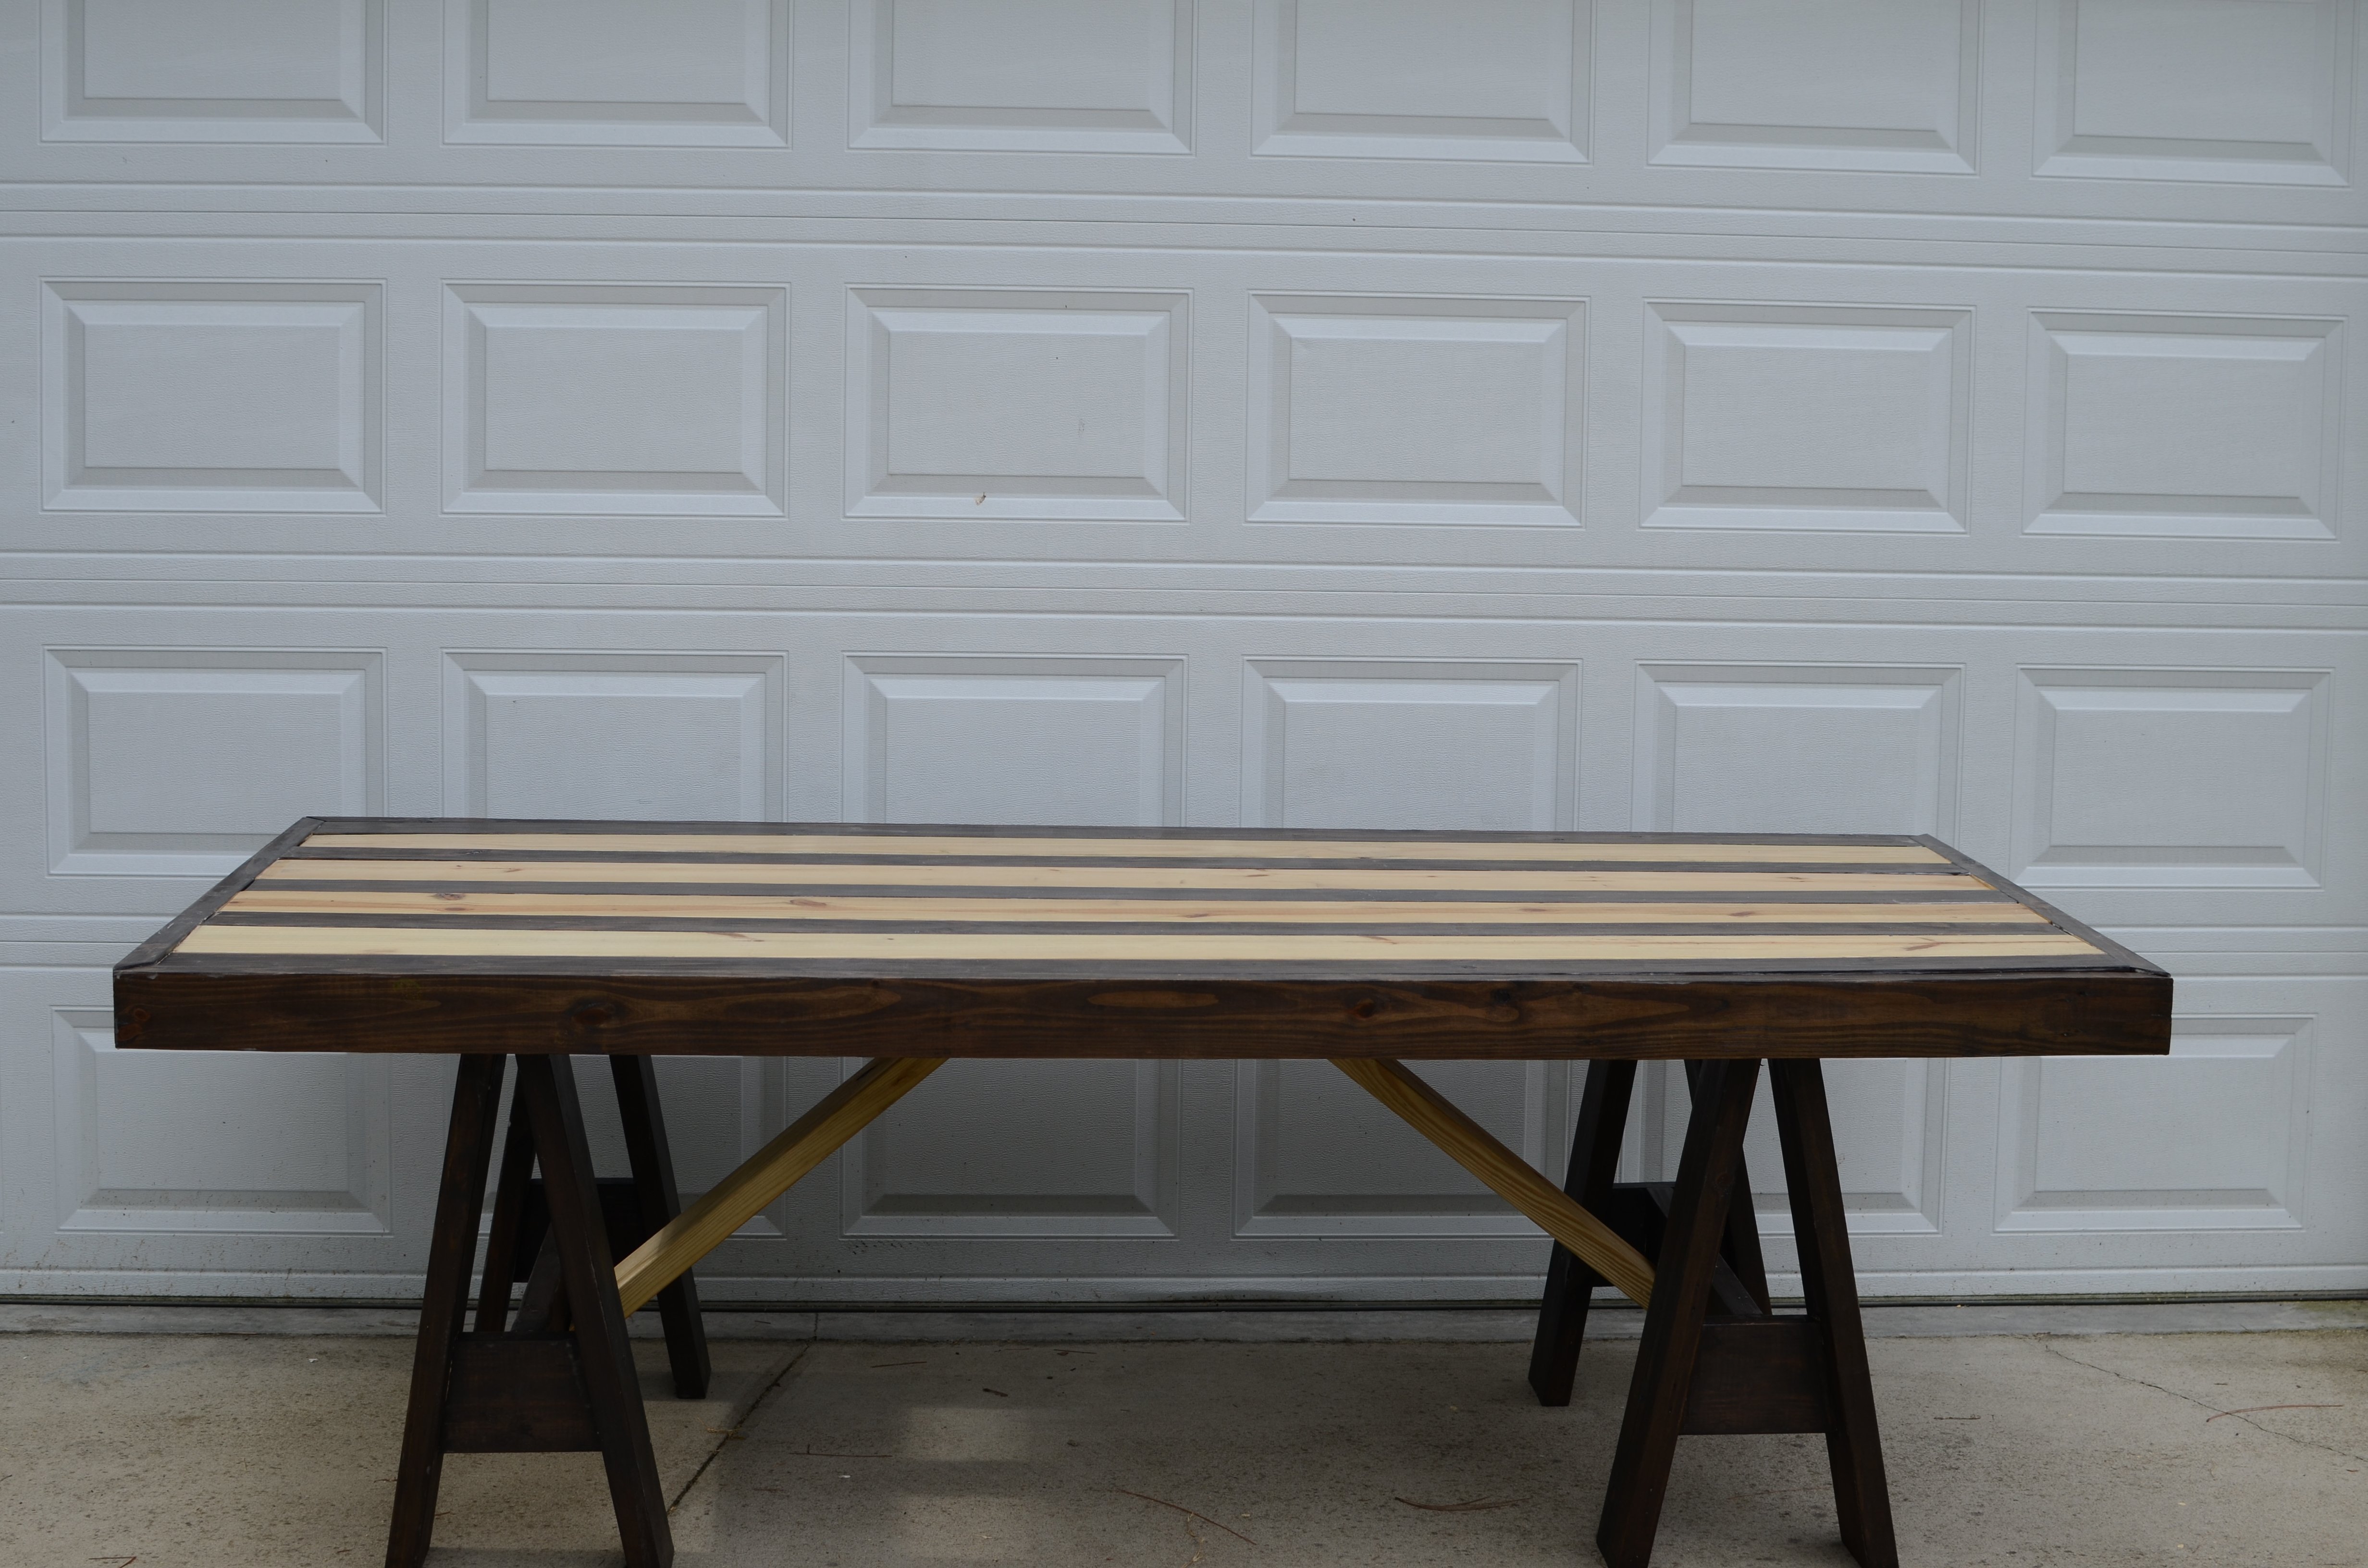
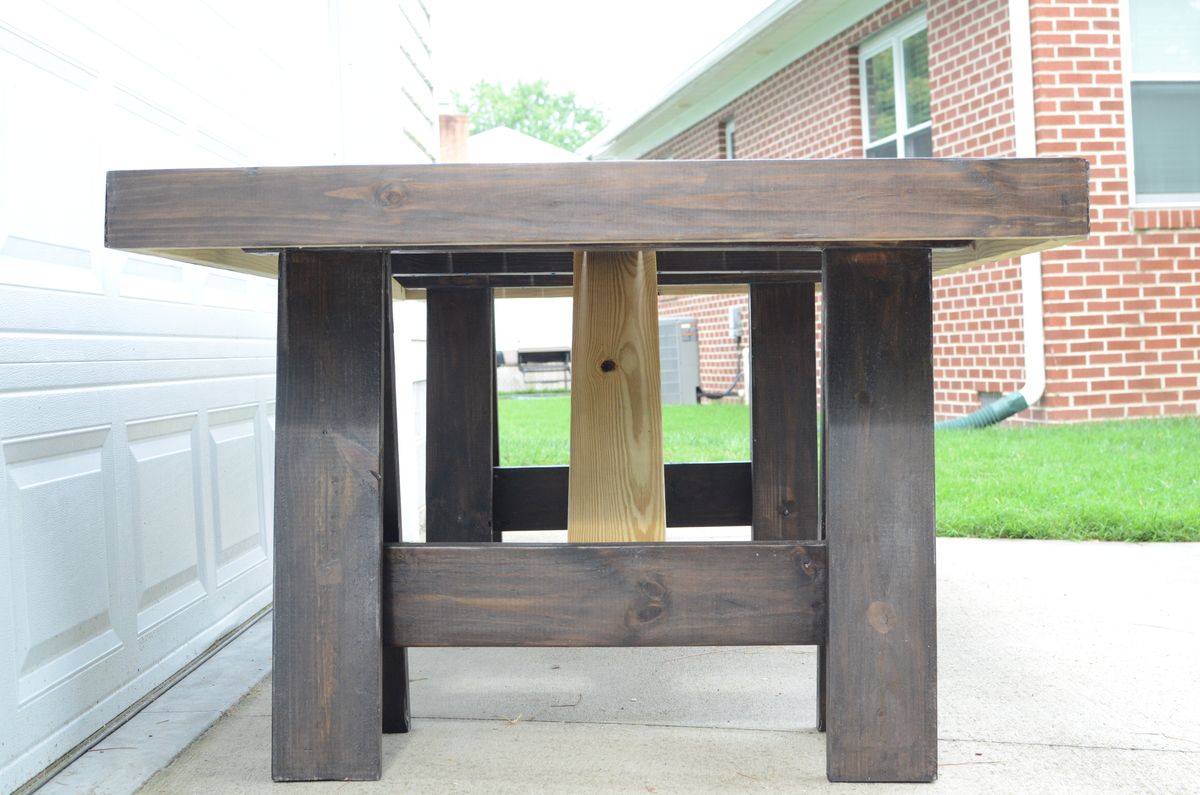
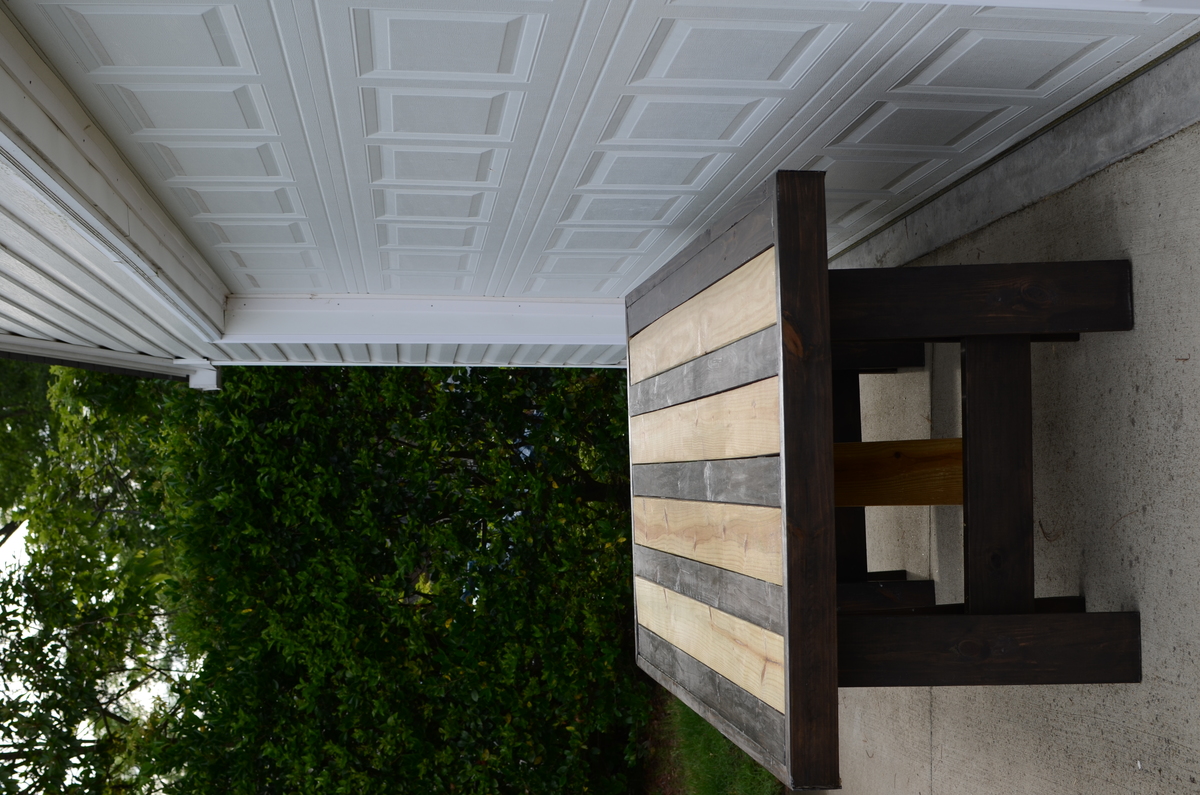
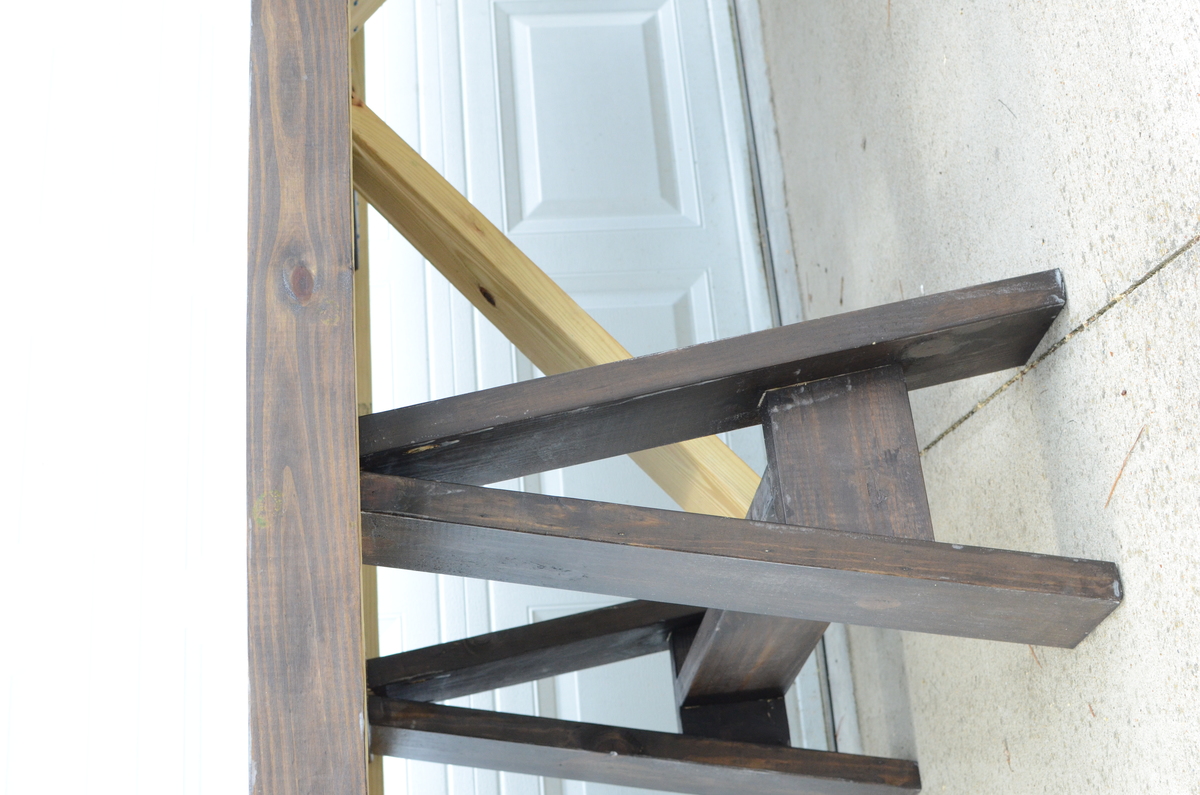
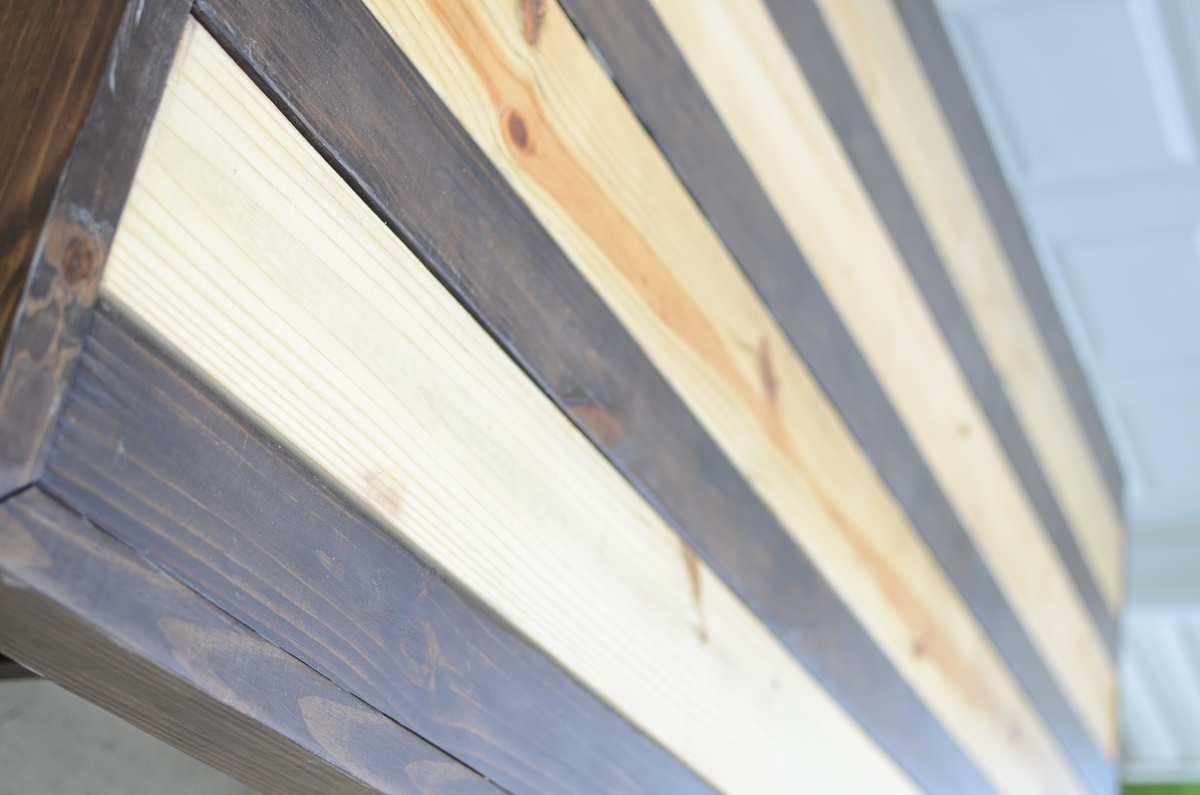
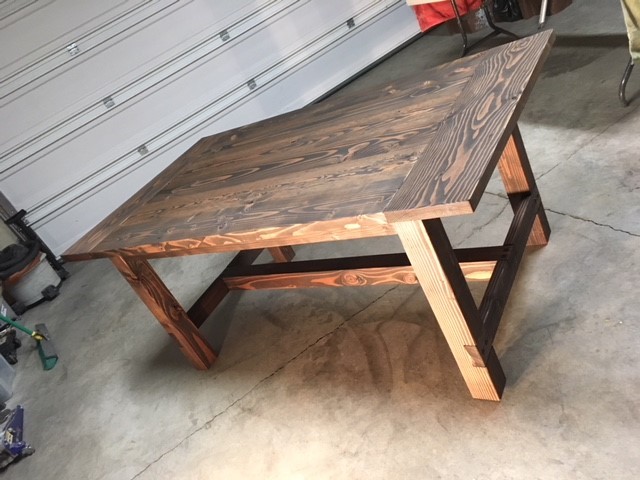
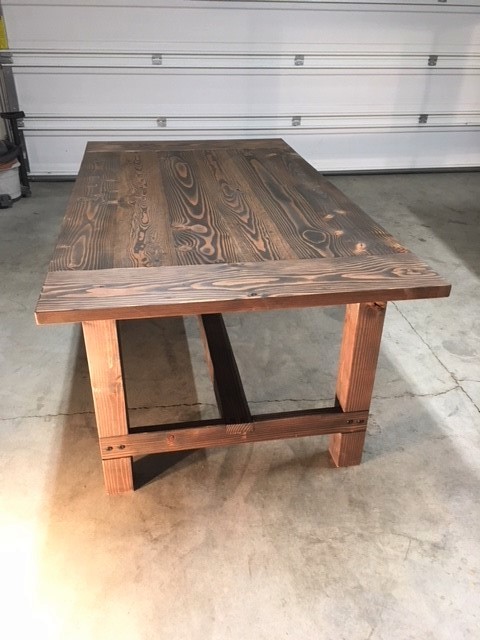
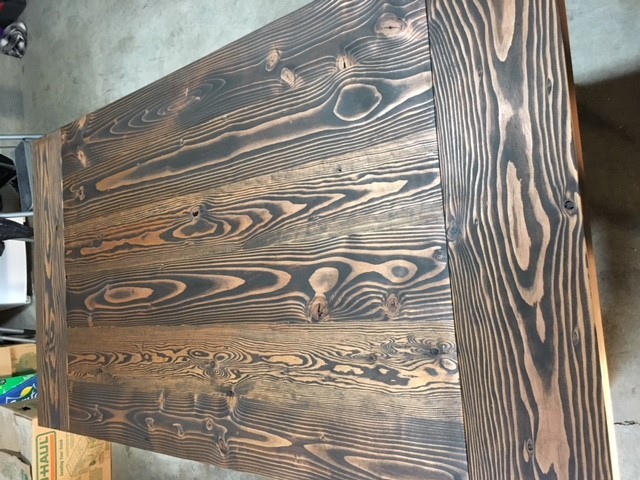
I am starting to work on more and more projects and I'm limited with space. I needed a worktable that could double as a backyard dining table (should the occasion arise). We have been planning to build the farmhouse table for a while now, so this was a great opportunity to build a prototype. I did some repair work for a friends deck and she gave me the leftover decking material. This became my table top. I purchased 4 2x4's at our local Habitat for Humanity ReStore for 50 cents each (this was the only money spent on this project). While I was at the ReStore I also picked up 4 pallets (they are free). After cutting them apart, the 2x4s from the pallets became the table legs and the 1x4's & 1x5's from the pallets became the shelf underneath. The shelf has been great for holding extra tools while I'm working on projects. My daughter likes to stack her toys on it too! This was a super quick and easy build. My wife even suggested we just refinish it and bring this one inside!
As always, I have to give thanks to Ana for such great plans!

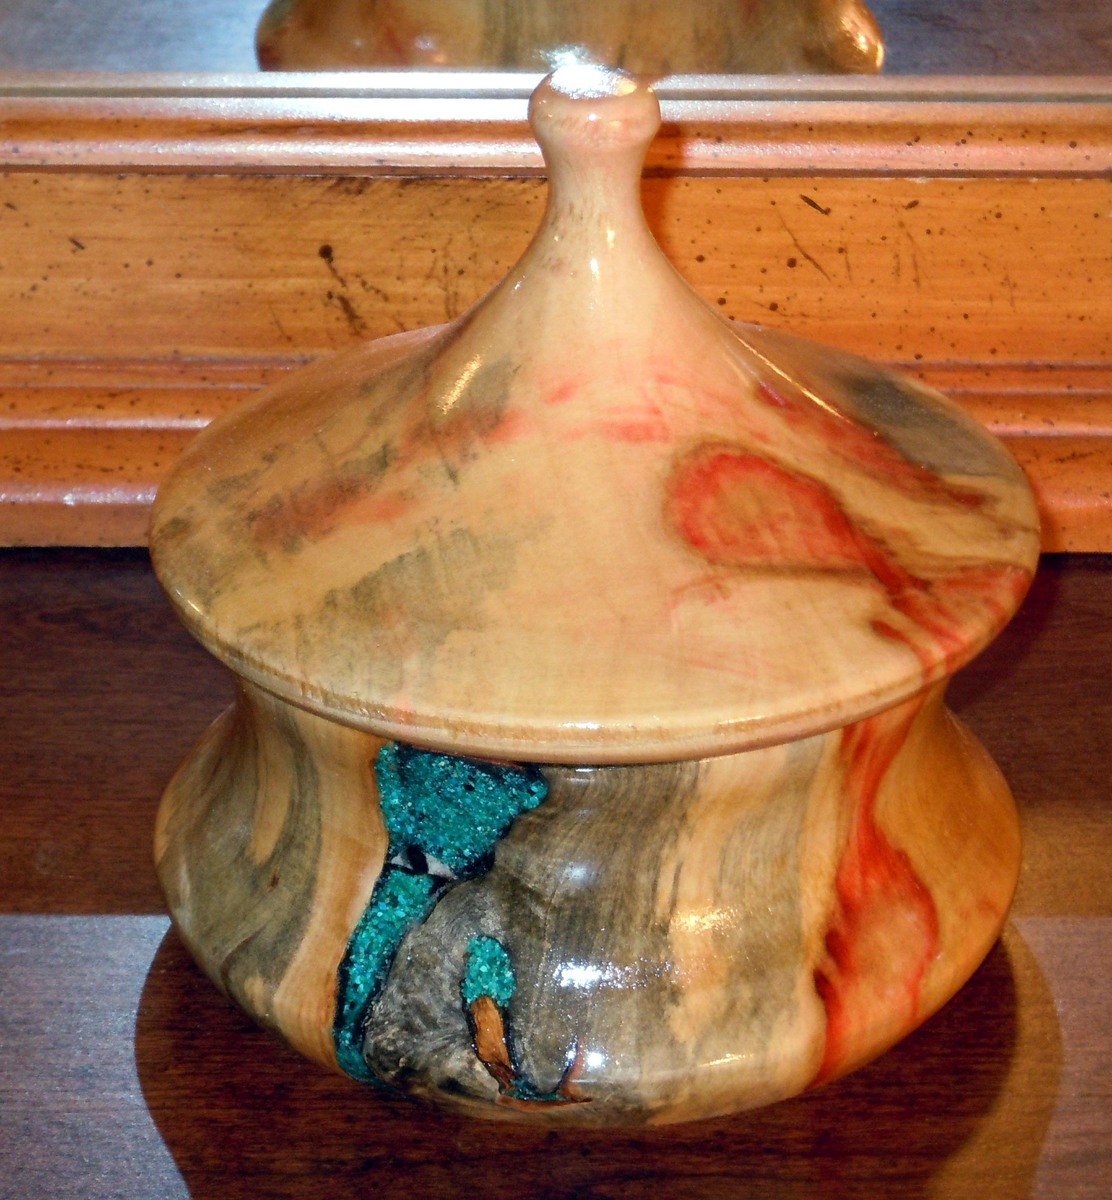
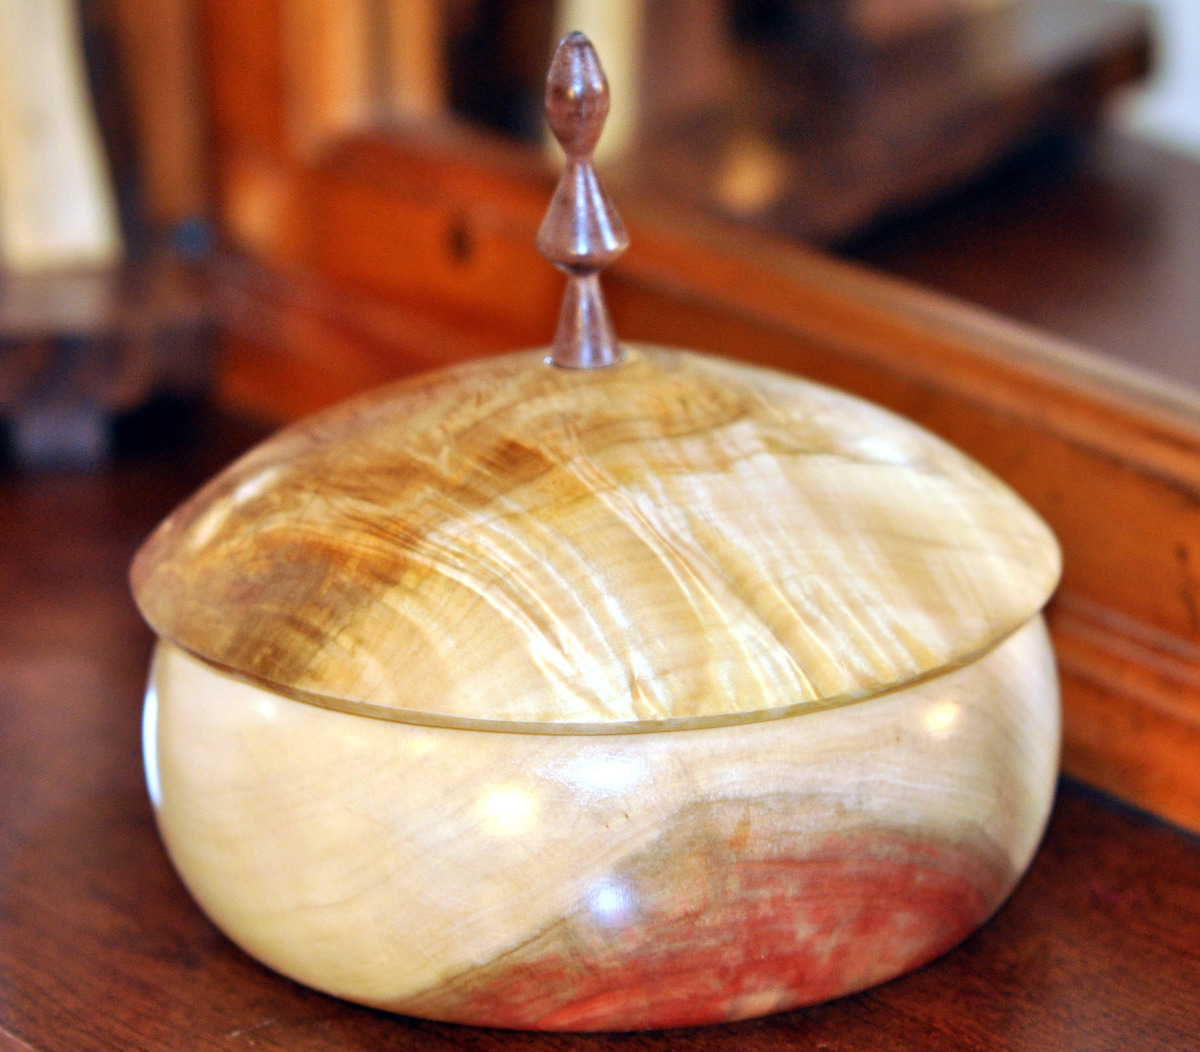
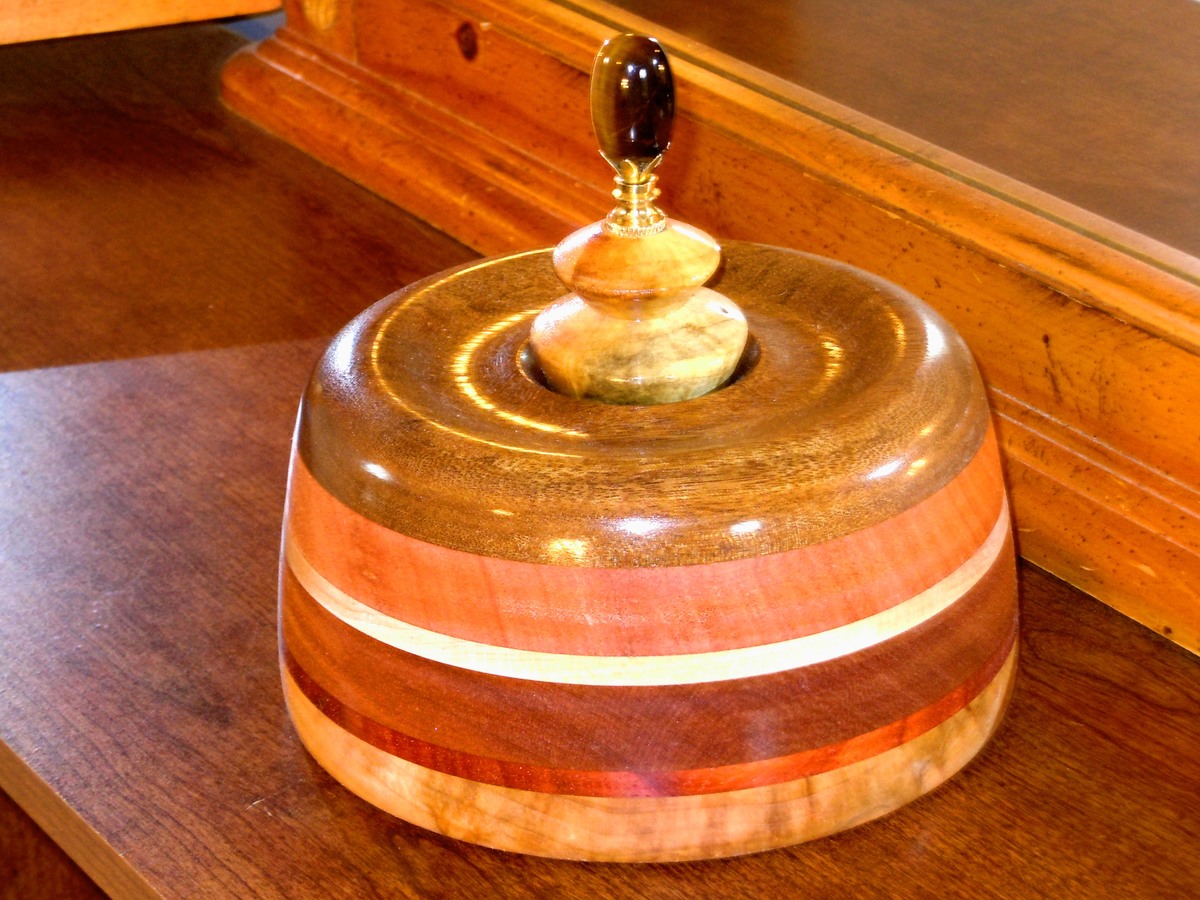
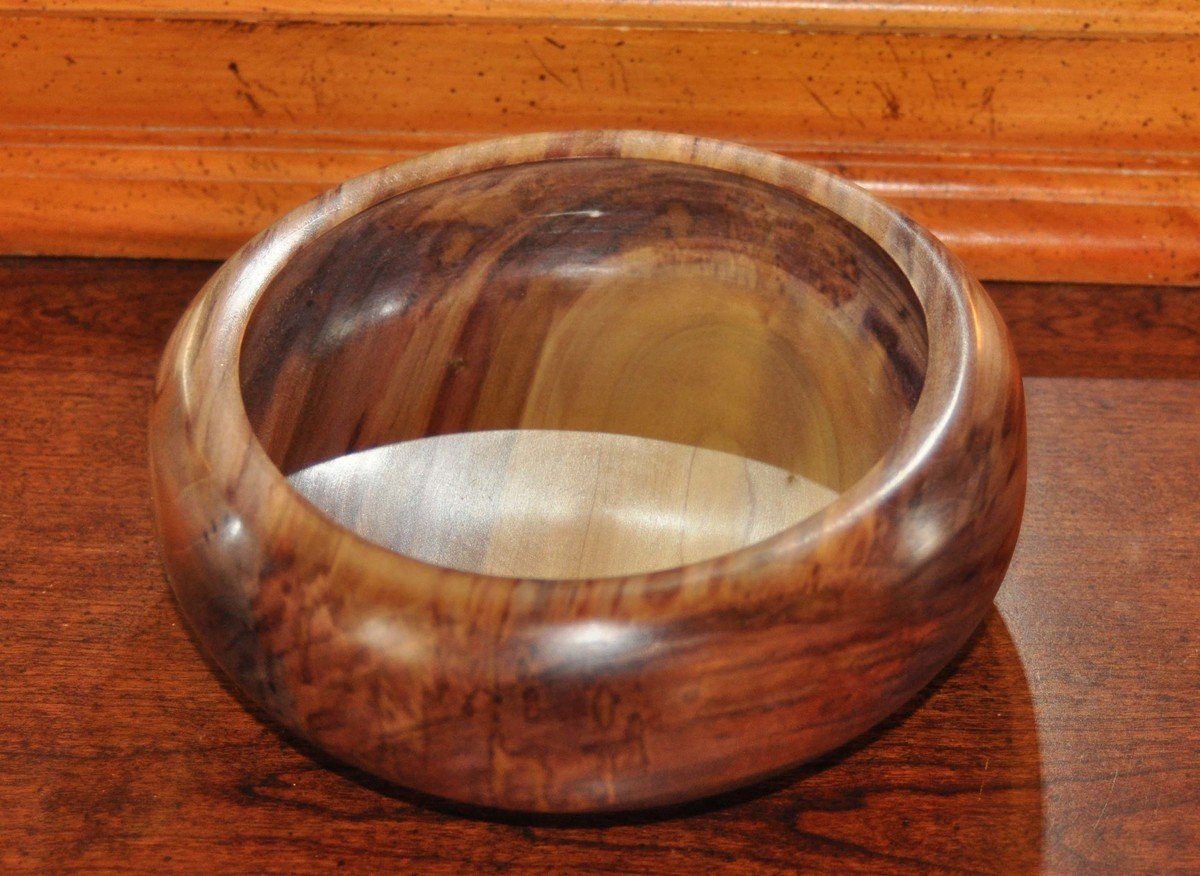
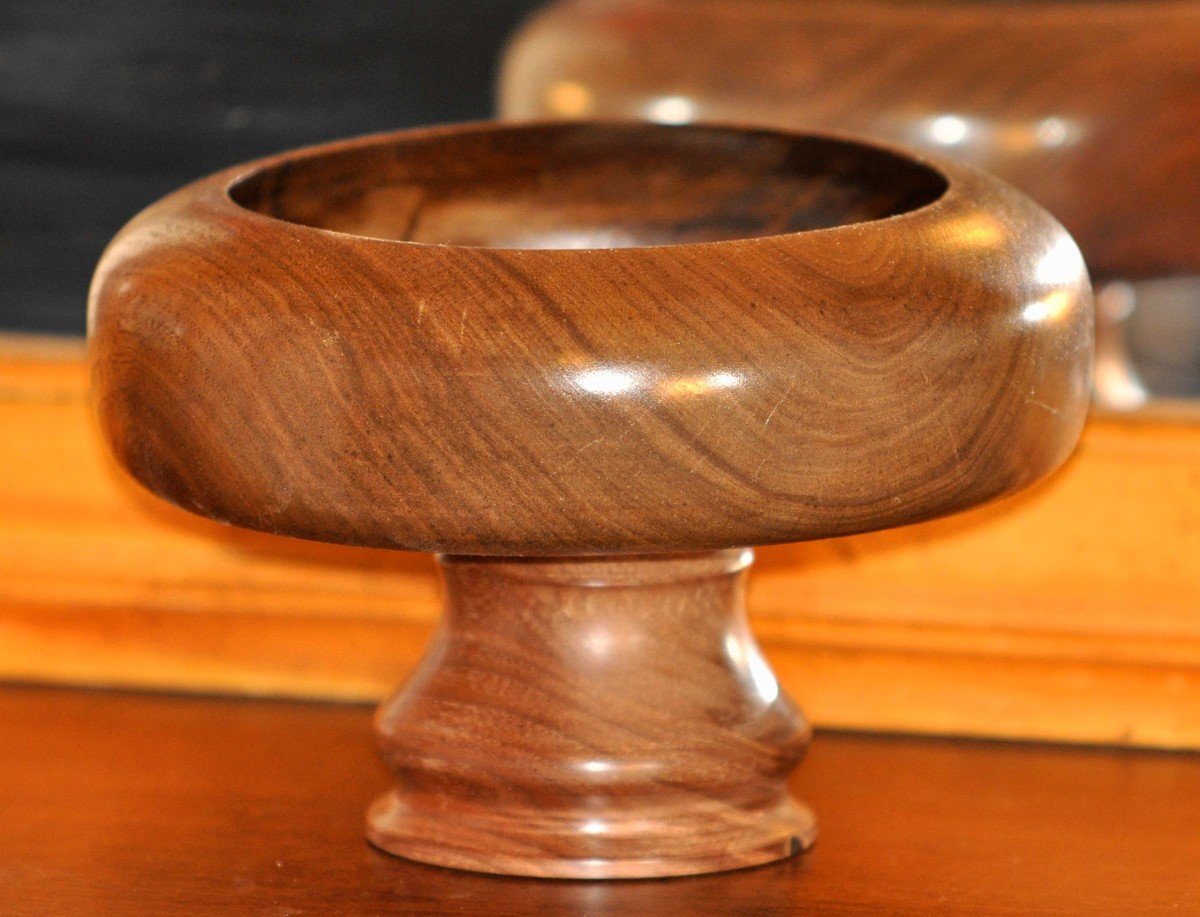
These are a few of my turnings. They are available for sale. Message or comment for price and shipping.


I looked around to buy a patio and found they were often quite expensive or they were poorly made out of metal that would rust. I had some scrap pine and some table legs from an old table I wasn't using so decided to make a patio table myself.
For more details, check out my blog:
http://www.woodworkingfourdummies.com/blog/patio-table
Cheers,
Ian
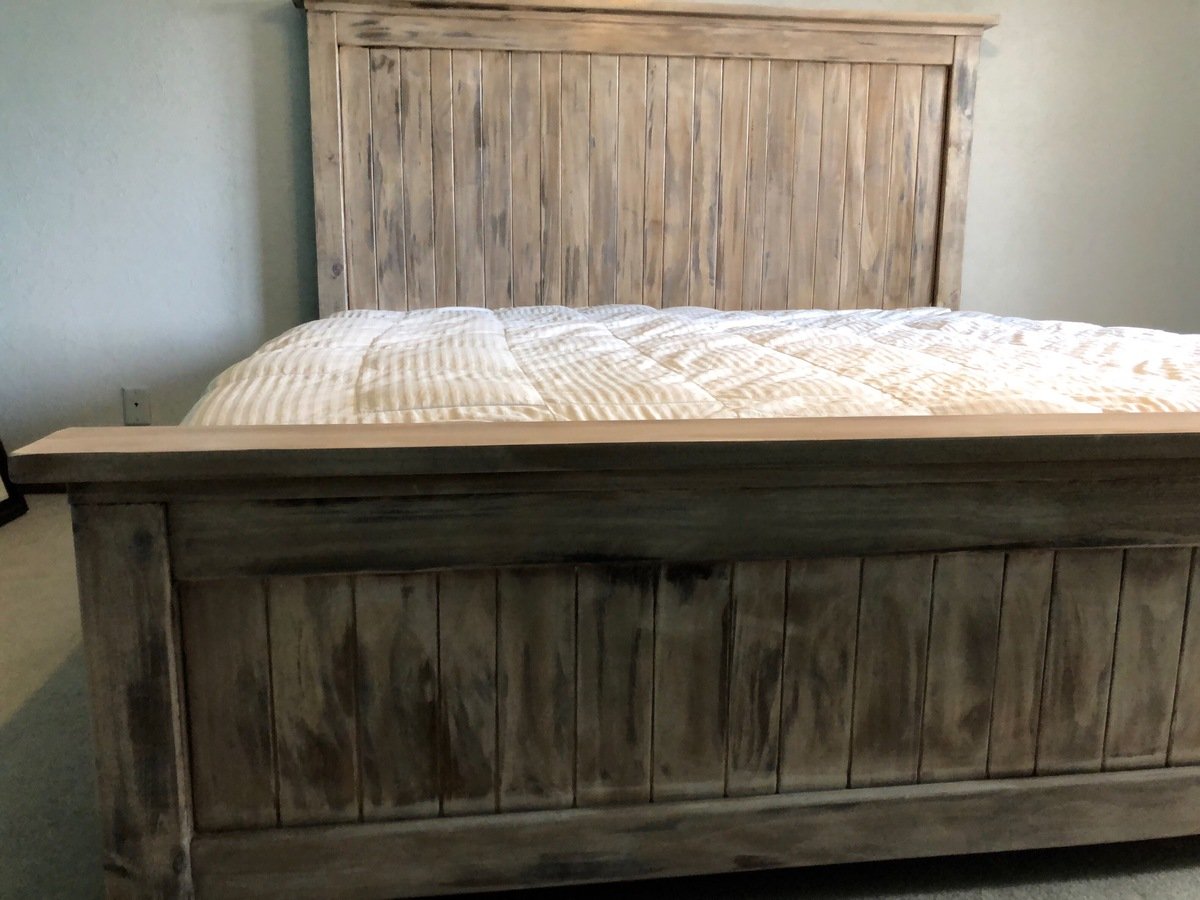
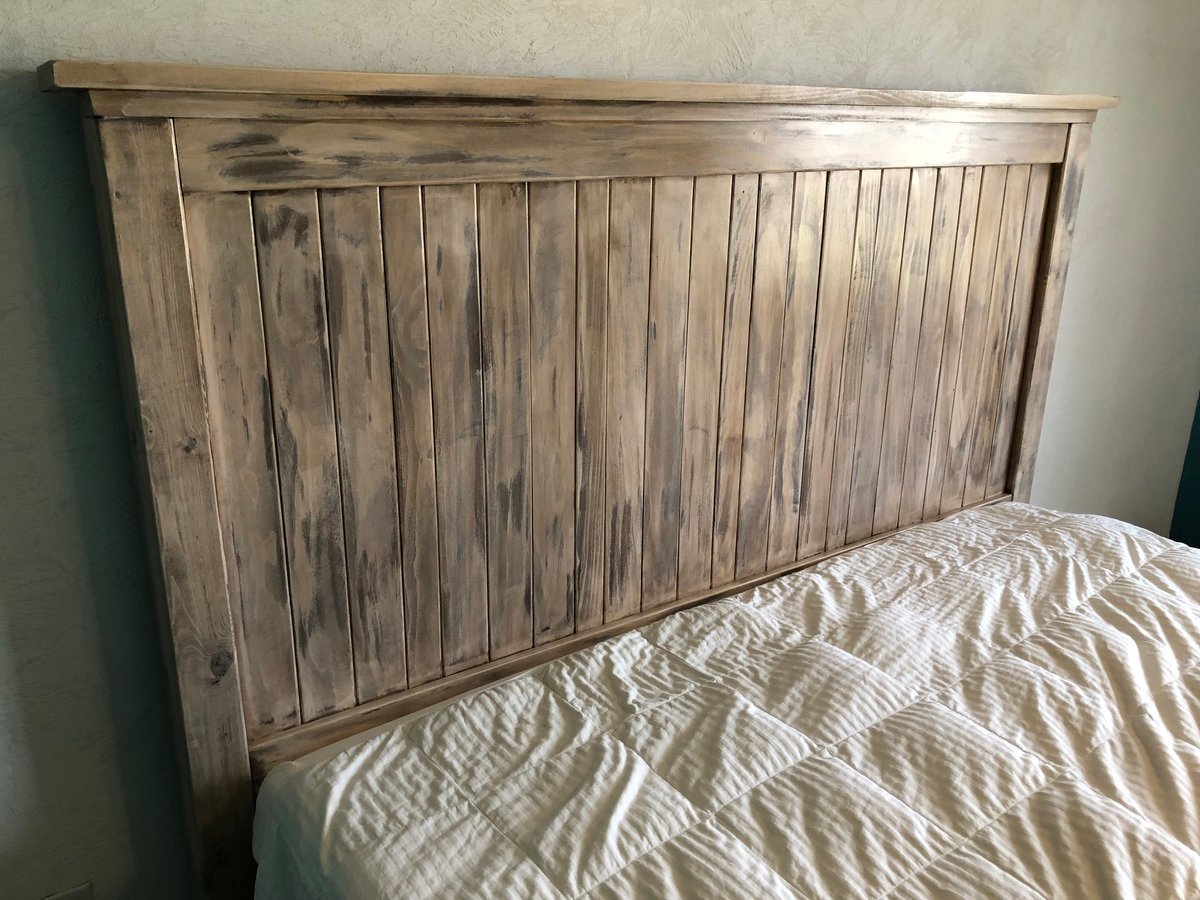
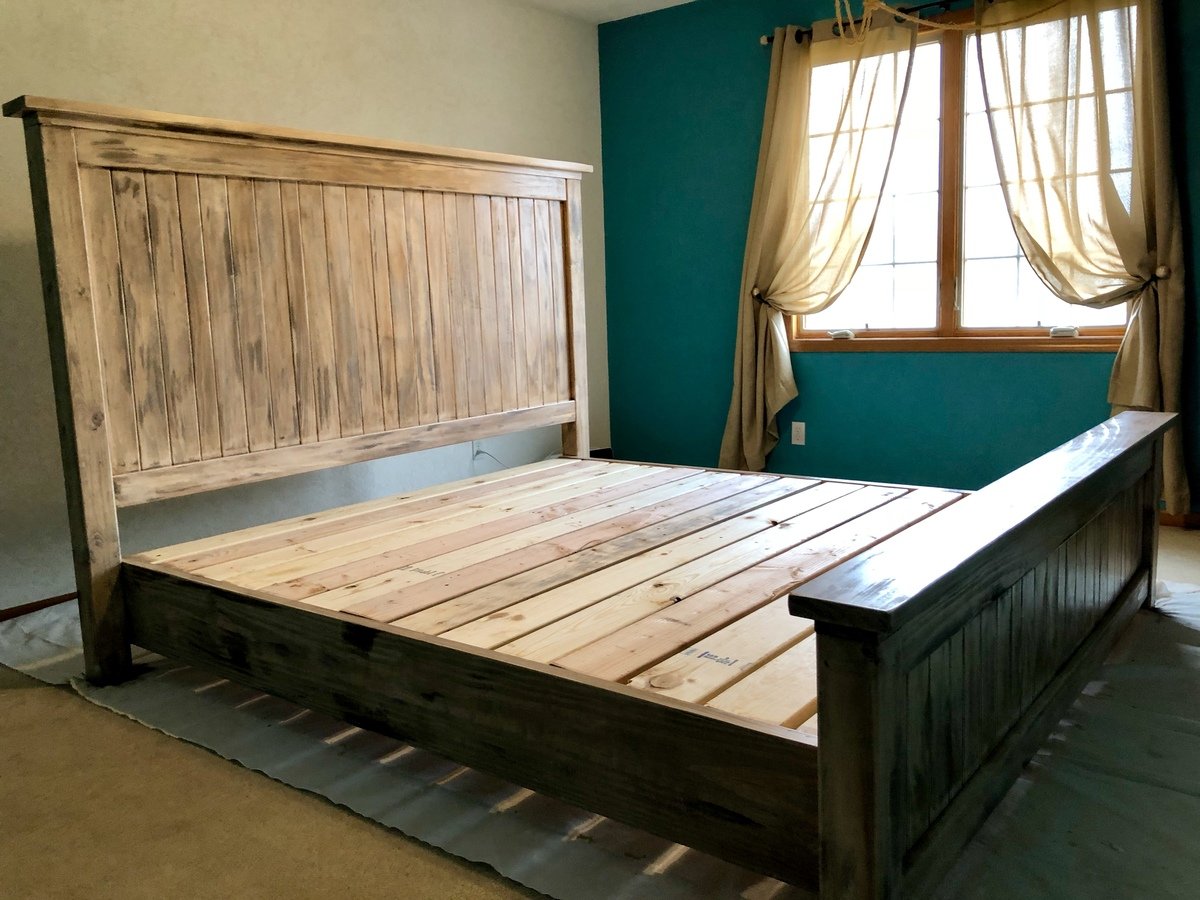
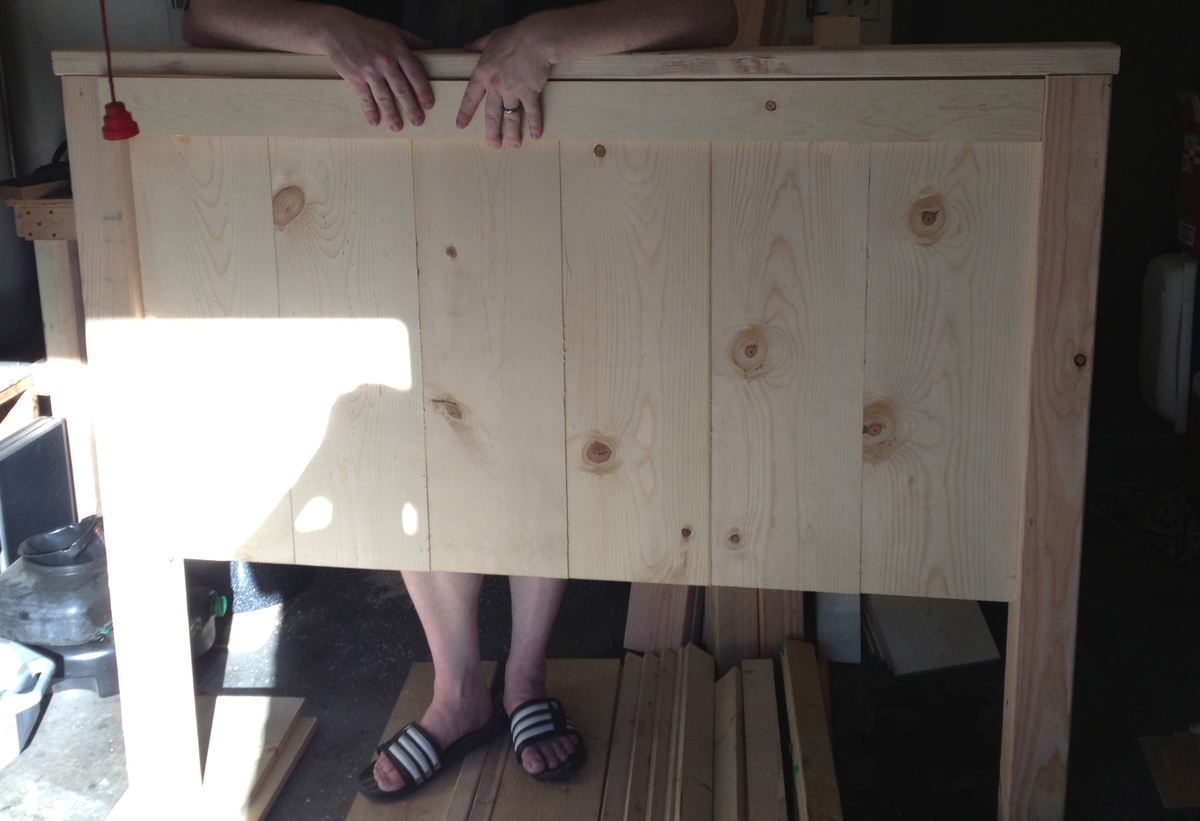
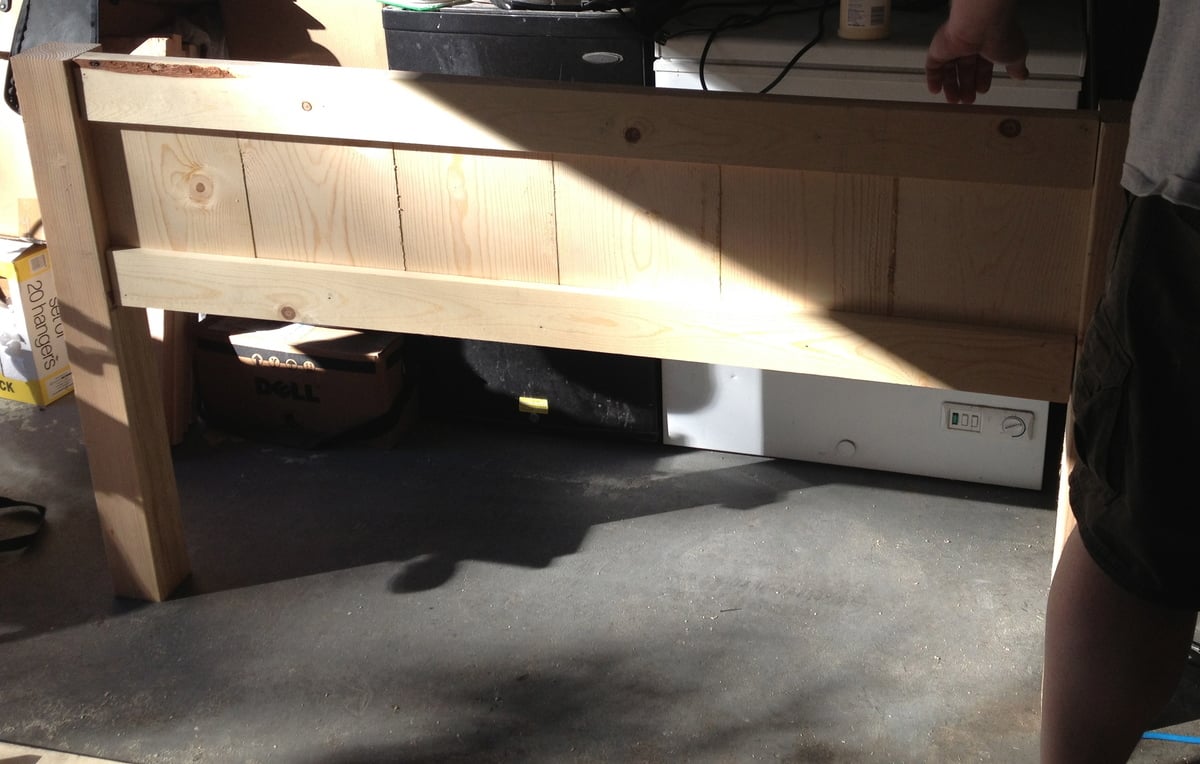
Modified the standard farmhouse king plan a bit. Made the headboard 4" taller and utilized 1x4's and 1x3's to fill in the headboard instead of 1x8's. I used 2x8 from front to back for the runners and horizonal 2x6's just under the lip of the 2x8 for the matress to sit on. It turned out great and we get lots of compliments.
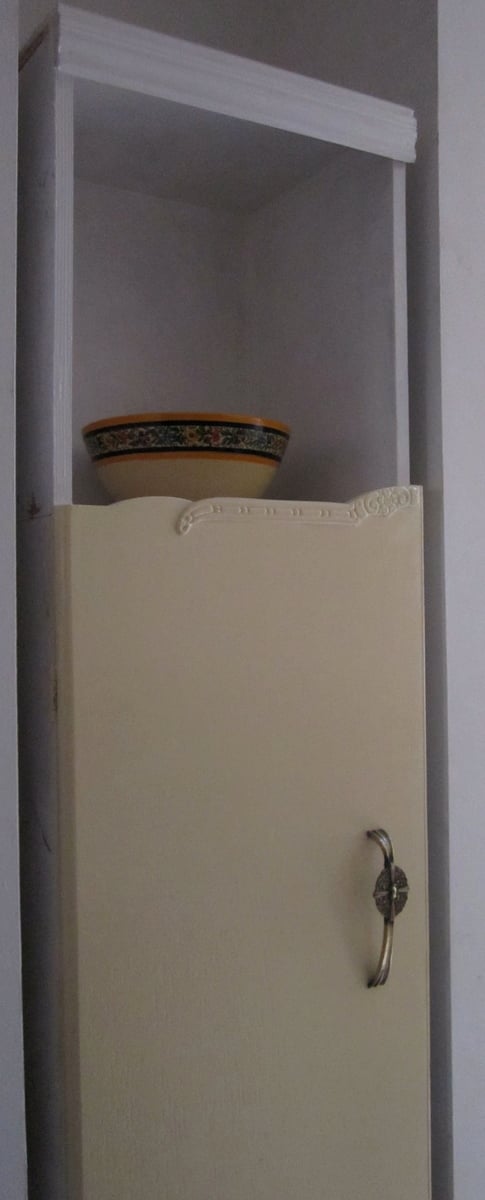
We have a funny alcove in our kitchen that is narrow but very high. I didn't want the space to go to waste, but because of the odd shape I couldn't find anything that would work. I modified the Single Locker Cabinet plans to design a tall cabinet and reclaimed a door from an old wardrobe we found on the street.
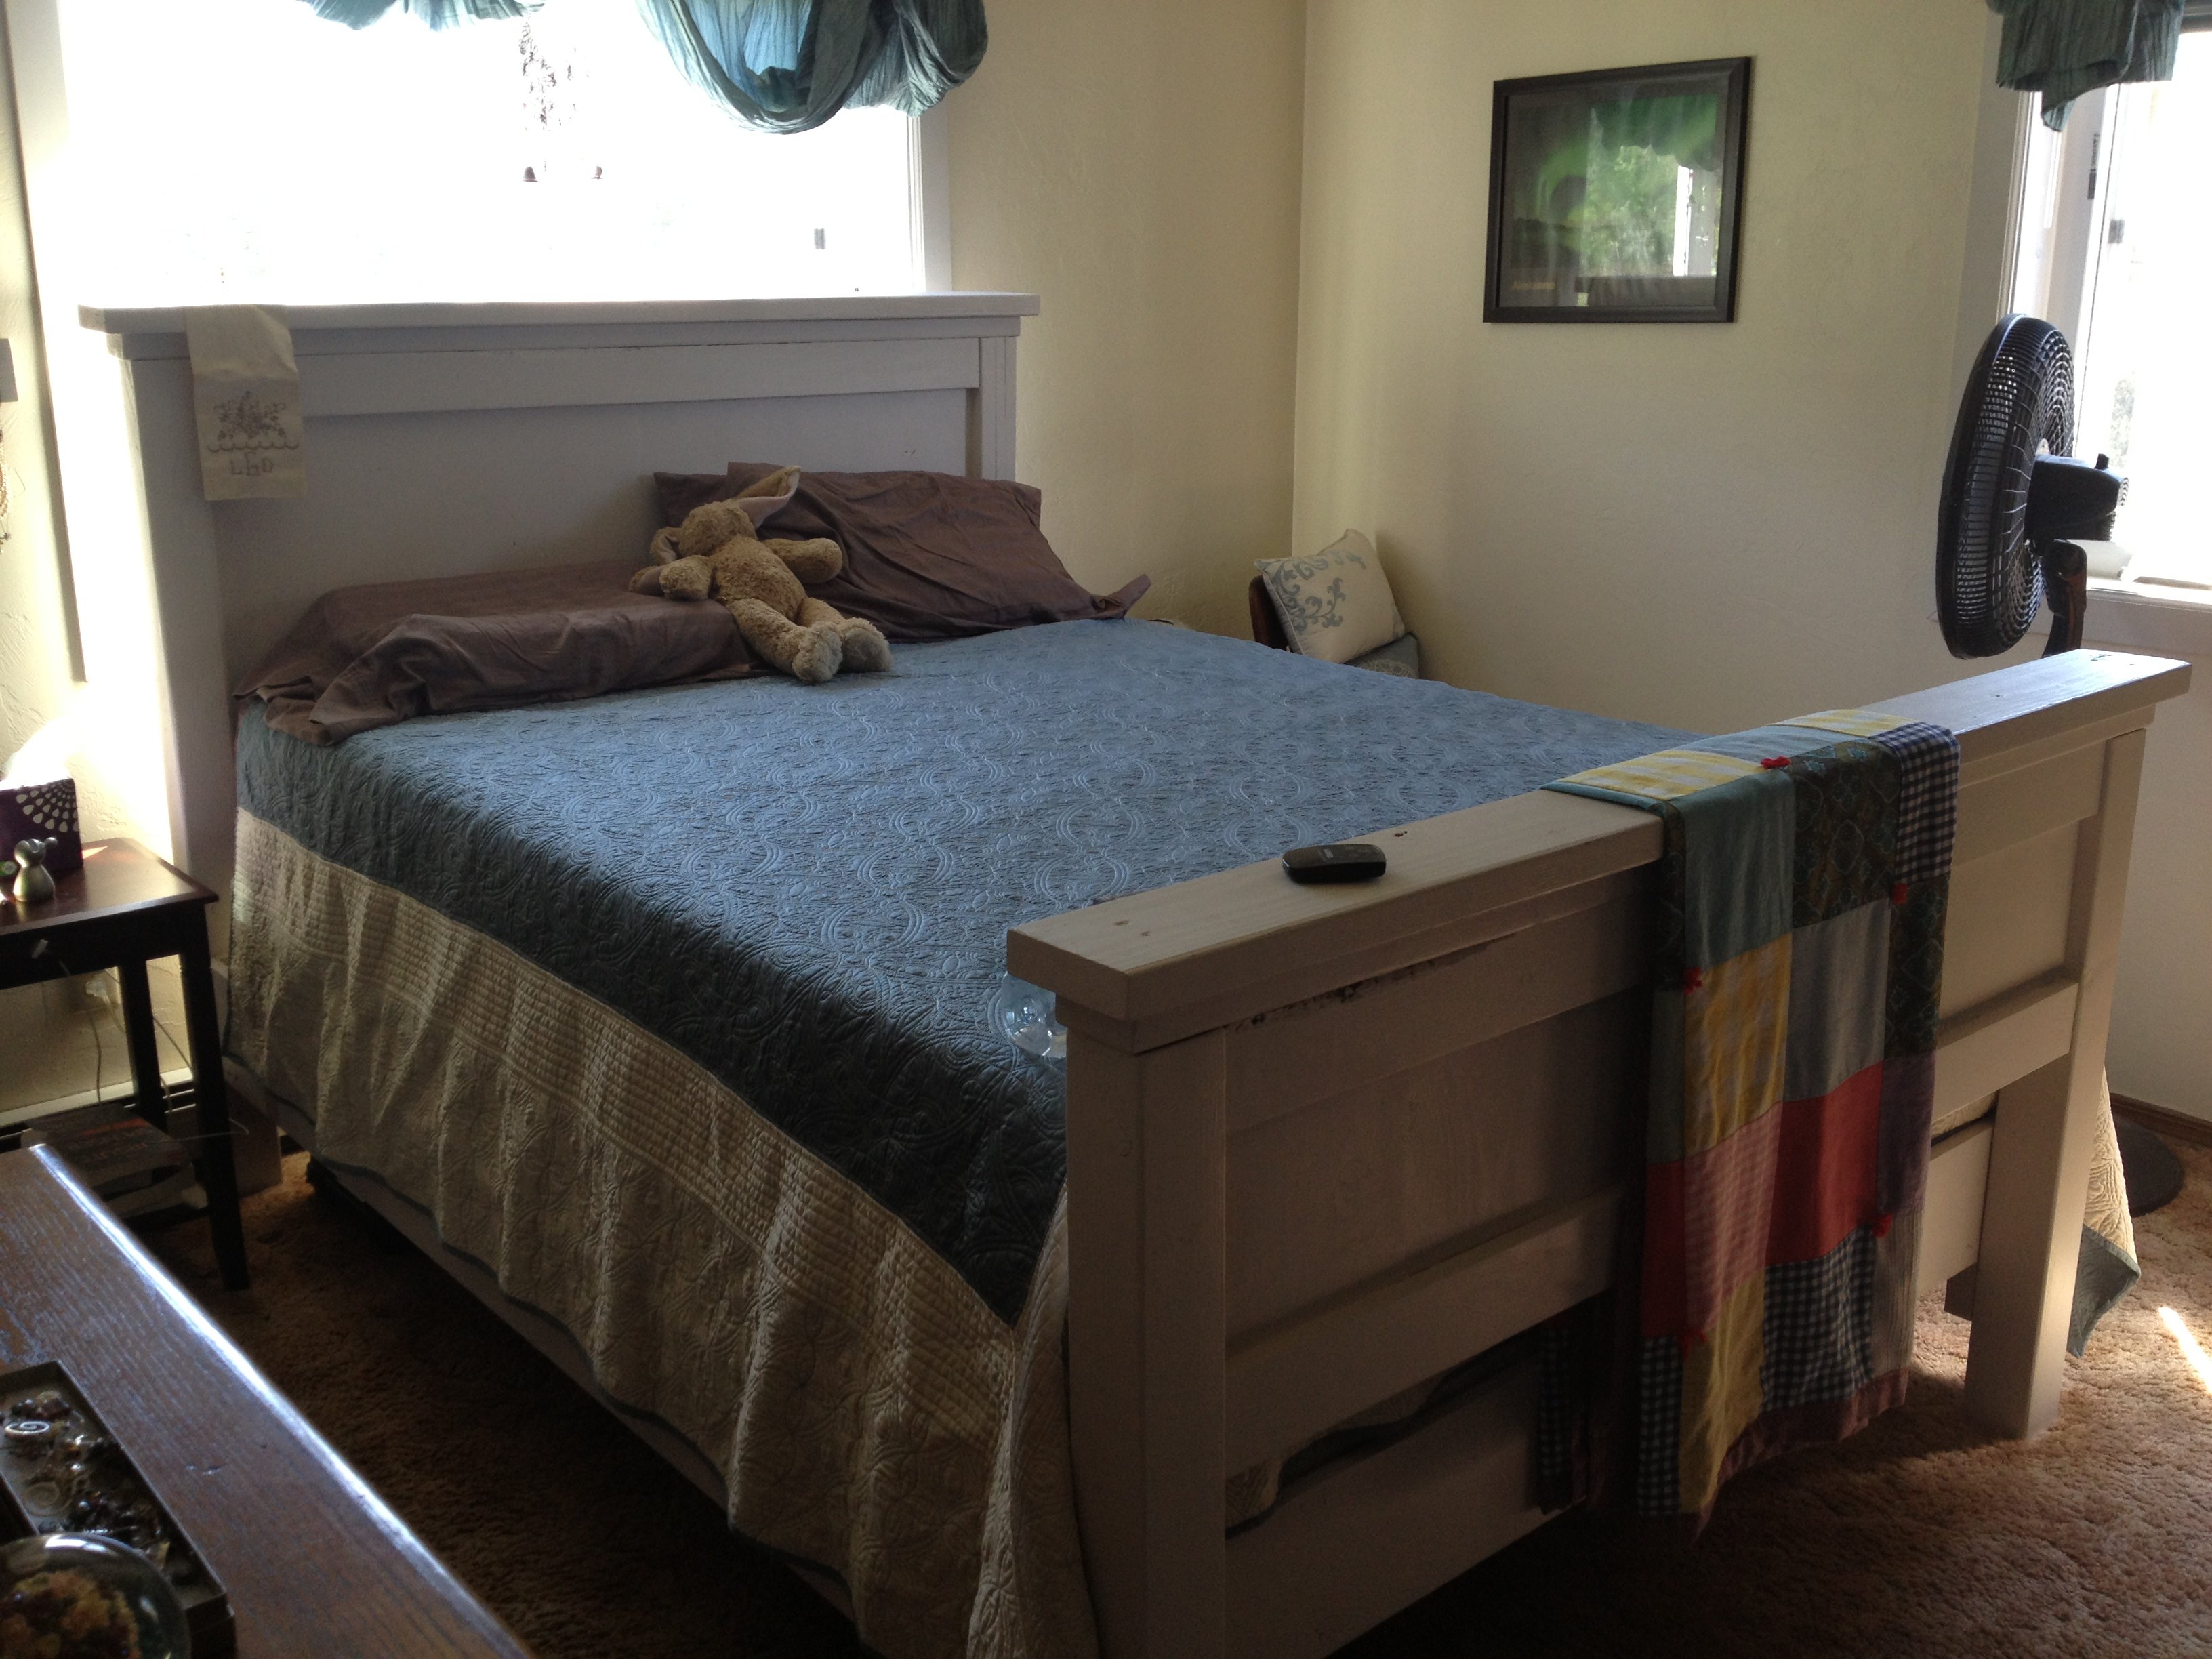
This was our first project & we worked on it together. My husband melded the Farmhouse plan with the Chunky Leg bed box. The box is reinforced & has 13 slats. We didn't sand out areas that had bark, but left them for the texture. We worked on it a few hours each night & then painted on Saturday & puit it together on Sunday. Design-wise we raised the bed so that the bottom of the frame sits at 12 inches. We also raised the footboard above the mattress level. These changes were just our preference, but we really love how it turned out. It is sturdy, substantial & beautiful!
Great project, super easy to follow instructions and really easy to modify with some simple math.
Perfect weekend project, started the table around 1pm on Saturday, finished the bench and had the garage cleaned up and sitting at the new table by 330pm on Sunday!
Thanks for posting the plans, they were very easy to follow!


I live in an apartment, so I had everything cut for me at the nearby hardware store except the trimming. I scaled it so that it fits in my living room. It was my first woodworking project since high school, but I’m happy with how it tuned out. Thank you so much for the easy to understand instructions!!
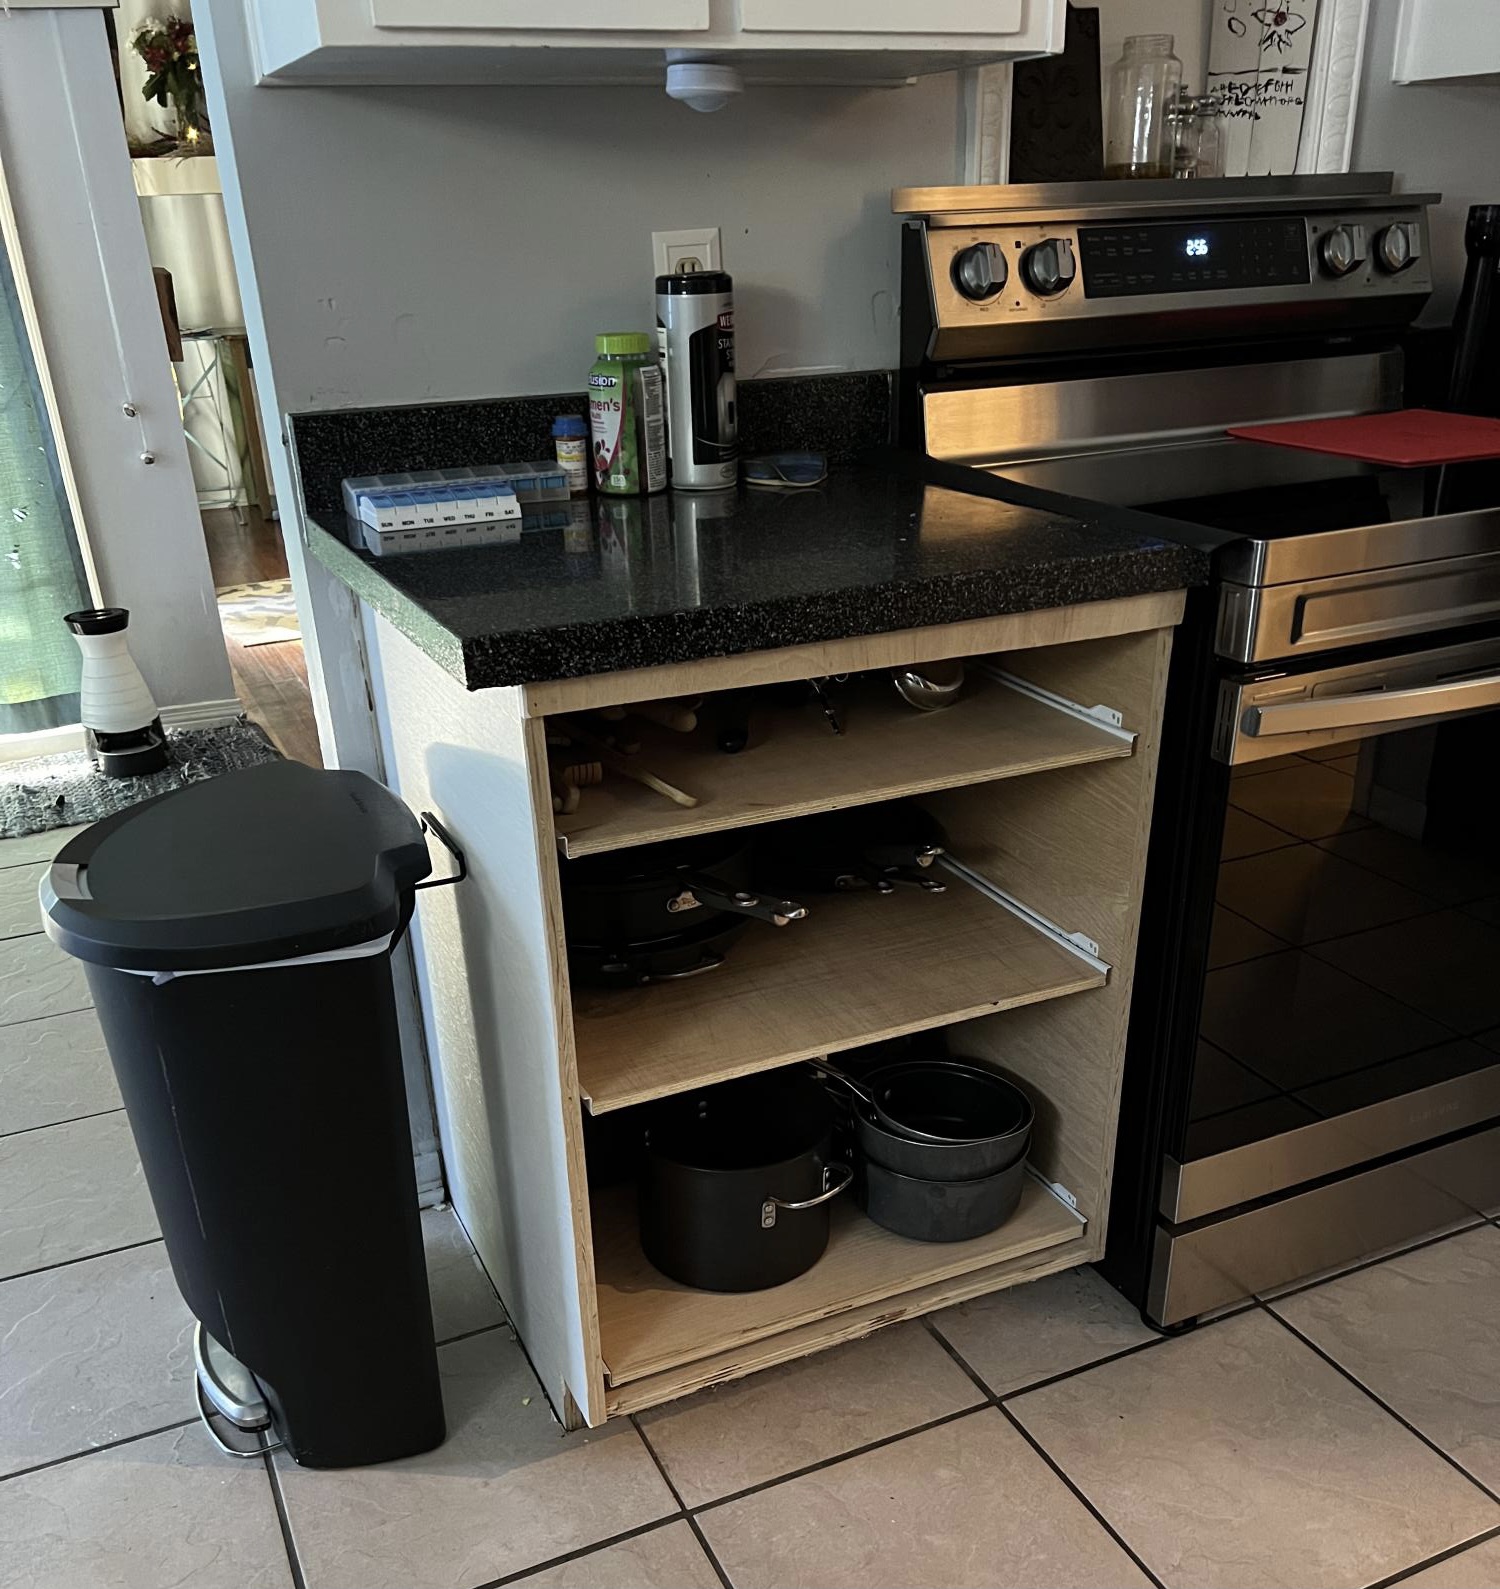
We are in the beginning stages of our kitchen redo. Three sliding drawers; not sure how we are finishing the front yet though.
This is a great weekend project I would add supports to the table to make it a bit studier. I found out that any flat surface will be inviting for adults to want to sit on during a BBQ
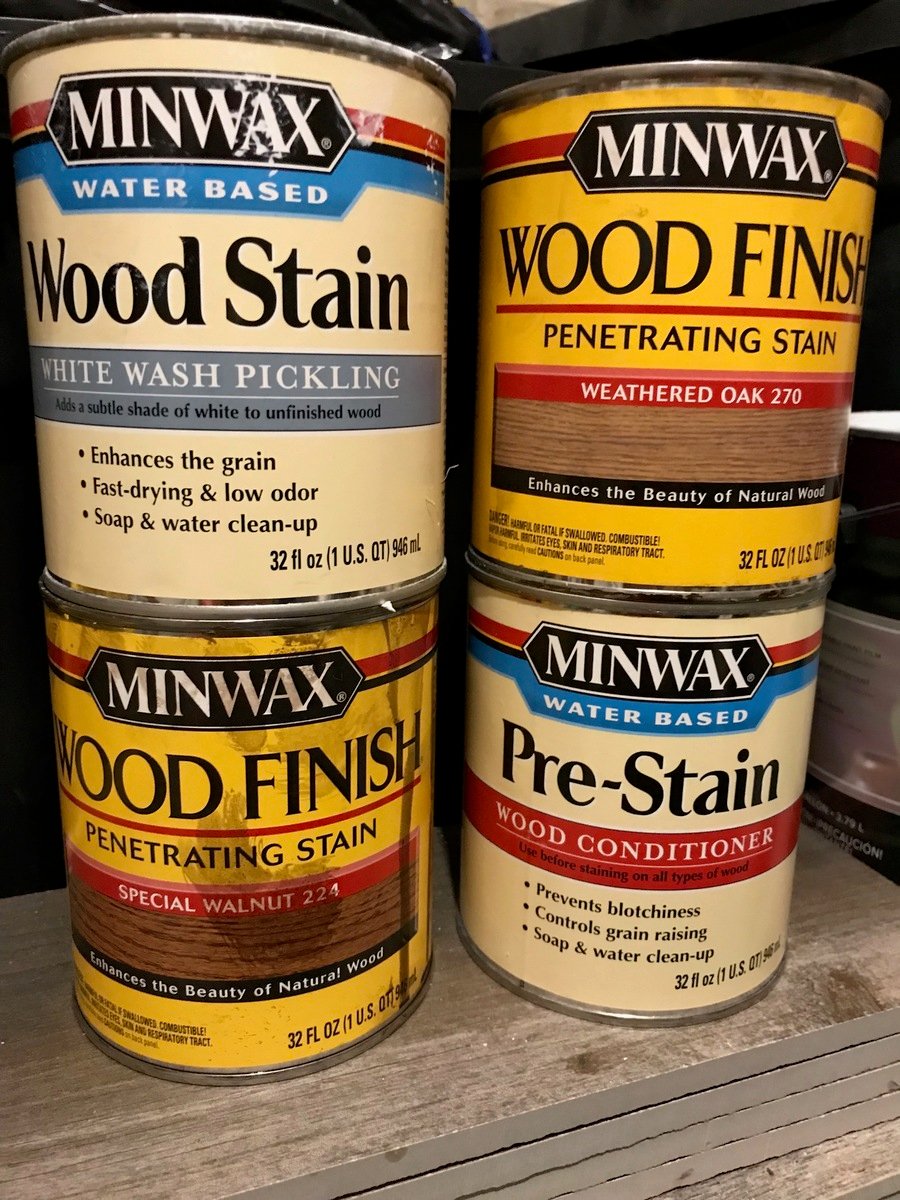
New table for our patio space. This was a fun, relatively easy project. The weather was my only hiccup in the building. Spent an afternoon making cuts, the next day sanding and staining and then assembly. Hubby saw the pieces laid out before staining was complete and loved the two tone look, so I went with it. I used minwax Kona for the stained area and covered everything with Spar Varnish.
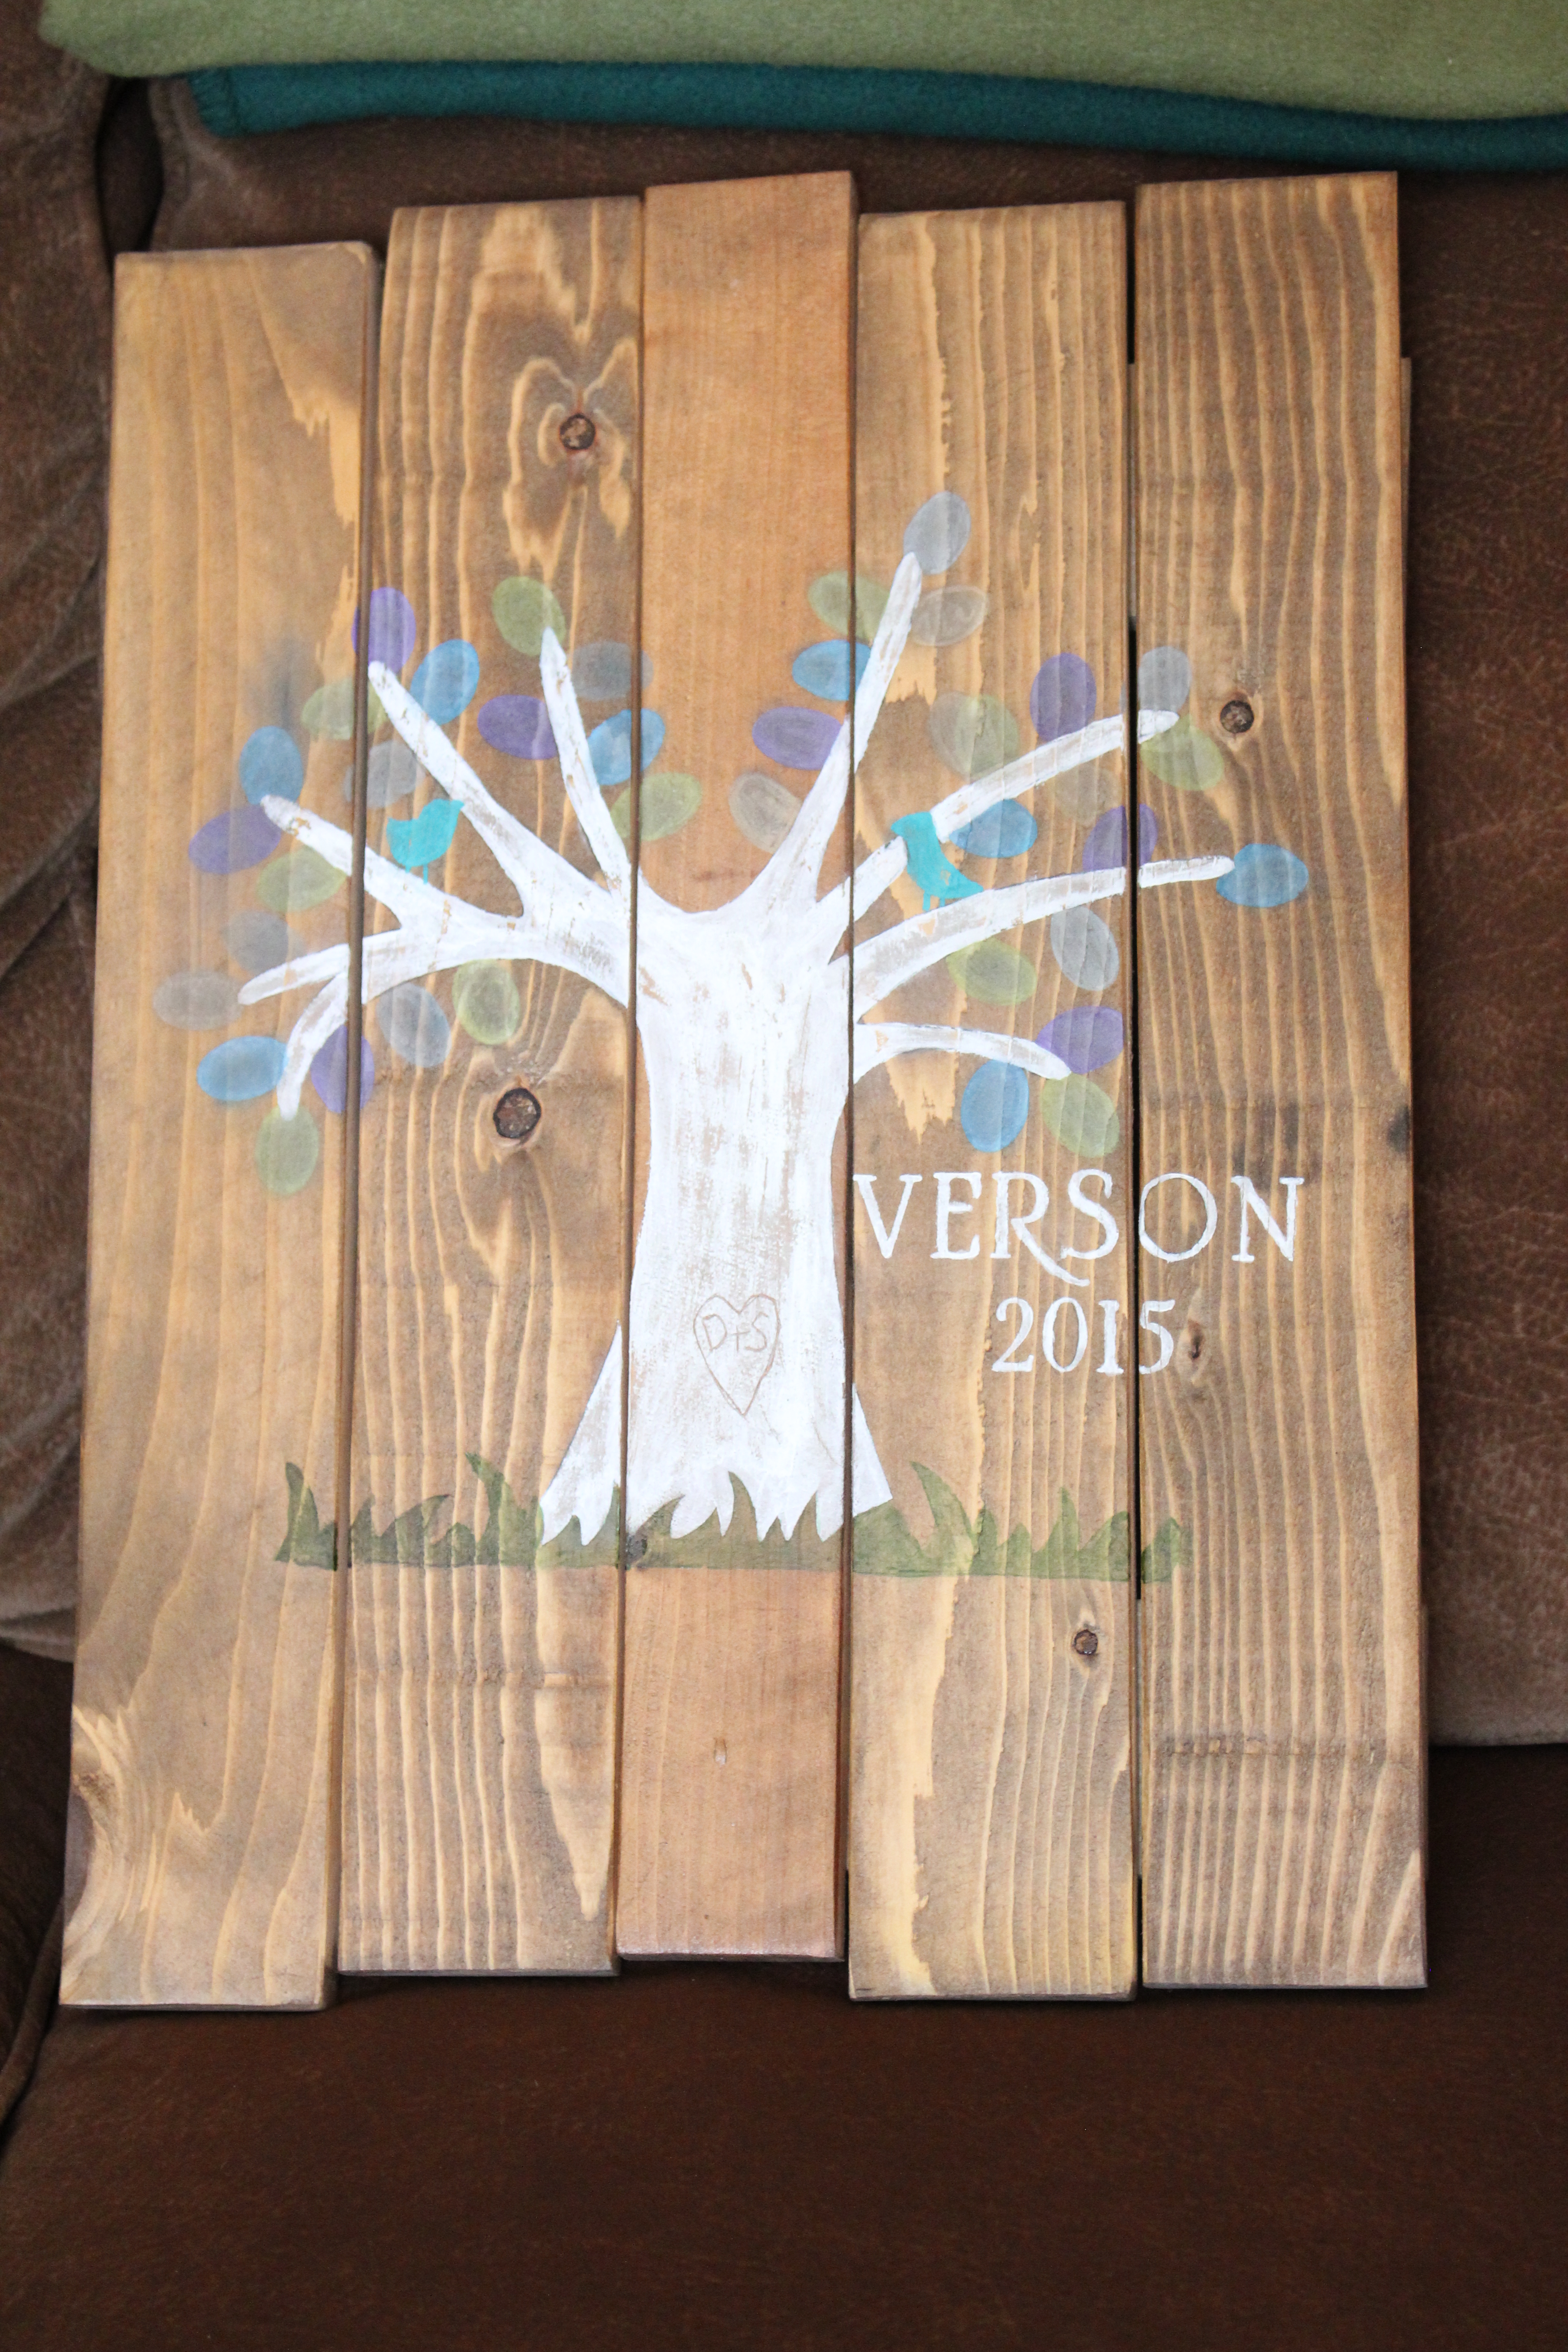
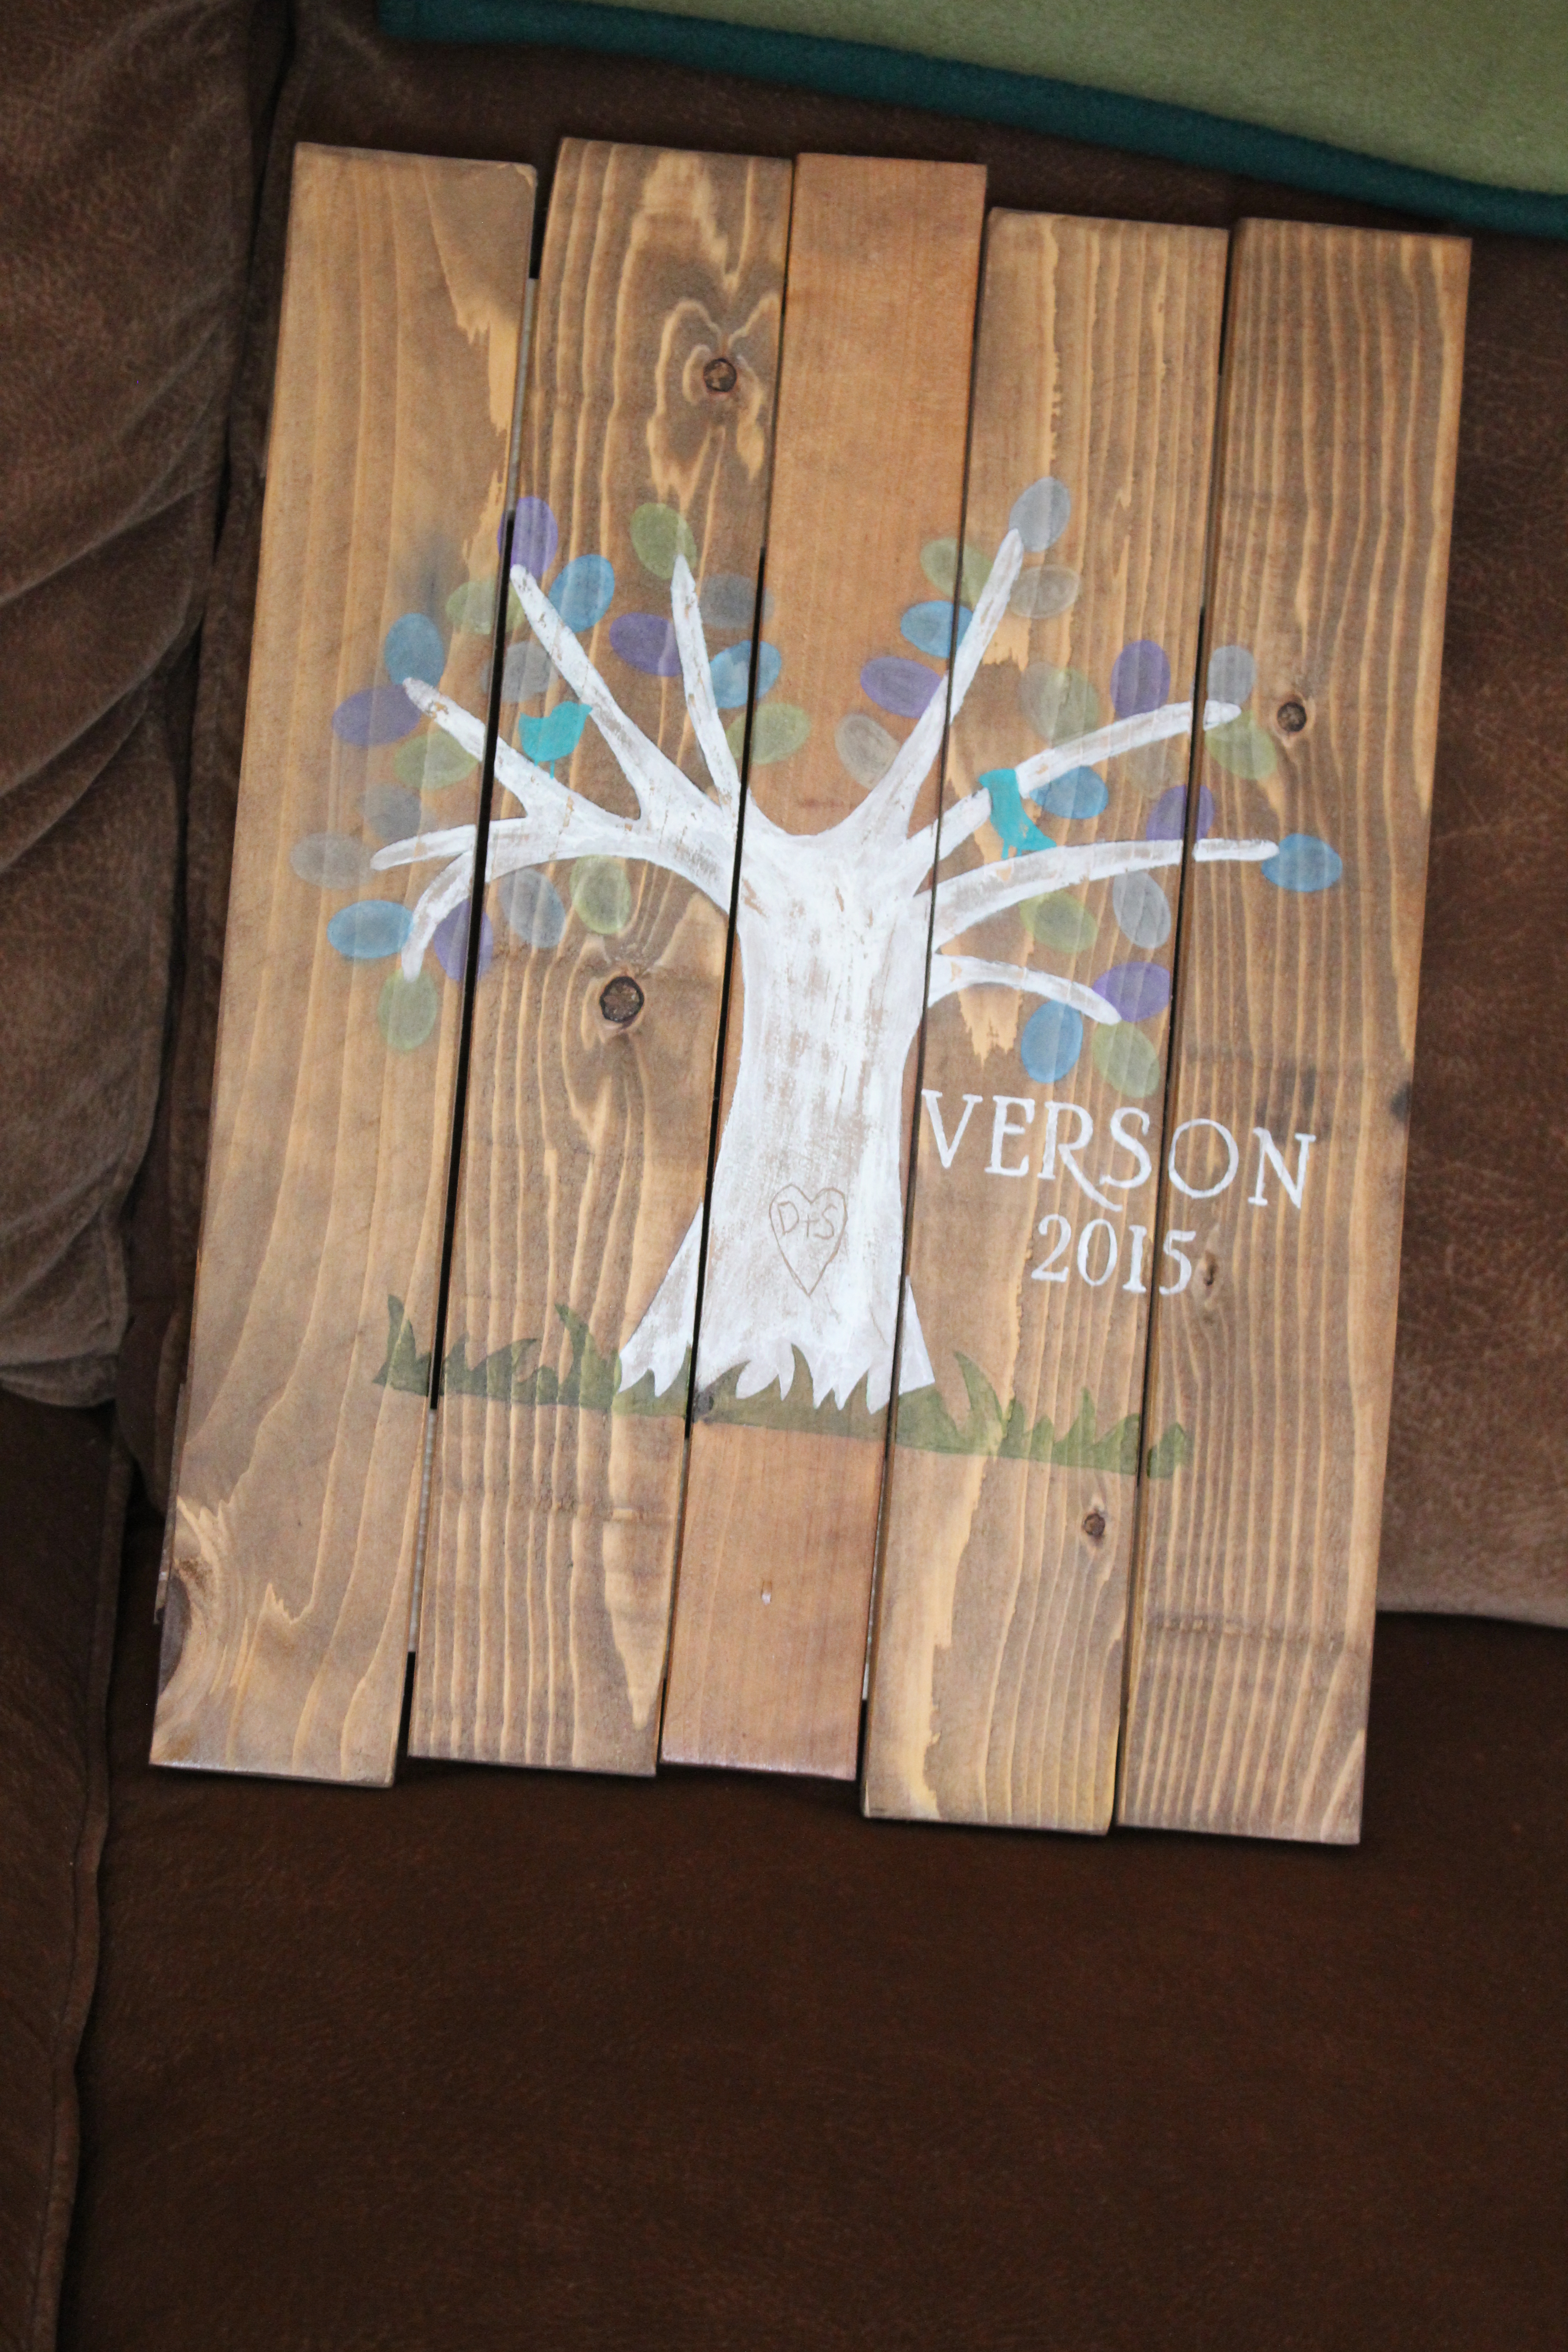
So glad to finally make this beautiful panel wall art for a friend for her wedding. The last name is Iverson, so the tree stood in for the I. I made it on cedar pickets ripped in half and sanded, kona stain, then designed my tree/lettering/birds in Cricut, cut it out, and painted. Can't wait to give it to her!
I did a few thing different than the plan calles for. I used kiln dried douglas fir 2x8's and ripped them to remove the rounded mill edge. For the stretcher I used 4x4 rather than the 2x4. Where the bread board is attached I put a very small bevel at the joining edges of the bread board and table to create a visual distinction.
Smaller version of yours but works really well in our foyer.
I made one table following your original plans and it turned out great! The top is American Walnut Polyshades from Minwax (stain and poly in one), topped off with paste wax. The bottom is just regular white paint that we had lying around the house. The plans were easy to follow and introduced me to the Kregg Jig. How did I ever live without it?! Thanks for posting them for everyone to see, we're so happy with how they turned out!
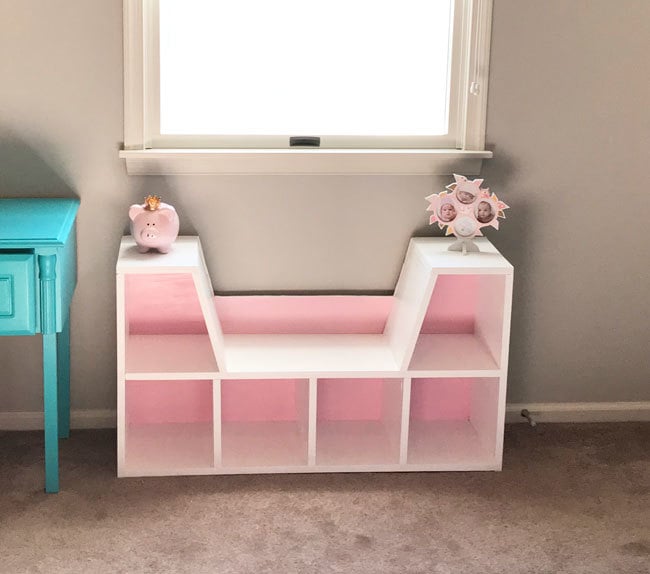
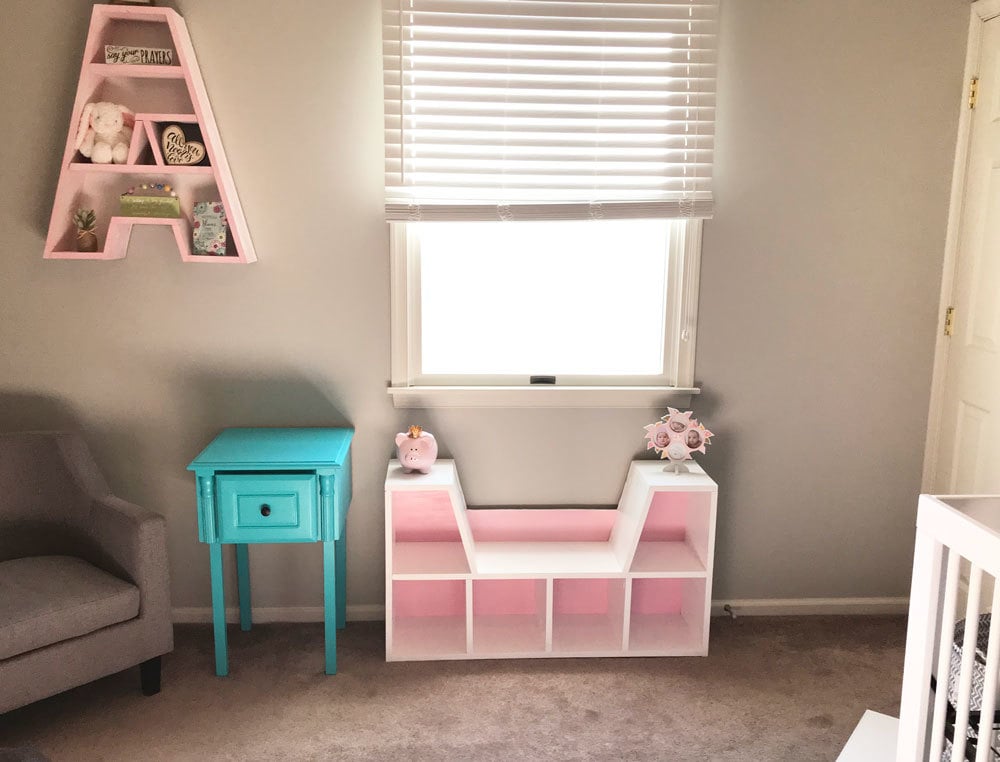
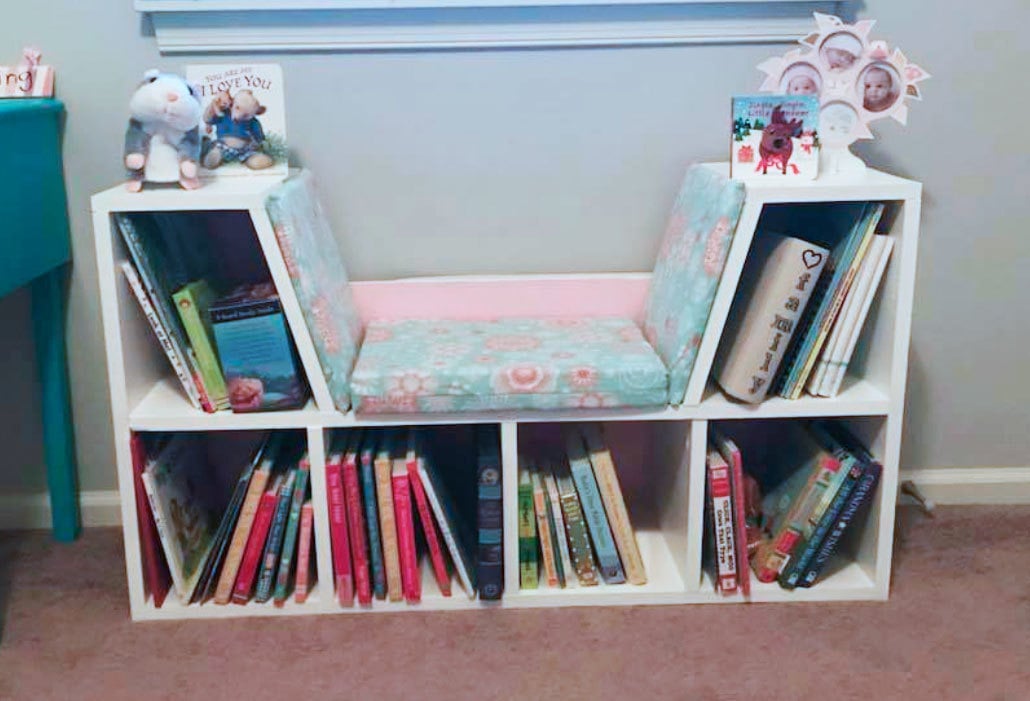
I made this book shelf with a reading nook for my daughters nursery. I found one you can buy online for $250 and decided I could make it for much less. I used 1 x12’s and the cushions were made by my mother and grandmother. All together it cost about $65 to make.

Sat, 01/06/2018 - 11:41
This is adorable! I love the entire room!
We've had a couple of people ask for plans. If there aren't any available, would you be willing to let us draw some plans up from your photos? Thanks! Ana
Sat, 01/06/2018 - 17:19
Absolutely! Sorry I didn’t have plans to post. It was an off the cusp kind of build and I just figured it out as I went along.
In reply to Absolutely! Sorry I didn’t by Knathu121
Sat, 01/06/2018 - 20:20
Thank you you are too kind! Do you happen to have your cut list? Or just rough dimensions?
Sun, 01/07/2018 - 09:11
I don’t have my cut list anymore but rough dimensions are as follows;
height - 23.5”
width 44.5
depth- 12”
I tried accounting for the width of the wood in order to make each square on the bottom 10x10 and the 2 middle shelves to be 12 inches high and the bottom on the middle shelves to be 10” wide. I wanted to have at least 20” for the seat while also having 2 wide enough shelves at the top to be able to put things. Sorry but I don’t have the angles of the 2 side walls for the sitting area. I know that’s a pretty rough explanation but with the things I’ve seen you make I’m sure you can make do!
Sun, 01/07/2018 - 15:43
I don’t have my cut list anymore but rough dimensions are as follows;
Height - 23.5”
width 43.75”
Depth - 12”
I tried making dimensions to account for each box on the lower level to be 10x10 and the boxes in the middle to be 12” high and 10 inches wide. I wanted the seat to be at least 20” but I miss calculated the angle cut length and my seat is less then 20”. I can’t remeber the angle I used for the walls (sorry!) but I wanted to make sure that the top shelf was wide enough to put stuff on it. I know this is a rough explanation but based on the incredible stuff you make I’m sure you can work it out and make some pretty awesome plans!
Thu, 11/26/2020 - 20:31
Hi Ana! I’ve been searching for plans for this. Did you happen to draw any up? If not, I’ll go off the OP’s dimensions and wing it! Thanks!!
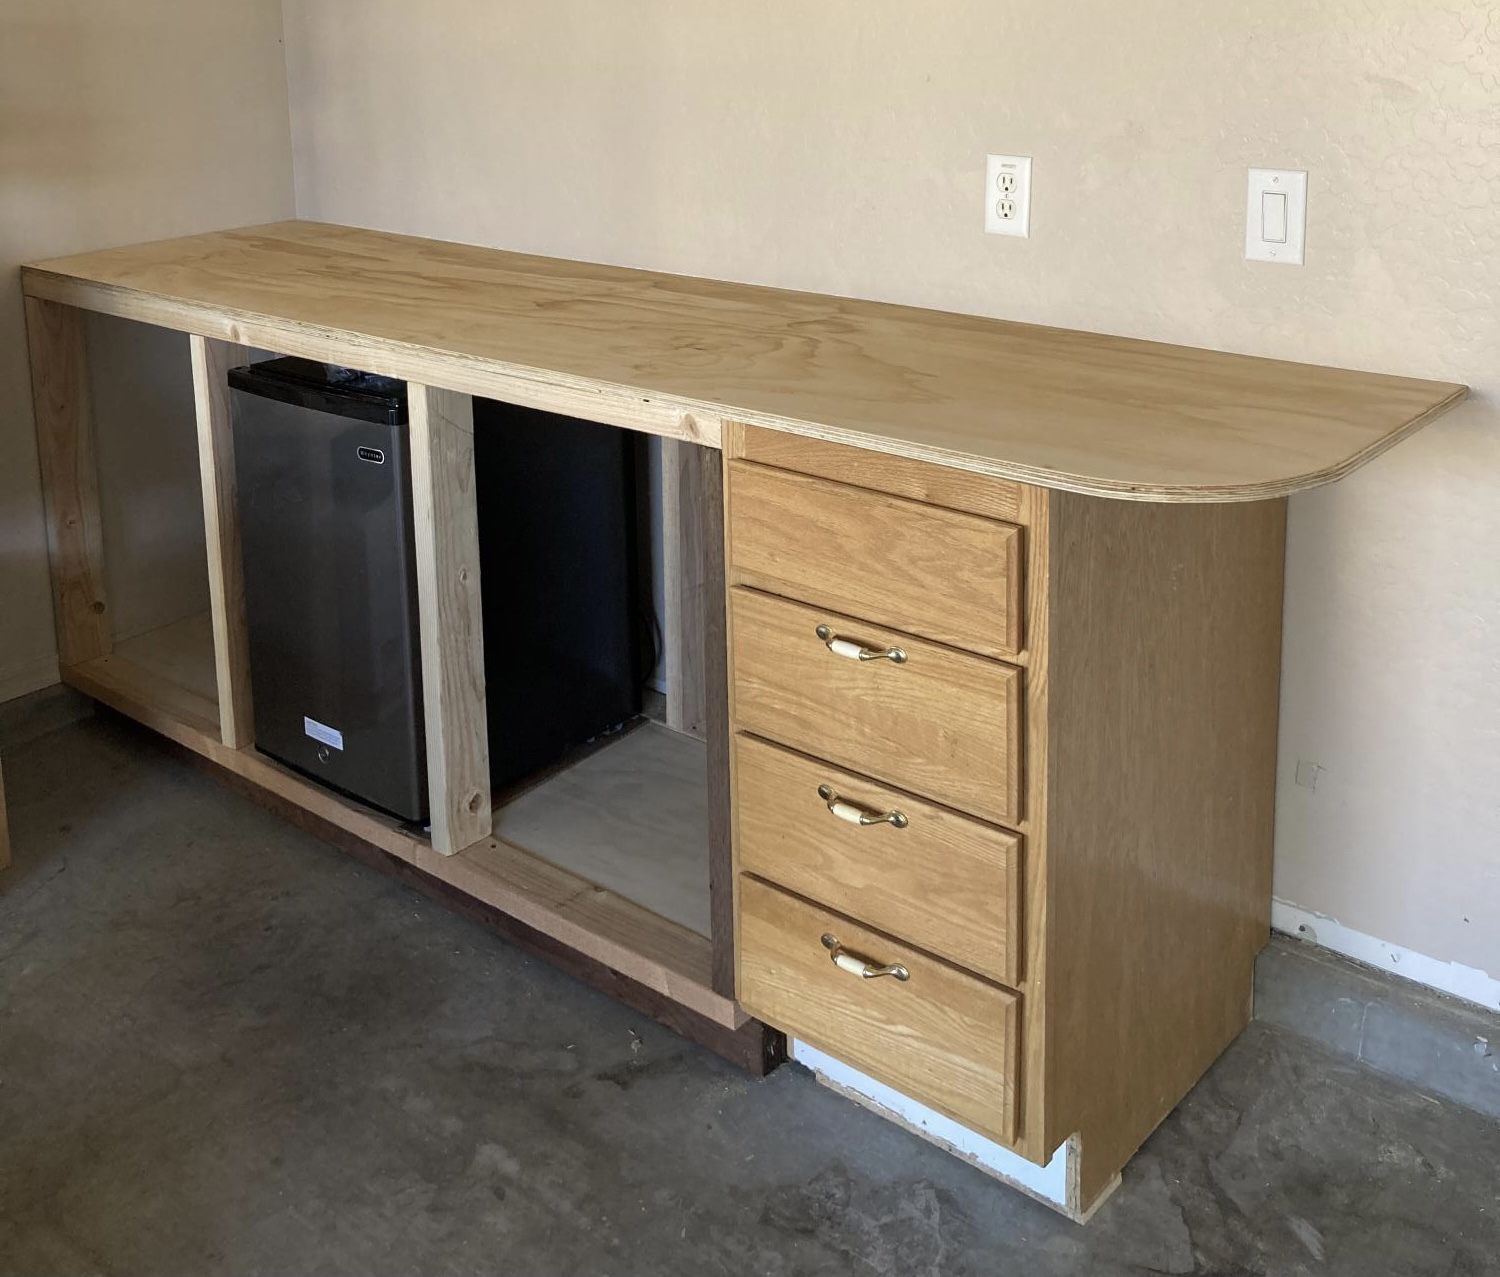
Had to tweak the pony wall plans a bit because the garage floor had a 2” x 3 1:2” cement retainer. I also wanted to incorporate an end cabinet I already had, so I shortened up the base to 69” and tied it together with the top.
2nd project, but learning quickly! :)
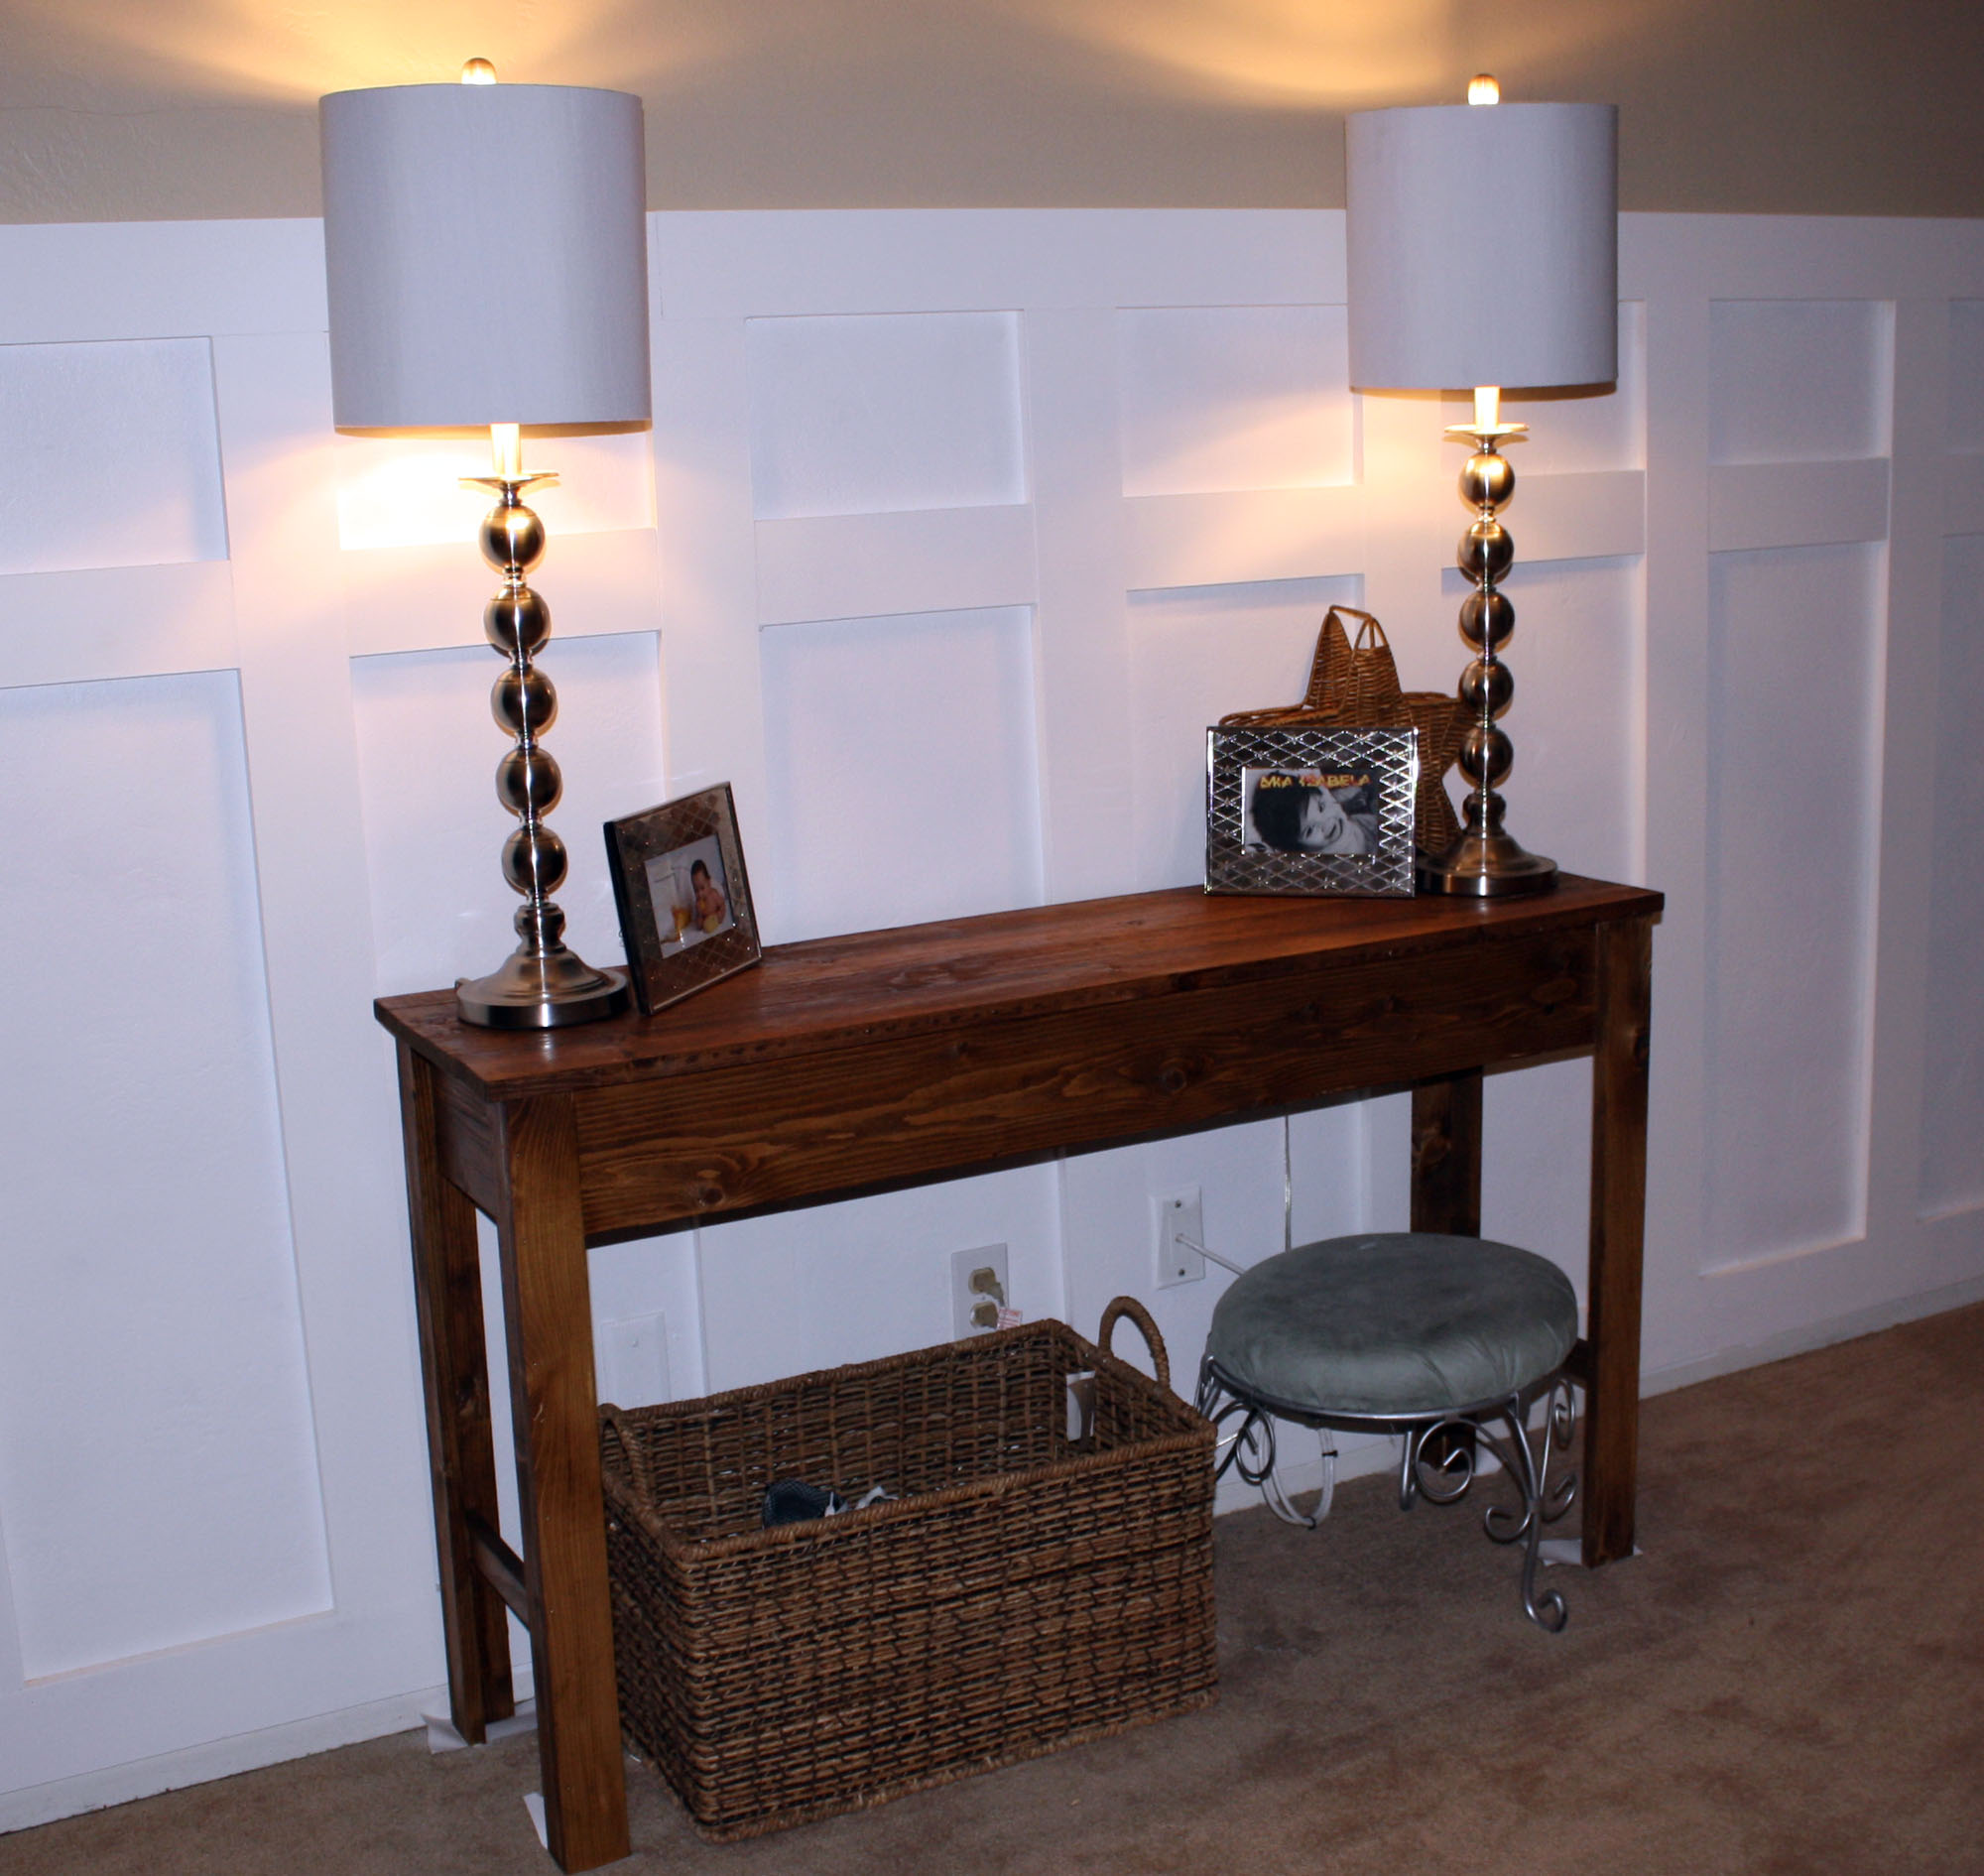
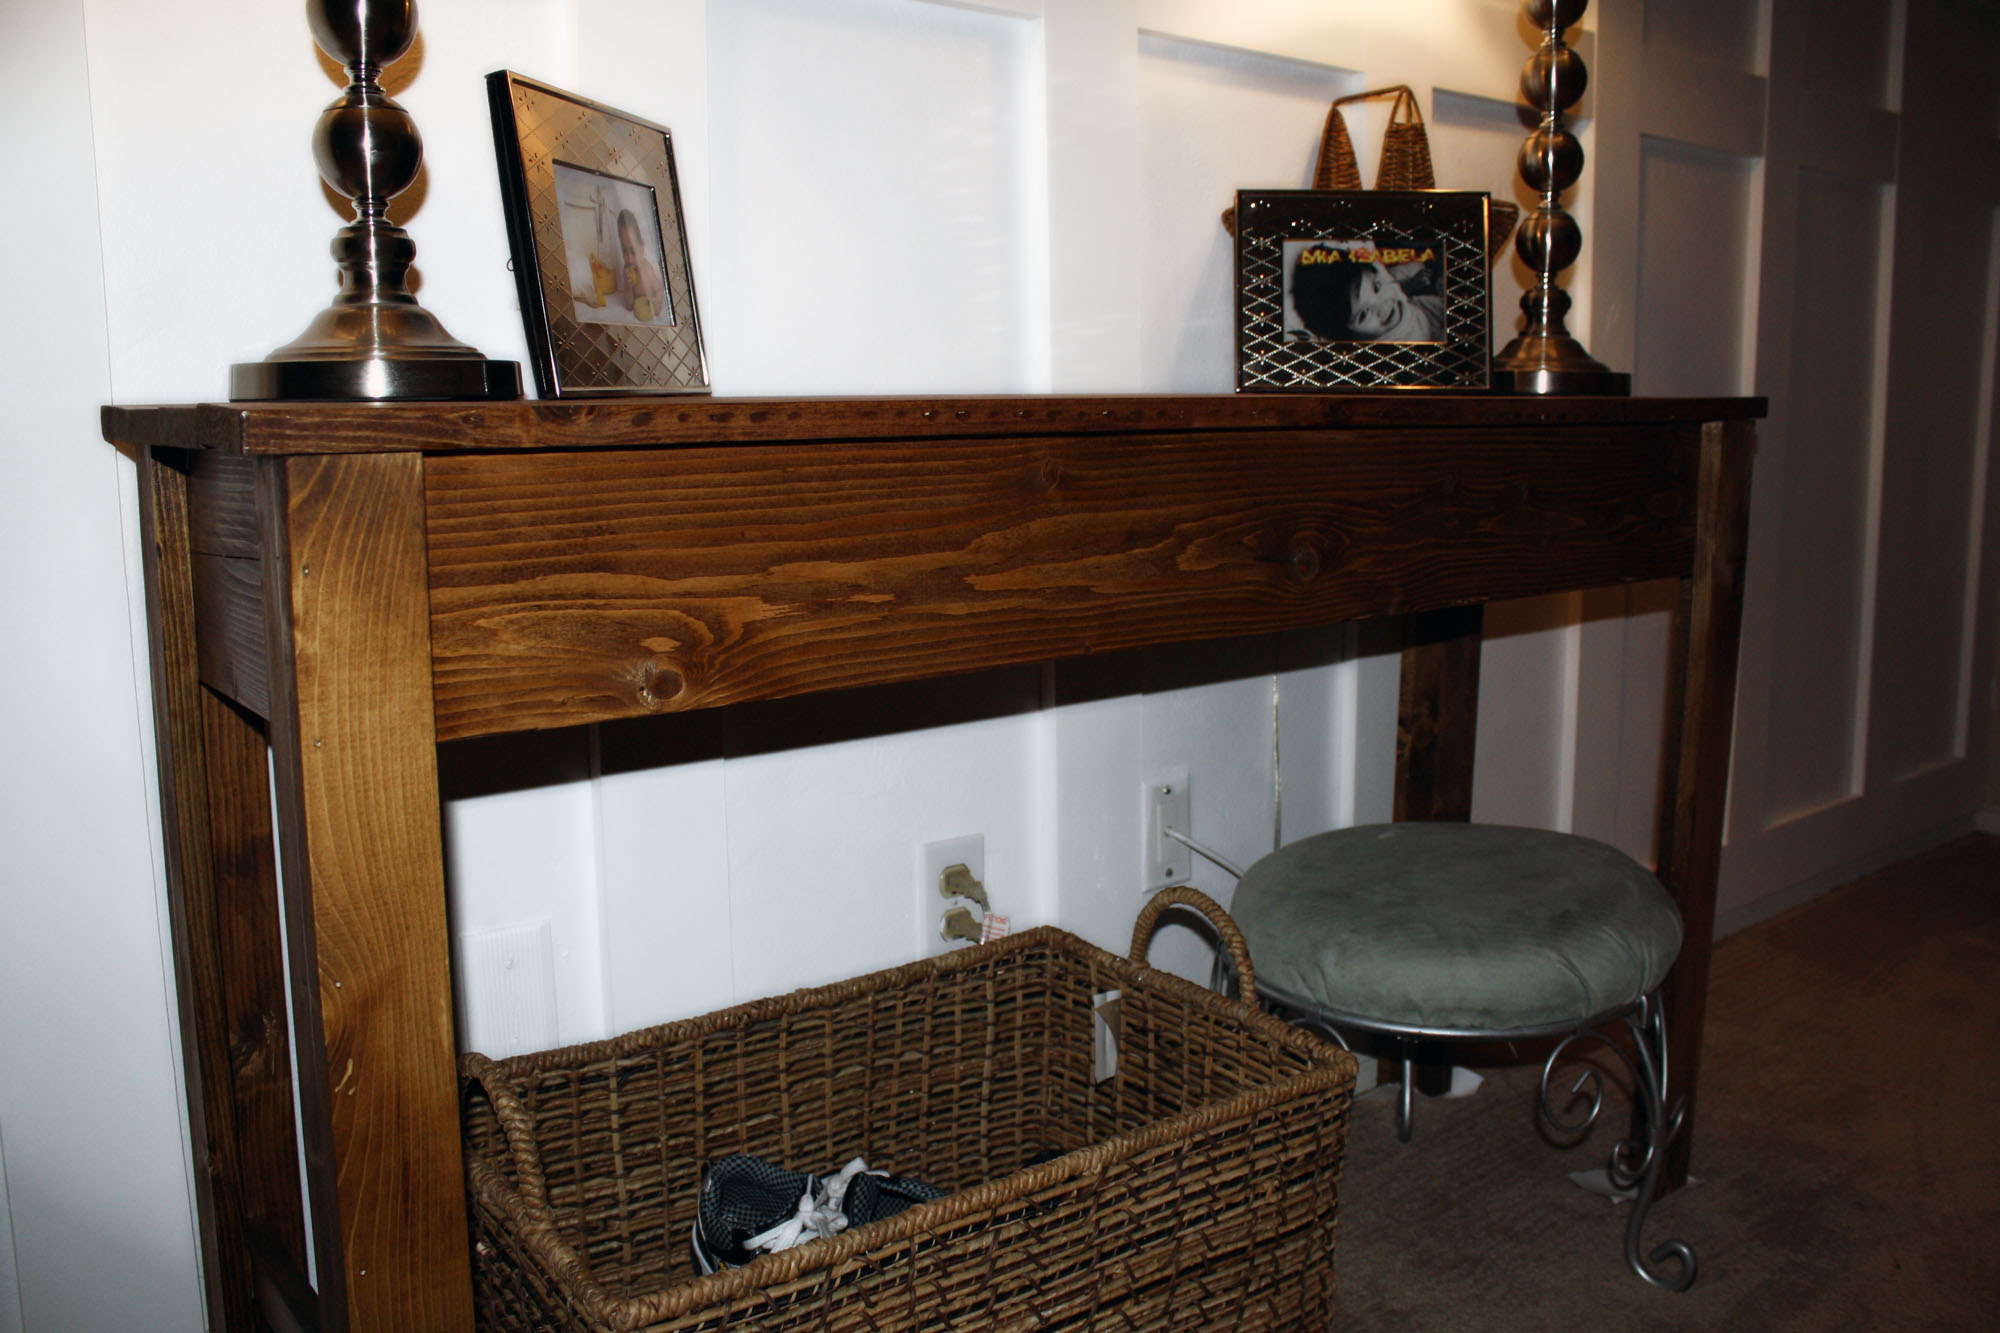
I first started with the wall treatment, love board and batten walls, they add such a crisp look and tons of character, but then the entry way was a little bare. So I needed a table for our keys and some lighting...so this table was perfect, narrow and Pottery Barn looking...
It took about 1 hour to build, including cuts and everything....the staining was the task...my God was I impatient!
I started with the wood conditioner, which only gives you a 2 hour window to add the stain, but do need to wait 15 minutes to start...then I did 2 coats of dark walnut stain and after 8 hours of drying time came in the top coat...which takes 4 hours to dry and then a 2nd coat needed to be added (which I skipped) but I love the color, love the turn out.
So light, I carried it ALL by myself. :)
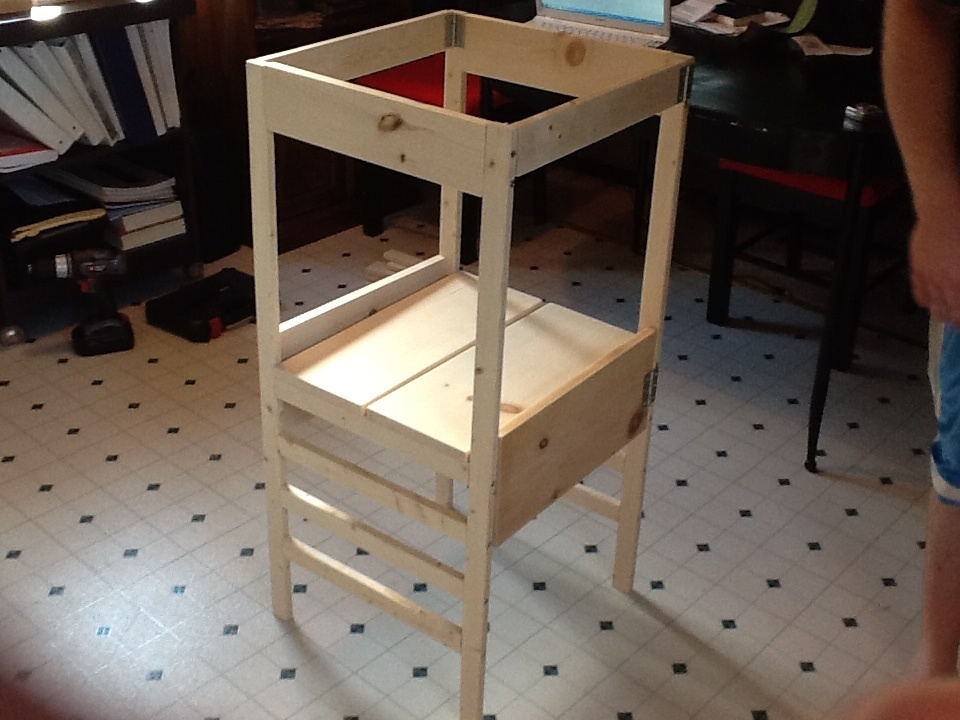
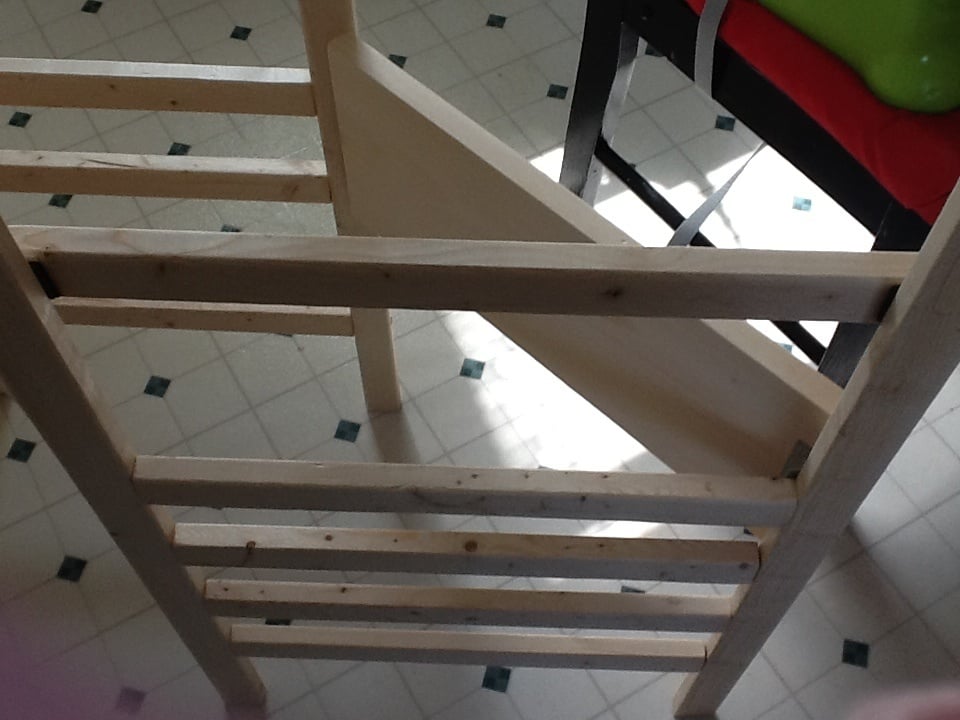
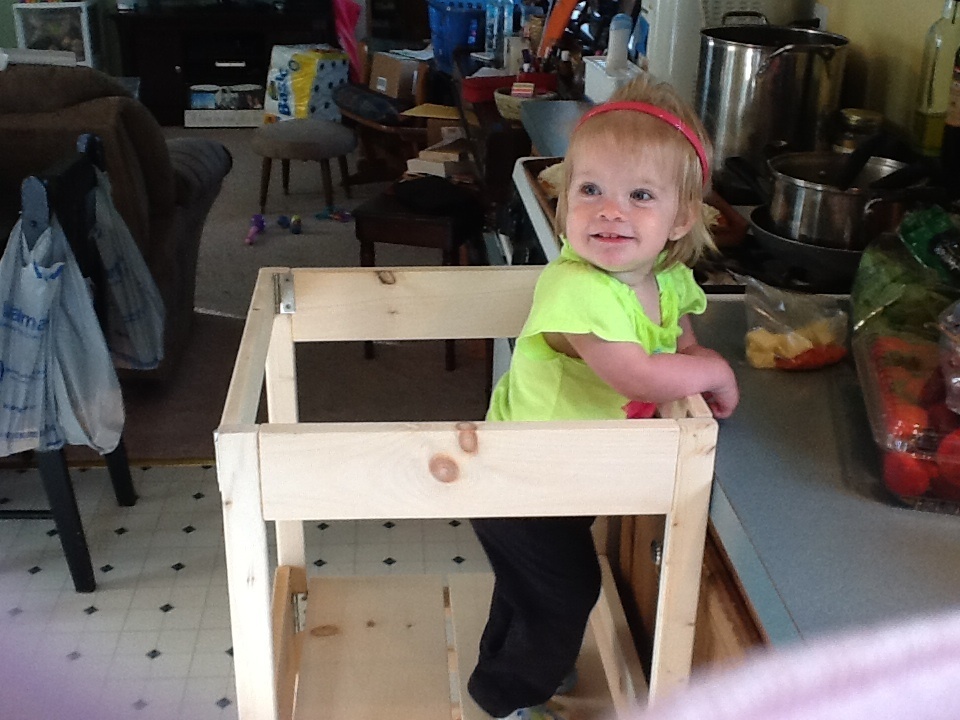
We used ana's plans and they were great!
We did not do the curved pieces we made it square all the way around. We did the modification and used hinges.
We have all the pieces for the anti-tip and will be adding that later.
We added on extra side pieces for safety using industrial strength velcro so they can be removed in the future when our 15 mo old gets big.
We do not own a kreg jig....so we just did screws and wood glue...making sure to pre-drill holes since the wood is thin and could split...
Comments
Ana White Admin
Thu, 12/16/2021 - 16:07
Awesome gift!
WOW, that is amazing, thank you for sharing!