DIY Corona Coffee Table
I made two of these...one for each daughter.
R White
Built from Plan(s)
I made two of these...one for each daughter.
R White
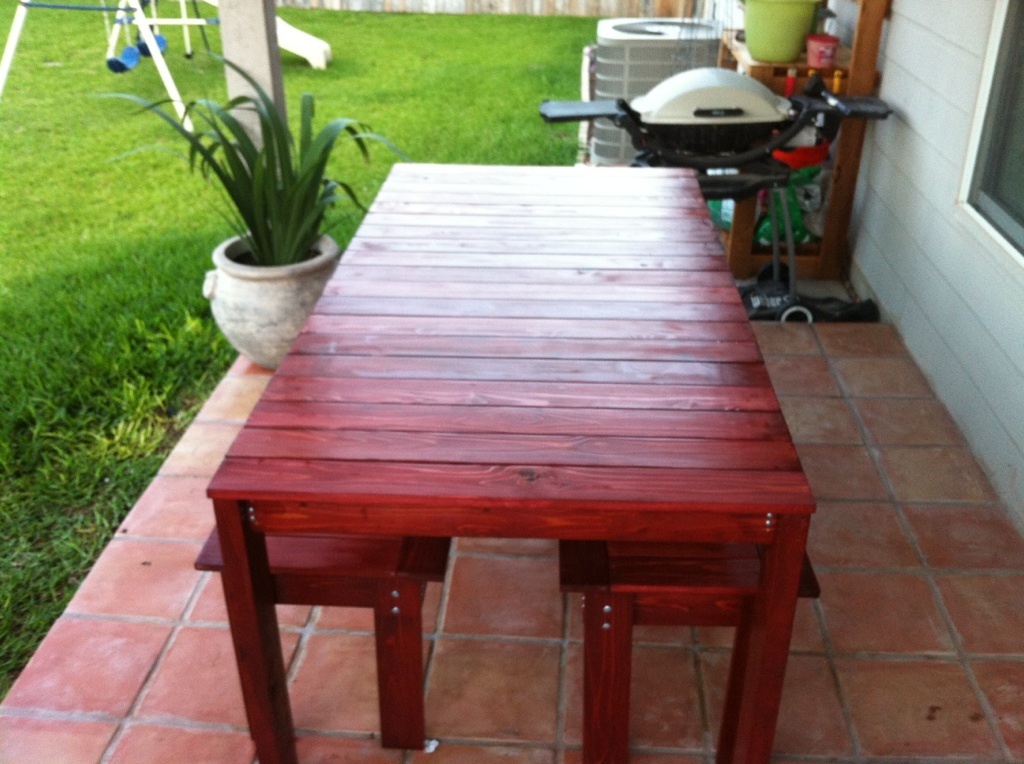
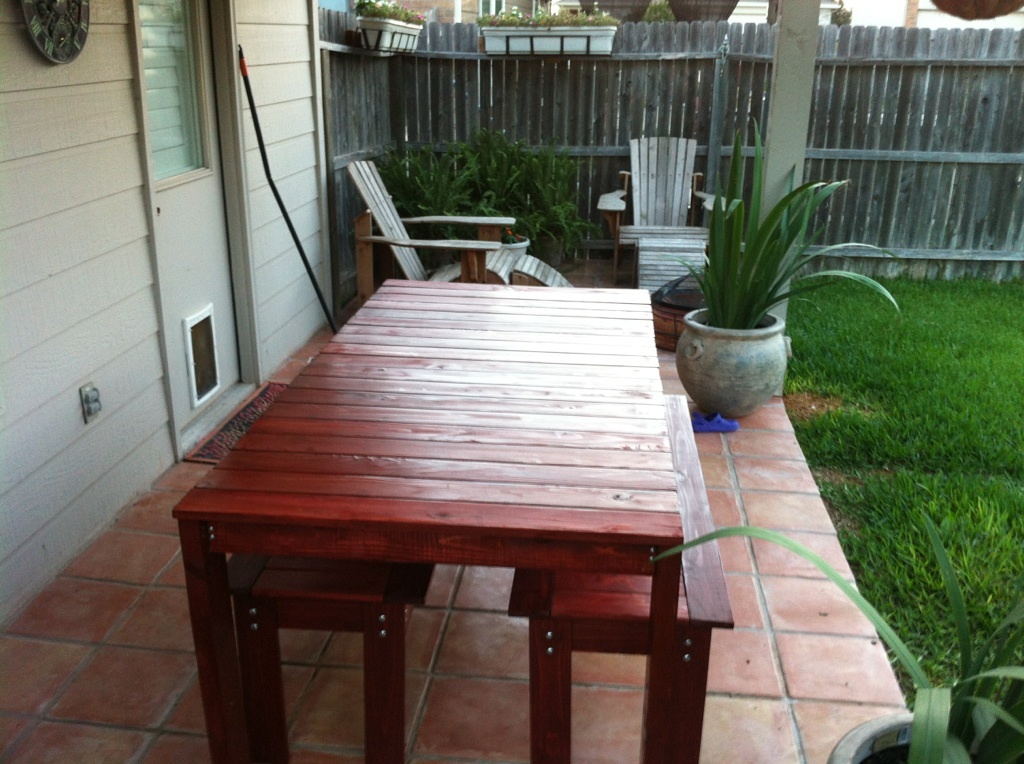
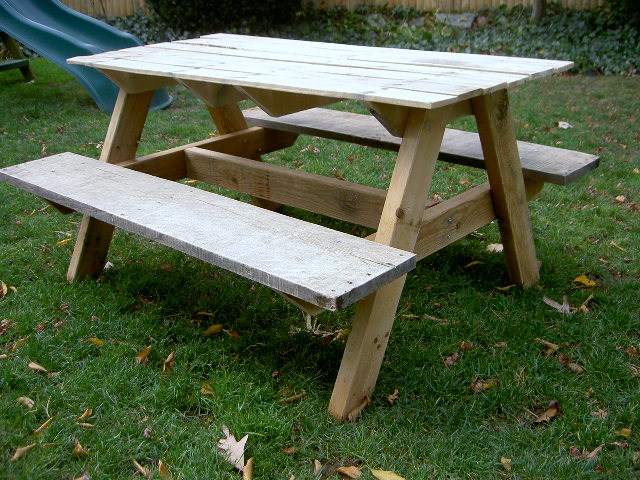
I am enamored by the Simple Outdoor Table that is usually featured on the homepage. This was my second project, and in hindsight, I it took several weeks to finish working at night because I made several mistakes that required some problem solving. Naively, though, I studied the plans, borrowed a saw and got to work.
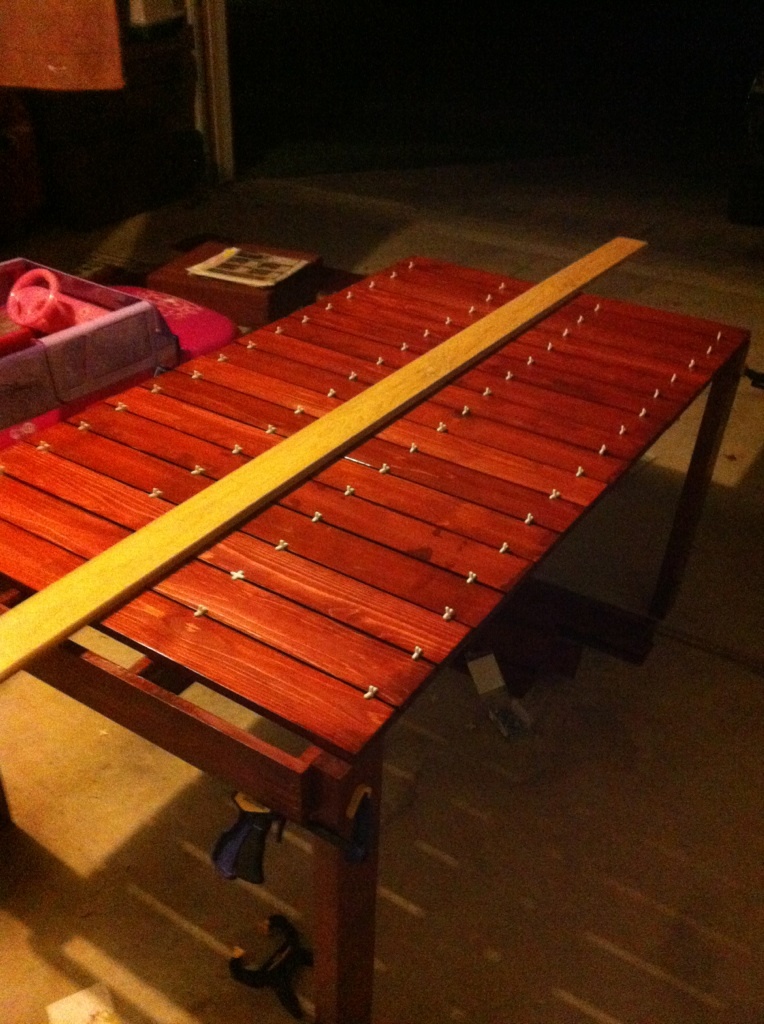
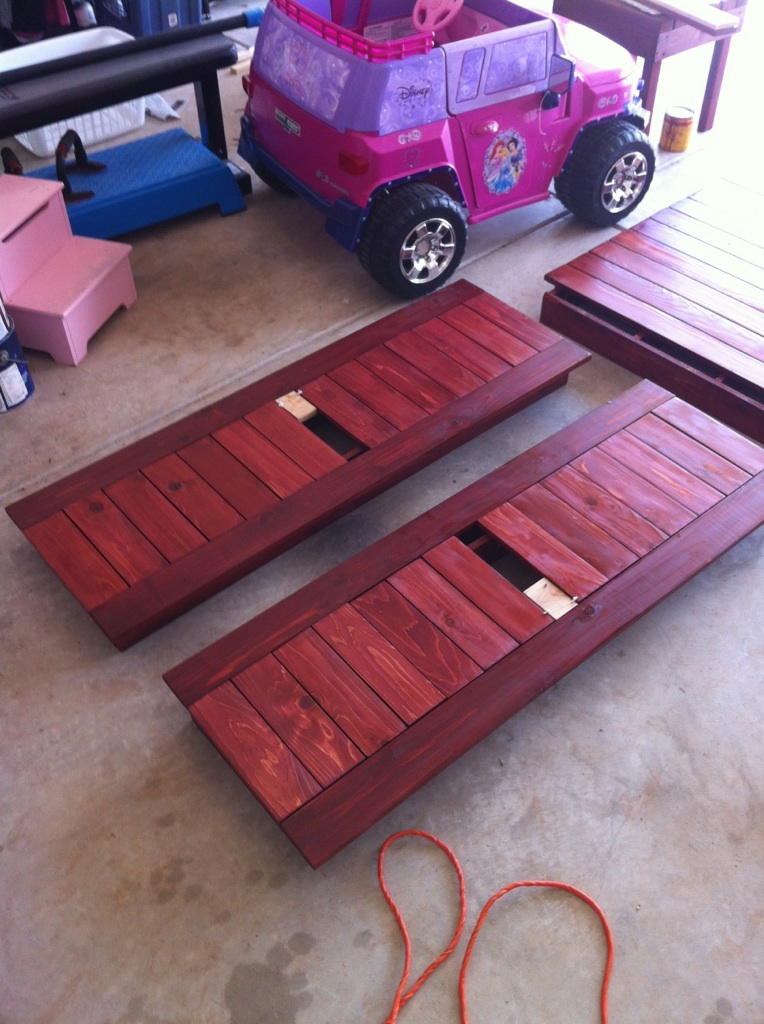
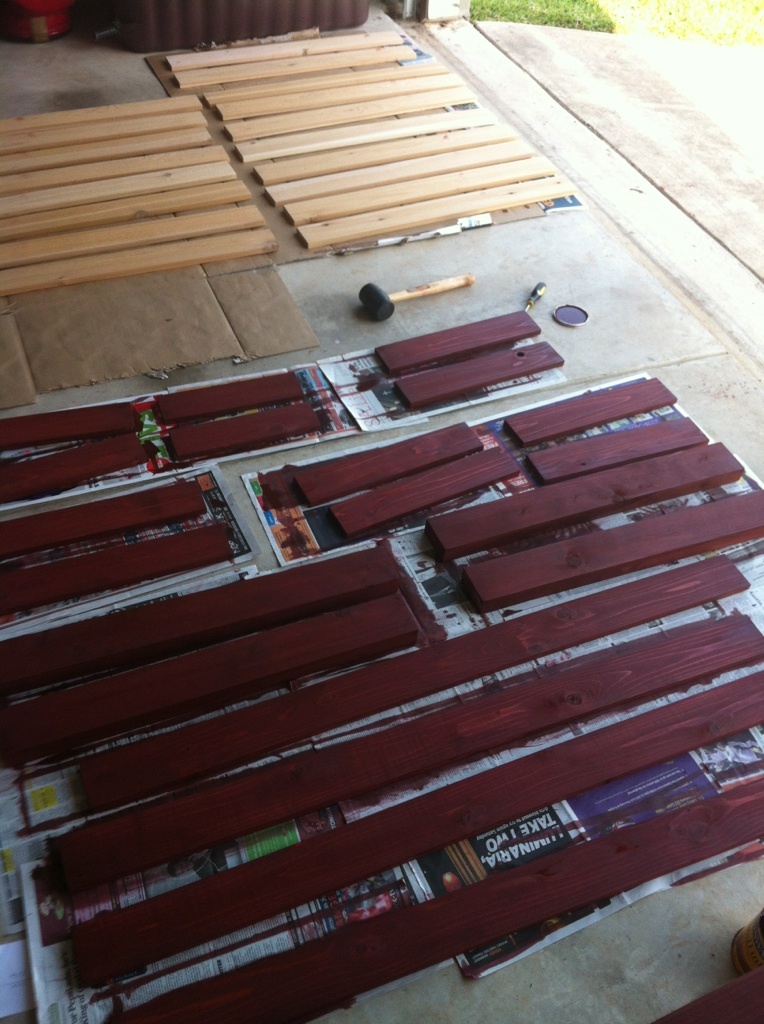
I opted for two benches to save space on the patio when not in use. As you can see in the picture of the bench tops, I opted for a smaller spacer (1/16")because it improved the looks dramatically, but that left me with a gap. There will be a skinny slat in the middle of each bench.
I also opted for 3/16" spacers on the tabletop which required one more board than was scripted. That is much easier to account for on the table then the benches.
You can see from the stacks of lumber in the garage, assembling is the easy part! I hope to never see the words, sand, stain, and seal in sequence again. I also learned a few difficult lessons when it came to using the Kreg Jig, which was new to me.
Now that it's done, though, I am very proud of the outcome.
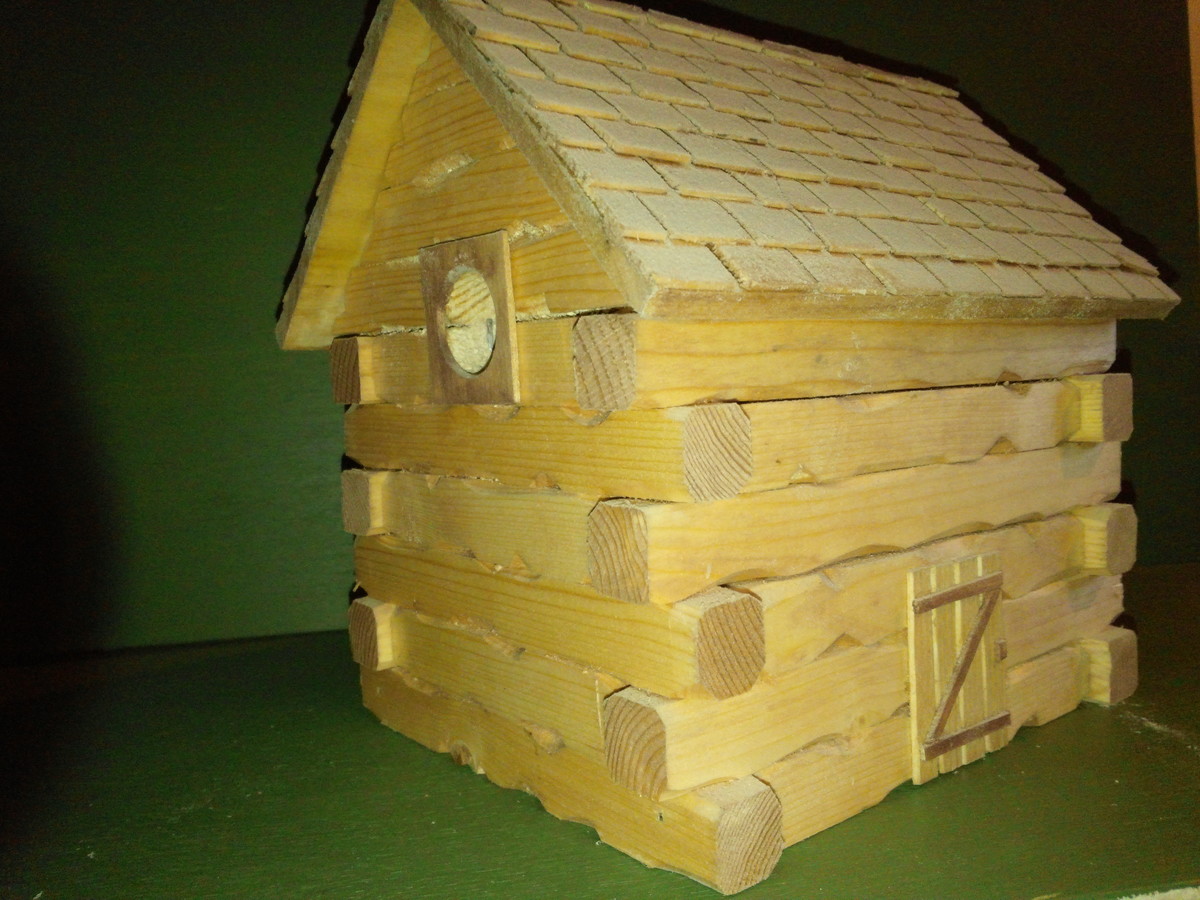
I enjoy making birdhouses and log cabin style is my favorite. I make the logs by setting my saw to rip 3/4 pine at 3/4 so I have 3/4 square strips. I then decide the size of my birdhouse and cut the logs accordingly. I also "wittle" on them a little to make it look more authentic. I simply then just stack, glue and nail one row at a time. You can use 1/4 poplar for the roof but I ripped pine at 1/16 and cut shakes with my utility knife and glue them on one at a time (there are 104 on this roof).

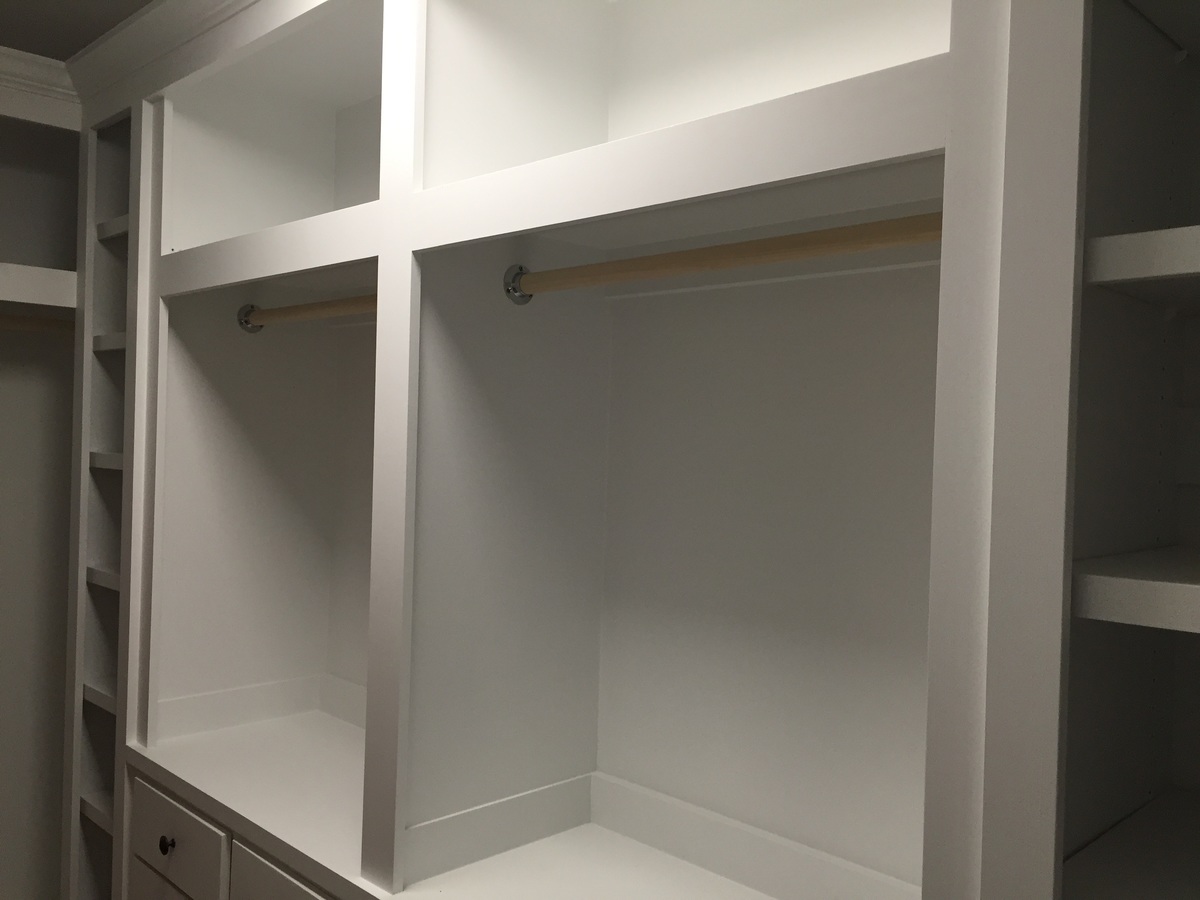
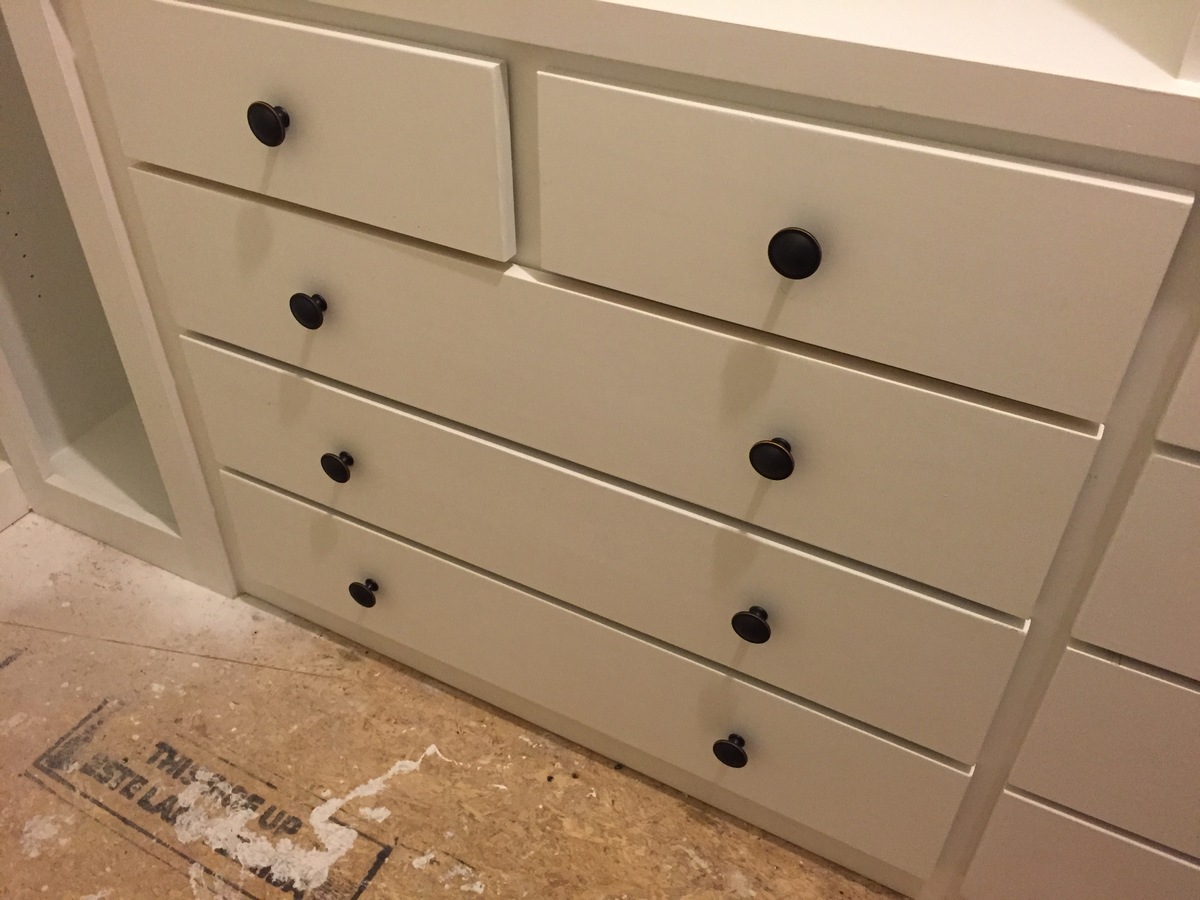
Built in closet to replace builder grade wire wracking. Closet is approximately 11 feet by 5 feet. consists of two shoe racks with 7 shelves each. 6 large drawers and 4 small drawers. Two hanger sections with storage above them. End wall has hanger for longer items and storage above and a cabinet with shelves.
Yet to finish the floor.


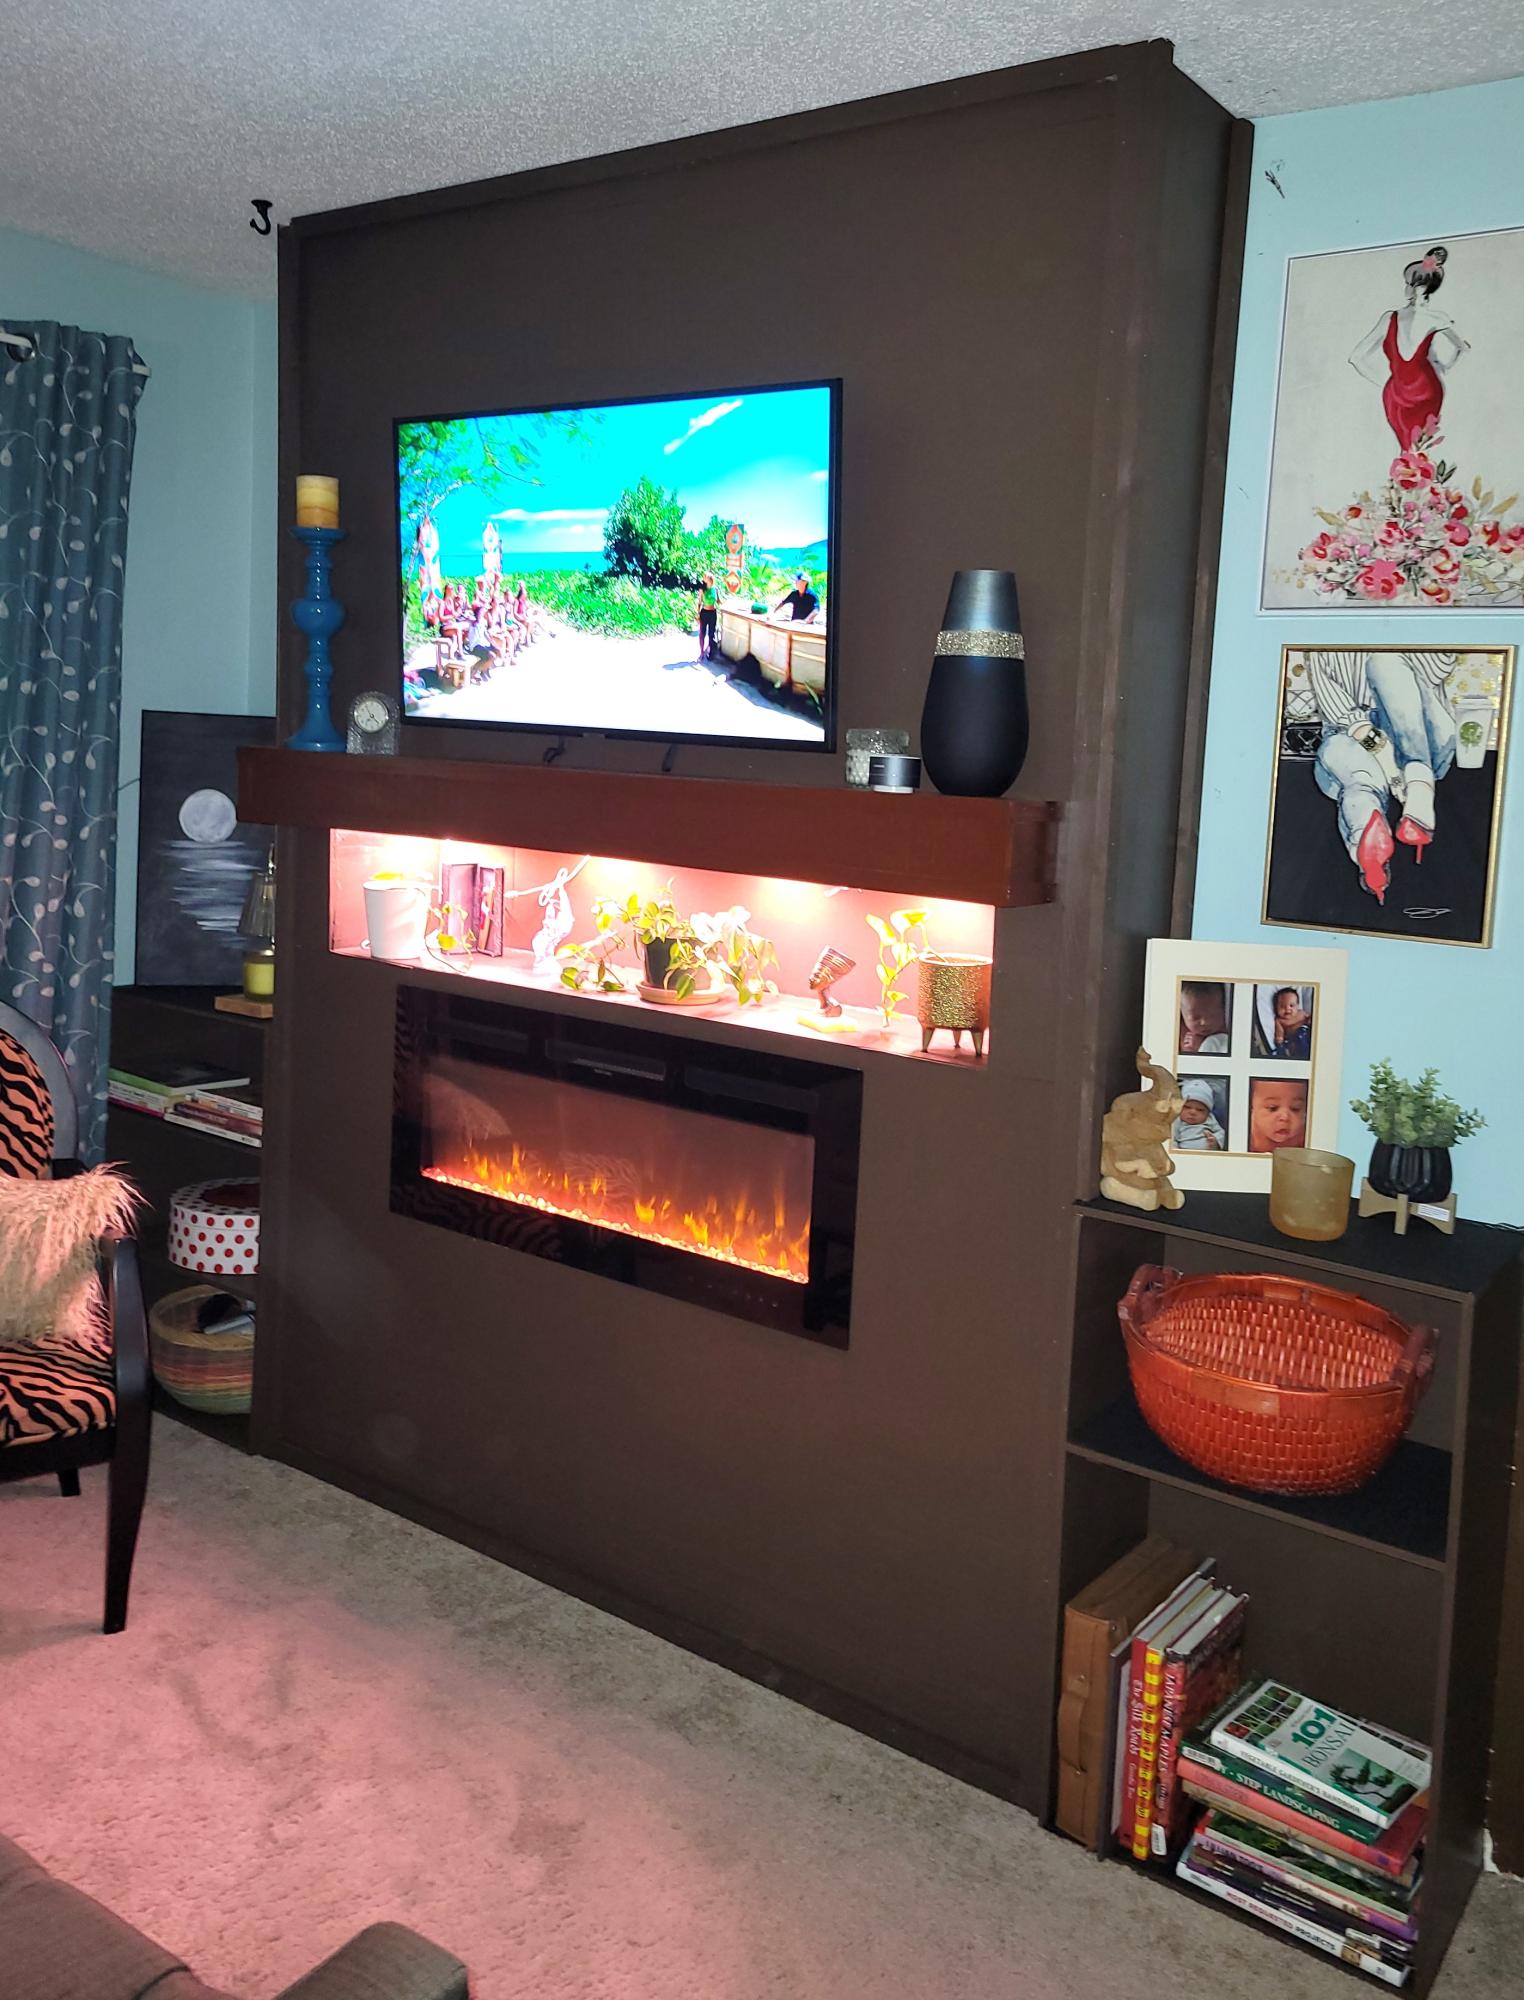
Came across your shiplap fireplace and tweaked it a little, not bad for a 64 year old female right? Didn't take a weekend though more like a month but worth it. Thanks for the inspiration.
Sat, 11/18/2023 - 12:53
Love the mods for the open display shelf! Thank you for sharing:)
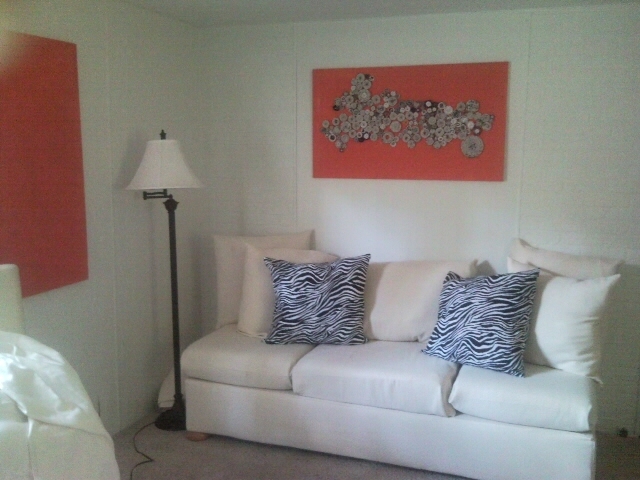
This is my new couch ,that I built with my husbands help,I could not find a one piece cushion in my area but, I did manage to find individual cushion.I am no expert , but I am learning as I go.
Thu, 05/31/2012 - 22:51
Thank you!........... any tips to help me improve?

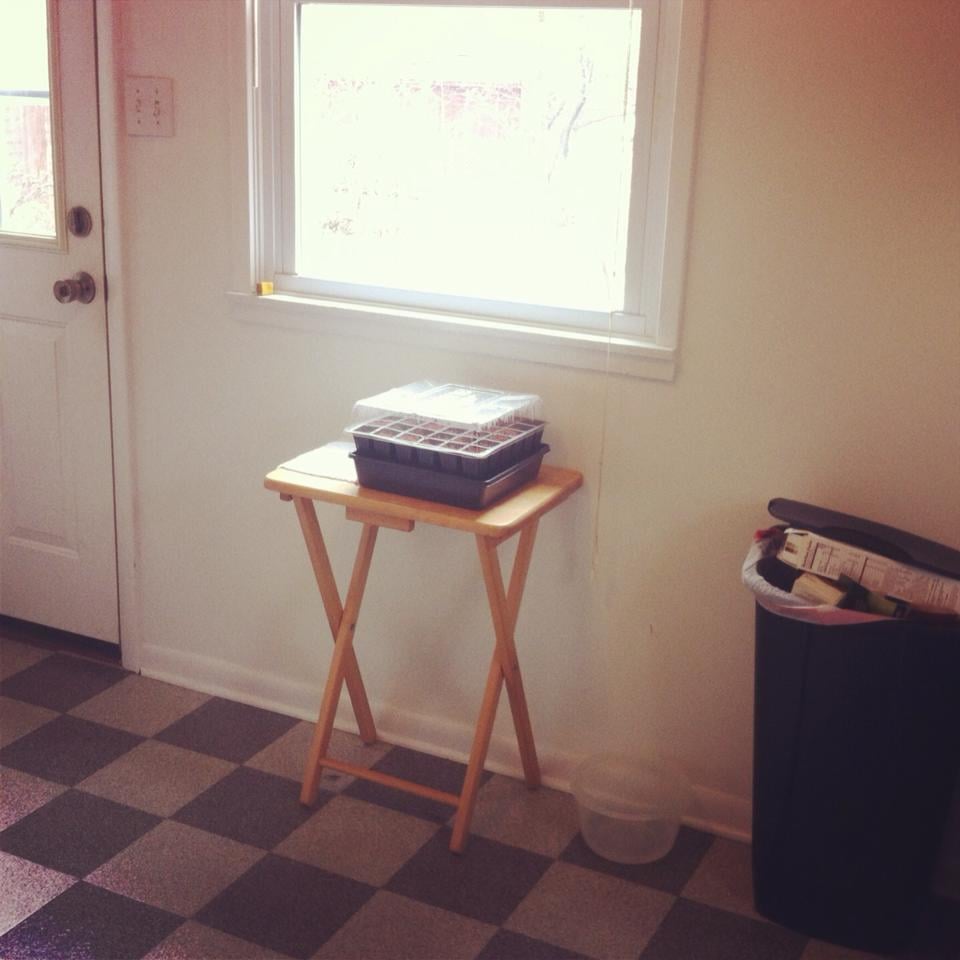
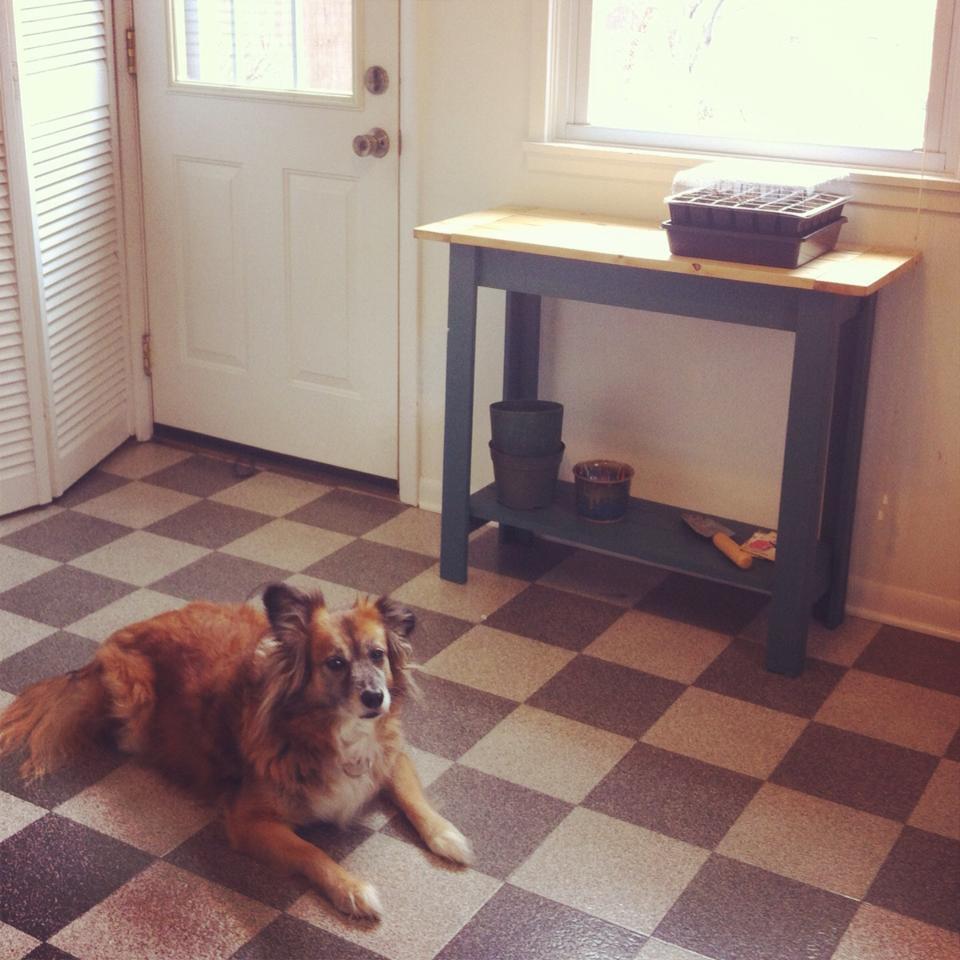
I had my seed starters sitting on a TV stand by my sunny window, which was as ugly as it gets (see before photo...). So, I built this little console for my gardening stuff to sit on while my seedlings are growing. It turned out being the perfect size for what I'm using it for. I only modified it slightly, by adding end pieces to the top (just subtracted 6'' from the length of the top pieces and measured the width of the top to decide the length of the end pieces. I also used pocket holes to attach my bottom shelf pieces and the top shelf pieces, instead of nails. I've never done a 2 tone piece (I love the look of stained wood) so I was nervous about painting over the wood...but I'm really really happy with how it turned out! It was easy to make, and mine was done in an afternoon. Thanks Ana!!
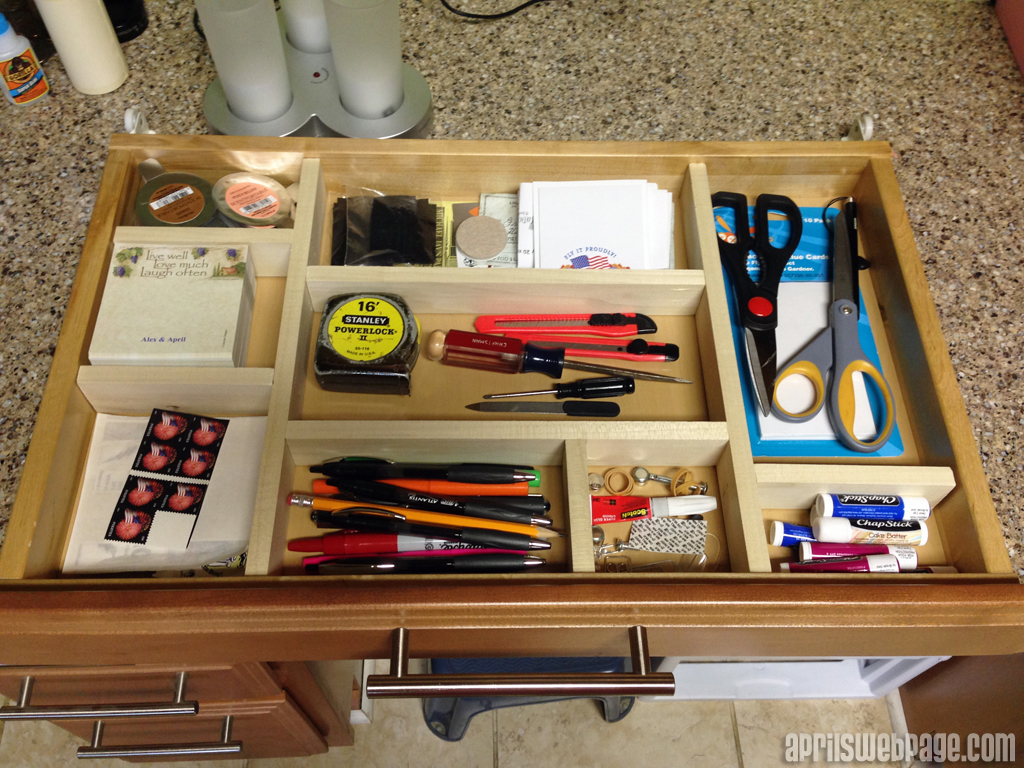
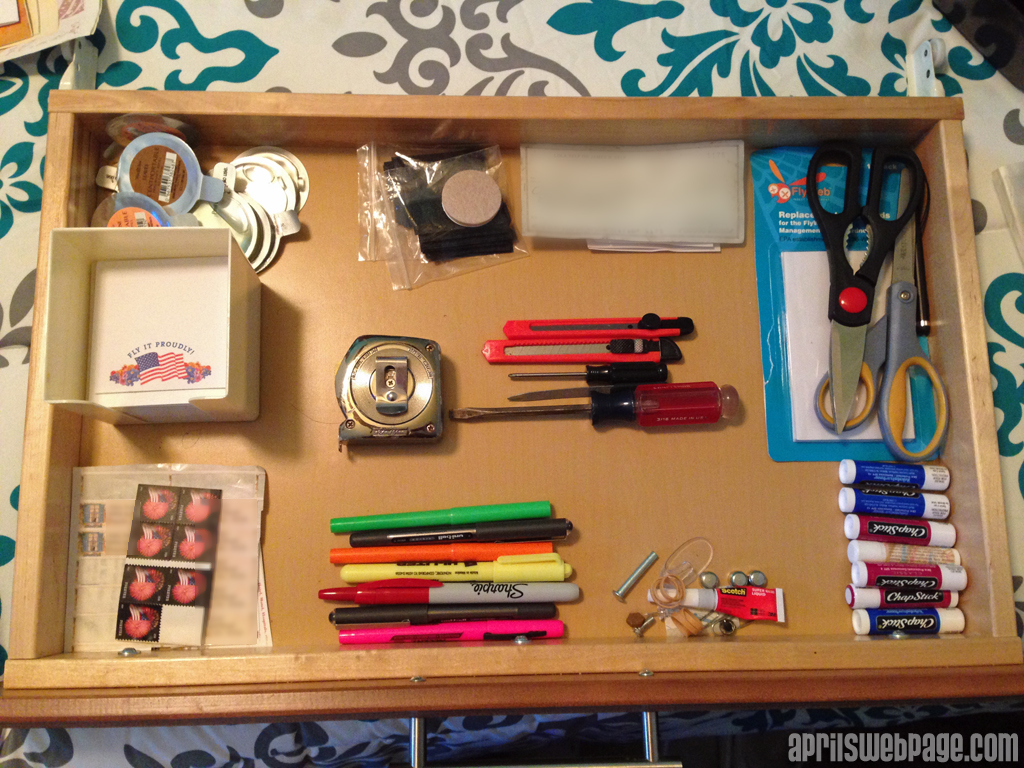
My kitchen drawer wasn't as deep as the one in the tutorial, so I had to use 1x2 hobby poplar instead of 1x3's. I can't wait to do more drawers! It's been more than 6 months, and the drawer is still neat and organized.

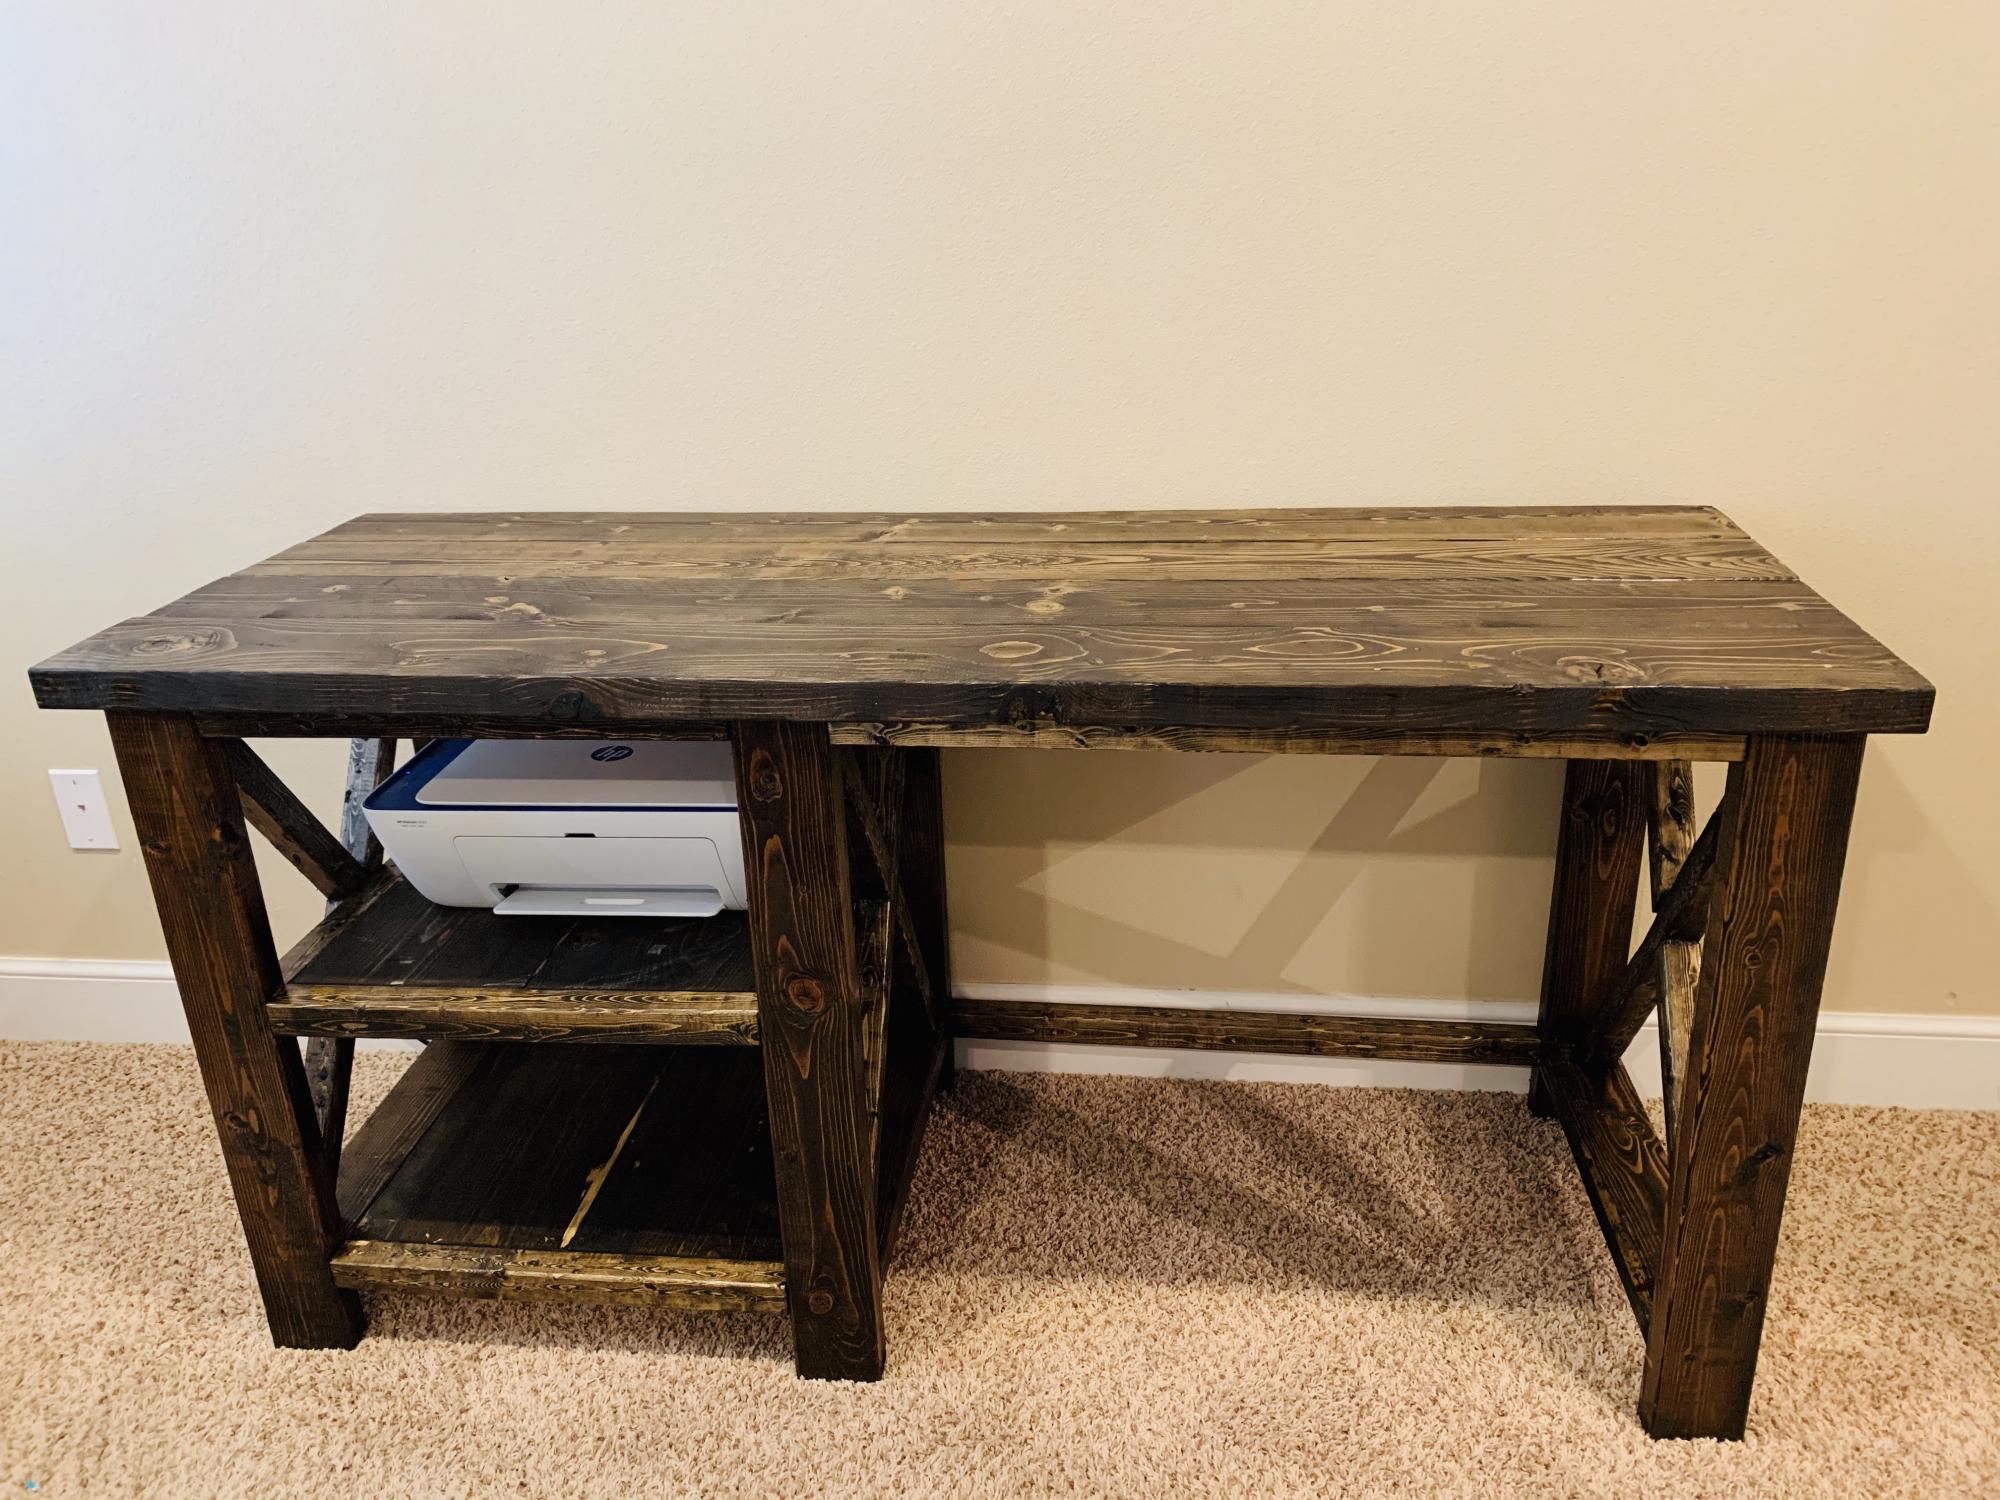
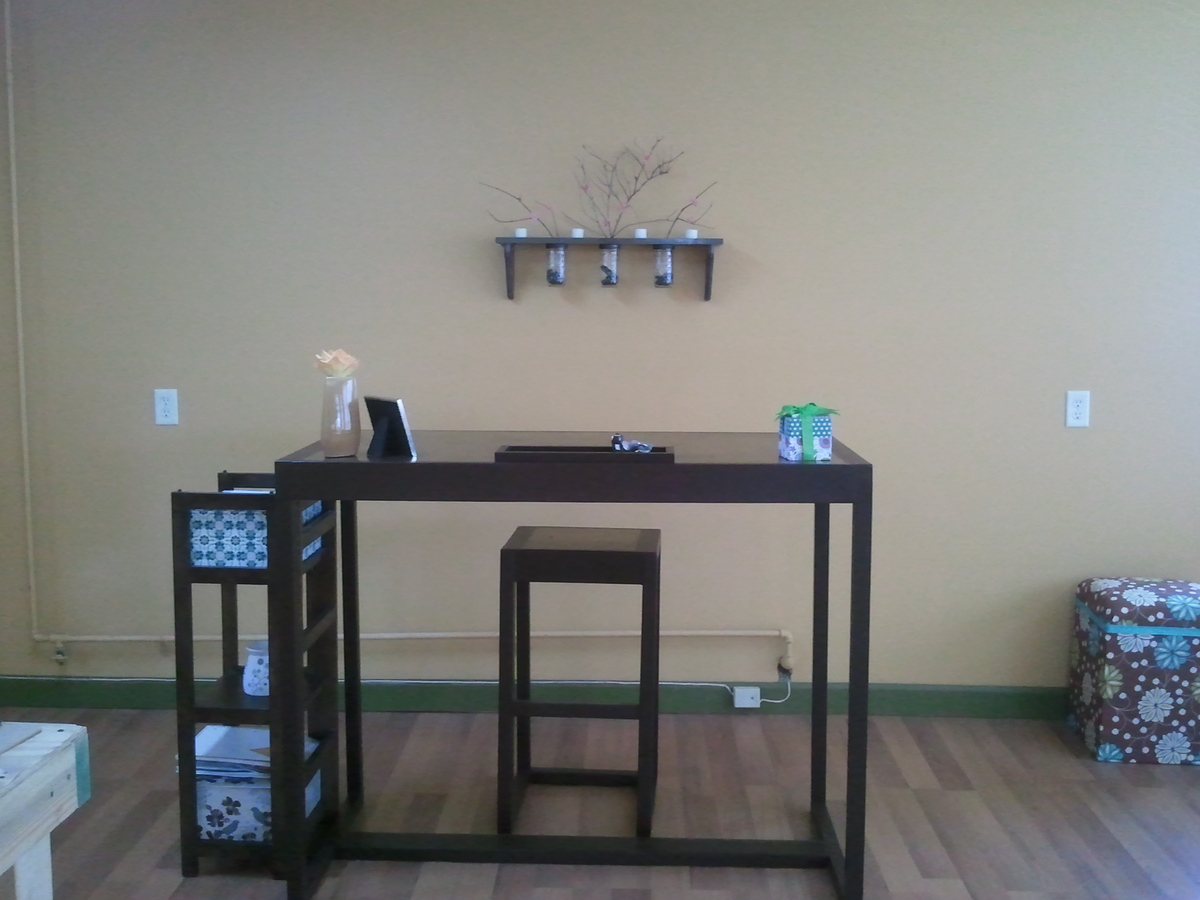
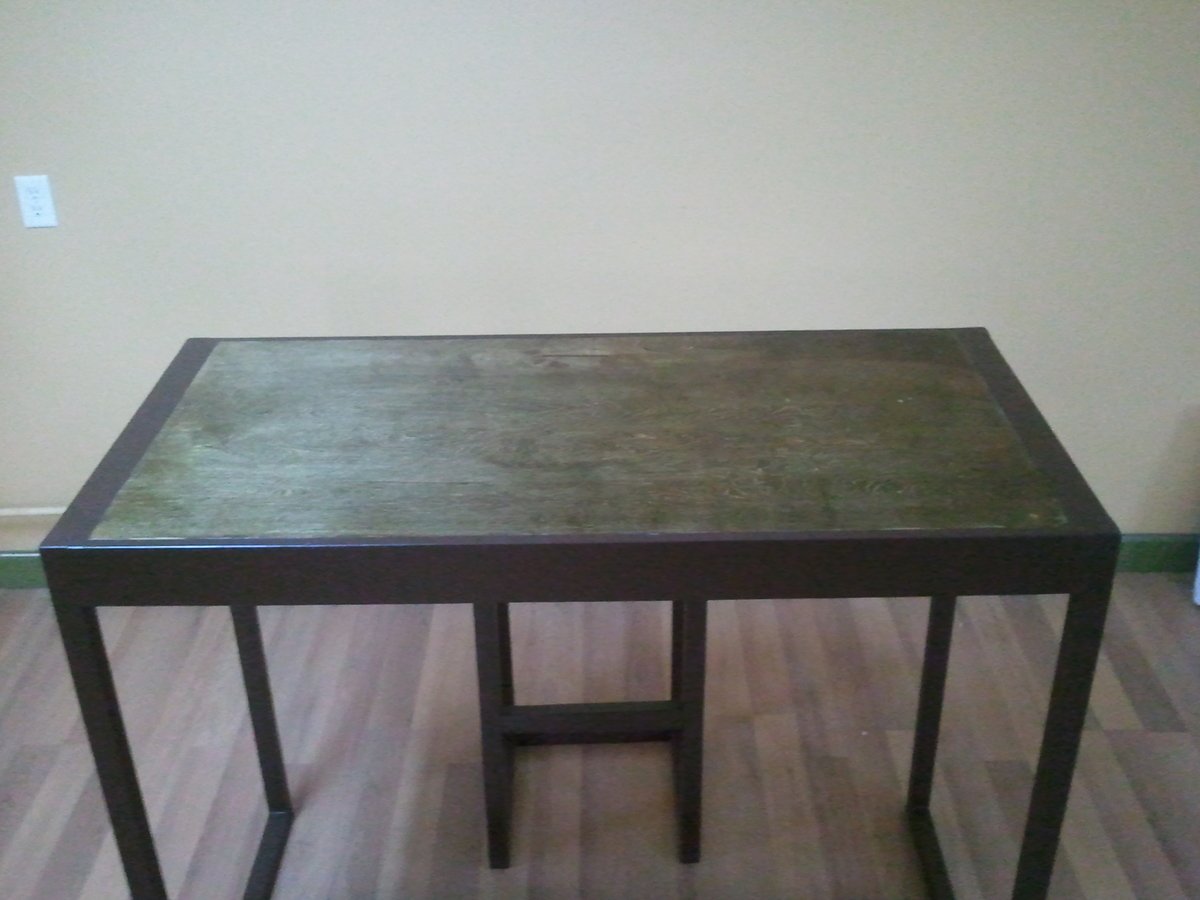
This was my first project. I followed the plans exactly! I LOVE it! It is a perfect desk that I will be using to work through this remote teaching I'm having to do. Thank you for the plans. Next up-Rustic X Console!
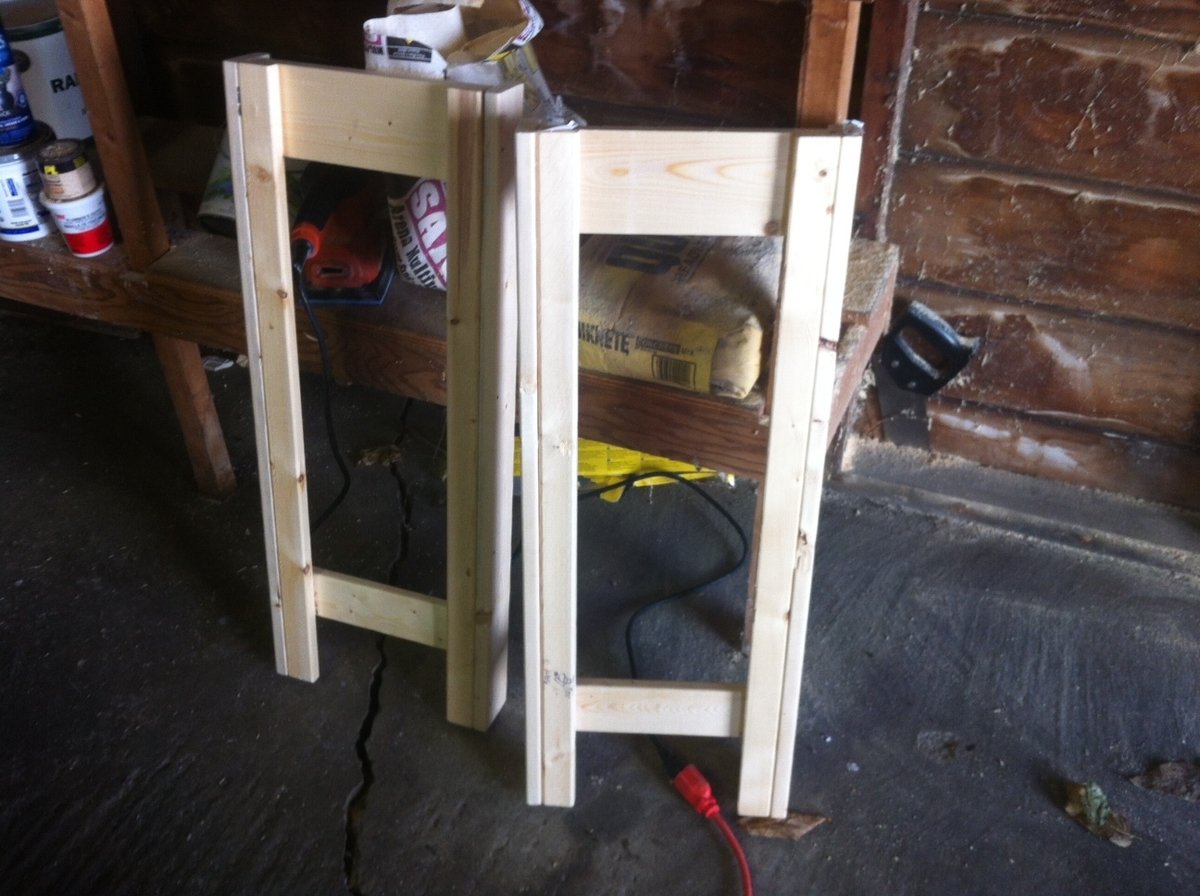
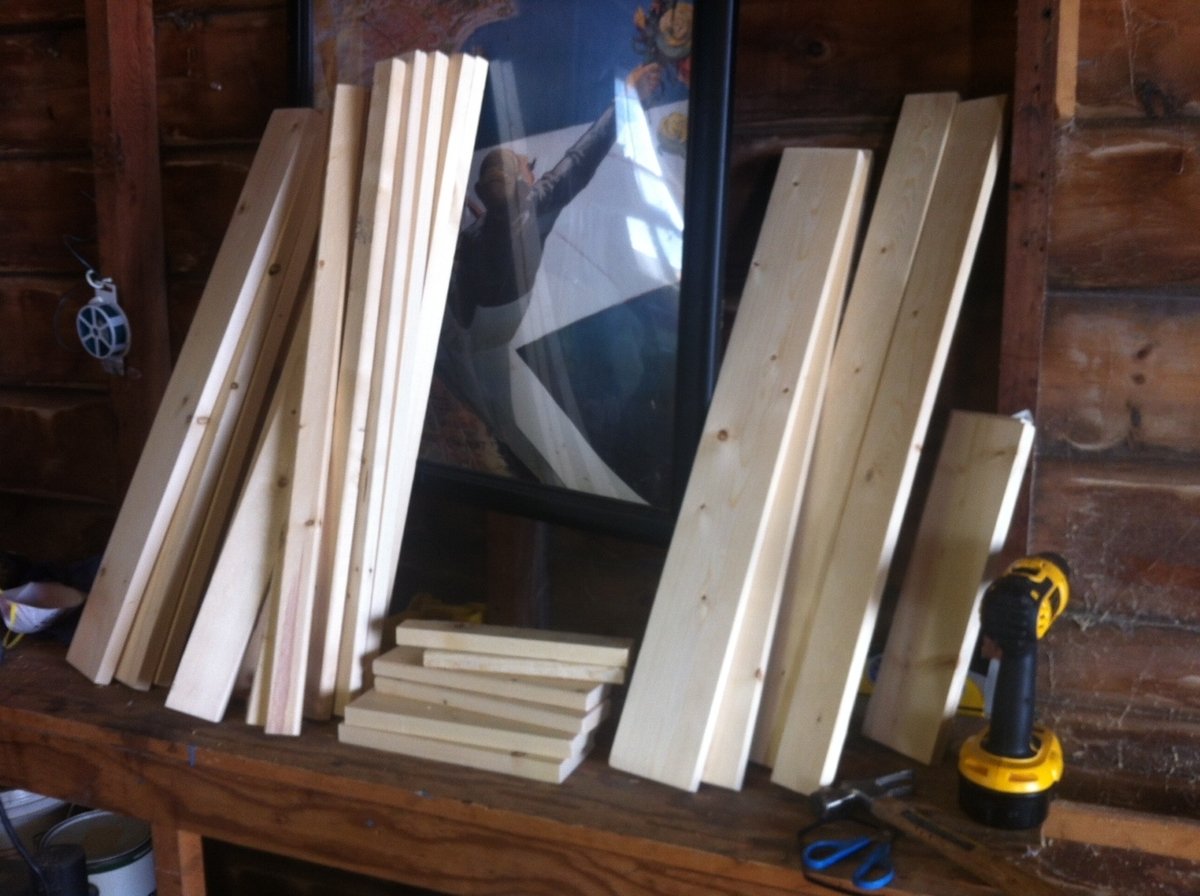
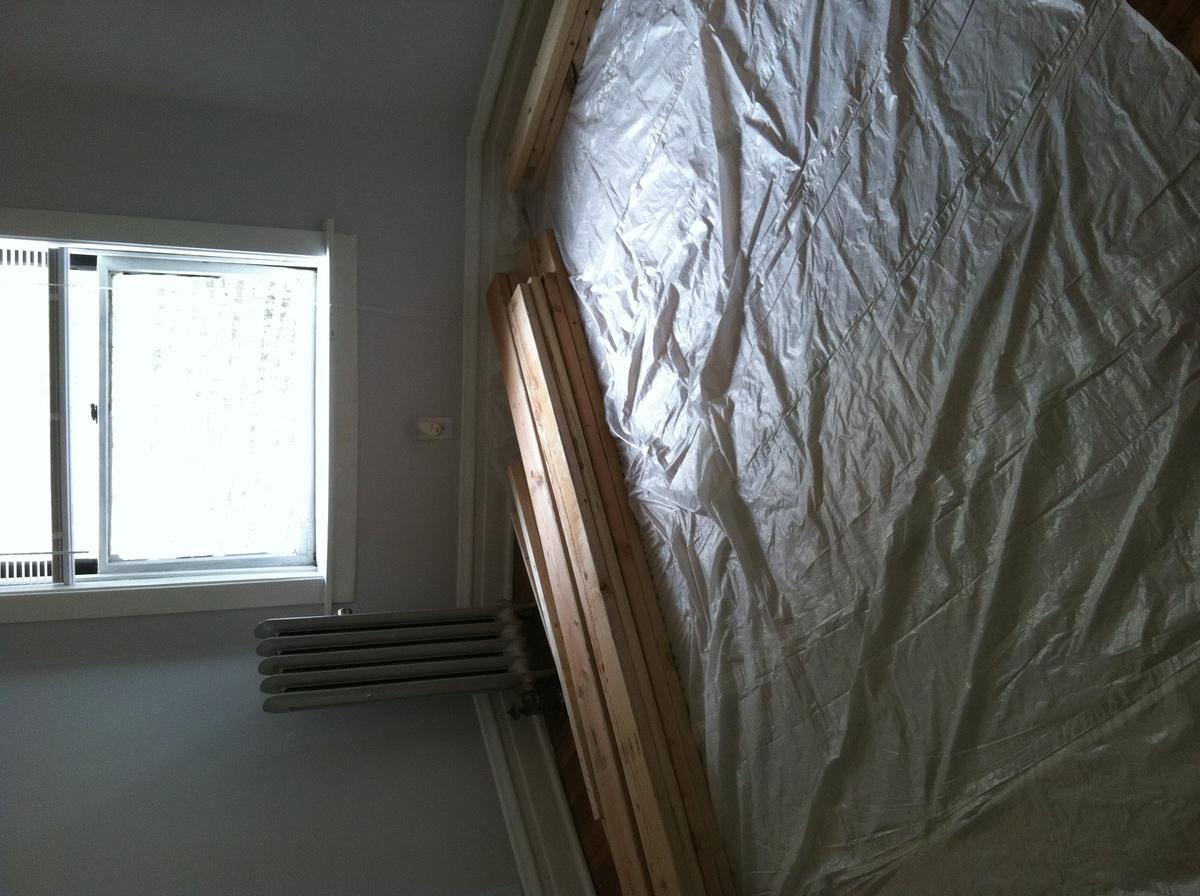
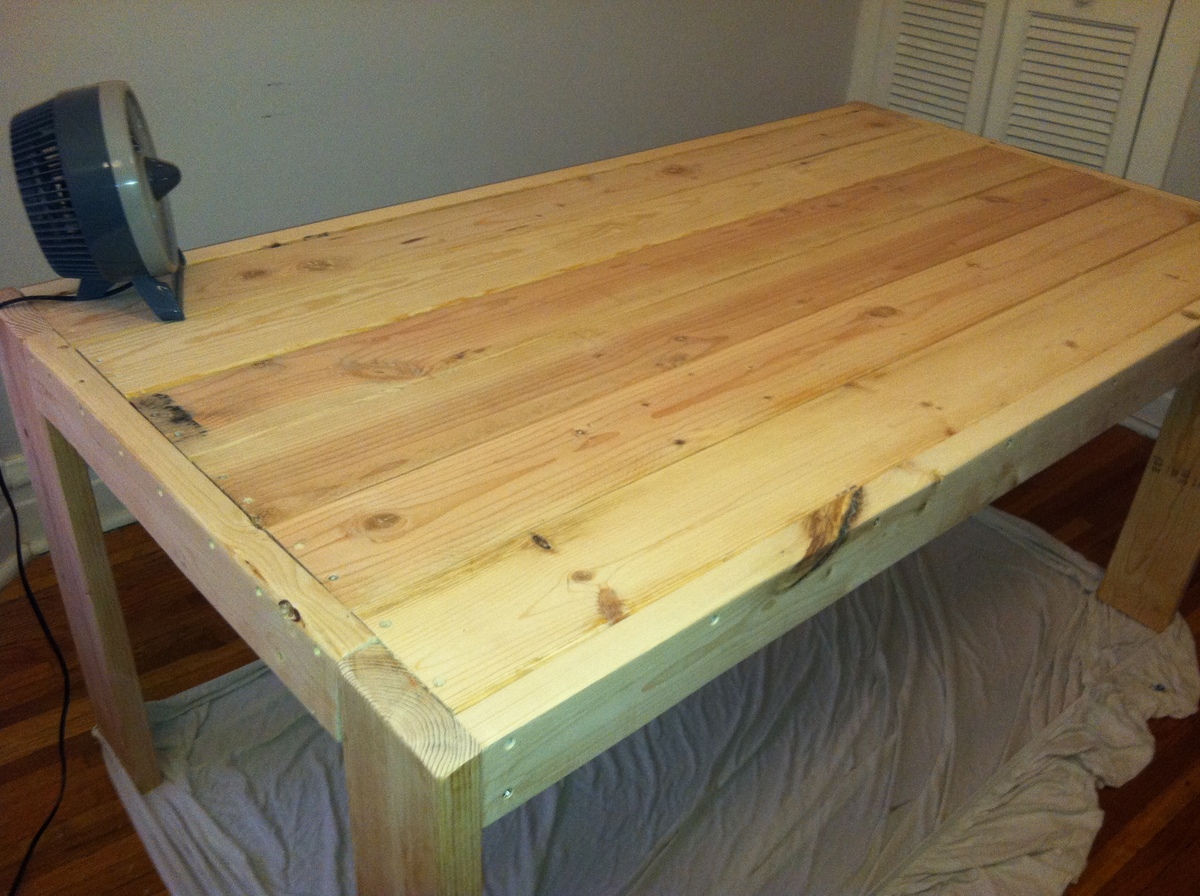
After spending weeks lurking on the site, I decided to go for it. I have no real experience doing this sort of thing, so everything was a learning experience. I had to invest in a lot of tools but the materials only cost about $100 ($50 in pine from local home store + ~$50 in other materials).
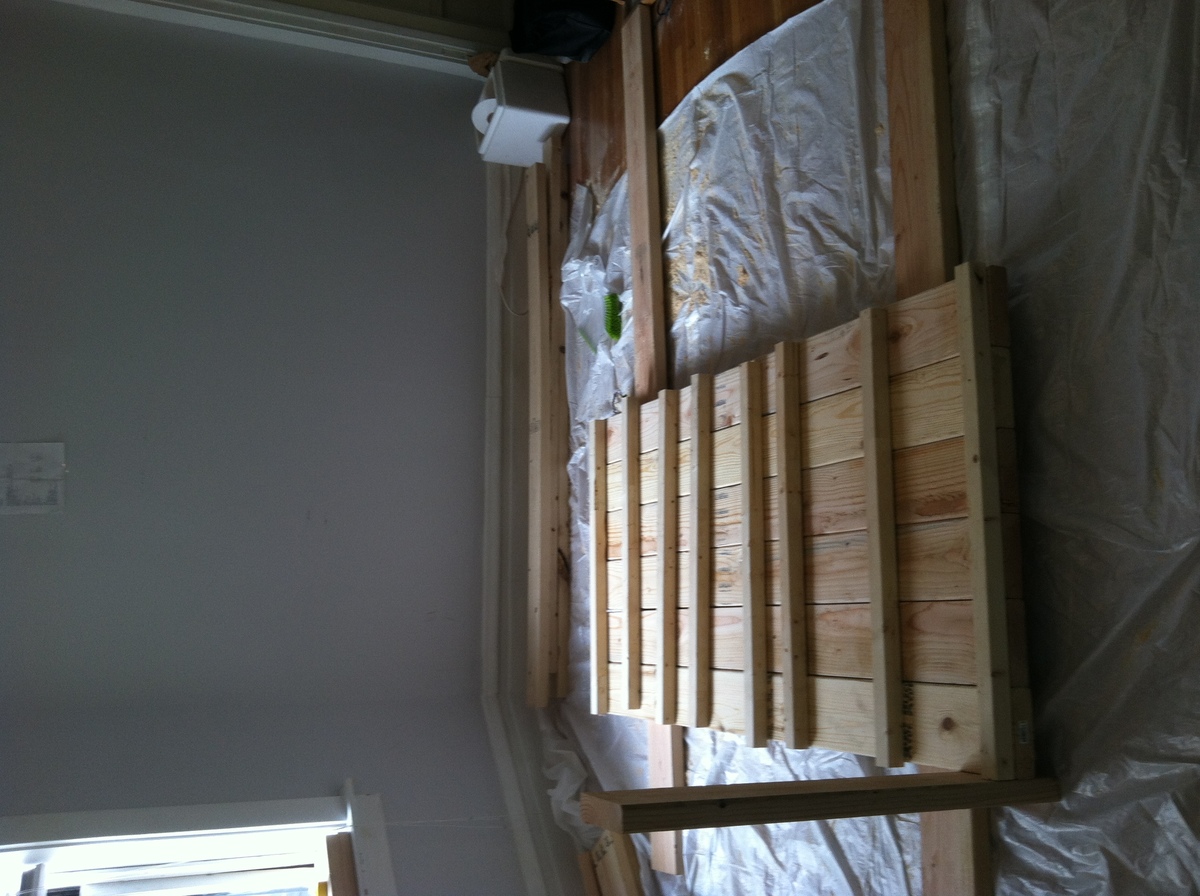
I live in a small apartment, so my workplace was less than ideal. I did a lot of sawing and sanding in the space you see so I made a HUGE mess, but I didn't really have any other choice.
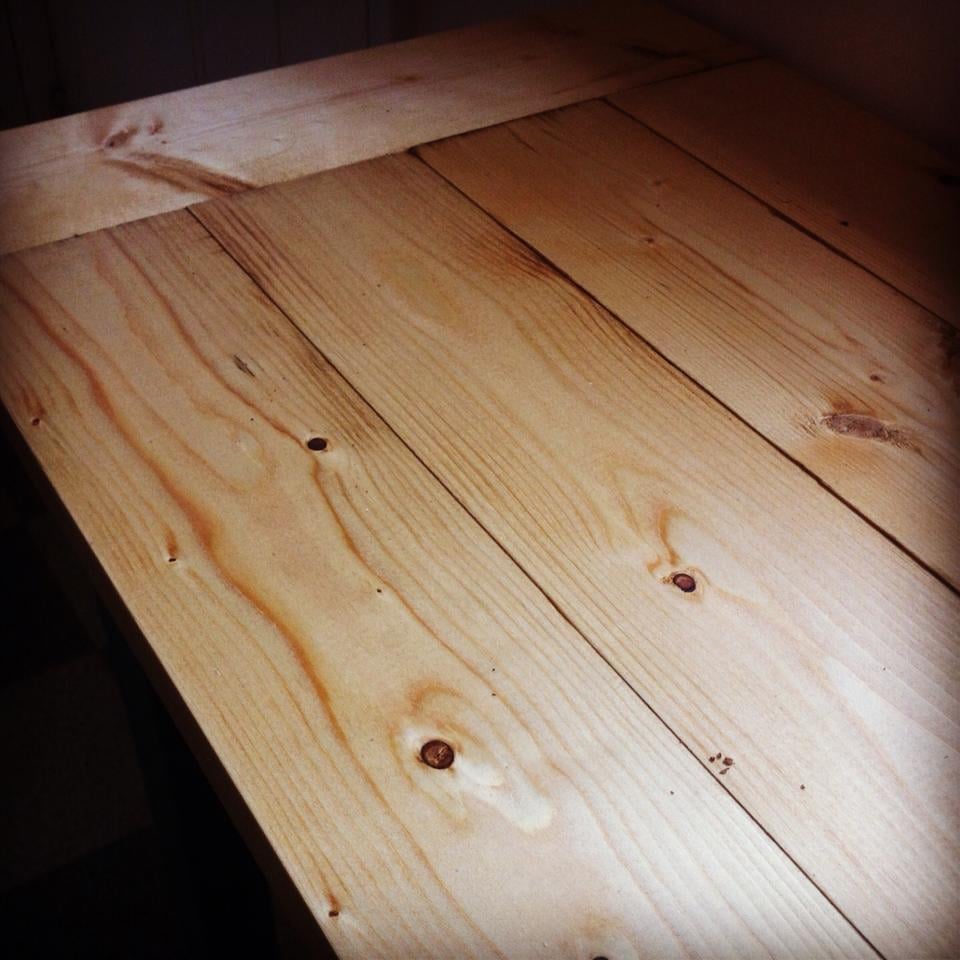
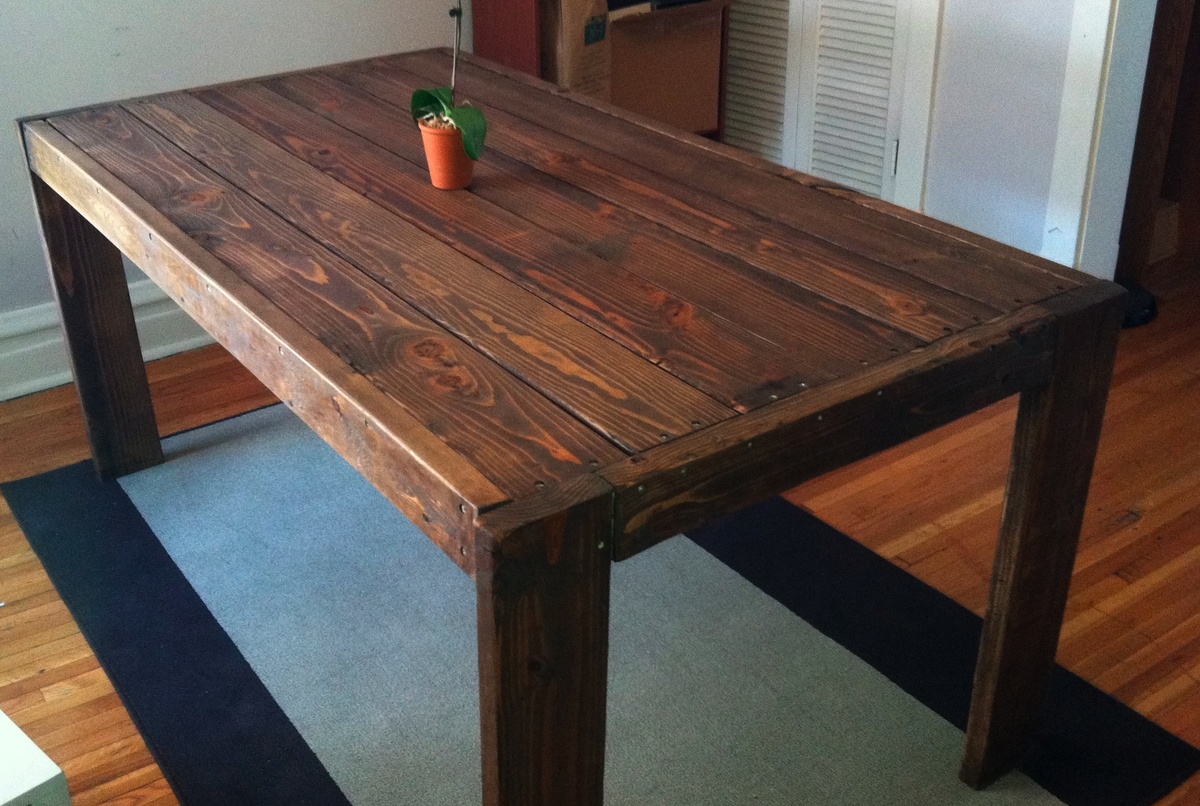
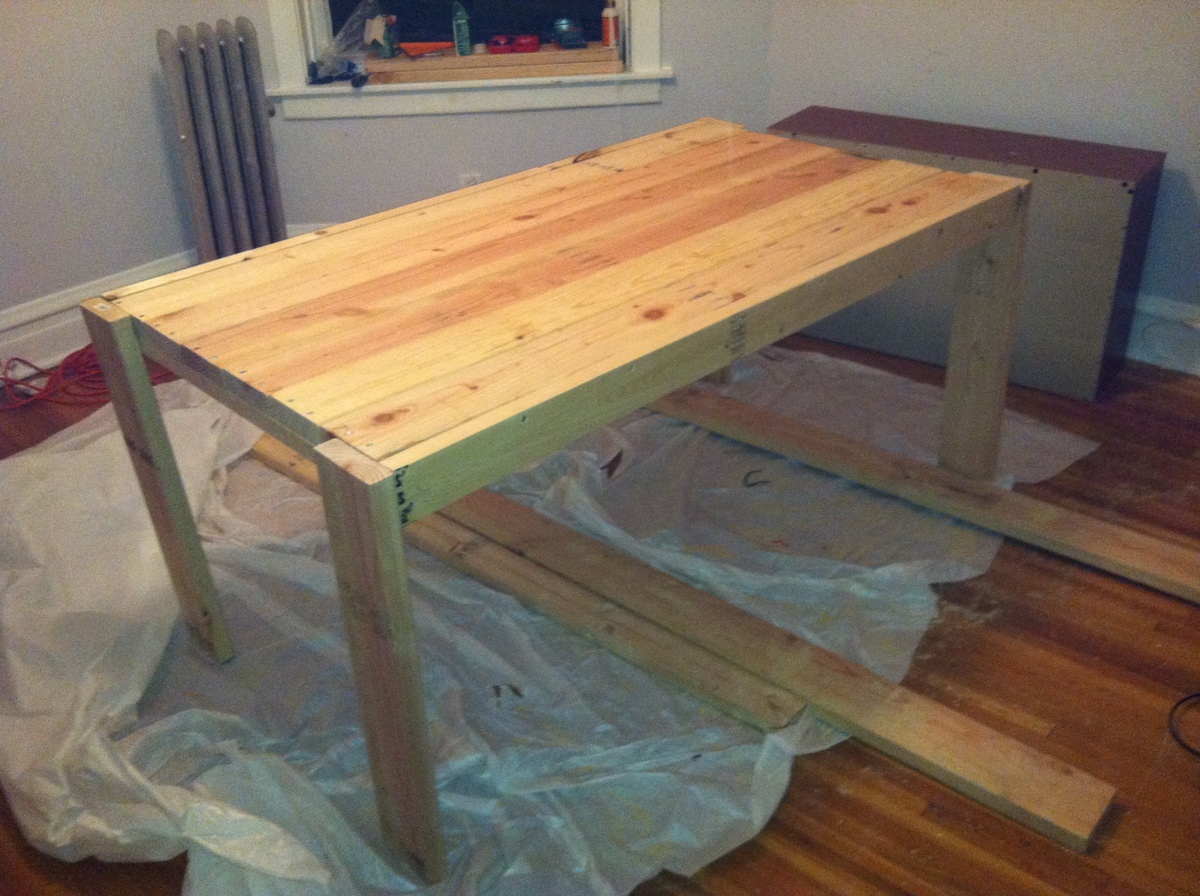
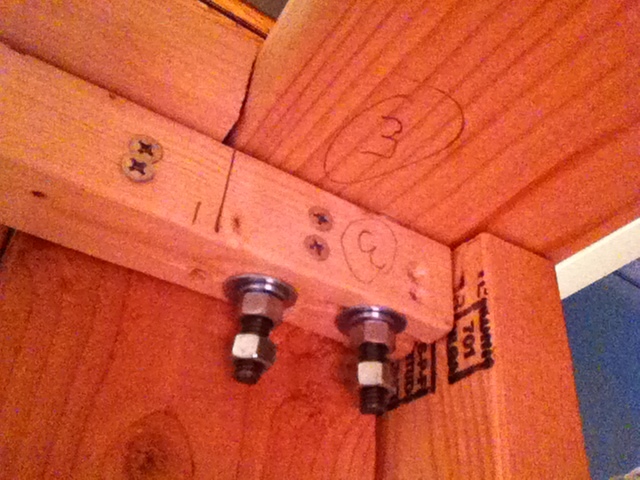
I'm really pleased with the outcome. It isn't perfect, but it doesn't have to be. There are gaps in the planks on the table top, but I can live with it. I didn't follow the plans exactly in order. I built the table top first which allowed me to add removable legs for when it comes time to move. Instead of screwing the legs, I hung hanger bolts and did a nut/bolt setup (as I type this, I realize this was not a necessary step - I could have bolted the legs instead of screwing them in per the stepwise instructions, which would have been easier. Alas, what's done is done!). The picture shows two sets of nuts per bolt, but this is only because I had extra bolts and this ensure that I don't lose them.
I plan on finishing with a polyurethane and building the benches but that will be in the future. My advice to anyone on the fence is to just do it. It's easier than you think and if it doesn't turn out exactly perfect, no big deal. My project goes to show that even with a tiny Chicago apartment, as long as you're willing to make a mess, it can be done. Good luck, thanks for reading!
*sorry my photos are aren't right-side-up - just tilit your head :)
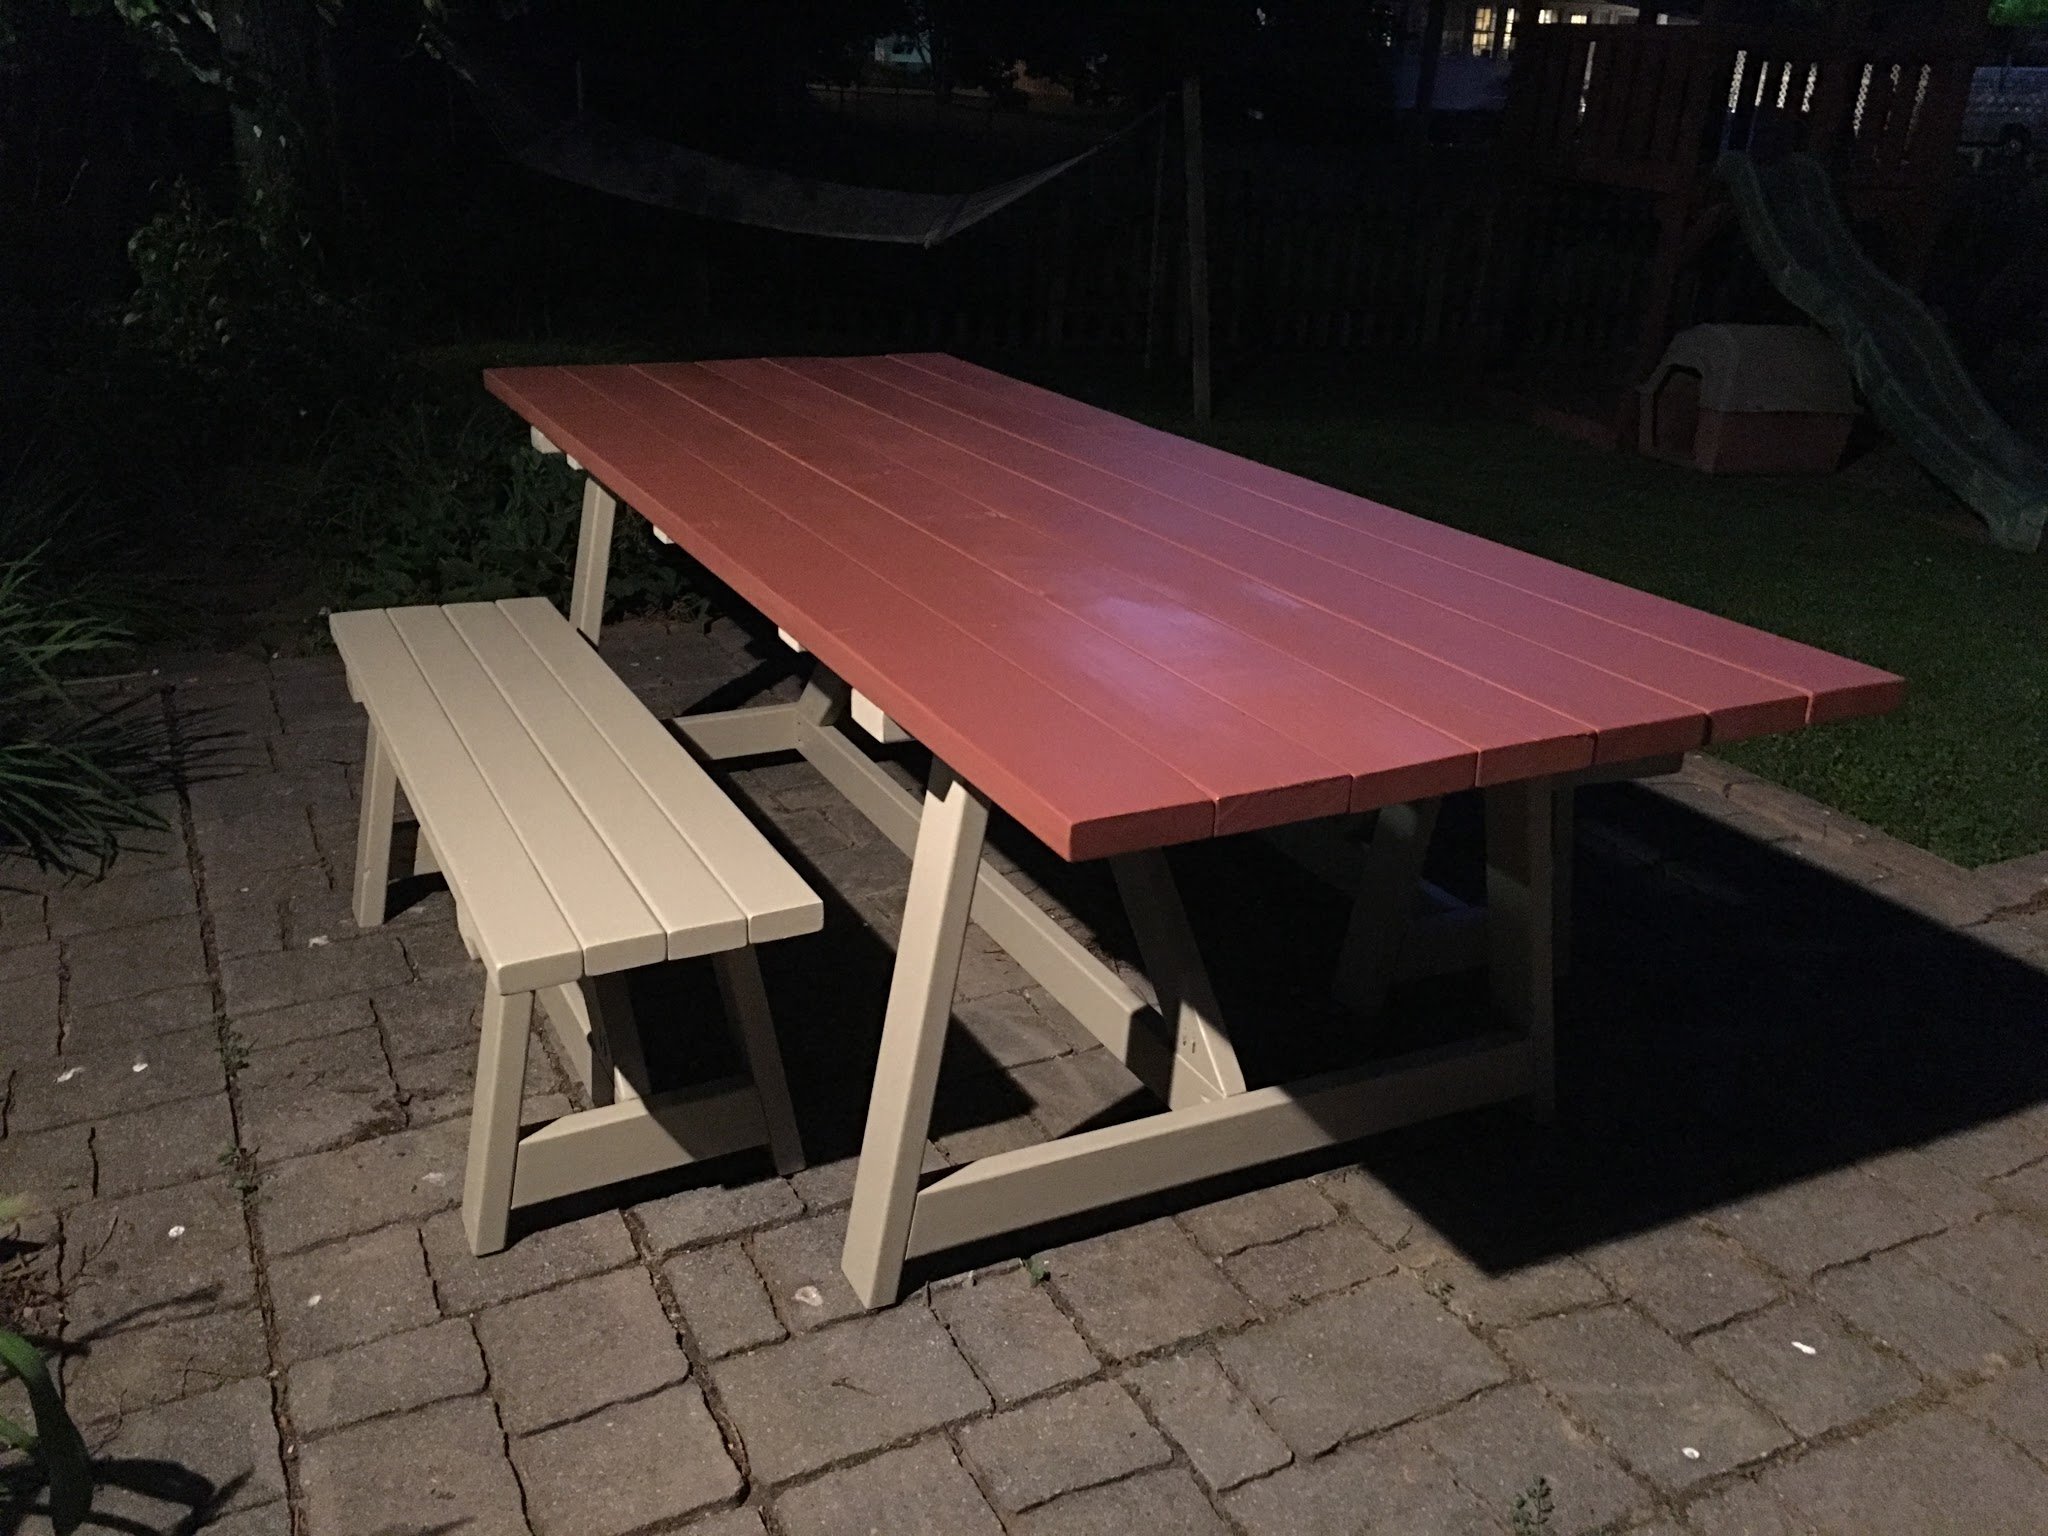
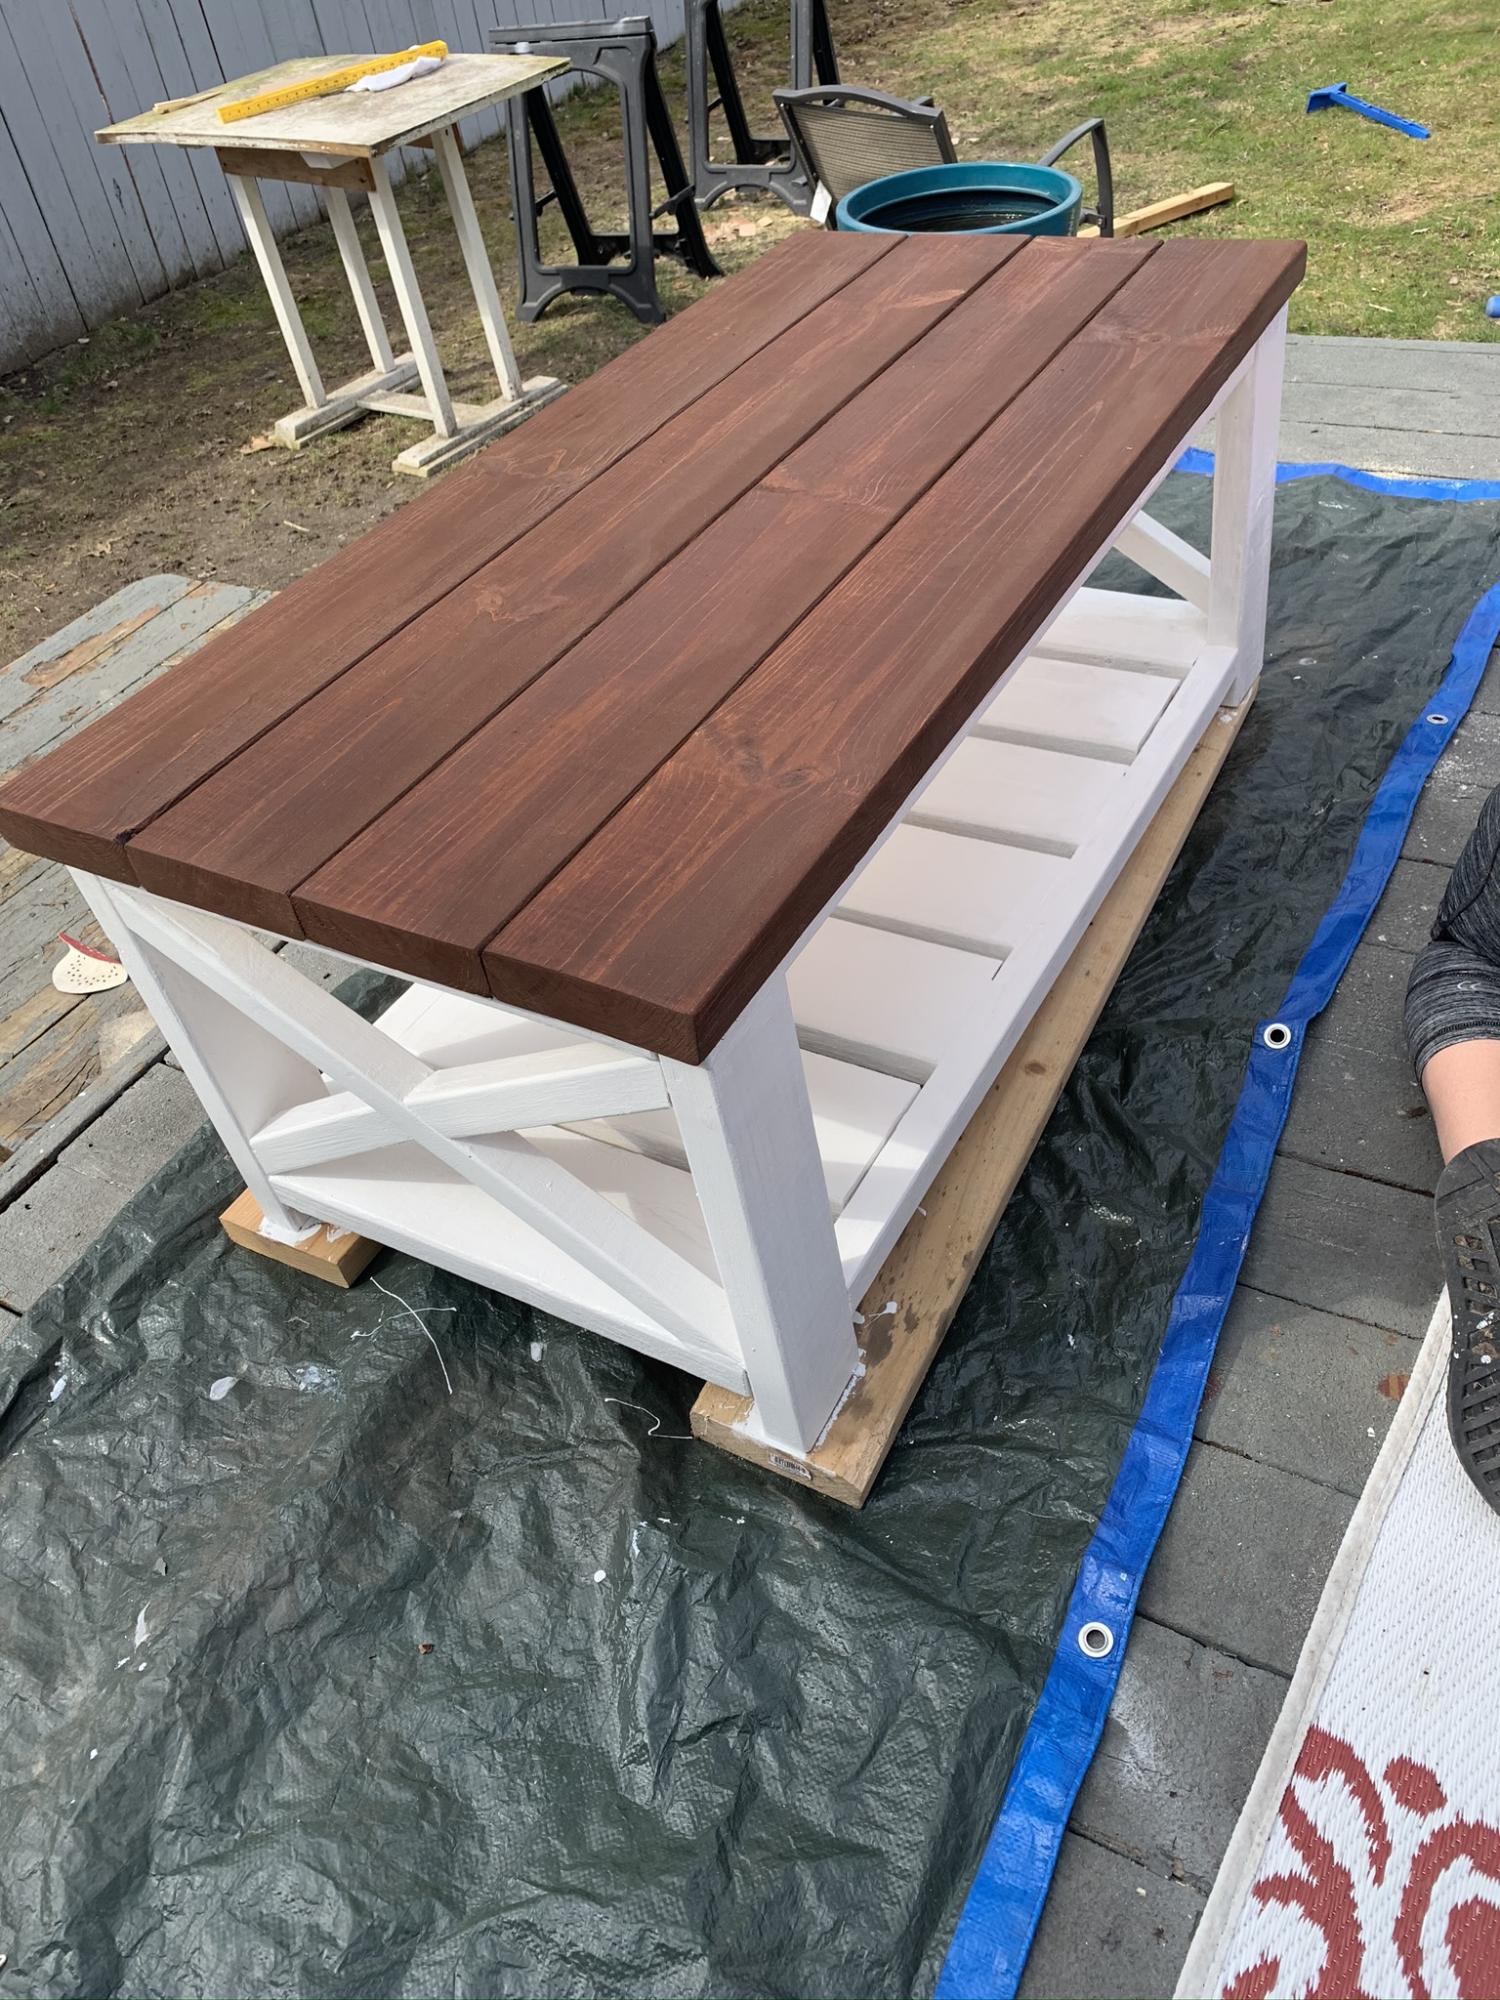
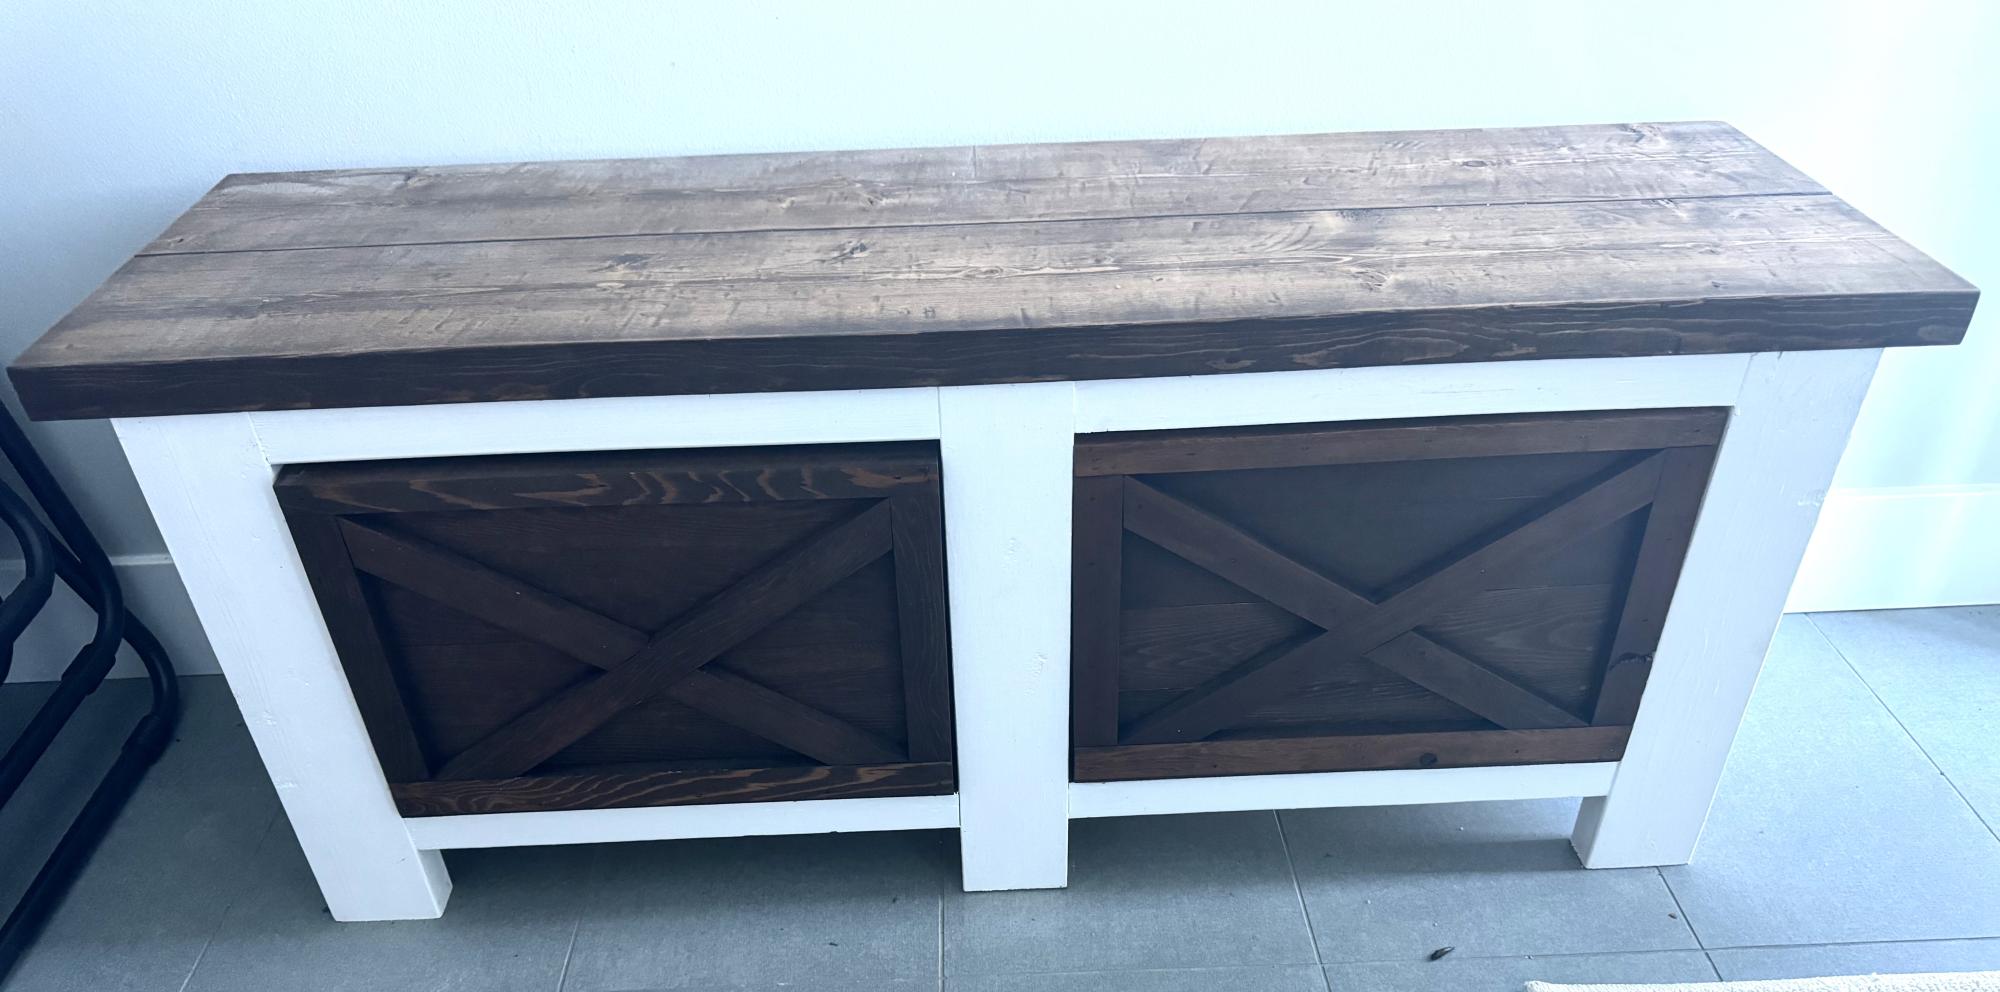
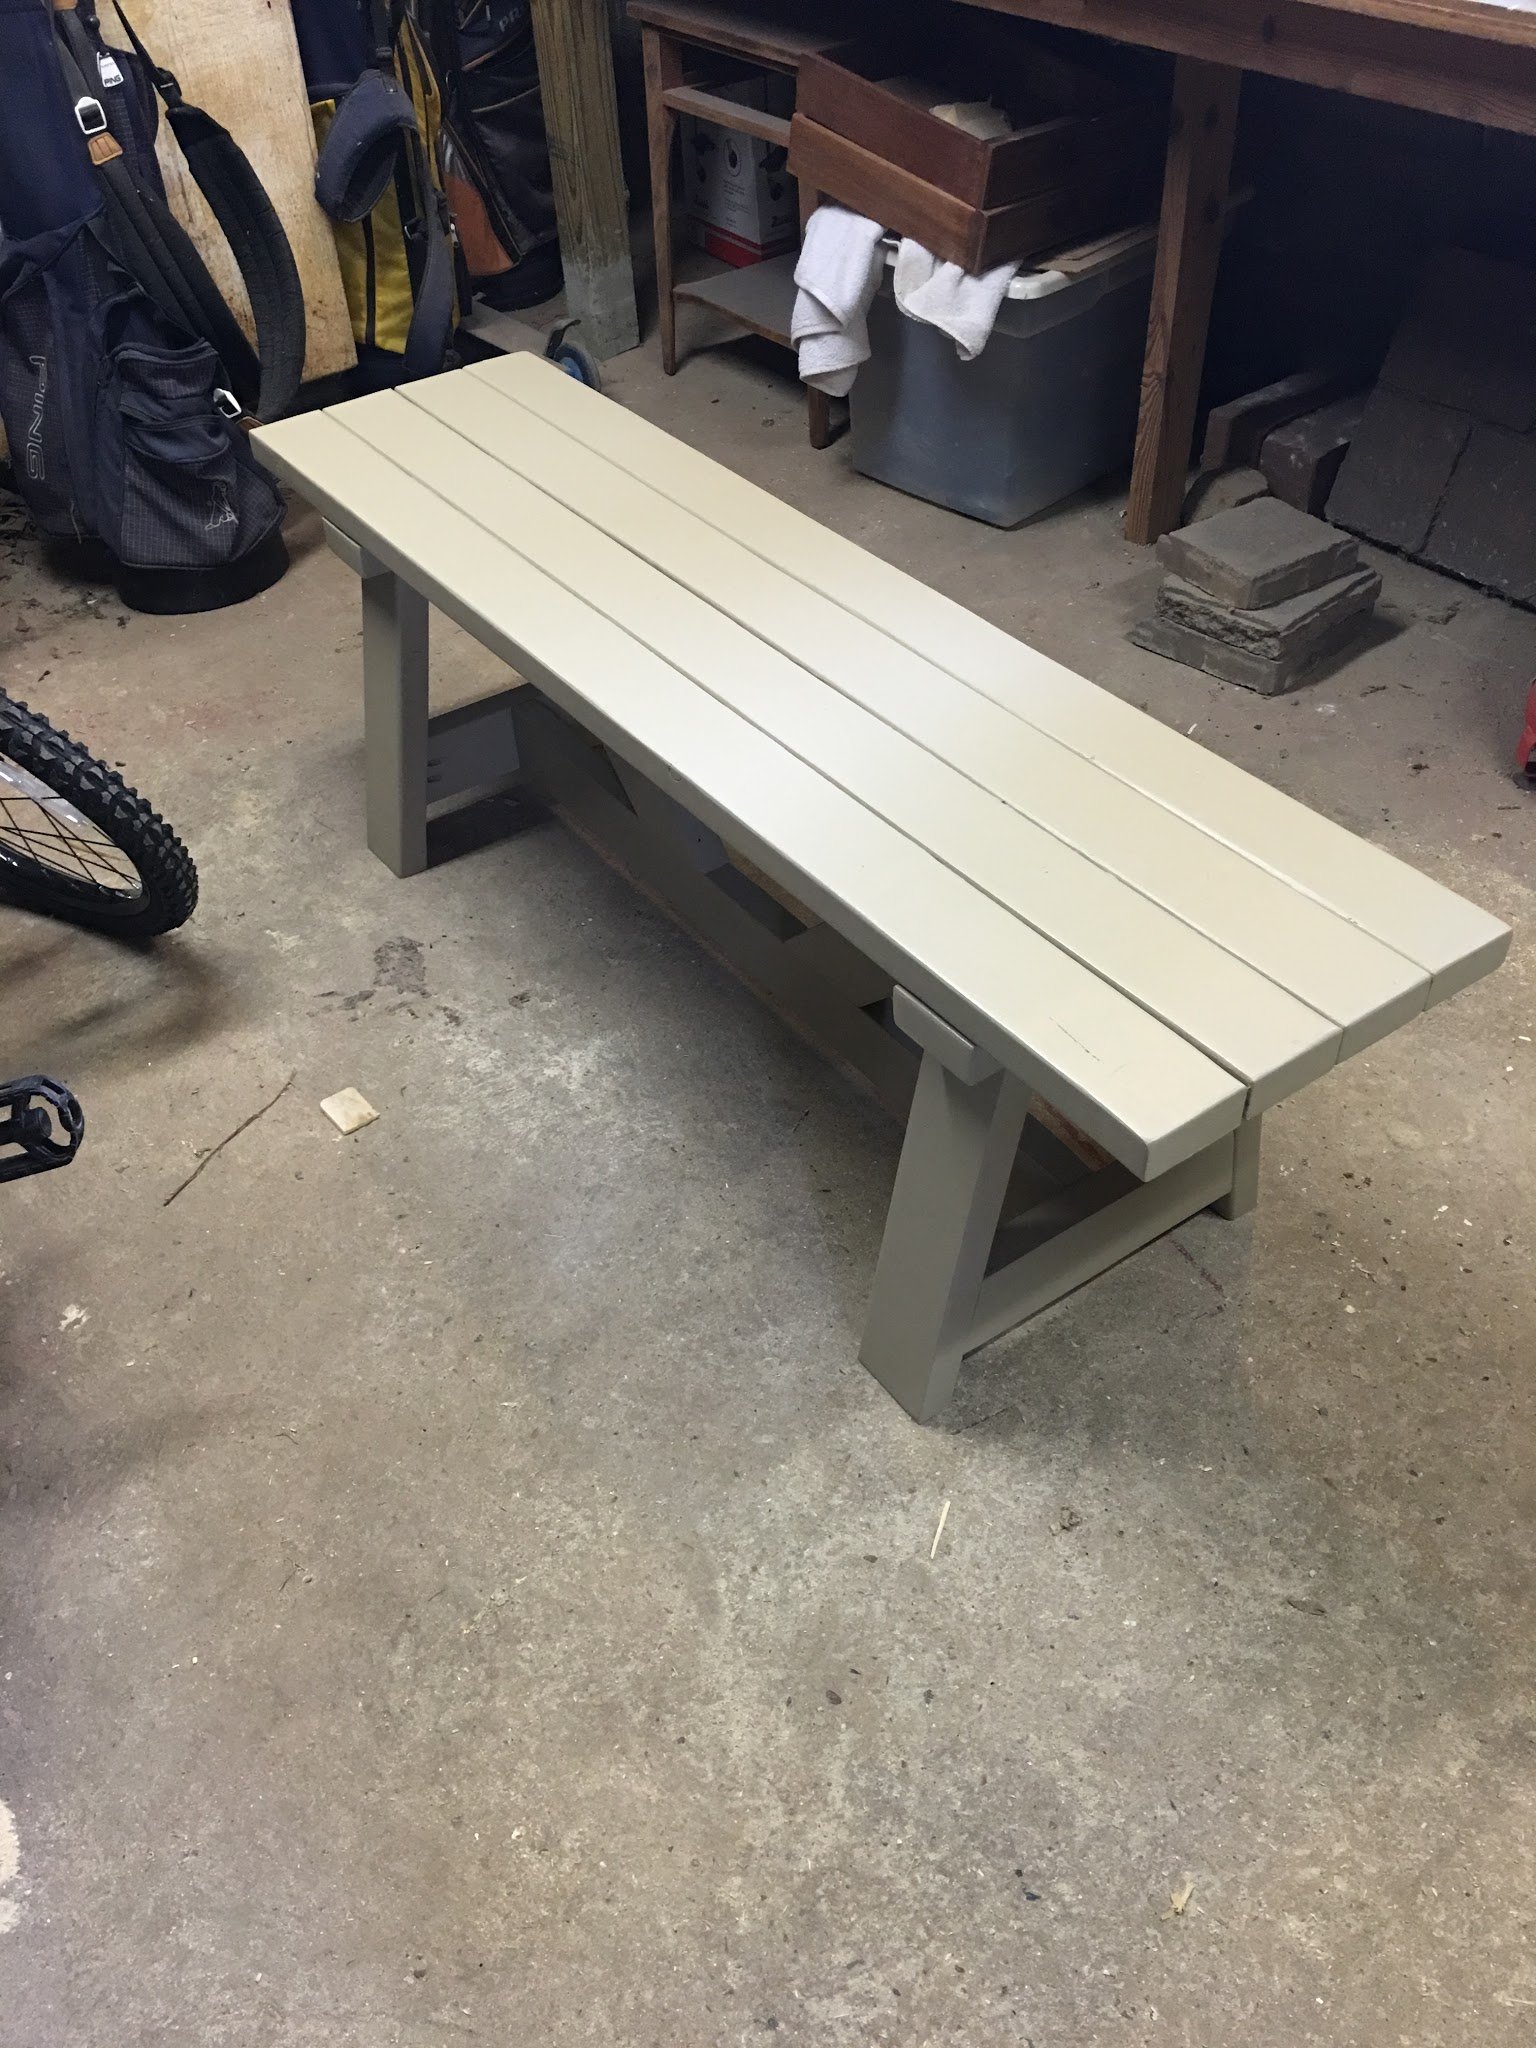
I built one bench originally, but quickly decided that I had to build the complete set. I painted the base of the table and the benches with Valspar Duramax Barnwood and the table top Valspar Duramax custom matched to my garage shutters. The only part of the project that I really needed help was carrying the table to the patio.
Thanks again Ana (and Brook) for a wonderful plan!
I saw the plan and thought I would give it a shot. My wife loved the plan, but wanted something with a higher back. I used the bases of the plan as is, but I adjusted by adding some higher pieces at the back. They are attached at the seat flat and the back rail. It worked out pretty well. I still need to sand and stain.

I made this shelf with hooks a few days ago. Modified the overall length.
Zenski Farm
Simple but beautiful!
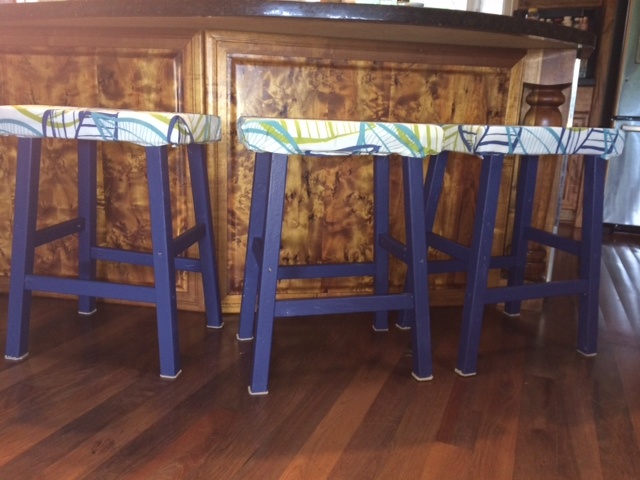
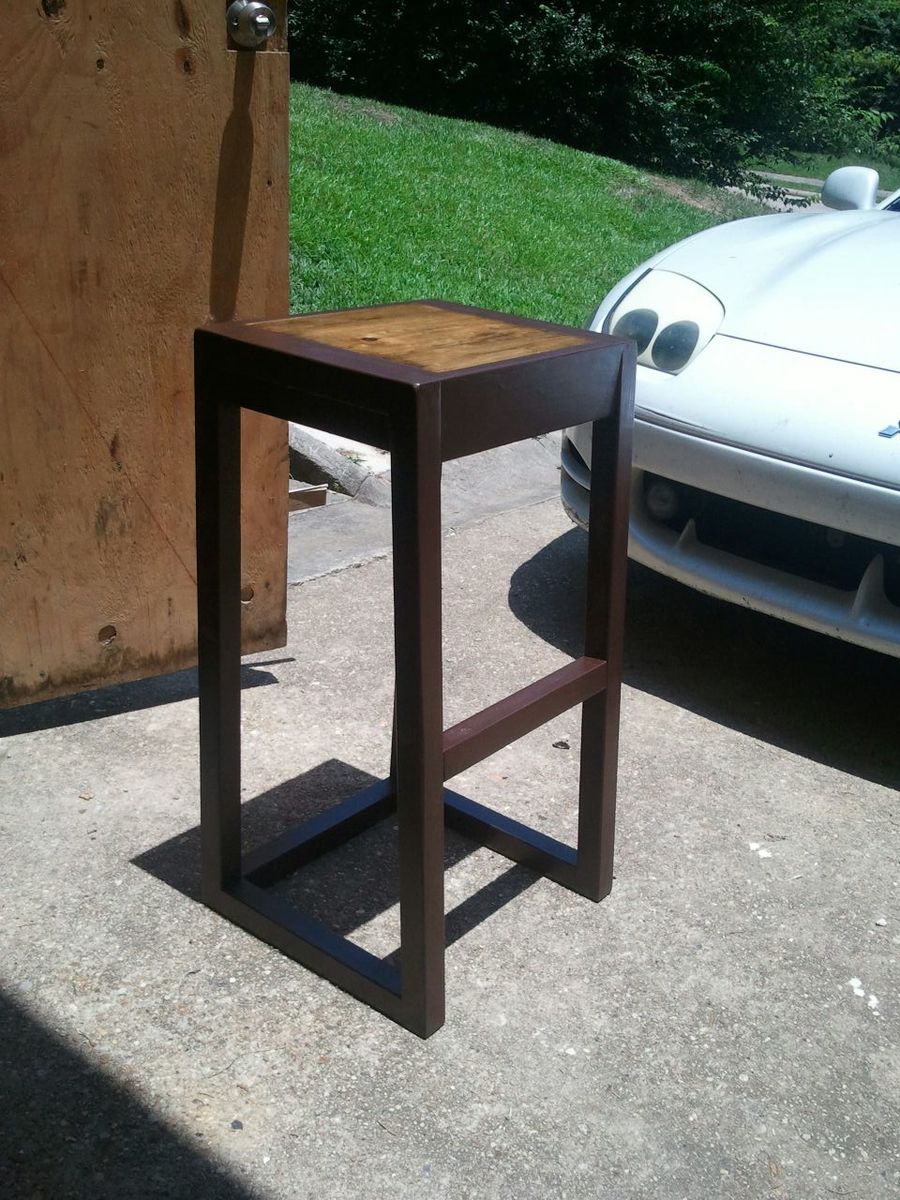
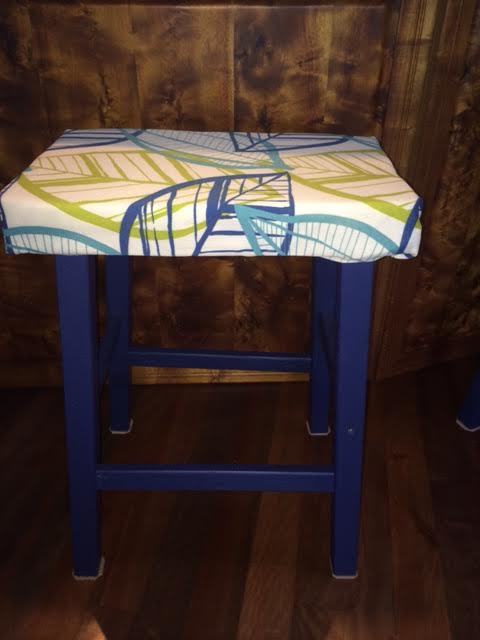
I needed 3 stools for my kids to eat breakfast at the counter. These were perfect.
I already owned the fabric so I only needed to purchase the wood and the foam. I made it entirely out of furring strips so it was really inexpensive.
I took me a couple of hours to build and sand all 3.
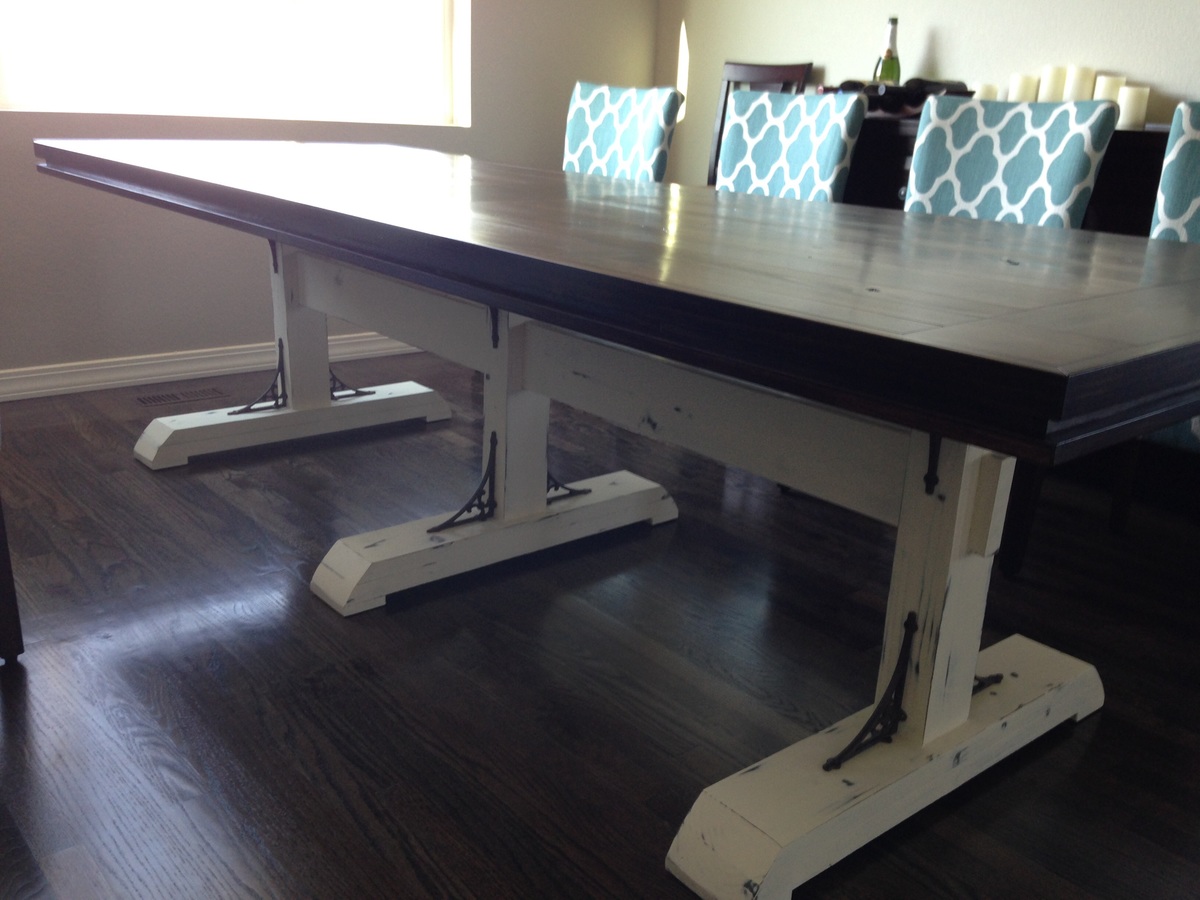
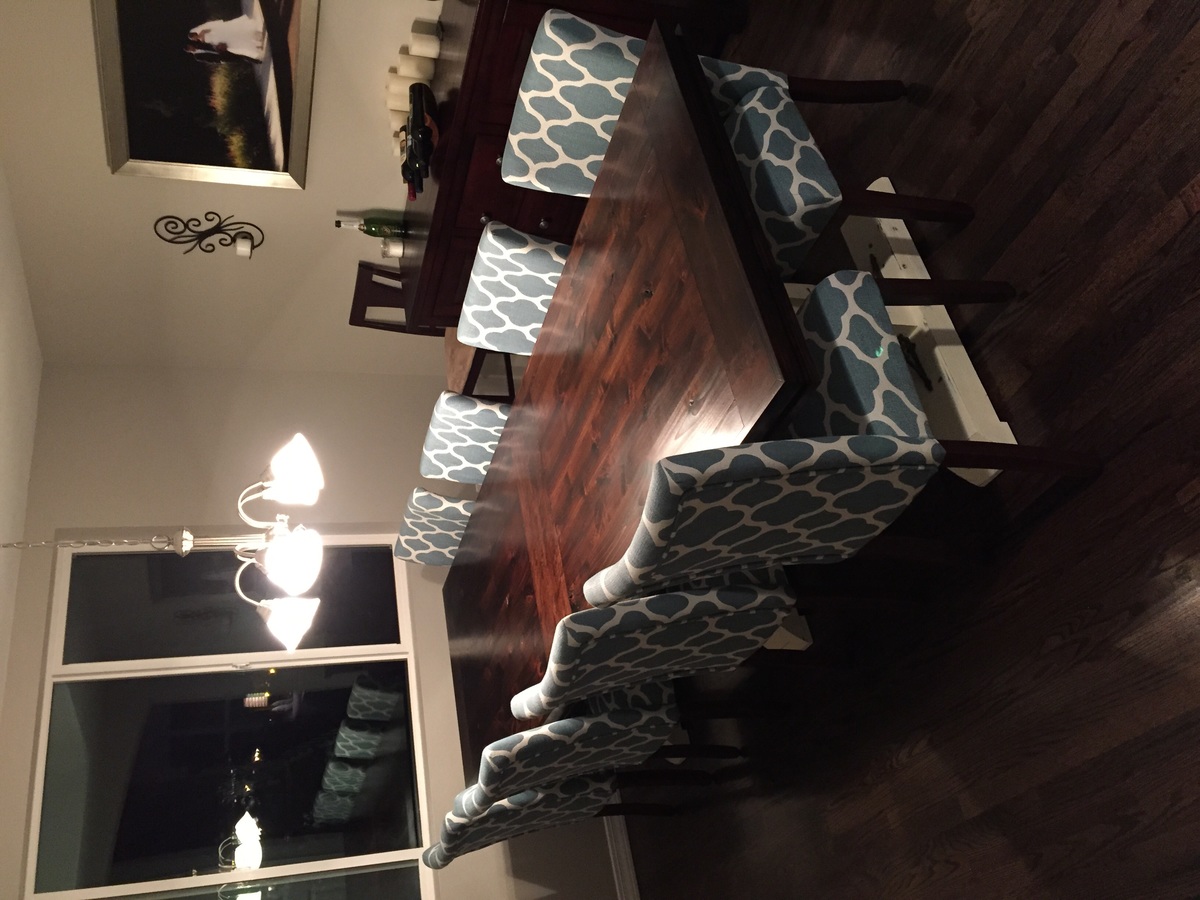
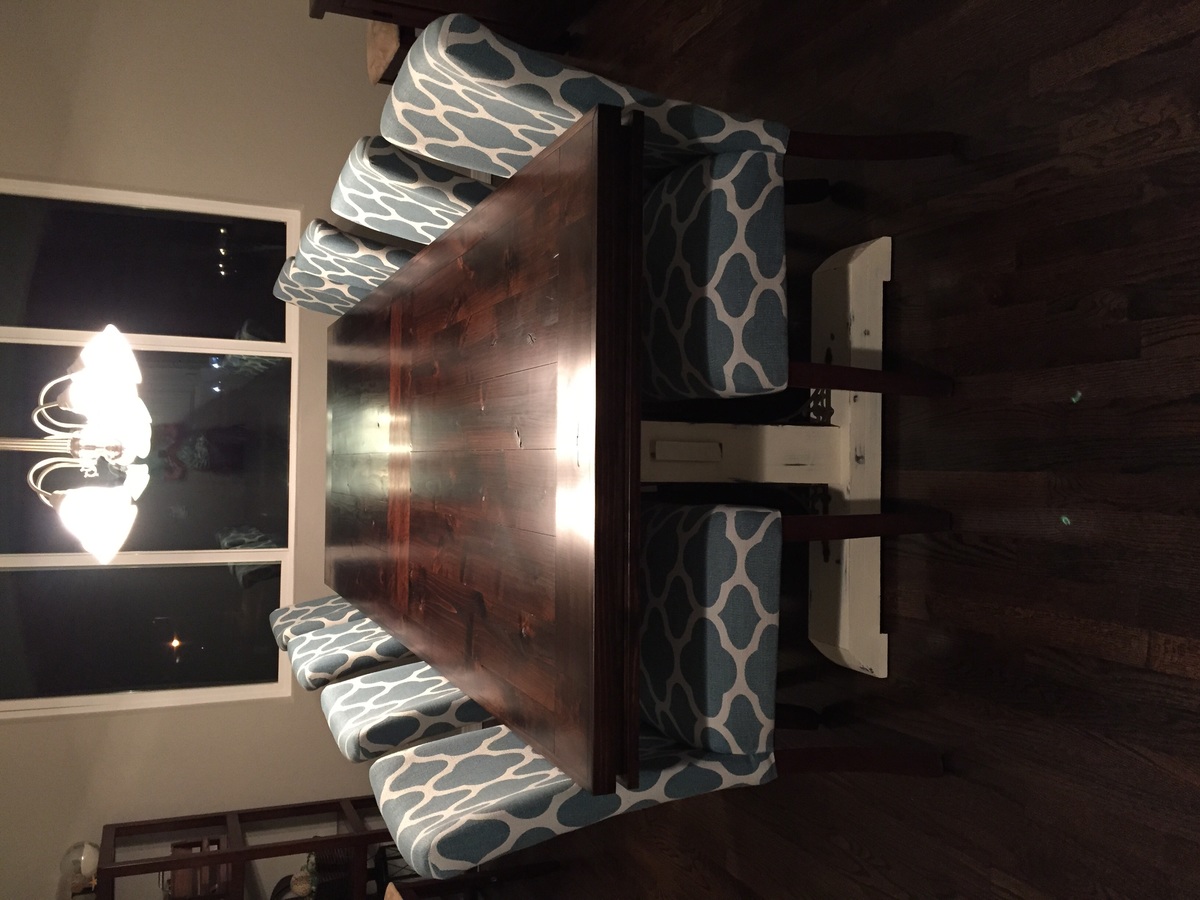
Modified version of the Ana White Triple Pedestal Farmhouse Table. Table top is made of 1in alder while the base is made of construction grade 2x4 and 2x6 lumber.
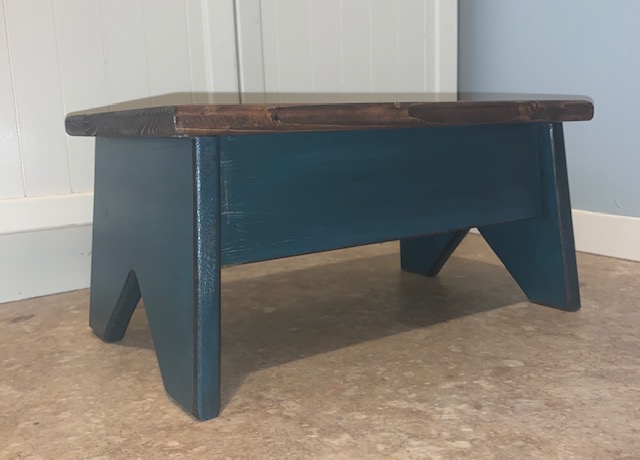
Simple Step stool. My husband suggested we needed one of these for our pantry, so I whipped one up for us! The plan was so easy to follow, it took me about 20 mins to make this stool.
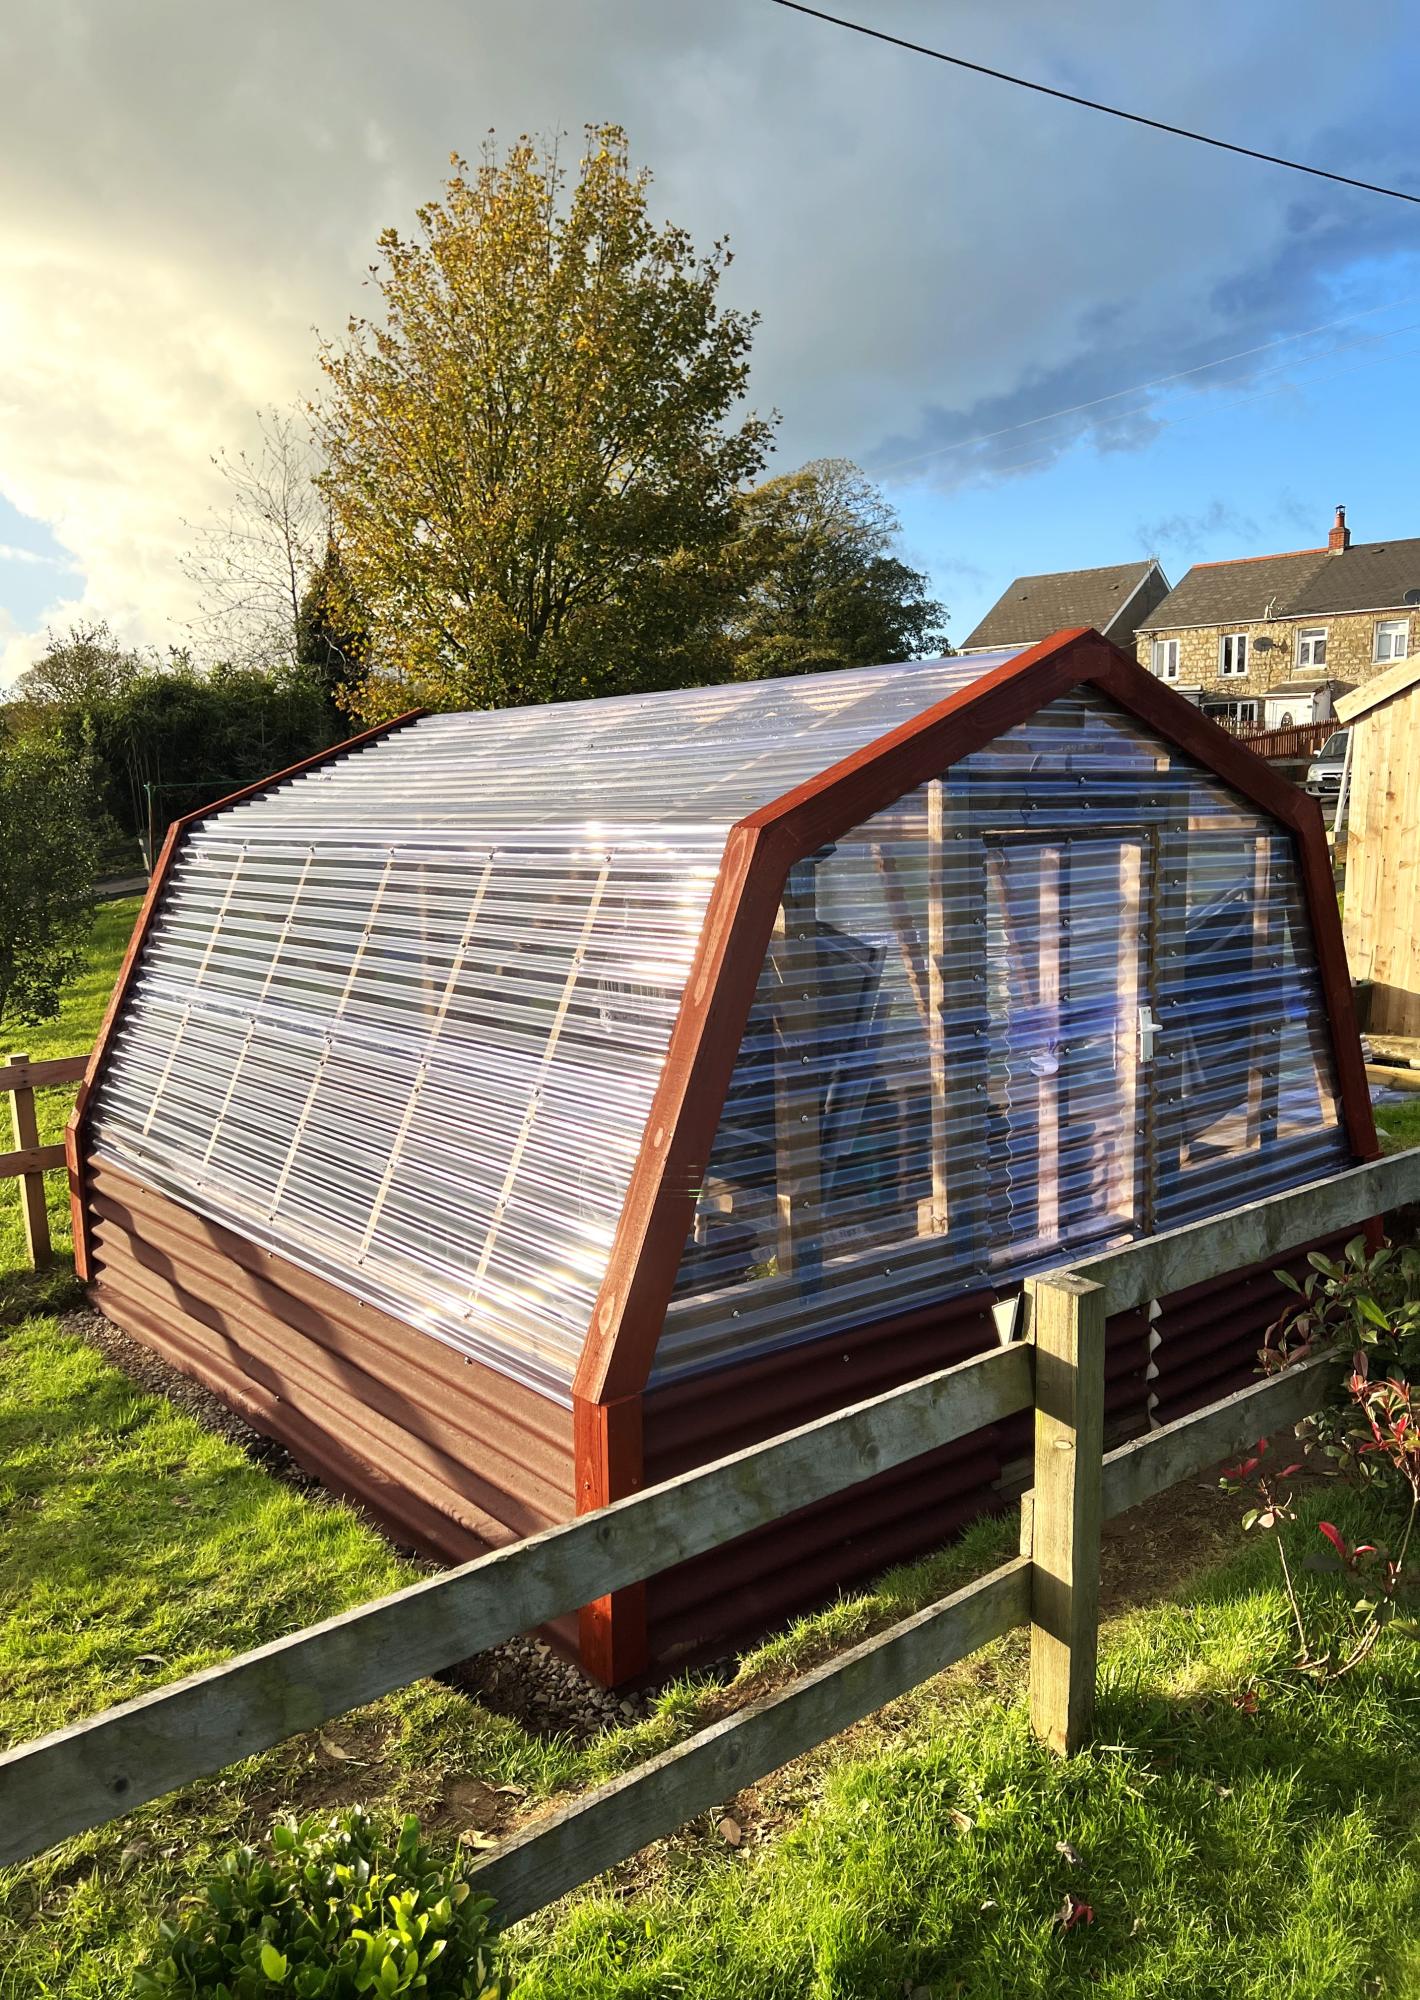
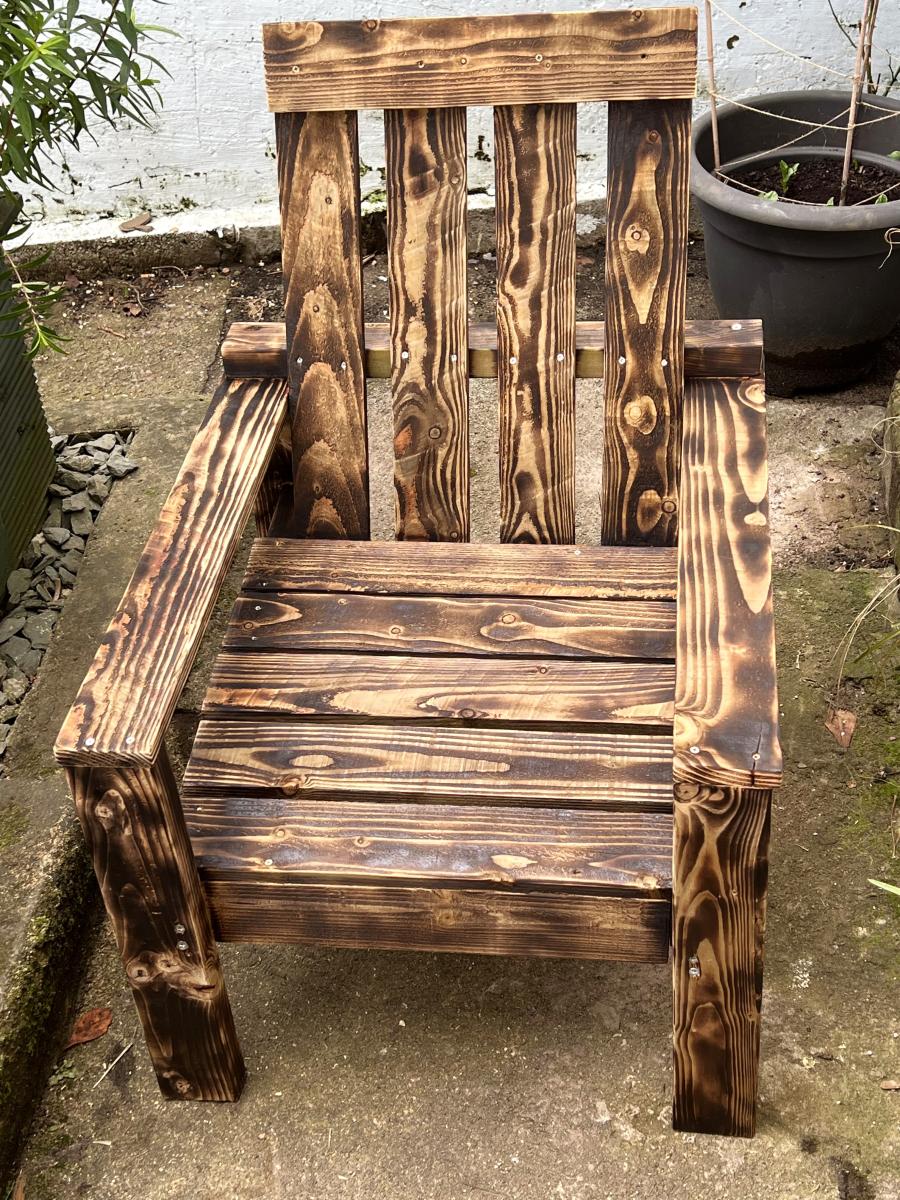
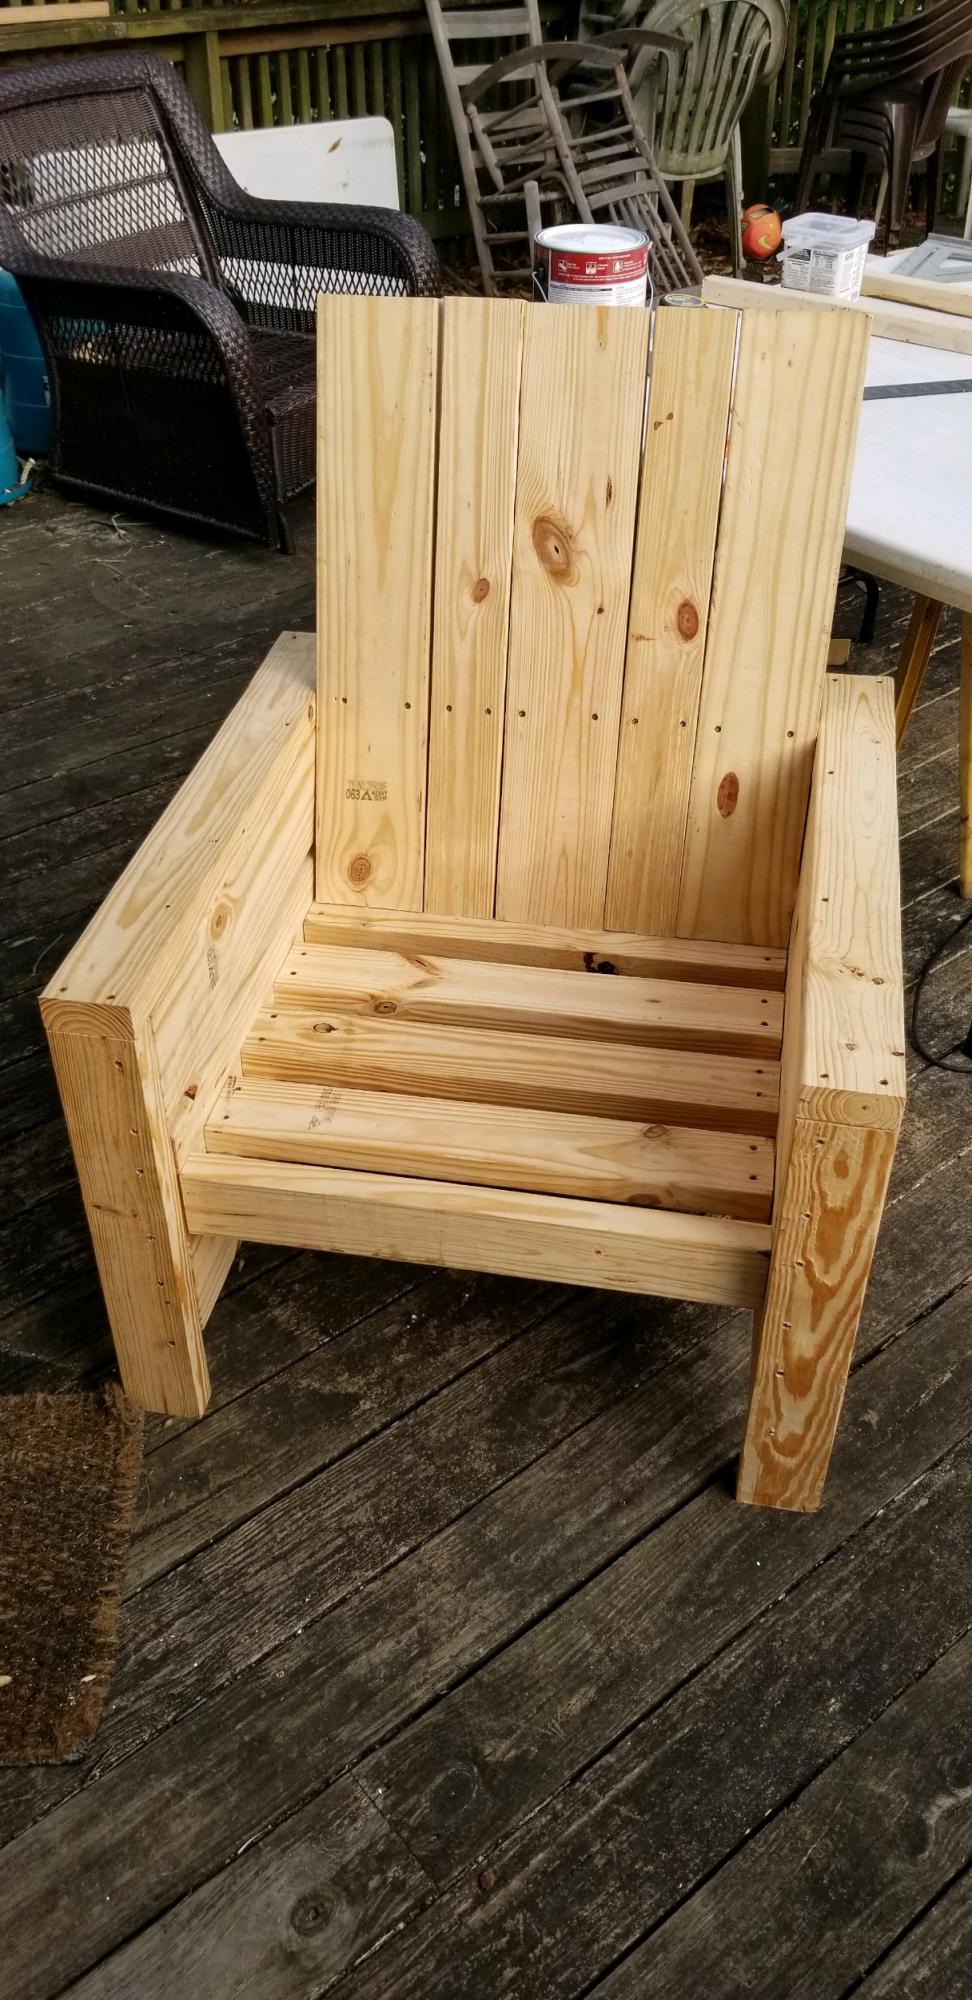
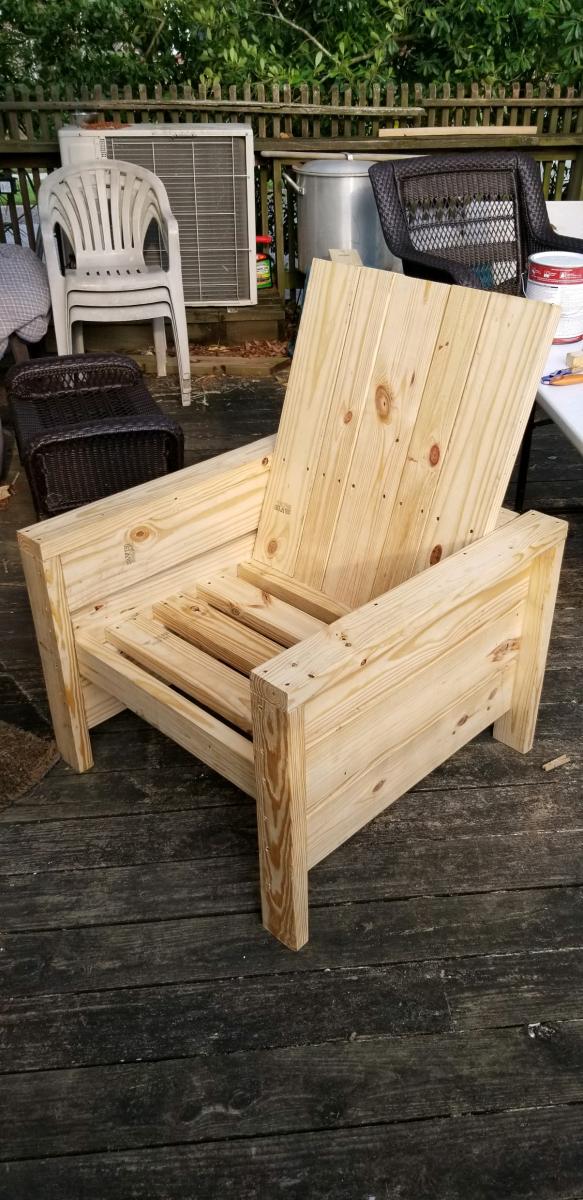
Made to the basic design for the outside patio chair. With a few modifications due to utilizing all the scrap wood from the greenhouse.
Welshsmoker