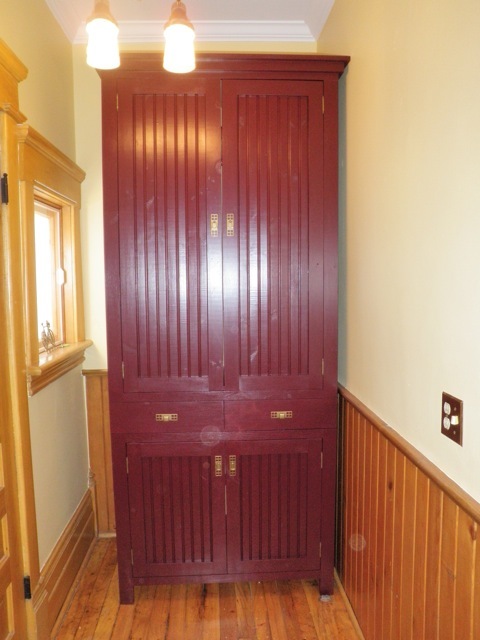
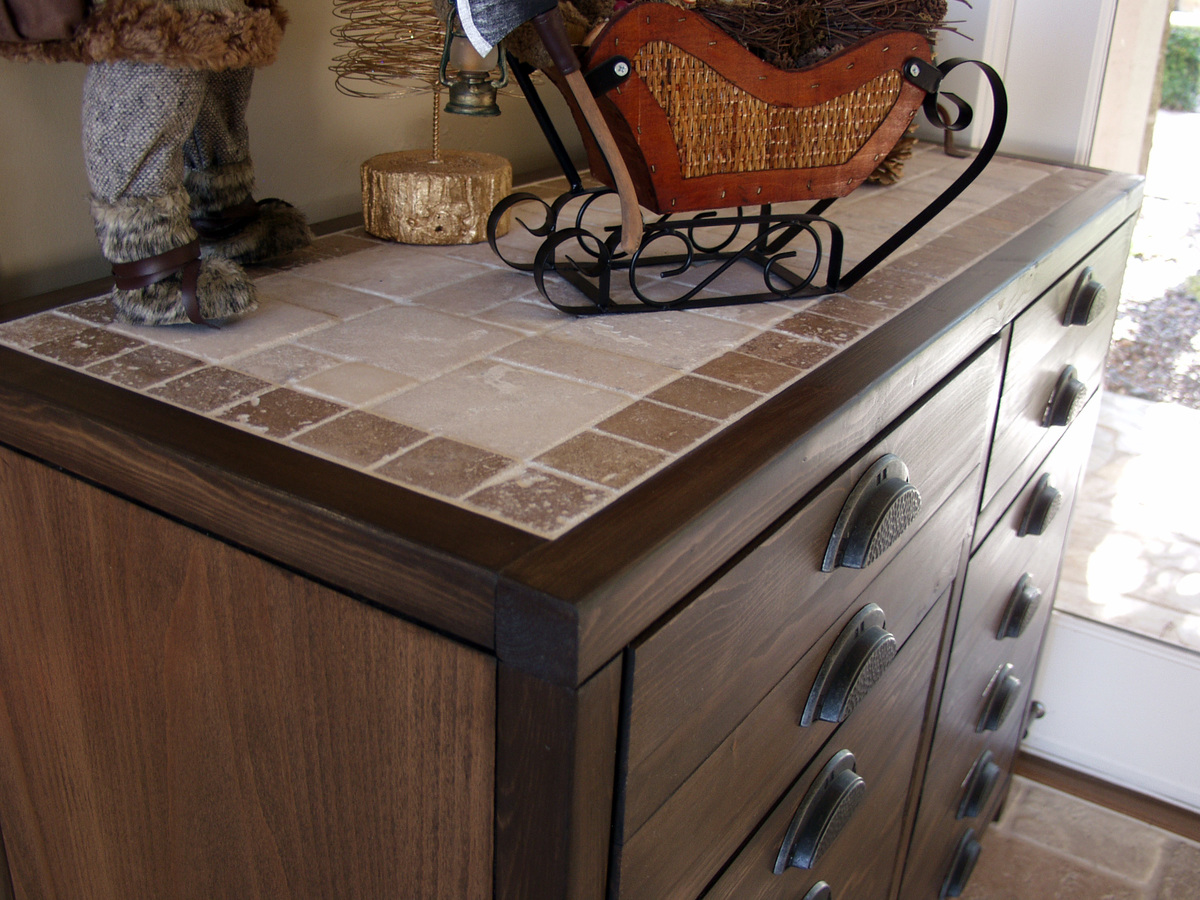
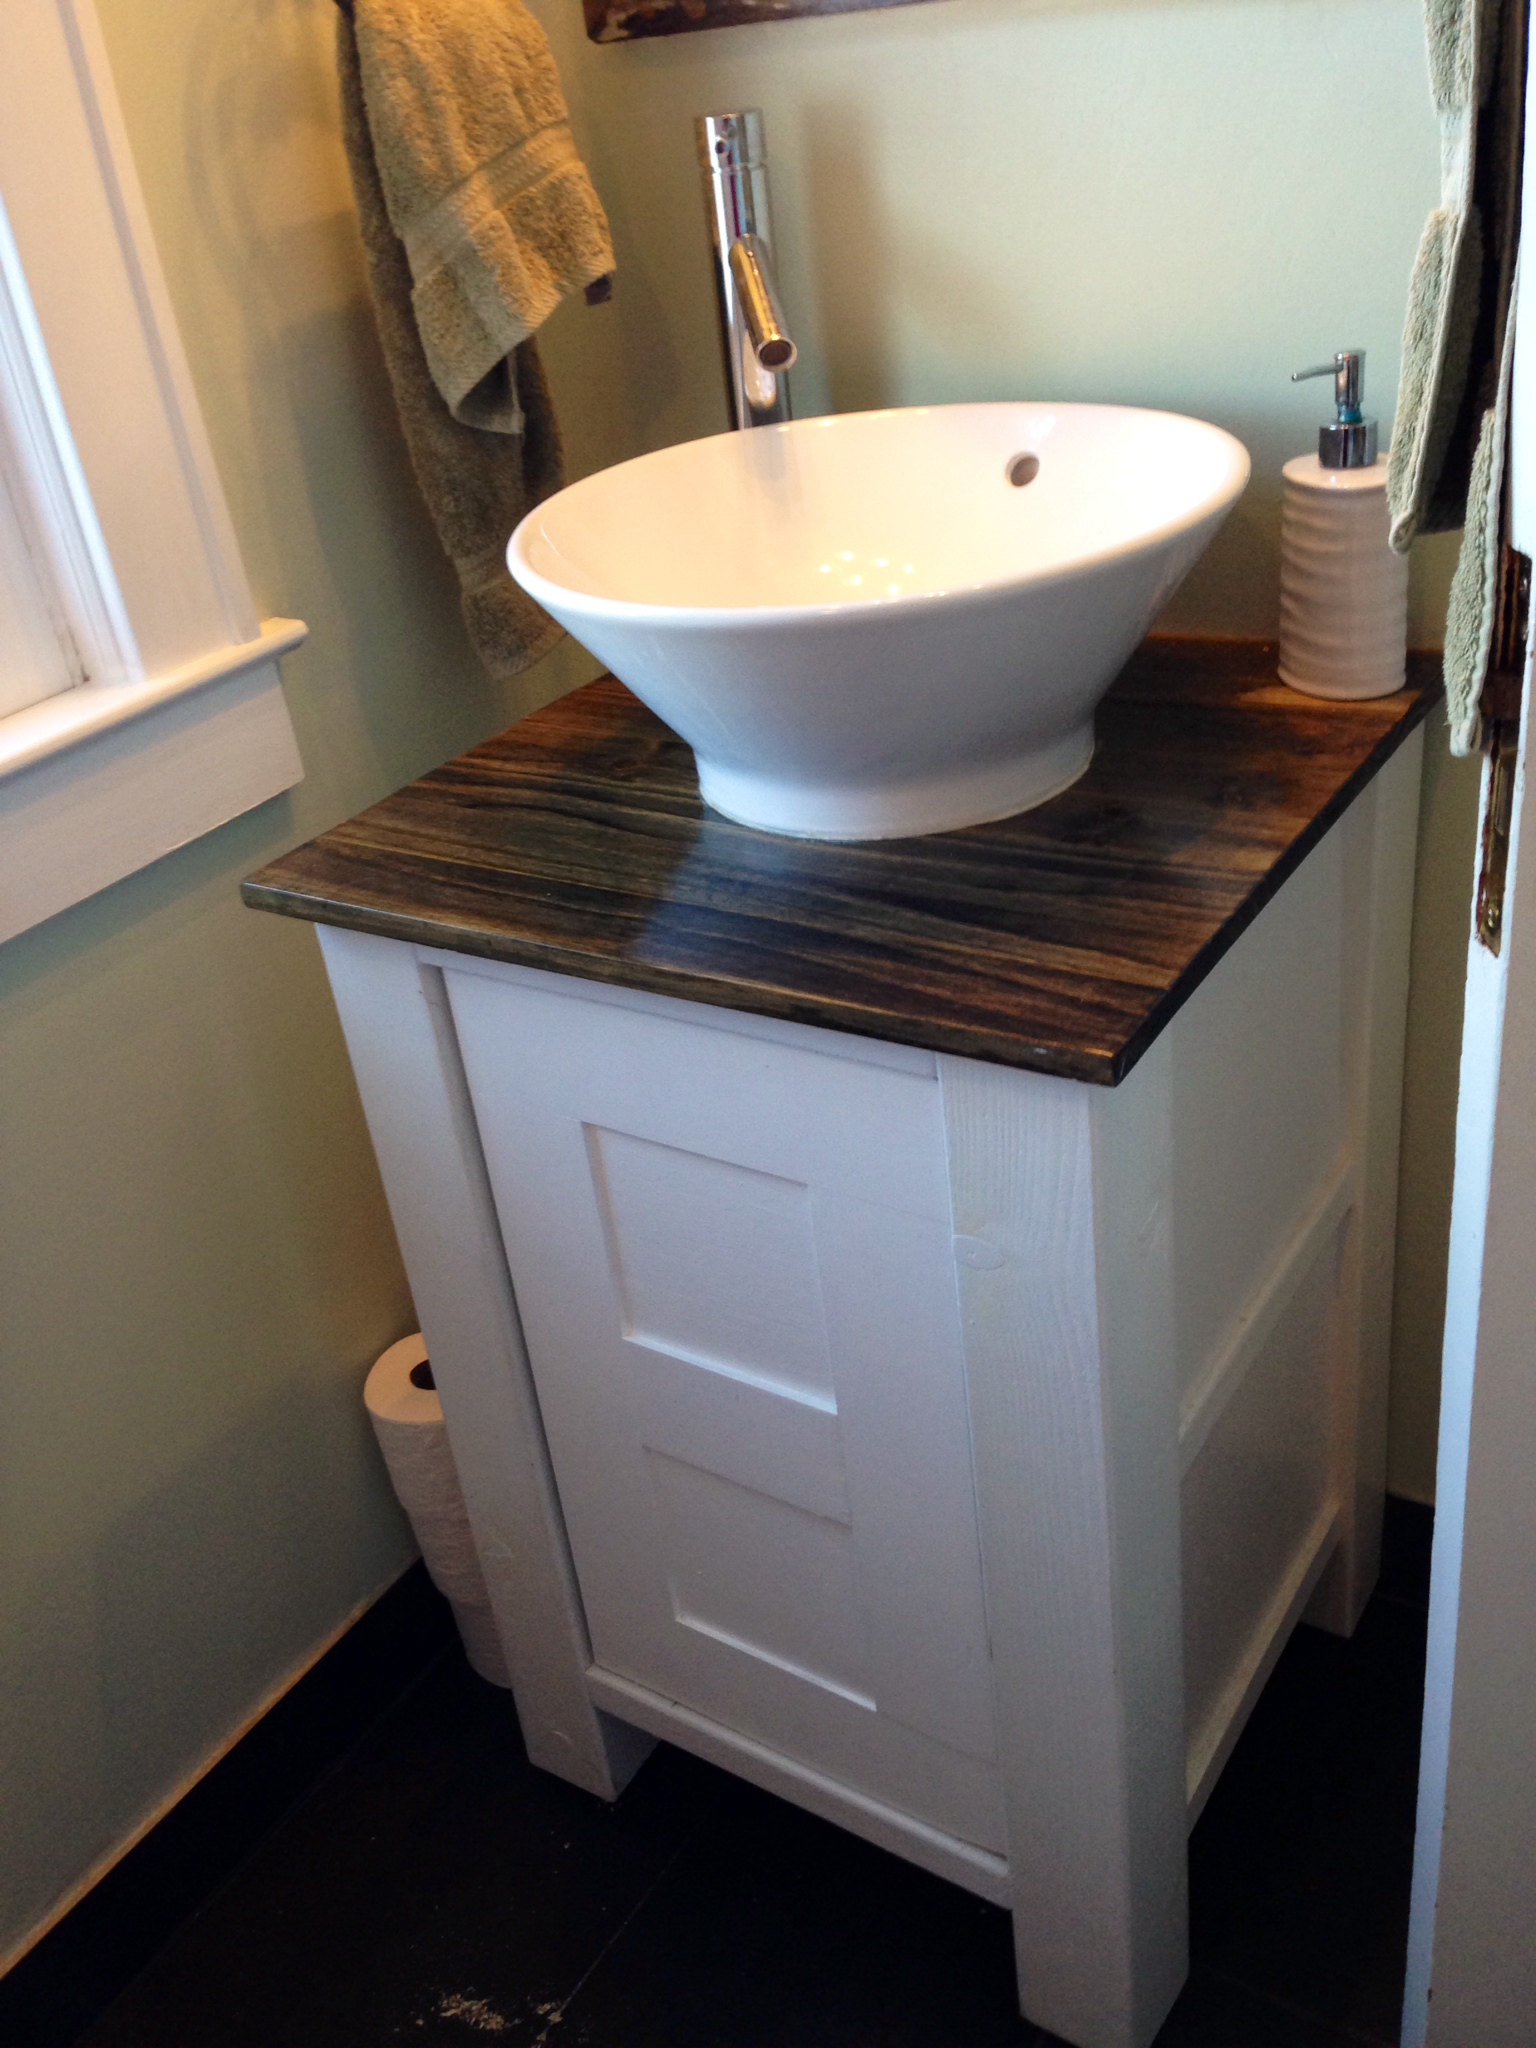
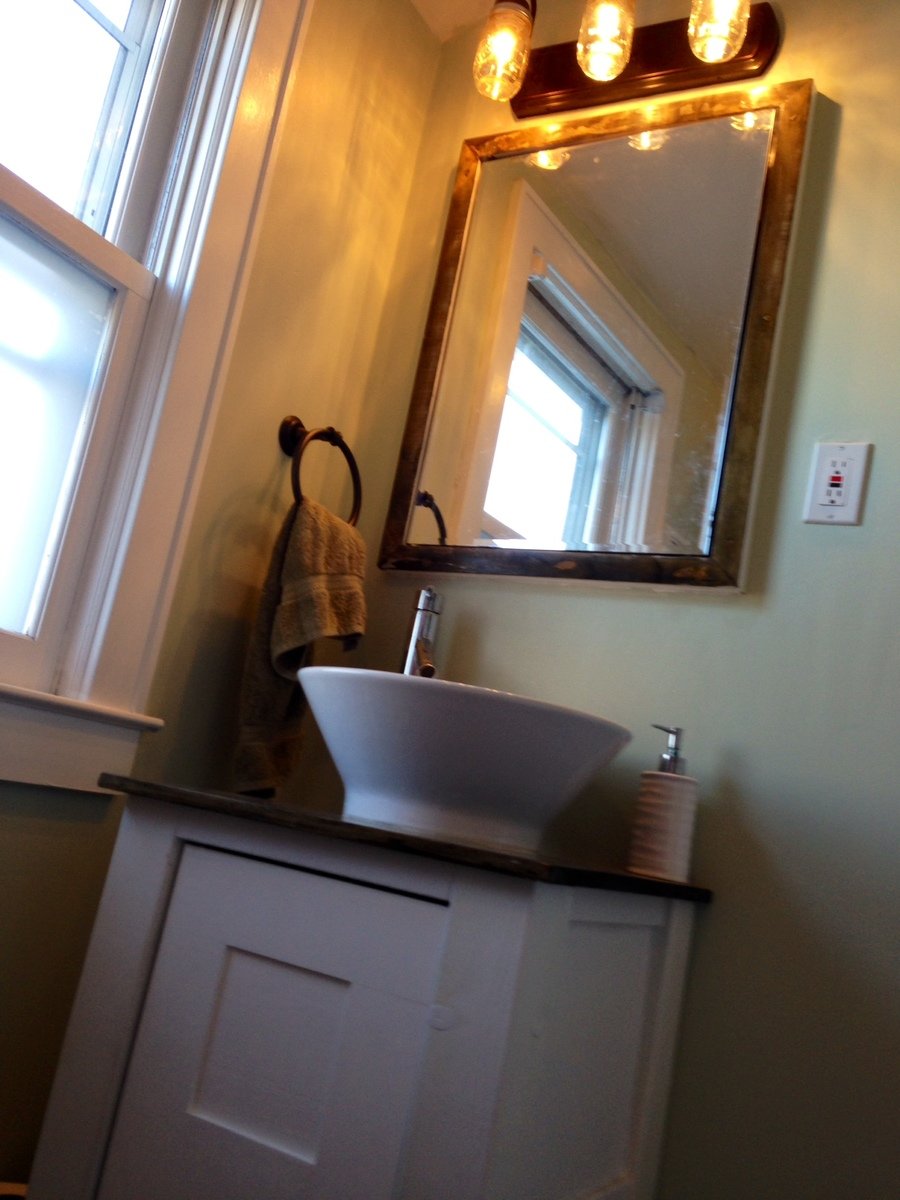
Community Brag Posts

bathroom vanity

Submitted by Chriss45 on Mon, 10/26/2015 - 20:28

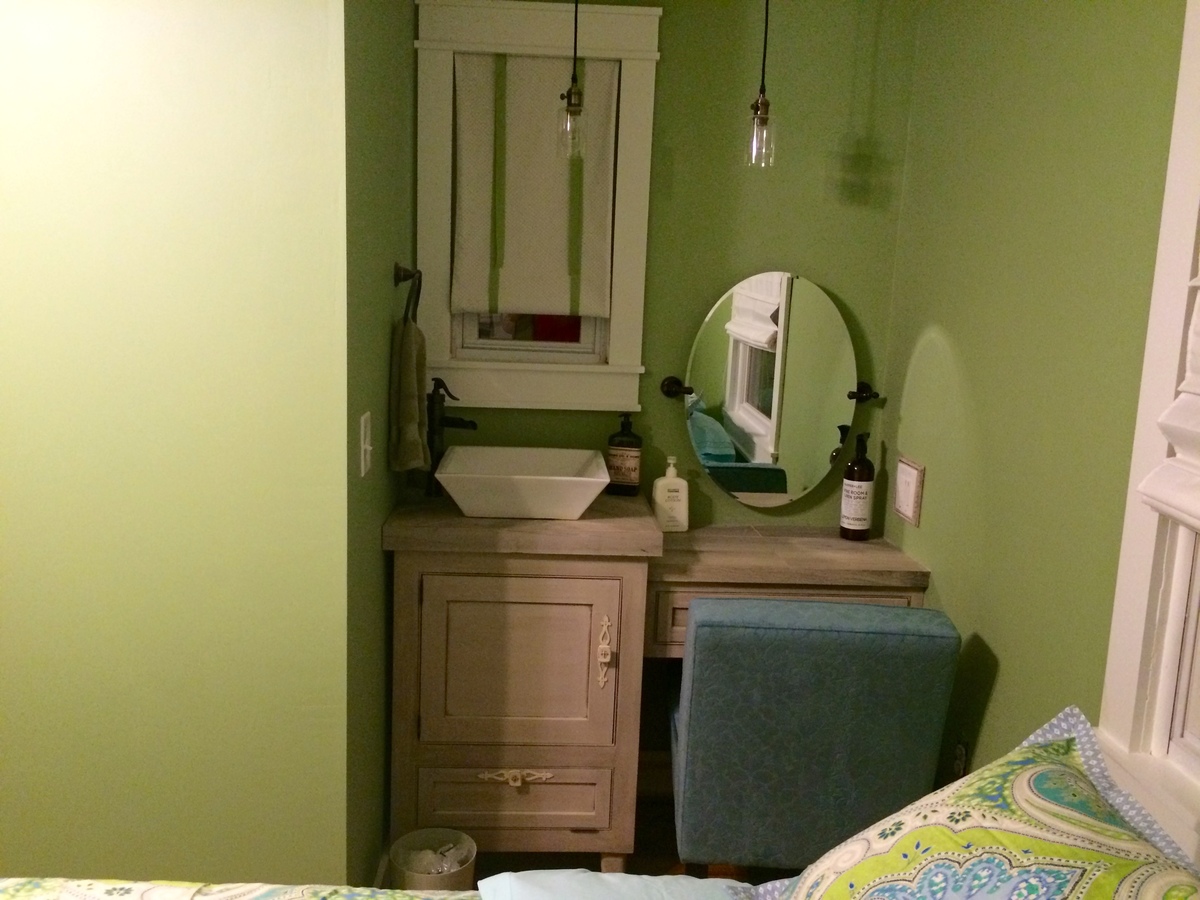
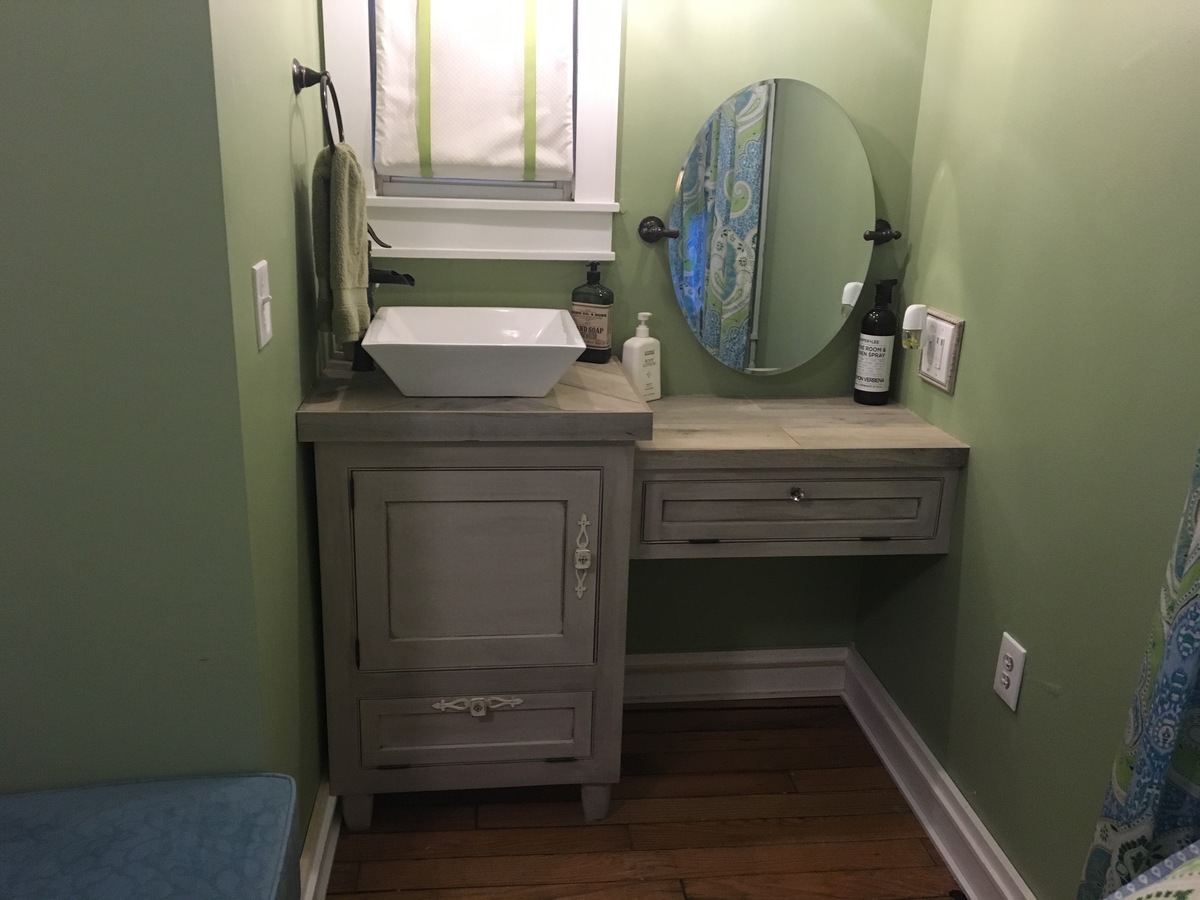
I had a half bathroom in my guest room but wanted a second full bathroom, so removed the sink out of the half and installed a shower. I built the vanity in the room and added a make-up area with seating. I used my Kreg beaded faceframe system and to add a bead around the faceframe and built inset doors and drawers. I used Behr paint and used valspar antiquing glaze for the finish. I used the leftover shower tiles to make the countertop. 

Estimated Cost
75 dollars not including sink and faucet
Estimated Time Investment
Weekend Project (10-20 Hours)
Finish Used
Behr satin paint and valspar antiquing glaze
Recommended Skill Level
Intermediate

Front Hall Armoire

Our big old house doesn't have a front hall closet, so I decided to make the Nursery Armoire for our extra coats and shoes. Since our ceilings are so tall I decided to make it the full 96" that I could get out've the sheet of plywood.
I also modified the plan to adjust the door heights so that the top would make good coat hanging and the bottom can be used for shoes and boots. I also changed the drawers to be on the outside instead of behind the upper doors.
I used 3/4" plywood for the box and pine for the doors and trim.
For the doors I pocket holed the frames and then routed an edge on the backside and stapled pine paneling to fill out the middle. This matches doors I made previously to make cupboards in our full-wall brick fireplace (and the hardware matches too).
I did the top trim as in the plan, and I decided to leave the bottom plain.
It's quite large! But in the space a smaller one would've looked silly, so I'm glad I went with the height.

I decided to paint it so that I didn't have to fuss with staining, but went with the same paint as the walls for the backs and undersides of shelves to lighten it up.

Can't wait to fill it up! ....just have to give the dark paint one more go-over....

Built from Plan(s)
Estimated Cost
$300
Estimated Time Investment
Week Long Project (20 Hours or More)
Finish Used
Paint! "Wine and Dine" Exterior semi-gloss from Canadian Tire! And an interior yellow paint leftover from the walls in the foyer.
Recommended Skill Level
Intermediate

Comments

COVID Projects

Submitted by Anonymous (not verified) on Fri, 03/31/2023 - 07:31

A few alterations to plans….thanks for the inspiration!

Built from Plan(s)

Comments

Tall Rustic X Bookshelves

I followed the Rustic X Tall Bookshelf plan to make a set of bookshelves for my husband for Christmas! It was my second ever woodworking project. The plan was really easy to follow and so fun to make! I ended up using an additional shelf piece on the very top for a more modern spin on it. I also bought a pocket hole jig to use on this project. I'm happy with how it turned out!

Built from Plan(s)
Estimated Cost
$75 per shelf
Estimated Time Investment
Weekend Project (10-20 Hours)
Finish Used
MinWax English Chesnut Wood Finish and Paste Wax
Recommended Skill Level
Intermediate

Workbench

Submitted by Ulrike on Sun, 06/21/2020 - 09:37

Built 2 of the workbenches for our garage. The plans made assembly very easy and quick. We had Home Depot cut the plywood to size.

Estimated Time Investment
Afternoon Project (3-6 Hours)

Comments

outdoor patio furniture

Well this was first project my hubby and I tackled together. He actually let me use the power tools. The plans were great! Loved having a shopping list! I made the cushion s myself. I have to say, I wish I had made the couch and chairs the size of cushions available at Lowes . AFt e r you buy foam batting fabric and chording I found set at lowes for a lot less but I am so happy how it all turned out . Thks for providing plNz!

Estimated Cost
500 with cushions
Estimated Time Investment
Day Project (6-9 Hours)
Finish Used
Non transparent stain.Olympic elite stain an sealant n one
Recommended Skill Level
Beginner

Comments

charitydtrull

Sun, 05/24/2020 - 14:45

I can't find the plans for these pieces. I found the one using 2x4, but these pieces look like they use 2x2. Can someone tell me where to get the plans?
Thank you,

Seasonal And Holiday

Printer's Console or Sneaky Litterbox Cabinet? Cat Litter Box Cabinet

Submitted by Joni on Sun, 11/25/2012 - 08:12

I had been wanting to build something to hide the litterbox for a long time. When I saw the Printer's Console plan, I knew this was the perfect plan for a cat litter box furniture. I loved that Jen Woodhouse's version was completely modified to her bar plan, so I thought I could modify for my litterbox idea. I modified the plans on size, as I was trying to use a bunch of mis-matched plywood. I also modified it to include a cat door, a cat passageway on interior panel, a vent on the back behind one of the drawers, and the stone top. I built a frame on the back to house the backing as an inset piece, as I didn't want it to be seen at all. I learned a very important lesson during this build. Not all 1x3s are created equal. Once I got my doors assembled, they were too big for the opening. I couldn't shave off the tiny amount needed, and couldn't make anything work short of starting over with 1x4s, sawing off a small amount, and cutting down the # of "drawers" (and handles). I wanted the inside to be fully finished (because cat pee on raw wood would not be good!). I had to finish certain "planes" prior to putting the thing together. I used kitchen and bath paint on the inside floor and sides for easy cleanup. The stone was carryover from construction on our house 12 years ago. The handles were an amazing deal @ $1.81/each .


Built from Plan(s)
Estimated Time Investment
Week Long Project (20 Hours or More)
Finish Used
Minwax Wood Conditioner, followed by a mix of American Walnut & Onyx Minwax water-based Stain. 3 Coats of Old Village Gel Varnish. On inside, I used a kitchen/bath paint.
Recommended Skill Level
Intermediate

Comments

blueskiesinNM

Mon, 06/17/2013 - 12:23

Love your use of the buffet. Our family has discussed making a piece of furniture like this for our smaller dog. Nice to see someone has done it! Our big dog has scheduled feedings but our little dog would prefer to be a free feeder. Poor thing chokes down his food in our pantry listening to our big dog breathing under the door waiting for him to finish. When he is done we open the door and the Big, greedy dog bolts in looking for left overs. A family member has to wait patiently for the little dog to finish so he can escape the pantry. I really don't want a doggy door in my pretty swinging bi-fold doors to my pantry which is also access to our kitchen.That would be a pain to have to keep closed all day. But this buffet idea is super cute! Thanks for the inspiration.

wayneled

Fri, 01/09/2015 - 22:01

I know this is an old post, but I'll ask anyway

I love this piece and am in the planning stages for ours. Thank you for sharing!

I am Wondering how you went about the table top. Did you install a 3/4 ply on top but not flush, allowing room for mortar and tile? If so how much room did you allow for the tile/mortar? 1/2 inch? How did you keep the surface of the tile level and uniform? Lastly, did you seal the tile with anything when you finished?

Aesthetically, the tile top really sets this piece off and I really want to make my own.

Thanks

Seasonal And Holiday

Easy DIY Workbench on Wheels

Submitted by Anonymous (not verified) on Wed, 09/09/2020 - 13:26

I needed a workbench and Ana's easy plans were perfect for what I needed. I have a small one-car garage that I do my projects out of. The garage also provides storage for bikes, kayaks, gardening tools, etc. I customized the dimensions a little, making the bench only 30" deep to better fit the space available, and to add wheels to be able to roll the bench out into the driveway if needed. The lower shelf provides some good storage for me as well.

Estimated Cost
$90
Estimated Time Investment
Afternoon Project (3-6 Hours)
Finish Used
none
Recommended Skill Level
Beginner

Corner hutch

Submitted by Soni_max on Sat, 09/26/2020 - 03:06

This was challenging, but that made finishing it, so much greater. Ana's plans are so easy to follow.

Built from Plan(s)

Comments

Pedestals Modified

Submitted by cloerzel on Thu, 11/20/2014 - 05:34

Basically eliminated the bottom shelf to gain more space and built this as a "built-in". Fortunatley for us this room is the right size and we just screwed it into the wall studs.

Estimated Cost
Materials 37.00*
Paint 15.00
*I discovered that if you pick-out a piece of cabinet-grade plywood from Home Depot, and it has some flaws in it (peeling veneer), they will spray paint a purple stripe across it and you get it 70% off!!!
Since I was painting it anyways, that purple paint didn't matter. Thanks Home Depot!!!
Estimated Time Investment
Day Project (6-9 Hours)
Finish Used
Paint
Recommended Skill Level
Beginner

Comments

CSaintD

Thu, 11/20/2014 - 09:18

Thanks for the money saving tip on the plywood!

I have upper cabinets in my laundry room too and was wondering how to get a storage pedestal in there.  This is a great use of space.  Looks great too. Thanks!

Dimarc67

Tue, 03/24/2015 - 10:34

Did you also fasten ledger boards to the side walls for side support? Or is the rear ledger board and front legs enough to support the front corners?

SMALL GABLE ROOF GREENHOUSE

Submitted by Ledopmi on Wed, 12/23/2020 - 06:07

I was planning on building a greenhouse some time next year but I just happen to see this by chance and fell in love with it. I've always built from my own designs but when I saw this I decided to purchase the plans. I couldn't be more happy with it. Right now its doubling as a feed room. I wanted a solid foundation so I build a floating deck to mount the walls on. The deck added quite a bit to the total price.

Built from Plan(s)
Estimated Cost
$1384.94
Estimated Time Investment
Week Long Project (20 Hours or More)
Finish Used
Paint
Recommended Skill Level
Advanced

Comments

Lawnmower Shed

Submitted by PipesTX on Wed, 01/07/2015 - 06:19

Modified the design to allow me to roll lawnmower directly in the end. Fun project.

Built from Plan(s)
Recommended Skill Level
Intermediate

Comments

An updated bathroom vanity

Submitted by mhayden on Mon, 04/08/2013 - 14:06

This was a part of my recent bathroom remodel (new floor tile, shower tile, toilet, and vanity). The plans came out of looking at my favorite home sites, which for this were Ana White and Remodelaholic, and realizing that the vanities in my price were were cheap and not that cheap.

The vanity build itself didn't take that long but had to be done is small segments due to lack of one giant clump of time. Total wood cost was around $60, plus $5 for the gloss polyurethane, $60 for the sink (clearance) and $100 for the faucet. More importantly, the vanity fits the space that I had in the efficient bathroom.

Estimated Cost
$225 (vanity, sink bowl, and faucet)
Estimated Time Investment
Weekend Project (10-20 Hours)
Finish Used
White Painted Sides, Ebony stain top
Recommended Skill Level
Beginner

Comments

Master Walk In Closet with Bookshelf Door

Submitted by valpal5 on Thu, 04/16/2015 - 20:26

We used an unfinished attic space above our garage that was connected to our bedroom to make a walk-in closet with great shelving.  This project took a lot of time but we are so happy with the results!  There is a side for my husband and a side for me.  Although it is hard to see we also incorporated a small door/bookshelf into the room to allow us access to attic storage space.

closet shelving
 

Estimated Cost
$500
Estimated Time Investment
Week Long Project (20 Hours or More)
Finish Used
White painted finish.
Recommended Skill Level
Intermediate

Comments

Chair Build with Loveseat Modification

Submitted by Joshh81 on Sat, 09/02/2017 - 12:26

Built the 2 chairs according to the plans, and then modified it for a bench that's 48" (our cushions are 23.5 x 23.5). Worked really well!

Estimated Time Investment
Weekend Project (10-20 Hours)
Recommended Skill Level
Beginner

Comments

Seasonal And Holiday

Bookshelf Hidden Doors Over Closet

Submitted by Anonymous (not verified) on Mon, 10/23/2017 - 10:13

Hidden door bookshelves hide a furnace closet.  Built by Kraig Faulkner

Built from Plan(s)
Recommended Skill Level
Advanced

Comments

charkue

Thu, 09/17/2020 - 08:01

I'm currently working on a basement renovation project. I'm probably going to incorporate a feature like this for my mechanicals, too.

One important safety note for anyone who wants to do this: It's recommended that your furnace be a minimum of 30" away from any combustible materials. That includes walls and partitions. The image of this project displayed is right next to the furnace, which is not a good idea.