Community Brag Posts

Workbench

Submitted by jaimej on Sun, 04/28/2013 - 18:38

This is our 2nd project - we liked building the bookshelf so much, we decided we're gonna keep going and need a good workbench. Got these plans from the Family Handyman Website (http://www.familyhandyman.com/DIY-Projects/Woodworking/Workbenches/how-…). They claim the cost to be $50, but it was closer to $80 for us - still a GREAT project and easy to put together with the nail gun.

Built from Plan(s)
Estimated Time Investment
Afternoon Project (3-6 Hours)
Finish Used
none
Recommended Skill Level
Beginner

Comments

Pool Noodle Holder from DIY Planter Box

Submitted by Anonymous (not verified) on Sat, 06/04/2022 - 06:58

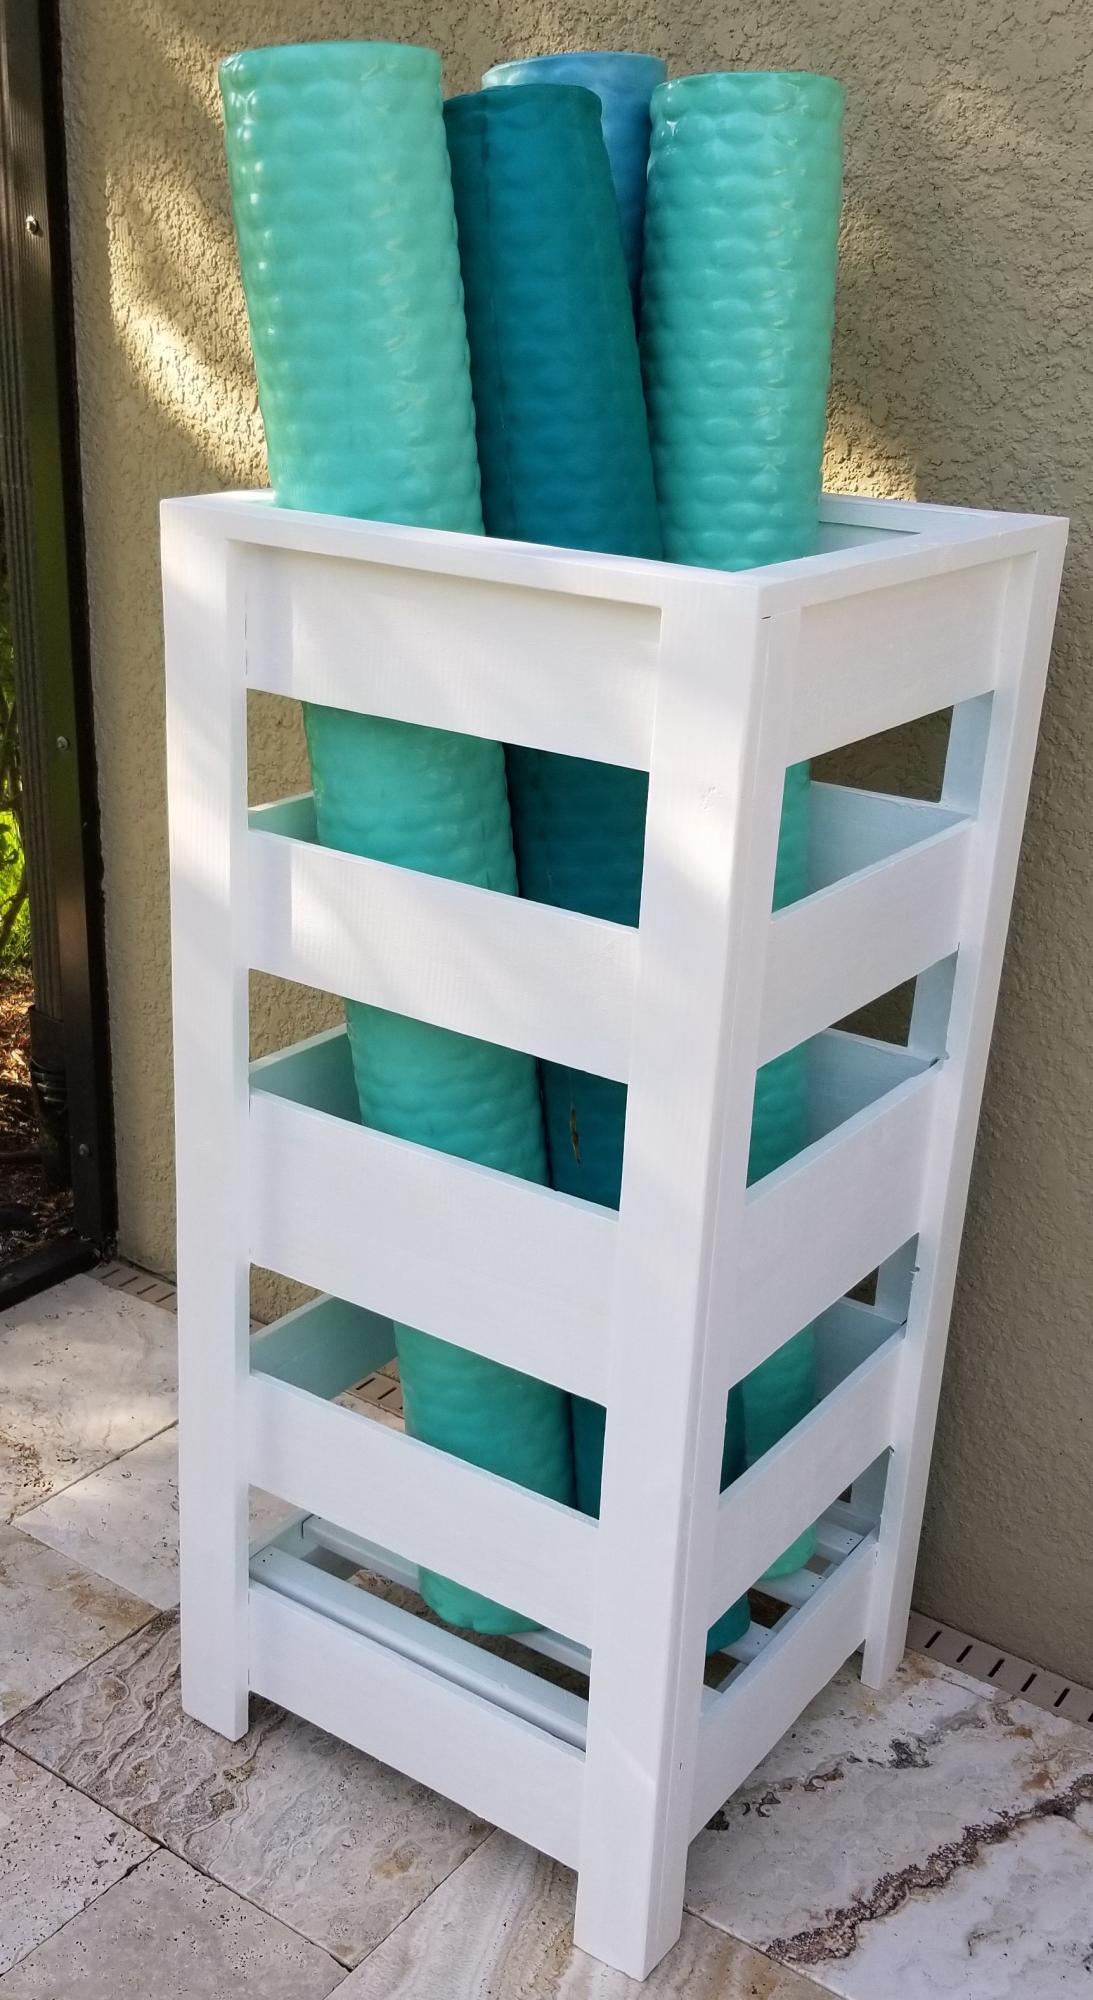
I modified the plans for the planter box to make a holder for Pool Noodles. I made it 40" tall and used 4-4" fence pickets and 1-5.5" fence pickets. I used a 4" spacer and the openings worked out perfect. I stained inside and out since it would show with 2 coats of the solid stain. It is perfect! Thank you so much for the inspiration and plans!

Comments

Lift Top Coffee Table

Submitted by JJones0925 on Fri, 03/16/2018 - 20:48

Instead of attaching the top to the coffee table base as done in the plans, the top is attached using a set of coffee table lift top hinges. 

Built from Plan(s)
Estimated Time Investment
Weekend Project (10-20 Hours)
Recommended Skill Level
Beginner

Comments

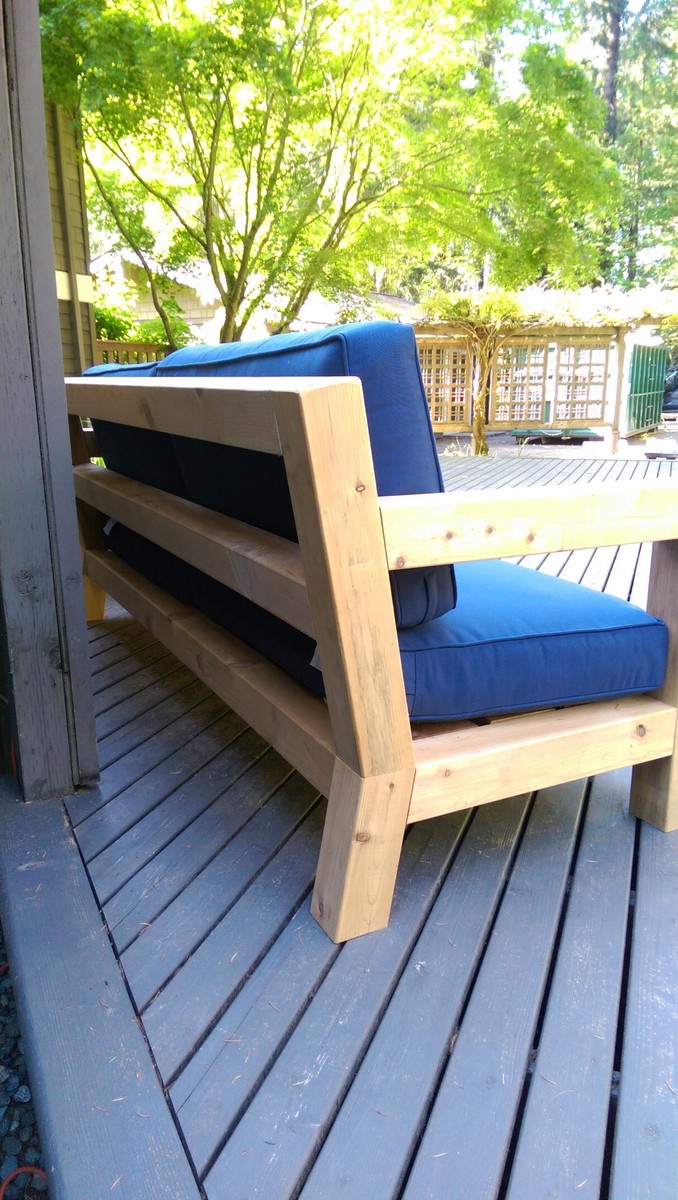
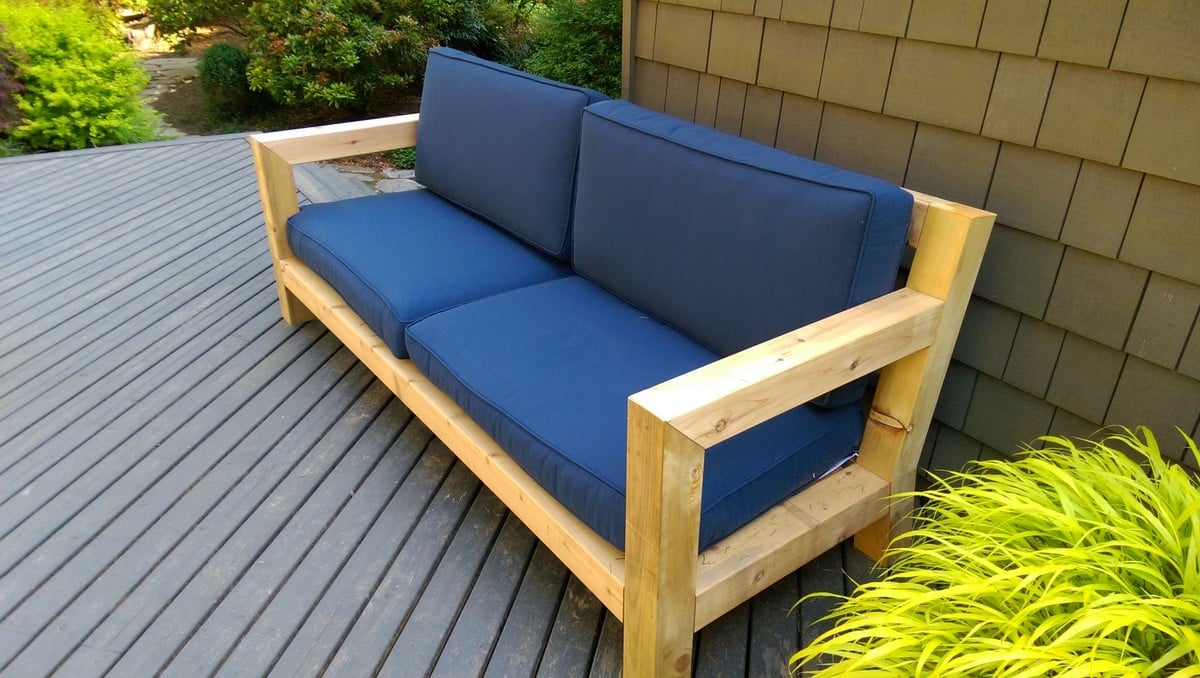
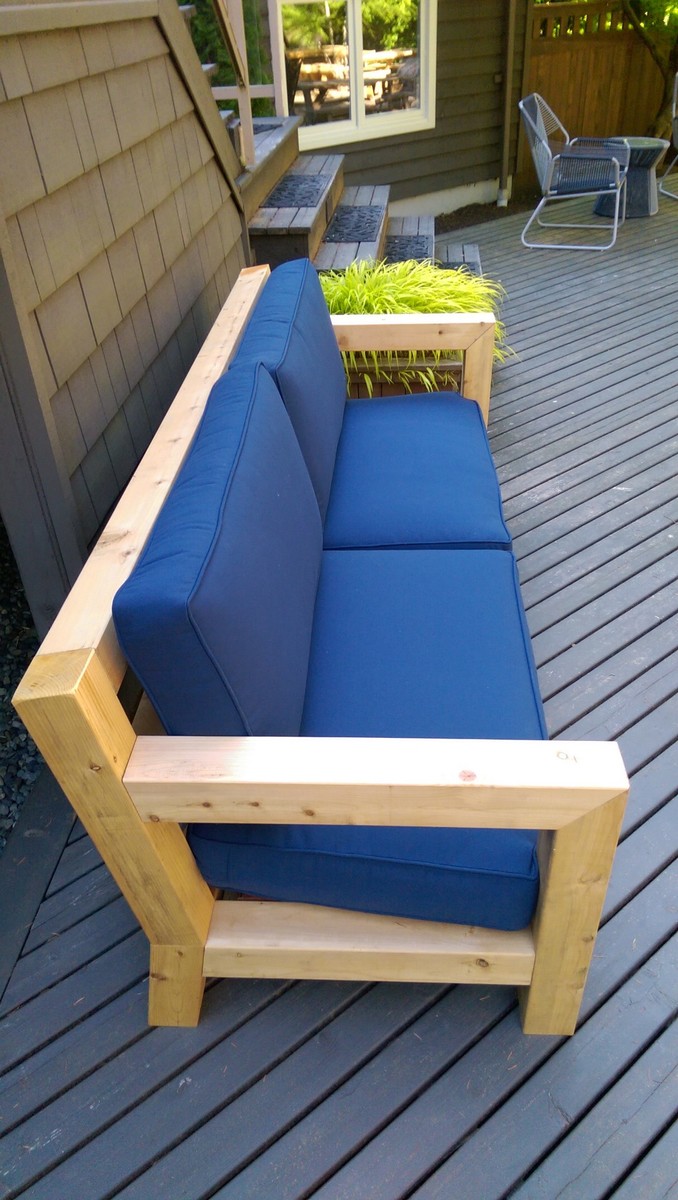
Modern Rustic Outdoor Sofa Inspired by RH Merida

Submitted by susanshamp on Sun, 04/01/2018 - 14:19

I was in love with the RH Merida set because of its clean lines and modern style. Also, the plan seemed simple enough that I could re-create it without a pattern. The only thing that I did not like about it is the lack of arms. I really like to have a place to put my arm or my beverage :) - so I added arms to the design.

Estimated Cost
$150
Estimated Time Investment
Day Project (6-9 Hours)
Finish Used
Natural
Recommended Skill Level
Intermediate

Comments

bogle

Wed, 05/20/2020 - 10:45

This is Awesome. I'm halfway in the middle as i thought I could complete without plans. Do you have any plans could share. Please....

IKEA Hack 6" Tray Cabinet

Submitted by Matty3481 on Thu, 01/07/2016 - 16:30

I'm happy to share with everyone my IKEA hack 6" tray cabinet.

I found a 24" cabinet box in IKEA's As-Is section and took it home for half price ($23)!  I would have preferred plywood, but my table saw is a little small and cutting large sheets of plywood is a little scary.  When I deconstructed the cabinet, it sustained some damage (as its particleboard), so if you try this at home, be careful!  I ended up changing the depth to 22" in order to cut off the damaged piece, but that shouldnt be noticeable with average trays and cutting boards.  

I used Ana's 6" tray cabinet plan and modified the dimensions a little for my planned space.  It still needs the back, face frame and door (which will be a replacement drawer front from the cabinet manufacturer).  I plan on building the face frame at the time the cabinets are installed, since this will go in between the 36" corner easy-reach and the 36" sink base.  Once its done, I'll post updated pics!

Estimated Cost
$30 (cabinet and an aluminum straight edge tool to help me cut straight lines with my Dremel).
Estimated Time Investment
Afternoon Project (3-6 Hours)
Finish Used
Face frame will be painted to match factory cabinets
Recommended Skill Level
Intermediate

Treehouse/Playhouse

Submitted by Bigbill99 on Sun, 01/10/2016 - 00:07

Thank you! You've helped me look like a true carpenter who knows what he's doing! My whole family is impressed with my woodwork lately, and now I'm addicted. I've done your seesaw, bar table and stools plus the treehouse in 2 weeks. Thank you for sharing your plans!

Estimated Cost
$500.00
Estimated Time Investment
Week Long Project (20 Hours or More)
Finish Used
Spar urethane
Recommended Skill Level
Beginner

DIY Greenhouse Project -Added elevated raised beds & temp/humidity control

Submitted by Anonymous (not verified) on Sun, 07/05/2020 - 09:09

We loved this greenhouse plan from AnaWhite and wanted to be able to grow in 3 seasons so we modified the design to include humidity & temperature control & 18" deep elevated cedar beds inside with 4x4 posts for support and trellis option. We added electricity in order to have a lighted workspace and the ability to put in a circulating fan to control mold and fungus. We added 2 work tables (2x2') on the inside of the door left and right side door in order to do seed trays & store supplies. This was a wonderful project for my husband and my plants inside are doing incredibly well compared to my outside garden beds here in zone 5. Products used:

Foundation
We had a landscape company come and scape/dig a platform and then fill/compact with crushed rock
My husband then used rebar driven into a 4x4 frame in order to secure the frame to the ground and create a base upon which to build the greenhouse

Active ventilation
AC Infinity Cloudline T8 Inline duct fan
Air king range hood wall cap 8" on the bottom outside of the greenhouse wall for air intake + flex 8" duct to the fan itself
Shelter logic autovent automatic shelter vent kits (1 on each side of the front wall) in order to allow air intake from the bottom back of the greenhouse under the elevated beds to flow to the front of the greenhouse and out
Circulating fan- Hurricane wall mount fan 16" - this fan has 3 speeds with tilt function and small mounting bracket

Soil - sourced 3 yards of 50/50 loam/compost from local landscaping supply
60% loam
30% organic compost
10% organic topsoil + perlite

Soil beds
-cedar frame 2 feet wide along sides, 3 feet wide on the back wall
-galvanized metal roofing with holes drilled into it for drainage
-landscape cloth lined

Built from Plan(s)
Estimated Cost
$2000
Estimated Time Investment
Week Long Project (20 Hours or More)
Finish Used
None
Recommended Skill Level
Intermediate

Comments

bushy99

Wed, 09/09/2020 - 13:09

Thanks for that update! I was wondering how to vent this project, as Green houses need the ventilation. Good to know dollar amount also. Great photos.

bushy99

Wed, 09/09/2020 - 13:09

Thanks for that update! I was wondering how to vent this project, as Green houses need the ventilation. Good to know dollar amount also. Great photos.

bushy99

Wed, 09/09/2020 - 13:09

Thanks for that update! I was wondering how to vent this project, as Green houses need the ventilation. Good to know dollar amount also. Great photos.

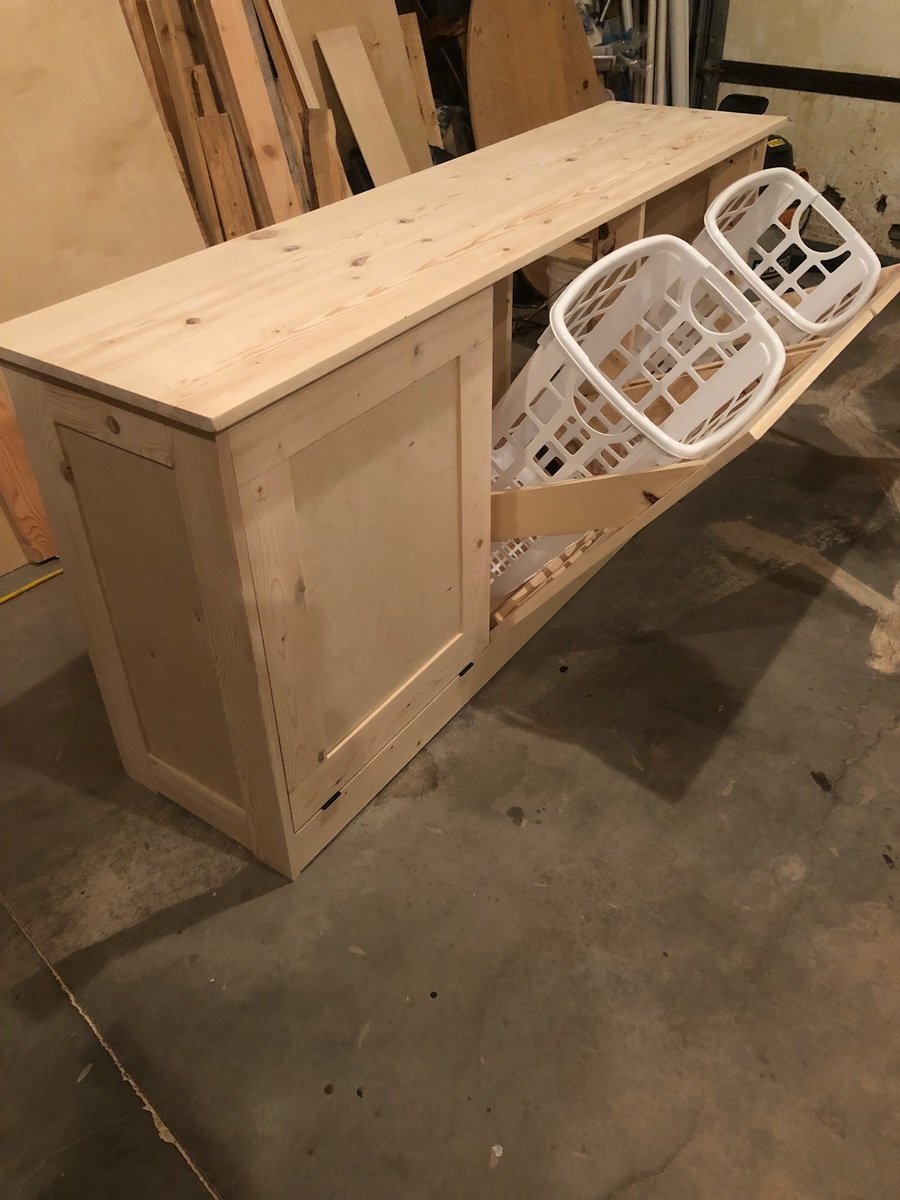
Laundry bins

Submitted by wy2ak on Mon, 05/07/2018 - 19:57

This was a build from a picture and made to fit into a space we have in the laundry room. Used the Kreg jig for much of it. 

Estimated Time Investment
Week Long Project (20 Hours or More)
Finish Used
Will be painted and distressed
Recommended Skill Level
Intermediate

Comments

First Project

Submitted by dragondad on Thu, 08/06/2020 - 11:34

Well, I started with one chair and finished with a full set. Not bad for a first timer. Definitely room to improve. Little tip if you're going to make this amazing set... raise the backs as they are too low with thicker cushions. I built a casing to go on top after the fact. Pretty happy with how it all turned out. Thanks Ana for the plans... now onto the next project!
Comments

Just My Size Closet

Just My Size Closet!

Built this from Ana's plans with a few modifications.

Started with a big empty box after ripping the old stuff out and finished with this look.
Adjustable shelves and all !

Built from Plan(s)
Estimated Time Investment
Weekend Project (10-20 Hours)
Finish Used
Whatever white paint my wife bought !!
Recommended Skill Level
Beginner

Lean-To Shed

Submitted by Anonymous (not verified) on Fri, 03/24/2023 - 13:17

I’m a first year teacher of construction class at Waterloo High School in Illinois. We recently used your Small Cedar shed instructions with some modifications for a class project. It’s a bear getting cedar right now, so we used T1-11 for the outside and 2x4 for the frame.

Built from Plan(s)

Comments

Farmhouse Storage bed with platform modification

Submitted by Anonymous (not verified) on Mon, 10/04/2021 - 13:06

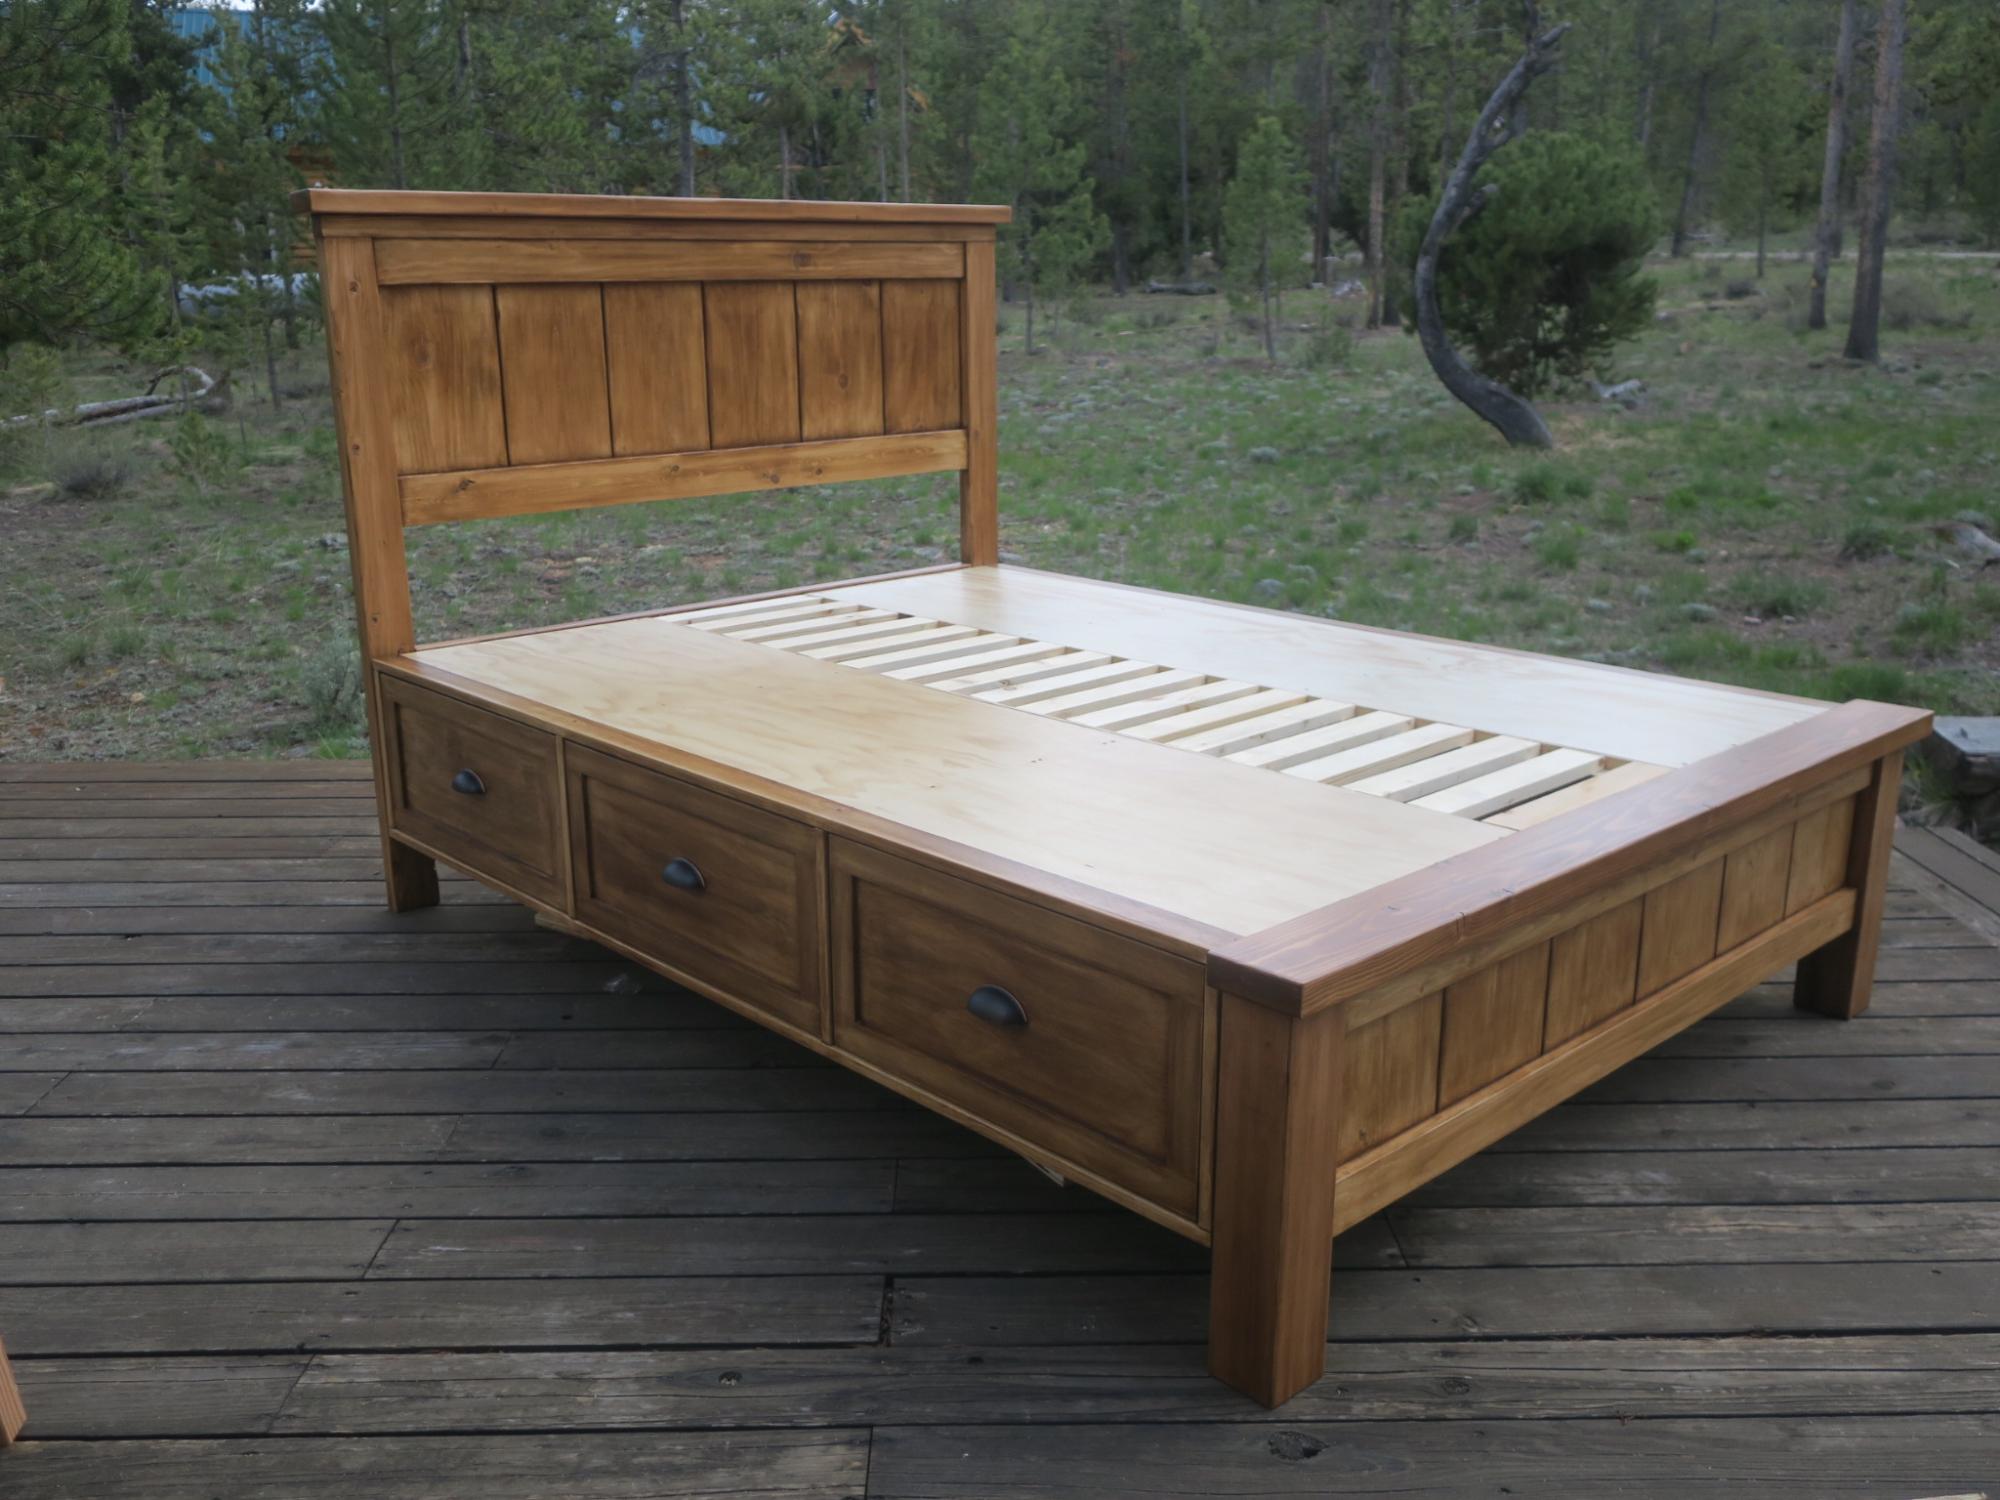
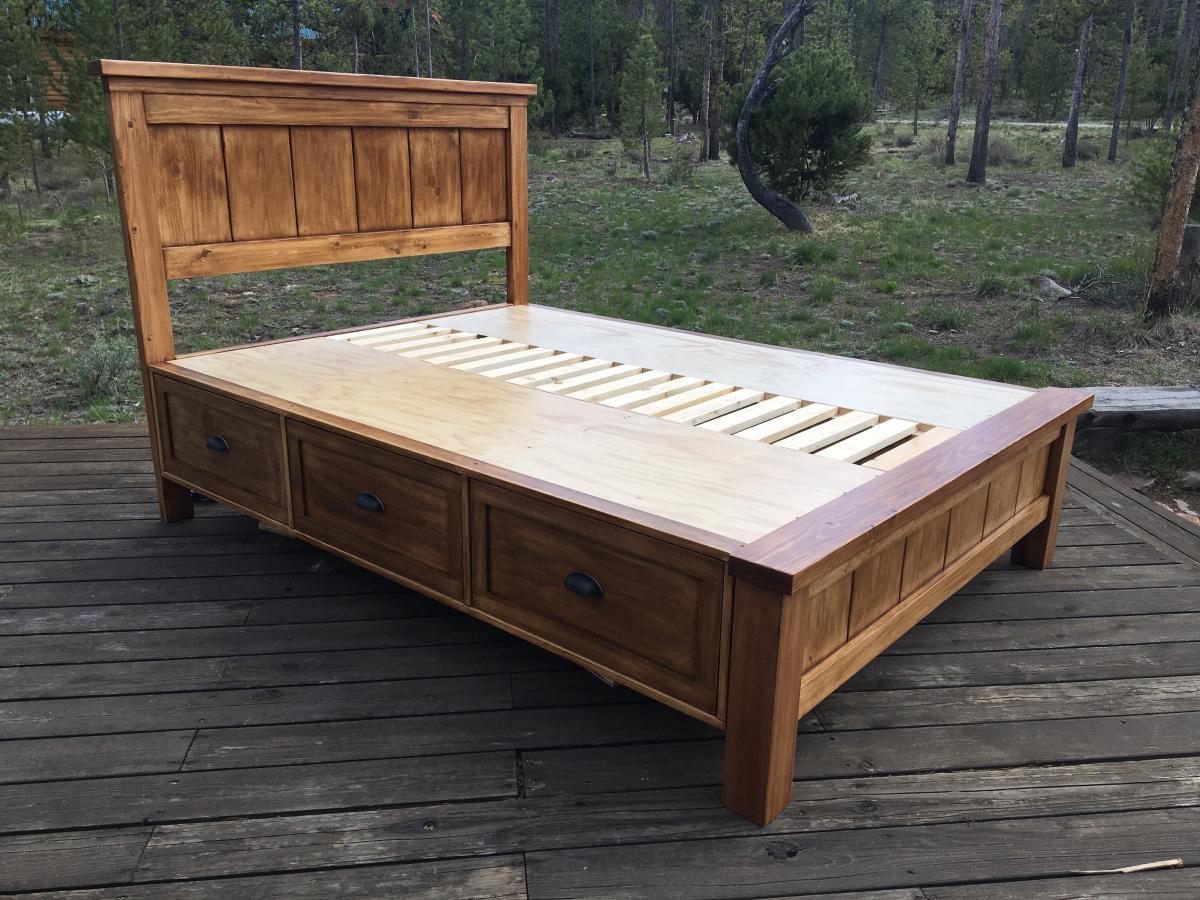
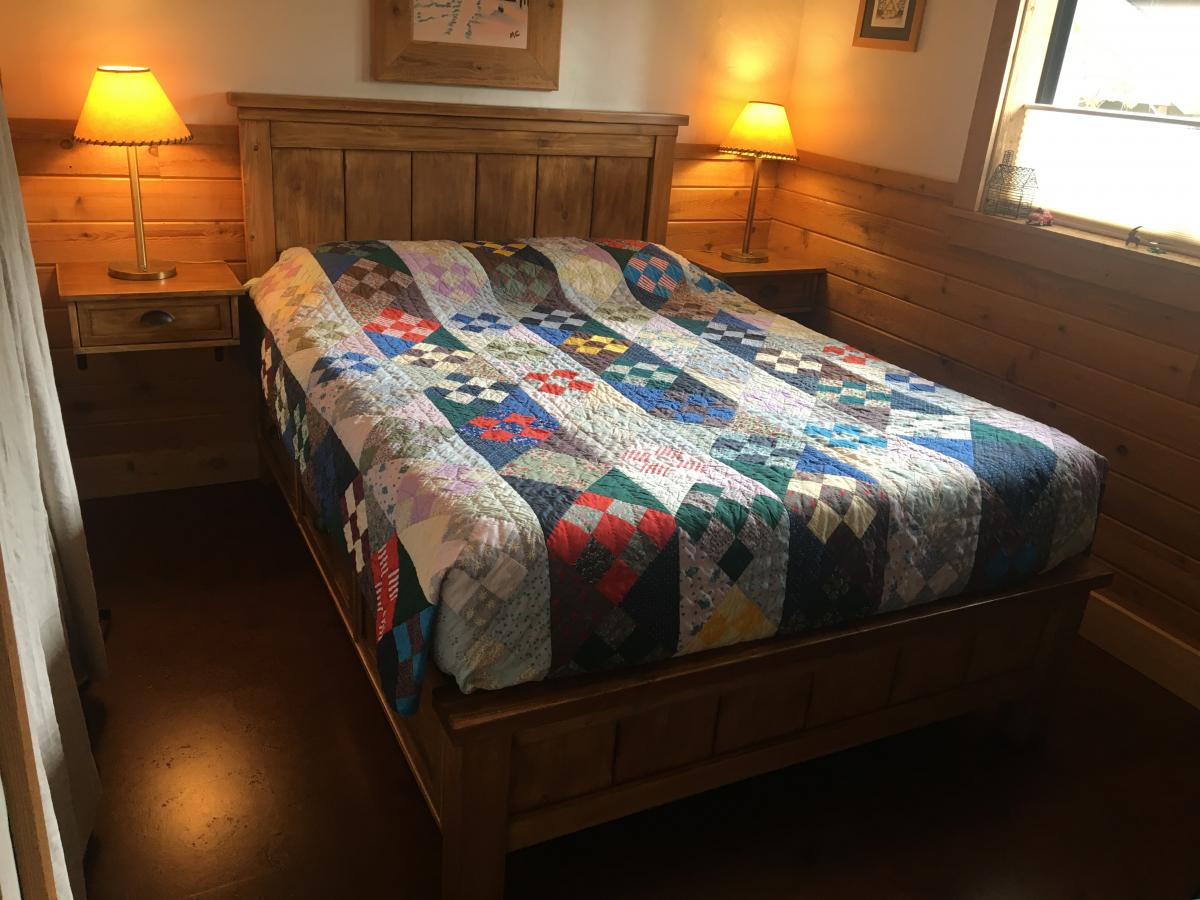
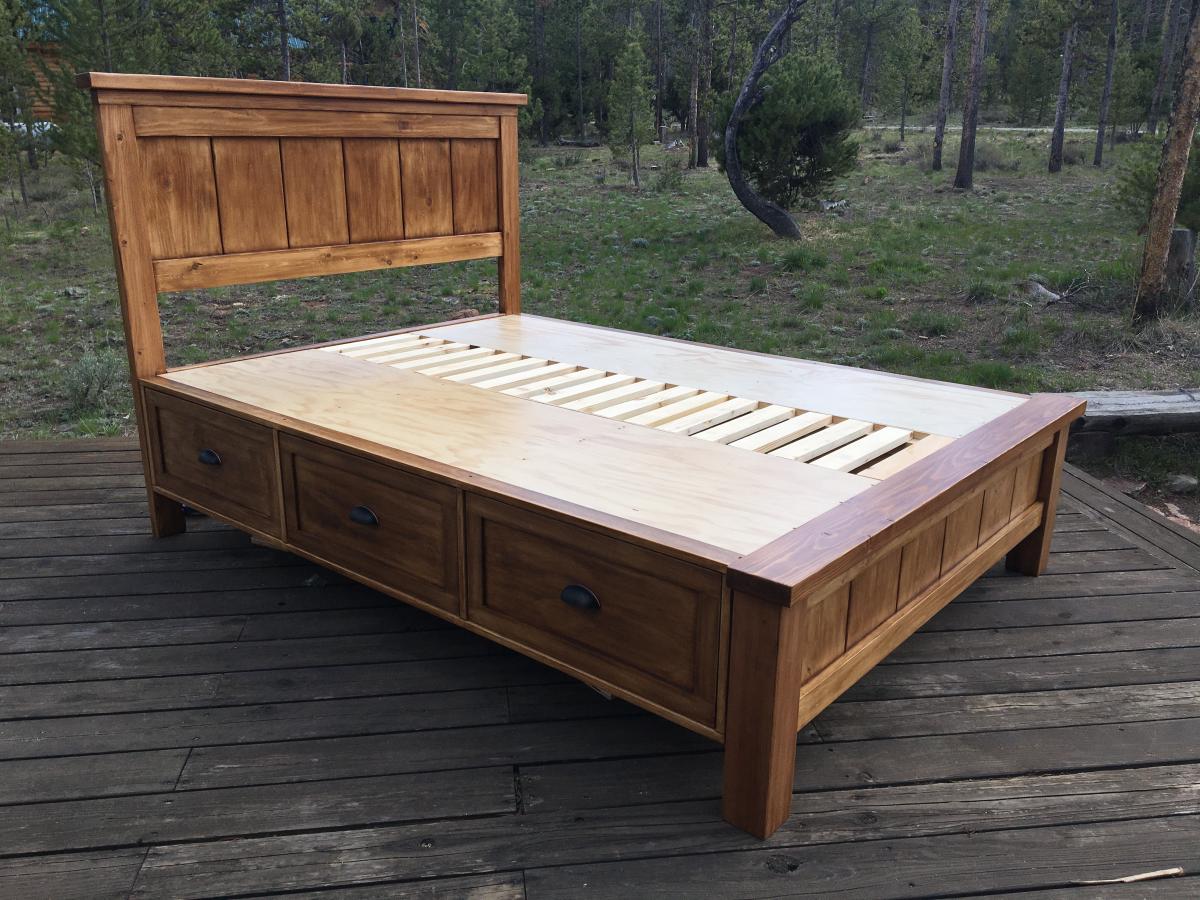
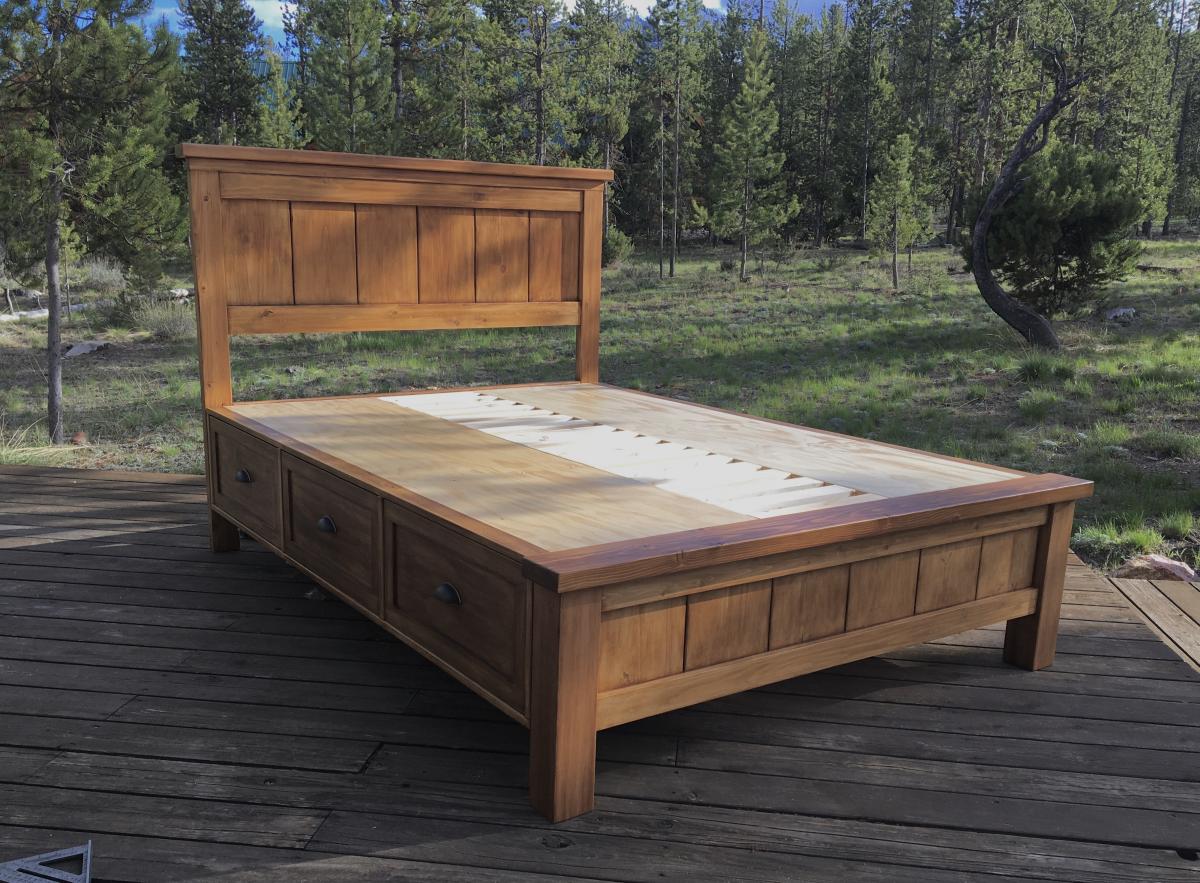
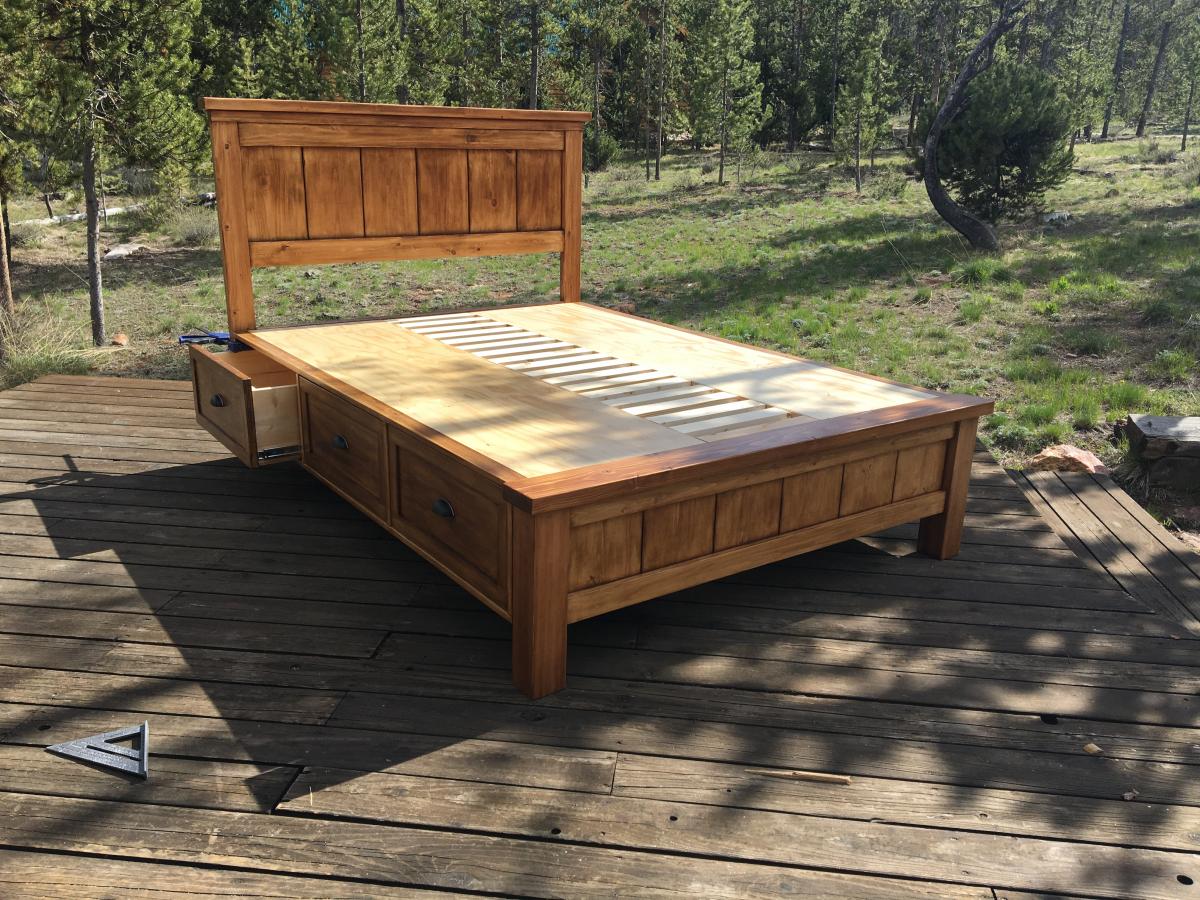
Hi, I’m Joe and love working on my cabin in Stanley Idaho. I needed a queen size bed on the ground floor but the room is small so I incorporated the footboard into into the platform to gain 6 inches of space in the room. It took a couple months working off and on but all fun. I also made the drawers deeper front to back to maximize storage. I did this at the peak of lumber prices and spent like $900 on lumber. It came out great, my Airbnb guests love it!

Comments

6' Square Sandbox

I've been wanting to buy or make a sandbox for my son for a couple of years now. Since seeing this on Ana White I knew I had to make it. My son is 4 yo and I didn't think the 4' square sandbox would be big enough for him, so I made it bigger. Ours is 6' square.

Materials:
4@1x8x6'
12@1x6x6'
2x4 - used leftovers from another project
8 hinges
4 handles
decking screws

Cut lengths:
2@1x8 cut to 71.5 (long sides of the box)
2@1x8 cut to 70.5 (short sides of the box)
did not cut the 1x6 boards (top planks) - actually designed the other boards to fit their length to prevent cutting (saving time) (note that original plan uses 1x4 planks - I used 1x6s so I could use the same number of planks but cover a larger area)
4@2x4 cut to 11.5 (arm rests)
4@2x4 cut to 18.5 (back supports)

followed instructions for assembly otherwise. At my husbands suggestion we put the handles on the sides and can easily open from either side - prevents having to lean over to the middle to open (back saver)

I finished the project in 4 hours including clean up and a couple of small breaks. This is my first Ana White project. It was a lot of fun to build and I hope my son will enjoy it for years to come!

Built from Plan(s)
Estimated Cost
$190
Estimated Time Investment
Day Project (6-9 Hours)
Finish Used
Sand and stain with sealer included
Recommended Skill Level
Beginner

Comments

Mrs. Chellebelle

Sat, 09/01/2012 - 20:59

Wow, this is just what I need! I've been wanting to make a sandbox for under the playhouse but the other plan was too small. This would be great for the little guys. Thanks!

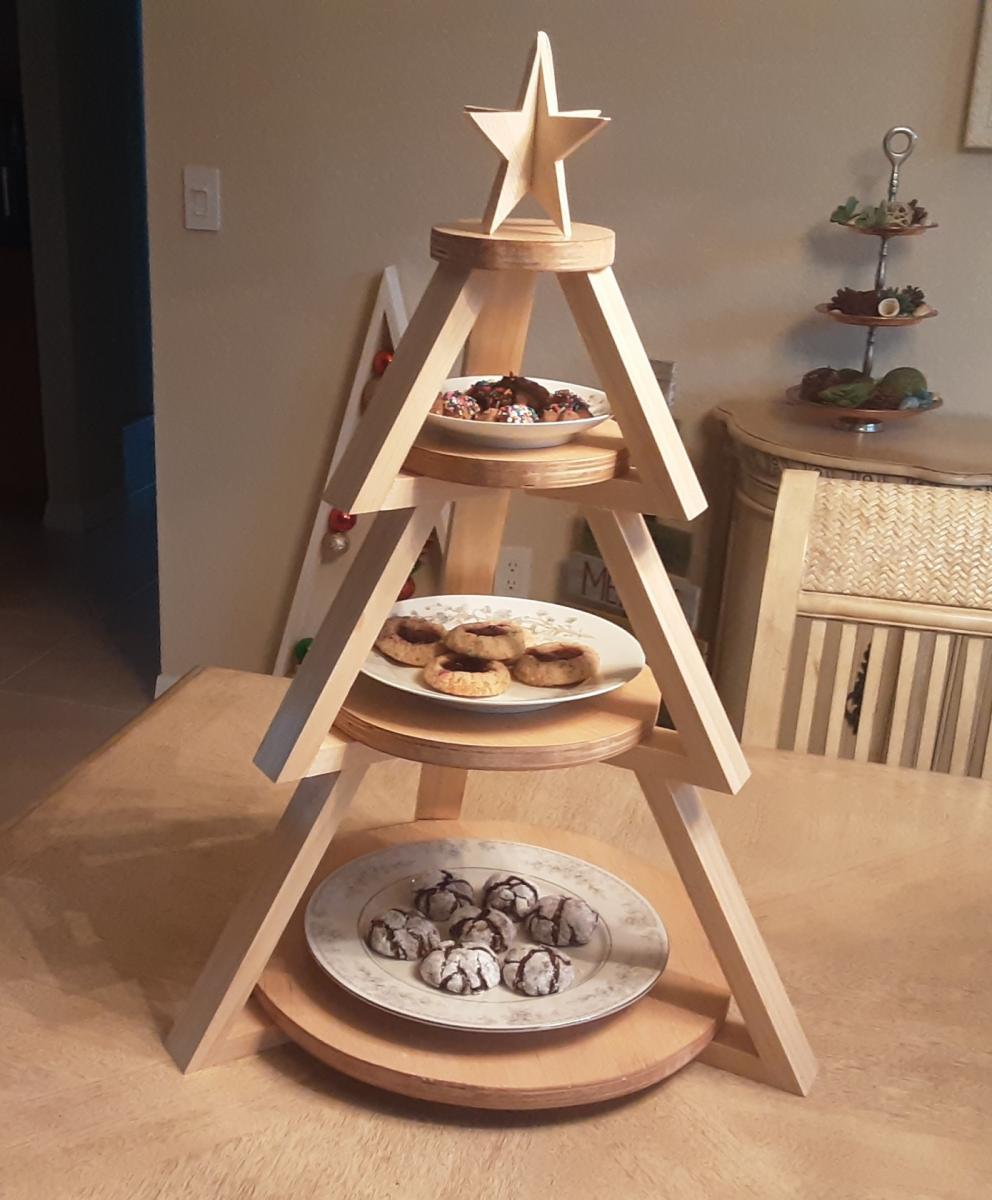
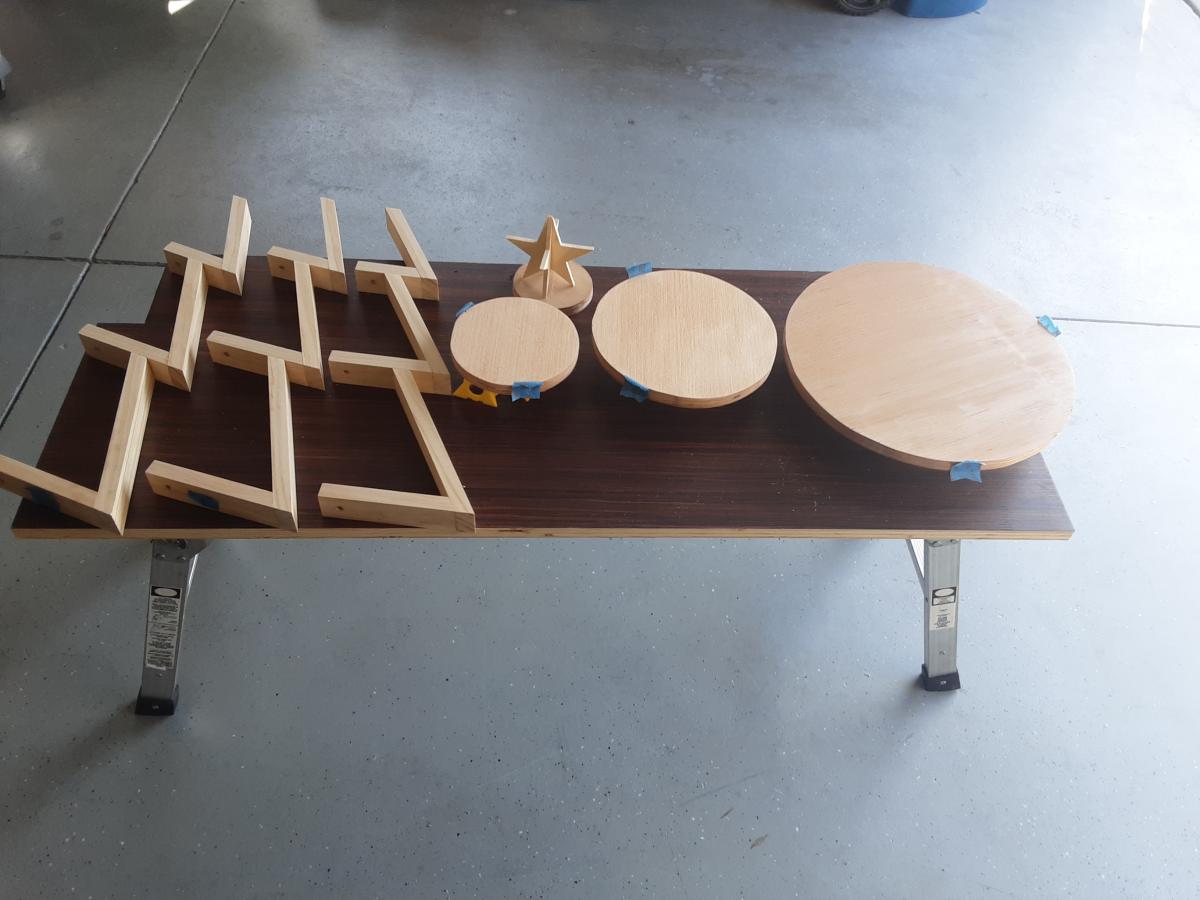
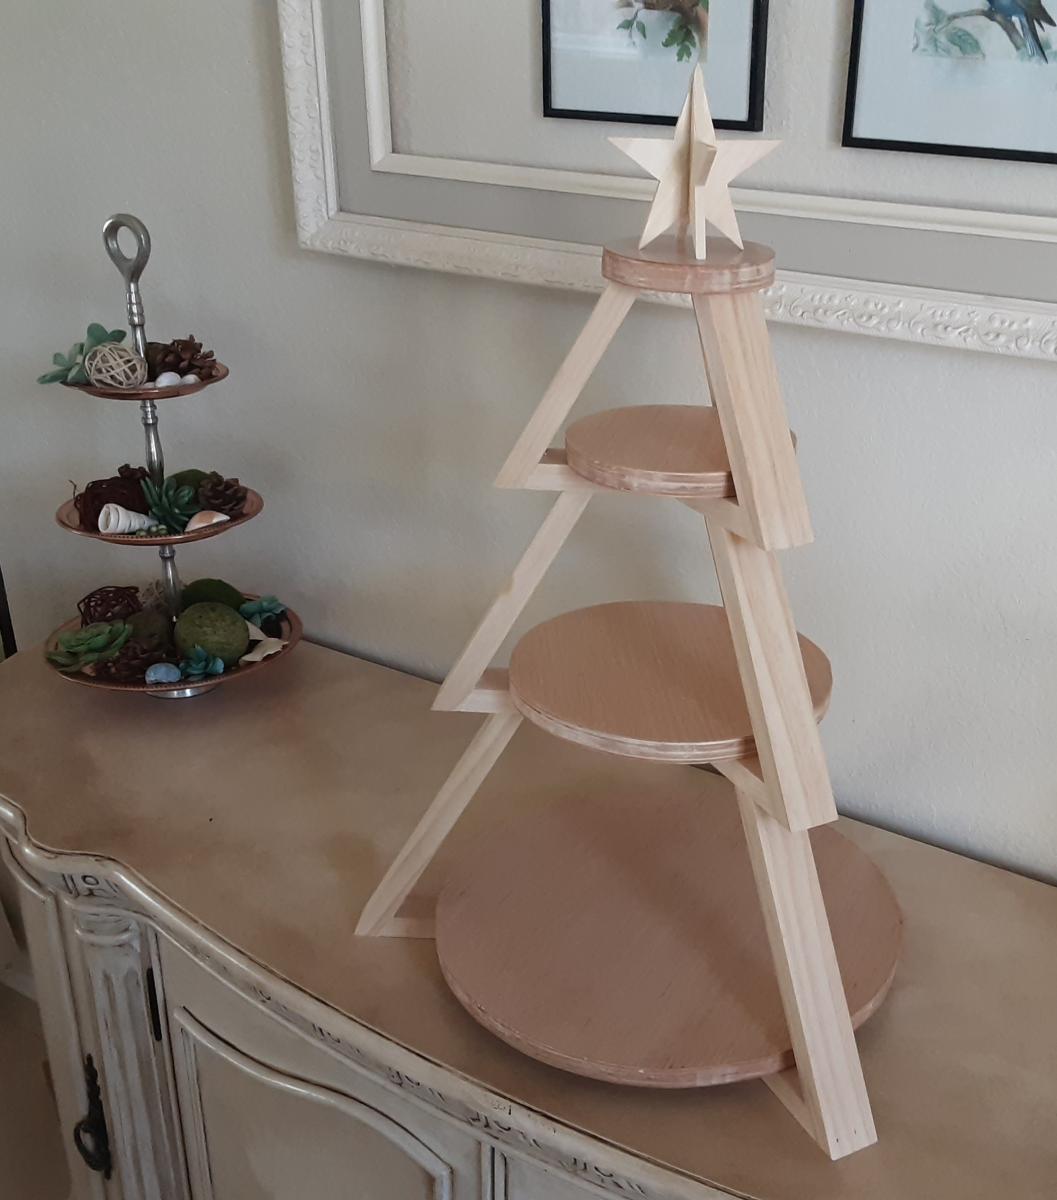
Christmas 3-tier cookie stand

Submitted by calcowoods on Thu, 12/31/2020 - 12:51

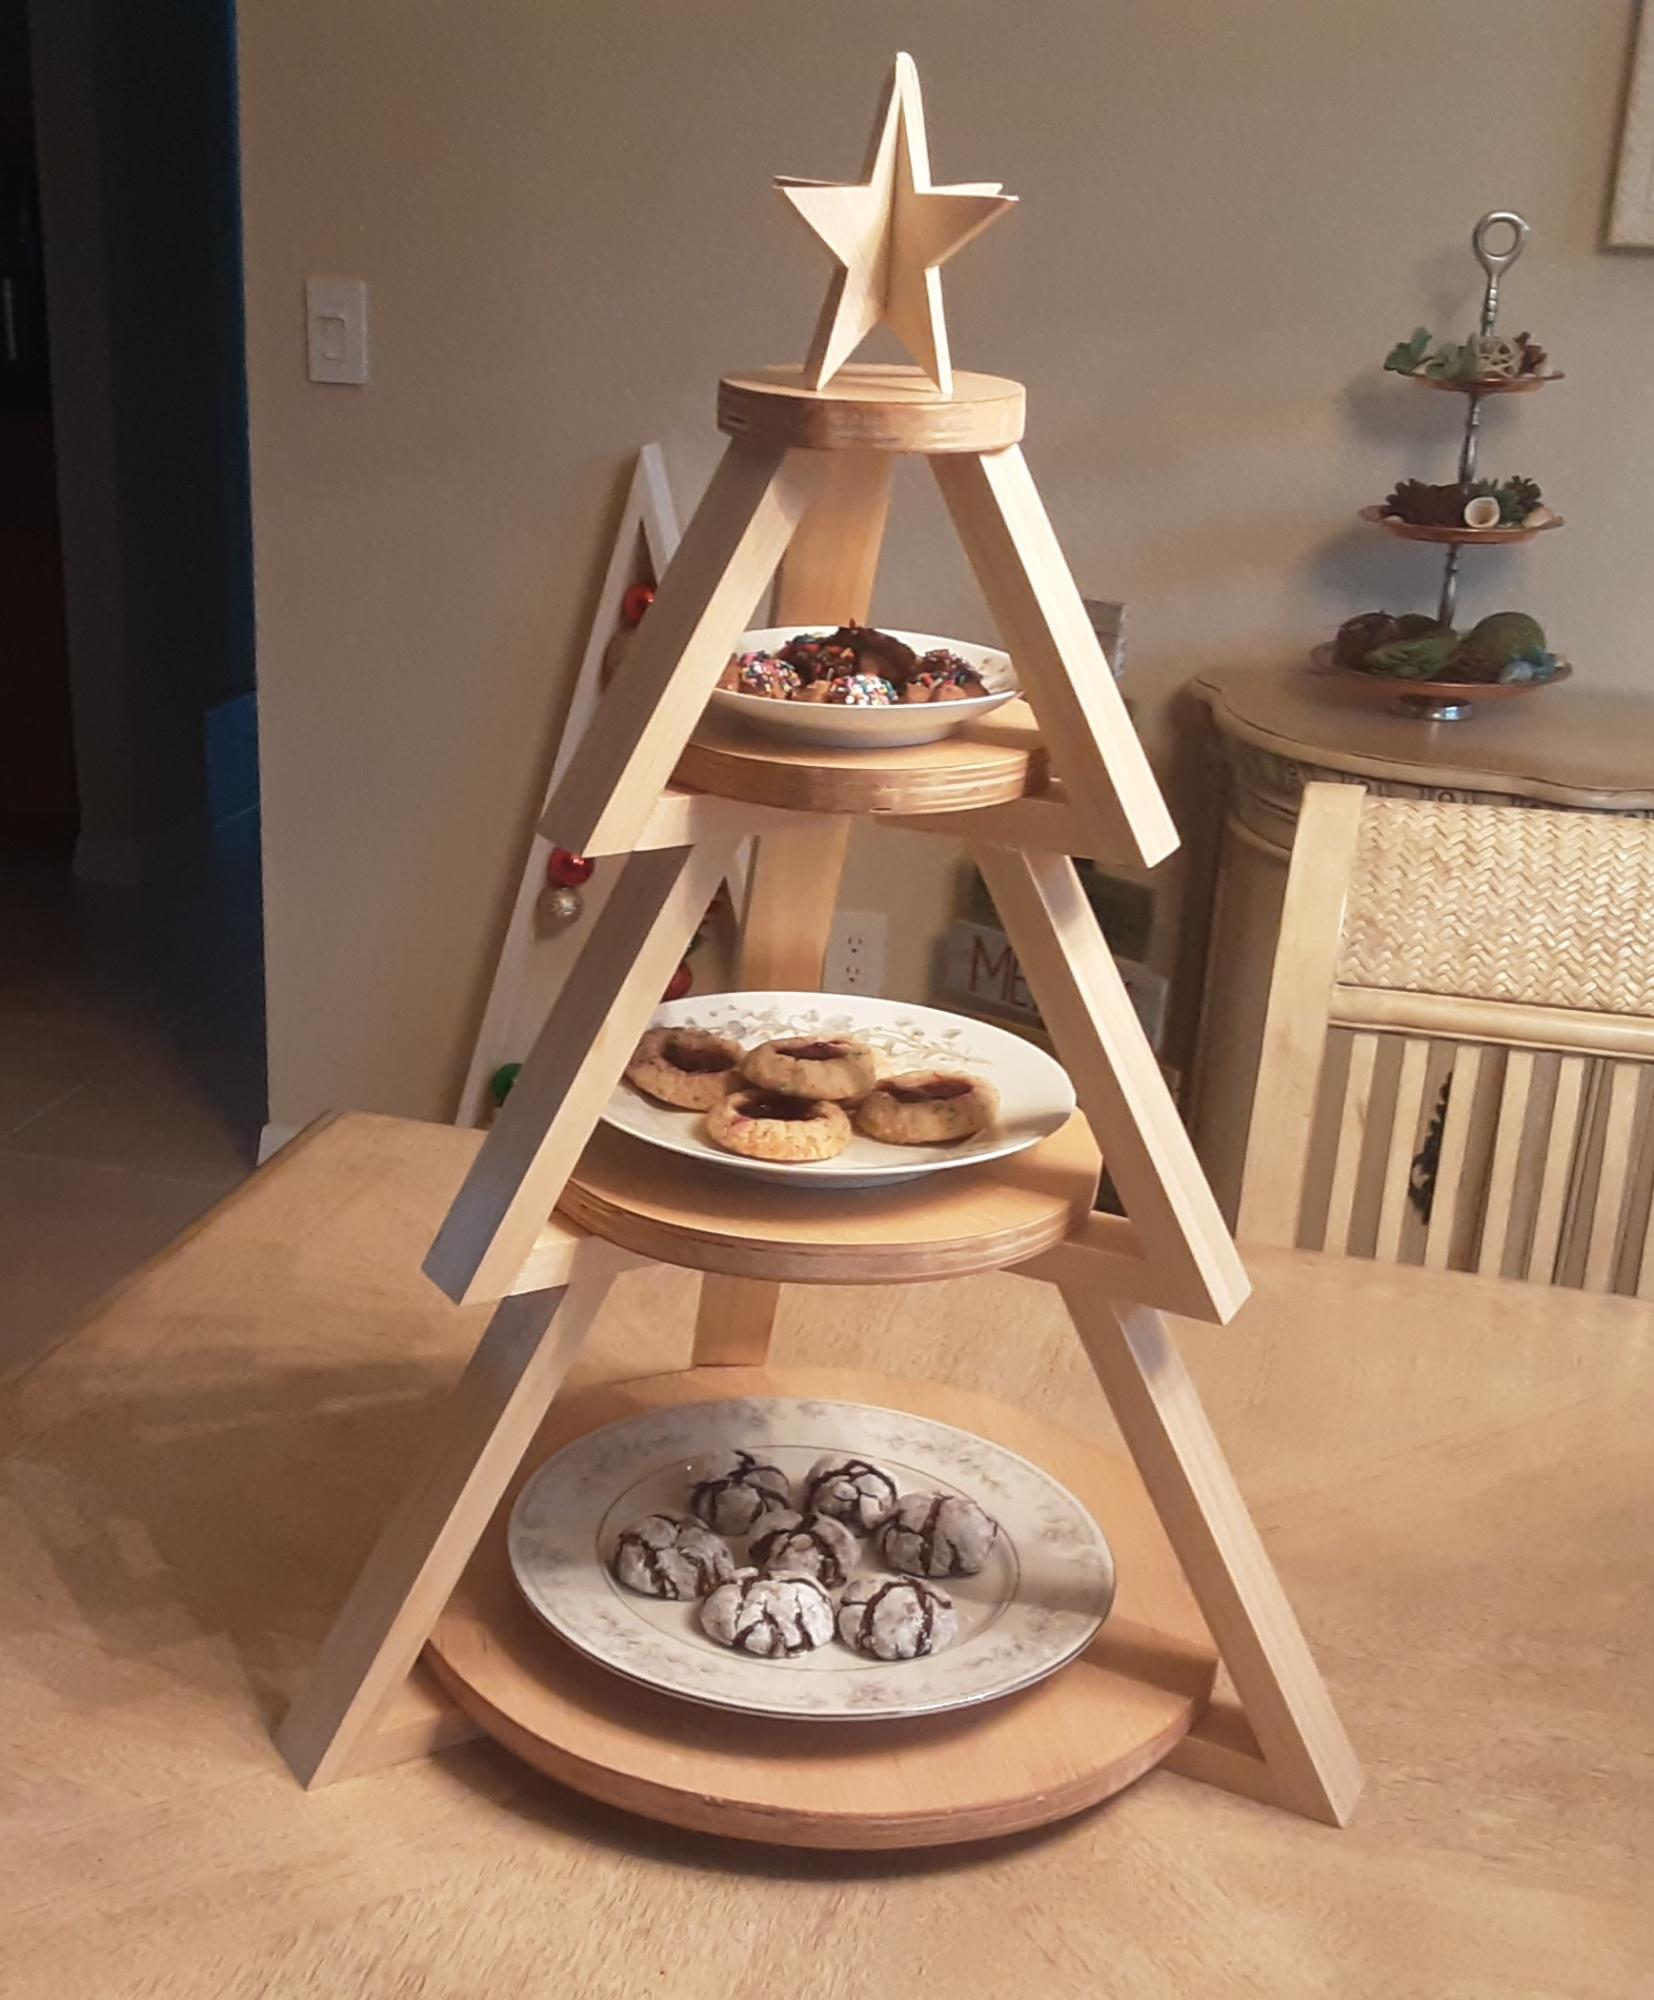
Inspired by Shara of Woodshop Diaries, created this 3 tier tray for displaying cookies for Santa. Added a 3 dimensional star as the topper and simply followed the excellent photos and schematics on Shara's website.

Estimated Cost
$5
Estimated Time Investment
Afternoon Project (3-6 Hours)
Finish Used
Minwax paste wax
Recommended Skill Level
Beginner

Comments

Outdoor sectional

Submitted by Anonymous (not verified) on Wed, 10/02/2019 - 04:17

Made the outdoor sectional. The coffee table was made out of left over pieces!

Estimated Cost
$260
Estimated Time Investment
Weekend Project (10-20 Hours)
Finish Used
We used a semi transparent stain applied with brush. We would recommend a hand sprayer instead.
Recommended Skill Level
Beginner

Comments

Outdoor Sectional

Submitted by nikkiice on Sat, 05/28/2016 - 17:40

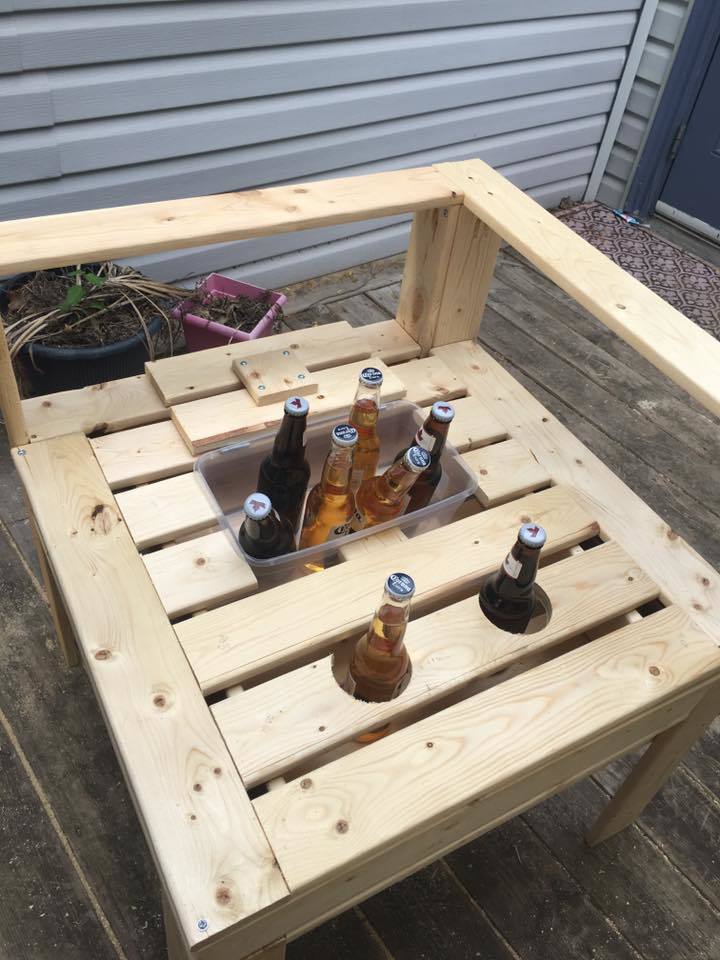
I had so much fun building this! I got a little creative with the corner section and decided to make it a table. I built a small hatch so that I could put in a container for ice and cold beer. When the hatch is not in use, the container can be removed and the hatch can be closed to provide more table space. I also added drink holders! 

Estimated Time Investment
Week Long Project (20 Hours or More)
Finish Used
none yet
Recommended Skill Level
Beginner

My First Project: Spinning DVD Rack

Submitted by Dan Y. on Sat, 07/13/2013 - 20:19

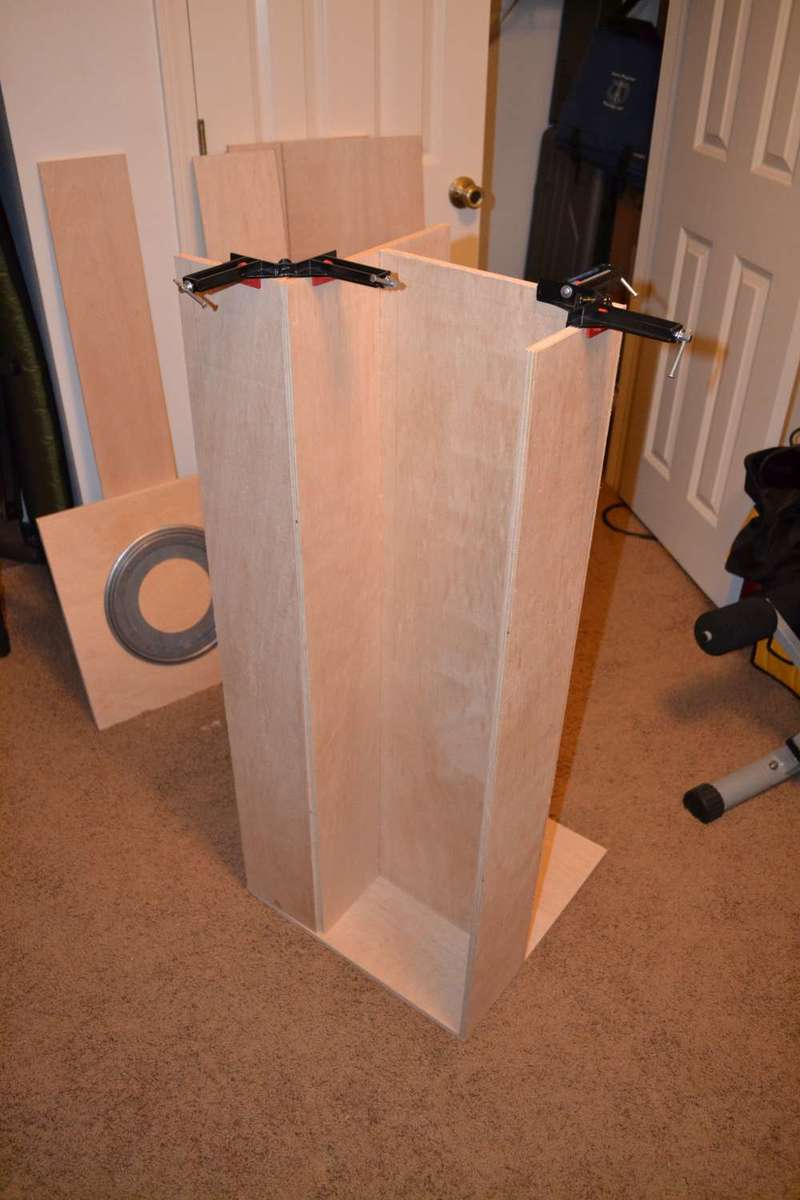
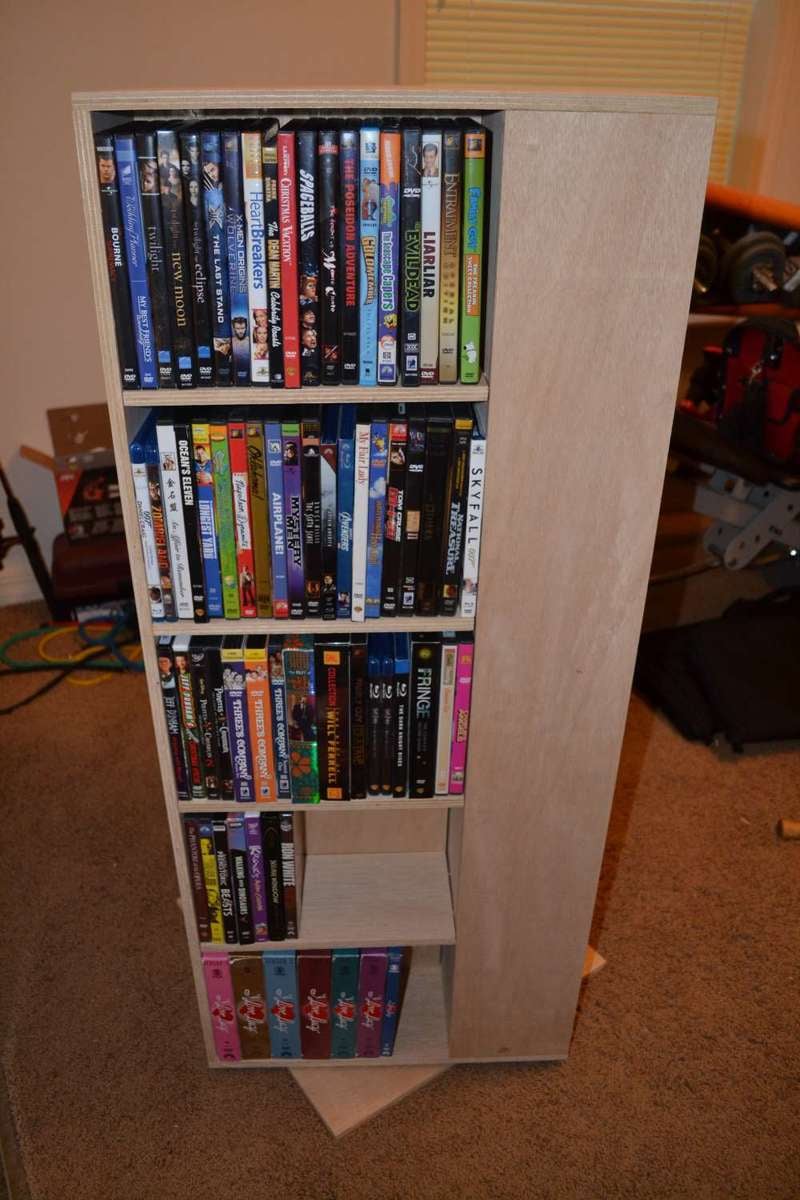
I was looking online for a spinning DVD rack to buy when I stumbled across a picture of a custom built rack. I decided to give it a try and this is the result. This is the first project I've done outside of basic shelves and it was a great learning experience. The overall fit and finish isn't quite where I'd like it to be but overall I think it turned out pretty well. I was able to find a 12" lazy Susan at a hardware store that supports over 300lbs and worked perfectly for this project.

I used pocket holes for the shelves, finishing nails for the top and screws for the bottom and lazy Susan. I also used pocket holes to attach the shelf backs and hid them behind the shelves. One thing I definitely won't use next time is spray paint/enamel. The finish isn't nearly as nice as I wanted and it cost far more than I was expecting.

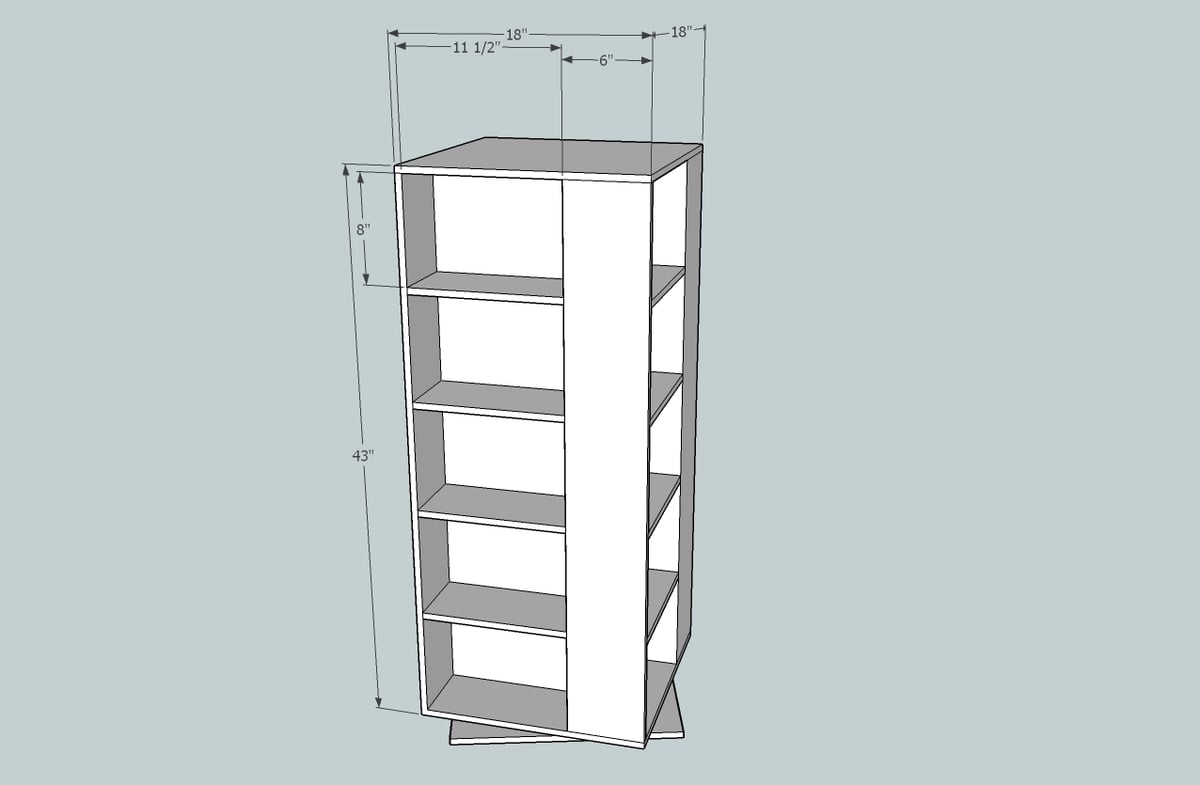
This is also my first time using SketchUp and I'm really impressed with it. I've uploaded a copy of the plans.

Criticism and suggestions are appreciated.

-Dan

Estimated Cost
$170
Estimated Time Investment
Weekend Project (10-20 Hours)
Finish Used
Rust-Oleum Universal Satin Spray Paint - Espresso Brown
Rust-Oleum Crystal Clear Enamel
Recommended Skill Level
Starter Project

Comments

Val Manchuk

Sun, 07/14/2013 - 11:35

I like this spinning DVD unit! Coincidentally, I just finished using spray enamel to redo some cupboard door handles. It's horrible stuff! I ended up sanding it off, and doing it over in flat black. I roughed up the edges with 180 grit to antique them a bit. Looks much better!

Toddler Bunk Beds

Submitted by Anonymous (not verified) on Sat, 07/16/2016 - 22:13

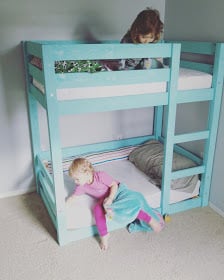
Modified the classic bunk bed plans to fit crib size matresses for our 1.5 & 2 year old girls, loved how my toddler bunk beds turned out! 


Estimated Cost
$200
Estimated Time Investment
Day Project (6-9 Hours)
Finish Used
Behr 'Rainwater' paint in satin
Recommended Skill Level
Intermediate

Comments

em01024

Mon, 08/01/2016 - 17:27

Hi,

Could you email me the change in measurements you used for the crib mattress? 

It would help me out so much. I want to build a similar one for my boys. 

Thank you.

Danielle S. 

Drop down murphy bar

Submitted by nick_h on Tue, 12/06/2016 - 10:54

My attempt at the murphy bar featured on this site. Still have to add the sash locks. Added pallet crossmembers at the back, an x in the leg, and a french cleat to mount to the wall. 

Estimated Cost
$45
Estimated Time Investment
Day Project (6-9 Hours)
Finish Used
Special Walnut Minwax on the bar top and shelves, crisp linen matte latex and dry brushed casual gray for accents/aging. 2 coats of polycrylic for protection. If built again would pre stain and base coat all the wood before build time, then assemble, add accent brushing and spray the polycrylic.
Recommended Skill Level
Beginner

Comments

zannej

Tue, 12/31/2019 - 11:49

This looks awesome! I want to help my friend build this for his kitchen. I've looked at the plans in the link & I'm wondering what modifications you made for the X pattern-- how much did it alter the material & cut list?

Would you please share your material & cut list for this?

Daughters blue Playhouse

Submitted by rysos81 on Thu, 07/23/2020 - 08:55

I used the basic framing plan for the project, but extended roof overhangs, added engineered siding / trim and cedar shake roofing. I put 2x4 bracing on for the platform.

Estimated Time Investment
Week Long Project (20 Hours or More)
Recommended Skill Level
Intermediate
Seasonal And Holiday