Community Brag Posts

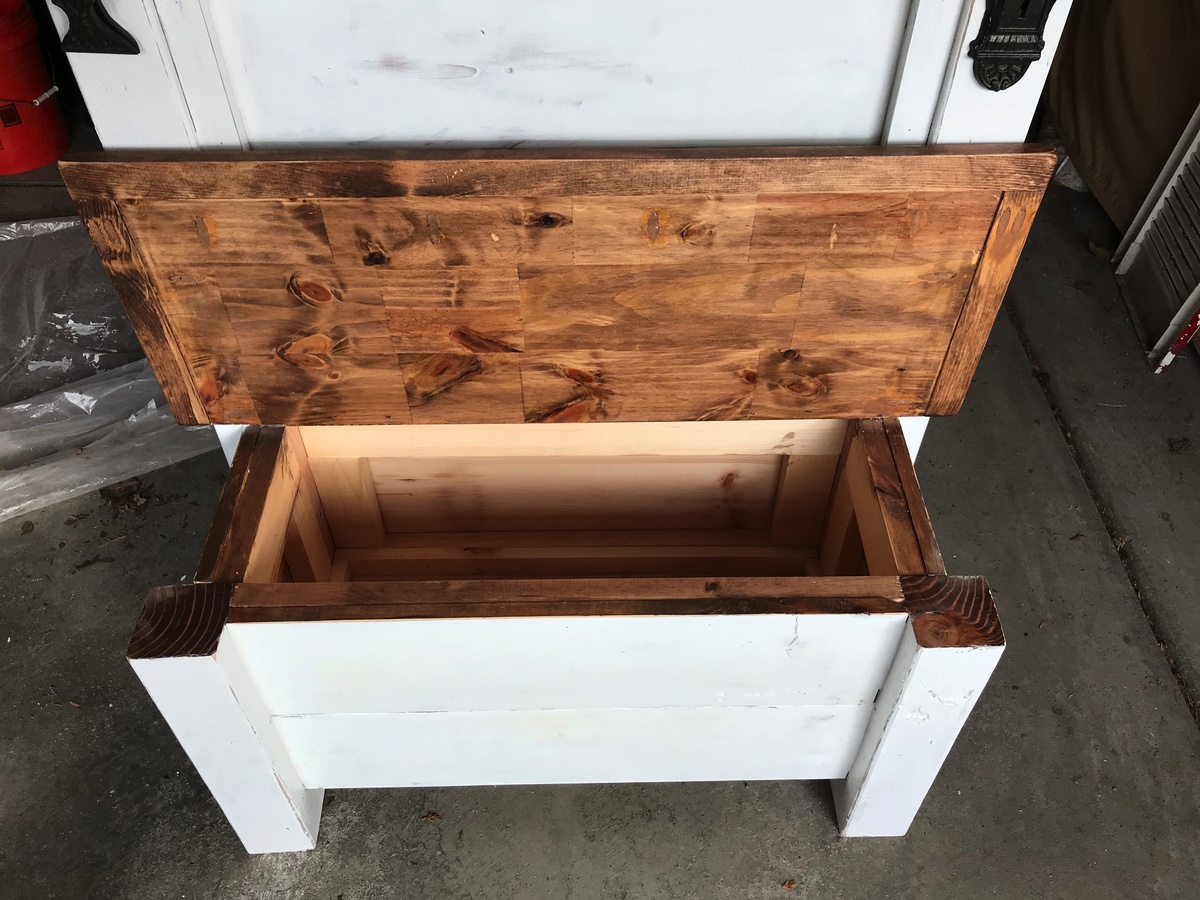
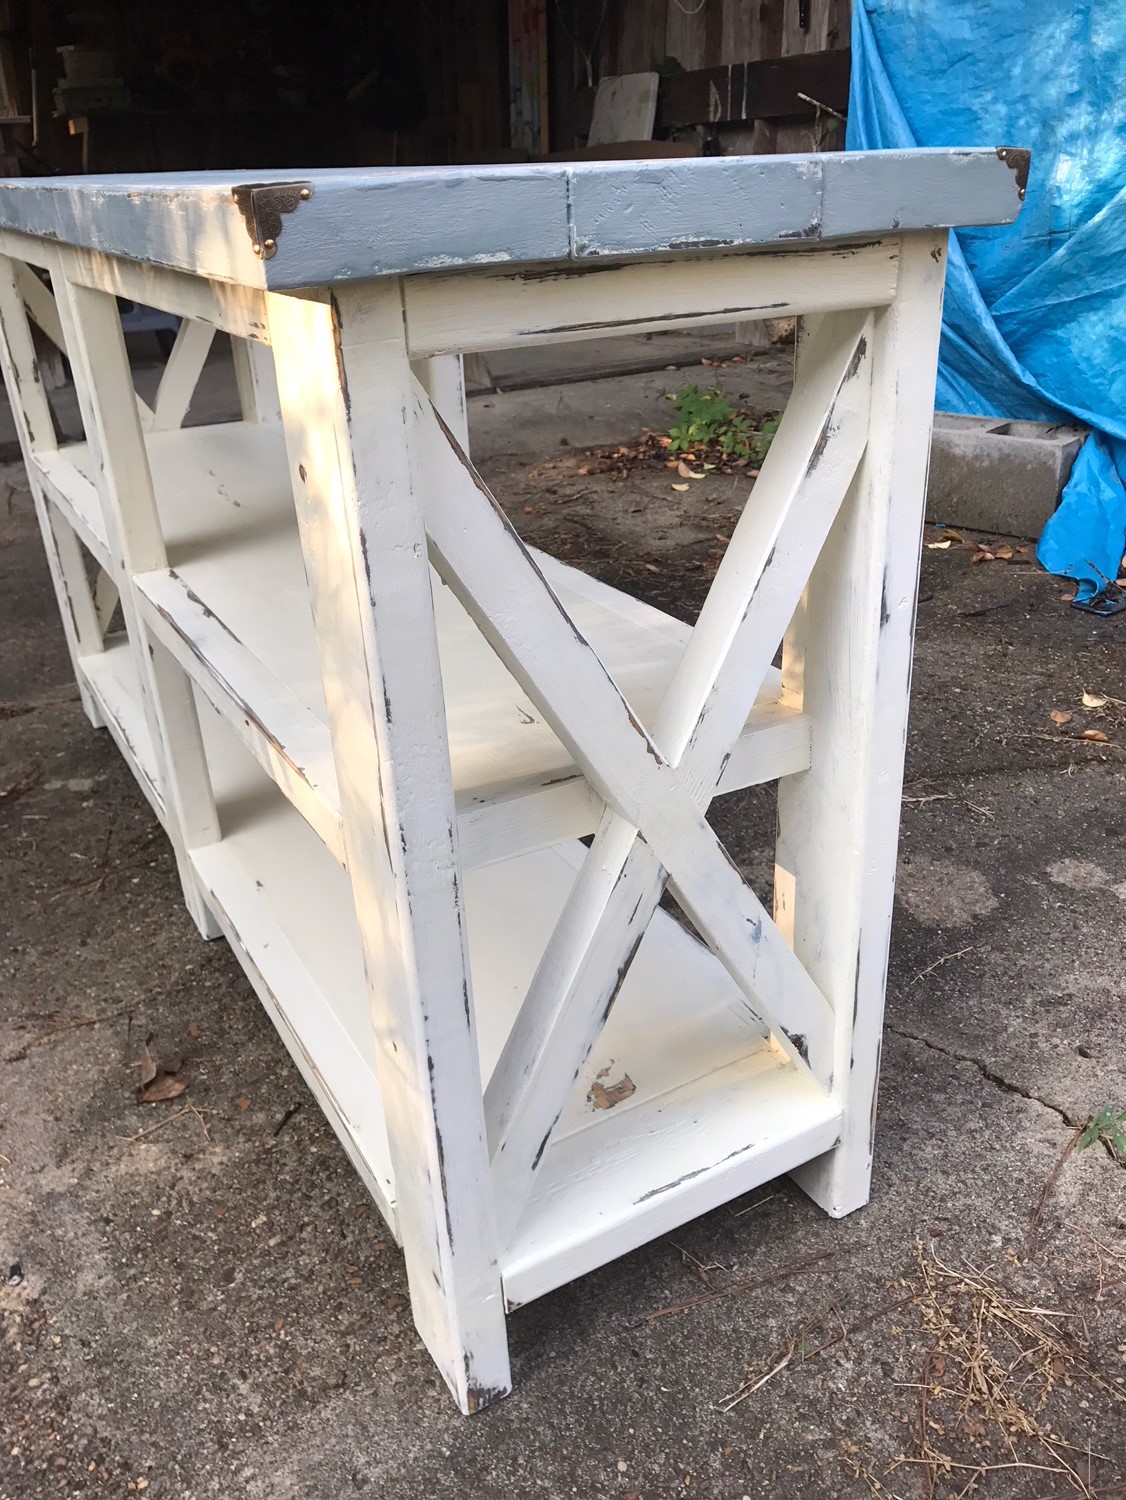
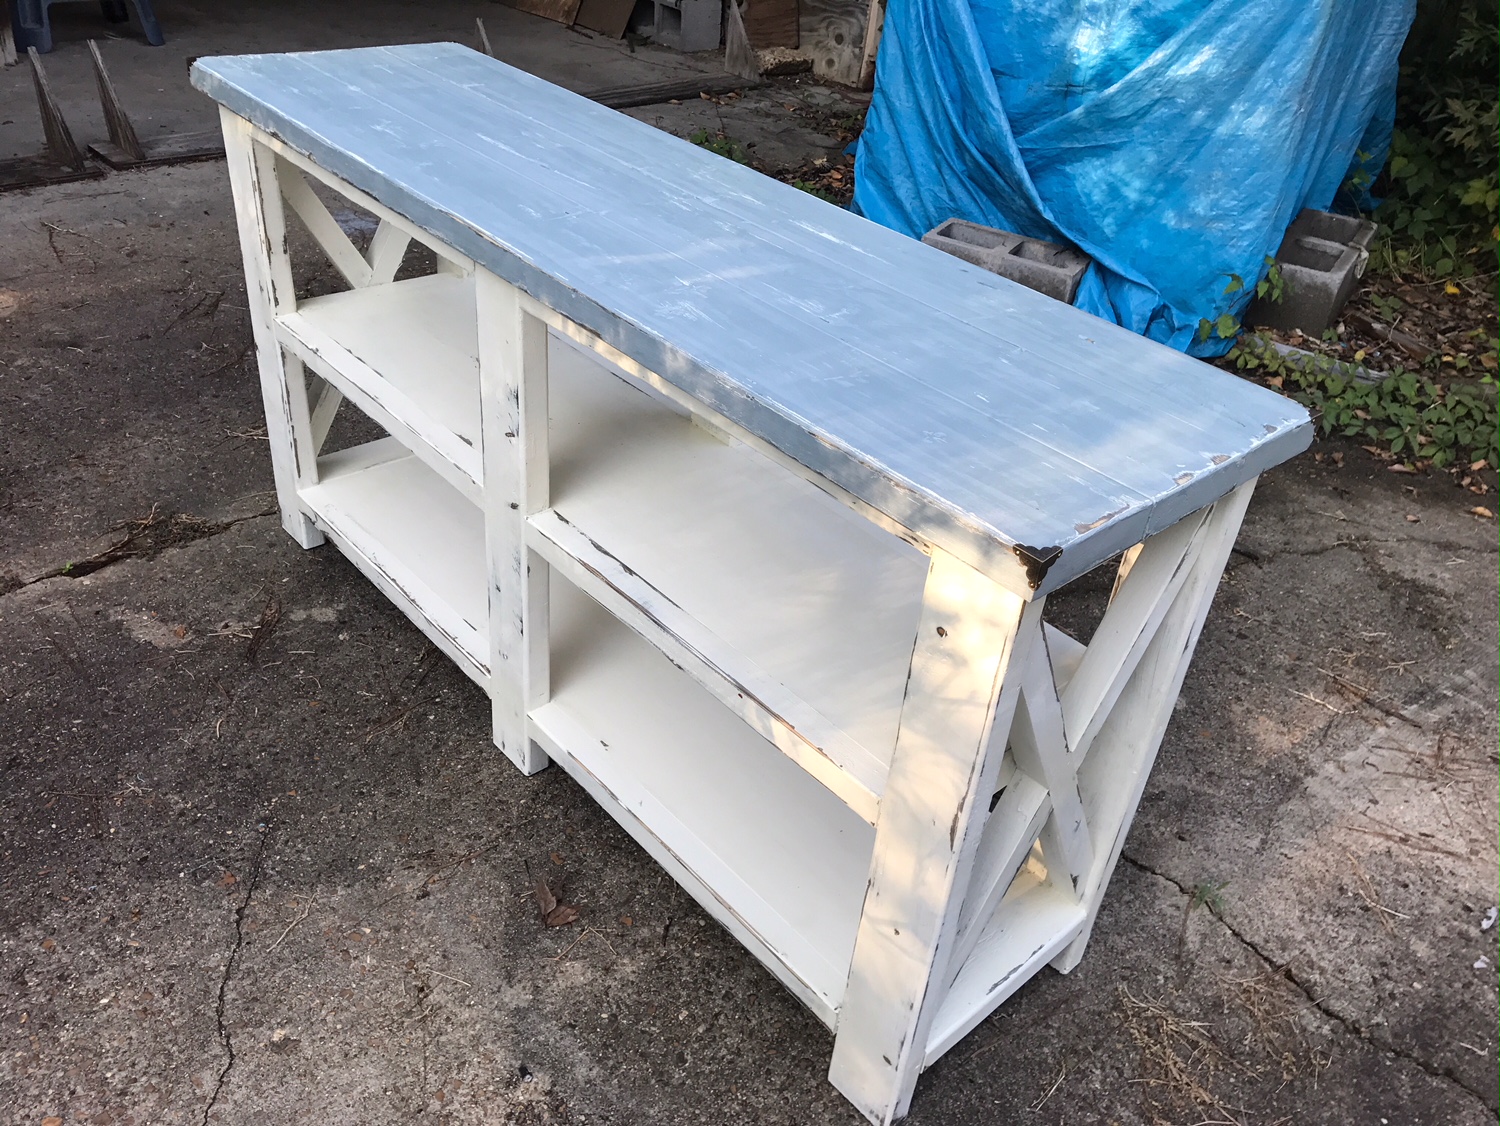
Modified mudroom bench - hall bench

Submitted by Anonymous (not verified) on Fri, 11/05/2021 - 09:18

Dear Ana White.,
First, I am a fan of your woodworkingand I follow you on YT. I like your approach to projects, making it simple and easy but still making very fine pieces that both are nice looking at and good for use.
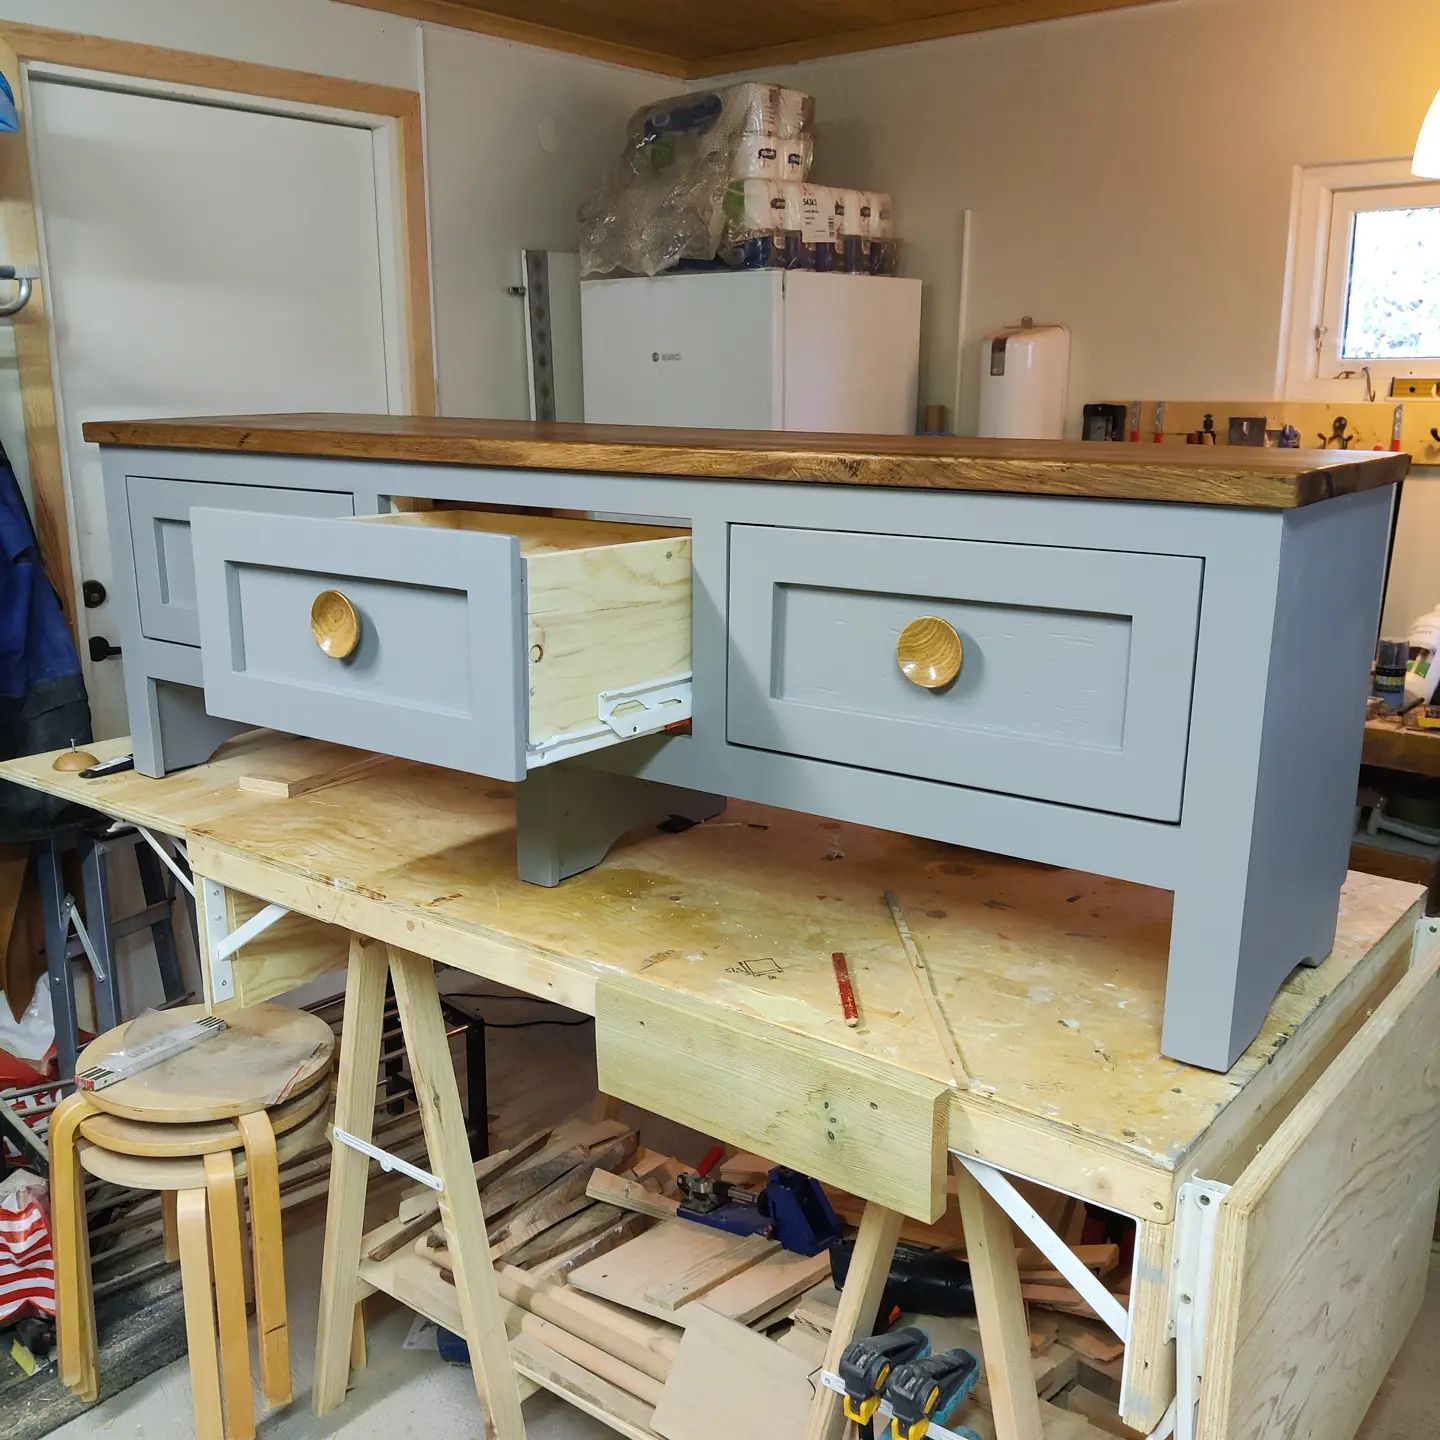
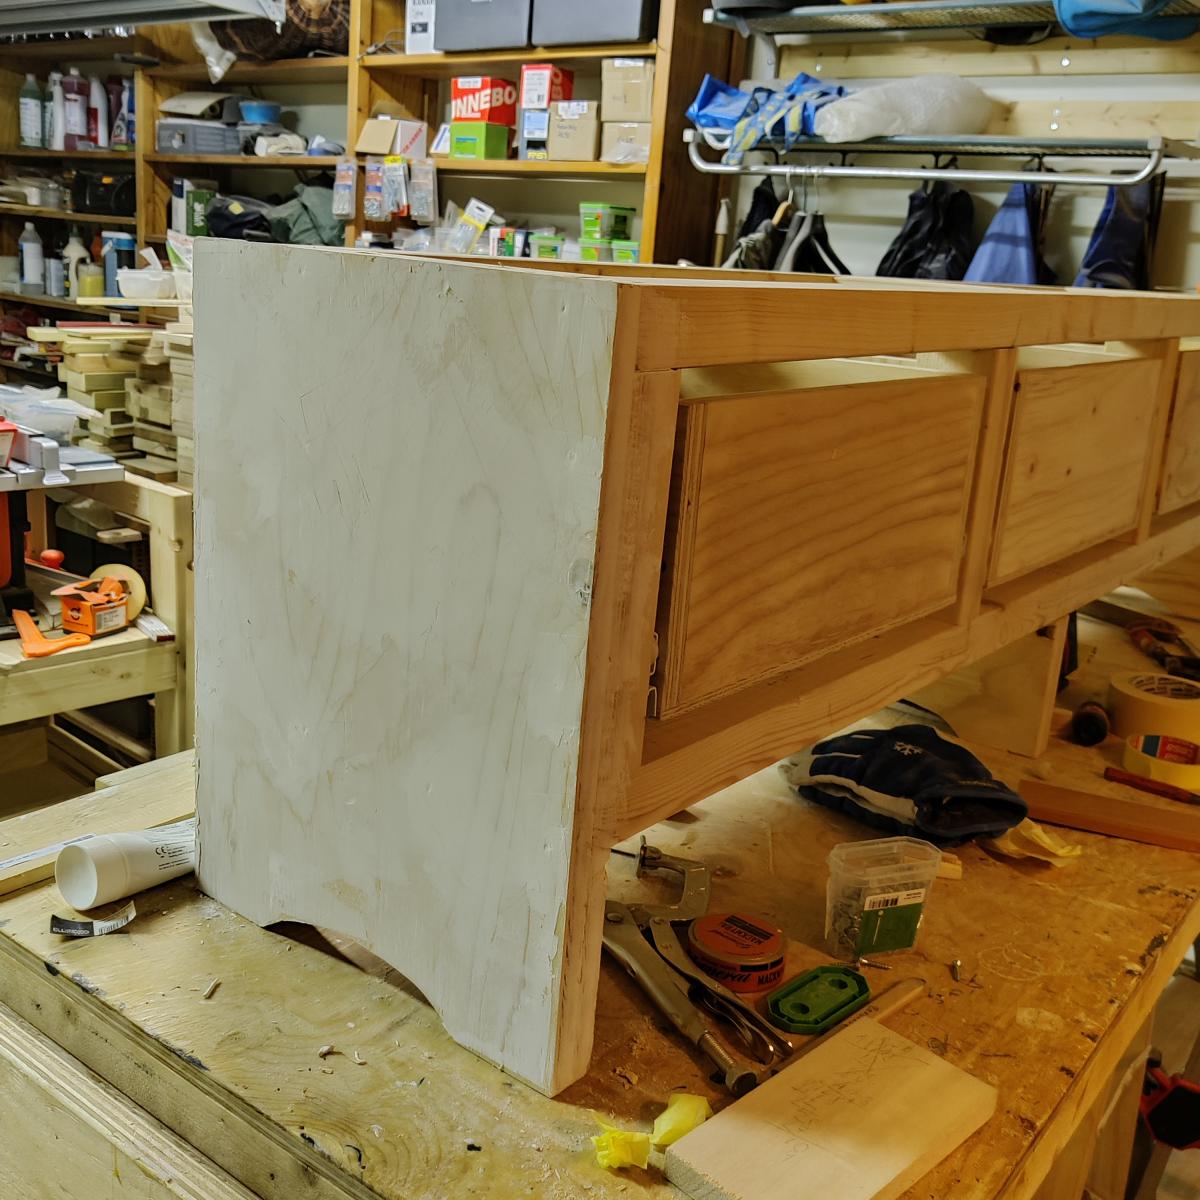
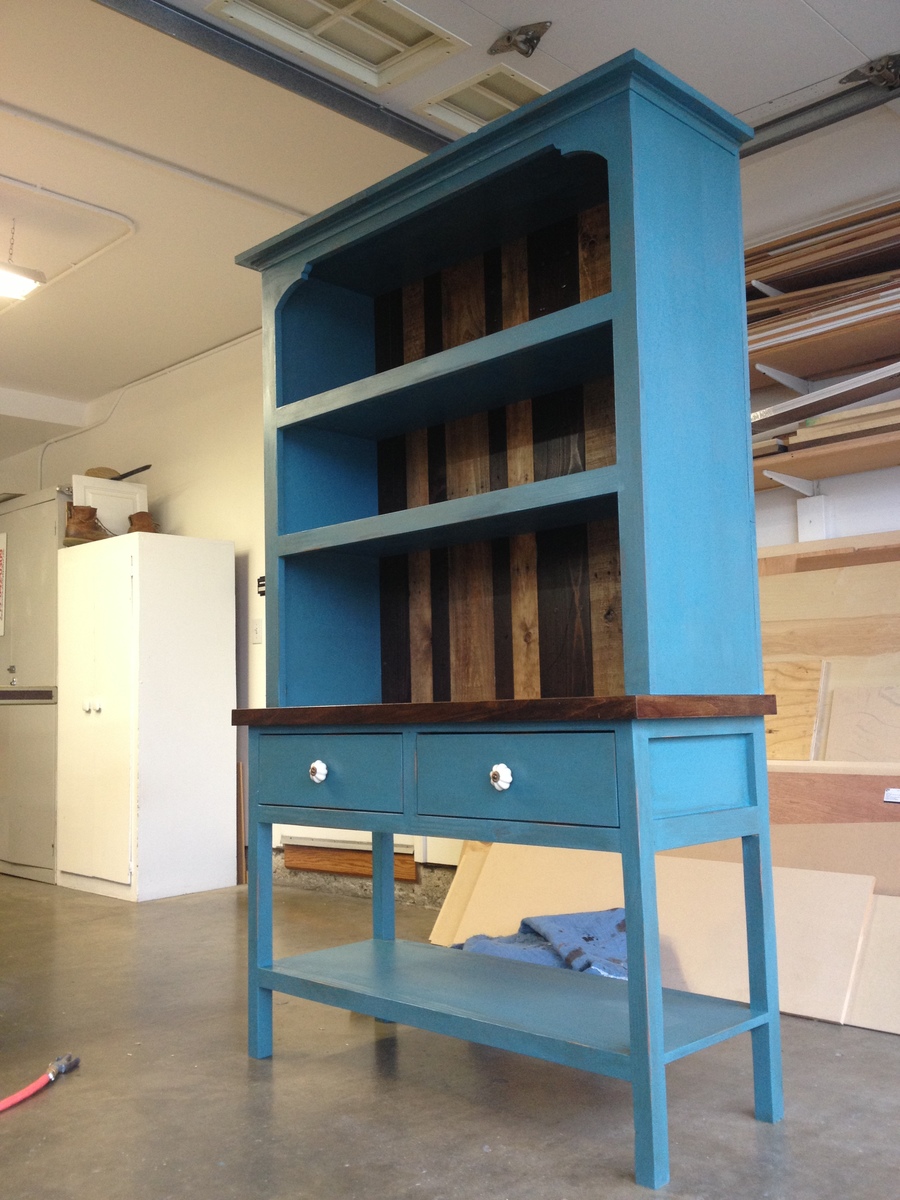
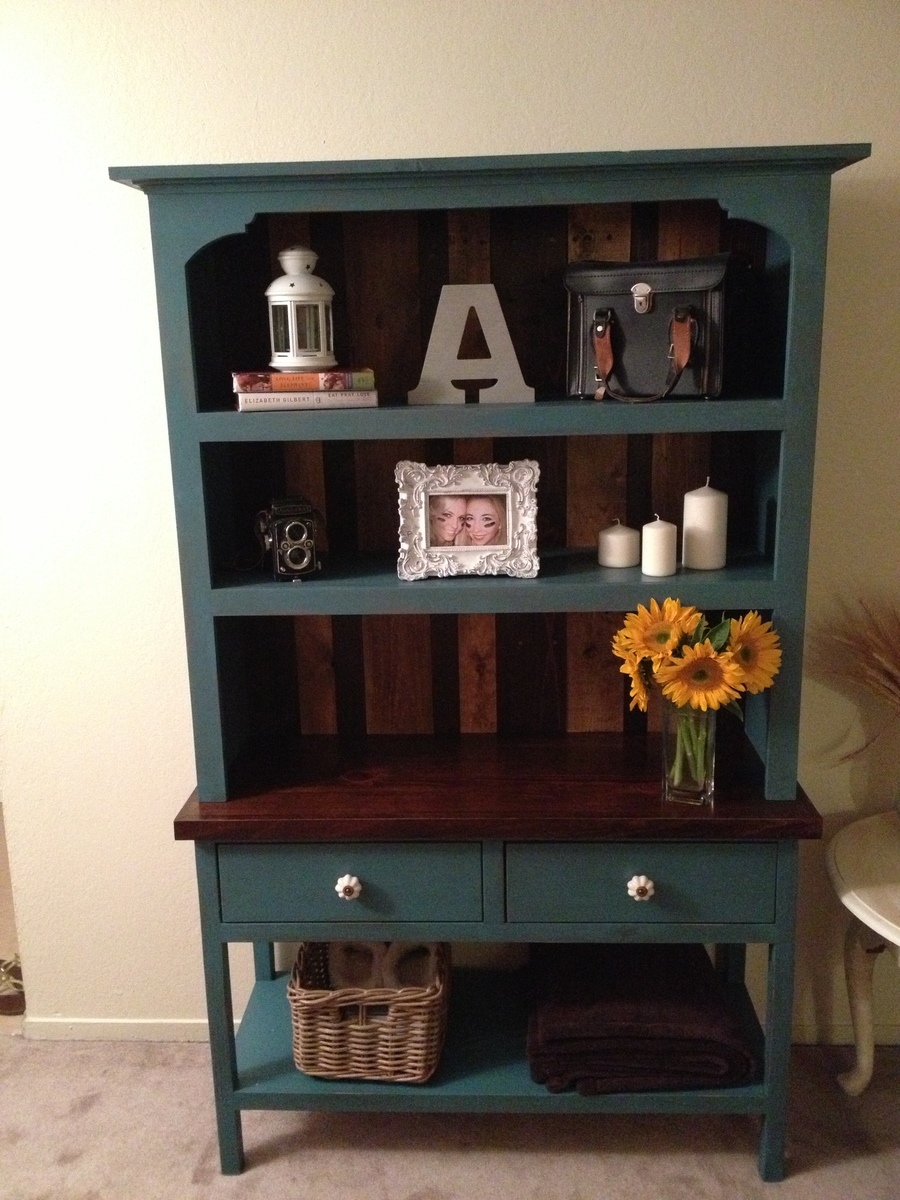
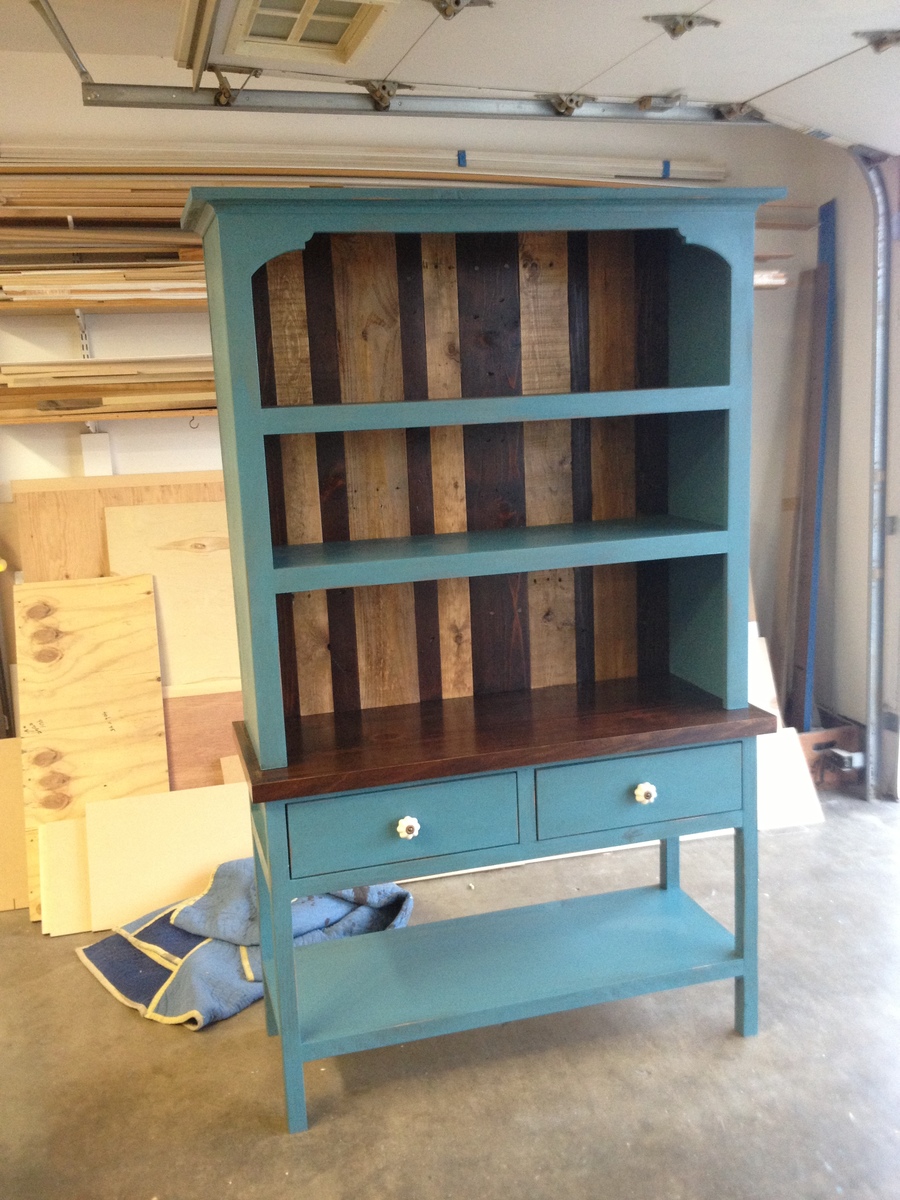
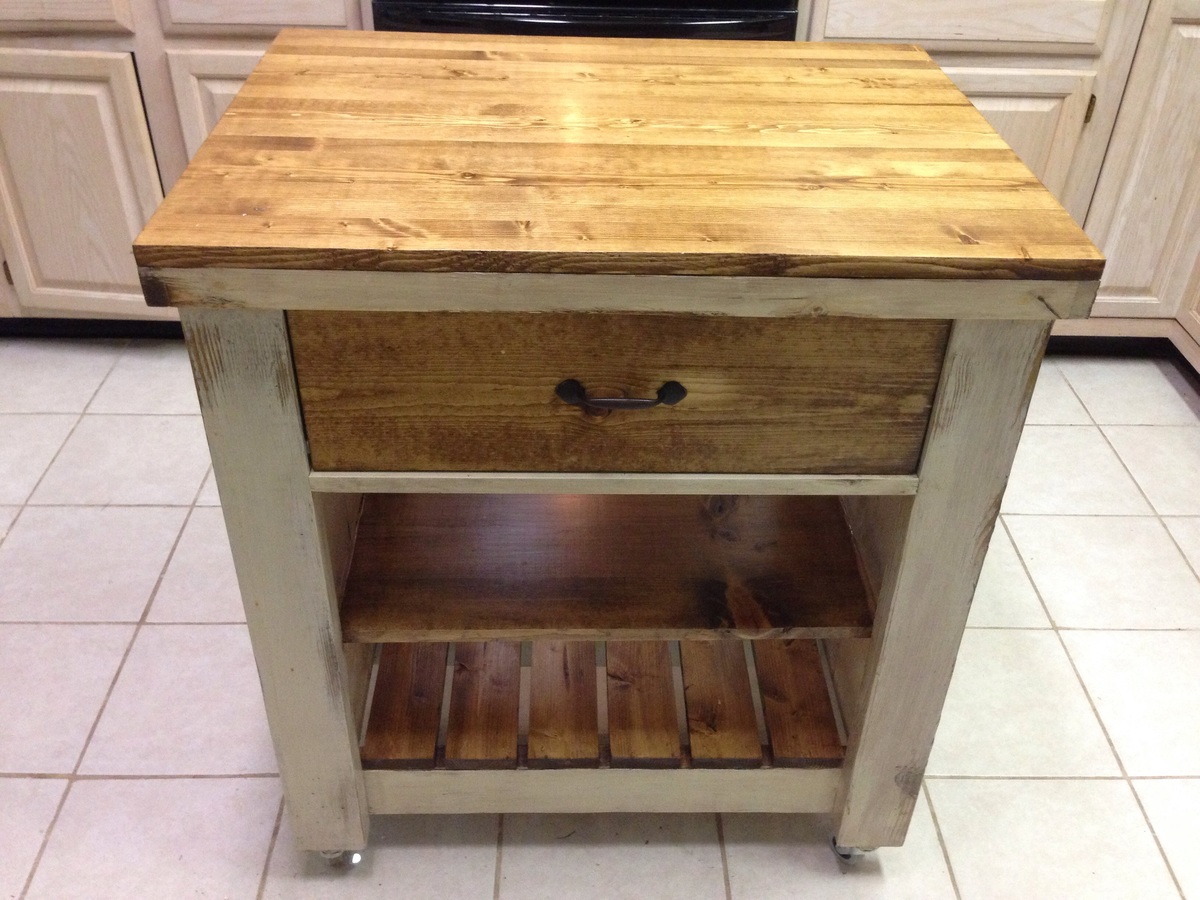
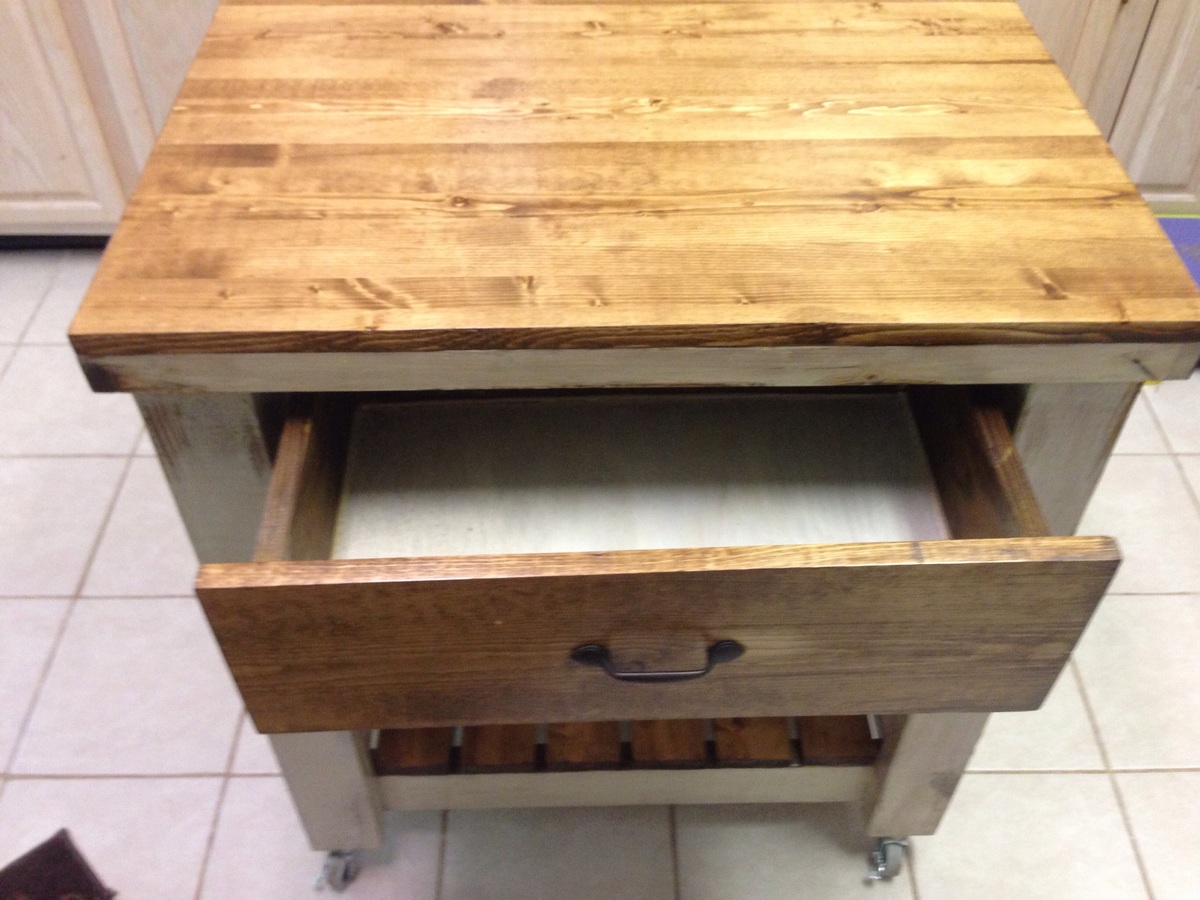
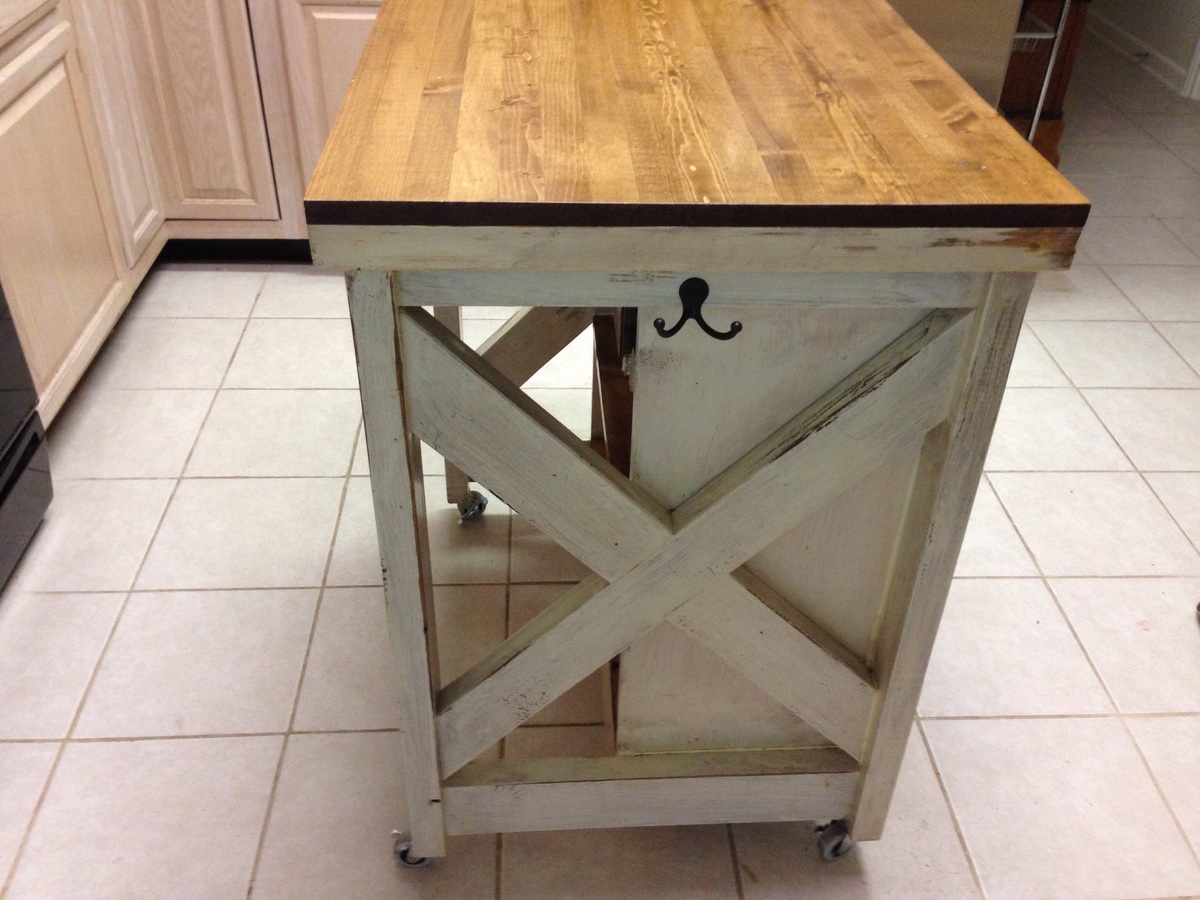
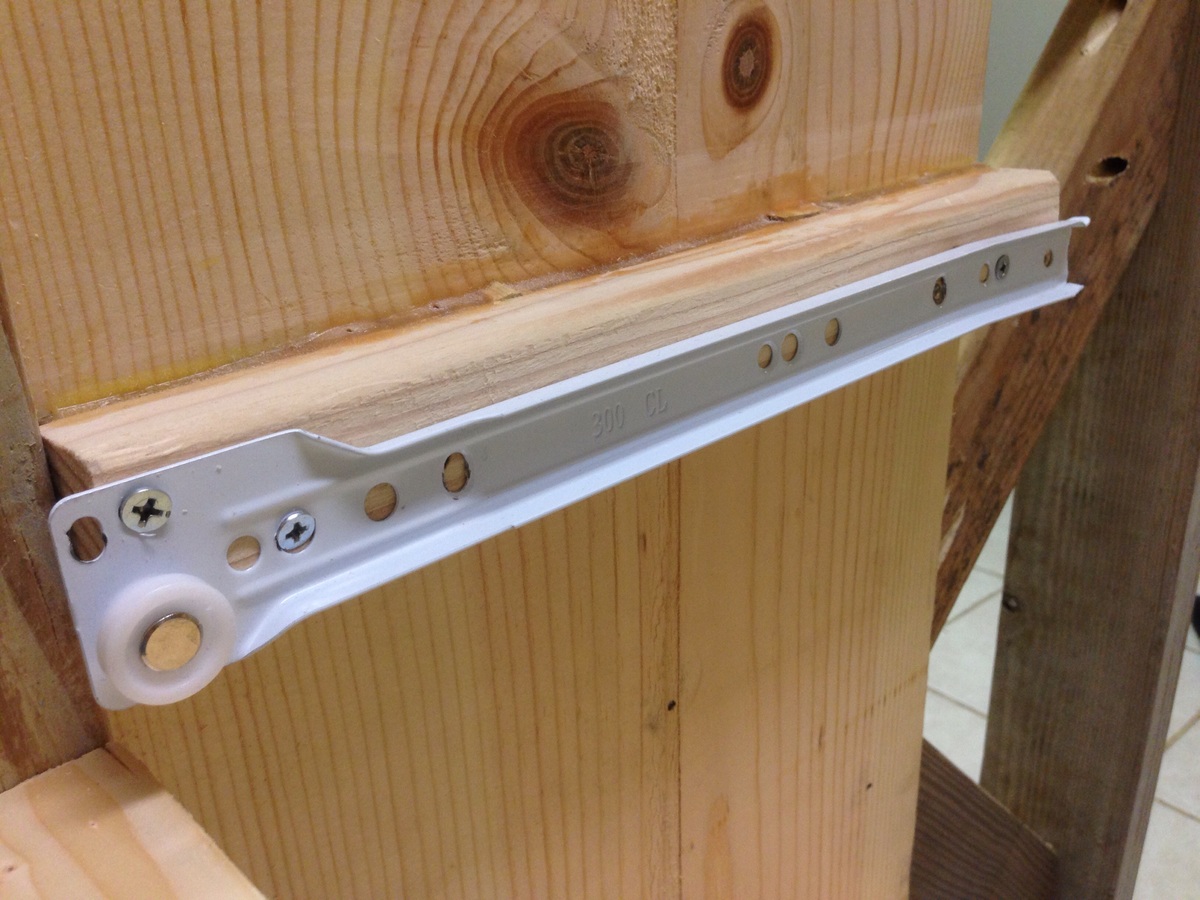
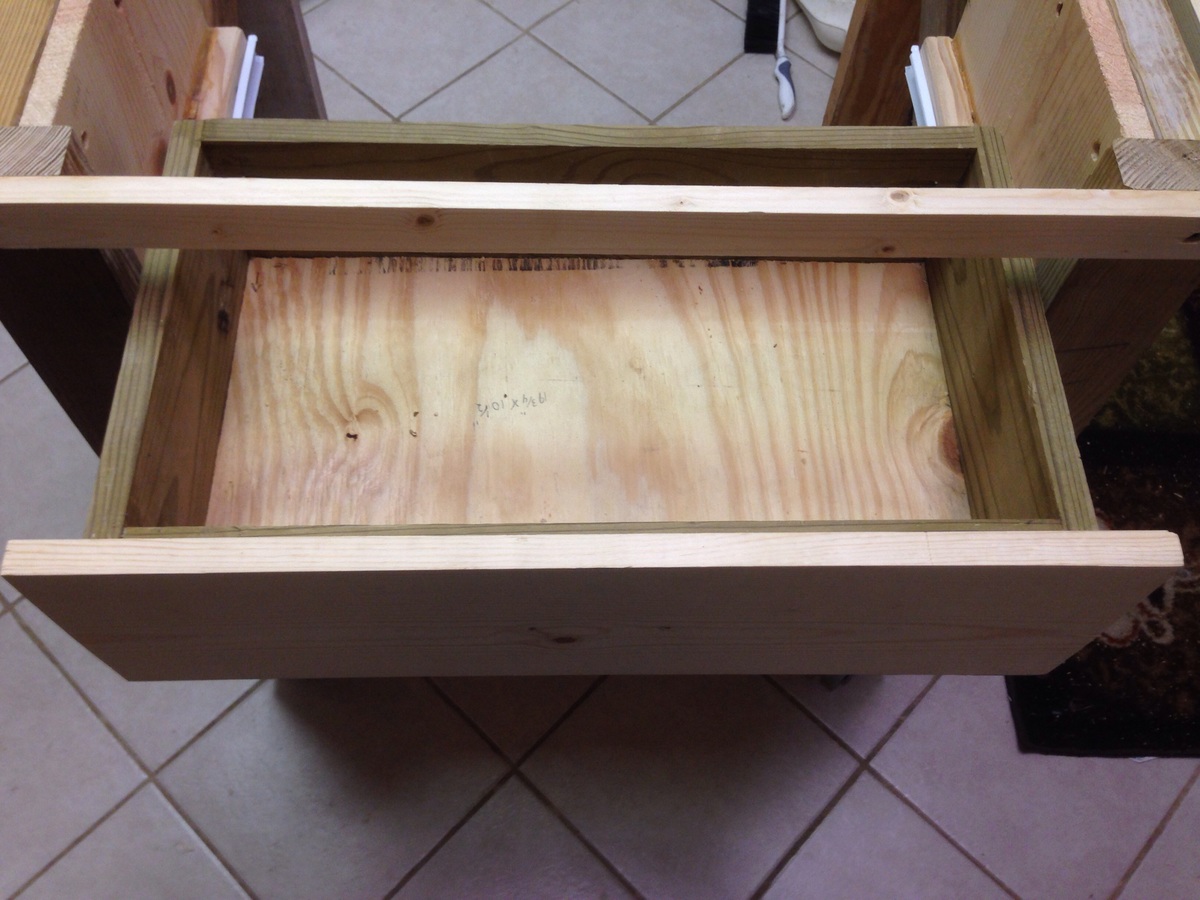
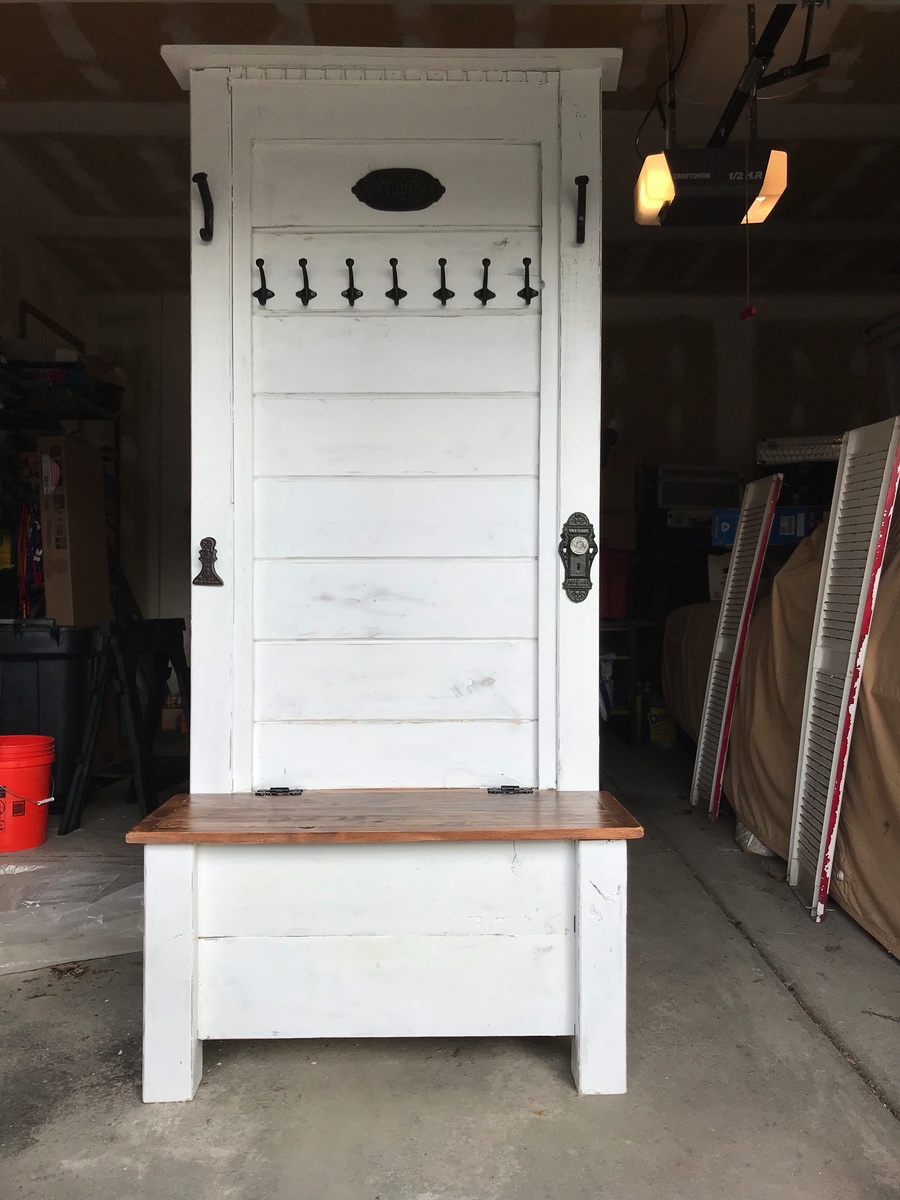
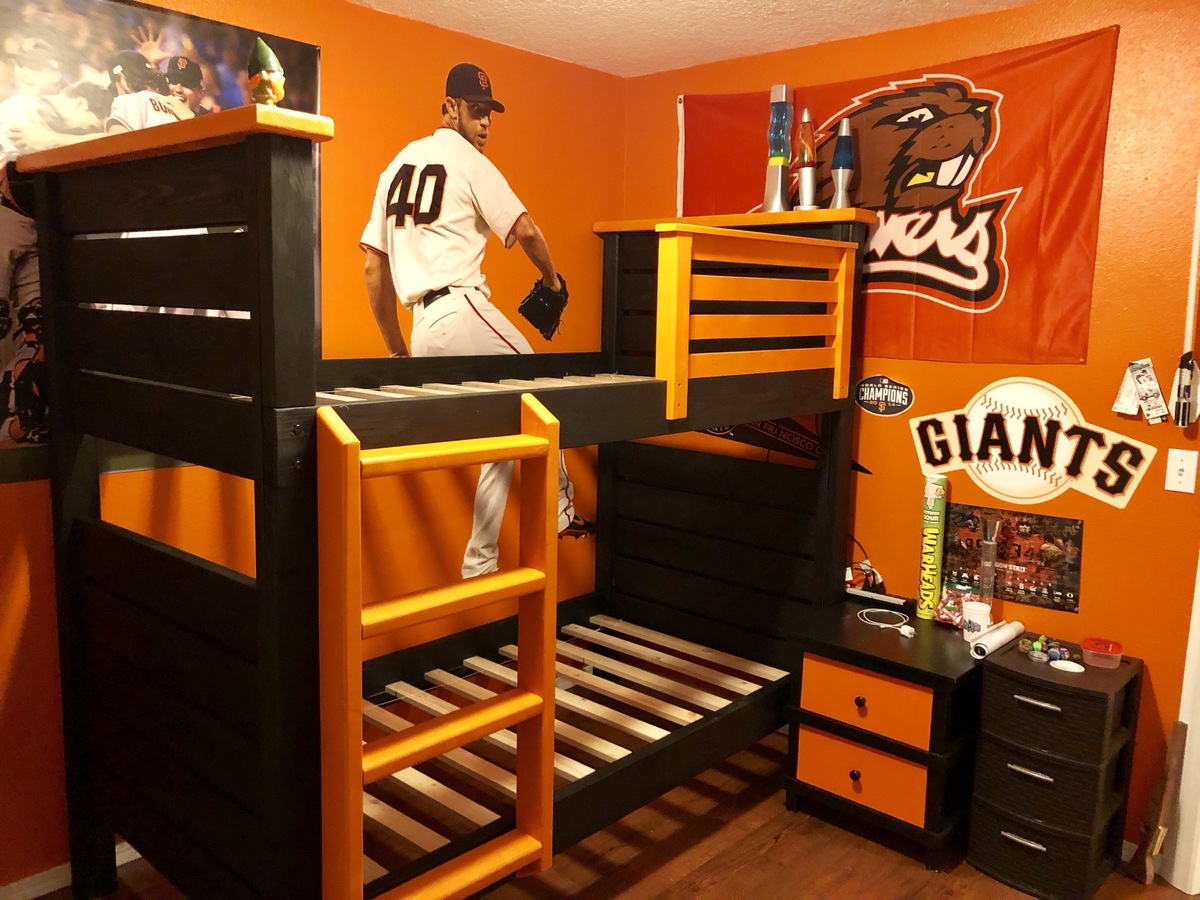
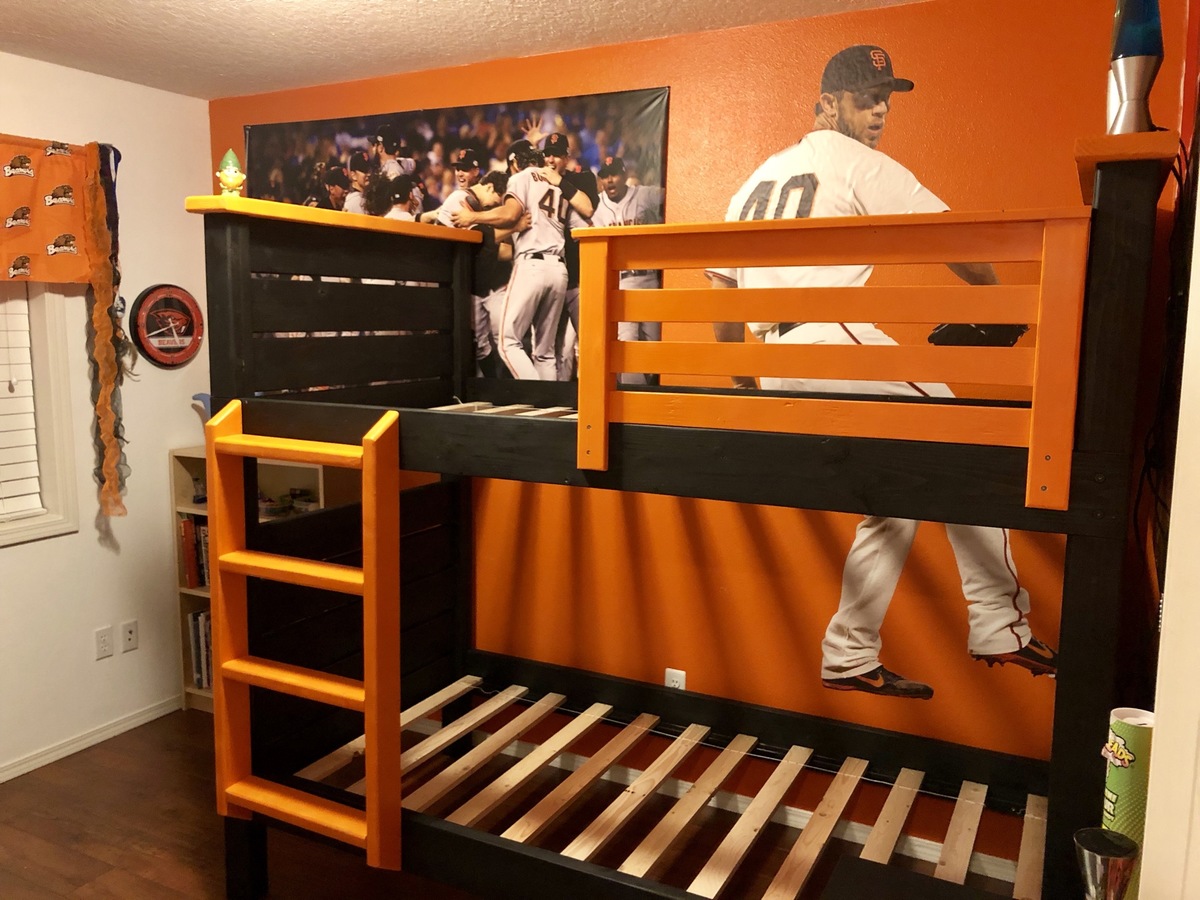
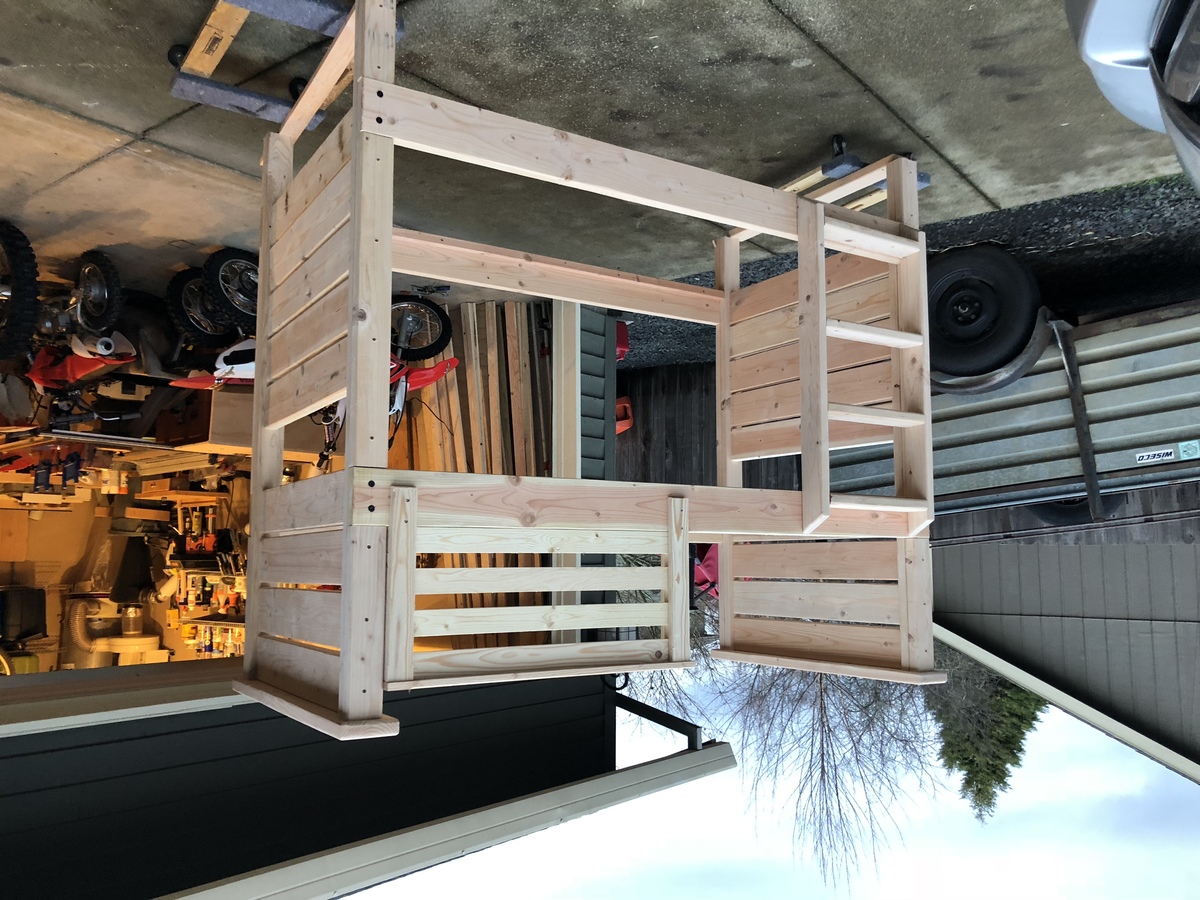
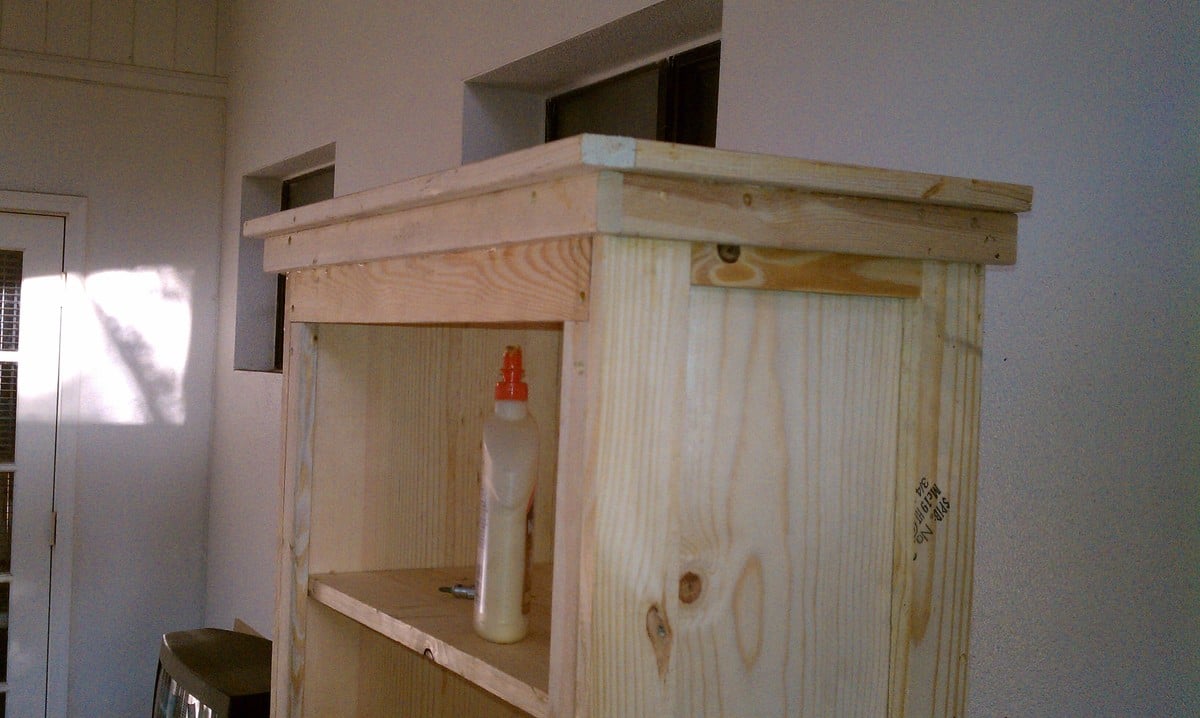
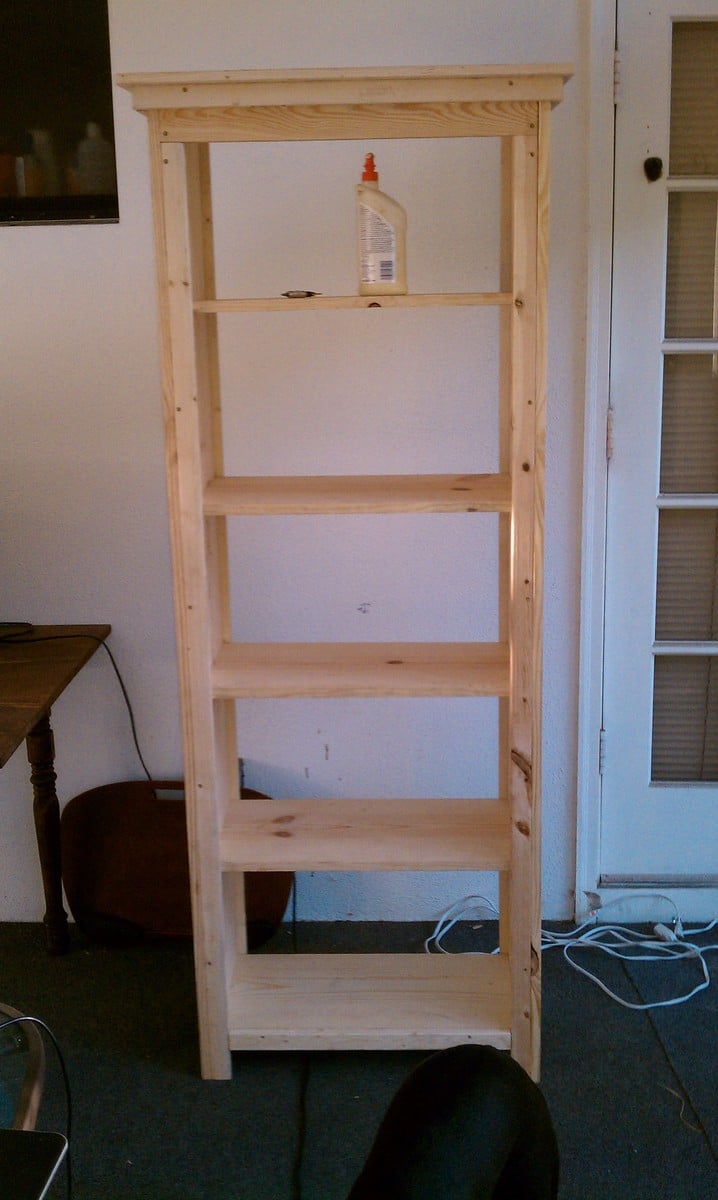
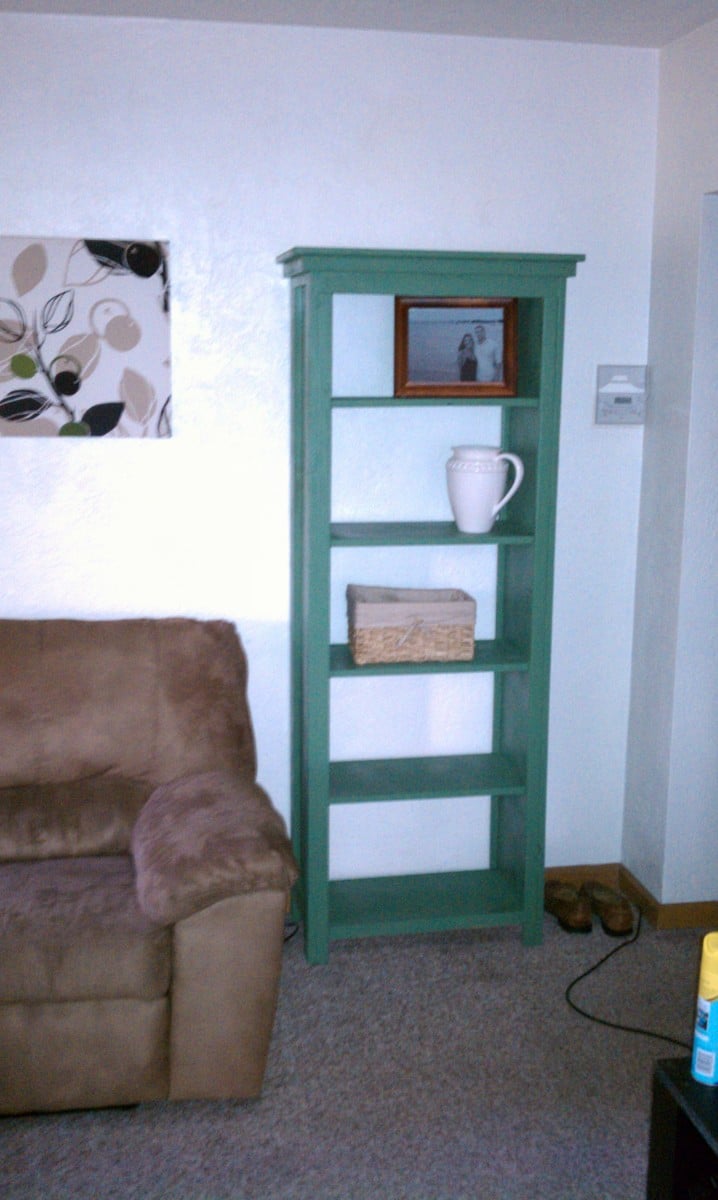
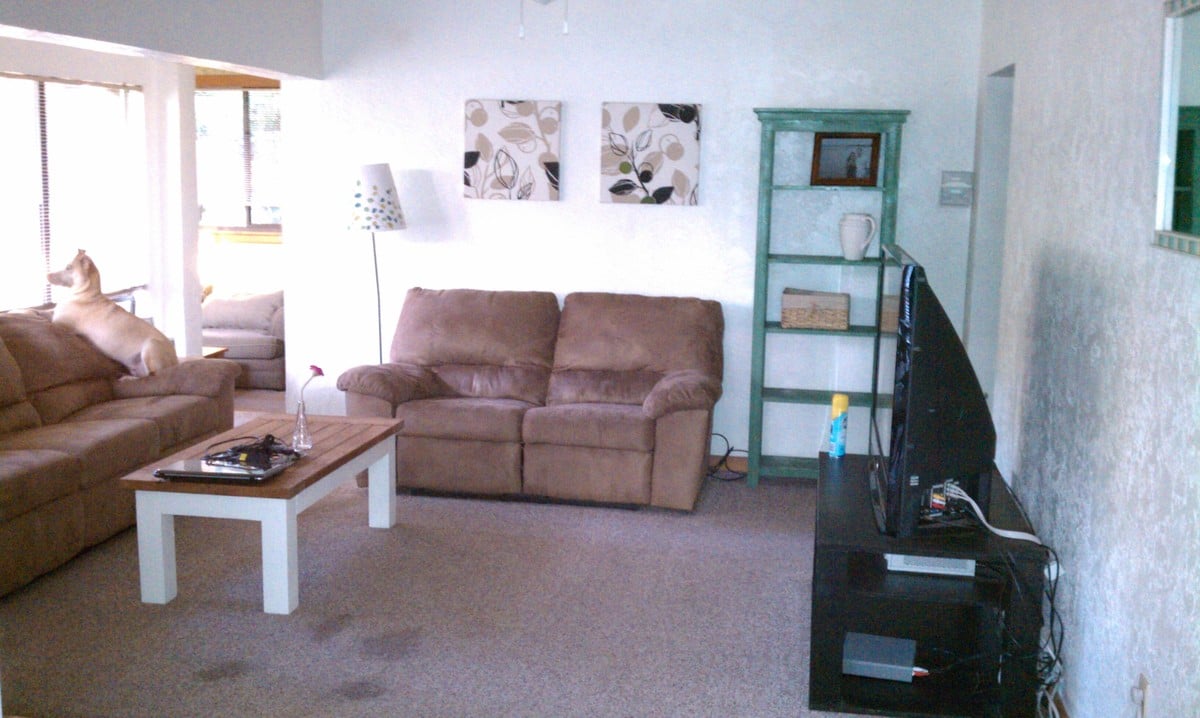
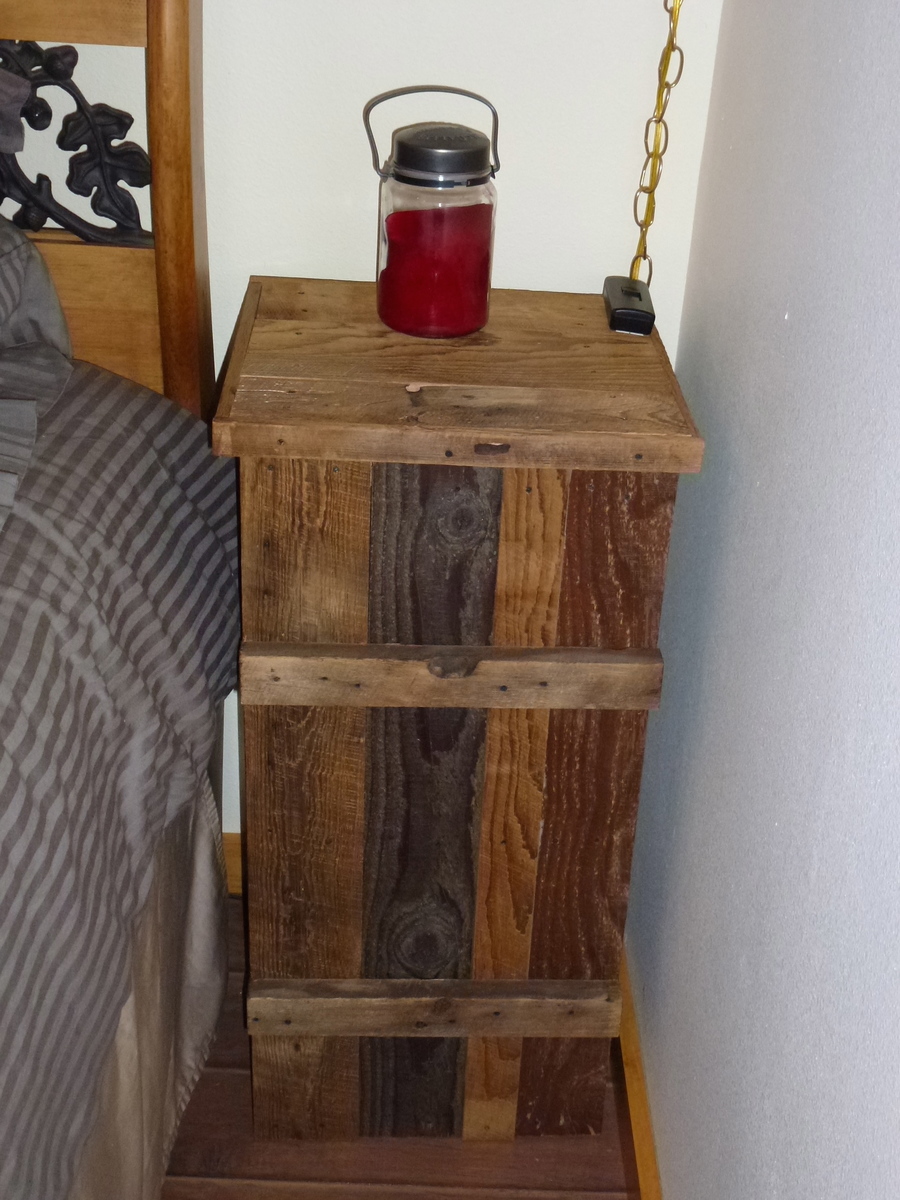
My former neighbor needed a bench in the hallway of her new apartment; with the desired measures (roughly) 5’x19-20”x18” (150x50x45 cm). And then I saw your mudroom bench on YouTube which inspired me building my own bench according to the general ideas from yours’. So, I made like a frame with 2x3”, then I let the plywood sides proceed down to the floor, leaving a space between the carcass and the floor of 15 cm (6”), for shoes. Three drawers and using a scrap bit as space block for the drawer slides it was not that hard to get them in place. The top sheet is a slab of massive oak that are sold as “shelf material” at our local store (Bauhaus, possibly the Swedish equivalent for home Depot?).
I think it turned out pretty well, and I am grateful for your work, inspiring me and making my own woodworking easier.
Best//Göran Redmo Tyresö, Stockholm Sweden

Built from Plan(s)

Comments

Craft Table Build

Submitted by cathytn2 on Thu, 03/31/2011 - 05:28

I emailed my husband the plans for this desk on a Friday night and said we HAVE to make this desk this weekend.  I can't believe he actually went for it!  Well it turned into about 3 weekends and some nights of painting.  We also had some issues getting straight and square plywood and boards with knots in them.  He also added some extra holes in the sides for me to adjust the shelves.  We used an oil based white paint to finish the desk and looks nice and clean and shiny.  I can't wait to get started on our next project!  Please check out my blog for more details and photos and information on materials used, etc. (kitcats-studio.blogspot.com/2011/craft-table-made-from-plans.html
PS - {I had one more coat of paint on the drawers to finish so ignore the bare fronts of the drawers.}

Estimated Cost
$150
Estimated Time Investment
Weekend Project (10-20 Hours)
Finish Used
We primed everything using Zissner and then used an oil based white paint (about $15/gallon) from Lowe's for the finish. The trick to doing this is a WELL ventilated area, and a good brush. Although we're kind of lazy about cleaning up from oil based paint (it's a chore) so we got a medium cost brush (about $5) and threw it away when we were done with it. I used general handles from Lowes and the color on the inside of the drawers is Valspar Turquoise Tint 5006-10B.
Recommended Skill Level
Beginner

Farmhouse Table and benches

This is the first furniture building project that my husband and I have completed. It took us about 5 weekends to complete it- including finishing.

We started with the benches as recommended in some of the comments and ended up buying a pocket hole jig and redoing the tops of the benches before completing the table.

The stain is Minwax Red Chestnut and there are three coats of Minwax Fast Drying Polyurethane on it. We're so happy with it and can't wait to start the next project!

Estimated Cost
about $200
Estimated Time Investment
Week Long Project (20 Hours or More)
Finish Used
Minwax Red Chestnut stain- one coat
Minway Fast Drying Polyurethane in Semi Gloss
Recommended Skill Level
Beginner

Built for my sister

Submitted by Diesel911 on Wed, 05/13/2015 - 11:45

Built for my sister. Because she liked mine so much :) I also built her an apothecary console to use as a side board in the dining room

Built from Plan(s)
Recommended Skill Level
Intermediate

Comments

Modern Adirondack Chair

Submitted by Sylka on Mon, 11/08/2021 - 15:39

What a great project! Simple and relatively easy. Very stylish chair!

Comments

Seasonal And Holiday

Hutch

I built this hutch from Ana's book. I made a few modifications to the plans. The stained top and stained back planks are from reclaimed wood. If you build this hutch be sure to choose white knobs. I my opinion, its what makes those hutch pop. If anyone has any questions I would be happy to answer them. - Brad

Estimated Time Investment
Week Long Project (20 Hours or More)
Recommended Skill Level
Intermediate

Comments

mrsjones23

Tue, 10/28/2014 - 07:25

Hello! I am currently building this console table and hutch. At the moment, I am stuck on attaching the console legs to the side aprons. The legs are not sitting flush with the side aprons. Did you have this issue with your 2x2's when attaching them to the side aprons? If so, how did you fix this issue? The directions say to attach flush to the aprons but mine won't be flush on both sides, only one.

jwoelk

Sat, 07/25/2015 - 07:59

Where are the plans for this hutch? My wife wants this exact hutch for her birthday.

TeXas Kitchen Island

Submitted by Bandera89 on Sat, 05/16/2015 - 15:19

This kitchen island should be your next project. My wife wanted me to build an island for so long, but I never thought I had the skill to get it done. I can truly say this was only my second woodworking project and it was pretty simple. I learned a lot along the way and made a modification to the drawer rails. The key to my success was the Kreg jig. In the end it was a blast to build and I couldn't have done it without Ana's plans.

The rolling kitchen island is the central point of the kitchen now, even though we have 75'sf counter space to use. It seems to be used by everyone in the family whether it's getting something out of the fridge or using it for serving. Well worth the effort..

MODIFICATIONS: I made two small modifications to the project.
One was the casters. Instead of the plate casters I installed threaded stem casters with a T-nut in the bottom of the legs. The casters are adjustable so it's easy to keep level. The second mod was the drawers. I initially built the drawer with wood rails, but was not happy with the drawer falling to floor, if you pulled it out to far. Living in a humid climate, I could see the original rails swelling and then the drawer would be hard to operate. My solution was to add metal rolling sliders. I had to remove the 2 x 2's on inner cabinet and the 1 x 2s on the drawer itself. I added 1 x 2s on the inner cabinet, mounted 12" metal sliders ($5)) on the 1 x 2s and screwed the other half of slider on bottom of drawer. It may require a small shim behind sliders to make it fit perfect though. I provided photos of this mod. My drawer works perfect now. There is no dragging, no falling out and no wear.

Estimated Cost
$87
Estimated Time Investment
Weekend Project (10-20 Hours)
Finish Used
Stain: Minwax special walnut
Distressed finished:
Paint; Behr Ultra, Cream color, lightly sanded with spec. walnut stain over paint then 3 polyurethane coats. Top had 4 light coats of poly coat.
Recommended Skill Level
Intermediate

Hall Tree Storage Bench

Submitted by ScottyG on Sat, 12/02/2017 - 14:59

Hi Ana!  This project was pretty much inspired by ALL the great things you build on this site, as well as from watching a 'Fixer Upper' marathon (hence, the white color and shiplap).  Last Christmas, I promised my sister that I'd build her a hall tree since she's now up to 10 grandkids and needed more hooks for all those coats and hats.  Unfortunately, I also came down with a WICKED case of vertigo, so no power tools for yours truly. : (

Well...  The vertigo finally cleared up, so it was time to get out my trusty ol' Kreg Jig and fire up the tools.

This project started with 2 4x4s.  I cut 17 1/2" off each, then used the long pieces as the back and the sort pieces as the front legs.  Then I built a rectangle (shored up by some cross supports) out of 2x3s and used those to attach the back legs together with pocket holes.  I did the same thing with the 2 front legs, then attached the 2 sets of legs together with shorter pieces of 2x3s that framed up the side.

Next, I added a front to back support to the underside, and then attached the bottom of the seat on top of that.  I built the front, back, and side pieces of the bench section by cutting a couple of 8' x 8" x .5" planks to size, and attached 2 pieces to each side by gluing and nailing them to the frame.   Then, I rans some shiplap up the back (glued and nailed to the back frame) and topped it all off with a mantle.

For the seat, I used a 12" project board ($11 at Lowes for a 6 foot section) because I love all the knotty details and nail marks.  I framed it out with 1x1 and attached with pocket screws on the underside.  I finished that piece by staining it in Rustoleum Dark Walnut.

As for the rest, I just framed the shiplap section with leftover 1x1s, then sanded and stained the whole piece with the same Dark Walnut stain (so that something would show through after distressing).  Finally, I applied 2 coats of Rustoleum Linen White Chalk Paint (LOVE that stuff!), distressed it, and topped with one coat of Minwax 1 Coat Poly (ALSO love that stuff), and added some hardware and country do dads from Hobby Lobby (Rustic Hooks, 'Bless This Home' Sign, Decorative Doorknob, and "Mitten Clip" for wet mittens and gloves coming off little hands) .  What do you think?  ヅ

Estimated Cost
About $100
Estimated Time Investment
Weekend Project (10-20 Hours)
Finish Used
Rustoleum Dark Walnut Stain (Bench Seat), Rustoleum Linen White Chalk Paint (Rest of project), sealed with Minwax 1 coat poly.
Recommended Skill Level
Intermediate

Paper Roll Dispenser

Submitted by vendo on Wed, 11/17/2021 - 10:44

This took me about 20 minutes! I love the look of it and that it can just be left out when the kids aren't doing art. A great little item to add to keep the kids busy and inspired. I made a couple of mods from the plan. I used glue and nails instead of pocket holes and I did that bottom board flat instead of on it's side. I also used a little bigger dowel, and bought two rolls of paper on Amazon for $14.I'm giving this to my daughter for her birthday with some fun art supplies, so I think it's a great gift idea for any occasion for those crafty people out there!

Built from Plan(s)

Comments

Monika

Tue, 04/02/2024 - 06:09

Sometimes, when working with papers, you might need to convert file formats, right? So, I recently came across this website https://pdfflex.com/webp-to-png It's super handy for converting. It's been a real time-saver for me, especially when I need to tweak documents for printing or sharing. I'd desided to share in case it helps someone else out there too!

Doll House Bookshelf

Submitted by alhskier on Mon, 04/04/2011 - 19:43

My first project from this website.  Made it for my daughter's first birthday! Had a fun time with it. Caulked the joints for a cleaner look, it came out great.

Built from Plan(s)
Estimated Cost
$100
Estimated Time Investment
Weekend Project (10-20 Hours)
Finish Used
Caulk, and semi gloss paint!
Recommended Skill Level
Beginner

Wood Deck Chairs

This was my first solo build project and my first time using a power saw. I was terrified but determined because I've been wanting to make these chairs for years. After failing to convince my husband to make them for me, I decided to make them myself and I am so glad that I did. I am so proud!

I fell in love with the fabric first (Premier Prints' Suzani Chocolate and a striped fabric called Veranda Chocolate for the bottom) and then picked a stain to match. I chose to reinforce the sling by sandwiching the outer fabric with a layer of heavy duck fabric. I also made pillows, which protect your head from that upper wood support.

Also, I ordered some special connecting bolts and nuts made by Rockler that someone else mentioned in their brag post. Unlike the hardware mentioned in the original plan, these bolts are flush with the frame on both the inside and out so the chairs can fold completely flat. Here are the links to them on Amazon:

http://www.amazon.com/Statuary-Bronze-Connector-Bolts-8-Pack/dp/B001DT3…
http://www.amazon.com/Cap-Nuts-Connector-Bolts-pack/dp/B001DT3G9O/ref=p…

The inner frame did need slightly larger holes (3/8 inch, I believe) to accommodate the cap nuts.

Estimated Cost
$100 - I spent a little bit more on wood than others because I bought pre-sanded stock. I also ordered extra fabric to make pillows and chose two different fabrics to make the design reversible. This project can definitely be done more economically if you already have some of the materials and if you find the fabric on sale.
Estimated Time Investment
Weekend Project (10-20 Hours)
Finish Used
Cabot Premium Wood Finish Stain & Sealer (Espresso) - I originally tried a few different stains (one from Minwax and one from Valspar) that we already had but I didn't like the fact that I would have to do multiple coats to get the color opacity that I wanted and then I'd have to do multiple coats of sealer. I'm too impatient for all that so I found an all-in-one product that worked beautifully. I will definitely use this product again!
Recommended Skill Level
Beginner

Comments

Joni

Fri, 05/22/2015 - 09:43

These are just beautiful. Nice job! Thanks for such a nice write-up with all the additional hardware information.

Beavers/San Fransisco giants bunk bed

Submitted by Medickep on Wed, 12/13/2017 - 18:16

I’ve  made several of these bunk beds now and my oldest was wanting a oregon beavers/San Fransisco giants themed one after we donated his during our move.  It’s made out of 2x4’s, 2x6’s and 1x3 pine.  

Estimated Cost
215.00 plus finish
Estimated Time Investment
Weekend Project (10-20 Hours)
Finish Used
I rattle canned all of the orange stuff as painting orange takes forever! The rest of the bed is stained with three coats of no wax ebony to make it look black!
Recommended Skill Level
Beginner

Favorite Bookshelf

Submitted by ke263565 on Sun, 04/10/2011 - 05:06

Favorite Bookshelf - 2nd project  - slowly replacing all of my furniture - took about a day - all day - sprayed about 3 coats of spray paint on there - came out pretty good - hardest thing is to screw in shelves level -  but overall not too bad

Built from Plan(s)
Estimated Cost
40 - 50 bucks
Estimated Time Investment
Day Project (6-9 Hours)
Finish Used
moss green spraypaint - saw another user that used color so i stole it - sorry
Recommended Skill Level
Beginner

Children's Castle Bed

Submitted by Yodannos on Sun, 05/24/2015 - 20:39

This was a project I took on for my two daughters (5 and 2). I was pretty intense as I used the castle loft bed as my starting point. The drawbridge is fully functional, but I had to remove the black ropes as my kids were running around and tripping (safety hazard). I made the top large enough to house two small mattresses for the kids to sleep on. I made use of the space under the stairs and the slide by cutting out doors. This is a very large structure and is modular (front, towers (2x), stairs, slide, platform). They are all joined with some significant lag bolts and is sturdy enough to have my wife and I and both children up top. I have also mounted LED lights under the platform wired to a switch so that they can see at night. Overall, it has been a hit for my daughters and their friends. Thanks for the plans!

Estimated Cost
Approximately $400
Estimated Time Investment
Week Long Project (20 Hours or More)
Finish Used
Body - Cotton Whisper (Behr)
Tower Peaks - Mixture of leftover red and white paint (gold sparkle paint over the top)
Antiqued the body by sanding on edges, and applying a walnut stain lightly
Recommended Skill Level
Intermediate

Comments

AmberI65

Sun, 04/19/2020 - 18:25

could you possibly give me a rundown of what specific changed you made, what extra material I would need, ect. I'm wanting to build the princess bed- but I'm a little ocd and would much appreciate the symmetry of two identical towers. thanks if you can help.

Second Rustic X Console table build

Submitted by mcneece on Mon, 12/18/2017 - 13:55

After being forced to sell my first build by an admirer, I decided to do another and distress it rather than stain it.  Turned out really nicely.

Estimated Time Investment
Weekend Project (10-20 Hours)
Finish Used
Homemade chaulk paint
Recommended Skill Level
Beginner

2x4 Adirondack Chair Plans with a few changes

This was my version of Ana's chair. I made it just like the plans put bit wider for the of 1x6 back. I made it into a shark chair for my Grand Daughter.

Comments

Dollhouse Bookcase

Submitted by mnewton on Mon, 04/11/2011 - 12:52

This was my first build. I was conviced to do this once I saw the Pottery Barn price tag. The plans were so easy to follow.

Built from Plan(s)
Estimated Time Investment
Afternoon Project (3-6 Hours)
Recommended Skill Level
Starter Project

Convertible picnic table

Submitted by ClemTanya on Tue, 06/18/2013 - 19:43

I built this table with the dimensions described in the original plans, but made a slight modification by using my Kreg Jig to add pocket holes for attaching the tabletop and seat boards from below rather than drilling down through the top. I'm never really happy with the way a finish comes out after using wood filler, plus not having to fill holes saves a step in the finishing process (which is the really arduous part of the job for me). I also like the sturdiness of the Kreg joints.
This was my first project using the Kreg Jig in an application that didn't have the location for the pocket holes specified, so for the first bench I followed right along with the plans and just detached the drill guide and clamped it to my project to drill the pocket holes as I went along. For the second bench I was familiar with where all the holes should be drilled, so I was able to quickly mark off the location and pre-drill all the pieces assembly line fashion. The second one practically flew together.
If you want to use this method, you will be drilling your pocket holes in the boards labeled "seat support" and "tabletop support" (there are 2 of each of these pieces for each bench/half table). You can mark the position of the tabletop boards on the tabletop supports and drill your pair of pocket holes to correspond roughly to the center of where each board will be (so 6 holes in each of the 2 pieces labeled tabletop support for each bench). Nearly the same process for the seat supports, but remember that the holes to attach the outermost seat board won't be centered because of the location of the front leg. I chose to add a couple of pocket holes through the front leg board as well for extra sturdiness in case it gets picked up by that outermost seat board when the bench/table is getting moved. I have included a picture of the pre-drilled pocket holes to help clarify the above directions.
The build itself can definitely be classified as a beginner project and easily manageable by one lady (although it would be really nice to have a buddy to help move the finished bench...I had to take the tabletop back off mine to move it from my "workshop" (carport) around to my patio). In terms of time, the build for both benches could easily be completed in an afternoon; I ranked it as a weekend project because of the finish. The tabletop and seat boards each have 4 coats of an exterior semigloss paint and I custom blended the colors so that each board gets progressively darker as you go down the bench. I was inspired by the ocean, with the water getting darker as you go deeper and deeper. As you can see from my photos, I rushed headlong into the first bench and put it together unfinished (I was more concerned about figuring out the placement of the pocket holes than the finish.) For the second one I pre-drilled my pocket holes, then put on 2 coats of base coat and 1 coat of color (on seat and tabletop boards) before assembly, saving only the finish coat on the colored boards and touchups on the white boards for after assembly. I definitely recommend the second method.
I worked on the project over a couple of weekends and evenings because of weather and time constraints, but under the right conditions it could be completed in a weekend or even maybe a long day (especially with a second painter and in good paint drying weather). I'm really happy with the final product and I've already been enjoying the comfy bench seat for reading.

Estimated Cost
$100 (including finish)
Estimated Time Investment
Weekend Project (10-20 Hours)
Finish Used
Exterior semigloss paint: 2 coats of self priming base coat (Valspar Duramax) and an additional 2 coats of color that I custom mixed into 6 shades on the bench seats and tabletops. The darkest shade on the outermost seat board is called Monterrey Bay Teal from Valspar. I mixed the five additional colors with white in 15% by volume increments. (If you want to get really, really specific, I started with a quart of the teal and made 100 grams of each of the 5 blended colors and this was almost the perfect amount to put 2 thick coats of color on all sides of each of the seat/tabletop boards.)
Recommended Skill Level
Beginner

Comments

Barnwood wall

Dear Ana White: Please stop posting cool - “must do” projects on your website … you’re killing us.

After we saw Ana White’s posting for her pallet wall http://ana-white.com/2015/02/free_plans/pallet-wall-hgtv-saving-alaska , we knew we had to augment our guest bedroom with this concept.

Before we began this project, we really didn’t have any idea how expensive “rustic” was or how complex “random” could be.

Mostly, we used 1 type of reclaimed barn wood and stained it with 3 different colors as well as using the natural un-weathered side to add color contrast. For added variety, we used some leftover reclaimed barn wood from a previous project spattered throughout the design.

This was really a fun project. Barn wood is very forgiving and user – friendly. Each piece of barn wood is unique in itself, very much like a snowflake, from being weathered in the elements.

We finished the room off with closet sans door, picture frame & nightstand.

The GOOD news is that we are now out of reclaimed barn wood and we can’t build anything else.
Thanks, Ana! You have helped us make our guest bedroom a special place for our visitors.

Estimated Cost
$1,000
Estimated Time Investment
Week Long Project (20 Hours or More)
Finish Used
Leftover stains from other projects
Recommended Skill Level
Intermediate

Husky Farmhouse Table

This is one of my favorite pieces on Ana's site. I knew the minute I laid eyes on it I had to build it. I hope you guys enjoy it half as much as I do.You can read the full details of the build at my blog here:

http://copycatcarpenter.blogspot.com

Built from Plan(s)
Estimated Time Investment
Week Long Project (20 Hours or More)
Finish Used
Espresso stain, Helsman Spar Urethane, Light Cream Milk Paint
Recommended Skill Level
Intermediate

Comments

JoanneS

Thu, 06/20/2013 - 16:00

Love this! You did a wonderful job, and the finishes are awesome! Also I read your blog post, what a great idea to give a new life to those bedposts and use them for your table legs.

Copycat Carpenter

Fri, 06/21/2013 - 05:14

I'm glad you like it! I've been showing this picture on my phone to everyone recently, like a proud parent, lol! Check back soon, I should have the full blog finished shortly.

spiceylg

Fri, 06/21/2013 - 07:58

Great job. Love the chunky legs and the story behind them! Way to repurpose!