Community Brag Posts

Lift Top Coffee Table

Submitted by JJones0925 on Fri, 03/16/2018 - 20:48

Instead of attaching the top to the coffee table base as done in the plans, the top is attached using a set of coffee table lift top hinges. 

Built from Plan(s)
Estimated Time Investment
Weekend Project (10-20 Hours)
Recommended Skill Level
Beginner

Comments

Modern Farmhouse bed and bedside tables

Worked on the bed over the summer at the same time I redid the floors.  I built the side tables one at a time in case I needed to change anything for the second one.  All in all these were fairly easy to build.  Thanks Ana!

Estimated Cost
Roughly $300 maybe?
Estimated Time Investment
Weekend Project (10-20 Hours)
Finish Used
Varathane weathered wood
Recommended Skill Level
Beginner

Cabin Bed

Submitted by Anonymous (not verified) on Sat, 04/02/2016 - 07:53

Changed the scale of the front panel and the window trim slightly.  Added window boxes for a drink, toys and book storage.


Built from Plan(s)
Estimated Cost
~$200
Estimated Time Investment
Weekend Project (10-20 Hours)
Finish Used
Interior paint and primer
Recommended Skill Level
Beginner

Kitchen Pantry

I made this pantry to match some new kitchen cabinets that my friend ordered from lowes. He wanted me to make all of his cabinets but unfortunately I didn't have enough time, it was kind of one of those things hey I'm redoing my kitchen can you make this. This was all built and designed from a picture his wife found on pinterest with just the measurements for the space it needed to fit in.

Estimated Cost
$400
Estimated Time Investment
Week Long Project (20 Hours or More)
Finish Used
Latex paint and polycrlic
Recommended Skill Level
Intermediate

Comments

alpinecwt

Tue, 02/11/2014 - 09:18

You should definitely get with Ana to make plans for this pantry!! Looks superb,job well done.

OurHome

Fri, 06/17/2016 - 18:39

HI - 

My husband and I have been trying to find a DIY Pantry for our kitchen. We've looked everywhere and finally came across this! We love it and would like to try and build it. Do you have the plans available to share? I look forward to hearing back from you.

suziewelker

Fri, 11/27/2020 - 21:33

I tried the link for crafted perfection in attempt to get the plans for this. It led me back to this website. Is there ANY chance of getting the plans for this pantry PLEASE?

watkinswd

Wed, 09/01/2021 - 13:59

Okay, Ana, where are the Plans? You're killing me with this teaser! I'm not smart enough make something this great without serious plans like you usually produce. Help this old guy, please.

farrellp

Thu, 08/11/2022 - 18:08

Hi Ana! Do you have plans? My daughter is moving and could always use more kitchen cabinets. She loves kitchen gadget everything!

Custom Game Table

Submitted by Anonymous (not verified) on Mon, 03/18/2024 - 11:12

I saw this table on wyrmwoodgaming.com but I wanted to see if I could make it myself. I did it all in Cherry and used Tung oil to finish it. I have two coats of Tung oil on there for a finish. In all I paid about $800 for the cherry and flat steel I used for the magnetic rails on the sides.

Michael Frerichs

Comments

LuckyGirl

Wed, 03/27/2024 - 06:31

Investing in a custom game table can really enhance your gaming experience. It's not just about having a cool-looking setup, but also about creating a space where you can fully immerse yourself in the game without any distractions. Speaking of which, I recently stumbled upon a non Gamstop casino on https://notgamstop.com/ which adds an interesting twist to the gaming experience. Check it out if you are a keen player like me and choosing only the best options for yourself.

Drop down murphy bar

Submitted by nick_h on Tue, 12/06/2016 - 10:54

My attempt at the murphy bar featured on this site. Still have to add the sash locks. Added pallet crossmembers at the back, an x in the leg, and a french cleat to mount to the wall. 

Estimated Cost
$45
Estimated Time Investment
Day Project (6-9 Hours)
Finish Used
Special Walnut Minwax on the bar top and shelves, crisp linen matte latex and dry brushed casual gray for accents/aging. 2 coats of polycrylic for protection. If built again would pre stain and base coat all the wood before build time, then assemble, add accent brushing and spray the polycrylic.
Recommended Skill Level
Beginner

Comments

zannej

Tue, 12/31/2019 - 11:49

This looks awesome! I want to help my friend build this for his kitchen. I've looked at the plans in the link & I'm wondering what modifications you made for the X pattern-- how much did it alter the material & cut list?

Would you please share your material & cut list for this?

Garden shed

Submitted by Anonymous (not verified) on Sat, 11/28/2020 - 13:19

Our take on the small garden shed. Ours is 4 1/2 by 7 feet. We used cedar fence pickets and 2x4 construction. Left over shingles from when our house was built. We are definitely not roofers or framers, also chasing around a 3 year old didn't make things easier. Turned out beautiful for what we want it for. Just rustic enough. Great intermediate project.

Built from Plan(s)
Estimated Cost
$400
Estimated Time Investment
Weekend Project (10-20 Hours)
Finish Used
Thompson's clear water seal will be applied this summer.
Recommended Skill Level
Intermediate

Comments

Seasonal And Holiday

Round X Base Pedestal Dining Table

Submitted by bRick on Thu, 12/18/2014 - 18:05

We wanted a round table that would seat a full Monopoly game. To do this we needed about a 5' diameter tabletop.  The base was made consistent with the plans.  

A few tips on the base:

  1. Get your angles as close to 45° as you can.  Otherwise, there will be much sanding and puttying in your future.  
  2. If you want to hide your lag screw like I did, I used a spade bit to recess an area for the screw head.  Then I glued in a plug made from dowel and sanded flush.  

If you want to make a round tabletop, here is what I did (there may be better methods).  Keep in mind this was for a ~60" diameter table, I was assuming that the perimeter arc pieces would be about 4.5" wide and that I would cut the inner circle at a 50" diameter.

  1. Picture 1 - I built two 5' slabs of (7) 2x4s pocket-holed together.  
  2. Picture 2 - Then I cut two pieces from each slab that would later make up the 90° "pie slice" pieces.  Make sure to remove the screws that will be in the way your saw blade. Also, you just have to concern yourself with the angle since the radius will be dealt with later.  There is a lot of wood waste with this method, but I think it avoided headaches. 
  3. Picture 3 - I assembled (screwed and glued) the "pie pieces"to the cross pieces. The length of the cross pieces don't matter much since they will also be to cut to a specified radius.  Since I would be cutting a 50" diameter circle, the large cross piece had to be at least 50" and the two small pieces had to be at least 22.25" (subtracting the 2x6 width).  
    1. Picture 3 - I mounted my router to a piece of MDF and drilled a hole at the necessary distance to cut a 50" diameter circle. This distance is 25" + half of the bit diameter.  Since I used a 1/2" straight bit, my point was 25.25" from the center of the router bit.  I screwed this jig to the center of the tabletop assembly so the router could pivot and cut a circle.  As for logistics, I rested this assembly on some scrap wood and kneeled on the tabletop as I was cutting it.  It took a large number of passes with the router since I was cutting through 1.5" of material. 
  4. Picture 4 - The perimeter pieces required some time and geometry. I found that I would need (8) 23" 2x8 pieces (the 23" is approximate because I was a little off for some reason, though I can't recall why).  From those pieces, I used the same router jig to cut the perimeter arc pieces. You will need to make two new radius holes in teh jig to accomplish what you need.  To cut the inner arc you need a hole set at 25" - half of the bit diameter (24.75" for me).  To cut the outer arc, I used a hole that was 29 5/8" from the center of the router bit.  You may need to do some fine tuning to these pieces to get them to fit correctly, but for me it pretty minor.  I trimmed a couple pieces with a miter saw but that was it. 
  5. The rest is screws and glue. 
Estimated Time Investment
Week Long Project (20 Hours or More)
Finish Used
Sanded using 60, then 120 grit. The stain was Rust-Oleum's Ultimate Wood Stain in Dark Walnut. The top coat was General Finishes water-based polyurethane in flat. One coat of stain, six coats of poly, while sanding with grade #0000 steel wool after every other coat.
Recommended Skill Level
Intermediate

Comments

ILoveDIYing

Sun, 03/08/2015 - 10:23

Hi, your table is beautiful! I was wondering if you had to increase the size of your base since your table top is 60". I'm going to be building a round one the same size and wanted to make sure it would be stable at the current size.

bRick

Fri, 03/13/2015 - 20:36

The only modification I made to the base was the to the lengths of the 2x4 pieces that make up the "X" that sits between the base and the tabletop. In the plans, this "X" is made of (1) 32" piece and (2) 14.5" pieces. I believe I increased these to 36" and 16.5", respectively. Truthfully, I don't think this modification added much value.

I did some calculations and at a 60" diameter, it would've taken over 100 lbs placed at the edge of the table. This was also a function of the weight of the table. The heavier the table, the more stable it will be.

Momma Gladden

Sun, 04/05/2015 - 19:21

I want to put a concrete top on this base and increase the diameter to 72". Would I need to increase the size of the base to accommodate the larger and heavier top? Thank you

bRick

Tue, 04/14/2015 - 20:20

It all depends on how much your tabletop weighs. I'm going to take a wild guess that your tabletop will weigh around 500 lbs (~28 sq. ft. at ~18 lbs/sq. ft.). For reference, I think my wood top weighed about 80 lbs. I will also assume the wood base weighs 50 lbs. Using these assumptions, the result is a worst-case scenario (weight placed at edge of table, tipping between two table legs) of tipping at 300 lbs. The lighter the tabletop, the less stable it will be. Since your concrete table is likely to weigh a lot more than my wood top, it will be a lot more stable.

That addresses the design and assumes none of the wood or connections (screws) fail under the increased load (weight of concrete). I can't speak very confident to this aspect. Though I can venture a guess. I will guess that it will be stable under no load, but there will increased loads when under uneven stress (i.e. somebody leaning on one side of the table). Honestly, I don't know how valuable any further speculation would be.

X3cougsp

Tue, 09/06/2016 - 08:14

Can the pedestal hold a 66"- 72" top?  I've been searching for a table that seats 6 comfortably with an occasional squeeze for 8.  I think a 60" would work but my husband thinks 72".  We are struggling to find exactly what we want and are now investigating DIYs .  This is a beautiful table!!  

In reply to by X3cougsp

bRick

Wed, 10/05/2016 - 17:16

This is a conversation that we had in our house as well. My personal opinion is that 60" is big enough for 6 people and good enough for 8 people. What we did to "dry run" it was I cut a board to 72" and set it up at table height and we sat at oppposite ends of the board. I asked my wife if it was too big and we both agreed that not only would really shrink the room, but it also was too big for regular use. We currently have 6 chairs around this on a regular basis. As for the stability of the table itself, you may want to increase the width of the base. I say this because 74 lbs at the edge of the table (in between legs) will cause the table to tip, which is probably a force that will be exceeded by someone leaning on it. 

bRick

Thu, 12/22/2016 - 20:58

I used the jig that I made the large circle but made a couple new radii. The inner edge was the round piece radius minus half of the bit diameter. The other radius is as wide as you want to make it. 


I fixed this jig to my work bench and set it up so that I would be cutting each piece identically. I have a picture that I'll add that shows it better than I can explain it. 

In reply to by Omally83

bRick

Sat, 01/21/2017 - 07:46

I believe my approach was that I cut the 2x8s to the length that would produce the arc length I was looking for. So basically the outer edge was going to (if my jig did its job) be exactly as long as I needed it to be. With that in mind, I used a piece of yarn tied to the pivot point on the jig that I was using and used that to tell me where I needed to make the cut. 

Otherwise, I could've used trig to figure it out but I was all angled out by that point. With 8 border pieces they should each cover 45 degrees (360/8) and the other two angles should be equal ((180 - 45))/2=67.5) resulting in a 67.5 degree angle. The trouble in using that method is it doesn't account for all the little screw-ups that may have thrown off certain measurements. Plus, the yarn-thing was pretty easy. 

SueInVA

Sat, 01/23/2021 - 14:17

We made the table base for a 60" solid walnut top (used the wider measurements). When people get up from the table, my husband thinks the base twists when they push off. Has anyone else noticed this or have a suggestion on how to make the table not twist? Thanks, Sue

Wedding tables and benches

Submitted by JoanneS on Tue, 10/17/2017 - 14:59

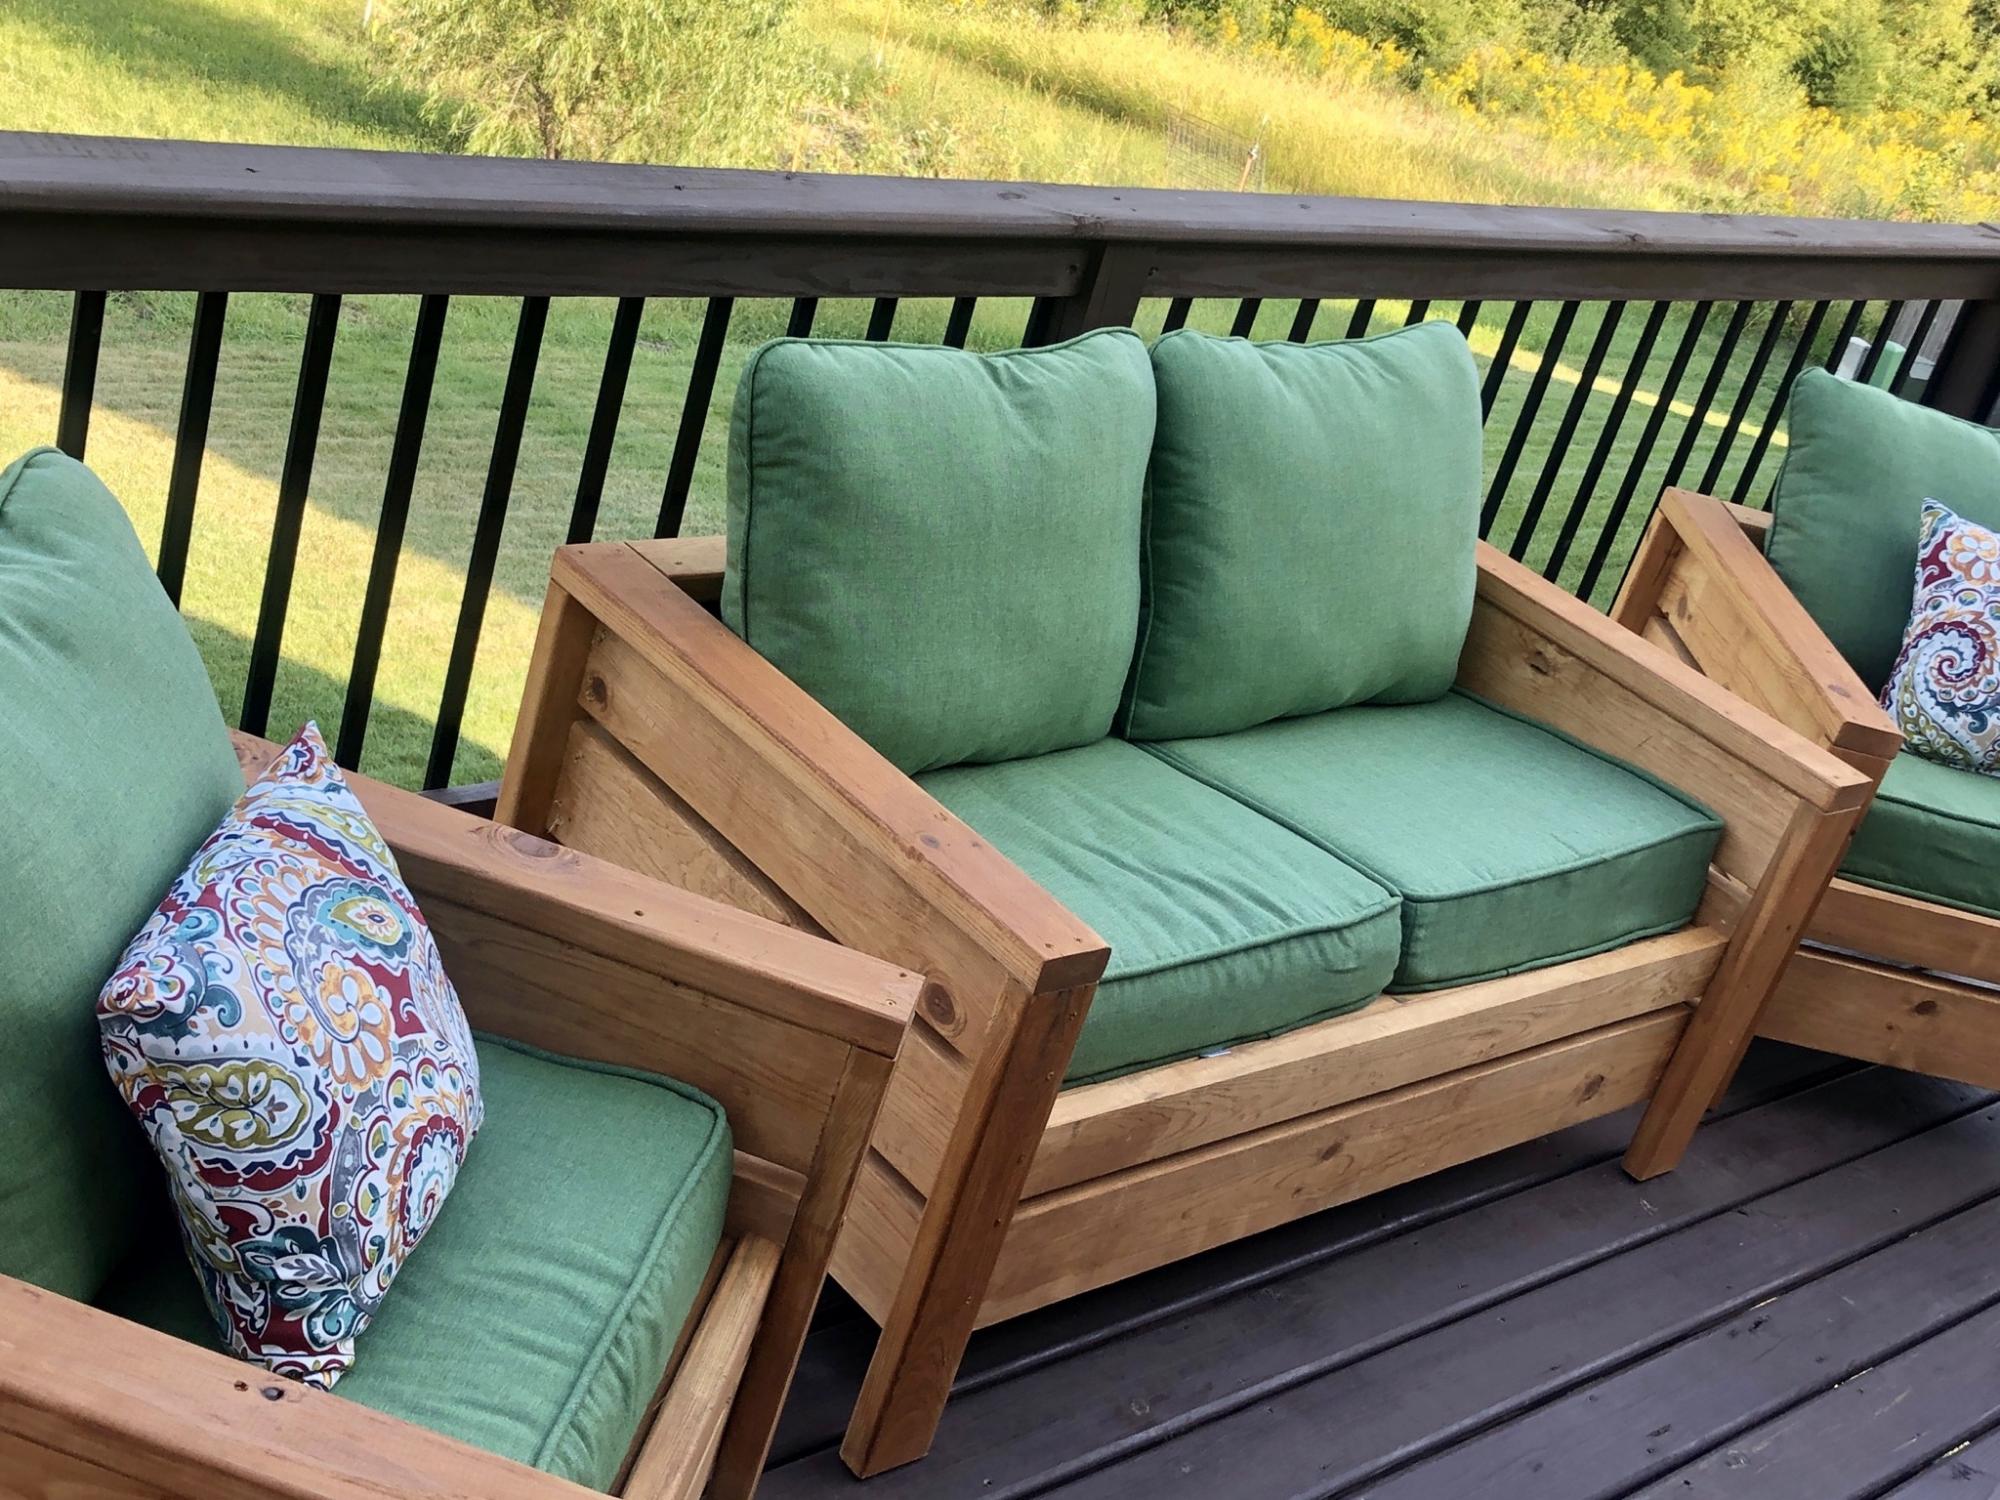
Last week we hosted a reception for our son’s wedding.  We built 8 benches and 2 banquet tables over the course of 3 weekends.


The banquet tables are 30” x 8’ and are constructed from 2x4, 2x2 and ½” plywood, with some angle brackets at each leg for extra strength.  We used the 2x2 for the tabletop apron/frame, attached leg assemblies made from 2x4 with some 1x3 furring strips for stringers, and topped the tables with ½” plywood.  Hubby and I put these together in an afternoon.  The tables were left unfinished because they were covered completely with tablecloths. 

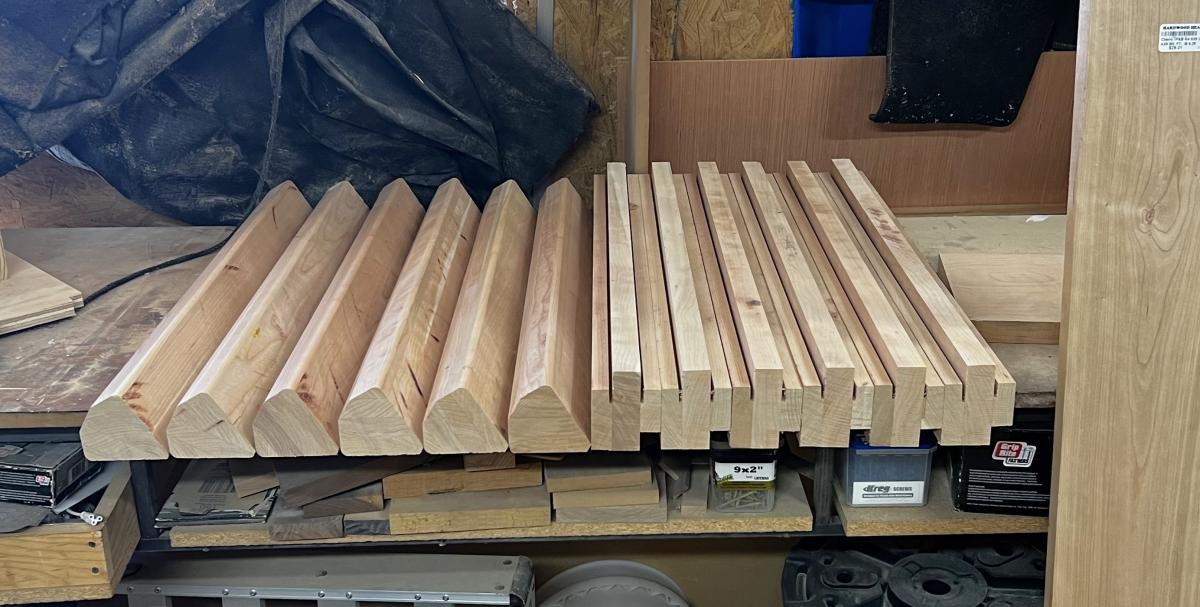
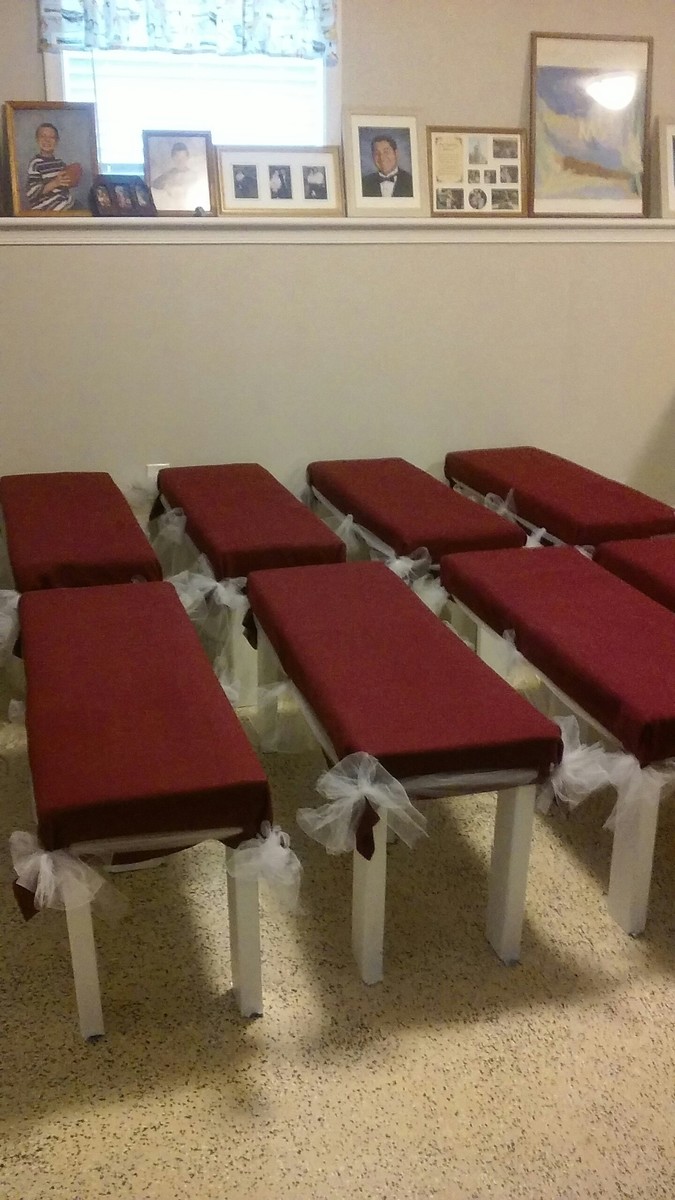
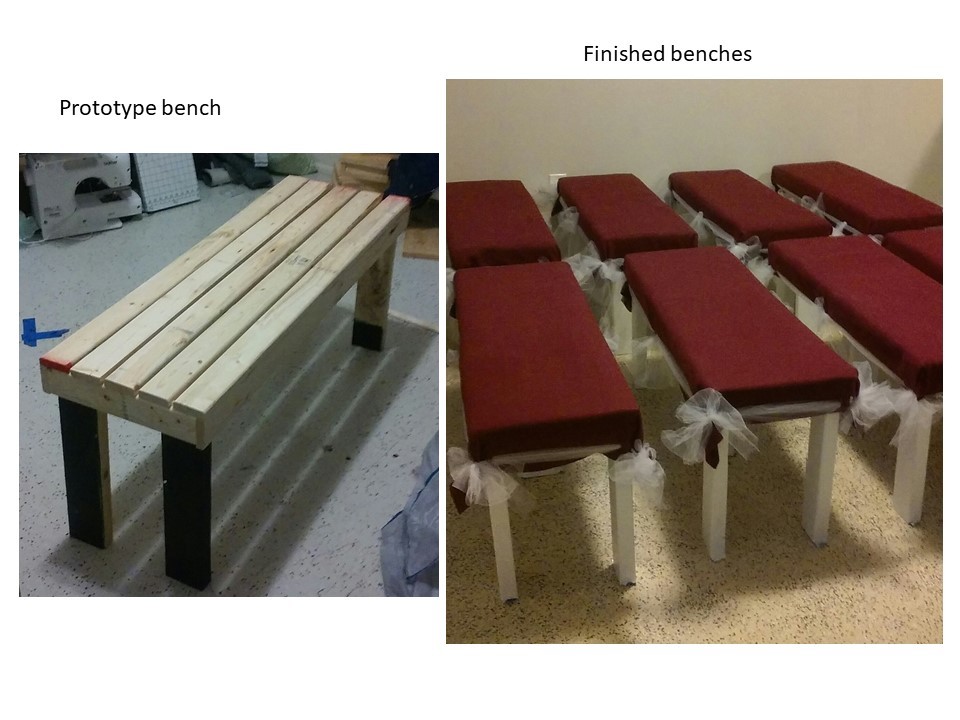
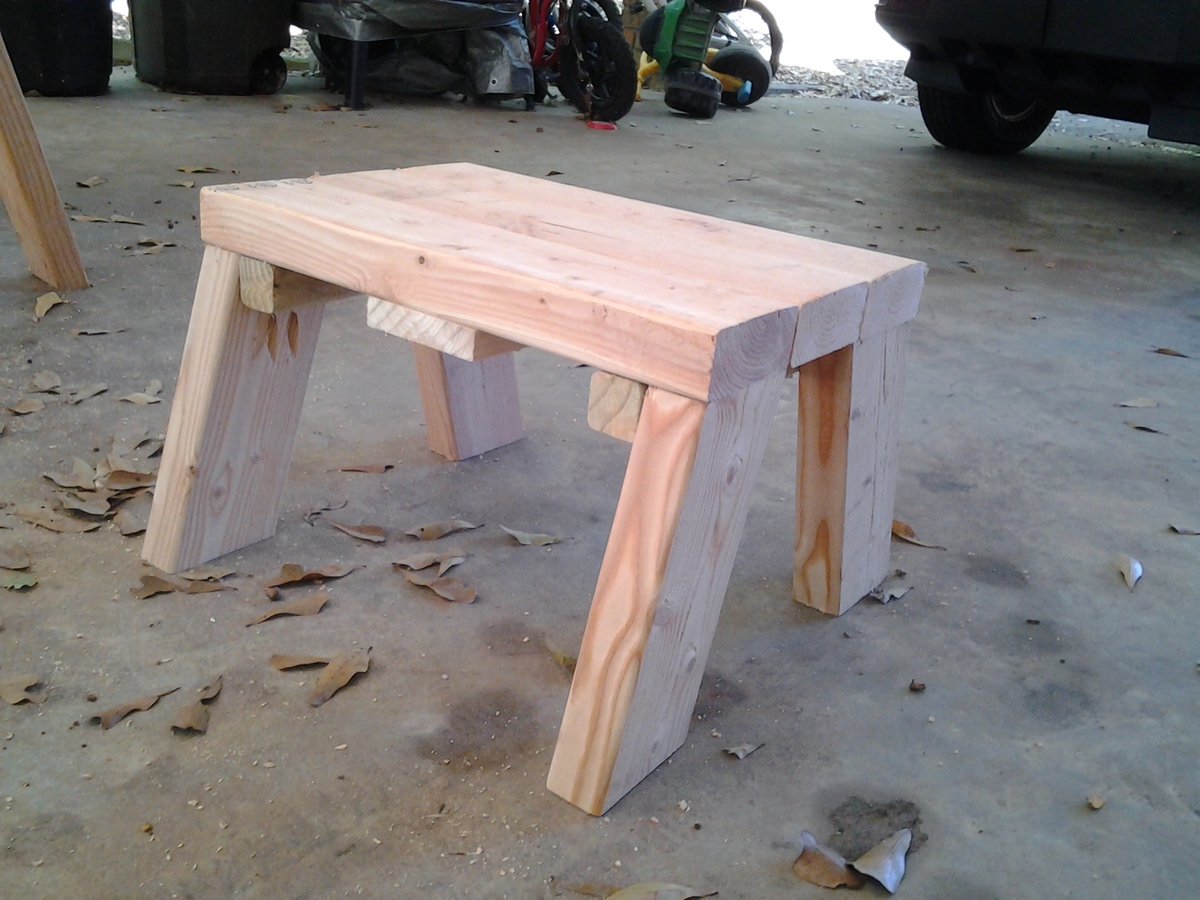
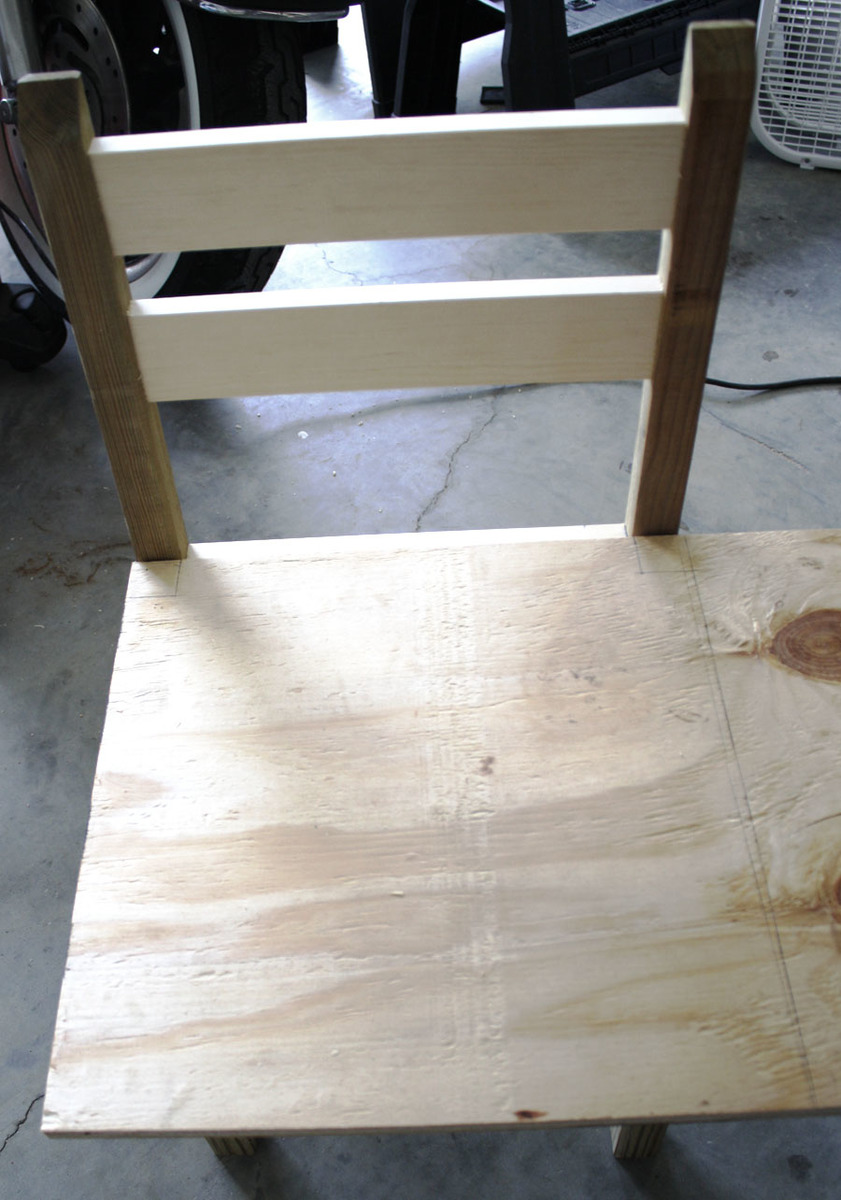
The benches are 42” long, 14” wide and 18” high.  These were built from 1x3 furring strips for the bench top/frames and 2x4 for the legs.  The bench tops were assembled first, then we attached the 2x4 legs to the frames at the corners, with a 5th leg in the center for stability.   This was a fun “mom & daughter” project for me and the bride, and we got the 8 benches built in one weekend and the finishing done the next.


The bench legs are painted (1 coat primer and 1 coat paint + primer).  The seats are topped with a clever combination of batting, fleece fabric and tulle ribbon ties, to create an upholstered look.  The fleece fabric will be re-purposed into some pillows and a memory quilt.


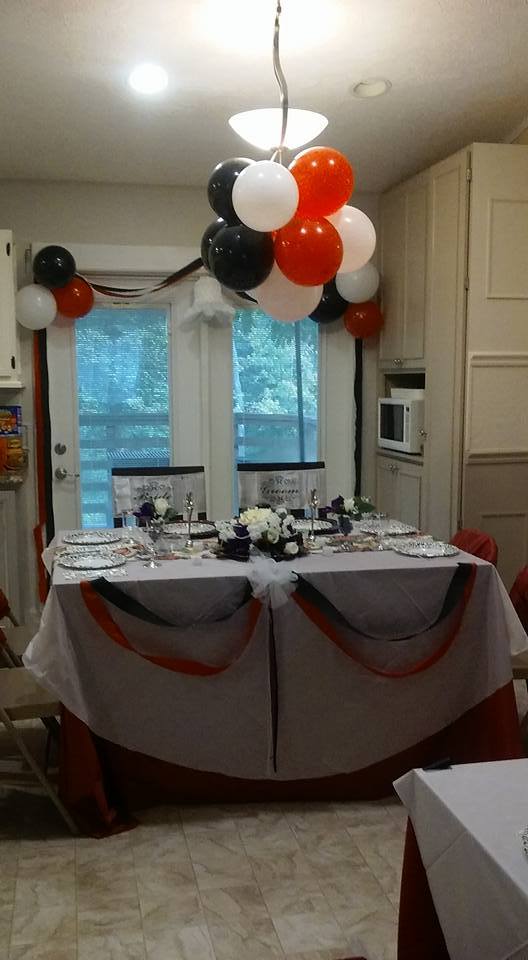
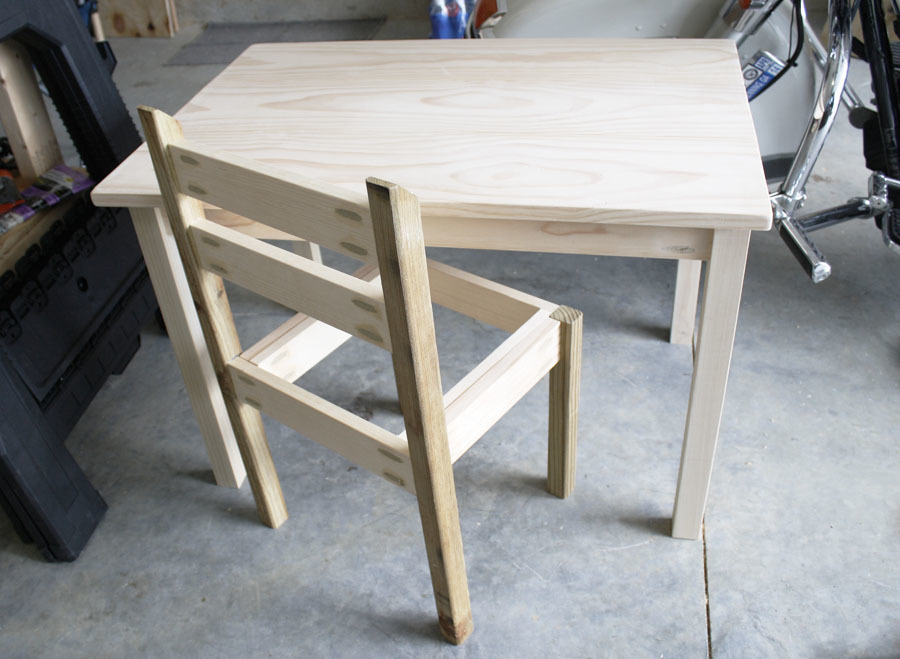
The head table is our ‘almost farmhouse’ table with 2 of the modified Harriet chairs for the bride and groom.


The newlyweds plan on re-using some of the benches for the dining set in their new place.  We’ll also be disassembling the banquet tables and re-using the wood to make them some more furniture, including a dining table to go with.


The wedding and reception was small and intimate and turned out beautifully.  We were thrilled to put this together for our son and his wonderful bride!

Estimated Time Investment
Week Long Project (20 Hours or More)
Finish Used
Tables - unfinished. Benches - 1 coat primer, 1 coat paint + primer on legs. Bench tops: fabric, batting, tulle ribbon
Recommended Skill Level
Beginner

Deck Chairs

Submitted by mgb11184 on Thu, 07/21/2022 - 19:54

I made a couple of additions/modifications

I also made a couple of side tables and foot stools for the chairs. A total of four chairs, two tables and two foot stools for the deck set.

Comments

Skipper's Stool

Submitted by c-e-fogus on Sat, 10/12/2013 - 17:14

We needed a couple of sturdy step stools for the bathrooms. My boys are not tall enough to reach the sink for hand washing and teeth brushing. Wally wanted $8 for a plastic thing. So I headed to the big orange store and bought a few 2X4's. $12 for both stools, plus the paint and screws which I already had.

I used the plans from the Skipper's Stool for some of my cuts. But I used 3-2X4 pieces for the top and shortened the legs to 10 inches. I was going to put on the side stretchers but it was super sturdy with the pocket holes and 2.5 inch pocket hole screws. So I left them off. A few coats of paint and they are good to go. Two of my boys can stand on one so that makes them a hit.

Built from Plan(s)
Estimated Time Investment
An Hour or Two (0-2 Hours)
Finish Used
Gliddon Paint and Primer in one, color: organic celery.
Recommended Skill Level
Starter Project

My own weathered corner hutch :)

This was my first project. It took me a weekend to build and prime. Since I chose to use a crackle finish, waiting time between coats extended the total time to one full week. My husband and I were supposed to make this hutch together, but I became obsessed and did most of it alone! I adjusted the size a bit to make it larger, so I could fit big pieces on shelves and in cabinets. Thanks for the plan Ana!!

Built from Plan(s)
Estimated Time Investment
Week Long Project (20 Hours or More)
Finish Used
Weathered Crackle Finish done as follows:
1. Killz2 latex primer (highly recommended)
2. Valspar interior satin finish, "Frontier Road" (this is the color that shows in the cracks)
3. Valspar weathered crackle glaze (a suggested substitute that costs less is Elmer's glue)
4. Valspar interior flat finish, "Churchill Hotel Lace" (must be a flat paint, this is the dominant color of your piece)
5. Valspar clear protector (also highly recommended to protect the finish you worked very hard to create, when you paint the same piece of furniture 5 times in one week your sanity will agree!)
Recommended Skill Level
Starter Project

Comments

JoanneS

Fri, 04/13/2012 - 14:47

Wow, this is sooo beautiful! The finish is just awesome. My Hubby hates to paint, and he saw this multi-step finish and said you must have the patience of a saint! :) Congrats on such a stunning first project!

kmsdance (not verified)

Mon, 10/01/2012 - 23:33

Very Nice! What did you do to make it "bigger"...did you make it deeper or wider? Just curious, because I would like to try and make a bigger version as well. Did you still cut the shelves on each side at a 45 degree angle? Thanks!

Playhouse with Swing Set

Submitted by Anonymous (not verified) on Wed, 06/01/2016 - 12:48

We really enjoyed building this playhouse swing set for our kids.  We have a decent slope to our backyard, so we needed to sink our posts, which required a bit more work thank Ana's plans.  We also used a real window (my dad just happened to have in his garage) instead of the 3 open aired windows Ana's plans called for.  Inside we built a fold under table, shelf, and a chalkboard for thier entertainment.  

Estimated Cost
$800
Estimated Time Investment
Week Long Project (20 Hours or More)
Recommended Skill Level
Intermediate

King size Farmhouse Bed

Submitted by Anonymous (not verified) on Sun, 04/19/2020 - 15:59

This is a plan that My 16 year old son chose to do for a project to fulfill a goal to learn some woodworking skills during our unexpected downtime from School.
Mom is thrilled with the new space.
He adjusted different sizes based on what lumber we already had. He used 1x7’s and routed a 45deg on the edges to give the tongue and groove look. Posts are 4x5 and top railing is 2x7.

Estimated Cost
$40 in paint and supplies. Wood was free from a friend.
Estimated Time Investment
Weekend Project (10-20 Hours)
Finish Used
Valspar Furniture Enamel.
Color - Web Grey
Recommended Skill Level
Beginner

Comments

Kiddie Chairs

These chairs were easy to build, although I modified Ana's plans a little bit. I opted for solid wood 2x2s for the legs (I wanted it to be sturdier), and a solid seat instead of a slatted one. I notched out the back of the seat so it would fit flush against the back legs. Because of my modifications, my chair was just a couple bucks more.

Also, I was so excited to find solid wood balusters for the chair legs - they're not only better quality, but cheaper than furring strips!

Check out my blog link for a complete play-by-play!

Estimated Cost
$7.00
Estimated Time Investment
Afternoon Project (3-6 Hours)
Finish Used
Primed with Zinsser 3-in-1 Primer, then painted with Red Valspar Paint found in the "Oops" section of Lowes. Three coats of Rustoleum Satin Polyurethane.
Recommended Skill Level
Beginner

Comments

Modern Outdoor Patio Set

Submitted by dlangford on Sat, 09/05/2020 - 16:08

Built this over the weekend for my girlfriends sister. It was a great project and the whole family was able to work together on it, sanding and waterproofing it before assembling. The loveseat plans need a little tweaking. We ran ran the slats the same direction as the chair plans call for so we added a middle support for extra stability. We also pitched the seating down towards the back by 5* to make a more natural sitting position.

Estimated Cost
$300
Estimated Time Investment
Weekend Project (10-20 Hours)
Finish Used
Behr Cedar Natural Tone Waterproofing Stain and Sealer
Recommended Skill Level
Beginner
Seasonal And Holiday

Shoe Dresser

Submitted by Anonymous (not verified) on Sat, 04/01/2017 - 08:26

We used the shoe dresser instructions with some modifications to make it longer

Built from Plan(s)
Finish Used
Stain, polyerthane, chalk paint and wax
Recommended Skill Level
Advanced
Back