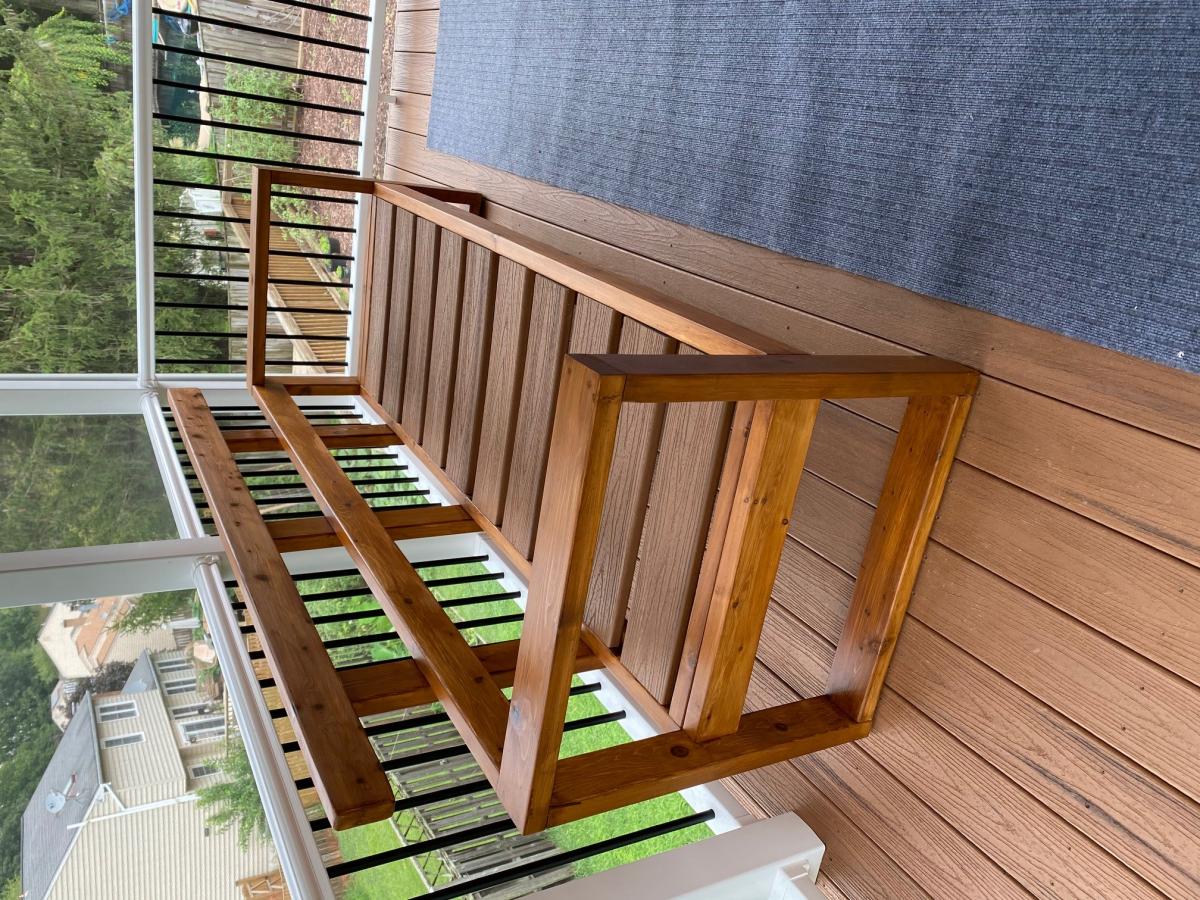
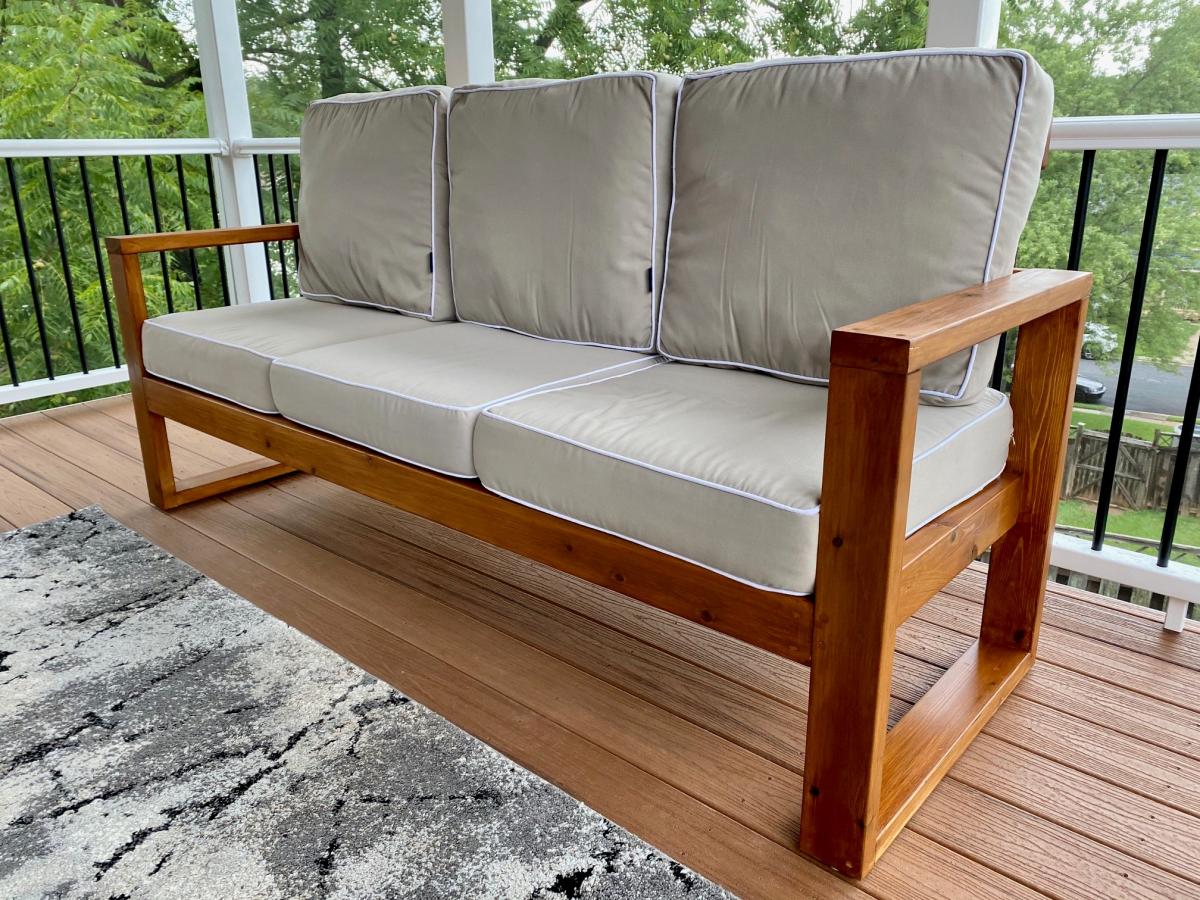
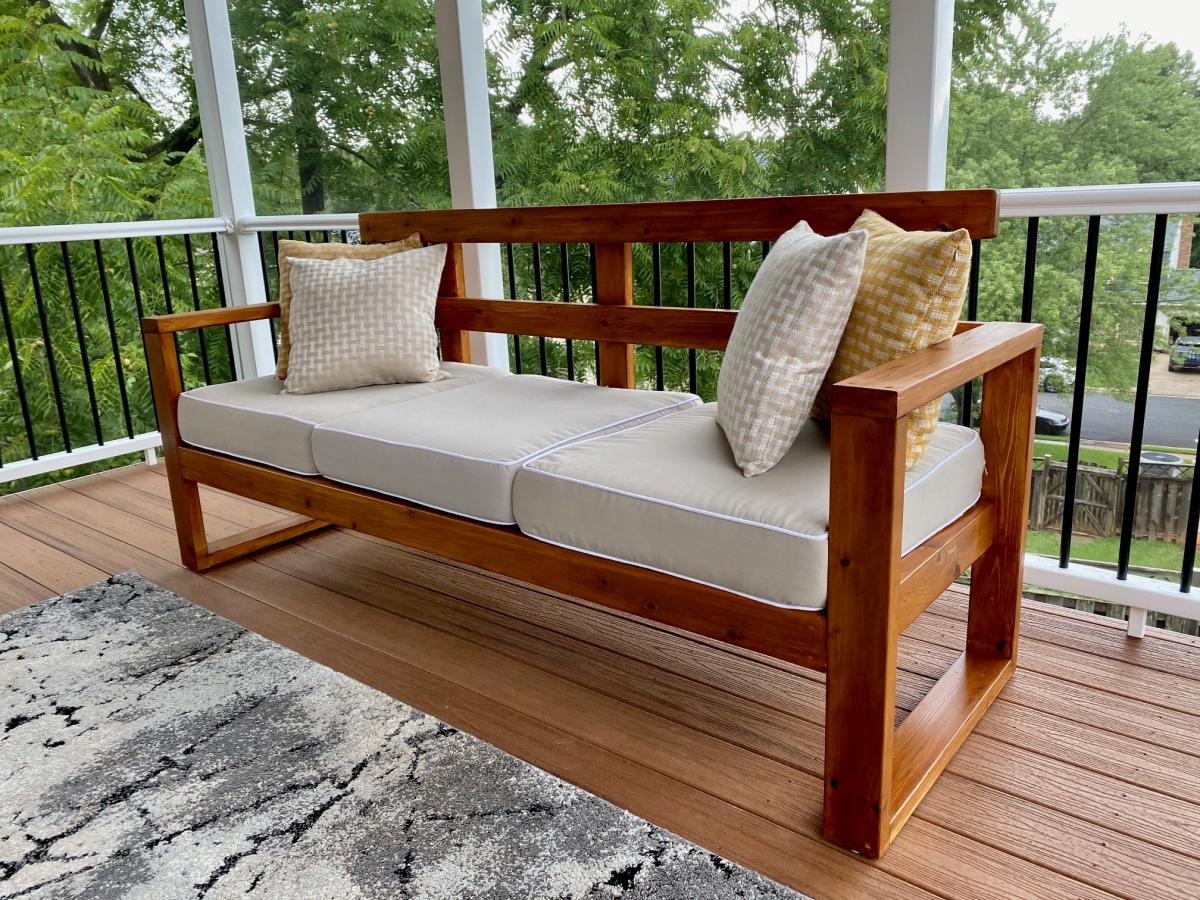
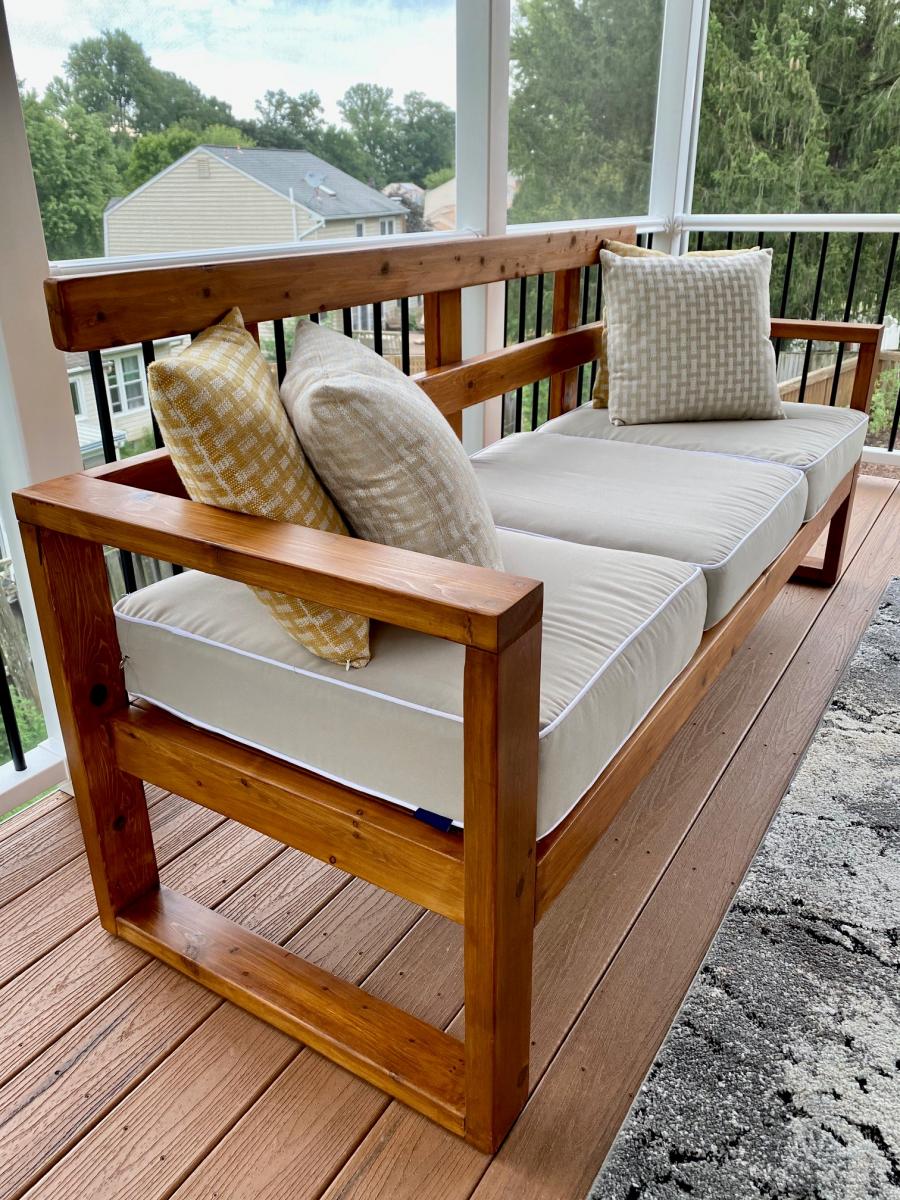
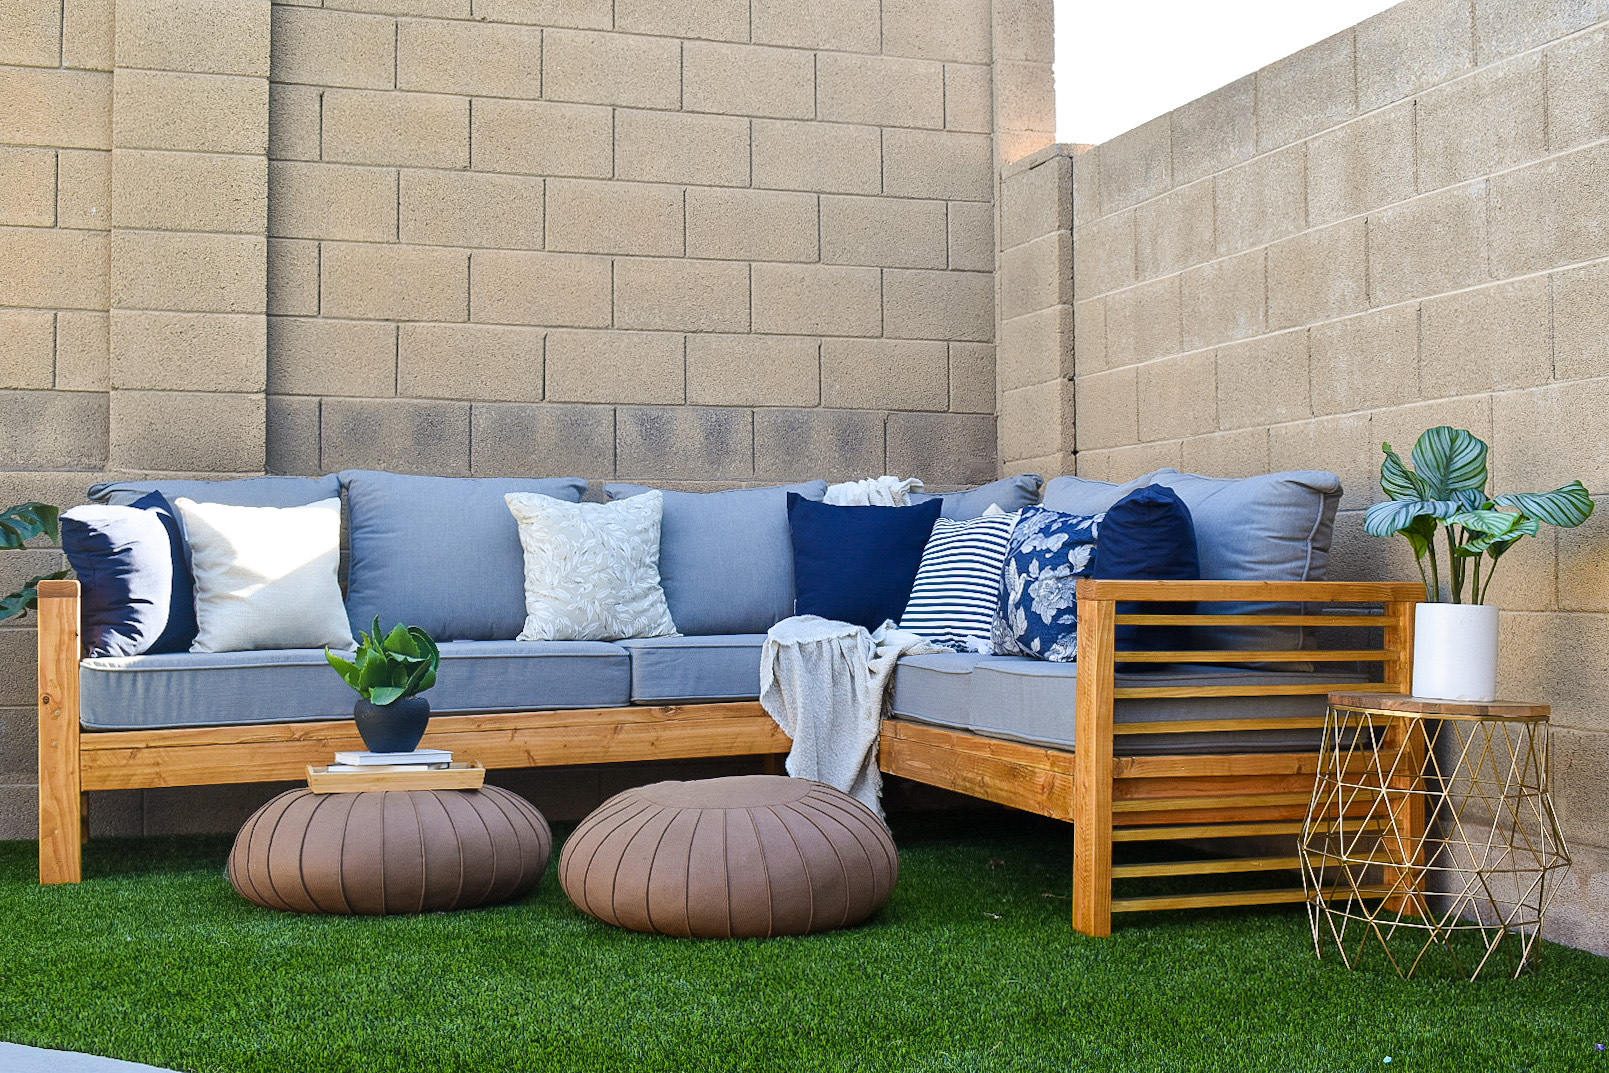
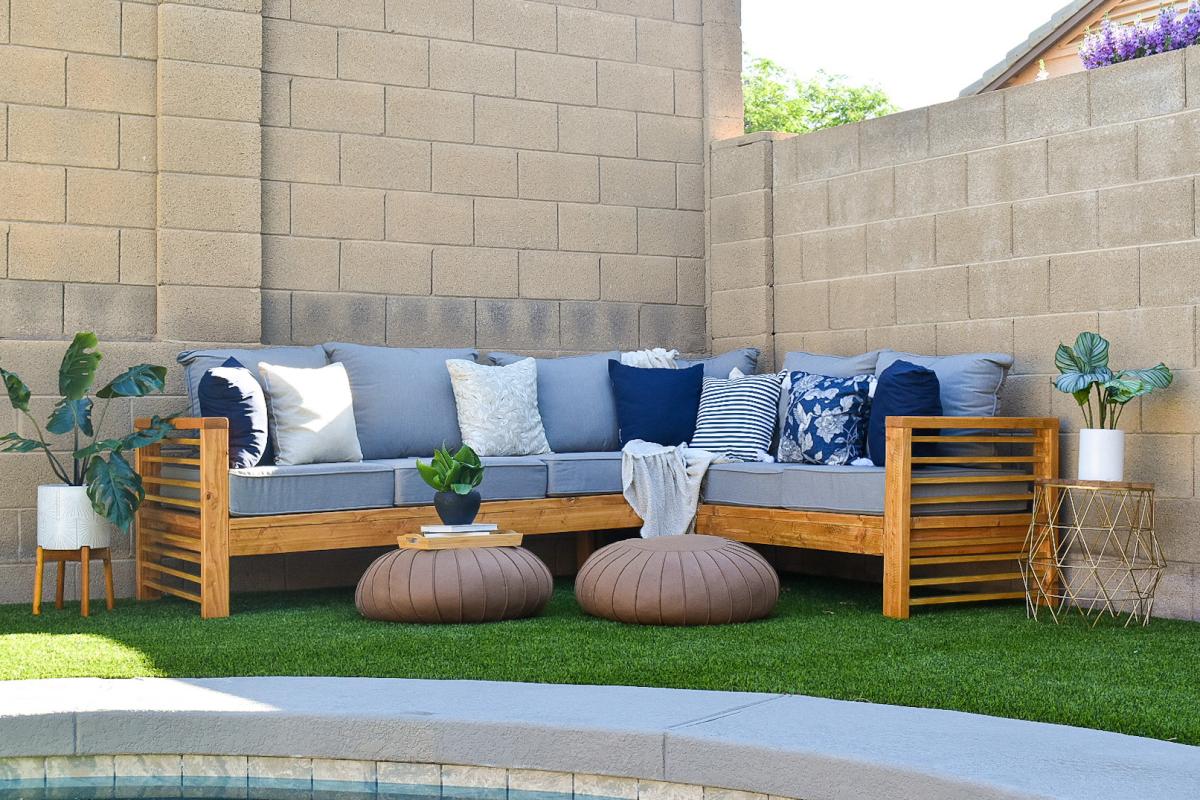
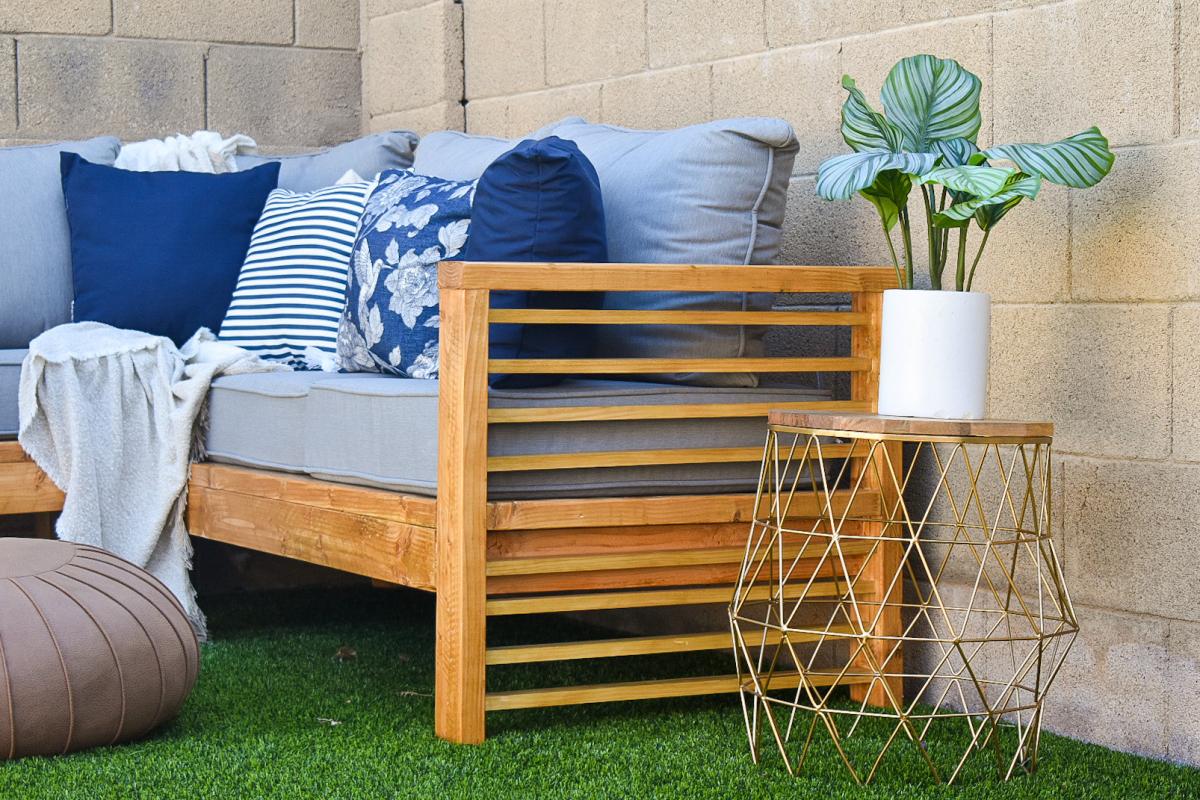
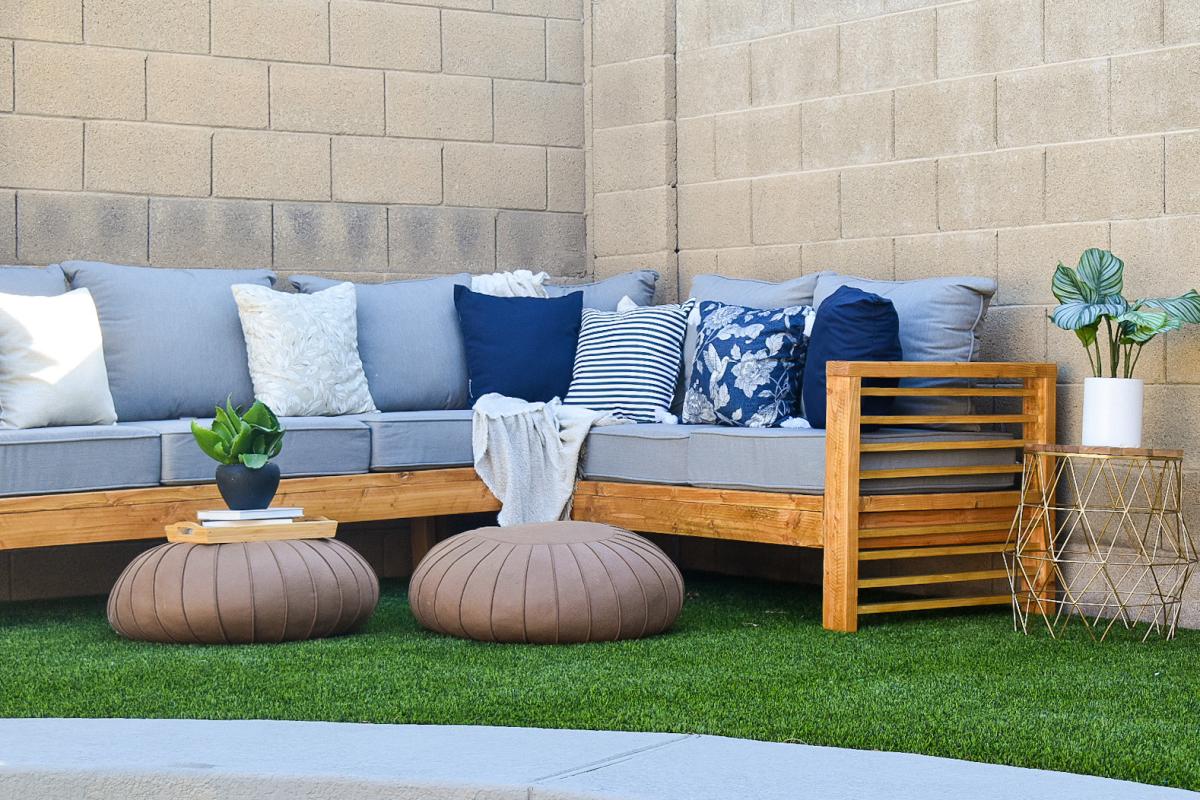
Outdoor Sectional
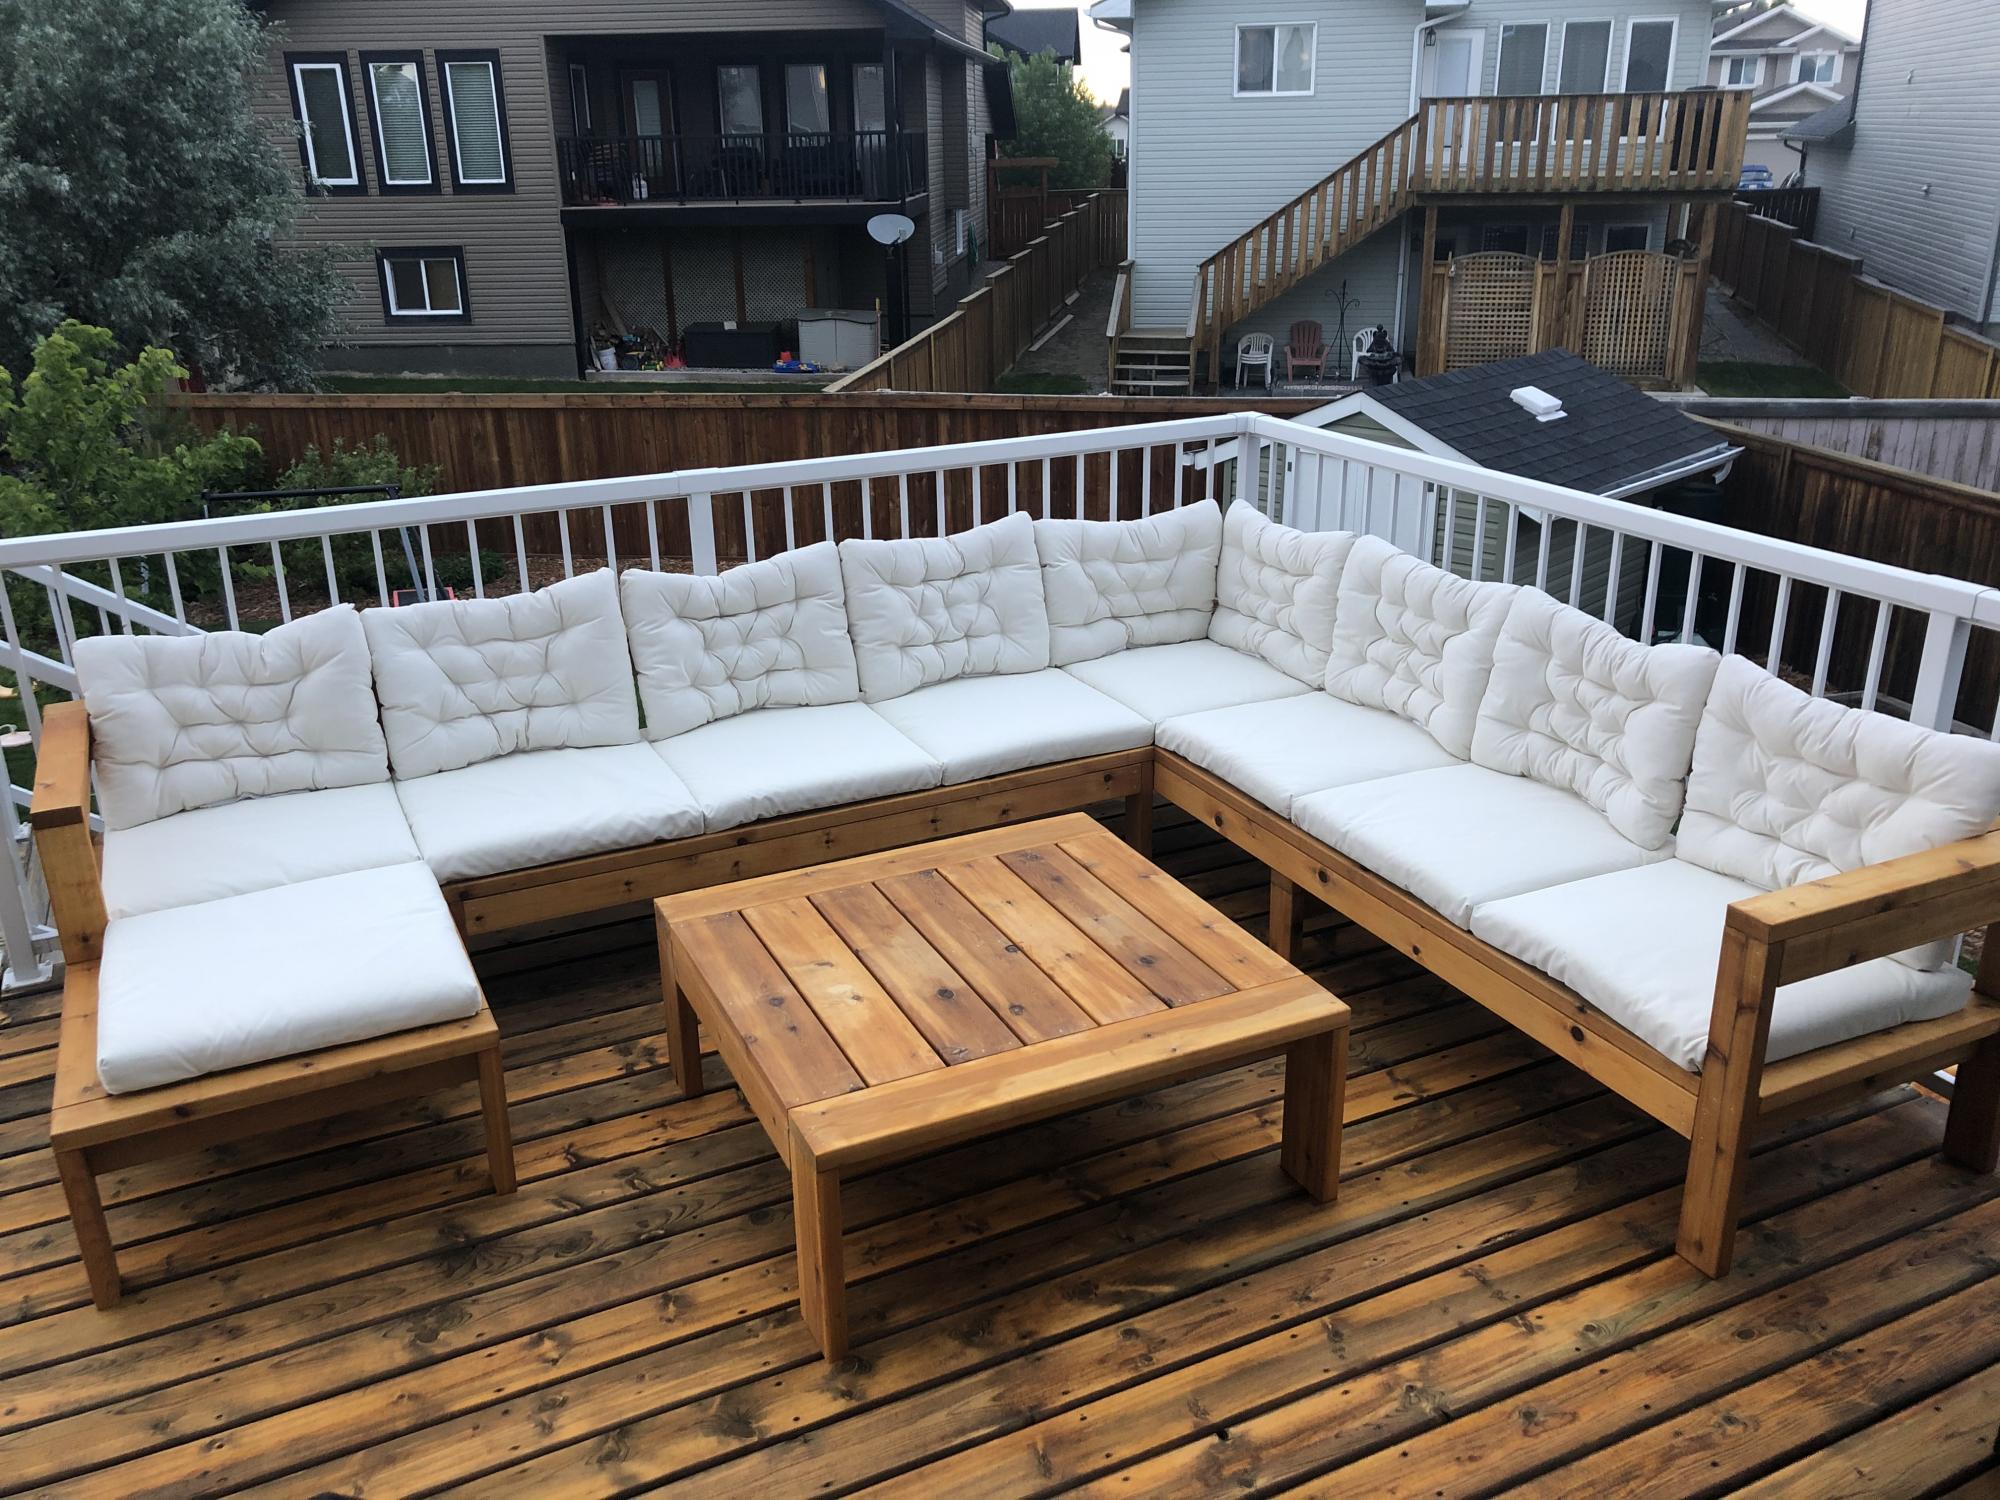
Modified the plans of the outdoor sofa and sectional piece to create this set, then added cushions from IKEA.
Built from Plan(s)
Finish Used
SuperDeck Cedar Tone Natural
Modified the plans of the outdoor sofa and sectional piece to create this set, then added cushions from IKEA.

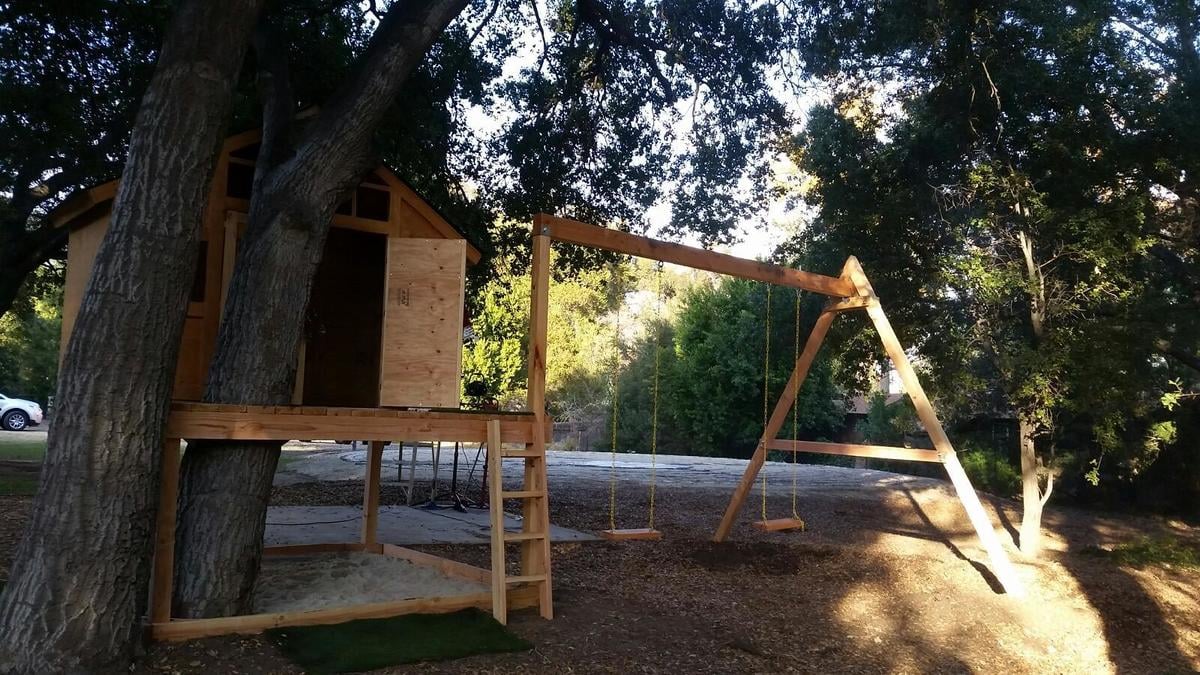
I made this coop twice as wide like Ana suggested since I have 4 chickens and wanted to make sure there was some extra wiggle room in case “chicken math” got the best of us. I made a nesting box to mount on the outside. I also used plywood for the sides like Ana did in the video. I installed a Run Chicken automatic door that opens at sunrise and closes at sunset. I added some hasps and clasps to make sure all my doors would close tightly. I put hardware cloth across the top before installing the roof panels. I stapled and buried hardware cloth around the perimeter for predator protection. I also spray painted the hardware cloth flat black so that it would be easier for us to see inside the coop. I stained the rest of the wood with Varathane Semi-Transparent stain, color “Carbon Gray.” I also added some roosts and cedar shingle siding for some extra protection during our New England winters at to match our house. Working 2-4 hours a day, off and on, with a bum shoulder and weak hands, this took me about a week! Thanks for the great plan, Ana!


We loved this greenhouse plan from AnaWhite and wanted to be able to grow in 3 seasons so we modified the design to include humidity & temperature control & 18" deep elevated cedar beds inside with 4x4 posts for support and trellis option. We added electricity in order to have a lighted workspace and the ability to put in a circulating fan to control mold and fungus. We added 2 work tables (2x2') on the inside of the door left and right side door in order to do seed trays & store supplies. This was a wonderful project for my husband and my plants inside are doing incredibly well compared to my outside garden beds here in zone 5. Products used:
Foundation
We had a landscape company come and scape/dig a platform and then fill/compact with crushed rock
My husband then used rebar driven into a 4x4 frame in order to secure the frame to the ground and create a base upon which to build the greenhouse
Active ventilation
AC Infinity Cloudline T8 Inline duct fan
Air king range hood wall cap 8" on the bottom outside of the greenhouse wall for air intake + flex 8" duct to the fan itself
Shelter logic autovent automatic shelter vent kits (1 on each side of the front wall) in order to allow air intake from the bottom back of the greenhouse under the elevated beds to flow to the front of the greenhouse and out
Circulating fan- Hurricane wall mount fan 16" - this fan has 3 speeds with tilt function and small mounting bracket
Soil - sourced 3 yards of 50/50 loam/compost from local landscaping supply
60% loam
30% organic compost
10% organic topsoil + perlite
Soil beds
-cedar frame 2 feet wide along sides, 3 feet wide on the back wall
-galvanized metal roofing with holes drilled into it for drainage
-landscape cloth lined


Wed, 09/09/2020 - 13:09
Thanks for that update! I was wondering how to vent this project, as Green houses need the ventilation. Good to know dollar amount also. Great photos.
Wed, 09/09/2020 - 13:09
Thanks for that update! I was wondering how to vent this project, as Green houses need the ventilation. Good to know dollar amount also. Great photos.
Wed, 09/09/2020 - 13:09
Thanks for that update! I was wondering how to vent this project, as Green houses need the ventilation. Good to know dollar amount also. Great photos.
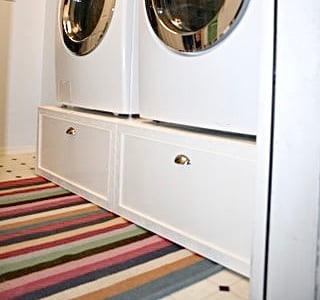
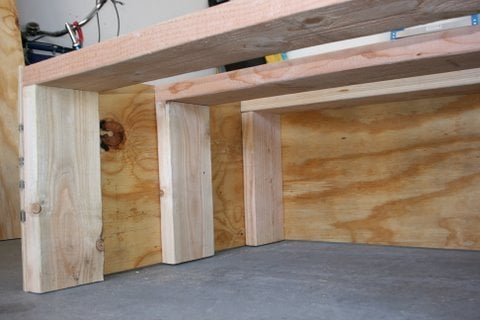
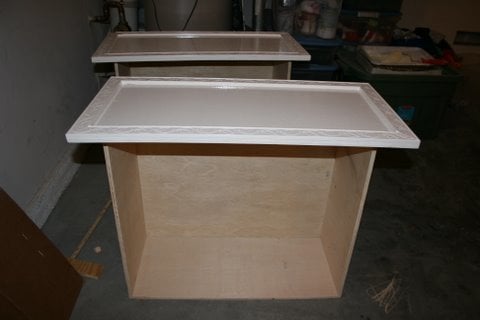
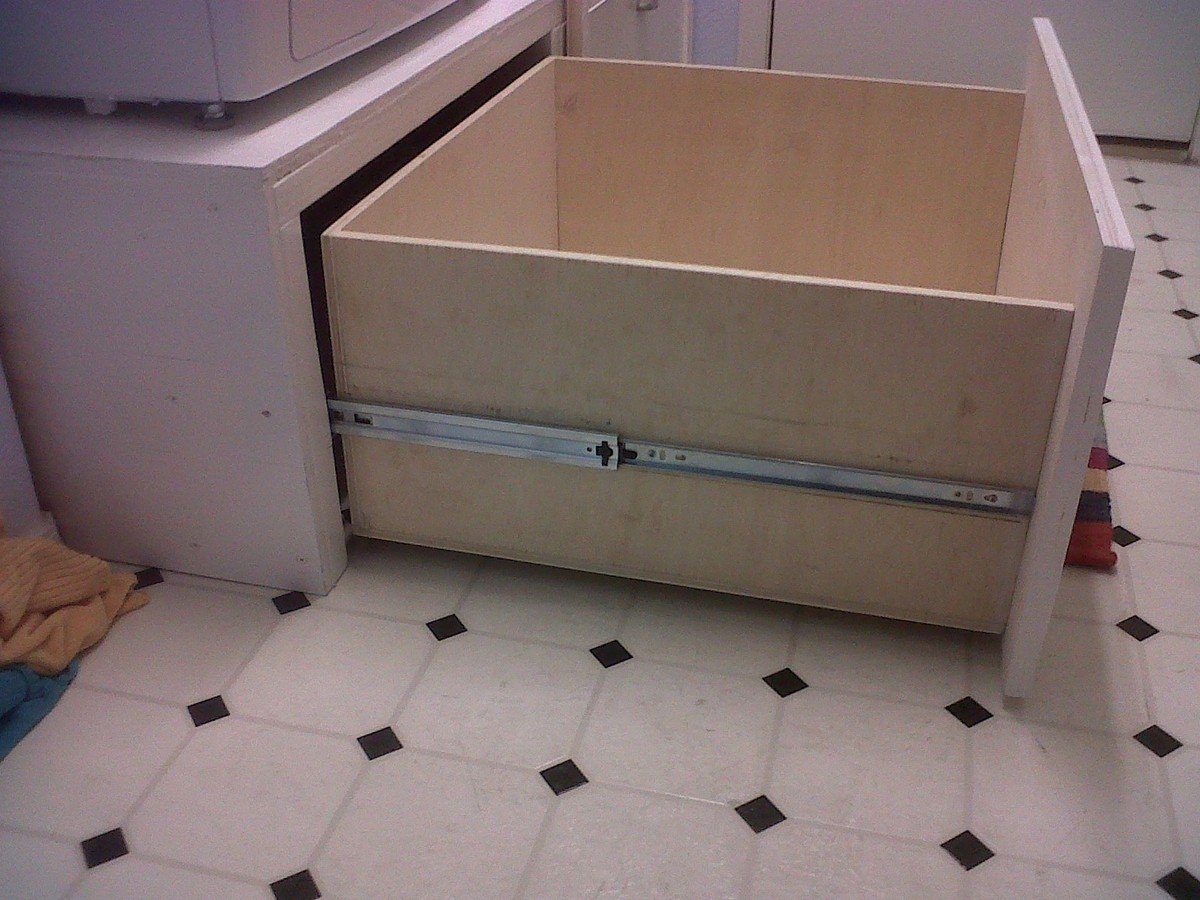
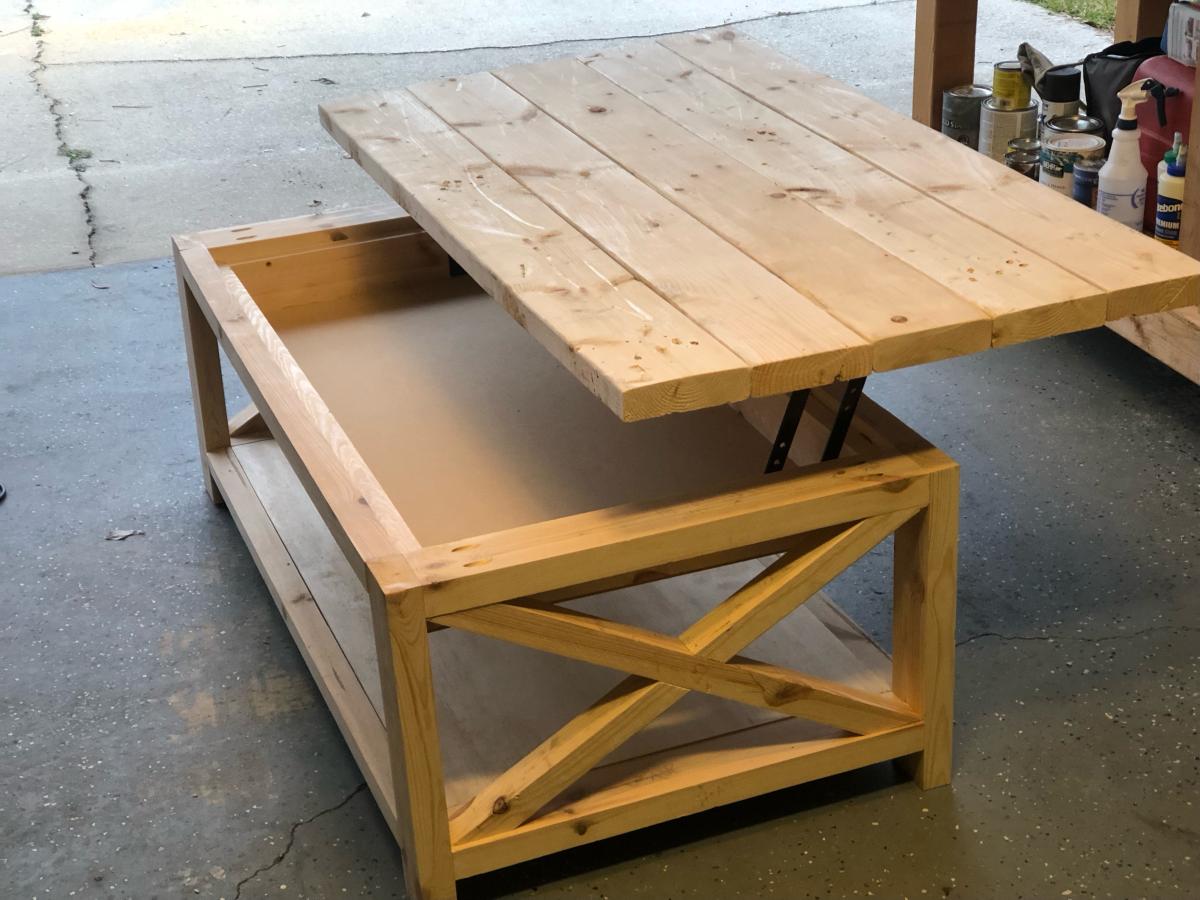
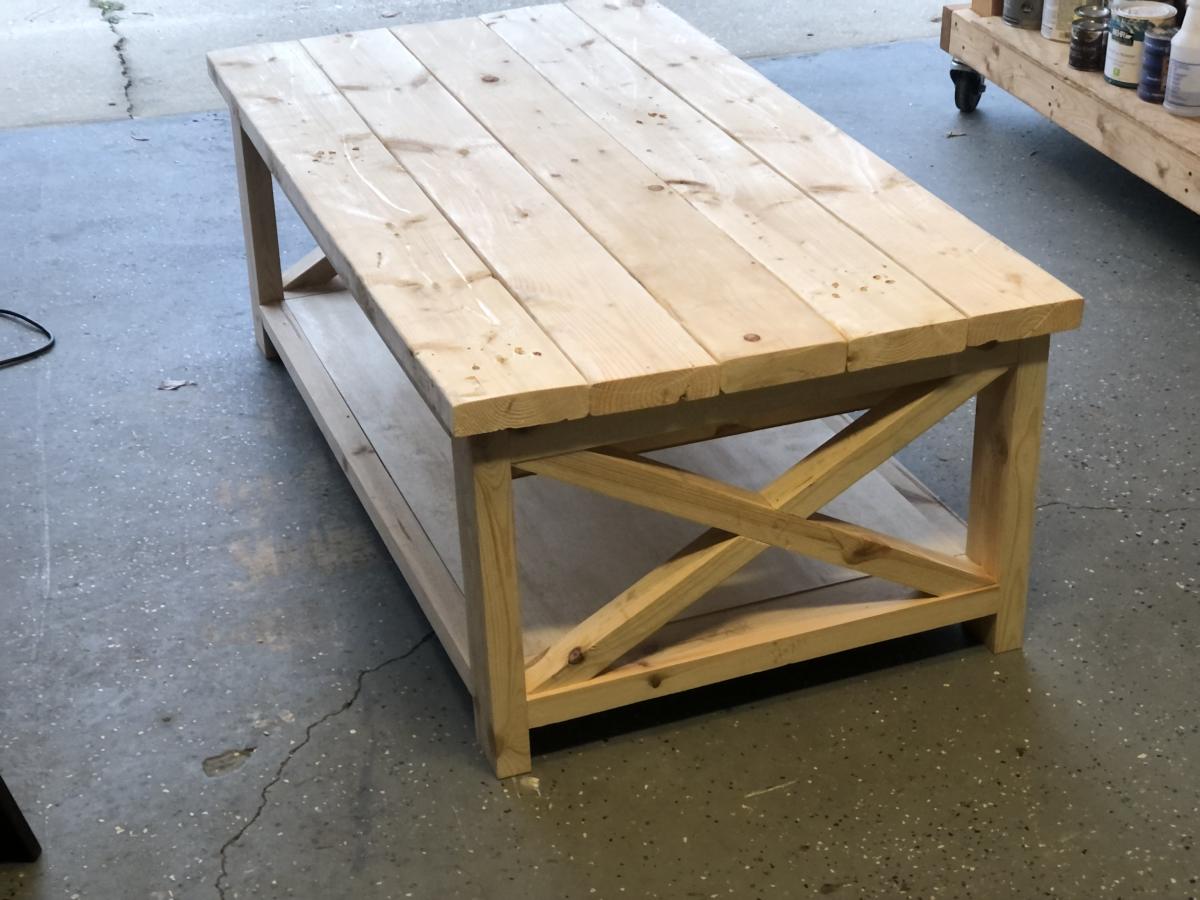
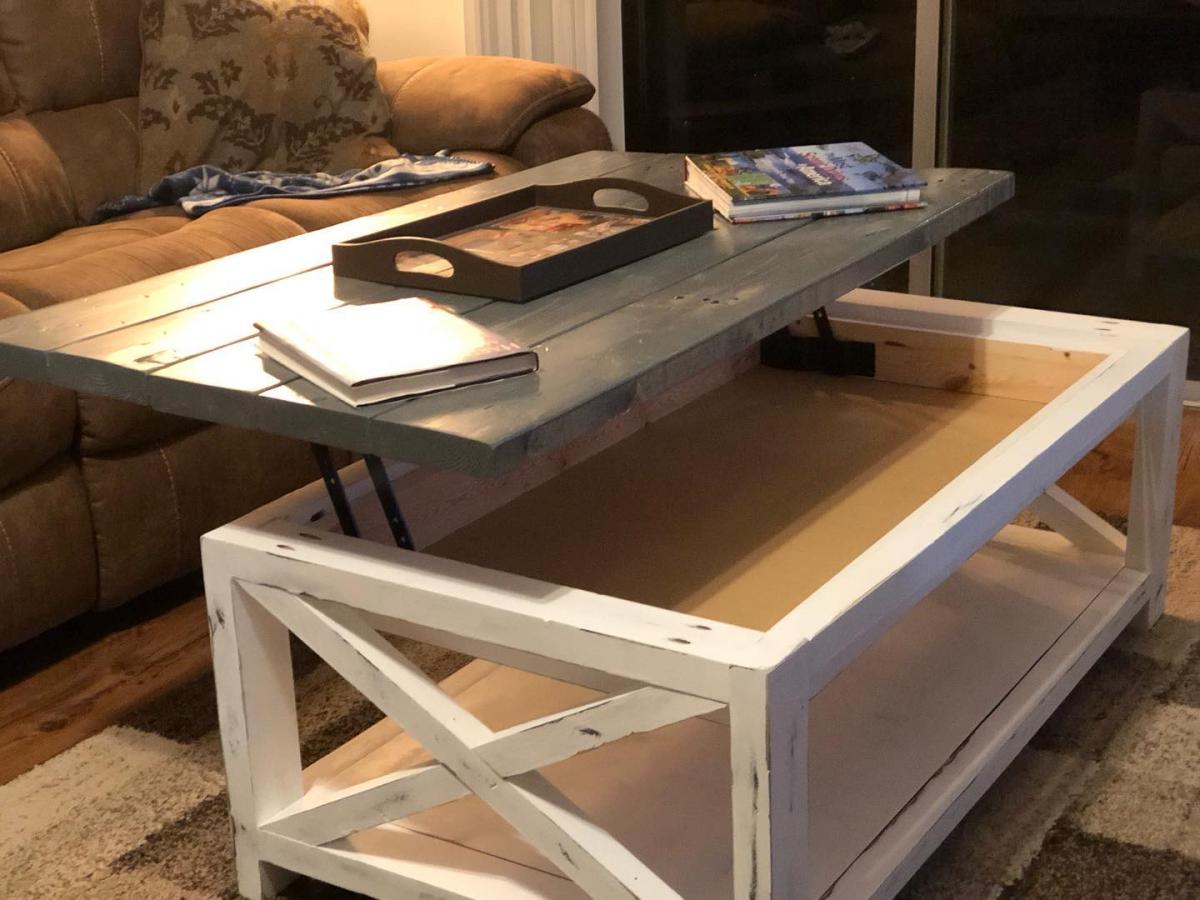
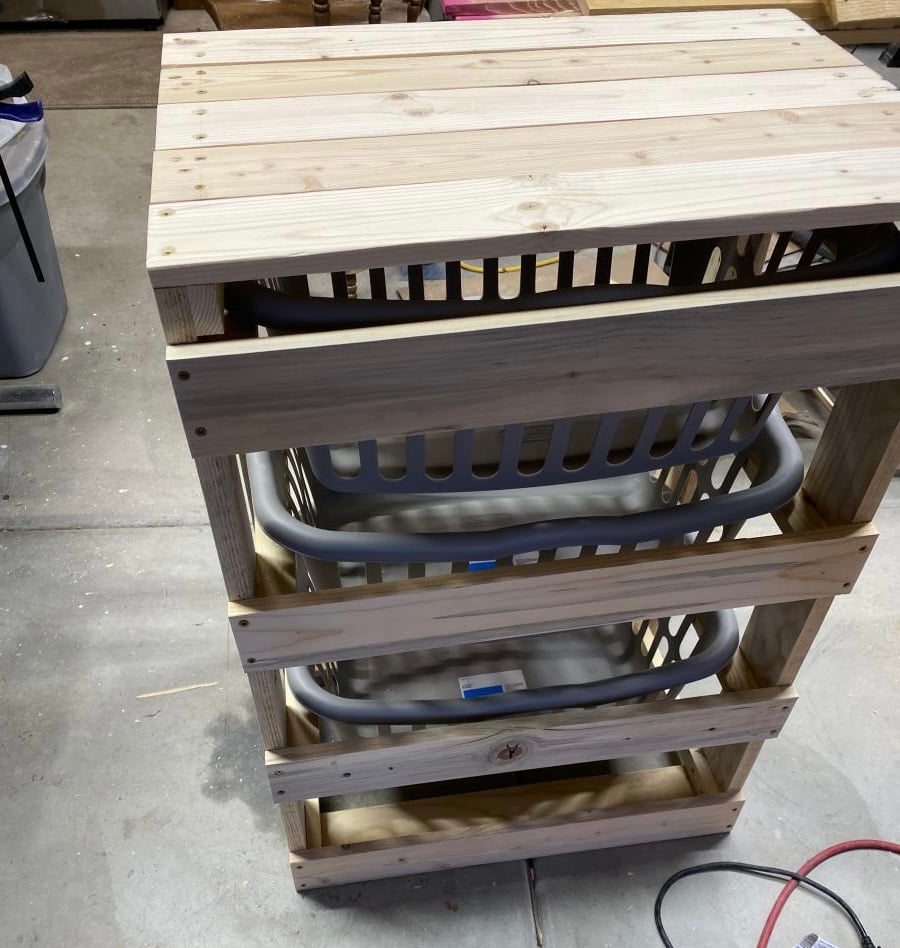
Platform (Pedestal) with Drawers for front-loader Washer & Dryer. Cheaper than buying the manufacturer's plastic pedestals and more fun to build anyway! The drawers are also much wider and deeper than the manufacturer's pedestals. We can usually fit about 3 full loads of laundry in each drawer. (That's 6 loads of laundry before we have to start folding!) It's a very easy and basic DIY project. I made a 2nd one for my brother using these plans (sans the drawers). I gotta say, the drawers are SO nice to have though. But you could just leave the front open, without drawers, and slide some laundry baskets underneath for an even quicker project. We've been using this platform now for over 2 years and there is still no squeaking or rattling. The washer & dryer haven't moved from the vibration even in the slightest. They're exactly where I placed them on the pedestal 2 years ago. There's also zero problem with the weight of the washer either...it really is a strong frame. (After finishing, I jumped up and down on it!) A couple small tweaks I would make doing it over is raising the drawers a 1/2" in. off the floor to tuck a rug underneath (as is, they sit about 1/8" in. off the floor). Also, I would cut out a couple of square holes in the back panel to access those socks that fall behind (I can't access the sides of my W&D in our particular laundry room). Lastly, I would have painted with a quality paint (I just used a few cans of white spray paint to be quicker). Step-by-Step Plans and Materials List (PDF) and many more photos found at the Blog Link below...I'm certainly no professional "Plans Writer" so email if you have questions! Happy DIY-ing! Estimated Cost: ~$200 (2x6 lumber, plywood, drawer trim, nails, screws, paint)

Wed, 03/13/2013 - 10:12
I have wanted to do the pedestal project for quite a while. I am so glad I held off though. Yours are fantastic! I would never have thought of drawers to hide the dirty laundry! Love it!
Fri, 02/07/2014 - 17:05
Hello this looks great and for the amateur carpenter I am but one item I need clarified "the top measurement at 64" is .25" greater than the bottom at 63.75"
Please explain if I am missing something
Thanks
Mon, 02/10/2014 - 15:33
Not sure what measurement you mean that's 63.75" since there's no "bottom" to the pedestals. Or do you mean 1/4" wider than the sides? The top panel should overhang both sides by 1/4" each so that when the side plywood is attached, it will be flush. Hopefully that helps? (If I'm understanding the question correctly)
Mon, 02/24/2014 - 10:29
Could leave the back panel of plywood out so you could reach what may fall behind? Then you would just have to pull the drawers out?
Thu, 12/03/2015 - 06:11
Did you ever find out if you can leave off the back panel?
Wed, 06/22/2016 - 16:35
Back panel is very very structural and provides lot of strength. If i wanted more access than the 5-7 inch of duct space behind the pedestal gives me, then i would replace the back panel with a long 2x6, that holds the three legs from going in different directions due to all that weight.
Mon, 12/12/2016 - 14:58
This is the one modification I could make if i could redo these plans...I would still put on the back panel of plywood as it stabilizes the pedestal, I would just have cut out a rectangle (behind each drawer) so that I could remove the drawers and stick my hand/arm through to grab fallen clothes or vacuum the lint.
Mon, 12/18/2017 - 19:17
Rather than cut holes in the back, I just cut the back and side boards a little small and left a gap around the bottom the whole way around. That way I can get a vaccuum hose in there or reach through and get lost items. Because my washer and dryer seem to be deeper than yours (I needed at least 33" depth, so I went with 3'), that also worked out well in getting the most out of the boards. I could do the top, back, and sides out of one single sheet of good 3/4" plywood just leaving those small gaps at the bottom for clean-up and retreival.
Fri, 11/20/2015 - 05:23
Hello,
I downloaded the pdf but have exactly the same information that the website html, where can I find a solution step by step guide?
Thank you for all the interesting posts.
Mon, 12/12/2016 - 14:55
The original step-by-step plans are found on Ana-White:
http://www.ana-white.com/2011/01/sausha%E2%80%99s-washerdryer-pedestals

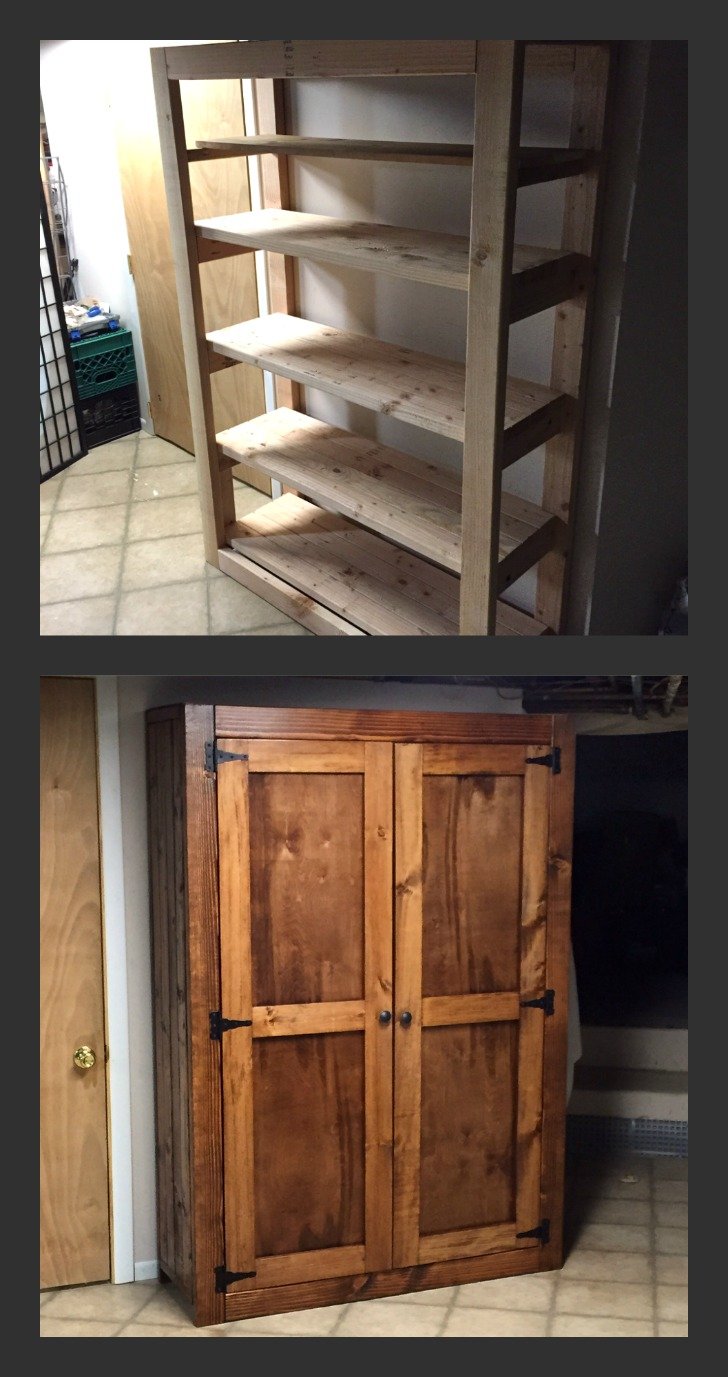
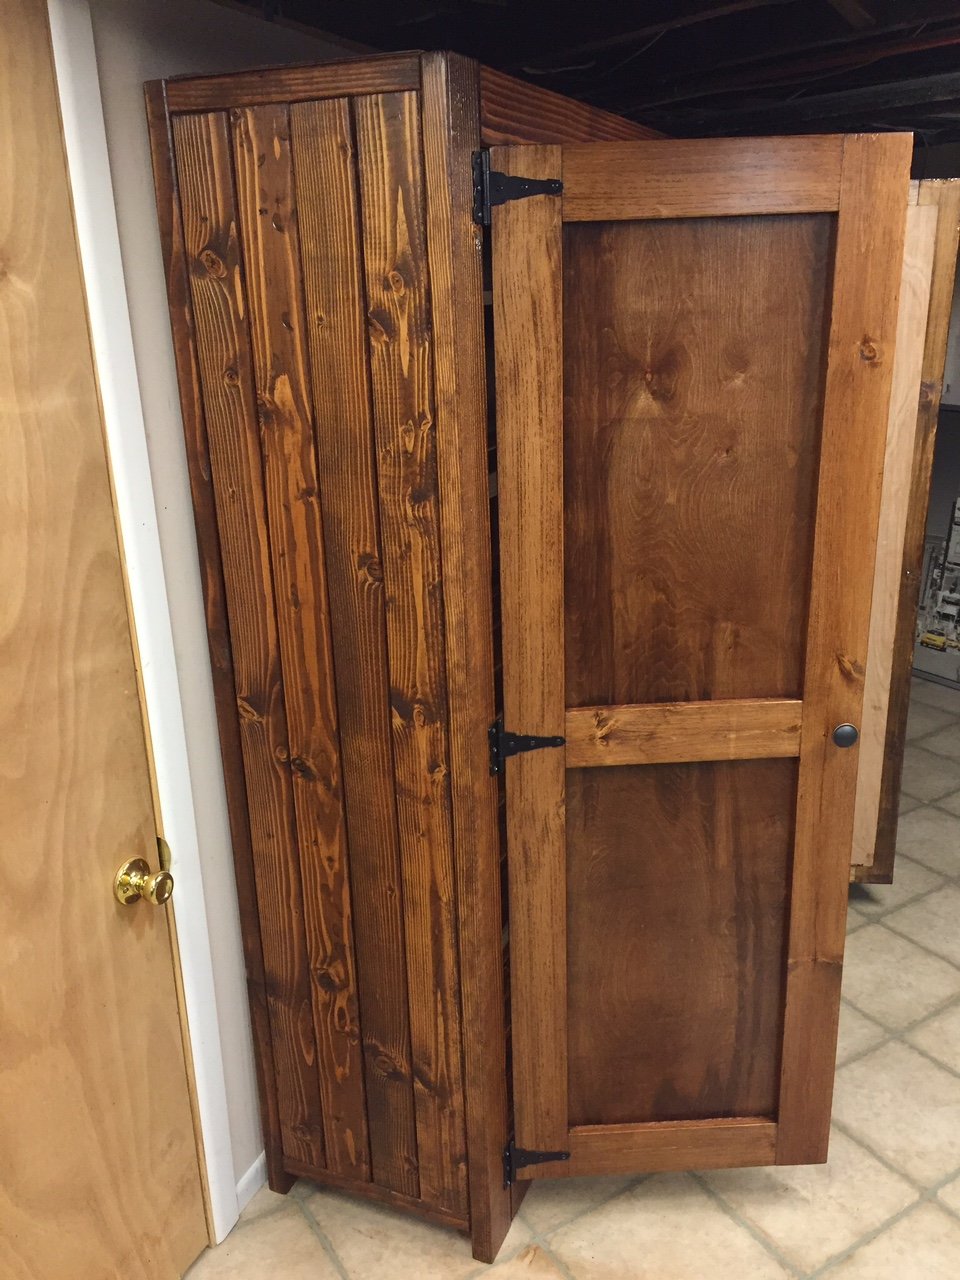
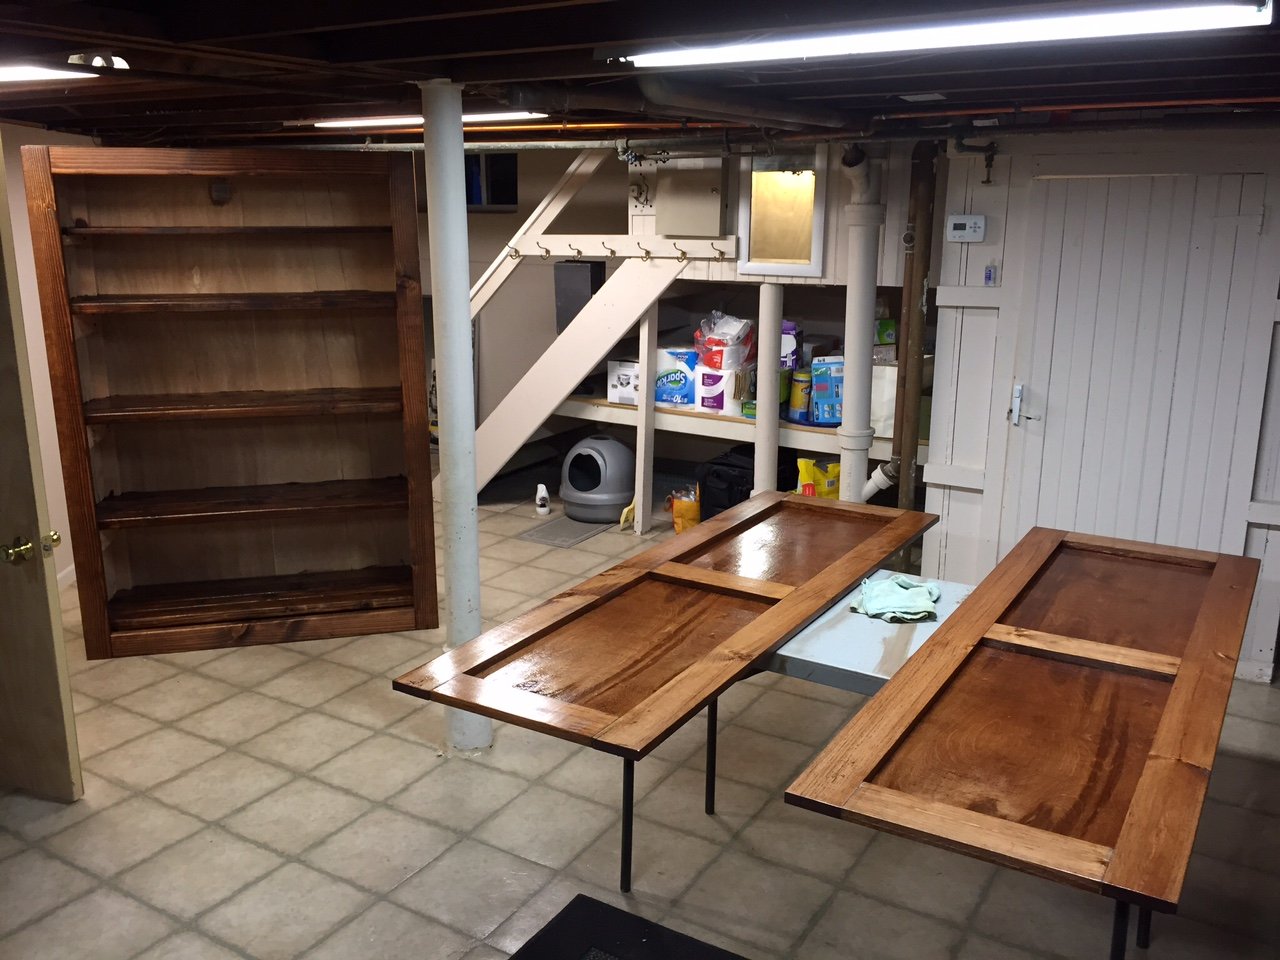
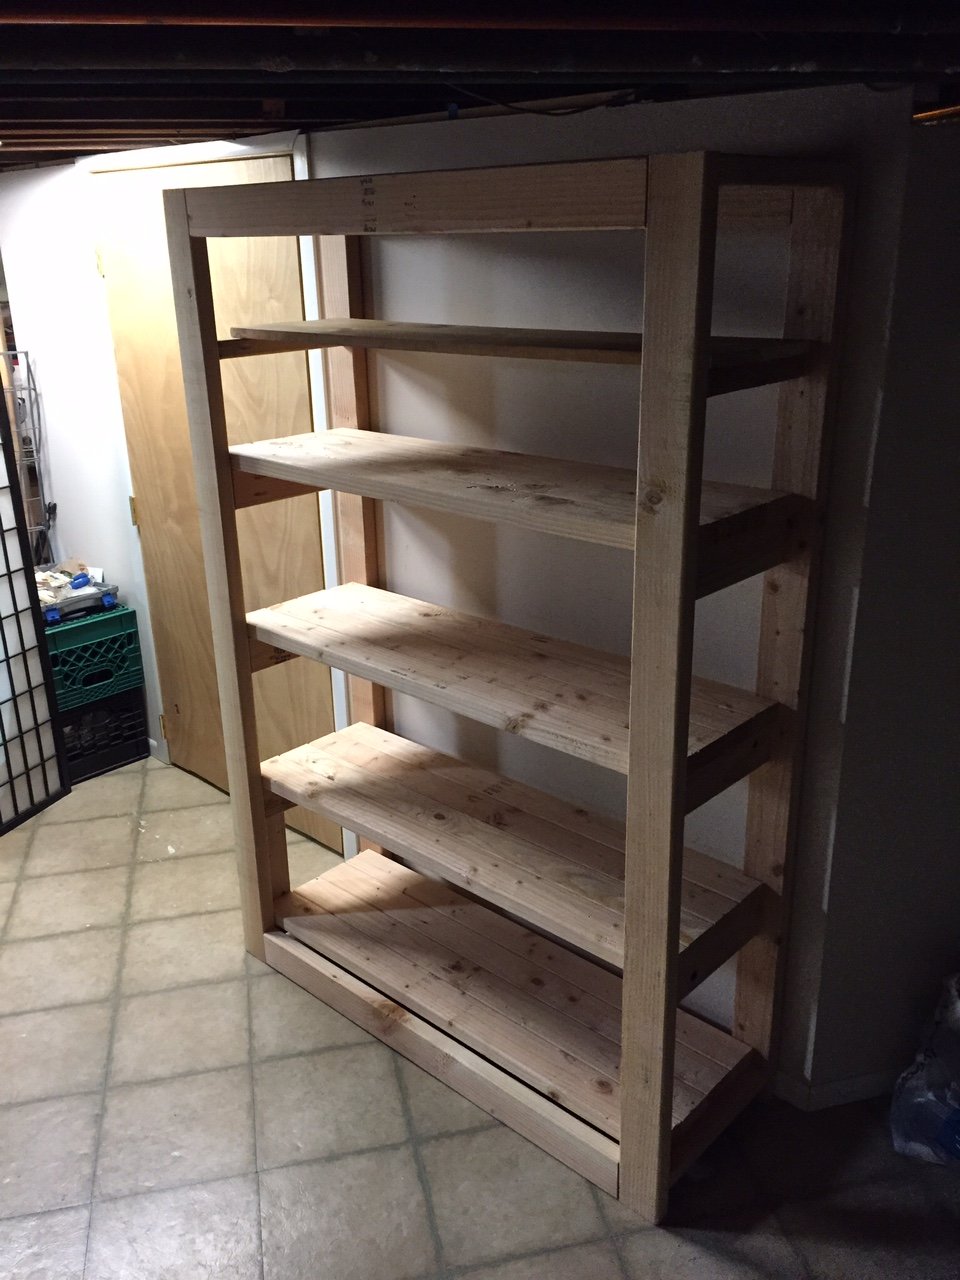
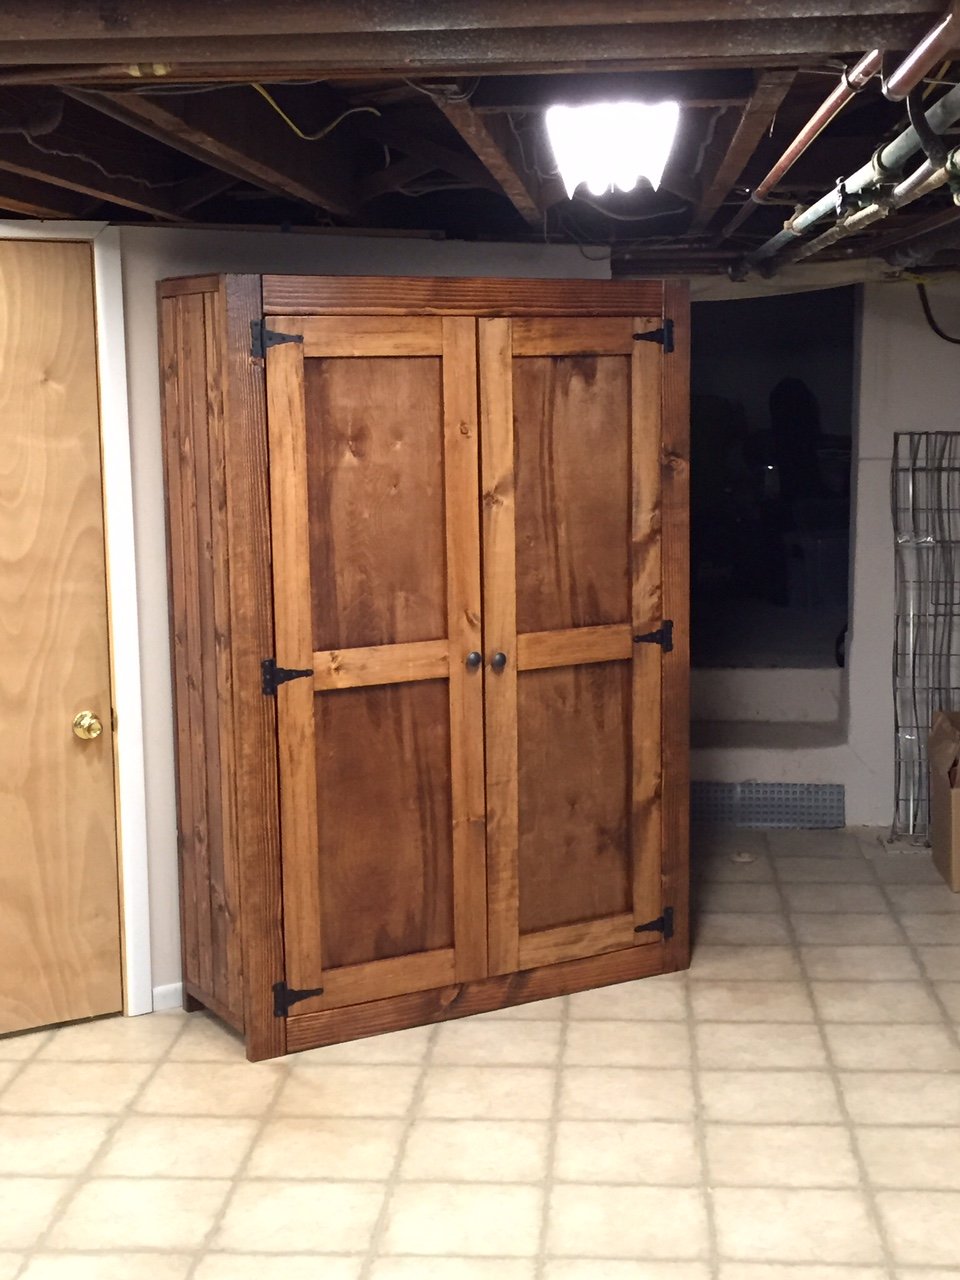
Anything is possible when you put your mind to it. This is my 4th DIY furniture project. First time working on cabinet/doors. Installing them straight was the biggest challenge. The side of the pantry is actually four 2x4's. I measured the frame so tightly that I had to use a hammer to bang in the fourth 2x4 on each wall, also adding a distressed look in the process. The pantry is very large, 48in wide and about 17 inches deep. Our kitchen lacks storage space and we could use a little more space for food and also pots, pans etc. The staircase to our basement is off our kitchen, so I placed the pantry right at the bottom of the staircase for easy access. I am thrilled with how this came out considering the time and effort it took. Very gratifying. Build on!

Thu, 03/05/2015 - 06:24
I really love how the finished turned out. I need to build something like this too! My current pantry just isn't big enough for bulk shopping :)
Thu, 04/16/2020 - 10:55
Building this from your pictures as we speak! What type/thickness of wood did you use for the back panel and door panels??
Sat, 07/23/2016 - 18:21
I am thinking about building one but I am not sure if my skill level is up to this yet. I am going to attempt to build the Kentwood Bookshelf and see how that goes. I am remodeling my office and want real wood shelves instead of that pressed wood junk. Great job on your build. I love this website!
Sat, 01/13/2018 - 18:09
Hey Michael I really love the pantry and would love to make this exact one but there is not enough info on the sizes and what all you used for all the wood. If you have time I would greatly appreciate it if you could give us some more info thank you
Thu, 01/09/2020 - 06:19
Is the top of this a single piece of plywood. Pictures are a bit vague. Trying my hand with this
Wed, 04/28/2021 - 16:38
Love it! I am in need of one too. Can we get the plans for this pantry?

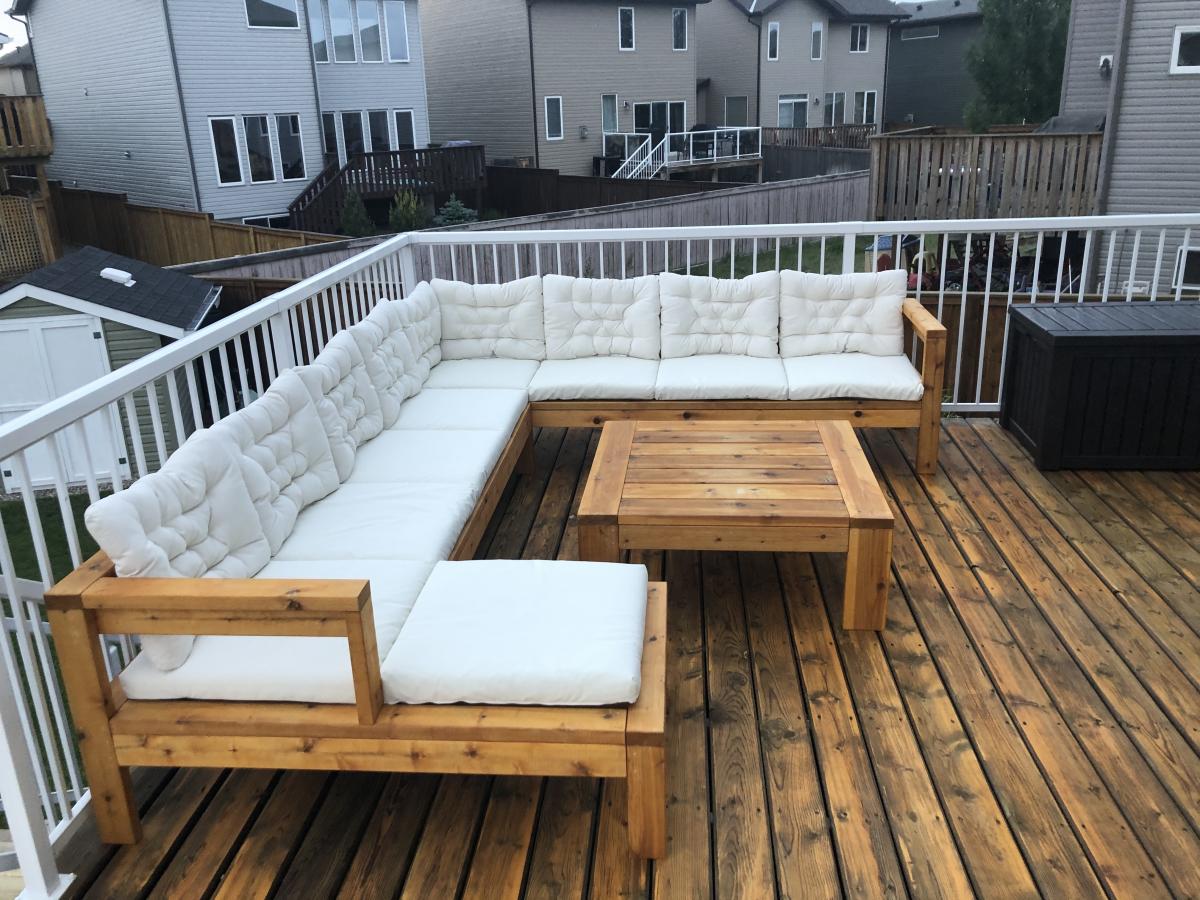
Made the outdoor sectional. The coffee table was made out of left over pieces!

Wed, 10/02/2019 - 09:54
So smart to make the coffee table out of the spare pieces.
Looks amazing!

This project was made from reclaimed wood from my office where they had built a temporary safety railing out of 2x4s and 2x6s. I added a compartment for storage. The top is stained in a classic grey. I painted the body in black followed by white. I then sanded the body to allow the black to bleed through for a distressed look.


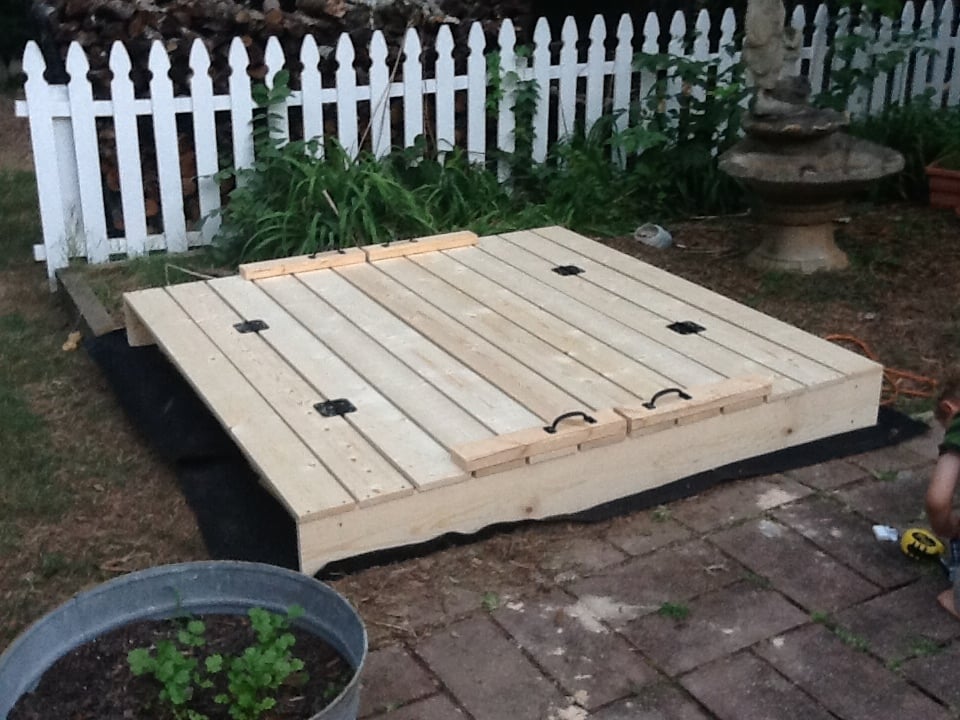
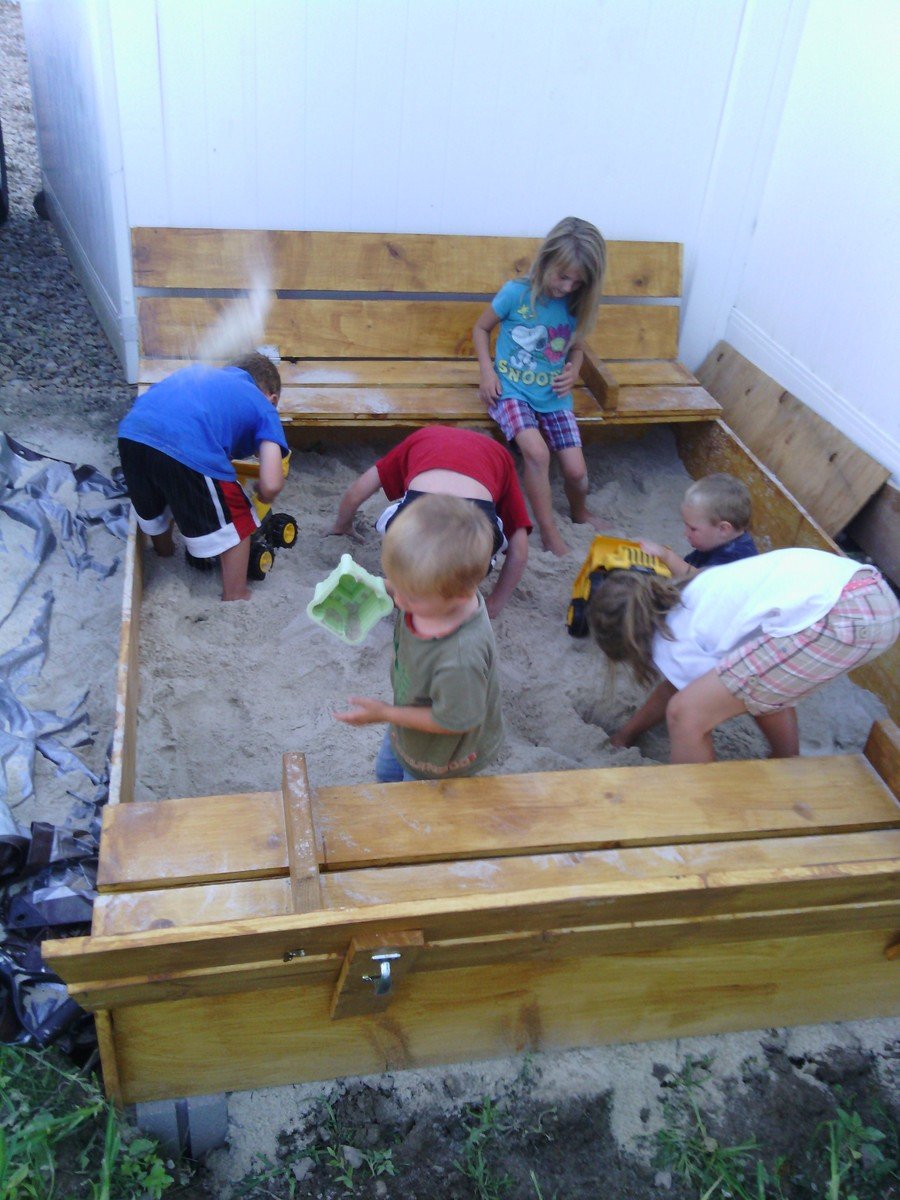
I've been wanting to buy or make a sandbox for my son for a couple of years now. Since seeing this on Ana White I knew I had to make it. My son is 4 yo and I didn't think the 4' square sandbox would be big enough for him, so I made it bigger. Ours is 6' square.
Materials:
4@1x8x6'
12@1x6x6'
2x4 - used leftovers from another project
8 hinges
4 handles
decking screws
Cut lengths:
2@1x8 cut to 71.5 (long sides of the box)
2@1x8 cut to 70.5 (short sides of the box)
did not cut the 1x6 boards (top planks) - actually designed the other boards to fit their length to prevent cutting (saving time) (note that original plan uses 1x4 planks - I used 1x6s so I could use the same number of planks but cover a larger area)
4@2x4 cut to 11.5 (arm rests)
4@2x4 cut to 18.5 (back supports)
followed instructions for assembly otherwise. At my husbands suggestion we put the handles on the sides and can easily open from either side - prevents having to lean over to the middle to open (back saver)
I finished the project in 4 hours including clean up and a couple of small breaks. This is my first Ana White project. It was a lot of fun to build and I hope my son will enjoy it for years to come!
Sat, 09/01/2012 - 20:59
Wow, this is just what I need! I've been wanting to make a sandbox for under the playhouse but the other plan was too small. This would be great for the little guys. Thanks!
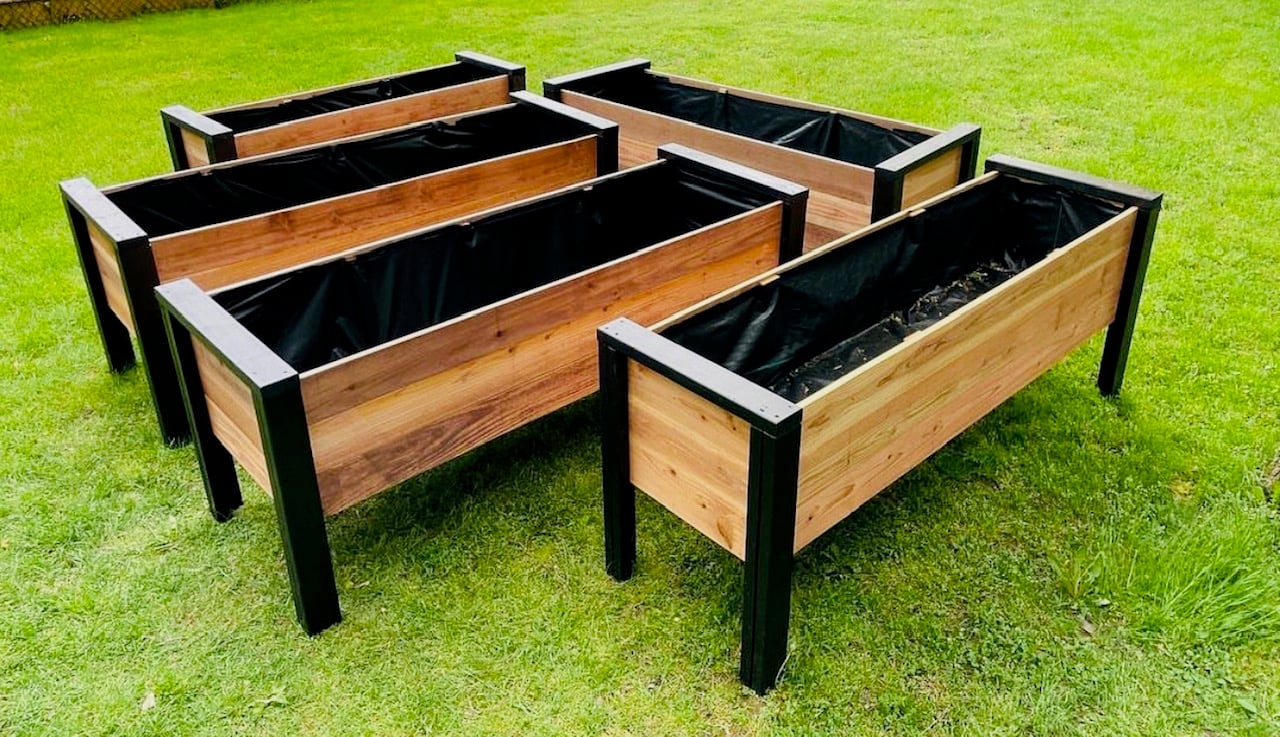
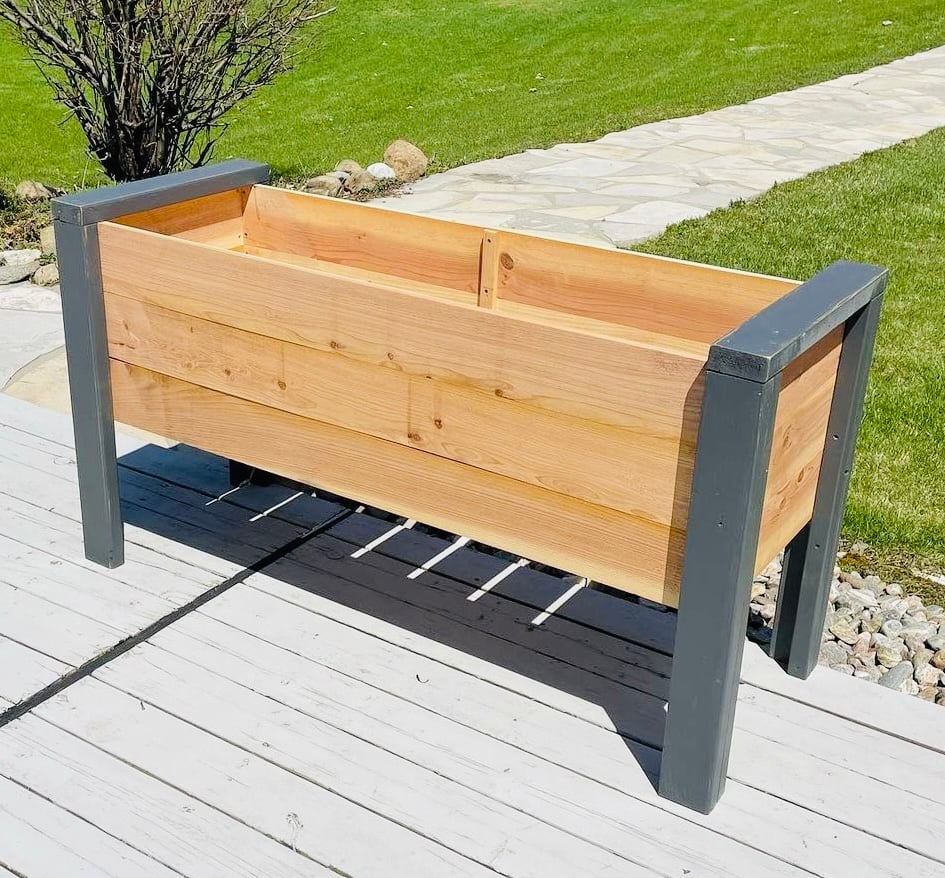
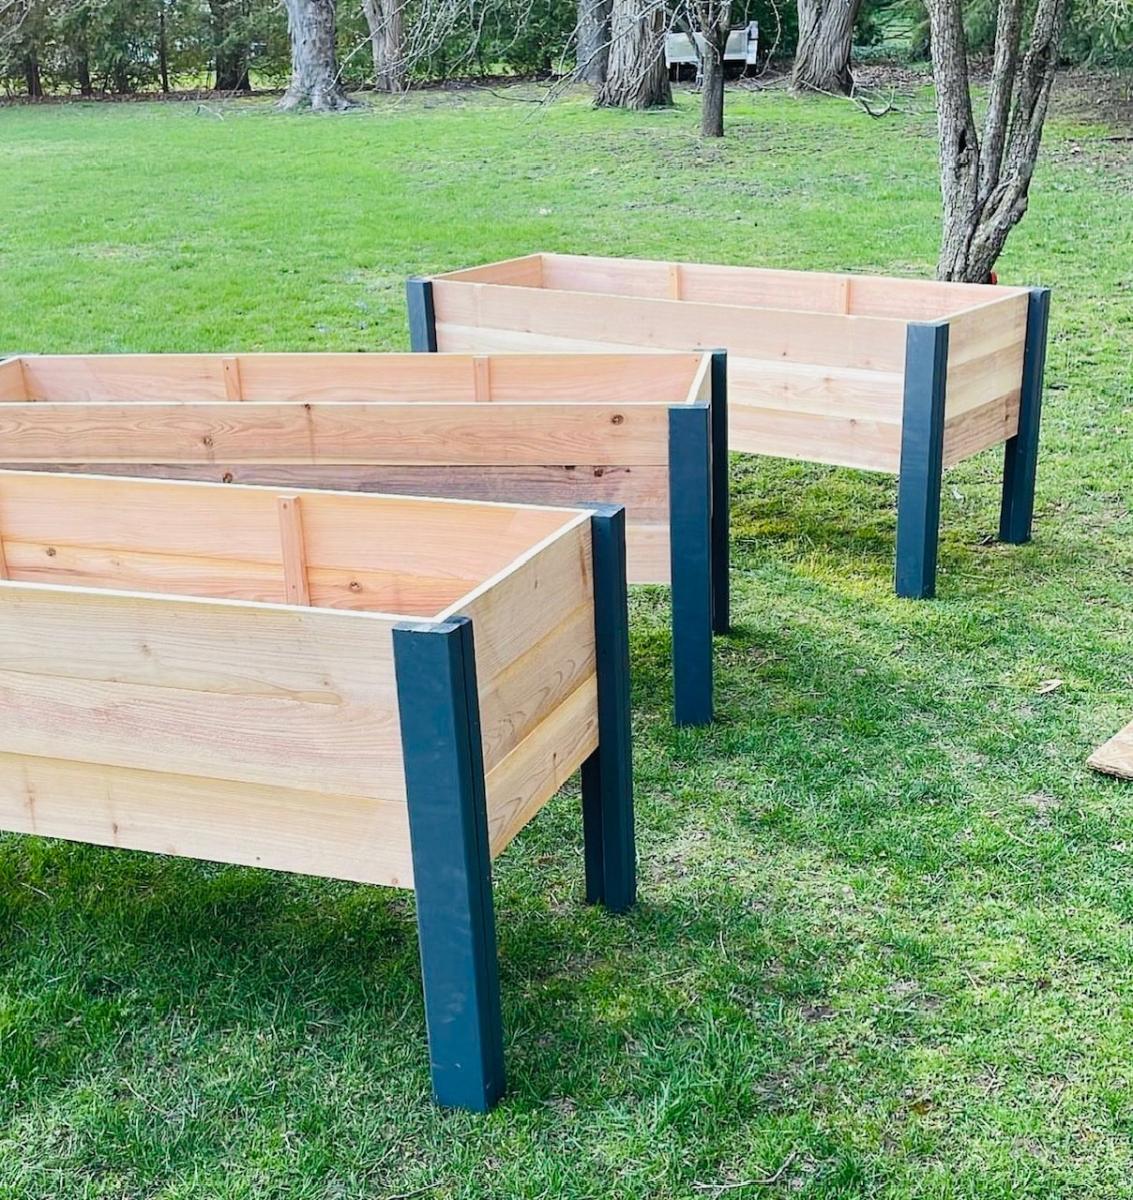
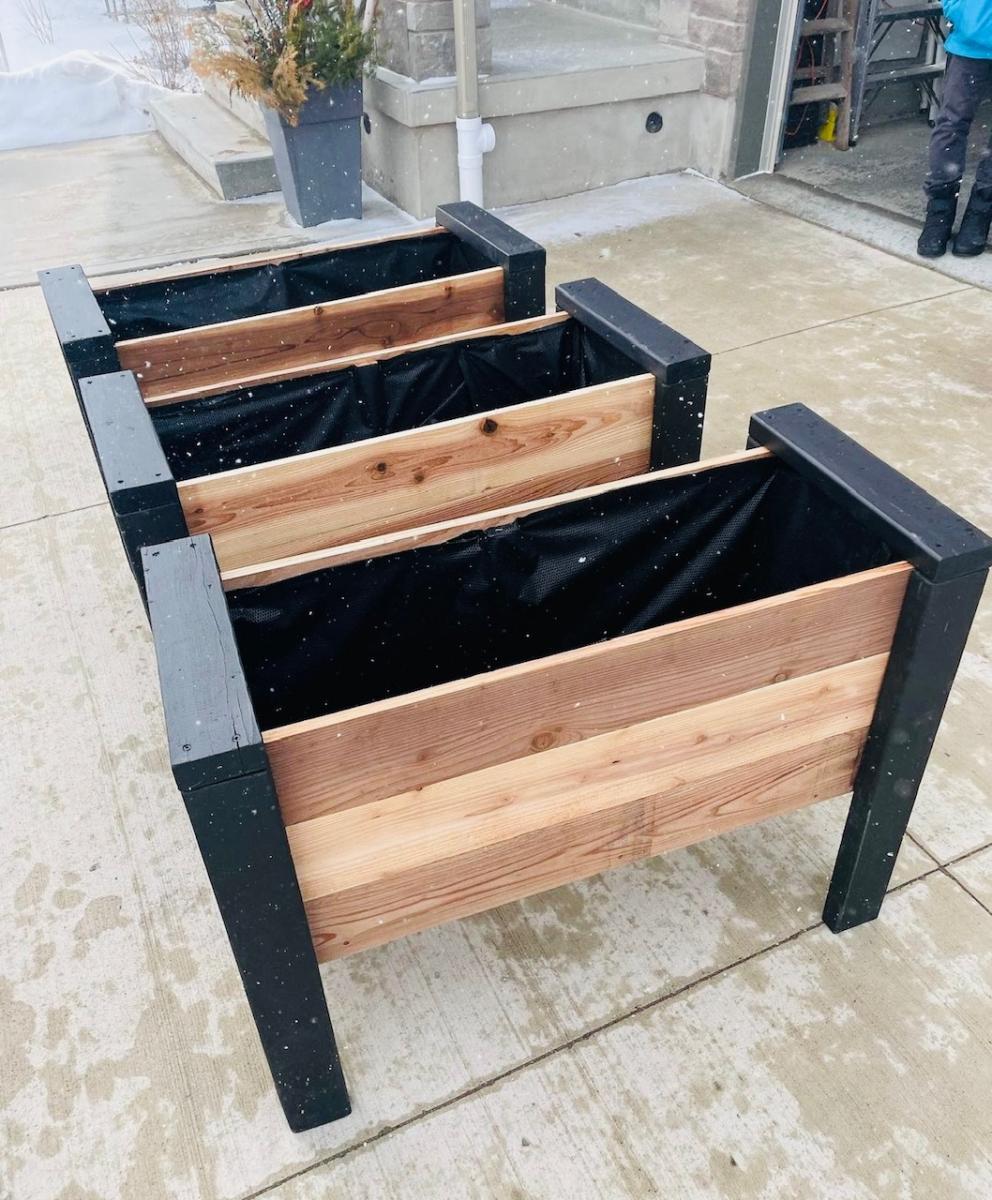
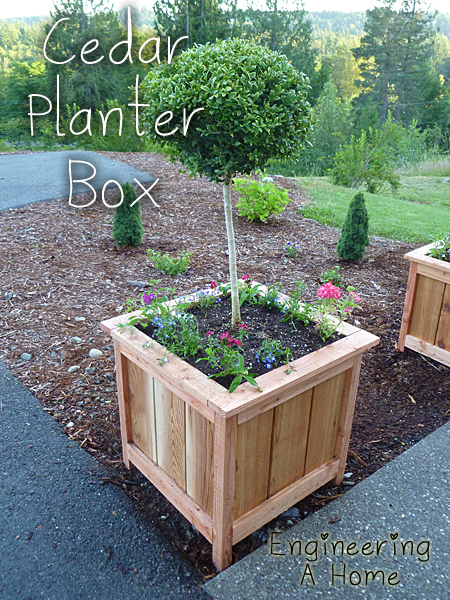
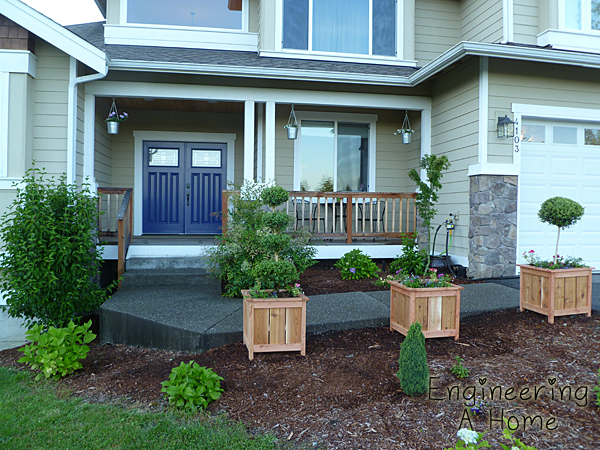
Planters build by Urban Wood Solutions

Fri, 03/31/2023 - 04:23
These are incredible. They look a little deeper, and would be good for vegetables. How deep are they?
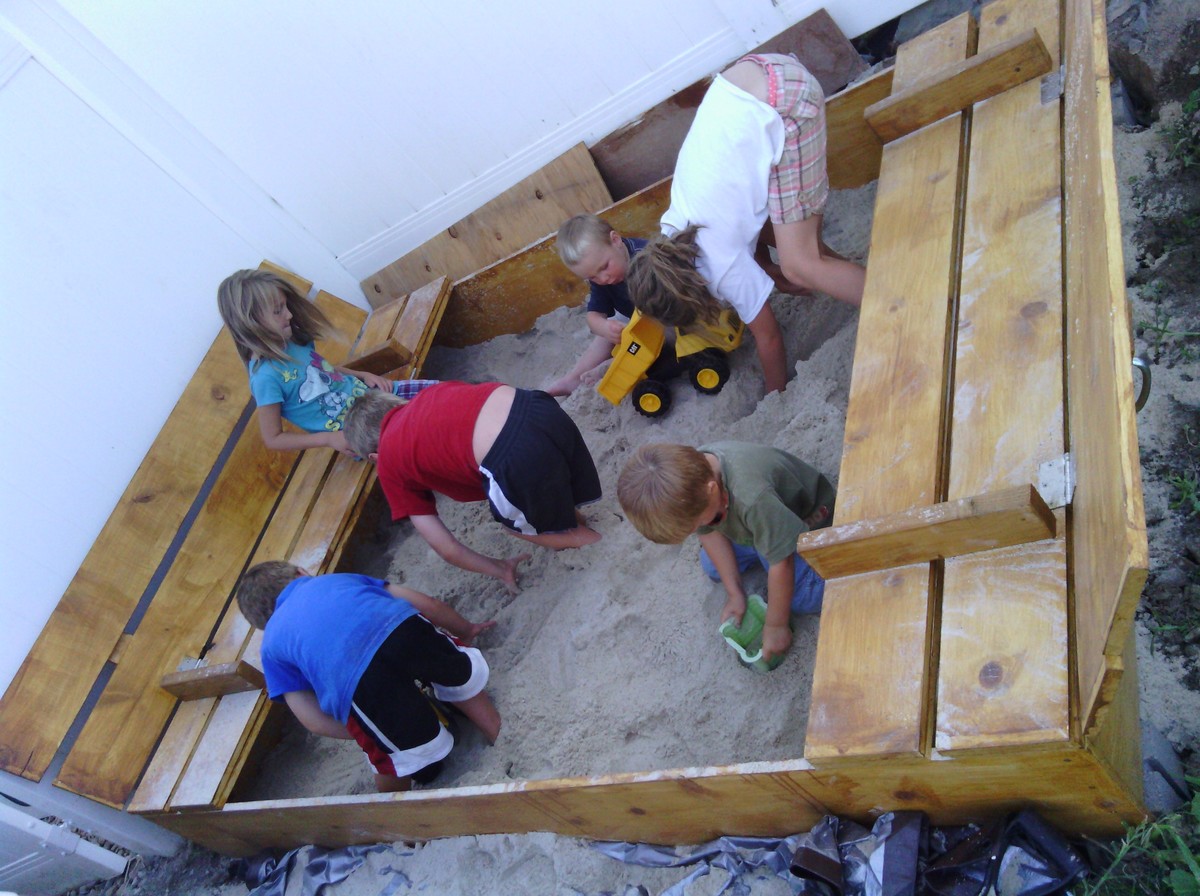
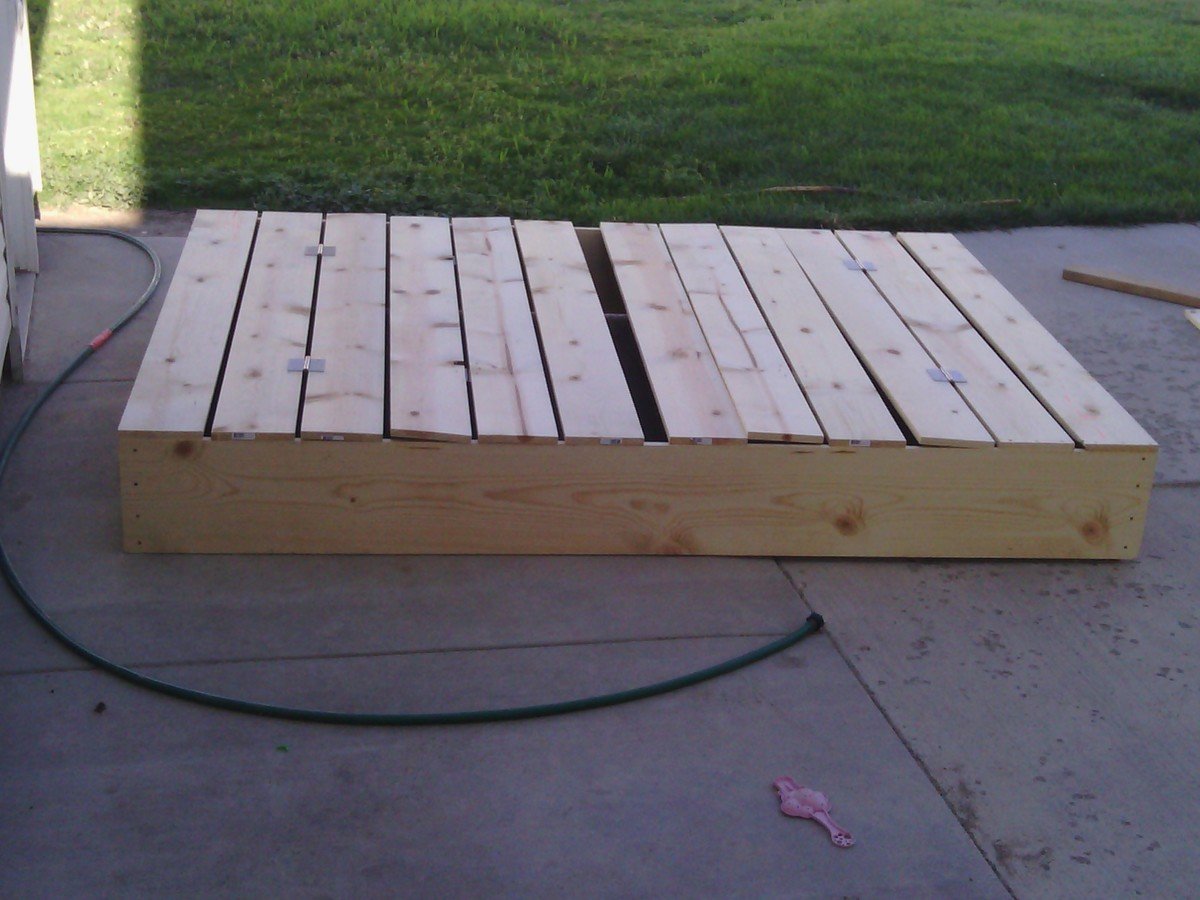
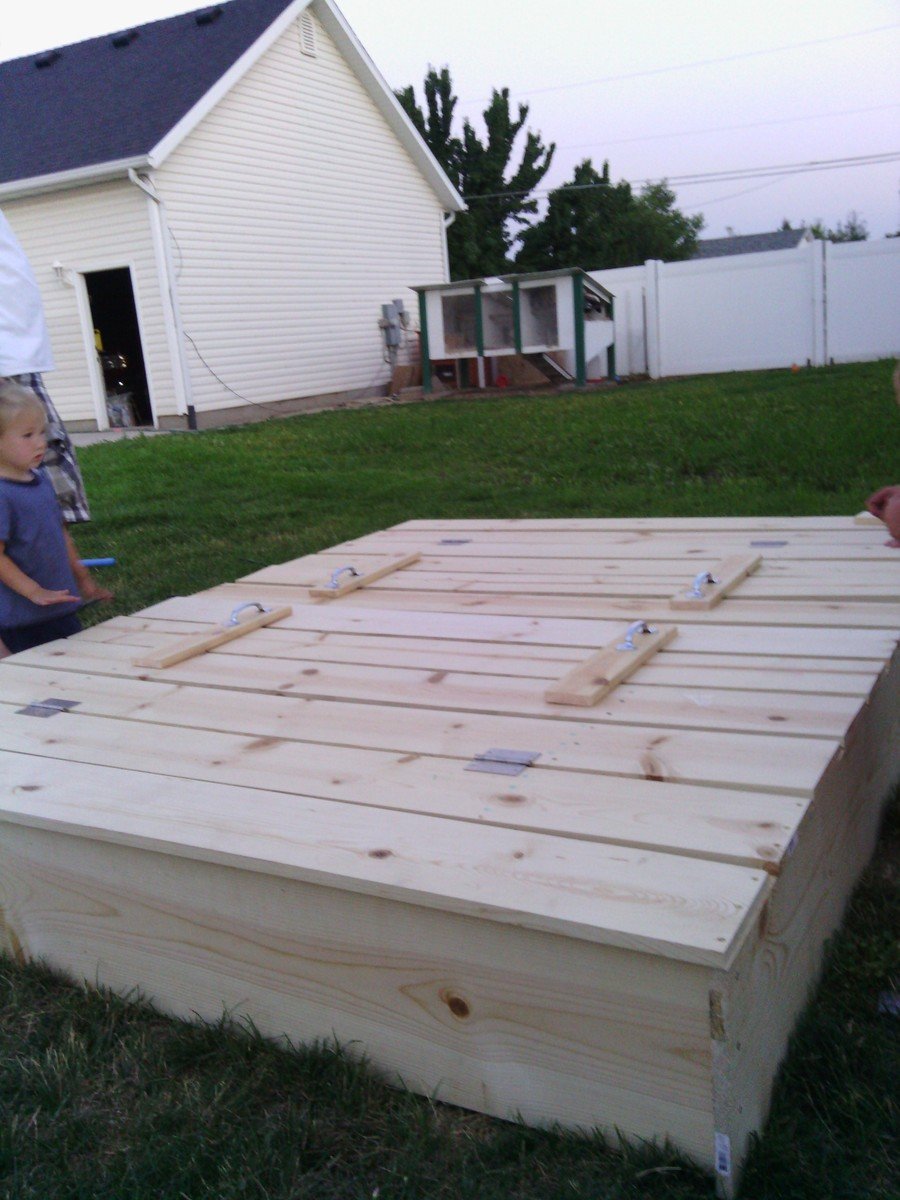
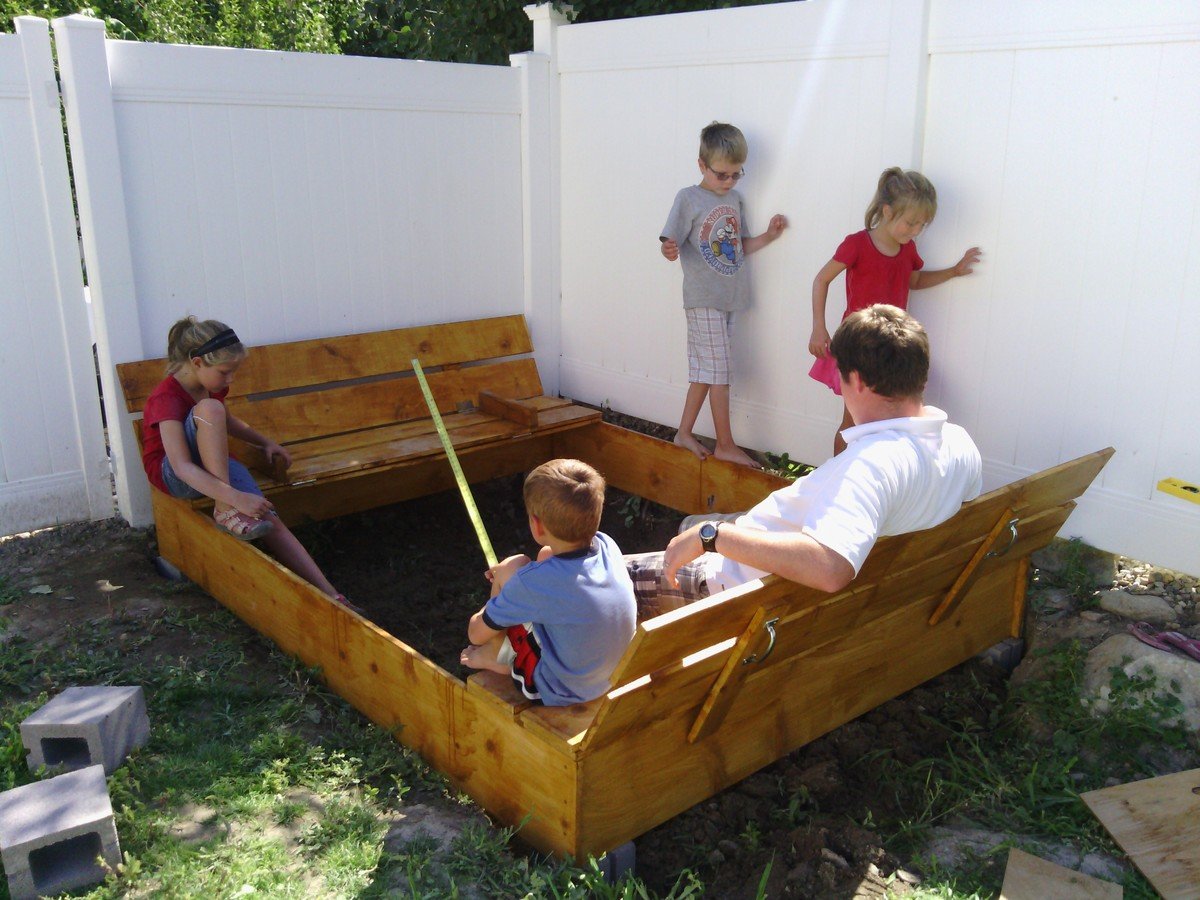
We wanted to make a large sandbox for lots of kids. We love that it has an easy cover and two large benches to sit.
Supplies and Steps are shared at http://myhomedonemyway.blogspot.com/2013/07/building-6-x-8-sandbox.html

Wed, 02/26/2014 - 13:37
I hope sharing this will inspire others of things that they can make. Check out my blog for other DIY projects: http://myhomedonemyway.blogspot.com


Thank you! You've helped me look like a true carpenter who knows what he's doing! My whole family is impressed with my woodwork lately, and now I'm addicted. I've done your seesaw, bar table and stools plus the treehouse in 2 weeks. Thank you for sharing your plans!
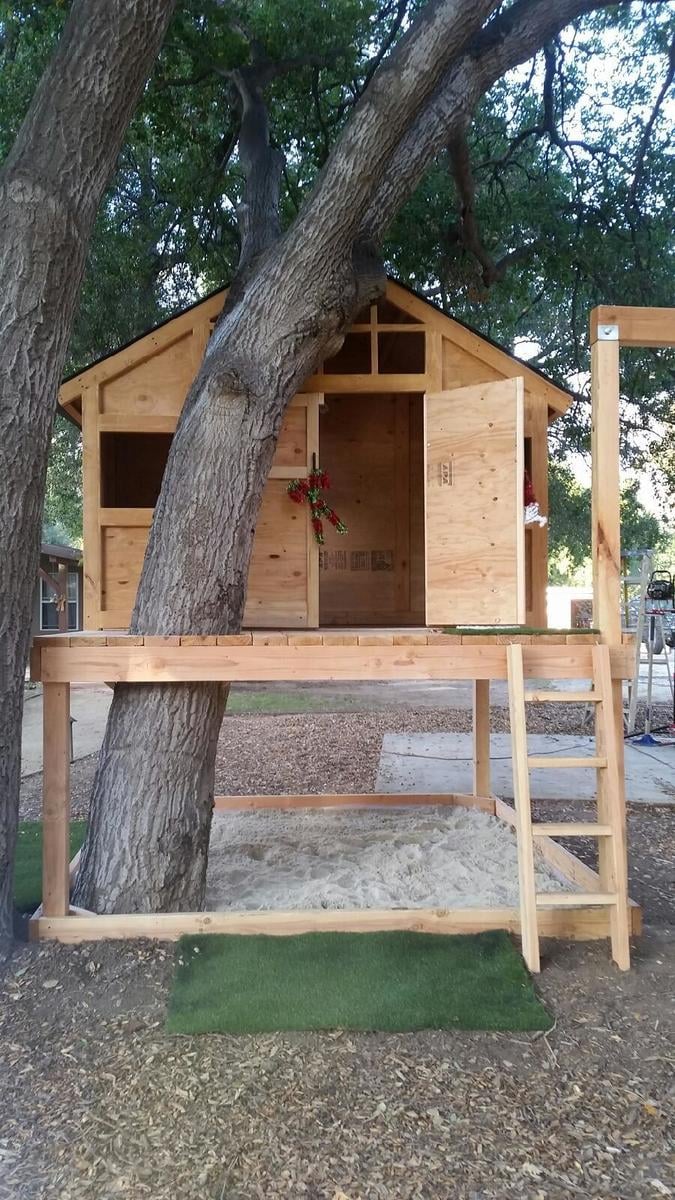
They were simple to make and the plan was easy to follow. The only modification I made was adding the 1x3 topper in place of the longer legs sticking out of the top.


Fri, 07/19/2013 - 06:36
Adding these to my to-do list for spring (yes, I plan ahead). I'm thinking of elevating and elongating them to fit around a bay window.

I reduced the size of the 2x4 coffee table to make 2 end tables. They can be used as additional seating when needed.


This was a great last minute Christmas gift. Took me a little over two hours. Made completely out if pallet wood.
Sun, 12/26/2021 - 13:19
It looks great, I'm sure the recipient loved it! Thanks for sharing:)

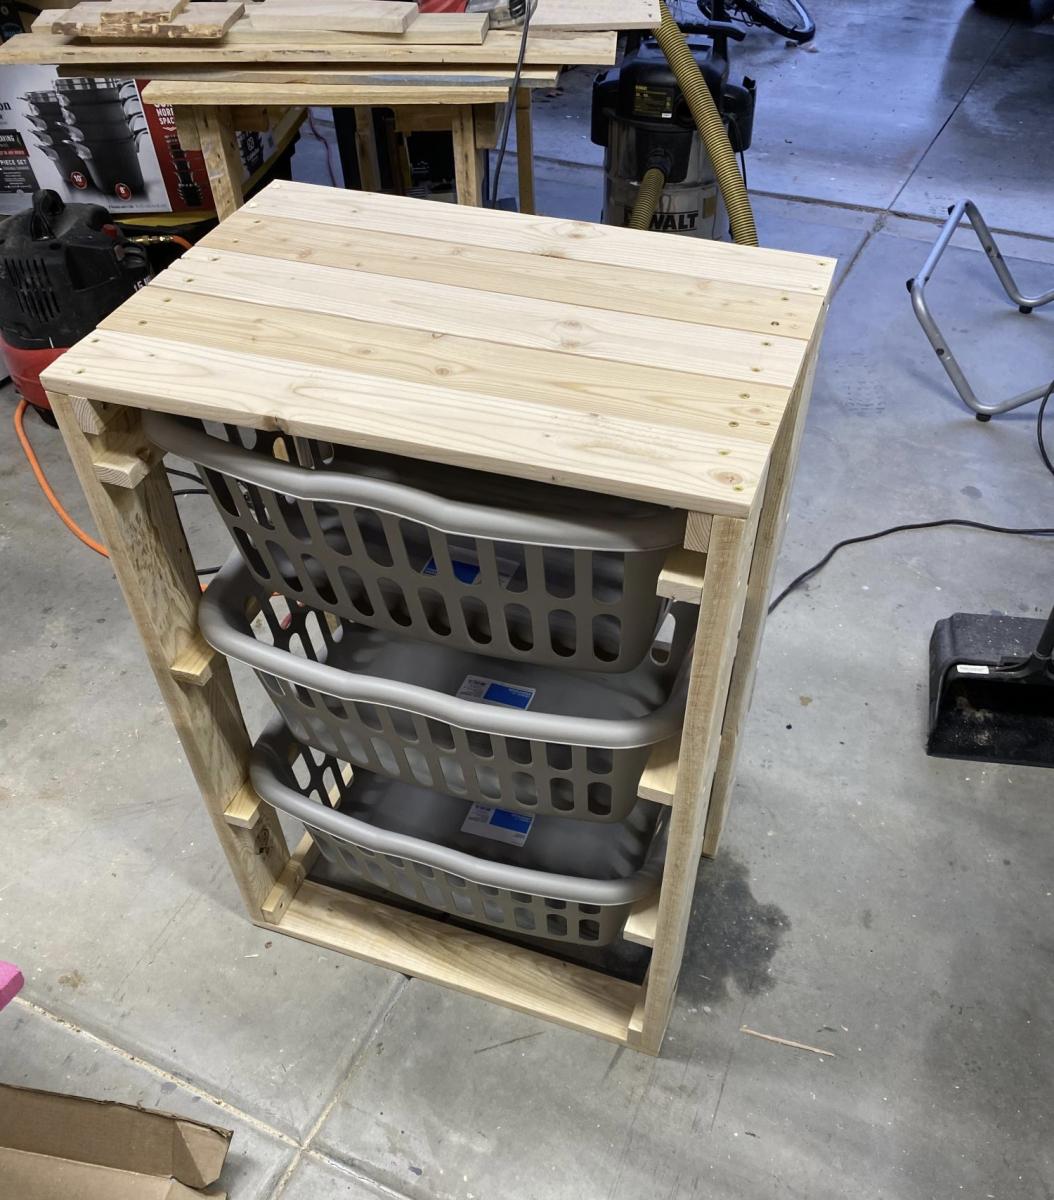
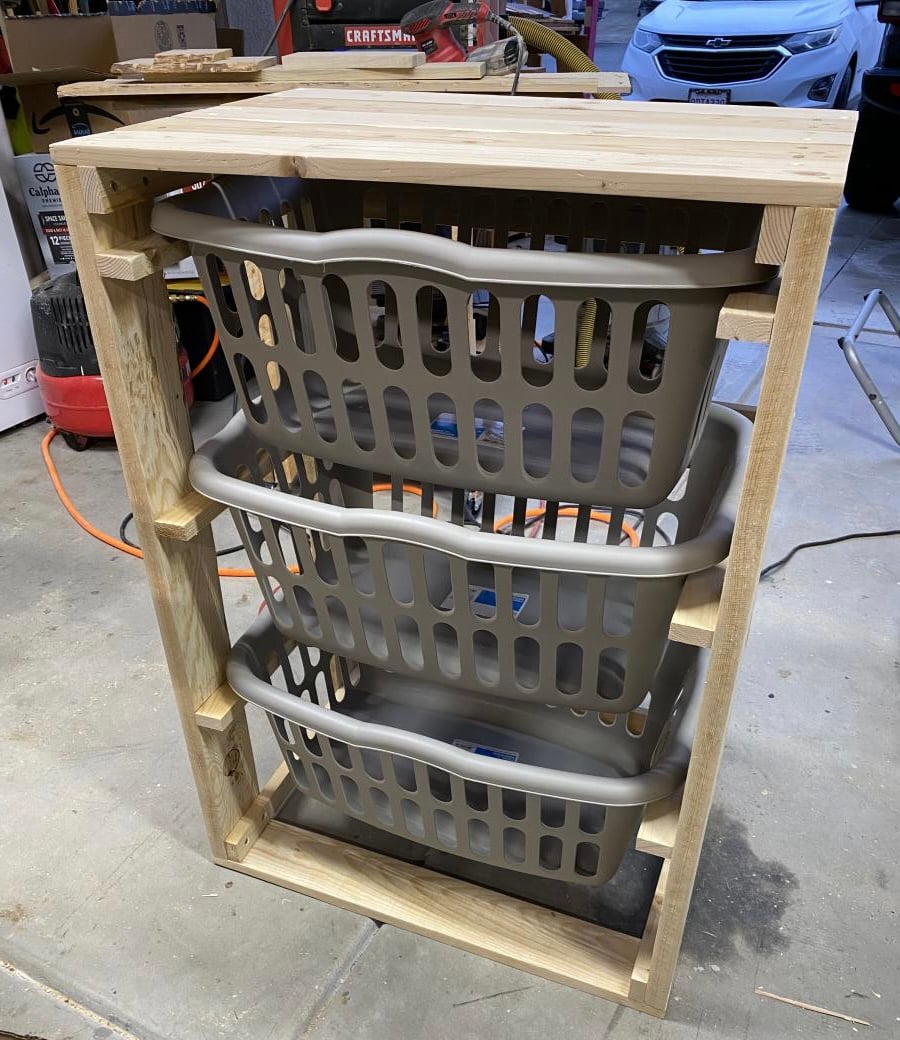
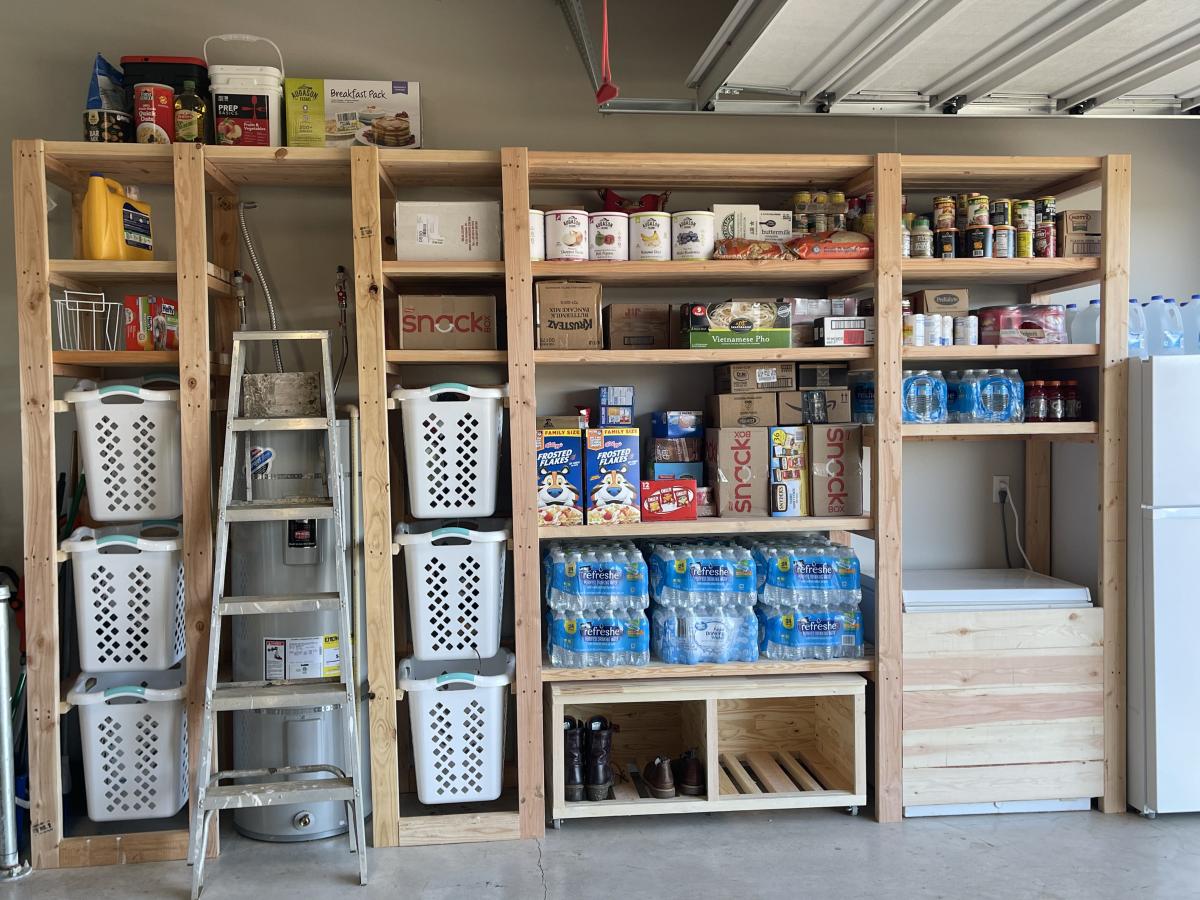
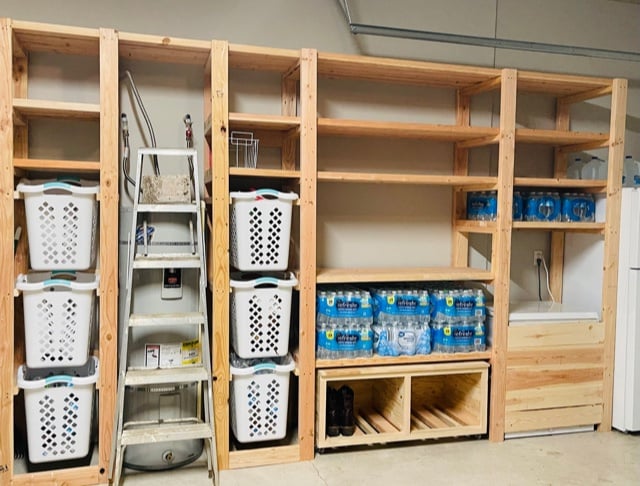
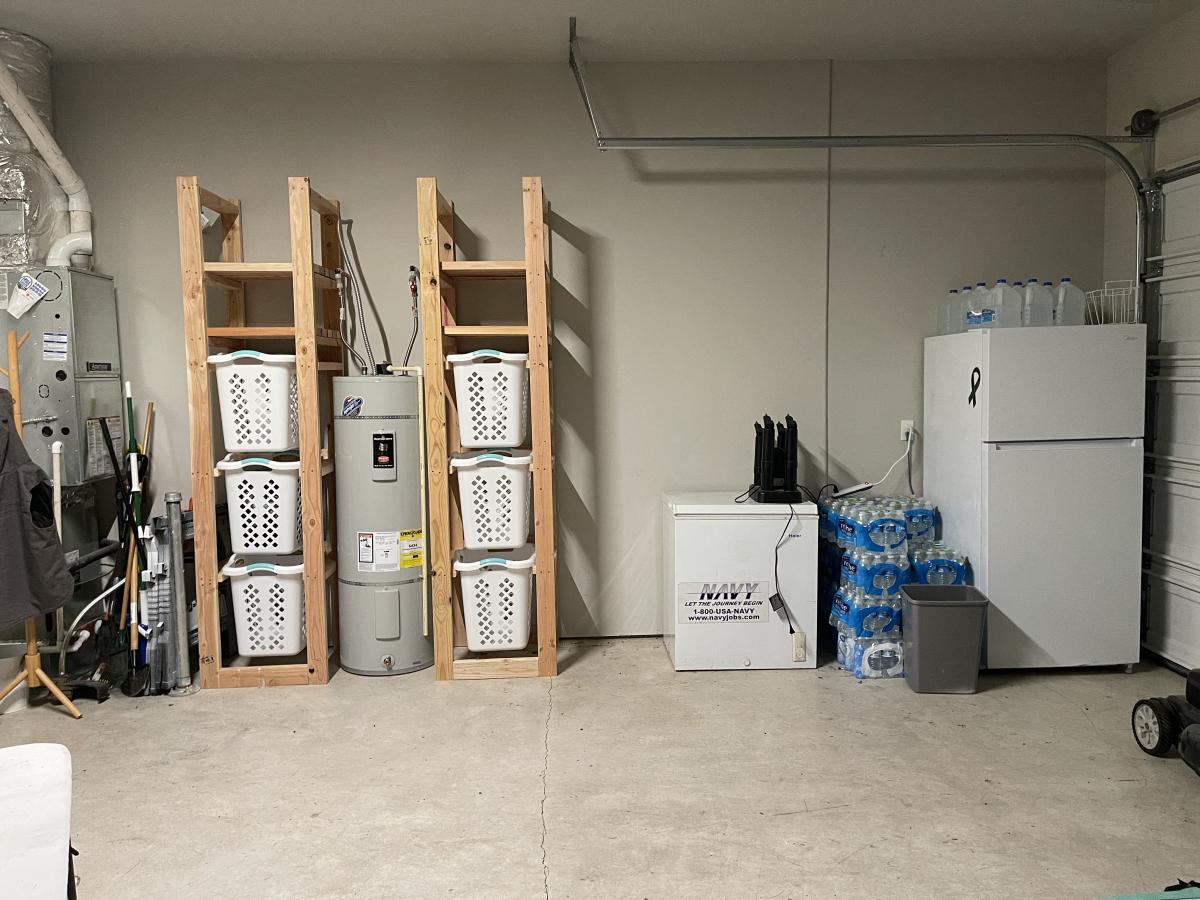
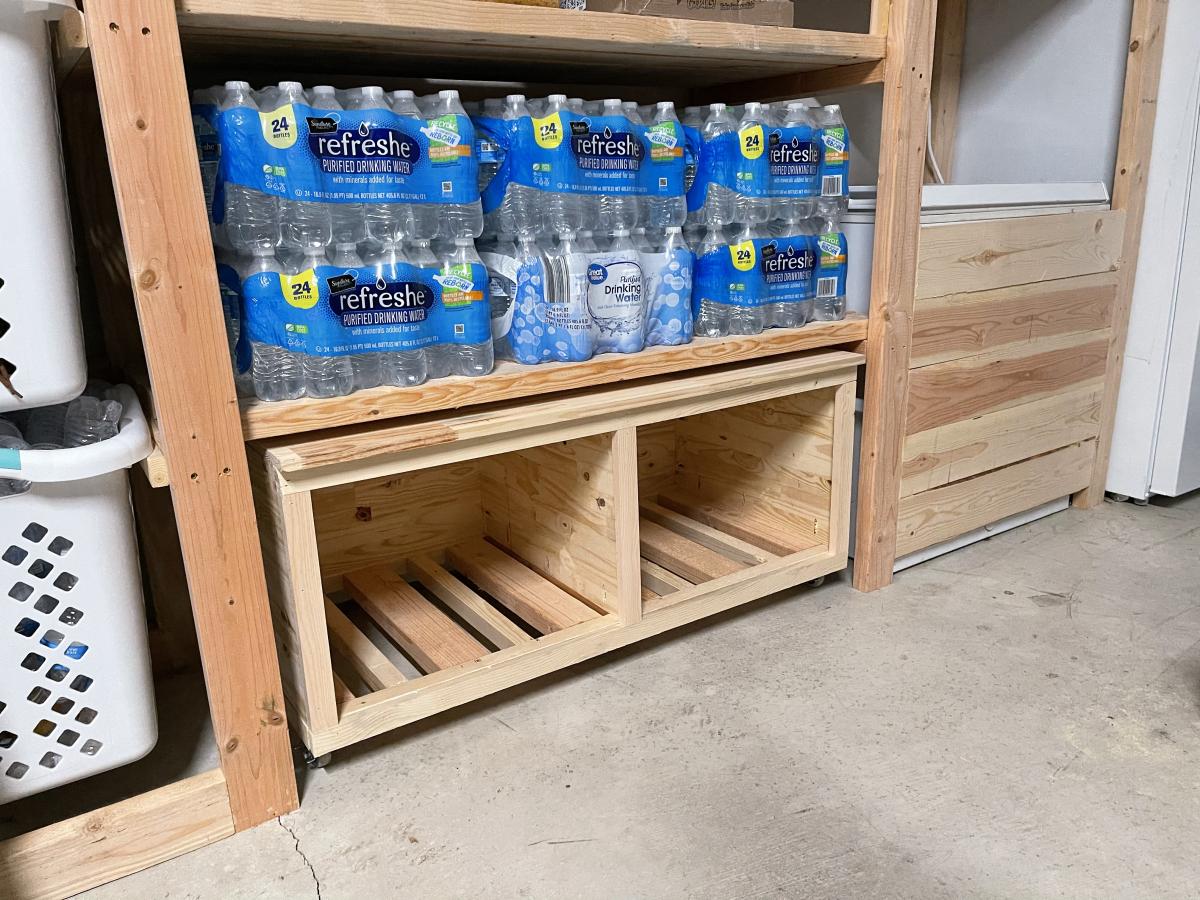
Easy to build, easy to customize, perfect for totes
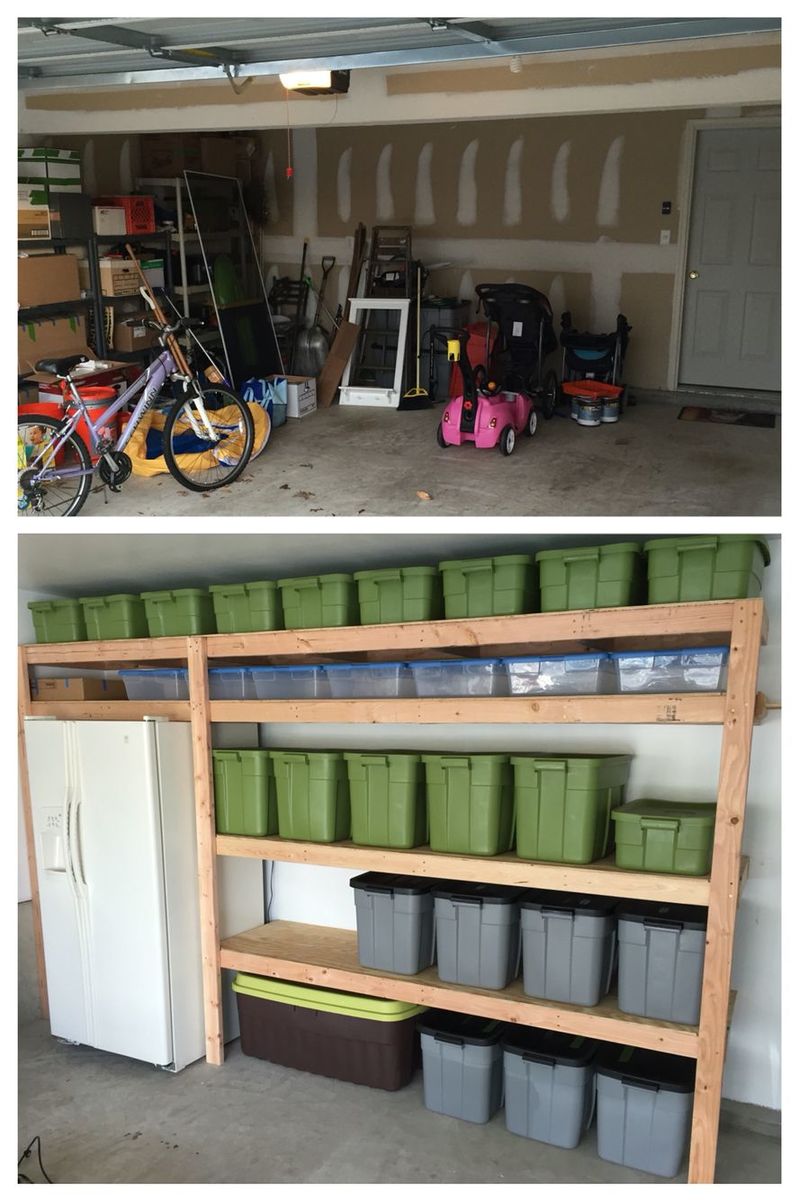
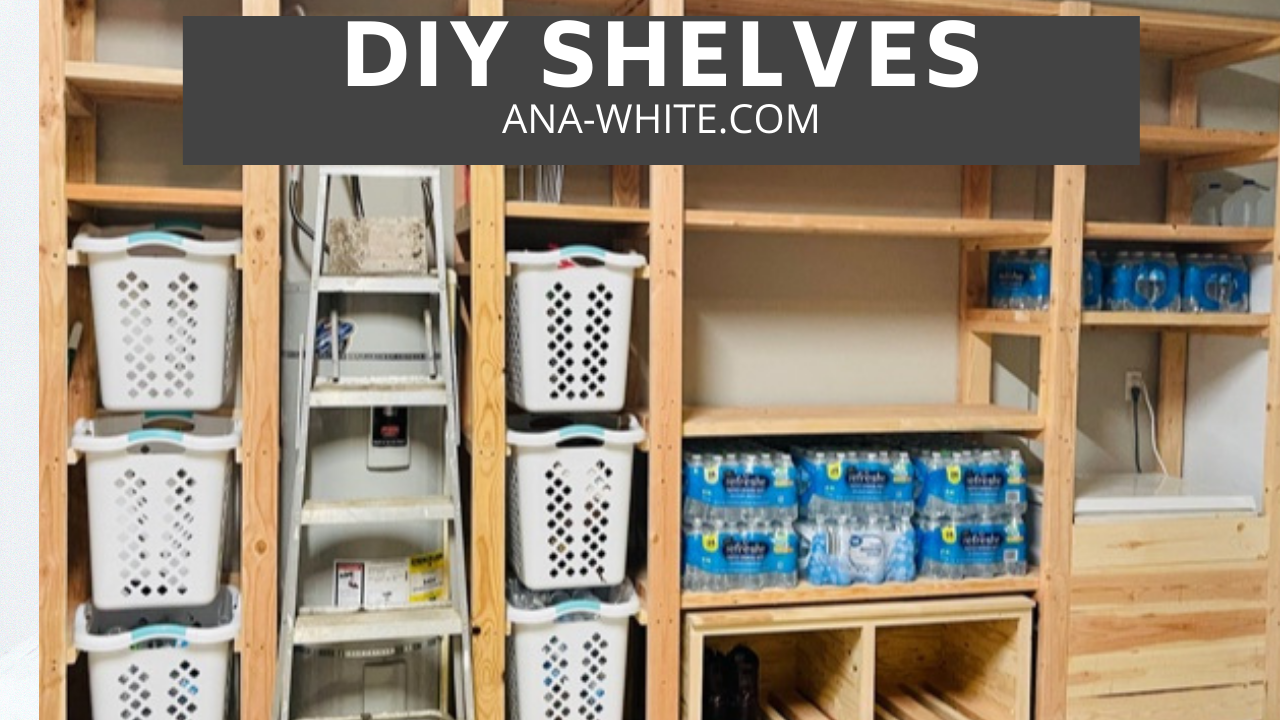
I used Ana's Freestanding Shelf plan and customized it to fit my needs. I incorporated laundry and recycle storage, a rolling bench and built in for our chest freezer. If you want to see it being built with some added tips, that video is available here https://www.youtube.com/watch?v=N8w7XGiVMbs&t=258s

Built this beautiful Sofa from Ana White's Plan, had to modify a bit as I had left over small pieces of trex from my Deck , and the back rest cushions were higher.

Reader submitted photo

I built this outdoor daybed to add a cozy and inviting space to my backyard. It was a fairly easy build, which I managed to tackle by myself. Head over to the blog for more details.


Comments
Juan Butler
Wed, 02/21/2024 - 10:27
I'm building the sectional…
I'm building the sectional this weekend, and saw your addition to the end piece and am going to steal your idea. Very nice.