Community Brag Posts

Modified Farmhouse Bed

This was our first "Big" build.... Our bed.  I modified the footboard as I like taller footboards and it keeps the mattress in super snug!!!! Love this bed with light stain!!!!  Also we used tongue and groove boards for the head and footboard!!! Went together so nice!!!

Estimated Cost
$120.00
Estimated Time Investment
Day Project (6-9 Hours)
Recommended Skill Level
Intermediate

A Big Patio Planter

Submitted by Jake on Tue, 06/04/2013 - 17:47

I have a really boring backyard patio so I thought I would spice it up with flowers but I could not find a plan for a large right angle planter. So I made up my own.

The planter is made from cedar fencing but pine for the top trim and the corner legs. The legs have grooves that the sides slide into and are not screwed or glued in place. That is so you can remove the top trim and then just pull the sides out to replace them as needed or to even change the size of the planter.

This planter is 18" high so it is comfortable to sit on but that also means you will need a lot of soil to fill it up. Mine took 26 40lb bags which is over 1/2 ton of soil. Add water and that planter is here to stay. But it also means that there is a large tendency for the sides to bulge along the bottom so I placed stop blocks along the bottom base and screwed into the base.

I planted Angelonia for color and sage, oregano, and thyme for spice. It was fun to build and came out well but it was expensive as the soil along was nearly $60. Add another $50 for lumber and screws and you have exceeded the magic $100 mark. Still a good deal, however.

Estimated Cost
$110
Estimated Time Investment
Weekend Project (10-20 Hours)
Finish Used
Painted the top trim and legs with Behr water-based enamel and left the cedar to mellow on its own.
Recommended Skill Level
Intermediate

Comments

Rustic X Coffee Table First

Submitted by ShaunEDM on Mon, 05/04/2015 - 20:45

Came across this plan as my first wood working project. Took the corner brackets to a different level, spoke with a local blacksmith who created the brackets for me to give it a more rustic feel.  Created the nails, same way they were done in the early 1800's.

Total time took me longer than normal since this was my first project.  Otherise I could see hammering out one of these a day (excluding waiting for stain to dry)

Very excited to keep going, thanks for the great site Anna!

Built from Plan(s)
Estimated Cost
$75 dollars roughly
Estimated Time Investment
Weekend Project (10-20 Hours)
Finish Used
Used Miniwax English Chestnut with Minwax® Polycrylic® Protective Finish.
Recommended Skill Level
Beginner

Cedar Planter with Trellis

Submitted by redhead_61 on Thu, 06/06/2013 - 15:13

I put the two planter boxes on this site together to get a perfect little lattice box for the space by my door. I get lots of compliments and hopefully soon I will have yummy jasmine welcoming my guests.

Built from Plan(s)
Estimated Cost
free with scraps
Estimated Time Investment
Afternoon Project (3-6 Hours)
Finish Used
wood protector
Recommended Skill Level
Beginner

Dresser

Submitted by smettauer on Sat, 05/09/2015 - 06:18

My wife and I are expecting our first child, a baby girl, in September. I decided that I was going to make as much of the furniture as possible, and started with this dresser/changing table.

This is the first project I've made with drawers, and they were a bit of a challenge. Other than that building the dresser was straight forward. The drawer fronts are made from up-cycled deck boards and the knobs are from Anthropologie

Built from Plan(s)
Estimated Cost
The wood wasn't that expensive but the hardware (drawer pulls and slides) drove up the cost. In total probably around $300
Estimated Time Investment
Week Long Project (20 Hours or More)
Finish Used
oil-based white paint
red mahogany Varathane stain rubbed with black shoe polish
Recommended Skill Level
Intermediate

Comments

smettauer

Sat, 05/09/2015 - 06:21

Sorry the pics are upside down - when I created the post they were shown as being correct. I will try to update later

Two-tone kingsize bed- extra tall

My First Project

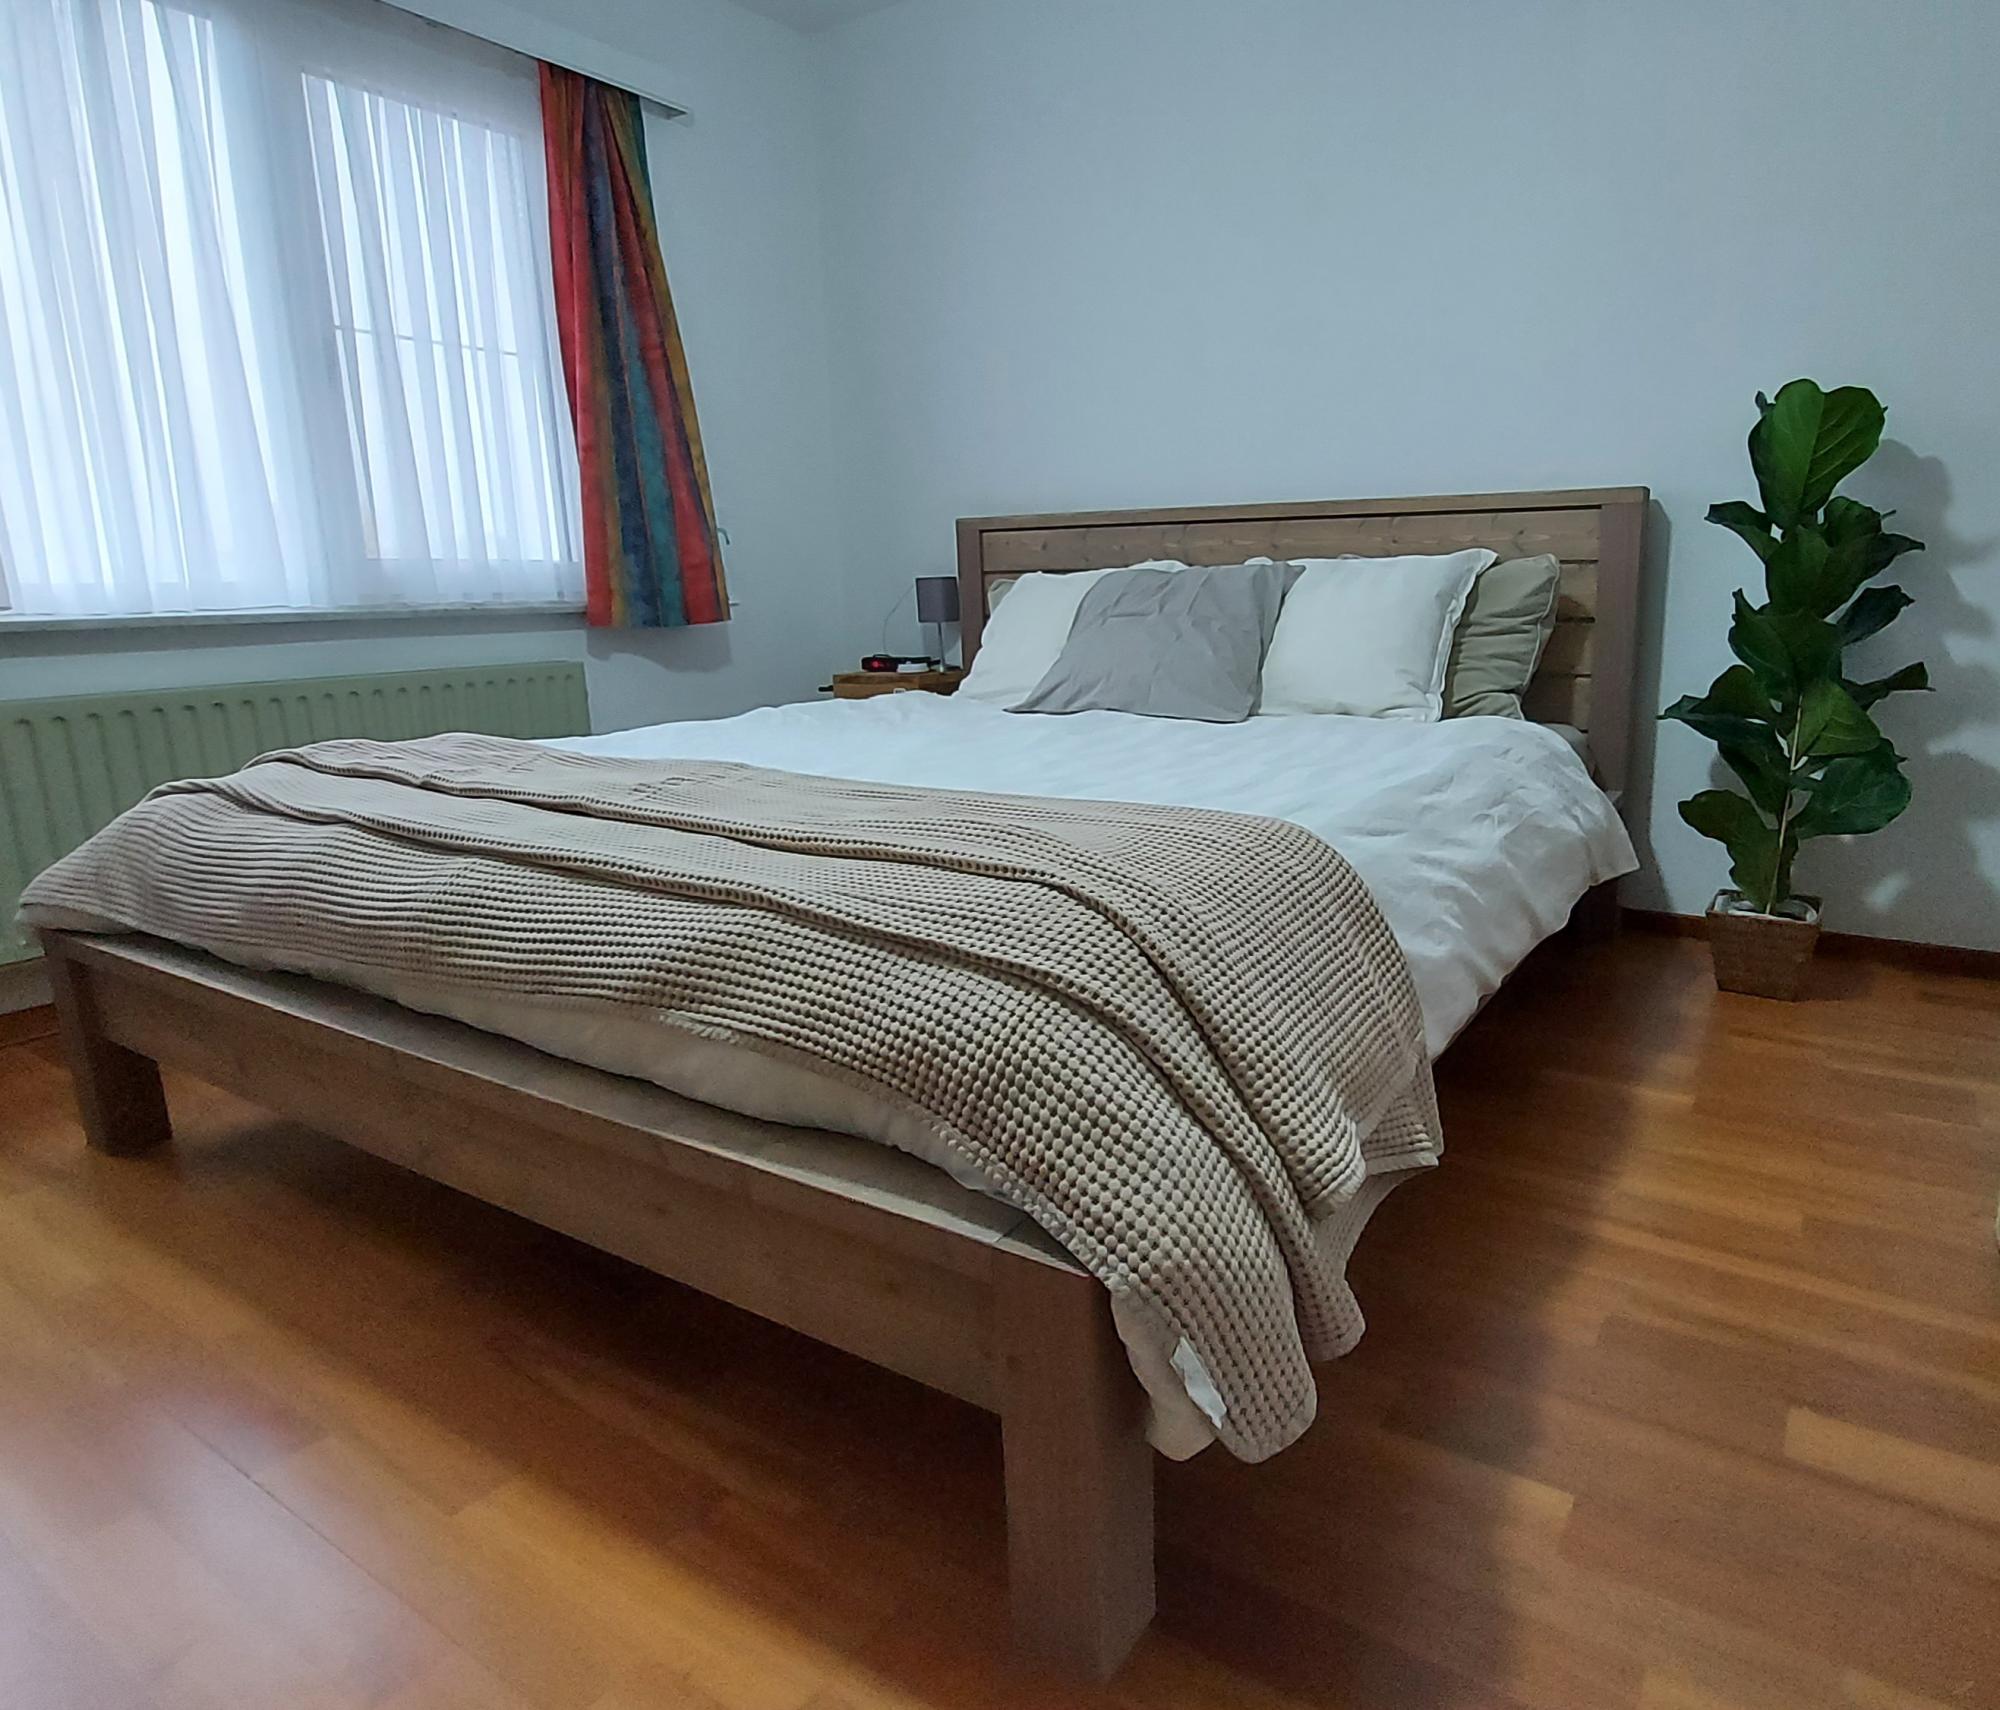
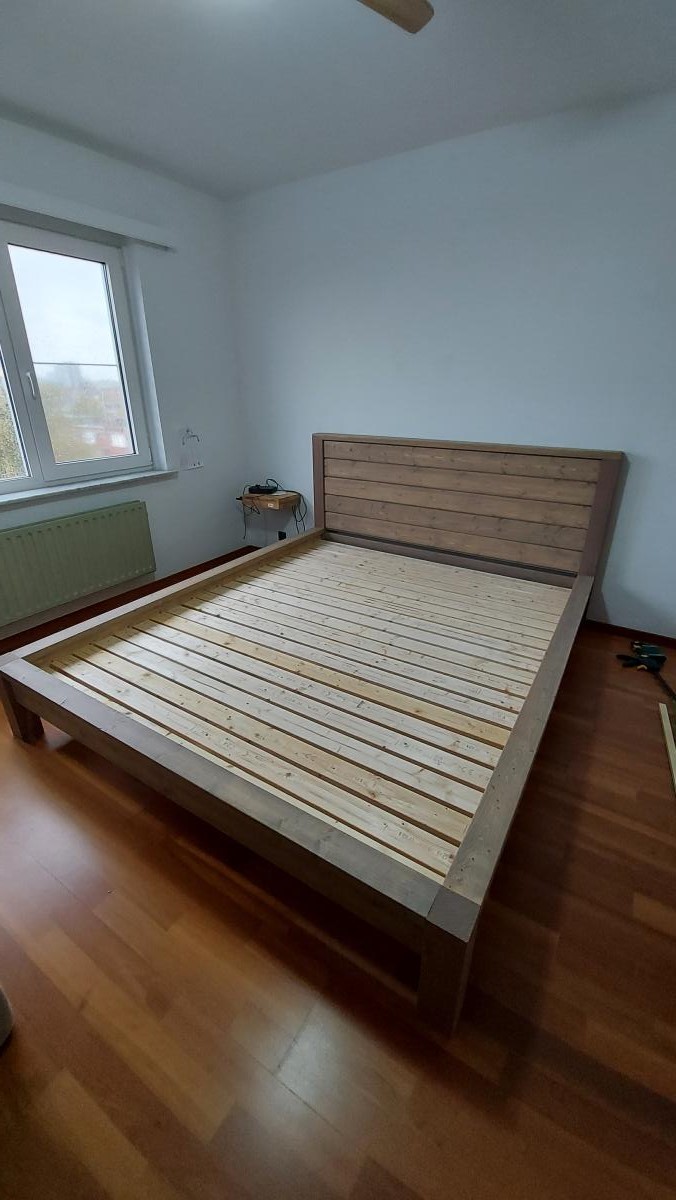
My husband and I had a problem.  We were tired of sleeping on a mattress on the floor, and most beds were out of the question because my husband is tall. 6'7" tall.  Ana White's plan looked perfect, but I had never built anything before, unless you count an improvised 'clean the gutters from the ground" stick.

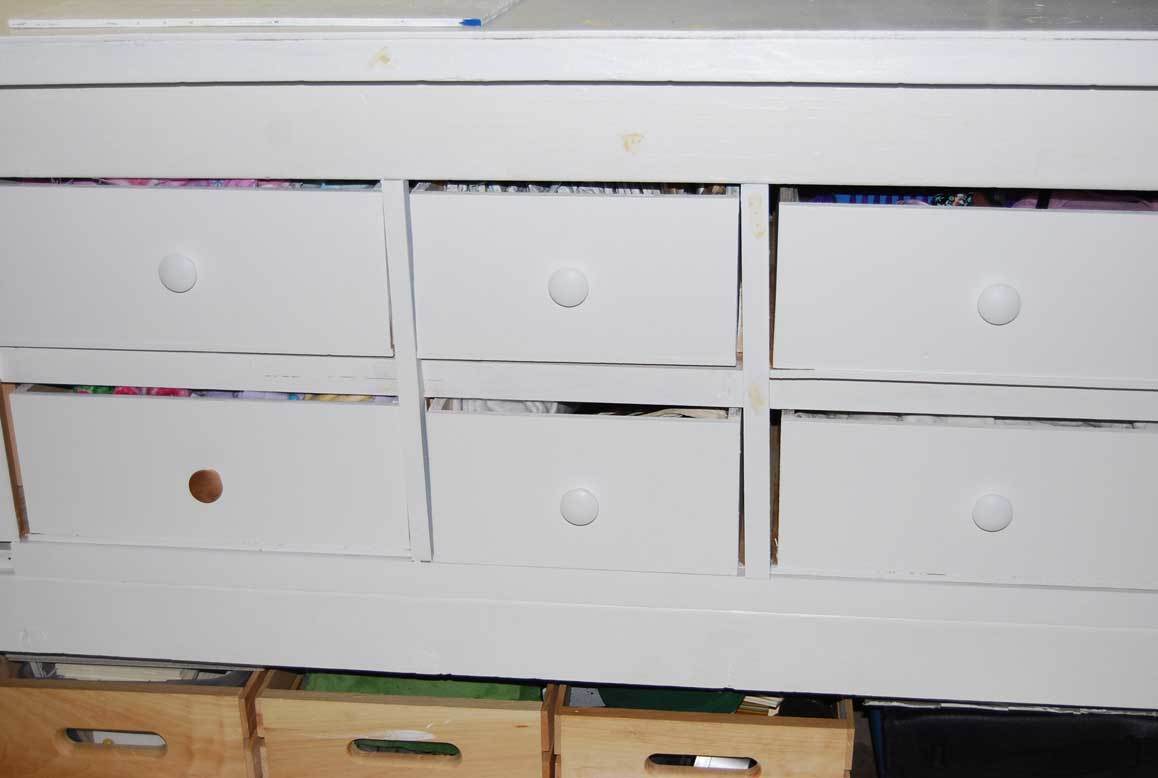
I knew I had to make something that could be taken apart because we are renters right now, so it will take a little bit of work, but after some modifications to the plans, it will come apart when it needs to.  We are also not small big humans, so the bed is appropriately beefed up where it needed to be- to accommodate 2 big humans, 2 fairly large dogs, 150 lb latex foam mattress, and any future kids.

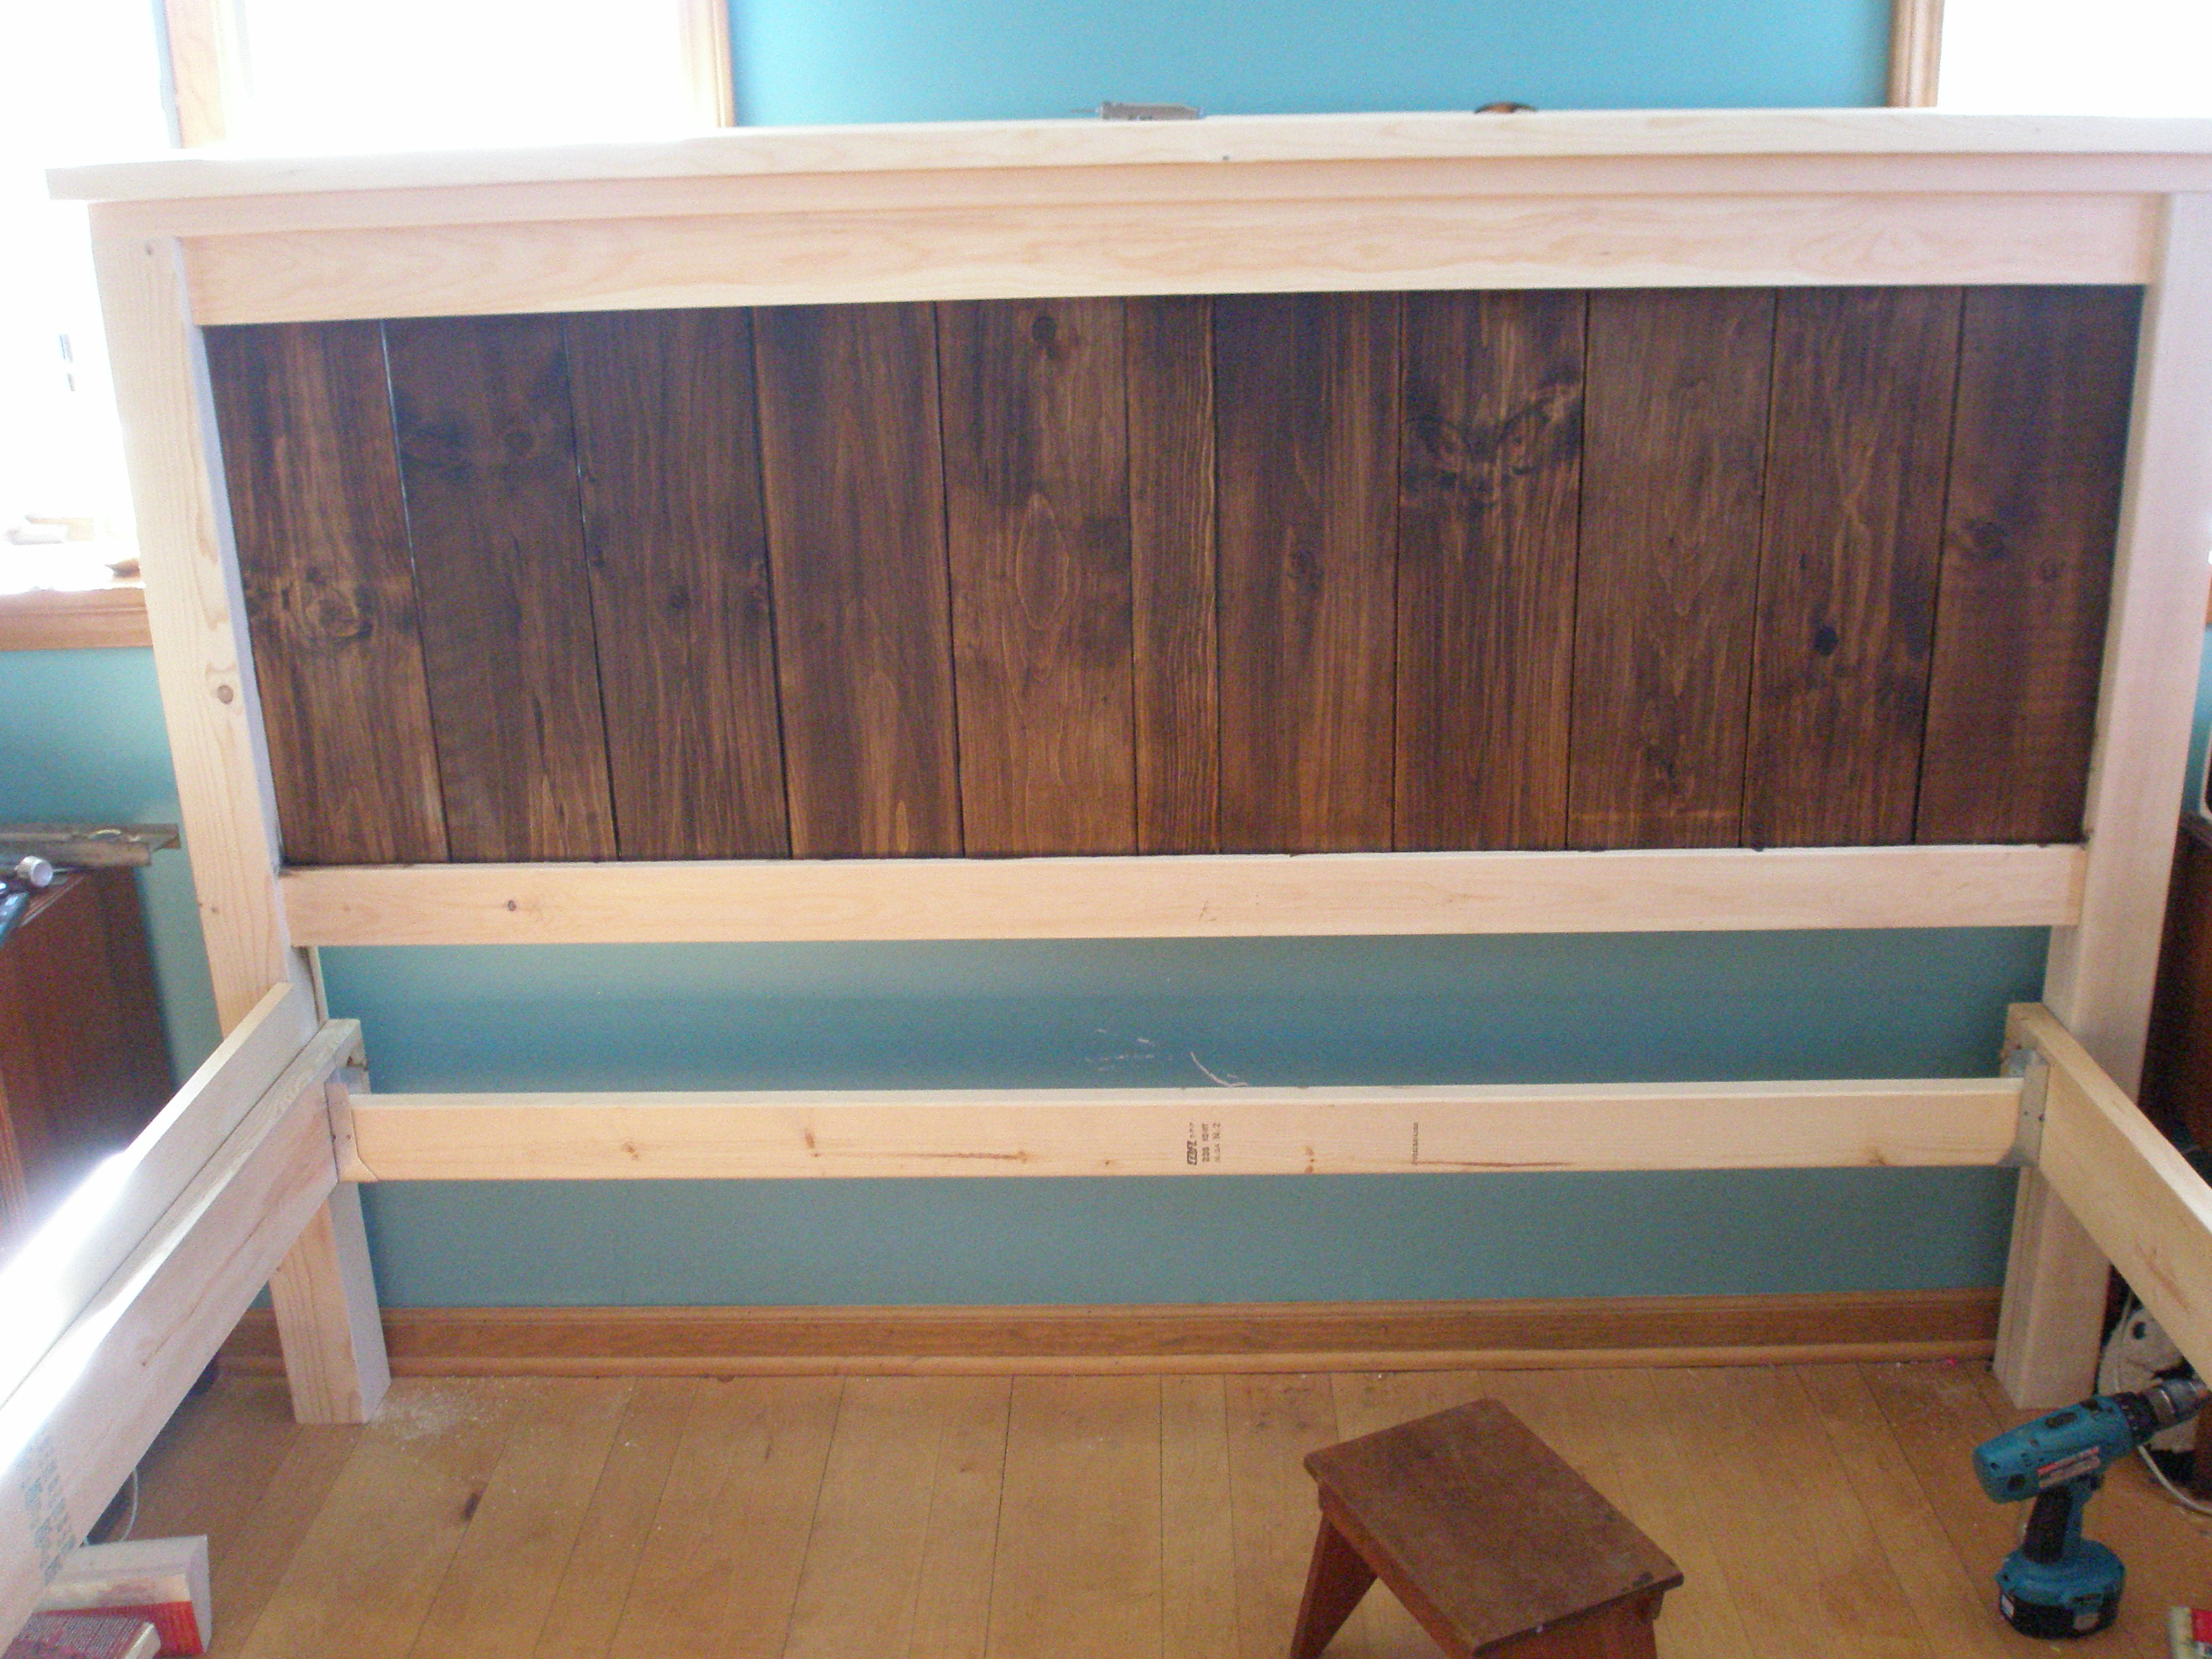
I also had to make changes to the King size plans because Ana's original plans have the mattress oriented sideways, which would be too short for us.

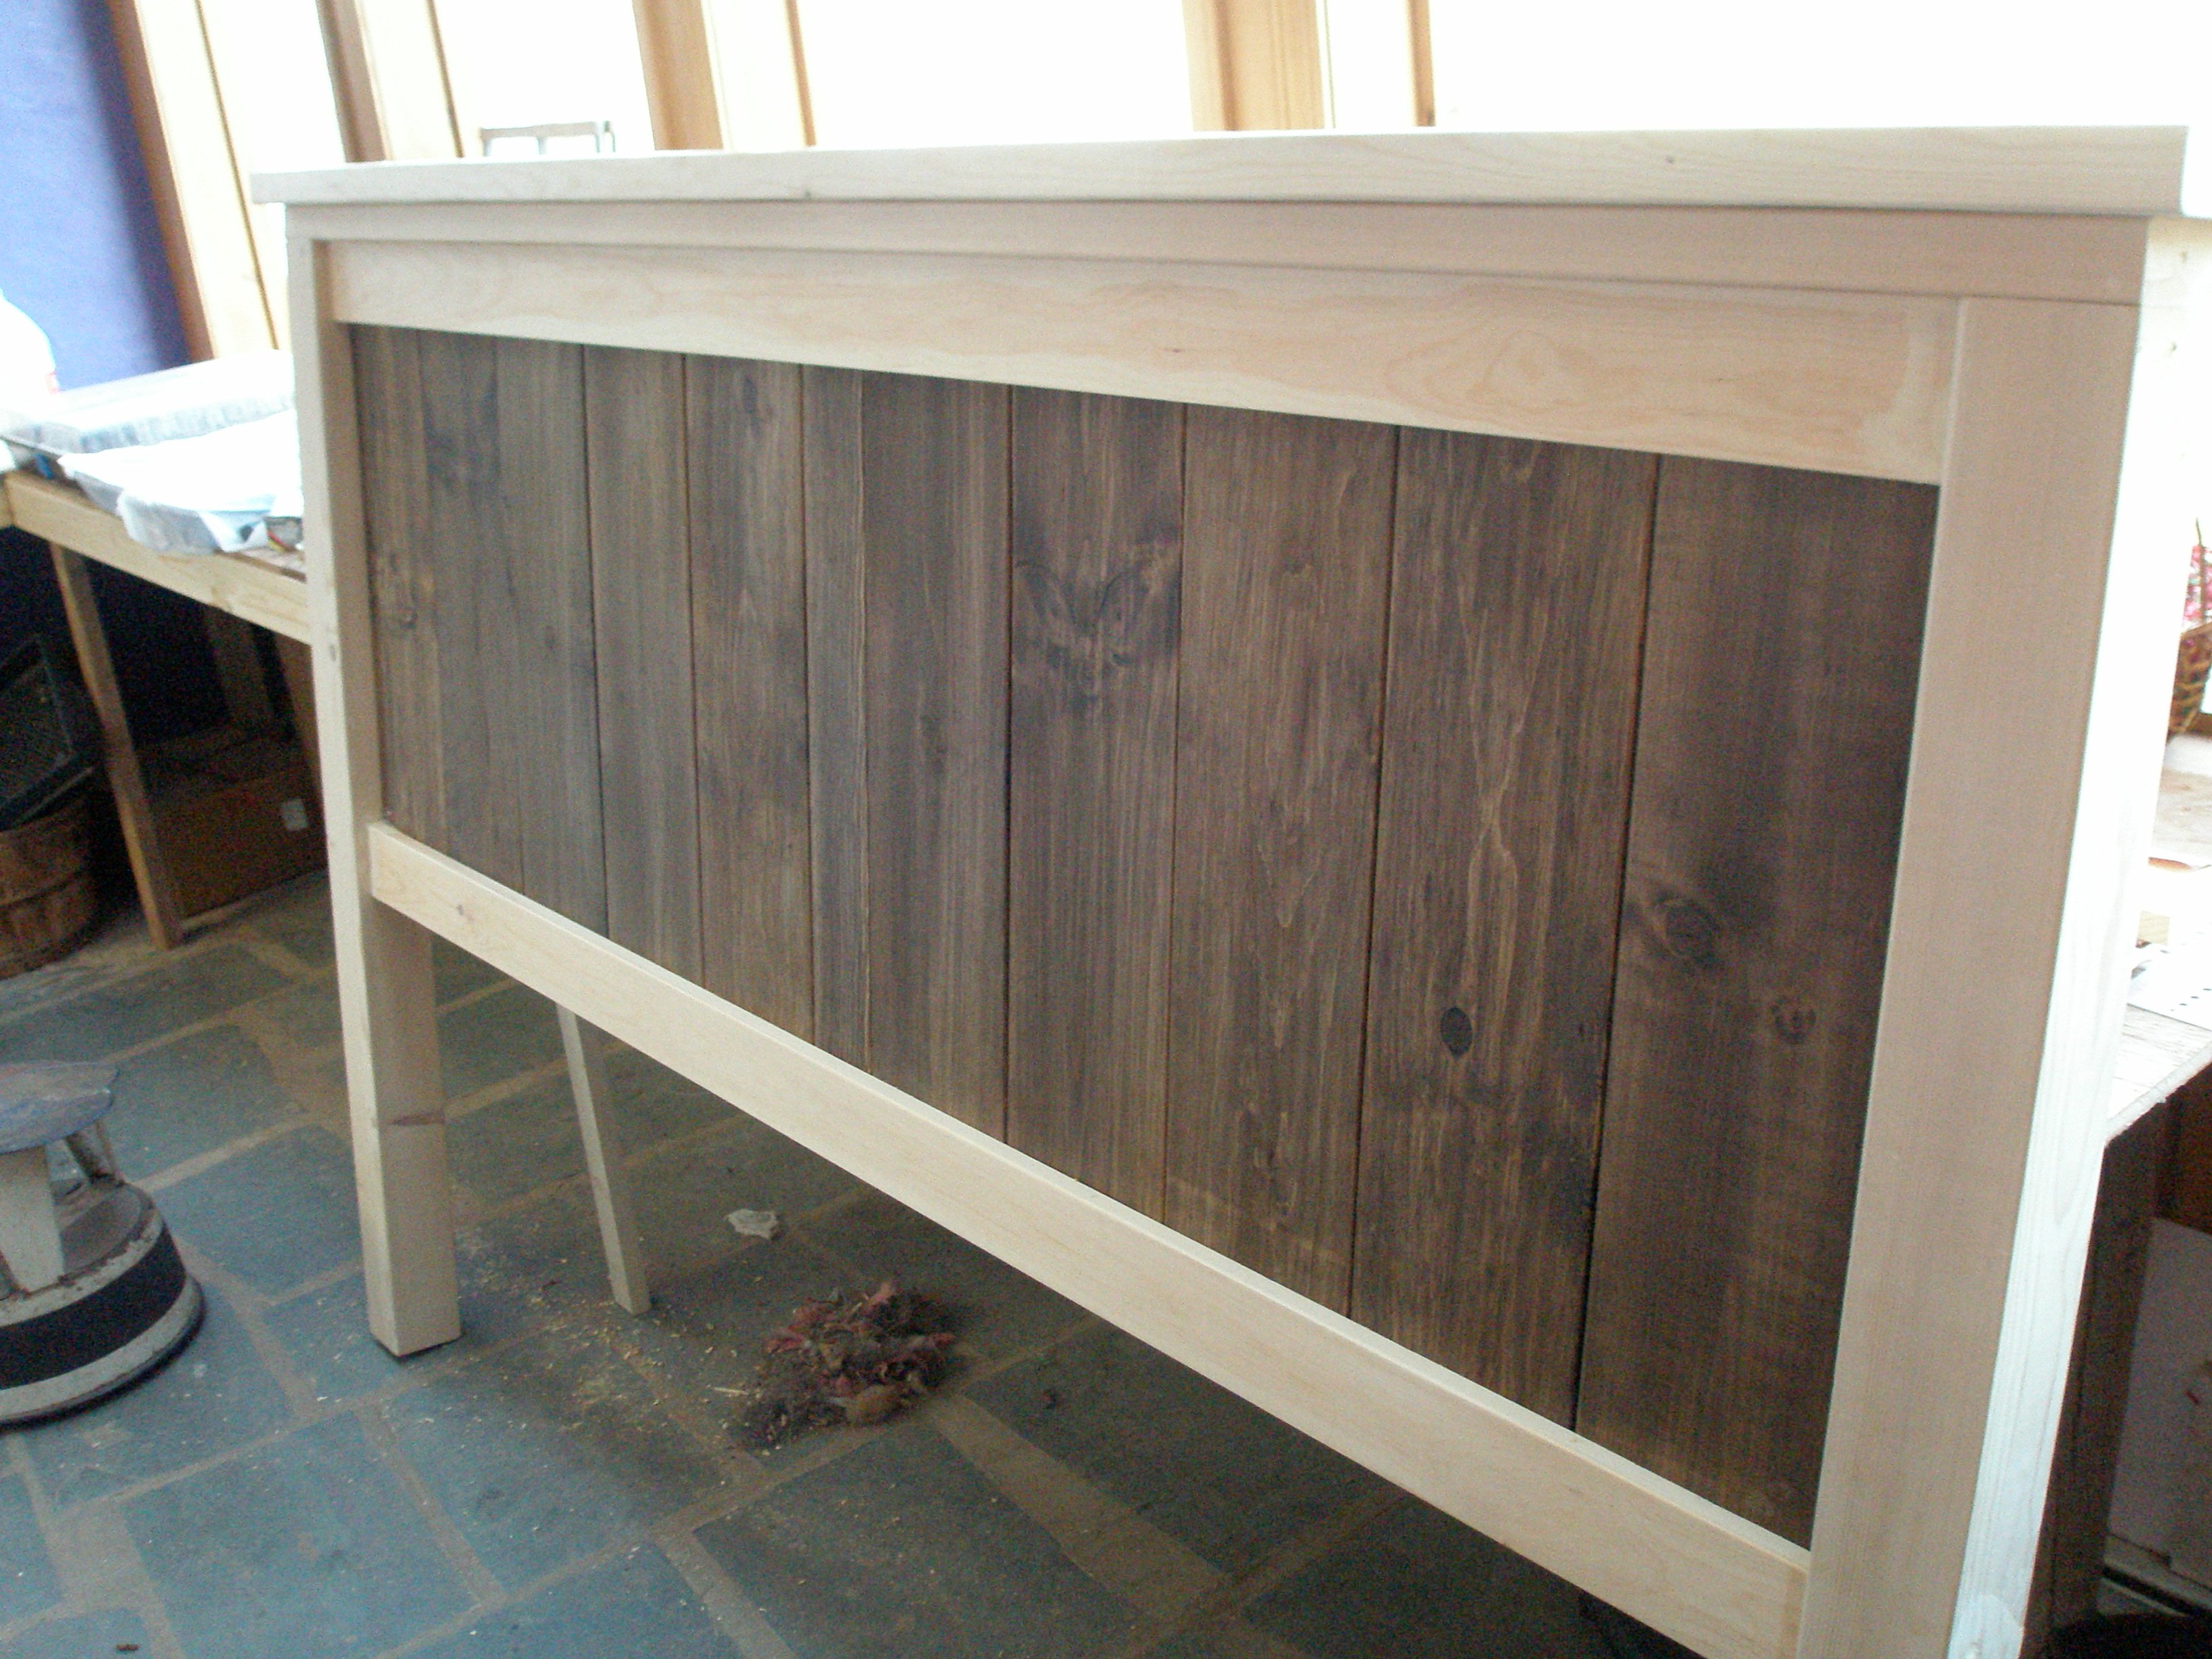
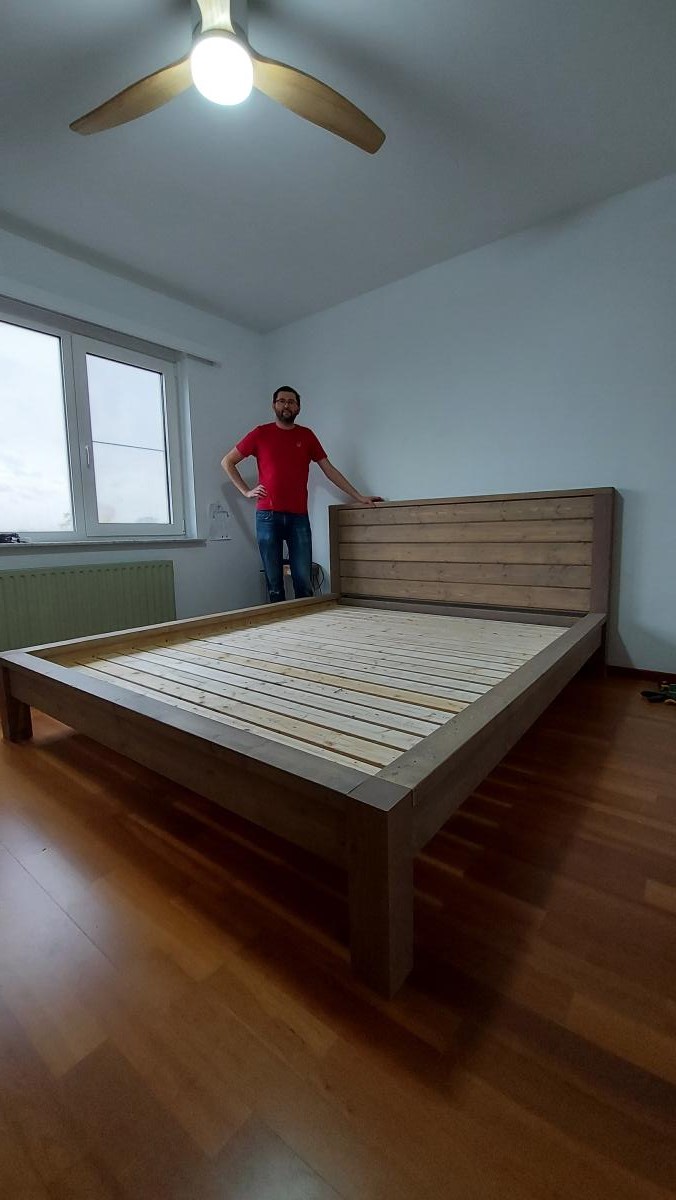
For extra storage space, a hangout for dust bunnies and dogs, and a just a plain tall bed for tall people, I made the foot-board posts taller, and attached the rails higher than the plans indicate.  I also made a platform for our mattress to sit on out of 2x4's, 2x6's, and 3/4" plywood.  This bed is STURDY.

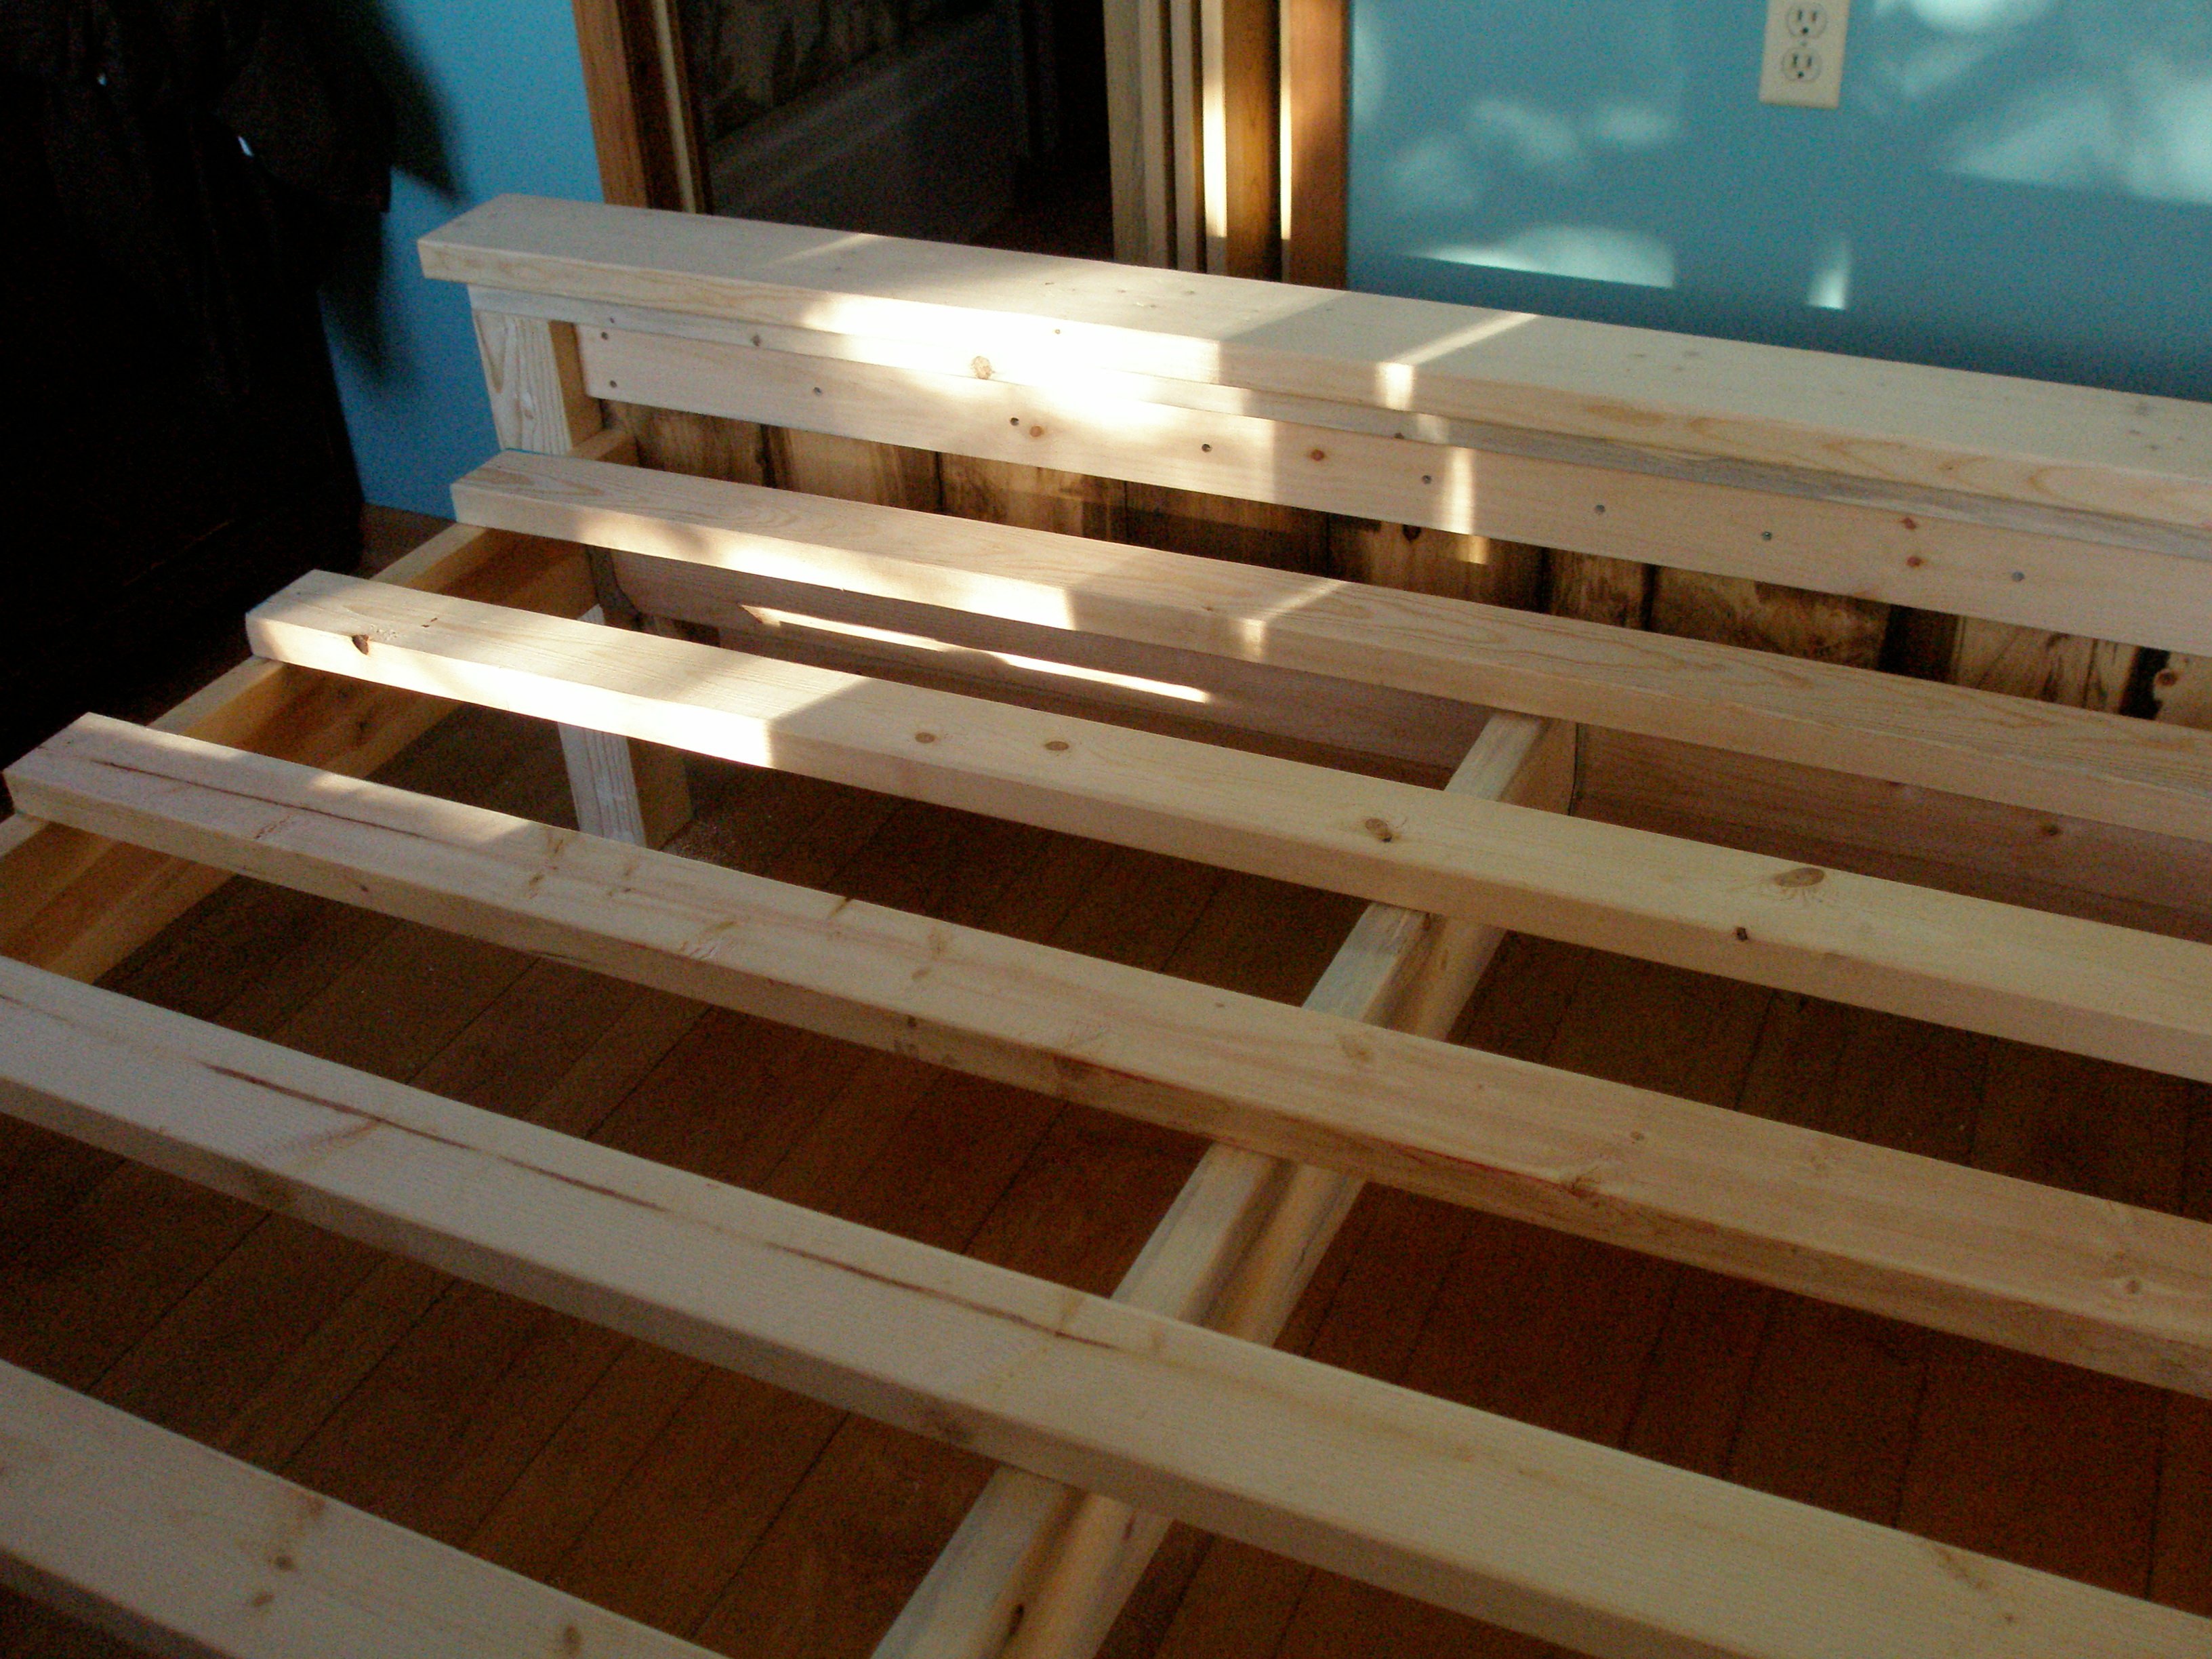
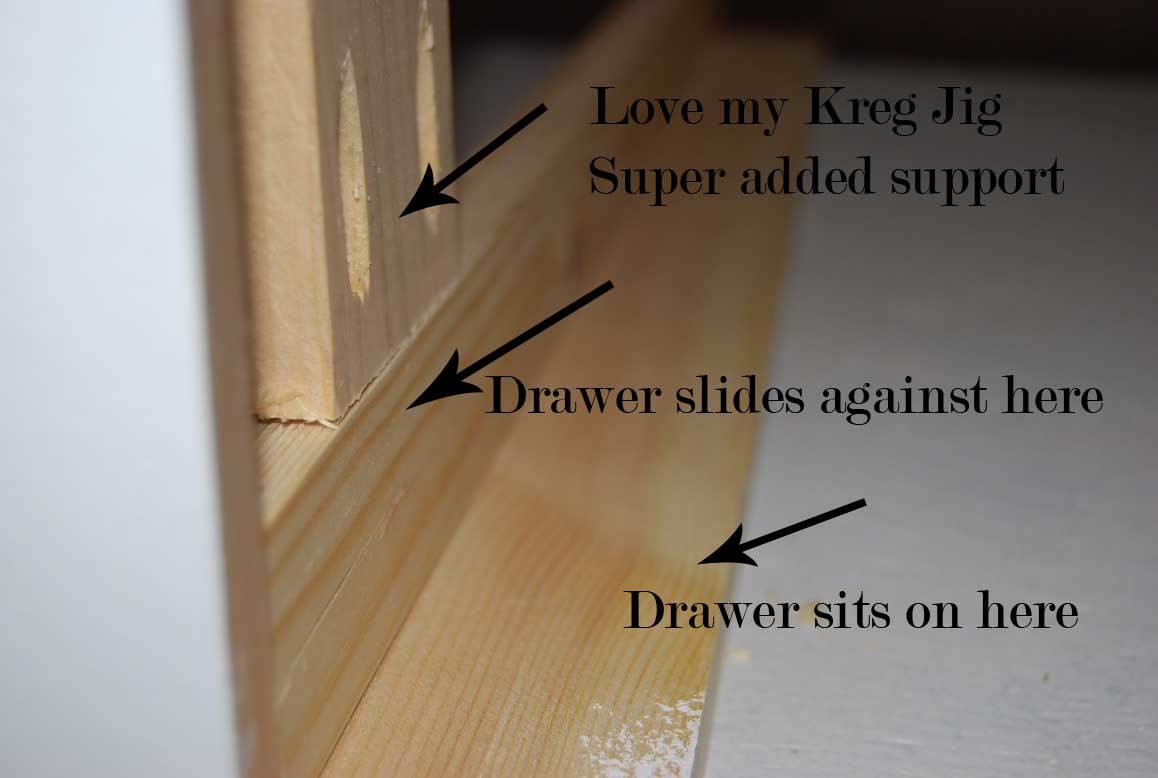
To support the slats and mattress well, I hung a 2x6 with joist hangers in the middle of the bed frame (see picture below), and it stops the 2x4 slats and plywood from bending in the middle.

Built from Plan(s)
Estimated Time Investment
Week Long Project (20 Hours or More)
Finish Used
The panel boards were stained with two coats of Minwax Dark Walnut for 15 minutes each time before attaching the trim. Wood conditioner was applied before the first coat of stain.

Poly coat to be applied... later. When we will be away for a couple days after applying it.
Recommended Skill Level
Starter Project

$55 fancy x desk turned kitchen table

I was making the fancy x desk, and my wife suggested building a bench to go with it to make it a bar style kitchen table to take up less space in our kitchen. So I looked up plans for a bench on here (providence bench looked best with it), and built it. I painted it with rust-oleum American accents spray paint for wood, metal, and plastic in glossy black and surprisingly it looked amazing!

Estimated Time Investment
Afternoon Project (3-6 Hours)
Finish Used
rust-oleum American accents spray paint for wood, metal, and plastic in glossy black. used 2 coats and it gives it a nice look and smooth finish
Recommended Skill Level
Intermediate

Magazine rack

Submitted by kwhitt on Tue, 05/12/2015 - 08:05

This is my first project, just to see if I could actually build something. I used some wood and paint we had lying around the garage, since I didn't want to put money into something I might screw up! This turned out to be pretty easy, despite the wood being a little warped from sitting in the garage for years. It's not perfect, but now I have a place to store my husband's golf magazines that were cluttering up the bathroom -- and the courage to try something bigger!

Estimated Time Investment
An Hour or Two (0-2 Hours)
Recommended Skill Level
Starter Project

Comments

Mini Bedside Table

Submitted by RITWood on Sun, 10/22/2017 - 11:30

My take on the Mini Farmhouse Bedside Table using a combination of new and repurposed pine.  Using a 3/8” round over bit and router I softened the edges of the top and the shelf.  I substituted a ‘plank’ look on the sides instead of the solid flat which the plan calls for.  Finished with a scuffed paint and contrasting dark stain which makes the piece stand out.  

Estimated Cost
$20 each
Estimated Time Investment
Afternoon Project (3-6 Hours)
Recommended Skill Level
Intermediate

Modern farmhouse style bed

Submitted by rikkiesix on Sun, 10/31/2021 - 08:32

We are so happy with our new bed. Made the headboard a foot lower. Like it a bit better this way. Thanks Ana for the awesome plans Greetings from Belgium Marrah and Erik

Built from Plan(s)

Comments

Table turned cabinet

I had an old table that was in my basement.  I wanted to re-do my craft room.  I have been thinking and thinking about it.  So when I saw Ana’s link to her drawer organizer – and how to install drawer slides – I thought – ok – now it’s time to do it.


I spent about a week drafting plans, making measurements.  At first I was going to recycle the metal sliders I had left over from the kids dressers…but there wasn’t enough – and to do 12 drawers would be more money than I wanted to spend.


So – a trip to home depot – I was able to take this table that was just collecting junk – literally – to an organized and functional crafting cabinet – with huge deep drawers.  There are 12 drawers in total.  They are all 6 inch in height, 26 inches deep, and then there are 8 that are 16 inches wide, and 4 that are 12 inches wide.


Here are some before and after pictures – I have all the details on the build on my blog.  I wouldn’t have been able to do it without Ana.  Her plans and continual inspiration!

Estimated Cost
Around $80
Estimated Time Investment
Afternoon Project (3-6 Hours)
Finish Used
On the fronts of the drawers only. Sanded, primed and painted with high gloss white.
Recommended Skill Level
Intermediate

Rustic X End Table

Submitted by dzubakj on Mon, 06/10/2013 - 08:40

I altered the dimensions slightly so that it wouldn't be overbearing in my living room. It is much shorter than the plan suggests, and the length and width are also changed. I used framing 2x4 and 2x6 lumber, so I had to sand the heck out of it to make it nice and smooth. It looks great next to the console table. Good plan.

Estimated Cost
60
Estimated Time Investment
Weekend Project (10-20 Hours)
Finish Used
I went with the steel wool in vinegar finish with two coats of light brown Briwax over that (applied with steel wool). I really liked the steel wool and vinegar finish, but if you have never used it before be careful, it is a bit tricky to apply evenly. Also, it goes through several changes while it dries. I started panicking a little before it was fully fry because it was not turning out how I suspected at all. After a few more minutes it looked much better, and the wax brought out just enough brown to make it exactly what I wanted.
Recommended Skill Level
Starter Project

Castle Bed

Submitted by AndyH on Wed, 05/13/2015 - 08:00

Friends asked me to design a princess/castle bed for their daughter. It needed to fit a single/twin size mattress and fit a 61 inch space they had so I designed the overall width to be 60 inches.

It is all made from solid planks apart from the two big shelves in the headboard which are plywood.

They wanted the sides close to the headboard to be raised as well so their little girl didn't roll out the bed.

Not added the slats yet as it is off to the paint shop to be sprayed Pink!! I will post more photos once painted and will also post plans soon once finished them.

Hope the little girl likes it when she sees it.

Estimated Cost
$350
Estimated Time Investment
Week Long Project (20 Hours or More)
Finish Used
Will be spray painted pink. I will post more pictures once painted.
Recommended Skill Level
Intermediate

Comments

Vespa ride-on

I made the plans a little different. I had more support to the front, made the base wider, and added swivel wheels instead of rockers.

Built from Plan(s)
Estimated Cost
$20
Estimated Time Investment
Weekend Project (10-20 Hours)
Recommended Skill Level
Beginner

Cabin style bed

Submitted by Anonymous (not verified) on Fri, 11/05/2021 - 19:27

This was my version of the cabin bed plans on this site.
My son loves it and of course my wife does too..

Built from Plan(s)

Comments

Playhouse Loft Bed

This is my first KOW project...I built the playhouse loft bed for my daughter, Kayla.  She named it Lofty Cottage.  I used leftover pink paint from painting her table and chair set for the inside of the playhouse.  I made the letterbox from scraps and the half-door from the door cutout.  I added hardware that matches the hardware on her other furniture.  I made the banner by hand and hand painted the birdhouse and the sign.  She loves it!  Thanks for the great plans Ana!  Can't wait to start on something new now!

Recommended Skill Level
Intermediate

Porch bench

Submitted by DWolf on Tue, 06/11/2013 - 15:58

Using Ana's garden bench design, I modified the plans slightly to make the bench less deep in order to fit on my narrow porch.

Built from Plan(s)
Estimated Time Investment
Day Project (6-9 Hours)
Finish Used
White Valspar outdoor paint
Recommended Skill Level
Beginner

Barn Greenhouse on the Penninsula!

Submitted by klatz on Fri, 05/15/2015 - 09:08

Super easy to follow and build! We went with treated lumber from Home Depot and have around $1500 into the project. Will be looking at adding an automatic fan and thermostat next year. Benches on one side for starters and a raised bed on the other side.

Built from Plan(s)
Estimated Cost
$1500
Estimated Time Investment
Week Long Project (20 Hours or More)
Recommended Skill Level
Intermediate

Comments

MartiB8

Fri, 06/12/2020 - 11:00

What a fabulous job! I love the red door for a pop of color. And the thermometer is a brilliant idea. I'm modifying this plan to better fit my yard. Thanks for sharing!

Bluebird Birdhouse Made From Pallets

Submitted by mtairymd on Sat, 11/25/2017 - 15:20

Build Instructions: https://www.instructables.com/id/Bluebird-Birdhouse-Made-From-Pallets/

This is a very easy project to make for attracting bluebirds to your yard. I wanted to reuse some of the wood I have from with the pallets I broke apart last year. This project uses a combination of industrial strength pallets made from 2x6s and standard pallets which provide slats in the 3/8" to 1/2" thick range. As for the house, I tried to hit the basic bluebird birdhouse dimensions for this build:

  • Hole Entry Size: 1.5"
  • Hole Distance Above Floor: 6" to 7"
  • Floor Dimensions: 4"x 4" to 5" x 5"

Feel free to leave the birdhouse exterior to weather unfinished or stain/paint it. I finished the house with a combination of stain for the bottom and sides and green paint for the roof.

Estimated Cost
$2
Estimated Time Investment
Afternoon Project (3-6 Hours)
Finish Used
Dark Cherry & Paint
Recommended Skill Level
Beginner