Community Brag Posts

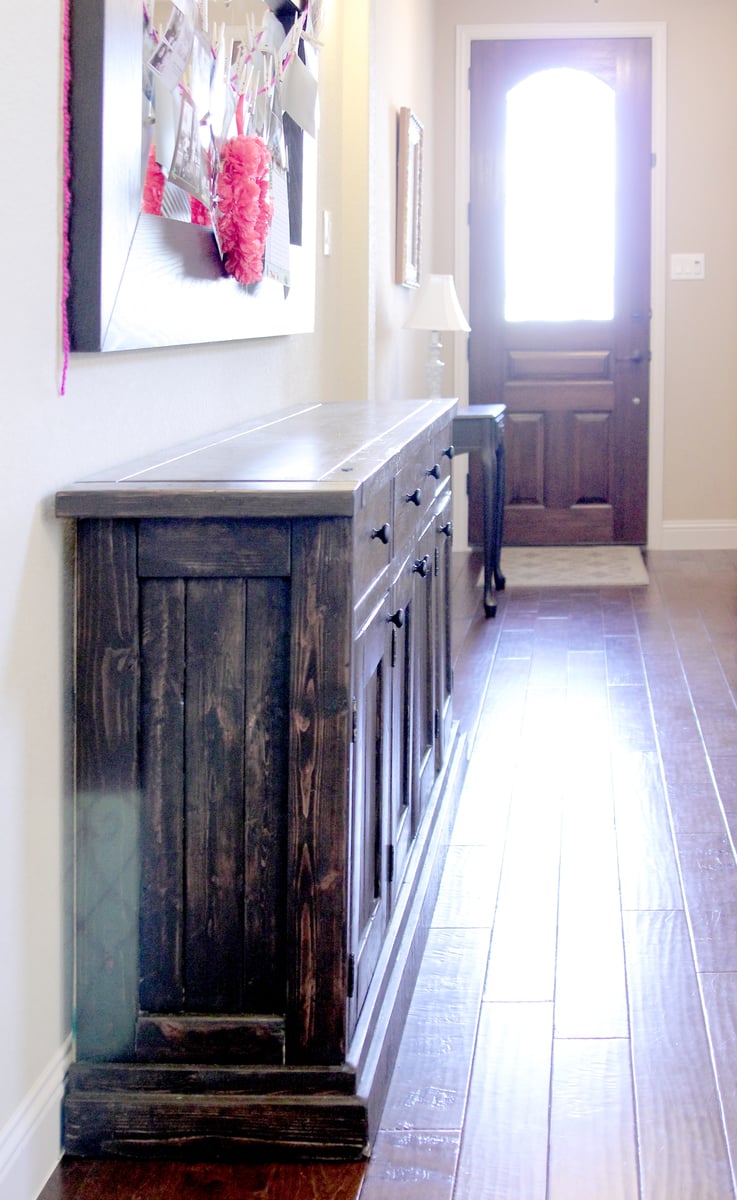
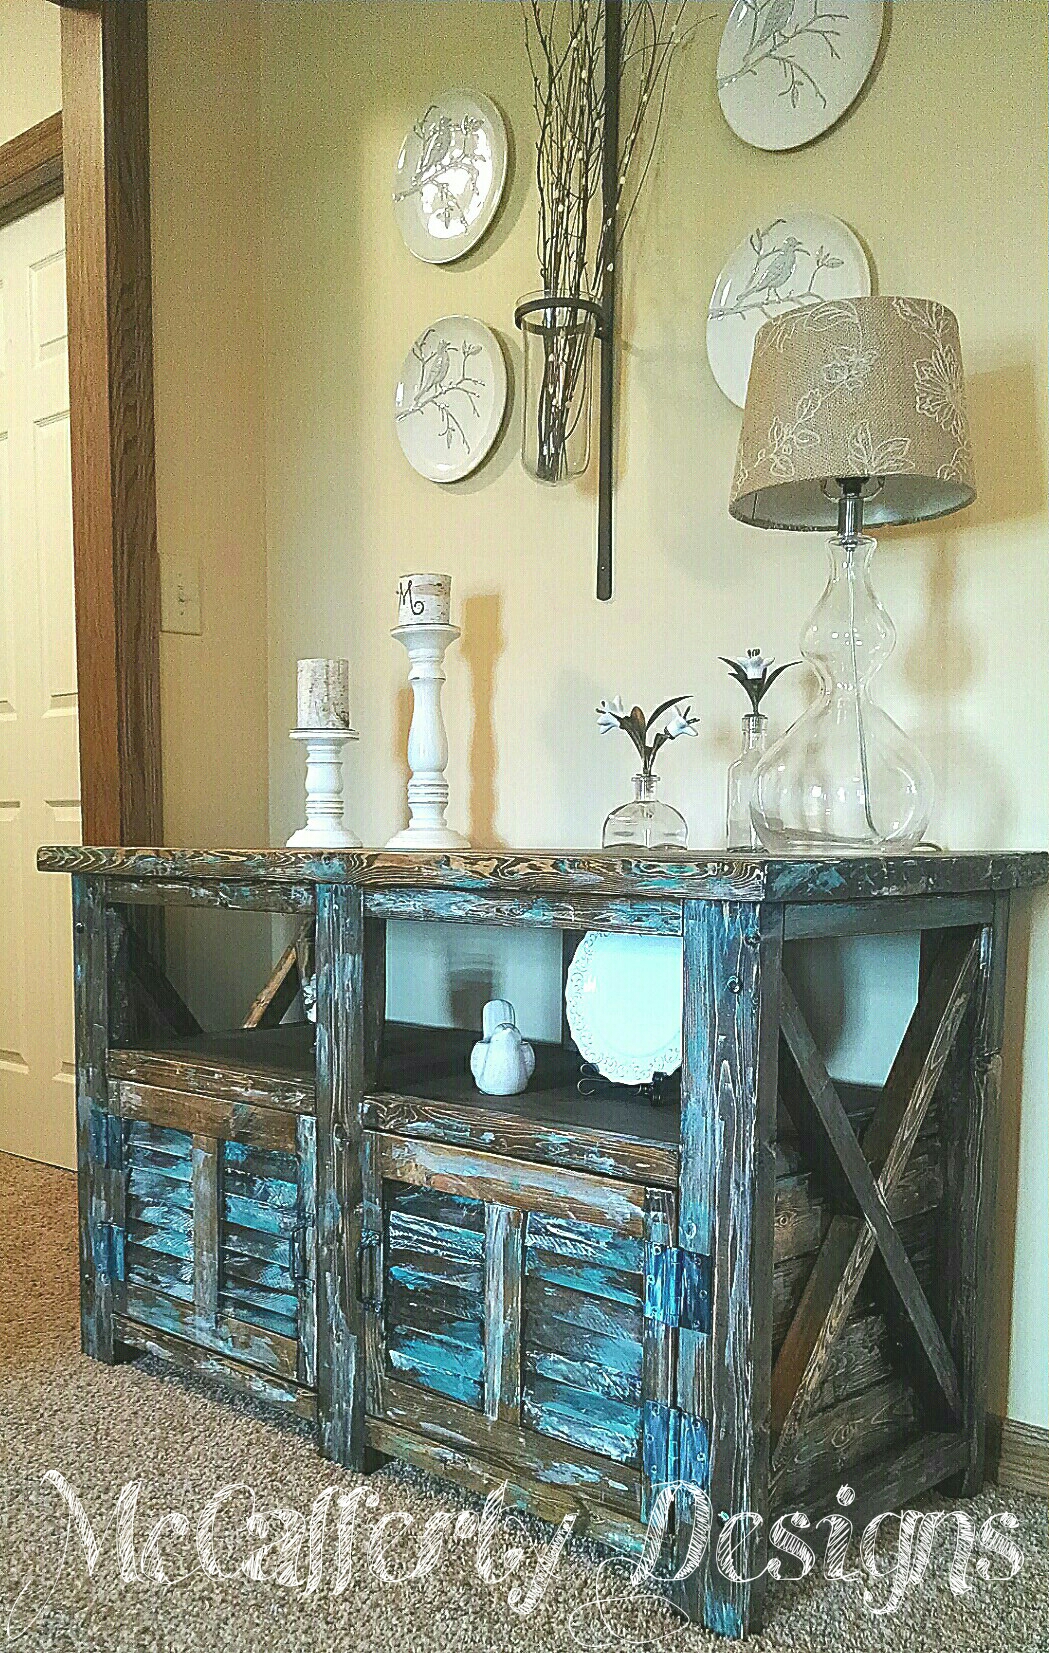
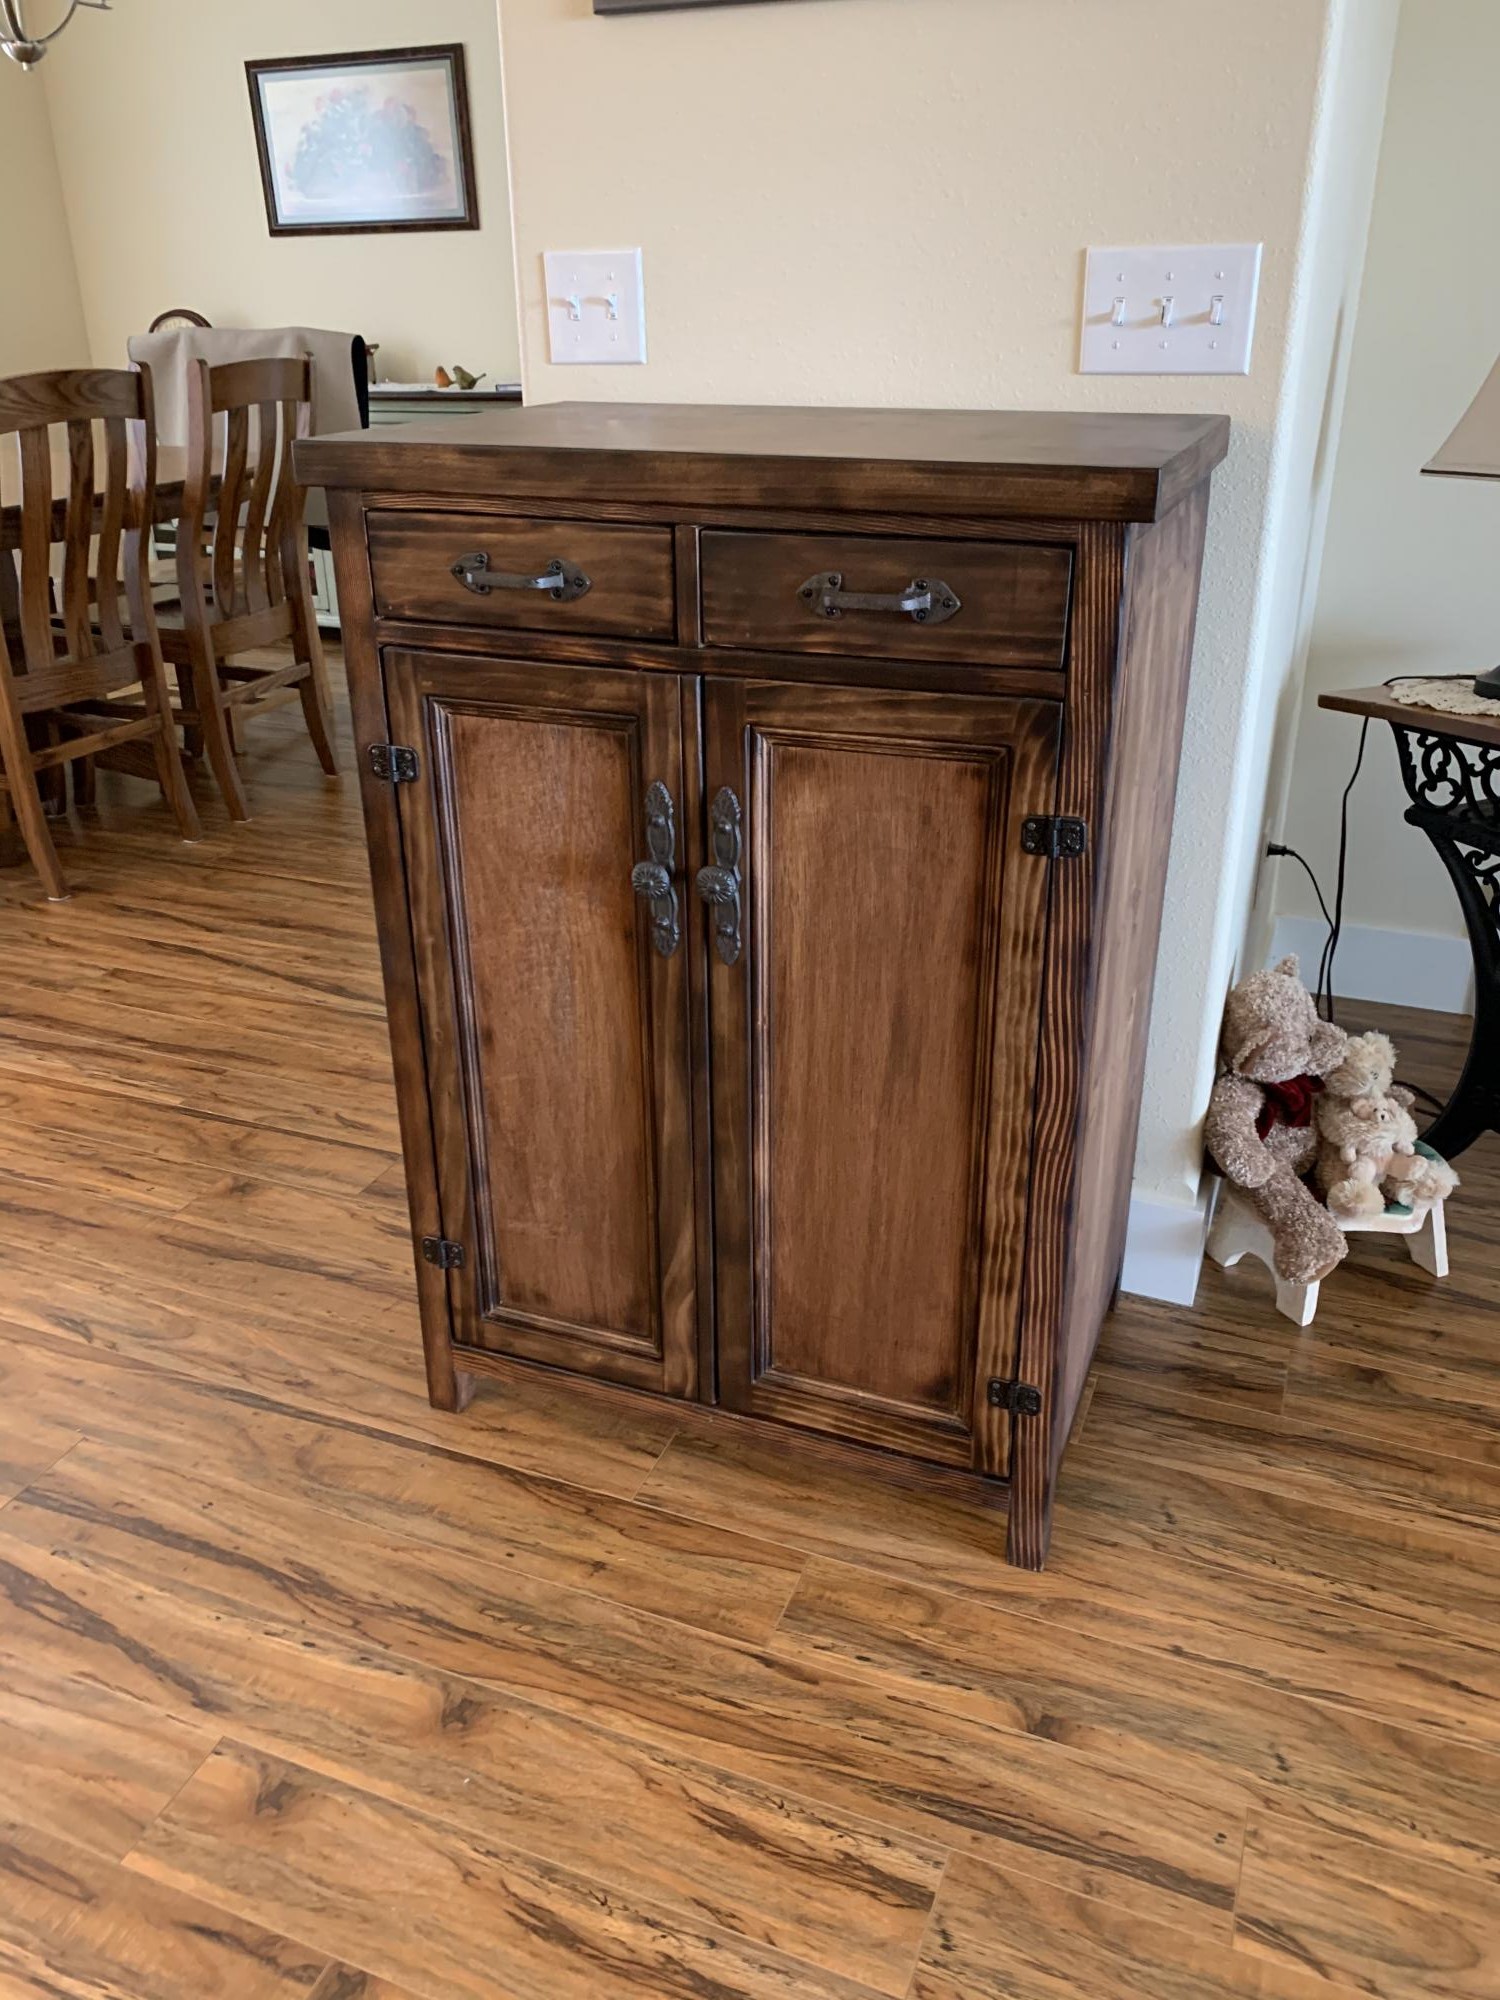
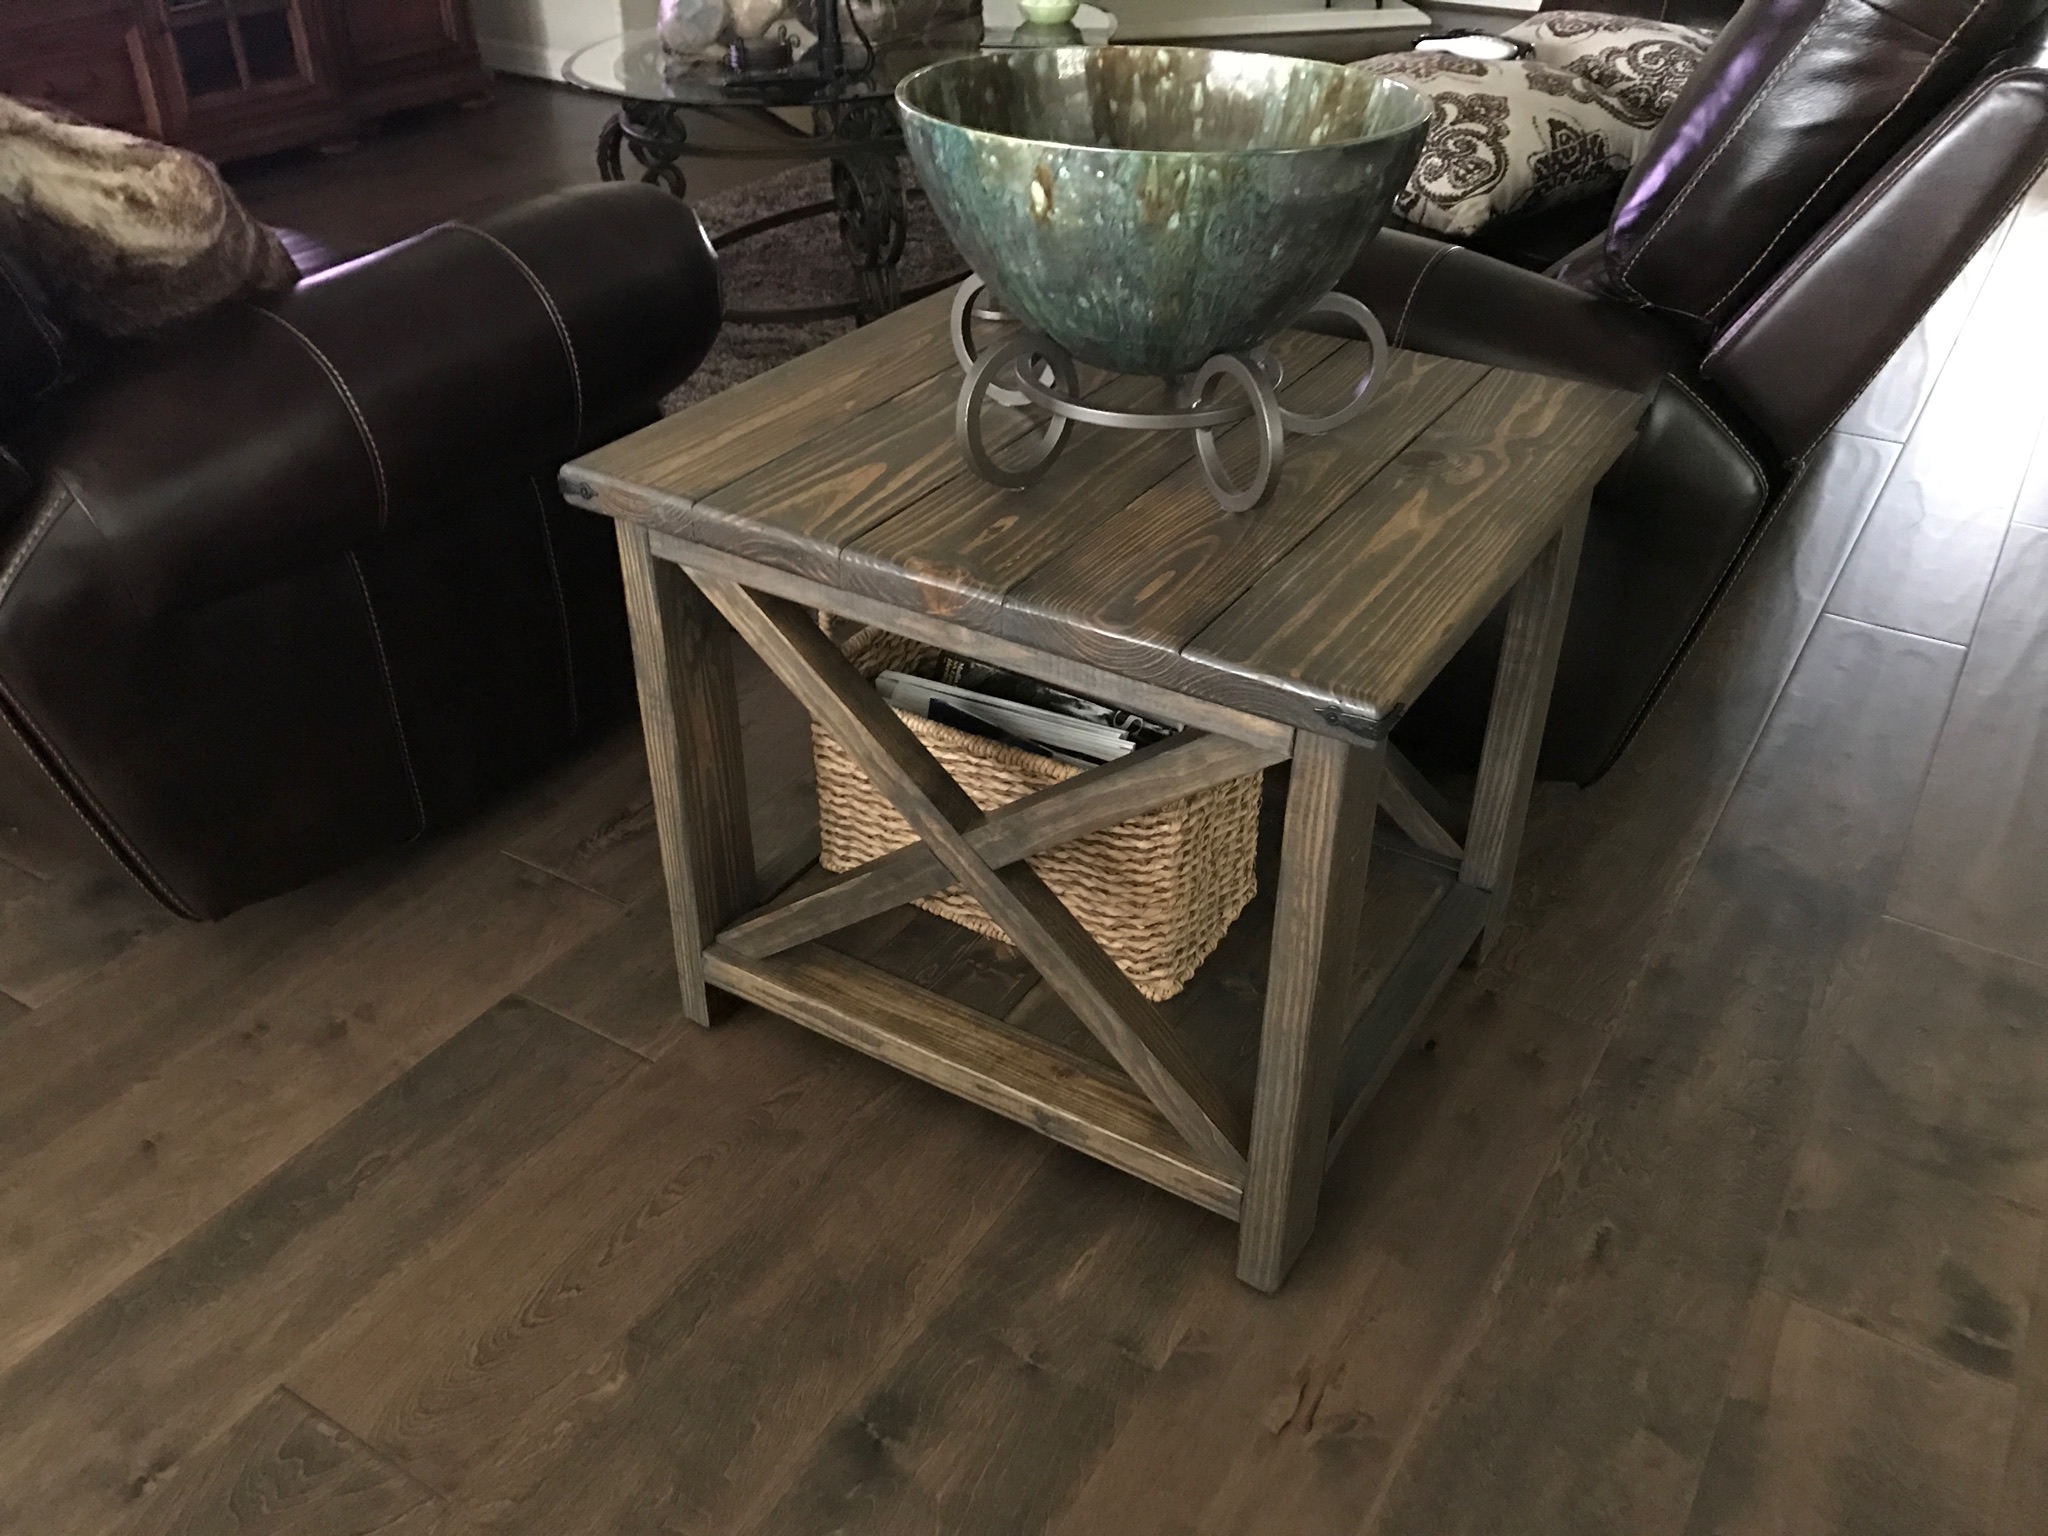
Rustic Sideboard / Buffet Table

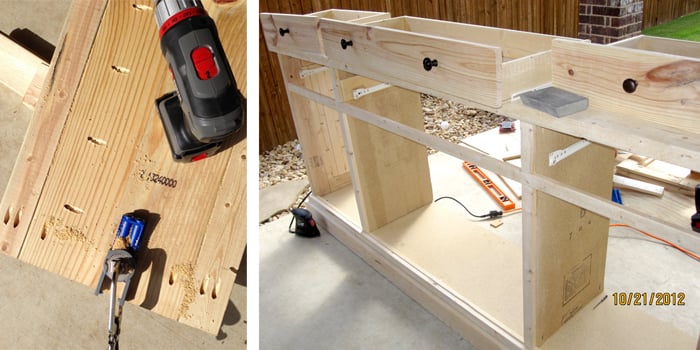
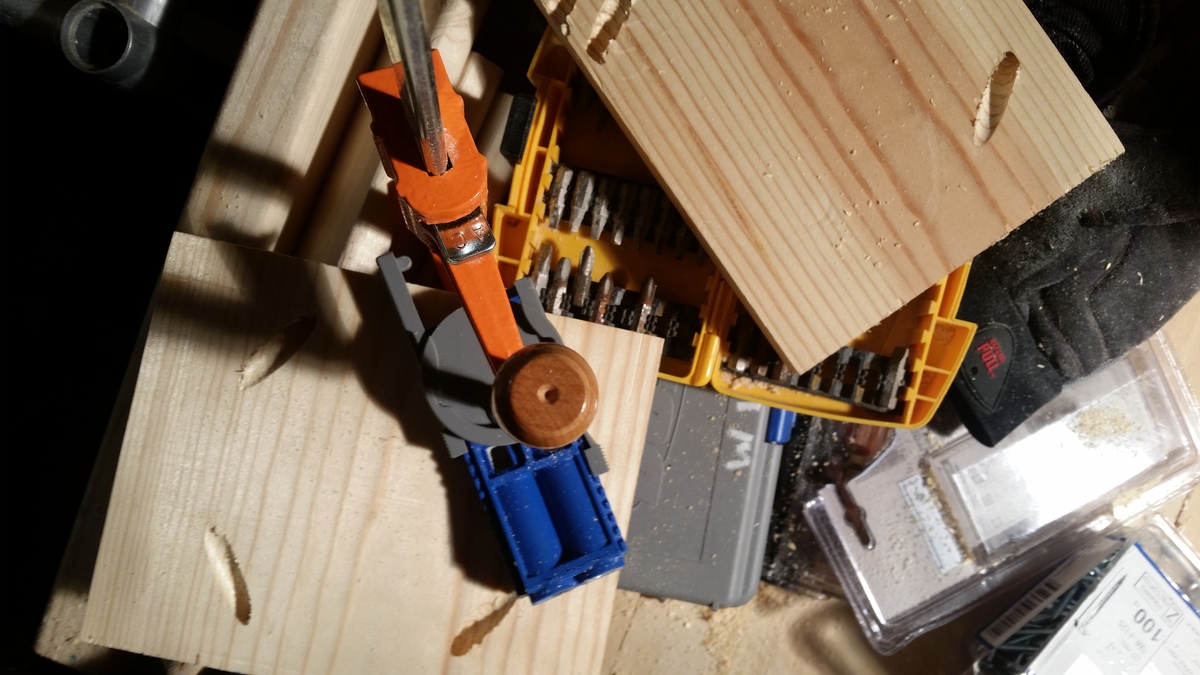
This was our second project (though I'm proud to say that I was able to put the bulk of it together all by myself...and that's because of the miracle of the Kreg Jig pocket hole kit!)

First I had to modify the plans so that the sideboard wasn't as deep (about 16" deep...so just a couple/few inches off the original plans). Then we bought the wood. My husband helped me cut most of the pieces, and then I started drilling pocket holes. It felt like it took forever! But once that was done, I was able to put it together so quick...like an IKEA furniture! BUT! I really should have checked for SQUARE better than I did, b/c once it REALLY started coming together, things were a little off kilter... Thank goodness my husband had the patience to SAND THE HECK out of the bottom of the poor thing to level it back out. :P

The door fronts took forever...and the drawers took a while to fit in correctly (all of which my hubs did). We had left our lumber on the patio, and the second day it got rained on. It might have helped if our lumber didn't get wet (to help keep things straight and square).

The things that took the longest: squaring, leveling, doors and drawers, and the base molding (I ended up using a 2x4 and 1x2 to build my own base along the bottom...we wanted to stain the wood instead of paint it, and didn't want to pay the $$$ for paintable molding).

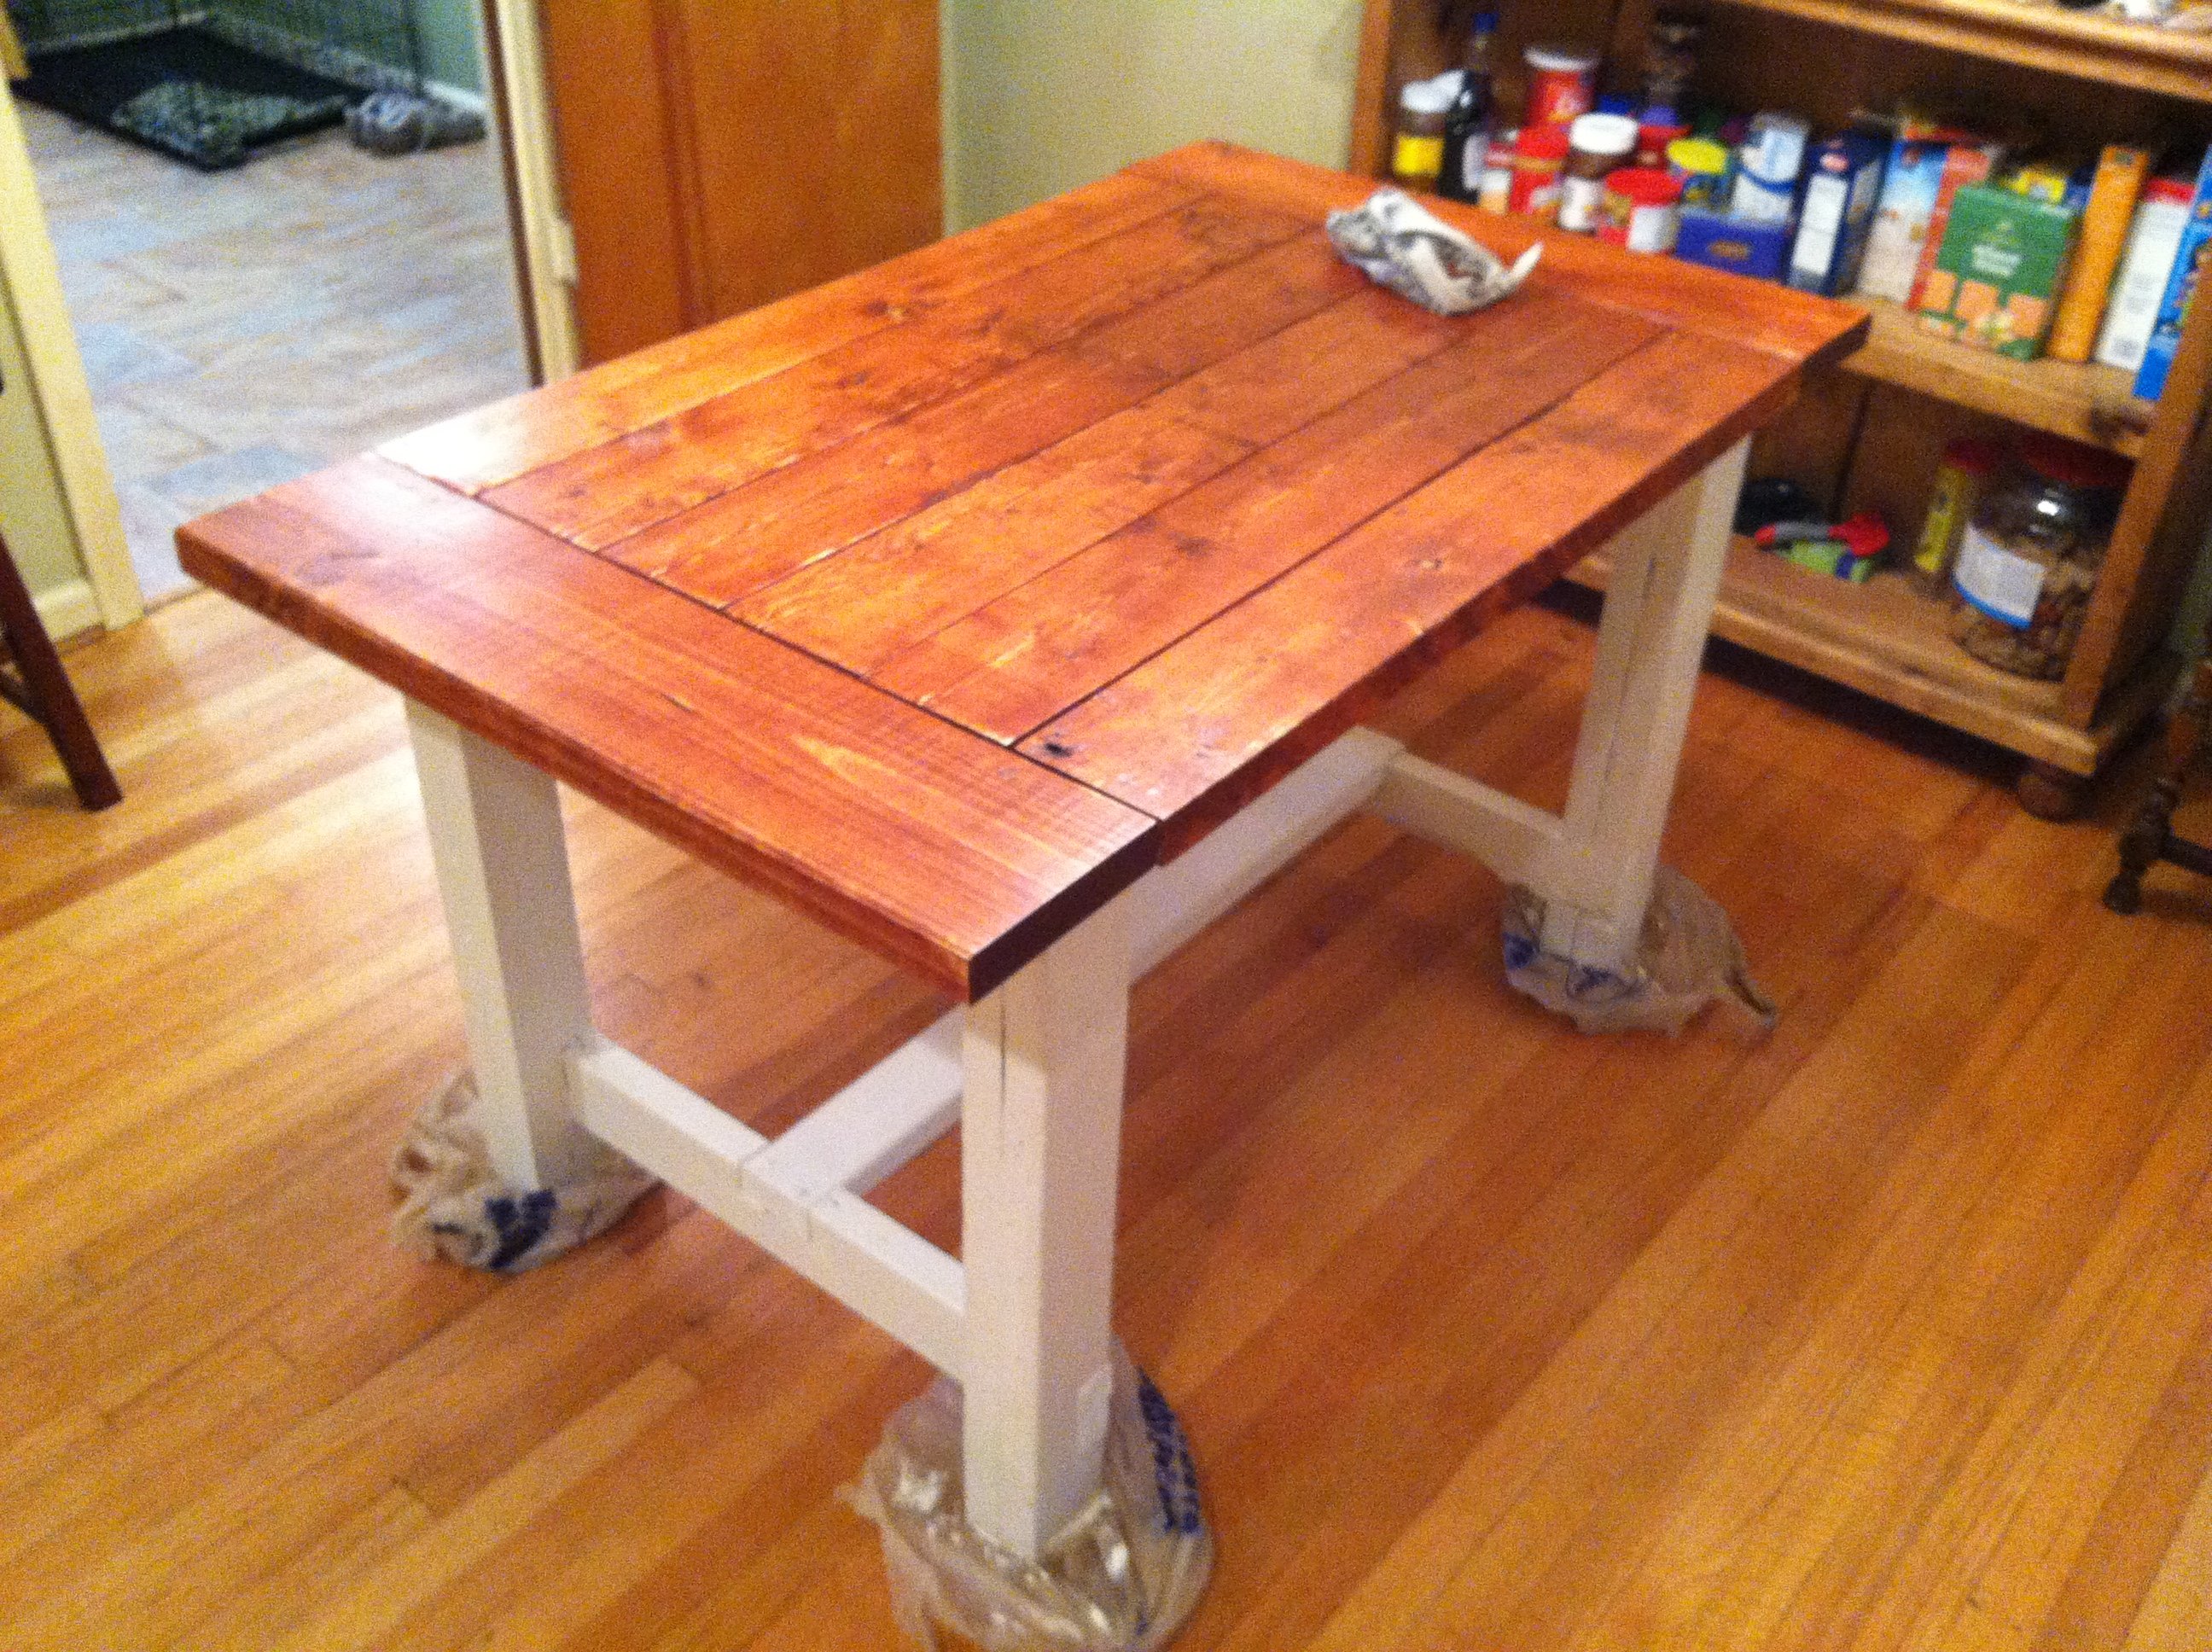
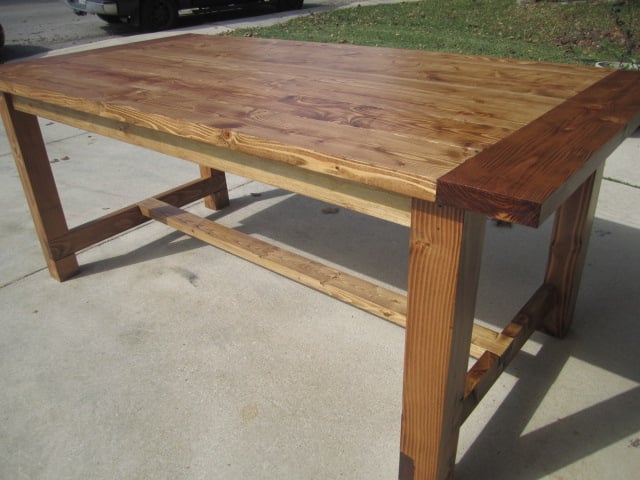
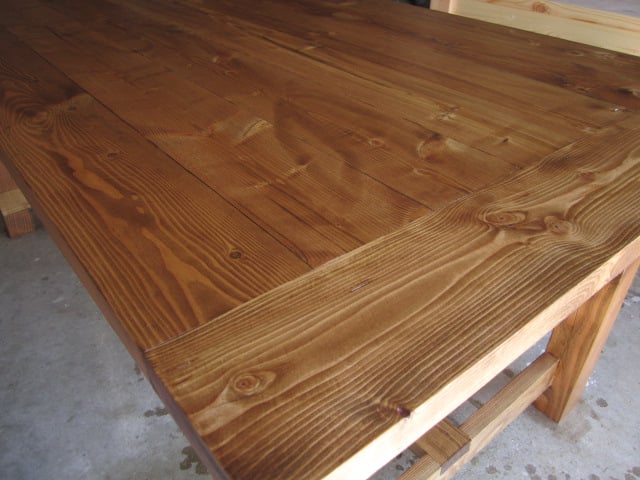
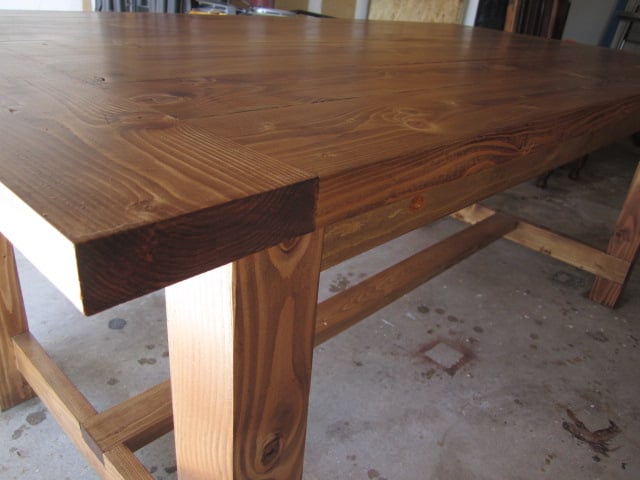
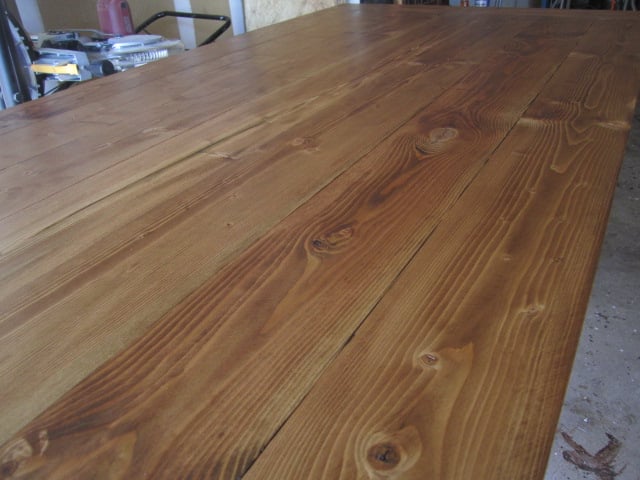
I used the same Rustoleum Dark Walnut stain that I had used on our Farmhouse Table...but I didn't shake it enough before using it, then left it on longer than I should have, so it is much darker than our table. Eventually may want to paint over it since it was so hard to get stain in all the nooks and crannies.

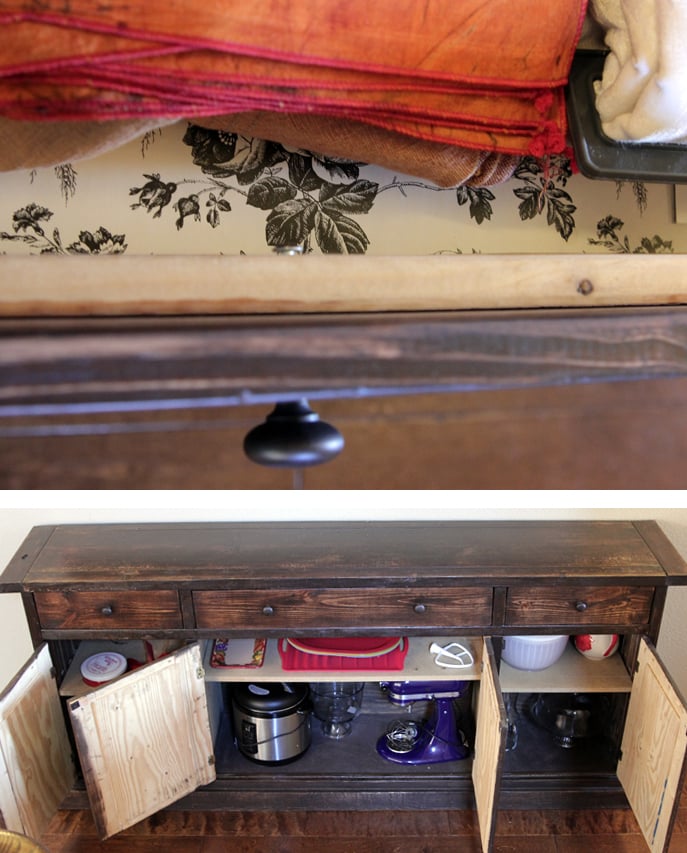
I didn't think to stain the inside of the doors. I will have to go back and paint it someday. We used particle board for the bottom and inside shelf (much cheaper than plywood). I tried staining the bottom piece, but it just soaked in the stain. So I used some dark brown spray paint instead. Worked like a charm. Planning on painting/covering the shelves one day, too.

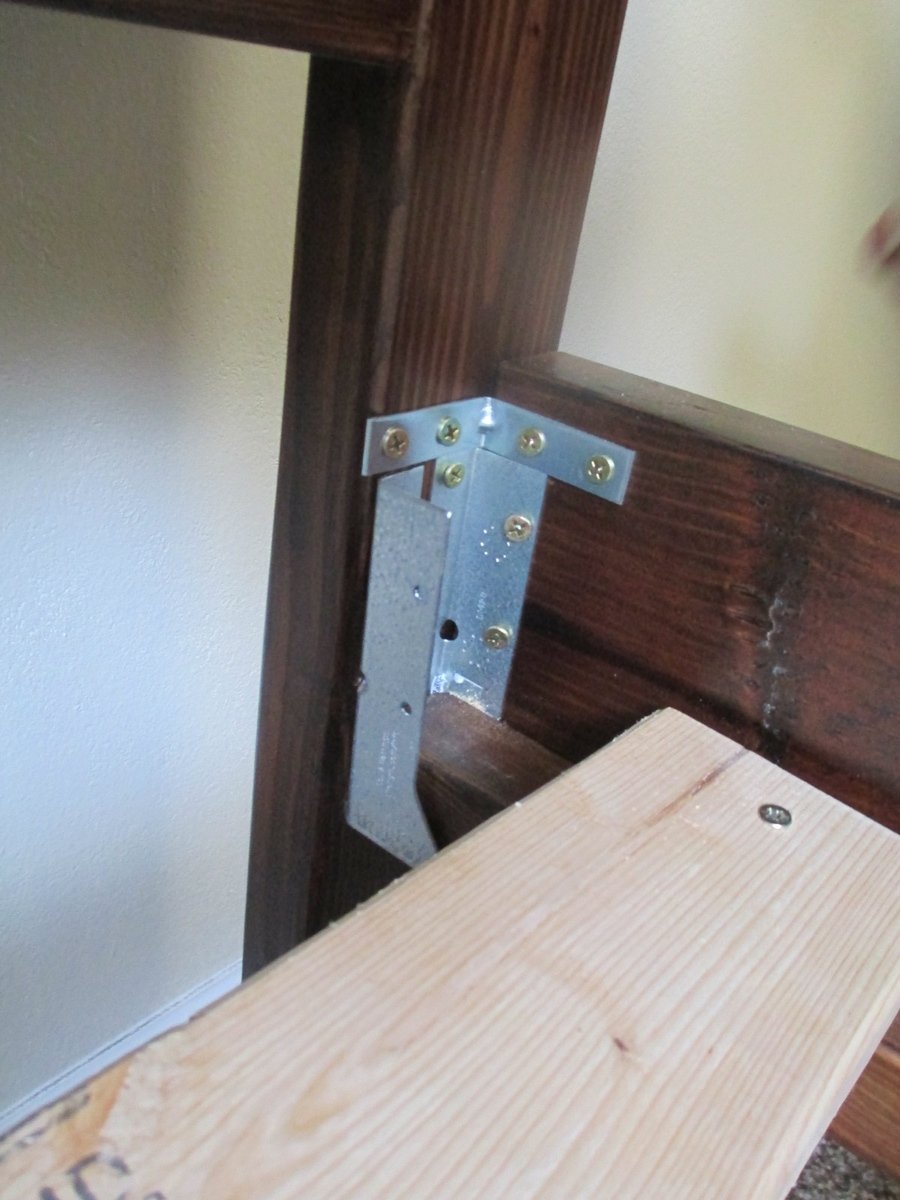
OH! AND, I couldn't find the wider "bead board" (or whatever it is that everyone else used on their sideboards), so we used plywood as a backing, then attached some thin Poplar boards on the front for the appearance of planked boards. VERY painstaking. Would recommend a different method for that part.

(Timing: We started building this around the beginning of November, brought it in and used it before it was finished...then finished it a couple days before Christmas. Just the other day I added some drawer liners).

Built from Plan(s)
Estimated Cost
$200-300 for lumber.
Estimated Time Investment
Week Long Project (20 Hours or More)
Finish Used
Rustoleum Dark Walnut
Deft Clear Satin, 1 coat.
Recommended Skill Level
Intermediate

Comments

hillarylouise

Wed, 02/06/2013 - 15:20

I saw your comment on my blog and had to come take a peek! It sounds like it was a challenging project, but you did a fantastic job. Beautiful!

Kentwood Twin Bed

Submitted by meganomesh on Wed, 12/10/2014 - 13:32

My husband and I built this bed for my sister-in-law for Christmas. It took us about a week of working an hour or so a day on it. Most of that time was staining. The actually assembly took about 2 hours. 

I included a picture of how we attach the siderails to the headboard/footboard. We use a bracket that the 1x2 slides into. It is screwed to both the siderail and the headboard with 1 1/4" screws. We also attach a small L bracket to each corner with helps remove any wiggle that was there previously. It really makes the bed much more stable by adding those little L brackets. Again, we used 1 1/4" screws to attach them. 

Built from Plan(s)
Estimated Cost
$110-$120 (price includes wood, stain and hardware)
Estimated Time Investment
Week Long Project (20 Hours or More)
Finish Used
Sanded well
1 coat of pre-conditioner
1 coat of Minwax early american
2 coats of Minwax Mission Oak with Polyurethane, Satin
Steel Wool after each coat of the stain with poly
Recommended Skill Level
Beginner

Comments

meganomesh

Wed, 12/10/2014 - 13:55

I had some trouble with the submission of my form and now it's not allowing me to edit so I'll write the details in the comments.

The assembly took about 2 hours but we worked on the bed about a week due to the many coats of stain etc.

Here's how we finished the bed:
1 coat of Minwax pre conditioner
1 coat of Minwax Early American
2 coats of Minwax Mission Oak stain with poly, satin
Steel wool the project after each coat of stain with poly

I included a picture of the hardware we use to attach the side rails to the bed. The big bracket holds the side rails up. The little "L" bracket in each corner makes it so the bed doesn't wiggle or move. This is our 4th bed to build and we have found this set-up to make a very secure, sturdy bed.

meganomesh

Wed, 12/10/2014 - 14:01

I had some trouble with the submission of my form and now it's not allowing me to edit so I'll write the details in the comments.

The assembly took about 2 hours but we worked on the bed about a week due to the many coats of stain etc.

Here's how we finished the bed:
1 coat of Minwax pre conditioner
1 coat of Minwax Early American
2 coats of Minwax Mission Oak stain with poly, satin
Steel wool the project after each coat of stain with poly

I included a picture of the hardware we use to attach the side rails to the bed. The big bracket holds the side rails up. The little "L" bracket in each corner makes it so the bed doesn't wiggle or move. This is our 4th bed to build and we have found this set-up to make a very secure, sturdy bed.

Rustic Media Center

Rustic Media Center stained with teal and white distressed paint. 

Estimated Cost
$350
Estimated Time Investment
Weekend Project (10-20 Hours)
Finish Used
Kona Stain, Teal and White Paint
Recommended Skill Level
Intermediate

Classic Storage Bed, adapted

Submitted by Anonymous (not verified) on Tue, 01/05/2021 - 16:24

I doubled the height of the Classic Storage Bed to create 6 side drawers and 4 bottom doors for my daughter's twin bed. She lives the extra storage in her small bedroom. Thanks for the inspiration!

Estimated Time Investment
Week Long Project (20 Hours or More)

Comments

Junk Drawer No More

Submitted by mom of 4 on Fri, 02/08/2013 - 15:23

I finally got tired of my junk drawer being messy, so I took 10 minutes today and a piece of scrap wood and made this drawer divider. I even have a dedicated cubby for my tape measure!

Estimated Cost
nothing
Finish Used
I left it unfinished.
Recommended Skill Level
Starter Project

Kid storage chairs

Submitted by Anonymous (not verified) on Wed, 03/15/2017 - 08:50

I followed Anna White's plan to build this chairs. My kids love them. Thanks for the free plan. It took me a while to finished it because they were my first project.

Built from Plan(s)
Estimated Cost
about 30 to 40 for two chairs.
Estimated Time Investment
Weekend Project (10-20 Hours)
Finish Used
simi gross paint self primer.
Recommended Skill Level
Beginner

Farmhouse Dining Table

Submitted by sastricker on Mon, 02/11/2013 - 08:20

Using the plans provide, I simply changed the measurements needed for my dining room. A really fun build and a great looking end product!

Estimated Time Investment
Weekend Project (10-20 Hours)
Finish Used
Gunstock Stain with Minwax Satin Polyurethane finish; Behr paint (Bone Folder) on legs
Recommended Skill Level
Intermediate

FARMHOUSE TABLE

Submitted by beefcake on Tue, 12/16/2014 - 11:03

All the boards are ran through a jointer and planer making each board squared.

No rounded ends.

Stain conditioner used.

Finish - Minwax Early American


Estimated Cost
$85
Estimated Time Investment
Weekend Project (10-20 Hours)
Recommended Skill Level
Beginner

Cedar Toy Box

Submitted by Anonymous (not verified) on Fri, 03/17/2017 - 17:07

I wanted an easy toy box made from pallets. I came across the plans for the Simple Cedar Wooden Toy Box and decided it would be easier to but a few lengths of cedar fencing than to tear apart a bunch of pallets.


I omitted the feet and rope handles and opted for a carved wooden sign for personalization. I thought it was going to be too small, but soon realized it is a decent sized box.


I used Minwax Jacobean stain and am very happy with the end result.

Built from Plan(s)
Estimated Cost
$30
Estimated Time Investment
Afternoon Project (3-6 Hours)
Finish Used
Minwax Jacobean
Recommended Skill Level
Starter Project

Hemnes Linen Cabinet

Submitted by Anonymous (not verified) on Sun, 01/17/2021 - 09:59

I modified the Hemnes Linen Cabinet plans to fit this space. Instead of painting, I burned and stained the cabinet before applying polyurethane.

Estimated Cost
$300
Estimated Time Investment
Weekend Project (10-20 Hours)
Finish Used
Burned and stained wood with polyurethane. I used a blow torch on the edges for the burned look.
Recommended Skill Level
Advanced

Comments

Camp Loft Bed

Submitted by dadto3kids on Thu, 12/18/2014 - 20:51

I had a friend who needed a bed for two energetic boys for a small bedroom.  I saw these plans and thought this would be perfect for them.  They absolutely loved it and now have plenty of room for their toys in their bedroom. 

Estimated Cost
about $50 for screws stain and polyurethane. I already had all the wood otherwise I would presume it would cost another $50-$75.
Estimated Time Investment
Week Long Project (20 Hours or More)
Finish Used
Minwax Early American
Recommended Skill Level
Beginner

Comments

milyron

Tue, 05/19/2015 - 11:00

Hi, This bed is awesome. I have few question and would appreciate if you could help me.
Did you use any connector bolts to be able to take it apart easily?
How did you connect the slats of the platform to the frame? with PH screws?
would appreciate any details you can give me.
Thanks
Mily:-)

Thanks for providing the plans!

Submitted by Anonymous (not verified) on Mon, 03/20/2017 - 17:45

Used the plans with minor modifications, many thanks for a great design!

Estimated Cost
$55.00
Estimated Time Investment
Day Project (6-9 Hours)
Finish Used
Dark Walnut topped with classic Gray.
Recommended Skill Level
Intermediate

Providence Table & Bench

Submitted by Murphy Fam on Sat, 02/16/2013 - 08:13

We needed a new table for our growing family but didn't want to spend a fortune.
Found this website, explored some plans & fell in love with the Providence table & bench.
It is great!!
We used the Rustoleum stain in Kona as well & did 3 coats of polyurethane. Unfortunately, the table is VERY rough to the touch. And I can see it becoming a problem. We can't wipe it with a damp paper towel as the roughness shreds the paper towel. Any help here would be greatly appreciated!!!
We think sawdust & debris settled on the table when we stained & sealed with the polyurethane. We did not sand in between polyurethane coats either.
If there's an easy fix (or do over) here, please let us know!
Otherwise, it is such a great piece & has already received many compliments!
We'll be sure to refer to Ana White's site!
Thanks so much!!

Estimated Cost
$160
Estimated Time Investment
Day Project (6-9 Hours)
Finish Used
Rustoleum in Kona
Recommended Skill Level
Intermediate

Comments

Quartney

Sat, 02/16/2013 - 15:02

from what I understand, the water in the polyurethane raises the wood, so it needs to be sanded after the first coat (at minimum). I'd sand it down, if I were you. Maybe with a high-grit paper, so you don't damage the stain. Then coat, sand again, and coat.

Jamaunzie

Sun, 02/17/2013 - 16:18

I have had problems with polyurethane all my own fault mind ya. I do not know how smooth of a surface you had after the stain, but if the surface is now so rough that it rips up paper towels. I would venture to say it started there. Also the coats of polyurethane are so thin it would be very hard to just sand down to the stain without scaring the stain finish. I would try either 0000 steel wool or 220 grit sand paper and do it by hand not sander. The picture I see shows it to be a dark stain so if you do scare it you might be able to touch it up, but my experience with that is just bite the bullet and sand down to bare wood and start over. If you do have to do it over I use 0000 steel wool lightly after I stain and wipe it down good and do your thin coats of poly ( with steel wool between coats ) until you reach the look you are wanting

Pam the Goatherd

Mon, 02/18/2013 - 11:22

I learned my lesson about sanding between coats of poly the hard way too! I was able to smooth out the surface of my desk by sanding it lightly with the finest grit sandpaper. If that doesn't smooth it out enough then you are going to have to sand it down further and re-do the poly.

Changing Table / Dresser

Submitted by Ben W on Mon, 12/22/2014 - 09:09

I wanted to build a dresser & changing table combination for our son, who is due in January. I liked the Fillman (Pottery Barn's Fillmore) dresser plan, but also wanted to incorporate some ideas from Pottery Barn's Larkin Hi-Lo Changing table ($1100 - yikes!), namely the side cabinet, so I made a few modifications.

The side cabinet has a pullout shelf to accomodate a diaper pail or hamper. The changing table topper is removable so that this can continue to be used as a dresser when we no longer need the changing table.

I have built a few pieces from or inspired by Ana's site before, but none have been as rewarding as this!

Estimated Cost
$150
Estimated Time Investment
Weekend Project (10-20 Hours)
Finish Used
Sherwin Williams ProClassic Enamel (semi-gloss) in Snowbound.
Recommended Skill Level
Intermediate

Comments

Linda7

Mon, 12/22/2014 - 10:26

Beautiful build. Your modifications make this table very versatile, and I noticed that your spacing all around the drawers and door is so even. This should become a family heirloom.

Easy, cheap garage shelving

Submitted by Anonymous (not verified) on Thu, 03/23/2017 - 20:12

I used 1x3 box pine instead of 2x4's for the bits that things sit on, and everything fits perfectly.

Originally I was planning on a 3.6m long x 0.6m deep X 1.8m high shelf.  At the lumberyard I found out that 2x4's came in 6m lengths as standard, so I adjusted this to 1.5m high instead, which worked out fine as I think 1.8m would have been a bit tall to get heavy things on top of.  Luckily for me my power points and light switches were just under this, which I didn't think about at the time!

Originally I was going to try and cut grooves for the 'rungs' of the ladder frames to slot into, hence the insets at the bottoms of the legs.  I think that the glue-and-screw construction will be plenty strong enough, though.

This took me about 4 hours to put together, and cost about NZD$170 all up, which is about USD$120.

I've got the bug.  Making things is awesome.

Estimated Cost
USD$120
Estimated Time Investment
Afternoon Project (3-6 Hours)
Recommended Skill Level
Beginner

Cal King Scrap Wood Bed Frame

Submitted by Jaruddp on Thu, 01/21/2021 - 17:41

My first project from Ana’s plans. Loved having the material and cut list available!! I adjusted my measurements to fit a Cal King just as Ana suggested.

Estimated Cost
$400
Estimated Time Investment
Week Long Project (20 Hours or More)
Recommended Skill Level
Intermediate

Comments

King Size Farm House Bed

Submitted by lolli020 on Sun, 02/17/2013 - 17:32

We made this bed after making the farmhouse bedside tables. So now we have a whole new bedroom set for probably less than $600. We love how it all turned out, and the plans were so easy to follow. We built both projects from Ana's book and plan to build a lot more from it too!

**In the book the plans are for a queen size bed, we modified it to fit our King size**

We added a piece of plywood to the back of the headboard and footboard and stained them so that it would cover all the pocket holes. Also, we extended the very top piece of wood that is on both the head and foot boards so there was a two inch overhang instead of just one.

This bed is so sturdy! I think if a tornado ever blows through we could just hang onto the bed and we wouldn't go anywhere! The side rails also give it a nice finished look even though they just essentially cover the box spring and bed rails. The bed still sits on the metal frame that is bolted into the headboard.

Check out the bedside tables we made to go along with it!
http://ana-white.com/2013/02/farmhouse-bedside-tables-2-toned

Estimated Cost
$400
Estimated Time Investment
Weekend Project (10-20 Hours)
Finish Used
Minwax Dark Walnut- one coat that sat for about 20 minutes before being wiped down

Minwax Water Based Polycrylic- Clear gloss- 2 coats on top of the stain
Recommended Skill Level
Beginner

Comments

garzalesley

Mon, 09/14/2015 - 10:05

is there a link that gives the dimensions?  When I click on the print friendly or PDF version it doesn't have much on there

Fancy Jewelry Box

Submitted by mmihelcic on Thu, 12/25/2014 - 21:18

My first real wood project with no help from my father. I wanted to make this for my mother for christmas and I got it done 2 hours before church. I recently purchased a kreg jig r 3 and put it to good use. I made a few changes to the plan that helped me achieve the look that I desired. First, through trial and error I adjusted the kreg jig to be able to drill pocket holes to secure the shelves without the need to go back and wood putty the scrww heads that normal would have been exposed on the outer walls. There is a picture of this set up that I uploaded. Also, when byielding the drawers I made two changes. From what I could tell, the plans called for 1/4 inch plywood for the bottoms of the shelves and that is the way I made them at the beginning. However I was not happy with the appearance of the plywood on the nice face boards I was using for the drawers. So I decided to rip down the two side pieces and the back piece of the drawers ( should be 1 - 5 1/2 inch back piece and 2 - 5 3/4 inch pieces ) but I left the face Plate the full inch and a half that way the plywood wous not show from the front. The last change I made on the drawers was I made 2 pocket holes on each side piece to attach the face to the drawers that way the nail holes would not be showing from the front view. While these steps might not have be necessary , it worked for me. Thank
you very much for the plan my mom cried when she opened the box for the first time.

Built from Plan(s)
Finish Used
Minwax early American
Recommended Skill Level
Intermediate

Comments

JoanneS

Fri, 12/26/2014 - 16:25

Great job! What a lovely gift for your Mom! It turned out beautiful!

mega coop

Submitted by Anonymous (not verified) on Sun, 03/26/2017 - 13:42

milled a bunch of cedar with the intention of building adirondack chairs, but we got chickens instead :)

Estimated Cost
$50 in hardware milled all the wood
Estimated Time Investment
Day Project (6-9 Hours)
Finish Used
just going to let it weather naturally
Recommended Skill Level
Intermediate

Frosty Garden Greenhouse

It was truly great for us to find a greenhouse design from a fellow Interior Alaskan blogger. We kept coming back to this design, enough times to where we decided to actually build it.

We would be the first to admit that tackling a gambrel style building was slightly intimidating and not what we had in mind for our very first self-built building! But, we faithfully followed the cut lists and directions. It turned out beautifully! If you're in the same boat, have confidence that you can build this too!

We love the options available for making it your own. We decided to stain the greenhouse lumber of ours to match our cedar sided home. We also built a semi frost-resistant foundation, since we're a little north of Ana at 65 degrees and sometimes experience frost heaving. We also added full climate controls to ours, adding both fans and louvers that keep our greenhouse at perfect temperatures.

The performance has been great! Building this greenhouse has been the single greatest thing we have done in our years of subarctic gardening. We might even consider building a second greenhouse down the road. No matter how big your greenhouse is, it's never quite enough!

Thanks for the great plans, Ana! We appreciate your work!

Built from Plan(s)
Estimated Cost
$2400
Estimated Time Investment
Week Long Project (20 Hours or More)
Finish Used
Transparent cedar stain
Recommended Skill Level
Intermediate

Comments