Community Brag Posts

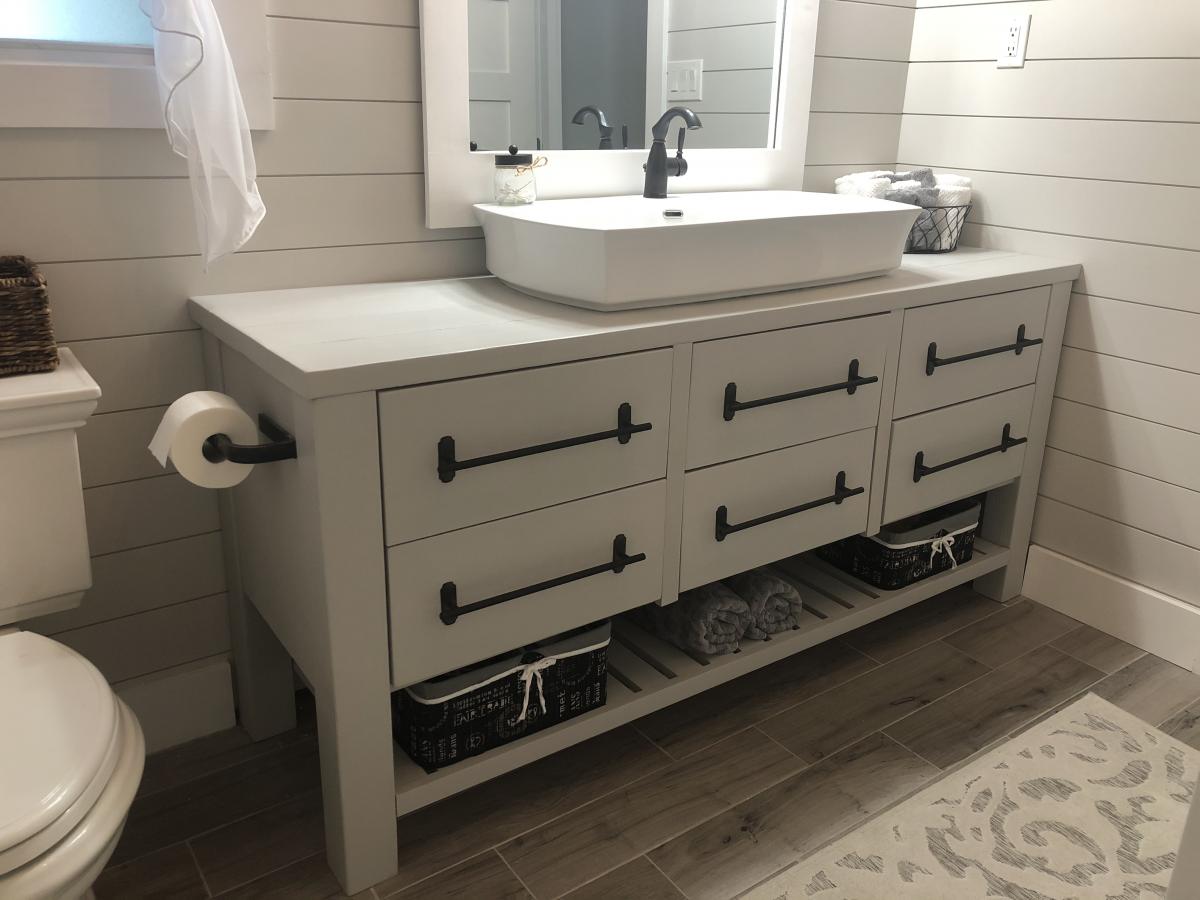
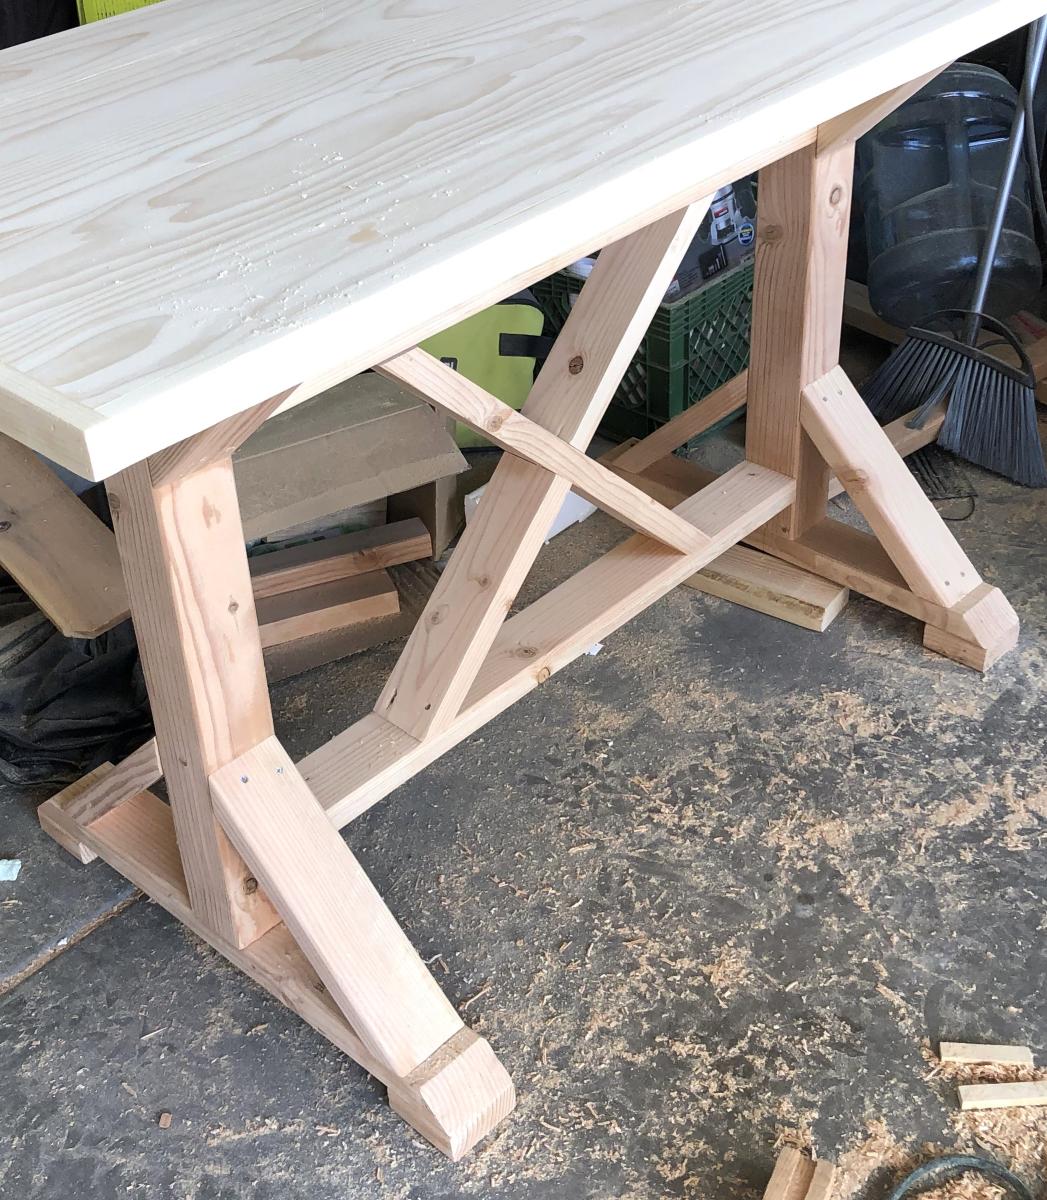
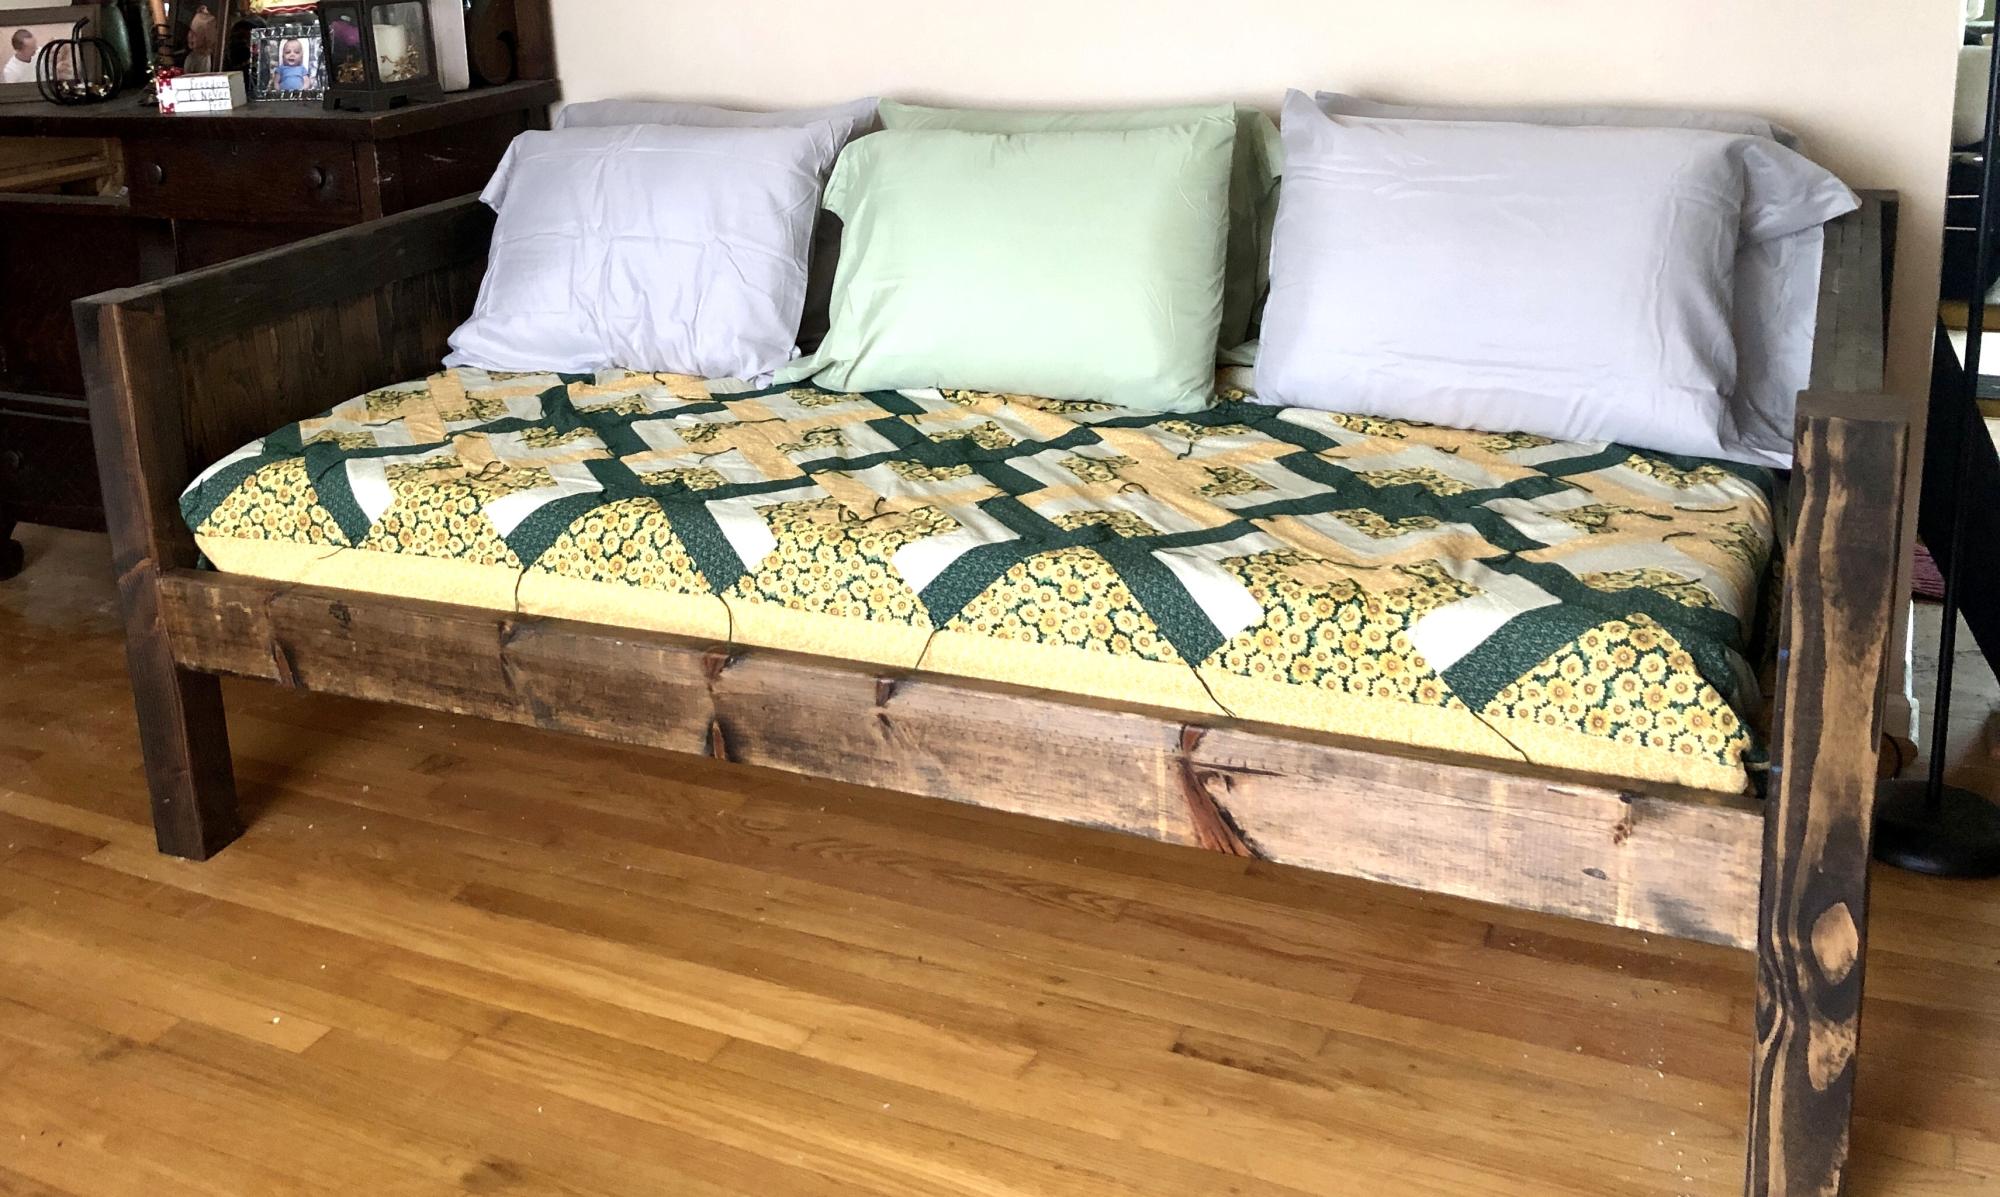
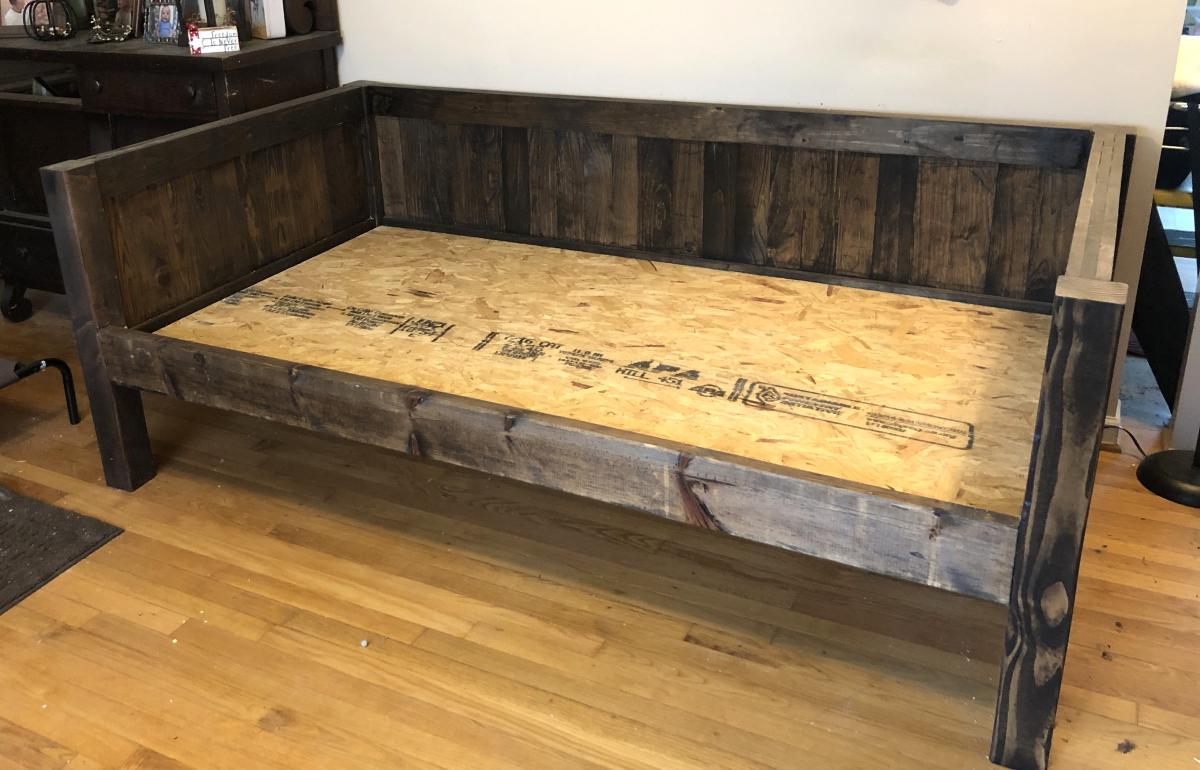
Rustic Farmhouse Vanity

Submitted by jameslee on Thu, 10/10/2019 - 16:23

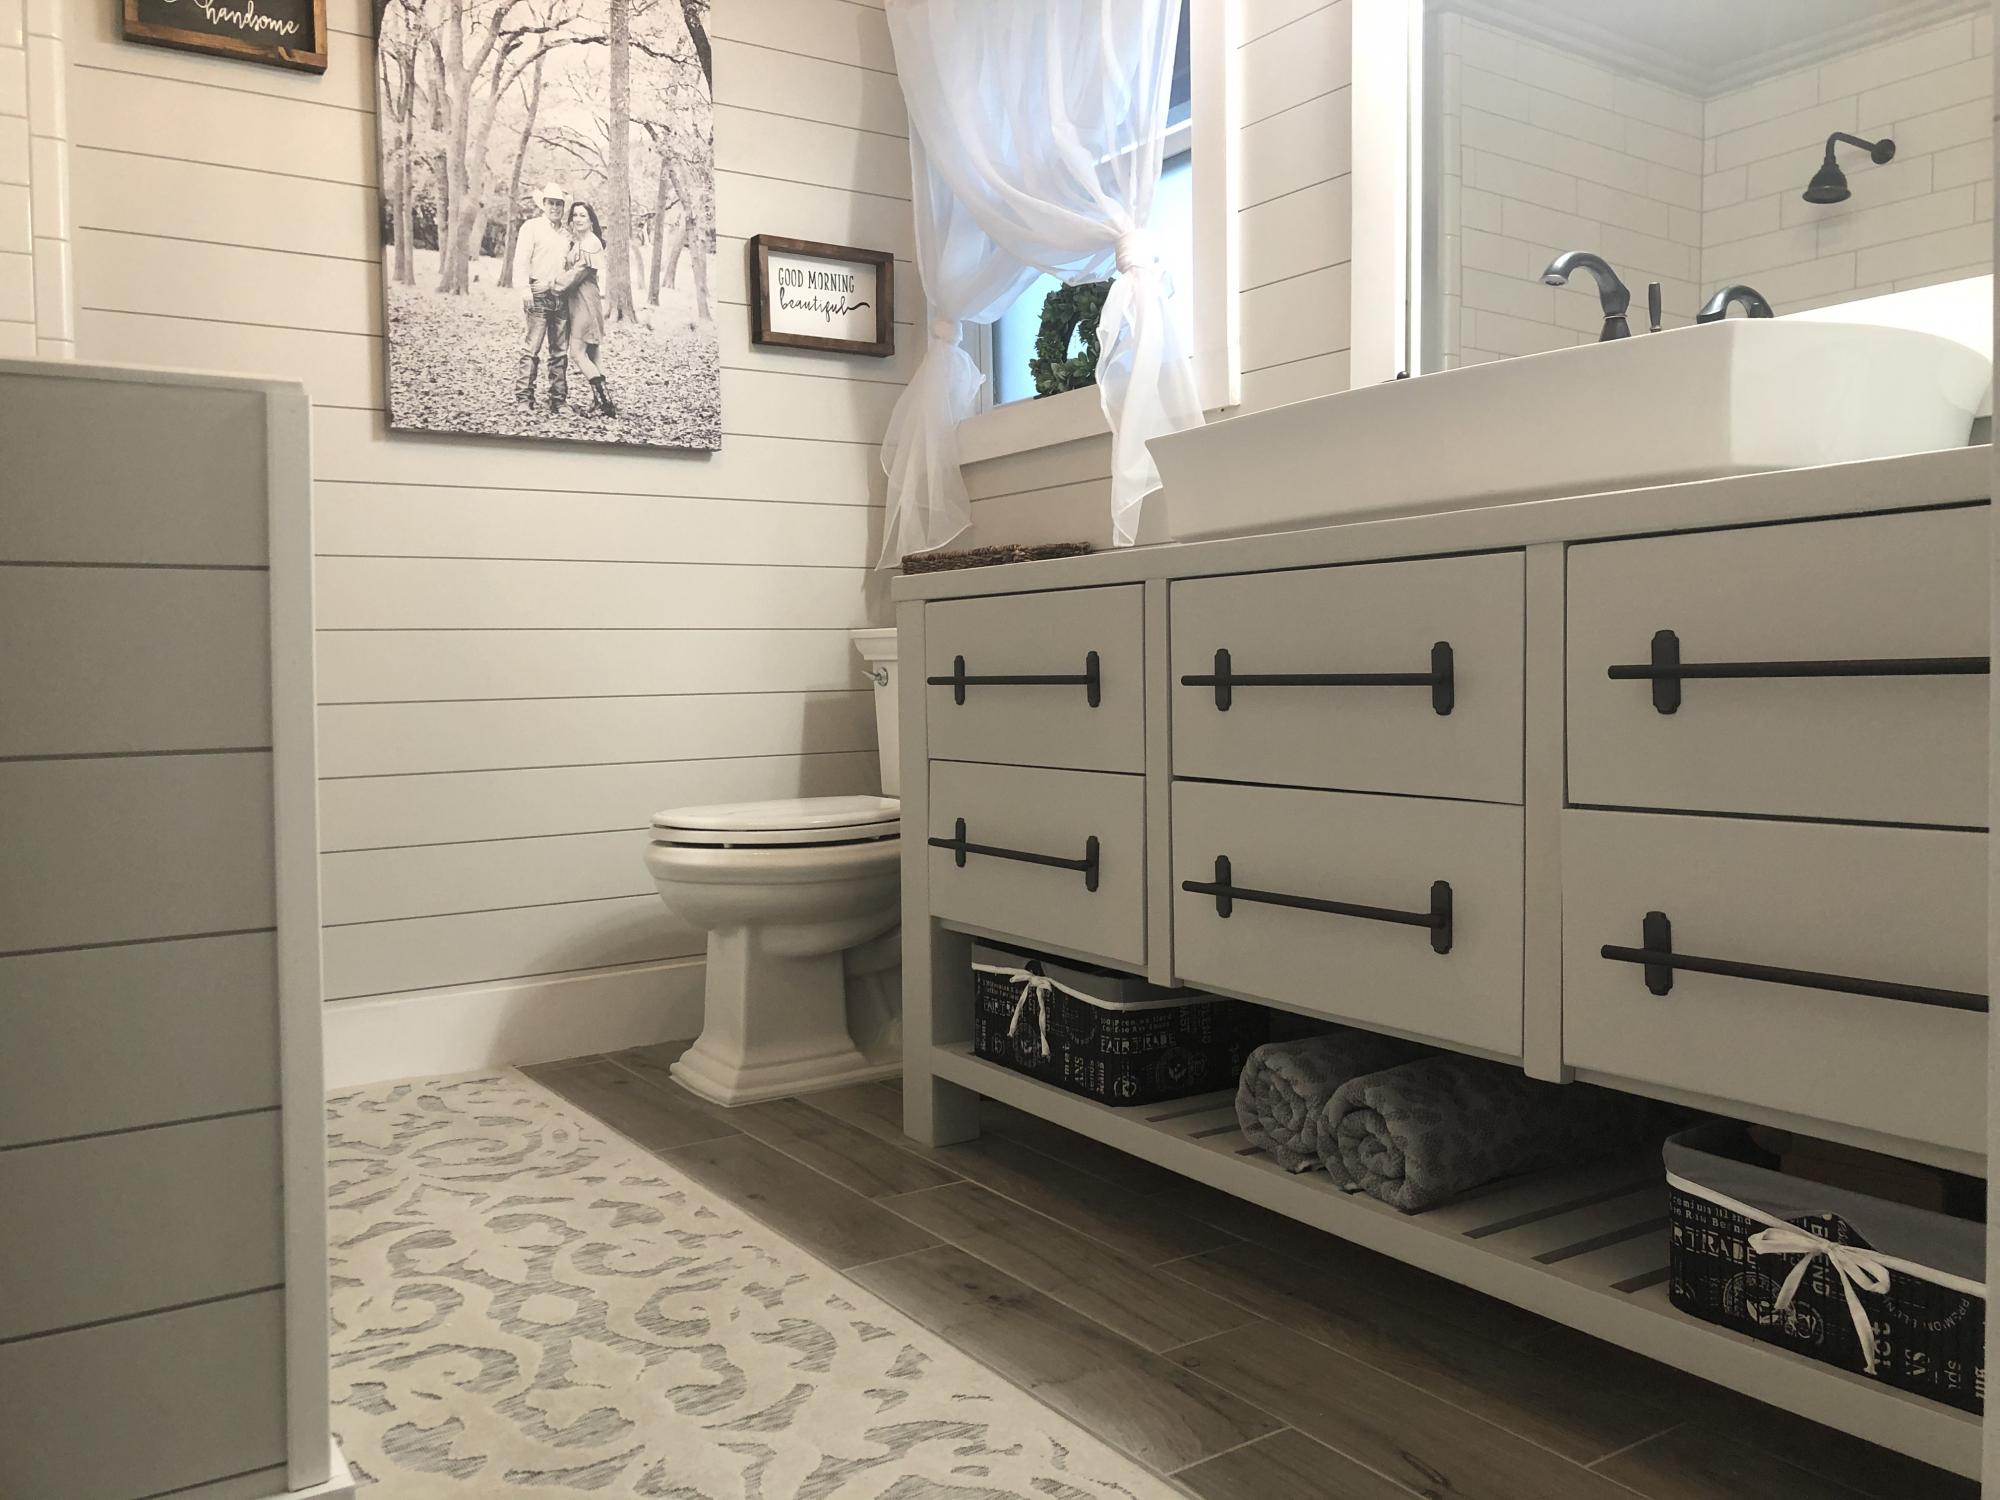
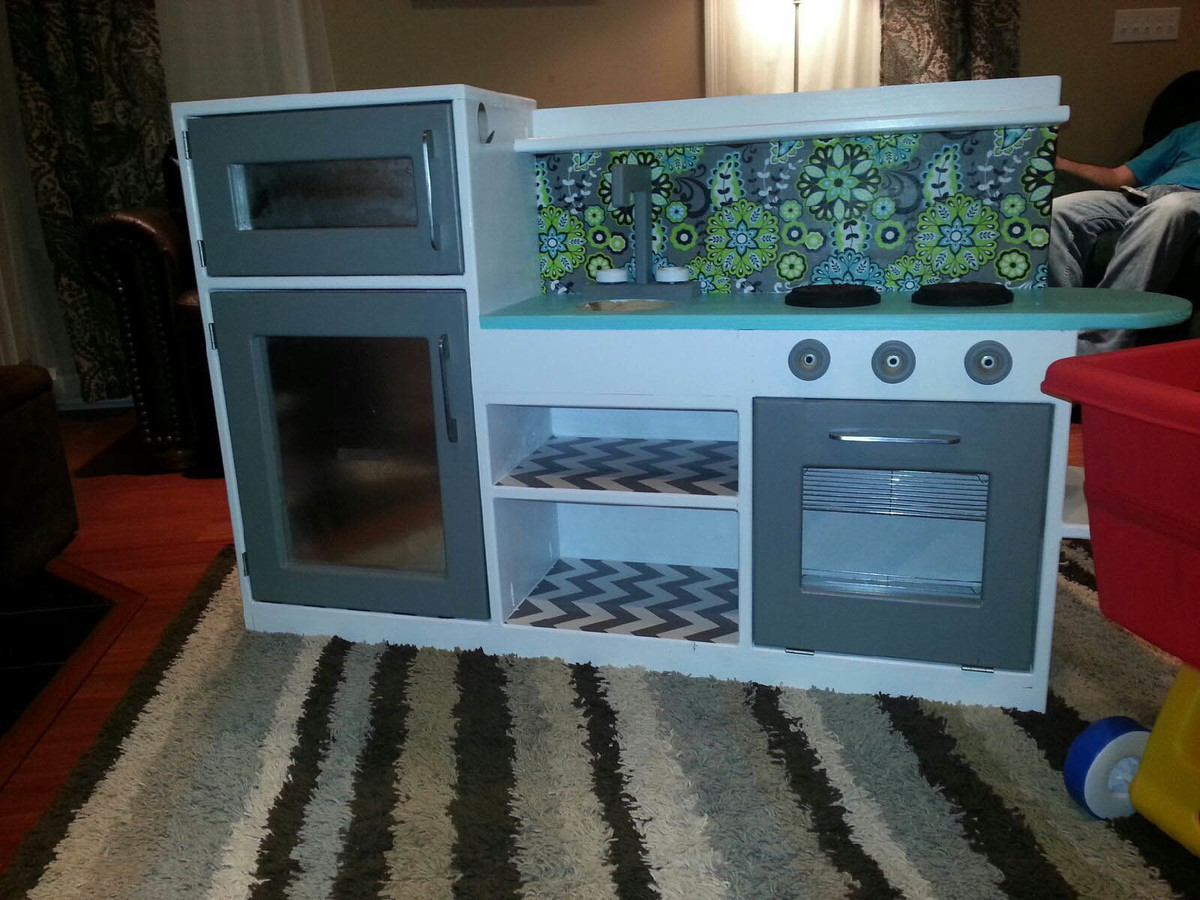
My master bathroom was my first DIY remodel. I took this room down to the studs and built it back up. I struggled to find the perfect vanity that felt strong and sturdy and could not find one. I needed a wide vanity to accommodate this 3 foot wide vessel sink. I found Ana White and this plan online and fell in love! This was my first build and I’ve become addicted to wood working since. As my first build, this took me most of a day to build and assemble drawers. Sanded and painted with a flat finish! I love it! Thank you Ana!

Estimated Cost
$200
Estimated Time Investment
Day Project (6-9 Hours)
Finish Used
General Finishes milk paint in Seagull Gray with a high performance flat finish. Hardware and sink found on Amazon.
Recommended Skill Level
Beginner

Comments

Garden Bench

Submitted by sidman on Tue, 02/14/2012 - 02:50

When I saw this we had to build it. Hope you like!

Estimated Cost
45.00
Estimated Time Investment
Day Project (6-9 Hours)
Finish Used
Painted black with a poly coating.
Recommended Skill Level
Starter Project

Comments

Margaret Kubiszyn (not verified)

Tue, 02/14/2012 - 07:11

I love this, but the link to the plans is broken!

Fire Pit Benches

Submitted by tsmonson on Mon, 12/23/2013 - 21:24

This was an easy plan to follow! We built these for around our fire pit. The finishes is what took the longest. The tops are stained American Walnut.

Built from Plan(s)
Estimated Time Investment
Day Project (6-9 Hours)
Recommended Skill Level
Beginner

Comments

Tiny House Ontario

Submitted by Anonymous (not verified) on Fri, 03/04/2016 - 12:43

I looked at all the sofas that people built and took bits out of a lot of them to decide what I needed to fit my needs. I am in a tiny house and I wanted the sofa to be super versatile as well as being good for storage. I decided to build it the size of a double bed, but to divide this into three sections so that it can be used as a sectional, a seating area for meals and a bed for overnight guests. It was a lot easier than I thought it would be.

Thank you for this, I would not have known where to begin.

I decided on brightly printed outdoor fabric because the interior of my tiny house is all wood and I though the bright colours would be a nice addition. The outdoor fabric was chosen so that it would resist water and stains as well as pet hair.

Estimated Cost
$487.
Estimated Time Investment
Day Project (6-9 Hours)
Finish Used
water proof outdoor fabric
Recommended Skill Level
Intermediate

Built in dining bench

Submitted by aahmad79 on Sun, 10/13/2019 - 09:14

I used the mudroom bench plans and modified them slightly to account for the wider space and air registers underneath. Thanks Ana!

Built from Plan(s)
Estimated Cost
$450
Estimated Time Investment
Week Long Project (20 Hours or More)
Recommended Skill Level
Intermediate

Comments

Daybed Mash-up of Plans

Submitted by Anonymous (not verified) on Mon, 07/03/2023 - 12:35

I mashed together several twin bed plans - farmhouse bed, simple twin bed and Hailey Storage bed to create this farmhouse style daybed. It's a very sturdy and heavy piece of furniture.

Built from Plan(s)

My new sewing table!!

Submitted by sattaway on Sun, 02/19/2012 - 20:46

I consider this my first build...notice the ribbon rack and painter's ladder shelf also in the photo. Those were just confidence boosters to help me tackle the craft table I've been asking my hubby to build me for years. I just got tired of waiting, and decided to give it a try. With a 2 and 6 year old in the house, this took me a few weeks to complete...building during nap time and forgoing sleep on some evenings just to get it done. :) The drawers were by far the trickiest part of the whole thing. My first attempt was with 16" euro side mount slides, and I couldn't get the drawers in because they are inset under the tabletop. I ended up going with just a regular side mount drawer slide ($4.30 per drawer). The bookcases and the drawers are just your standard white cabinet paint, but the tabletop is finished in Martha Stewart's Potter's Clay textured paint (Hacienda) with a top coat of polyurethane. I also made the table top twice as thick by gluing 2 pieces of plywood together and screwing them together through the bottom piece. The height of the table is perfect for cutting fabric...no more backaches from bending over a table to cut fabric. I can't wait to move on to my next project! :)

Estimated Cost
$150
Estimated Time Investment
Weekend Project (10-20 Hours)
Recommended Skill Level
Beginner

Comments

Sandie

Mon, 02/20/2012 - 14:28

Great job! I love it when women finally figure out that they CAN build! Everything looks great!!!!

counter raised beds

2 - 2x12x8

2 - 2x3x8

2 - 4x4x8 (cedar, fur is cheaper and will work fine also)

16 - 5/16x4 lag screws 

16 - 5/16 washers

3x10 feet 1/4 hardware wire

20 - 3inch wood screws (outdoor rated, deck screws or the like) 

you will have left overs if you buy extra lags you can make some other boxes depending on how high you want these, or set them on ground without legs. and use the wood screws 

Estimated Cost
$75
Estimated Time Investment
An Hour or Two (0-2 Hours)
Finish Used
no finish
Recommended Skill Level
Beginner

Farmhouse Nesting Tables

Submitted by Anonymous (not verified) on Fri, 10/18/2019 - 08:34

First real furniture project. Used pocket screws for just about everything and added some decorative 2" bread boards.

Built from Plan(s)
Estimated Cost
Under $100
Estimated Time Investment
Day Project (6-9 Hours)
Finish Used
Early American Stain with Polyurethane finish
Recommended Skill Level
Beginner

Square Picnic Table with Umbrella

Submitted by Anonymous (not verified) on Fri, 07/07/2023 - 11:06

Used your plans to make a sturdy, durable hardwood picnic table for a friend. Top is black cherry (1 1/4") and base/seats are white oak (1 1/4"). The seats are one piece, 11" wide from a white oakoy cut and sawed on our property! Sealed with two coats of Spar Urethane.

Chip McCoy

Built from Plan(s)

Argie Bedside Table (Nightstand)

Submitted by mstarnes on Fri, 02/24/2012 - 09:40

Used the Argie Bedside Table plans, but instead of using plywood for the top I used 1x4's joined together. Painted it a semi-gloss black and put the stainless pull on the drawer front

Built from Plan(s)
Estimated Cost
$75
Estimated Time Investment
Afternoon Project (3-6 Hours)
Finish Used
Semi-Gloss Black Paint
Recommended Skill Level
Intermediate

Cottage style bookcase

I modified the original plans by making the book case low and wide so my 5 year old could reach all of her books. I also added some 1x3's to the back of each shelf to keep the books from falling off the back and everything square. I have quarter round moulding on my baseboards, so it doesn't sit flush against the wall.

Built from Plan(s)
Estimated Cost
$45
Estimated Time Investment
Day Project (6-9 Hours)
Finish Used
Olympic interior satin Scandinavian Sky
Recommended Skill Level
Beginner

Caroline's double loft bed

Submitted by Anonymous (not verified) on Thu, 03/10/2016 - 19:18

We made this a double bed and lowered the height by 3 1/4 inches because we have low ceilings. We added an extra support under the mattress since it's a double. Plan to add the desk and low shelves later. Followed the plans very closely, worked out great. One thing I would suggest is to do the slats after the guardrail. Otherwise you can't stand under the bed and it's hard to get a good angle when screwing it on. Many happy hours of reading Harry Potter up there in the first week :).

Built from Plan(s)
Estimated Cost
$500
Estimated Time Investment
Week Long Project (20 Hours or More)
Finish Used
Gel stain
Recommended Skill Level
Intermediate

King-sized platform bed

DIY king-sized platform bed. A quick afternoon project to get yourself off the ground. Specifically built for Ikea memory foam mattress (which doesn't honor their warranty if bed is kept on slatted wood platform bed). Detailed plans here. http://www.thehomespunjournal.com/2012/02/27/king-sized-platform-bed/

Estimated Cost
$87
Estimated Time Investment
Afternoon Project (3-6 Hours)
Finish Used
None
Recommended Skill Level
Starter Project

Comments

babysteps

Tue, 02/28/2012 - 07:52

I am thinking that if you wanted your mattress to breathe on this platform, you could drill a bunch of small holes in the platform to let some air circulate from underneath.

Kids Play Kitchen

I wanted my daughter to have a play kitchen for Christmas - so I was excited when I found these plans on ana-white.com. My husband is a very skilled, self-taught, craftsman - so I knew he could do this! I'm pretty crafty myself - so combined, we made this awesome kitchen. We couldn't be prouder of how it turned out.

The back splash is a piece of remnant cloth from Hobby Lobby - I modge podged it on. The shelf liners are laminated fabric also from the Hobby Lobby remnant bin, that was put down with a little bit of spray adhesive. Oven racks are from the Dollar Tree - cookie drying racks. The stove eyes and oven burners are wooden disks from Hobby Lobby as well as the knobs. The stove eyes and oven burners have red glitter glue swirls on top to give the realistic "hot" look. The sink was a stray dog bowl we've had for a while. The handles were left over from another project we did a while back.

My husband built the faucet and knobs from plans he dreamed up as he went. We used metal sheets in the fronts of the fridge doors so she could put magnets on them.. like a real fridge! He also added an additional shelf in the lower part of the fridge. He used magnetic closures on each of the doors so they will stay shut nicely.

He built the entire kitchen in one day -- the drying time on the paint -- slowed us some due to the weather we've been having. Over all it took us about 1.5 weeks to finish - working on it a little each evening.

Our daughter loves it.. she's cooked us several meals since Santa brought her kitchen. LOVE IT!!

Estimated Cost
$150.00
Estimated Time Investment
Weekend Project (10-20 Hours)
Recommended Skill Level
Intermediate

Crescent Moon Crib

Submitted by Anonymous (not verified) on Sun, 03/13/2016 - 21:21

I took a crib plan I saw on here from DIYstinctly Made, but I wanted to have a crescent moon, so I altered the plans to a solid back with a crescent moon in the center!

Estimated Cost
$200
Estimated Time Investment
Week Long Project (20 Hours or More)
Finish Used
Rustoleum Varathane Water-based Poly+Stain (Early American) - 2 coats used a little less than 1 quart
Recommended Skill Level
Intermediate

Main closet

Submitted by Anonymous (not verified) on Sun, 10/27/2019 - 19:23

10 ft closet that had a lot of space but little organization. First attempt at building anything. Built the bench first in four different sections then attached together. Closet already had two long 10 ft boards so just added vertical dividers to match the cubbies for each person. Added shelving on sides using the concepts of making the original bench. Our baseboards have tile that was installed up to it so I didn’t attempt to remove them but notched out the backs of the wood to fit around. On the side left about 6 inches and installed the rod front to back using C hooks to hang things from them. Will be adding lots more hooks on the sides as well. Used a couple different plans but ended up making changes along the way based on my skill level and what I thought would work best for the family.

Estimated Cost
250
Estimated Time Investment
Week Long Project (20 Hours or More)
Finish Used
Painted sections are Sherwin Williams Olympus white and stained shelves are classic oak
Recommended Skill Level
Beginner

Kid Built Stool!

Submitted by Anonymous (not verified) on Mon, 07/10/2023 - 08:46

Summer lessons, had my 10 year old and 13 year old build. It was their first project and they did all the work. Great designs and easy to follow. We will do more this summer from Ana White.

Jerry

Built from Plan(s)
Back