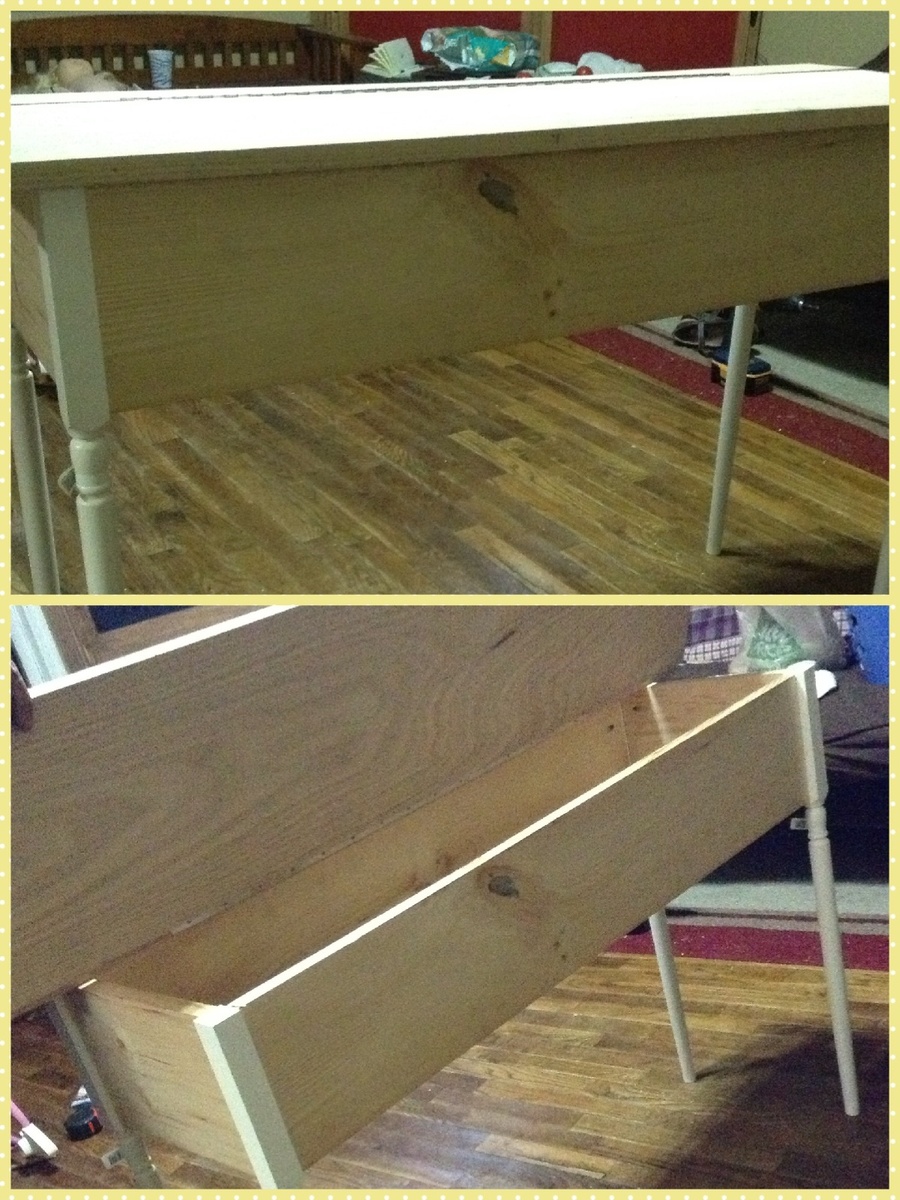
Flip Top Desk
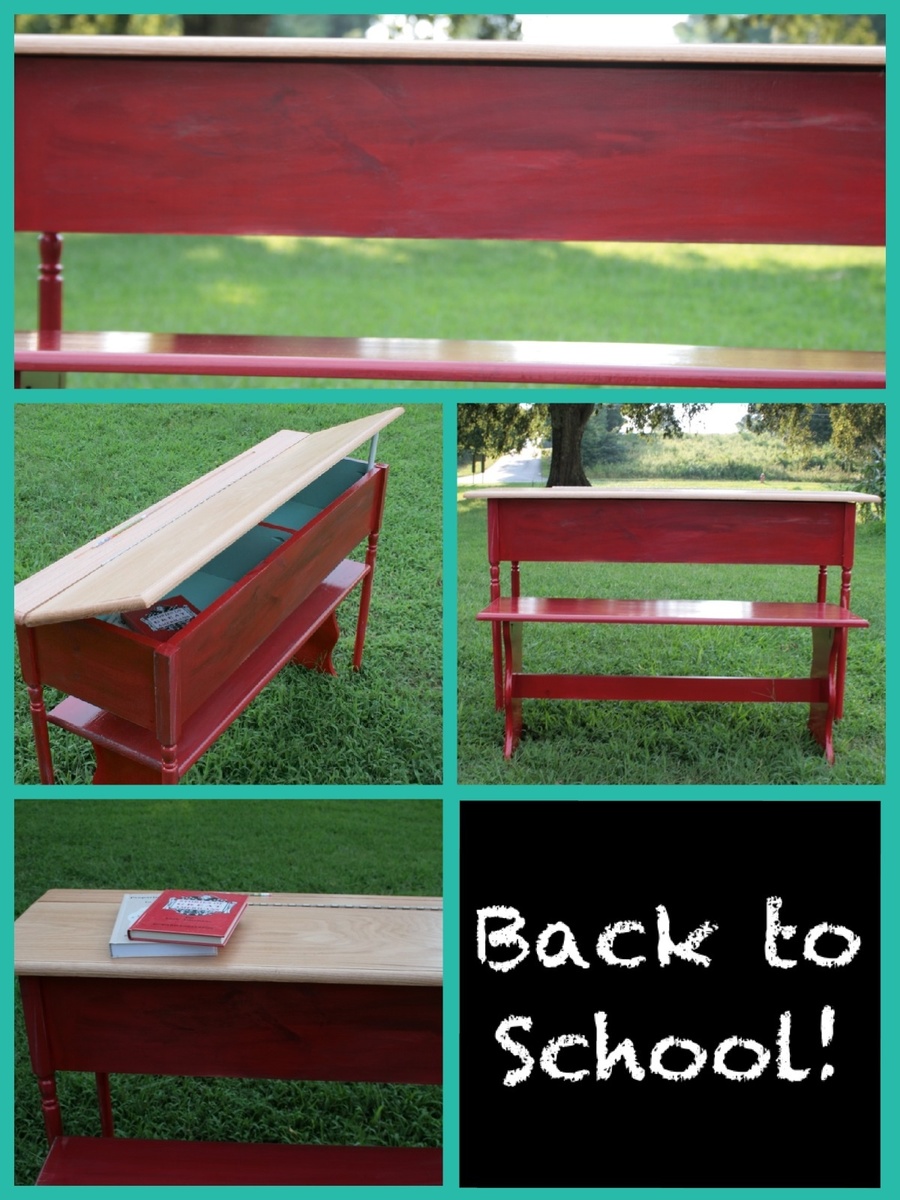
Used the plans to make a desk for my girls!
Built from Plan(s)
Estimated Cost
$150
Recommended Skill Level
Intermediate
Used the plans to make a desk for my girls!
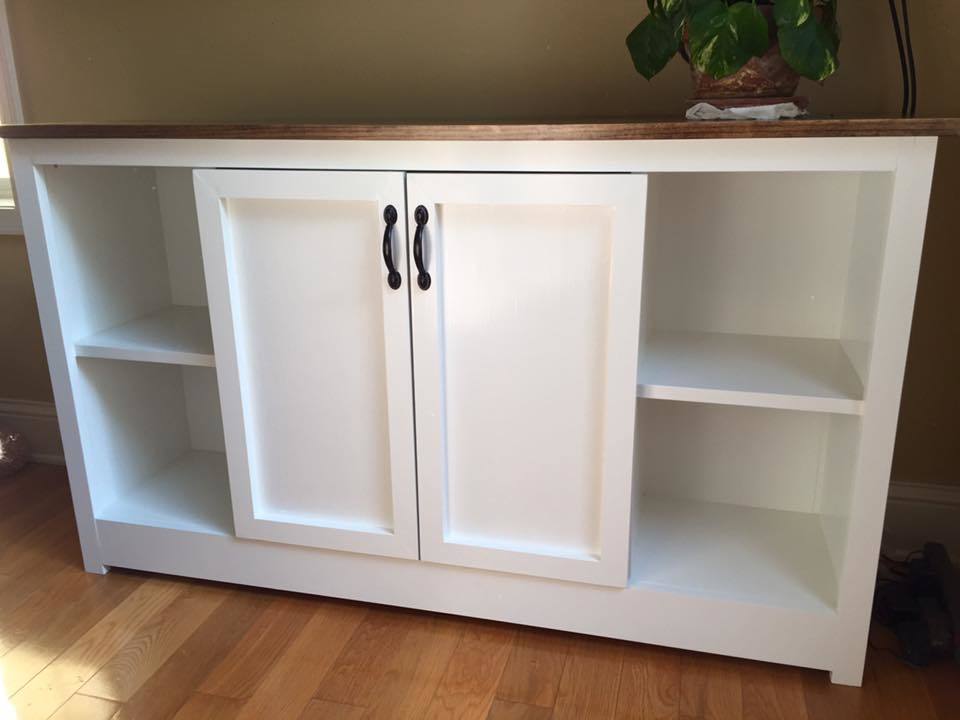
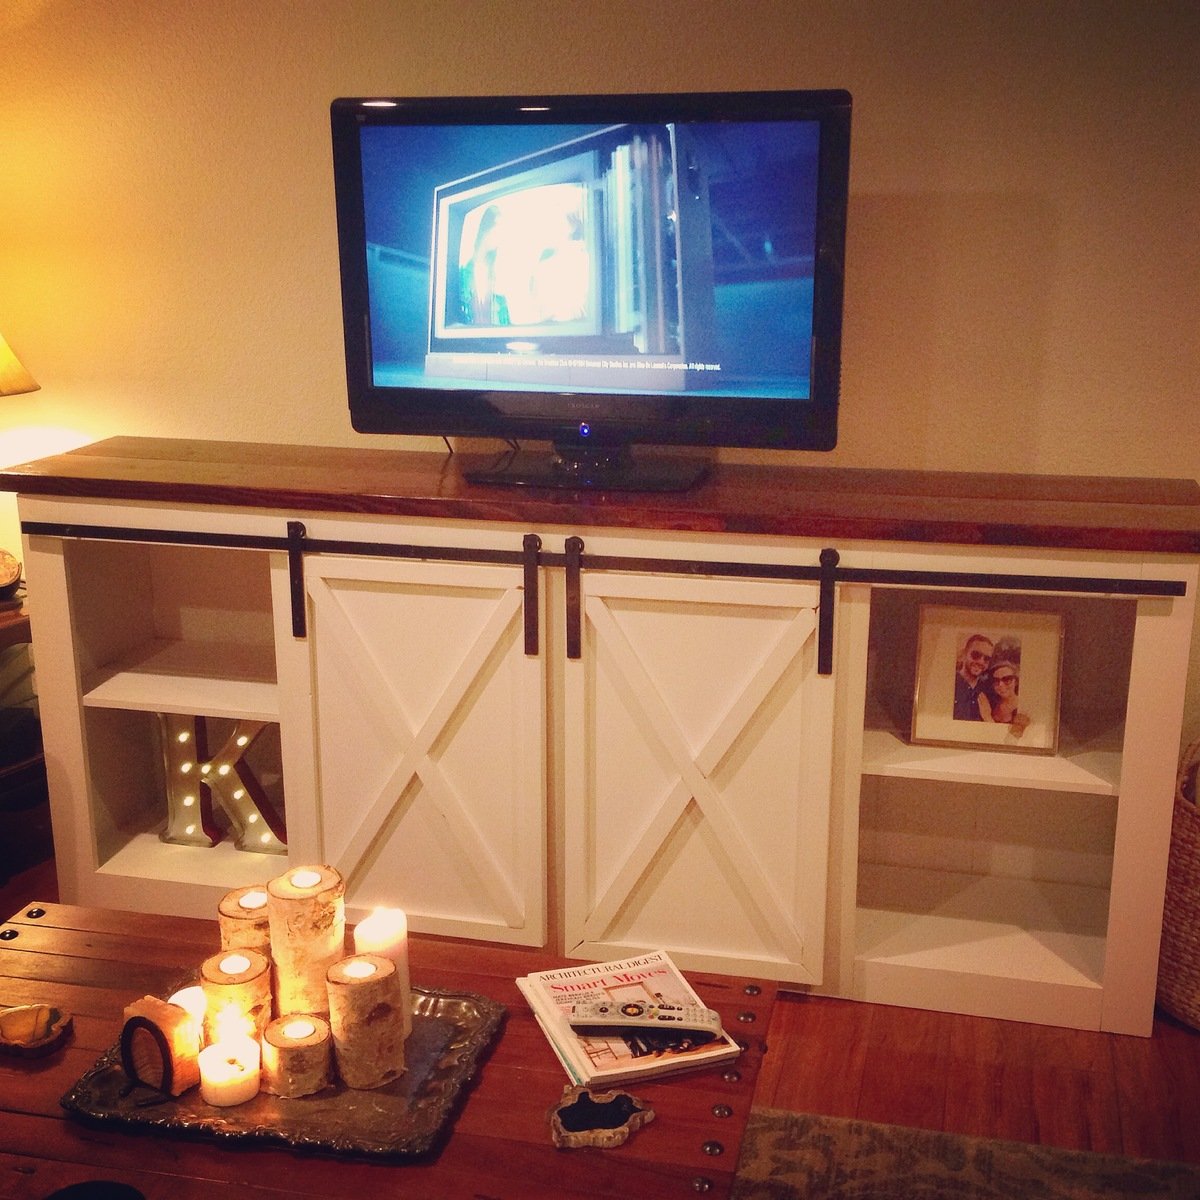
I based this off of the farmhouse media console plans, but made a lot of changes with dimensions, doors, etc. Originally we wanted the doors to slide sideways instead of opening outwards... but we couldn't figure out how to do that and still make it look nice! Very easy to build. I am happy with the end product!
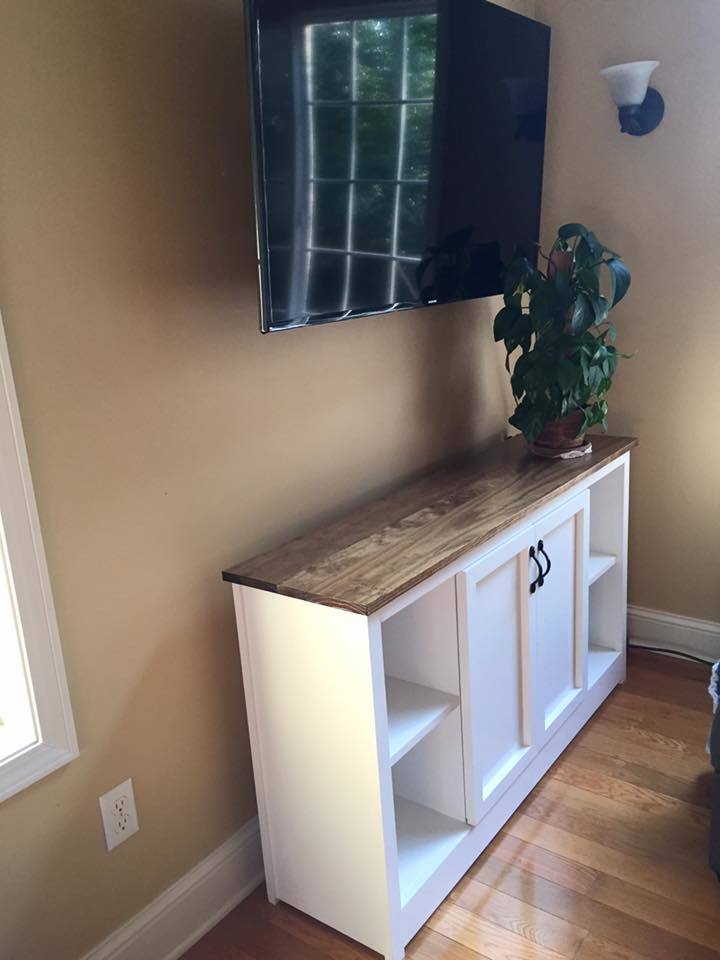
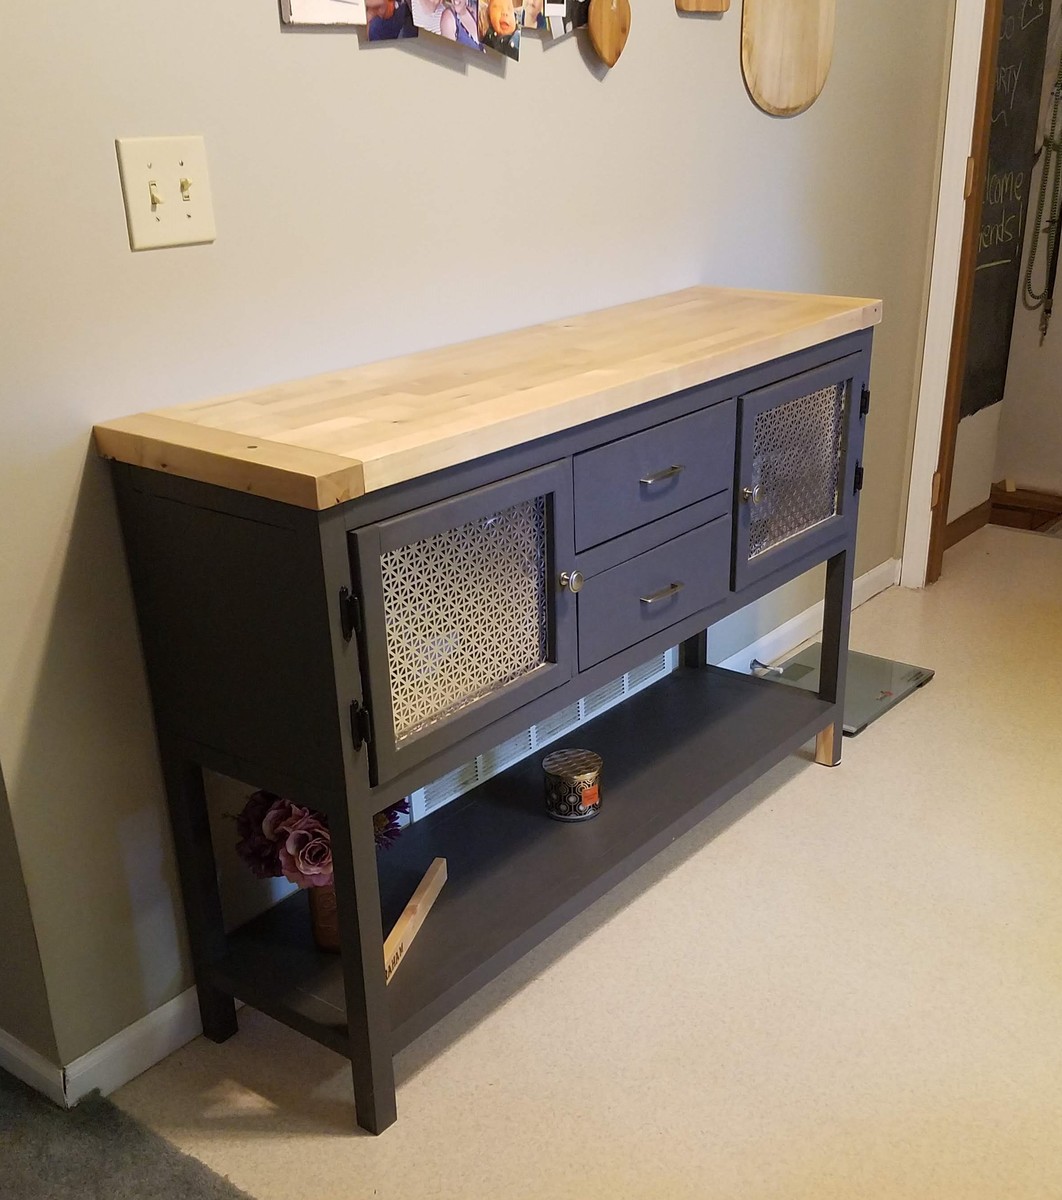
We really wanted a narrow console tabtabltabtable for this space. This was perfect! Modified the original plans to add to the width and height so it is counter height. We added a butcher block top to match our existing kitchen cabinets. I used aluminum decor inserts from Home Depot for the doors. Thank you Ana for your amazing plans!

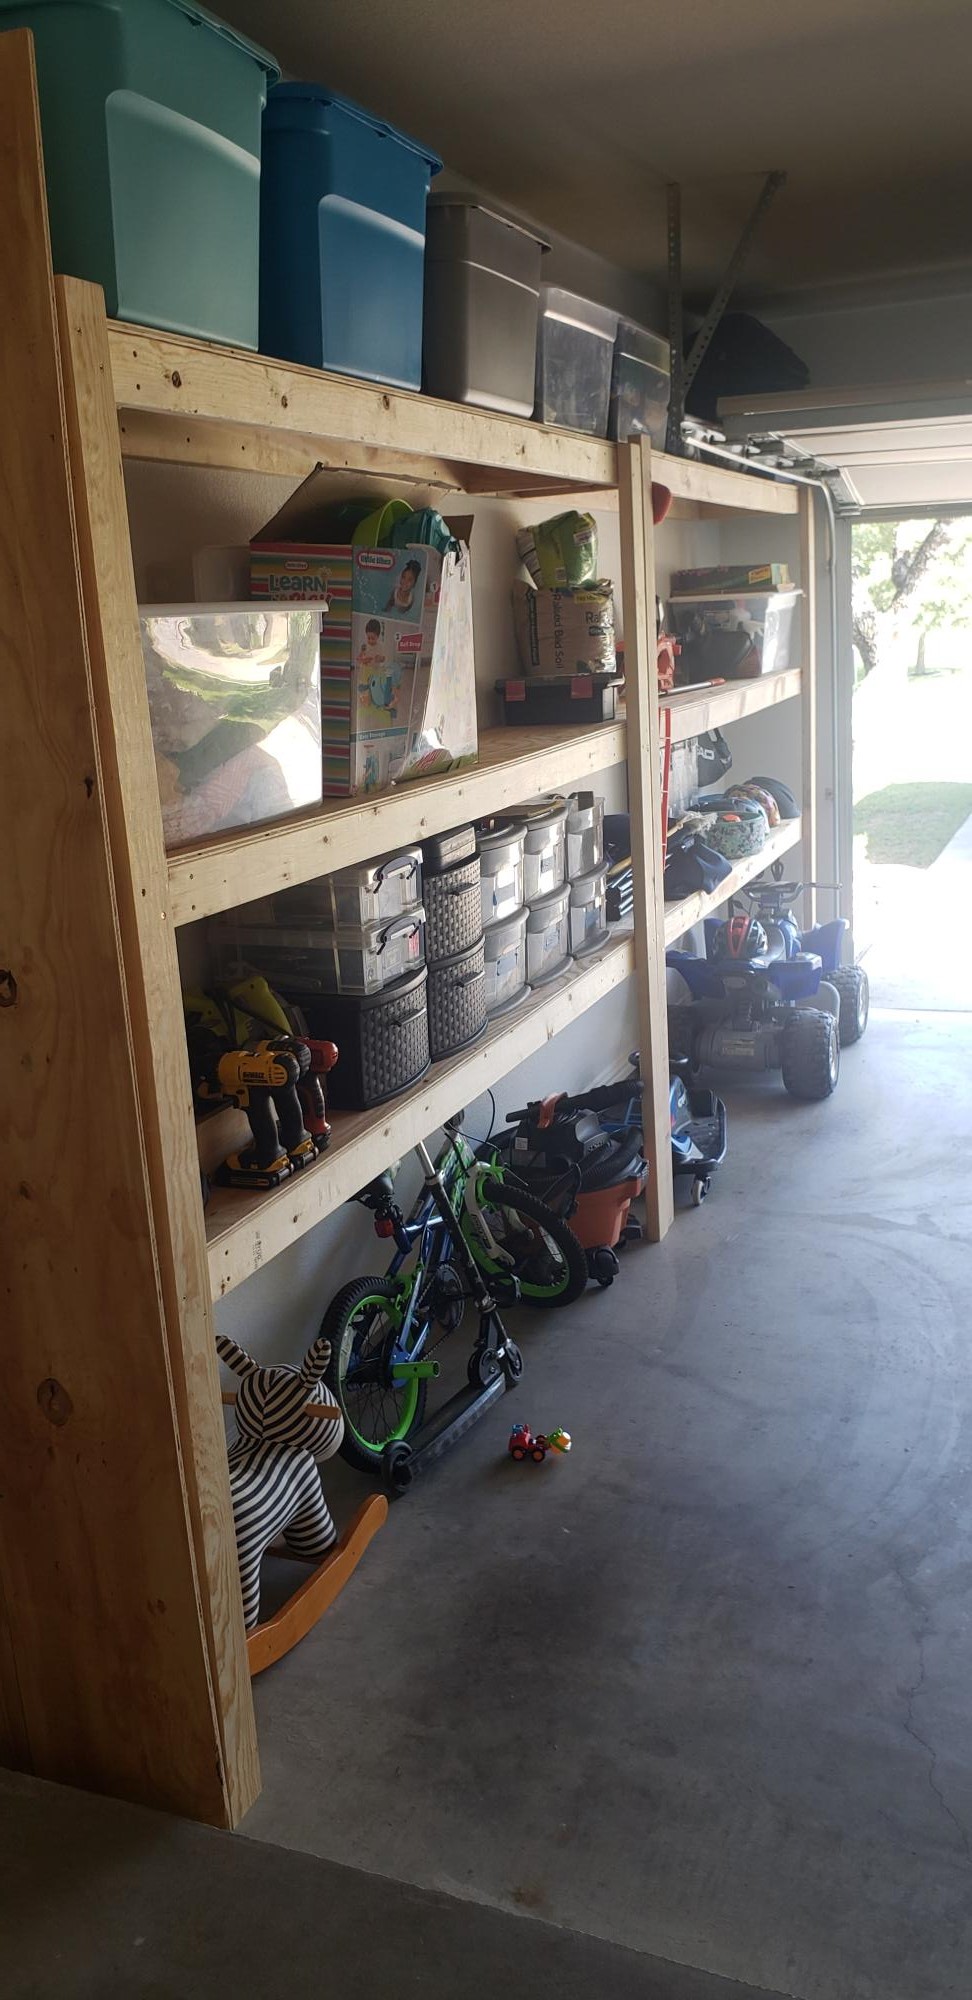
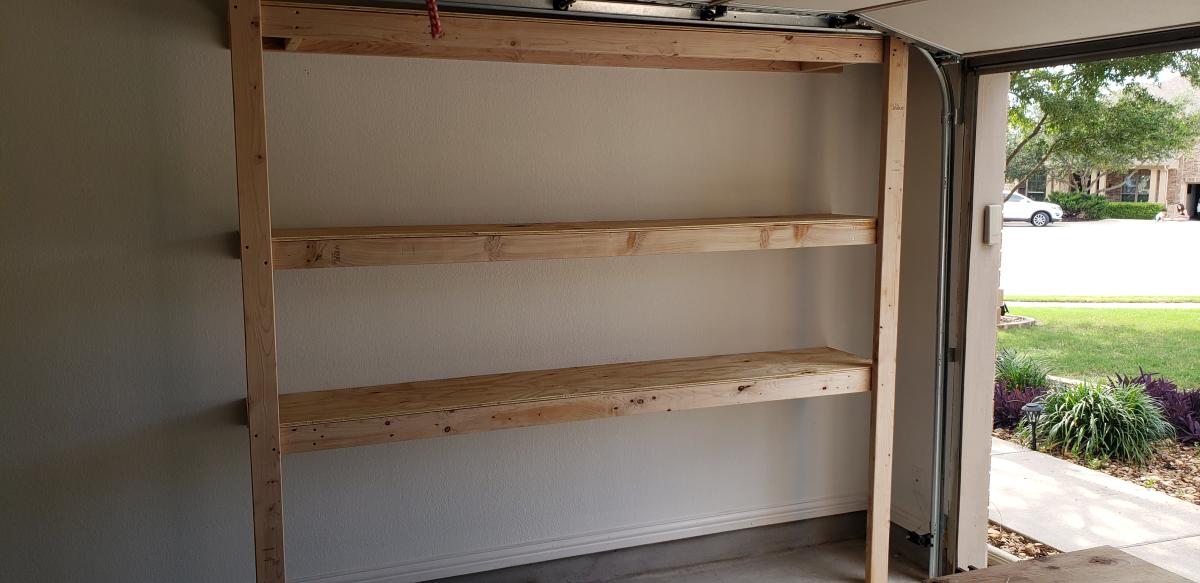
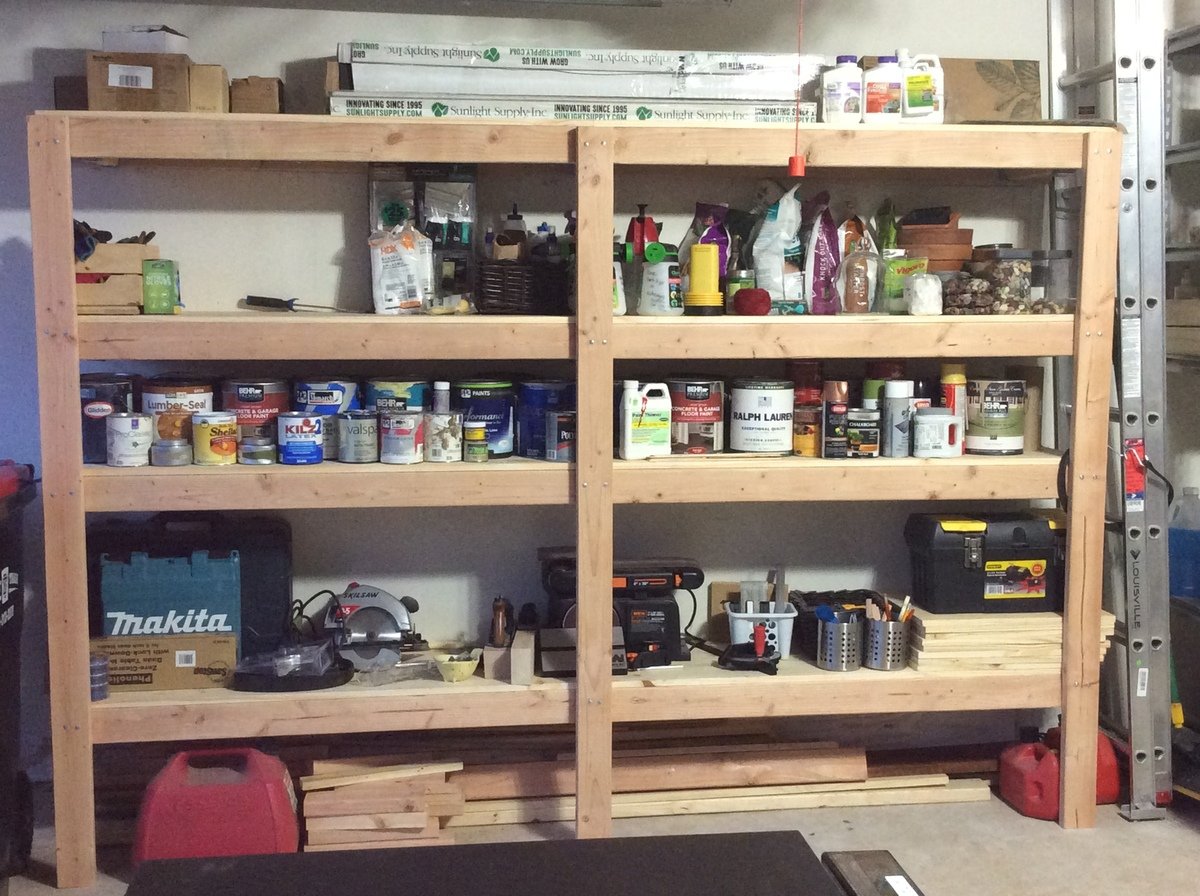
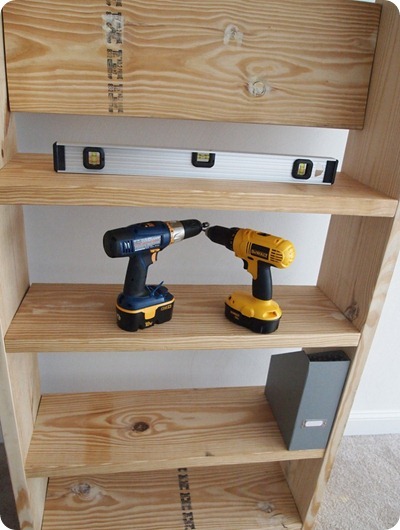
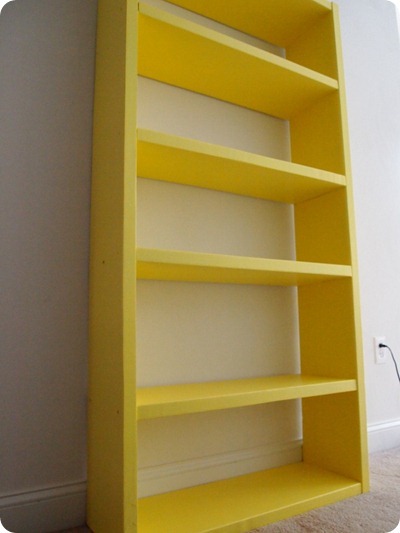
I followed your plan for my 16 inches garage shelves and I absolutely love it. Tons of storage and easy to customize. Each 8 foot shelves is now costing $120 in material - which is still a great deal! Thank you @Anawhite 🙏

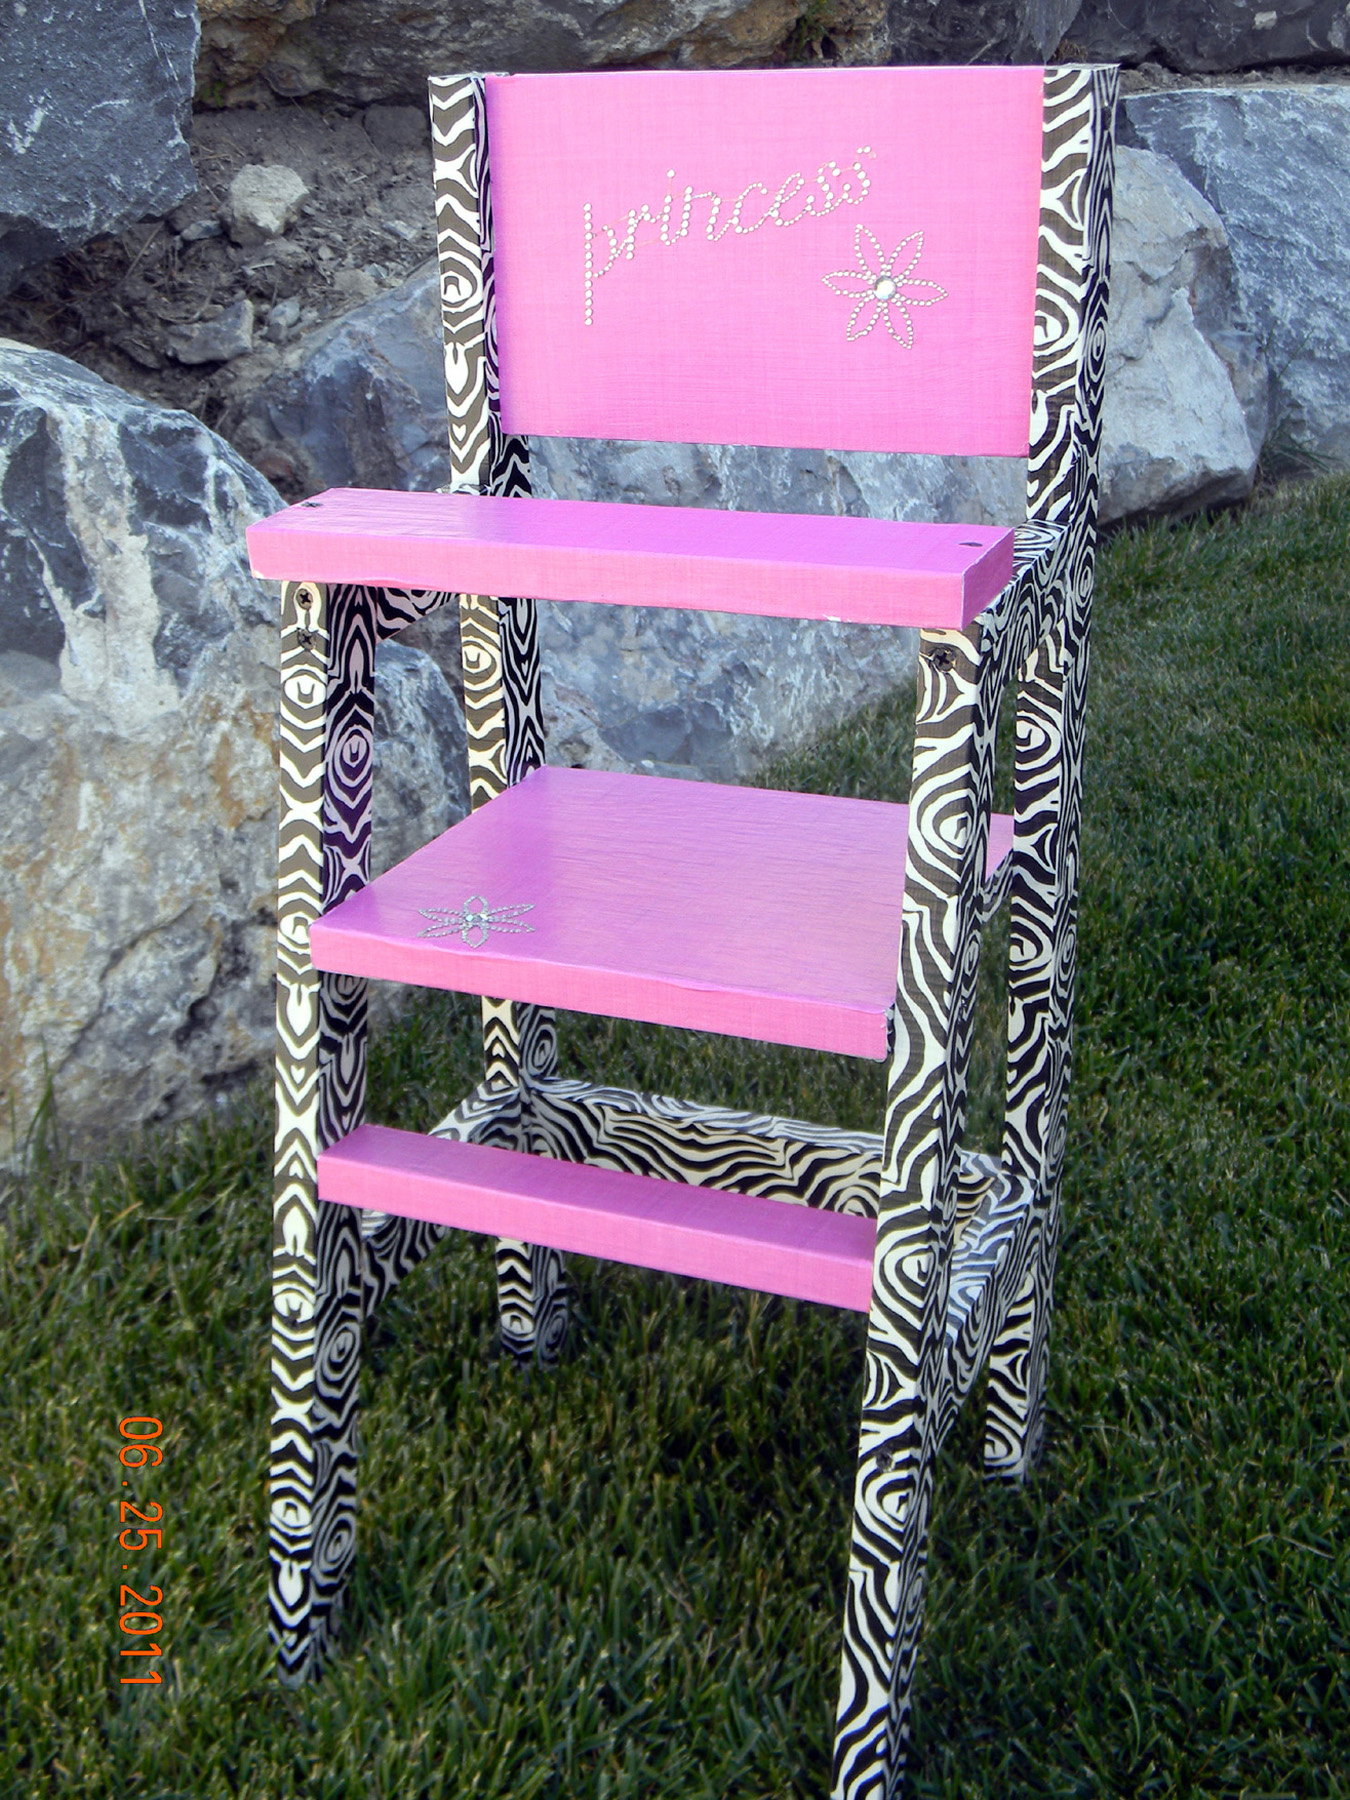
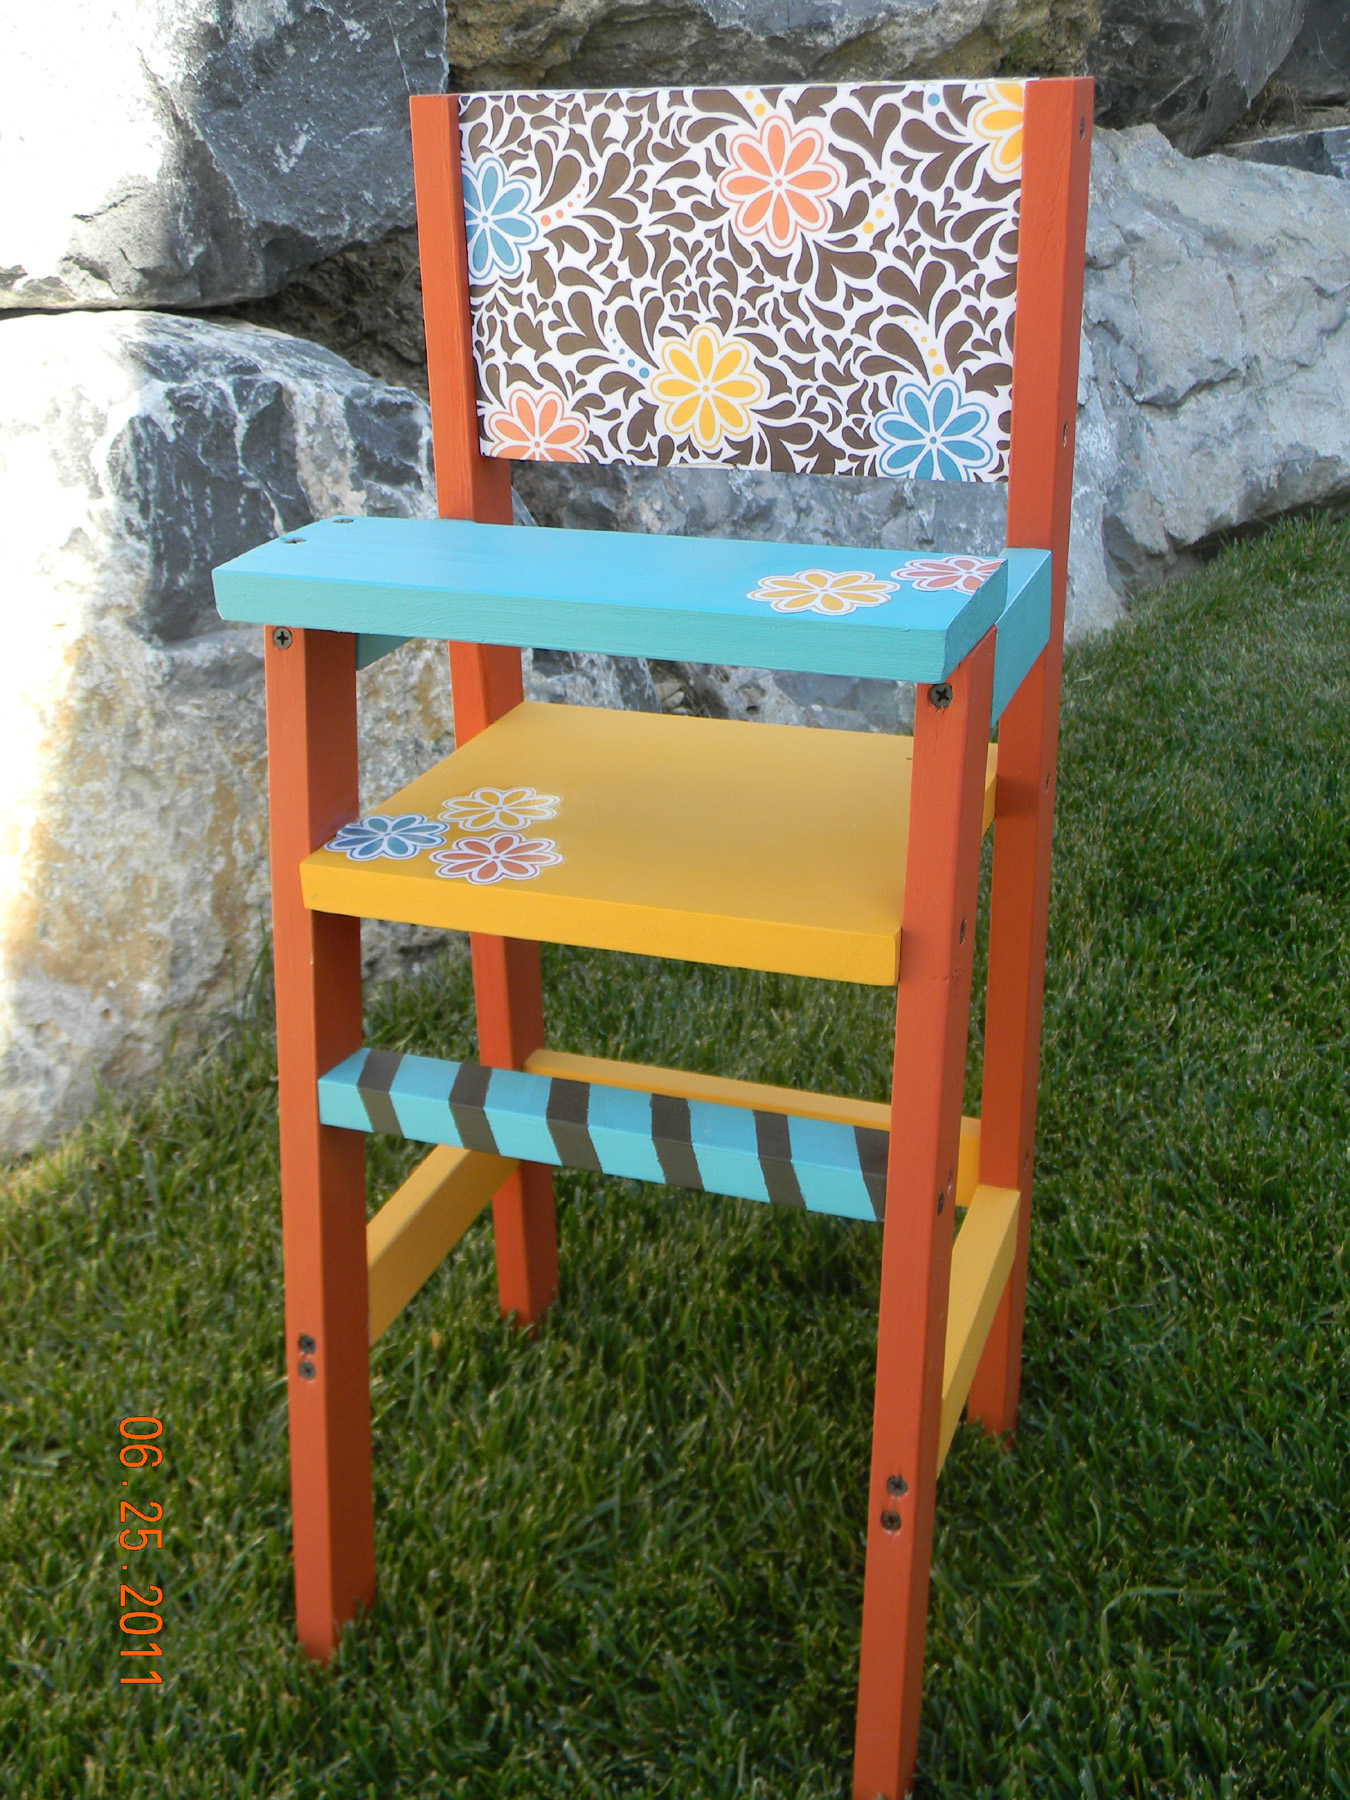
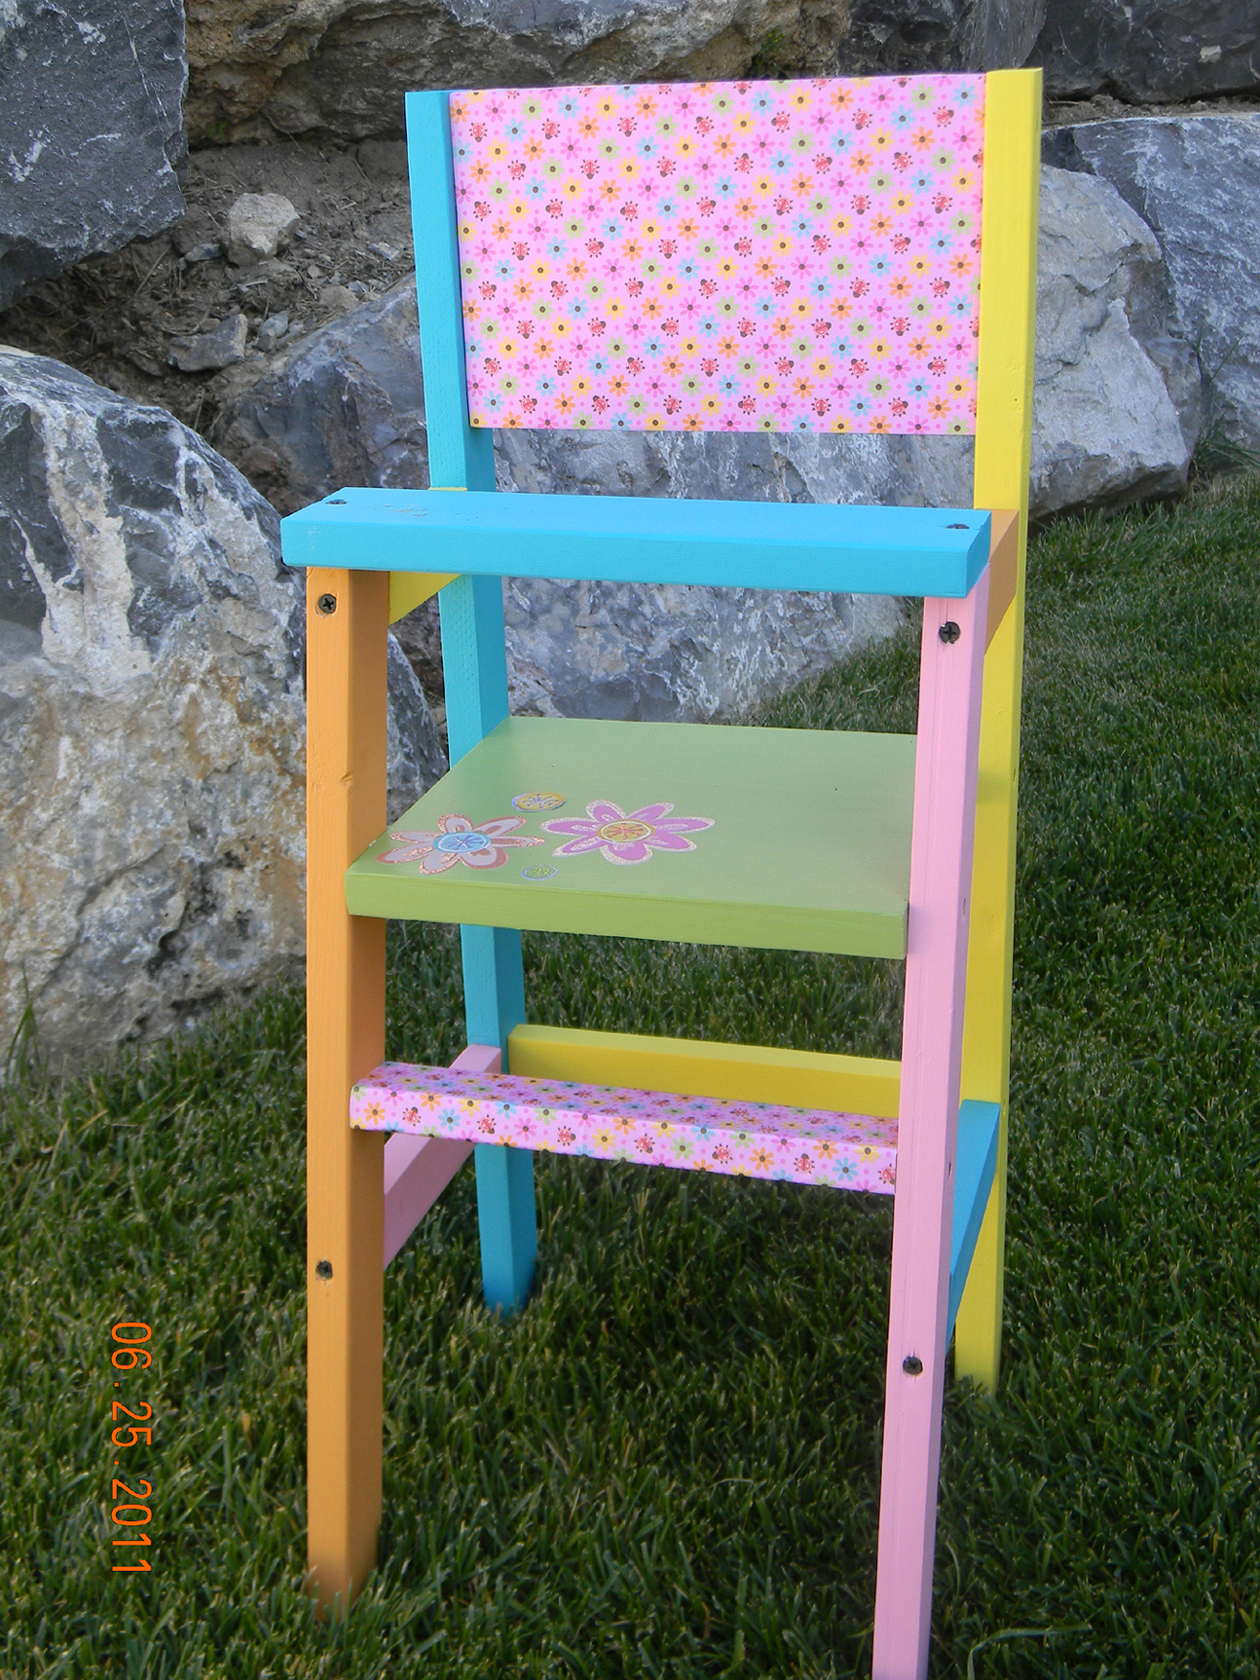
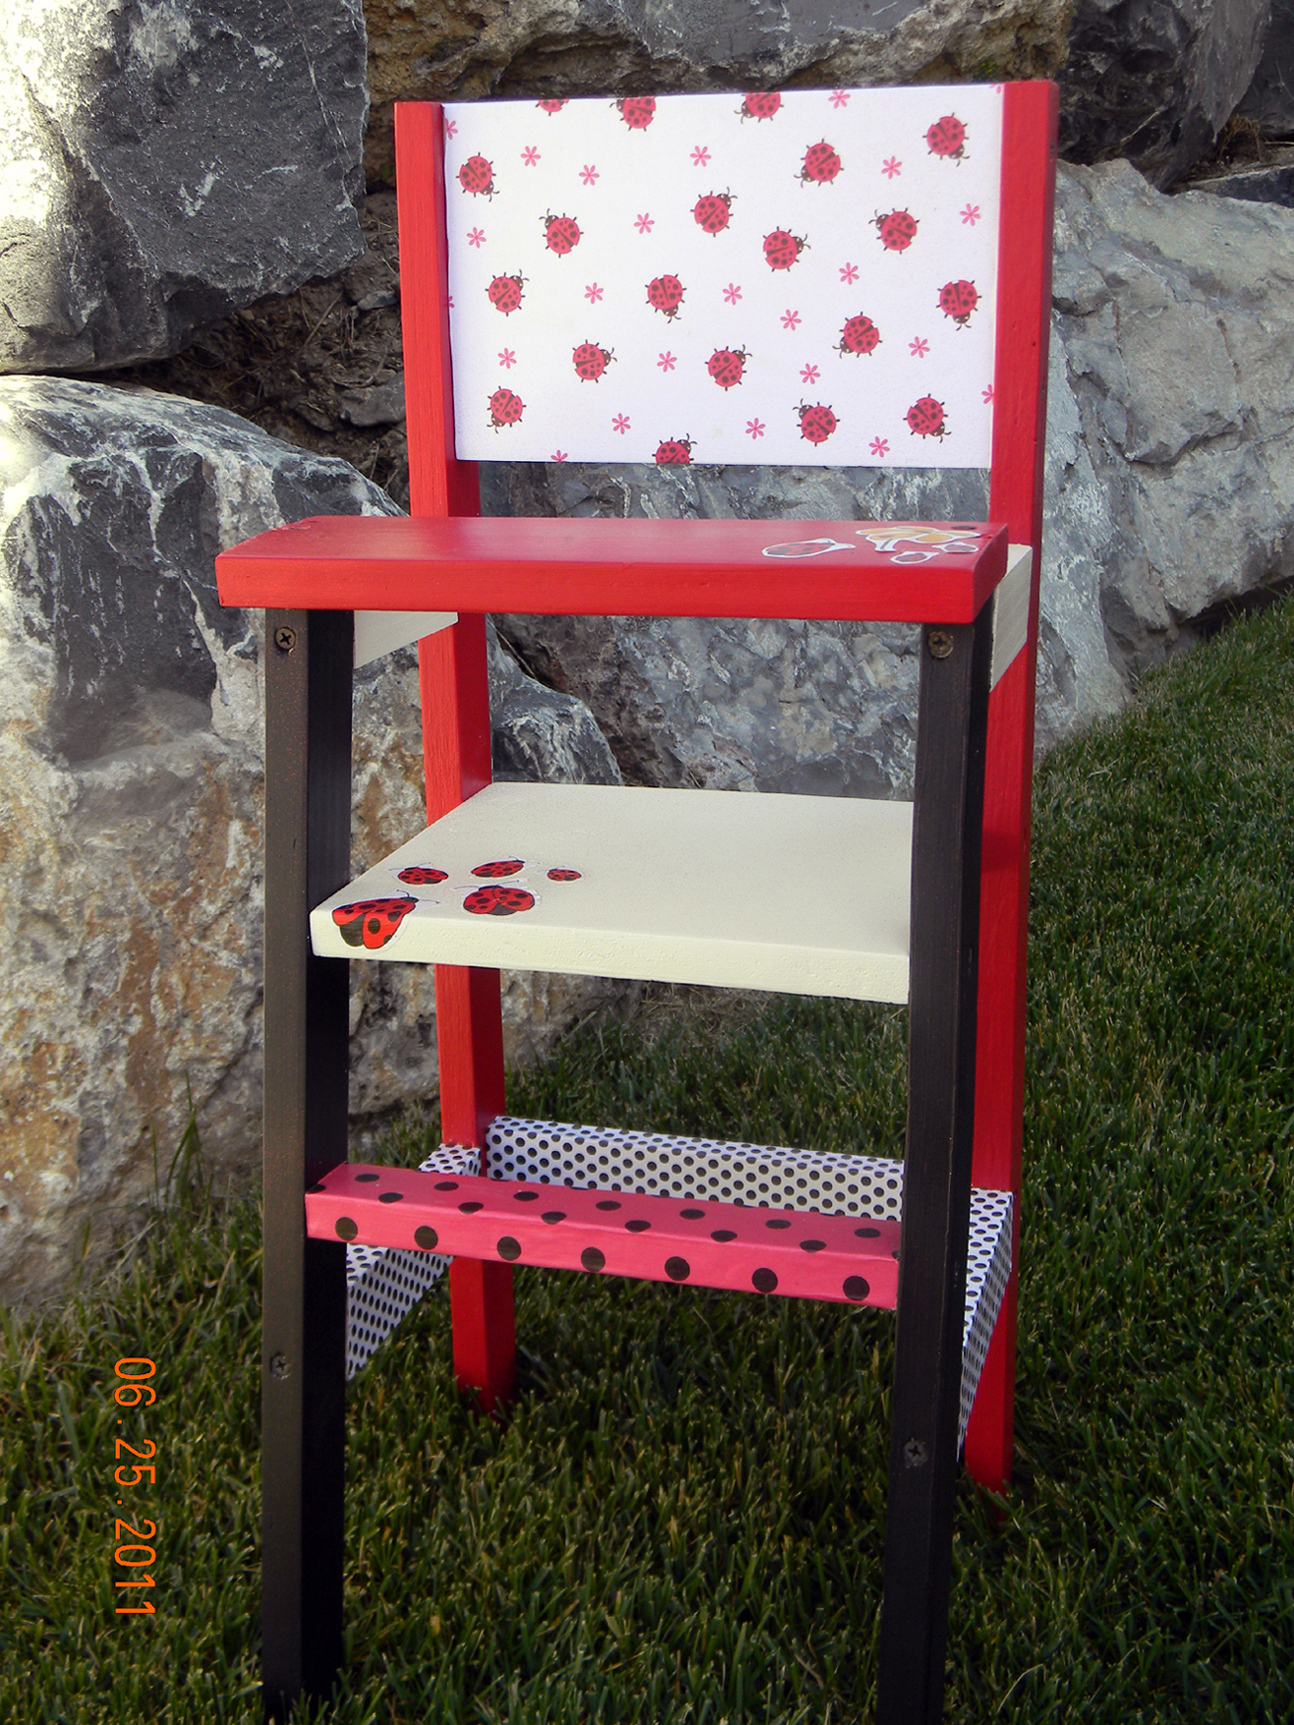
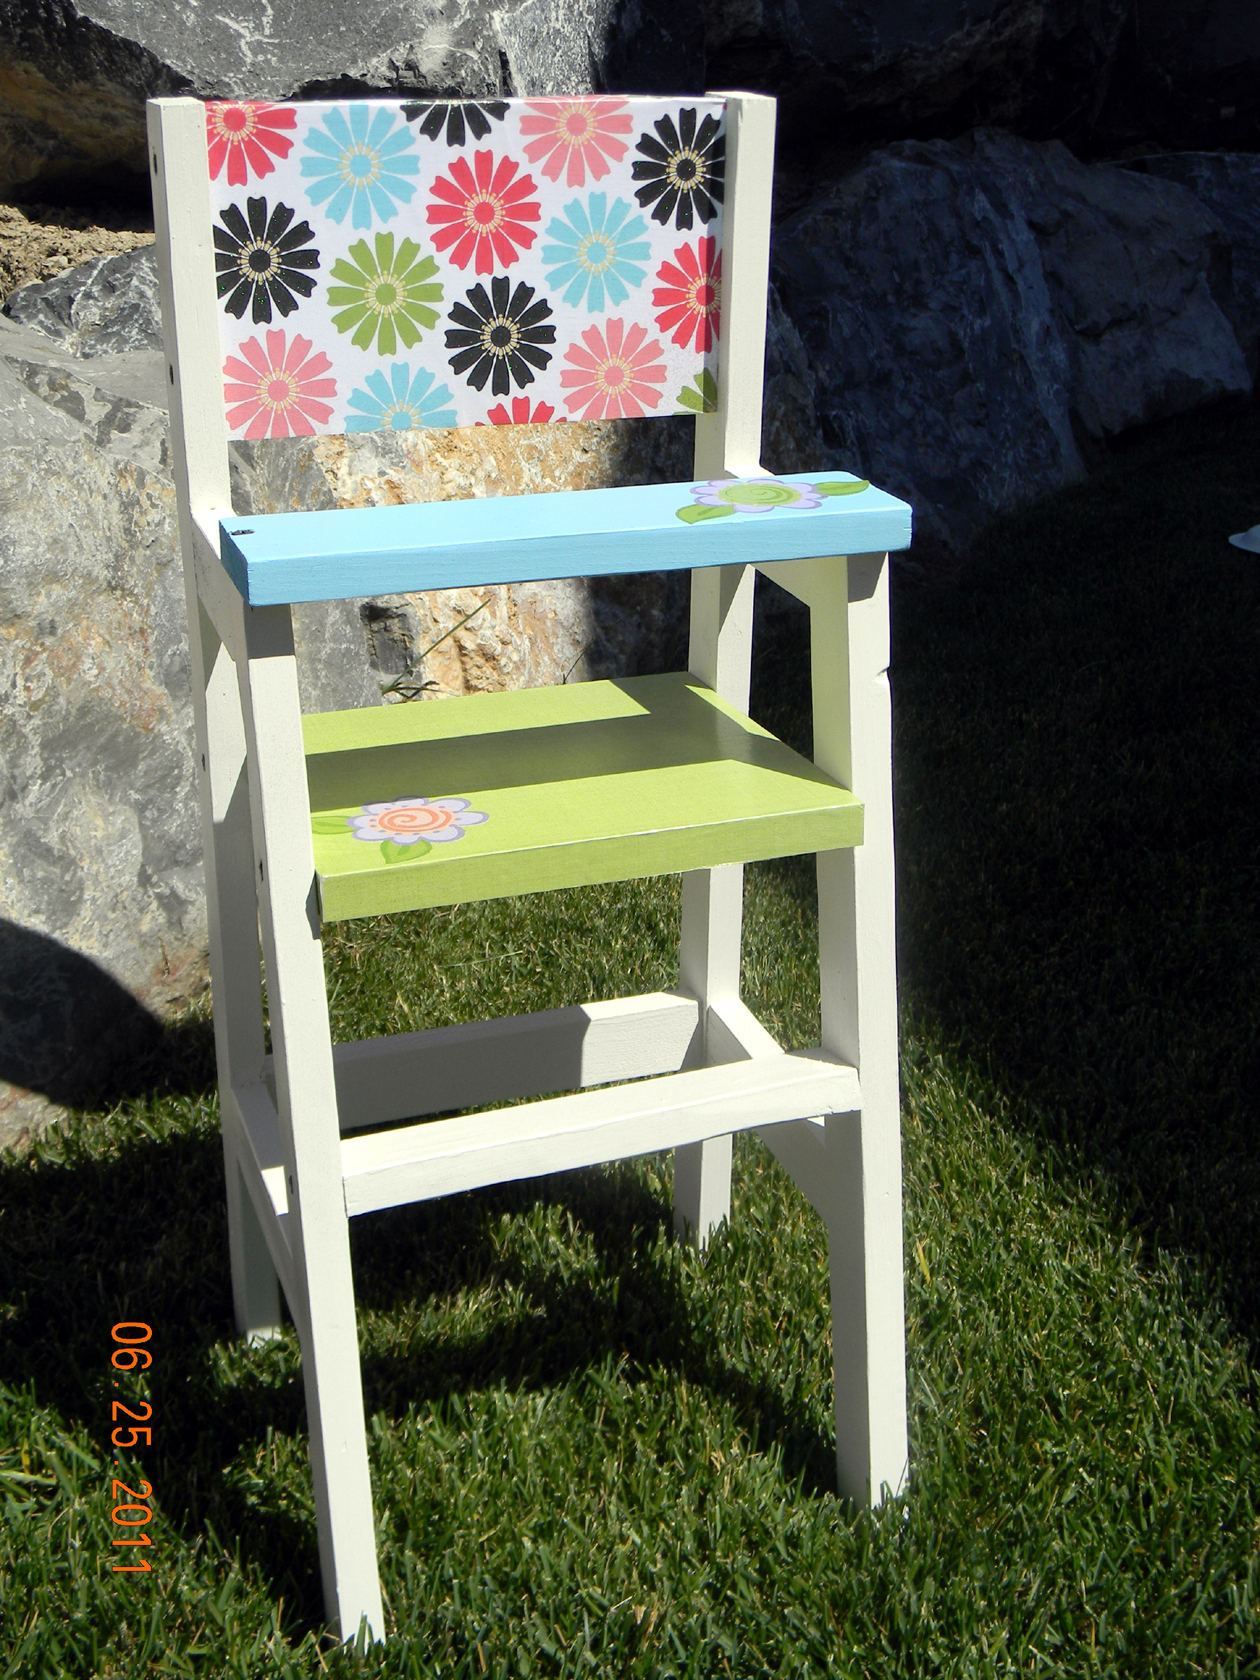
I built 11 doll highchairs for my daughters 5th "Adopt A Baby" birthday party! These chairs were fast and easy to build and I had a BLAST painting them! The girls loved, loved, loved them! A little extreme for a 5 year old birthday party? Maybe. But definitely worth it!

Fri, 07/15/2011 - 05:13
Wow! That's a LOT of work!!! They turned out absolutely adorable, though.
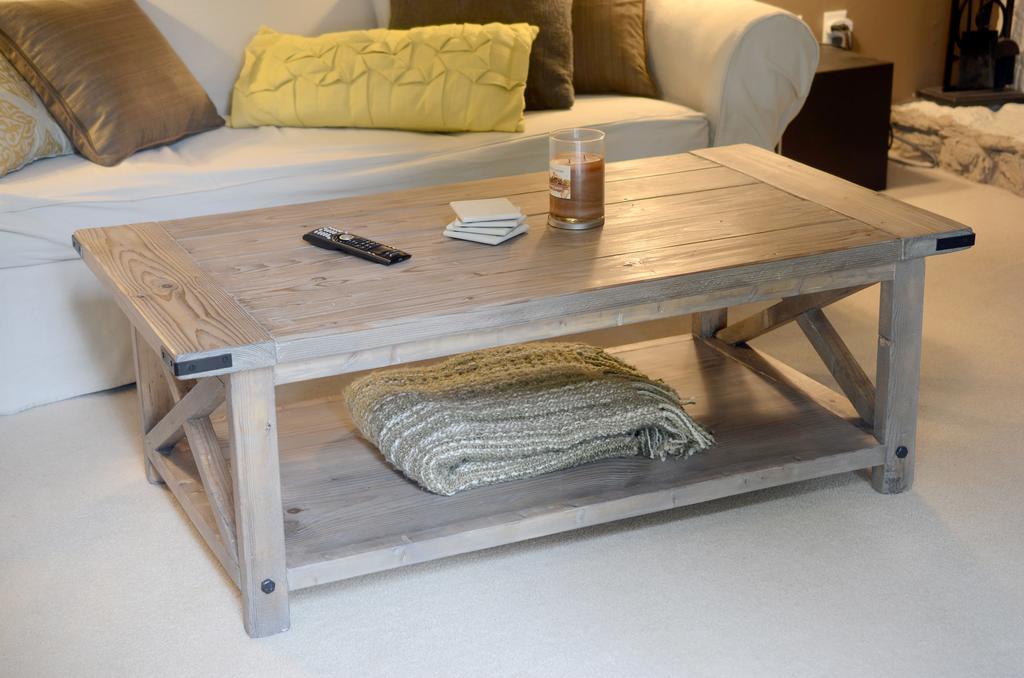
In need of a new coffee table and having a budget lower than what would allow for similar looking store bought tables, I decided to build a variation of the Rustic X coffee table. I used the modified plans by Pete Sveen which included the bread boards on the table top. We used a solution of white vinegar and steel wool to age the wood and used a clear furniture wax to finish it.
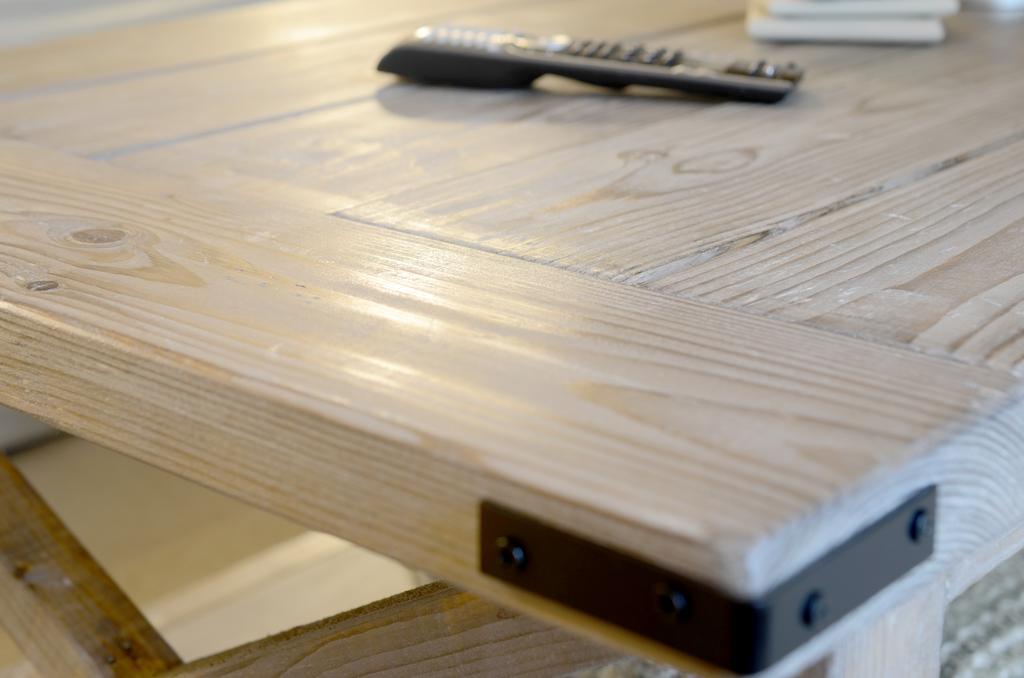

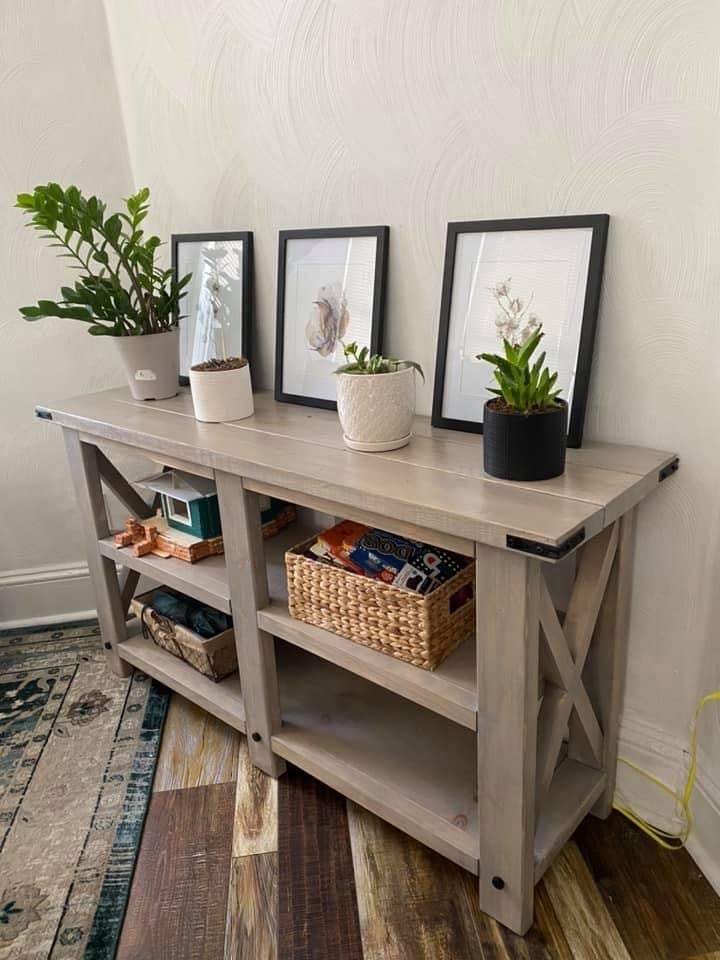
This project was a great learning experience and turned out fantastic. The mitered/beveled cuts were a bit tricky for me, It took me a while to understand how to use my miter saw to make the cuts correctly. Other than that, the building plans were clear and easy to follow. Cara, an author at Inspired Workshop, posted the plans at the following link: https://theinspiredworkshop.com/diy-slim-truss-console-table/
-Drew Cameron

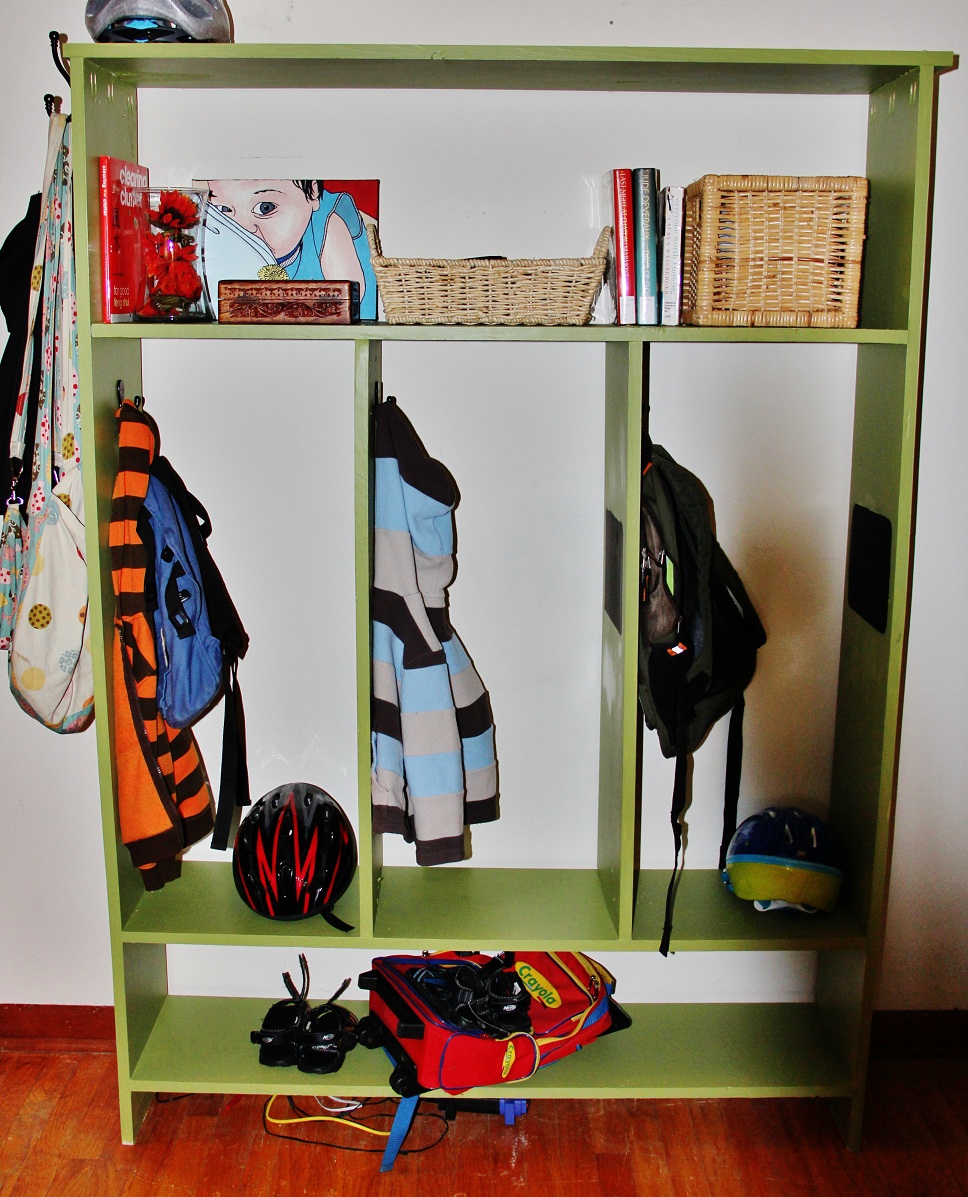
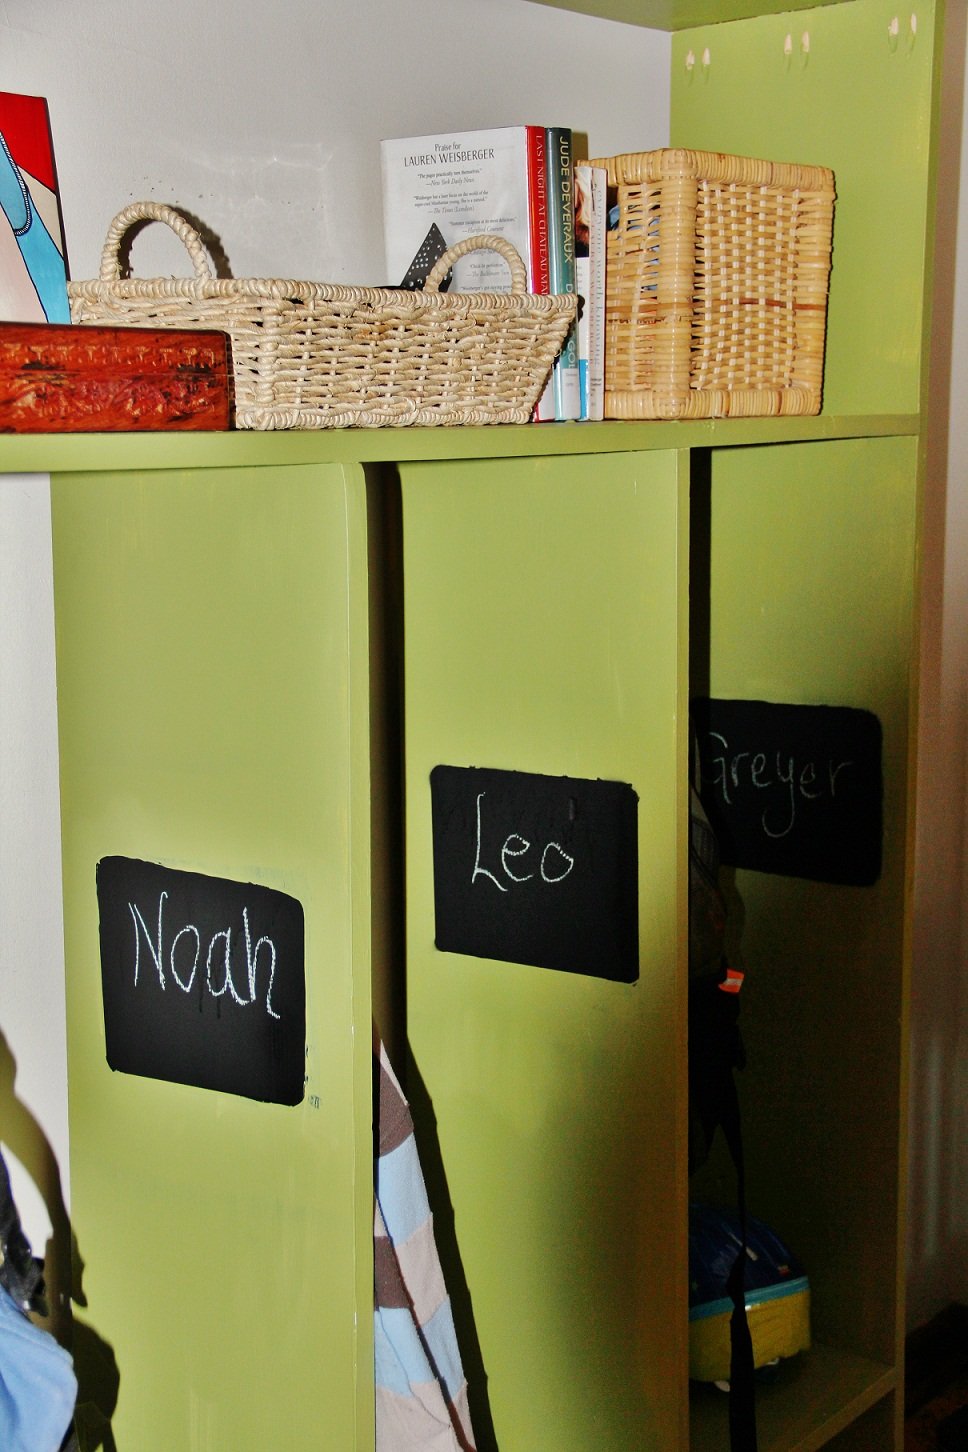
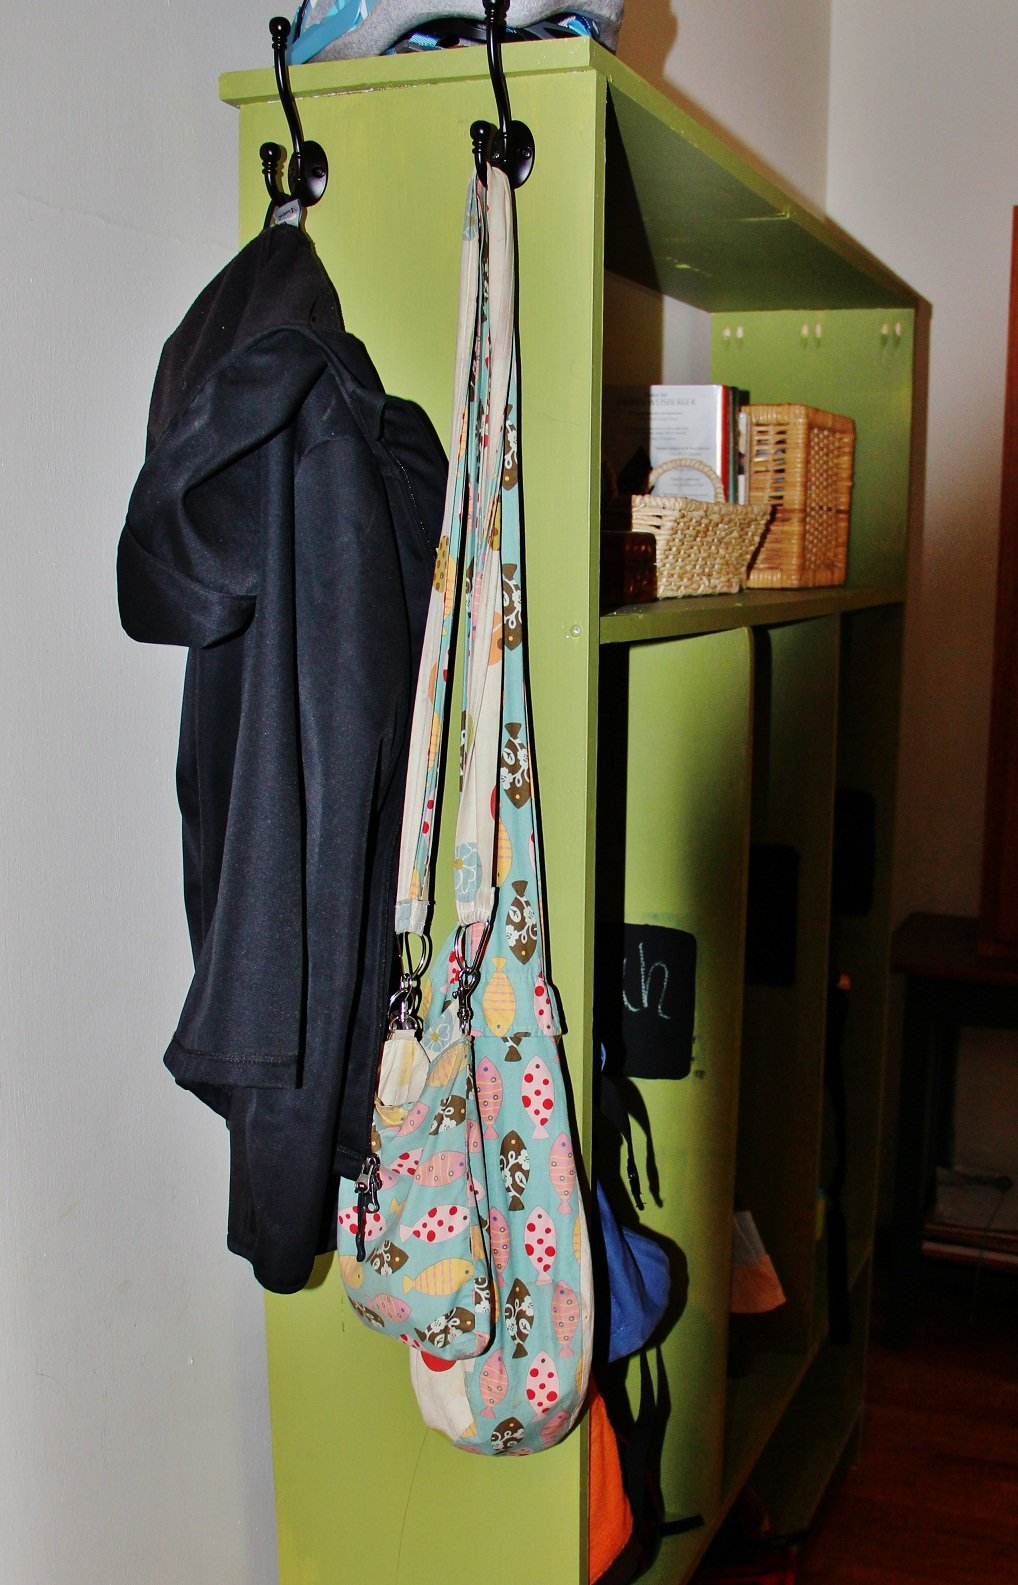
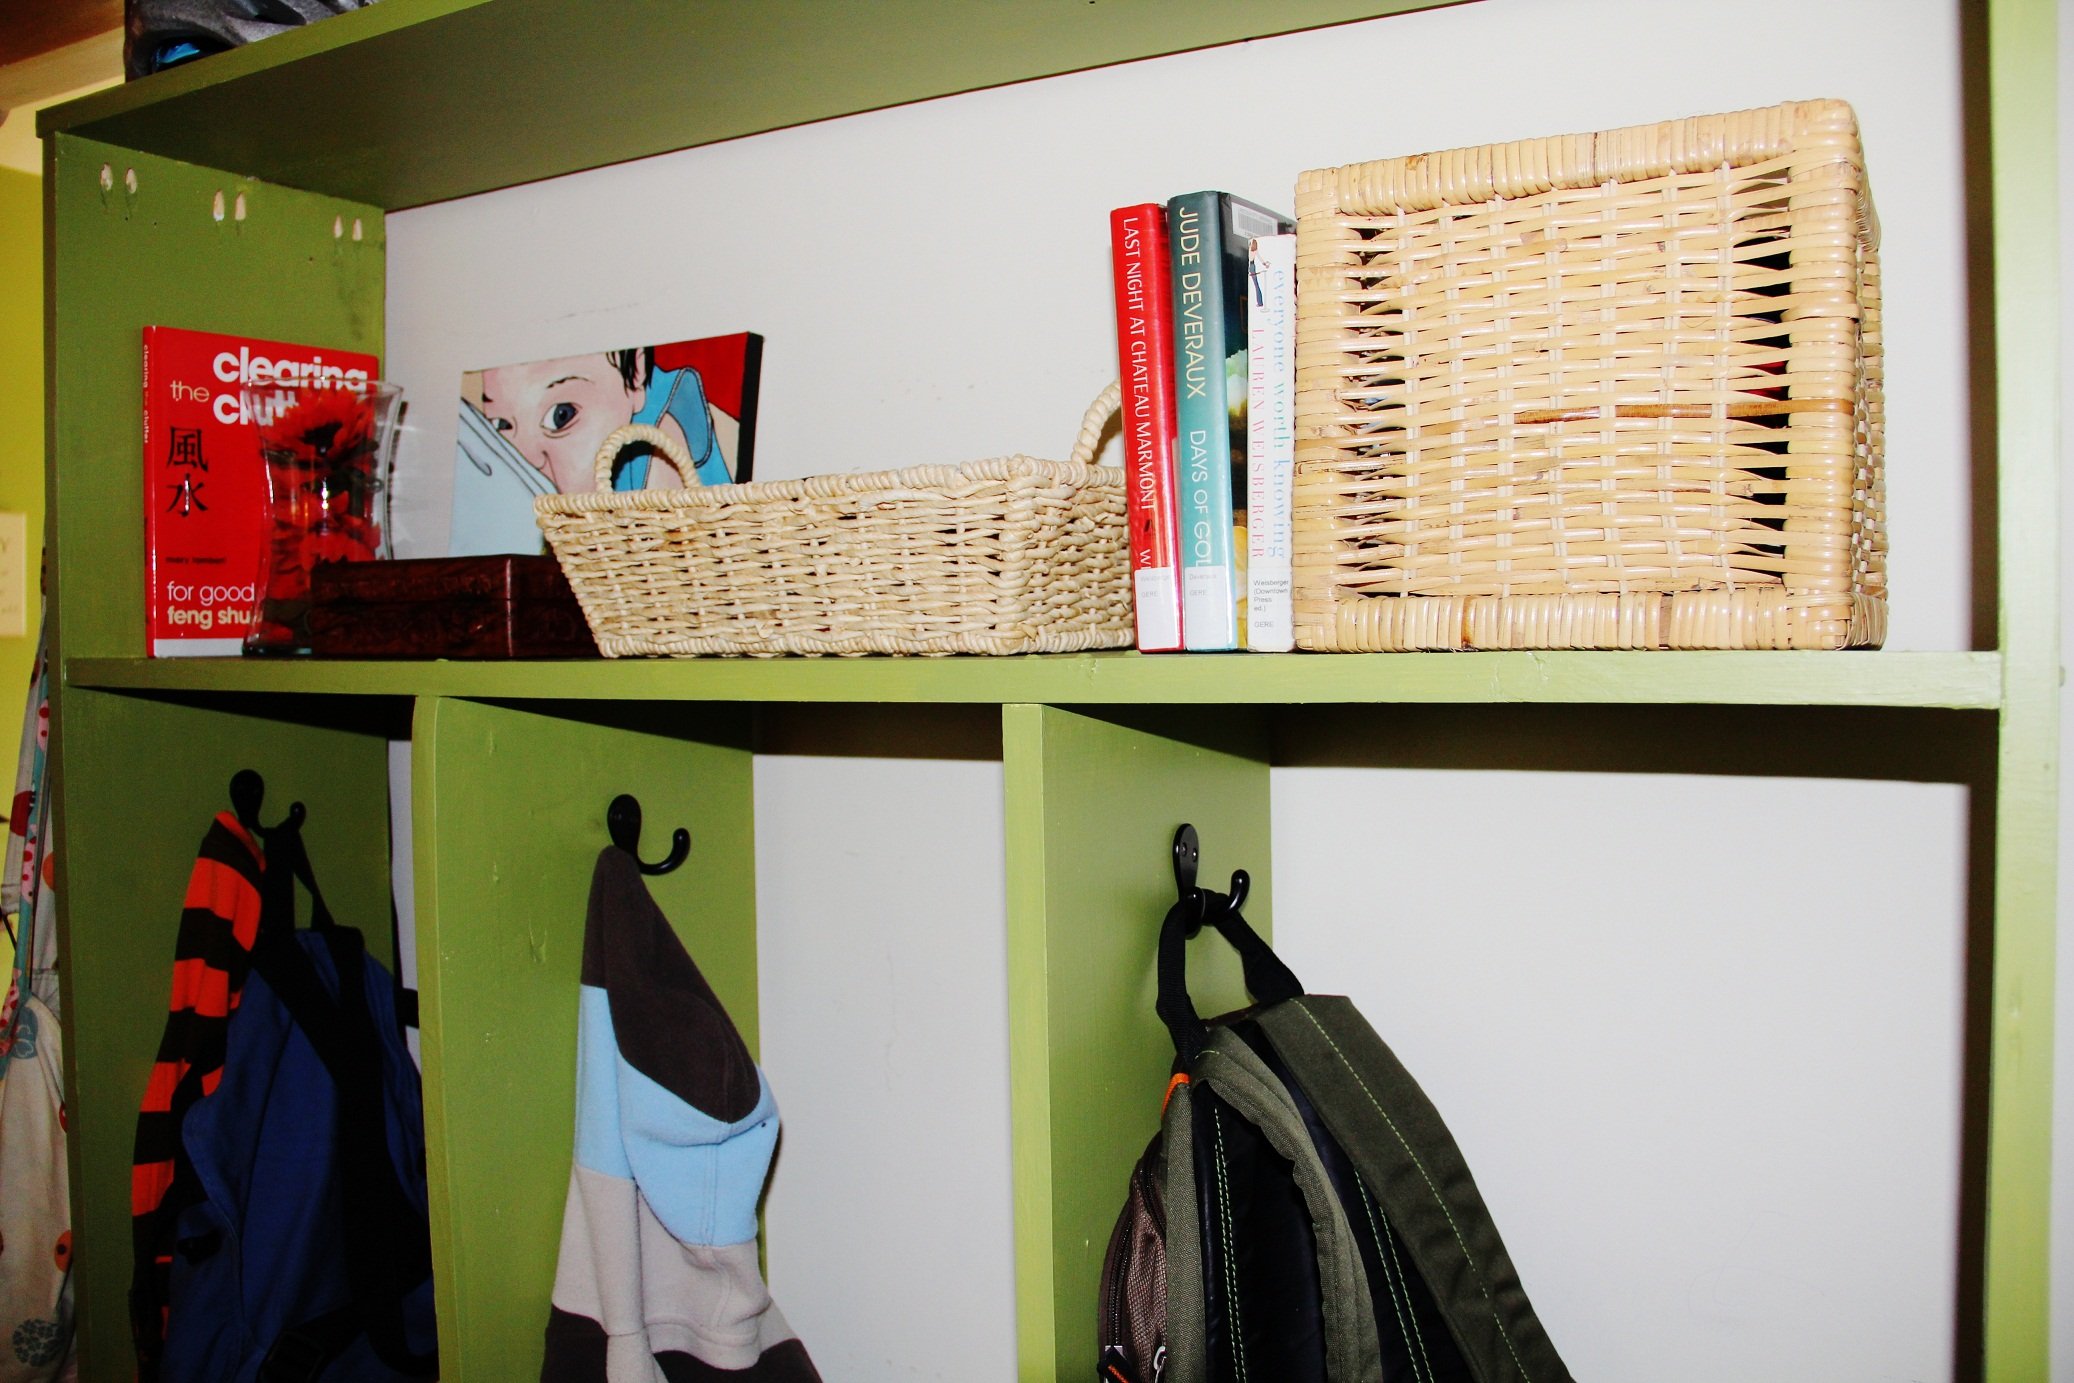
I really needed an entry way system that was easy to corral all of my 3 boys shoes/coats/crap, etc. . . and I LOVED this plan! I messed up on the frame, so just left it off, and decided that I didn't need the back either. I painted little chalkboards on the side of each boys cubby.
I'm fairly certain that this isn't made perfectly, but it's perfect for us! This was my 2nd project and I'm really super psyched about it!
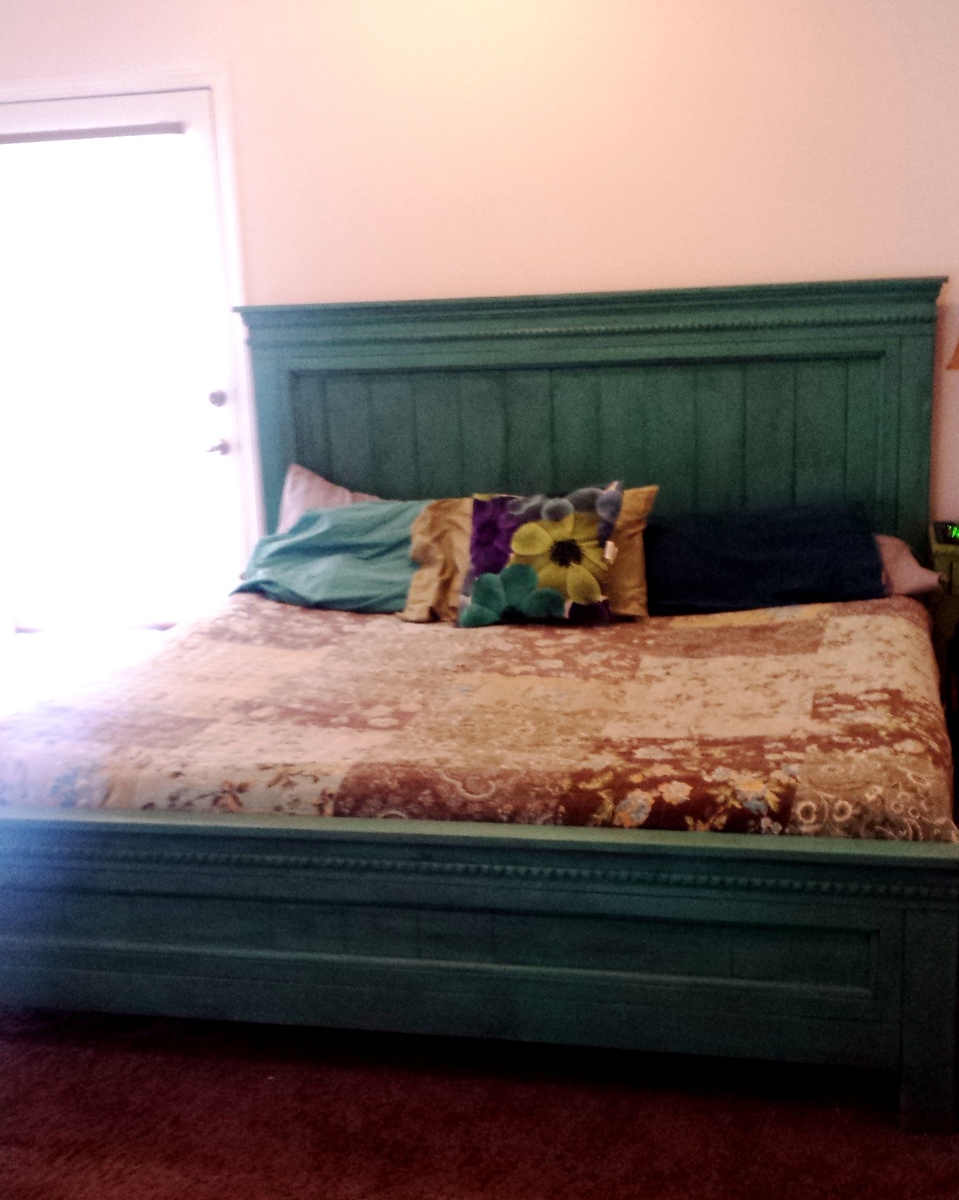
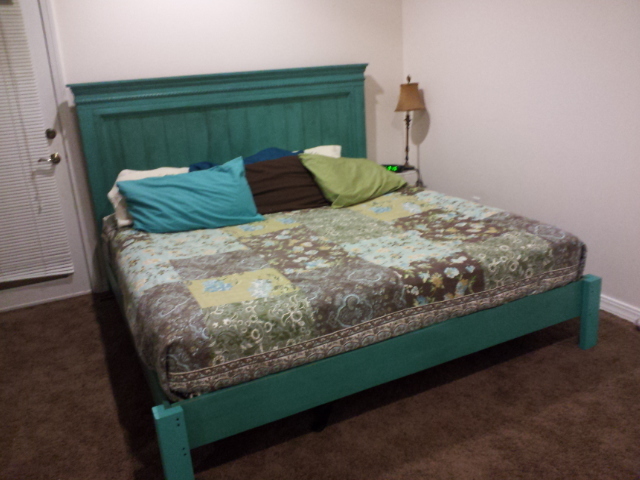
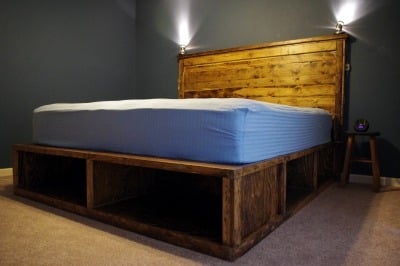
This bed was made as a Christmas present for my parents. At the time, there were no plans for a king-sized bed so I modified the queen plans to fit their mattress. I added a 5th leg to support the center of the bed and also added some plywood sheets underneath to better support the mattress.

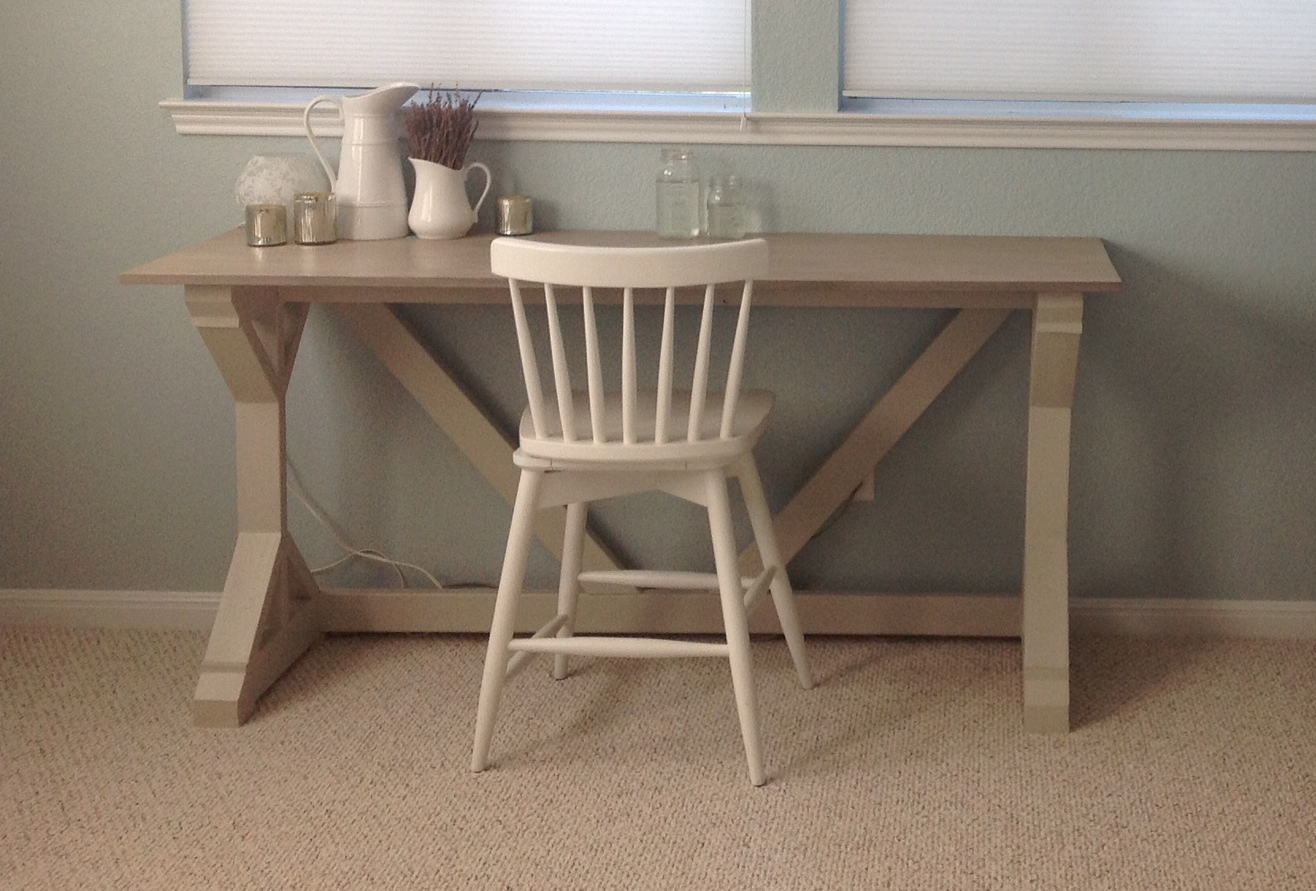
This was pretty easy for my first build! Don't look too closely though.... I raised thedesk to counter height to adjust for working while standing and add a bar stool. The hardest part was adjusting the angle of the diagonal braces. For the desktop I found a 2' X 6' piece of aspen at the blue big box store. Sanded well, grey "whitewashed" it and sealed with paste wax.

In reply to This is Gorgeous! by Ana White Admin
Wed, 10/14/2015 - 13:00
Thanks Ana! I'm working on a dining table and ironing out the kinks....
Made 2 couches and 2 chairs out of red wood using your plans
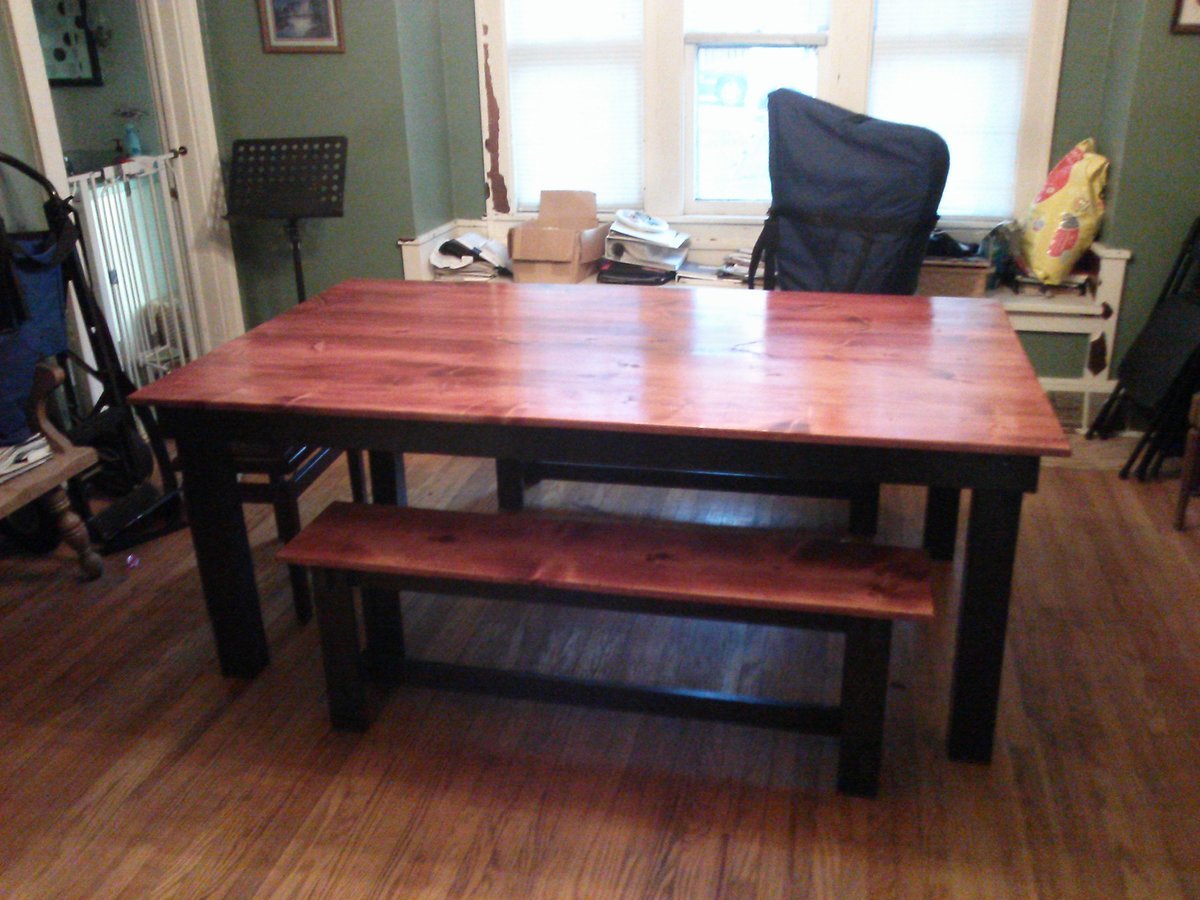
This was totally my first real build. Like most others I modified the plans to fit in my mother-in-law's dining room. I used 4x4s for the legs and built two benches to go with it.
Built in about 2 days. Hardest part was definitely the hardware. Looks great!

Sun, 10/04/2015 - 07:34
this looks really great! I really want to bulid this but I don't have anywhere to put it :(
Fri, 12/11/2015 - 19:49
Looks awesome...we've got ours built...now to make the doors and the hardware? Any tips would be appreciated!!!! Thanks!
Thu, 02/11/2016 - 08:32
The hardware was a pain in the butt. The metal bar was easy to cut actually. I just put one of my old blades back on my mitre saw and it worked great. Extracting the wheels from their casing was the most challenging. I ended up putting the entire thing in a vise and drilling through it. It is totally worth it though. Everyone who comes over is obsessed with it. Also, I did not attach the boards on top. It's much easier to move if you take those boards and the doors off and carry it. Good luck guys!
Thu, 02/11/2016 - 08:29
I used the same dimensions as the plan. That TV is a 42". We have since upgraded to a 60" and it now looks more proportionally correct. The hardware was a pain in the butt. The metal bar was easy to cut actually. I just put one of my old blades back on my mitre saw and it worked great. Extracting the wheels from their casing was the most challenging. I ended up putting the entire thing in a vise and drilling through it. It is totally worth it though. Everyone who comes over is obsessed with it. Also, I did not attach the boards on top. It's much easier to move if you take those boards and the doors off and carry it. Good luck everyone!
Sat, 03/26/2016 - 08:41
Hey, love how this turned out! Was wondering where you purchased the barn door hardware? Been stuck with trying to find some that won't break the bank!
Tue, 01/03/2017 - 00:47
By the pic of that hardware, they are interior decorative sliding door hardware. Home Depot, Lowe's and other big box stores carry them are can be bought online
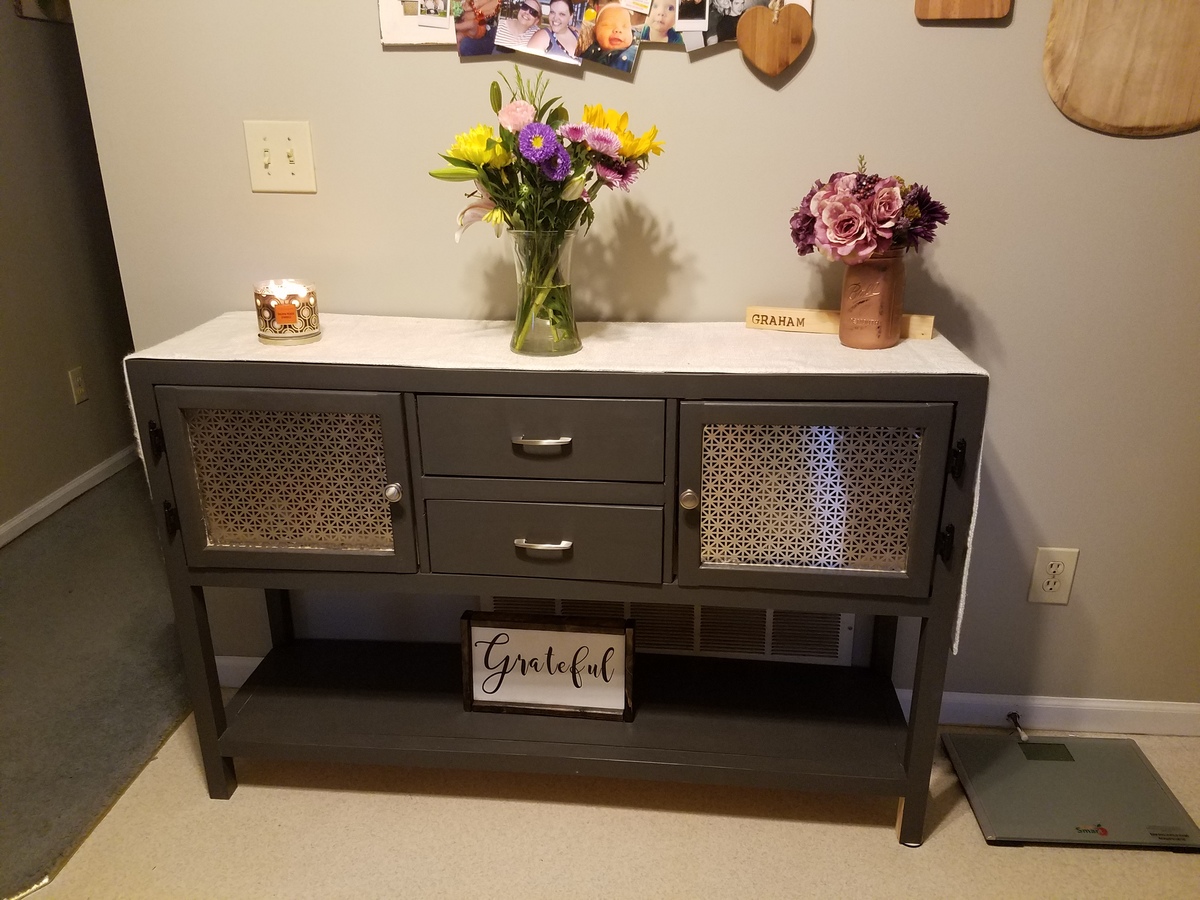
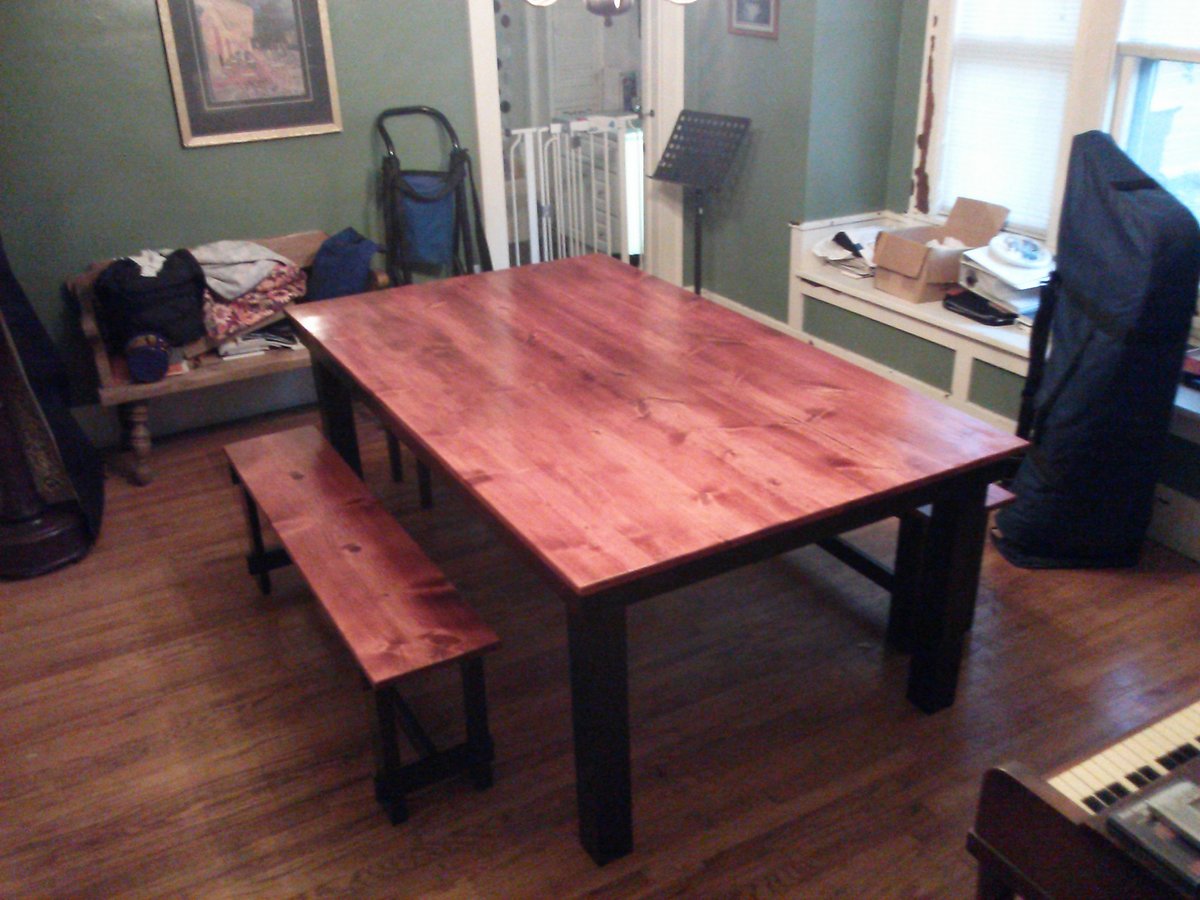
Built this for a friend of mine, but didn’t need it quite as long…I absolutely love this table!!!
Tue, 06/28/2022 - 11:36
This looks gorgeous, thank you for sharing, I'm sure your friend is thrilled!
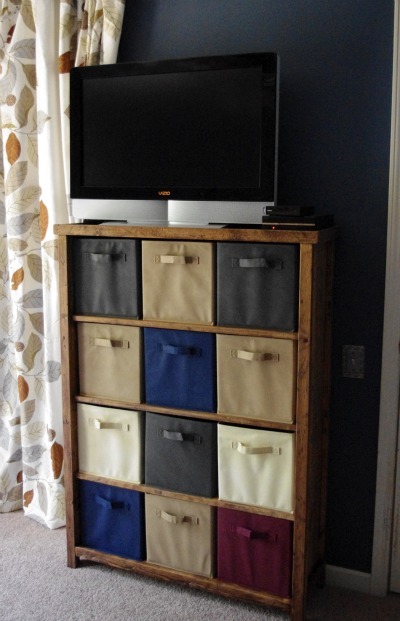
This is inspired by pieces I've seen here, though I sketched it out on paper myself to make sure it would suit the limited space in our room. I built the simple piece to match our bed (made from Ana and her reader's plans, see my photos below).
Originally, I planned to include cabinet doors, but with the limited space we have, this is better for us.
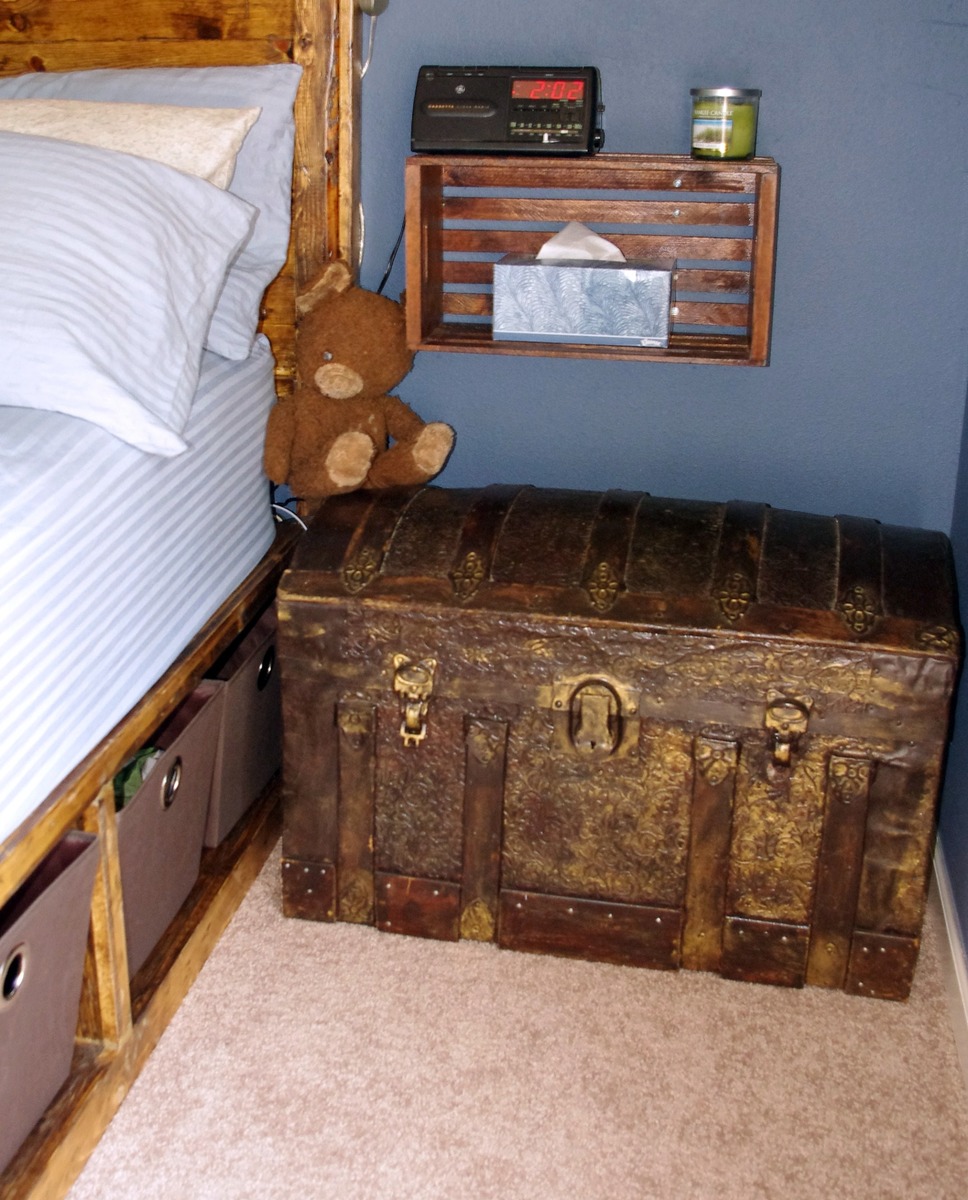
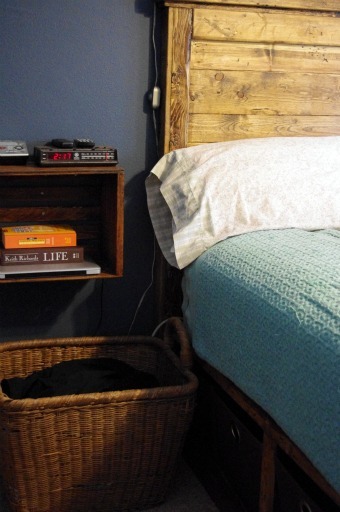
For nightstands, I stained plain wooden crates I had in the basement. Still working on how to hide the cords.
The baskets under my bed are from Bed Bath Beyond. The baskets in the "dresser" are from Target.
Sorry about the poor photo quality.
Wed, 07/27/2011 - 14:23
I see that they all go together, and they look great! I'm especially loving that dresser, it is beautiful.

Sat, 12/10/2011 - 07:41
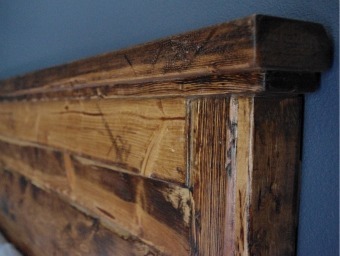
Sorry I haven't logged in in so long--the bed follows plans for the king Stratton, combined with the reclaimed wood headboard. The headboard is attached to the wall. We can slide the foot bench part out to hide presents behind, which is really handy (though heavy) to do.
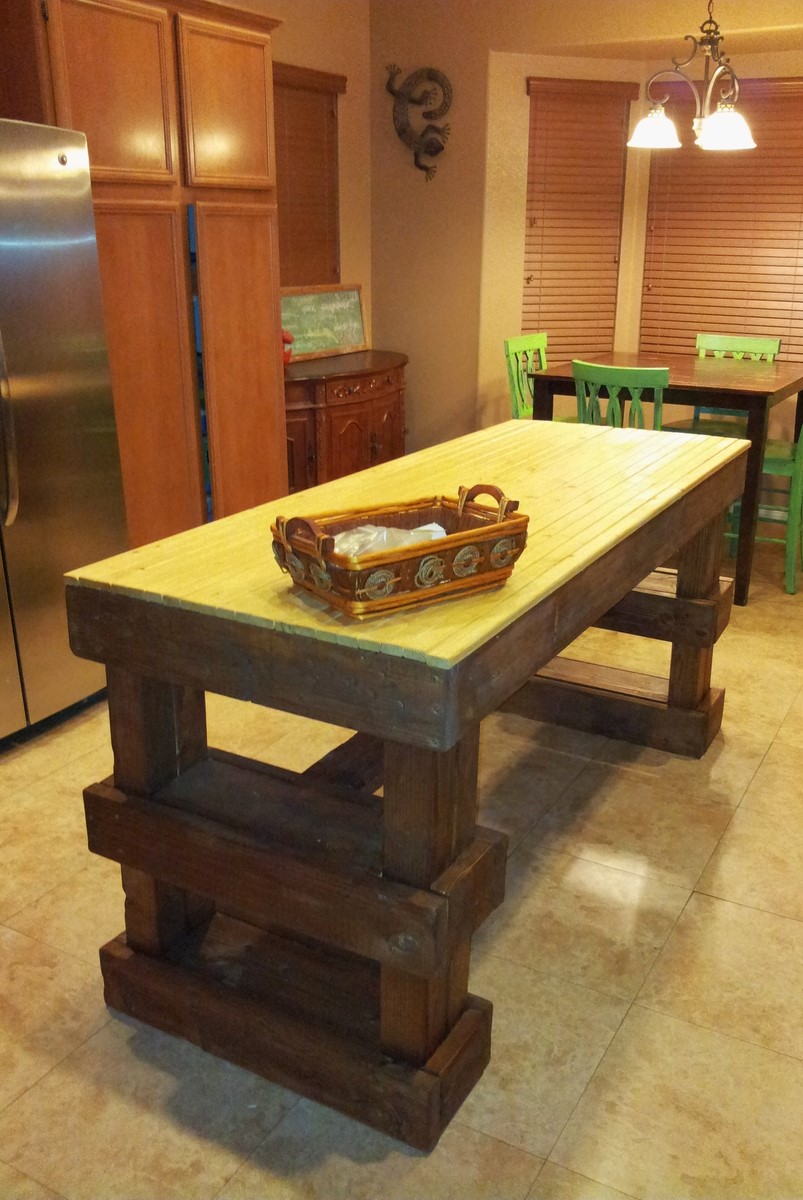
I wanted a Super Rustic and Super Chunky Island with out the Super High price tag. So I turned to pintrest for inspiration. I switched up a few things , but the end result was EXACTLY what I was looking for. Score!!!!

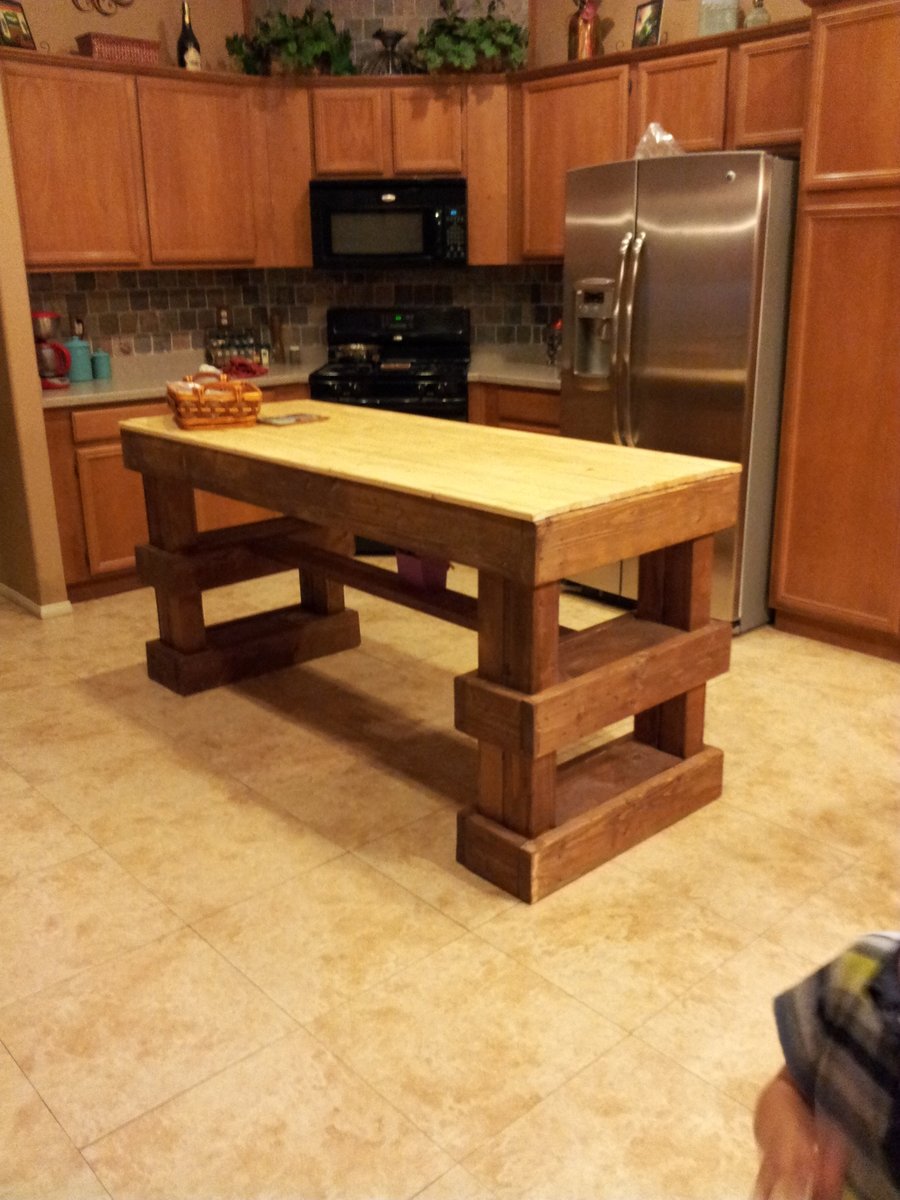
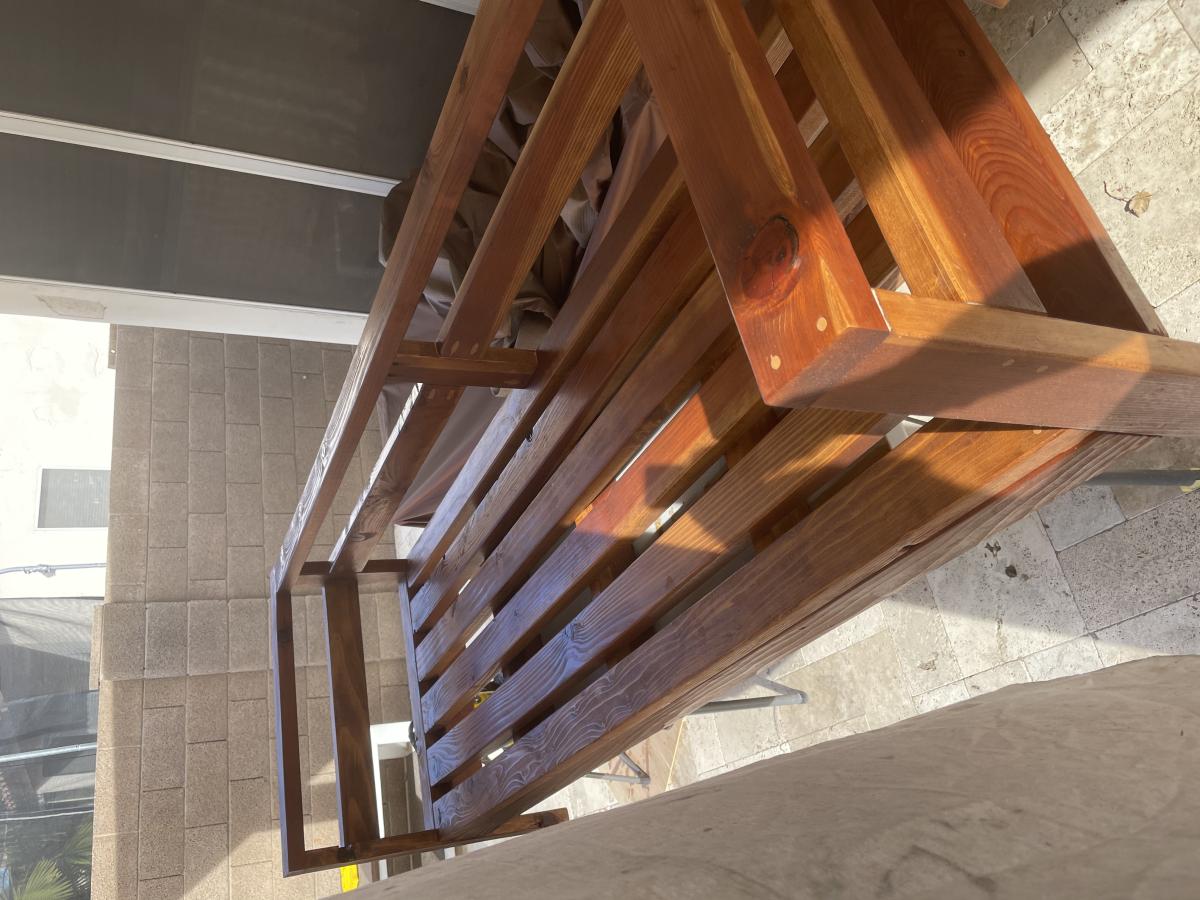
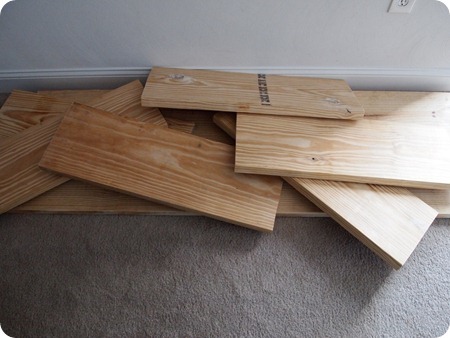
104.5” long, 17 1/2” wide. Heughan varies but on average is 72”. My garage slopes downward, so each front leg is a different length which made the unit level. I used joist hangers instead of pocket holes.

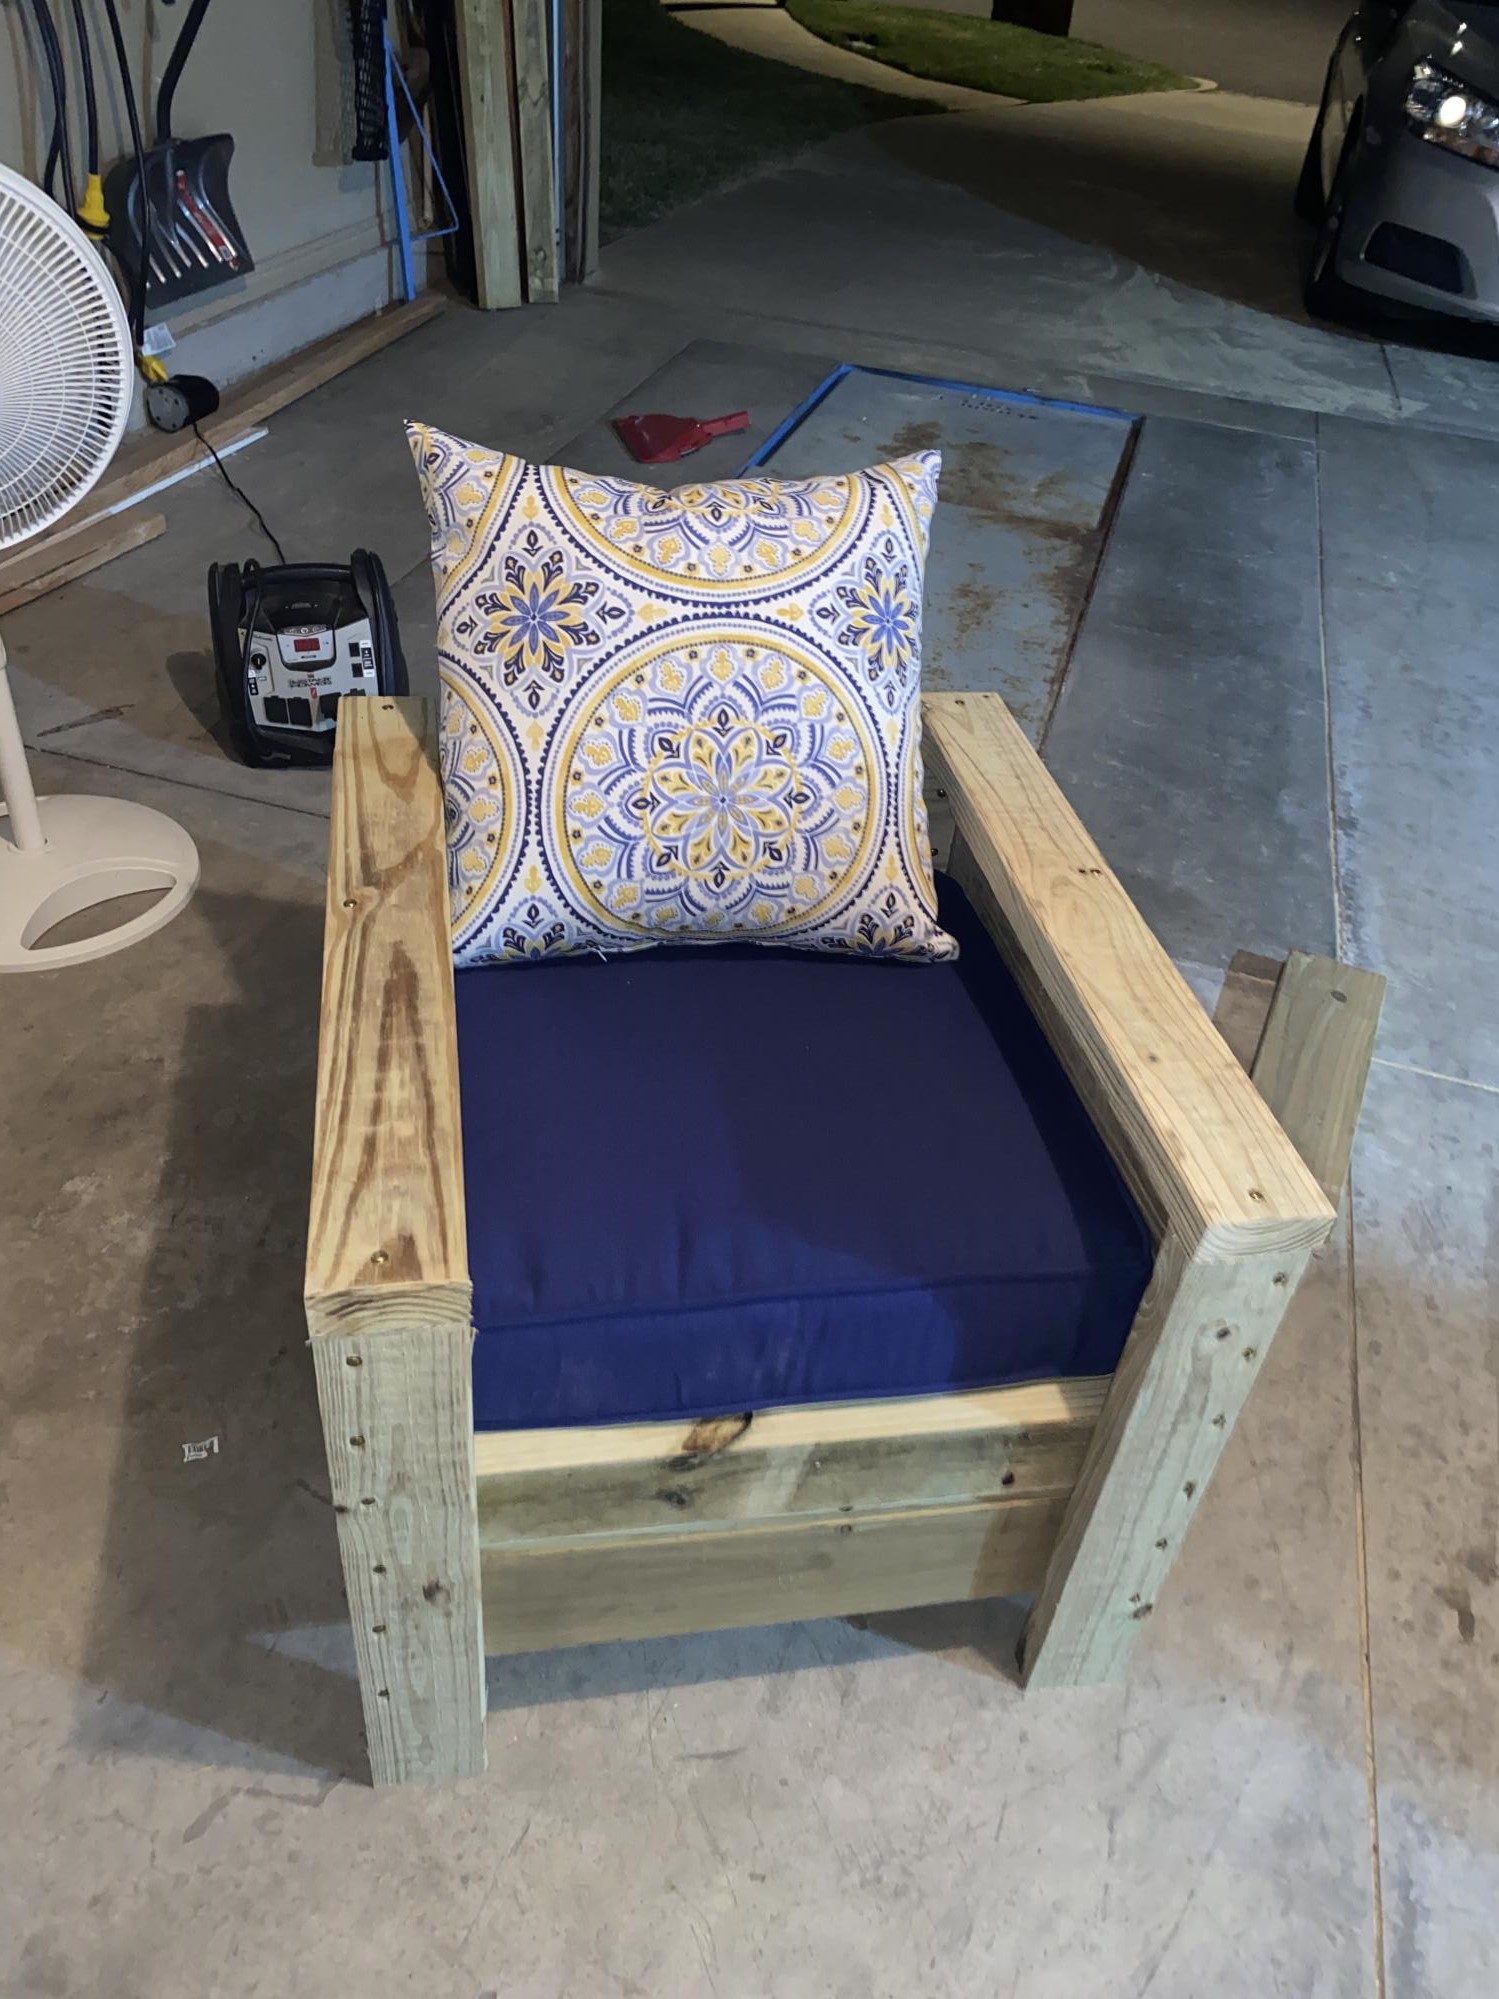
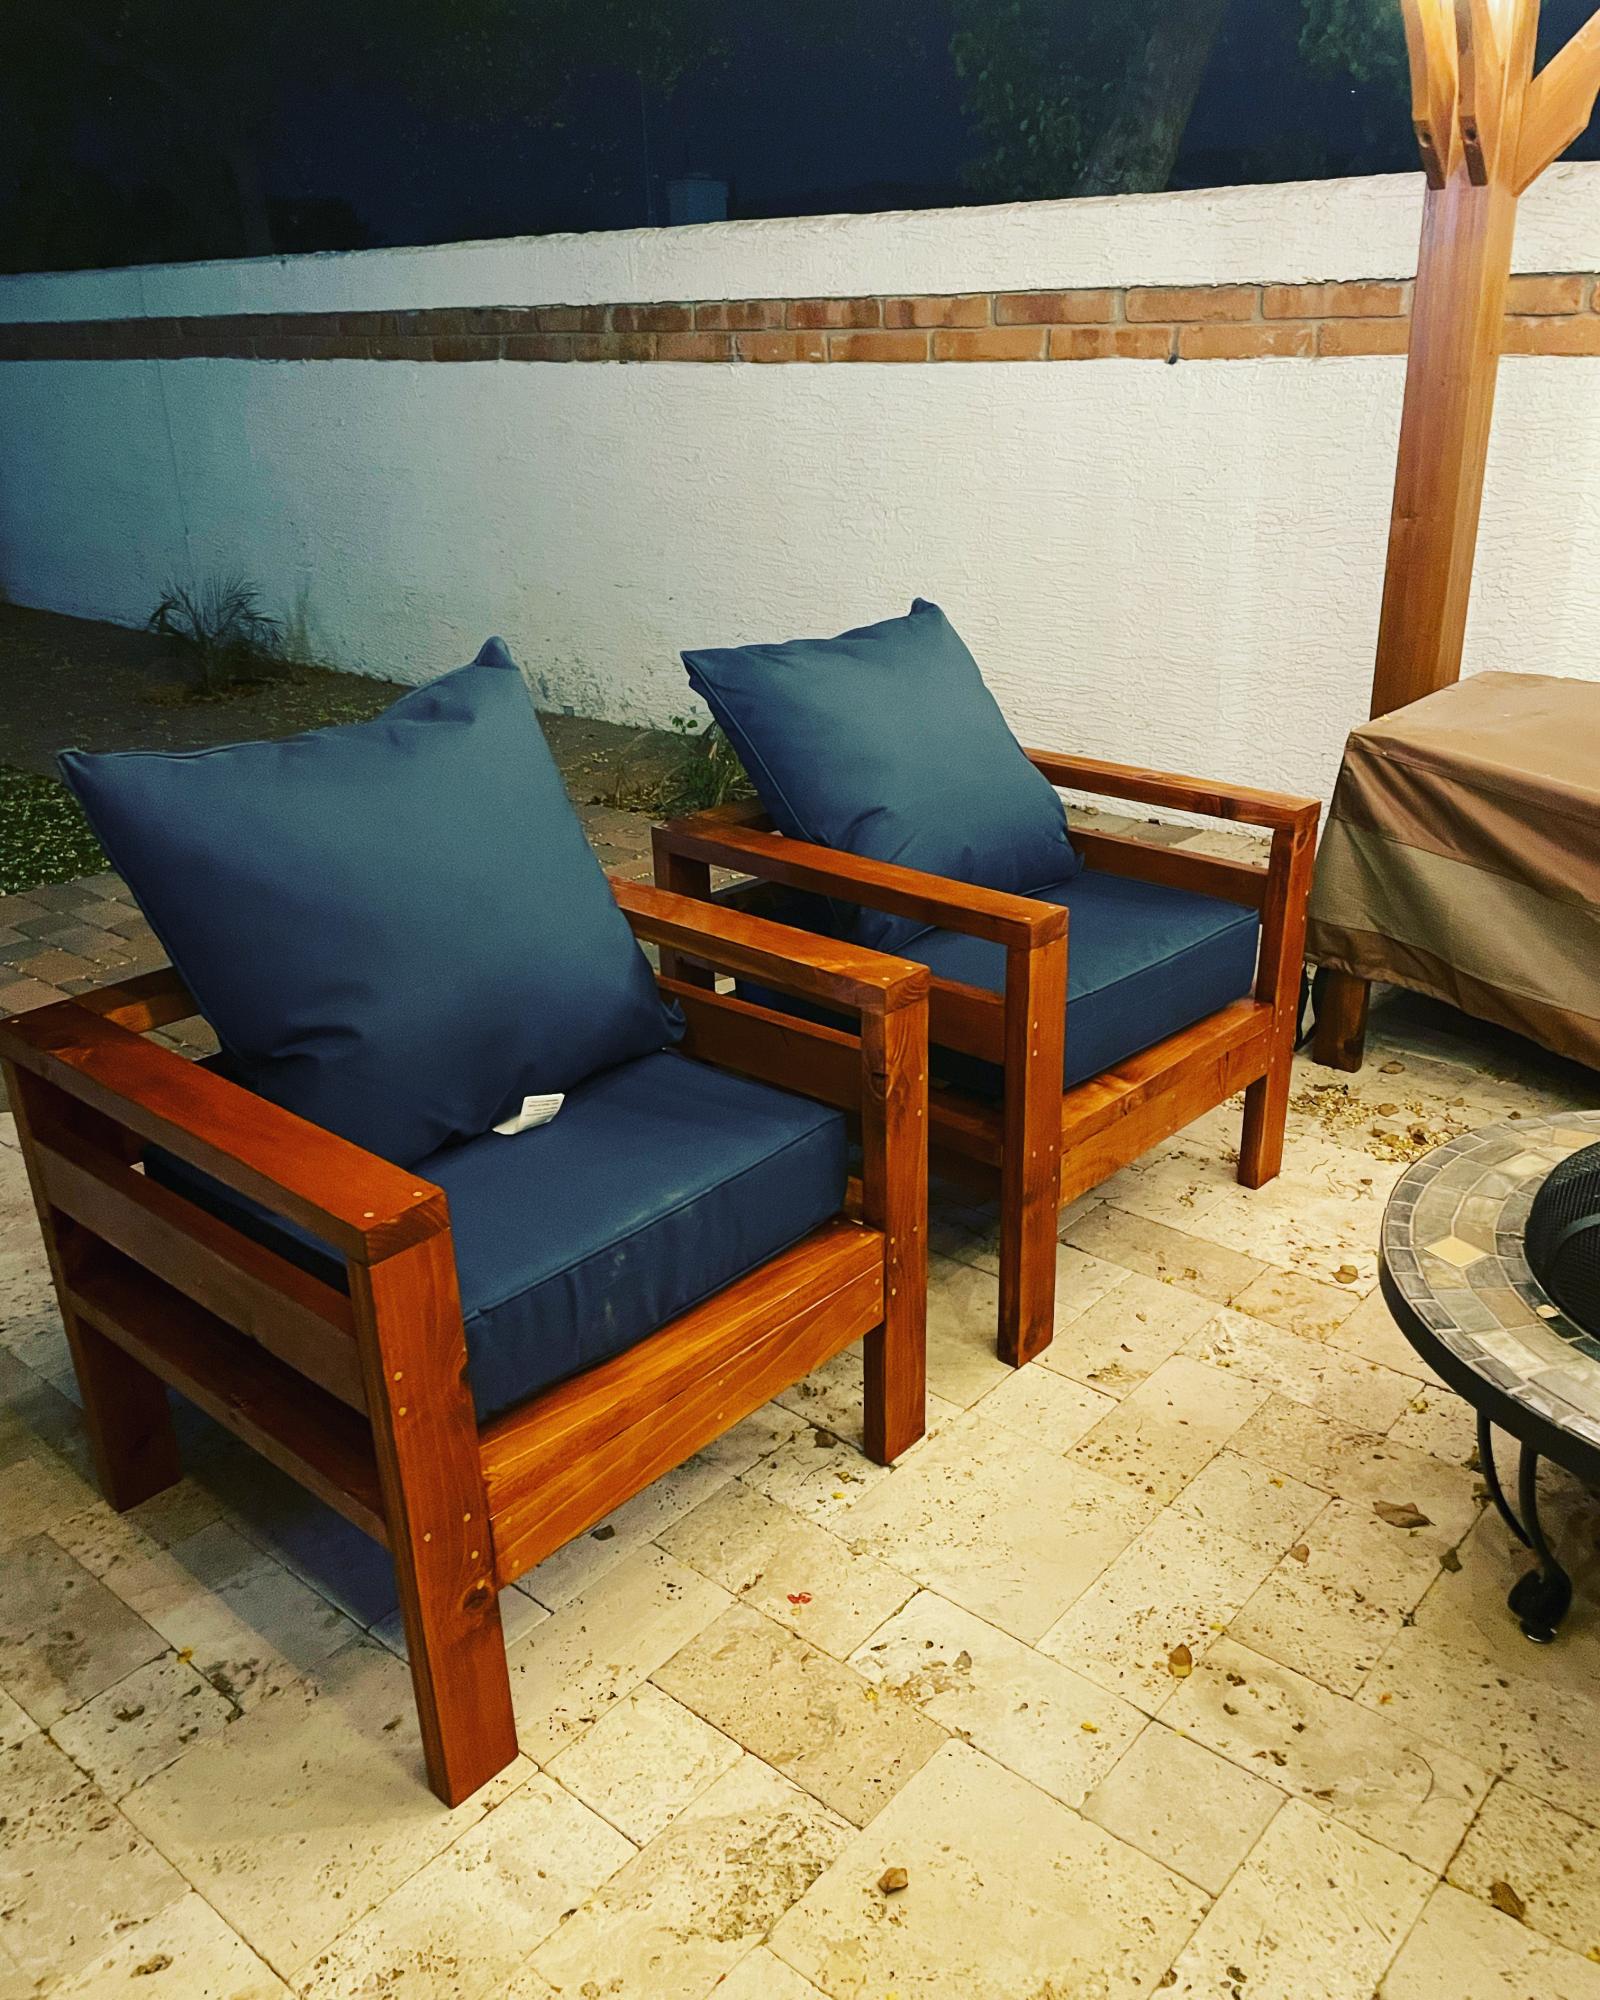
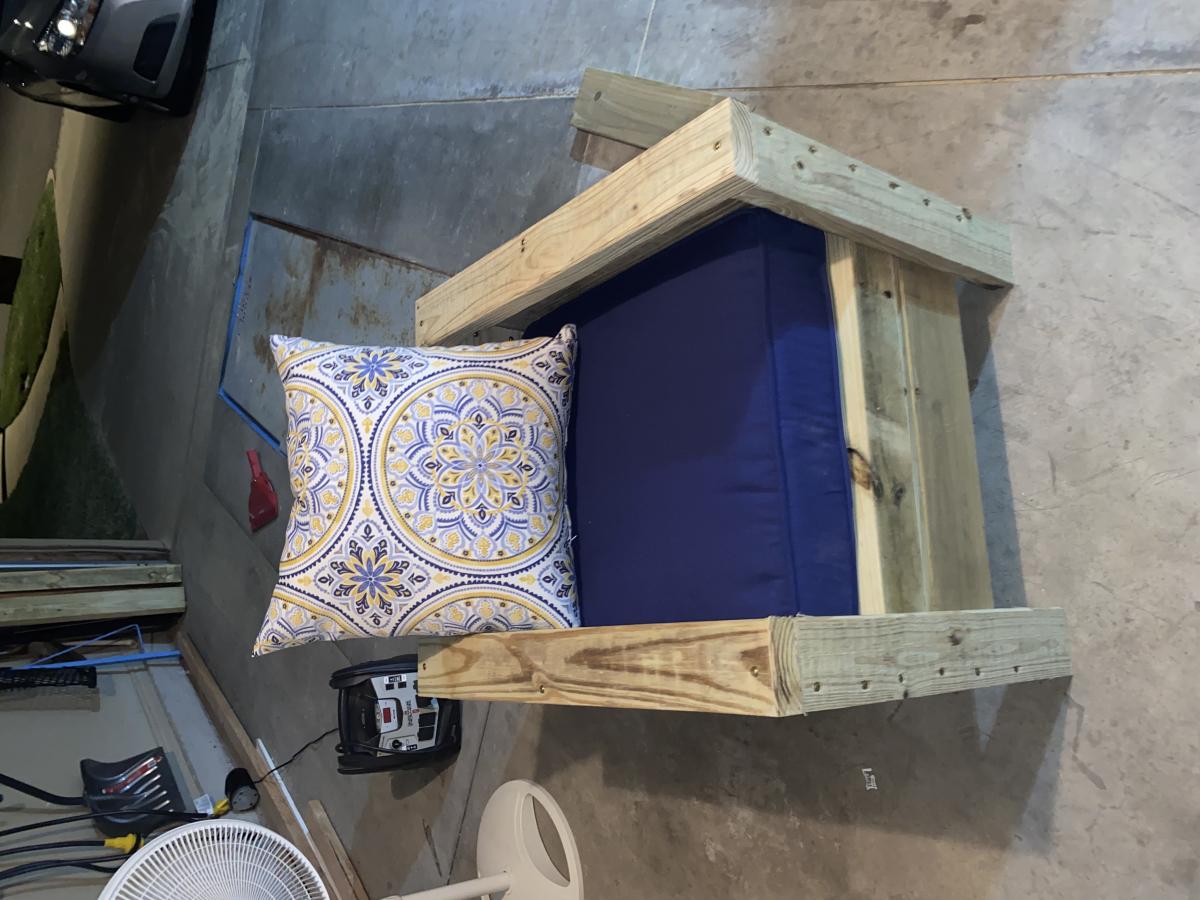
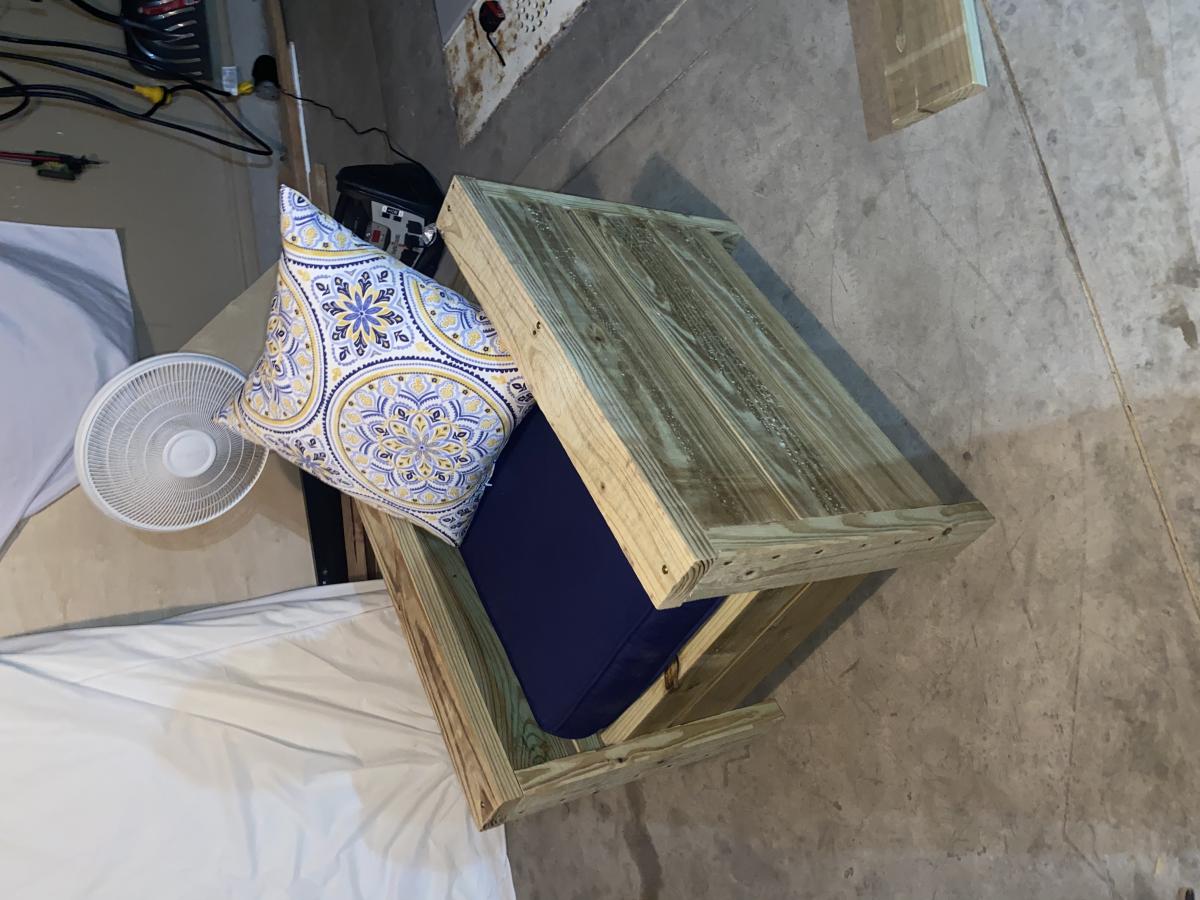
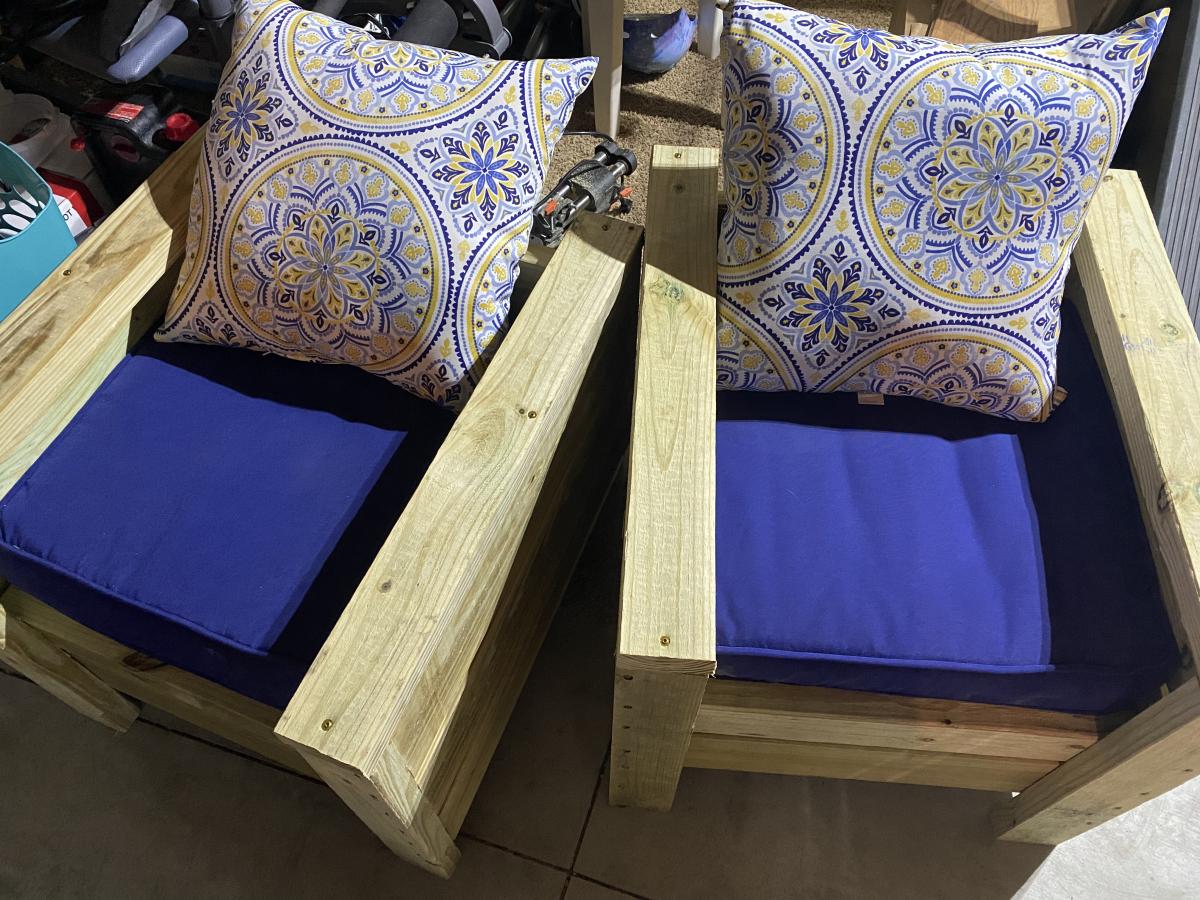
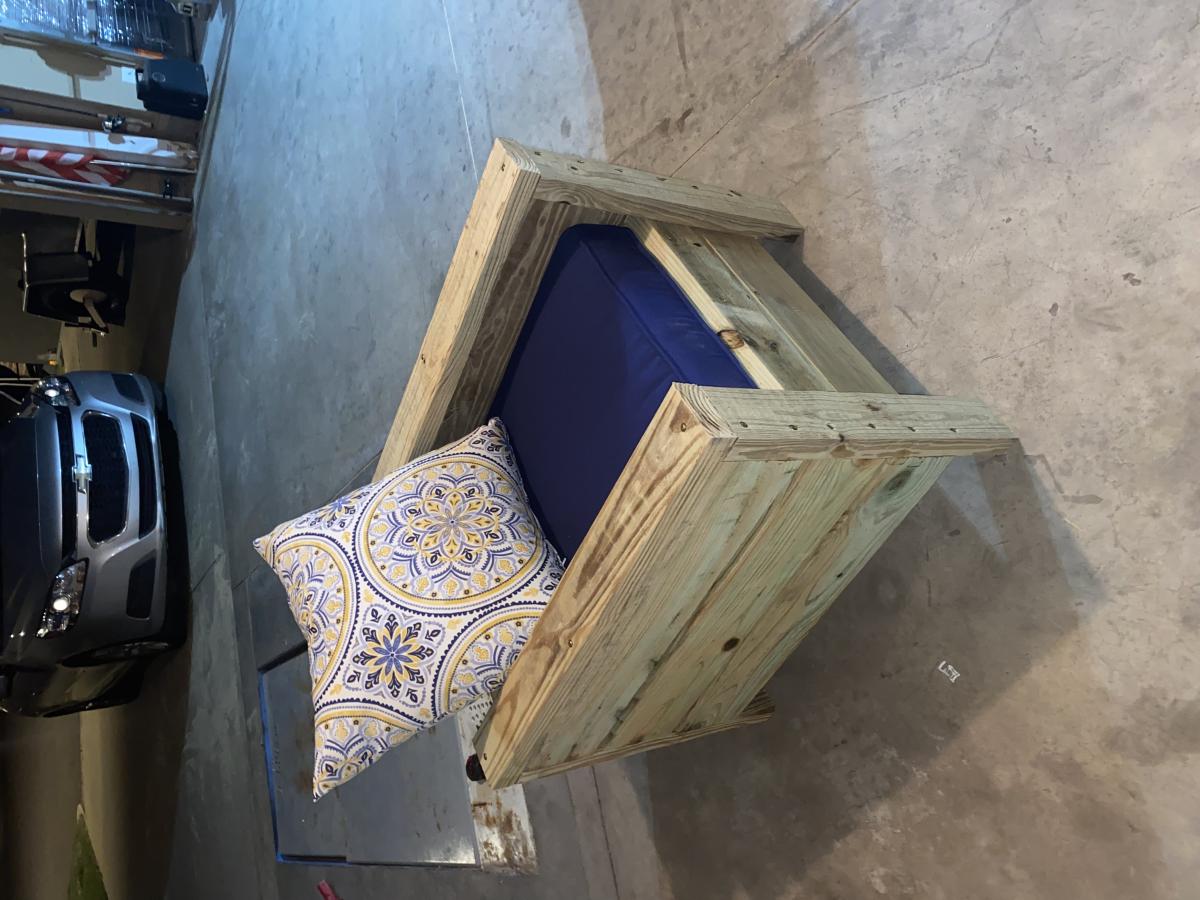
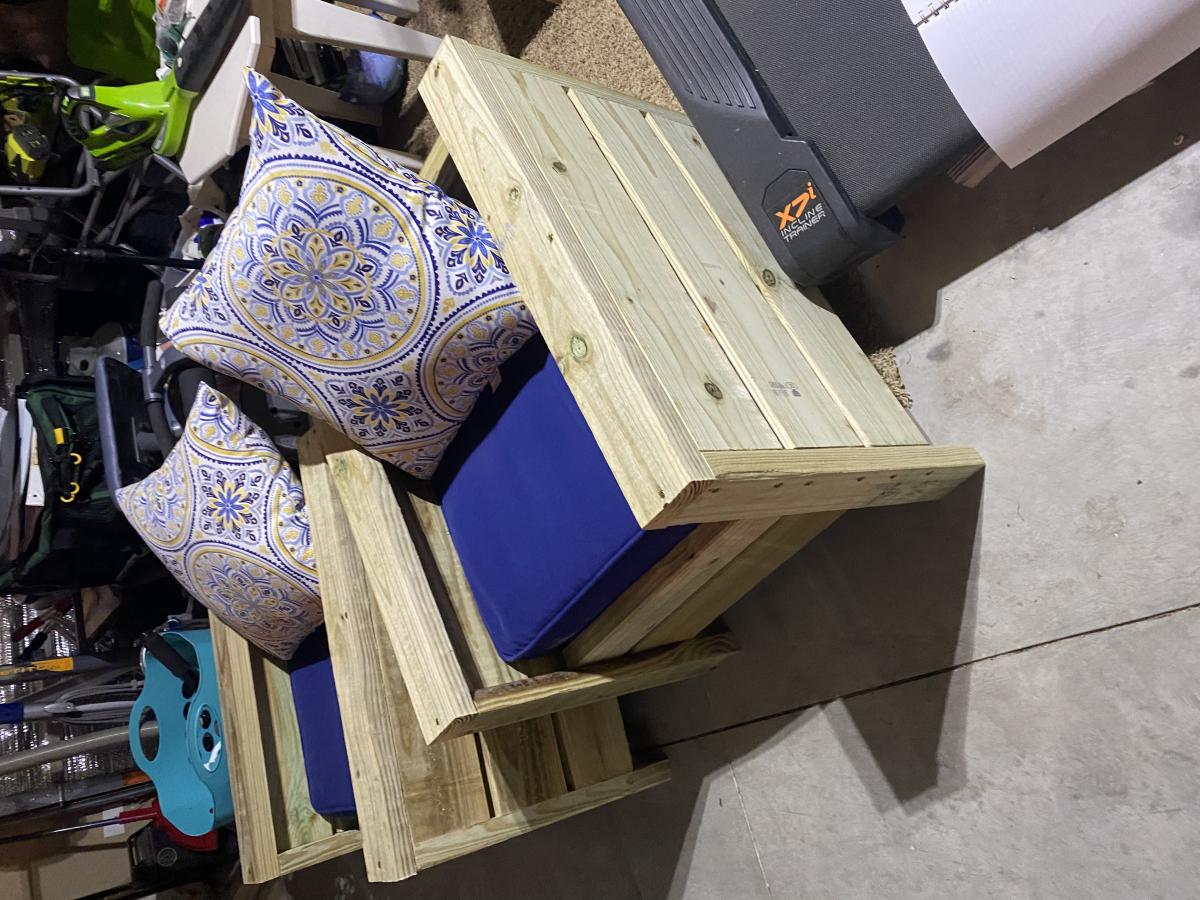
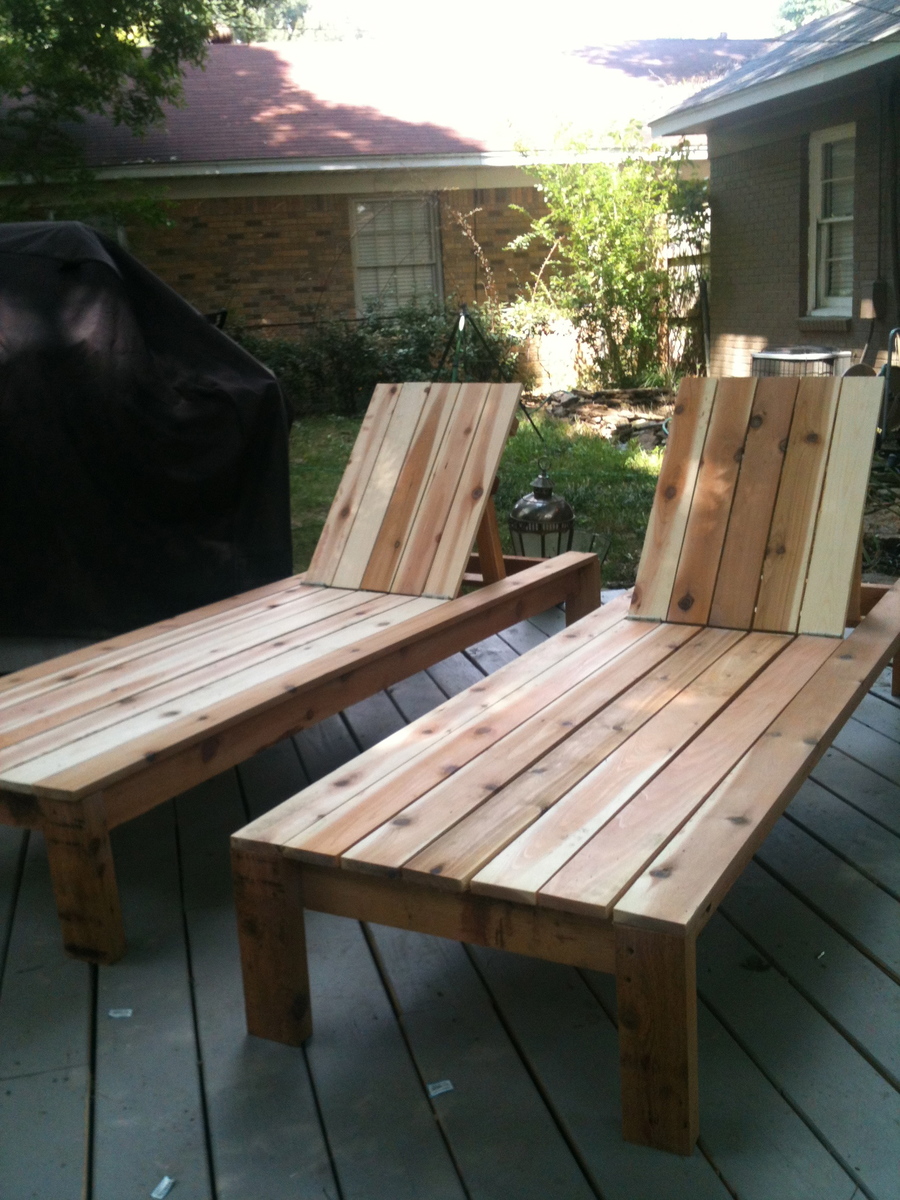
I have not yet sanded or sealed the chairs. I made two in 5 hours because I ran out of screws and had to go and get some more but I made these for my husband and my 15 year wedding anniversary to be able to spend more time outside after the kids go to bed. It cost me $130 plus the cushions to build
This was my third project, but it is my favorite to date!
In reply to omg this is gorgeous!! you by Guest (not verified)
Fri, 09/30/2011 - 21:21
thank you!
Wed, 04/04/2012 - 10:39
Love this - a little scared to try this project but going to give it a whirl. I also like the color you chose to finish it with.
I used 2 x4 x8 cedar instead of the the 1x4x8