DIY Home Fireplace
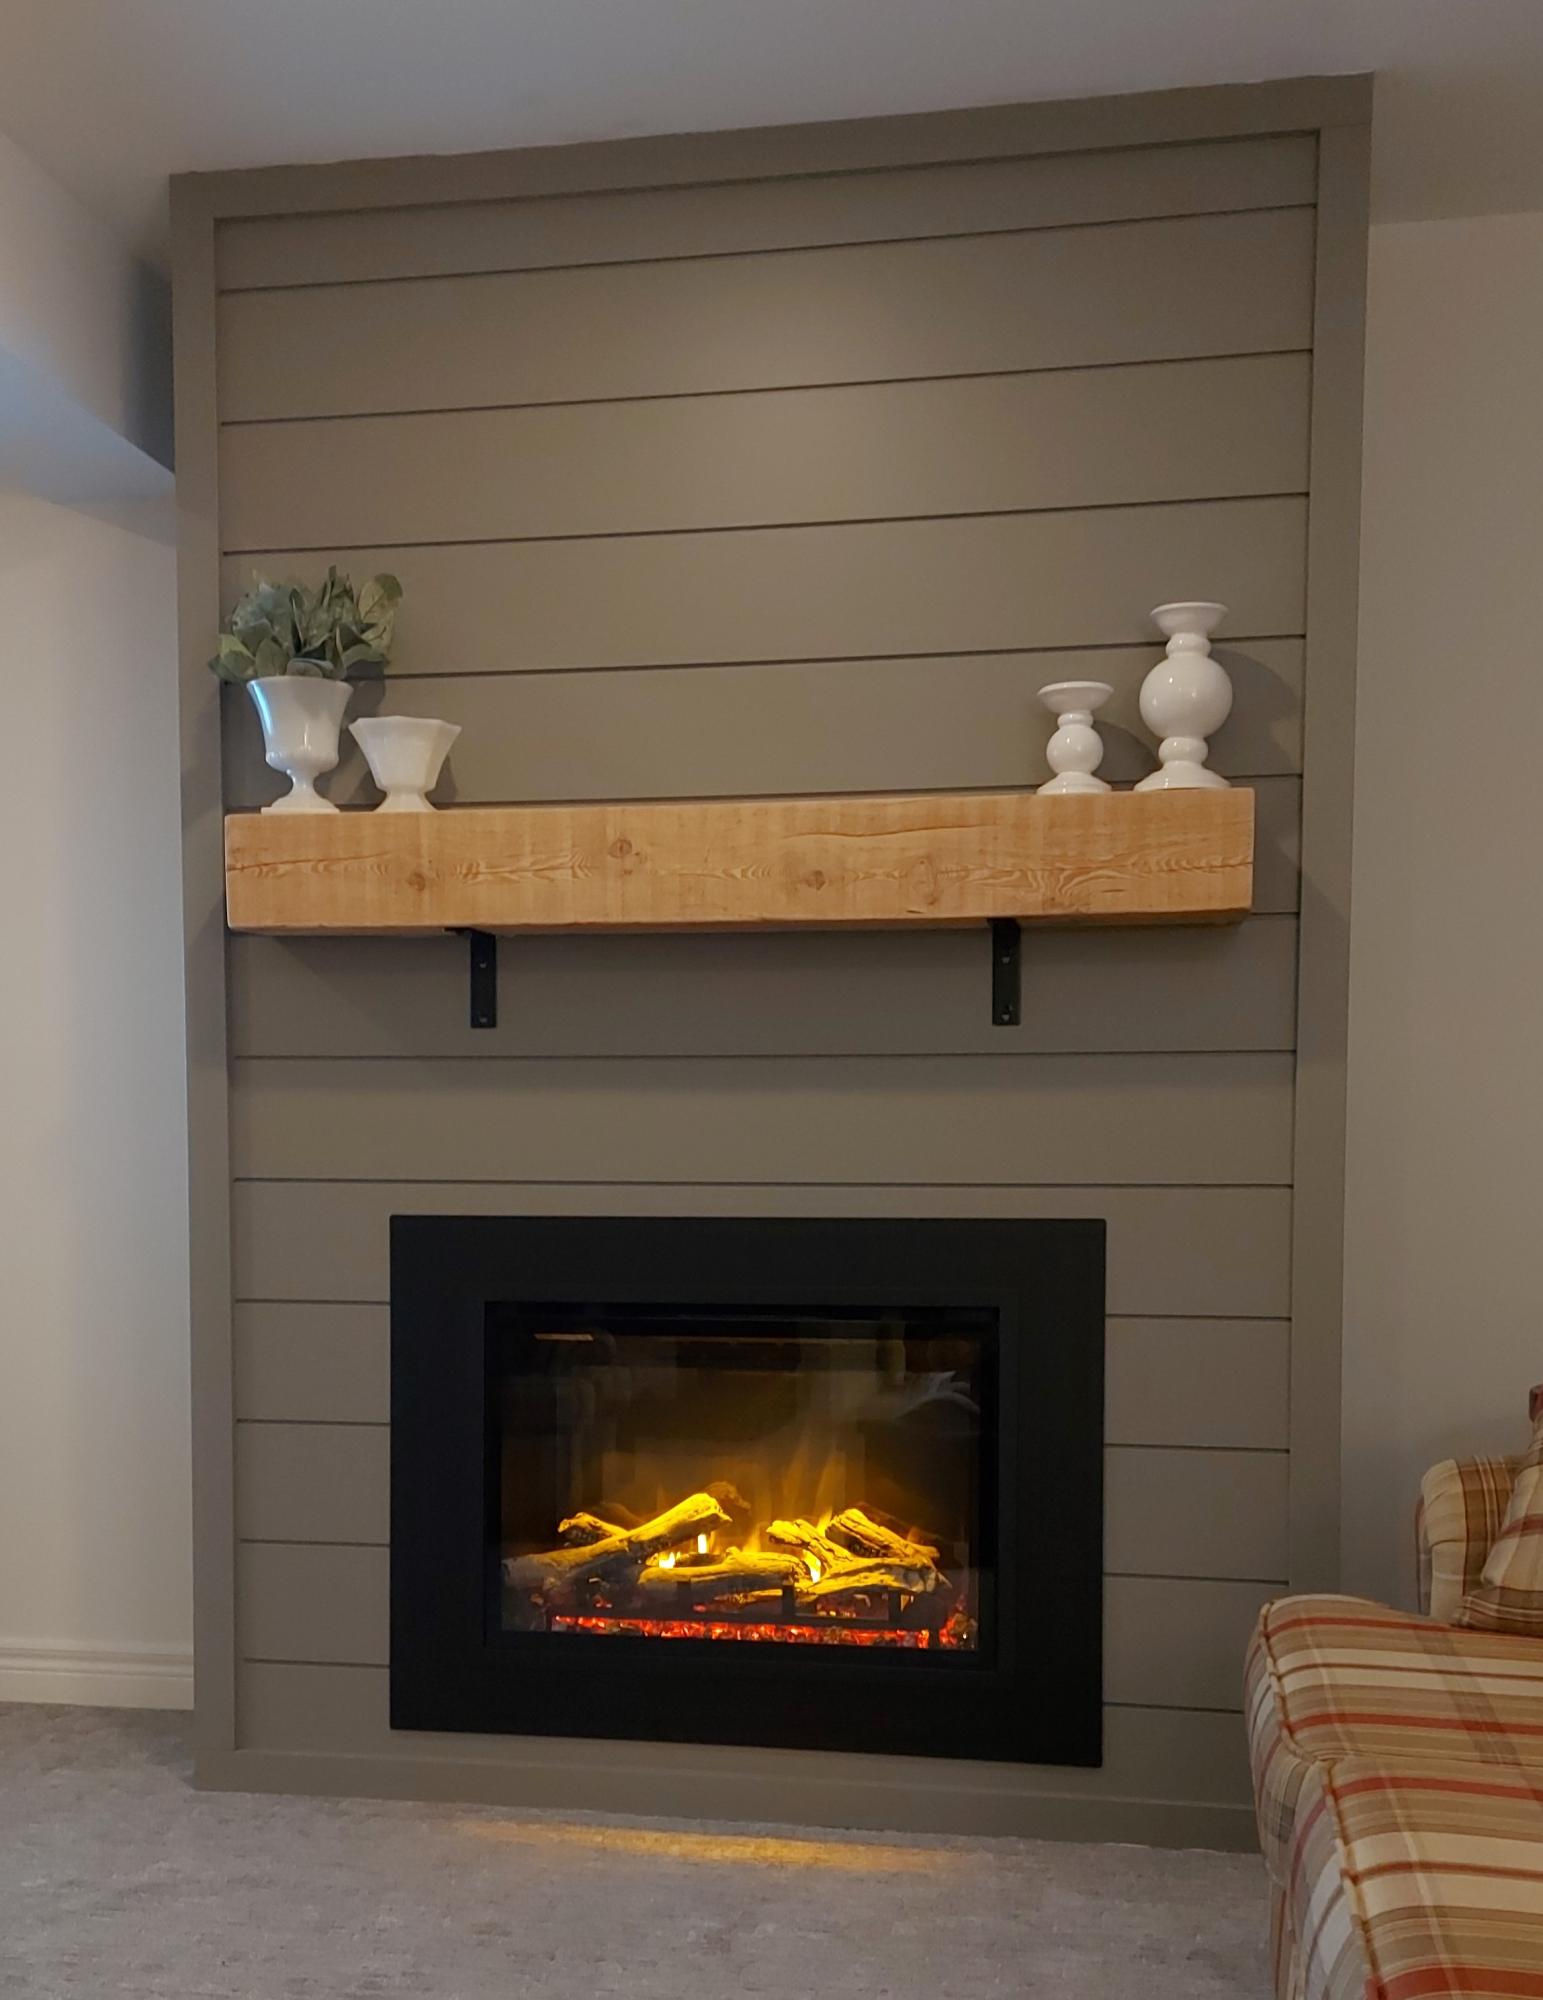
We built this fireplace where nothing existed before. The instructional video was very helpful. We are so proud of how it turned out.
Jim and Susie Jacob
Built from Plan(s)
We built this fireplace where nothing existed before. The instructional video was very helpful. We are so proud of how it turned out.
Jim and Susie Jacob
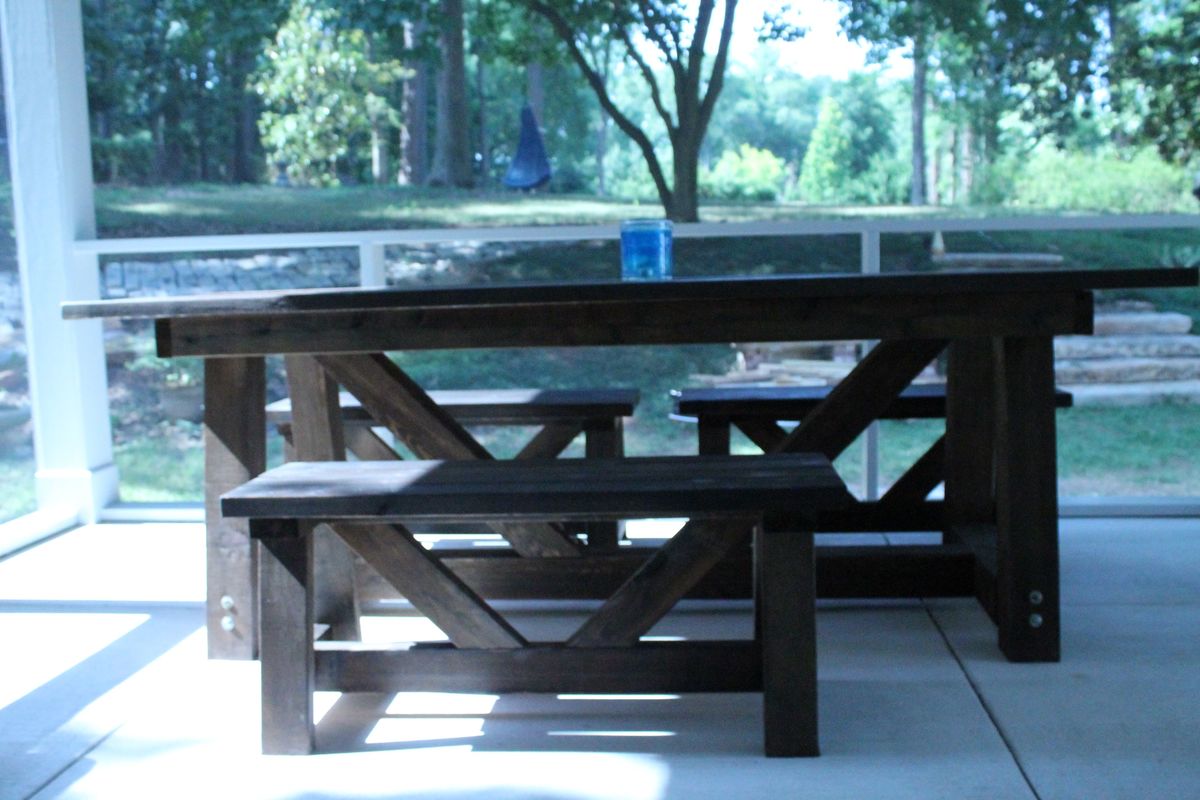
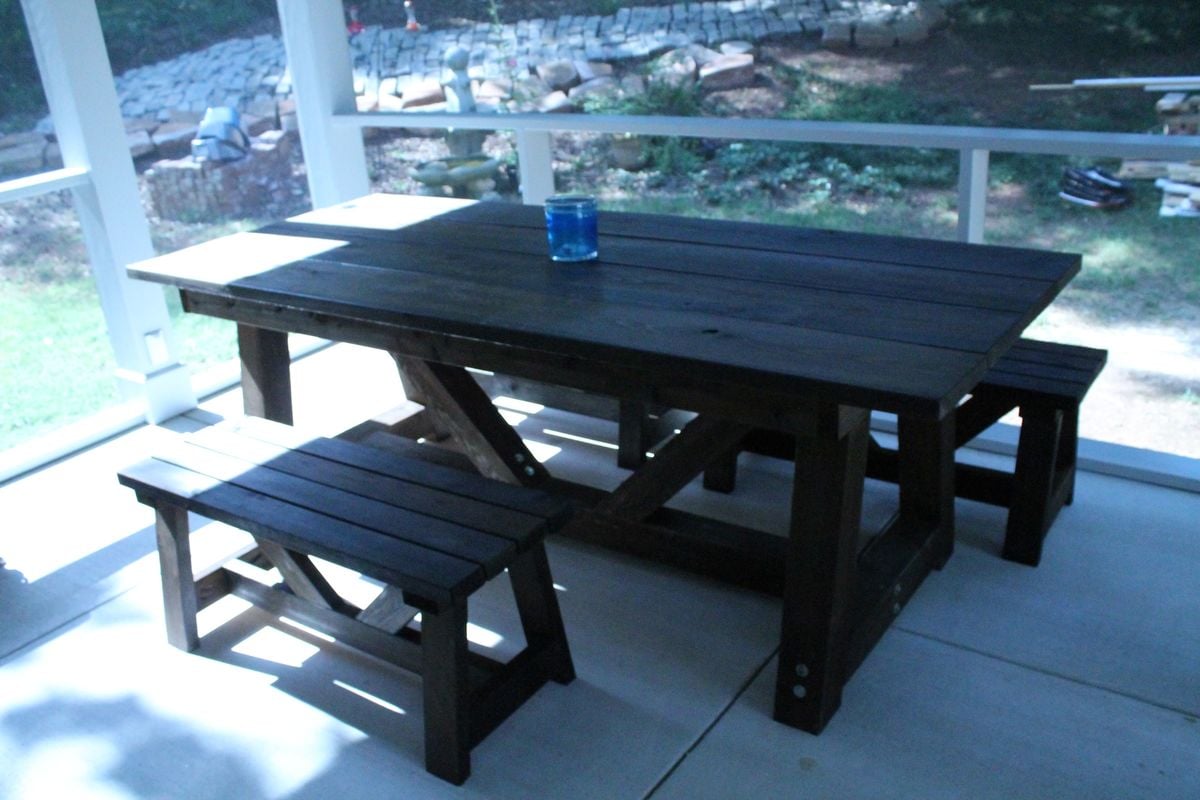
Provence table knockoff from restoration hardware (aka: providence) with 4x4s and providence benches
table modified to 90 inch length, benches to 42 inches
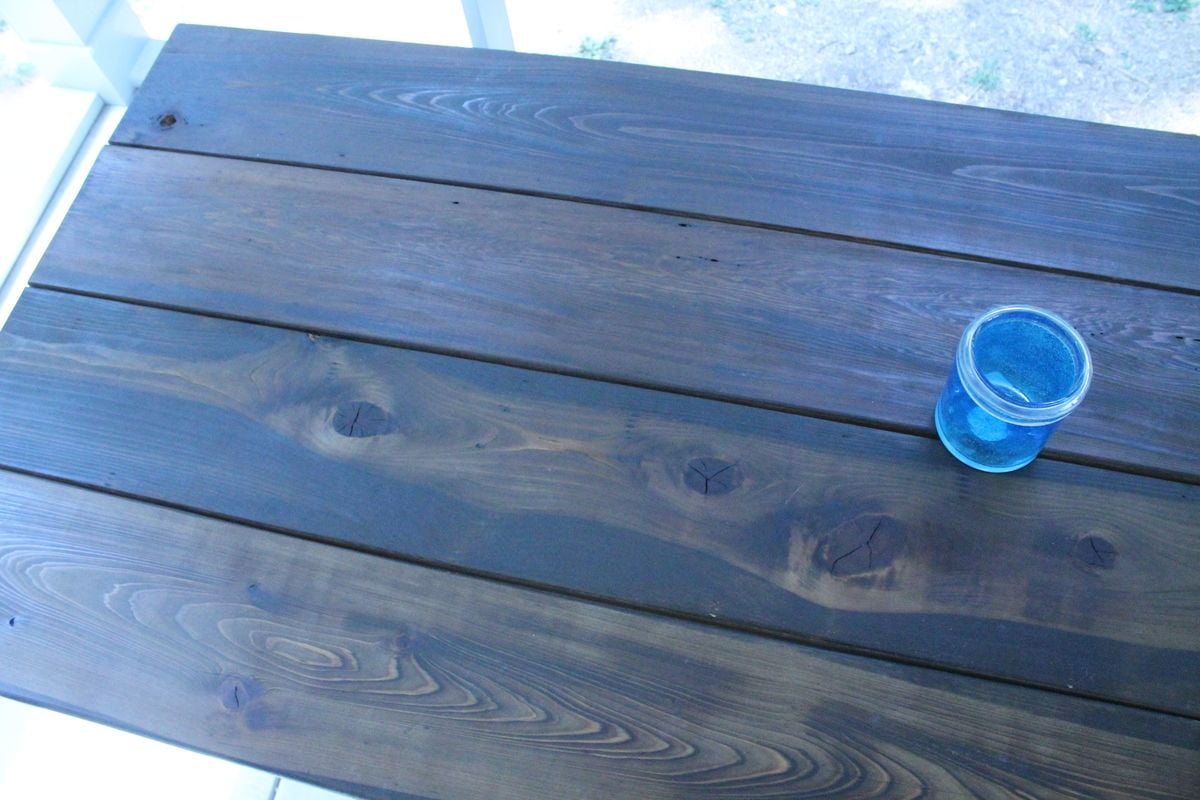
used lag bolts with a washer on 4x4's that show, kreg pocket screws everywhere else
note: the free-diy plans listed last have an issue with the table height. It came out 1 1/2" too high, so we made a change that I like better: we modified the table top to have a 2x4 skirt held together with kreg pocket screws that drops over the 2x4 frame above legs. we left about 3/8" gap between the skirt and framing so the framing would fit in easily. The top actually just sits on the frame so it is possible to move it in two pieces. It is so heavy and stable that we didn't worry about screwing it together.
we love it! perfect for 2 families to eat dinner together. my husband calls it Thor's table because it looks so tough.


Thu, 07/05/2012 - 11:35
This is gorgeous! I definitely prefer the chunkier leg you used and love the hardware showing as well. That was smart the way you made the top for easier moving, too. Great job! I think you should have added the link for the plans, this way your picture will always show up above the plans in order for everybody to see it each time. :)
Thu, 07/05/2012 - 19:22
thanks so much. I have now attempted to link the plans to my brag....let's see if it works!
In reply to thanks so much. I have now by Anne in Decatur
Fri, 07/06/2012 - 05:46
It worked, yay!
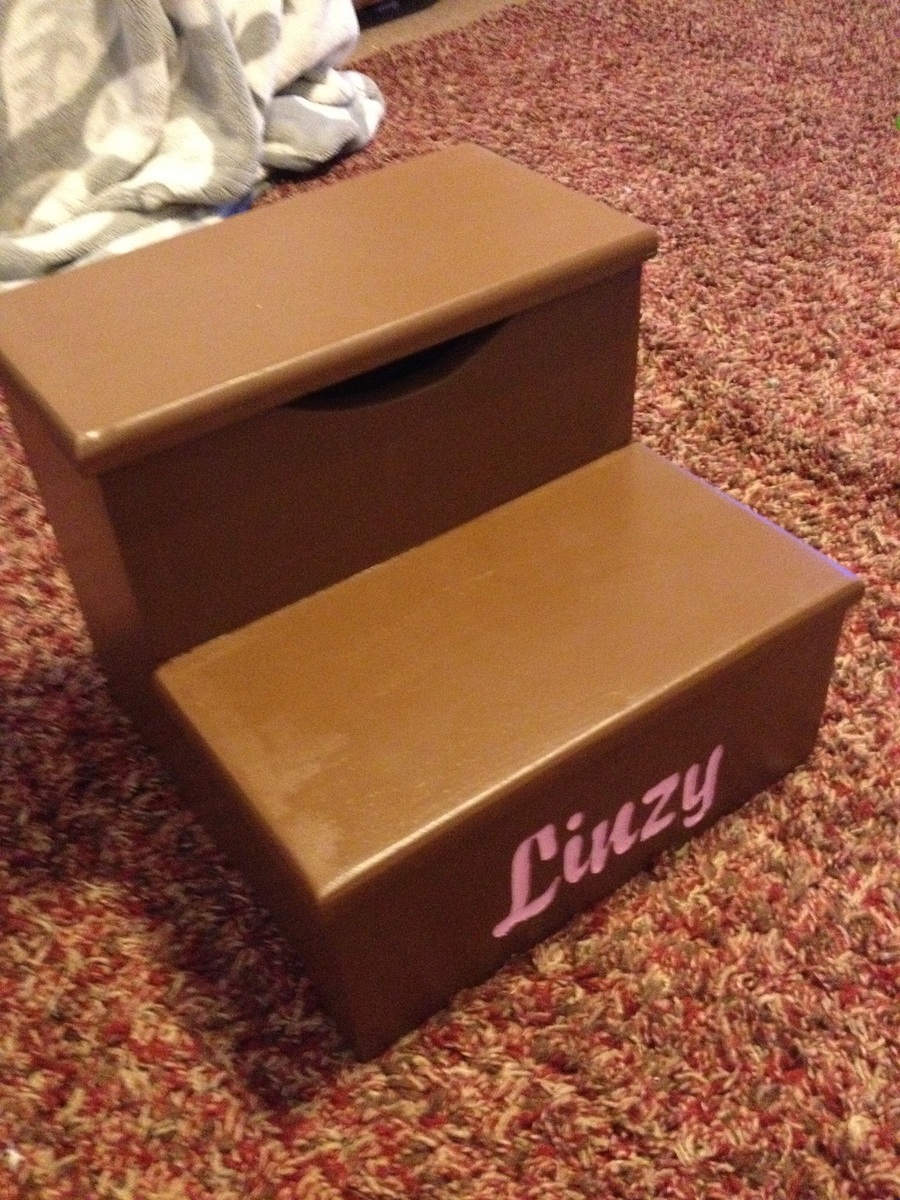
My daughter needed a step stool to reach the sink in our bathroom. I simplified the jigsaw cuts for this design to accommodate my learning curve. :) I used leftover plywood for the sides and 1x6s for both steps because it was what I had on hand in my garage. It was fun to make and is something we use every day!
built by Instagram: @sawdustandperfume
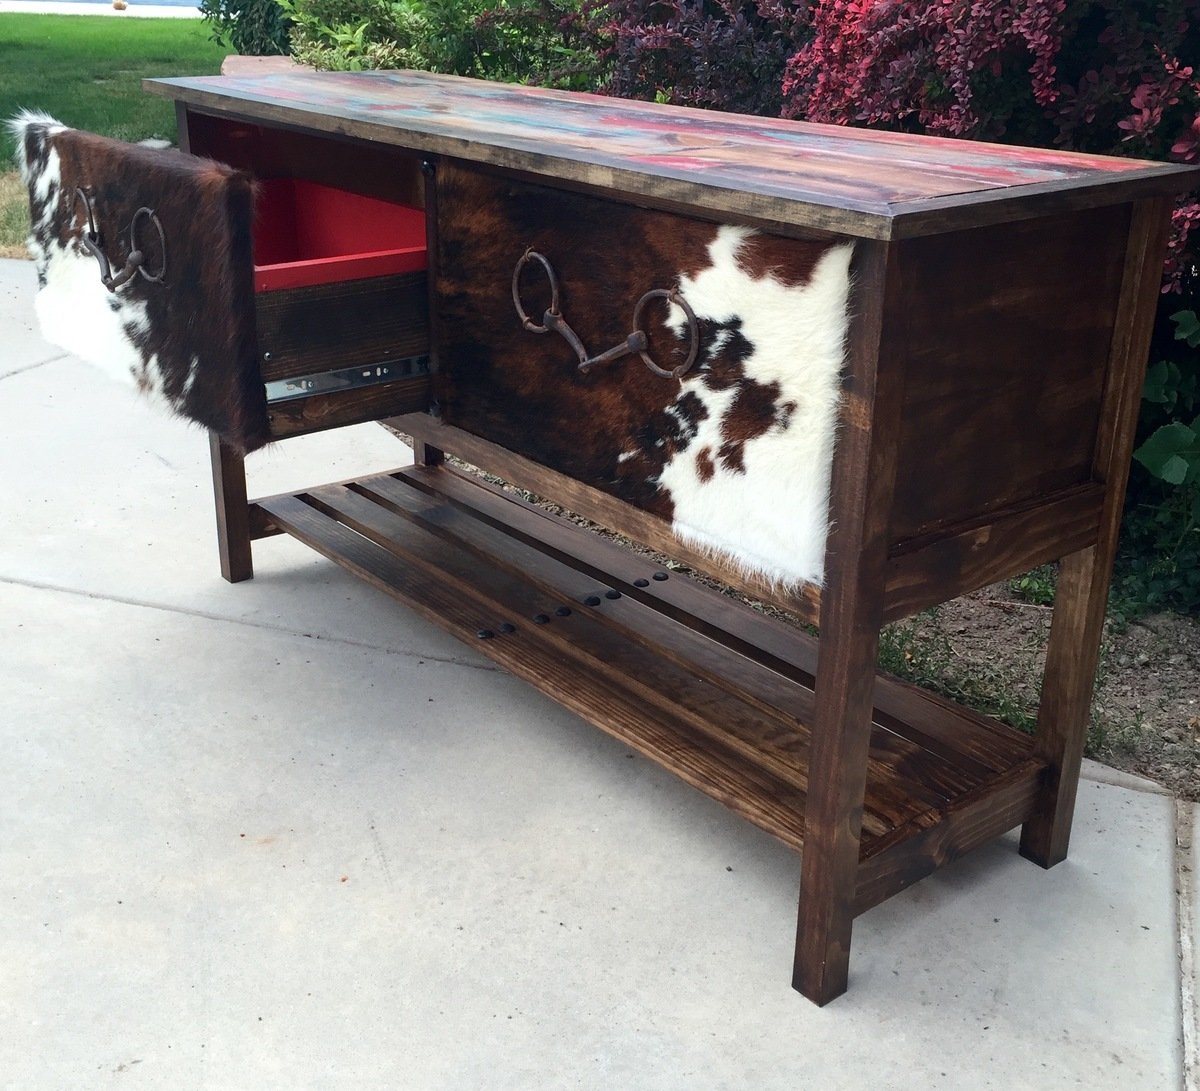
built to be used in an buisness office that a former cattle rancher conducts buisness.
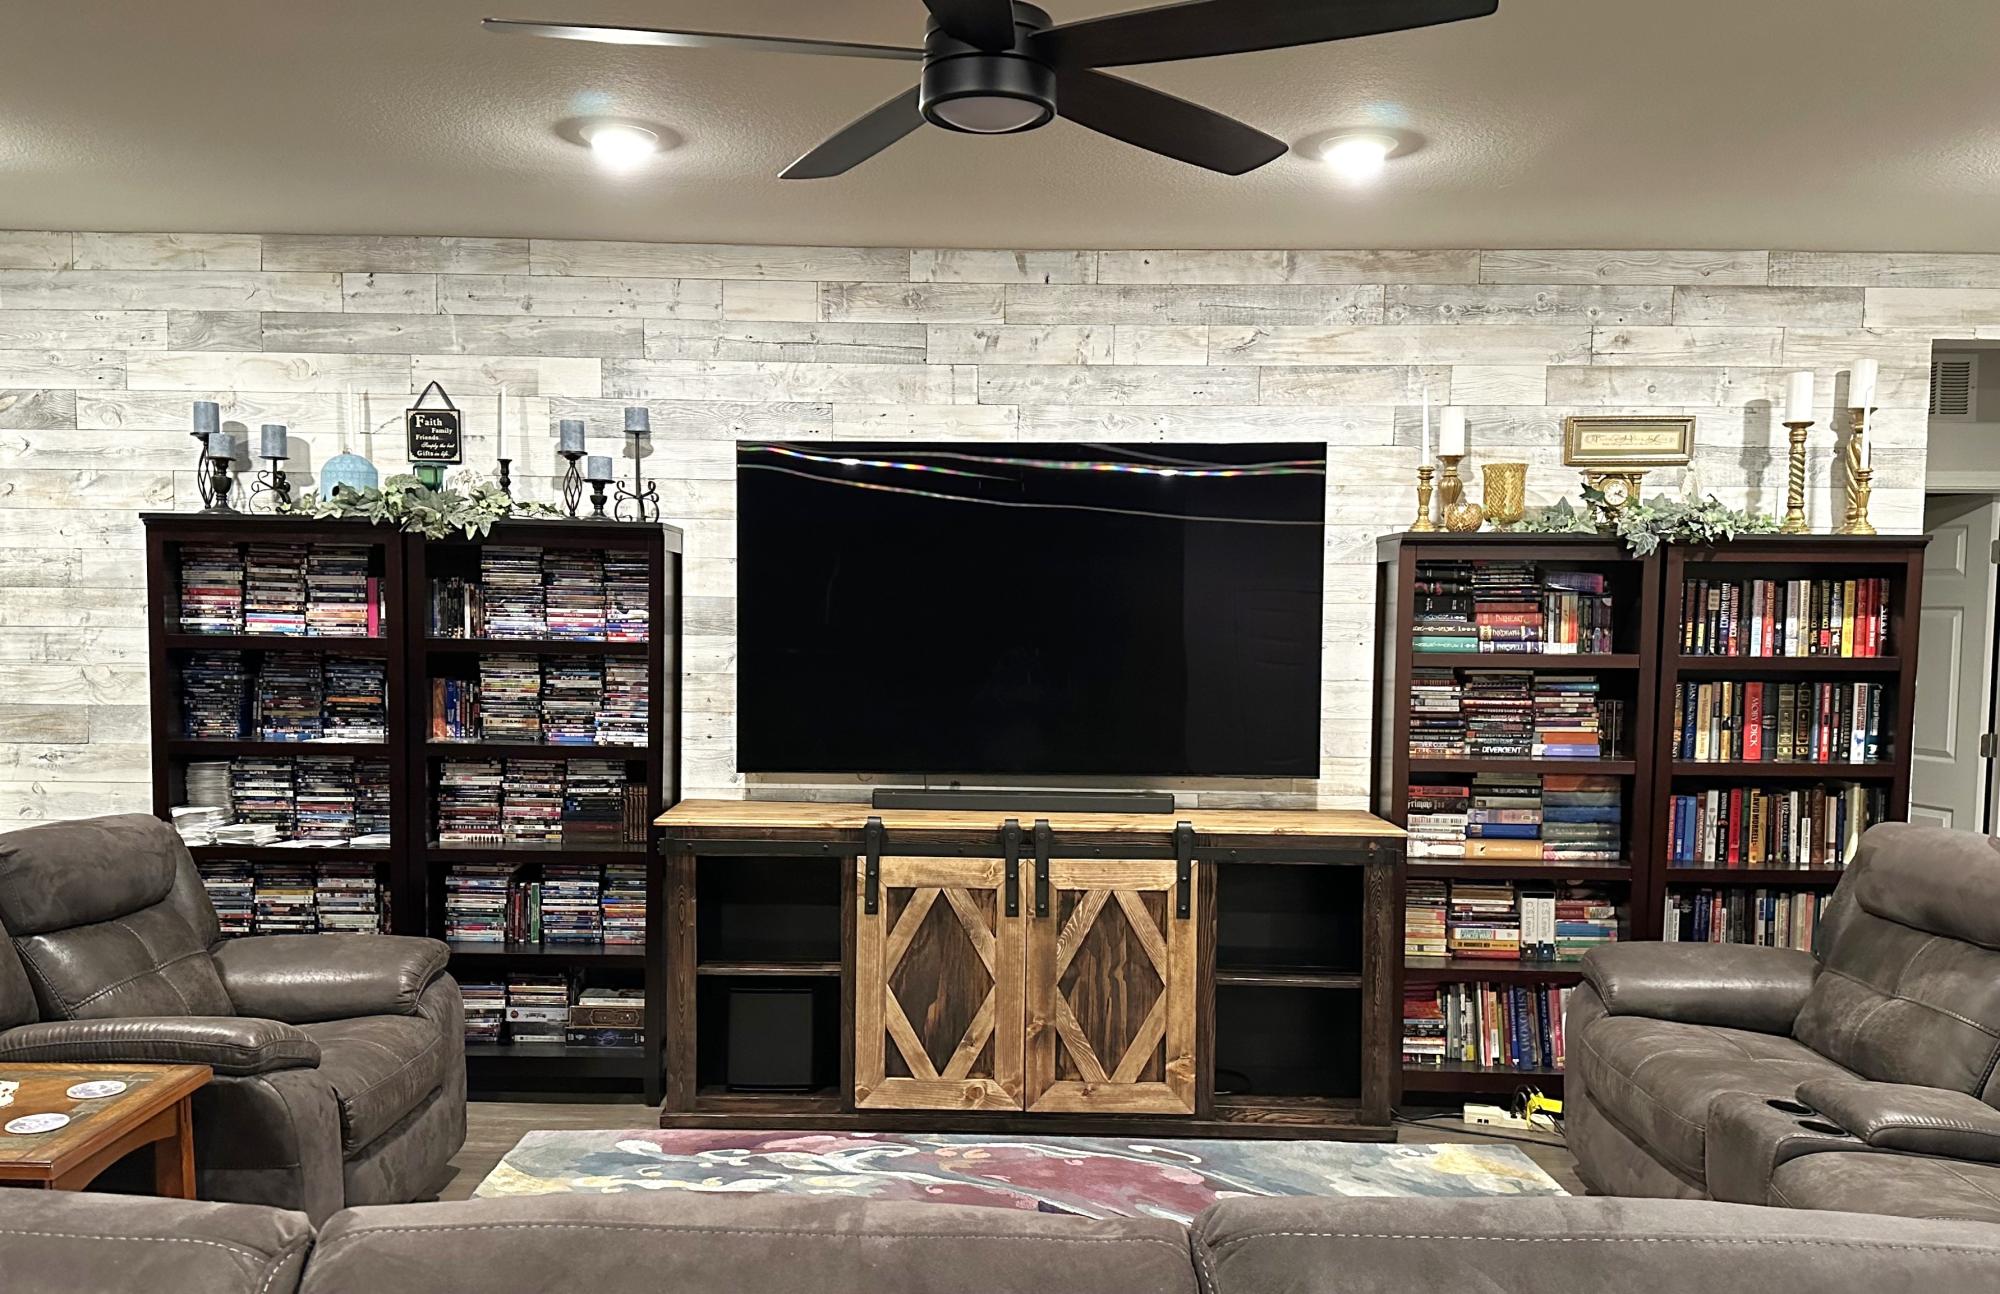
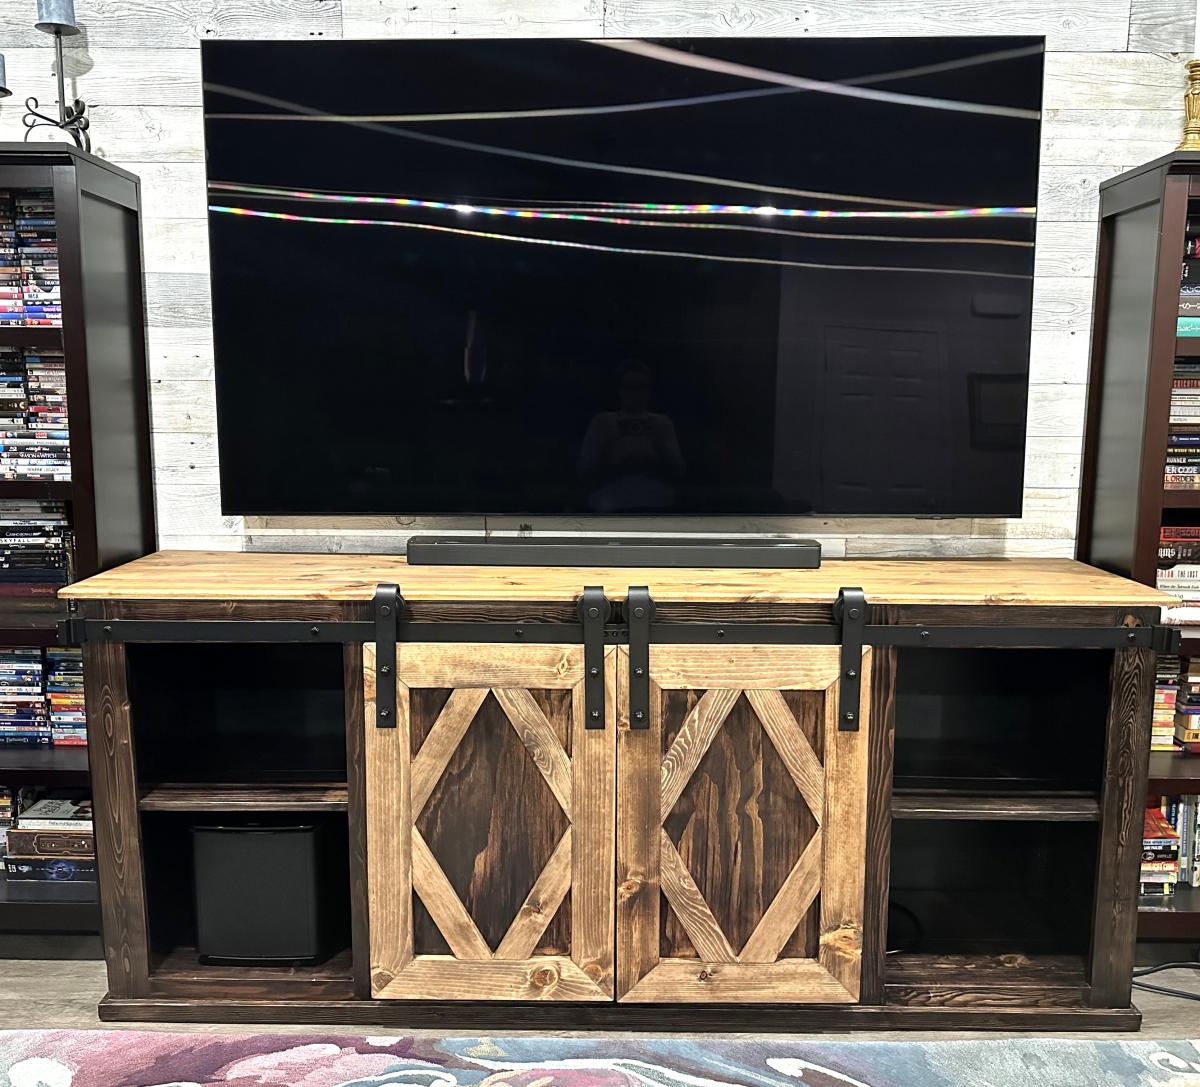
We have been looking for a TV console for the last couple of years, but couldn't find anything we liked. My husband said, "Why don't we build it ourselves?" We found the Simplified 8' Barn Door Console plans! The rest is history! We LOVE this console. And we loved making it together!
Janet Pulleyn
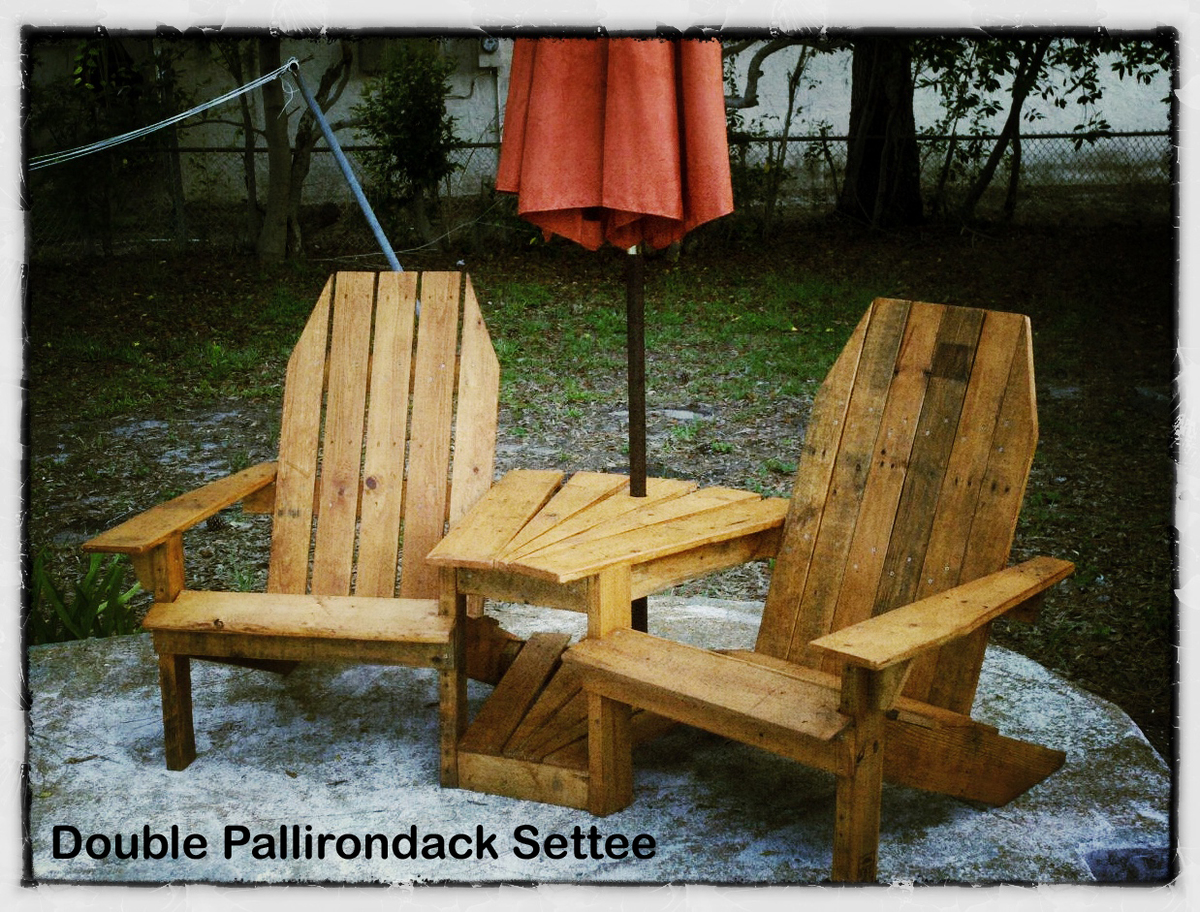
This is a Double Pallirondack Settee, an Adirondack-styled set of chairs connected by a two-shelf table that is also an umbrella holder. It is made 100% from recycled wooden pallets (thus the name). It took approximately four full pallets to make the settee. The finished picture was taken by its new owners after they stained it with a cedar-colored sealer and added an umbrella.
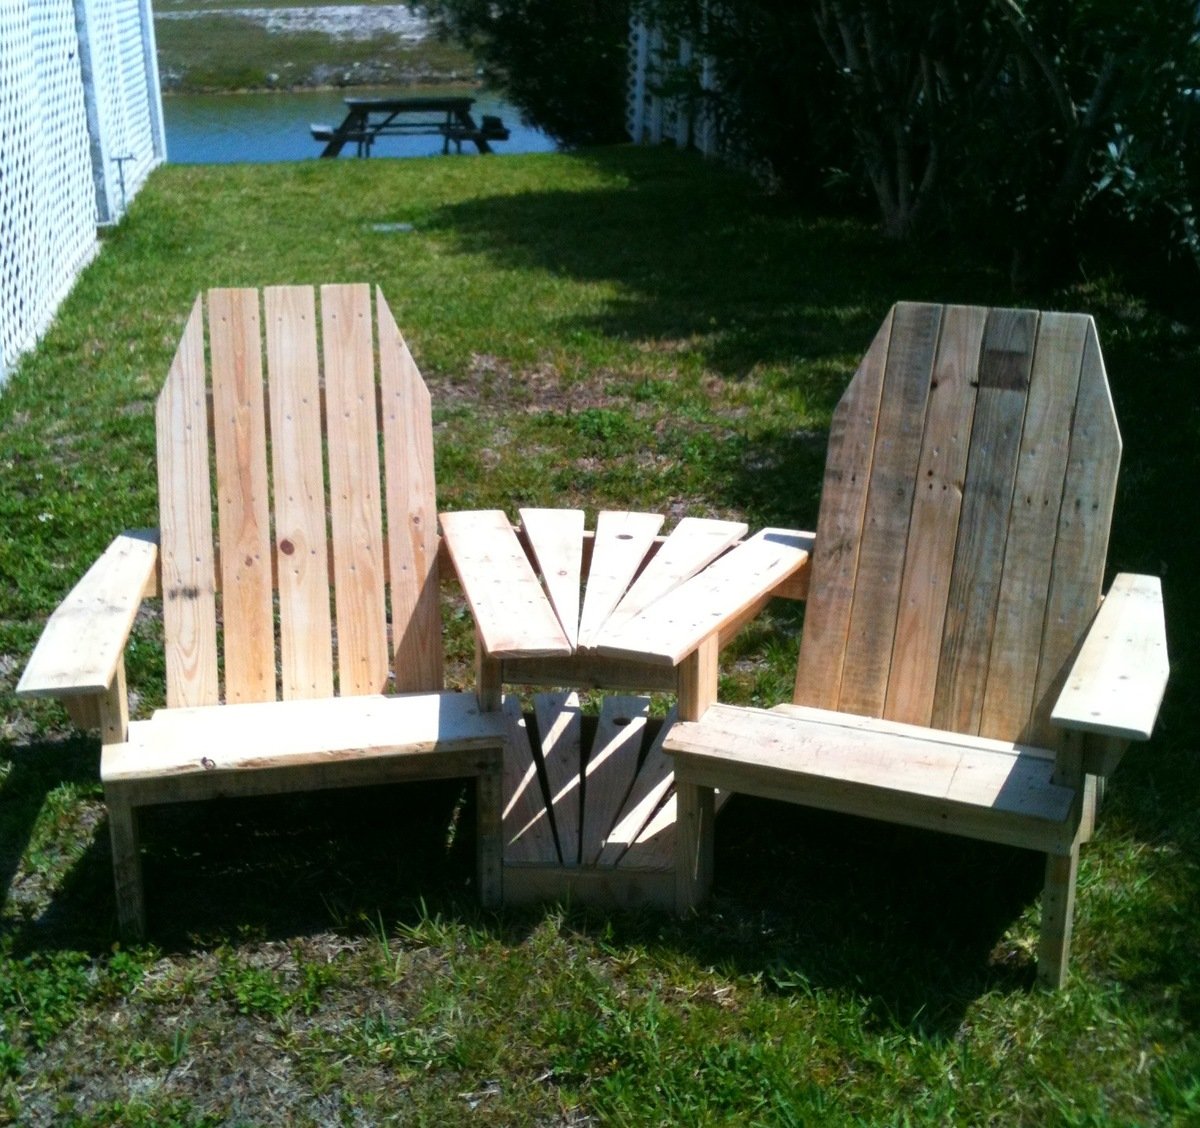
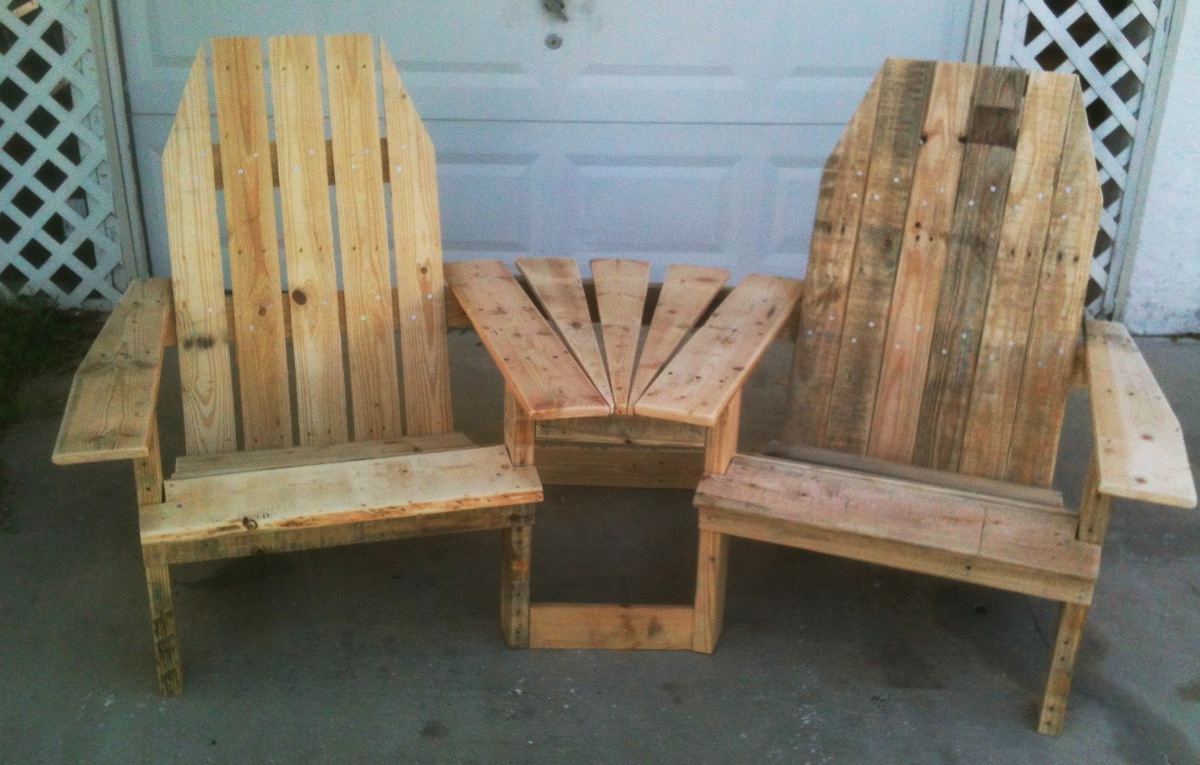
The other two images show it before I had added the bottom shelf of the table and it finished before staining. I just finished a second settee and will be selling that to someone who saw the original one at a party.
The design is based on a couple different plans -- one for the chairs and one for the table/umbrella holder. I modified both plans to make them work together. Great fun. If I could have worked on it straight through, it probably would have taken 2 full days, starting with pallet deconstruction, then cutting pieces, sanding, assembly of chairs and, finally, assembly of the connecting table.
Thu, 07/12/2012 - 10:16
Is it possible to get plans for these??? This would be awesome to build..
Thu, 07/12/2012 - 10:17
Do you happen to make plans for these?
I would love to build this!!
Thu, 07/12/2012 - 13:51
Unfortunately, no. I actually took the plans for a chair and mixed it with the plans of another settee. Essentially, the "inside" arms of the chairs do not get shaped at all. The front of the chairs are 12" apart (15 degree miter) and the backs are 27" apart if I remember correctly. I added 4" 2x4 blocks to the outside of the bottom back legs and that is what the bottom back table support is attached to on the settee. The the three center boards are cut to fit (1/2" in the front, 5.5" in the back and spaced equally. 1.5" hole for the umbrella holder in the center board, top and bottom.
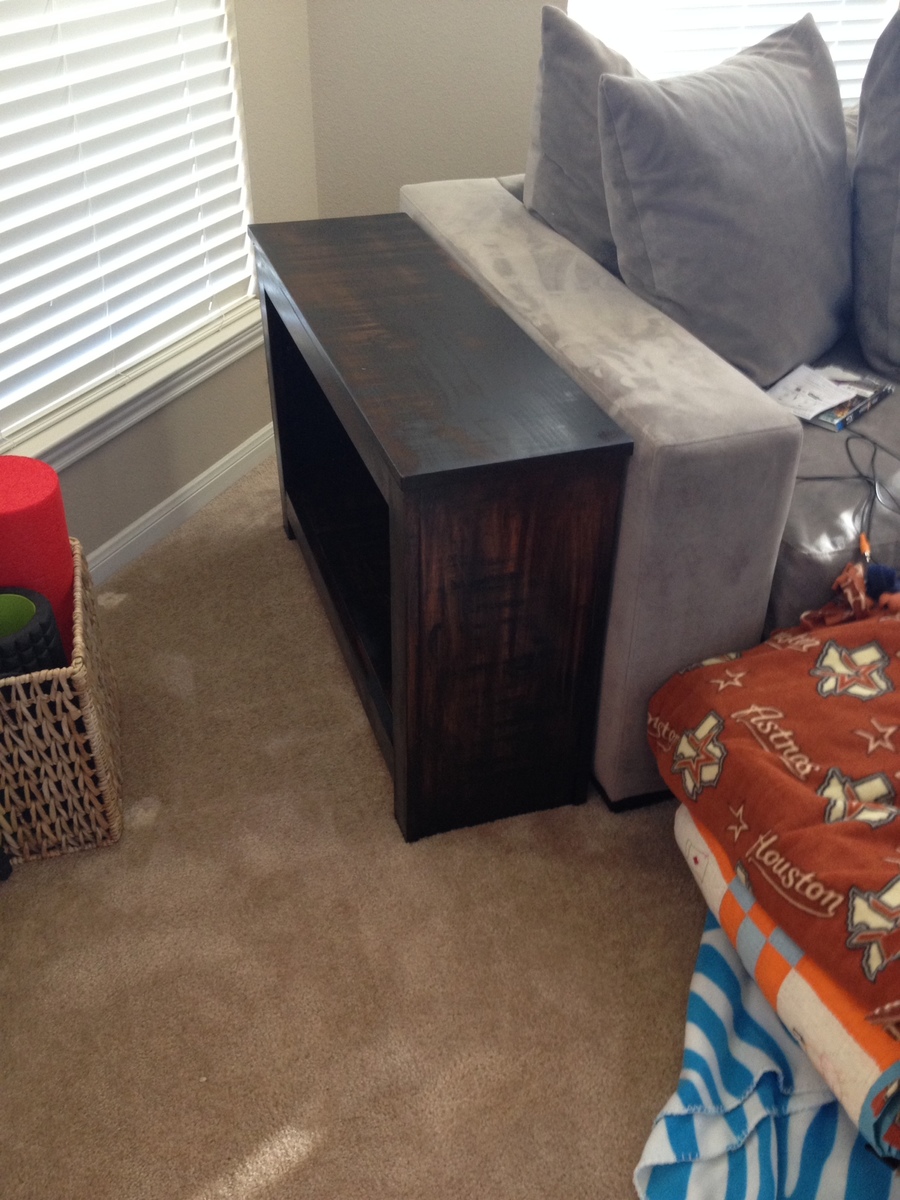
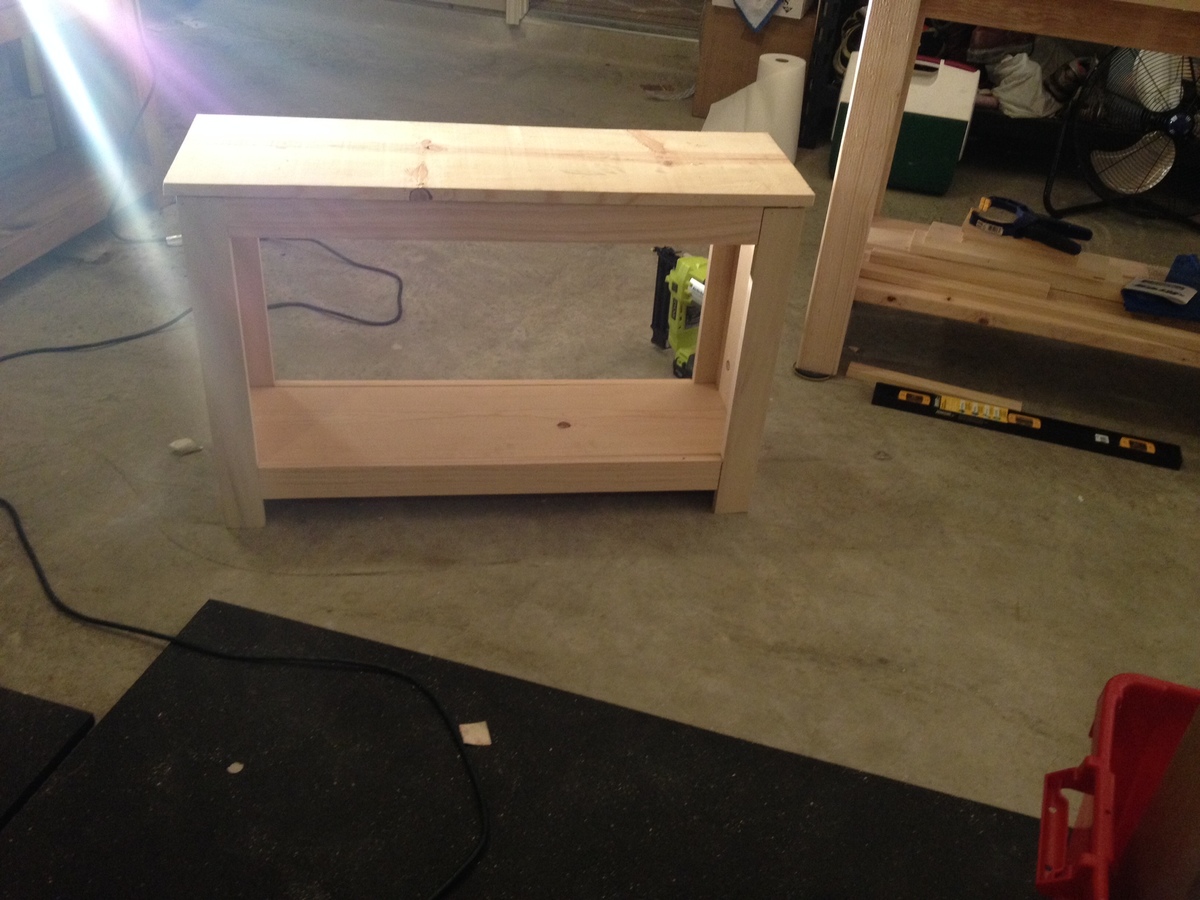
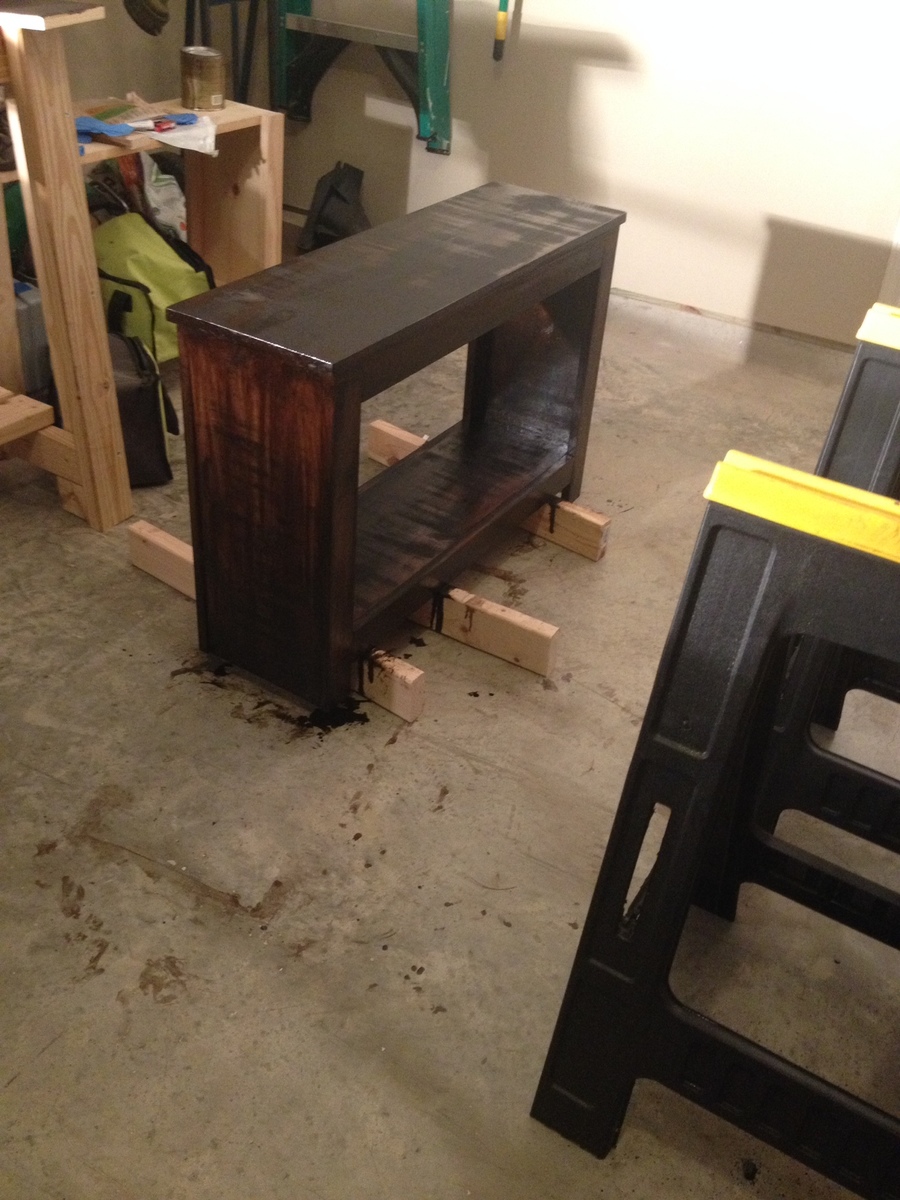
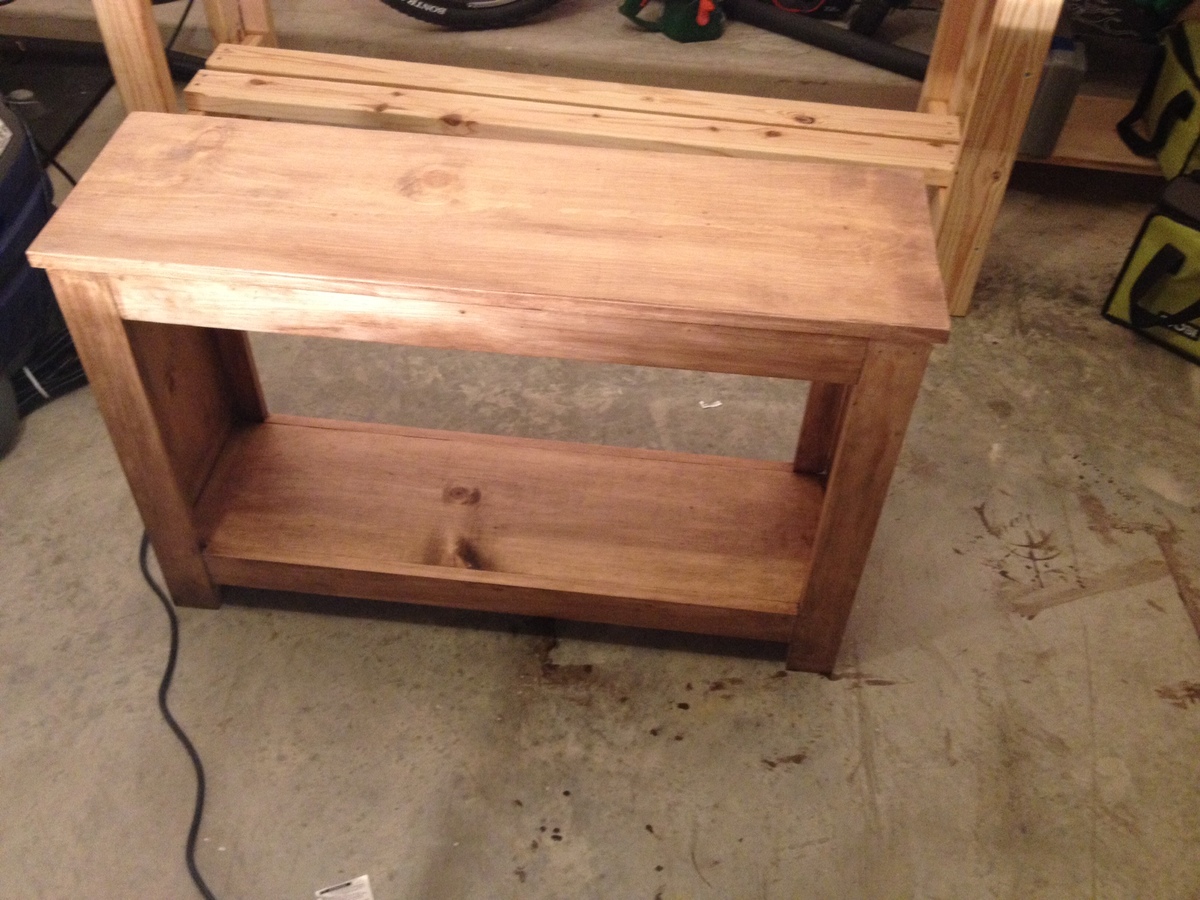
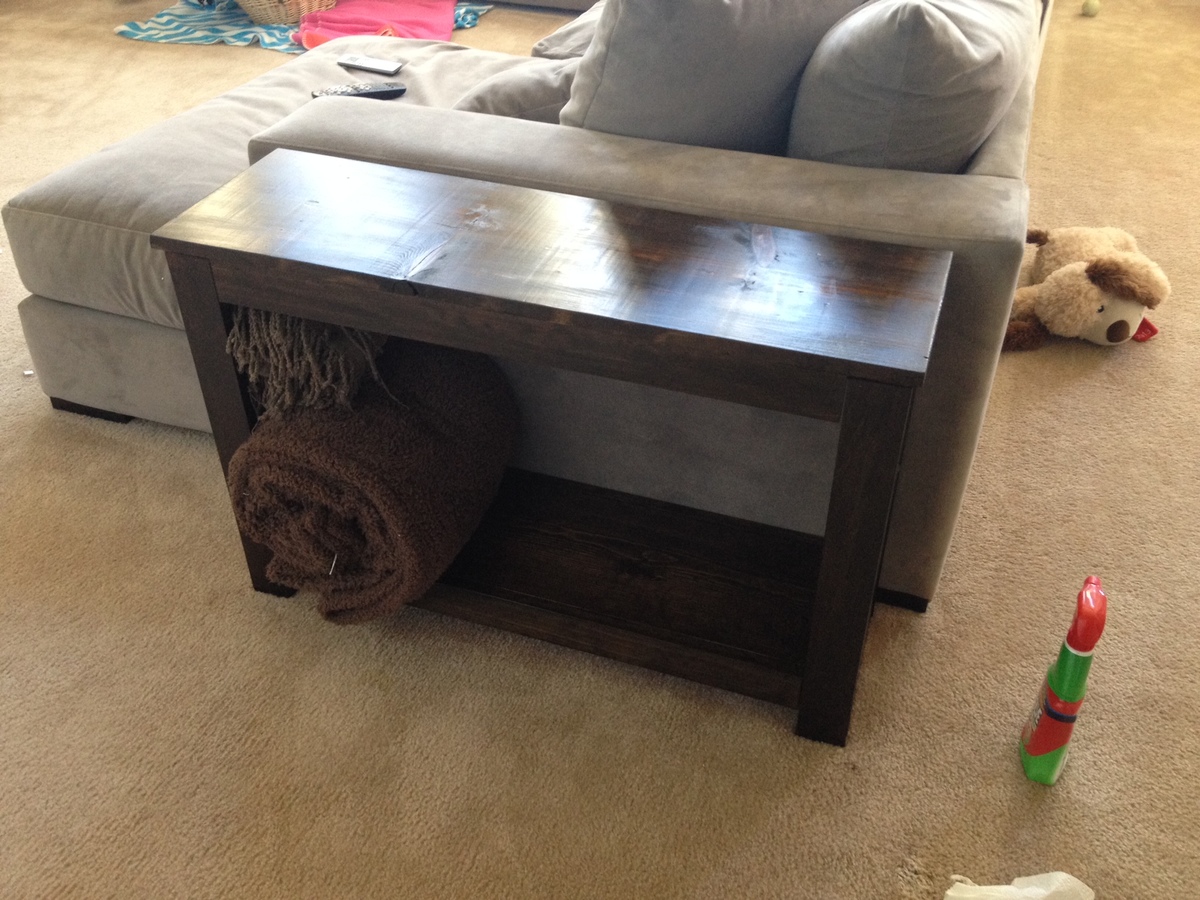
I was wanting long, skinny end tables for my couch and when I came upon the spa bench plan I knew it was perfect length and size for what I wanted. I only altered the plans by making it taller to fit my couch. This was my second build and I learned a lot through the process so these are not perfect but I love the imperfections. I also didn't like the first stain that I put on the tables and when I tried taking it off my sander made weird marks but it gave it a more rustic look which I ended up loving. (Which I could never recreate on purpose)
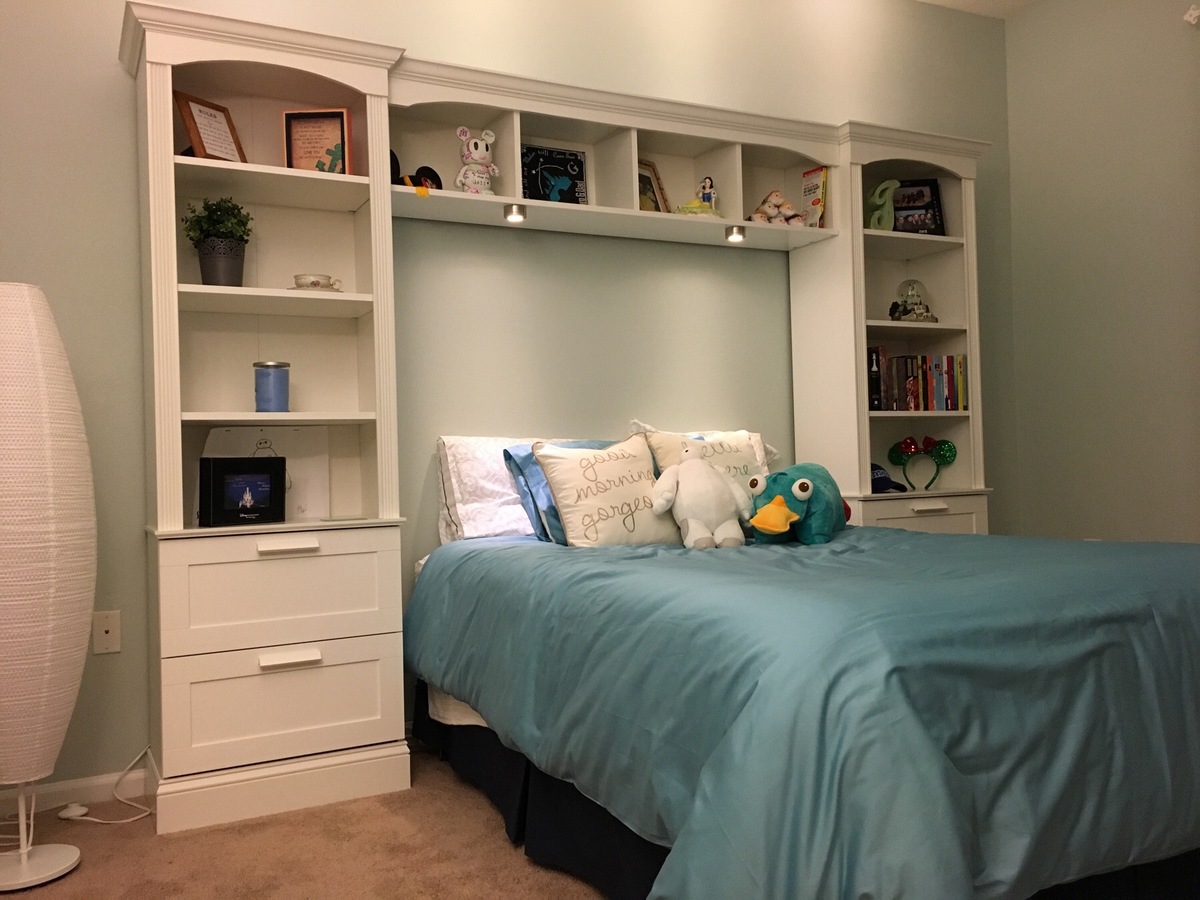
I hacked three IKEA bookcases into this beautiful bed for my princess of a daughter who was getting her first apartment in Orlando, FL, because she got a full-time dream job with Disney. Full details at http://handydad.tv/ikea-hack-bed-bridge-bookcase/.
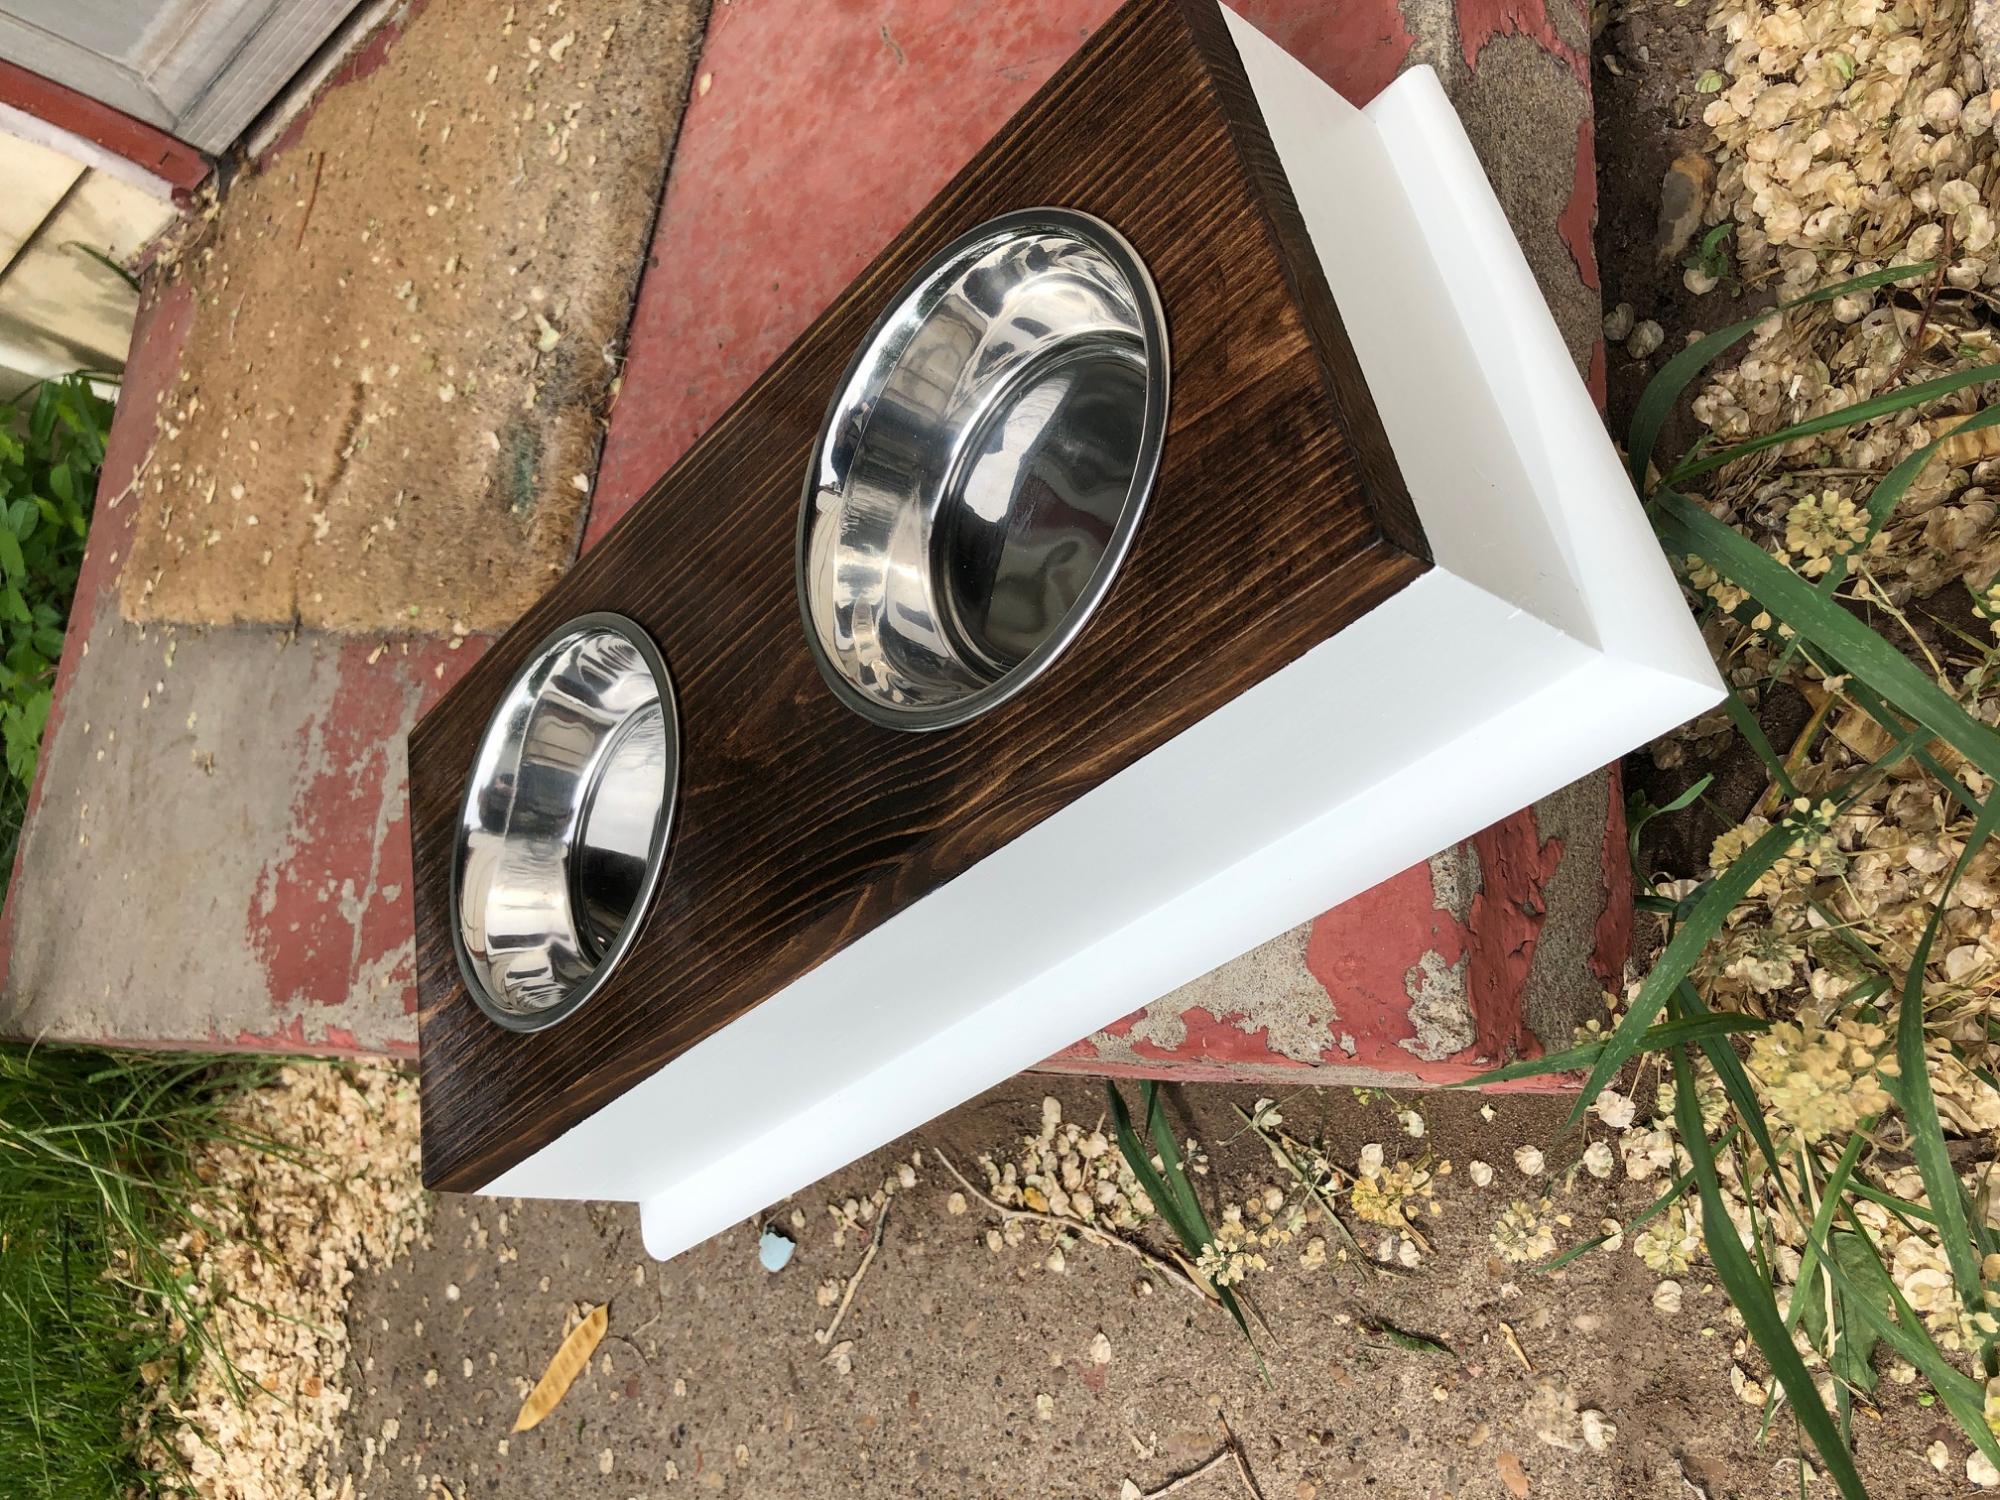
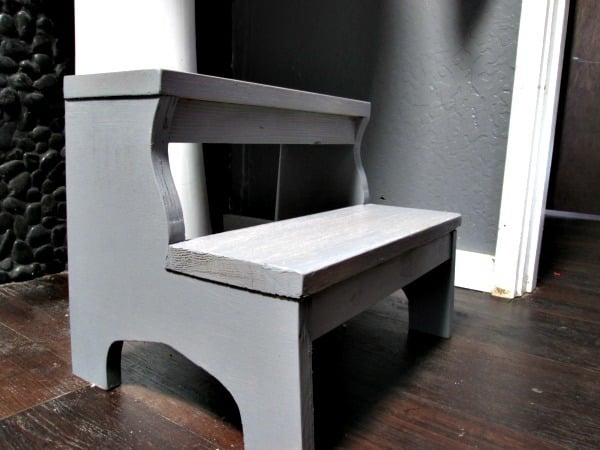
This was one of my first wood working projects. It taught me so much and it also helped me to realize that I really do love wood working! I think in the future I'd probably paint the bottom more of a light grey color to cut down on the contrast between the stained top and the painted bottom. Overall, I love it and my Sadie pup will be happy to have some new bowls to eat out of!
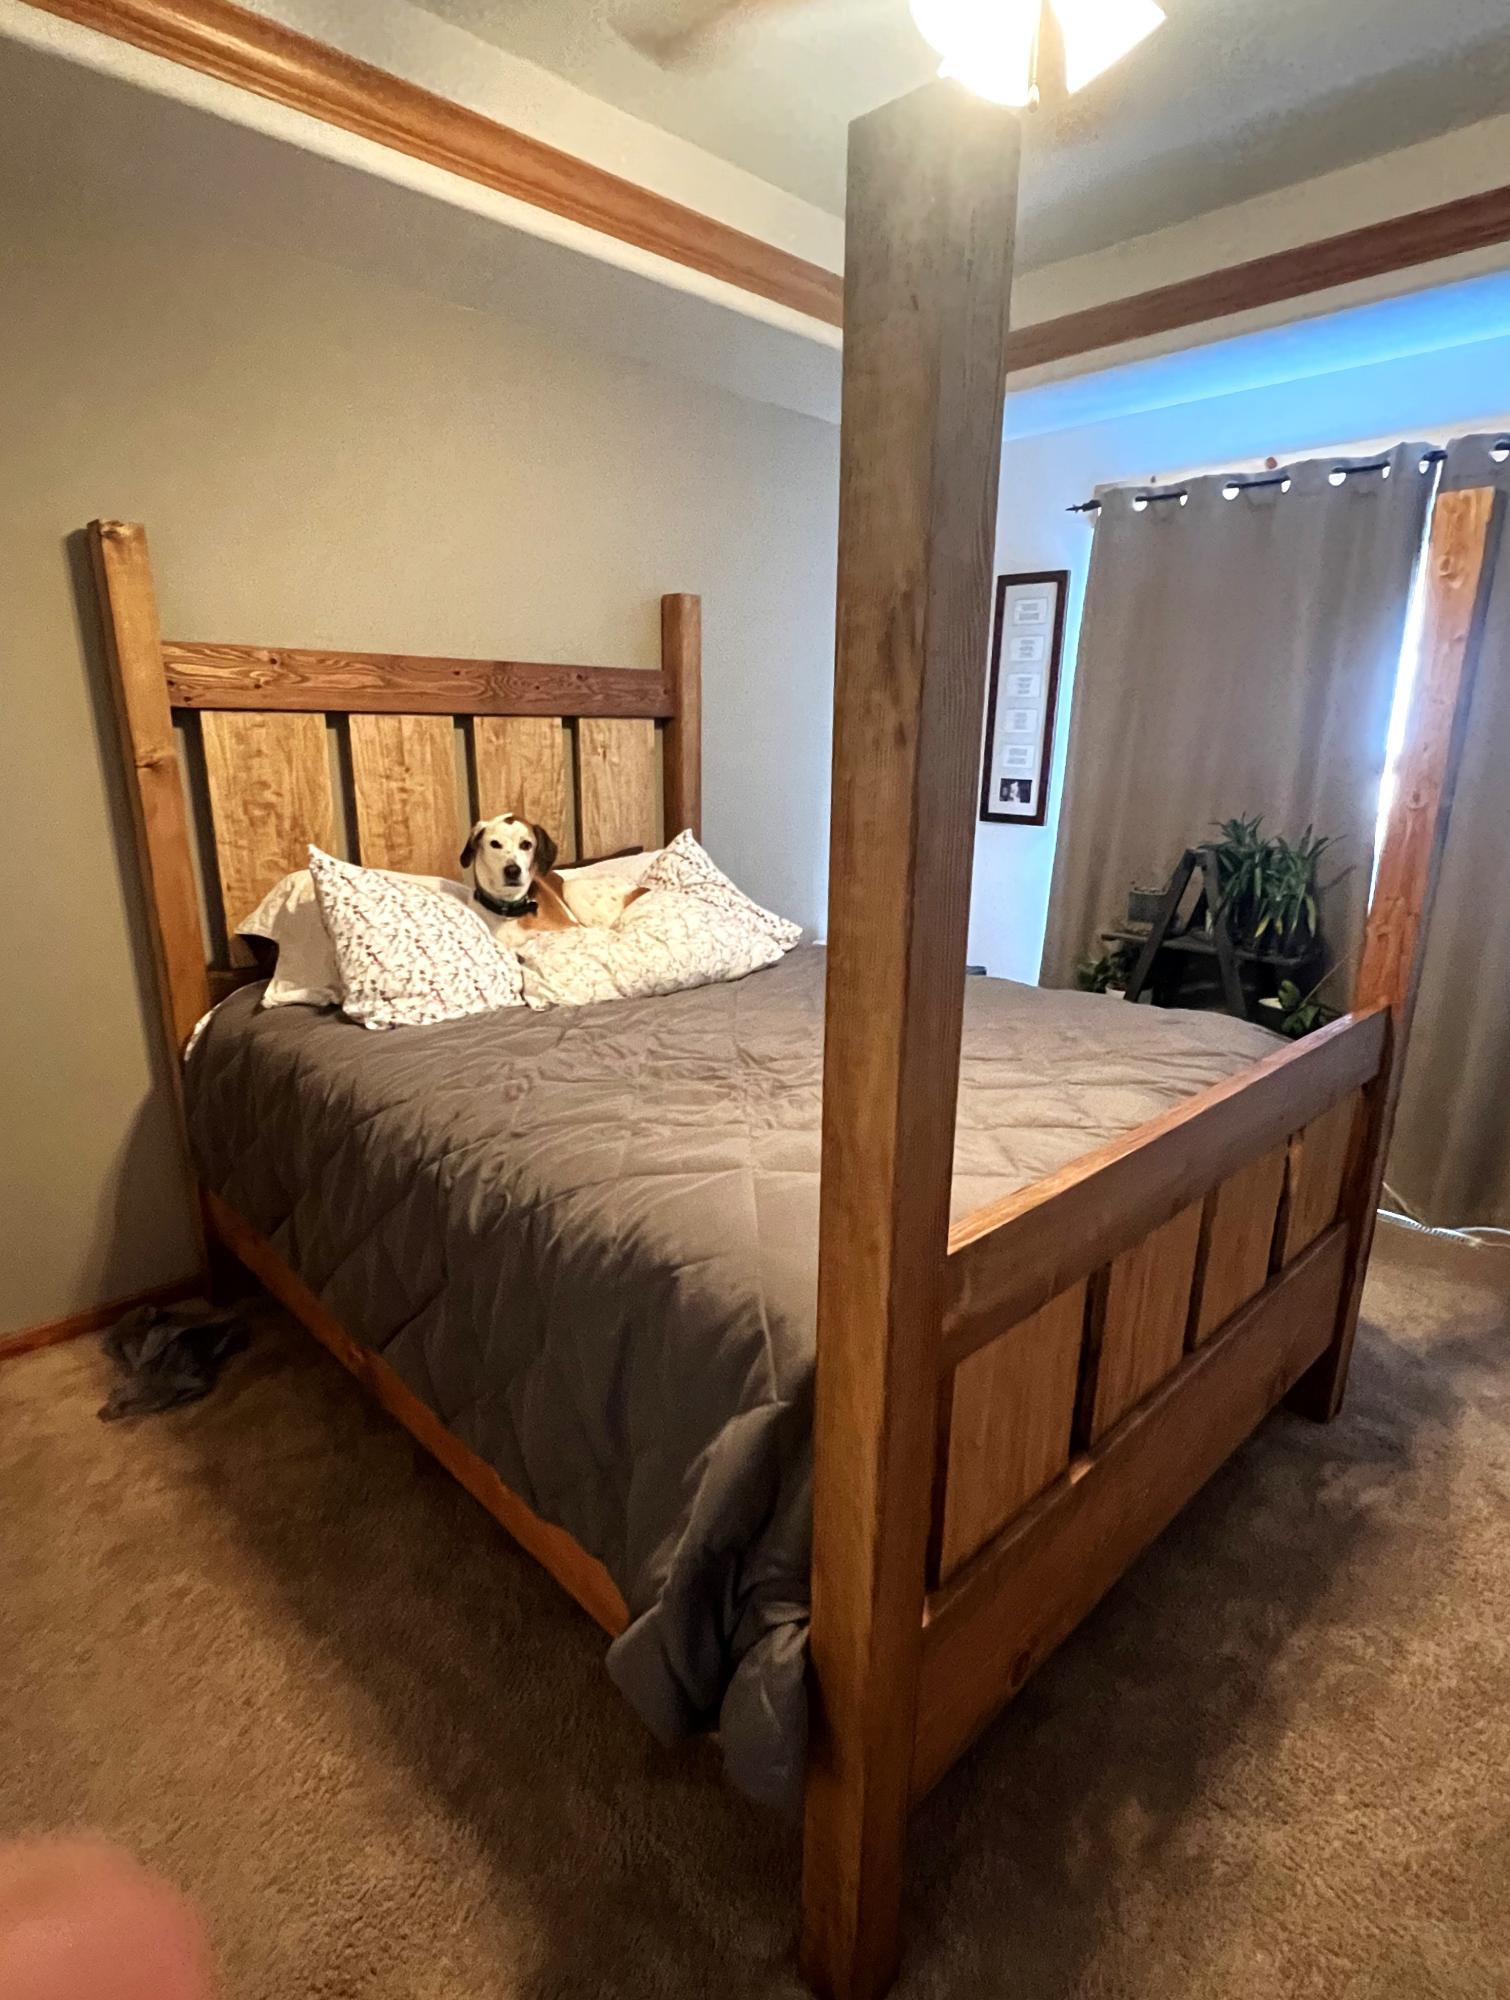
Slatted four posted bed and I adore my new bed!
It was a big project, and my husband did all the main stuff!
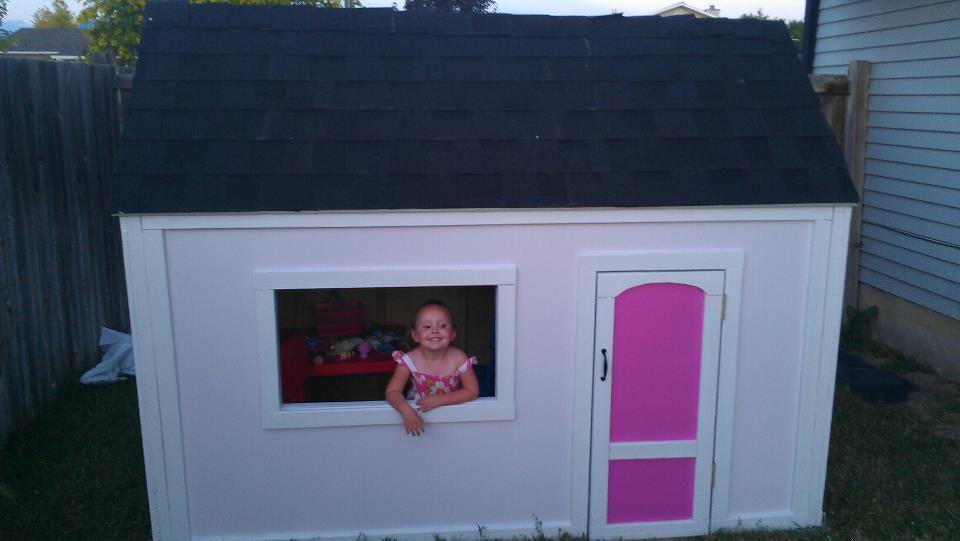
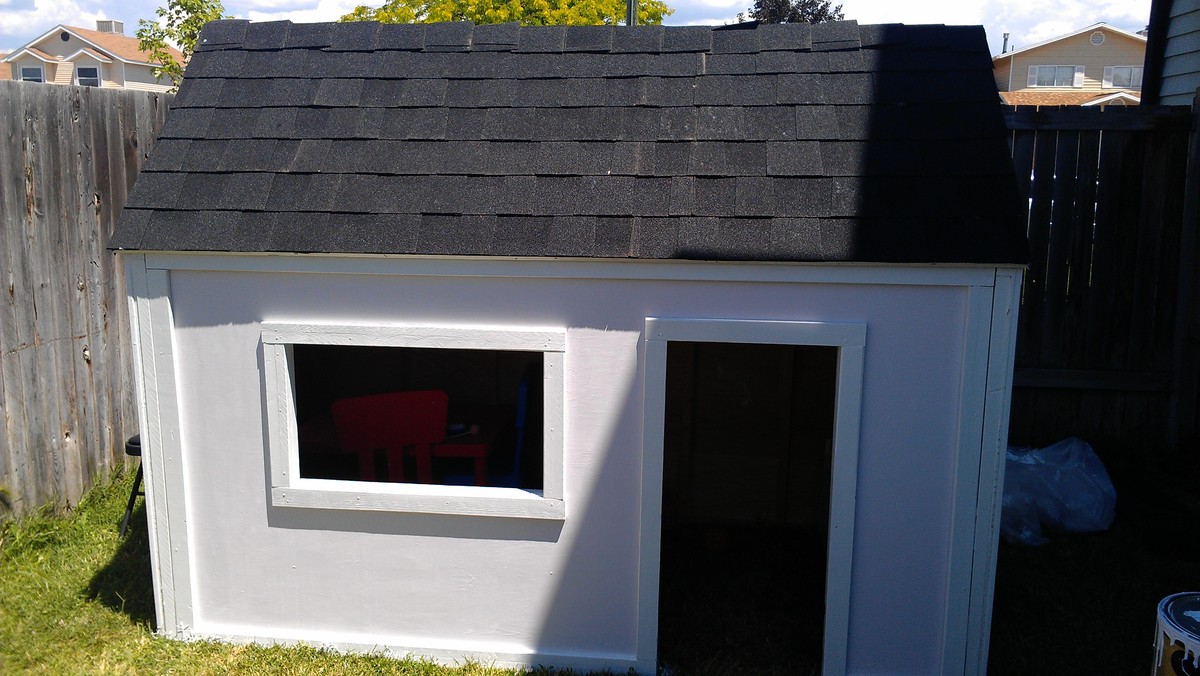
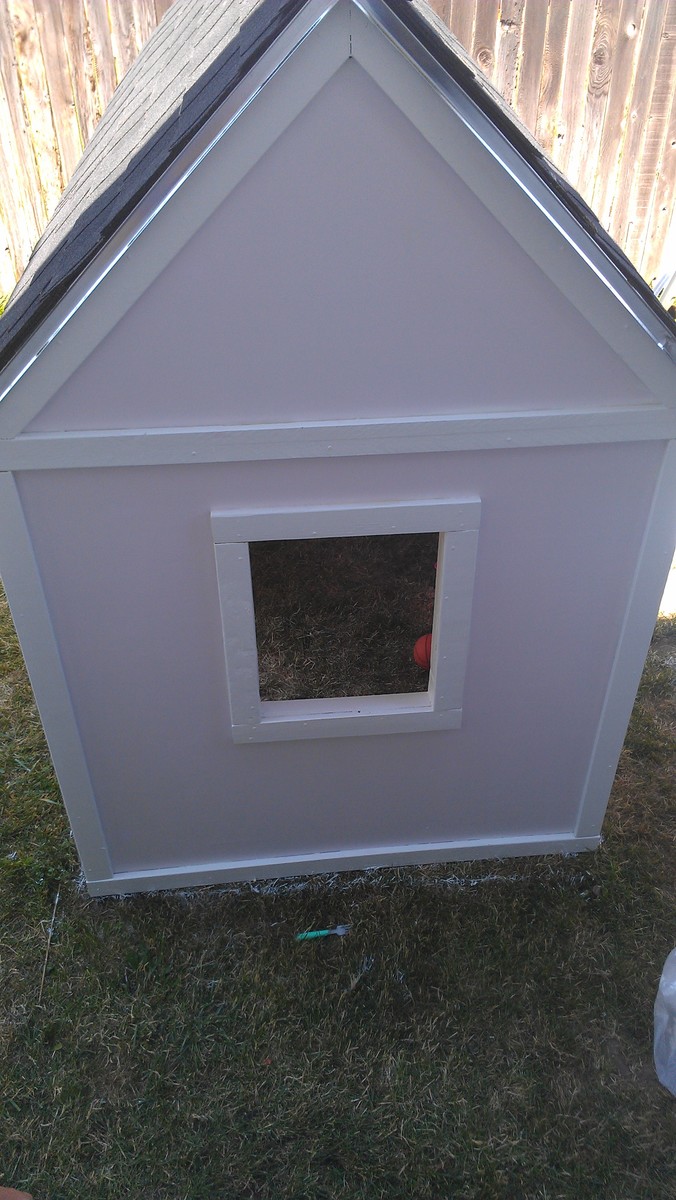
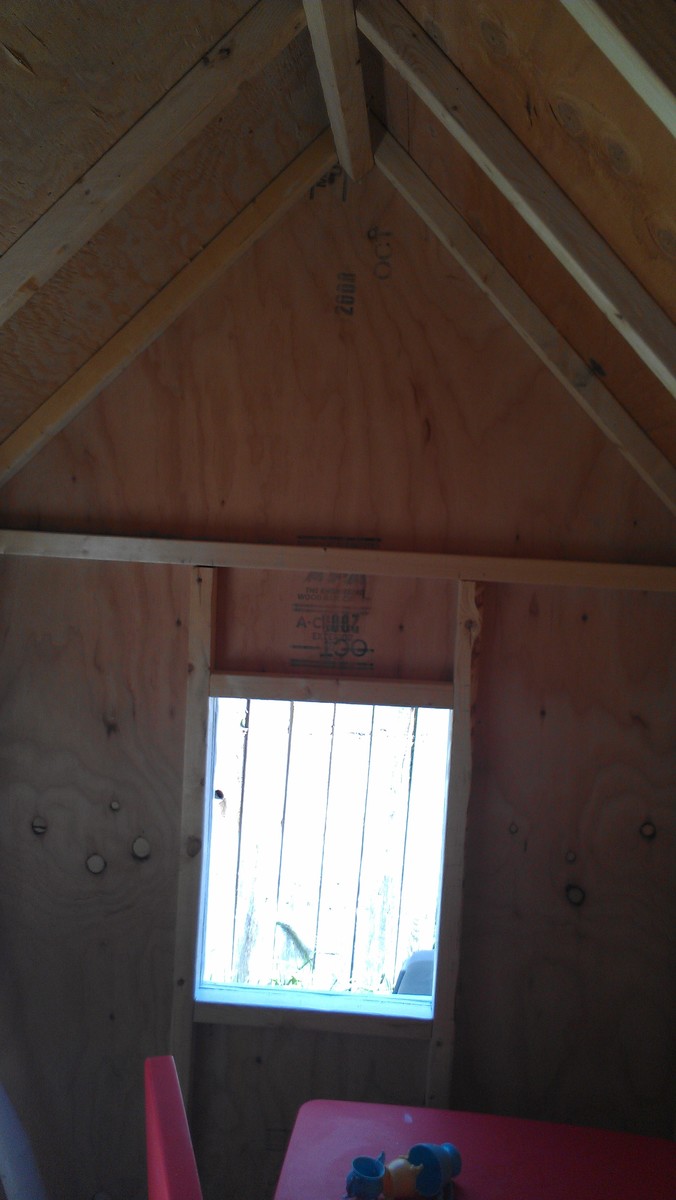
I still have to paint the inside. Since we aren't building a deck yet, we are putting it on some pavers. We bought 40 12x12 pavers and will push that out on in the next couple of days. I also will eventually attach a window box with plants. I'm planning on painting a couple of the inside walls with chalkboard paint.
It was seriously worth every amount of time and energy. If you are thinking of doing this, do it! You can, it's a great plan. Thanks Ana for the plans!
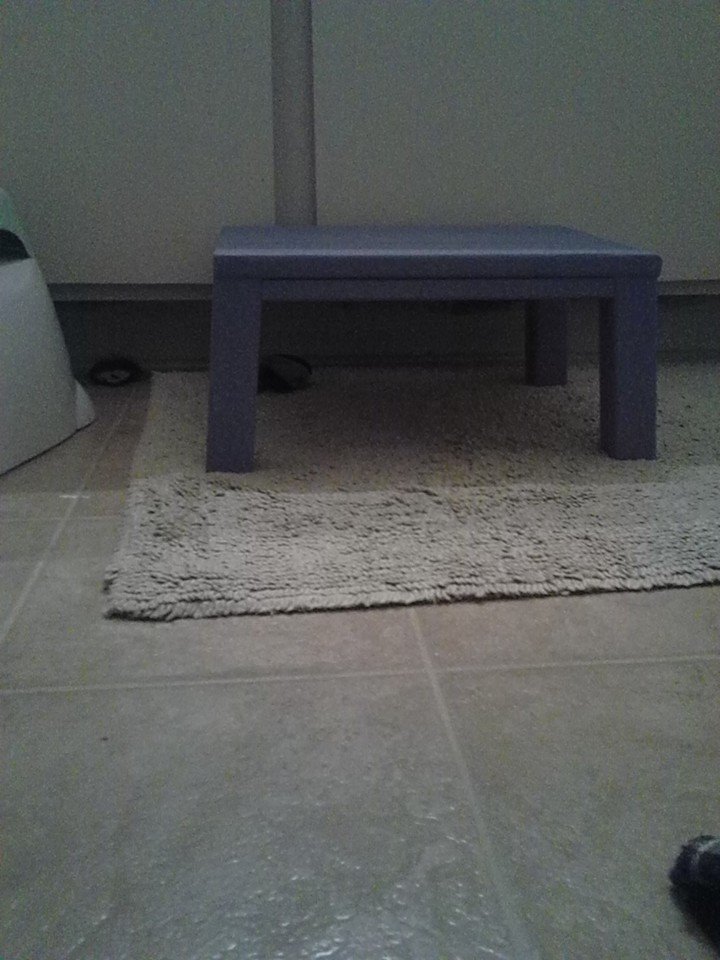
We built a toybox for our son and discovered that he isn't quite tall enough yet to really get into it. So, to remedy the problem I put together a stool for him. I modified the "simplest stool" plan to make it short and wide. Perfect as a little boost to get into the toybox. We also use it in the bathroom as a little step stool for the sink.
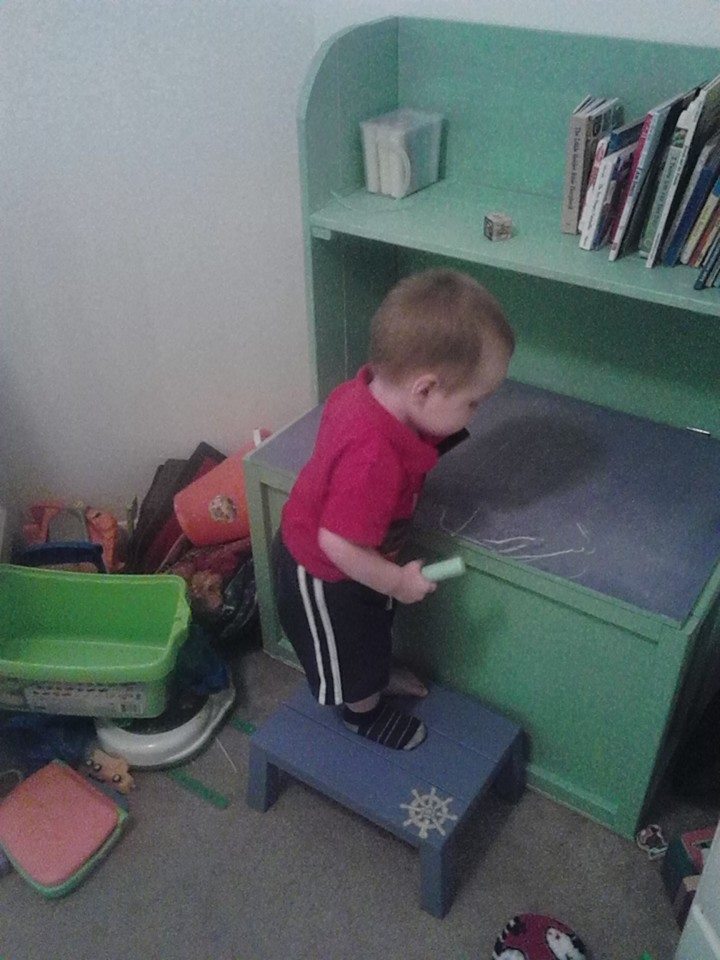
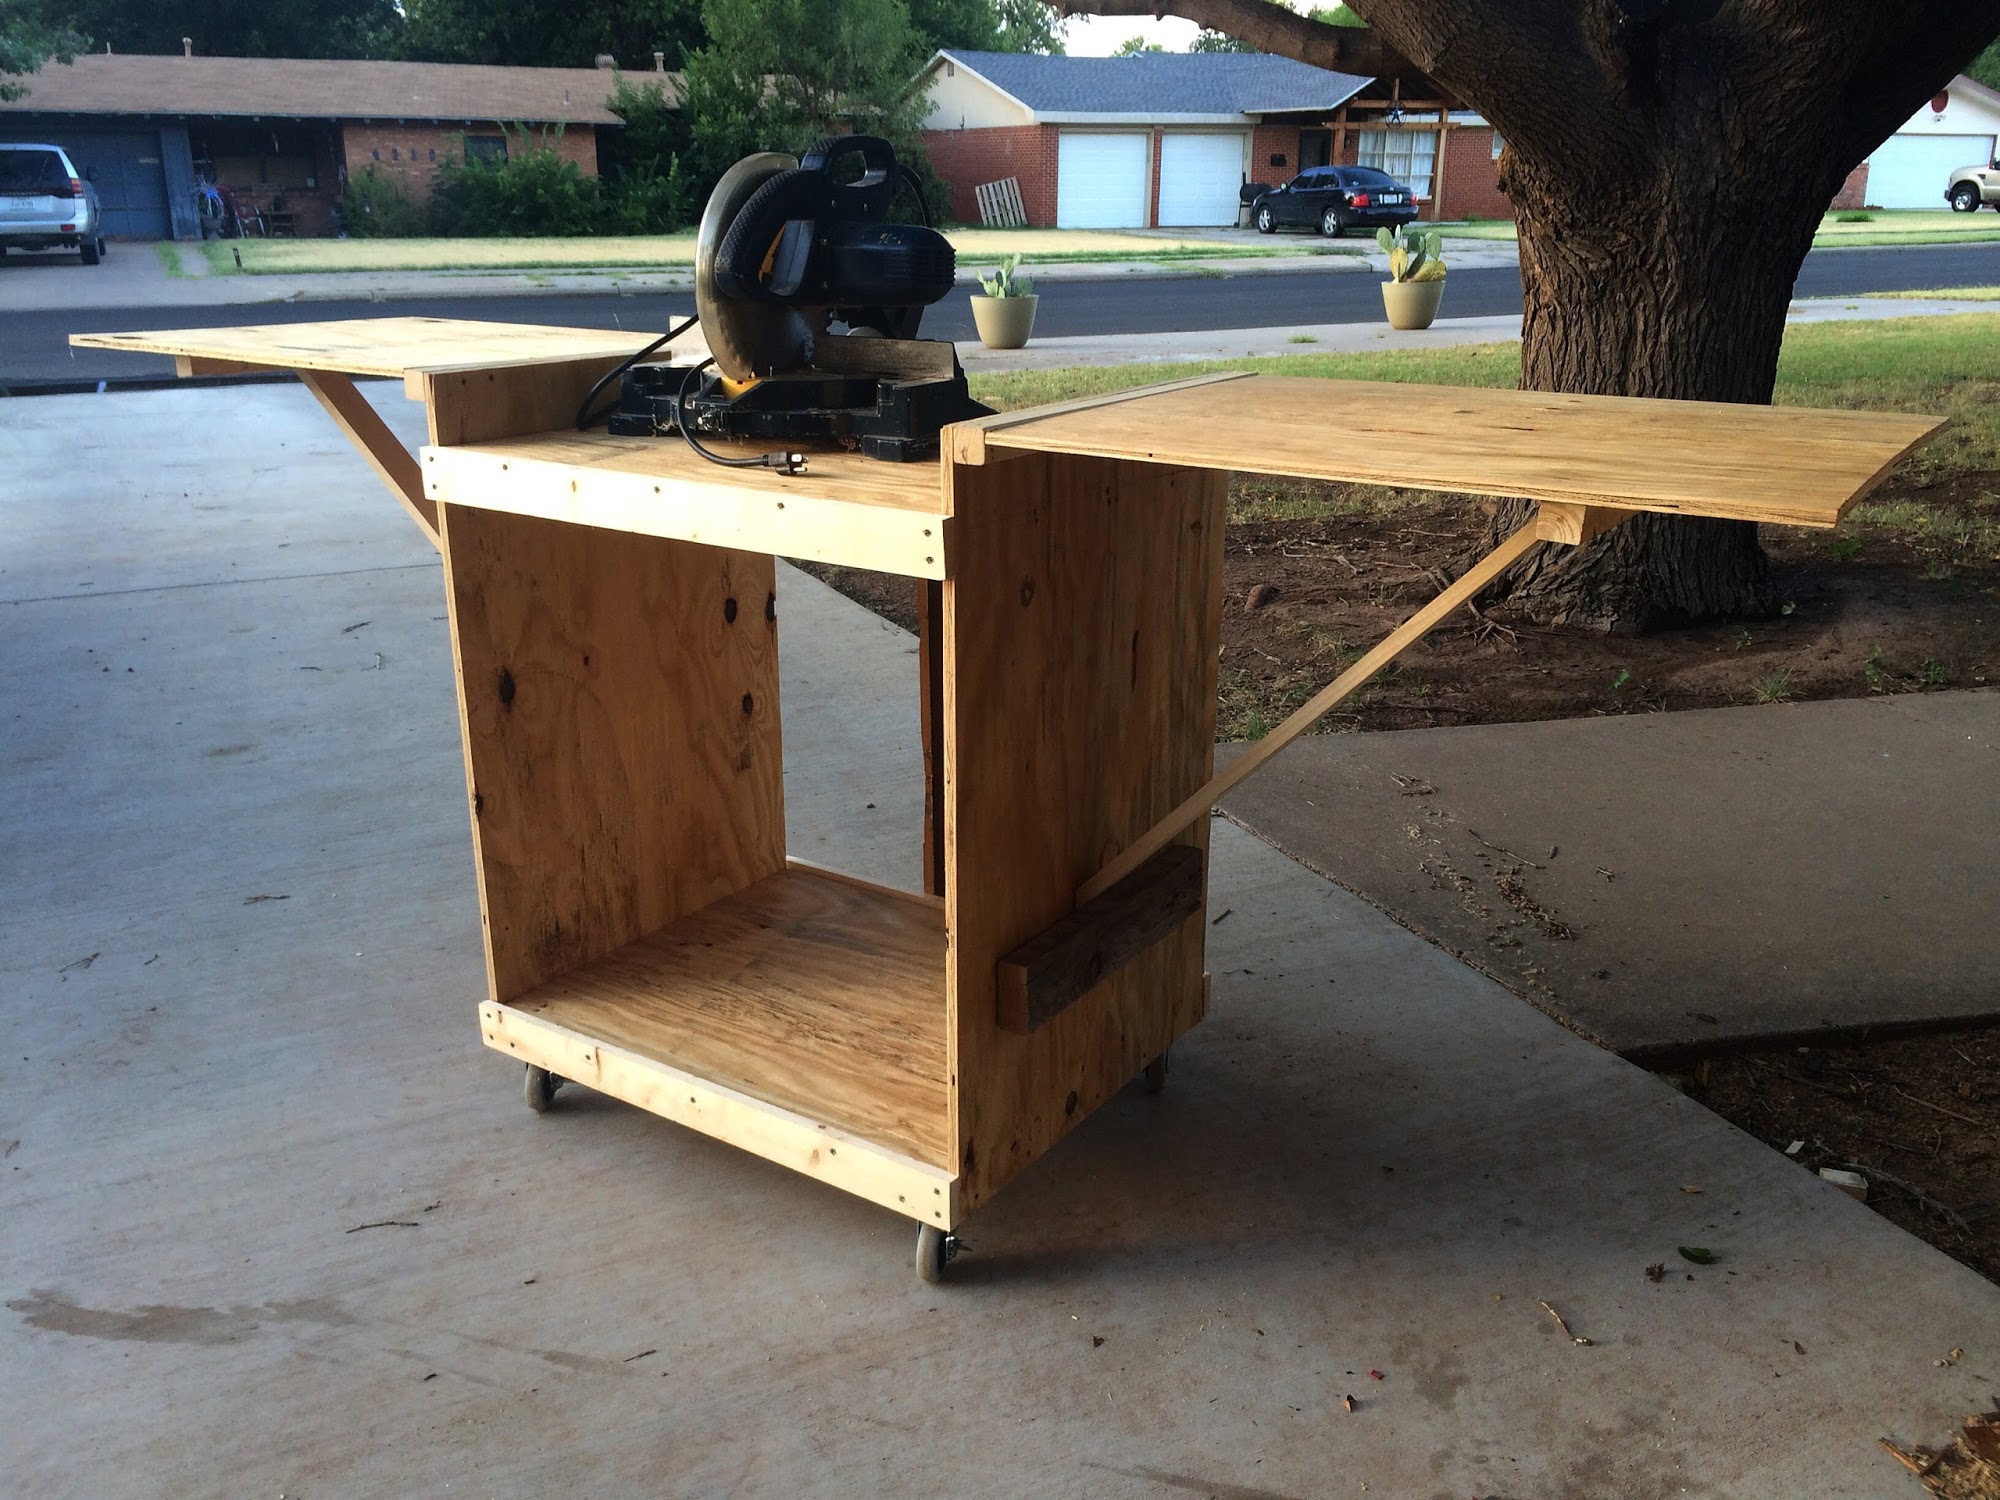
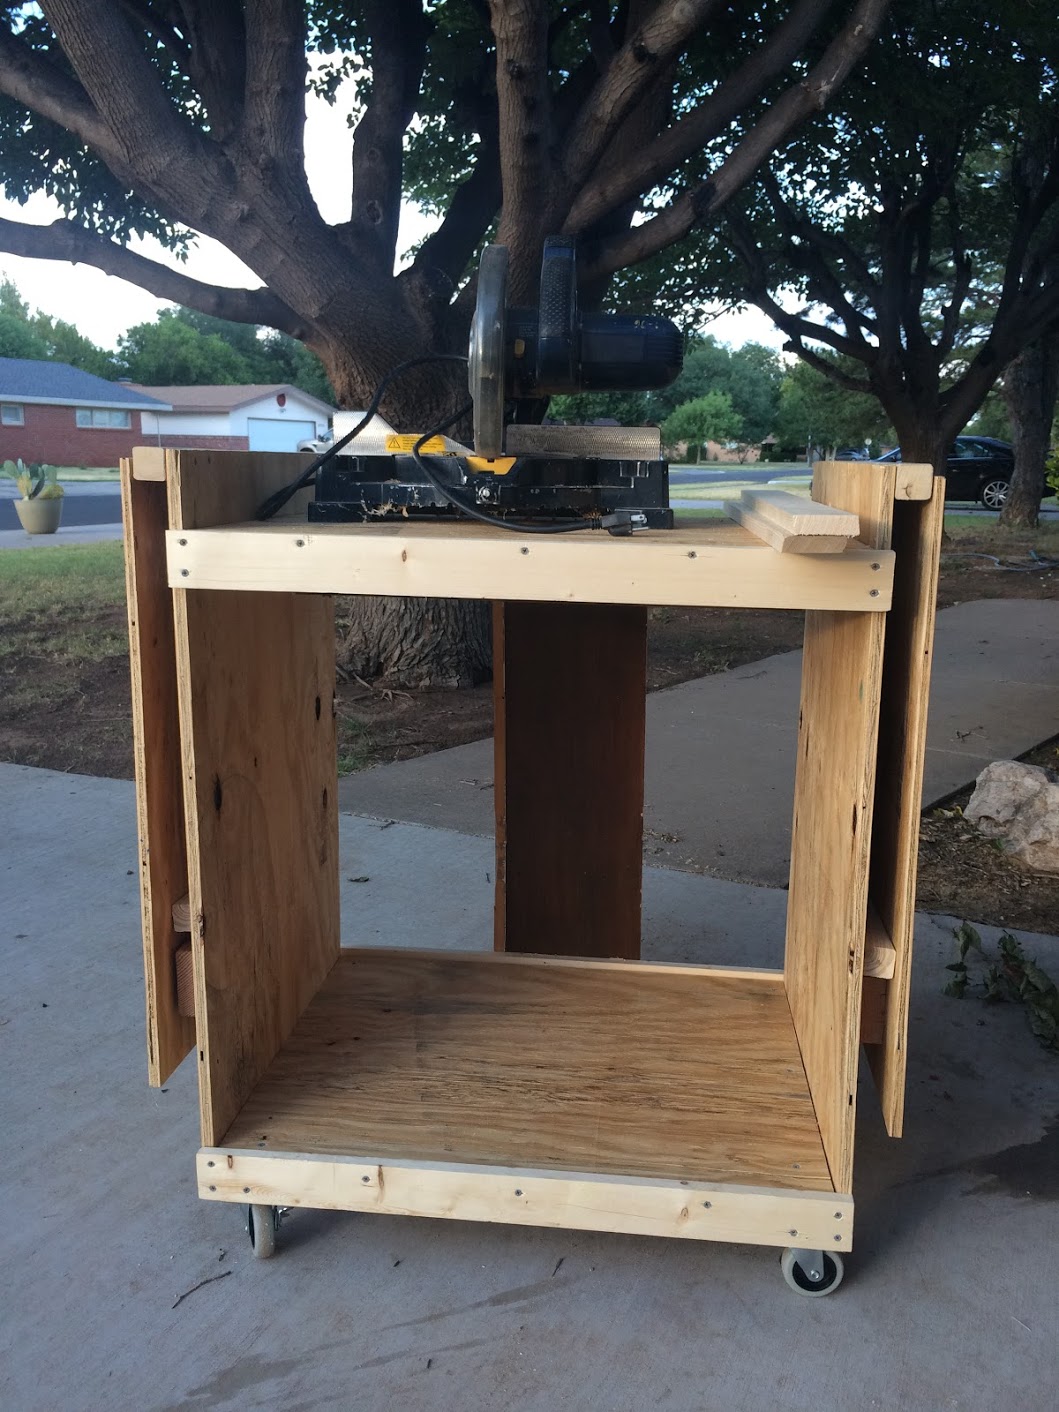
I followed the plans as listed pretty closely. I added a 2x4 under the main shelf for extra support, and used 2x4s instead of 2x2s at the bottom, so I could have something to attach the casters to. I also opted for 1x3 braces, rather than the hinges to hold up the sides. I need to add the fence and paint it white.
This is my first time making this kind of project and it turn out amazing!!! Looking forward to built some end tables with this same design!!!

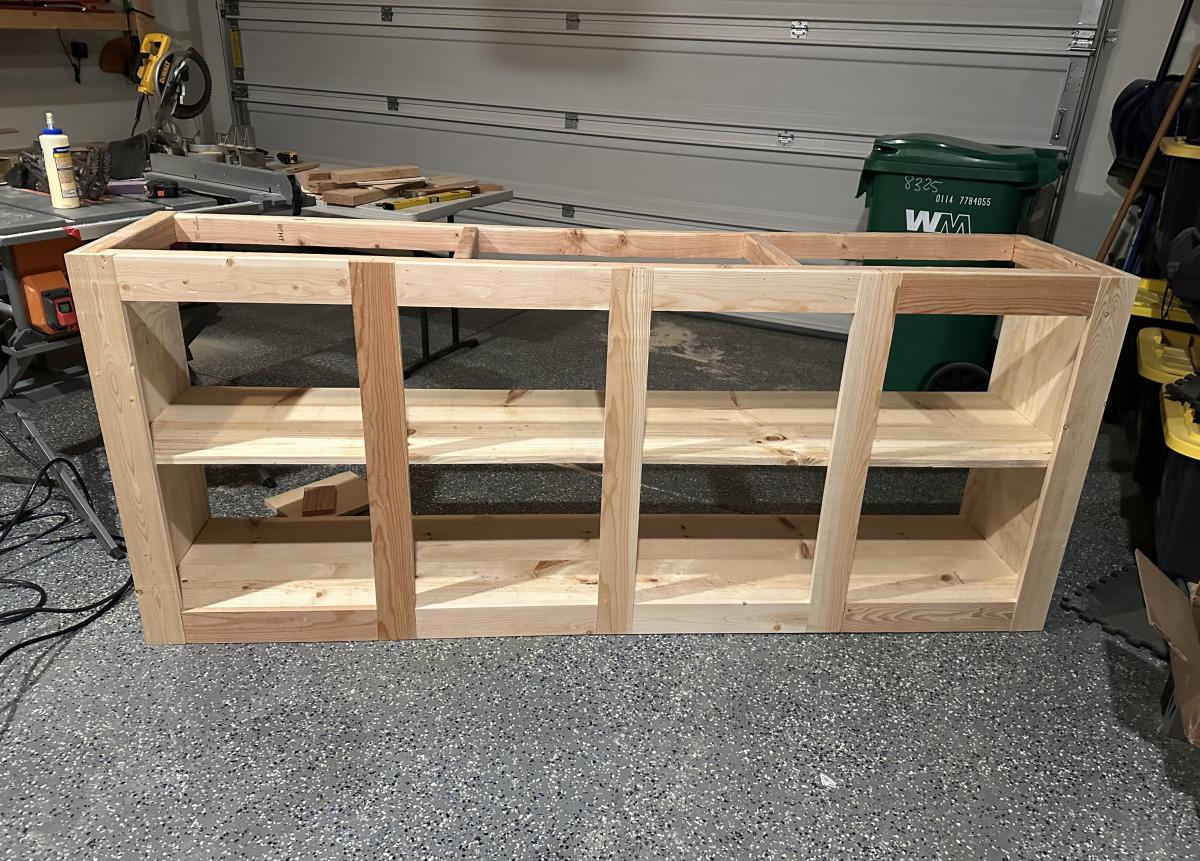
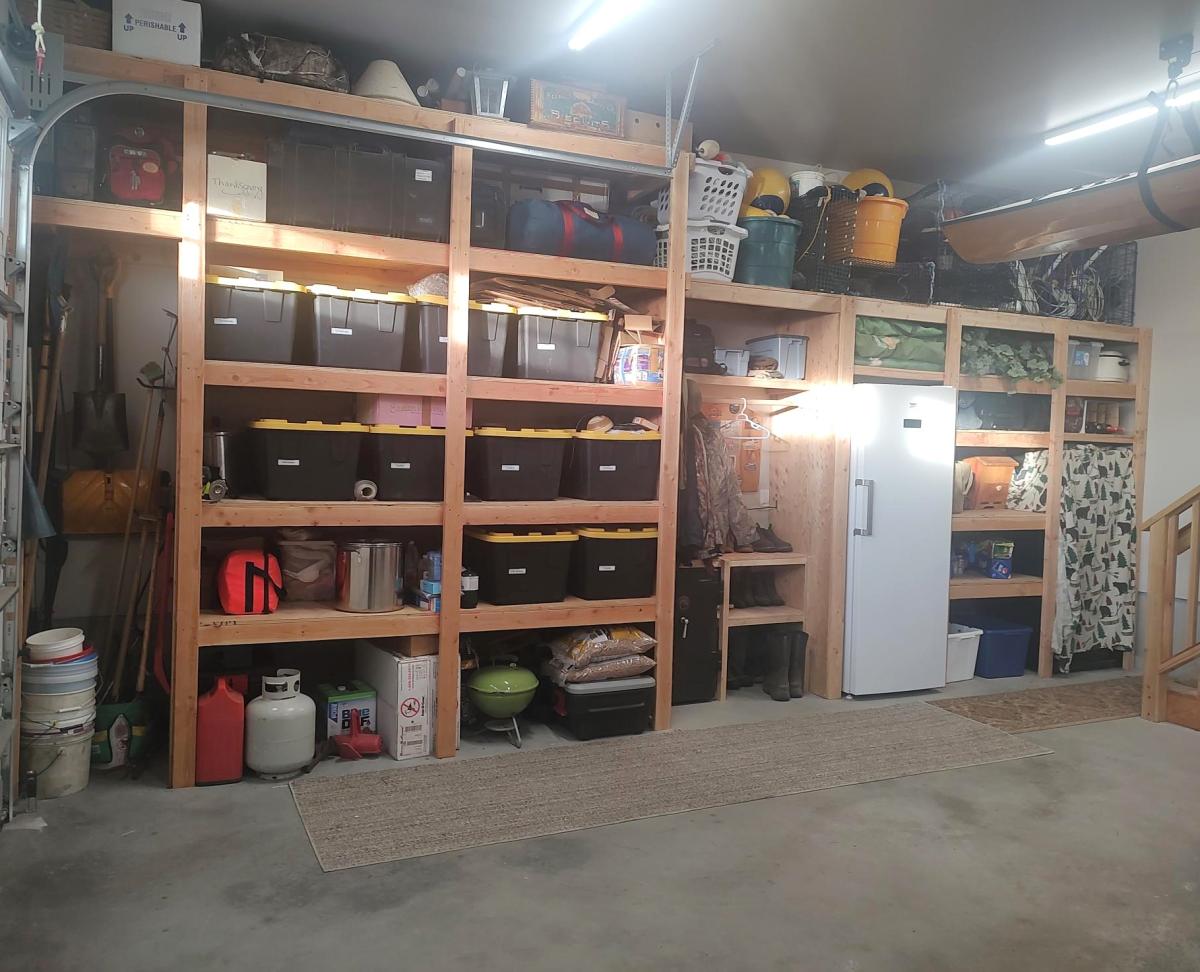
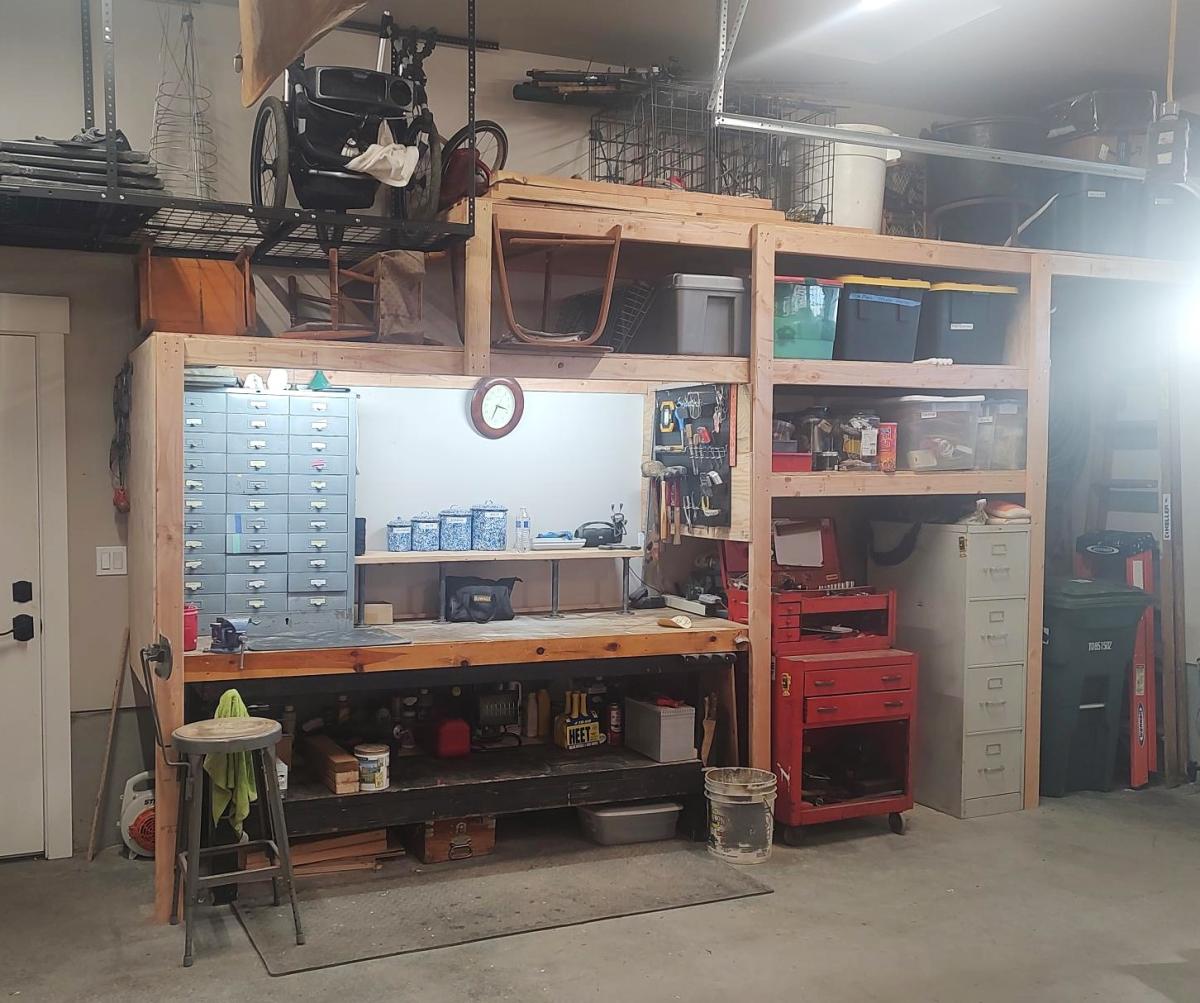
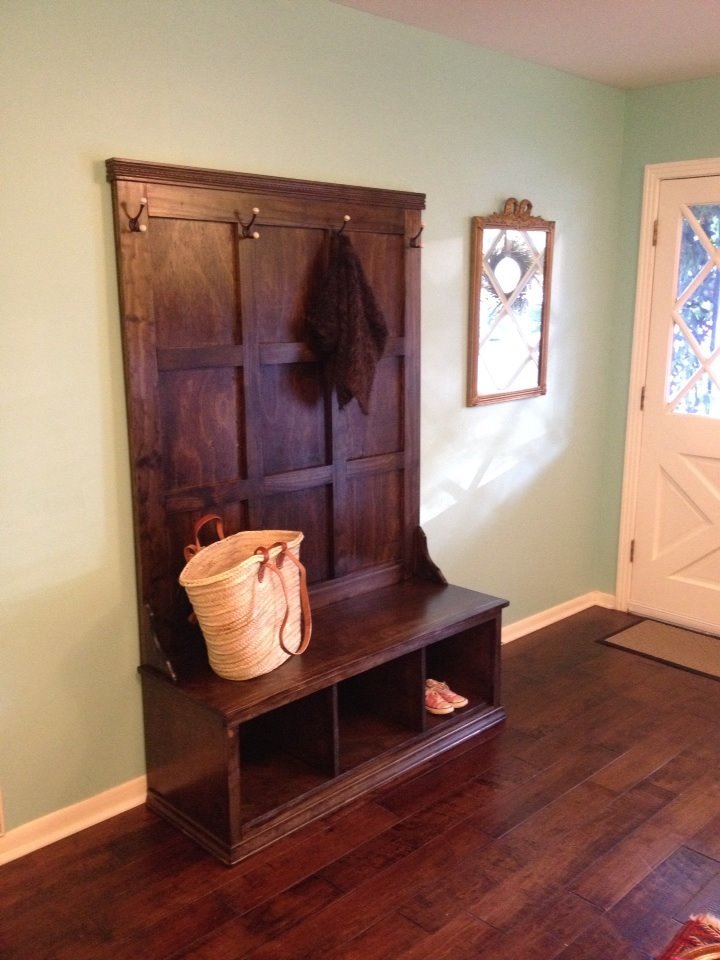
I just finished shelves on both sides of my garage using your video. I built a coat rack and boot rack. I also made space for tall items like tools and ladders near the garage door. I had to also build in a gun safe, freezer and my work bench. Everything came together and now I have everything in bins on shelves.
Gary Hoffman

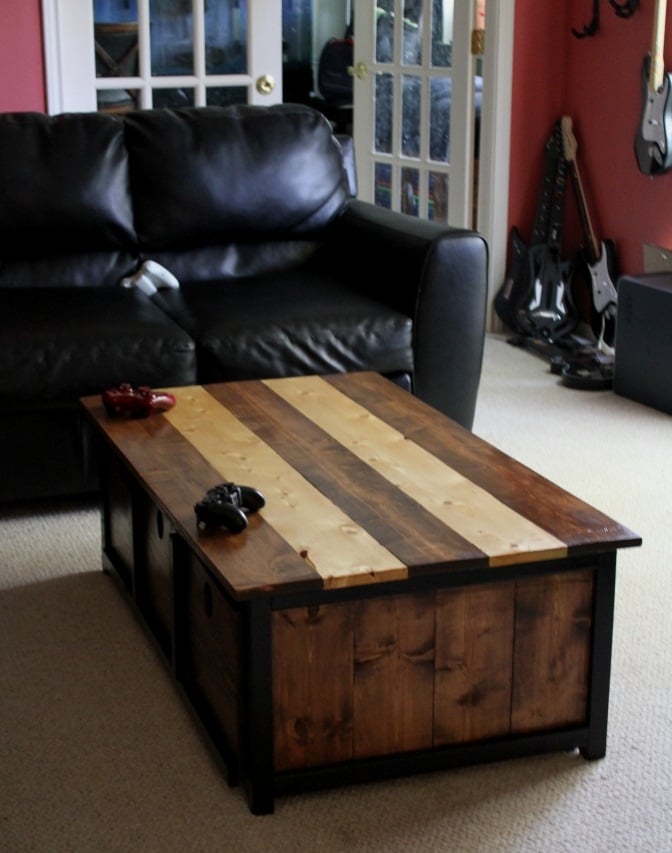
I Loved the idea of this table! It is in the kids' living room/game room. This room is usually cluttered with blankets for friends, games, game controllers and so on! I was thinking about building a storage chest for their coffee table, then I saw these plans! It is perfect! The boys even use it to clean up...WITHOUT ME FORCING THEM! Oh yeah!!!!
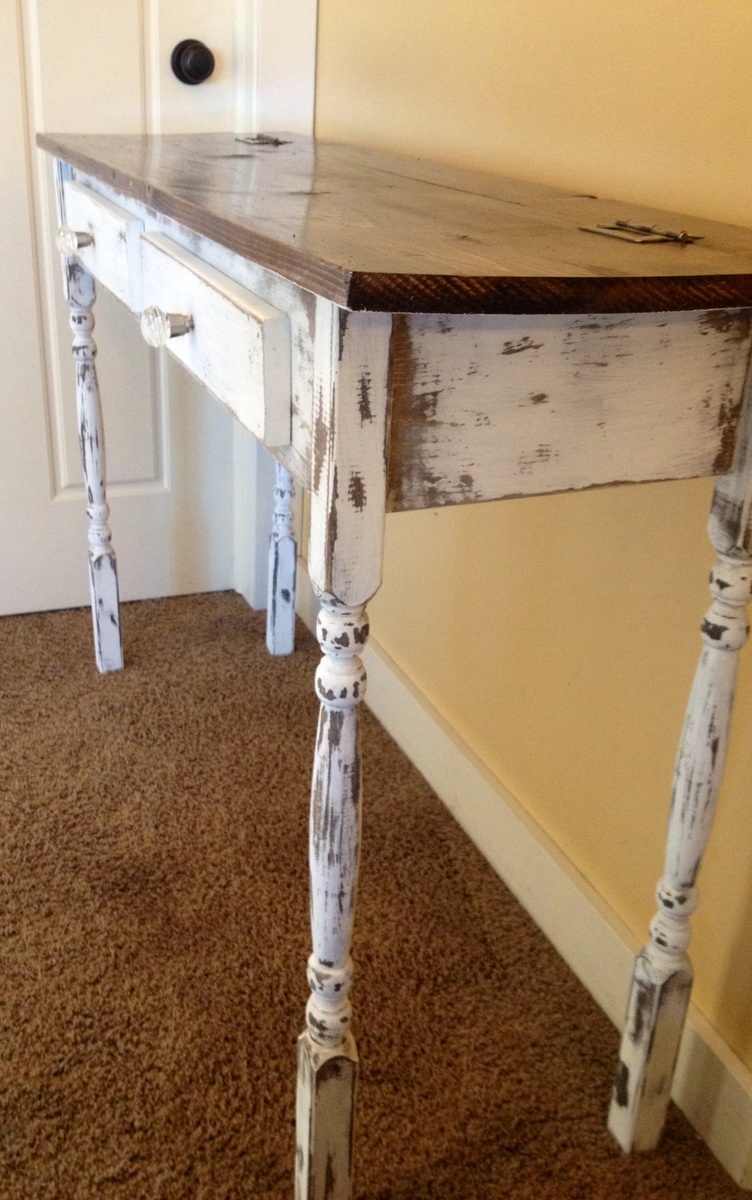
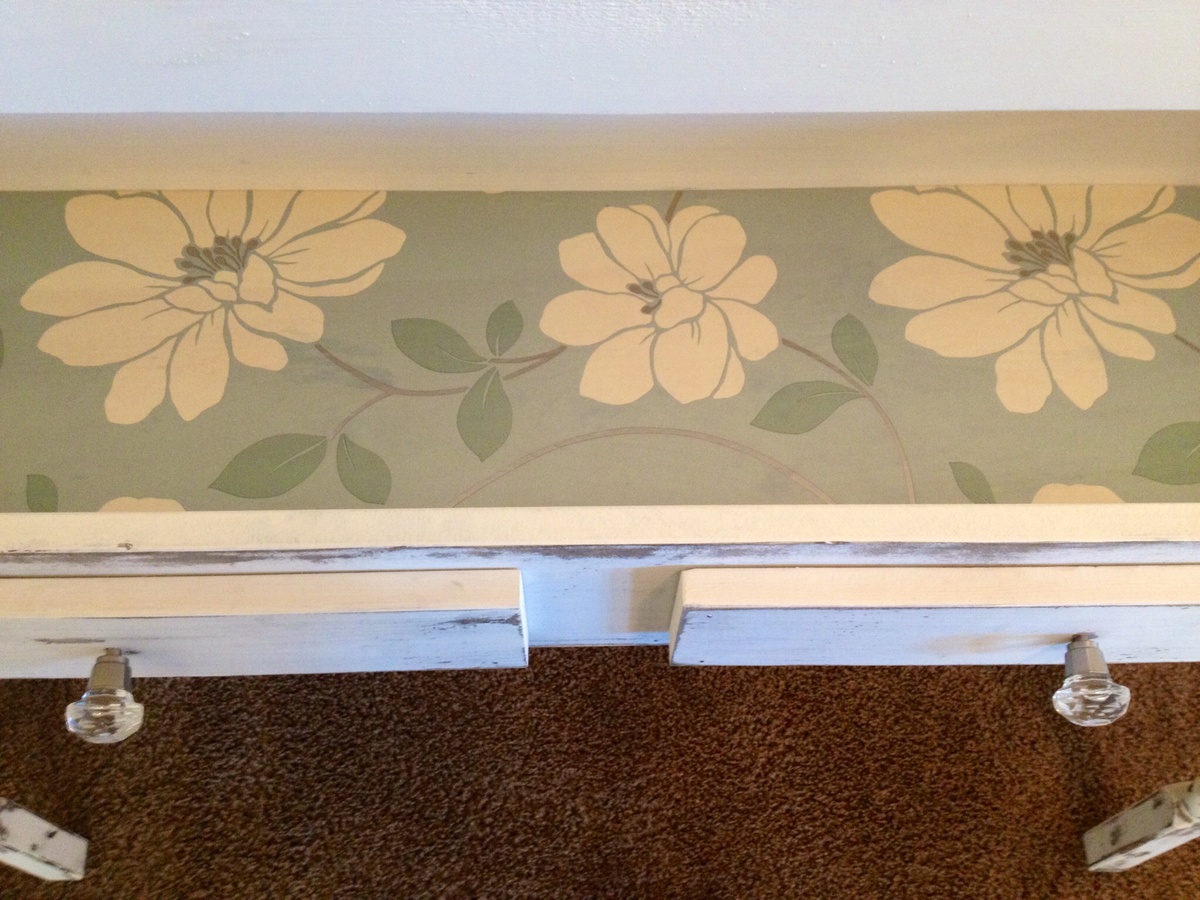
I wanted my table to appear to have three drawers instead of two, so I modified a bit. I also opted out on the breadboard ends and just made the top boards a little longer.
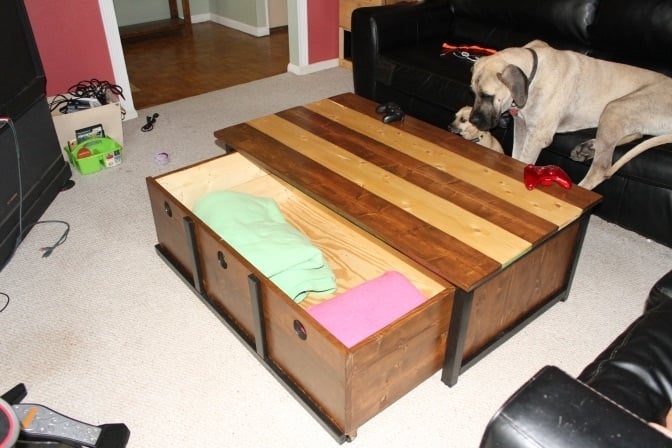
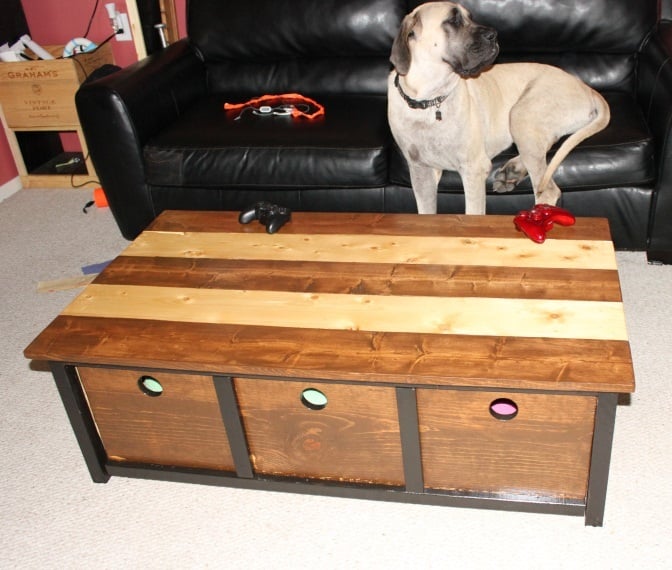
This build was quite easy. I didn't run into any issues. I went with stair balusters for the legs instead of the 2x2's that the design calls for, but the balusters ended up being 2x2 anyways so I didn't need to make any changes. My building costs were a bit pricier as I find there's a slight price difference for lumber here in Canada. The construction of the table itself took about an hour or so, however the finishing took much longer due to the painting, staining and then lacquering and waxing!
I decided to go with a more distressed/aged look for my finish, and I thought the glass knobs would look gorgeous. I also decided to line the inside storage area because it just looked a little bland to me! All-in-all I'm very happy with the outcome!
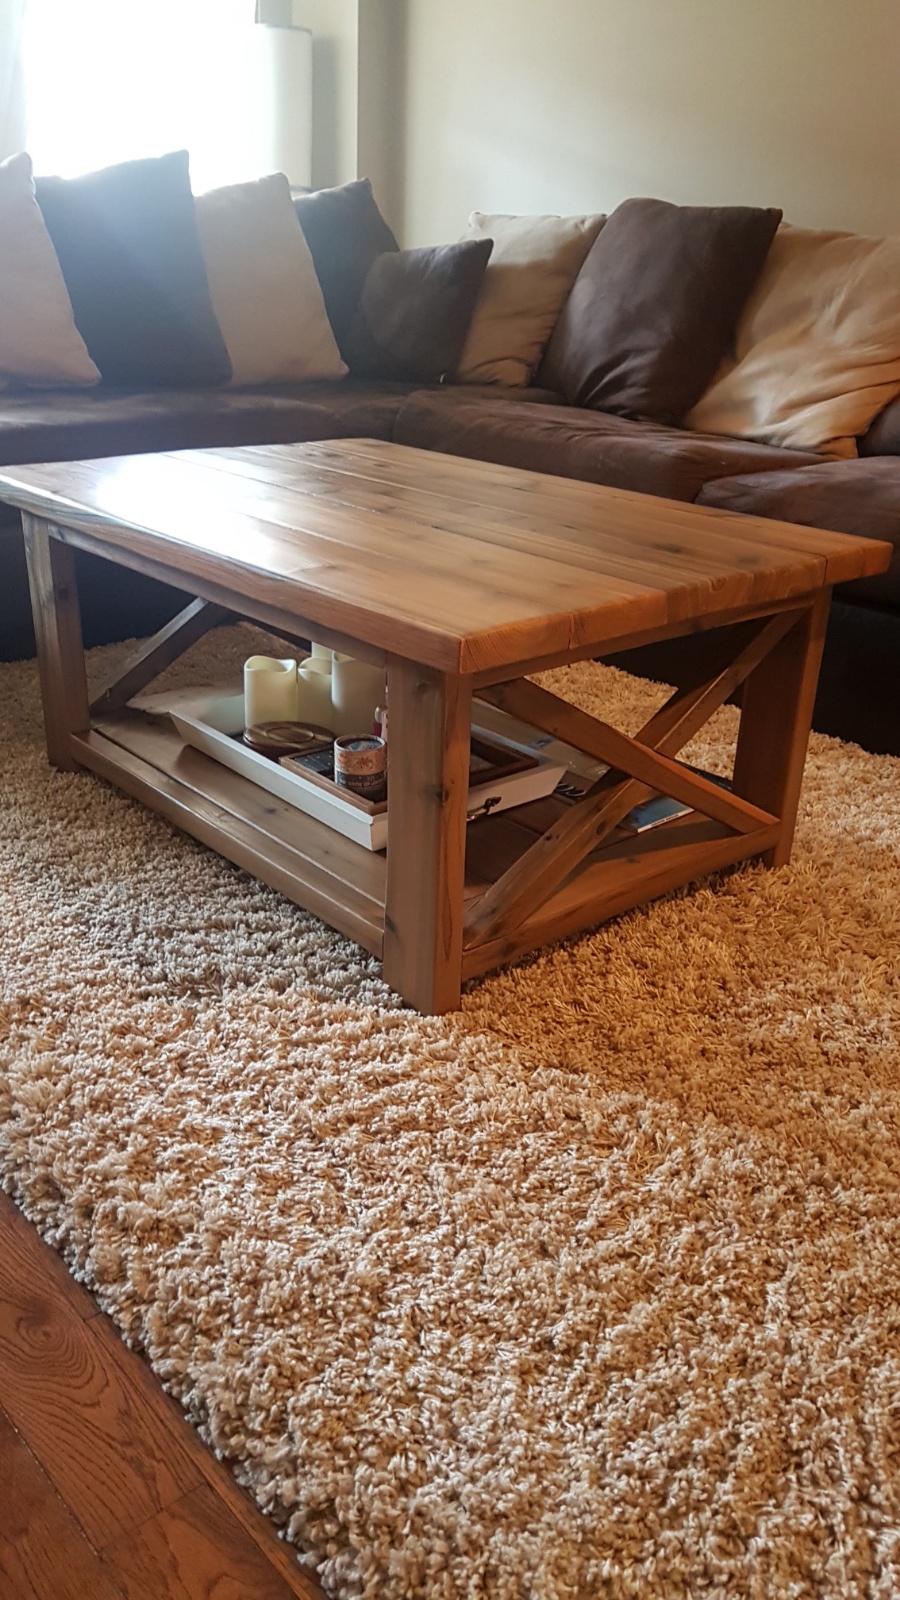
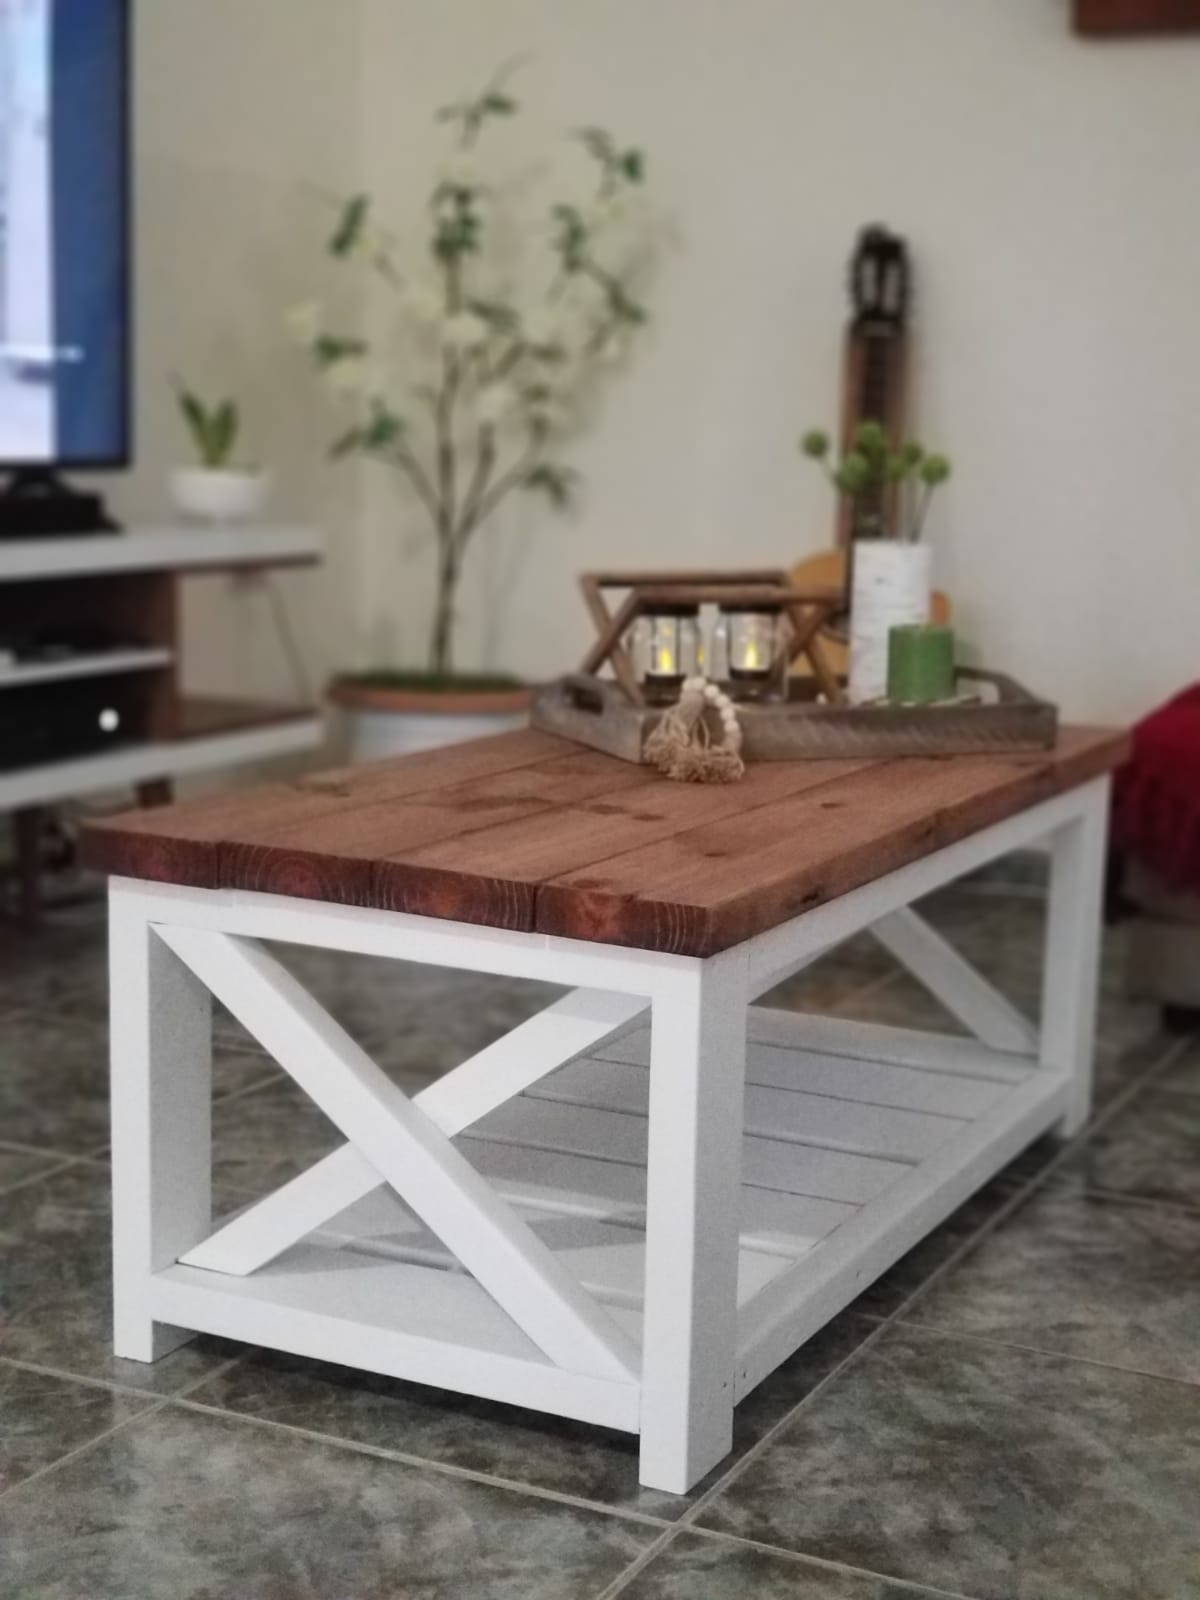
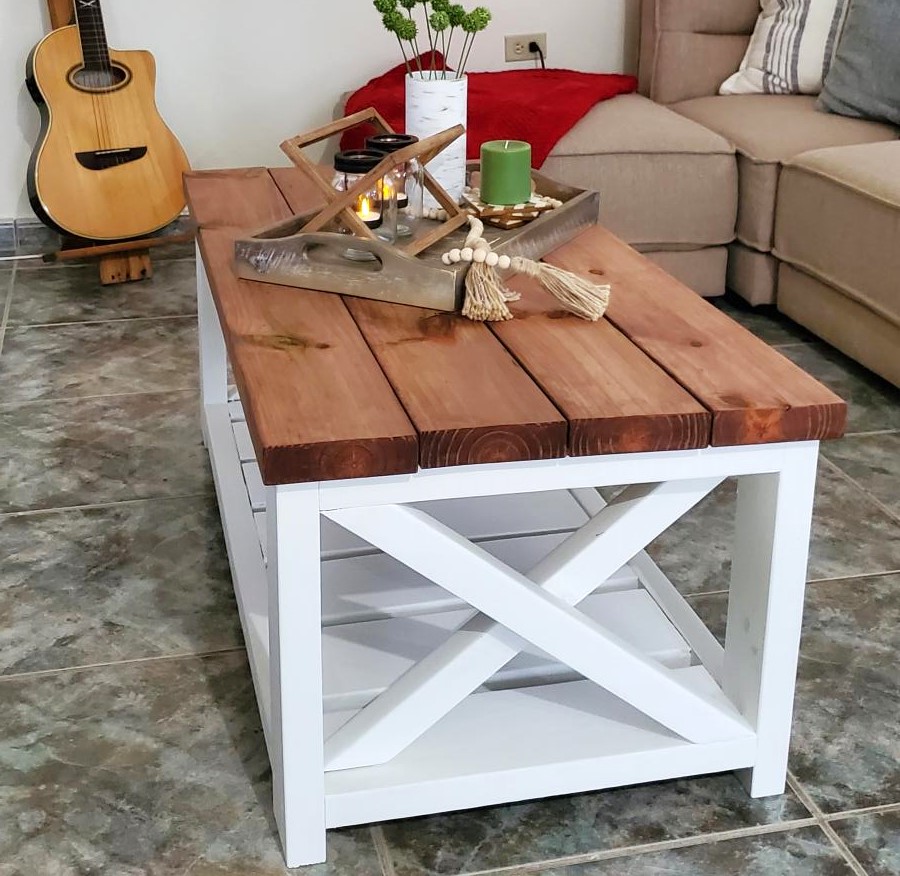
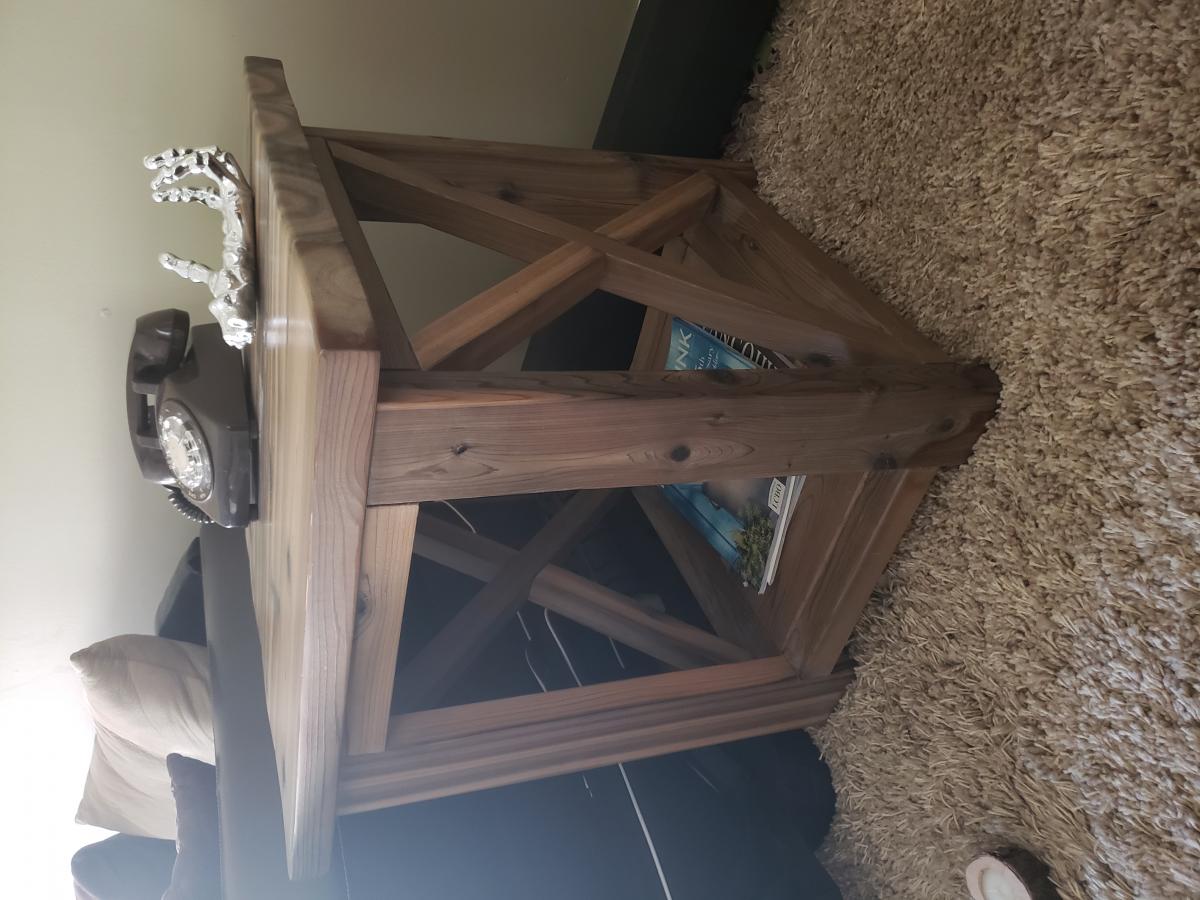
Cedar coffee table and side table from rustic x plans.
*lesson learned: I weathered the wood for each table about a week apart. This meant my vinegar mixture sat for an extra week. The second table came out much darker as a result.
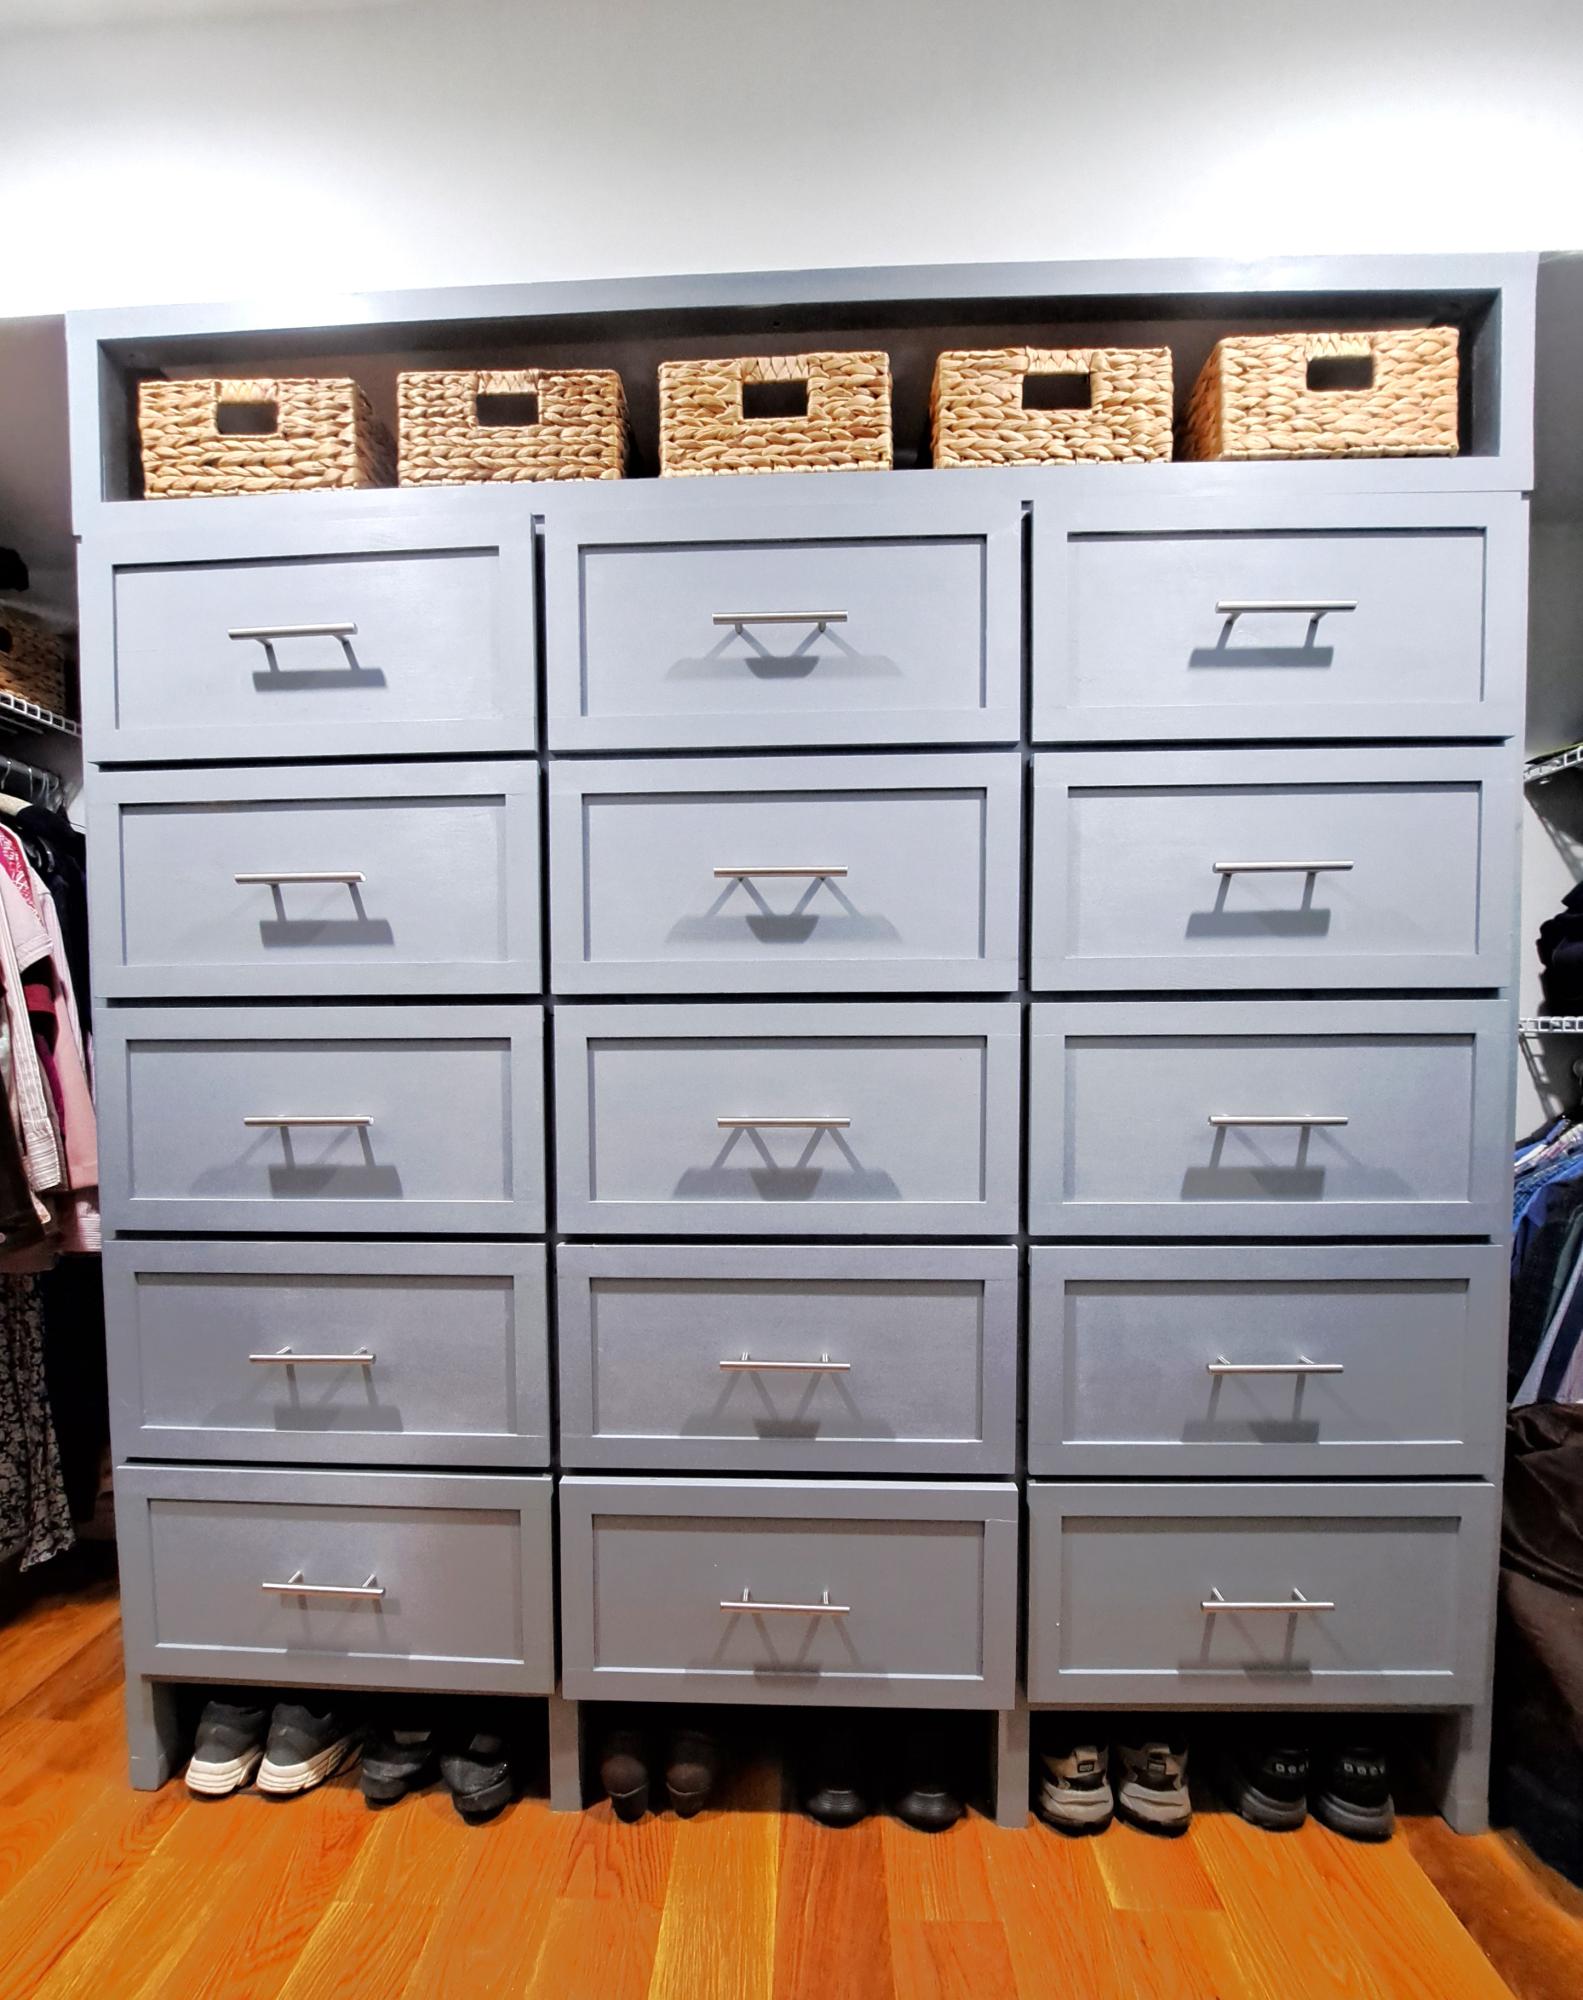
Using Ana's methods of drawer construction - 15 Drawers in the Primary Bedroom Closet - with tote storage above and shoe storage under.
Phil F. *Ana's secret drawer slide trick for full extension drawer slides
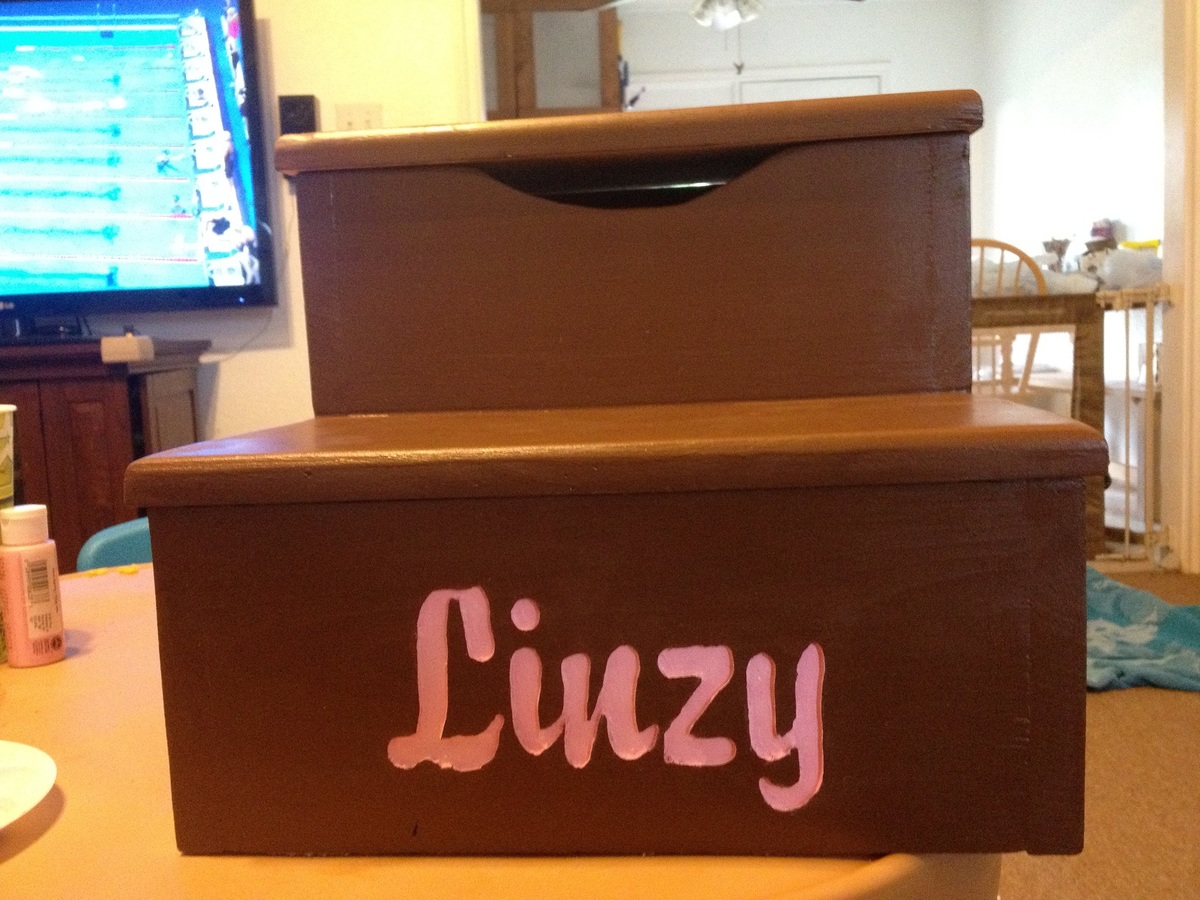
I built the entire project to plan.. I did however engrave my daughters name instead of painting it on.. I think it gives a little more personal touch..
Fri, 03/29/2013 - 16:18
I was curious as to what tool/s you used to complete the engravement, this is a nice touch and I would like to do this for mine as well.
This was my first major woodworking project, and I am so pleased with it! I have been looking for a piece of furniture like this and couldn't find something that I liked and could afford. I spent about $180 in lumber, and also took Ana's advice and invested in a Kreg Jig. I HIGHLY recommend this! It is expensive ($100) but so worth it. I had to learn a few things along the way, and had encountered some obstacles, but in the end I am very pleased with the project. A few things I learned on my first project:
1. Exact cuts are SO important. Every 1/8" matters. It was helpful to do as many cuts as possible at the lumber store.
2. Ana mentions this in her beginners section, but it bears repeating: wood glue will repel stain. Be sure to wipe away ALL residue of wood glue before staining, and be sure to give extra sanding attention to areas that had wood glue. Otherwise you will have a white spot in the midst of your stain.
3. On this plan in particular there is one change that I recommend. Do not add the wrap around trip on the top and bottom until AFTER you have put the plywood backing on in the last step. The reason is that the plywood adds another 3/4 inch, and so there was a gap between the edge of the trip and the back on the furniture. I redid it on the top because it was so noticeable.
Wed, 04/30/2014 - 11:14
This is gorgeous! You did a great job! I want to make this but I have no place to put it in my tiny apartment. Someday…
Comments
Ana White Admin
Mon, 01/08/2024 - 09:36
WOW!
You did an amazing job, absolutely love the color choice!
hmillgarv
Wed, 02/28/2024 - 19:20
Could this be modified to be moveable?
Hello! I’m wondering if you think this could be built as a temporary piece that could be moved? I live in apartment and wouldn’t want to leave something like this behind after spending time and money to build it. Maybe if I built in some removable access panels (a few of the slats?) to be able to attach it to studs (and later remove it) after building the entire piece. Thoughts? TIA!