Community Brag Posts
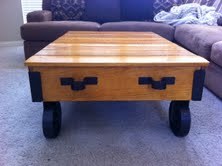
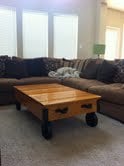
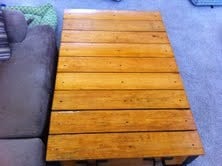
Third Project - Factory Cart Coffee Table
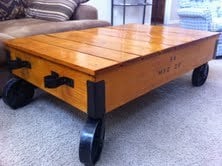
This Factory Cart Coffee Table is my third project. I used pretty much the same design as the Factory Cart Coffee Table plans on the site, with some minor modification. We attached a few pieces of hardware to the sides, and corners of the table to add a little bit more of the industrial look.
Great plans, keep up the good work. I am beginning to build a lot of stuff now. The furniture all looks great, it has the look of homemade, and saves a lot of money over buying in a store.
Built from Plan(s)
Estimated Cost
$215
Estimated Time Investment
Afternoon Project (3-6 Hours)
Finish Used
The finish I used on this project was Bullseye Amber Shellac, and Deft Brushing Lacquer. I put down three coats of the Amber Shellac to give the wood a great amber color. I let the shellac dry for a couple days, then added six coats of the Deft Brushing Lacquer. I also spray painted all the hardware with Rustoleum Hammered Black Spray Paint.
Recommended Skill Level
Beginner
Comments

Sat, 07/16/2011 - 08:20
Been looking at these plans
Been looking at these plans for a while trying to figure out where I could fit a table like this in my teensy-tiny house. Love your interpretation of it. The black hardware is a nice touch!
Thu, 07/28/2011 - 07:20
Thanks, and Caster Answer
Hello,
Thanks...we really like the look of this piece in the house, and by building it ourselves it saved a ton of money.
I got the casters at Tractor Supply. They are 5 inch casters. The front two are able to swing 360 degree, and the back two are just straight casters. These were by far the most expensive portion of the project. I bought and tried 3 inch casters first, but these made for a really, really low table.
Wed, 08/03/2011 - 19:23
factory cart table
I love the work you did on the table. Did you also stencil something? Did you get the hardware at the tractor supply store? Just beautiful.
Mon, 08/29/2011 - 08:54
Guest Factory Cart Table answer
Thank you so much. We did stencil something on the side (S & K MFG Co.). A mix of mine and my girlfriends name.
We got the hardware at Lowes, and the casters at Tractor Supply. The casters were the hardest part since I was looking for the old type casters used on the turn of the century carts, but those were way too hard to source.
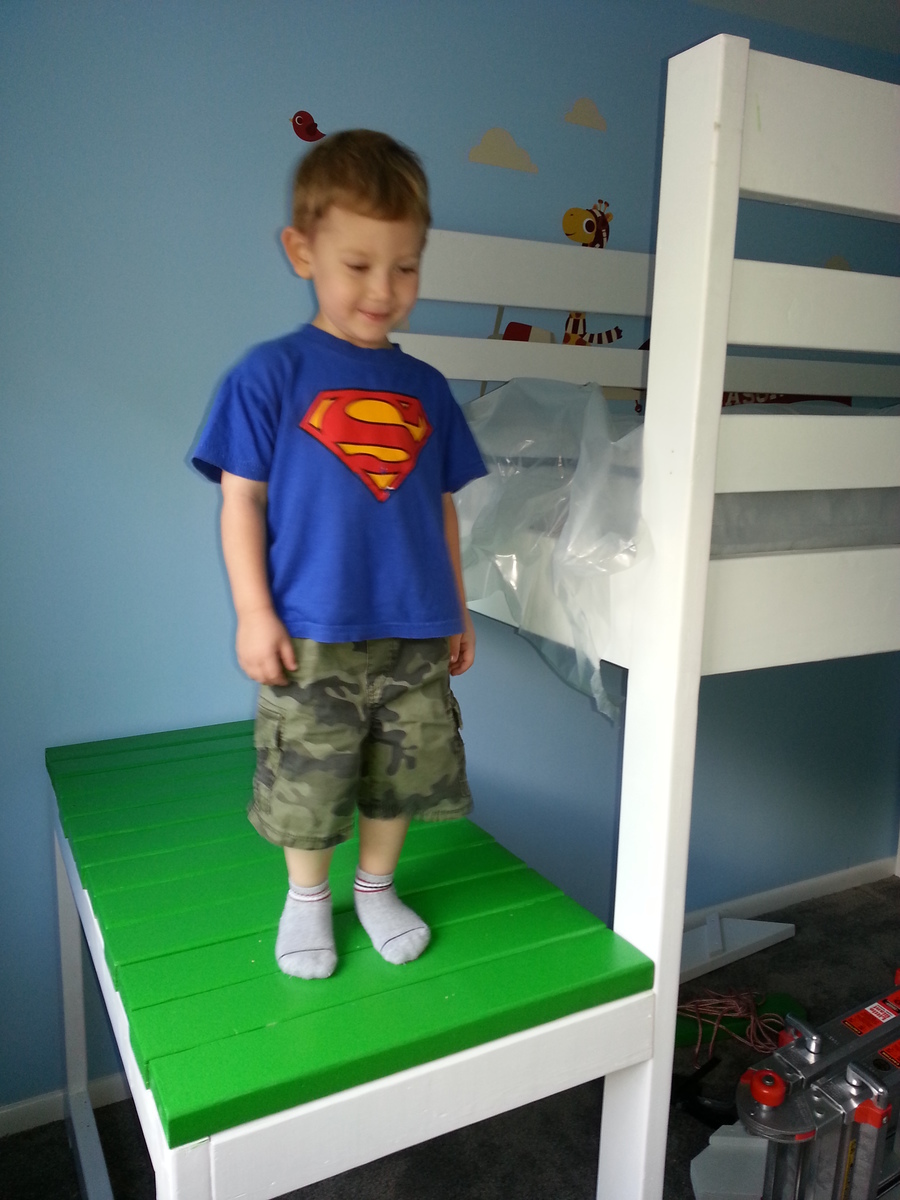
My first big boy bed!
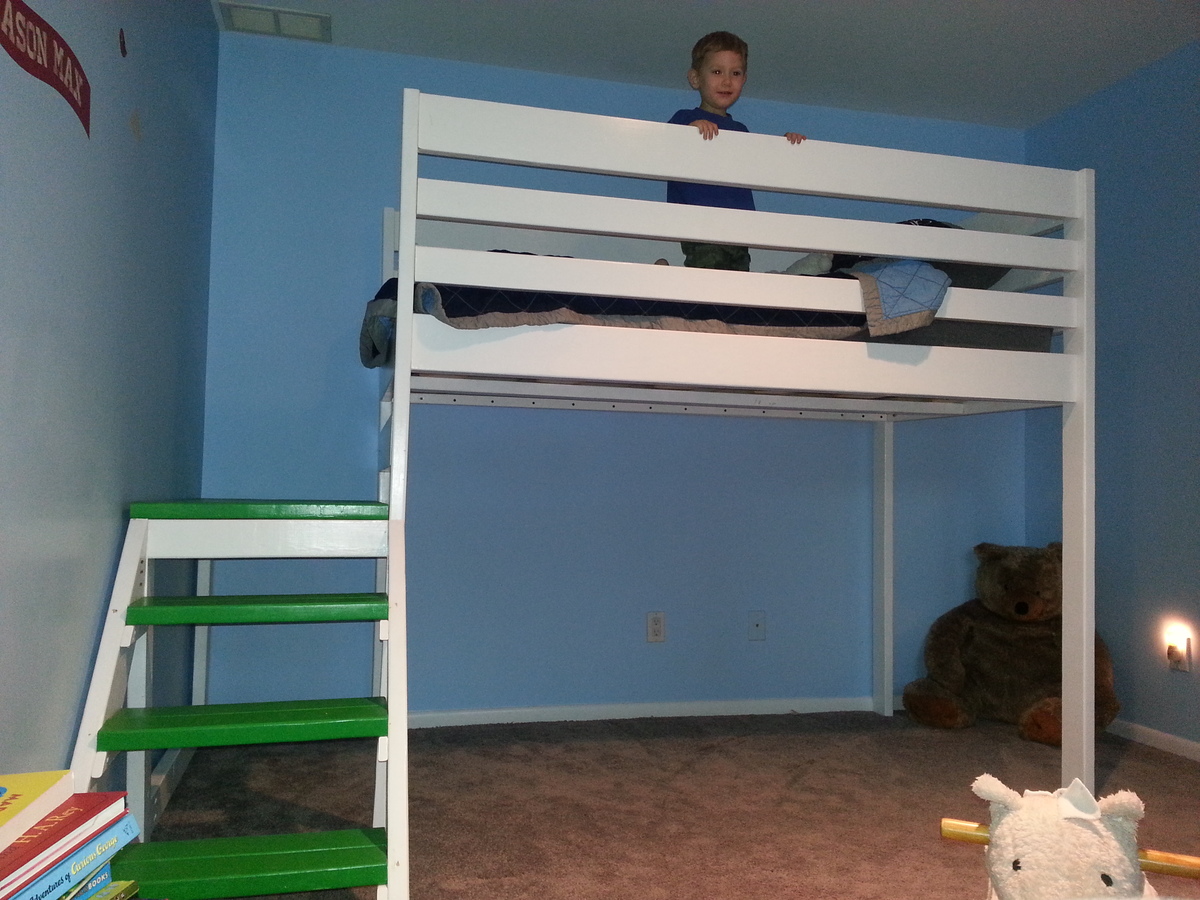
So we couldnt find any bed we really wanted for my son, and this one was perfect.
I used the wood one step up from the whitewood at HD, which had too many knots for this, and was .75 more. Still had to pick thru the 2x4 and 2x6s but the quality of the wood was much better.
After seeing what another bragger posted, i raised the posts to 72" instead of 66", which allowed for an additional 2x6 at the top. The mattress stayed at the same height, but know i sleep better thinking he wont roll off.
Lesson learned from this: Sand the primer!!! i never knew to do that before in my life and wow, what a difference.
Painting Steps were:
Sand wood,
prime, ( Used Zissner BIN)
Sand primer with 220
Wipe with Tack cloth
Paint ( Used Behr Ultra White Semi Gloss and Behr Par Four Green Semi Gloss)
Sand lightly with 320 grit
wipe with Tack
Paint again.
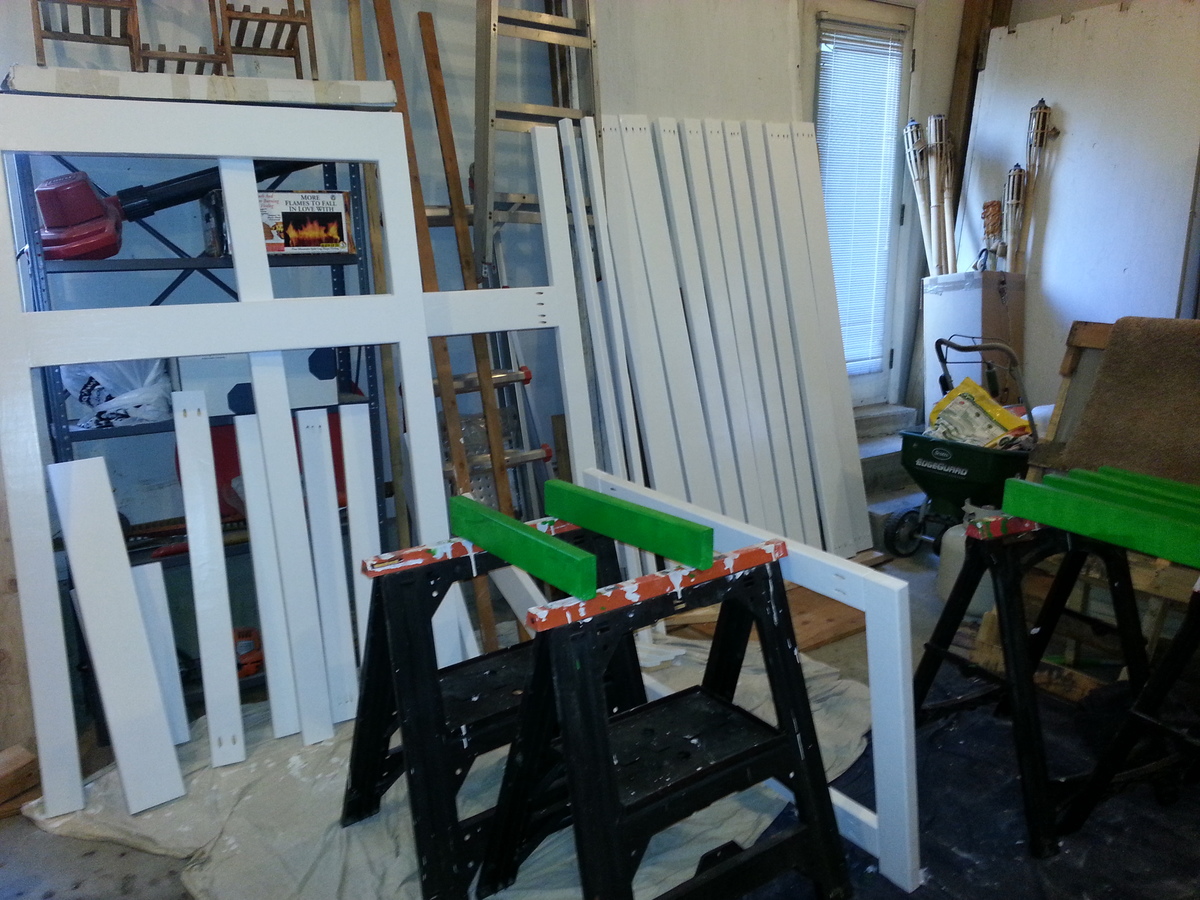
The two end pieces and the deck were assembled in the garage, but the cross pieces and steps were built in the bedroom.
Im thinking of creating a mini gate where he climbs up just for sleeping that i could put in once he is in his bed to really prevent rolling... trust me.. he rolls everywhere. May be to the height of the top 2x4, halway the length of the opening, and use dowels or something.
Note the second picture didnt have the 2x6 ladder step installed yet.
Thanks Ana for the plans! My son never wants to leave the bed!
Built from Plan(s)
Estimated Cost
150
Estimated Time Investment
Week Long Project (20 Hours or More)
Finish Used
Behr Ultra white Semi Gloss
Behr Par Four Green Semi gloss
Behr Par Four Green Semi gloss
Recommended Skill Level
Starter Project
Vintage Step Stool
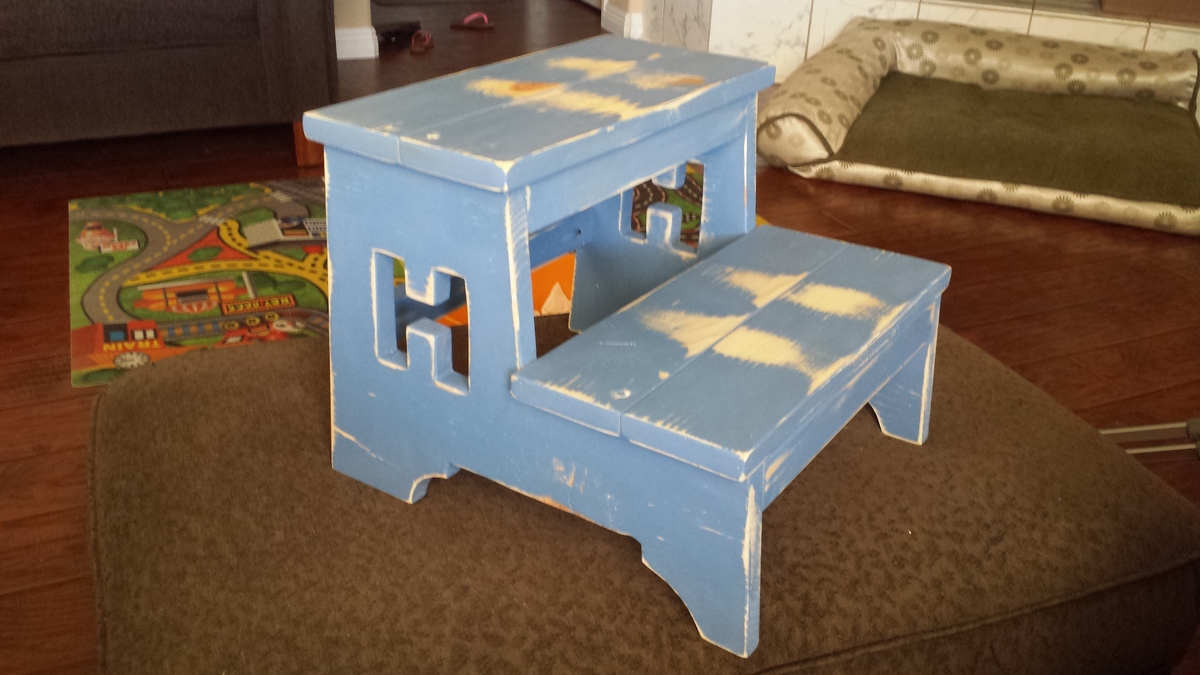
This is the 2nd step stool I built, the first was for my daughter and I just followed the plans. Built this for my friends son Hayden, decided to add the H for his name. It was a tag team build, I built it and painted it and my wife did the sanding, distressing and wax sealer.
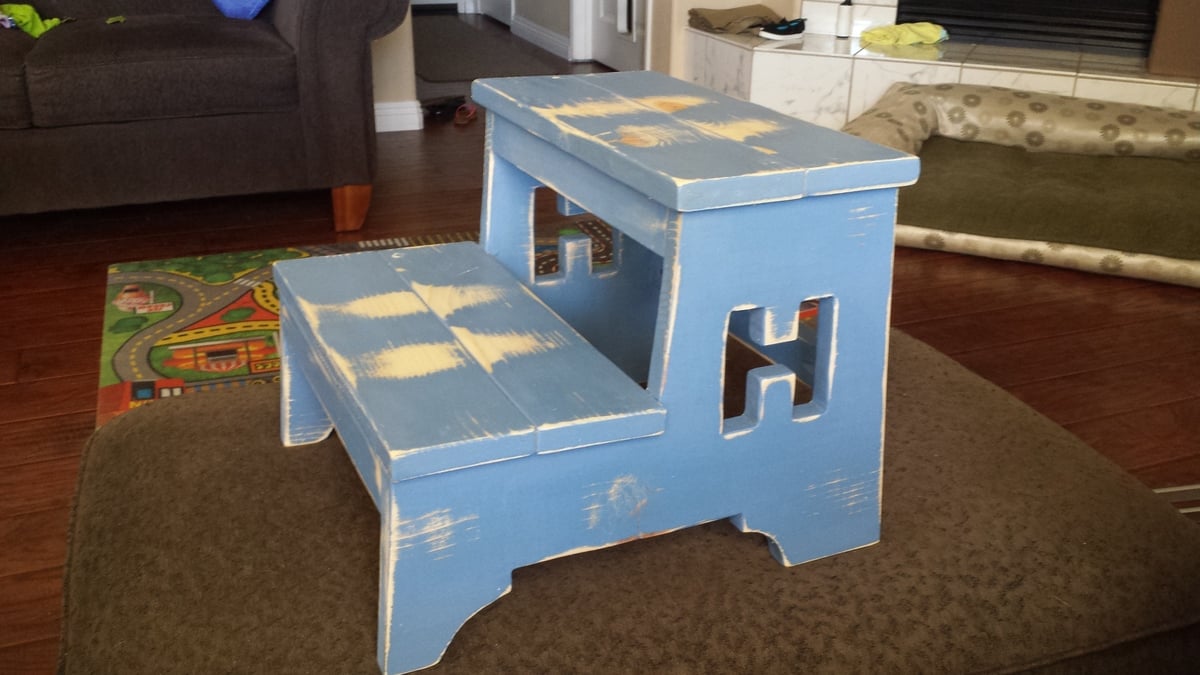
Built from Plan(s)
Estimated Time Investment
Day Project (6-9 Hours)
Finish Used
latex paint and wax sealer
Recommended Skill Level
Beginner
Comments
Big Red Buffet
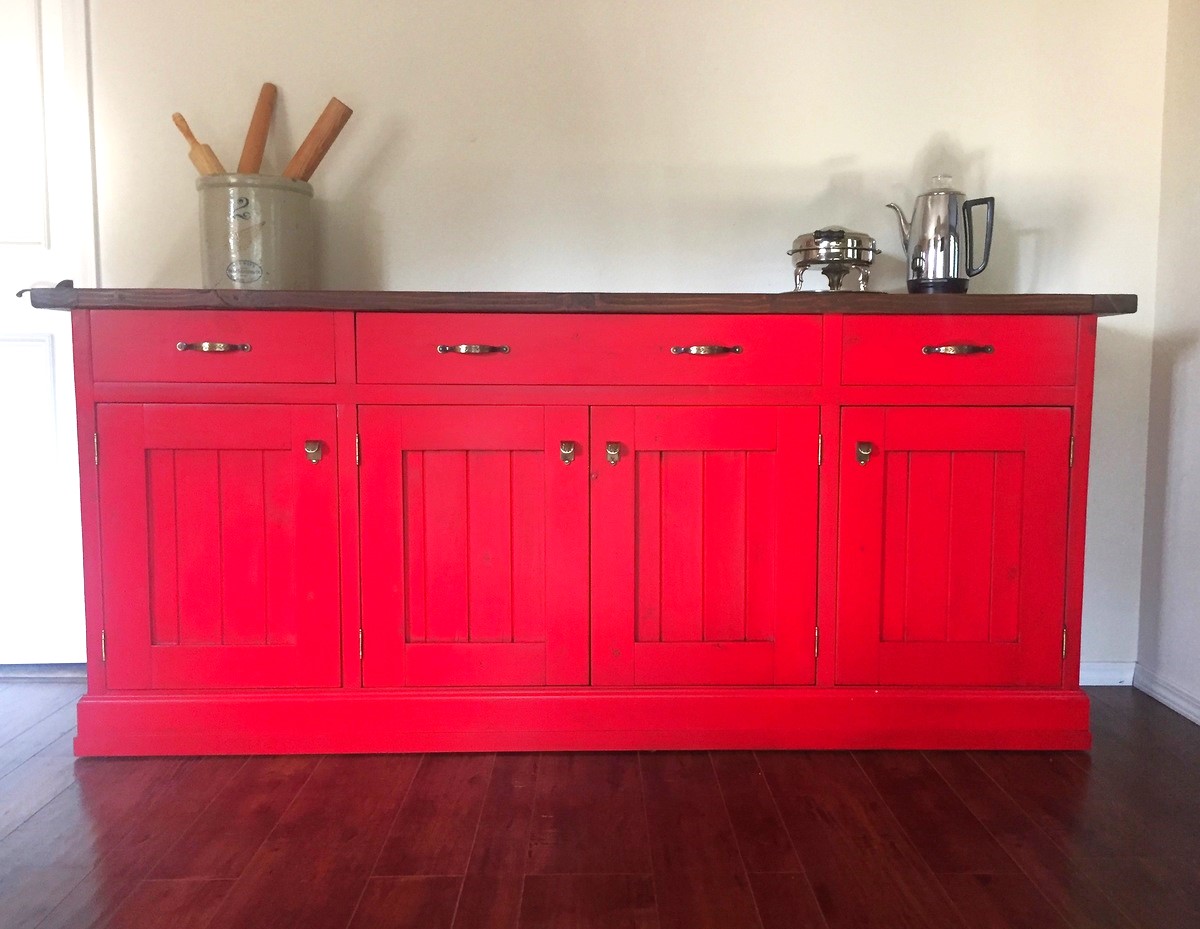
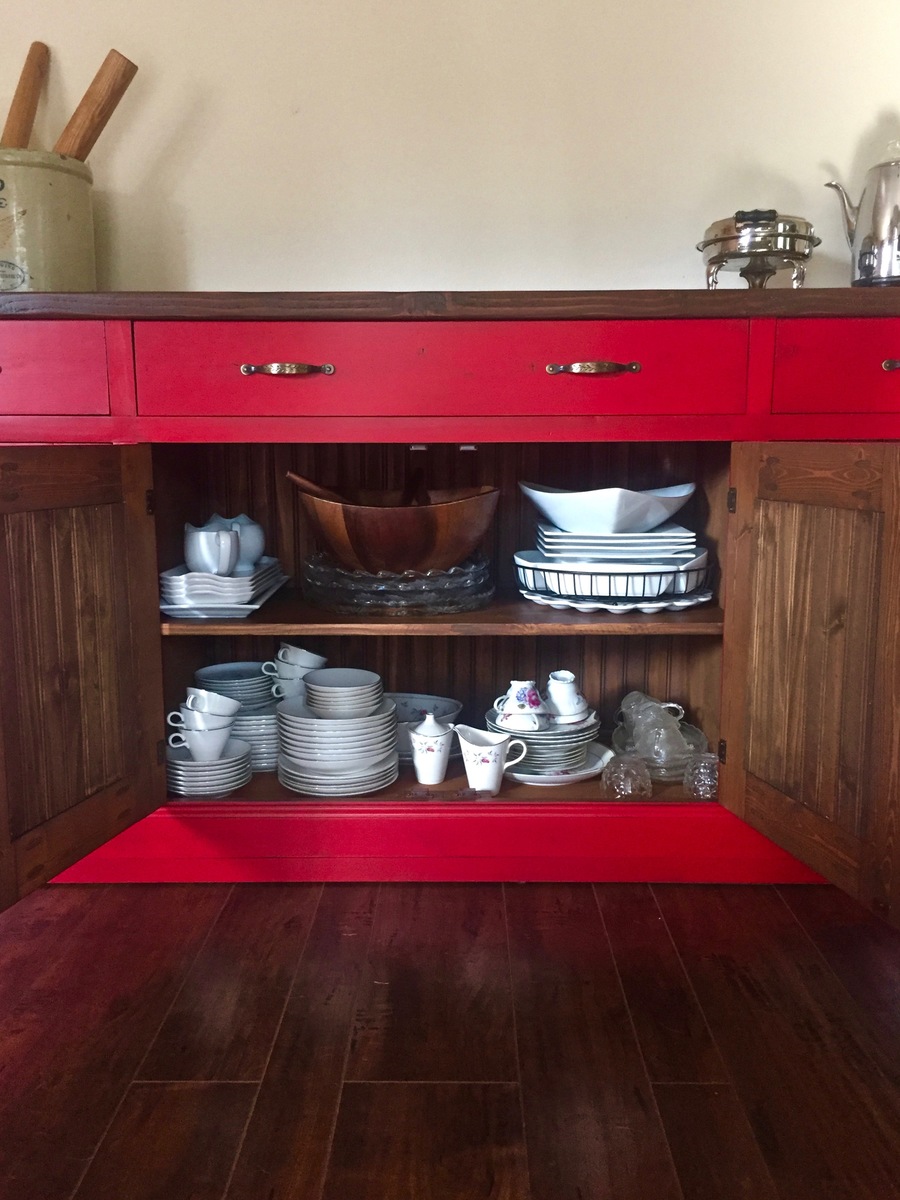
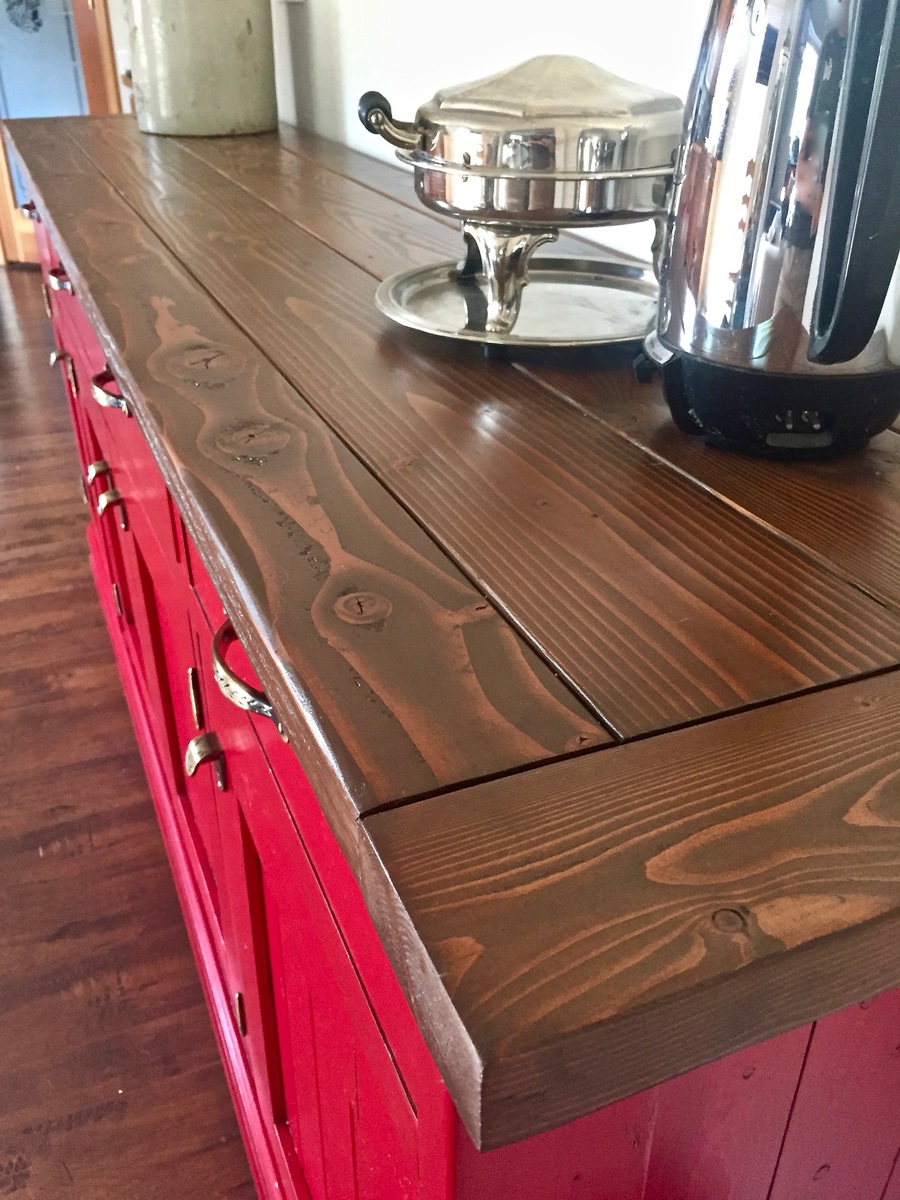
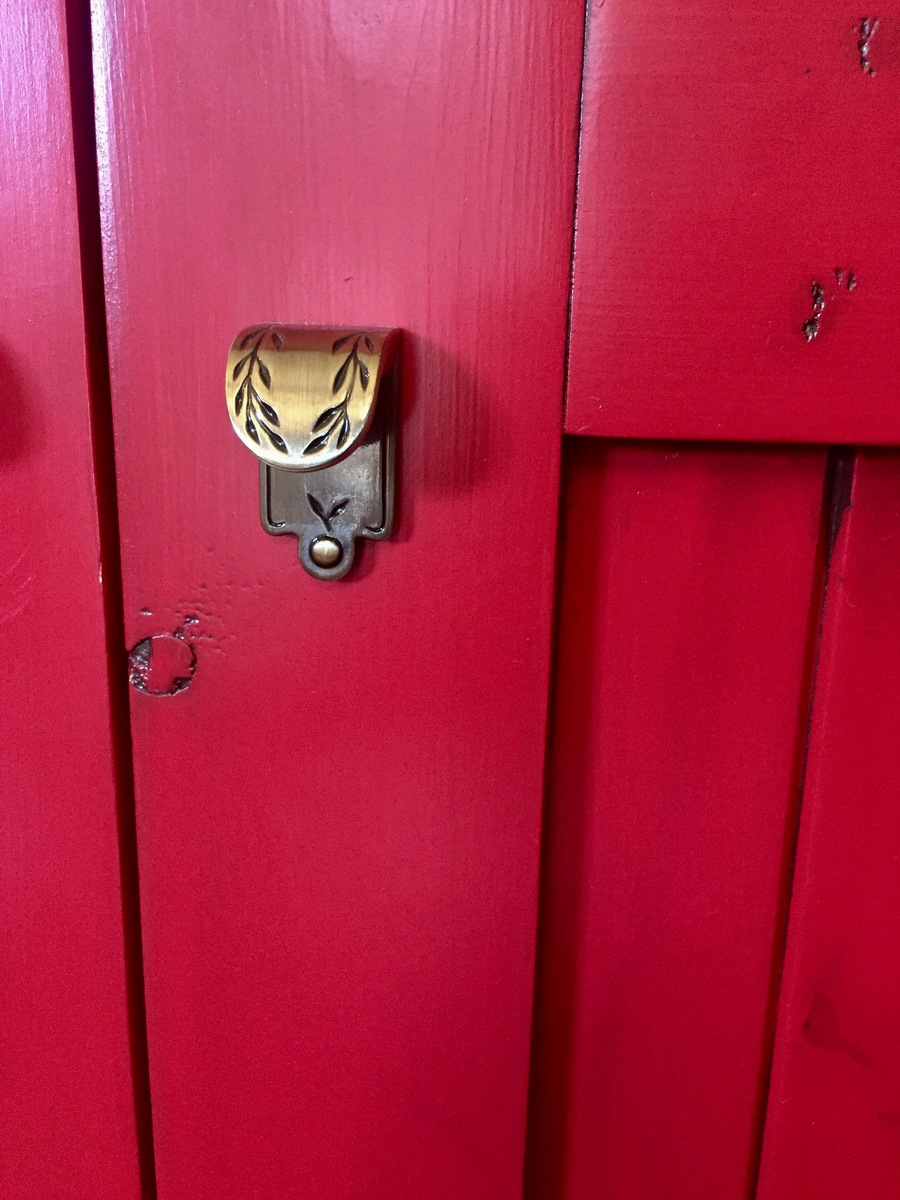
I was on a mission to find just the right buffet to house Grandma's china and infrequently used serving dishes. Countless searches in second hand stores, hours scouring Offer-up and Craigslist, and even some regretable purchases all led to the building of this magnificent buffet. I found a build plan for the planked wood sidboard, printed it and started in. I had always planned on painting it and wanted a rustic look so decided on budget friendly lumber. The frame and top of the unit is made from fir and the drawers and doors from pine. The door insets and the back of the unit is pine beadboard. The top and interior of the buffet is finished in GF Antique Walnut Gel Stain. I used a wipe-on polyurathane on the interior of the buffet and the inside of the drawers. I choose an amazing shade of red for the exterior of the buffet: GF Milk Paint in Holiday Red. It was my first experience with milk paint and it was a pleasure. It went on so smooth and brush-stroke free. After two coats of Holiday Red milk paint I applied a single coat of GF High Performance Top Coat in satin finish. This really enhanced the color of the Holiday Red and served as a base for a glaze application. I mixed the GF Antique Walnut Gel Stain with ten percent mineral spirits and glazed the entire buffet. I got into all the nooks, crannies and knots and left a thin coating on the face of the unit. I loved the buffet before the glaze, but now I was head over heals. The buffet was finally finished off with two coats of High Performance Top coat. Mission accomplished!
Built from Plan(s)
Finish Used
I used all General Finishes products. Holiday Red Milk Paint - 2 coats, High Performance top coat - 1 coat, Antique Walnut gel stain mixed with ten percent mineral spirits for glaze, and finally two more coarts of high performance top coat, the top is Antique Walnut gel stain with 3 coats of high perforamance top coat.
Recommended Skill Level
Intermediate
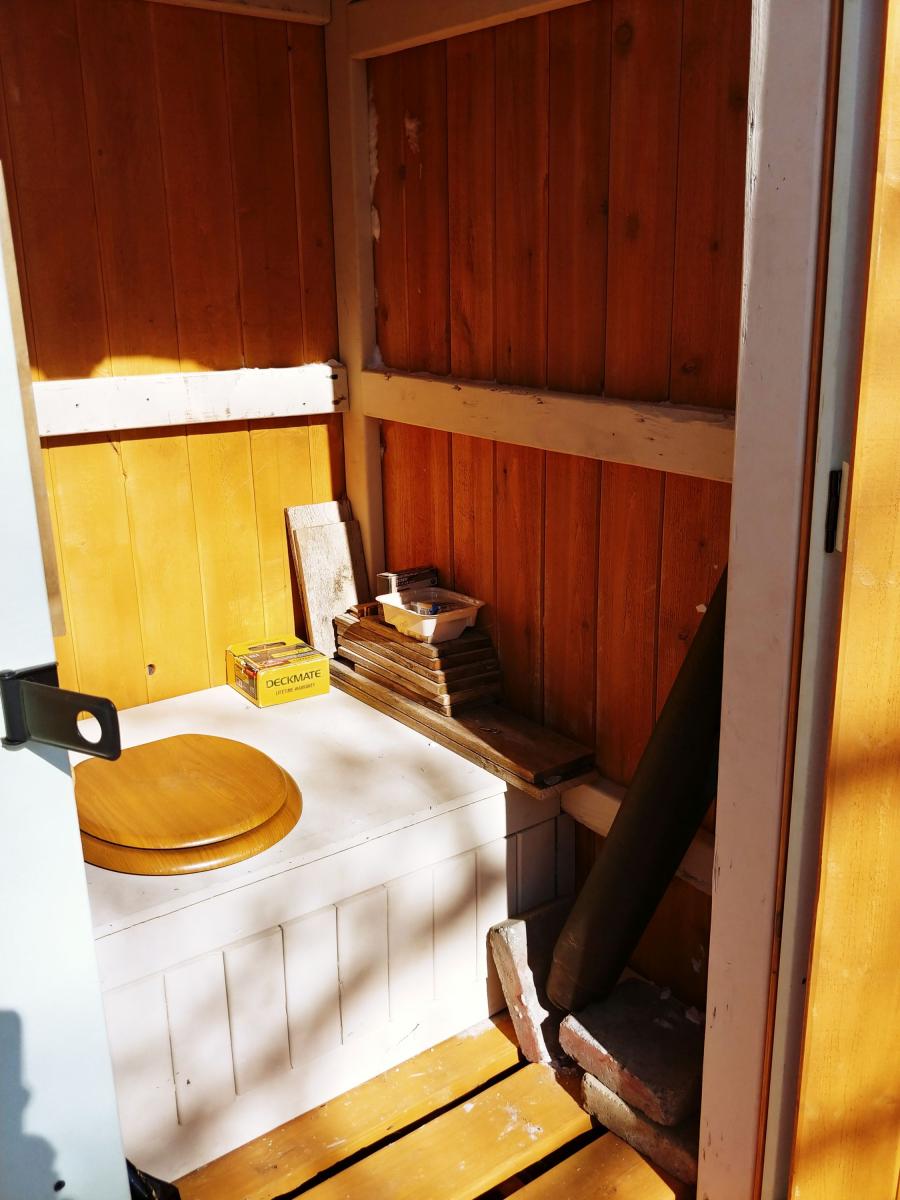
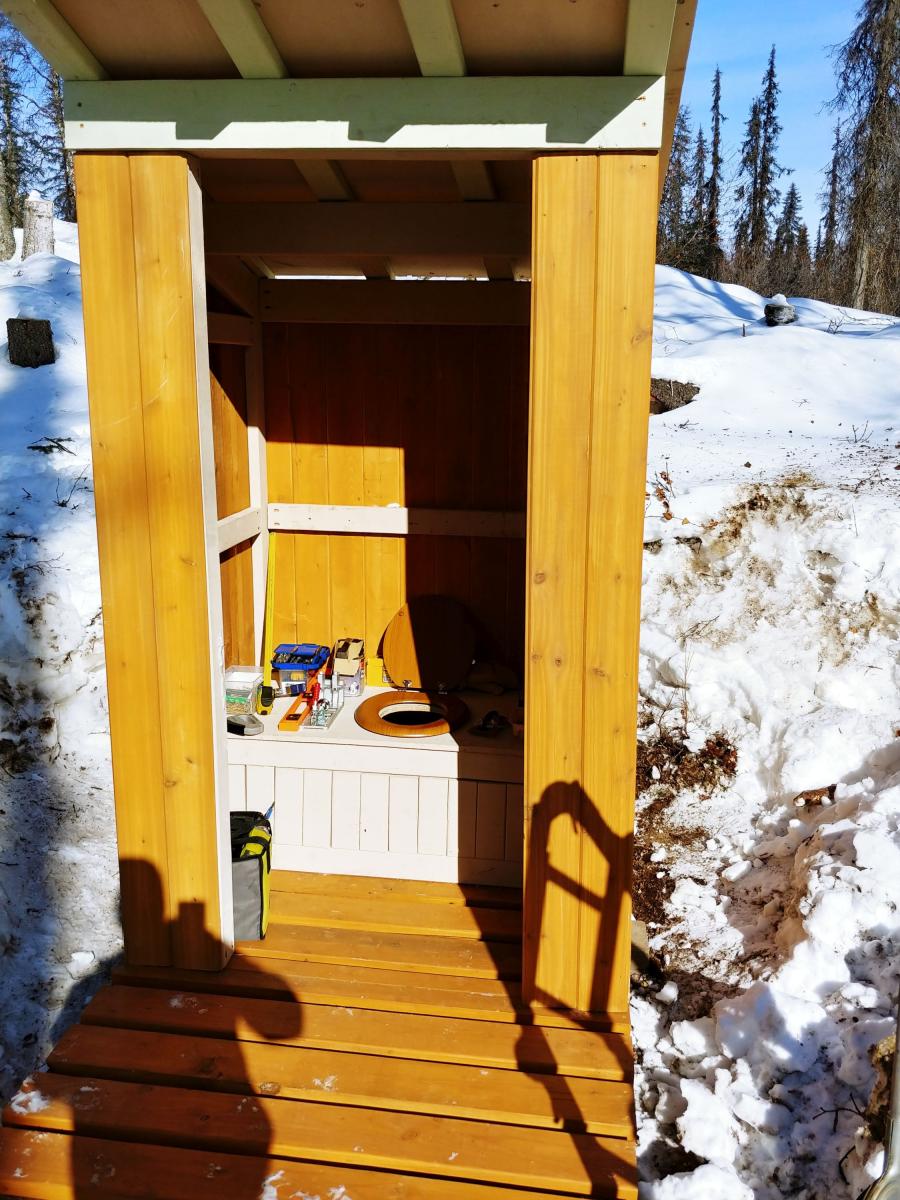
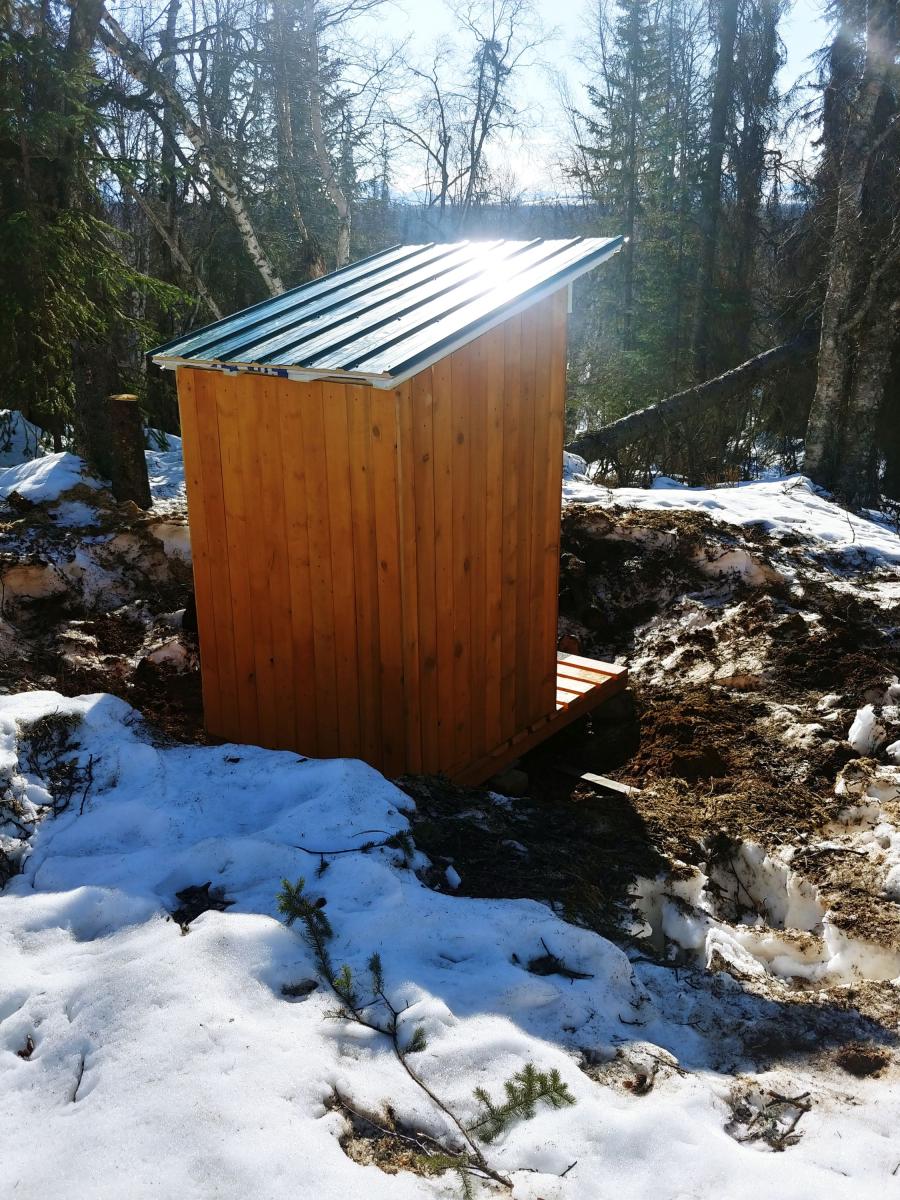
My version of "Outhouse Plan for Cabin"
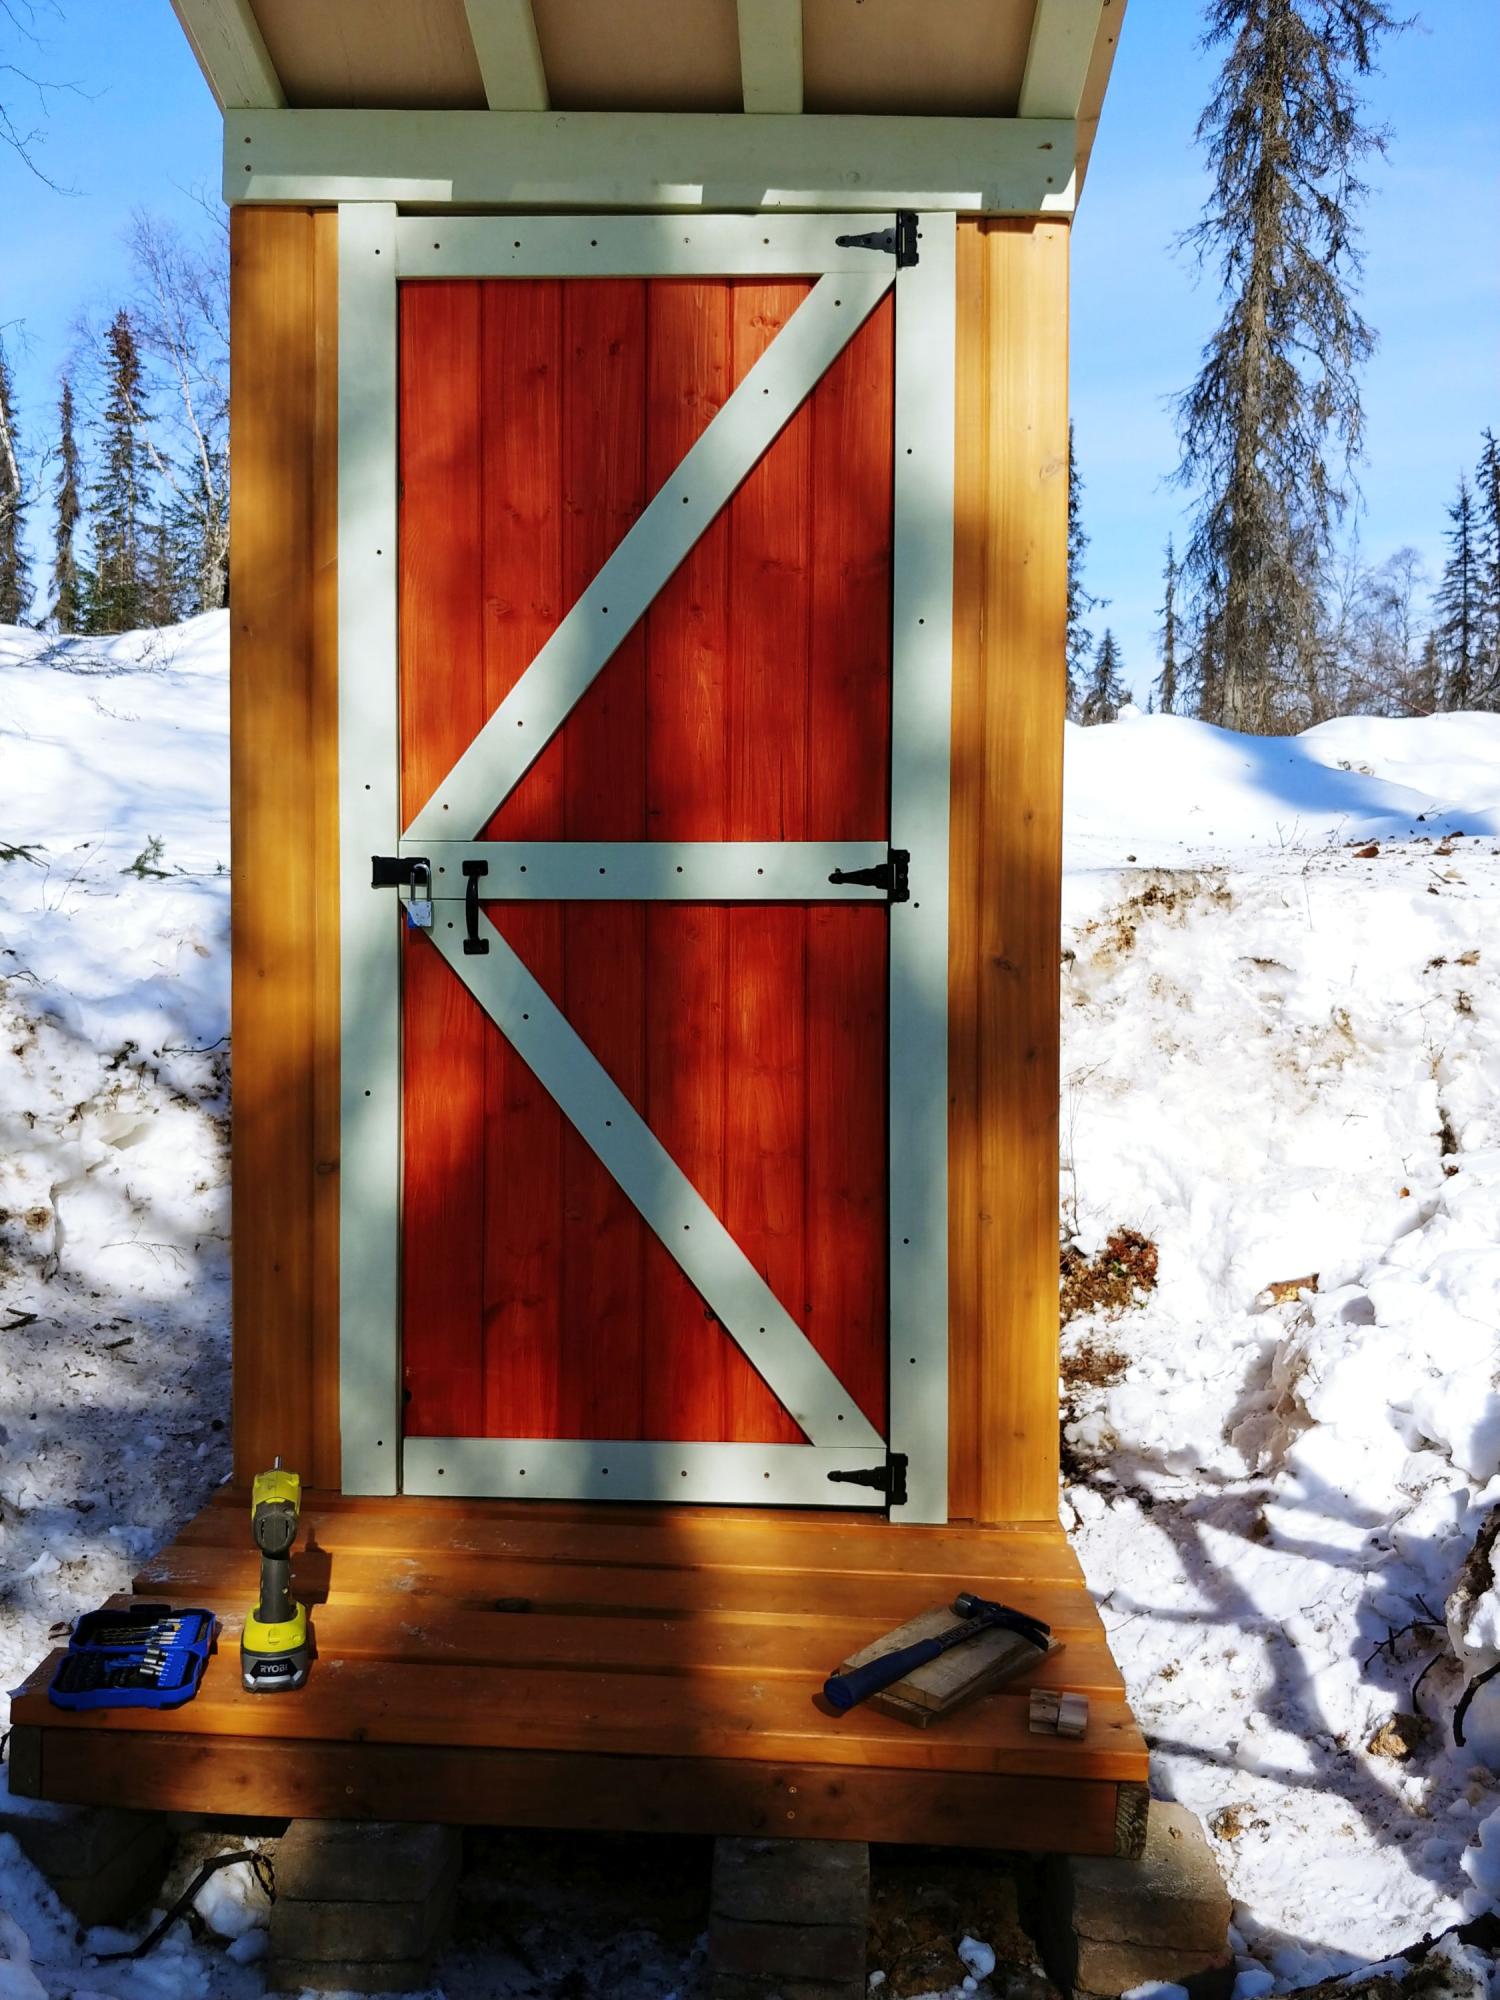
Hi Ana and Family,
I mostly followed your plans for my remote Alaska property outhouse build, with slight modifications. Our property is 7 miles from any road (and 2.5 hr drive from Anchorage) and I typically go there in the winter via snowmobile (December-April). I built this on my back deck in Anchorage and then took it apart and transported it in sections (back wall, 2x sidewalls, floor parts, door, roof parts, seat parts). It took me 5 trips to get it all up to my property from the truck at the trailhead via snowmobile!
The hardest part was digging the hole under 5 ft of snow! I cut several dead spruce trees in the area I planned to situate the outhouse and started a big fire (really big). We kept that going until we had melted out about a 15ft wide area down to bare soil. The next morning, while the ground was still warm from the previous evening's fire, we dug the hole (only about 3.5x3.5ft). Then I cribbed in the hole with old cedar fence slats to help prevent the inevitable ground cave-in that we often see with soil melt and rains in Alaska. Then, I pieced the outhouse together, with the frame sitting on small pavers.
I used a combo of T&G pine and cedar for the walls. I used metal for the roof. As I built this in January and February over several weekends (in Alaska), it was very cold and I would take the pieces inside and paint/stain them. As such, this basically took me all winter from start to finish. It doesn't take that long if you build it on site in warm weather. Once transported to the cabin site, it took parts of 3 weekends to get it in place and useable, including site prep. I've still got a little touch-up work to do (e.g., window for light in winter and bird block to keep the spring and summer nesters out). I put some anti-slip tape on the frame so that I don't slip on the frame base.
There is some waste wood if you follow the plans directly (especially 2x6), but I am using that to build a small firewood cover at home. This was not an inexpensive outhouse even without pandemic prices (I could have chosen a less expensive siding), but I wanted a nice outhouse and I'm very pleased with the outcome, so it was money well spent. Great plans! Thanks.
Built from Plan(s)
Comments
Tue, 06/07/2022 - 15:29
That turned out amazing!
Snow always makes everything more challenging! Thank you for sharing, this looks great:)
Copy Cat Nesting Table - Larger Table

After seeing the $400 PB Tables on their website, I decided I wanted the look without paying such a high price.
I recreated a table using their table as an inspiration piece. I plan on building the little table next week.

Estimated Time Investment
An Hour or Two (0-2 Hours)
Finish Used
Paint, but I will be distressing it and glazing it too.
Recommended Skill Level
Beginner
Comments

Mon, 07/18/2011 - 06:59
LOVE LOVE LOVE
I requested plans for nesting tables because I don't have the confidence to try and do it myself. Beautiful job and yours look much better than PB's and their ridiculous price! Once you get the smaller table done, will you please post your plans? I would really appreciate it. We have an ottoman so there isn't room for a coffee table and we badly need tables for when our weekly guests arrive. I don't like the snack tables as they are too wobbly. Again, beautiful work!
Wed, 07/20/2011 - 12:50
Thank you!
And yes, I'll be posting the finished plans and table pictures this weekend. I even tried my first attempt at the plans on the sketch up program. The big table is already up on my little blog site.
http://www.thequaintcottage.net/2011/07/copy-cat-nesting-end-table-part…
My table is a bit larger than the PB table, but I wanted the little table to be able to be used as a secondary table when guests come visit (move to side tables).
Once I get them perfect, I'll post here.
THANKS for your positive feedback. :)
Karen
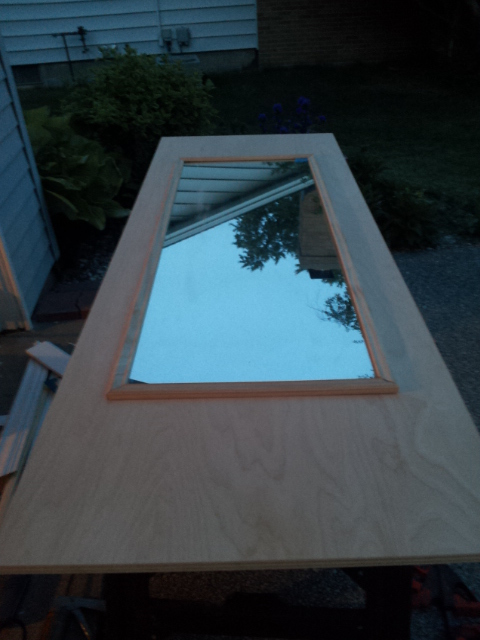
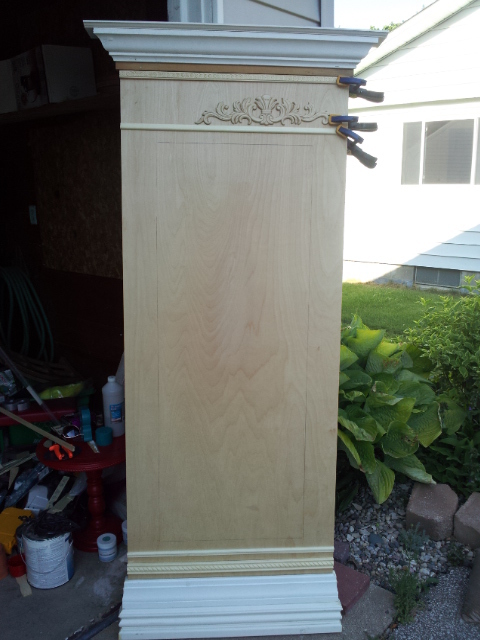
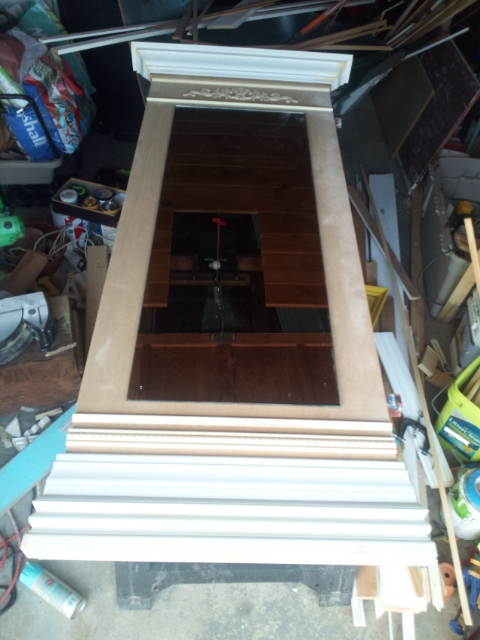
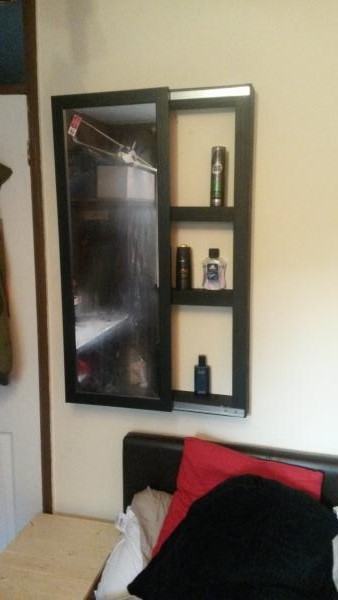
Leaner mirror
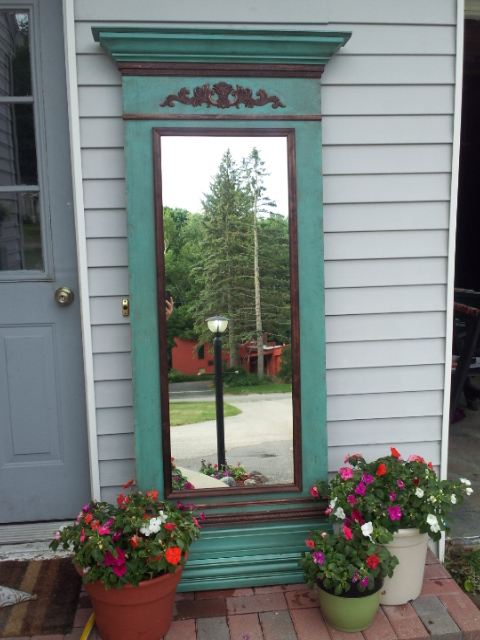
This was made as a present my mom's birthday. I found a good sized mirror at the thrift shop which was perfect for the project. I adhered it to some plywood, added trim around it, bulked up the top and bottom with multiple layers and types of trim and added some crown molding to the top. The finish is "A Day at the Jewellers" by Valspar with a Red Mahogany stain/glaze over top.


Estimated Time Investment
Day Project (6-9 Hours)
Finish Used
A Day at the Jeweller by Valspar with stain overtop
Recommended Skill Level
Starter Project
Ridge Media Console
Project was a bit difficult but extremely rewarding when completed!! I followed Ana White's advice......"take a break and always finish your project!!!"
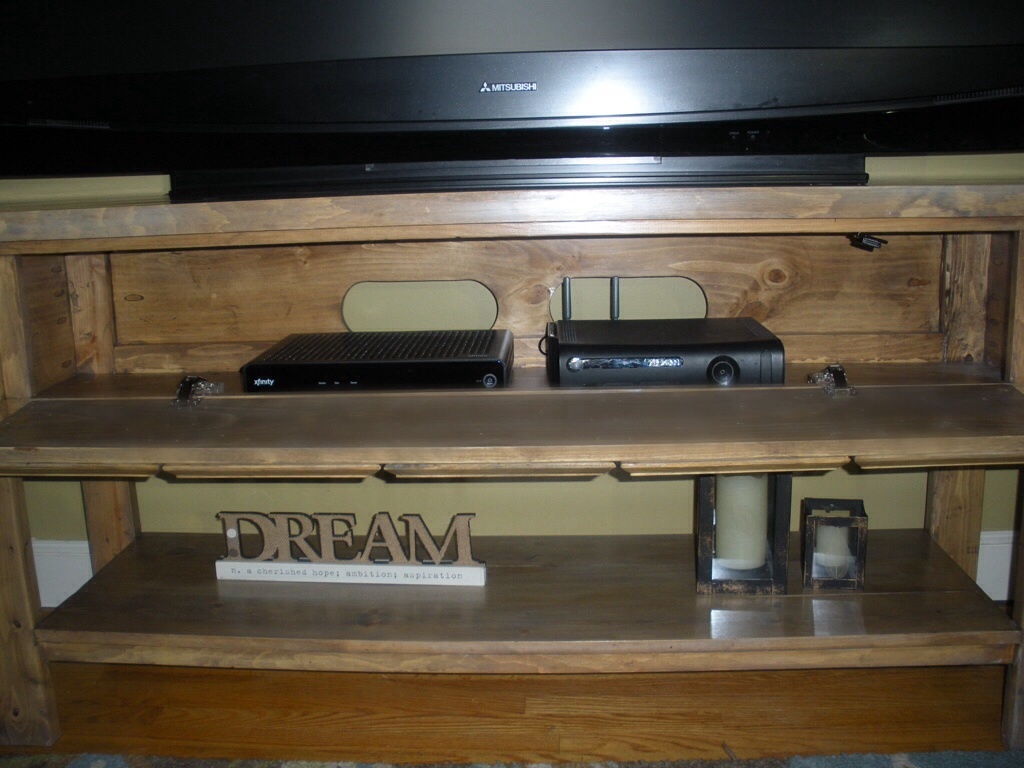
Built from Plan(s)
Estimated Time Investment
Weekend Project (10-20 Hours)
Recommended Skill Level
Intermediate
Comments

Farmhouse style queen headboard
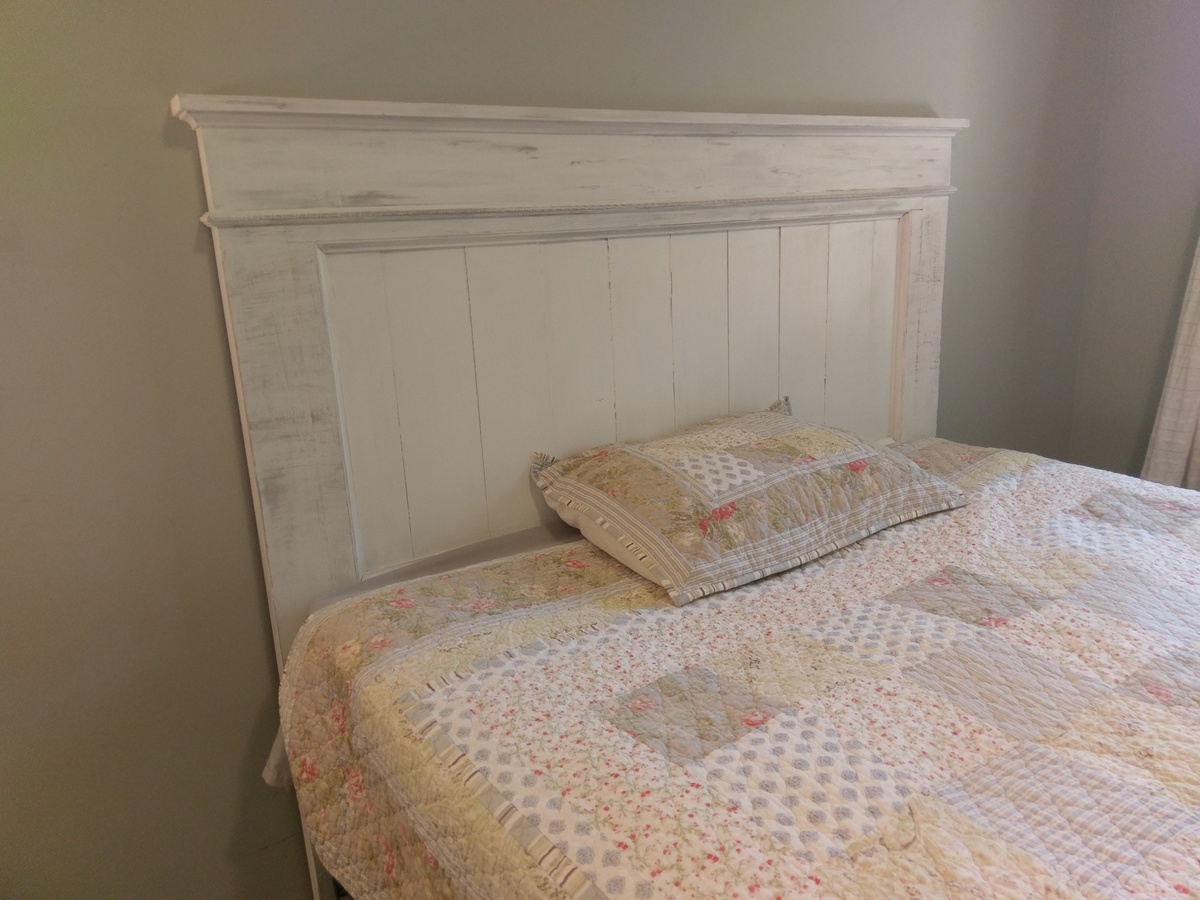
Here's a queen headboard we just completed for our guest bedroom.
It only took an afternoon to build this simple yet stunning headboard, and then a little more time to paint, distress, and wax it.
More information is available on our site at FamousArtisan.com
Estimated Cost
100
Estimated Time Investment
Afternoon Project (3-6 Hours)
Finish Used
Chalk paint and wax
Recommended Skill Level
Beginner
Coop Update
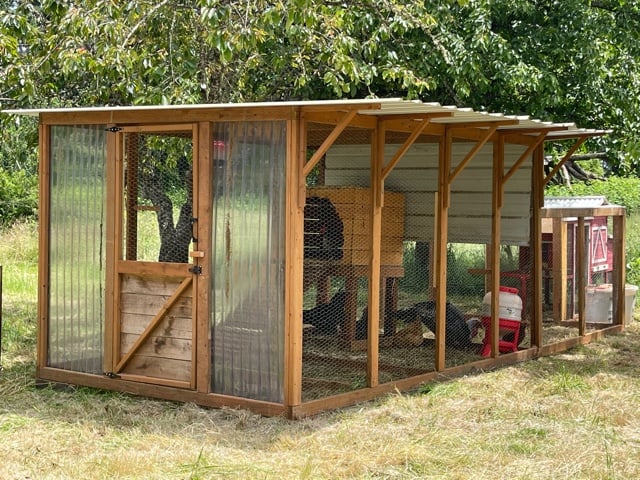
I had to move our original coop to another property, so decided to do a little upgrade. We used Ana's Chicken Run plan for both of the large sections and just added a roof. We attached the run to a small red coop that we purchased. Ana's plans are great for modifying for any size, as you can see the main tall portion is from her run plan just built taller and we added a door to the front.

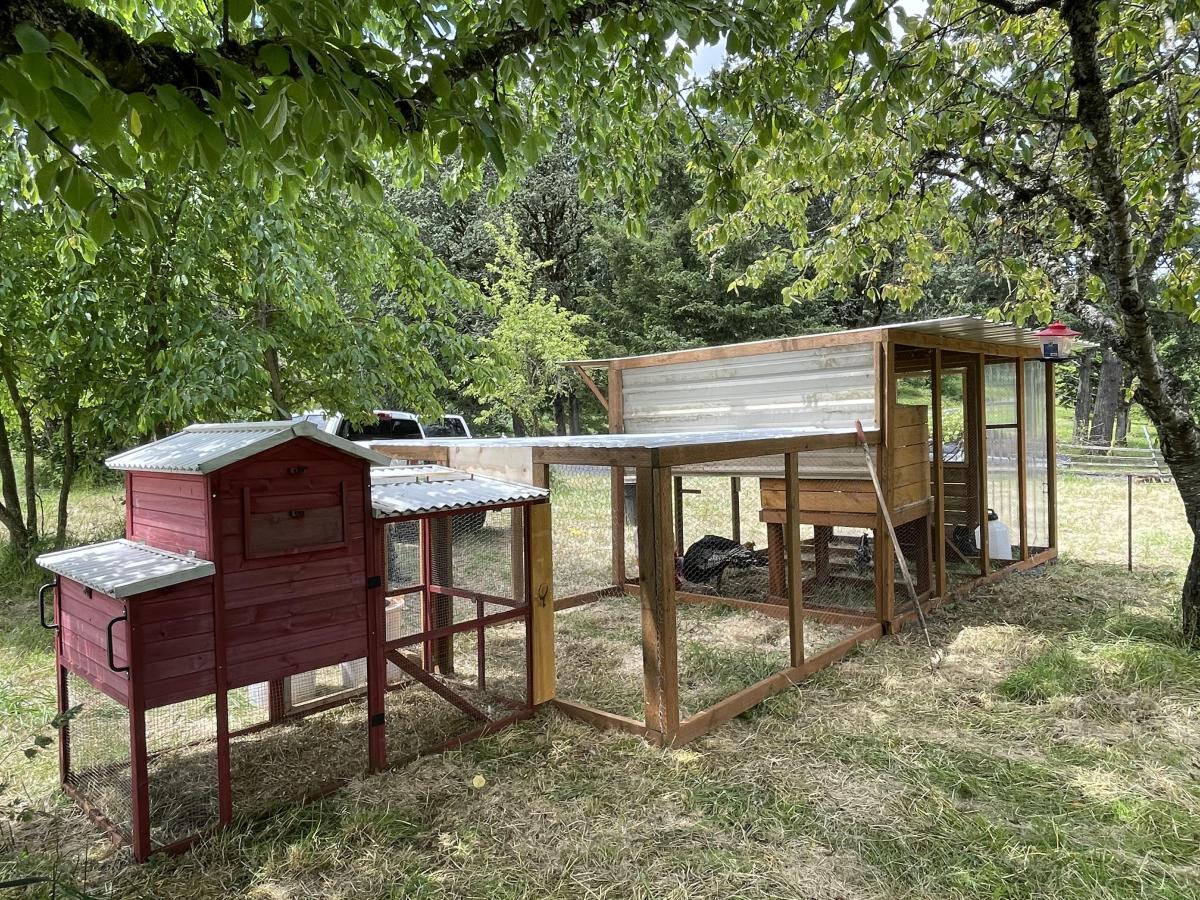
Built from Plan(s)
Whoop! I did it!!!!!!!
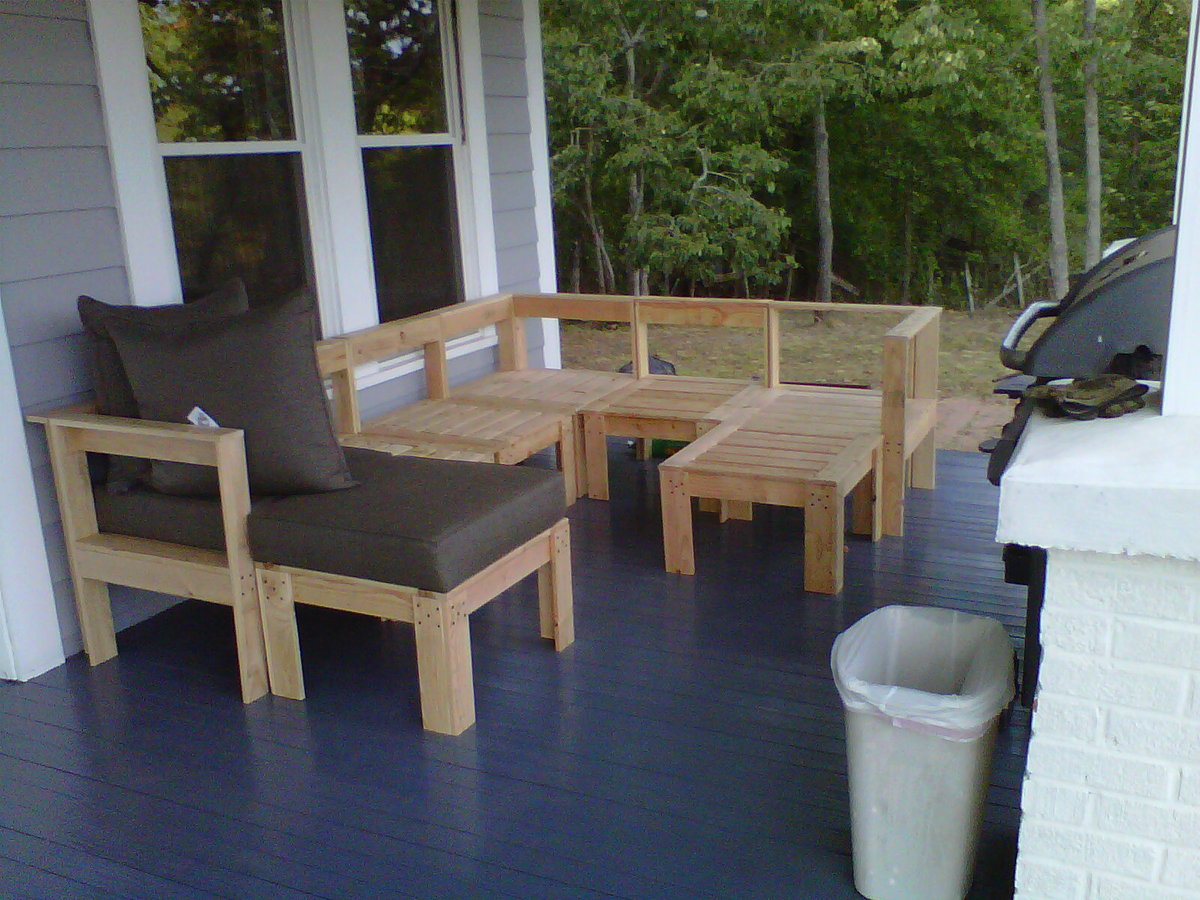
I am very suprised, but I made my very first ANYTHING with the help of this website and my very dear step-dad! We used two plans from this website and did some modifications by adding some back supports at the tops. We also made two foot stools to act as chaises on the two ends. I thought that I would go ahead and post the results now before I painted the sectional so more of the detail. What cost so much was the cushions. The cushions were from Target and they were $650.00. I was concerned that when people sat on the sectional they would be able to feel the wood underneath, so I purchased the 5" deep seat cushions and over sized pillows, which I am soooo glad that I did, it makes this sectional look so much more professional looking and gives it even more of a crisp look! I also didn't skimp on the paint which was $65.00 on the paint! The rest was wood, materials and tools that were needed. But if you priced purchasing something like this from PB or WestElm, it would easily be 3-4K at the least! Unto the next project!!!
Built from Plan(s)
Estimated Cost
$1000.00
Estimated Time Investment
Week Long Project (20 Hours or More)
Finish Used
My plan is to use wood filler where needed, sand 120 grit, prime and apply an outdoor black satin finish.
Recommended Skill Level
Beginner
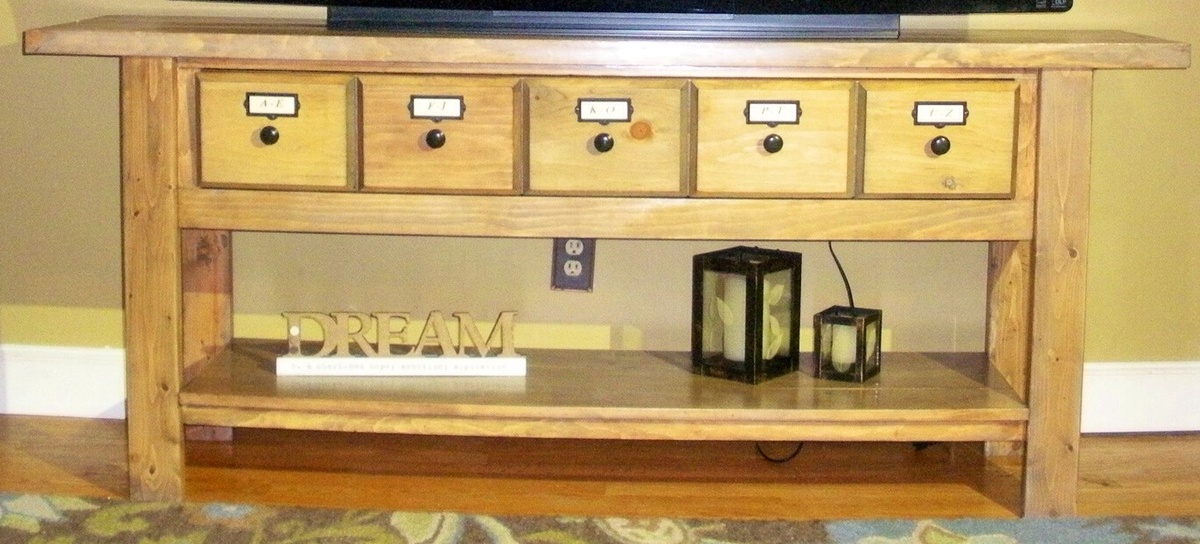
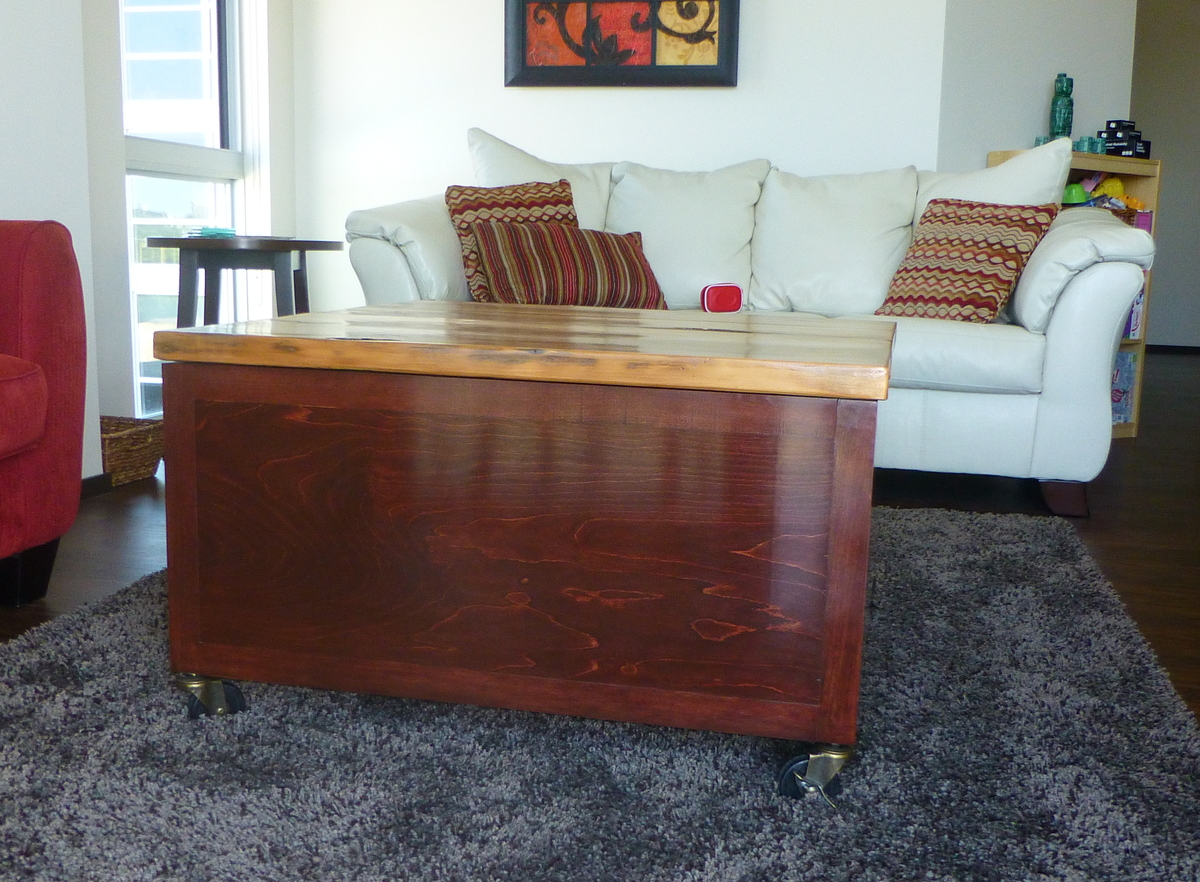
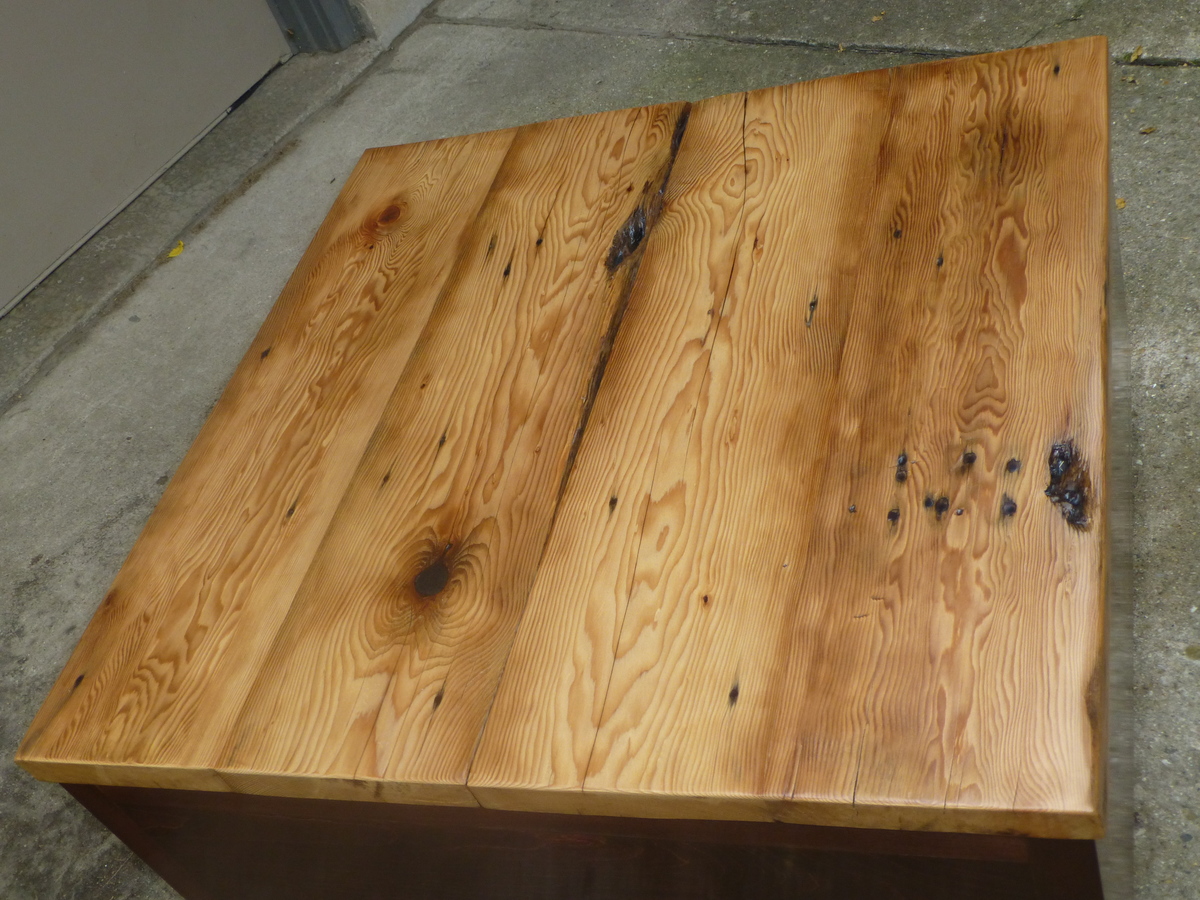
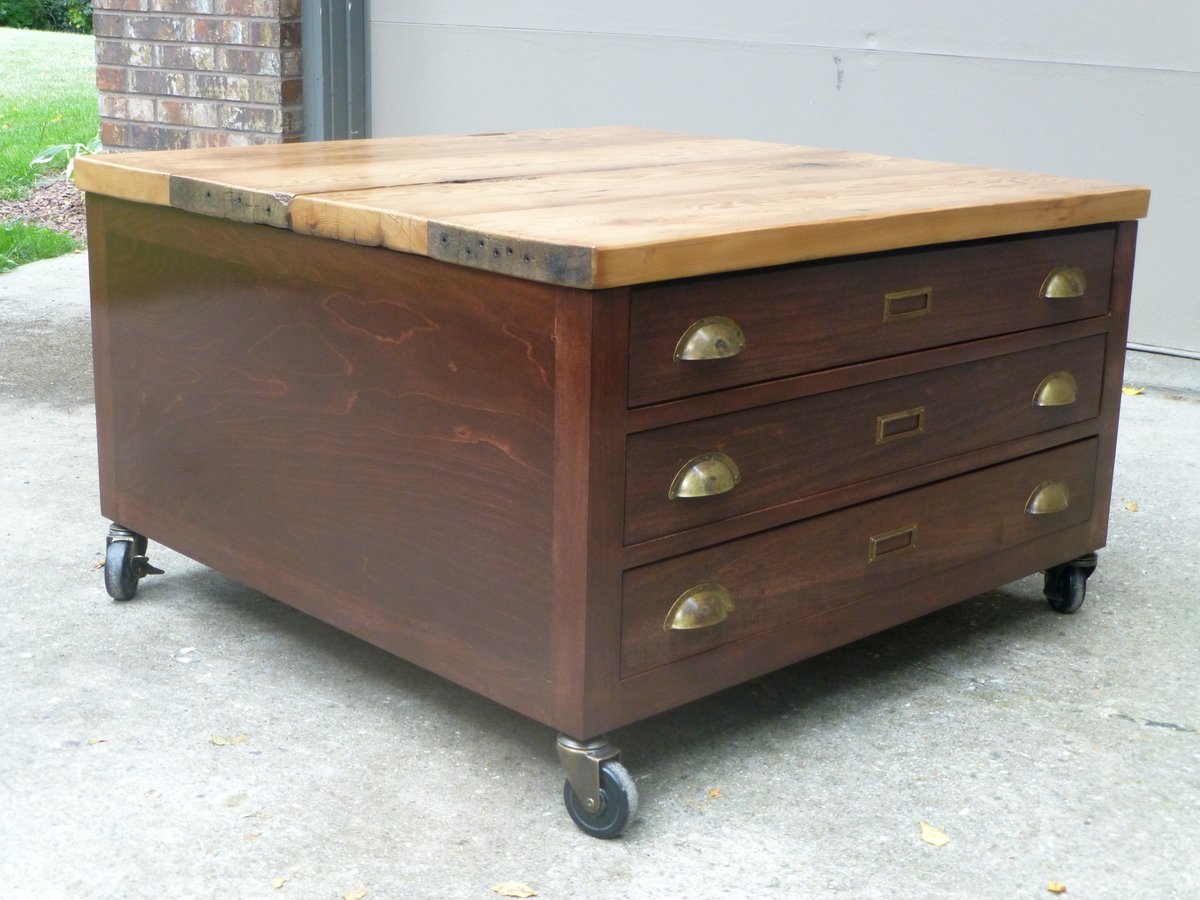
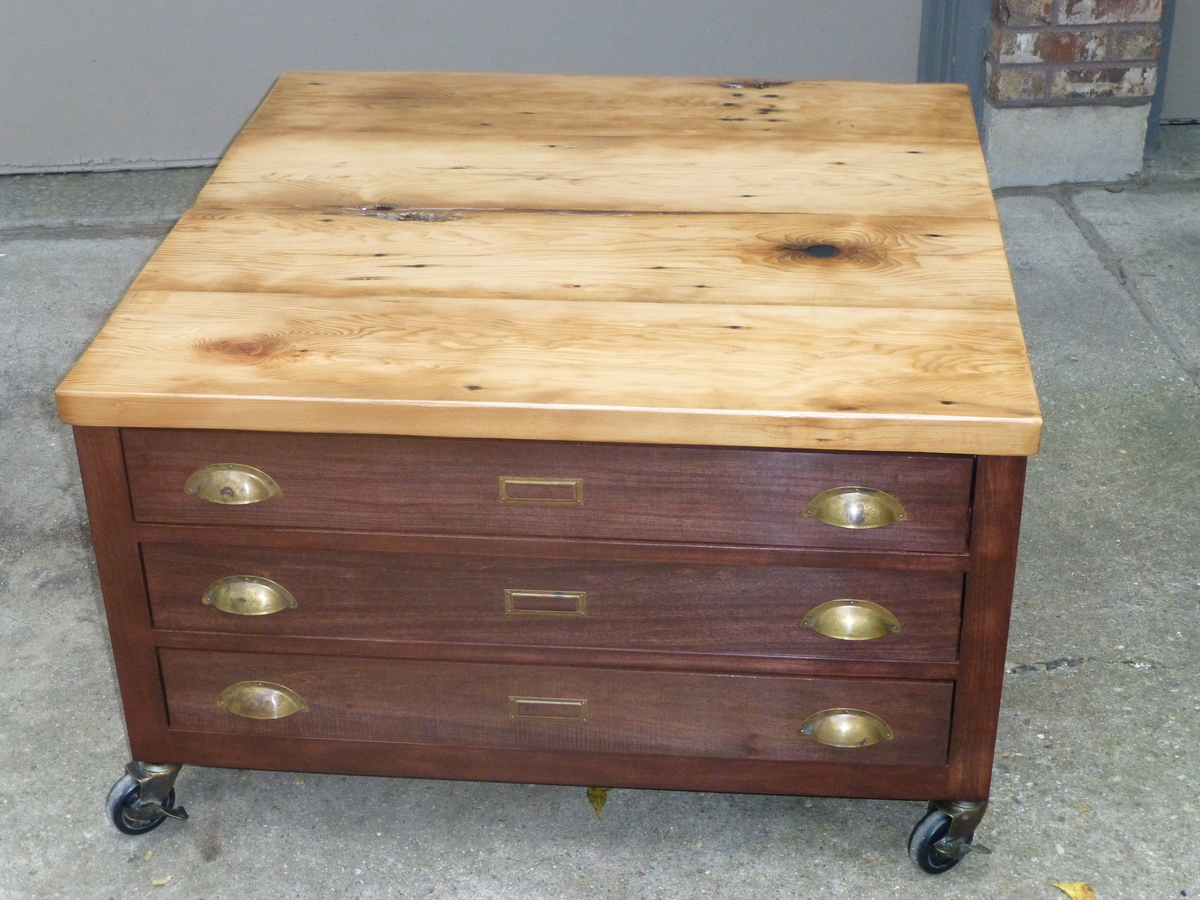
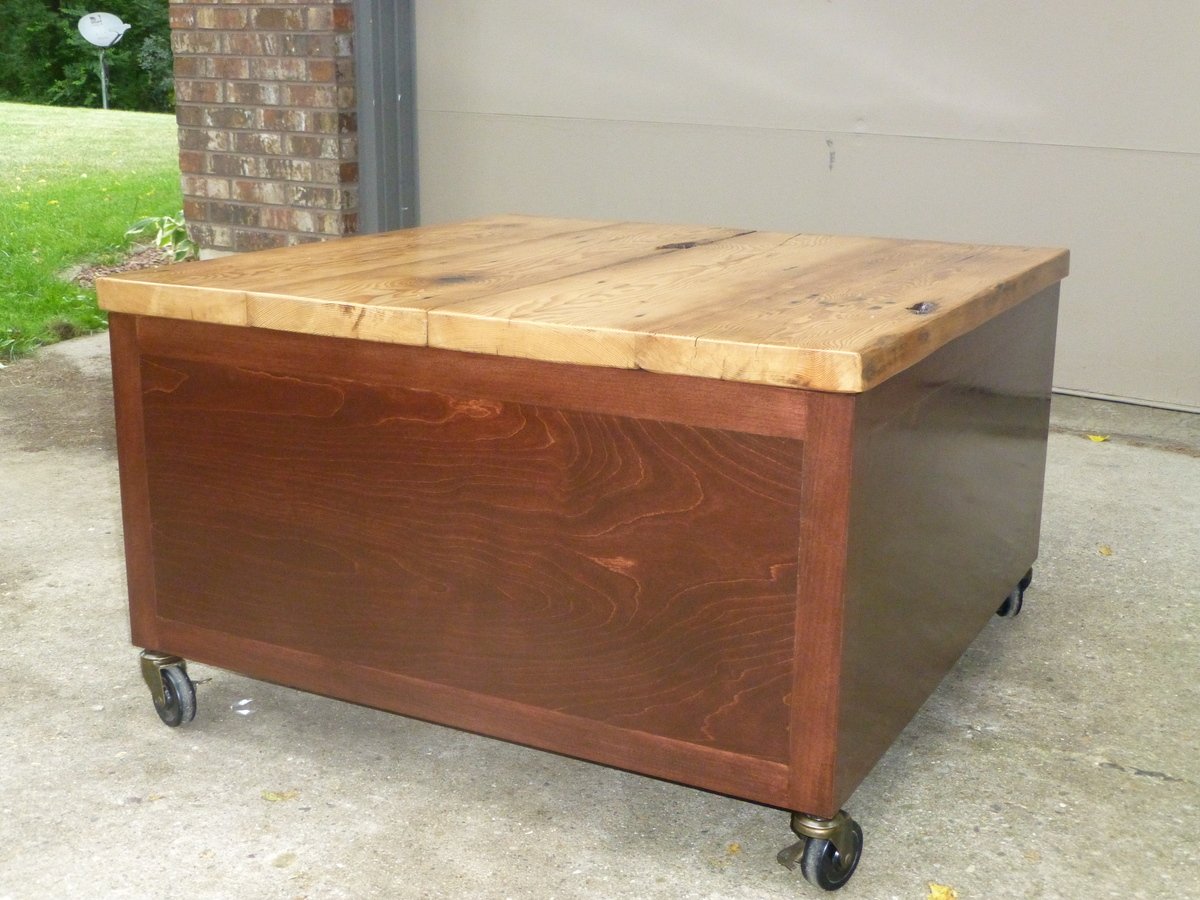
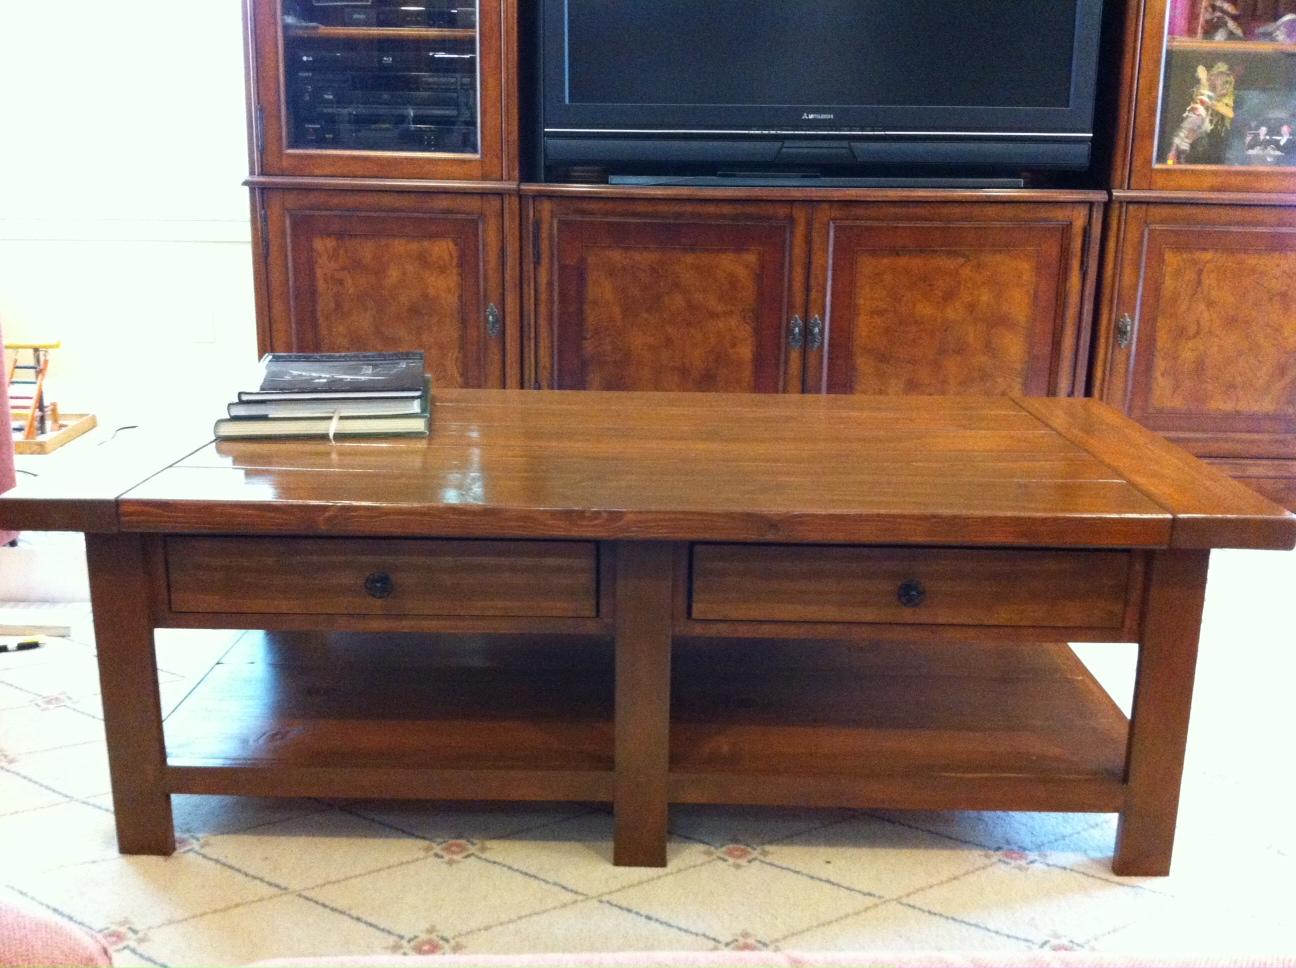
Library Coffee Table with Reclaimed Barn Wood Top
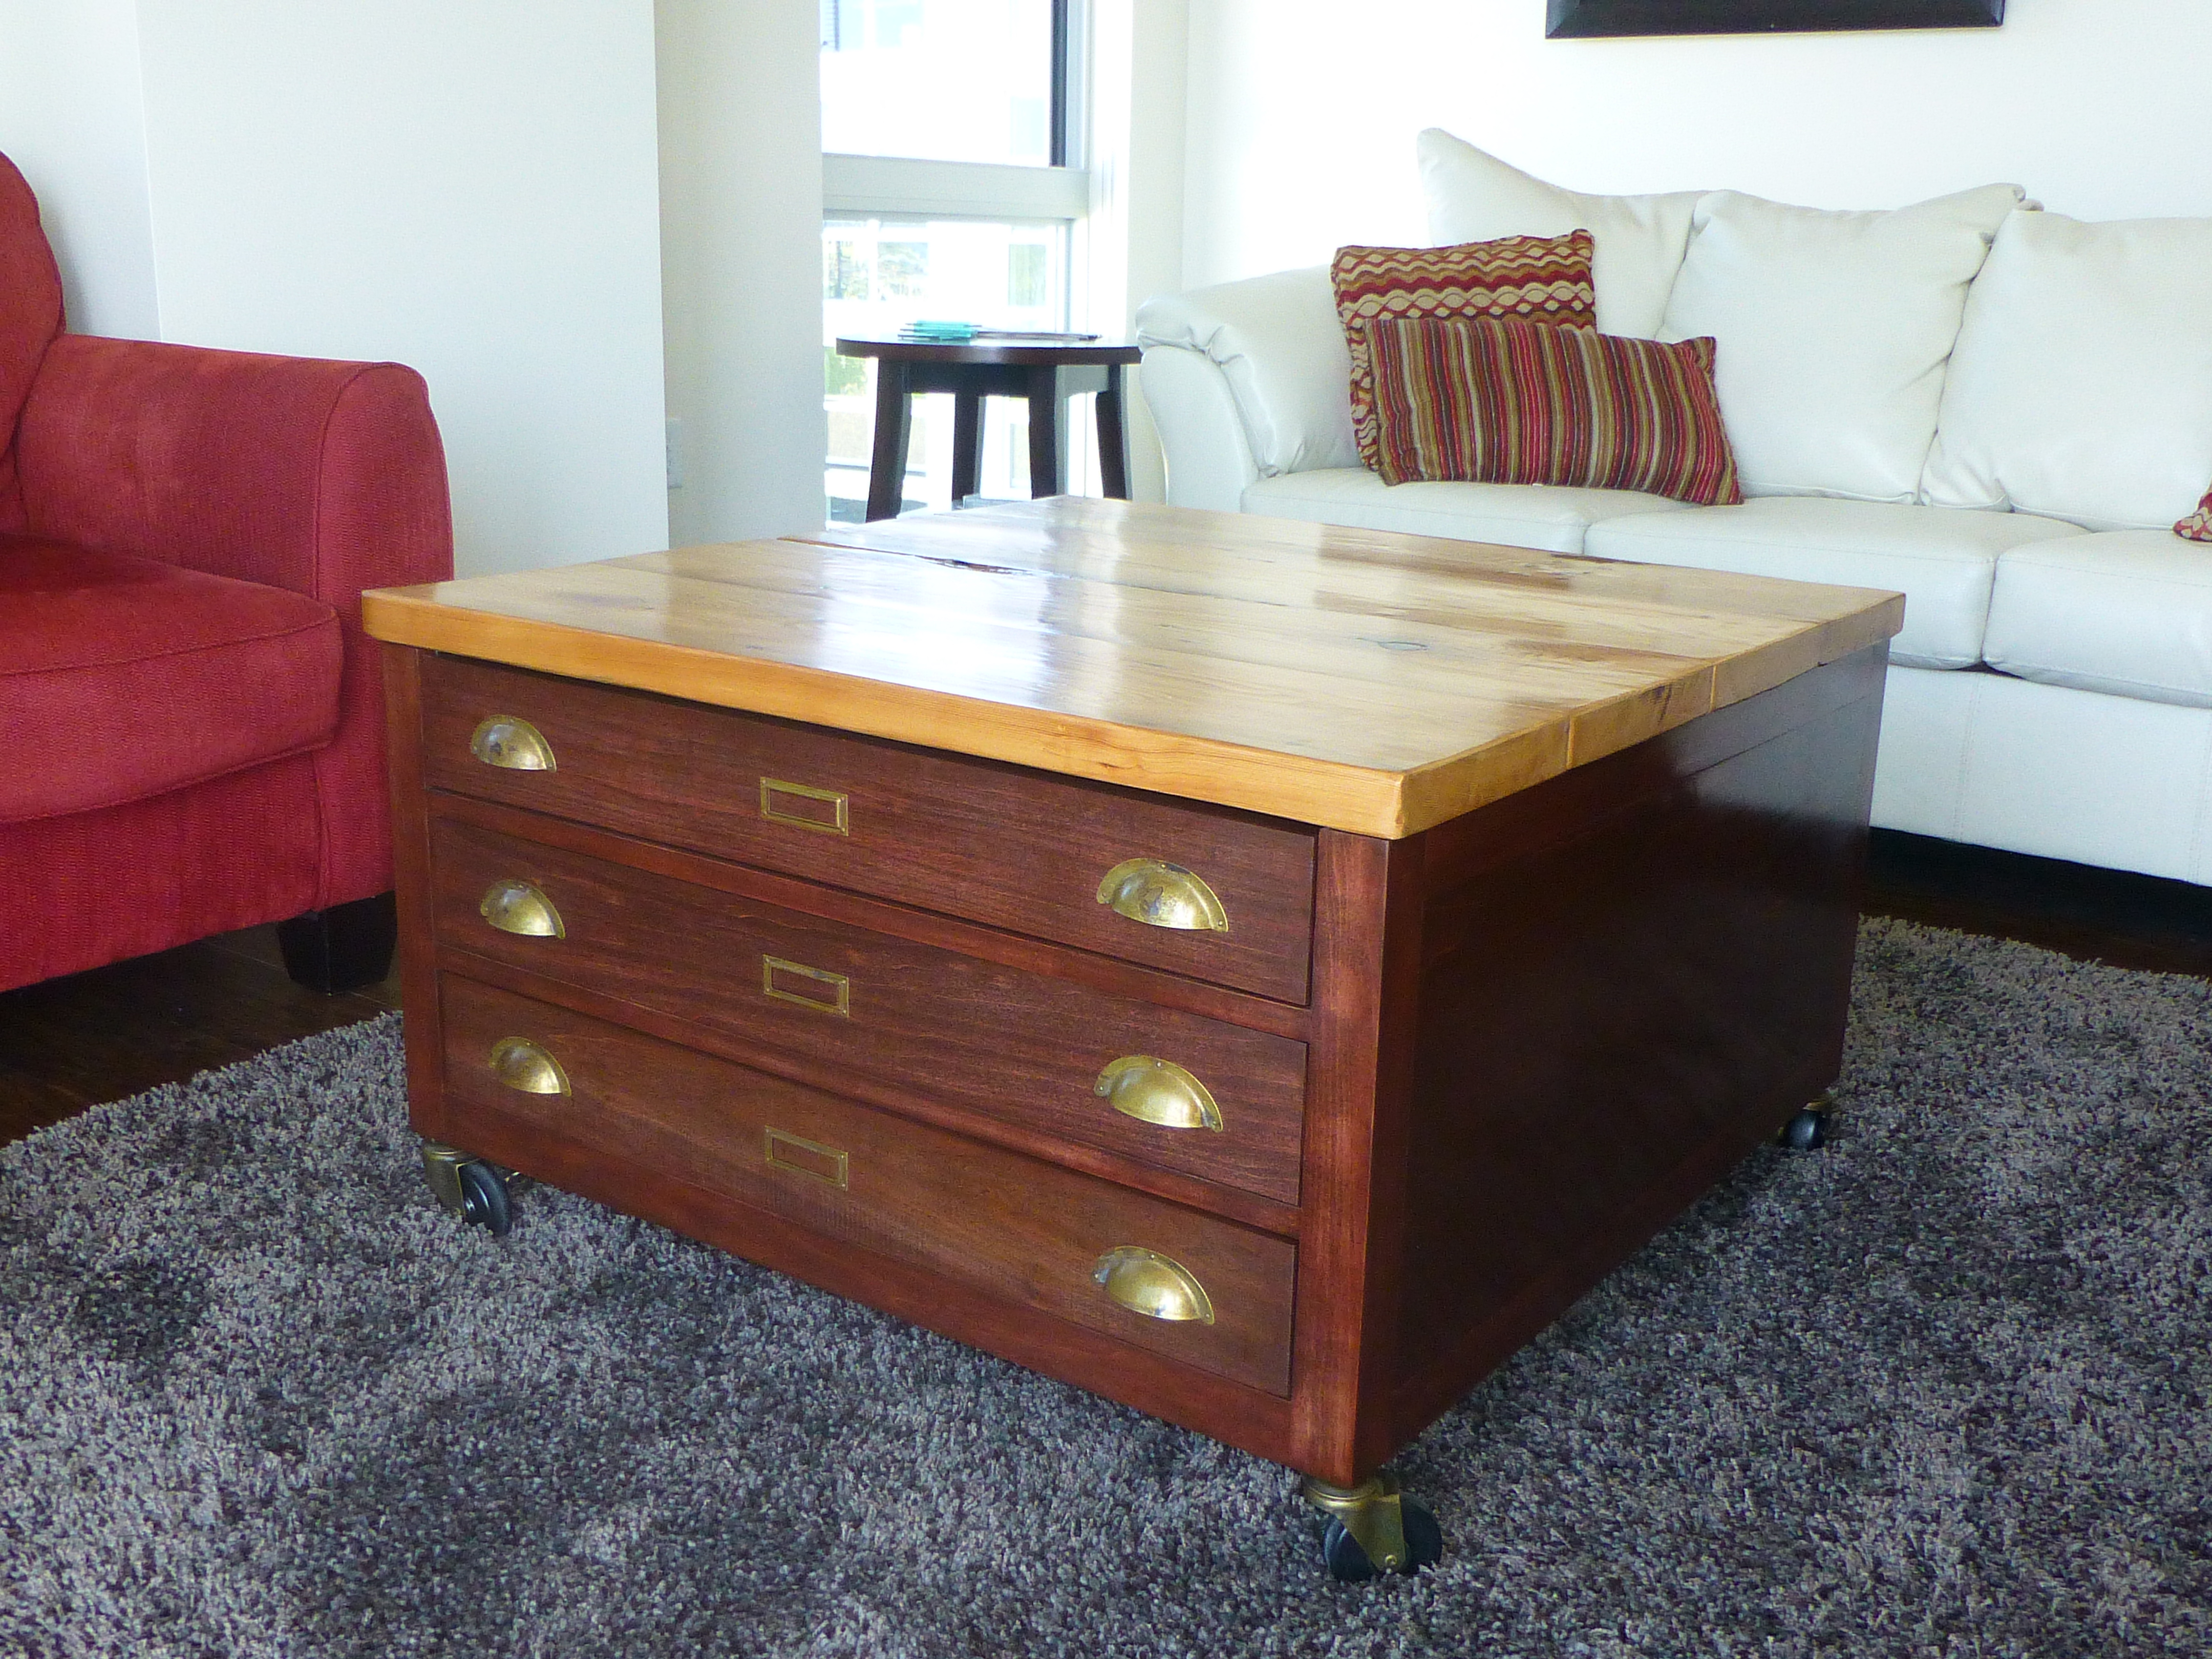
Modified the plans to be only 3 drawers which saved on weight and hardware. Used reclaimed 100+ year old barn wood for the top, adding lots of character.
Built from Plan(s)
Estimated Time Investment
Week Long Project (20 Hours or More)
Finish Used
Cabinet: Minwax gel stain in Red Elm, and Winwax wipe-on satin poly. Top: West System epoxy to stabilize and fill 'defects', sanding sealer and wipe-on satin poly.
Recommended Skill Level
Intermediate
Comments
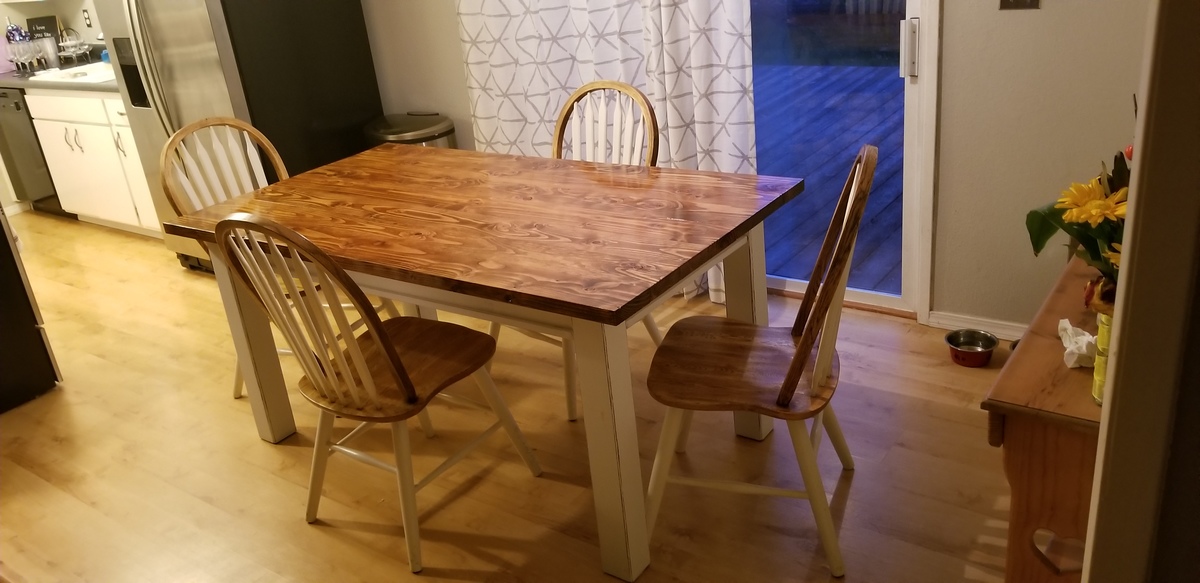
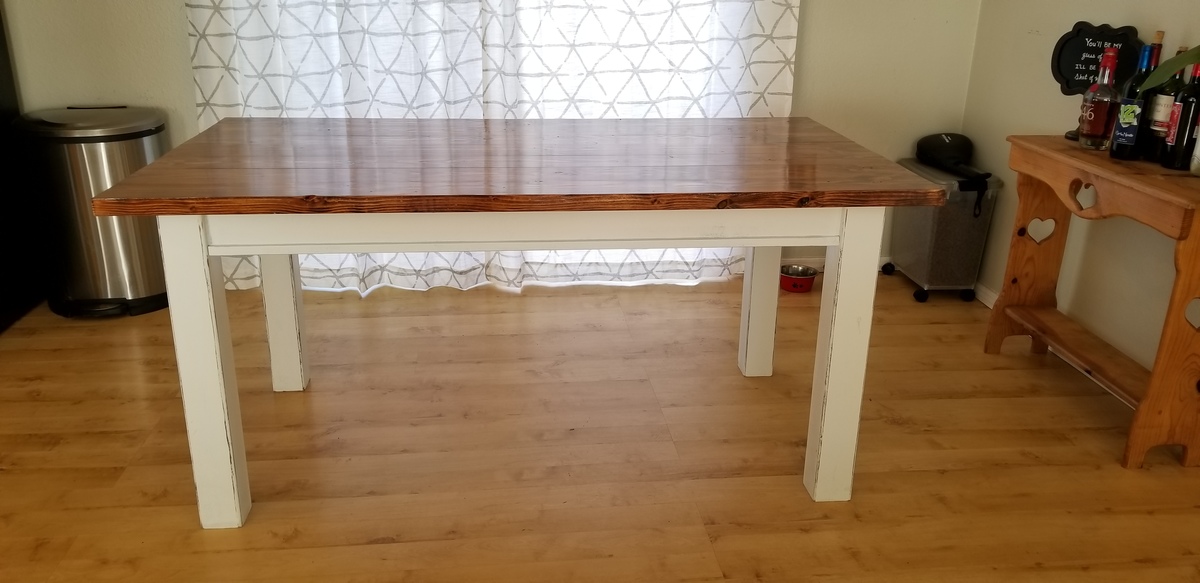
Modified Beginner Farm Table and Bench
Altered the Beginner Farm Table plans to use 2x8s for the top and 4x4s for the legs. I used pocket holes for the table. I followed the bench plans almost exactly, adjusting slightly for the 2x8 tops. I am a beginner and I did it myself! The table and bench are beautiful and sturdy! Thanks Ana!
Comments
The Easiest Shelf!

This really is a easy beginner project and adds instant decor for your wall.
This project is also pretty versatile because it lends itself to ANY decor. You could go totally country like I did or pick a nicer, newer pallet and paint or stain it for a more modern or traditional take. Whatever you choose, it's something you can do in no time at all!
Another great thing about this is you don't need any fancy tools, although it does make it easier! You can choose from a circular saw, a sawsall, a jig saw or even a hand saw to cut your section out.


Built from Plan(s)
Estimated Cost
Free
Estimated Time Investment
An Hour or Two (0-2 Hours)
Finish Used
Lightly sanded then sprayed with a light coat of polyurethane.
Recommended Skill Level
Starter Project
Comments
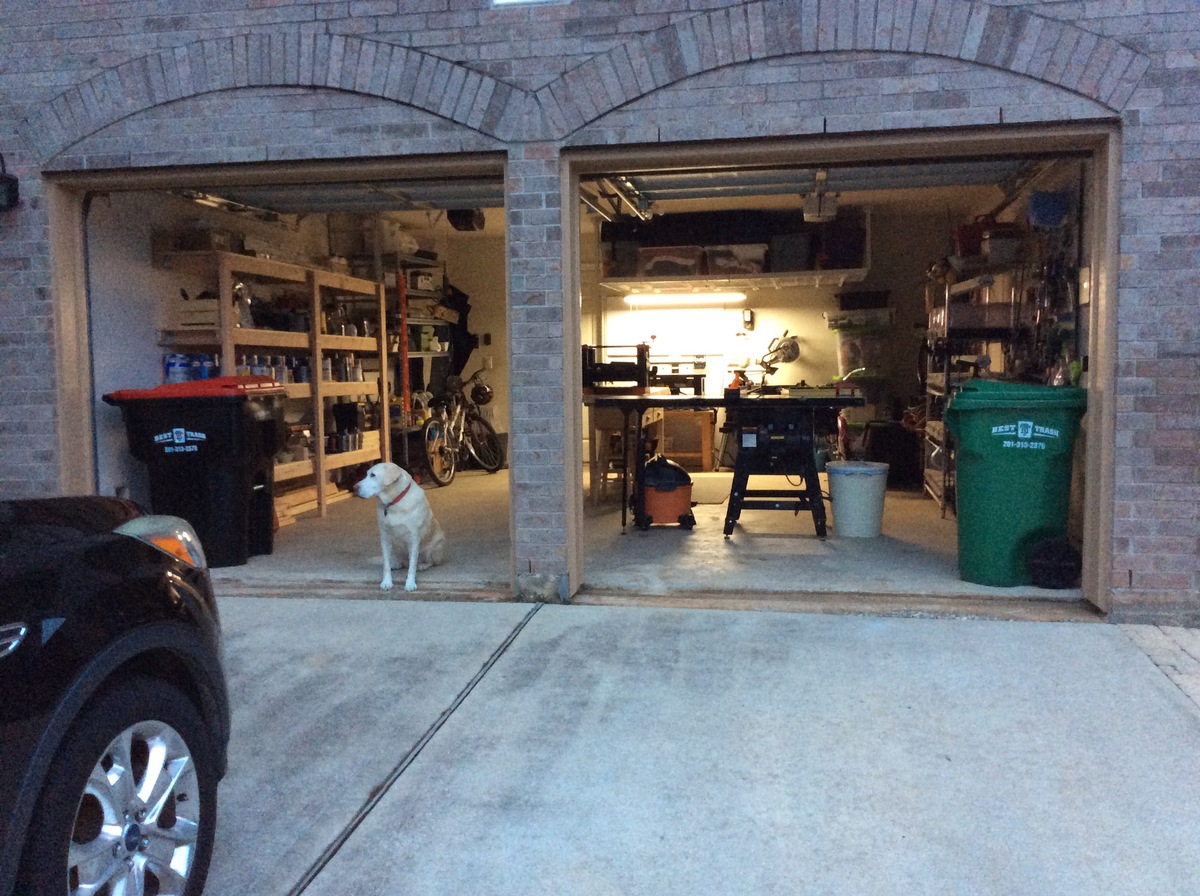
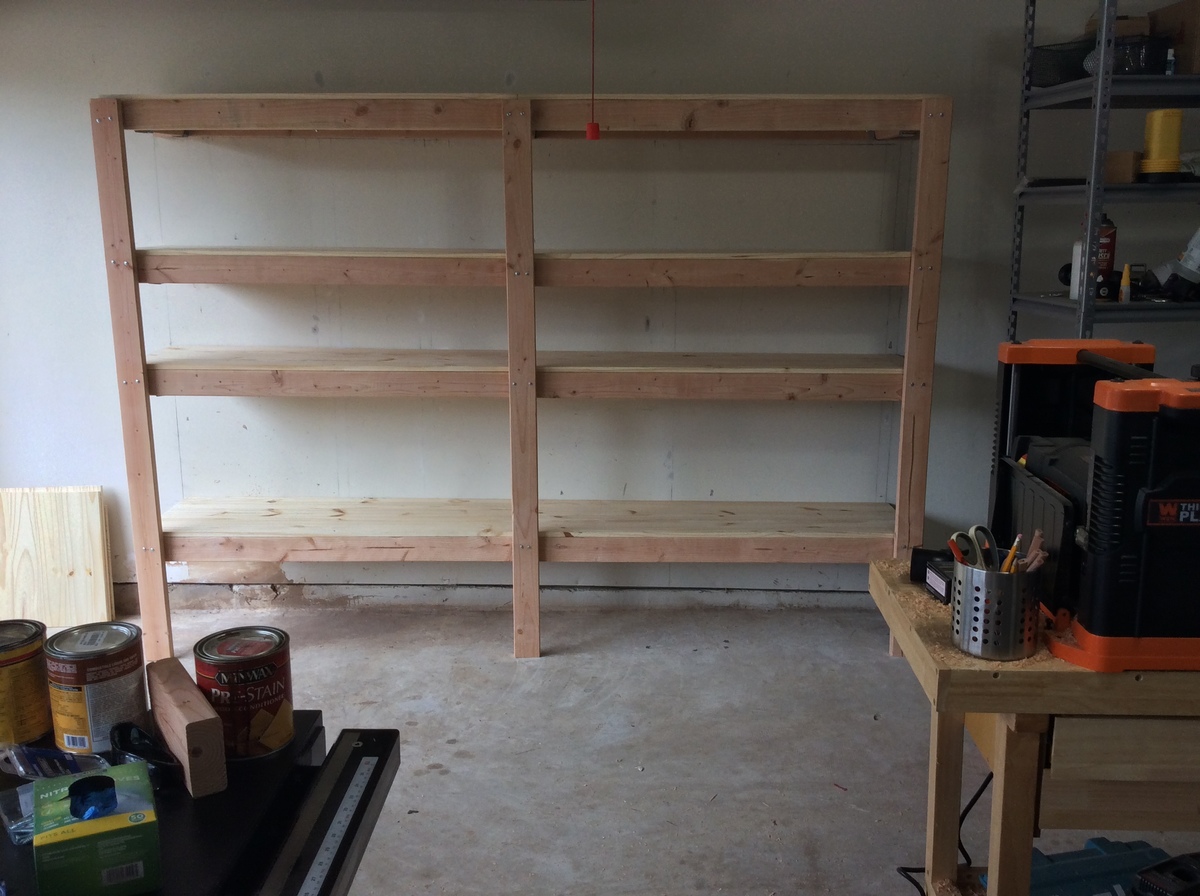
Garage Shelves
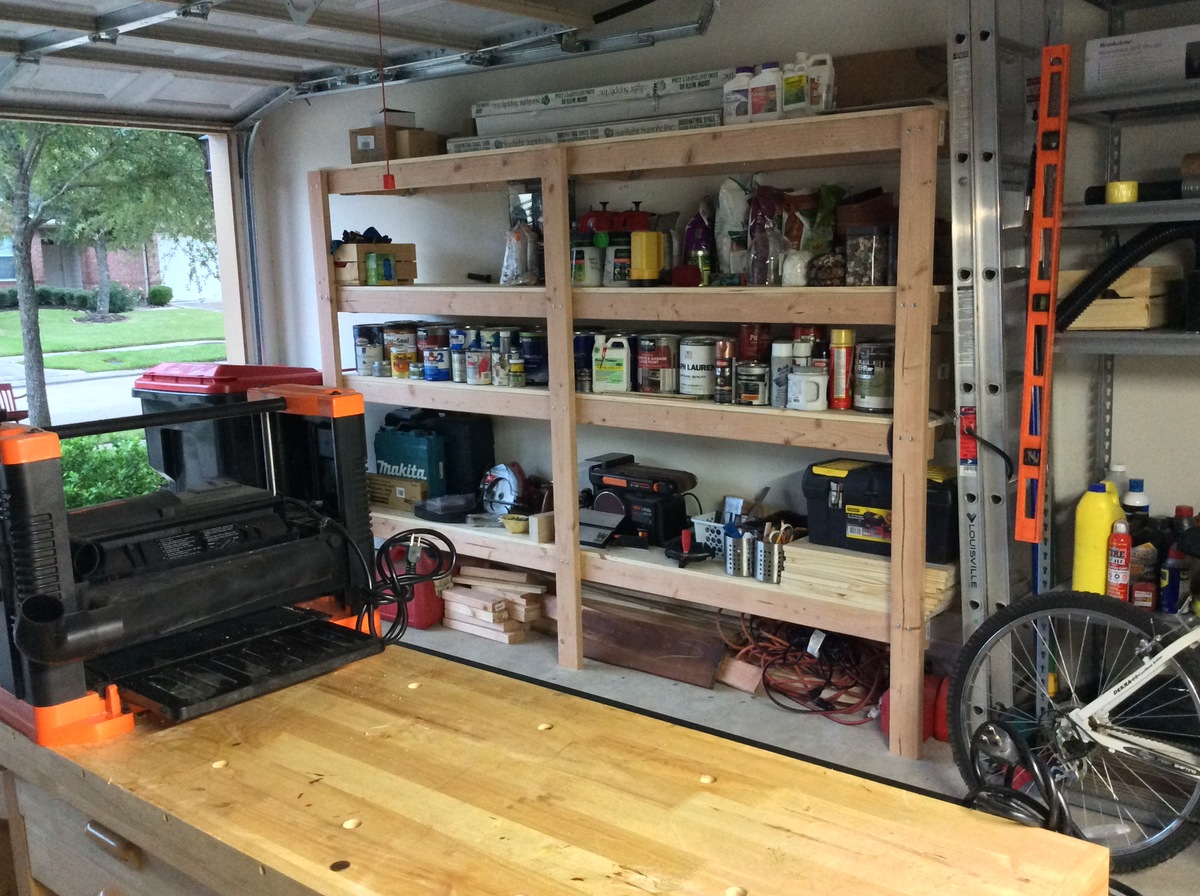
This was a pretty easy project, but I had to adjust the vertical legs to accommodate the sloping garage floor. I drew a horizontal line for the top edge then measured to the floor at the spacing I wanted the vertical legs. I used these measurements to cut the three vertical legs. It’s level and straight, even though my garage is sloped.
Built from Plan(s)
Estimated Cost
$300
Estimated Time Investment
Week Long Project (20 Hours or More)
Finish Used
Garage shelving
Recommended Skill Level
Beginner
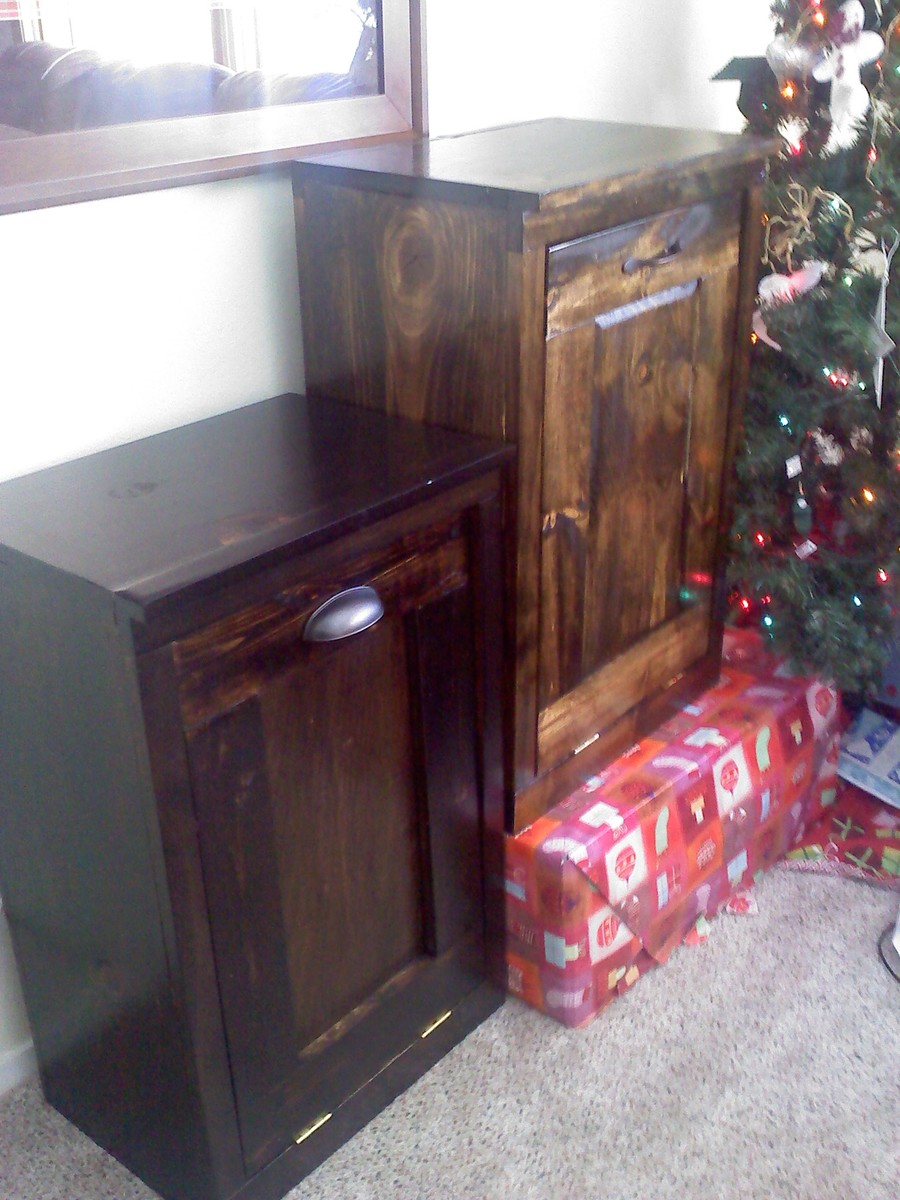
I couldn't be more happy about a garbage can!
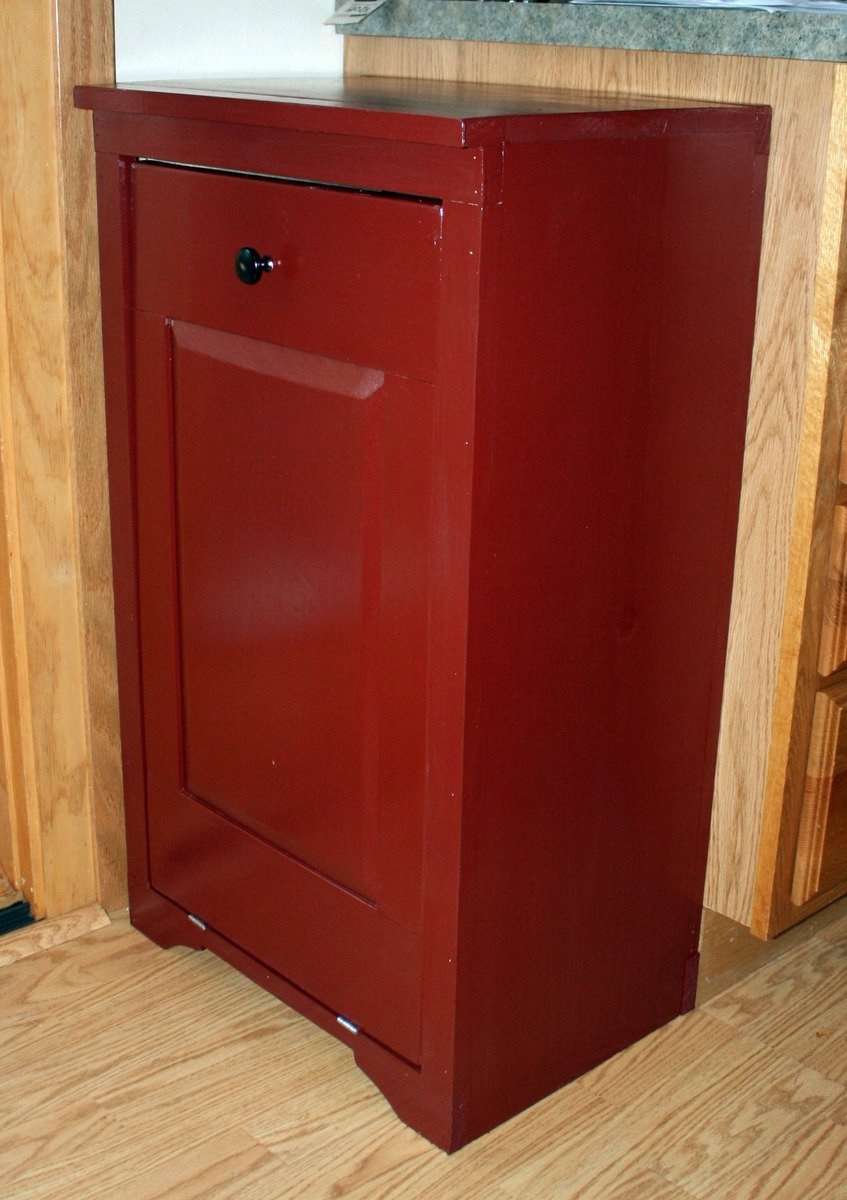
I started this project thinking that I would put in a rental home we were working on. But after I completed it I couldn't part with it.
I found the plans to be easy to follow! I watched the videos and tackled the raised panel doors. I wanted to add some height so added a few inches just in-case. I couldn’t bear the thought of completing this project and my garbage can not fitting. So I did use 1x6 for the rails and found it didn't look too bad.
I put a lot of thought about what color and finish I wanted. I thought about distressing it but couldn’t decide on the color or technique. So I decided on Color Place paint that I had left over from another project. I am going to find a spray paint that matches and do the inside.
I choose an oil rubbed bronze knob that I had left over from a kitchen remodel, added a magnetic closure as well as a door safety chain. I have lots of little hands and toes that I don’t want getting smashed. I like the idea that if I want to open it all the way for cleaning all I have to do is unhook the safety chain.
Over all I am so pleased with how it turned out. It keeps the garbage and smell in and curious fingers out! My kids love to put stuff in the garbage now!
I spent a weekend with a visiting friend and made one as well as completed two more for Christmas gifts.
Thanks Ana


Built from Plan(s)
Estimated Cost
$30-35
Estimated Time Investment
Afternoon Project (3-6 Hours)
Finish Used
2-3 coats-ColorPlace-Redwood semi-gloss exterior
1 coat-Minwax-Polyurethane-Semi Gloss
1 coat-Minwax-Polyurethane-Semi Gloss
Recommended Skill Level
Intermediate
Comments
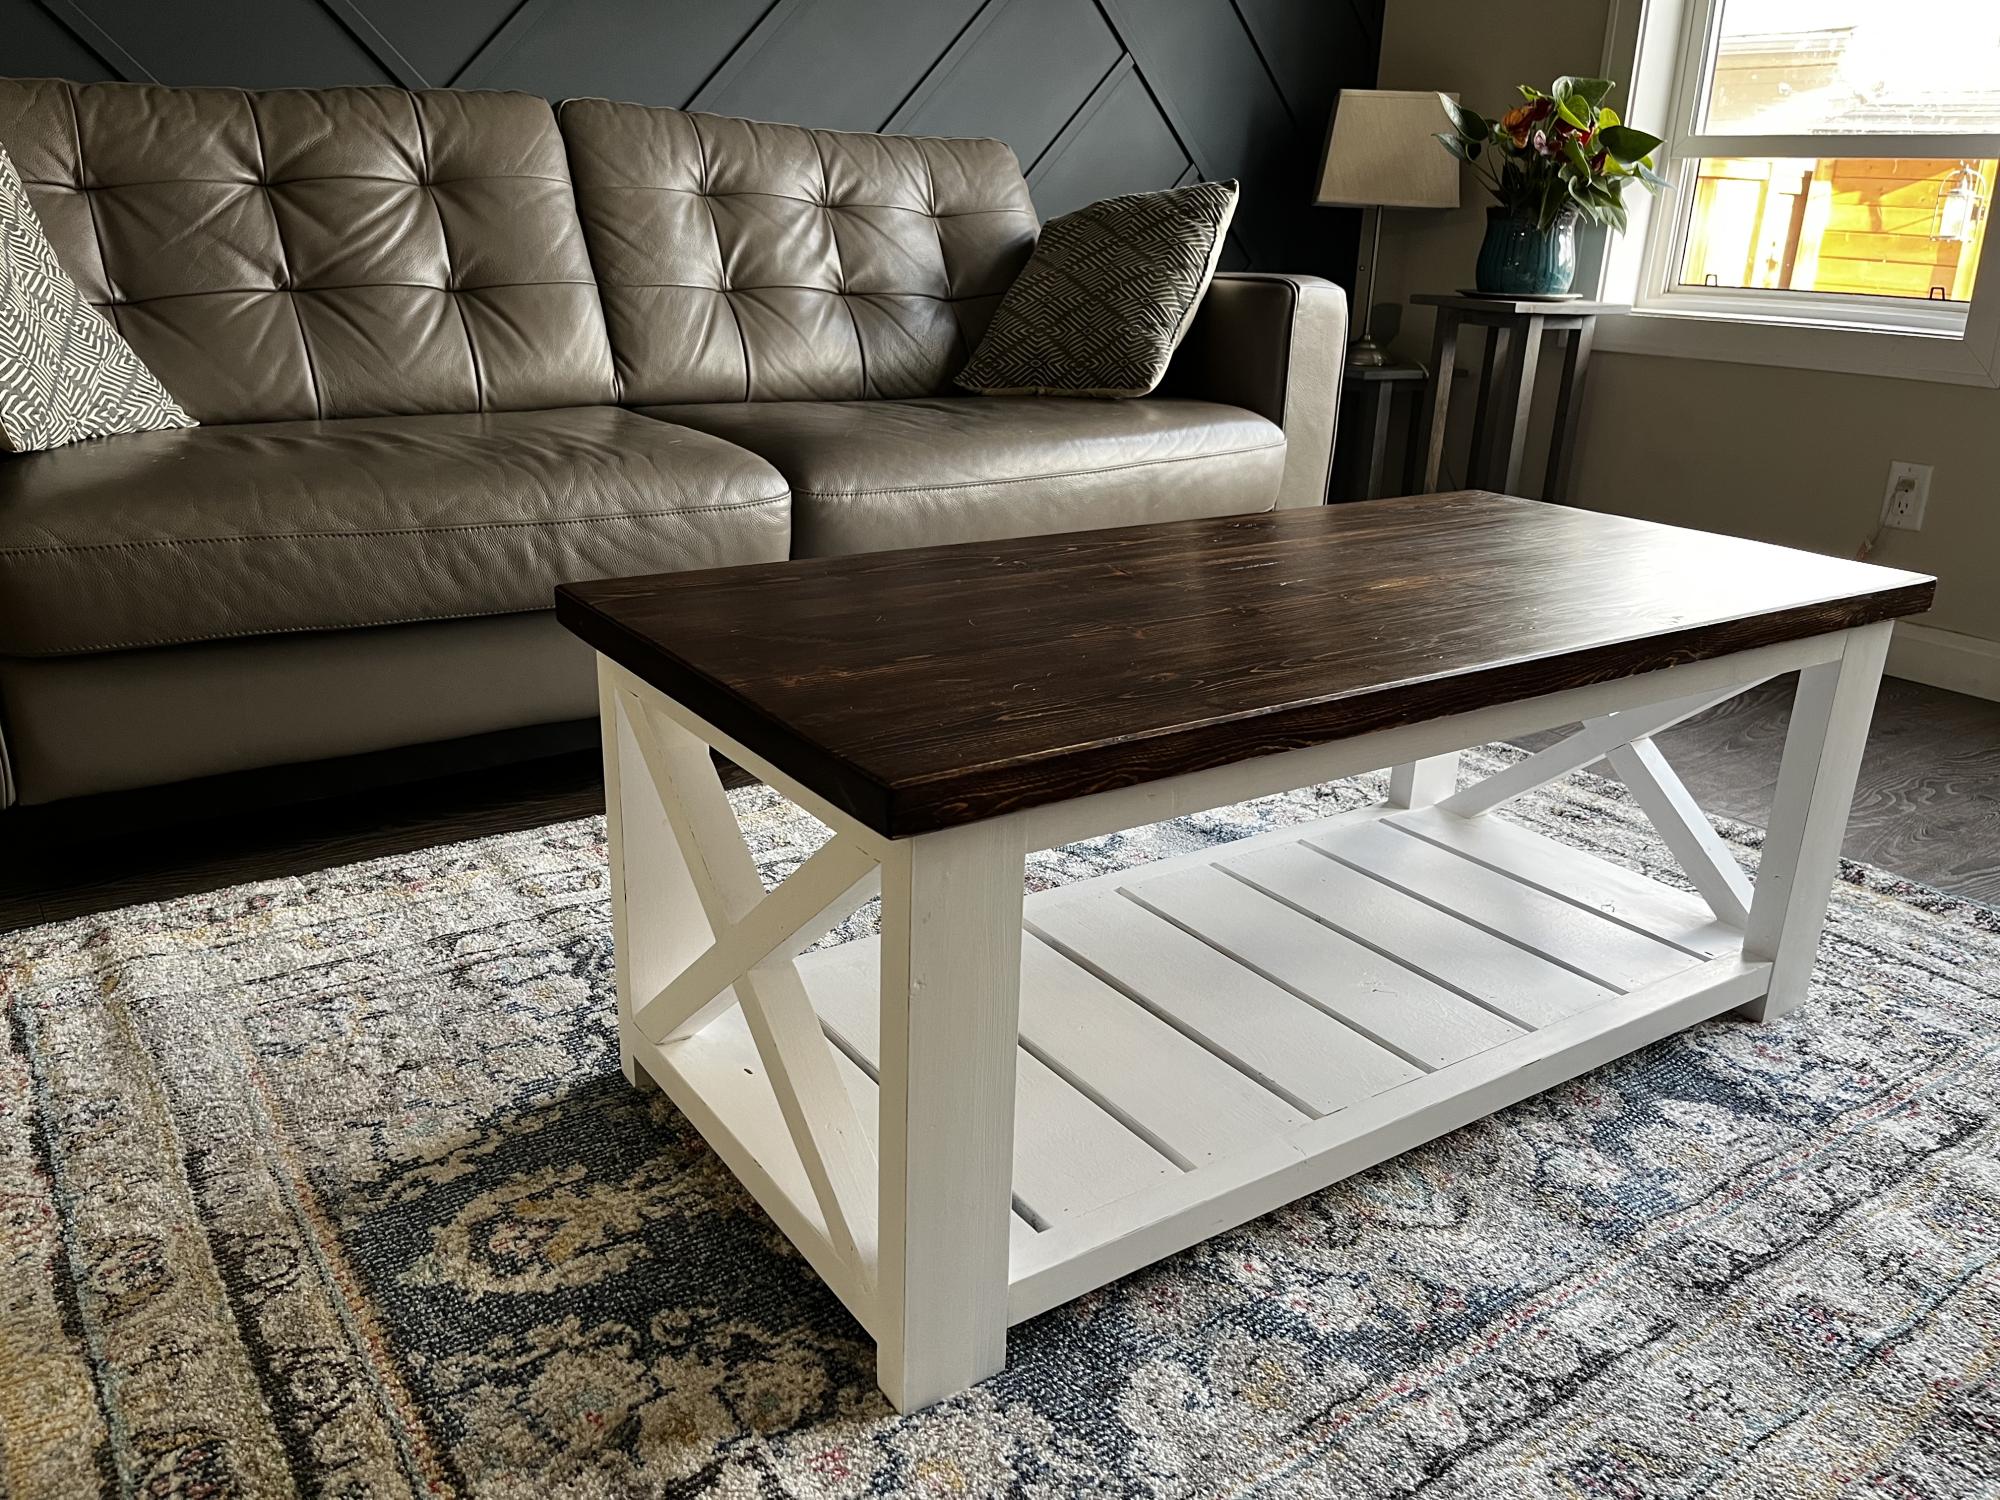
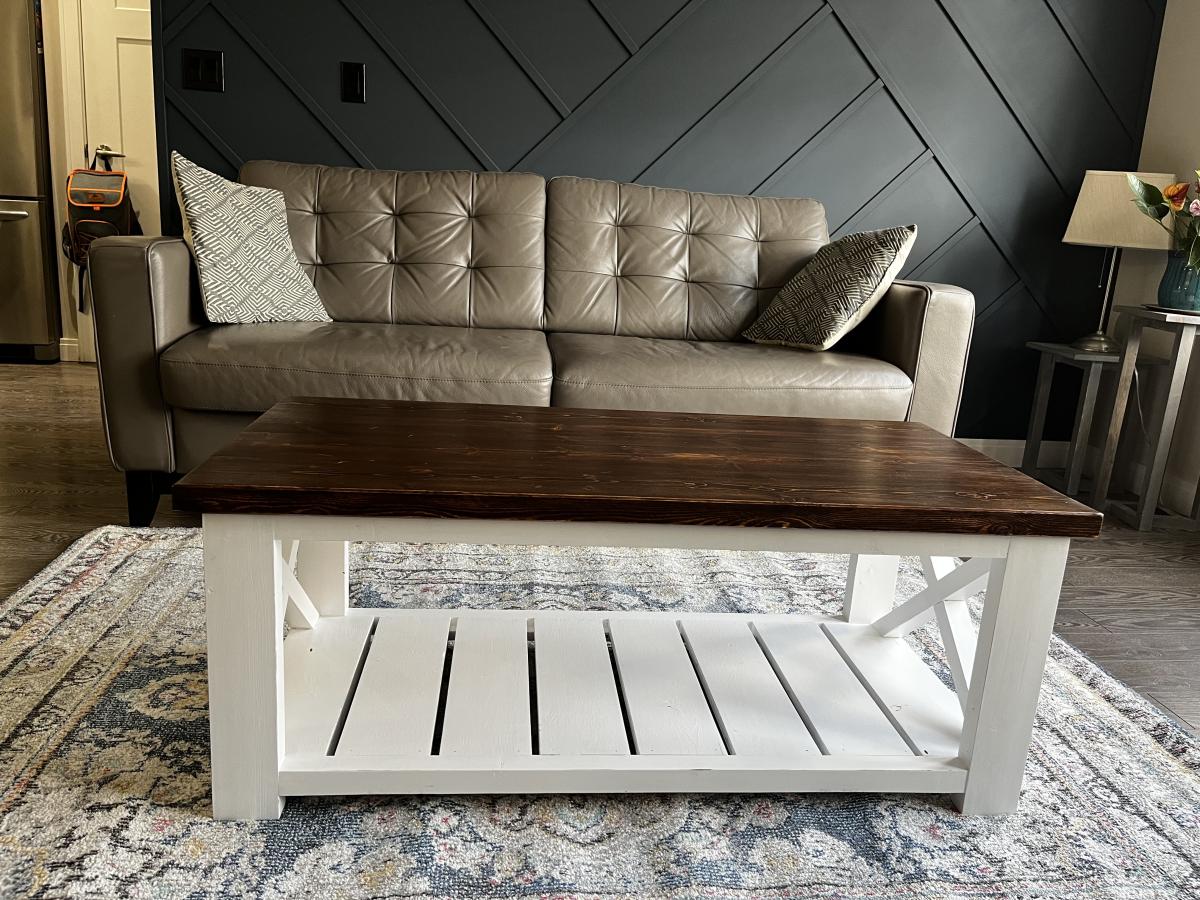
Ana White Admin
Tue, 05/31/2022 - 14:33
Beautiful table!
Thank you for sharing, love the finish!