Community Brag Posts
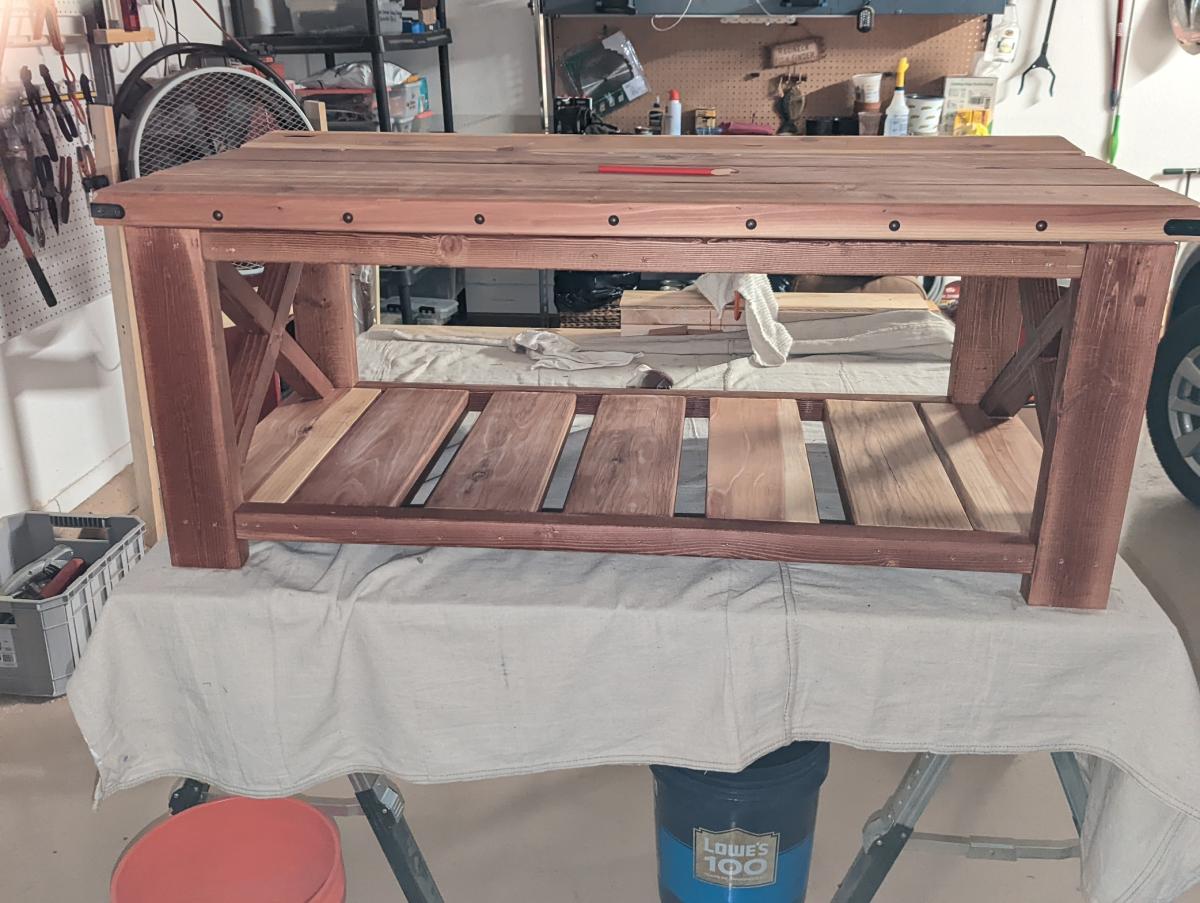
Farmhouse Coffee Table
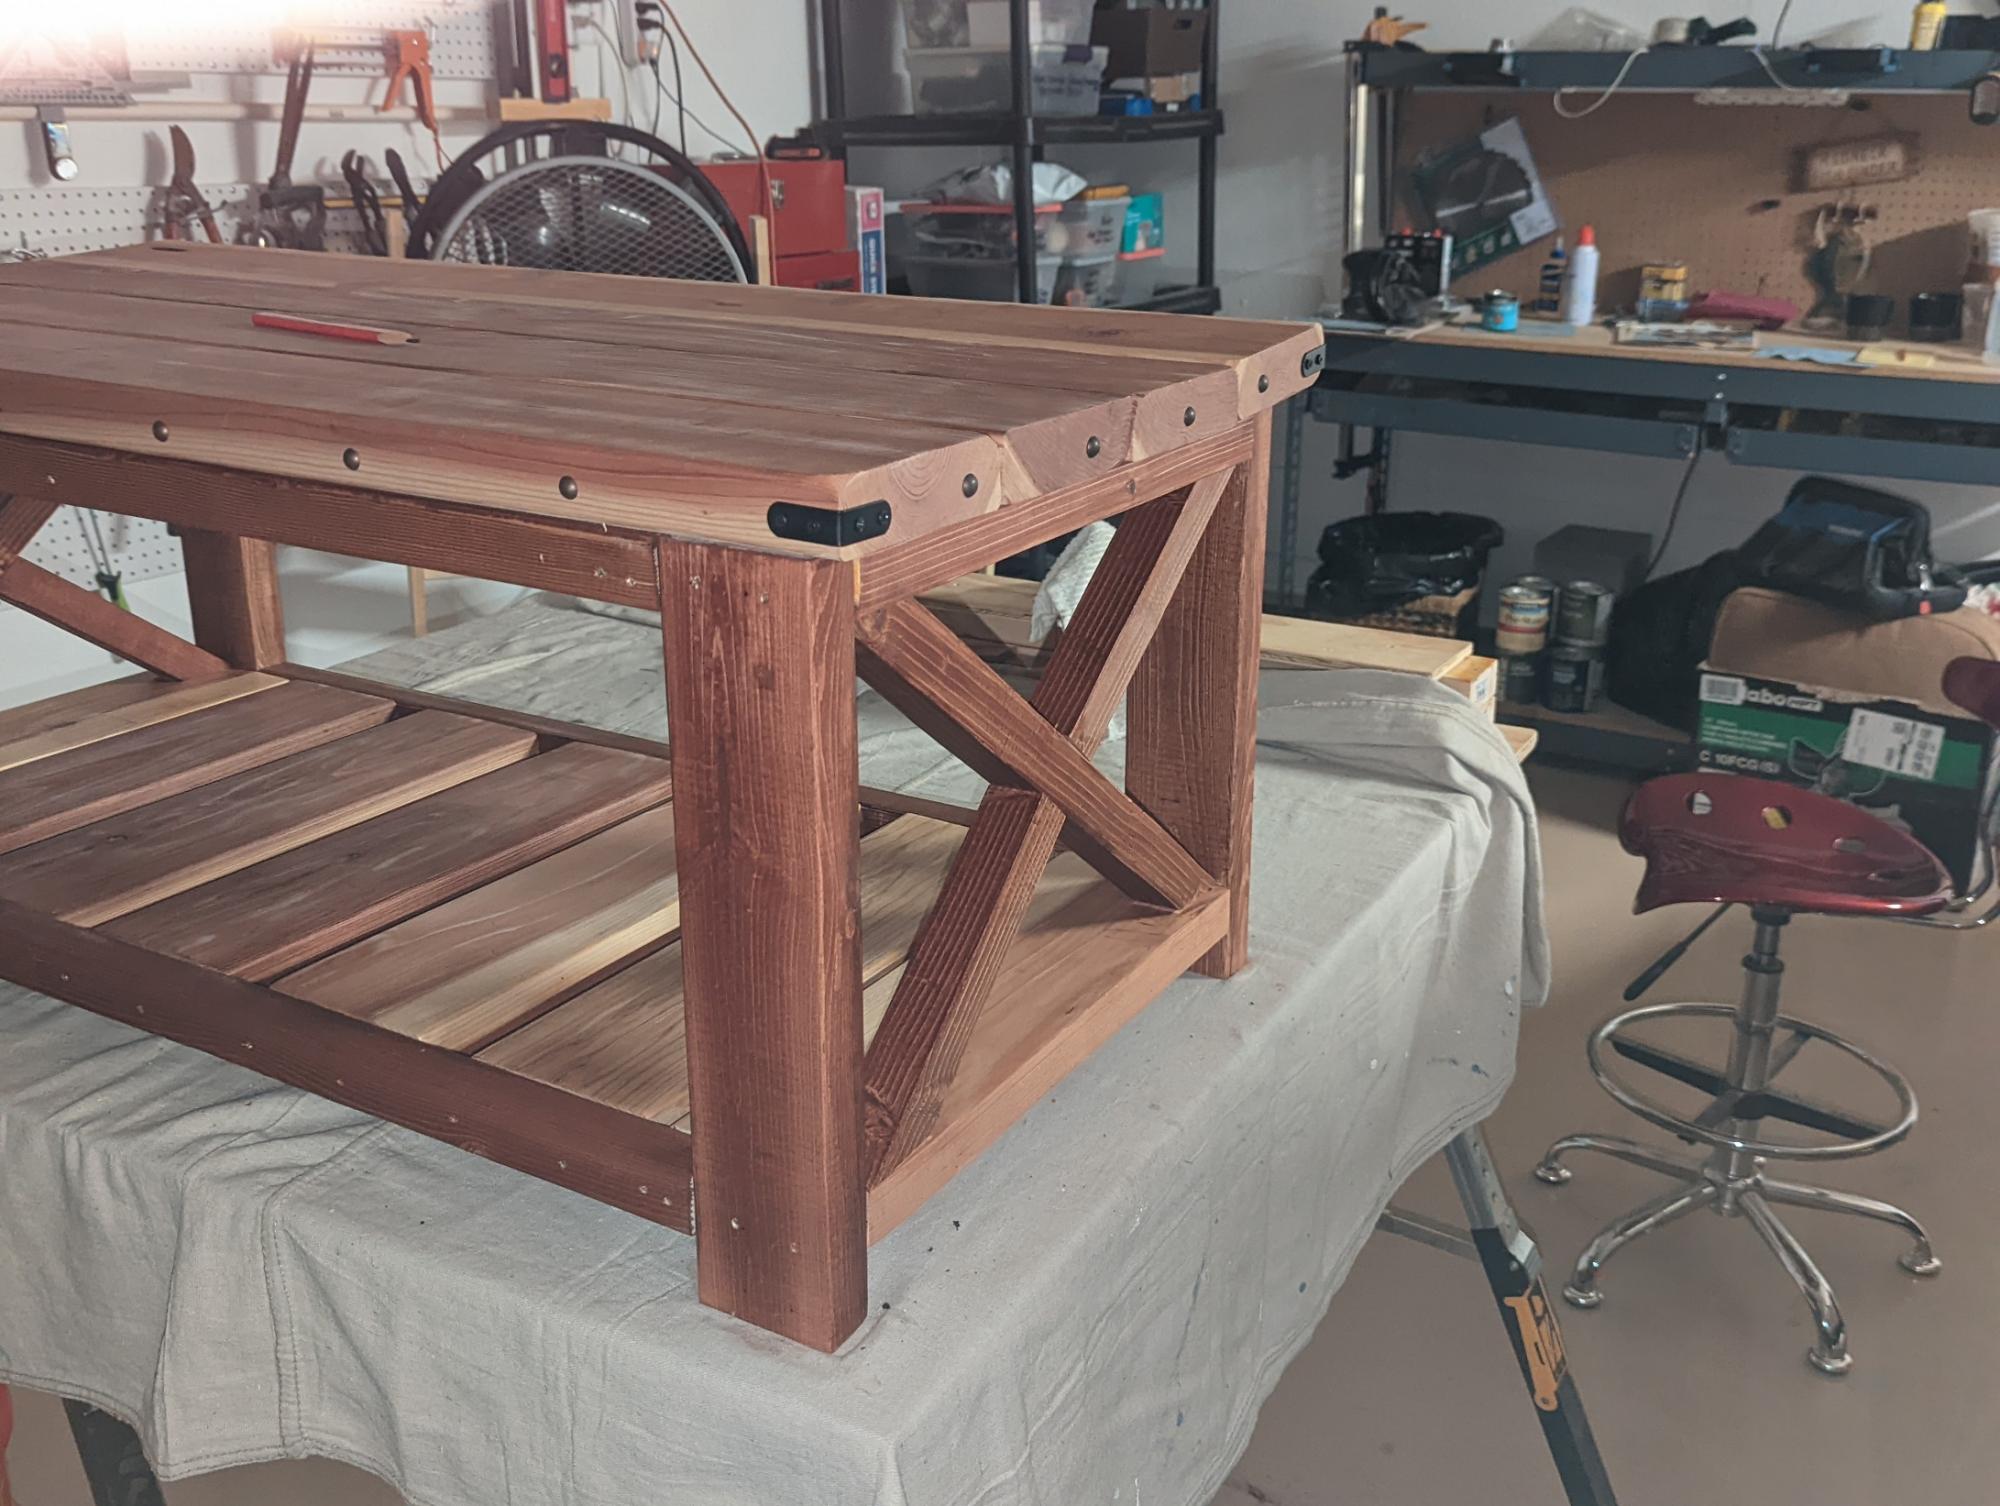
I really had a lot of fun with this project Ana, so thank you for both the plans and that YouTube tutorial. Built almost exactly like your plans, with the exception of those nail heads I added around the perimeter. Decided to use redwood for the 2x6's, and that seemed to add more wood beauty, but I also ended up with one board that was slightly bent. I fixed that with some wood filler. Finished with clear shellac.
Comments
Tue, 08/16/2022 - 11:01
Gorgeous build!
Love all the extra details and gorgeous wood, looks fantastic!
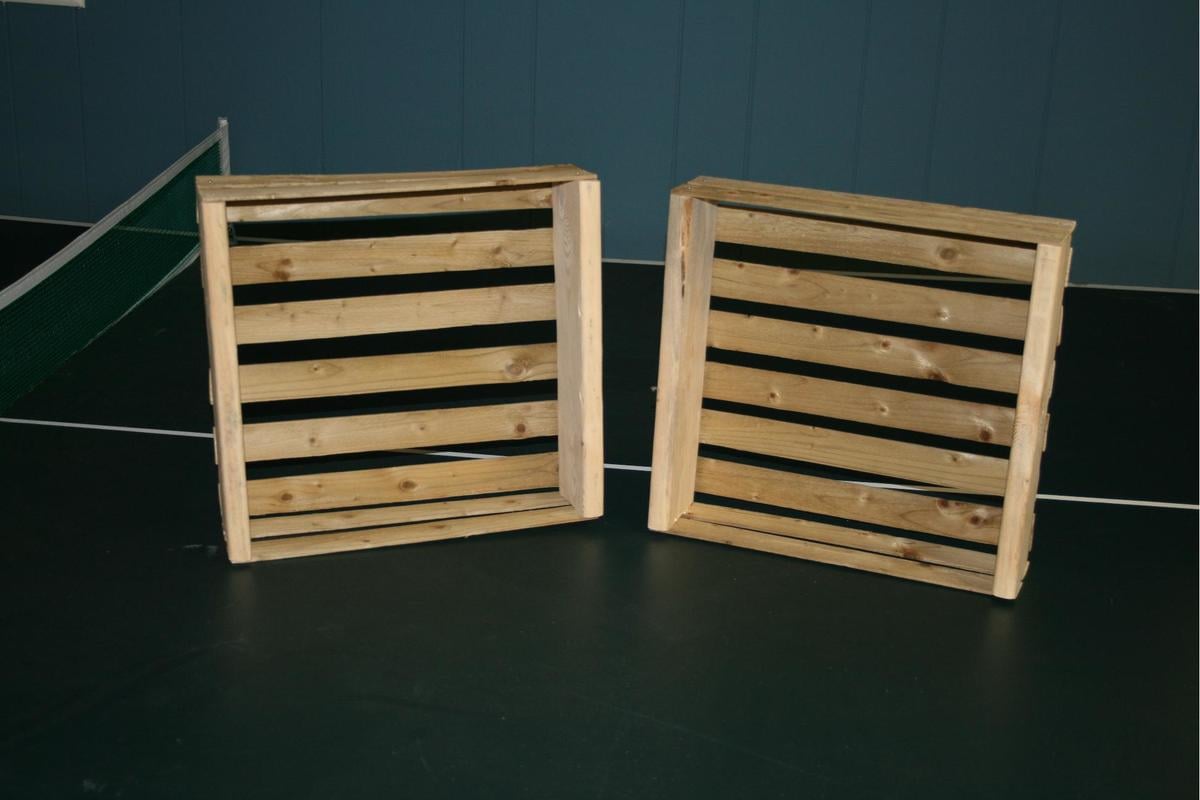
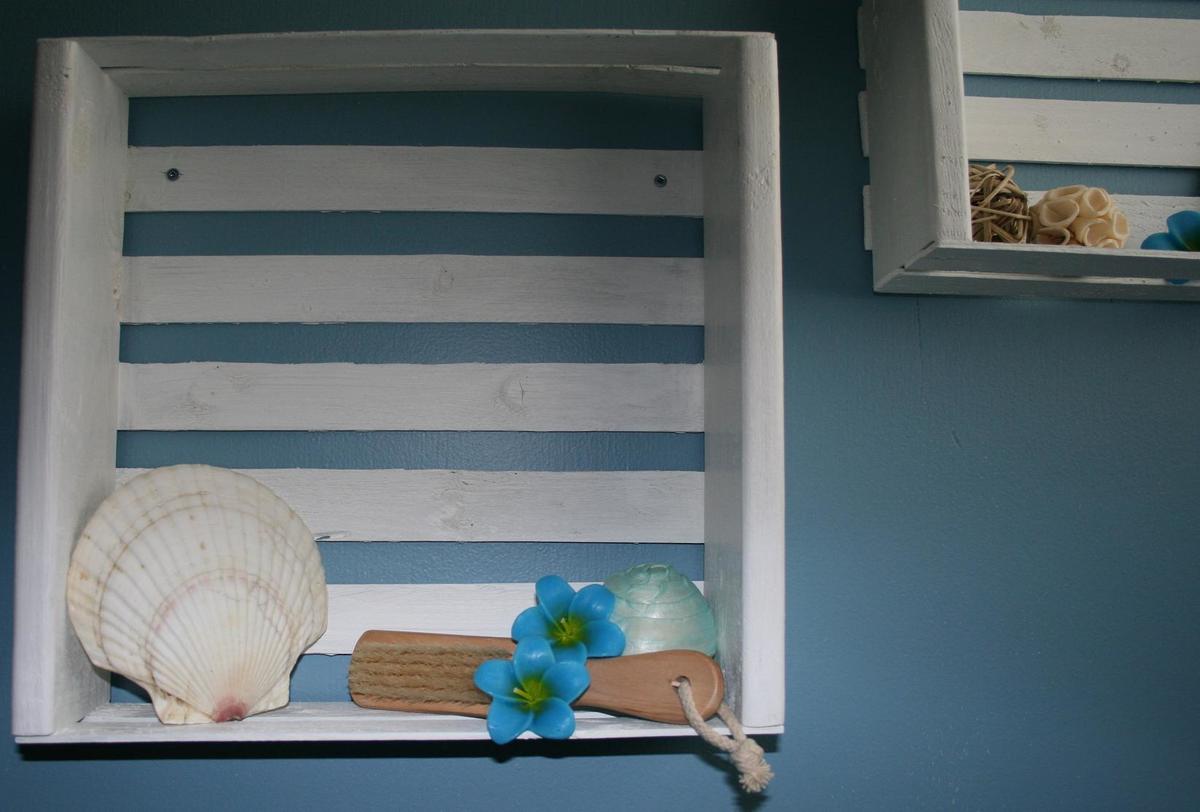
Little Crates
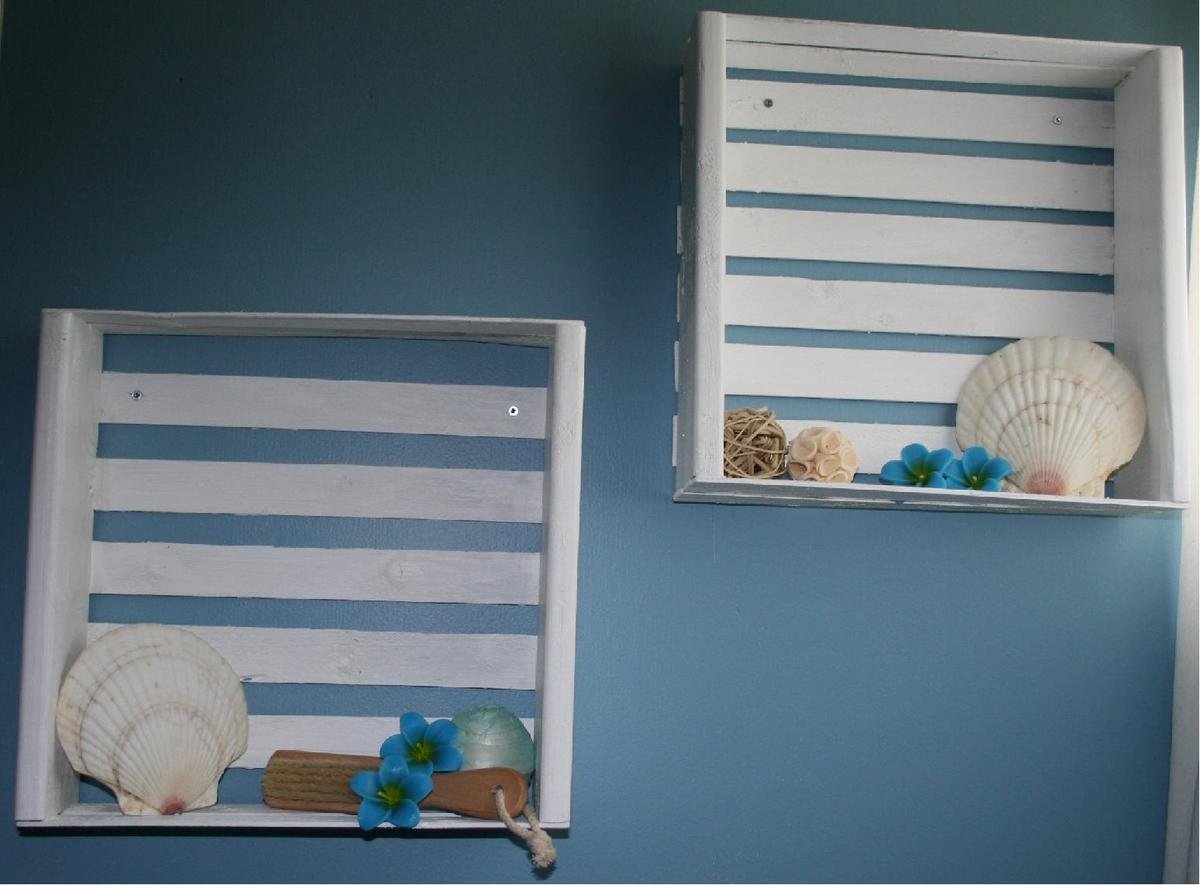
My first project where I made the whole thing by myself! My friend and I each loved this idea and so together we each made our own version! It was just what I needed for some bathroom beautifying in a small space!!

Built from Plan(s)
Estimated Cost
$8 to $12
Estimated Time Investment
An Hour or Two (0-2 Hours)
Recommended Skill Level
Starter Project
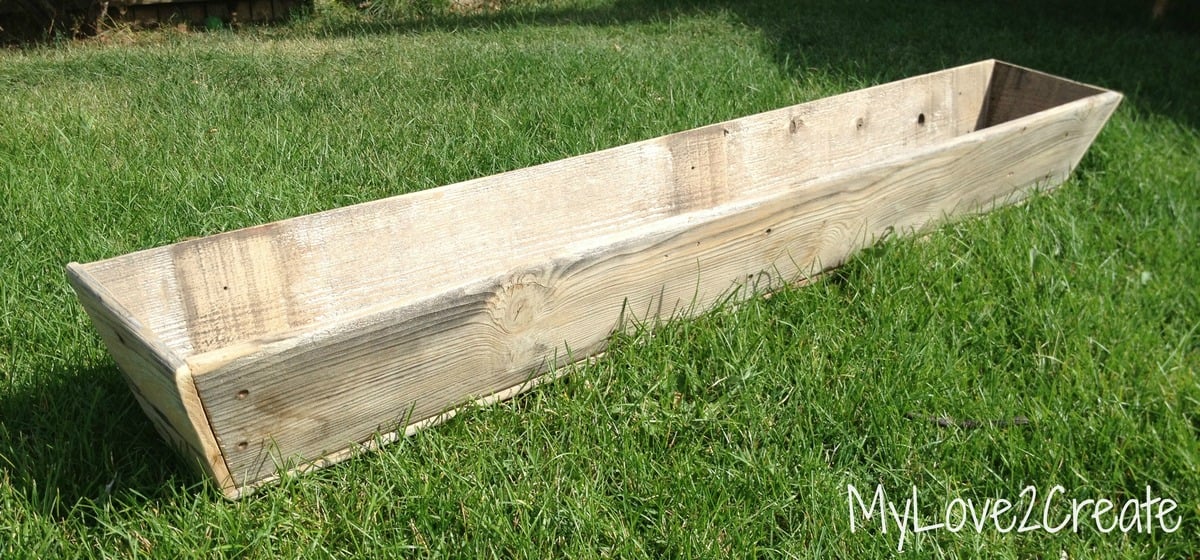
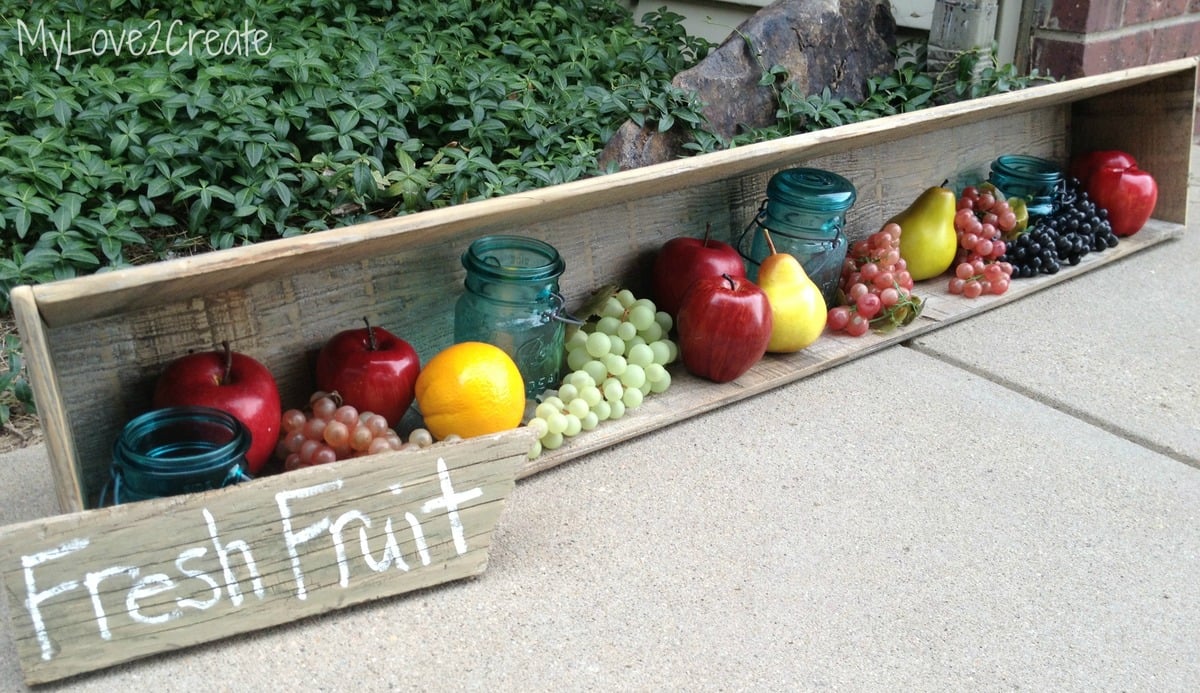
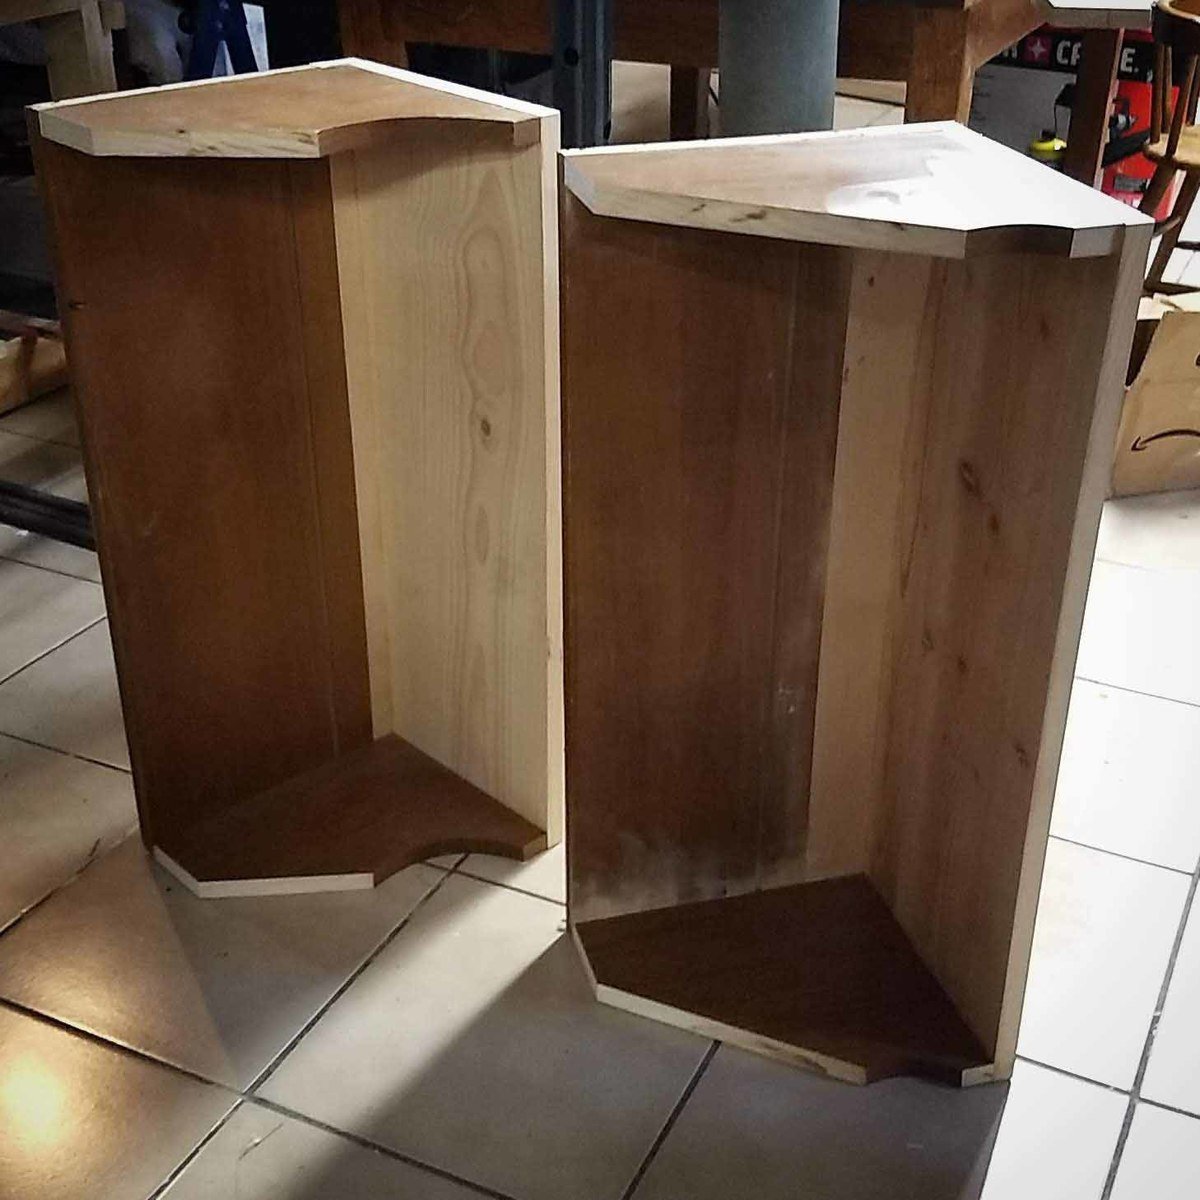
A Long tapered crate
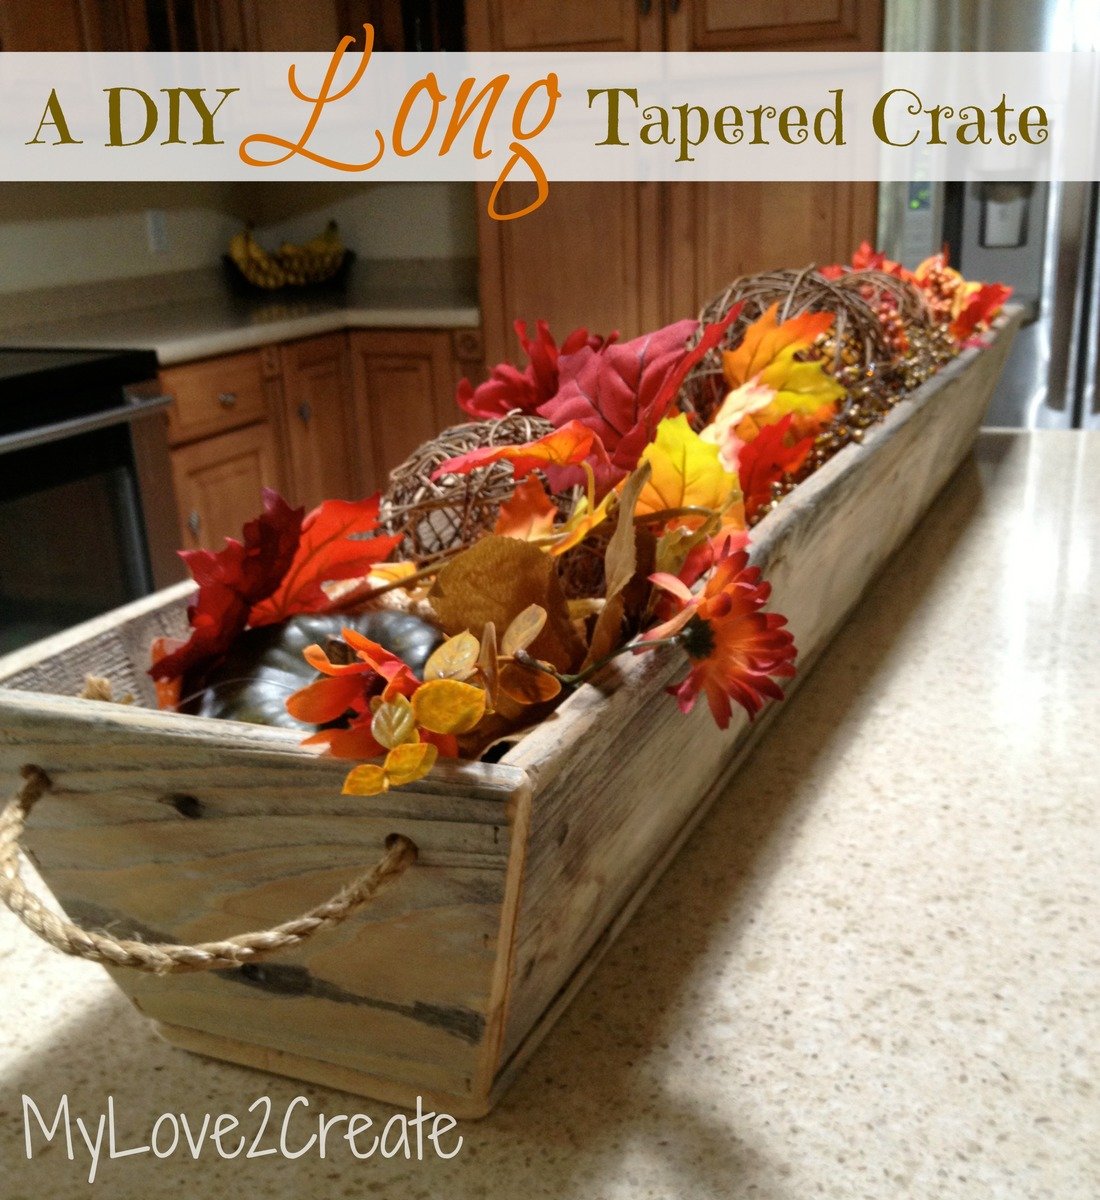
I love Ana's tapered crate! I decided to add some length to the sides and make it really long! It is super cute and makes a big statement, for only a small amount of work! Sa-weet!
Built from Plan(s)
Estimated Cost
Free, or under $5 if you by the wood new
Estimated Time Investment
An Hour or Two (0-2 Hours)
Recommended Skill Level
Beginner
Comments

Tue, 09/03/2013 - 14:47
Rustic Beauty!
Perfect for a Christmas display!
I better get busy and build one!
Val

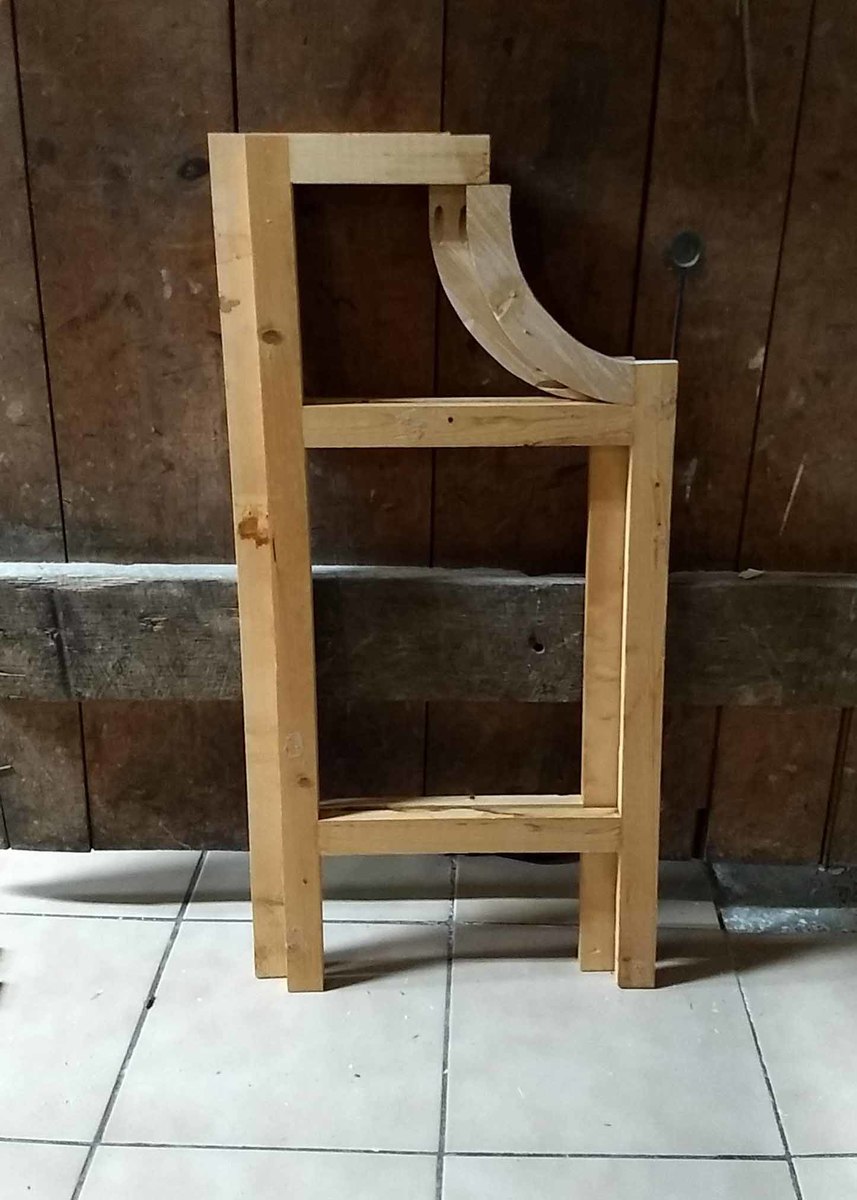
Potting Bench
I modified the collapsibile planting table by Lady Goats. My wife asked for it to have a removable shelf to keep with the take down Idea and also to come up with a way to have a spicket added. this was a really fun project to make, I even added carvings and painted to allow it to stand out and to give it some color.

Built from Plan(s)
Estimated Cost
$60
Estimated Time Investment
Weekend Project (10-20 Hours)
Finish Used
MinWax English Chestnut
Recommended Skill Level
Beginner
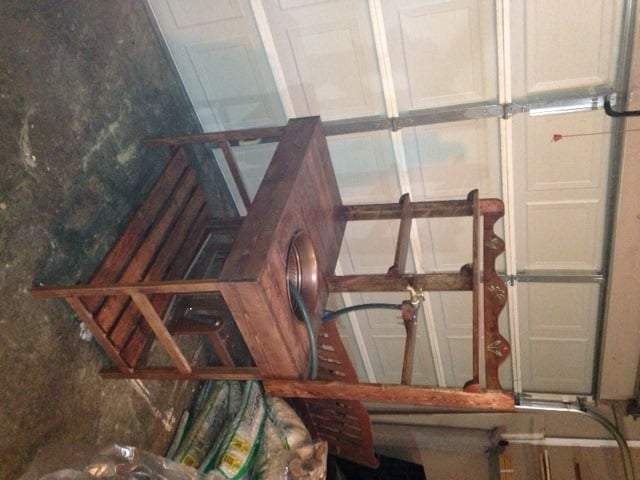
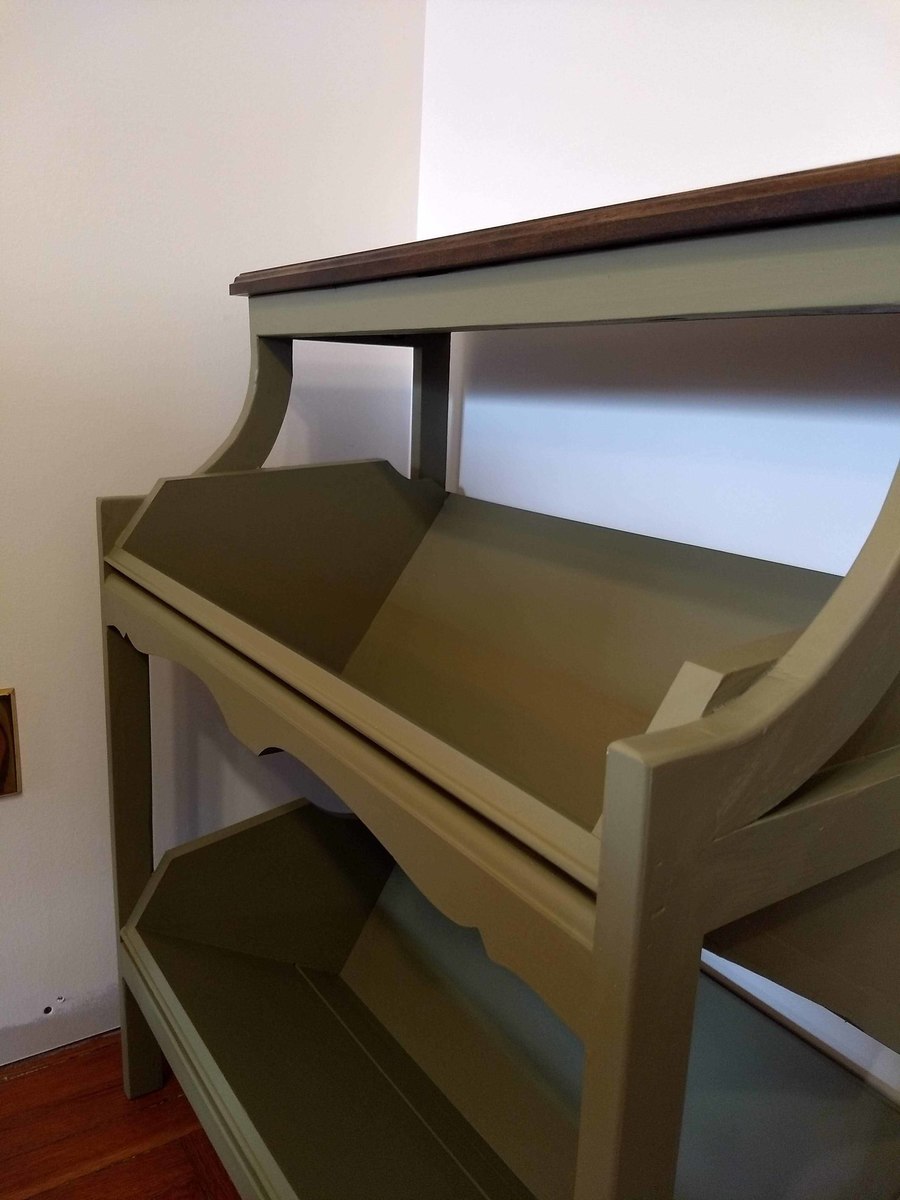
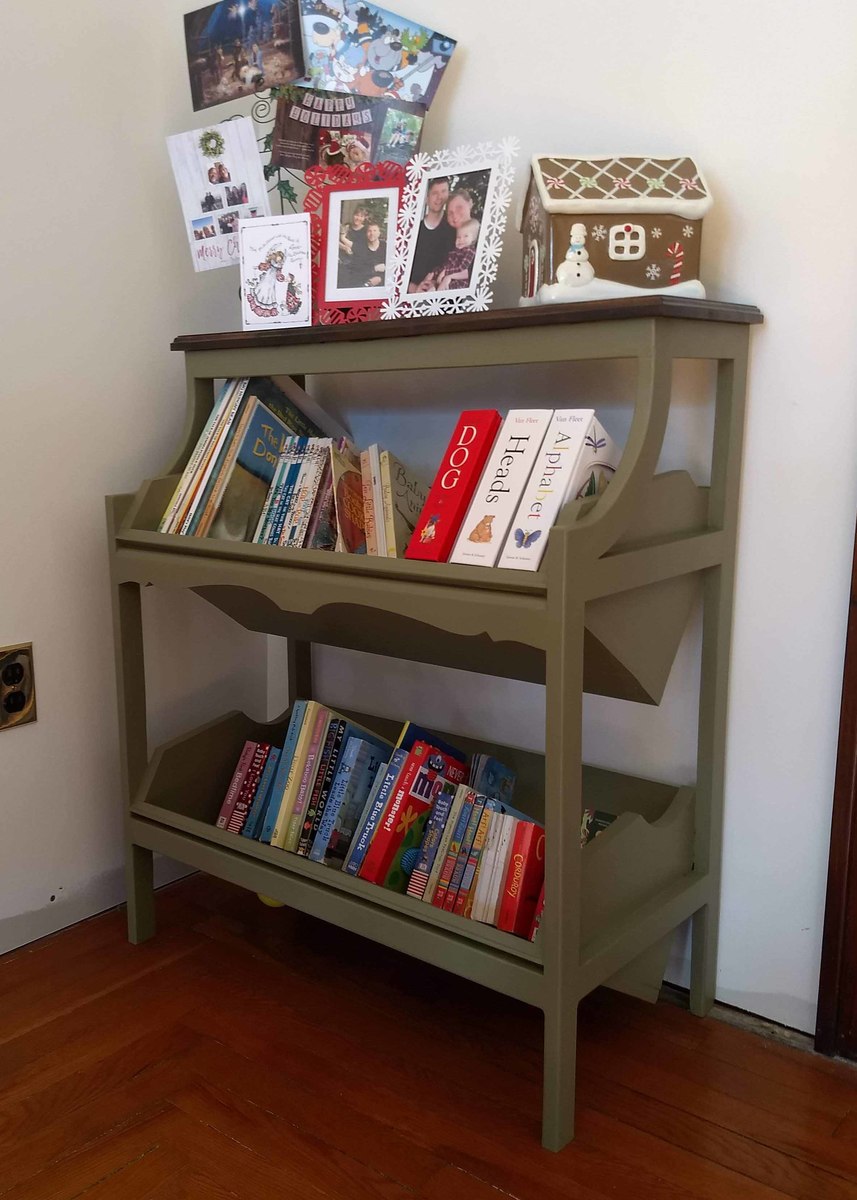
Kid-friendly Green Library Console

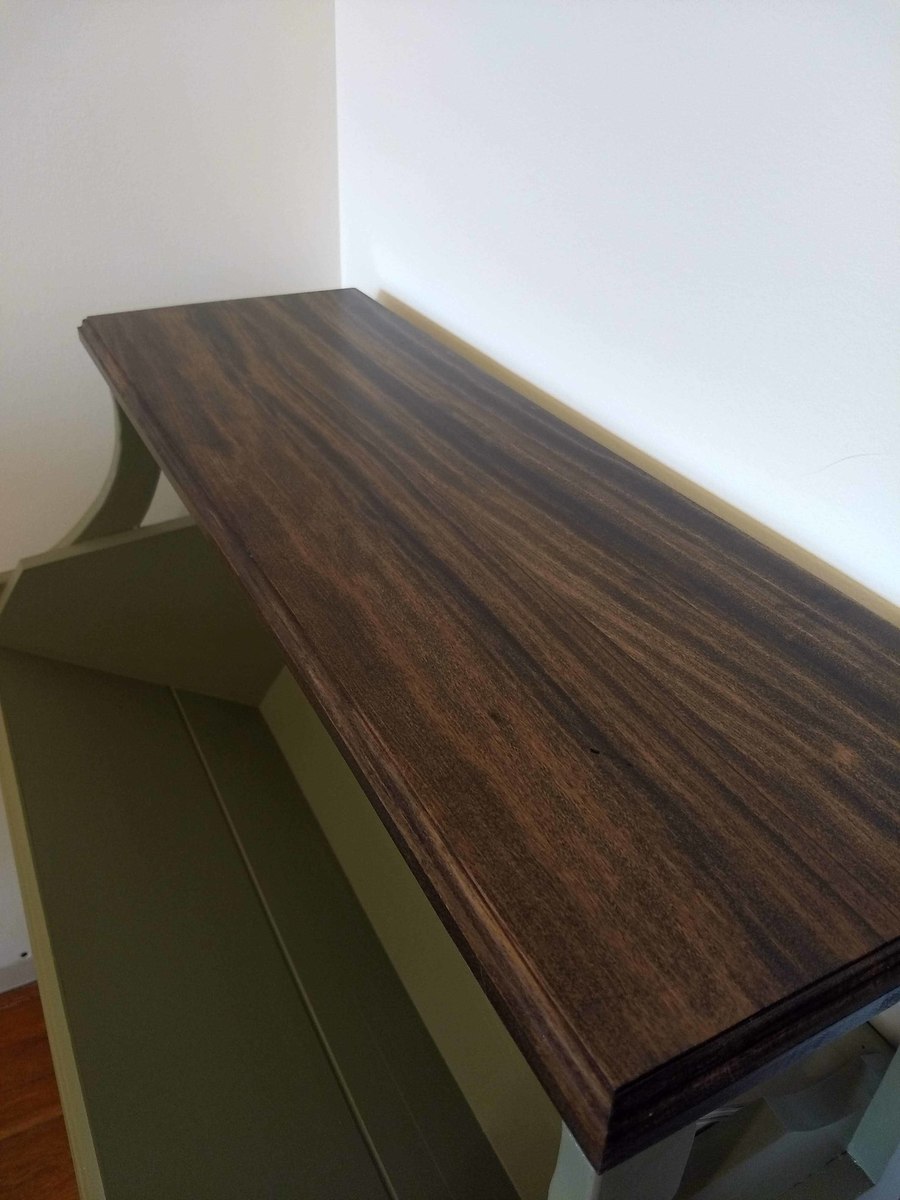
I did very little modification to the original plan on this one besides reducing the overall length to 28". I had an old plate/cup display hutch that wasn't very practical or pretty, so I took it apart and used the pieces to make the shelves (and the curvy bit under the first shelf). <!--break-->They weren't quite the right size, so I added other wood scraps (including a bit of plywood) to get the dimensions needed. The 1x2s are crappy used furring strips I ripped out of the attic when we redid the roof, so they were all water stained and covered in nail holes. The top was a vintage table leaf I acquired at some point and appears to be 3" pieces of poplar glued together (it took the stain beautifully). Oh! I did do one other thing that wasn't in the plans...I connected the shelves to the base using 5/8" dowels through the horizontal pieces on the sides. It took a little extra time, but I do feel more secure with the weight of the books+shelves (+possibly a climbing child) resting on those dowels instead of just screws.
The main thing is that this case holds my toddler's whole library. She can even put the books away by herself without them falling off when she doesn't place them just right. I love that it looks like it belongs in a grown-up's living room, but it's 100% classy kid-friendly furniture design!
Built from Plan(s)
Estimated Cost
Maybe $6 for screws, glue, and finish - built from scraps and a crummy wood hutch I was otherwise going to toss
Estimated Time Investment
Day Project (6-9 Hours)
Finish Used
100 grit sanding, then Zinsser Shellac-based primer and Behr Marquee oops paint for the base. The top is Minwax Dark Walnut stain followed by General Finishes water-based poly in satin (applied with a foam brush which turns out almost looking like I sprayed it: perfect with no brush strokes. I prefer the Wooster foam brushes from Lowes).
Recommended Skill Level
Beginner
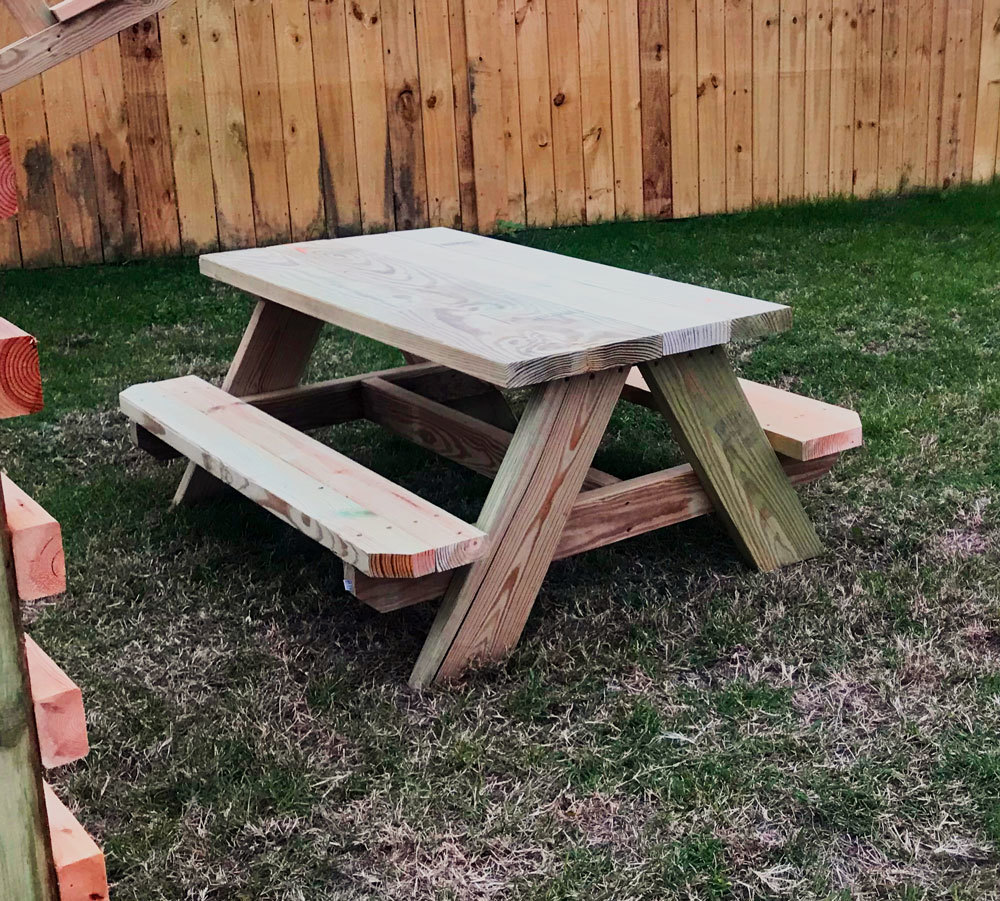
Coffee Table
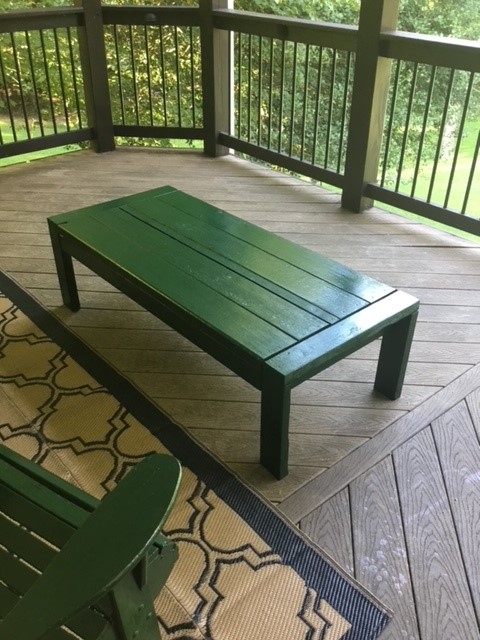
Here is a coffee table I built using the plans from Ana and wood from an old picnic table. The plans were perfect and the coffee table turned out well. I used the 2X4 coffee table plans - http://www.ana-white.com/woodworking-projects/2x4-outdoor-coffee-table - I had to make a few cutting adjustments in order to only use the reclaimed wood from the picnic table but it still turned out great.
Comments
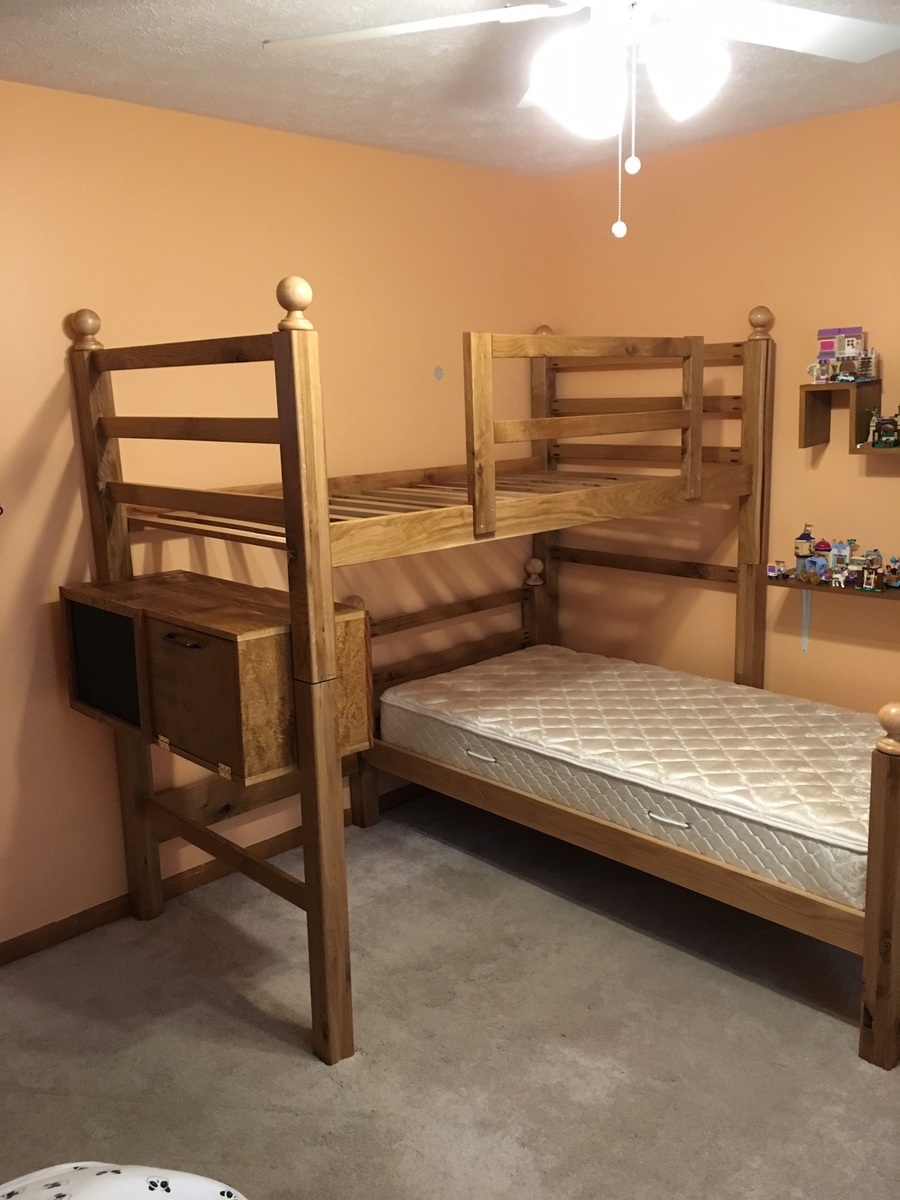
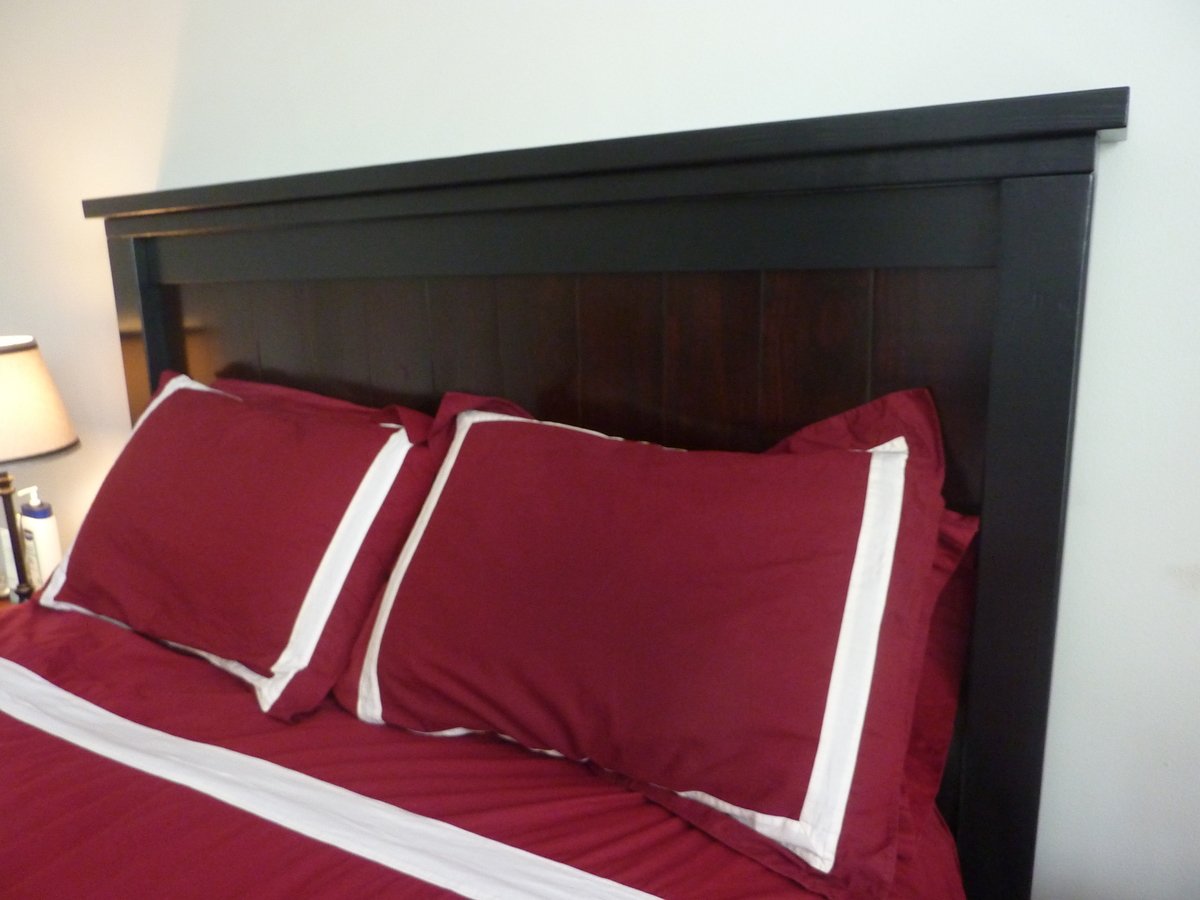
Two-toned farmhouse bed
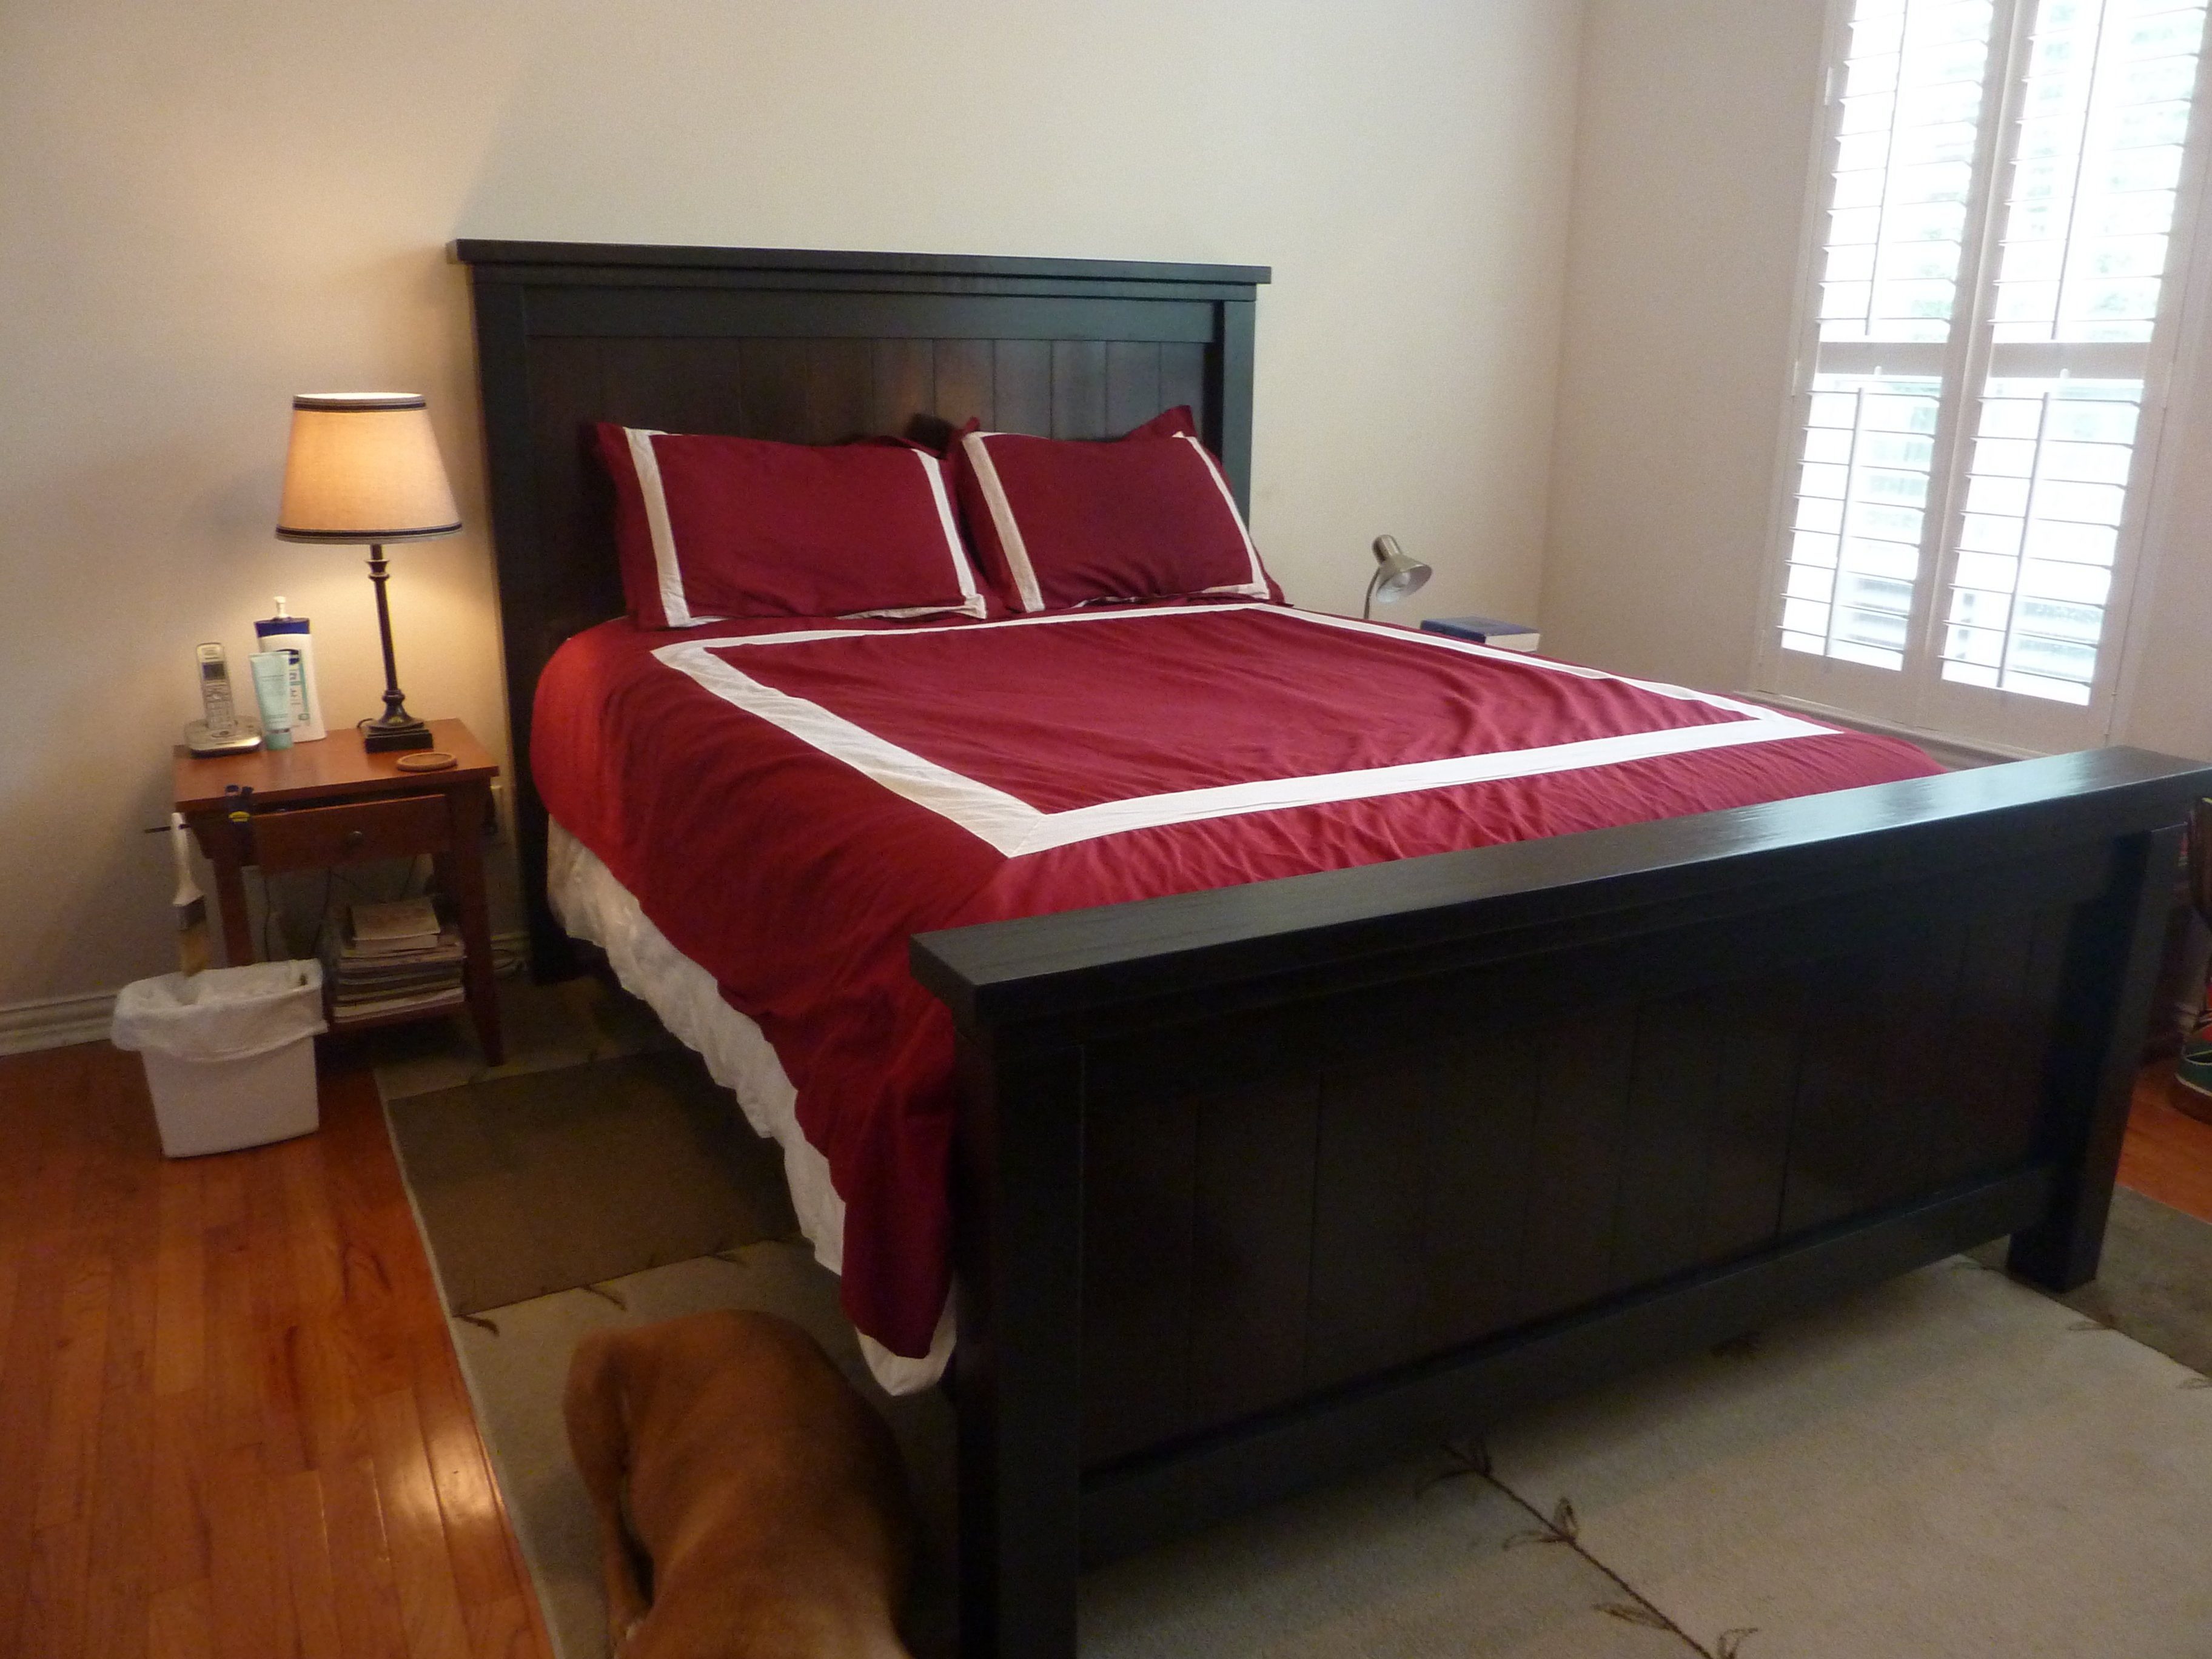
He likes natural wood, I like painted furniture. Solution: two-toned bed! Vertical slats are stained in Minwax Red Oak (took 3 times to get that dark color!), surround is painted black. I thought we'd never find a workable compromise!
I changed up the dimensions a bit to fit my preferences:
1. I like a taller headboard and footboard (dog can't rub against the end of the bed anymore - wahoo!).
2. Also wanted the bed to be just a bit higher above the ground so I wouldn't have to buy new under-bed storage boxes.
3. Used 1x6s instead of 1x8s for the vertical slats because they fit the width just perfectly - no trimming needed.
4. Added about 2" to the length so I'd have plenty of room for tucking the duvet at the end of the bed. I hate when the covers get stuck and I can't pull them up easily!
5. I routed out a groove in the posts to slide the side rails in because it seemed more secure than screws alone. Could've done it without, though.
6. We used dowels and wood glue on the 2x6 tops of the headboard and footboard pieces. I think it made a big difference in the overall appearance. We don't have a doweler, but the hubby made a guide with a spare 2x4 to keep our dowels lined up correctly. It worked pretty well.
Next time I would use pocket screws. I've acquired a jig since this piece was completed. It would definitely have saved me some time in the finishing process.
I really wish I could have talked the hubby into letting me distress the finish just a bit. The thing is, it's inevitable around here (my kids are like crazy apes sometimes!). So I really wanted it to at least look intentional. Oh well, I guess we'll get there soon enough even without it!
Built from Plan(s)
Estimated Cost
$300 (be bought the select pine for the vertical slats; wouldn't been a lot cheaper if we'd used all regular lumber)
Estimated Time Investment
Weekend Project (10-20 Hours)
Finish Used
Minwax Wood Finish stain in Red Oak - It took 3 coats to get the right color.
Valspar flat paint in the only good shade of black that I could find. This stuff was terrible - I would NOT use this again! Unfortunately, there were only about 4 shades of black paint available in all of Lowe's, and the others were all too purple in tone.
2 coats of Minwax fast-drying polyurethane.
Recommended Skill Level
Beginner
Comments
Thu, 09/05/2013 - 09:07
Altered Dimensions
I like the foot board height. I noticed it in the Arched Headboard version of the Farmhouse bed a while back but could not find dimensions. I also like the idea of having more space under the sides to fit my storage bins. Could you tell me what the cut length was for the 2x6s on the foot board? I like the finish too! Bed looks great.
Thu, 09/05/2013 - 10:27
Headboard/Footboard height
GScott -
Thanks!
I changed several things on the footboard, as follows:
Slats = 22"
Post = 26.5"
Total height of footboard = 29.5"
I made the slats on the headboard a bit longer too, but didn't change the actual height of the headboard. I just wanted the wood to extend down behind my mattress a bit so I wouldn't have a little corner of wall showing behind it.
As for more space under the sides - I just screwed the siderails in just a bit higher than the plan called for.
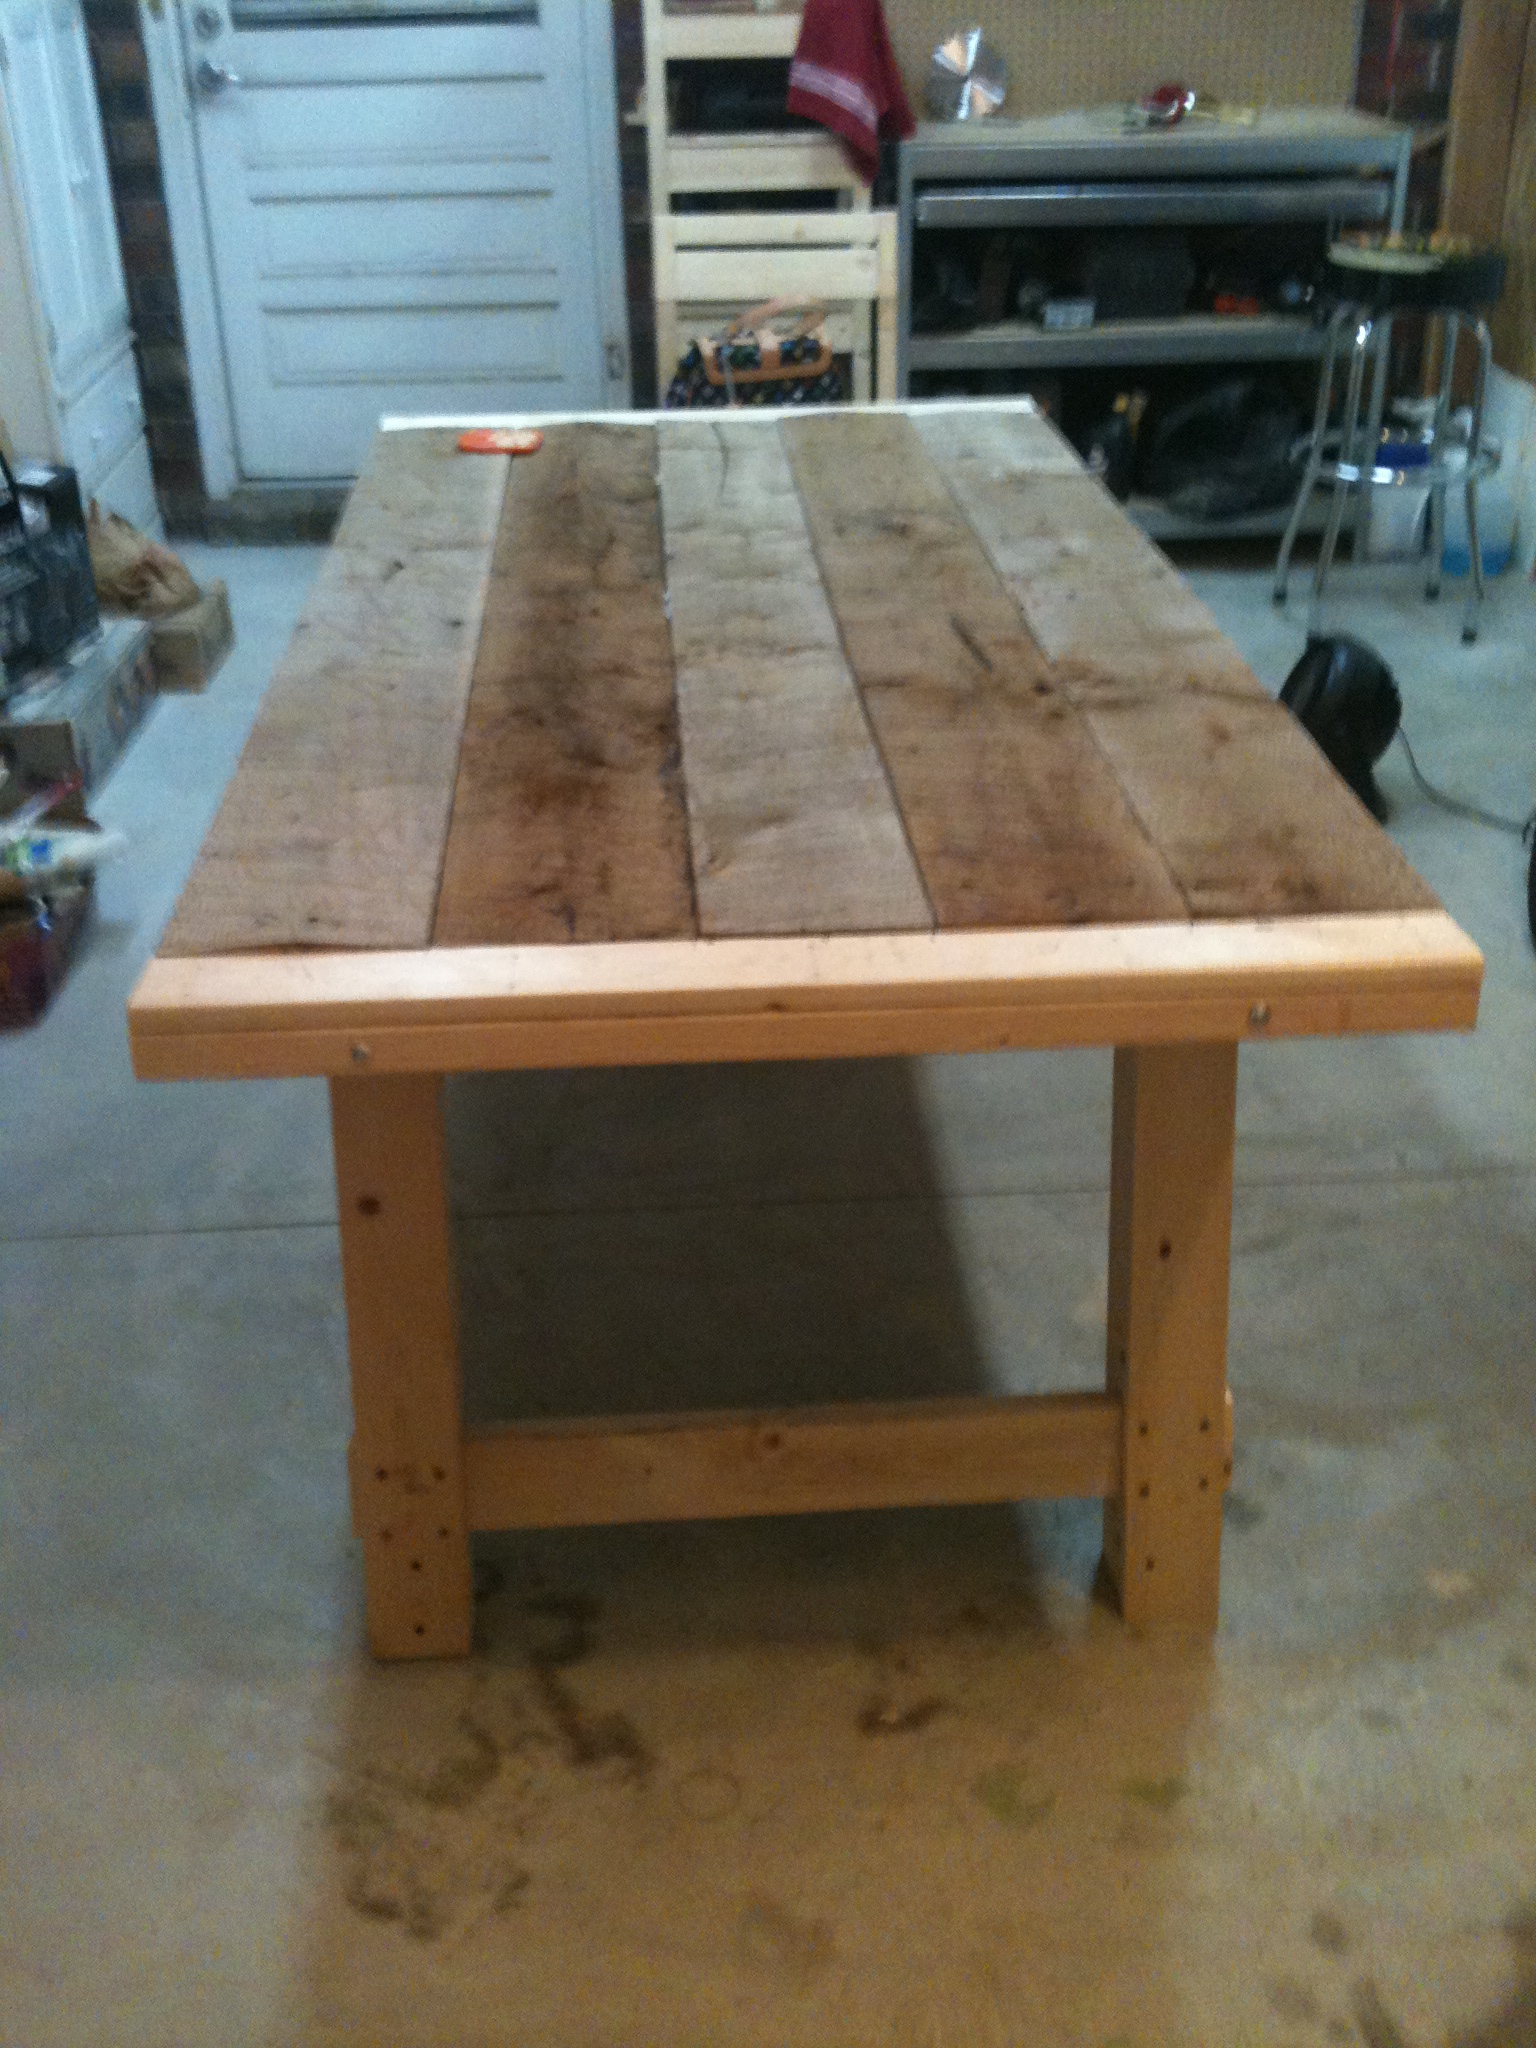
Heart Pine tabletop
Found five 2x12 heart pine planks and used this base as the template. Table is about 18" wider than the plans. It turned out great!

Estimated Time Investment
Week Long Project (20 Hours or More)
Finish Used
Classic american
Recommended Skill Level
Beginner
Comments

Thu, 12/27/2018 - 10:05
That tabletop is gorgeous!
That tabletop is gorgeous! Thanks so much for bragging, much appreciated! Ana
Floating bed
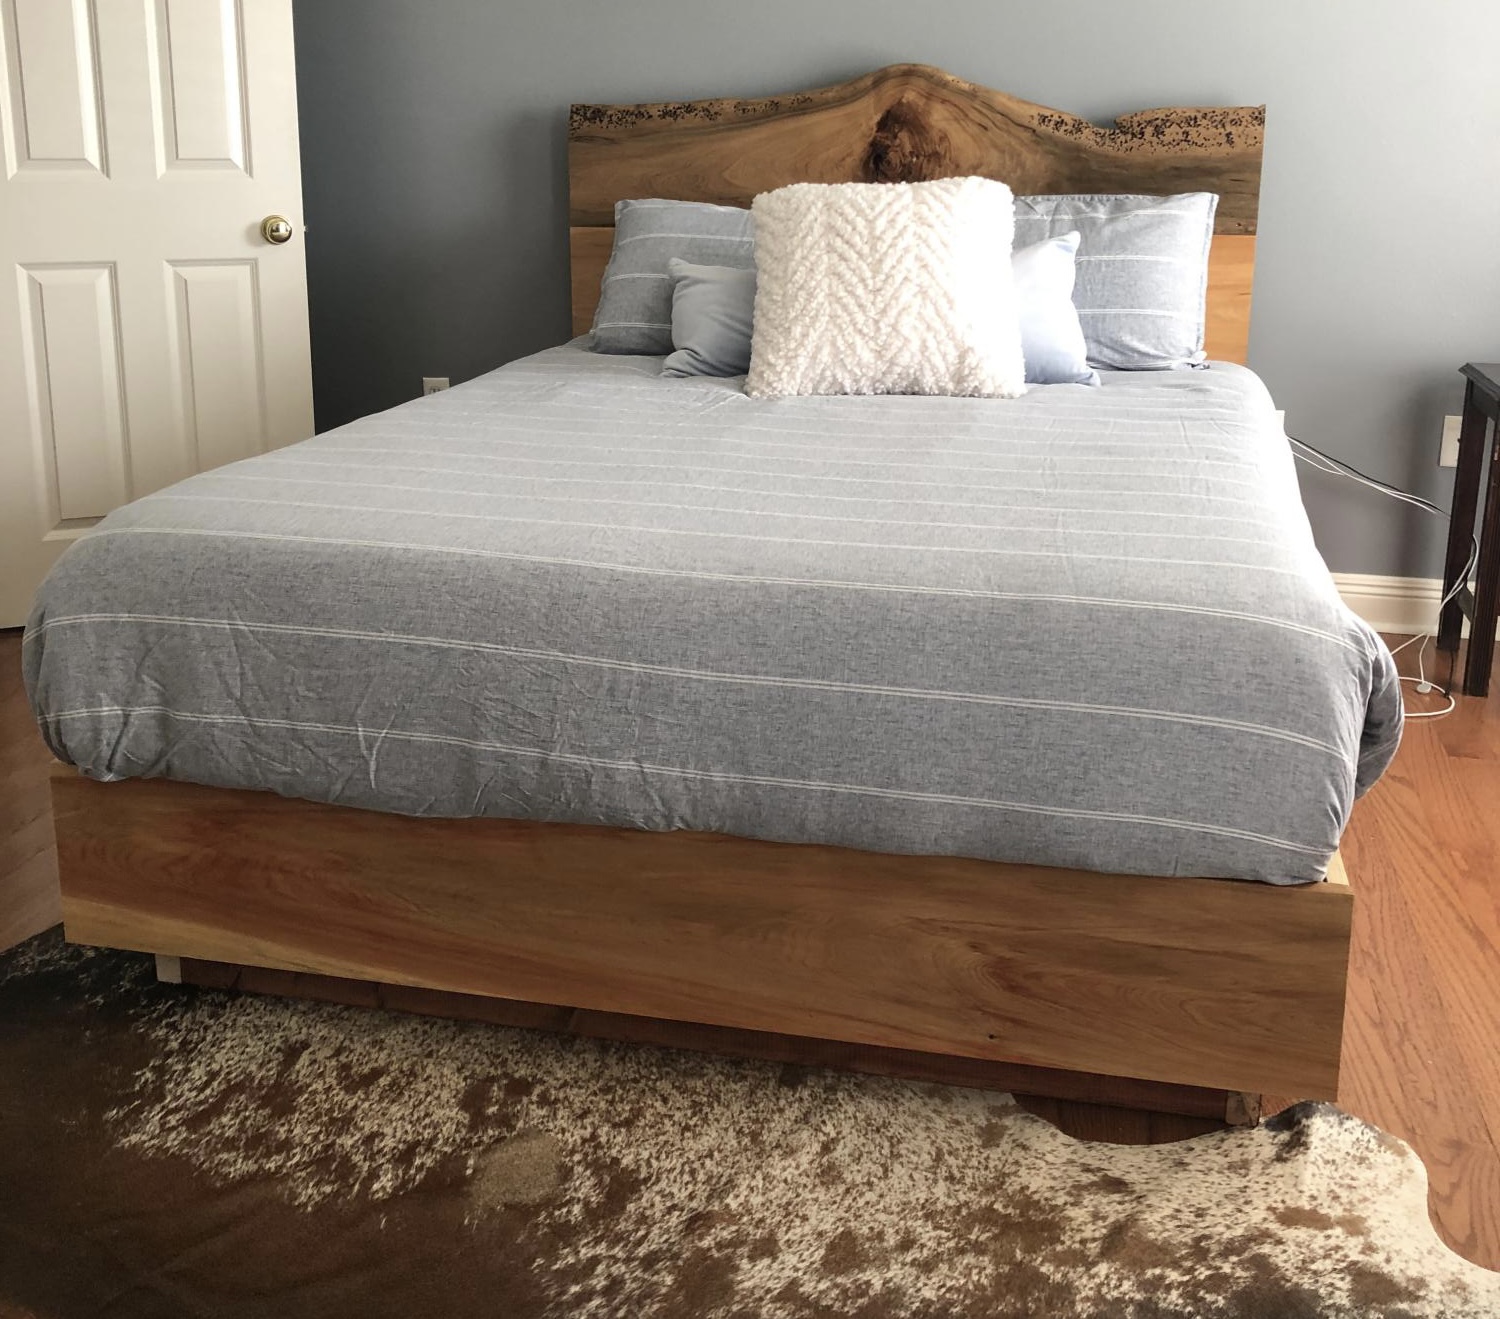
My son needed a new bed and he was interested in a live edge Cypress headboard. We were able to make this one!
Built from Plan(s)
Comments
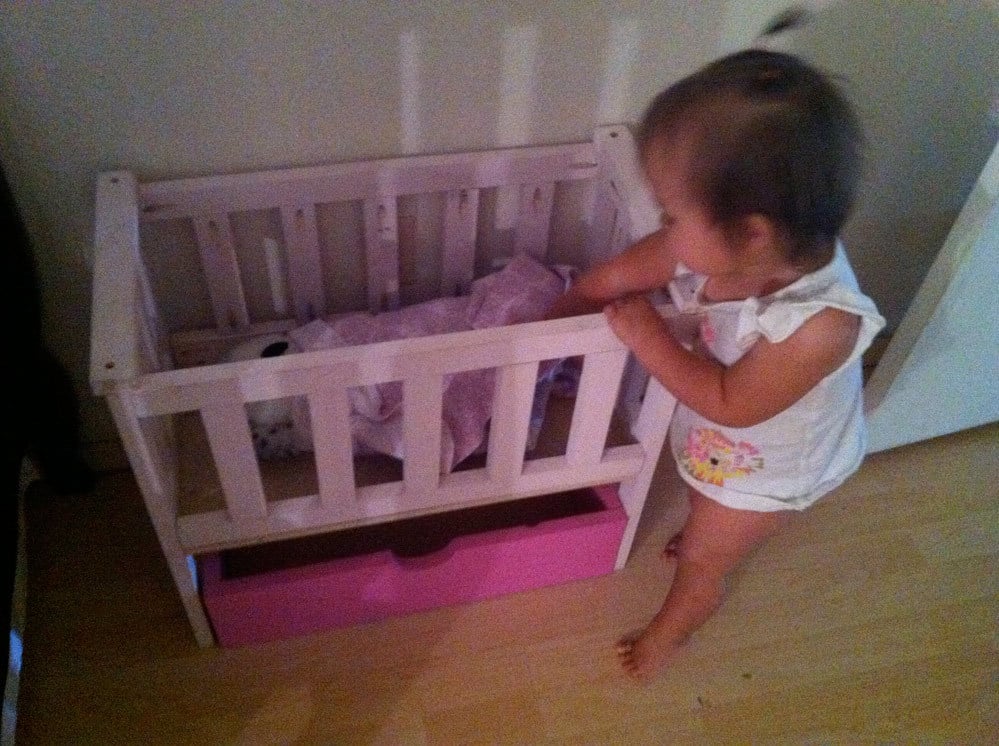
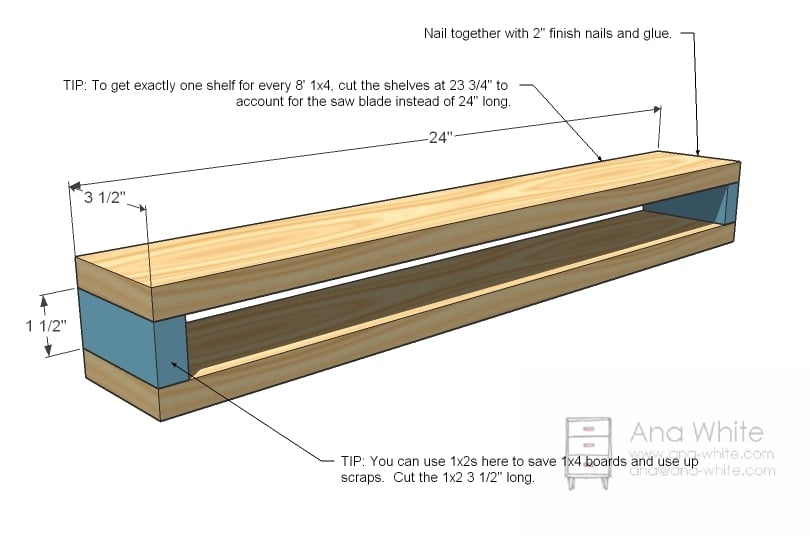
My $6 Doll Crib

Well, this crib is STILL unfinished, and the date-stamp says I built it December 5th.... So... Uhh.. I should really get on that!
I had initially built this crib for a friend's daughter's birthday gift, but the baby (8 months old at the time) got REALLY sick, so I wasn't able to finish it in time (don't worry, we got her a Pillow Pet - she got a gift still!). It was just before Christmas, so instead of going out and spending more money that we were tight on, I just bought 3 1x2s and used scraps for the rest of it.
The crib's basically been sitting in the baby's room looking cute until about a month ago. That's when she decided that her stuffed owl (from Build-A-Bear) needed to be put to bed every night before I put HER to bed. It's become such a routine that I have no idea how she'd react if we couldn't put her owl to bed! So I'm scared to try to start filling all the holes and painting in fear that we'd have a mental breakdown if I didn't finish in time for bed! EEK!
Built from Plan(s)
Estimated Cost
$6
Estimated Time Investment
An Hour or Two (0-2 Hours)
Finish Used
OOPS bin paints on the parts that WERE finished.
Recommended Skill Level
Beginner
DIY stackable chairs (added arms) and table
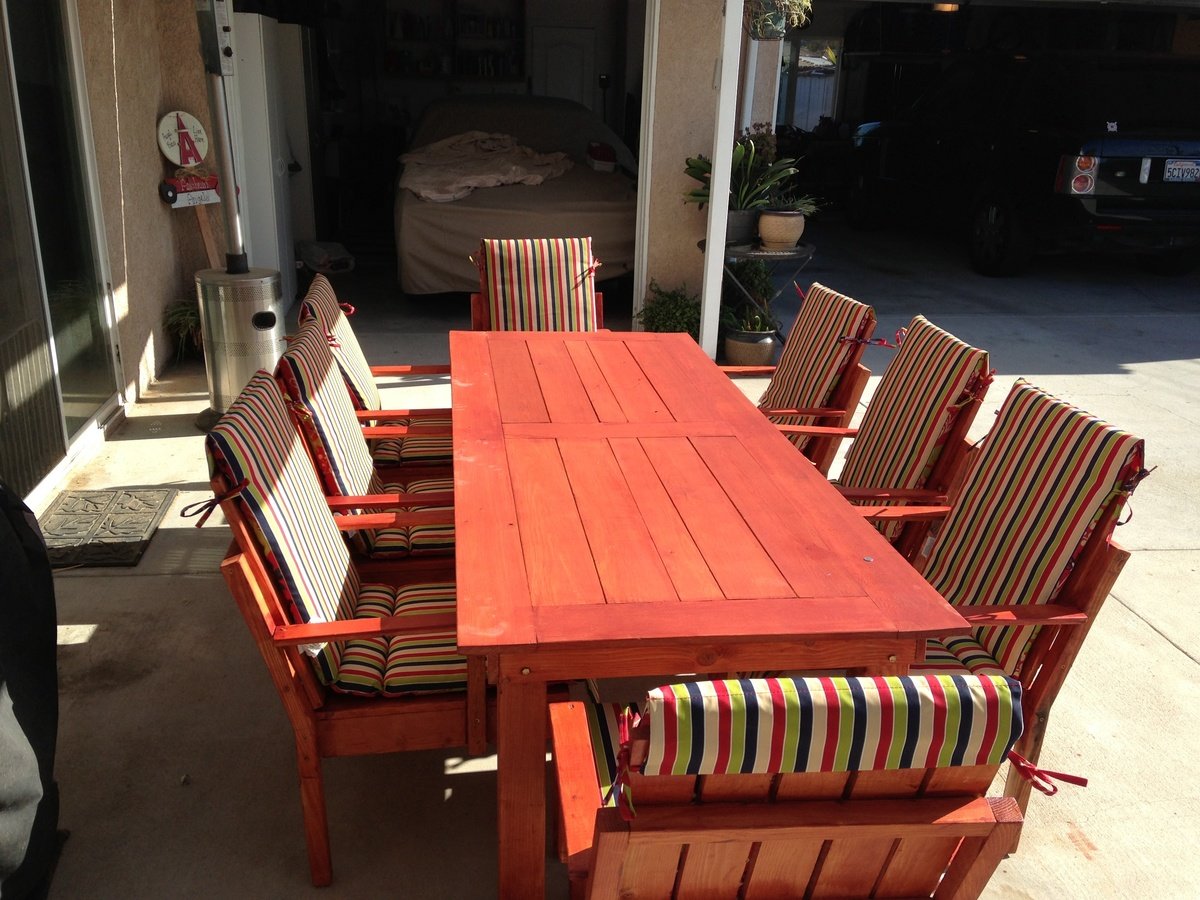
I added arms to the stackable chairs. This table and 8 chairs set came out great and I was able to build everything (including the chair cushions found on clearance) for under $350.00 thanks to this website!
Estimated Time Investment
Weekend Project (10-20 Hours)
Recommended Skill Level
Beginner
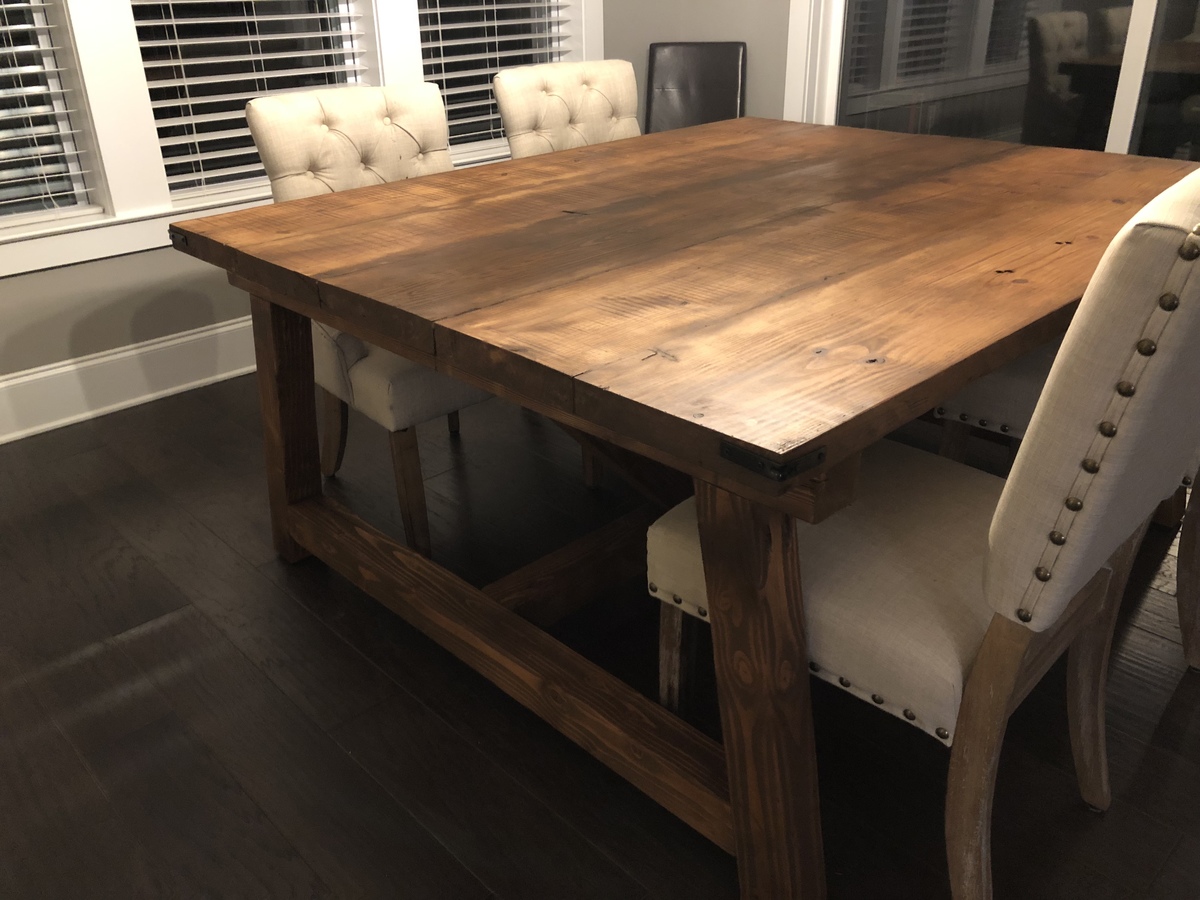
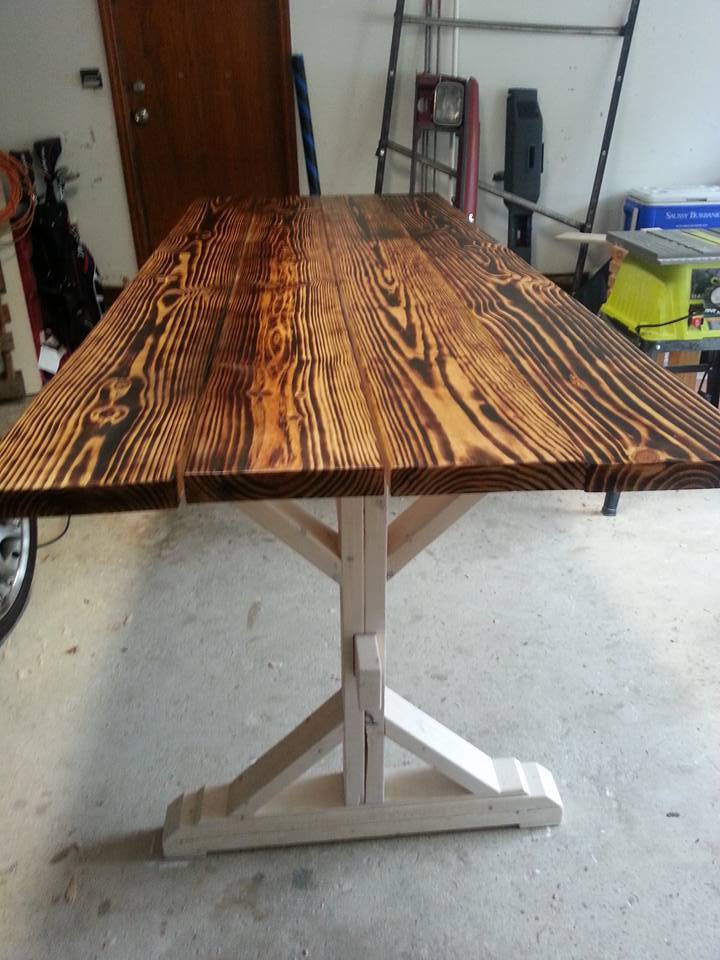
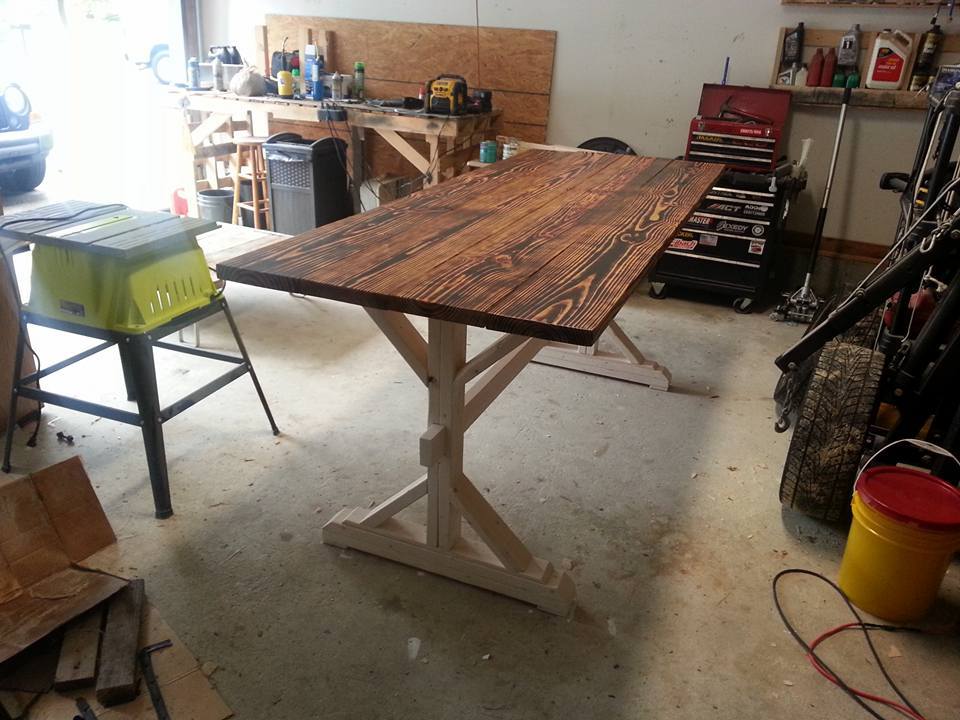
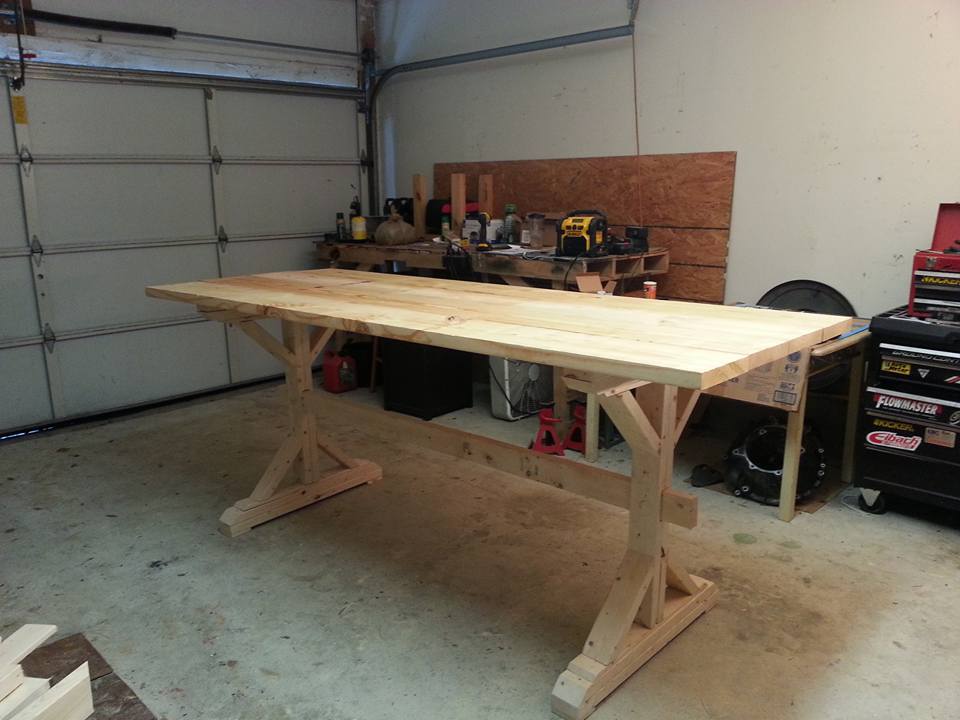
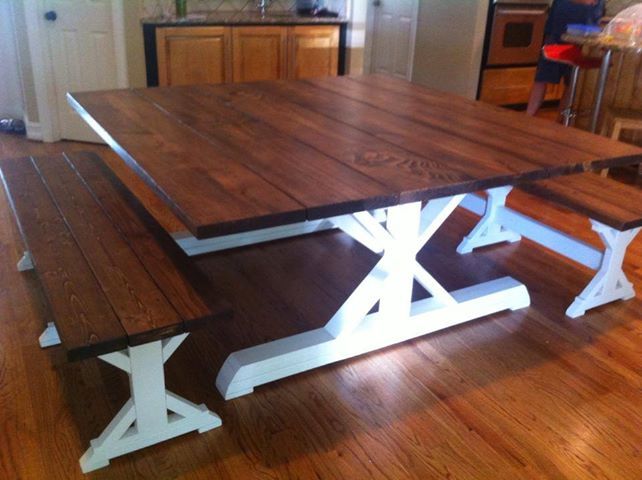
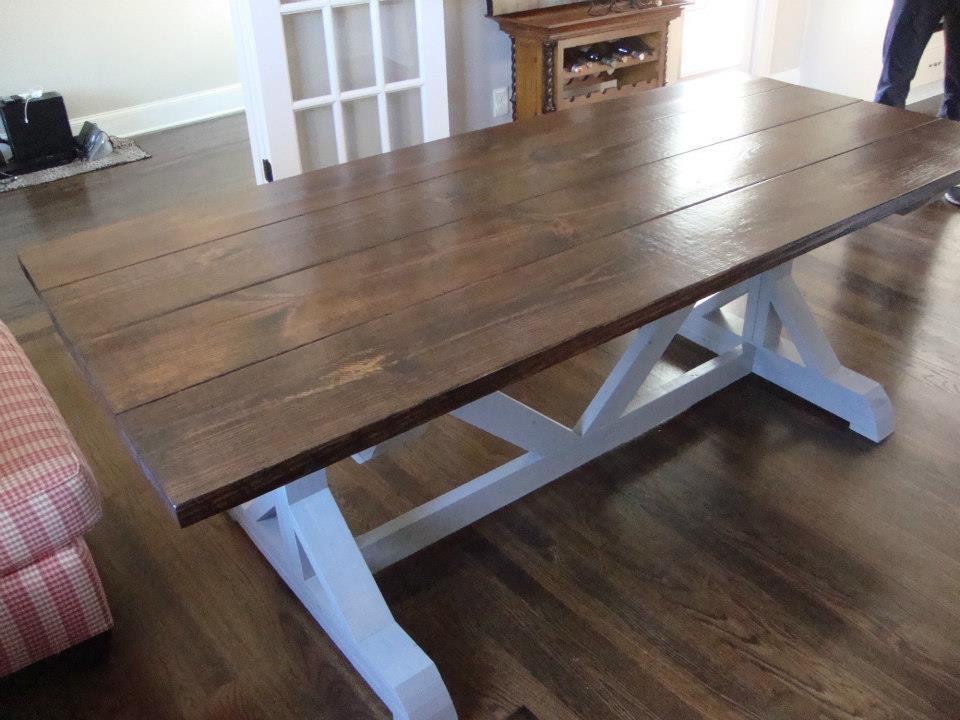
Burnt X Farm Table
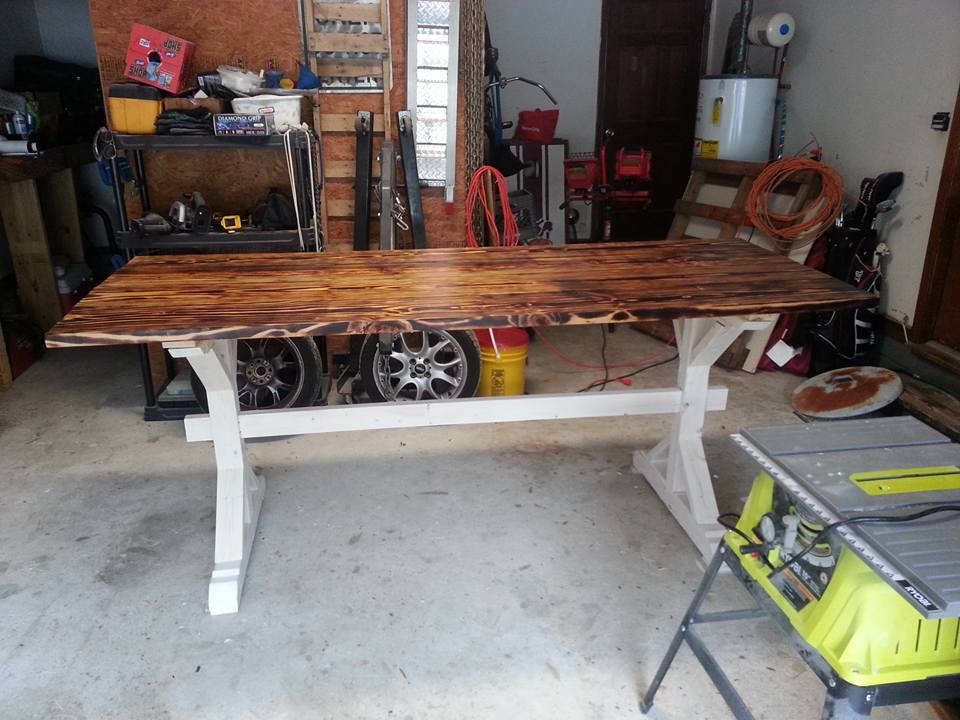
This is built off the Farm House X Table but I changed a few things around. The lower support beam has been raised up to the middle of the table. The table height has been raised to 40". The top of the table is floating. The top most 2x4s are secured directly to the top. They are also notched out a little to match the notch I put into the top support beam. The 2x4 is the female side and the support beam is the male. I finished the table by burning the top with a hand held torch and 2 coats or varnish. The base of the table has been white washed with 1 good coat.
Estimated Cost
Estimated cost of the wood, screws, varnish, and white wash is just shy of $90. I did buy extra screws, varnish, and white wash for future projects though.
Estimated Time Investment
Day Project (6-9 Hours)
Finish Used
burnt with varnish on top and 1 liberal coat white wash on base.
Recommended Skill Level
Intermediate
Keurig K Cup Holder Drawer

Was easy to make
Built from Plan(s)
Estimated Time Investment
Afternoon Project (3-6 Hours)
Recommended Skill Level
Beginner
Comments

Thu, 01/02/2020 - 13:02
Adjustments made?
Looks great! We were hoping to add a drawer as well but I’m not really sure where to start. What adjustments did you make to create the open drawer? Can you post a photo of the side of the drawer? Thank you!
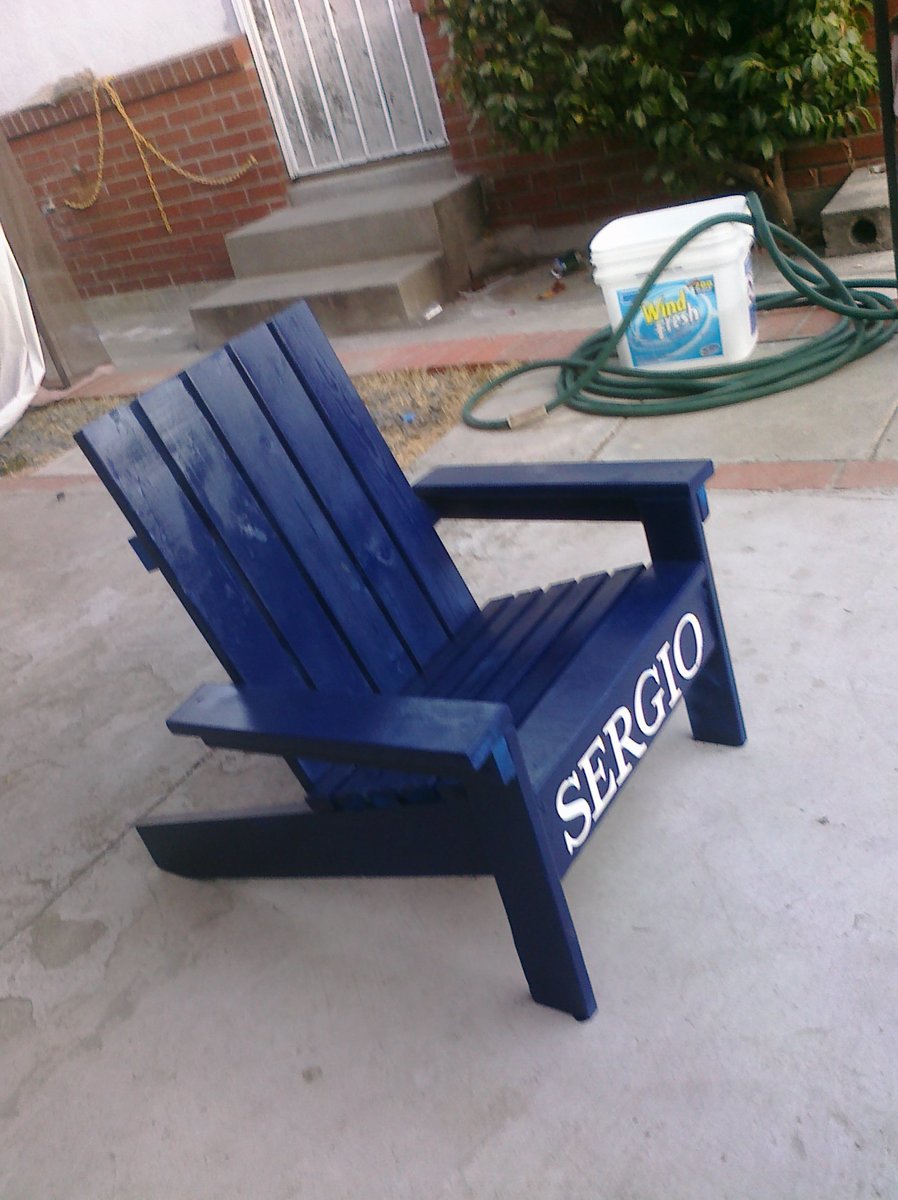
Adirondack Chair
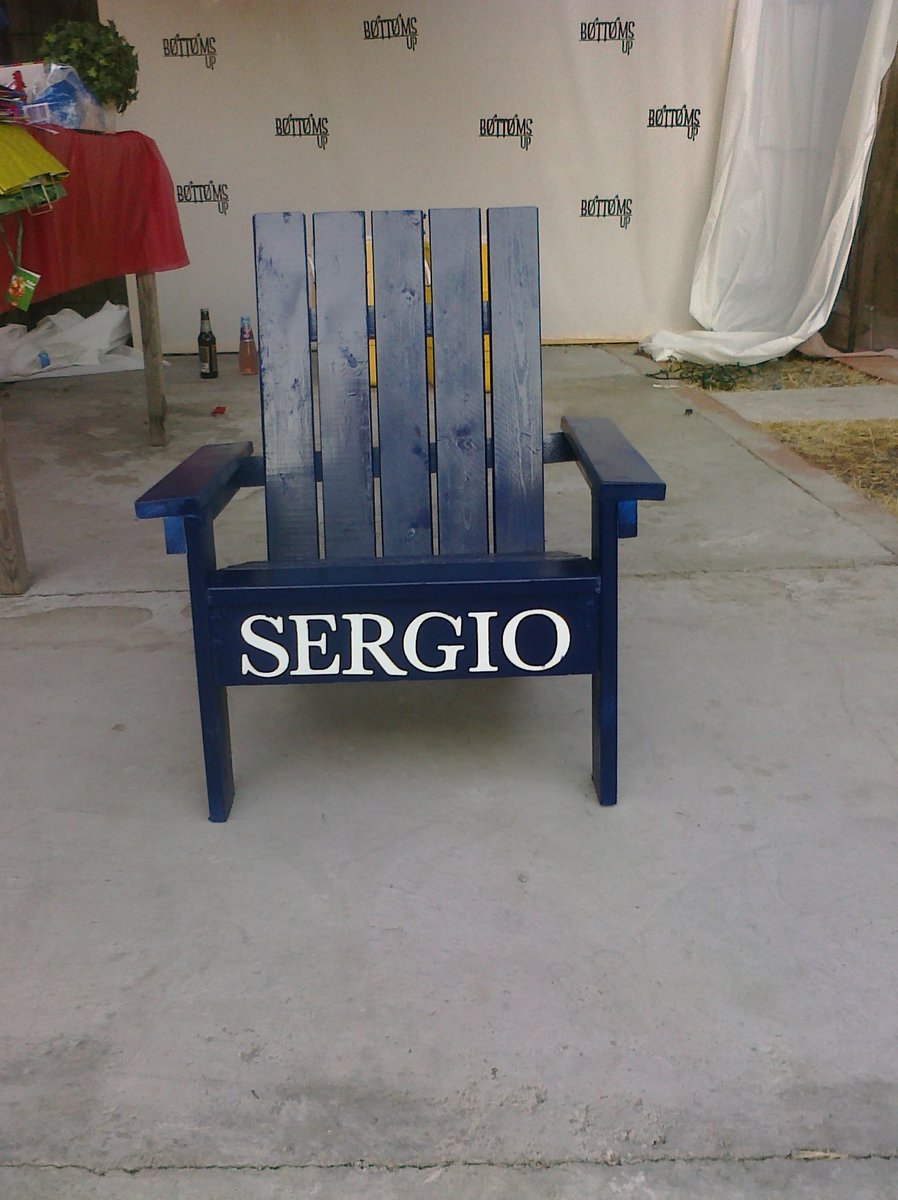
I made this chair for my 3 year old son's Birthday, he loves it. Really easy build.
Estimated Cost
$10-$15
Estimated Time Investment
An Hour or Two (0-2 Hours)
Finish Used
Primed and used Navy Blue spray paint- letters were done with my Cricut machine on vinyl and then placed on chair, spray painted, then peeled off.
Recommended Skill Level
Starter Project
Comments
In reply to Great colour! by Francoise
Wed, 08/17/2011 - 15:03
Thank you!
I love the navy blue and white combination, I am trying to use it more around the house...just waiting for my son to be tired of his toy story theme room to re-do it. :)
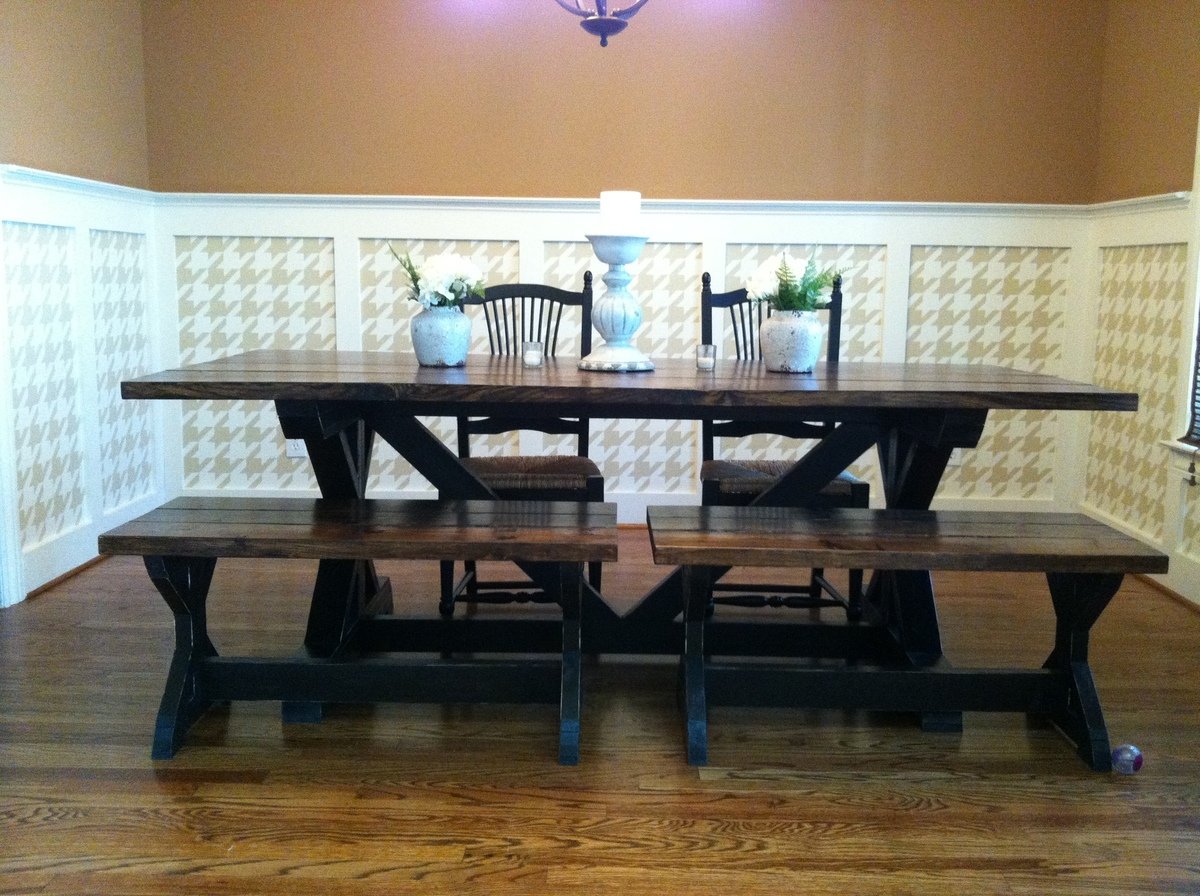
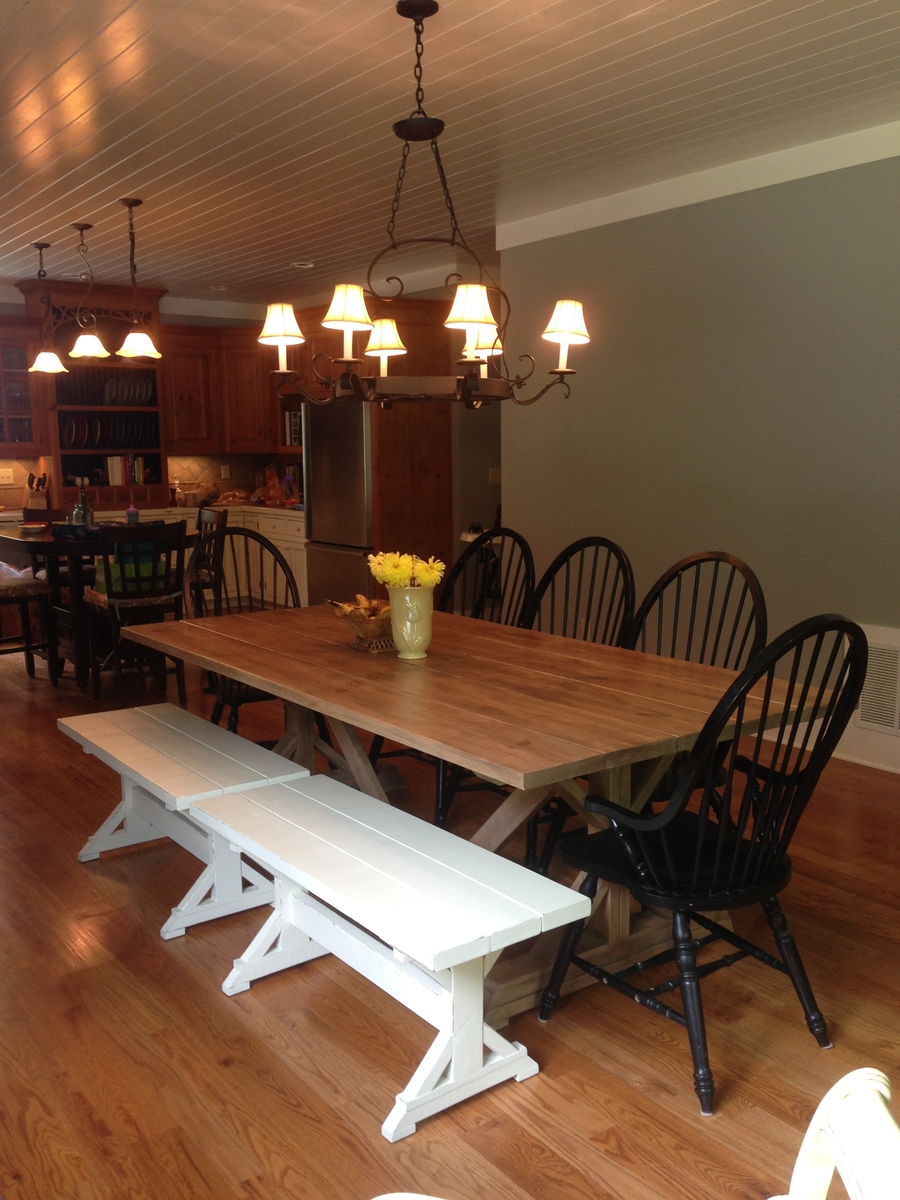
Our 67.5 square trestle table and matching benches
The square table project obviously modified the original plans a bit. We always use 4" brackets to further stabilize and level our tops. This table we used L brackets on the insides at the top of the trestles. The final finish was Minwax Special Walnut for the tops and an antique white that we color matched for our client. Oh and SEVERAL coats of poly to seal her and make her pretty!
This table was table number 22 that we have built from the plans provided here. We have modified widths, lengths and heights many times over! Come find us on Facebook book or follow us on Pinterest. Just put a /youreunique after and you are there. I would be happy to give tips on our finishes if you email me or send me a PM. Thanks for looking and have a blessed day!

Estimated Time Investment
Afternoon Project (3-6 Hours)
Finish Used
The final finish was Minwax Special Walnut for the tops and an antique white that we color matched for our client. Oh and SEVERAL coats of poly to seal her and make her pretty!
Recommended Skill Level
Advanced
Loft bed
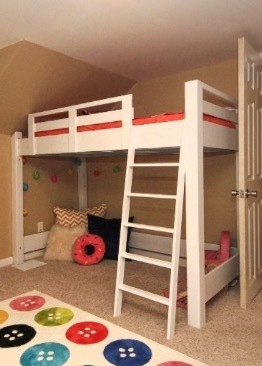
Built this bed from the look of the project done by Ana. Used 4x4s for the legs and used a router to make slots for the 1x8s to fit in. Everything was built as I went because our house was built in 1907 and nothing is square and it also has vaulted ceilings.
Built from Plan(s)
Estimated Cost
$100
Estimated Time Investment
Weekend Project (10-20 Hours)
Finish Used
High gloss white latex paint
Recommended Skill Level
Intermediate
Dylan and gerald picnic table
Picnic table

Built from Plan(s)
Estimated Cost
$40
Estimated Time Investment
An Hour or Two (0-2 Hours)
Recommended Skill Level
Beginner
Hockey Drying Rack

Love it so much! It holds every single piece of my husbands gear, and he finally keeps it all in the garage instead of dispersed on the ground around his office (gag). I’m currently making a vinyl sticker with his name and number to put on the front bottom piece! Thank you, Ana!
Built from Plan(s)
Comments
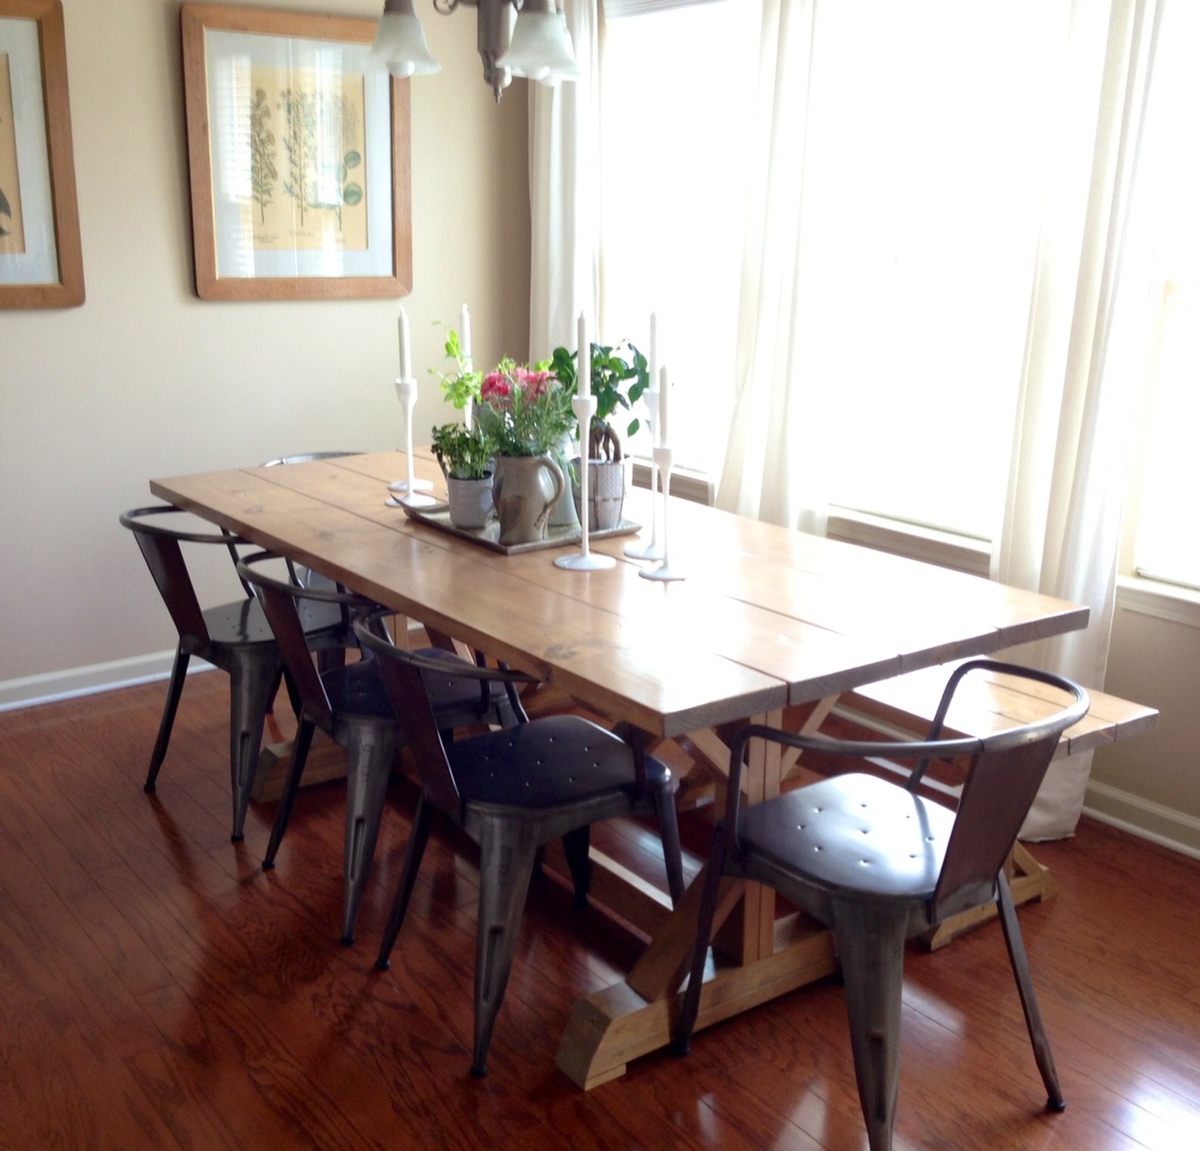
Benchright Farmhouse Table
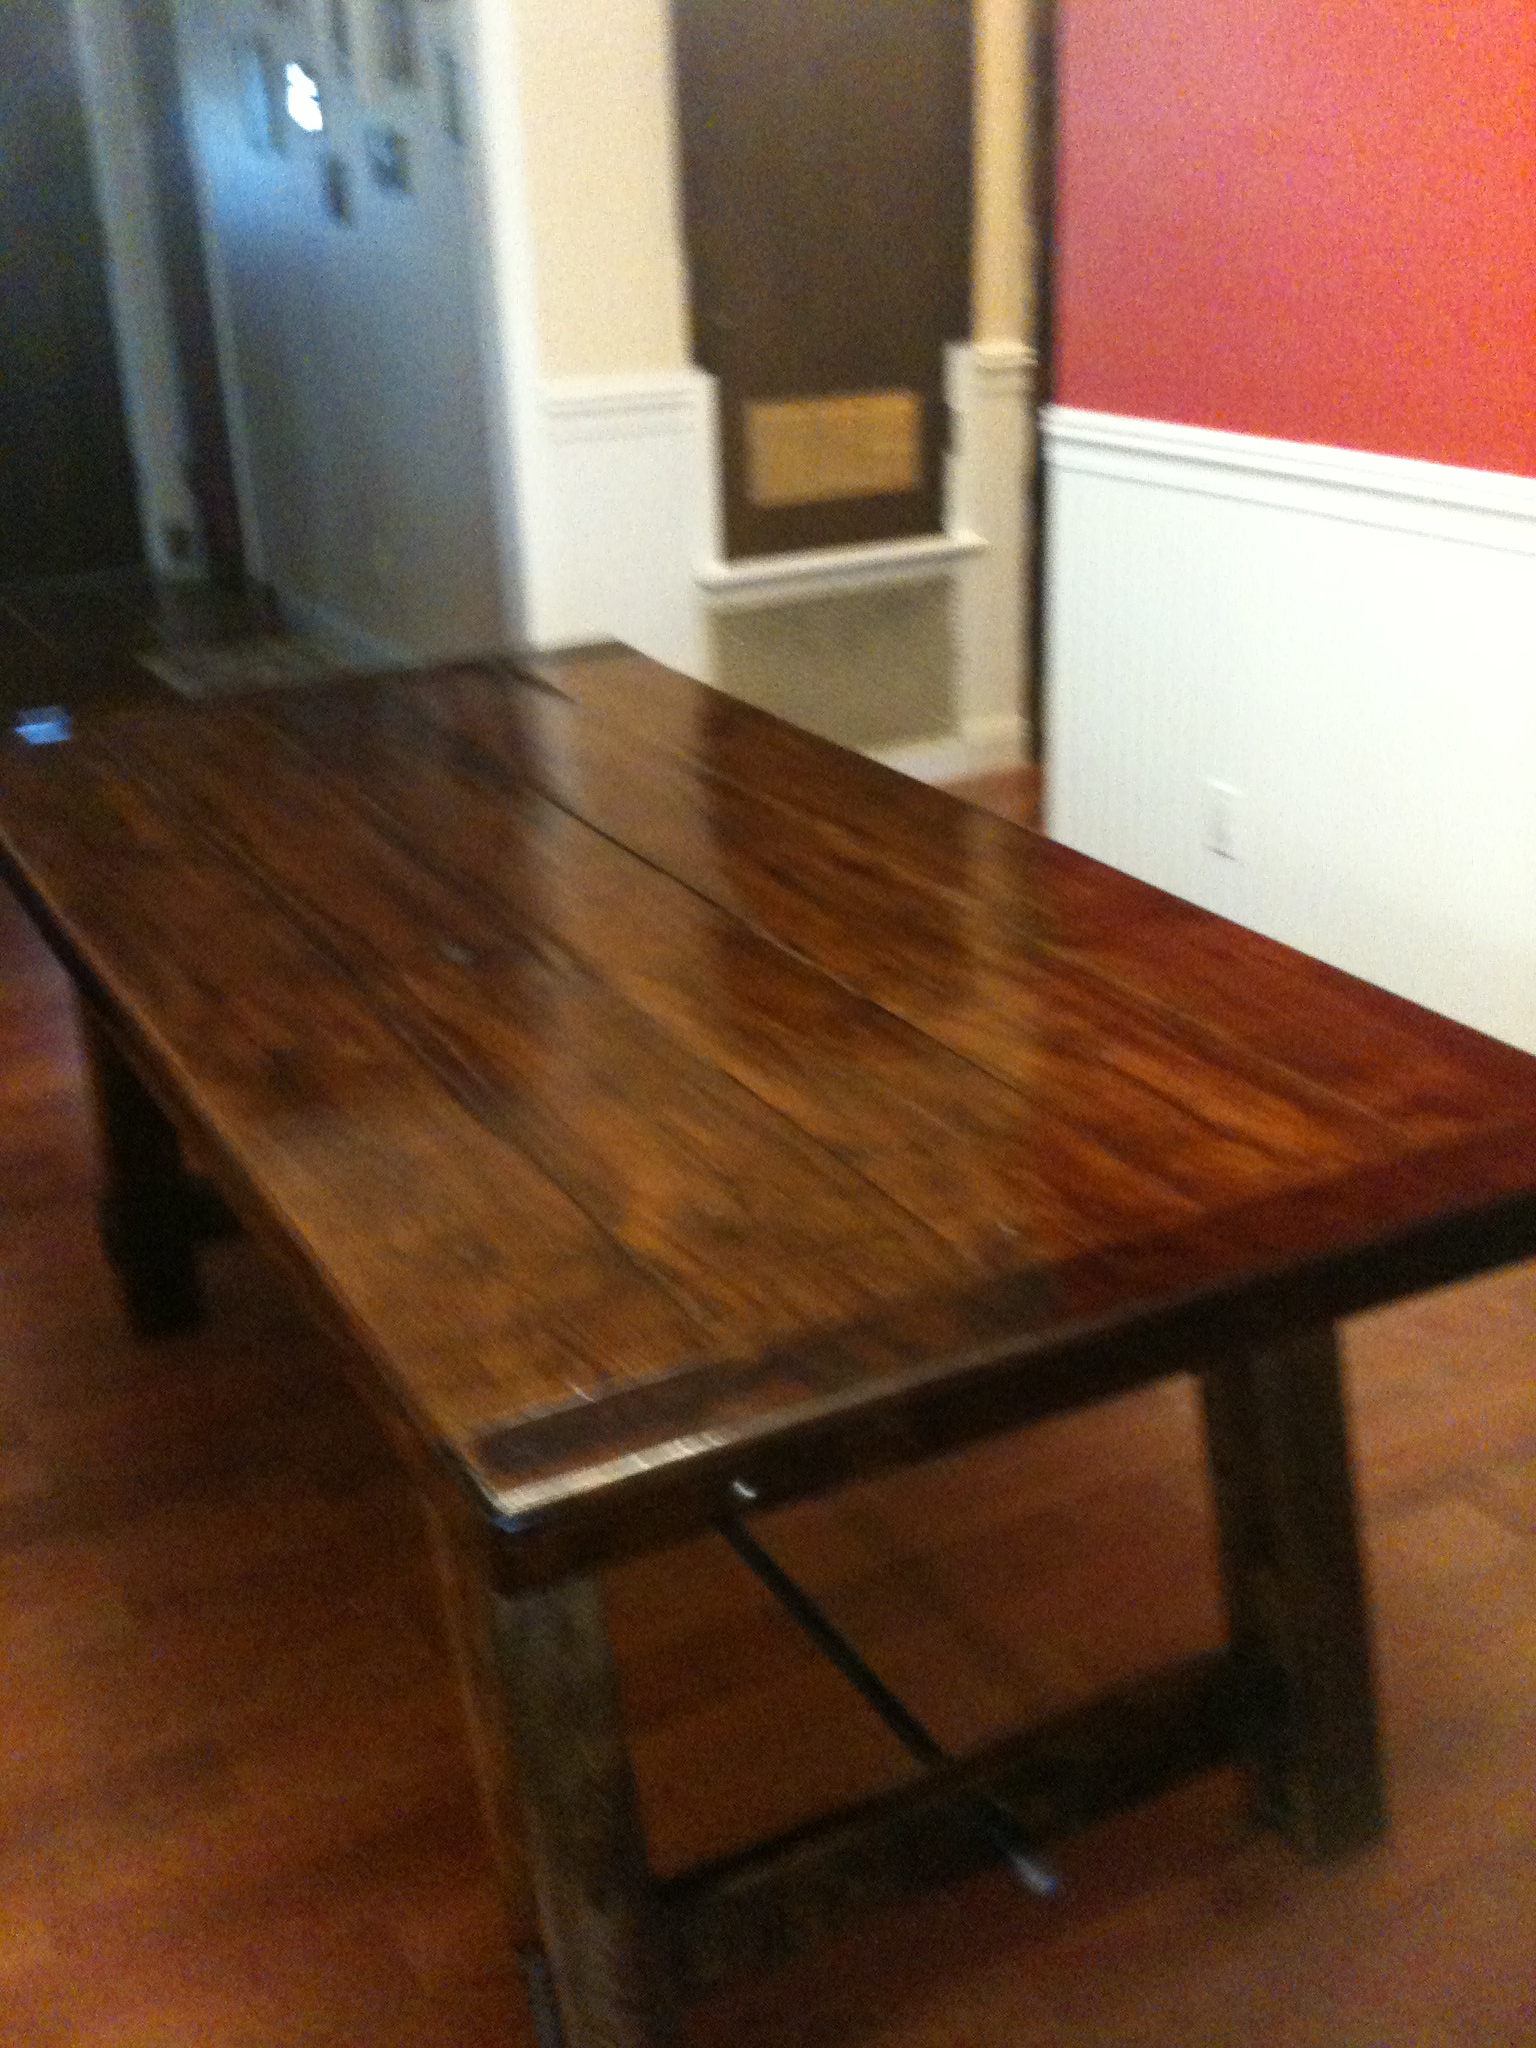
We really liked the plans for this table, but it was too narrow for our taste. My husband altered the plans so that the table is 36" wide. The solid oak boards on the table top are reclaimed from the old barn out back.

Estimated Cost
$90
Estimated Time Investment
Week Long Project (20 Hours or More)
Finish Used
He raised the wood grain, and applied three coats of Minwax provincial, sanded in between coats, and five coats of polycrylic clear coat to protect it.
Recommended Skill Level
Intermediate
Comments
Sat, 08/20/2011 - 19:14
Beautiful built! I'm so
Beautiful built! I'm so excited to see your table! Thank you so much for sharing!
Thu, 08/25/2011 - 20:20
Thank you Ana for making the
Thank you Ana for making the plans available and easy to follow. My honey-do list gets longer. You do such great work.
Mon, 08/22/2011 - 04:50
Beautiful table
Great finish. What type of wood did you use for the top and what color was your stain?
Thanks,
Susan
Thu, 08/25/2011 - 20:19
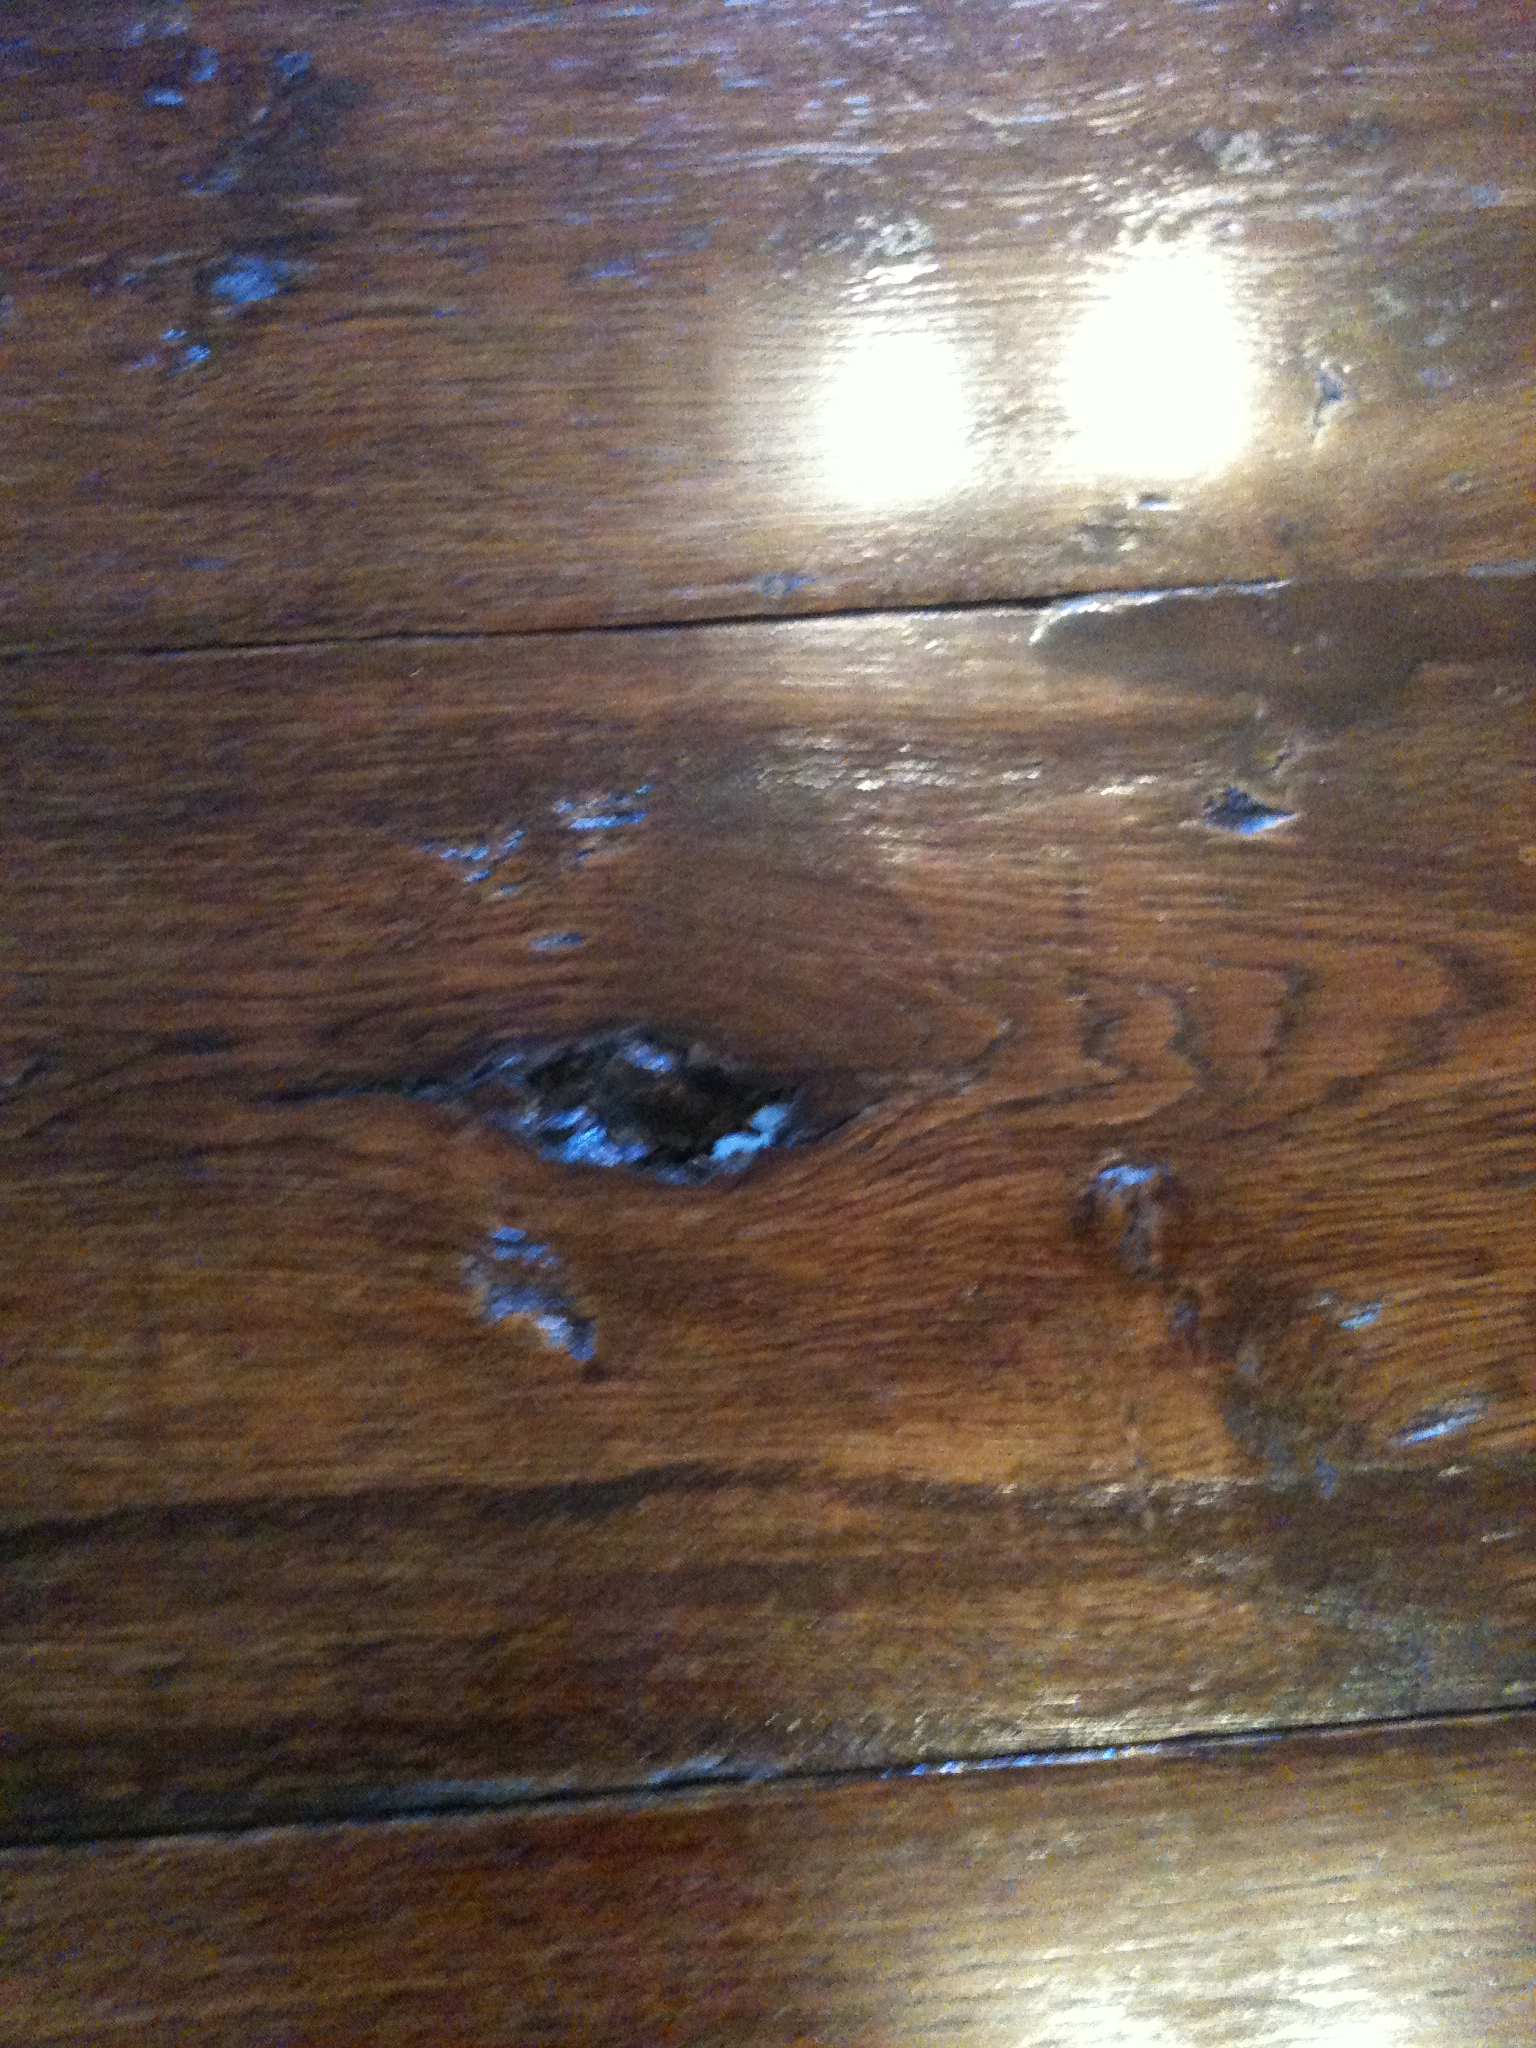
The top is oak from an old
The top is oak from an old barn we have on our property. The stain is named Provincial from Minwax. The rest of the boards are whiteboards from Lowes.
Mon, 08/29/2011 - 19:25
Gorgeous table! Where did you
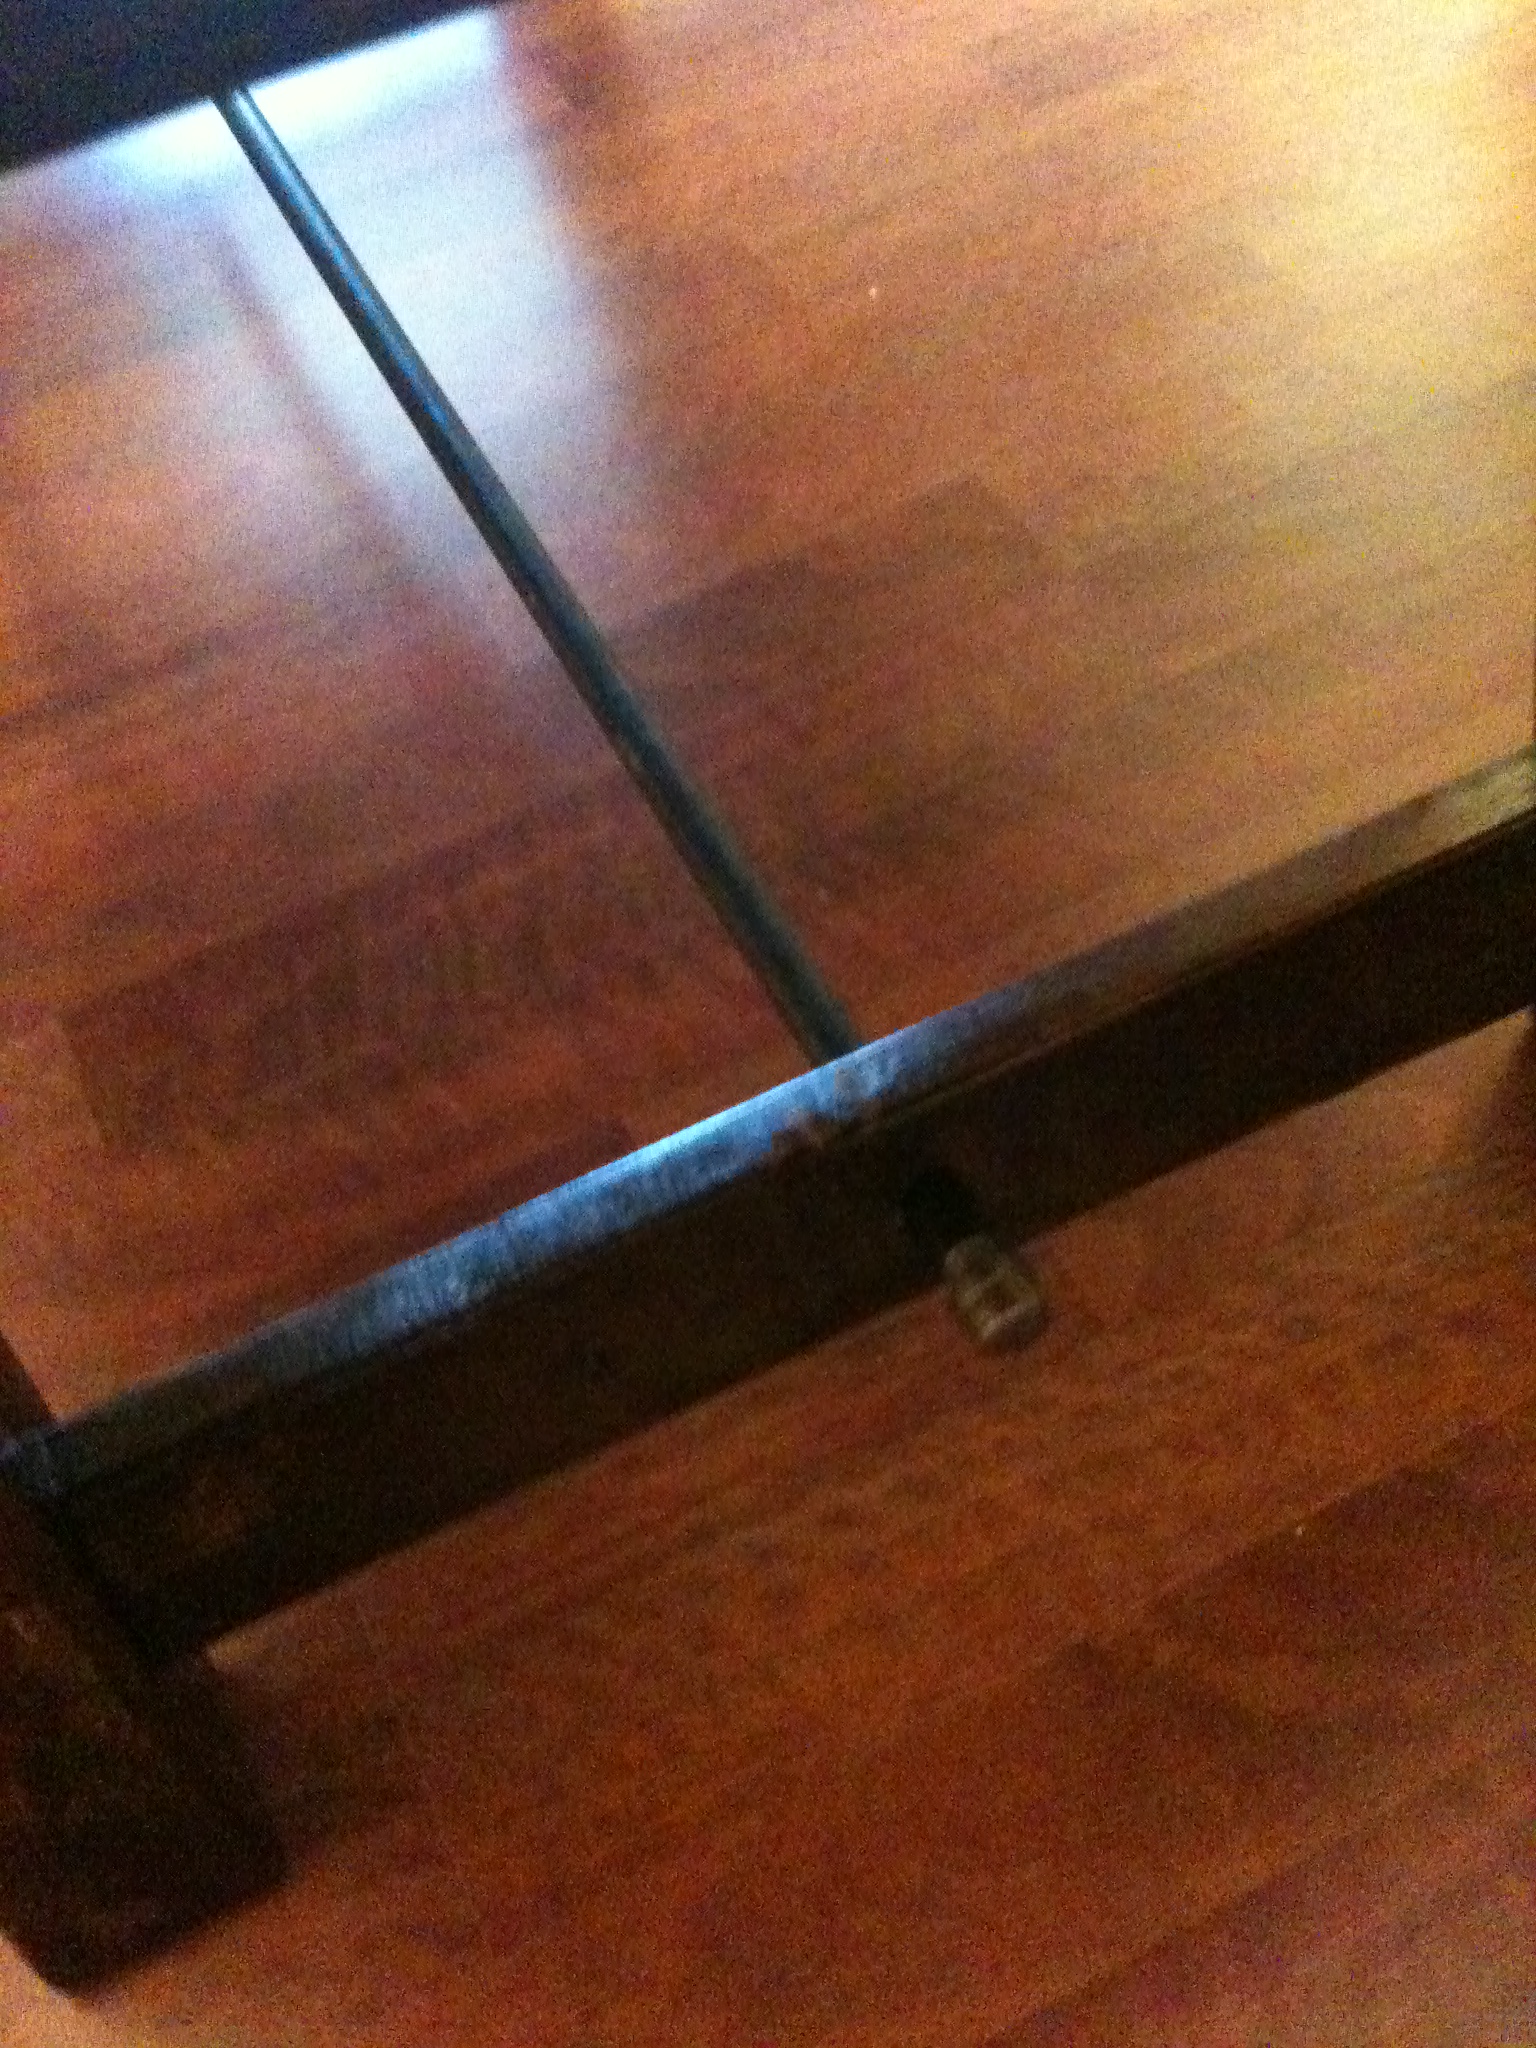
Gorgeous table! Where did you find the metal rod for the bottom of the table?
Wed, 08/31/2011 - 14:49
I found it a Lowe's in the
I found it a Lowe's in the section where the pipes are sold.
Sun, 12/04/2011 - 07:14
Gorgeous table!!!
Gorgeous table!!! I love the finish, and I know you must be so proud of your work. I love the pic that shows the bones of your table in progress. It shows the craftsmanship that you put into this piece. Great job!
Sun, 02/12/2012 - 10:11
Color of stain?
Hi,
You mentioned that you used "Provincial by Minwax" I looked at it at lowes but it doesn't seem nearly dark enough to achieve the color from your pictures. I have included a link to it so, maybe I have the wrong stuff:
http://www.lowes.com/pd_45804-24-22110000_4294766269_4294937087_?produc…
If you could let me know if I'm on the right track that would be great!
Thanks!
Tue, 02/14/2012 - 04:55
Color of stain.
You have the correct stain on the website, I used 3 coats on the table top to get it darker and let the stain soak in longer before wipping off the extra. On the chairs only 2 coats were applied. What I did was sand in between all the coats, even though the stain directions say its not needed, I just wanted to try and the results I liked. As always try on a spare piece of wood first. I hope this info. helps, thanks for looking and asking.
Wed, 02/22/2012 - 10:30
Great! Thank you for the
Great! Thank you for the reply. I am going to start on this project in a few weeks and your input is very valuable. I'll give it a go and let you know how it goes.
Thanks again!
Wed, 03/07/2012 - 19:39
I love the table, but I'm
I love the table, but I'm suprised that no one said anything about the chairs. Do you have the plans for the chairs you made? I built the table but would love to have chairs that matched! Thank You
Tue, 03/13/2012 - 14:21
Awesome table! I'm in LOVE! Plans?
I'm in LOVE with your table!!! Did your husband follow Ana's directions for the legs? They look like they are at a slight angle. Does your husband have the plans for this? Thank you so much!!
Tue, 03/13/2012 - 14:26
Do you have the plans for this table?
Hi, I LOVE your table - it came out so beautiful! Just wondering, did you change the plans other than the with of the top? The legs look like they are at a slight angle and I love that!
Sat, 03/31/2012 - 15:47
Table and chair plans.
I followed Ana's plan to build the legs, they are at a slight angle. The chairs are based on the Modern Angle Chair. They are posted as another project. I did add the three cross supports on the bottom. When I saw my wife sit down and lean back a little bit I could see the back legs moving to much in the wrong direction. I basically used a 1x2, and I tried to measure about the middle or what looked good and screwed them in. It added more strength to the legs and made the chair much sturdier. I hope this info., helps. Sorry it took awhile to reply back.
Thu, 01/31/2013 - 04:40
Amazing Work
This table is stunning, great work. Everytime we think we know which type of table we want to build we go and see another that looks even better.
Dresser For Little Girl's Room
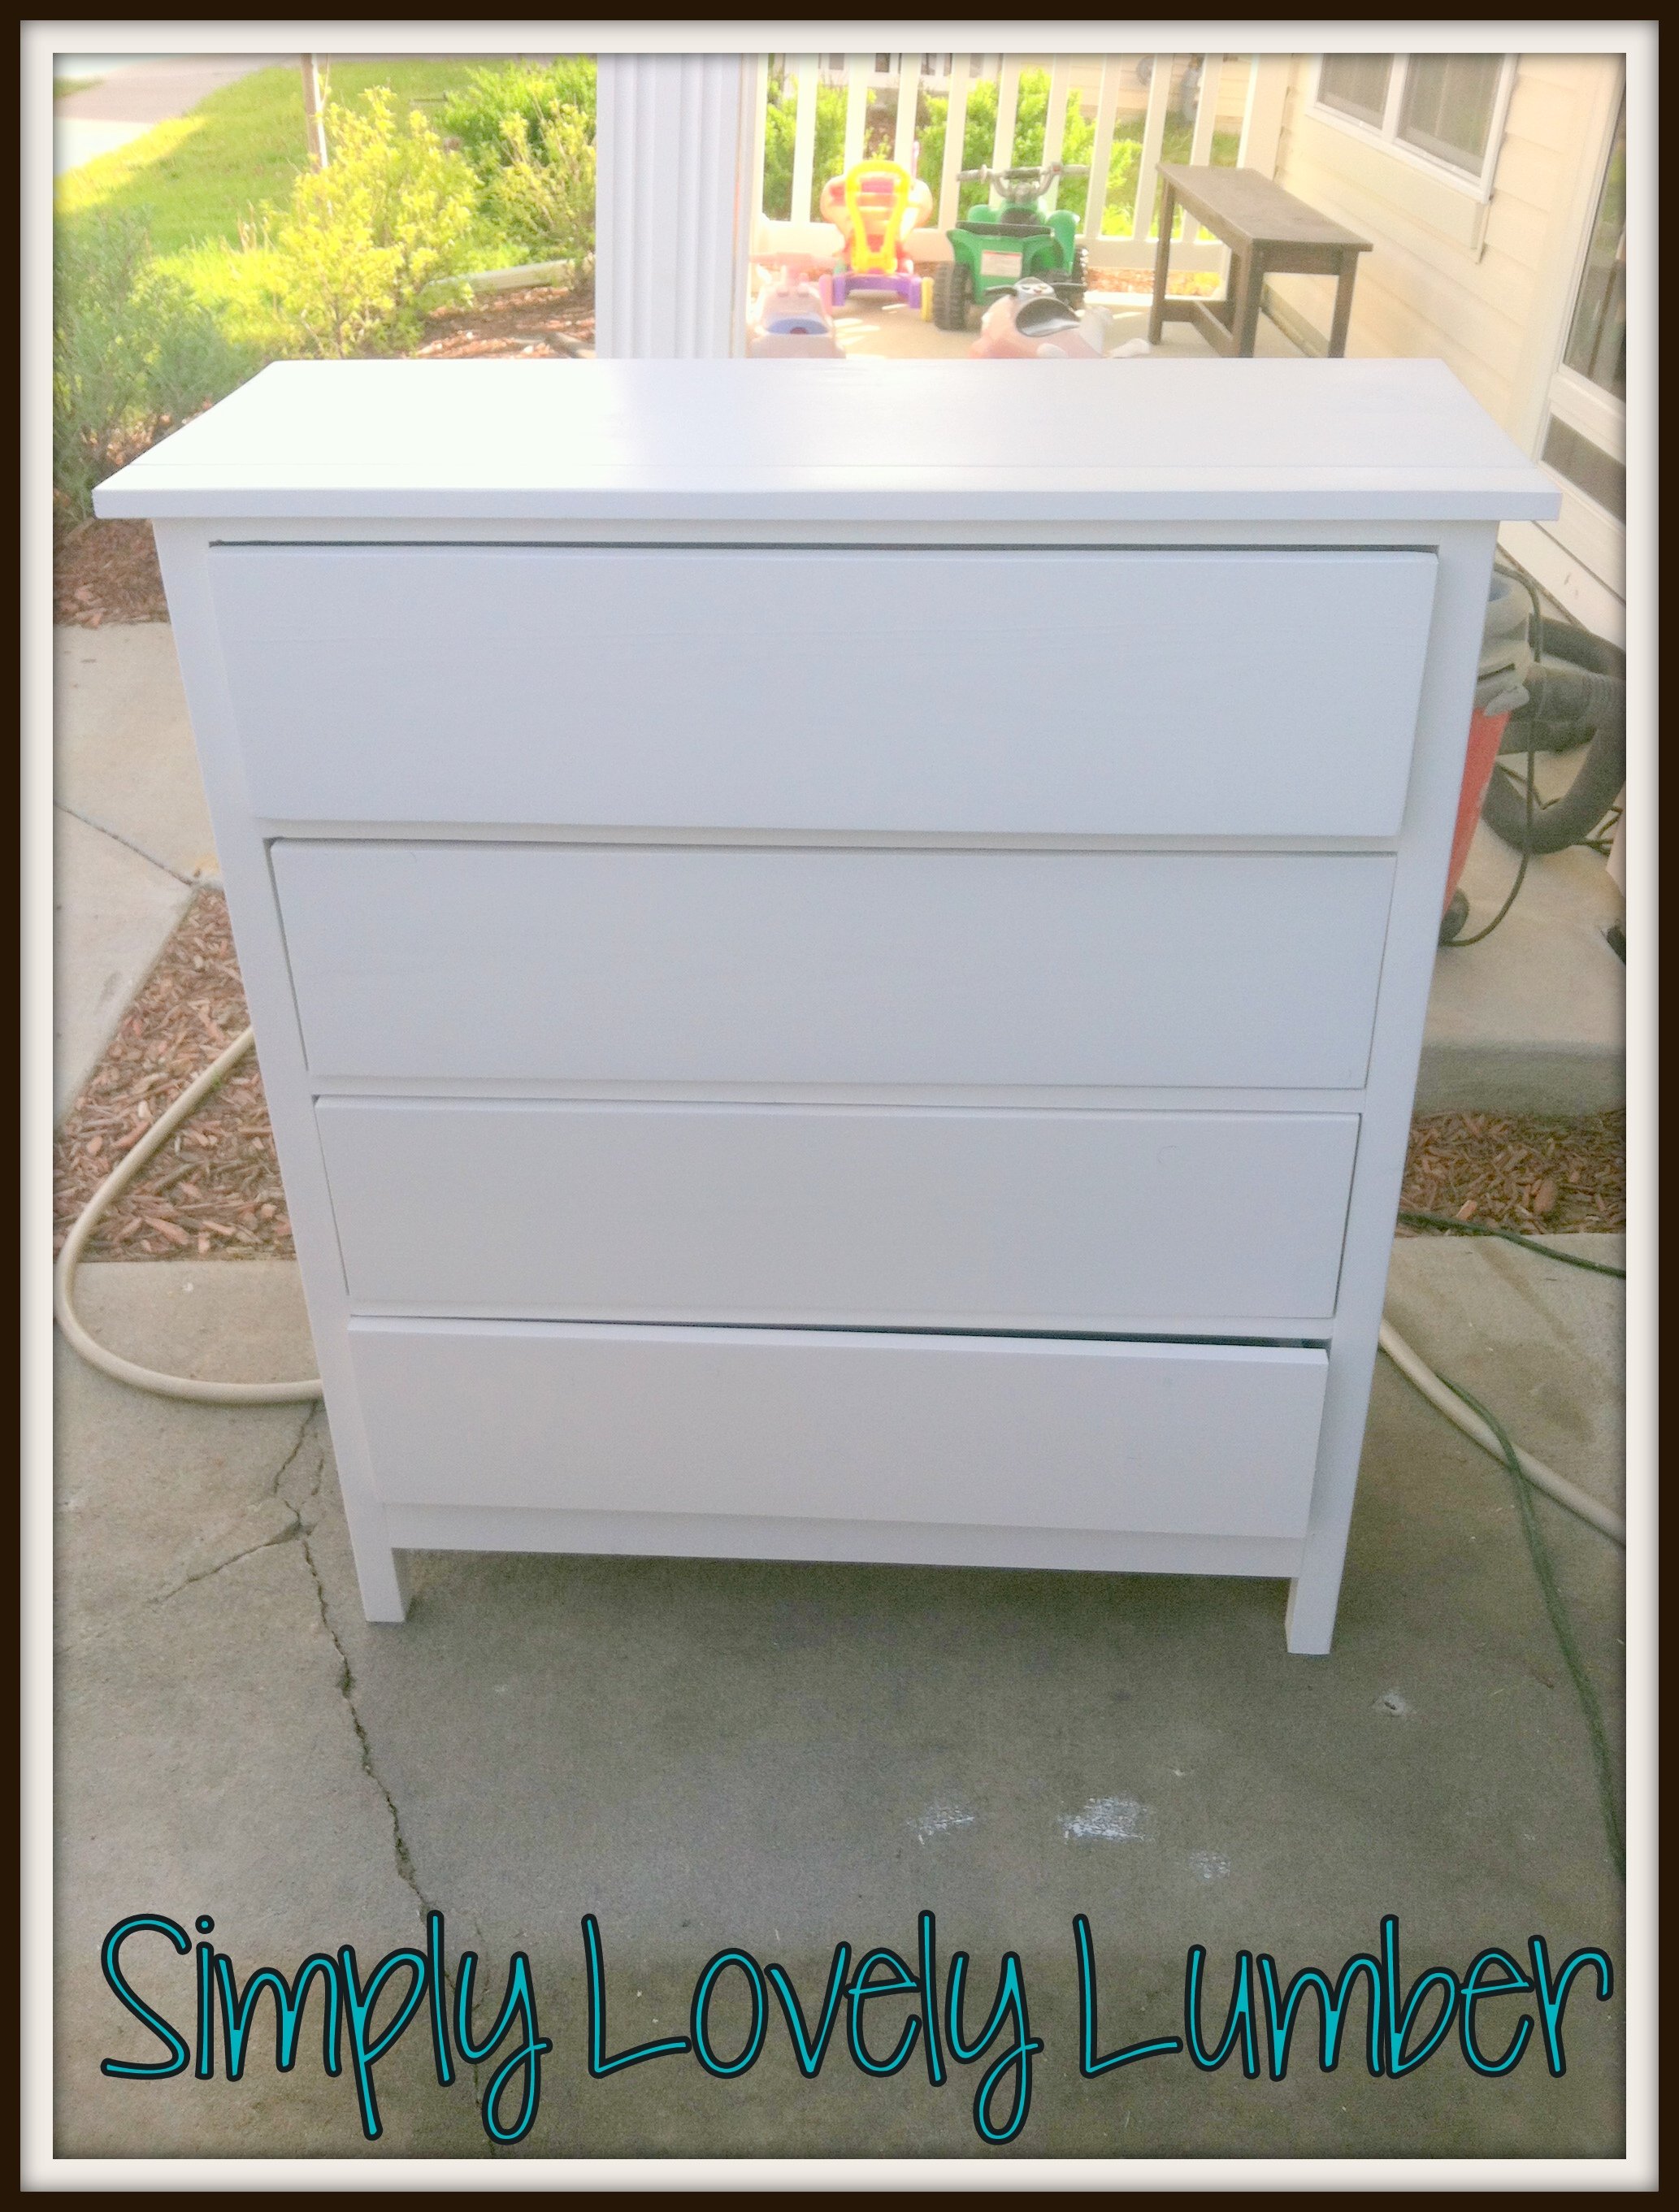
I built this dresser for a little girl. It was my first time doing drawers and I was a little intimidated but it wasn't bad at all! I'm going to be building one for my sons room too. Thanks for the great plans!!
Built from Plan(s)
Estimated Time Investment
Day Project (6-9 Hours)
Recommended Skill Level
Intermediate