Community Brag Posts

Under Stair Pantry

Submitted by Anonymous (not verified) on Sun, 10/15/2023 - 18:40

Our tiny cottage pantry is complete! We followed Ana-White's 2x4 Storage Shelving modified to fit.

Materials:
Paint: Behr Whisper White
Vinyl tile: Armstrong Terracotta Clay
Ceiling: Beadboard
Plans: Ana-White 2x4 Storage Shelving (modified)


Built from Plan(s)

Modern Park Bench

Submitted by Tim PIZZ on Sat, 05/16/2020 - 06:17

This was one of my first projects. I just used a circular saw but a mitre saw would be better. I’ll look for one soon. It was rewarding, fun and we love how it looks on our back patio.

Built from Plan(s)
Estimated Cost
$200
Estimated Time Investment
Weekend Project (10-20 Hours)
Finish Used
I primed the pieces with Sherwin-Williams exterior latex primer before assembly then painted with Sherwin-Williams Resiliance exterior latex. We chose “Retreat” as our color.
Recommended Skill Level
Beginner

2x4 Outdoor Sectional with Matching Ottomans, Chairs & Table

Submitted by cqueiruga on Fri, 06/12/2020 - 21:01

We were looking for outdoor furniture for our deck, and for the size and amount we needed it would have cost us at least $2000. We really like the idea of having an outdoor sectional that we can also use for dining, and we had trouble finding a set we liked. We found Ana's plans for the 2x4 Outdoor Sectional, and i loved the look. After seeing what others have done with the plans, I thought I would be able to modify it to get everything we needed for much less cost than buying a set.

We ended up extending the size of the 2x4 outdoor sofa by one 24" section, for a total length of 96". I then used the same design to make two outdoor chairs, just reduced the length to 24". I modified the 2x4 outdoor coffee table plans to create two ottoman's that can be moved around to make the seating more lounge style Finally, I modified the coffee table plans to make a 5 foot outdoor dining table. All in all, it took about a week and I couldn't be happier with how it turned out!

Estimated Cost
$800 ($200 for wood, $600 for cushions)
Estimated Time Investment
Week Long Project (20 Hours or More)
Finish Used
Valspar Semi-Transparent Antique Oak Stain
Recommended Skill Level
Beginner

Comments

jwood4

Mon, 08/02/2021 - 09:44

Looks amazing! What method did you use (pocket holes, dowels, deck screws, etc) to join the visible portions like the arms?

Simple Outhouse

Submitted by Anonymous (not verified) on Thu, 06/18/2020 - 13:45

We used the plans from the Simple Outhouse to make a space to hold our porta potty. The door is a repurposed barn door and I think it looks amazing! These plans were perfect for us as we were able to build it in panels and reassemble on our property by the lake. Some screened windows to allow for ventilation and light were the finishing touches. Thanks Anna for the simple to follow plans!

Built from Plan(s)
Estimated Cost
$200 Canadian
Estimated Time Investment
Weekend Project (10-20 Hours)
Finish Used
We used pressure treated wood for the base and deck. For inside, we repurposed some scraps of composite decking. Painted with exterior latex "driftwood".

Rolling grill cart table

Submitted by kmatt55 on Sat, 10/18/2014 - 19:13

I made the countertop with 2 plywood boards screwed together and topped the stainless steel with heavy duty adhesive.  I adjusted the plans a little to accommodate my space.  Thanks for the plans!  It was a fun build!

Built from Plan(s)
Estimated Cost
$100
Estimated Time Investment
Day Project (6-9 Hours)
Finish Used
Glossy black exterior paint
Recommended Skill Level
Beginner

Our Daughter's Playhouse

Submitted by jhedlund on Fri, 03/22/2013 - 06:17

We built this in early 2013. We ended up turning the house 90 degrees on the deck, because the slide worked best off the backside of the deck due to the various heights around the deck. The sloped back yard caused some challenges, but in the end it's a very sturdy deck with the cross beams attached. Thanks for posting these plans online for us, our 3 daughters are loving the playhouse and swingset! Here are some more pics of the project: http://www.flickr.com/photos/11031534@N00/sets/72157633009259873/

Estimated Time Investment
Week Long Project (20 Hours or More)
Recommended Skill Level
Intermediate

Comments

sgilly

Fri, 03/22/2013 - 15:07

Of course your girls love it - it's fantastic! Great job.

Robinwood

Fri, 03/22/2013 - 16:39

Love this - my grandson's back yard is too small to build something like this; which is why we had to settle for his loft bed airport/clubhouse.

slug

Thu, 06/27/2013 - 05:24

I'm planning on building two A-Frames and no playhouse, so my questions are focused there.

Did you do any modifications to swing portion of the plans?
Is it sturdy enough for an adult to swing on as well?
It looks like you put the posts in the ground, did you cement them in too?
How high off the ground is the bottom of the support beam for the swing?
Is there any issue side-to-side swaying?

Seasonal And Holiday

Planter Boxes

Submitted by Anonymous (not verified) on Mon, 10/04/2021 - 12:53

I made the boxes from plans, but added bench and trellis from my own design.

Built from Plan(s)

Comments

Seasonal And Holiday

Over Toilet storage shelf

Submitted by Anonymous (not verified) on Mon, 10/04/2021 - 14:30

I made this less wide then the plans to fit in my small bathroom. Thank you for these wonderful
Plans!

Comments

Green House

Submitted by Anonymous (not verified) on Thu, 07/13/2017 - 08:31

I built this amazing green house following your plans!  My wife and I moved our family from the city to an amazing 5 acre homestead out in the country here in Wisconsin. We are super happy that we will be able to keep our new garden going longer!  Thanks so much for the plans!

Built from Plan(s)
Estimated Cost
We spent about $800 for the frame and plastic panels. Then we spent another $250 for the reclaimed barnwood siding. We found the door at a reclamation site for $25.
Estimated Time Investment
Week Long Project (20 Hours or More)
Finish Used
I followed Ana's plan pretty closely. This was the first building I ever built from scratch. It was a little difficult to get the foundation level. But I figured it out. I used pressure treated 6x6s on top of gravel. I was able to screw the actual walls down to the 6x6s.

I'm actually building a second building from these plans to use as a chicken coop. Once it's done I will post photos.
Recommended Skill Level
Intermediate

Comments

Seasonal And Holiday

Playhouse kitchen from Modern Vertical Slat Top Console

Submitted by LauraLaura on Mon, 05/27/2013 - 17:21

I've been looking for a simple design for a consol table that I could easily modify to fit in my kids' club house. This one fit the bill perfectly! I also happen to have a pile of 2x4s left over from a closet demo, so I wanted to use those up. I basically built 2 of the consol tables, letting the 2 outer-most horizontal beams extend across and 25.5 inch space and connect the two consols. Then I put in a middle beam and that created the perfect space to set some catering pans in it. Also, I only had 2x4s so I used those for all the pieces, making the gaps a little wider than the original design. And lastly, because I didn't quite have enough wood, I shortened the vertical beams. If you look at the picture, all of this will make more sense! Thanks for the inspiration and direction! ps - I have no idea how to rotate the photos. Sorry!

Estimated Time Investment
Afternoon Project (3-6 Hours)
Finish Used
none yet, but I think I need to paint it or something so it doesn't rot outside.
Recommended Skill Level
Starter Project

Planters- modified

Submitted by Anonymous (not verified) on Mon, 03/07/2022 - 06:14

Used your youtube instructions for the square planters and revised them to create these! Thank you so much for your video it helped me so much. I was trying to make a small backyard for my dog at my condo without breaking any rules not to have a fence. Gary loves it!

Comments

Lumber Storage

Submitted by Anonymous (not verified) on Sat, 08/20/2022 - 15:44

We are so excited about have an organized way to store our lumber and scraps. We only had to purchase 4 2x4’s for this project and were able to use a lot of on-hand scrap pieces. The plans were so clear and easy to follow. Thank you for sharing!!

Comments

Farm House Table and Bench

Submitted by Anonymous (not verified) on Fri, 05/05/2023 - 08:52

Closet Organizer

Submitted by kristen on Sun, 02/05/2012 - 10:26

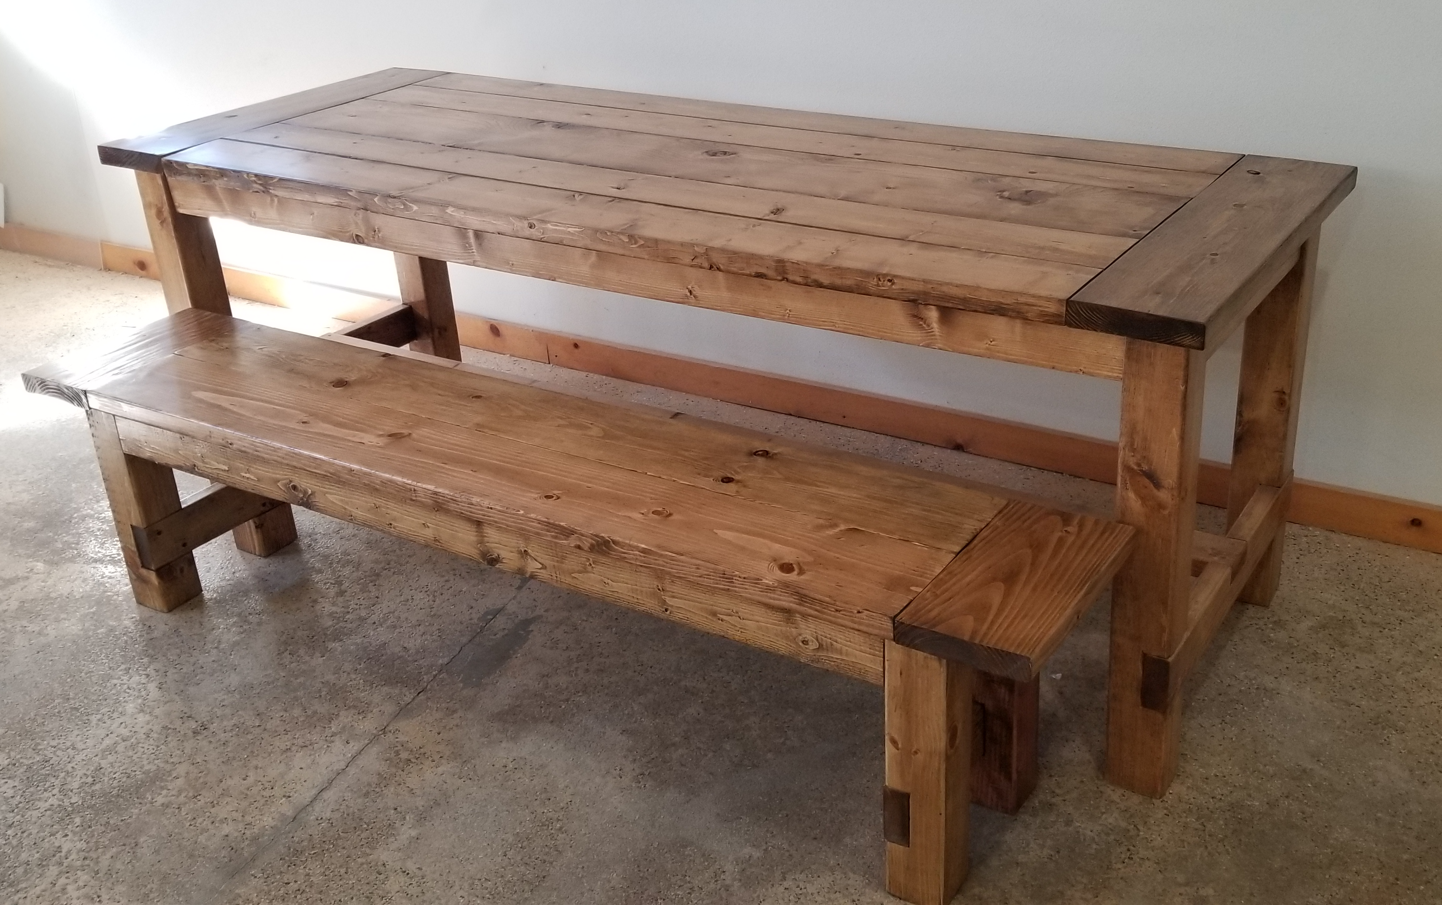
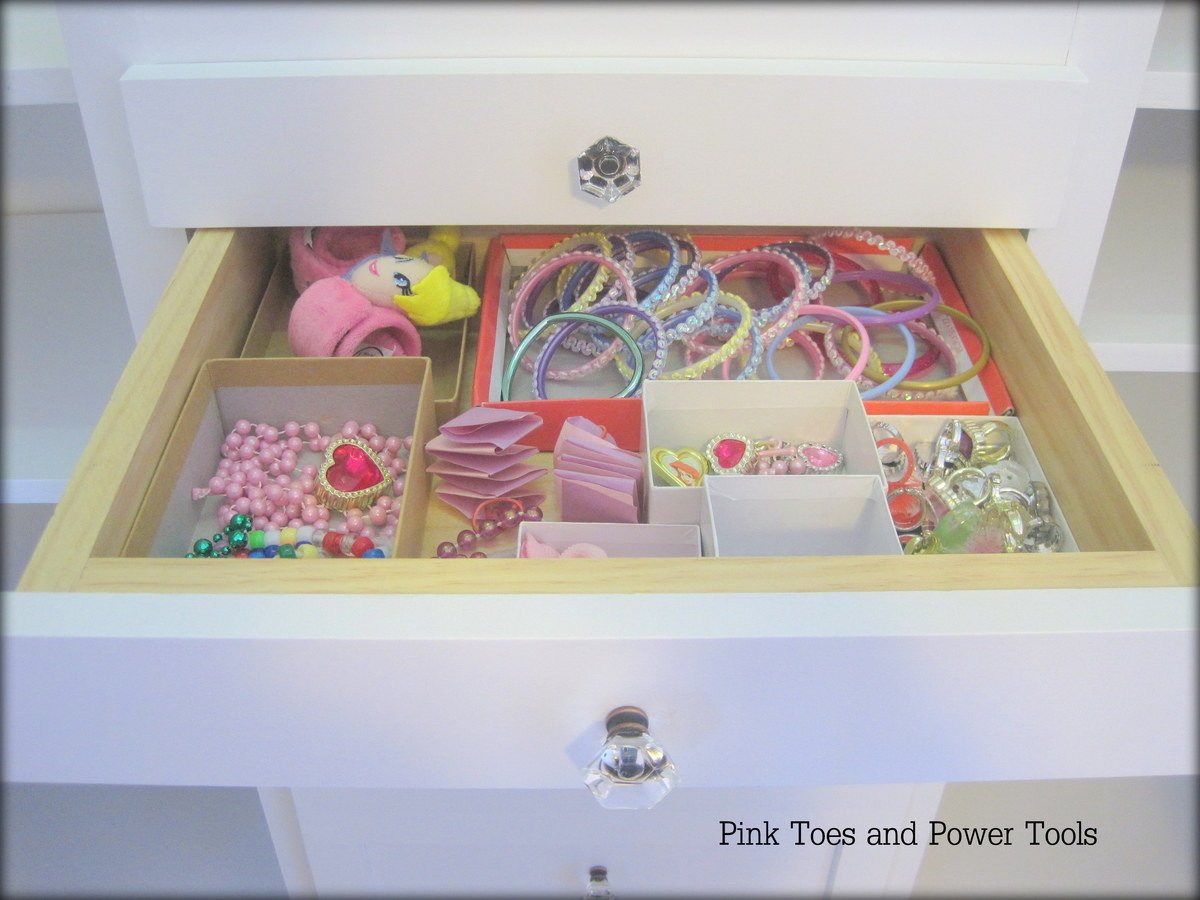
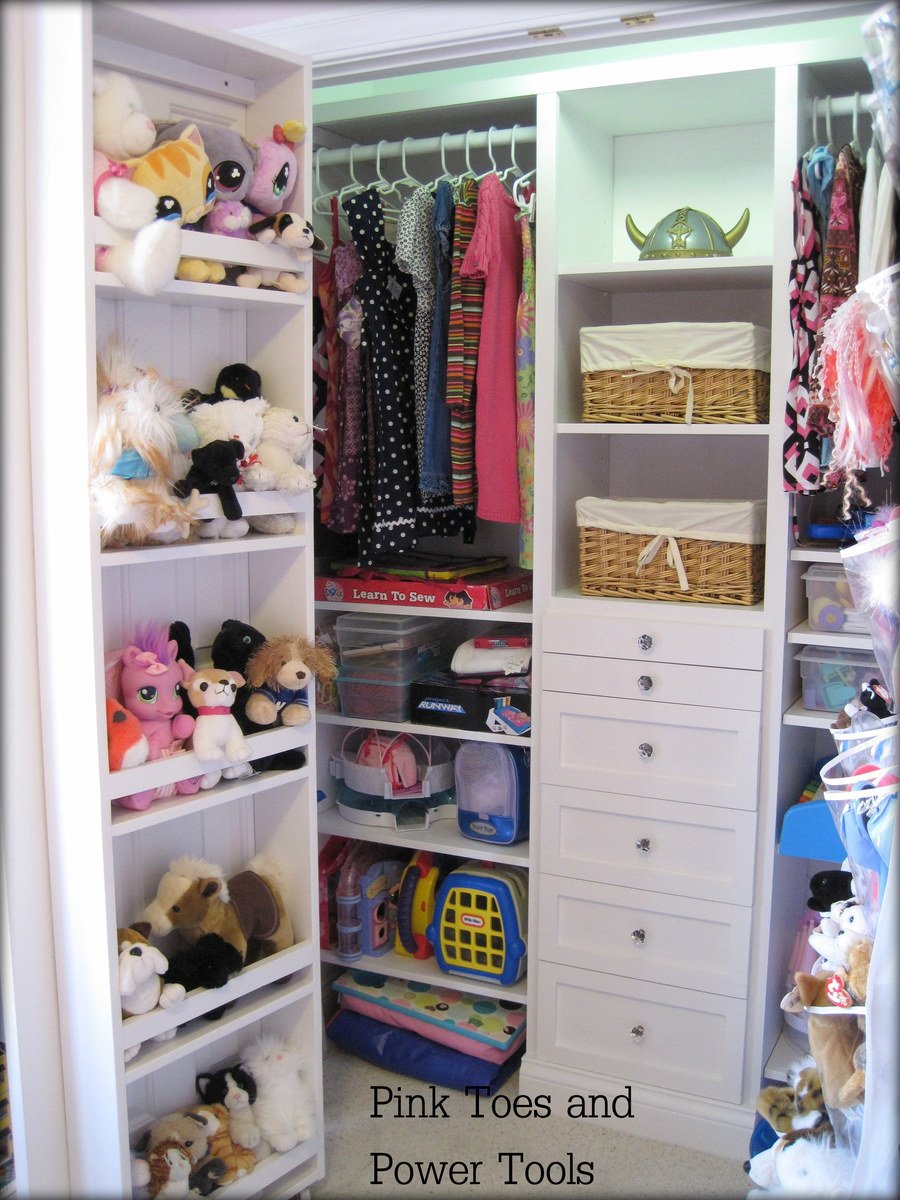
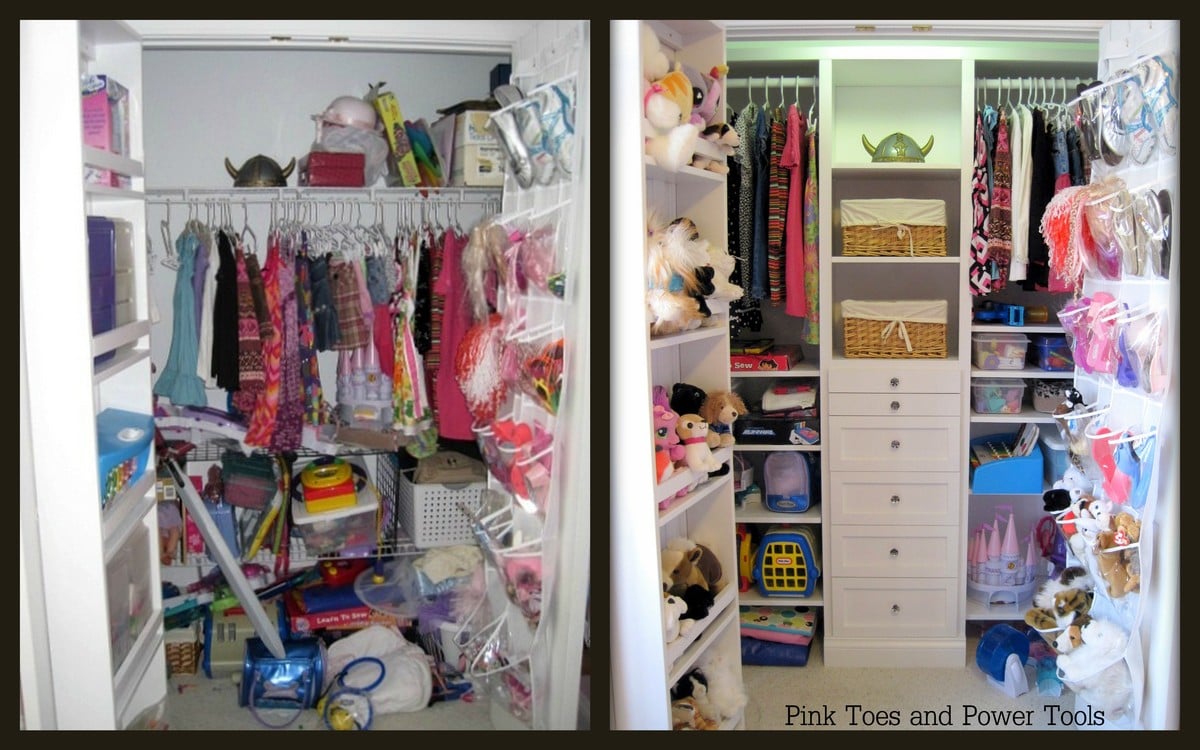
I needed a closet organizer for my daughter's room that could grow and change with her age. Right now it needed to have lots of shelves at her height to hold the massive amount of stuff an 8 year old can accumulate.

Once she transitions out of the toys, I plan on moving the shelves all to one side or the other for shoes, and adding another rod. Another possibility is shoes in the door organizer and 4 sections of hanging clothes...regardless, the end result has options that will grow with her!

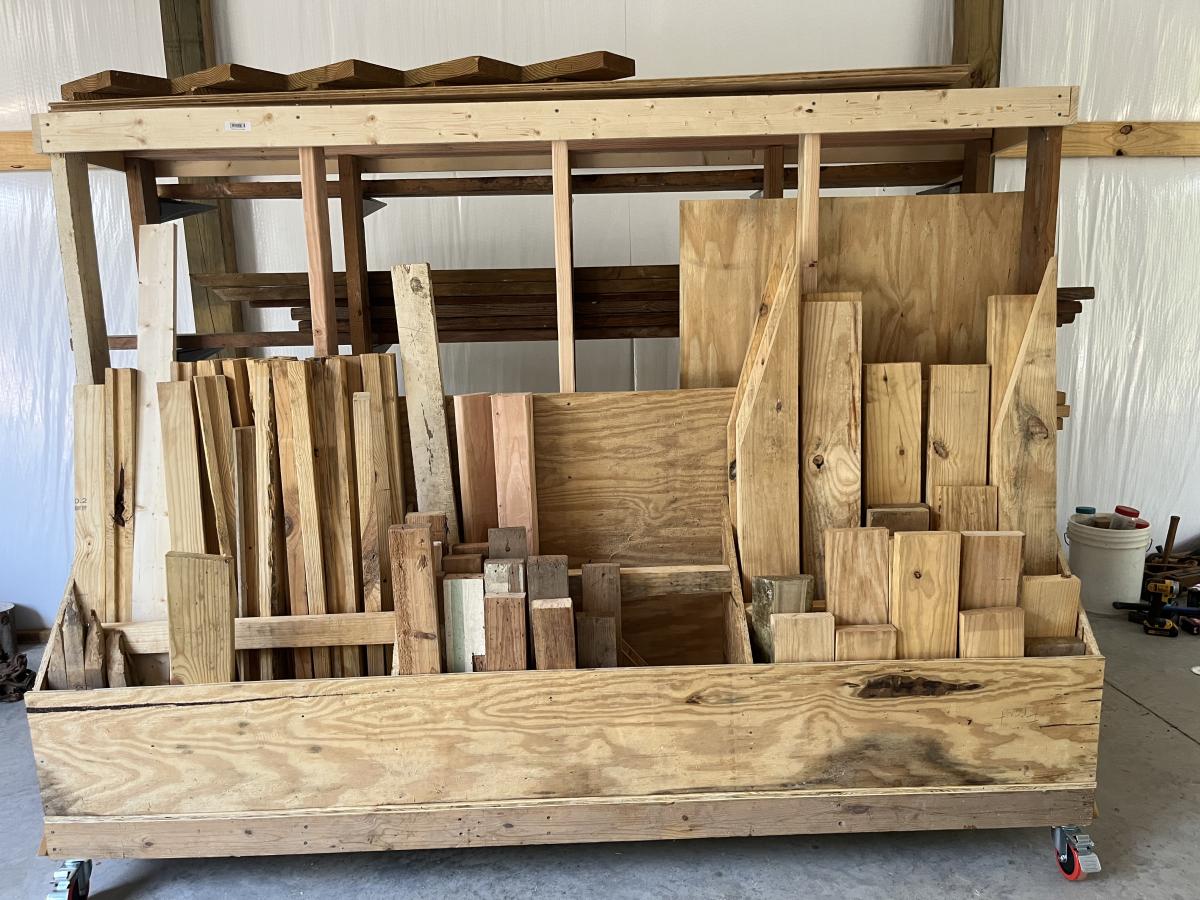
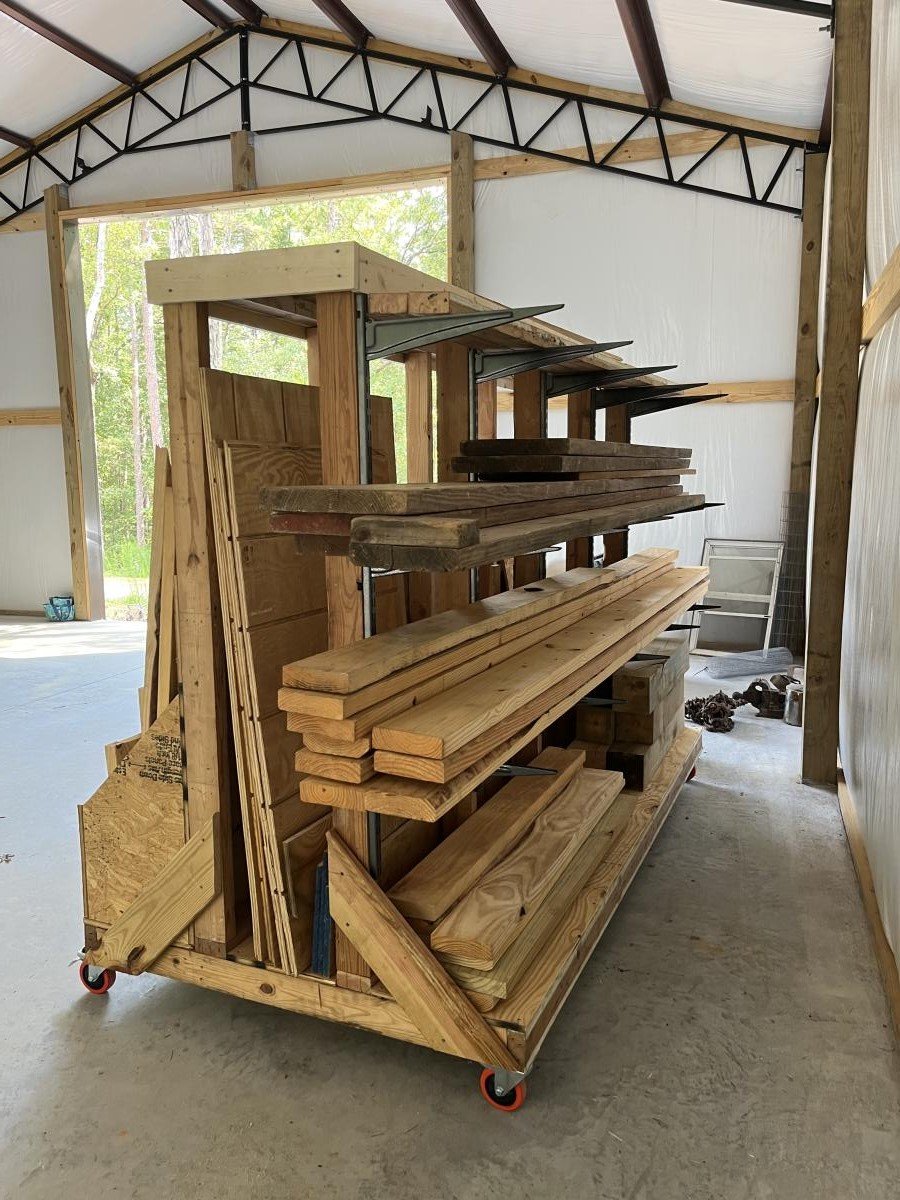
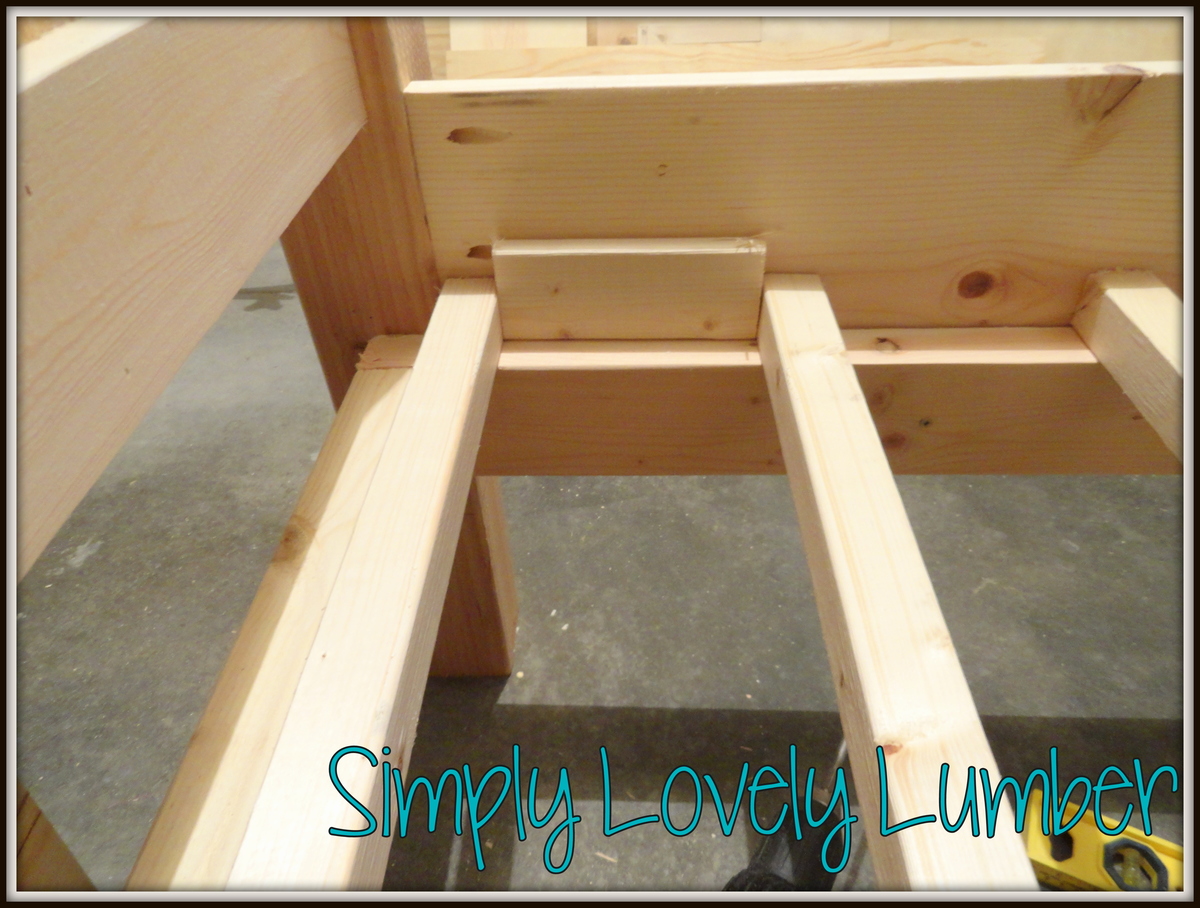
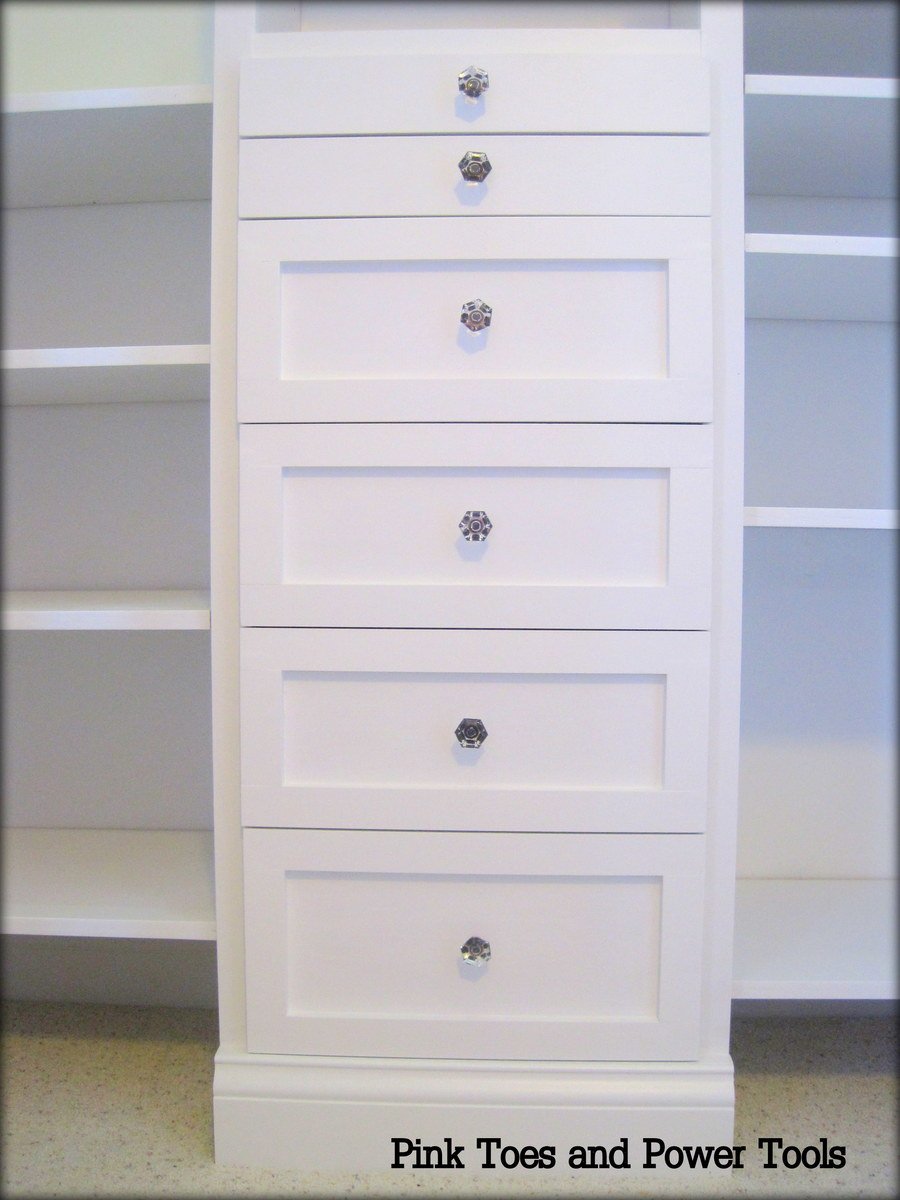
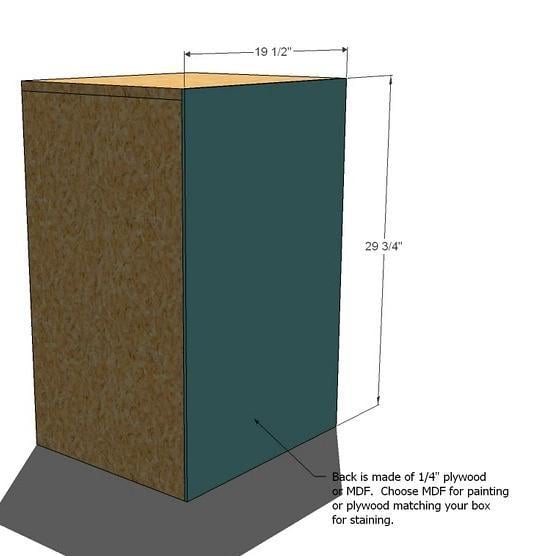
I was able to keep the cost of this down because I used all scrap plywood to make the drawers. I did splurge in S4S pine lumber rather than trying to make rougher cuts nice.

On the left door is Ana's Behind Closet Door Storage plan as well :)

Estimated Time Investment
Week Long Project (20 Hours or More)
Finish Used
Kilz No VOC primer, Olympic No VOC paint in semi-gloss (white off-the-shelf tint)
Recommended Skill Level
Intermediate

Comments

Guest (not verified)

Sun, 02/05/2012 - 11:17

I love the idea of the stuffed animals on the door! Those things multiply so fast and get in the way of making the bed - great closet!

Cindy from Indiana (not verified)

Sun, 02/05/2012 - 18:58

Right now DD's room is a blank canvas. One of the first projects (after getting her window in) is to figure out the closet. I think this will be my inspiration!

Looks great!

kristen

Sun, 02/05/2012 - 19:25

Thank you! I am loving how organized her whole room is because of the closet being in good shape. And everything has a spot now, so it's easy for her to get it back where it needs to go!

Oh, those stuffed animals. I mentioned to her the idea of paring her collection down and she was horrified at the idea!

In reply to by kristen

claydowling

Mon, 02/06/2012 - 06:40

A shocking notion. I think there's a box in our storage area with my wife's stuffed animals somewhere. Keep in mind, my wife isn't a 20-something who just moved out of her parents' house. We have a grand-daughter. Stuffed animals are forever. In fact I think one of my nephews still has my teddy bear.

kristen

Mon, 02/06/2012 - 09:04

...at the bottom of the basket where her stuffed animals used to live, were two of mine from when I was little, lol!

But you bring up a good point about forever. I think I need to put a ban on any new ones joining her stuffed animal family from here on out. Pretty soon I'm going to need to add another closet to her room just for those!

Guest (not verified)

Thu, 02/23/2012 - 17:32

How did you build and incorporate the drawers?

In reply to by Guest (not verified)

kristen

Sat, 06/30/2012 - 20:46

claydowling

Thu, 02/23/2012 - 19:12

The easiest way to do a quick drawer, if you don't know how to do dovetails (and that's a simple skill totally worth learning), is to drill holes through the sides and into the front, and pin it with hardwood dowels. Use a domestic hardwood, you'll be a better dowel and a dimension that matches drills you own. The cheaper white imported dowels don't match any drill diameters that I can find.

hoffer5353

Thu, 06/28/2012 - 13:18

I am wanting to add shelves and drawers on a closet and am afraid it will be too big for the space. How wide is your closet?

In reply to by hoffer5353

kristen

Sat, 06/30/2012 - 20:53

Here is the post with the plan mock-up with dimensions:

http://pinktoesandpowertools.com/2012/01/24/how-to-build-a-closet-organ…

It says 65.5" wide on there, and I don't believe I made any changes, so that should be accurate. I think you could get away with having an approximately 46" wide closet. You could have the drawers in the middle and then 12" wide shelves on either side that would fit sweaters, jeans, shoes. If you made them adjustable like mine, then you could really maximize the space in there. Just make sure you give yourself plenty of room in front of the shelves if there is wall there--you want to be able to easily take things in and out.

Good luck!

mrs.T.La Forme

Mon, 02/04/2013 - 17:49

i just want to say I`m jealous i wish my closet looked like this. cant wait until I`m skilled enough to try it .

kristen

Tue, 02/05/2013 - 15:08

I'm looking forward to doing this to my closet too!! It's a good project to take on once you want to try out drawers for the first time--since it's behind doors, it doesn't have to be perfect. Good luck!

The Gíaffe TV Stand

Submitted by Anonymous (not verified) on Thu, 02/06/2020 - 09:55

The Gíaffe Free Standing TV Mount. Handcrafted and engineered to use its center mass to deliver strength and balance for tv sizes 30-60". Display your television without detracting from your home's decor. The Gíaffe Free Standing TV Mount is the perfect solution and its rich finish will be perfect for any house/office room.

Estimated Cost
$109
Estimated Time Investment
Day Project (6-9 Hours)
Finish Used
Stain - Dark Walnut - Varathane - 2 Coats
Finish - Water Based Polyurethane - Varathane - 3 Coats
Recommended Skill Level
Intermediate

Comments

Sandbox with Seats

I built this sandbox for my kiddo's because we have cats! It was great. Easy to build, great plans for it.

Built from Plan(s)
Estimated Cost
$50 CAD
Estimated Time Investment
Afternoon Project (3-6 Hours)
Finish Used
Minwax 2-in-1 in Natural
Recommended Skill Level
Beginner
Back