Community Brag Posts

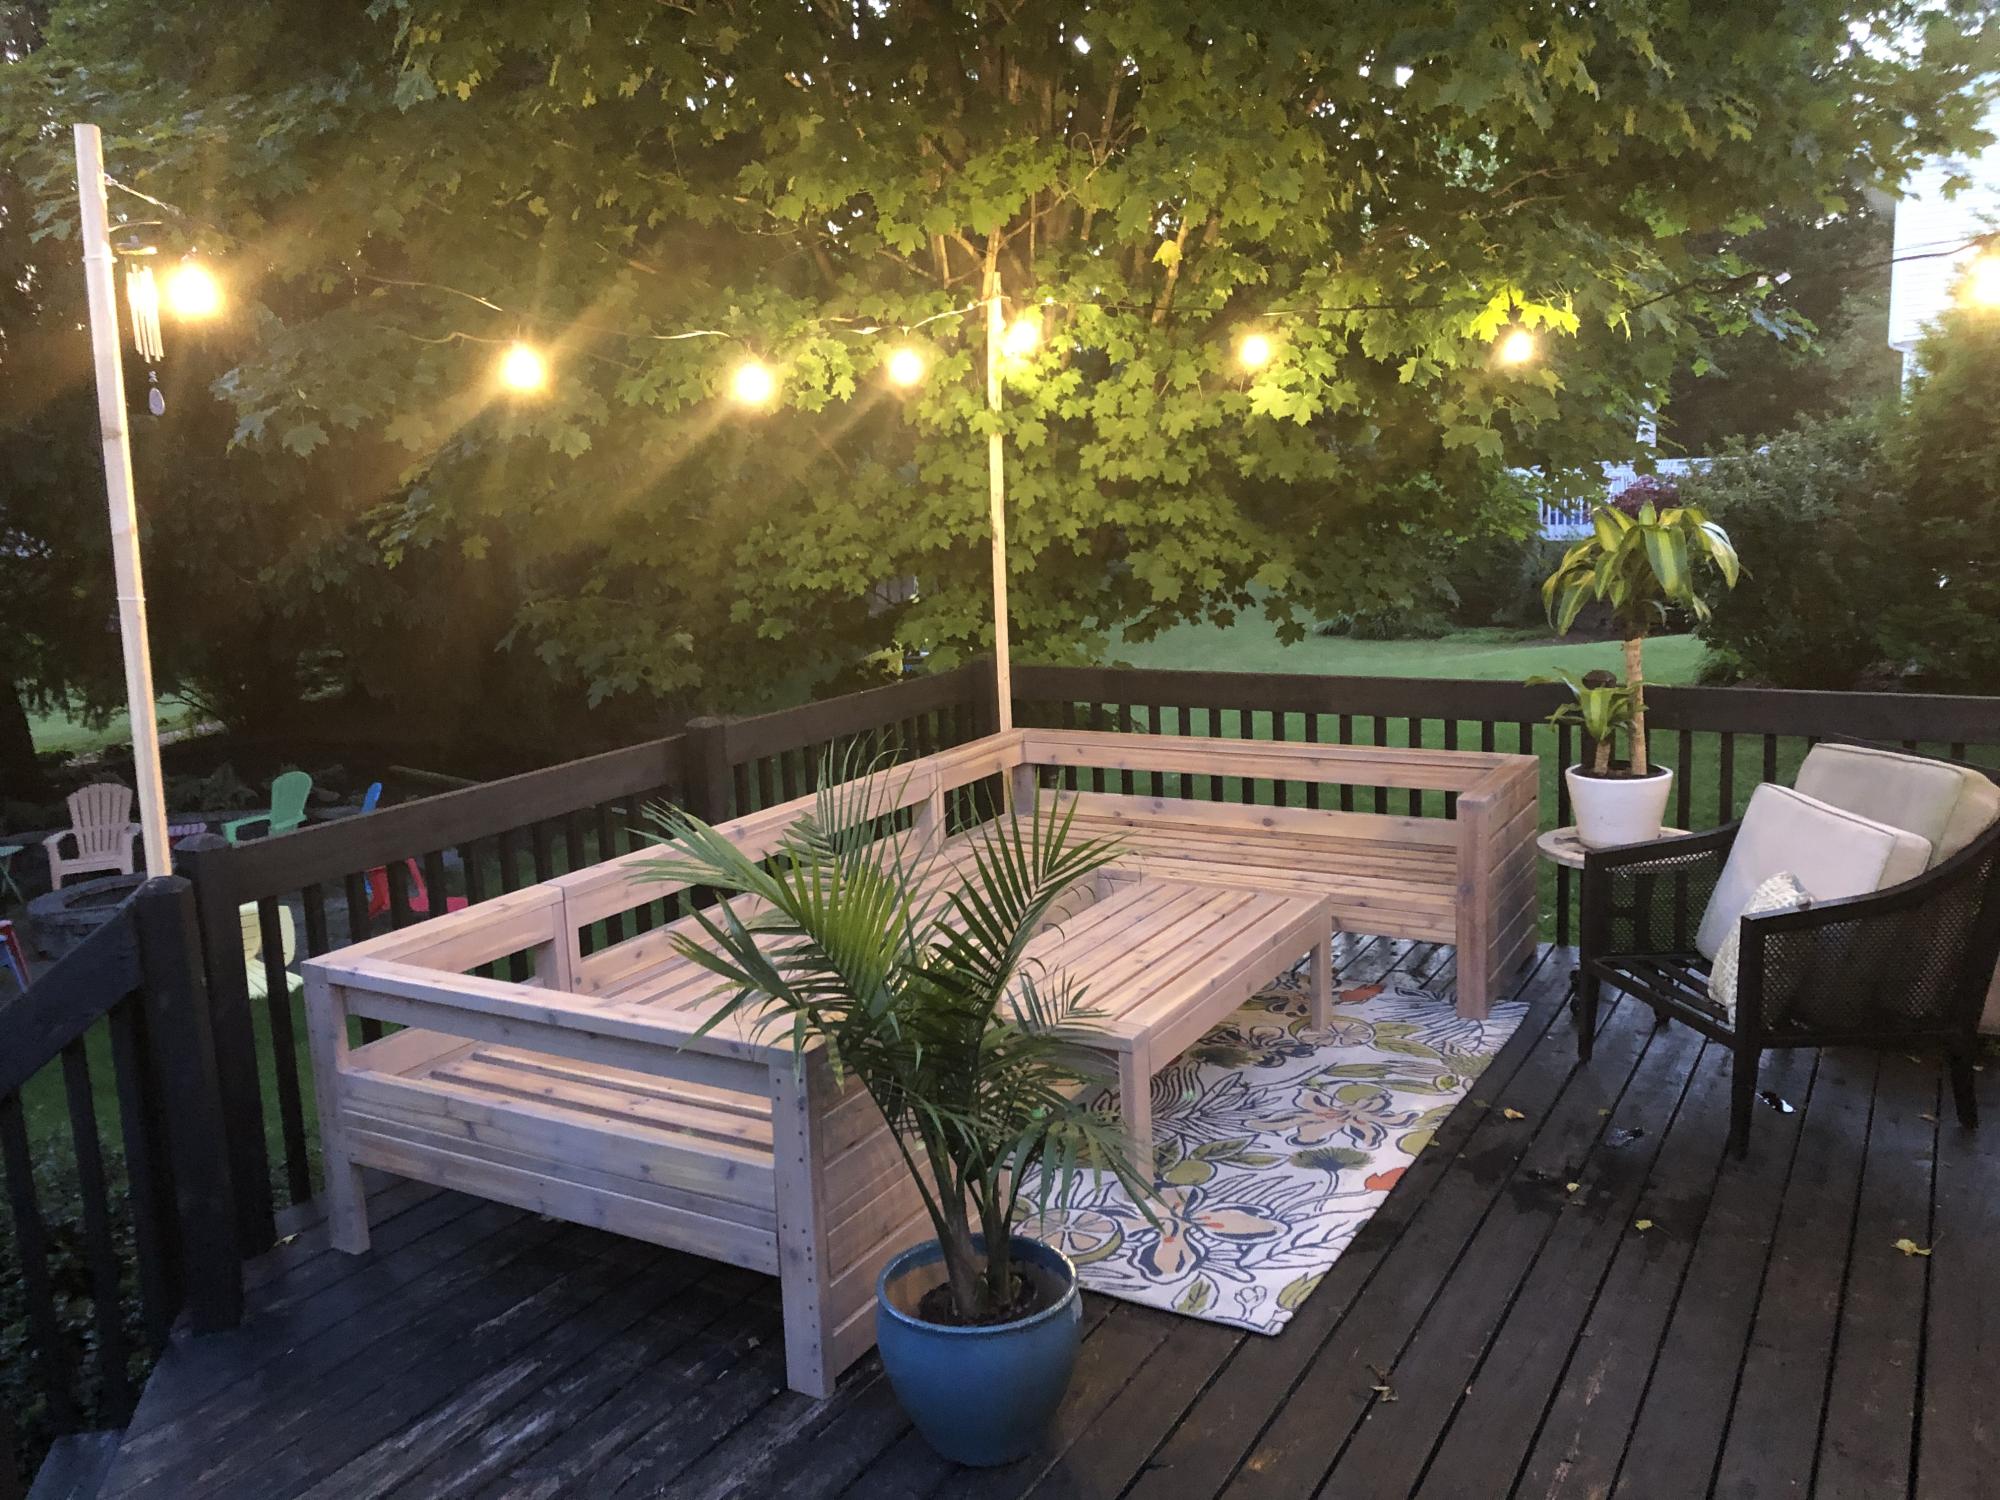
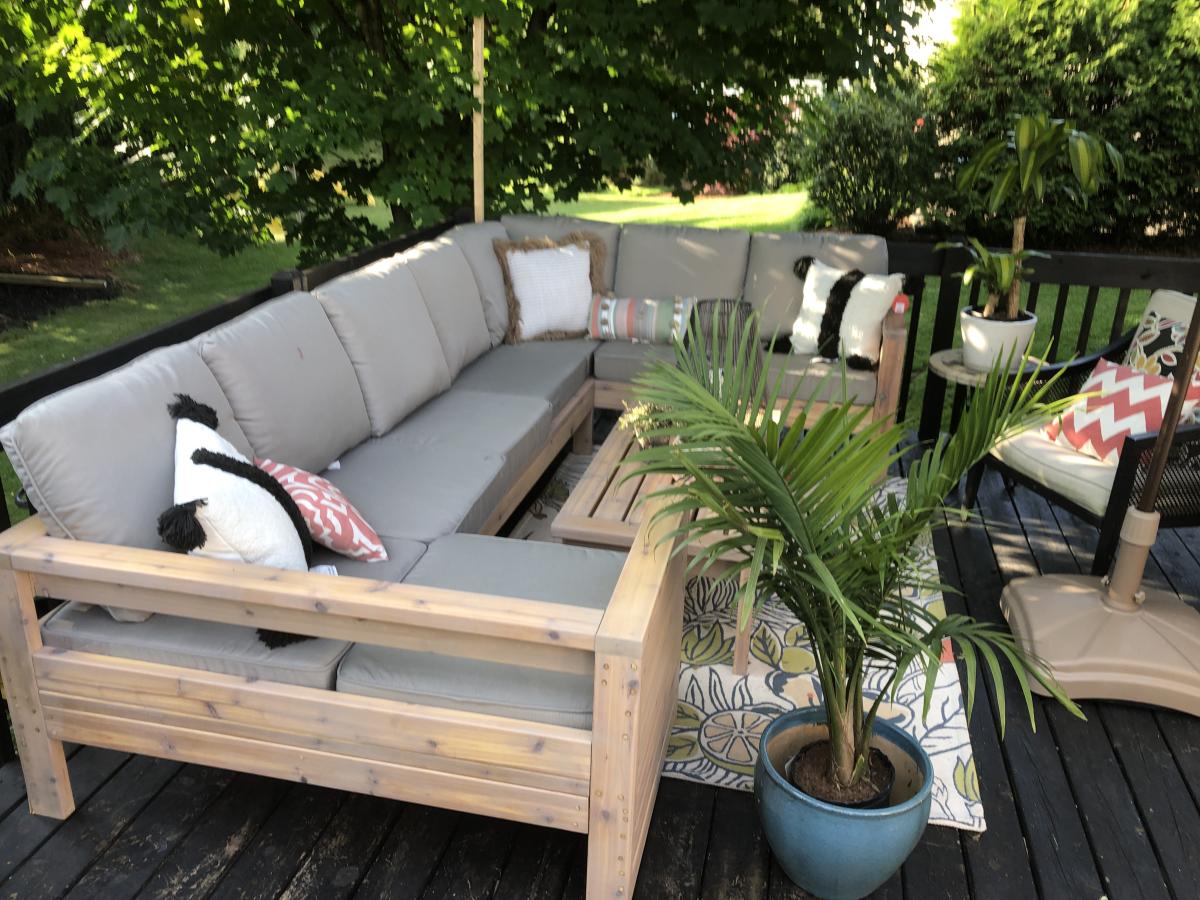
Amazing 2x4 Outdoor Sofa

Submitted by Anonymous (not verified) on Fri, 12/31/2021 - 05:44

We have wanted nice deck furniture since we moved into our house 22 years ago but just couldn’t justify the cost. I have made several projects from Ana’s website and I love her easy to follow and FREE plans! But this project was my favorite as you can see by the pics. I used cedar and my wife finished the furniture with stain. Thanks to Ana for providing these plans and helping a DIYer to feel proud!

Built from Plan(s)

Comments

Seasonal And Holiday

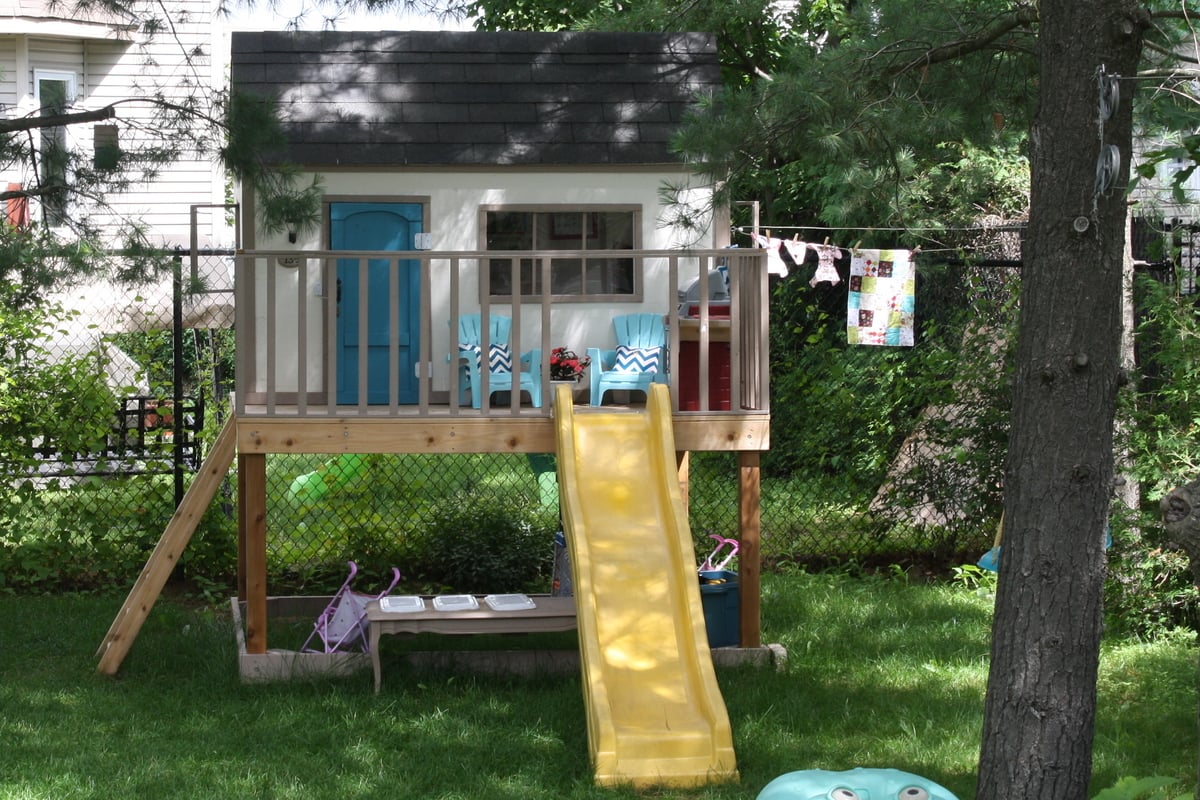
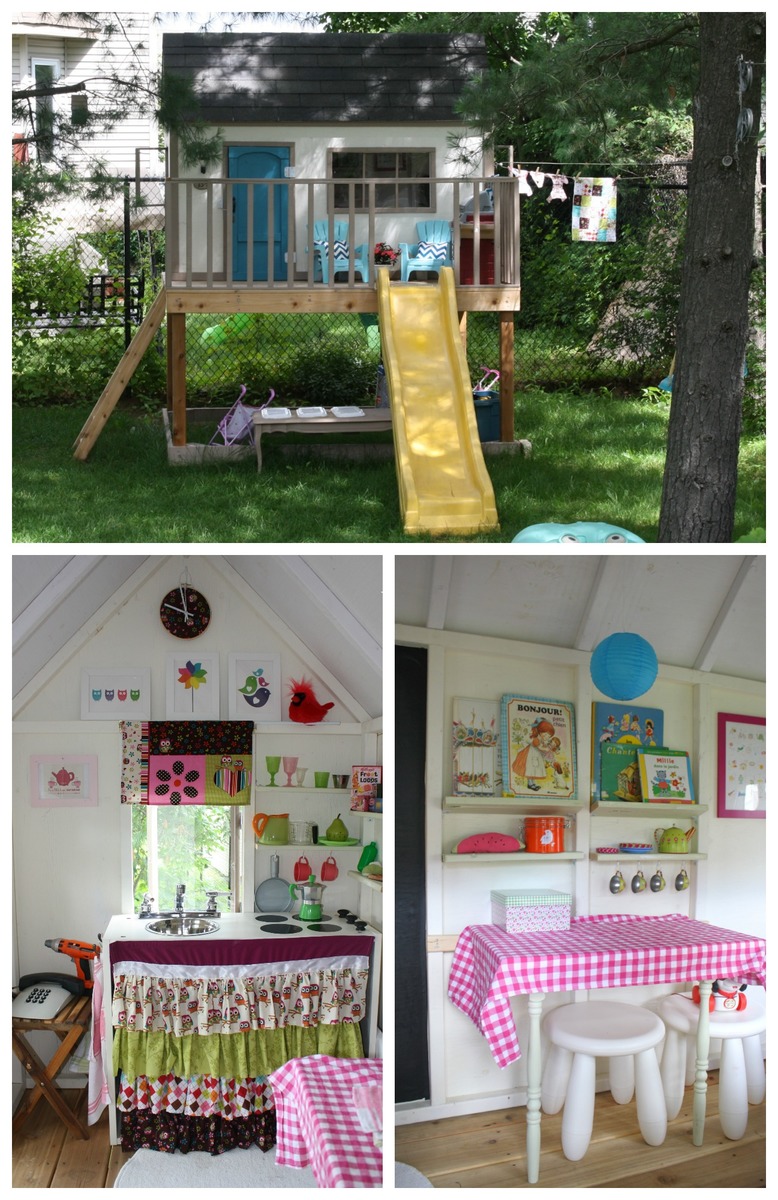
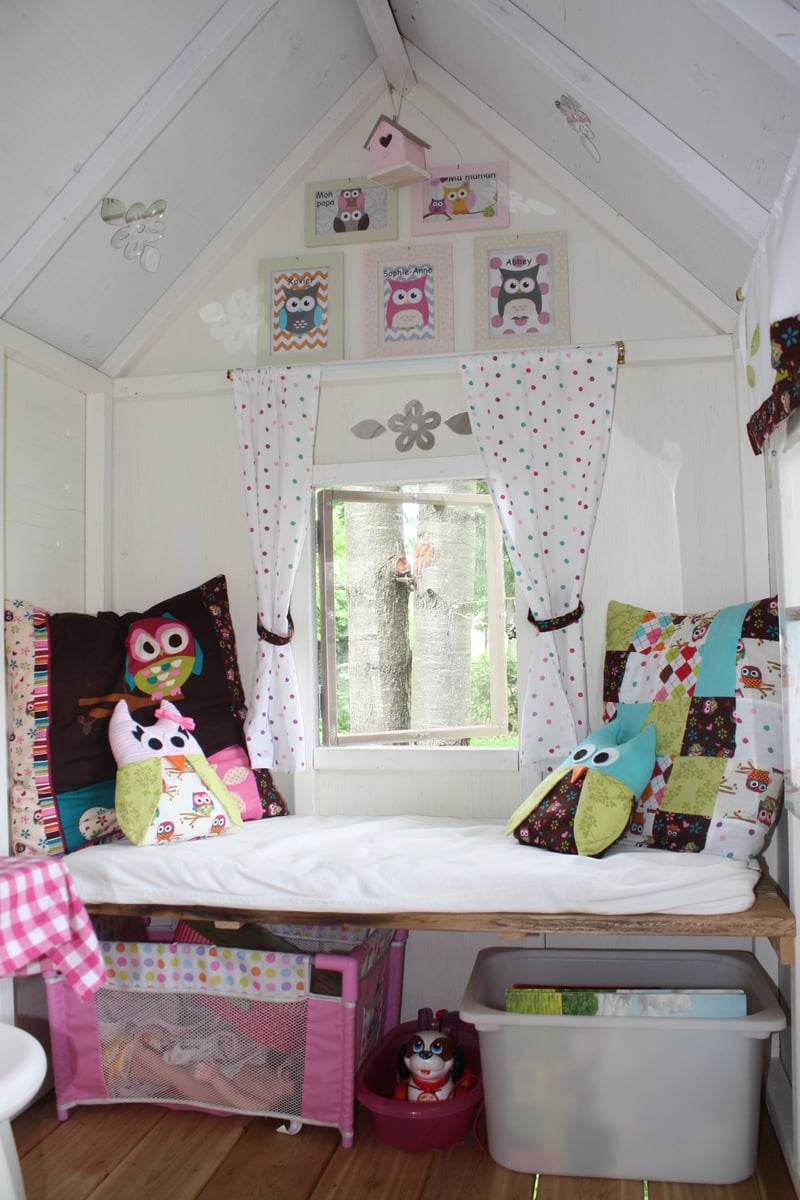
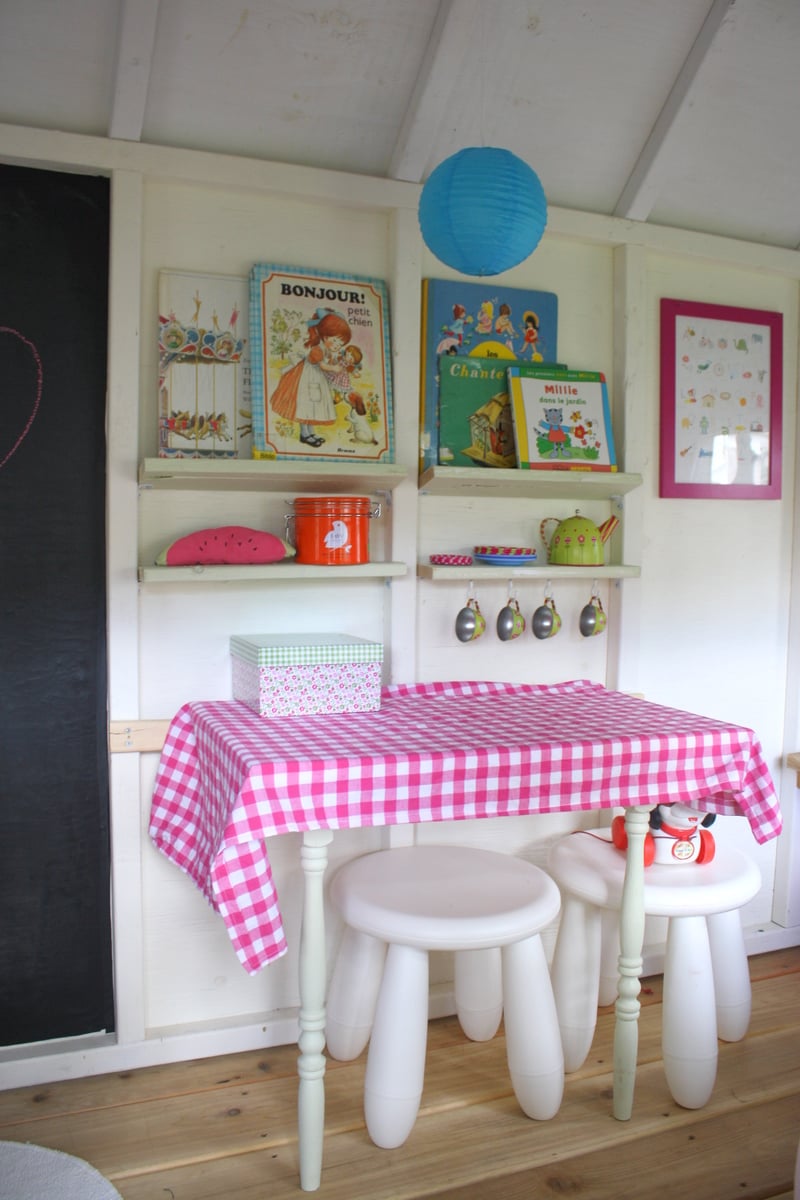
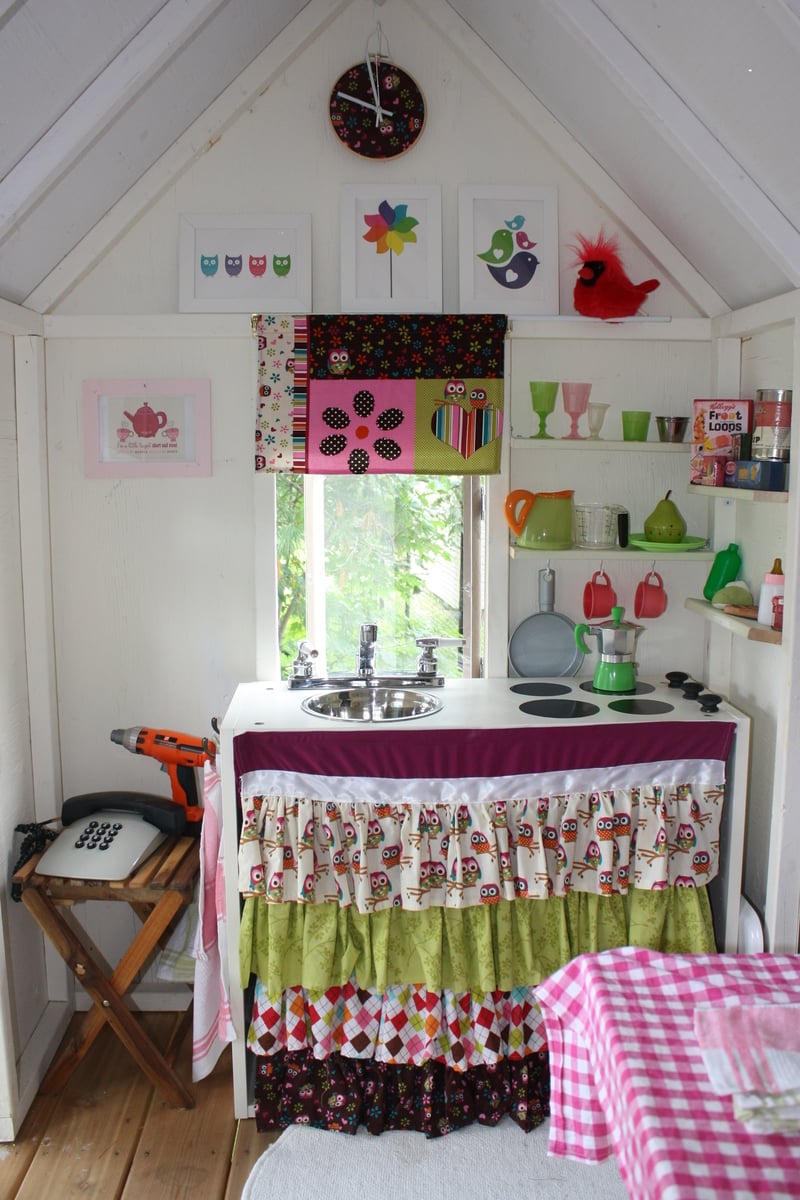
The playhouse project!

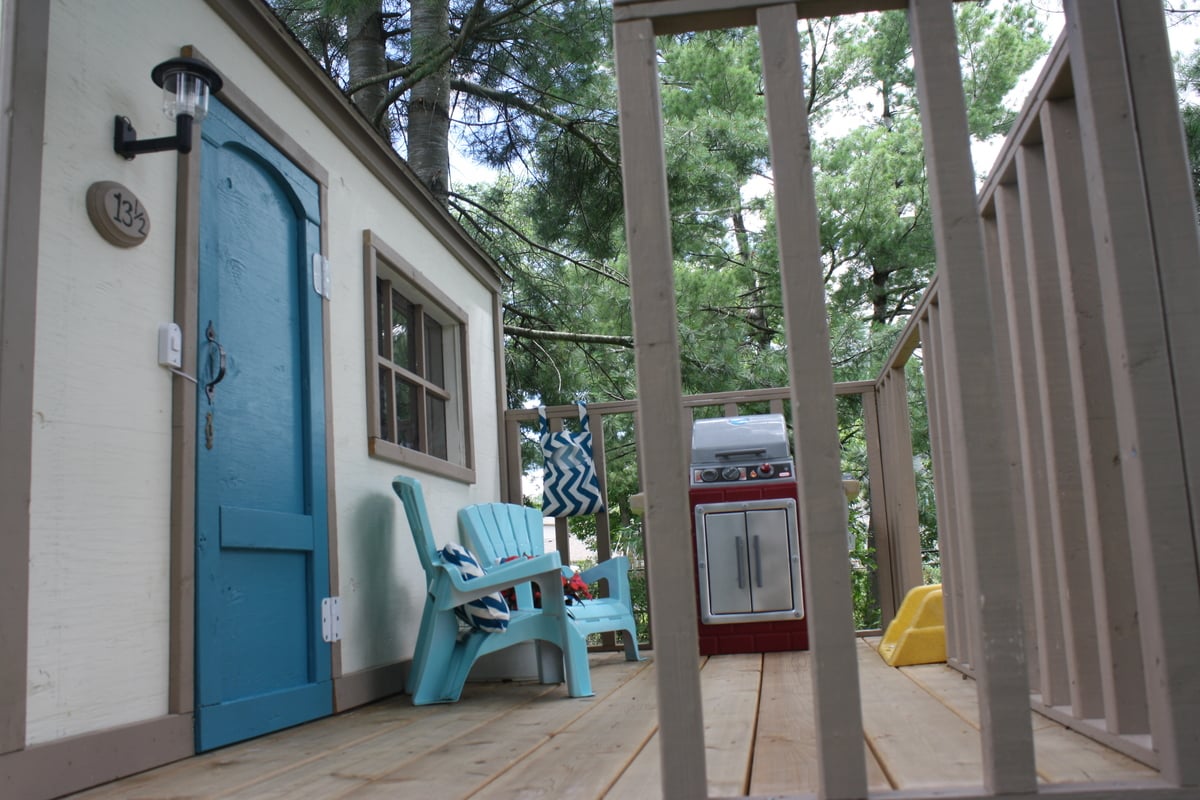
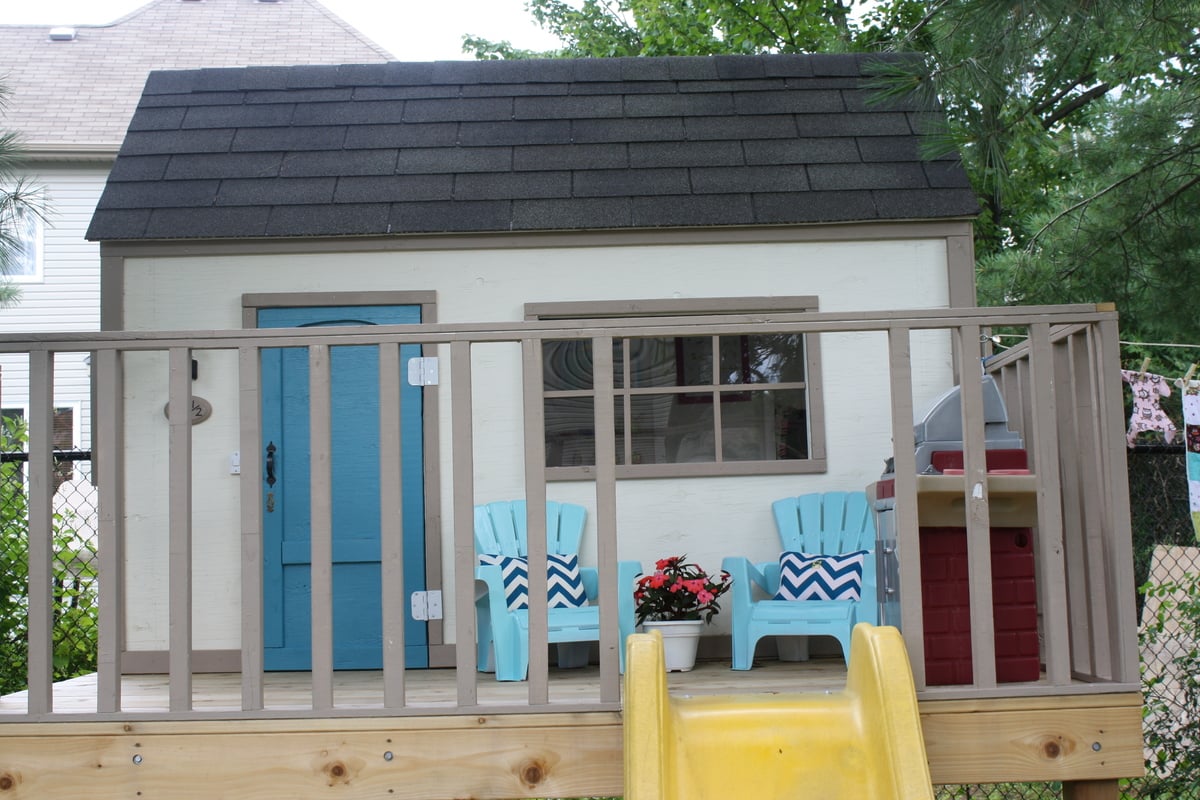
We started this project a few months ago. My husband made most of the construction, and I decorated the inside. We added many little details, including a clothesline, windows with plexiglass, a BBQ, a little kitchen, a doorbell, a solar light, a slide, shelves, a table, a bench, etc. The kids loooooove their new house. The whole project took many many hours, but I am really happy with the results. Thank you so much Ana for the plans!!

Estimated Cost
900 $
Estimated Time Investment
Week Long Project (20 Hours or More)
Finish Used
primer and extorior paint
Recommended Skill Level
Intermediate

Comments

Theresa W

Sun, 07/14/2013 - 17:24

It is beautiful. I can only imagine how excited your kids are to play in this gorgeous space made just for them. Well Done!

LadyBird

Sun, 07/14/2013 - 21:10

Looks like your child has everything they need. Including a phone! I love the bench seat and the pillows with the window. So cool. You put a lot of work into this. Well done.

denaschance2

Thu, 04/03/2014 - 08:23

Love, love it! Couple of questions... how did you attach the walls to the decking and how far apart? How tall is the railing? I'm curious to know the sturdiness of the project overall and my SIL has concerns about the 3/4 roof sheeting over 1/4 walls. Comments please. My son-in-law and I have just started this project.

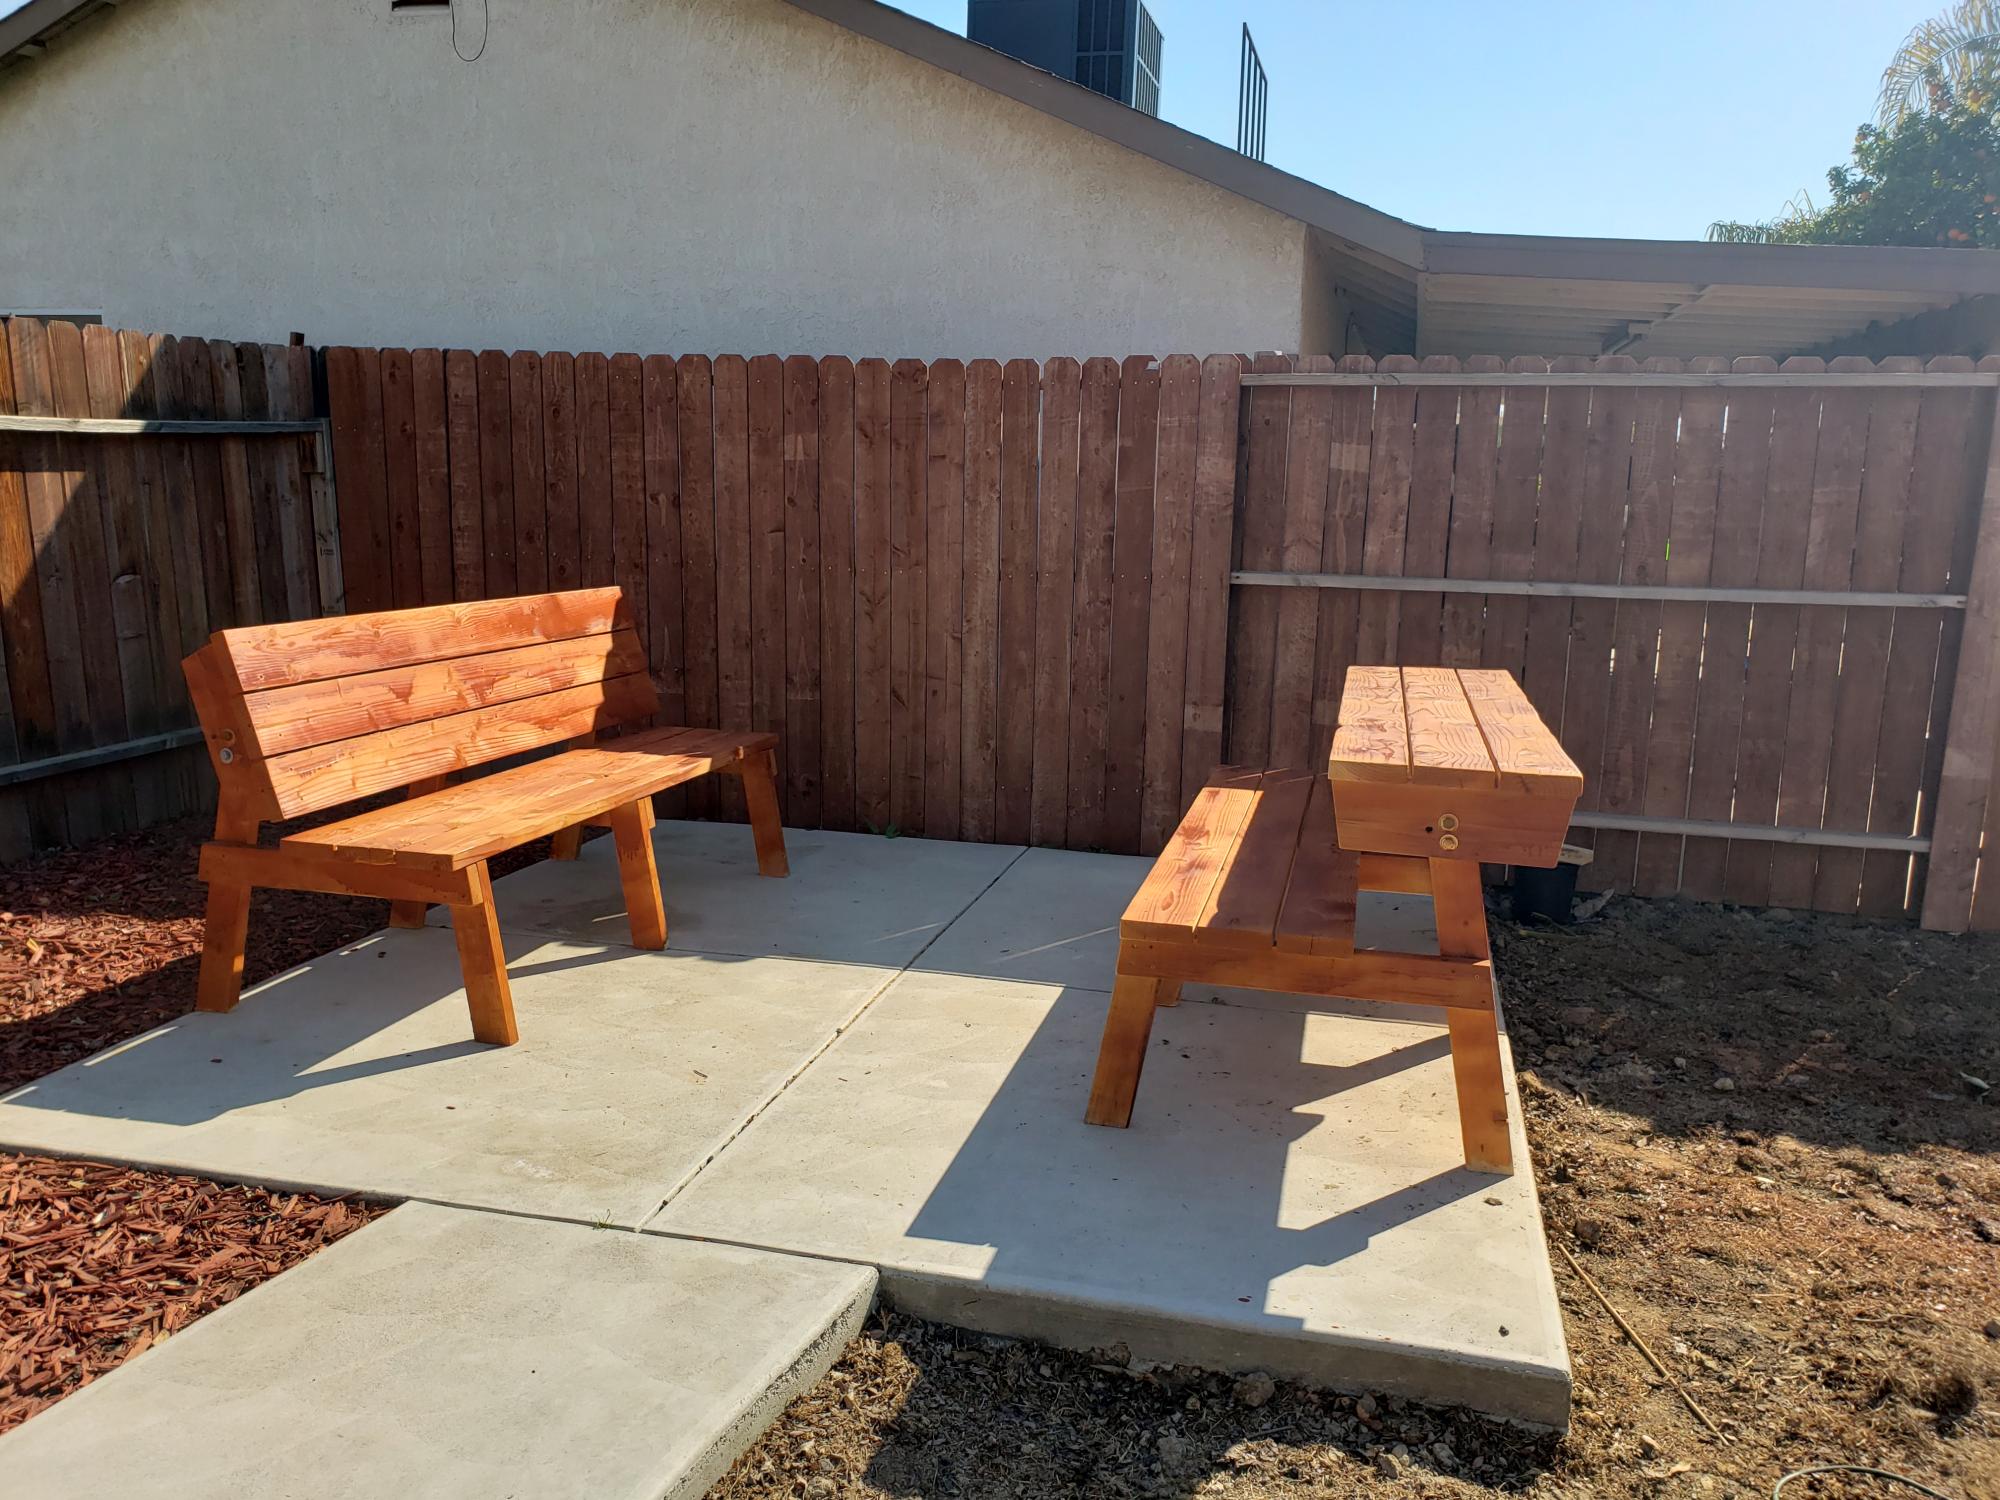
Convertible benches

Submitted by Anonymous (not verified) on Thu, 02/17/2022 - 13:43

We love these benches! We actually just leave one of them in bench form and the other in table form for everyday use.

Comments

Trofast Toy Storage Solution

Submitted by CassieD on Fri, 09/30/2011 - 17:27

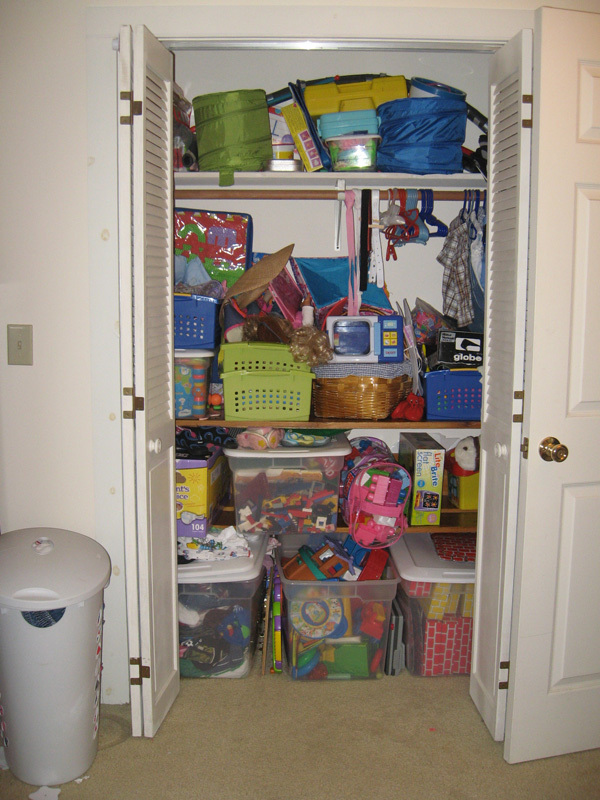
I had been asked a few times for these plans, but as someone else posted a similar one, I'll just stick to a blog post for now and describe my differences. I made this shelving unit January 2010, just after I found out of I was pregnant with my third child, and it's been a lifesaver since then. I desperately needed a toy storage solution (and purging), as shown in the 'eek' kids closet below. I didn't like the shape of triangular Ikea ones, as they spanned more floor space than I cared to give up. Plus, I wanted a place to put *almost* all of my kids toys, so I wanted it to be tall. I'm so glad we did, since we've moved twice (also, 'eek') since than, and it's made packing and unpacking the kids toys super (SUPER) easy. At first, I was afraid that the kids would go crazy and just tear down every bin at once, but it hasn't happened yet. Unlike the other plan that was posted, I used white sliders that ikea sold. I'm not sure if they still sell, as I don't see them online. It cost an additional $24 (they were $1/2), but seemed worth the extra money. I didn't have a router and wasn't particularly confident with our table saw skills. Plus the Ikea version had some really thin areas that made me nervous that it would break easily. I tried to keep it easy and just had to line up and screw the sliders in. Now that I'm a little more confident with a table saw, I'd give the router style a-go. I used two sheets of cabinet grade plywood, each costing about $30. I ripped down some pine boards to cover the front edges, which made the unit look loads nicer. However, I wish I would have used maple, instead of pine as they got dented almost immediately. Not a big deal though. The three shelves were sort of an afterthought, but turned out to be great for puzzles and other type toys. I didn't use backing or cross supports initially, but put some in after we moved. You can see them in the last picture below. The heater in our temporary house caused the slightly-bent sides to become very bent sides. That caused the drawers would spontaneously fall out, which was always quite the shock and disappointment. I put in some supports in the back, which I wish I did initially as it would have made manufacturing easier. Also, If I were to go back, I would put one cross support in the front-middle, as the boards are so tall, it needs something to help maintain the shape in the front. I've found that even in a perfect fitting slider, really heavy buckets would bend just enough to flex out of them to crash... so don't plan on filling one of the large buckets with matchbox cars and sticking it on the top. Regardless, we've learned our lessons, made it work better, and has been a huge success in our house for a while now.
Estimated Time Investment
Weekend Project (10-20 Hours)
Recommended Skill Level
Intermediate

Comments

Supermom77 (not verified)

Sat, 10/01/2011 - 14:22

Great work. Love the colors. Do you have directions on training the kids to put the toys back?

In reply to by Supermom77 (not verified)

CassieD

Tue, 10/04/2011 - 19:42

Haha, I guess a little. Picking up when they aren't motivated is an ongoing battle. However, I did find having a specific place to put items with labels helped a lot, albeit with screaming. Actually the labels would probably be the best motivation of all of it.

The ideal is to have the kids only play with one bin at the time, but with more than one kid, that theory very quickly gets muddled... One child wants to play with one toy and one wants play with another, then "lego houses can't be broken down" and "polly pocket is using those blocks for the house" and so on. So it's more of a end-of-the-day(week/month/year haha) pick-up routine.

However, there seems to be a light at the end of the tunnel. My oldest (almost 6) seems to have caught on that the faster she picks up, the sooner she can move onto other activities besides playing (coloring, playdough, etc.), and is starting to pick up as soon as she's done without us even asking. I think getting an allowance has also helped with that.

That was way more than I thought I was going to comment, but I guess it goes to show you should never ask a Mom her opinion on something, unless your ready for a lecture :)

birdsandsoap

Thu, 10/13/2011 - 21:44

I love that your labels have pictures on them! I thought I should have done that way back when since my children are too young to read. Easy to find and easy to put away. Good job, Mom!

Cedar Fence Board Planter Box

Submitted by iowachap on Sat, 03/15/2014 - 19:40

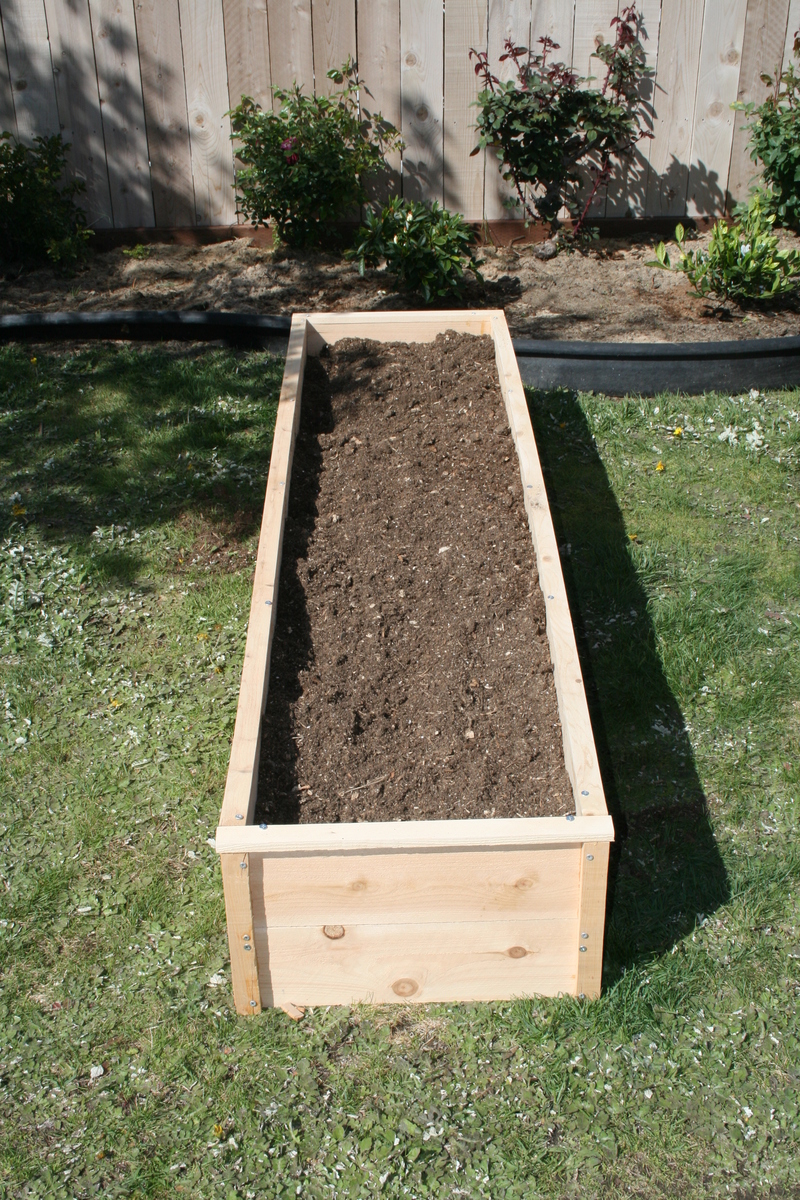
Using Ana's 10 dollar raised garden planter box idea, I made my own using the cedar fence boards and then used 2 x 3 x 8 studs for the L corner supports and mid center support along with top rail. This photo is the first 3, I will have a total of 6 boxes. Will post more as I progress.

Estimated Cost
20 to 25 dollars per box
Estimated Time Investment
Afternoon Project (3-6 Hours)
Finish Used
I used 6 fence boards, 2 for each side of the 6' long runs, and 1 for each short 3' section cut in half.

I got the 6' x 5 1/2 " x 5/8 " cedar fence boards at the orange box

I used 2 x 3 x 8 boards for the corners the middle support and the top rail. I got these at the blue box

I used 2 " and 2 1/2" exterior star bit screws.

NOTE: I pre drilled holes in the fence boards and screwed all the boards to the L corner sections from the inside out, so the screws are on the inside of the box, they did not poke through the 2 x 3 boards.

Instead of trying to measure how far off the side of the board I needed to go to match the vertical 2 x 3 boards, I just cut 10 11 inch long 2 x3 sections, and then used the 2 1/2" screws and made 4 L corner pieces the shorter side I screwed the short 3 foot length fence boards too, once I had both my short sections screwed to the L corner sections, I then stood one up and screwed 2 of the 6' length boards to the L corner section. Then the other side.

Once all 4 walls were done, I would then measure 3' in the middle of the 6' long side runs, and put in an additional 2 x 3 x 11" again screwed from the inside of the box out.

Now that all the 2 x 3 x 11" L corners and side support sections were connected to the fence boards I then cut 76 1/4" 2 x3 boards one for each length run, and then 2 26" 2 x 3 sections that were all cut on 45 degree angle to complete the top rail.
Recommended Skill Level
Starter Project

Weathered Gray Fancy X Farmhouse Table With Extensions

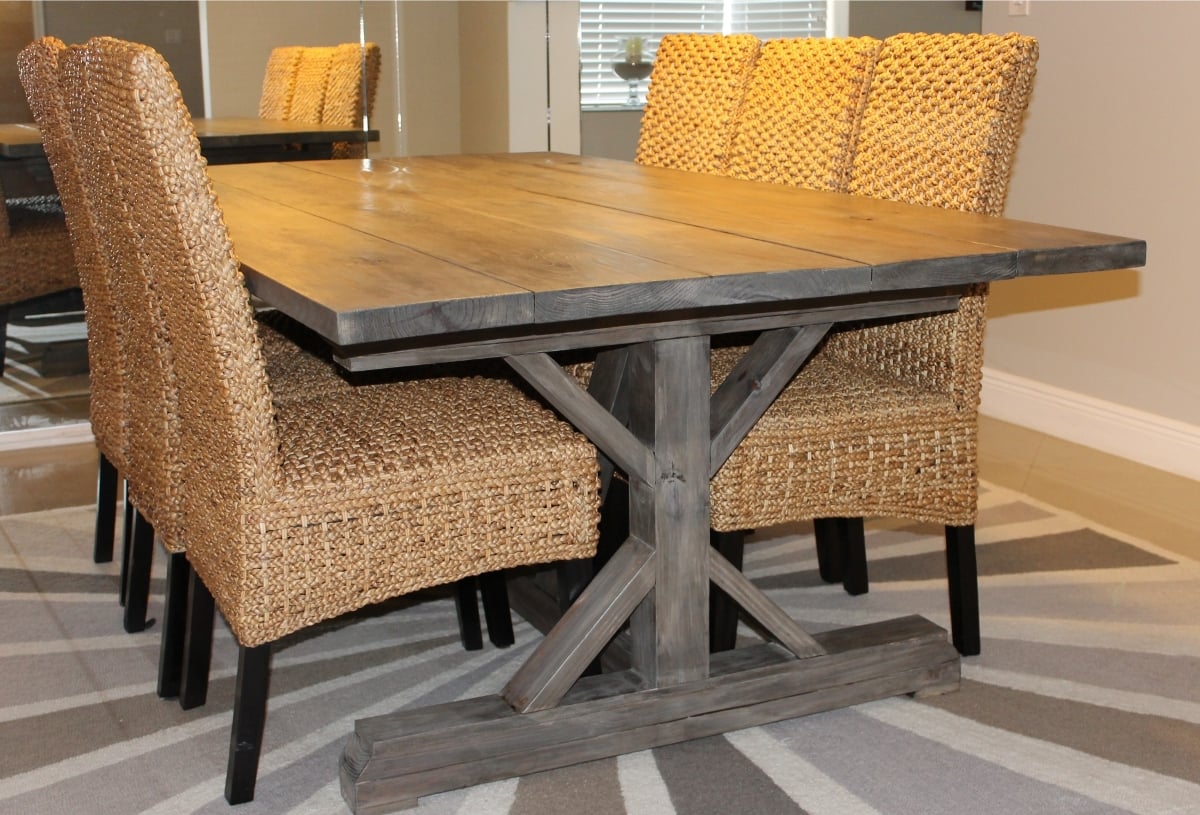
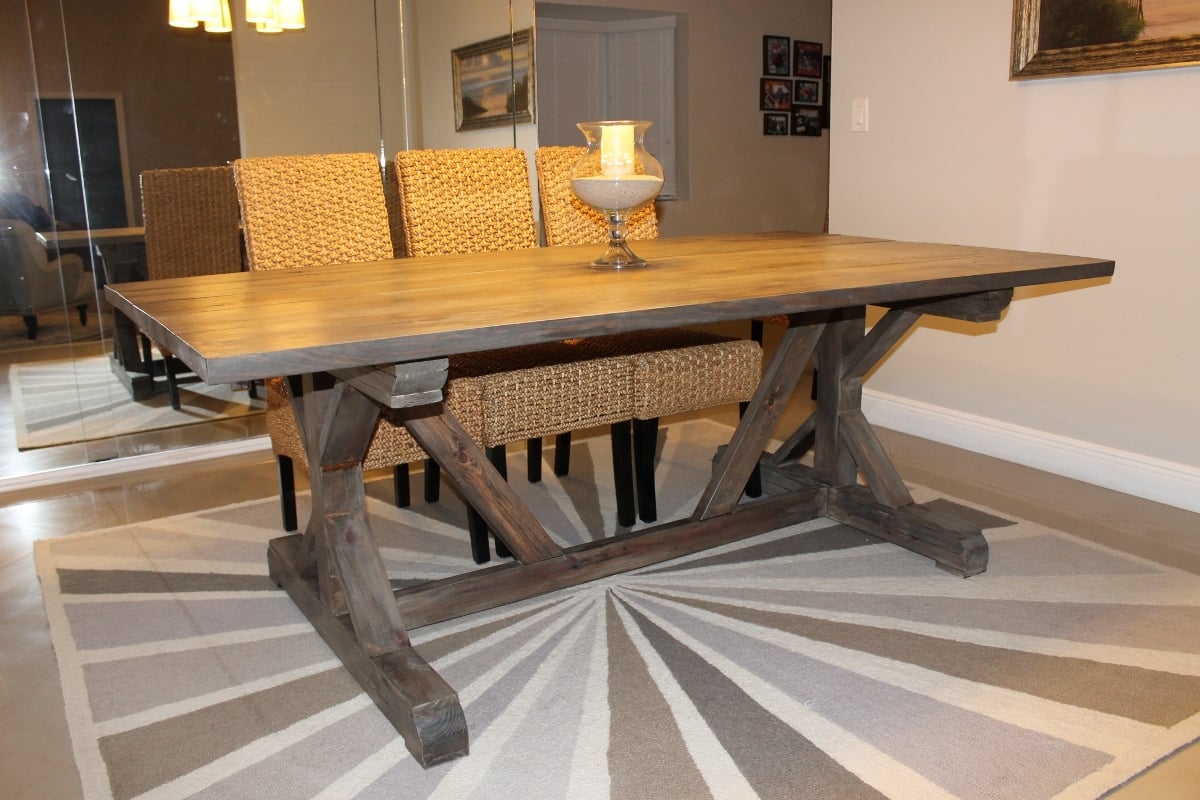
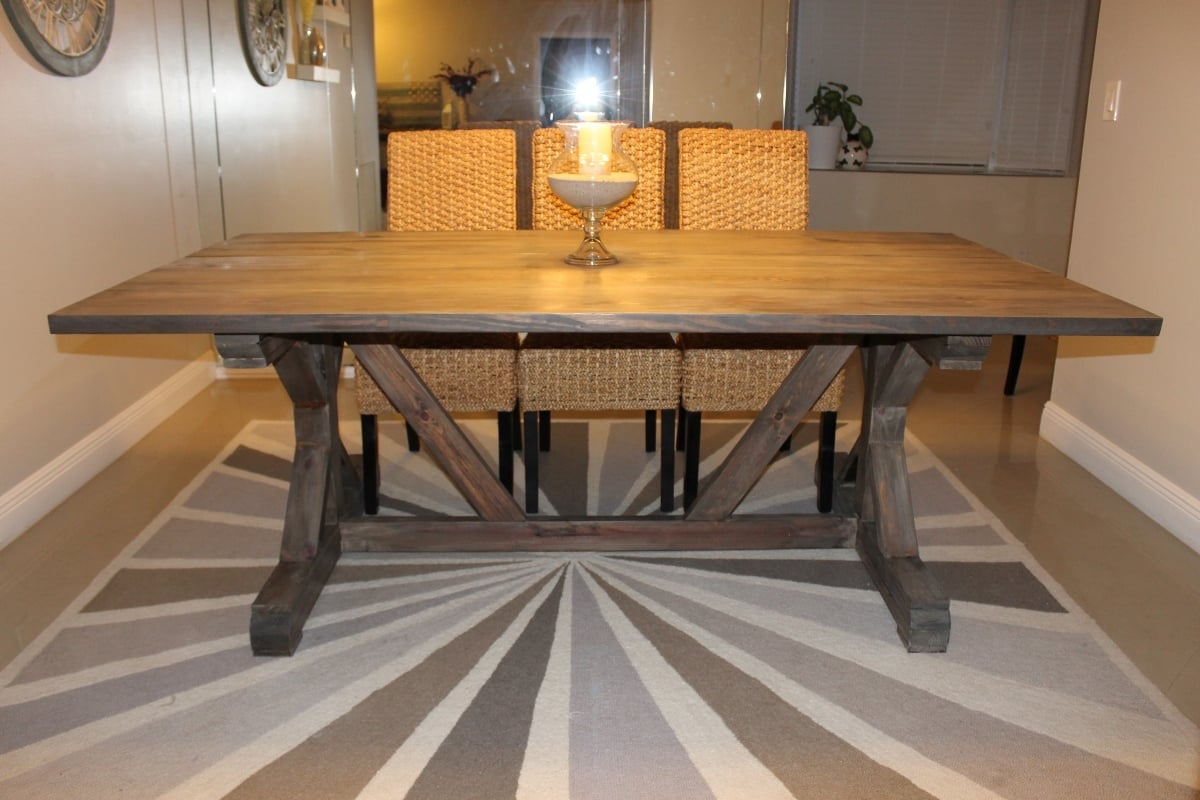
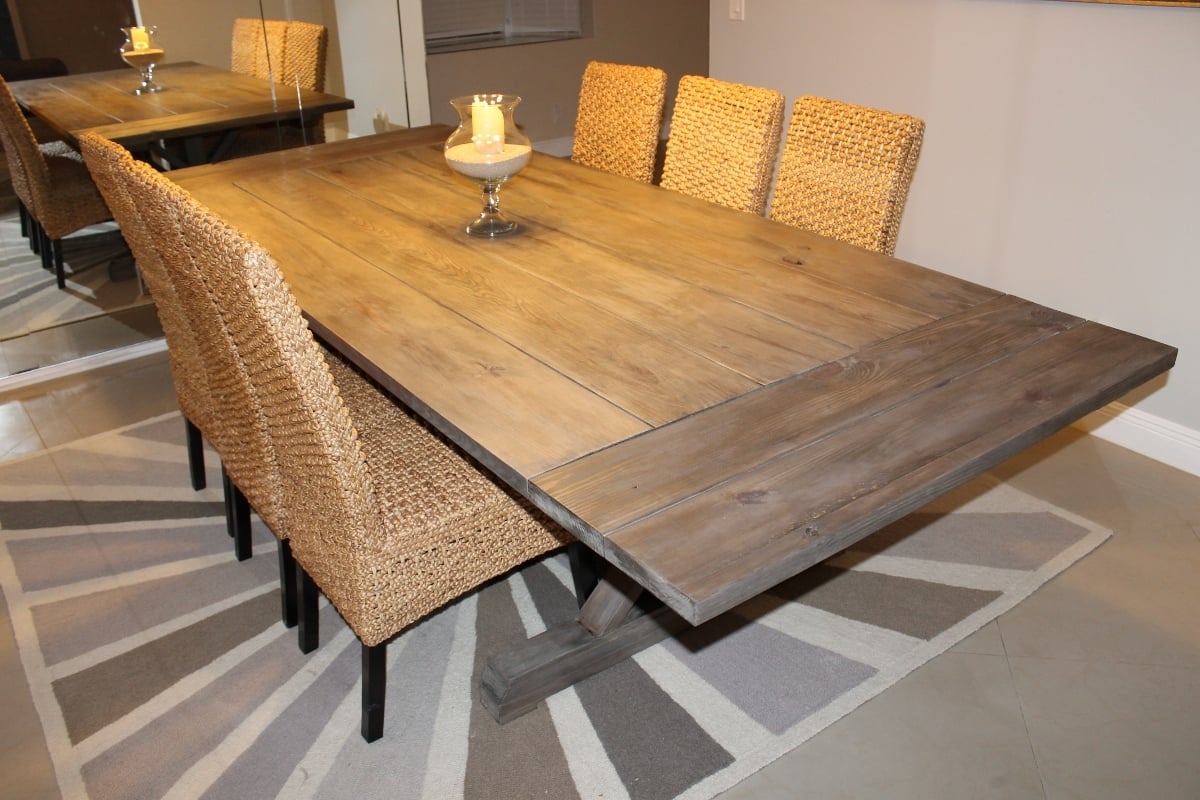
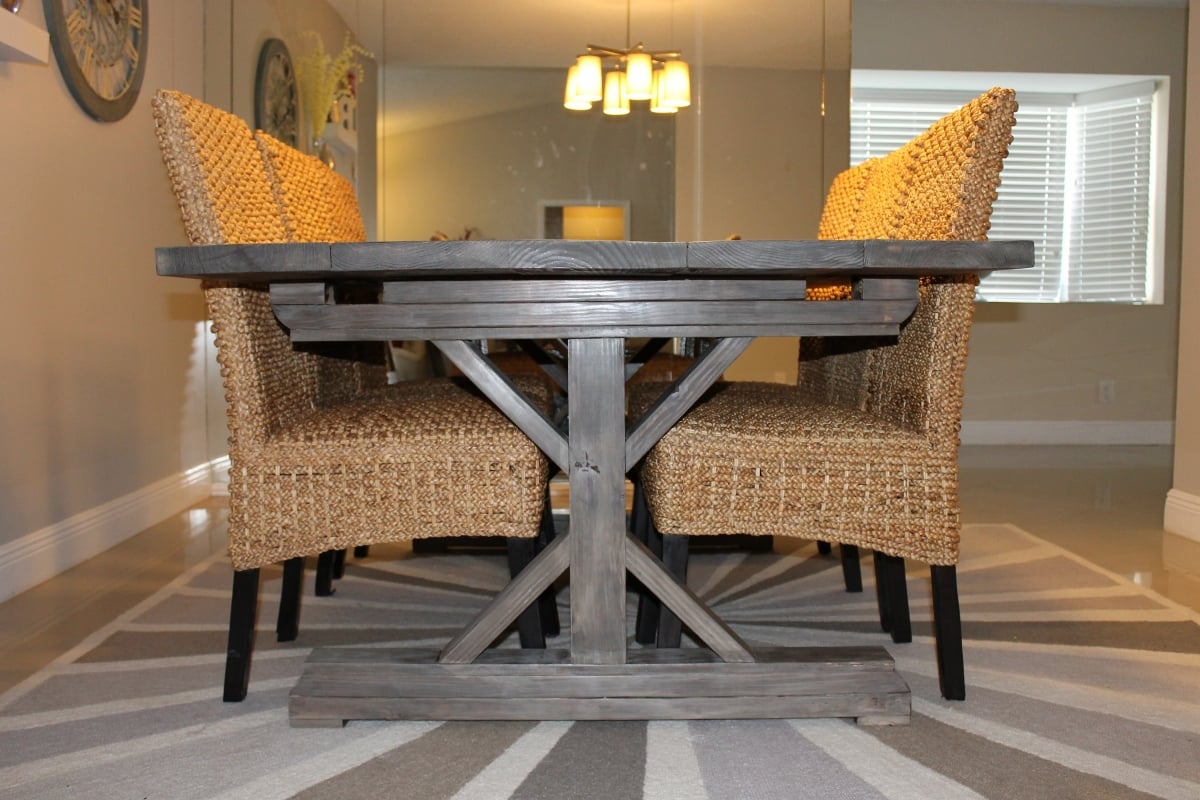
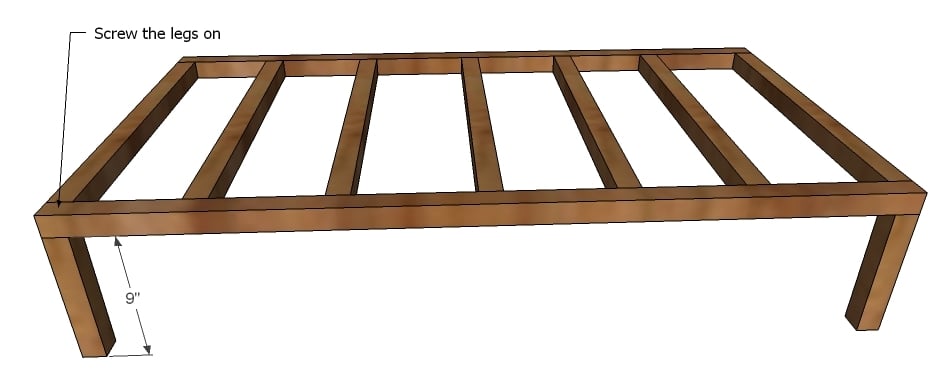
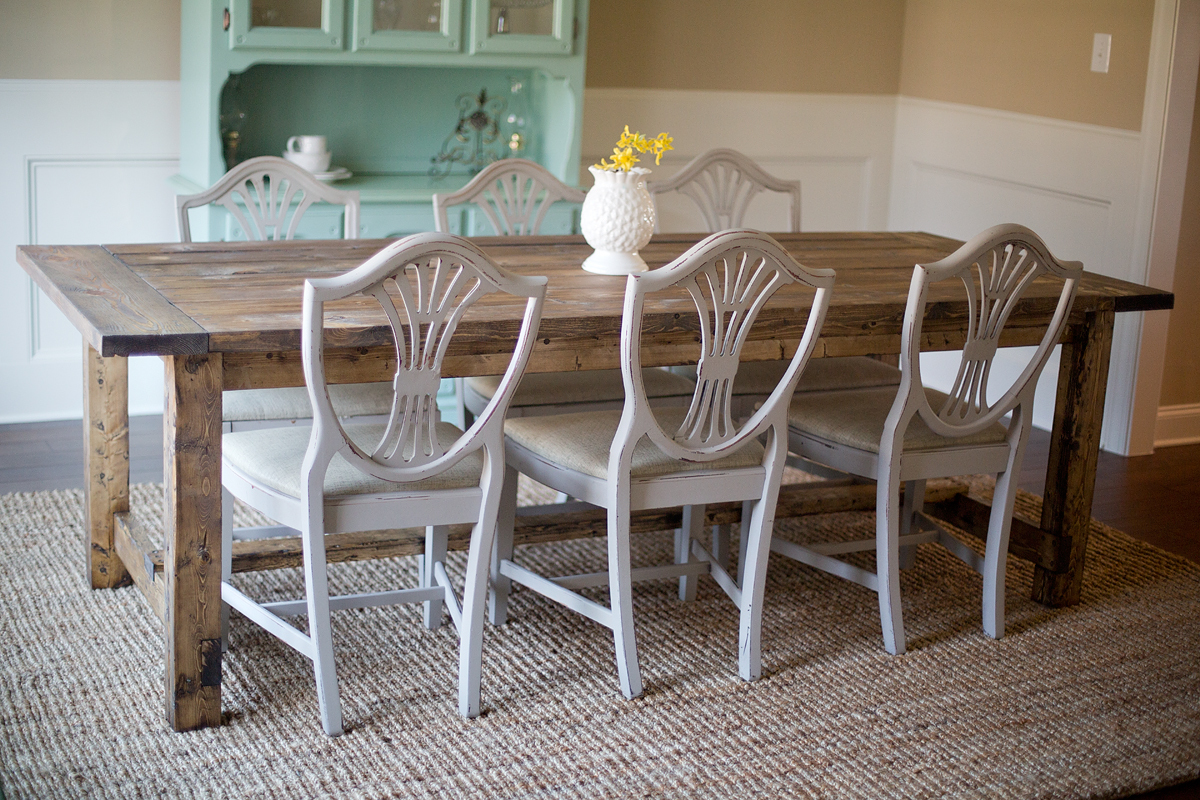
This is our attempt at the Fancy X Farmhouse Table. My husband and I built this over a weekend. We modified our table from the plans, making ours shorter and wider. We also added extensions and changed out a few boards for a bit of a different look from the exact plan. We created a custom finish with a few cheap and easy steps to get the look we wanted. Our table is 84" long by 46" wide. The original plans for the table called for it to be 96" long by 37" wide. We added a fifth board to our table top, thus making our tabletop 9.25" wider (since a 2x10 is actually 9.25" wide.) To account for this, we simply increased the width of the base boards by 9.25". As for the length, since our table was 12" shorter than the plan, we decreased the length of the two support boards running between the bases by 12" to account for that. We had to adjust the length of our decorative pieces somewhat, because of the wider base and shorter length. It was bit of trial and error but we were happy with what came out of it. For the center base post, instead of using 2x4's we used one 4x4 which was clean, square, and straight. We were happy with how things turned out for the base. Perhaps our biggest alteration was the fact that we added extensions to each end. To do this, we cut out 3.5" slots in the top of the base so a 2x4 could slide in. We then took two 2x8's and used pocket holes to bring them nice and tight. With the extensions in place, our table is nearly 10 feet long! As for the finish, we wanted a weathered gray color and were able to come up with it through a three step process. Its really beautiful in person! Thanks again for the plan

Built from Plan(s)
Estimated Cost
$80-$100
Estimated Time Investment
Weekend Project (10-20 Hours)
Finish Used
Custom!
Recommended Skill Level
Intermediate

Comments

Darcy Taylor (not verified)

Tue, 08/07/2012 - 03:10

Could you possibly give me a detailed explanation of how you finished this table? I love, love, love the color and want to replicate it.
Thanks!
Darcy

Jennifer Nealy (not verified)

Tue, 09/25/2012 - 09:06

Beautiful table, but I really want some information on the 3-step process you used to get the weathered gray look. Can you please provide that information? Thanks!

SawgrassHomeGirl

Sun, 04/07/2013 - 20:40

Thank you for your interest in the finish....we used regular pine from Orange and Blue. We used a mixture of steel wool and vinegar in a glass jar, let it sit for a night or two, then brushed it on evenly over each board. We then let that sit for a night or two and then proceed to whitewash the entire table (two parts water one part paint.) After that, we took Dark Walnut Stain and wiped it over each board, then quickly wiped/scrubbed it off after just a minute or two. That's how we did it!

Id suggest practicing first with some scrap , esp. with the steel wool mixture so you can see how the wood changes. :)

FLKS

Fri, 09/23/2016 - 15:24

Hi Emily! 


        I love your table. We are about to make one and love your stain. Would you be so kind to give me details of what you used to achieve the look? I read the above post, but could you give me brands and colors? I don't understand what is steel wash- is that the color? 

Thank you so much!


FLKS

ajdriscoll08

Mon, 09/09/2013 - 11:40

but when we brushed on the steel wool/vinegar mixture, the holes on the table top and base that we had filled in with putty didn't really stain...did you run across the problem? I don't see any areas on the top of your table where you can tell where the holes were??

rmf

Wed, 04/09/2014 - 09:05

I'm curious if you made the extensions permanent or if they can be removed and added as you need? I love this table!
Thanks,

Jenni2526

Wed, 08/13/2014 - 11:50

I am not understanding how you made the extensions from your description and then looking at the end pictures... Would you please explain this a little further and how they are stored and placed for use and how this works? Thank you!

Ren.K777

Tue, 10/07/2014 - 17:39

LOVE the finished product! I aim to get the hubby to make this one at some point!  But for now, we have just a bench in our kitchen that he made and I'd like to apply the same finish you did.  I've looked at a bunch of different tutorials but I like yours the best.  Here's the question...how long after I apply the paint/water mixture to I apply the walnut stain? Do I apply the water/paint and wipe off right away?  A few seconds later?  A minute later?  Do I allow the applied/wiped water/paint mixture to dry completely before adding the stain or do I want to apply the stain before it's throughly dry so that it mixes a bit for a softer look?  Thanks so much!  


Nesting Office Station

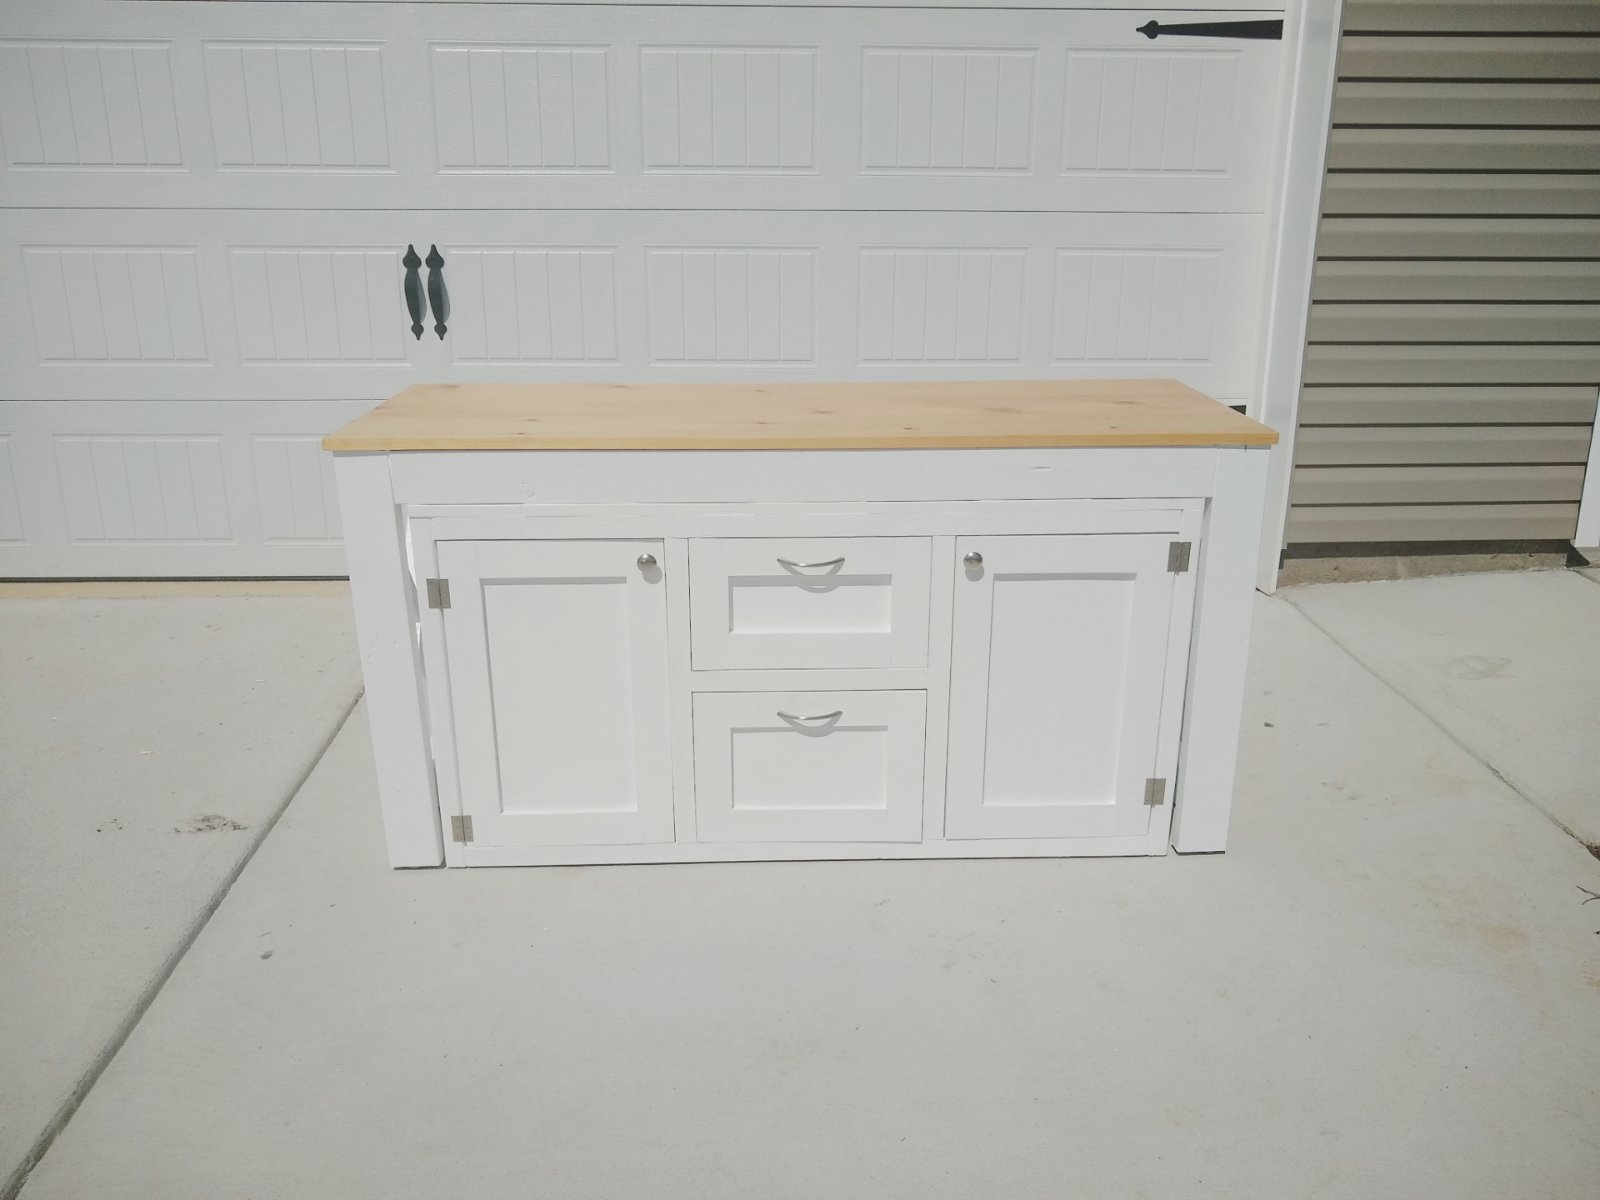
Submitted by Sb1212 on Tue, 07/14/2020 - 18:38

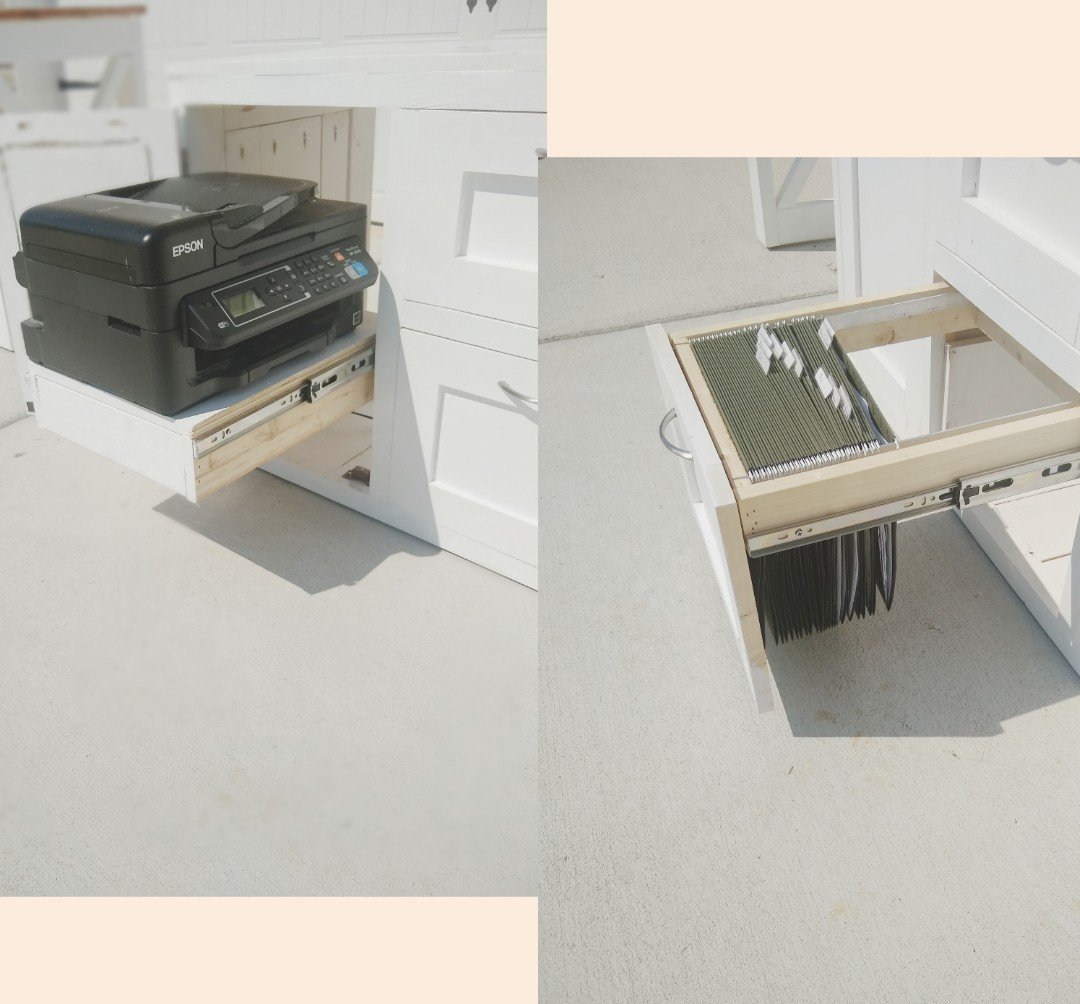
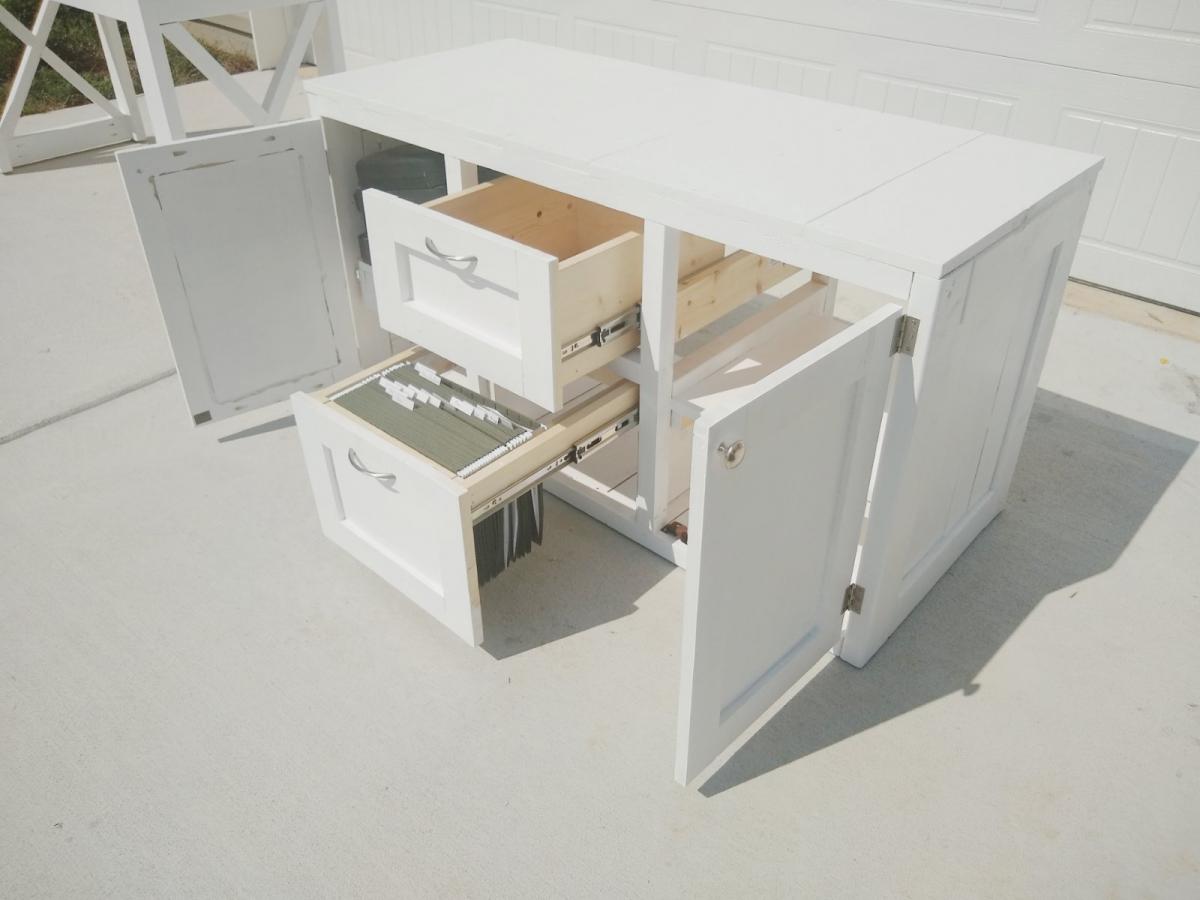
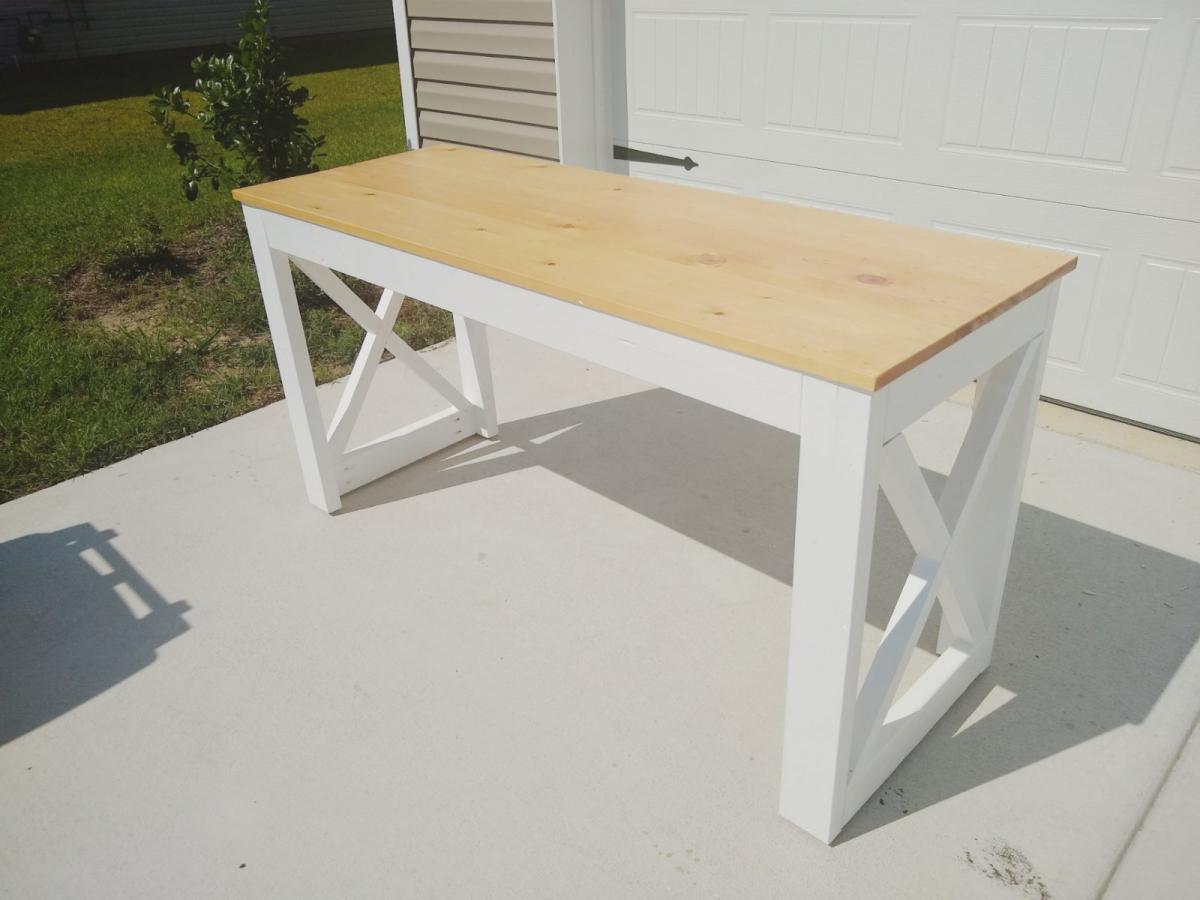
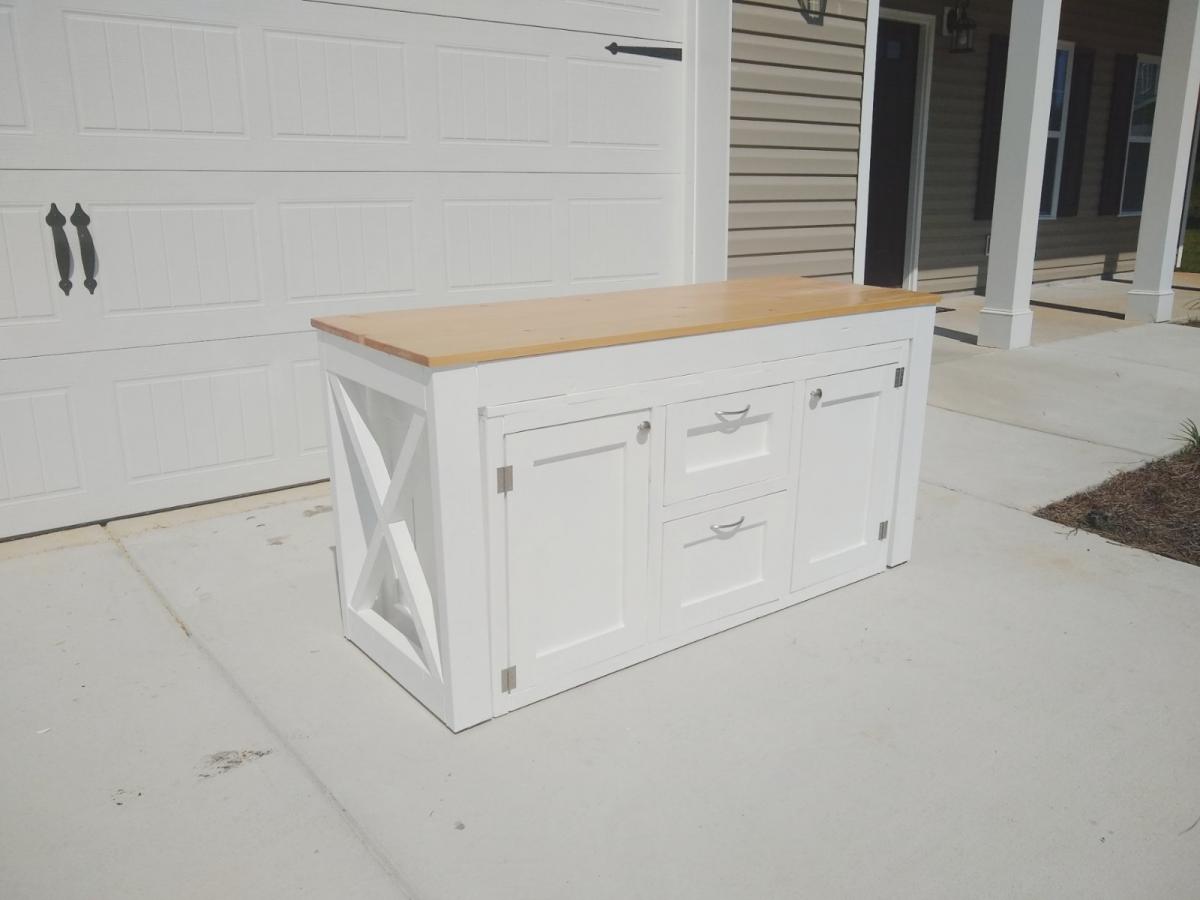
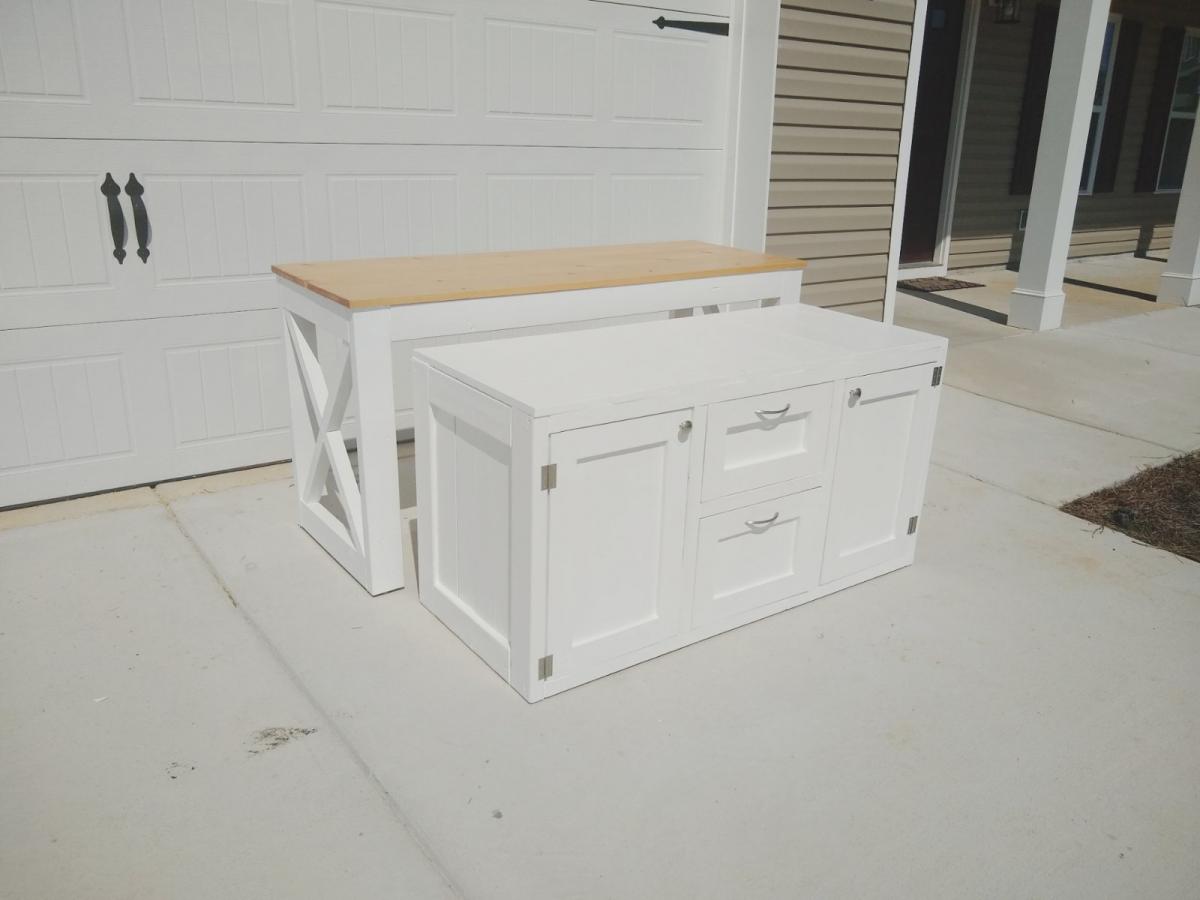
So loving this nesting office station❤️! We will have a sofa sleeper in the office as well. So we needed a desk that could be moved to the wall when the sofa sleeper is being used by guest. I saw a post from Ana for her Nesting Grill Station and I came up with the idea to make this nesting office station. The cabinet includes a file folder drawer (which is from Ana's mail boss plans), a regular drawer, cabinet doors with shelves. One of the shelves is a pull out shelf for the printer. I think it came together great! Design for nesting desk inspired by these plans: https://www.ana-white.com/woodworking-projects/nesting-grill-station https://www.ana-white.com/woodworking-projects/mail-boss

Estimated Time Investment
Weekend Project (10-20 Hours)
Finish Used
Minwax Golden Pecan
Valspar Signature Ultra White in satin
Recommended Skill Level
Intermediate

Comments

Sb1212

Sat, 10/03/2020 - 08:35

Hi, Thank you! Actually I didn't add wheels to the design since this will be in an office with thick carpeting. I added adjustable metal foot pads to the bottom of the desk.

Converted TV wall niche

Submitted by Vol4Life1 on Tue, 12/13/2016 - 05:35

We bought this house about a year ago and we finally got around to removing this pointless niche!  The center divider and bottom were removed.  The cabinet and hutch were assembled seperately.  


This is still a work of progress.  I am looking for a nice decorative molding face for the top.  If anyone has any suggestions please let me know!  We will most likely paint it white to match the fireplace mantle.

Estimated Cost
300
Estimated Time Investment
Week Long Project (20 Hours or More)
Finish Used
Paint
Recommended Skill Level
Intermediate

Mantel Moulding Headboard with Variations

Submitted by wyosharon on Sat, 10/11/2014 - 19:56

As suggested at the beginning of the instructions, be sure to read through the entire set of instructions before shopping and making this headboard. The parts lists calls for 3 - 7ft pieces of moulding. However, we needed more than three to do the finishing touches. Also, none of the mouldings suggested were at our Home Depot, so we improvised. Cutting some of the mouldings to go around the corners was too challenging for us, so we ended the moulding strips at the end of the bed. To give the ends a finished look, we used some of the 1/4" plywood, cut them, and sanded them. Be sure to sand all the surfaces. The instructions tell you how long to cut some pieces, but they don't say whether the board is supposed to be a 2X4 or 1X6, so be sure to go through the directions thoroughly before starting and cutting. We did use spray paint, and it took more than three cans to provide sufficient coverage, since the wood soaked up much of the first layer of paint.

Built from Plan(s)
Estimated Cost
$150-$200 depending on the types of moulding and paint/stain used
Estimated Time Investment
Weekend Project (10-20 Hours)
Finish Used
We sanded all the surfaces prior to painting. The first coating of spray paint soaked into the wood quite a bit, so we added another three coats of spray paint. The dry time adds some extra time to the complete project. We needed nearly four cans of spray paint.
Recommended Skill Level
Intermediate

Farmhouse Table

Submitted by ssshindler on Fri, 11/07/2014 - 05:39

This is my first project and I am thrilled with how it turned out. Thank you Ana, you have empowered this stay at home mom! 

Finish Used
minwax dark walnut stain, polyvore wax varnish
Recommended Skill Level
Starter Project

Comments

sagey

Sun, 11/09/2014 - 18:41

I  love this table sooooooo much .

please explain exactly how you achieved the finish on it > is the wood reclaimed!!!!

sagey

Sun, 11/09/2014 - 18:42

I  love this table sooooooo much .

please explain exactly how you achieved the finish on it > is the wood reclaimed!!!!

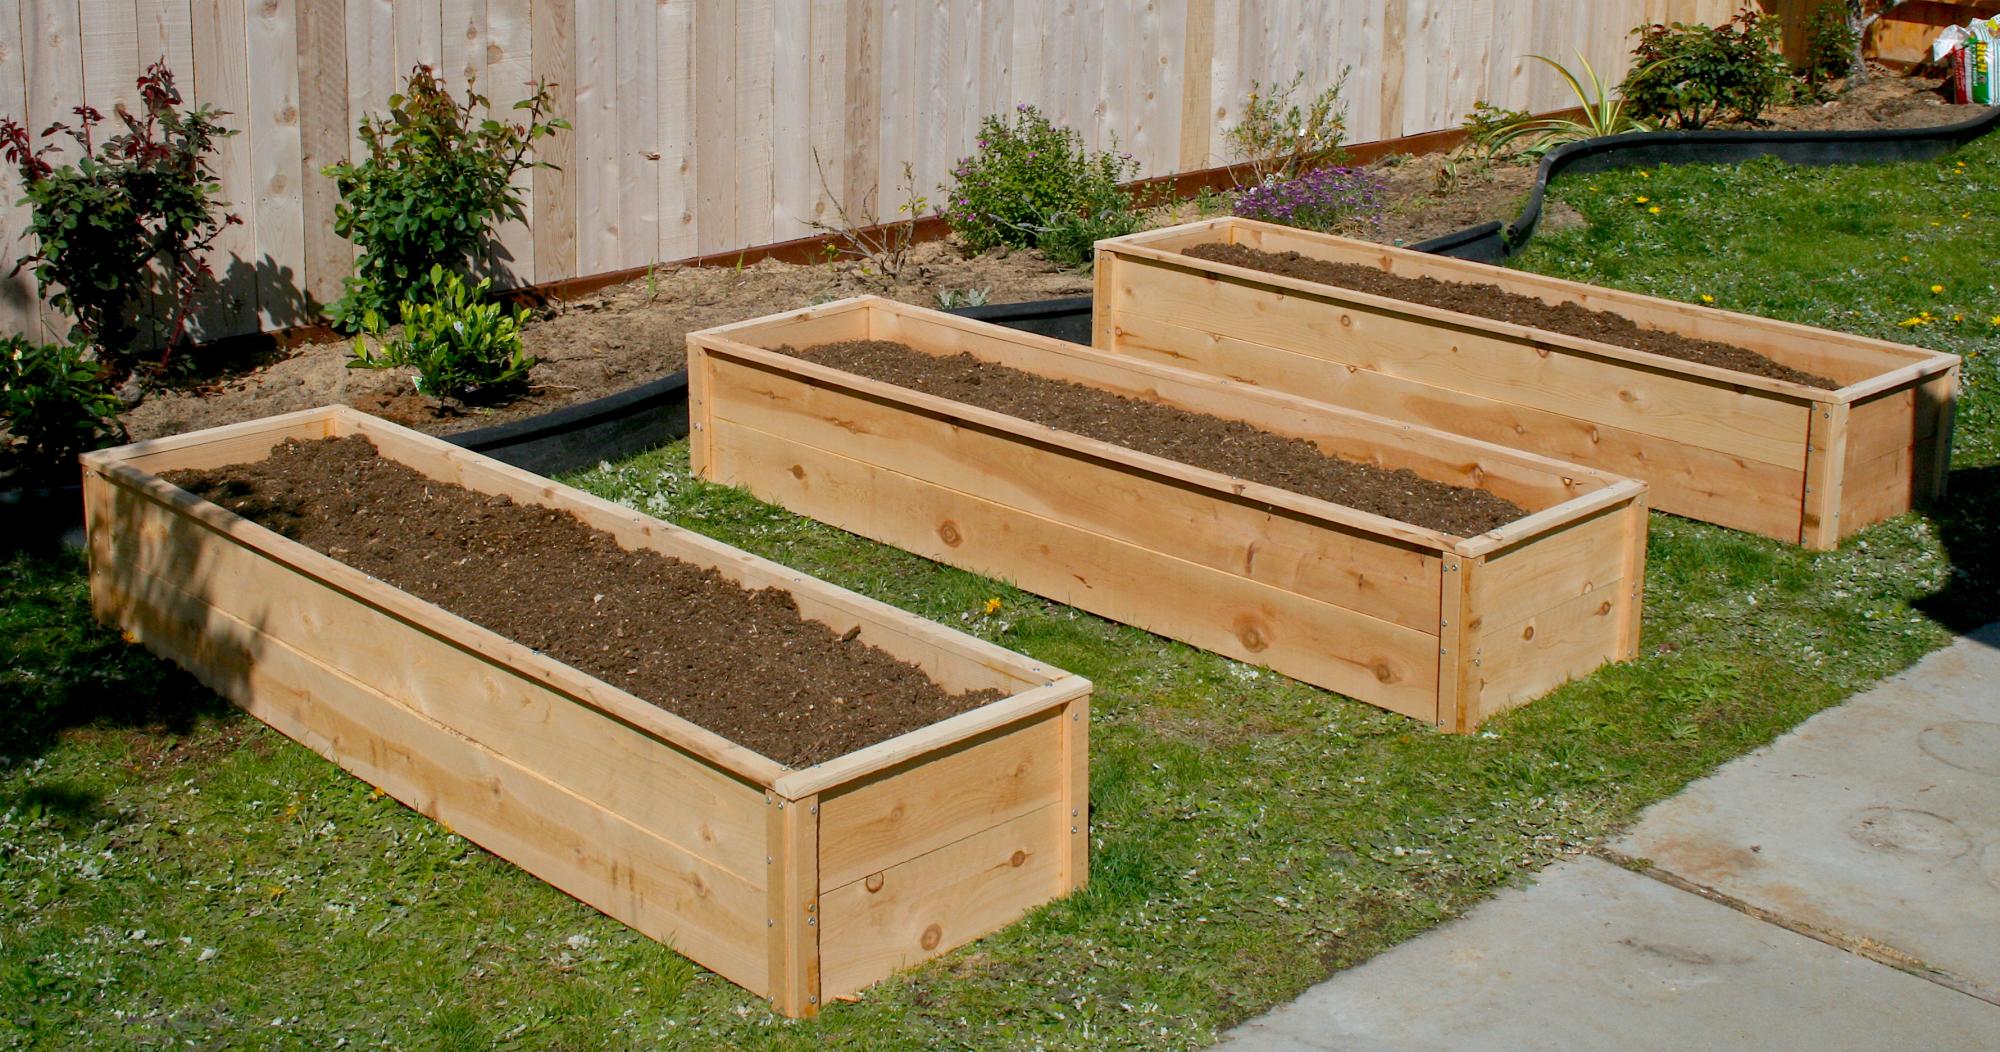
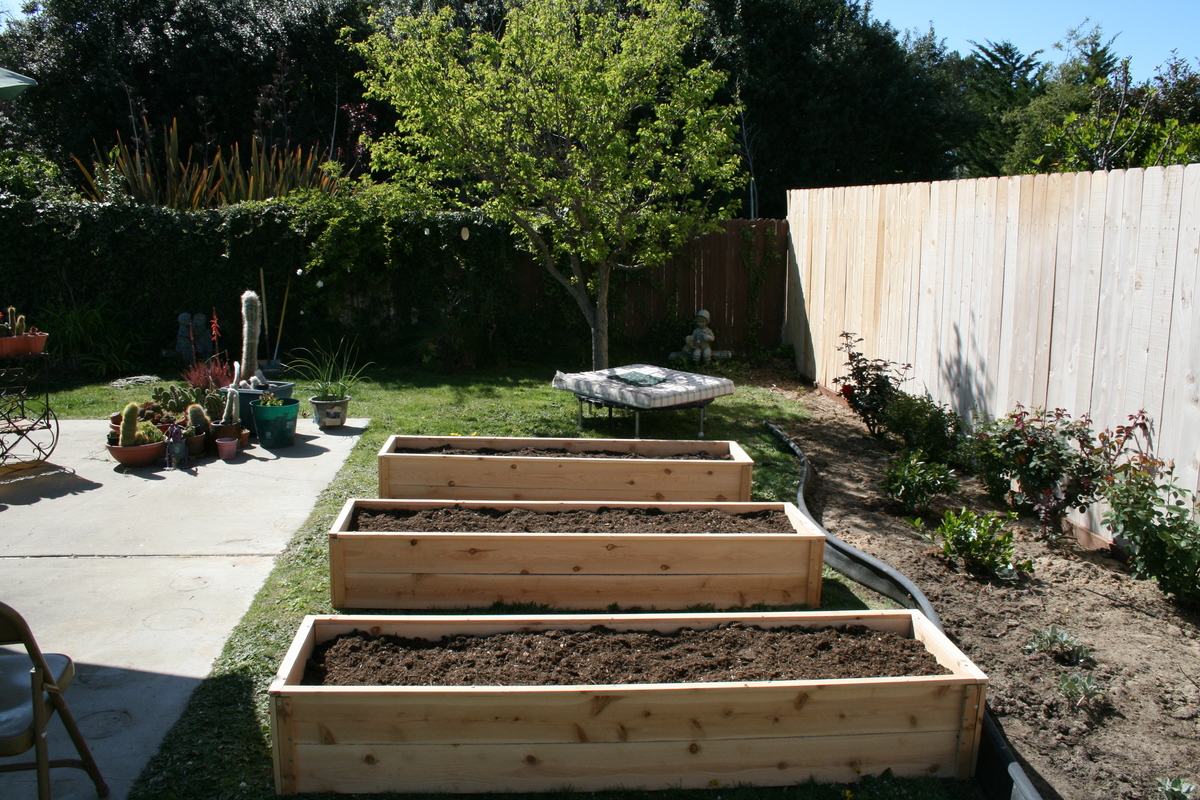
Cedar Fence Picket Raised Garden Beds

I made these for my 81 year-old Grandma, and I will be making some for my own front yard soon. I followed the plans and ripped the fence boards instead of buying the optional 1x2s. My awesome dad showed me how to use the table saw, but the rest I did all by myself! We decided to leave them unfinished for a natural look. It took me about 7 hours total broken up to make all three, but this is my first project and I was slow. Thanks Ana, for inspiring this working Mom to pick up a hammer and get stuff done!
Estimated Cost
$13 per bed in fence boards
Estimated Time Investment
Afternoon Project (3-6 Hours)
Finish Used
Left unfinished
Recommended Skill Level
Beginner
Seasonal And Holiday

My First Greenhouse

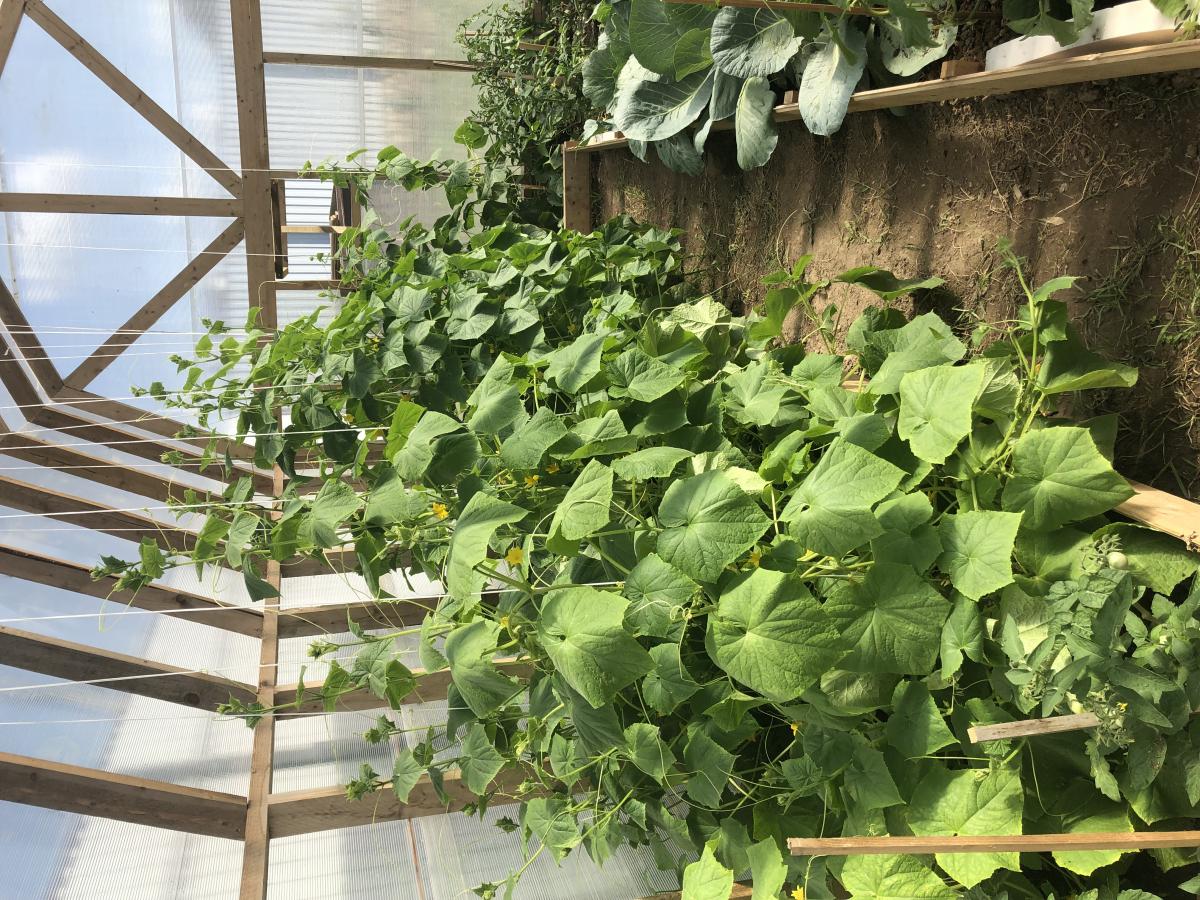
This was my first attempt at building a greenhouse. I wanted my cucumbers to be able t climb high so I made the house higher than the plans showed. It's also a little larger too. Since I am in Europe my dimensions are in meters. The overall size is 3 x 6 meters. I also built it on top of 100mm x 100mm lumber (the equivalent of 4x4's). It took 5 sheets of 6mm thick polycarbonate in 2 x 6 meters.
Built from Plan(s)
Estimated Time Investment
Week Long Project (20 Hours or More)
Recommended Skill Level
Intermediate

Comments

Simple Square Outdoor Table

Submitted by hannant on Mon, 08/07/2017 - 15:10

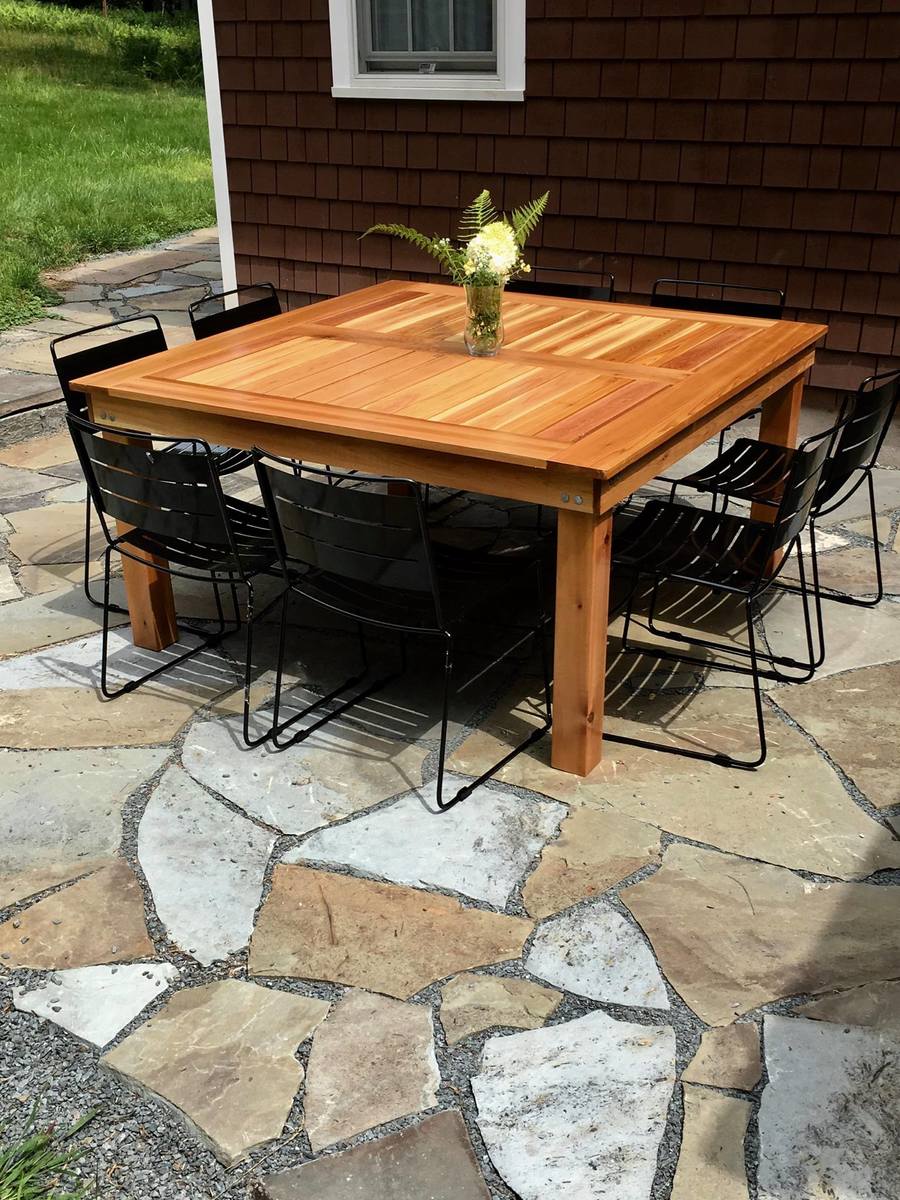
Inspired by Finn's Dad's table, we decided to copy it since we wanted to build a table that would seat 8 comfortably. The most difficult part of this project was finding clear cedar for the top. It had to be ordered through our local lumber yard and we were not able to match boards. We built the frame out of treated pine and the 4 x 4 legs from average greade cedar found at Lowe's. We finished it with four coats of polyurethane. 

Built from Plan(s)
Estimated Cost
$300-$450
Estimated Time Investment
Week Long Project (20 Hours or More)
Finish Used
Zak Polyruethane marine satin
Recommended Skill Level
Beginner

Pet Stairs

Submitted by alli2410 on Tue, 03/13/2018 - 06:26

I needed sturdy stairs for my 2 60lb dogs.  My bed is 33 inches from floor to top of mattress.  So, this is my very first project completed by myself!  Custom size pet stairs 24inx24inx24

Estimated Cost
$40-50
Estimated Time Investment
Afternoon Project (3-6 Hours)
Finish Used
Minwax polyshades Espresso gloss (3 coats)
Recommended Skill Level
Starter Project

Comments

Farmhouse Dining Room Table and Bench

Submitted by dpero on Sat, 10/10/2015 - 18:46

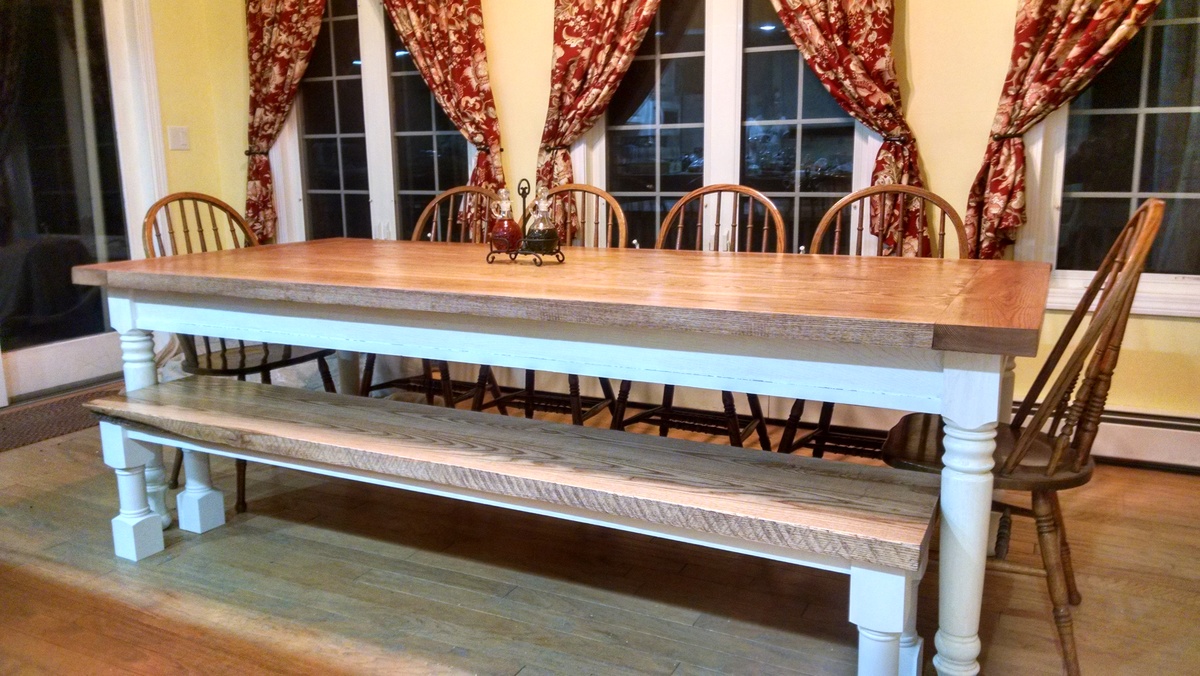
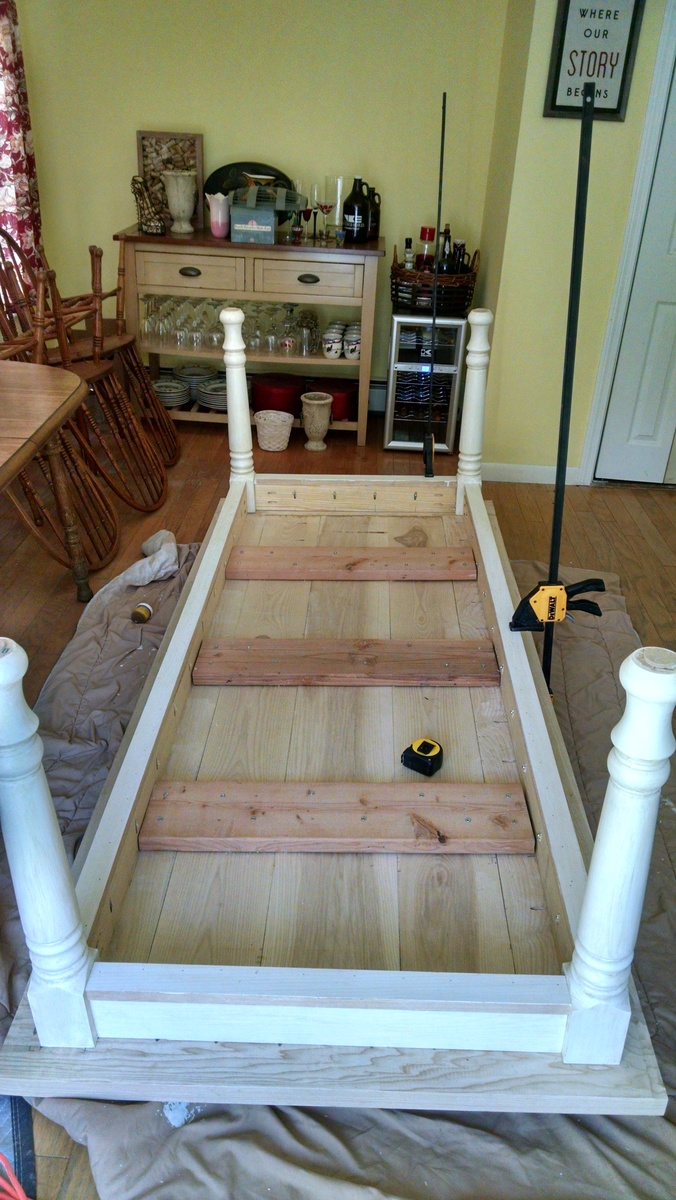
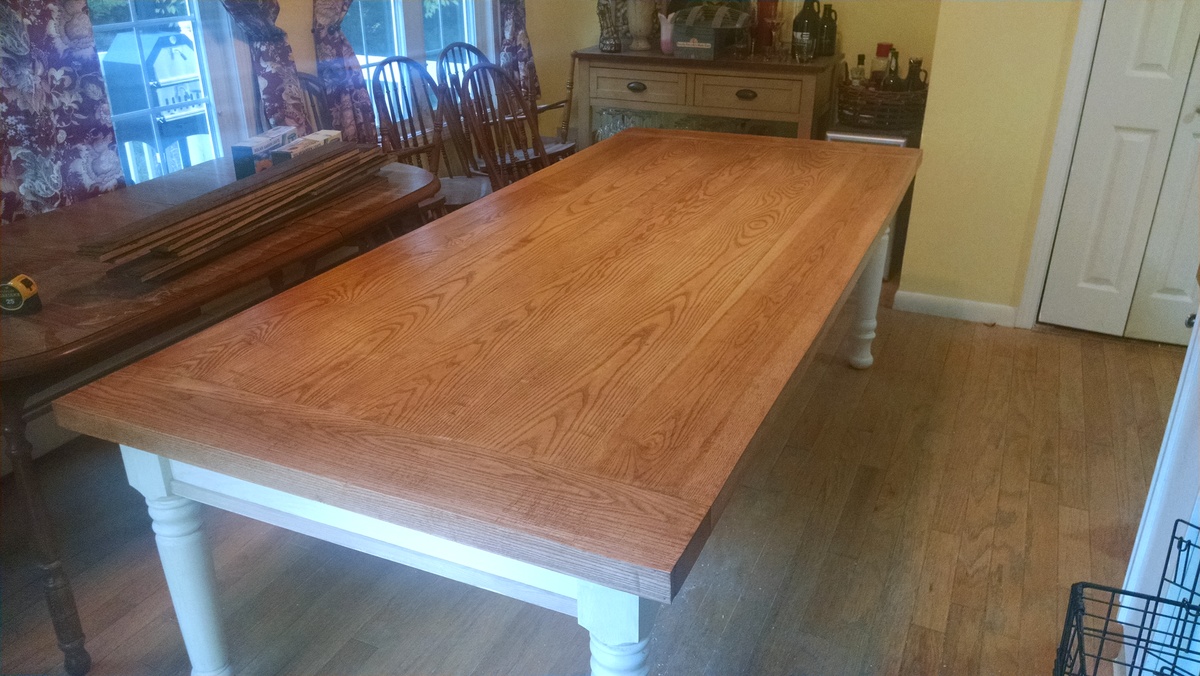
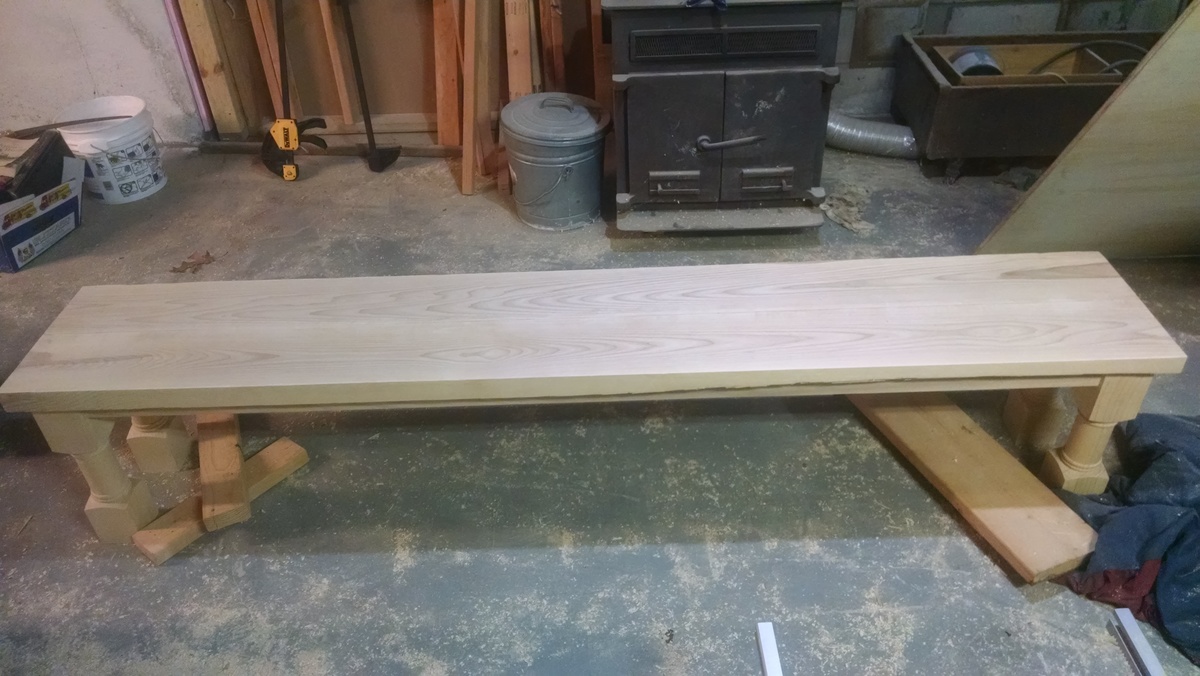
This table is massive with the top being 96" x 42" and 2" thick and sitting 31" high.  The table can be done in a weekend and the bench was assembled the same way as the table out of scraps and was finished in about 4 hrs.  

Built from Plan(s)
Estimated Cost
$700
Estimated Time Investment
Weekend Project (10-20 Hours)
Finish Used
Miniwax Cherry for the tops and white paint with faux glaze for the distressed aprons and legs.
Recommended Skill Level
Intermediate

Comments

Bathroom Cabinet

Submitted by Smokeydog on Wed, 11/11/2015 - 10:58

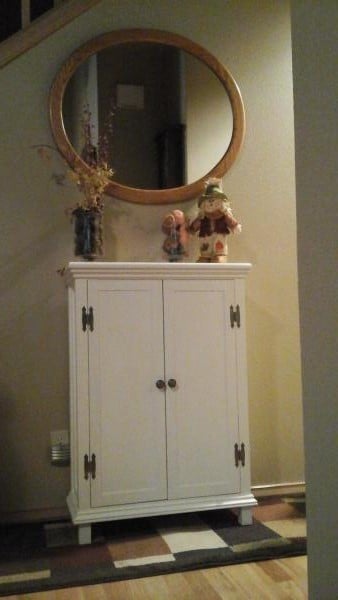
I built this cabinet for a little additional bathroom storage.  I used select pine for most of the project and some old leftover hardwood flooring for the top.  The lines of the hardwood gave the cabinet top a nice rustic appearance.  I am happy how this project turned out.

Built from Plan(s)
Estimated Cost
Around 100.00.
Estimated Time Investment
Weekend Project (10-20 Hours)
Finish Used
BEHR satin paints
Recommended Skill Level
Intermediate

Laundry Sorter

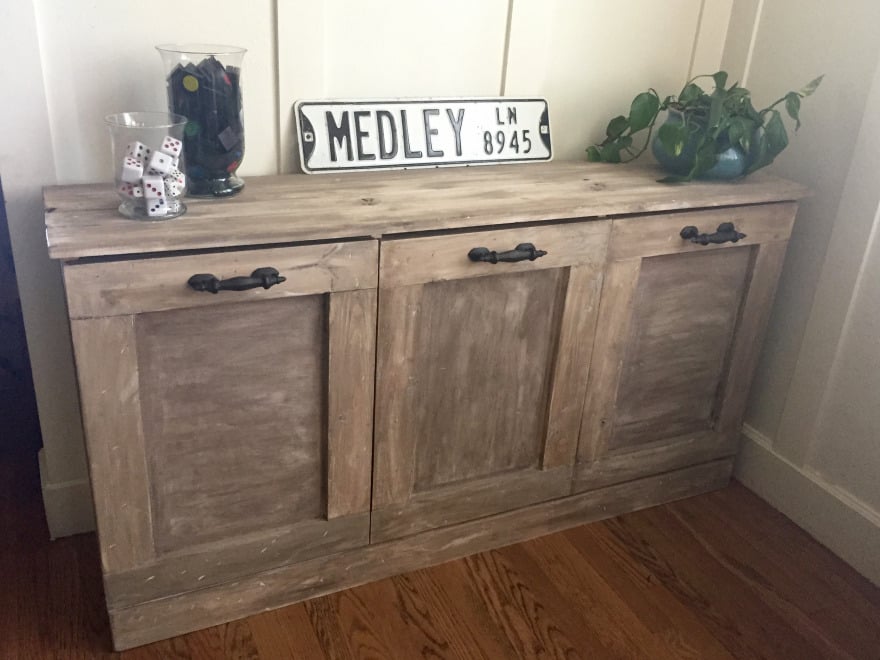
My laudry never looked so good!  I love these plans from shanty2chic and anawhite.  I spent a few days in the garage building, and now, my laundry can be hidden away in any room of my house.  


Thanks shanty2chic and anawhite for your excellent plans. 

http://www.shanty-2-chic.com/2014/08/diy-laundry-basket-dresser.html

http://www.ana-white.com/2011/04/wood-tilt-out-trash-or-recycling-cabin…

Estimated Cost
$200
Estimated Time Investment
Weekend Project (10-20 Hours)
Finish Used
Mix of paint and stain to create whitewashed look.
Recommended Skill Level
Intermediate

Full size loft

Submitted by Anonymous (not verified) on Tue, 10/01/2019 - 18:46

Built a full size loft bed for my kids but wanted something safer than having them climb up and down a ladder so used the Camp Loft Bed plans to add the platform and stairs. It is much easier for the kids. Going to finish by covering the platform and stairs with carpet.

Estimated Cost
180
Estimated Time Investment
Day Project (6-9 Hours)

Comments

Bed frame and headboard upgrade!

Submitted by Anonymous (not verified) on Thu, 10/03/2019 - 09:03

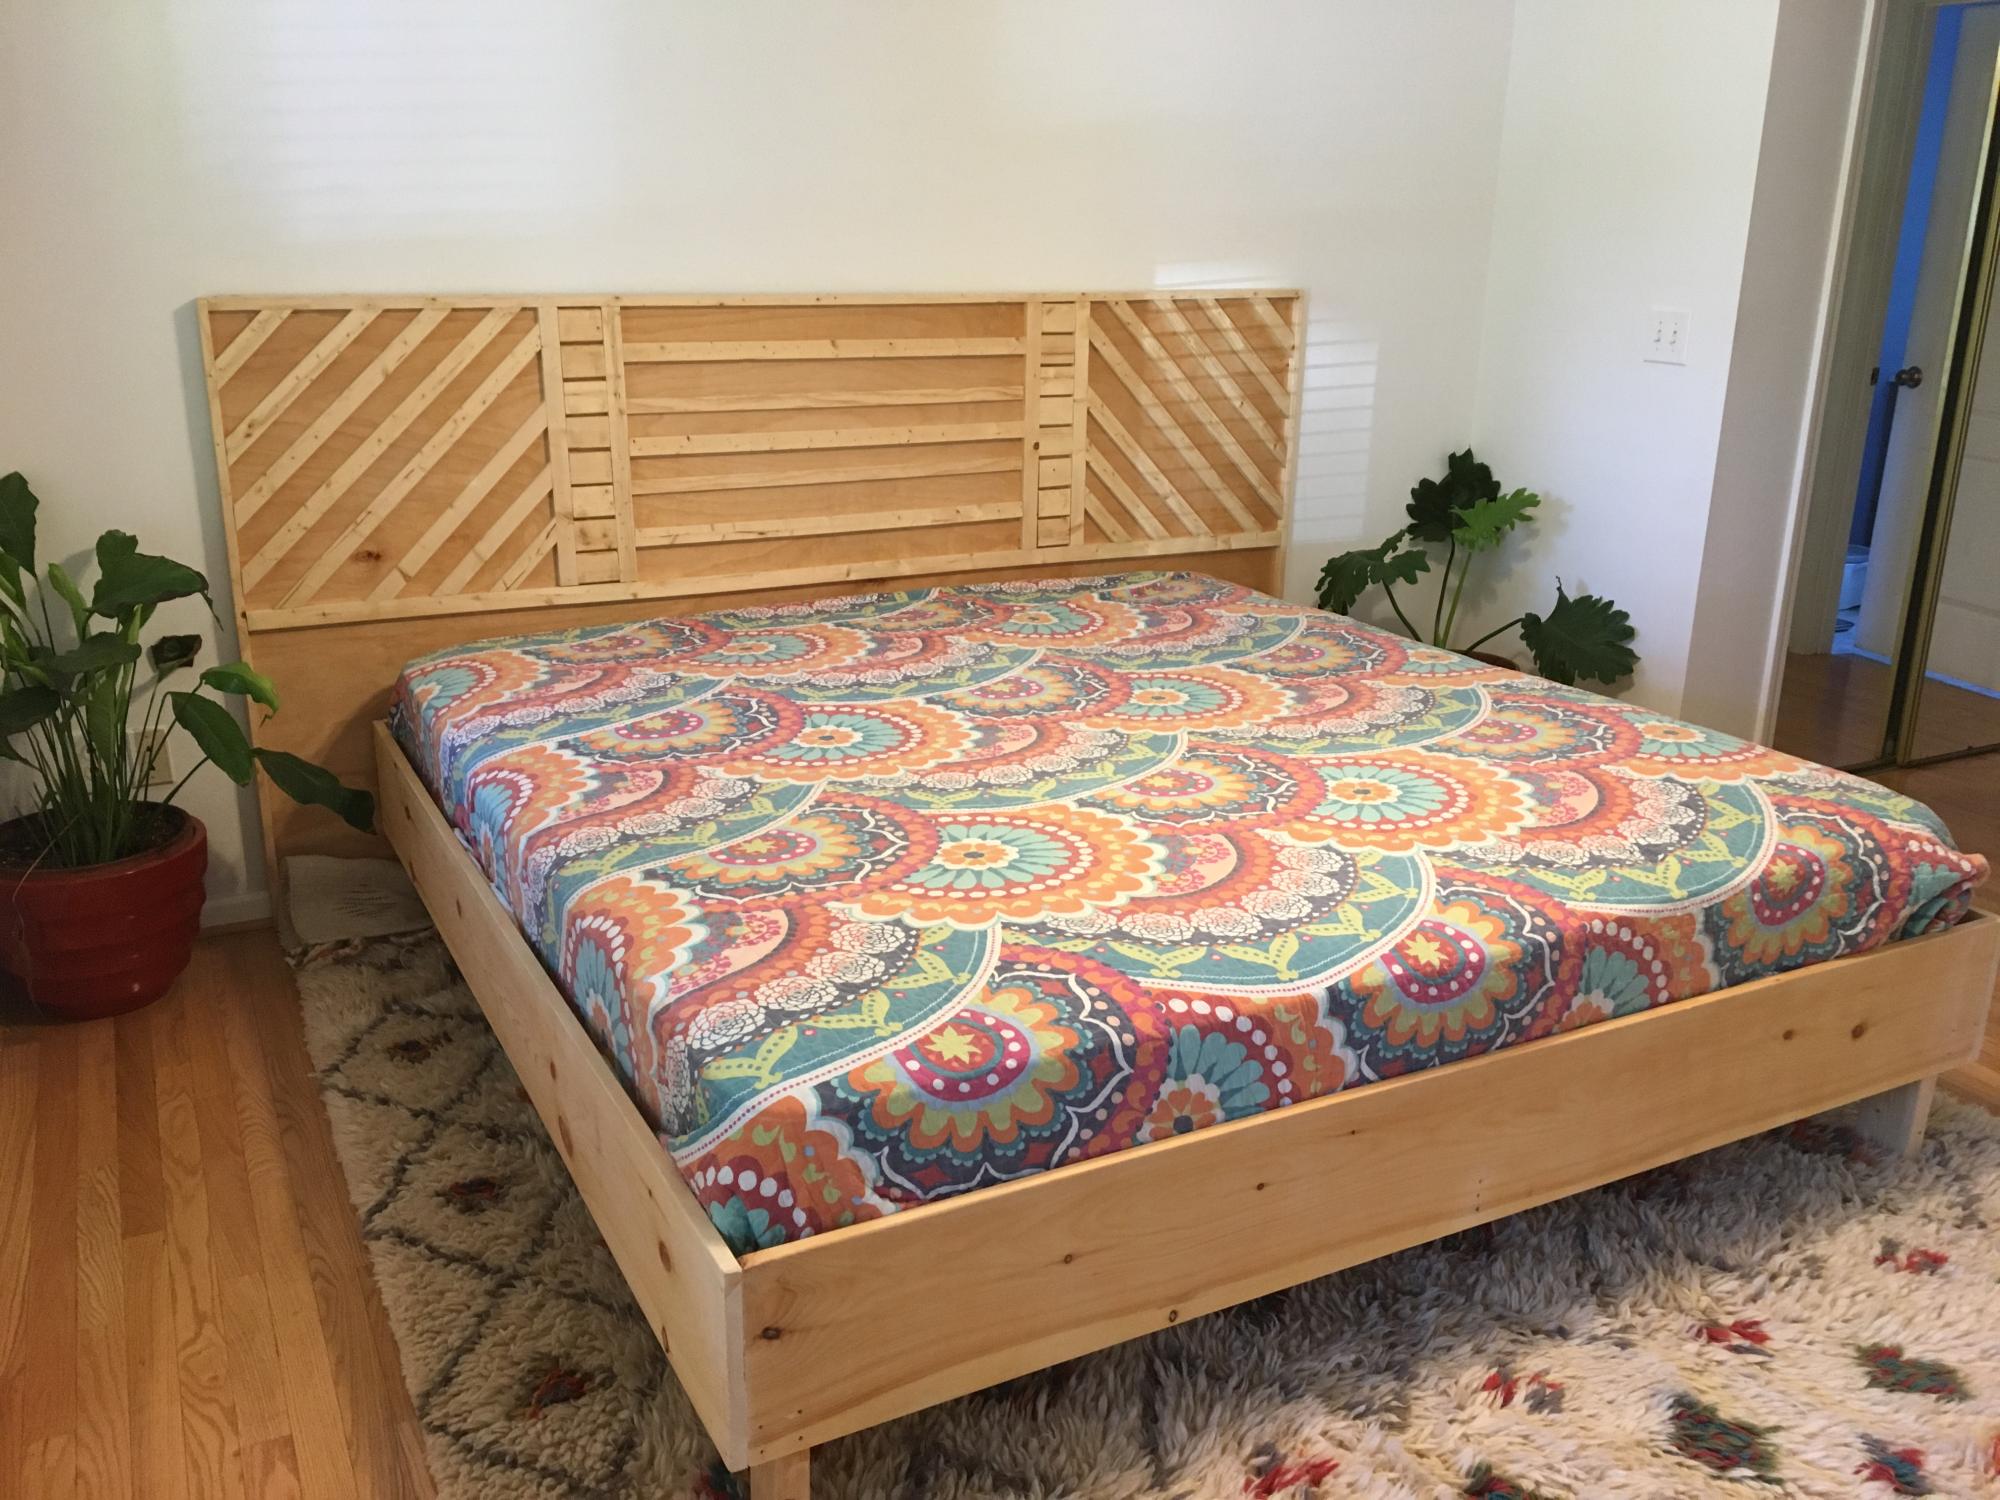
We decided to upgrade to a king sized bed and so my queen sized bed frame and headboard had to go. I based the whole idea off of Ana White’s modern headboard plans. Just using one sheet of plywood and some common board was super easy and made the geometric design fun and quick.

Built from Plan(s)
Estimated Cost
$150
Estimated Time Investment
Weekend Project (10-20 Hours)
Finish Used
I used just satin clear poly to finish the wood but it could easily be stained. I did have to rebuild the entire project and make the gap between the mattress and the wood smaller. I changed it to a 3/4 “ gap around the entire mattress which looks good and still allows you to make the bed. I just used sanded 2x4 legs but may upgrade to hairpin when my budget allows.
Recommended Skill Level
Beginner

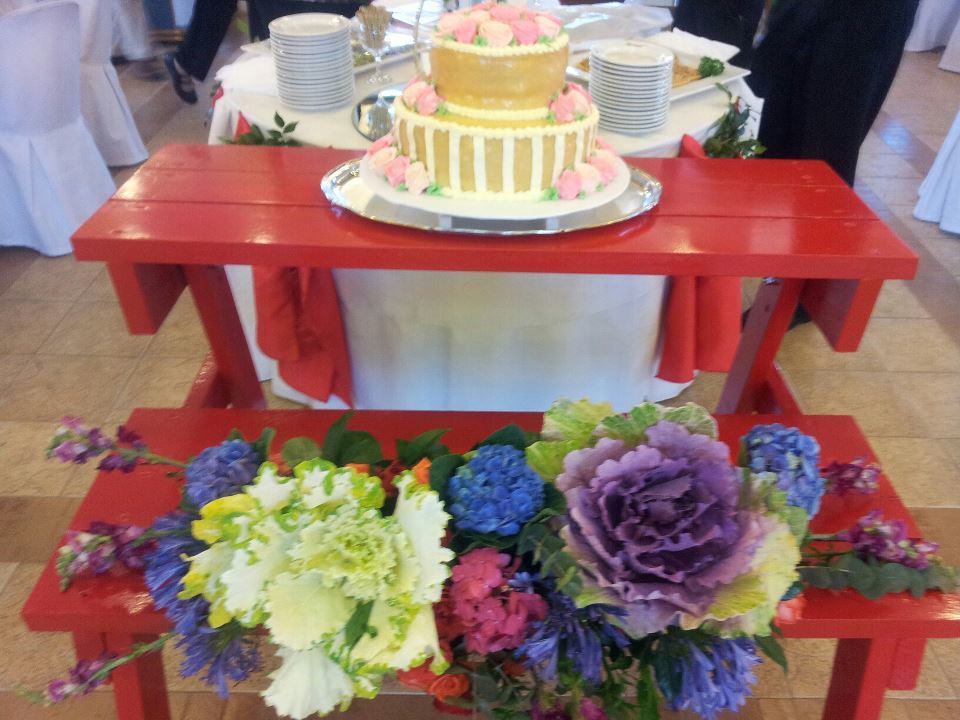
Picnic Table that Converts to Benches

Submitted by blakeallan on Wed, 02/22/2012 - 13:26

**The second pic is of the grill I built for our wedding. It was done in about 4 hours with NO plans, and a whole lot of on-the-spot thinking. All while precooking 120 lbs pork butt, 200 ribs, baked beans & whatever else that oven pushed through that day. I look forward to one day having the time to draw out the plans, and throw them up here :D **

Hey! It's been a while since I've posted anything with so much going on, but I thought I'd share a photo of a project I finished a while back. These were actually built as a gift for my in-laws to thank them for organizing our wedding. They were thrilled, and decided to incorporate the benches into the reception. As of late, I've been remodeling one living unit, one office, and one new studio & on top of that, getting married. I'm sure you can see how uploading something as simple as a photo is a chore in itself. Nonetheless, here is the finished project.

I changed a few things from the original plans; The biggest being the holes that convert from picnic table to bench. I realize not everyone is the same height, body shape, etc, so I took this into account. I actually have an additional hole on each side. One to pivot the table, one to lock it in as a bench, one to lock it in as a table, and one extra bench hole for those who prefer more of a decline/incline position. It all turned out great & works perfect for either bench or table. Very sturdy, and nothing but compliments. As a matter of fact, people asking over and over again where I bought it & for how much :D The reason I put 10-20 hours is due to the paint. I used three coats because, even though I used plenty of primer, pine just loves to soak it up. I also wanted to make sure every bit of it would be covered as much as possible for the weather conditions outside. It turned out having a rubbery coating feel to it, much like those of galvanized benches dipped in paint. Overall, very pleased with the outcome.

Cheers for the plans!

Estimated Time Investment
Weekend Project (10-20 Hours)
Finish Used
Water-resistant enamel
Recommended Skill Level
Beginner

Comments

Pam the Goatherd

Wed, 02/22/2012 - 18:48

Congratulations on your marriage!
I love the red paint on the picnic table/benches. The grills remind me of growing up in Miami and having roast pig that was cooked in those huge steel barrels.

Pam the Goatherd

Wed, 02/22/2012 - 18:48

Congratulations on your marriage!
I love the red paint on the picnic table/benches. The grills remind me of growing up in Miami and having roast pig that was cooked in those huge steel barrels.