Garage Shelves Plan with Added Doors - Built and shared by Jeremy Doyle
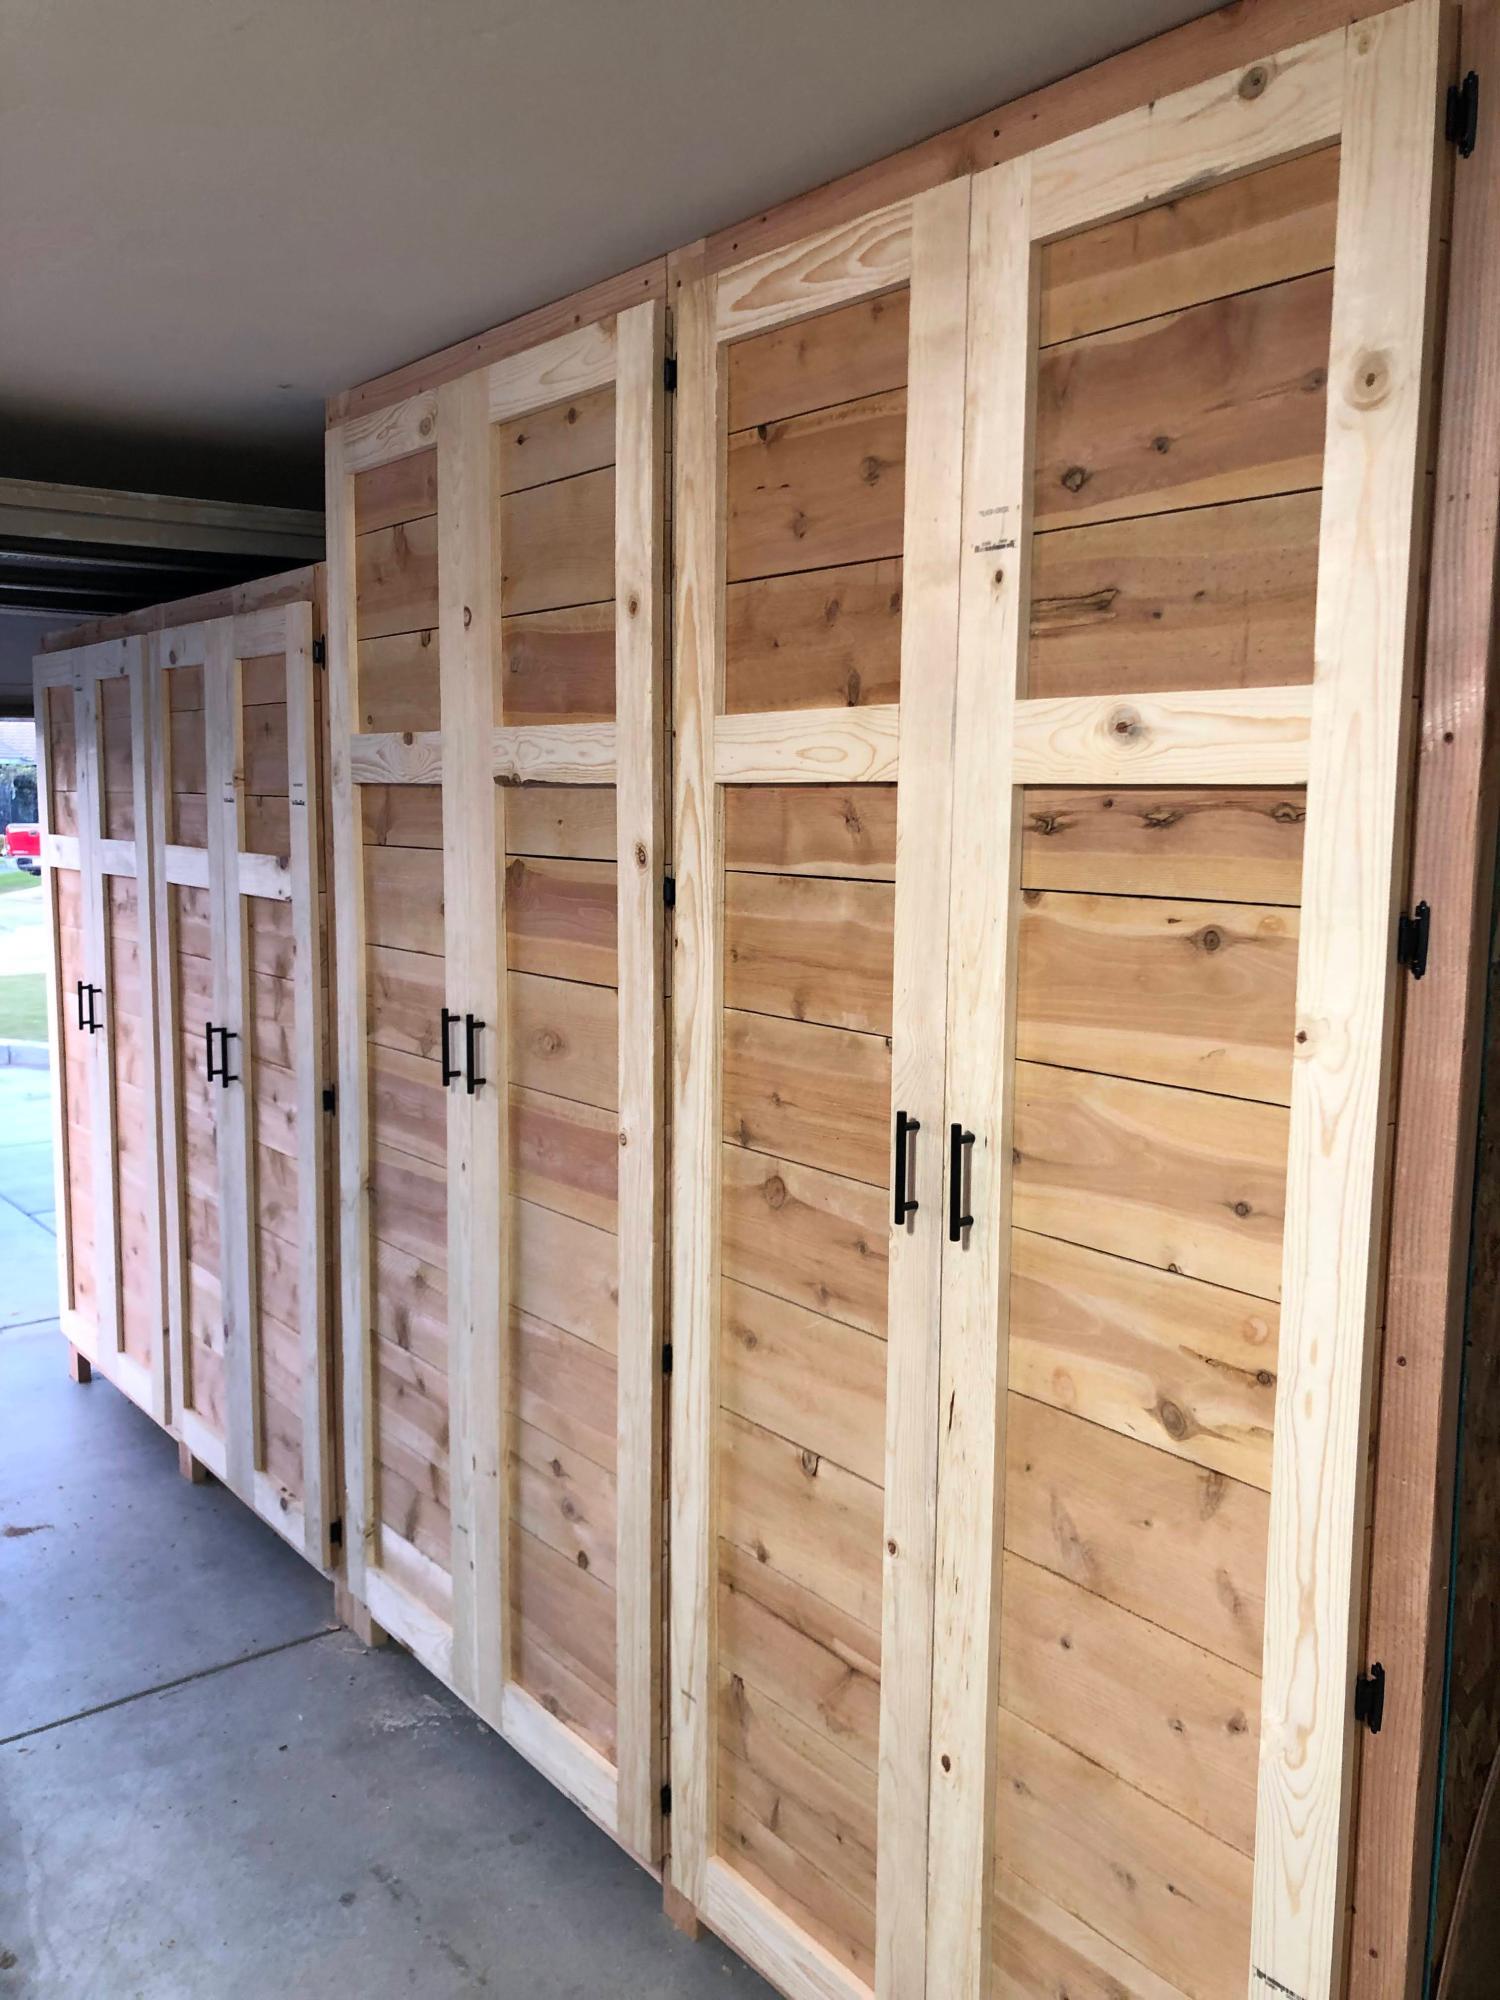
Garage Shelves Plan with Added Doors - Built and shared by Jeremy Doyle
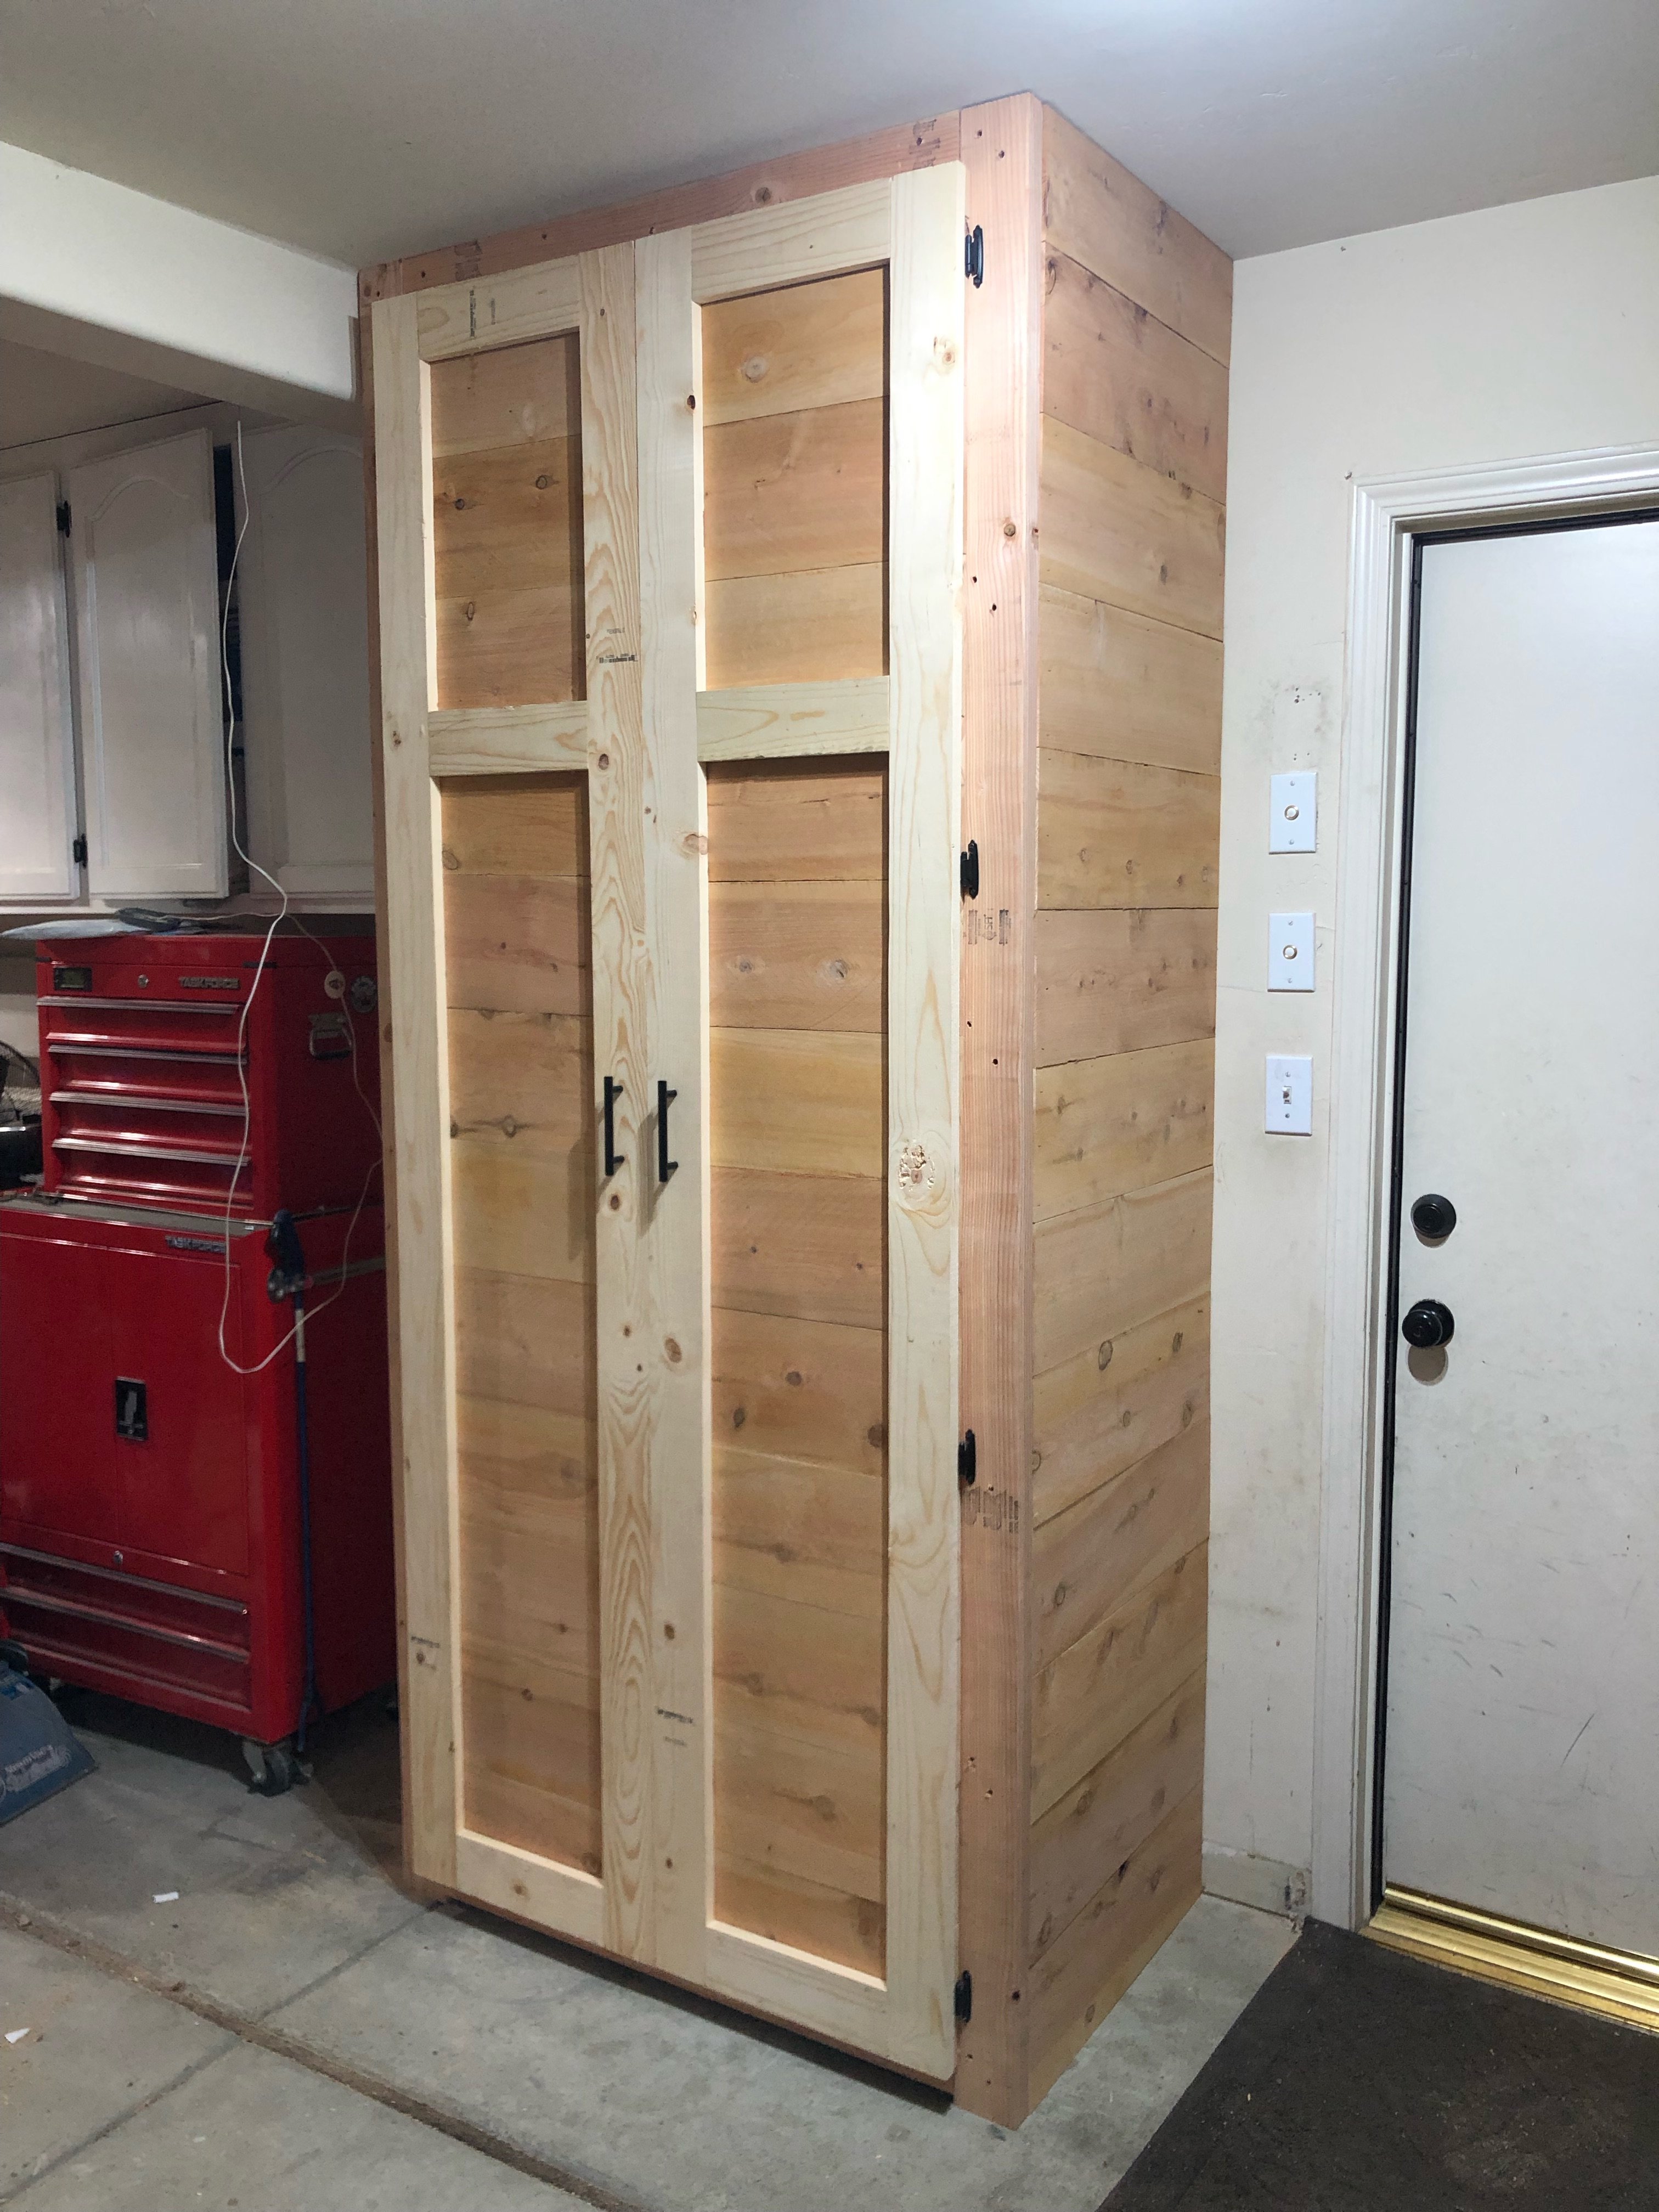
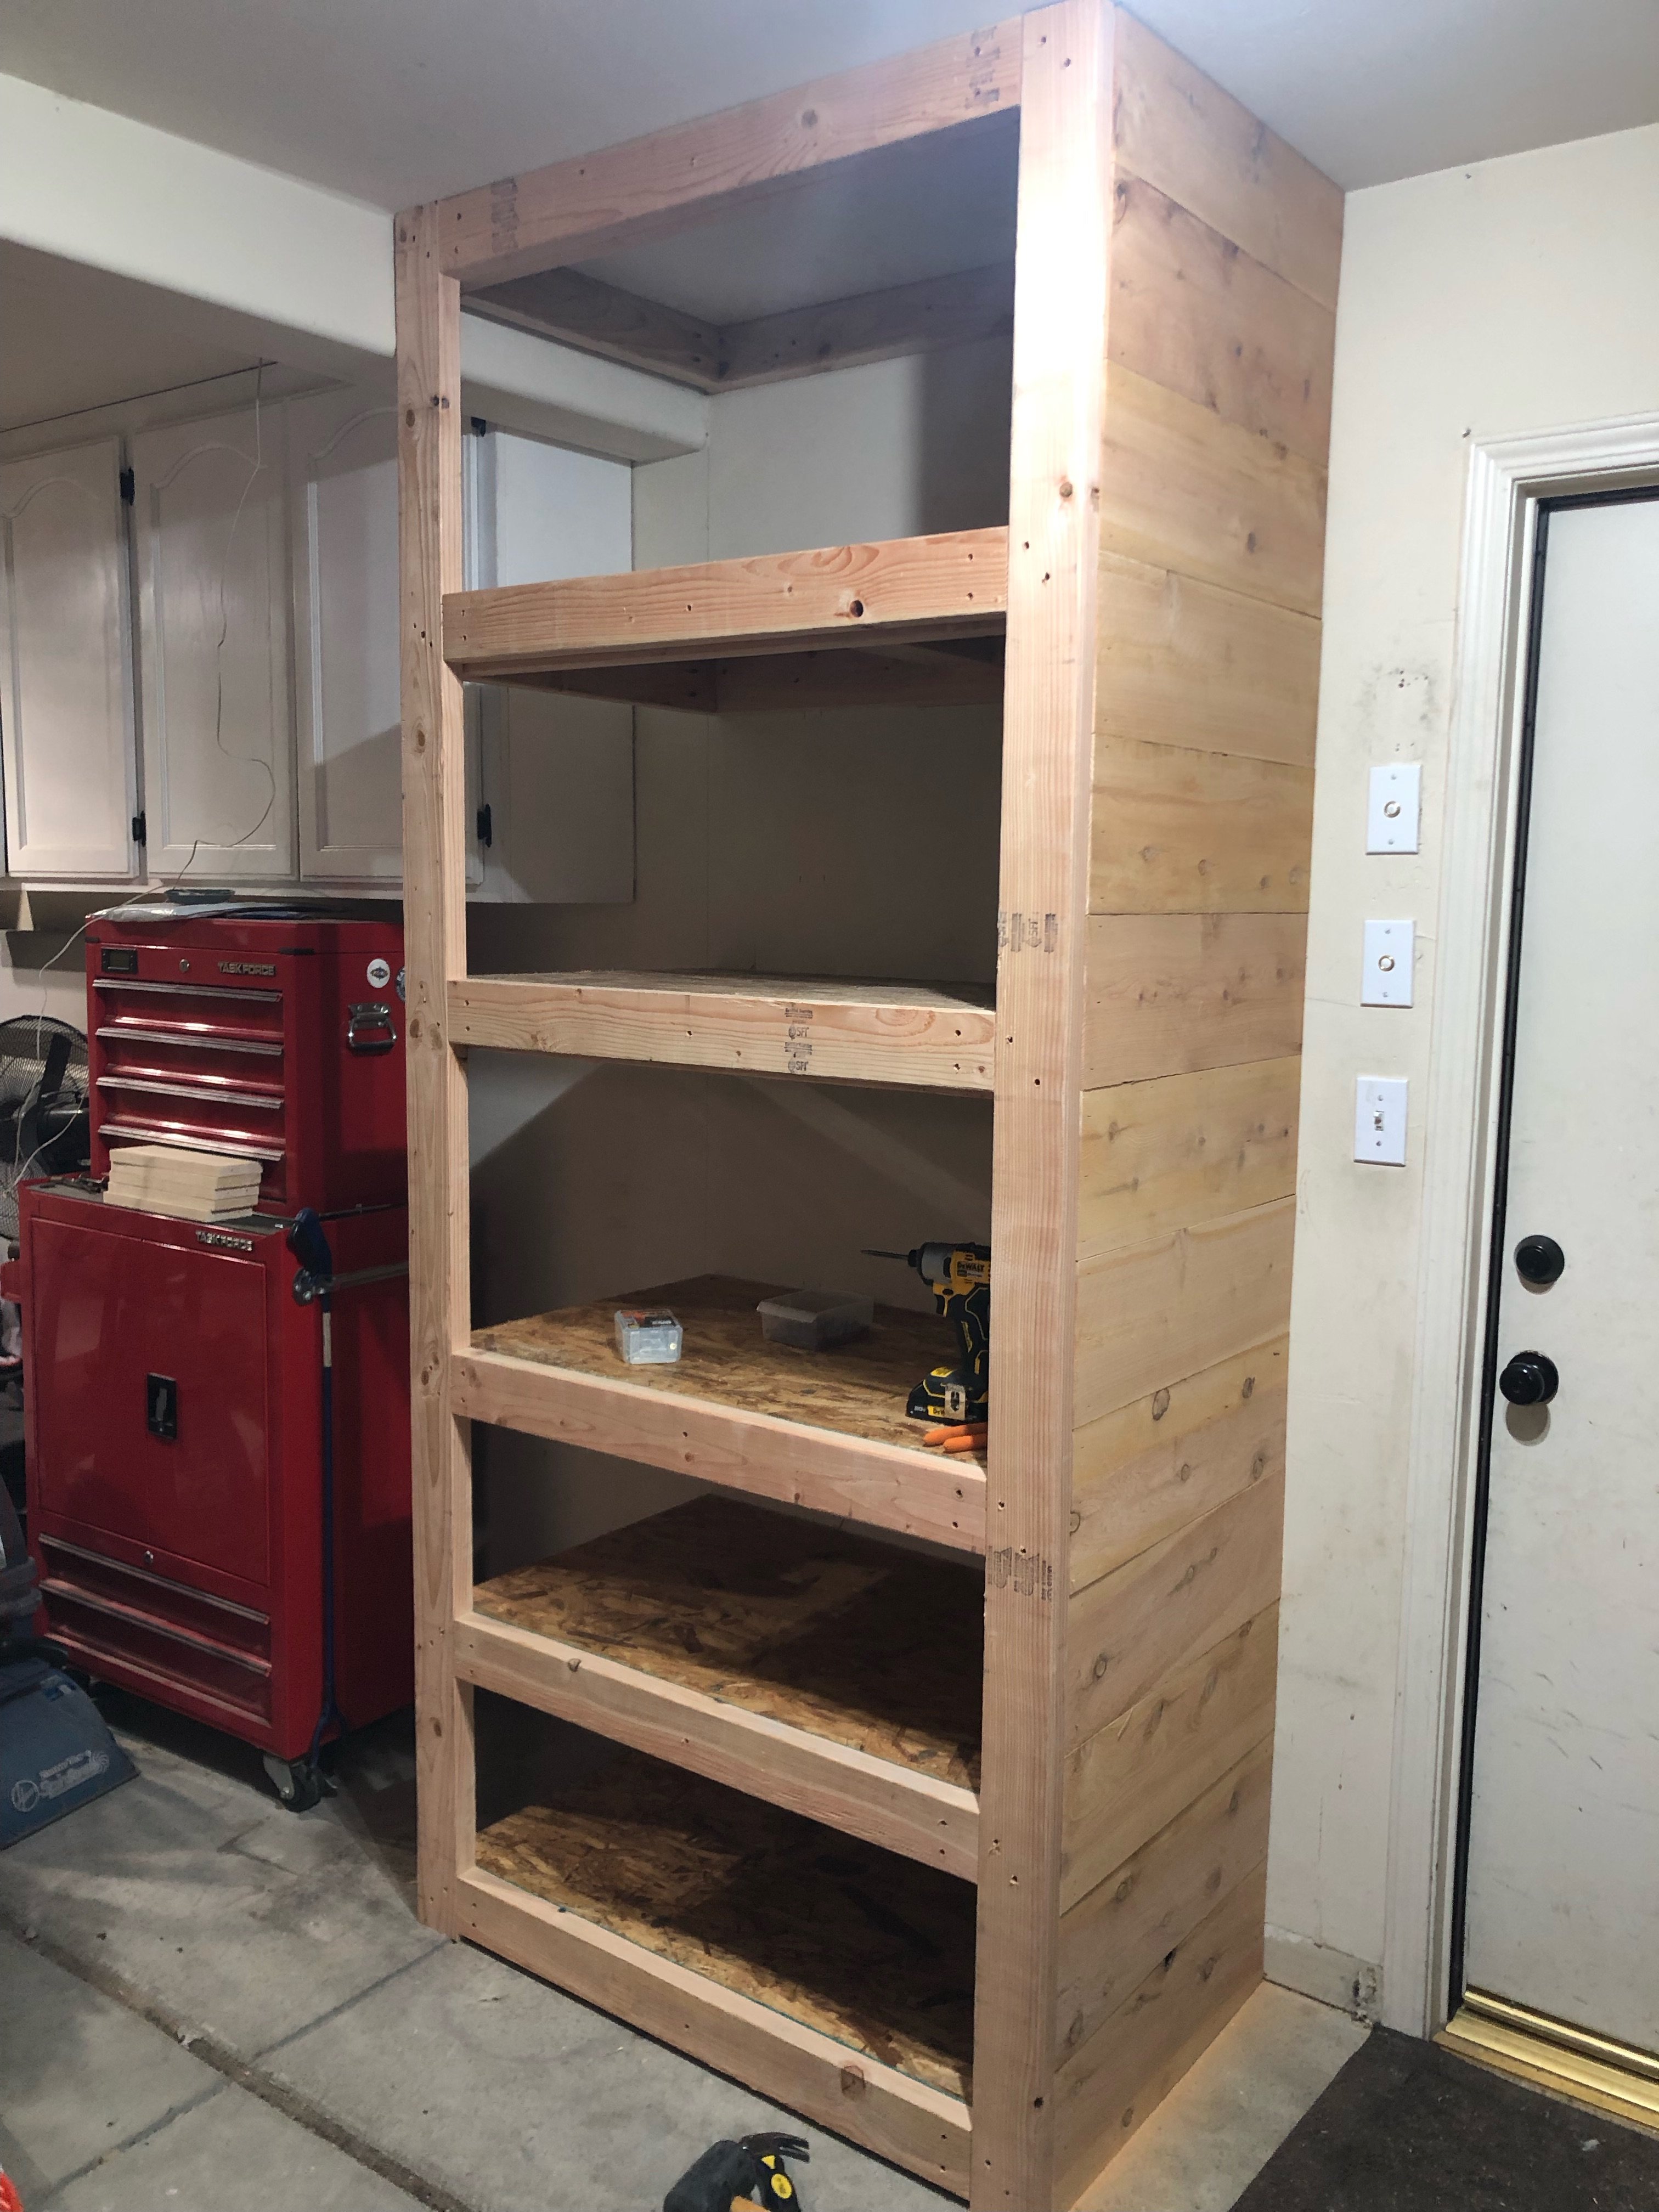
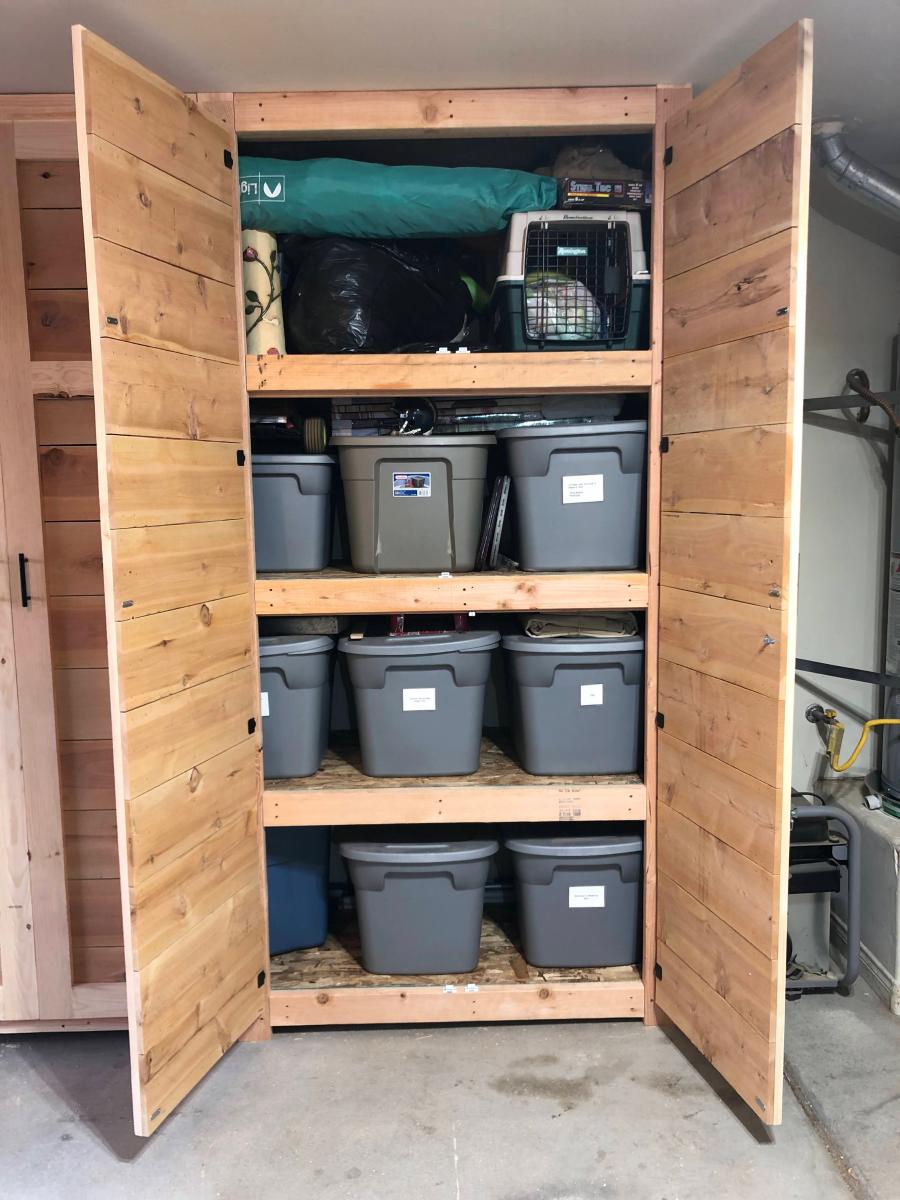

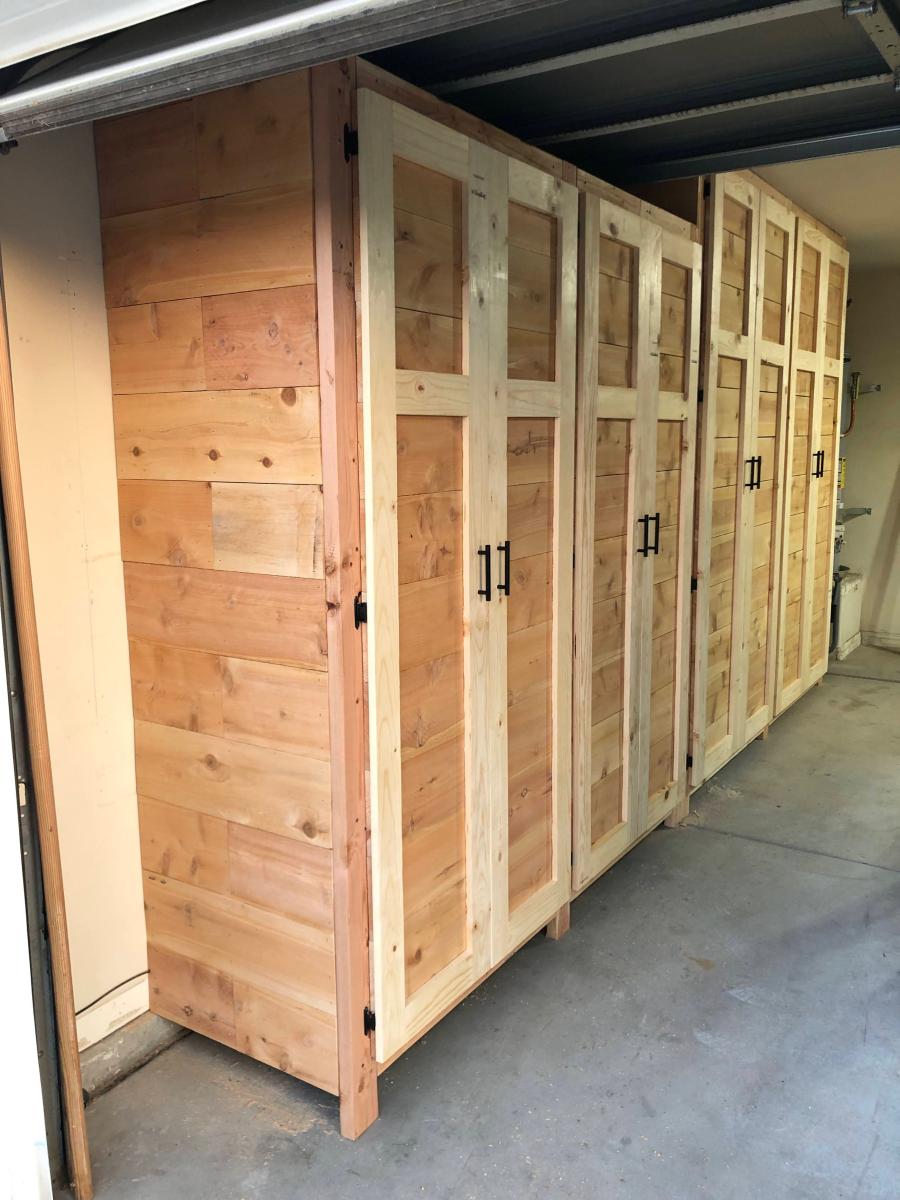
Built from Plan(s)
Garage Shelves Plan with Added Doors - Built and shared by Jeremy Doyle

A frame chicken coop with a few modifications- metal roof, insulation and slightly larger second floor.
By Chrystal
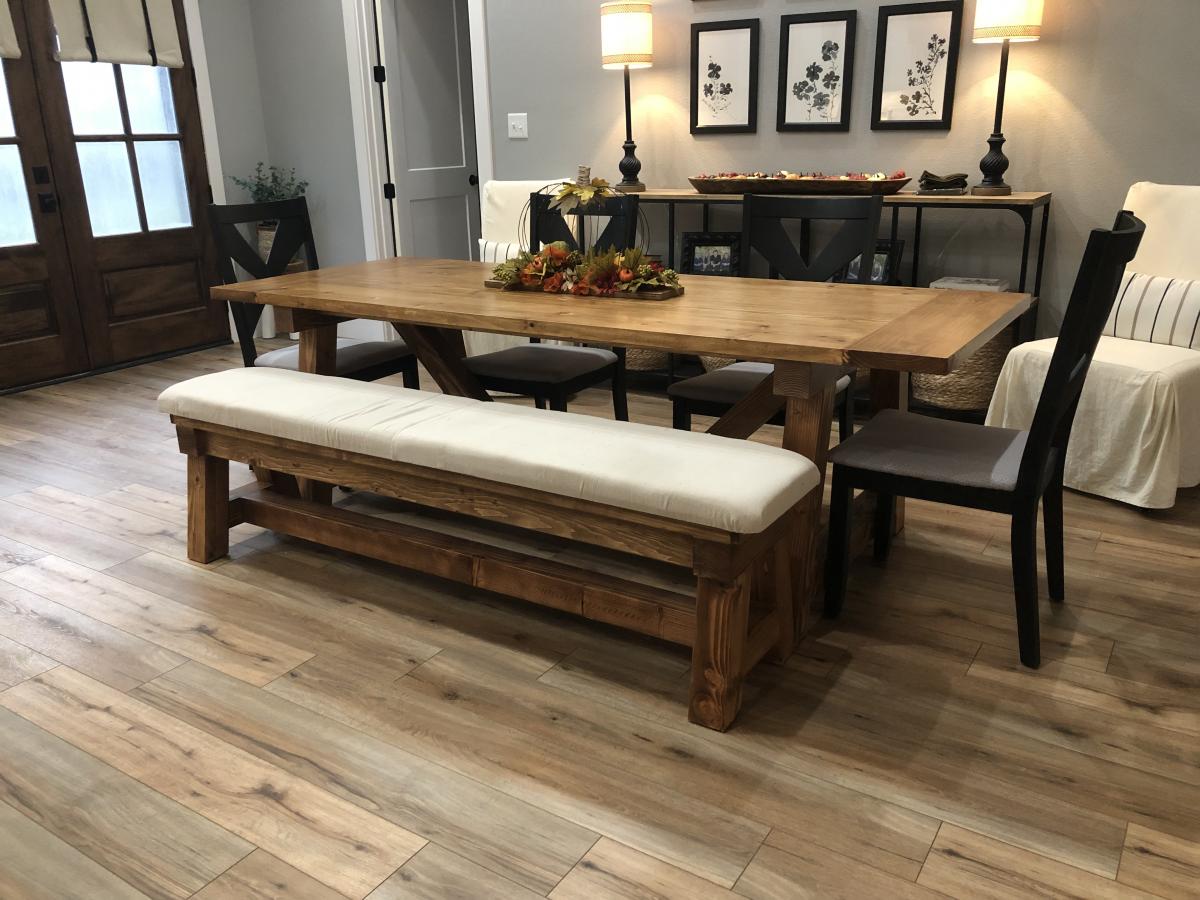
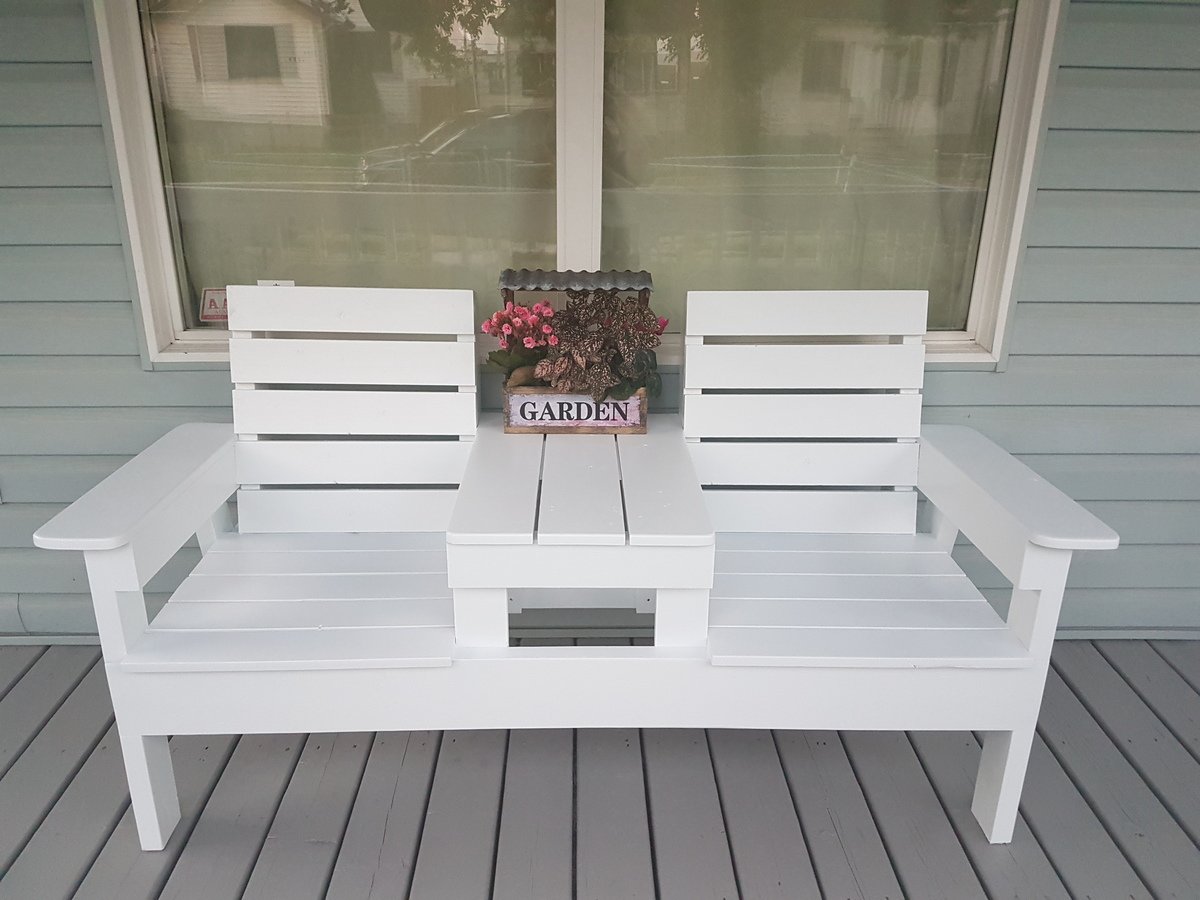
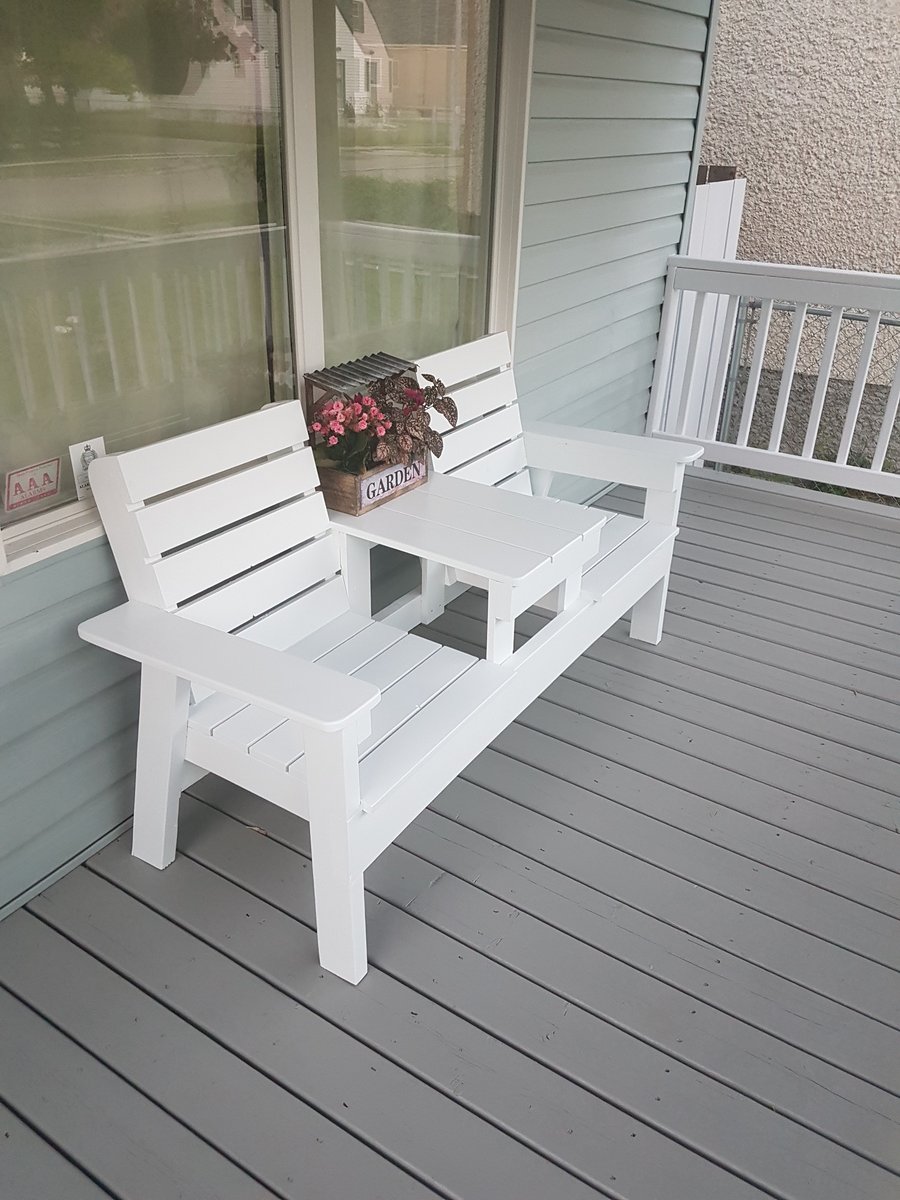
The plans were very easy to follow for non avid woodworkers. We decided to upholster the seat on the bench.
Tue, 10/05/2021 - 10:43
Looks professionally done and well built, the upholstered bench is a beautiful addition!
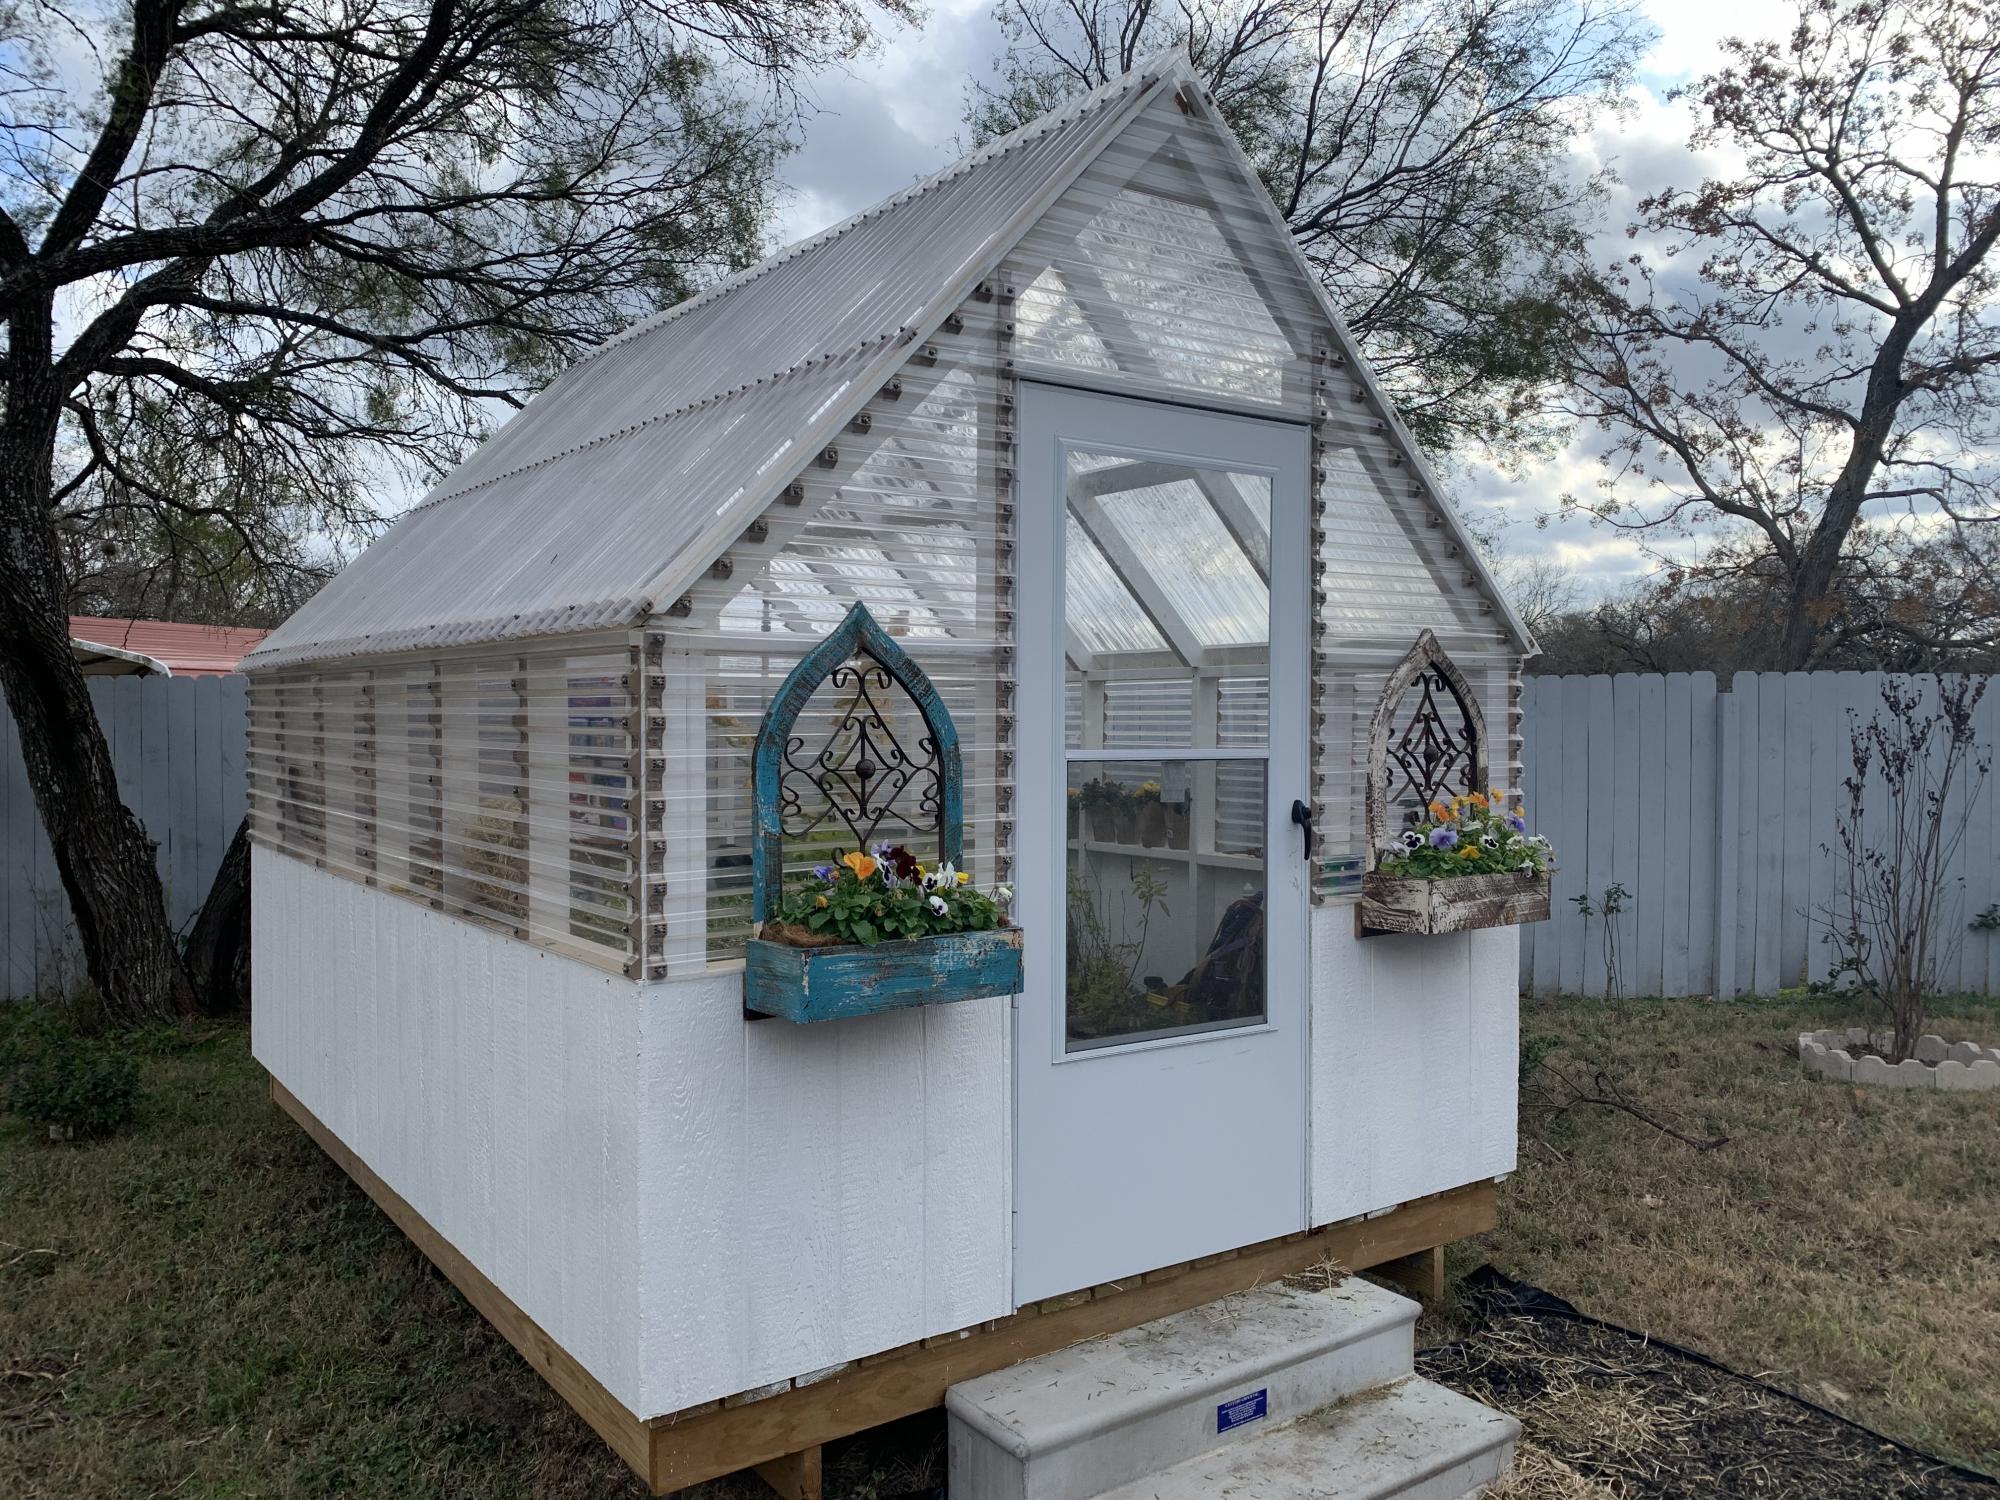
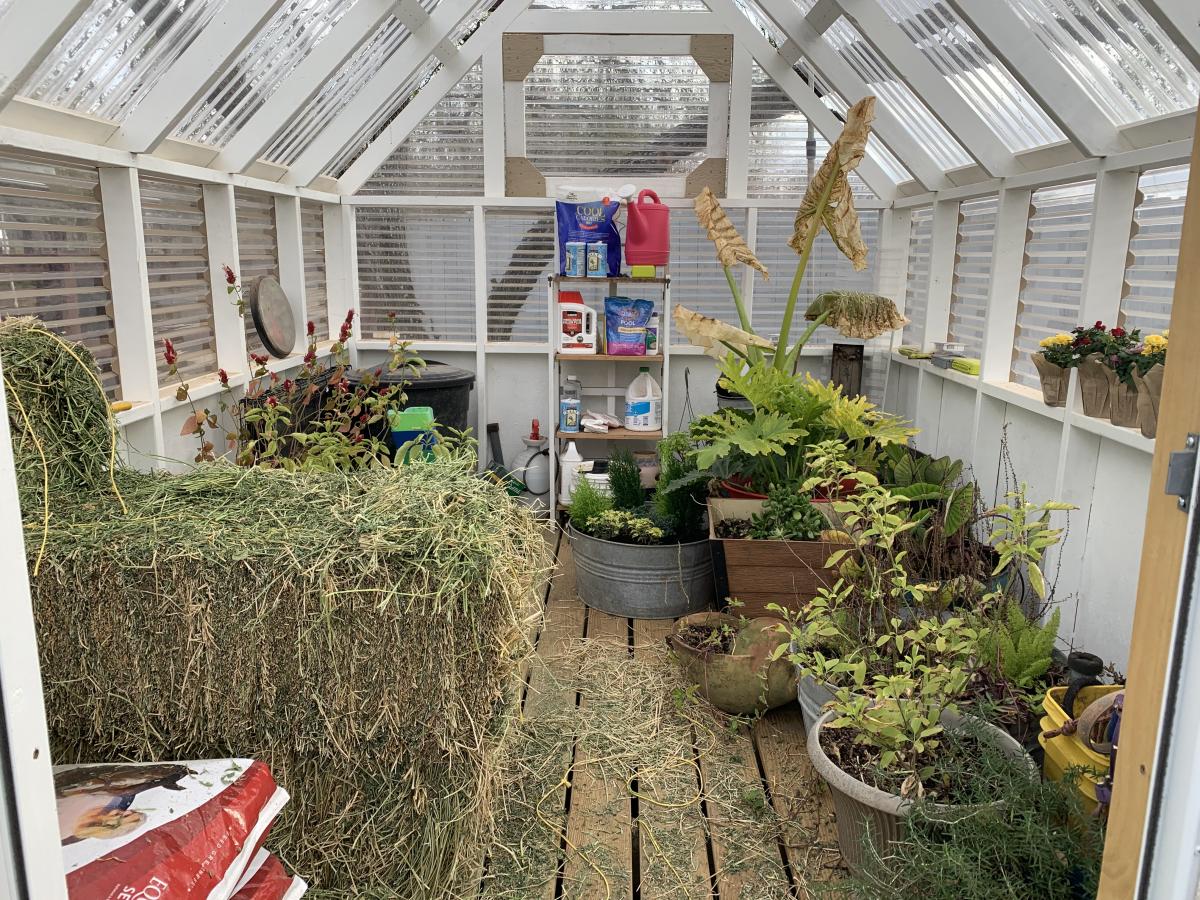
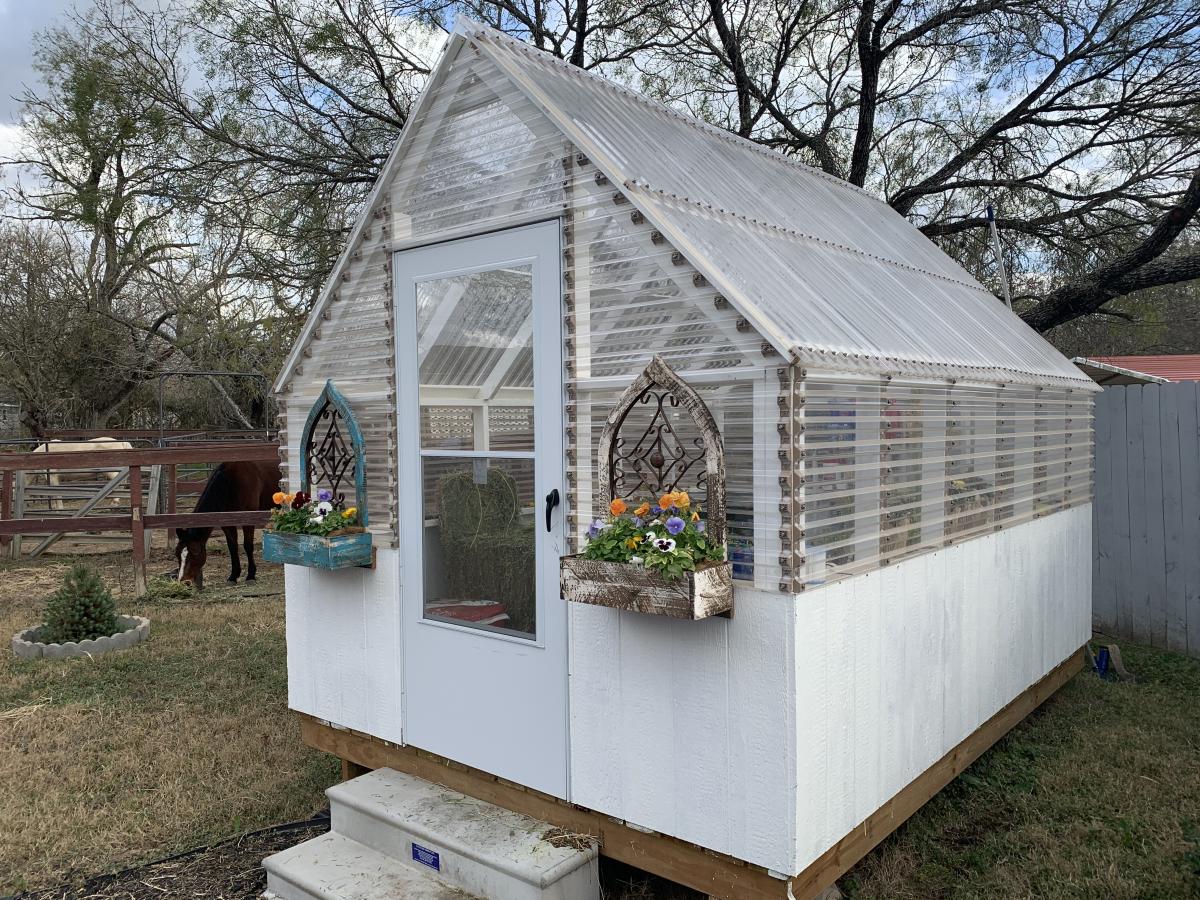
I was planning on building a greenhouse some time next year but I just happen to see this by chance and fell in love with it. I've always built from my own designs but when I saw this I decided to purchase the plans. I couldn't be more happy with it. Right now its doubling as a feed room. I wanted a solid foundation so I build a floating deck to mount the walls on. The deck added quite a bit to the total price.
Wed, 12/23/2020 - 09:52
Love that you're able to double it as a feed room, great job on this build!
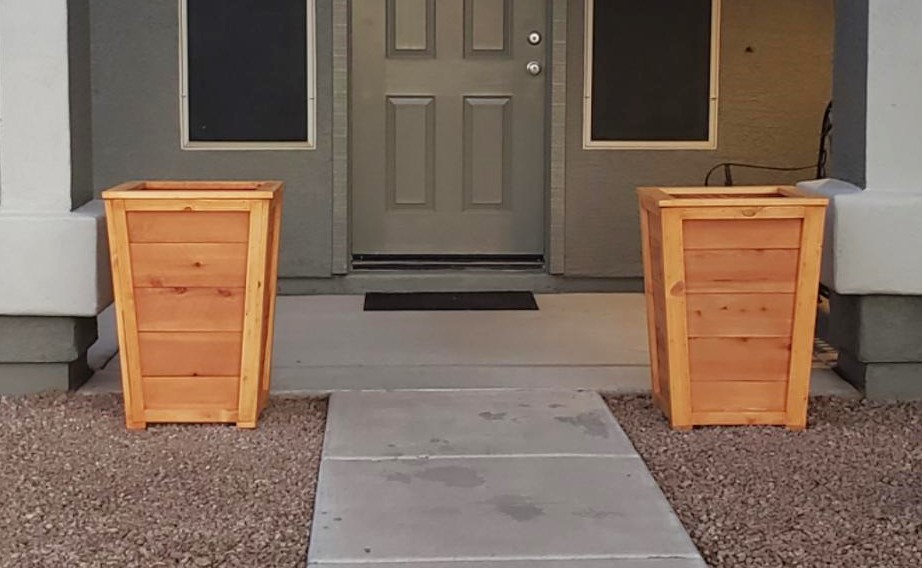
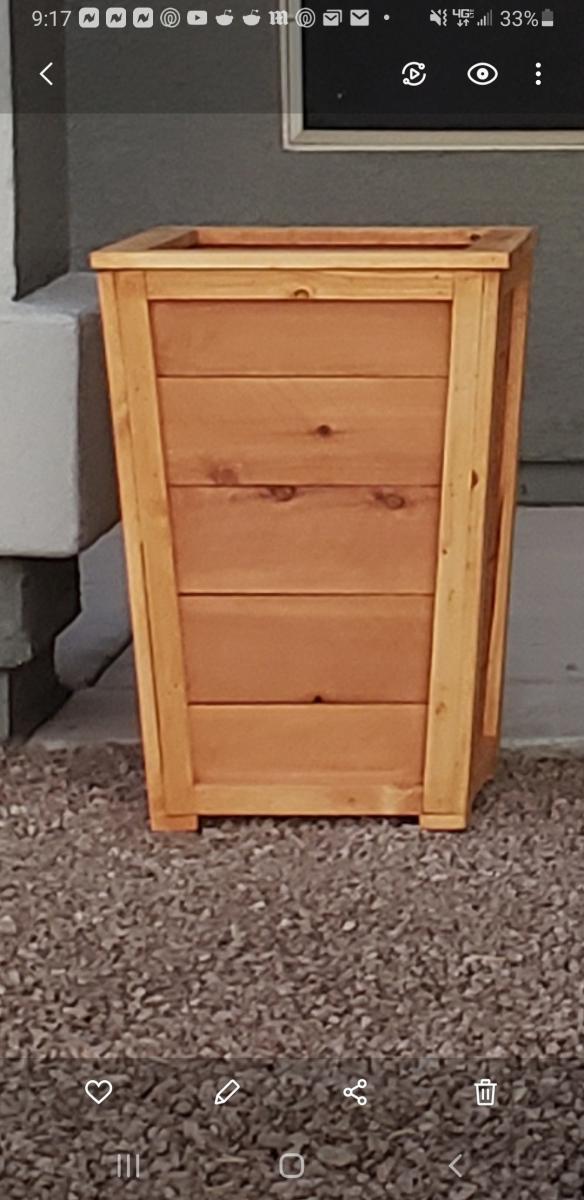
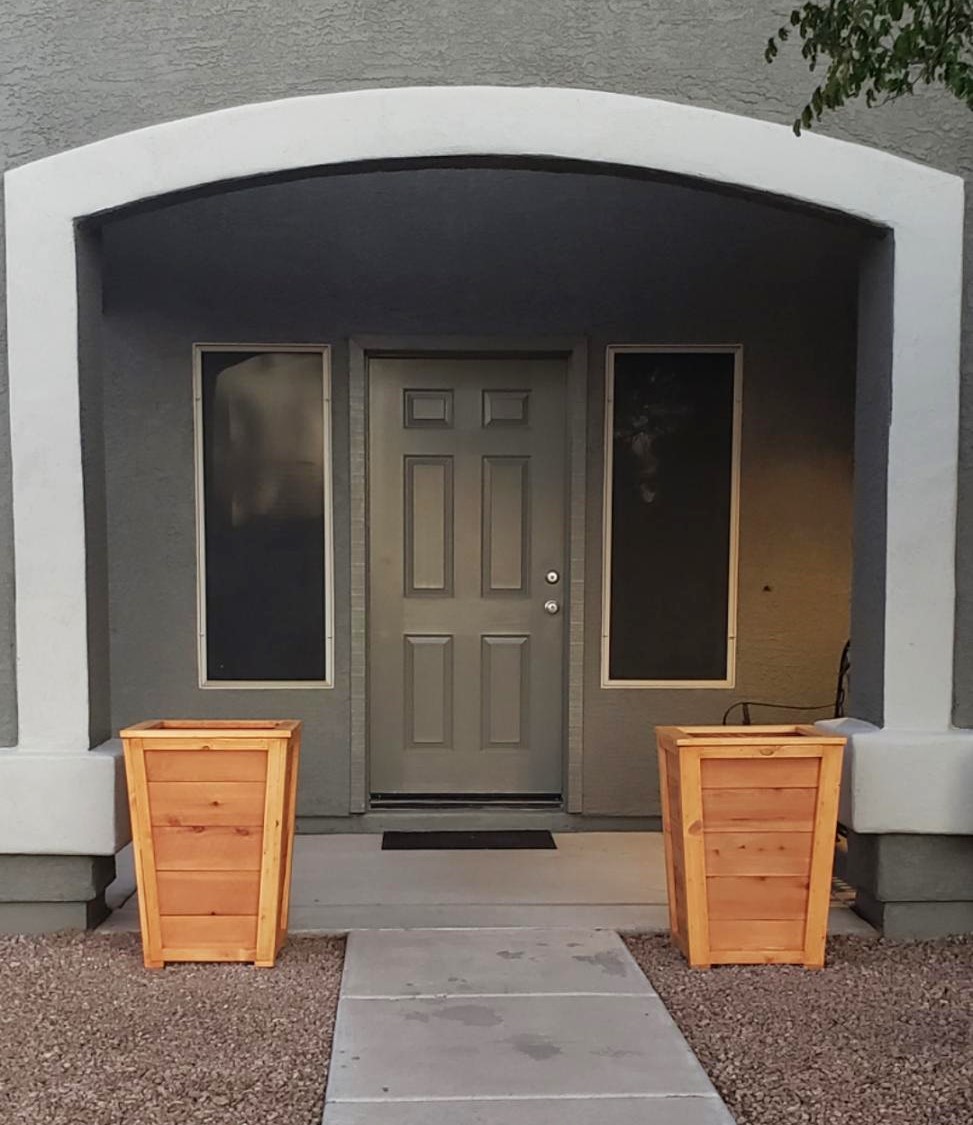
Followed your plan but added extra 1 x 2 trim to the sides, feet made from 1 × 3 and 1x 3 trim around the top

This was my first attempt at building anything....ever. It was so incredibly fun and I certainly learned a lot. My 8 little chickens are loving their new home and I can't wait to build my next project!
Wed, 06/19/2013 - 11:51
Hello! Could you repost the picture / info on your chicken run? I keep getting "page not available" and I've been trying for days :O) I think I want to build that chicken shed (too big for 3 hens?? It's just so cute!) and a run like that to go with it! Thanks! Have a great day!
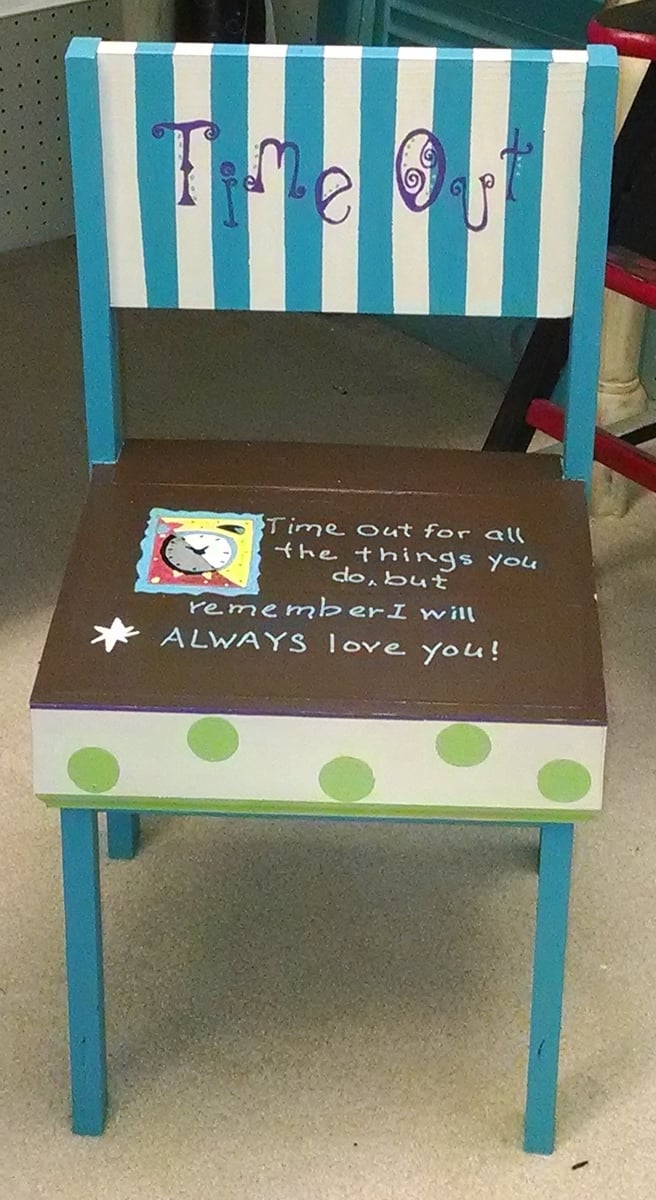
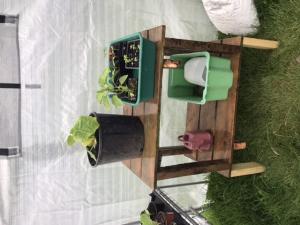
Kids stuff usually sells pretty good for us. Considering in our area, to buy kid size chairs are about $25 we looked for another option. This stackable chair fit the bill perfectly and was so inexpensive and easy to build!! Made the back part solid so I could paint on it and added some moulding on the side. Going to get my grandson who is being homeschooled, busy building some more as part of his wood shop class.
Fun build. Plans were easy to follow!
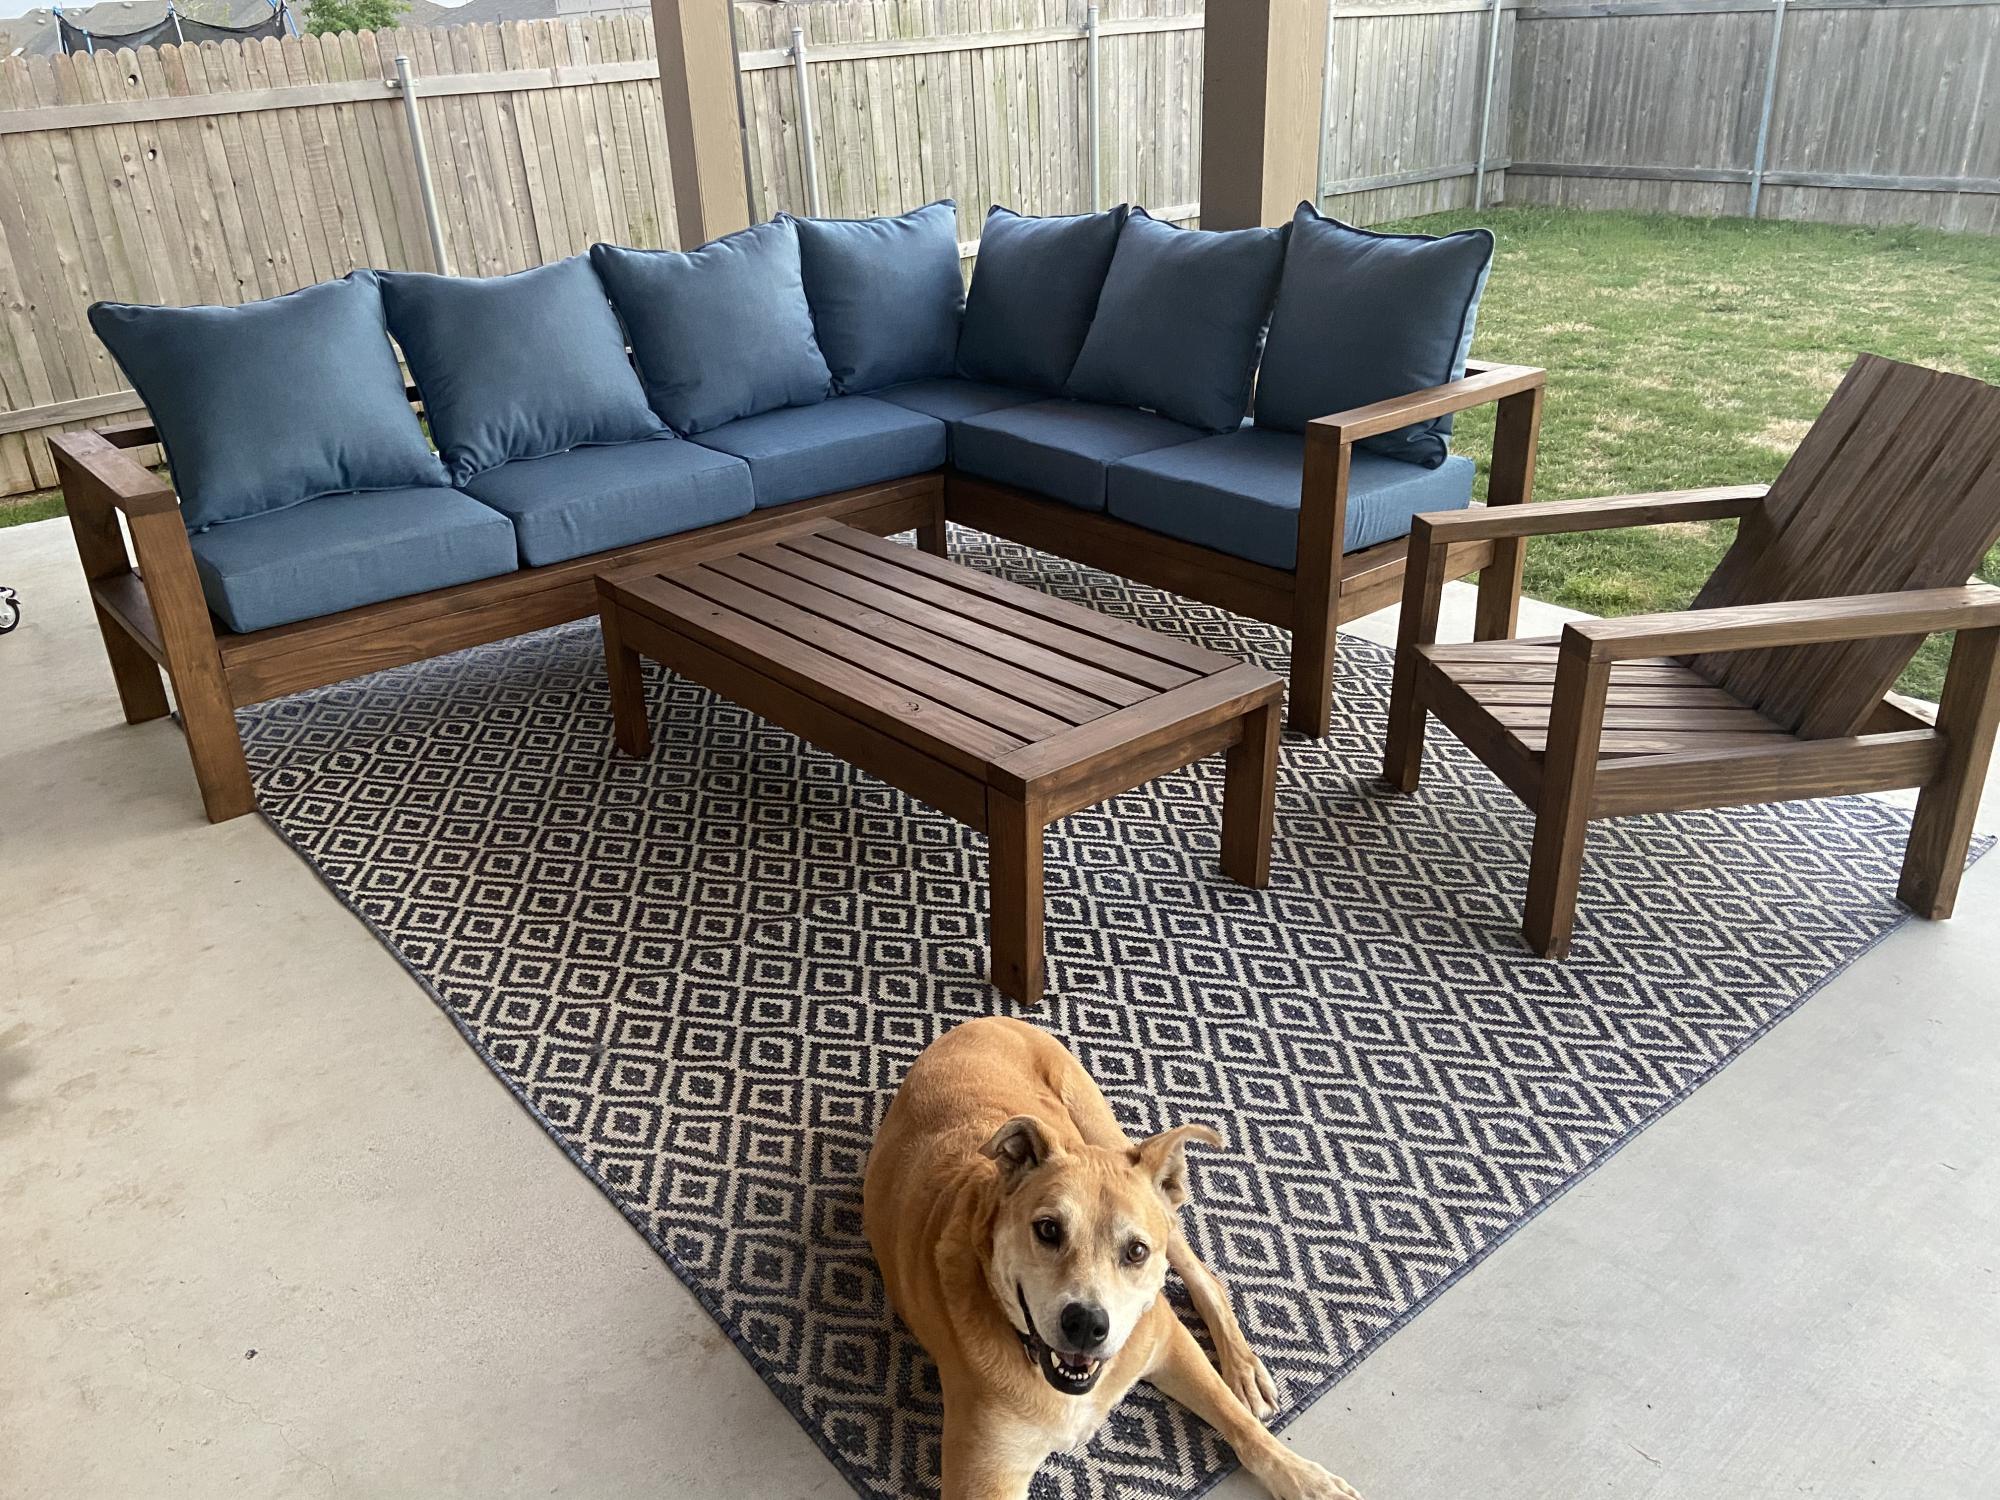
My husband made 4 pieces from the 2x4 outdoor collection. It was his first time doing a wood working project. The step by step plans made it easy and manageable!
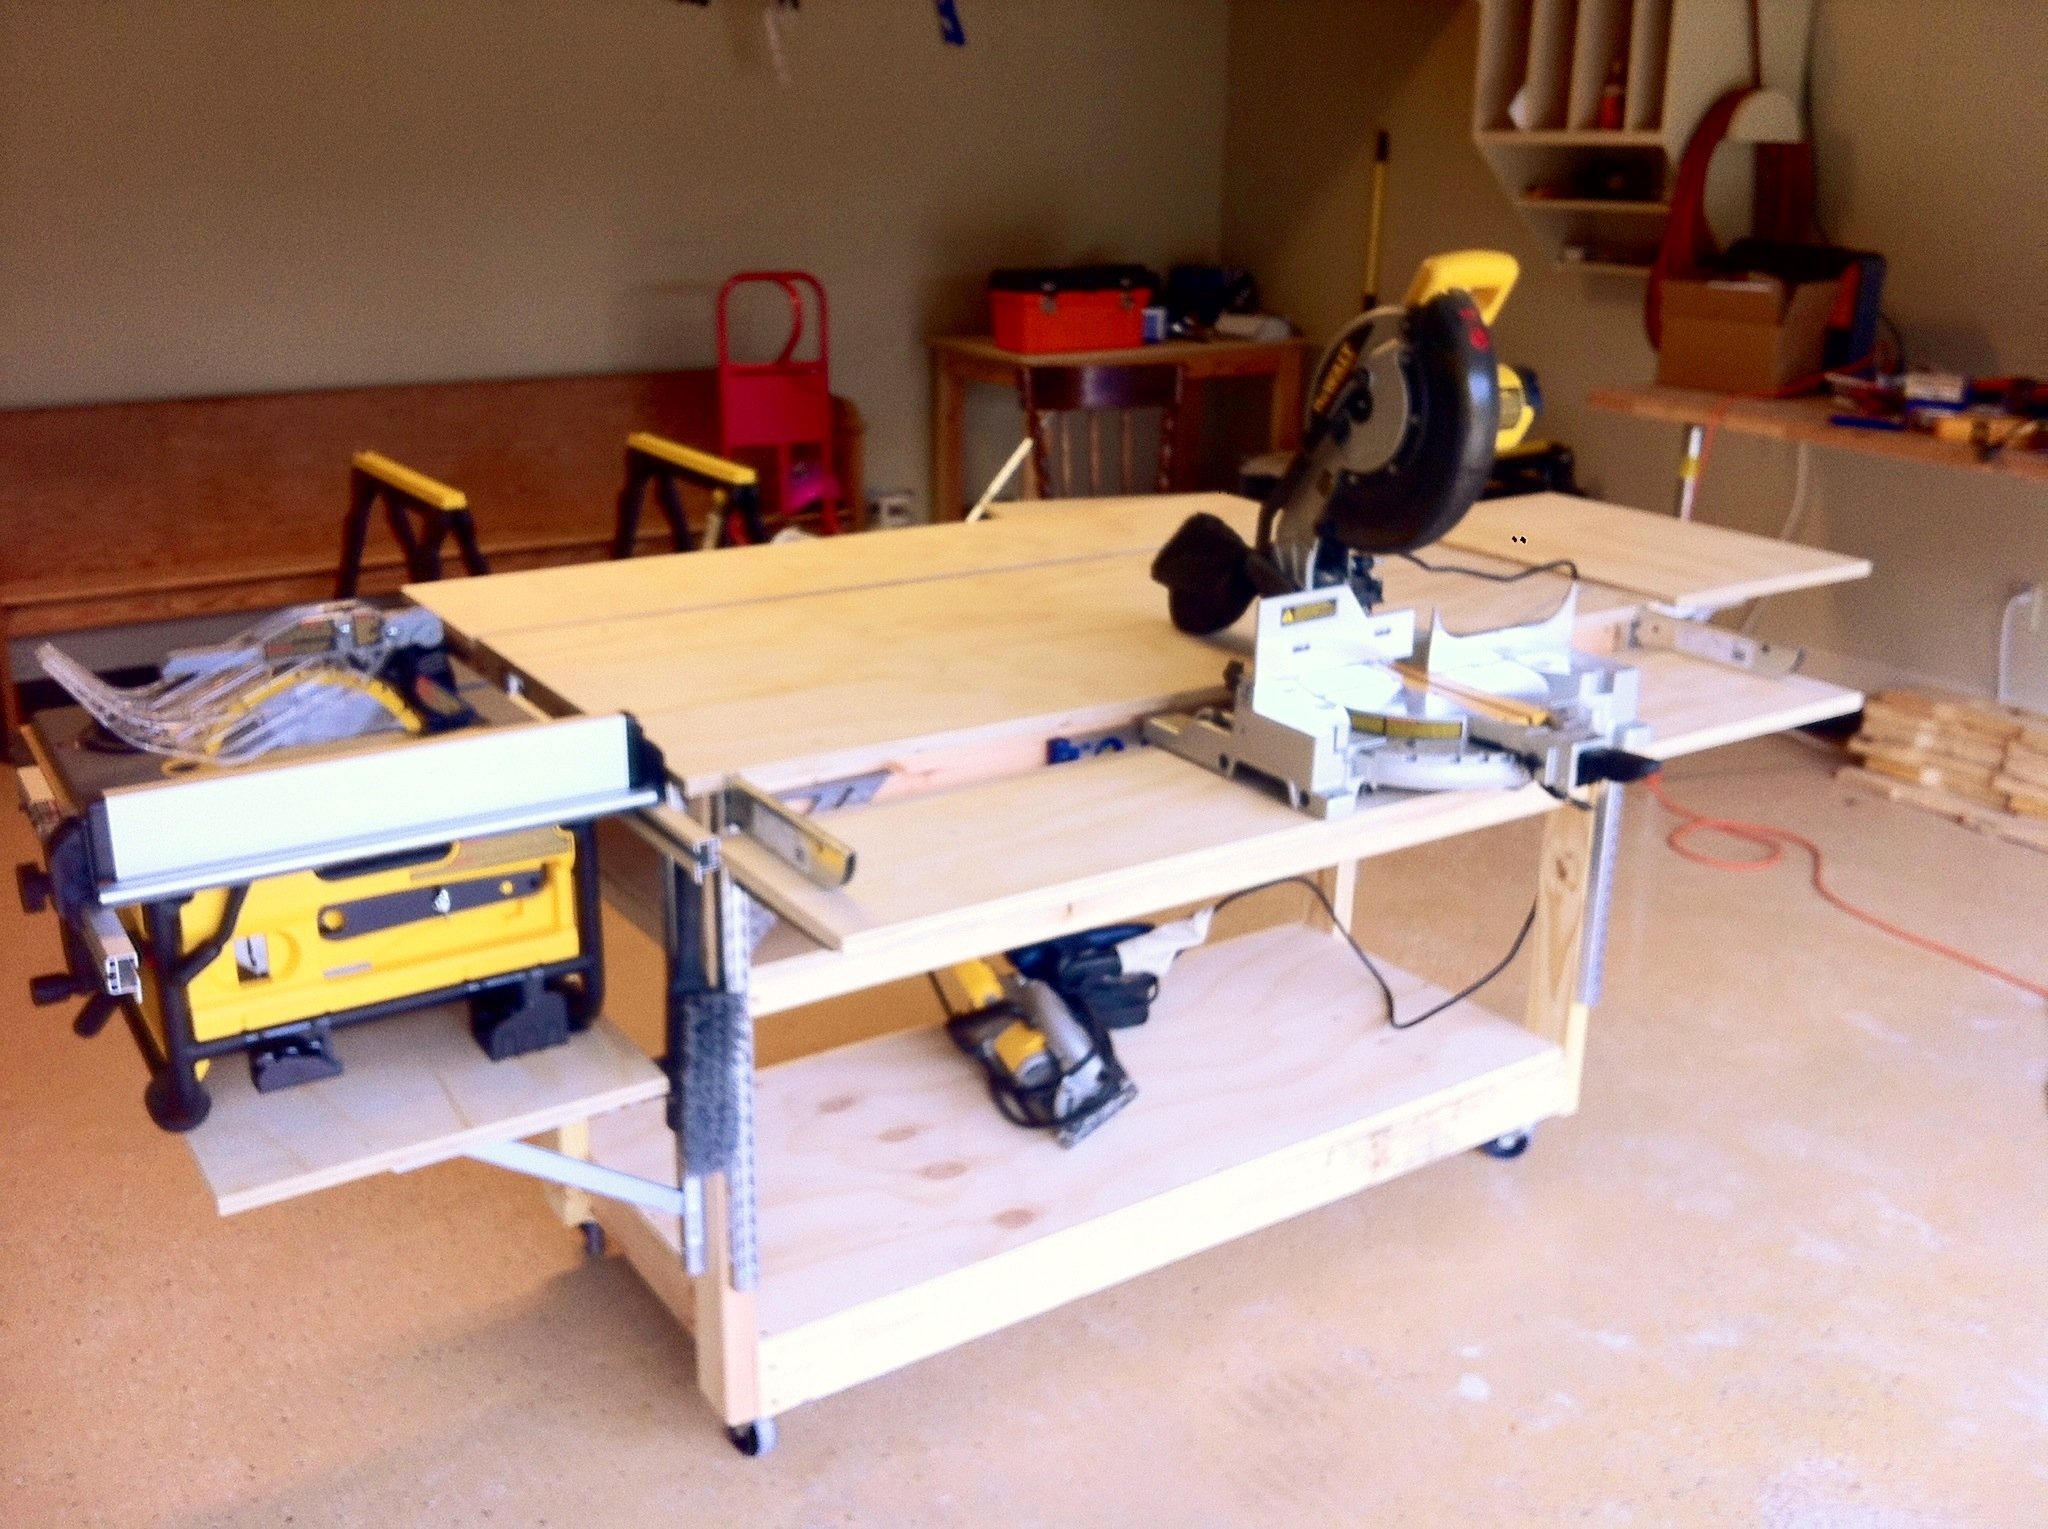
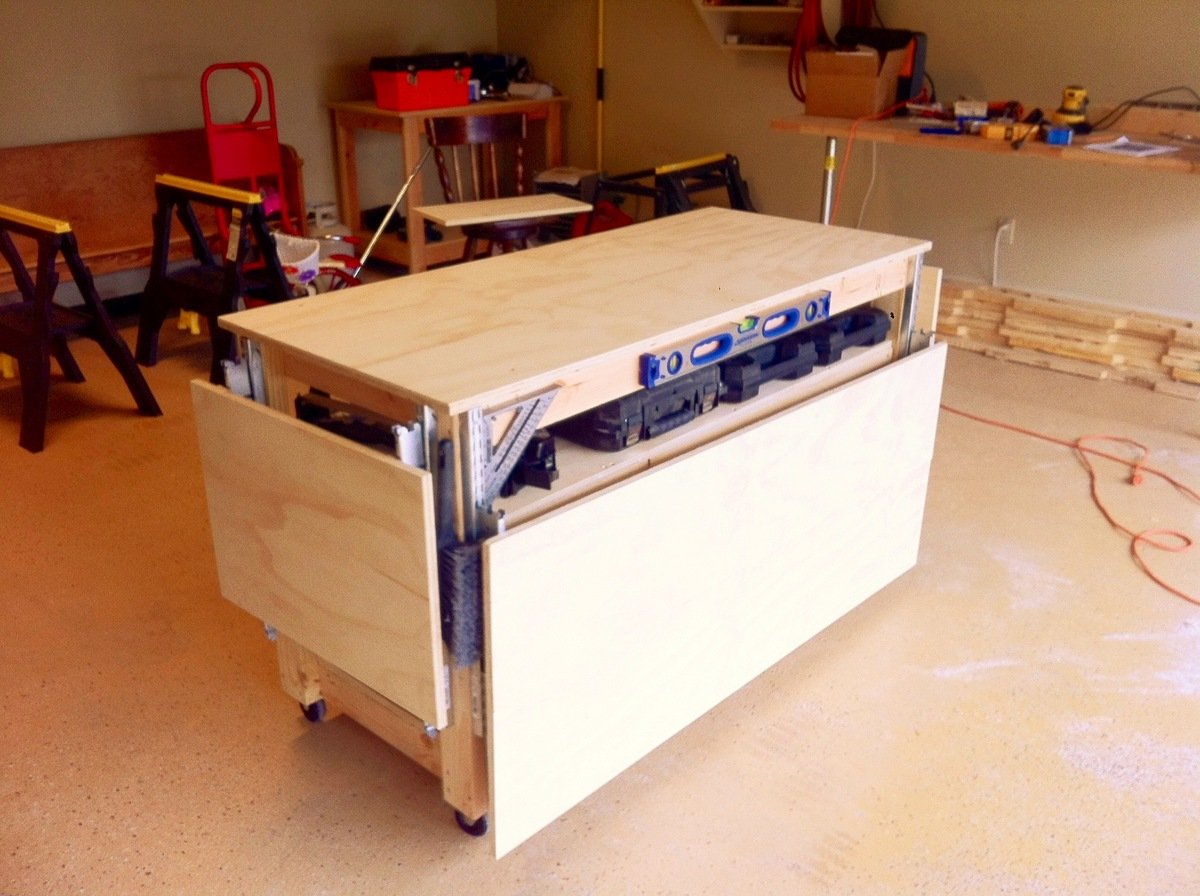
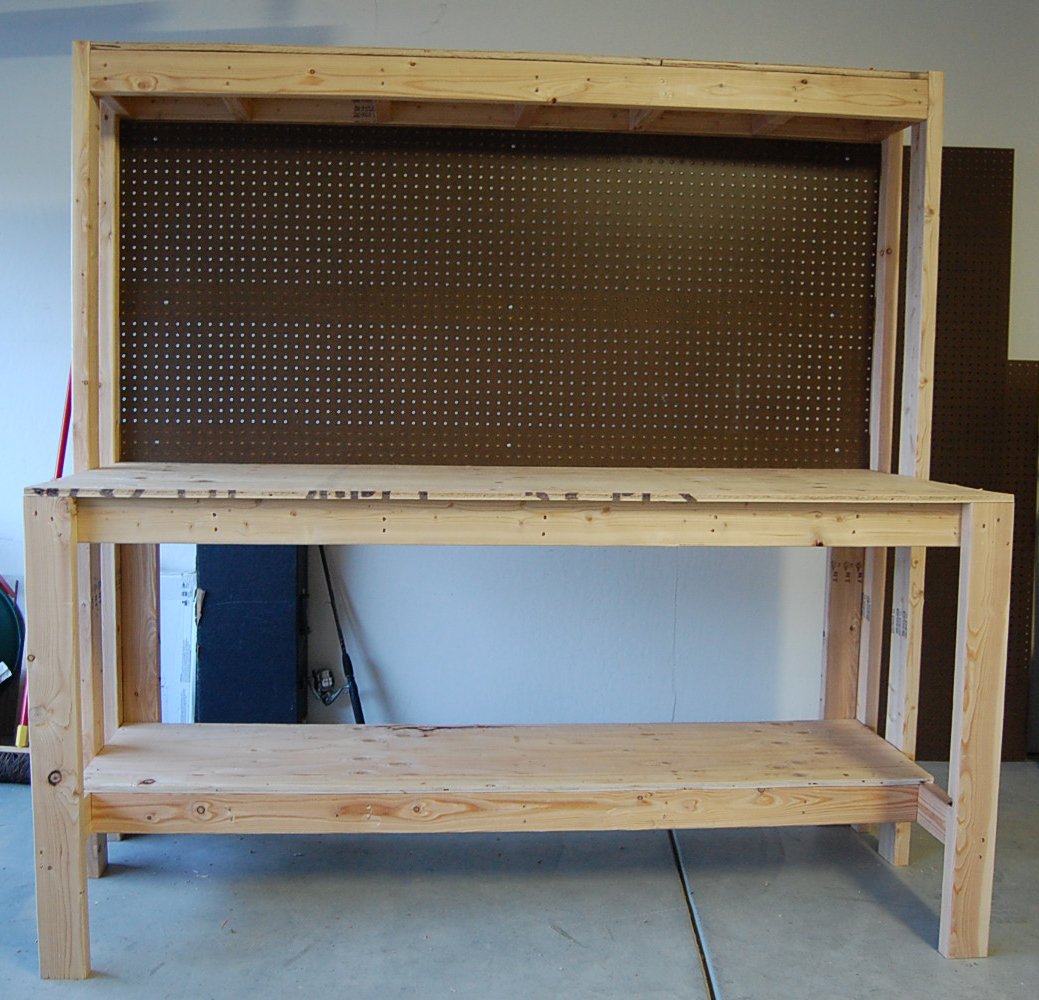
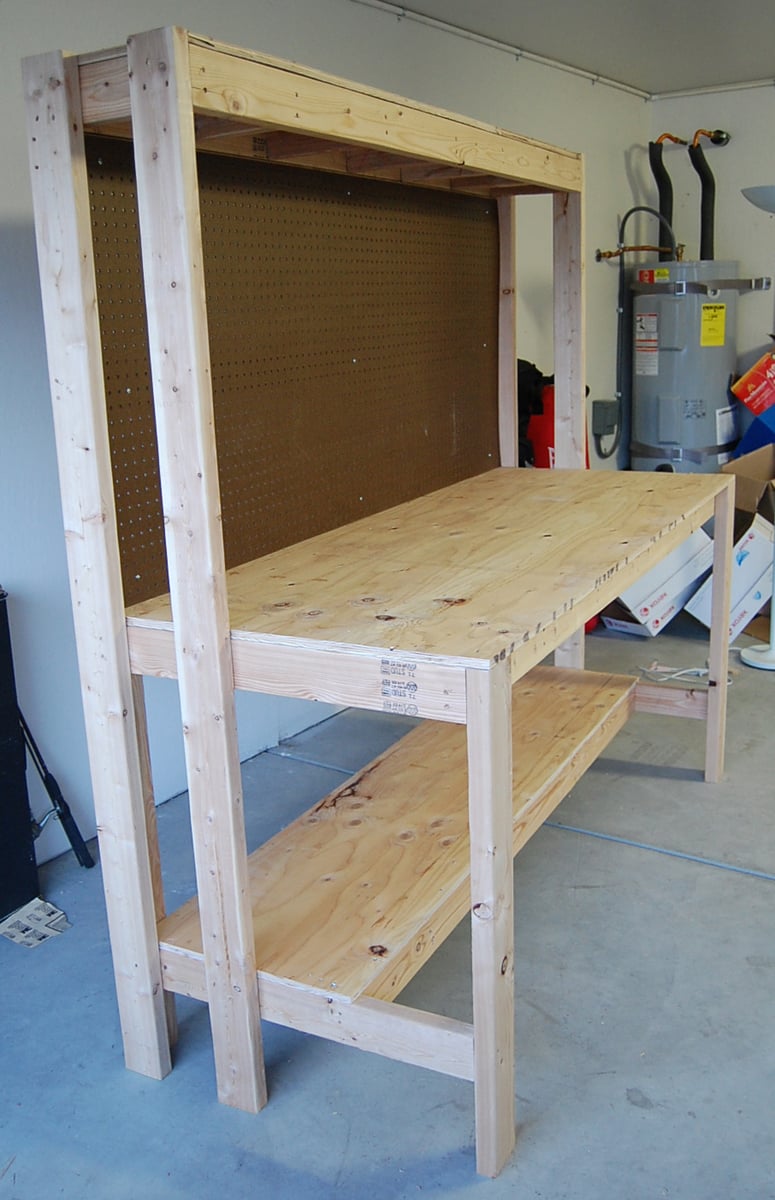
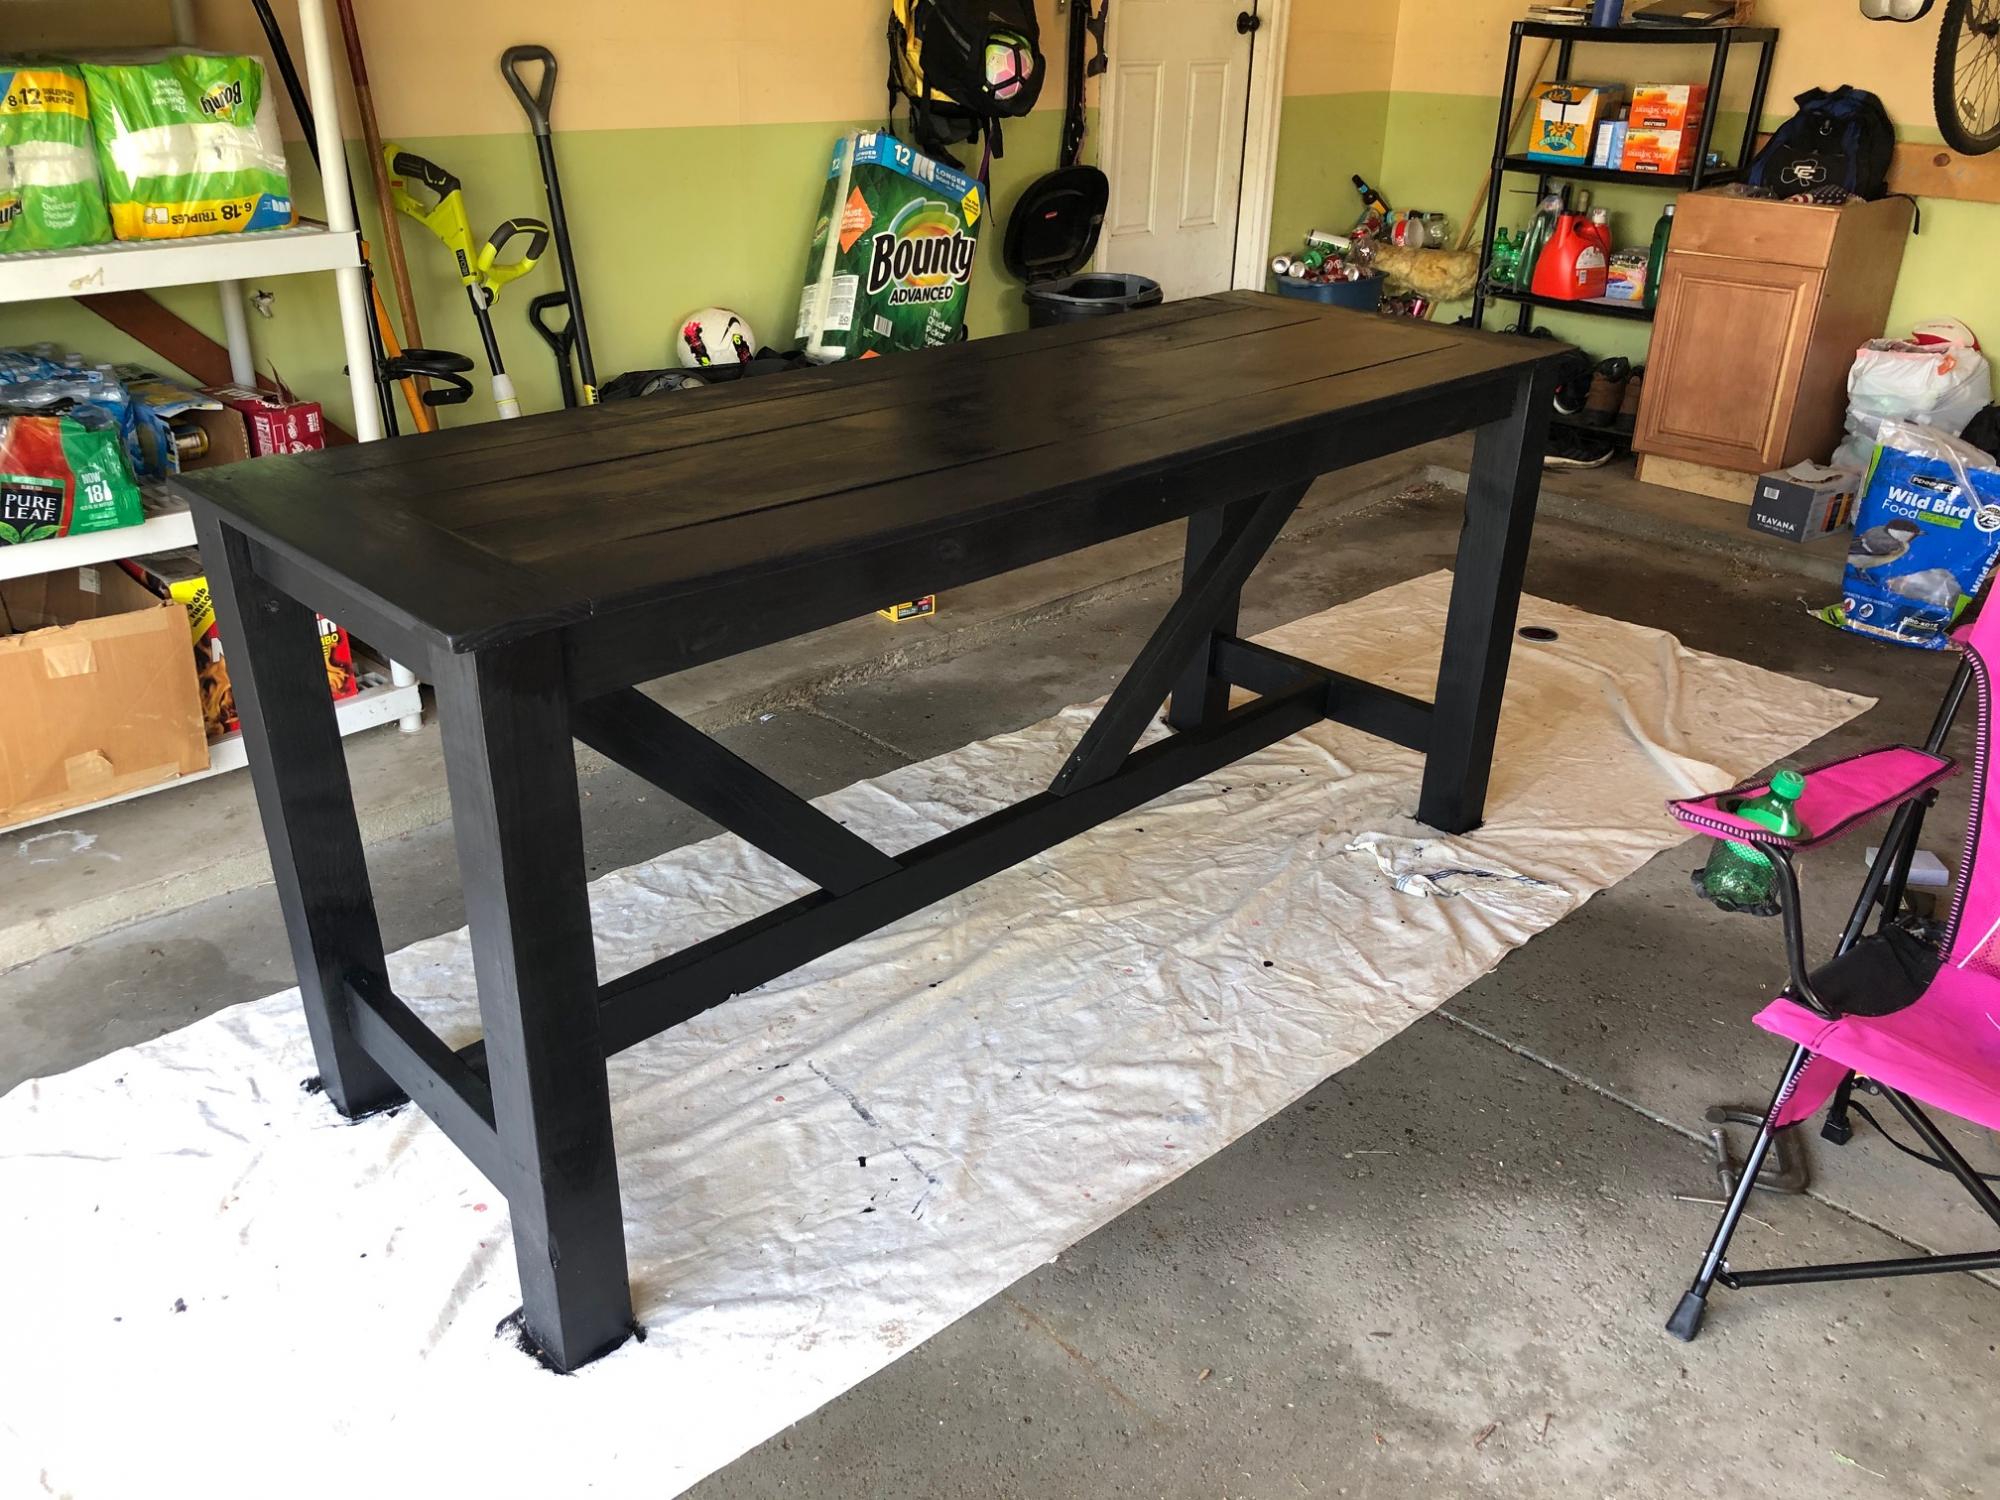
The need for a proper workbench in my garage/shop is a must, but. So is space! I already have a fold down workbench I’ve made with ¾ inch pipe & a door, but. I just need something that can handle all my tools. So, I stumbled upon these plans from the Family Handyman & couldn’t find a reason why this wouldn’t work in my shop. It has room for storage, can easily accommodate my tools & most importantly fold up to store. Easy to build too! Make sure you read all the plans first as some of the materials could be pricey, but well worth it. Technically it’s taken 2 months to build this bench, as I operate on a firefighter/teacher’s budget & during the holiday season no doubt. I ordered all the shelf standards & brackets through Amazon, $210.00 for those alone, but they hold so much weight to support your tools I figure it’s worth it. The rest materials (wood, screws) were purchased at Home Depot for around $150.00. The plans called for ¾ inch ply & it was $45.00 per sheet. However they did have a smaller thickness for $22.00 per sheet & was only a 1/32 inch thinner. I plan on topping all my surfaces with some ¼ inch tempered hardboard later on so I knew it would work. That also left me adjusting my screw size to mount my brackets. Due to the reduction in thickness of the plywood all my #8-1 inch screws needed to be adjusted to ¾ inch so to not screw through the ply. I also hit the molding isle to nab some pieces to use as furring strips to use under the shelves before attaching the brackets. This way I can sand each strip to match before mounting to make sure it lined up flat with the center top. One more thing; where it says “drill 1/8 inch hole in brackets make sure you use 1/8 inch pop rivets. I barrowed a pop rivet gun & was handed some rivets as well. Popped two & they had to be trashed because the rivet size turned out to be 5/32. So I stepped up in drill bit size & it all worked out. As I said, I’ll be topping it with some ¼ inch hardboard. I also plan to run it’s own electrical with an outlet on each post. I hope you all enjoy & this can help!


Thu, 11/29/2012 - 07:03
This is by far the best workbench I have ever seen!!! Thanks for sharing. And excellent choice of table saw and miter saw.
In reply to That is awesome! by Rusty Cottage
Thu, 11/29/2012 - 14:59
If I had it to do over I'd had gotten the contractor grade portable saw from Dewalt. The smaller version I have is the same 10" saw, but. It's maximum rip capasity is only 16. The other will at least rip a sheet of ply in 1/2.
Thanks for the kind words on the bench! I hope everyone that may find this valuable will. The plans came out of a 2005 issue & were hard to find on the internet.
Thu, 07/04/2013 - 18:28
I love this work bench and would love to build it but i cant find them. Could you post them or email them to me please. uniquetrio2000 [at] gmail [dot] com
Thu, 10/23/2014 - 09:04
After some searching, found the plans at http://us.readersdigest.com/images/offer/fh/project_plans/pdf/FH05DJA_W…. Hope that helps. This is on my list of things to make very soon.
Wed, 10/22/2014 - 13:31
I bought all the standards and brackets at Menards for $87.58 and this price included tax and shipping.
Mon, 12/10/2018 - 16:55
Thanks for sharing! Good job! Any chance you'd share palns? No luck on inet or with provided link. Thanks!
Wed, 08/07/2019 - 12:48
This is the perfect workbench that I’d like to build. Could I get the plans for it?
Thu, 03/12/2020 - 12:46
Were you able to locate the plans?
The link in this thread doesn’t seem to be active.
Sun, 07/12/2020 - 17:59
I found the PDF download for these plans, here is the link:
https://docplayer.net/28130746-Do-it-all-mobile-workbench.html
The only place where I could find them, FH doesn't have them online any more.

Tue, 12/08/2020 - 17:57
Great build. I would love to see an instructable on this. :) Thank you for sharing..

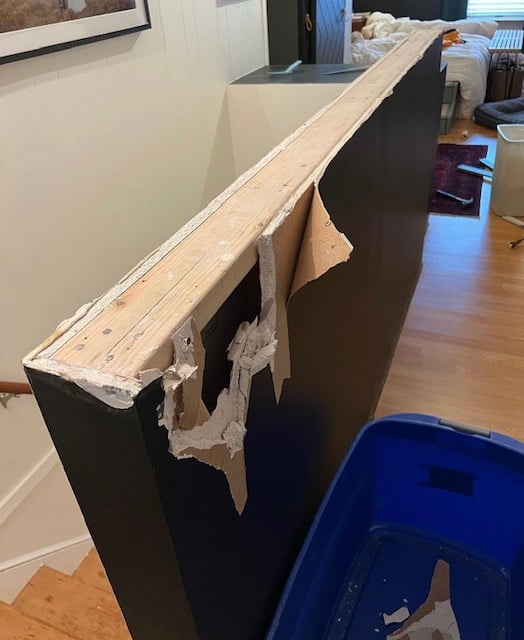
Entire wall fireplace built-in!


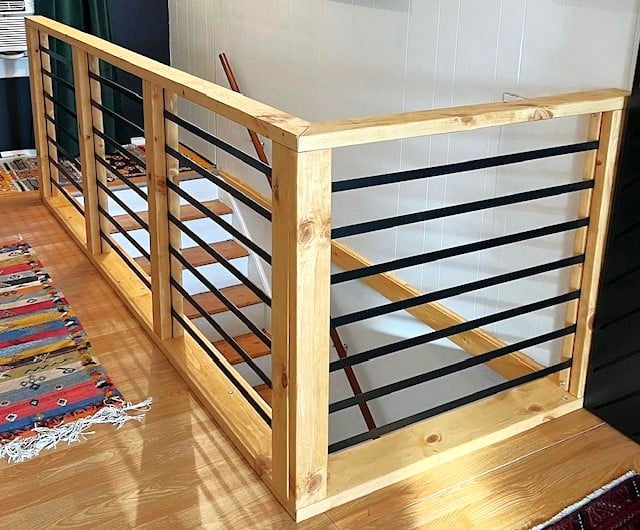
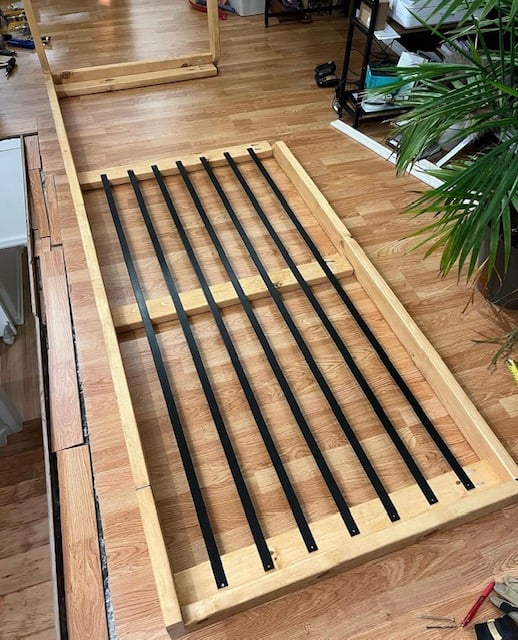
Amazing stair railing upgrade shared by Sara and Chris!

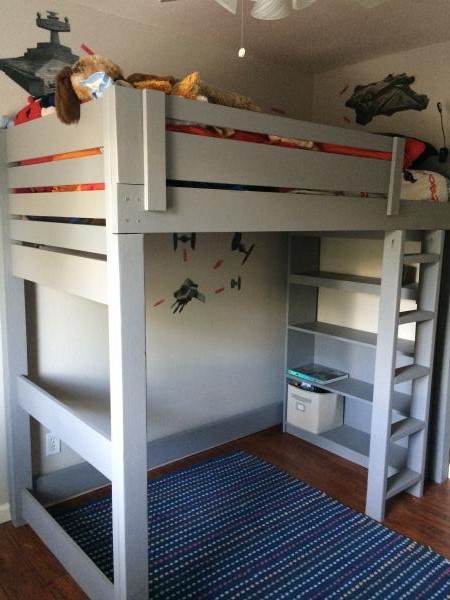
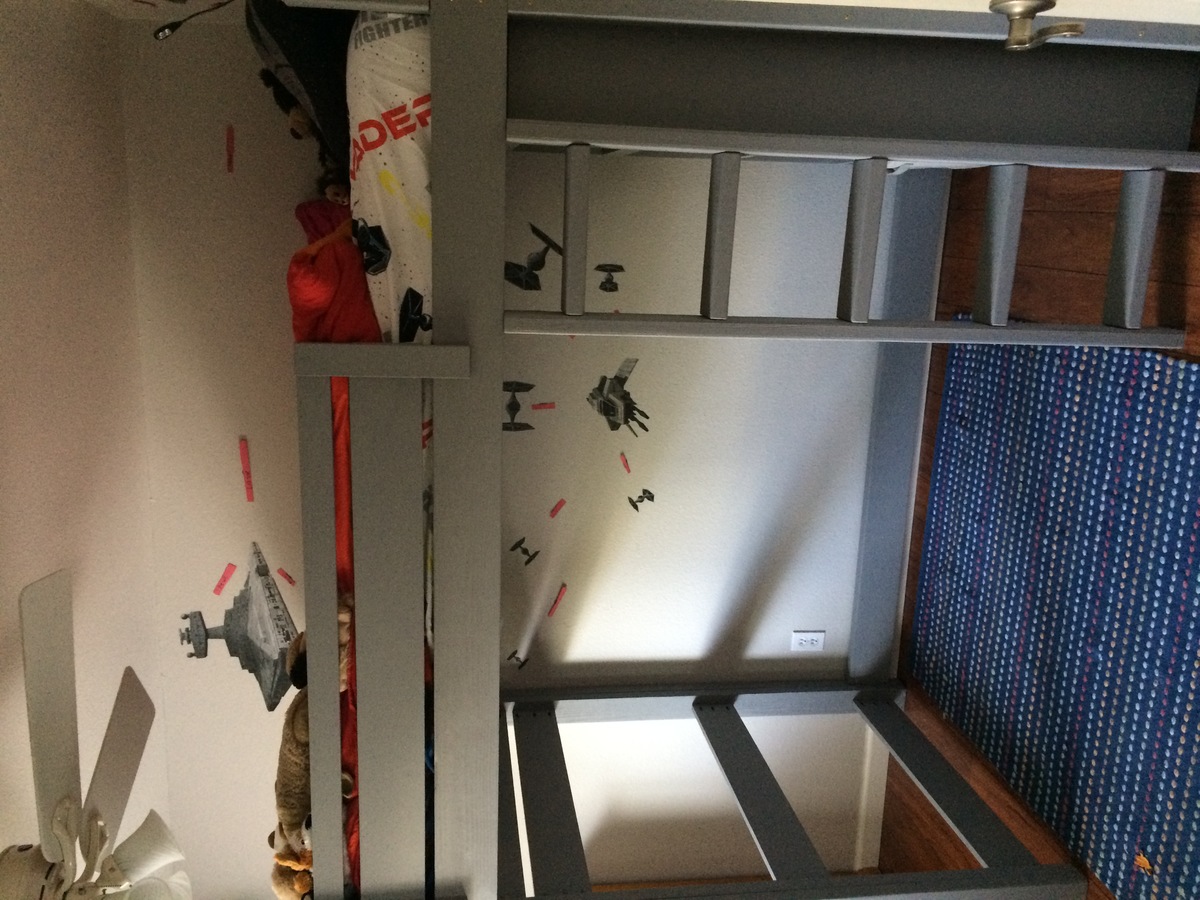
This is a mix the "Side-Street bunkbed" plan and the "How to Build a Loft Bed." I used "Spax" 3 inch wood screws to attach the side rails instead of bolts used in Side Street plan. I used KregJig pocket holes for everything else.
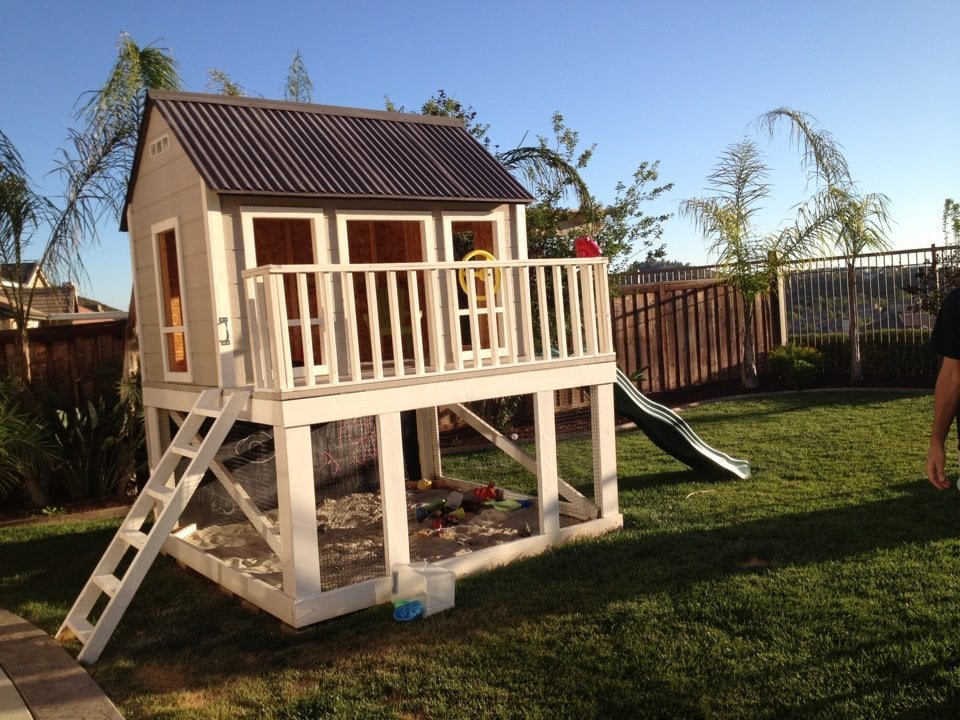
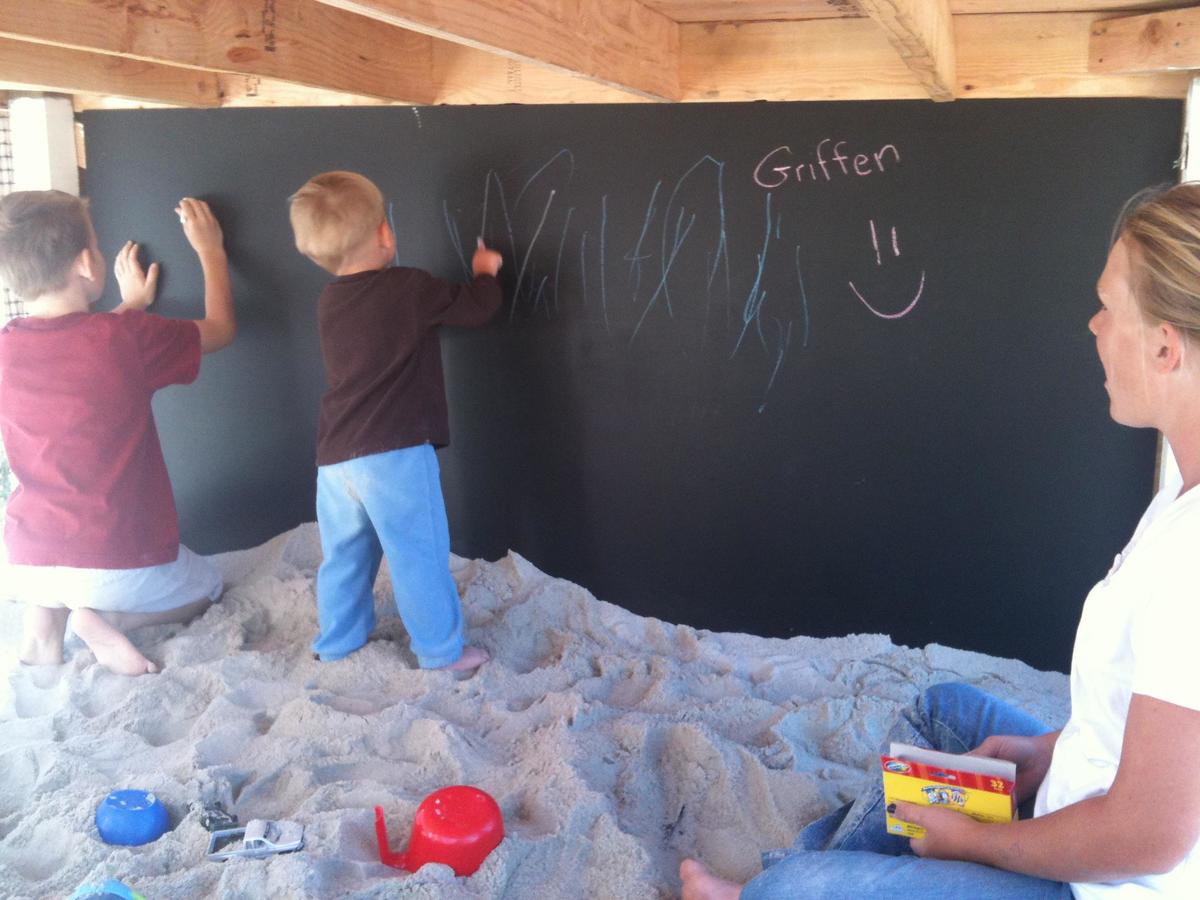
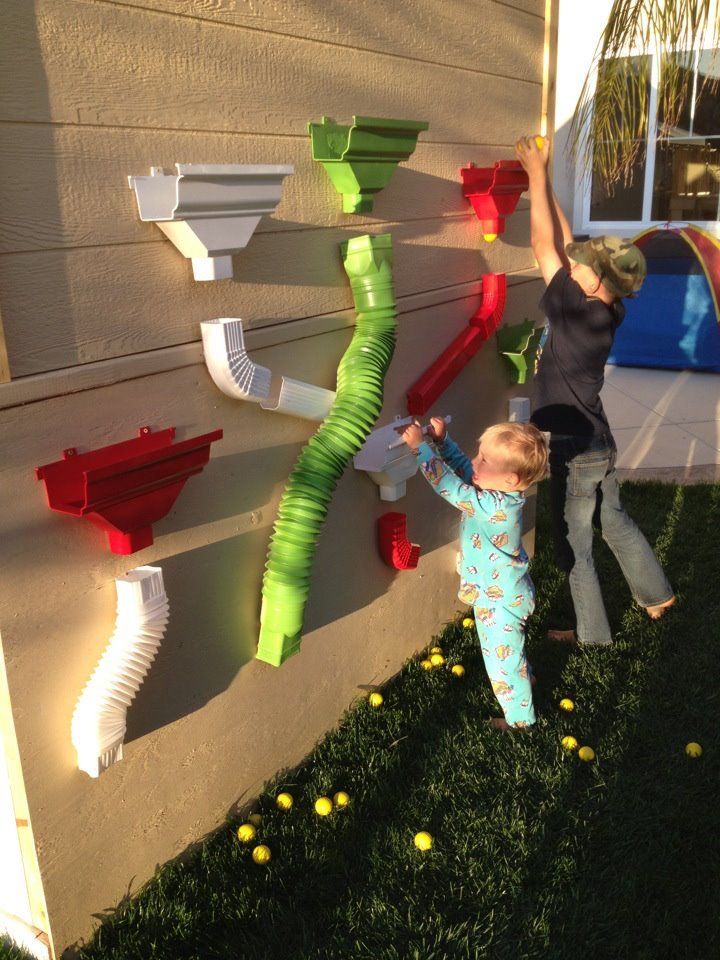
This was so much fun to do! Very easy and I added some personal touches. I made the lower level an enclosed sandbox area with a chalk board on the back wall. On the outside of the back wall, I added a "ball wall" that my kids love. I enclosed the bottom sandbox with plastic "chicken wire" to keep the cats out. :)
Thu, 11/22/2012 - 13:05
This is an awesome build. love the colours too, could you share them with us, including the roof colour. Thanku
Thu, 11/22/2012 - 15:34
Thanks! Glad you like it!
The paint was from Dunn Edwards: Roof was "Louisiana Mud", playhouse walls were "Drifting" and then the white was a snow white from Lowe's.
The slide and accessories were also from Lowe's.
Tue, 04/15/2014 - 09:35
I LOVE this! This is exactly what I'd like to build. Do you have plans you can share with us? I think I'd also like to add a couple of swings on one of the sides too. Thanks so much!
In reply to Love this! by m7hennen
Sun, 04/27/2014 - 08:39
I know I messed with the dimensions a bit but I don't remember exactly. I made the playhouse larger (deeper and taller than original plans) . I also cut the roof line on the deck side for more room. I put aluminum over the wood on the roof and then painted. The Ball Wall was made out of plastic gutter pieces that I painted and we used practice rubber golf balls to throw into them. I hope that helps! We sold that house, so I can't go out and measure it :)
In reply to Plans for Playhouse by Dawnybb
Thu, 05/28/2020 - 15:32
You may not get this as this is an old post. Did you dig post holes? I have older kids and I am thinking about building a plan like this but at a 6ft height. Wondered how much it moves around when there are a bunch of kids on there. The house I will build is also 6 ft heigh.
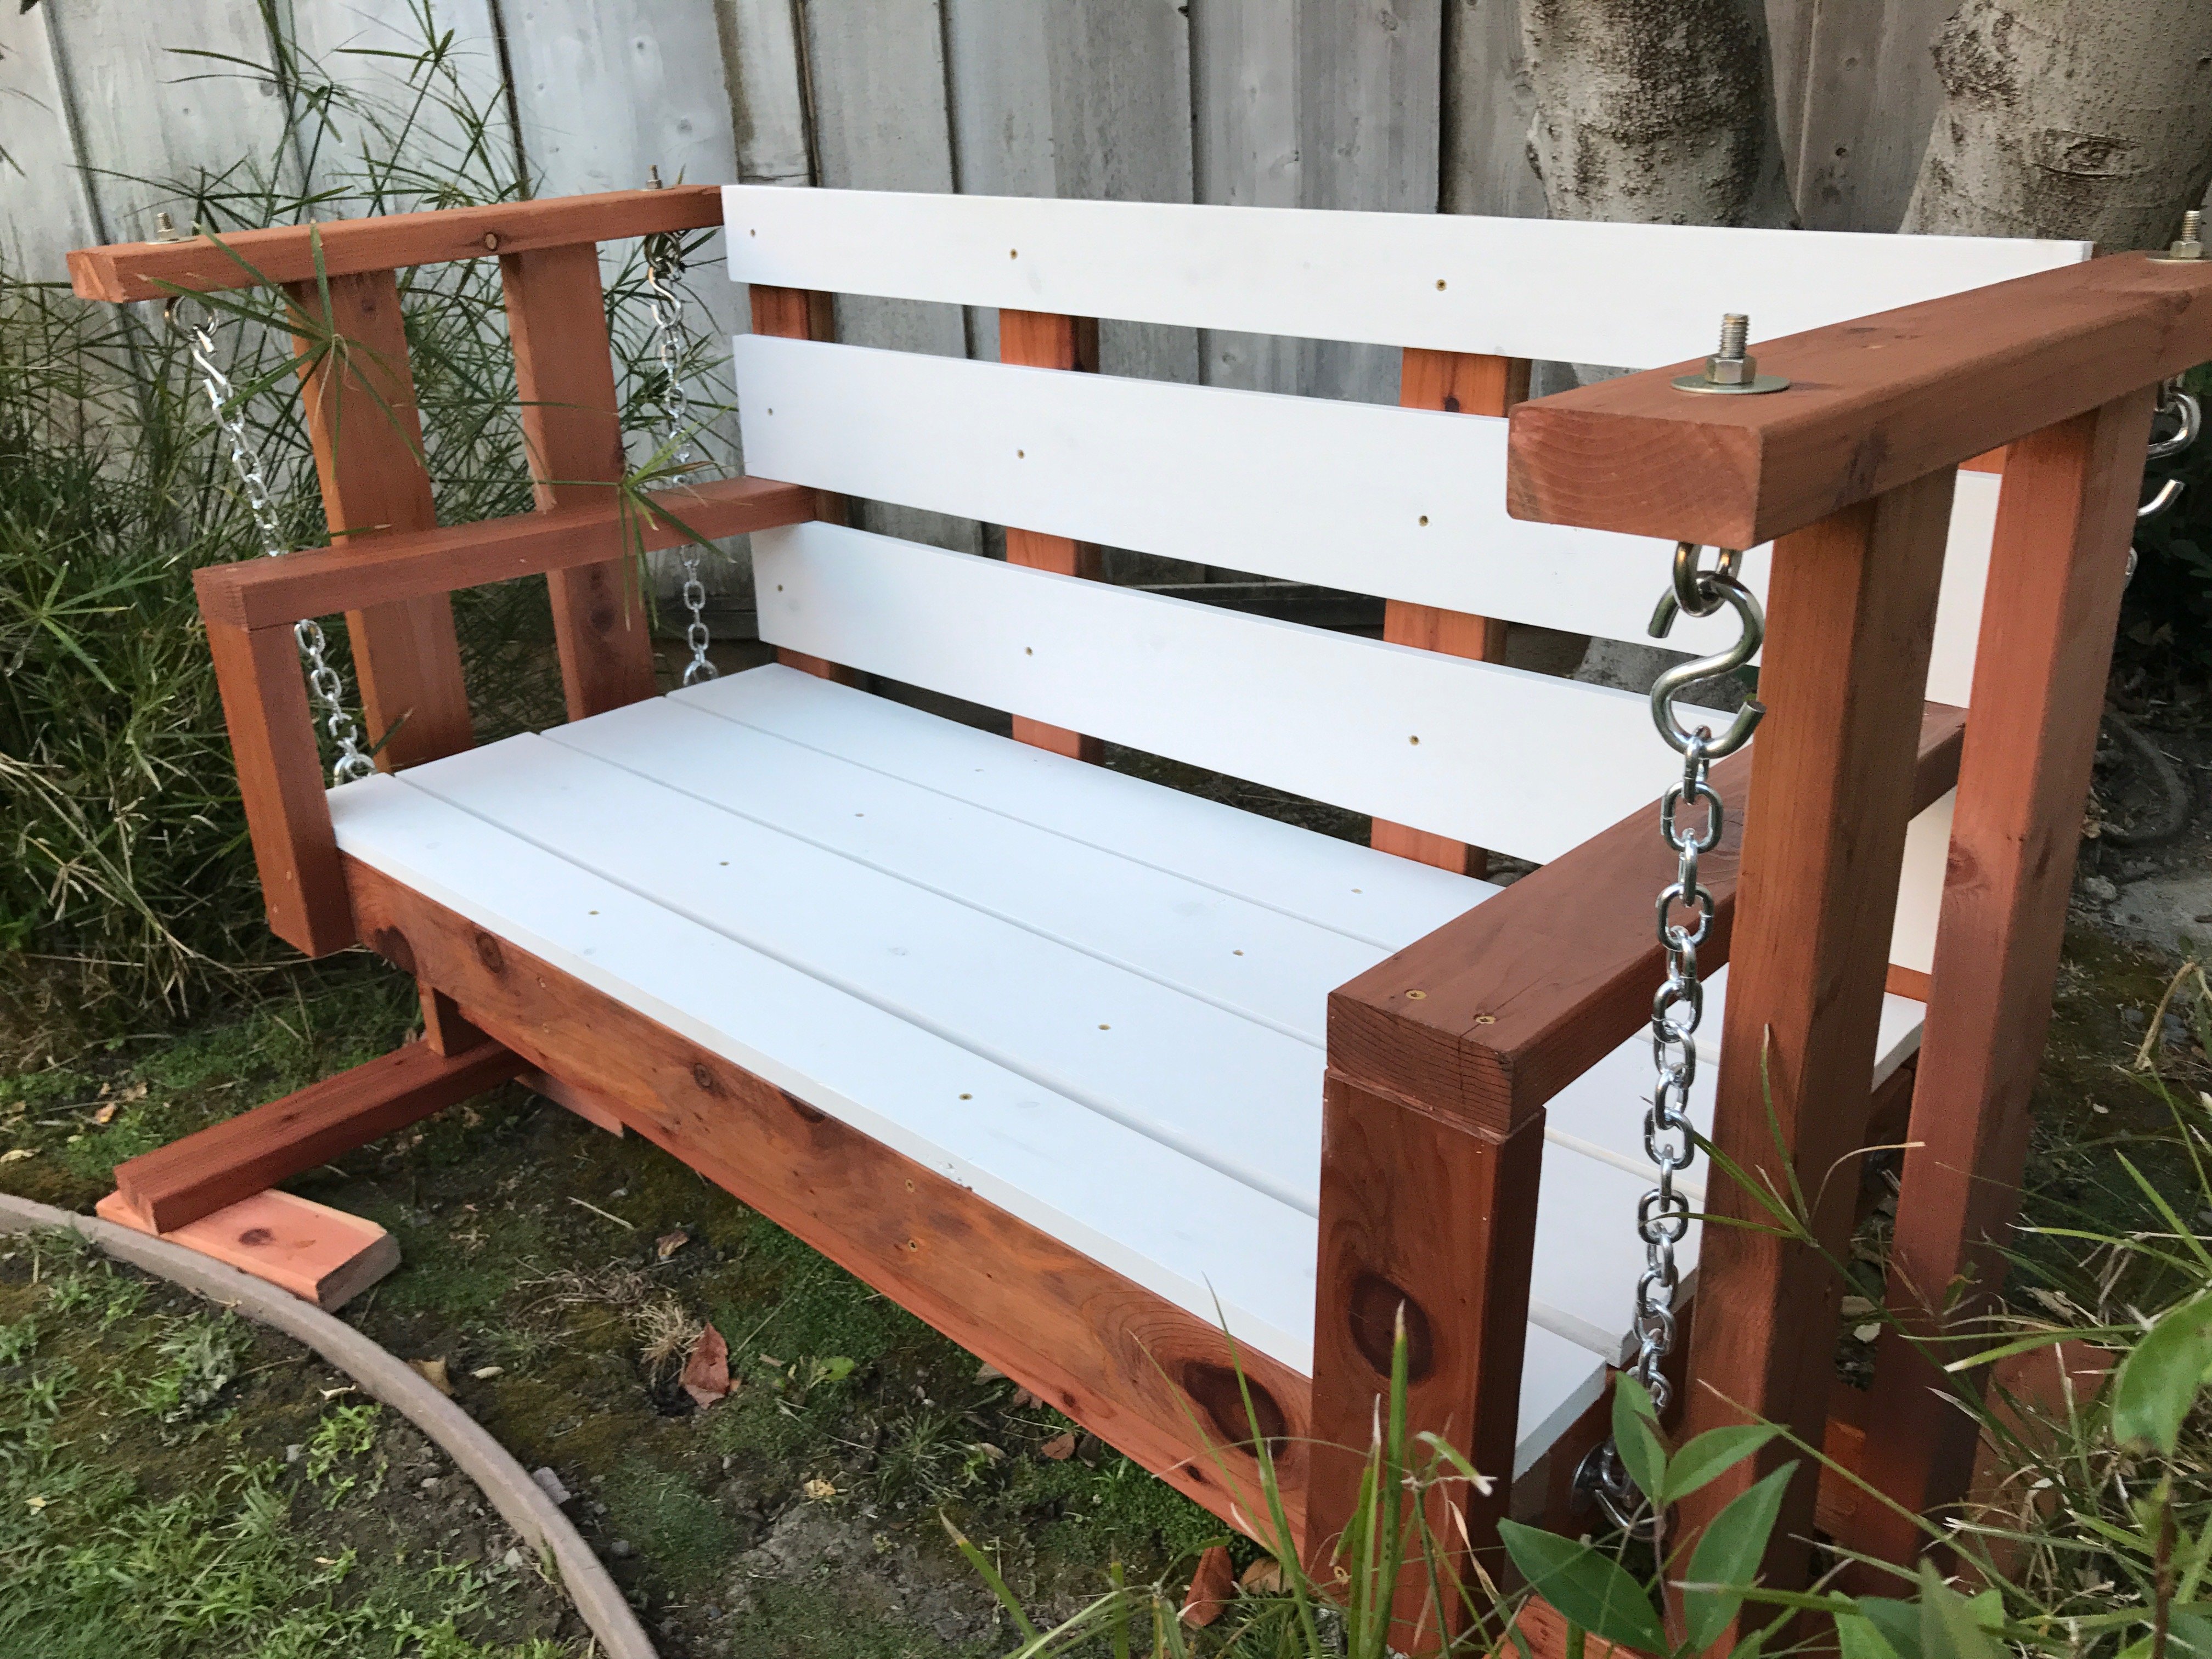
Built the porch swing and was inspired to build the glider frame by another "Brag Post" Looks great and fits perfectly in my back yard!
Fri, 02/18/2022 - 08:20
Are there any dimensions for the glider part? I have first year agriculture students building this, but we are unsure of the cut list for this. I am sure I can figure it out as the teacher, but with 20 students in the class, it would be better to be able to give them instructions to follow on paper. Thank you!!!
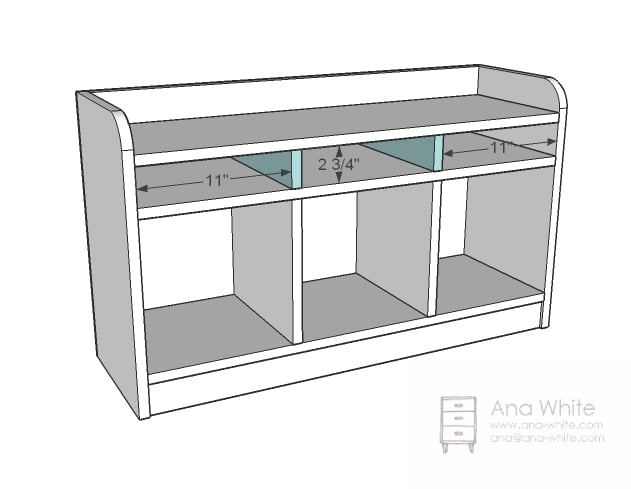
This is our 2nd project - we liked building the bookshelf so much, we decided we're gonna keep going and need a good workbench. Got these plans from the Family Handyman Website (http://www.familyhandyman.com/DIY-Projects/Woodworking/Workbenches/how-…). They claim the cost to be $50, but it was closer to $80 for us - still a GREAT project and easy to put together with the nail gun.
Sat, 04/16/2022 - 07:29
No working link. Cannot find this or the plans.
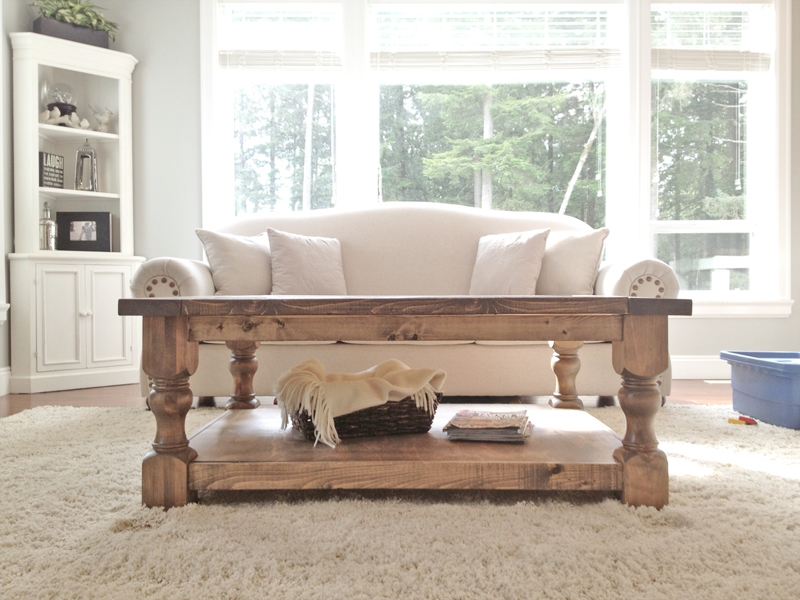
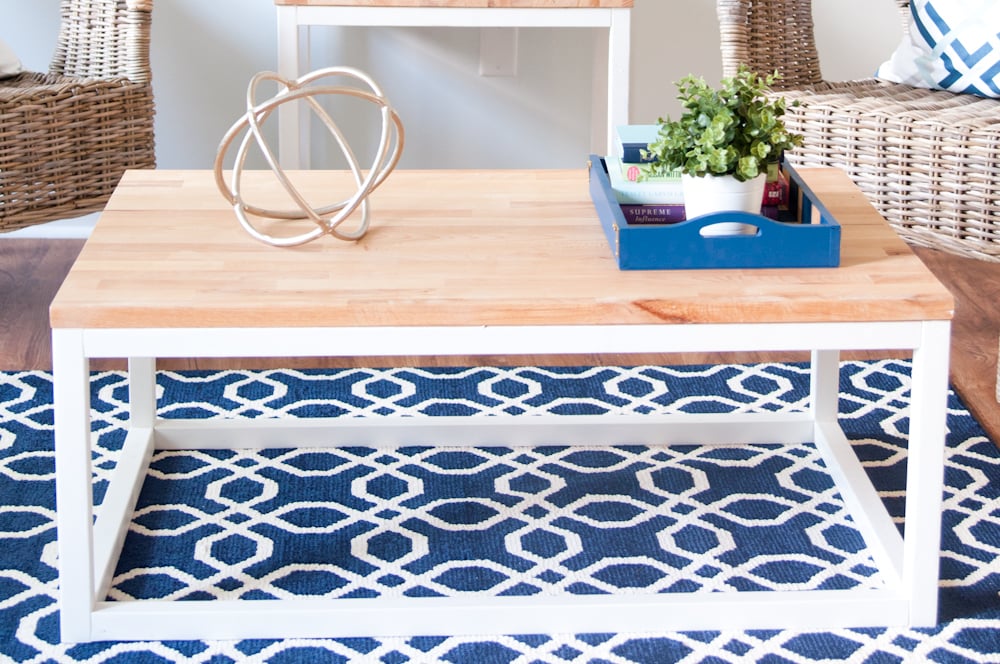
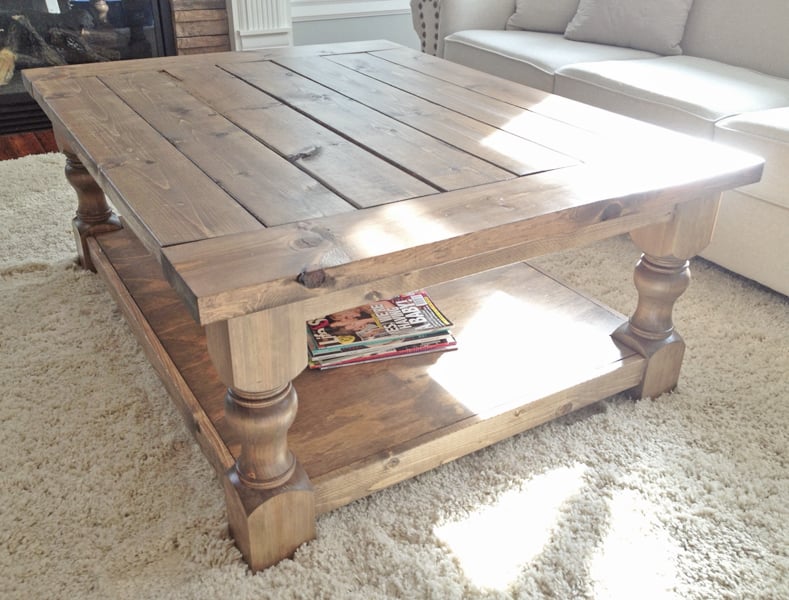
Loved this Coffee Table and wanted to suprise the wife for christmas, so being my first project I got started! had no idea what I was doing but they were great instructions, and the KREG JIG is AMAZING. altered the plans a bit to make it a rectangular coffee table (added 12 inches) instead of square to fit our living room better. Now to tackle the next project!
Wed, 03/19/2014 - 07:39
I absolutely LOVE the finish on this, thank for sharing!!! For the estimated cost you put $100, is that without including the cost of the turned legs? Did you get the legs through Osborne? I think I NEED to make this coffee table and use that finish!
In reply to I absolutely LOVE the finish by MichelleC
Wed, 03/19/2014 - 09:02
Now that you brought it to my attention you are absolutely right, I completely forgot about the cost of the legs. including the cost of those, it does come to $200 dollars, ill change that. I also did get the legs from Osbourne. As for the finish yes do it! I am really happy with how it turned out :) thanks again and let me know when your coffee table is done so i can check it out!
Cheers,
Justin
Wed, 03/19/2014 - 09:55
if you dont mind me asking, in what order did you apply the stains?
In reply to if you dont mind me asking, by 2nervous2build
Wed, 03/19/2014 - 11:47
not at all! here is a link as to what I followed.
http://ana-white.com/2013/05/vintage-graybrown-stain-pine
Ana shows exactly what to do :) mine didnt turn out as dark as her project, but am still lovin the table none the less. :)
Cheers,
Justin
Wed, 03/19/2014 - 09:55
if you dont mind me asking, in what order did you apply the stains?
Sat, 04/26/2014 - 17:54
Wow, congrats on your first build! It turned out amazing! And that finish? OMGosh, so incredibly beautiful! I love it! Thanks for sharing!
Tue, 05/20/2014 - 13:32
Thank you Jen for checking out the coffee table! thanks for the compliment as well!
Tue, 05/20/2014 - 13:32
Thank you Jen for checking out the coffee table! thanks for the compliment as well!
In reply to AWESOME 1st Build by RE
Fri, 01/02/2015 - 09:48
Thank you!
Cheers,
Justin
Fri, 01/02/2015 - 09:47
Sorry for such a late response! incase you still needed to know, I made a typo and I did mean special walnut.
Thanks!
Cheers,
Justin
Fri, 07/17/2015 - 12:59
Being as yours is much lighter (and i like it more than the darker). Did you use the wood conditioner and how long did you leave the stain on for? it almost looks like once it was on you were wiping it off. Love it well done :)
Also, do any of you guys use the paste wax when finished? I was thinking about following the stain with some poly to seal it. any suggestions?
Wed, 08/19/2015 - 09:47
An excellent finished project. Did you use 2x6 for the top as your wood looks a tad thinner?
Wed, 08/19/2015 - 09:47
An excellent finished project. Did you use 2x6 for the top as your wood looks a tad thinner?
Wed, 08/19/2015 - 13:58
Can you tell which legs and size you used from osborne?
Project looks amazing!
This is my first project, based on your outdoor bar table plan. Great design. I changed the top a little, still needs a little work.
We didn't paint it, but between two newbies, it only took an afternoon. It has freed up a ton of space in the cabinets!
Hattie
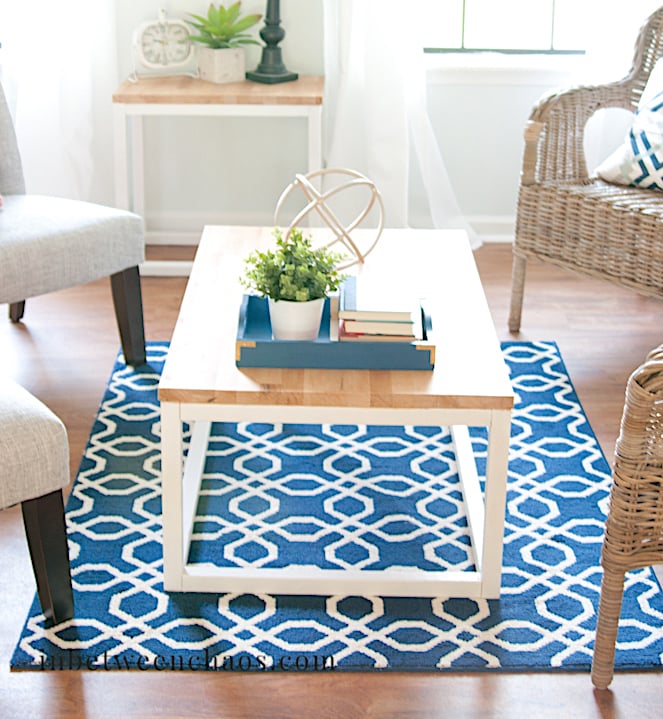
While staging my most recent flip house, I needed some accent tables for the living room. I picked up a butcherblock countertop at IKEA, then created two end tables and 1 coffee table. I loved Ana's simple design, and I thought it was a great balance to the warm butcherblock top. Thank you Ana for a great plan as always!