Community Brag Posts

Changing table

Submitted by markmart74 on Thu, 07/07/2016 - 03:40

With the arrival of our first baby in 10 days,  the wife wanted a changing table. My only vision of a changing table was the ones in public restrooms. With the help of Google, I came across all the great diy ideas on this site. I combined 3 plans into 1 and came up with this. The project took 2 days to build. Next step is to prime and paint. 

Estimated Cost
90 - 100
Estimated Time Investment
Weekend Project (10-20 Hours)
Finish Used
Primer and paint
Recommended Skill Level
Intermediate

Comments

2x4 Adirondack Chair

Submitted by Anonymous (not verified) on Tue, 08/03/2021 - 06:27

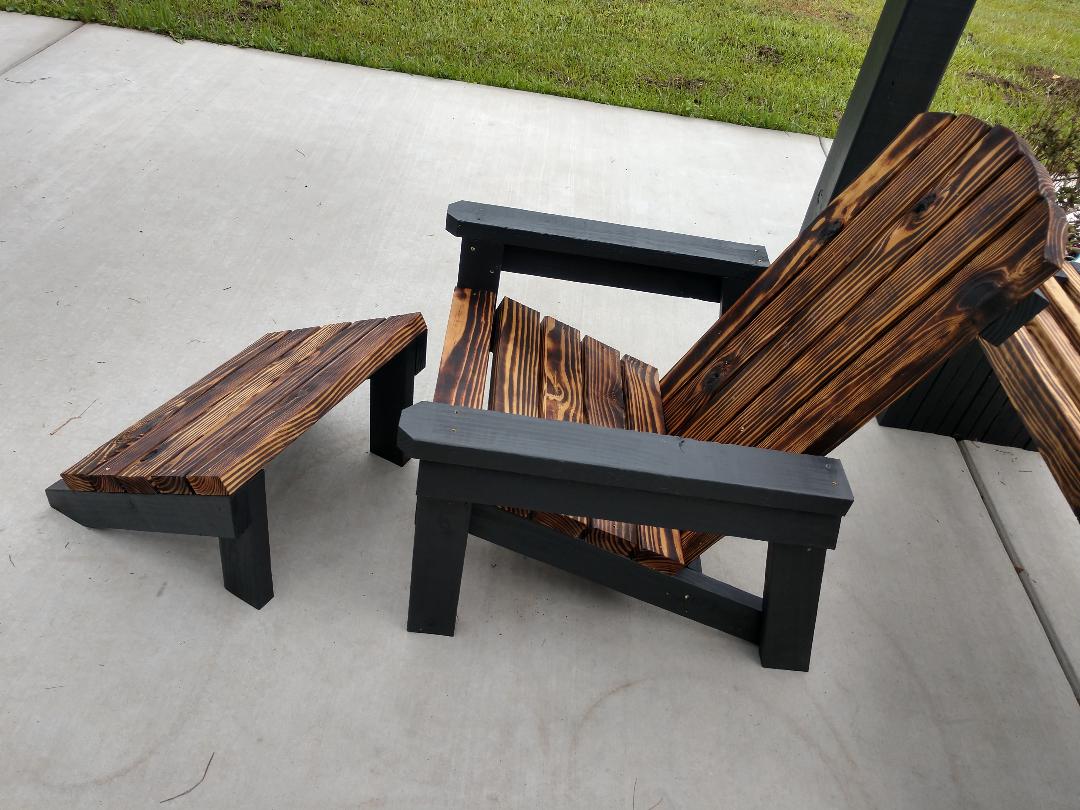
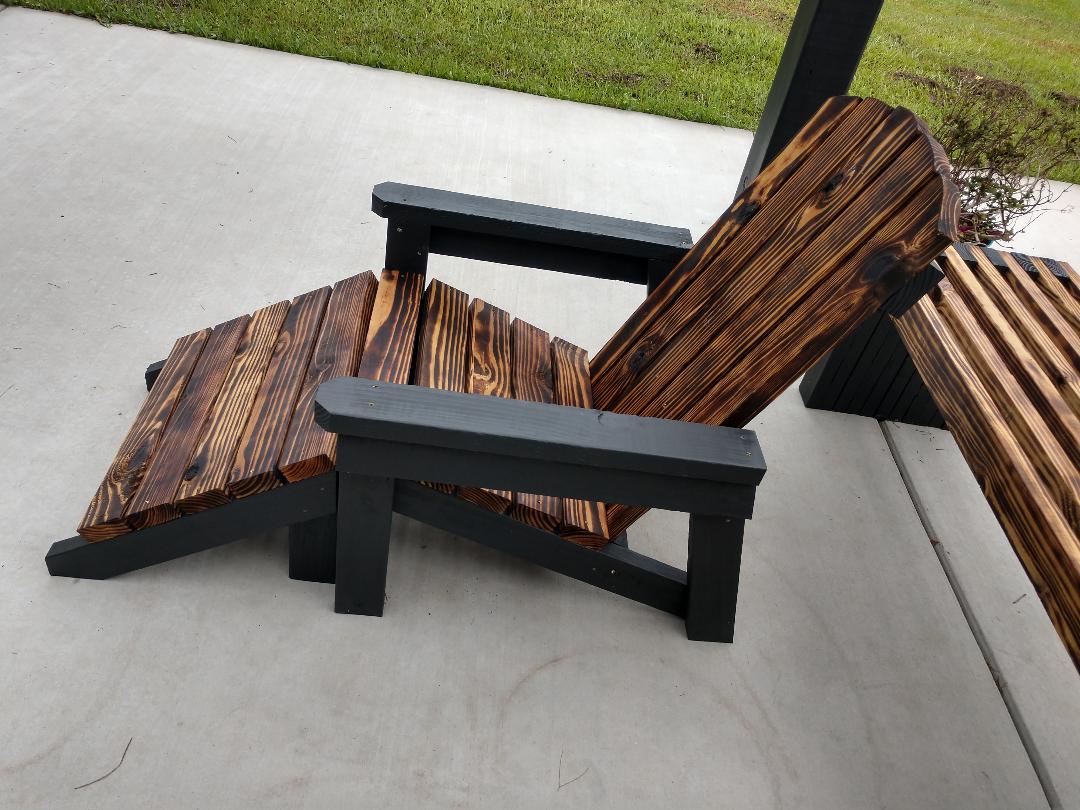
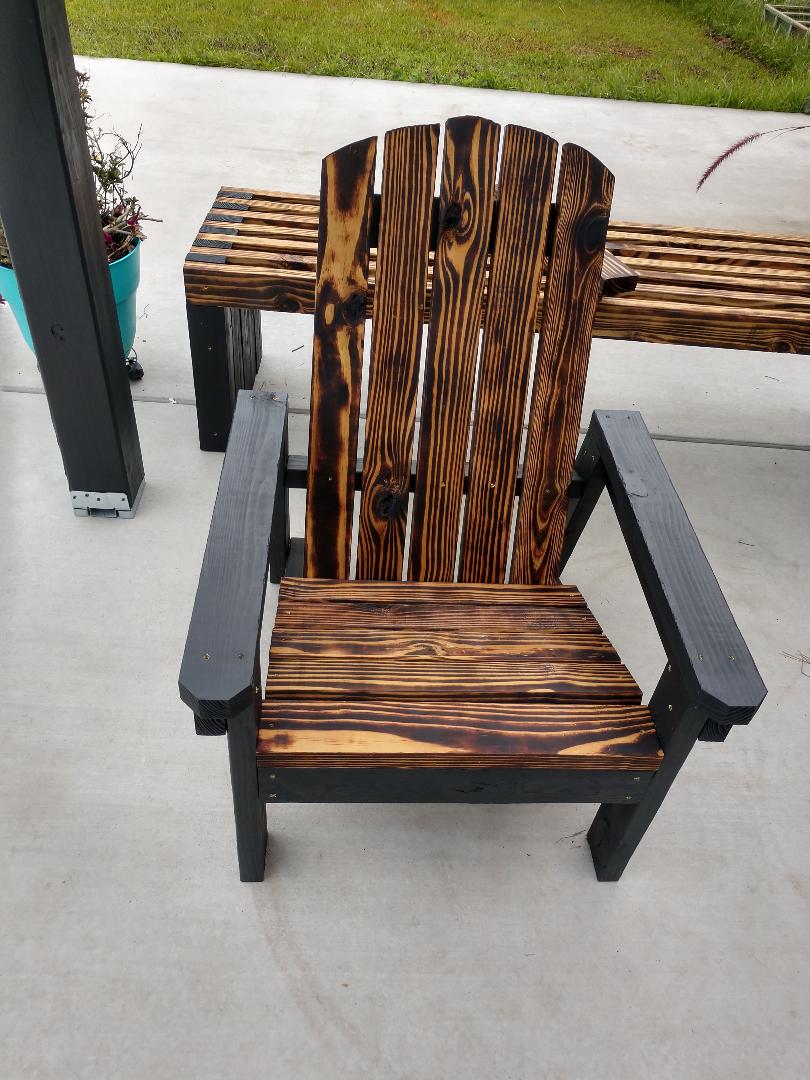
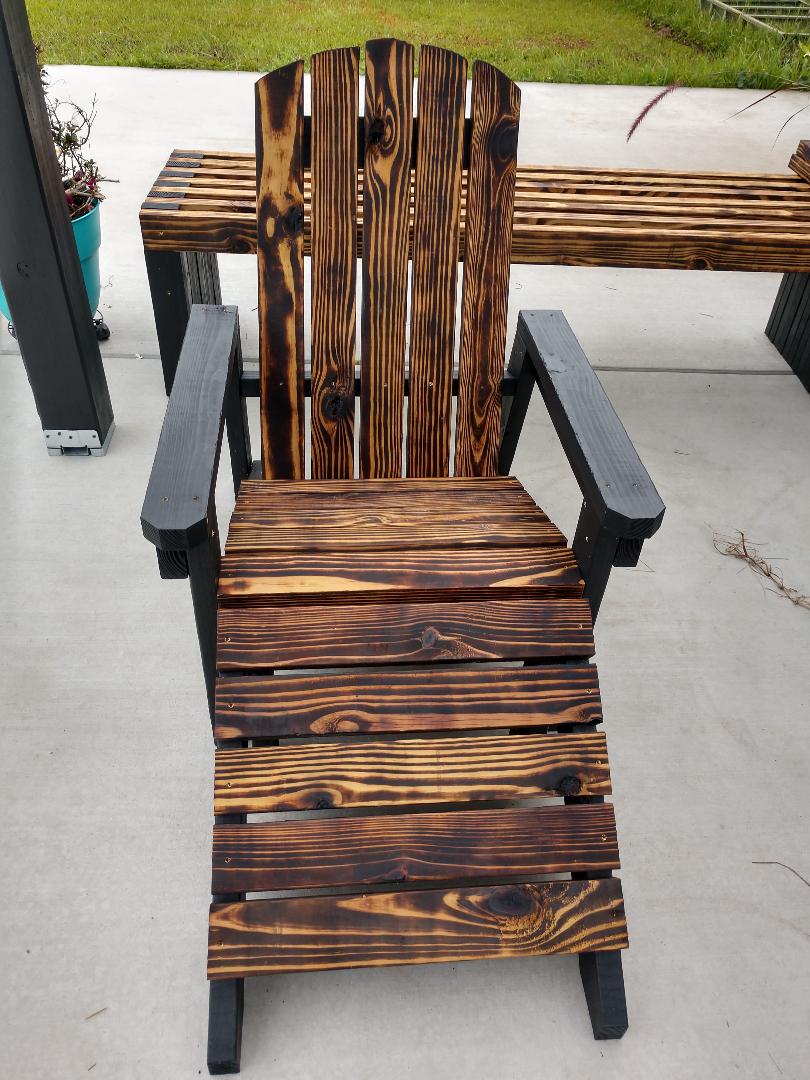
Very easy instructions. I love the way they turned out. I used all 2x4's that I had left over from another project. I burned the top pieces and painted all other pieces. Love your easy instructions. My first time making furniture.
Thanks
Yvette

Recommended Skill Level
Beginner

Guest Bathroom Open Vanity

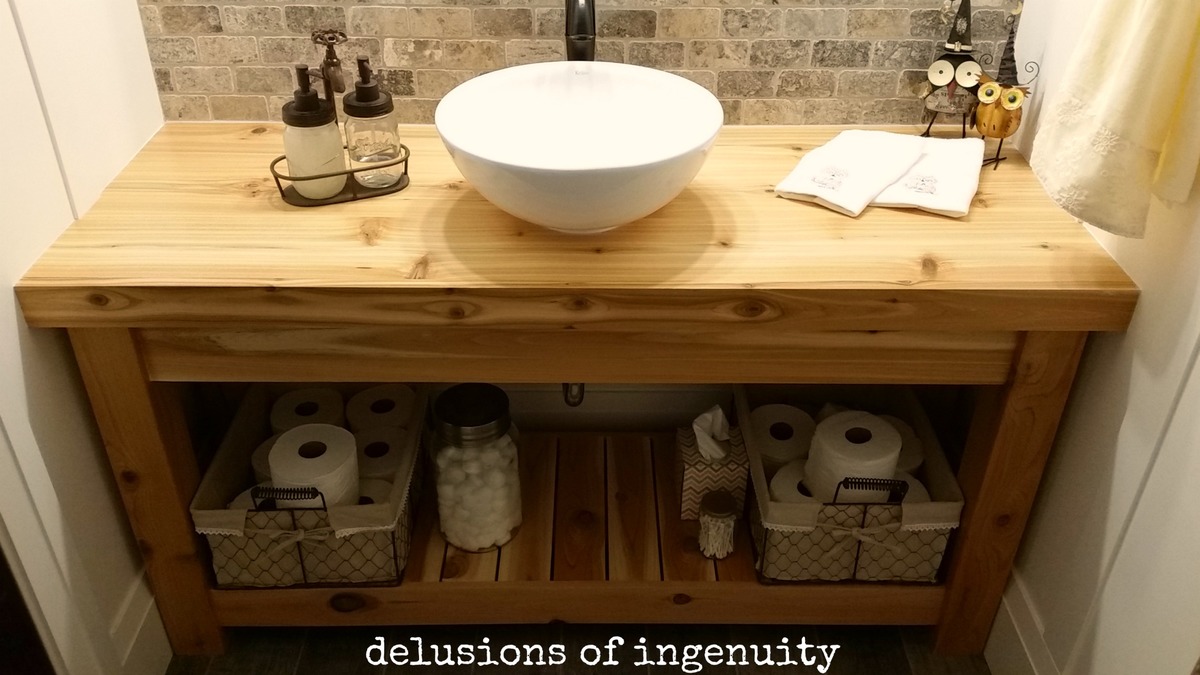
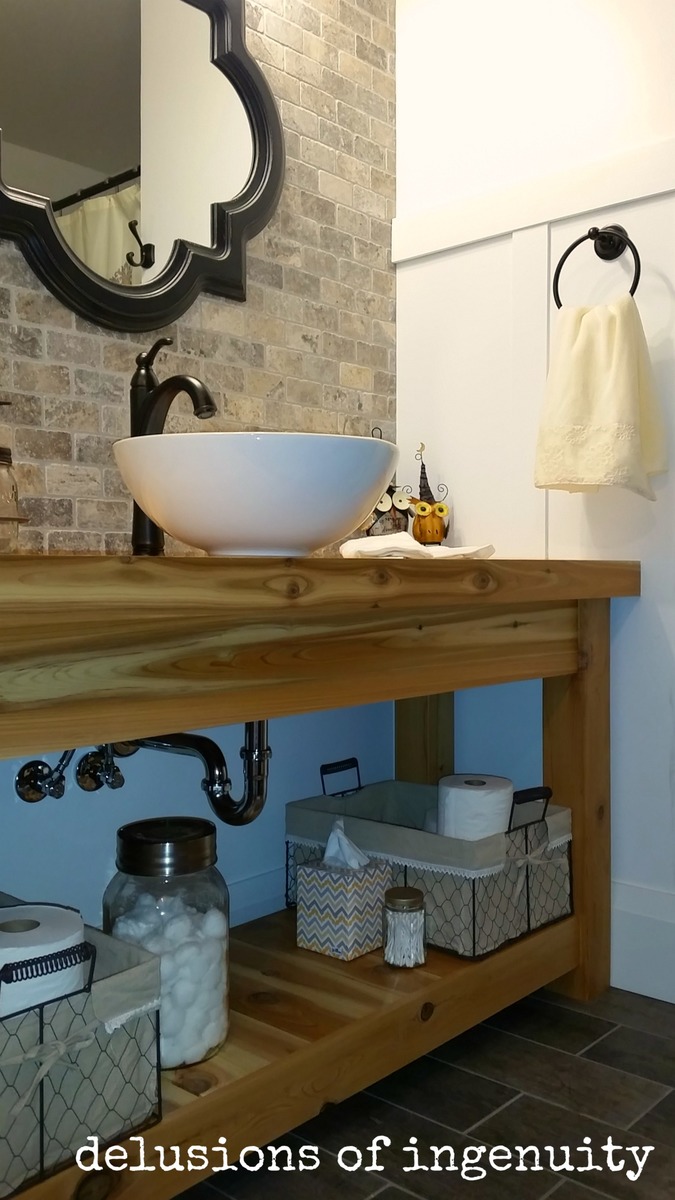
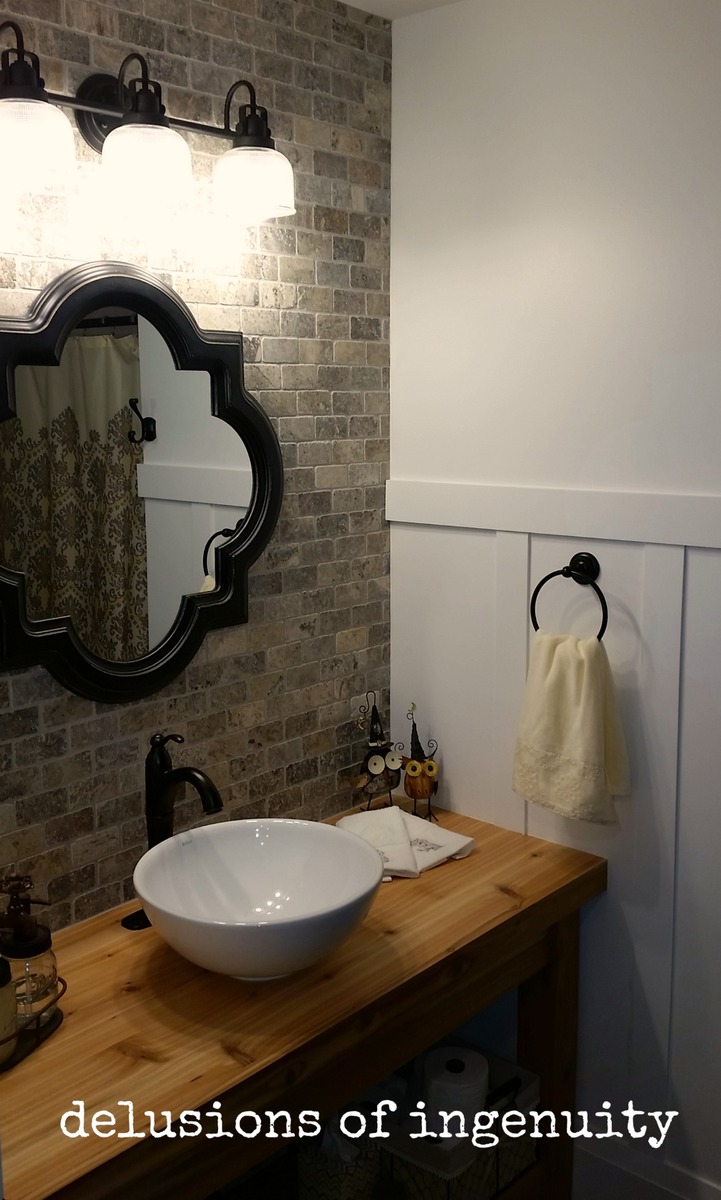
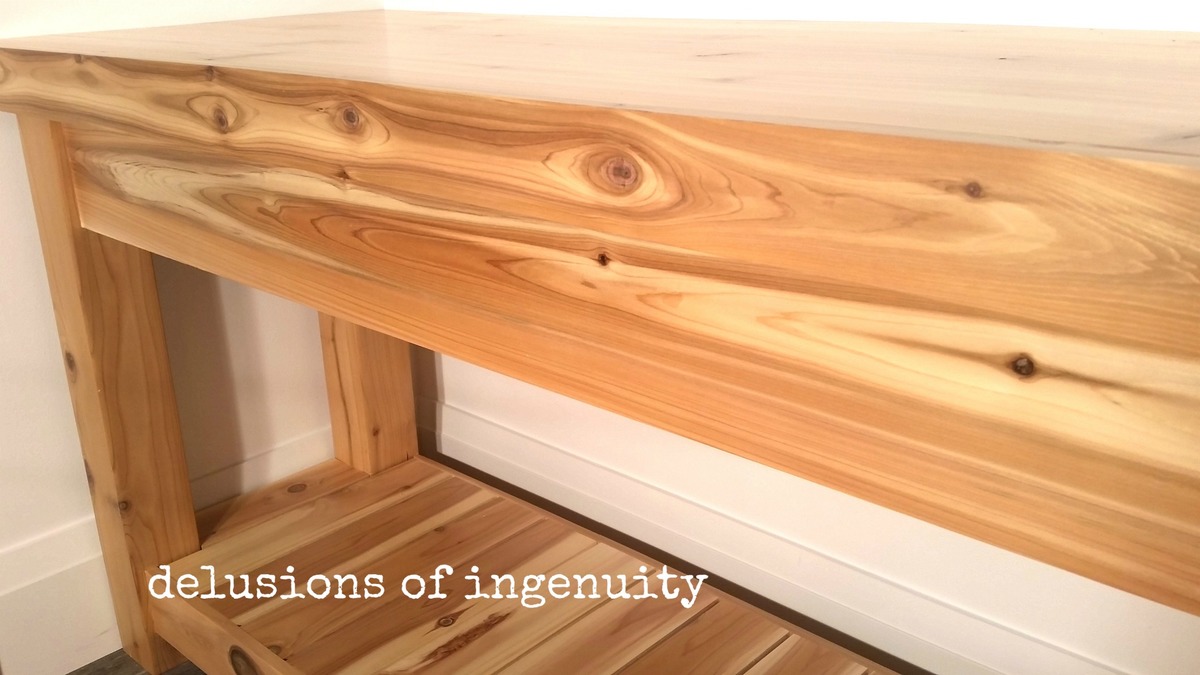
This plan from Ana's site fit the bill perfectly for the vanity in our guest bathroom. Only a short four years after building our home, our guest bath finally has a functioning sink vanity! We also added a Kraus brand faucet and vessel sink, as well as tiling the back wall and installing faux board and batten. The estimated cost is for the entire bathroom project.

Estimated Cost
$1000
Estimated Time Investment
Week Long Project (20 Hours or More)
Finish Used
General Finishes High Performance Flat clear coat
Recommended Skill Level
Intermediate

DIY Modern Rustic Outdoor Chair

Submitted by susanshamp on Fri, 07/10/2015 - 15:07

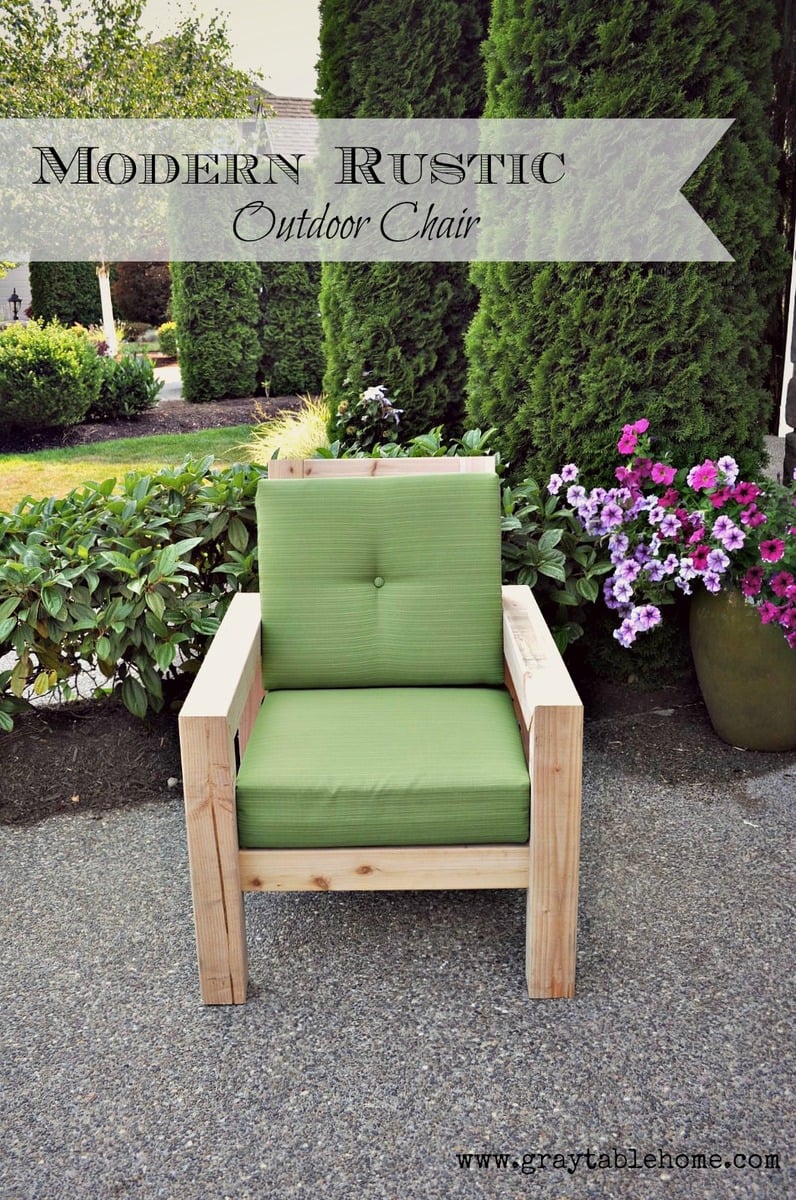
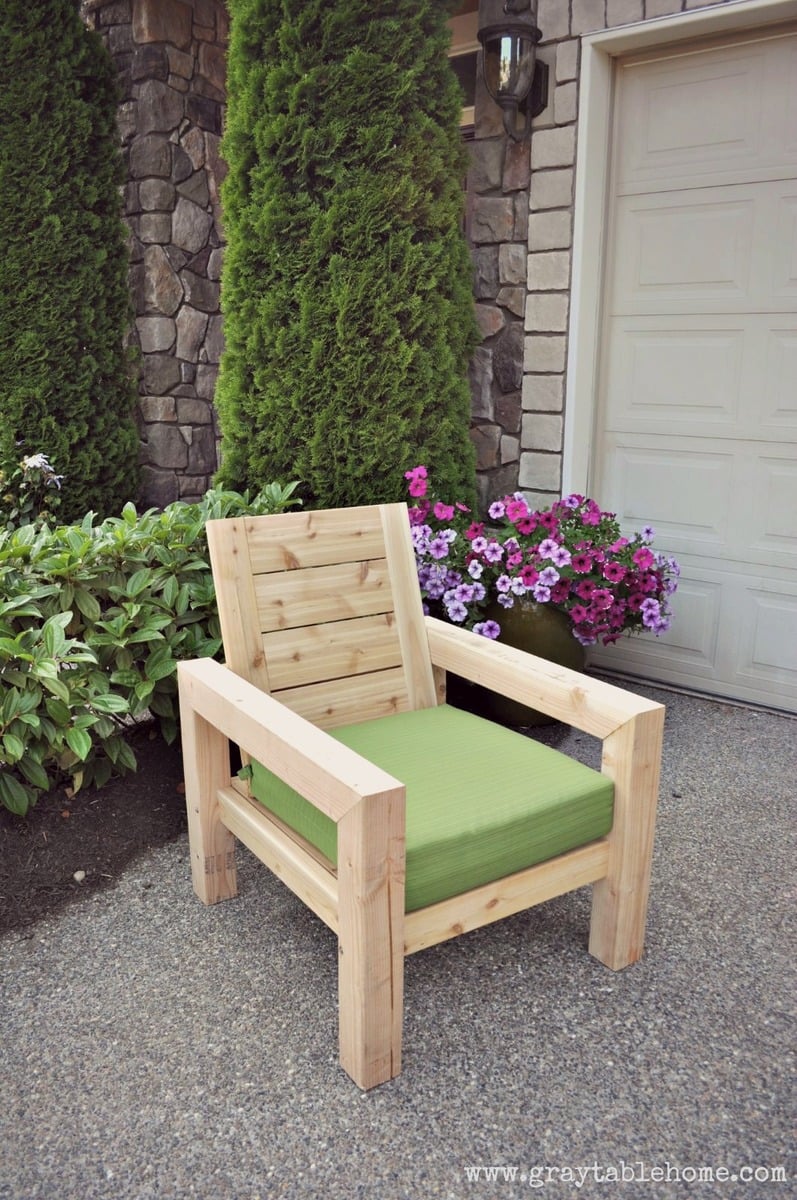
I made this outdoor chair by looking at a variety of plans and designs from Restoration Hardware and other stores. Check out more info on the project on my blog link. Thanks for looking!

Estimated Time Investment
Afternoon Project (3-6 Hours)
Recommended Skill Level
Beginner

Comments

Workbench

Submitted by jaimej on Sun, 04/28/2013 - 18:38

This is our 2nd project - we liked building the bookshelf so much, we decided we're gonna keep going and need a good workbench. Got these plans from the Family Handyman Website (http://www.familyhandyman.com/DIY-Projects/Woodworking/Workbenches/how-…). They claim the cost to be $50, but it was closer to $80 for us - still a GREAT project and easy to put together with the nail gun.

Built from Plan(s)
Estimated Time Investment
Afternoon Project (3-6 Hours)
Finish Used
none
Recommended Skill Level
Beginner

Comments

DIY Laundry Cabinet

Submitted by Anonymous (not verified) on Mon, 09/18/2023 - 14:56

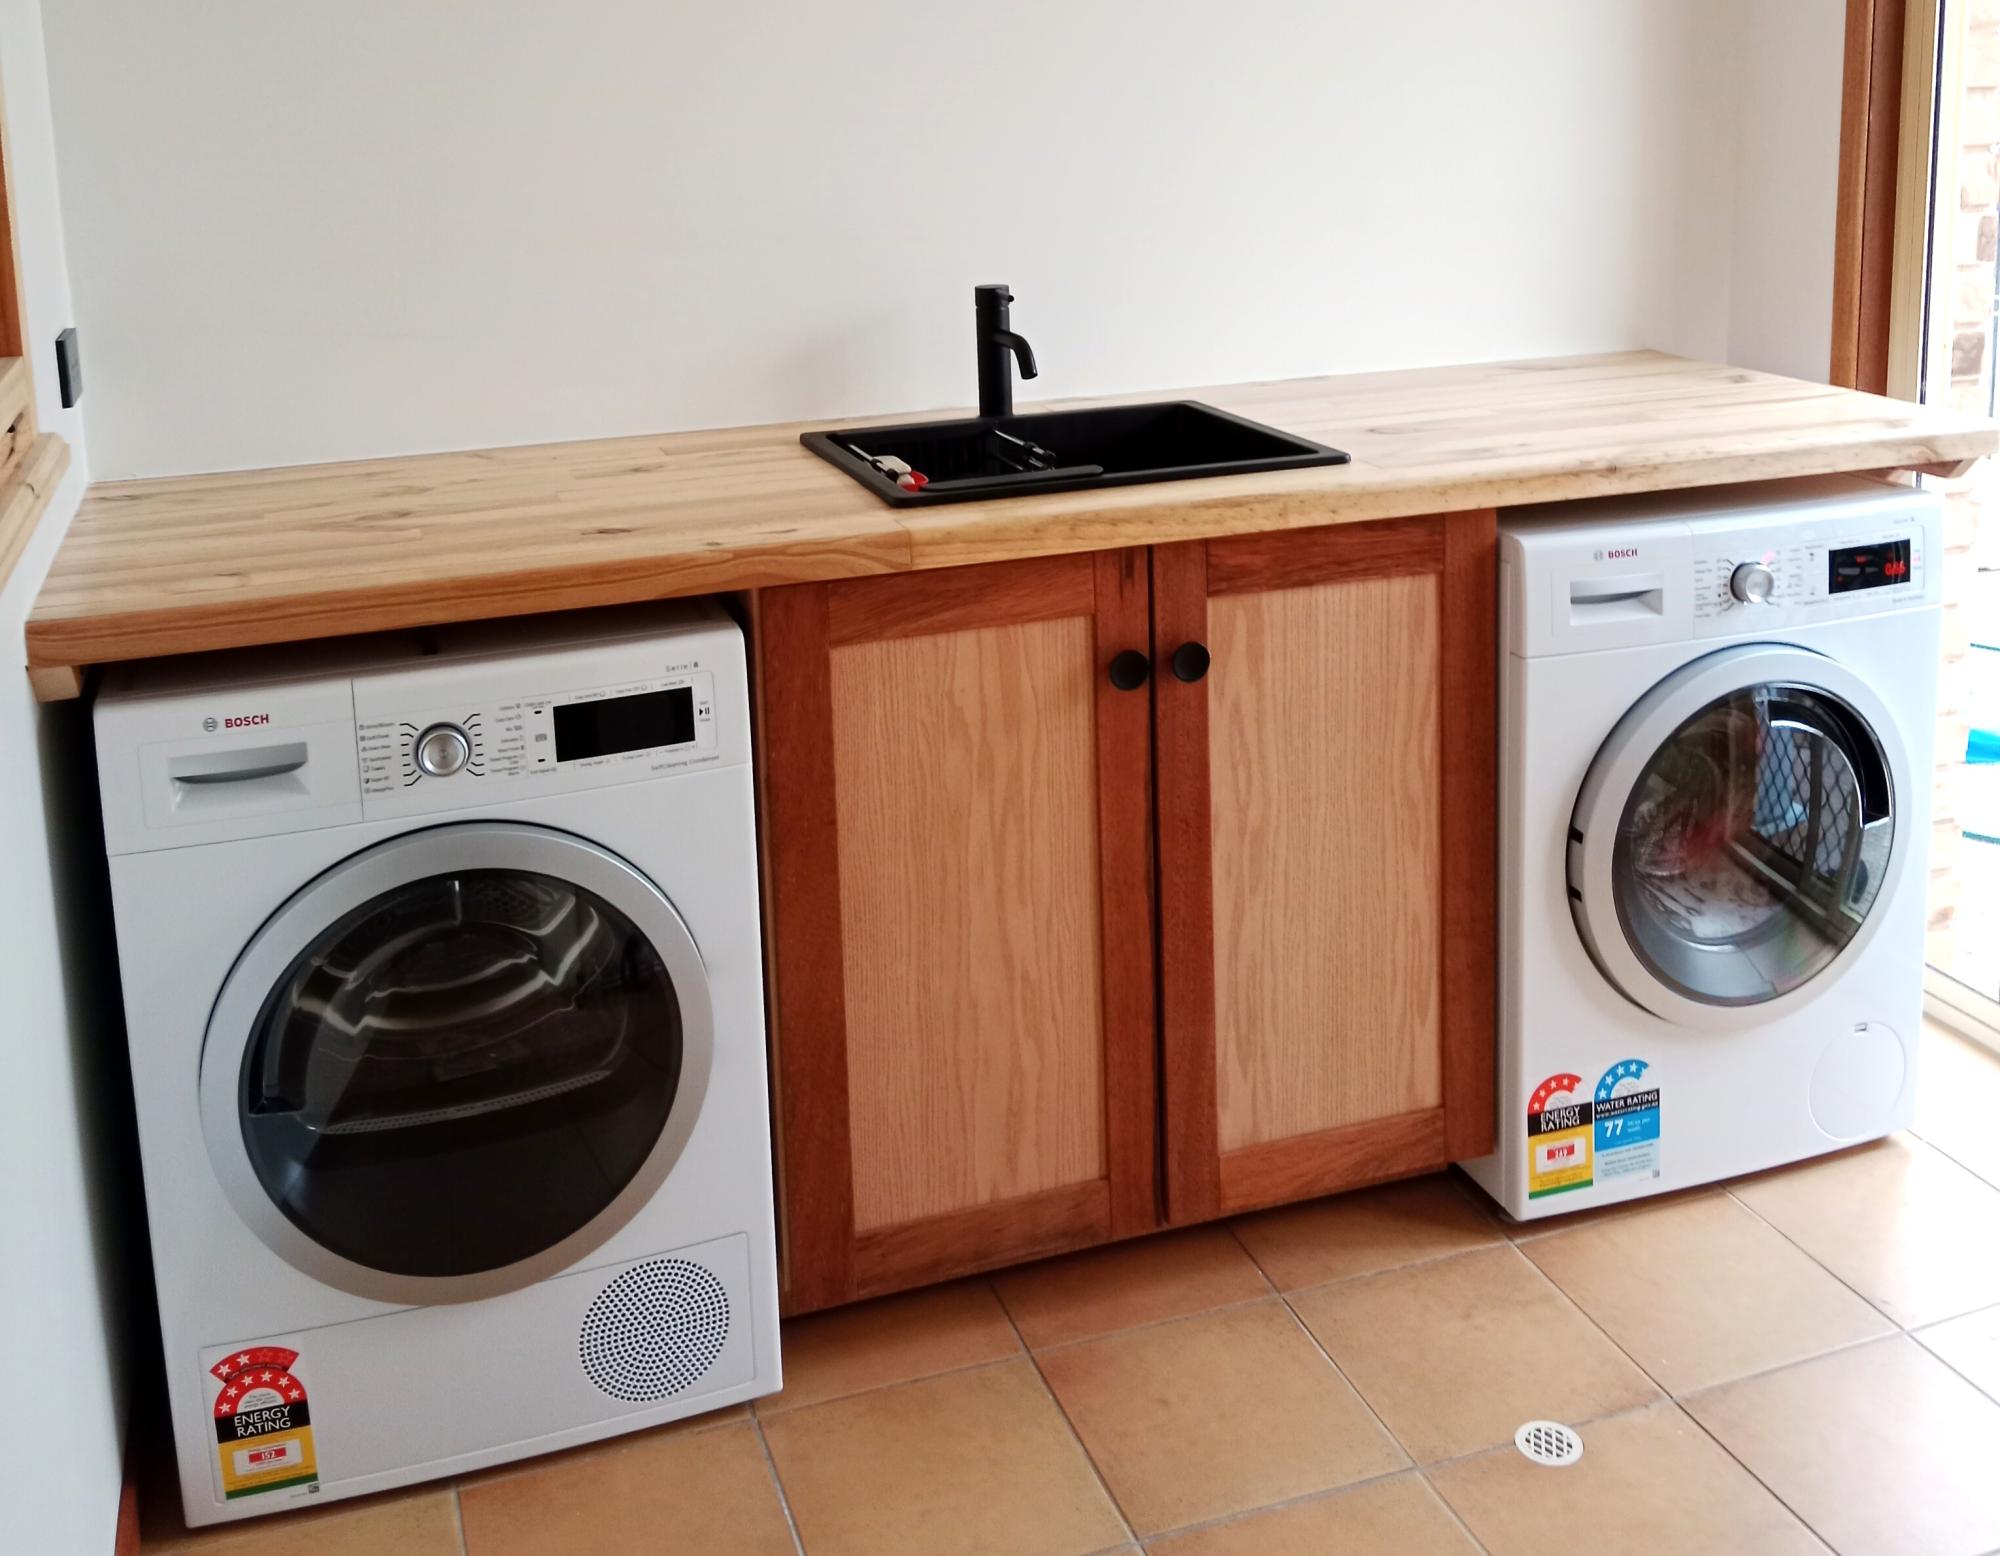
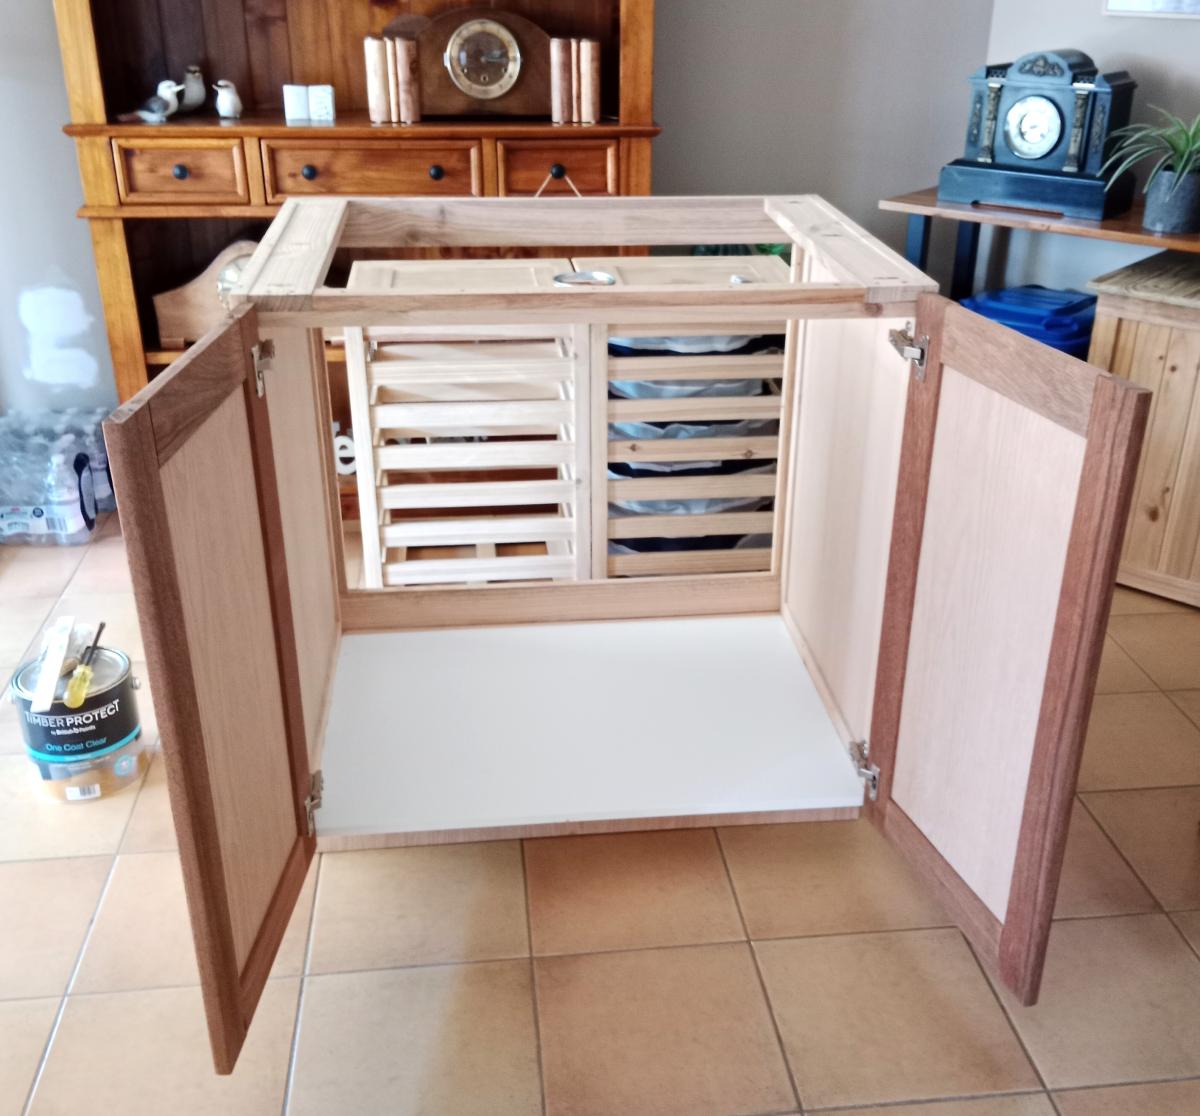
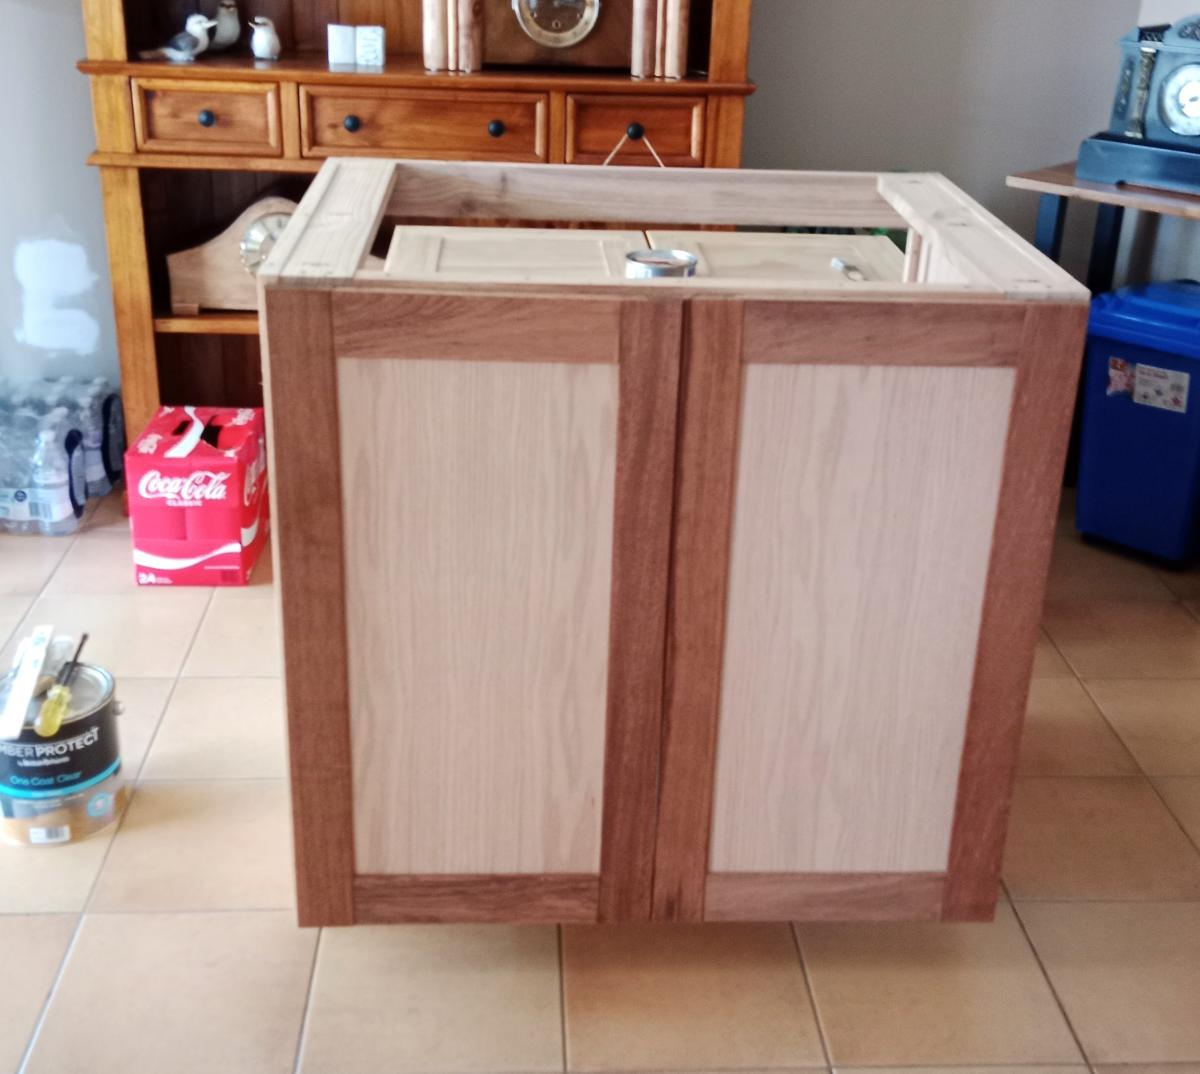
Our laundry renovation with the cabinet loosely based on the Ana's kitchen cabinet plan. I used 7mm red oak plywood for the door and side panels with some with Baluster hardwood for the doors frame. 

The benchtop was all cut from my usual 200mm x 50mm pine landscaping sleepers.

Mark

Comments

Full size loft

Submitted by Anonymous (not verified) on Tue, 10/01/2019 - 18:46

Built a full size loft bed for my kids but wanted something safer than having them climb up and down a ladder so used the Camp Loft Bed plans to add the platform and stairs. It is much easier for the kids. Going to finish by covering the platform and stairs with carpet.

Estimated Cost
180
Estimated Time Investment
Day Project (6-9 Hours)

Comments

Arbor Bench and Rustic Outdoor Table

Submitted by Anonymous (not verified) on Fri, 07/10/2020 - 14:05

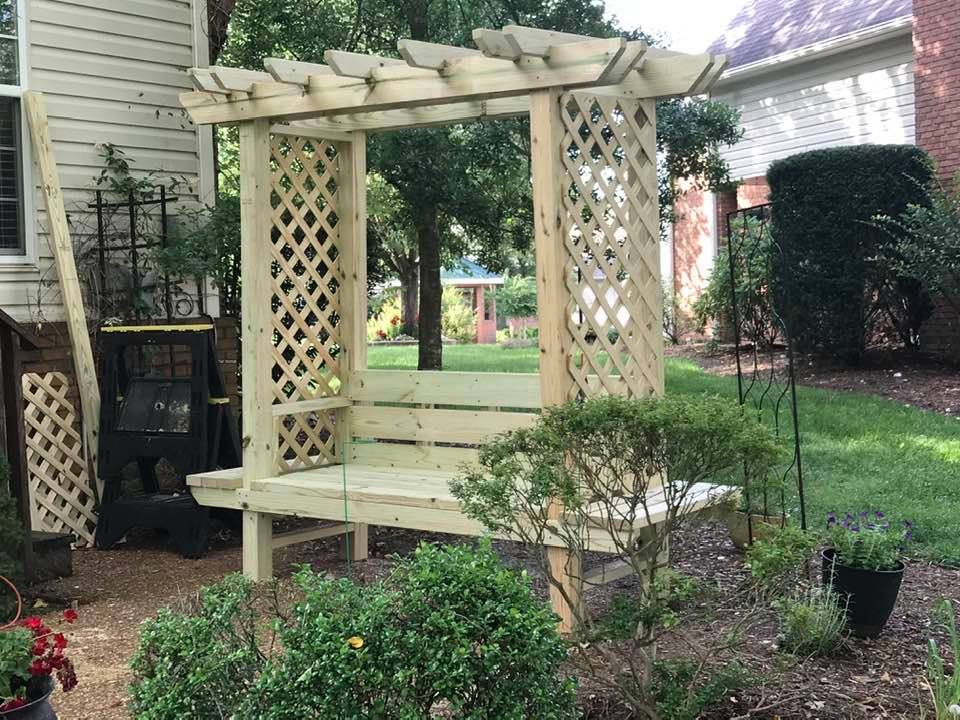
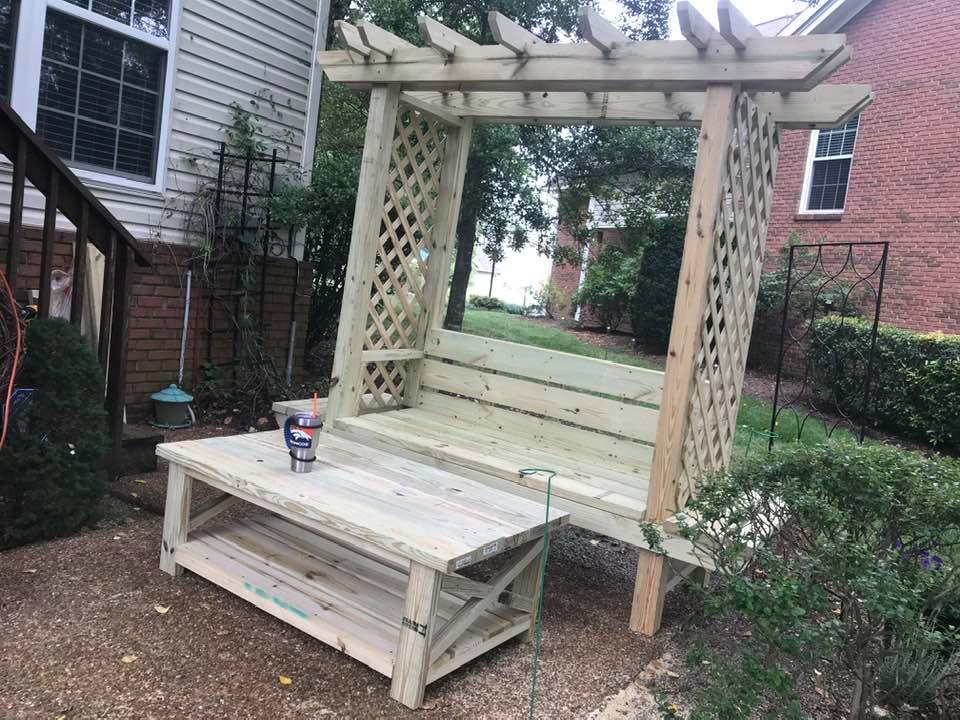
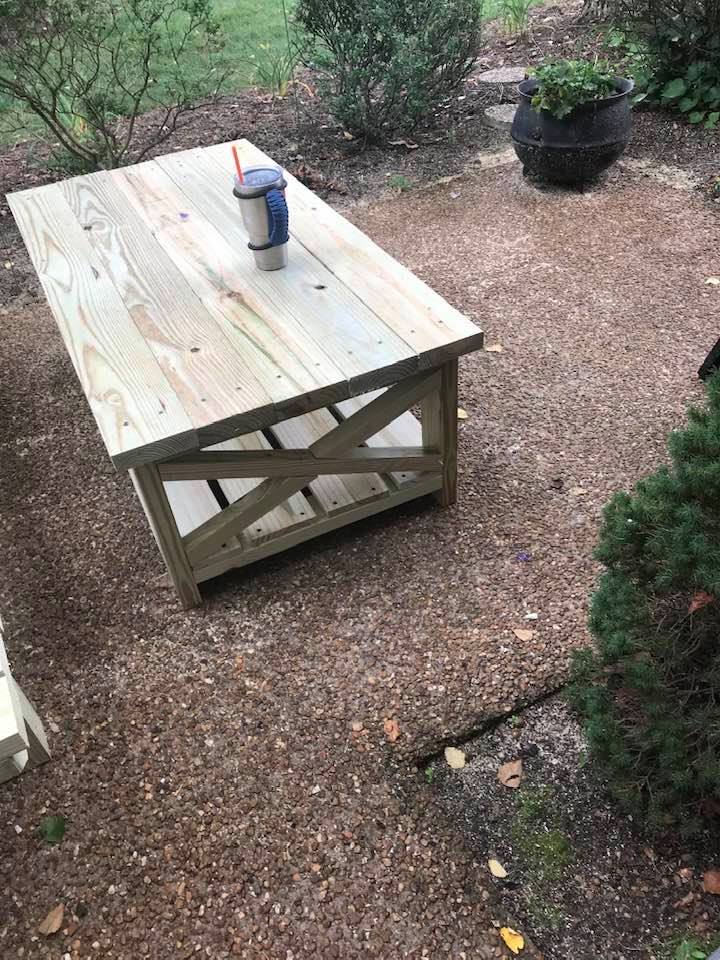
I built the arbor bench first, and was very impressed at how complete the instructions were. I enjoyed it so much, that I found the plans, and built the outdoor rustic coffee table to complement it. I ended up using pressure treated pine, and am now waiting for the wood to completely dry out enough to put a stain on both pieces. The plans for both were very comprehensive.

Estimated Time Investment
Week Long Project (20 Hours or More)
Recommended Skill Level
Beginner

Farmhouse Style Toy Box / Blanket Chest

Submitted by Anonymous (not verified) on Tue, 01/17/2017 - 11:17

I built this for my daughter after Christmas sinse she had the living room covered in toys. The dimensions are 37" x 18" x 20" 

Estimated Cost
$75
Estimated Time Investment
Weekend Project (10-20 Hours)
Finish Used
Watco Danish Oil - Medium Walnut (2 coats) with a light sanding between coats with 220 grit, I allowed 24 hours between each coat to dry. To protect the surface I used water based polyurathane matte finish (3 coats) with a light sanding - 400 grit.
Recommended Skill Level
Beginner

Comments

jwelch

Wed, 01/18/2017 - 13:06

Great job! Can you share more about how the legs were constructed and joined? Was this project based on Ana White's "Simple" toy box plan? Any info appreciated.

jgreaff

Tue, 01/09/2018 - 05:51

HI Anna, 

Can you provide more pictures or instructions on how you assembled this toy box? i want to make one just like it! 


Thanks!

apezz

Wed, 03/10/2021 - 16:31

Looking at the wall panels they look like the long edge of each panel has a small bevel cut on it. This gives each panel edge a more pronounced or well-defined edge? Is this true? Was it done with a router?

Barbecue/BBQ Quick Built-in

This was just a standard BBQ with an attached folding table. I used a combo of Ana's plans to add a little character and style to the BBQ and it made a huge difference in not only the BBQ, but also the backyard. 

Estimated Time Investment
Weekend Project (10-20 Hours)
Finish Used
Golden Oak
Recommended Skill Level
Beginner

Comments

mdwstgrl

Mon, 05/23/2016 - 12:29

Hello:  Very interested in which plans you used to build the BBQ Built In. Thank you.

Outdoor sofa with table and matching chairs!

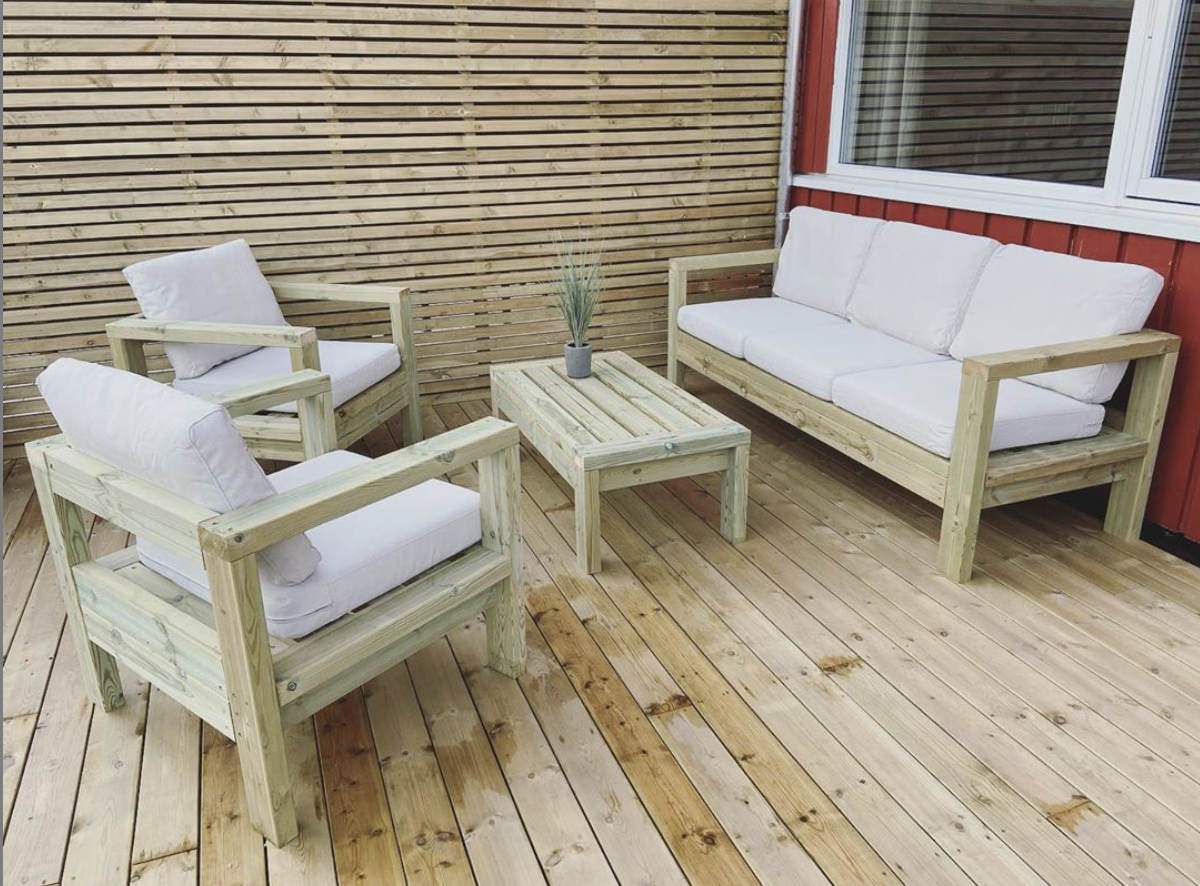
So, we decided after not finding any outdoor furniture, that why not make them! So this is the result, made a few changes to the size and measurements so the pillows from IKEA, would fit perfectly. Now we are waiting for them to be ready to oil/paint. We also made the chairs with the sofa plans, so happy we did that. Thank you so much for the plans! We are so happy! IKEA pillows name are: Sitting pillow - FRÖSÖN/DUVHOLMEN 62cm by 62 cm. Back pillows - FRÖSÖN/DUVHOLMEN 62cm by 44 cm.

Estimated Cost
$240
Estimated Time Investment
Day Project (6-9 Hours)
Recommended Skill Level
Starter Project
Seasonal And Holiday

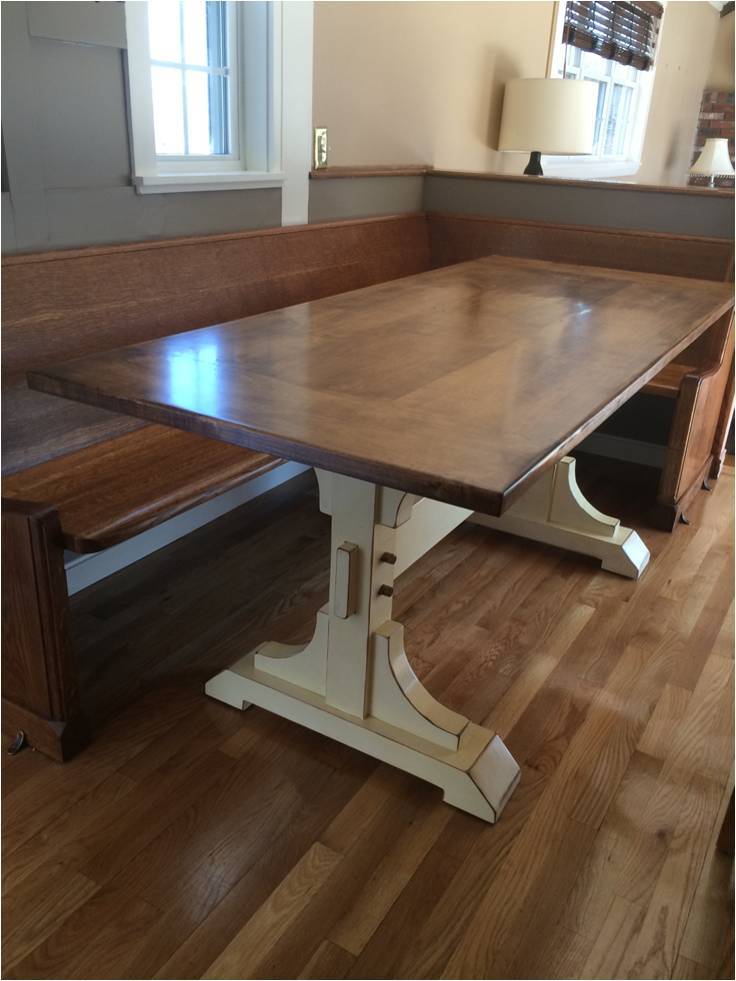
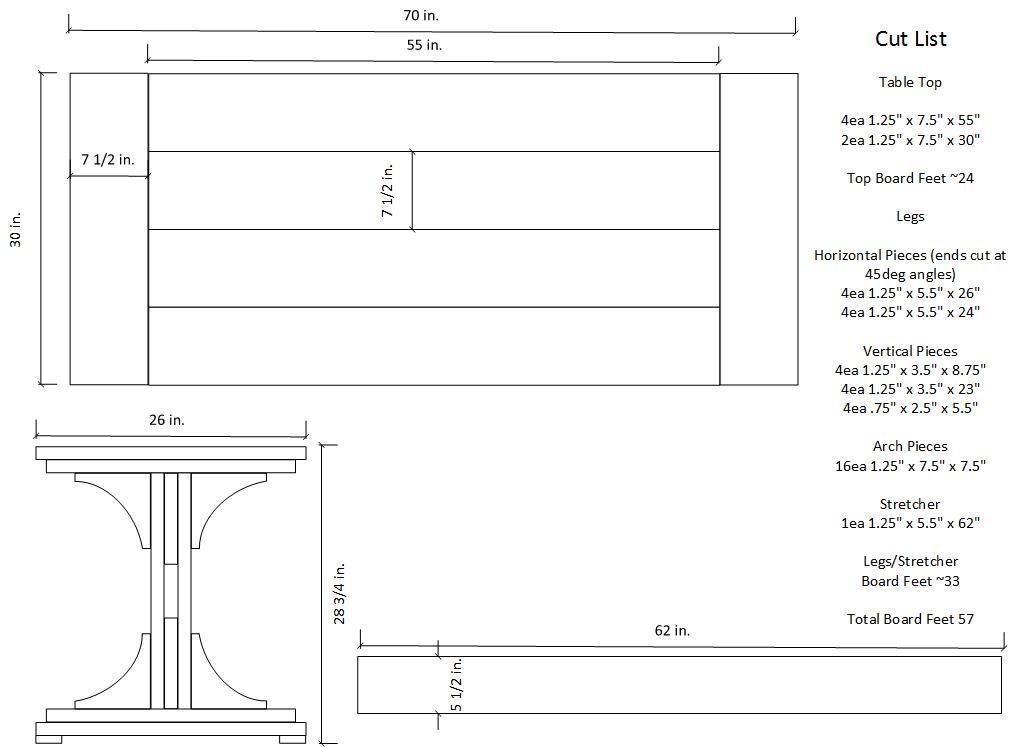
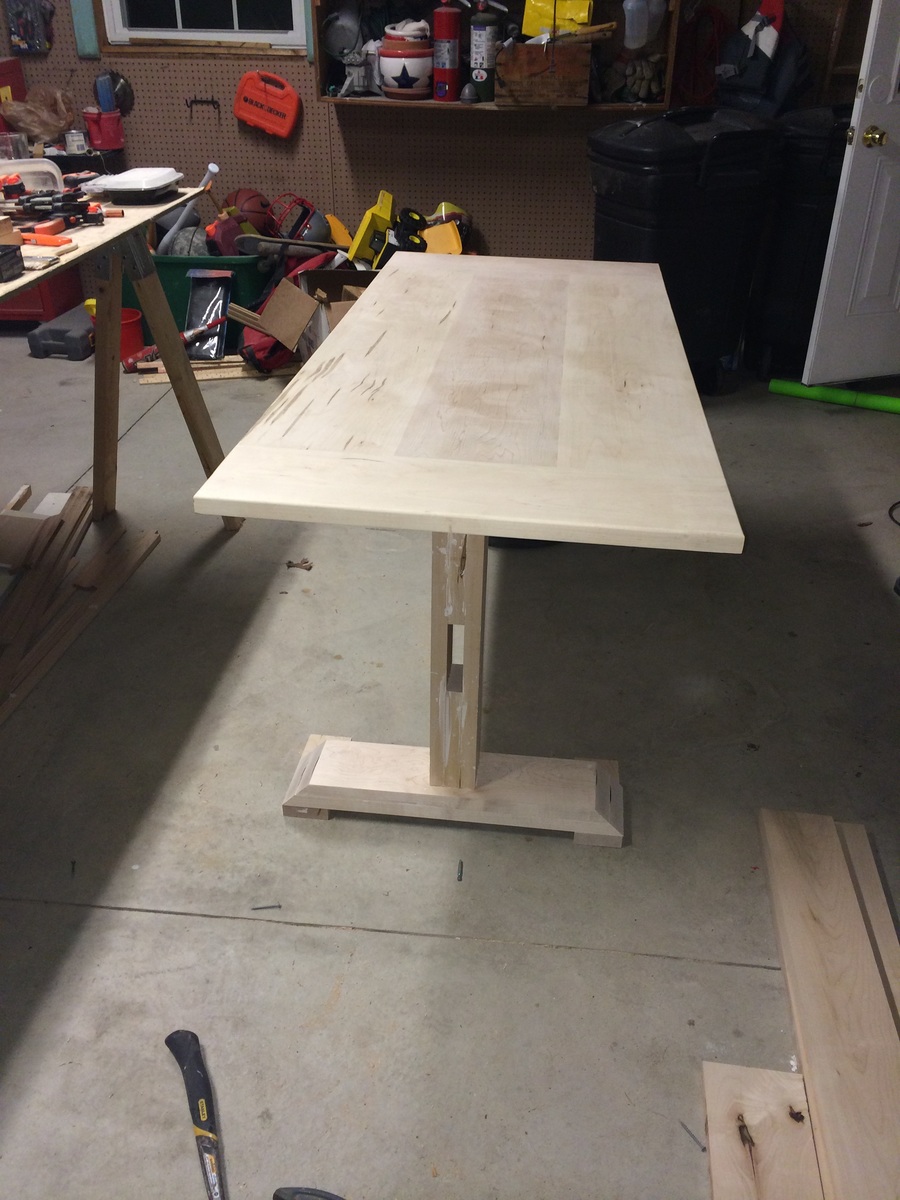
Double Pedestal 6' Farmhouse Table

Submitted by g82martin on Sat, 05/17/2014 - 20:38

Farmhouse table made from distressed (worm hole) maple.

My neighbor was able to get me the 5/4 distressed maple for about $2/bd ft - I ended up buying 100 board feet and had plenty leftover. The finished board feet for this project was about 60 if I remember correctly. So the $200 was the bulk of the expense. The only other costs were sand paper, I bought a Kreg Jig, screws, Minwax Marker, paint, stain and urethane (much of which I already had).

It came out better than I anticipated. The antique white finish was not difficult at all.

Tip - When following the instructions for the finish here, I applied the first coat of urethane with a brush almost immediately after applying the Minwax marker to all of the sanded edges. I did this in haste, but ended up with some unexpected results that really added a nice touch. The stain from the marker incorporated a bit into the urethane as I brushed it giving it an antique, yellow hue. At first I thought I made a big mistake, but it turned out to add a really nice look.

Built from Plan(s)
Estimated Cost
$250
Estimated Time Investment
Week Long Project (20 Hours or More)
Finish Used
Antique White using Minwax Stain Marker - http://ana-white.com/2012/09/antique-white-using-minwax-stain-marker
Recommended Skill Level
Intermediate

Comments

g82martin

Mon, 05/19/2014 - 07:29

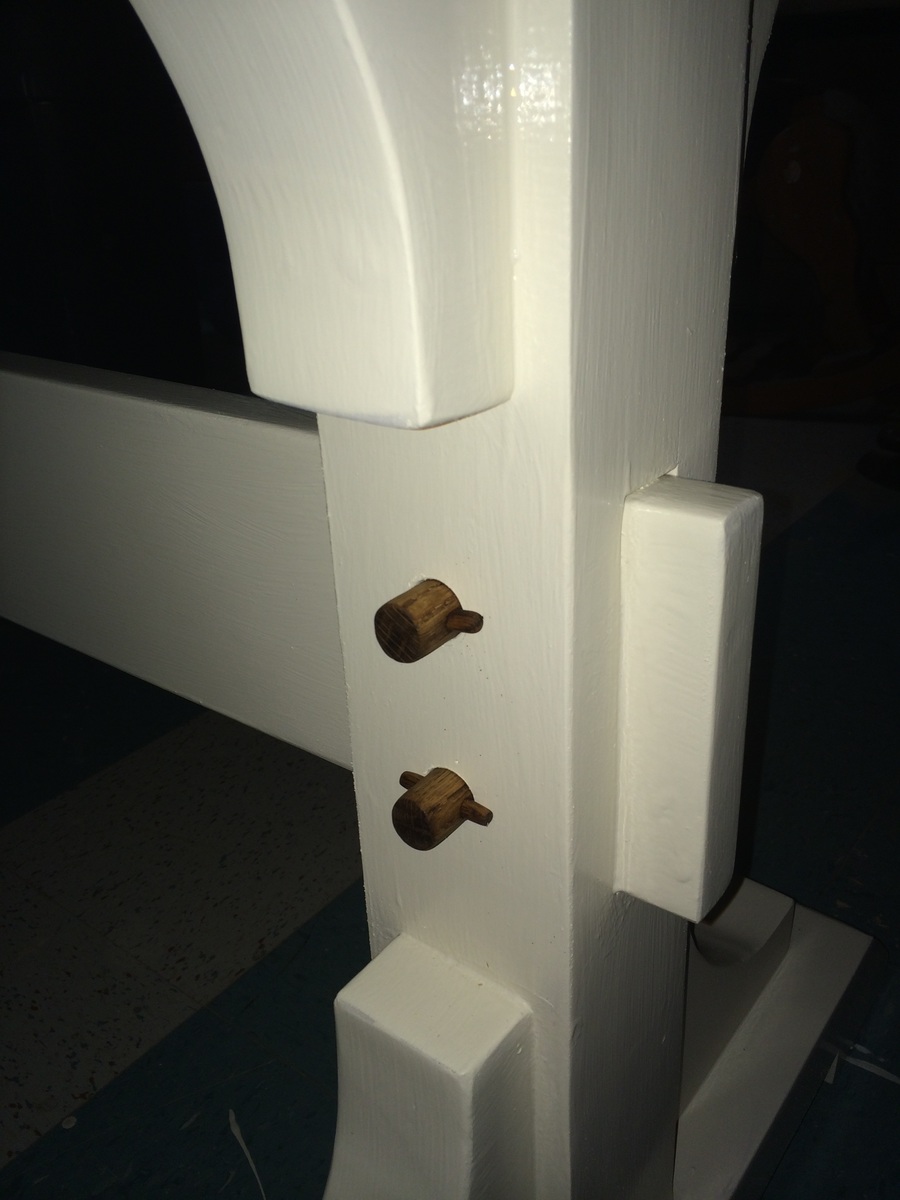
CSaintD - The top can be removed as I did not glue it. I set 3 dowels on top of each of the 2 legs so that the top would always lign up correctly if disassembled and reasembled. The stretcher could be removed, but would probably cause some damage to the finish as it was a tight fight when I finished it. The stretcher would be removed by removing the dowel pegs that I fabricated on each leg.

g82martin

Mon, 05/19/2014 - 08:26

I cheated a bit on the top. My neighbor who got me the wood works in a furniture reupholsery shop. He planed and joined the boards for me, which saved me a good amount of time. I'm confident I could have done this at home with my table saw, miter saw and hand plane, but what he did in 2 hours probably would have taken me 10.

bclute

Mon, 05/19/2014 - 08:06

Table looks great! Great antique finish on the base and your table top looks nice a smooth.

bclute

Mon, 05/19/2014 - 08:06

Table looks great! Great antique finish on the base and your table top looks nice a smooth.

KathrynK13

Fri, 01/01/2016 - 12:00

I love the table...but I wanted to ask about the booth?  Is that a church pew?  Did you make it?  Any tips for recreating it?

Lenaluv87

Fri, 08/05/2016 - 20:35

Love the dowels you added! Planning on building this exact table pretty close to your dimensions and have a very long church pew as well! Trying to decide between L-ing my pew and cutting to straigjy 6'. Do you mind sharing the dimensions of your pew? And how did you miter the pew?

Custom Rustic King Bed

Submitted by jhavinga on Wed, 01/14/2015 - 14:55

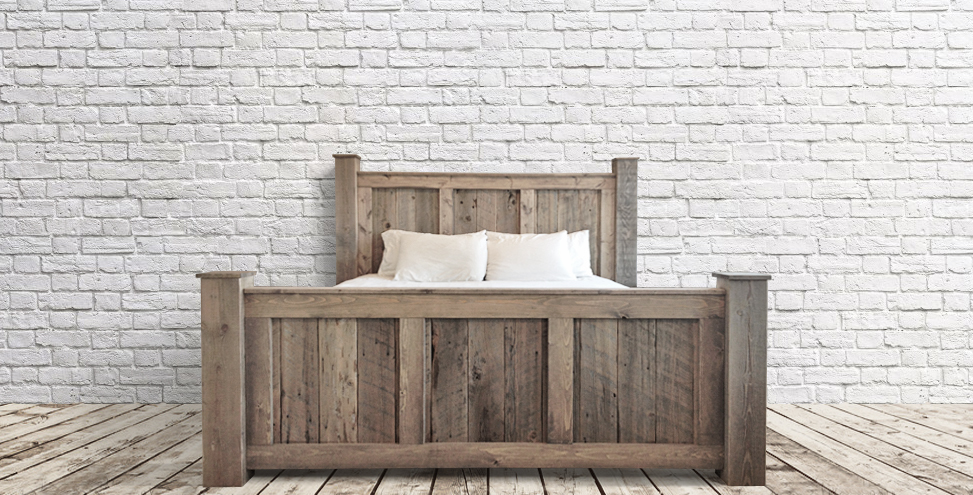
My wife is always annoyed with me. I make something for our home, and a few months later I decide I dont like it and want something better! I sold our 5th bed set months ago (Farmhouse Bed made through Ana White) and have been sleeping on the floor for the last few months.. Figured it was time to create something I wouldnt sell! Took some plan ideas from the Farmhouse King Bed Plans and came up with something a little more extravagent.

Hopefully I dont sell this one.

Estimated Cost
$350 With Reclaimed Wood, Im sure much cheaper with HD Wood.
Estimated Time Investment
Weekend Project (10-20 Hours)
Finish Used
For the Pine. used my favourite combo; Weathered Oak and Special Walnut.
For the Fir and Cedar I just sanded.
Recommended Skill Level
Beginner

Comments

jhavinga

Thu, 01/15/2015 - 05:06

Thanks thewoodbuilder, its super easy and you could probably figure it out just by looking at it. =)
I extended the legs 2" past top of footboard, and 4" past top of headboard with caps on top. And layed 1x4 vertically over top of the 1x6 planks, and horizontally across the top of both foot and head board.

Cheers!
Justin

tracygator

Wed, 01/21/2015 - 20:47

This bed is gorgeous!!!! If you don't mind I have a couple of questions... For your stain combo of Weathered Oak and Special Walnut do you layer the weathered oak, wipe it off then apply special walnut? Or do you mix the two stains? Your footboard looks taller than the plan calls for , did you make it higher , if so by how much? And what dimensions are your footboard posts? This seriously is an amazing build. Great job!

In reply to by tracygator

jhavinga

Fri, 01/23/2015 - 14:04

Thank you! I don't mind at all. =)
The stains I do seperataely. I start with weathered oak and let sit for 15min, wipe off. Than do special walnut right after for 15min than wipe off. I repeat this until I like my color. From the farmhouse plans I really only took the planking idea and how to attach planking section to legs. The foot board is higher by 11" while the headboard posts are higher by 10".

The posts are reclaimed fir 6x6's. Thank again very much tracygator! Its a super easy design! if you have any other questions just let me know. =)

Cheers,
Justin

awheat1

Sat, 05/23/2015 - 20:13

Do you have any other pictures of the side rails? I'm curious how you did them? Specifically, how did you mount them to the head and footboard?

Twin Farmhouse Bed with Trundle

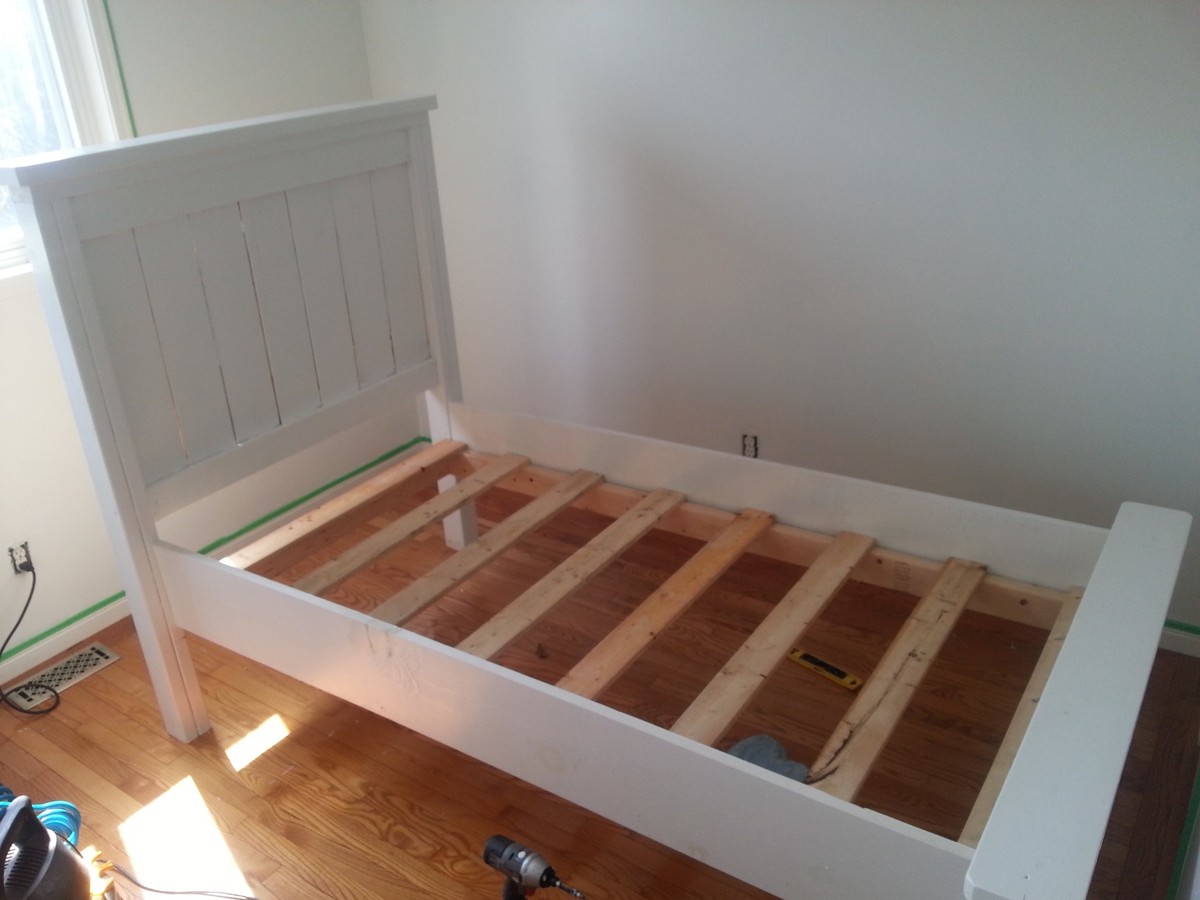
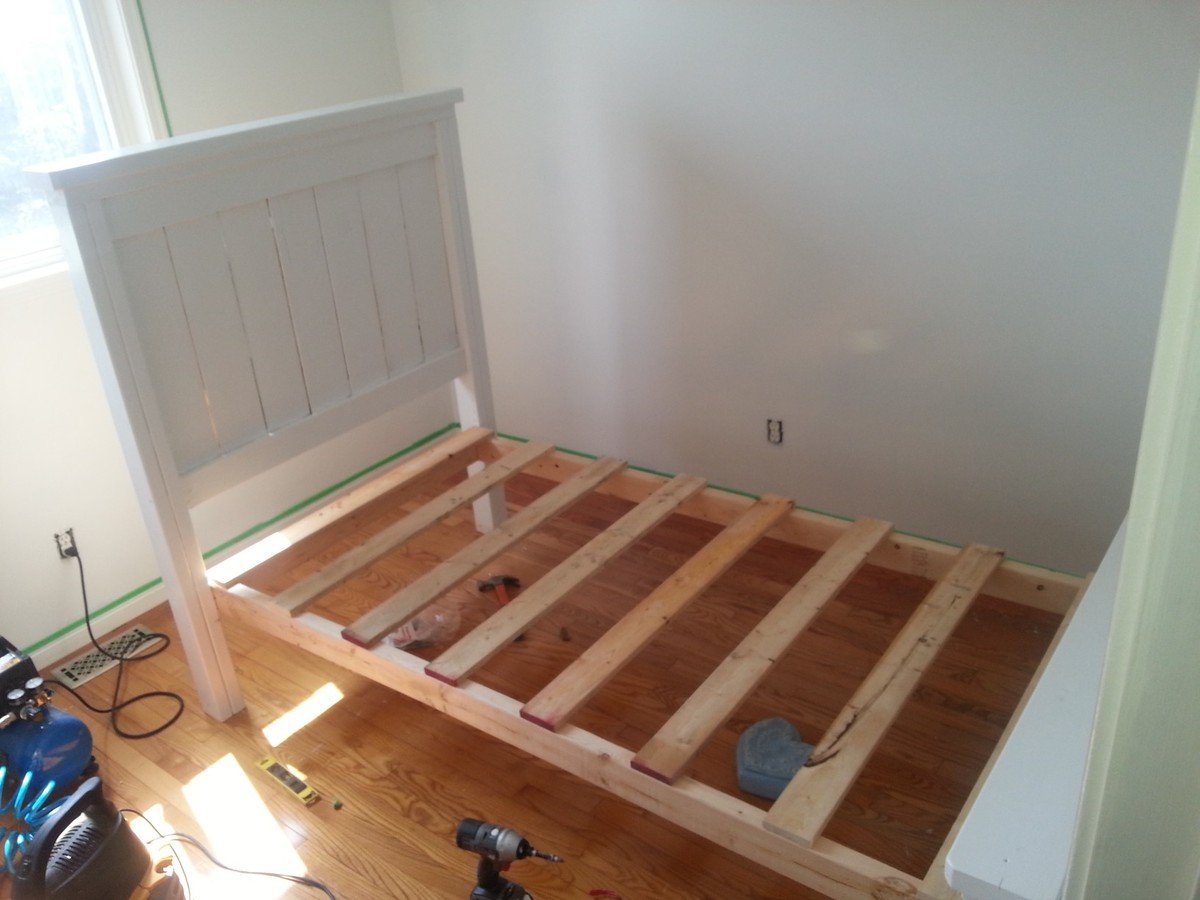
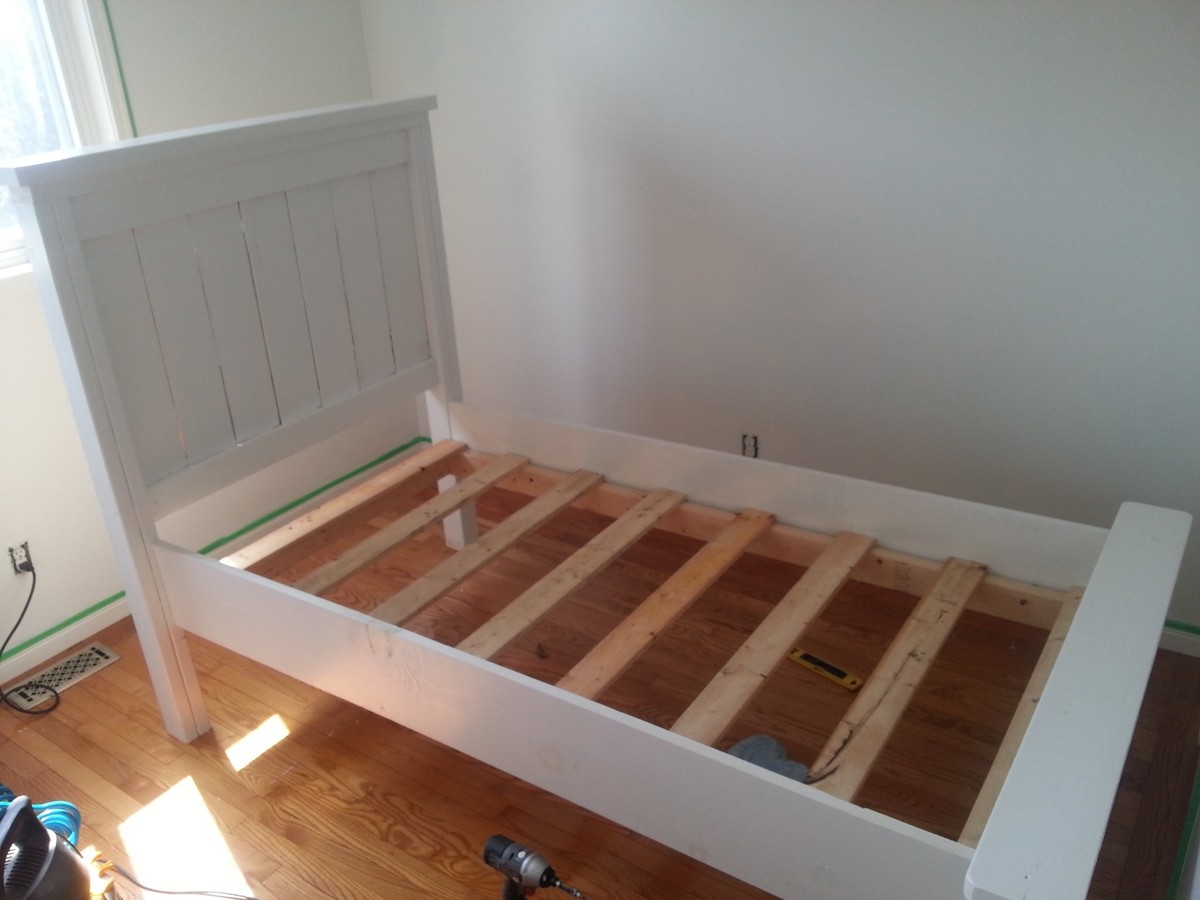
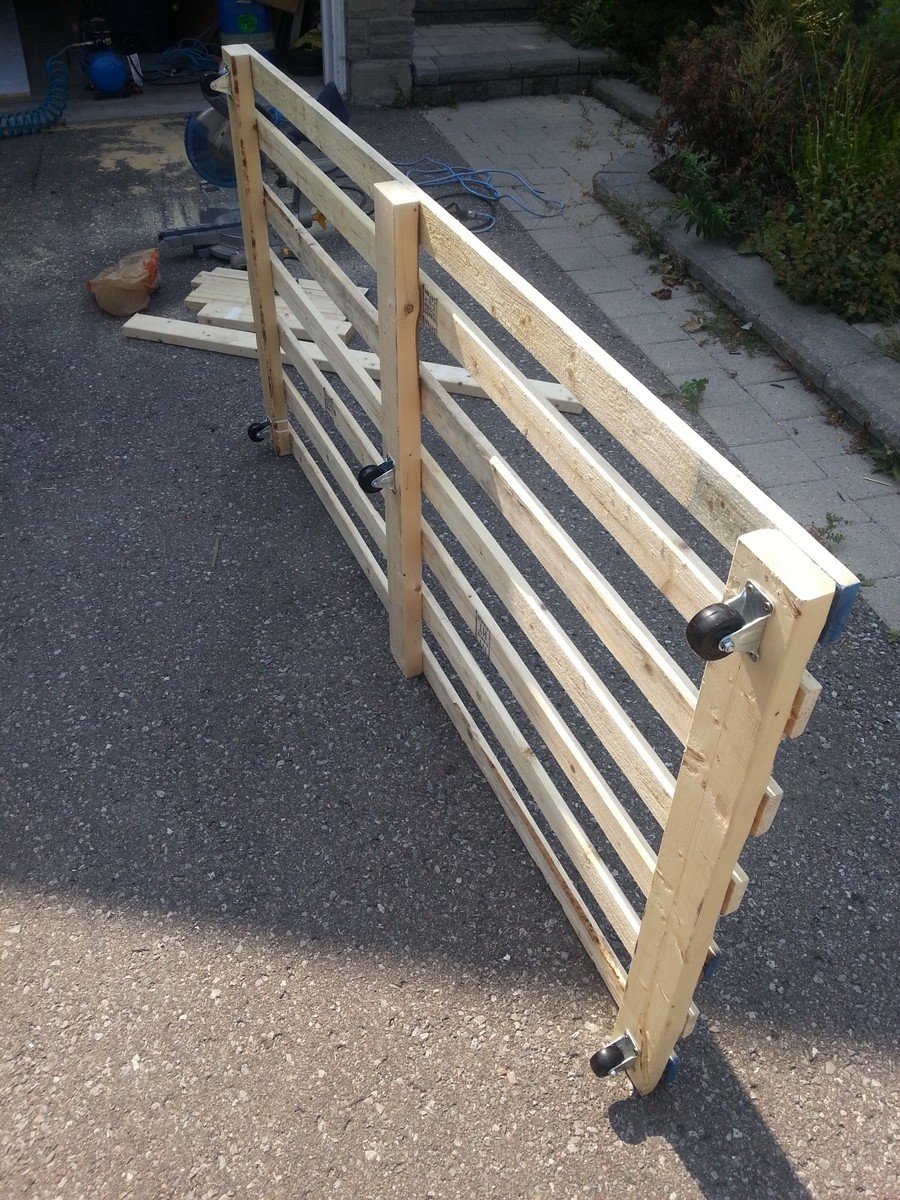
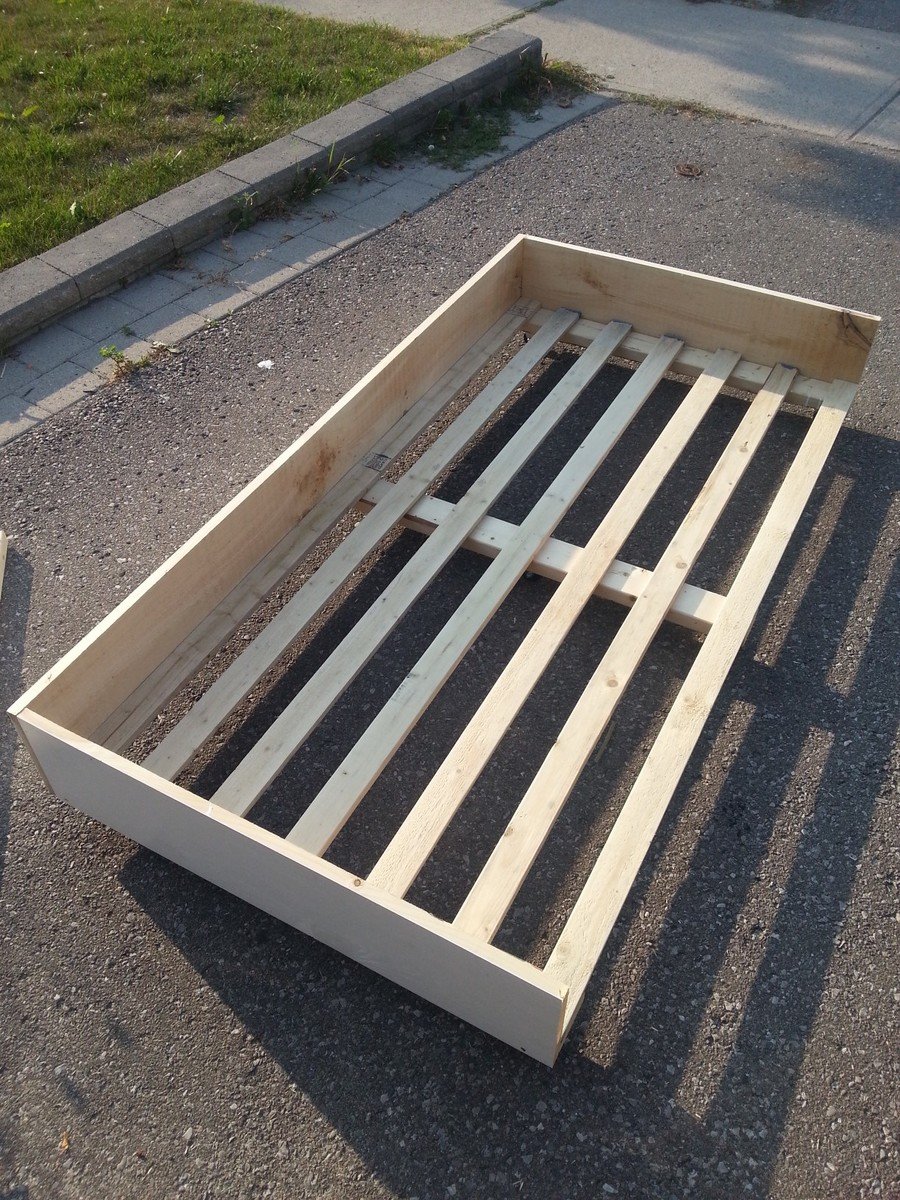
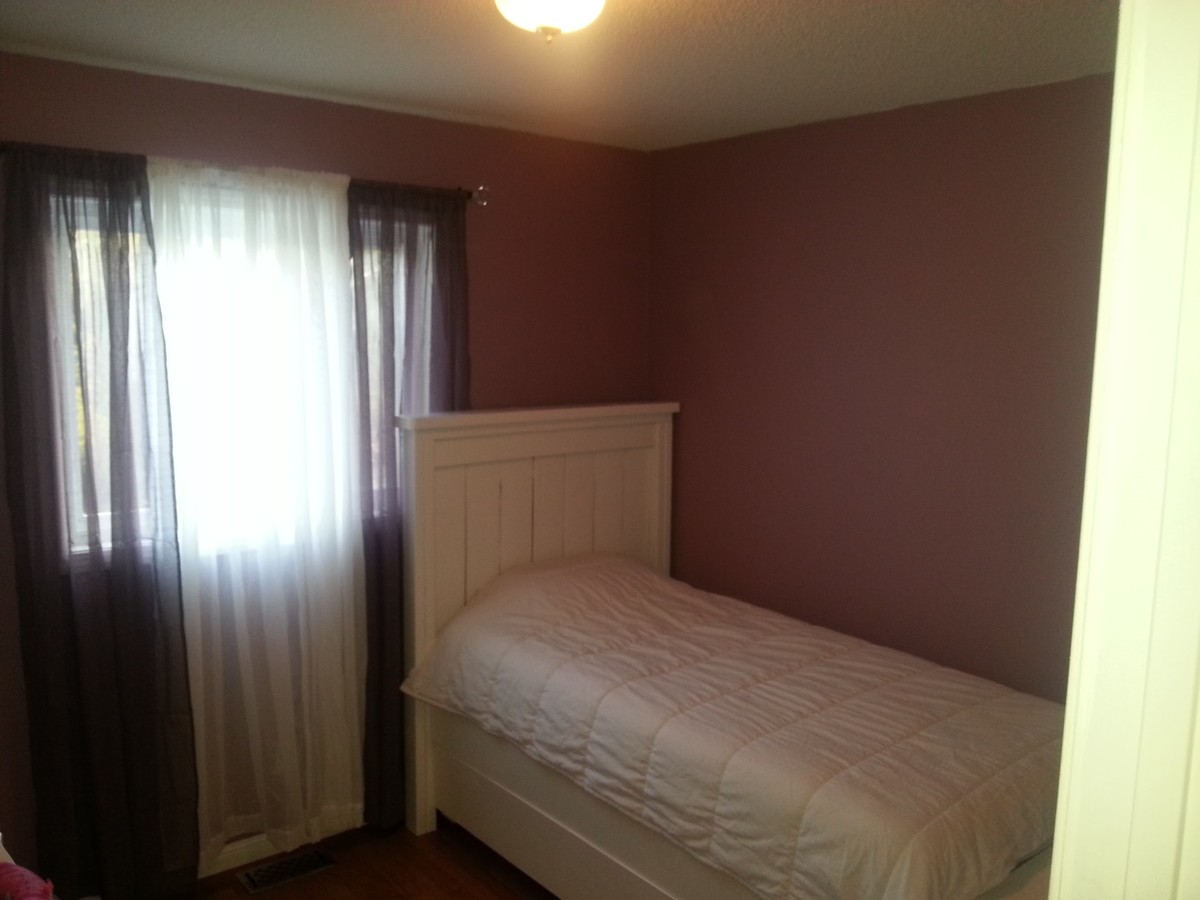
Took the farmhouse plan and added a Trundle.   Was initially going to build two farmhouse beds for my two girls, but thought adding the Trundle would free up some much needed floor space.  The girls love it!

Estimated Cost
$150
Estimated Time Investment
Day Project (6-9 Hours)
Finish Used
Latex paint
Recommended Skill Level
Intermediate

Pergola Swing

Submitted by grarob1956 on Thu, 04/23/2020 - 17:59

I saw this project on YouTube under Arbor Pergola Swing. It did not mention any specific detailed plans or cut list but it was enough to get me started. I began with (2) 10' 6" x 6" post. buried each 24" and cemented. I cut the post tops at 83" from ground line. The rafter consist of (2) 10' 2"x 6". I used the leftovers of the 6" x 6" post tops in the middle of my rafters to hang the swing from with 1/2 " eye bolt. Then I used (9) 2" x 2 " x 8' and cut each at 36" to finish off the top and (2) 2x6x8 for the 4 rafter supports. I drew out the designs of the rafters and top ends free hand and at made a template for the cuts with s jigsaw.

The entire cost including hardware minus the swing was $170. My wife had purchased the swing last Fall at a clearance for $40 brand new.

Built from Plan(s)
Estimated Cost
$170.00
Estimated Time Investment
Weekend Project (10-20 Hours)
Finish Used
Valspar Duramax Special Walnut
Recommended Skill Level
Intermediate

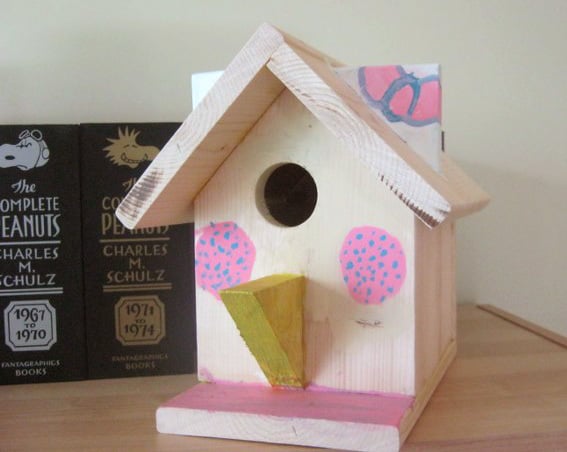
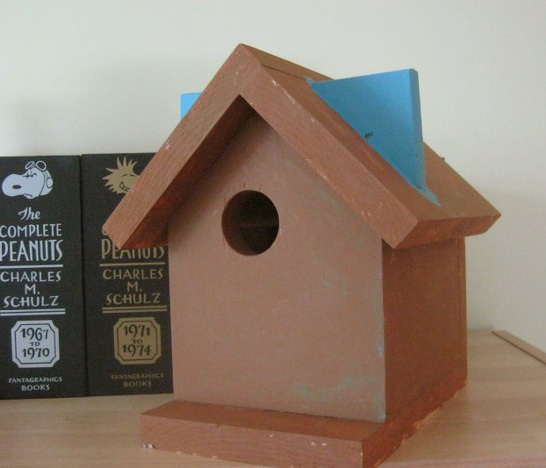
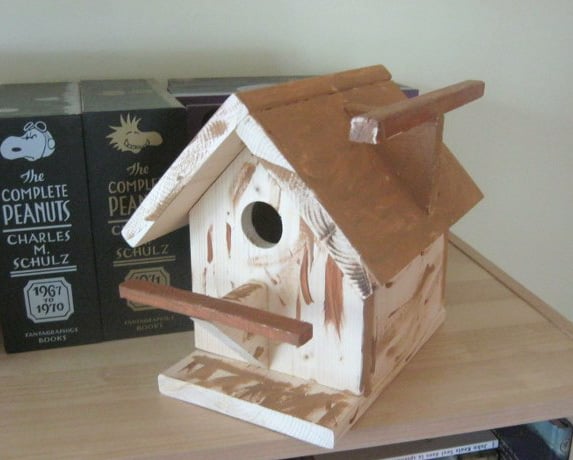
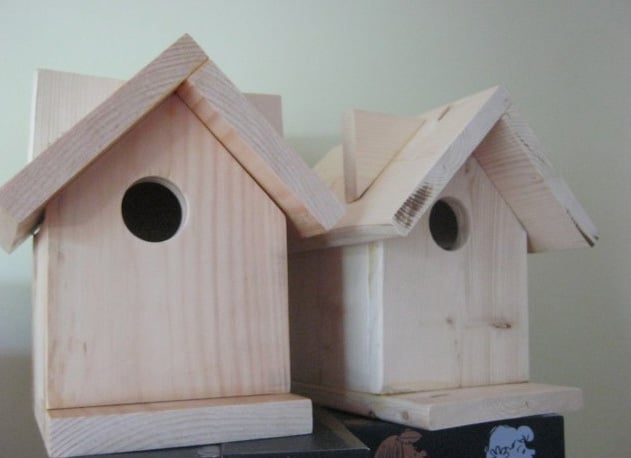
Three birdhouses

Submitted by Maribel on Mon, 07/07/2014 - 08:15

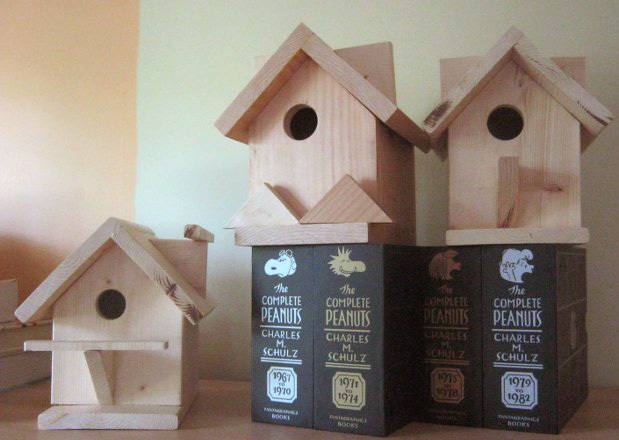
Our first plan from Ana White. It was really easy to follow and this was a fun project to do with the children. We used pine wood because it was cheaper than cedar, so we will try to not put them directly under the rain.

We were able to make two birdhouses in removing .25 inch in one birdhouse. We used wood we already had for the third one.

We let the children added some details to the birdhouses. Because of the birds we want to attract here, one hole is 1.25 inch and the other two are 1.5 inch.

Estimated Cost
$1.50 per birdhouse for wood
Estimated Time Investment
Afternoon Project (3-6 Hours)
Finish Used
The children applied acrylic paint and we will add varnish before to put them outside.
Recommended Skill Level
Beginner

Garden Tool Shed (based on plans for Small Outdoor Shed)

Submitted by aceecee on Tue, 09/22/2020 - 14:07

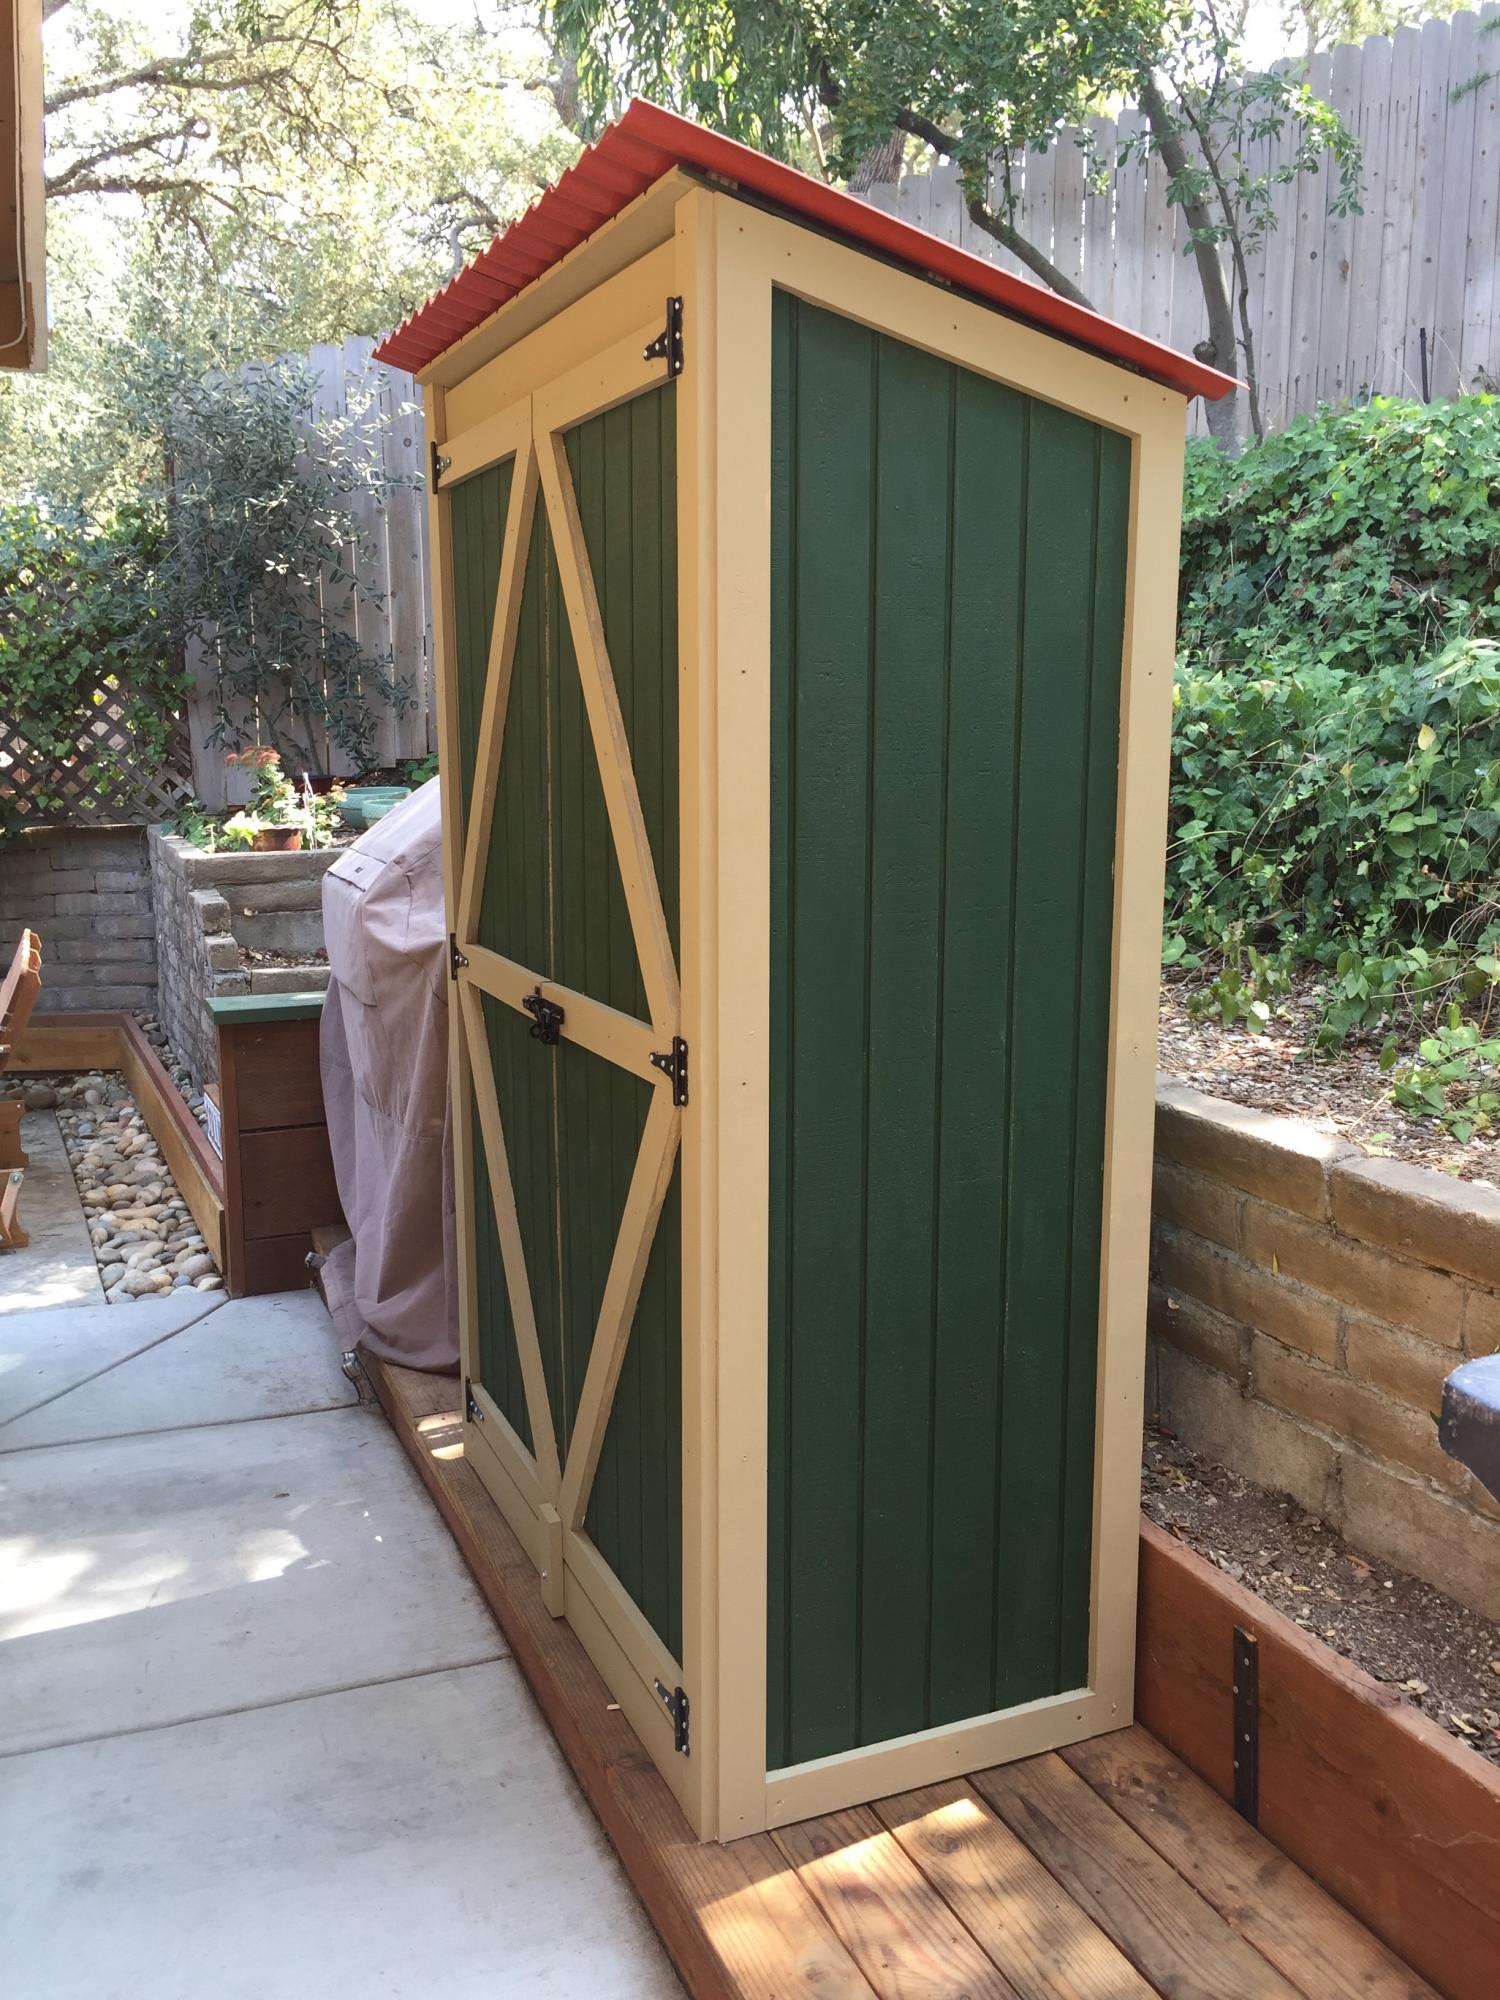
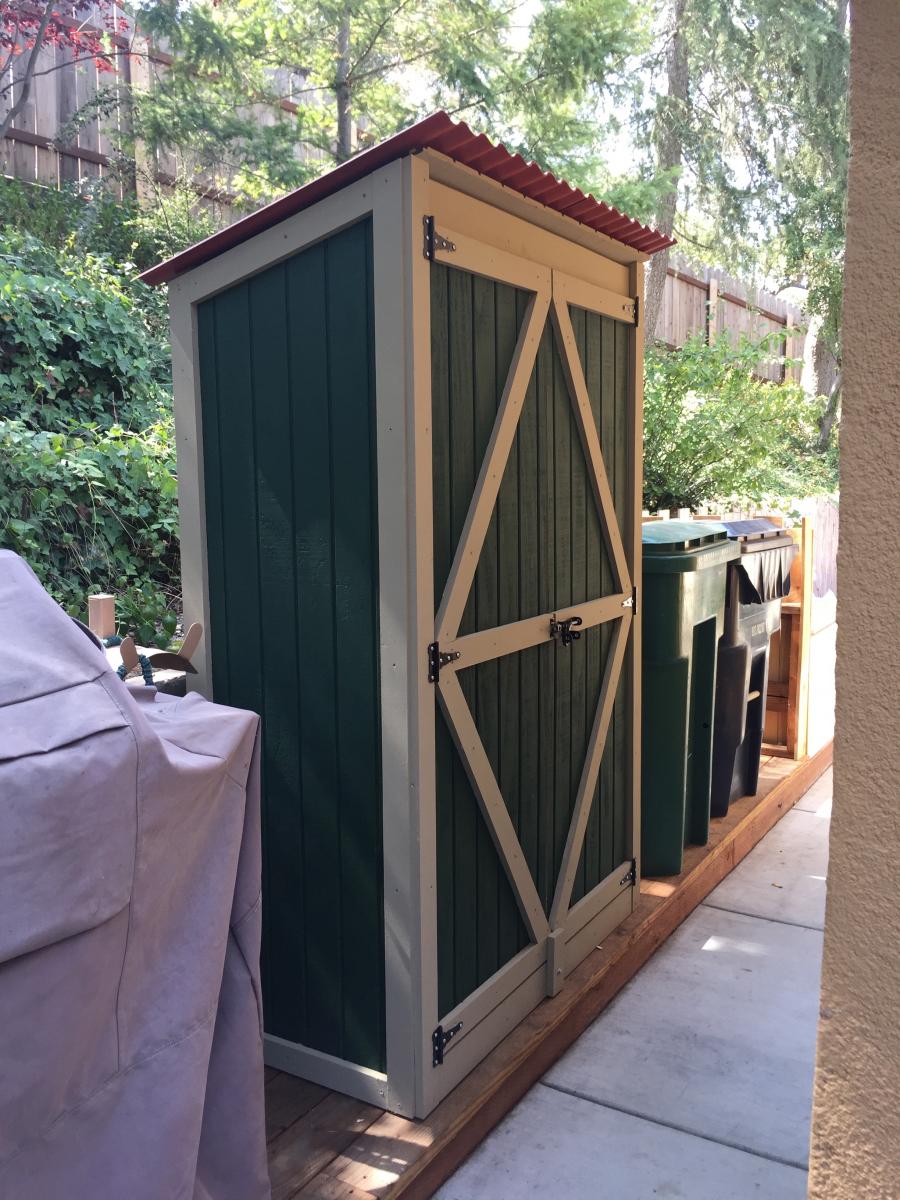
My husband and I built a garden tool shed using your plans for a "Small Outdoor Shed or Closet." We needed exactly this size for our available space. (THANK YOU! The video was really helpful and the plans were very detailed.) We are not handy at ALL, and are definitely beginners when it comes to woodworking. But, when the person who was supposed to build it for us was delayed, we thought we could try it, or at least START.

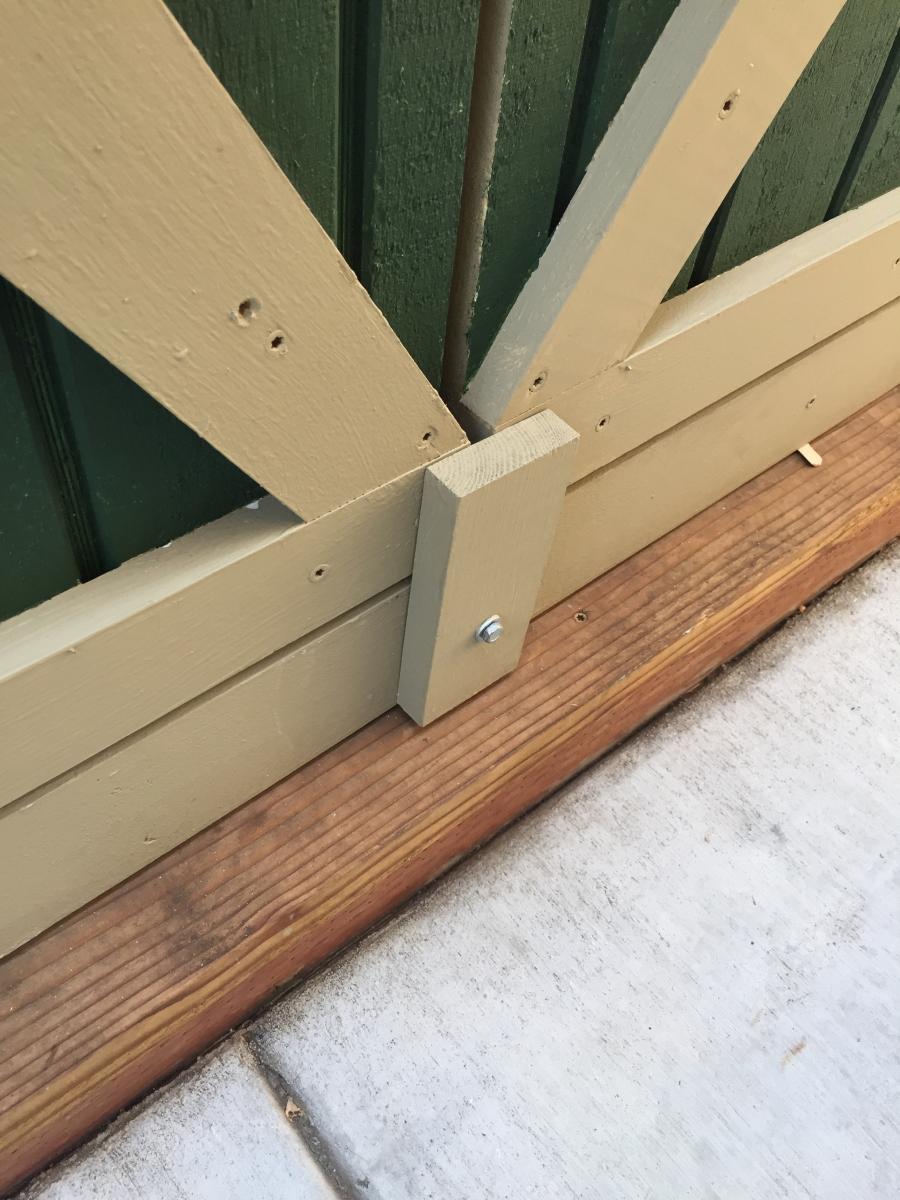
We bought a lower-end Kreg pocket jig and a secondhand mitre saw, and set to work, using T1-11 siding. We ended up building the entire shed ourselves, and were very surprised at the end result (and proud too!). The hardest part was building the doors, since we weren't really sure how to construct them to keep them from bowing. We ended up putting trim all around the edges of the T1-11 plywood doors, inside and out. (We were too far into building them when we realized we probably should have done it differently.) We also couldn't figure out how to get the double doors to stay tightly shut, but ended up using a rotating block (see picture) at the bottom and it works great, especially given that one of the doors had a slight bow at the bottom.

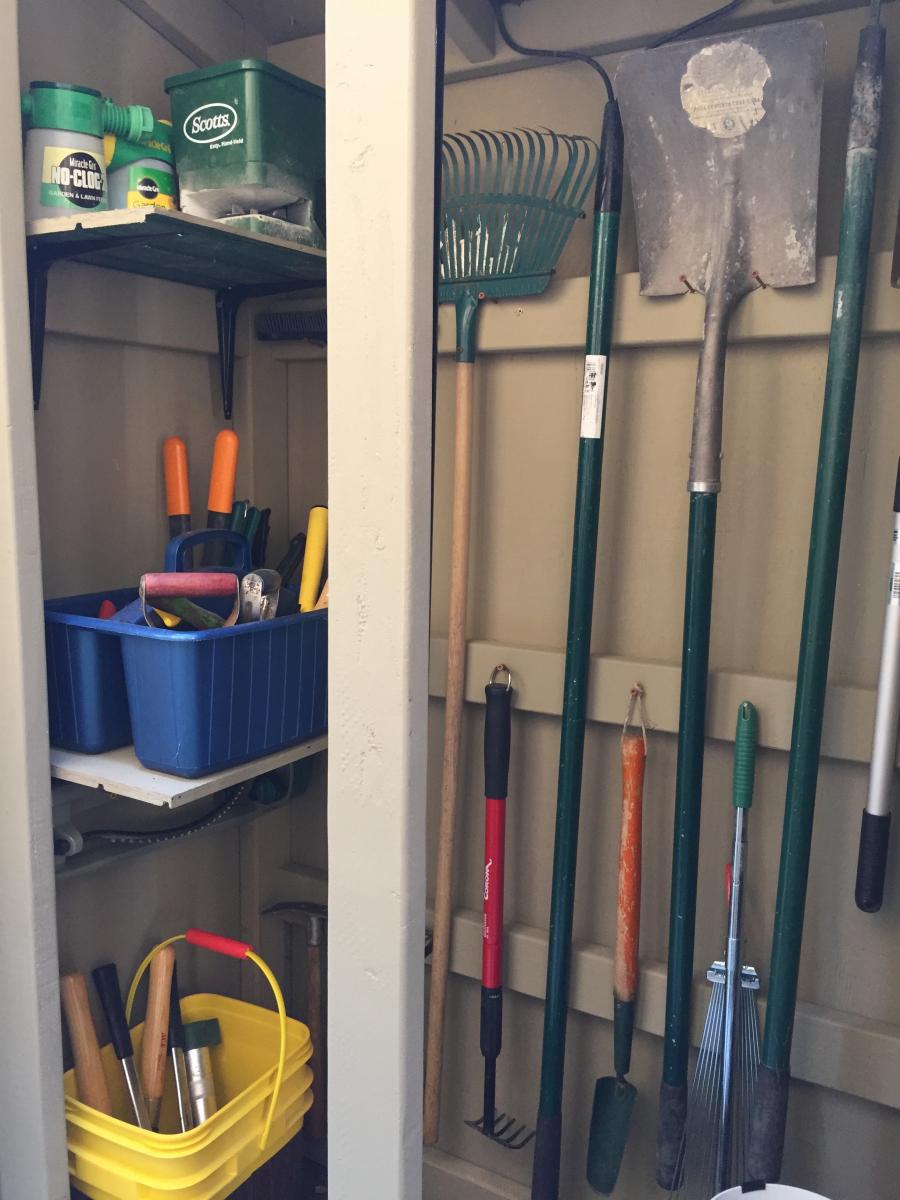
I think the only ways in which we deviated from the plan were that we added trim, an additional 2x4 up high across the back of the shed (for hanging long-handled tools), and two interior shelves on the left (from leftover siding). We used colored corrugated polycarbonate sheeting over the roof instead of asphalt shingles. (Unfortunately you have to use specific screws for the sheeting and one length was too short and the other too long and protrudes through the roofing slightly, into the interior. But we like the pop of color the sheeting adds, and REALLY didn't want to do shingles for such a small area, nor did we know how to do shingles.)

My final suggestions would be that a mitre saw and pocket jig are REALLY helpful and using star head screws is easier. I would also suggest that you paint everything (prime and color coat) before assembly and just touch up afterwards, especially if you use a lot of trim as we did. We primed and painted the siding but just primed the trim, and it was a real pain to put the color coat on all that 1x3 trim after construction.

This plan is listed as an "intermediate" project and I think that's probably a correct designation. As beginners, it just took BOTH of us to figure it all out (we work really well together) and to build it, and it took a much longer time than it would for someone with more experience.

Estimated Cost
I think we probably spent between $300 and $400 on lumber, hardware and paint, not counting buying the secondhand mitre saw and the Kreg jig.
Estimated Time Investment
Week Long Project (20 Hours or More)
Finish Used
Primed and painted, green and tan. (We bought the green and had the tan on hand.)
Recommended Skill Level
Intermediate

Comments

laurawelsh

Tue, 10/06/2020 - 15:56

Well done! I love this! Can I ask what dimension your garden tool shed is? And how did you decide on the new roof size/angle? I have a similar space and am contemplating something similar. Thanks!!

laurawelsh

Tue, 10/06/2020 - 15:56

Well done! I love this! Can I ask what dimension your garden tool shed is? And how did you decide on the new roof size/angle? I have a similar space and am contemplating something similar. Thanks!!

IKEA Hack 6" Tray Cabinet

Submitted by Matty3481 on Thu, 01/07/2016 - 16:30

I'm happy to share with everyone my IKEA hack 6" tray cabinet.

I found a 24" cabinet box in IKEA's As-Is section and took it home for half price ($23)!  I would have preferred plywood, but my table saw is a little small and cutting large sheets of plywood is a little scary.  When I deconstructed the cabinet, it sustained some damage (as its particleboard), so if you try this at home, be careful!  I ended up changing the depth to 22" in order to cut off the damaged piece, but that shouldnt be noticeable with average trays and cutting boards.  

I used Ana's 6" tray cabinet plan and modified the dimensions a little for my planned space.  It still needs the back, face frame and door (which will be a replacement drawer front from the cabinet manufacturer).  I plan on building the face frame at the time the cabinets are installed, since this will go in between the 36" corner easy-reach and the 36" sink base.  Once its done, I'll post updated pics!

Estimated Cost
$30 (cabinet and an aluminum straight edge tool to help me cut straight lines with my Dremel).
Estimated Time Investment
Afternoon Project (3-6 Hours)
Finish Used
Face frame will be painted to match factory cabinets
Recommended Skill Level
Intermediate

Modified and Expanded Loft Bed, Shelves, and Desk

Submitted by mickelsn on Mon, 11/25/2019 - 20:09

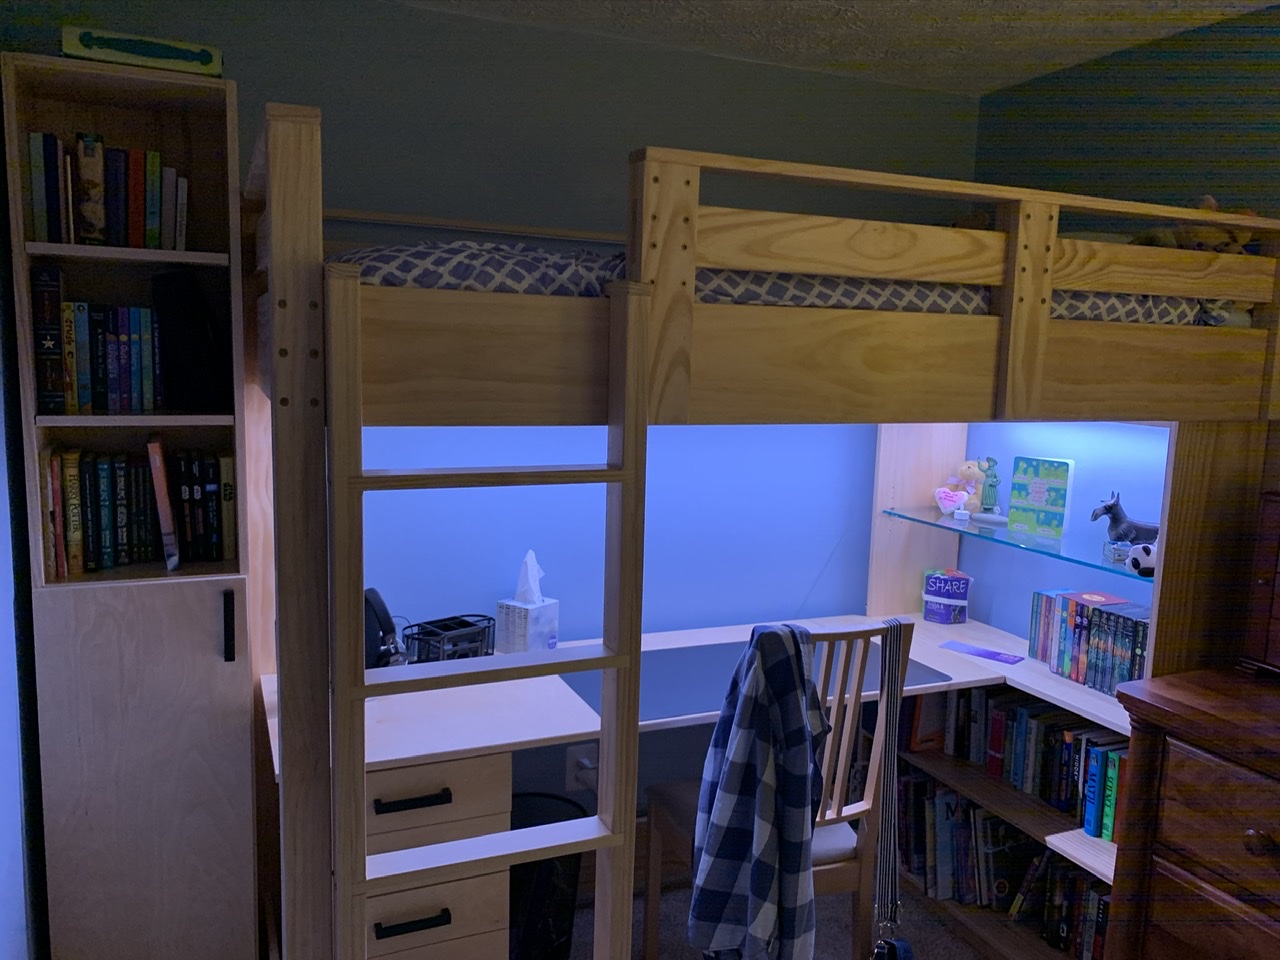
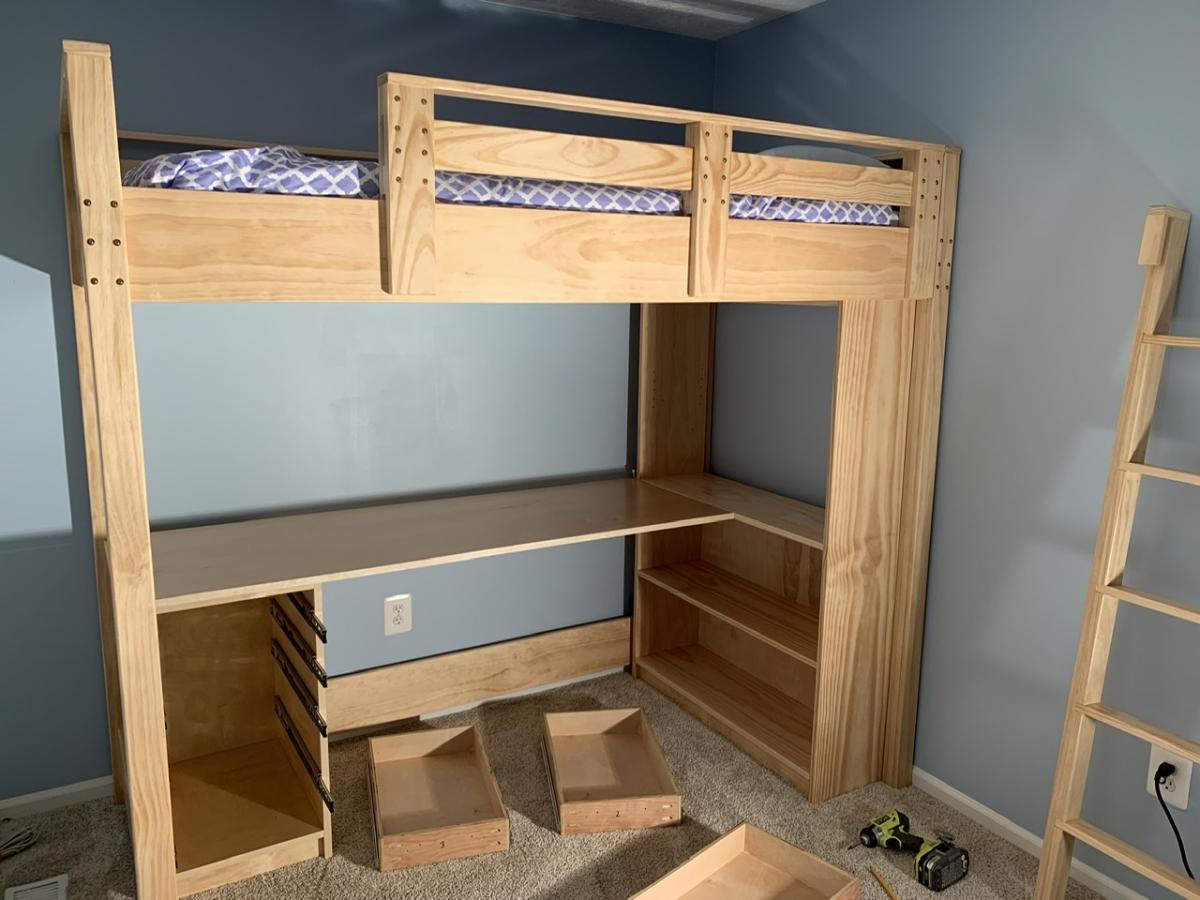
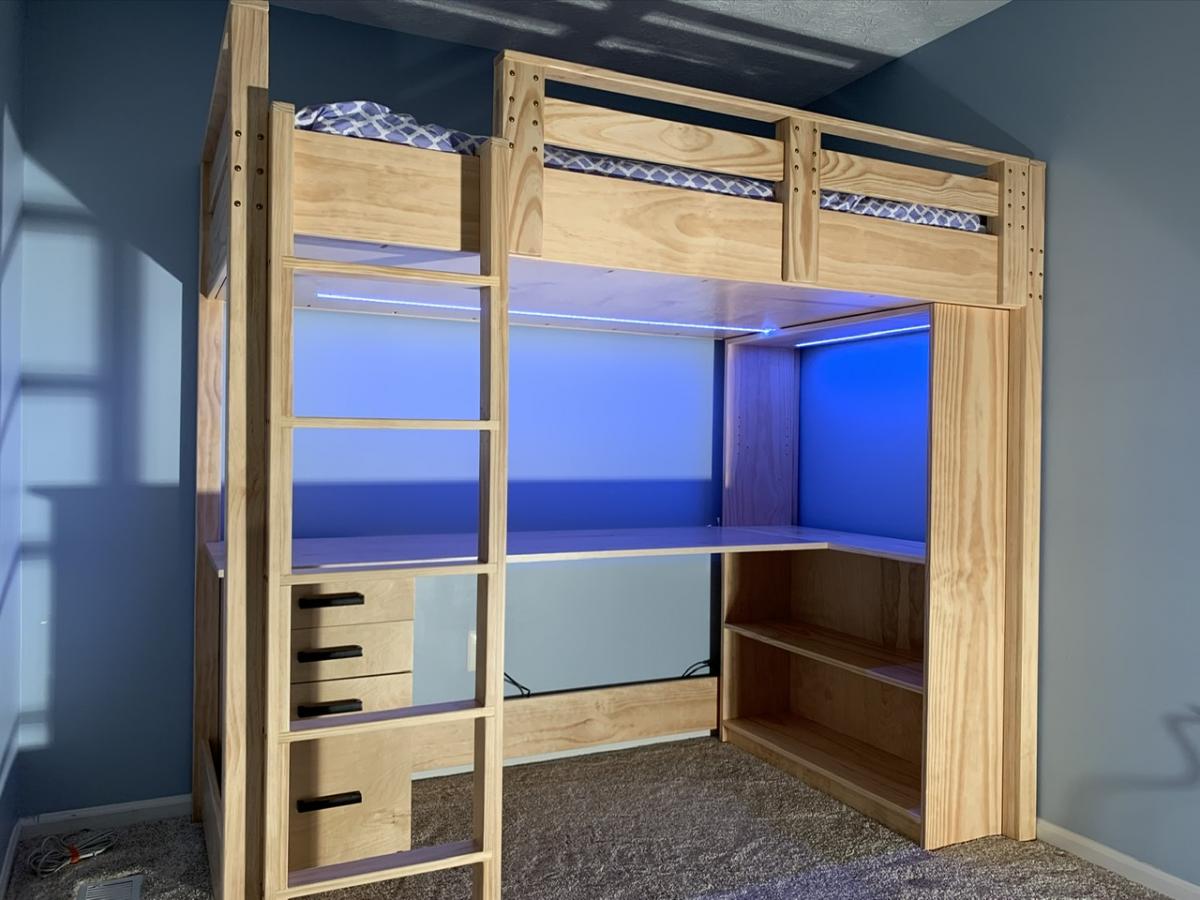
My daughter desperately needed a new loft bed for her small bedroom as she became a teenager. After looking a long time, I finally decided to   take the plunge and make something custom after we couldn’t find a bed that met her needs (she’s VERY tall for her age). Thank you for posting the loft bed and bookshelf plans to this site, as they were great to work from and customize! This is my first woodworking project of any kind, and it came out great with these plans.

We followed the Loft Bed and Loft Bed Bookshelf plans pretty closely, but we did make some changes as we went...

First, we tweaked the guard rail design to make it removable by adding back vertical posts. This way, the front and back posts slide over the front rail and it no longer needs to be screwed in place. This is a nice tight grip for safety, but it’s much easier to make the bed by removing the guard rail and dealing with the mattress. If you do this, just make sure the back vertical posts are shorter than the front ones to make room for the cleats and slats on the inside of the rail! This also means the top of the rail is made with a 1x3 instead of the 1x2 in the instructions.

We also decided to use a vertical ladder design rather than an angled ladder. We did this for space considerations in the room; it’s a bit harder to get up the ladder, but not that much. This also helped avoid any weird angle cuts with my basic tools. We also made the ladder about 3” wider than the one called for in the plans.

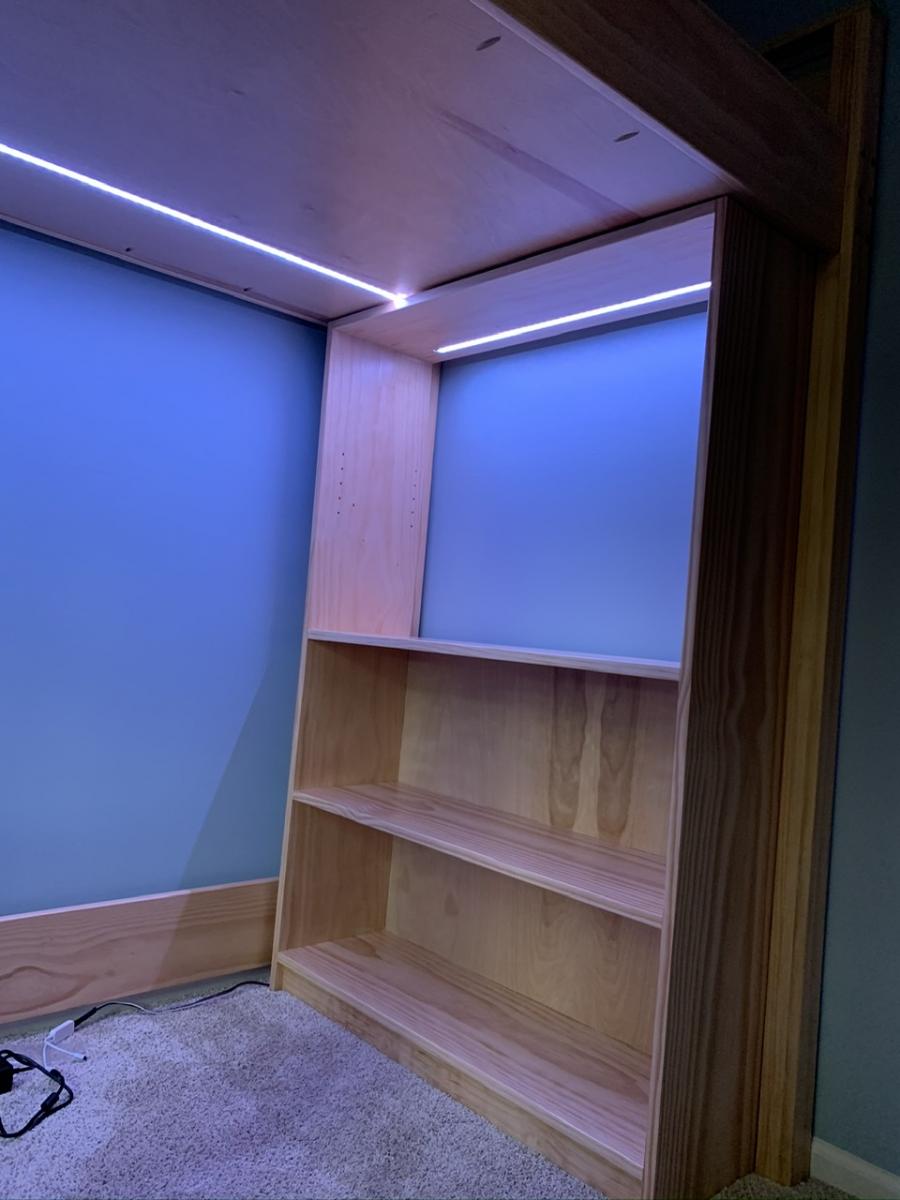
One of my favorite features was adding a 3/4” plywood “ceiling” above the desk. We did this by moving the long side cleats upward by 3/4” of an inch in the plans, and using pocket holes roughly every 10 inches around the perimeter of the plywood. We used this to hide the bottom of the mattress and all the bedding from view when sitting at the desk. It also provides for LED strip lighting above the desk, which is installed by routing out a pathway in the board and installing the lights within an aluminum channel for heat dissipation and to allow installation of a plastic diffuser over the lights. The wiring for the lights lives in the ~1.5” gap between the board and the slats thanks to the 1 x 2 cleats.

In the shelving, we made the upper shelf in the wide bookcase adjustable with the help of a Kreg shelf pin jig. We also ordered a 3/8” tempered glass shelf for this area to let more of the LED light strip we installed in the top of this shelf shine down as well. Again, this was installed in a routed-out pathway that holds an aluminum channel, and the wiring goes up through both the bookcase top and the plywood bed “ceiling” panel to join into the power. We got the strip lights, aluminum channel with diffusers, power supply, and controller from Amazon.

To get power to the LED lights, I routed out a channel for 5-conductor wire in the middle board of a rear leg assembly. Before gluing up the leg, I coated the wire with silicone spray to avoid the glue adhering to it so I could slide the wire around as needed. With a little bit of chiseling, this wire is able to come out of the slide-in joints for the upper and lower wide rails on the back of the bed. On the top, these wires go into a splitter and then to the two sets of LED light strips. On the bottom, the wires to into the LED controller which is mounted to a scrap board along with the power supply that stands on end in the 3/4” gap between the back side wall of the bookshelf and the bottom bed rail.

We created a custom-designed file drawer unit as the pedestal for the desk opposite the wide bookshelf. This was modeled roughly after Ikea Alex drawers with three narrow drawers and one file drawer. The carcass is about 14 1/2” wide by 21 3/4” deep by 29 1/4” tall and made of 3/4” plywood. The drawer boxes are approximately 12” wide by 20” long made of 1/2” plywood with 3/4” plywood fronts. We used full-extension soft-close drawer slides and positioned the cabinet so they have nearly full extension behind the ladder. Four wooden dowels are used on the top corners to align and secure this end of the desk surface.

Speaking of the desk, it is a piece of 3/4” plywood approximately 24” deep by 64” long. One end rests on the file drawer cabinet, and the other end is flush with the middle shelf of the bookcase and attached using two 6” by 5” 14-gauge galvanized T-straps usually used in framing applications. These are screwed upwards into the bottom of the desk and shelf from below, and are holding up quite well. This avoids the need for desk legs by the bookshelf.

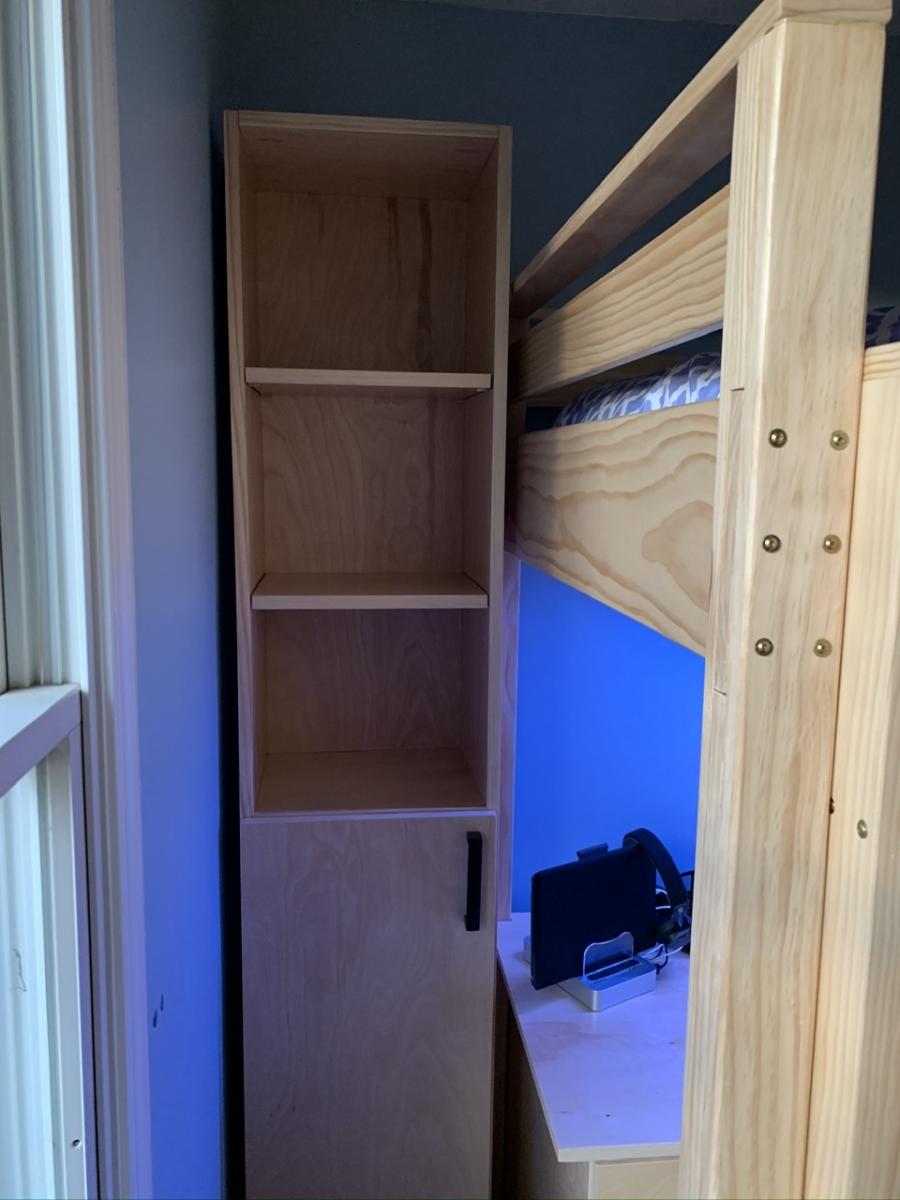
We then adapted the techniques used for the wide bookshelf to build a narrow bookcase (79” tall, 14 1/2” wide) out of two more 10-foot long 1x12 boards. This bookcase sits between the end of the bed and the corner of the room to finish out the look and provide more storage. The top, middle, and bottom shelves are fixed and there are a total of four adjustable shelves (two in the top half, two in the bottom half). We also cut a door and installed it using a pair of full-overlay euro hinges. With these dimensions, the tall bookcase is also capable of working with 11” x 11” x 11” storage cubes just like the wide bookshelf.

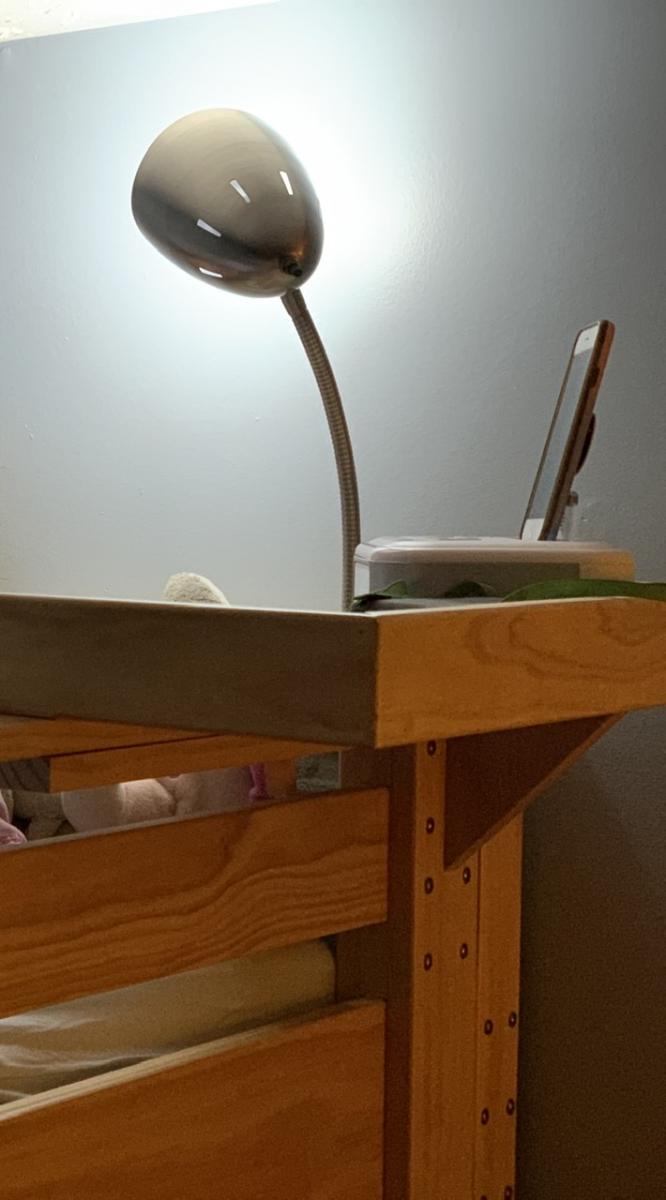
The finishing touch was to create a shelf that attaches to the guard rail and provides a place for my daughter’s alarm clock to sit and be within easy reach. This shelf is made around a piece of the scrap 3/4” plywood that is approximately 21” long and 9” deep. I used leftover 1x3 pine that I glued and nailed to the outside perimeter of the plywood flush with the bottom to hide the layers in the plywood while providing walls around the shelf. I also glued and screwed another 1x3 piece to the front of the plywood, this time flush with the top, as the first piece of a U-shaped grip to slide over the top of the guard rail. Another 1x3 scrap was then positioned, glued, and brad nailed to this front piece to finish the grip. I then cut a triangular piece of wood from a 1x6 to provide additional support under the shelf against one of the vertical pieces of the guard rail. This piece is held in place with counter-sunk screws that go through the top of the plywood shelf down into E-Z Lok threaded inserts in the top of the triangular wood support. The whole shelf assembly is only attached to the guard rail so that I can still easily remove the rail to change bedding on the mattress.

The whole project is constructed out of Home Depot select pine boards and birch plywood. Throughout construction, I used a 3/16” round-over bit in a router to eliminate sharp corners pretty much everywhere on the bed itself (legs, rails, ladder, etc.). I didn’t use this on the bookshelves, the file drawers, or the desk. Edge banding was used to hide any exposed plywood edges. I used 200-grit sanding discs and an orbital sander to sand the various pieces during construction and before finishing. The entire thing is finished with two or three coats of Minwax Polycrylic water-based polyurethane, sanding between coats, which gives this a nice smooth finish and lets the richness of the wood grain come through.

Hopefully the pictures I’ve posted can help understand the write-up on modifications to the project. I enjoyed building this a lot, and my daughter really loves what this did to her room to make it much more usable! That was worth all the effort and time right there.

Ana, thanks a million for the plans!!
Estimated Cost
$750 in materials for wood, LED lighting, tempered glass shelf, etc.
Estimated Time Investment
Week Long Project (20 Hours or More)
Finish Used
Minwax Polycrylic, Satin finish. Used Shur-Line 3.5” x 7” White Fiber pads to apply on most flat surfaces, with foam brushes to get into corners and apply to edges. For complex pieces like the ladder and guard rail, used Minwax Polycrylic Satin spray. Sanded between coats with 320-grit sandpaper in all cases. Used two coats when doing pad application; four coats when doing spray application.
Recommended Skill Level
Beginner

Woven back bench

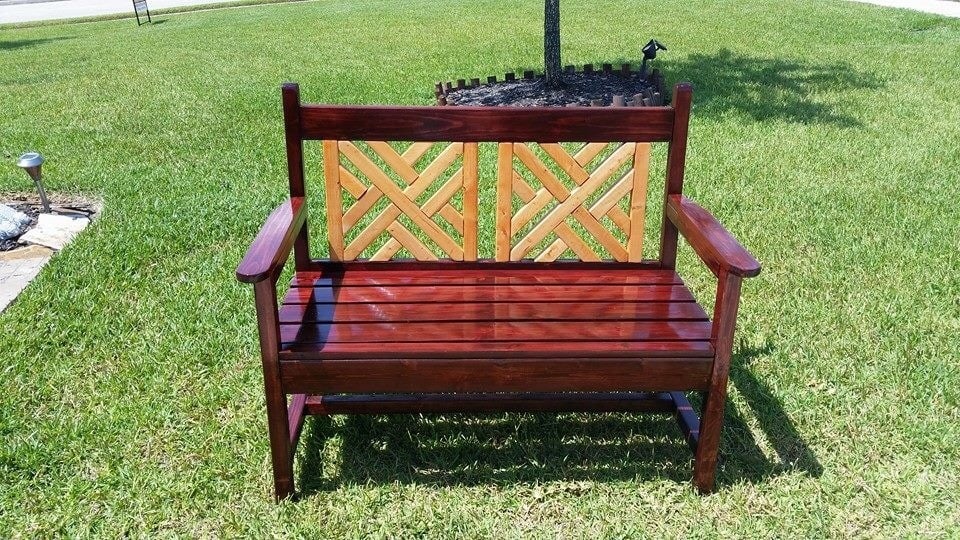
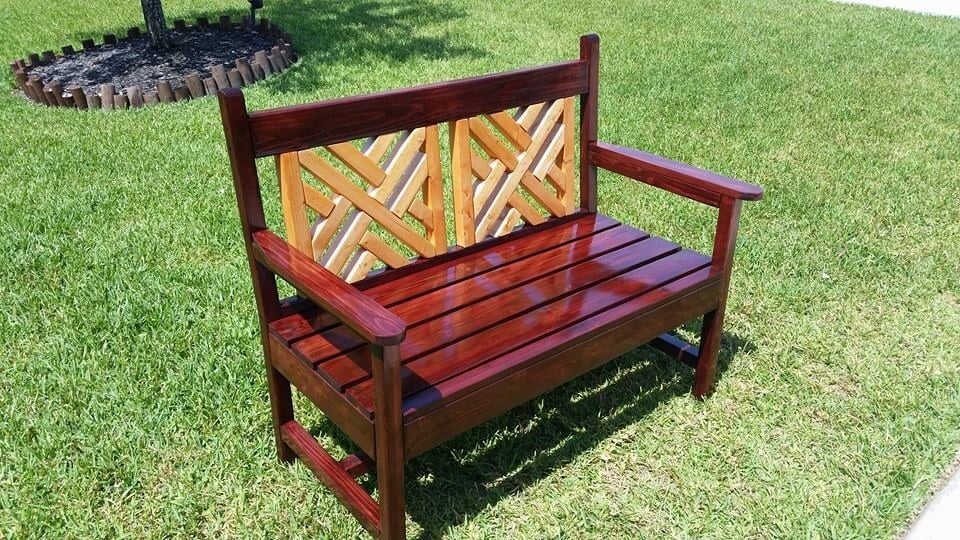
Really fun project. I plan on making a side table and 2 chairs with this plan as well.

Built from Plan(s)
Estimated Cost
$75
Estimated Time Investment
Weekend Project (10-20 Hours)
Finish Used
Cherry gel stain and oil pecan back. Followed with high impact clearcoat.
Recommended Skill Level
Beginner

Comments

pde00311

Tue, 07/08/2014 - 10:26

Awesome job. I love the finish. I actually just finished a pair of these (which I have yet to post on the website) that are sitting on my front porch. I was also thinking of making matching side tables, but I cannot decide what would look good with the benches. Are you using Ana's plans to make your side-table, and if so, which plan? Looking forward to seeing what you create.

Large Old English Style Farmhouse Dining Table

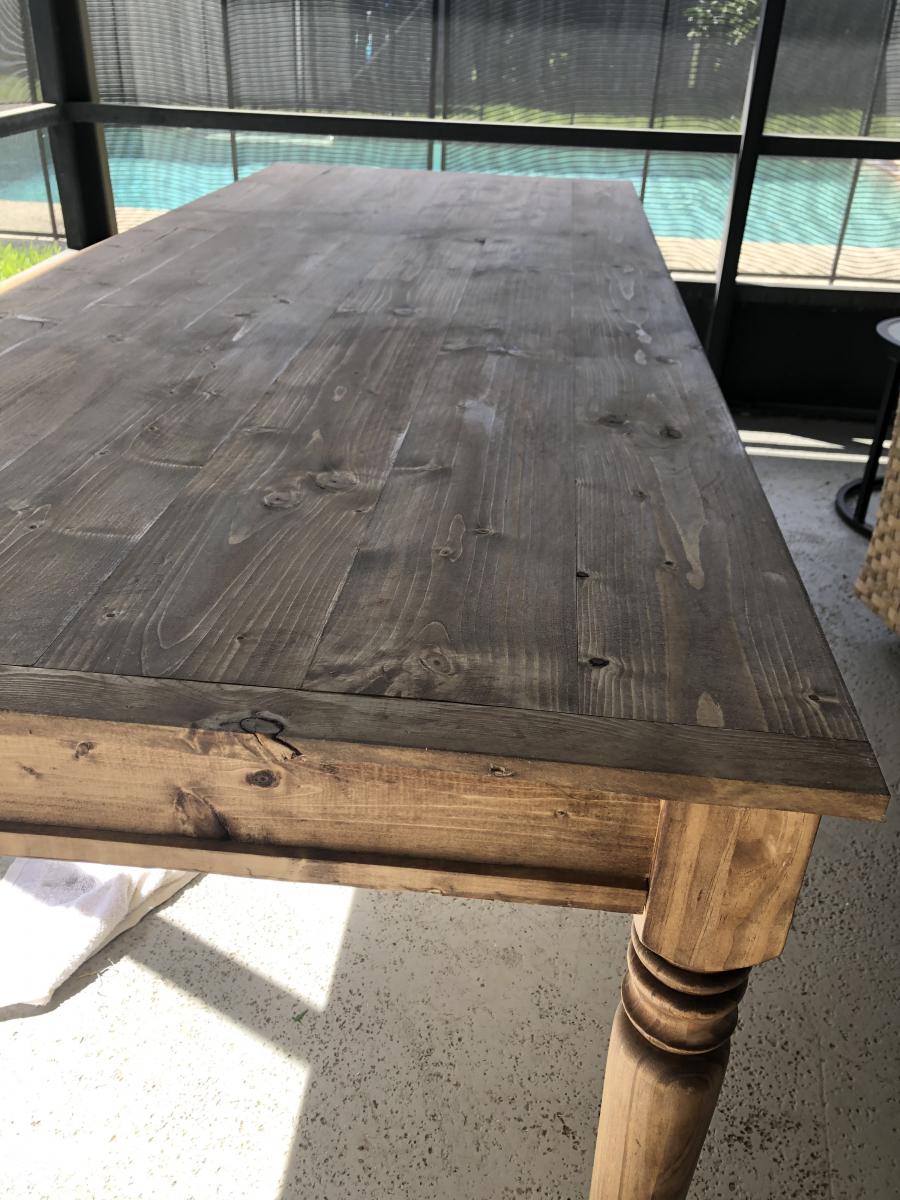
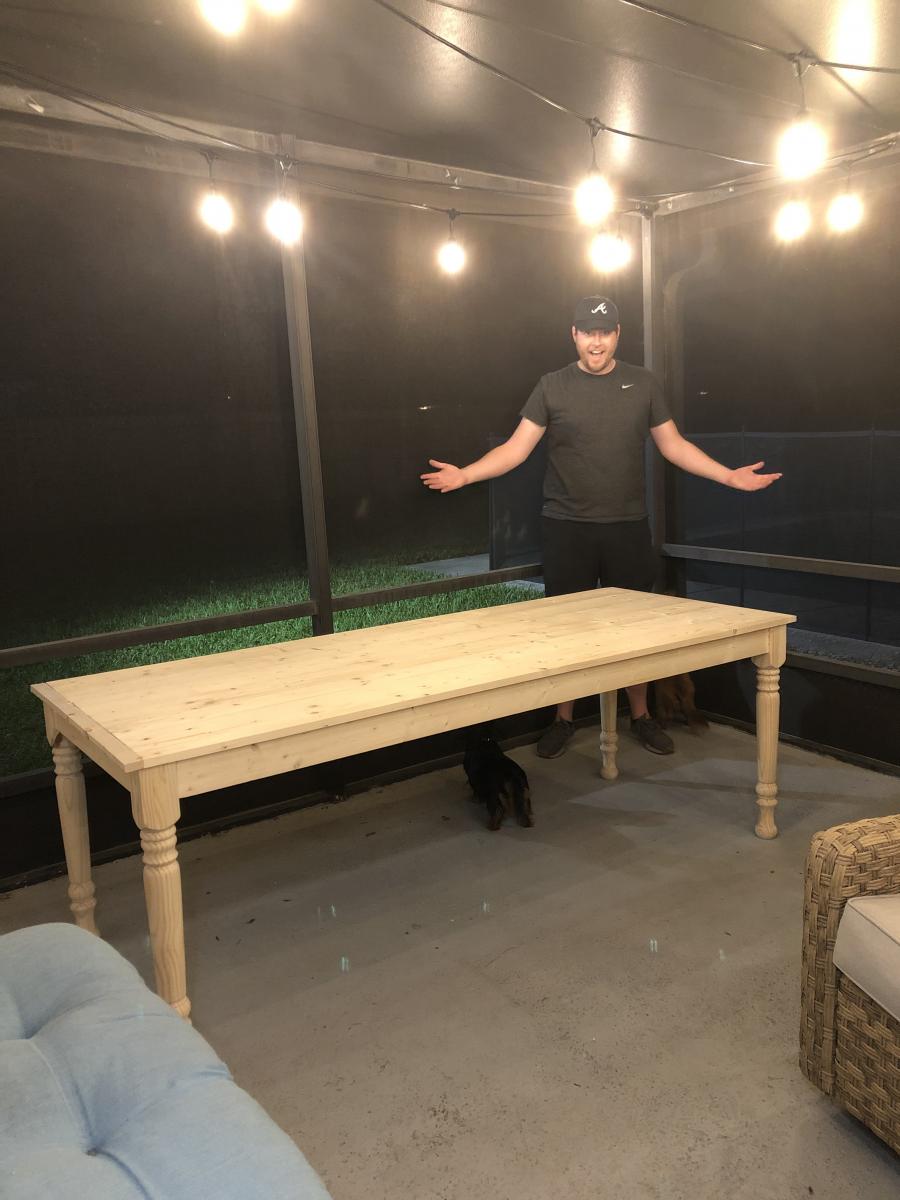
My wife and I were wanting a large outdoor farmhouse table that looked stylish, and like it could have been bought at Pottery Barn or another high-end furniture store. We found this plan that Ana white had made "Small Old English Style Farmhouse Dining Table". We often host groups from our church and will have 15-20 people on our patio or around our pool area, so we needed a bigger table... I just made some modifications to make it longer (7ft) in length to better fit our space and allow for more people to sit.

To make this plan longer, I simply adjusted the cut-list on the long 1x2s, 1x4s, and 1x6; and added a crossbar to prevent the longer tabletop from sagging. I also added the diagonal corner struts to make the table a little sturdier.

Adjusted Shopping List:
4 - 1x2 @ 8ft
5 - 1x4 @ 8 ft
6 - 1x6 @ 8ft
Waterproof 1 1/4" Kreg screws (for outdoor use)
Minwax Weathered Oak
Minwax Vintage Grey

Adjusted Cut-List
• 2 - 1x2 @ 26.5"
• 2 - 1x2 @ 76.5"
• 2 - 1x2 @ ~33.25"
• 2 - 1x4 @ 26.5"
• 2 - 1x4 @ 76.5"
• 4 - 1x4 @ 7.25" w/ 45º miter (diagonal corner supports)
• 1 - 1x4 @ ~28" (Crossbar - I forget the exact measurement)
• 6 - 1x6 @ 82"

For seating we just bought some inexpensive farmhouse weather resistant chairs from Walmart:
https://www.walmart.com/ip/Yaheetech-Metal-Dinning-Chairs-Stackable-Cof…

Estimated Cost
$170
Estimated Time Investment
Day Project (6-9 Hours)
Finish Used
Minwax Early American (base), Minwax Weathered Grey (2nd coat)
(See more on outdoor use of stains: https://ana-white.com/blog/2019/05/outdoor-wood-furniture-finishing-secrets)
Recommended Skill Level
Beginner

Comments