Fancy X Farm Table with 2x6 Feet
I wanted to change up the style of this table and make the base chunkier! So I opted to use 2x6s instead of the 2x4s
Varuthane Triple Thick
I wanted to change up the style of this table and make the base chunkier! So I opted to use 2x6s instead of the 2x4s
I learned so much for this first project. I used redwood instead of cedar and finished it to match our fence. I coated the inside with flex seal. Next time, I'll drill drain holes nearer to the front edge of each box so they drain into the box below a bit better. I angled the bottoms of each box with a band saw on a 15 degree tilted platform. They fit like a glove! Thanks for a great plan.
built this to go around our adjustable bed. for the posts i took 2 select pine 5/4 (2x4) and 1 - 1x4 and glued them together and left a gap to slide the side rails (2 - 1x8's) into the post approx 2-3"s and then ran 2 screws from the side to anchor the side rails to the head/footboards
I saw this super simple farm house table plan on my Facebook feed from Ana and I just had to do it !!$50 in lumber a Saturday afternoon and I was done!!!! Followed all her tips and it turned out great
Saw this clever side table on Pinterest. It's made out of 1 1x8x8. I was able to figure out how to build a jig for the table saw to suit the project and then it was easy peasy lemon squeezy from there.
Mon, 12/21/2015 - 09:41
This is so clever and would make an inexpensive yet first-rate gift! I love it...thanks for sharing.
Fri, 10/28/2016 - 08:40
I would love to build this unique table, but can't seem to find some actual plans with dimensions and jigs
Fri, 10/28/2016 - 08:45
Would you please email me the plans for this table. Thanks so much
Nursery photo ledges. Shortened the shelf depth using a 1 x 2 instead of a 1 x 3.
Mon, 04/08/2024 - 01:07
I love the idea of book cornices for the nursery! Reducing the depth of the shelves is a smart modification that makes them more suitable for children's books. It is very important to customize the furniture so that it perfectly suits your needs. Using 1 x 2 instead of 1 x 3 will give you a more customized solution. Books are a storehouse of knowledge! Speaking of knowledge, for students looking to adapt their learning process, platforms like Edubirdie https://essays.edubirdie.com/assignment-help offer reliable assignment help services. Edubirdie can help you tailor your academic assignments to your specific requirements. It's all about finding the right option for your needs, whether it's organizing children's books or tackling academic assignments. Great job on the customization!
Mon, 05/06/2024 - 14:40
A very cool ledges for books, especially useful for those who like to read like me. Moreover, I dream of writing a book myself. For this I must develop strong writing skills, often refined through literature review tasks. Yet, these assignments very complex for me. I prefer turning to professionals https://literaturereviewwritingservice.com/ for help. It provides students with the help needed to succeed in crafting compelling writing papers.
Modified with a high back and modern adirondack arms.
The base of the chair is built exactly to the plan except that the arms are done in a modern adirondack style.
The back was made independently to fit inside the base and then attached to the plan base.
Very comfortable but very heavy chair even without the modified back.
Not stained yet obviously.
Cushions are hard to find I think I would make it slightly smaller next time and maybe even find the cushions first and alter the plan to fit.
Tue, 06/09/2020 - 09:11
Stained with Saman: Urban Grey mixed with some left over brown 4:1 and now has a companion side table
Wed, 06/24/2020 - 07:33
Do you have the plans for the table you built? Im a brand ne beginner. I am trying the modern outdoor chairs and live this table with them.
I’m a first year teacher of construction class at Waterloo High School in Illinois. We recently used your Small Cedar shed instructions with some modifications for a class project. It’s a bear getting cedar right now, so we used T1-11 for the outside and 2x4 for the frame.
Sat, 03/25/2023 - 09:14
Very fun and job well done! Thank you for sharing.
We built this farmhouse table a few months ago and absolutely love it. We modified the plans a bit based on another brag post and went with a replica of the Restoration Hardware table. I also built the chairs for the table based on the Parsons chair plans
Tue, 11/05/2013 - 17:59
Really nice job! This was quite an accomplishment, especially given that you guys did additional chairs (that look fantastic). Also, great job documenting on your blog.
We had just moved into our new house and were using an end table for our TV stand I just didn't like it. I found this and modified it so it's shorter and fits in our room better. I also opted to not put doors on it and use it to display items instead. This was a relatively easy build and I'm learning new things with every build I make. It took about 2 days to complete not including filling holes/paint/stain. I love it, it looks so great in our room and I am planning on building end tables to match as well as replacing our buffet with movies in it to match also. Thanks for the easy-to-follow plans!
We did some conversions to the smokehouse plans to make a locker for all of my horse tack! :)
Decided our old play set needed an addition, landed on these plans of Ana's. Sat on them and mulled them over for months. Once the wife said something about adding on to it I made the purchases needed. Connected the two platforms with a bridge. I used 4"x4"x10' for the runners, same boards as the decking for the platform of the bridge(5/4"x6"), 2x4's and 1x4's for the railing. If you look at the 3rd photo, I had to chisel out the 4x4 post to get the 2"x6"x12" support to fit correctly. This should measure 2"x6"x13". Another change I made was to cut the bottom and top trim pieces longer on the front and back sections so that the trim would cover the framing of the gable end walls (see last photo). my son wanted windows so I faked in some windows with scrap 2x2's. I used 2x6's as supports from the 4x4's to the 2x6 framing (see photo 3) I added the monkey bars about a month before deciding to do the platform/deck and playhouse. The ladder is based loosely off of a couple of plans I found online. I was able to do all of this work myself except for the roof. Need my dads help to lift the plywood, he then helped me with the rest of the roof.
This was my first project at building some sort of furniture. we wanted a stool that really fits out toilet bowl shape, the height, etc. and 2x6's worked perfectly. I could have bought 2x12's for the sides, but it would have cost significantly more and with the inside support board it is plenty sturdy.
I bought 2# 2"x6"x6 foot coarse pine boards from Home Depot (not the expense Select Pine boards. They cost about $6 each. Then I bought a 100 count package of Kreg 1.25" coarse screws.
Cut lengths
2 @ 15 3/4" for lower sides
2 @ 10 1/4" for upper sides
5 @ 14" for steps and fronts
1 @ 12 1/2" for inside support
I used my Kreg Jig and connected all the pieces along with wood glue. I sanded the whole thing down after and tried to round/smooth the corners.
Tue, 03/01/2016 - 10:29
Does anybody have plans for a potty seat. I would like to build a childs chairs that has a ptty
Followed the DIY changing table plan!
Solid garden lounger and side table to match our garden chairs and table.
Well, I had just bought a house. We had no furniture for our sunroom, so I took it upon myself to build some while materials were still cheap.
Hindsight, the chairs rear end should have been a level seat instead of trying to build an Adirondack style club chair. I modified the ends to match the modern style so they would match the chairs.
The sofa turned out great, all are solid and built with pocket screws. Sealed with redwood deck sealer, should last forever!
For the covers, we had them made from covers and all, and went to the local Joann and bought 4" thick foam.and wrapped it with with polyfill. Can't tell that they were made in a backyard, but they've been great for 18 months so far!
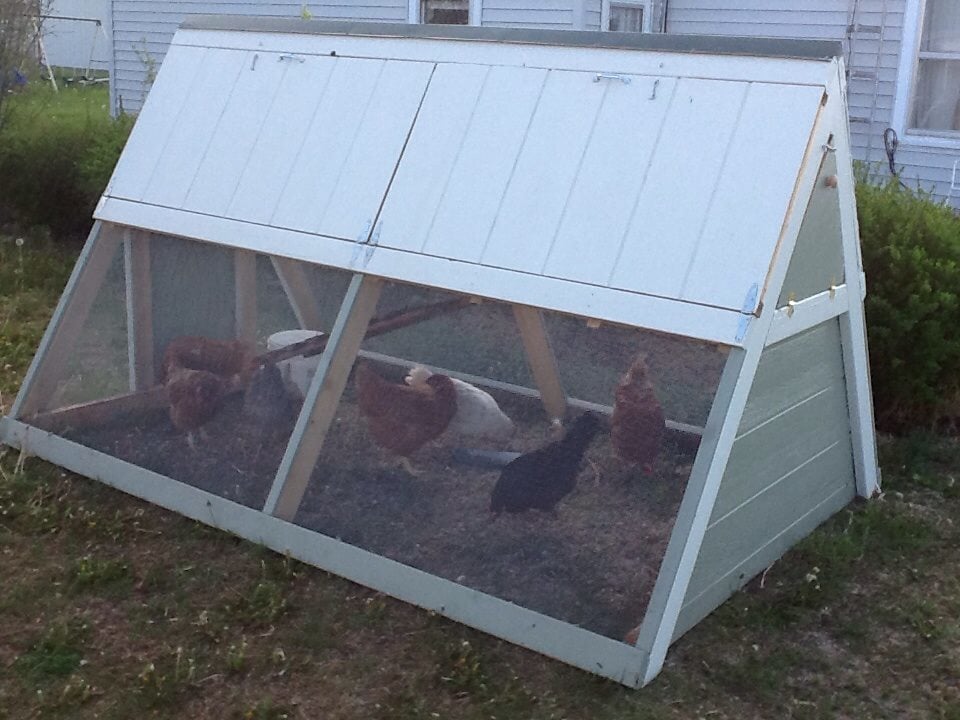
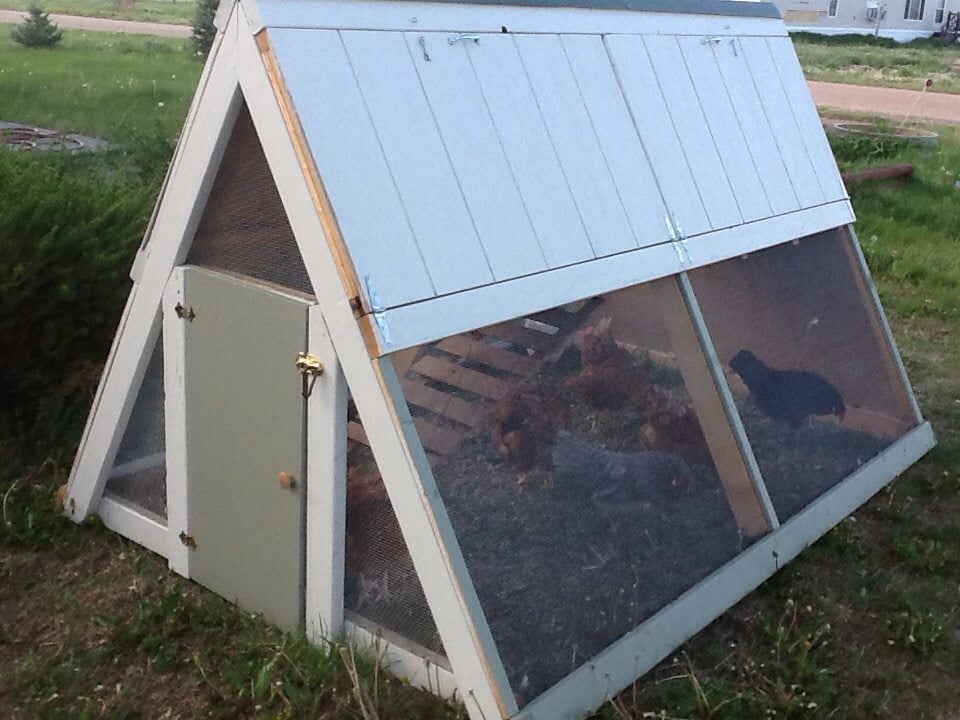
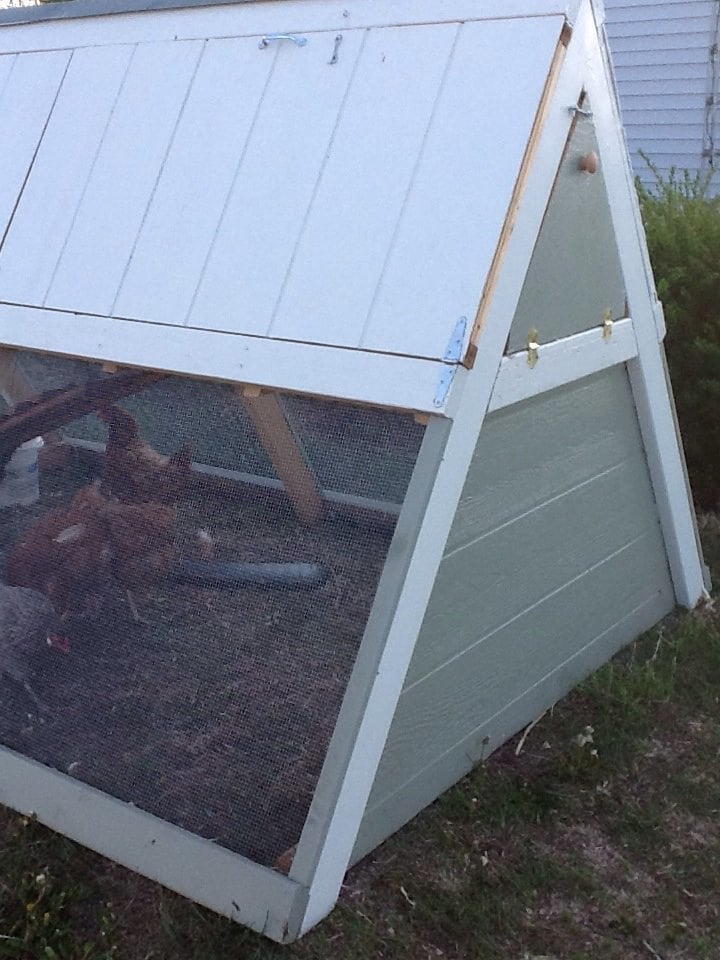
I built this A-Frame Chicken Coop using the Ana White plans. It turned out adorable, strong, and I am very pleased. Final cost was $250, and it took me 4 days (in real time, as a mom of 3). One Saturday at Lowes shopping, one Sunday afternoon cutting, and two days of assembly. Then a 5th for painting. Give or take a dozen extra runs to the hardware store! My brother-in-law helped cut the angles on his miter saw, and my uncle helped with assembly. I kinda doubt this could be done for $100 - maybe if you have a bunch of scrap materials and spare paint. We even have 7 or 8 hens in there! I only intended 3 to live in it, but my uncle added the extras and they all get along happily. I found the roof cap at Home Depot (didn't find at Lowes).
I would also like to point out that I was very afraid to do carpentry - I was afraid to even buy the lumber. But I asked for a lot of help from a lot of Lowe's and Home Depot people, and resisted the naysayers, and just got brave and did it. And it came out beautifully! If you are new to using power tools, get someone to assist, and you would need help anyway with holding things up while another drills.
Wed, 05/22/2013 - 11:59
As an extra note, I used Hardware cloth, not chicken wire. Wire will not keep dogs or predators out (and my dog immediately tried but failed to claw his way in). I bought I believe 36 inch tall rolls - the standard size that I could tell (not 30 inches like in the plans). But it fit perfectly, so I think maybe the plans had a typo? Lay out the lumber according to the plans and it will fit perfectly.
Wed, 05/22/2013 - 21:33
Very nice! Hardware cloth is definitely the way to go.
I had very little clearance on the long side of the shed, so I opted to put the door on the short side. Thanks for the plan, it was a great starting point for my project.
Tue, 09/10/2013 - 10:15
Thanks for posting! I plan to make this shed. Yours turned out beautiful!
In January, I came across your plans for the farmhouse, coffee table. I made it, and loved it! I had been wanting a new spin on kennels for our dogs. And thought your coffee table transformed into a dog kennel would be perfect, and they are!!
Fri, 03/03/2023 - 11:53
Love the look, thank you so much for sharing!
I used the farmhouse table plans, with a few modifications. I made two benches to go along with it. This was my first big wood project and I'm pretty proud of it. My daughter bought her first home and needed a table custom sized to her space so this was perfect. I love all of Ana's plans, so easy to follow.