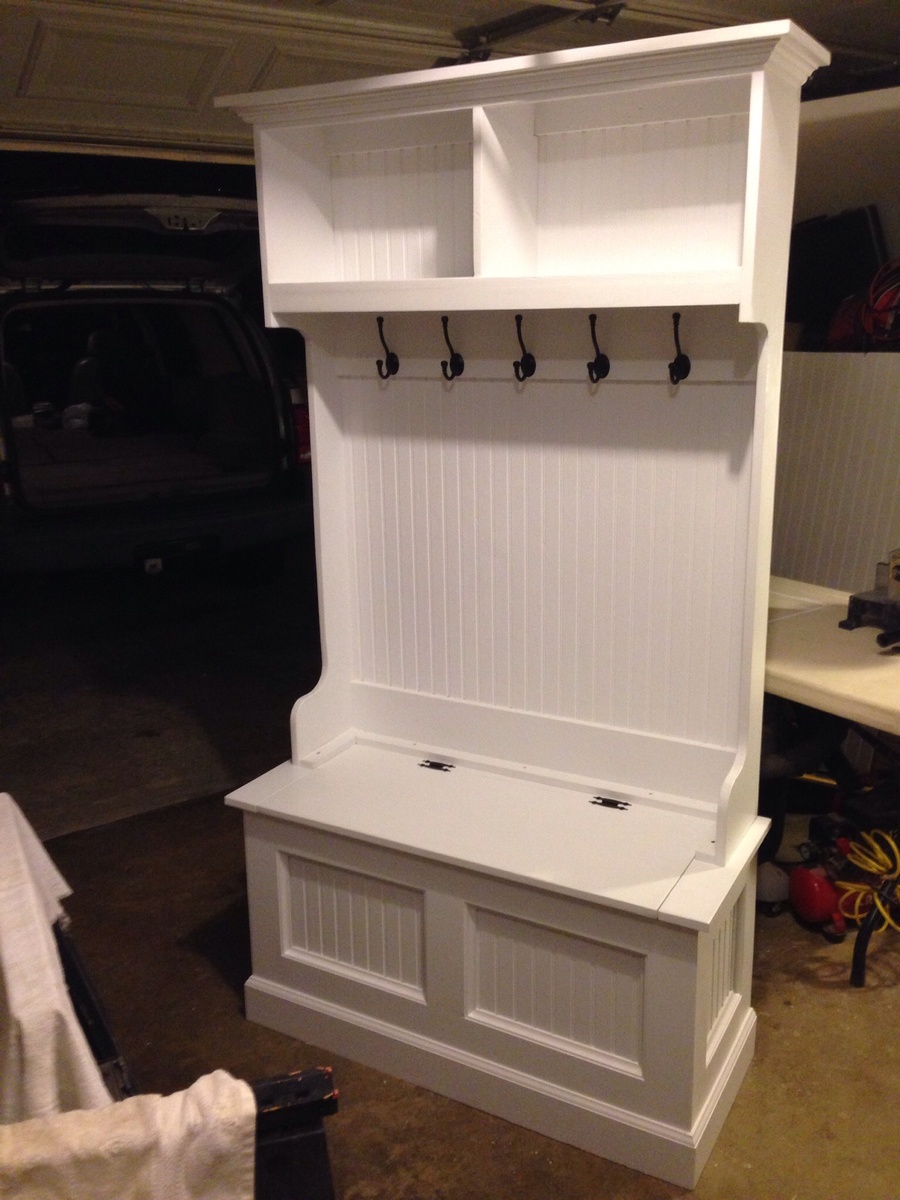
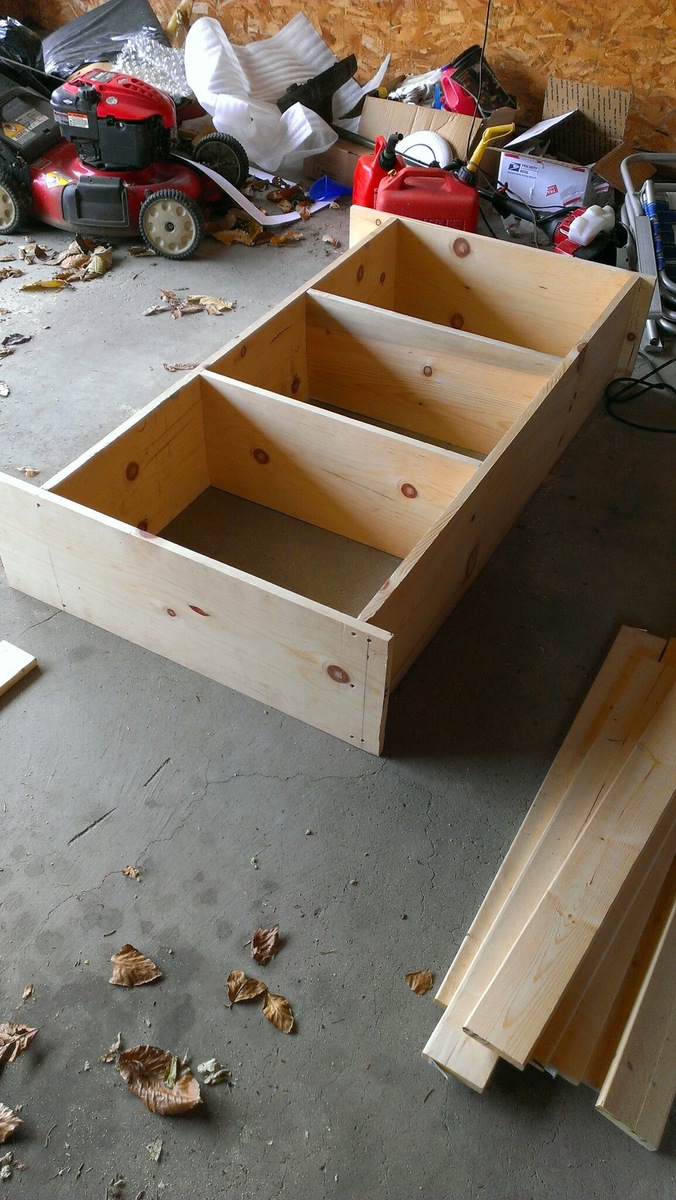
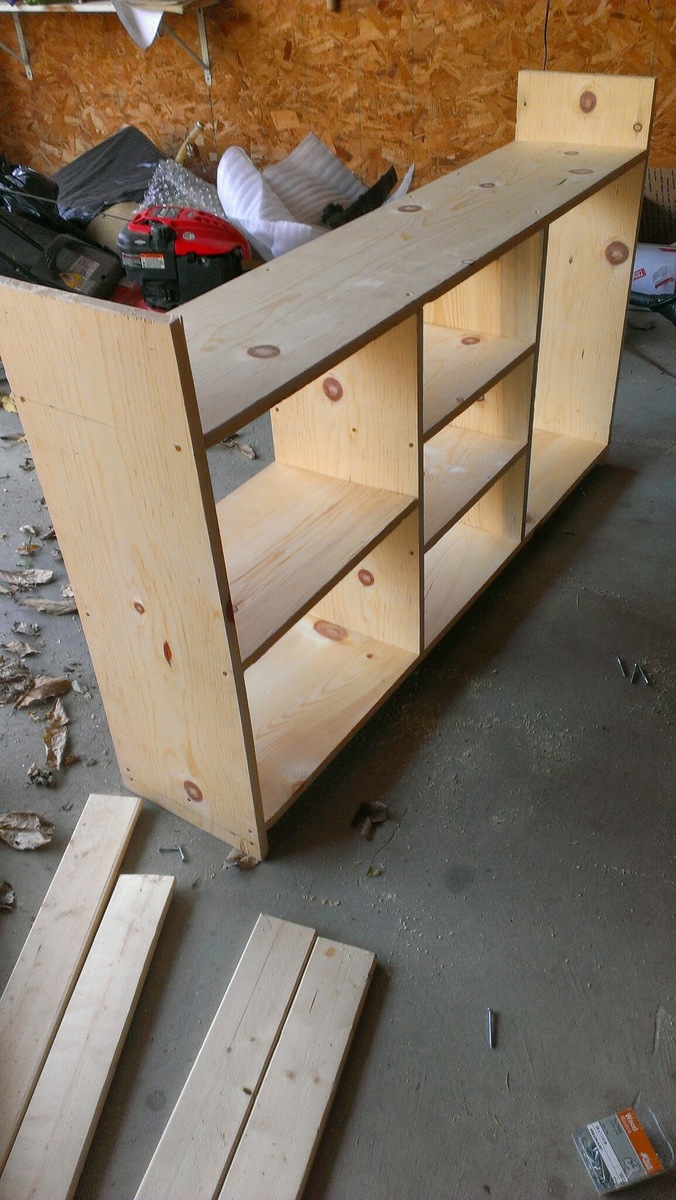
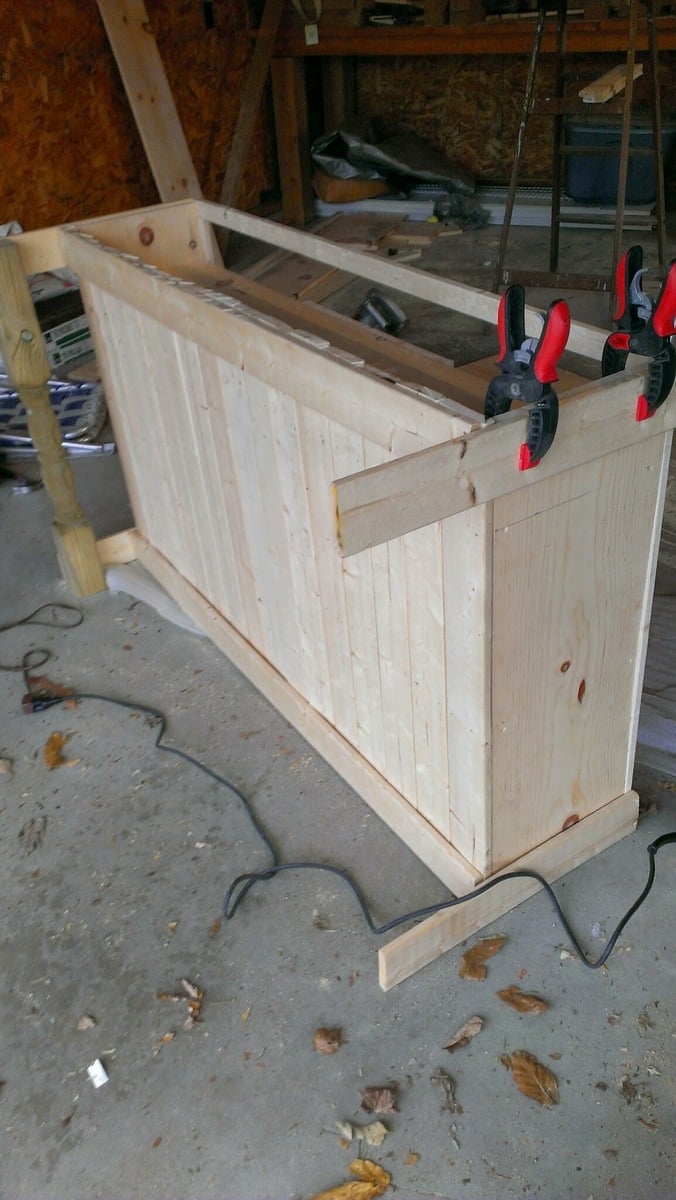
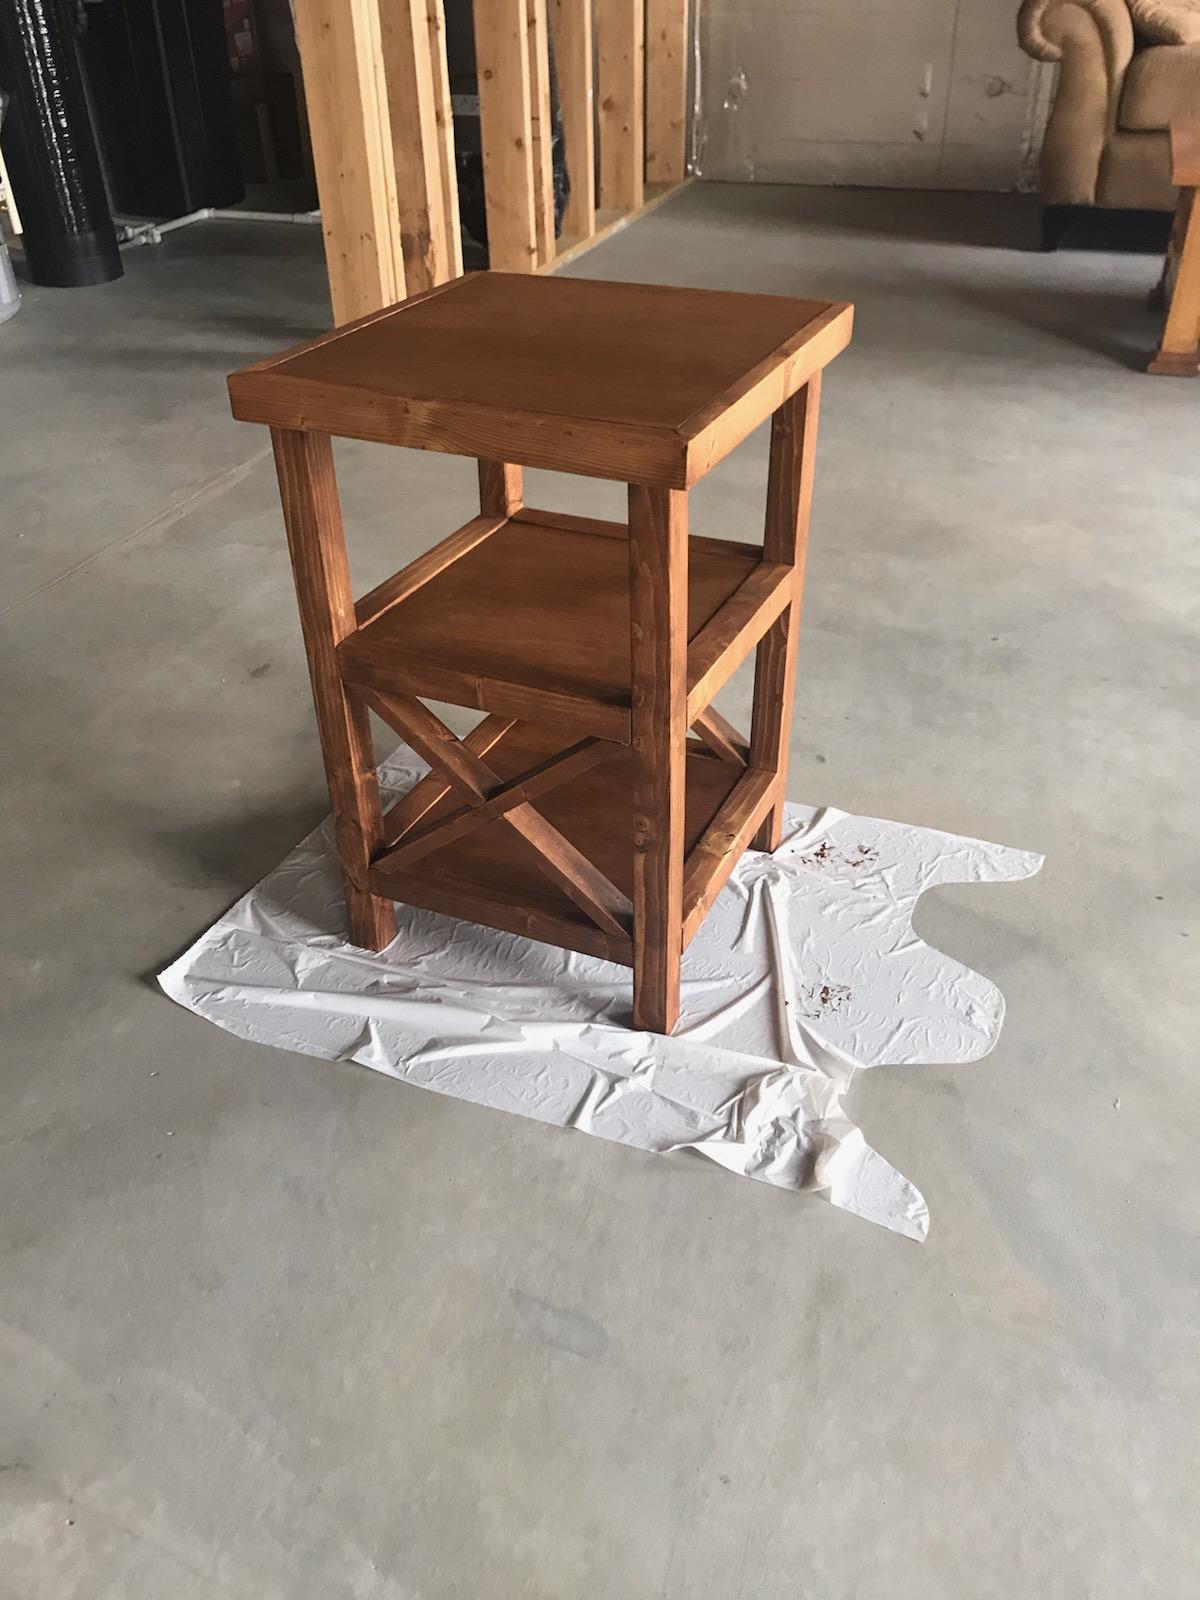
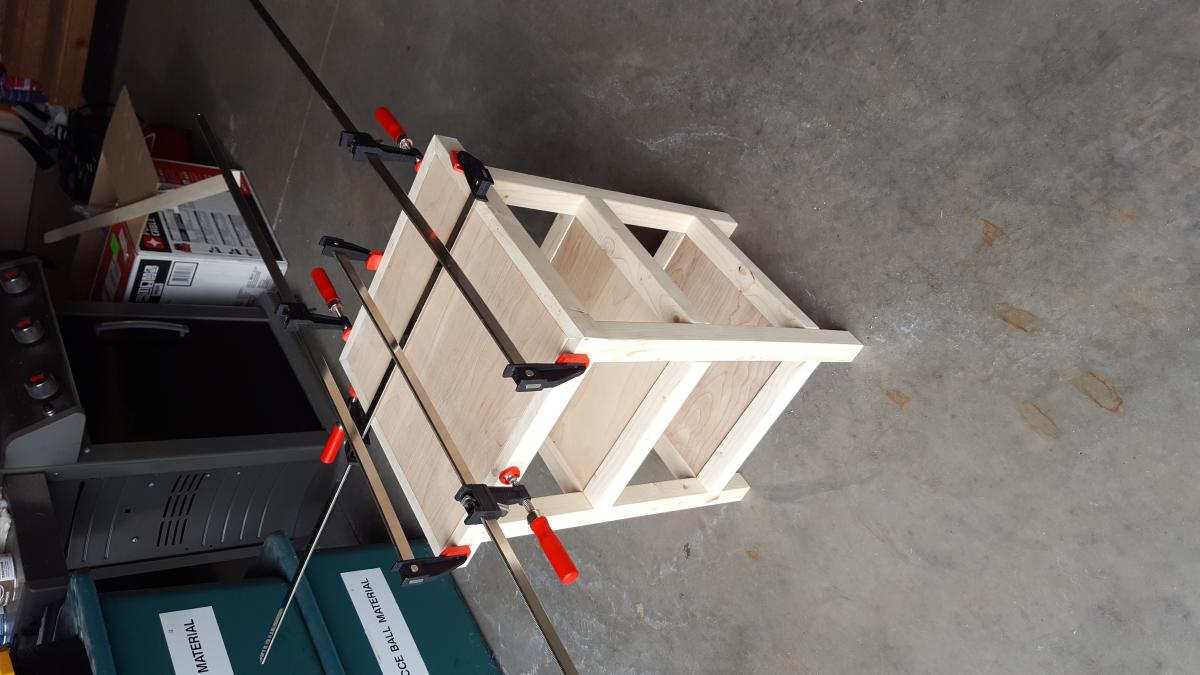
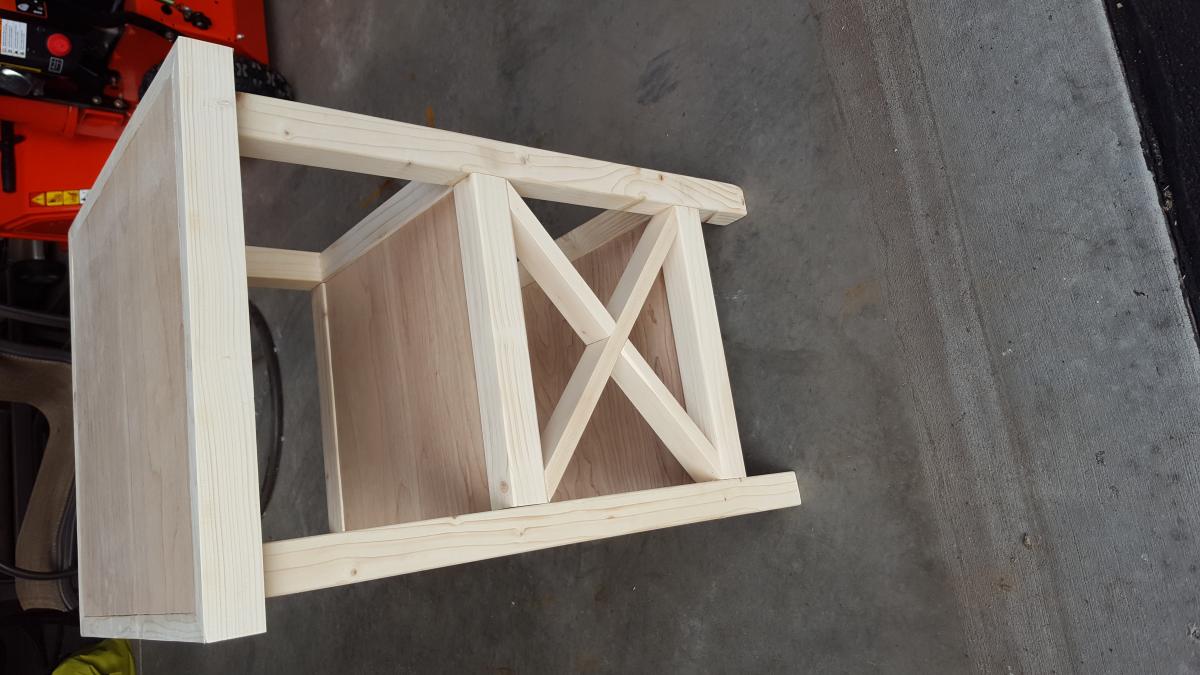
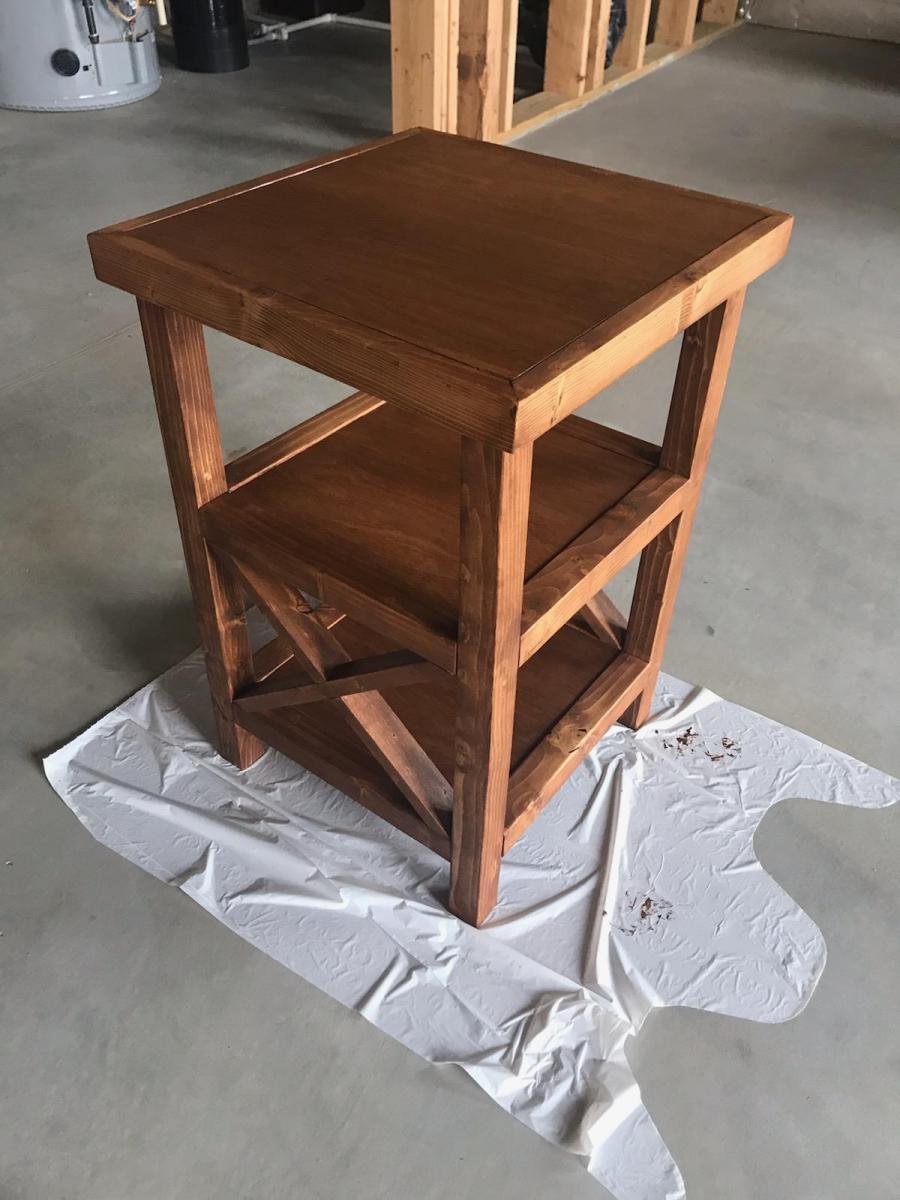
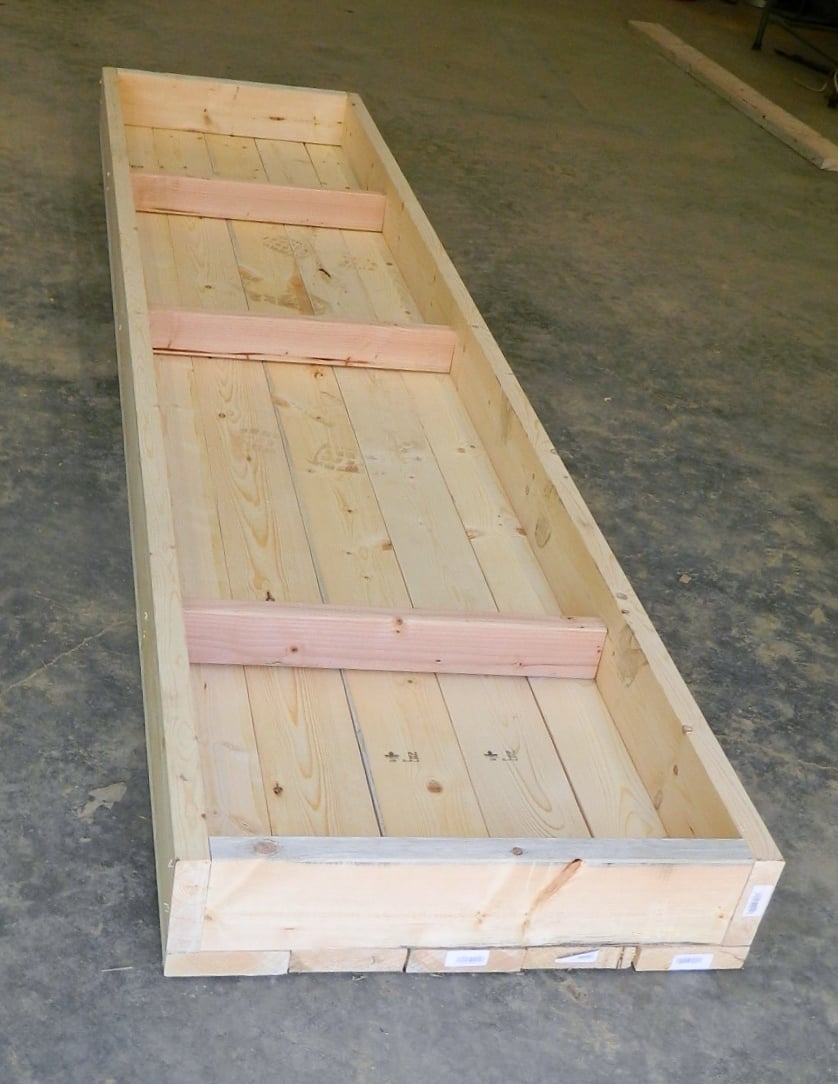
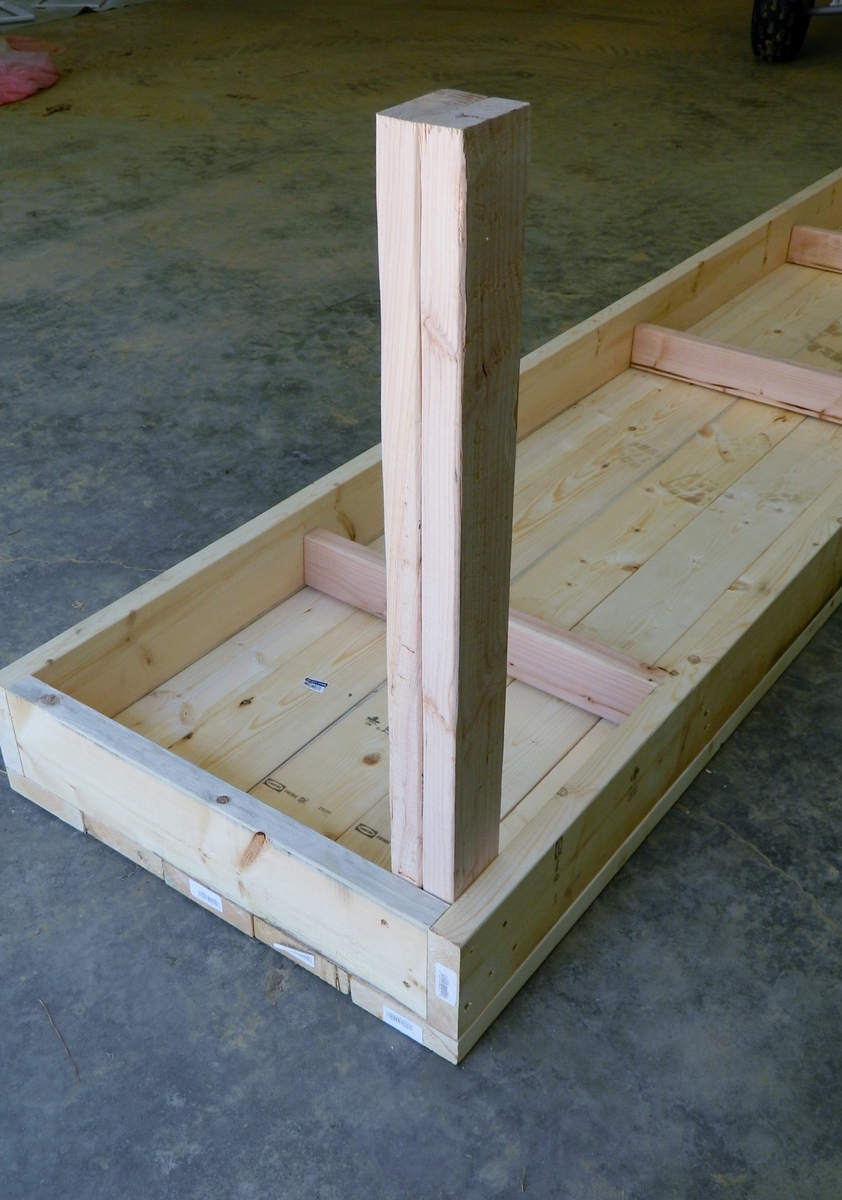
Community Brag Posts

Workbench

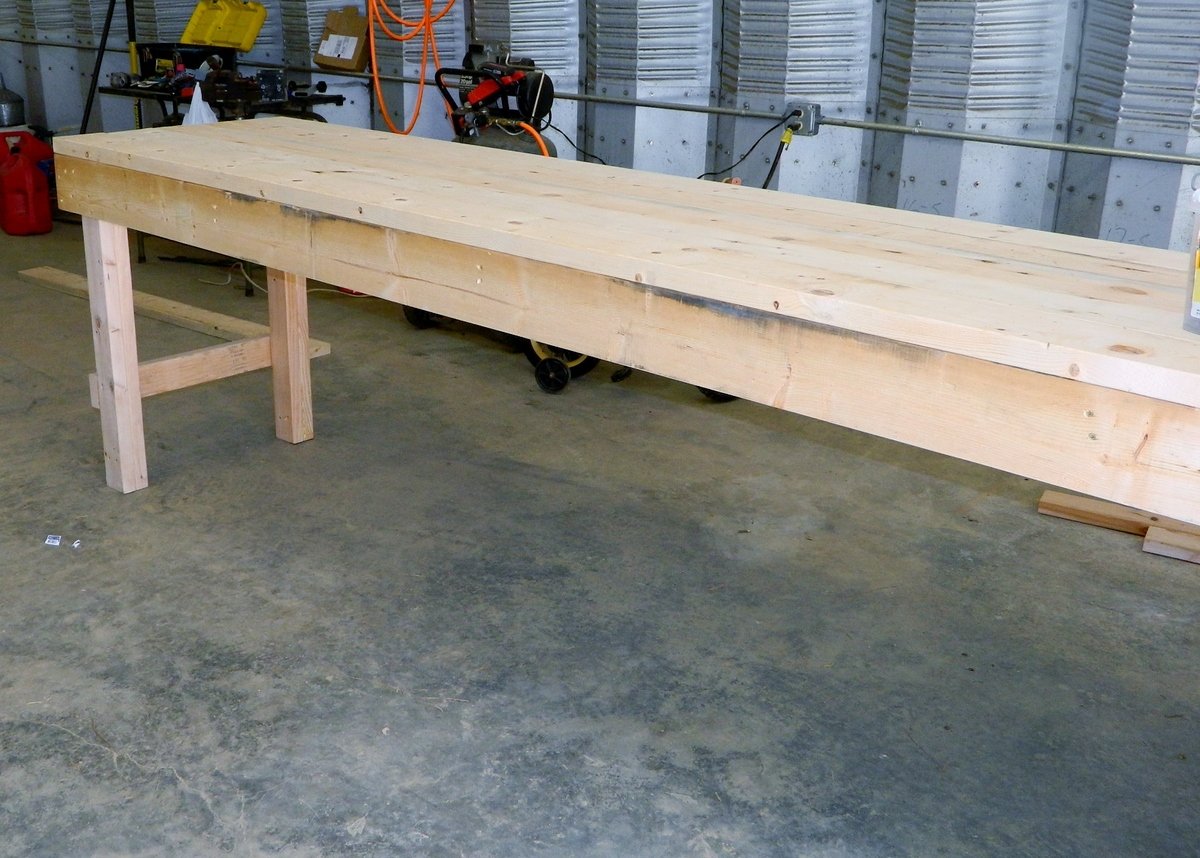
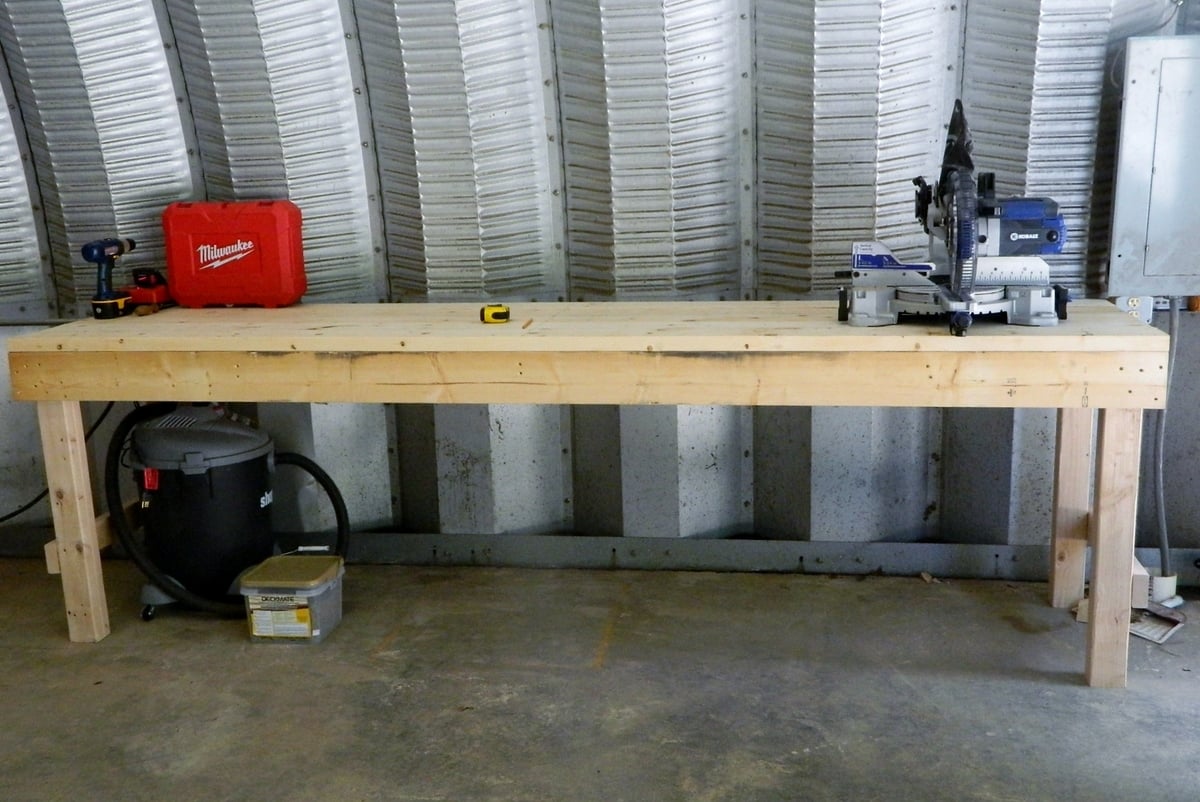
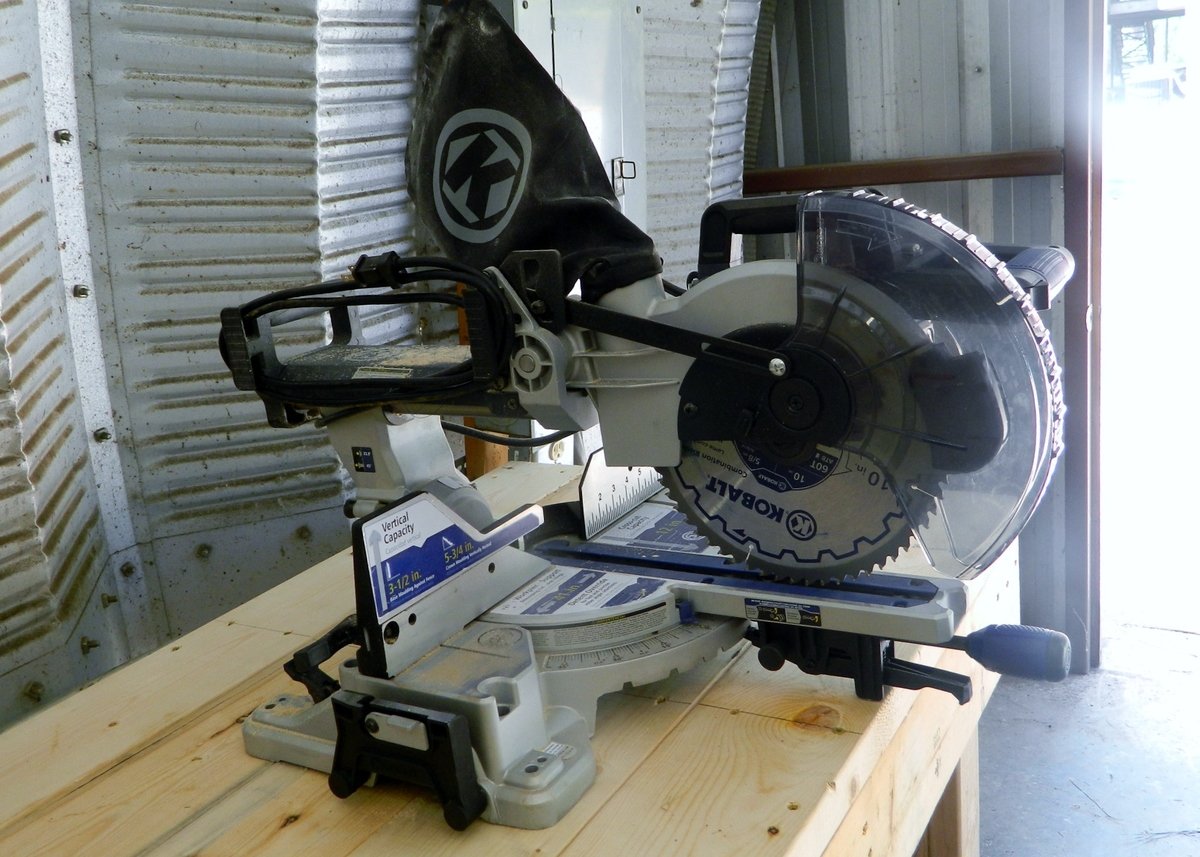
This morning my dad decided to help my build the workbench I've been wanting since we moved to our new house. I would usually do it myself but being 37 weeks pregnant I wasn't wanting to get out there on my own and lift a bunch of 10 ft boards. So we got a bunch of 2x4s and some 2x6s and threw one together... it ended up being 10 ft long and around 28 inches wide and a good 36 inches tall. Now I have a nice place to put my new saw I got for Mother's Day

Estimated Time Investment
An Hour or Two (0-2 Hours)
Recommended Skill Level
Beginner

Hall Tree

Submitted by tbonia on Wed, 03/19/2014 - 13:50

This was my first attempt at building actual furniture. It went pretty well I think. I followed the plan pretty much. I made the bench longer and taller. I also added a few inches to the height if the hutch.
A couple other changes I made that I thought it needed was 2x2 bracing on the bottom if the bench for stability. I also added a band of 1x2 to the bottom of the hutch so I could screw the hutch to the bench without having to go inside of the bench and try to line it up .
I then added another board to the top band of the hutch, because with the one small board there it want wide enough to mount a decent size hook to.
That's pretty much it. If you have any questions, let me know.

Built from Plan(s)
Estimated Cost
$200
Estimated Time Investment
Week Long Project (20 Hours or More)
Finish Used
Painted White
Recommended Skill Level
Intermediate

Farm style night stand

Submitted by Decross on Tue, 06/21/2016 - 15:11

Very easy farm style night stands. Made from pine and leftover butcher block top from another project. Went exactly by the linked plan with the exception of the top. 

Estimated Cost
$70 each
Estimated Time Investment
Day Project (6-9 Hours)
Recommended Skill Level
Intermediate

King size Farmhouse Bed

Submitted by Anonymous (not verified) on Sun, 04/19/2020 - 15:59

This is a plan that My 16 year old son chose to do for a project to fulfill a goal to learn some woodworking skills during our unexpected downtime from School.
Mom is thrilled with the new space.
He adjusted different sizes based on what lumber we already had. He used 1x7’s and routed a 45deg on the edges to give the tongue and groove look. Posts are 4x5 and top railing is 2x7.

Estimated Cost
$40 in paint and supplies. Wood was free from a friend.
Estimated Time Investment
Weekend Project (10-20 Hours)
Finish Used
Valspar Furniture Enamel.
Color - Web Grey
Recommended Skill Level
Beginner

Comments

Nursery Dresser

Submitted by Anonymous (not verified) on Sun, 11/26/2023 - 12:18

My first attempt at a dresser before my first grandson arrives.

Rick White

Comments

Console Table w/Drawer & Raised Dog Bowls

Submitted by Booooozle on Tue, 06/05/2012 - 18:00

I actually designed & built this table on my own but it is very similar to Ana’s Simple, Cheap, & Easy Console Table. When we moved from an apartment to a house our lil neurotic jack Russell terrier decided he wasn’t going to eat unless we were both in the same room as him. So his food was put in a spot where he could see both of us even if we were in separate rooms, it just turned out that where that spot was, is the exact spot I wanted a console table. Well I couldn’t find a console table with a raised dog bowl shelf in it so I built my own. Now the dog bowls are up off the floor at a comfortable level for our fur babies & I keep all their vet paperwork, sweaters & toy stash in the drawer, all puppies things in one place.

Estimated Cost
$35
Estimated Time Investment
Afternoon Project (3-6 Hours)
Finish Used
Valspar Flat Black Indoor/Outdoor Enamel
Recommended Skill Level
Intermediate

Farmhouse Kitchen Island

Grabbed some cheap whiteboard for my first project. My wife was looking at buying an island and I decided to surprise her by trying my hand at building one. Turned out to be an enjoyable new hobby that I hope to continue (plus, Laura now says I am her "favorite husband!").

Materials breakdown:
The lumber is white board from Lowe's for $115
The countertop is laminate Pragel from Ikea for $59 (cut to size)
Paint, polyurethane and drawer hinges were $50

I had another $75 in tools, glue, wood filler, nails, etc, because this was my first project.

Estimated Cost
$225
Estimated Time Investment
Weekend Project (10-20 Hours)
Finish Used
Green paint with black and chestnut dry-brushed distressing. Two coats of polyurethane.
Recommended Skill Level
Intermediate

Comments

Pastor Priestley

Wed, 04/02/2014 - 17:42

We just moved into an old house with a garage and the previous owners left a work table and an ancient Craftsman jig-saw, circular saw, and scroll saw (all from 1956). They were a bit sketch, but they got the job done!

gozinehtalaee

Tue, 11/15/2016 - 00:15

I love that. It have a nice design. ین درها دارای تکنولوژی مدرن و پیشرفته بوده و استفاده از آن سهل و آسان می باشد. وجود موتور توبولار و مرکز کنترل پیشرفته الکتروند فرانسه در آن باعث ایجاد امنیت، آرامش خیال و سهولت کارکرد آن بصورت دستی و اتوماتیک شده است. این مدل درب اتوماتیک به دلیل کم حجم بودن و جمع شدن در زیر سقف فروشگاه ها و یا مراکز تجاری و یا به صورت عمودی در سوله ها و کارخانه ها، هم باعث کارآیی بیشتر و هم دارای زیبایی مضاعف می باشد و کاربرد آن در مراکز تجاری، فروشگاه ها و صنعتی باعث ایجاد امنیت، راحتی و سهولت در استفاده از آن شده است .

Changing Table

Submitted by Eves on Fri, 06/24/2016 - 15:15

Changing Table

Estimated Time Investment
Week Long Project (20 Hours or More)
Recommended Skill Level
Beginner

10 Dollar Ledges in Espresso

Submitted by Kimiemich on Thu, 06/07/2012 - 15:17

I made these ledges with pine and white wood, 4' long. I wish I had used pocket hole screws to connect them, but instead I just counter-sank the screw holes and butt jointed the boards with wood screws. I filled the screw holes with 5/16" wood plugs and sanded them down flat. Then I sanded, stained, varnished, and sanded again.

Please see my process below on my blog.

Thanks, Ana!

Estimated Cost
$30
Estimated Time Investment
Afternoon Project (3-6 Hours)
Finish Used
A mix of "ebony" and "walnut" oil-based stains, then 2 coats of varnish and a light sanding with 600 grit paper.
Recommended Skill Level
Starter Project

Rhyan Coffee Table

Submitted by dbwalk on Wed, 04/02/2014 - 19:15

I loved this coffee table plan. I found it on www.morelikehome.net and also linked on Ana White's page. My wife and I loved the size and also the number of drawers for storage. I would say that the plans were great and I had to only make minor adjustments due to my own errors.

It took me about four days to complete. I used the Kreg jig to complete most of the joining. I put it all together by the end of the second day. It is solid as a rock. The last two days were mostly staining all pieces and then restaining to get the right finish. It also took a couple more weeks to find pulls and get them installed. But now it's all done and we love it already!

Built from Plan(s)
Estimated Cost
140
Estimated Time Investment
Week Long Project (20 Hours or More)
Finish Used
Black satin polyurethane
Recommended Skill Level
Beginner

Outdoor chairs

Submitted by Big J on Mon, 06/27/2016 - 17:10

I built two chairs for my wife and I and a little table (for beer or wine). I made the table out of scrap that I had left over. My favorite part is the paint color I chose. Thank you Anna!

Built from Plan(s)
Finish Used
Behr paint and primer in one
Recommended Skill Level
Beginner

Small X End Table

This was a fun project spread out over 3 weeks to enjoy working on while quarantined at home. It was the first project I worked on featuring mitered corners. It took some practice and many "polishing" cuts to get everything to line up right, but in the end they looked great! I went with a Birch interior plywood instead of you typical (pine?) plywood because it looked a lot more furniture esque. I trick when using a circular saw to cut the plywood is to keep the desired side up when cutting in the direction with the grain and the desired side down when cutting across the grain. When cutting across the grain, the blade can fray the edge of the top ply. I also added braces attached to all 4 legs flush with the top of the legs using 1x2's. This allowed me to glue and screw (1" screws) the table top to the base from underneath so it was hidden rather than nail from the top. I didn't want to have nail holes on the table top because, even with wood filler, they would stand out from the rest of the wood.

I chose to go with the cheap pine that home depot sells instead of the Select Pine because the cheap pine has a lot more character and offers a more rustic look. The pine can be pretty beat up so it takes a while of digging to find the straight boards without any major defects or cracks. I just figure it's part of the experience. Once I have my straight boards I sand everything down so the boards are completely smooth and have softened edges. Clamps are a must and a HUGE help with getting everything lined up during the assembly. I neglected clamps in some of my first builds because I didn't have them and didn't want to invest. I had a real hard time getting things level and straight. Never again.

Other pieces I've build from Ana's plan include (in order of build):
Ana's Adirondack Chair (4x)
Reclaimed-Wood Look Headboard, King Size
Modern Outdoor Chair from 2x4s and 2x6s (2x)
Simple White Outdoor End Table
Rustic X End Table

Estimated Time Investment
Weekend Project (10-20 Hours)
Finish Used
One application of Varathane Early American Premium Wood Stain
Three applications of Varathane Crystal Clear Matte Water Based Ultimate Polyurethane

Play Horse Barn

Submitted by Anonymous (not verified) on Fri, 12/08/2023 - 08:35

Hello from Australia! I had to change the dimensions a little to convert this to a metric friendly build. I also added a roof line beam to neaten up the top. Great project and the barn looks a treat.

Chella

Built from Plan(s)

Workbench Console and Rustic Hutch

Submitted by mebohn on Mon, 06/11/2012 - 18:13

I love this antique workbench console b/c it's the perfect mix between my desire for beautiful and my husband's desire for rustic hunting lodge. (Southern girl meets Minnesota hunter - LOL). It's just a gorgeous antique look, but for far less money. I have haven't put the towel bar on the front yet b/c I keep forgetting to buy it (it's amazing how shopping with toddlers can do that to you). And in my area, mounted bottle openers are only available online, so we need to order one. I used standard stud grade 2x4's for the console, and 1x6's for the planked backing of the hutch. I also dropped the bottom shelf to the natural resting place at the bottom of the legs/top of the feet. It was so much easier for me that way as a beginner, and I really think it still looks great. This was my first Kreg Jig project - and it was so so easy. Ana is totally telling you the truth when she says it's completely worth the money to buy one. My father-in-law is a very well seasoned carpenter and wanted one after he saw some of the furniture I've built with it as a beginner! (We bought him one, of course, b/c he's awesome.)

Estimated Cost
Less than $100
Estimated Time Investment
Weekend Project (10-20 Hours)
Finish Used
2 Coats Minwax English Chestnut, 3 coats Minwax Polyeurethane sanding lightly in between coats
Recommended Skill Level
Intermediate

Comments

Simplest Console (first furniture project)

Submitted by Yrkylvr on Sat, 04/05/2014 - 18:50

First furniture project with my Kreg Jig. Went smoothly. Loved the plans and how descriptive they were. This is a great beginner project. It only took me about 2 hours to complete.

Estimated Time Investment
An Hour or Two (0-2 Hours)
Finish Used
Minwax Kona Stain and Valspar paint on bottom (white) then distressed with mouse sander. Actually the more the paint gummed up on the sanding disc the better it distressed!
Recommended Skill Level
Beginner

Comments

JoanneS

Sun, 04/06/2014 - 06:33

Congrats on your first furniture project, great job! Your distressed finish and stained top are awesome. Love the Kona stain color, and I think it is the perfect amount of distressing on the paint. Beautiful!

Modified pottery barn knock off

Submitted by Anonymous (not verified) on Fri, 07/01/2016 - 11:37

Slight modification to the original plans. Used all 2x6's across the top and added capped ends. Used 2x3s instead of 1x3s. Cuts and assembly were not time consuming, sanding was!!

Built from Plan(s)
Estimated Cost
$40
Estimated Time Investment
Weekend Project (10-20 Hours)
Finish Used
Urethane semi-gloss triple thick 2 coats, brush application. Varathane Cognac stain 2 coats. Sanded to 200
Recommended Skill Level
Beginner

10 Dollar Ledges

This is the first Ana White plan I've used and my first project with a Kreg Jig. It was so easy! I used 6' long lumber. This ledge is 4' long and I have a 2' ledge in the living room.

Built from Plan(s)
Estimated Cost
$17
Estimated Time Investment
An Hour or Two (0-2 Hours)
Finish Used
"Hammered" finish black spray paint
Recommended Skill Level
Starter Project

Our Porch Swing Bed

I have wanted a swing bed for ages and got hubby on board with this. We built a full size bed (plenty of room for me and all 3 grandkids!) using poplar. I had the turned dowels from a major score at my Habitat Store several years ago. $2 per dowel! I wanted an old fashioned look and so added the corner brackets to all sides and the resin appliques on the back.

I primed with cream colored ceiling paint, an "Oops" paint from my neighborhood home improvement store. The baby blue was another "Oops" paint - another score- only $5 for a gallon of Valspar eggshell. After a very light distressing, I finished it with a paste wax.

I make the design and drawing and Hubby makes all the cuts. I joined all with biscuit joinery for a strong and solid piece.

We hung it from the ceiling joists with 1" manila ropes, added lots of pillows and plants and it is my happy place. A night blooming jasmine adds a heady fragrance that puts me right at peace ... A great refuge from a crazy work day!!!

Estimated Cost
$500 without the bedding
Estimated Time Investment
Week Long Project (20 Hours or More)
Finish Used
Valspar eggshell finish in a baby blue for a matte look, finished off with a little aging wax and final coat of paste wax. (Hard edges were lightly sanded to give a bit of distressing)
Recommended Skill Level
Intermediate
Back