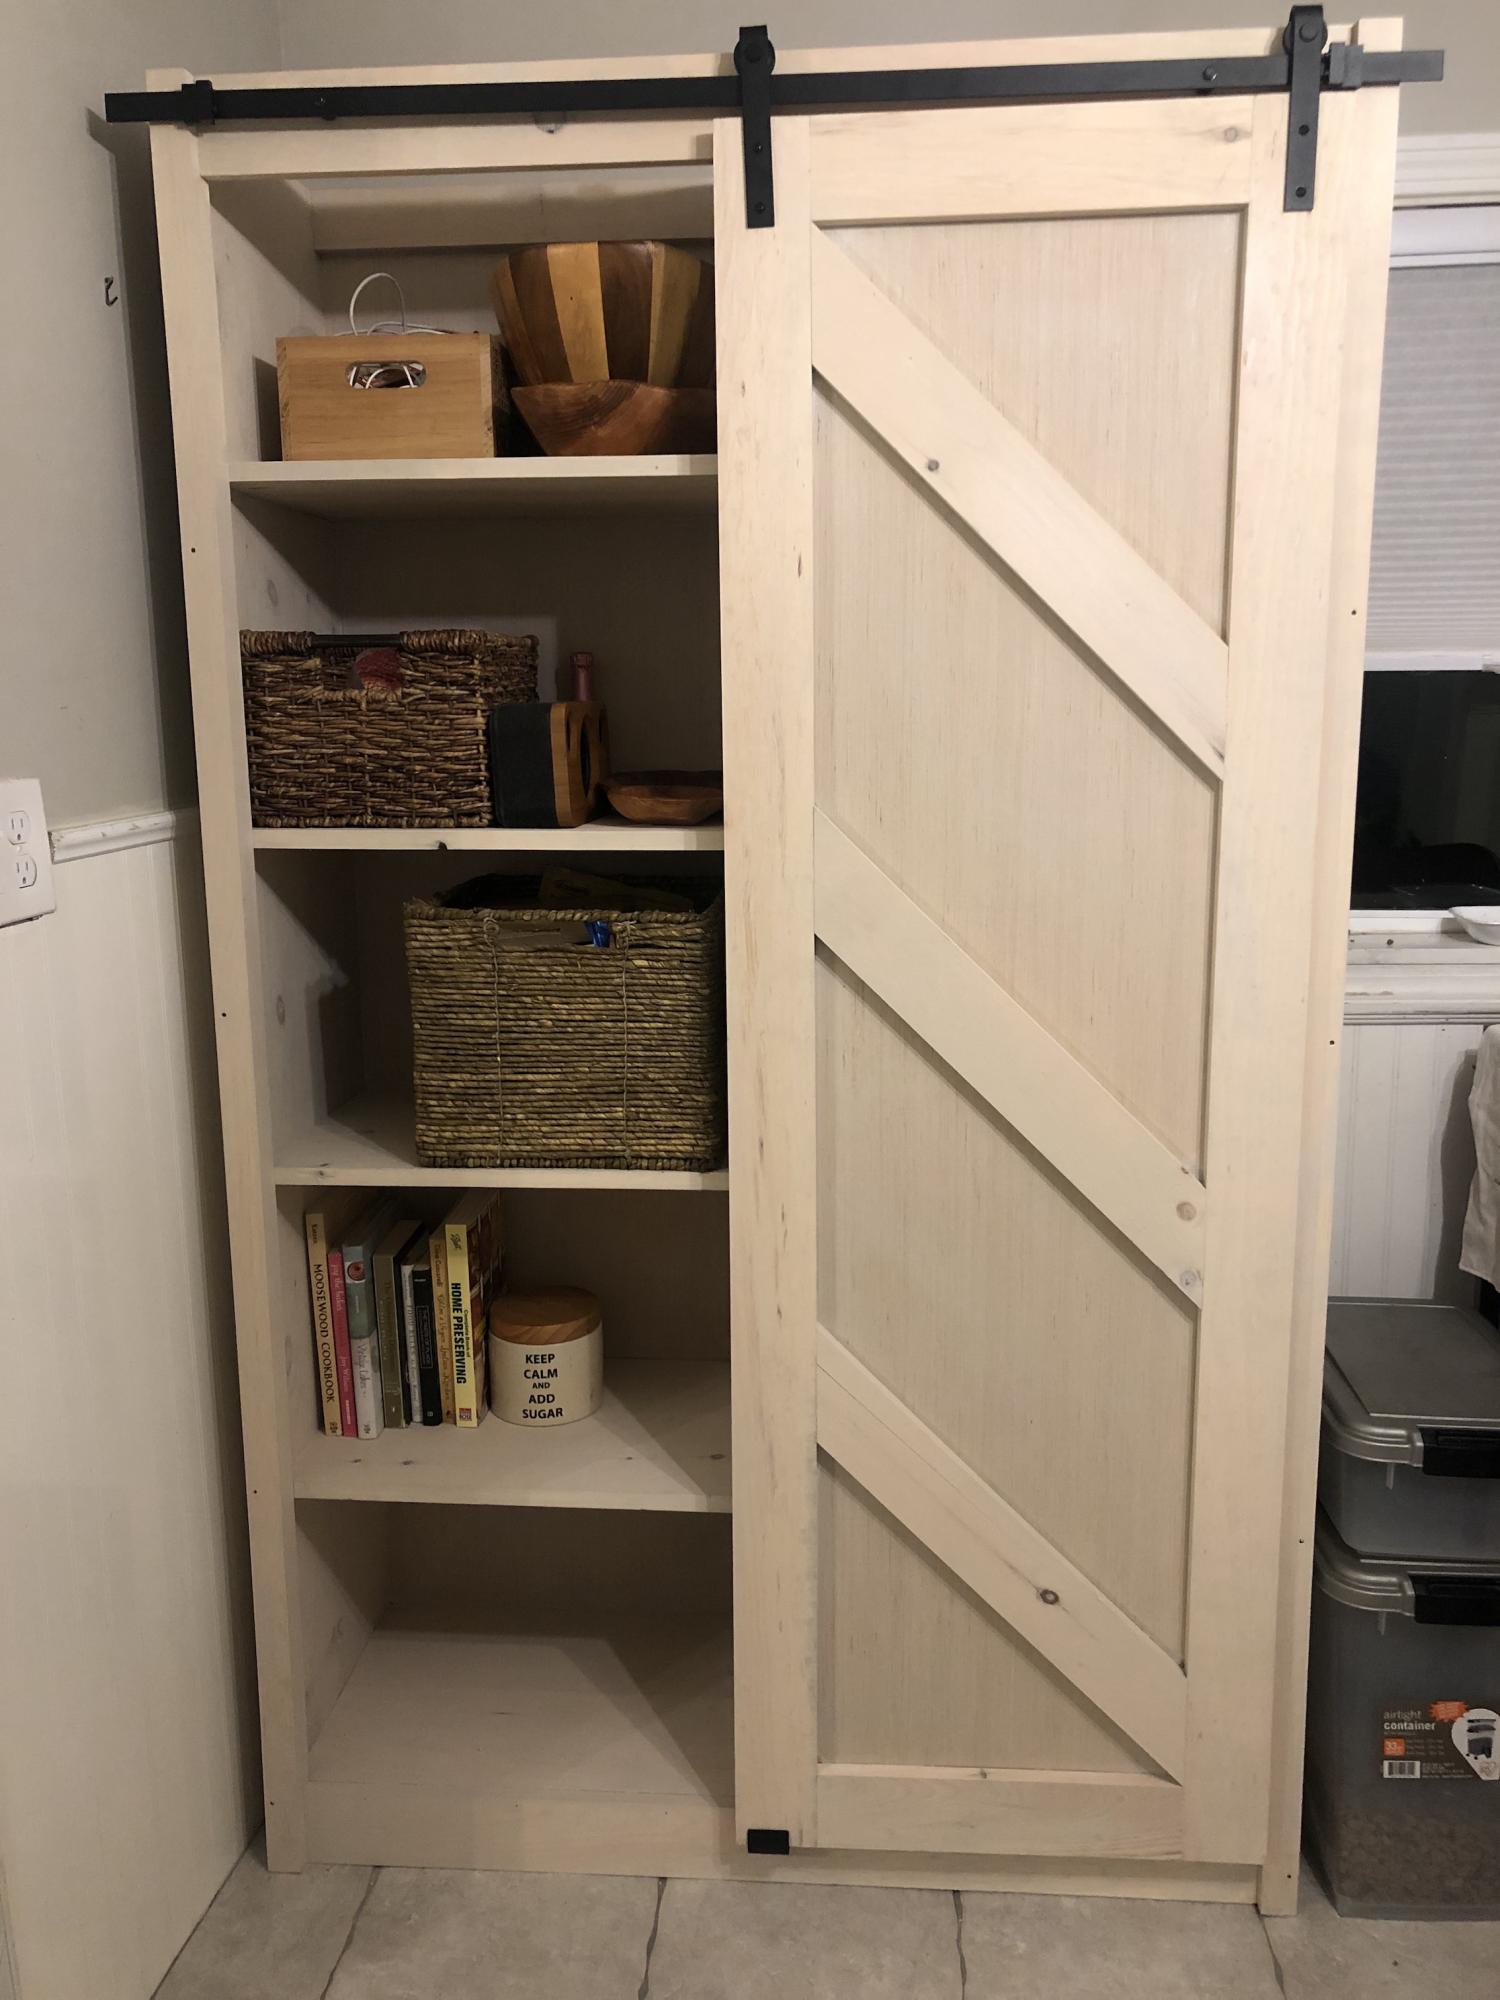
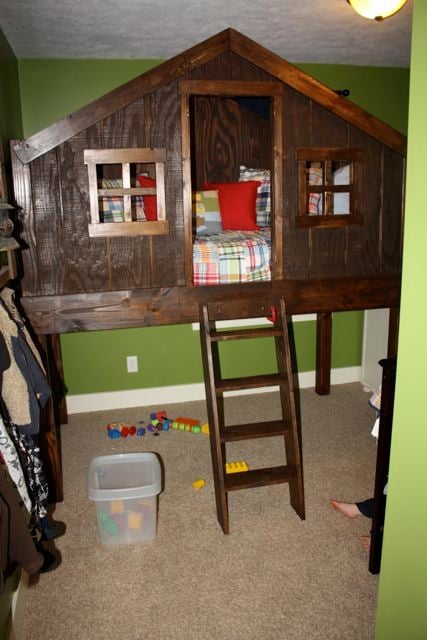
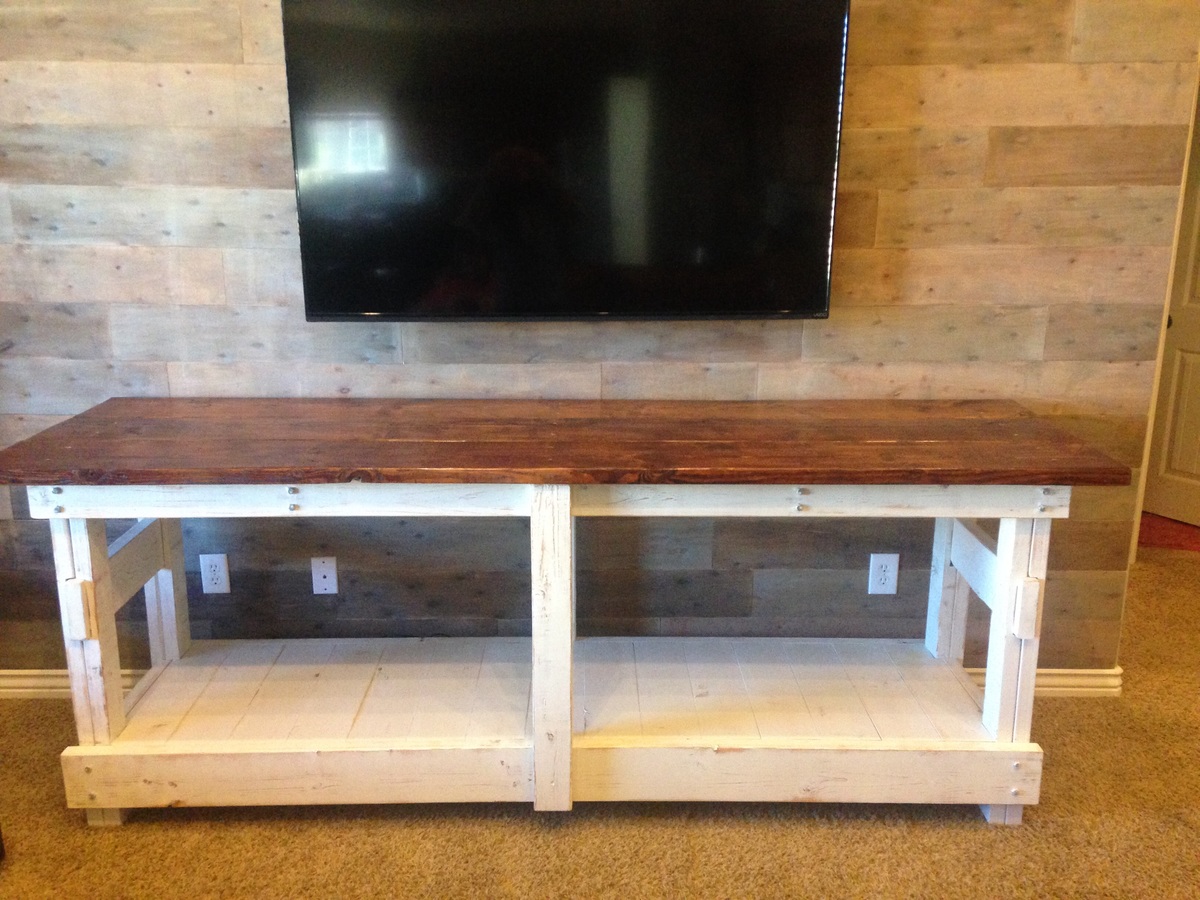
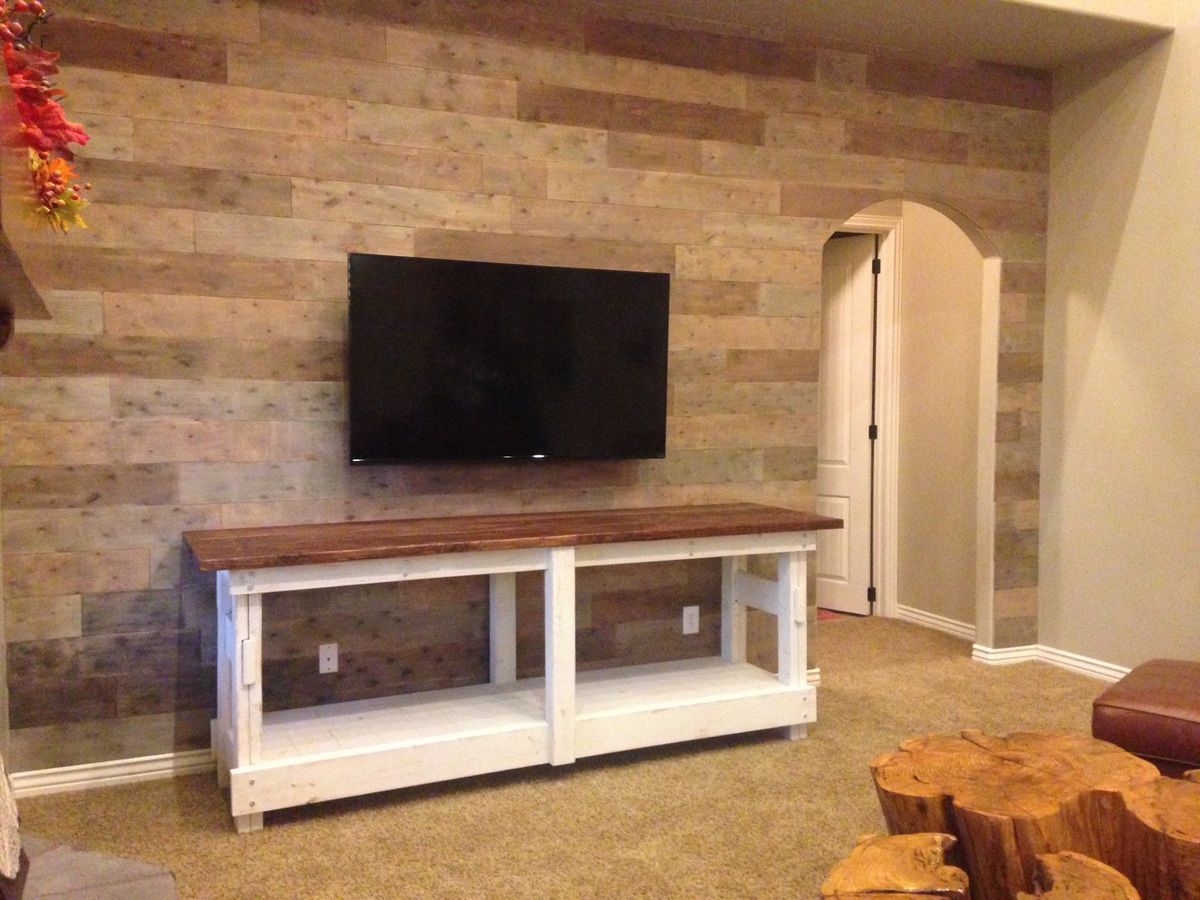
Community Brag Posts

Farmhouse Console

Submitted by Lis West on Sun, 01/06/2013 - 16:05

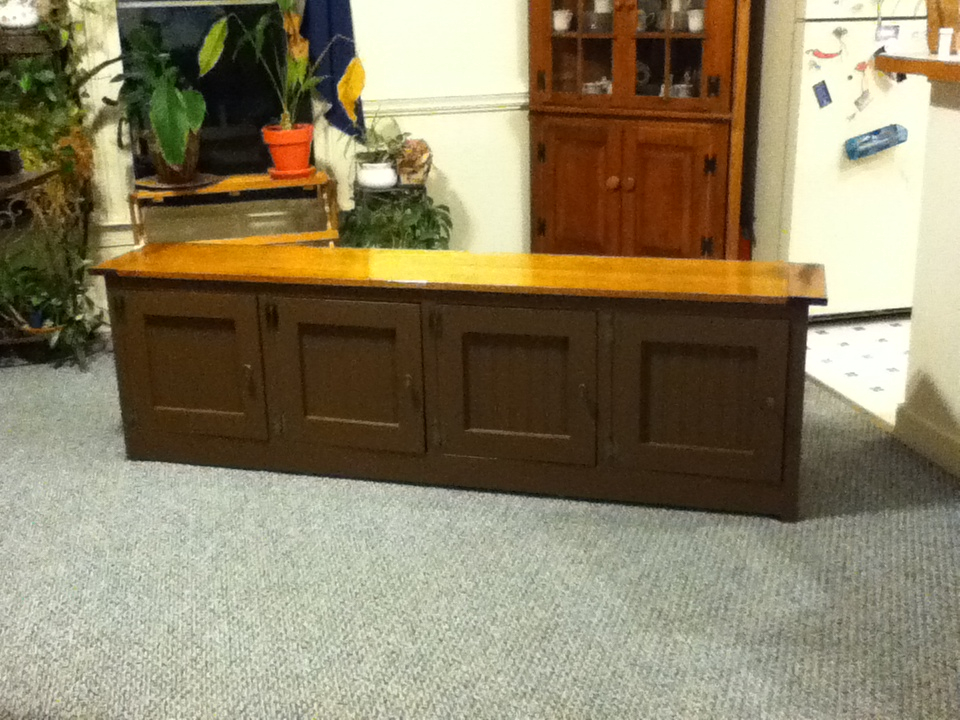
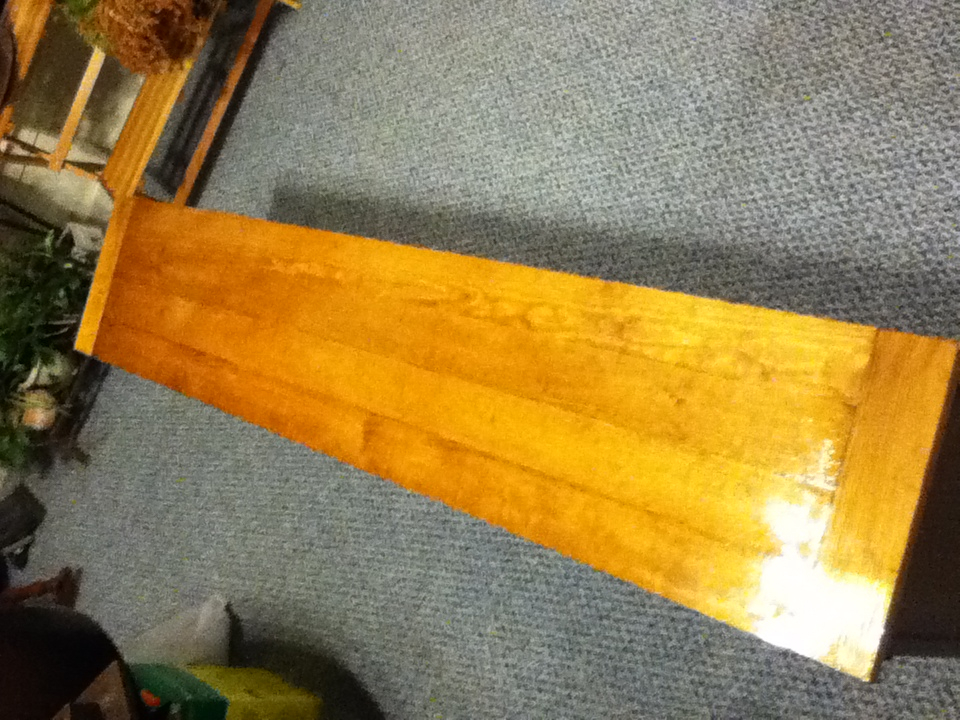
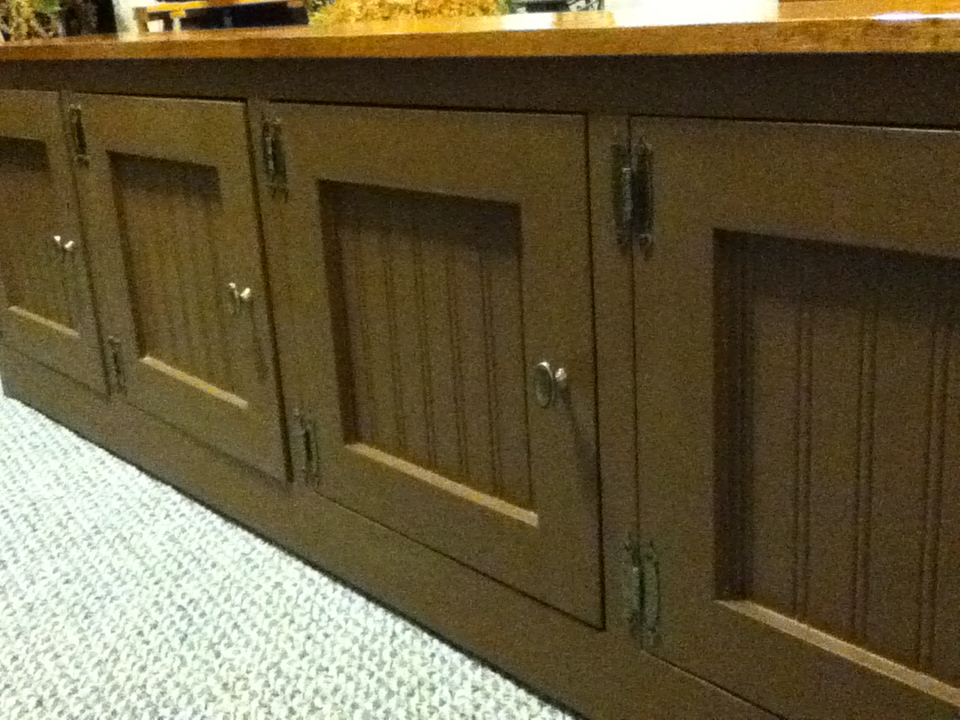
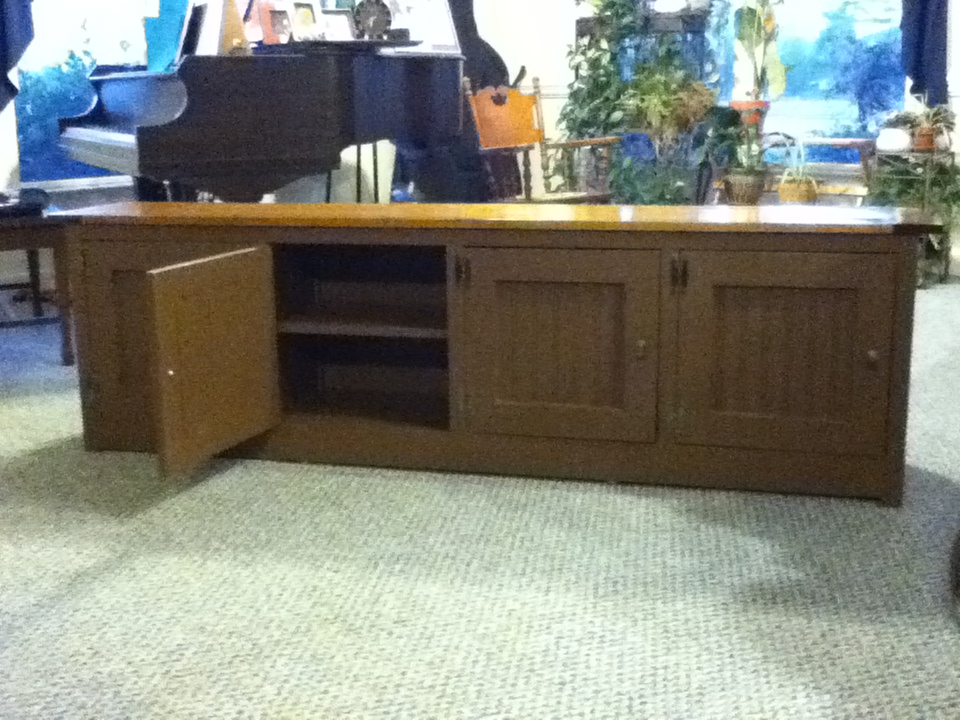
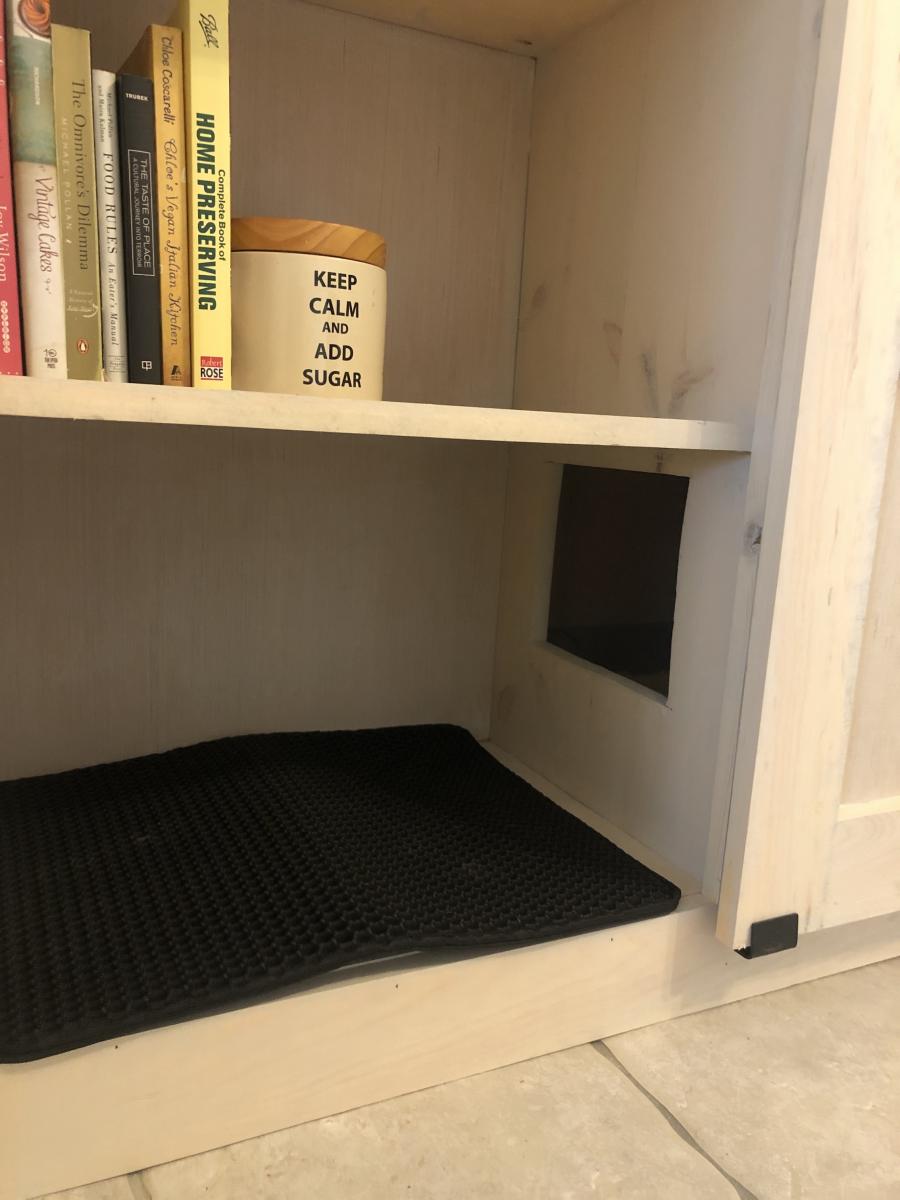
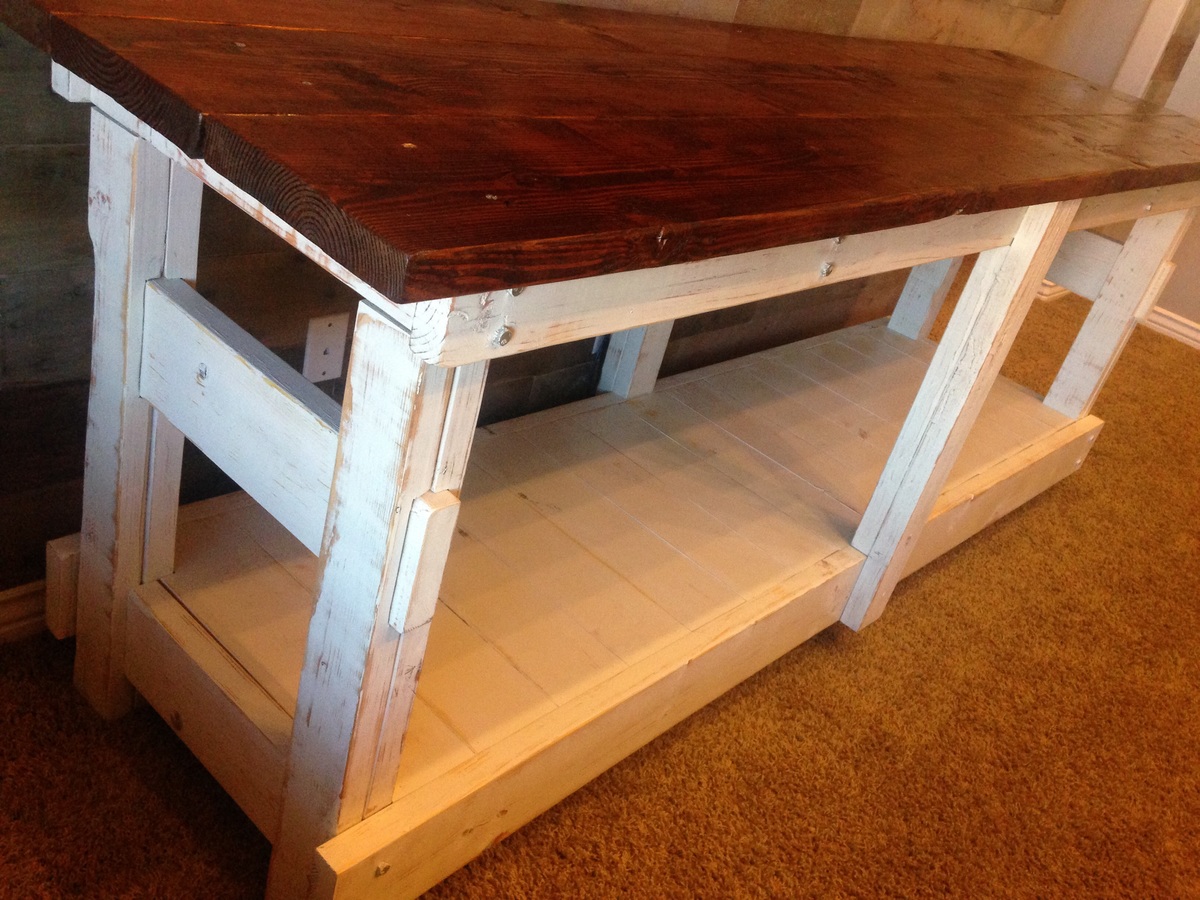
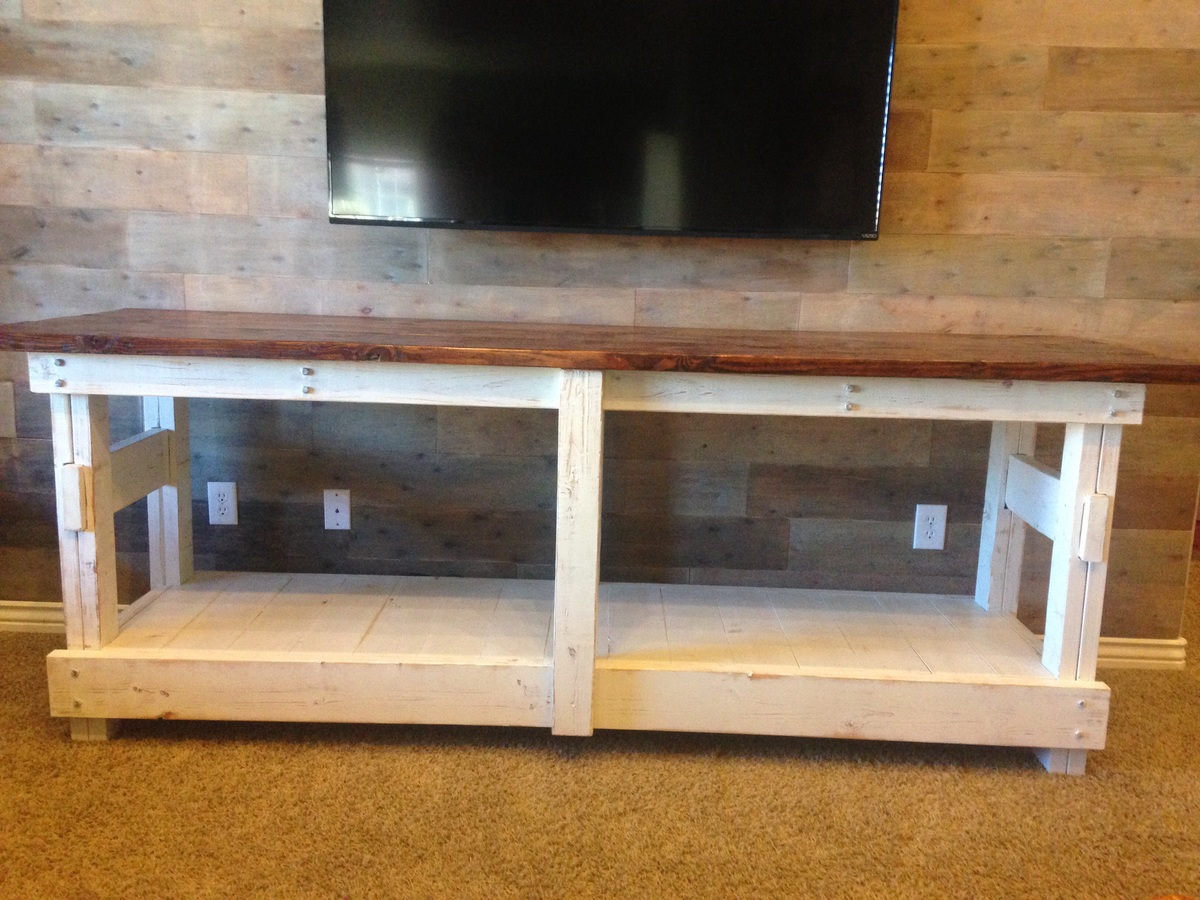
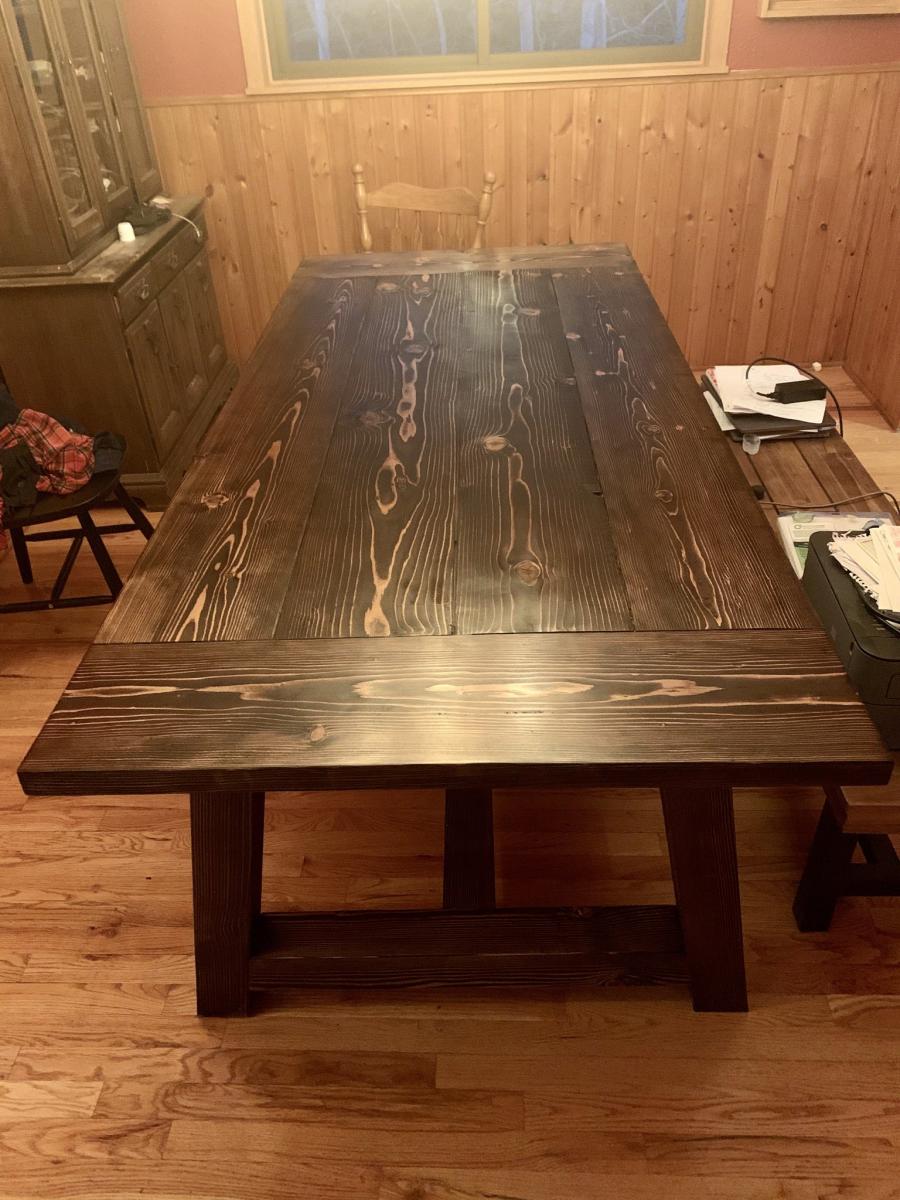
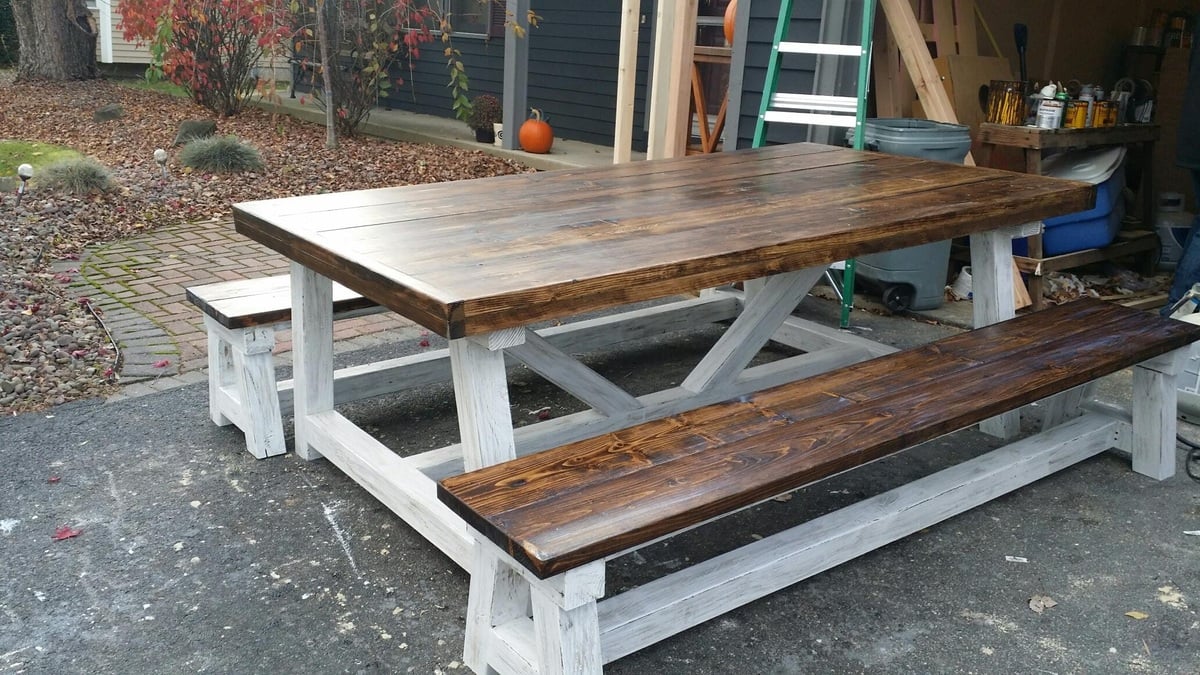
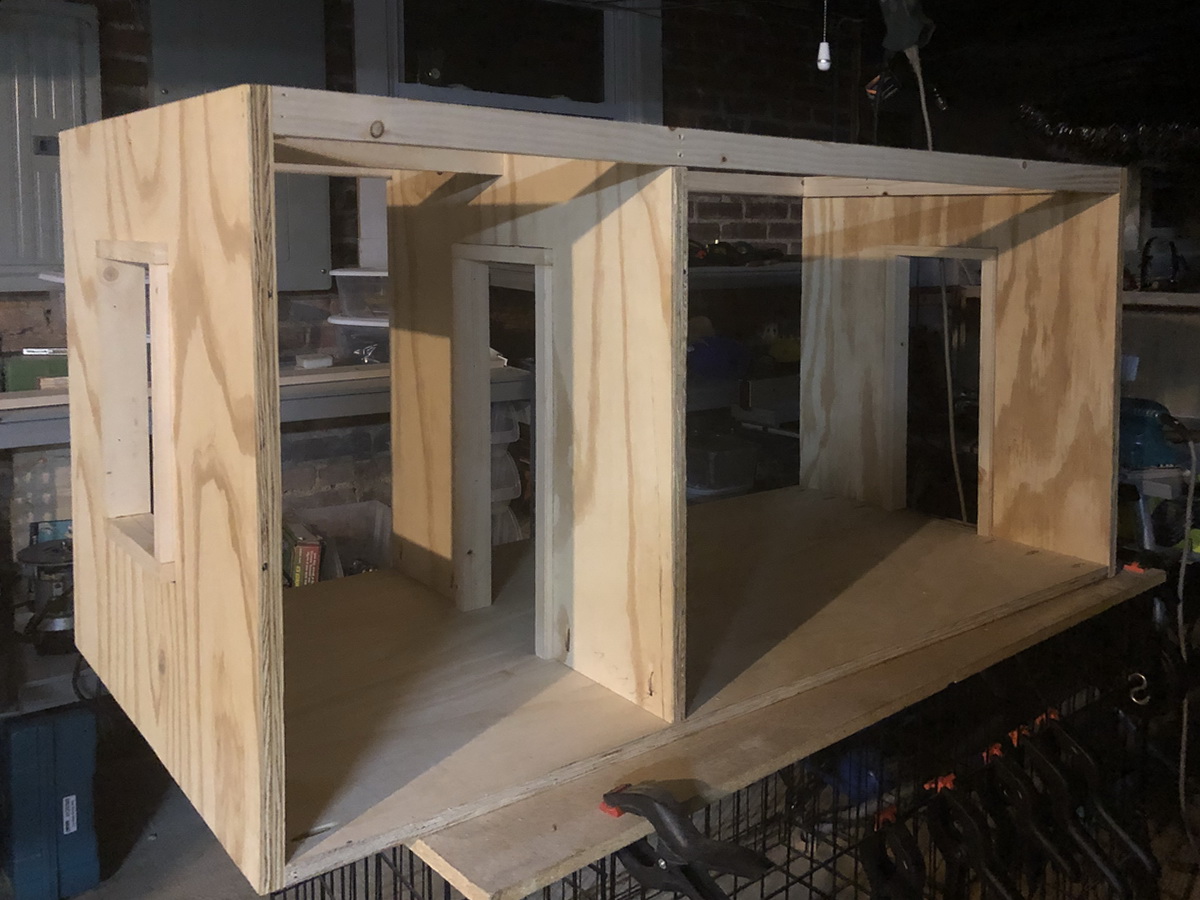
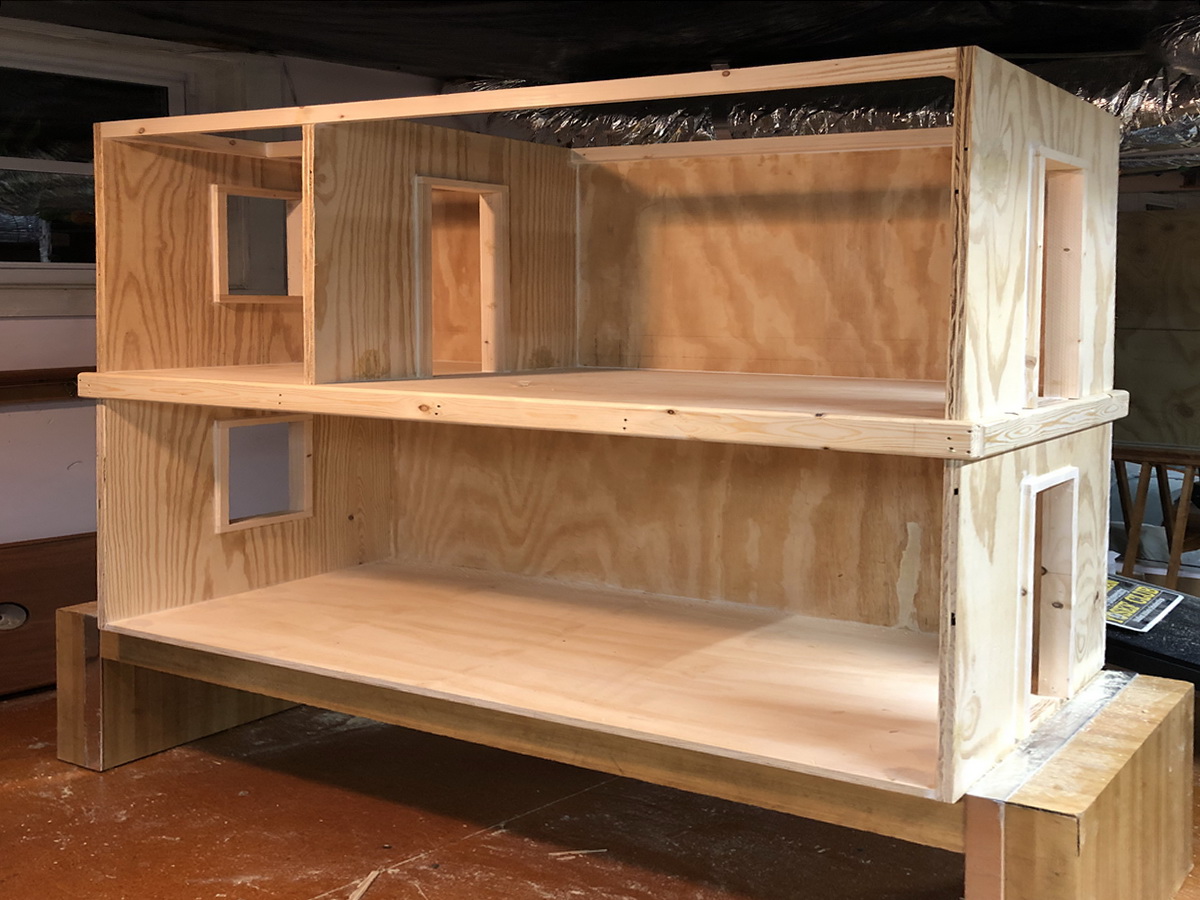
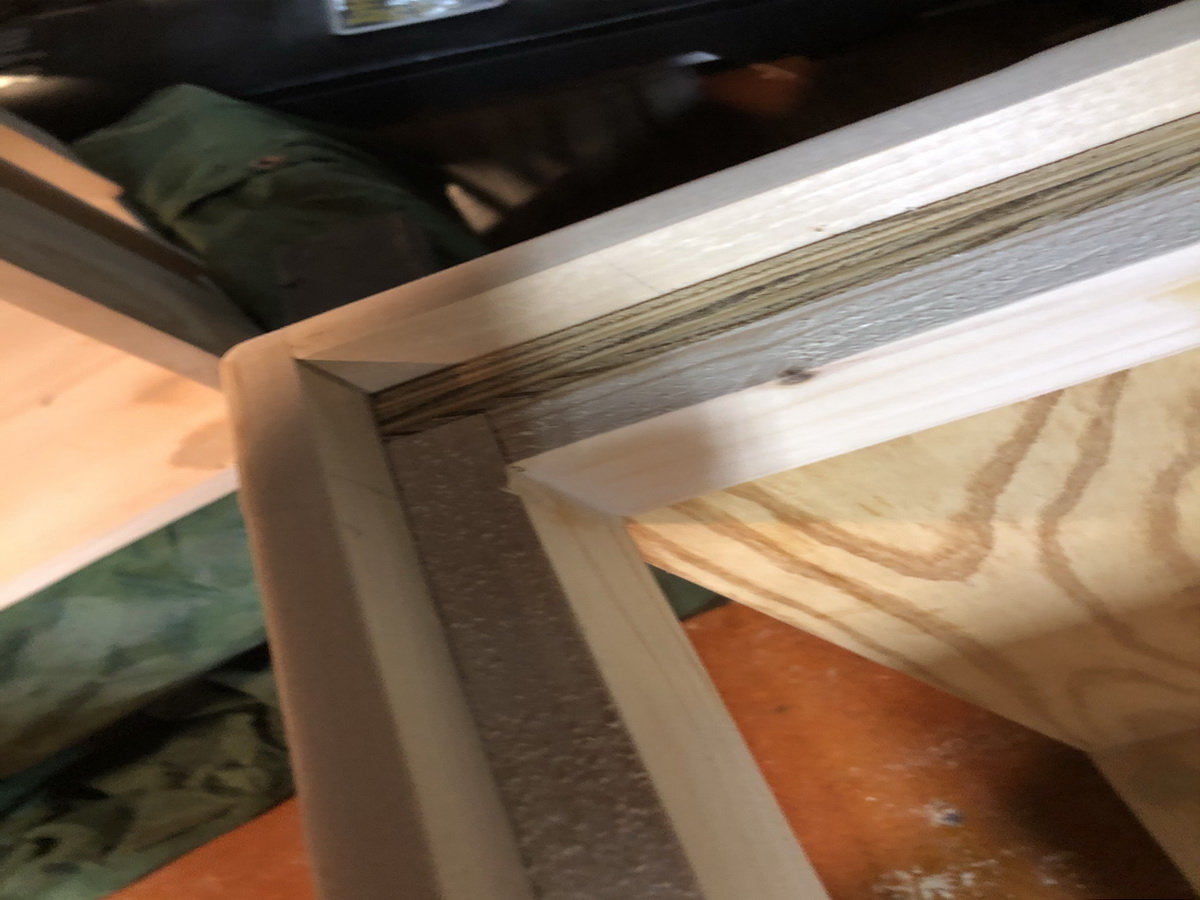
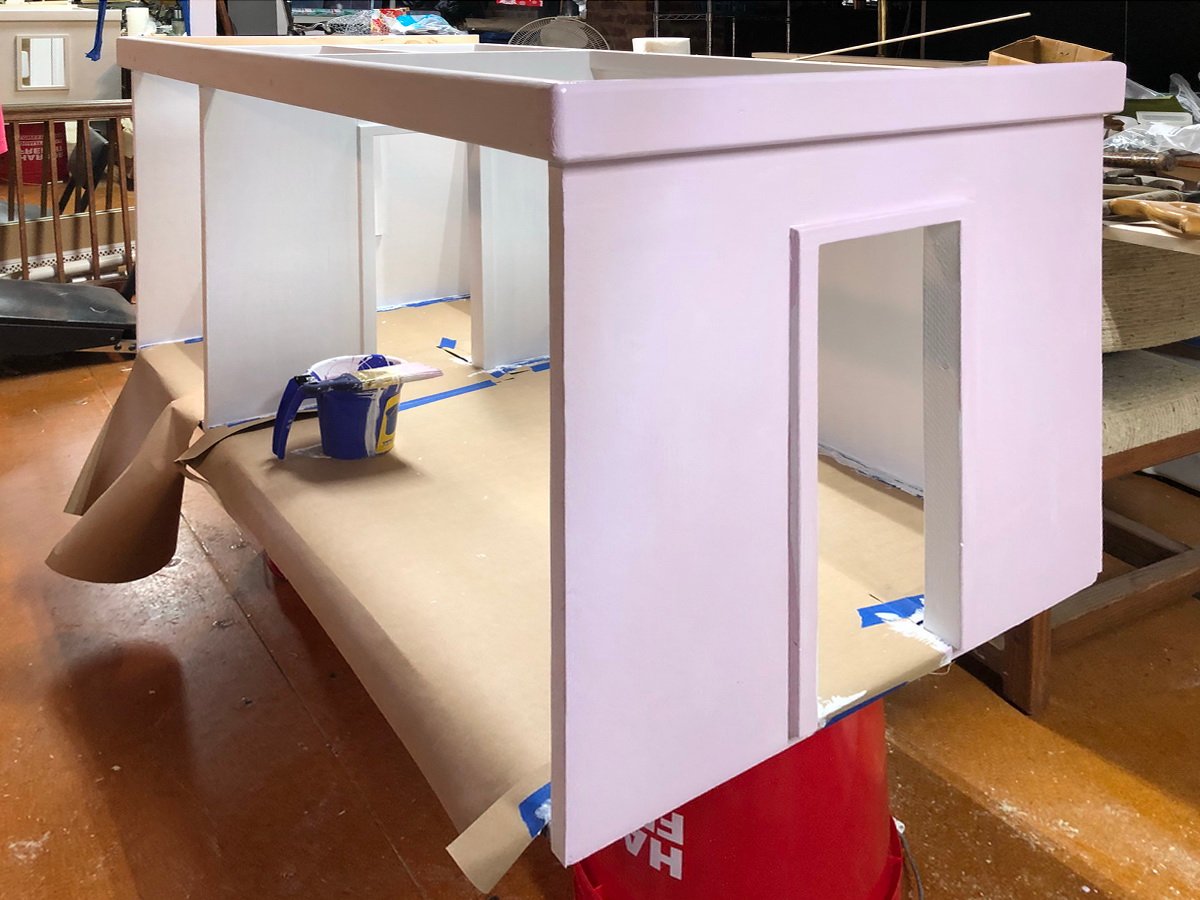
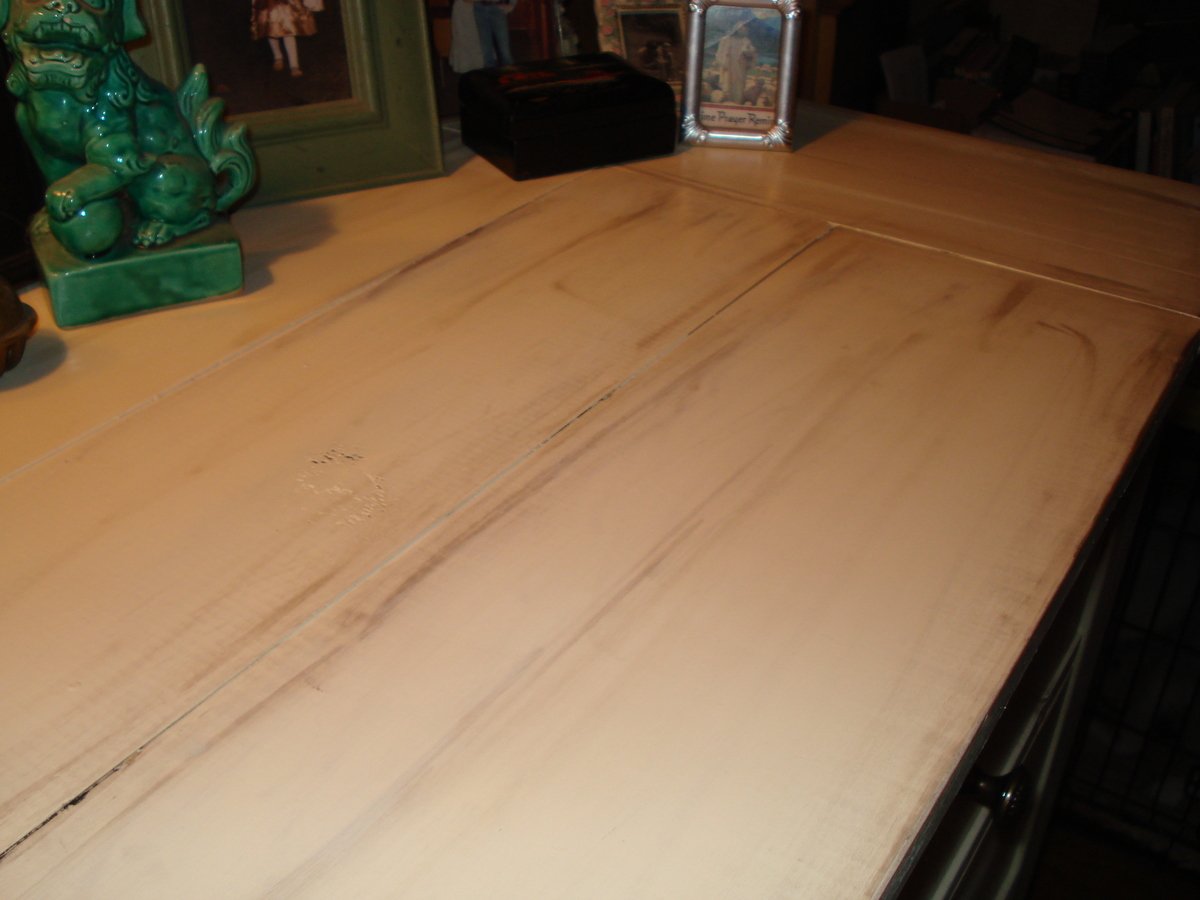
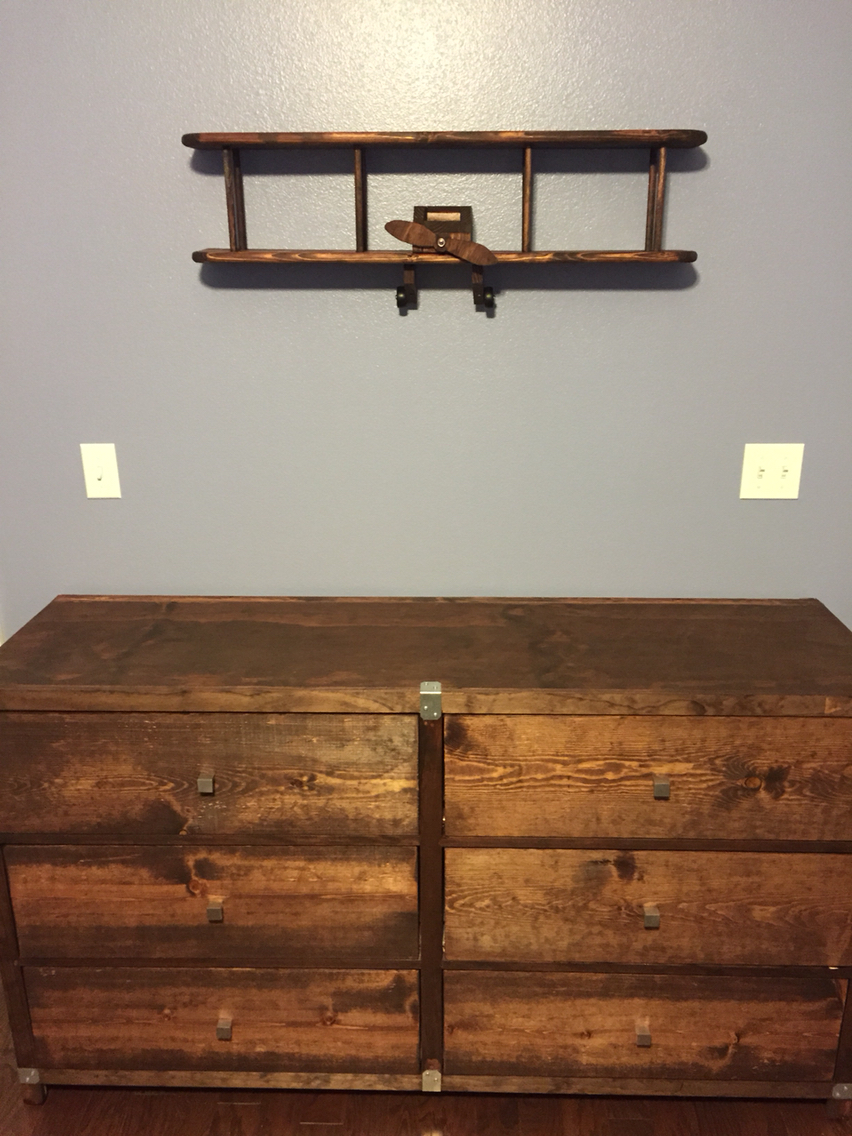
I added length by adding another "cubby" and increased the height a few inches. There were no instructions for the door, so I made a square like a picture frame the size of the door opening from 1x4's and routed the inner portion of the square with my dremel so I could lay in wainscoting to the inner door. I made the top differently and made it more farmhouse style by attaching four 1x4's together and adding breadboards at the ends. The shelves are movable instead of being attached to give more flexibility in storage. I used 1/4 inch MDF board for the back because it was cheaper than plywood, looked better when painted and was easier to cut in any holes if needed for media equipment without the splinters of plywood.

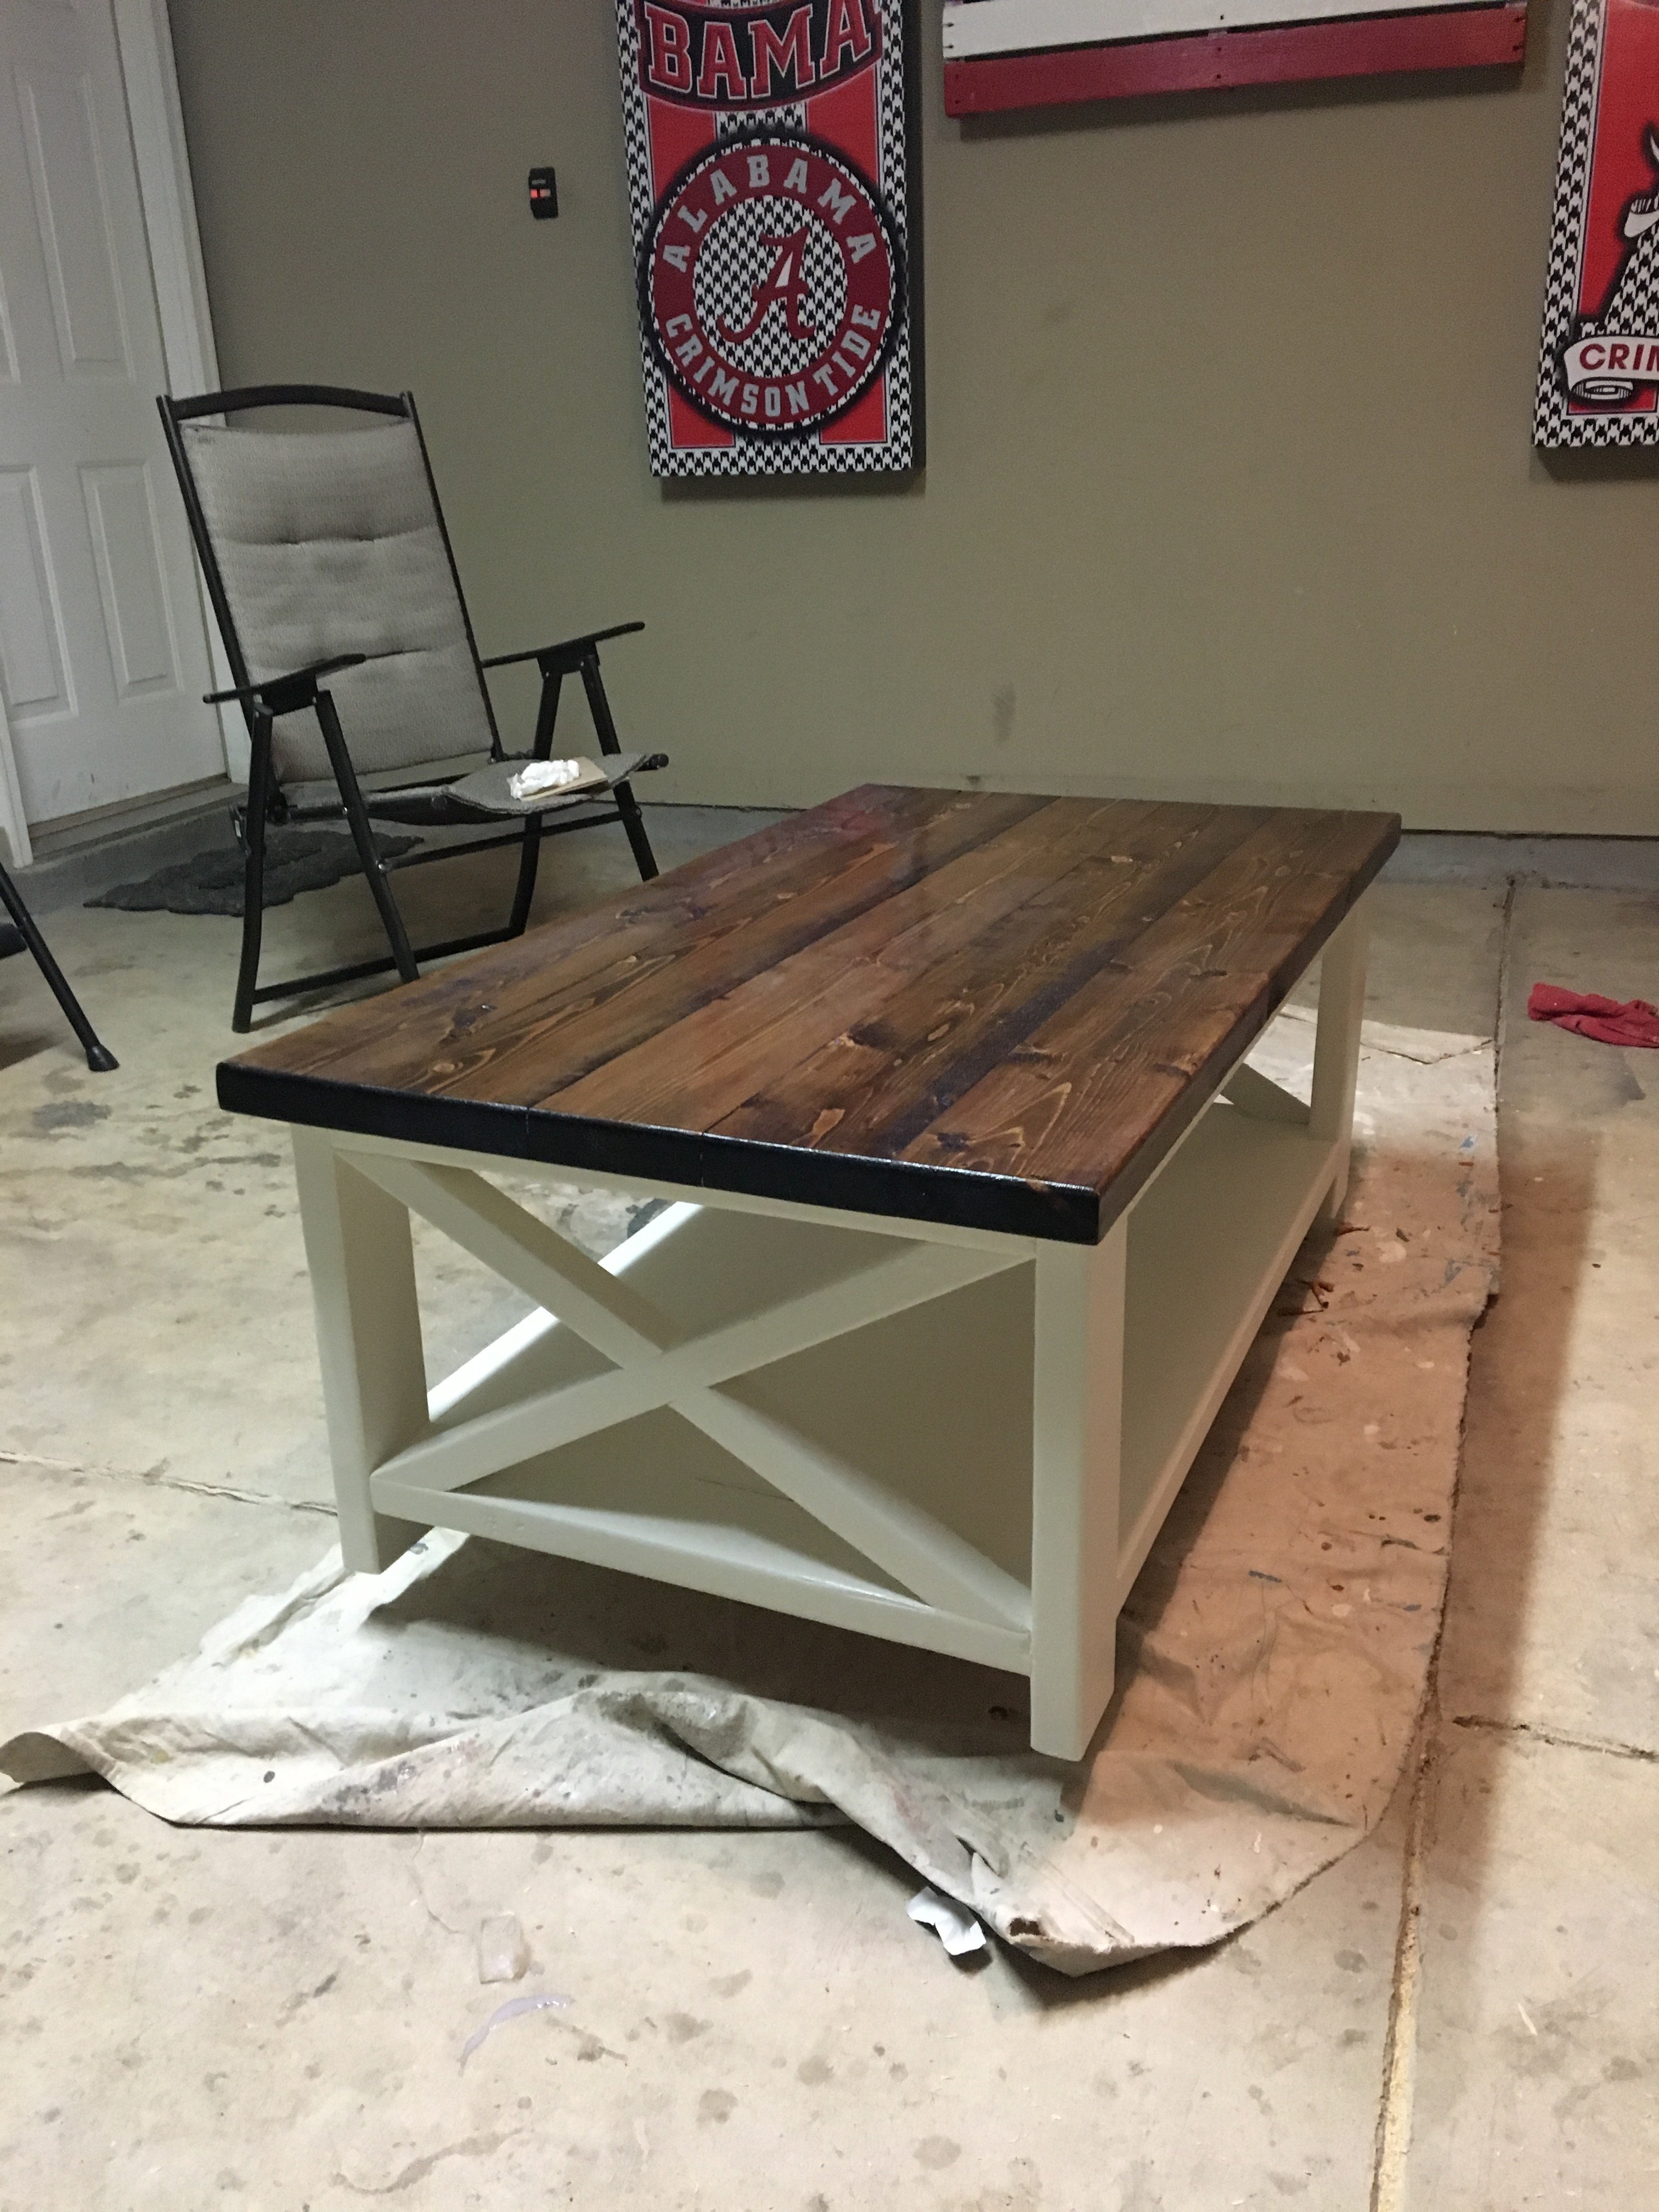
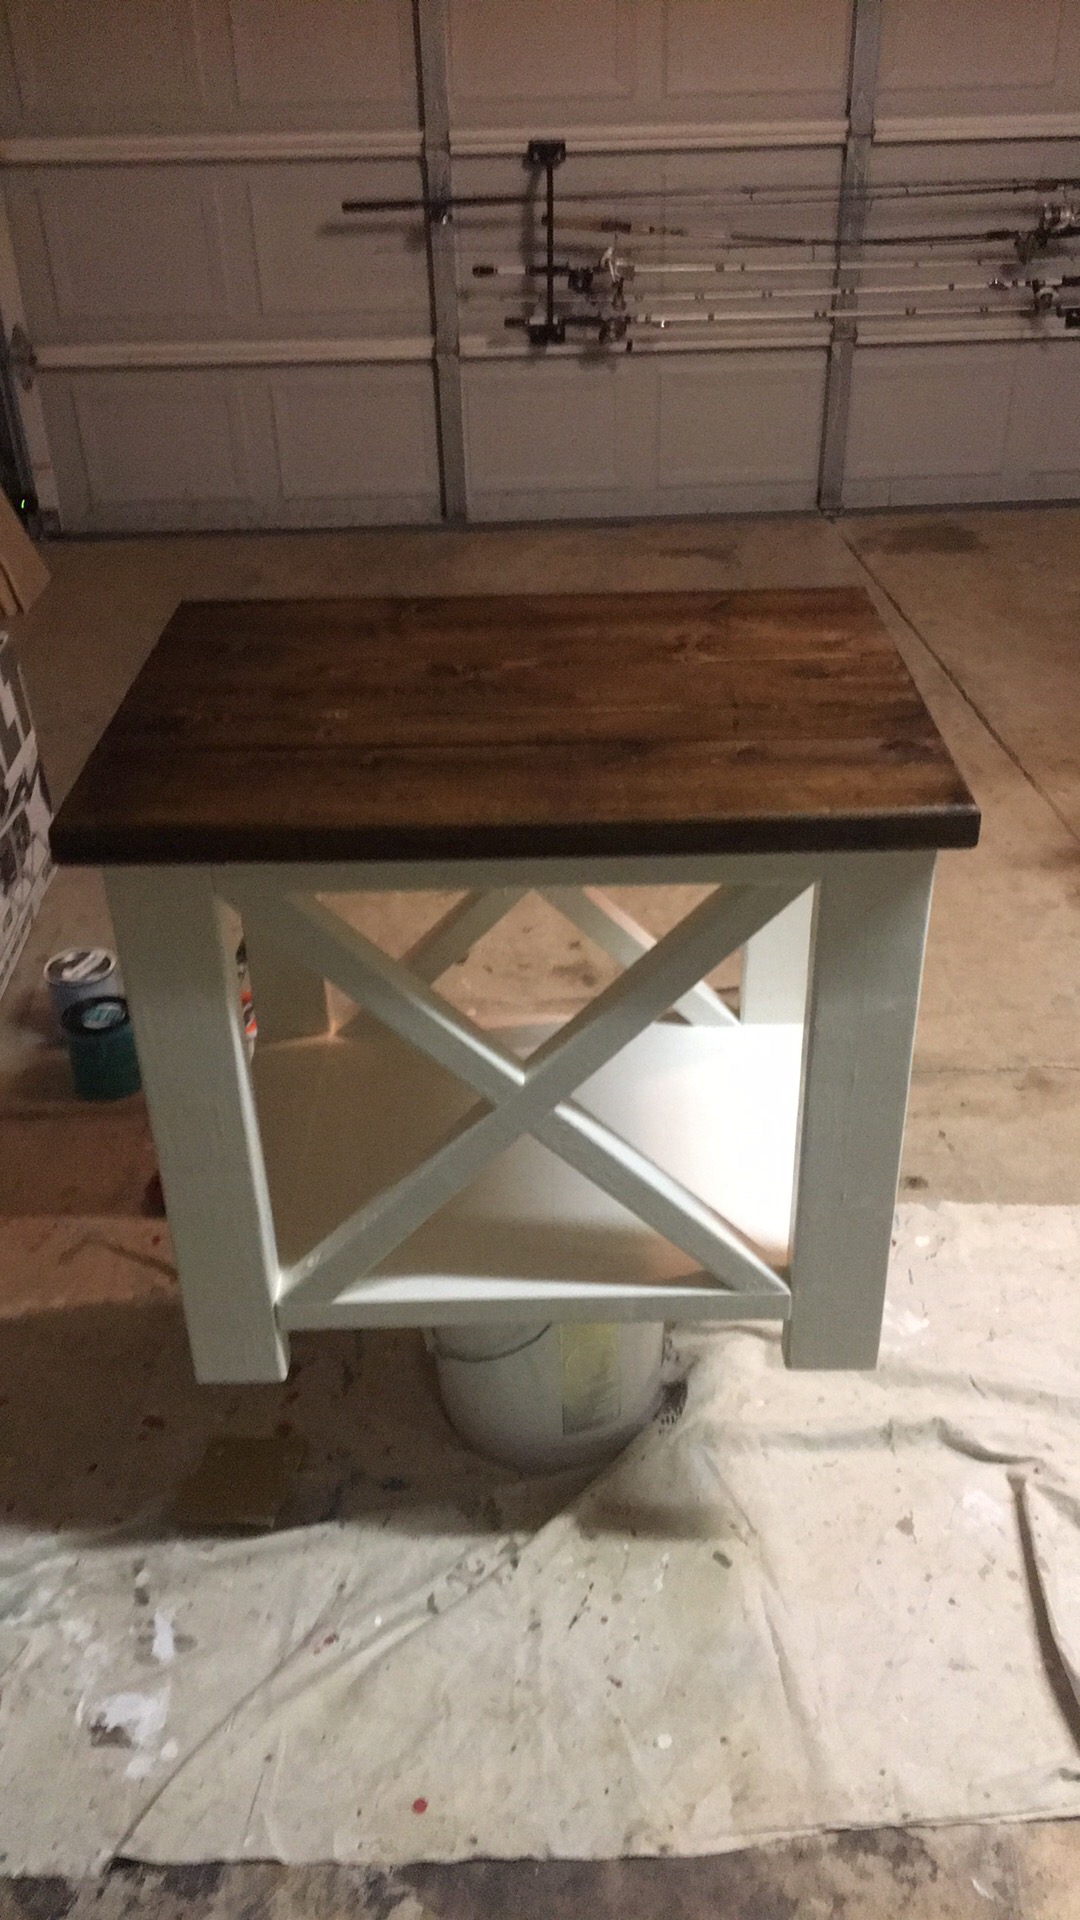
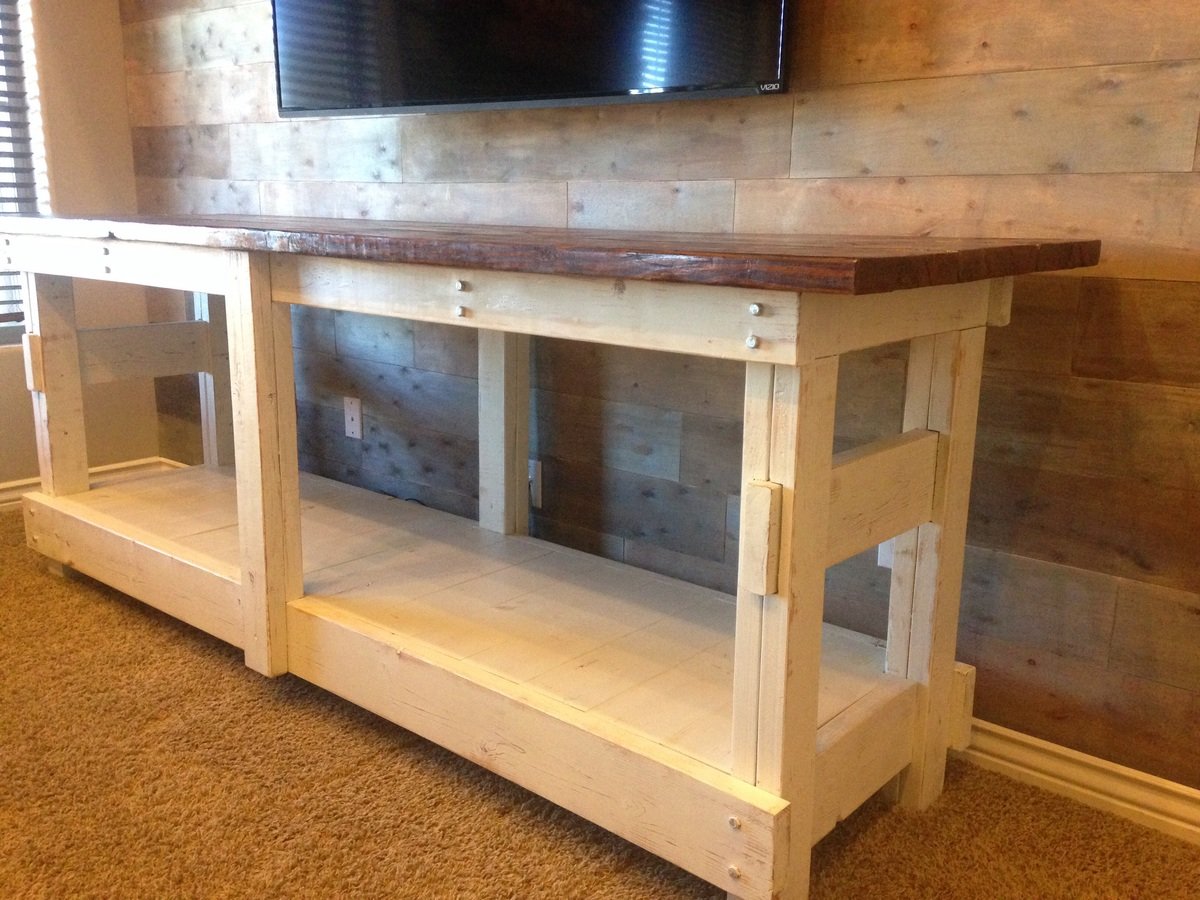
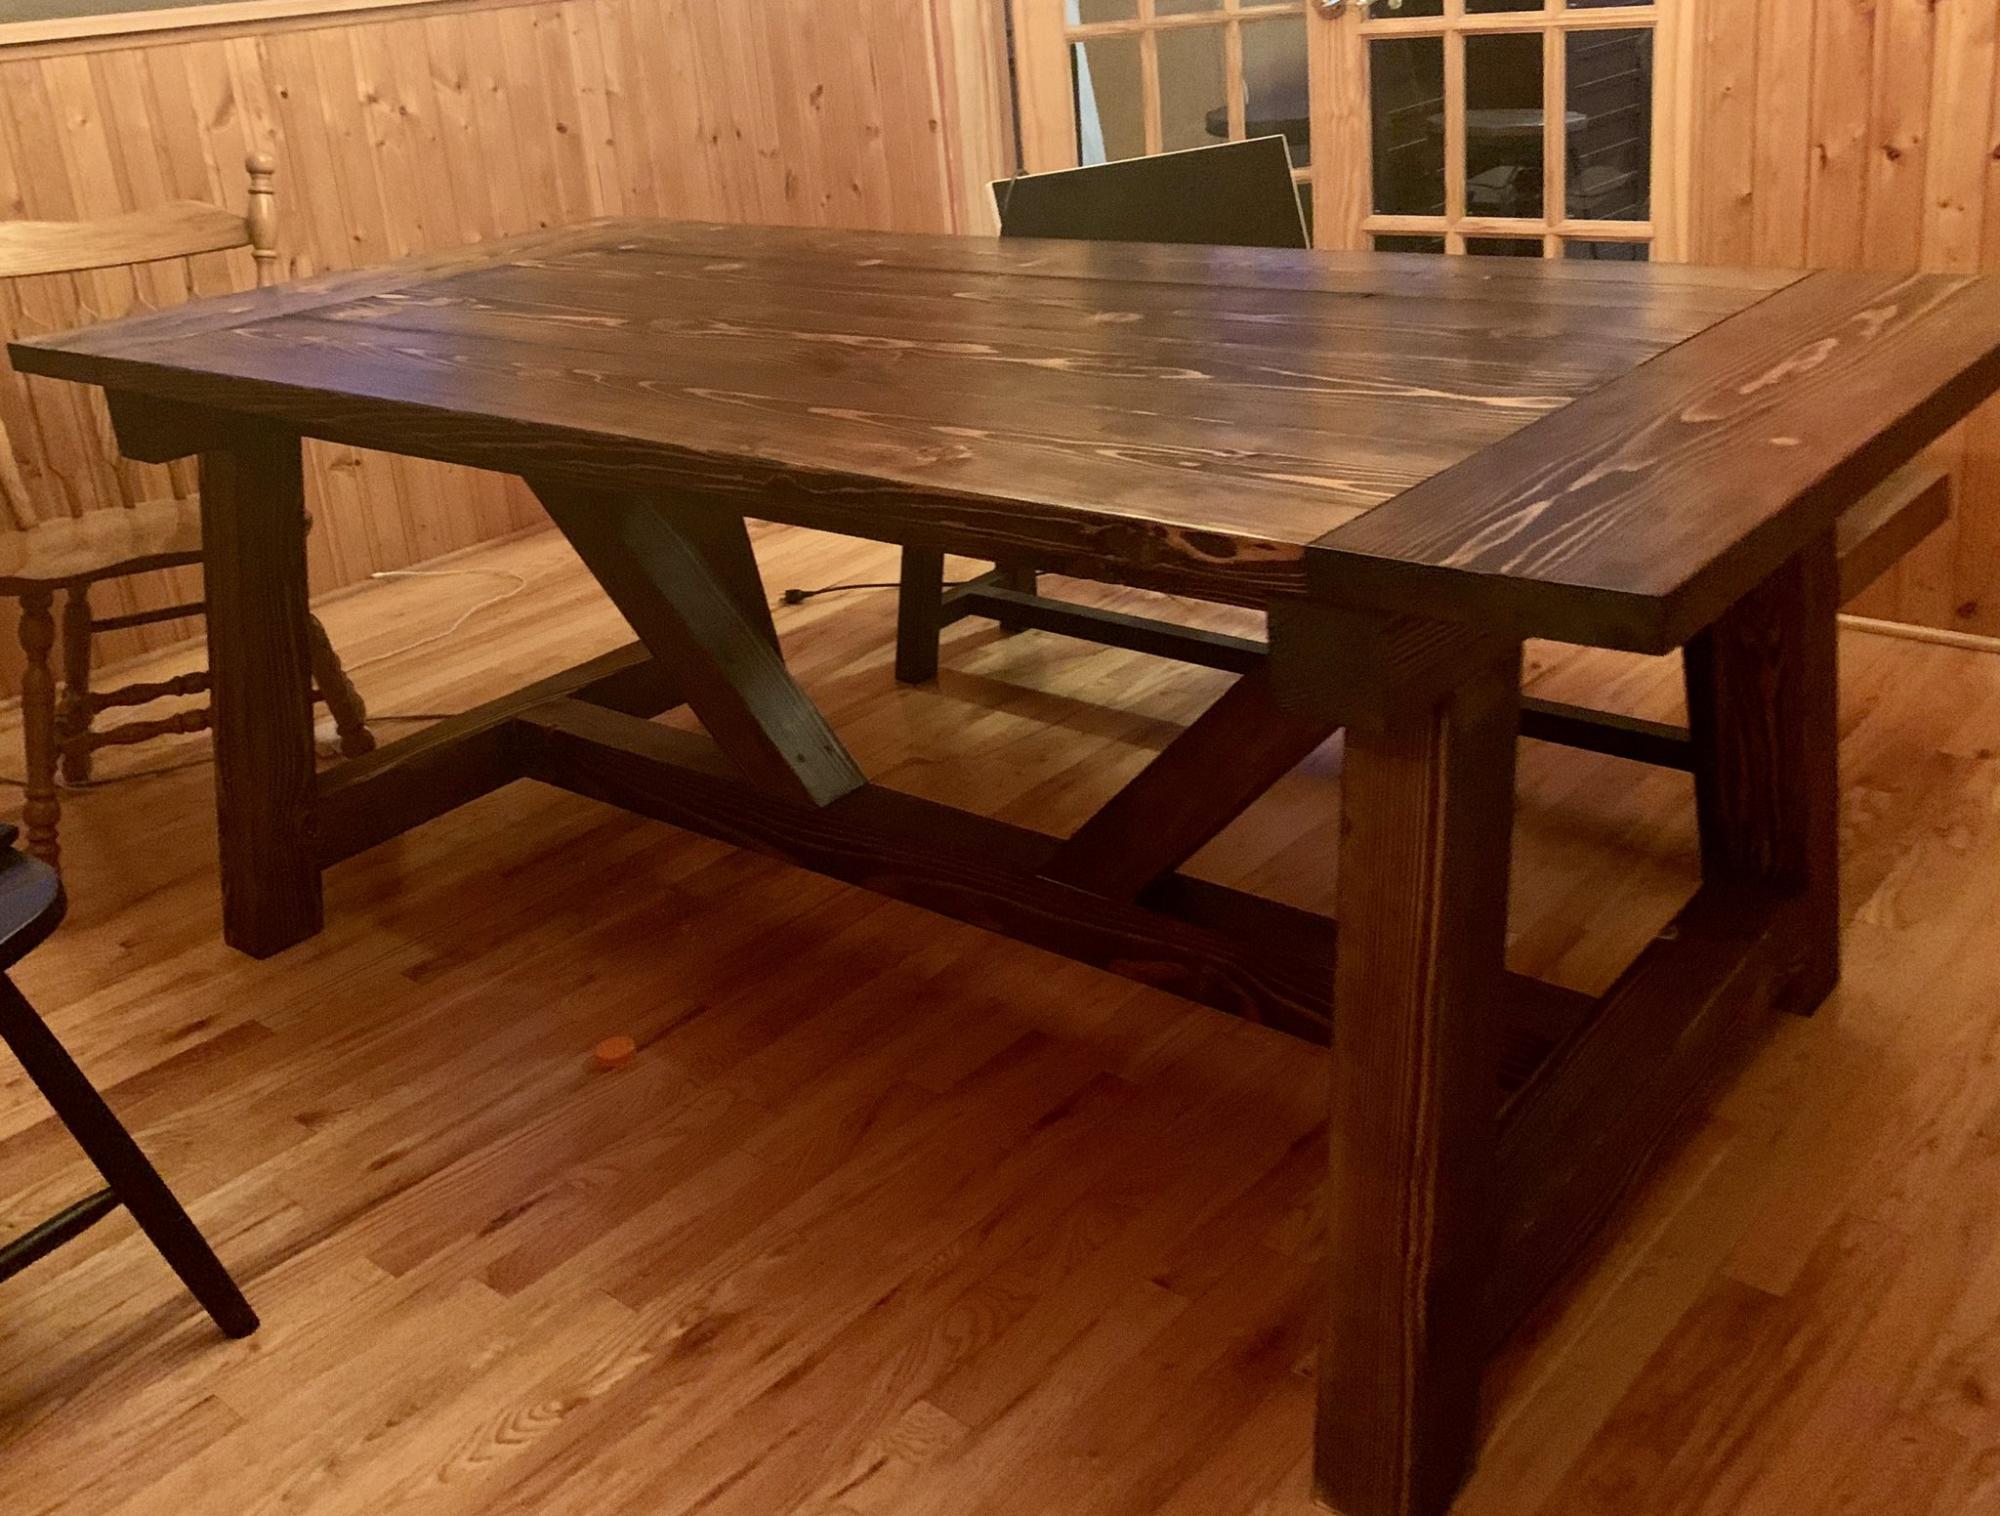
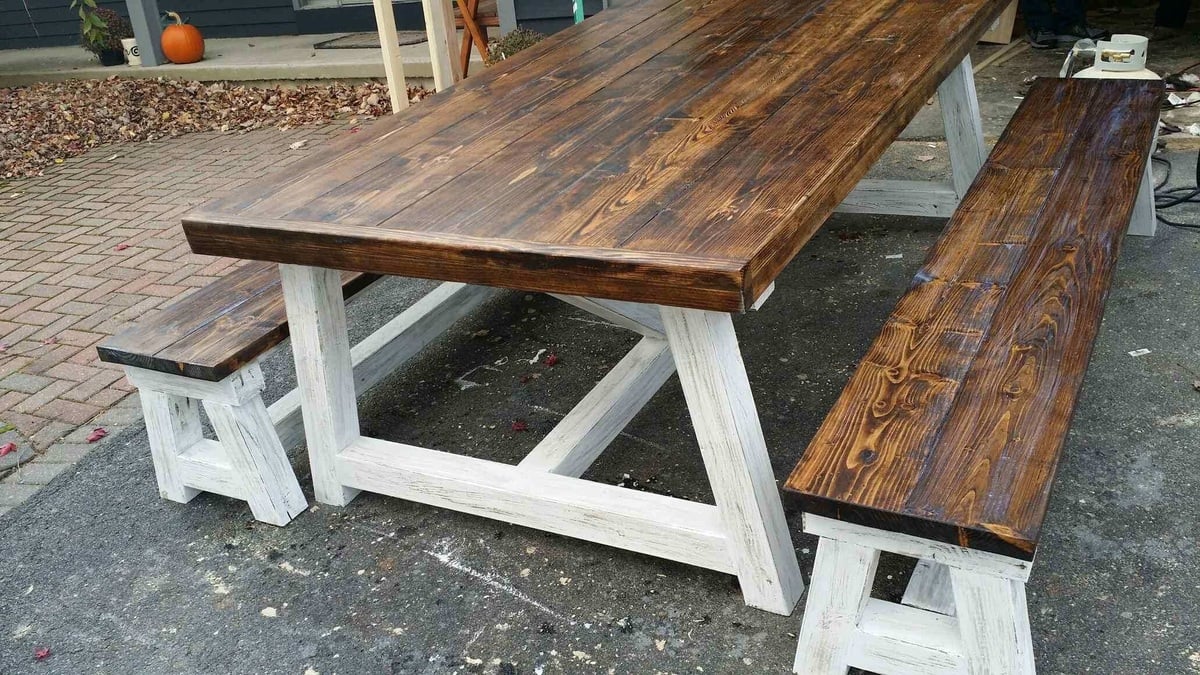
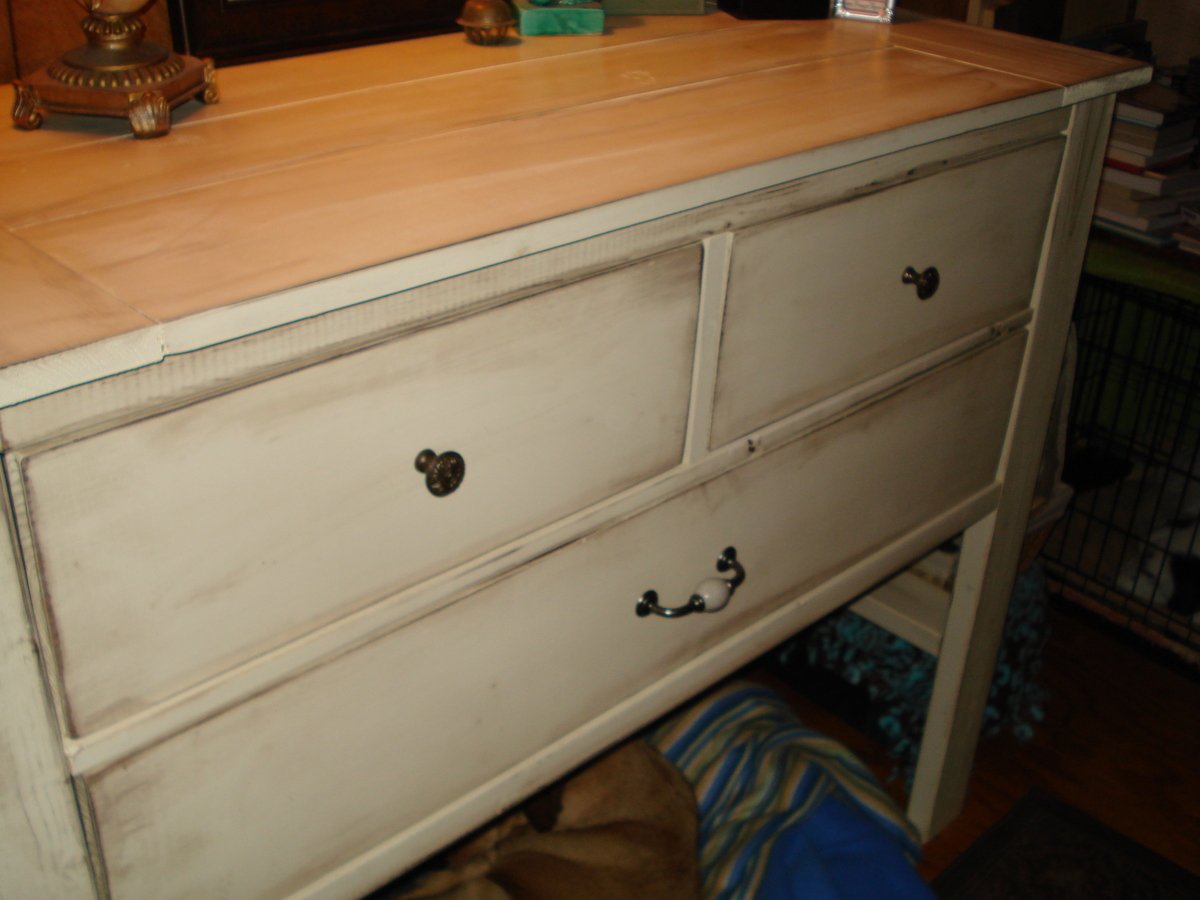
The top is made of top grade pine (no knots) and stained in Early American with glossy polyurethane. The bottom is cheaper pine boards (with knots) and painted Caffeine Nation from Valspar (my kid picks out all paint color because I will spend hours choosing paint and he takes 30 seconds and his color selections are always perfect for us).

If I had to do it all over, I would have attached five 1x4's for the top instead of four because there just isn't much "lip" to the top. I would definitely change the doors from inset to overlay. Inset doors are more of a farmhouse style but are not forgiving if you are just slightly off. Also, the doors do not shut all the way...they stay open just ever-so-slightly, I think it is due to the hinges, I am not sure. It is not a big deal but it bugs me. I have never had this problem with overlay doors.

Estimated Cost
$100
Estimated Time Investment
Week Long Project (20 Hours or More)
Finish Used
top: Early American by Minwax, Glossy polyurethane, bought at Lowe's
base: Caffeine Nation by Valspar, bought at Lowe's
Recommended Skill Level
Intermediate

Comments

Bander

Sun, 01/06/2013 - 17:28

You might want to try putting magnetic catches on the inside of your doors. I find these helps pull the inset doors shut and keep them closed.

I love how the wainscotting looks in your door inserts.

Debra455

Sat, 10/19/2013 - 00:16

This looks beautiful. A great job

A router will be my next purchase.

Bunk Beds

Submitted by Medickep on Wed, 10/29/2014 - 13:54

This was a fun and pretty easy project.  My oldest son has been asking for some bunkbeds for awhile now, so I was glad when I ran into these plans.  

The project was realitively cheap, but if I could do it again, I would have used nicer material to avoid some of the finishing work.  I built this in one day, but spent sevral weeks on the finishing work, which included two coats of primer and LOTS of wood filler.  I took all the edges through my router, so everything would have a nice rounded edge.  I also decided to put a cap on the headboard, footboard and rail to finish off the project a little.  I liked the look of thes being added.  

The original project does not include slats in the pricing and knowing that firrying boards were not strong enough for this task I really wondered what I was going to do.  Buying a ton of 1x2's can add up fast, so I decided to make them out of cheap 2x4's.  I bought a few 10' 2x4's that allowed me to get six slats out of each of them after I ripped them on my table saw.  They ended up being very sturdy 1 3/4" x 1 1/2".  

******If I was going to do this project again, I would mark the location of every screw, as I hit some of the screws holding the 2x6's of the headboard and footboard with the lag bolts I used to hold the main rails.  I would have also painted all of the pieces individually, put it together and than touched it up, as there were many hard to reach areas with the paint.  This would have improved the finish*******


Built from Plan(s)
Estimated Cost
120 in wood. 30 in hardware. 90 in paint.
Estimated Time Investment
Weekend Project (10-20 Hours)
Finish Used
I primed this with an oil based primer, twice and than painted it with rollers.
Recommended Skill Level
Beginner

Dumpster dresser..

Submitted by unclebones on Mon, 02/06/2017 - 14:51

Honestly think it needs a new name, because when all said and done works and looks great.
Going to be making another one at some point, and make some alterations to it to fit a need, and suggestions.
It took me longer then it probably would for some, but then again I am disabled and can only work for short bursts.
Hard to see in the photos, but i used brass knobs on the drawers. I also used briwax on the parts that slide, (the rail, and bottom of drawer edges..  works nicely..  

Built from Plan(s)
Estimated Cost
Dont remember, but it was very resonable with using mostly 2x4, and then pine wood for the drawers
Estimated Time Investment
Week Long Project (20 Hours or More)
Finish Used
Stain/seal
Recommended Skill Level
Advanced

Barn Door Bookcase

Submitted by Anonymous (not verified) on Mon, 11/02/2020 - 06:29

This project cost us about $430, but we modified Ana's plans, a Lot! We made it deeper, narrower, and taller to fit out space. The best part of this project was creating a hidden litter box area in the bottom shelf. We cut a hole through the bottom center board, and put the litter on the side with the door so it was hidden yet easy to clean!

Built from Plan(s)
Estimated Cost
430
Finish Used
tinsmith gray
Recommended Skill Level
Advanced

Comments

Fancy X Farmhouse Table

Submitted by jonahnkopp on Tue, 01/08/2013 - 08:50

Just finished up this table. I'm probably going to sell it as the wife would rather have the Pedestal Table. So, it will remain in the house until it sells. Then, I'll get to work on the other one. Thanks Ana!

Built from Plan(s)
Estimated Cost
$90
Estimated Time Investment
Weekend Project (10-20 Hours)
Finish Used
English Chestnut Stain
Polyueurathane
Recommended Skill Level
Intermediate

Rustic Headboard

Submitted by bjd on Sun, 11/02/2014 - 19:59

We finally bought a wonderful King size bed but couldn't afford a headboard.  After seeing this one on Ana's site I knew I could do it.  Purchasing a compound miter saw helped.  For some reason the thought of using a circular saw sets my teeth on edge.  I've found that using the much sturdier miter saw on a workbench has been a piece of cake for me!  I adjusted the plans for the width of our mattress/box springs and didn't go quite as high.  But I'm VERY pleased with the results!  And I swear we slept MUCH BETTER last night with the headboard installed...LOL. 

Estimated Cost
$75-90
Estimated Time Investment
Weekend Project (10-20 Hours)
Finish Used
minwax - early american three coats; polyurethane - 2 coats;
Recommended Skill Level
Beginner

Coffee and end table

Submitted by Anonymous (not verified) on Thu, 02/09/2017 - 19:18

Handmade pine tables with dark walnut stain

Estimated Time Investment
Afternoon Project (3-6 Hours)
Finish Used
Walnut stain
Recommended Skill Level
Intermediate

I love building these

Submitted by whulse78 on Fri, 11/06/2020 - 06:58

Love building these I made 15 last week already sold 10

Built from Plan(s)

Comments

Ana White Admin

Sat, 11/07/2020 - 11:41

It's awesome how cheap and easy these are with such big impact! Glad you are earning extra income too! Thanks for sharing:)

Camp Loft Bed With Stairs

Submitted by fletchro on Wed, 01/09/2013 - 15:51

Note: I think the plans were slightly incorrect. Add 2 more 2x4s @8' long (construction studs will do, you don't need 96" length) to be certain you have enough wood. I bought 15, planning to add the lower rear support rail, but then I found I didn't have enough decking. So I scabbed it for decking. Then I didn't have enough for the stairs, so I found some 2x4s in the garage that gave me 5 out of the 6 stairs. The next day I made the last stair. So buy 2 or three more 2x4s than the plan says. The worst that can happen is you have an extra 2x4 sitting around for a while. As for all the other cut items, just don't mess up your cuts and there is enough material.

This was pretty easy to build. It took a lot of work for just me, working by myself. I think the thing is VERY sturdy. We had about 200 lbs of adult and kids up there and it didn't seem to be complaining at all.

I used no glue. I think I was too focused on getting the project completed that I forgot to apply glue at the several steps where she mentions to apply glue.

I did not use Kreg(R) brand screws. But I used the nearest equivalent available at my local home store. It turns out there is another specialty woodworking shop in town which sells the Kreg brand screws, and it turns out they are pretty much the same price. So next time, I will make a special trip to that store because the Kreg screws seat much more solidly in the pockets than the regular pan head screws.

Estimated Cost
~$90
Estimated Time Investment
Day Project (6-9 Hours)
Finish Used
I didn't finish this project yet. I have a pretty busy life, so just getting the thing built and installed in one day was kind of a feat. We will probably paint it with some good quality indoor paint.
Recommended Skill Level
Starter Project

Park Bench

Submitted by Storm on Tue, 11/04/2014 - 20:20

I made this bench just as instructed except I made the back legs taller (after the fact) for more back support.

Built from Plan(s)
Estimated Cost
Approx $70
Estimated Time Investment
Day Project (6-9 Hours)
Finish Used
WoodRx Semi-Transparent
Recommended Skill Level
Beginner

Leaning Bathroom Ladder

Finally, after 21 months of having no place for extra rolls of toilet paper in the toilet area of our new home, I convinced my husband to make this for us. Now he wants one in his workshop bathroom! I've had the plans printed for almost a year!  


We couldn't find a 1x10, so we used the table saw to cut down a 1x12 into a 1x10, 1x8 and a 1x6 for the shelves. Also, couldn't find 2x3s for the legs and ended up buying a 2x6 and ripping it in half.


It came out more beautiful than I imagined. Almost done with the Squatty Potty, that we also found on Ana's site, to complete the room :)

Estimated Cost
$40
Estimated Time Investment
Afternoon Project (3-6 Hours)
Finish Used
Minwax Wood Finish in Espresso
Recommended Skill Level
Beginner

Clubhouse bed for my Eli :)

I was sitting down looking through the pottery barn catalog one day and saw the Eli fort bed. My sons name is Eli so I found it funny it had his name but also decided he had to have one! I of course was not going to pay the pretty penny of $1400 that pottery barn wanted so I knew if he was going to have it , I would need to build it. He is 2 years old btw. I decided to google Eli fort bed to see if I could get any other measurements. Then I saw Ana Whites website for the first time. I was in my glory and super excited when I saw the clubhouse plans. Though I changed alot of things, her plans gave me a great layout to give me the confidence I needed to go and do it! So here is my building before and after pictures. Just thought Id share and of course the last picture is my son super excited about his new fort bed!

Some of my changes:

I added 7 inches to the posts height to give more space underneath it and to give me space to lower the mattress .Then I changed the angle of the peek as well to make it shorter to make up for the height difference as well.

I used plywood that looked like panels for the walls instead of pine planks. Im not sure if the cost is cheaper or more but I wanted wood above the door instead of just a piece of trim like in the Clubhouse plans and this I believe was much faster then cutting planks and putting them all together.

I dropped the mattress height down 6 inches because I wanted the railing to be taller after the mattress was in the bed for extra safty since he is only 2. It is easier for him to climb up into the bed with the mattress being lower in the doorway as well. I hid the fact that is was much lower behind the 2x8 trim in lou of the 1x6 trim the plans called for.

I also added the top step to the ladder as well because 3 wasn't going to get him up there. :)

Thanks Ana White for the plans!! They helped to give me a starting point so that I knew which bases to cover when I altered something!

Estimated Cost
$210.00
Estimated Time Investment
Weekend Project (10-20 Hours)
Finish Used
Dark Walnut stain by minwax and apolycrylic satin clear coat.
Recommended Skill Level
Beginner

Comments

bhoppy

Fri, 01/11/2013 - 14:45

It looks so awesome! I can't believe this was your first project!! This may seem like a silly question but how did you get the mattress inside the bed?

My favorite TV console ever!

Submitted by Ash12bug on Fri, 11/07/2014 - 18:32

My husband and I were able to build this project one night after putting our kids down. It took us 3 1/2 hours to build. I love how long it is. I wanted a TV console that was pretty long and this one is 8 feet. It's perfect. We didn't change anything about the plans...except we haven't put casters on the bottom and I can't decide if we ever will. Thx for these plans Ana!

Built from Plan(s)
Estimated Cost
We went to a lumber yard and were able to get all the wood and lag screws for about $130
Estimated Time Investment
Afternoon Project (3-6 Hours)
Finish Used
Top- Early American wood stain and sealed with poly acrylic sealant.
Paint- Chalk dust mixed with Baer brand (off white) paint and sealed with hemp oil.
I sanded the paint before sealing it to give it the distressed look because I wanted to see some of the grains in the wood.
Recommended Skill Level
Intermediate

Comments

TwoCuteKids

Thu, 11/20/2014 - 09:34

It looks fantastic! I love the finish and the impressive size. Your plank wall is amazing...I wonder is it tile or wood? Great job!

My Lucinda stroller

Submitted by penny58 on Mon, 02/13/2017 - 21:42

For the grandkids

Estimated Time Investment
Afternoon Project (3-6 Hours)
Recommended Skill Level
Beginner

Truss Dining Table

Submitted by omnia on Fri, 11/13/2020 - 10:55

Followed the plans pretty closely other than making it a tiny bit shorter to fit in the living room. The hardest part was just smoothing out the top because I could not find straight boards. ended up using a hand planer and a ton of sanding after it was put together.

Feels very solid.

Built from Plan(s)
Estimated Time Investment
Weekend Project (10-20 Hours)
Finish Used
Minwax dark walnut and polyurethane
Recommended Skill Level
Beginner

Two-Toned shabby chic 4X4 Truss dining Table and Benches

4c4 truss with dark walnut top 4" thick, base stained dark walnut with white wash and shabby etching.

Estimated Time Investment
Weekend Project (10-20 Hours)
Finish Used
Dark walnut, white paint, matte pily
Recommended Skill Level
Intermediate

Comments

thewoodbuilder

Tue, 11/18/2014 - 04:55

I know right, i think looks even more amazing when seen in person.  I did 2 chairs to match as well. which i will load up now.  :0)

Sideboard / buffet table

My husband built this buffet table as a mother's day gift, for me. It matches my farmhouse dinning table, that he also made from Ann white's plans. He Installed soft closing drawers. It took him  about 17 hours. 

Built from Plan(s)
Estimated Cost
$260
Estimated Time Investment
Weekend Project (10-20 Hours)
Finish Used
I used a dark walnut stain.
Recommended Skill Level
Intermediate

American Girl Doll House-tweeked

Submitted by Anonymous (not verified) on Thu, 11/19/2020 - 21:09

I loved the AG Doll House plans you designed and when my granddaughters asked me to make one for them.... how could I resist. Unfortunately my 7' basement ceiling and steps created a challenge. As a 72 year old female, there was no way I could man-handle a 6' x 4' x 2' - 3/4" plywood project in addition to the challenges of my work space. I was not going to disappoint my granddaughters so I had to come up with a plan. Instead of making the doll house in one piece, I decided to make it as 3 individual boxes (the floors) and stack them on top of each other. Not only would I be able to handle them mostly by myself, but I would be able to work around the low ceiling and transport them up the steps. With only a few modifications to the original plans, I believe I came up with a workable solution.

Instead of the sides resting on top of the doll house floor, I extended the sides 3/4" longer to run past the floor for more stability. I also used 1x 2s to frame the inside at the top of each unit for more support and to help in keeping the box square. This may not have been necessary, but I just wanted to make sure it would be sturdy. The main change to the original plan was to add 1" x 3" routed trim to the outside top of each box having it extend 3/4" above the sides. This created a pocket that allowed the next floor to nestle in place and protect it from sliding off in case any little ones decided to climb on it. I also made a 2 car (30" x 30" x 24") detached garage for the AG vehicles. I did fill the holes, plugs, and errors with wood putty, sand numerous times, prime and paint. It was a real help to add some of the paint to the primer because plywood really soaks it up. I think this kept us from having to paint a 3rd coat. The floor was painted a med dark brown, but wiped with the grain before it dried to give a wood grain look.

I finished it in time for the birthday party even though it took 3 vehicles to transport it to the destination. It was a joy to see their faces when it was unveiled and to watch them climb on it of course.

Estimated Cost
$200 (+/-)
Estimated Time Investment
Week Long Project (20 Hours or More)
Finish Used
PPG Acri-Shield (Exterior Semi-Gloss 100% Acrylic Paint and Primer in one.
Recommended Skill Level
Beginner

Modified Wide Cabin Dresser

Submitted by rhettar on Fri, 01/18/2013 - 20:59

I live in a small mobile home, so I didn't make the dresser as wide. I also used a little combo of the 2x4 look from the Rustic X Console (which I already made a modified version of) I liked the 2x4 look and I wanted the dresser a little sturdier because I was making it a little taller without a bottom shelf. It's 44" wide and 40" tall. I wanted a space where my dog could have her bed out of the way (you can already see her in her spot :) ) Because I didn't make it as wide I also thought 3 drawers to the top would be too busy, so I put two to the top and one large bottom drawer. It is already given me more room for clothes.

I have to estimate on skill level and time, because I do it here and there, but I probably finsihed this with in a week. I haven't been real good at keeping track of costs because I have bought wood here and there, but this may have been around a $100 more or less?

This was also my first project with drawers. The first was a toughie...but the other two went right in (???).

But I am proud of it and love it! Without Ana and her website I wouldn't have been able to do it....

I also have 4 other dogs who started out as fosters....so more space saving projects on my list....tons to do! So, please don't look at any mess, still lots of work in progress :)

Estimated Cost
$100
Estimated Time Investment
Weekend Project (10-20 Hours)
Finish Used
I used 2 coats Behr paint and primer "Corner Stone" and Rust O Leum Dark Walnut stain (I've used Minwax before, but thought I would give it a shot). I paint and stain my pieces before I put everything together. This is just my preference I find it not as frustrating as trying to paint a big piece and getting into odd spots. The finish is what seems to be the most time consuming, waiting for the drying between coats. Before staining, I sanded around edges of pieces some enough to expose some wood. I also use a small brush for my stain mostly making a streak where the exposed wood was, use it sparingly and wipe immediately, letting the rag do the rest of the work in some places. I found this gives me the finished effect I like vs. other techniques I have seen or tried.
Recommended Skill Level
Intermediate

Comments

Ann M. (not verified)

Sat, 01/19/2013 - 04:51

Lovely build and excellent space saver too. Also, so kind to keep your furry buddies comfort in mind as well.!

ACM (not verified)

Sat, 01/19/2013 - 04:53

Lovely build! Love the adaptations to fit your space AND make a wonderful place for your furry buddies!

rhettar

Sat, 01/19/2013 - 05:20

Thank you for the comment Ann. Quite a few of my projects will have my babies in mind :)

Dana P (not verified)

Sat, 01/19/2013 - 09:19

I love the way you painted it. Looks great!

Dana P (not verified)

Sat, 01/19/2013 - 09:20

I love the way you painted it. Looks great!

Cool Dresser

Submitted by Gotwake7 on Thu, 11/13/2014 - 08:39

This project is built from a/b sanded plywood, pine select trim, and pine 2x2 furing stirps.  I was a little scared to do the drawers as i have not had great luck with them in the past.  But after watching some videos and reading the tutriol for the slides i tackled it and it came out great.  I didnt want the wheels so i made the side 2" taller and it worked out great.

Built from Plan(s)
Estimated Time Investment
Weekend Project (10-20 Hours)
Finish Used
minwax red mahogany no poly on it just stain to keep the satin look
Recommended Skill Level
Intermediate

Fancy X Desk- 4 foot version

Submitted by Anonymous (not verified) on Sat, 02/18/2017 - 17:39

Love this desk and have gotten so many compliments!

Estimated Cost
$60 worth of lumber. Already had paint and screws.
Estimated Time Investment
Weekend Project (10-20 Hours)
Recommended Skill Level
Intermediate