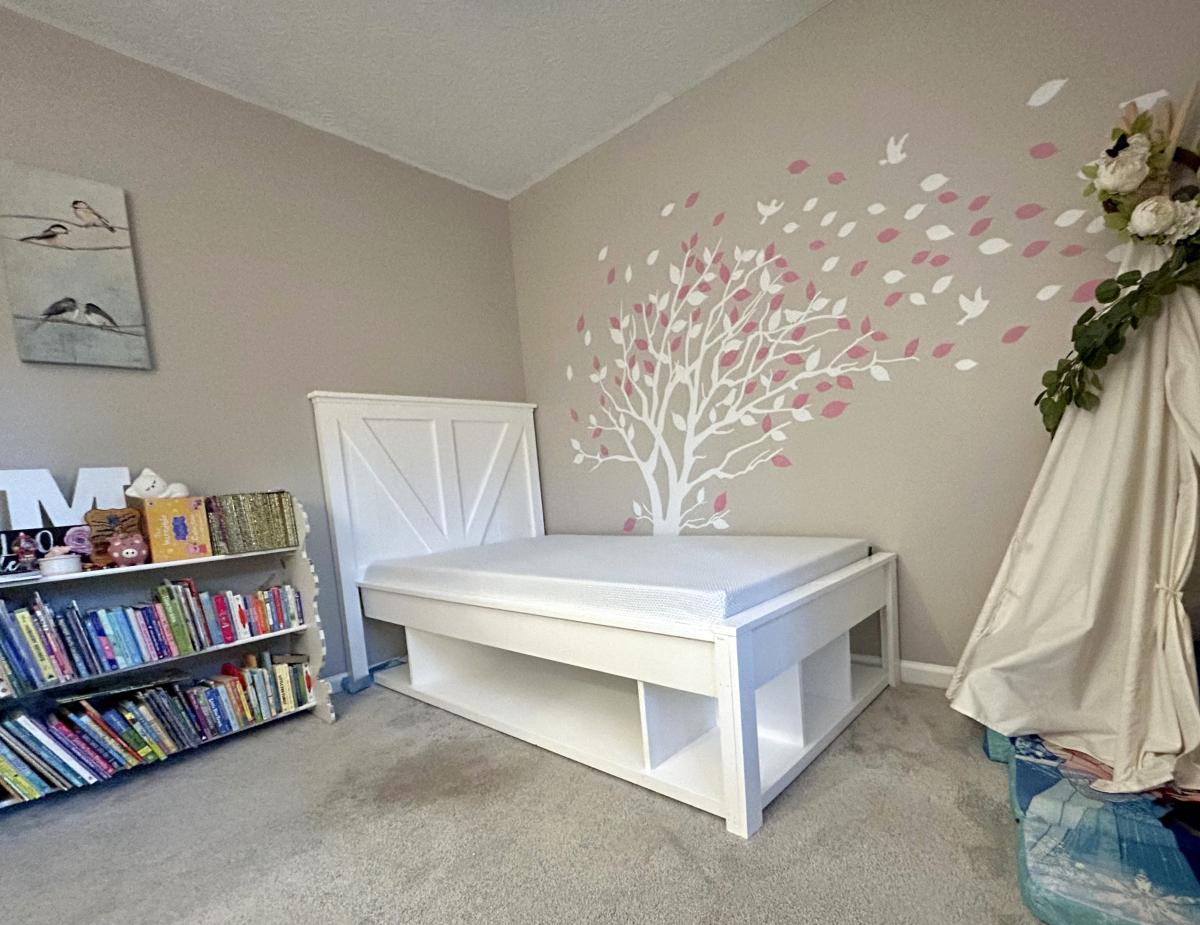
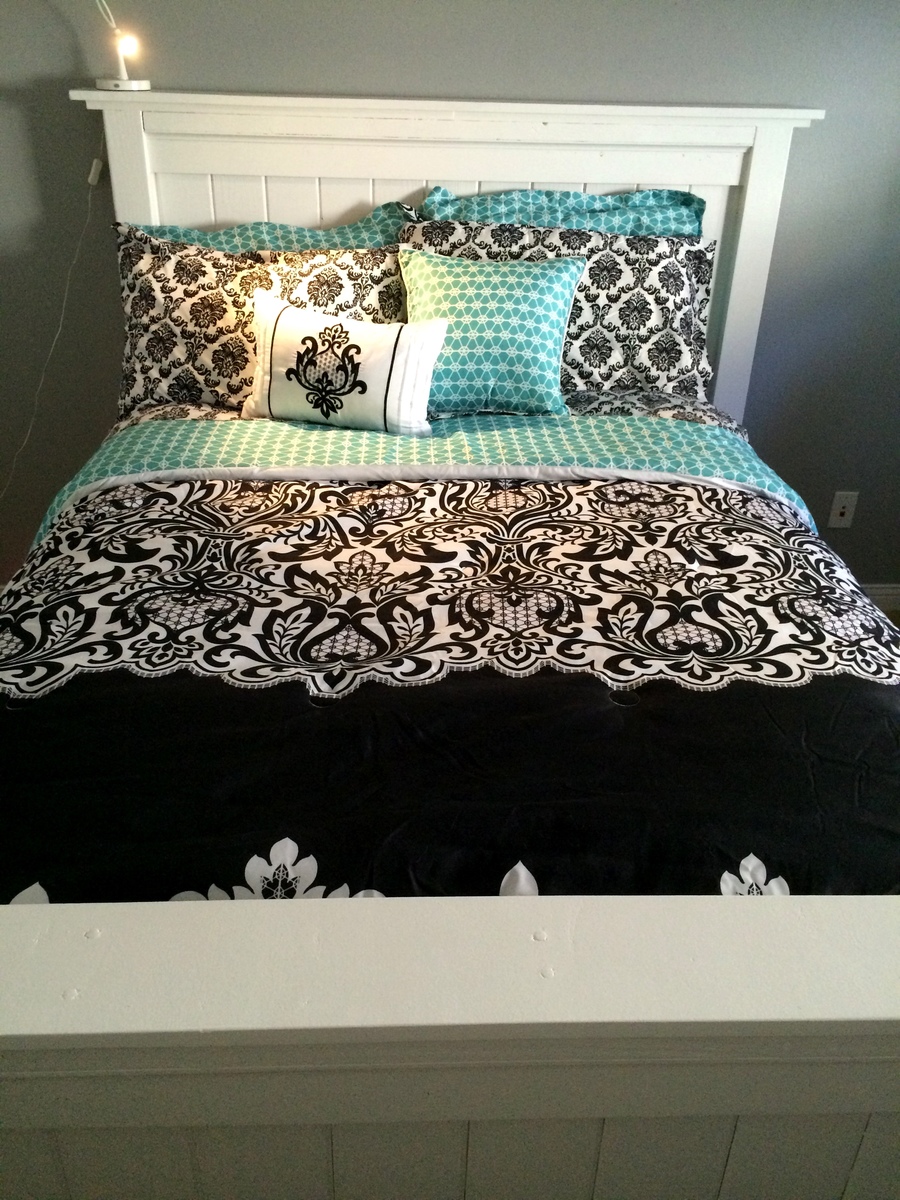
Storage Bed for Girls Room

Love this build! We decided to flip the head board pieces because our daughters initials are MNW and we thought it looked more like a M and a W this way.
Built from Plan(s)
Love this build! We decided to flip the head board pieces because our daughters initials are MNW and we thought it looked more like a M and a W this way.
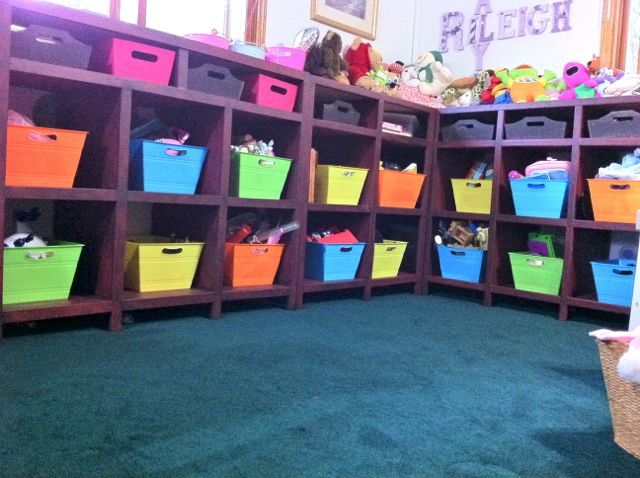
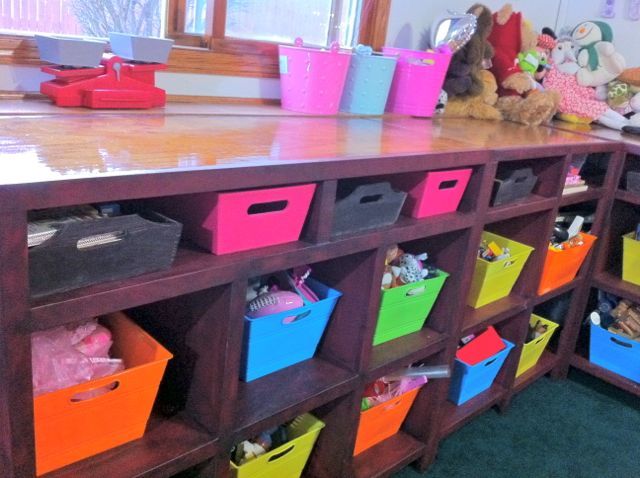
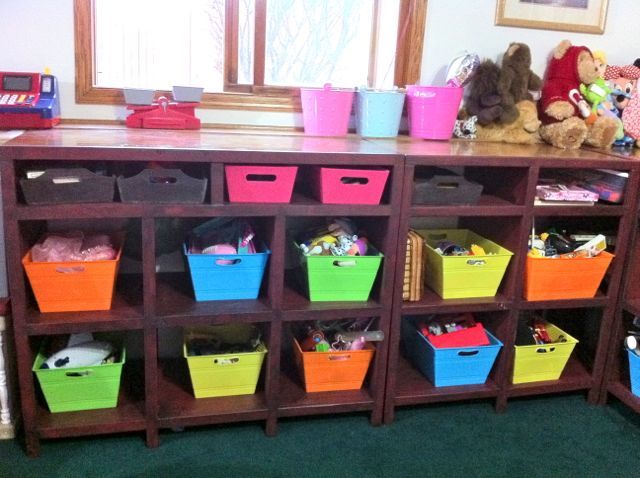
In our basement we have an 8 inch oak ledge on the outside walls. I love the oak finished ledge, but it makes it hard to place furniture up against it. The furniture is either shorter or taller than the ledge and looks awkward. So, I built several storage pieces to fit our area and ledge. I modified a couple of different plans to create our toy storage area. It's so useful and looks great.
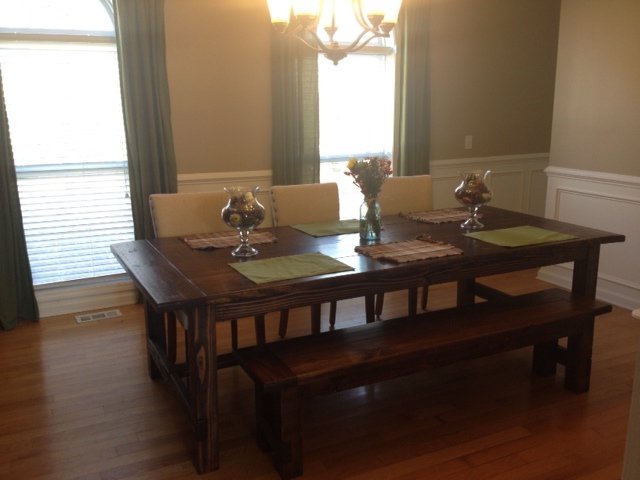
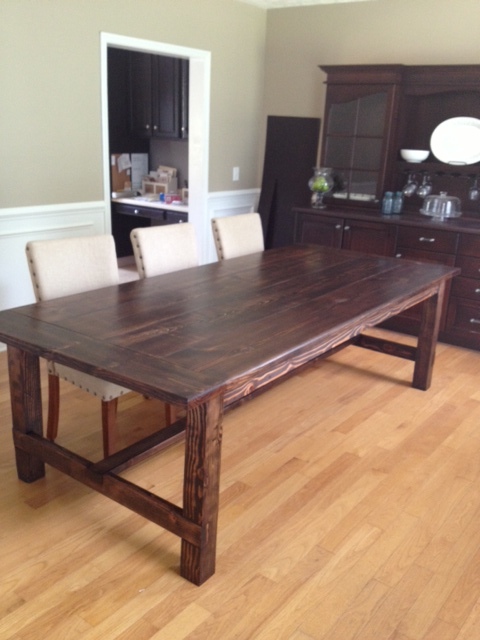
We used the farmhouse table plans from this website, and modified the length and width. The finished length is about 8 1/3' long (100") and 45" wide.
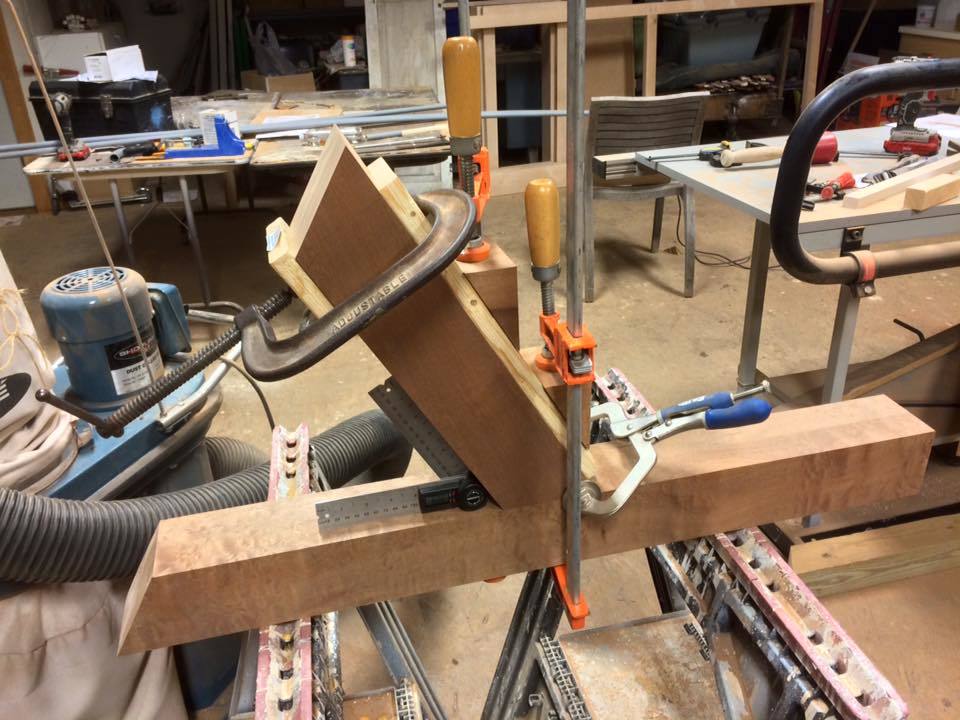
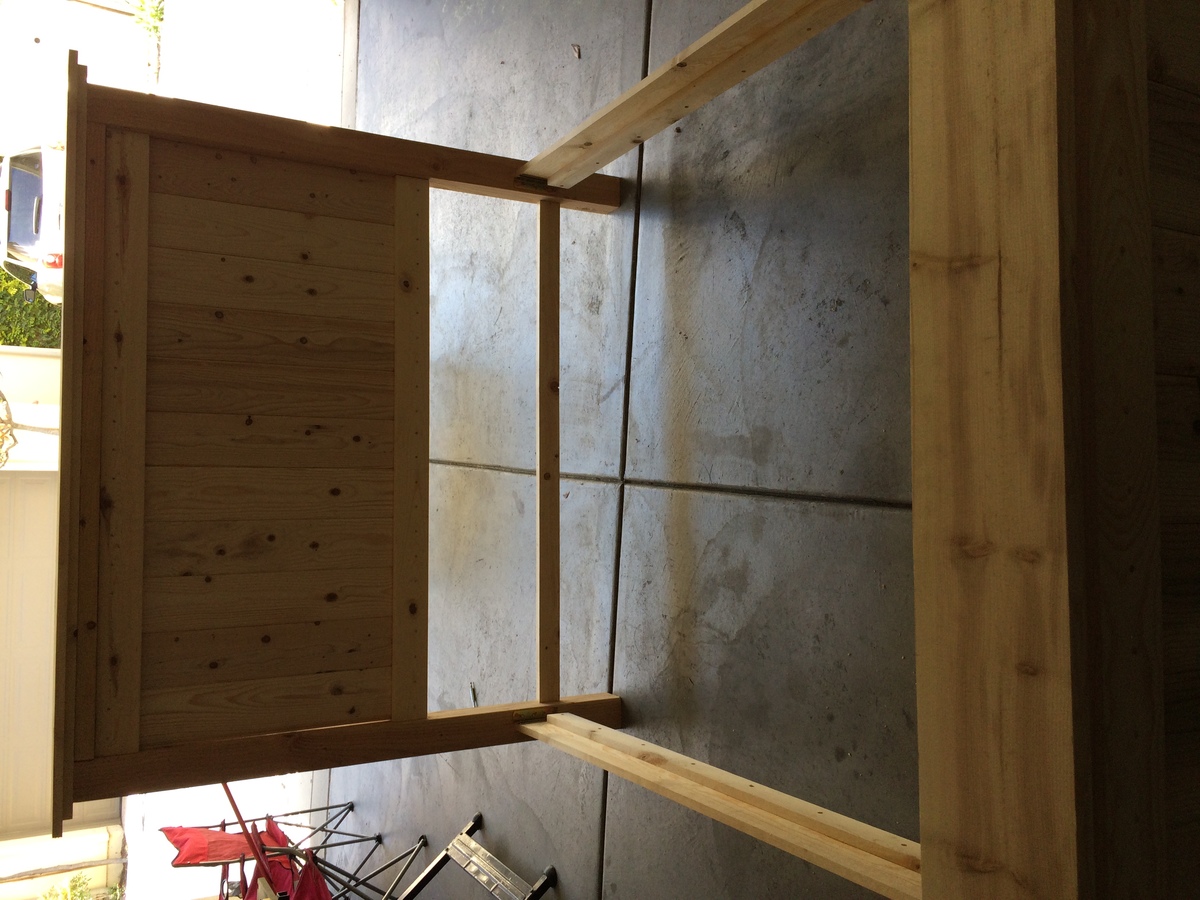
This was our first build and my husband and I learned a lot! We could not find untreated 4x4s ANYWHERE in our area. We searched for days and called probably 10-15 places. We were just going to build with 2x4s, but my husband's work ended up having some pallets that used 4x4s come in with a shipment. They were not in the best shape, but we wanted it to look rustic so we weren't too concerned. Also, our 2x6s were a little warped, so they bow down at the ends. We searched through piles and we didn't really notice until they were on (breadboards). We did buy a Kreg Jig Kit and are so glad we did! We have used it for other projects and can't wait to use it for more. Such a great purchase!
I learned to ALWAYS do a test piece of stain first. This was new to us. We stained it the first time, and then had it spray coated with polyurethane (my stepfather does cabinets). I hated the finish! So I ended up spending an entire day (from 8 in the morning until midnight) stripping the 3 coats of polyurethane and stain. We could not get it all out, but got most of it. We then re-stained it with a lighter color (custom stain left over from our kitchen) and finished it with Minwax Wipe-On Poly. I like the more natural finish much better. If I could talk my husband into it, I would build another one so I could get the stain right.
Overall, I'm pleased with how it came out! The plans were easy to follow, and not hard to modify using a little math.


Thu, 05/21/2015 - 08:00
I'm new to this. Did your apron cuts/measurements change when you increased the length and width of the table? By the way, your table looks beautiful!
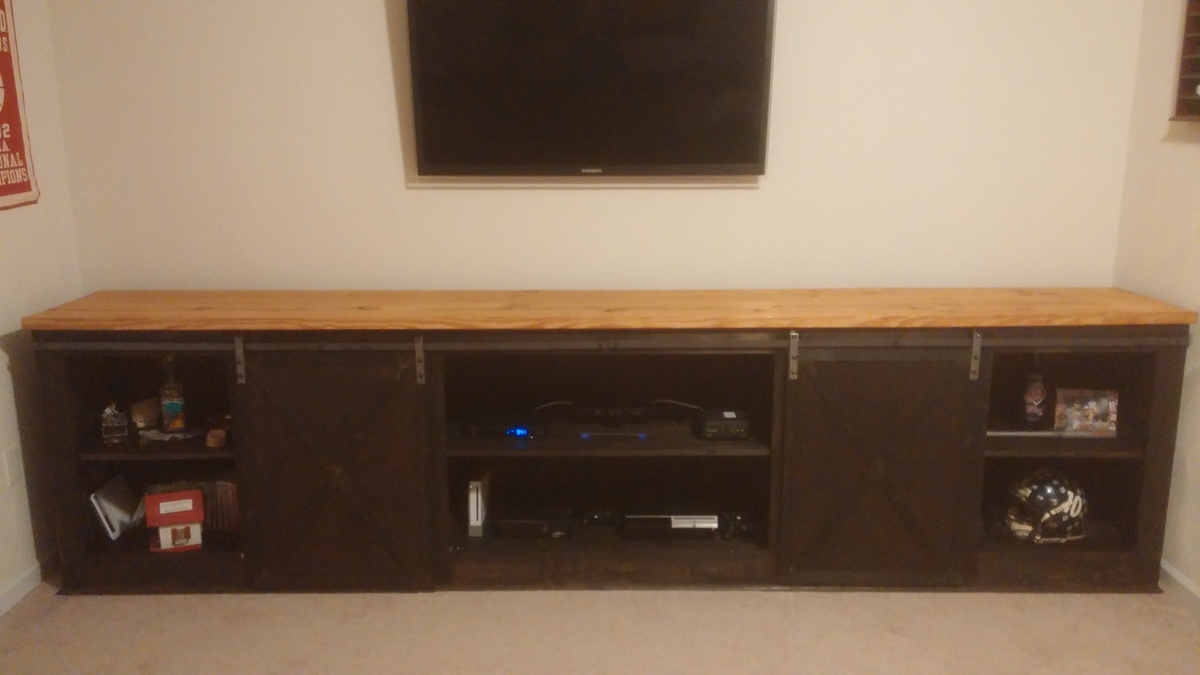
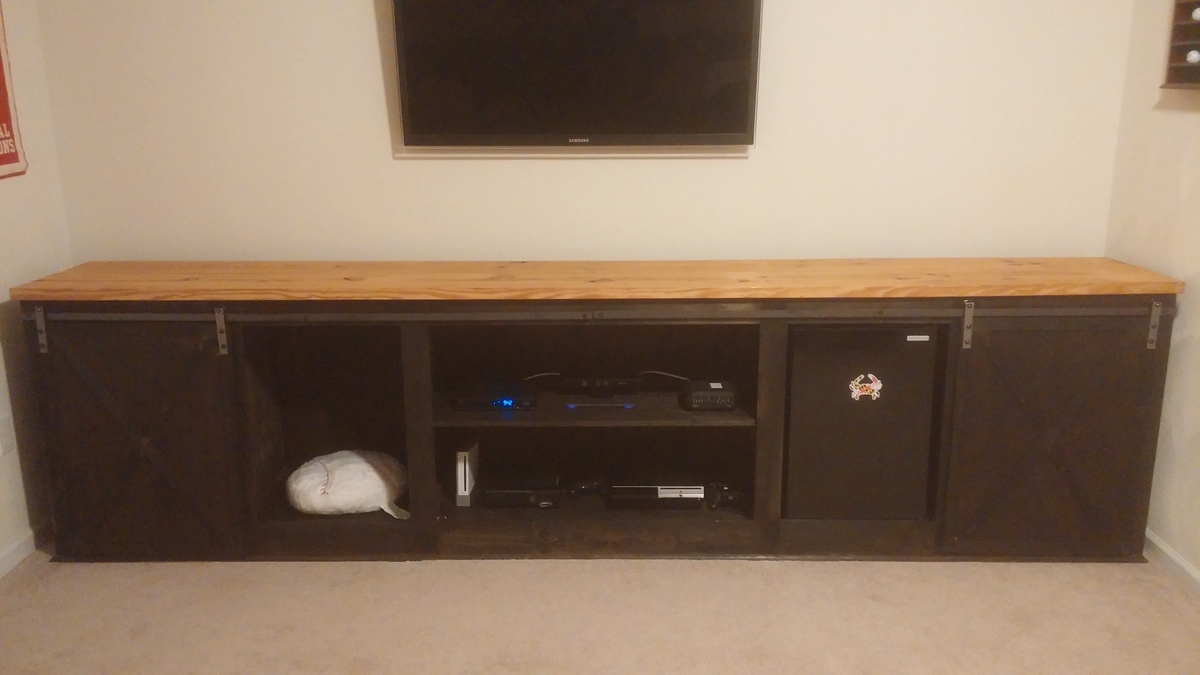
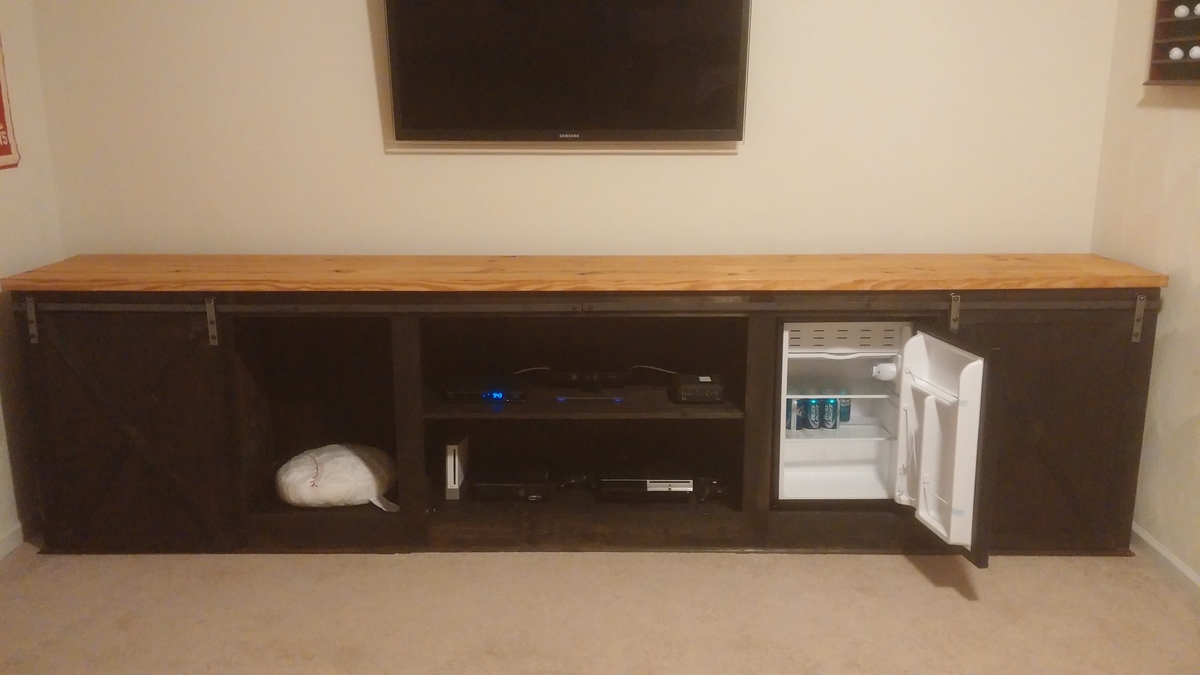
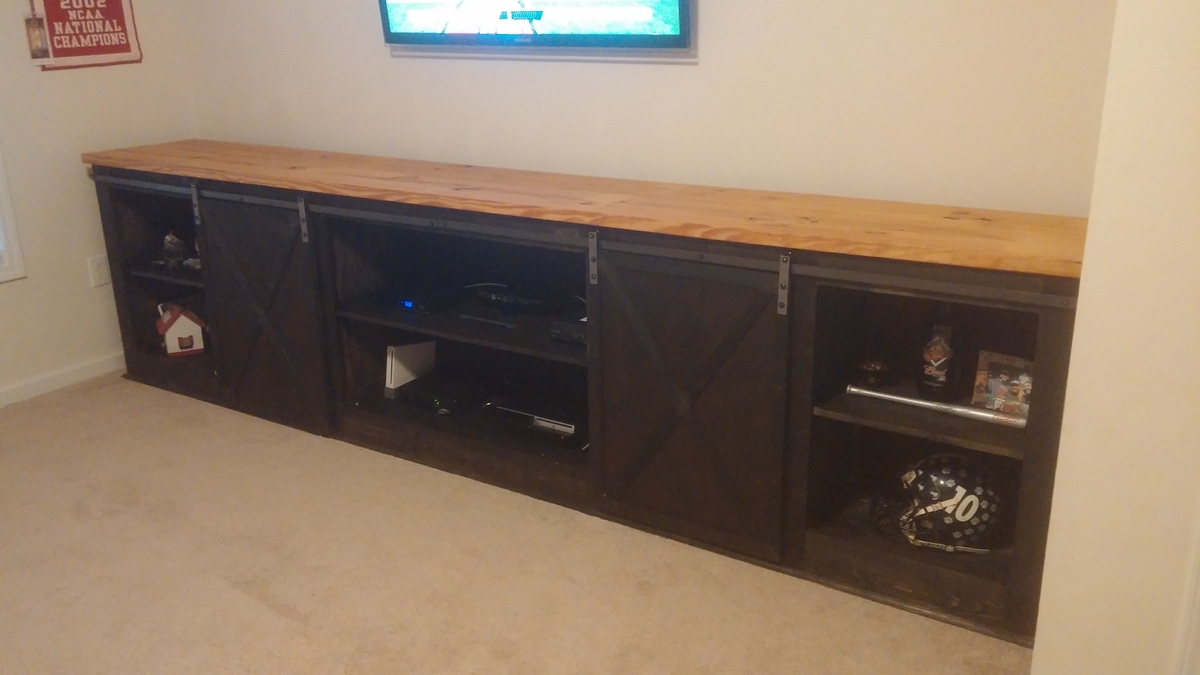
I took the Grandy Sliding Door Console plans and added another middle section to make the entire plan fit the nook in my man cave. I manipulated the plans to have openings without shelves to fit a mini fridge and an area for blankets (currently in the wash). Total length is 12 ft and height is 37.5 inches high (36 inches + the top). I tried to stain it to match another table in the room and it worked out pretty well.
First project in my back porch turned into a makeshift wood shop
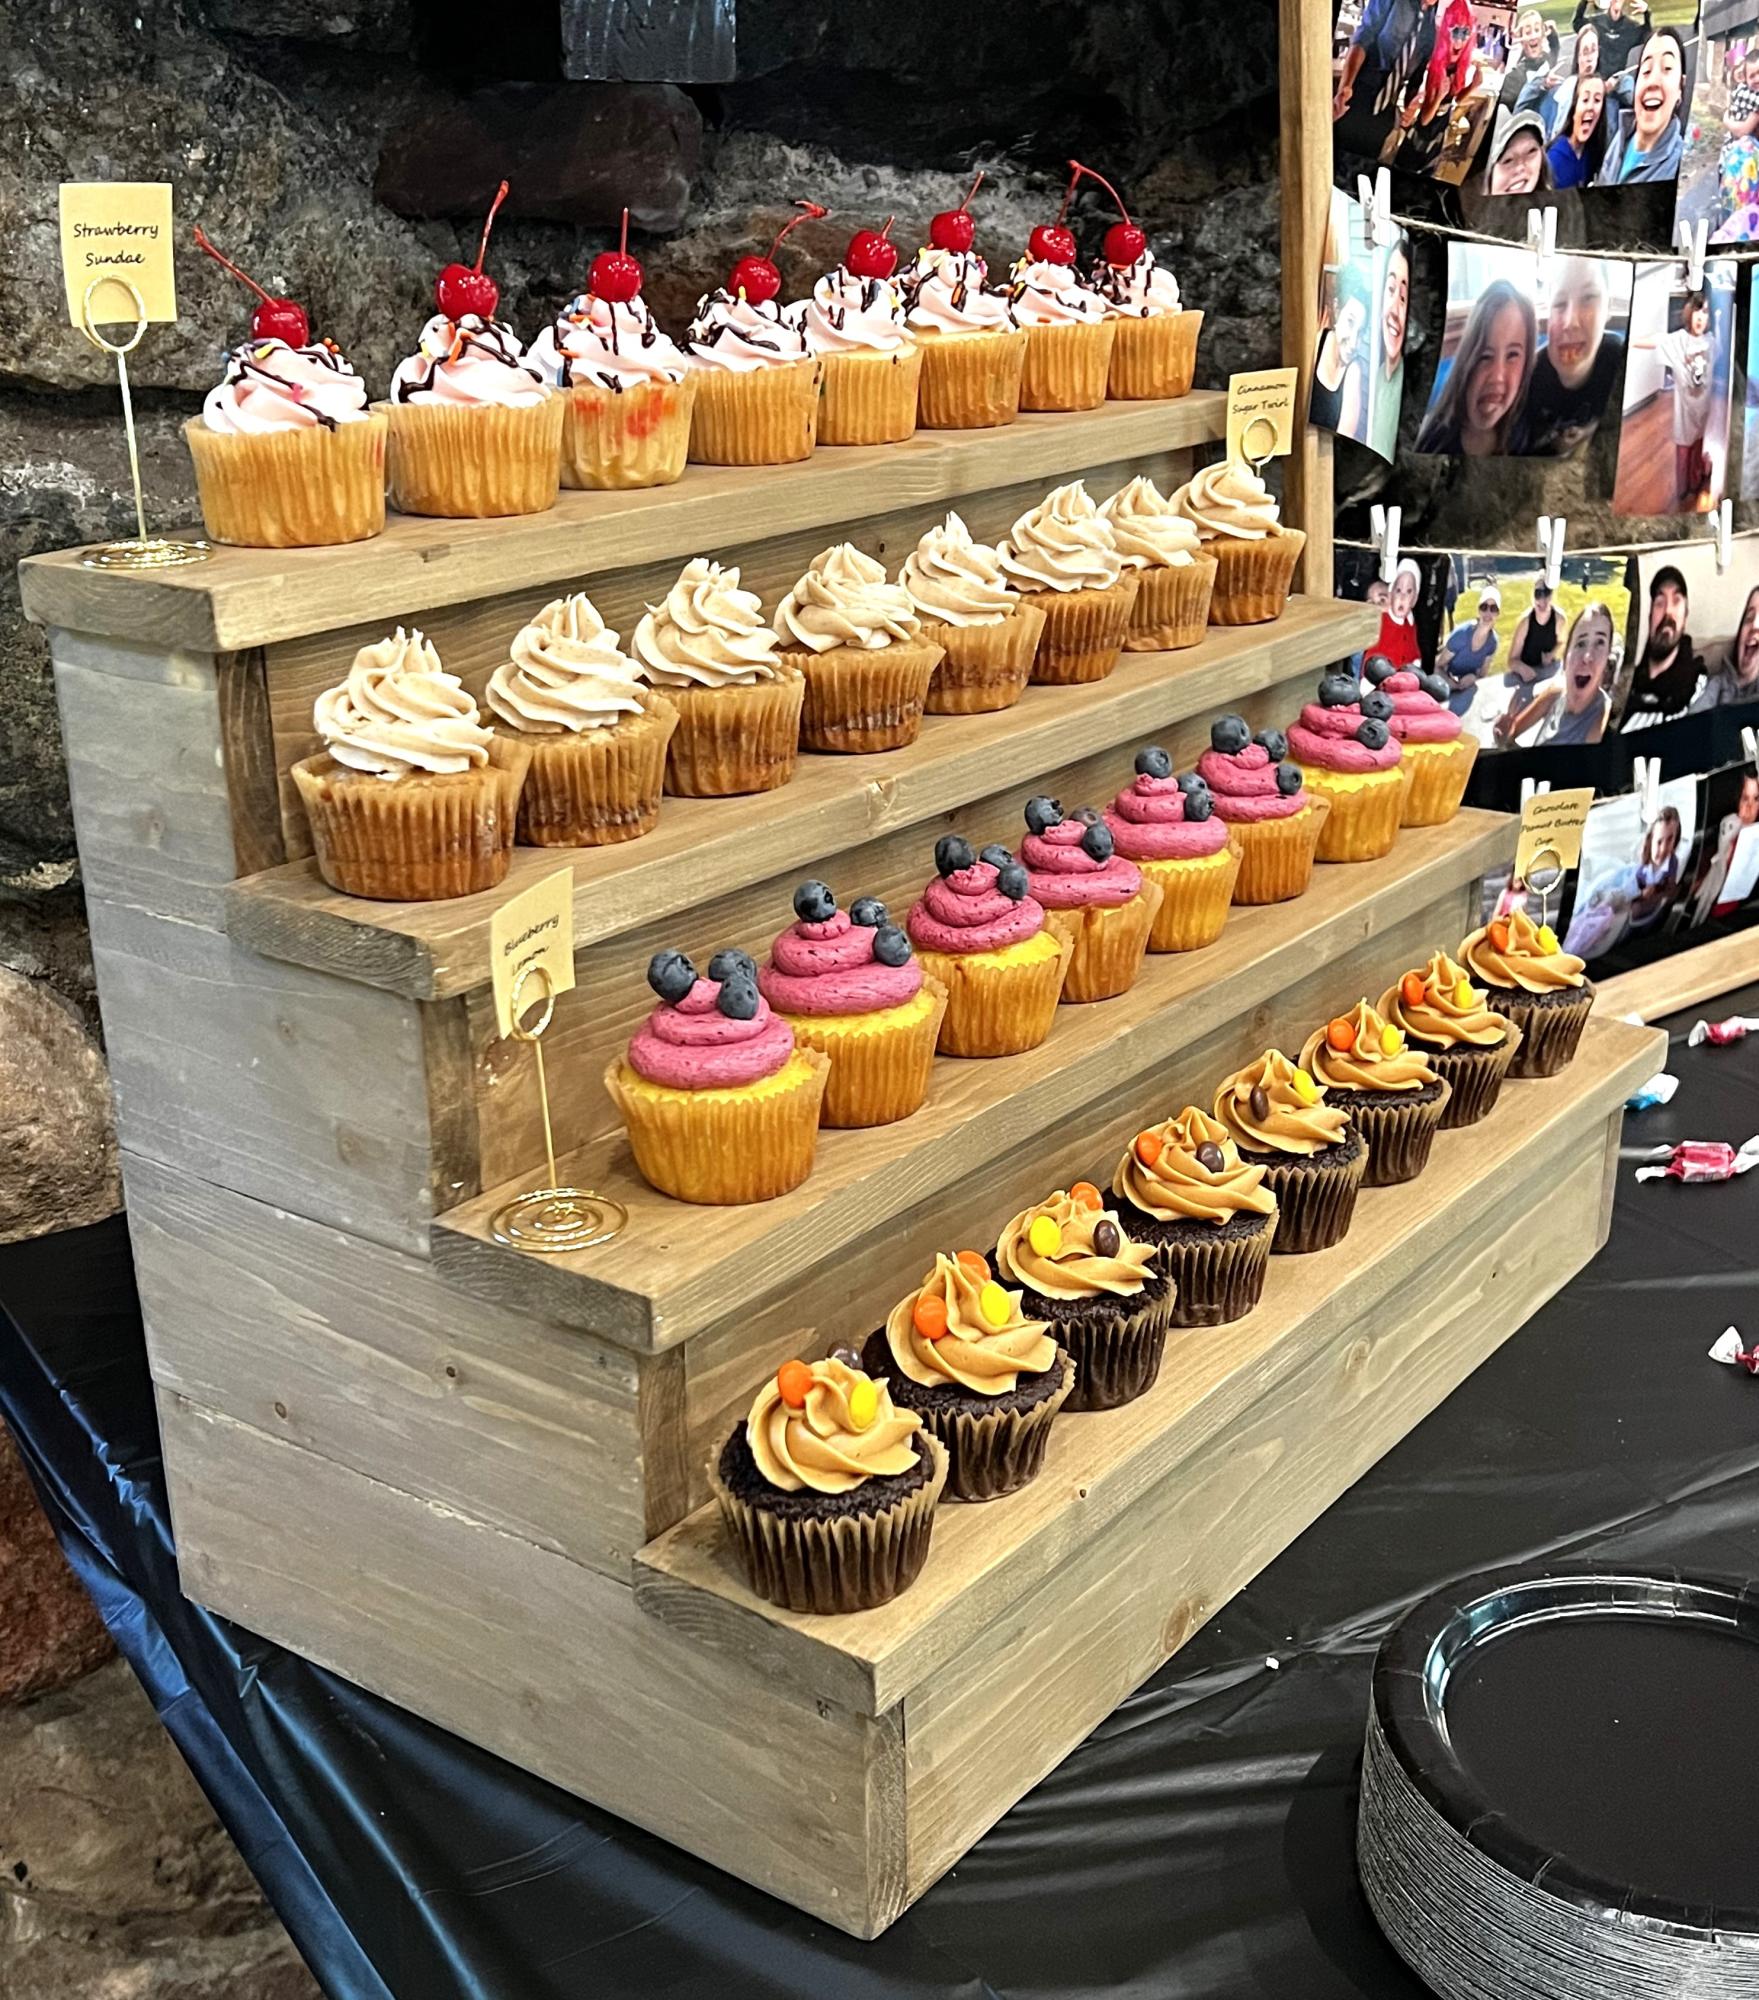
Cupcakes for my daughter’s graduation party displayed beautifully on Ana White’s stand I built.

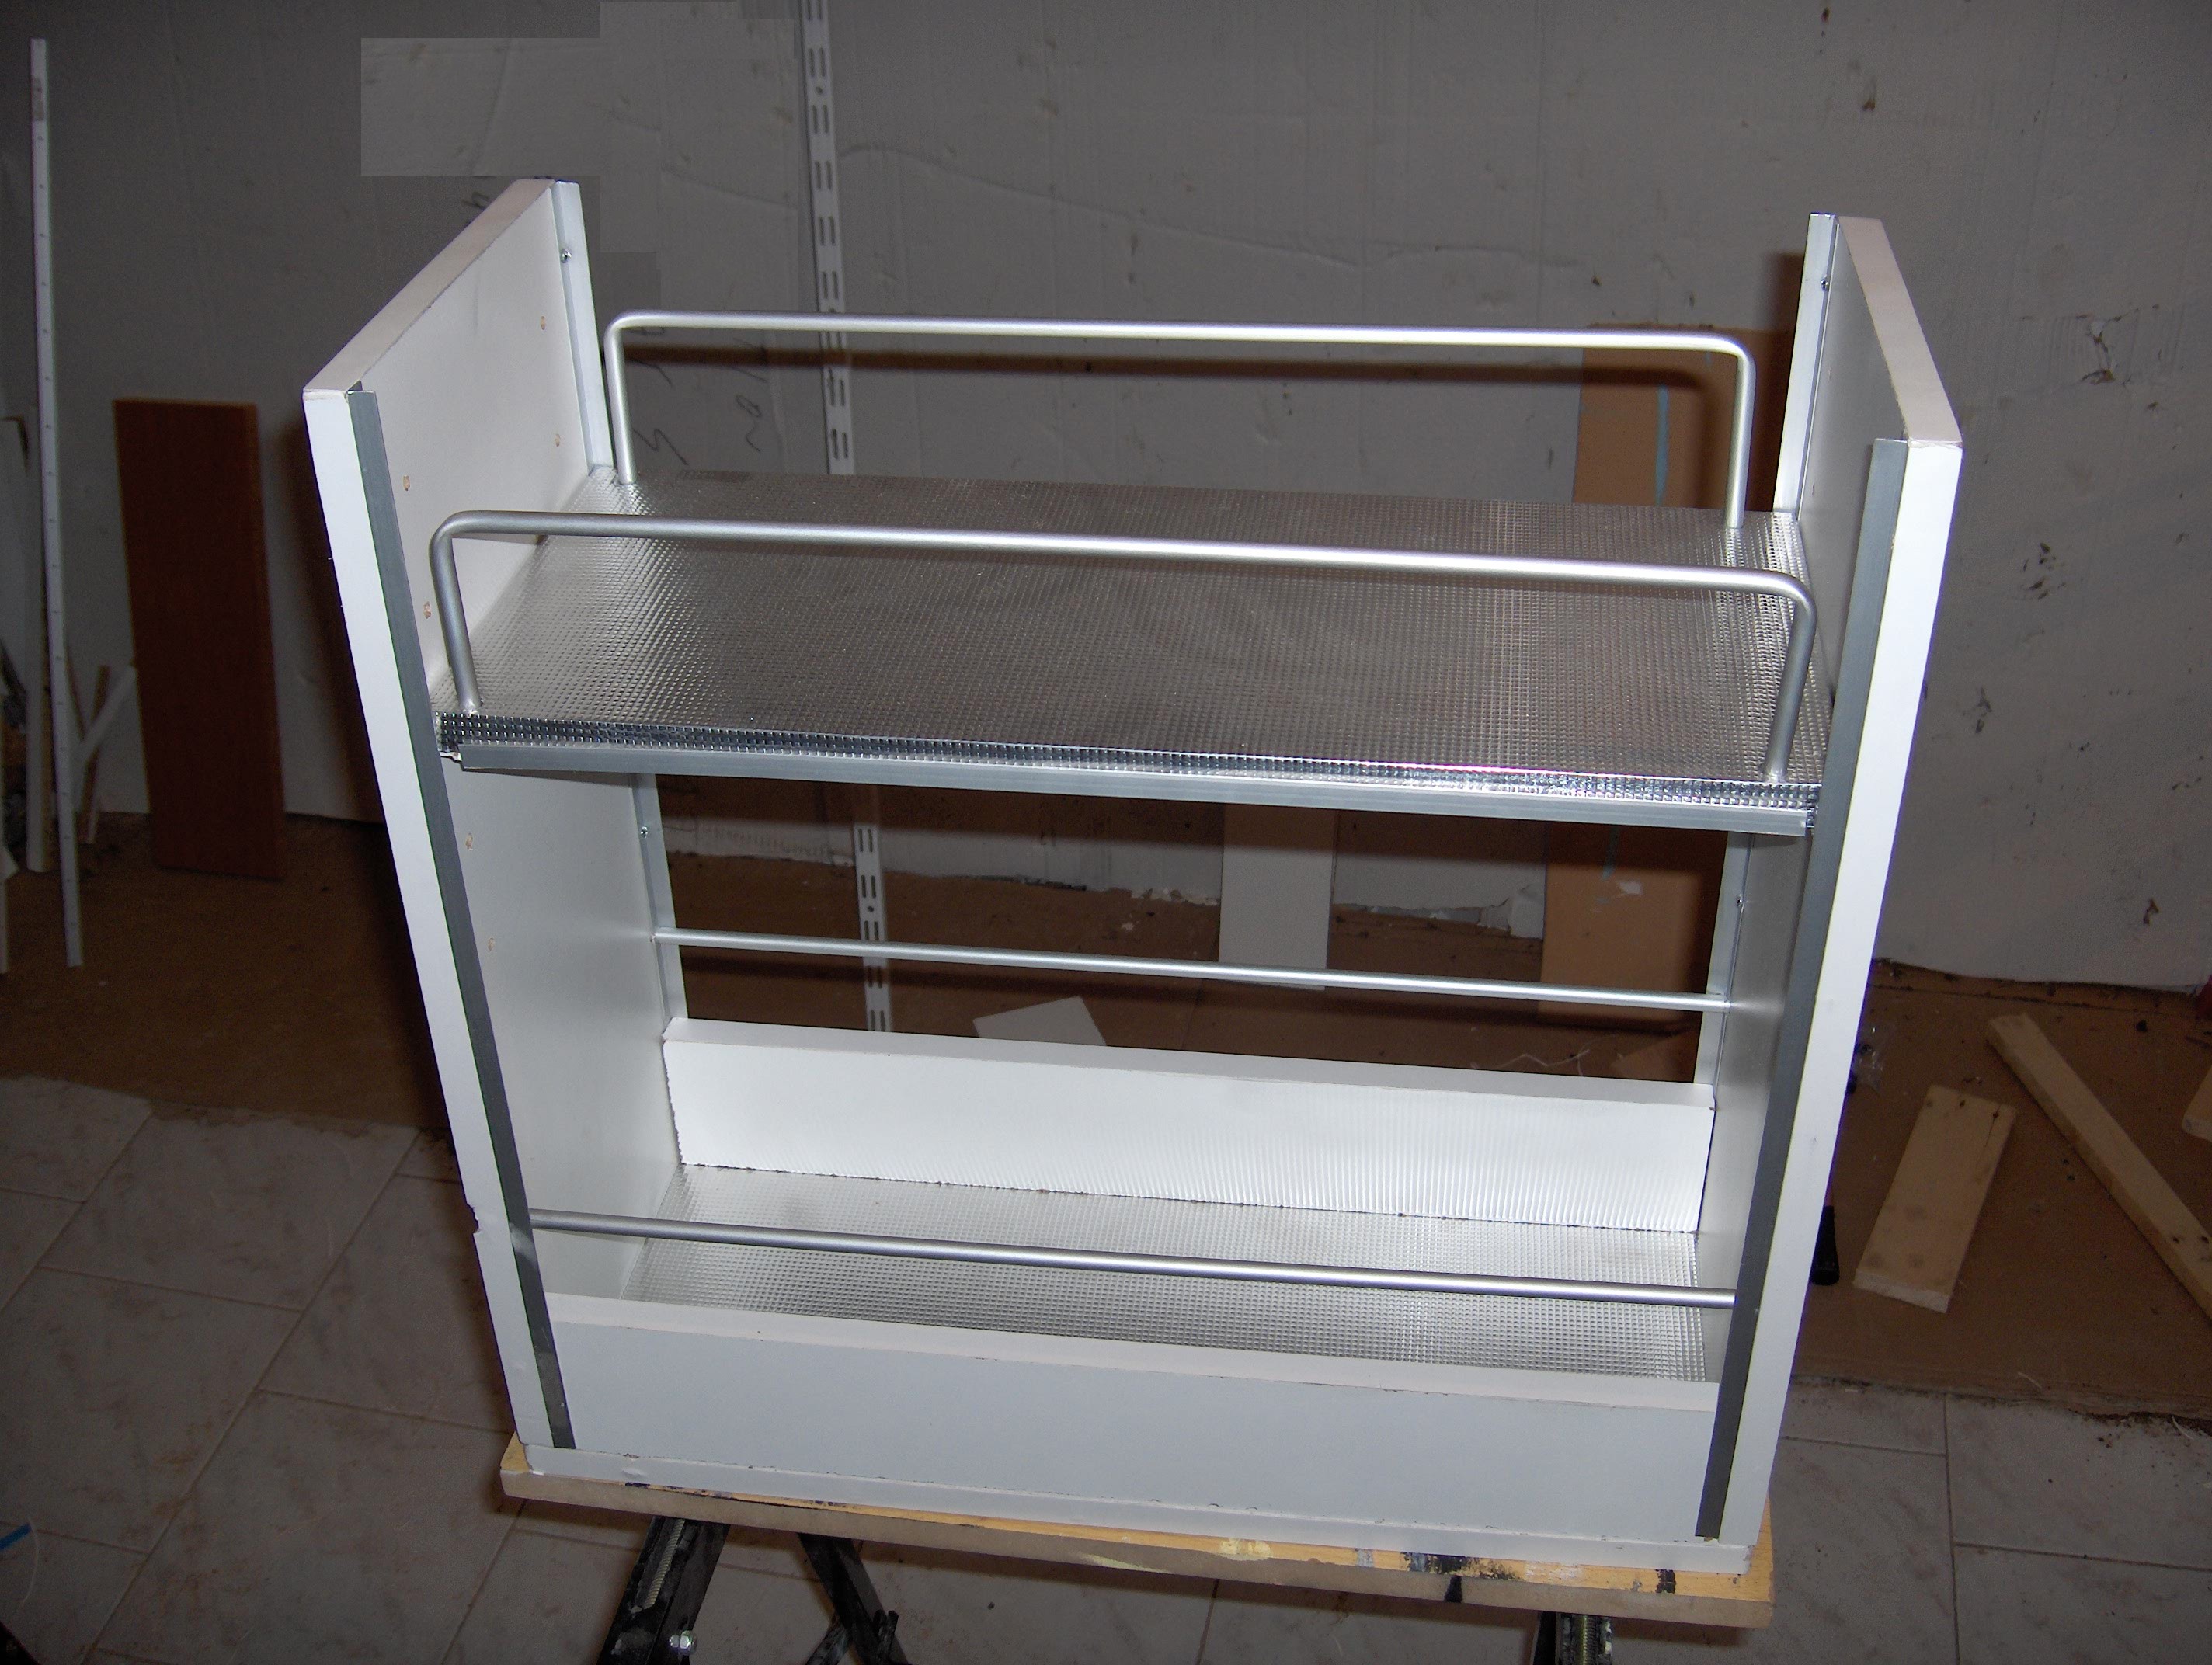
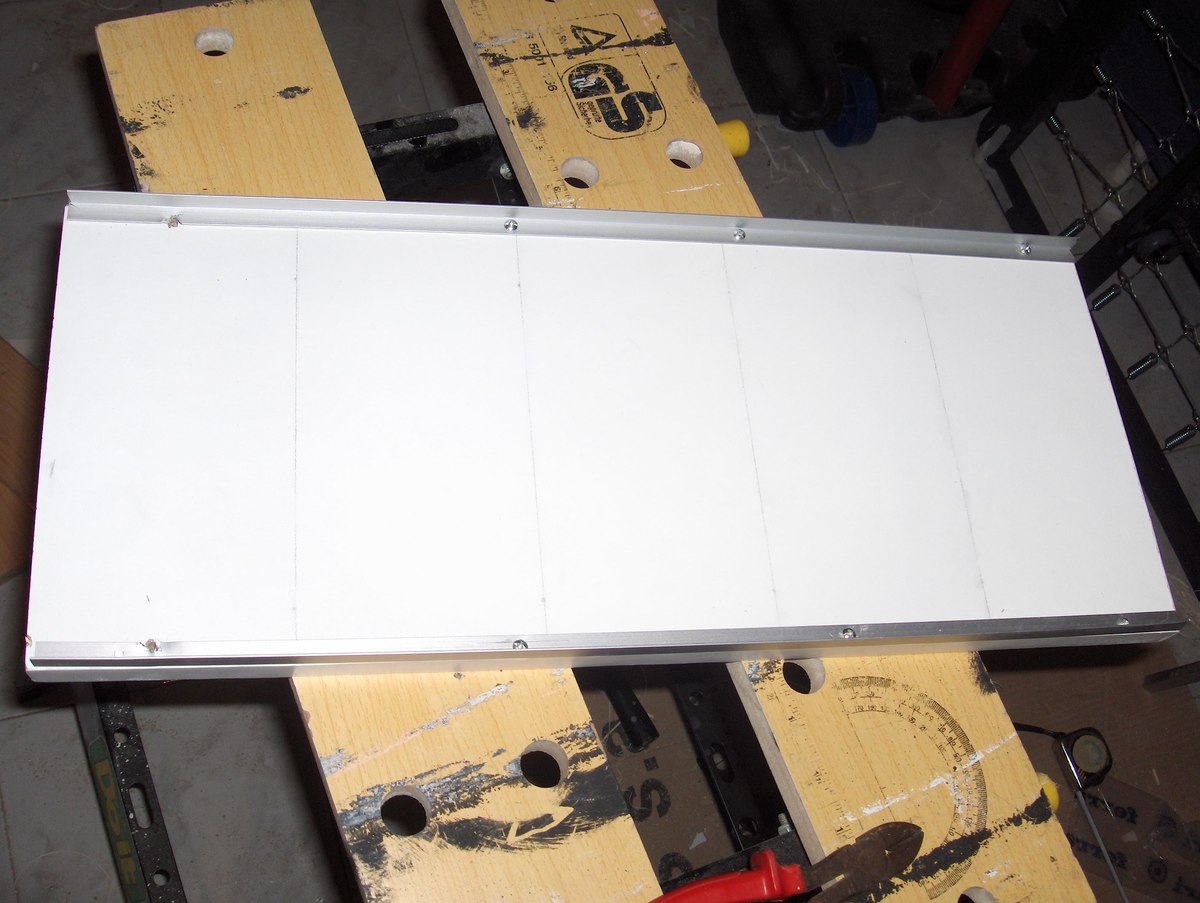
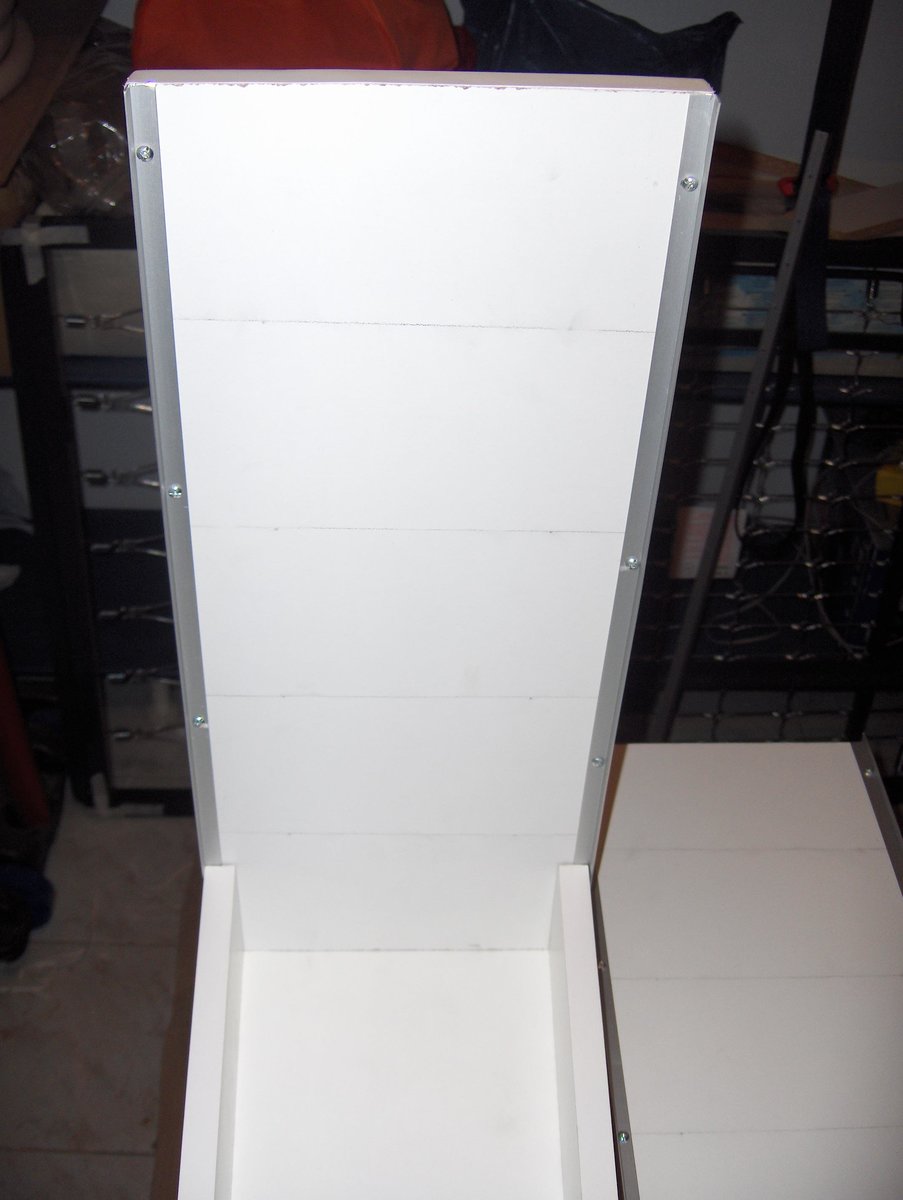
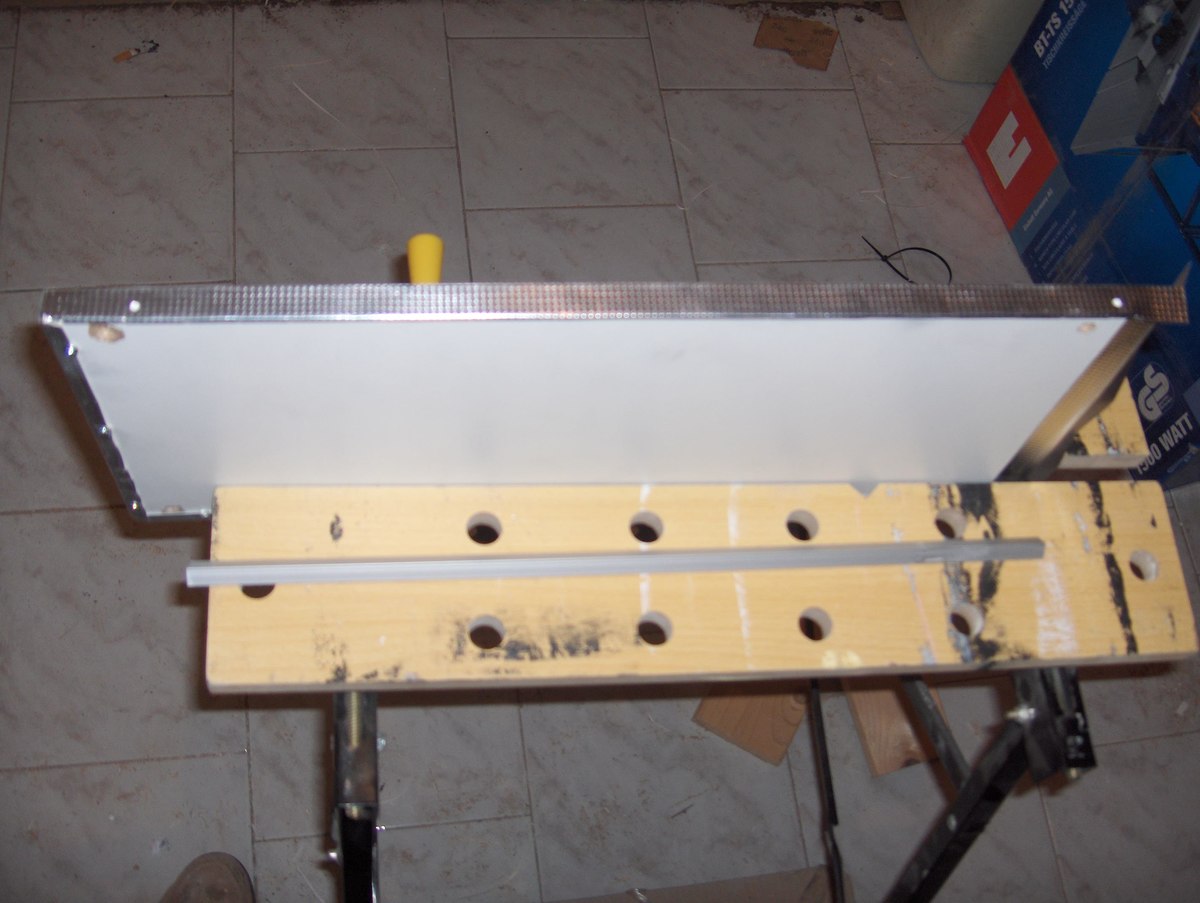
One of the kitchen accessories is
a bottle rack. There are many kinds of bottle
rack depending on the type of bottle (oil or whiskey) and the use of it
(sliding, stable under the sink, in a single cabinet roundtrips etc).
The demands of my own
construction is on bottle rack wagon (ie kitchen pulled out of context), will
find below and next to the sink that will use the entire height of the cabinet
and will have bottles of oil that can be dirty and will therefore be wash.Finally it is two storey with
the second shelf can be moved in height. The dimensions are length
height 50cm. The materials we use are white
melamine 16mm aluminum angle, aluminum tubes and aluminum sheets to dress
racks.
 Materials of Construction
Melamine White 16mm: 4pcs x
(25cm x 50cm)
Aluminum angles (15mmx15mm):
4pcs 4pcs x 50cm x 47cm and
Aluminum tubes 10mm: 2 pcs and
2 x 52cm x 54cm pieces
Aluminum Sheets: 2pcs x 32cm x 57cm
Cost of construction
Melamine
m
euros
Guide Ferrari50 cm 1pc x 9 = 9
euros
Aluminum angles
10
euros
Aluminium tube
11 euros
Aluminum Sheets 8 euros
Mounting rack 1
euros
Total: 45.75 euros
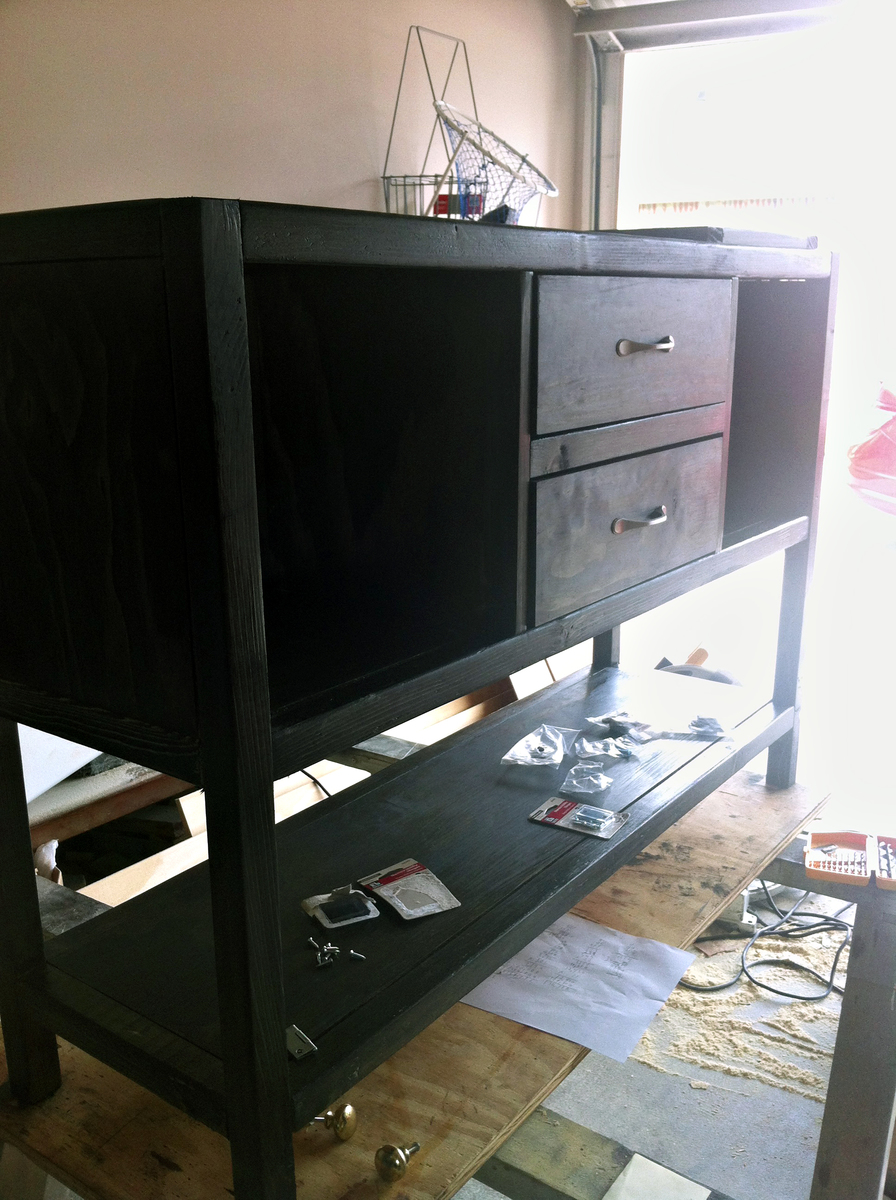
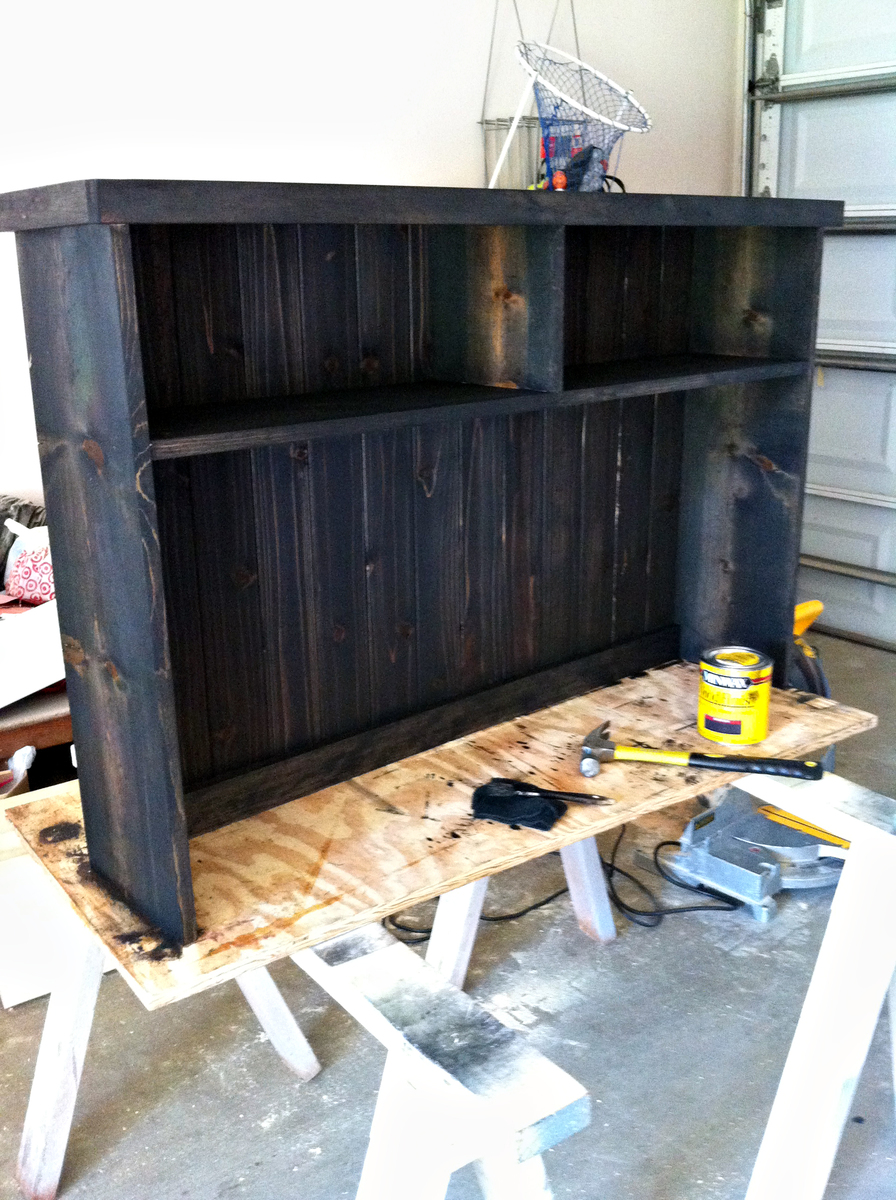
I built this console table for my son's room, and added a matching hutch for additional storage and display. It's a versatile piece of furniture. He uses it for games, books and collectibles, but it would be great for a tv and game system too. Thanks for the plans!
Wed, 01/15/2014 - 11:06
I love how this looks! Very nice job! Can you please tell me what the total height is once you added your hutch?
Wed, 01/15/2014 - 11:41
Thank you! I just checked and it measures at 63 inches. It's sitting on thick carpet so it may actually be more like 63.5 inches.
Wed, 01/15/2014 - 12:52
Great! Thank you so much! I think this will be the perfect size for what I need. Yours looks so nice that I'd like to copy it. Did you use any plans to build the hutch or did you just make it up? I just love how yours looks! Thank you so much for posting!
Wed, 01/15/2014 - 14:09
Moosmani, I made it up just based on a very simple hutch. Two days later, Ana posted plans for the School Desk Hutch. :/ A plan to follow would have been nice but honestly, the hutch was a very easy build. Good luck building yours and I look forward to seeing pics.
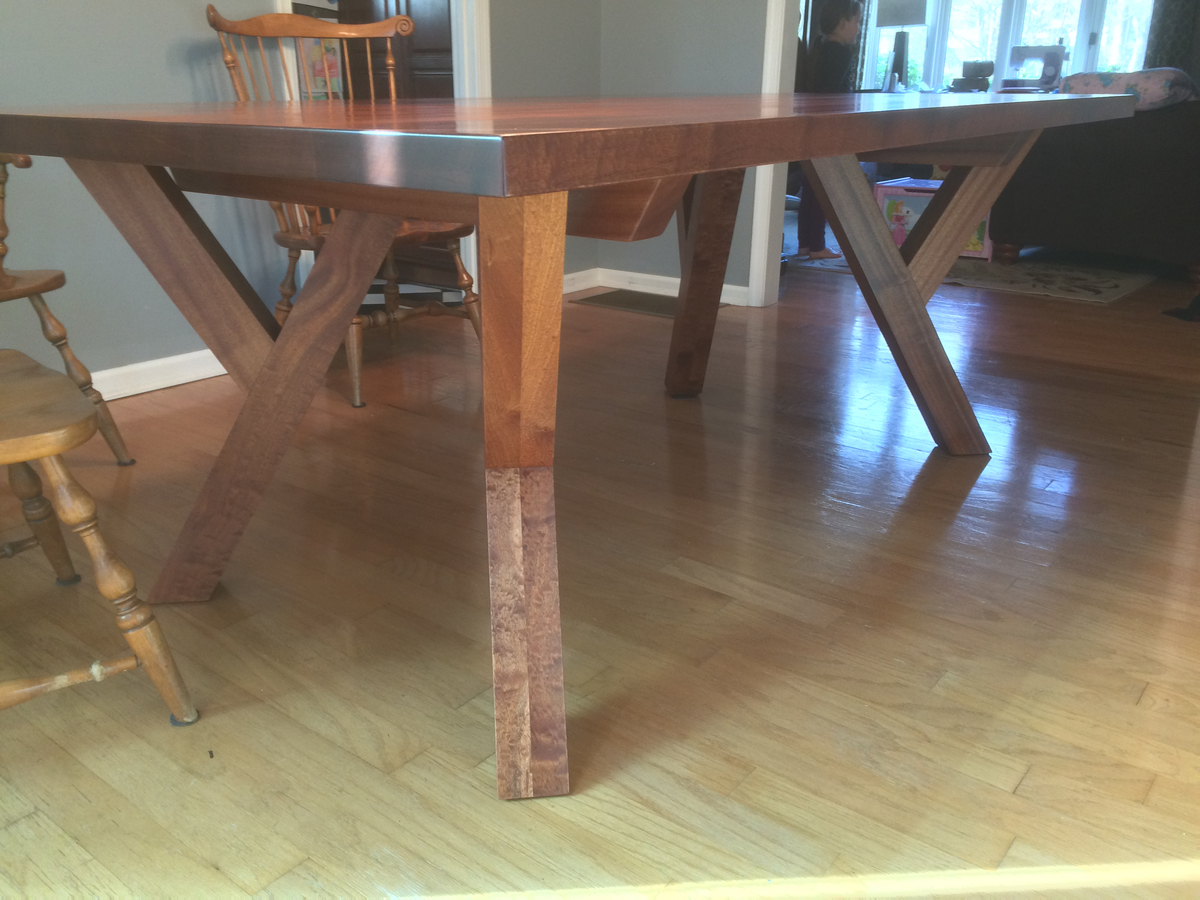
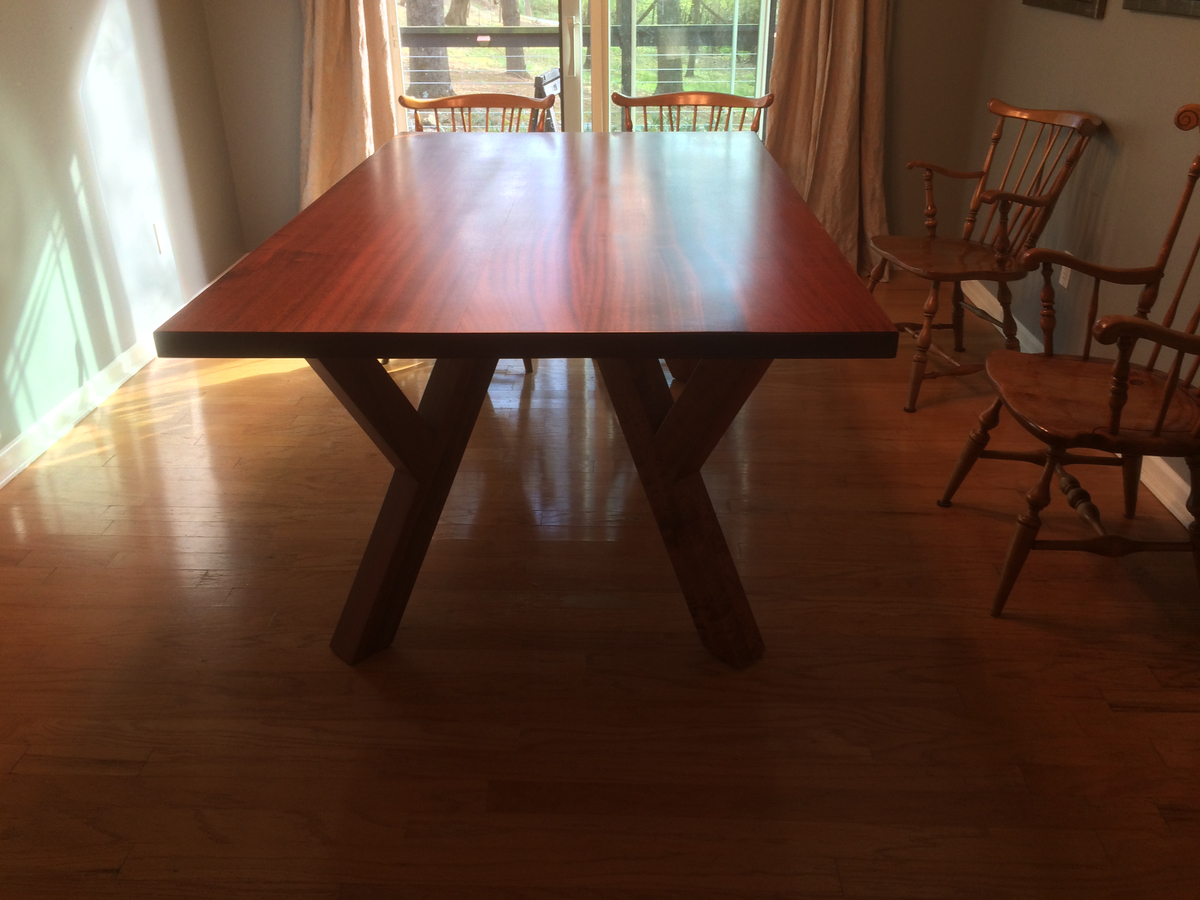
This is our first real furniture project. We wanted a large enough table to be able to sit 10 people comfortably around without the table legs getting in the way of the people on the corners. We are really happy with the way this turned out. Each leg was joined with a double floating mortise & tennon. The overall dimensions are 47" wide by 80" long by 31.5" tall.
Mon, 04/11/2016 - 12:48
Sure. I'd be happy to. I drew it up on Sketchup. Would that work or would you prefer just a pdf? Feel free to email me: [email protected]
Mon, 04/11/2016 - 12:51
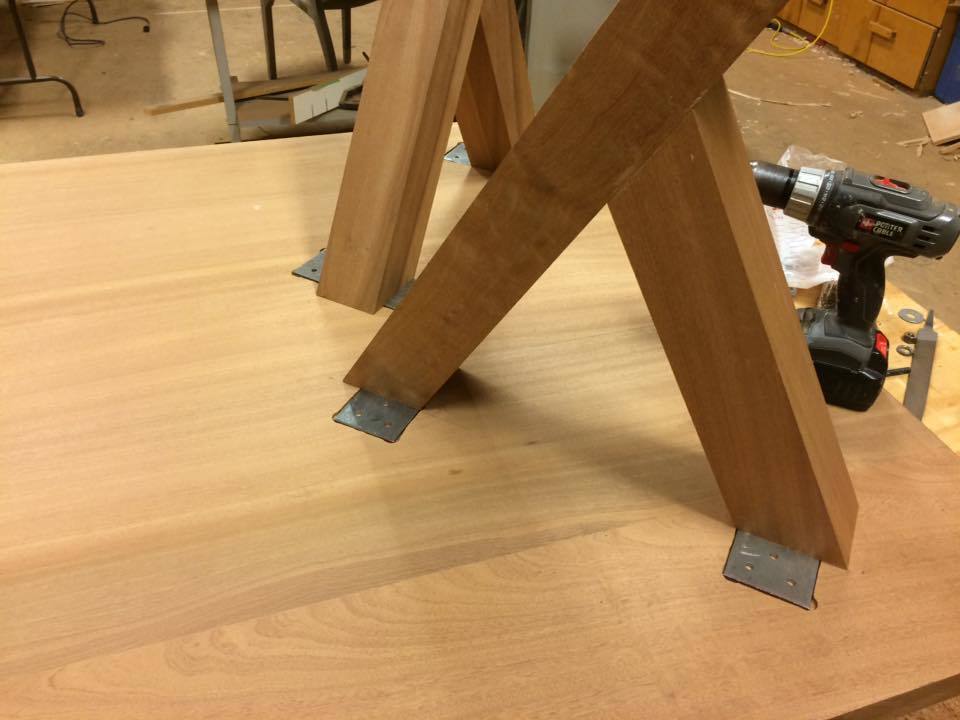
Table legs are mounted using steel plates routed flush with the bottom of the table.
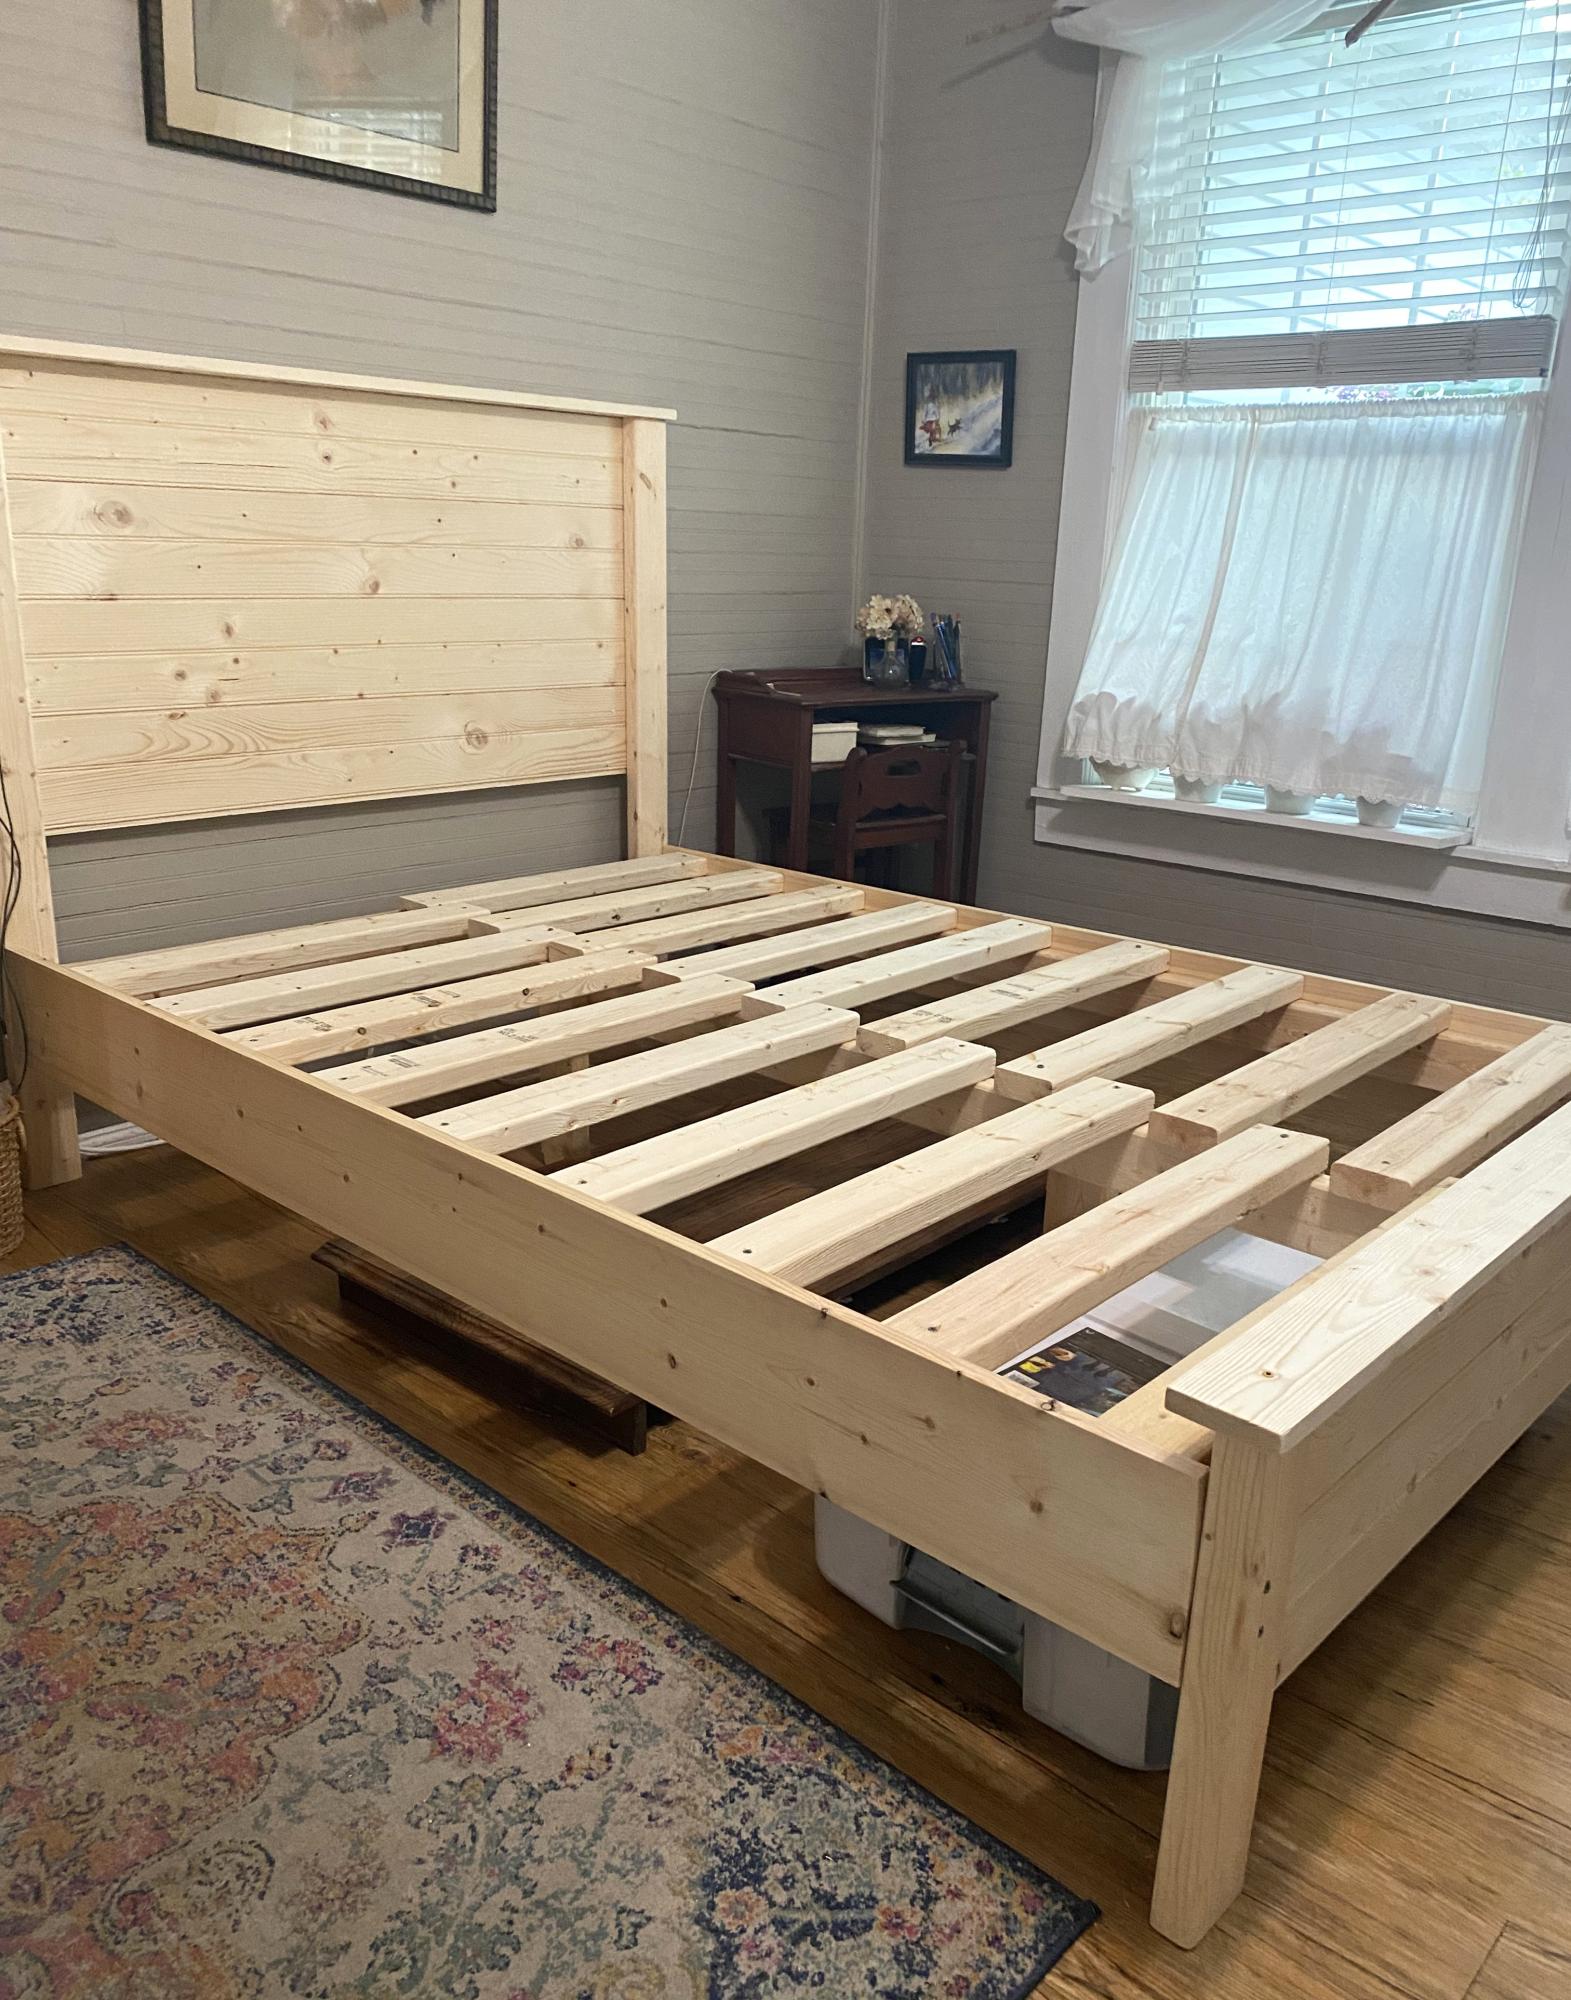
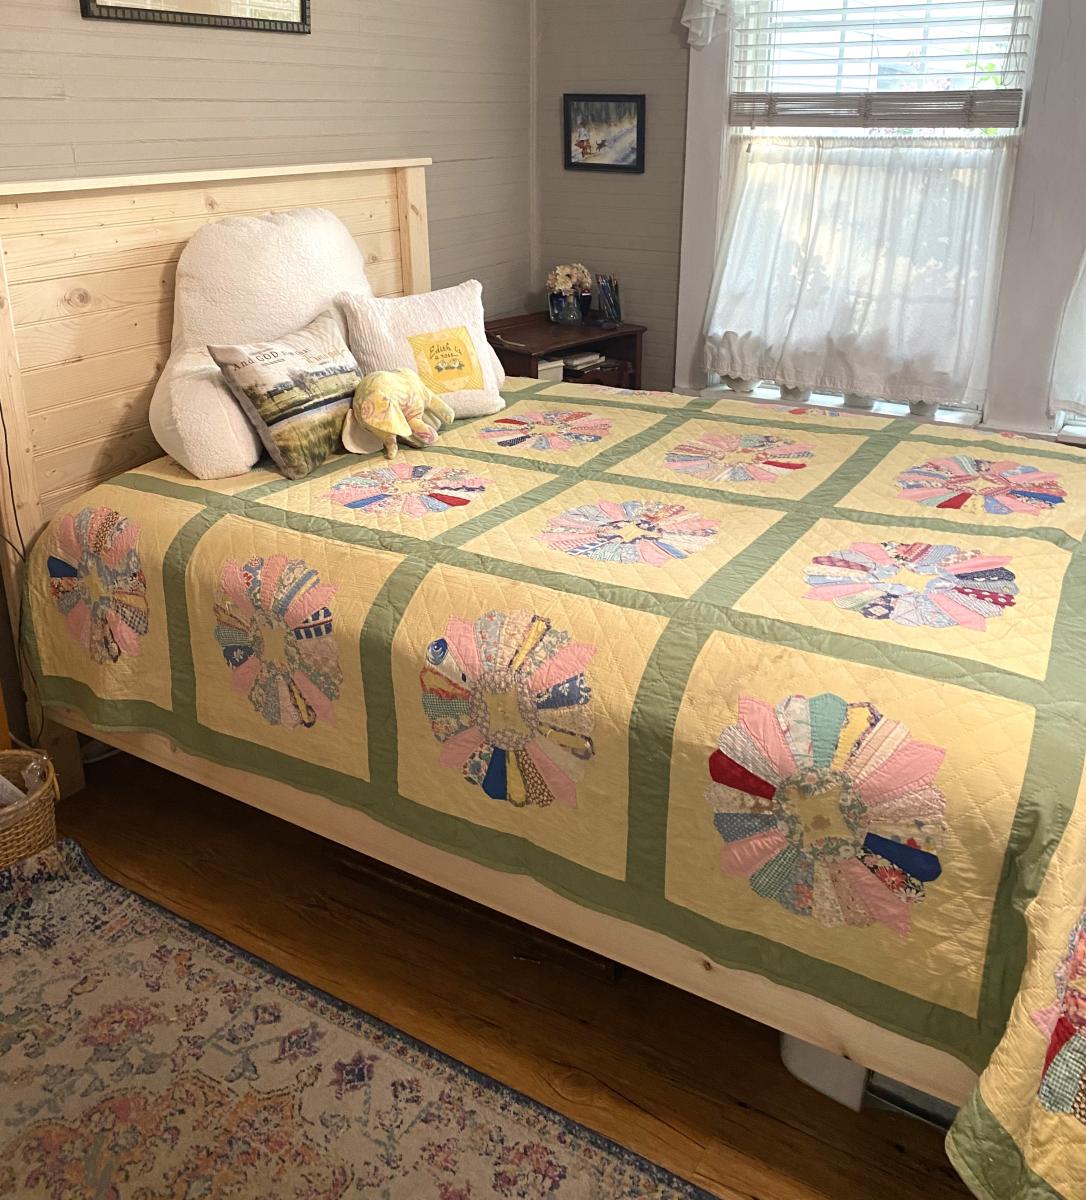
For a while I’ve been wanting to build a bed. I had two days free this week so I began. I actually completed it in about 6 hours. First time doing this size project. Plans were SO easy to follow. Thank you Ana
I LOVE IT! And am motivated to do more.
Edith, SC
Modified the salsa console by taking the drawer off and stealing some from Patrickhosey's (bragpost). I built it for my dining room. Measures 57-1/2" long X 17" depth X 39" tall.

Sun, 04/01/2012 - 16:52
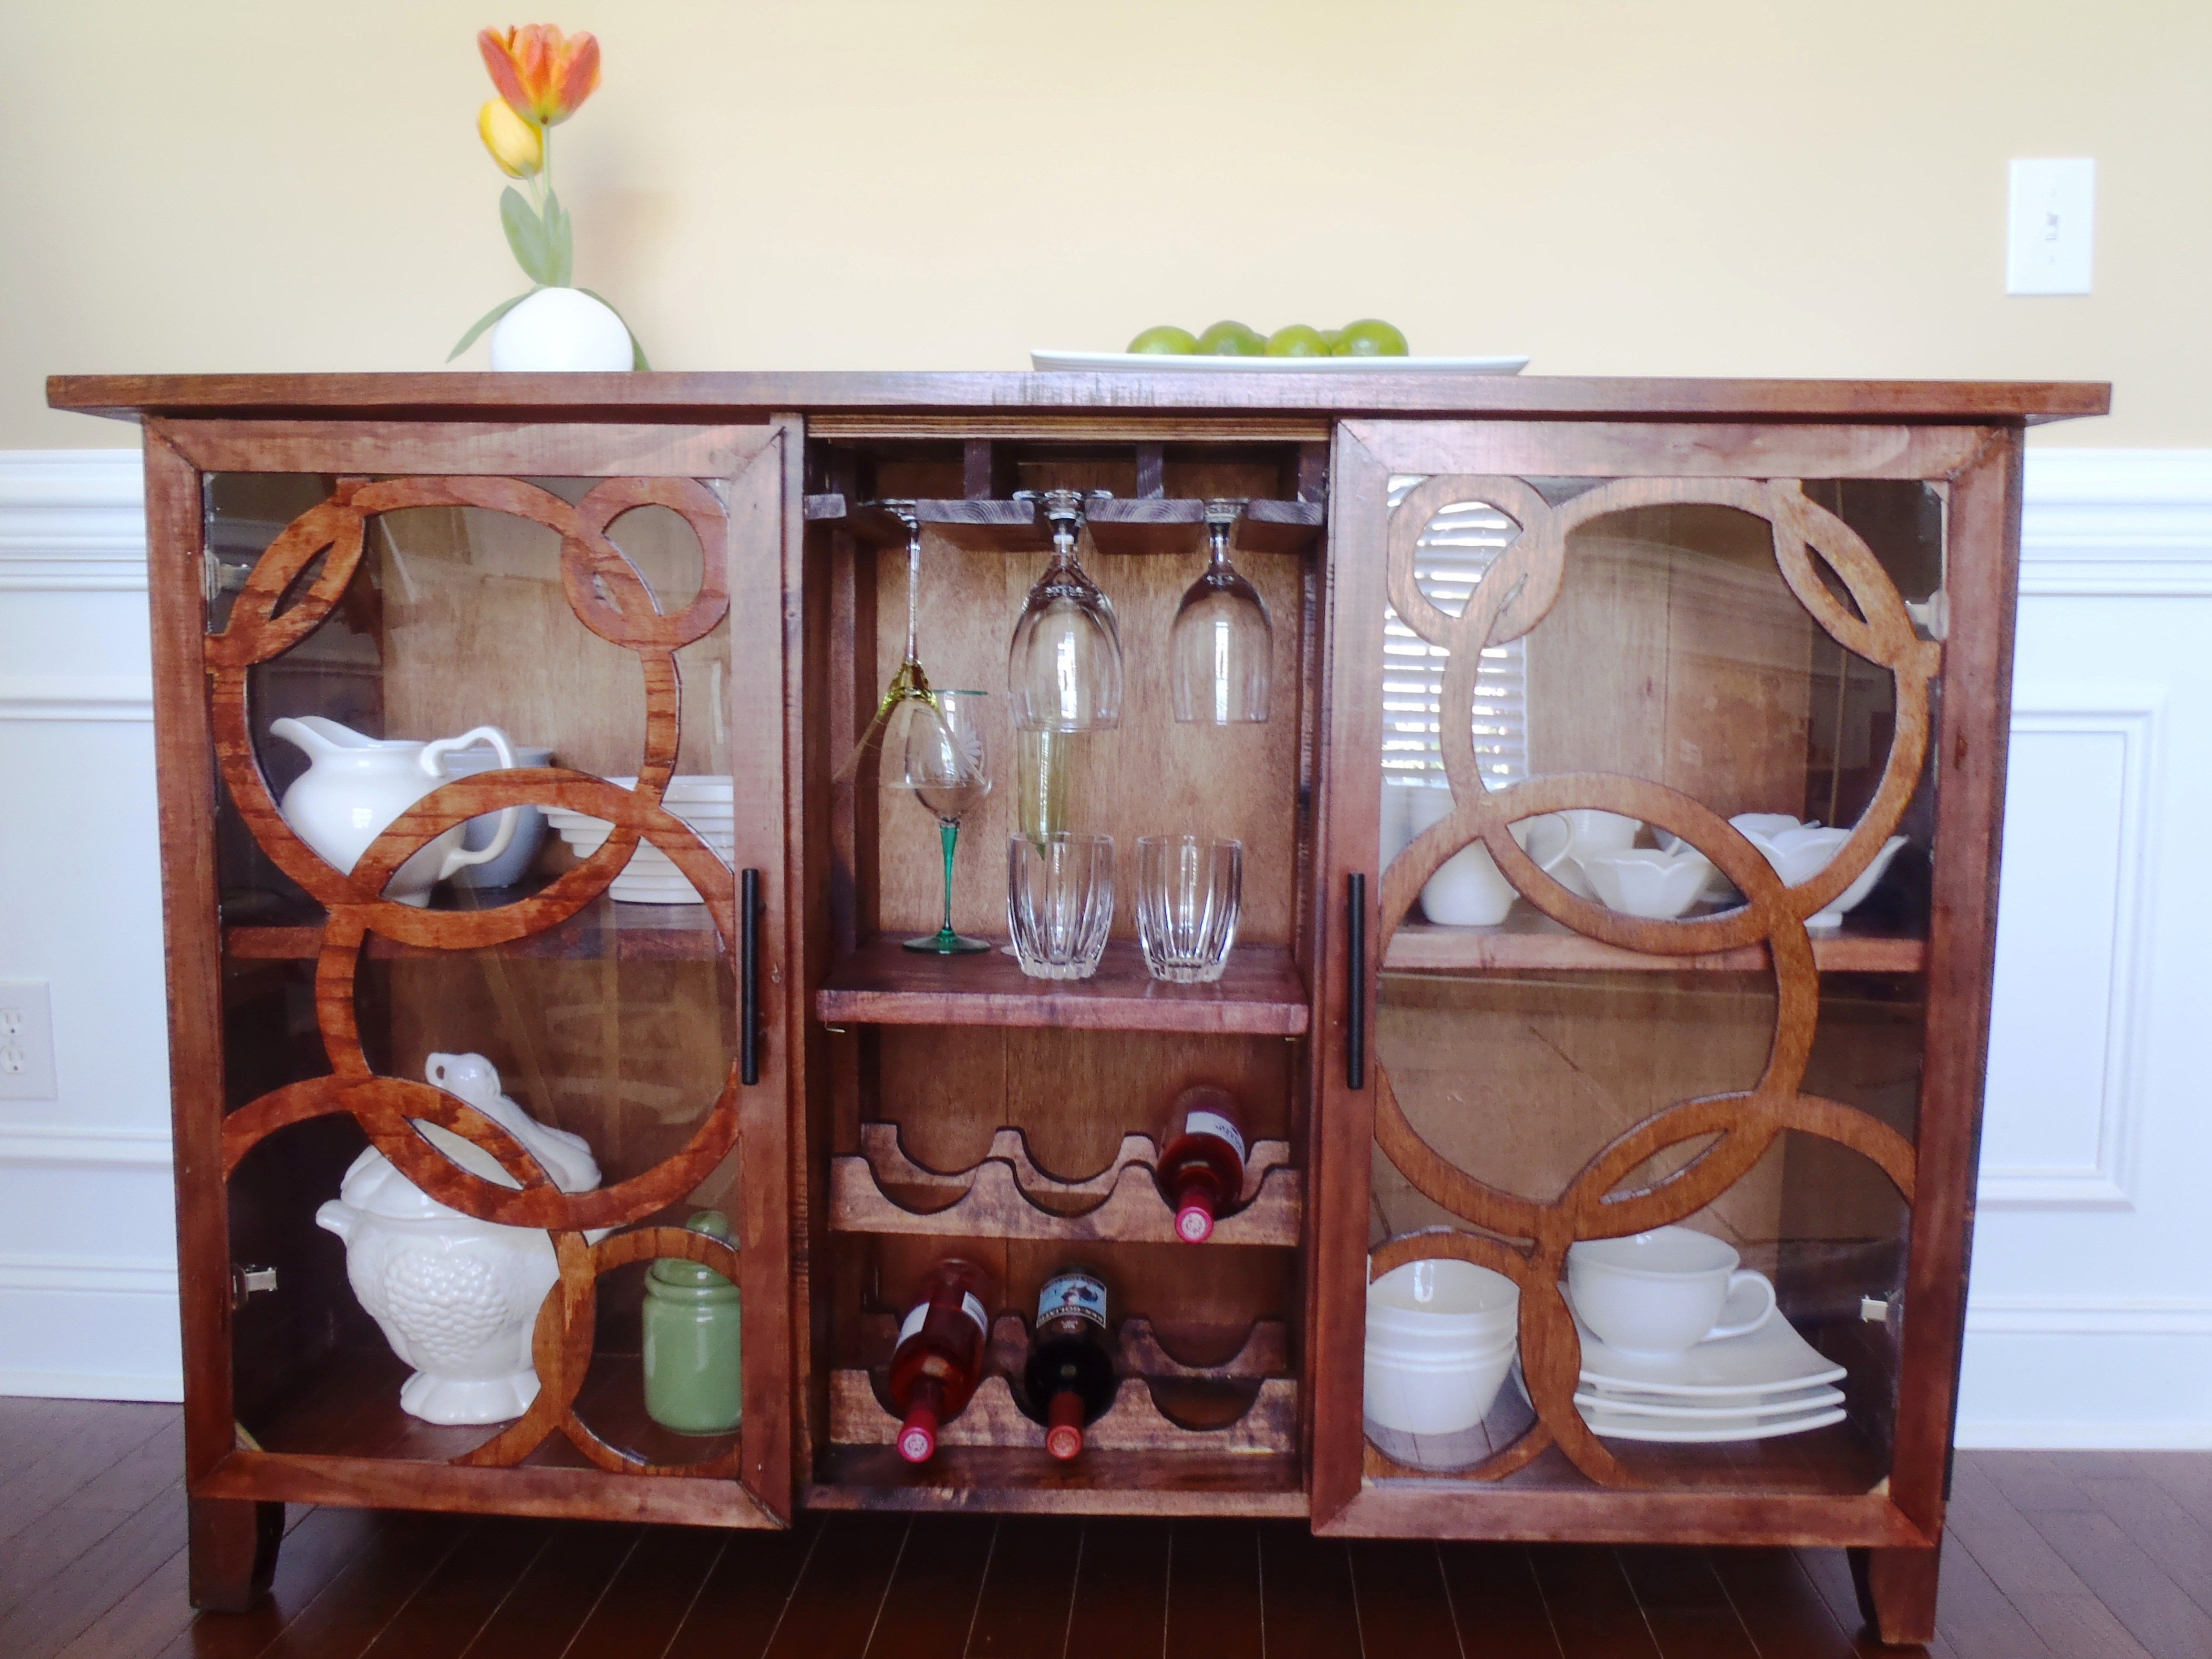
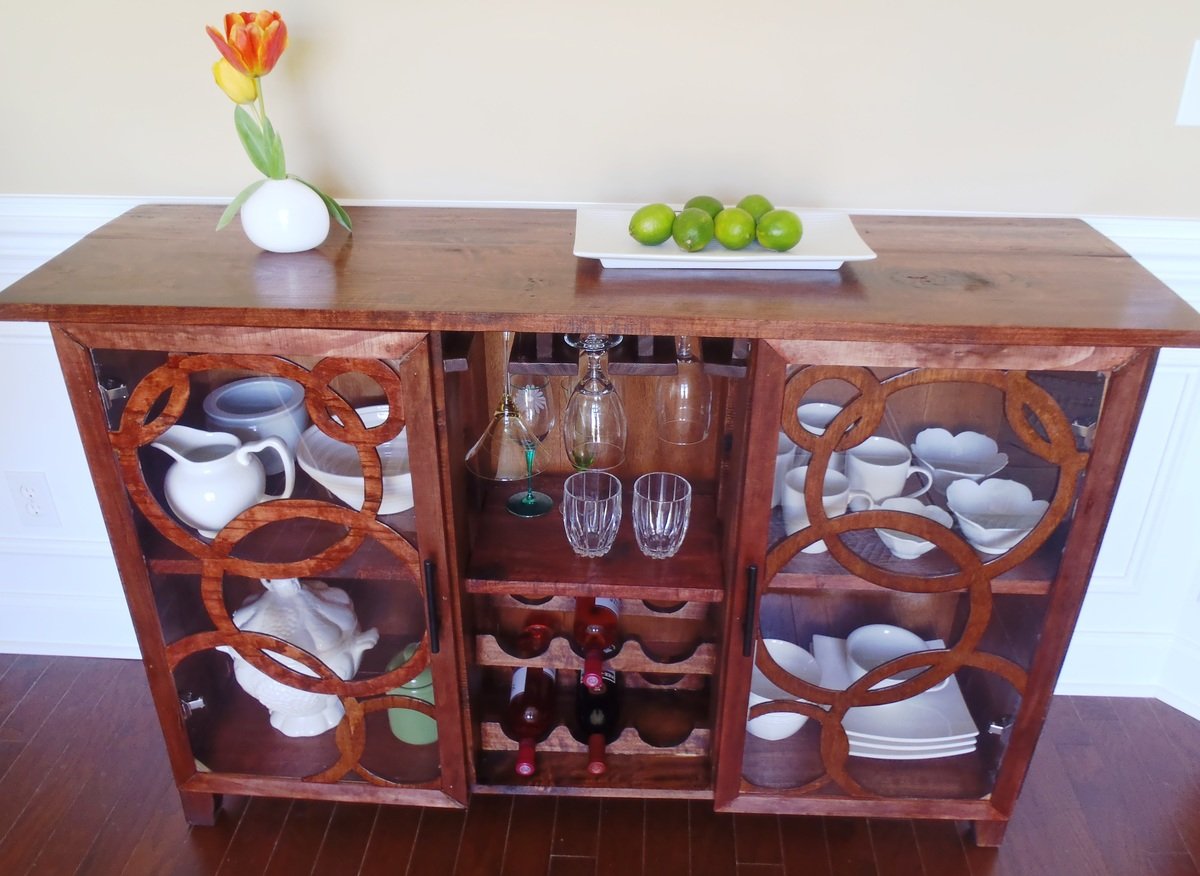
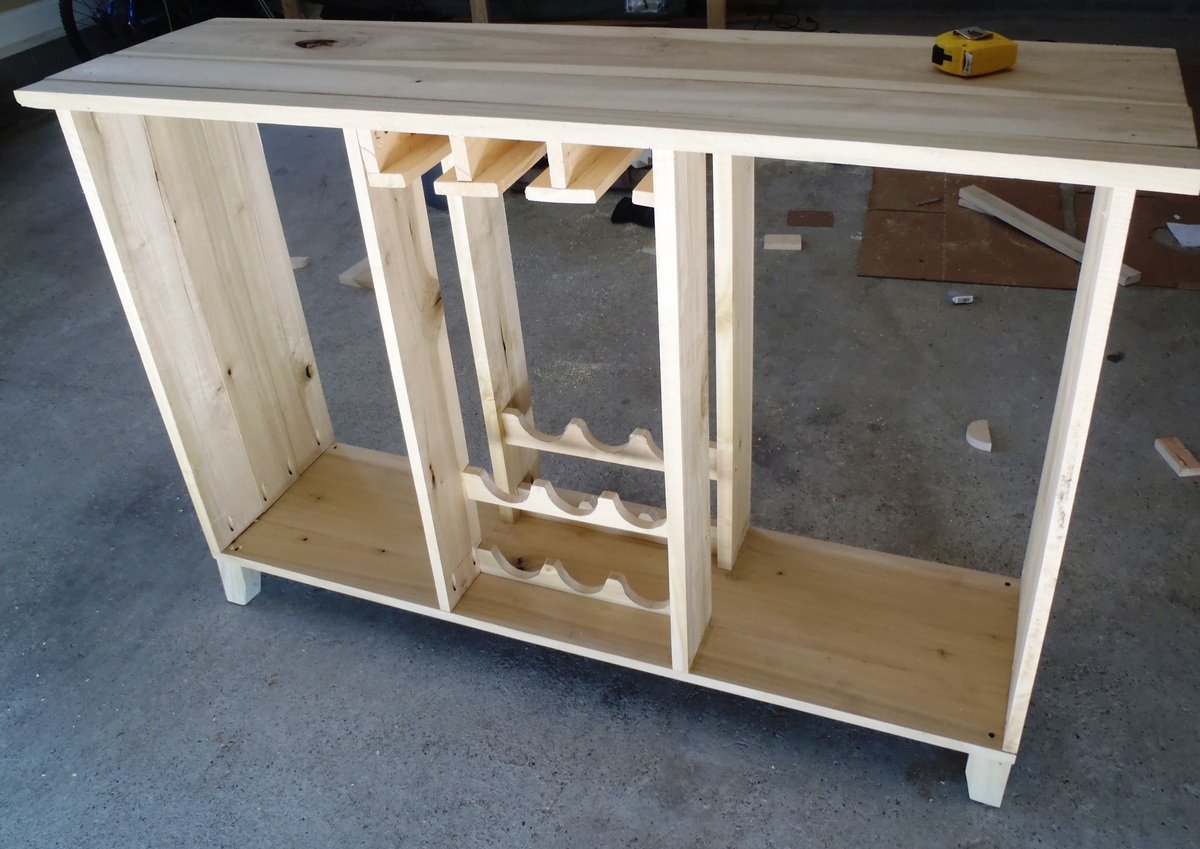
great job! do you have a template for your circle pattern?

In reply to great job! do you have a by margjack
Mon, 04/02/2012 - 04:47
I don't but it's easy to make, make your door frame first, trace the inside of frame on a plywood sheet and use compass to make all sizes of circles on that sheet. If you don't have compass that's big enough, just use string or thread( like I did on this project), pivot one end, attach the pencil on one end and swing to make circles :)
In reply to That is sooooo cool! by Pam the Goatherd
Mon, 04/30/2012 - 05:24
Love your avatar! so cute, I hope that's not mountain dew in there (just kidding:)
Thank you for the plan, this is the result.
Farmhouse / cottage style bed based on your plans.
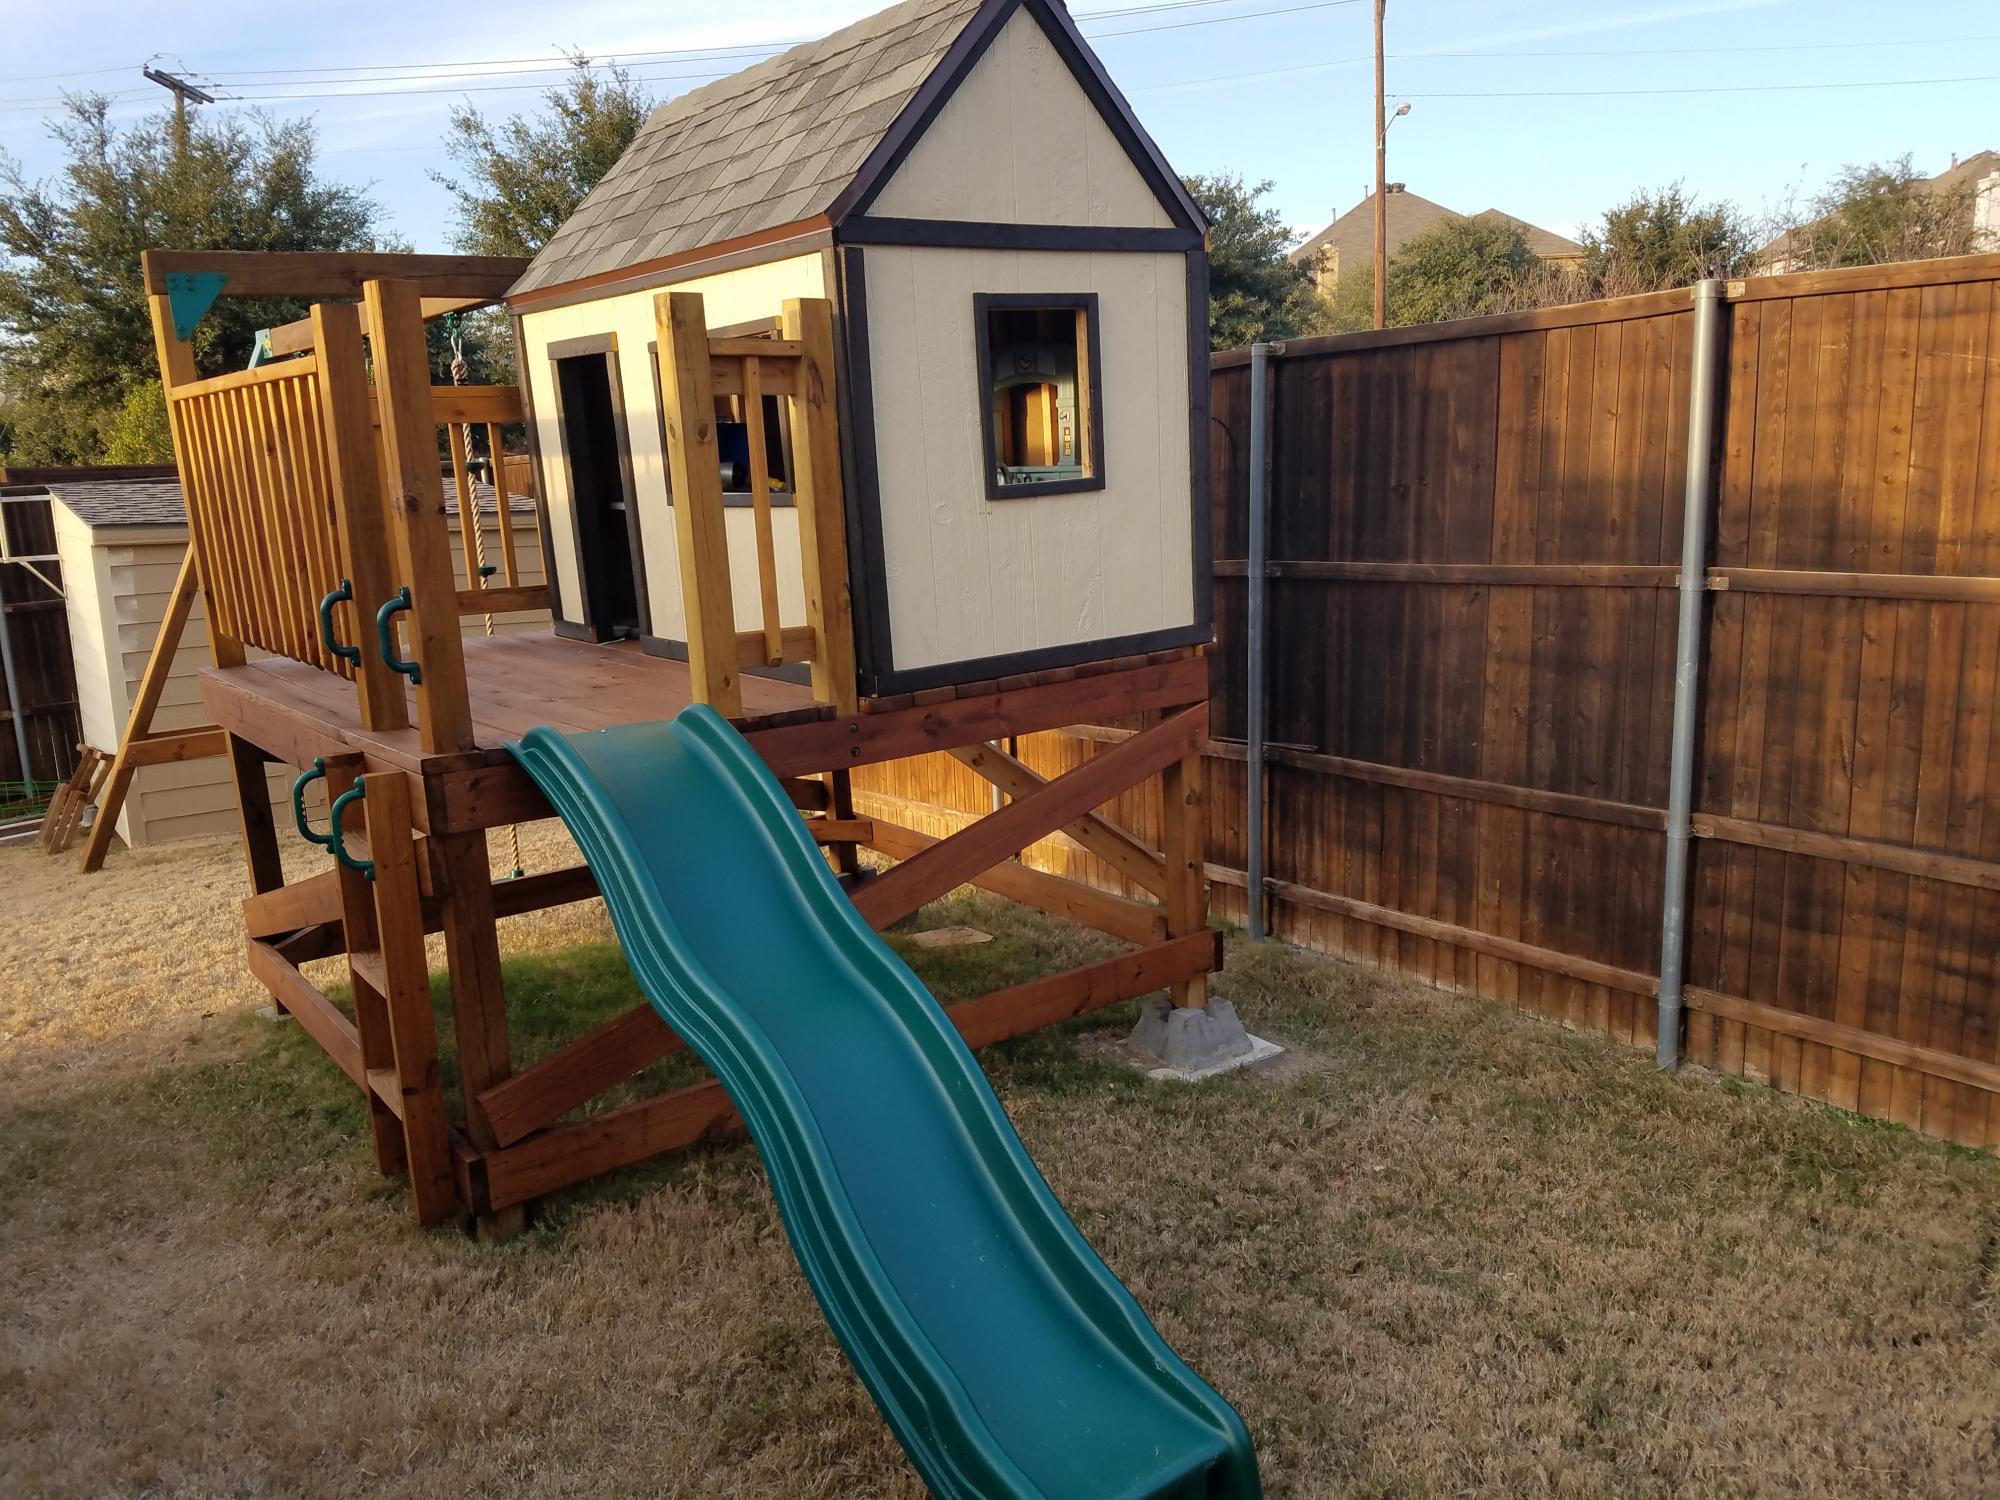
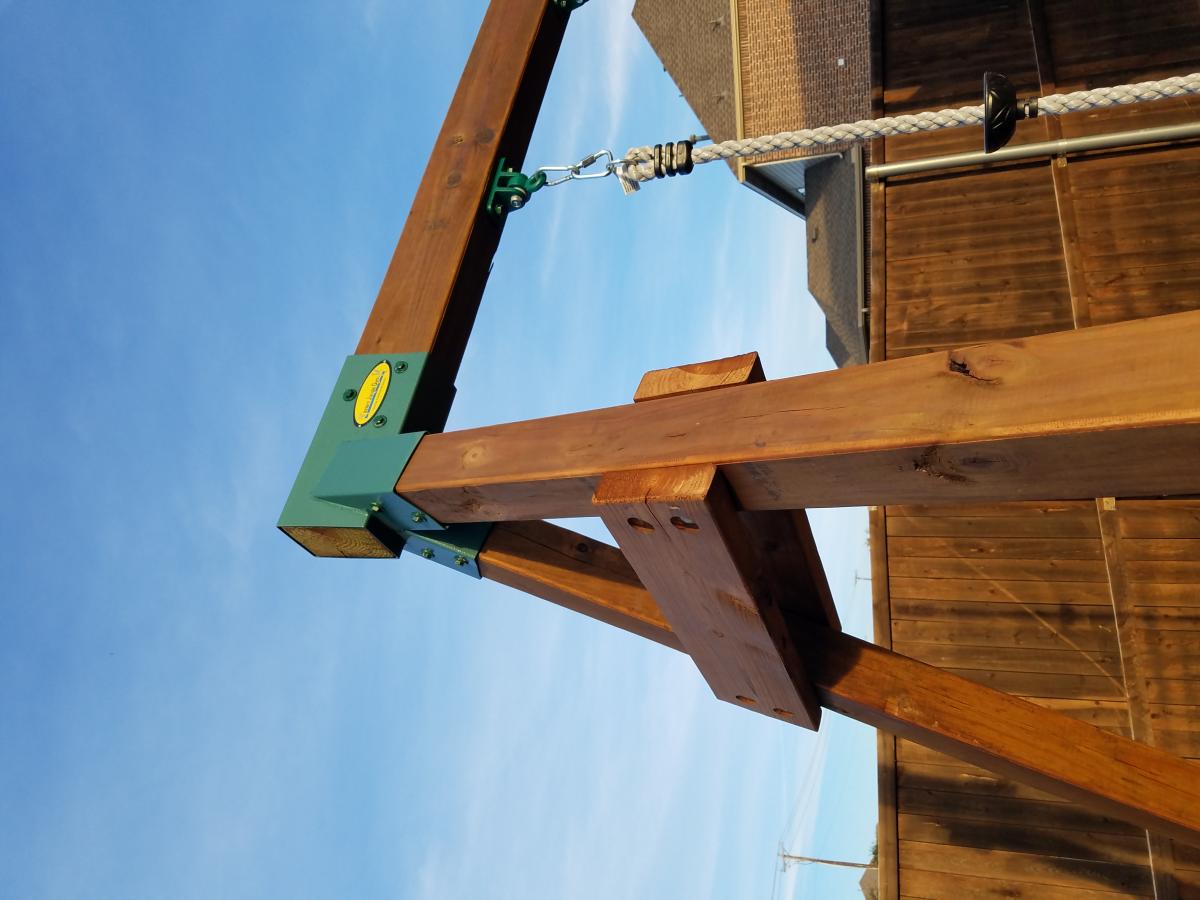
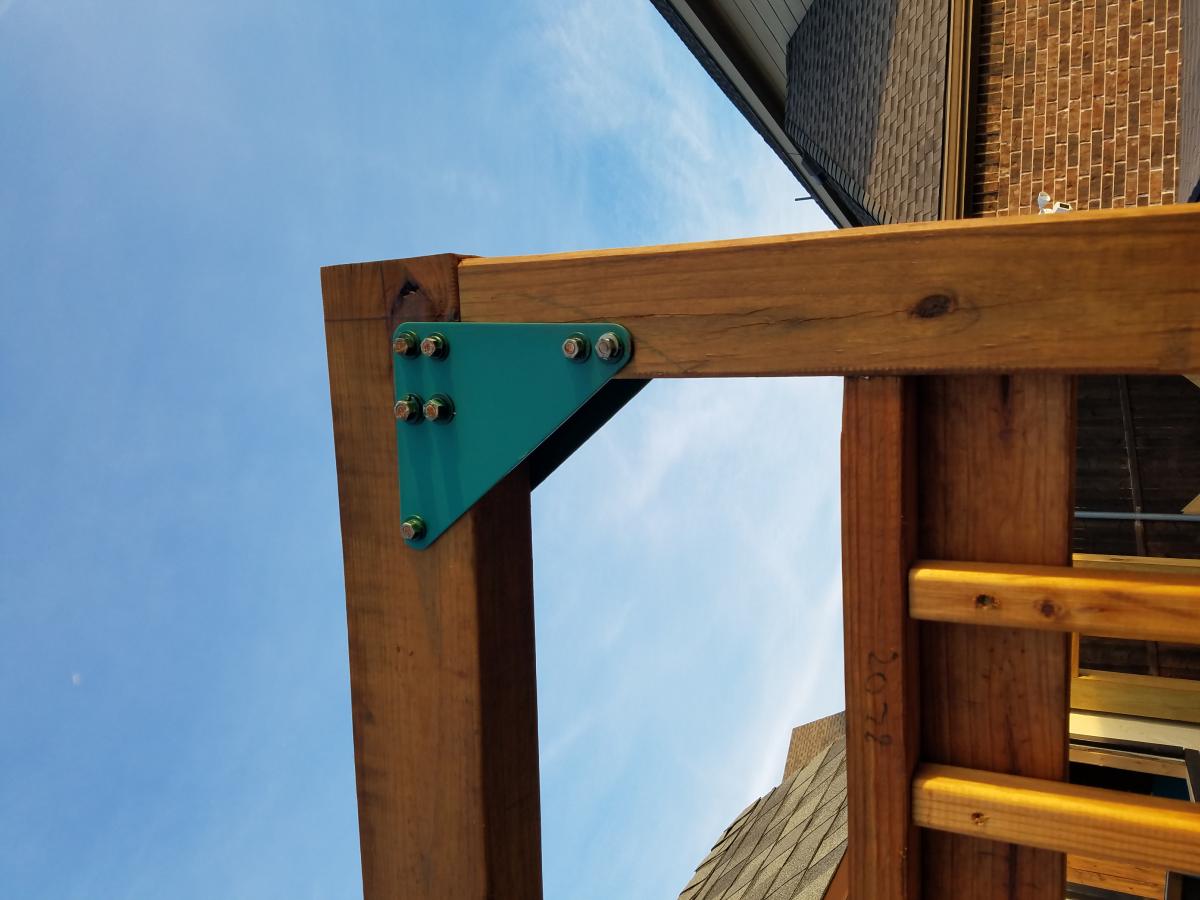
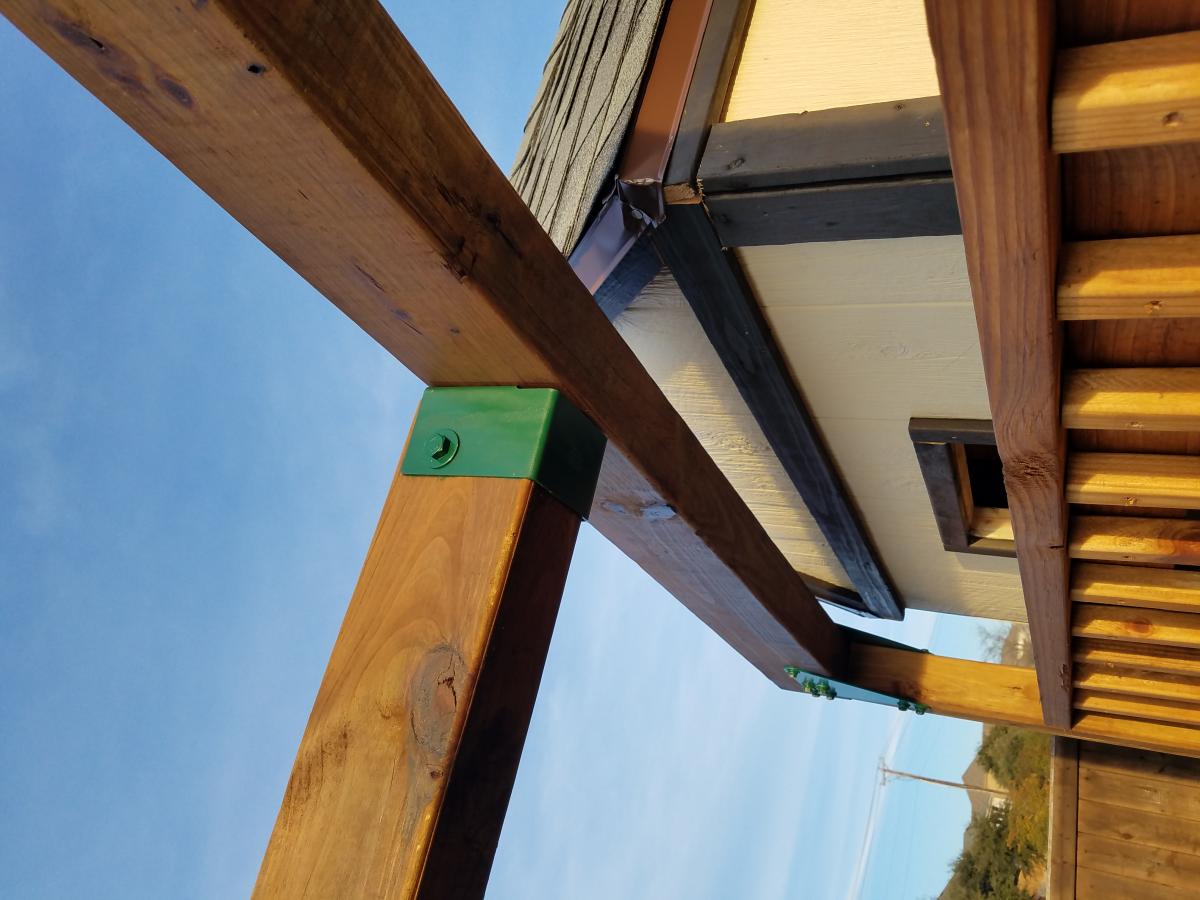
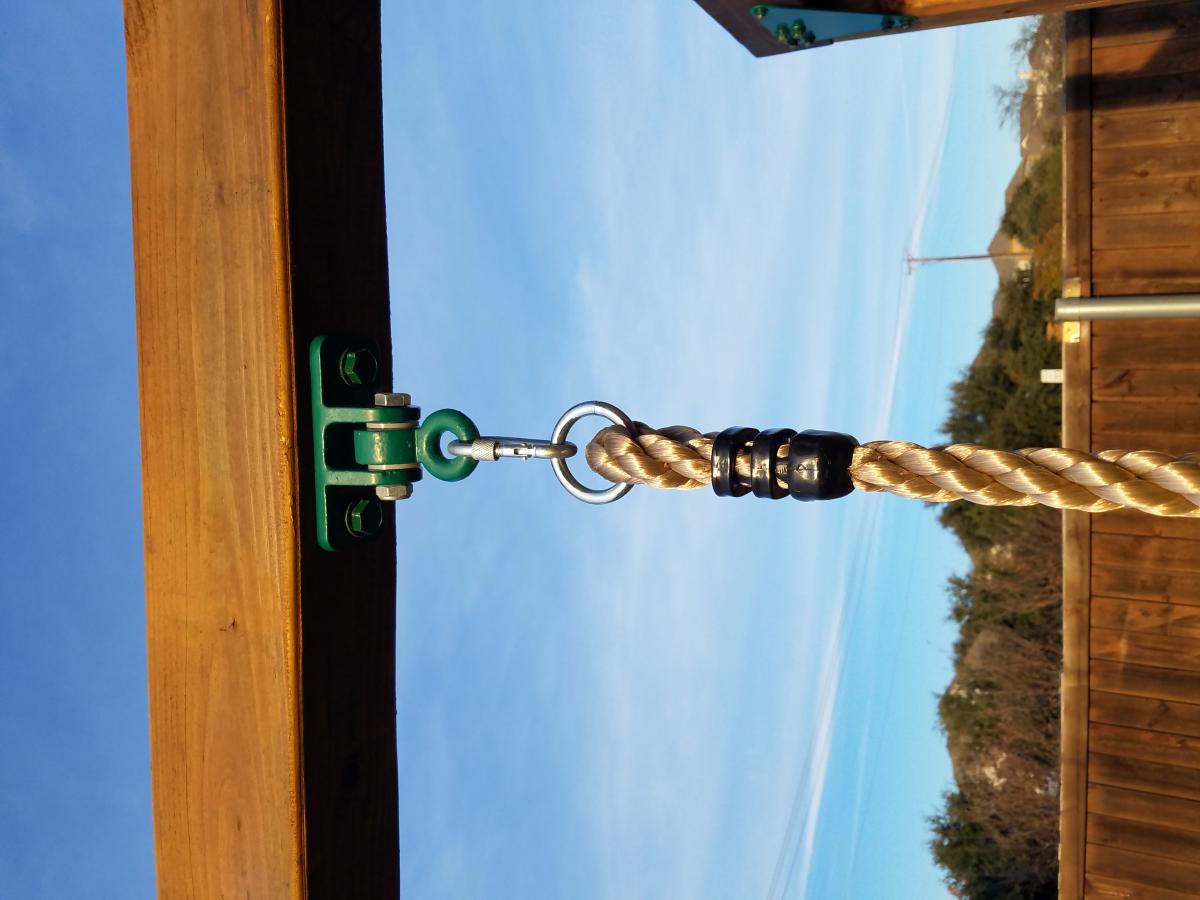
I deviated quite a bit from the plans. Mostly, I used readily available swingset hardware to beef up the design. This stuff can be found on big online sites or specialty sites.
I bought all of the swings, and ninja rope online along with the 4ft slide and safety handles.
Mon, 04/12/2021 - 15:48
did you put your pillars into concrete? It looks like you have a few different bases.

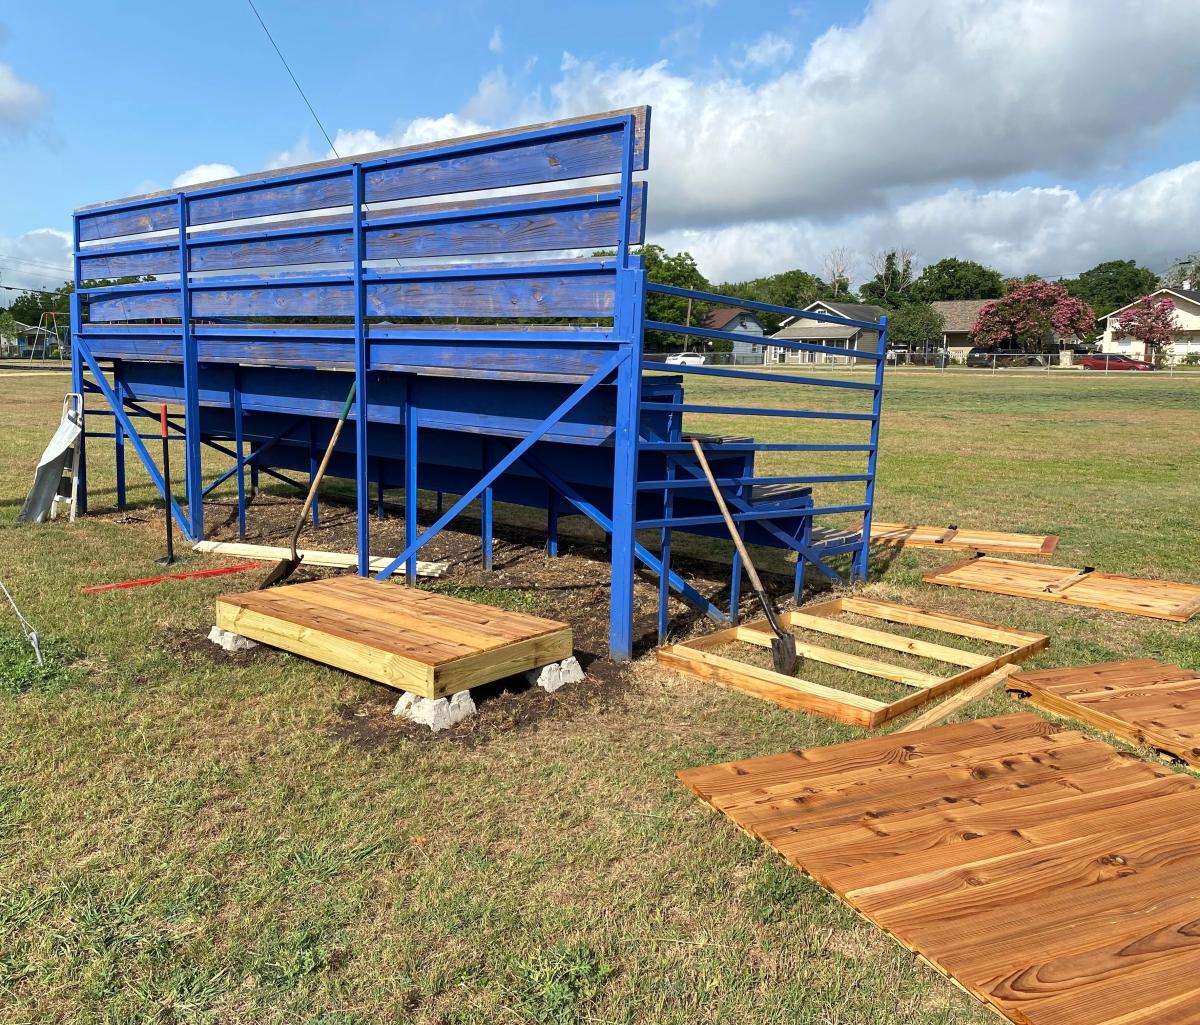
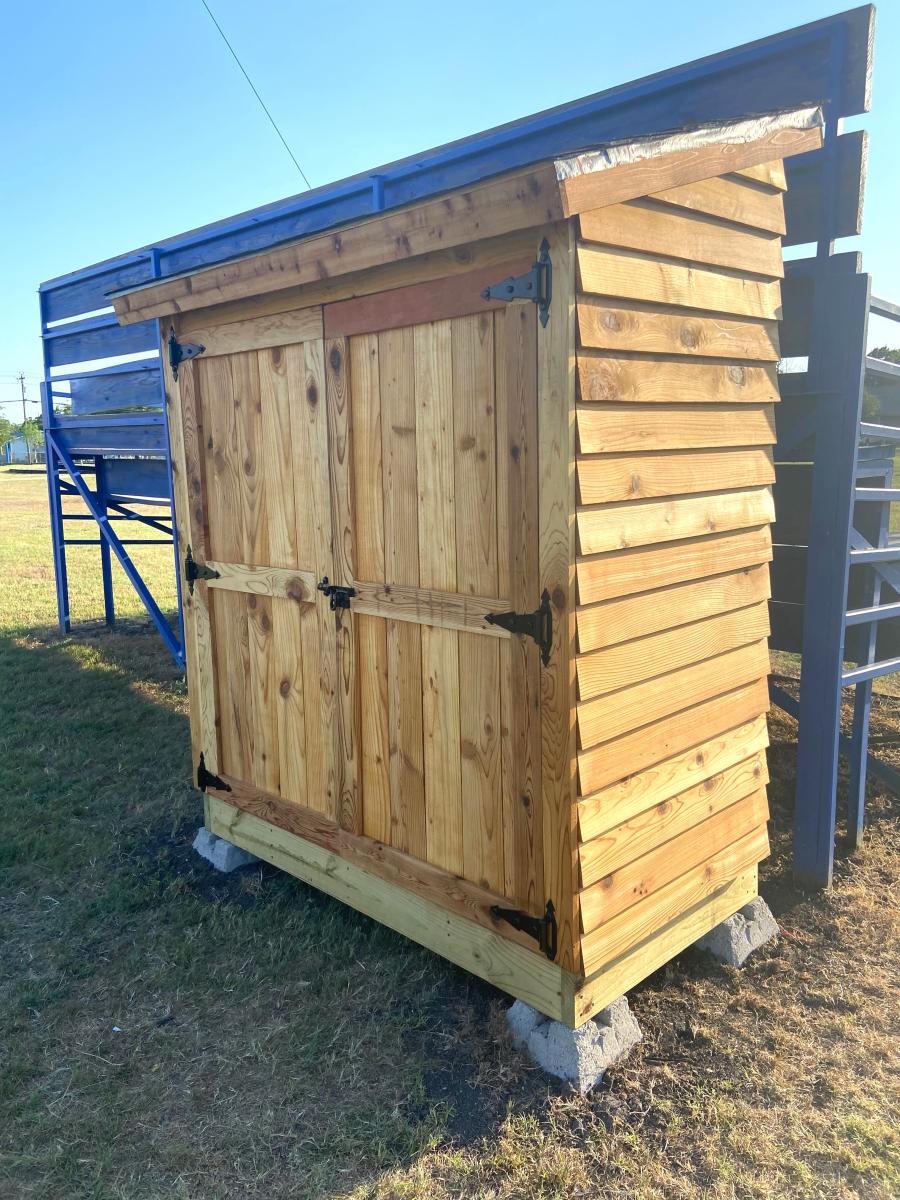
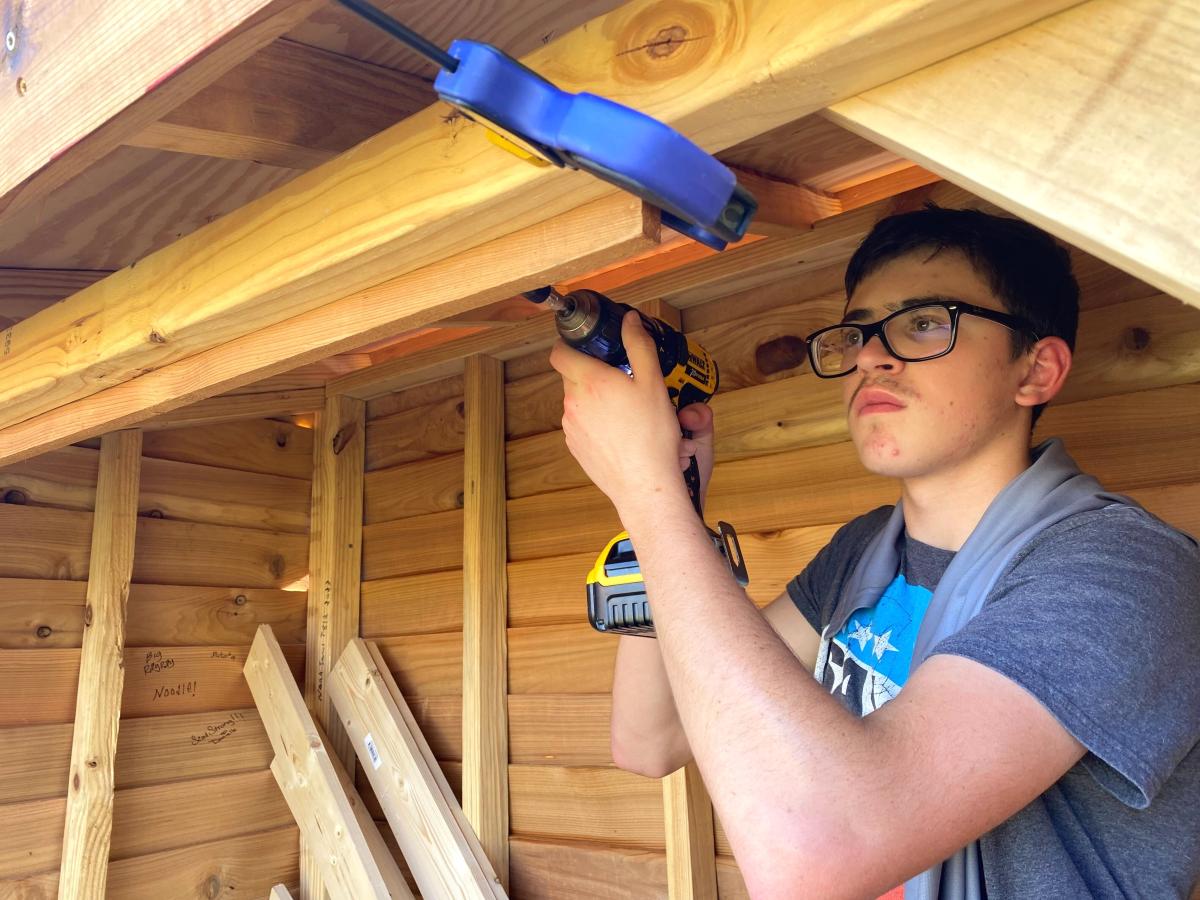
My son used your plans to help students at his old elementary school for his Eagle Scout Project. He was able to adjust the plans to meet the school's needs. Local Austin Texas news did a report on it. Thank you for the inspiration!
https://www.fox7austin.com/news/boy-scout-builds-shed-stocks-it-with-re…
Robert Saul

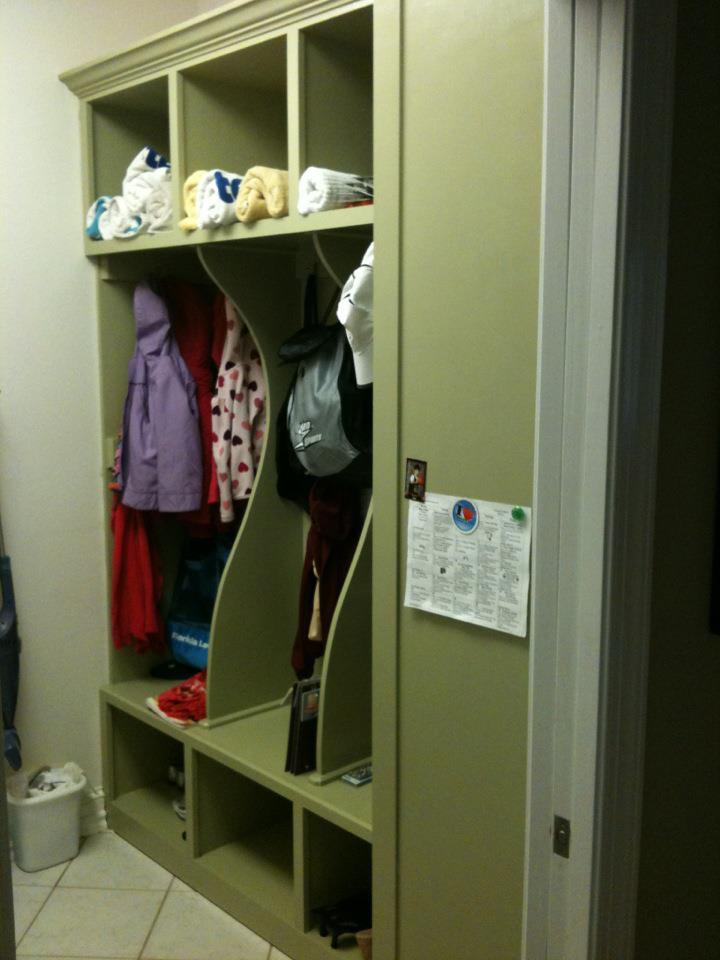
This replaced a huge formica countertop in our laundry room. The counter collected unfolded clothes on the top, and piles of shoes underneath. Also, we had a 4 hook shelf from Target holding all 3 of our kids bags and backpacks. My husband was against this, because "where would we put all the laundry?" Well, this is the solution and we both love it!
I measured this out and drew diagrams and then finally decided this was too big of a project to do for the first time. I did hire someone, but he said the measurements were right on.....he had never built something like this before. The outside of the door is painted with magnetic primer and holds magnets. So much more functional that the counter.
I know I didn't build this myself. I think I could have done it, if I could have a week to do this without interruption, but that was impossible and I needed this YESTERDAY (the 4 hook wall shelf fell out of the wall). But I wanted to share in case anyone else is having a space dilemma! We LOVE it!!!!


Thu, 04/05/2012 - 12:10
What a great idea! Very well planned out! I would love to build something like this in our mudroom.
Tue, 04/10/2012 - 16:33
Just what we need! Thank you! And I love the door covering the baskets and the magnetic paint - I hadn't thought of those! Thanks so much for sharing! It gives met the confidence to try it myself!
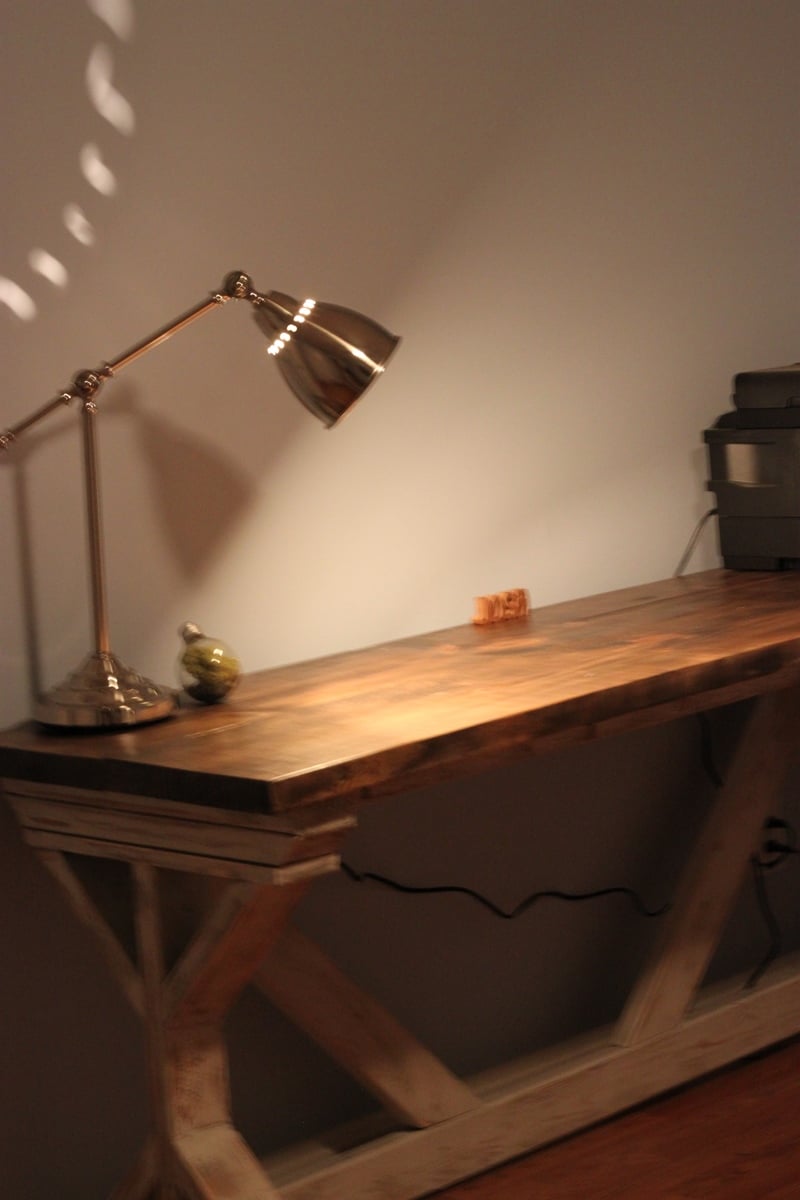
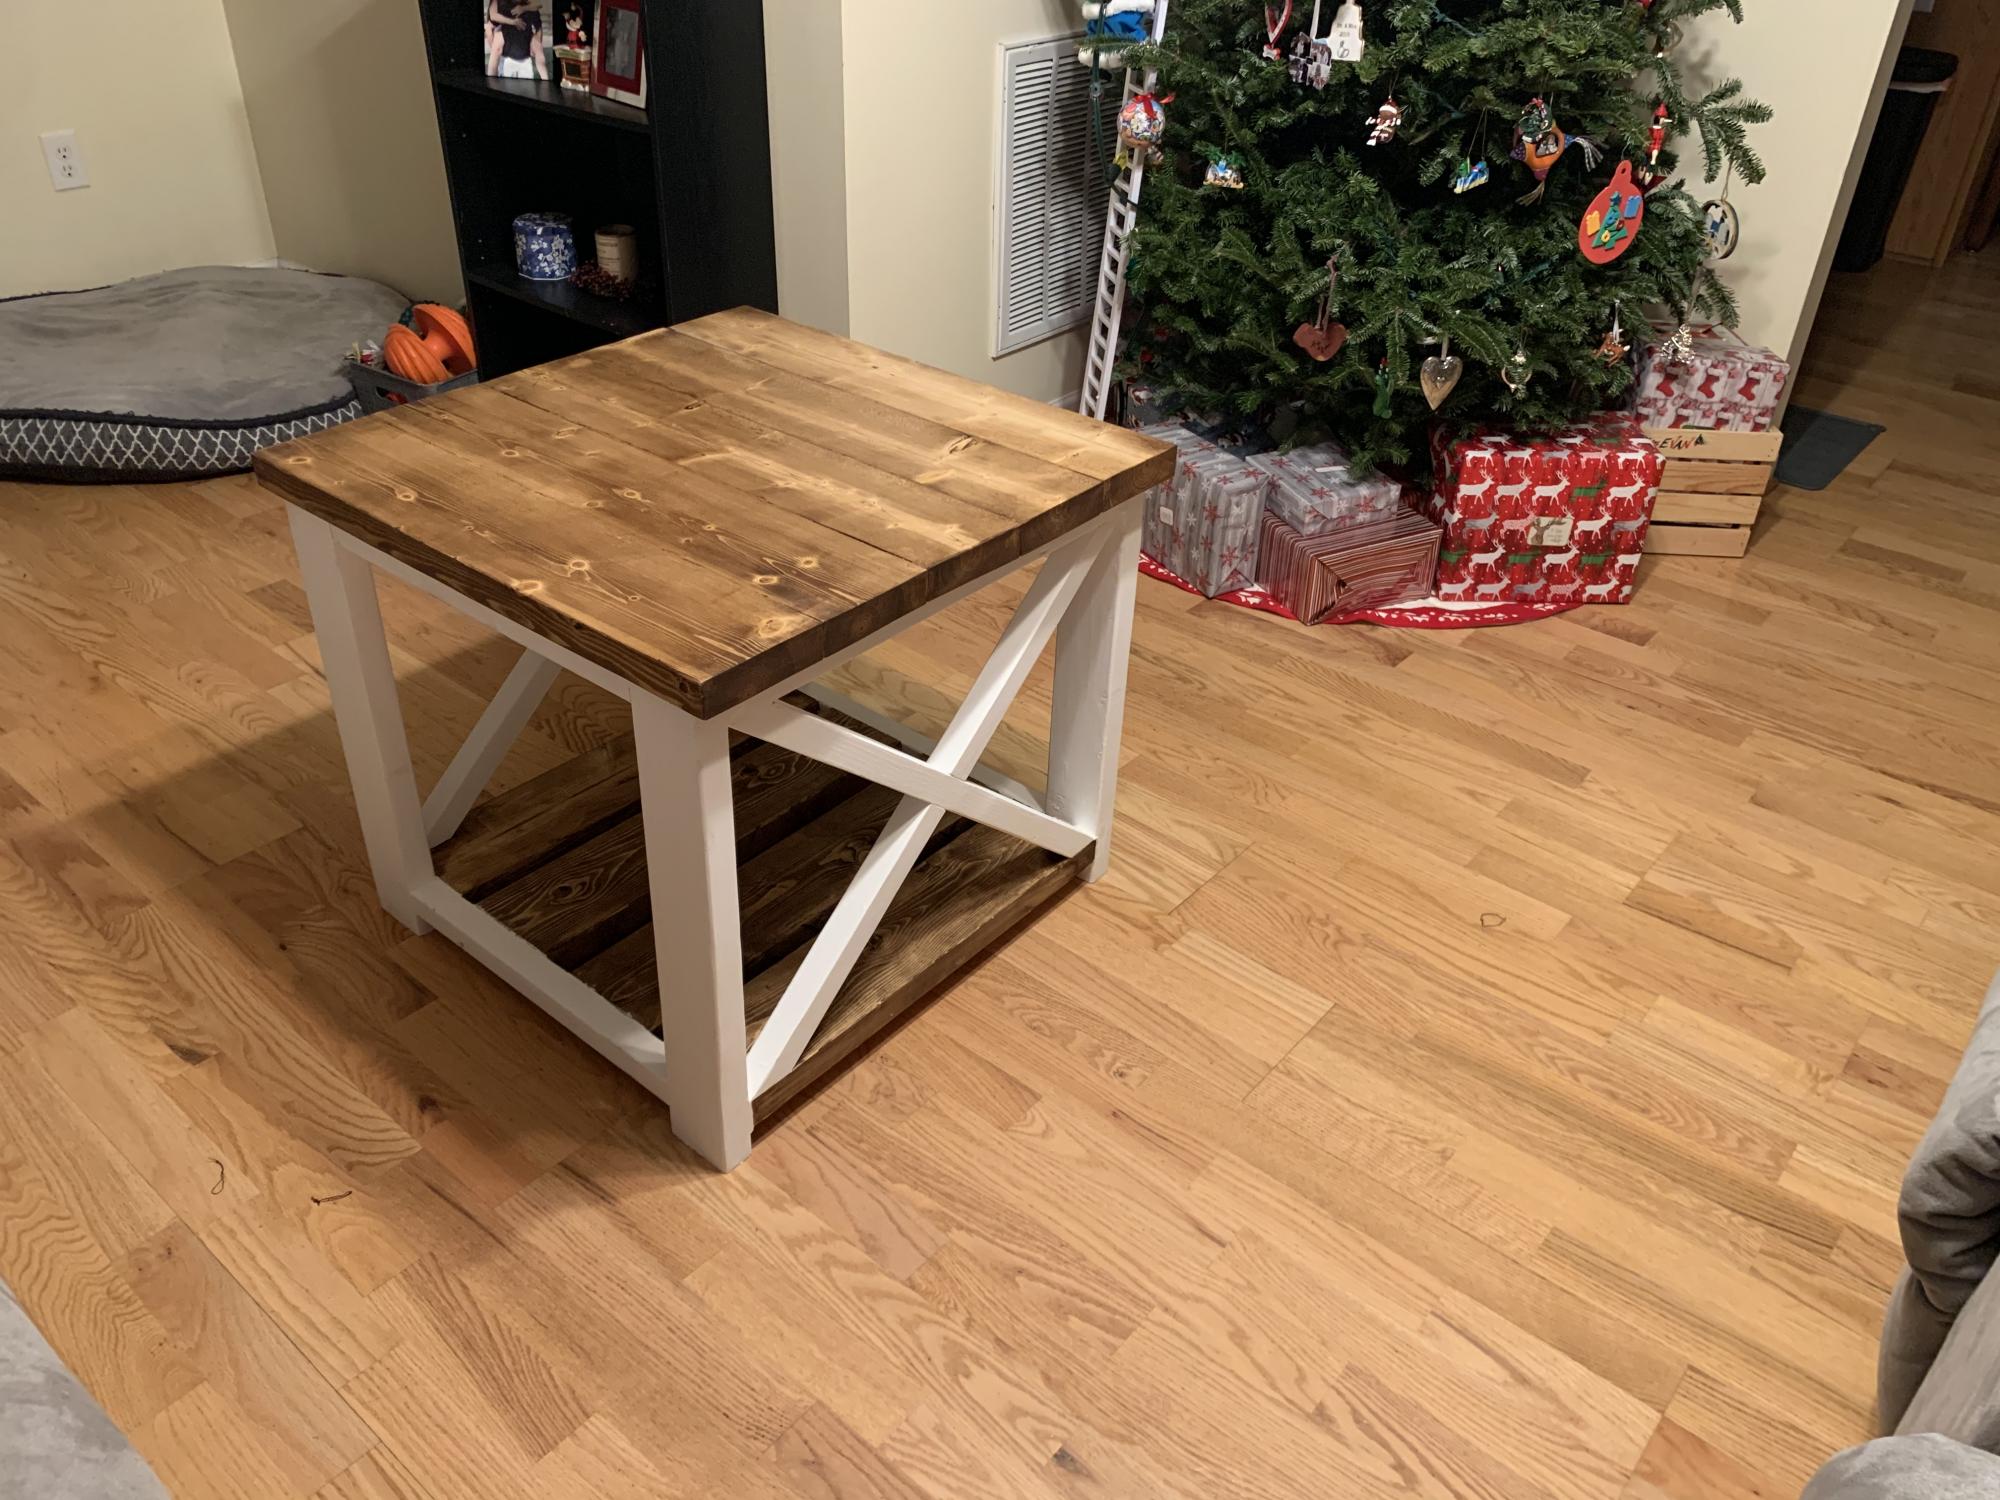
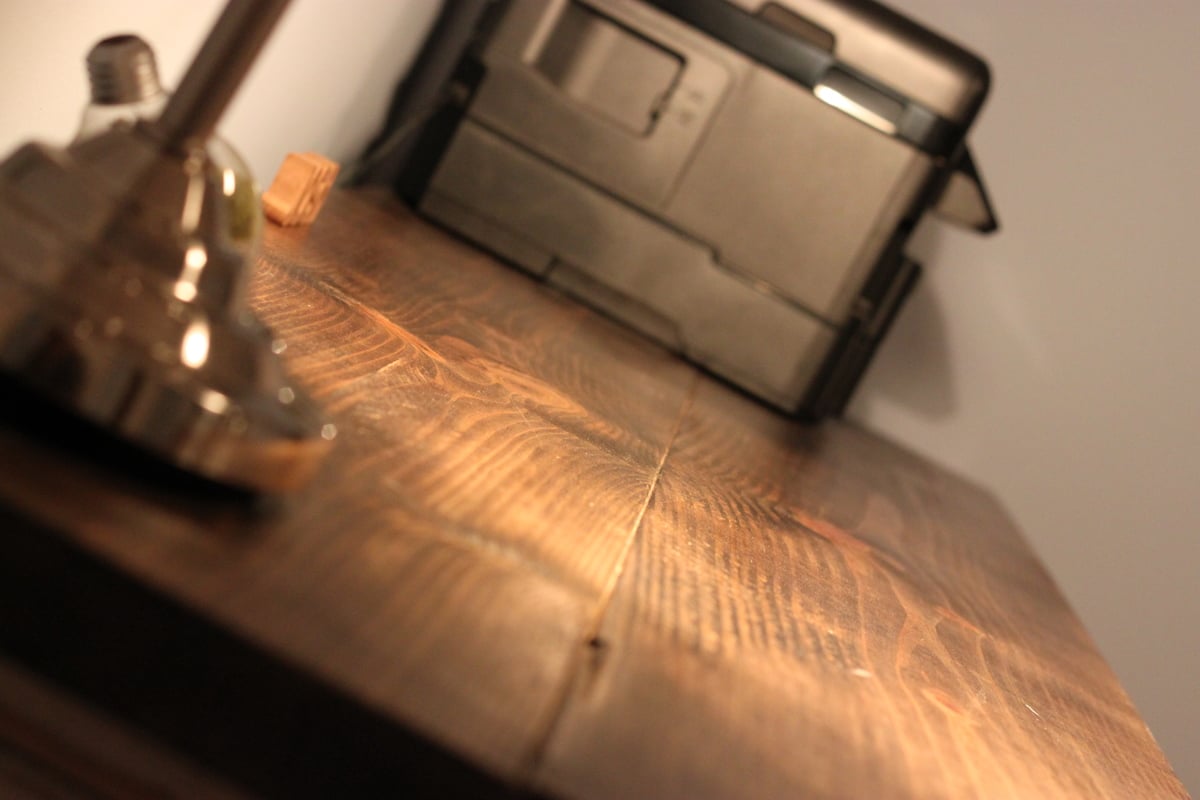
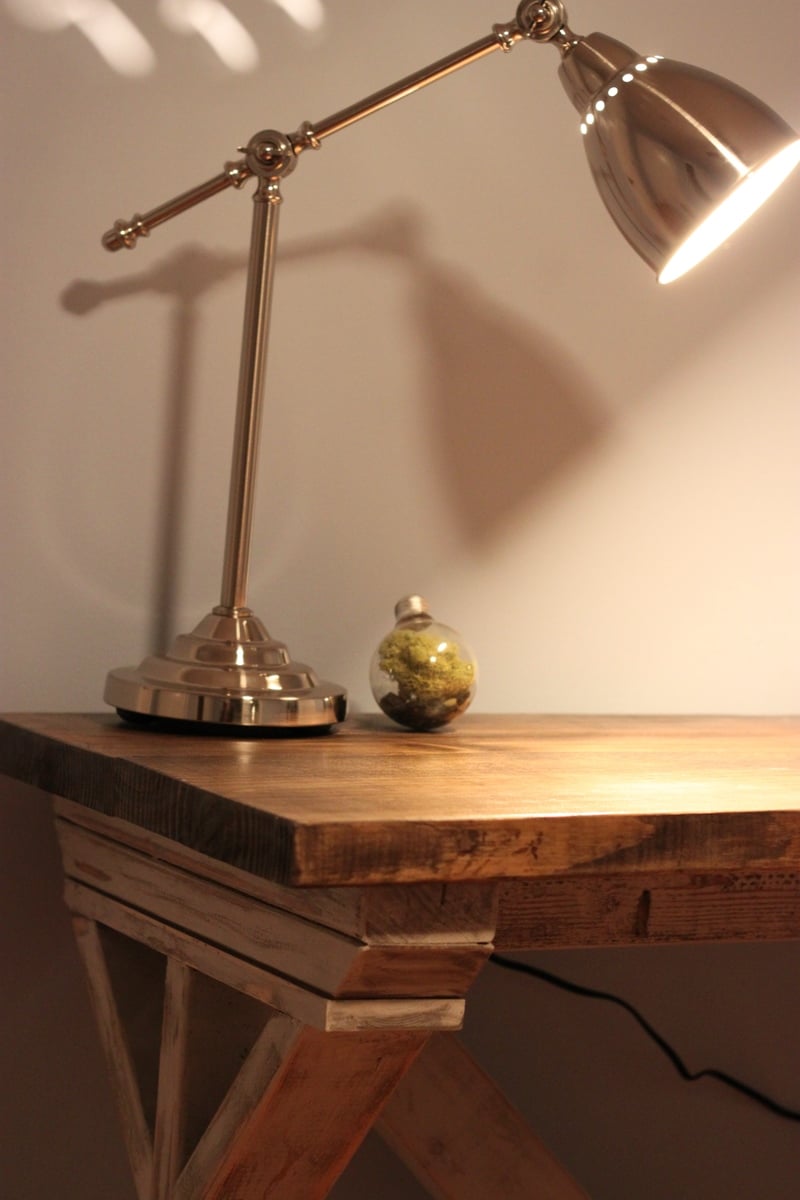
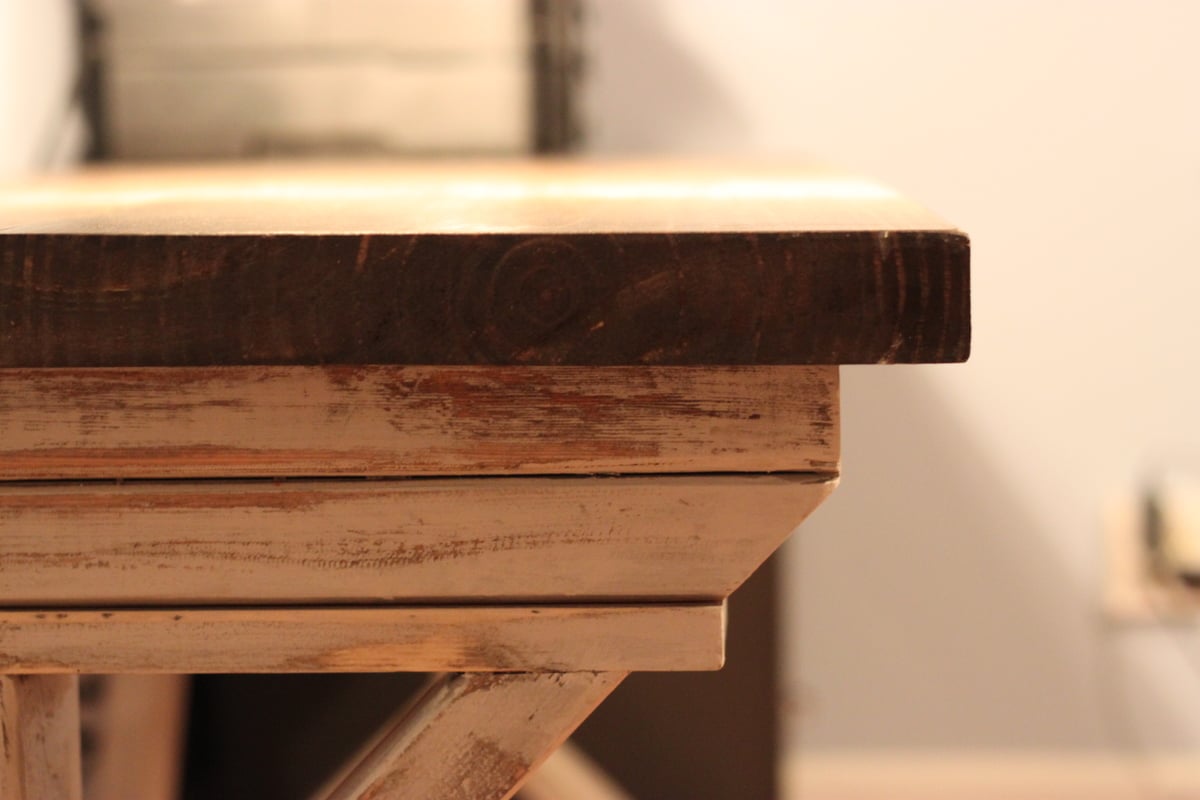
This was a great project. I had some trouble with getting the X's perfectly connected (due to off square boards) and had to use some wood filler here and there. Beyond that, everything came together really well. The longest part was getting the finish just right.
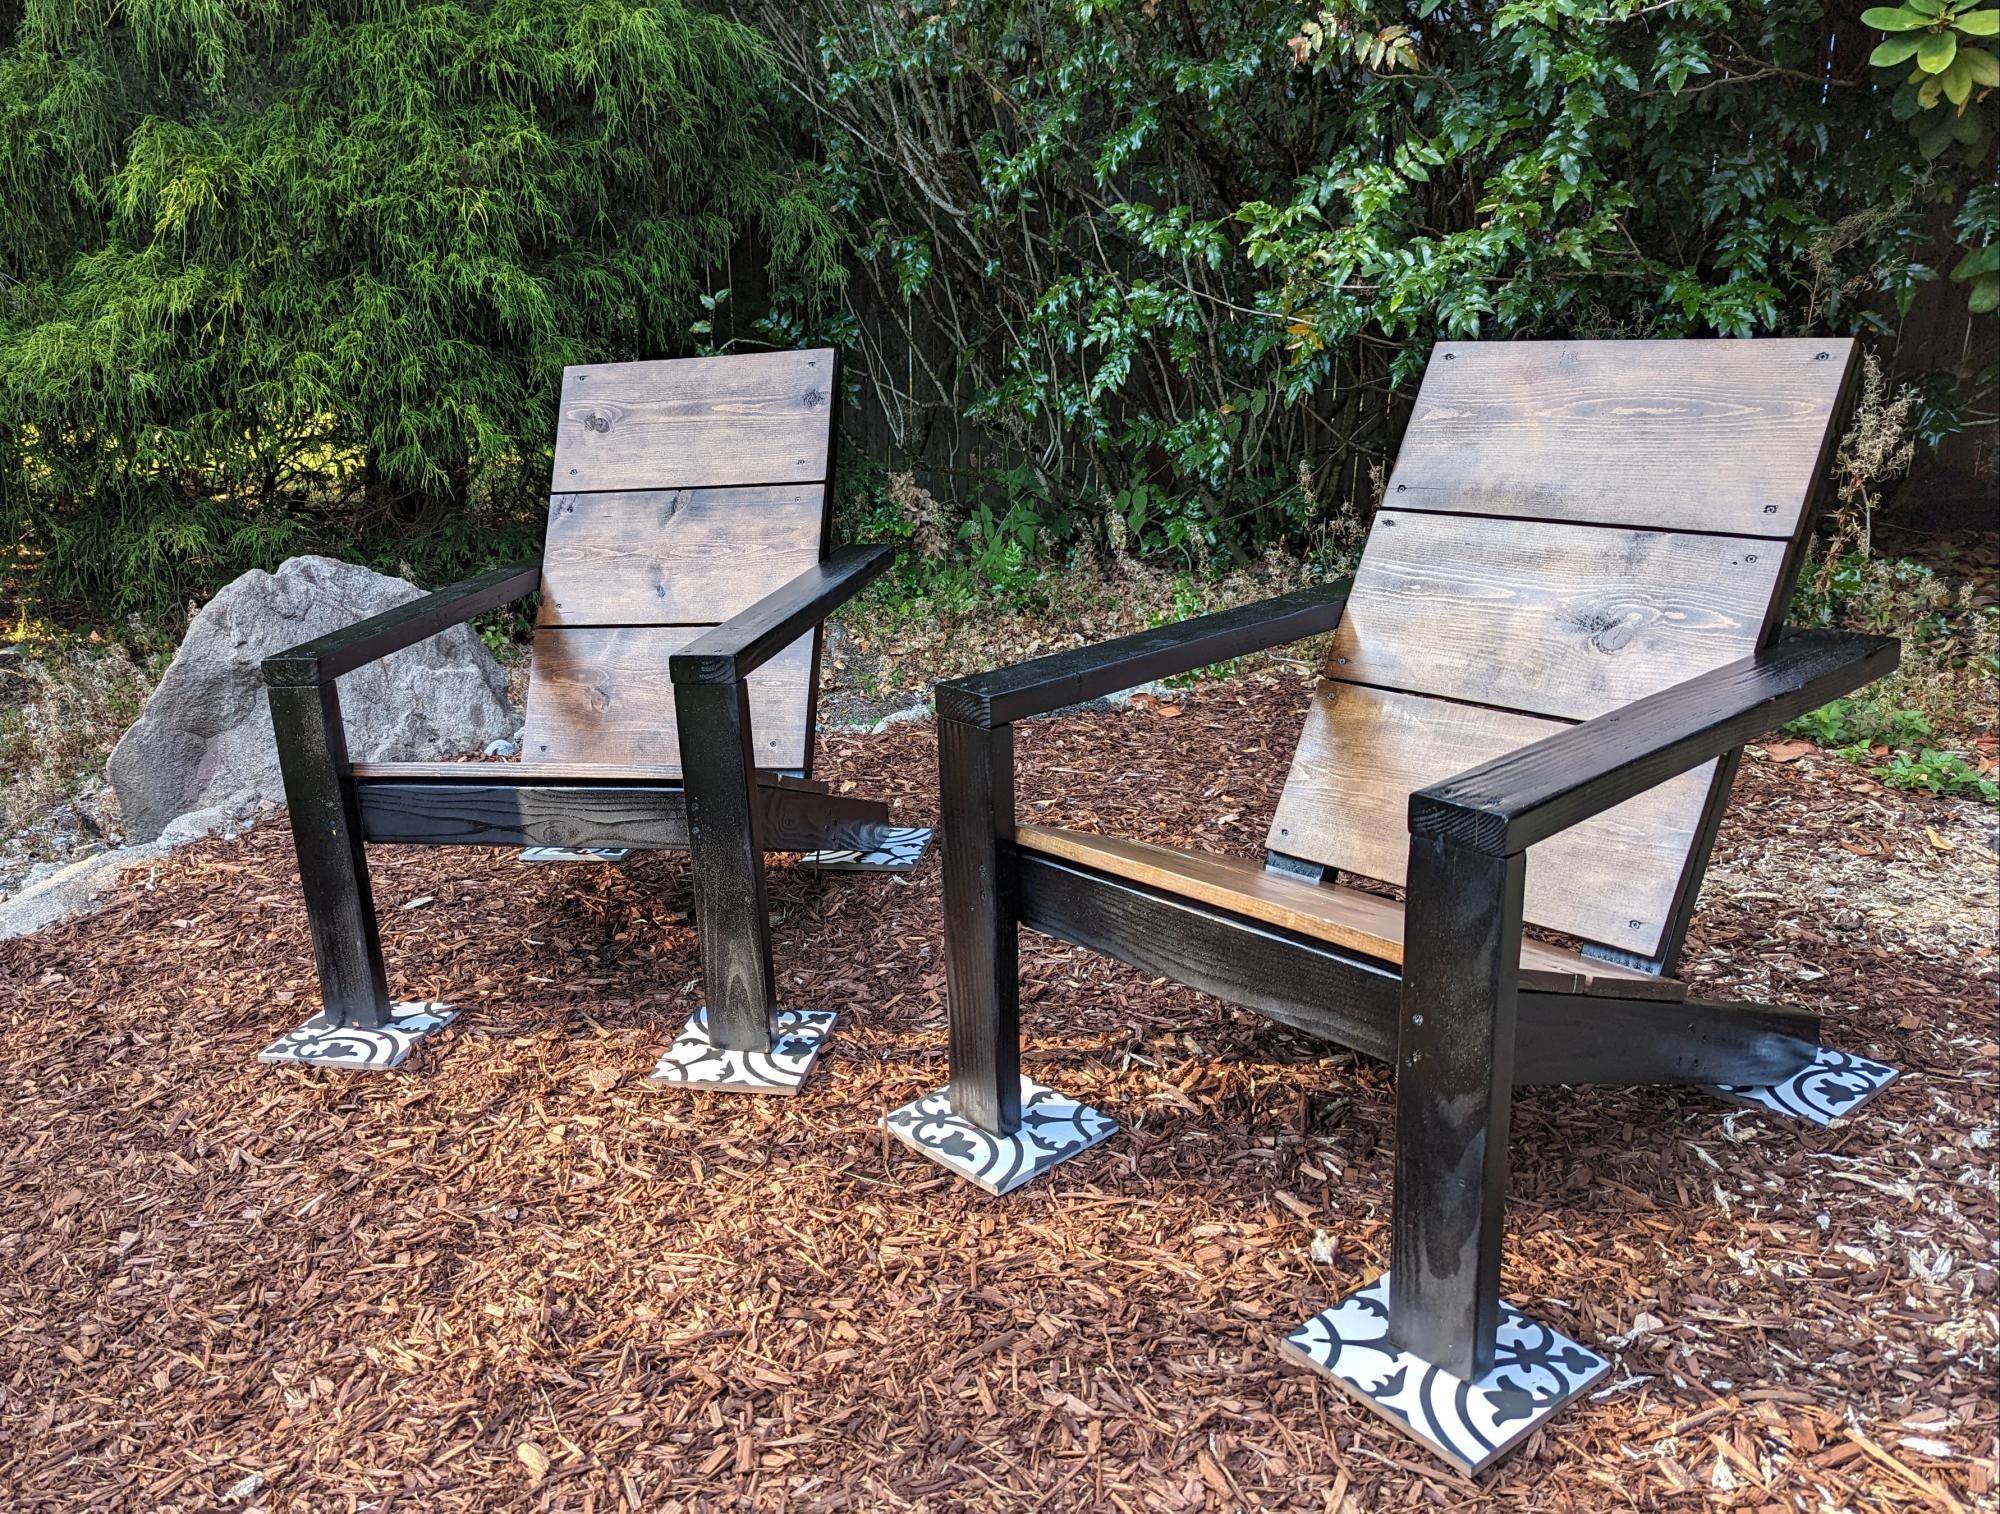
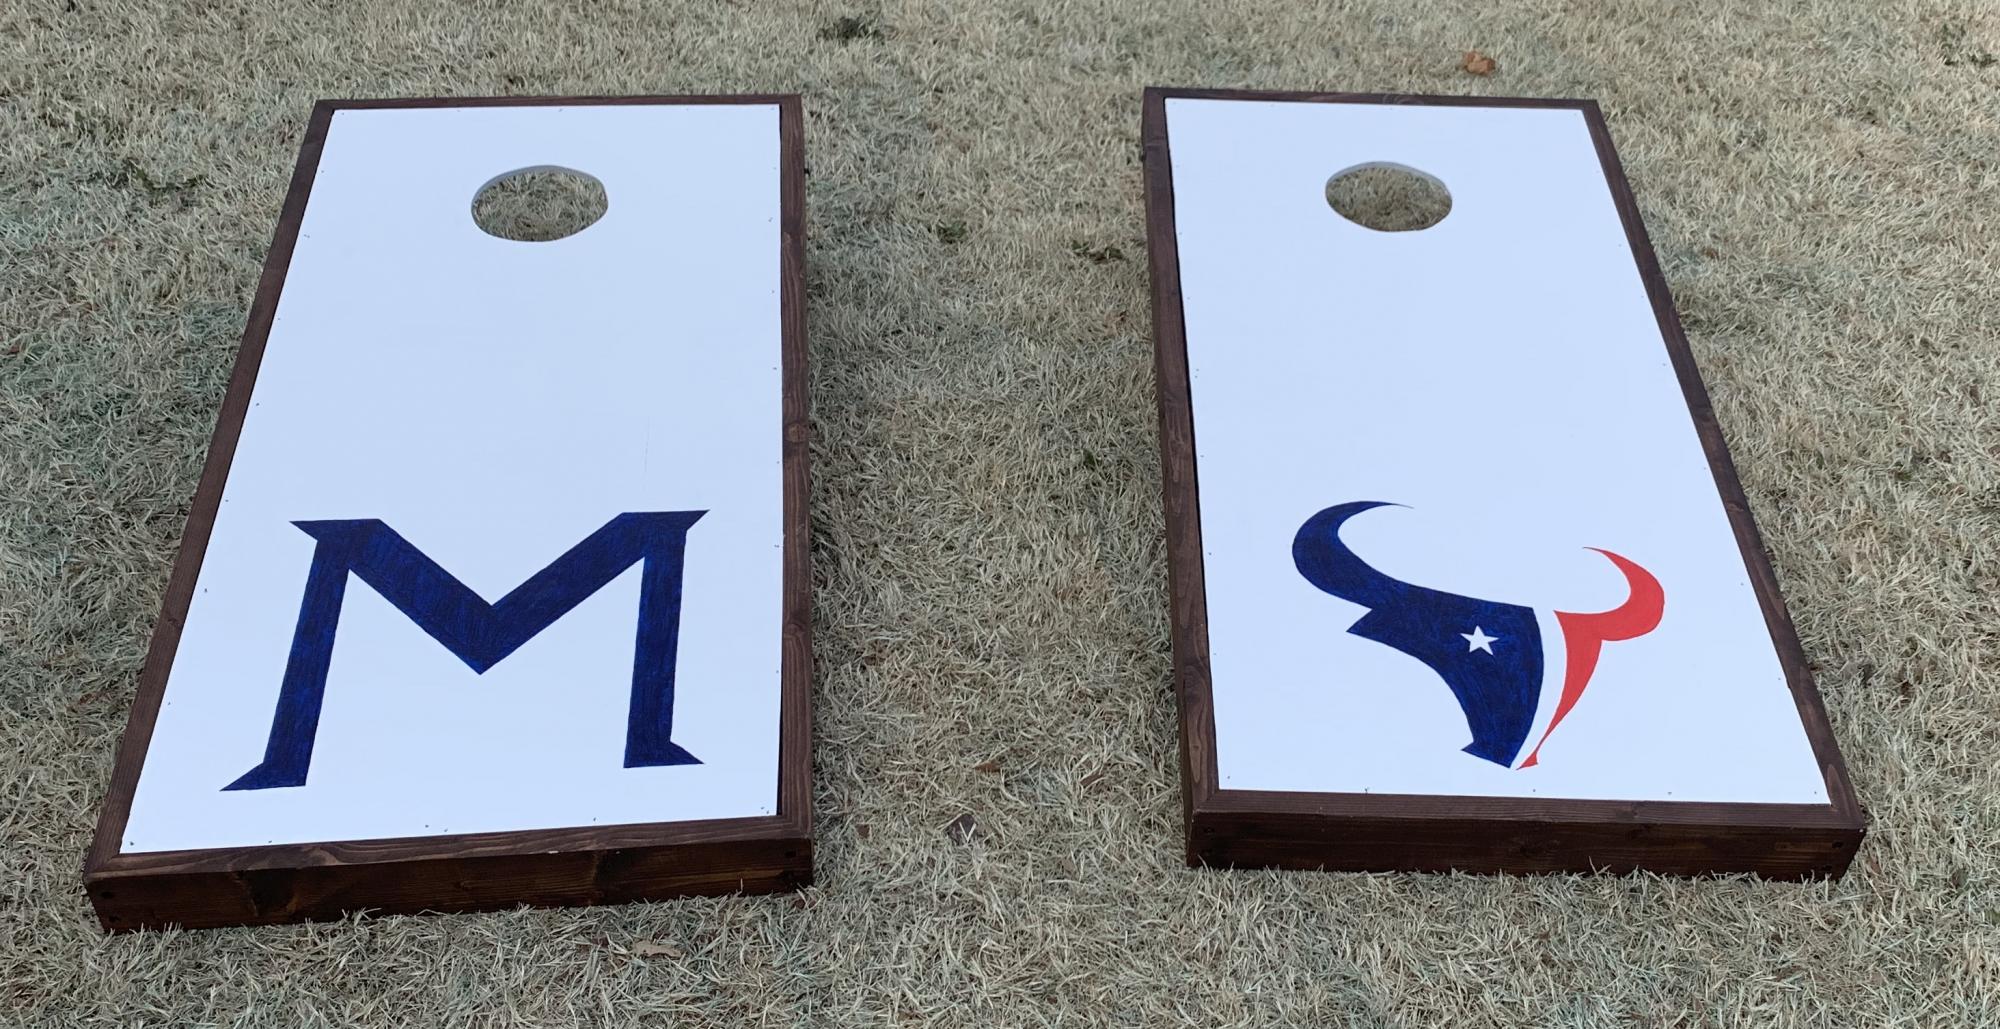
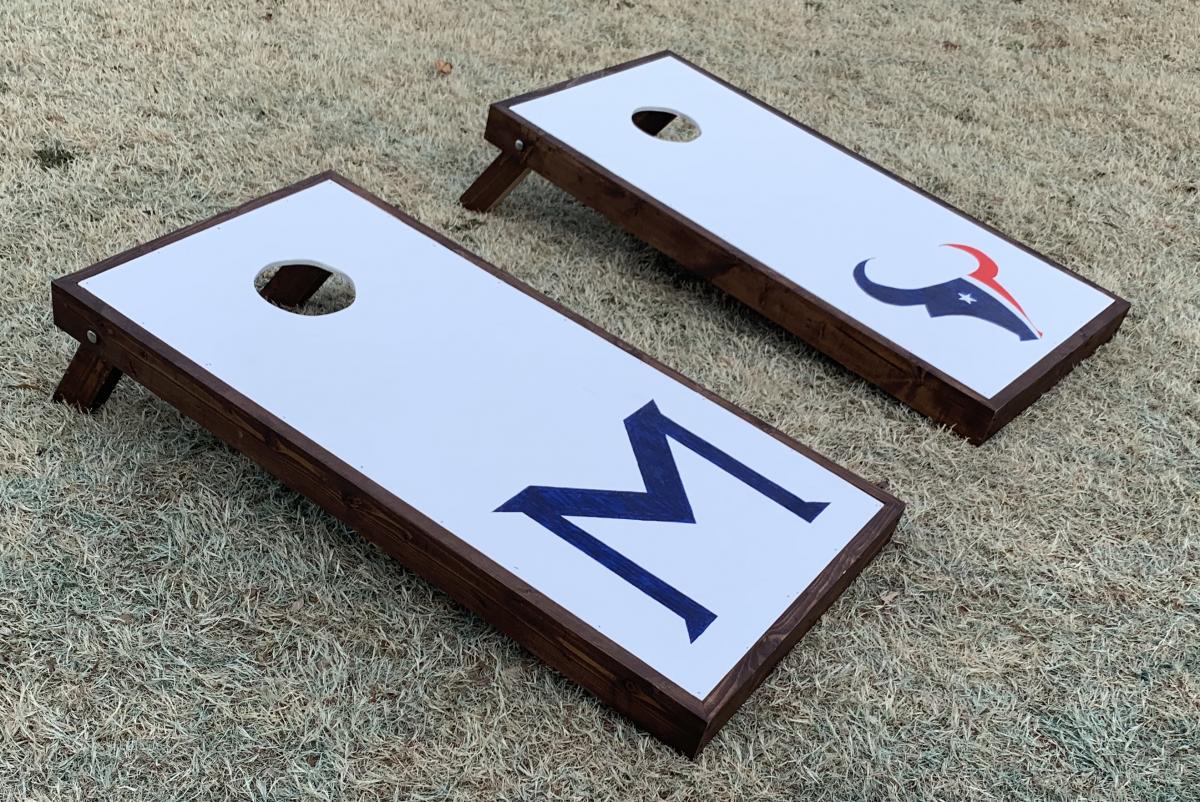
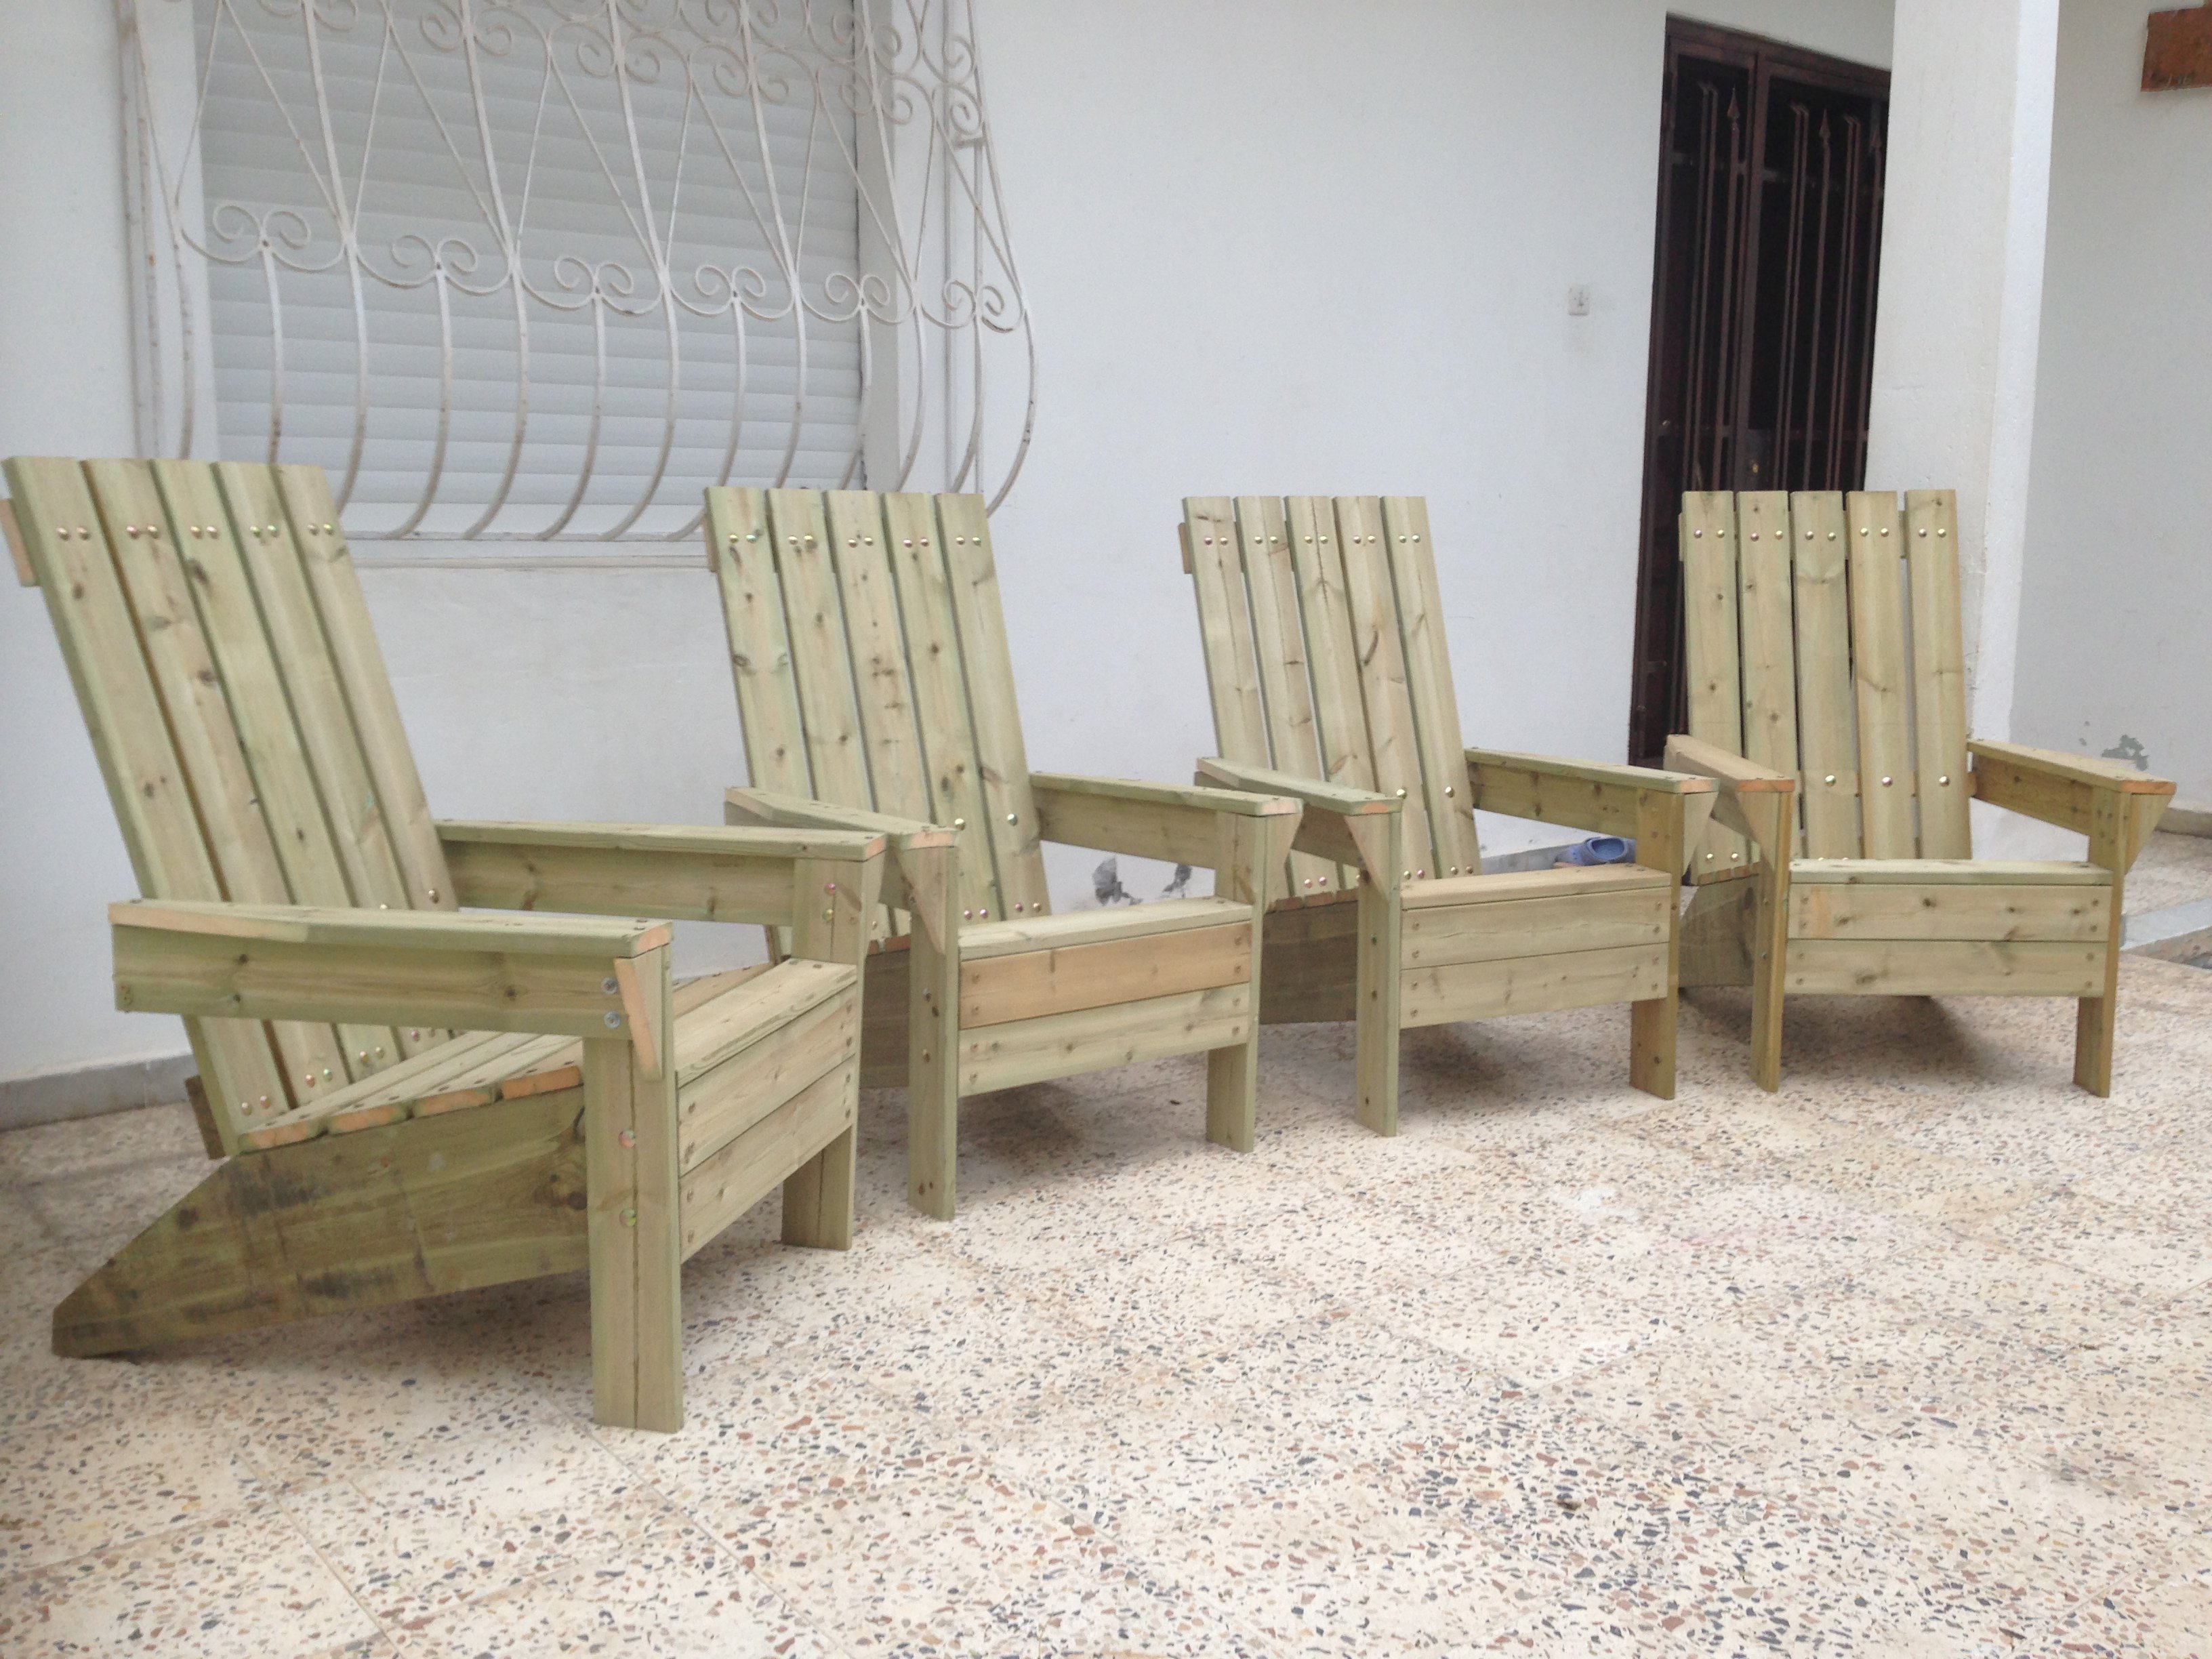
I built these this last weekend, super easy to follow the plans and they turned out great!
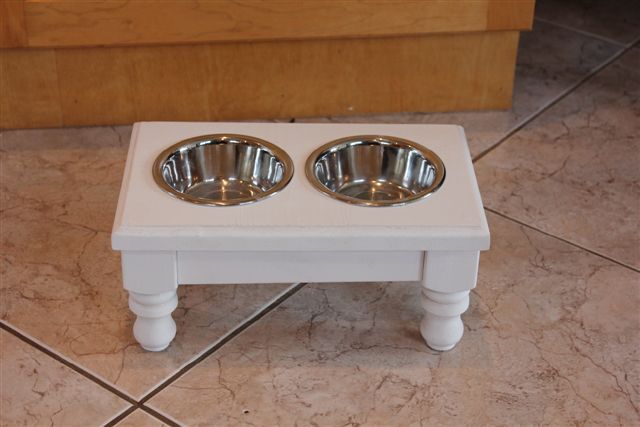
I love my cat, and felt she needed a pretty feeding dish. I stole some old spindles from my sister's garage, cut them down and threw this plan together. It was actually harder than I expected because getting into tight little spaces with my drill to drill in the pocket holes was almost imposible. The wood split, nothing is square and the holes for the dishes are messy...but it doesn't really matter, it looks good from a distance and my cat doesn't judge. Not that I know of, anyway.