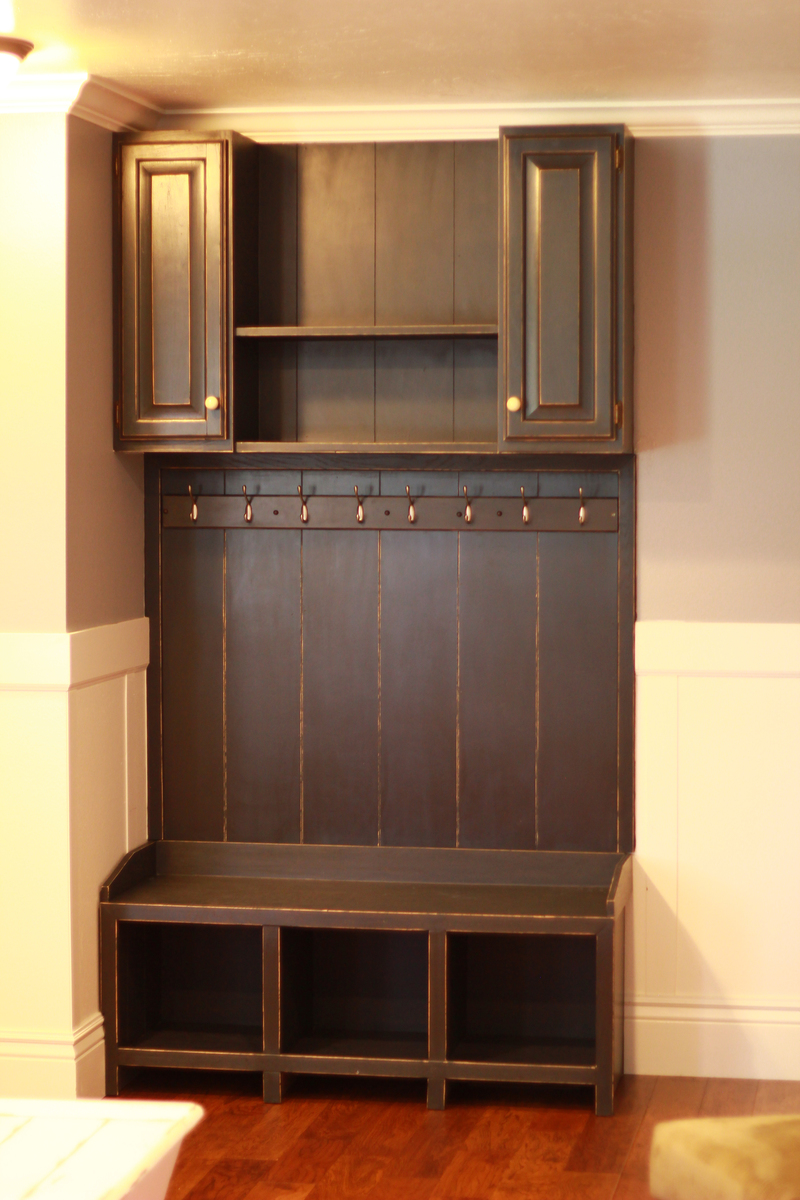
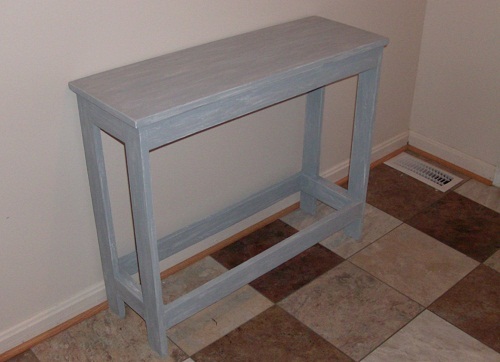
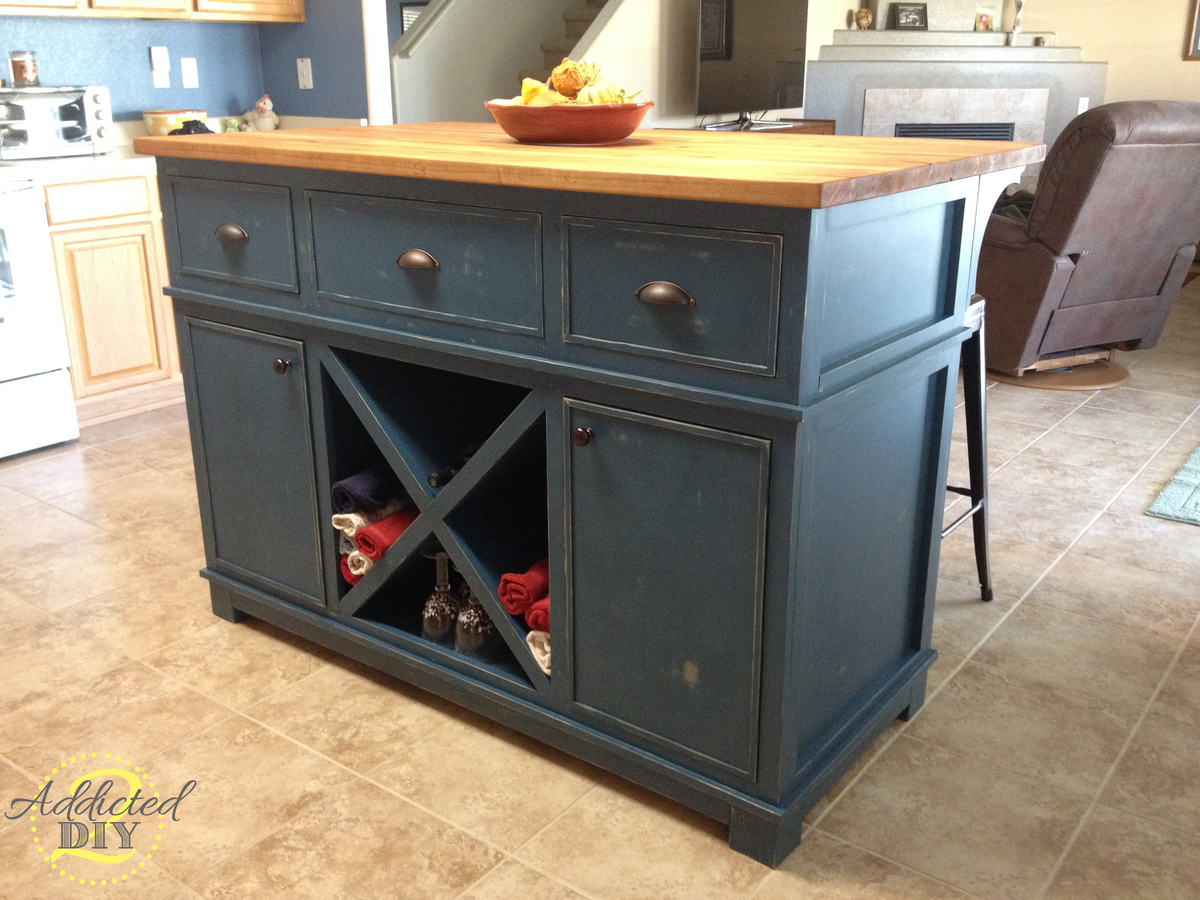
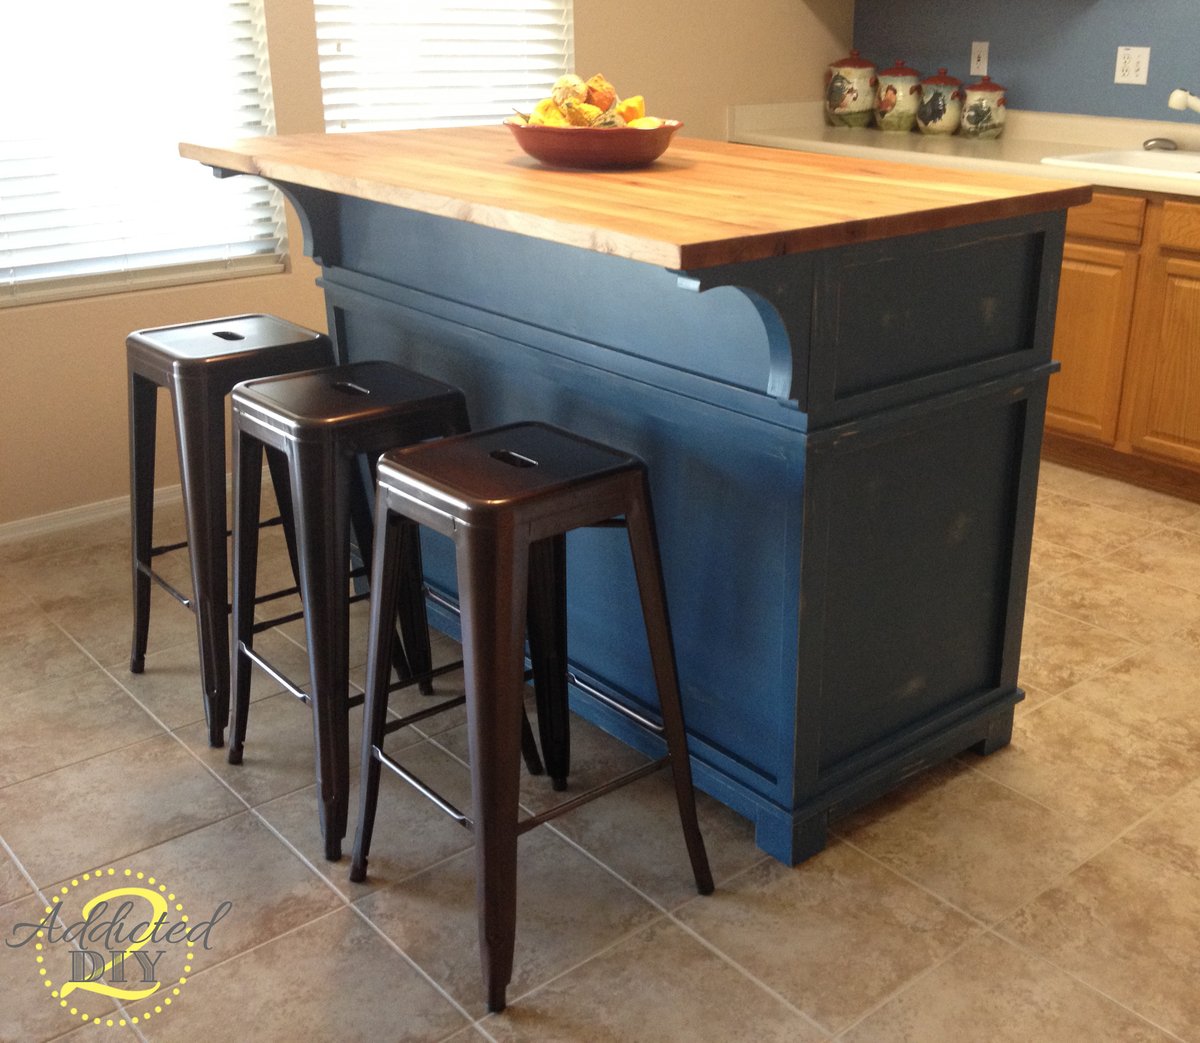
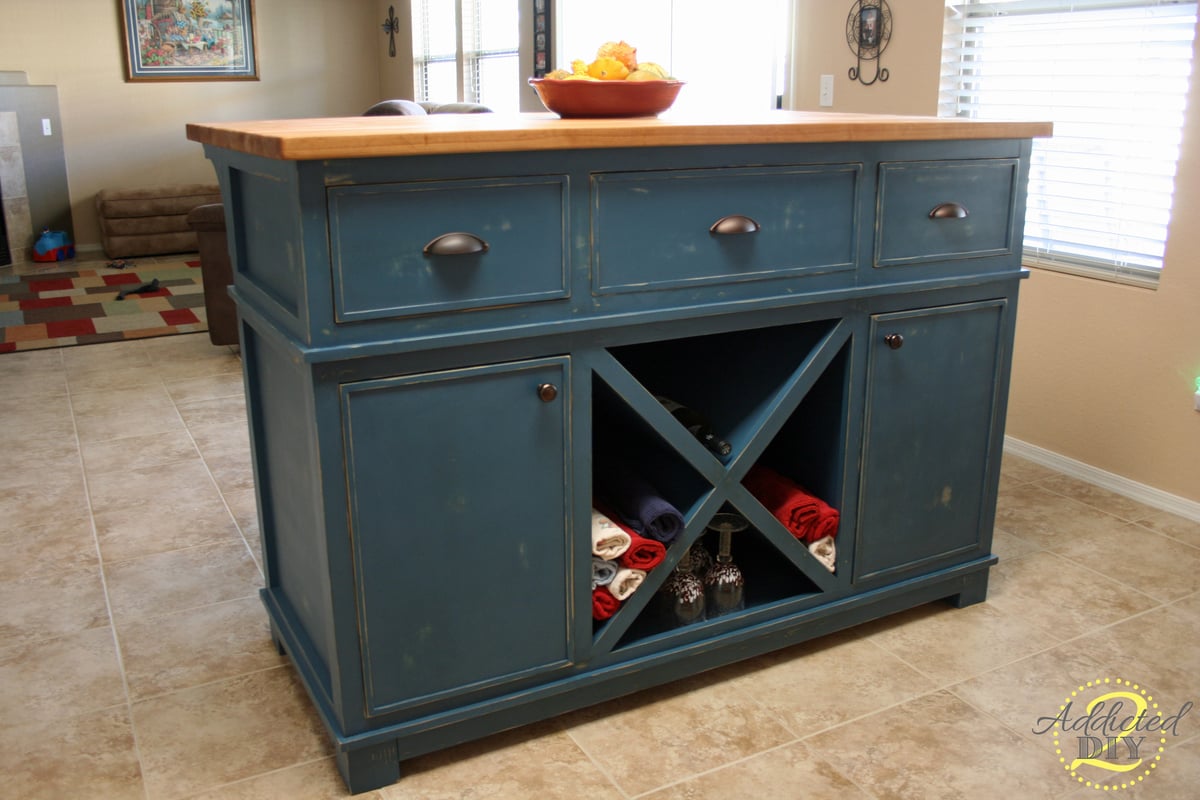
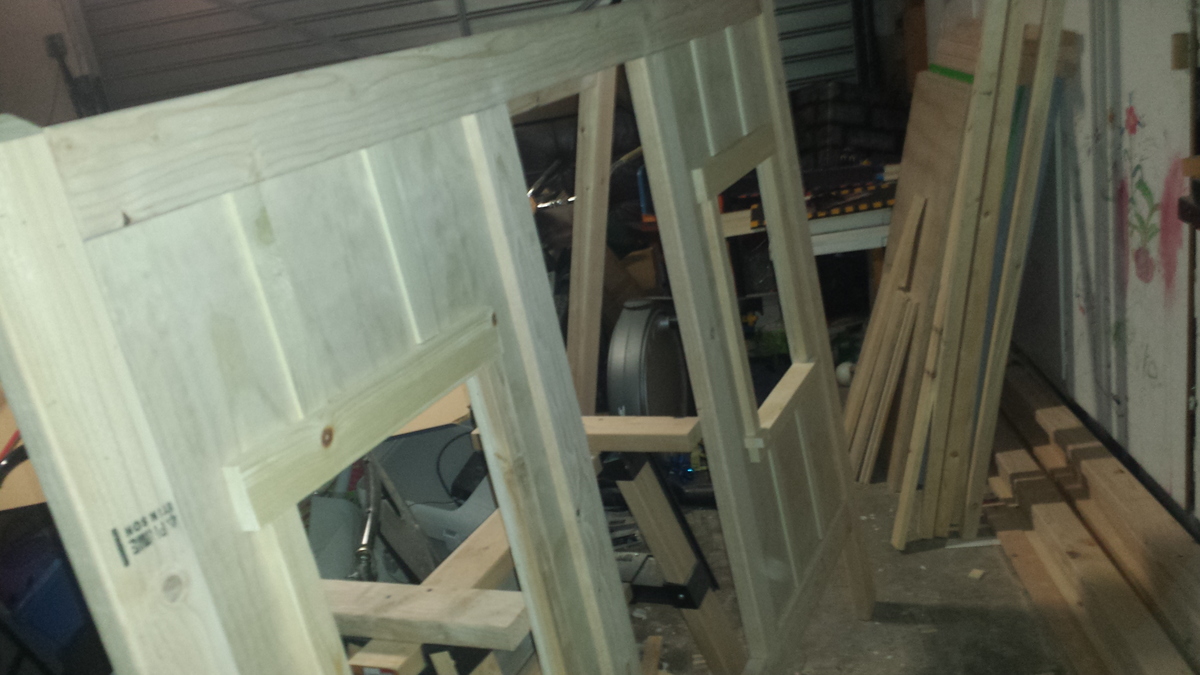
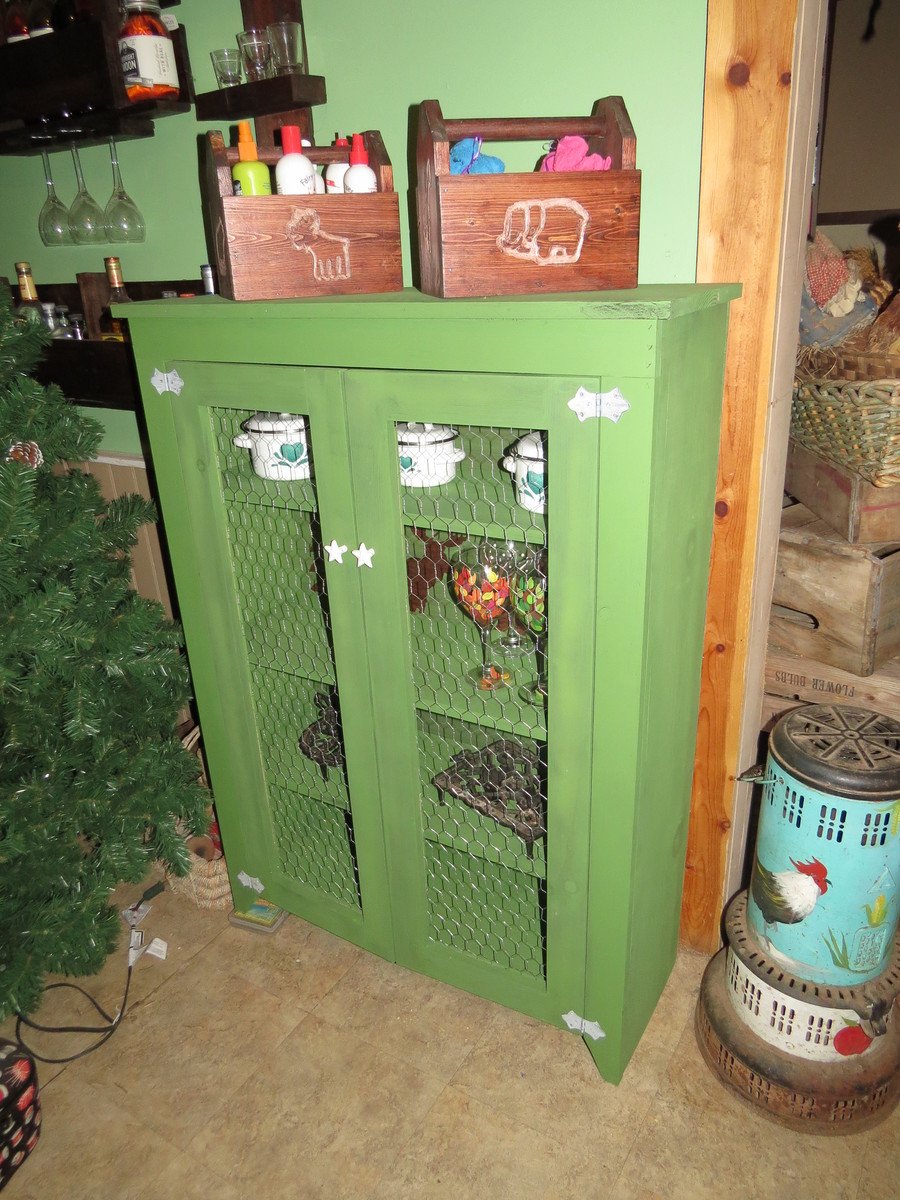
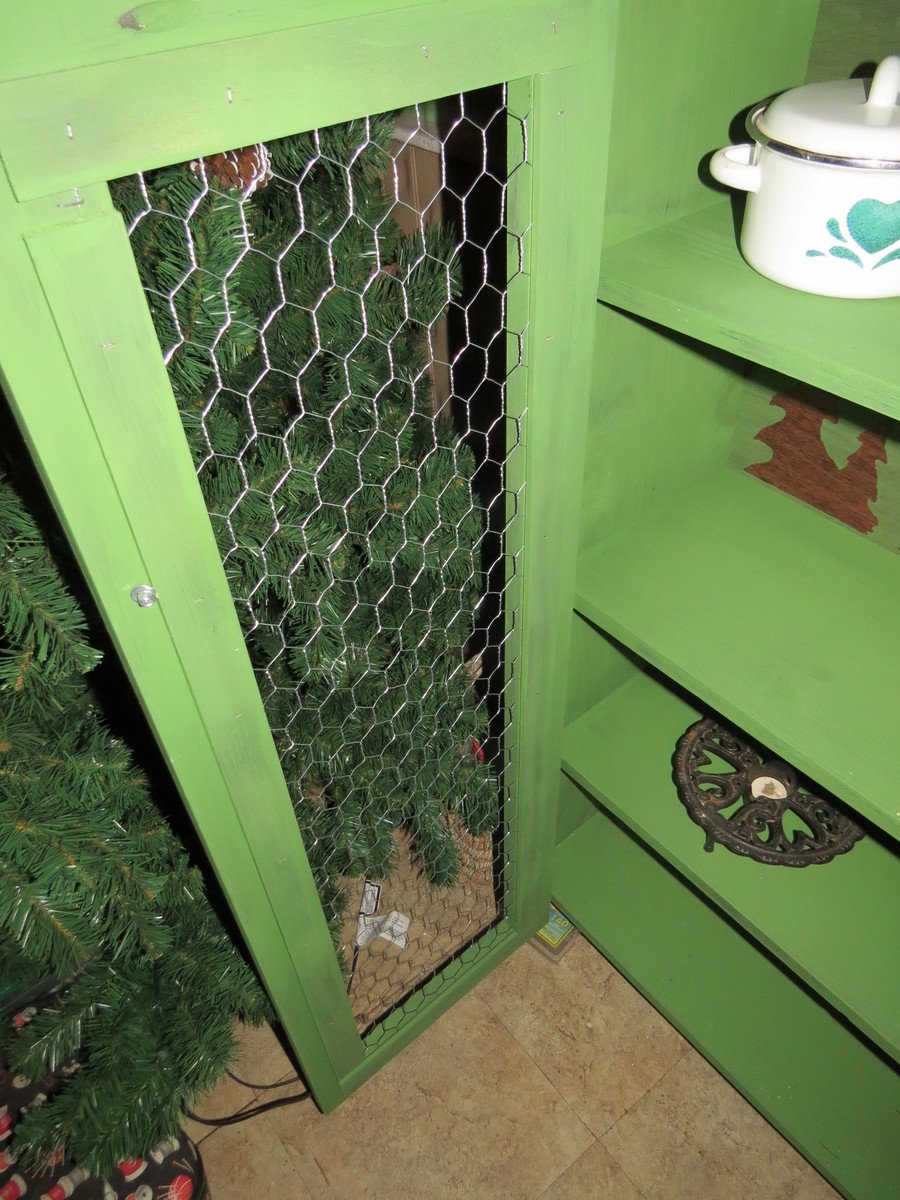
Community Brag Posts

Mudroom Area

Submitted by bhammond on Tue, 11/12/2013 - 12:31

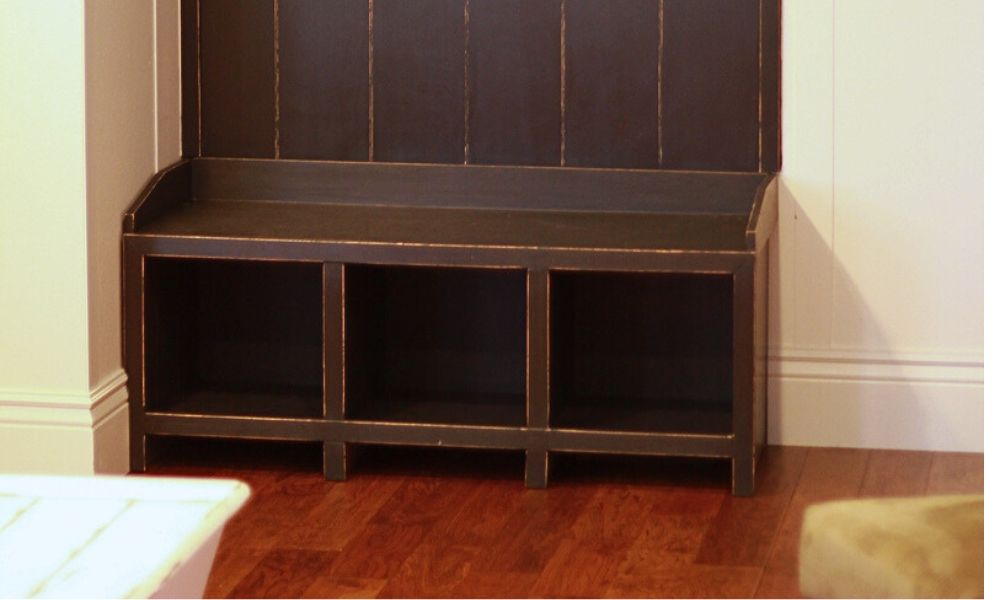
Mudroom area by my front door. Perfect for removing shoes, hanging jackets, etc. For the top I used two old cabinets that were on their way to the trash. It was easy to build shelves between them. For the back I used beadboard from Home Depot. It was 1/4" thick and 4x8. The bench pulls out easily, because there is an outlet behind it, and an air register beneath it. (That's why I left the front toe-kick open.) The rail with hooks came pre-assembled from Home Deopt, but I had to paint it black.

Estimated Time Investment
Weekend Project (10-20 Hours)
Finish Used
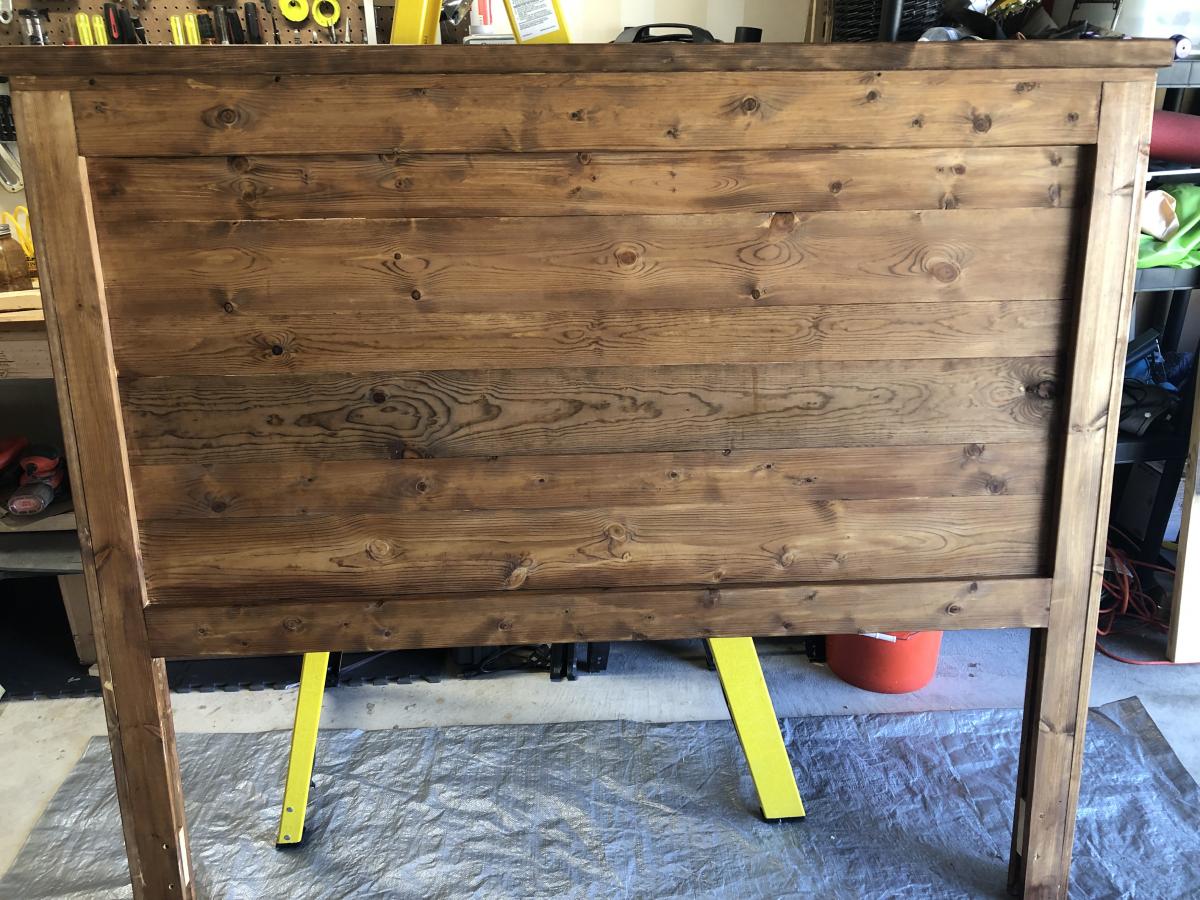
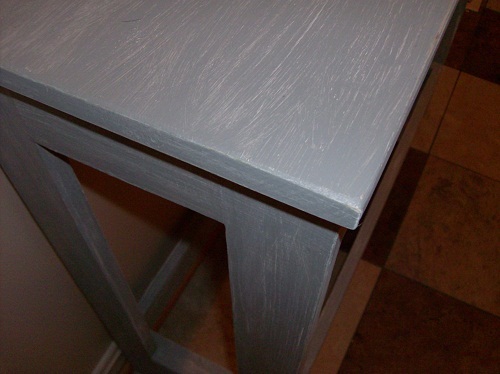
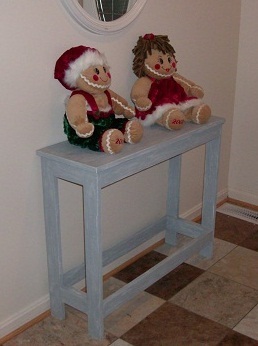
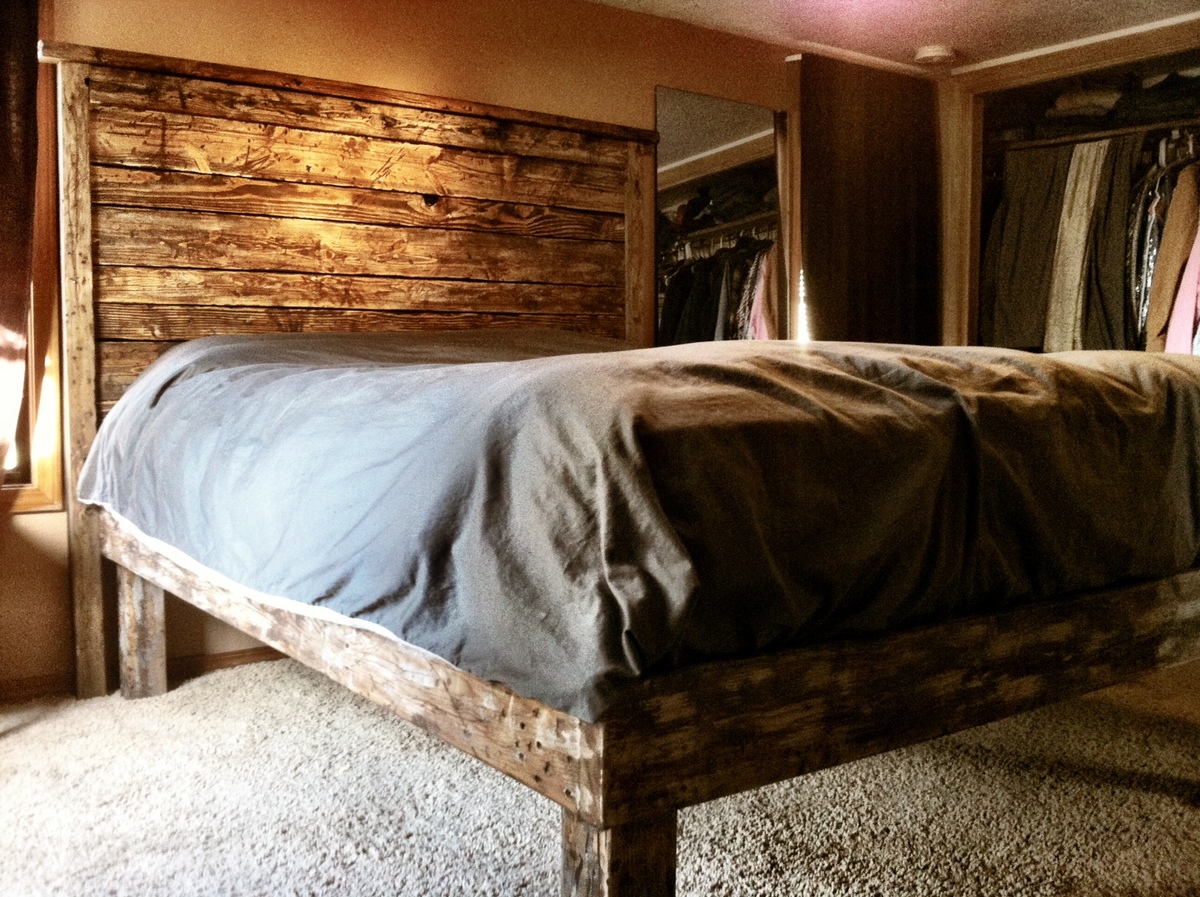
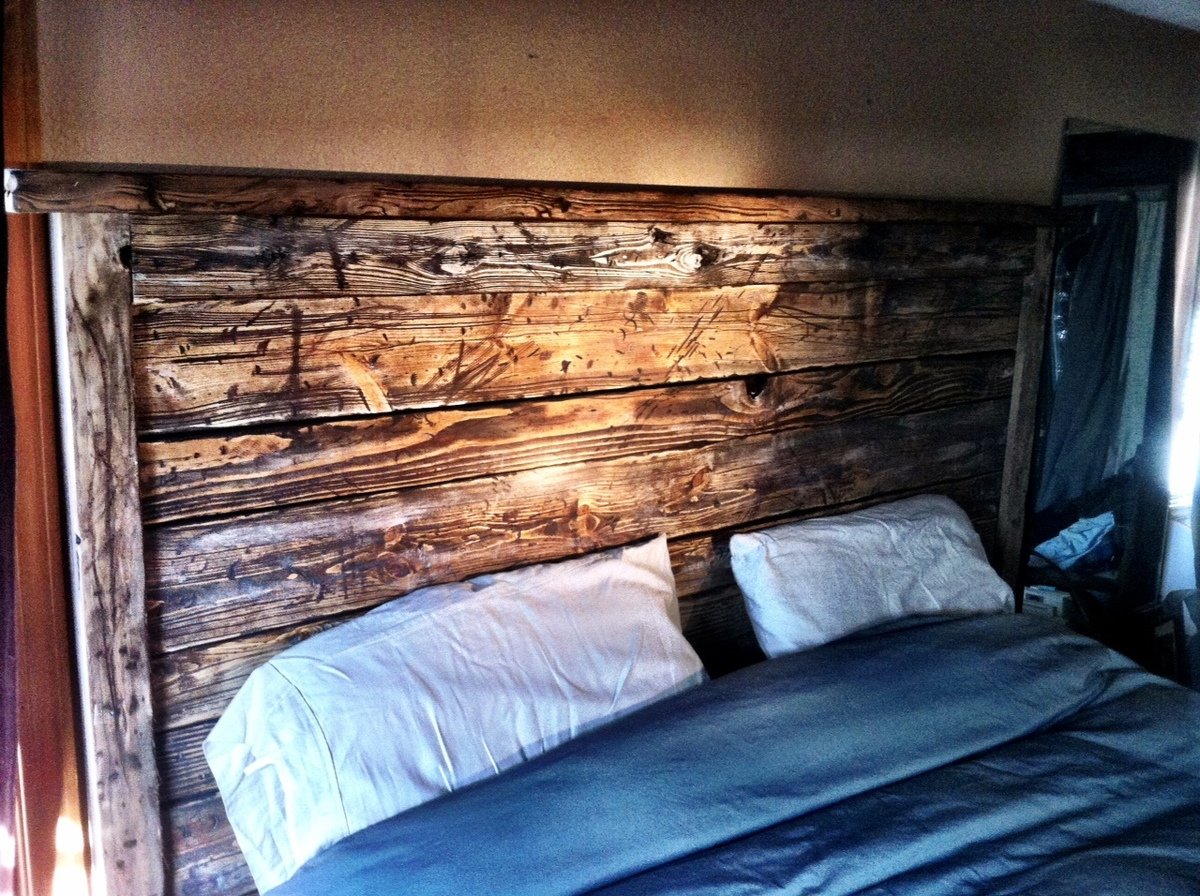
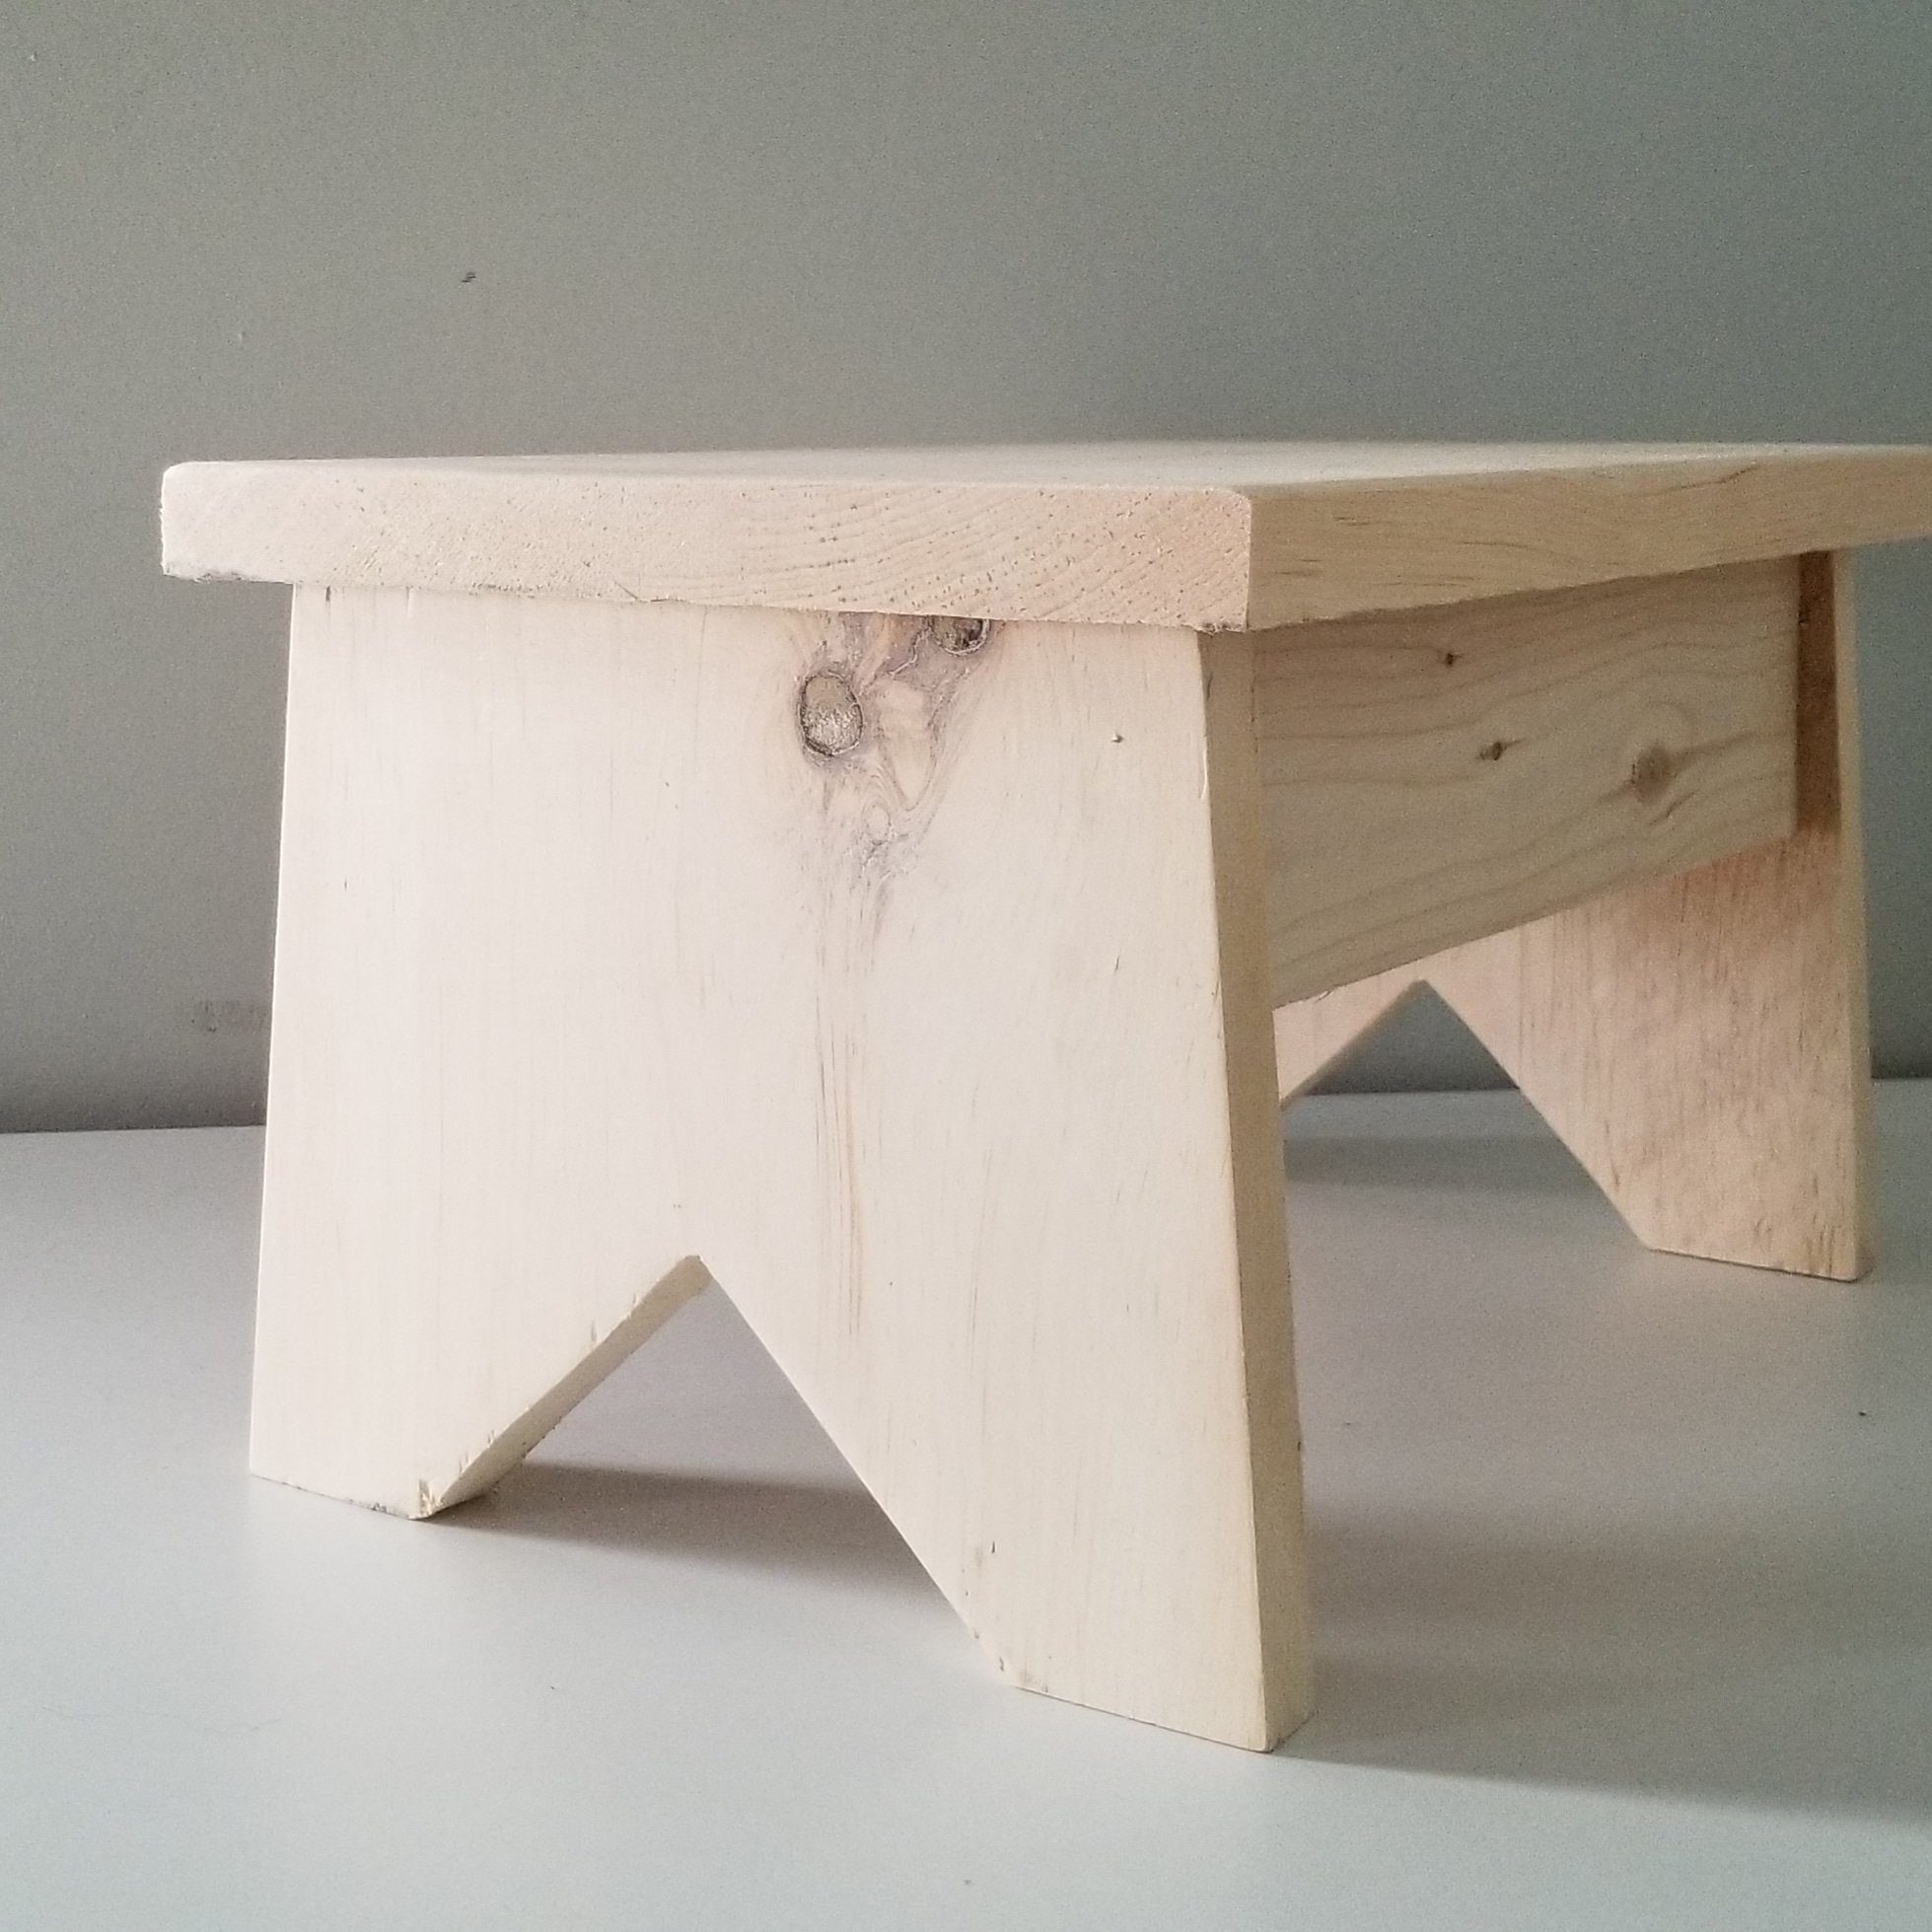
I used black chalk paint and minwax paste finishing wax.
After one coat of finishing wax I sanded edges to get the antiqued look. Then I applied a second coat of finishing wax.

For the finishing wax: simply rub on with a rag, wait 10 minutes, then use a clean rag to rub in the direction of wood grain to get a nice polish.
Recommended Skill Level
Beginner

Comments

Farmhouse bedside table inspired nightstand

Submitted by Anonymous (not verified) on Sat, 01/30/2016 - 19:54

This nightstand was insprired by the Farmhouse Bedside Table.  I was looking for ideas for a simple nightstand with a drawer and the Farmhouse Bedside Table was almost exactly the style I was looking for. I used solid walnut which accounts for a majority of the cost. Typically I would use motise and tennon joints for something like this but decided to try pocket hole joinery in an effort to save some time.  Overall, it worked well with the exception of the top rails. When I attempted to screw the top rail to the leg, the screw split the leg likey because of the screw going in so close to the edge. Instead, I just glued and clamped the top rails.

One unique feature is a power strip mounted in the back.  The drawer depth is reduced to make room for a 3 outlet power strip with 2 USB charging ports so that phone/tablets can be charged.

Built from Plan(s)
Estimated Cost
$150
Estimated Time Investment
Week Long Project (20 Hours or More)
Finish Used
Clear satin polyurethane
Recommended Skill Level
Intermediate

Reclaimed Wood Queen Size Headboard

The plans for this headboard are great. Very easy to follow and the cut list is spot on. I used some choice pine from Lowe’s ($63) and then used the vinegar with steel wool mixture to age the wood.  That’s where this piece is at right now. Trying to decide if I want to leave it or put a light satin clear coat. 

Thank you for the plans!!

OK.....I added 2 more pics.  I added 1 coat of Satin Clear Poly witch gave it a richer look. 

Estimated Cost
$75
Estimated Time Investment
Day Project (6-9 Hours)
Finish Used
1 Sheet of 0000 Steel Wool torn apart and left in a mason jar of vinegar over night
Recommended Skill Level
Beginner

Comments

Patio Couch

Submitted by Anonymous (not verified) on Sat, 04/22/2023 - 14:35

I have been asking my husband to help me build a patio couch with Ana’s plan. He just didn’t have the time. So yesterday I took about three hours, including the time to get the cedar, and built one with my sister. We had a great time and the plans were so easy. Bonus score… I found the great couch cushions on FB Marketplace super cheap. I love it!! It is perfect for our deck! Thank you Ana!!!

Built from Plan(s)

Comments

Distressed console table (free)

Submitted by JoanneS on Tue, 12/27/2011 - 18:12

Ana's simple, cheap and easy console table, made entirely with repurposed and scrap wood, so it was free! The plan was great, and it was easy to adjust to the wood I had on hand. The distressed finish was fun to do too.

Estimated Cost
free (everything was scrap wood, and paint was left over)
Estimated Time Investment
Afternoon Project (3-6 Hours)
Finish Used
white paint, then a coat of gray over the white, and sanded to reveal the white. Paint was left-over that we had on hand.
Recommended Skill Level
Beginner

"reclaimed wood" bed.

Submitted by bskovlin on Sat, 11/16/2013 - 14:15

I wanted to make a sturdy bed that was rustic and old looking but still kind of modern... I looked at google images and a photo of Ana's bed popped up. I started with new fir from Home Depot but wanted a good weathered look, so I spent extra time and effort on the distressing. It turned out just like I was hoping!

Estimated Cost
$125
Estimated Time Investment
Day Project (6-9 Hours)
Finish Used
I made stain with vinegar and steel wool, hit it with that then sanded. Light paint strokes with white and maroon, sanding in between, then ebony stain, sand, then a chestnut stain and wiped off. Clear finish.
Recommended Skill Level
Beginner

Comments

Val Manchuk

Sat, 11/16/2013 - 22:54

The light and dark variations in your finish make your project very unique! Nice work!

Val
artsybuildinglady.blogspot.ca

Farmhouse table

This was my first "big" project. I built it for Thanksgiving. I recently bought a home, and everyone wanted to have Thanksgiving at my new home I had no table, so I built one. Can't wait to start my next project. Love the site!

Built from Plan(s)
Estimated Cost
$50-$75
Estimated Time Investment
Afternoon Project (3-6 Hours)
Finish Used
Minwax polyshades in Bombay Mahogany, I just sanded the entire table, and applied with a stain brush. Nothing fancy, just applied two coats.
Recommended Skill Level
Beginner

Farmhouse King Bed

Submitted by aehutton33 on Wed, 07/24/2019 - 09:17

We used 2x6s on the sides so we wouldn't have a ledge on the side of the bed. Everything still lined up really well! We also used brackets to put the sides onto the headboard and footboard. It made it easier to put together and seems sturdier. 

Built from Plan(s)
Estimated Cost
$120
Estimated Time Investment
Weekend Project (10-20 Hours)
Finish Used
Minwax Weathered Oak
Recommended Skill Level
Intermediate

Comments

okstout4

Mon, 10/19/2020 - 19:53

I thought about doing brackets too, but not sure how that would work w/the cleets on each side for the slats.

Coffee Bar Sideboard

Submitted by Anonymous (not verified) on Fri, 04/28/2023 - 05:48

I made this coffee bar from your plans making modifications to fit our space .It came out beautiful, I have made numerous pieces of furniture from your plans but this is my favorite . They plans are super easy to follow and modify to my needs .
Thank you Ana and keep up the good work!!

Comments

Shadowbox Shelving Unit

Submitted by kpcrash on Sat, 12/31/2011 - 18:35

This project is all about using a Kreg Jig. My daughter asked for some shadowboxes to go around her chalkboard. 1 piece of 3/4" plywood and a few 1x2's later - here it is. It's really just an 8' x 2' box with the window panes inside - super simple, but does require a compact drill. Mounted to the wall using a ledger board underneath, then, pocket holes in the top shelf to join it to the studs. Quite sturdy. One day I'll learn Sketch-Up well enough to make this into a plan.

Estimated Time Investment
Weekend Project (10-20 Hours)
Finish Used
Rustoleum Classic Cherry Stain, Shellac clear. The wood was sanded to 400 grit, then stained via cloth. Shellac sprayed on via Preval as the air compressor was on strike.
Recommended Skill Level
Intermediate

DIY Kitchen Island

Submitted by katie0910 on Tue, 11/19/2013 - 07:18

This was my second solo project. I built it for my mom's kitchen to replace her old kitchen table. I absolutely love how it turned out. It is big and functional. Come see how I built it on my blog.

Built from Plan(s)
Estimated Cost
approx $600
Estimated Time Investment
Week Long Project (20 Hours or More)
Finish Used
Valspar Paint+Primer in Deep Twilight Blue
Valspar Antiquing Glaze
Minwax Polycrylic Spray
Recommended Skill Level
Intermediate

DIY Lift Top Coffee Table - Rustic X Style

Submitted by Anonymous (not verified) on Thu, 02/04/2016 - 18:55

Just wanted to do something a little more original.


Built from Plan(s)
Estimated Cost
$230
Estimated Time Investment
Week Long Project (20 Hours or More)
Recommended Skill Level
Intermediate

Comments

kitteny

Tue, 02/07/2017 - 06:33

Could you please provide the plans for this table? Looks perfect for what I need. Thanks!

2x4 outdoor cedar couch with ottoman

Submitted by Anonymous (not verified) on Thu, 05/04/2023 - 11:51

I used pocket holes to hide the screws. I made an ottoman out of the outdoor coffee table plans to my dimensions that can be used as a coffee table when we need it.

Comments

Farmhouse Bedside Table

Submitted by brookita12 on Tue, 01/03/2012 - 20:27

I looked ALL OVER for a bedside table that met my demands and my budget. It did not exsist. I found the Farmhouse Bedside Table and fell in love with it! It was definately a more tricky build, and my husband and I learned ALOT about what we know and what we don't know about tools, wood, angles, measurements, etc. But it was a fun project to do together and I just LOVE how it turned out! We definately surprised ourselves on this one! Only about $35, not too shabby! Only piece of advice would be to measure and cut as you go- some of the measurements didn't work out for us (not sure why...) but we were glad we didn't cut them ahead of time! We measured everypiece and double checked it. But we are new to work working, so cut at your own risk :)

Built from Plan(s)
Estimated Cost
$35
Estimated Time Investment
Day Project (6-9 Hours)
Finish Used
Paint: Lowe's Valspar "Du Jour" White
Recommended Skill Level
Beginner

Comments

jigganancy

Fri, 01/06/2012 - 10:58

I made the bedside table and love your modern (without being overly modern) look! great job,

Laundry Basket Dresser with picture top

This is my take on the Laundry basket dresser. I started with the idea based on many photos I found on this site, but made some updates/improvements (well they are improvements in my mind anyway). Please view the last picture that has text for explanations of the "features" of my design.

I did some quick drawings in Sketchup, and then did some work in the workshop. I don't have exacting plans on the exact measurements, but you'd probably need to tweak for the size basket you plan to use.

Built from Plan(s)
Estimated Time Investment
Week Long Project (20 Hours or More)
Finish Used
Oak is finished with polyurethane. Everything else is painted with the color "guacamole" which is a sage-like color.
Recommended Skill Level
Intermediate

Comments

Jake's Beach Cabin Bed

Submitted by Anonymous (not verified) on Sun, 02/07/2016 - 08:18

I built this for my son's beach room.  We stained the roof to match his dresser and built him a ladder as well.  

Built from Plan(s)
Estimated Cost
$200
Estimated Time Investment
Week Long Project (20 Hours or More)
Finish Used
High Gloss white and Colonial Maple stain.
Recommended Skill Level
Intermediate

Stepping Stool

Submitted by Anonymous (not verified) on Wed, 08/28/2019 - 04:49

I love the ease of your plans.

Comments

Trestle Desk with 2x6 laminated top

Submitted by Anonymous (not verified) on Sun, 05/07/2023 - 16:31

Started with simple small trestle desk idea. Decided to edge glue the top. Finished with poly and paste wax. Didn’t turn out too bad for the first project.

Built from Plan(s)

Comments

Dresser

Submitted by elainefour on Fri, 01/06/2012 - 09:33

I needed some furniture for the entryway and made this dresser. All it needs now is a few accessories! Thanks Ana.

Estimated Cost
$300
Estimated Time Investment
Weekend Project (10-20 Hours)
Finish Used
I used a light cherry stain and topcoated with a matte black paint. I lightly distressed the edges to have the stain show through.
Recommended Skill Level
Intermediate

Comments

spiceylg

Fri, 01/06/2012 - 12:00

I love this. I would love to build this, but modify it to be more narrow. I am afraid to do both. I don't have the confidence yet to modify or tackle drawers. Yikes. Going to have to bit the bullet one of these days!

Jelly Cabinet / Pie Safe

Submitted by Ctarbell03 on Sat, 11/23/2013 - 16:28

My mom as always wanted a jelly cabinet and there's one for sale at a local antique barn so when I saw the plans I knew exactly what I could get her for Christmas. The plan measurement's were a little off so I ran it through Google sketch-up to get the exact cuts I'd need and to play around a little with the plans. I used chicken wire for the doors and they came out better than expected. For a finishing touch, my mom loves black bears and moose, so I decided to include them in the final design. I went with free drawing them on contact paper and cutting them out and using them as a stencil, I love how they look. Overall it was a fun project. I just need to distress it a little and seal it with poly and it should be better well done.

Built from Plan(s)
Estimated Cost
$150
Estimated Time Investment
Weekend Project (10-20 Hours)
Finish Used
Just wanted to paint this piece, will be doing some sanding to distress it and then seal it with a coat or two of poly to protect the finish. The back pieces I stained first then drew the moose, bear and trees on contact paper then stuck them to the wood and painted it, let it dry, peeled off the contact paper and it came out better than I hopped.
Recommended Skill Level
Intermediate

Comments