Community Brag Posts
Toddler Farmhouse Bed With Canopy
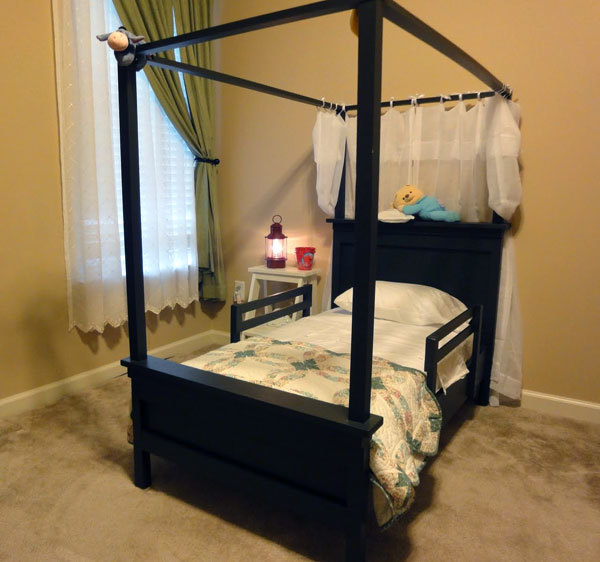
When I saw the farmhouse toddler bed plans on Ana’s site, I knew I had to build it for my daughter. I added siderails (modified from the bunk bed rail plans) and a canopy (modified from the adult size farmhouse bed canopy plans).
I can’t really give an estimate of how long this project took…I had to work on it while keeping my five year old and one year old entertained. If I’d had no distractions, it probably would have taken only 3 or 4 hours to build it (more for the painting).
Built from Plan(s)
Estimated Cost
$100
Estimated Time Investment
Afternoon Project (3-6 Hours)
Finish Used
Primed with Kilz then painted with leftover paint from an old project. The color is a dark charcoal gray.
Recommended Skill Level
Intermediate
Toy Box Gone Wrong

We went exactly as planned in the Build a Toybox outline, but bought 12x1 instead of 16x1. This caused a problem when we started putting it together. The two short sides were taller than the long sides. We decided to make lemons from lemonade and turn it into a toolbox/toybox, and in the end really liked the result. We added an additional cut with 1.5" holes on either side and a 1.5" diameter 36" long dowel rod for the handle. We added casters to the bottom and poof! done. Fun project! We made it for our soon to be nephew and filled with gifts for the baby shower.
Built from Plan(s)
Estimated Cost
$50
Estimated Time Investment
Afternoon Project (3-6 Hours)
Finish Used
Wood Stain with blue paint on top and cut out a mustache for the design then painted around it.
Recommended Skill Level
Beginner

Platform bed
My first build!!!! I live in an apartment, so I was nervous to undertake any project... luckily I was able to borrow a garage one weekend to build it, and then moved it in and finished it. It took more than just the weekend to complete. It probably took me a lot longer than if I had more experience and knew what I was doing...I stopped every two minutes to double check myself and reread the directions lol. I'm so happy with how it turned out. I used the IKEA center beam from my old bed for the center support, and cut wood slats for my mattress to rest on so I don't have to use a box spring. It looks so much more expensive than it was. my next project is a headboard...as soon as I have a space to build it in :)
Built from Plan(s)
Estimated Time Investment
Weekend Project (10-20 Hours)
Finish Used
Minwax polyshades- satin honey. I used minwax wood conditioner as well.
Recommended Skill Level
Beginner
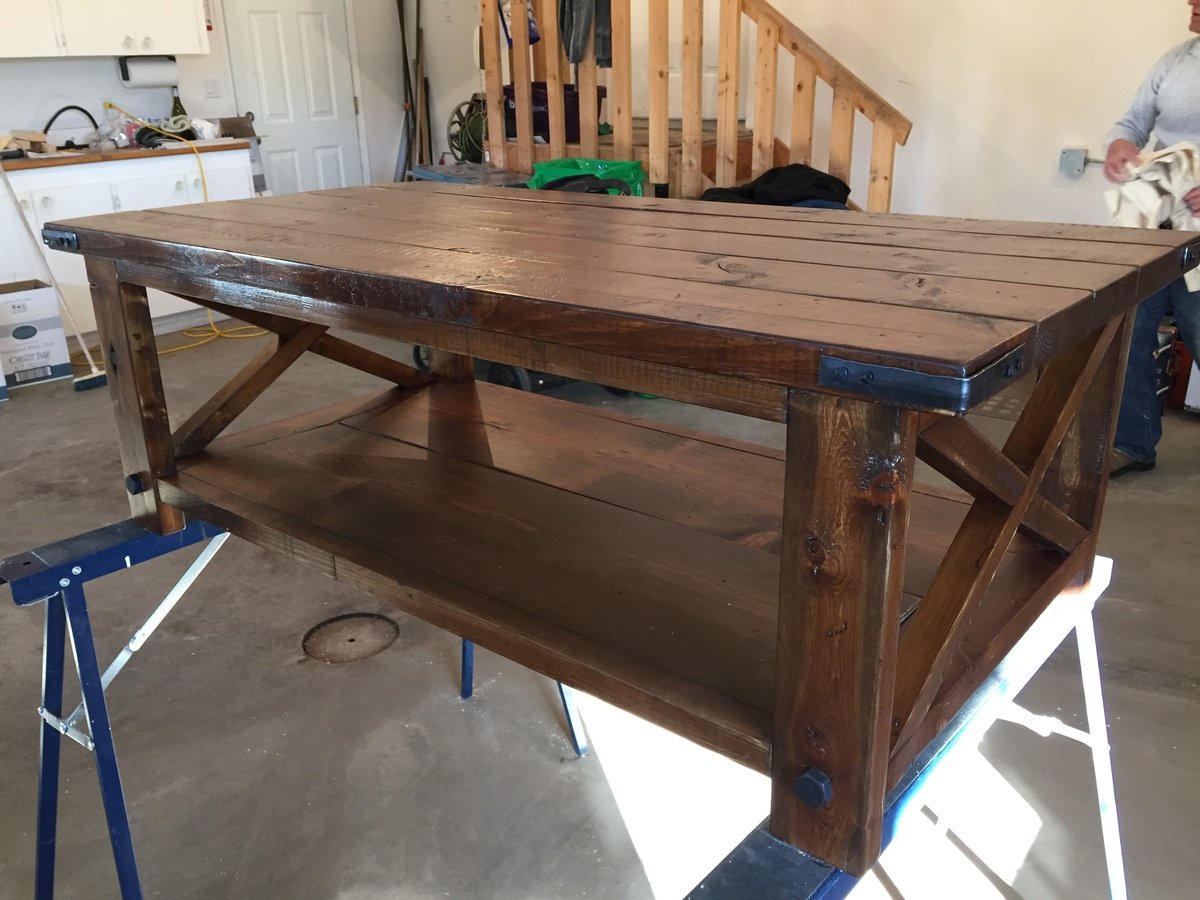
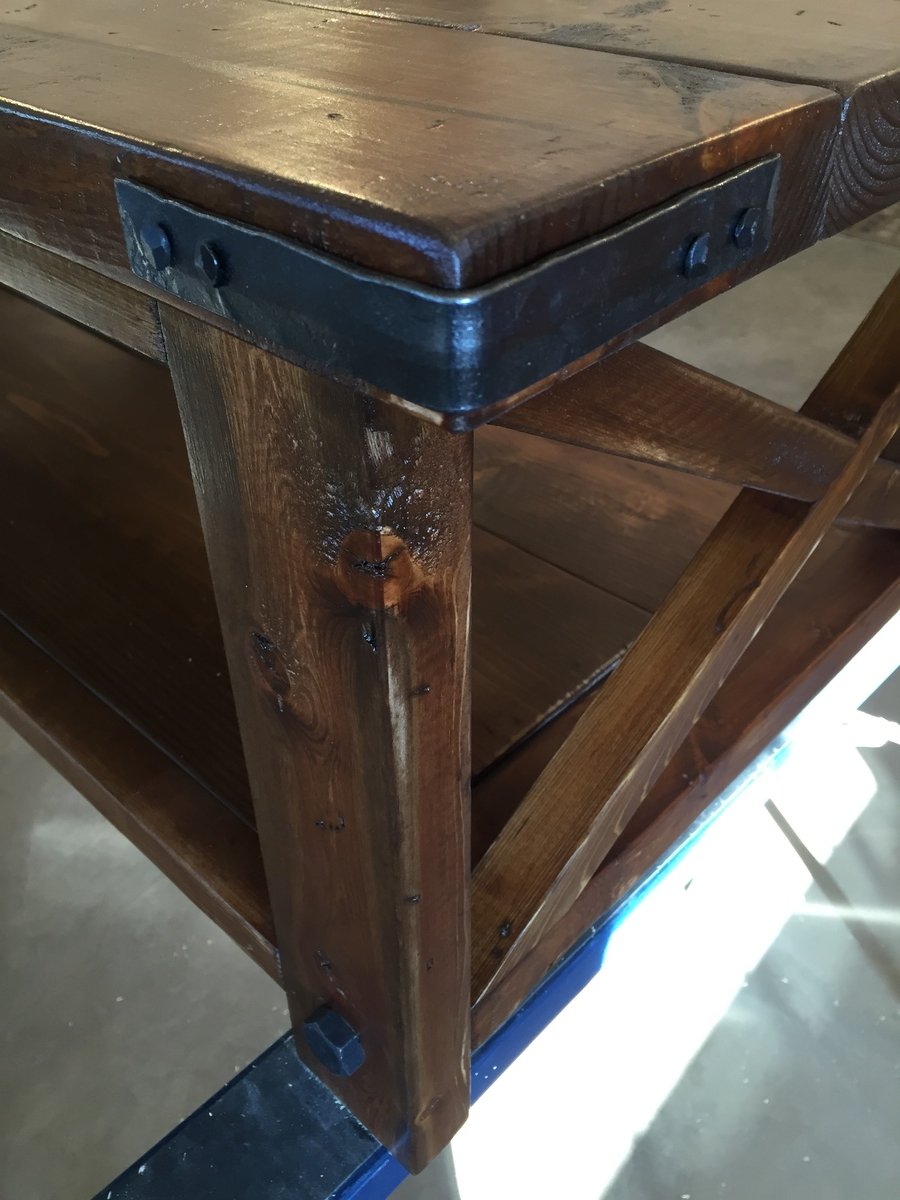
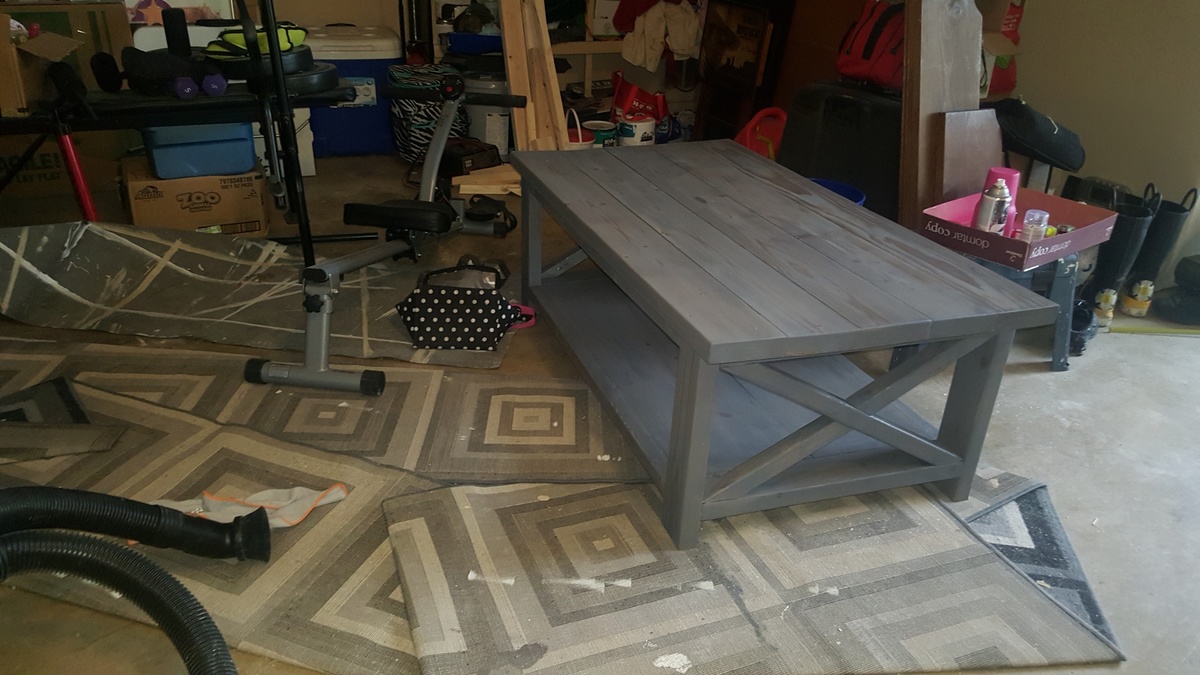
Rustic X coffee table
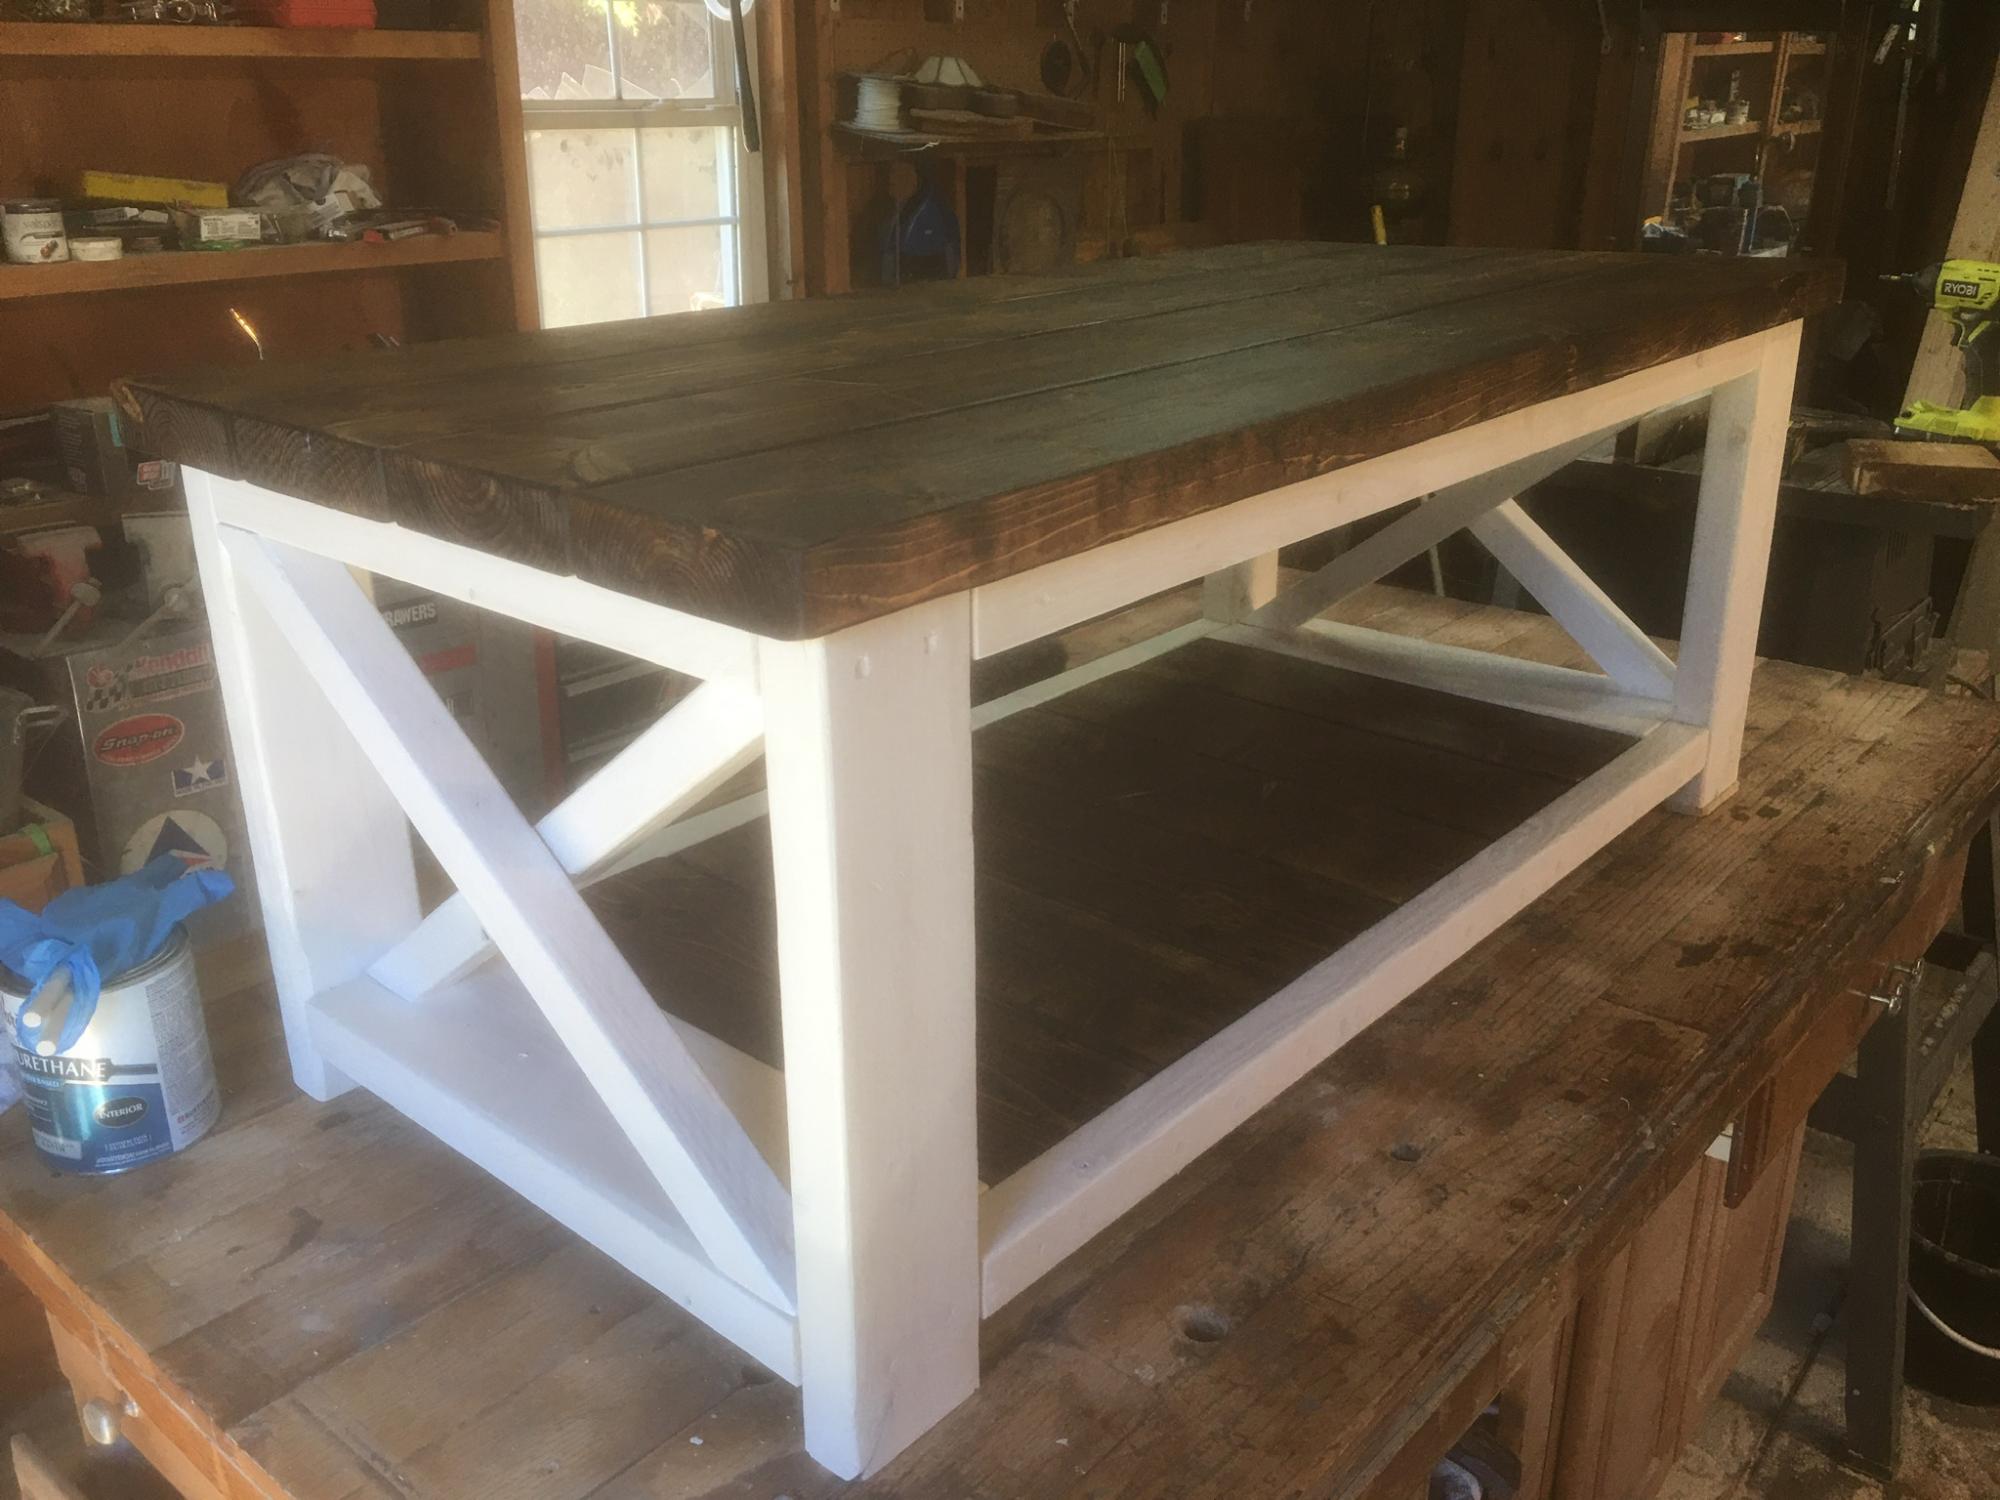
The first pic is the rustic x with 2x6. These plans are easily modified. The second is the rustic x with 1x material. Both projects were fun to complete!

Built from Plan(s)
Comments
Wed, 10/06/2021 - 09:37
Both look great!
Thanks for sharing, love the finish choices and the different tops!
Turquoise Lockers
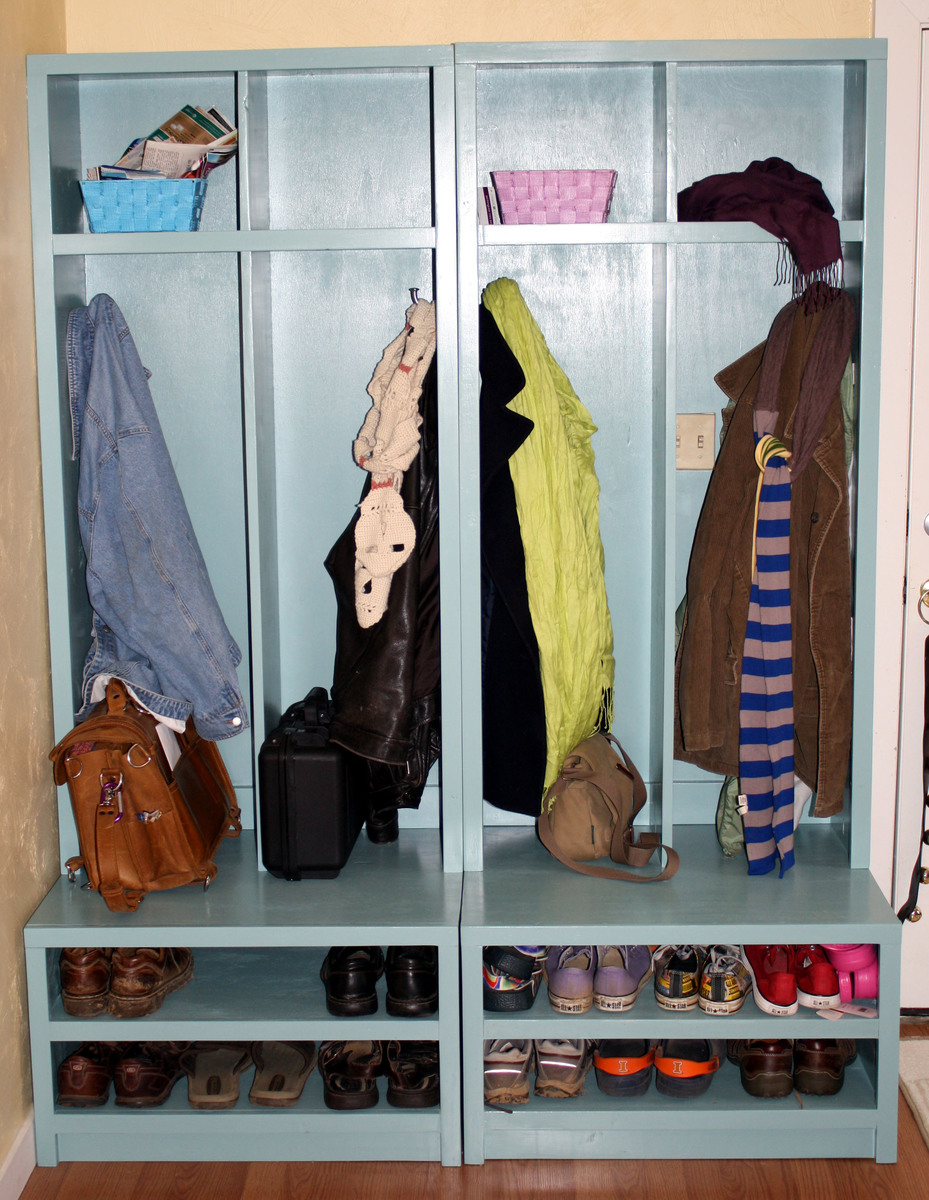
Always wanted lockers, now I have them! We built these in a couple of afternoons, but took forever to sand and finish (of course, the sudden onslaught of winter didn't help.) Added 10 inches to the height of the hutches to fit our adult coats better. We are absolutely in love with them!
Built from Plan(s)
Estimated Cost
$150
Estimated Time Investment
Weekend Project (10-20 Hours)
Finish Used
Oops paint, in a lovely turquoise and several coats of minwax polycrylic.
Recommended Skill Level
Beginner
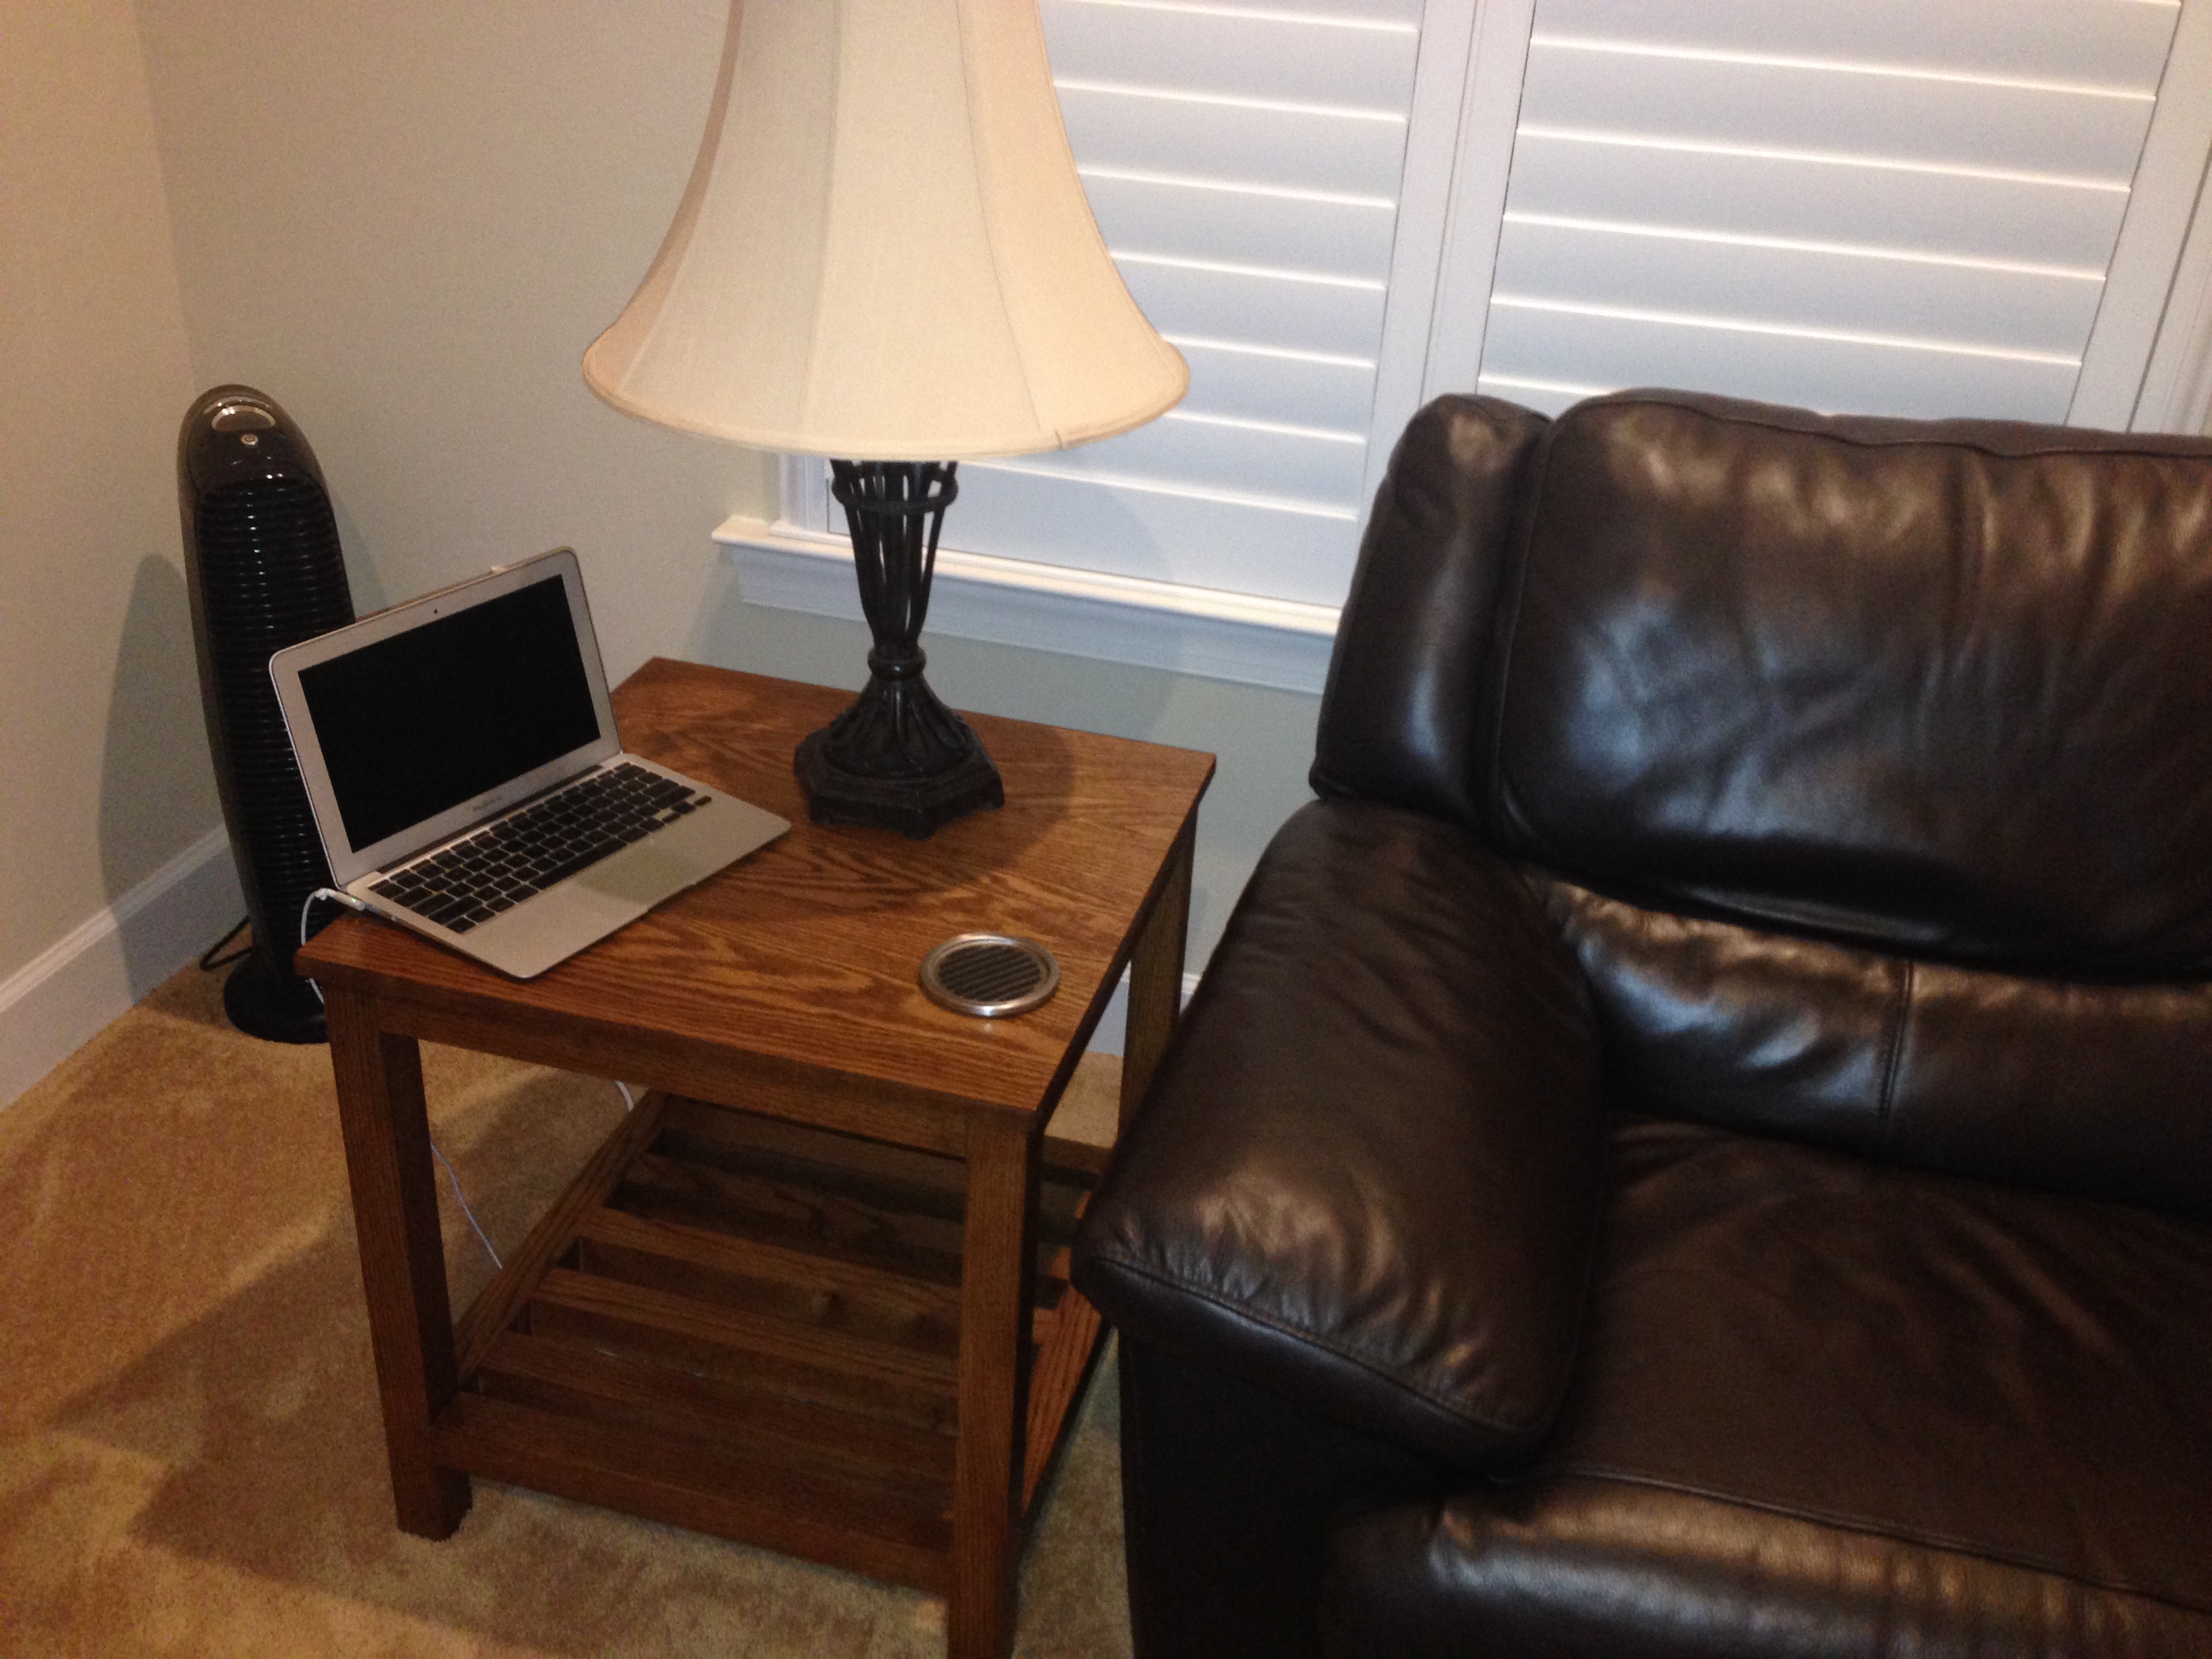
Spa Side Table

I completed this table with my 5 year old daughter as my assistant. My husband requested a table to put next to our new hot tub to set his drinks on and this is perfect. We only put one board on the top because I felt since it would be outside, I wanted a smooth top. I just screwed it in diagonally from the bottom. I also used spar varnish since it would be outside.
Built from Plan(s)
Estimated Time Investment
Afternoon Project (3-6 Hours)
Finish Used
Rust-o-Leum Ultimate Wood Stain in Kona
Semi-gloss Spar Varnish (3 coats)
Semi-gloss Spar Varnish (3 coats)
Recommended Skill Level
Beginner
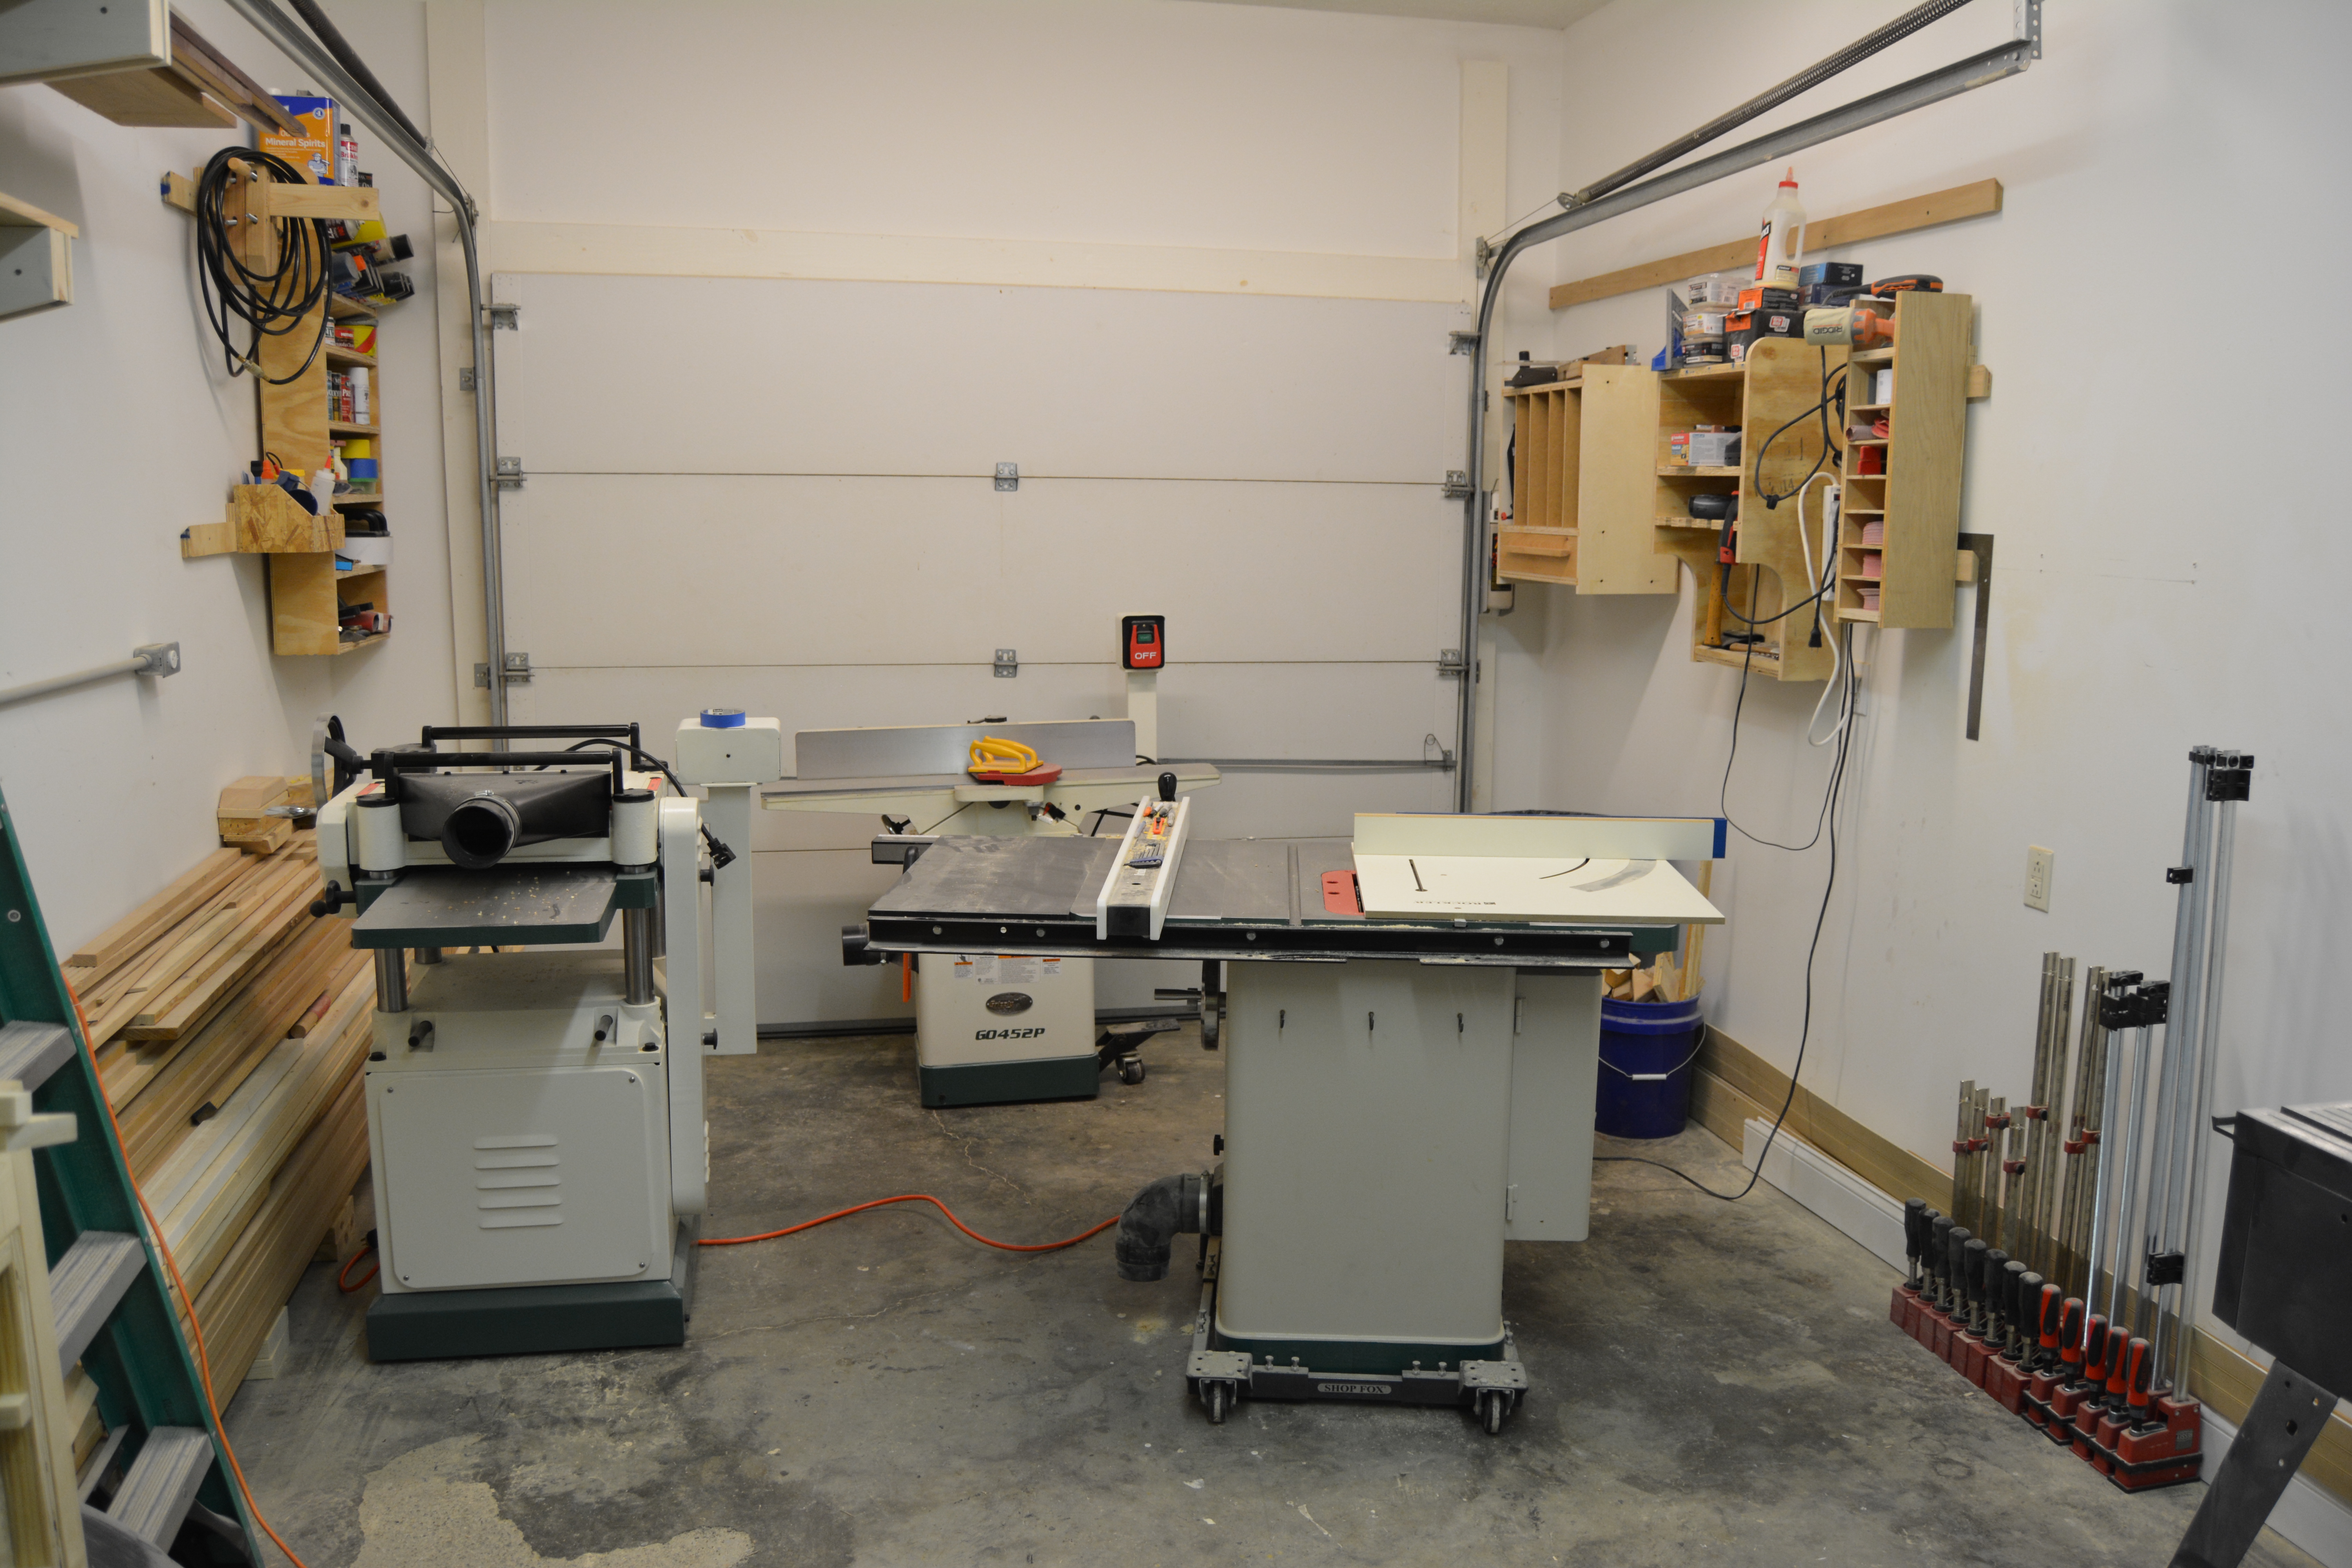
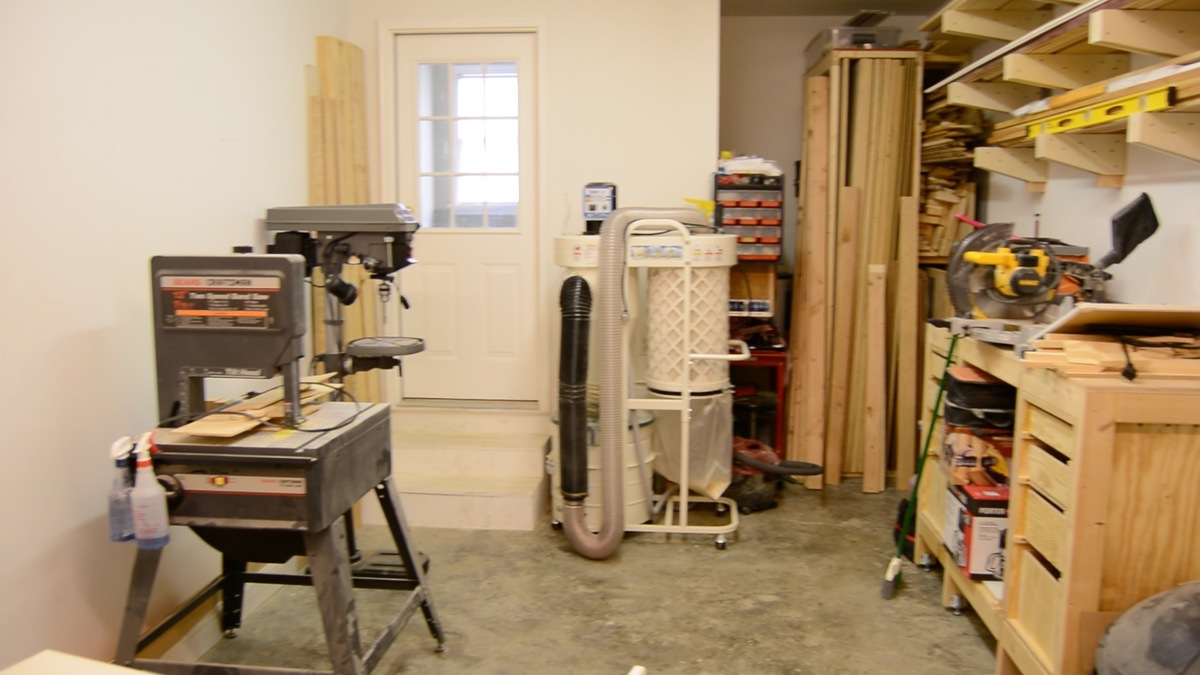
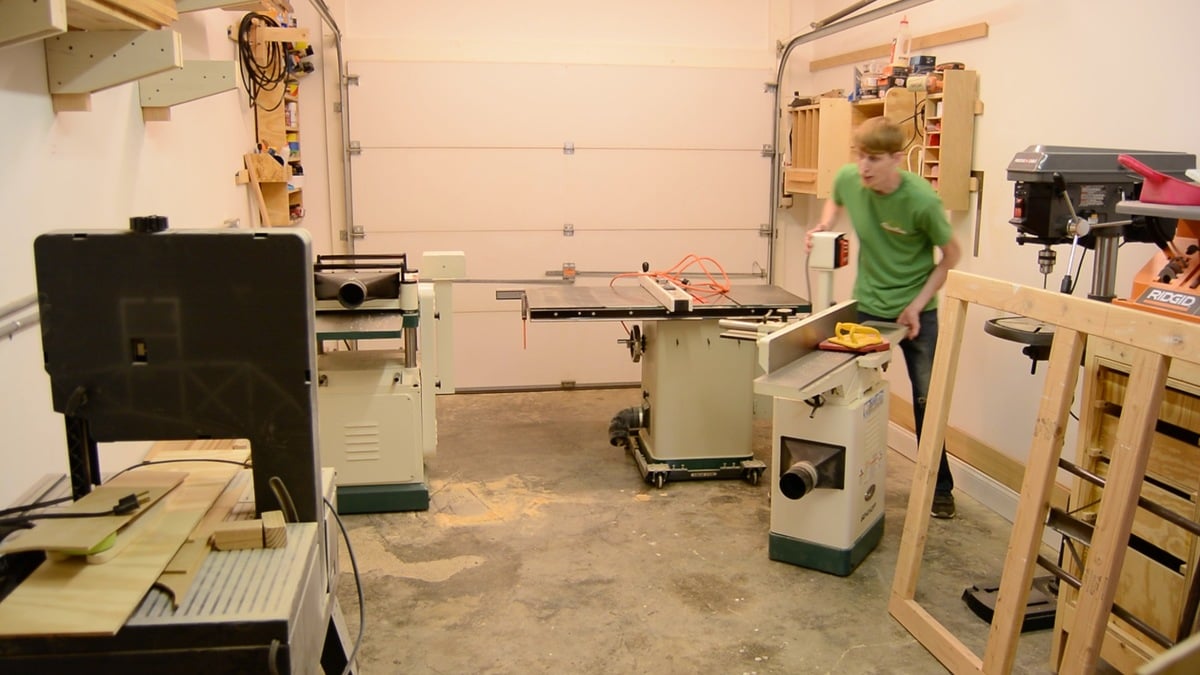
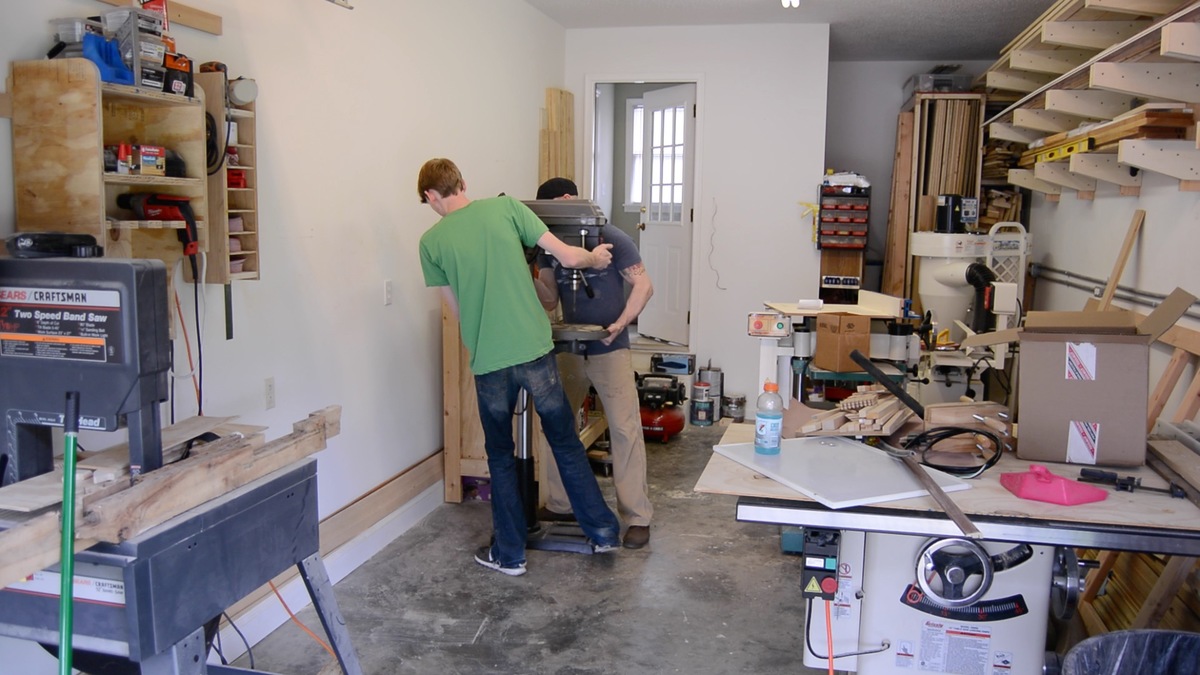
Small shop layout
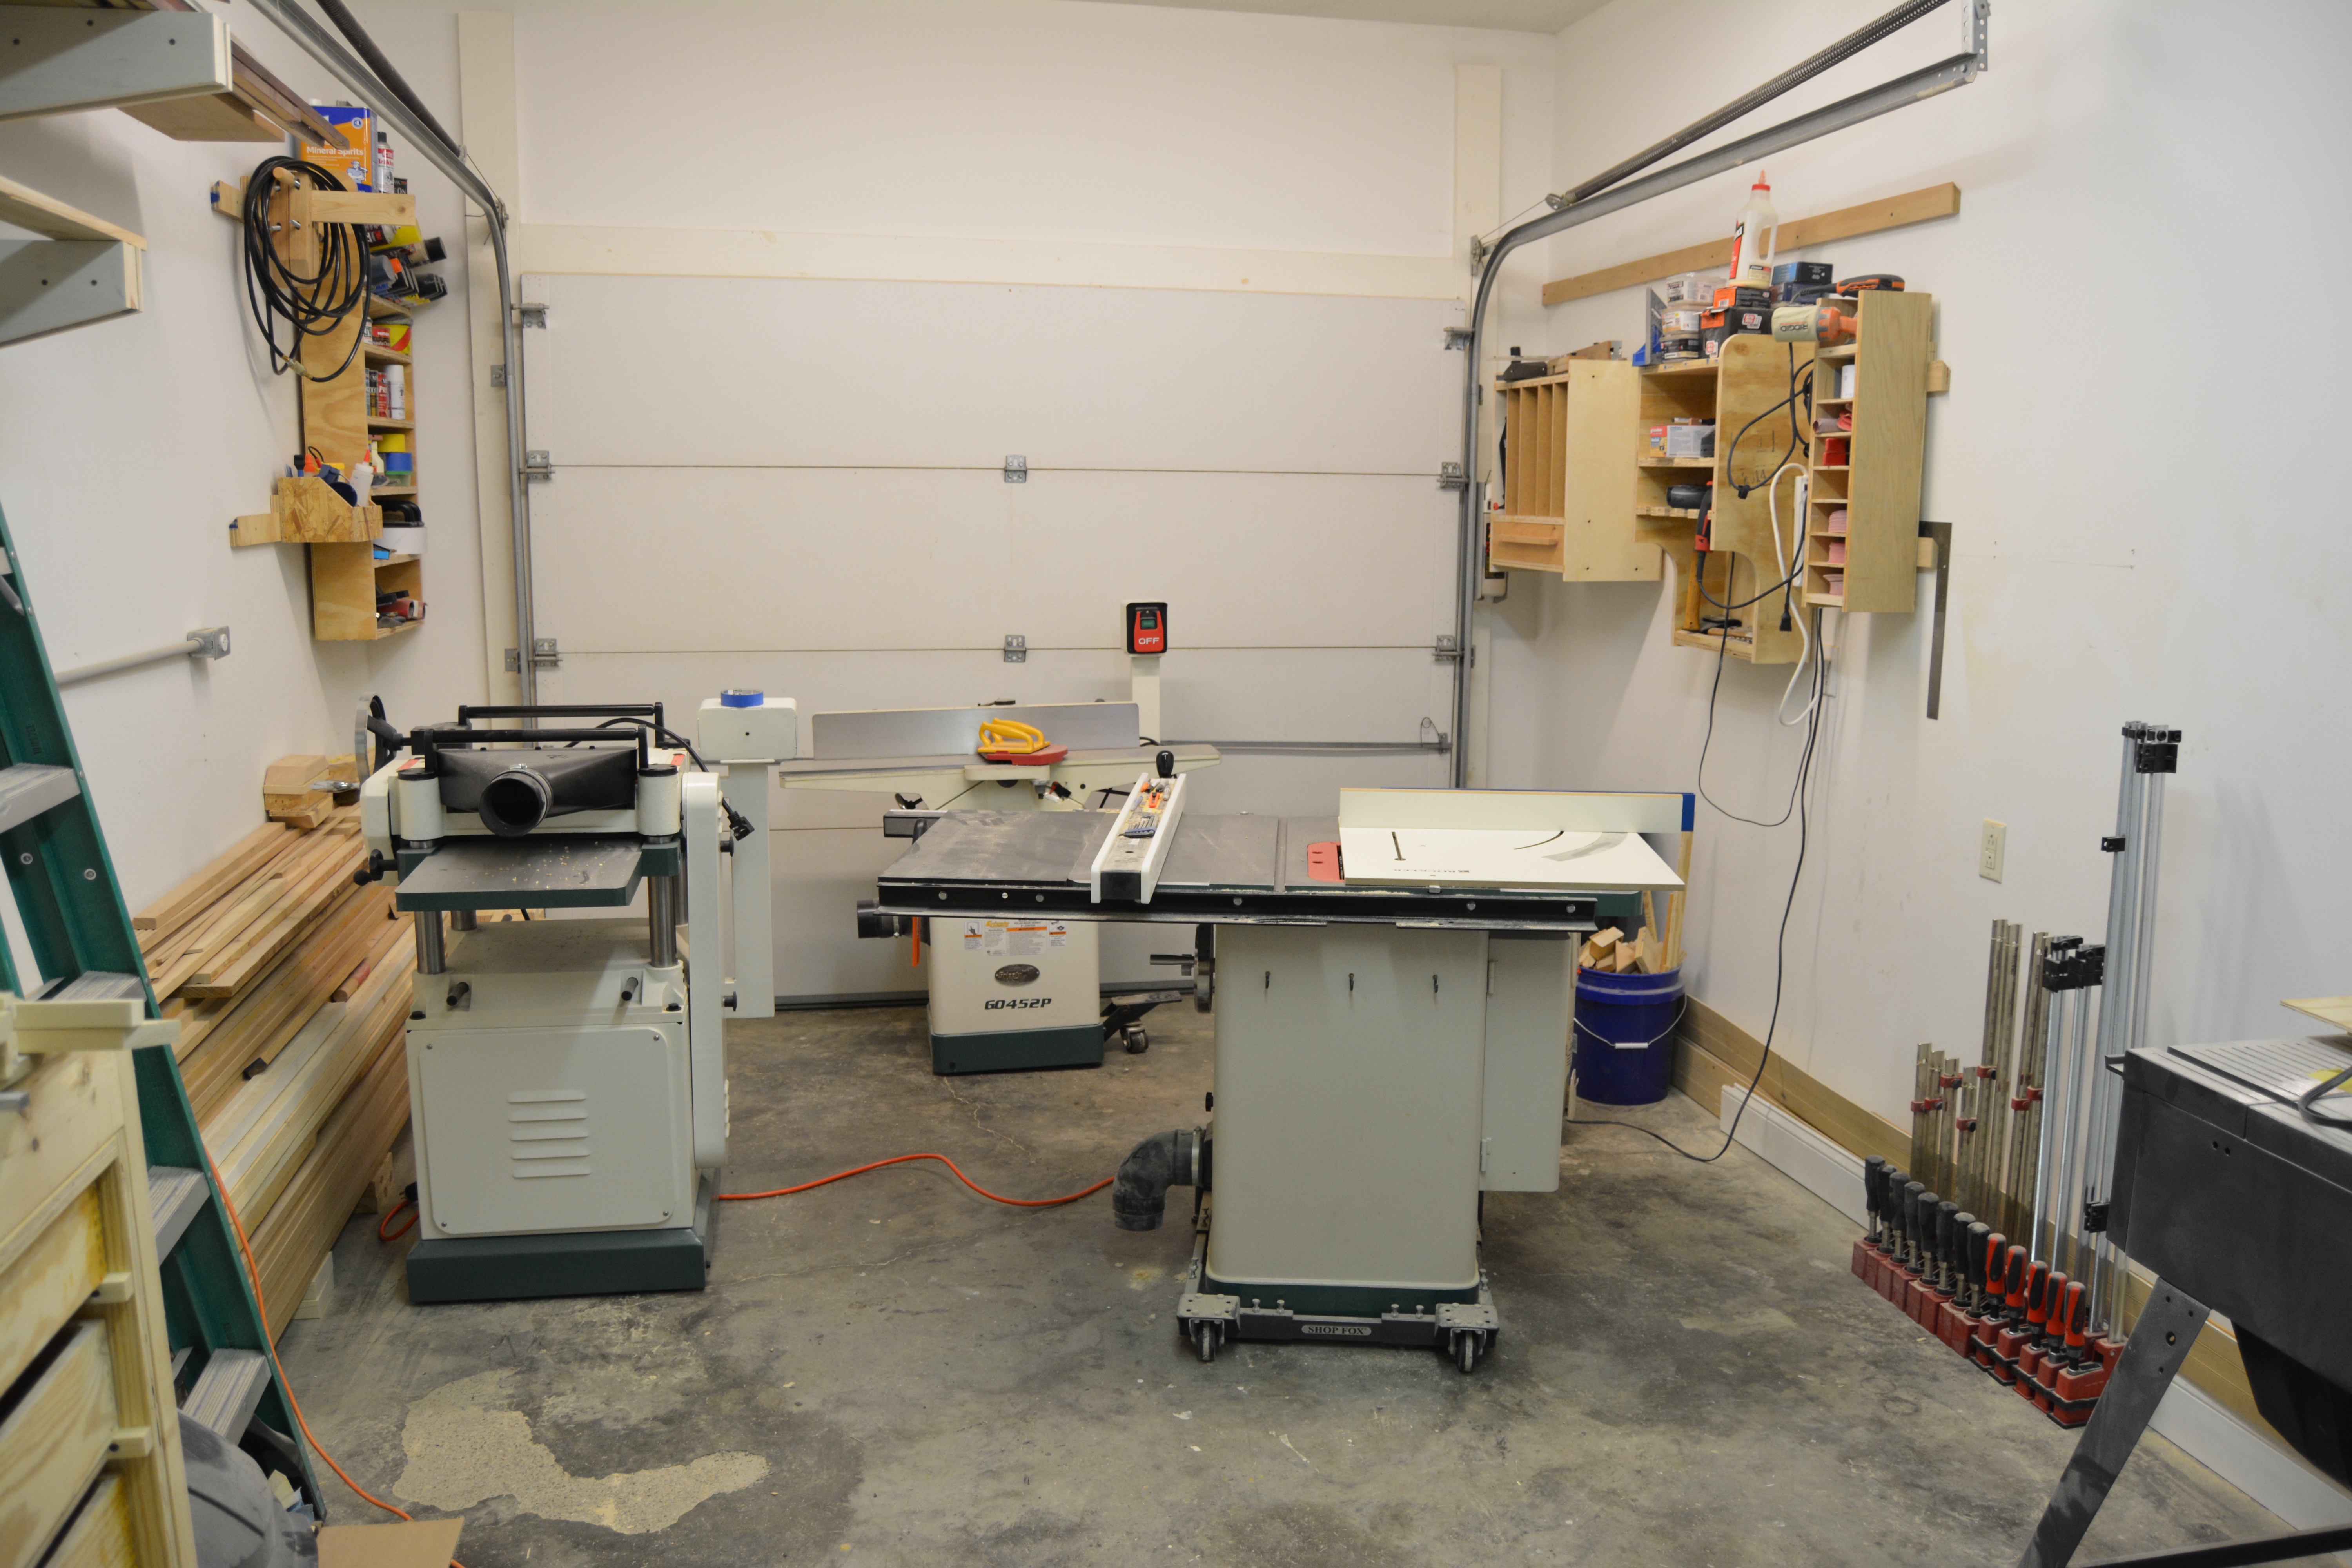
This week's project was to reorganize my small garage shop for a better layout. Hopefully you can get some ideas from my shop to better organize your own.
Blog: http://www.lanebroswoodshop.com/2015/04/new-shop-layout.html
Estimated Cost
Free!
Estimated Time Investment
Weekend Project (10-20 Hours)
Recommended Skill Level
Beginner
Rustic Bathroom Cubby with Makeup Box, Mirror, and Jewelry Hooks
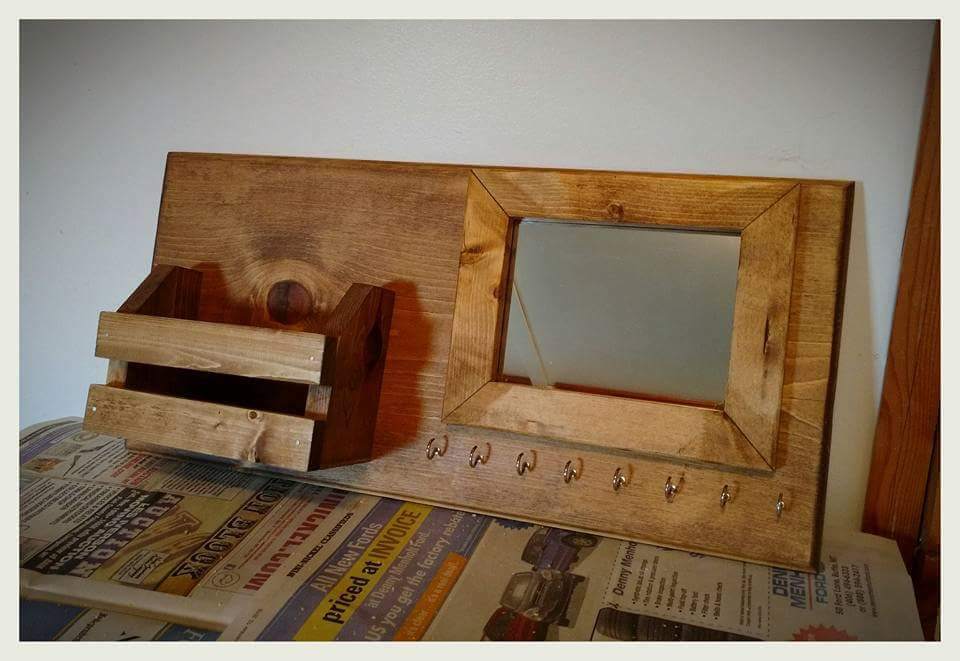
Fiance wanted some rustic bathroom decor, and asked for 3 things. It should have a makeup box, jewelry hooks, and a touch up mirror. She was super happy with the finished product. Stained in Early American and given a Semigloss poly.
Estimated Cost
$16 for 1x12 board, $4 for jewelry hooks. Everything else was scraps and stuff on hand.
Estimated Time Investment
Afternoon Project (3-6 Hours)
Finish Used
Minwax Early American, Minwax Semigloss Poly
Recommended Skill Level
Beginner
Outdoor Sectional
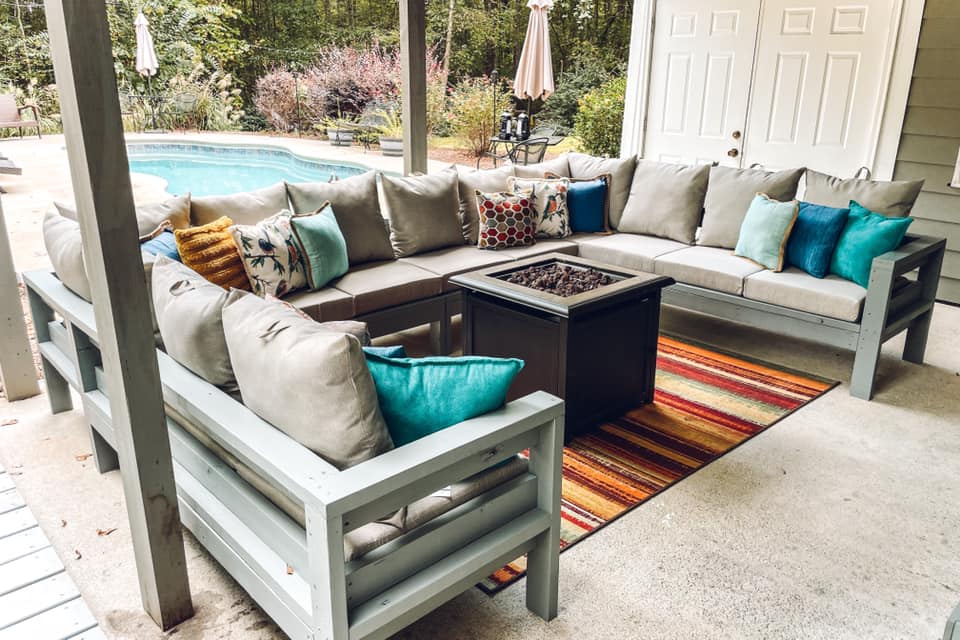
We couldn't find the perfect piece that would accommodate a crowd. As always, Ana's easy-to-follow and adaptable plans came through for us! We used a version of the One Arm 2x4 Outdoor Sofa to build this 8x12 sectional.
Built from Plan(s)
Comments
Tue, 12/14/2021 - 14:06
Amazing outdoor space!
WOW, that is so awesome and inviting! Thank you for sharing:)
Laundry Basket Dresser

Anything to make Laundry easier and looks good I will build. This is a very simple project that is invaluable to anyone that does laundry. We have it in our master bath to help with separating our laundry.
It is sturdy, functional and is a nice looking piece. The only changes I made was to use 2x2's for the rails instead of the metal L-brackets.
Built from Plan(s)
Estimated Cost
$30
Estimated Time Investment
An Hour or Two (0-2 Hours)
Finish Used
After a good sanding I primed it with Kilz oderless spray primer. Then painted it with some left over Trim Paint we had for our house. Finished it off with two coats of poly in a Satin finish.
Recommended Skill Level
Beginner
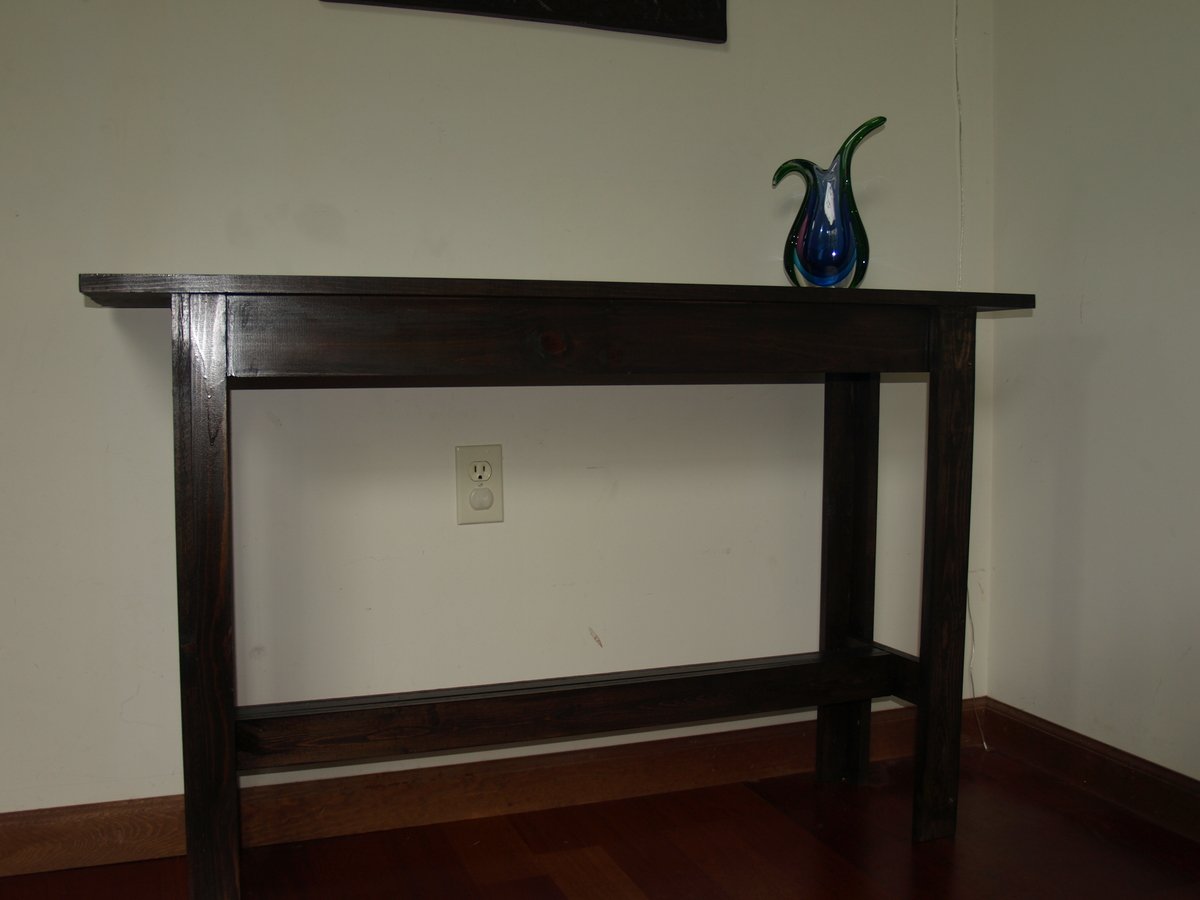
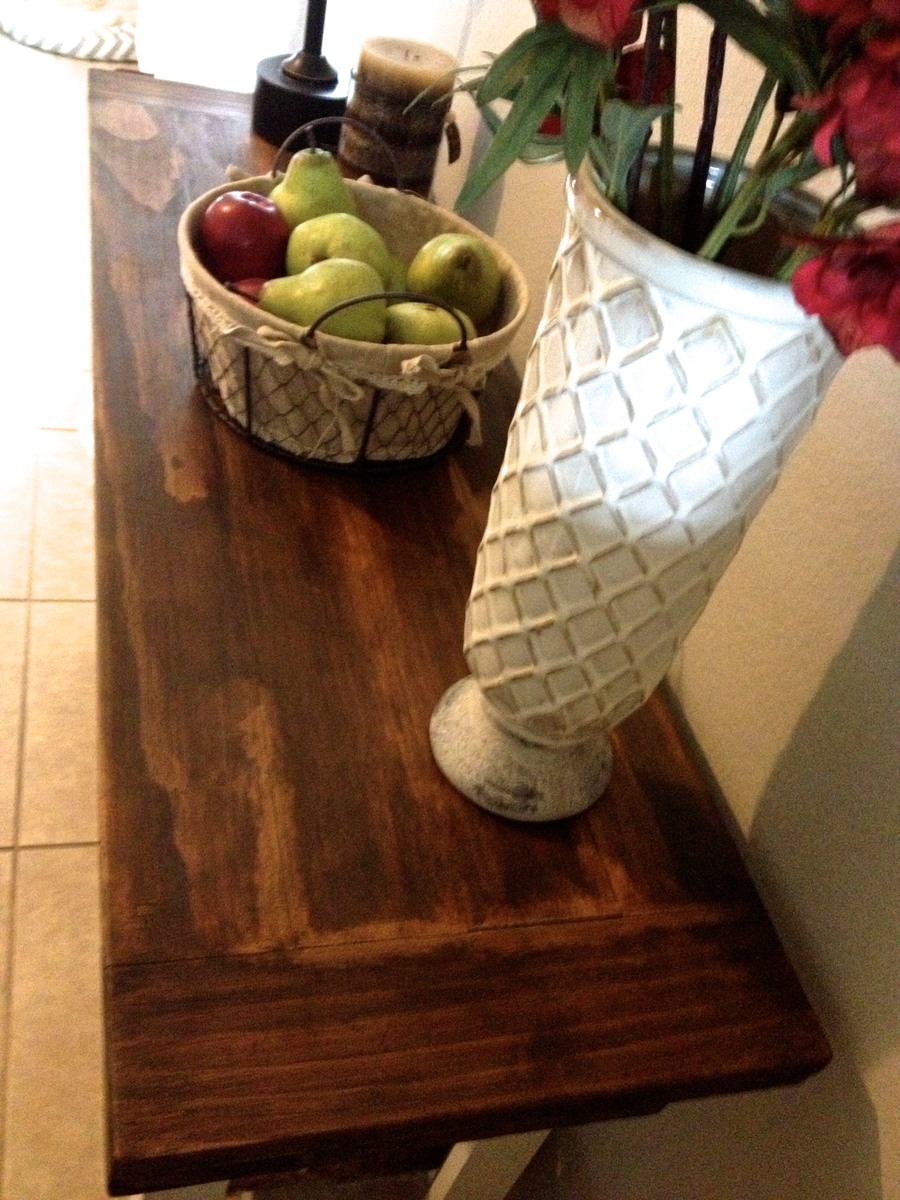
Knock off Hyde Console Table
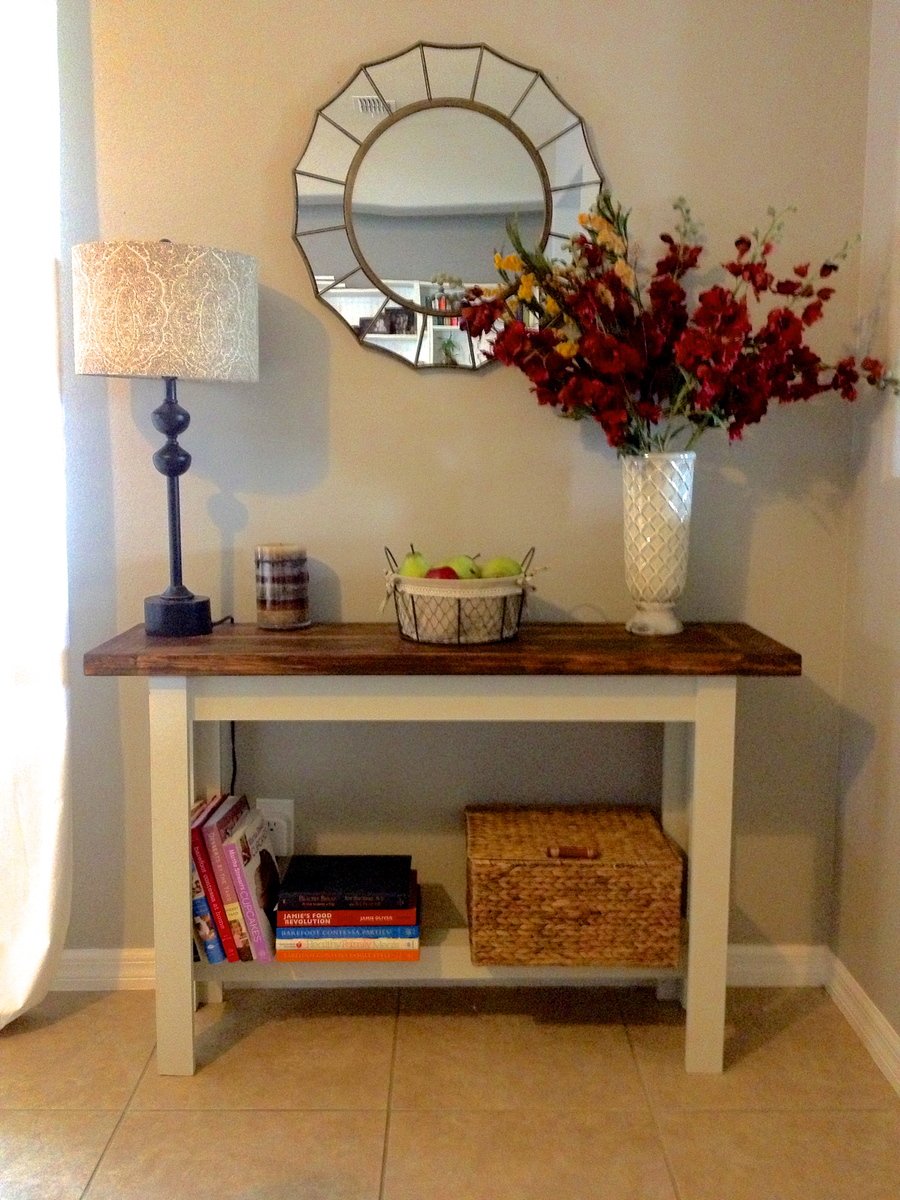
I am cheap and I have expensive taste. I love, love, love Pottery Barn. I also love Michael Kors, Coach, Gucci, Jimmy Choo, and all things pretty. Especially pretty shiny things.
So I regress...
Anyways, I have had this bare spot in my living room and it has slowly been driving me crazy. Through much painstaking research I have decided that I wanted something like the Hyde Pottery Barn Console Table. Okay, not something like.... I wanted the Hyde Pottery Barn Console Table, but it also would cost $500. Hahaha. $500 for a console table. That's just ridiculous says my cheap, fugal self.
So I look at ebay and craigslist... nope, no one selling my dream table. And then a miracle happens.... I stumble across Ana White's blog. I think I've found my new blog BFF!
I followed her plans exactly and I decided to paint the bottom off white and stain the top walnut.
This was my first ever furniture build and I'm so excited by how it turned out!
Thanks, Ana!
Built from Plan(s)
Estimated Cost
$50
Estimated Time Investment
Day Project (6-9 Hours)
Recommended Skill Level
Starter Project
Comments
Tue, 06/04/2013 - 13:57
First Build!
You did an amazing job! I'm so glad you found what you wanted and were able to create it yourself!
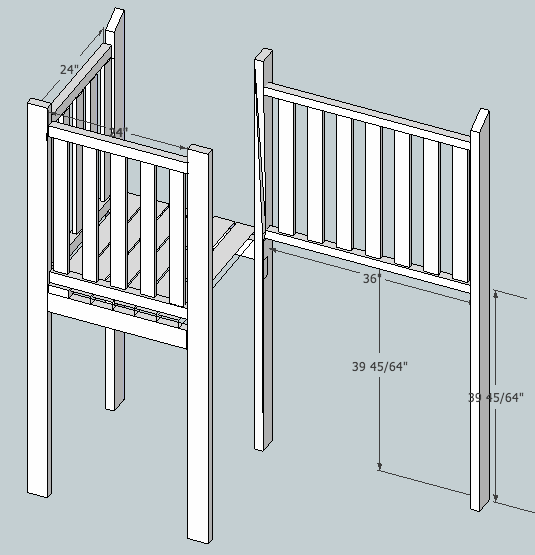
Clubhouse Bed -Full Size with Slide

Thank you Ana for the clubhouse bed plans! I added 15" to the width of the rails to accommodate a full size mattress. On the other side I made a slide platform! I chose a standard plastic slide because I couldn't find a way to make a wooden slide at home with the swoop at the bottom to keep the kids from hitting the carpet hard :). We couldn't have a green outdoor-looking slide, am I right? I used Rustoleum spray paint made for plastic in French Lilac color. After the paint I used a top a coat of Minwax 3x polyurethane. I also used the Rustoleum spray paint for the window grids.
To accommodate the slide specs I needed to raise this bed 5". I just made each leg 5" longer. Also, the ceiling in my daughter's room slopes down so I cut the point off the back of the bed. Totally not noticeable. I needed to do this even if I hadn't raised the bed :)
I also added full window frames around the window to make the bed a little more girly! One unexpected result is that the bedroom looks BIGGER with this bed in it. She had a twin size step 2 plastic castle bed before but now there is so much more room to play. Win! Changing the sheets isn't too bad but you need to get in the bed to do it.
I built this bed by myself. Don't be afraid, you can do this! Once the panels are assembled they get a bit heavy so you have to be sort of creative to drag them across the garage floor :)
Next up: mailbox for the bed, shelves under the slide and window boxes!


Built from Plan(s)
Estimated Time Investment
Week Long Project (20 Hours or More)
Finish Used
Valspar Flat White Paint in Glacier; Minwax 3x Polyurethane (I would maybe use wax or something next time! Maybe even semi-gloss paint)
Recommended Skill Level
Intermediate
Comments

Sun, 05/03/2015 - 07:37
This looks amazing! What an
This looks amazing! What an awesome job! I love the slide!
Slat Bench from Palettes
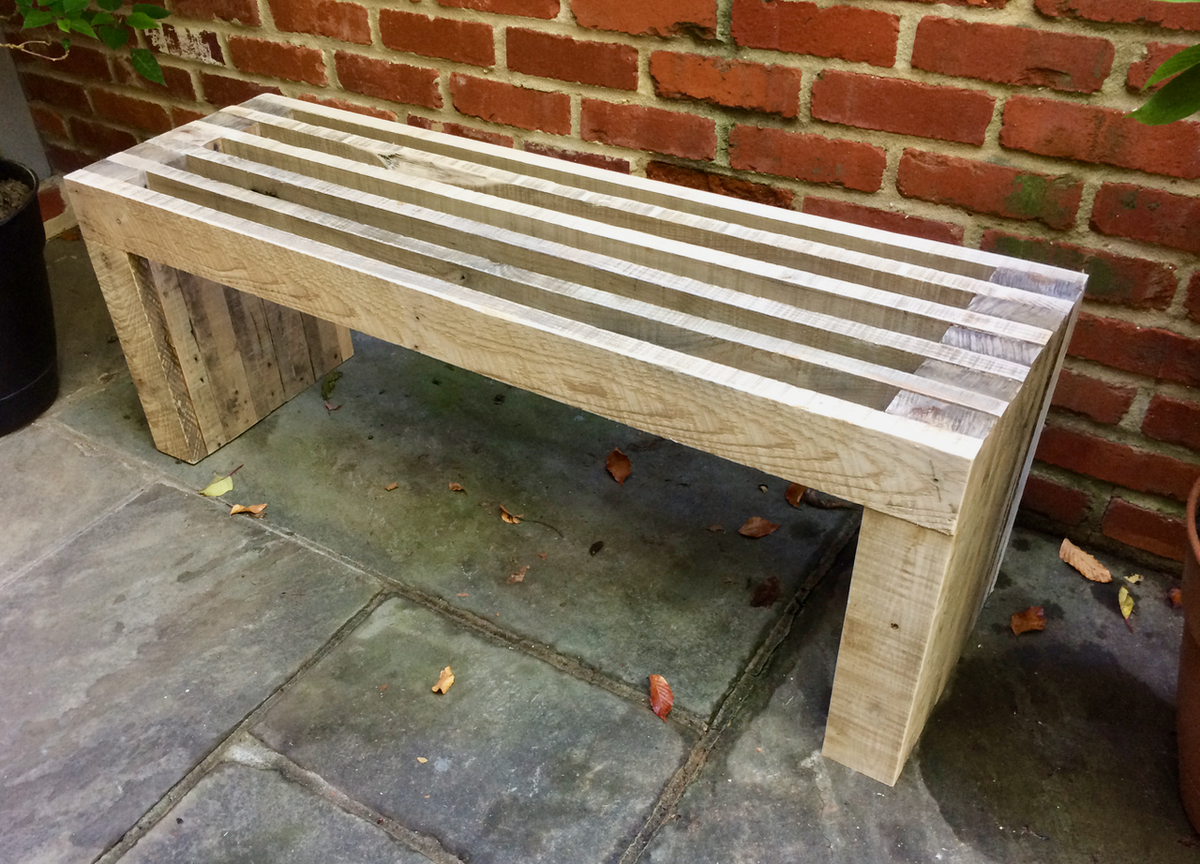
This was made from several heavy duty palettes that were used for delivering stone. Because of the wood I could get off the palettes, I switched the thin and thick pieces so that the slat gaps were where the 2x4 pieces were missing instead of the 1x4s.
Built from Plan(s)
Estimated Cost
$10 (for glue and screws)
Estimated Time Investment
Afternoon Project (3-6 Hours)
Finish Used
None
Recommended Skill Level
Beginner

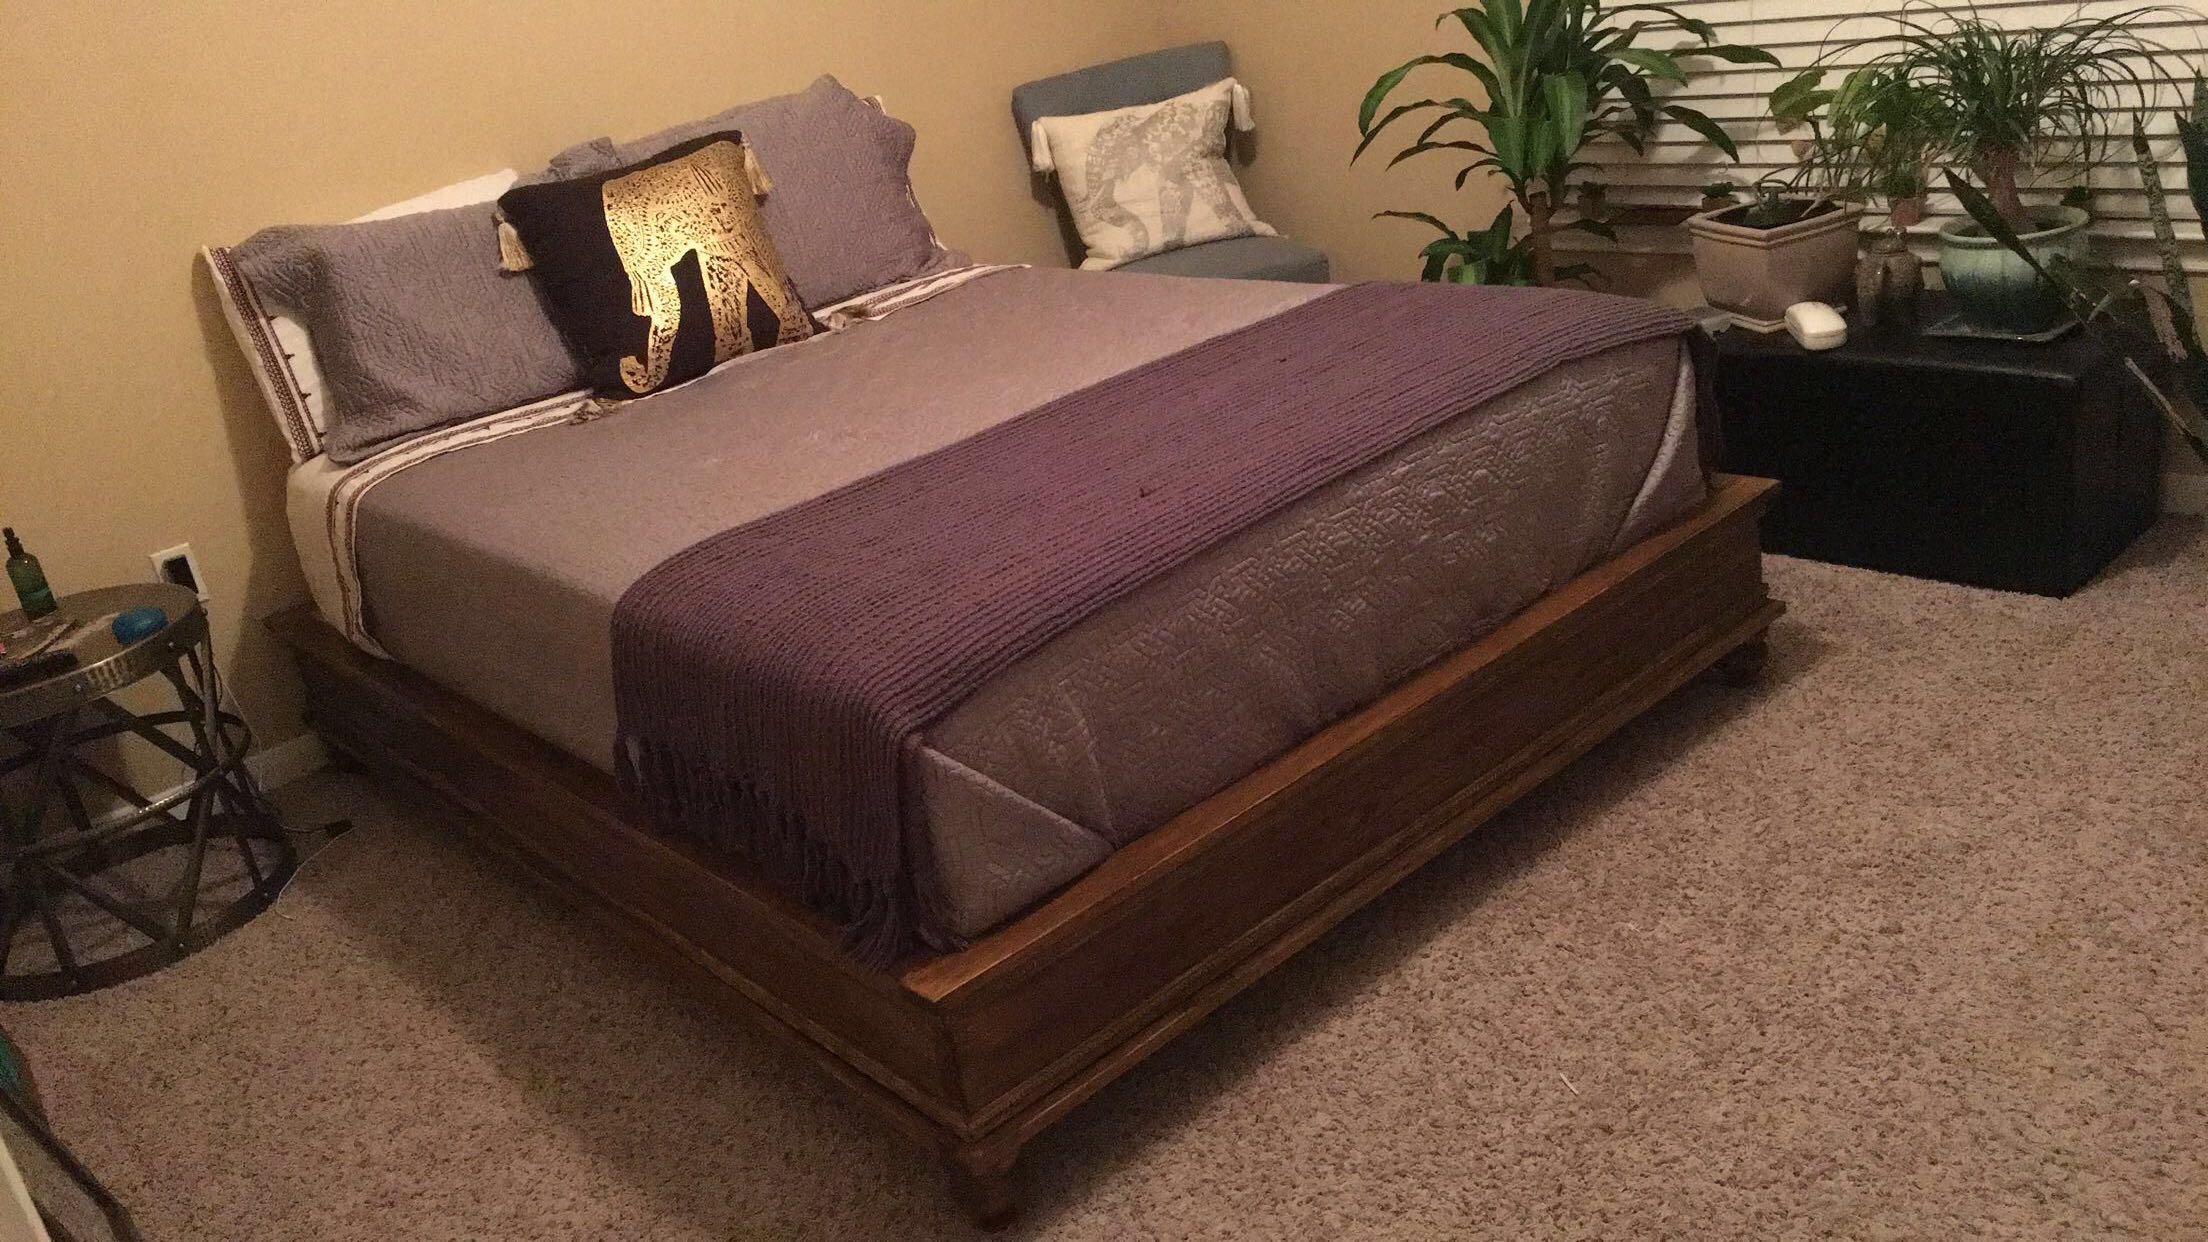
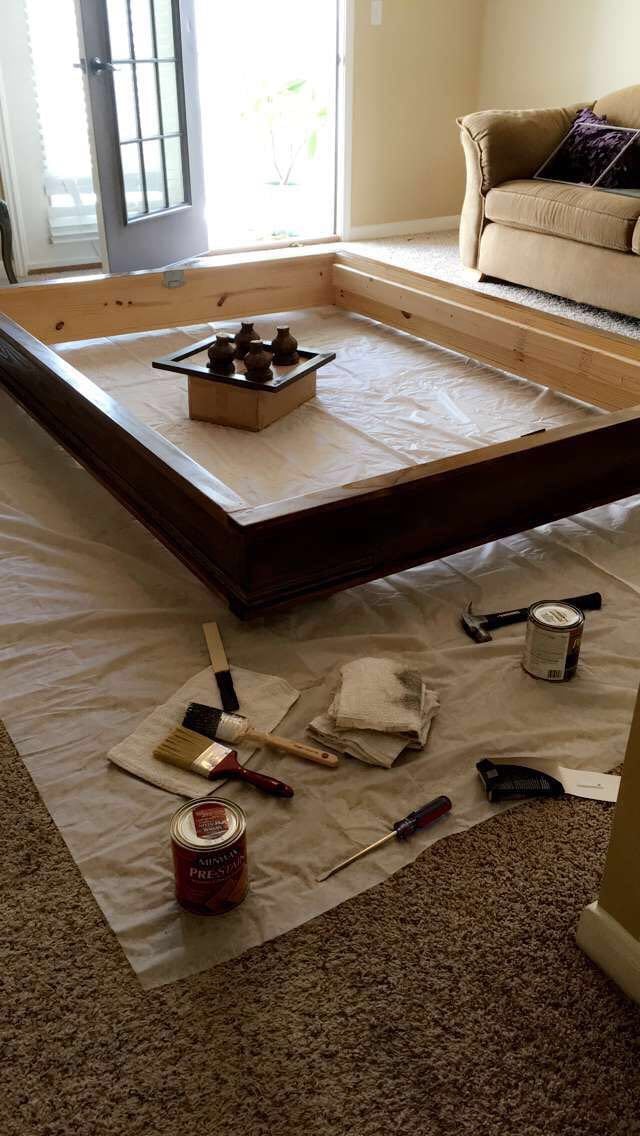
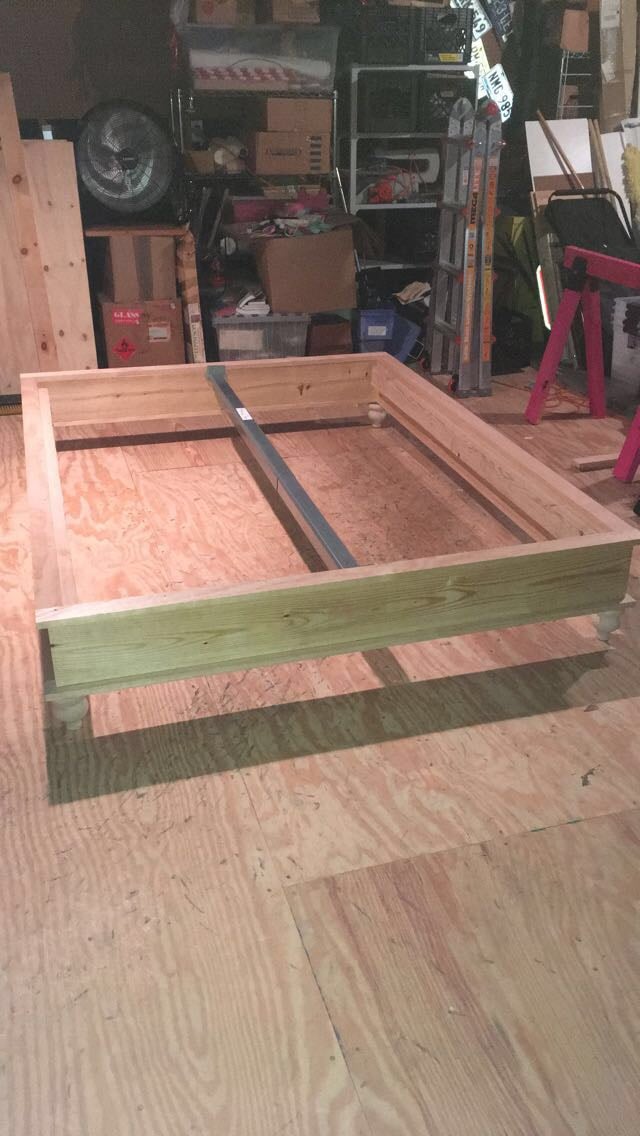
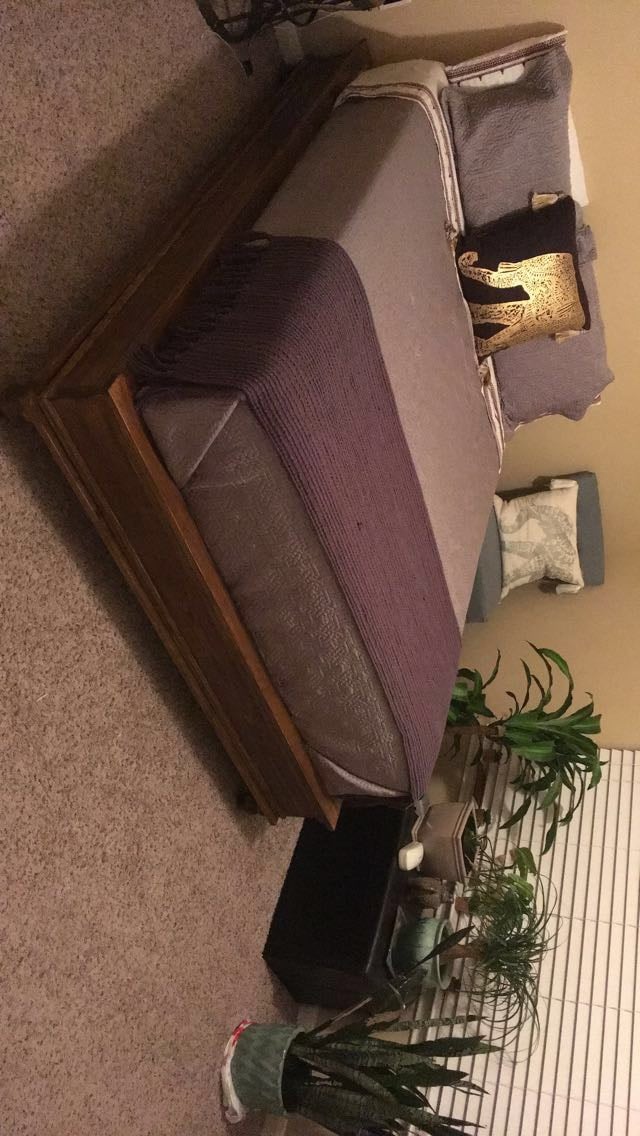
Modified Farmhouse Bed

This was our first "Big" build.... Our bed. I modified the footboard as I like taller footboards and it keeps the mattress in super snug!!!! Love this bed with light stain!!!! Also we used tongue and groove boards for the head and footboard!!! Went together so nice!!!
Estimated Cost
$120.00
Estimated Time Investment
Day Project (6-9 Hours)
Recommended Skill Level
Intermediate
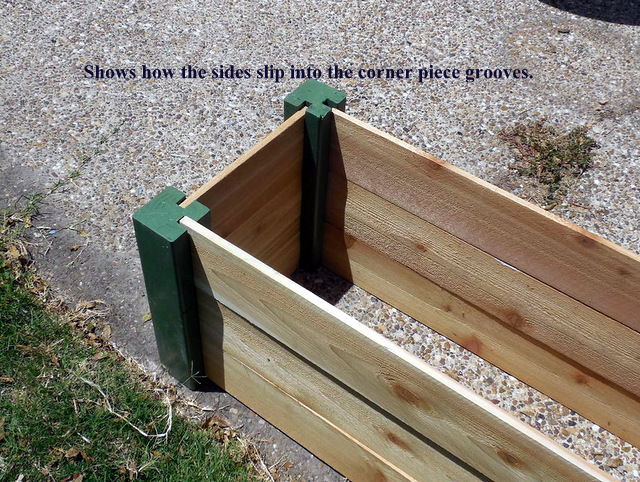
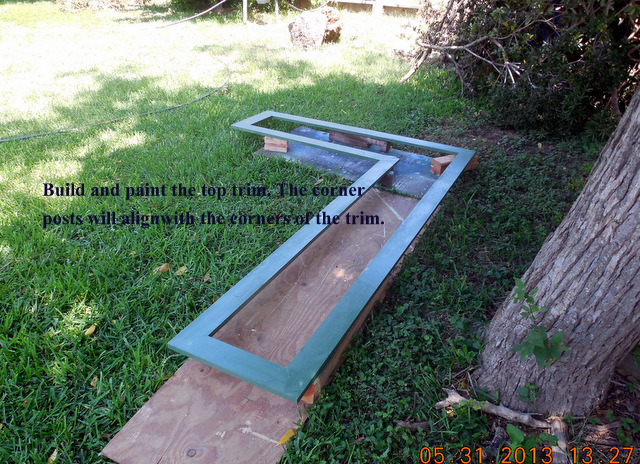
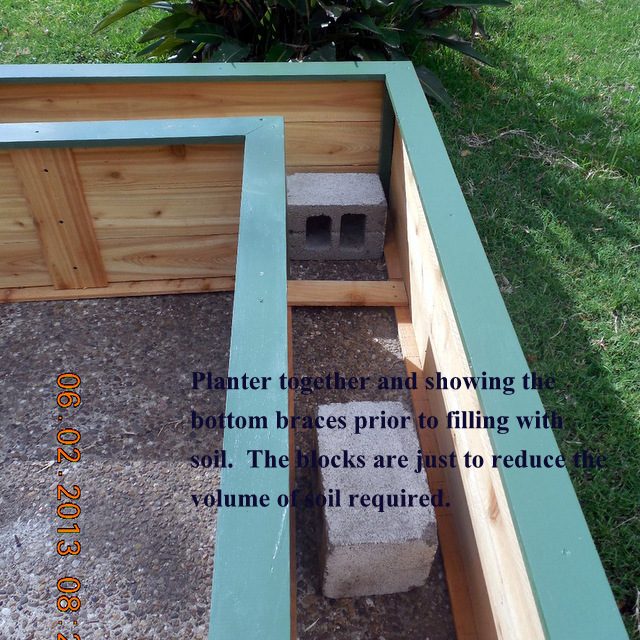
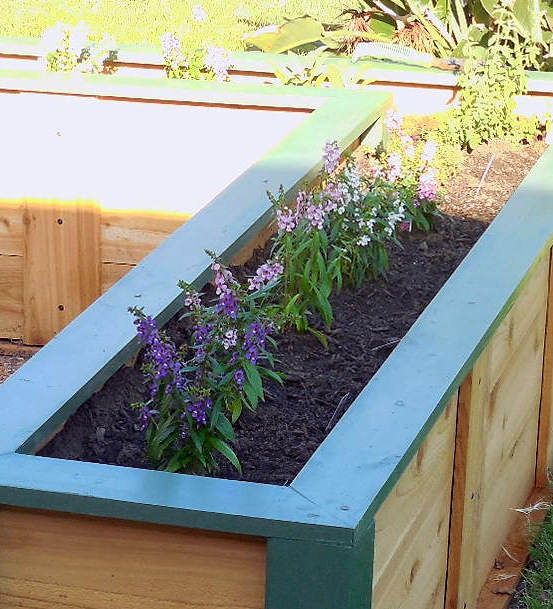
A Big Patio Planter

I have a really boring backyard patio so I thought I would spice it up with flowers but I could not find a plan for a large right angle planter. So I made up my own.
The planter is made from cedar fencing but pine for the top trim and the corner legs. The legs have grooves that the sides slide into and are not screwed or glued in place. That is so you can remove the top trim and then just pull the sides out to replace them as needed or to even change the size of the planter.
This planter is 18" high so it is comfortable to sit on but that also means you will need a lot of soil to fill it up. Mine took 26 40lb bags which is over 1/2 ton of soil. Add water and that planter is here to stay. But it also means that there is a large tendency for the sides to bulge along the bottom so I placed stop blocks along the bottom base and screwed into the base.
I planted Angelonia for color and sage, oregano, and thyme for spice. It was fun to build and came out well but it was expensive as the soil along was nearly $60. Add another $50 for lumber and screws and you have exceeded the magic $100 mark. Still a good deal, however.
Estimated Cost
$110
Estimated Time Investment
Weekend Project (10-20 Hours)
Finish Used
Painted the top trim and legs with Behr water-based enamel and left the cedar to mellow on its own.
Recommended Skill Level
Intermediate
Comments
Wed, 06/05/2013 - 10:14
Thanks for a Good Idea
Thanks for a very good idea. If I ever do another on I will incorporate your suggestion.
Wed, 06/05/2013 - 10:17
Thanks for a Good Idea
Thanks for a very good idea. If I ever do another on I will incorporate your suggestion.

Sun, 06/09/2013 - 06:05
I don't know what it would do
I don't know what it would do cost-wise, but you could also use gravel to fill the bottom of the planter to give it better drainage.
Rustic X Coffee Table First
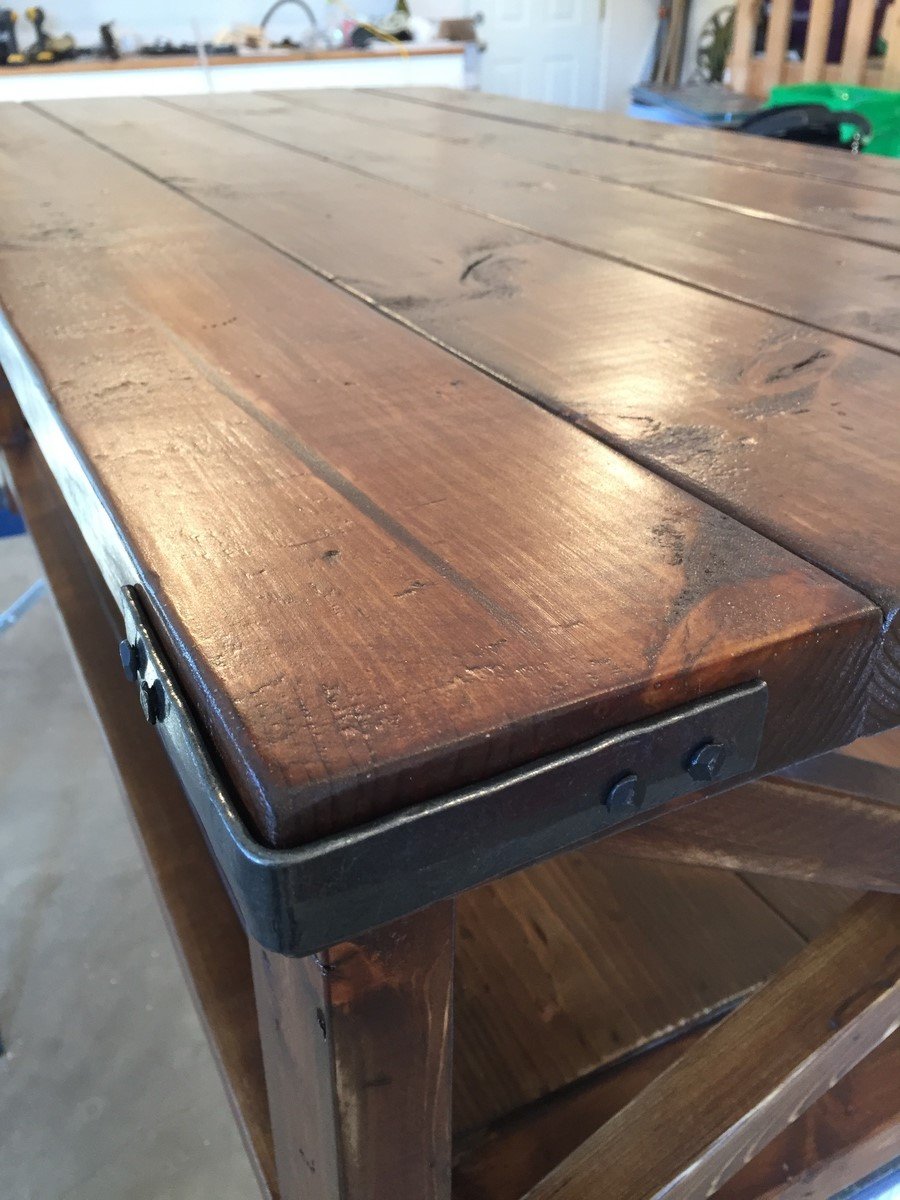
Came across this plan as my first wood working project. Took the corner brackets to a different level, spoke with a local blacksmith who created the brackets for me to give it a more rustic feel. Created the nails, same way they were done in the early 1800's.
Total time took me longer than normal since this was my first project. Otherise I could see hammering out one of these a day (excluding waiting for stain to dry)
Very excited to keep going, thanks for the great site Anna!
Built from Plan(s)
Estimated Cost
$75 dollars roughly
Estimated Time Investment
Weekend Project (10-20 Hours)
Finish Used
Used Miniwax English Chestnut with Minwax® Polycrylic® Protective Finish.
Recommended Skill Level
Beginner
My first build!
My first build I ever did back early 2016.

Built from Plan(s)
Estimated Cost
~$100
Estimated Time Investment
Afternoon Project (3-6 Hours)
Finish Used
Mini wax weathered grey
Recommended Skill Level
Beginner
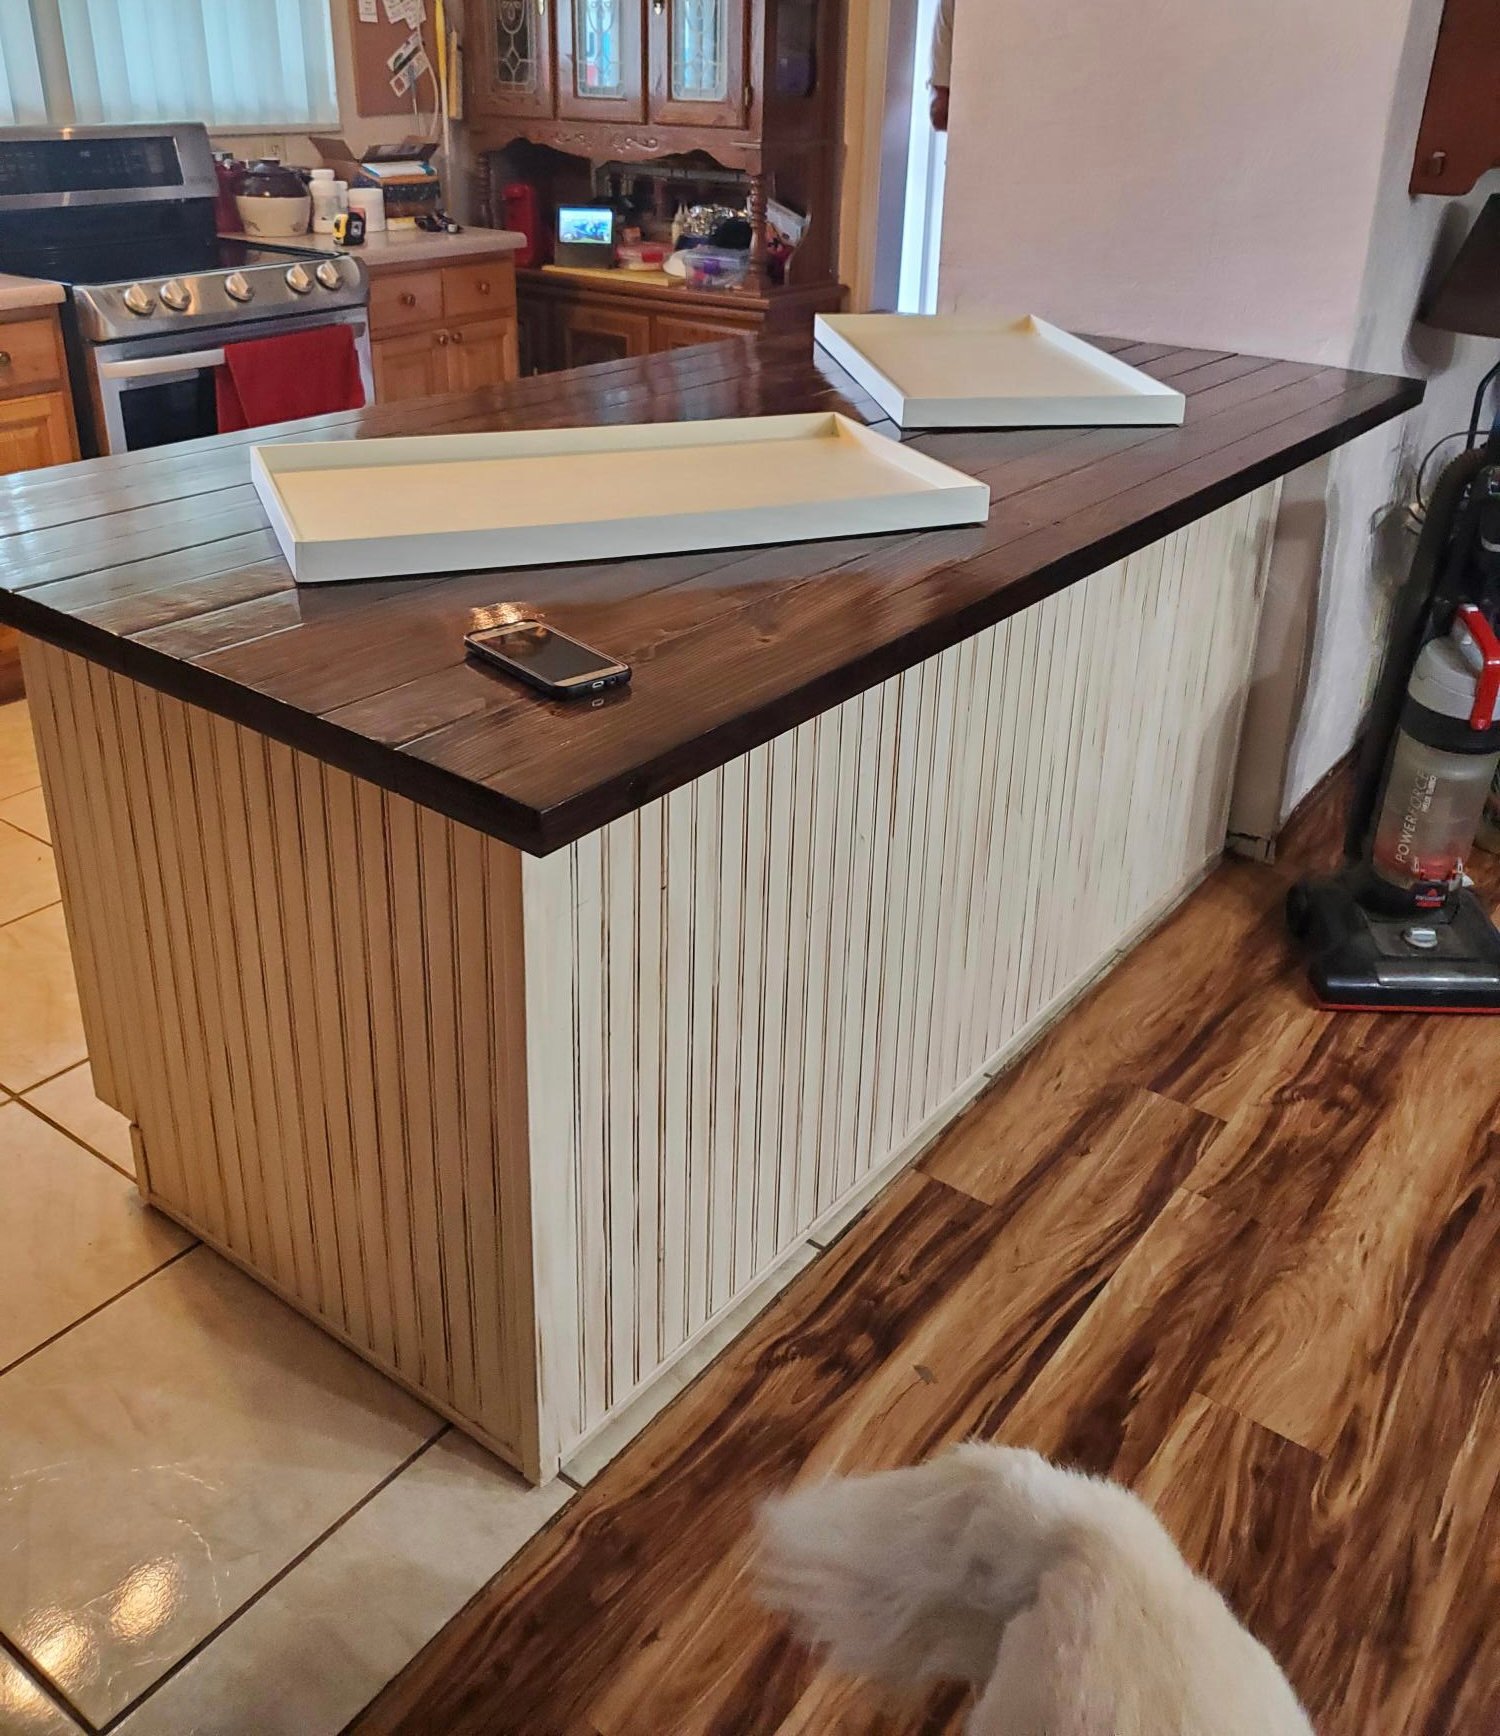
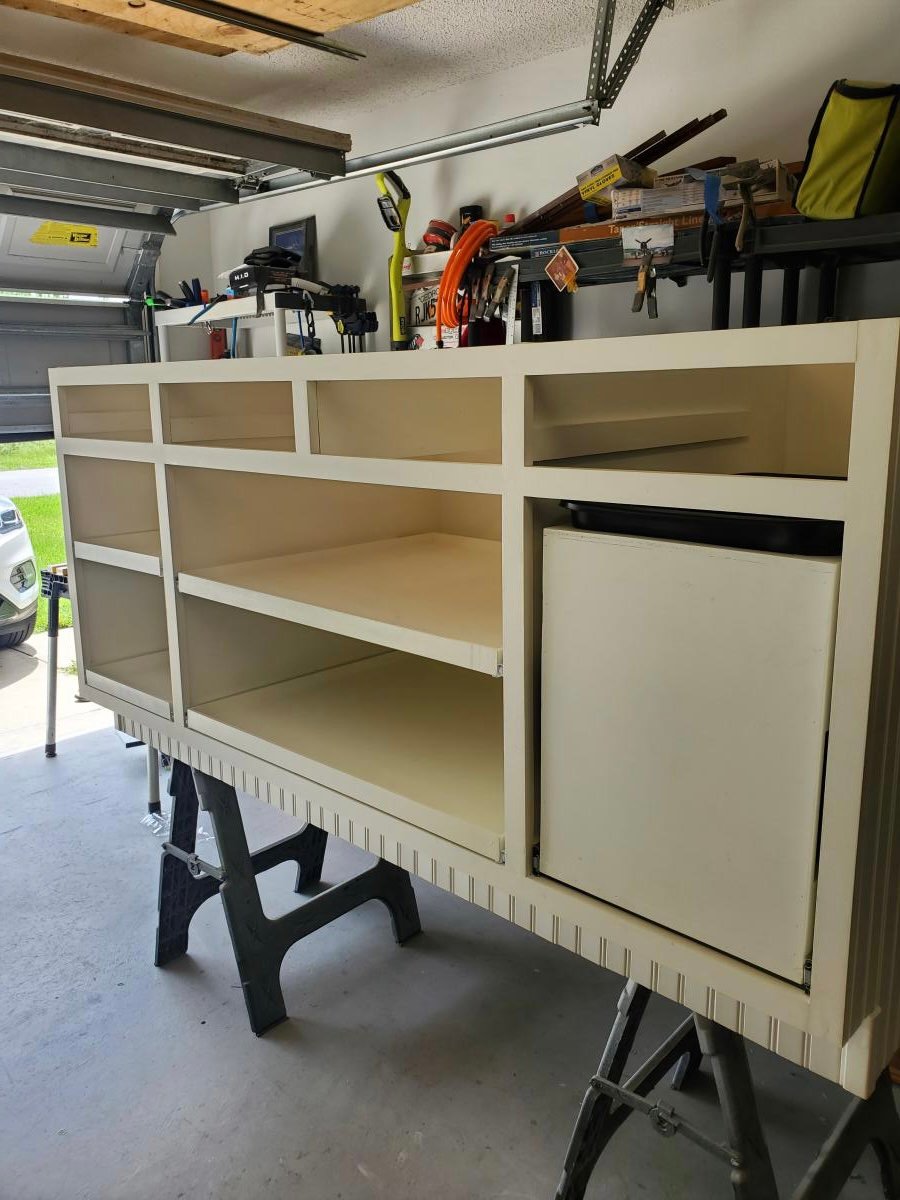
Mud Room Bench and Cabinets
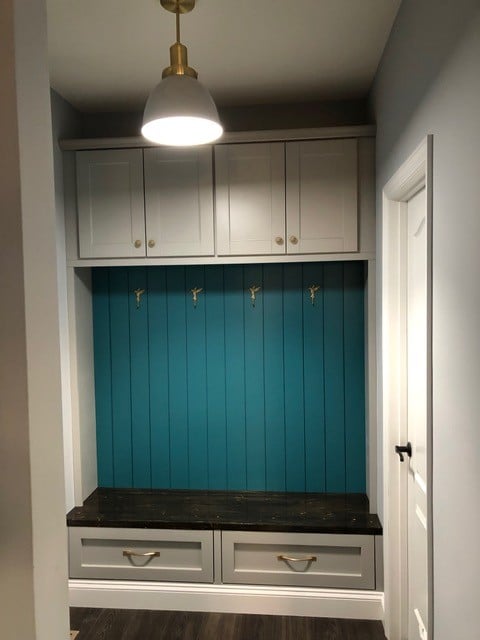
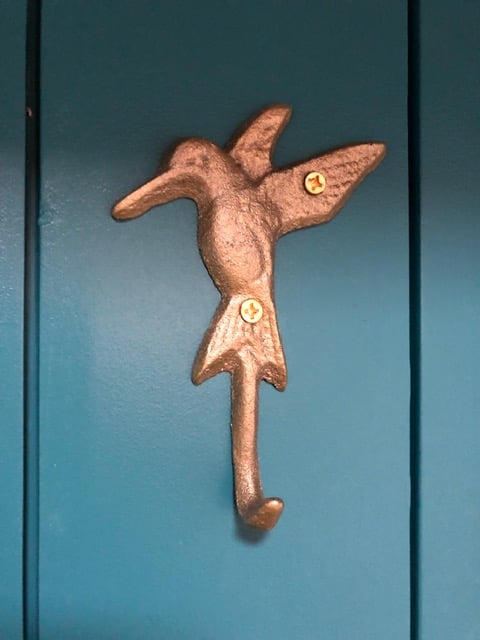
This is actually a mash up of Ana's "Mudroom Bench with Easy Drawers" design, and a "Mudroom Lockers" post by Infarrantly Creative. The end result is a 66" W x 98" H x 19 1/4" D built-in bench with 2 drawers and 4 cabinets. I did the cabinets first, to easily support them while installing on a temporary ledger board without the bench in the way. Unlike Infarrantly, I did not have existing cabinets to re-purpose, but I found 30W x 24H x 12D cabinets that practically matched the adjoining kitchen in both color and style. I also added matching pulls and handles to tie both rooms together. I almost went with taller cabinets to the ceiling, but this approach with Crown Molding "not-to-ceiling" matches the kitchen cabinets. I also bought matching trim pieces for the ends and across the bottom so anything touching the cabinets matched in color and texture. In hindsight, the color-matched paint was so close, though, I could have saved some cash by cutting and painting those pieces instead. Everything gray below this point is 1x material cut to spec and then painted. The bench is based on Ana's design (modified to two drawers) with Infarrantly's stained top. The top is a pine board from HD stained to closely match our LVP in that room, and the entire first floor. You will notice the top rail of the bench frame (attached to the top with Kreg pocket holes to minimize visible nails/screws) is also stained to give illusion of a thicker slab. The stain closely matches our LVP in that room, and the entire first floor. This was my first time building drawers, but thanks to Ana's "Easy" drawer design, it still worked out pretty well. The drawer frame technique (instead of faces) made everything a little more forgiving (which I definitely needed). After painting and reinstalling, I noticed that some of the reveal around the drawers did not line up evenly and straight around them. I simply adjusted the rails (drawer side), and the middle upright between them, without needing to remove or rebuild the drawers or the frames - WHEW! Between the cabinets and bench, I used 1x12's and 1x2's, down the sides - although you could leverage the existing wall finish. I also added vertical shiplap to the back, but again you could leave the existing wall finish or use beadboard. It is painted teal to coordinate with the adjoining kitchen's tile and backsplash. I added the Hummingbird coat hooks, since we love those feathered visitors around our deck in the summer. Thanks to both Ana White and Infarrantly Creative for inspiring this addition to our new home.
Built from Plan(s)
Comments
Thu, 10/14/2021 - 08:04
First time building drawers!?
That is amazing! Thank you so much for sharing, what a beautiful space you created!
Mon, 09/12/2022 - 11:59
Stunning work!
Thank you for sharing, such a perfect mash-up of plans, it came out beautiful~
Comments
Ana White Admin
Wed, 10/06/2021 - 10:17
Alright!
Looks great and so much storage! Thank you for sharing~