Community Brag Posts

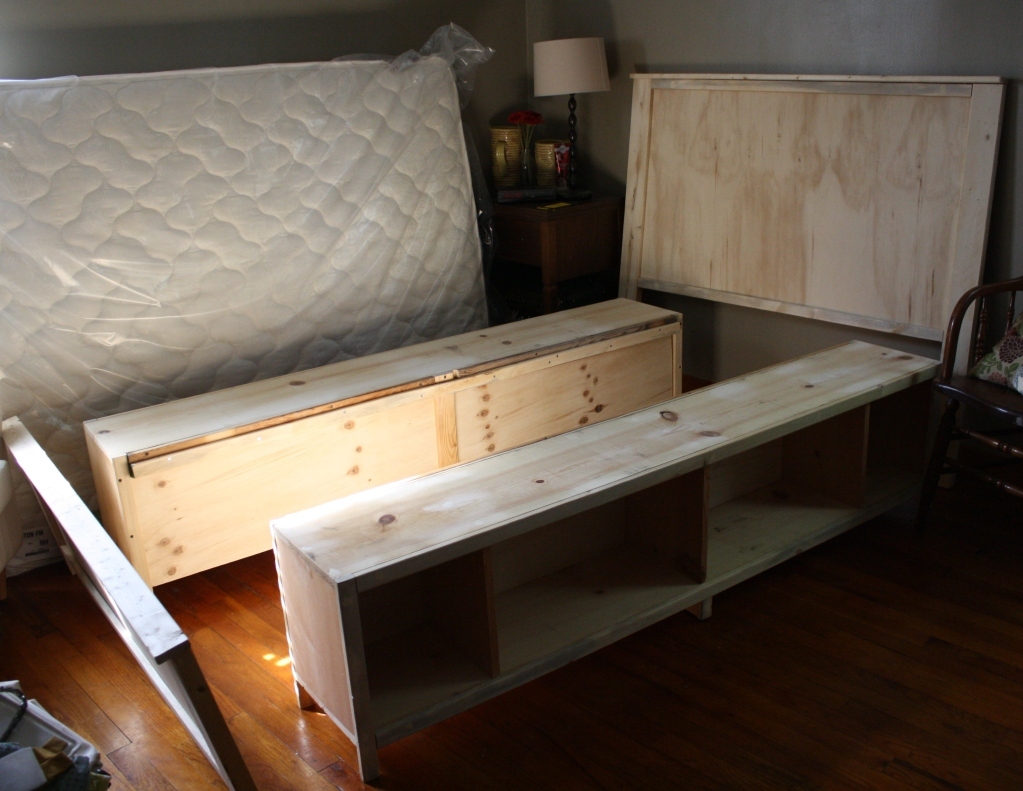
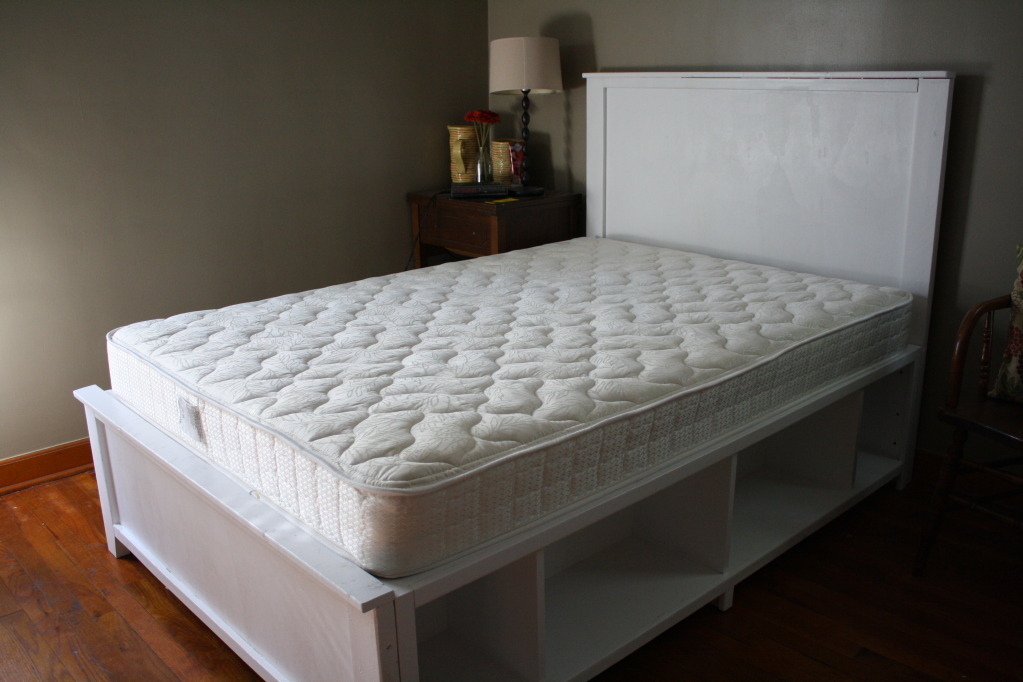
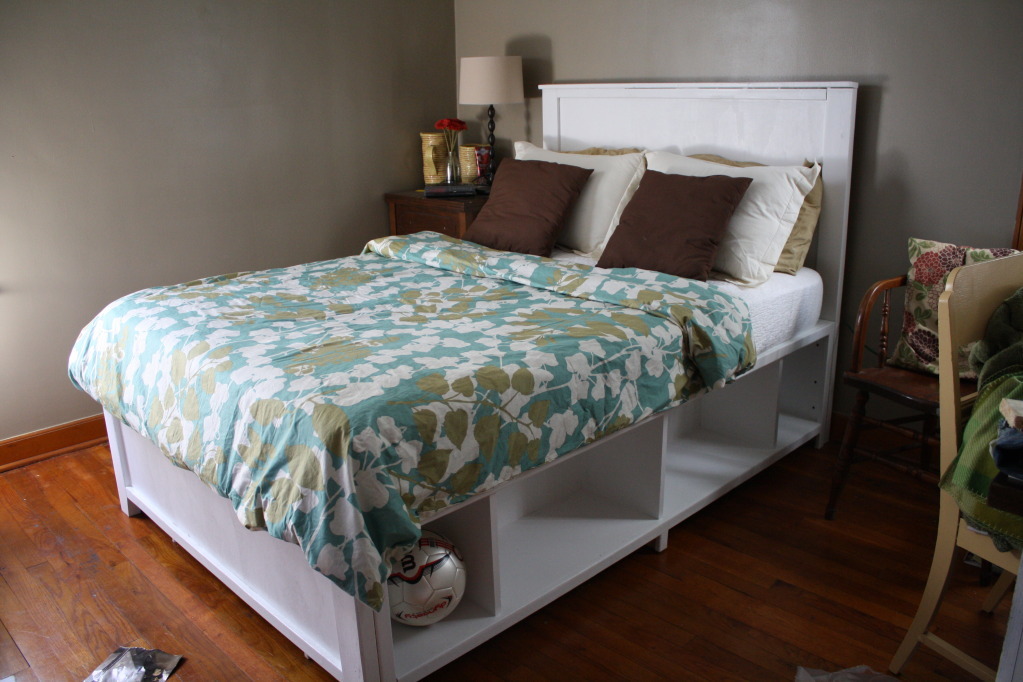
Full Size Hailey Storage Bed

When I saw the plans for this bed I knew it was exactly what I wanted for our guest room/office. I loved that it had storage underneath for extra blankets and office supplies and I loved the simple, clean look. I think it turned out great! We made it full size so it could sleep 2 people and we added an extra set of legs in the middle of the benches to make them extra sturdy. We want to add doors to some of the cubbies later.
This is the first piece of furniture I've painted instead of staining, and I'm so glad I did! The white looks so sharp against the gray walls. I don't think any stain would have turned out as good for the room.
The project came together really easily. We just worked on it for a couple hours on two Saturday afternoons and it was done really fast. The assembly was easy as well, and I love the concept of this bed being built of units that can be moved around or re-purposed later.
Thanks Ana for the great plans!

Estimated Cost
$150 (but we bought our wood from a small local lumber store)
Estimated Time Investment
Day Project (6-9 Hours)
Finish Used
Two coats of Olympic Premium (no voc) semigloss White.
Recommended Skill Level
Beginner
Comments
Fri, 01/04/2013 - 12:57
I cannot find the plans to
I cannot find the plans to make this bed. There is only a description of the bed. Could I please get the plans for the Full Size Hailey Storage bed?
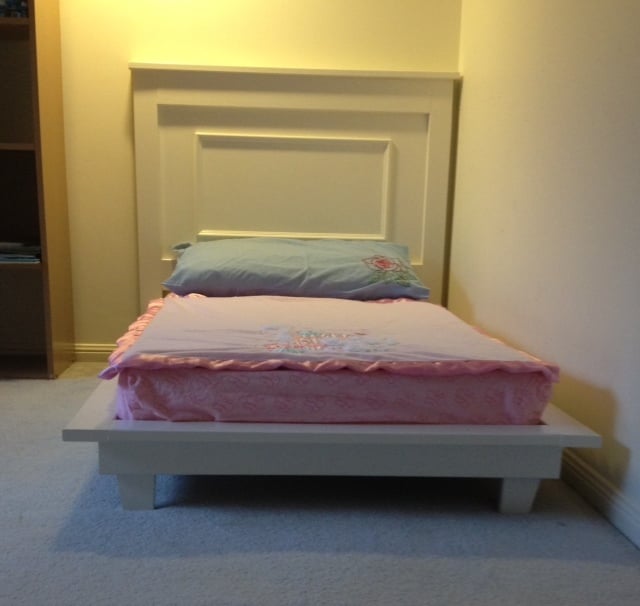
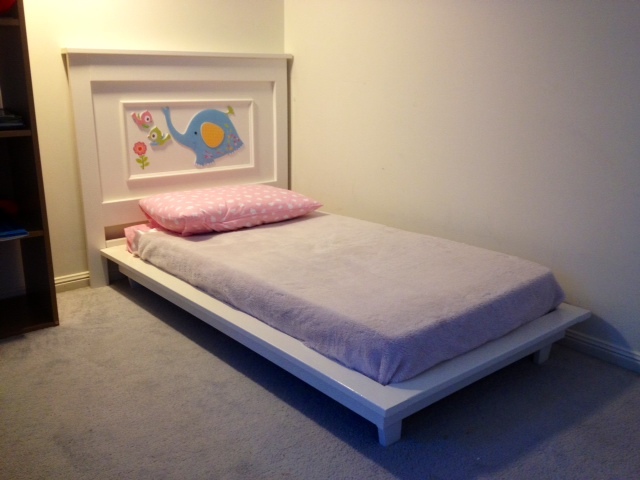
Fillman Toddler Bed
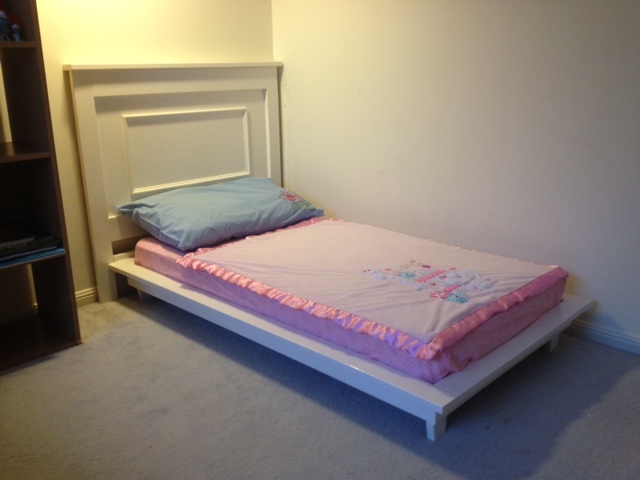
First build and totally happy with result . The excitement and smiles of our 18 months old grand-daughter was worth every effort !
Built from Plan(s)
Estimated Cost
$20 Aud
Estimated Time Investment
Weekend Project (10-20 Hours)
Finish Used
Acrylic White Gloss
Recommended Skill Level
Starter Project
Comments
Thu, 10/24/2013 - 01:42
Thank you Ana for sharing
Thank you Ana for sharing your resources and providing the encouragement to try new things .

Thu, 10/24/2013 - 13:20
Super Cute
Love this bed! What a super cute room for your grand-daughter! Looks totally professional, would never guess this is a first build -- Great job!
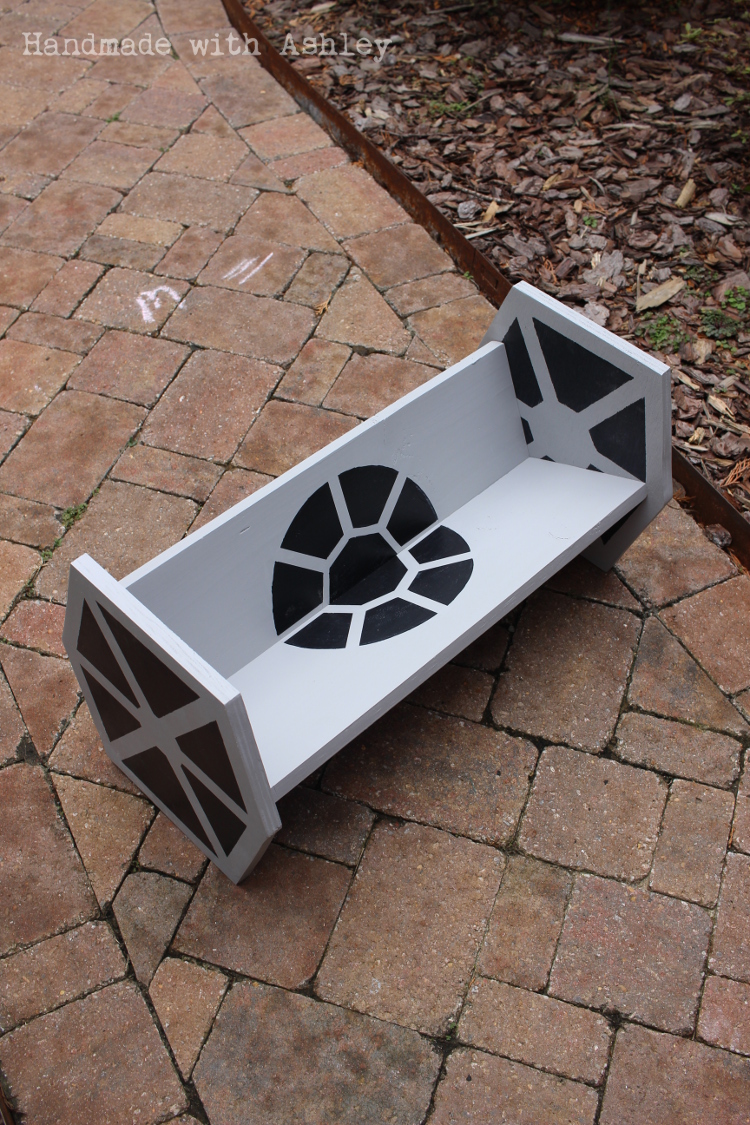
DIY Star Wars TIE Fighter Bookshelf
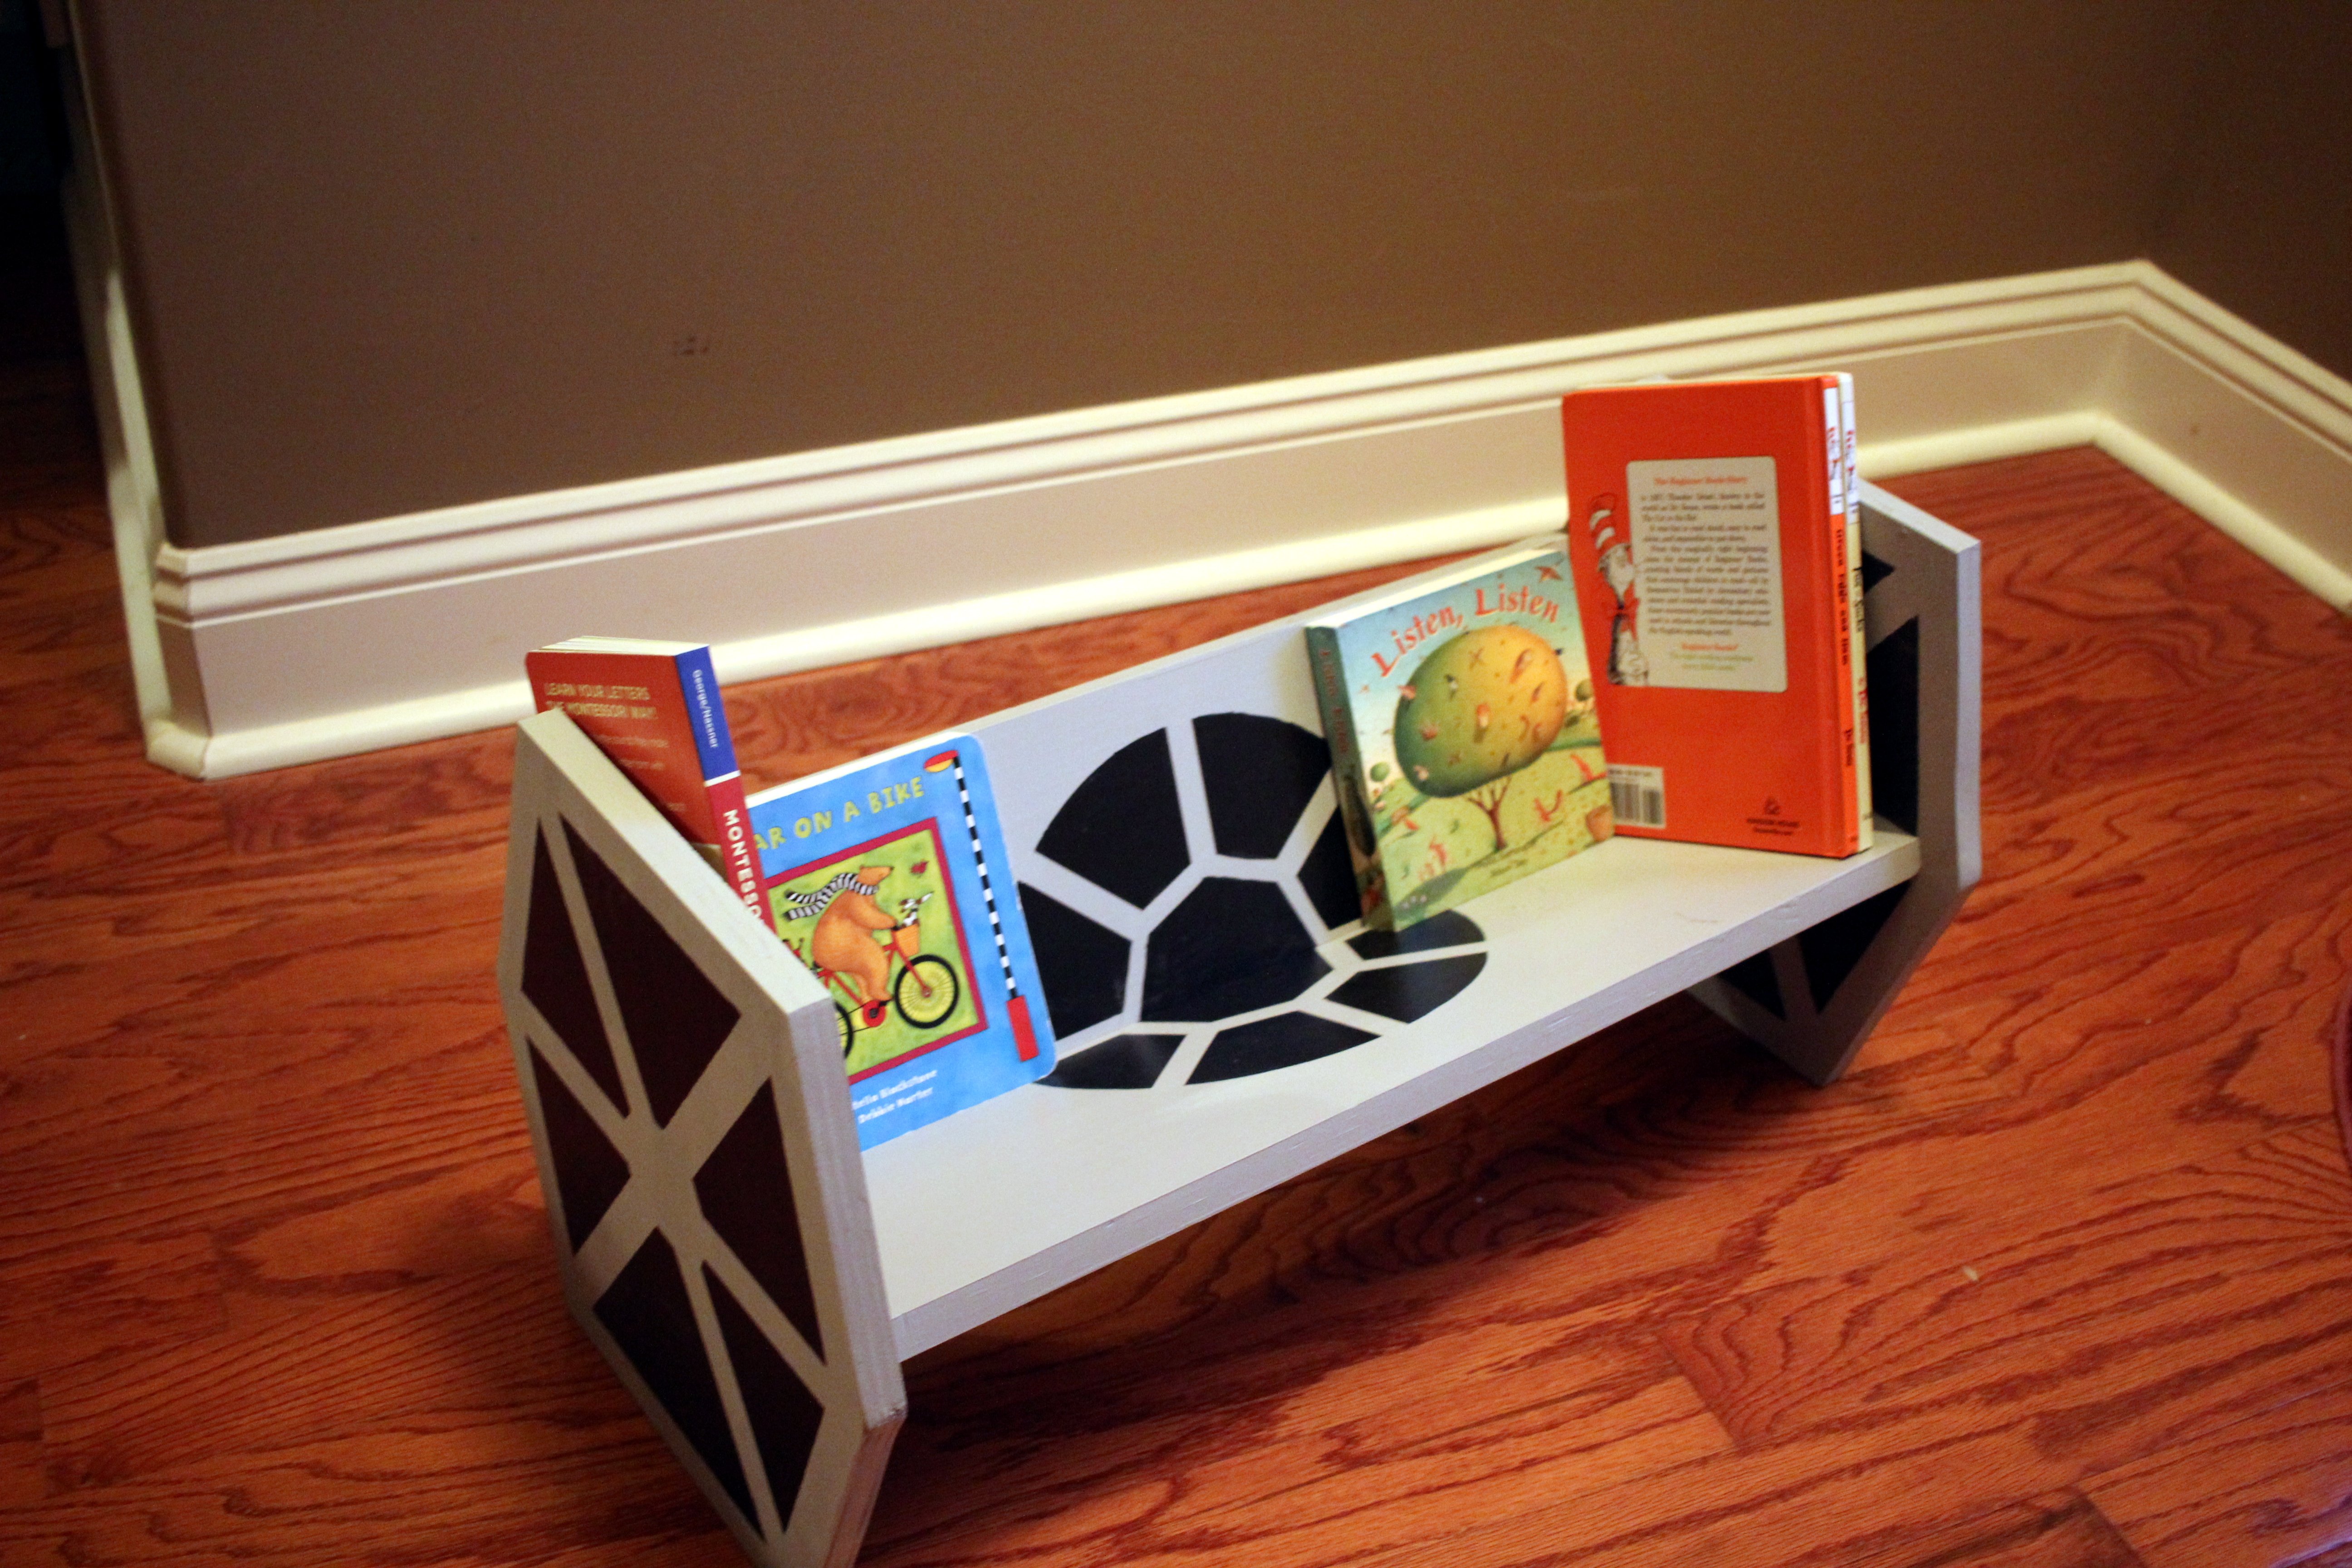
To bring a bit of order to my son's growing book collection, I built him a TIE fighter bookshelf. (By him I mean me, because he doesn't really care about TIE fighters. Chewbacca? Yes.) I was able to make use of some scrap lumber I already owned. Paint was the only item I purchased for the project.

Estimated Cost
$7. The only item I needed to purchase was the paint.
Estimated Time Investment
Day Project (6-9 Hours)
Finish Used
Gray and Black satin paint
Recommended Skill Level
Beginner
Comments

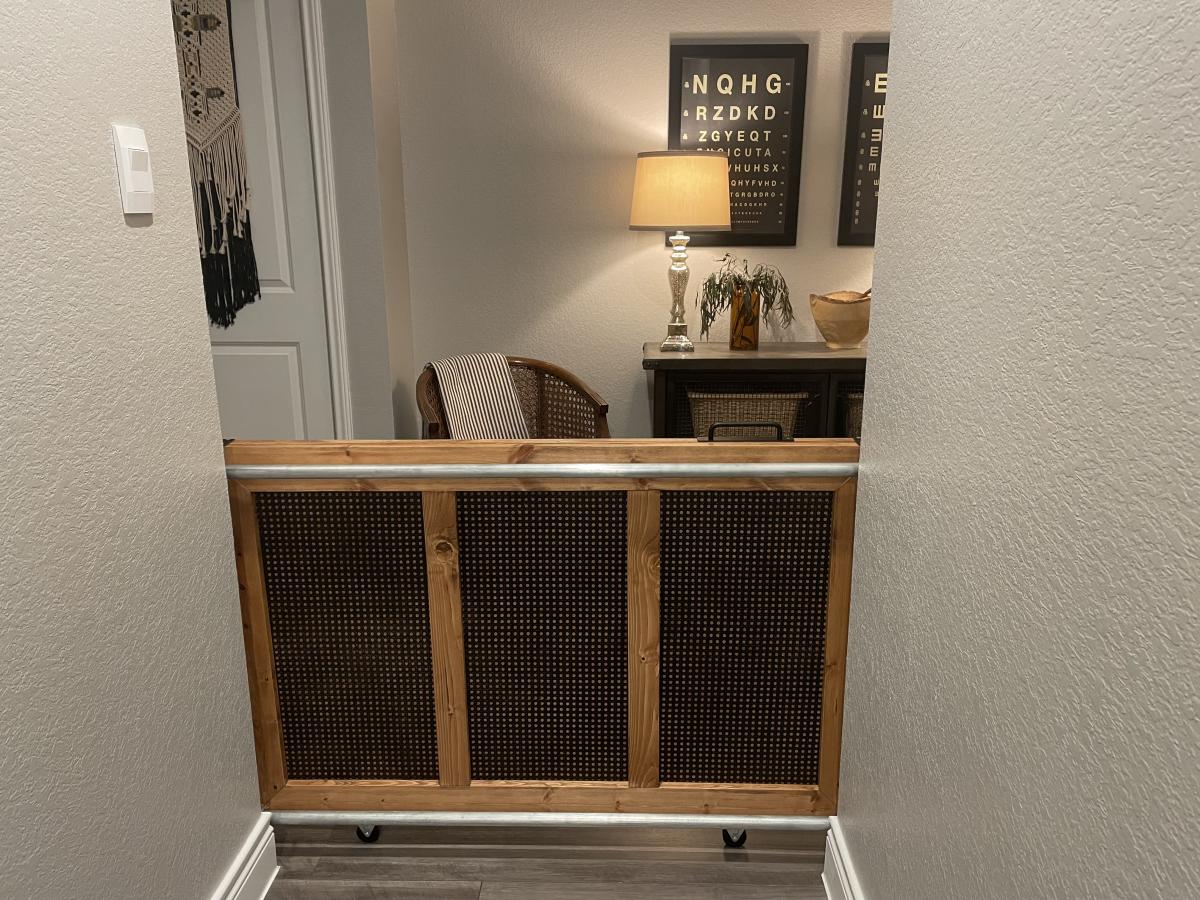
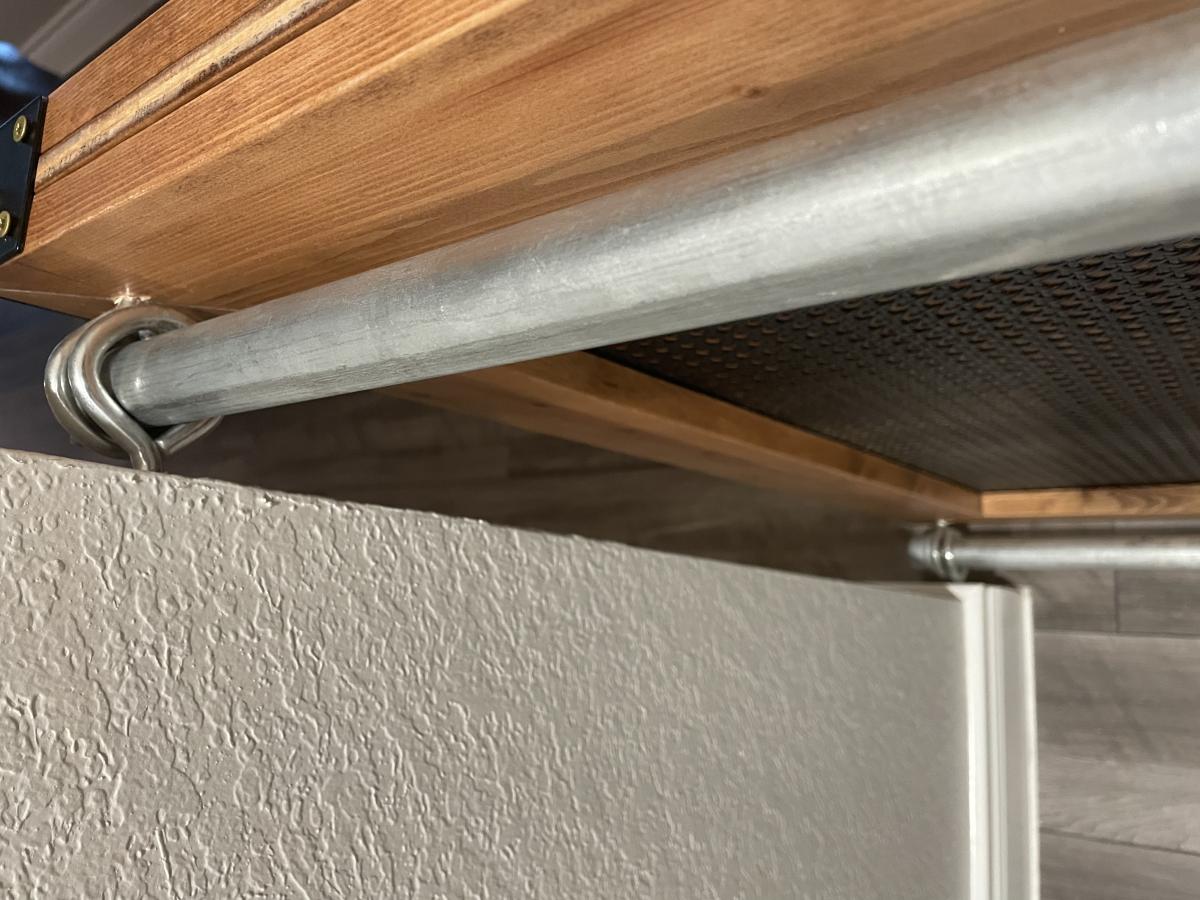
Sliding Pet/Baby Gate
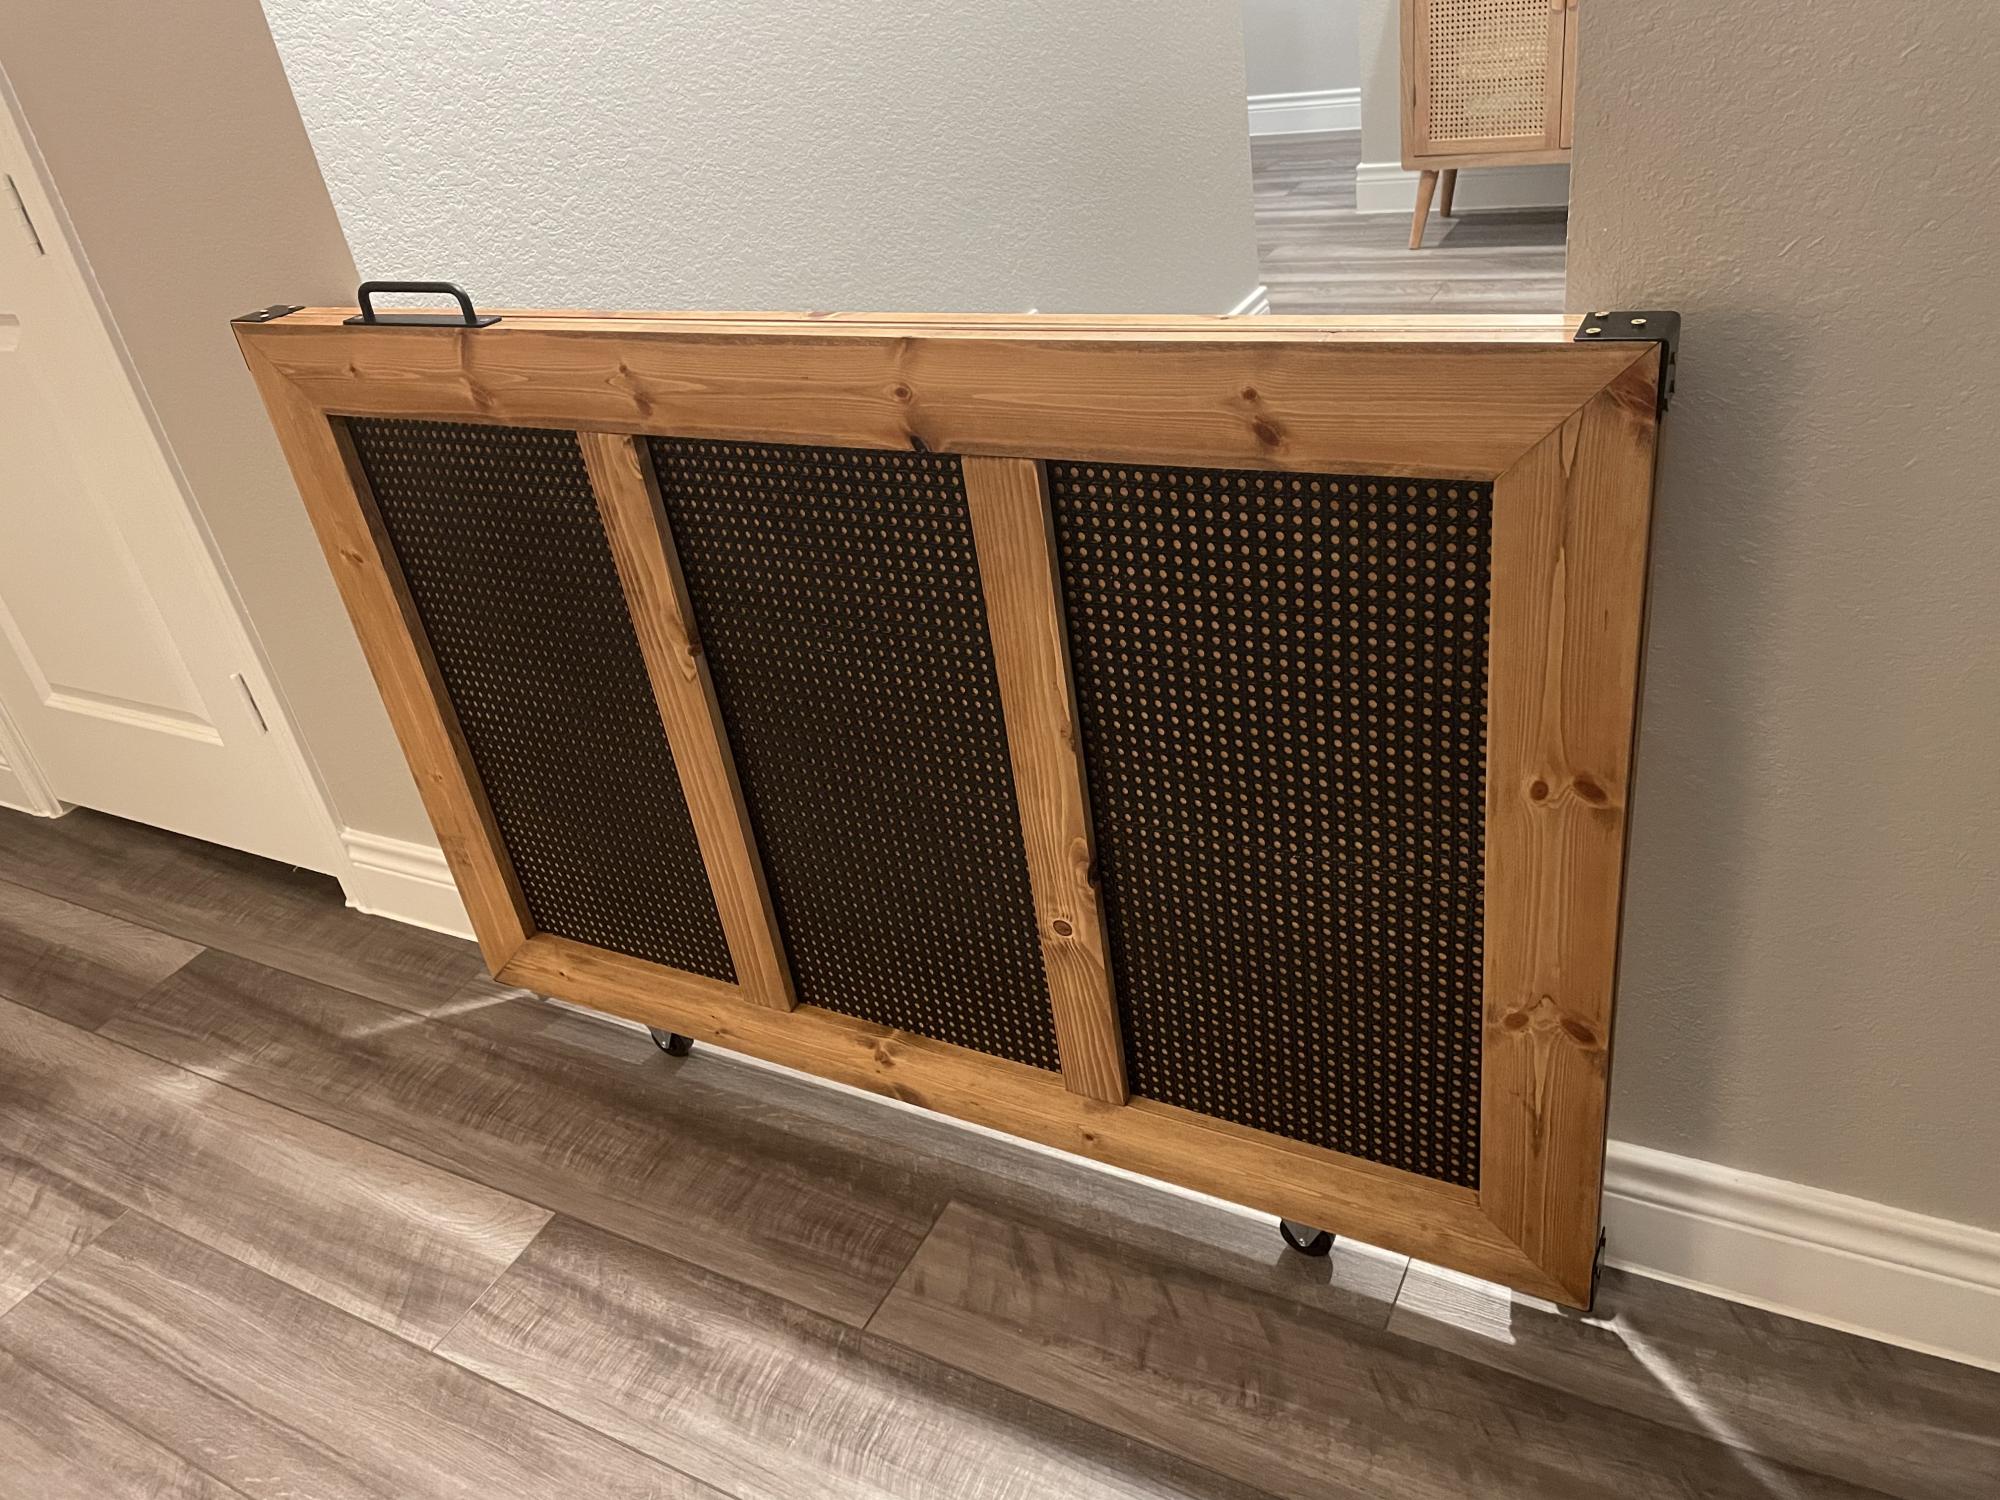
We desperately needed a gate to keep our pets from accessing the rooms, with carpet, in our new home. We originally thought about building a full barn door but, the security system was in the way and it wouldn’t have allowed the light to pass through to our dark entryway anyway. We definitely wanted to steer away from the “barn door looking” gate we did at our last home and wanted to try something more timeless with the sprayed, black caning. We have a very eclectic style. Very vintage industrial, MCM, with pops of RH glam and a touch of BOHO. Sounds confusing but, I needed this gate to take the pressure off of trends we didn’t quite fit in and be easy to use for my teenager. The gate leads to her bed/bath and the guest rooms. The mechanism is not my design but, it’s brilliant, especially for the industrial element to our home. Took me close to 4 days from start to finish. Lost my Kreg jig in our move and was so thankful to a stranger-neighbor that willingly let me borrow his on the curiosity of what exactly I was building. NGL, it felt pretty good when he said how impressed he was with the build. 💞
Built from Plan(s)
Comments
Tue, 02/28/2023 - 07:16
Incredible design!
This looks superb, thank you so much for sharing your super cool gate!
Rustic Table - 4x4 legs
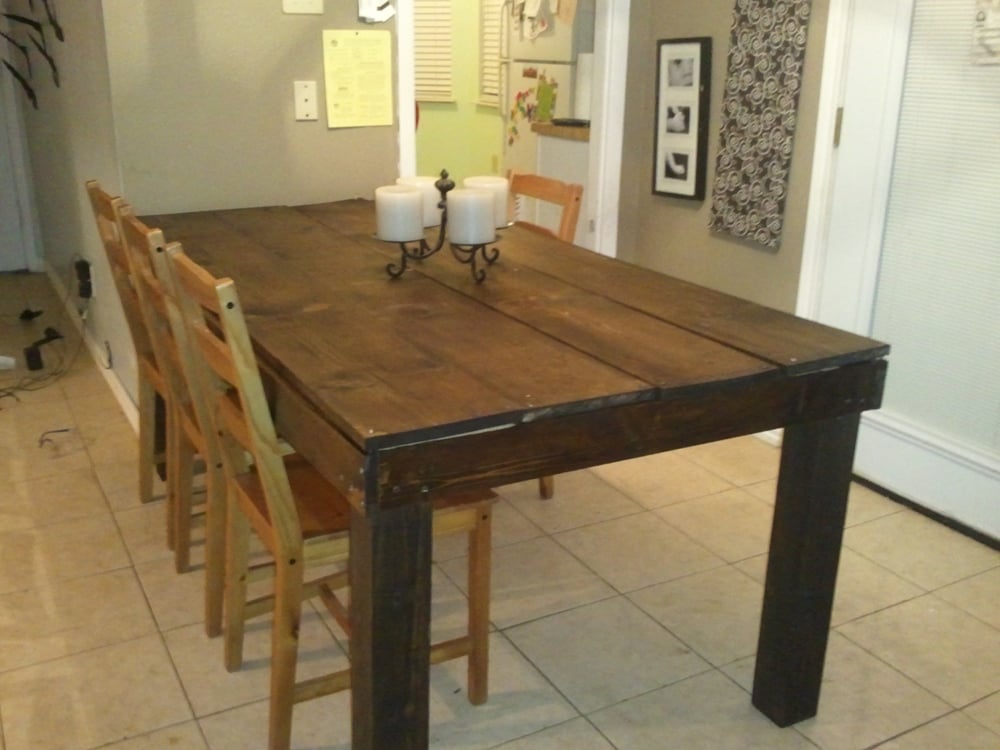
LOVED doing this! I am a total beginner so it is not truly perfect but that is what we love about it! My five year old helped me and learned how to work an electric screwdriver. We saw Pottery Barn was broadcasting a table like this and using that the screws showed as a marketing piece - so we have some screws showing and it is soooo warm and inviting. It looks 100 years old. Everyone loves it!! Thank you for the great inspiration. We made ours 6 feet long and 3 feet wide to fit our space and 4x4's for the legs.
Built from Plan(s)
Estimated Time Investment
Day Project (6-9 Hours)
Finish Used
Miniwax in jacobean
Recommended Skill Level
Starter Project
Comments
Thu, 11/24/2011 - 20:26
Can I have the step by step
Can I have the step by step plan too! Pretty please! I love this table :)
Thank you so much
-erin
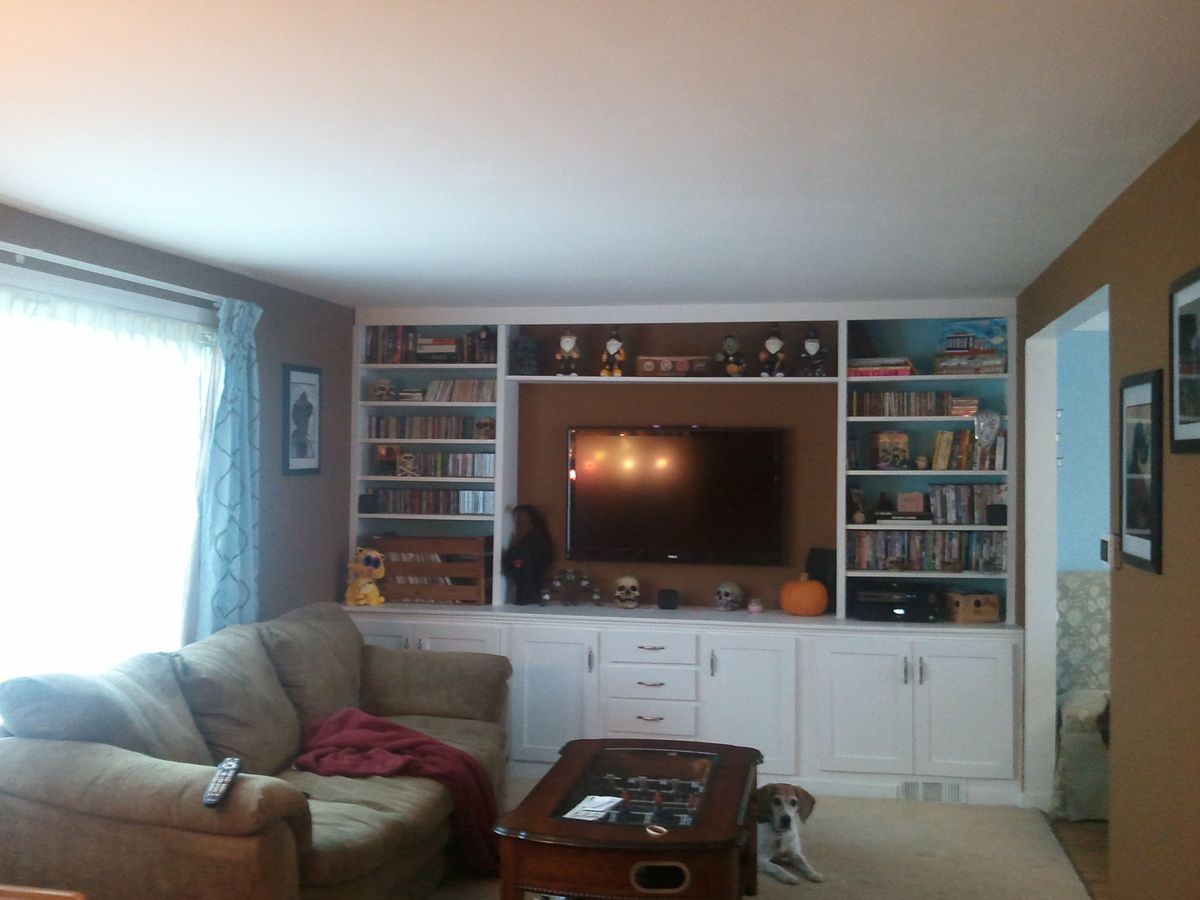
Super Storage TV Wall
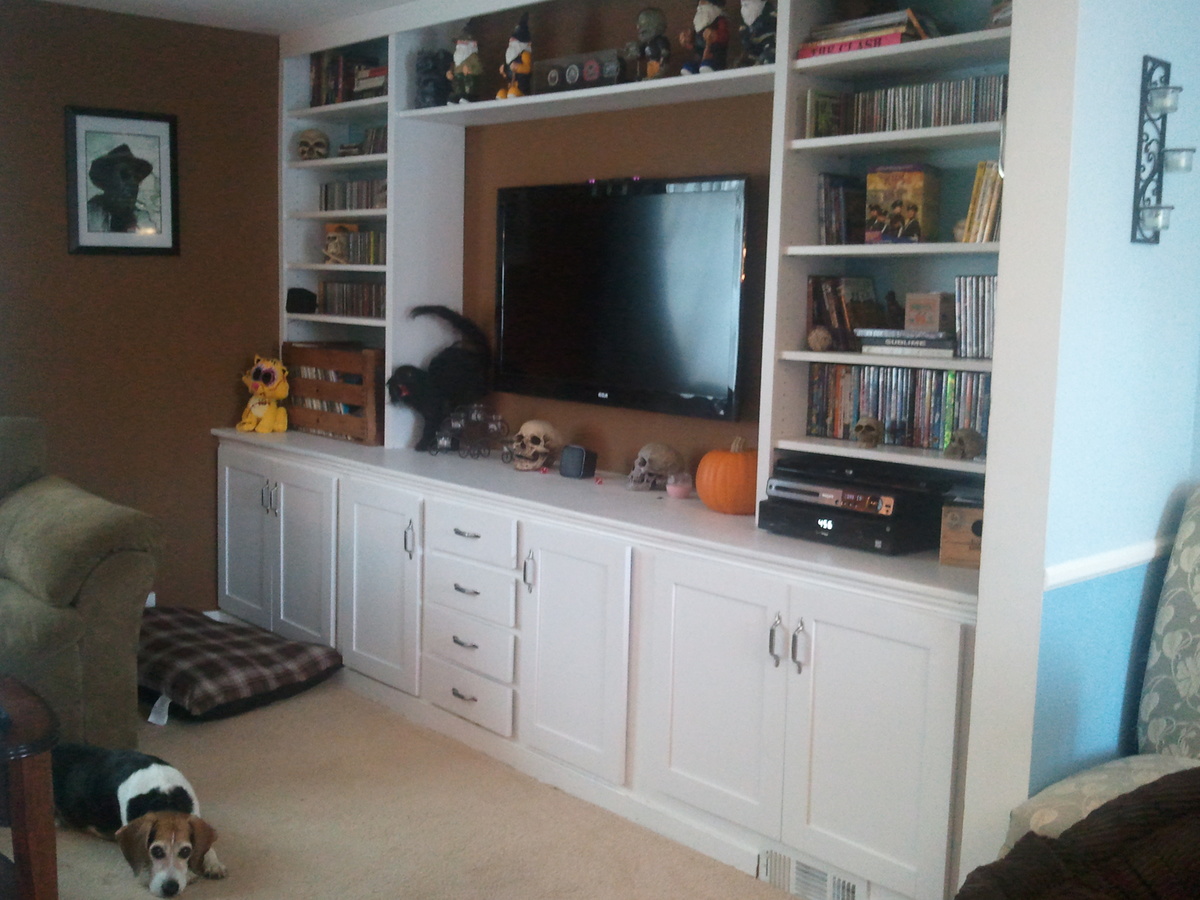
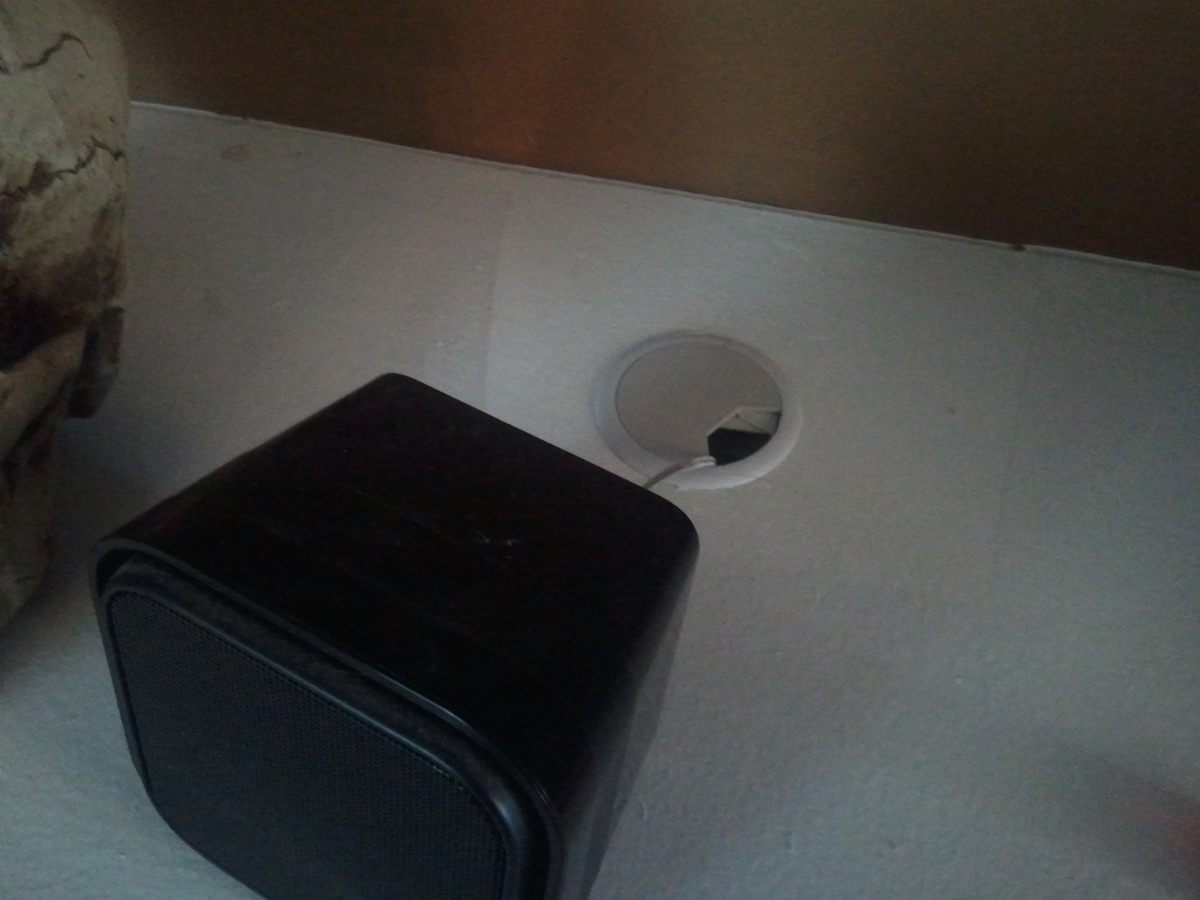
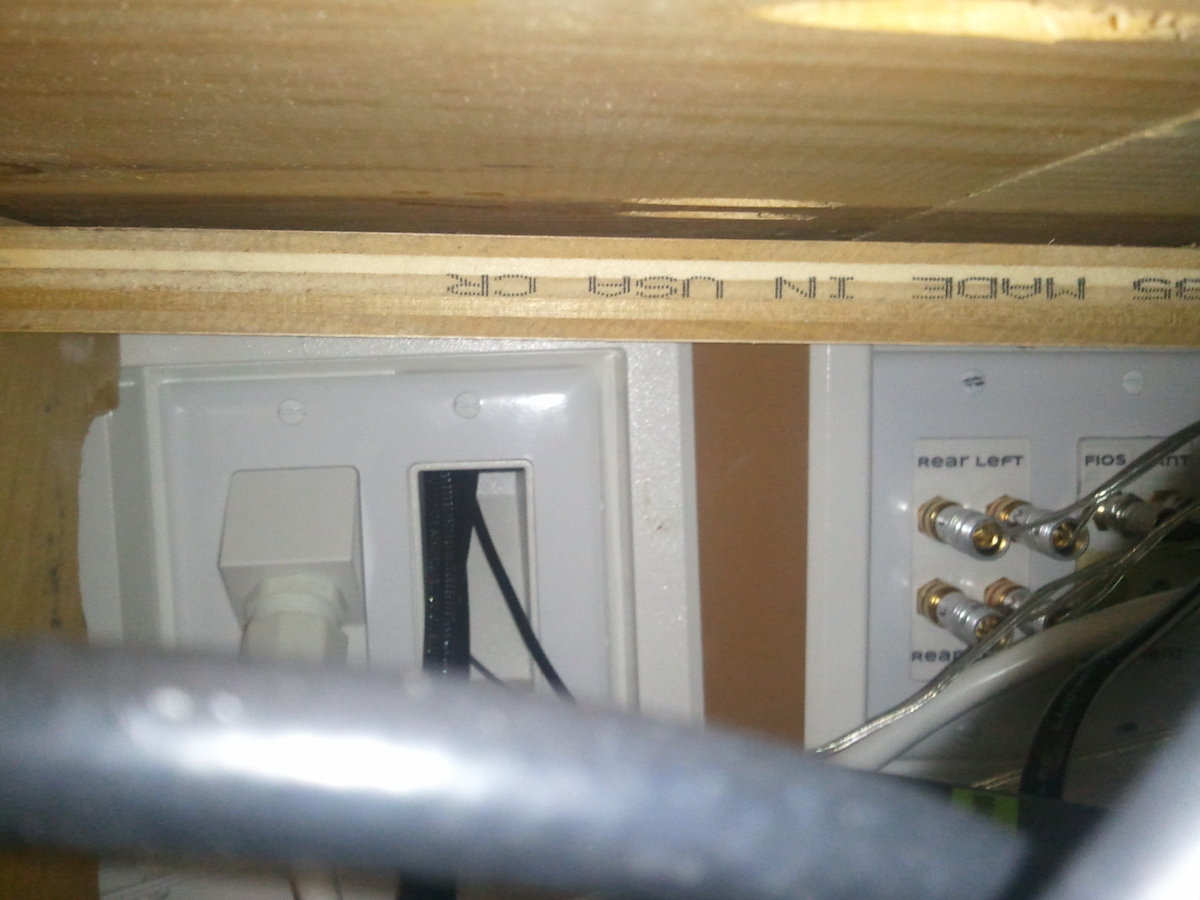
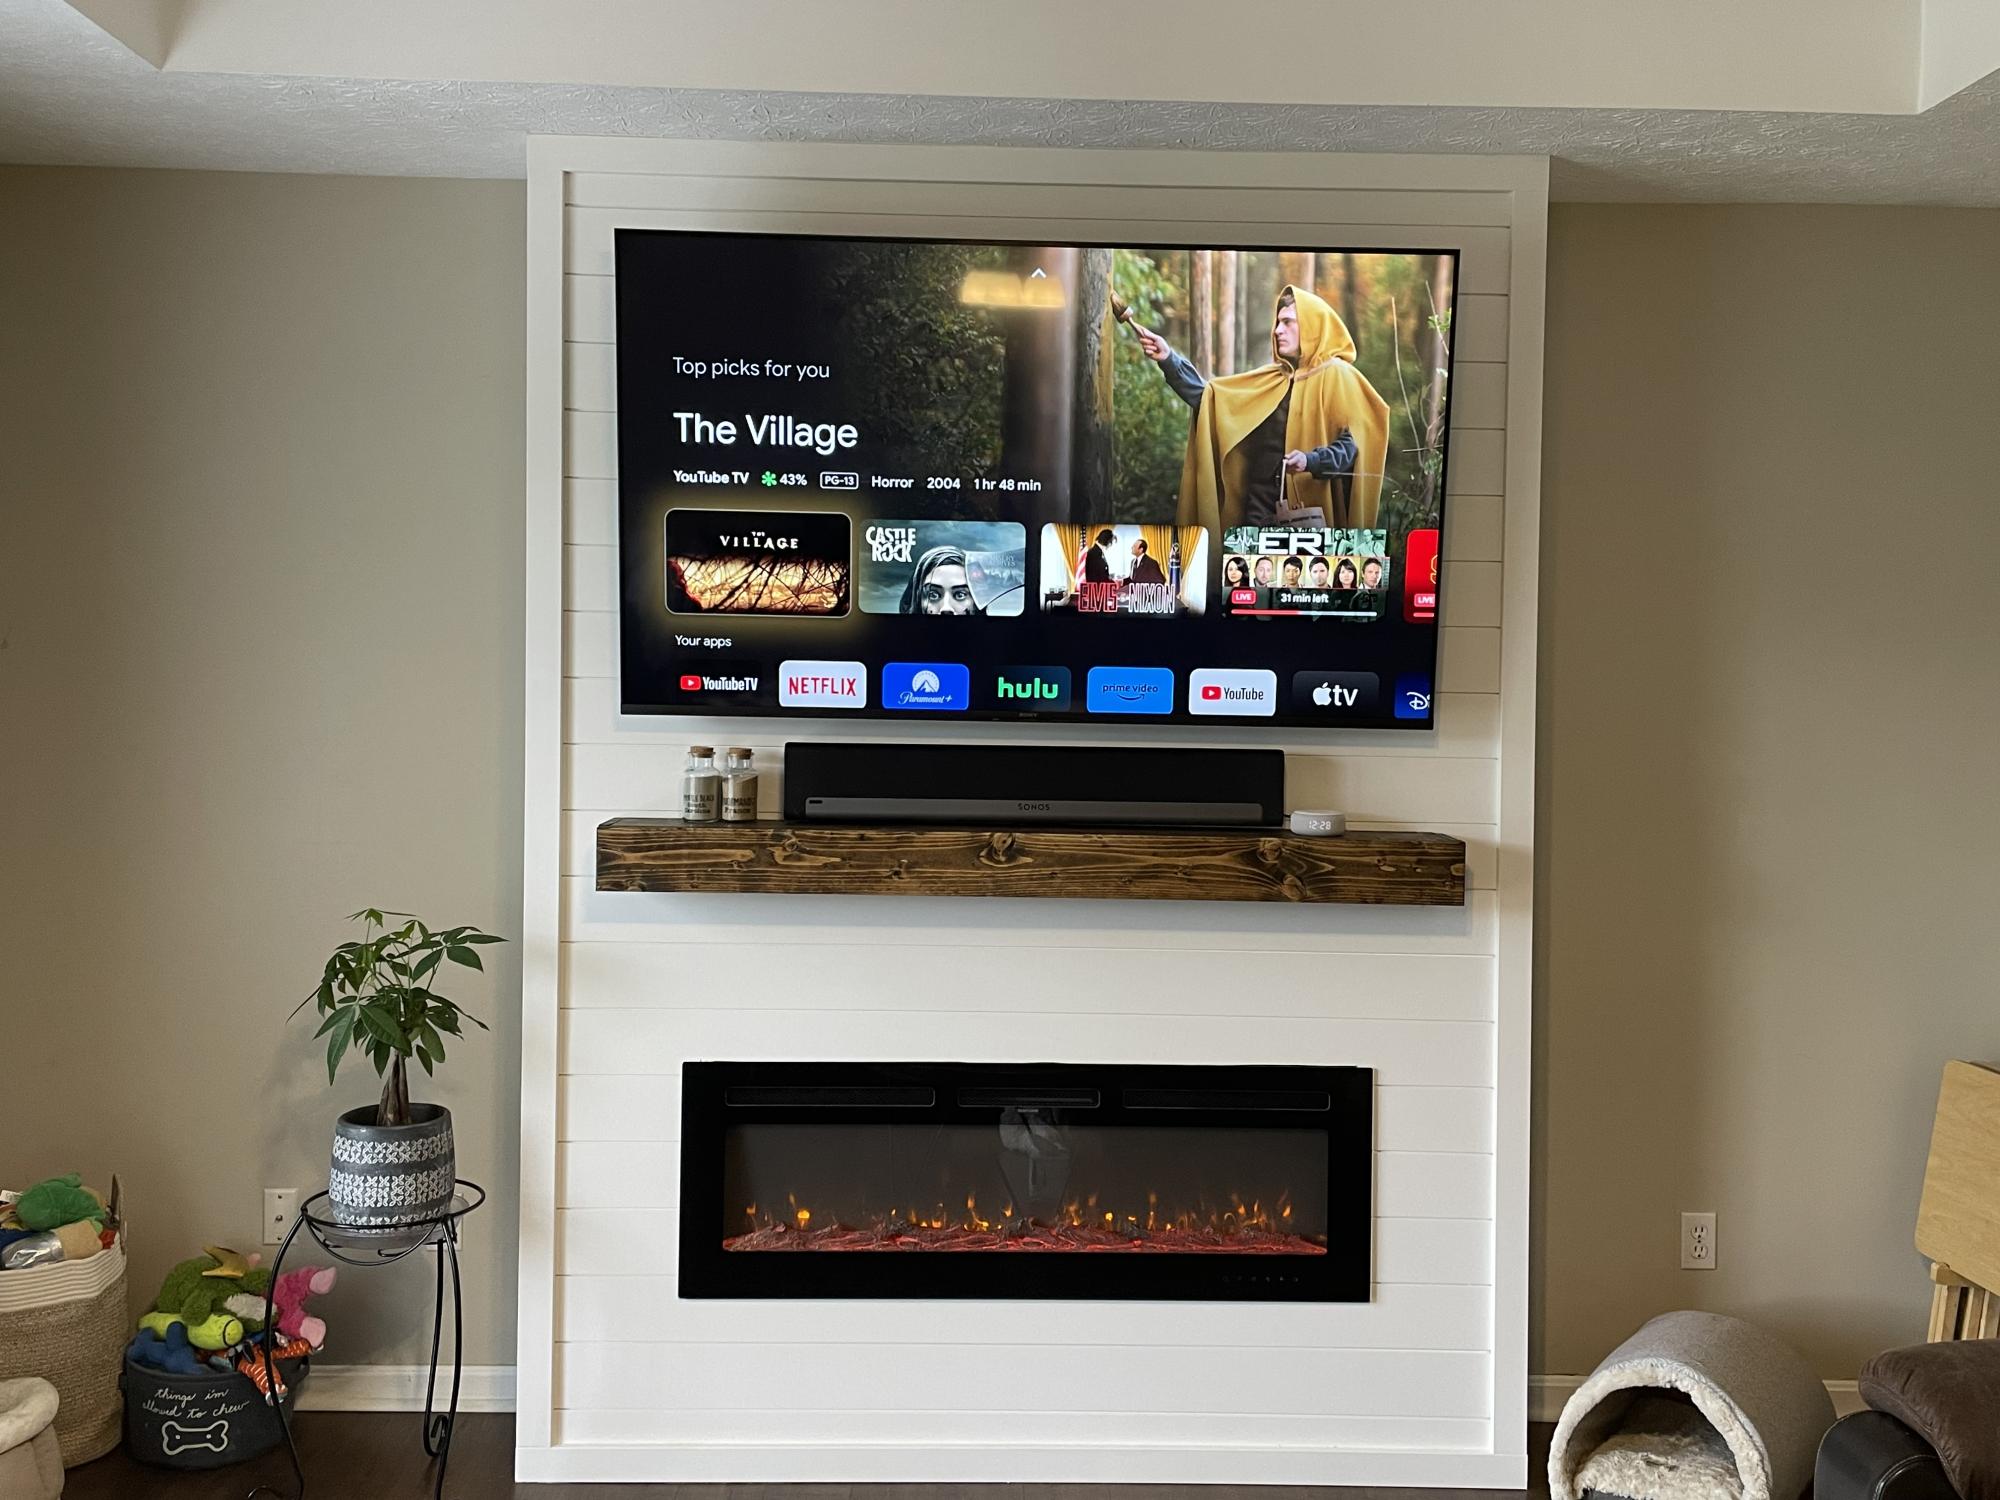
This took me about a year to complete, start to finish, but there was a lot of downtime. I started by running the wires through the wall and taking the opportunity to add a ground to the outlet on this wall.
The bottom cabinets are from Ana's kitchen cabinet base plans, but they are a little shorter, shallower and do not have a toekick cut out. My hope is that this will serve as good practice to do an entire kitchen!! I built these based on my modified plans, pulled back the carpet (there is hardwood under them that I intend to expose at some point), popped off the baseboard, and installed these as if they were kitchen cabinets. The top is 6 pieces of whitewood 1x12's "Kregged" together - I wish I had used plywood but an entire piece would still not be long enough, so that was awkward either way. There is a simple piece of molding under the edge of the "countertop". At that point, not much got done all summer and we just had base cabinets with no uppers and no doors.
More recently, I finally got more time to work on this and created the upper shelves. I just kinda winged these. A whole bunch of 1x12's, I cut 4 the height of what I needed (about 5', from the countertop to the ceiling) and I made a bunch of shelves cut to size. I wound up making more shelves than we needed, but I put shelf pin holes in the vertical pieces so all of the upper shelves are adjustable! I used a kreg shelf pin jig and it worked great. The middle shelf above the TV was cut and added after everything else since I knew it would've been more difficult to calculate the length than to just measure after everything was in. I added some molding to cover up some things that didn't quite line up perfectly and to beef up the vertical pieces (1x2's make 'em look a little wider and cover the edges of the shelves). We finally have storage for all of the cd's and dvd's!!
I was a little nervous to do the doors, but the post for how to do doors came out at a perfect time. Turns out the hardware I bought way at the beginning was pretty cool and let you adjust up/down, distance from the cabinet, and left/right a few mm each way just by turning a screw. I'm glad I went with the fancy self-close-soft-close ones! I'm also in love with the handles I found.
I had some issues with the drawers and they don't slide perfectly, I think it's mostly a squareness issue. I'm planning on getting the kreg drawer jigs before I do the kitchen. I got the fancy soft close ones to see how they'd work to see if I want to use them in the kitchen, if I can't do a better job then I might opt for the cheaper ones!
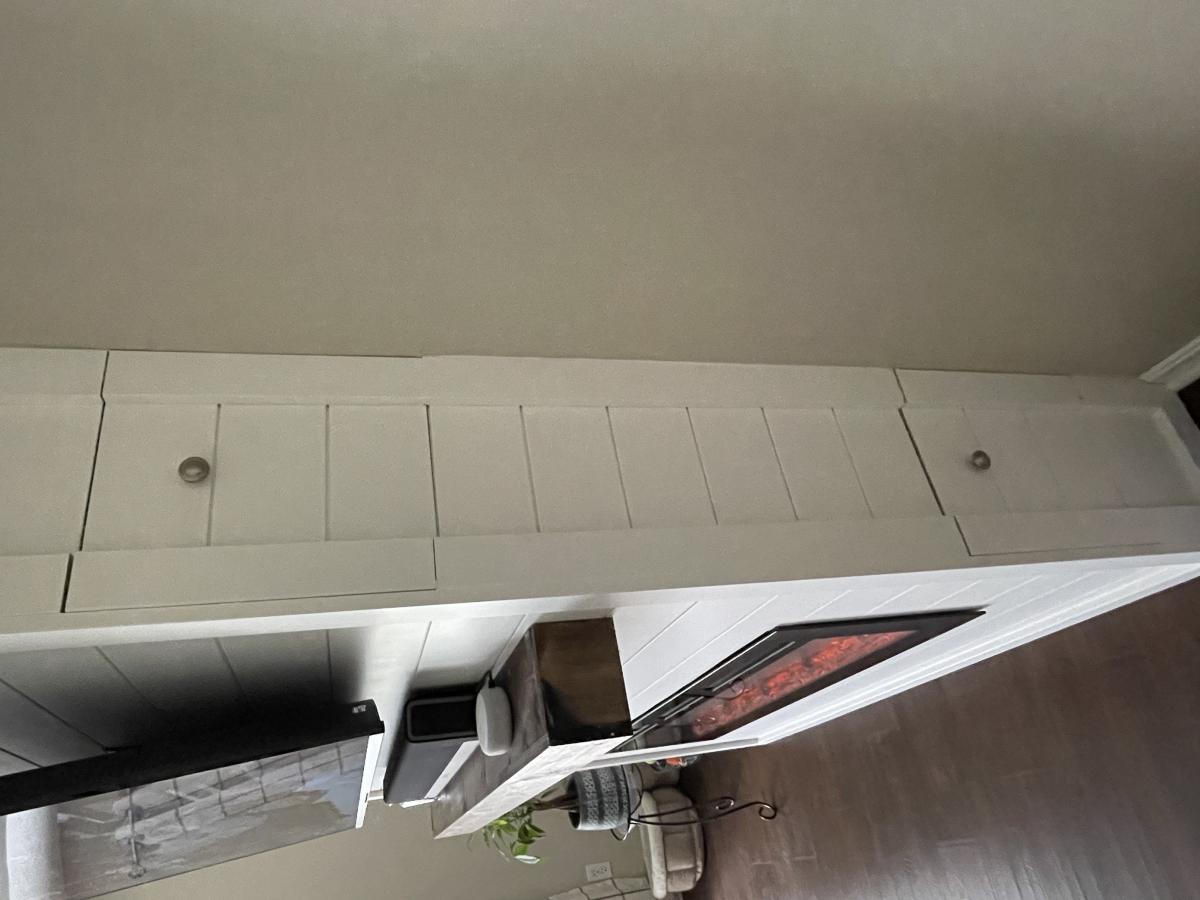
I have intentions of adding crown molding to this room and that will go across the front of this when I do. I added a 1x4 across the top that can act as a base when we finally get around to that.


Built from Plan(s)
Estimated Cost
800
Estimated Time Investment
Week Long Project (20 Hours or More)
Finish Used
Lots and lots of white paint. I wound up using a spray enamel for the upper shelves in attempt to make them less sticky after finding out that latex paint doesn't really work well for shelves. I've also learned that the paint with the primer in it is my new favorite type of paint.
Recommended Skill Level
Advanced
Comments

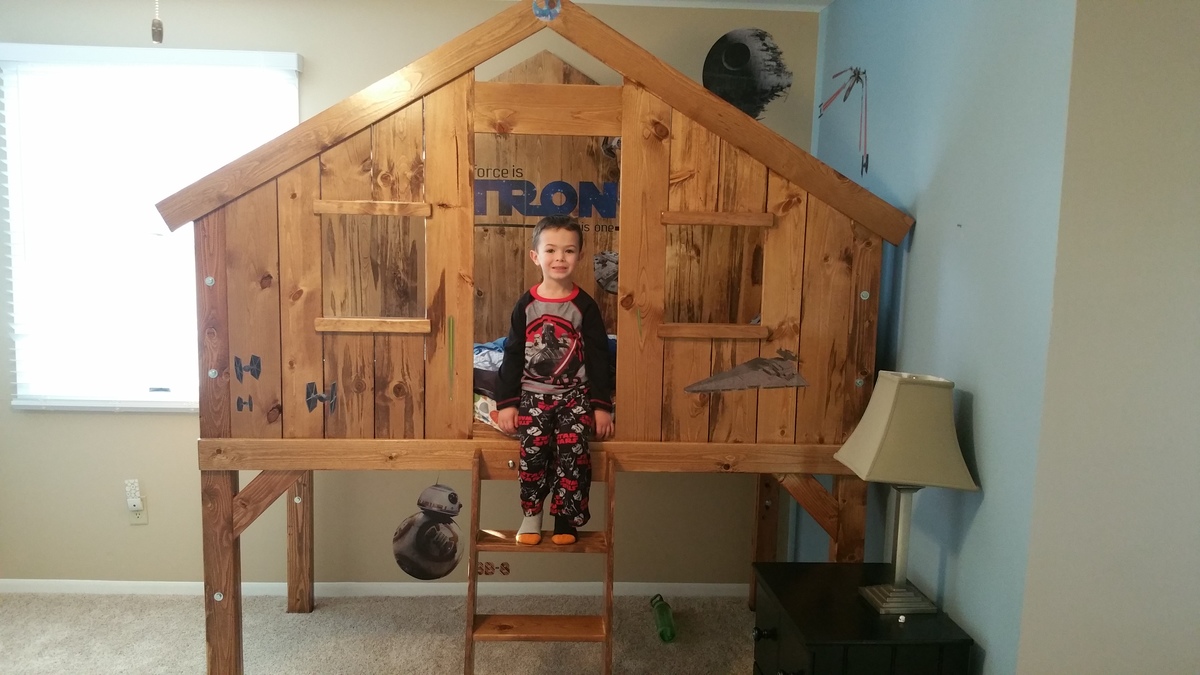
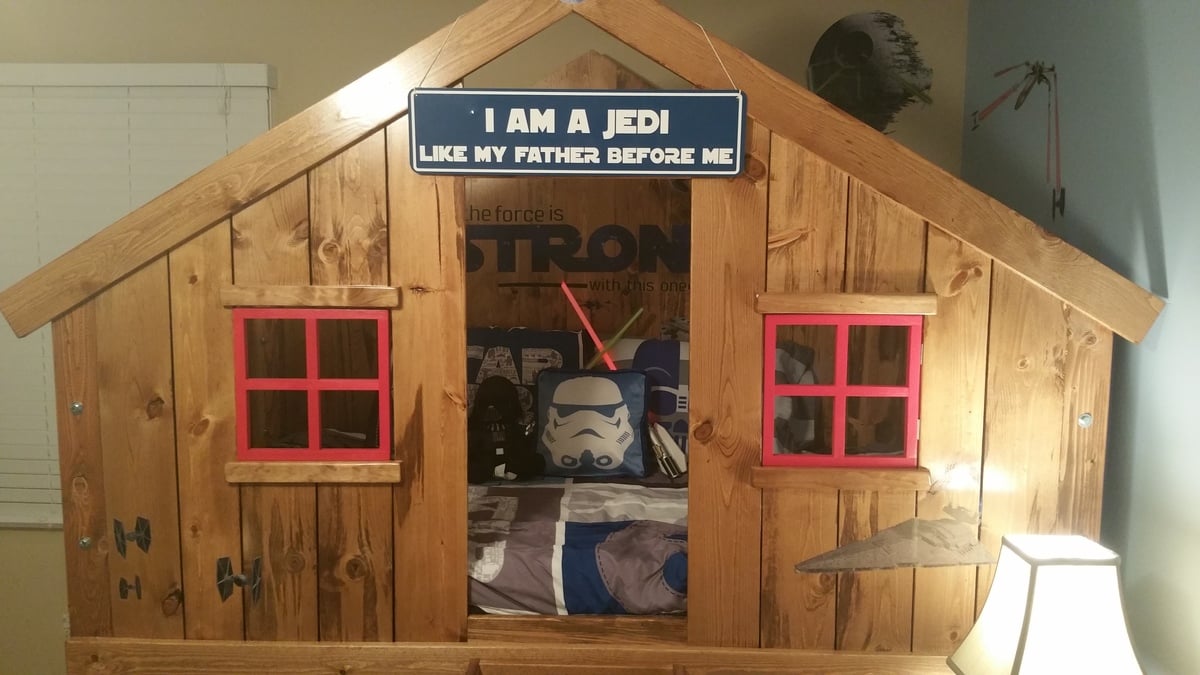
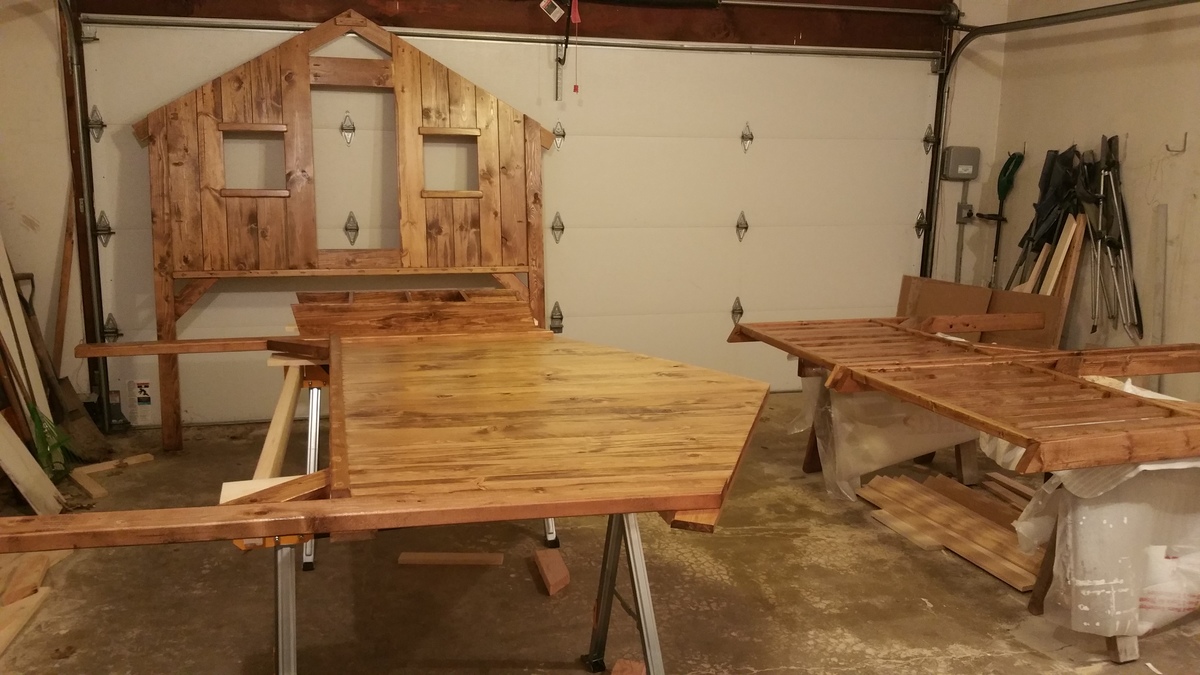
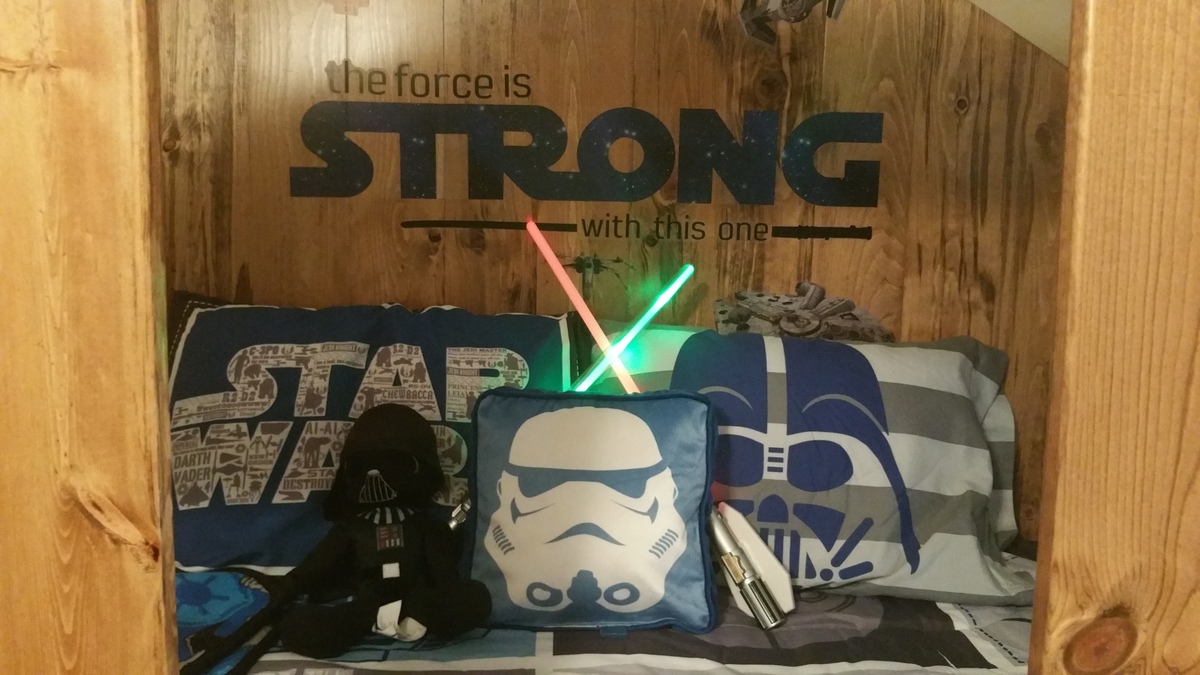
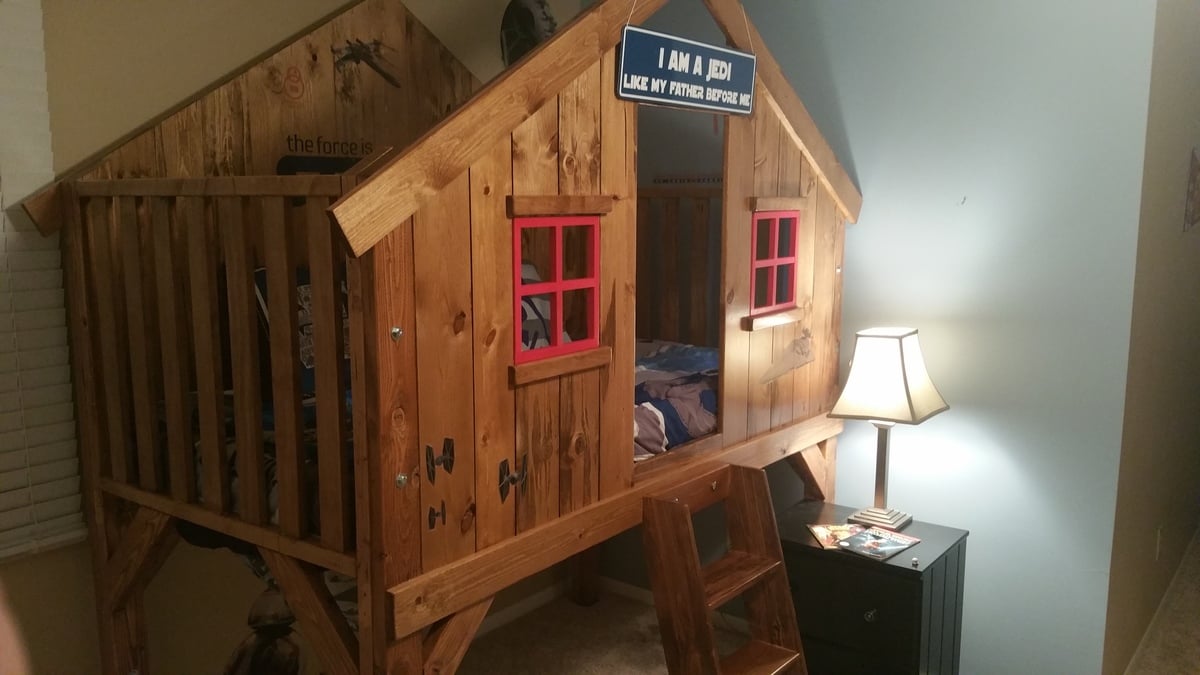
Clubhouse Bed Build
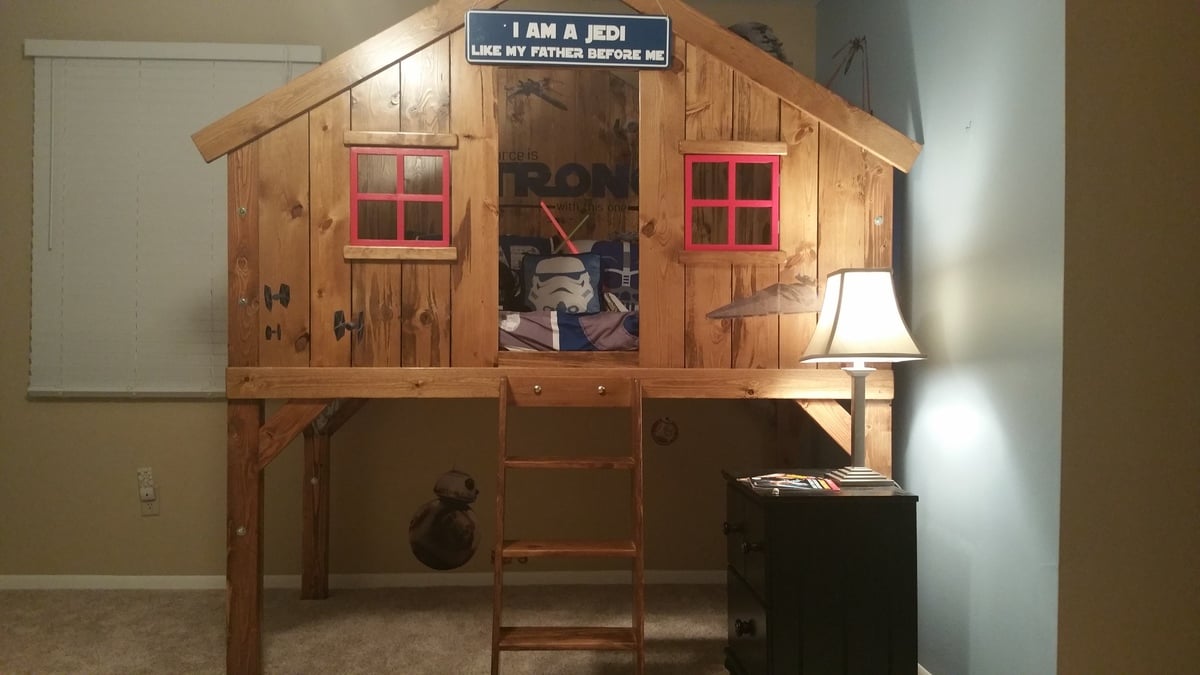
I originally got the idea to build a bed for my son when I needed to get something new for him and went looking online for beds for sale on Craigslist. I found a bed that looked like a barn and that made me search for plans to build one since why overpay for something you can build yourself?! I found Ana’s plan and knew immediately it was the one. I started at Thanksgiving and had it finished for Christmas. I can’t thank Ana and Jamie from That’s My Letter enough for such great plans. They were so detailed but easy to follow. I do all my own rehab work on my house and I am a weekend warrior carpenter so this was a really fun build. My son is about to turn 5 and is a huge Star Wars fan and so am I. I knew this had to be my theme so I bought him a bunch of stickers and a sign (couldn't help myself on this one, had to do the Jedi like my father sign) to decorate the bed on Christmas day. He was excited to get the stickers but he didn’t know I built this for him. I hid it in the garage the whole time and he never found out. So when we went to his room to see if for the first time he went nuts. My 2 year old daughter loved it too and they play in it together all the time. I had a few issues during the build with some measurements but was able to make it work. In the end I love it and so do the kids, especially my son! The window grilles take it to another level so I recommend them if you build this. I even sanded a lot of the edges around the windows and in the doorway to give it a more “weathered” look. I already have my next project chosen from Ana’s plans. I will hopefully be posting the results of the X desk build in the near future. Thank you Ana for all the plans, I will most definitely be showing this off and giving you credit every time. Chris
Built from Plan(s)
Estimated Cost
Not sure, haven't done the math yet. Probably in the neighborhood of $400-$500 but I acquired some new tools too.
Estimated Time Investment
Week Long Project (20 Hours or More)
Finish Used
Thanks to nleonard85 for the idea to use Minwax Early American. Applied with a brush and rag. St. Louis Cardinal Red for the window grilles
Recommended Skill Level
Beginner
Planked Wood Sideboard
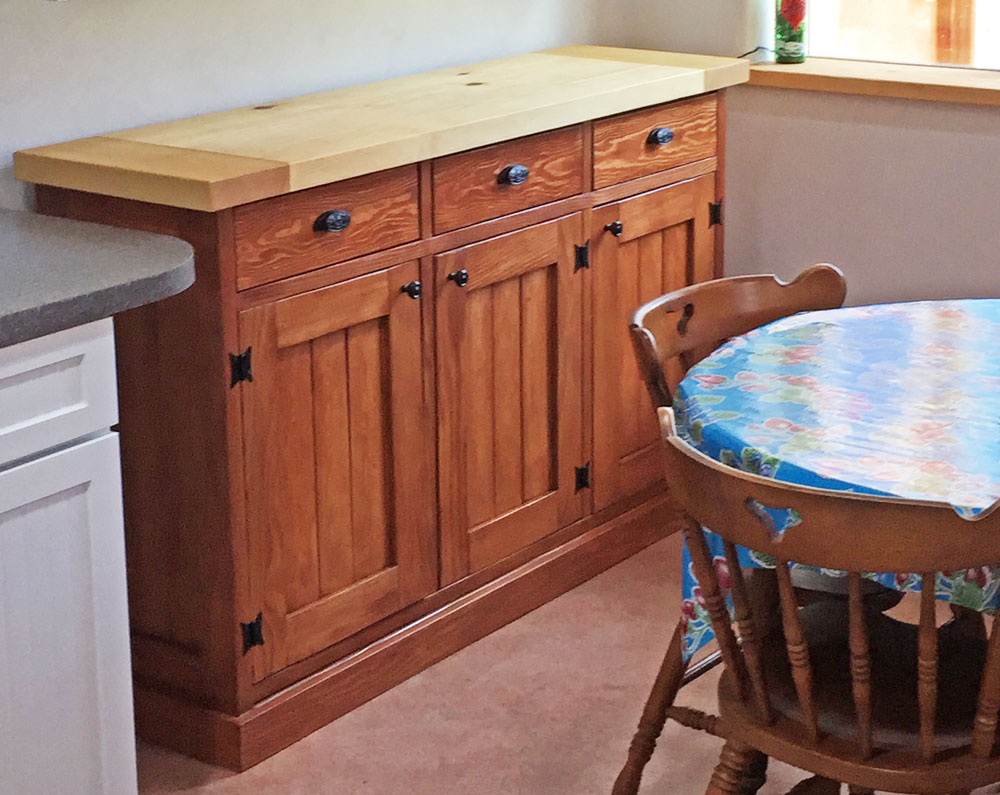
Great plans; thanks Ana . . .
Built from Plan(s)
Estimated Time Investment
Week Long Project (20 Hours or More)
Recommended Skill Level
Intermediate
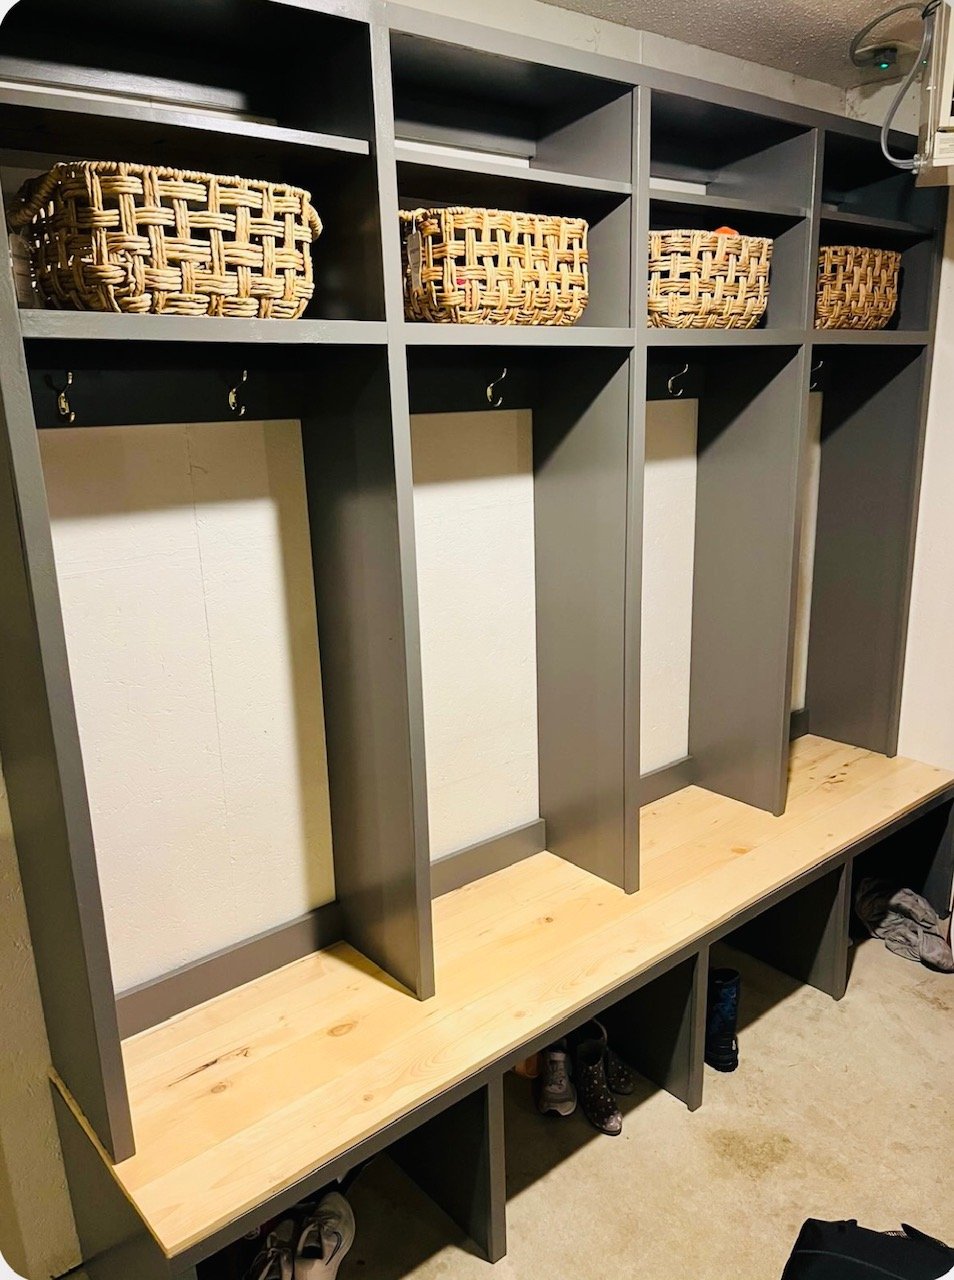
Mudroom Bench and Locker System - Espresso and Cream Blog
Doll Bed and Wardrobe
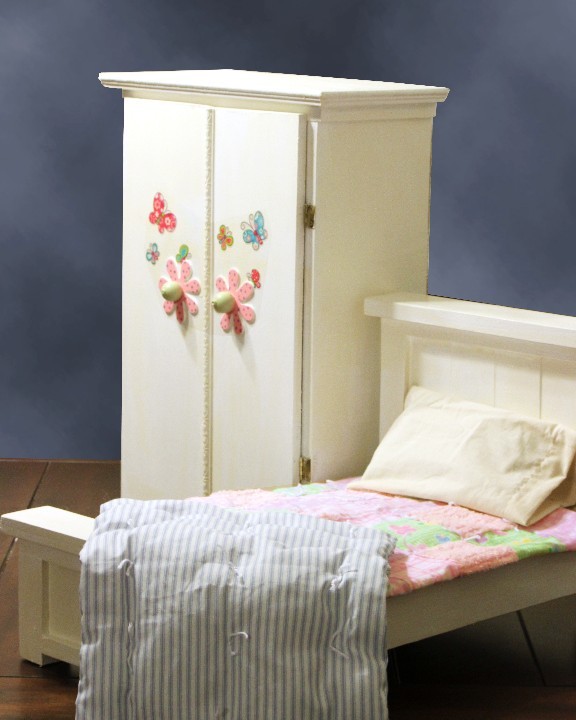
I love the Farmhouse Doll Bed, but because we bought a lot of doll clothes, I built a wardrobe to go with it.
The wardrobe is 21 1/2" tall X 14" wide X 7" deep. The inside shelf is 4" from the top. I'm having trouble uploading a photo of the inside, but will keep trying...
I made a mattress to look like the older striped "ticking" style. I still need to do a little more with the bedding because I'm not happy with the (muslin) pillowcase and want to do something brighter.
Cost was minimal because I'm still using up scraps from other wood projects and I used material for the mattress and bedding that I already had. That is what I love about some of the plans - they help me to use my leftover materials and still have something nice to give as gifts.
Thank you so much Anna for this plan - I also followed your suggestion and made a second one to donate. I love your site...

Estimated Time Investment
Day Project (6-9 Hours)
Recommended Skill Level
Beginner
Comments
Tue, 11/22/2011 - 07:25
Beautiful! I am trying to do
Beautiful! I am trying to do a wardrobe right now, too! I am making my second of this bed today. Great job!
Tue, 11/22/2011 - 13:21
looks great!
The wardrobe is great! I especially love the decorative touches! :)
Tue, 11/22/2011 - 13:21
looks great!
The wardrobe is great! I especially love the decorative touches! :)
Thu, 11/24/2011 - 12:56
Added photo of wardrobe inside
I finally managed to upload a photo of the inside of the wardrobe
Sat, 12/03/2011 - 11:29
Doll wardrobe
Where and how do I find the plans for the doll wardrobe?? I made the Farmhouse bed and love it. Thank you
Sun, 02/26/2012 - 15:22
doll wardrobe
I'll trade you picture and info for a great doll closet for you plans for the Farmhouse bed. Our granddaughter loves the closet, so now I need to build the bed.
Thanks,
Sat, 12/03/2011 - 14:12
Doll wardrobe
Thanks for your interest - I'm sorry, I tend to work by the seat of my pants and develop an idea as I go; so I don't really have plans. The best I can do is give somewhat of a cut list; which is:
Sides: 2@7"X19.5"
Bottom: 1@7"X13.5"
1st Top Board:1@7"X14" (hangs over 1/4in on sides)
2nd Top Board:[email protected]"X15"(hangs over 1/2in on sides and in front- it's even at back)
Doors: [email protected]"
Inside Shelf 1@7"X12" (Top of shelf is 4" below top of inside cabinet.
I just measured enough below to allow for doll hangers and drilled for dowel, but it came out just right for the longer dresses.
The front trim overlaps the left door, so that I only had to put one door catch at the bottom.
I hope this helps - I really need to learn the Sketchup program.
I used 3/4" plywood because that is what I had, but used 1/2" playwood for doors to make them lighter.
Fri, 12/09/2011 - 14:41
Beautiful!
What size dowel rod did you use? I have a niece who I've made a bunch of clothes for, and I'd love to make her a wardrobe to house new clothes!
Fri, 12/09/2011 - 21:14
dowel Size
I believe it was 3/8 or 1/2 inch - I took one of the hangers with me and just put it on dowels until I got the right size.
Wed, 03/14/2012 - 20:25
Ribbon!
Just a suggestion for a quick way to "brighten up" the pillow case. Just find some ribbon to coordinate with the bedding and sew (or use iron on adhesive - really easy then!) around the hem line of the opening.
The wardrobe is darling. I love the flower knobs!
Rustic X coffee table

I love this site. We needed new furniture in are house and didn't want to spend a bunch of money. Finding the Rustic x plans was a life saver.
Estimated Cost
$100
Estimated Time Investment
Weekend Project (10-20 Hours)
Finish Used
White paint and kona stain.
Recommended Skill Level
Beginner
Play Kitchen

I made this set for my grandchild! Love the plans! I modified the stove to include a range-top microwave, and included doors for the kitchen sink.
Built from Plan(s)
Estimated Time Investment
Week Long Project (20 Hours or More)
Finish Used
Dark gray, black, and white paint.
Recommended Skill Level
Beginner
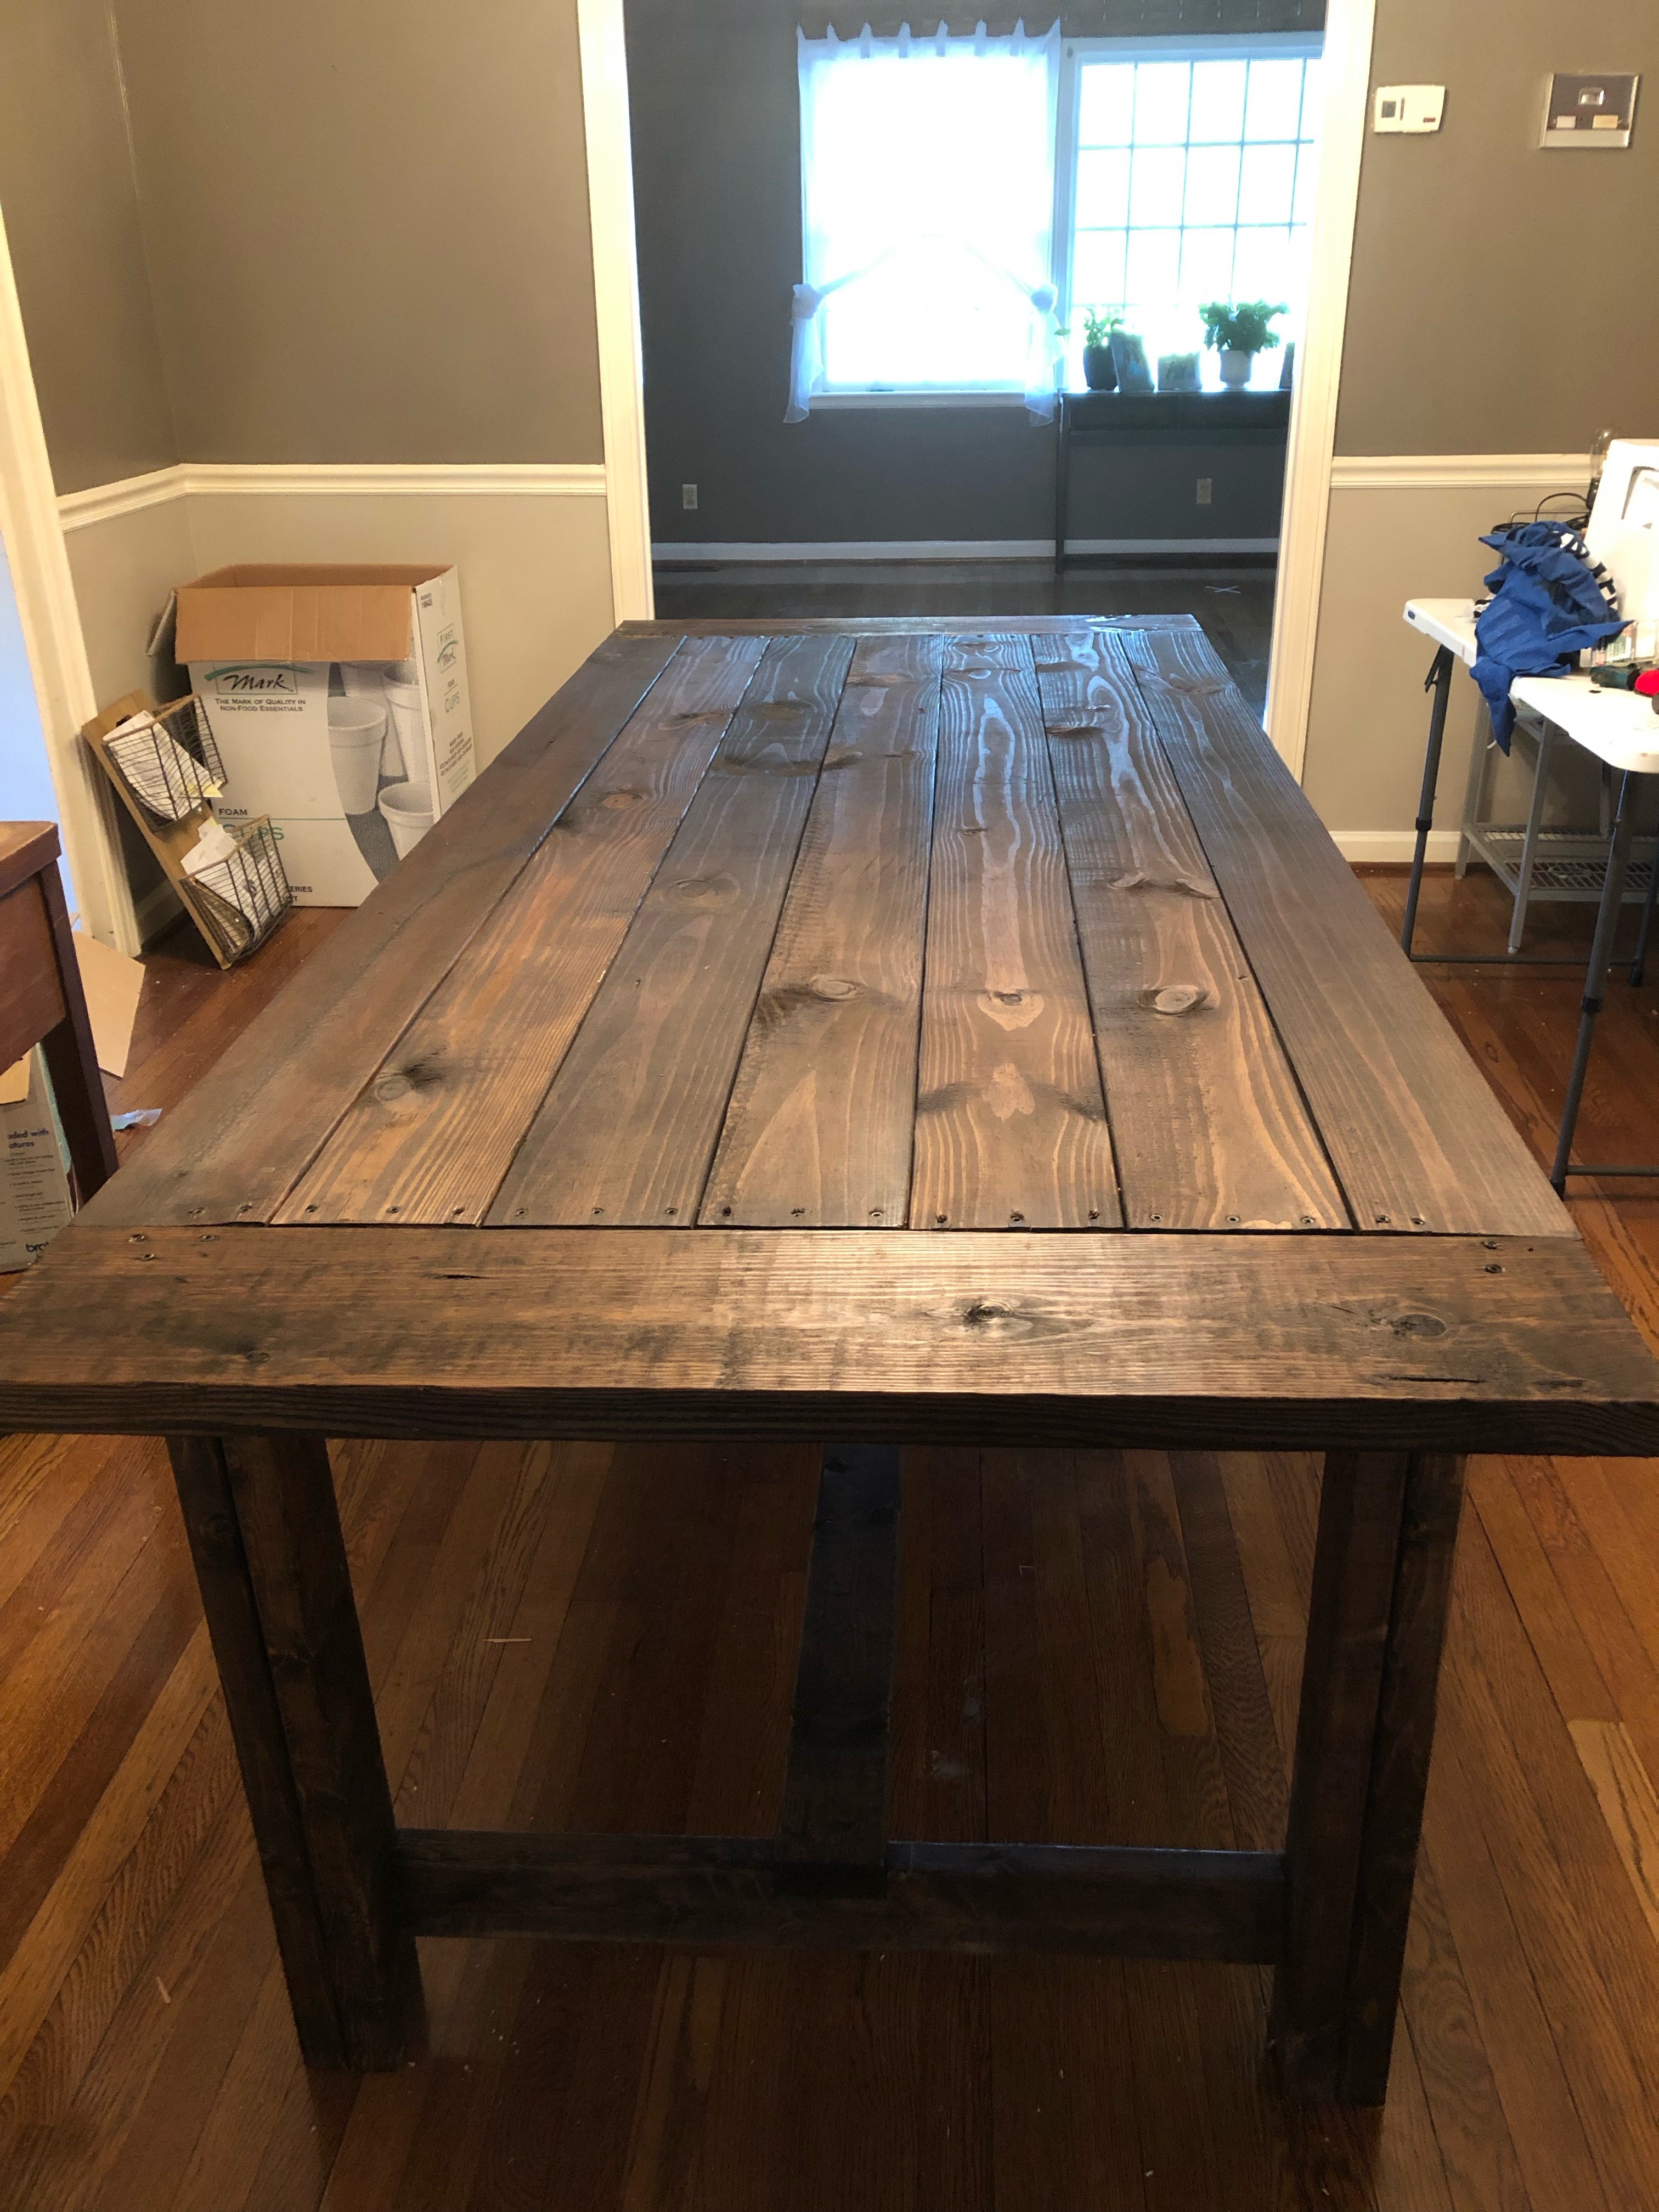
My First DIY Farmhouse Table
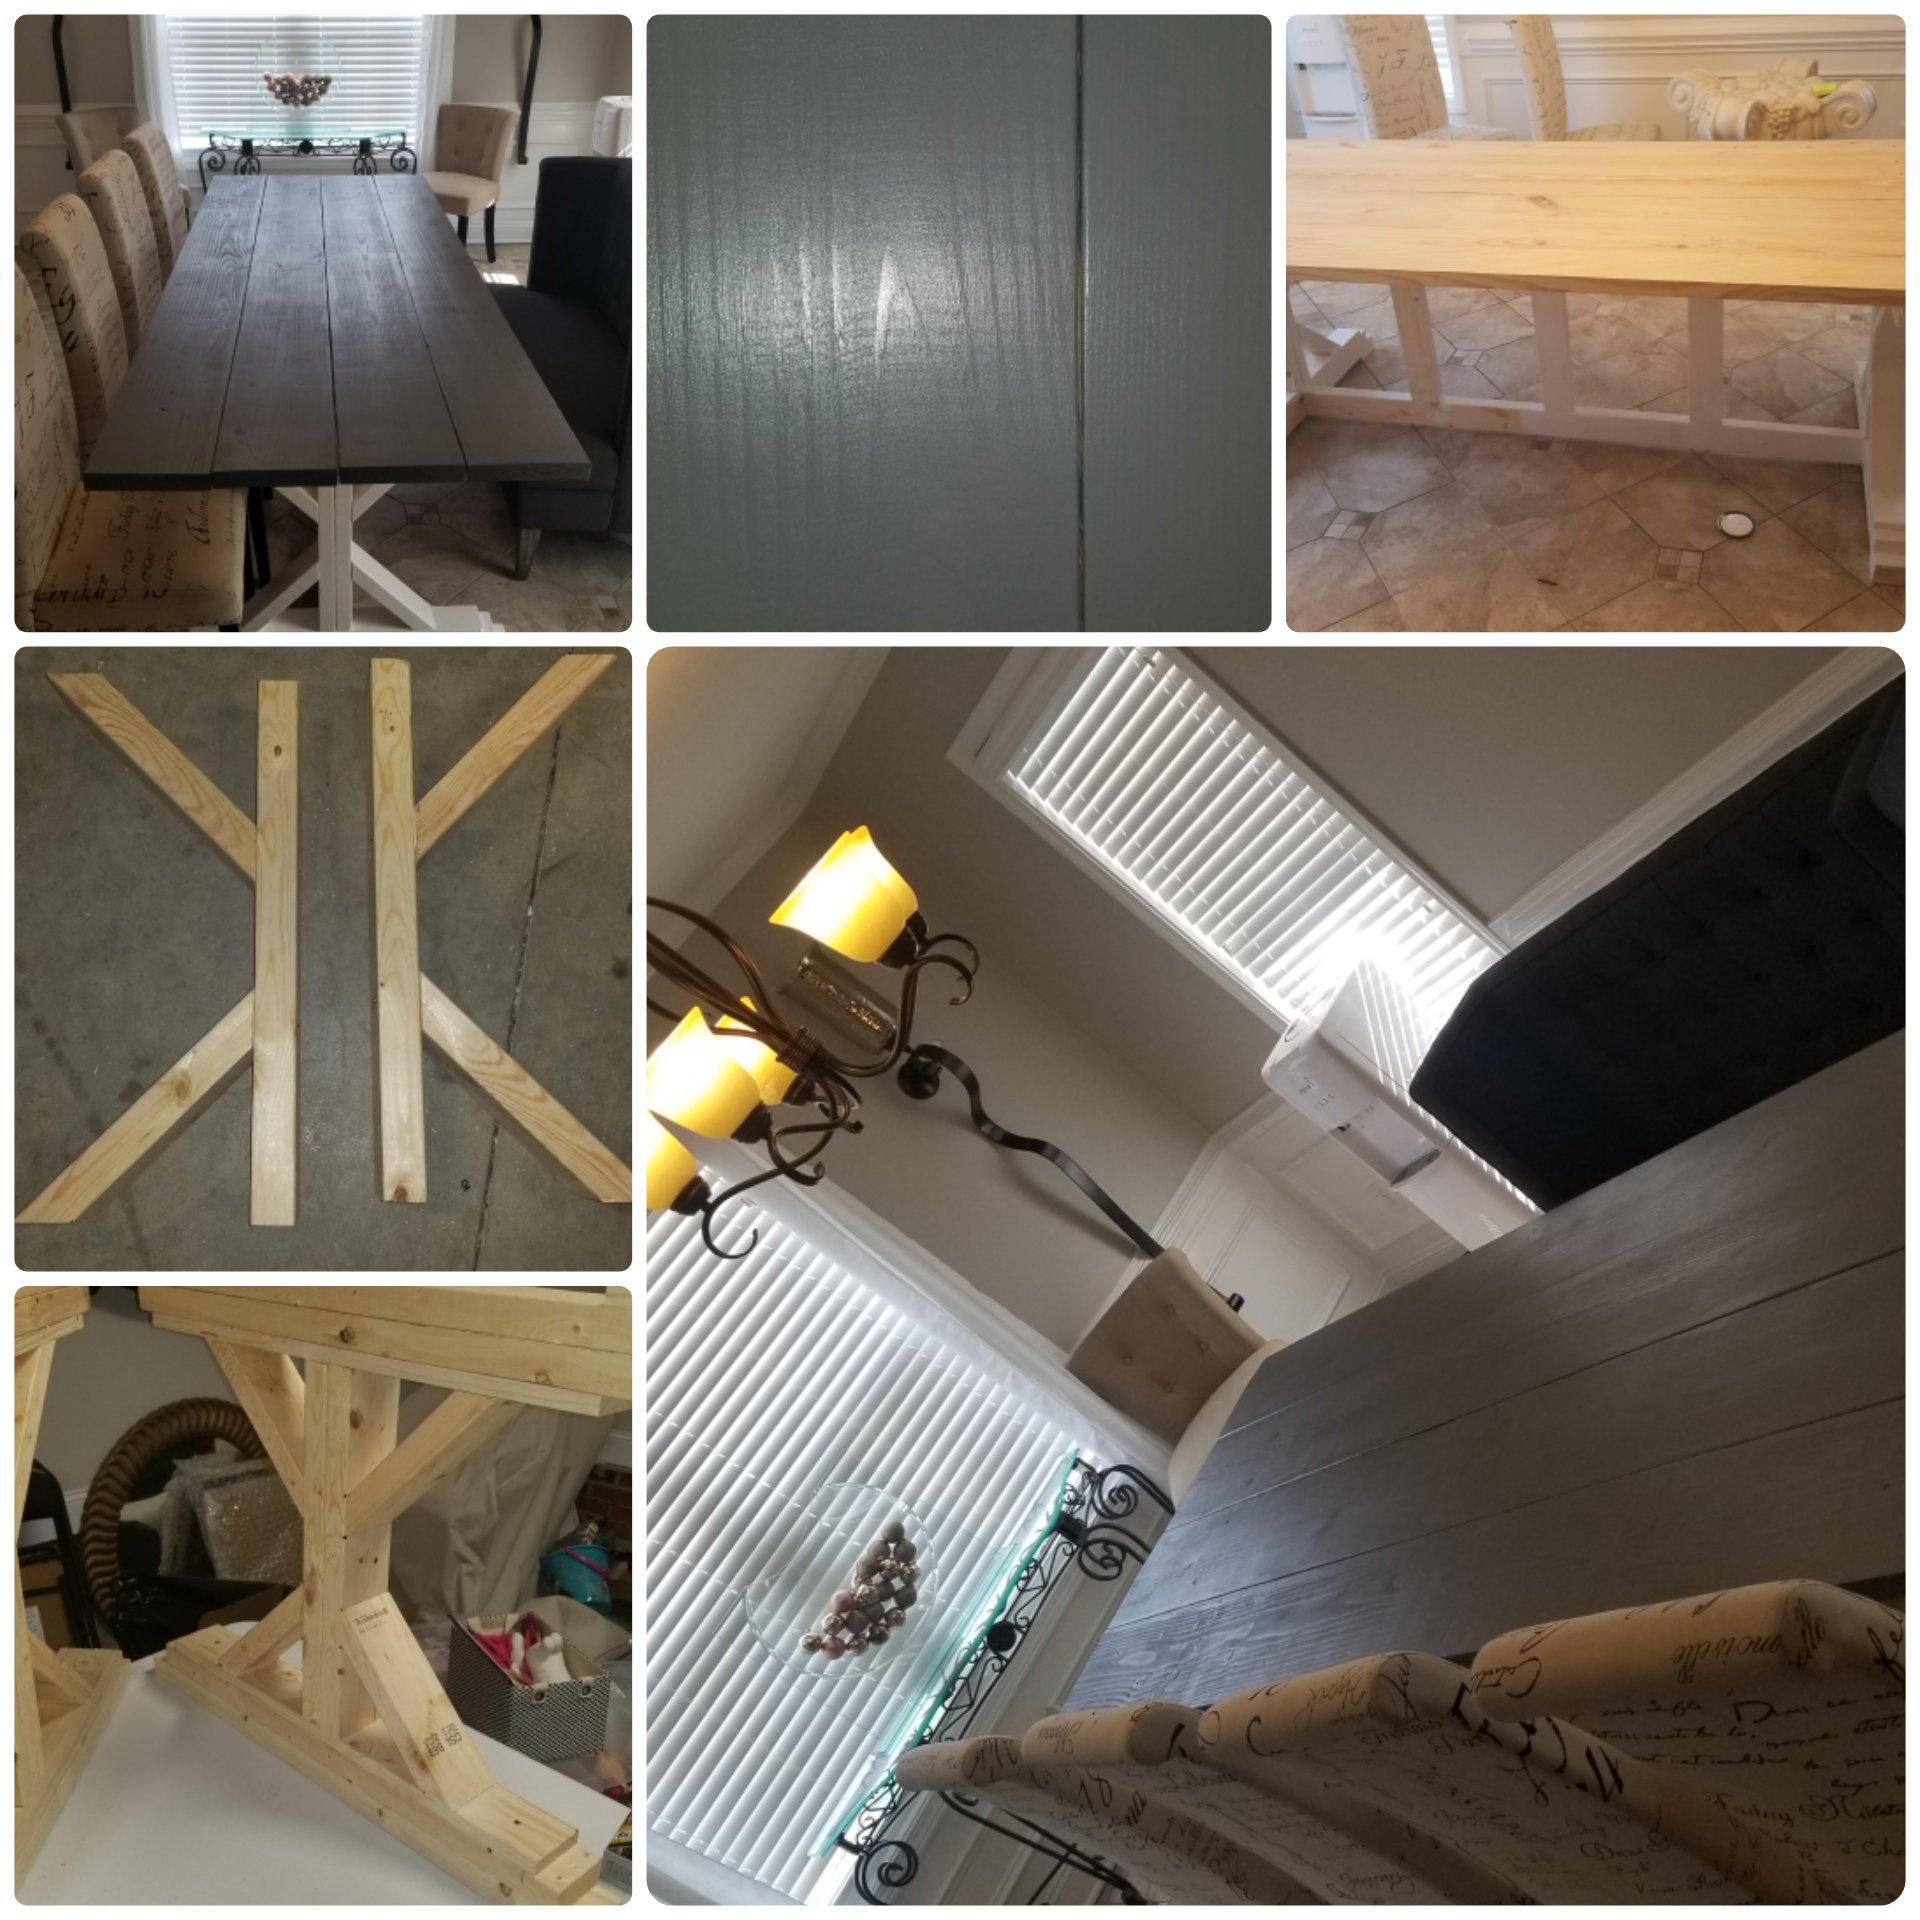
This is my first (but not last) large DIY project. My wife wanted a farmhouse style table but not the price that went with it. So while she took the LO out of town, I surprised her with this and she loved it. It's not as hard as it seem, but as a beginner, a lesson that I learned was to always cut the boards yourself to make sure the measurements are correct. Don't let a big brand named store cut your wood because, well, just because. I had to recut a few boards myself because of their lack of correct measuring. Other than that, this was fun.
Estimated Cost
$70 for wood
$100 for tools
$30 for paint and polyurethane
$100 for tools
$30 for paint and polyurethane
Estimated Time Investment
Weekend Project (10-20 Hours)
Recommended Skill Level
Beginner
I can’t believe I did this! Thanks Ana!
My first “real” build! I’m thrilled with how it turned out! Thanks Anna for giving me the confidence to give it a try.
Built from Plan(s)
Comments
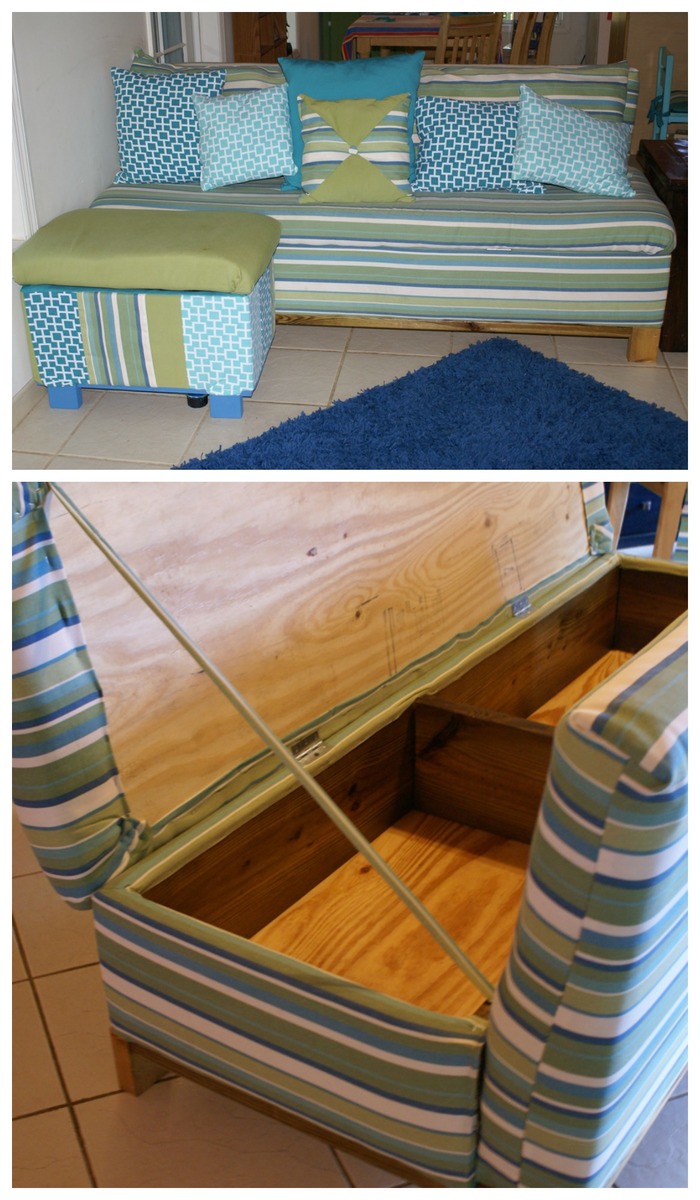
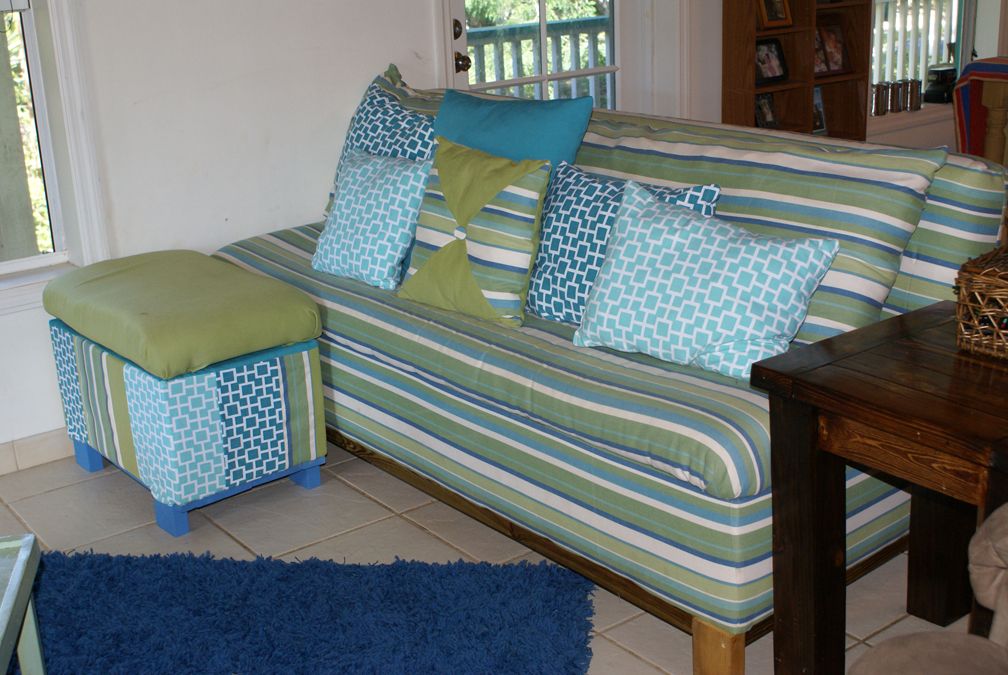
Beachy Storage Sofa
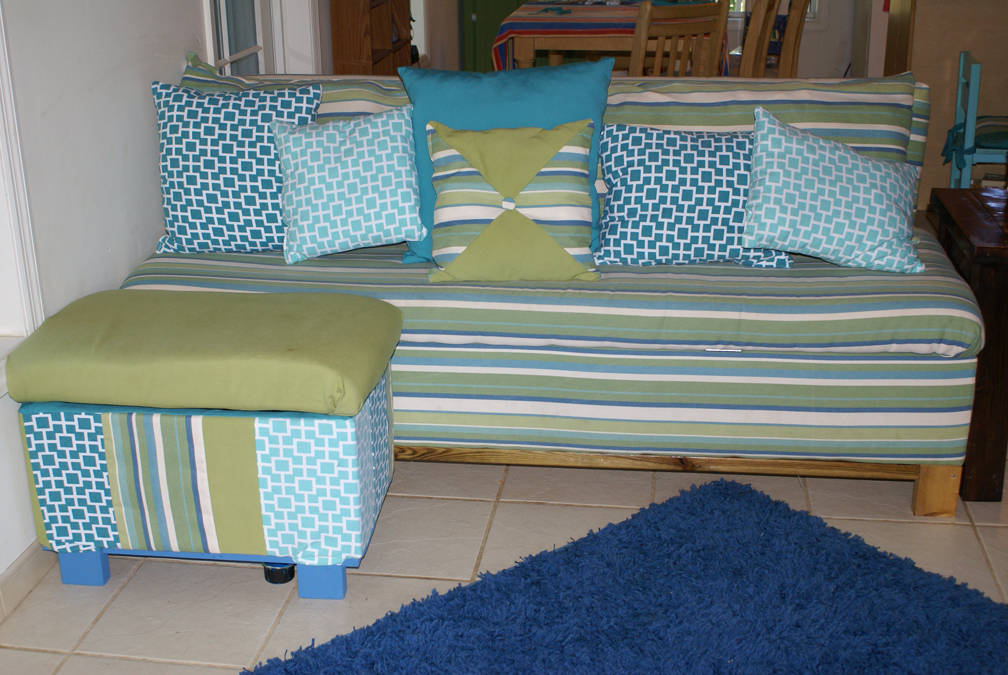
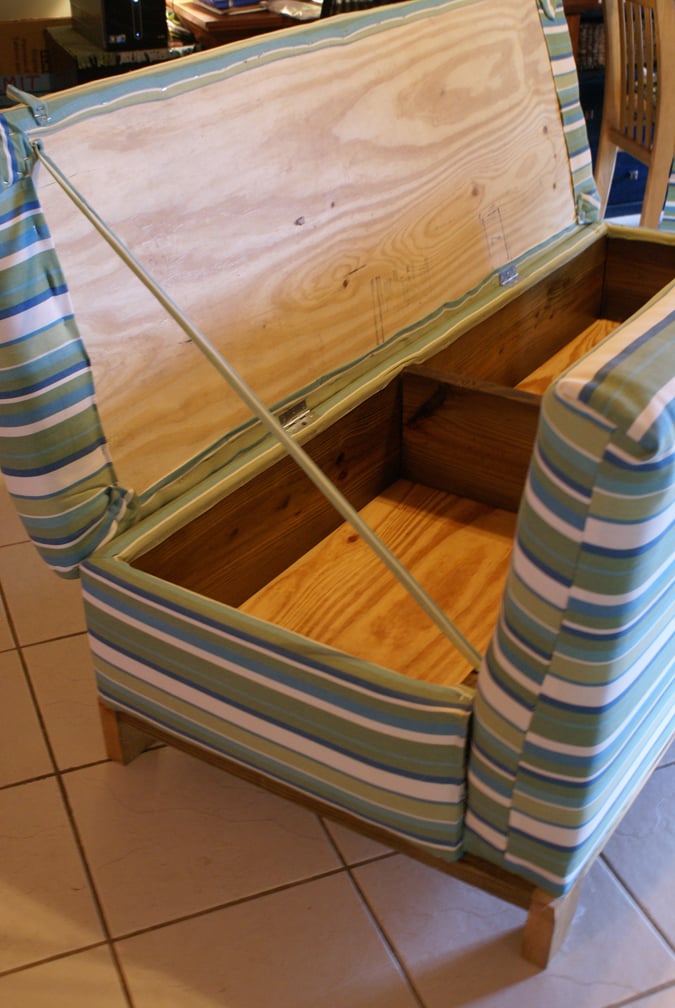
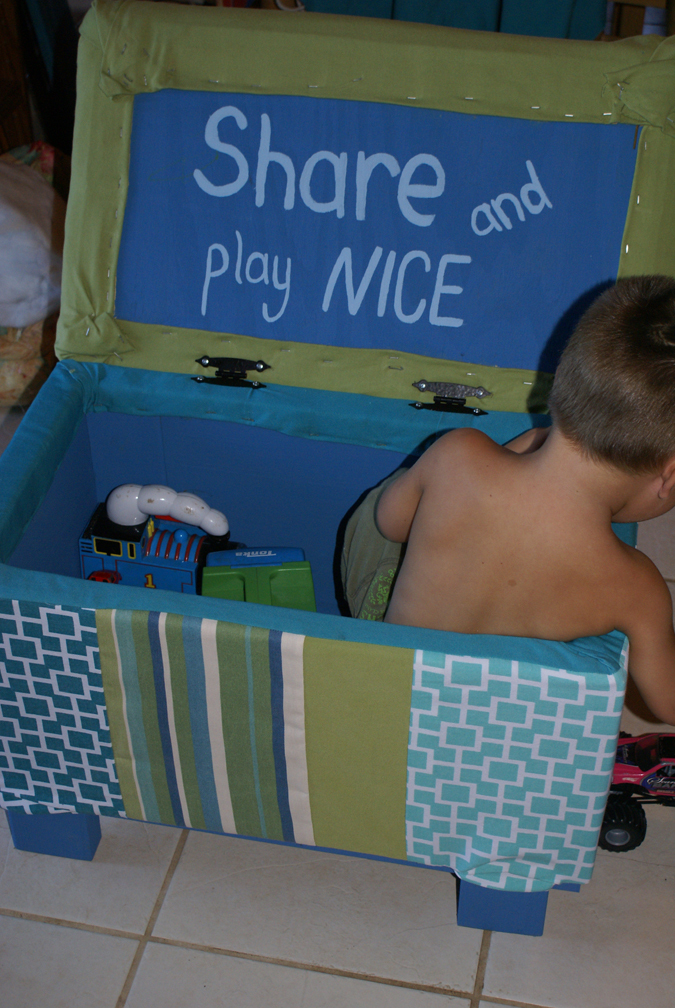
I love my new sofa! It is ten times more comfy than our old one. We live on an island and it was definitely cheaper to build my own sofa than to ship one in and pay duty on it. Thank you Ana for making this possible! Never thought I'd be building my own sofa, but we are so thankful for it. We even threw together our own little ottoman/toy box to go along with it from scraps...added bonus!
Built from Plan(s)
Estimated Cost
Total for everything probably about $500 ( a little higher costs for the wood here on the island, in addition to the other materials)
Estimated Time Investment
Weekend Project (10-20 Hours)
Finish Used
Clear Satin Poly finish on the parts of the wood that are still visible after the fabric goes on.
Recommended Skill Level
Intermediate
Comments
Sat, 07/21/2012 - 09:56
DIY storage sofa
this is so amazing! We go through so many sofas, mainly because we buy used, and you never know if they are going to last. This one looks really sturdy, and it could be recovered if the fabric got old, or you just wanted to update. Definitely considering this before we buy another one. And the storage hidden inside makes it even more desirable!! Love the fabric you chose as well.
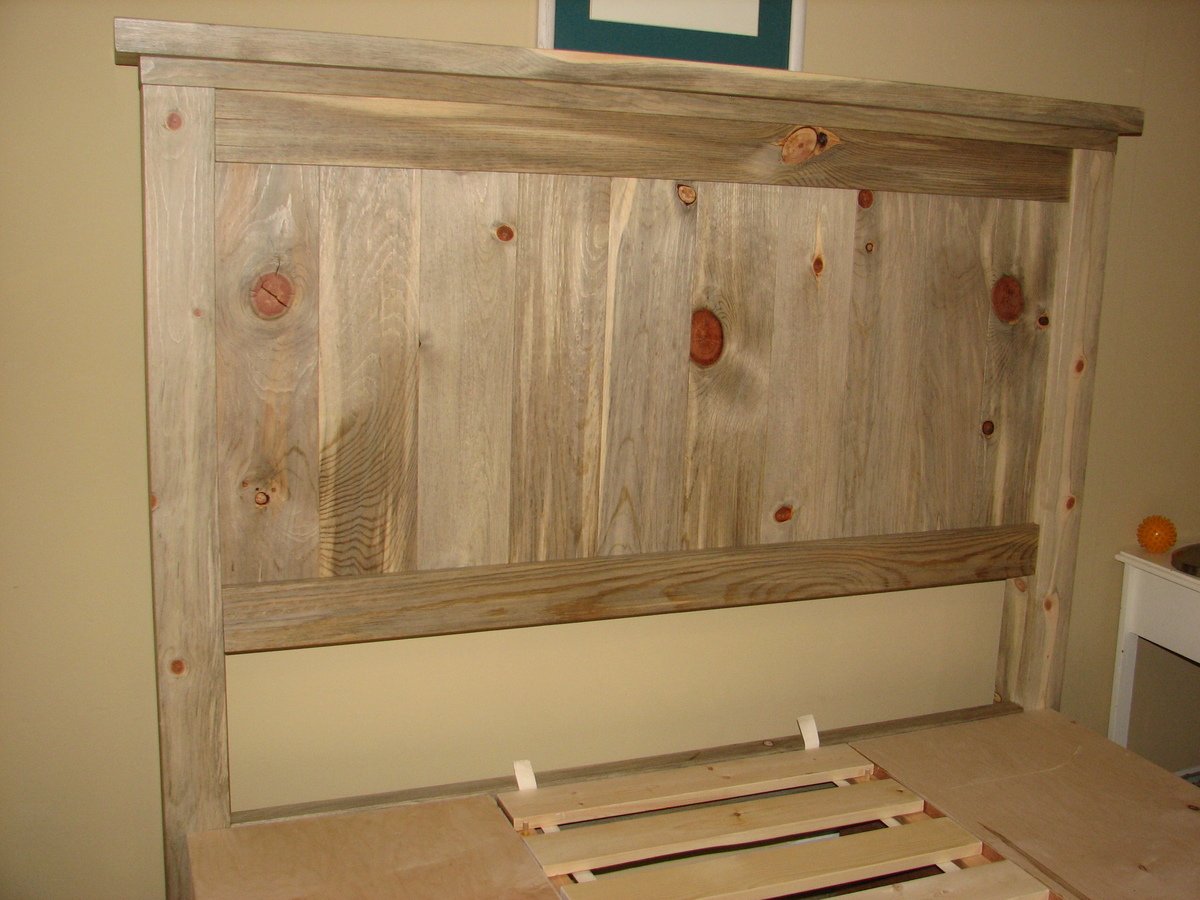
Blue Stain Pine Farmhouse Storage Bed

This project was inspired and guided by the plans for the
Farmhouse Storage Bed with Hinged Footboard by birdsandsoap.
The most visible parts, head and foot board, are made of beetle-killed blue stain Lodgepole pine, locally sourced and milled.
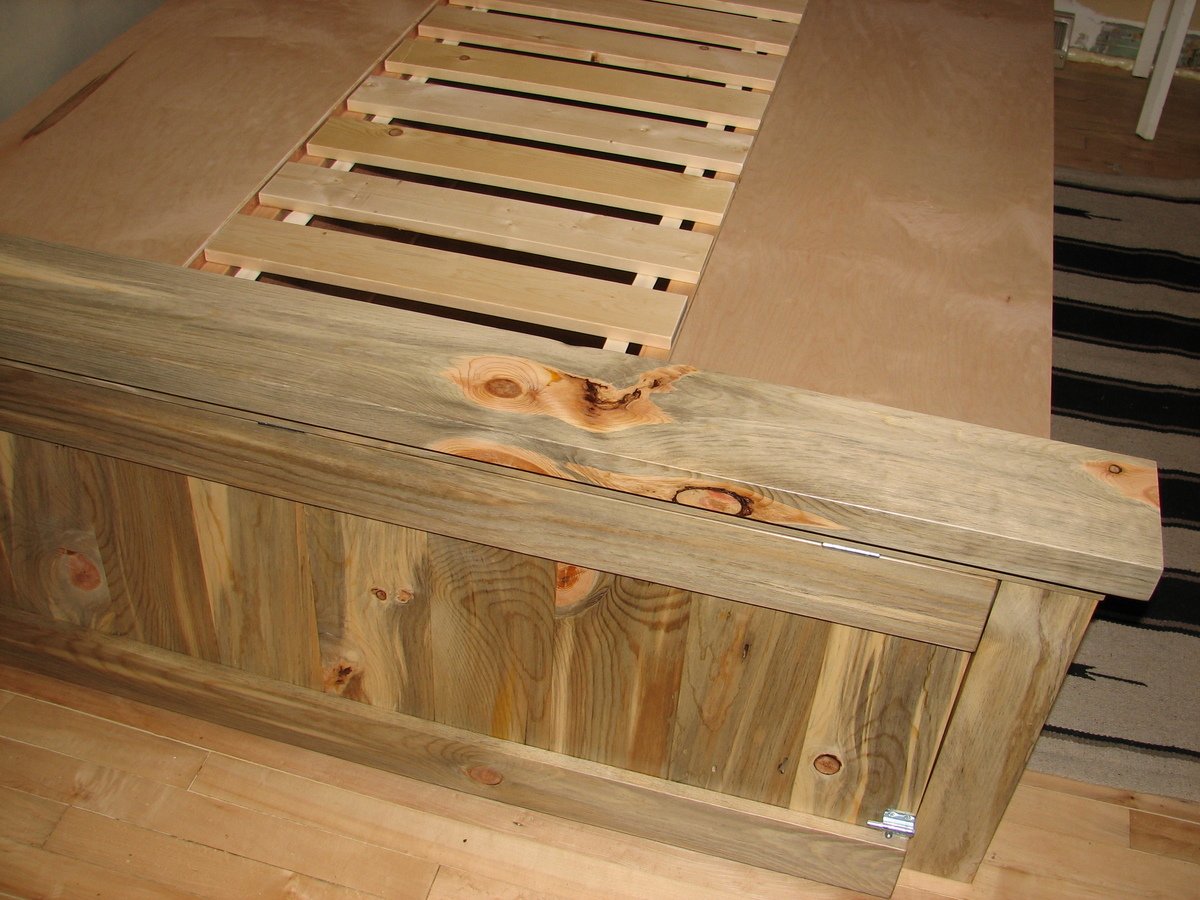
The boxes are made of 3/4" maple plywood and rest on a frame of 1 by 2's. I am still working on the 6 drawers, which will have blue stain pine fronts as well.
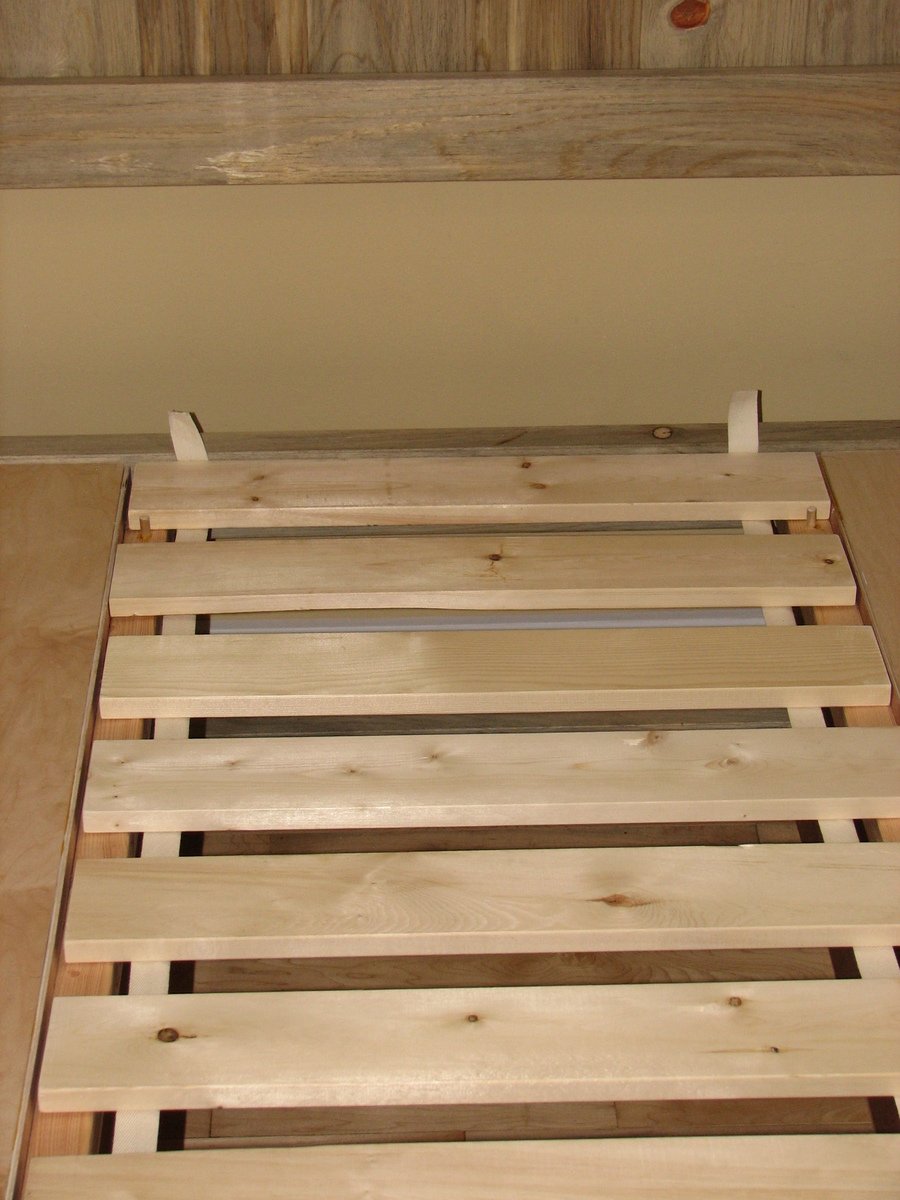
The bed slats between the boxes are stapled to webbing and the first and last slat are held by dowels drilled into the supporting rails to prevent the slats from sliding around.
Knock-down design - by removing the few (non-loadbearing) screws that fasten the head/foot boards to the boxes, the bed can be disassembled into manageable/movable components.
Built from Plan(s)
Estimated Time Investment
Week Long Project (20 Hours or More)
Finish Used
AFM Safecoat PolyureSeal BP - Satin
Recommended Skill Level
Intermediate
Comments
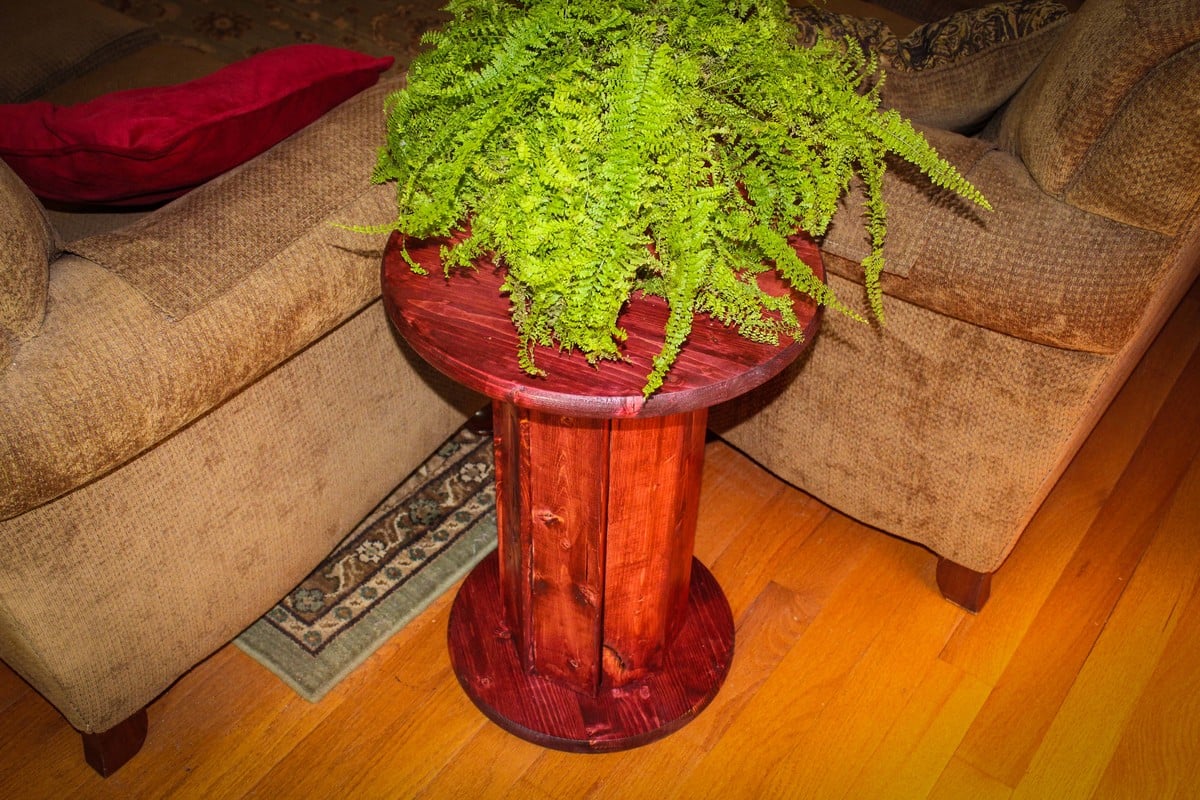
Plant Stand or Side Table
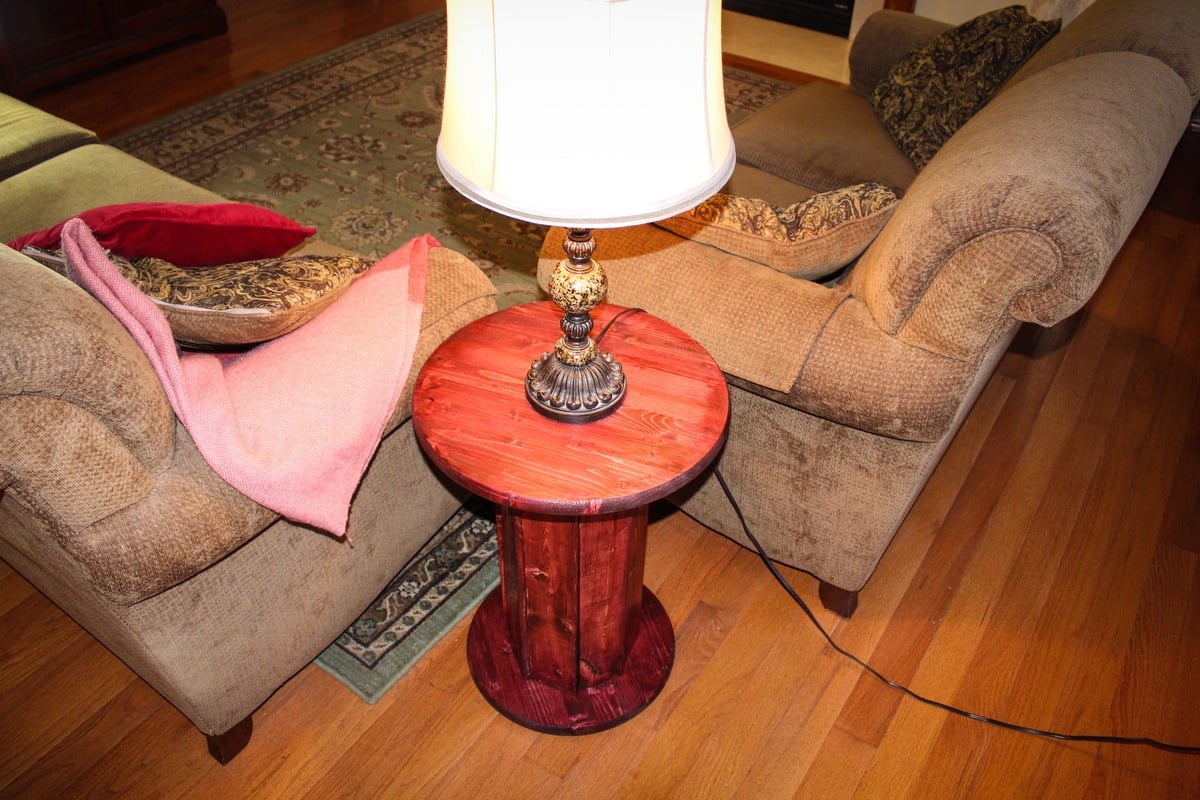
This project was made with two 2x4s and two solid wood round discs. Although it’s hard to see in the photos, the pillar has a unique shape due to the v-notched 2x4s. This design is very sturdy and should hold about anything you would like to place on it. See Link for full build Instructions:
http://www.instructables.com/id/Side-Table-or-Plant-Stand-Made-From-2x4…
Estimated Cost
$20
Estimated Time Investment
Afternoon Project (3-6 Hours)
Finish Used
Stain
Recommended Skill Level
Beginner
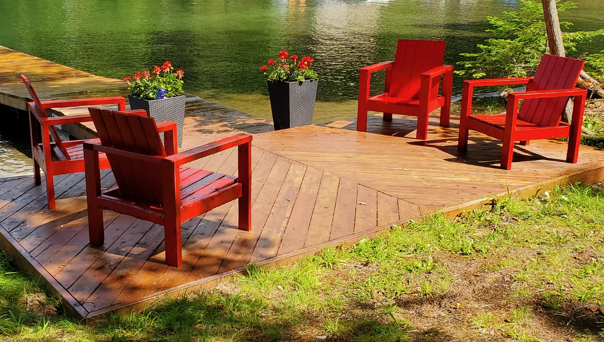
Awesome Adirondack chairs!
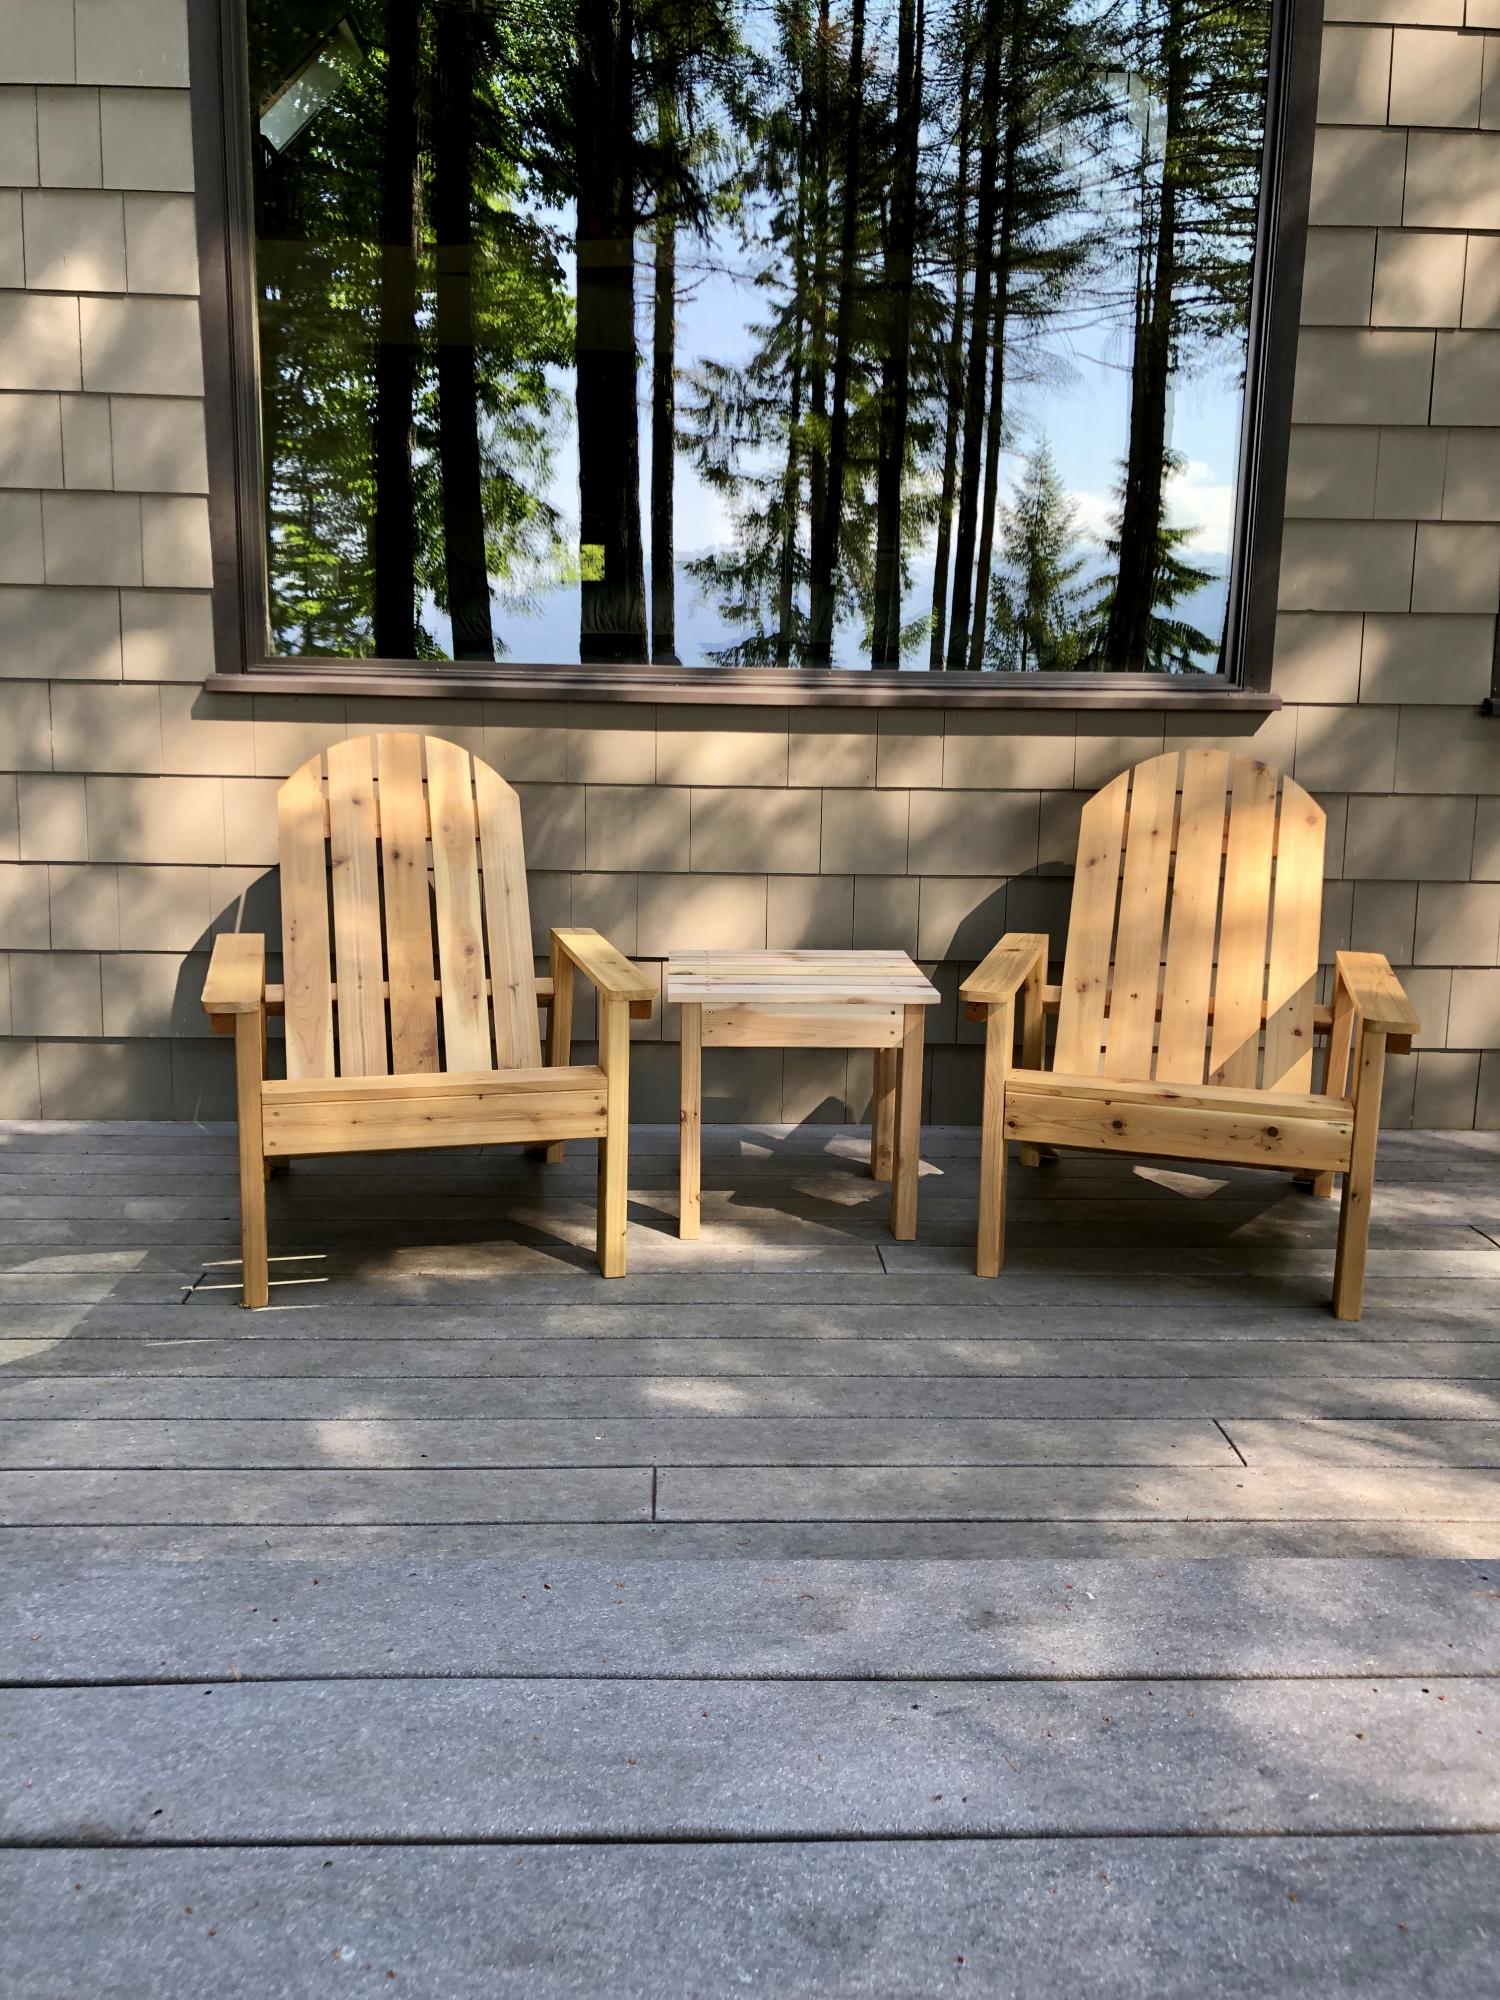
Thanks for sharing. Added a smal table to match!
Built from Plan(s)
Estimated Cost
$125 a chair for cedar
Estimated Time Investment
Afternoon Project (3-6 Hours)
Finish Used
Deck sealer
Recommended Skill Level
Beginner
Comments

Mon, 06/03/2019 - 11:35
These are gorgeous chairs! …
These are gorgeous chairs! Thank you so much for building from our plans!
Outdoor Chairs
"I had a great time building these chairs."
Peter
Built from Plan(s)
Comments
Ana White Admin
Fri, 02/24/2023 - 09:02
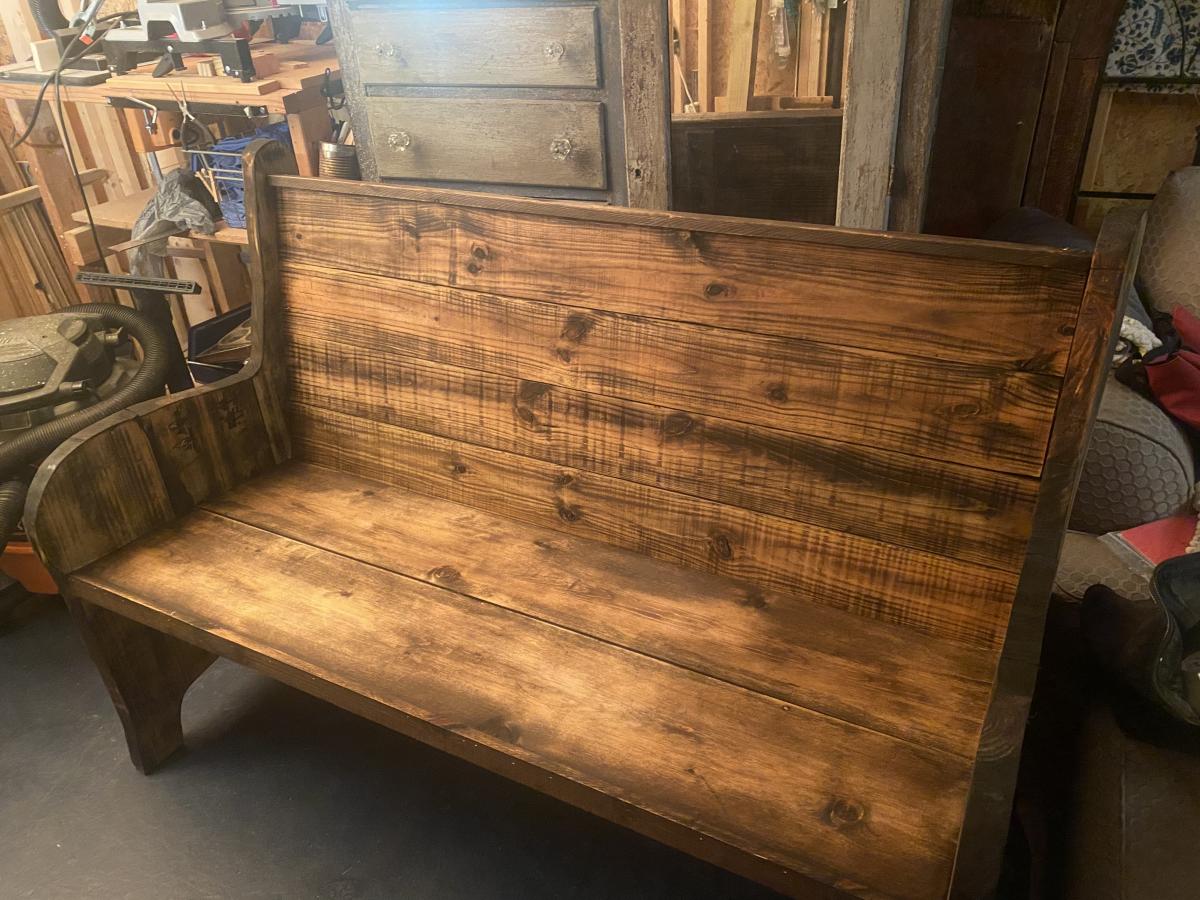
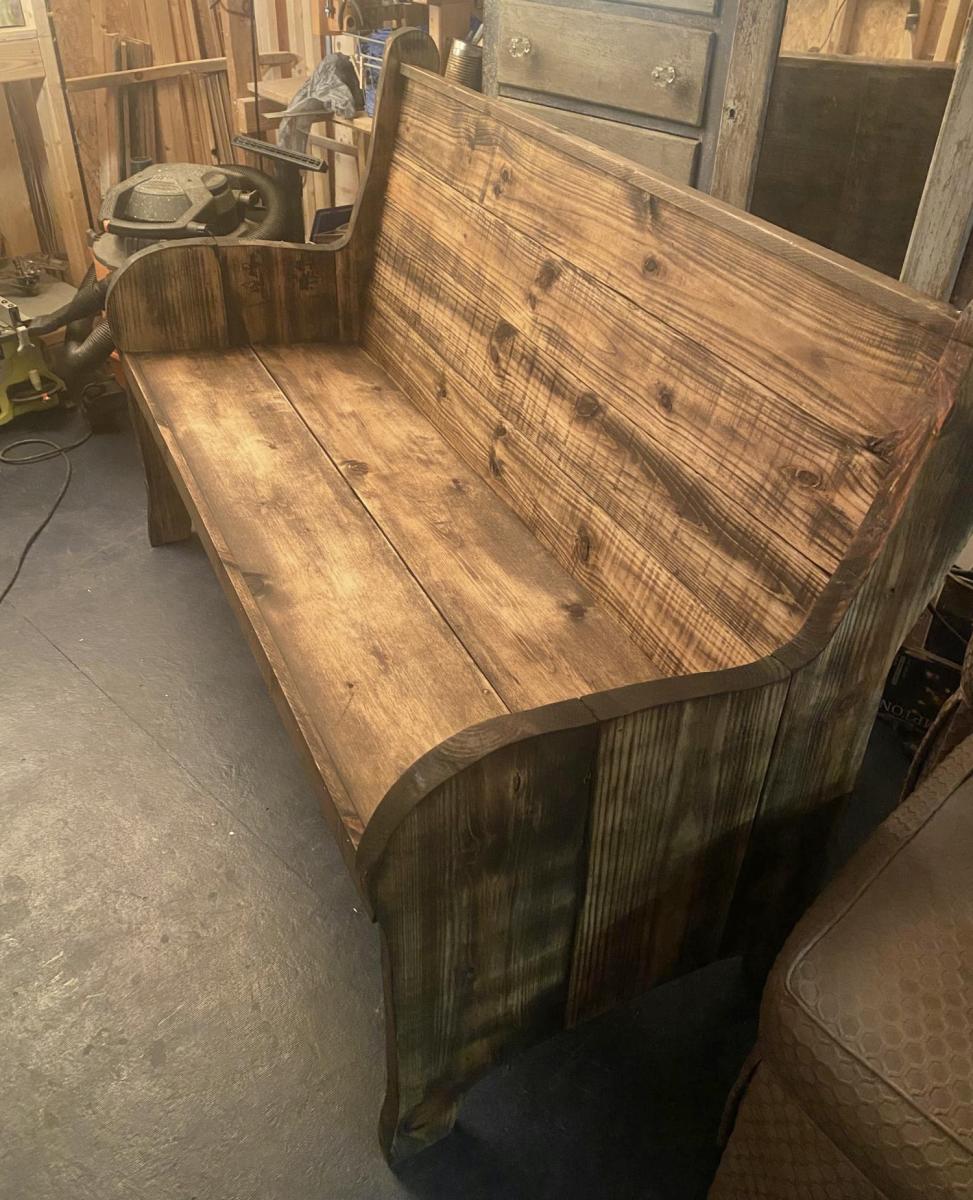
Beautiful pew bench!
You did an amazing job, thank you for sharing!