Community Brag Posts
Princess Play Loft Bed

I love the play loft bed, but wanted to add a princess twist for my 5 year old's birthday. I found melamine plywood, which helped in the finishing since it was already white. It was a lot of work, but so worth it! I think the kid's favorite feature so far is the slide, which has seen a ton of use :) My favorite feature is all the storage! Thanks so much Ana! If it wasn't for you, there is no way I would have had the courage to tackle a project like this!


Built from Plan(s)
Estimated Cost
$350
Estimated Time Investment
Week Long Project (20 Hours or More)
Finish Used
The plywood was already white, but after filling the holes I went ahead and painted the whole thing white so that it would all be the same color.
Recommended Skill Level
Intermediate
Comments
Wed, 06/22/2011 - 21:21
incredible!
This will be such a dream come true for any 5 year old! Beautiful.
Thu, 06/23/2011 - 11:12
One lucky princess
What a fantastic design for your daughter! She must pretend she's Rapunzel every time she gets into bed. The little cubbies to store toys were an excellent idea.
Mon, 07/11/2011 - 19:32
Slide
I started out by building the back and outer walls just like the stairs, just slightly narrower to fit my space and the side walls longer, coming out into the room more since the slide sticks out into the room farther. I then also did the top platform of the slide like the top step, having the top stair trim, cleats, and plywood support underneath the front of the platform. Then, I did some calculating to figure out how long to make the slide and what angle to use. I wanted it to come out into the room farther than the rest of the bed so that the slide wasn’t too fast, but I didn’t want it to stick out too far. So I used a piece of melamine board (nice and slick wood) that was 56” long. At the bottom of the slide, I put a piece of plywood that went from the ground up about 8 inches, so that the end of the slide would be up off the ground. So the slide ended up dropping a total of 34”, from the platform down to the plywood 8 inches off the ground. This made a fairly quick slide, but perfectly doable for my little ones. Then, before mounting the slide, I attached 1x2’s to each of the sides of the slide under where the slide was to be to support the slide from beneath. Then, I used a kreg jig to attach the slide to the sides and then screwed the slide into the supports. This made a very stable slide. If you have any more questions, I would be happy to try and help. I hope I’ve made sense ☺
Sat, 07/16/2011 - 15:45
Instructions
Hello Slide! My daughter screamed when she saw this bed...can you please tell me how to build it all? I would love it if you could share...
Sat, 07/16/2011 - 20:54
Instructions
I'll try :) I started by building the towers. It was just deciding how wide I wanted them (I did one narrower and one wider to use like a window seat). Each tower is essentially three sides of plywood with one having shelves in it and the other having one shelf to make a seat. I also put a shelf at the bed's height so that my daughter can use it to put things when she is in bed, such as her alarm clock. Then I knew how long I needed the bed to be and how wide each of the towers were, and I made the middle front section to be the remaining width. The rest of the bed is very similar to the Play loft bed with storage steps, but instead of making the steps storage, I just attached them down and then cut out on the inside underneath the stairs to allow access for storage from within the castle. I used a jig saw to cut out the window. The top pink parts of the tower are just decoration, so I bought a thin piece of plywood and used a jigsaw to cut the up and down cuts. And then on another post I talked about making the slide. I hope I helped some :) If you have any more questions, feel free to ask and I will try and help.
Sat, 10/01/2011 - 12:53
Looking for some help
*I'm willing to pay you for your help*
I wish to start making this bed, but need some help. I'm novice and need more instructions. If I were to email you measurements, could you elaborate more in depth?
Please respond.
Thank you for your consideration.
Sat, 10/01/2011 - 12:53
Looking for some help
*I'm willing to pay you for your help*
I wish to start making this bed, but need some help. I'm novice and need more instructions. If I were to email you measurements, could you elaborate more in depth?
Please respond.
Thank you for your consideration.
Thu, 10/06/2011 - 10:04
Re: Looking for some help
I would love to help in any way I can (free of course!) I have wanted to do the plans on the computer, but haven't been able to figure out the program :( So feel free to ask away and I'll try and help. You can post questions here, or email me at [email protected].
Tue, 07/19/2011 - 13:01
Dimensions
I was wondering what the dimension for your room are (especially the wall the bed is against. Just trying to figure out if the slide idea would work in our little room. Also would you mind telling me how wide the the n_n_n (That is my attempt to show the part of the castle that has the little rectangles/squares and then a space and another rectangle/square (the pink and purple parts of the bed) I have been drawing some trying to get spacing right and they never seem to look right, but your spacing looks great. And is the purple part that has the shield painted on it a seperate piece from the rest or is it cut out with the main part of the bed- if it's seperate how wide across and length down is it? We are in the process of attempting a similar bed for our little one and I have been playing around with ideas and so far yours looks like what I have been trying to show my husband in my drawings, only yours looks a lot closer to what I had in my mind than what I have on paper. Any help would be appreciated.
Mon, 07/25/2011 - 09:27
Dimensions
The wall the bed is against is 125.25", so a little over 10'. I still have a few inches of wall left and wish I had made the slide a little wider (the slide I made is 14.5" wide), but thought I would be tighter on space. For the pink on top of the tower, I first used 1 x 3 that I attached to the front of the tower. Then I used 1/8" plywood for the part that I cut the up and down parts. It is 6.5" tall, but part of it sits behind the 1x3, so only 5" is visible. I then cut the plywood 3" down, 3" across, 3" up, 3" over, etc. to make that up and down look at the top of the towers. And the purple part with the shield is separate. It is again just a thin piece of plywood that I nailed to the bed. When I put this up, part of the shield thing was sticking above the bed and I didn't think anything of it until someone broke off part of it. So now I've added a piece of wood behind the shield (the same width of the shield) so that it keeps the shield from being broken. The shield's overall size is 23.25" wide x 27" high. I hope this helps :) If there is anything else I can help with, please just ask. Good luck with your adventure :) !
Sun, 08/21/2011 - 22:19
Seeking plans
I am incredibly curious to know if I can get plans for this bed. I have looked extensively throughout various internet pages for a bed/playhouse like this. I would like to make it with a queen mattress on top. I have look through your posts and haven't gathered enough information to proceed. I am willing to pay for the plans.
Is there anything different you would do, if you did this project again?
Thank You,
Guest
Tue, 10/18/2011 - 08:43
princess loft bed
Hello:
First of all I have to say THANK YOU. I found the plans for the playhouse (which are fabulous) are there plans available for the princess castle?
Thu, 04/05/2012 - 15:40
Instructions for princess bed
I would love your directions or plans to build this my little princess. Thanks for any help. Just love this bed!
Thu, 04/05/2012 - 16:05
plans
I posted plans at:
http://ana-white.com/2011/10/plans/castle-loft-bed
Hope this helps!
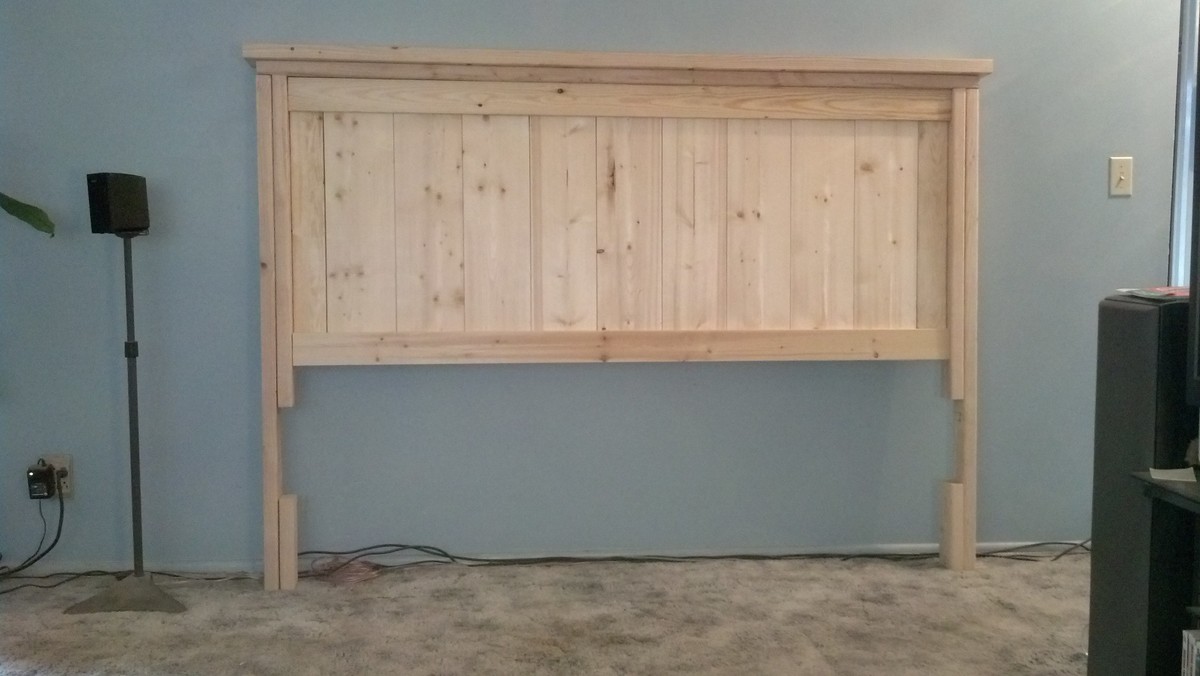
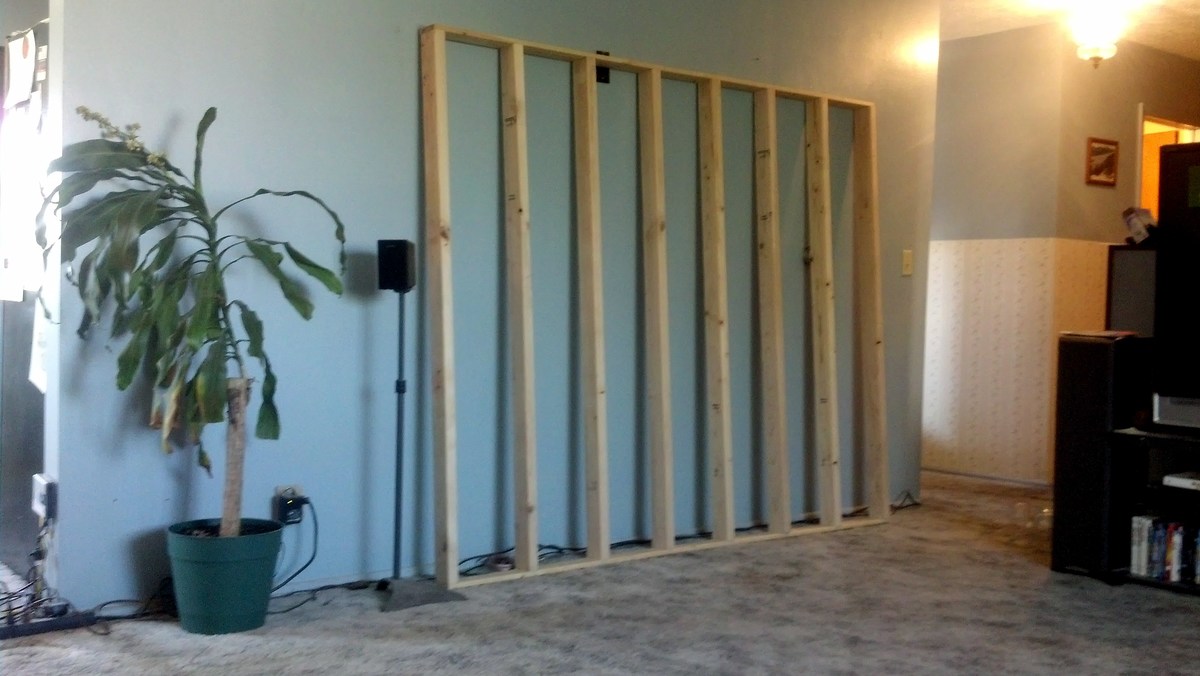
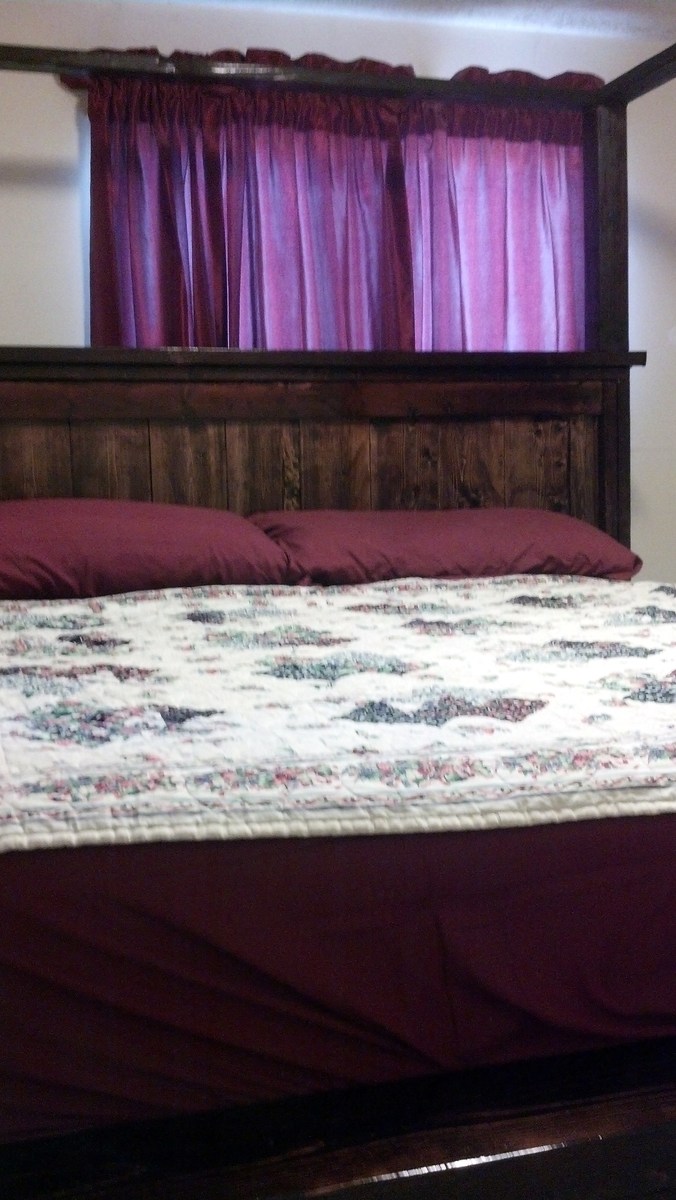
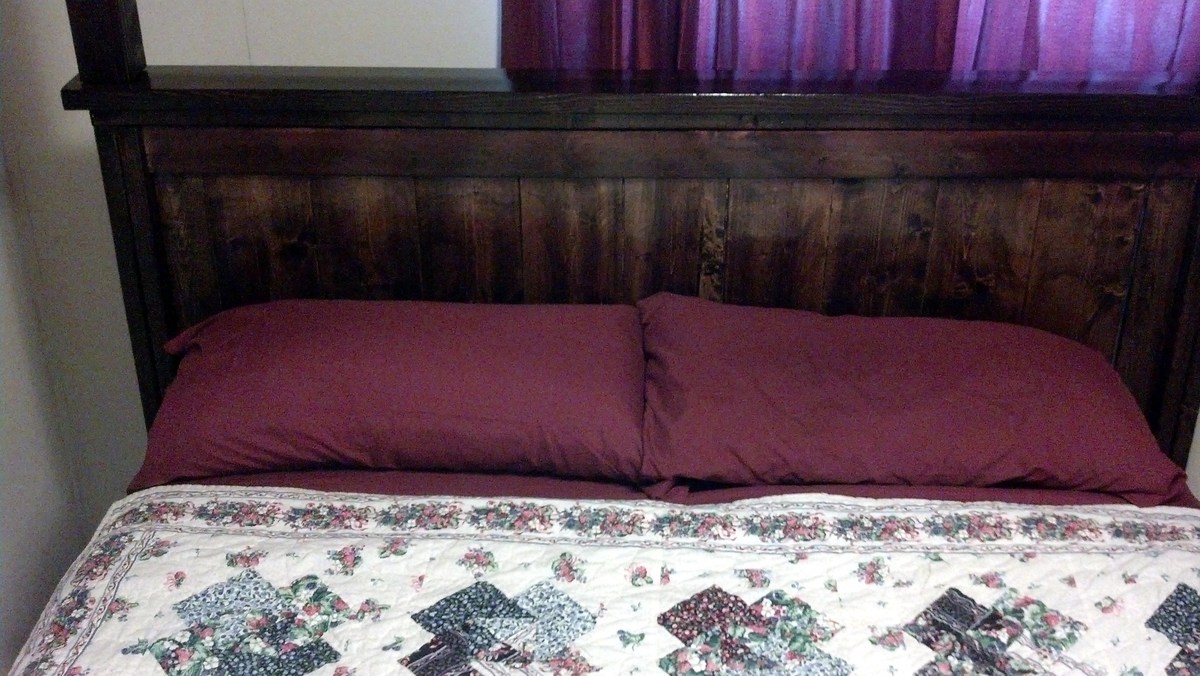
My California King Dream Bed
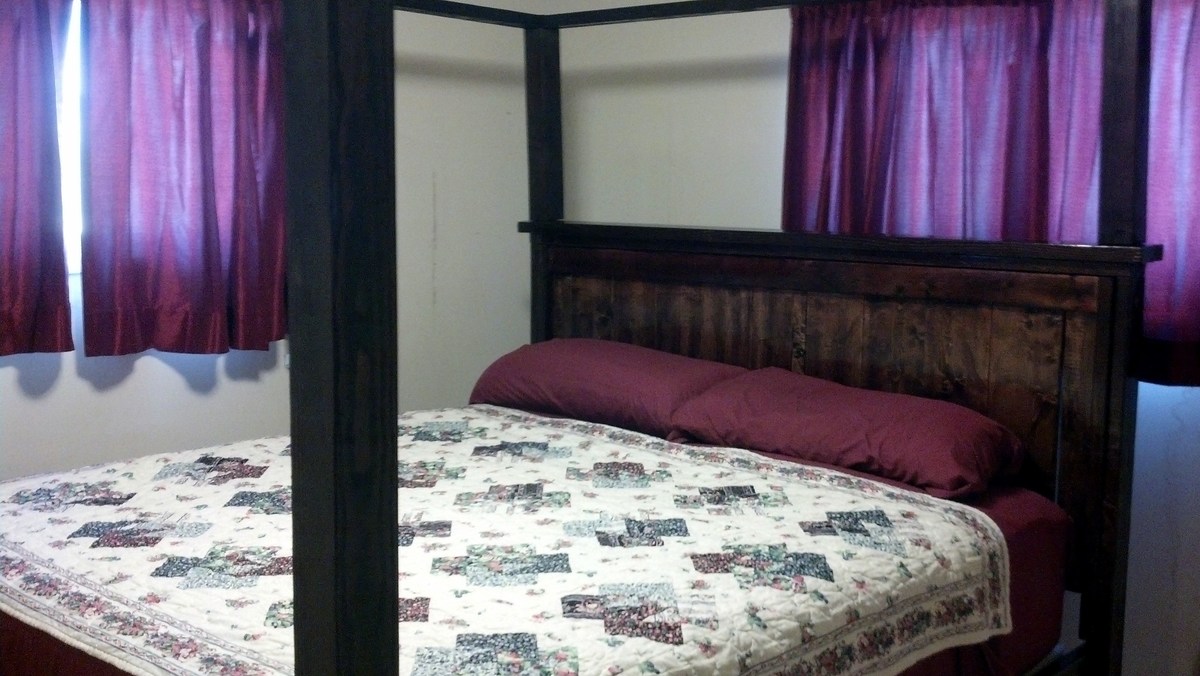
I've always wanted a Cali King bed, but balked at the one to six thousand dollar price tag for the showroom models. This one is an excellent, straight-forward build with little modification needed from the plans given. The lumber yard staff was great at selecting high quality stock once they knew to what end what the pieces were going to be used, so utilize their expertise. Tolerances are fairly tight on this bed, so measure carefully, and more than once. With the addition of the four posts and canopy frame (also provided on www.Ana-White.com ), and a Stearns and Foster luxury plush mattress from Costco, I've more than got my money's worth. Indeed, so will my children. it's heirloom quality.

Built from Plan(s)
Estimated Cost
$250.00
Estimated Time Investment
Weekend Project (10-20 Hours)
Finish Used
Minwax mahogany red was applied with a foam brush in consecutive coats, NOT wiped off (as doing so gave the wood the appearance of being a bit too distressed), and five coats of Polyurethane (two for the posts and canopy) were applied with a bristle brush.
Recommended Skill Level
Intermediate
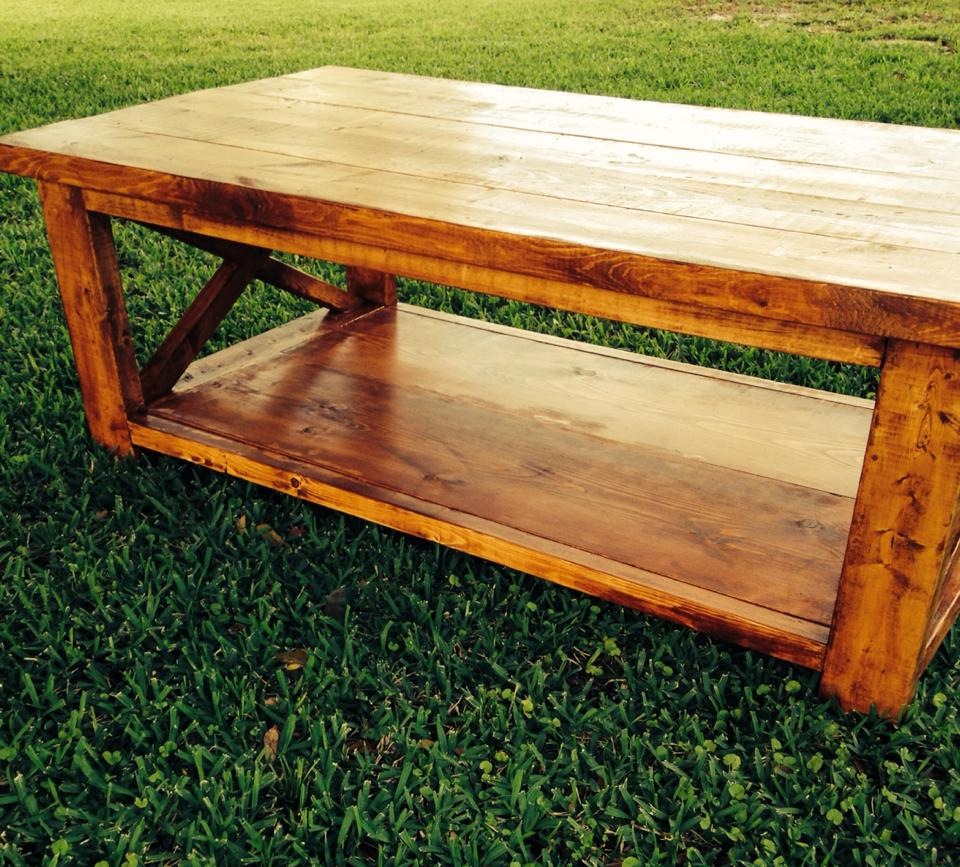
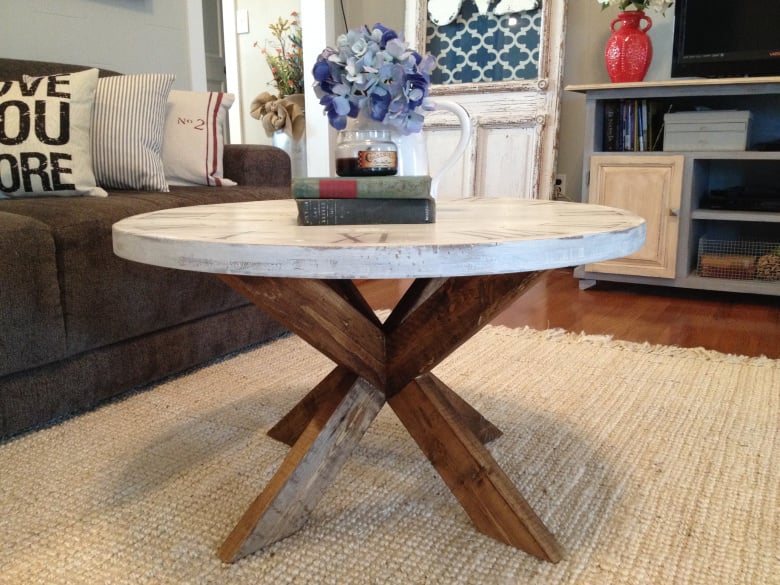
rustic x coffee table
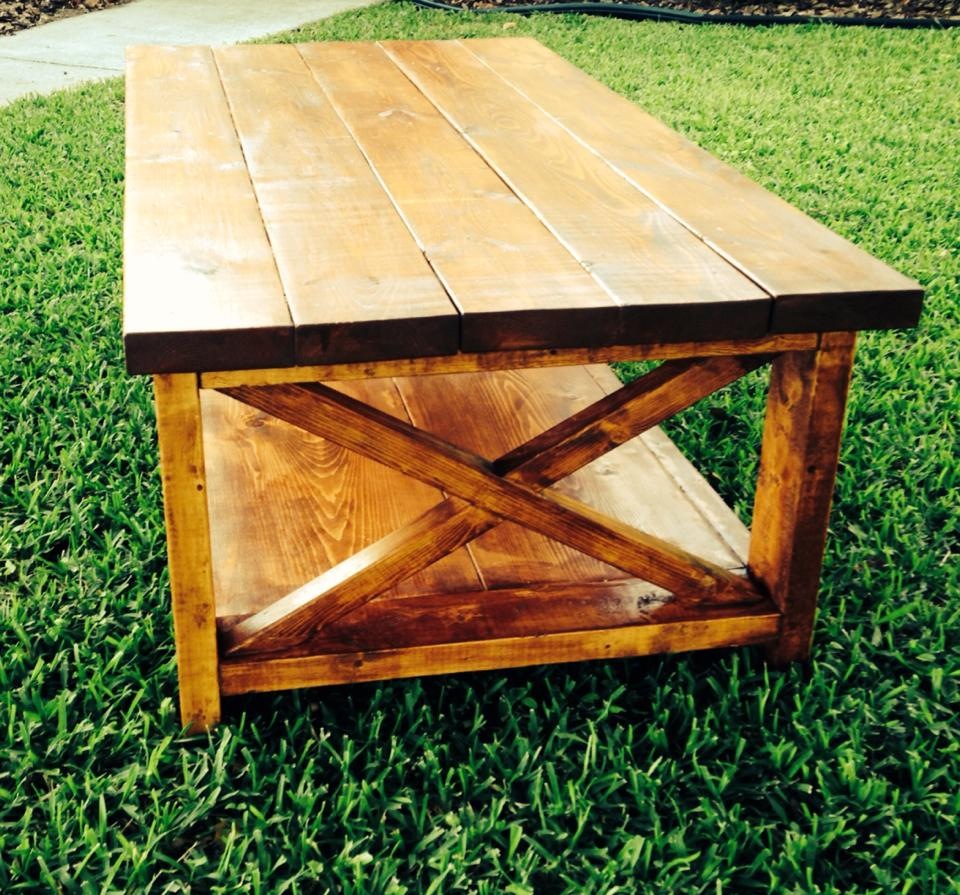
Built this for our living room. It's strong enough to withstand the daily rigors of a 4 and 5 year old. I built this last year, and have done several more since then.
Built from Plan(s)
Estimated Time Investment
Weekend Project (10-20 Hours)
Finish Used
Rustoleum American Walnut
Recommended Skill Level
Beginner
Comments
Sun, 08/23/2015 - 13:02
These X's were the bane of my
These X's were the bane of my building existence during this project, but wood filler covers a multitude of mistakes.
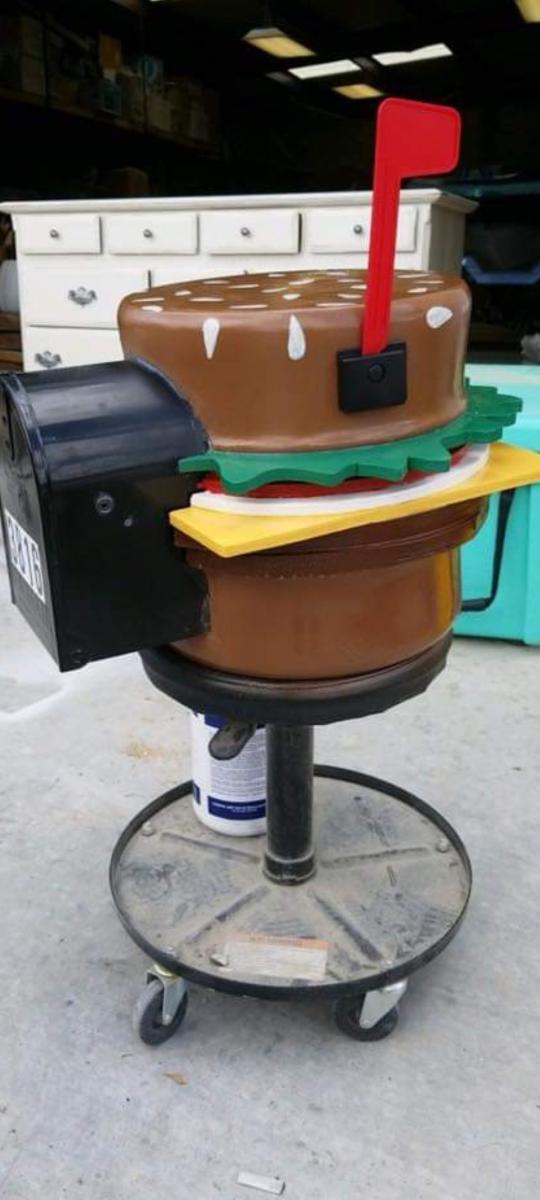
Scrap Lumber Cart
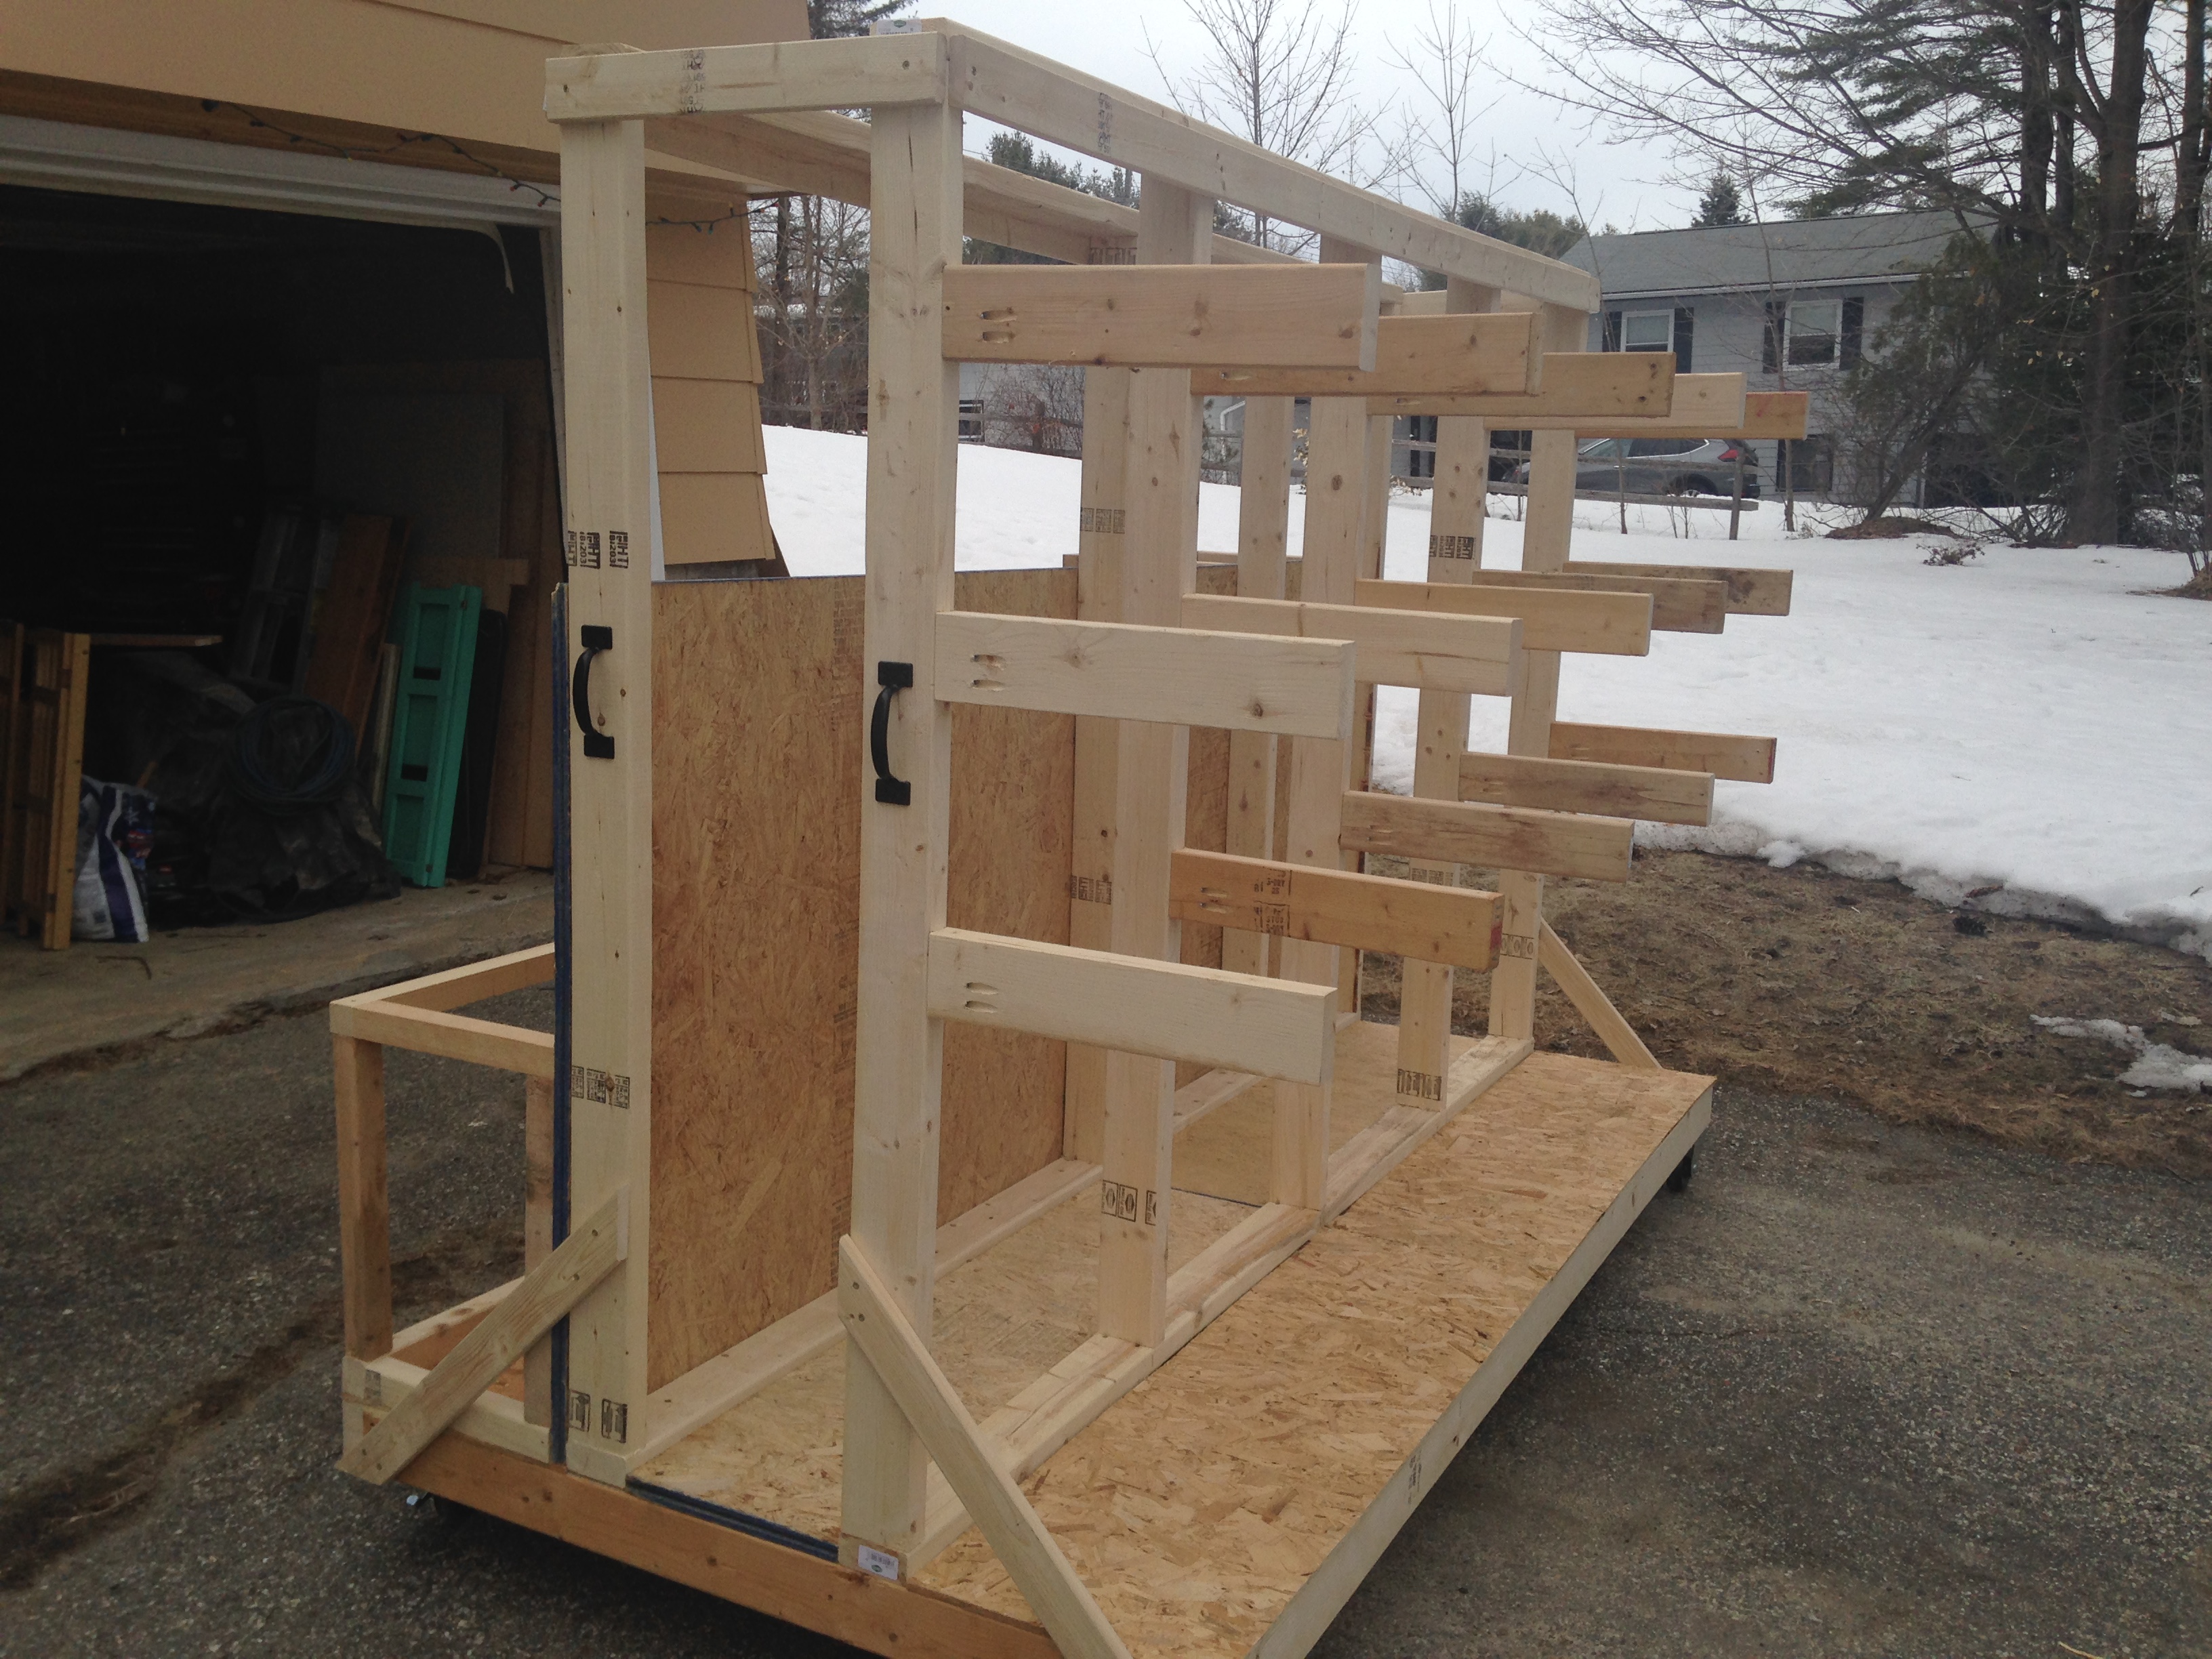
For the past few years our family has been enjoying building together. Our garage became a dumping ground for all the scraps and it got to the point where the piles became unmanagable. We build this cart from almost 100% scraps. The only piece that cost a bit where the casters, but we wanted to ensure that we could move the cart around in the garage so we purchased the most heavy duty ones at the big box store. This project took about one hour a night for a few days. Very pleased with how it turned out. Now that we have our garage back we can get back to building.
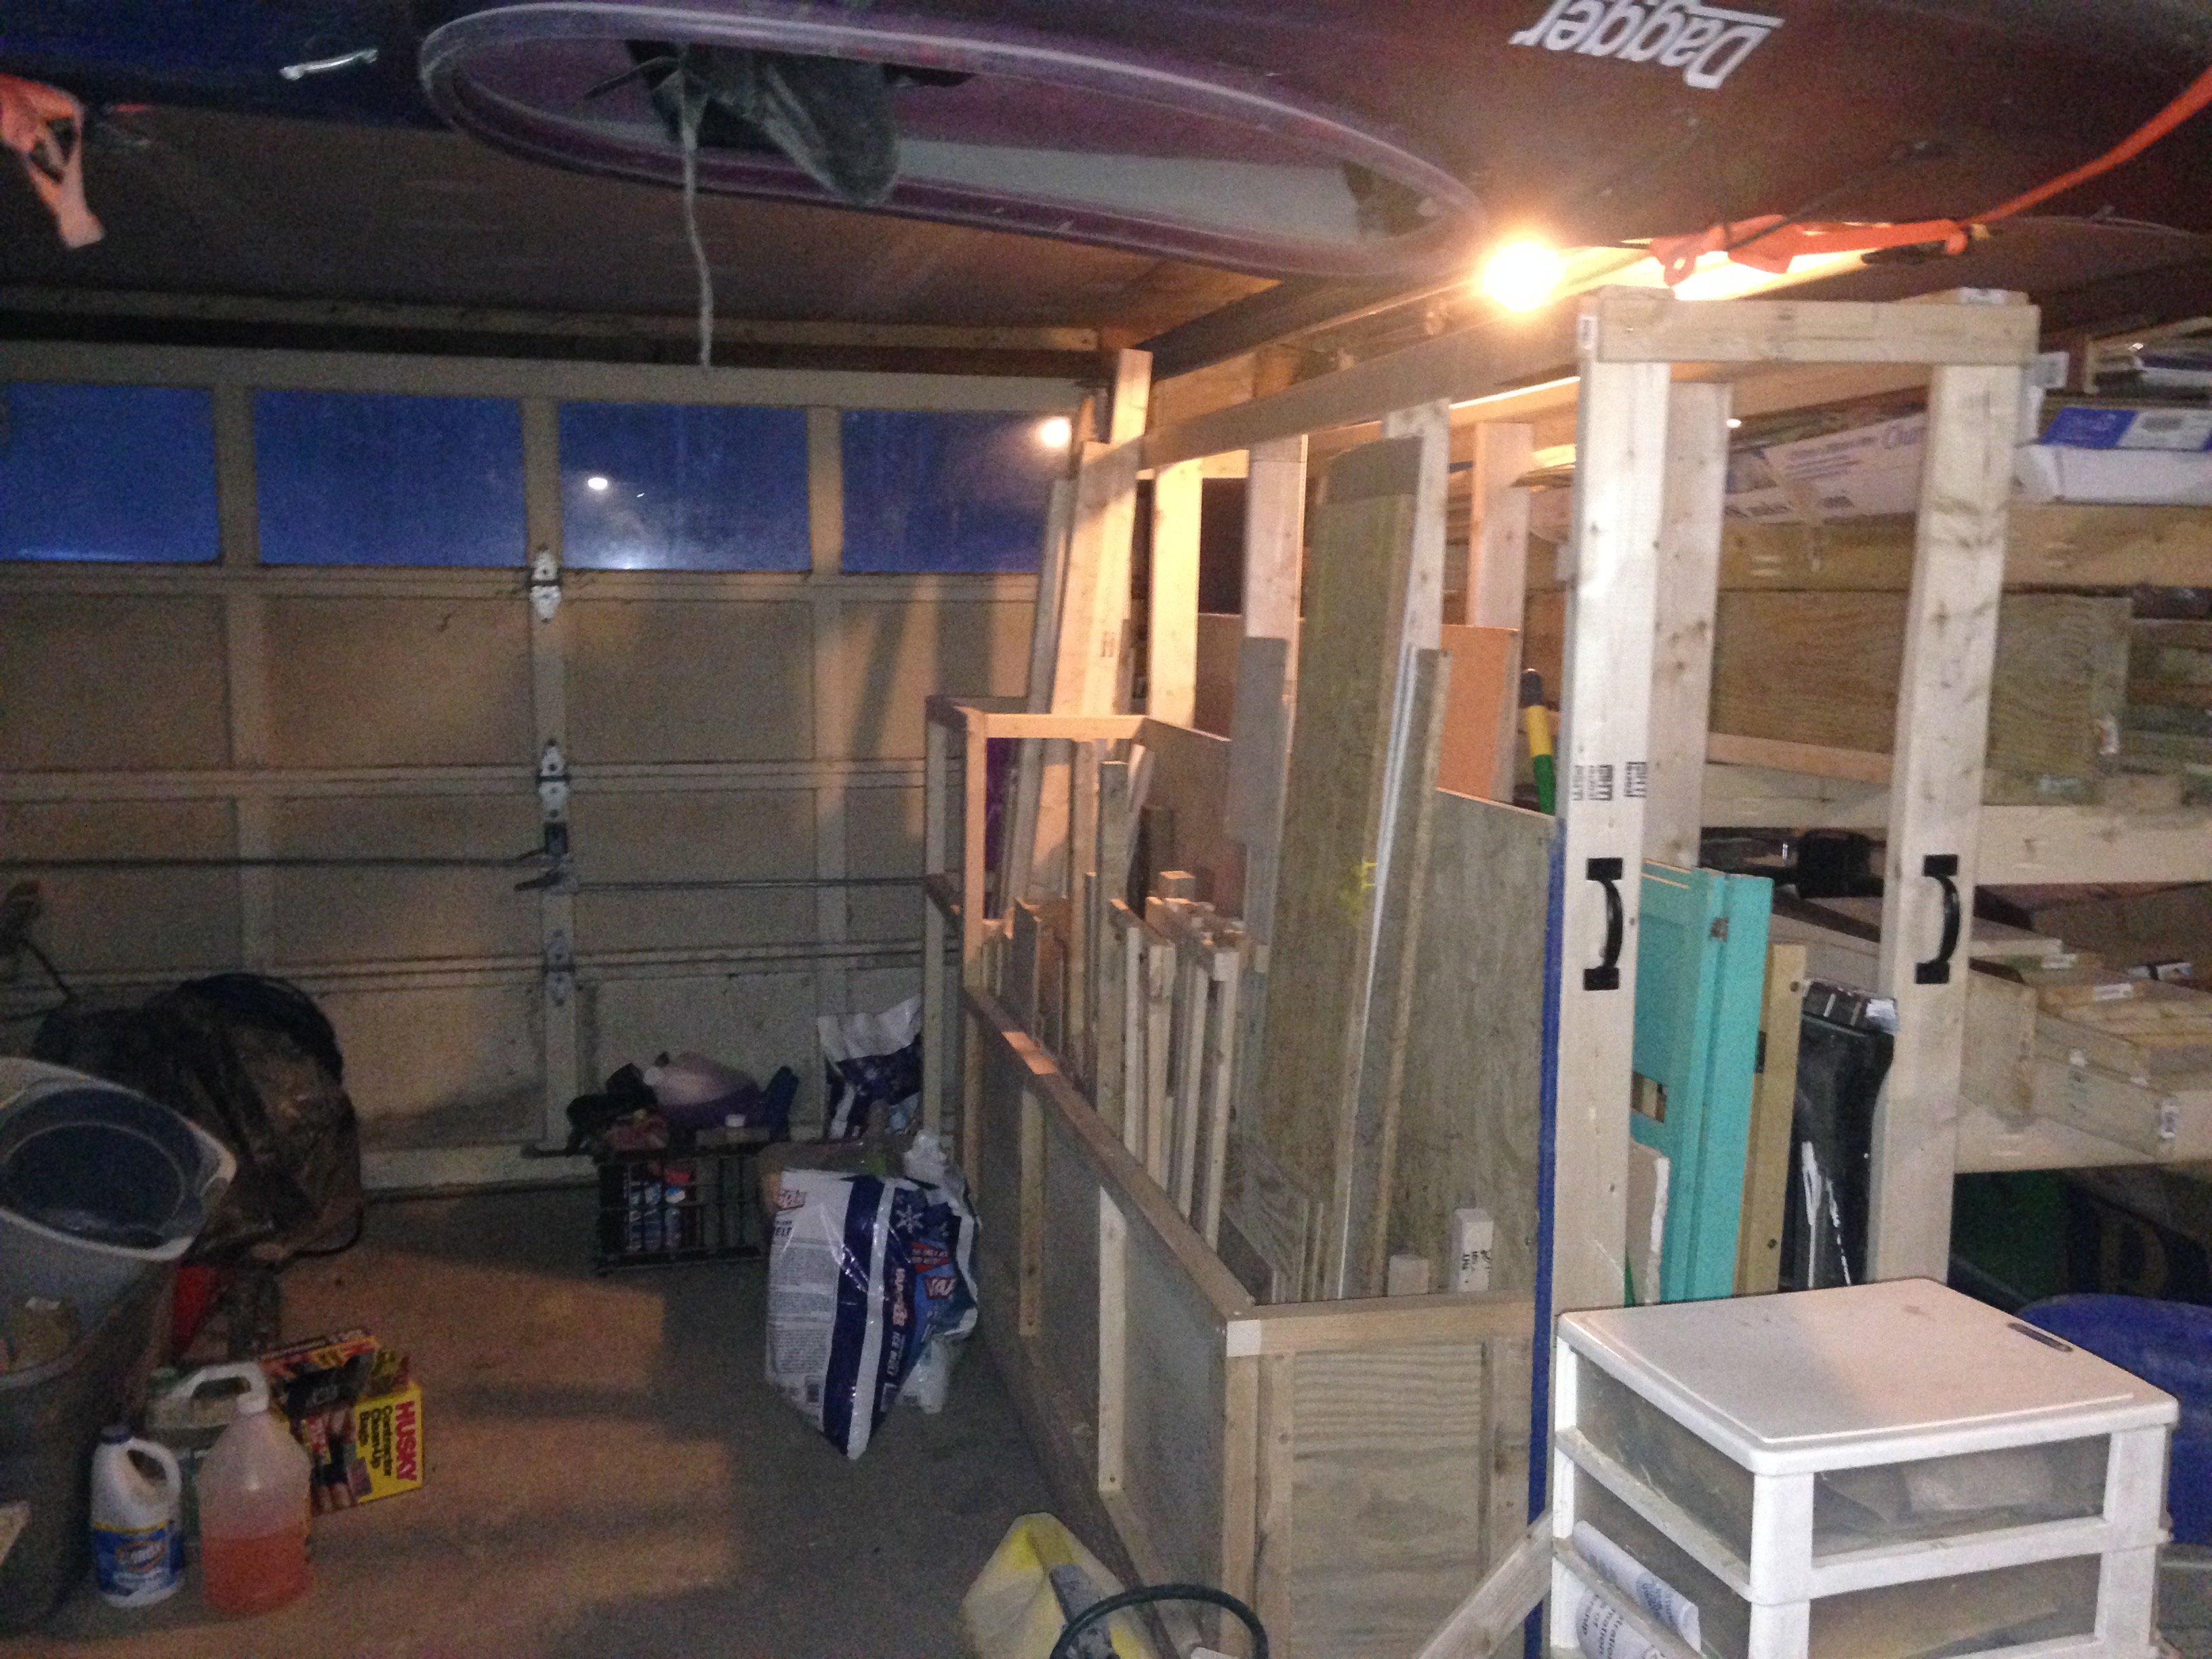

Estimated Time Investment
Afternoon Project (3-6 Hours)
Recommended Skill Level
Starter Project
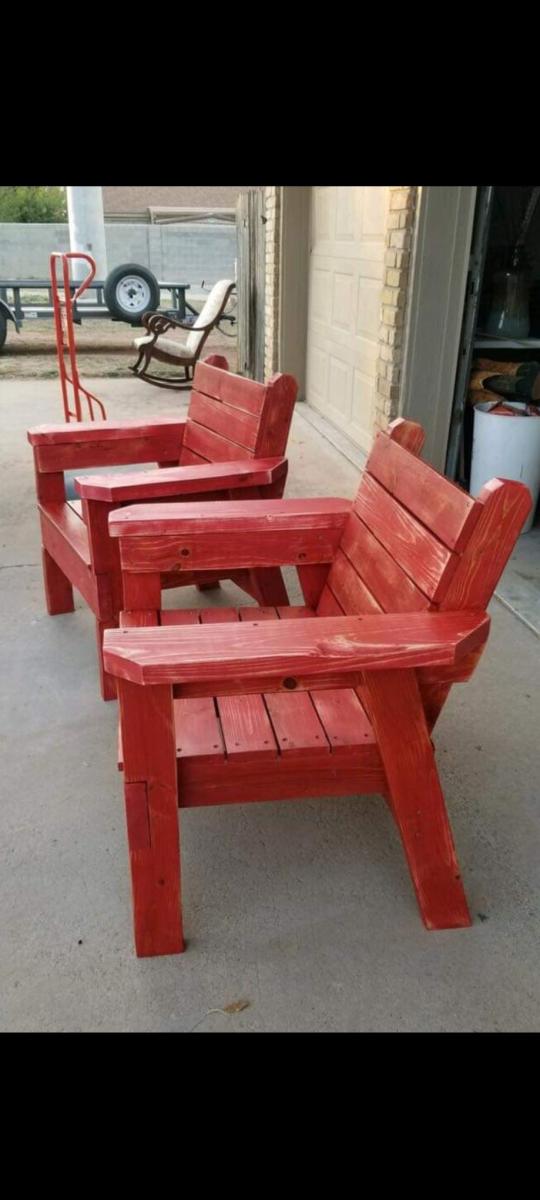
Harriet Outdoor Dining Chair with Cedar Slats

This chair was pretty easy to make with Ana's plans. I plan on making four more just like it (updated: completed). The only modification I made was adding another slat to the back of the chair. I used a miter saw for all cuts which really helped with the speed of the project. The 2x2's are treated pine and the 1x3 slats are cedar that I got from the "orange box store" for about four bucks a stick. I also primed and painted the 2x2's (legs) before I assembled. I could not imagine trying to paint the legs white and not getting at least some on that beautiful cedar. The contrast really pops in person. Thanks ana-white.com! $20 per chair.

Built from Plan(s)
Estimated Cost
$20
Estimated Time Investment
Day Project (6-9 Hours)
Finish Used
Semi-gloss exterior white, outdoor seal.
Recommended Skill Level
Intermediate
Comments
Thu, 07/14/2011 - 10:35
Beautiful!
Love the chairs! and like the painted body with the natural pine slats.
Wed, 08/03/2011 - 08:03
Way to go!
I love that you added the extra slat on the back. Such a simple change that made a big impact. The contrast is also very clever! They look great :)

In reply to Way to go! by CreativeBaggage
Wed, 08/03/2011 - 11:29
Thanks!
Thanks CreativeBaggage! I finished the dining table yesterday, I'll have to post that soon. As a couponer myself, I really like the standing can rack you made on your blog. Brilliant!
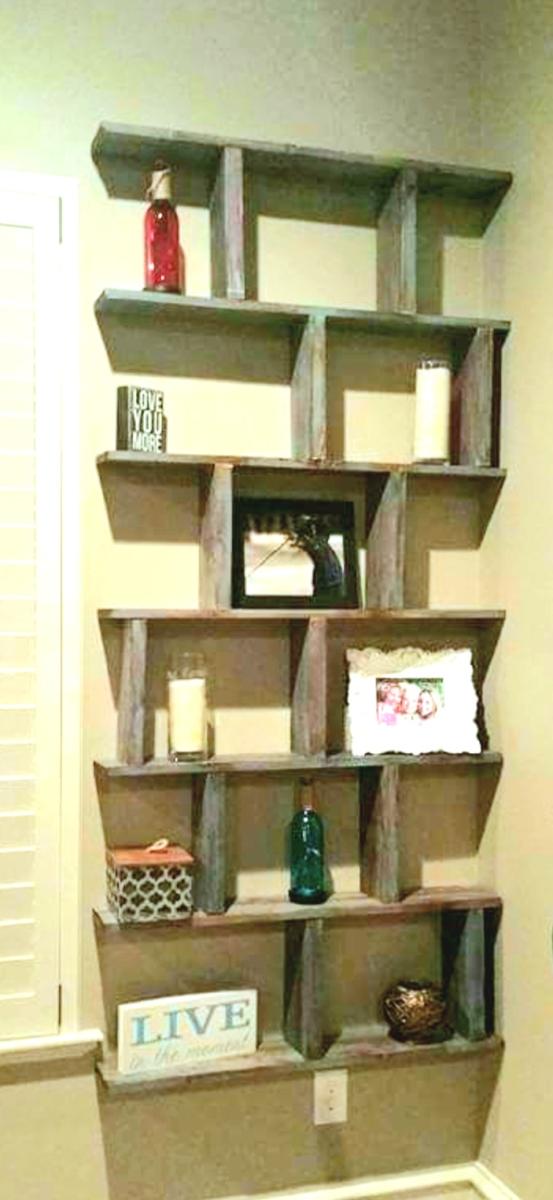
Leaning Desk and Shelf
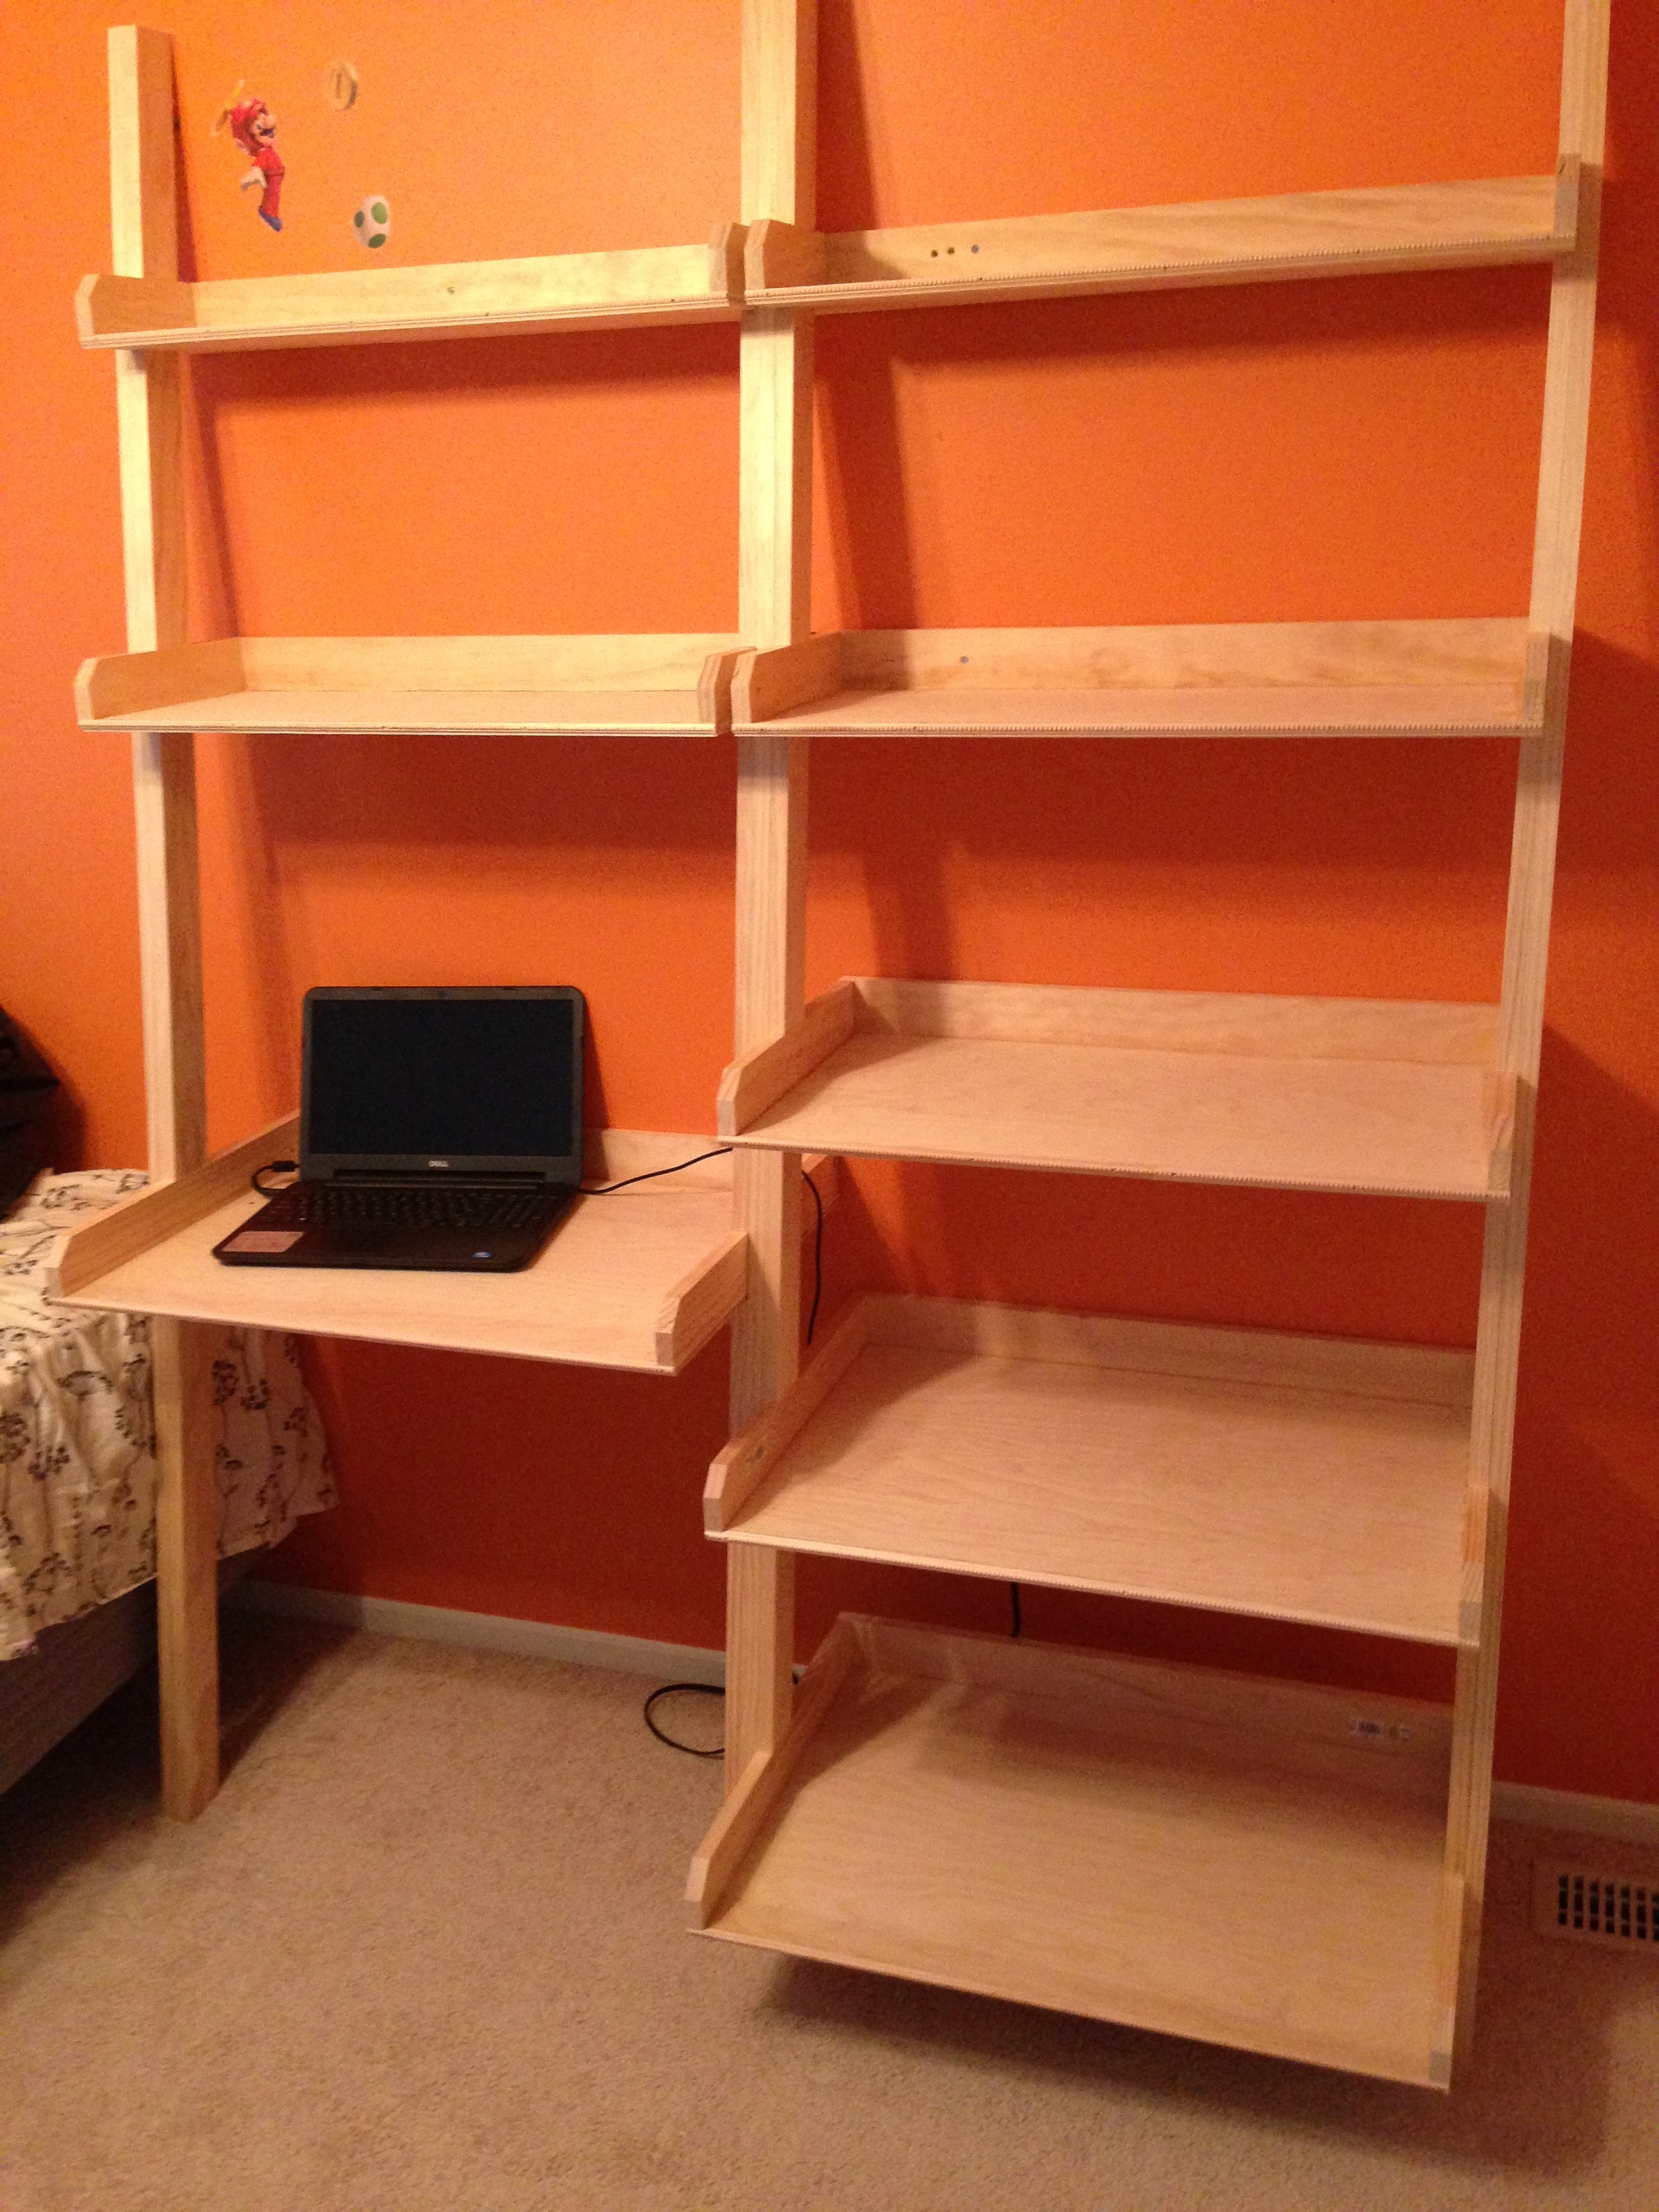
This was a lot of fun, and wasnt to difficult. I modified the existing design, and increased the size. It will be painted once my son decides on the color.....
Estimated Time Investment
Afternoon Project (3-6 Hours)
Finish Used
For my oldest son.
Recommended Skill Level
Intermediate
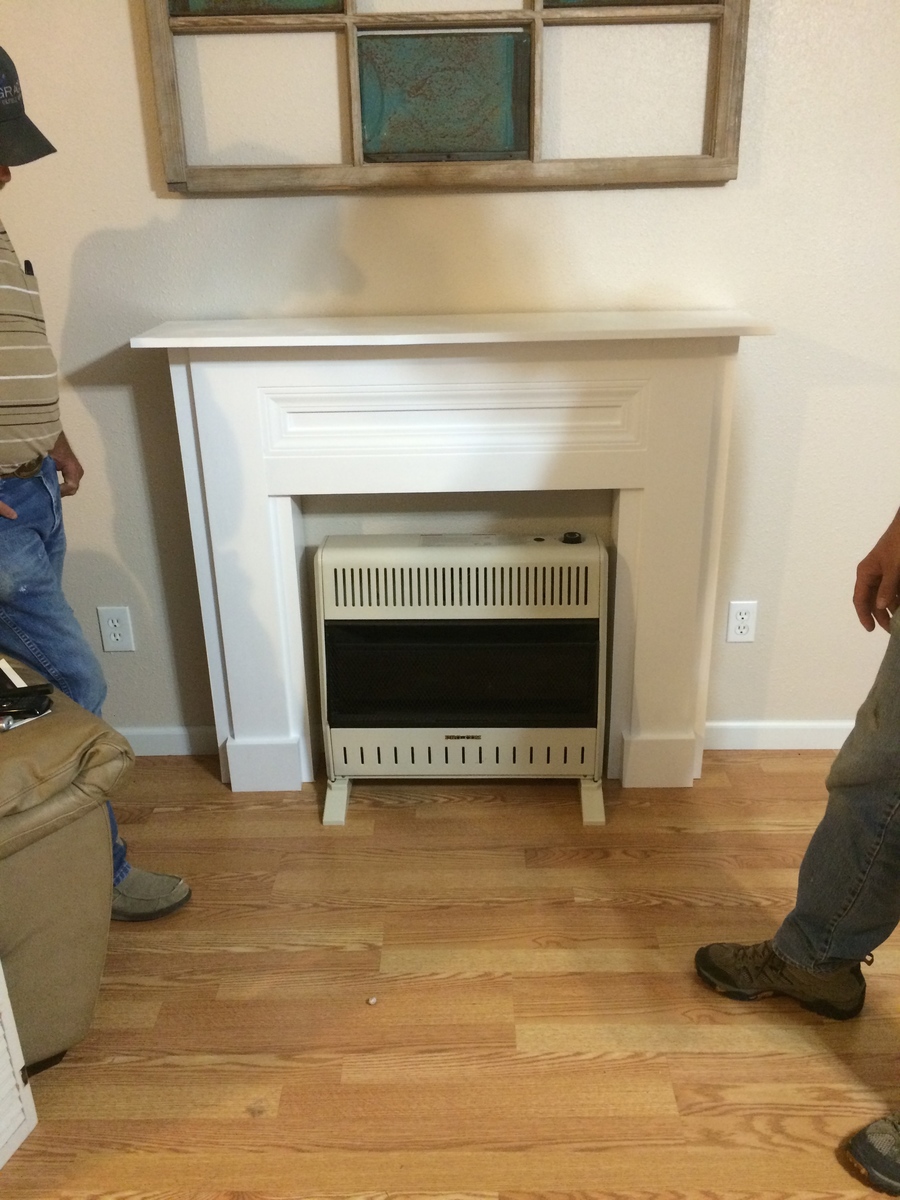
Mimi's Faux Mantle
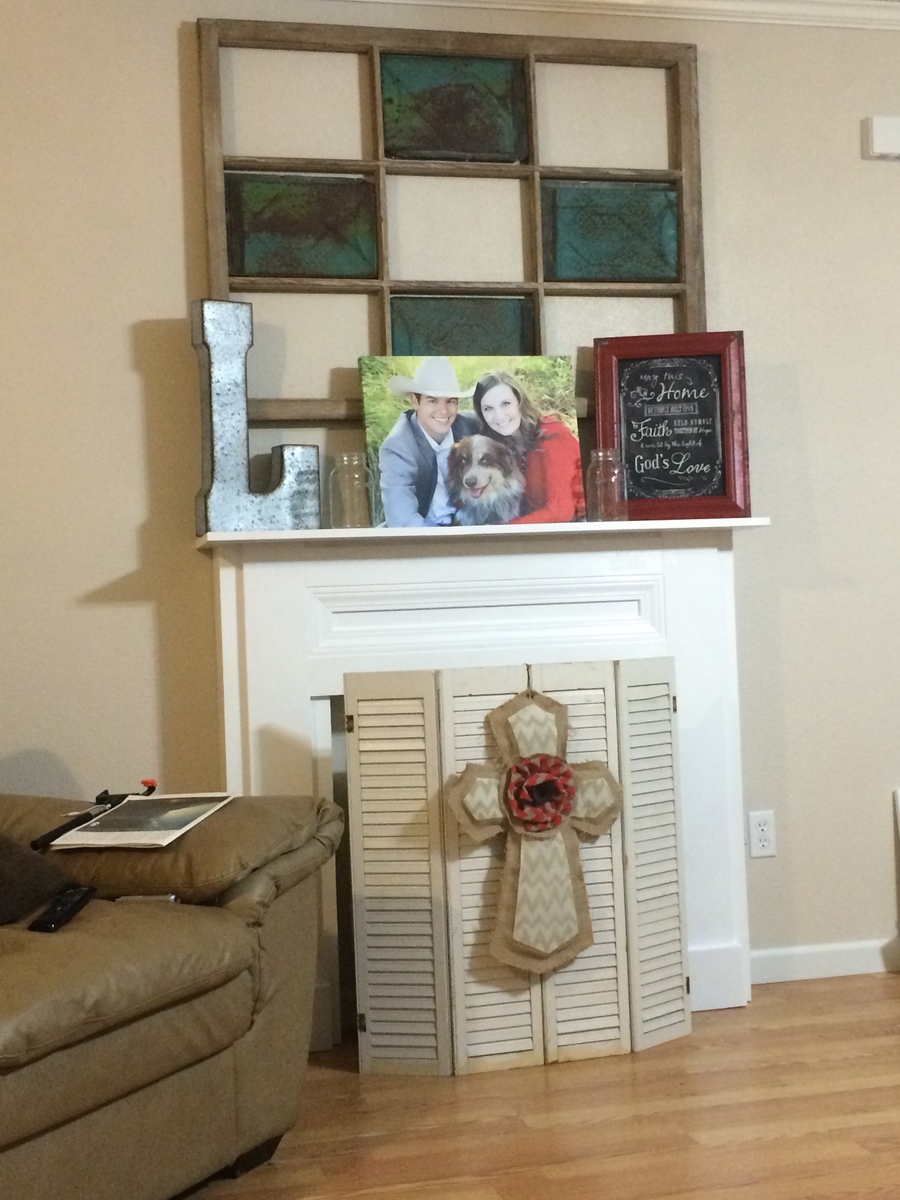
So I LOVE this mantle. I totally can't take any credit for this project. My sweet hubby built this for me for out anniversary to go around a gas heater in our living room that I just couldn't stand to look at anymore. We recently purchased our home and inherited an old, not-so-attractive, gas heater. I couldn't stand it any longer, I wanted something to go around it to decorate ;) So here is what we have! I LOVE IT!!!
Built from Plan(s)
Recommended Skill Level
Intermediate
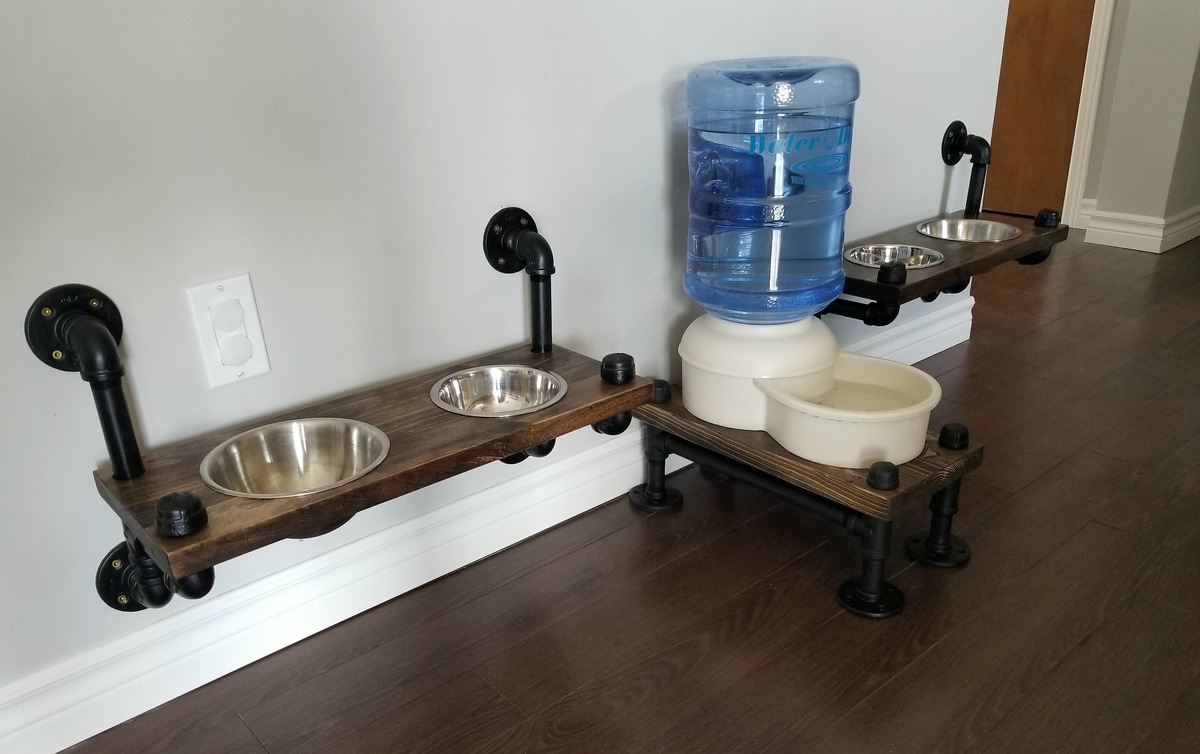
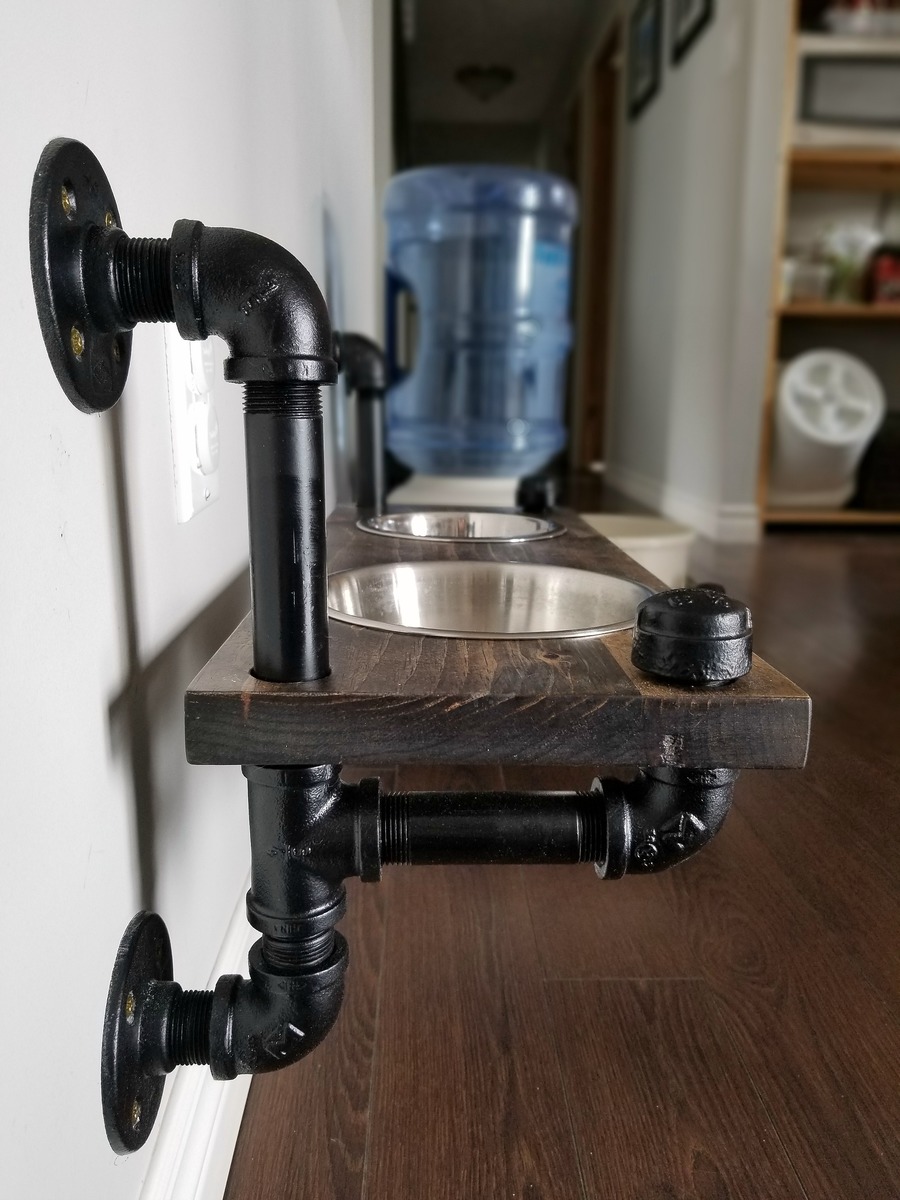
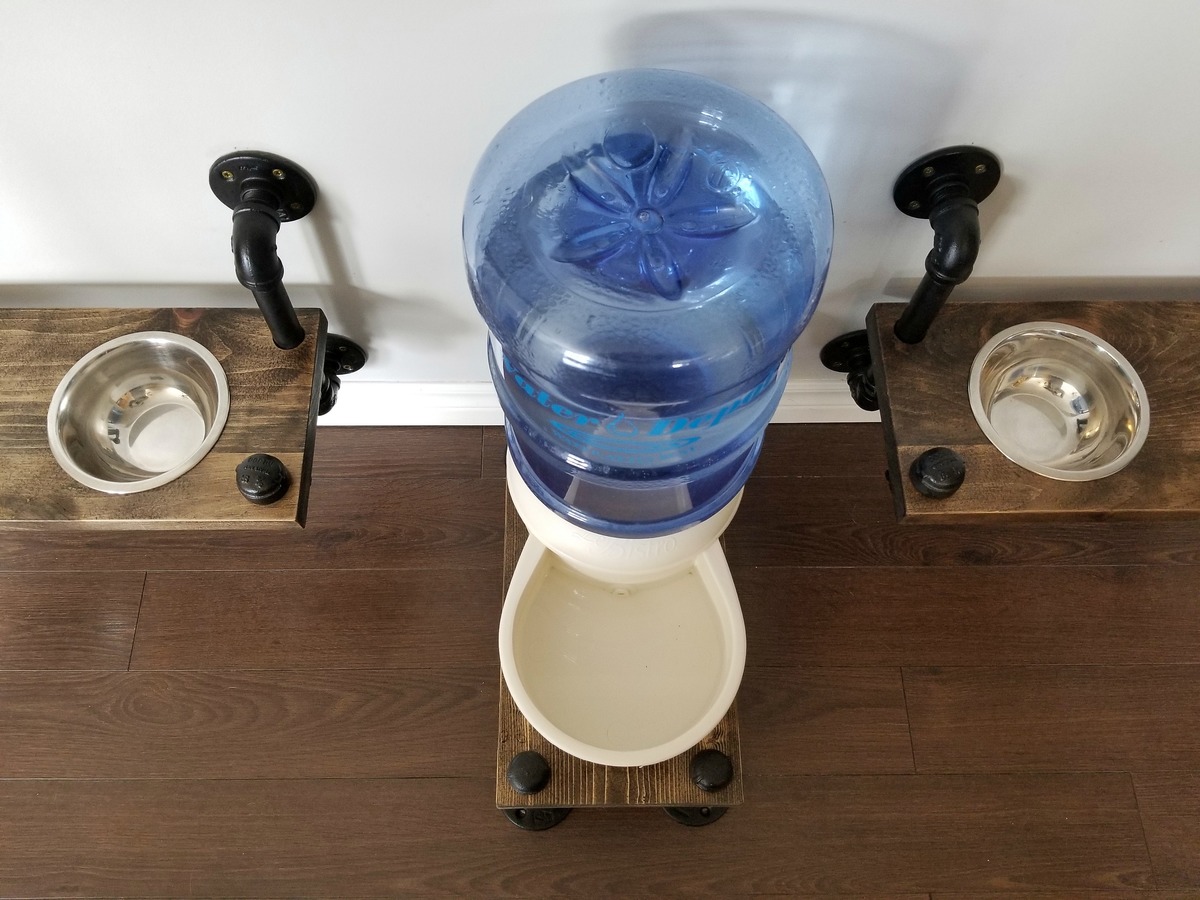
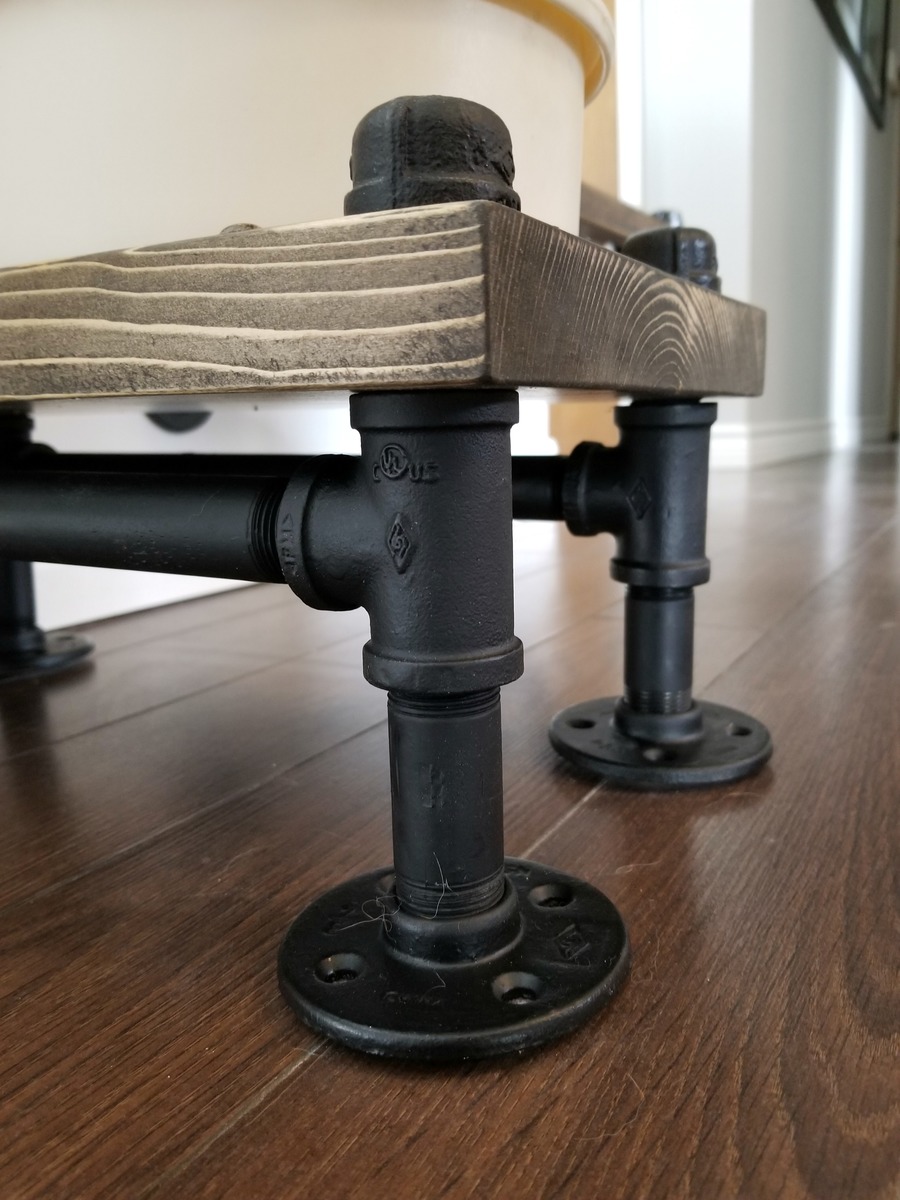
Industrial-Style Dog Feeding Area
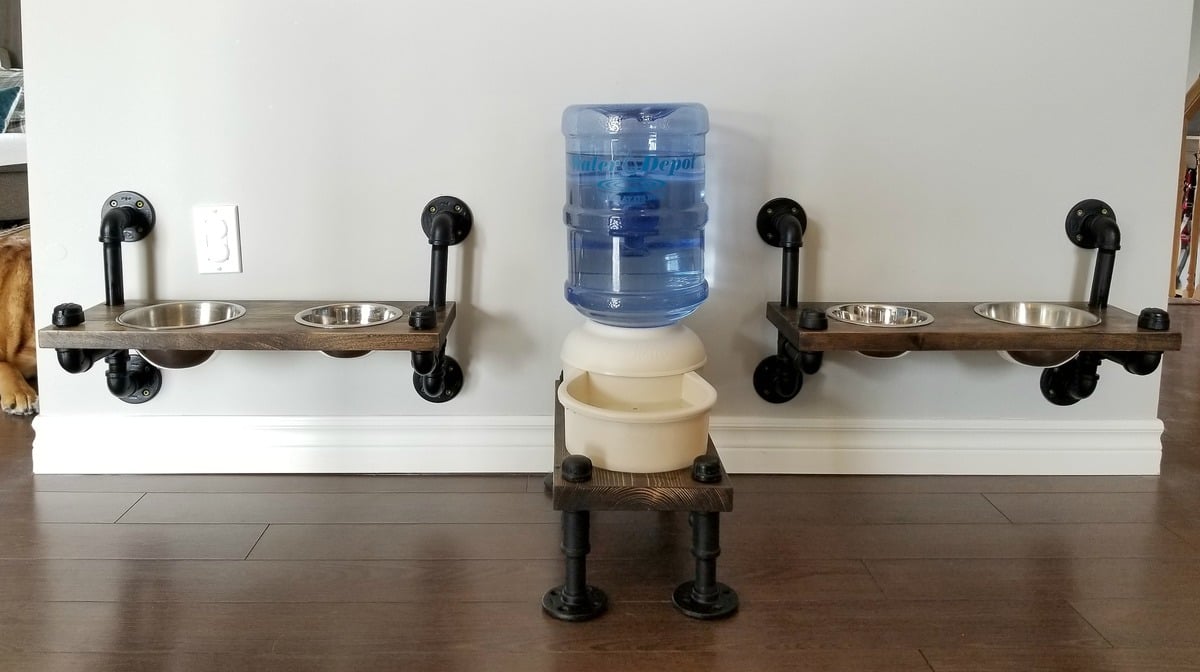
We built this feeding area to complement the plumbing pipe open shelving we installed in our dining room. The shelves for the bowls are mounted to the wall (use anchors or screw into the studs) and the water bowl stand is free-standing. This new setup takes up much less space and is easier to clean around than the usual mat and bowls on the floor.
We built the shelves and water stand from reclaimed wood - each shelf is 8.5" x 22.5". The pipes are spray-painted in flat black.
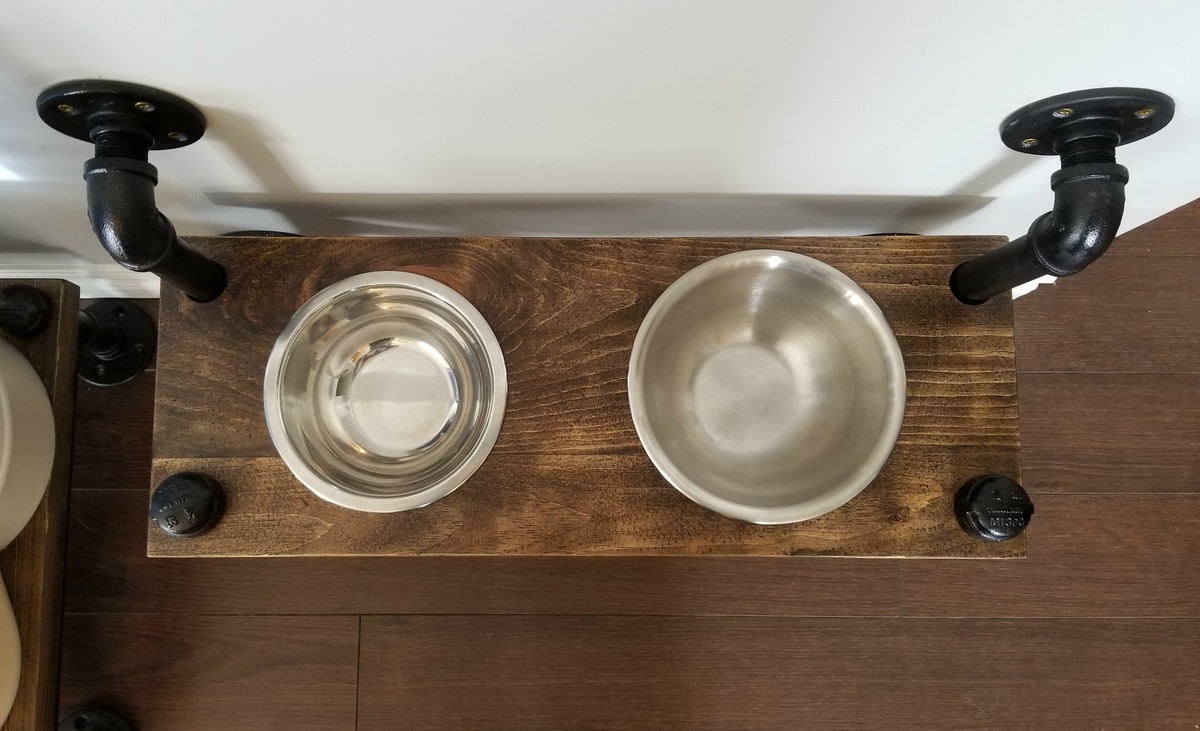
Tips:
- trace around your bowls on your piece of wood and then cut the holes out smaller than the circles you drew so that the bowl edges rest on the wood and hold the bowl in place.
- to get a silky-smooth surface on the wood, after waxing and buffing, do a final buffing with extra fine steel wool.
See link to blog for details on the build and more photos.
Estimated Cost
$50 - $100 on plumbing parts depending on how many "bowl shelves". $10 in wood. Spray paint, stain, furniture wax.
Estimated Time Investment
Weekend Project (10-20 Hours)
Finish Used
Minwax Jacobean stain, MInwax dark furniture wax, extra fine steel wool. Spray paint - Rustoleum Flat Black.
Recommended Skill Level
Intermediate
Cedar Toybox with Customization!
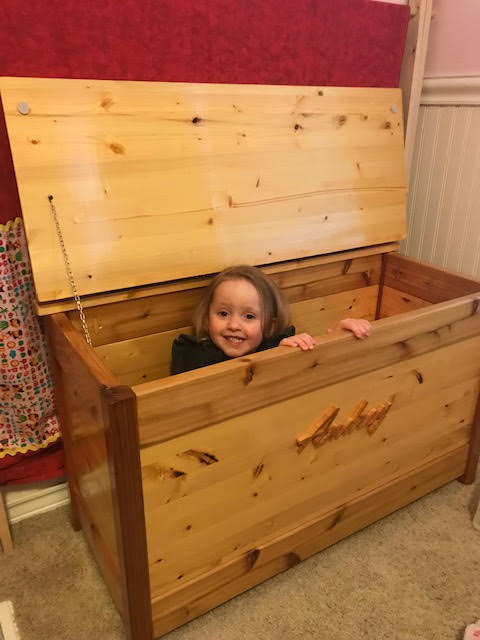
Love your website. My first project from your site was this cedar toy box for my great niece. I even used a scroll saw to cut out her name!
by Bruce
Built from Plan(s)
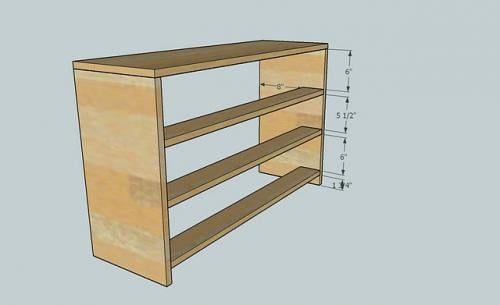
My-First Build-Simple Console Table
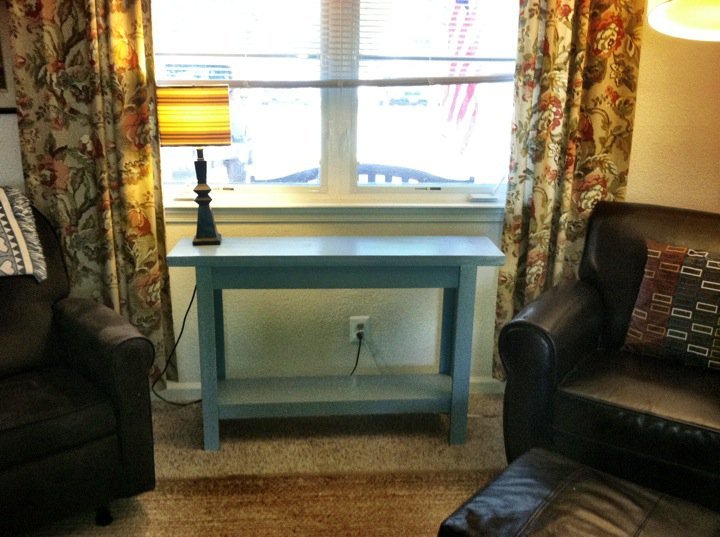
This was my first build and I'm not going to mention how many times I built the legs (which is why it took so long). I added a full shelf so I could learn to use the kreg jig. While not perfect, it feels perfect to e!
Built from Plan(s)
Estimated Cost
$80.00
Estimated Time Investment
Week Long Project (20 Hours or More)
Finish Used
paint, semi gloss and kilz over the pine
Recommended Skill Level
Beginner
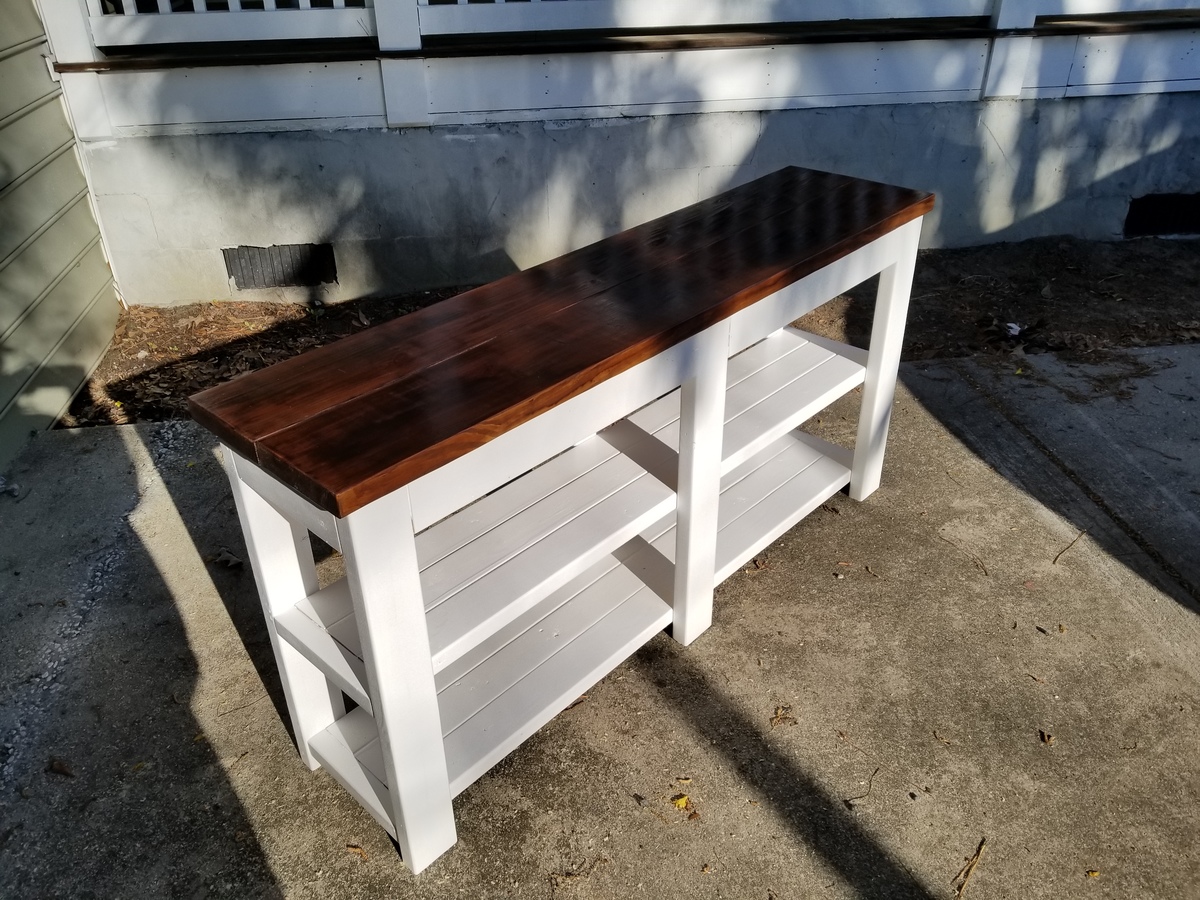
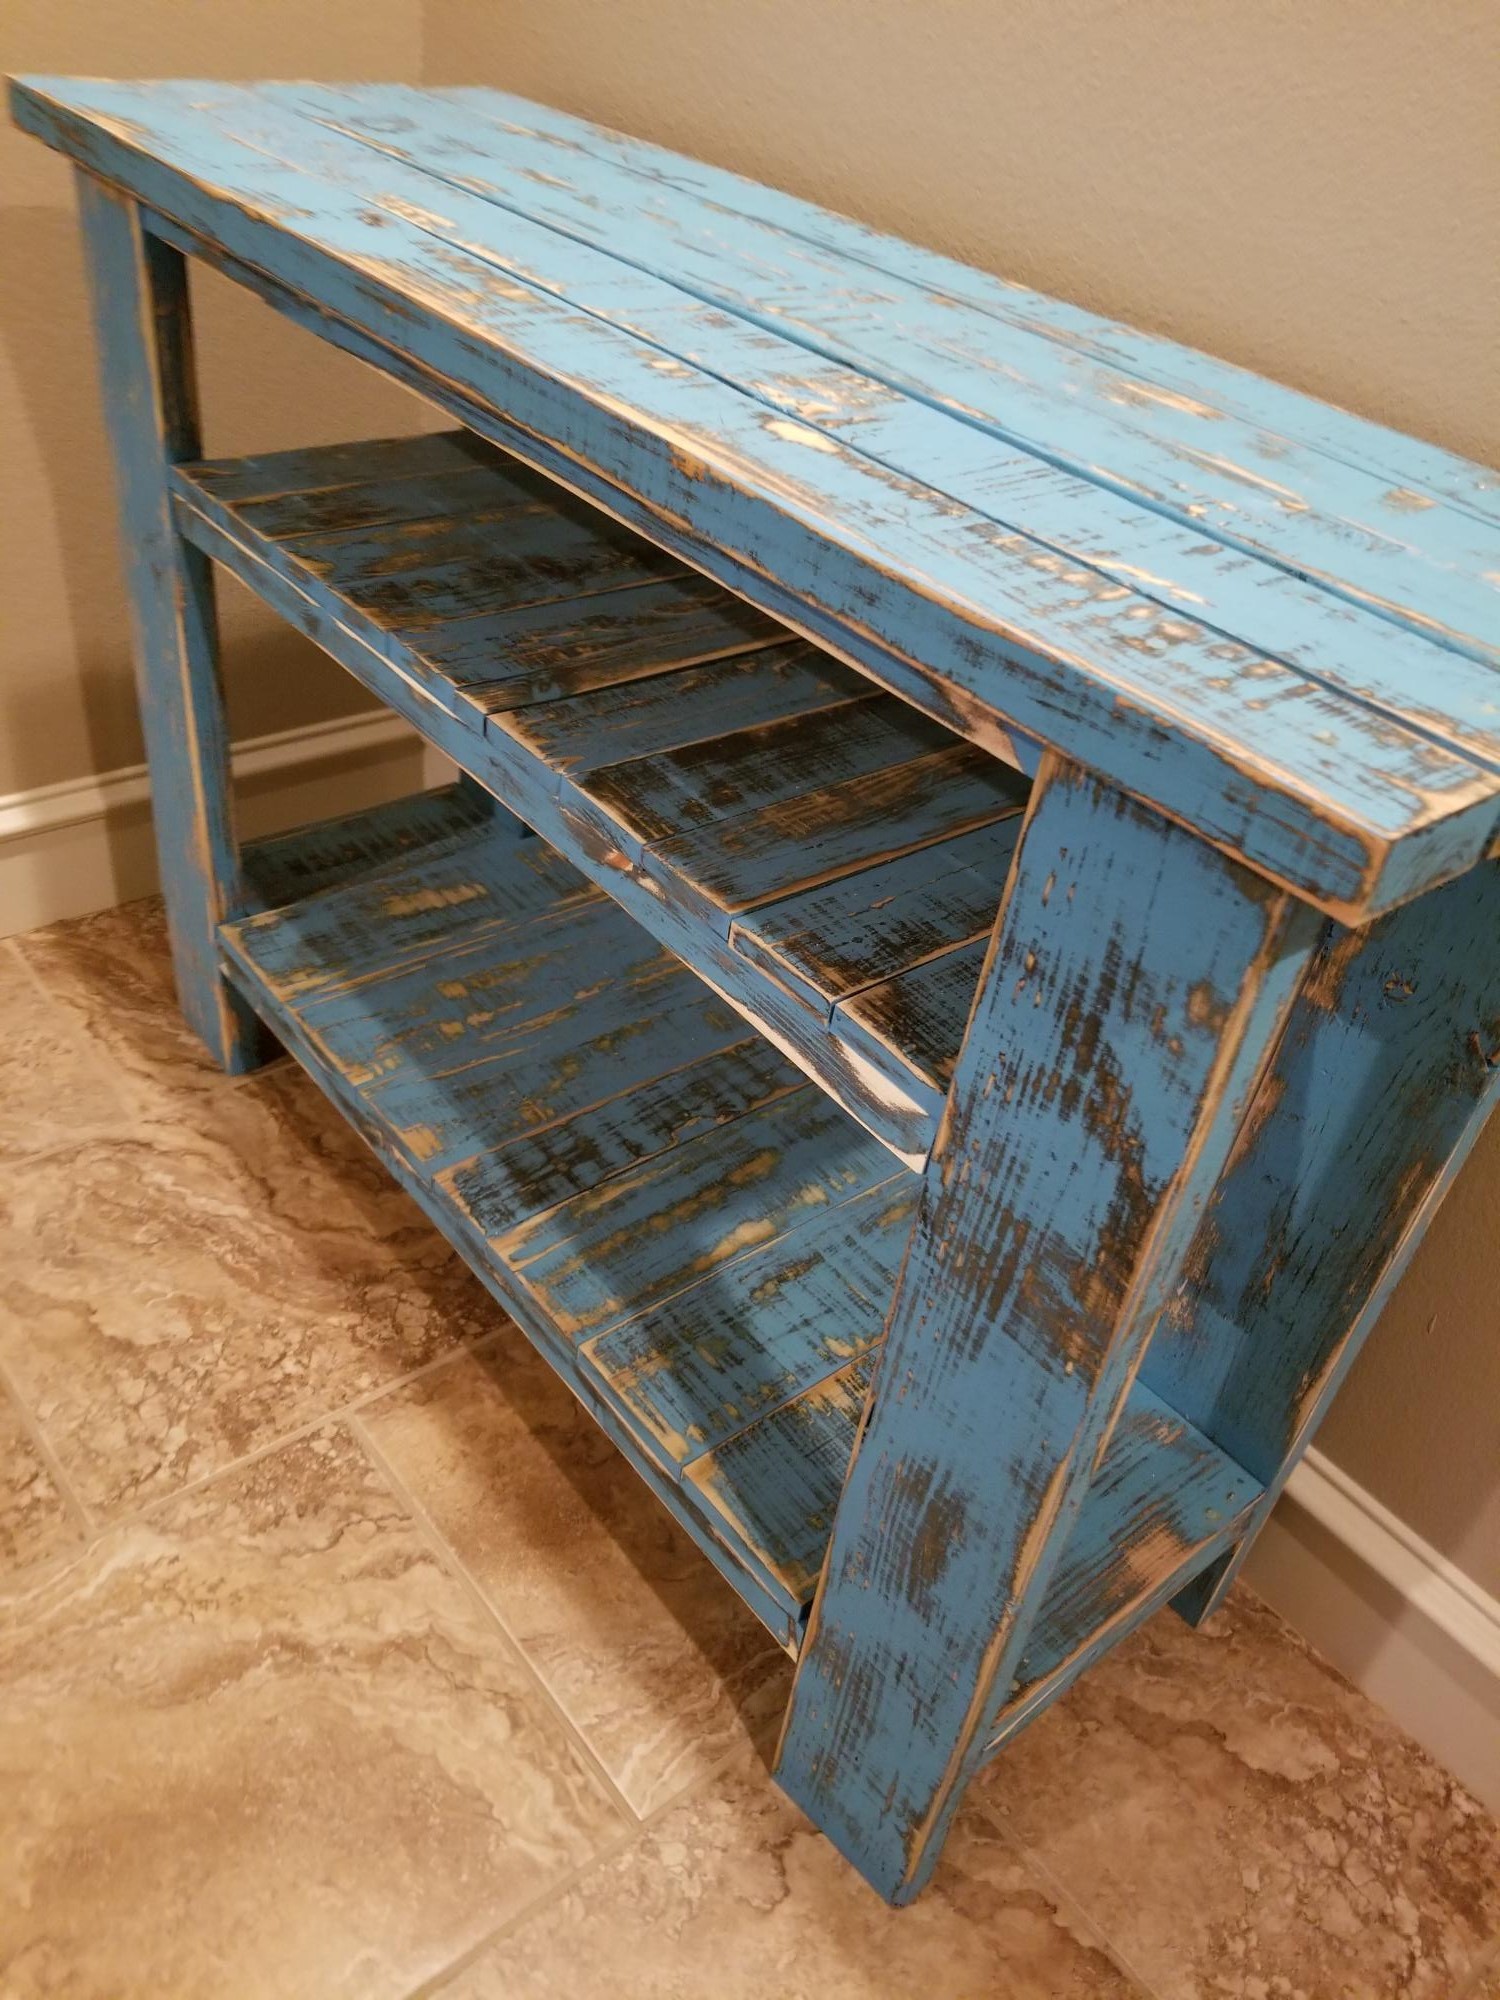
Console table/shelf/thingy
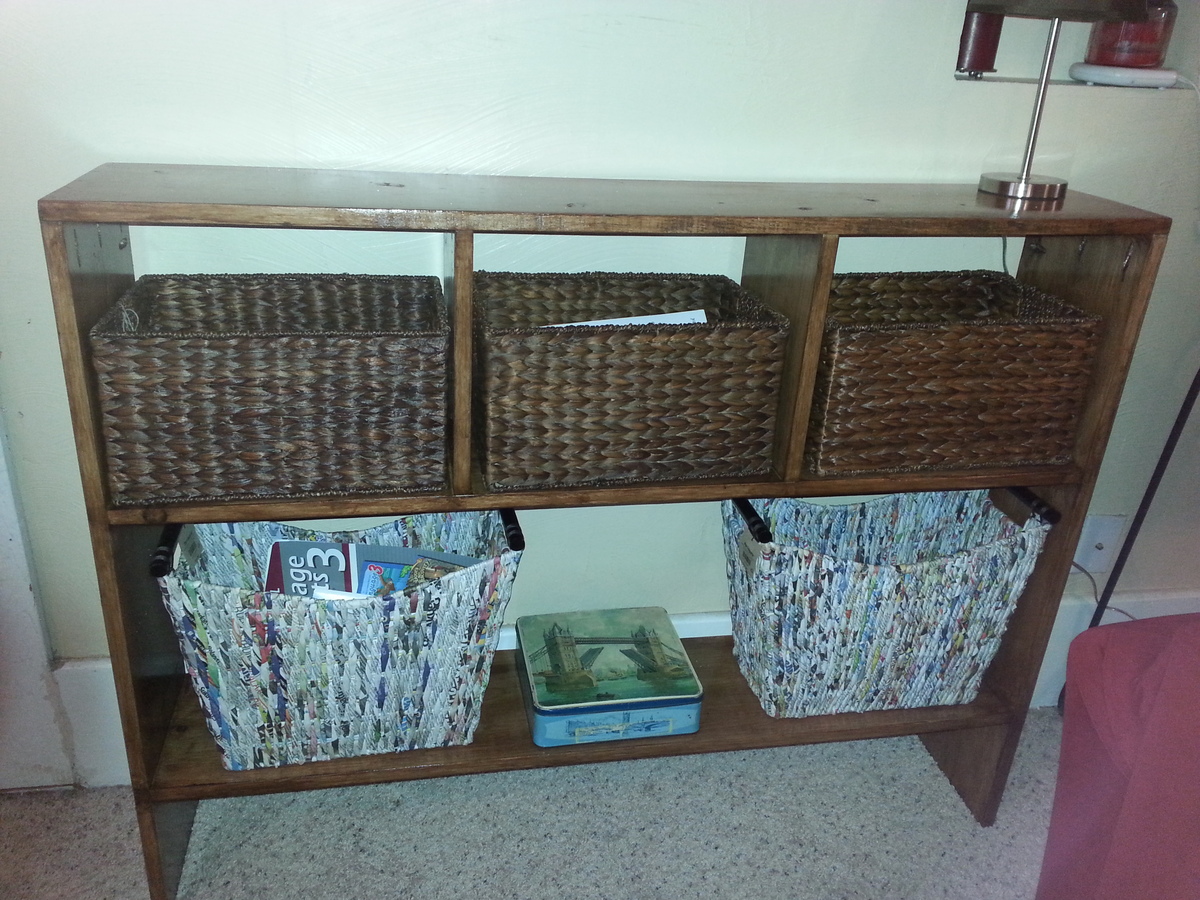
I gave away our piano and needed something to fill it's spot. I also needed some storage. I knew right where to look and eureka!! there it was, the Simple Rustic Modern Console plans.
It was inexpensive, easy, quick and perfect!! I modified it to the height I wanted and added some dividers for baskets and a bottom shelf as well.
Loving it!!!
Built from Plan(s)
Estimated Cost
30.00-40.00 depending on the size you need
Estimated Time Investment
Day Project (6-9 Hours)
Finish Used
I used Minwax Polyshades but I hated the way it gooped up in spots. I had to sand and redo but in the end was satisfied with the way it turned out.
Recommended Skill Level
Starter Project
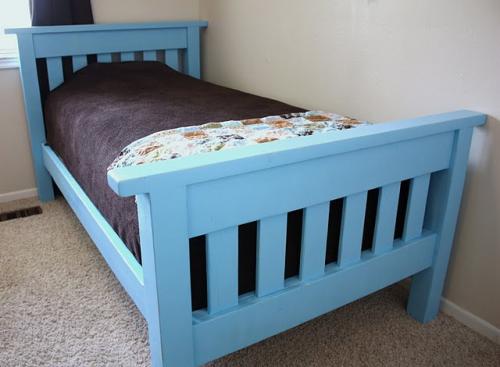
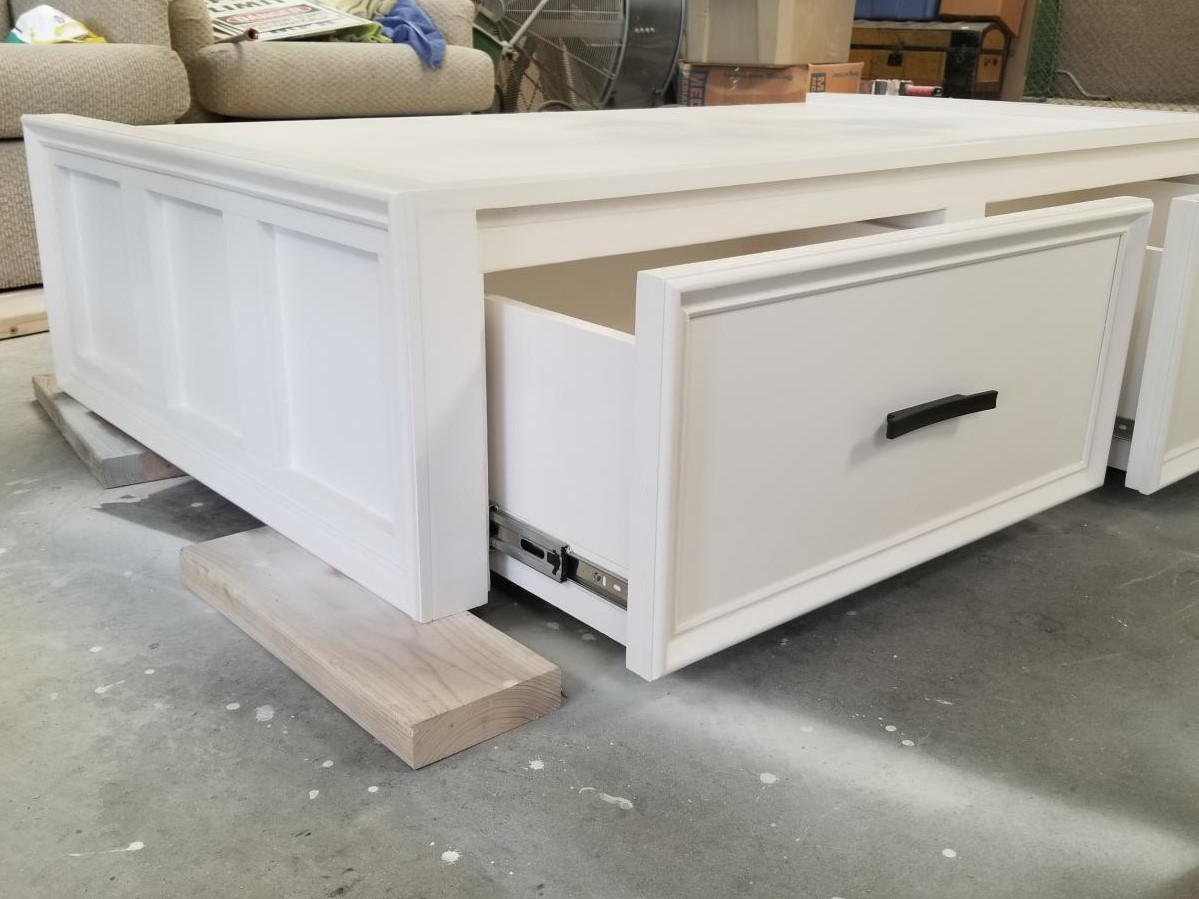
Picket Fence Bed with Storage
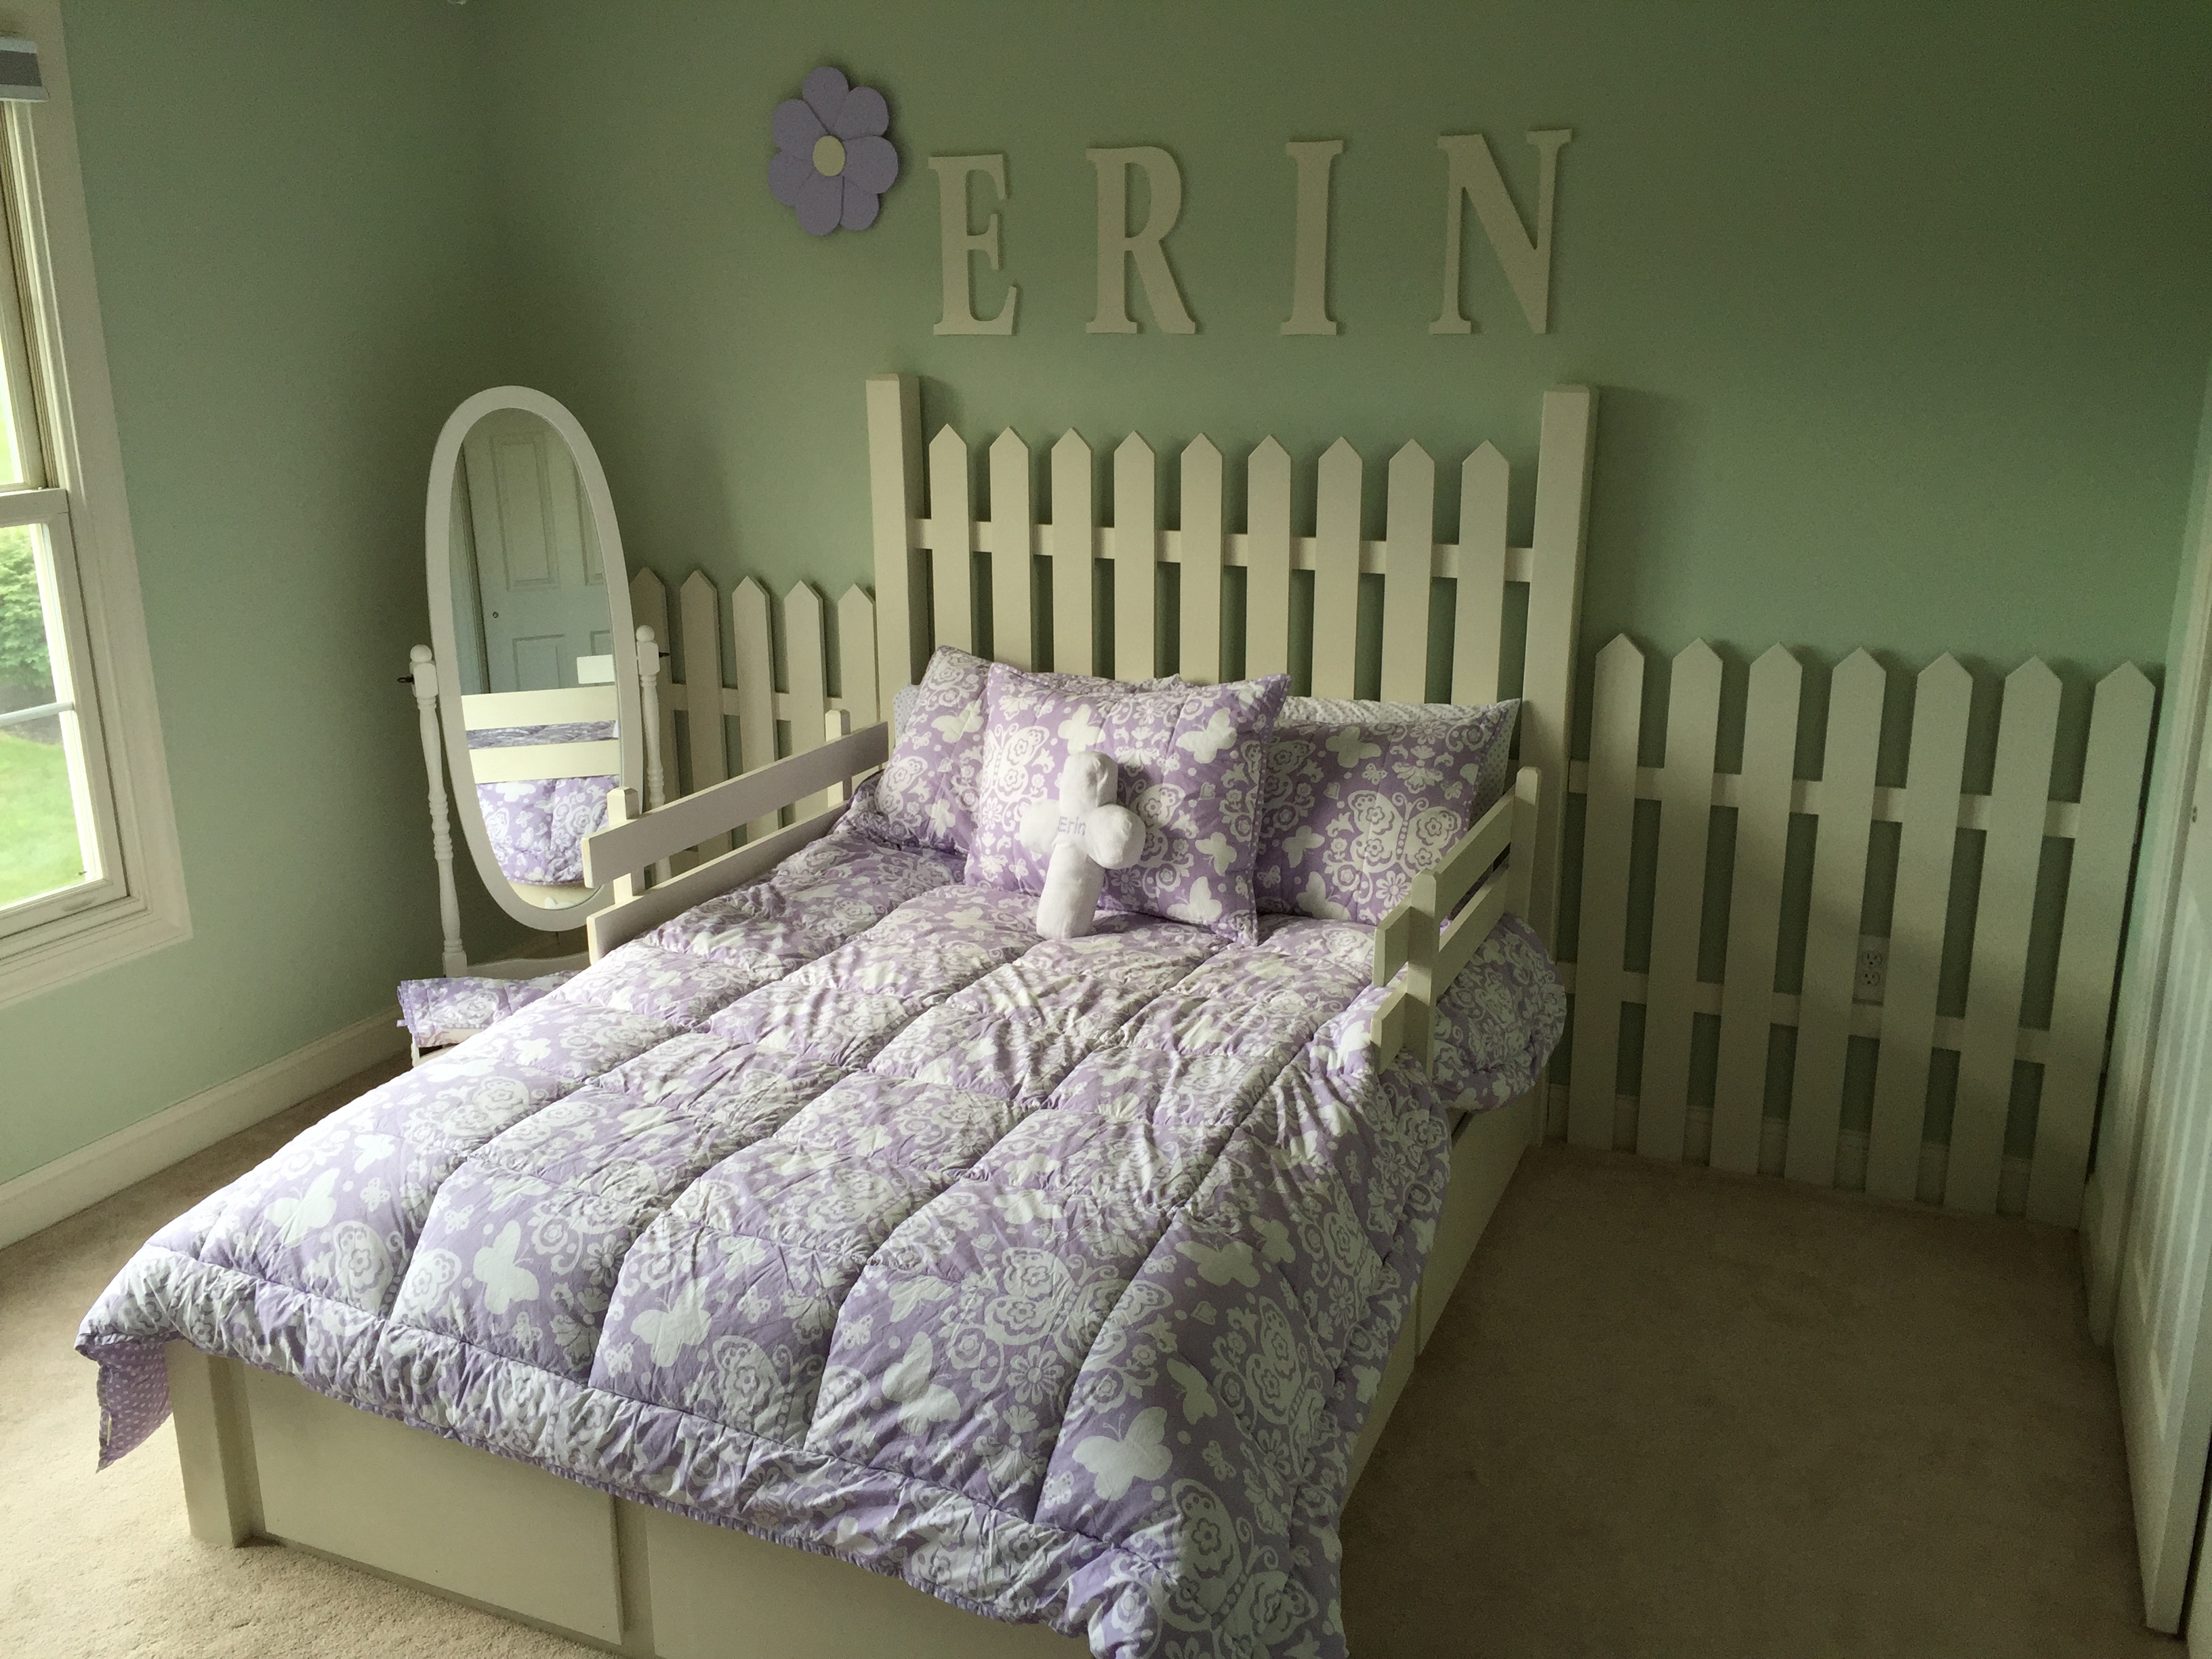
As you can see, the theme is a little different then the original, but the storage remains! Because of the room I actually made the side drawers the full length of the bed, and put false fronts on the end.
Built from Plan(s)
Estimated Time Investment
Weekend Project (10-20 Hours)
Finish Used
White Paint
Recommended Skill Level
Intermediate
Storage Bench and Crates

I modified the bench to make it longer and for four cubbies (for four kids and their shoes) instead of three.
Estimated Cost
$20-$25
Estimated Time Investment
Afternoon Project (3-6 Hours)
Finish Used
Distressed grey paint, sanded on edges with Jacobean stain used as a glaze. Three coats of poly.
Recommended Skill Level
Beginner
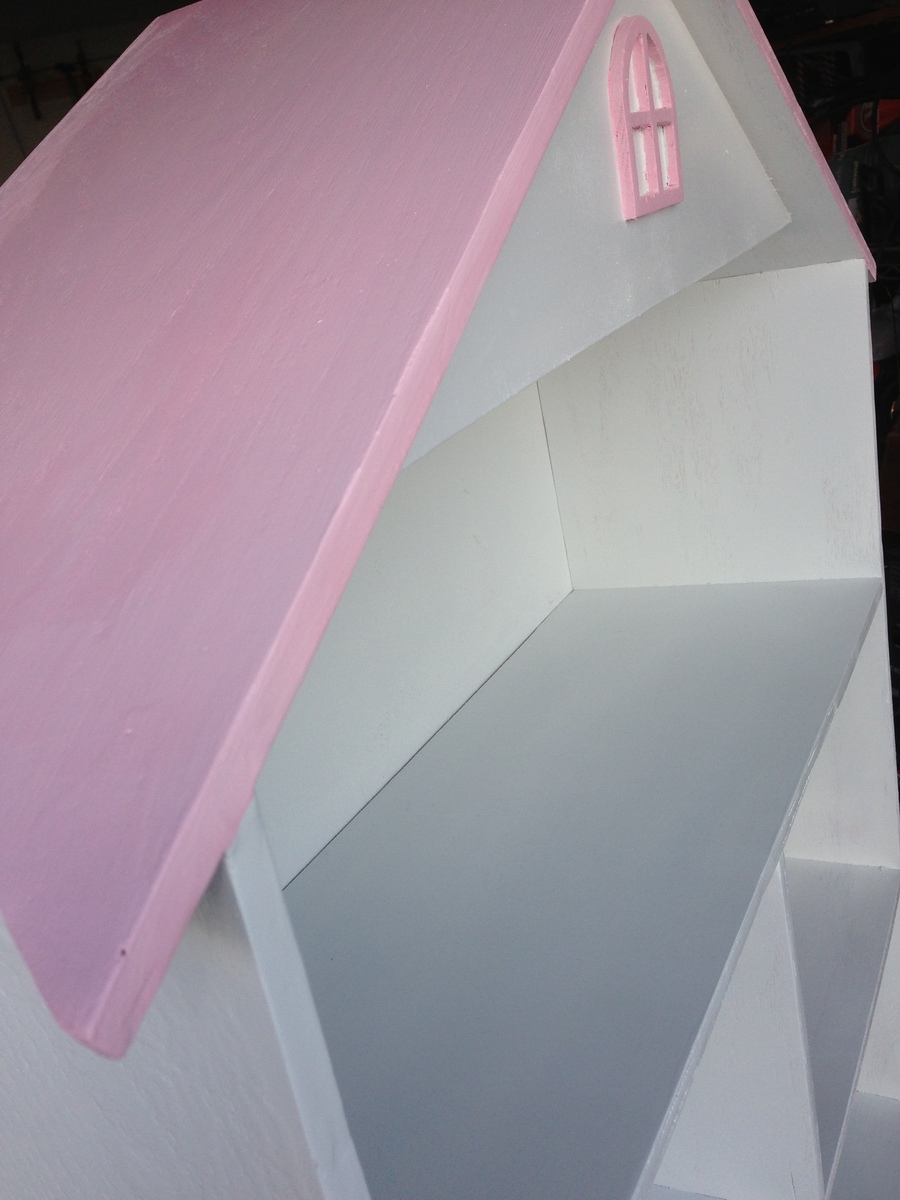
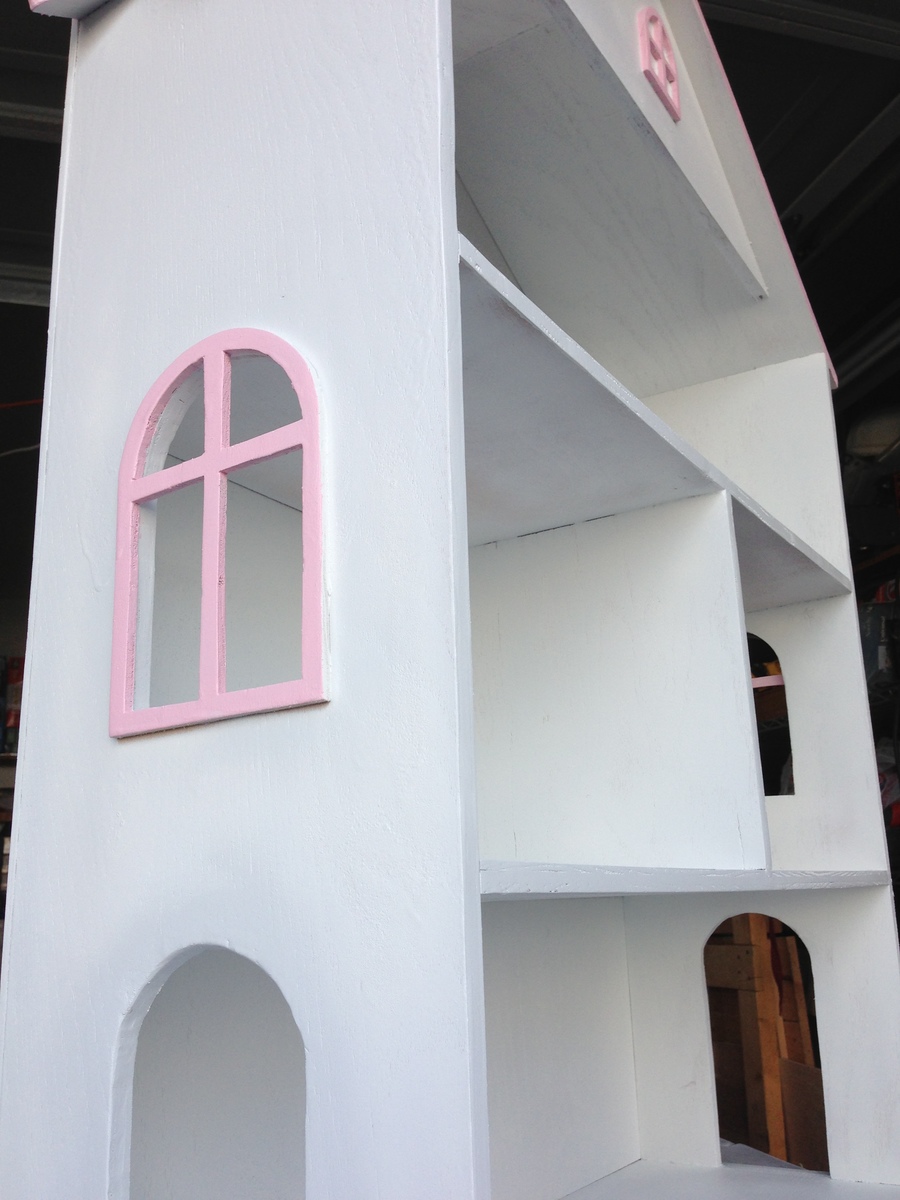
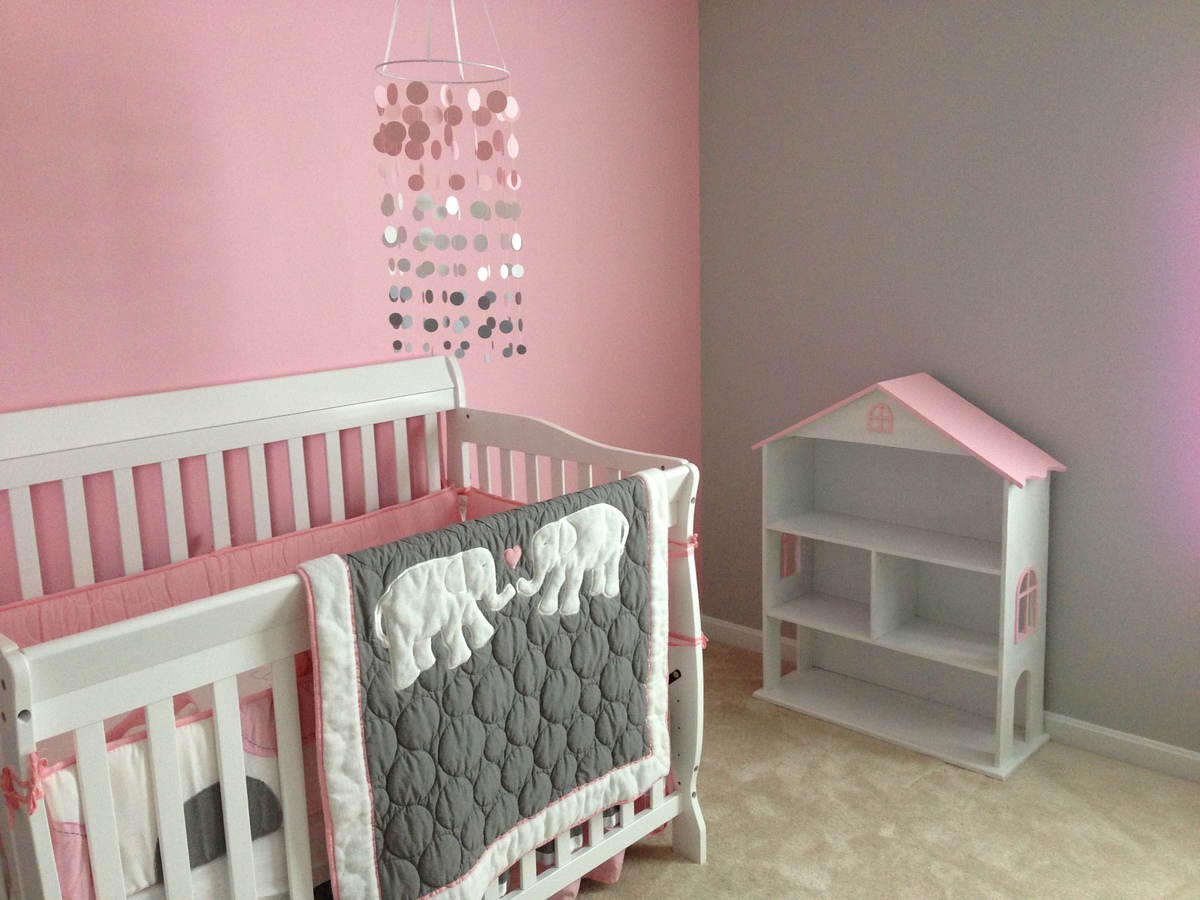
Modified Dollhouse Bookcase
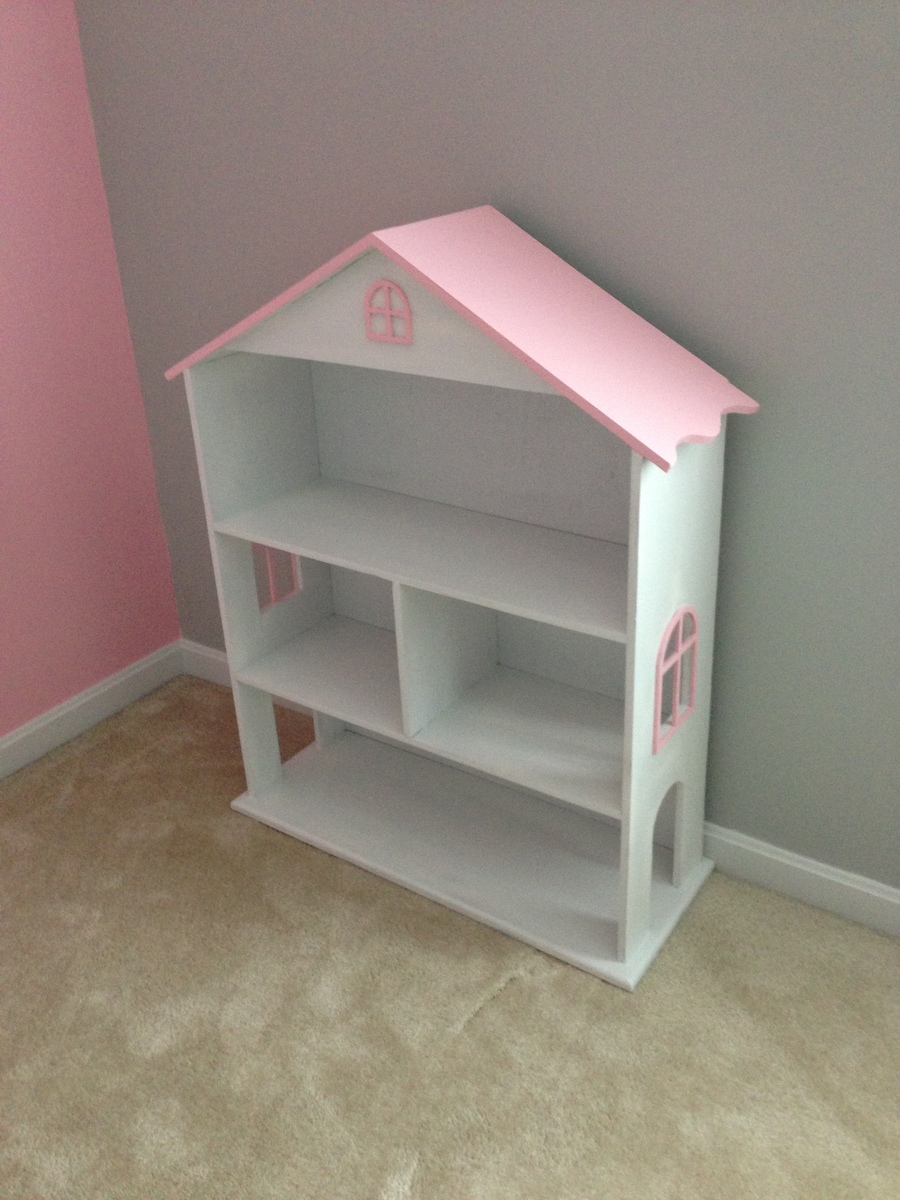
This was a collaboration between my father and I as a piece to add to my newborn daughters room.
I had seen a similar bookcase in a model home in my neighborhood and wanted it. That's when I remembered that Ana had plans for something similar on here. I used those and made modifications to suit my tastes by taking things I liked from Ana's plans and things I liked from the one I saw in the model home.
It was painted white with primer and then I painted the roof and accents with the same color paint I had used on my daughters' accent wall to make it match perfectly.
You can see photos of it from different angles and then a completed photo of it in her room.
I absolutely love this piece!
Estimated Time Investment
Weekend Project (10-20 Hours)
Recommended Skill Level
Intermediate
Comments
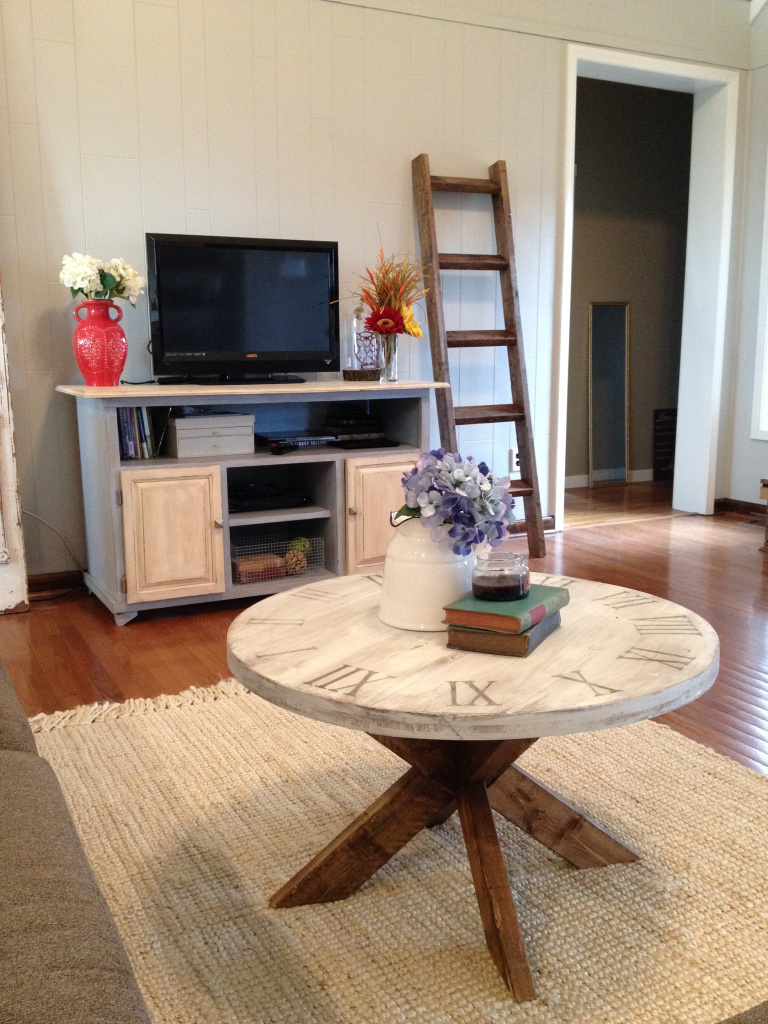
Round Clock X Base Table
I built this table based off the plans from Rogue Engineer for an X based side table with concrete top, but I modified the angles to make the table 18" tall and 34" wide. I also made the top from 2x8 boards instead of using concrete. More details in the blog post. A table base like this would cost $100 from Pier 1, but this plan helped me make my own base for about $8. Awesome!
Built from Plan(s)
Estimated Cost
$20-25
Recommended Skill Level
Beginner
Comments

Tue, 09/01/2015 - 09:39
Wow, I thought the top was
Wow, I thought the top was concrete! It looks great!
Tue, 09/01/2015 - 12:34
Thank you! Now that you
Thank you! Now that you mention it, it kind of does look like concrete at first glance!
Mon, 12/07/2015 - 21:03
Great base for a glass top dining table!
i am trying to find plans for a base like this as a pedistal dining table base with a 54" glass top, but haven't been successful. Maybe I can modify the plans to make the base. What do you think? And great job!
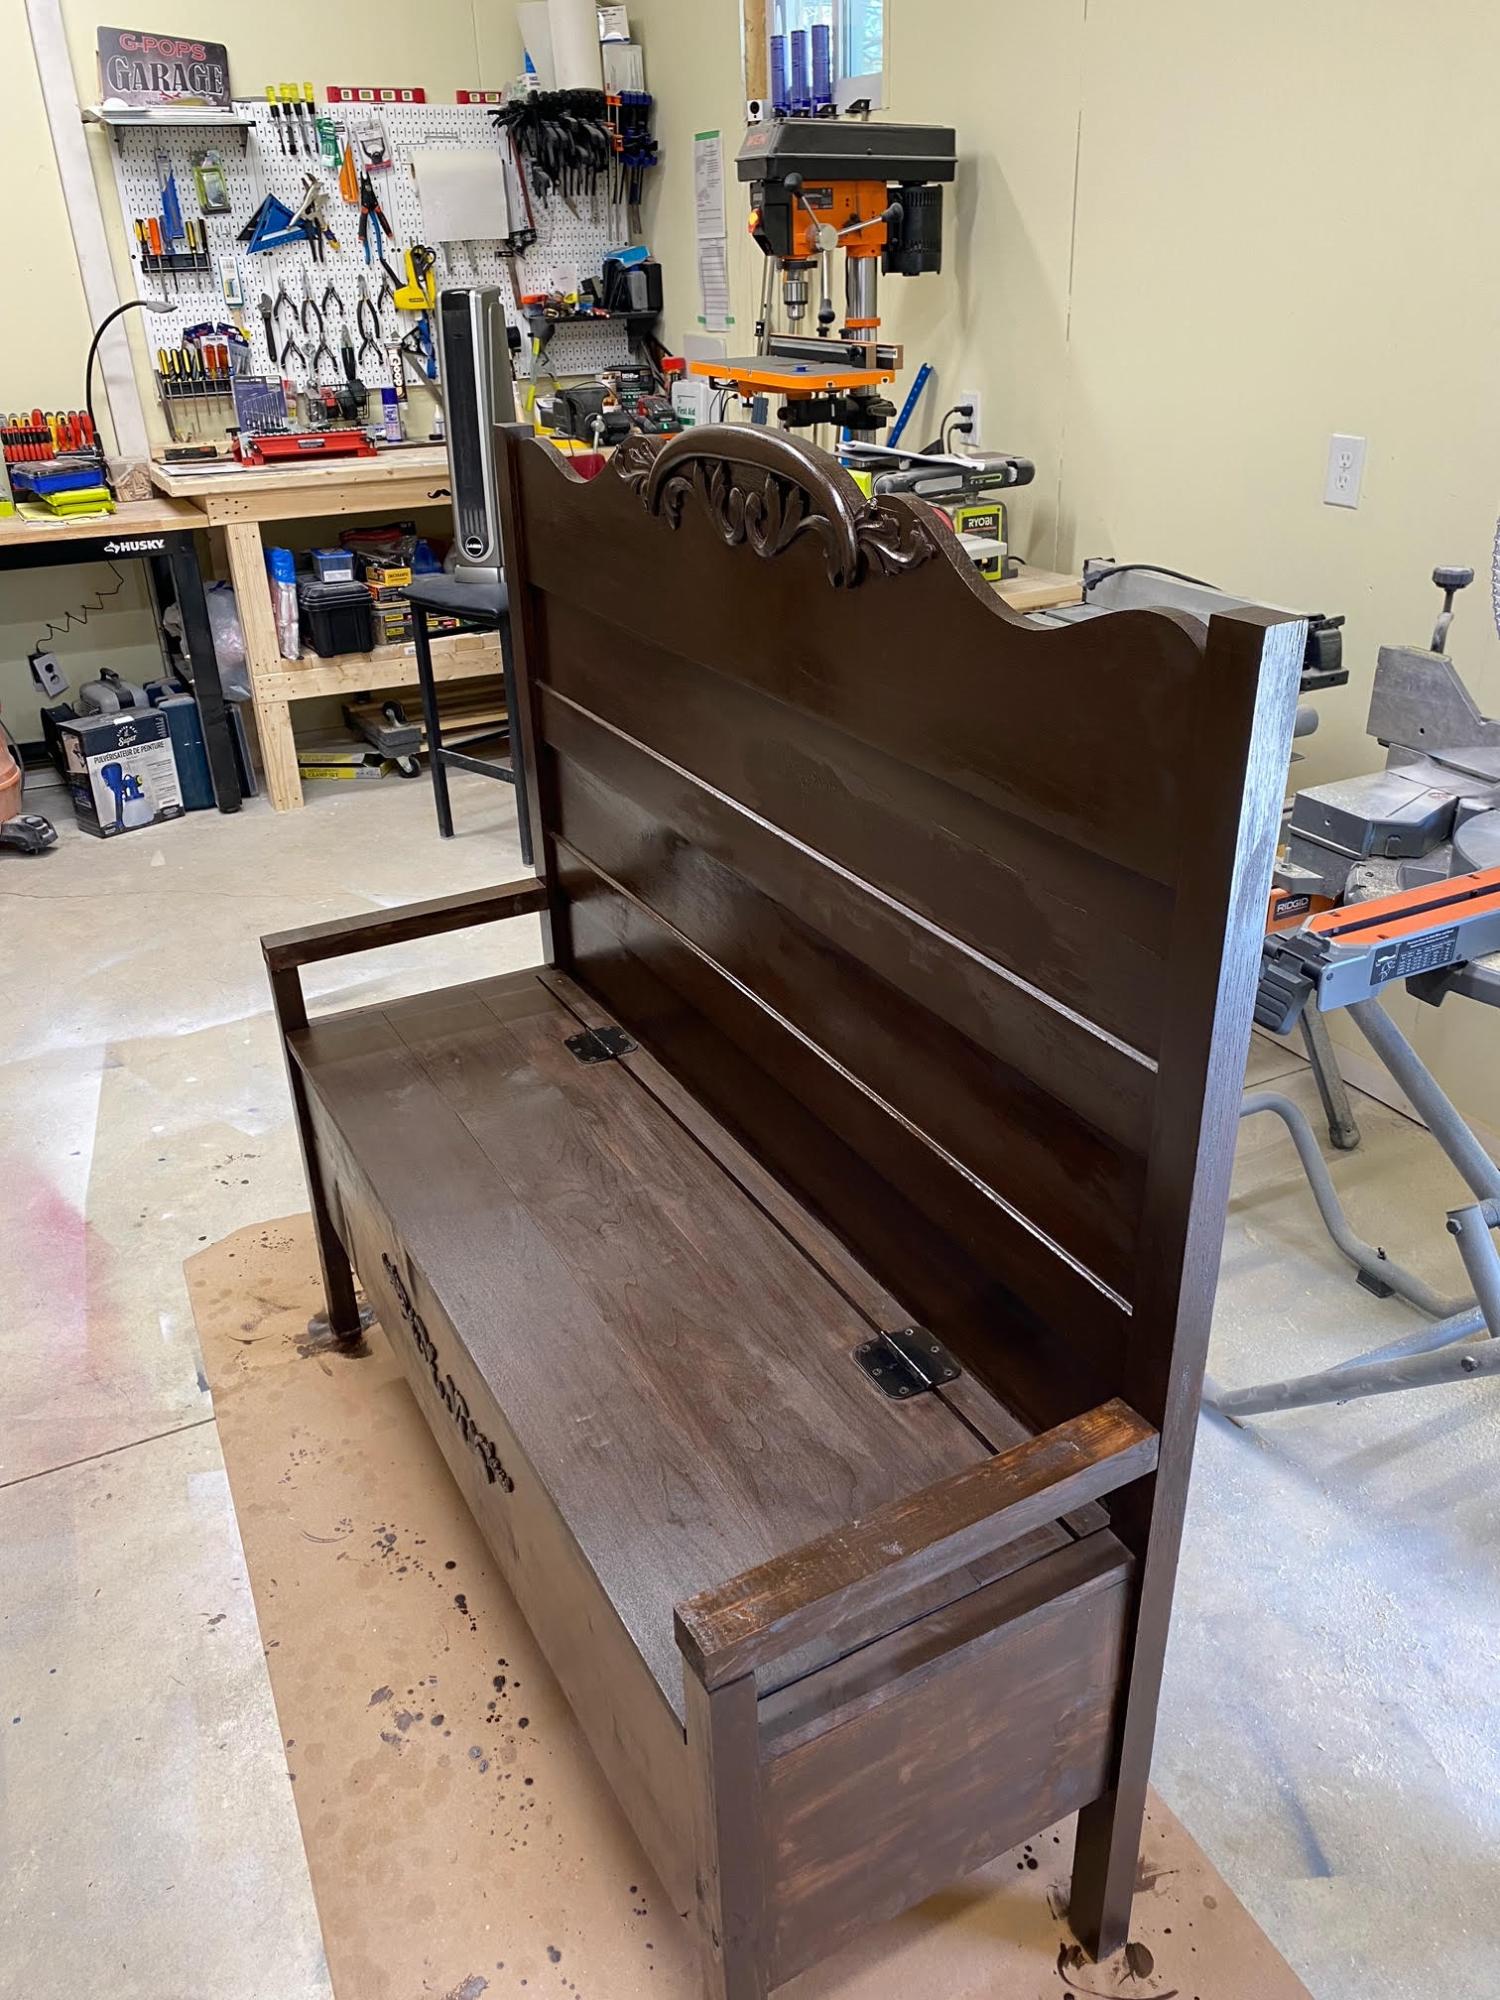
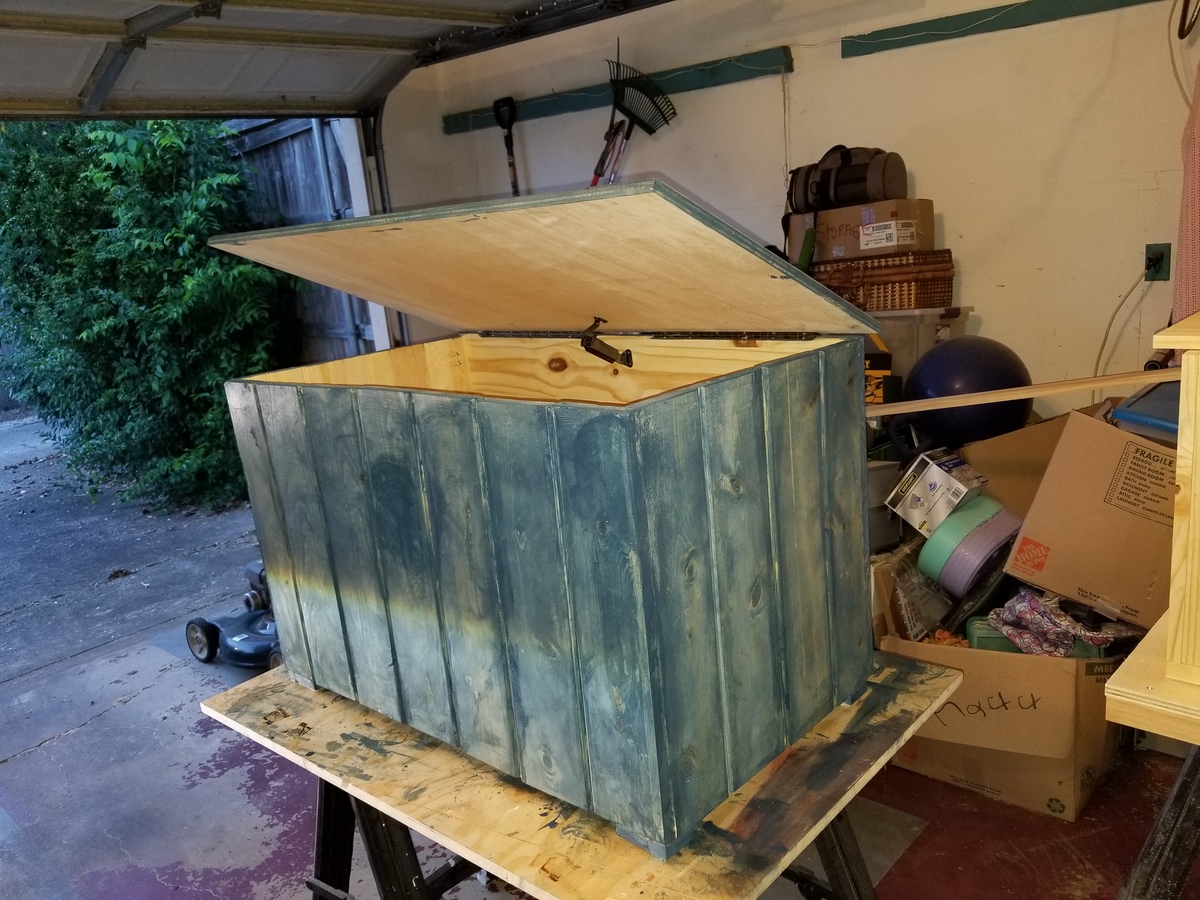
Toy Chest
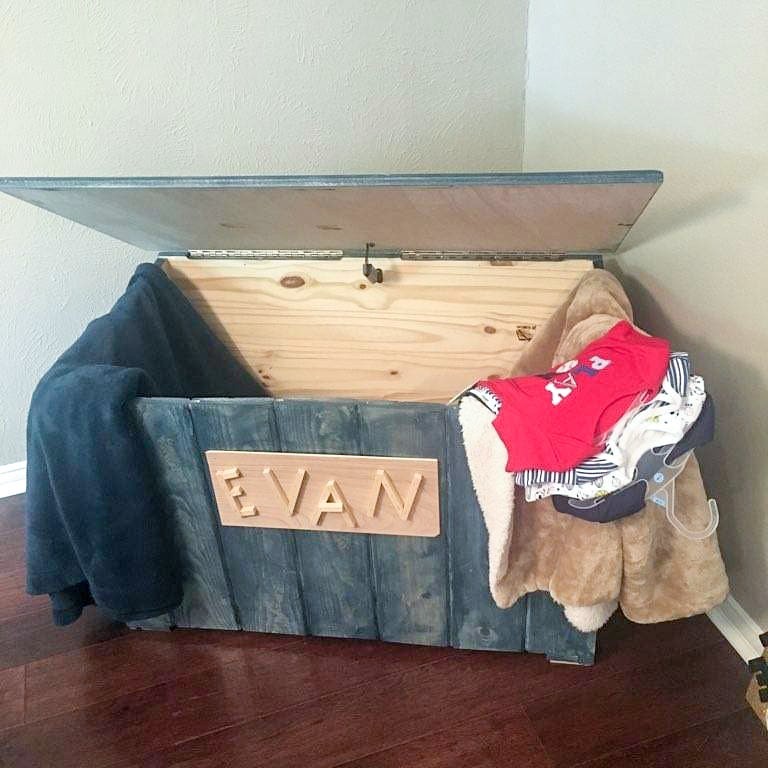
Toy chest made for grandson. The core made from tongue and groove boards. Lid supports hinge middle with two 90 Degree Stop Hinge on both sides.
Based off of this:
Estimated Cost
$100.00
Estimated Time Investment
Weekend Project (10-20 Hours)
Finish Used
Blue stain and clear coat polyurethane
Recommended Skill Level
Intermediate
King Farmhouse Bed
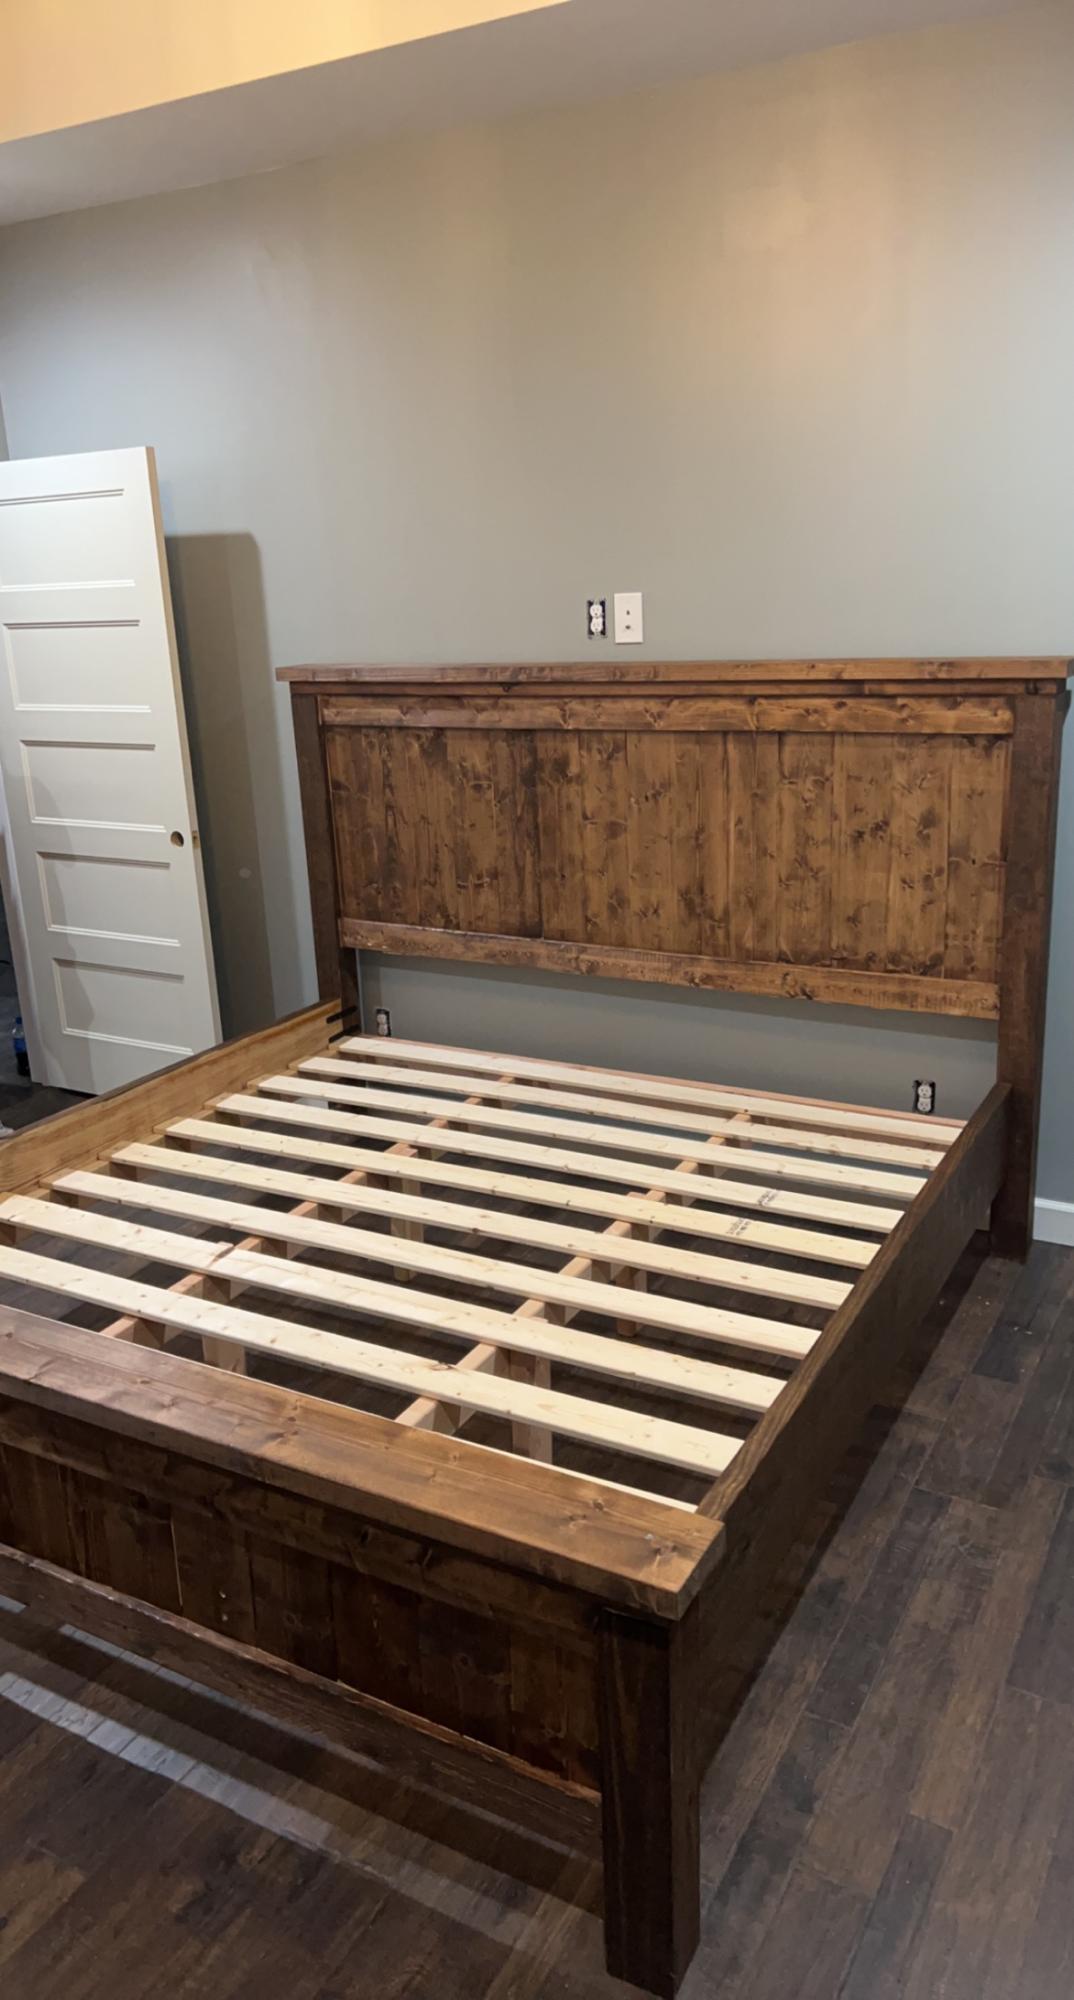
Easy build. Turned out beautiful
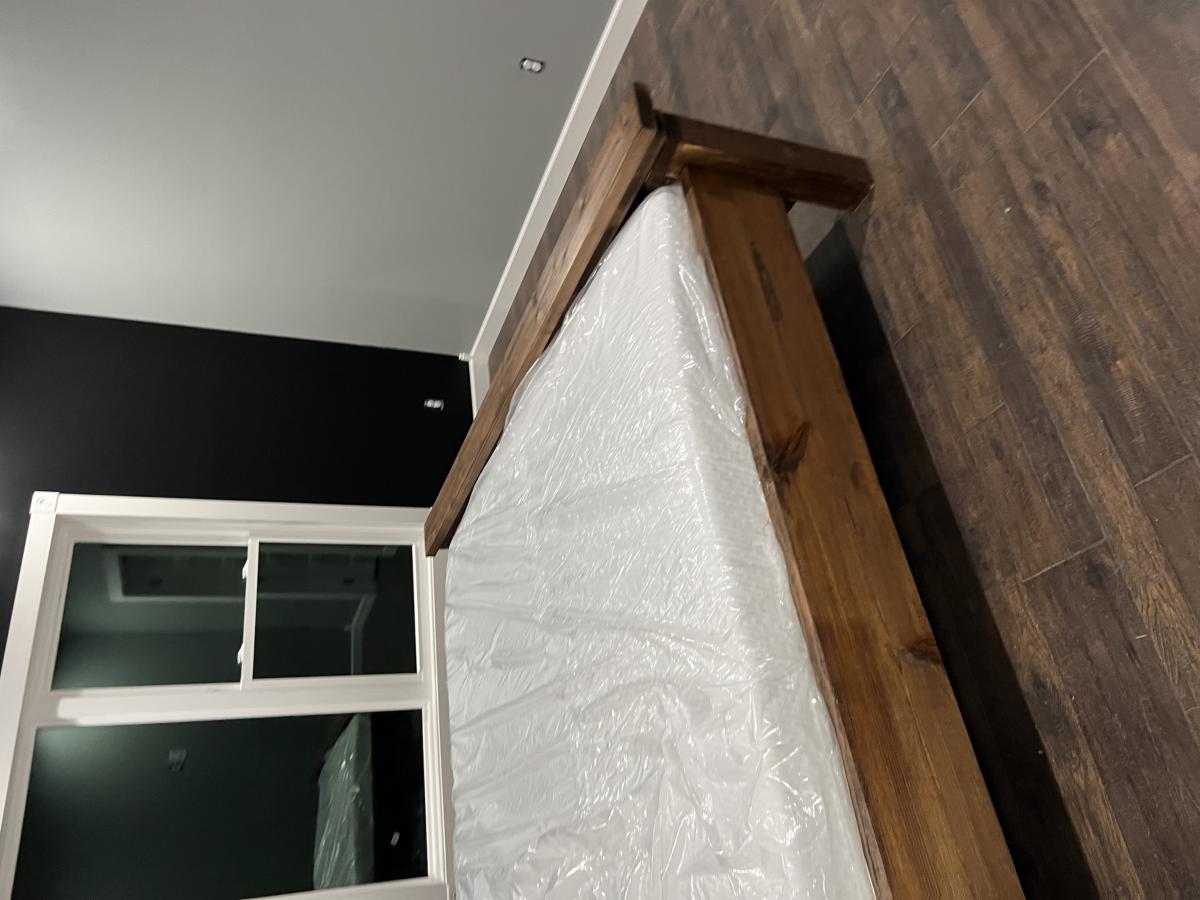

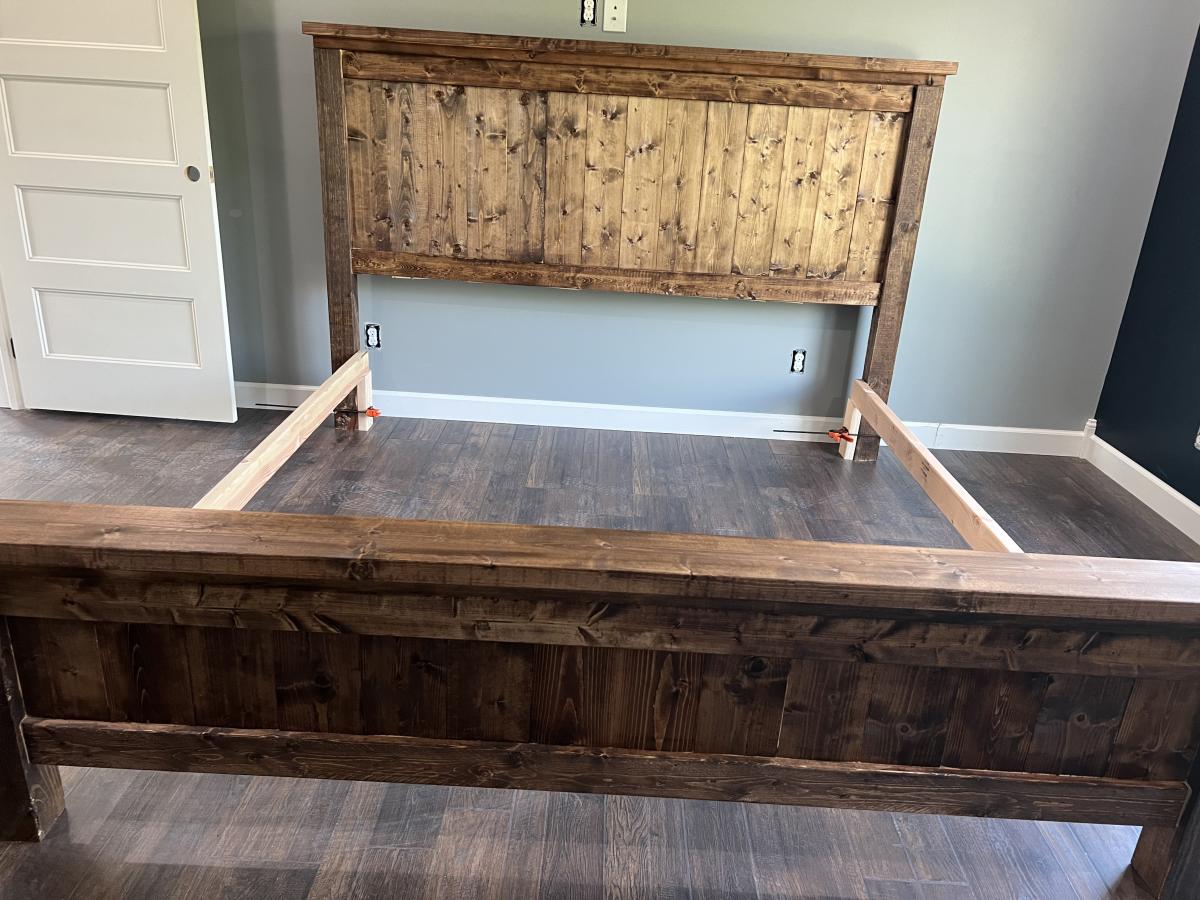
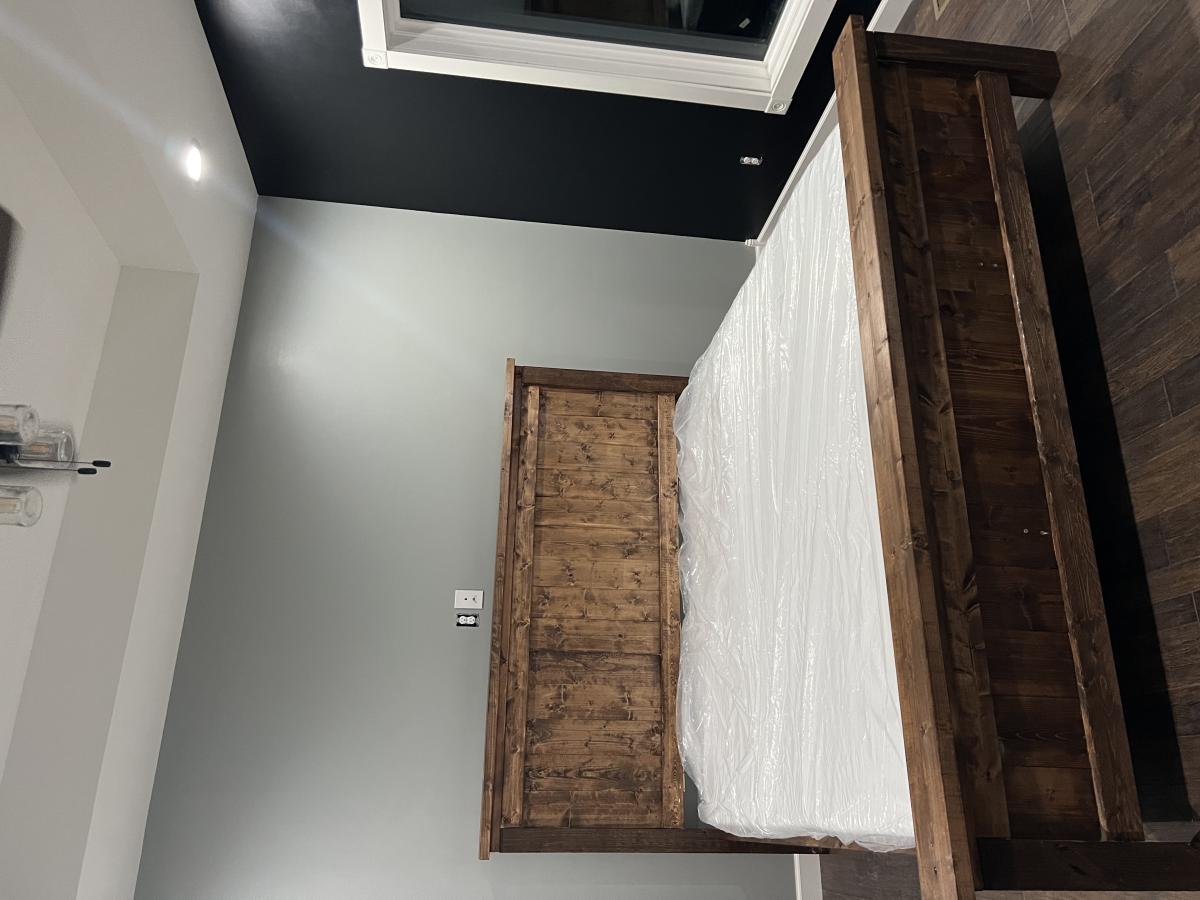
Built from Plan(s)