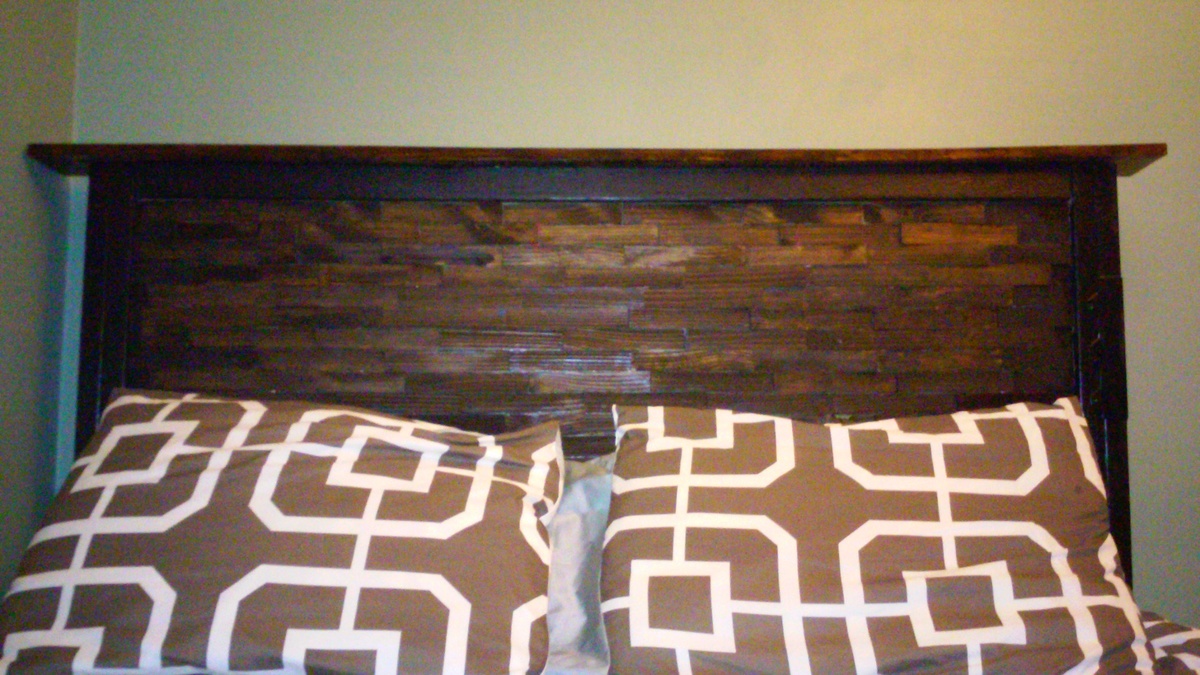
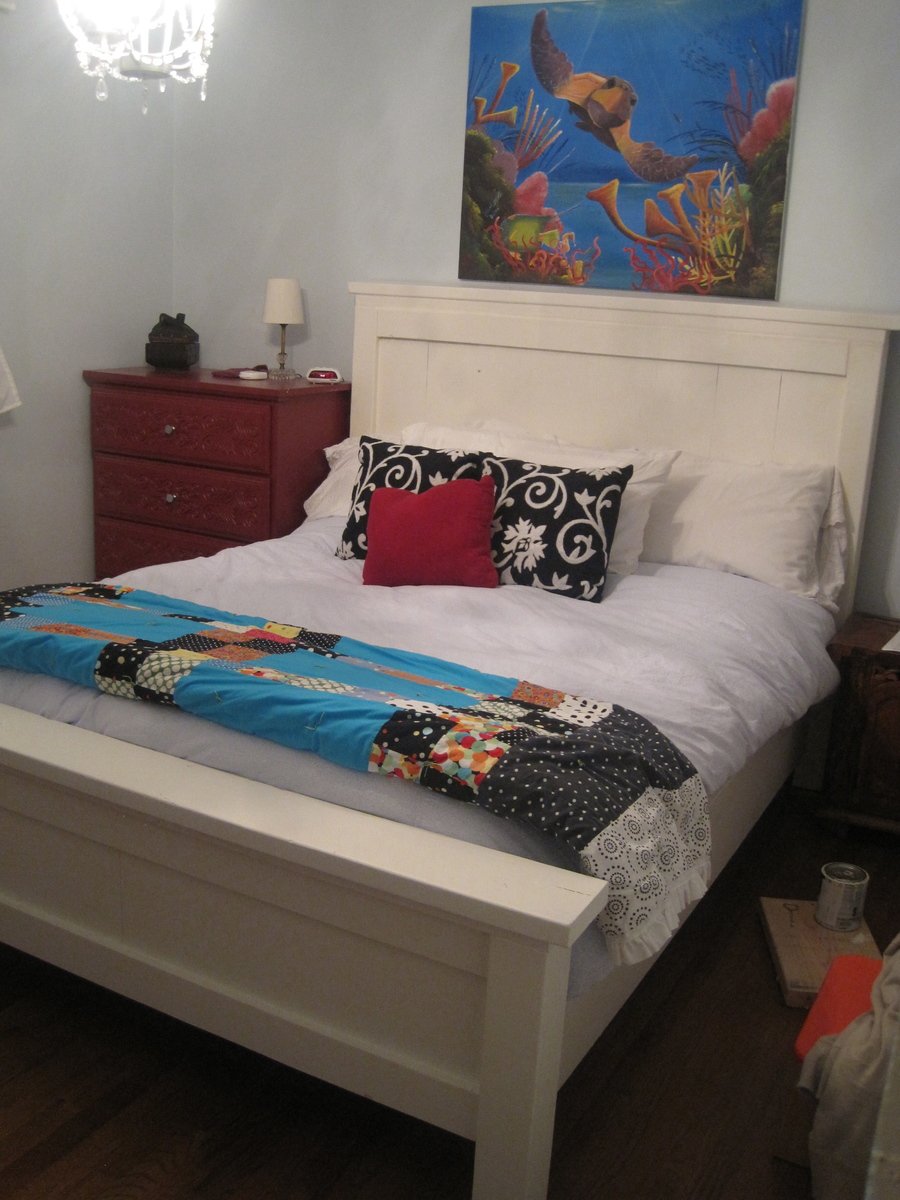
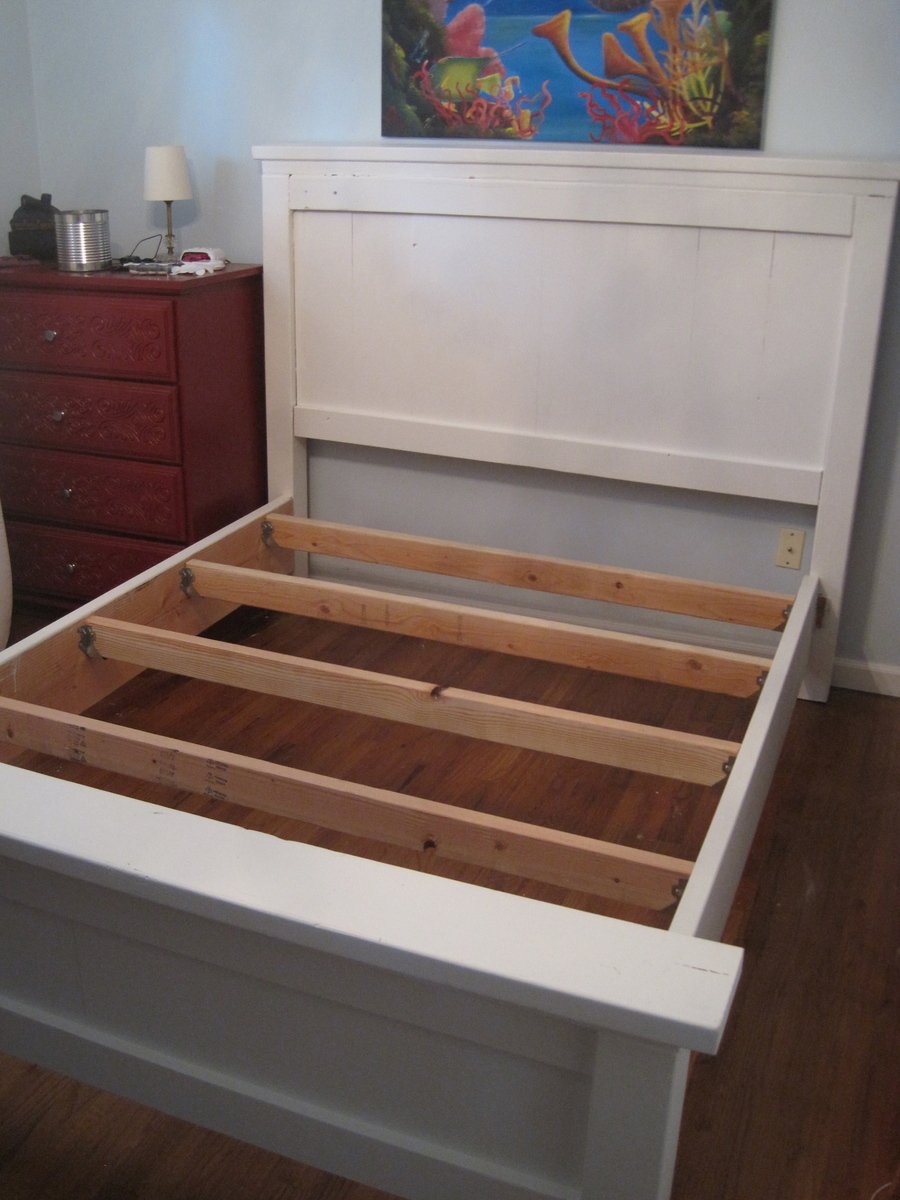
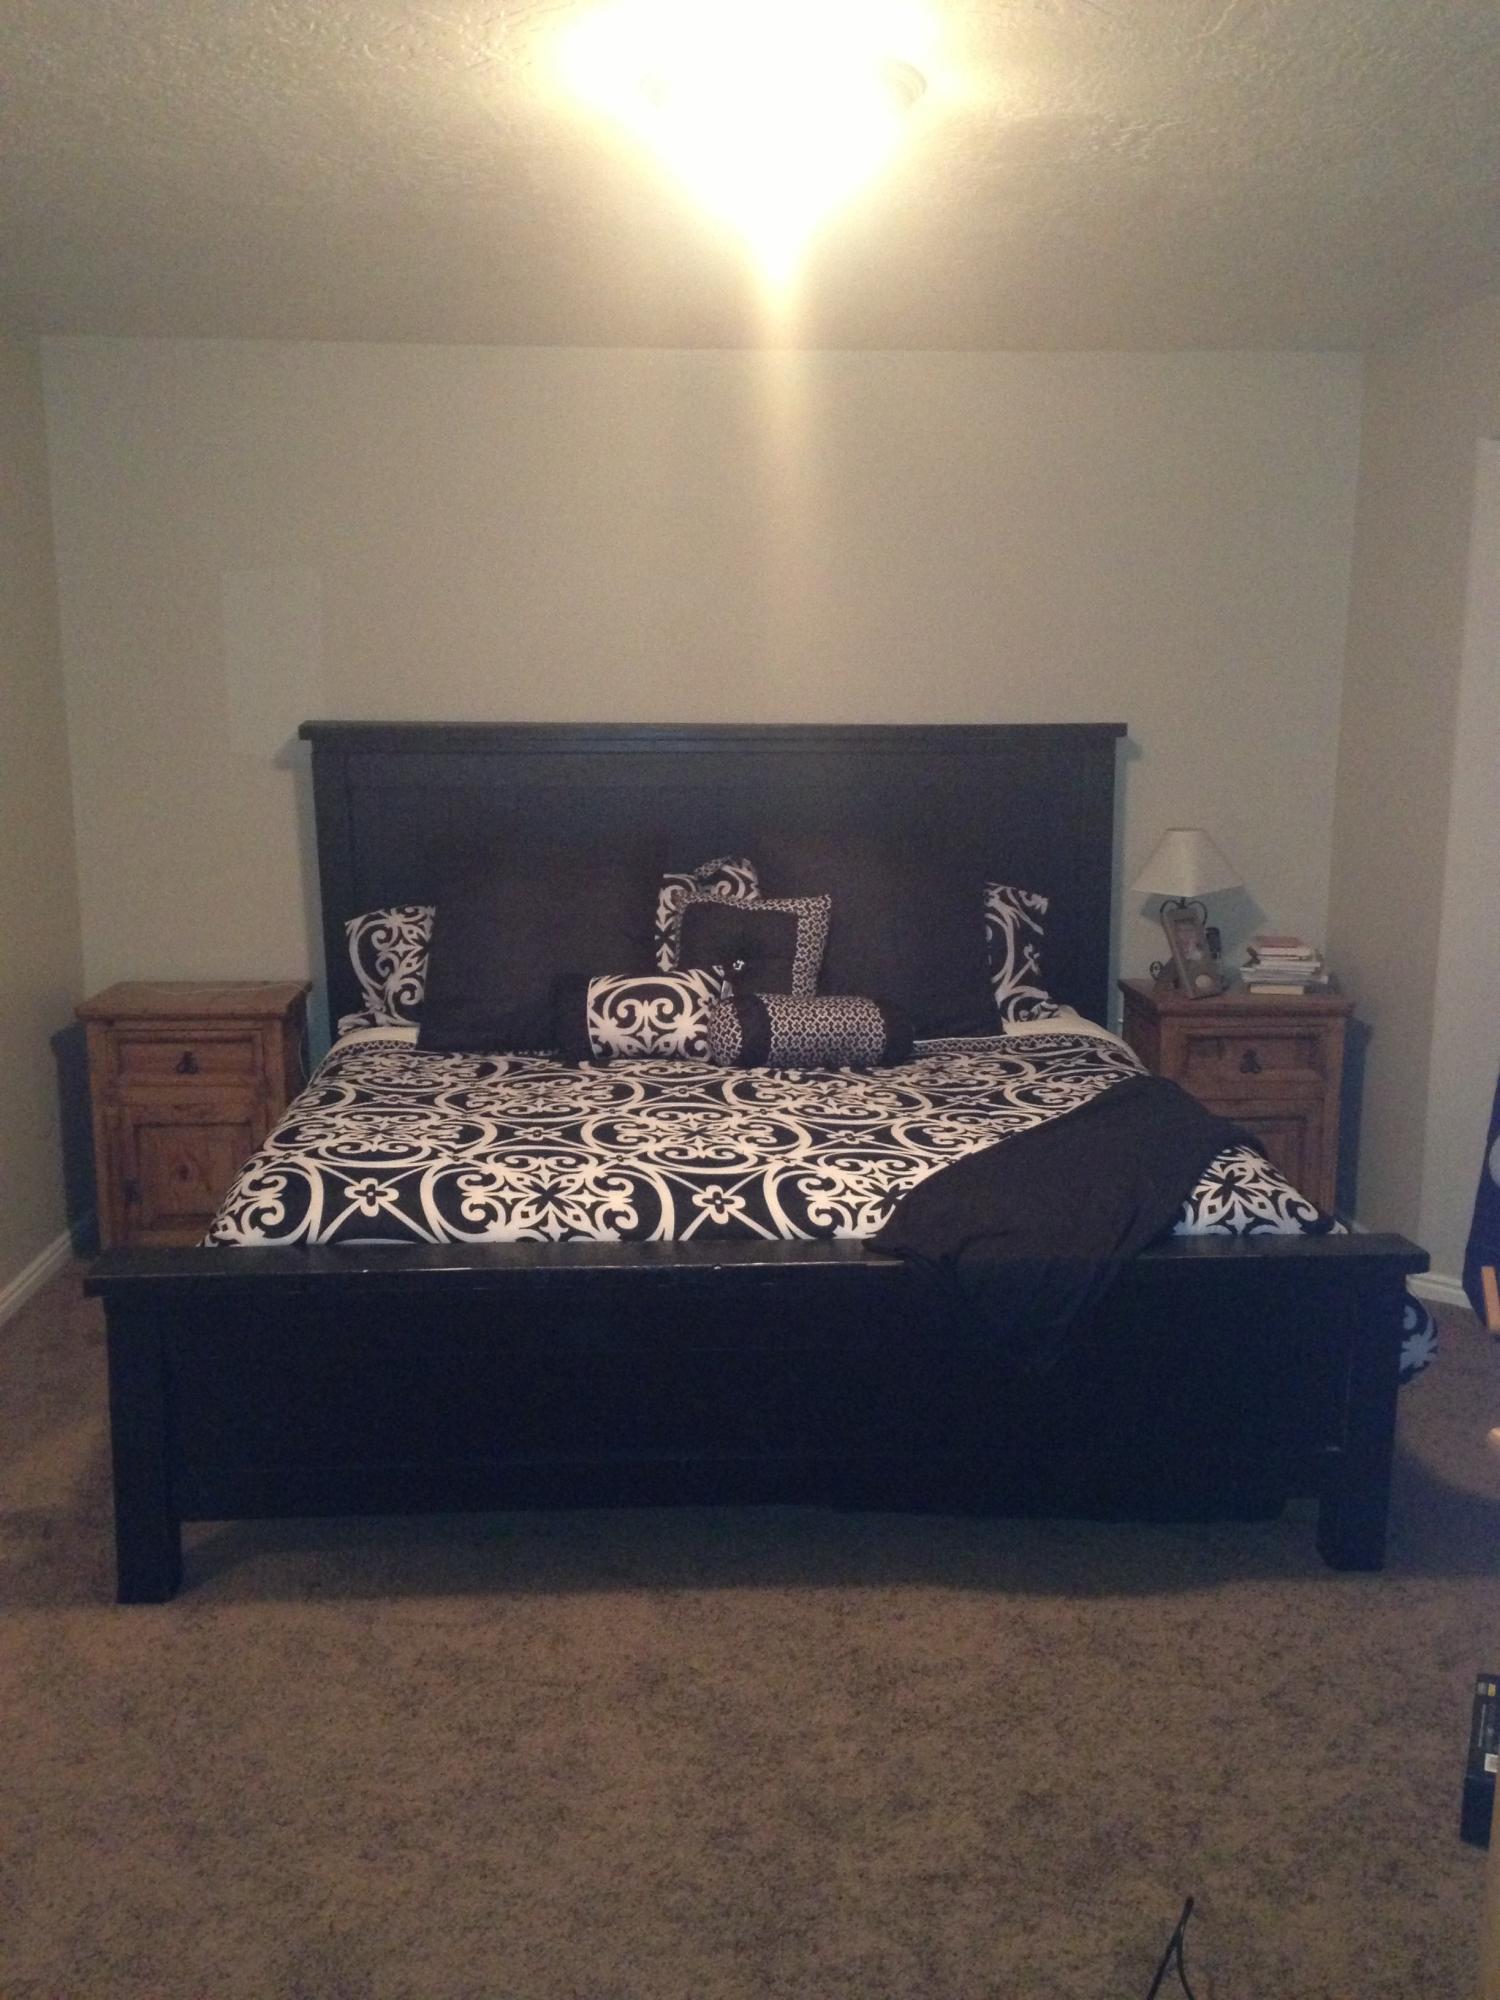
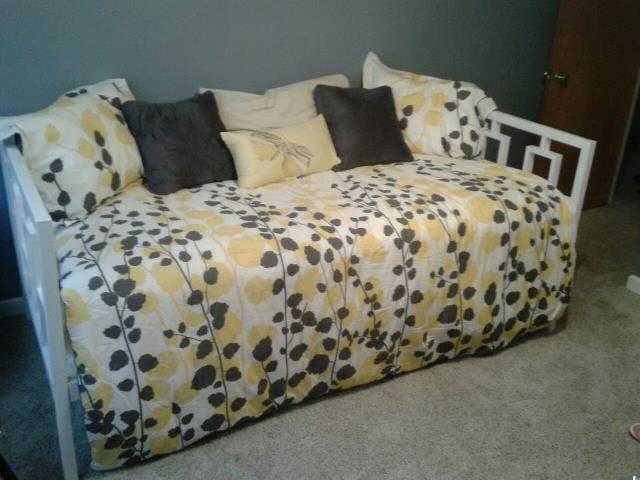
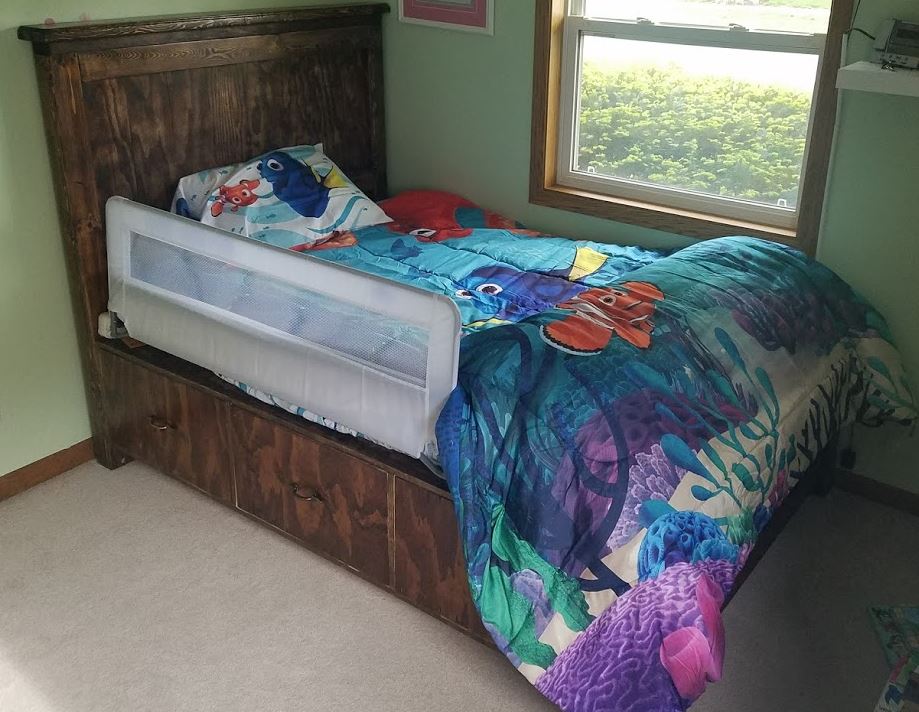
Community Brag Posts

Shim Bed!

Submitted by ncderemer on Mon, 01/19/2015 - 10:05

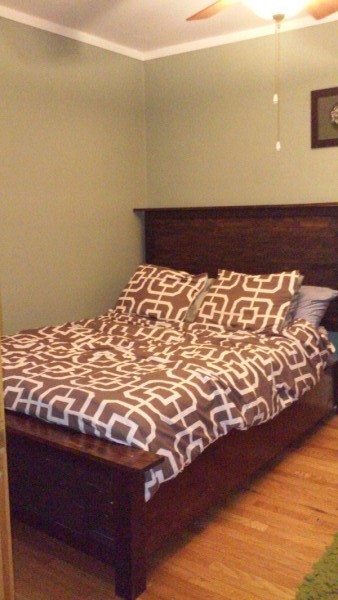
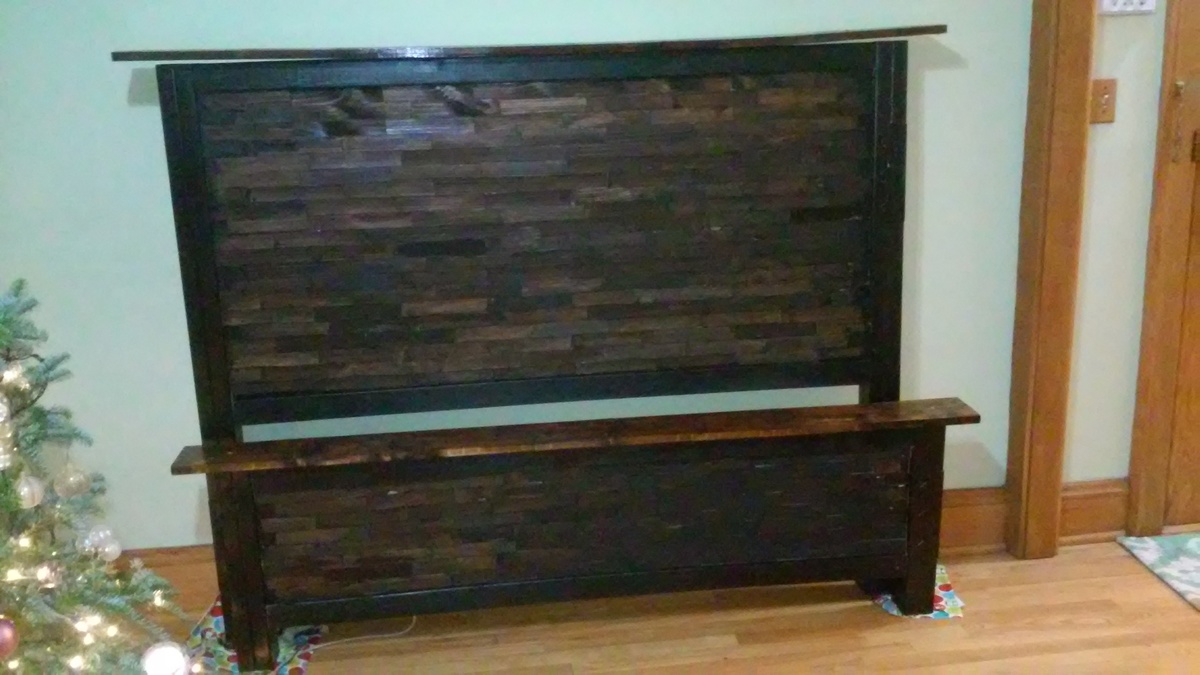
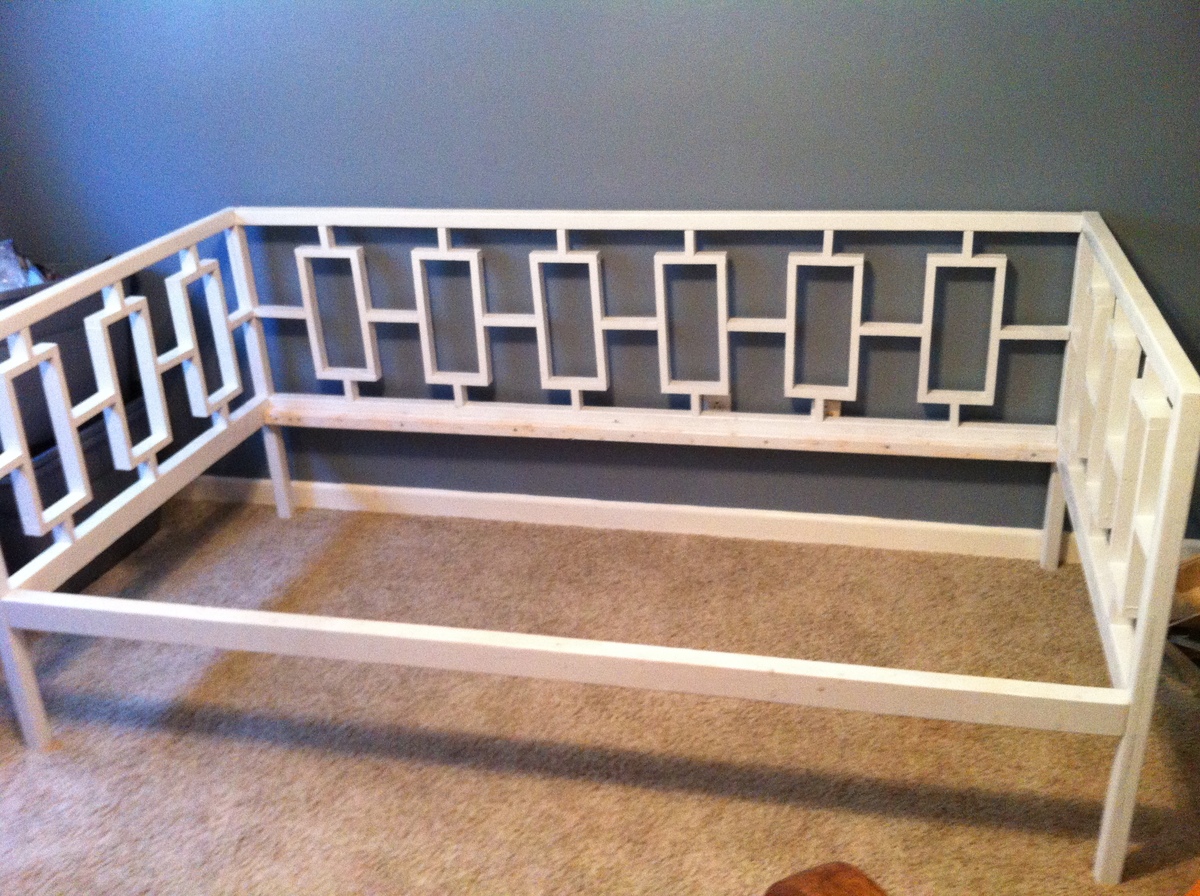
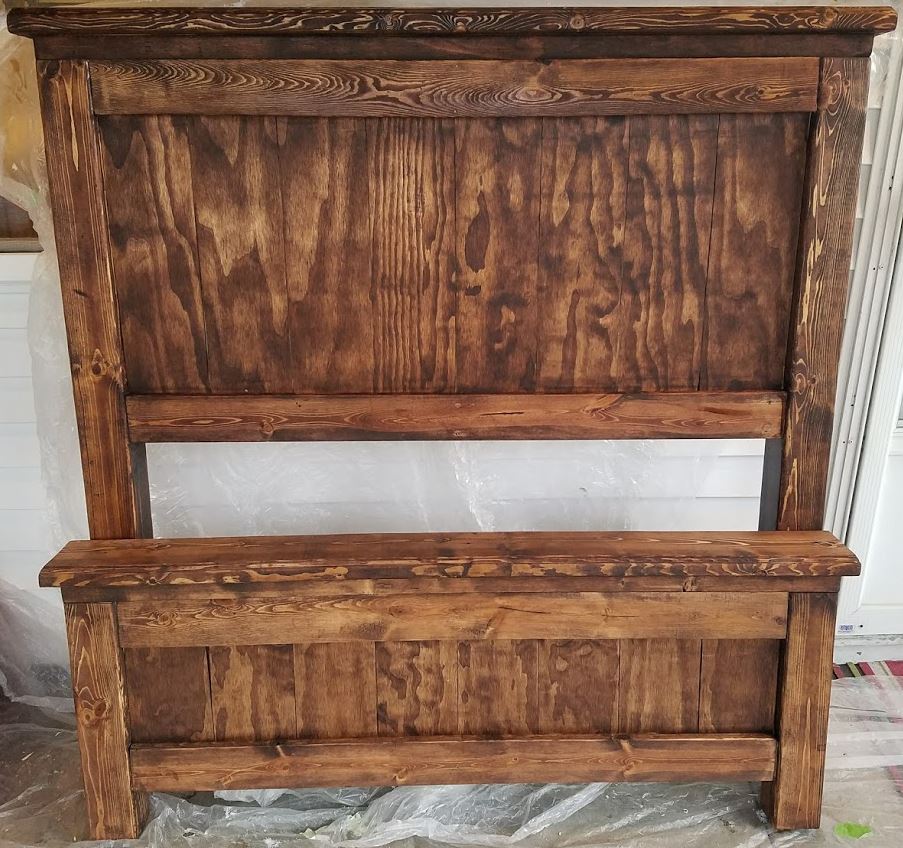
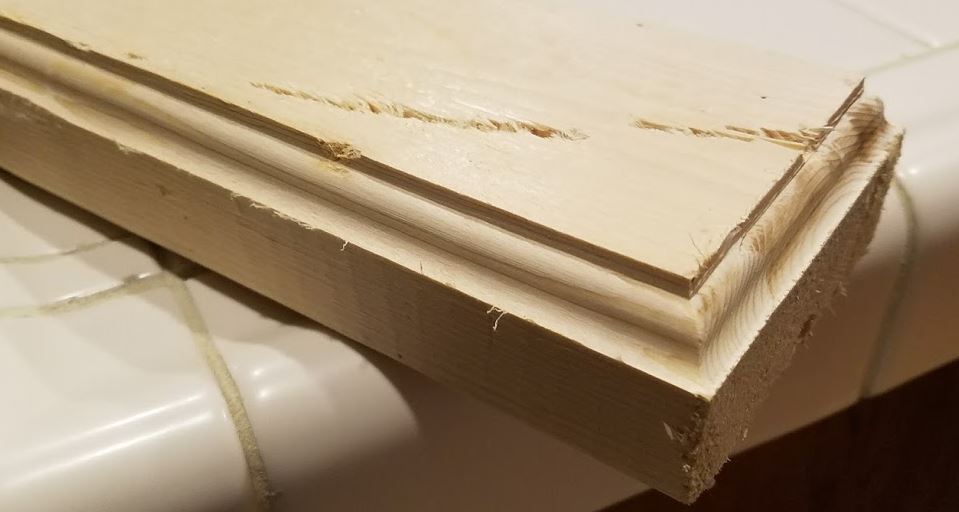
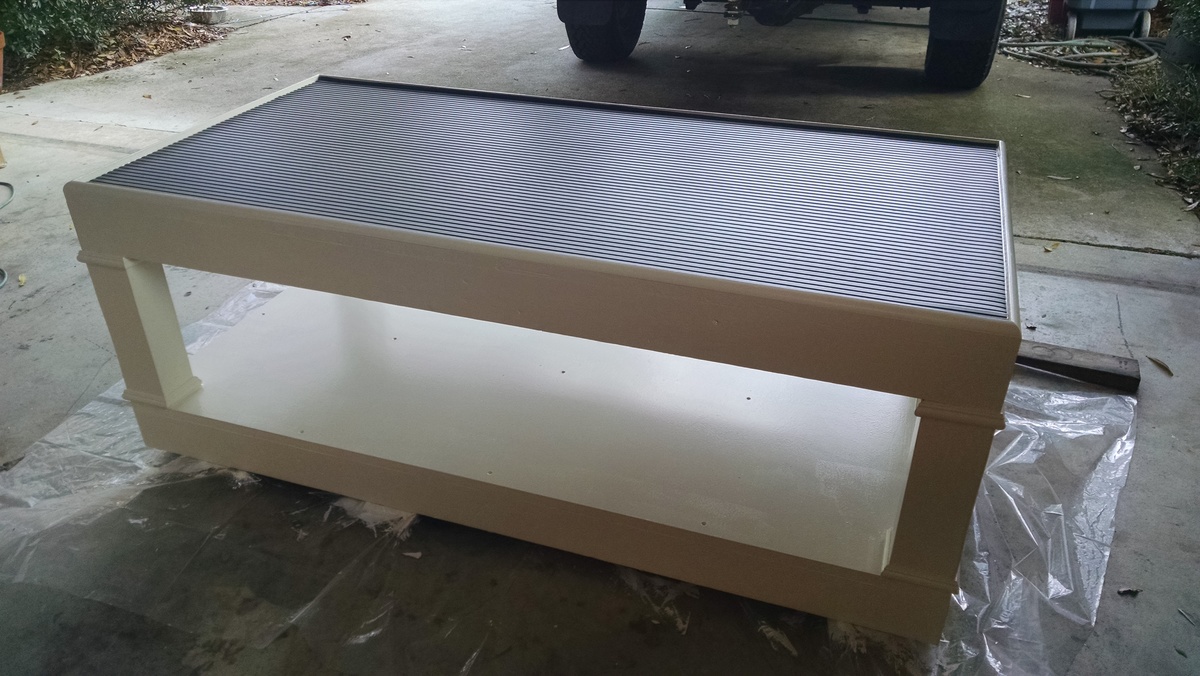
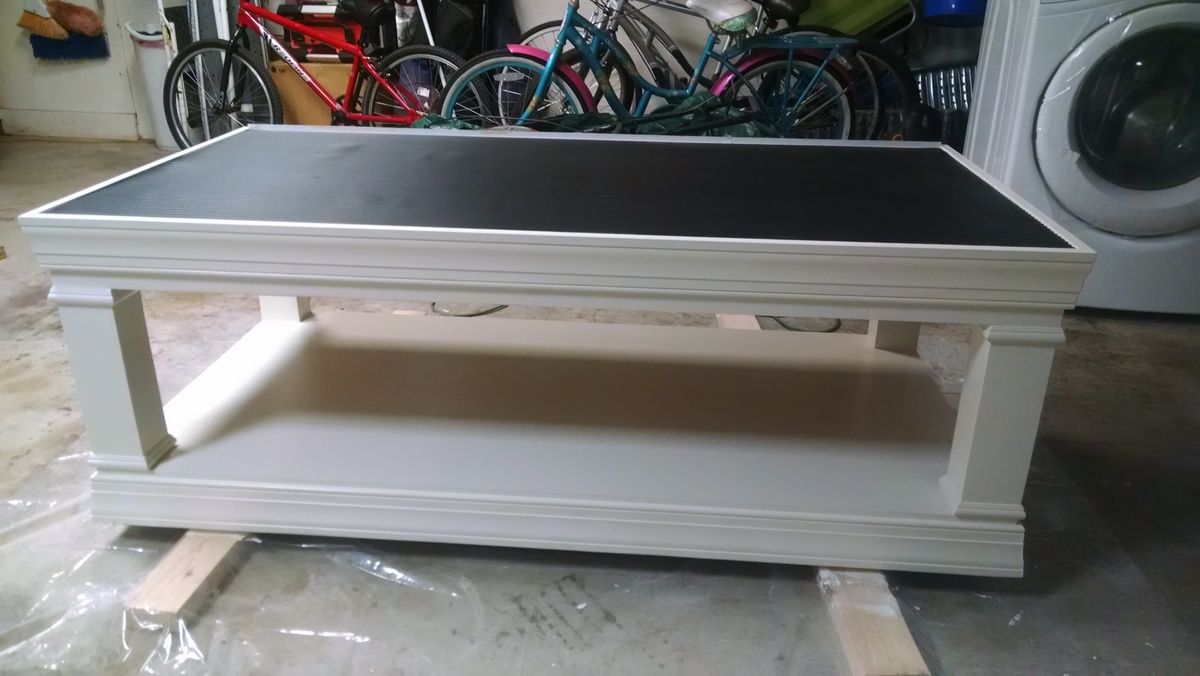
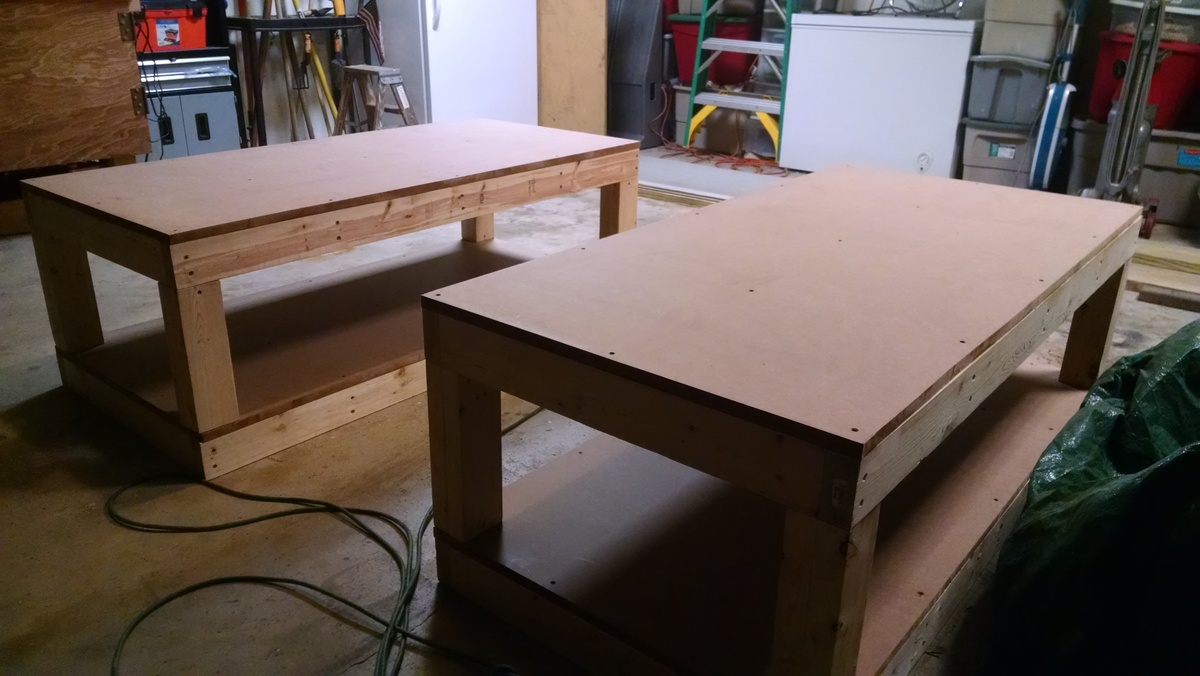
I have been working on this project intermittantly for months now. It is so amazing to have it finally finished and have it fit my style perfectly. Those shims took forever to apply. I stained them first and then attached them with wood glue to both the headboard and footbard. 

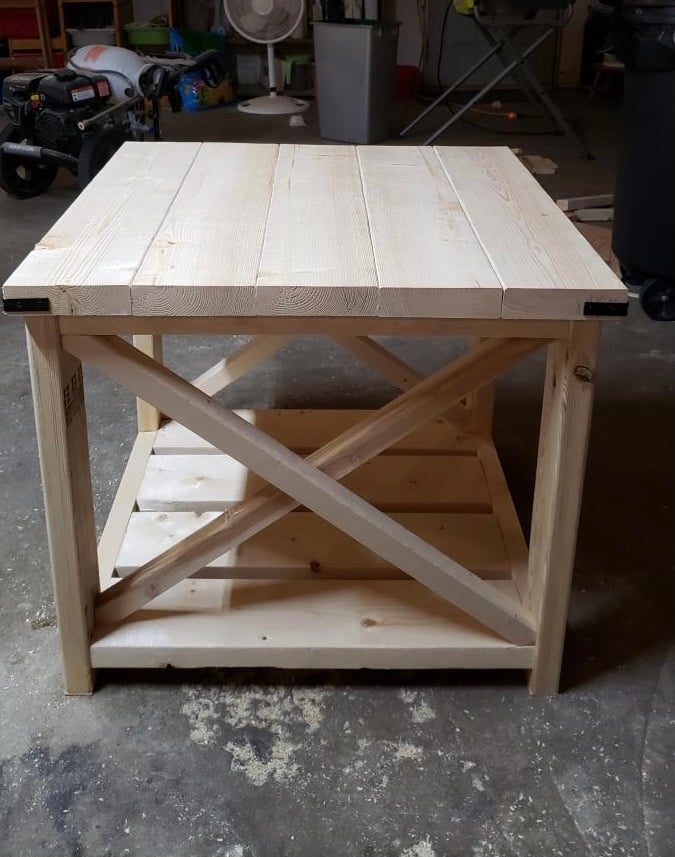
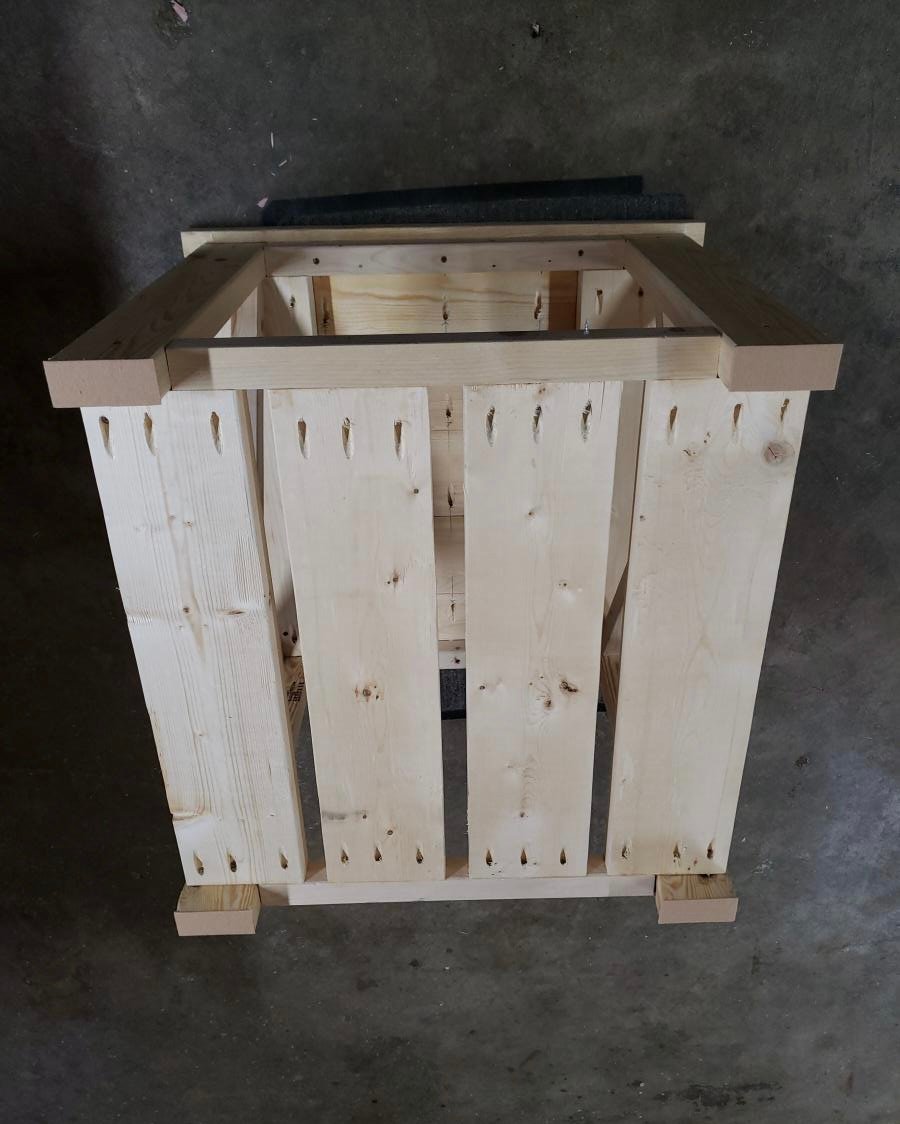
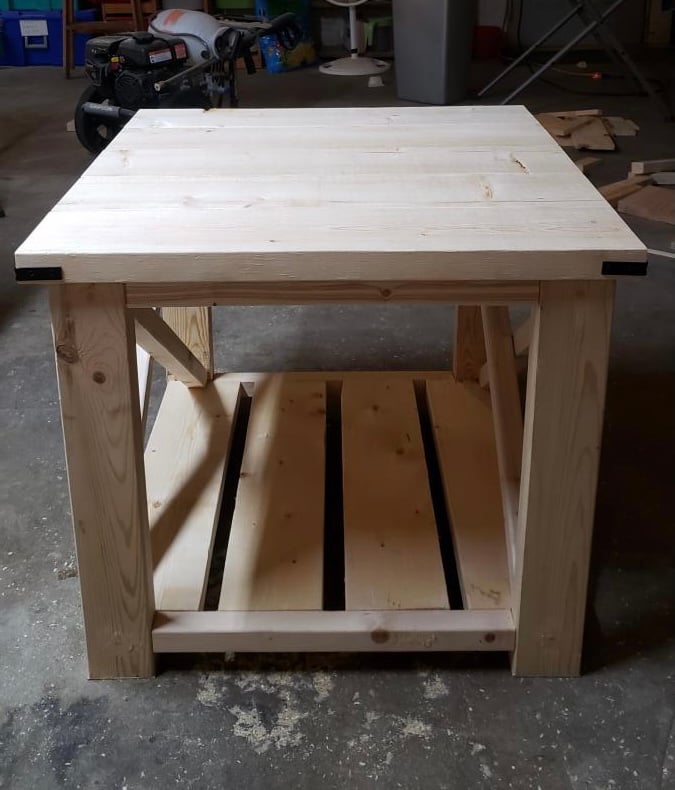
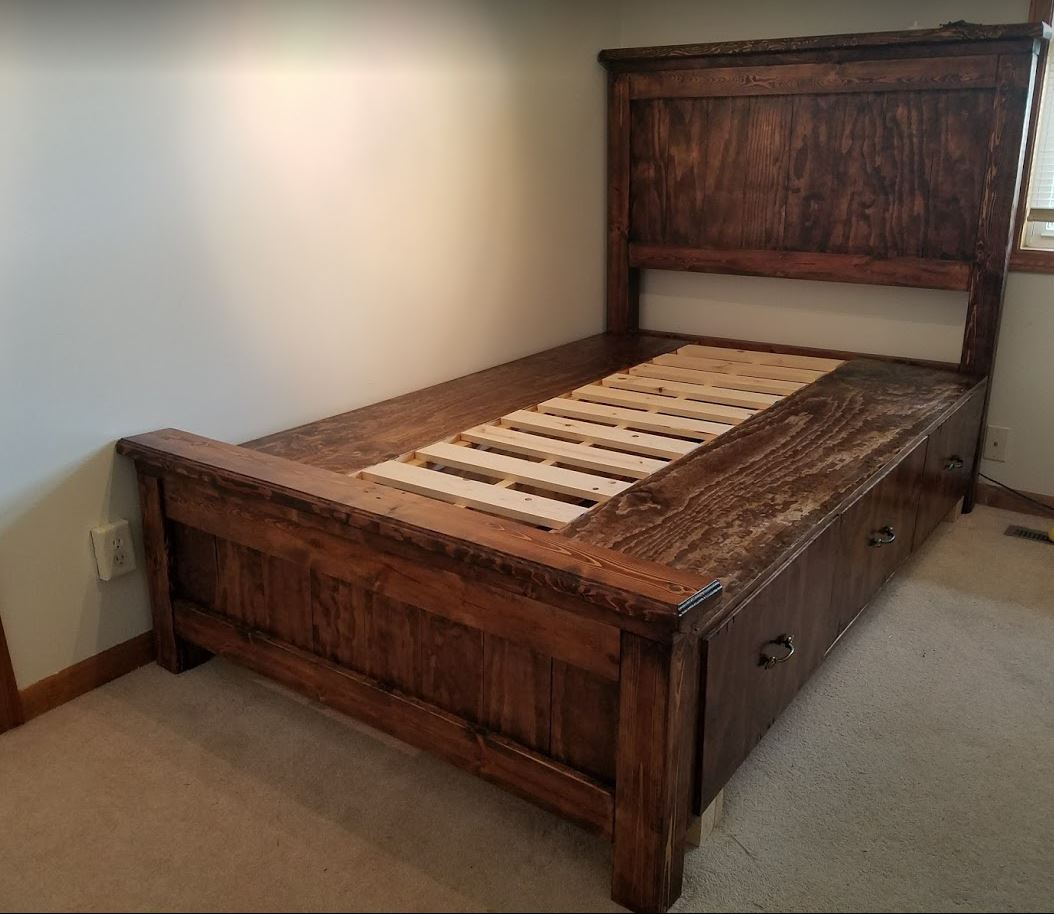
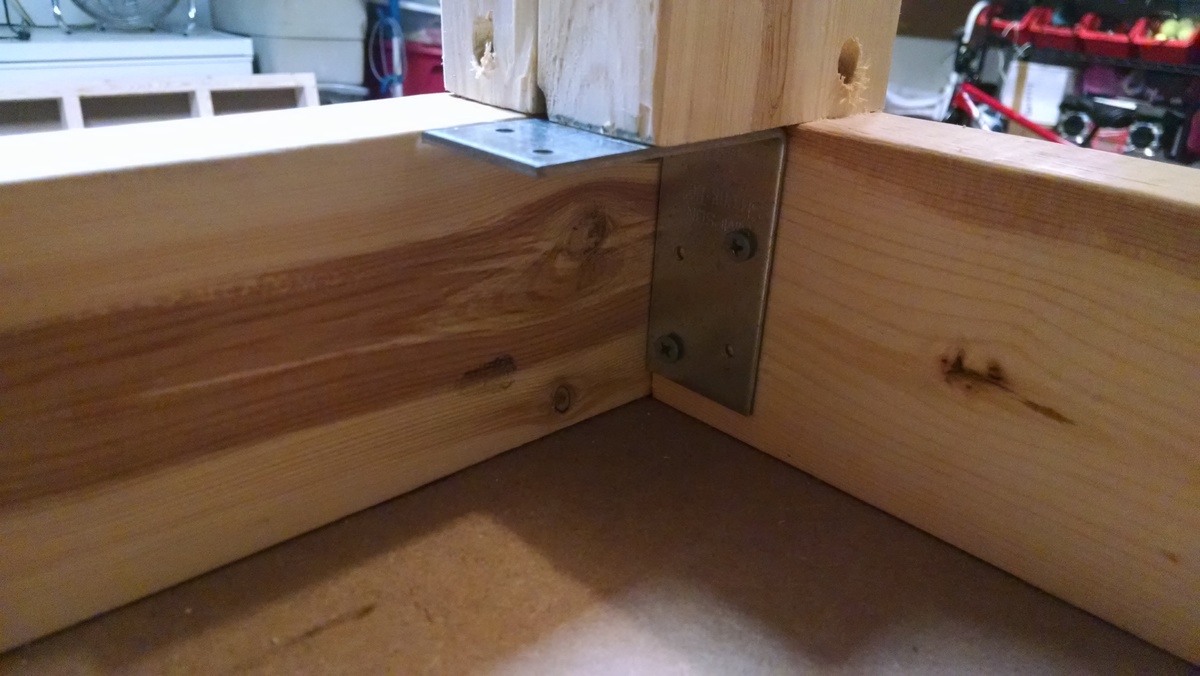
I made a few modifications to the aesthic though none of the cut lengths. Instead of using 4X4 posts I used 2x4's and attached them with metal brackets to give it a slight industrial feel. I also painted the framing black and the posts black and stained the top 1X6 and 1X12 siderails the same color as I stained the shims which I thought tied it all together and made it look warm and rustic. 

I did not build out the wood frame but instead used the metal frame I had already to set the bed down inside. I am really happy. Thank you Anna for this plan! I never would have thought I could pull something like this off!

Built from Plan(s)
Estimated Time Investment
Week Long Project (20 Hours or More)
Finish Used
Black Rustoleum paint and Minwax espresso stain.
Recommended Skill Level
Intermediate

Rustic delight

Submitted by Anonymous (not verified) on Wed, 04/19/2017 - 05:22

What an awesome project.  

Estimated Time Investment
Week Long Project (20 Hours or More)
Recommended Skill Level
Intermediate

Recycle Twin Bed

Submitted by LARMO on Thu, 03/14/2013 - 09:16

This was my bed handed down by two other siblings growing up a number of years ago. It is a Jenny Lind which I cut the foot board in half, attached to the head board, used the side rails for the frame on the front and sides and attached with my Kreg Jig. The underside frame was from left over pine trim from a window project and the seat was from leftover paneling from a bathroom remodel. I painted the bed with a satin black spray paint and left the seat as is.

Estimated Cost
1 can of spray paint 3.99 all other material left from previous remodels
Estimated Time Investment
Afternoon Project (3-6 Hours)
Finish Used
satin black spray paint
Recommended Skill Level
Intermediate

Comments

spiceylg

Thu, 03/14/2013 - 10:47

I have a twin head and foot board I got at Savers (thrift store) a few months ago to do just this. Just have to get my other projects out of the way (and out of the hubby's way as well) first. Great job!

agarrigan

Thu, 03/14/2013 - 13:28

I also have this type of project on my TTB list, using an old waterfall style bed frame. I already cut it apart and everything. Seeing how well your's turned out might just give me that little push I need to get mine finished. Thanks for sharing!

birdsandsoap

Sat, 03/16/2013 - 16:51

This turned out great. I did my first curbside stop and pulled an old crib out of someone's trash pile last summer. I just happened to be borrowing my mom's truck at the time...If I owned a truck, there would be no stopping my hoarding! Your bench turned out excellent. I plan on making mine a bench too. My husband has been complaining about the old crib leaning against the house in the driveway for a while now. Yep, better get started.

Laundry Room Makeover

Submitted by brittanyj on Wed, 01/21/2015 - 09:22

This project is the coolest.  The laundry room was a sad sack of disorganization, open cabinets (who took off the doors??) and no surface to work on.  The dog food sat in its' bag in between the washer and dryer.  Here's a video of the makeover: https://www.youtube.com/watch?v=xIi2Ay2vXEE

Used Ana's tut on making raised panel doors, and purchased tiny trim moulding to fancy it up.  I also routered the edges to give detail.  I LOVE these doors!  I created the dog food pull out bin to match it all so the food is concealed.  In hindsight, I should've sprung for better bigger wheels because we have 50 lbs of food in there and it's a little difficult to pull out when filled all the way.  It's just a cardboard box lined with a trash bag and painted white on the outside. 

Table top was made from plywood and scraps.  It's more useful than I thought.  Very nice to have a solid surface to put stuff on.  Routered the edge of the plywood for a more finished look, though I'm not sure that's wise with plywood. I love that the cabinets are now closed and I painted the room so it looked more fiished.  Yay for $75 room makeovers!

Estimated Cost
$75
Estimated Time Investment
Week Long Project (20 Hours or More)
Finish Used
paint, poly, paint spray gun
Recommended Skill Level
Intermediate

Comments

Rustic X TV Console modified to 42" Dry Bar

Submitted by Anonymous (not verified) on Sat, 04/22/2017 - 08:34

My wonderful husband and father built this dry bar for me using the Rustice X TV console plans.  They modified plans to so it is 42" tall, 6-1/2' long, and shelving is wider and centered.  I love it.  Thank you for sharing your plans.

Estimated Cost
$175
Estimated Time Investment
Weekend Project (10-20 Hours)
Finish Used
Paint and polyurethane finish.
Recommended Skill Level
Beginner

Floating Shelf planter box

I wanted some greenery in this tiny bathroom. I followed the build plans for the floating shelves and simply didn’t add the tops so I could use as planter boxes!

Built from Plan(s)
Finish Used
Wood conditioner, minwax Early American, minwax Weathered Oak.

Comments

Queen Farmhouse Bed (First Build!)

Submitted by Holli13 on Sat, 03/16/2013 - 19:59

This is my first ever build using Ana White's awesome plans! I stuck to the plan mostly, but used 4.5 lag screws and joist hangers like others had suggested. Oh, I also used a 2 inch board in the middle of the headboard and footboard, since my HD only carried 7.25" 2 X 8's. I had a couple of hiccups.....the headboard fell down in my garage and some boards got tweaked out of place, but I think I was able to sufficiently cover up the aftermath with wood filler and paint :D I really wanted to do this project by myself (sort of a "I am woman, hear me roar!" kind of thing, but it would've been a lot easier to have a helper.....just some advice :)

Built from Plan(s)
Estimated Cost
$175.....about the same as a bed frame from ikea :)
Estimated Time Investment
Week Long Project (20 Hours or More)
Finish Used
Primed with Zissner Bull's Eye, painted with Clark and Kensington Flat Enamel in Antique White (with a free quart that I got at Ace!) and finished with Trewax clear paste wax.
Recommended Skill Level
Beginner

Outdoor 2x4 Sofas

Submitted by Anonymous (not verified) on Mon, 04/24/2017 - 07:11

Super simple build! Thanks for the plans!

Built from Plan(s)
Estimated Cost
$120 for wood (per sofa), $12 for screws, $25 for water seal, $150 for cushions (per sofa)
Estimated Time Investment
Day Project (6-9 Hours)
Finish Used
Sanded with 120-grit sandpaper, two coats of Thompson's Water Seal (transparent).
Recommended Skill Level
Beginner

Comments

Littlest helper tower

Finished this over the weekend and put it into service....our grandson loves it! I did add a level for him to sit at the counter!!!!

Comments

C Sofa Table

I built this as a side table to eat tv dinners on. I put felt on the bottom instead of wheels.

Estimated Time Investment
An Hour or Two (0-2 Hours)
Finish Used
Stained with Minwax Jacobean and then added 4 coats of polyurethane
Recommended Skill Level
Starter Project

Comments

pallet coffee table

Submitted by witz on Tue, 01/27/2015 - 18:39

Built this project almost entirely of reclaimed pallets. I was able to keep the one skid almost entirely intact for the top and salvaged to 1x4 boards from the other skid for the bottom shelf. Th 2x4's came from yet another skid. My total investment was about $2. Finished with American Walnut stain and a satin polyurethane.

Estimated Cost
$2
Estimated Time Investment
Day Project (6-9 Hours)
Finish Used
American Walnut stain and varathane diamondcoat polyurethane in satin
Recommended Skill Level
Intermediate

Comments

witz

Sun, 02/01/2015 - 09:45

Thank you very much! I actually did end up selling this one within a few hours of posting it online.

I find these types of projects to be the most gratifying as the force me to exercise my creativity more than some other projects.

clout18

Mon, 02/02/2015 - 13:41

Do you have the specific plan list that includes supplies, dimensions, etc.?

Sage the Blind Lab's Rustic X Consol and Matching Coffee Table

Submitted by Anonymous (not verified) on Thu, 04/27/2017 - 13:32

Our Tv veiwing area was a disaster. I found the console plans on ana's website. I had no Idea what a Pocket Hole was until I bought my lumber and a Kreg Jig. This was the result! Had so much fun I made us our first nice coffee table. Great plans, Thanks Ana.

Estimated Time Investment
Week Long Project (20 Hours or More)
Finish Used
Stain and Wipe on Poly
Recommended Skill Level
Intermediate

Woven Back Bench, Chairs, plus a table

Adapted the woven back bench plan into two chairs. Talk about a ton of pocket holes!

Table with a small propane gas fixture.

Built from Plan(s)
Estimated Cost
$110
Estimated Time Investment
Weekend Project (10-20 Hours)
Finish Used
Olympia Elite Rustic Cedar outdoor stain, single coat so far.
Recommended Skill Level
Intermediate

Comments

I Built The Farmhouse side table (Large)

Submitted by nekeroom58 on Sat, 04/17/2021 - 20:10

I had fun building this side table it took me one day to build it. I didn't sand it or stain that's how my daughter wanted it. I used pocket holes on the bottom shelves and the tabletop.

Built from Plan(s)
Finish Used
none

Comments

Rectangles Daybed

Submitted by jlitt814 on Sun, 03/24/2013 - 19:37

This my first time to make something (almost) completely myself. I did all the cutting and assembly of the rectanges with some supervision from the husband. He then helped me assemble the rectangles on to the 2x2's and to put the daybed together in the room. This took about a 2 days and cost about $75. The worst part was the painting in my opinion. I love the final product though and can't wait to try another project!
I did modify it slightly by making the dimensions 3 inches longer and 5 inches taller to accomodate a trundle bed underneath.

Built from Plan(s)
Estimated Time Investment
Weekend Project (10-20 Hours)
Finish Used
Primed and painted white.
Recommended Skill Level
Intermediate

My Extra Wide Simple Dresser

Submitted by adpeters on Thu, 02/05/2015 - 18:35

This is the first dresser that I have ever made. There was a learning curve, but not much. It was a lot of fun and I hope you enjoy it!

Built from Plan(s)
Estimated Time Investment
Weekend Project (10-20 Hours)
Finish Used
Egg White Paint with Minwax® Polycrylic® Protective Finish on top
Recommended Skill Level
Beginner

Comments

nvadrevu432

Tue, 02/16/2016 - 10:40

what kind of wood did you use to build the drawers? i have used 1X6 and 1X8 as per the plan and the drawers dont fit in the frame. sliding doesnt work properly. plewase let me know, thnks 


Stained Full for Daughter

Submitted by Anonymous (not verified) on Wed, 05/03/2017 - 10:22

This was my very first woodworking project that didn't involve making a sign or wooden cutout; so very gratifying to see it all come together.  I enjoyed adding some simple touches from other users (planked head/footboard) as well as my own (router ogee cut around the head and footboard tops).  Very happy with how it turned out and we will see how well it sleeps!

Estimated Cost
$400
Estimated Time Investment
Week Long Project (20 Hours or More)
Finish Used
Stain with Poly
Recommended Skill Level
Beginner

Kids picnic table

Submitted by Markb25 on Fri, 04/23/2021 - 23:33

I needed a picnic table to go with a playhouse I built for my daughter, this one is a modification of one saw on here with a few amendments. the original plan has the top from 6x6 in a traditional looking row and the seats also from 6x6 however, finding a straight piece of 6x6 in Cyprus is like trying to find a unicorn so I opted to use 2x4, I also decided to change the look of the top give it a solid edge all around. We can't get Cedar etc over here so I've had to use Nordic fir treated with high protection wood stain by V33.

Estimated Cost
150
Estimated Time Investment
Afternoon Project (3-6 Hours)
Finish Used
High protection wood stain in Walnut by V33
Recommended Skill Level
Beginner

Comments

Seasonal And Holiday

Chris's Modified Washer/Dryer Pedestals

Submitted by MxChris on Sun, 02/08/2015 - 18:30

I ended up making three sets of these pedestals this month!

One set was for my In-laws, one for a friend and finally one for us. The two sets I gave away have a 12.5" opening underneath to accomodate two laundry baskets stacked inside each other for a total of six which is pretty good for most households. Our pedestal could only have a 9" opening due to the overhead cabinets in our laundry room so the shelf will not accomodate standard laundry baskets which is kind of a bummer.

I kept one pedestal fairly minimalistic because it's going into a laundry room off an outside patio, I added a bit of quarter round trim all the way around the top edge to act as a guard rail just in case the washer or dryer tries to travel off the platform.

The other two I trimmed out identically they just have different post heights to fit the space they are intended for. I used a little more trim than on the first pedestal, I believe it's window sash trim. Just as on the first pedstal I wanted a guard rail of sorts so I left the window sash trim with about a 1/4" reveal on the three visible sides and used quartter round on the back.

I used a very heavy black rubber runner I found at Home Depot which is sold by the foot on top of each pedestal as an additional water barrier and vibration dampner. I think this finished it off and really works well, I'm very glad I decided to add that.

My version was inspired by Ryans modification of the original plan so thanks to Ryan and Ana for these awesome pedestals, my wife, In-laws and friend love them!


Estimated Time Investment
Week Long Project (20 Hours or More)
Finish Used
Two coats of Kilz primer and two coats of Behr Premium Latex paint + Primer (eggshell color)
Recommended Skill Level
Beginner

Comments

zoolander

Wed, 06/29/2016 - 14:17

Glad I could help.  Yours turned out great.  I should have thought of creating more than one while I was doing it.  Every time someone sees them, they ask me to make them one.  Ain't nobody got time for THAT!  :)

bclute

Sun, 01/29/2017 - 17:29

Thanks for sharing the detailed information of your builds.  It's been a while since you built, have you noticed any sagging?  They look solid!