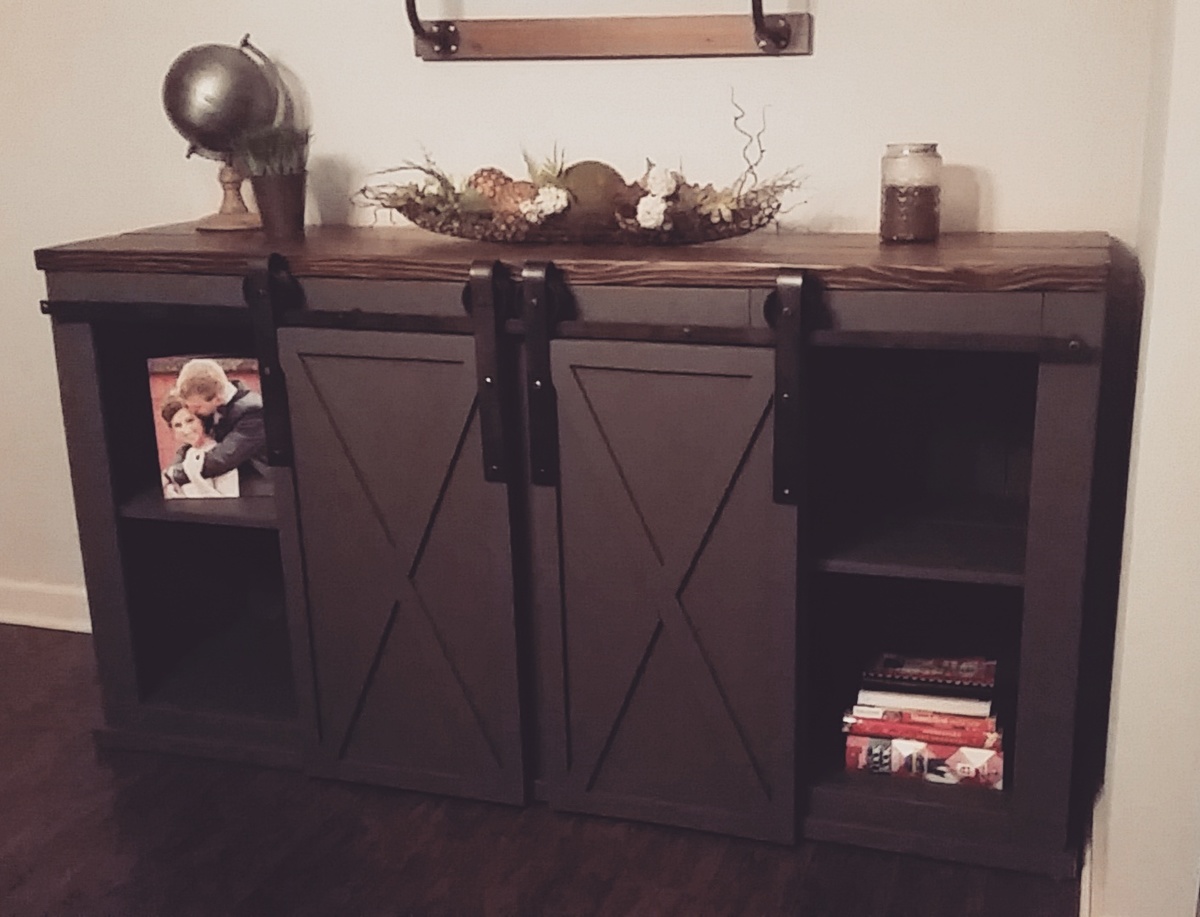
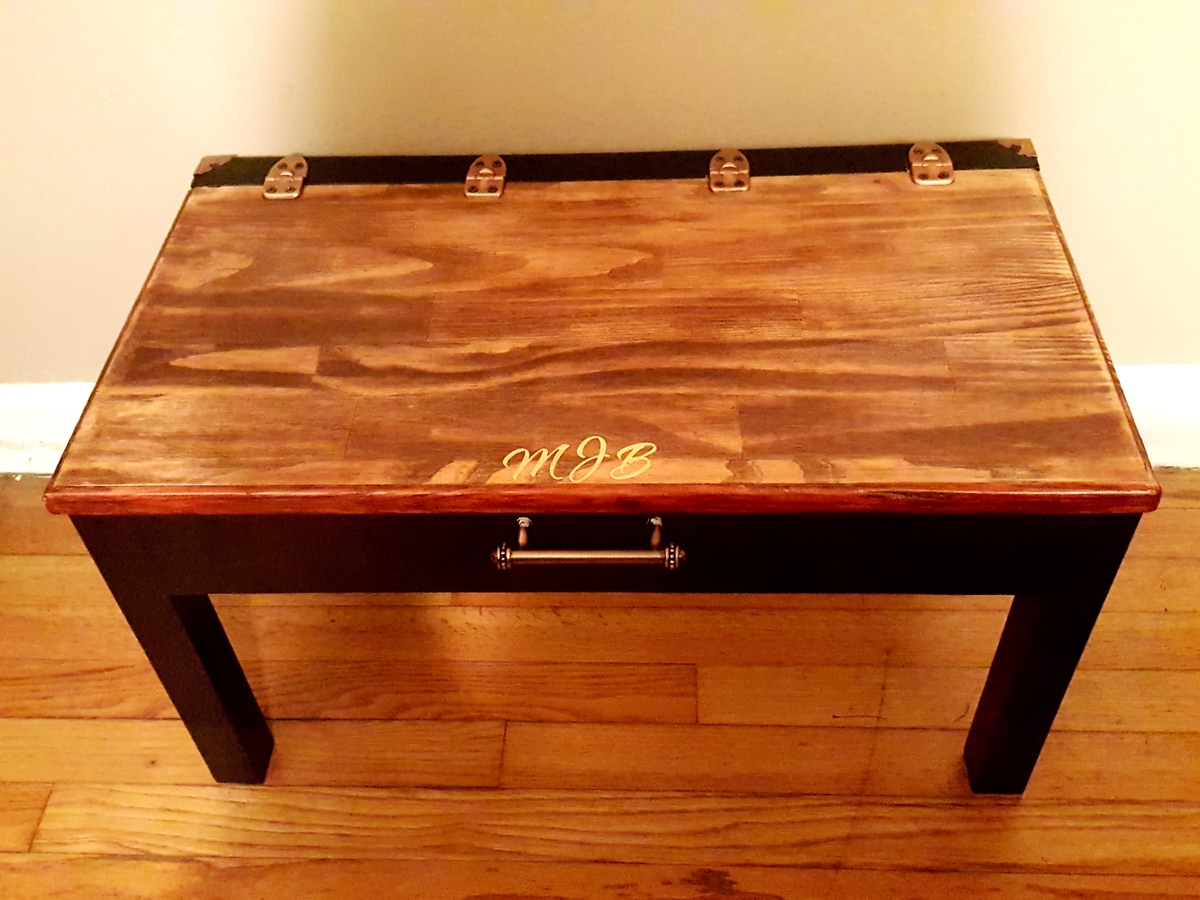
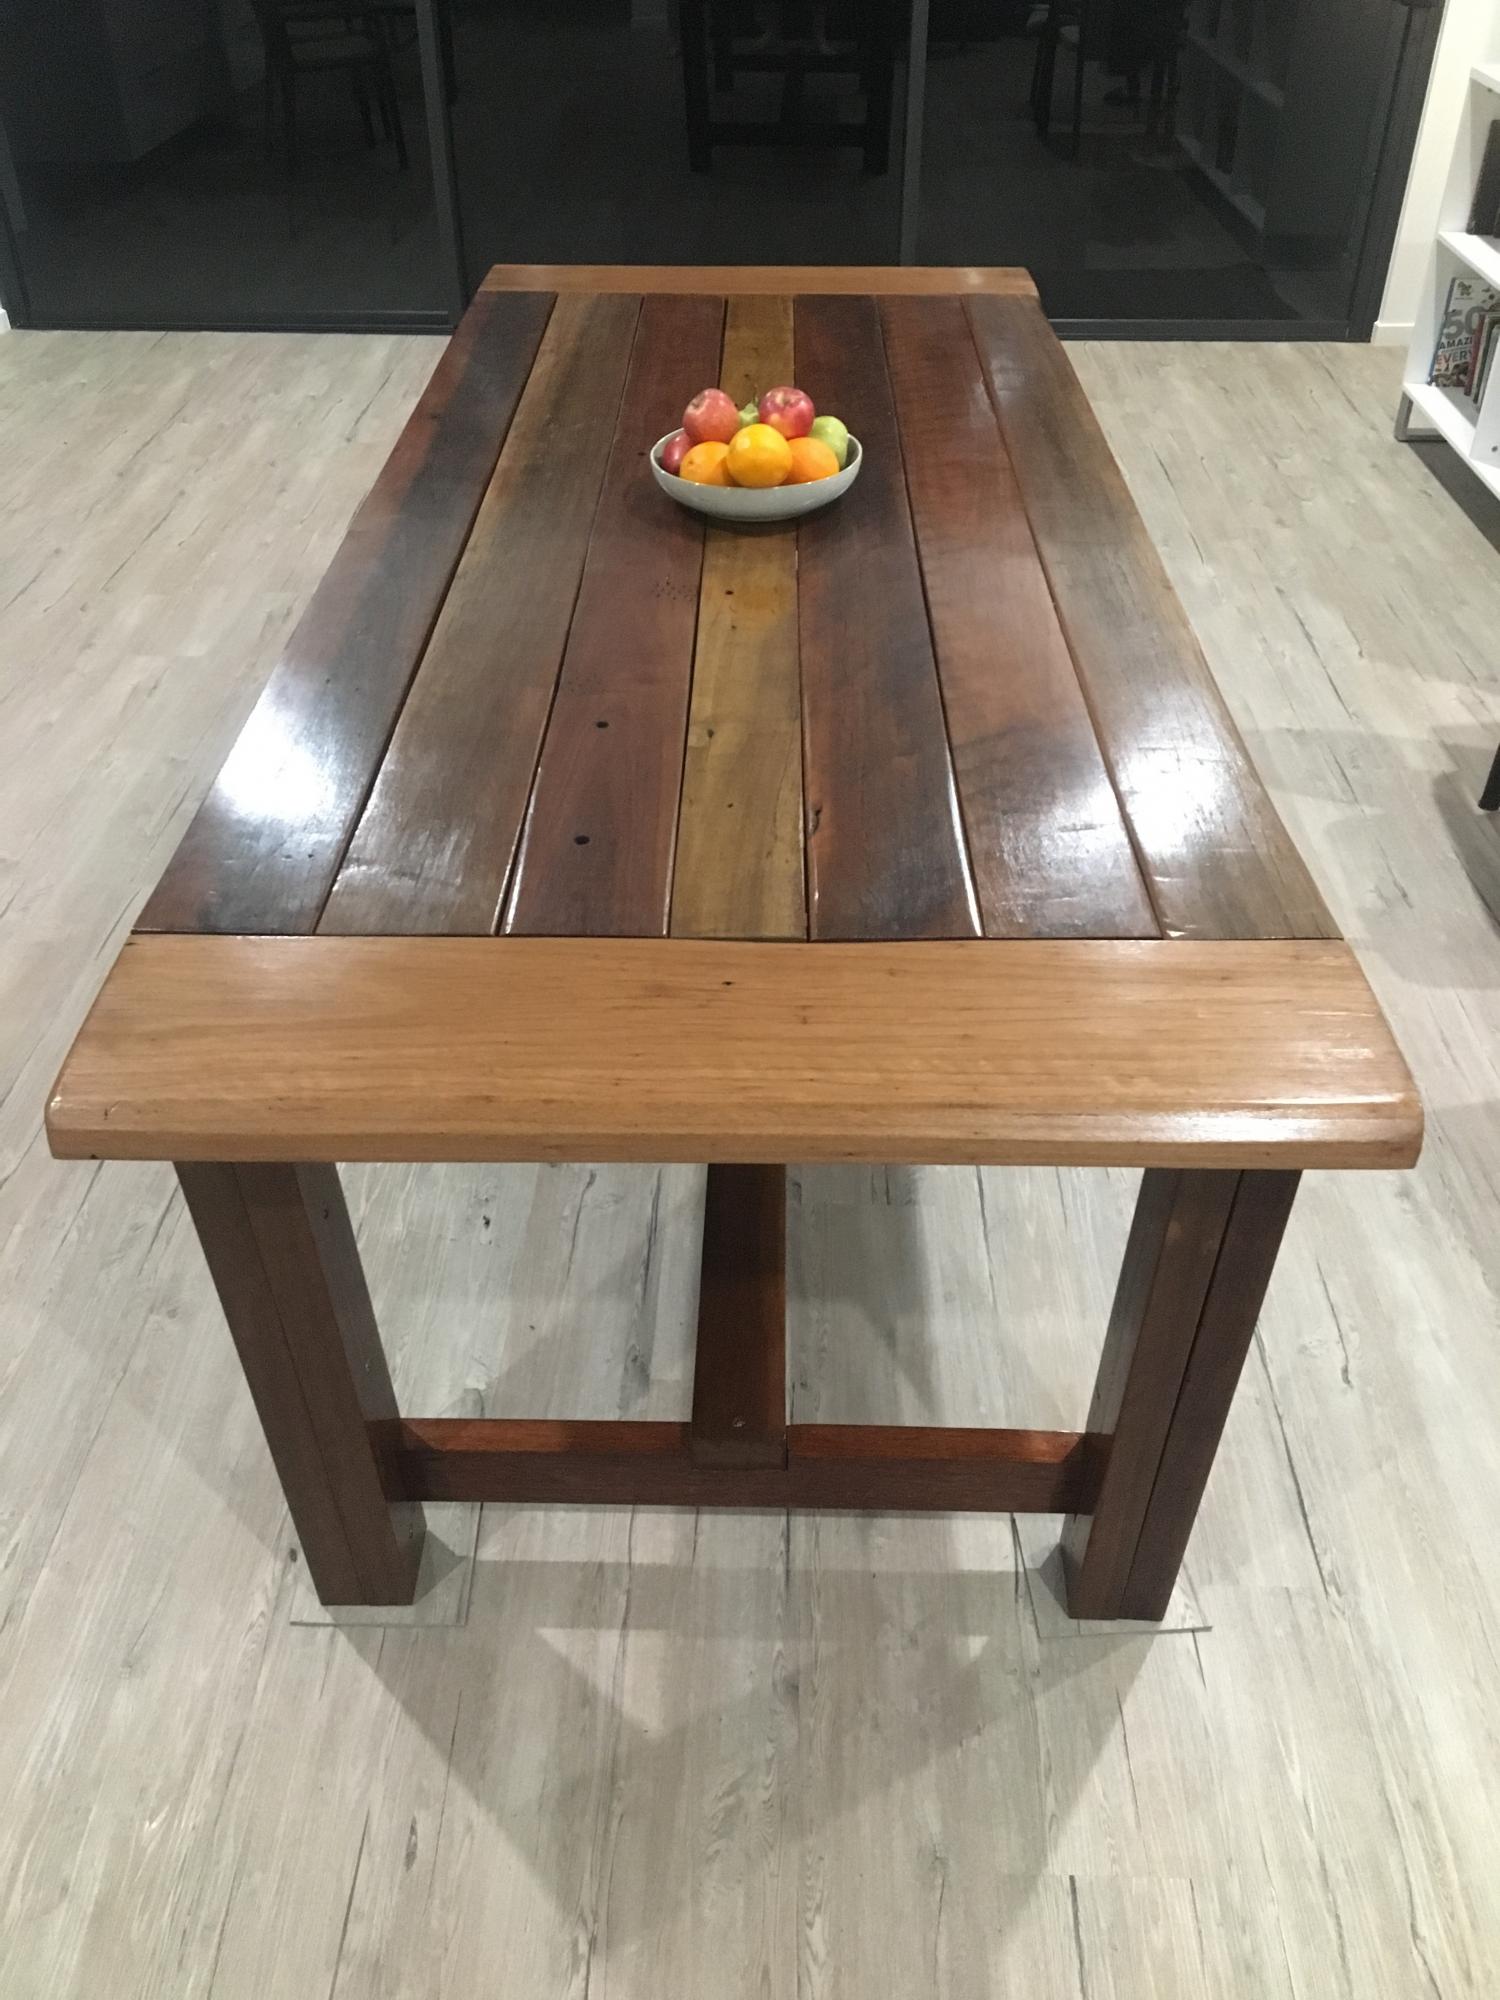
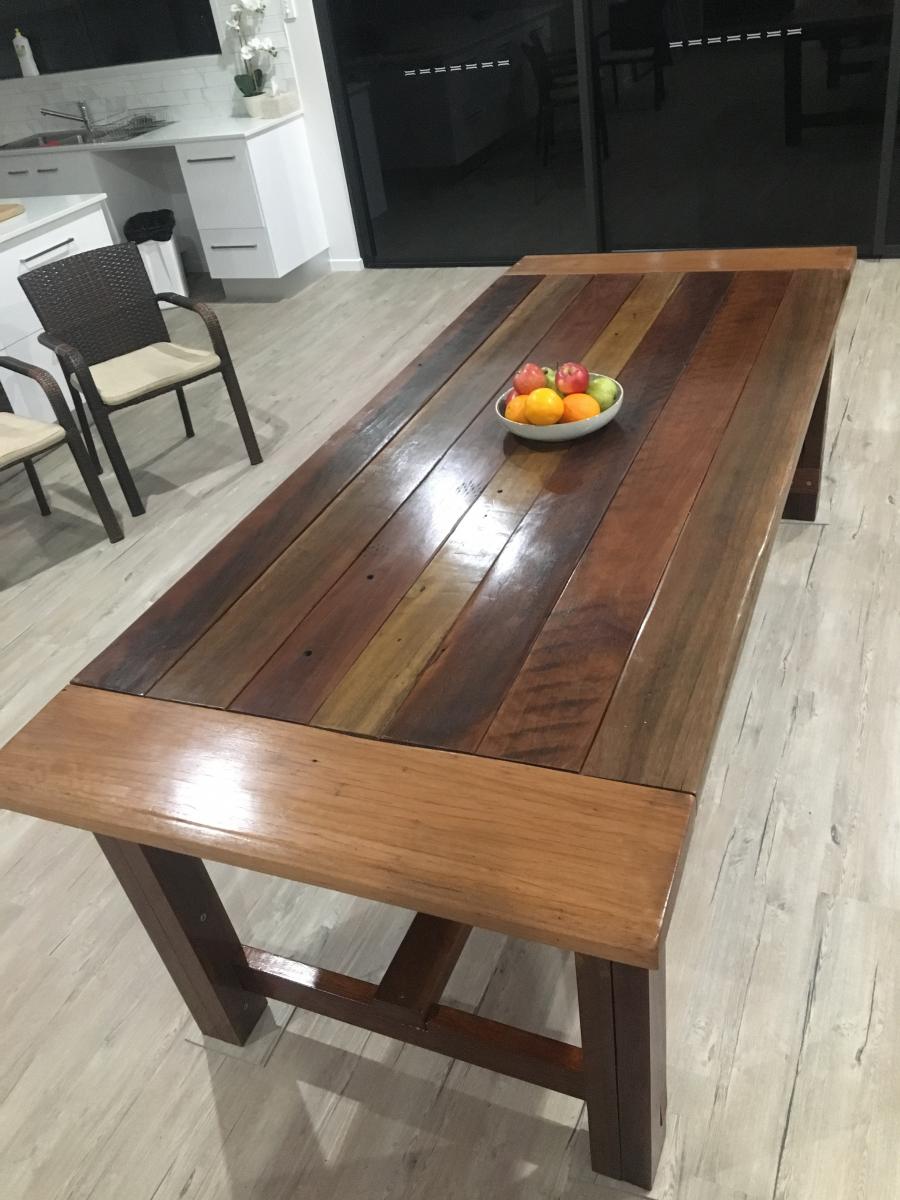
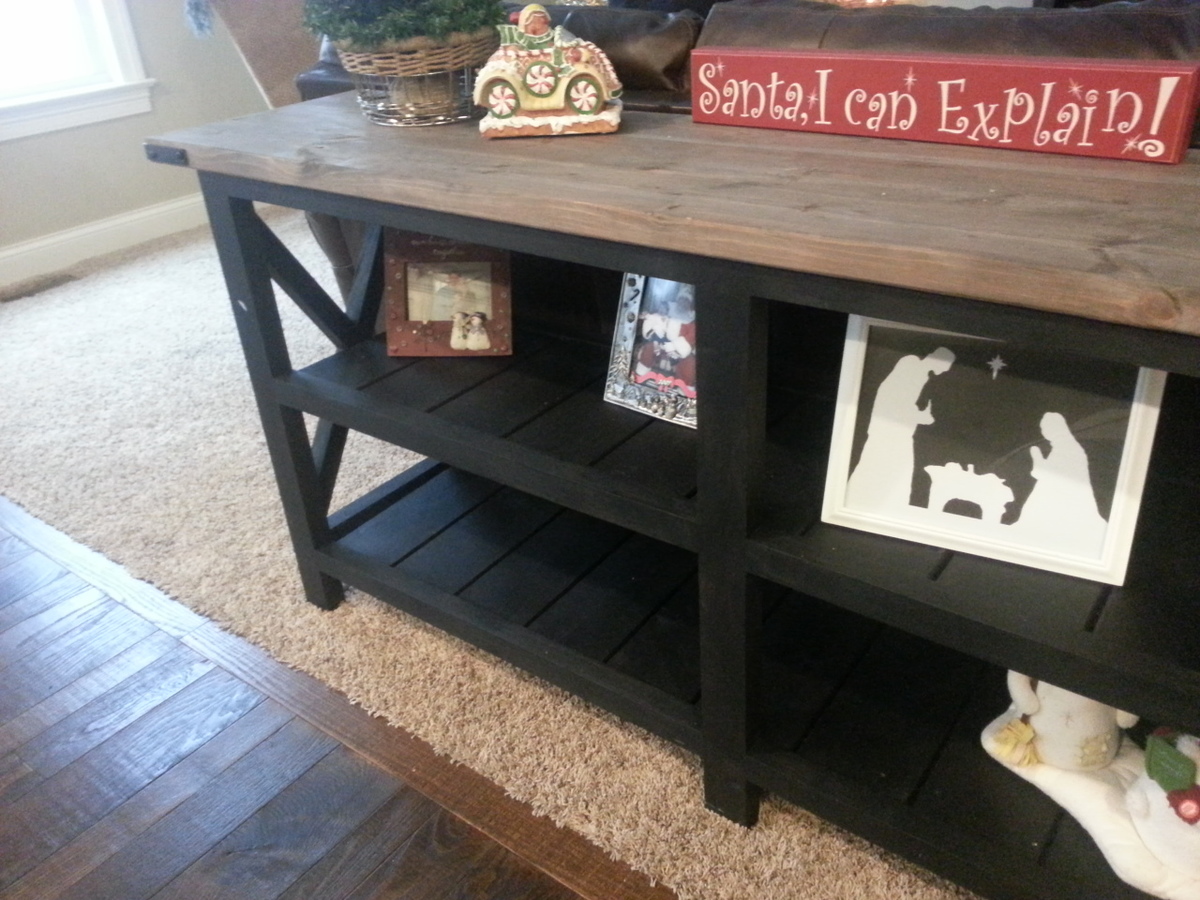
Farmhouse Table
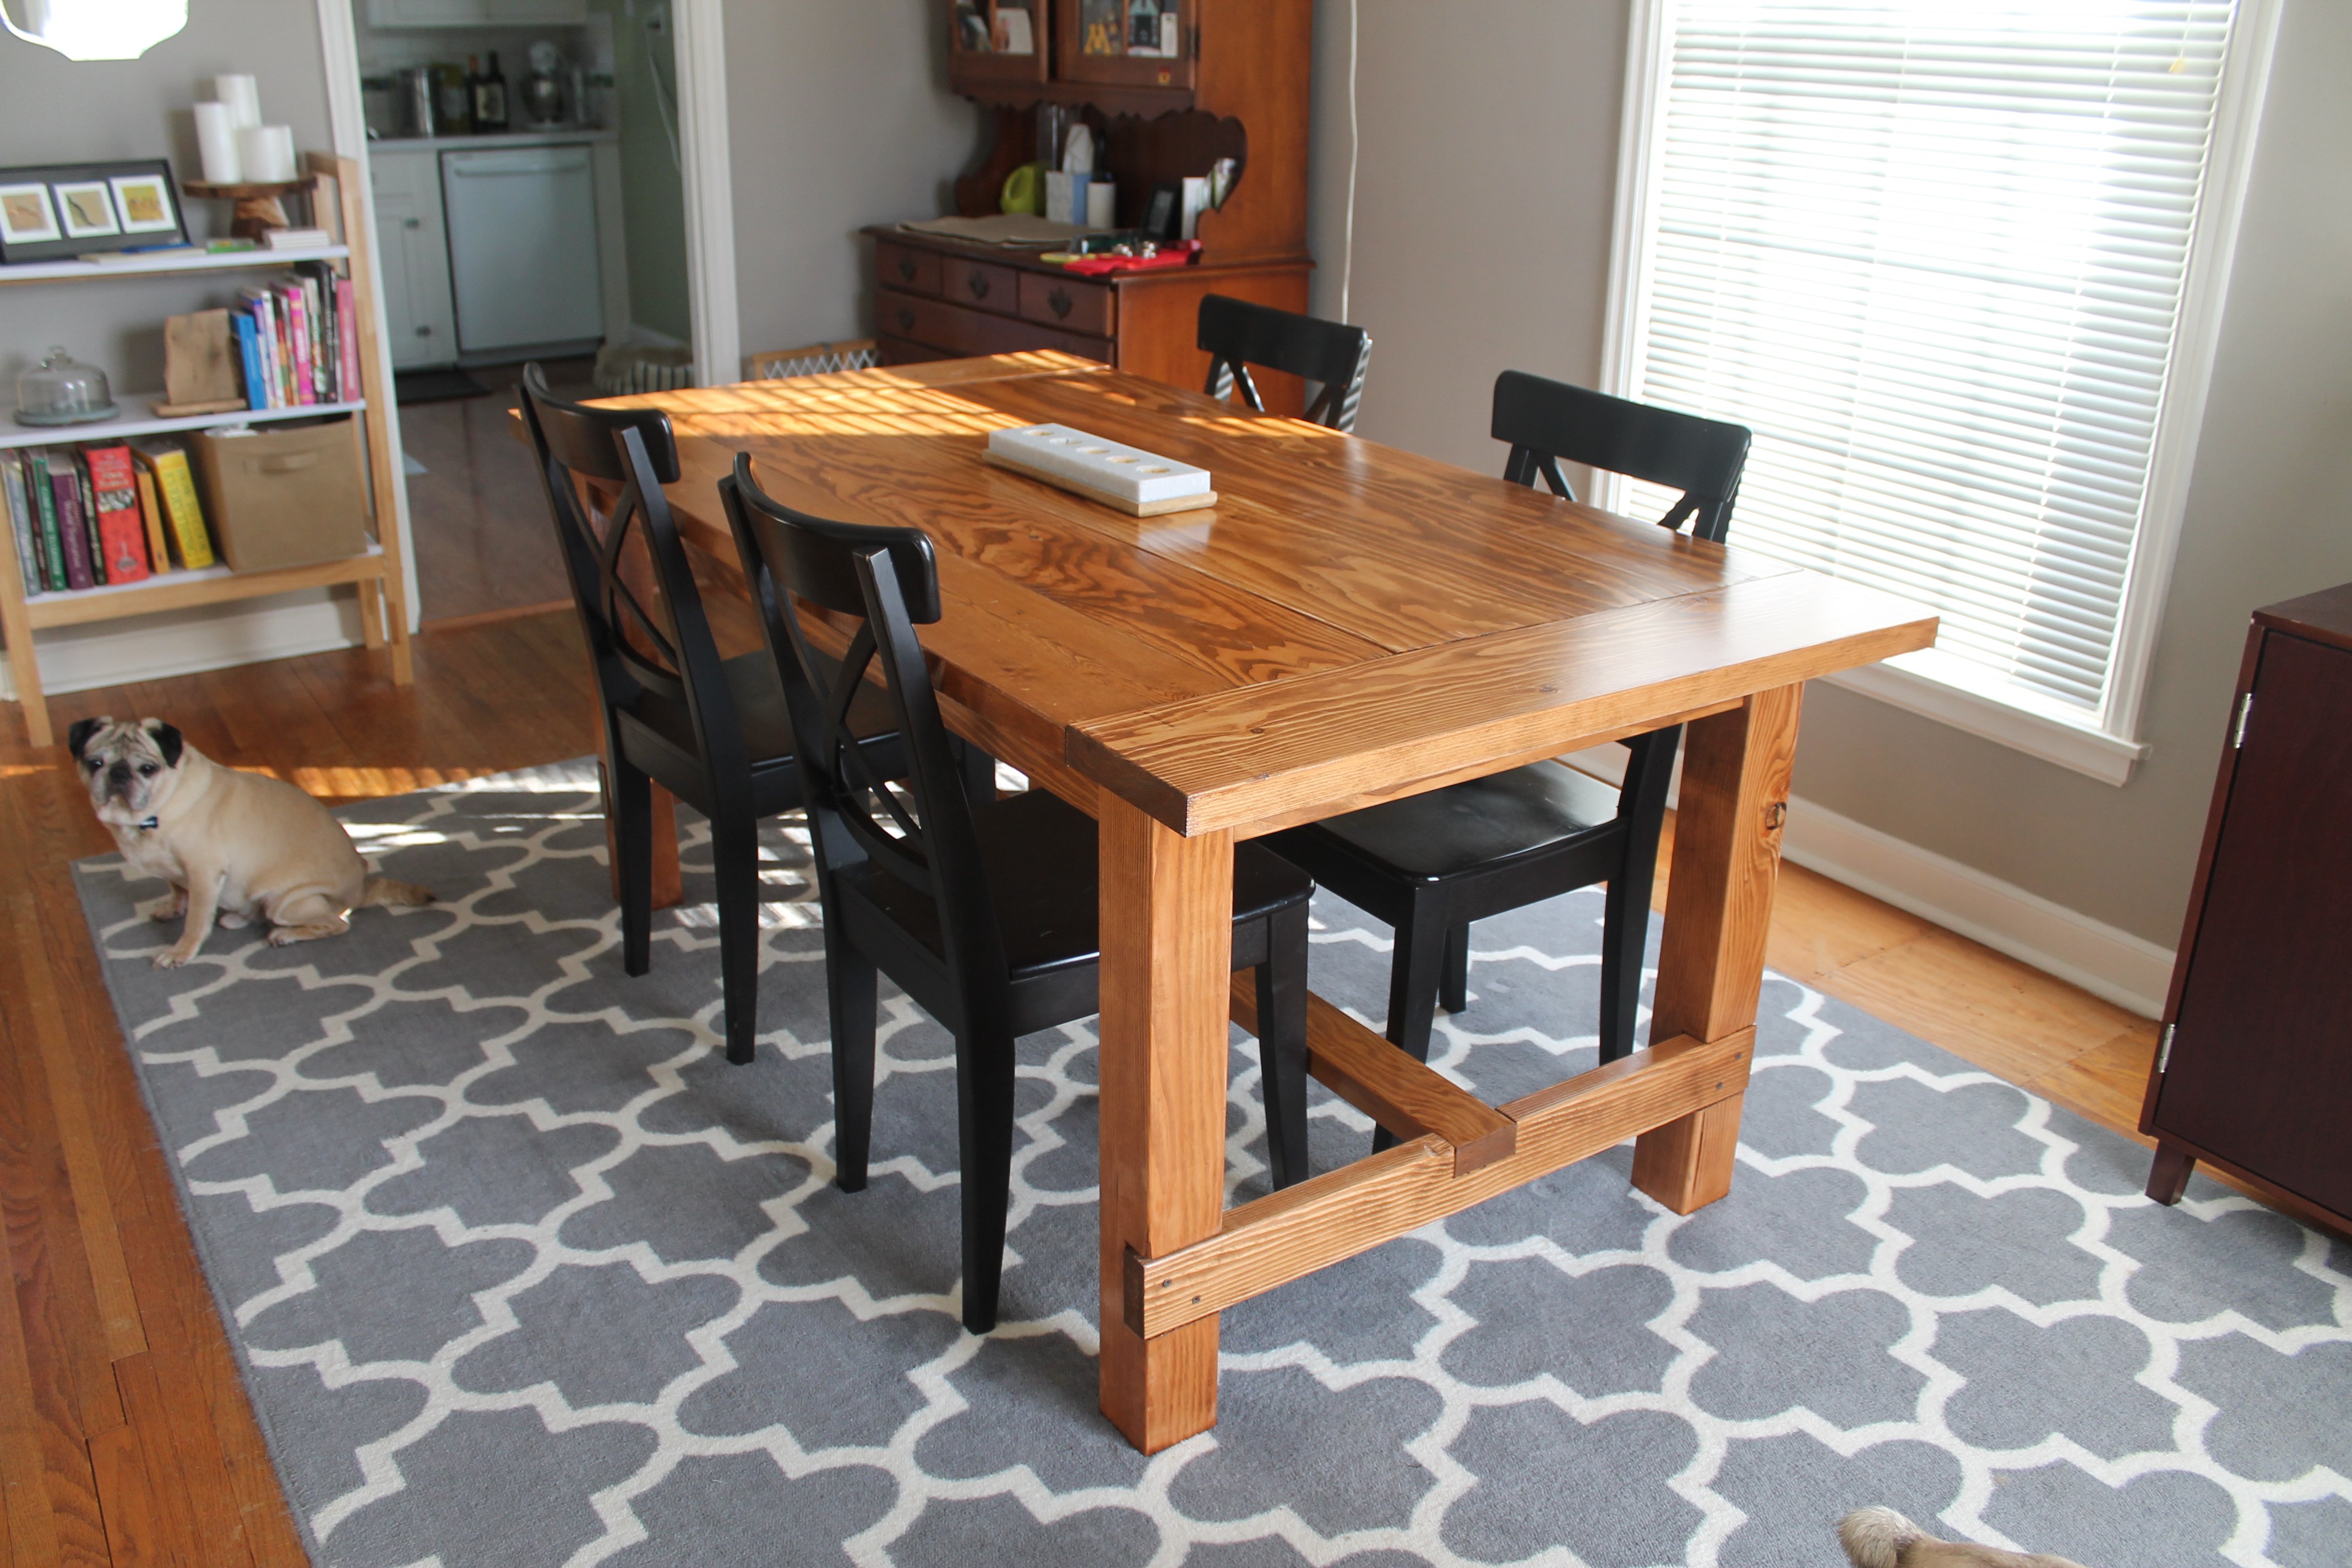
This version of the Farmhouse Table was made with fir and finished with Varathane Early American stain. It is by far my favorite item in the house! Love it!
I used the hanging bed plans to do a hanging bed that's attached on one side to the wall. Then created a ladder and side rail.
I haven't done much wood working but I found Ana White's plan and followed along with her video. Was able to easily assemble this beautiful table in one afternoon. Next step, sanding and finishing. I'm definitely going to try more projects.
This is my first woodworking project ever. I didn't like the numbers in Ana's plan so I changed it up a little for my taste. I also made this to sit on my desk and added felt to the bottom so that it wouldn't scratch the surface when my kids moved it around. It probably should have only taken me an hour but I was having issues with the brad nailer and not nailing straight.
This is the first project of any kind I have built from the Ana White website. It is for my grand daughter (her 1 year birthday present)I built this project from the large covered sandbox plan. I followed it pretty close to the original plan. Cut the wood at my home and then packed it in my SUV to be assembled at the grand daughter's home 30 miles away. It turned out great. Mom and Dad just need to get the sand out there now and we are set to go...
Fancy hall tree
Hi Ana,
I got your plans online as I always wanted to build a small, simple greenhouse - these plans were excellent, easy to follow and the job went way quicker than I thought. I did the work myself, so, even though 2 people would have really helped, some judicious use of clamps did the job.
I used deck blocks and standard deck flooring. This raised the structure up, as the low lying ground has a tendency to flood in the spring melt and I used old metal baseboards and leftover flashing to fasten a metal skirt to the structure to keep animals out. A bit of spaypaint to match the metal to the gravel. The wire shelving was inexpensive and I managed to get all of it from a local Habitat for Humanity store. The door I made from leftover wood from another project and some leftover cuts from the metal siding. I didn't need any special tools, but did use the project as an excuse to buy a Kreg Jig, which turned out to be really useful.
Mon, 09/02/2019 - 10:51
Wow, this is an amazing greenhouse! Everything about it, from the gravel pad with retaining wall blocks, to the finished door, is just spectacular. Thank you so much for sharing a brag post!
Mon, 09/02/2019 - 18:43
This is amazing, which plans did you use? I'm getting ready to build a greenhouse early next year, and was thinking of doing a pvc pipe structure with the panels like you have, but your post is inspiring me to go with the wood frame.
Loved this plan from Ana. Easy to follow and looks great. 100% reclaimed cedar.
Thu, 05/11/2023 - 19:39
Awesome build, thanks so much for sharing!
My husband and I worked together to build this project. We built the bottom in November 2010, then built the top hutch in January 2012. The project itself was easy to understand, but holding everything together and getting it square took a bit of work. We do not have a Kreg Jig or clamps, either of which would have been very helpful. However, we were able to complete it using our own best efforts, and we are very pleased with the results.
Sun, 01/08/2012 - 10:27
I regularly sit on the front of it when our living room gets too crowded. I'm sure I wouldn't do that with a store bought flat pack tv stand!
I was drooling over Ana's Faux Fireplace plan and it was perfect! Low profile, beautiful, and I knew I had to have it. We had a bunch of leftover 3/4" MDF and didn't want to spend any money on this project so we constructed the Faux Fireplace out of ripped MDF, a leftover 1x6, 1x2 and some quarter round! We made the faux beam top out of 1x4s as a slip cover that mounts to the wall.
We painted it with the off the shelf antique white paint by valspar that I had leftover and some "American Walnut" stain for the top. I painted the wall behind it in black chalkboard paint. This is the first piece of furniture we've made that pretty much serves NO function but I love it sooo much.
I put a basket in the opening with some christmas lights, burlap and chunks of 2x2s (I want some birch logs in there!) and they look pretty lovely when plugged in.
In reply to Marvelous! by JoanneS
Sun, 11/24/2013 - 16:49
Thank you! we soooo love it!
The plan was cut down to 6ft. This took a few weekends, in order for all the parts to come together (waiting for the hardware, waiting for someone to cut track, etc).
Bought a double door hardware set on eBay for $120 (including spacers and bolts), without the track included. If buying the hardware, consider the size of the hardware you are buying in the overall design!
Tue, 02/09/2016 - 14:33
Very nice work!! I was eyeballing this project myself a week ago, yours came out very clean!
I built this using the plans from here as a base and then made some alterations and added things i saw from different builds and added my taste to a few things.
Shou sugi ban burning of the pine roof and then a cherry stain. I added much more trim than the original plans called for. I put baseboard and trim in each sections of every room. This added about 30 hours to the build. Then the difficulty trying to use painters tape on such small trim. Took about another 5 hours. I used birch plywood with the intention of staining but only decided to stain the outside and the floors and then polyurethaned the floors to look like hardwood floors. Touch lights added to each room. Each room was primed white and then painted a different color per the kids request. We spent about 700$ on the nicer plywood and all supplies when all was said and done. Another $300 to furnish the rooms. I would estimate over a hundred hours spent over four months of work on this project.
I made this tall planter for my Mom for Mothers Day. She loves it!
Thu, 05/18/2023 - 07:33
I bet she loves it, fantastic job! Thank you for sharing.
This was my first build! I do enjoy this bed unfortunatly i found ana's blog just after i had built it. next time i build a bed i am totally building the farmhouse bed to match the farmhouse nightstand i also just built and will post. hopefully ana in her busy life will find time to post a plan for a farmhouse tallboy dresser to match!
Built this media center for the den. I had to resize all the pieces smaller to fit the console between two doorways.
This lap desk was easy to build, it took me less than 2 hrs. The painting and finishing...um, a bit longer. I really hate painting, and filling nail holes is not my favorite thing to do, either. But overall I am glad I built this little desk, as it will keep all of my beads and jewelry-making stuff handy for when I am sitting in front of the tv at night. The side storage compartments were omitted to keep it on the lighter side, and the front handle serves no purpose whatsoever, it is purely decorative. I added my initials on the top, they are just fancy gold stickers I found at the craft store.
First Crack at any wood work since high school. All timber used was reclaimed hard wood, hours of
planing,sanding and clamping (its heavy). A few mistakes but that's learning.
I've wanted chickens for a long time and loved this chicken coop plan. I used lots of salvaged materials so made minor changes in dimensions to use what I had and I absolutely love this! Probably took me longer to build than it should have but the Houston weather was not in my favor....
This was the plan that started my addiction! We had just gotten new mattresses, and we needed a new bed frame. All of the furniture stores have dark stains, and we wanted something natural and bright. I was searching one night found your site, and that was it. A few changes, increased the height of the headboard and footboard, wanted a slight overhang on the top of each as well. Also added an additional 2x4 between the legs of the headboard for support.
Wed, 01/11/2012 - 17:15
That looks great! The natural finish looks really great with your bedding. I love the higher headboard - we're planning to do the same with the farmhouse bed I'm planning so that my husband will be able to sit up in bed without hitting the back.
Did you end up using the boxspring, or is the mattress just in slats? I couldn't tell from your picture.
Wed, 01/11/2012 - 18:23
Hi, thanks for the positive response :) The mattress and box spring both are on here. In fact, I kept the bed itself on the original metal frame below, and added the side rails to hide it. Purchased the hardware for the side rails from Rockler
Fri, 01/13/2012 - 08:42
All I can say is wow. Definitely showing this to my wife today. We had plans to do something like this but yours is up up and away! Excellent job!
Fri, 01/13/2012 - 15:48
I'm glad you like the lights. I go back and forth on them. I hated that I had to drill holes into the wood to run the cord, as it does not give us the option to remove later on. Also, if you go with the lights, you might want to put some double sided tape on the back. Thanks!
Tue, 04/03/2012 - 09:41
My husband just forwarded me a link of your bed.
It is SO SO beautiful!!! Love the reading light. Where did you get that by the way?
The bed is so pretty. Love the natural wood look and the knots.
We too have mostly dark wood stain in the house and love this light color look. Did you stain it or coat it with something?
Sat, 04/28/2012 - 15:26
Hi Moldah,
Very impressive and great addition with the lights. Can you tell me how tall your final headboard and footboard are? Thanks.
Sat, 06/16/2012 - 04:46
LOVE IT! I love doing things like this and I am inspired by seeing your pictures!! I am especially impressed with the Star Wars case noted on your endtable LOL Right there I know you have great taste in films, too!!! I am going to do this project! Great job!
Wed, 09/04/2013 - 17:10
Wow, this is so beautiful! Great Job! We are very amateur builders and I had a couple questions. Do you have a blog with more details? How did you achieve the routered edges? And also, do you mind sharing the cost of the project? Thanks!
Sun, 11/03/2013 - 08:44
By how many inches did you increase the height of the headboard and footboard? I am thinking about doing the same when I build this bed and was hoping for some guidance.
Sun, 12/18/2016 - 06:00
We don't have boxsprings. How would you modify this plan for that?
This is a sofa table made from 2x6 framing lumber. I did the bottom shelves a bit different than the plan.
I built the Simple Bed into bunk beds. The plans for this project are pretty straight forward. The only change I made in the plans, was use 2" x 4" angle plates to mount the side rails to the head and foot boards. This made it easy to assemble and disassemble if the beds needed to be separated or moved. I also had to use two 2"x4"'s mated together to make the bed posts since 4"x4"'s are only available pressure treated. The ladder is constructed of 2"x4" with the steps spaced 10" on center.
Mon, 02/15/2016 - 19:40
Can I have a url to the angle plates you used ? I am not certain I know what they are.
The beds look great.
Comments
Shaunnyp
Sat, 02/06/2016 - 08:25
modifications for counter height with locking casters
I absolutely love this table. I have a small kitchen and would like to build it counter height (36 inches...including the casters) measuring 30x54 inches. This will allow me to move the table as needed to get it out of the way or move closer to my stove and use as additional prep space as needed. Any recommendations or suggestions to make a safe, sturdy, movable table would be greatly appreciated. Also any warnings if you see any potential pitfalls I should be concerned with. Thanks in advance.