Community Brag Posts

Laundry Basket Organizer

Submitted by Lovelace on Mon, 04/25/2011 - 07:48

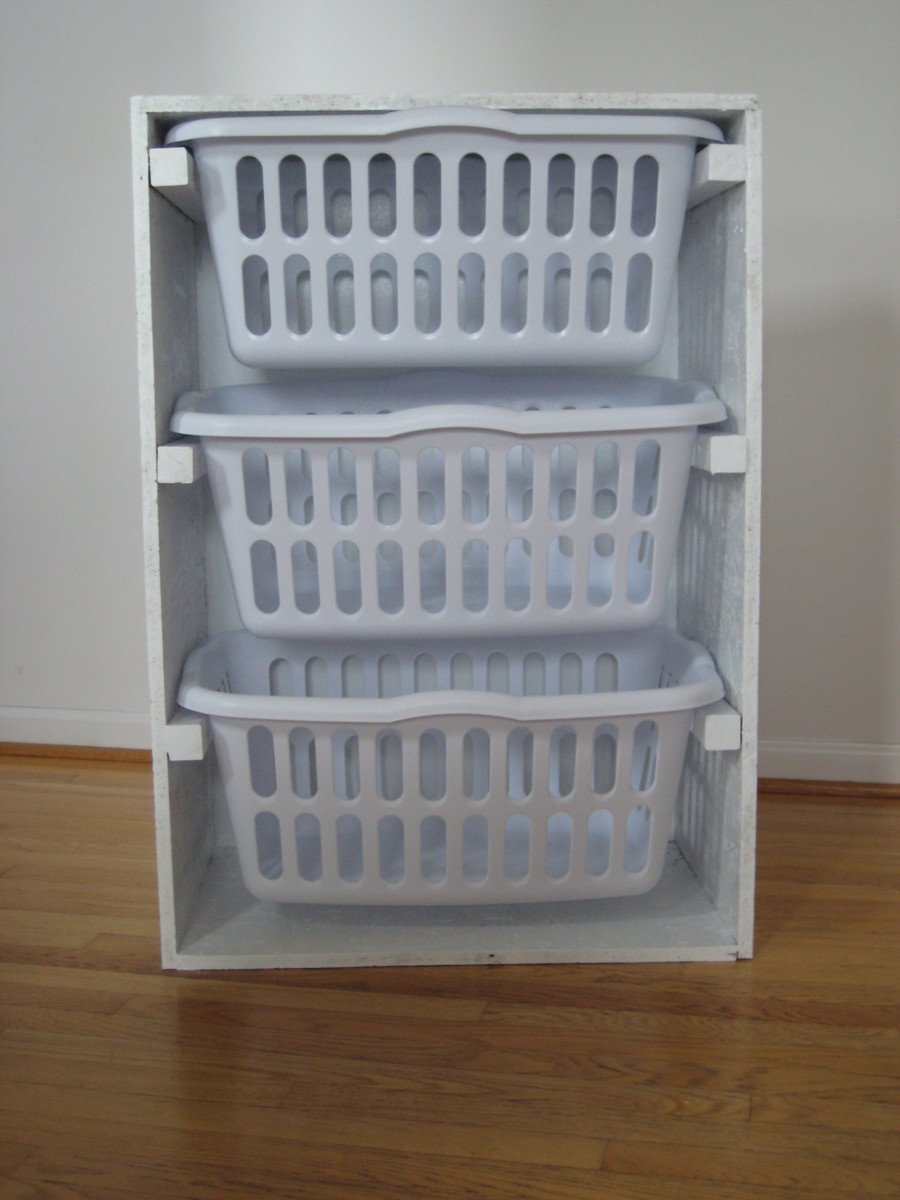
I use this dresser in my walk-in closet to separate dirty laundry...each basket holds either "whites", "lights" or "darks". The size of each basket is perfect for one wash load. I just love how much more room I have in my closet because of it!

Built from Plan(s)
Estimated Cost
$35
Estimated Time Investment
An Hour or Two (0-2 Hours)
Finish Used
I lighting sanded all sides and edges then put done two coats of Sherwin-Williams ProClassic acrylic latex paint
Recommended Skill Level
Beginner

Comments

Trofast Toy Storage Solution

Submitted by CassieD on Fri, 09/30/2011 - 17:27

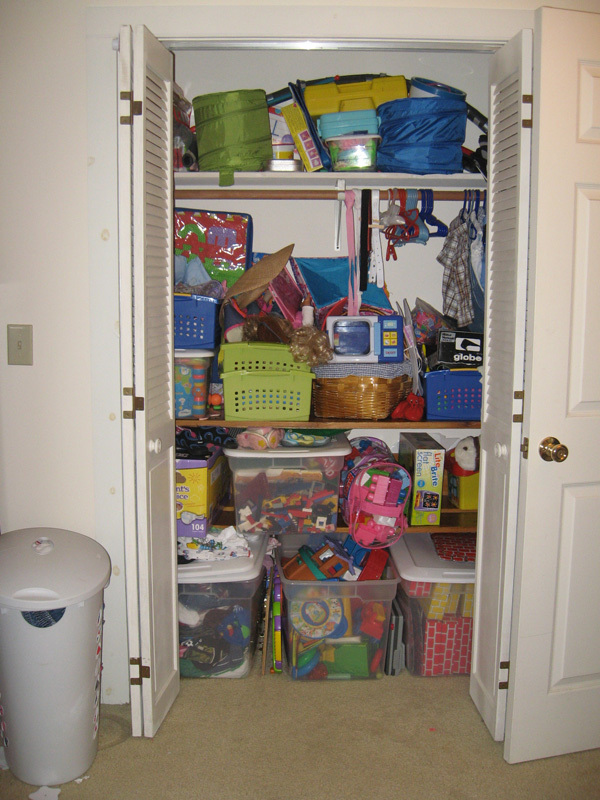
I had been asked a few times for these plans, but as someone else posted a similar one, I'll just stick to a blog post for now and describe my differences. I made this shelving unit January 2010, just after I found out of I was pregnant with my third child, and it's been a lifesaver since then. I desperately needed a toy storage solution (and purging), as shown in the 'eek' kids closet below. I didn't like the shape of triangular Ikea ones, as they spanned more floor space than I cared to give up. Plus, I wanted a place to put *almost* all of my kids toys, so I wanted it to be tall. I'm so glad we did, since we've moved twice (also, 'eek') since than, and it's made packing and unpacking the kids toys super (SUPER) easy. At first, I was afraid that the kids would go crazy and just tear down every bin at once, but it hasn't happened yet. Unlike the other plan that was posted, I used white sliders that ikea sold. I'm not sure if they still sell, as I don't see them online. It cost an additional $24 (they were $1/2), but seemed worth the extra money. I didn't have a router and wasn't particularly confident with our table saw skills. Plus the Ikea version had some really thin areas that made me nervous that it would break easily. I tried to keep it easy and just had to line up and screw the sliders in. Now that I'm a little more confident with a table saw, I'd give the router style a-go. I used two sheets of cabinet grade plywood, each costing about $30. I ripped down some pine boards to cover the front edges, which made the unit look loads nicer. However, I wish I would have used maple, instead of pine as they got dented almost immediately. Not a big deal though. The three shelves were sort of an afterthought, but turned out to be great for puzzles and other type toys. I didn't use backing or cross supports initially, but put some in after we moved. You can see them in the last picture below. The heater in our temporary house caused the slightly-bent sides to become very bent sides. That caused the drawers would spontaneously fall out, which was always quite the shock and disappointment. I put in some supports in the back, which I wish I did initially as it would have made manufacturing easier. Also, If I were to go back, I would put one cross support in the front-middle, as the boards are so tall, it needs something to help maintain the shape in the front. I've found that even in a perfect fitting slider, really heavy buckets would bend just enough to flex out of them to crash... so don't plan on filling one of the large buckets with matchbox cars and sticking it on the top. Regardless, we've learned our lessons, made it work better, and has been a huge success in our house for a while now.
Estimated Time Investment
Weekend Project (10-20 Hours)
Recommended Skill Level
Intermediate

Comments

Supermom77 (not verified)

Sat, 10/01/2011 - 14:22

Great work. Love the colors. Do you have directions on training the kids to put the toys back?

In reply to by Supermom77 (not verified)

CassieD

Tue, 10/04/2011 - 19:42

Haha, I guess a little. Picking up when they aren't motivated is an ongoing battle. However, I did find having a specific place to put items with labels helped a lot, albeit with screaming. Actually the labels would probably be the best motivation of all of it.

The ideal is to have the kids only play with one bin at the time, but with more than one kid, that theory very quickly gets muddled... One child wants to play with one toy and one wants play with another, then "lego houses can't be broken down" and "polly pocket is using those blocks for the house" and so on. So it's more of a end-of-the-day(week/month/year haha) pick-up routine.

However, there seems to be a light at the end of the tunnel. My oldest (almost 6) seems to have caught on that the faster she picks up, the sooner she can move onto other activities besides playing (coloring, playdough, etc.), and is starting to pick up as soon as she's done without us even asking. I think getting an allowance has also helped with that.

That was way more than I thought I was going to comment, but I guess it goes to show you should never ask a Mom her opinion on something, unless your ready for a lecture :)

birdsandsoap

Thu, 10/13/2011 - 21:44

I love that your labels have pictures on them! I thought I should have done that way back when since my children are too young to read. Easy to find and easy to put away. Good job, Mom!

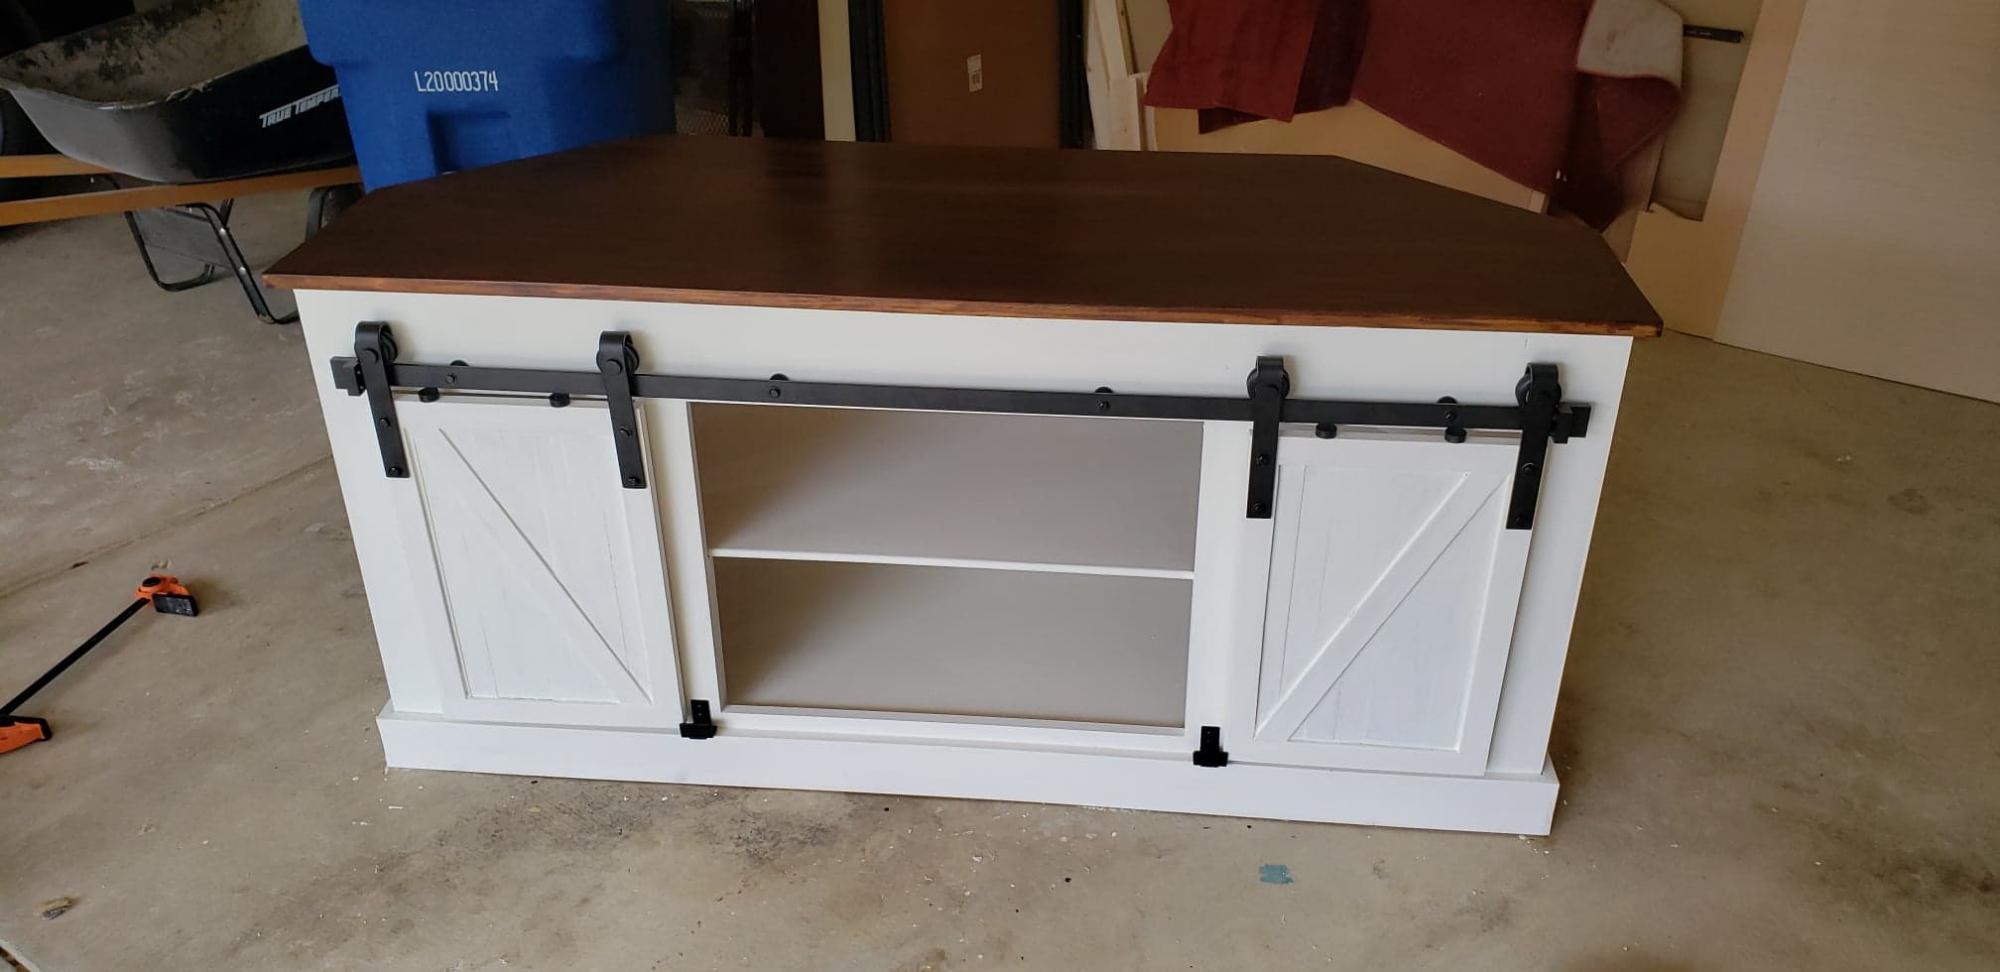
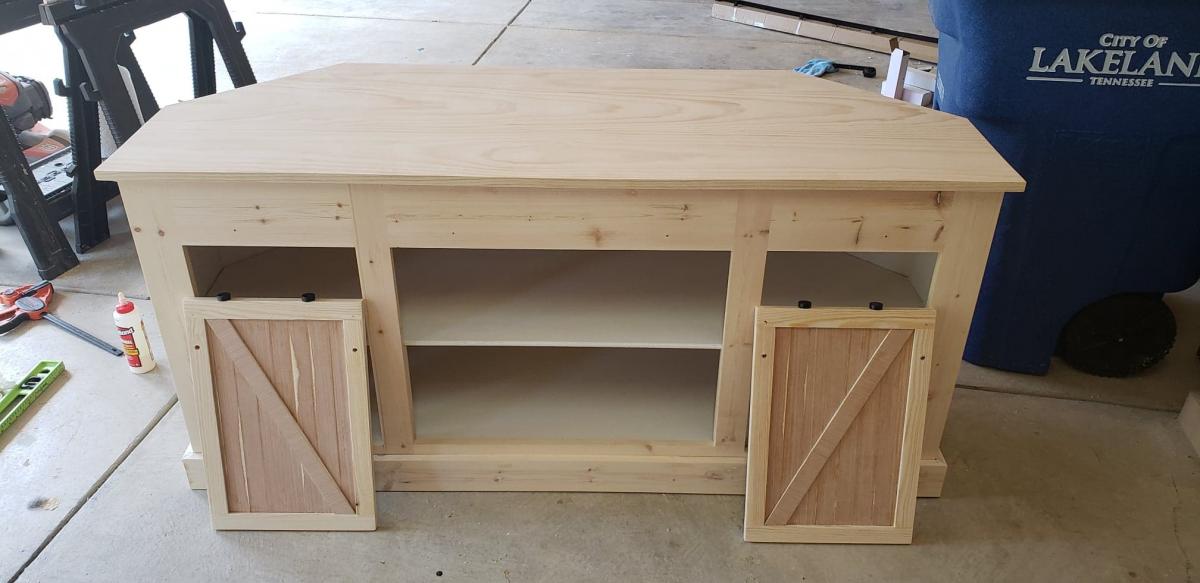
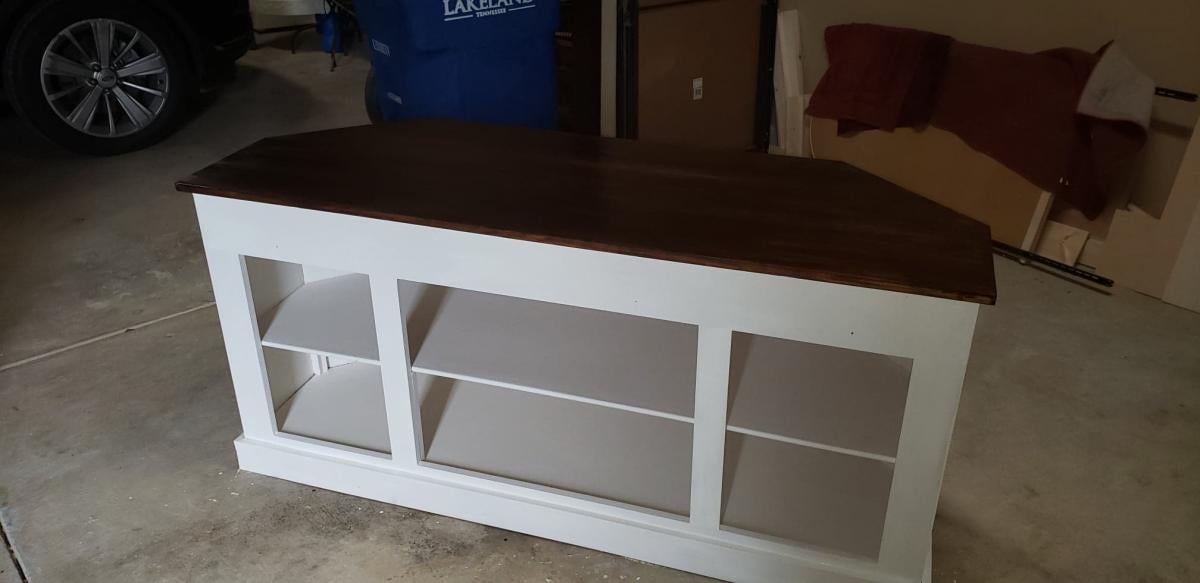
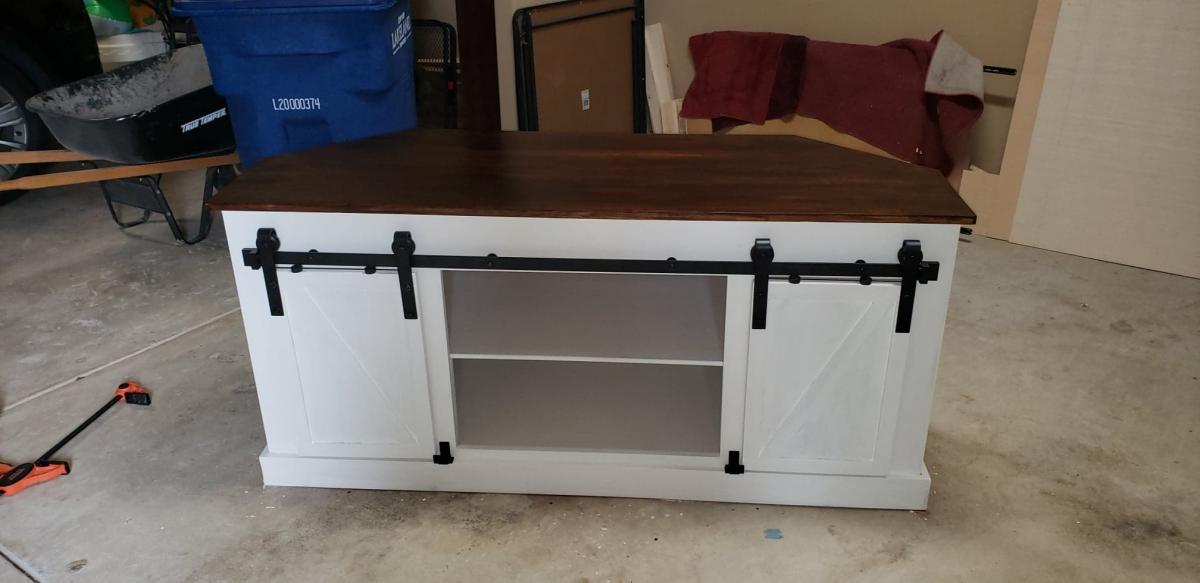
Grandy Barn Door Corner TV Stand

Submitted by Anonymous (not verified) on Wed, 01/08/2020 - 12:46

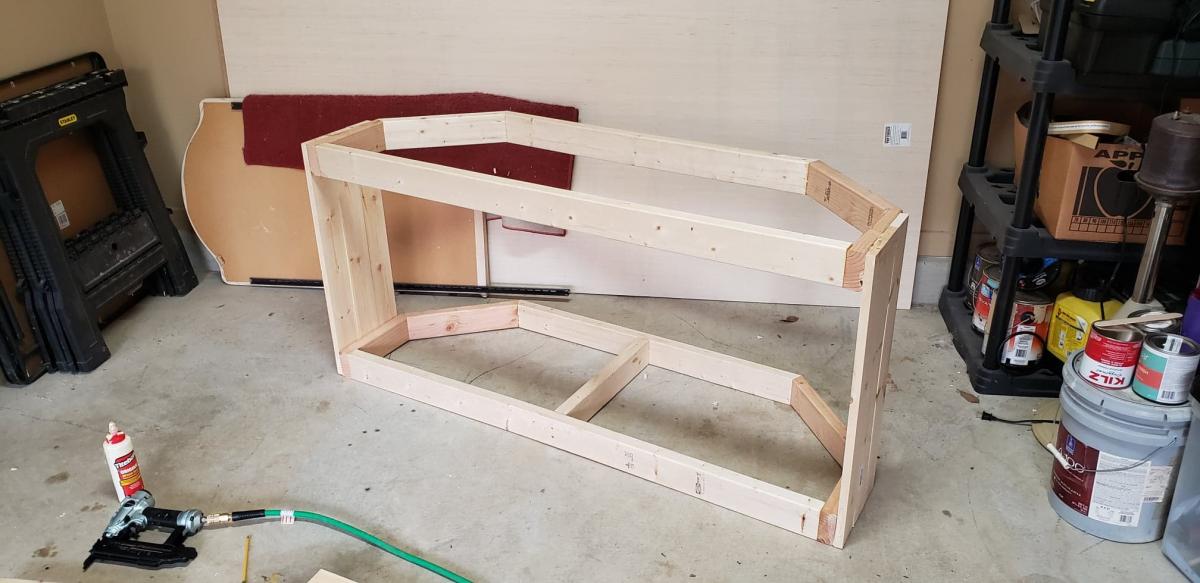
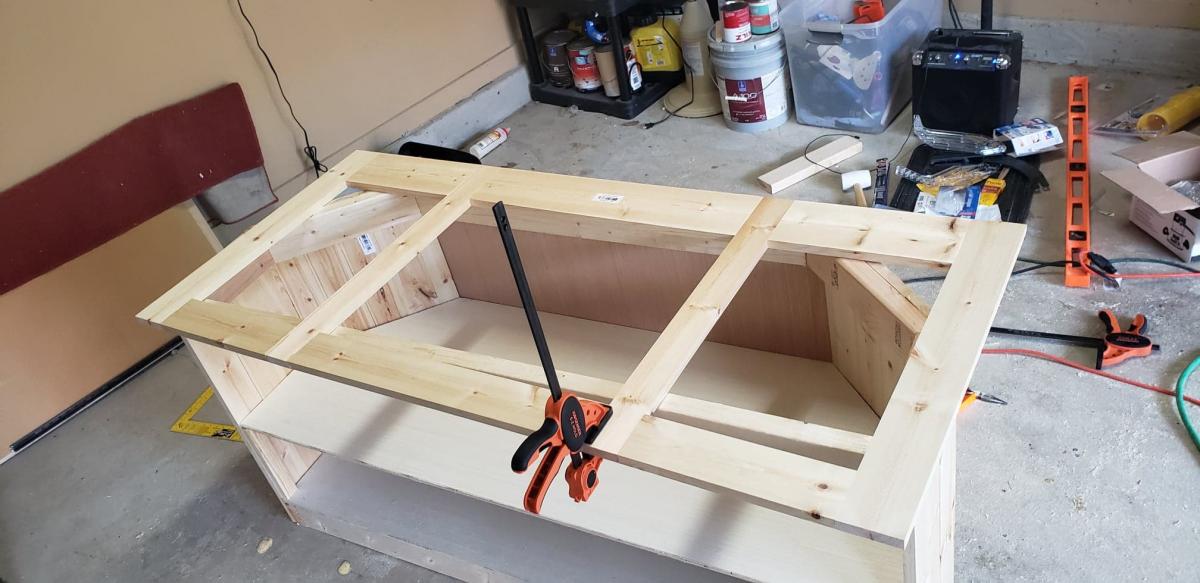
I couldn't find any corner TV stands with the barndoor style that were big enough, so I decided to design and make my own using the Grandy buffet design.

Built from Plan(s)
Estimated Cost
200-300
Estimated Time Investment
Week Long Project (20 Hours or More)
Finish Used
Minwax Polyshades Satin
Wax paint
Recommended Skill Level
Beginner

Comments

Football Lockers DIY

Submitted by Anonymous (not verified) on Mon, 09/11/2023 - 11:27

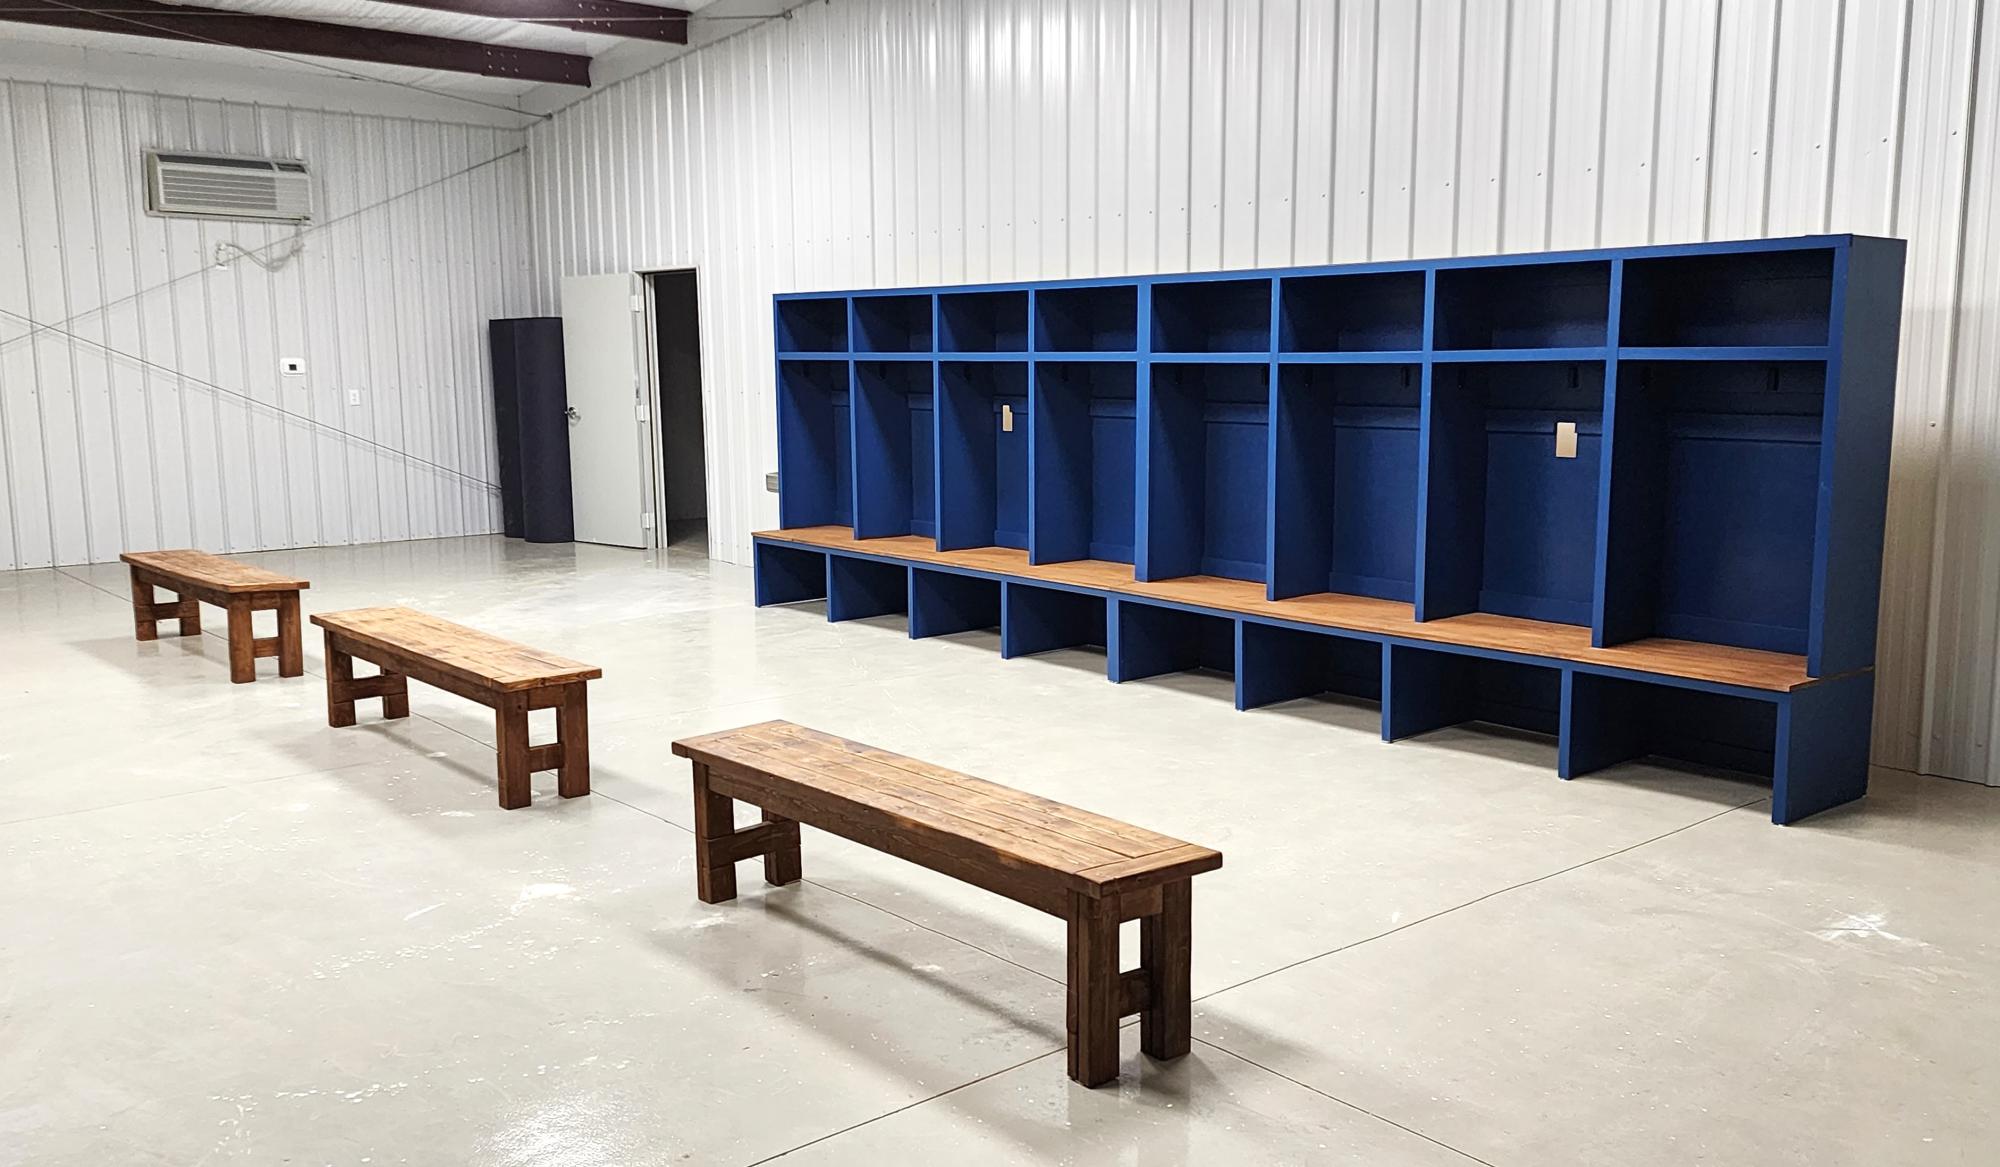
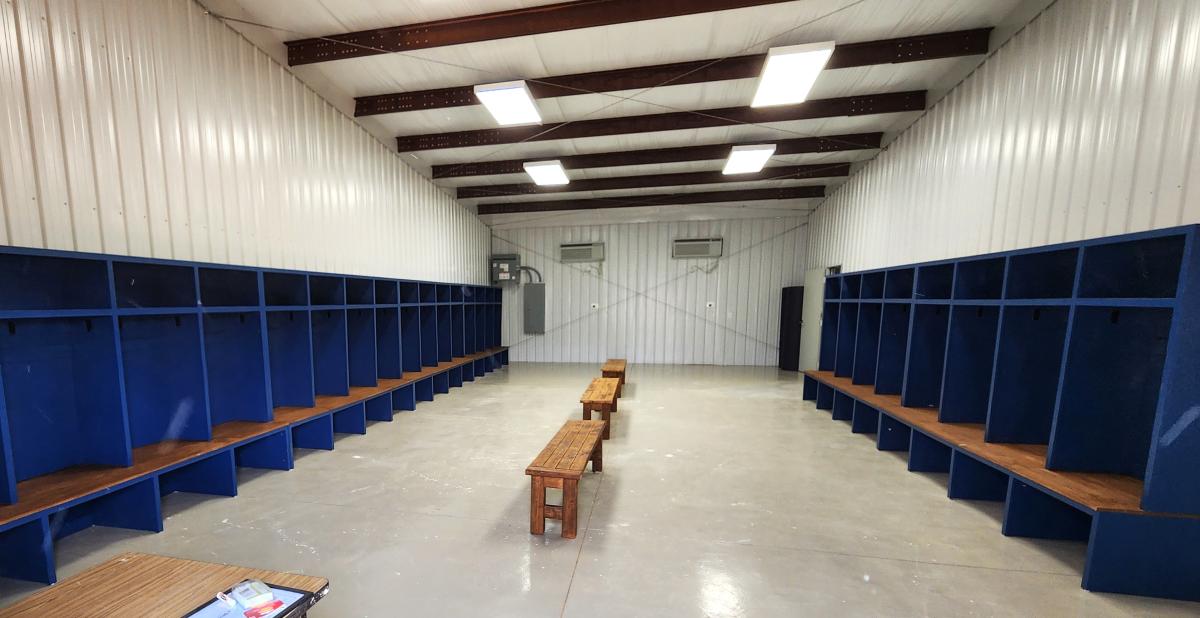
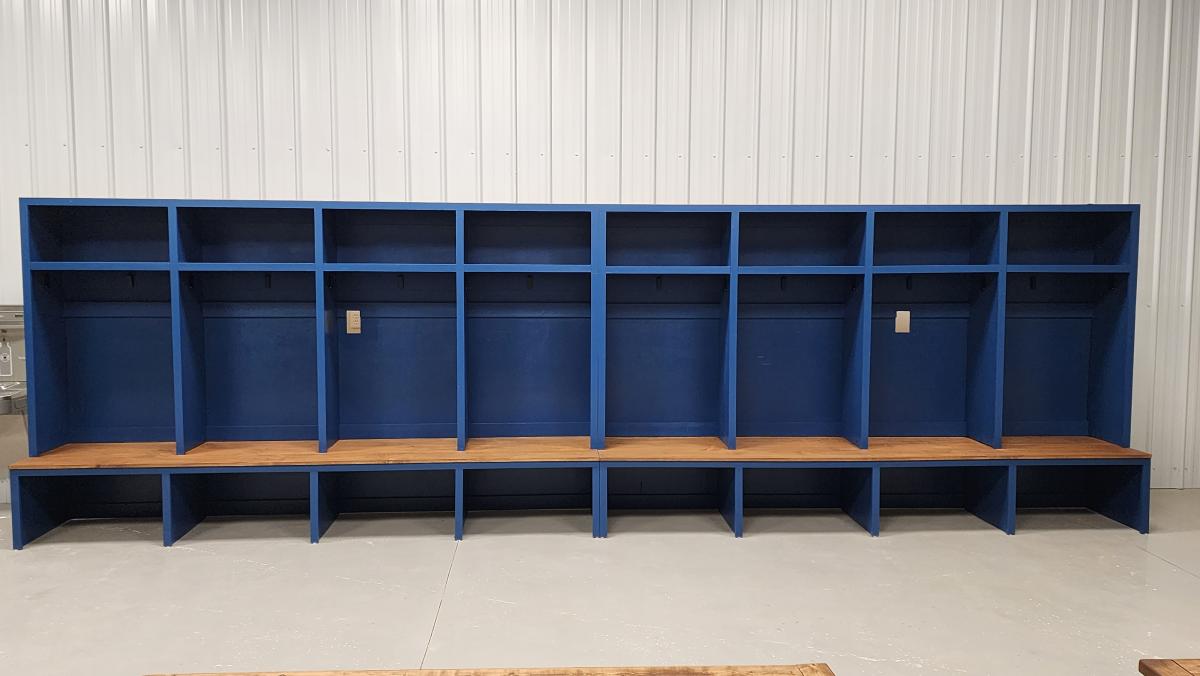
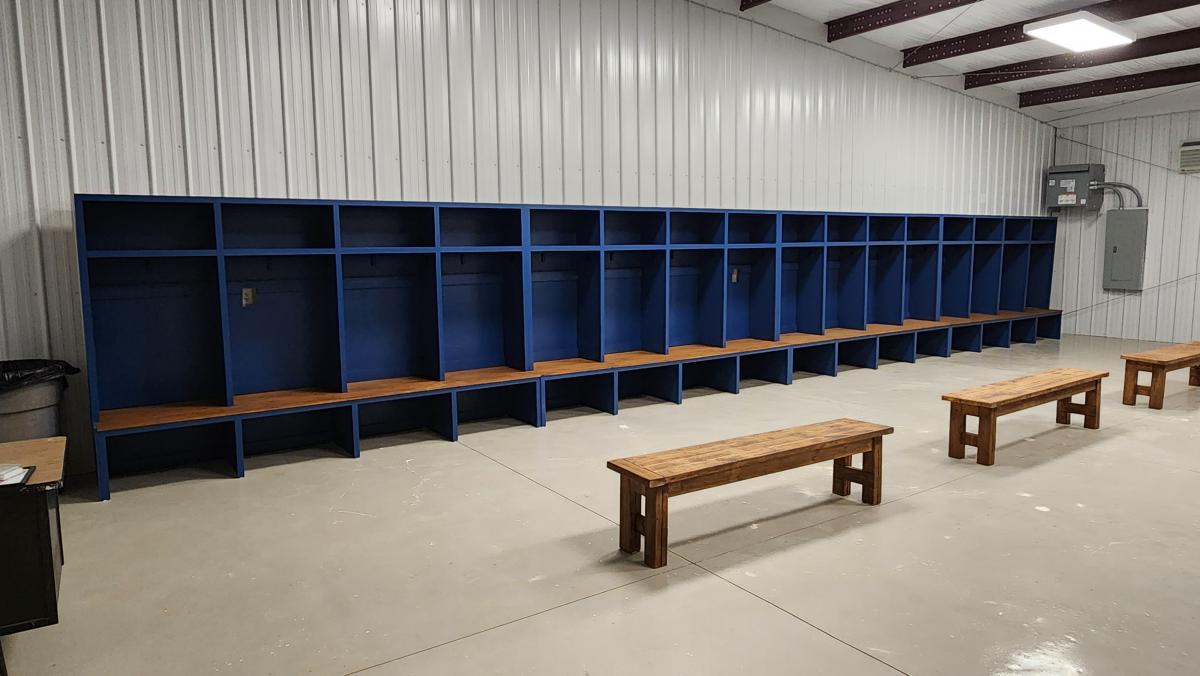
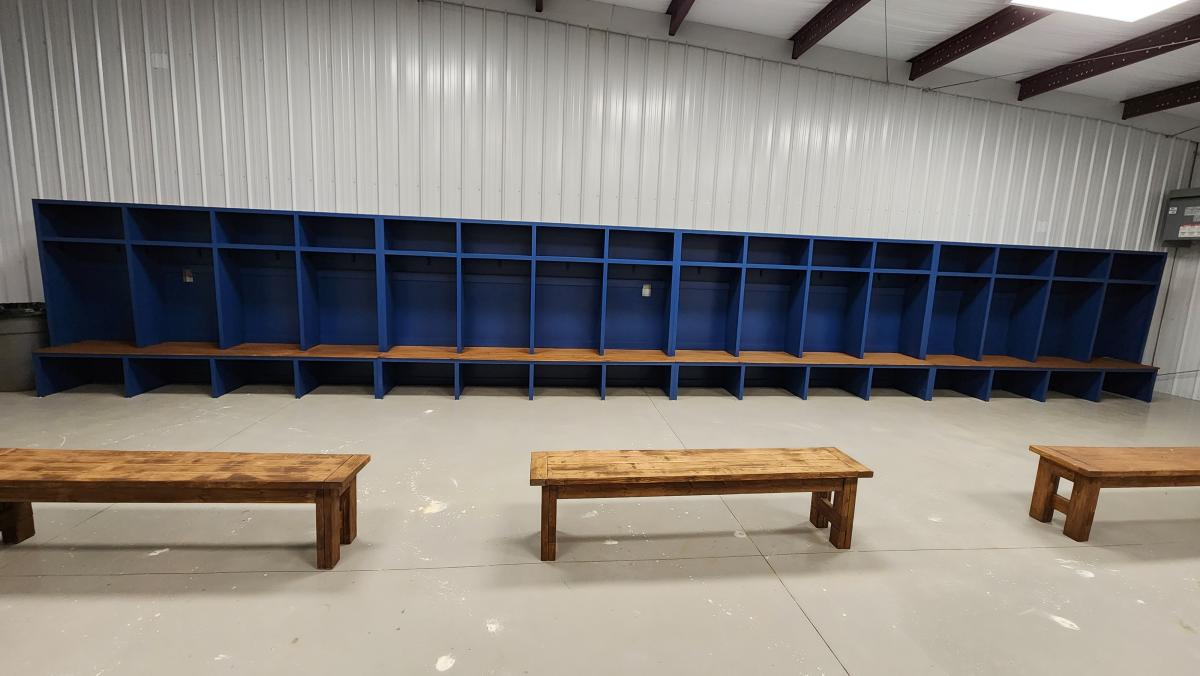
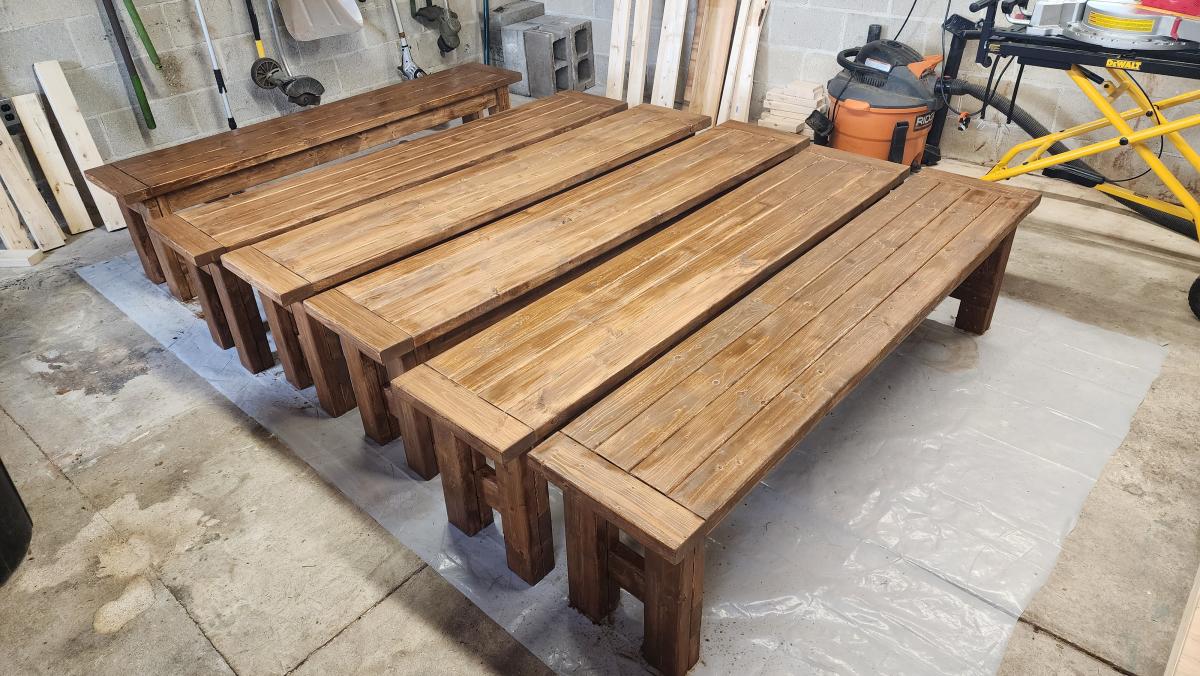
Here are a few pictures of the football lockers I built for our school. I used your mudroom locker plans and changed the dimensions to accommodate the boys' football gear. It worked great! I built 6 sets of 4 lockers, for a total of 24 lockers. I also used one of your plans to build 6 benches for the fieldhouse. Three for the home locker room and three for the visitor locker room. Each locker is 30 inches wide and 6 feet tall. 

Melinda Glenn

Cedar Fence Board Planter Box

Submitted by iowachap on Sat, 03/15/2014 - 19:40

Using Ana's 10 dollar raised garden planter box idea, I made my own using the cedar fence boards and then used 2 x 3 x 8 studs for the L corner supports and mid center support along with top rail. This photo is the first 3, I will have a total of 6 boxes. Will post more as I progress.

Estimated Cost
20 to 25 dollars per box
Estimated Time Investment
Afternoon Project (3-6 Hours)
Finish Used
I used 6 fence boards, 2 for each side of the 6' long runs, and 1 for each short 3' section cut in half.

I got the 6' x 5 1/2 " x 5/8 " cedar fence boards at the orange box

I used 2 x 3 x 8 boards for the corners the middle support and the top rail. I got these at the blue box

I used 2 " and 2 1/2" exterior star bit screws.

NOTE: I pre drilled holes in the fence boards and screwed all the boards to the L corner sections from the inside out, so the screws are on the inside of the box, they did not poke through the 2 x 3 boards.

Instead of trying to measure how far off the side of the board I needed to go to match the vertical 2 x 3 boards, I just cut 10 11 inch long 2 x3 sections, and then used the 2 1/2" screws and made 4 L corner pieces the shorter side I screwed the short 3 foot length fence boards too, once I had both my short sections screwed to the L corner sections, I then stood one up and screwed 2 of the 6' length boards to the L corner section. Then the other side.

Once all 4 walls were done, I would then measure 3' in the middle of the 6' long side runs, and put in an additional 2 x 3 x 11" again screwed from the inside of the box out.

Now that all the 2 x 3 x 11" L corners and side support sections were connected to the fence boards I then cut 76 1/4" 2 x3 boards one for each length run, and then 2 26" 2 x 3 sections that were all cut on 45 degree angle to complete the top rail.
Recommended Skill Level
Starter Project

Nesting Office Station

Submitted by Sb1212 on Tue, 07/14/2020 - 18:38

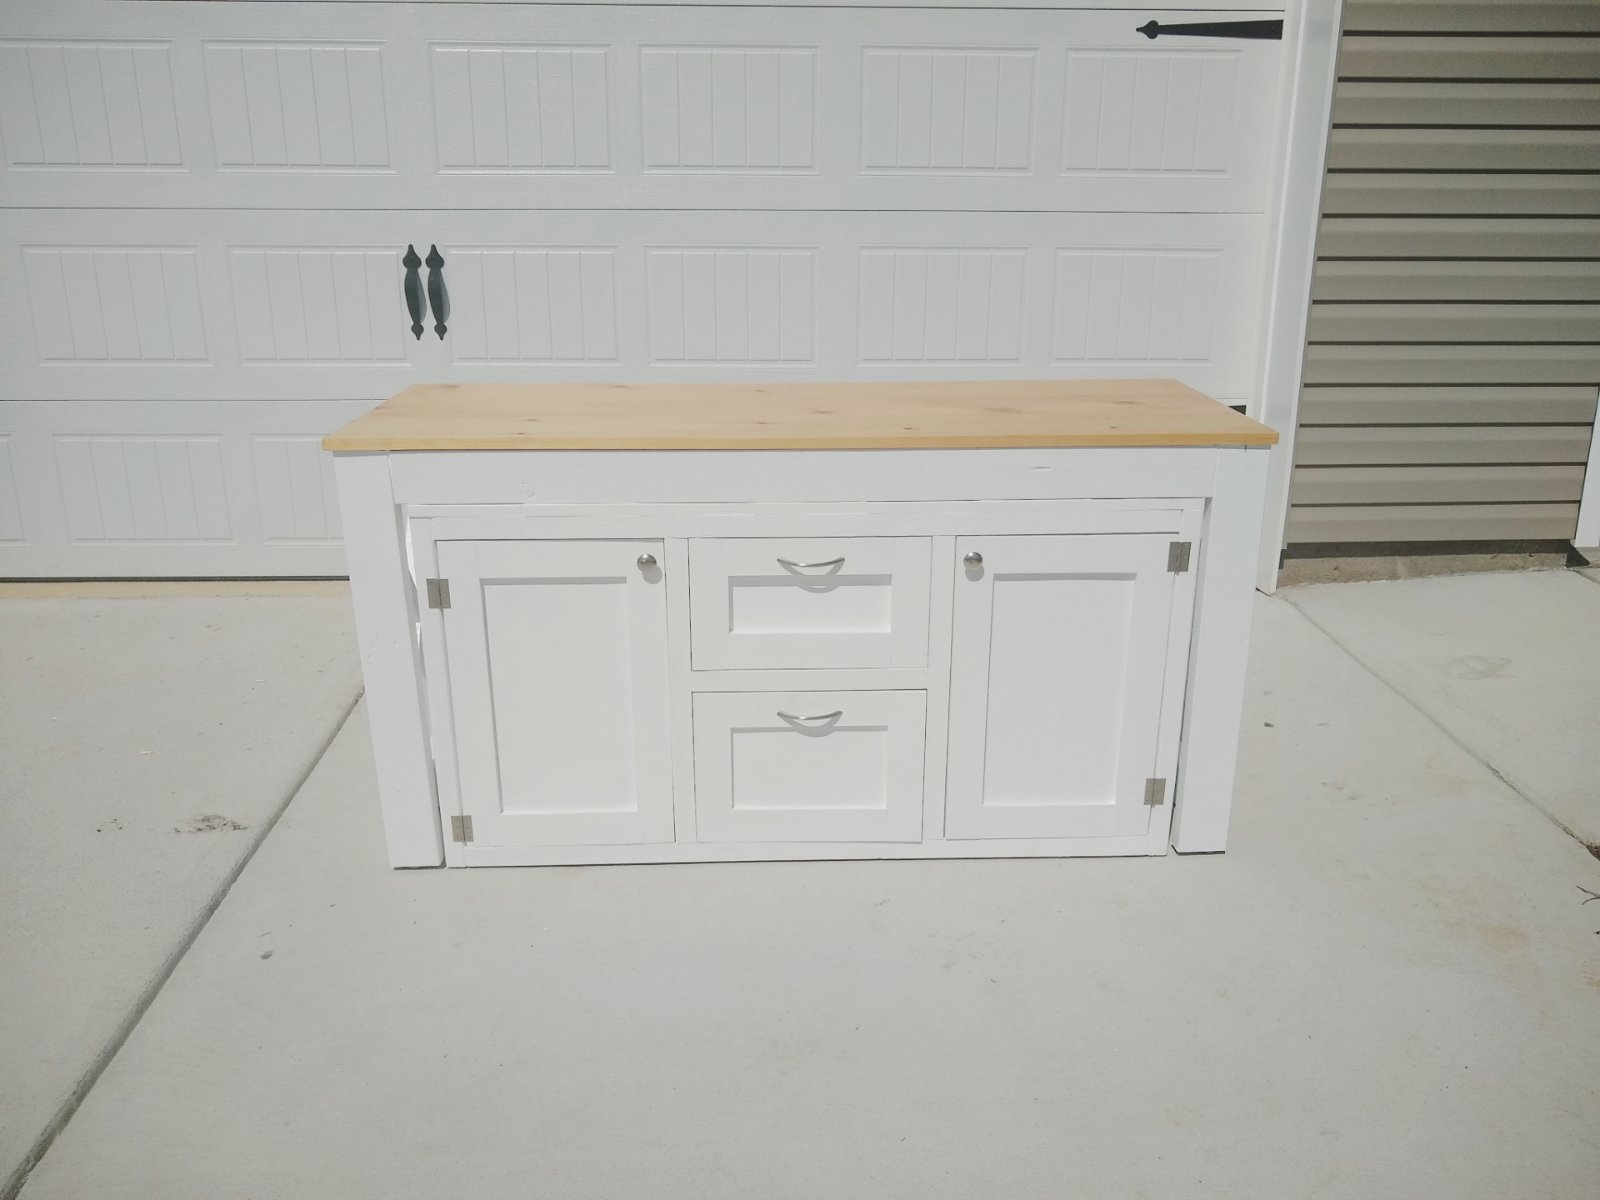
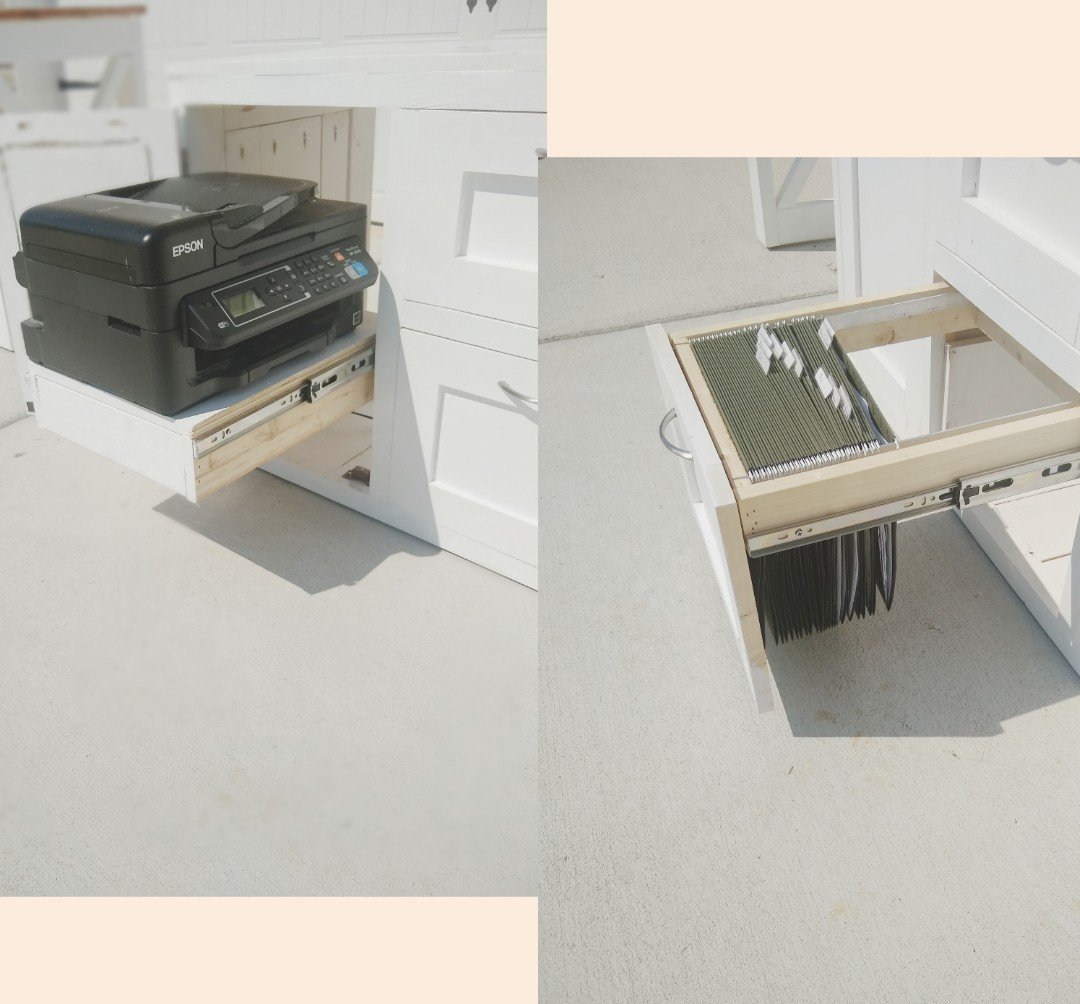
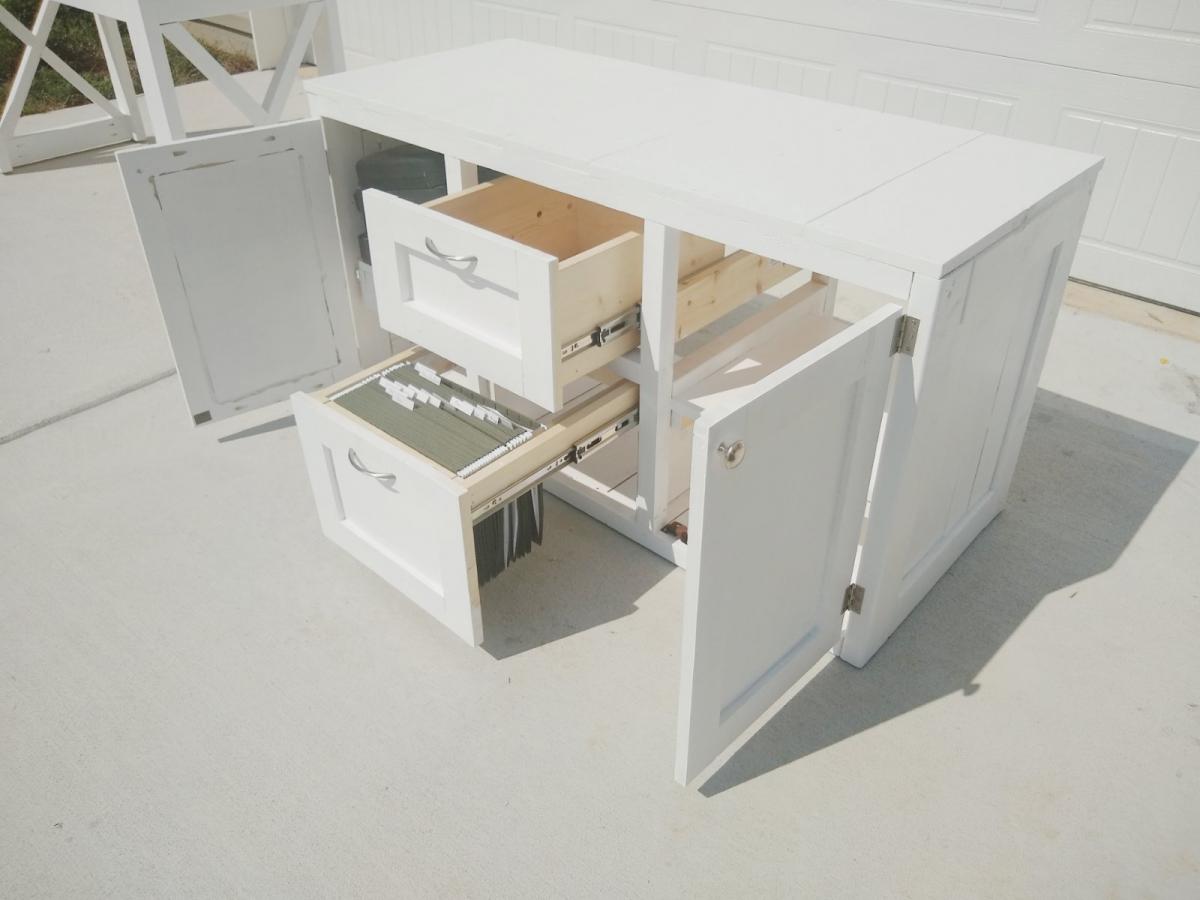
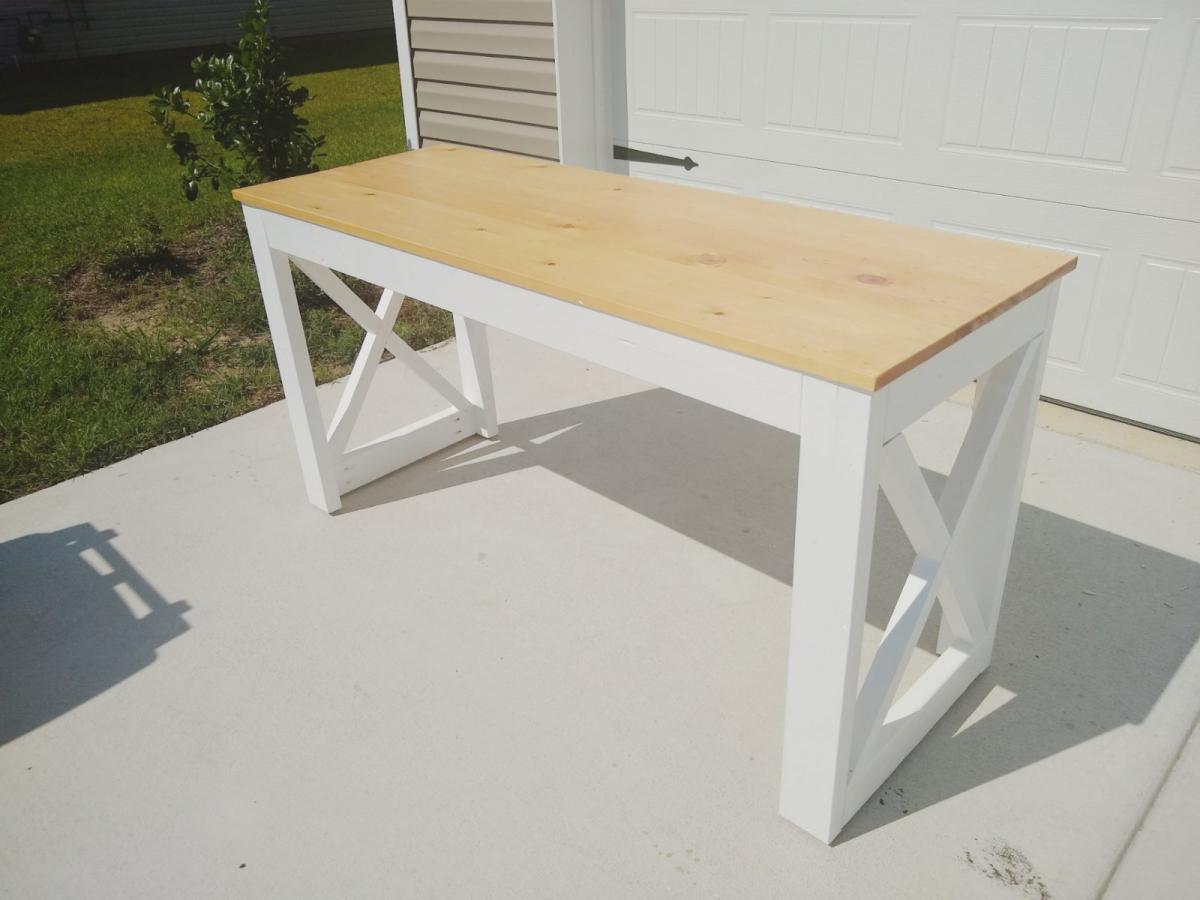
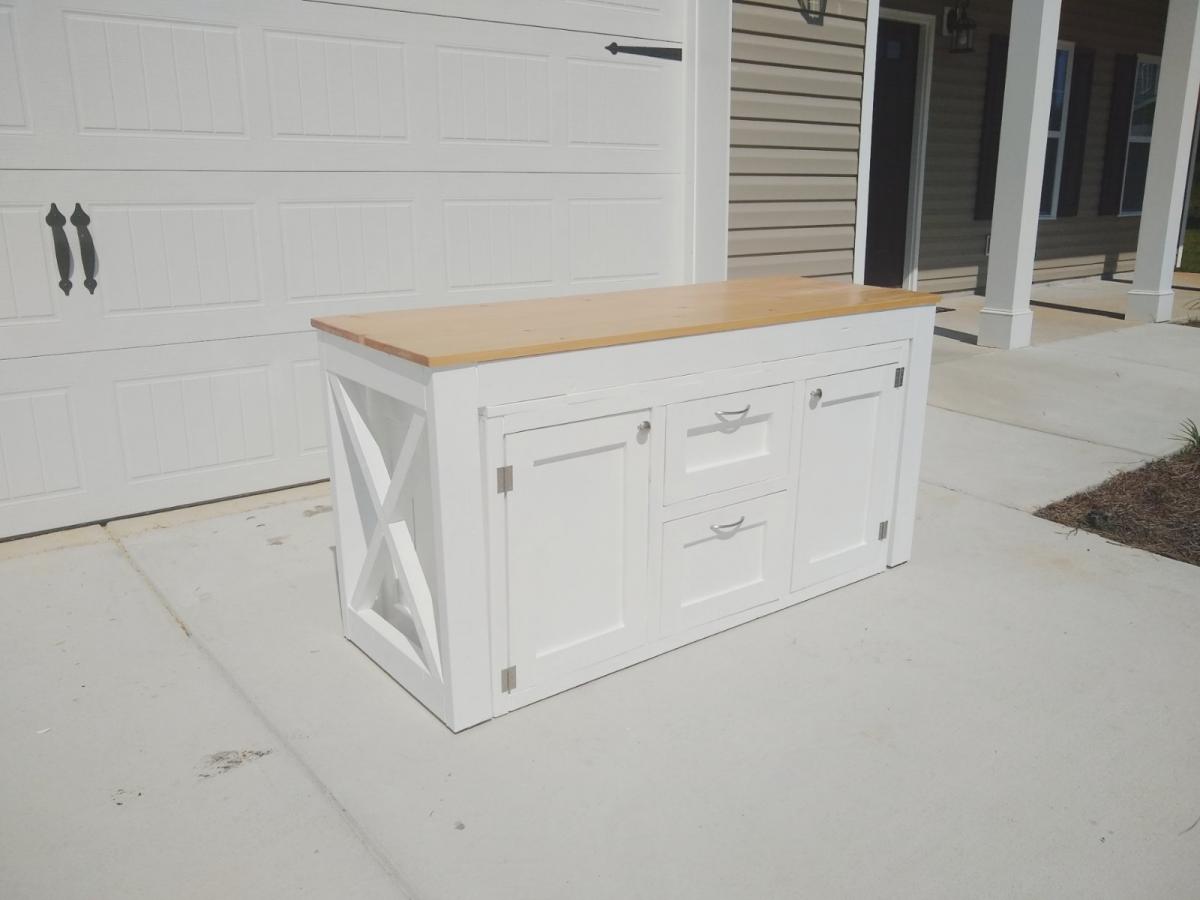
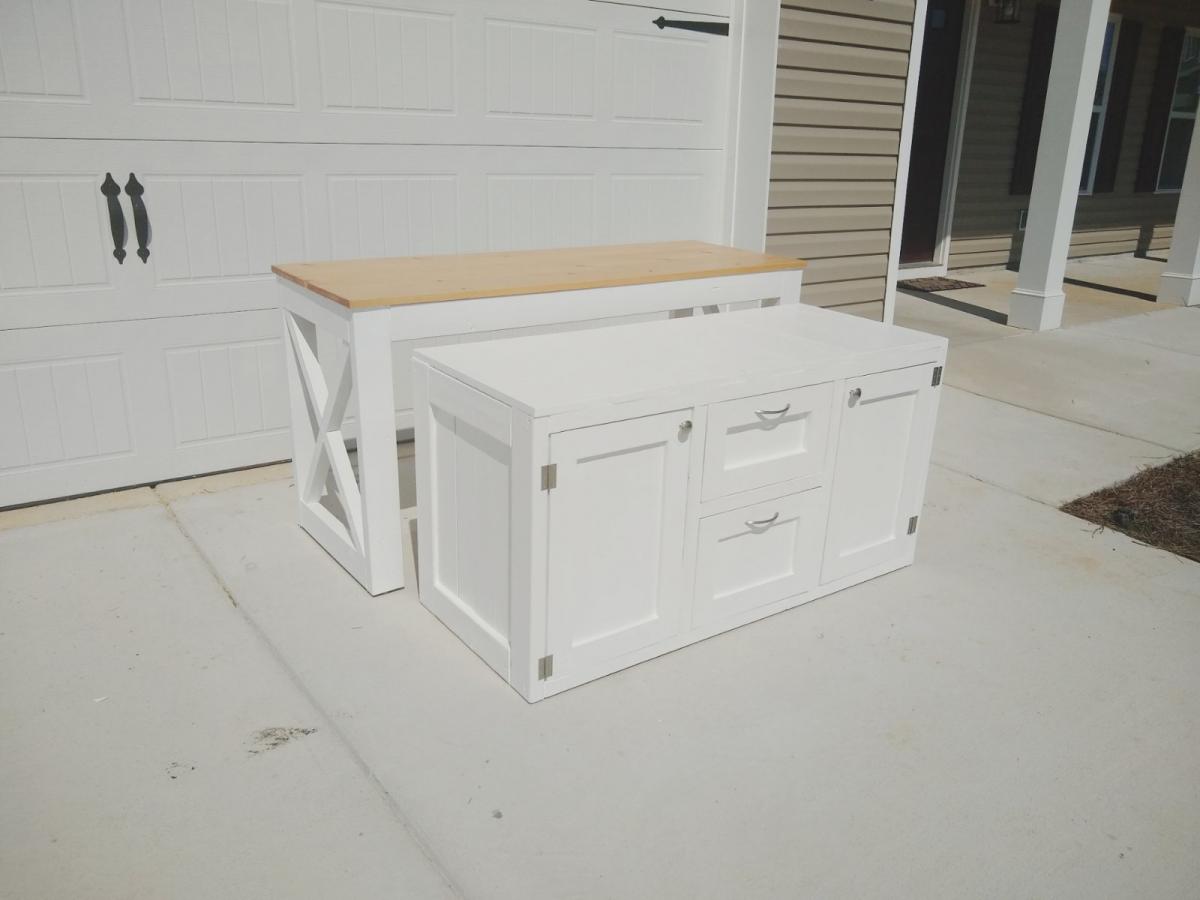
So loving this nesting office station❤️! We will have a sofa sleeper in the office as well. So we needed a desk that could be moved to the wall when the sofa sleeper is being used by guest. I saw a post from Ana for her Nesting Grill Station and I came up with the idea to make this nesting office station. The cabinet includes a file folder drawer (which is from Ana's mail boss plans), a regular drawer, cabinet doors with shelves. One of the shelves is a pull out shelf for the printer. I think it came together great! Design for nesting desk inspired by these plans: https://www.ana-white.com/woodworking-projects/nesting-grill-station https://www.ana-white.com/woodworking-projects/mail-boss

Estimated Time Investment
Weekend Project (10-20 Hours)
Finish Used
Minwax Golden Pecan
Valspar Signature Ultra White in satin
Recommended Skill Level
Intermediate

Comments

Sb1212

Sat, 10/03/2020 - 08:35

Hi, Thank you! Actually I didn't add wheels to the design since this will be in an office with thick carpeting. I added adjustable metal foot pads to the bottom of the desk.

Large Wood Storage Chest

Submitted by danicarby on Tue, 05/14/2013 - 07:25

I wanted a large chest to store toys, books or blankets. I wanted it to be cheap to build and be rustic. This project turned out perfectly! I used 2" and 4"-wide furring strips and rope for the hinges and handles. I used 1/4" plywood for the bottom and made a groove with the router for it to slide into while assembling. I helped 16 girls make these who had no previous experience and they loved it!

Estimated Cost
$20-$40
Estimated Time Investment
Afternoon Project (3-6 Hours)
Finish Used
Mixwax Stain and Polyurethane
Recommended Skill Level
Beginner

Comments

benjaminrogers

Fri, 12/27/2013 - 06:21

Can you provide a lumber list for this? I know you said you used 2x4 but the lumber I see in the photo doesn't look like 2x4.

Thanks,

Ben

danicarby

Fri, 12/27/2013 - 07:17

Hi Ben!

I used 1x4's and 1x2's. I have a shopping list and cutting list on my blog. I can't post the link here but you can click on the link where it says "Blog Link" under "About This Project"

Let me know if you have any other questions!

Chicken Run with Turkey House

Submitted by vendo on Wed, 10/13/2021 - 10:03

My daughter helped me build this enclosure. We used Ana's chicken run plan, but just made it taller so we could walk in easily. We added an overhang to store food and pellets under, for the supports we used Ana's easy shelves angle support plan, and finally we used the playhouse base plan for the base of turkeys house. All plans used are linked below. We ran the chicken wire out under the structure and still need to bring in some large rocks or pavers, but so far no issues with predators. Turkey was getting too big to fit in the smaller coop, so we decided to have fun with his house and used cedar fence pickets and some treated 2x4's, built a box and jig sawed the shape of a turkey. As you can see in the first photo the ladder for turkey wasn't big enough, all the other chickens were in his house, lol. So I beefed up the ladder and he happily can put himself up at night now:) Overall a super successful project, I wasn't sure what to do with the top and just at that point, the neighbor walked over and offered the metal, talk about a huge win and the perfect solution! We attached the run to the previous smaller structure and now they have so much more room and are laying like crazy:) Finally, I think this would make a great dog kennel as well...

Farmhouse Toy Box

Submitted by Anonymous (not verified) on Thu, 03/21/2019 - 11:28

Picture of my own version of the Ana White Design linked here
http://www.ana-white.com/2017/01/DIY_furniture/farmhouse-style-toy-box-…

Added Gas Shocks from Amazon 100N/18lbs.

Estimated Time Investment
Week Long Project (20 Hours or More)
Finish Used
White Paint
Minwax Espresso
Minwax Red Mahogany
Recommended Skill Level
Intermediate

6 Laundry Basket Dresser

Submitted by Anonymous (not verified) on Mon, 04/18/2016 - 06:51

Took the plans from the laundry dresser and adjusted them so it would hold 6 laundry baskets. My wife wanted a counter she could throw the clothes on and fold right there so this worked well for our needs. Added some trim to the end to match the shoe bench we built in our drop zone right outside laundry room.

Built from Plan(s)
Estimated Time Investment
Day Project (6-9 Hours)
Finish Used
Sand, Primer and Latex Satin Enamel
Recommended Skill Level
Beginner

Comments

Storage Bed with Drawers and Rustic Planked Headboard with Lights

Submitted by jjmaldon on Sat, 02/08/2020 - 10:22

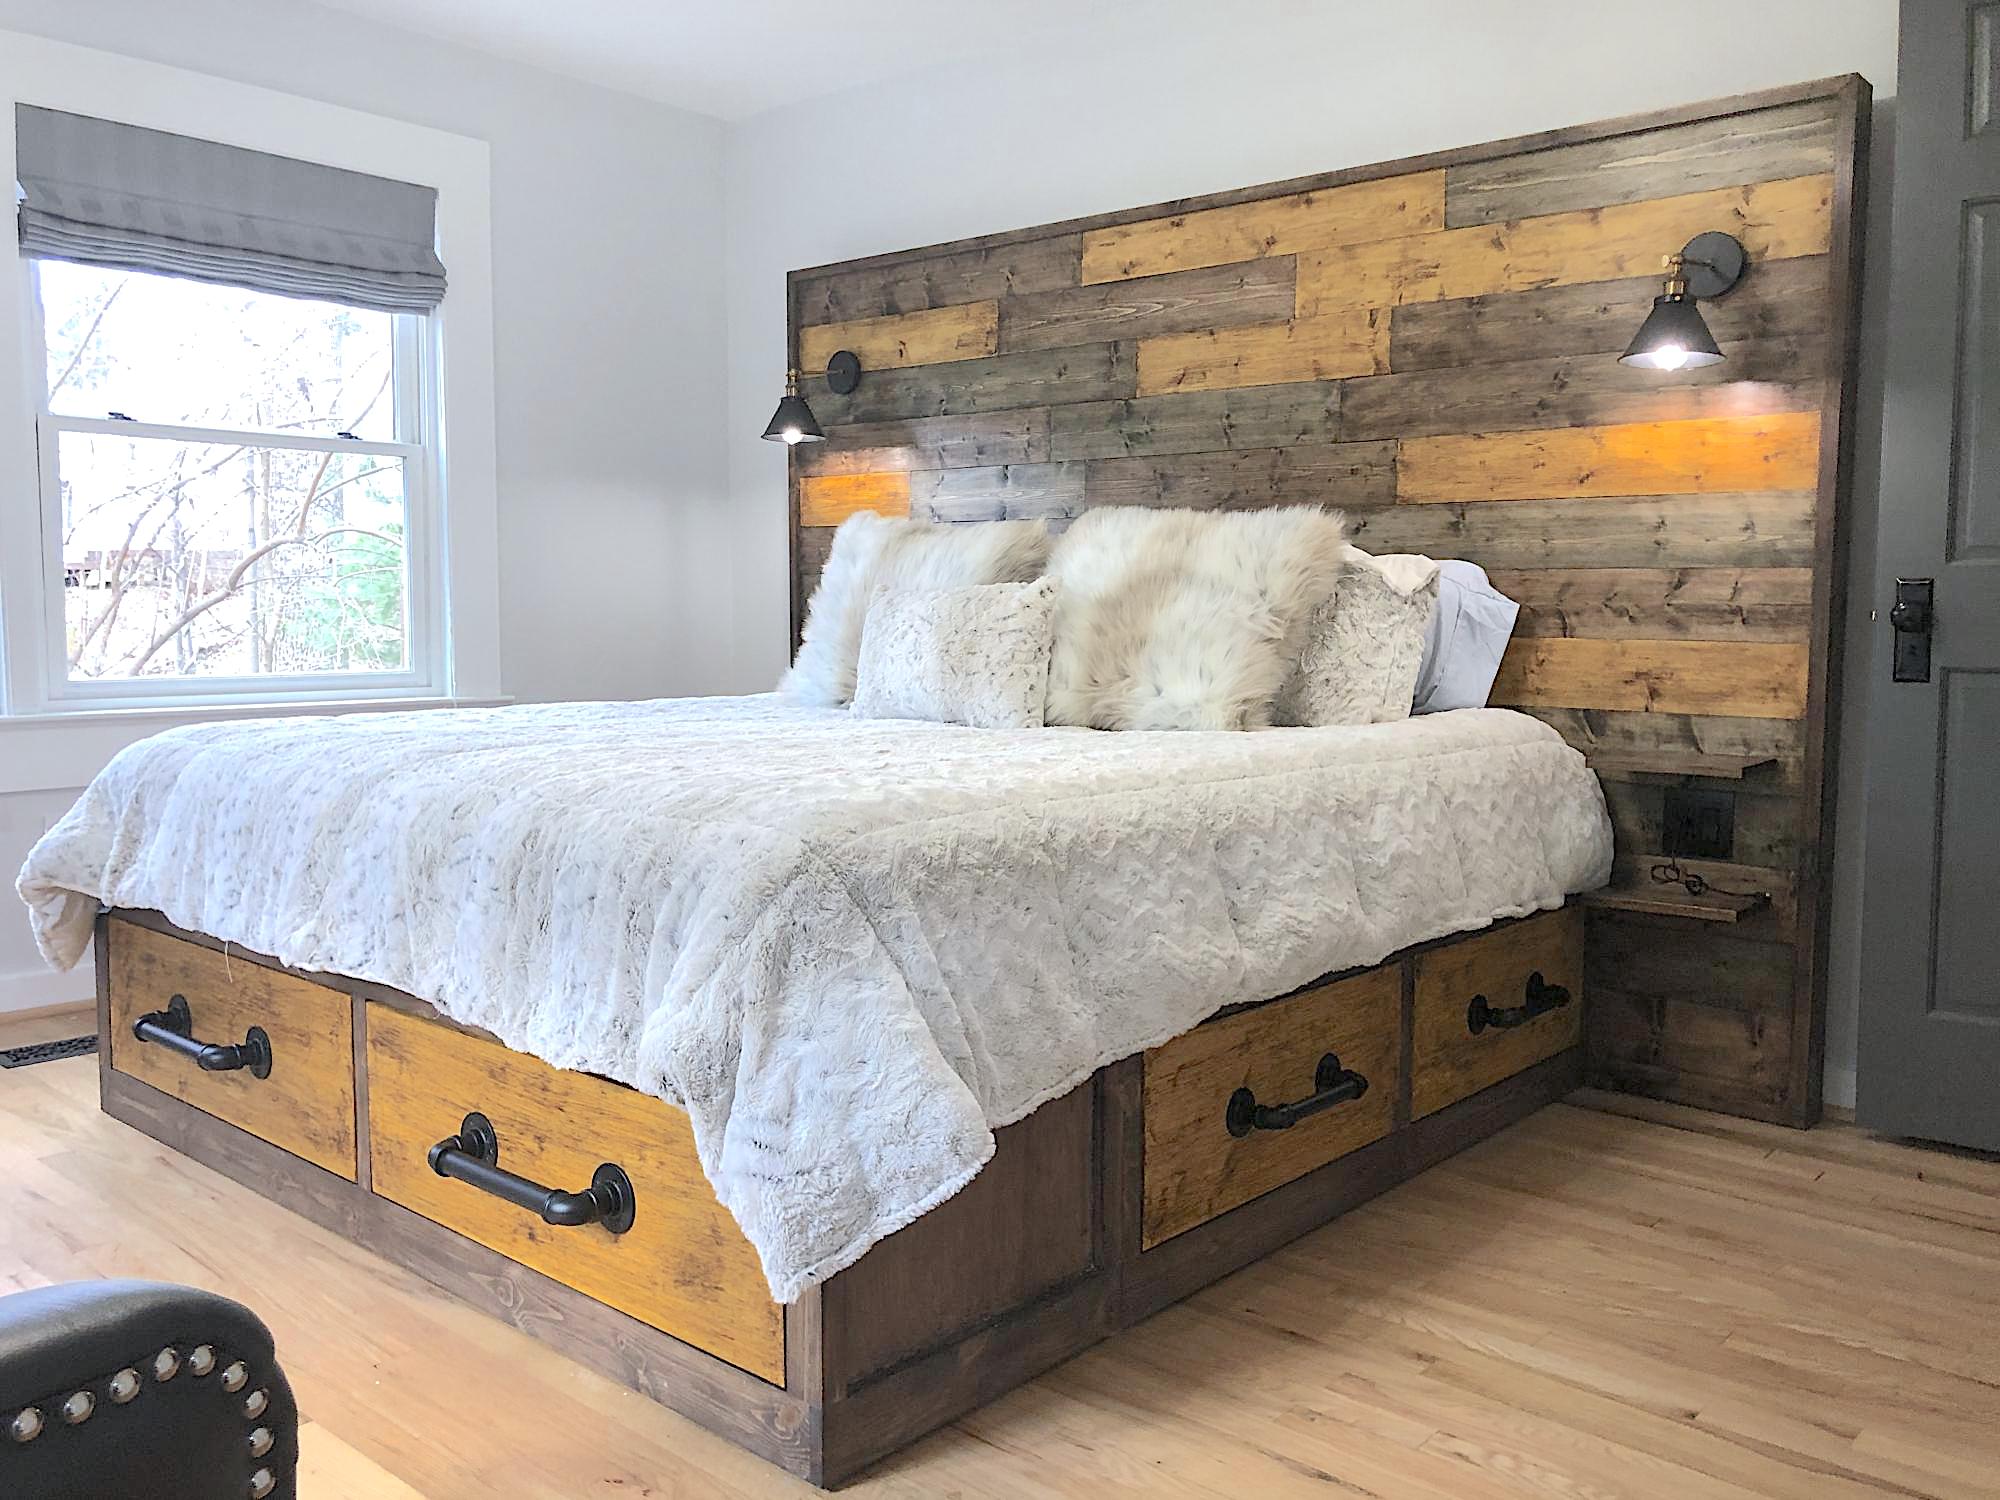
Base is classic storage king and the headboard was custom made to fit the size of the room. Enjoyed this project and the extra storage the drawers are providing. Thanks for the sharing the design plan; worked perfectly. 

Built from Plan(s)

Comments

Shared Miter Saw Station

Submitted by Anonymous (not verified) on Mon, 10/02/2023 - 10:48

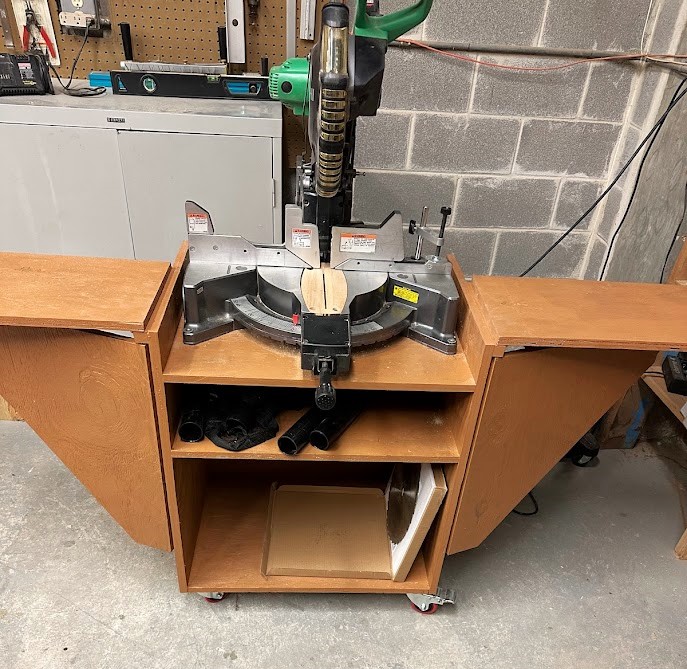
A friend and I built the mobile miter saw stand from your plans. We live in a retirement community and use the saw in our woodworking shop.

Built from Plan(s)

Tool Organizer

Submitted by Anonymous (not verified) on Thu, 07/02/2020 - 07:02

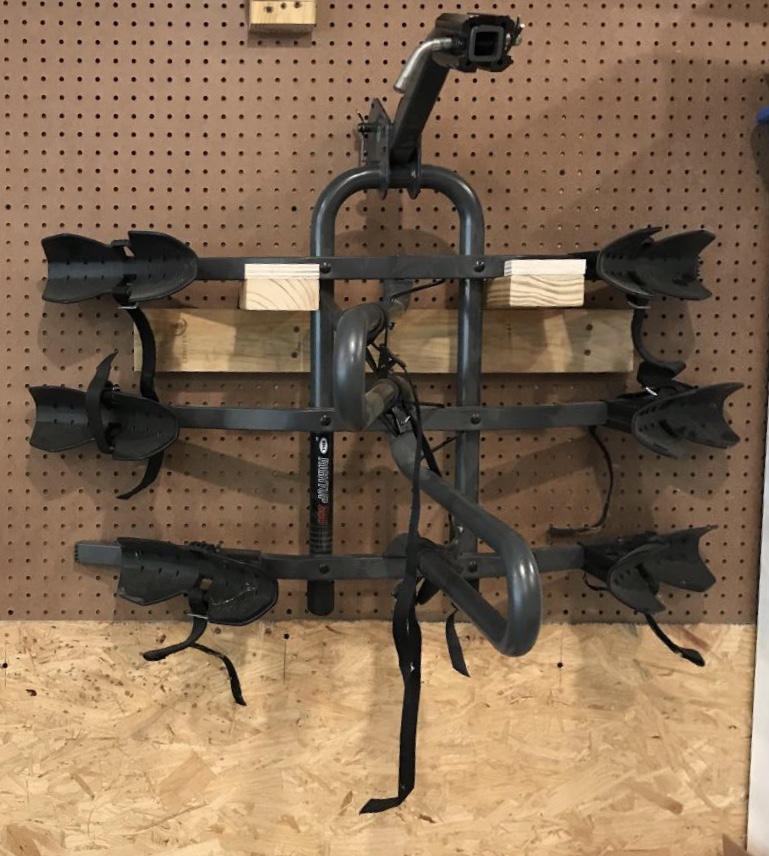
I’m very happy with my tool organizer. I also used the tool organizer idea for bracket to hang our bicycle rack. We love the way it all came out. Thank you so much for sharing!

We run a fence company. The best thing about this project is that it cost me $0!! I used 2X4 cutoffs that we were going to trash!

Built from Plan(s)

Pallirondack Laundry Basket Dresser

I showed my wife the Laundry Dresser featured on Ana White's website and she asked if I could make one for her, but not quite so tall. I also turned the orientation to fit our laundry room space. I used primarily oak from recycled pallets to build the Laundry Basket Dresser. She wanted a work space on top, so folded laundry, empty baskets, etc. all have a temporary resting place depending on the day. From start to finish, it took me about 6 hours. She plans to stain the piece at some point, but its already in use, so I'm not 100% sure that will ever happen until we move or something. ;-) Great idea and laundry room organization!

Estimated Cost
Half a box of screws
Estimated Time Investment
Afternoon Project (3-6 Hours)
Recommended Skill Level
Intermediate

Comments

Kathy in Pittsburgh (not verified)

Mon, 09/10/2012 - 10:22

I love the open sides, plus it makes it much more feasible to build with scraps repurposed wood, which I love. Thanks for the inspriation

payne.kj

Mon, 04/08/2013 - 08:48

Hi, do you have any kind of plans for how you did this or atleast dimensions? I think this one fits more of what my wife needs, but I'm pretty new to making anything.

nicholas_ftm

Sun, 06/14/2015 - 20:16

Soooo I made this according to the measurements and no laundry basket I find fit. Kind of dissapointed in the fact that this cool thing I just built doesn't have any baskets that will fit it. Any advice on finding a basket that fits?

jkread

Fri, 07/10/2015 - 20:56

I think the idea is to build it to fit the baskets you have or buy some and build around them.

E's play kitchen AND garage workbench and laundry

Submitted by melodyrae on Wed, 07/16/2014 - 19:18

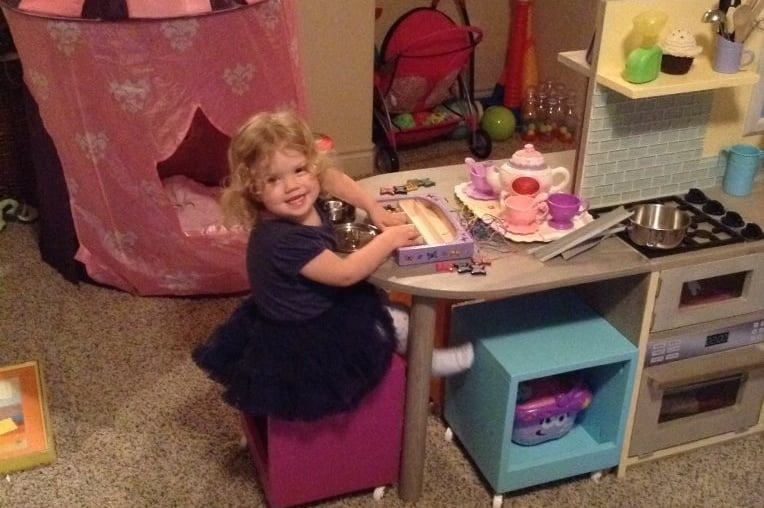
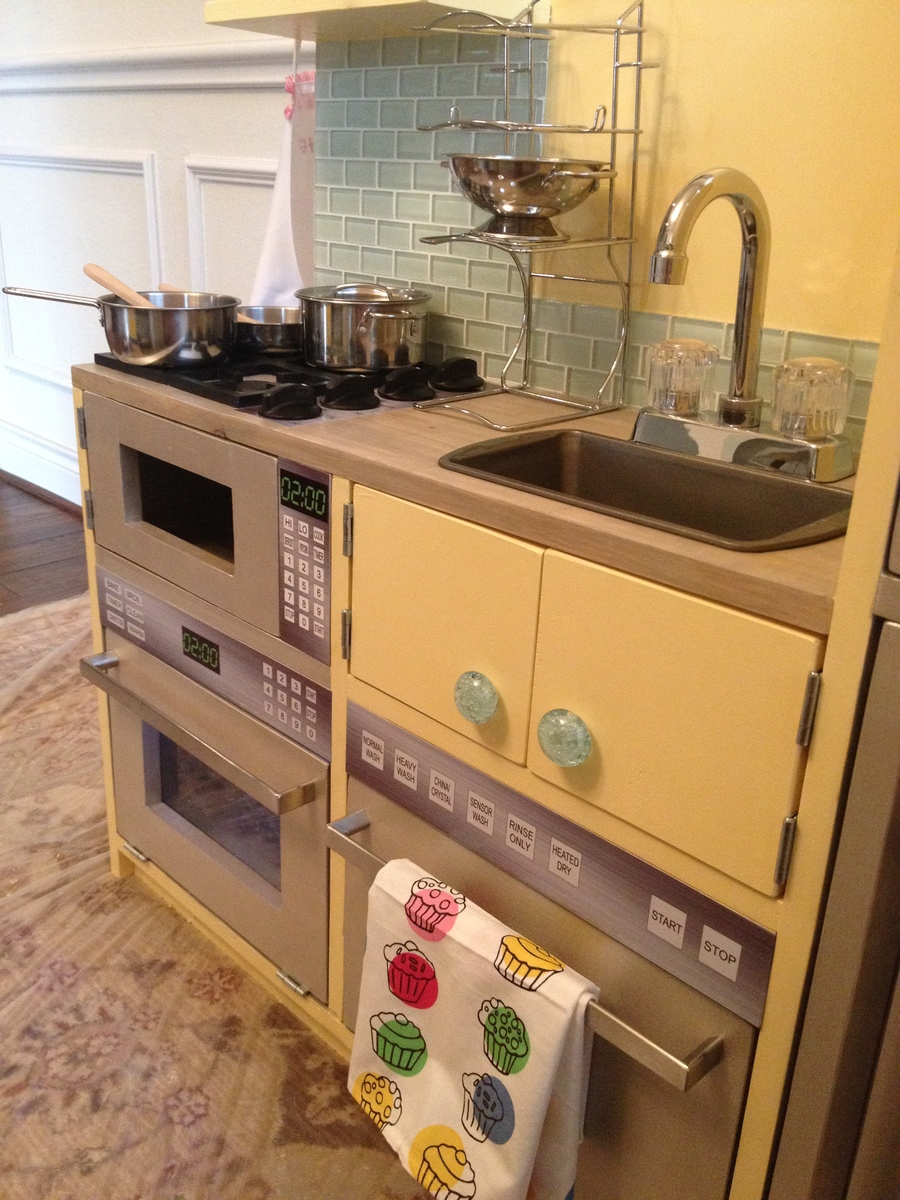
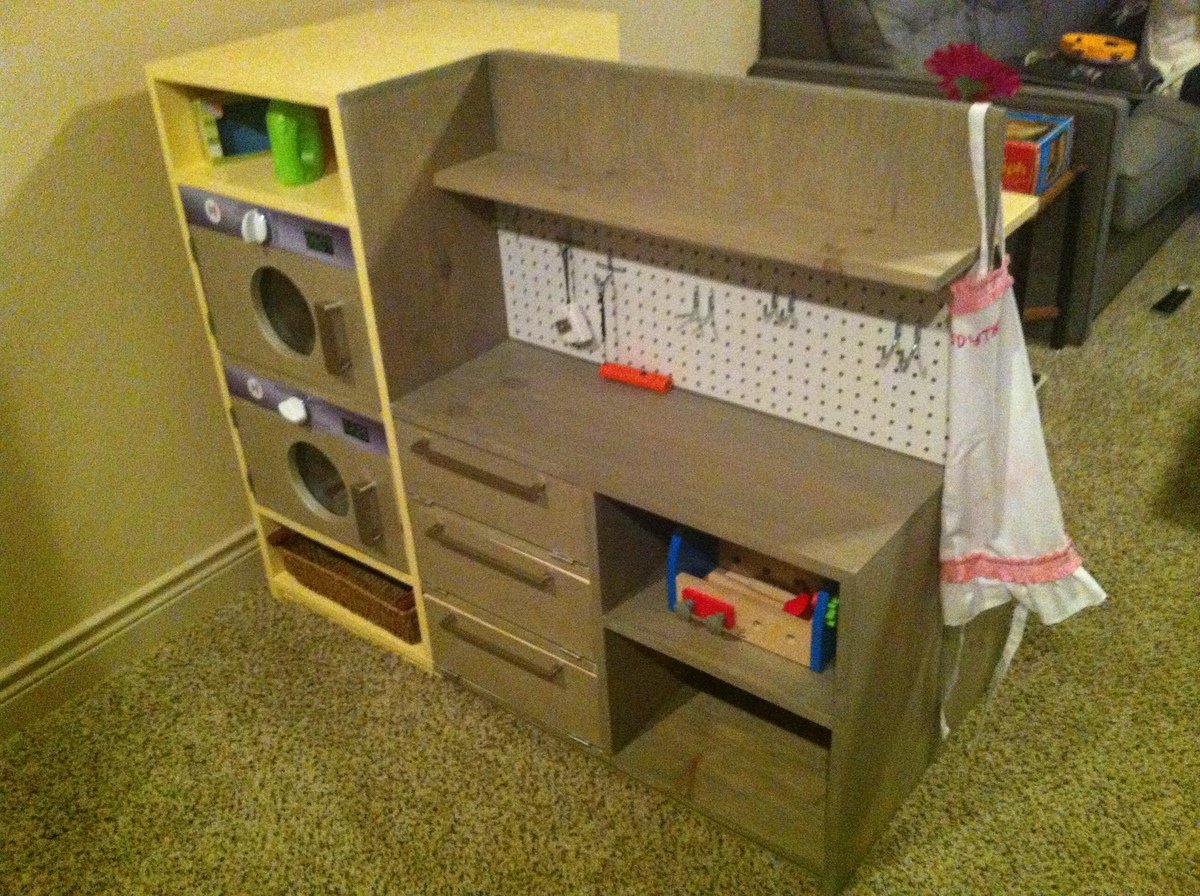
What's better than an Ana White play kitchen? 2 Ana White play kitchens back-to-back!

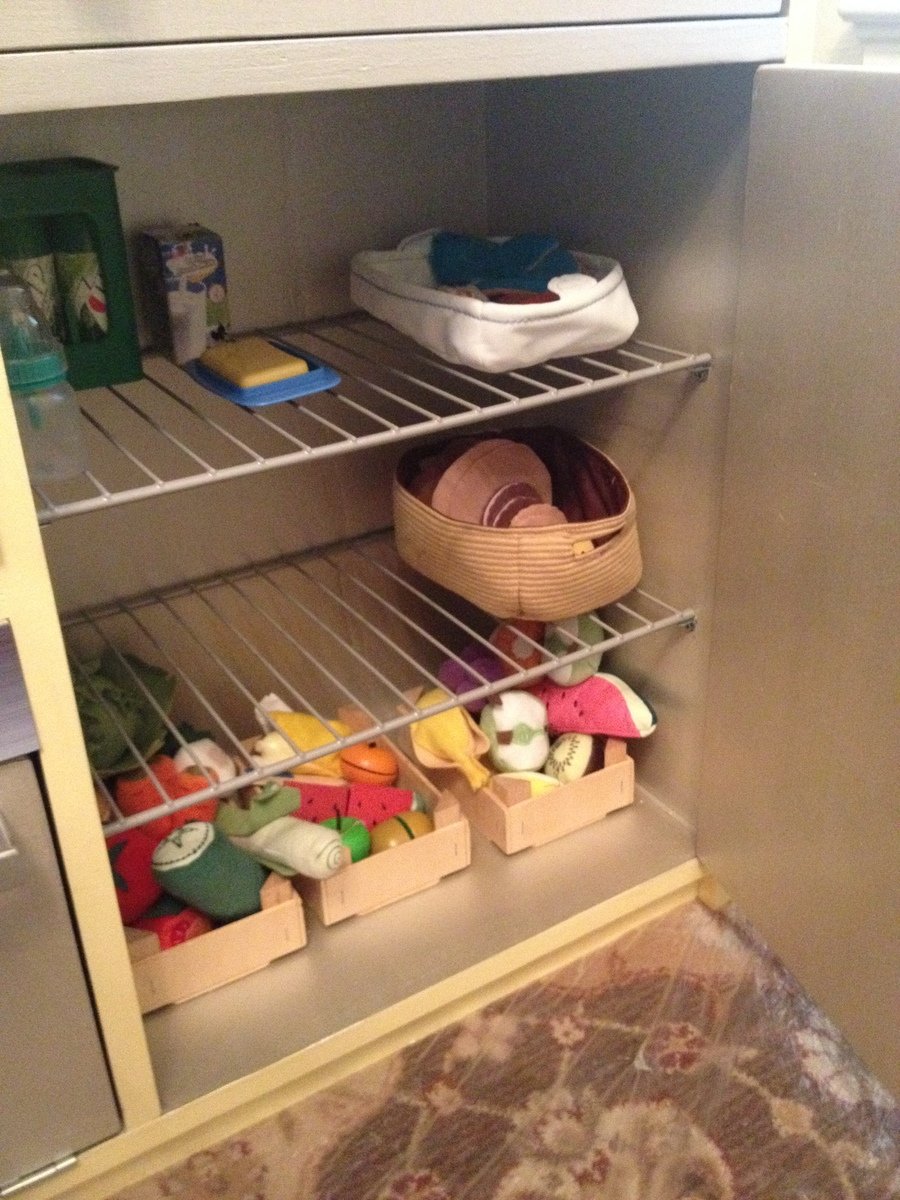
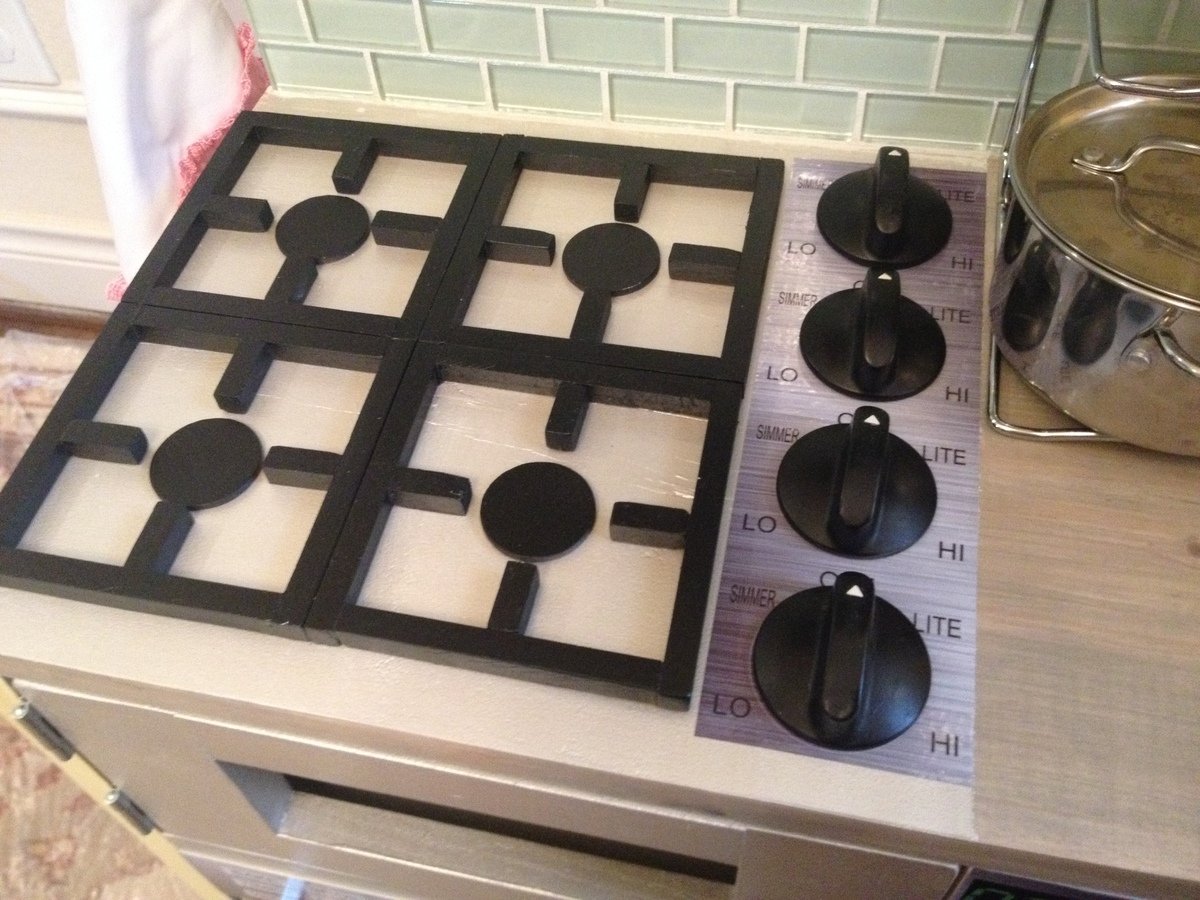
Slightly modified, we made 2 play kitchens, turning one into a garage workbench and laundry. We managed to just get the kitchen & garage done for Christmas morning (minus a latch & plexi for the microwave). We later added a window view above the sink, and a table and 3 storage stools to join the two units on one end. In a long mixed-use playroom with little wall-space available, they jut out from the wall, dividing the TV side of the room from the toy storage side.

Dad was excited to help put the garage-side together and bought his little girl some peg-board to hang her tools on, and installed garage lighting. As pull-out drawers cut into the storage space, her "tool cabinet" doors just fold-down. Grandpa sent her a full tool-set with power drill for her new workbench. Big brother helped piece the gas burners together and chose paint colors.

Little miss finger-painted in the garage next to me while I worked on this first woodworking venture, but she was not a bit interested in the contraption until we added the stickers! A local sign vendor we use was so tickled to be involved, he had the stickers printed in under an hour and for just $25 (which saved hours and hours of detail painting)!

Next up: the ana white dream dollhouse (which perhaps we should've started with).

Built from Plan(s)
Estimated Cost
Buying parts retail, last minute, we probably could've purchased a PB kitchen --but not custom to fit our space - and not with a garage and laundry and table and 3 storage stools!
Estimated Time Investment
Week Long Project (20 Hours or More)
Finish Used
We used Valspar's 2 step metallic finish for the stainless appliances - honestly, lots of extra coats that were probably not needed since the gray base coat was super sweet with our yellow kitchen. We used leftover Behr stain from Dad's garage workbench for the wood countertops, and the rest of the paint is Sherwin Williams. Cabinet knobs from World Market; appliance knobs from a salvage yard; handles from Ikea; fridge shelves a cut closet shelf; real tile backsplash; gas burners from dowels; real faucet from ebay; loaf pan sink (left removable because we knew she'd immediately fill it with water).
Recommended Skill Level
Intermediate

Comments

spiceylg

Sat, 07/19/2014 - 20:15

I love this. Especially love the addition off the workbench and laundry area!

Kitty Outhouse

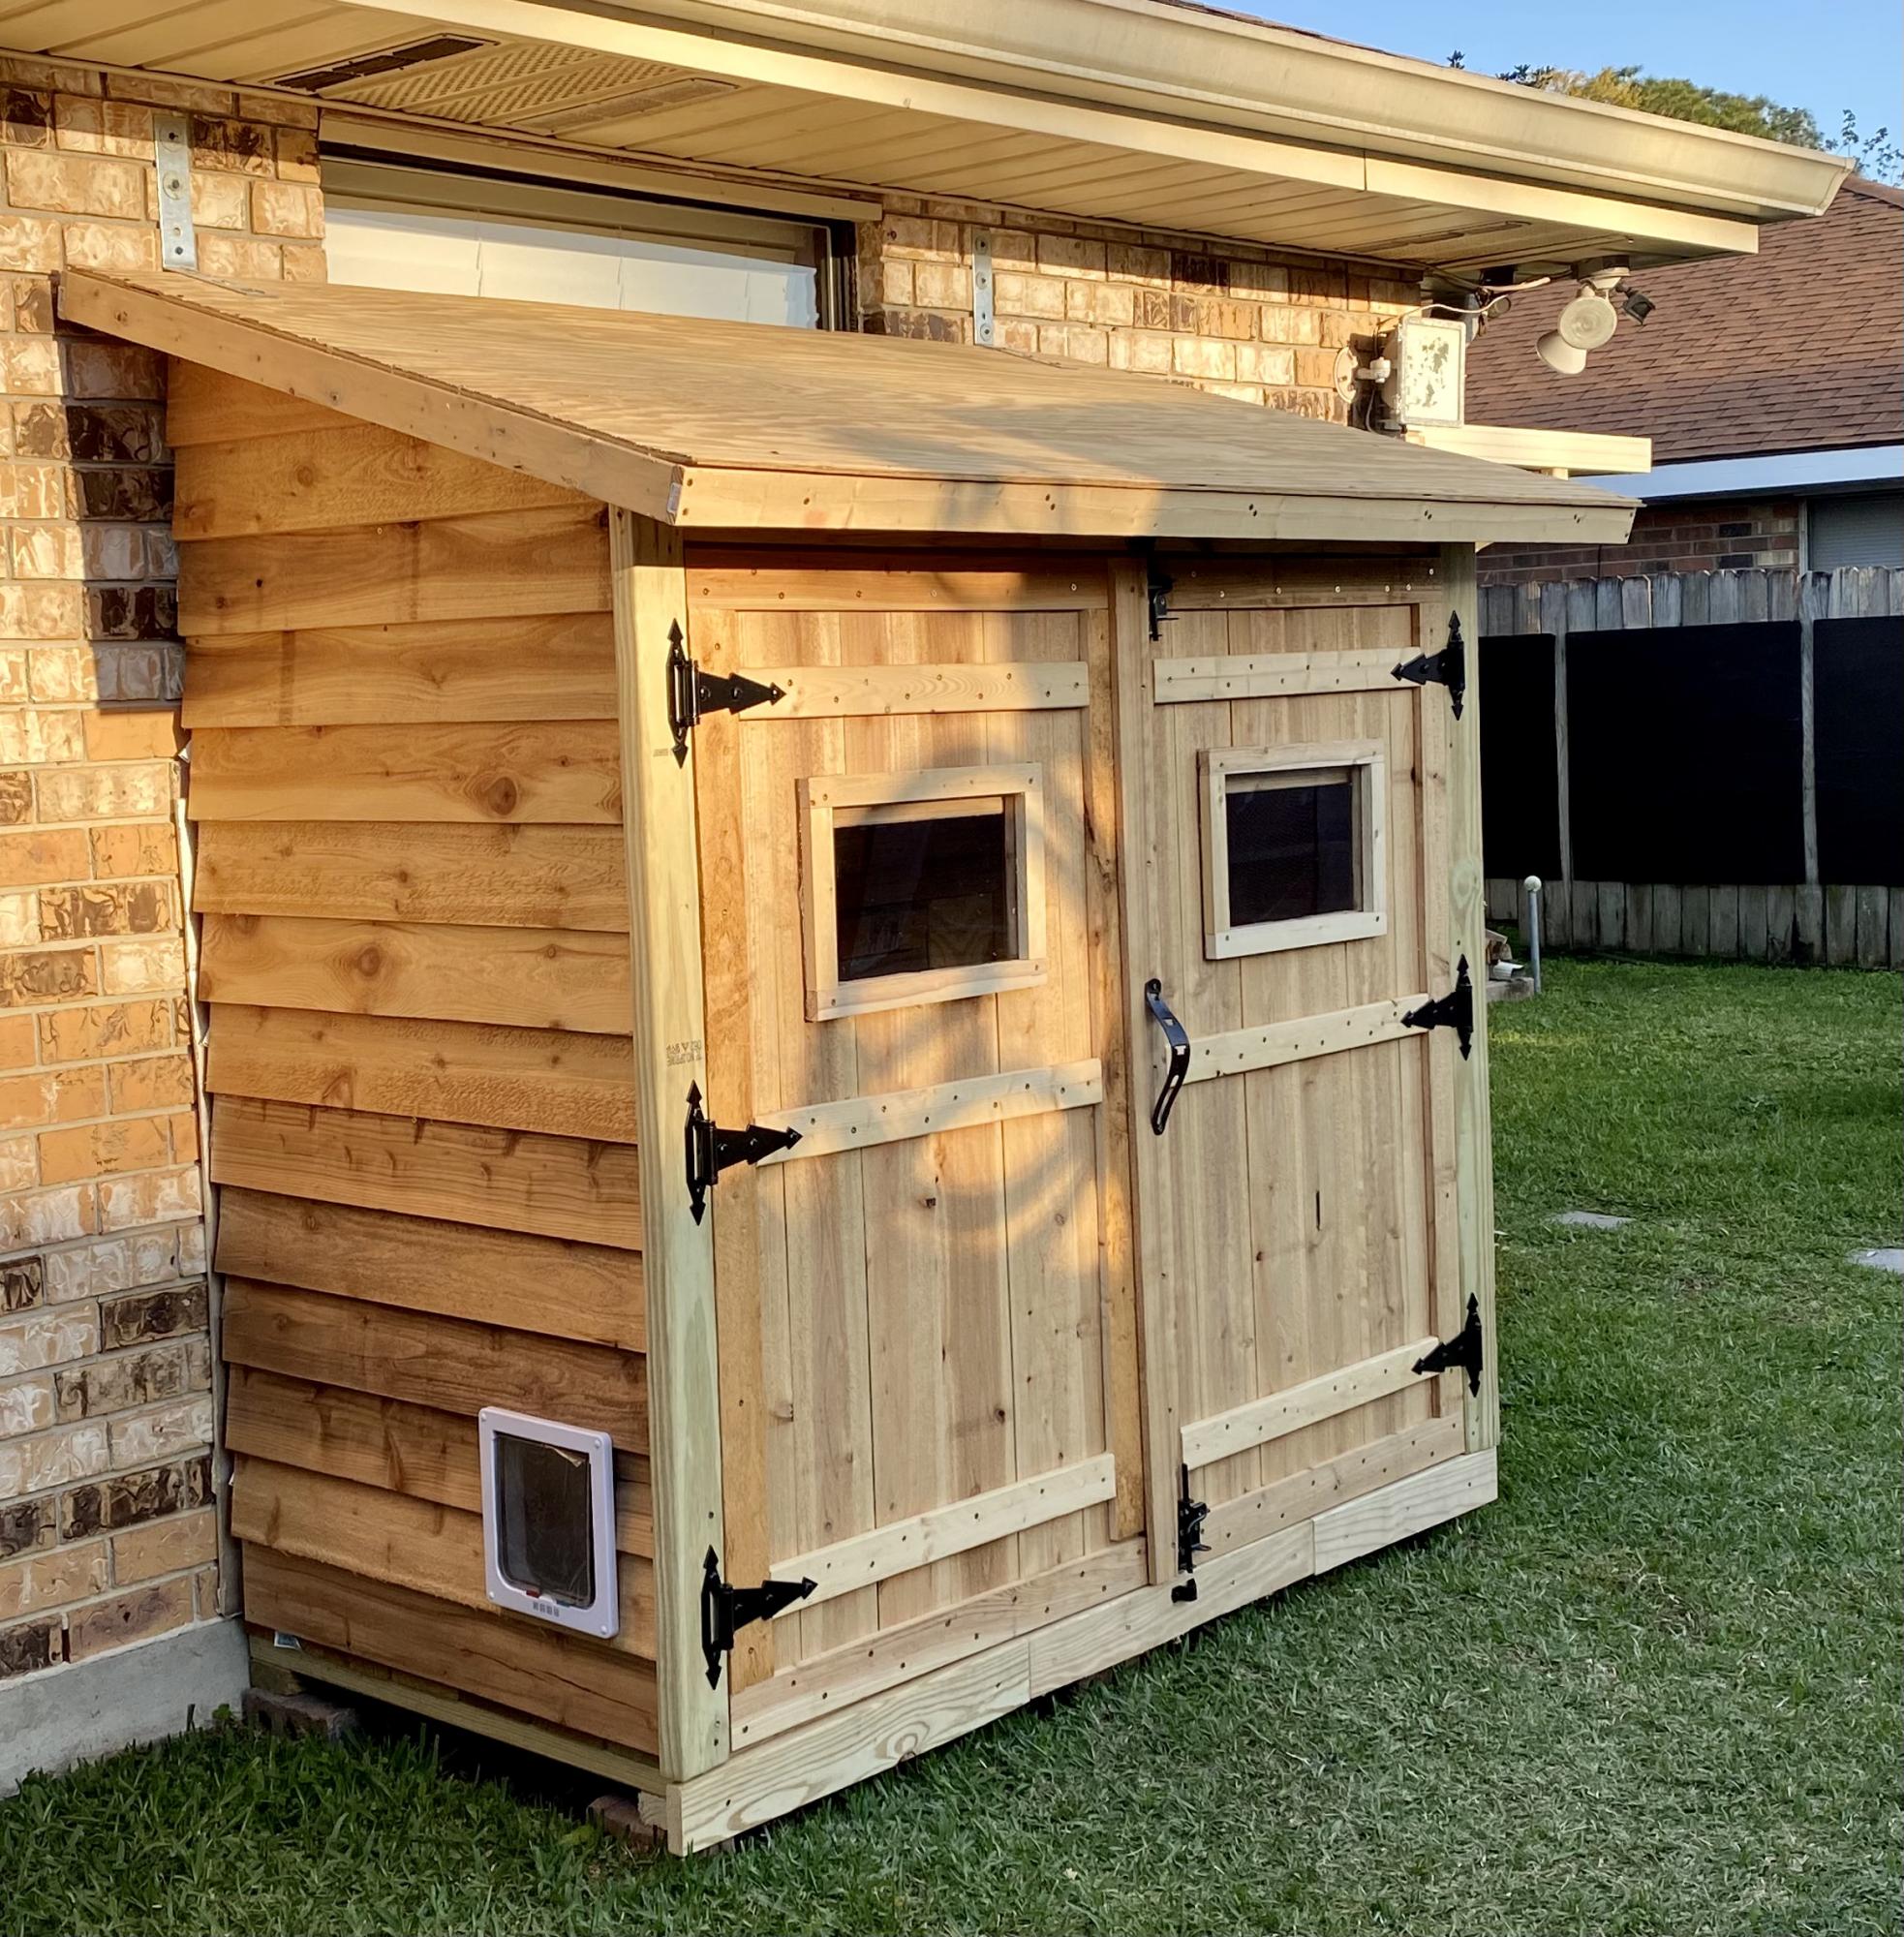
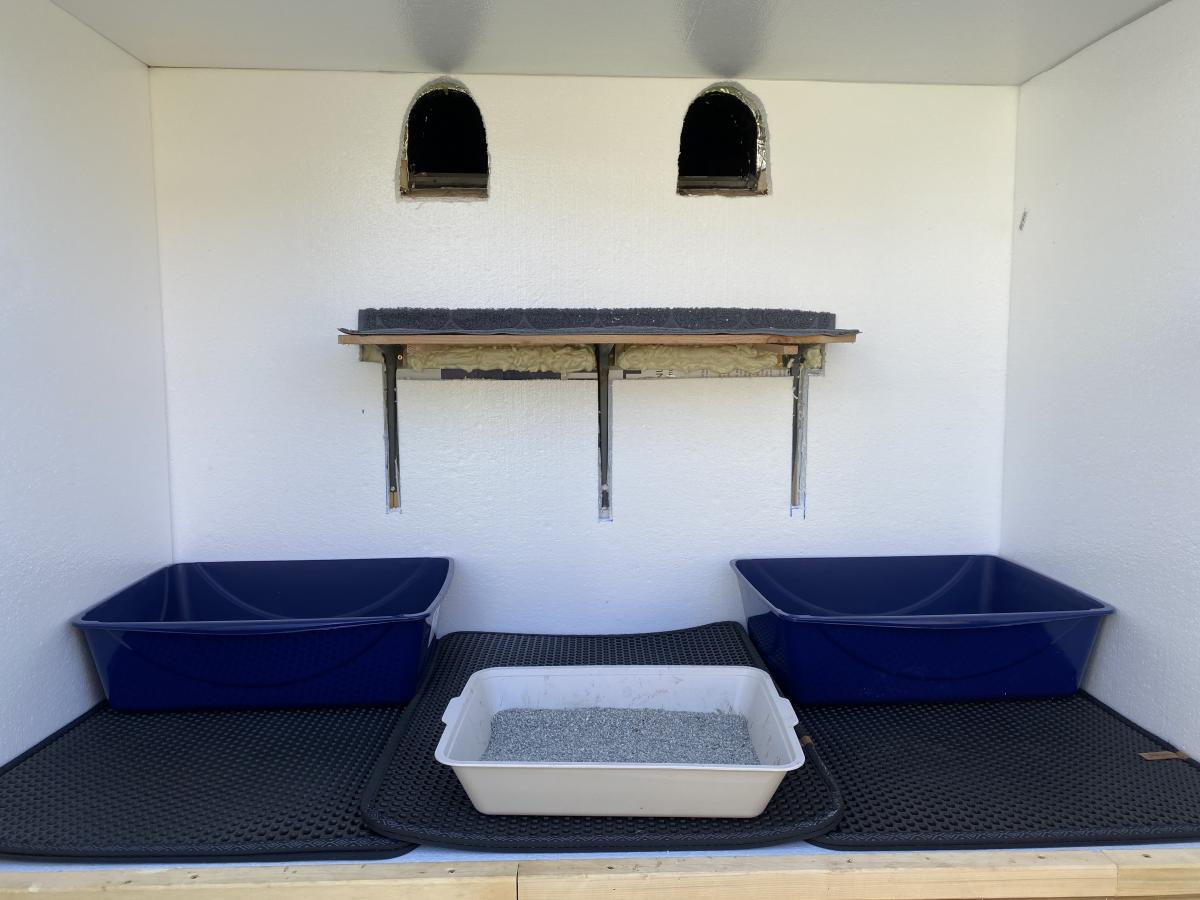
My first Ana White project. Built Ana’s awesome small cedar shed as an outhouse for our many cats. The have access to it from inside the house. Great way to keep litter boxes and the mess out of the house. It is stand alone, and attached to the house, in front of a bedroom window. There are two ‘entrances’ as well as two, one-way, escape hatches, if a cat in the outhouse is interrupted by another cat (I.e. a male cat comes in and the female feels trapped) they can exit to the outside (one way so no critters can come inside!). Ana has easy to build plans, great site! I plan on making the square table just posted today for my newly refurbished deck. Keep in mind, my estimated costs and time reflect a LOT of additional features on the inside. The shed itself, very easy, simple, inexpensive. Very little waste with Ana’s projects as well.
Built from Plan(s)
Estimated Cost
$500
Estimated Time Investment
Week Long Project (20 Hours or More)
Finish Used
No finish, at least not yet.
Recommended Skill Level
Intermediate

Comments

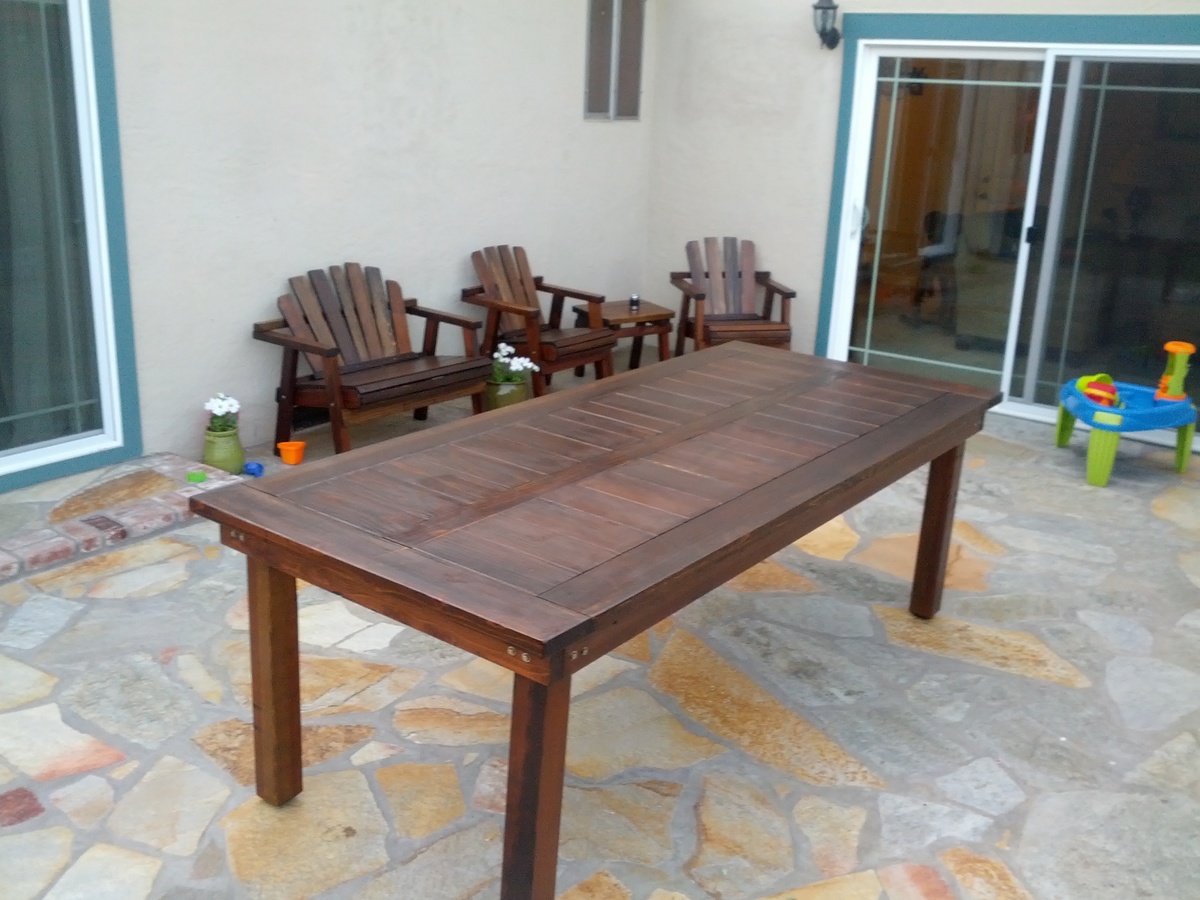
Oversized Redwood Heavy-Duty Outdoor Dining Table

I modified Ana's plans just a bit.

8ft long by 3 1/2ft wide. Used 2X lumber instead of 1X in hopes of reducing the chance for warping over time.

I also went w/ 4X4's for the legs.

Cost was a bit more for redwood here in the Bay Area of California.

Built from Plan(s)
Estimated Cost
$500
Estimated Time Investment
Day Project (6-9 Hours)
Finish Used
Minwax Dark Walnut w/ outdoor sealant-protectant
Recommended Skill Level
Intermediate

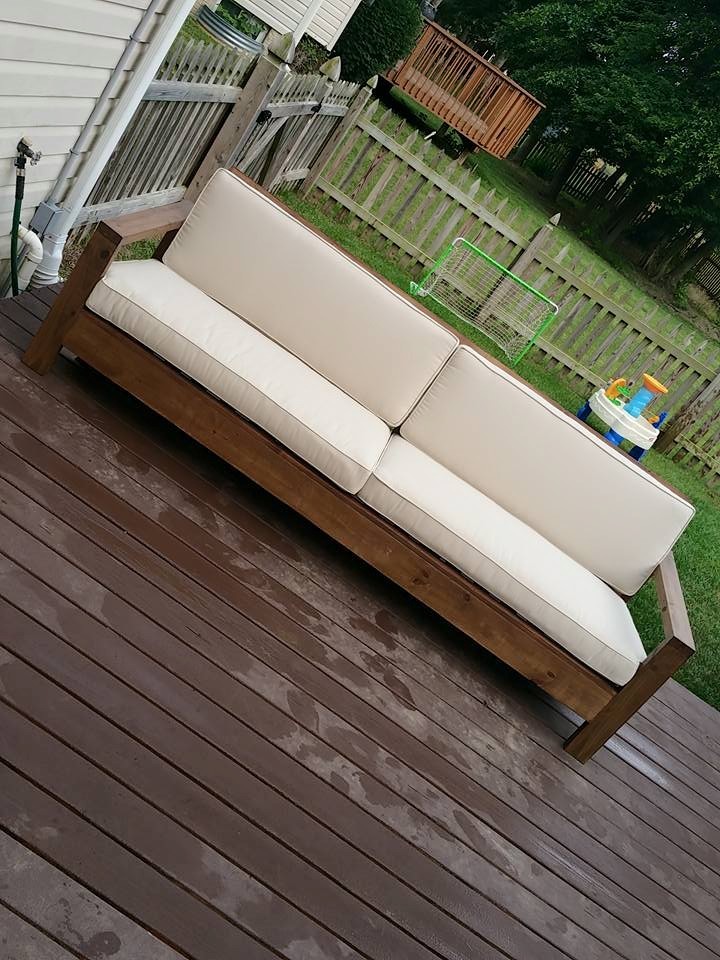
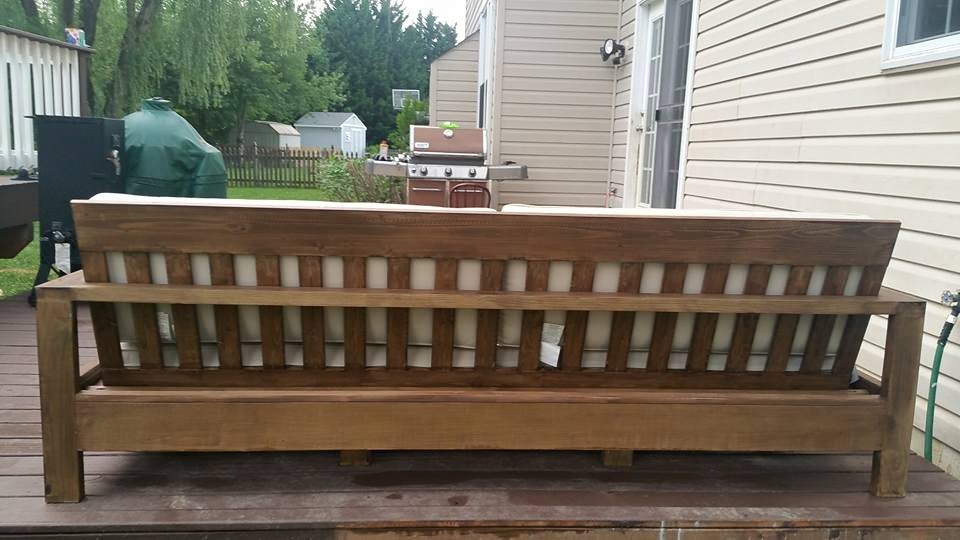
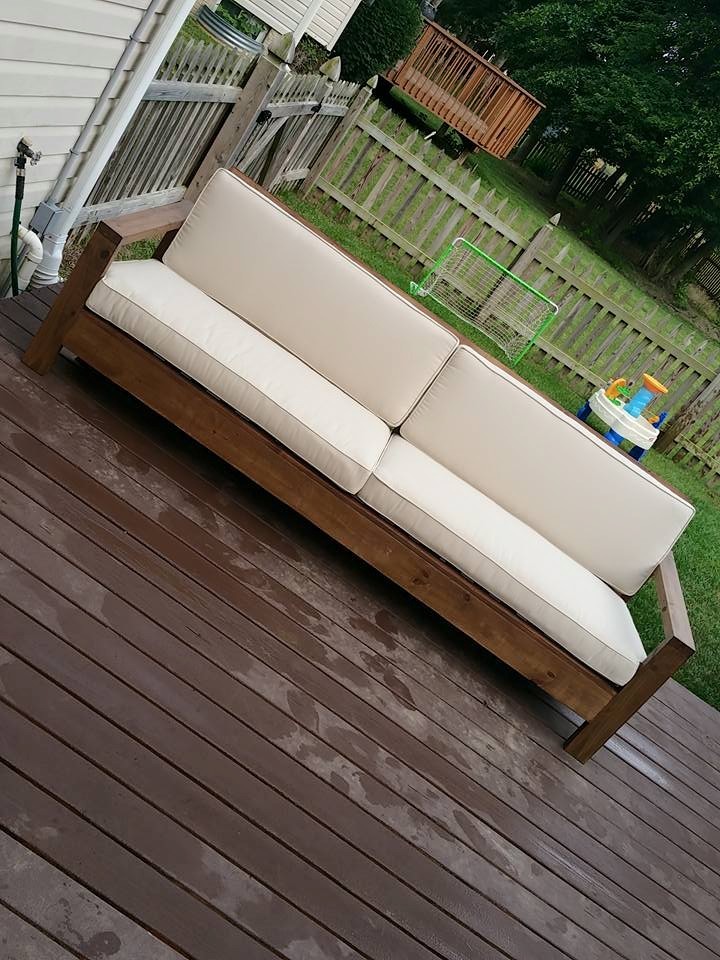
Simple White Outdoor Sofa

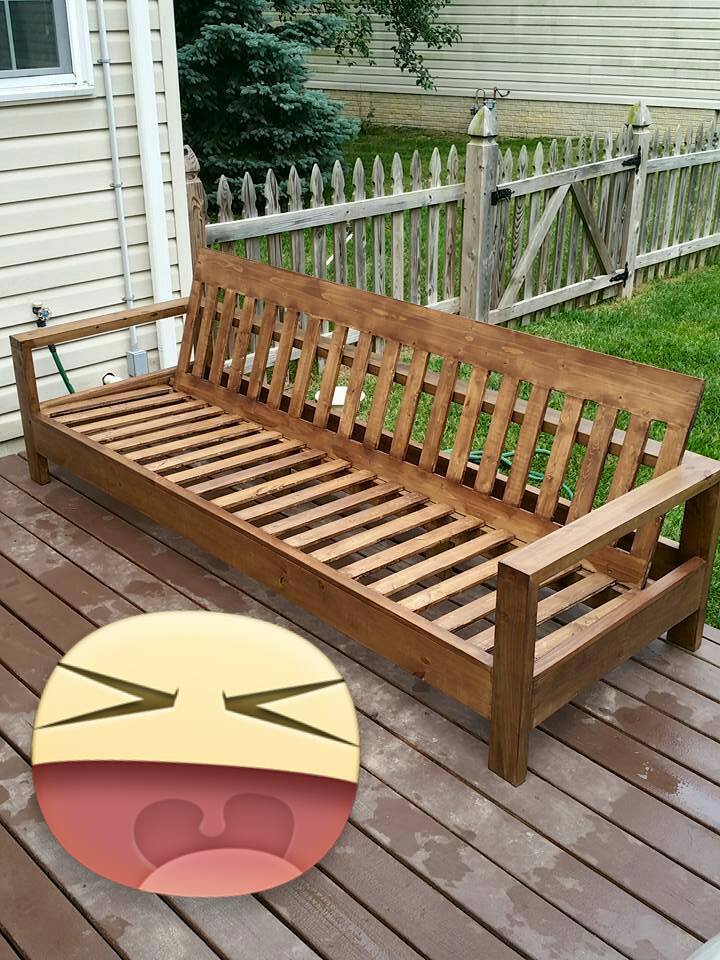
I followed the plan but made the sofa longer, the cushions were on clearance from Pottery Barn for $160 and the cushions are about 96 inches wide.
I used weather treated wood and did not want to spend more since its my first project. I used Behr exterior weatherproof transparent stain. I attached the seats back piece using a 2x2 attached on the bottom with screws and pocket hole screws are used to attach the 2x2 to both sides of the arm frame.
I love how it turned out. I was not expecting for it to come out this nice but I am really impressed.
I hope you guys like it too!

Total cost is around $240 including paint, wood, screws and the cushions.

Estimated Cost
$240
Estimated Time Investment
Weekend Project (10-20 Hours)
Finish Used
Behr Weatherproof transparent stain
Recommended Skill Level
Starter Project

Comments

Play fort and Swing Set

Submitted by gsnpbc on Fri, 03/16/2018 - 20:33

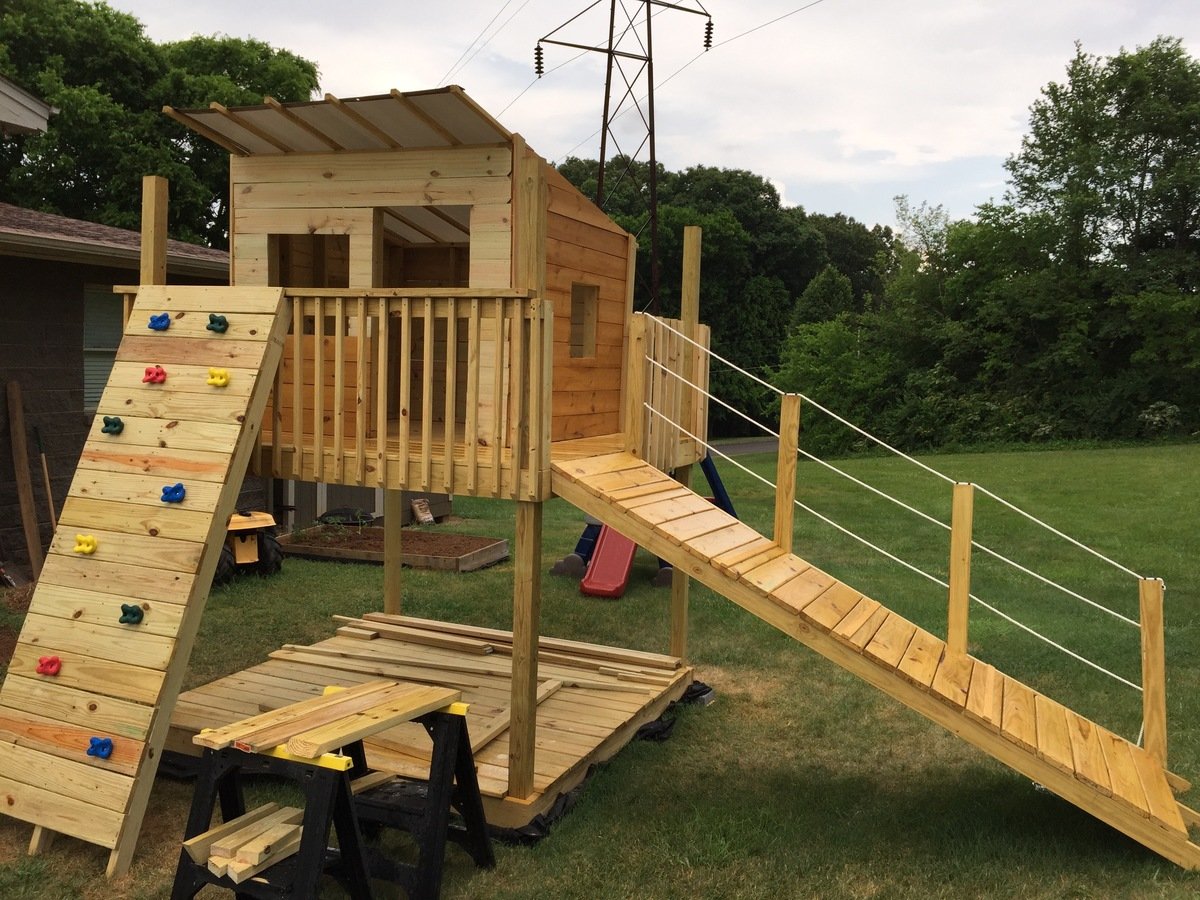
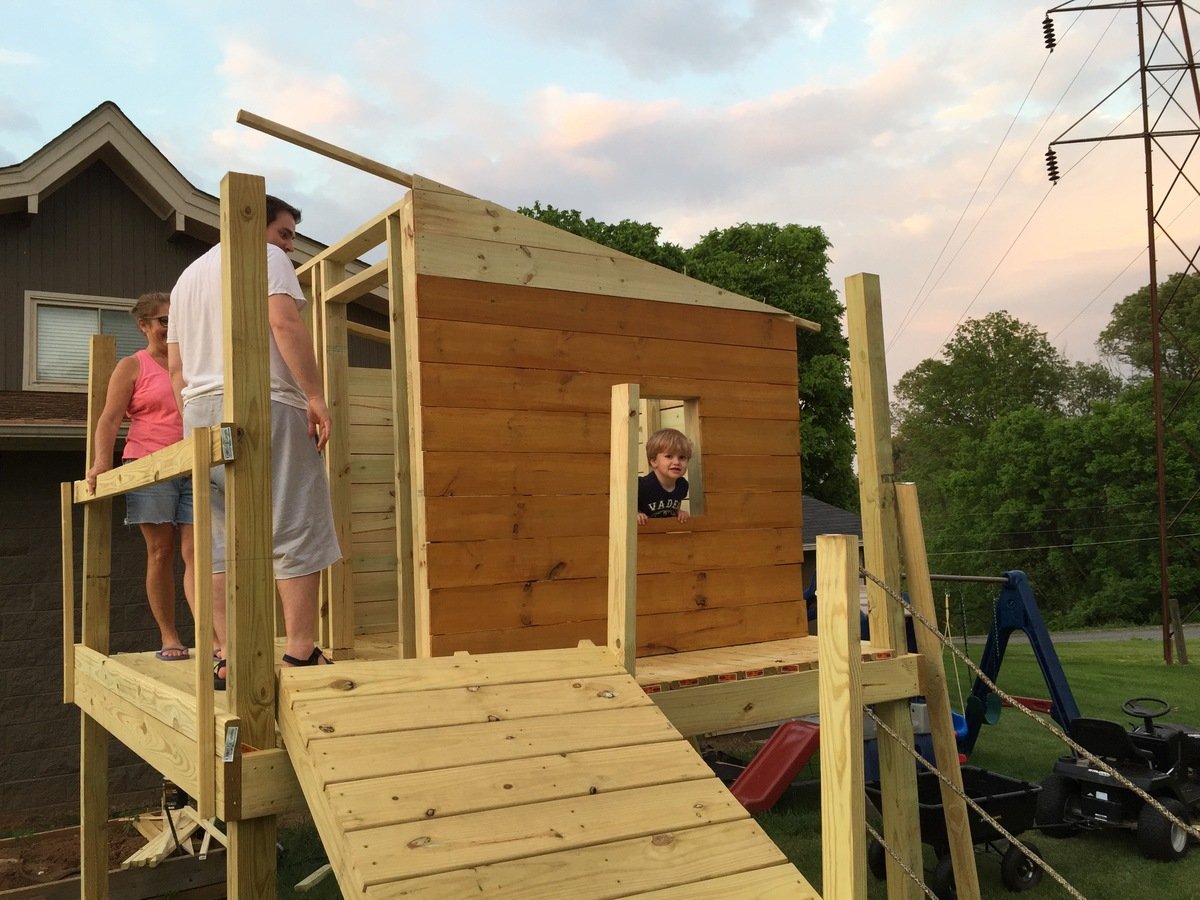
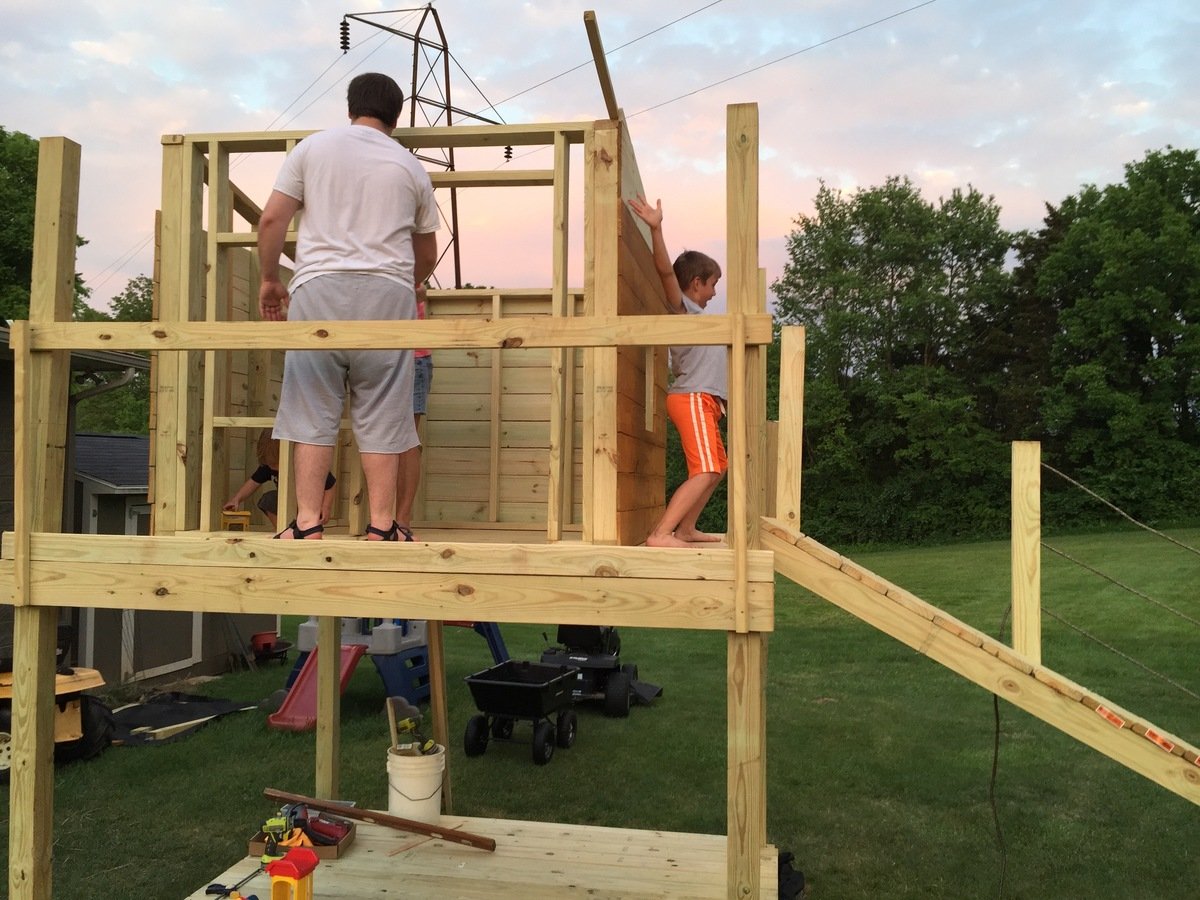
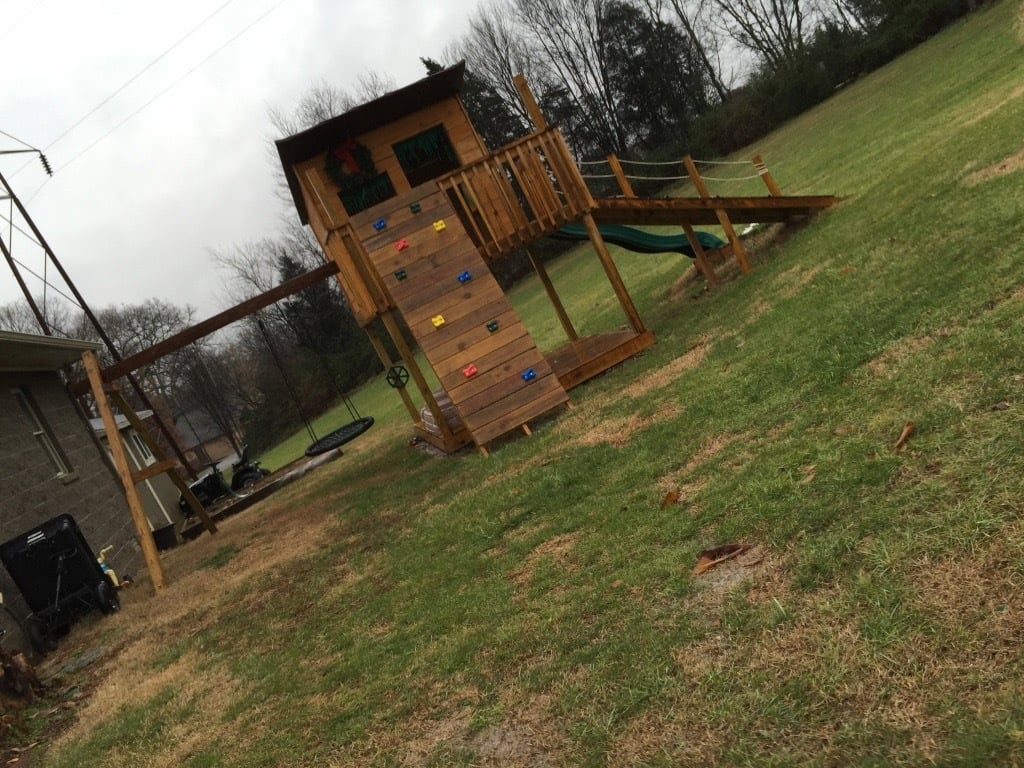
I wanted to build a structure for the kids to play in and on. I used the playhouse deck design and made it 8 feet by 8 feet. The "roof" is removable to provide shade when it's sunny. It's just 2x2 and a tarp - pretty simple, but it does the job. I used treated posts, dog eared fence boards andlots of screws. I stained and built the walls in my garage before assembling it. Once all of the wood at been stained, it came together pretty quickly with the grandkids help...Lol


Estimated Cost
$350
Estimated Time Investment
Weekend Project (10-20 Hours)
Recommended Skill Level
Intermediate

Comments

Back