X based pedestal table

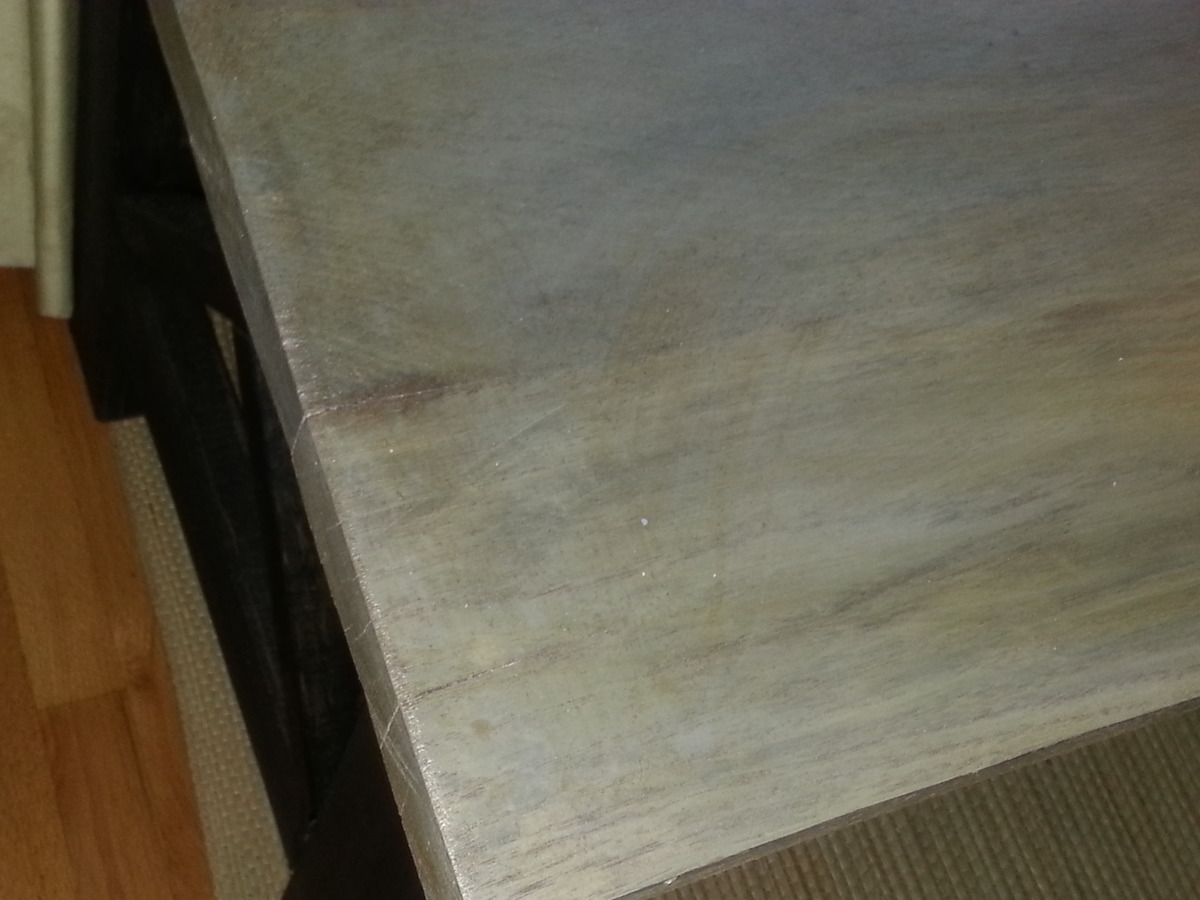
The entire table was made from 200mm x 50mm x 2400mm pine landscaping sleepers. Finished with Cabots benchtop clear
Built from Plan(s)
The entire table was made from 200mm x 50mm x 2400mm pine landscaping sleepers. Finished with Cabots benchtop clear

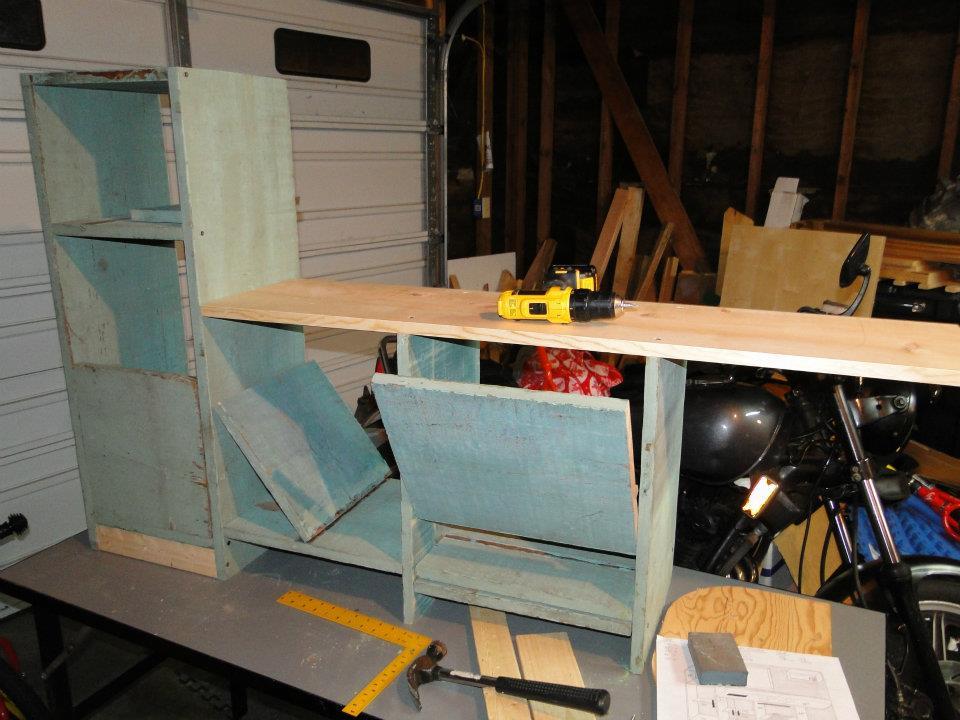
I've been wanting the pottery barn decorative ledge forever! I saw the picture online and was hoping I could find a tutorial for it. I ran across a couple but they weren't quite as big as the original and I wanted it to hang above my king size bed. So yesterday I headed out to my garage where I new I had a bunch of scraps/leftovers from my projects as well as my neighbor brought over some of his scap wood. I printed of the PB picture and wrote down the dimensions and got to work! This was my final result.


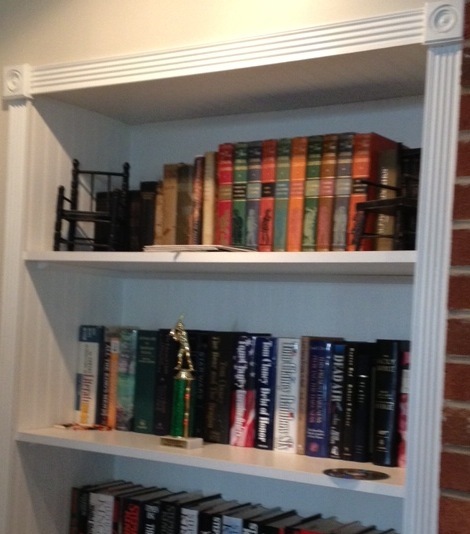
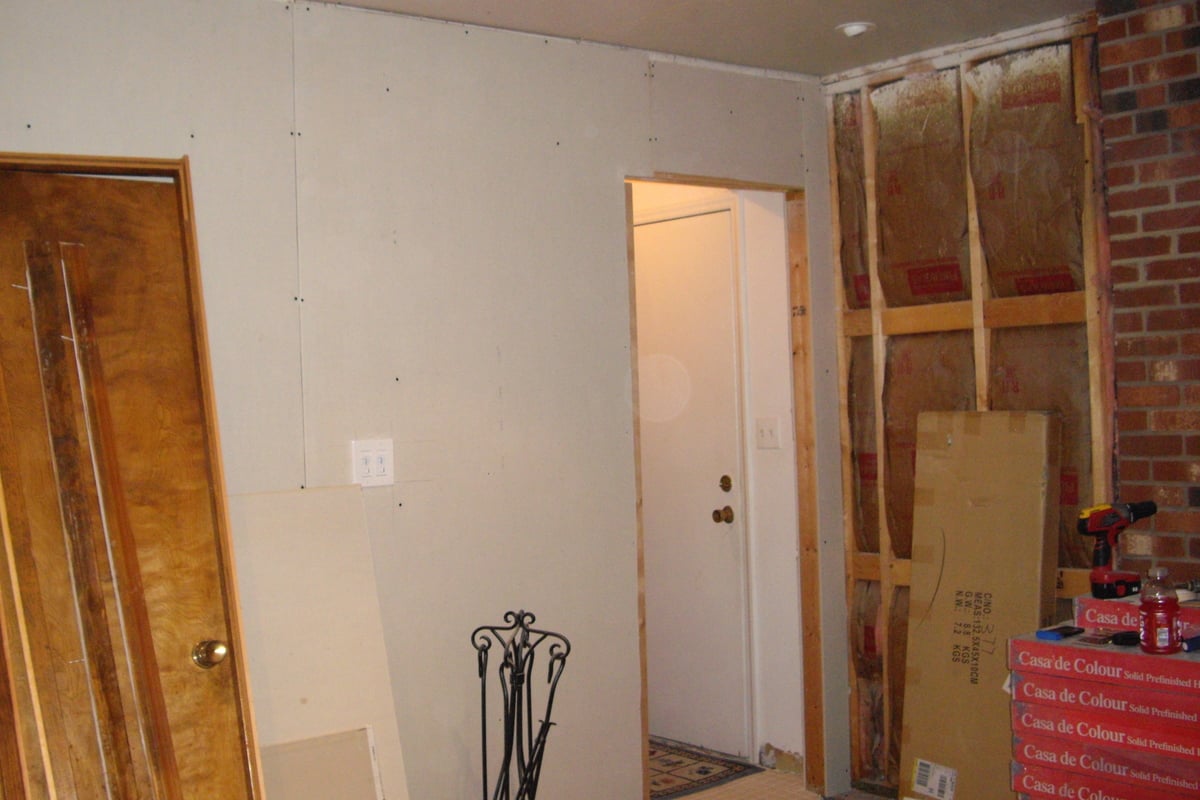
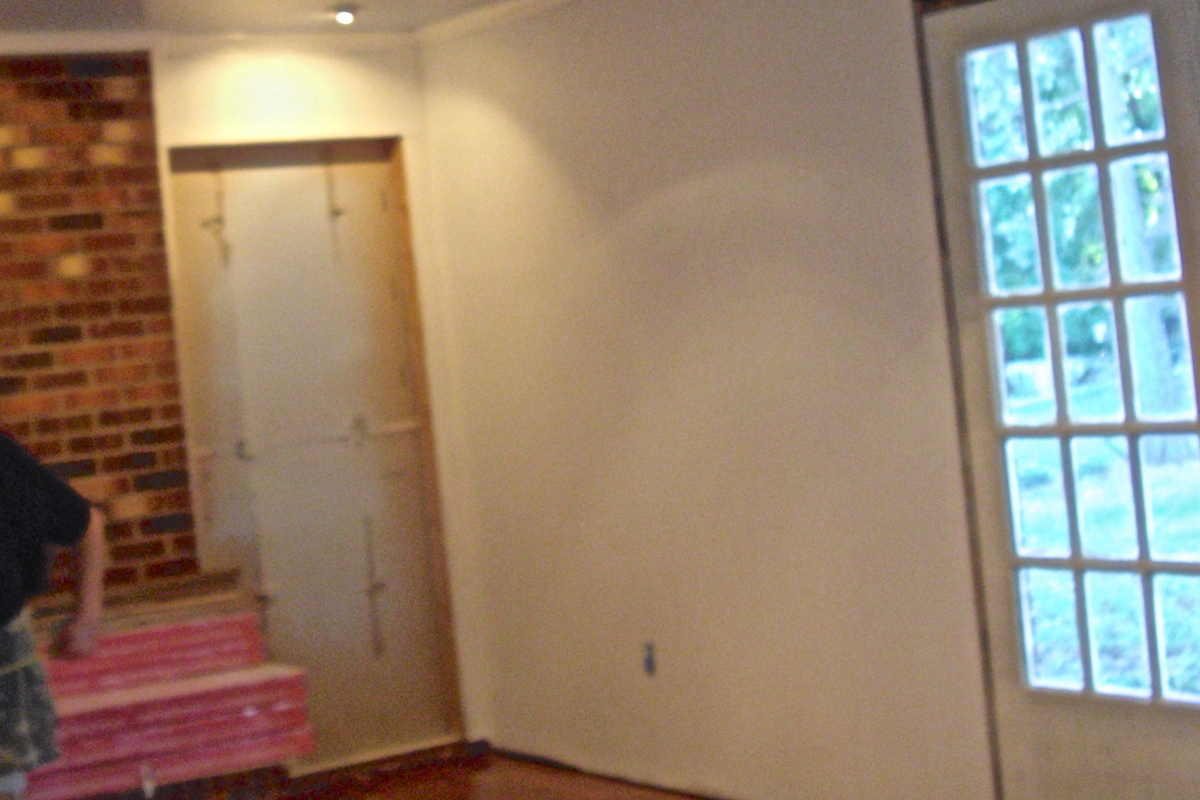
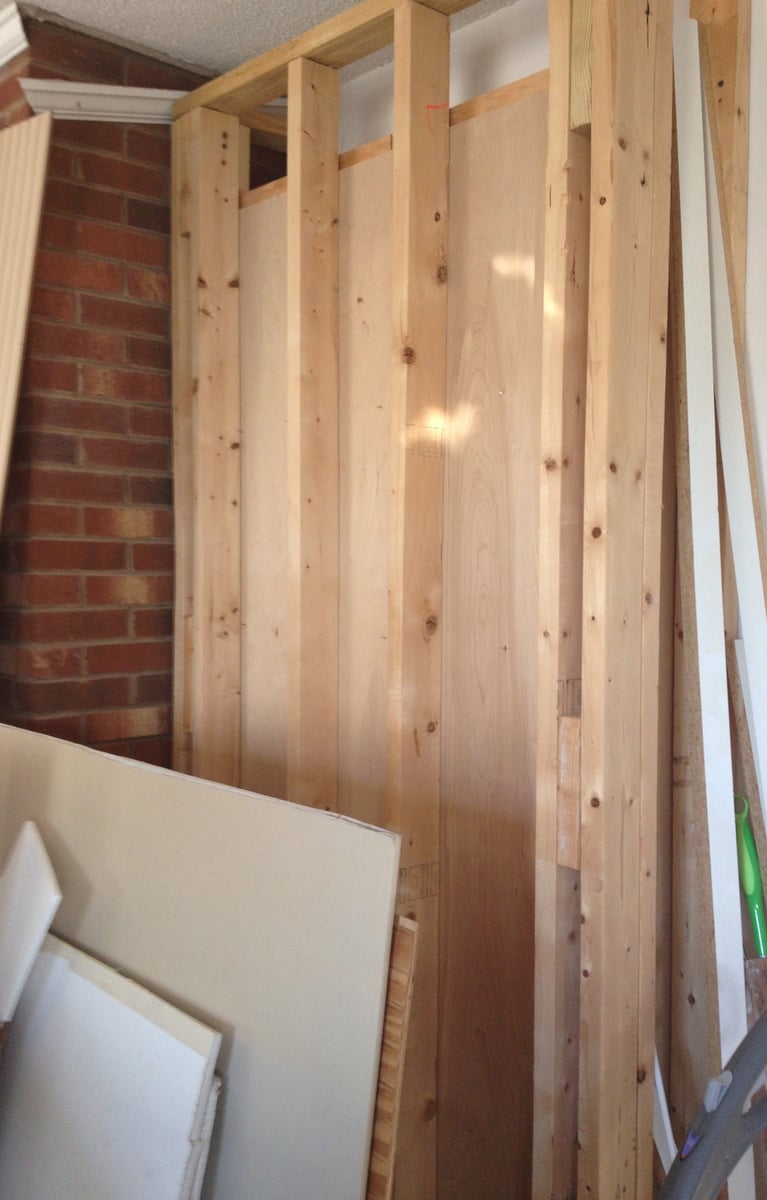
I decided to build bookshelves on either side of the fireplace, where it was just drywall. I wanted them to be flush with the wall, and the garage is behind the wall. So, I built them into the garage.
I put headers above where the bookshelves would be, and framed the back side in the garage with just 2x4's. I used full sheets of bead board to cover the backs and sides, and tops. Then I bought pre made shelves and put them up using quarter round to support the shelves on all three sides.
I then bought a door frame kit that I liked, that came with fluted pieces for the sides and top with decorative squares to put at the corners. I caulked and painted it all once it was built. I used a circular saw, framing nail gun, compressor, trim nail gun, chop saw and a hammer total. It was a pretty simple project but has made the space much more useable and pretty. My next project is to build a mantle and surround that matches the bookshelves.
I built this table out of really rough old lumber from our family farm. Lots of sanding and a real rustic look. Thanks for the plans! I love it!
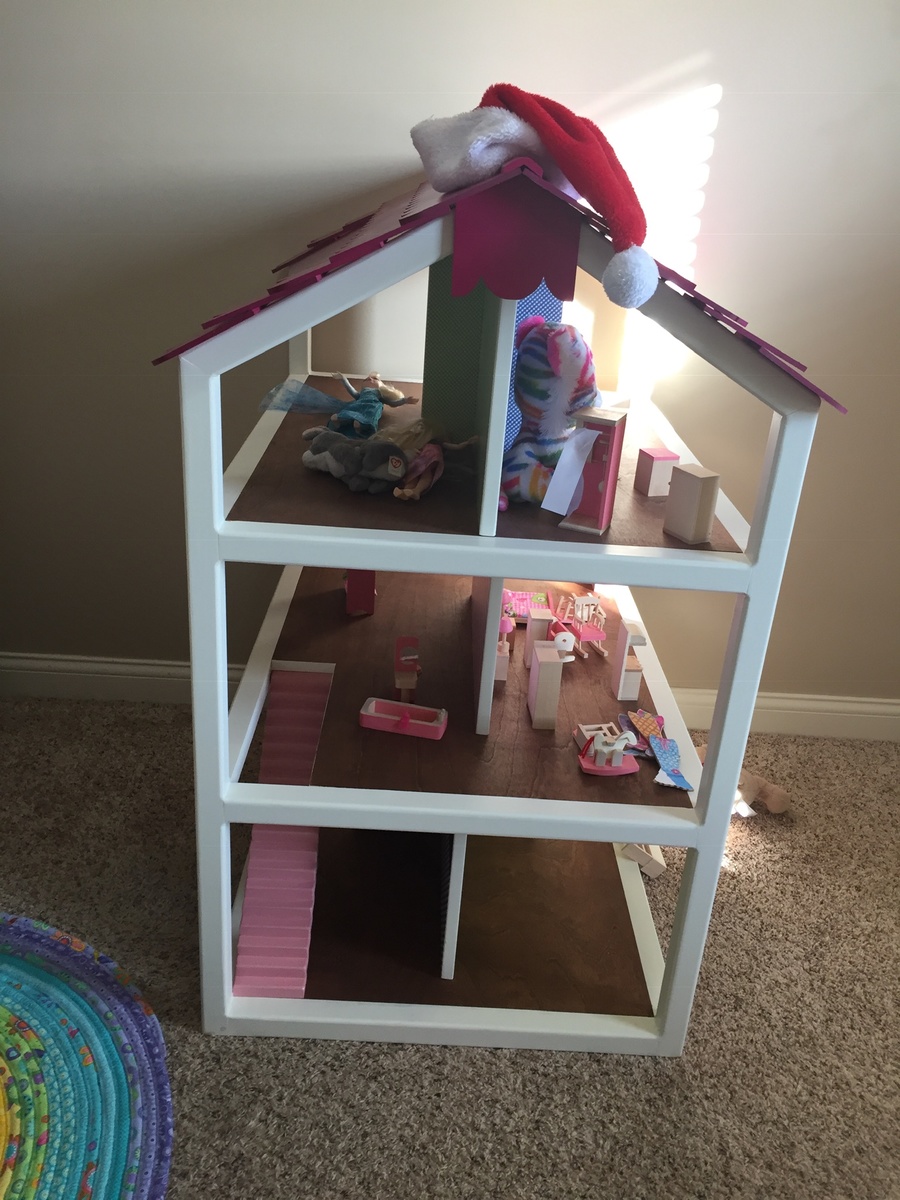
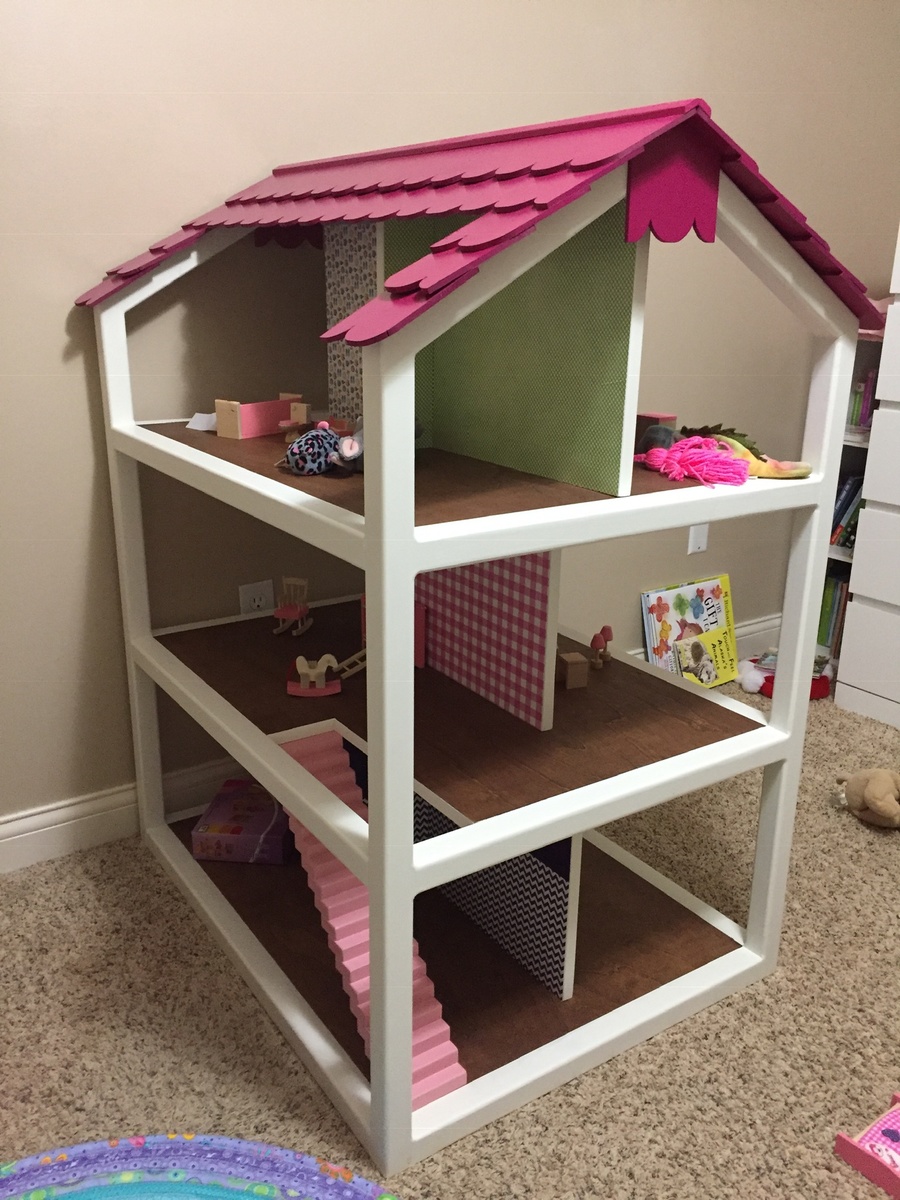
Built for 3 year old Granddaughter 2018 Christmas. Great instructions thanks. Added ridge cap instead of chimney. Stained floors for the hardwood floor look.
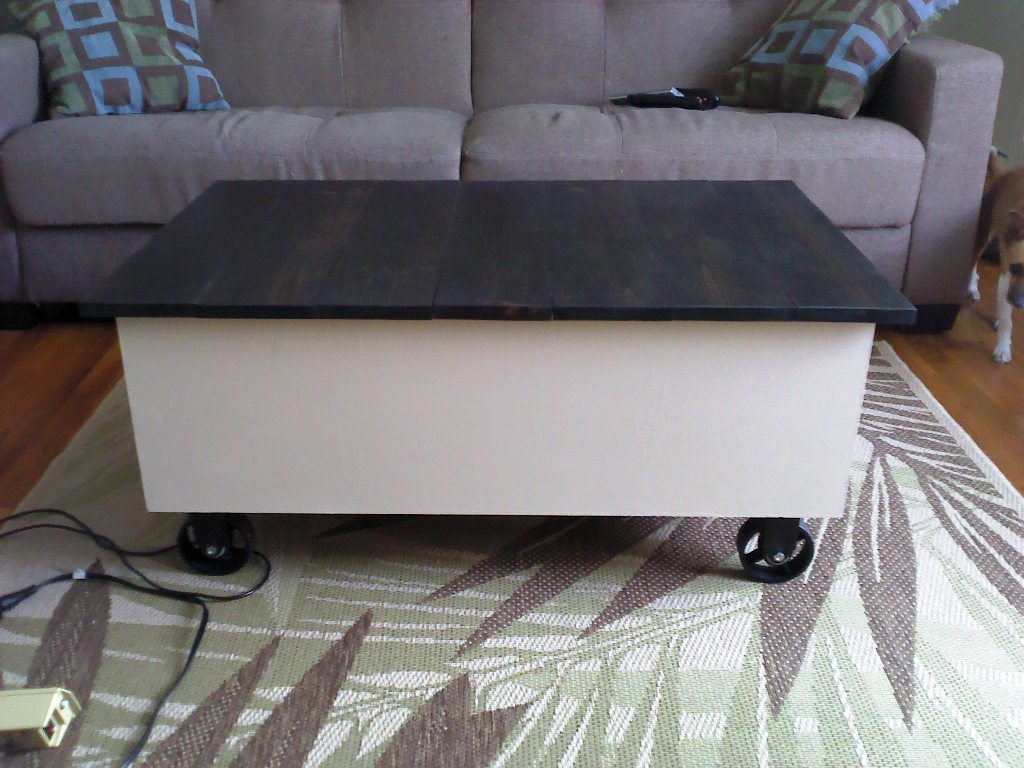
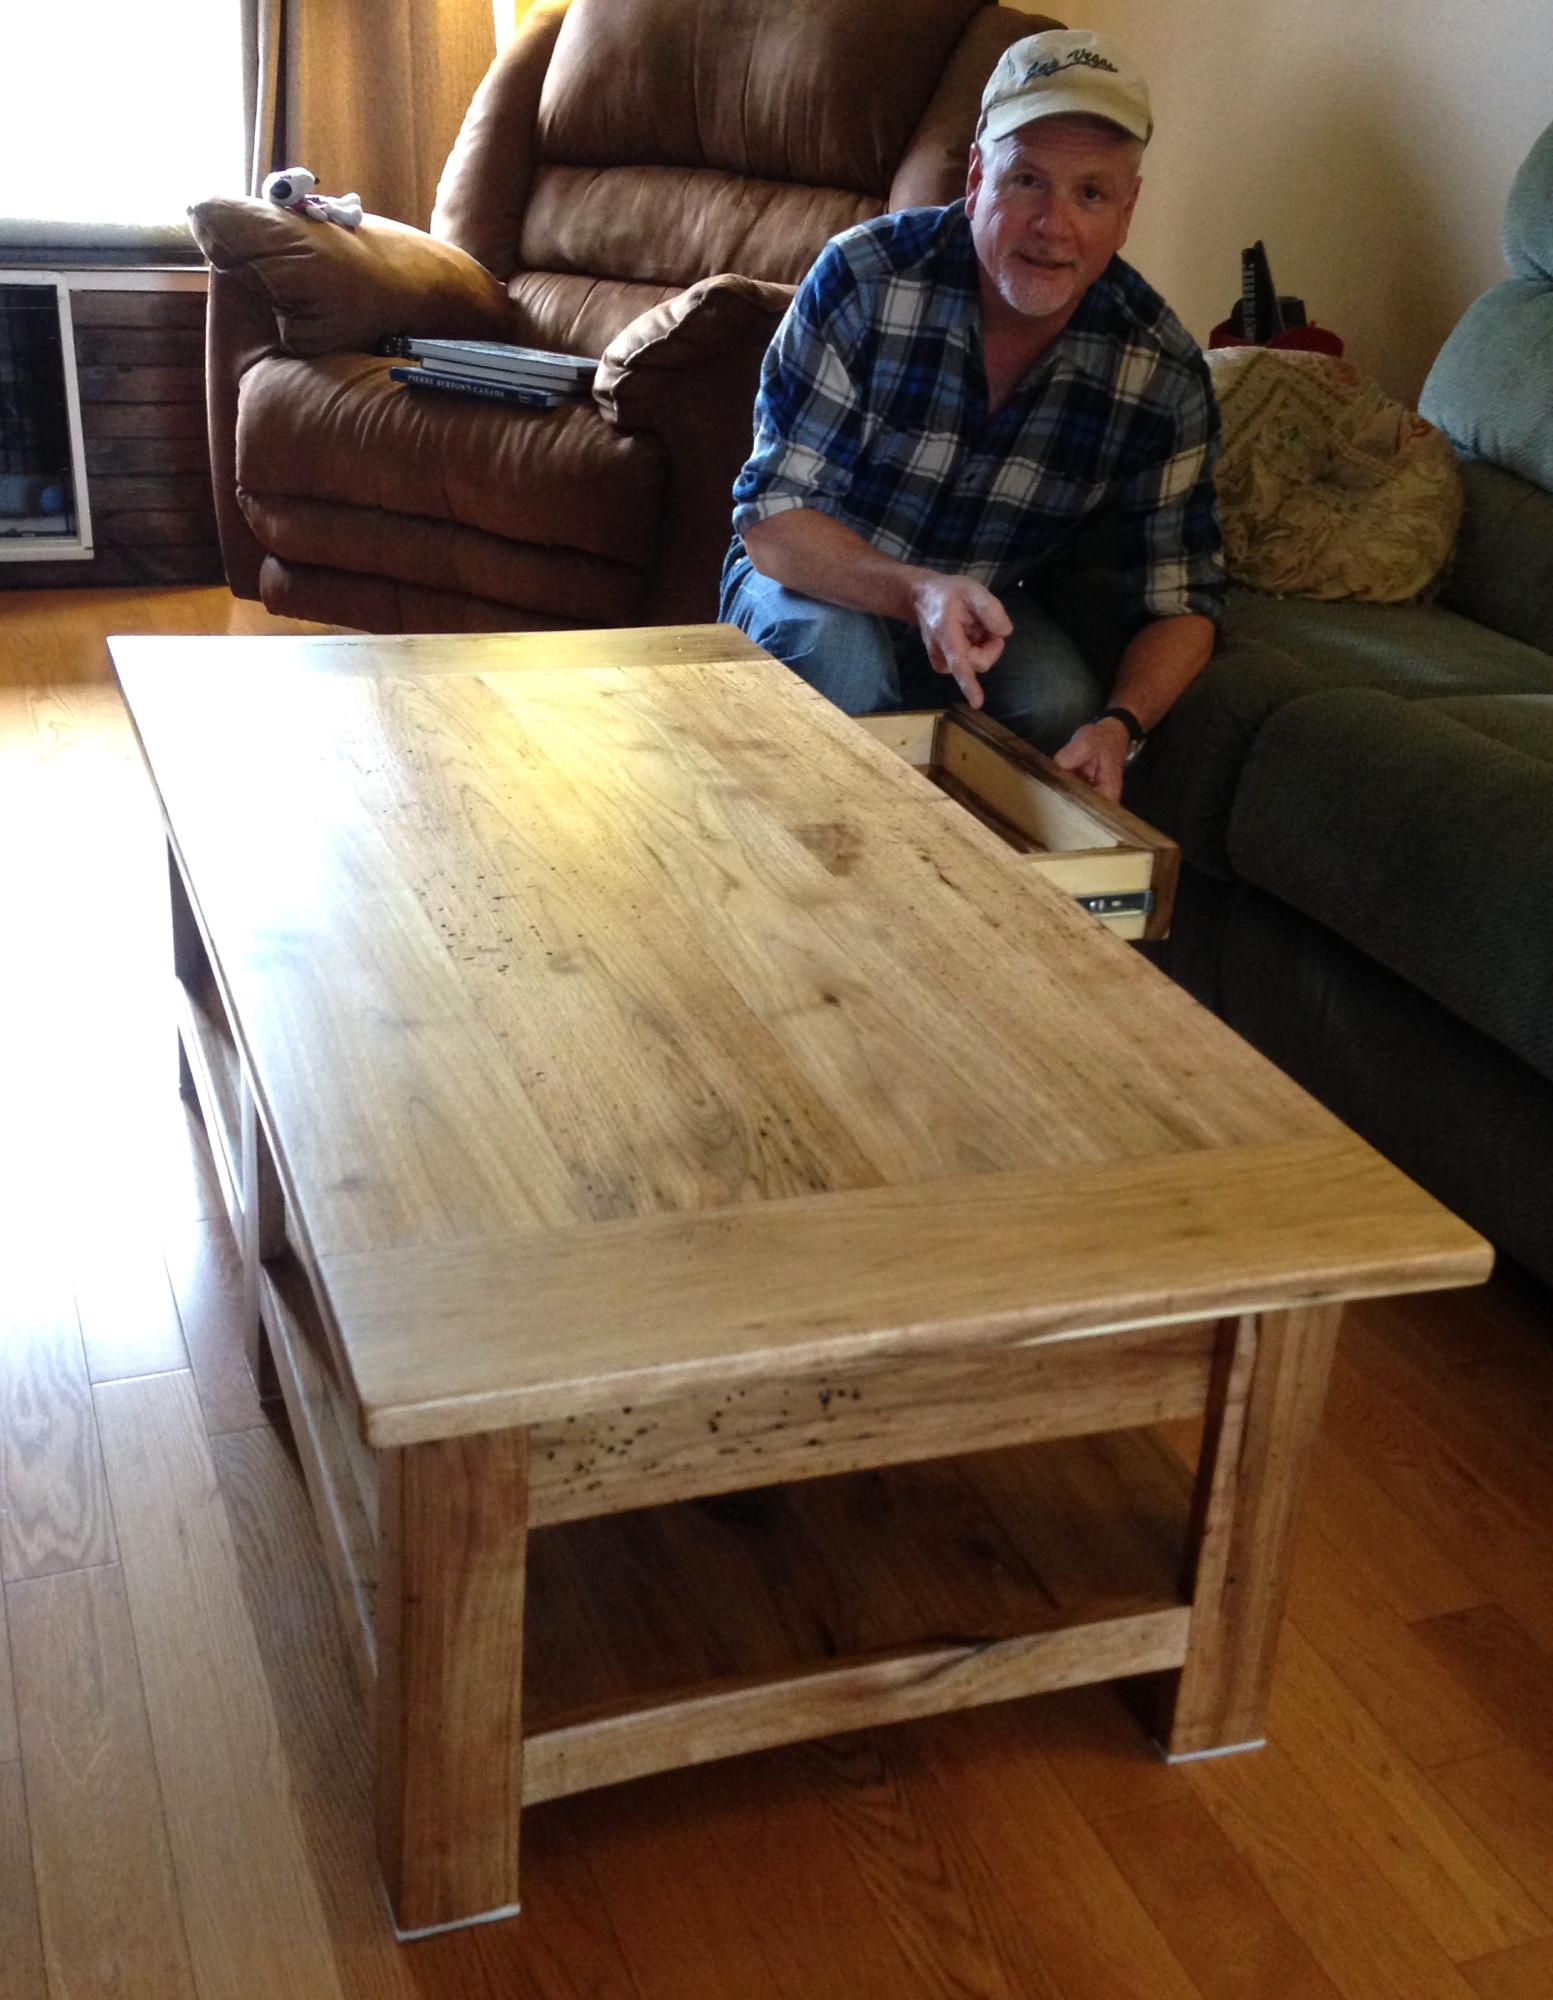
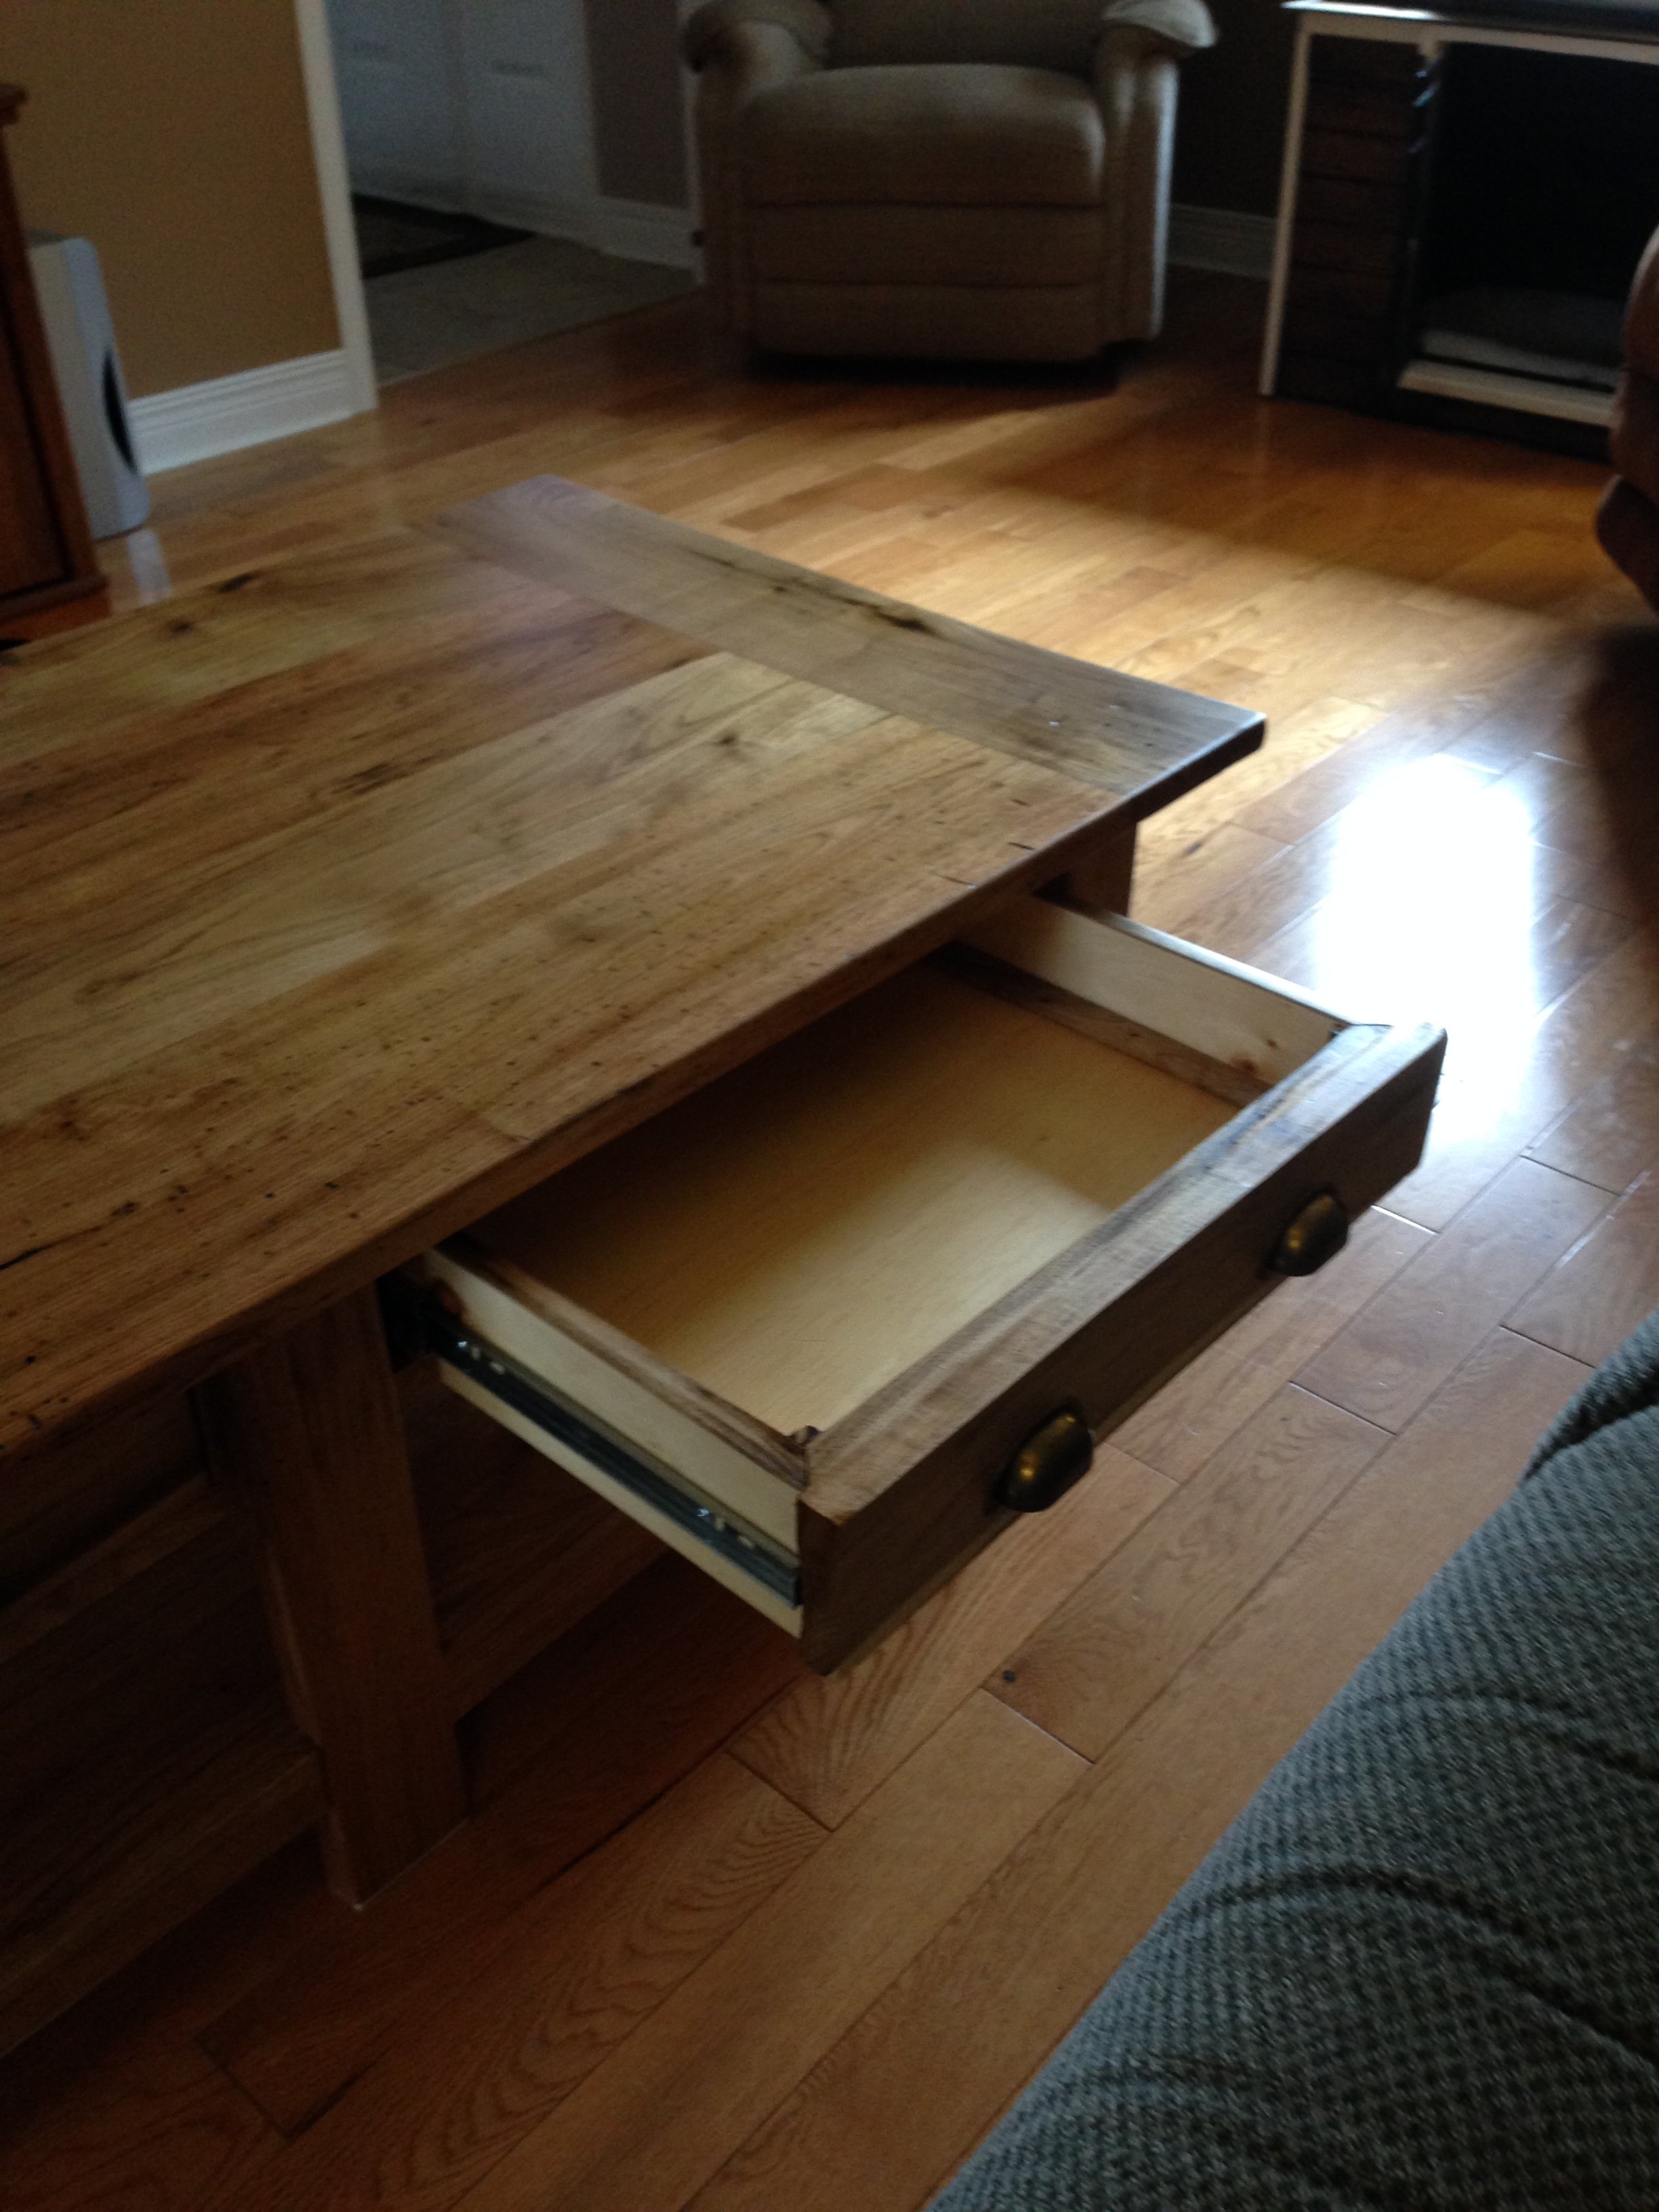
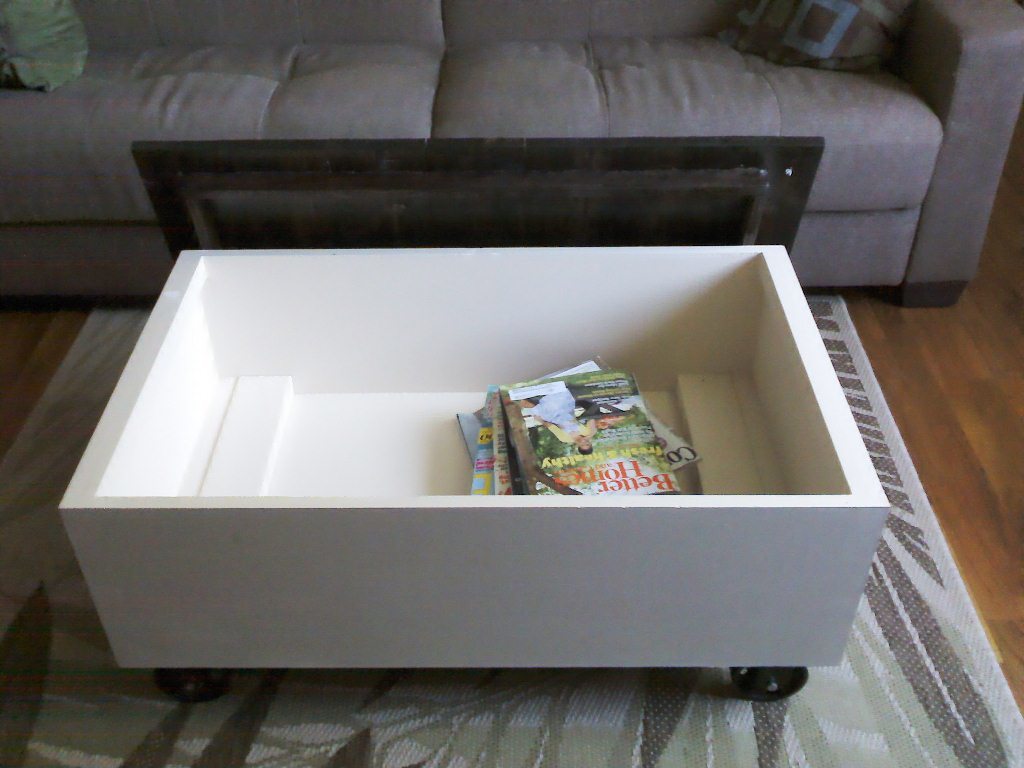
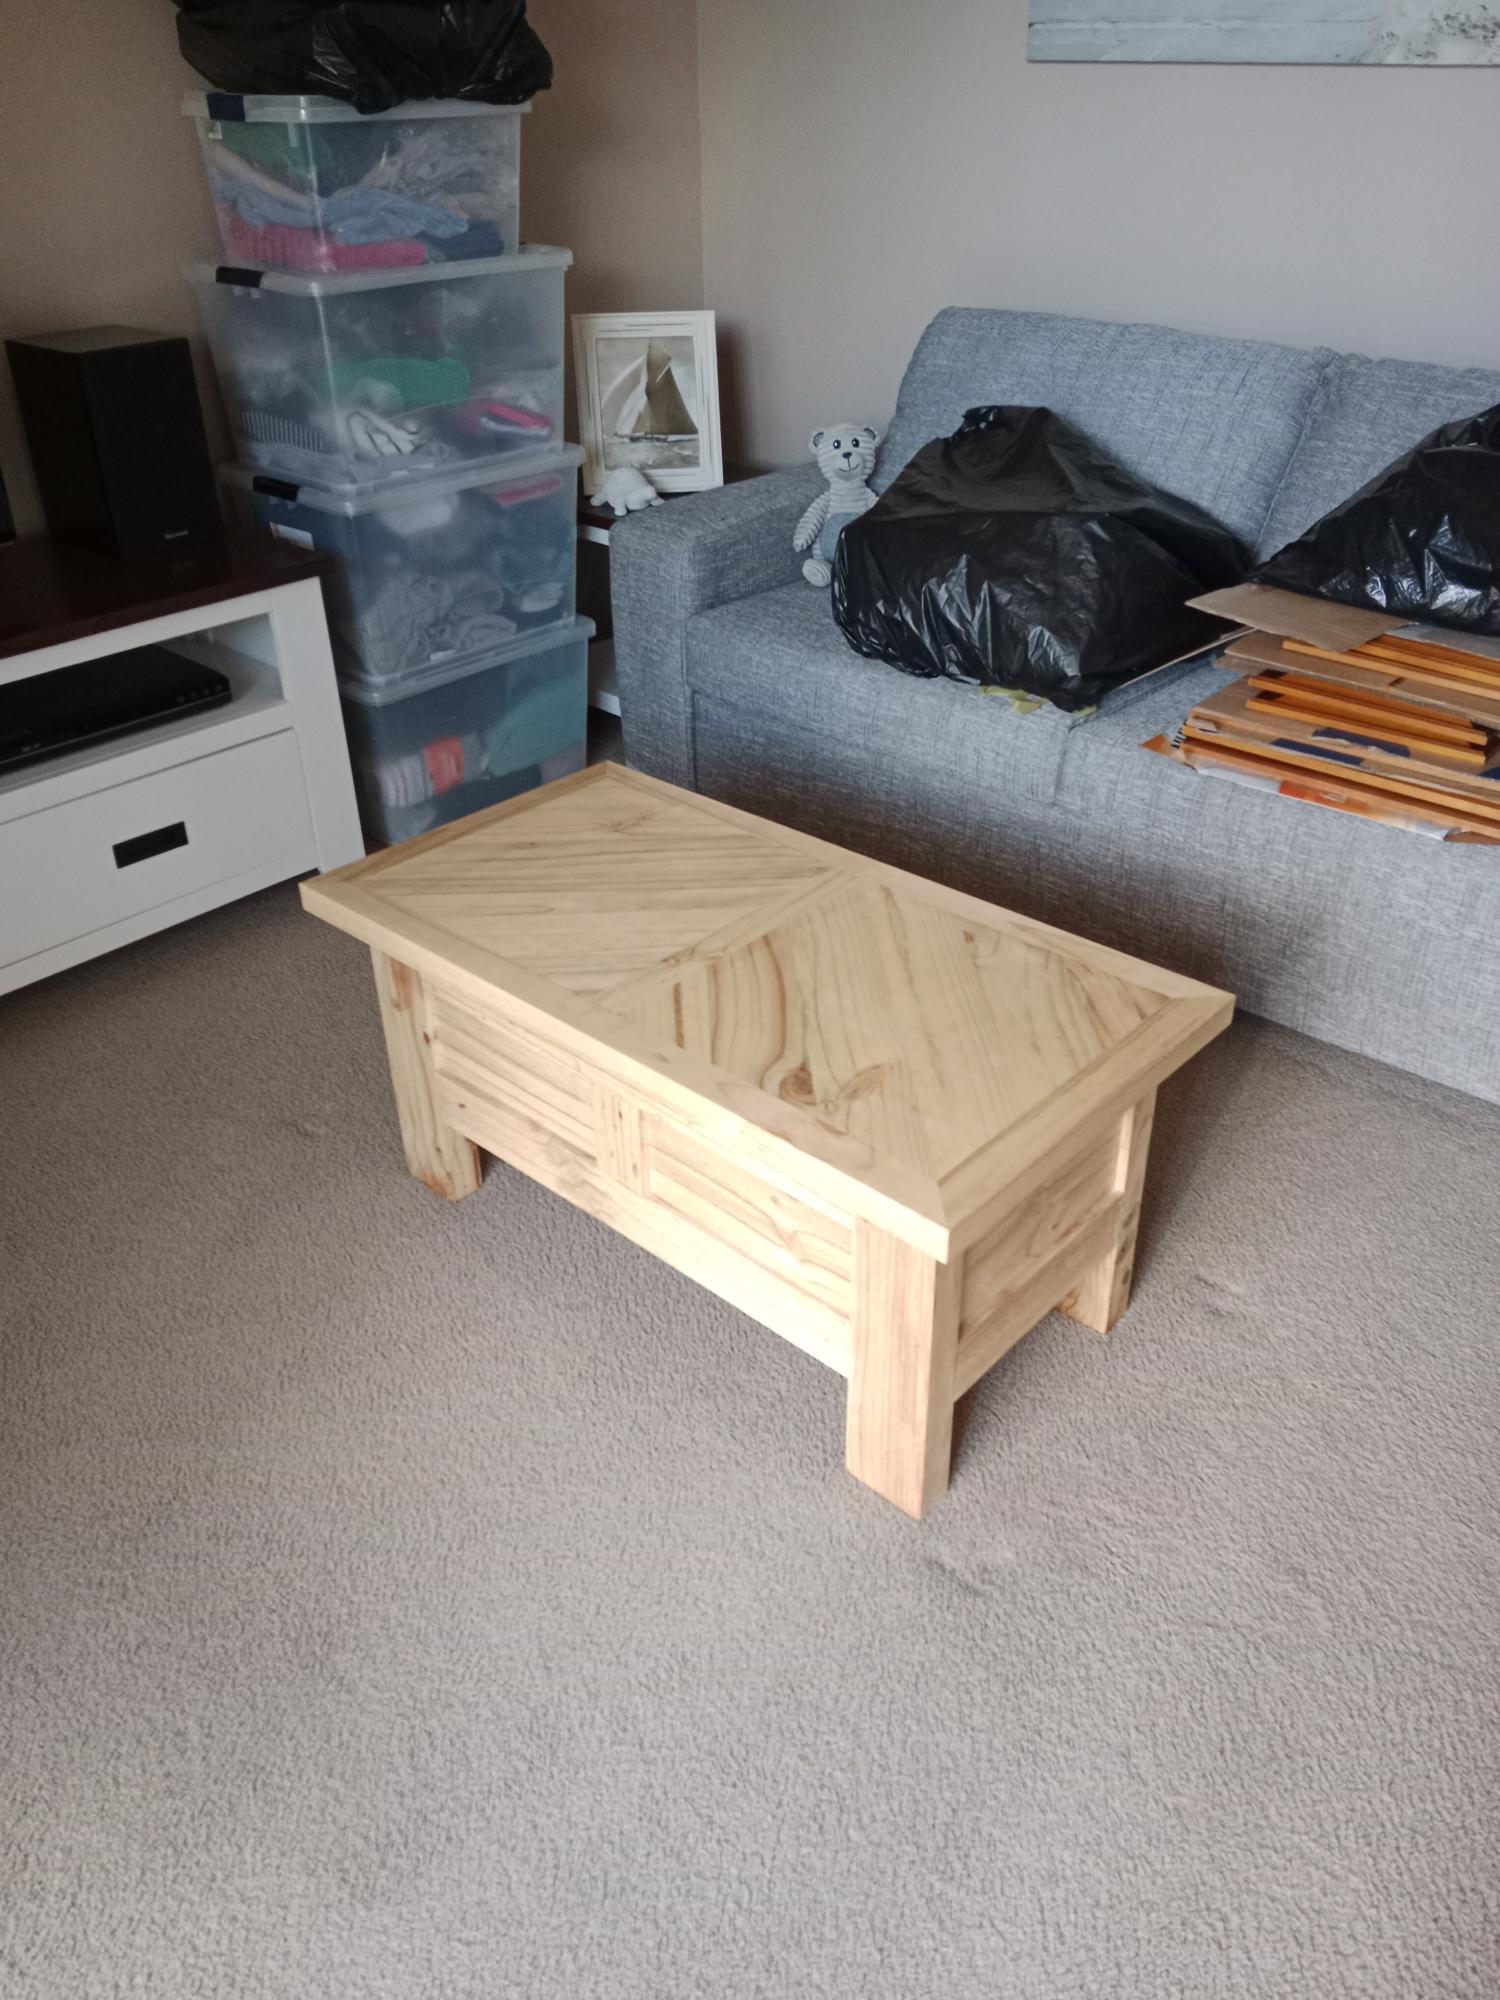
I modified the factory cart coffee table plans to make a coffee table with a removable top for storage. The result was more Pottery Barn than Restoration Hardware. I put a piece of plywood on the bottom, to make an enclosed box. Then modified the frame under the 1x6's of the top, to make it fit snugly in the opening of the top of the box. The sides of the box were 1x12's I had leftover from another project. Actually, everything was leftovers, except the 1x6's for the top, and the castors. The 4 inch castors were painted flat black with high heat wood stove paint (also a leftover from refinishing our pellet stove). I used smaller castors, since the table was already taller than the original plans.
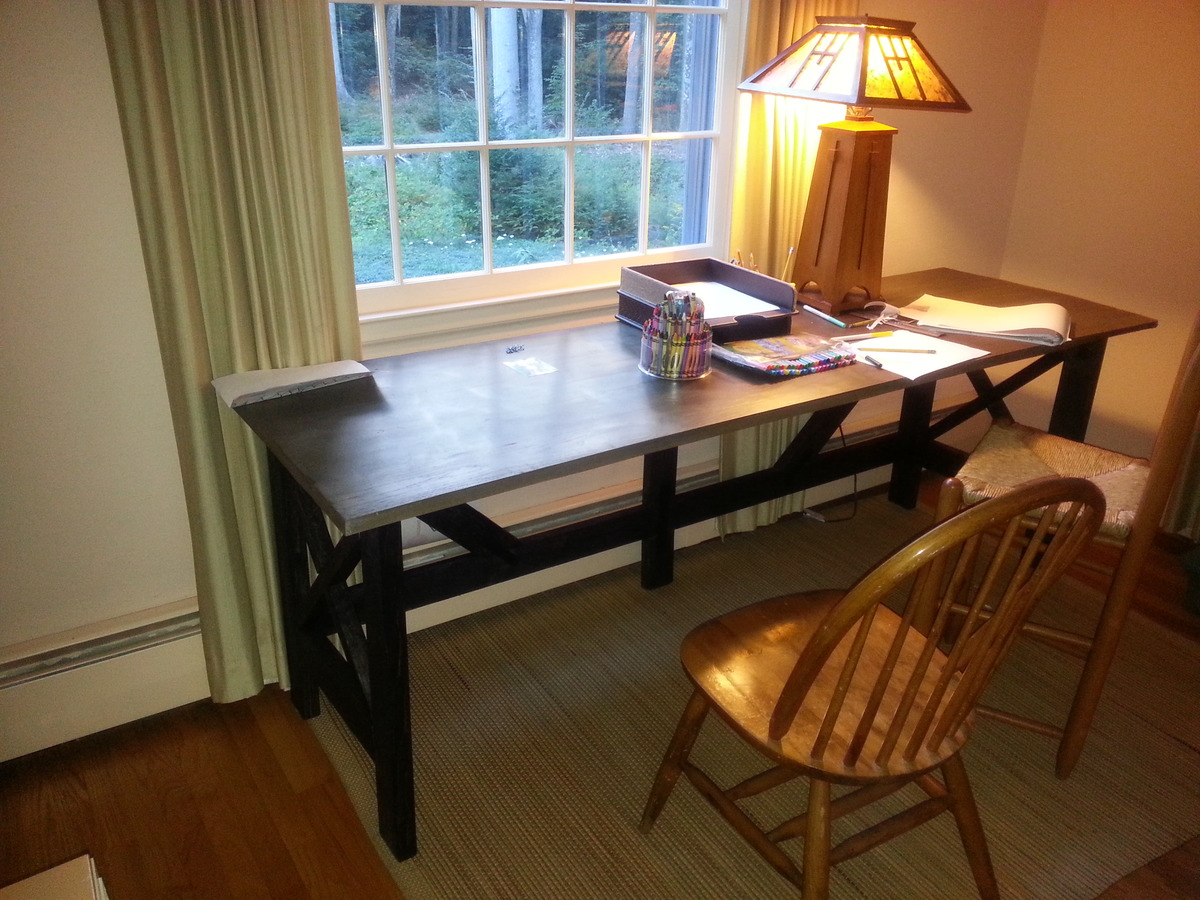
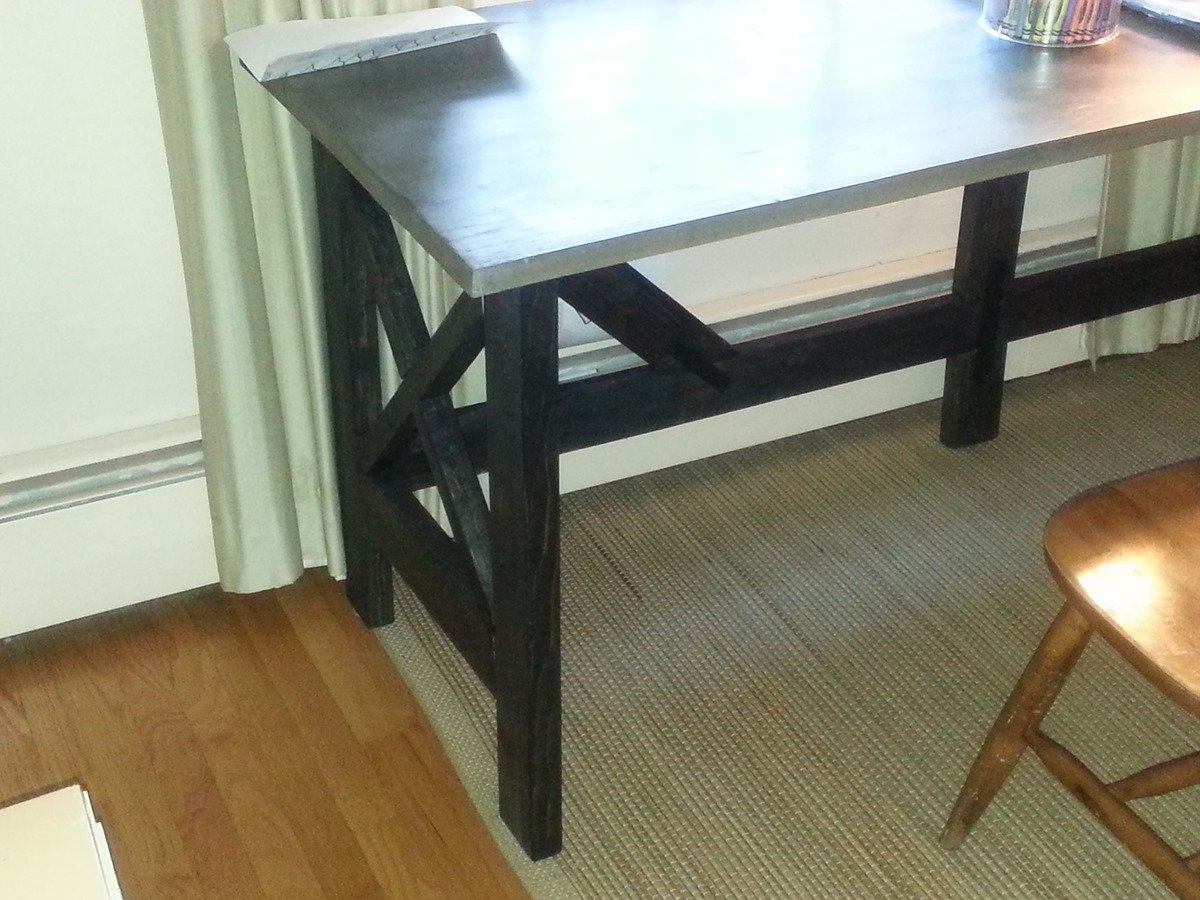
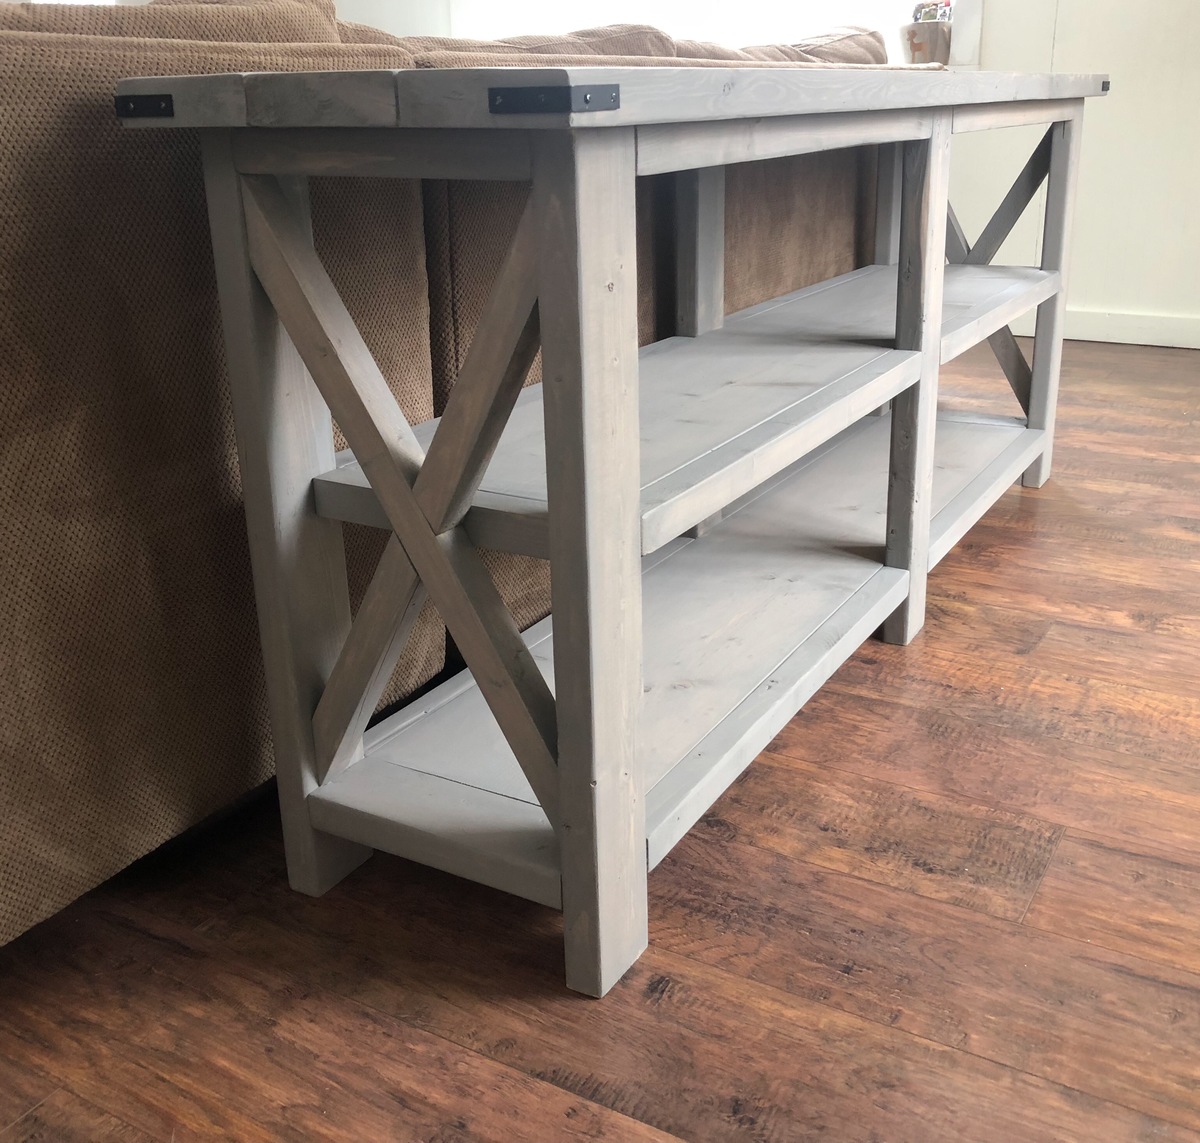
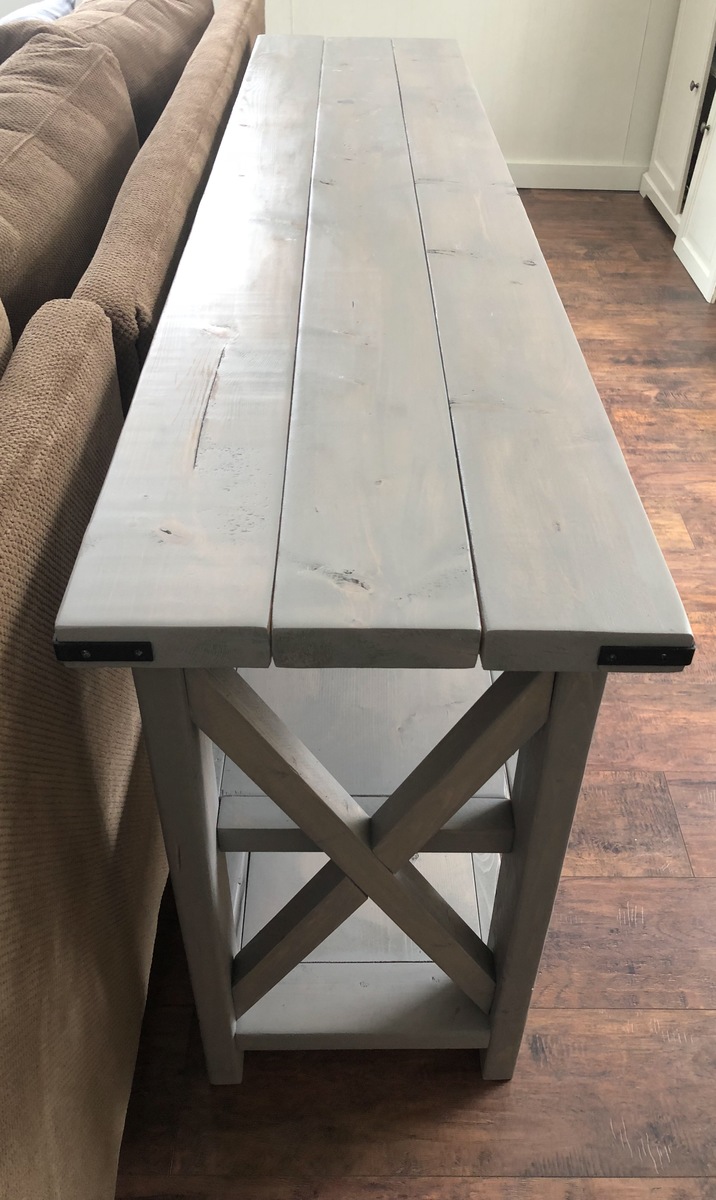
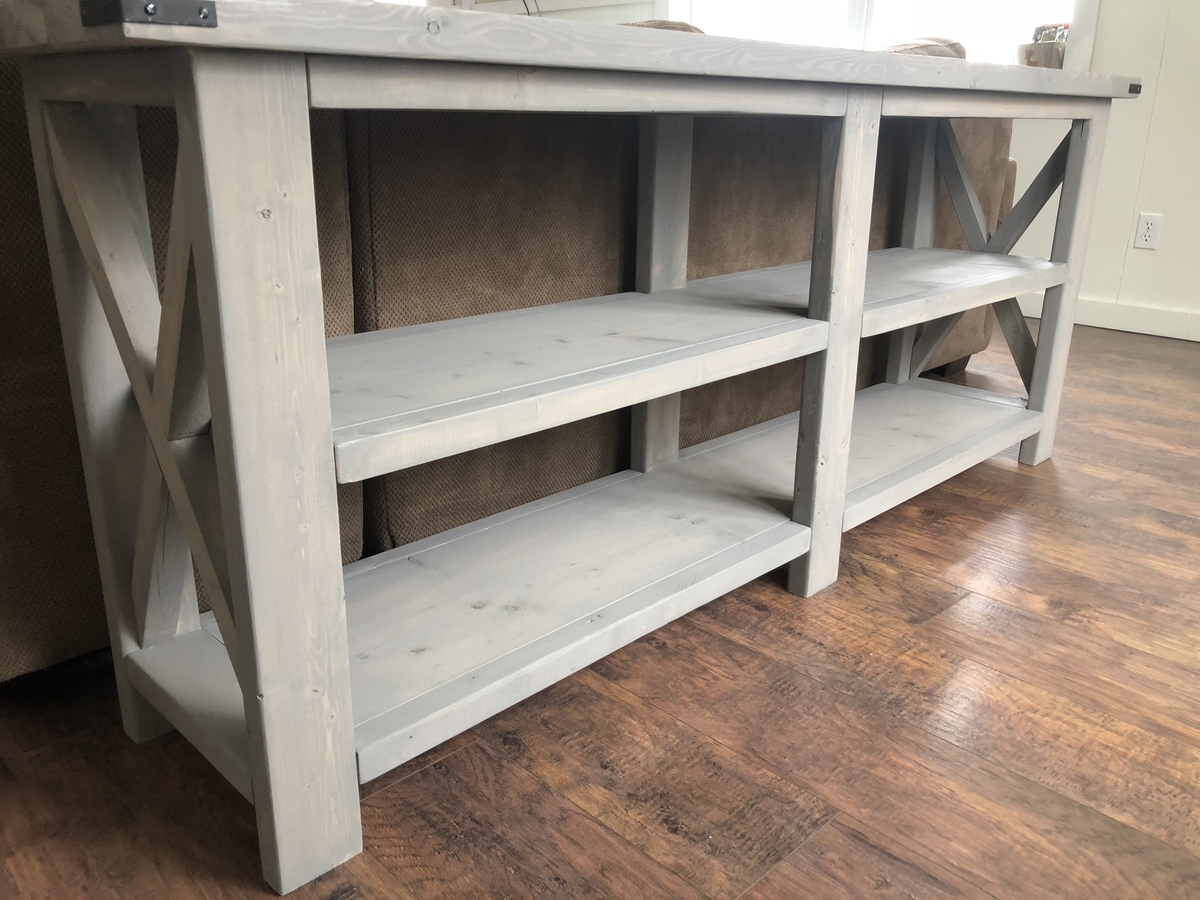
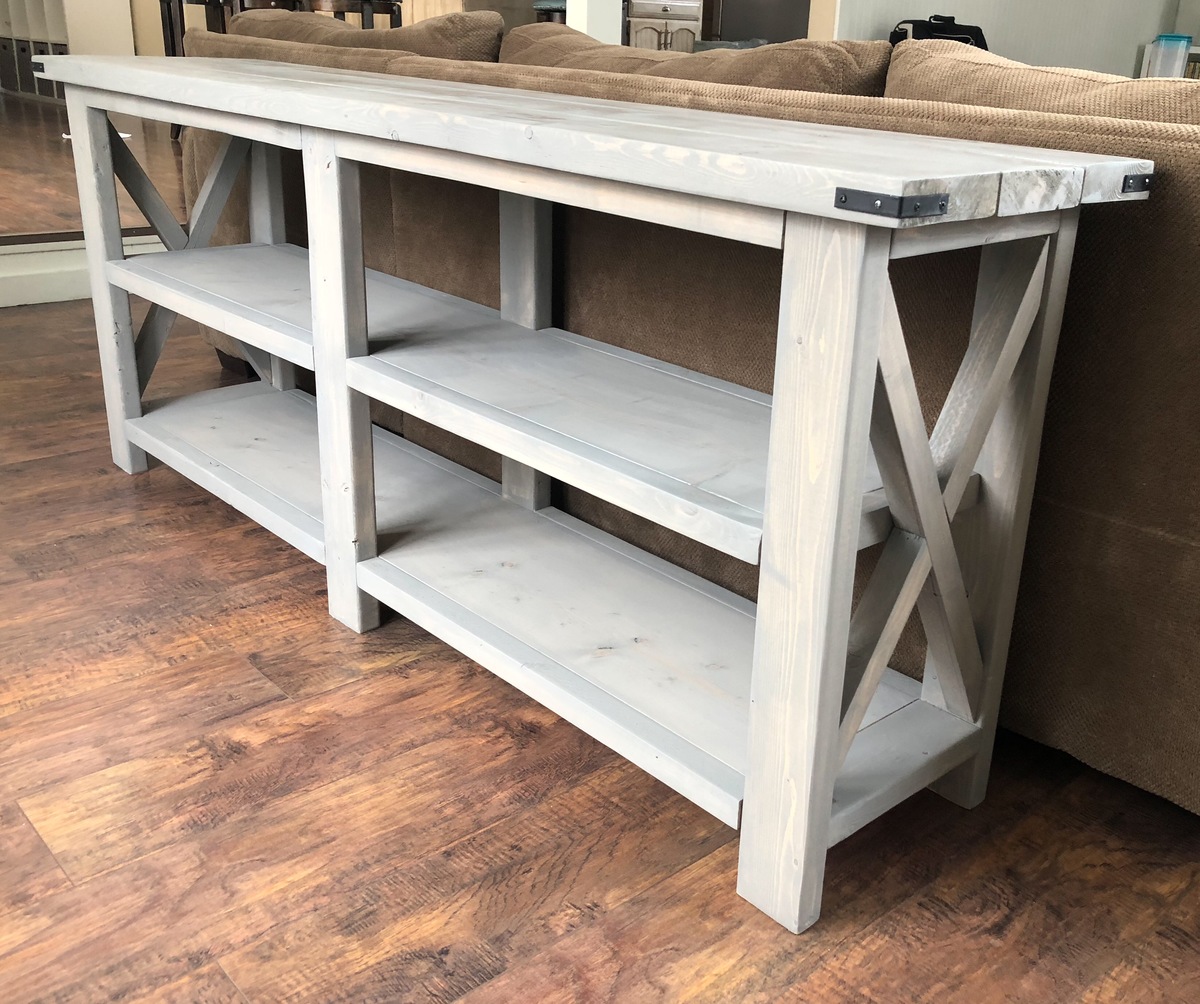
I wanted to create a library table (big desk) for my two youngest boys so they would have a craft/homework space. I liked the plan for rustic x console so I adapted it to make this 7 ft desk. Kids love it so much I couldn't even get a picture of it before they started using it.

Fri, 09/13/2013 - 07:02
I love what you did with the finish on the top. It makes it look like metal. It looks so good with the black base. Very unique!!
Fri, 09/13/2013 - 11:07
The vinegar will turn oak dark purple (not a chemist so I can't tell you why). The first coat of stain (gray) protects the wood (but not entirely) from that reaction. So when you rub the rusty steel wool and vinegar over the surface and let it sit, it creates depth. But it is easy.
Fri, 05/09/2014 - 07:55
This desk is great! I love the X plans, and I need a better desk than what I have. Would you be willing to do a plan post to share how you modified the console to a desk. While I've been lurking Ana-White for a few months, I've yet to actually build things, so I'm not sure I want to attempt going too far off plan on one of my first eventual projects.

Me: Hey can we get a new TV?
Wife: No, there is nothing wrong with ours.
Me: Darn, ok. Hey what if I build this cool frame around it?
Wife: <3 <3 <3 OK! <3 <3 <3
Me: Win.
So this is a project from quite a while back, one of my first builds that got me hooked on woodworking actually. I made a few modifications (obviously) since our TV was super thin it just wasn't going to work the way I wanted. I decided to go with more of a tapered look instead. It was my first experience with the "antiquing" technique, after lots of trial and error I ended up getting the look we were going for. It was overall a fun and fairly easy build, with a few learning moments along the way. The only time any of these projects seem "complicated," is when you over think everything, like I do :)


Sat, 03/26/2016 - 08:42
This looks beautiful! Was wondering where you purchased the barn door hardware? Been looking everywhere to find some that won't break the bank.
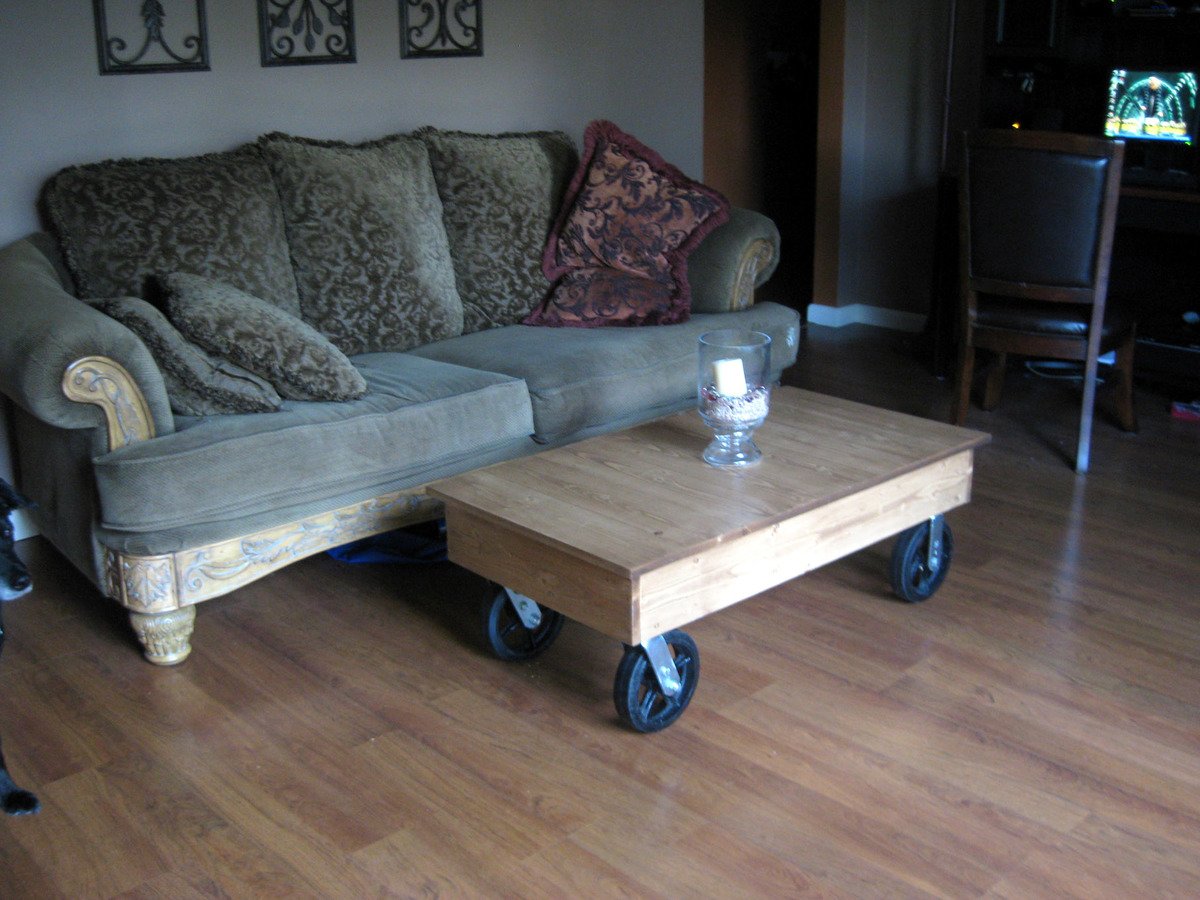
My wife wanted me to build her a coffee table that looked like an industrial cart for about the last year. I saw this plan on the Ana White web site, and it was just what she wanted. The hardest part of this was finding the wheels for the cart.
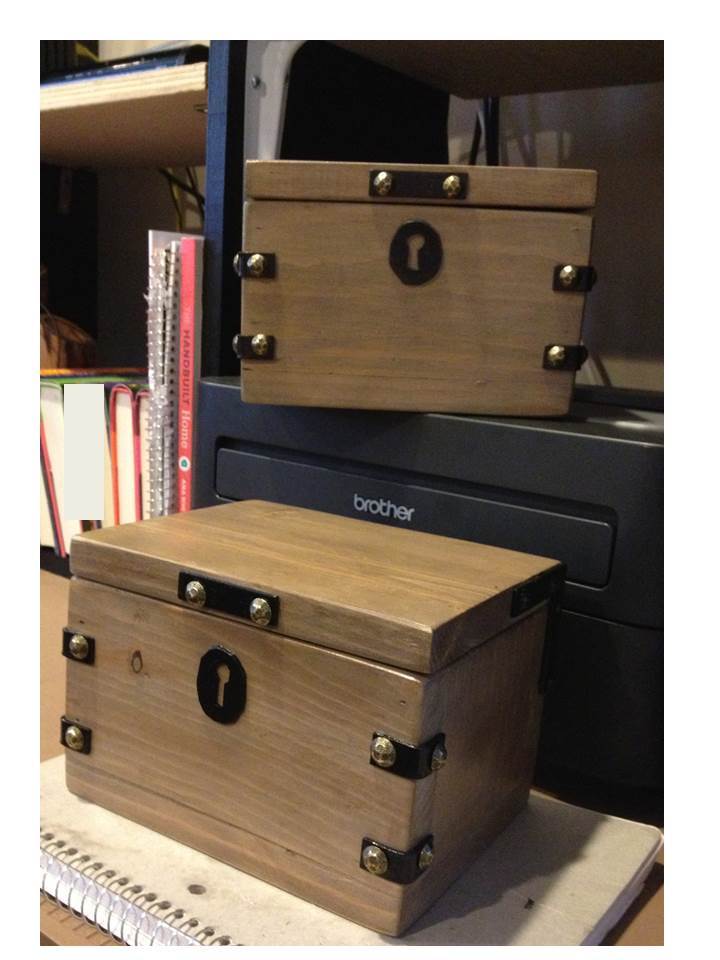
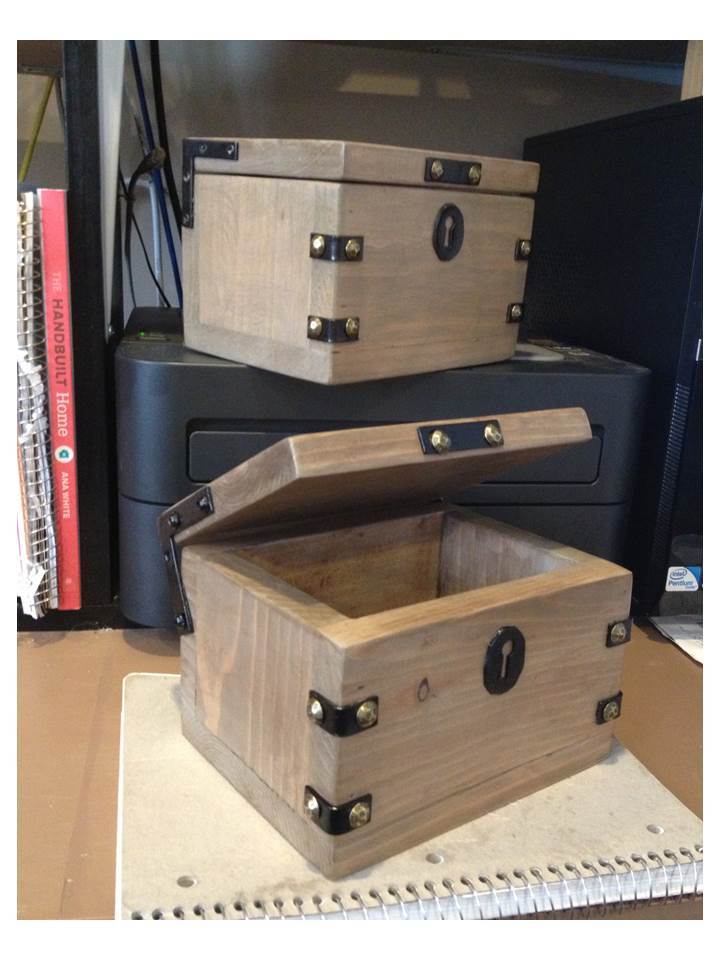
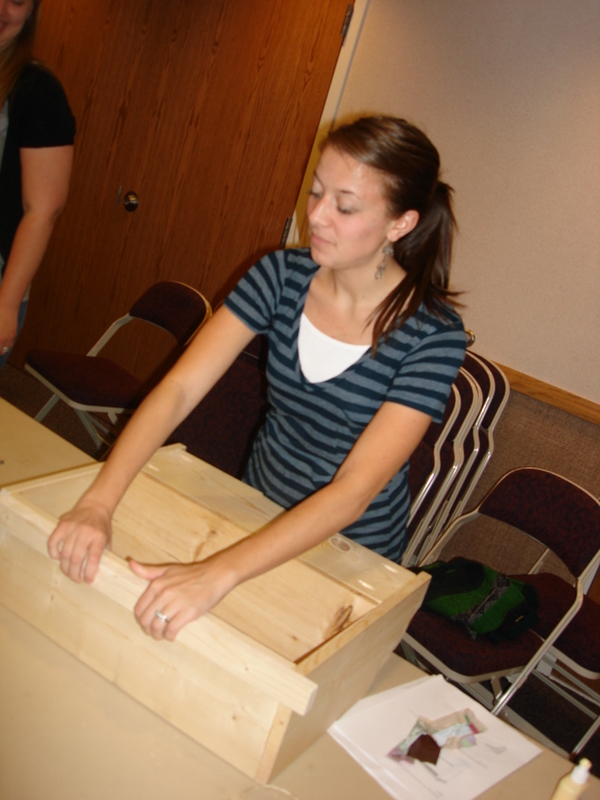
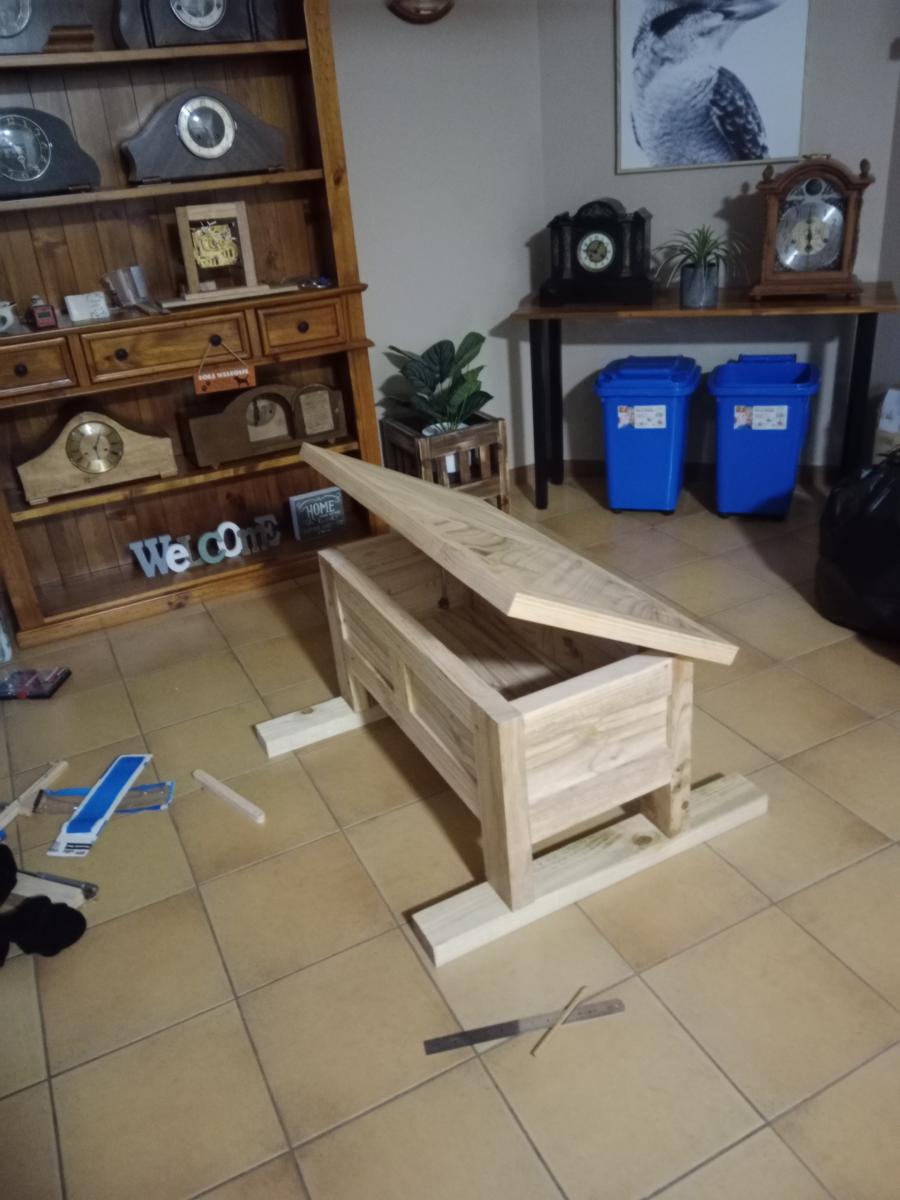
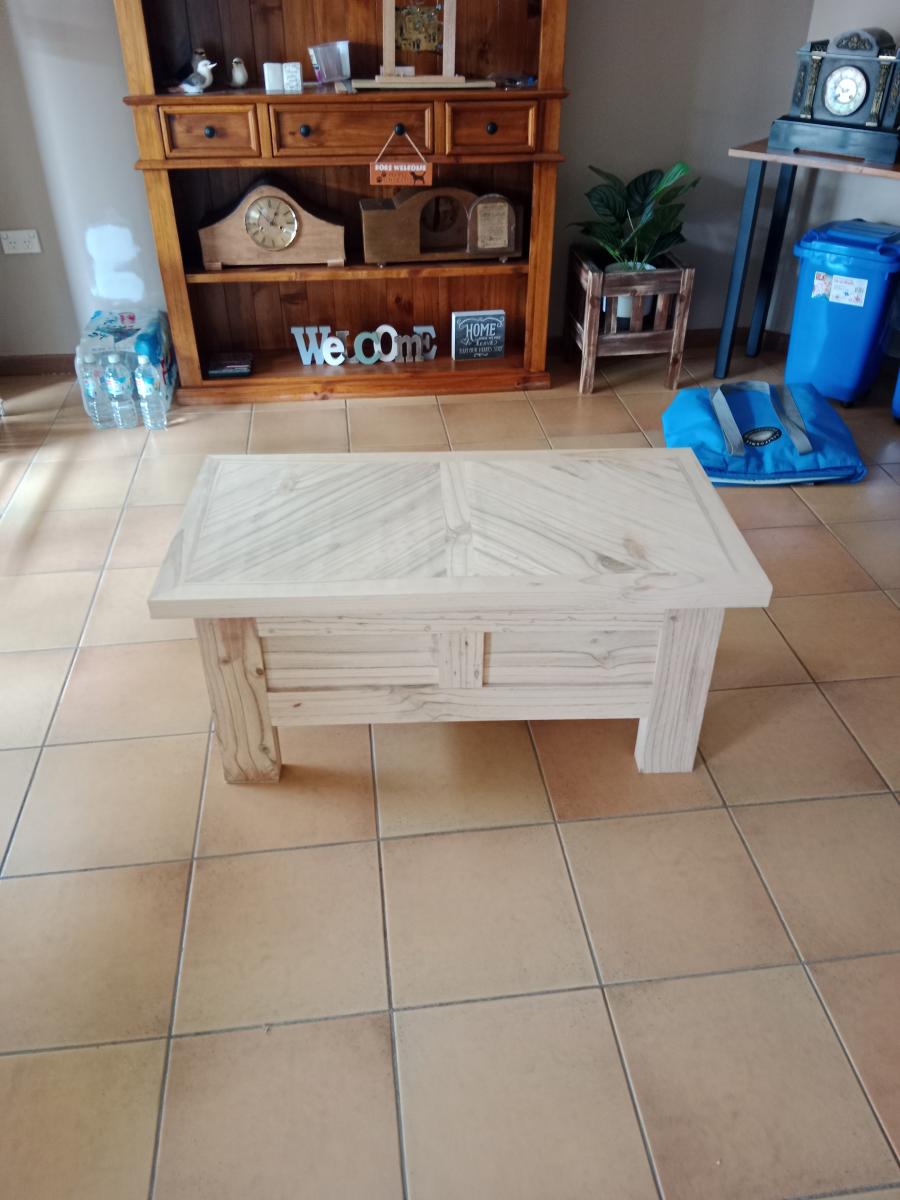
I had so much fun doing the prototype of the pirate’s treasure trunk, I built another one today! It was a super-fast build, and I did some things differently today which really speeded up the finishing process.
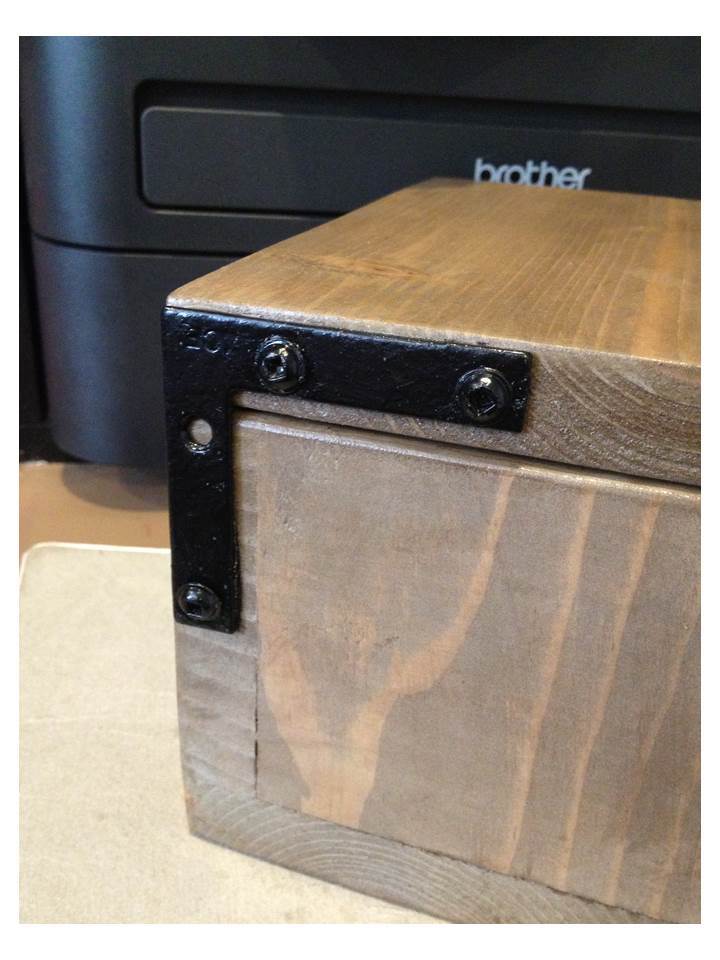
The first difference on this one is the use of the ½” x 2 ½” angle. It’s the next size larger than the one from yesterday. Instead of using the screws that came with it, I used some 1 ¼” Kreg screws. The hardware and screws are painted with some gloss black paint. I think it made for a sturdier hinge, so I’ll be doing them that way from now on. I also made a little “gasket” out of felt to go behind the bracket at the bottom where the pivot screw is attached. I’m hoping this will protect from friction over time.
For the finish, I started it with the gray wash just like the original. For the walnut glaze, instead of mixing the Minwax Express Color with mixing glaze, I just diluted it with some water. This dried much faster, but it gave the same look. I added 2 coats of Minwax oil modified water based poly before attaching the hardware. I still used the super glue before attaching with the furniture nails, but skipped the mod podge step, and just went over the hardware and keyhole with an artist’s brush and some poly.
All the wood was scrap and the finishing materials were left over from other projects. I bought the corner brackets and the larger angle brackets this morning at Ace for $7.50. These pieces cost a little more than Lowe’s, but Ace was closer so it saved me a trip.
There's another one of these in work (a lady’s trunk) which I will post later.

Used scrap cedar fence pickets for this build- only sanded the roughness off the top so that the saw marks remained to give it a rustic look. added tea stain then steel wool vinegar mix to age the boards, then a coat of poly on top. Very quick build, held together by brad nails.


This project took an afternoon to cut and assemble and a morning to paint. I wanted to try a light grey stain but only had dark browns on hand so I did a grey wash with some grey paint I had from another project and wiped down with an old rag. I love how it turned out! The X’s Were a little tricky for this beginner but I figured it out after a refresher course with the speed square.
I had a friend doing a class for a church activity on refinishing furniture. I think she mentioned to our leaders that I build furniture so two weeks ago she emailed me to see if I would be willing to participate and take a little time to talk. I said of course, and then in my true fashion of loving a good get-together and having a tendency to overdo things, I said, "we could even do a little project too".
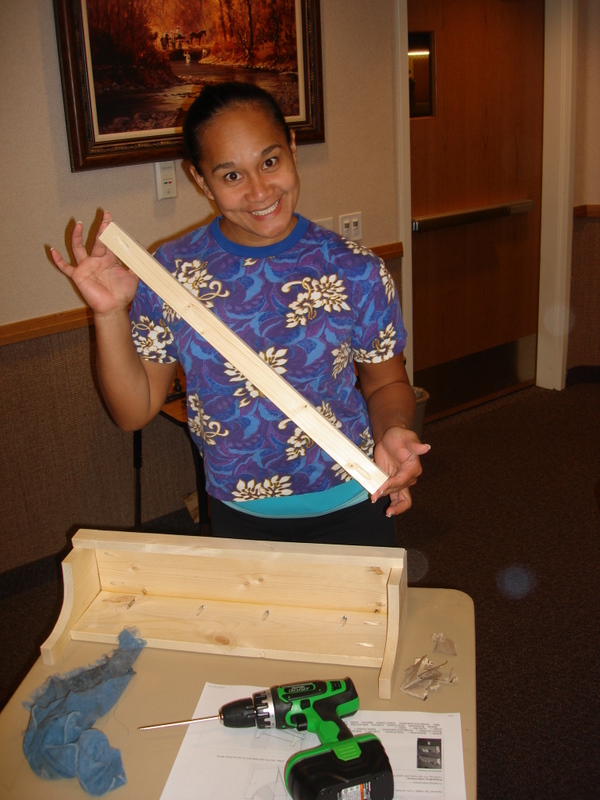
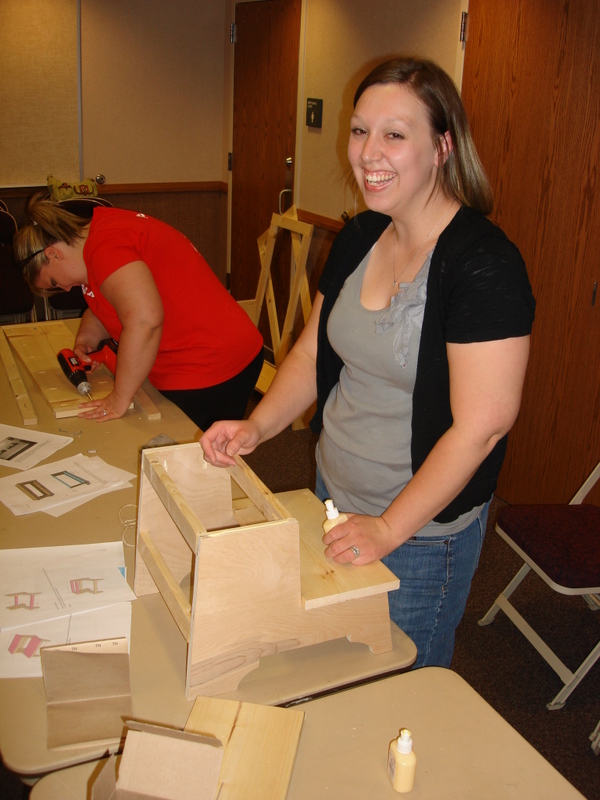
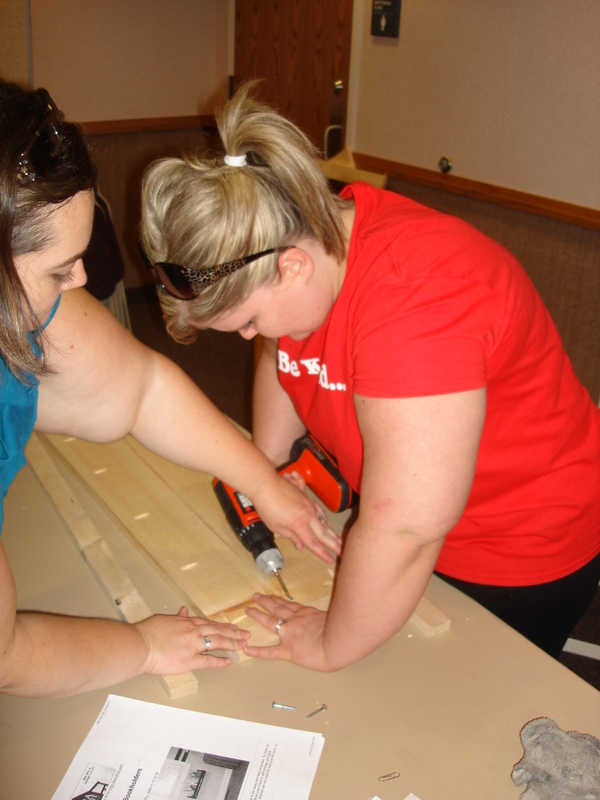
I went onto this site printed off 5 projects under $30 and let anyone that wanted sign up. I figured the easiest way to let people build a project in an hour and a half was to pre-cut and pre-drill everything (Thank you to my new Kreg jig that let me rock that part out no problem)
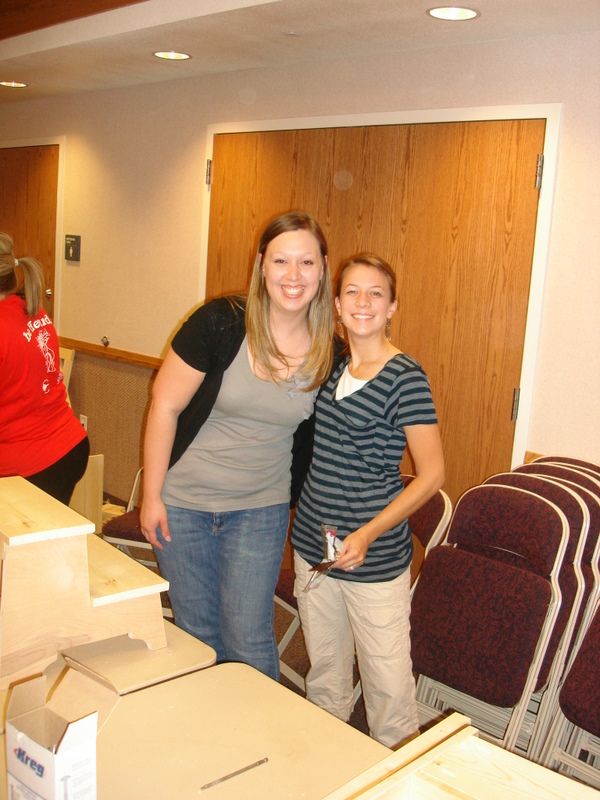
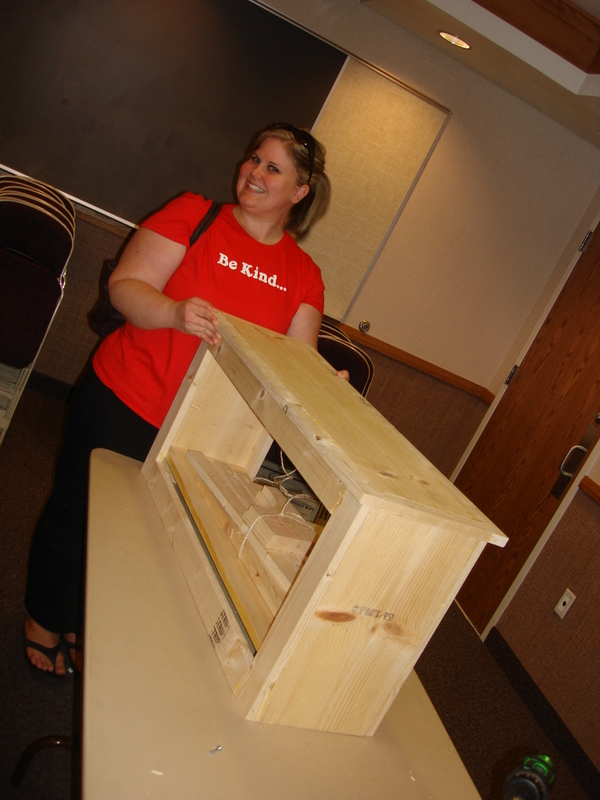
I ended up cutting and drilling for 26 orders!!! EEK! I was a little like a mad hatter running around helping people that had never even held a drill before (so please excuse the LACK of pictures, including none of me doing anything at all :( ) But I think it turned out awesome and everyone was so excited.
I just wanted to post this as a little tribute to Ana for all the amazingness that you are. Thank you for helping those scared to even start.

Fri, 08/26/2011 - 11:26
Thank you so much for sharing this! I can remember when my little sister took woodshop in high school, and we all looked at her like "what is woodshop" and "why on earth would you ever want to take woodshop - woodworking is for retired men!". Not too many years later, I was wishing I had taken wood shop!
This is so amazing to see because you are teaching these beautiful and courageous young laddies skills they will use throughout their lifetime. Not to mention the confidence to tackle other traditionally male trades. And I'm willing to bet, their daughters will be using drills too!
I'm so honored to know you!
And might I add, those projects look GOOD!

Sat, 08/27/2011 - 20:15
Wow! What a great thing that is that you did!!! Thanks to you and Ana there are now 26 other women who have a new sense of accomplishment!

Sun, 02/03/2013 - 12:17
MAN! I want to do something like this! What a wonderful thing to do to bring all those ladies together! (And tell Miss Red Shirt, I want a T just like hers! "Be Kind"!) Way to rock it out, all of you!

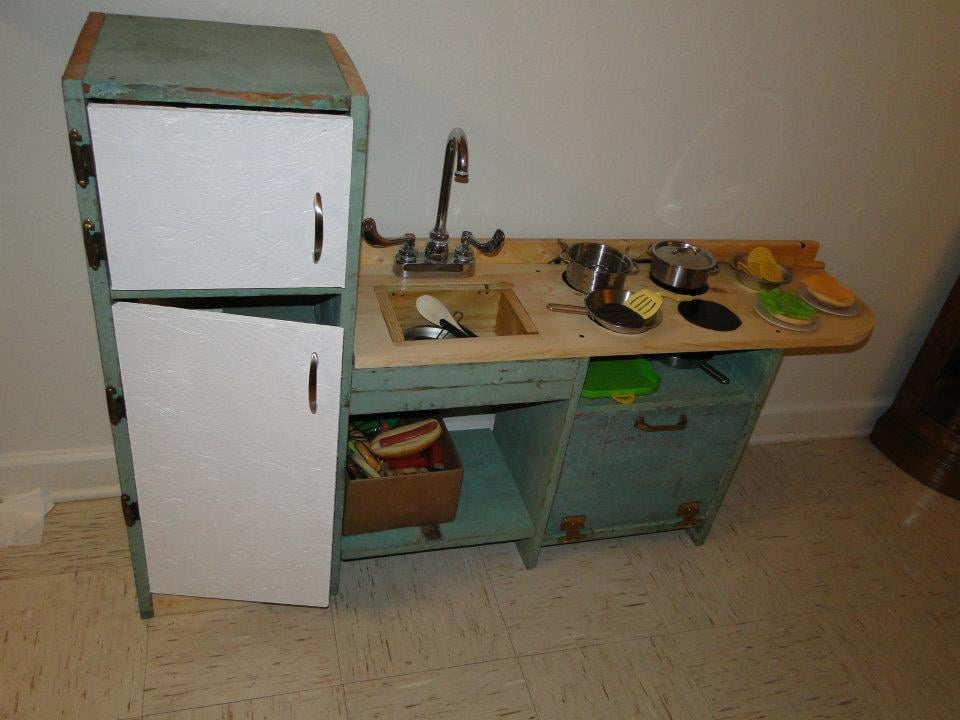
I had an old bookshelf in the garage.....wobbly and just not having any justice. I took it apart and turned it into a play kitchen. Used the plans and modified to what wood I had available from the shelves.

Got some butternut from a friend and here it is.
Mon, 11/23/2015 - 13:01
Making this was a little bit of a headache maker,but got thru it.No plan from anywhere was used.
First time building furniture and enjoyed the project. I used better lumber as I wanted to avoid paint but it turned out well for my first try. Thank you Ana White for a good set of plans.

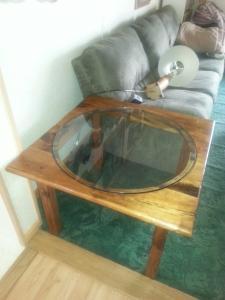
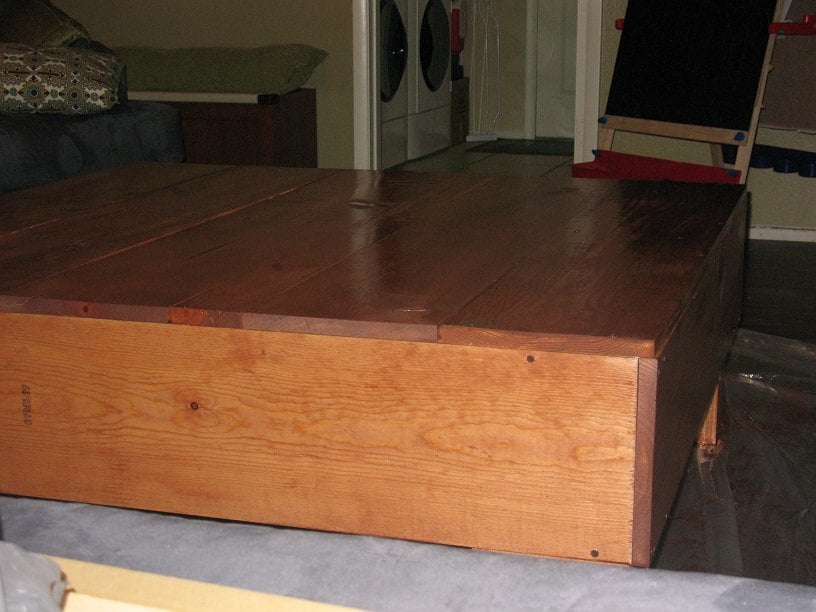
We wanted a new coffee table, I didn't really have a plan but the top was done to match the 4 x 4 x base pedestal dining table. As with all my projects it is made out of 200mm x 50mm pine landscaping sleepers

my first build
Sun, 08/28/2011 - 19:59
I have not finished the staining since it needs another coat. But I love love love my new coffee table. Thanks so much to Ana for her blog. I always wanted to build furniture but everyone would just laugh at me for even suggesting it. When I saw your site you really motivated me and made me believe I could do this. I am so happy. Still afraid to use power saws though. I make my husband cut the wood....lol
Loved working on this table. An easy build for sure. Couldn't find wheel casters that I liked so had to use another 4x4 to give it height. Will be building another one soon :)
Thank you so much for sharing the plans.

Sat, 09/21/2013 - 08:15
I love how you finished your project!
And the 2x4's across the bottom really make it look solid.
Val
artsybuildinglady
Mon, 09/23/2013 - 05:40
Love the finish, would it be possible to elaborate on how you got it to look so AWESOME!!! Did you just brush on the stain and the use a wire brush????
Mon, 12/30/2013 - 19:28
Hi! What color stain did you use and technique? It looks beautiful! Would love to make something similar!
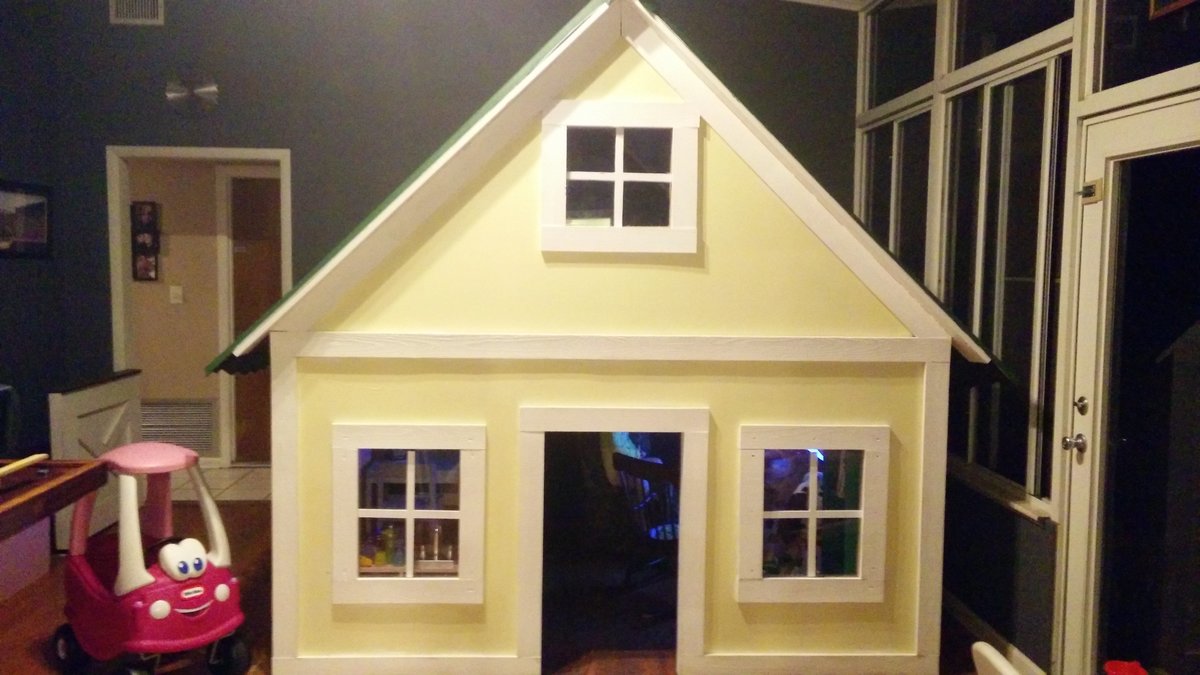
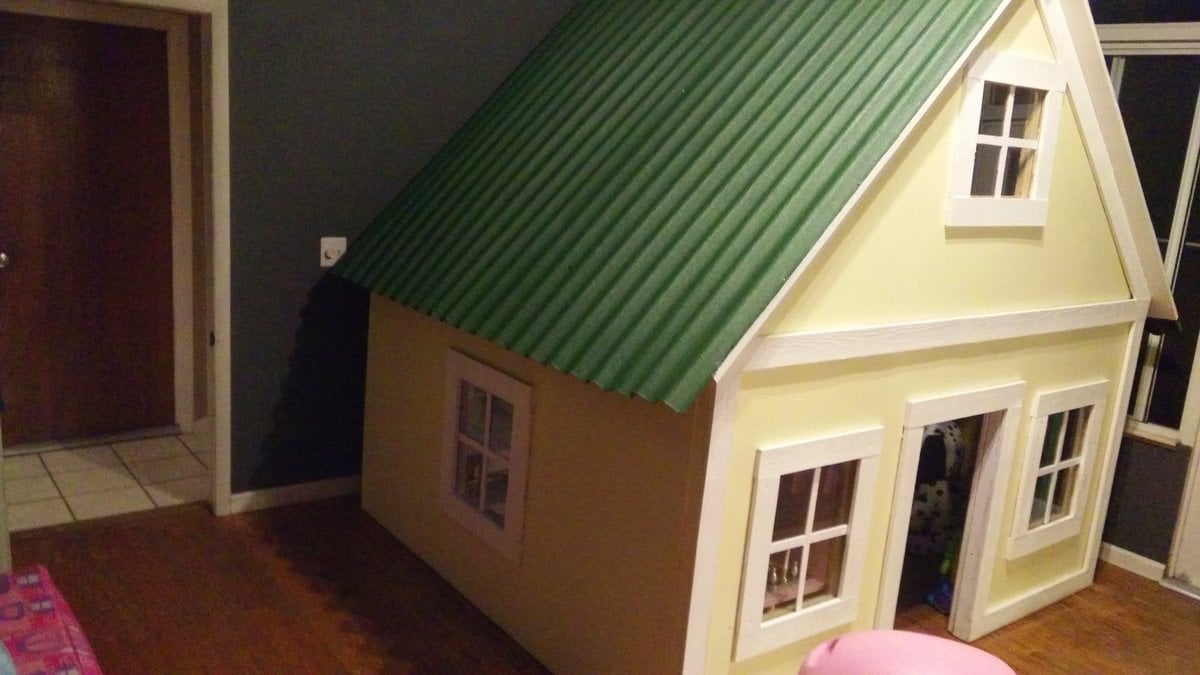
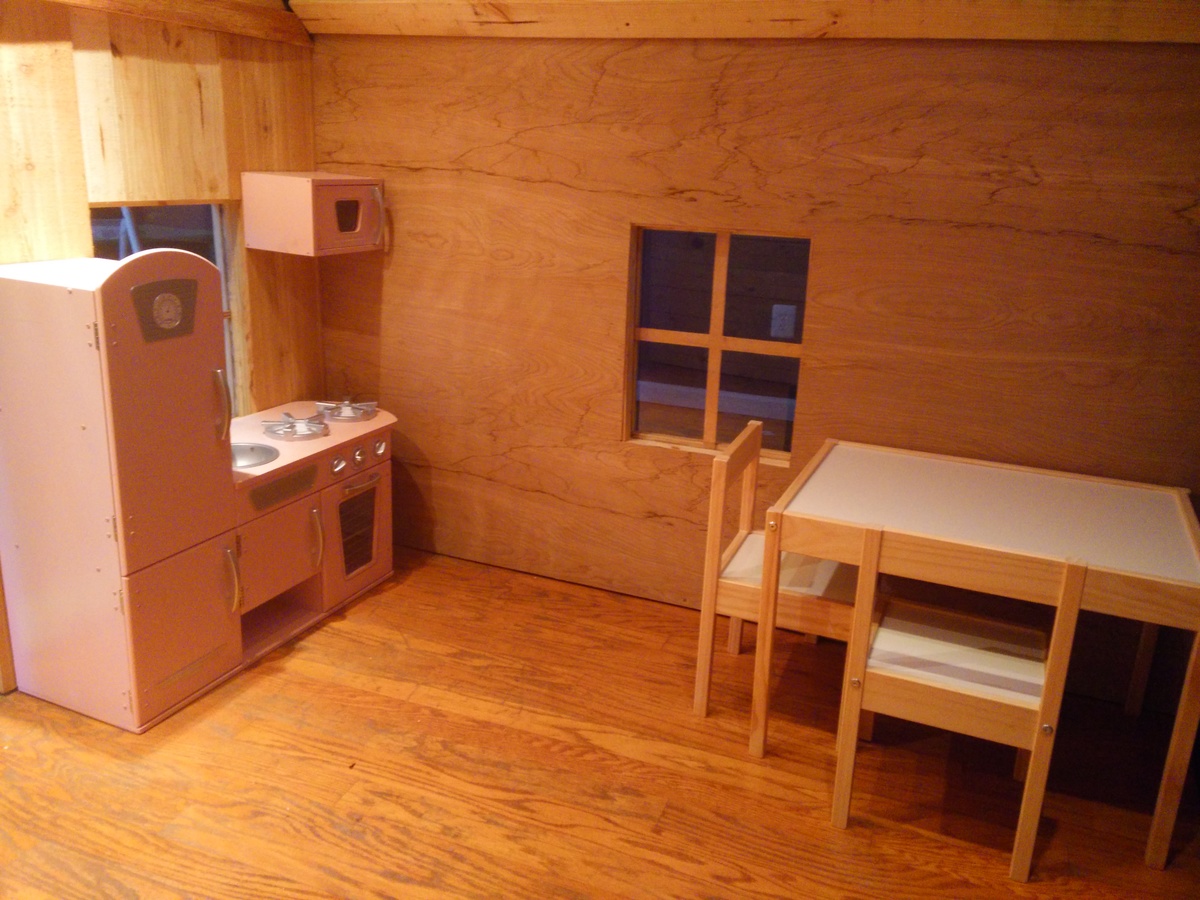
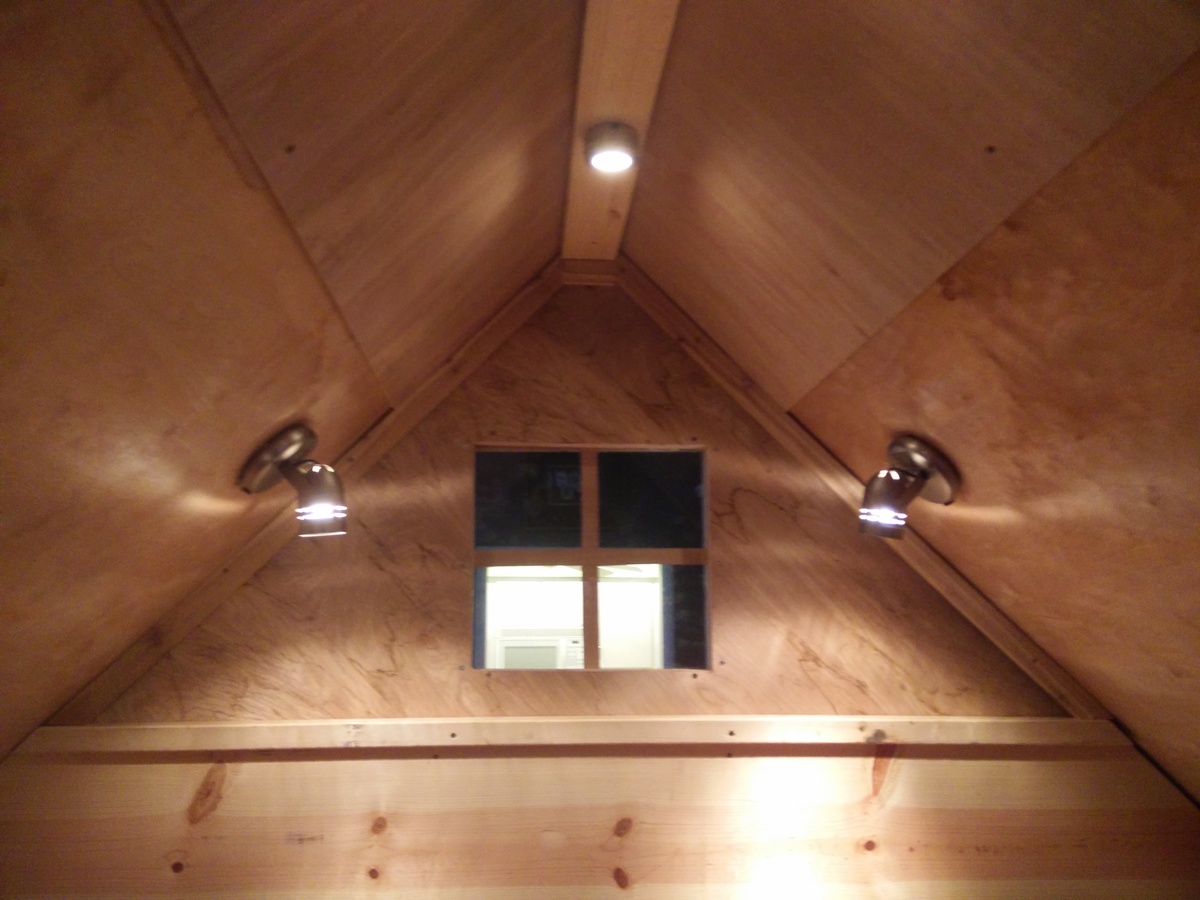
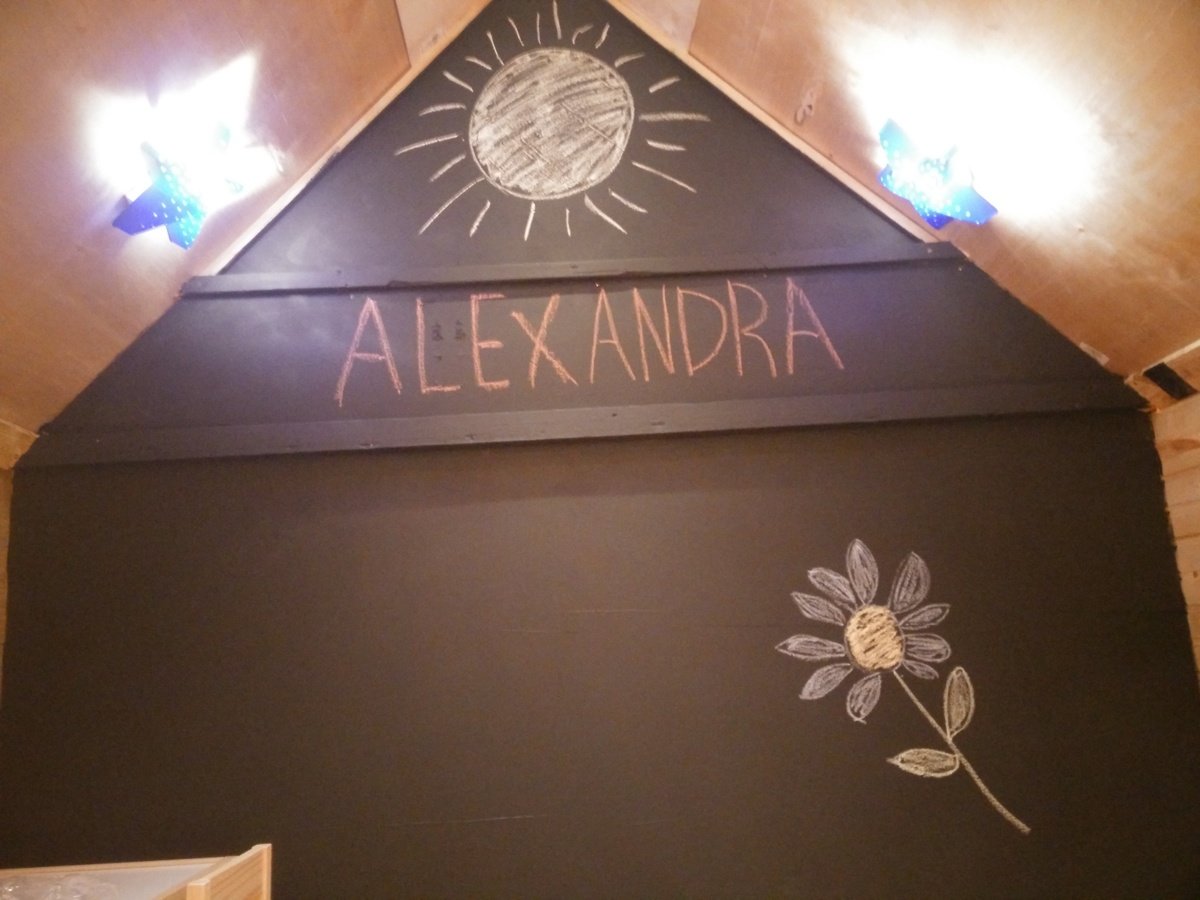
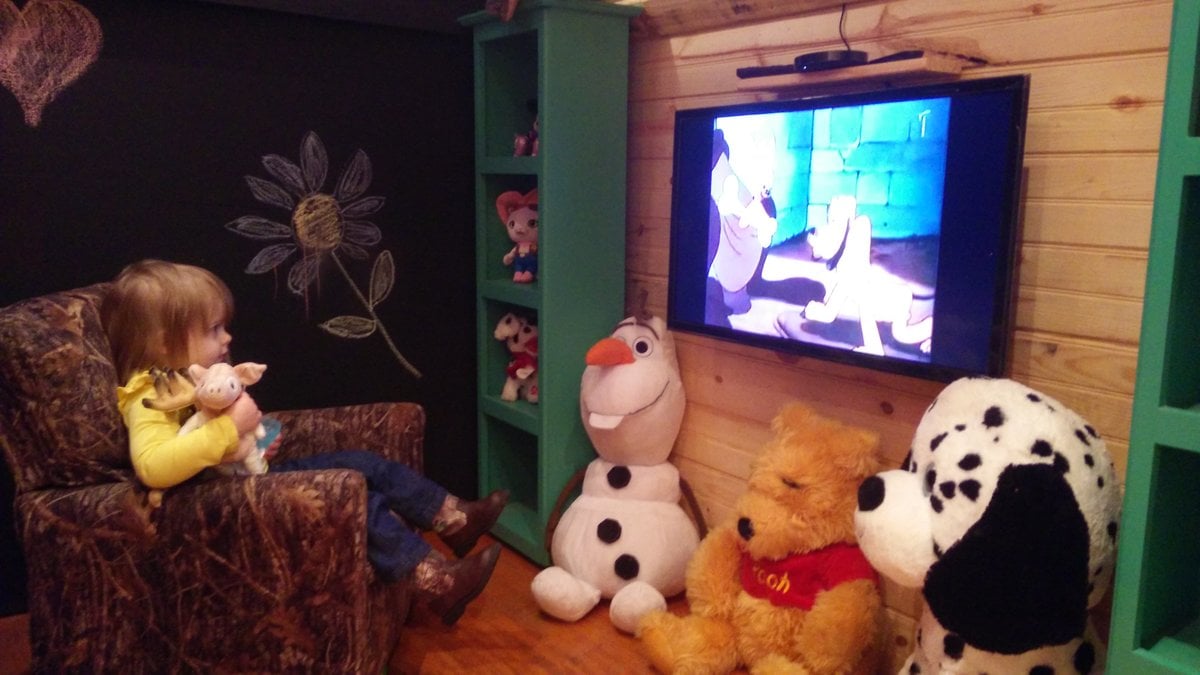
I built this indoor playhouse for my daughter who turned 2 in september. She loves to help mommy cook, loves to have little tea party's for her dolls and love to watch Chip n' Dale terriorize Donald Duck. So I thought I would give Alexandra her very own little house to do all those things. I hope you all like it and have just as much fun building one of these as I did.

Sun, 11/29/2015 - 19:02
Very impressive! I love this tiny house and all the nice attention to details.
Tue, 12/31/2019 - 10:08
Hi Ana -
Where can I find the plans for this house . Just too cute !
Sadhana .
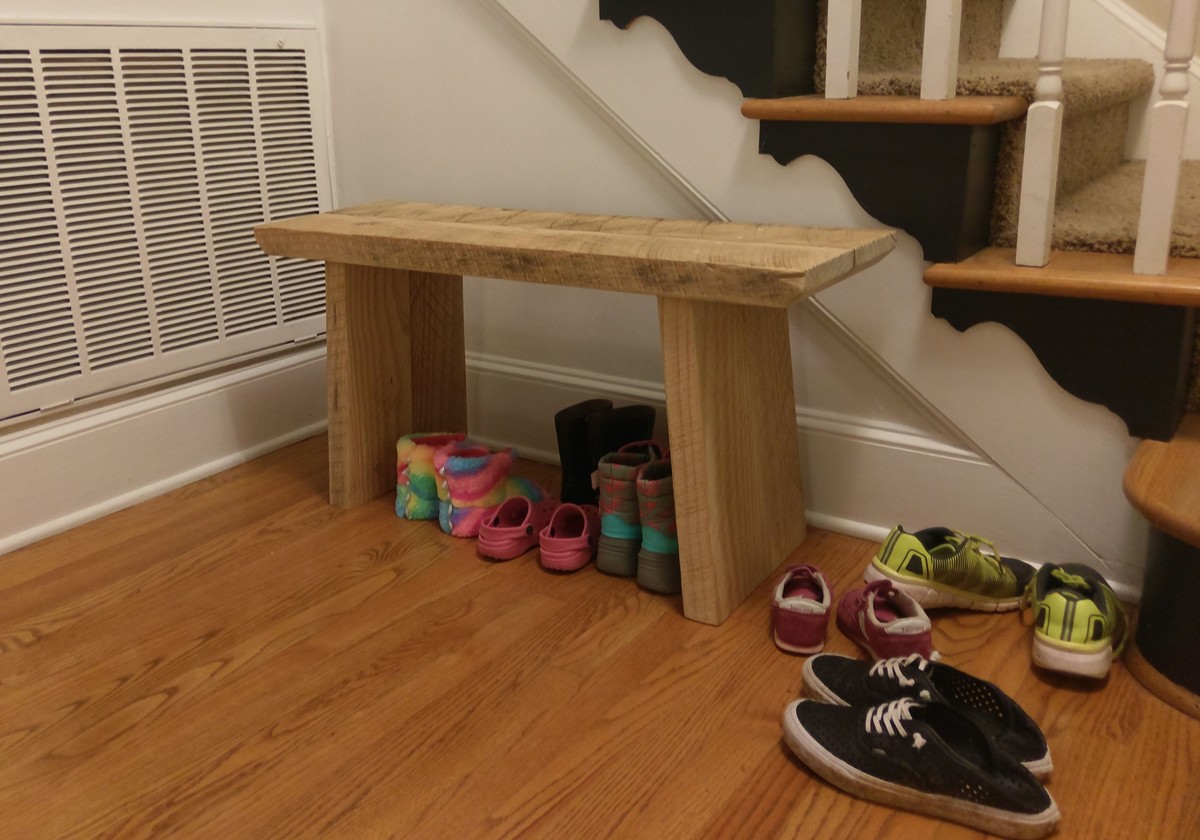
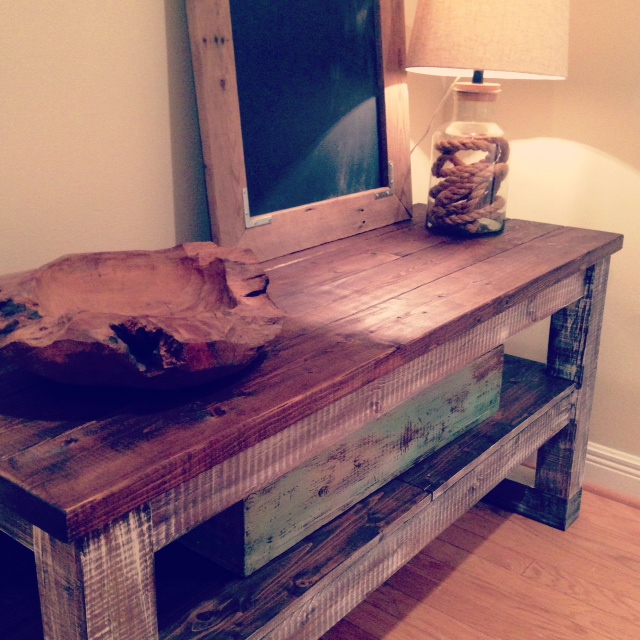
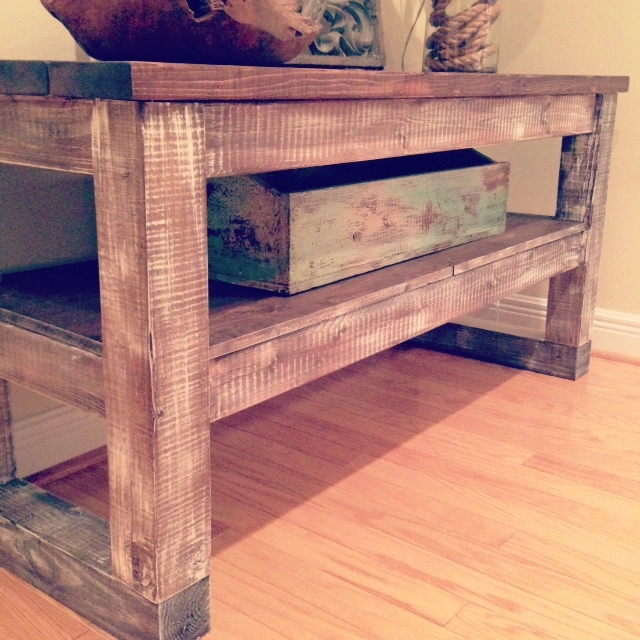
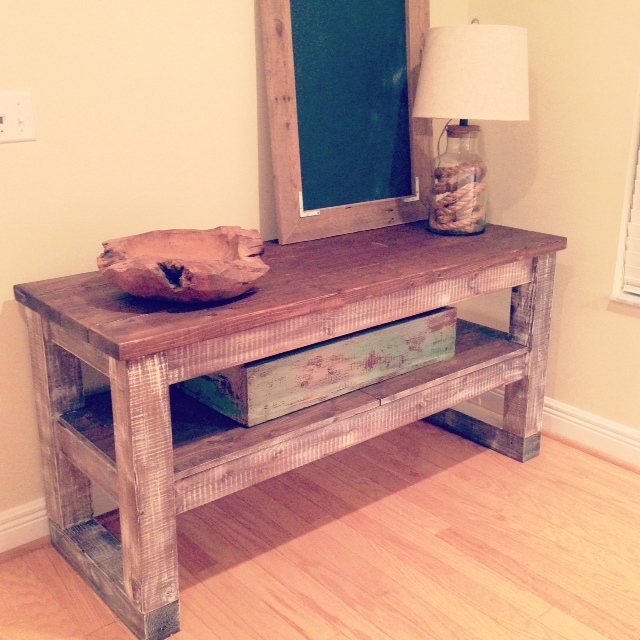
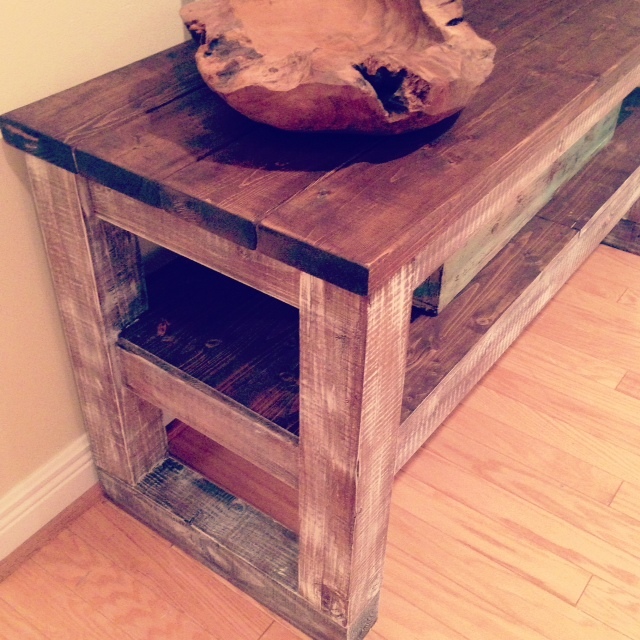
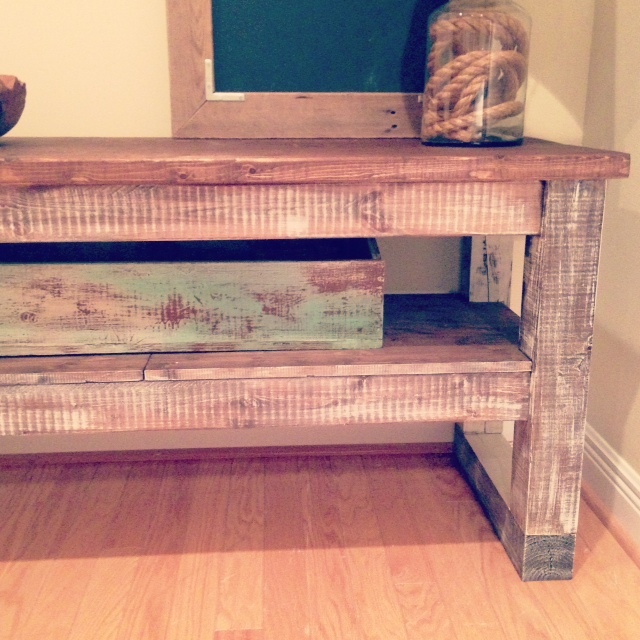
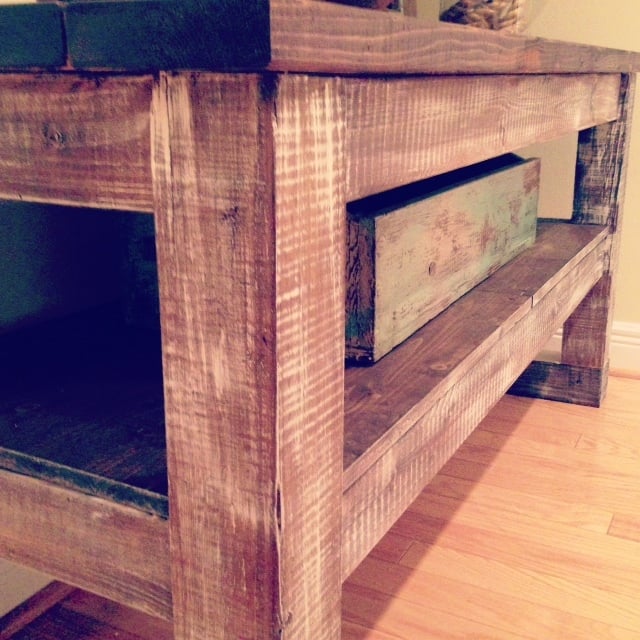
My wife wanted a small bench for our entryway/foyer. I happened to have some reclaimed pine barn wood laying in my shop, so I whipped this up.
The original plan was to use a colored wax or thinned paint on it to give it a weathered appearance (which is why I did screws and plugs from the top - I thought they were going to be painted over), but the wood turned out too beautiful with all of the character. We couldn't bring ourselves to paint it.
There are a few more pics and details in my blog post about this small reclaimed barn wood bench.


Comments
Ana White Admin
Sun, 09/11/2022 - 12:49
Wow, beautiful!
Thank you for sharing, this is amazing!