Community Brag Posts
Cabinet style farmhouse nightstands
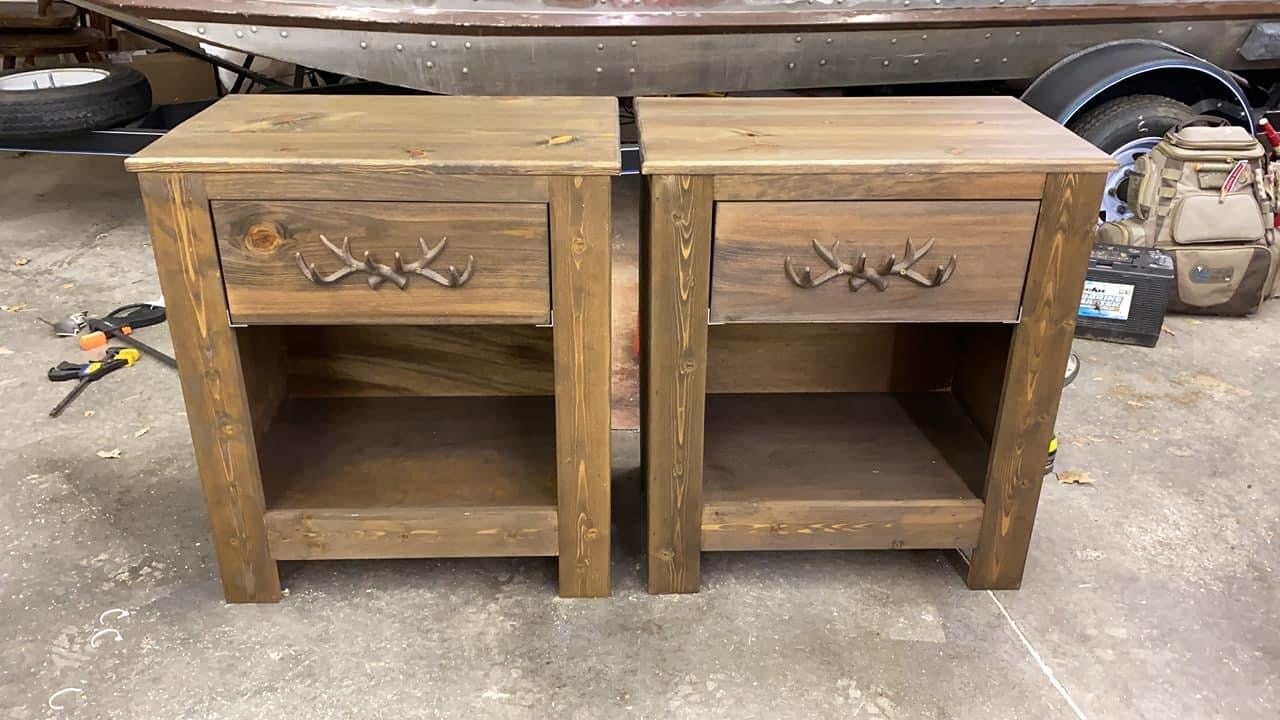
Beautiful plans, thank you Anna! I can’t wait to build the king bed to match!
Built from Plan(s)
Estimated Cost
100
Estimated Time Investment
Weekend Project (10-20 Hours)
Finish Used
Varathane weathered wood accelerator first coat then the rustic accelerator for the second coat. Apply with a foam brush. Then sprayed on 4 coats of semi gloss clear and it’s done!
Recommended Skill Level
Intermediate
Sling Chair birthday present

I did these as a birthday present for my husband. He is very picky about seating, but he said these were very comfortable! I used 1x4 oak for the headers and pine for the rest. After reading others' concerns about the support dowel, I decided to do the following:
1. Drill a 3/4" hole halfway through each 1x2 support with a 1/4" hole continuing the rest of the way through to the outward facing side of each
2. I glued a 1/4" dowel into one 1x2, pushing the dowel as flush as possible to the outer edge of the 1x2. I then slid a 3/4" hollow steel tube onto the wood dowel, and into the 3/4" hole in the 1x2.
3. Finally glued the other end of the wooden dowel into the other 1x2 (which forces the steel tube to nest into the 3/4" hole in the 1x2) and trimmed the excess dowel flush. The steel tube acts as the support, and the 1/4" wood dowel simply holds it all together. Did that make any sense?
If you can possibly avoid paying full price on the fabric, DO! That alone accounts for 70% of this project's total cost!
Built from Plan(s)
Estimated Cost
$25-30 each
Finish Used
Stained with Rustoleum dark cherry and sealed with a marine spar varnish. I wouldn't stain again, however...the red oak took it very differently than the pine (of course!), and I think paint would have looked better in the end. The varnish held up very well over a summer of high heat and moderate usage.
Recommended Skill Level
Beginner
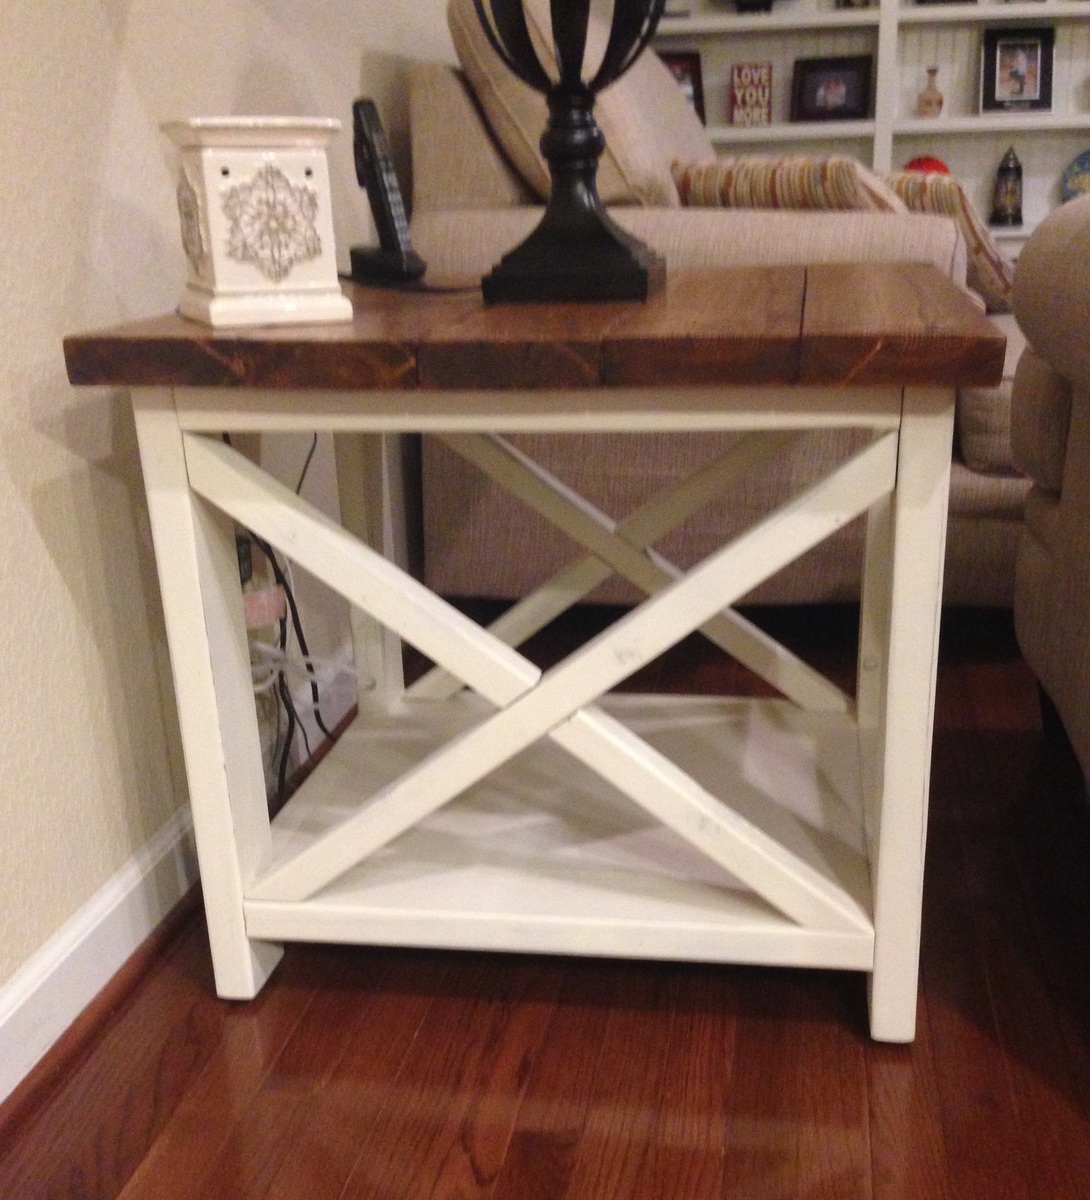
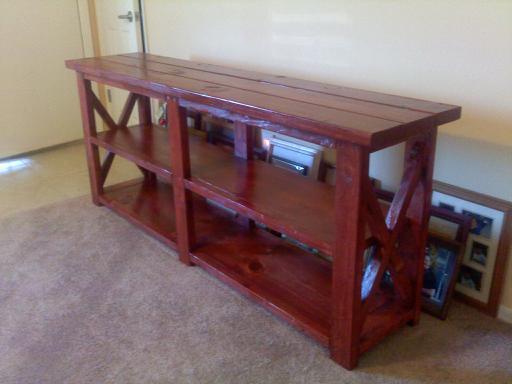
Rustic X end table
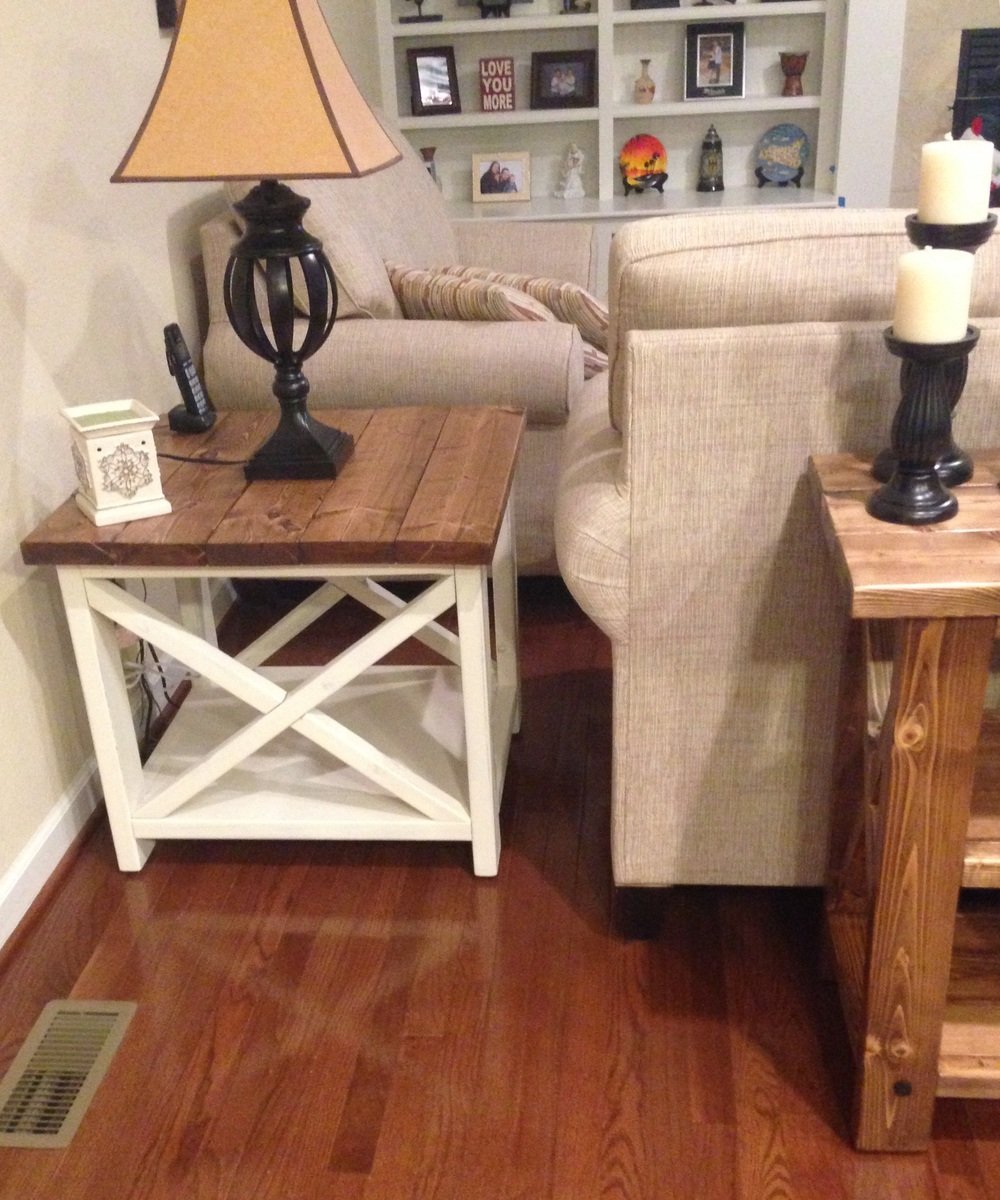
This project was similar to the Rustic X Console. Recommend building the lower shelf halves before installing so that it's easier to make the bottom flush. The X's were somewhat tricky....just take your time. It's easier to cut the piece too big and trim than to add wood to a piece too short. I stained the top with miniwax special walnut and used a satin poly. For the bottom, I used the same stain and then painted over it with rustoleum heirloom white. I lightly distressed it with 150 grit sandpaper so some of the stain would show through. All in all I am very happy with it!
Built from Plan(s)
Estimated Cost
Approximately $50
Estimated Time Investment
Afternoon Project (3-6 Hours)
Finish Used
Top: special walnut stain and satin polyurethane. Bottom: same stain and painted over it with rustoleum heirloom white. Lightly distressed.
Recommended Skill Level
Beginner
Comments

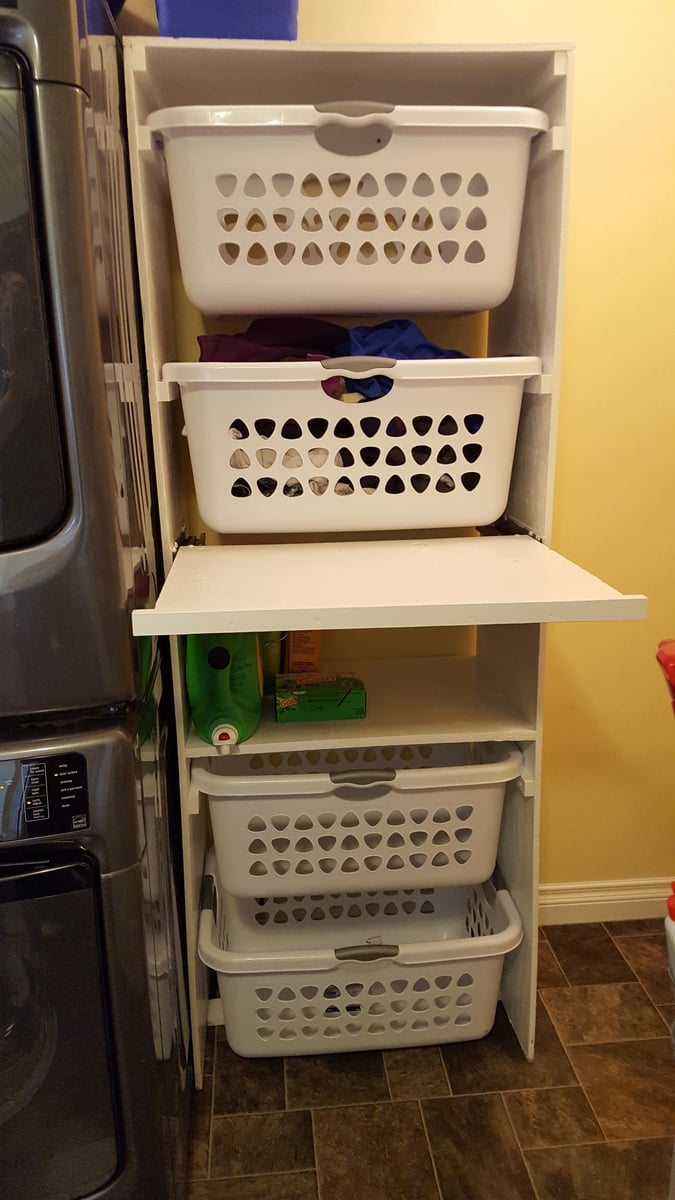
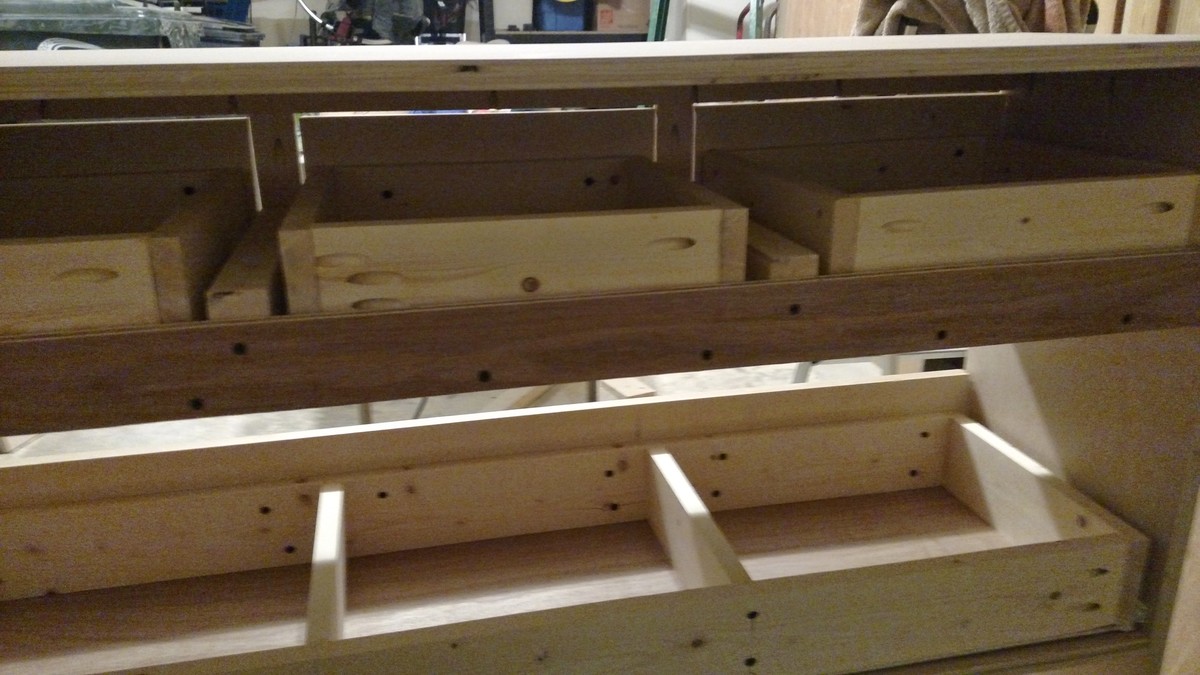
My Laundry Station

I love Ana's original design and it was a great inspiration. I needed to add more baskets so I adjusted it a little. I had some drawer slides sitting around so I added a pull out shelf to fold on as well.
Built from Plan(s)
Estimated Time Investment
Afternoon Project (3-6 Hours)
Finish Used
Primer and paint
Recommended Skill Level
Beginner
Farmhouse console table
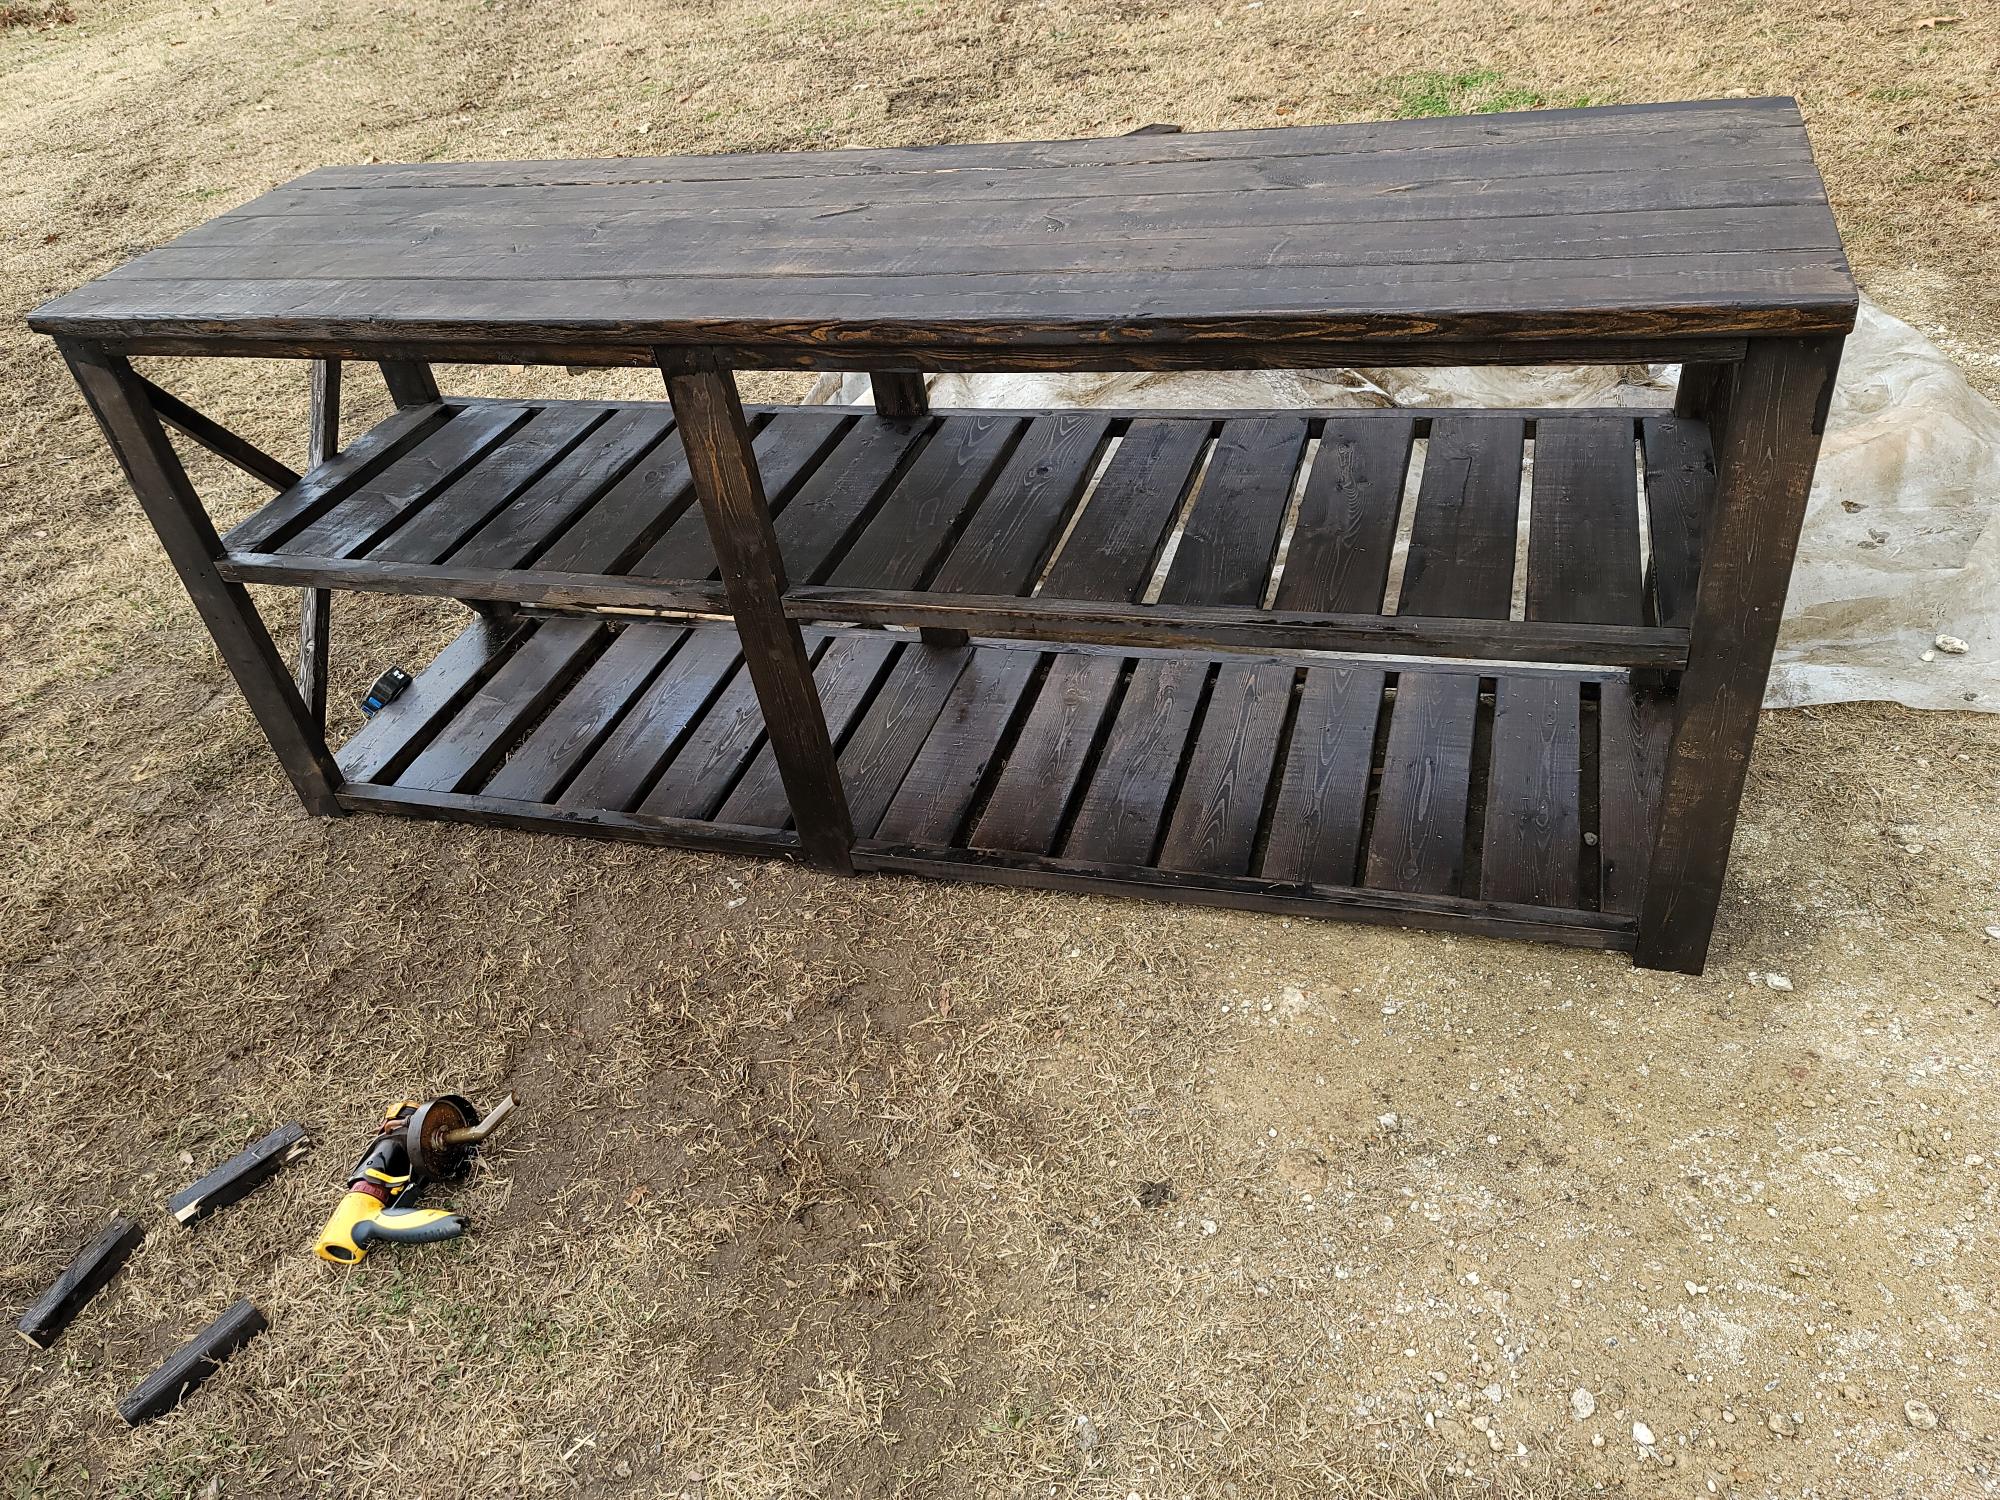
Thanks you Mrs. Anna white for the plans and my project turned out great...


Built from Plan(s)
Estimated Cost
160.00
Estimated Time Investment
Day Project (6-9 Hours)
Finish Used
Finished stain used dark walnut
Recommended Skill Level
Advanced

Console table
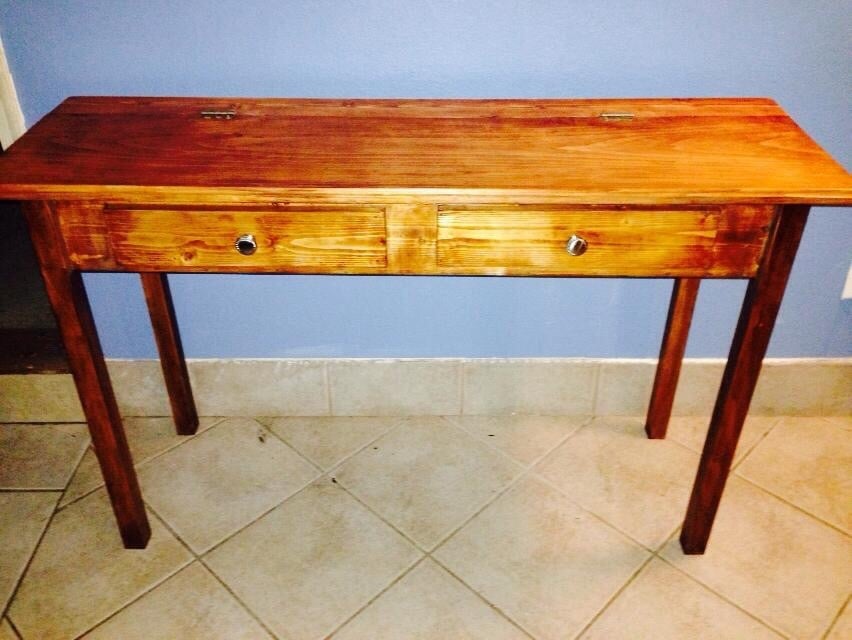
This was my first woodworking project since high school. Initial build I messed up the legs and almost gave up, but recut, got some other wood and got through it all pretty nice. I added an edge with my router I got when I was almost complete with this piece. Added bought molding around the top and used a stain I got from a local woodworking store. My wife loves. I still need to get some felt for the drawer, but I brought it in this week from my shop.

Built from Plan(s)
Estimated Time Investment
Afternoon Project (3-6 Hours)
Finish Used
Candlelight stain, satin finish.
Recommended Skill Level
Starter Project
My take on the benchwright console table
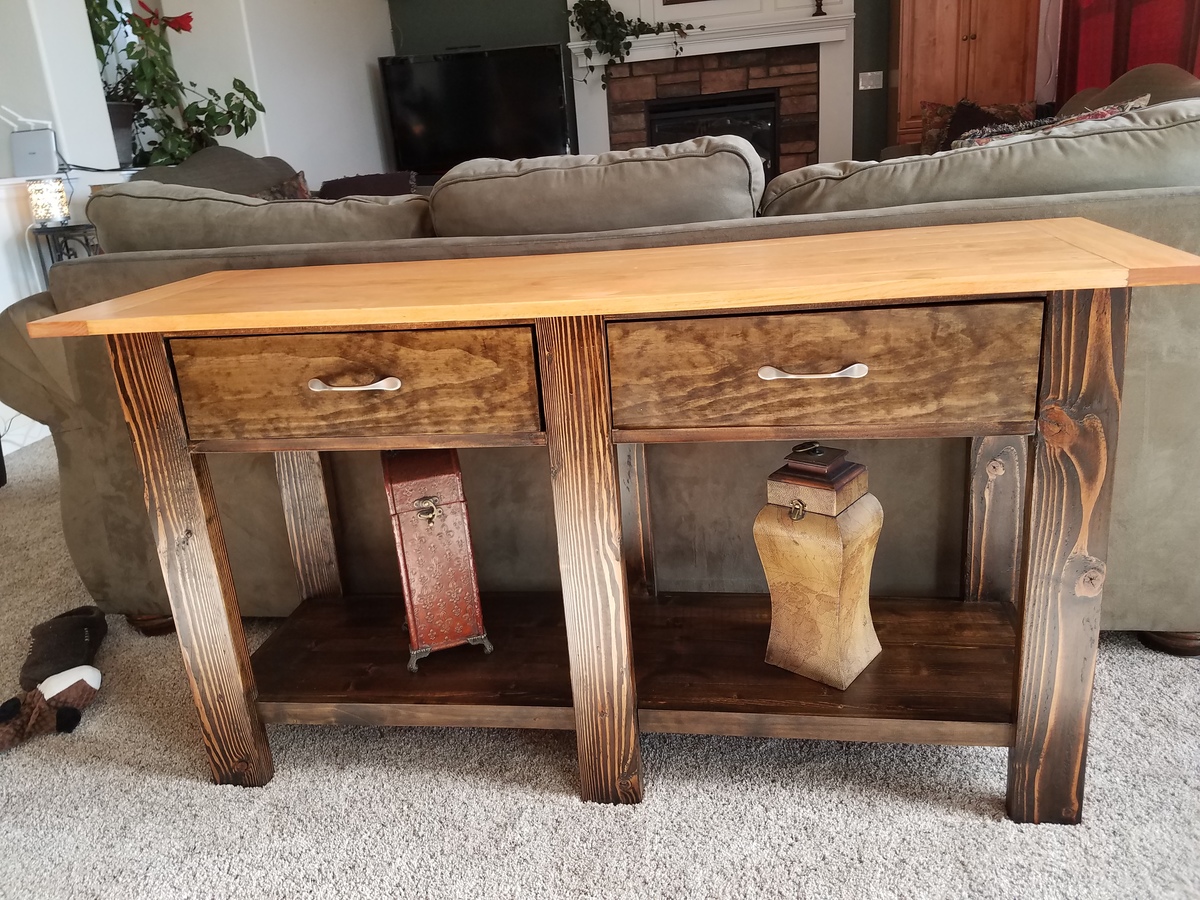
I chose to add an extra plank on the top to have it extend out a couple of inches on the front. This was my second furniture build and I'm still learning. This didn't take me very long and I was able to do it on the sly to surprise my husband. First project from Ana White and won't be my last.
Built from Plan(s)
Estimated Cost
$110 including stain
Estimated Time Investment
Weekend Project (10-20 Hours)
Finish Used
Both stains are Minwax - top is Colonial Maple and the lower is Espresso. Needed two applications of the maple to get it dark enough for my taste. I forgot to use pre-conditioner on the legs which were plain 2x4 studs, so the grain really showed through, but I'm pleased at how it looks like a combination of the maple and espresso
Recommended Skill Level
Beginner
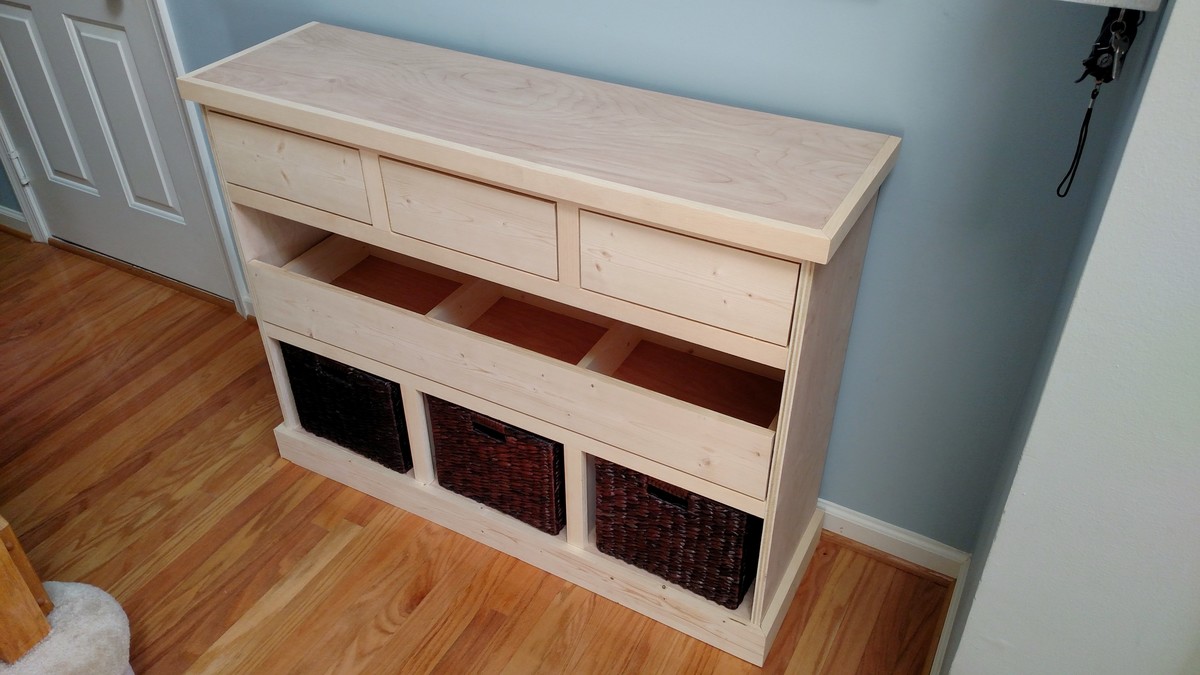
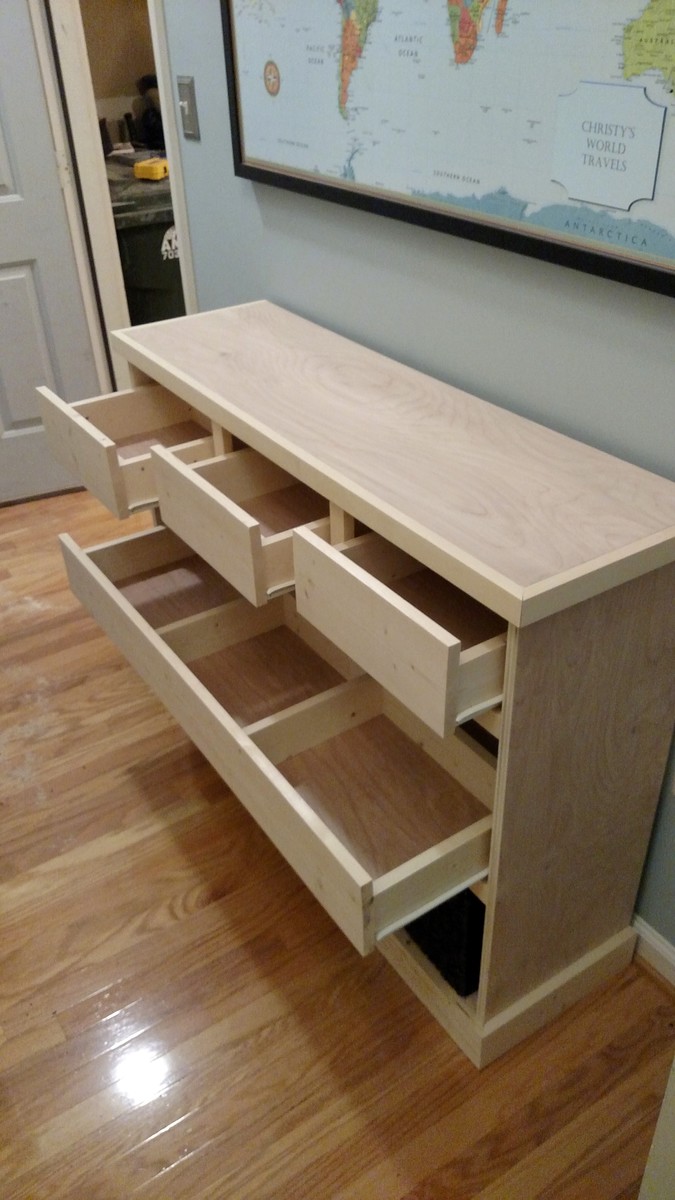
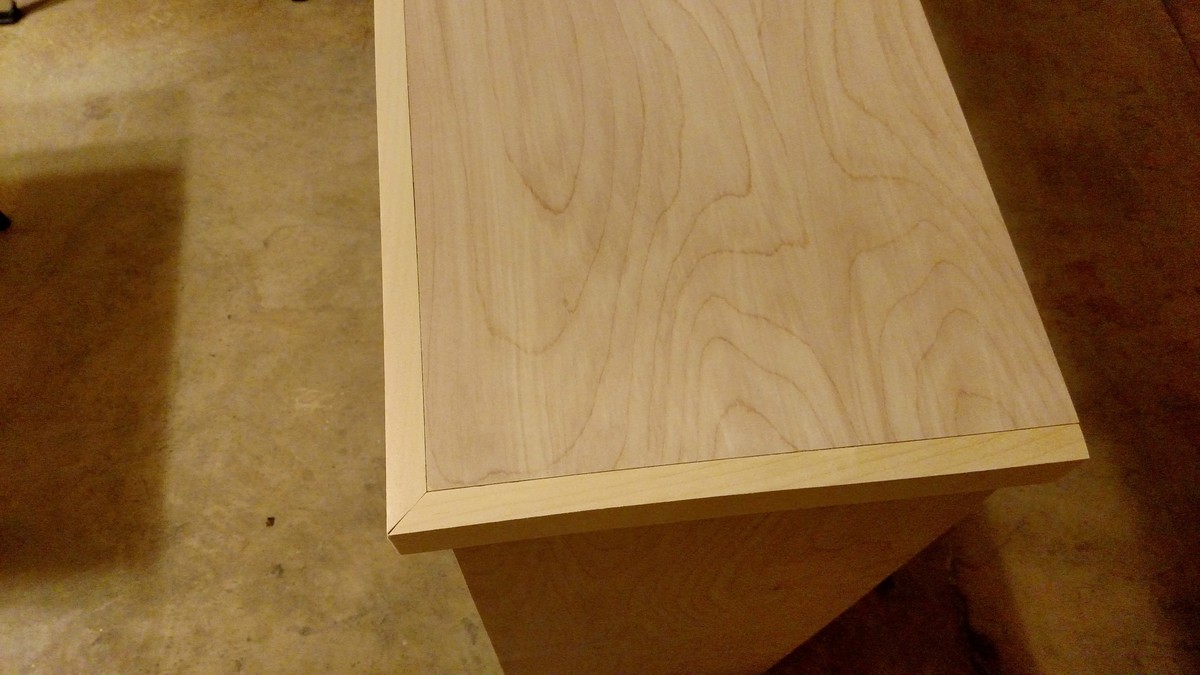
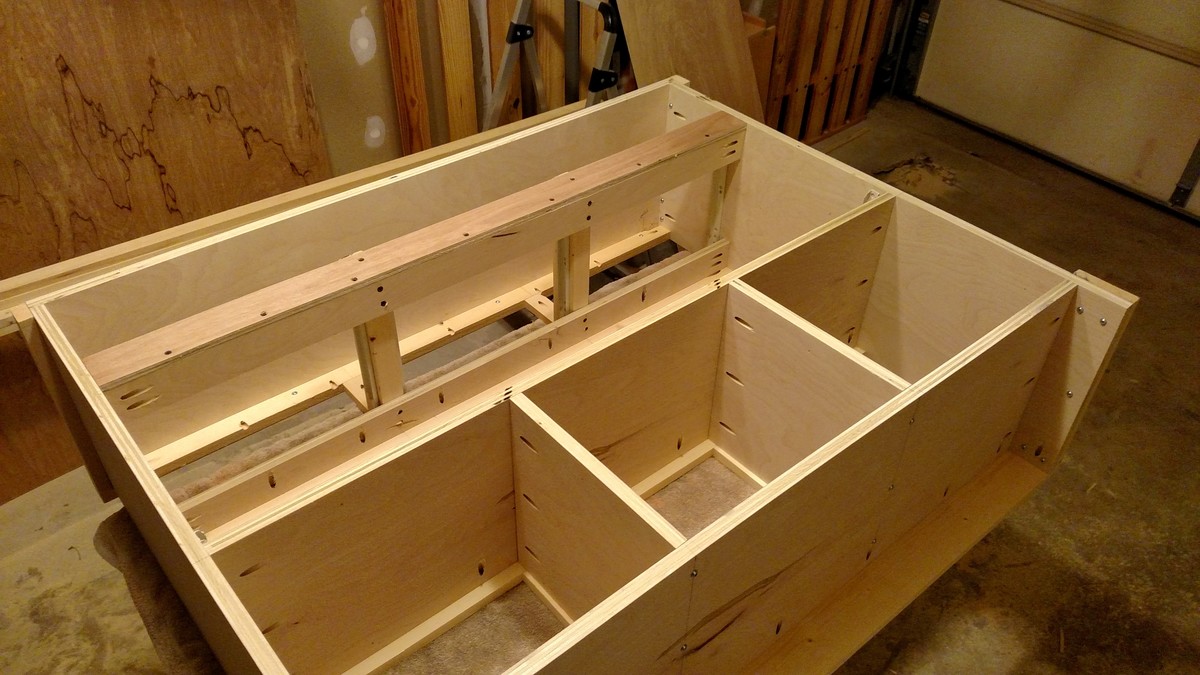
Entry/Foyer Table
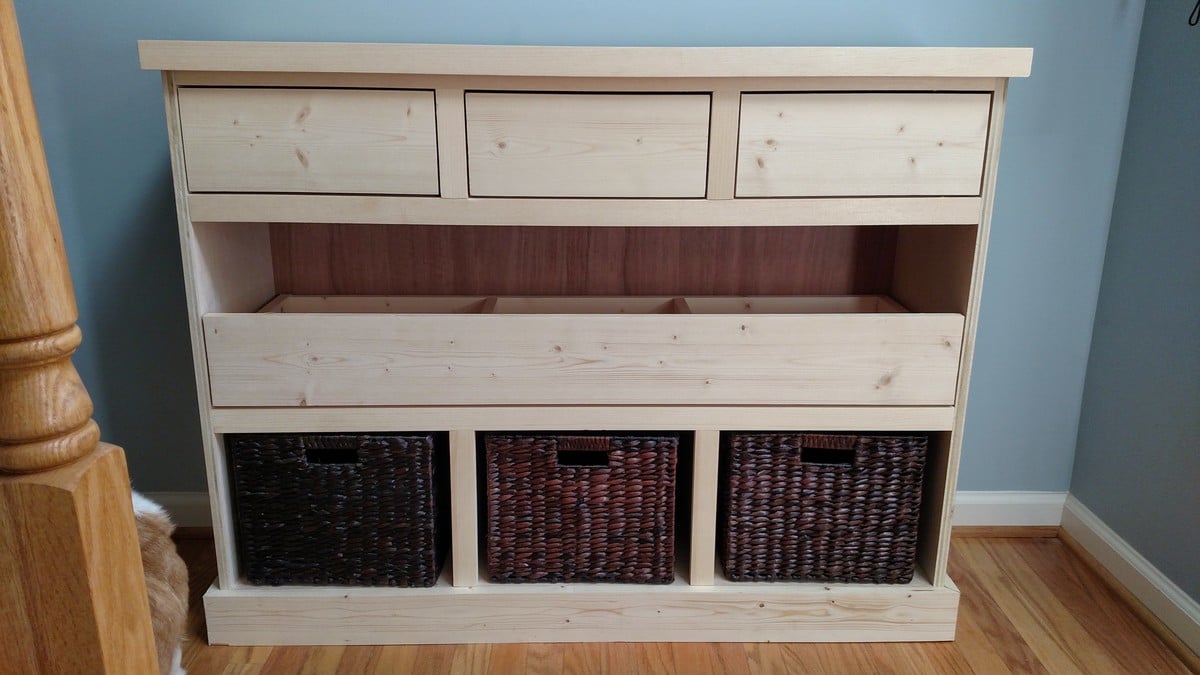
We built this for our entry way to store hats, gloves, and other goodies. I modifed the depth to be narrower to leave more walking space. We live in a three level townhouse and any space much less storage space is premium. I liked the idea of the long pull out drawer in one of the earlier postings as well as the basket idea so we included both into our design. I also used conventional drawer slides instead of the center mount. We havent decided on the finish or the drawer pull hardware yet but I love the look of natural wood so i wanted to post it without a finish.
Built from Plan(s)
Estimated Cost
$150
Estimated Time Investment
Weekend Project (10-20 Hours)
Finish Used
Unfinished
Recommended Skill Level
Beginner
Comments
Olivia's Toybox Bench

The box is pretty similar to Mimi's bench with a few dimensions changed. I also fully framed out the inside to make sure adults could sit on it if need be. The arms and backrest took a lot of just staring and "pondering". I like it and everyone else seems to love it. Thanks Ana and Mimi.
Built from Plan(s)
Estimated Time Investment
Week Long Project (20 Hours or More)
Finish Used
White prime, latex, finally aerosol. I need to learn more about the paint process because I was completely unsatisfied with the latex.
Recommended Skill Level
Intermediate
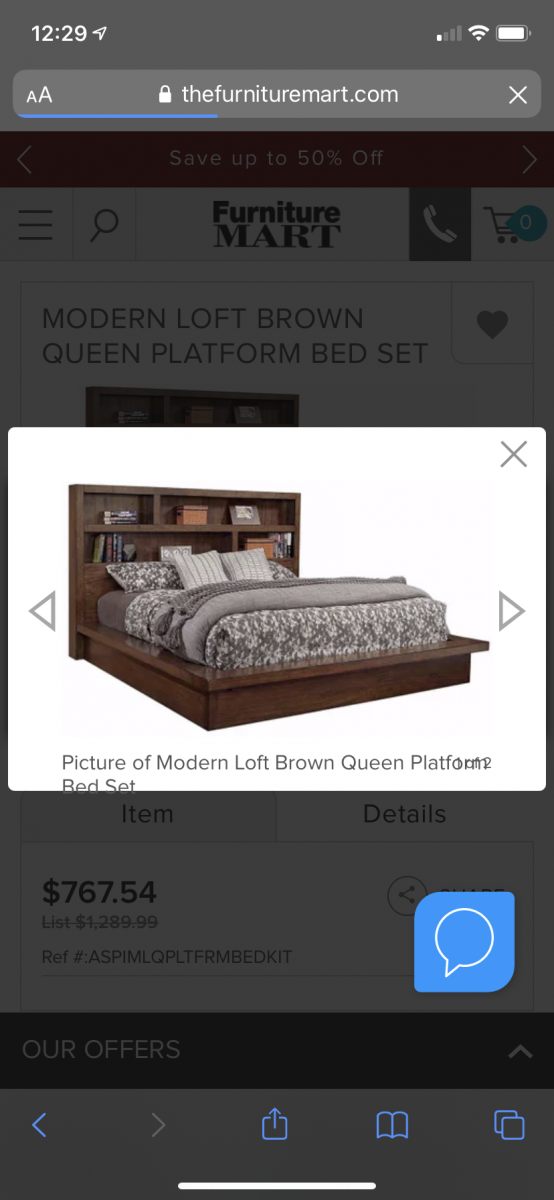
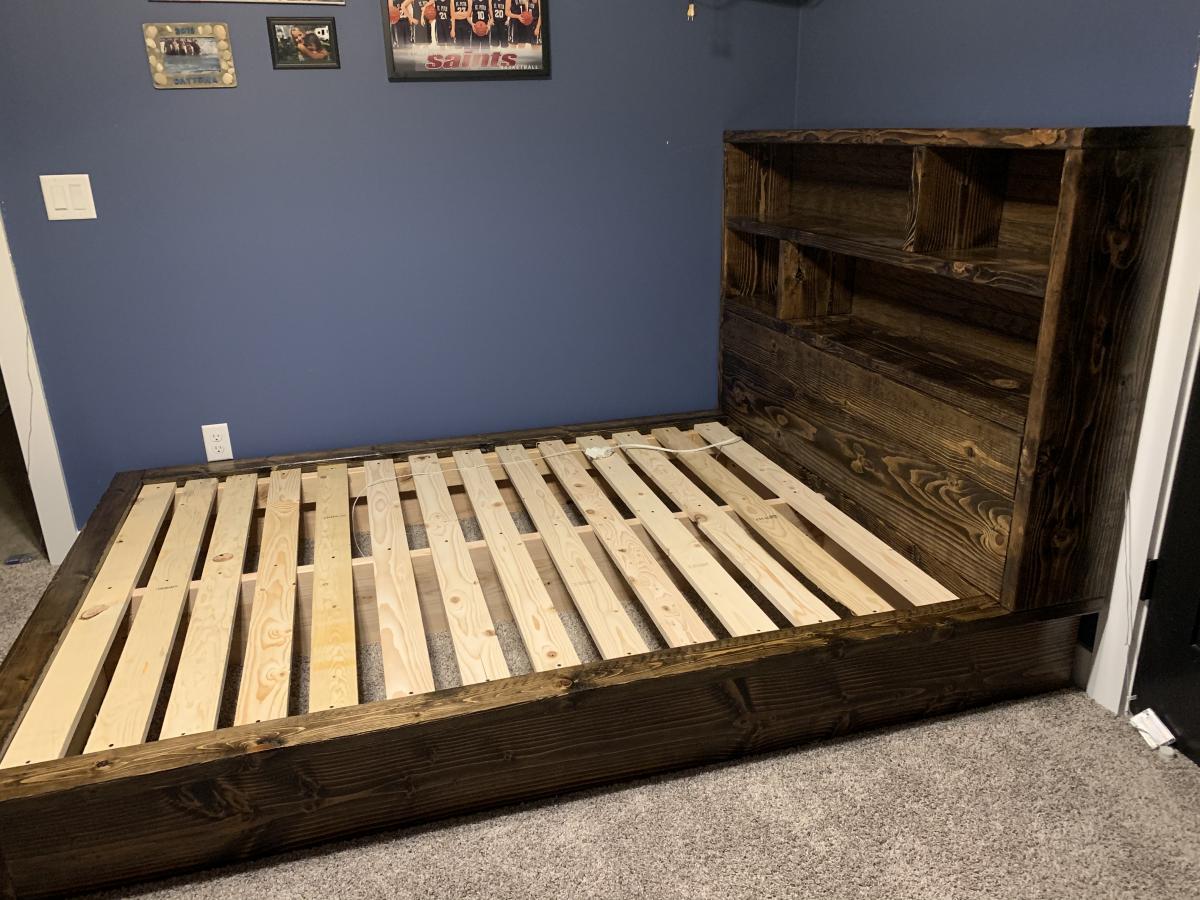
Full size Platform bed
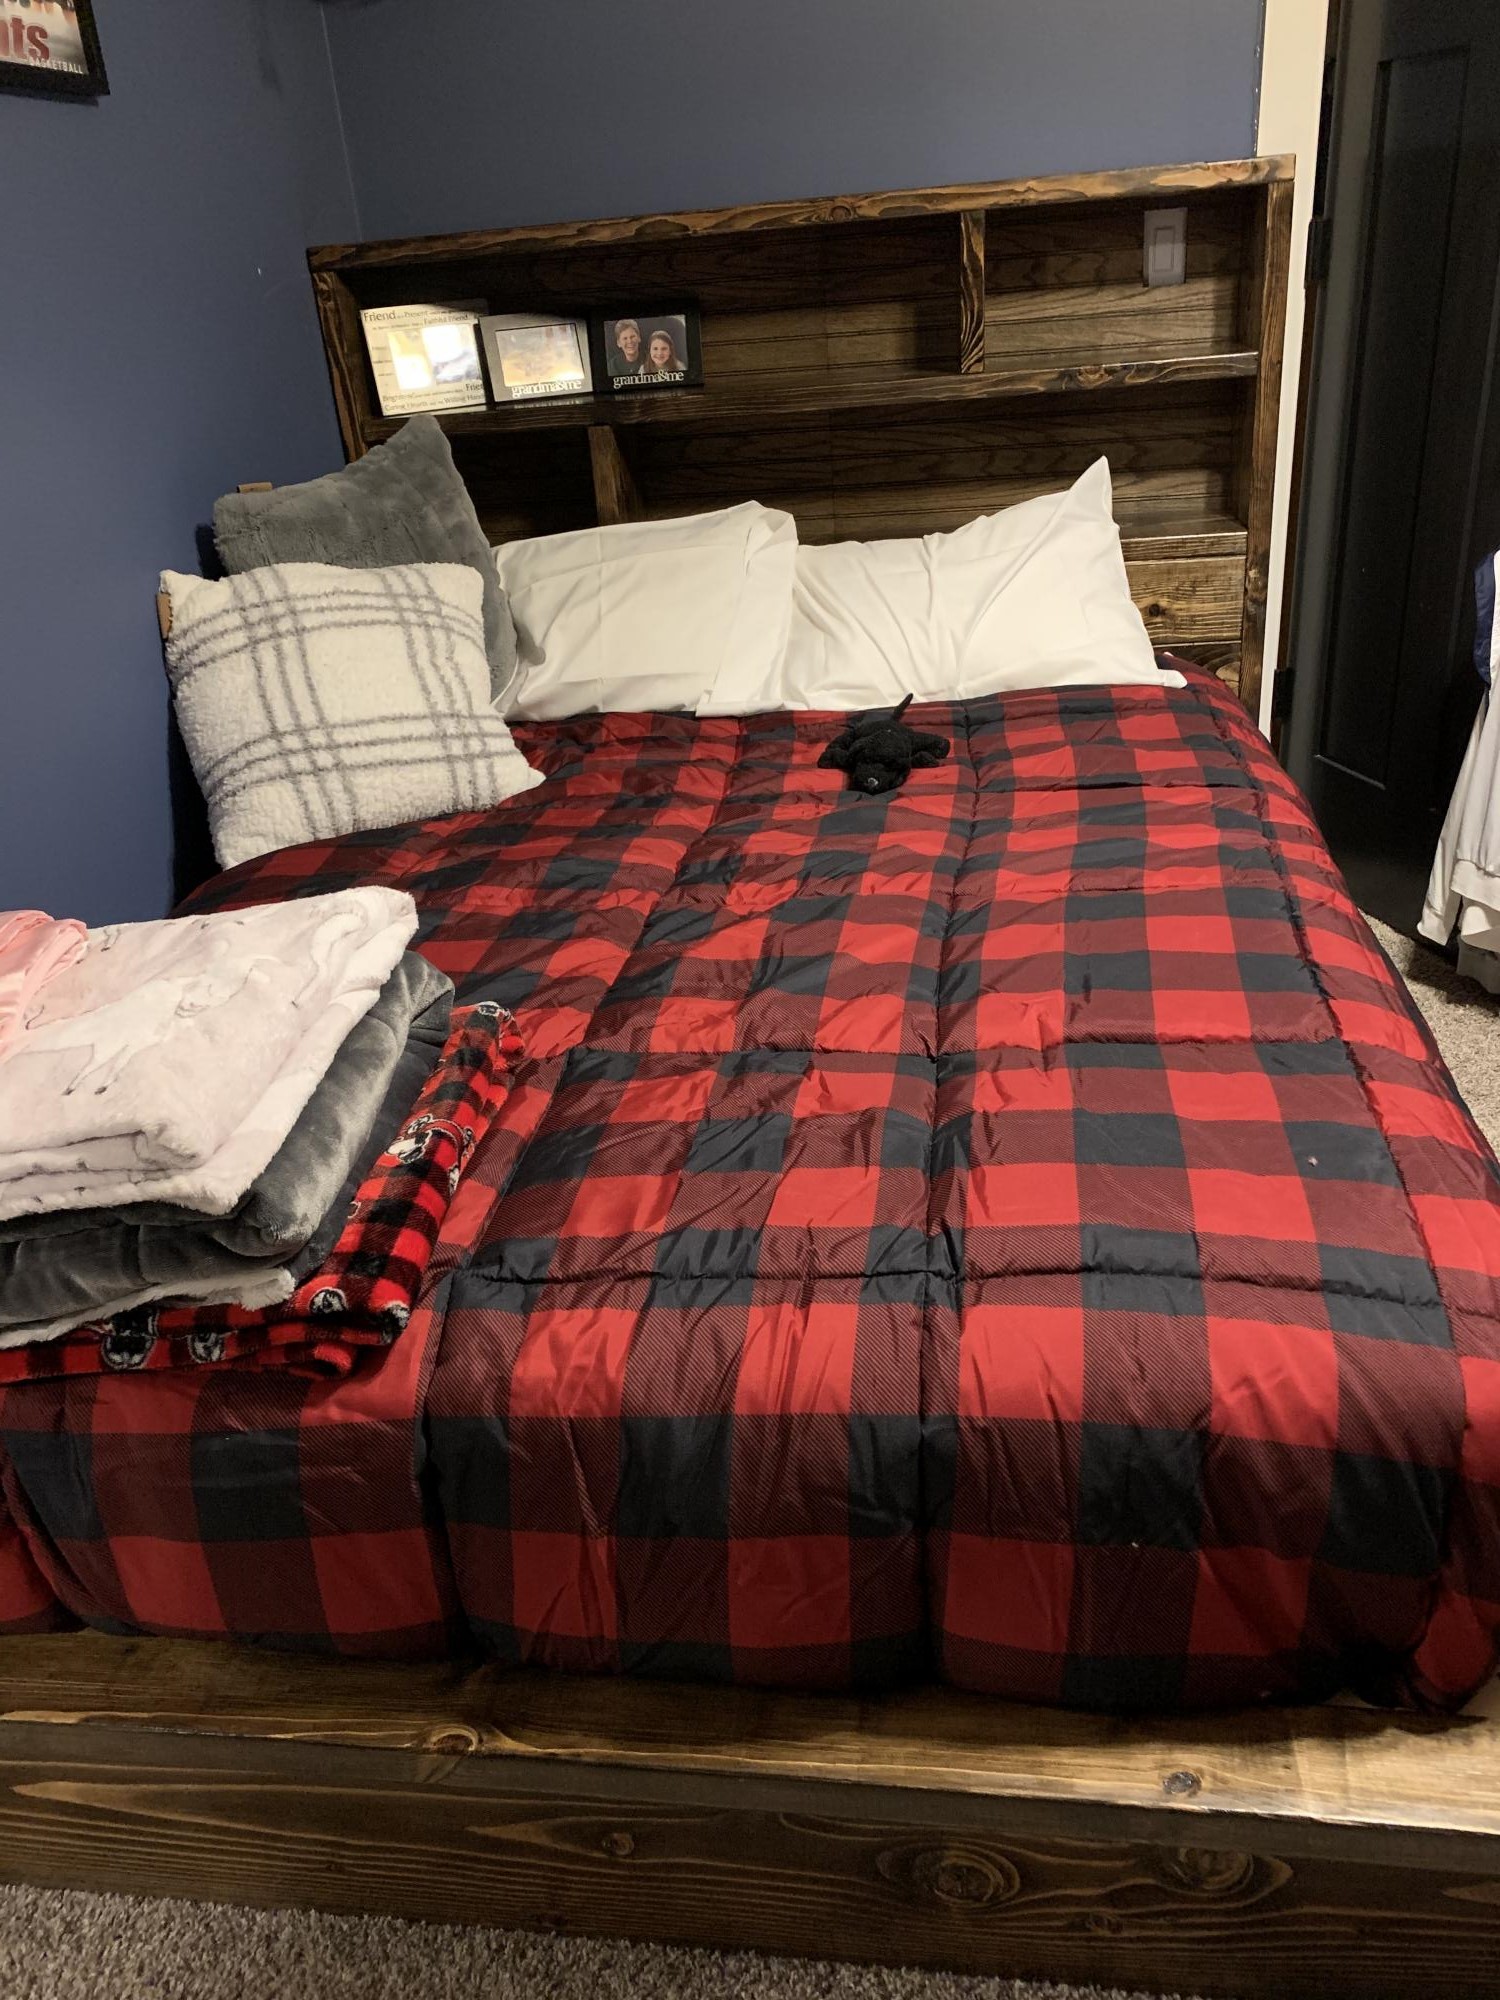
My daughter saw a bed like this that was going to cost $1000 for a queen size. She only needs a full size so we took the plan from this site and built the base. We made the headboard by looking at the picture and copying as best we could. It was our first big project! We were so happy with how it turned out!! She loves it!!
Estimated Cost
200
Finish Used
Minwax Dark Walnut stain and Polycrylic
Comments
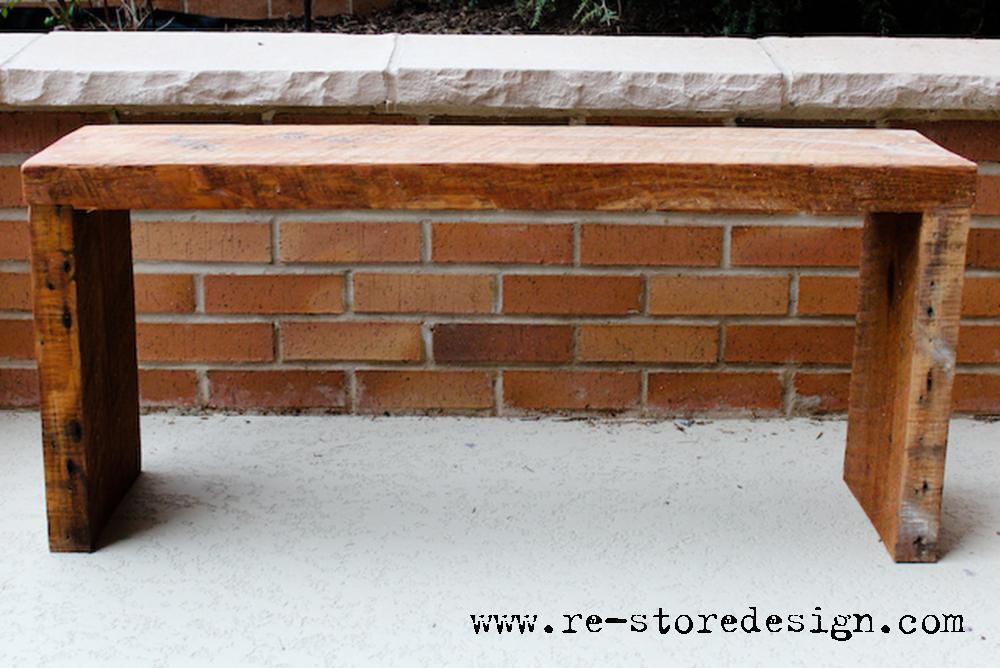
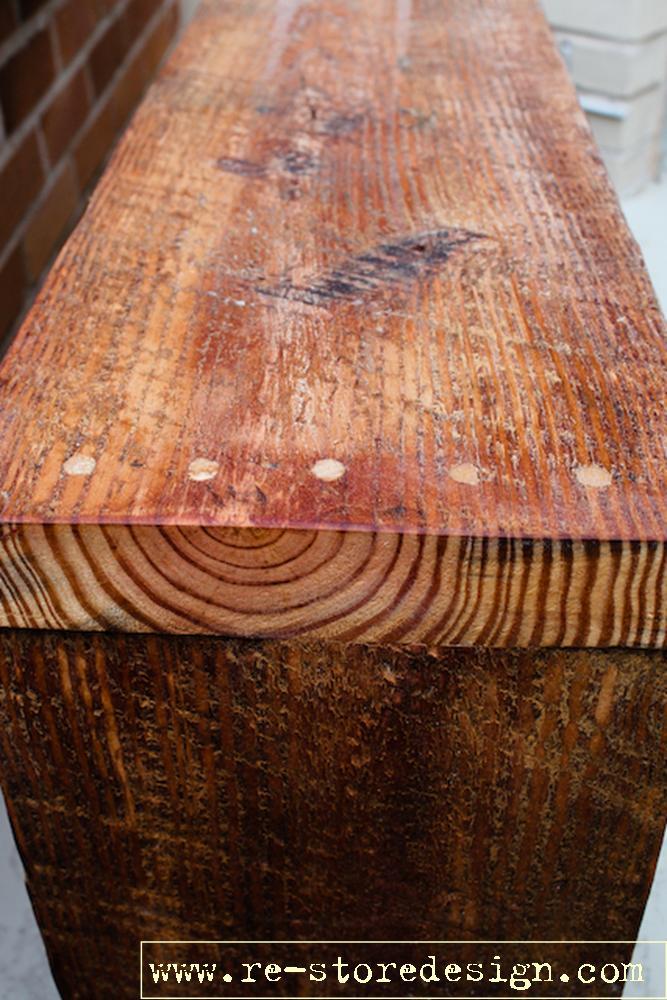
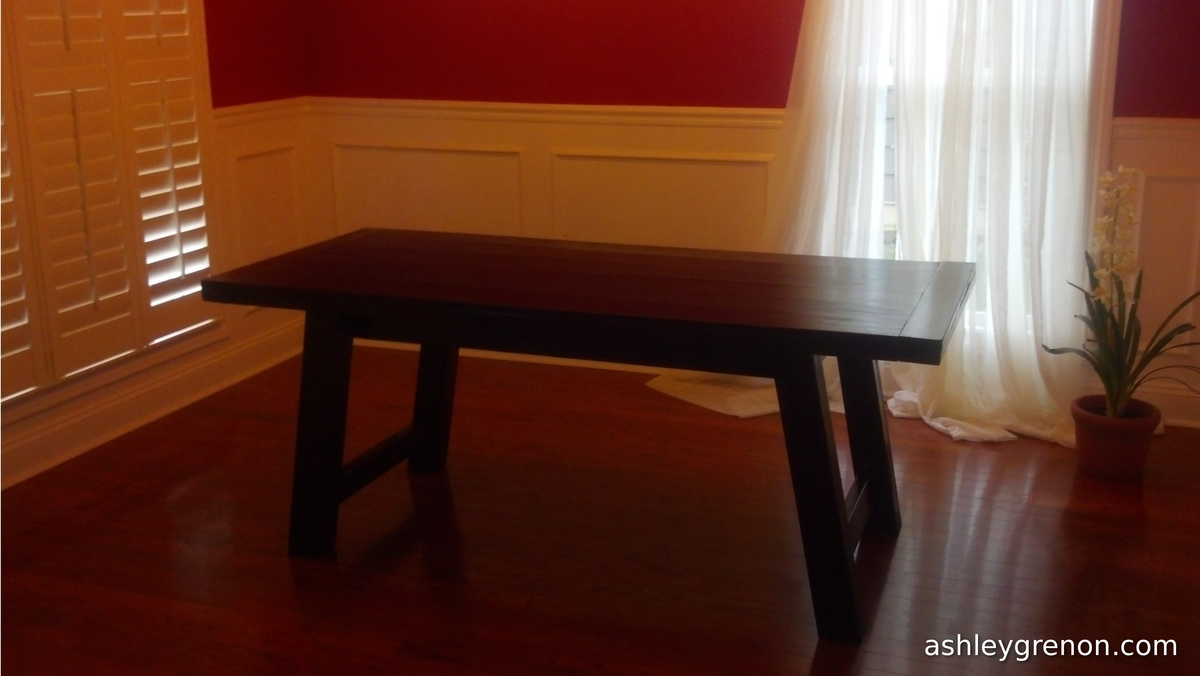
Reclaimed Wood Bench
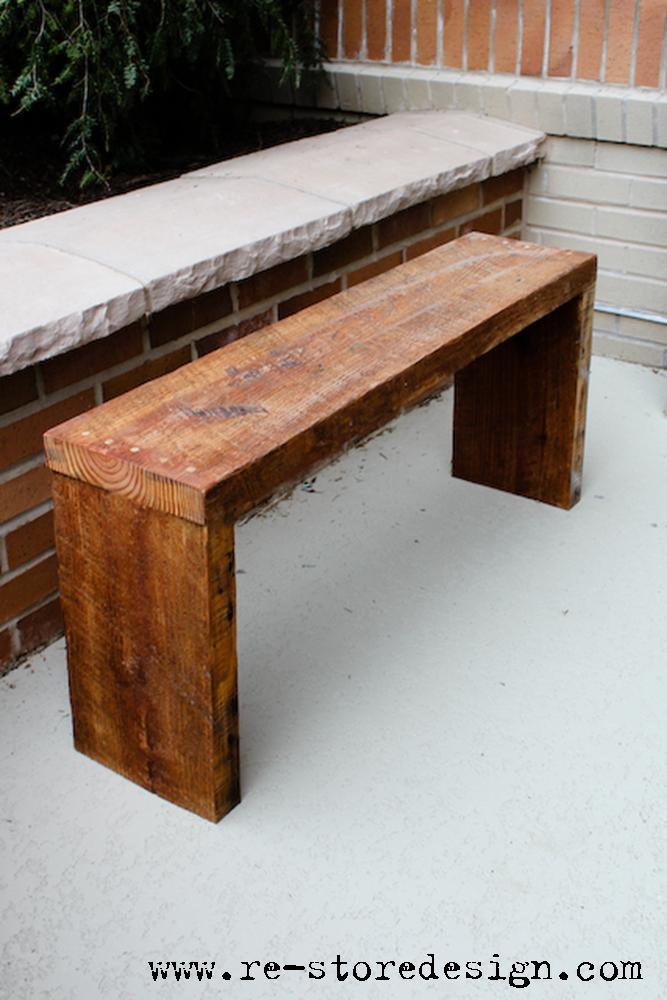
I built a couple benches to go with the reclaimed wood farm table I recently built. They are made out of hard to find 2″ reclaimed rough sawn lumber. The benches would also make a great coffee table or side table. Each bench is 36″ long and 18″ tall and 9″ deep.
Estimated Cost
$15
Estimated Time Investment
An Hour or Two (0-2 Hours)
Finish Used
Teak Oil
Recommended Skill Level
Starter Project
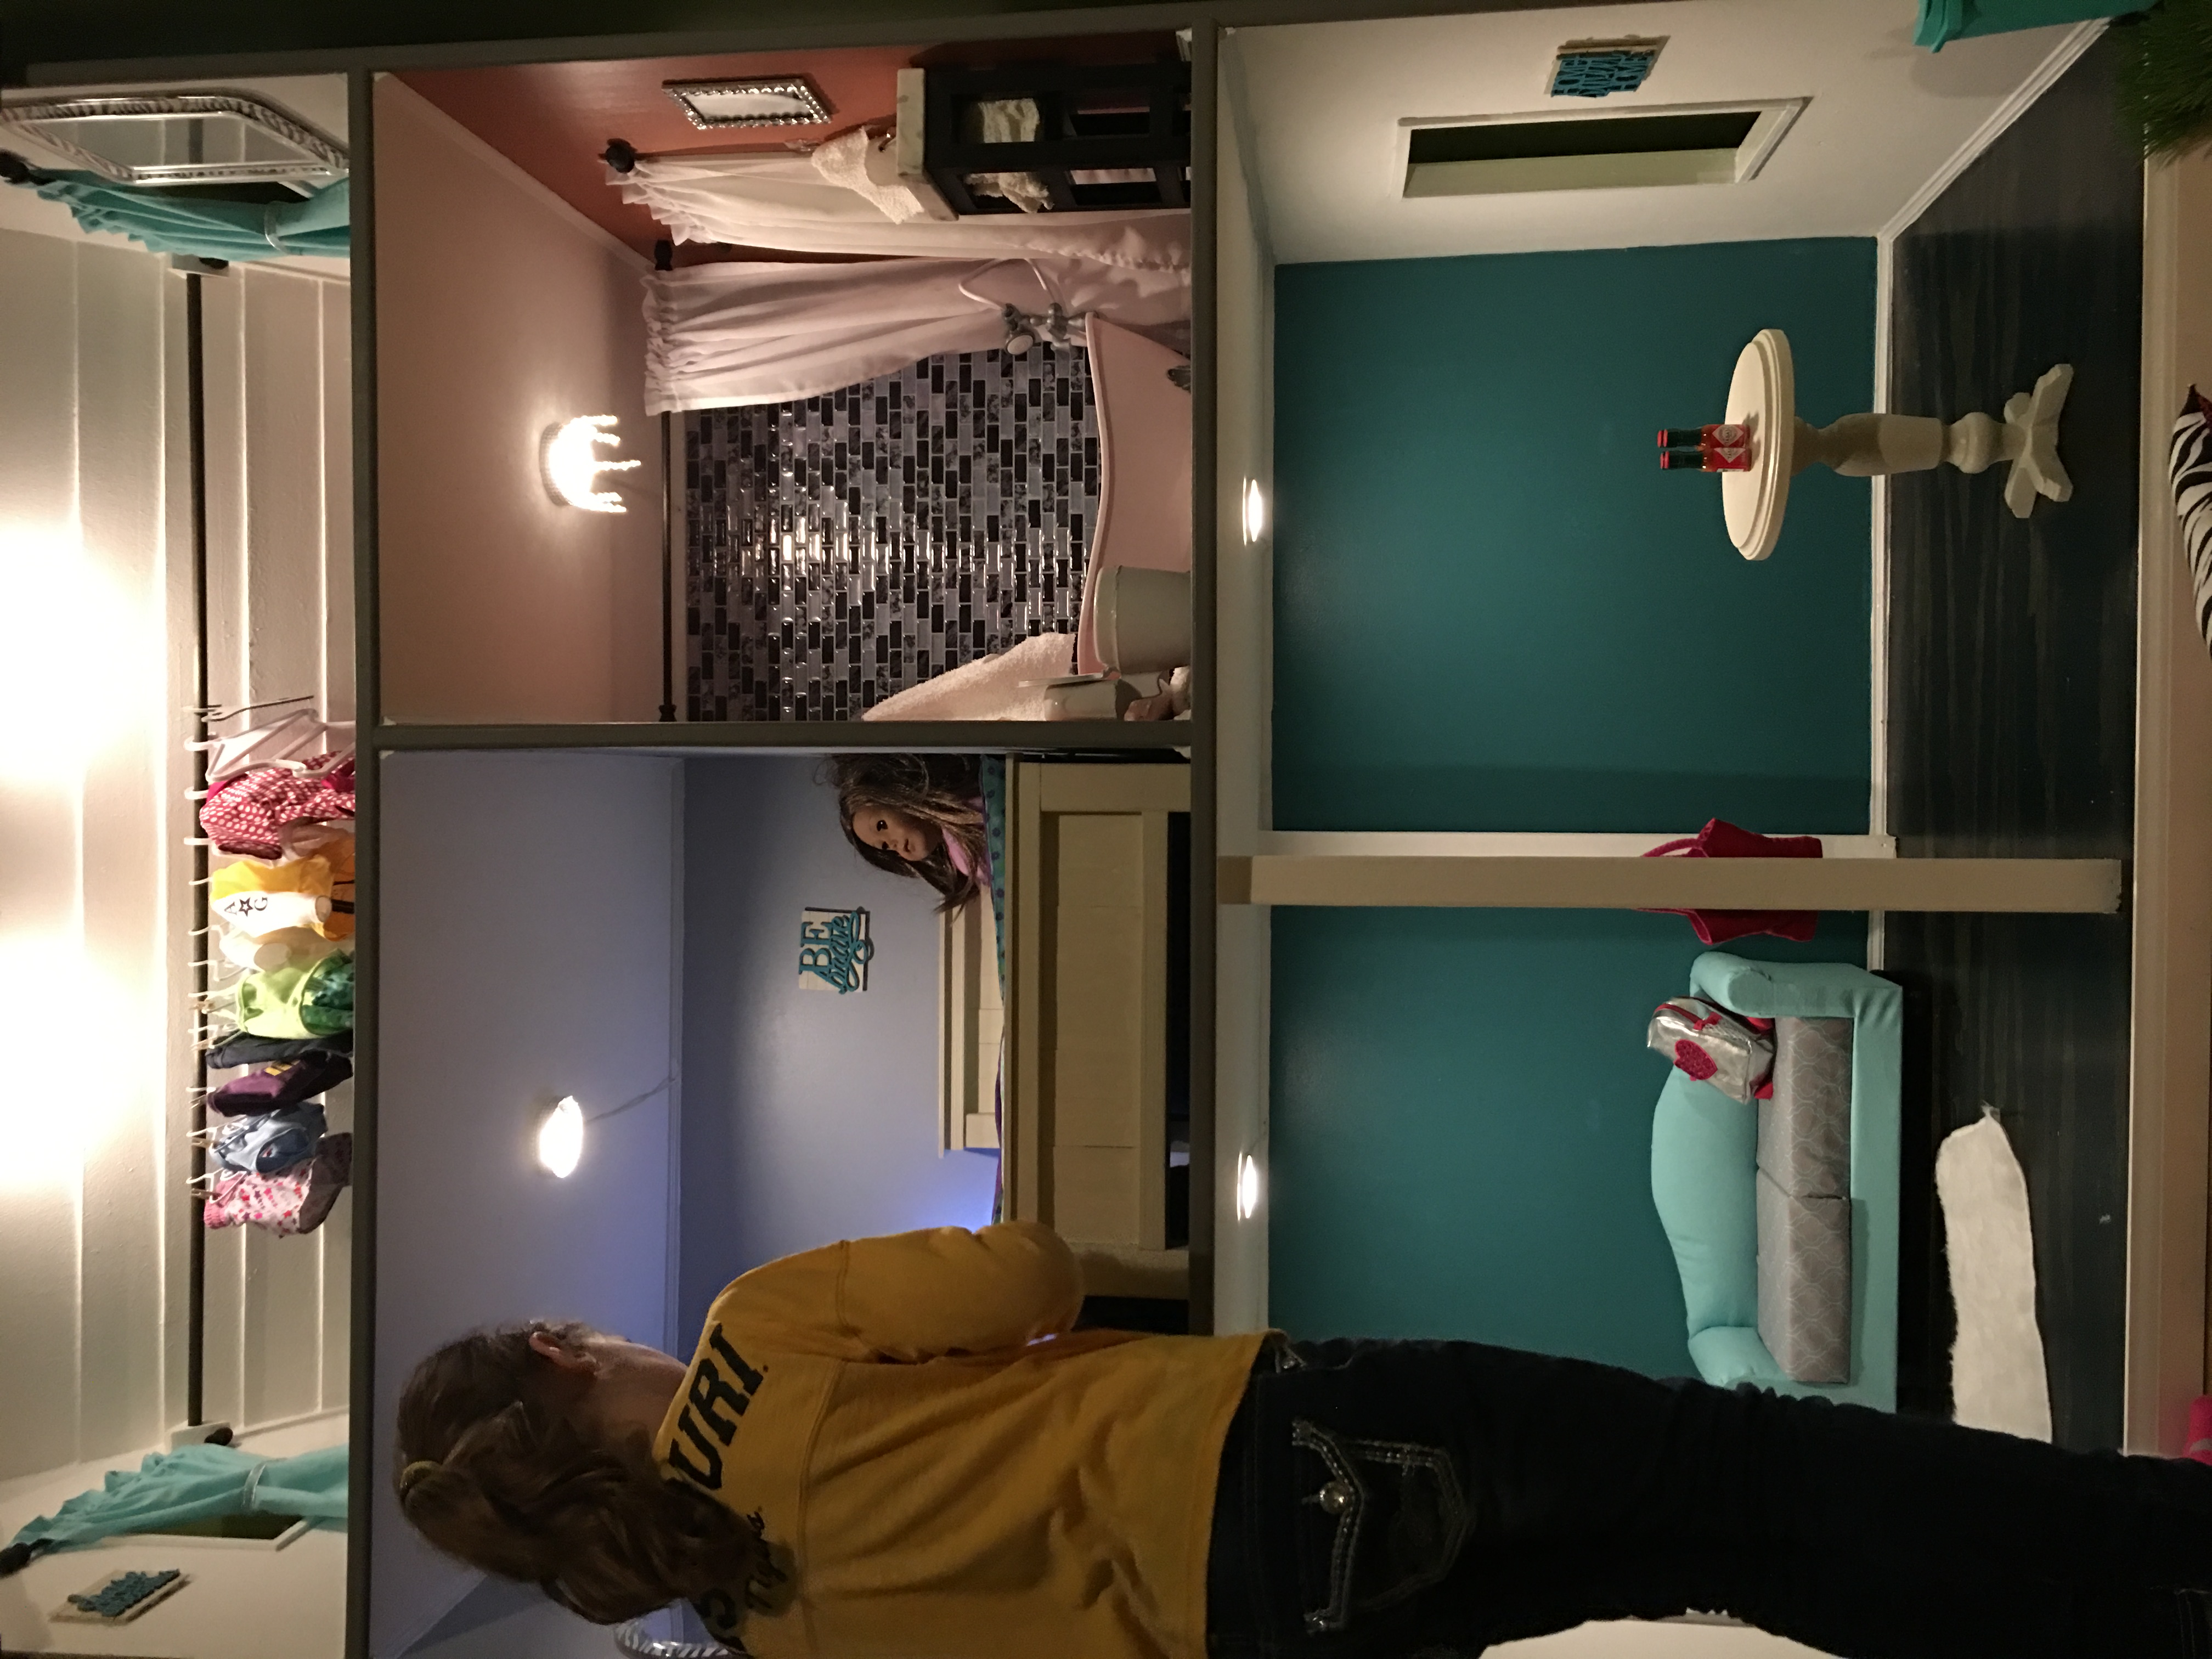
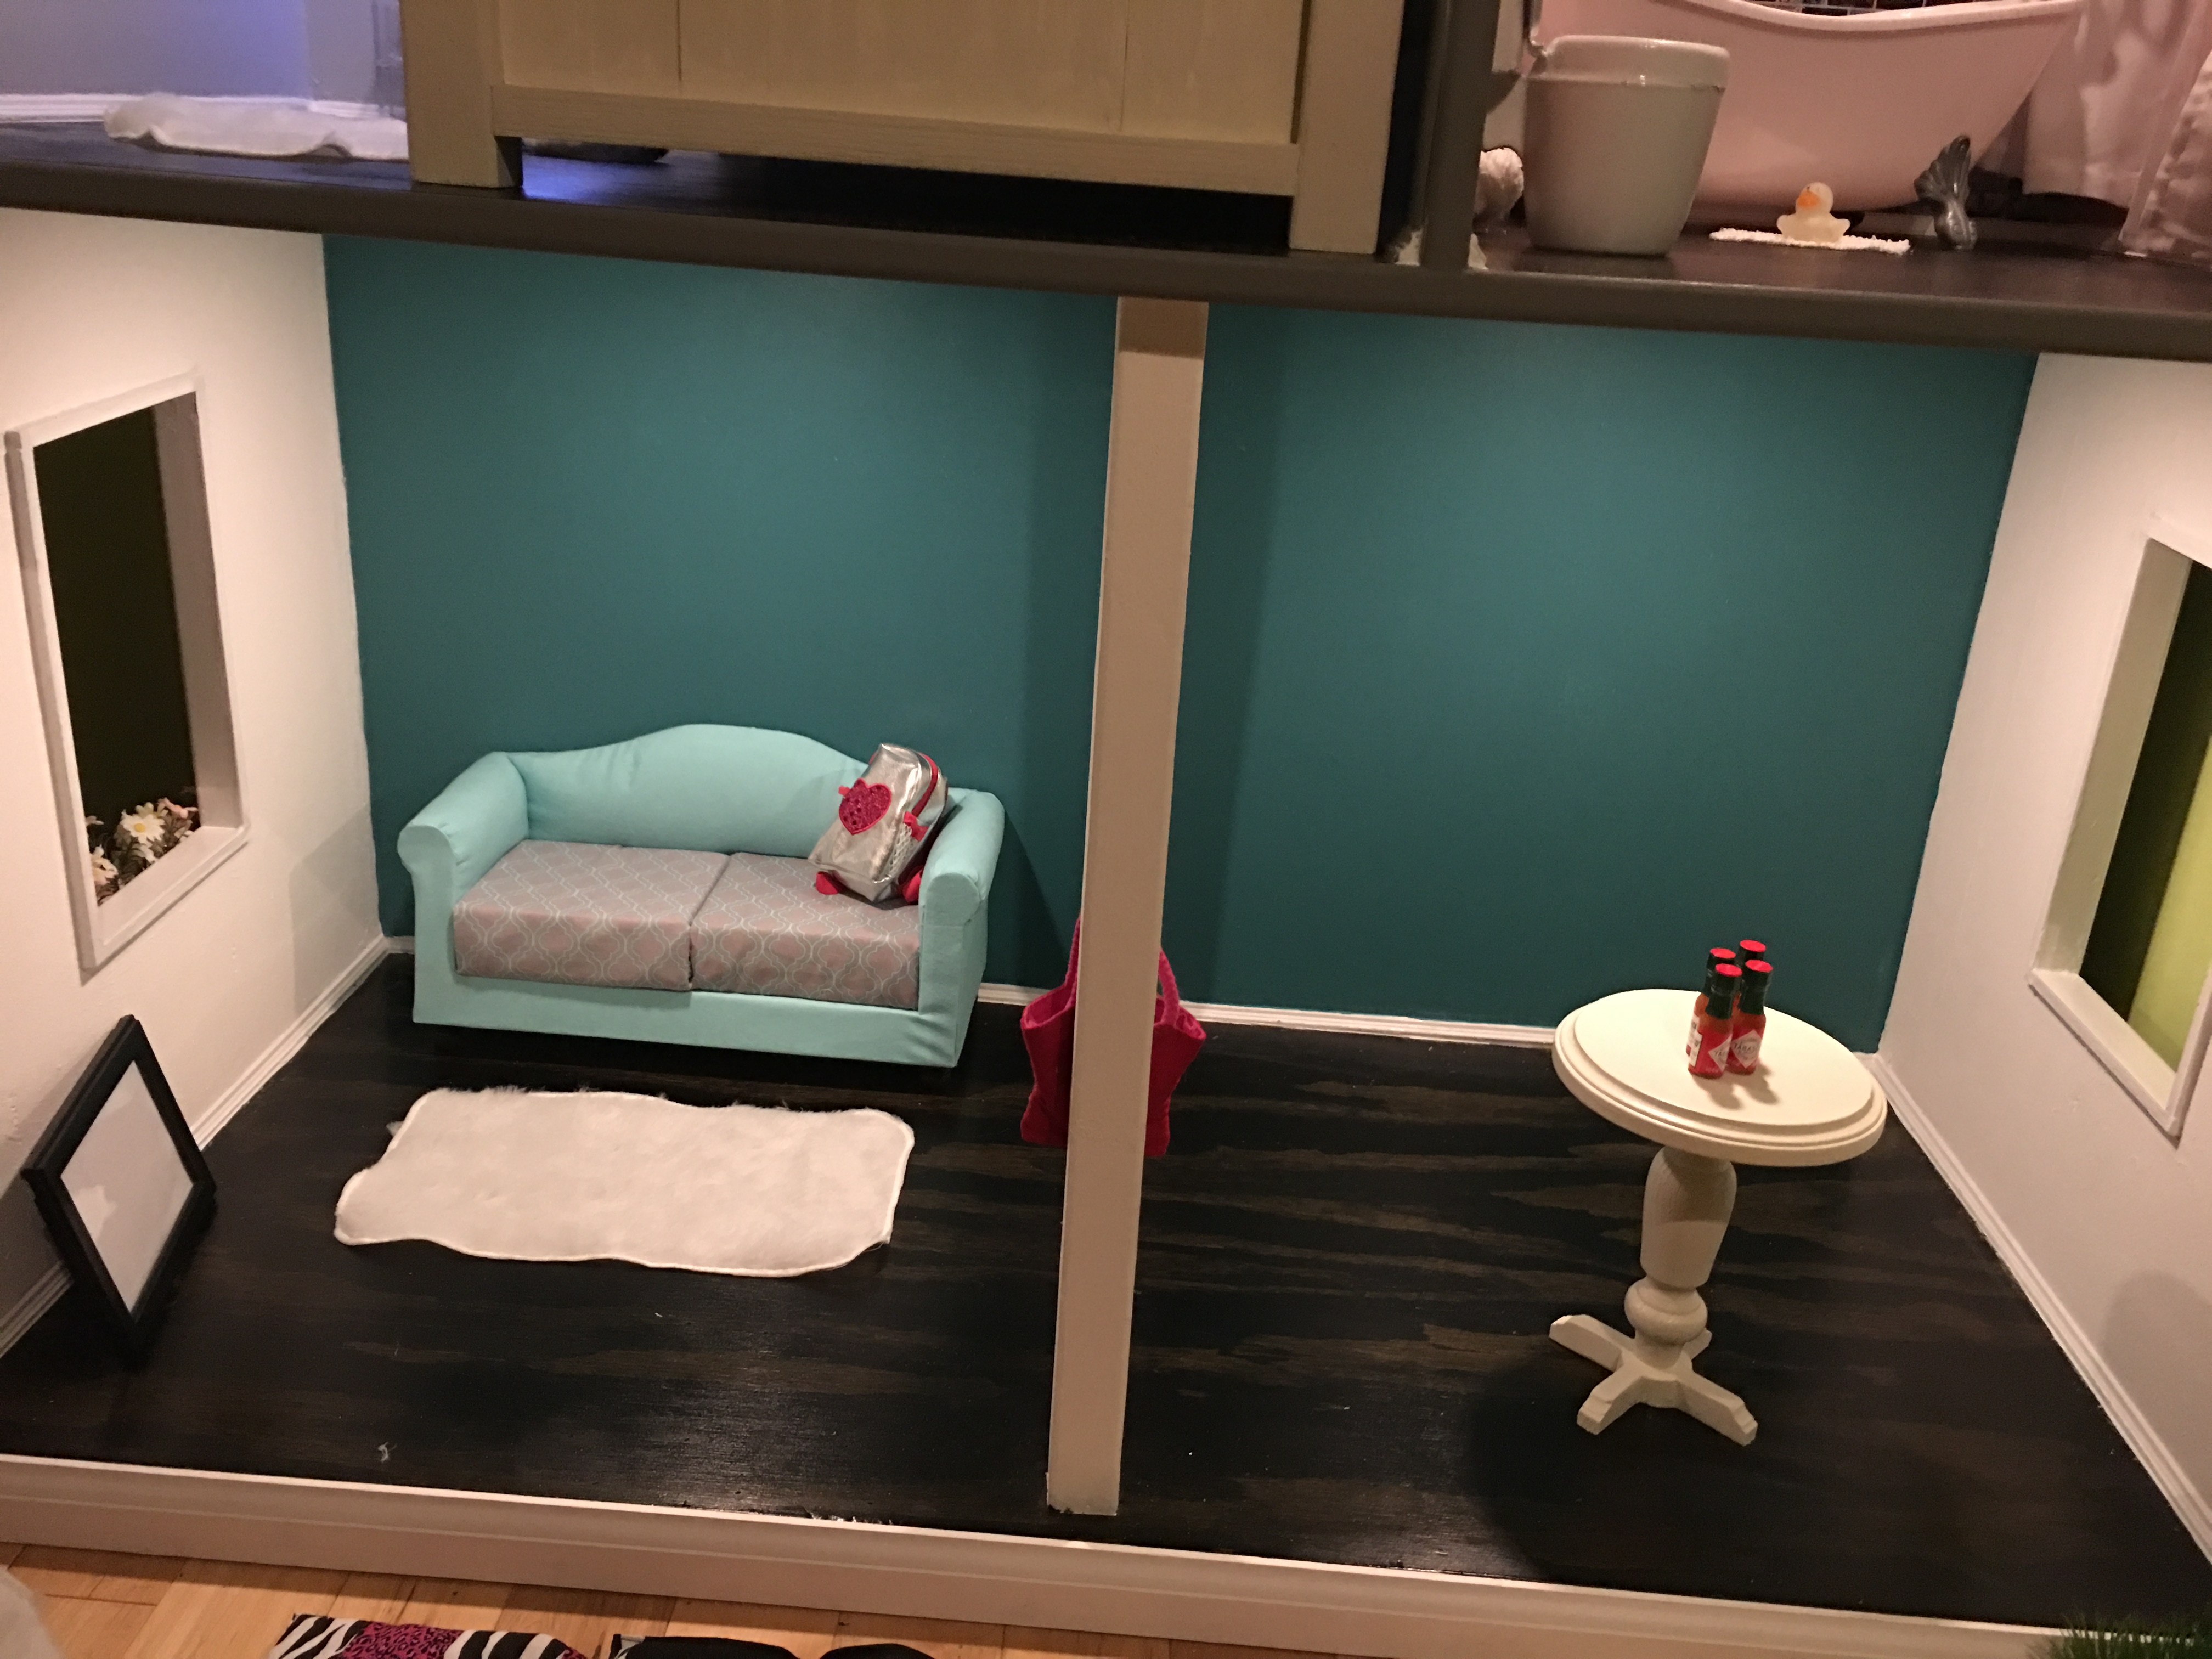
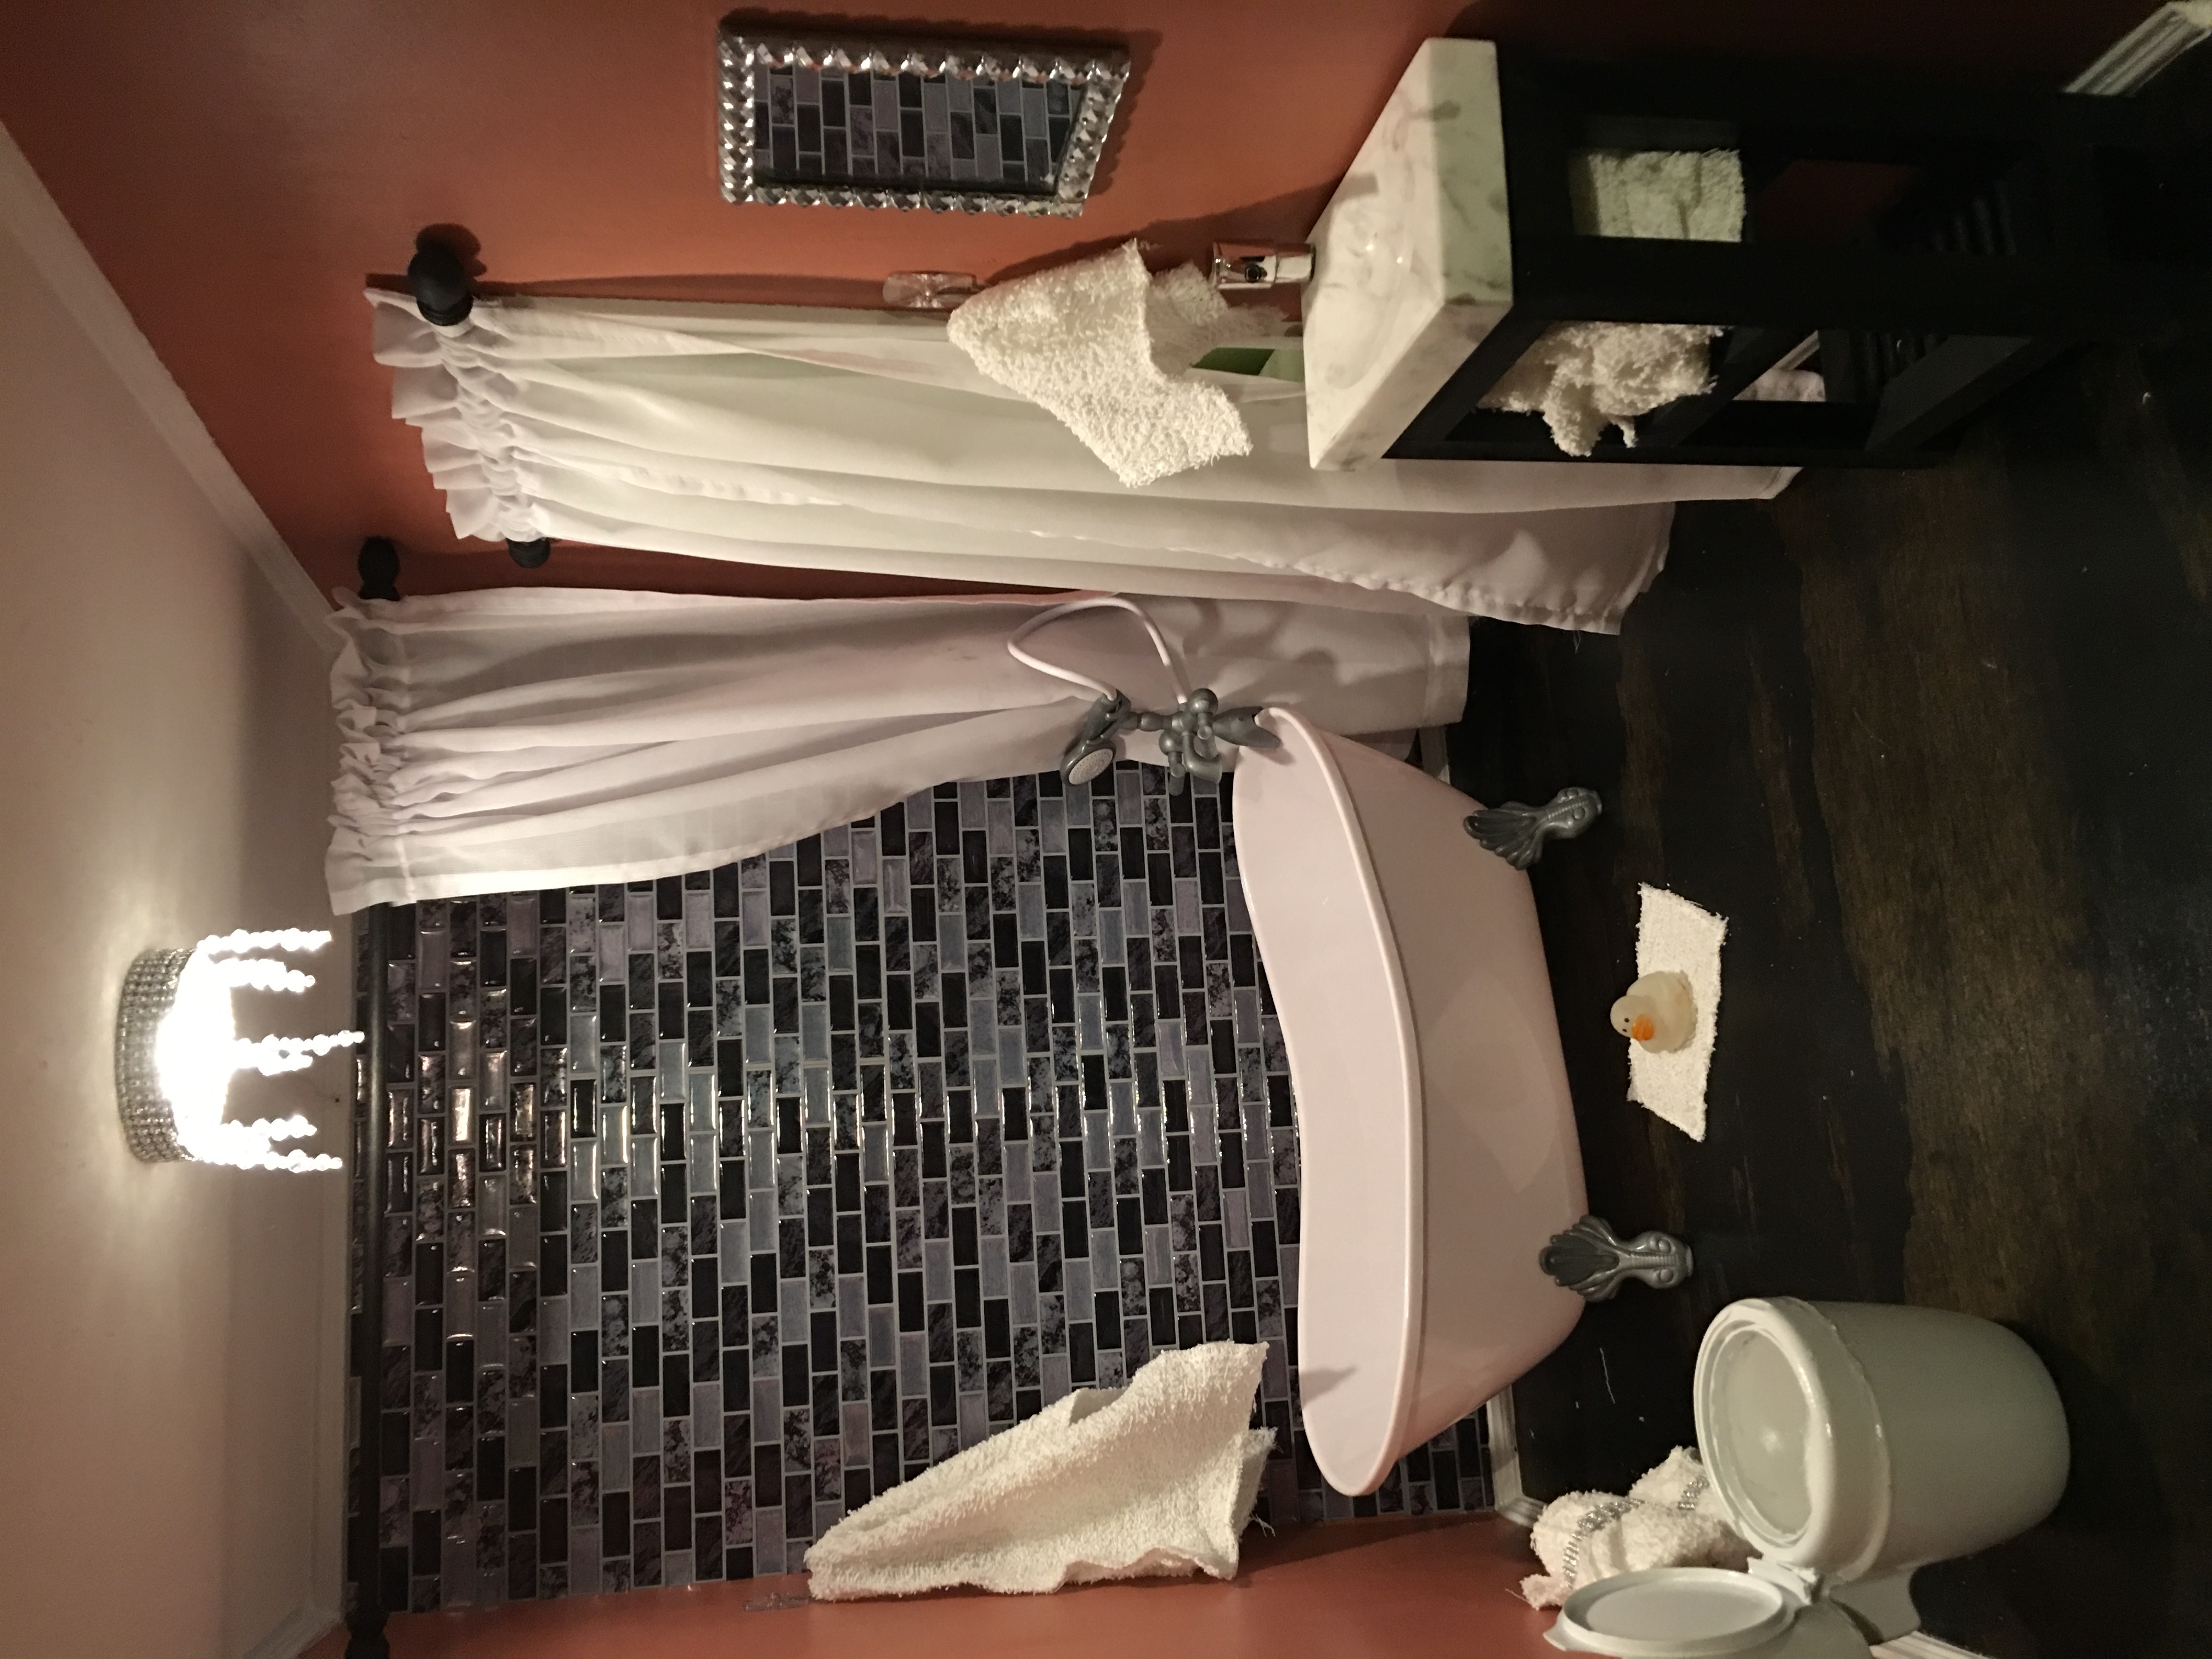
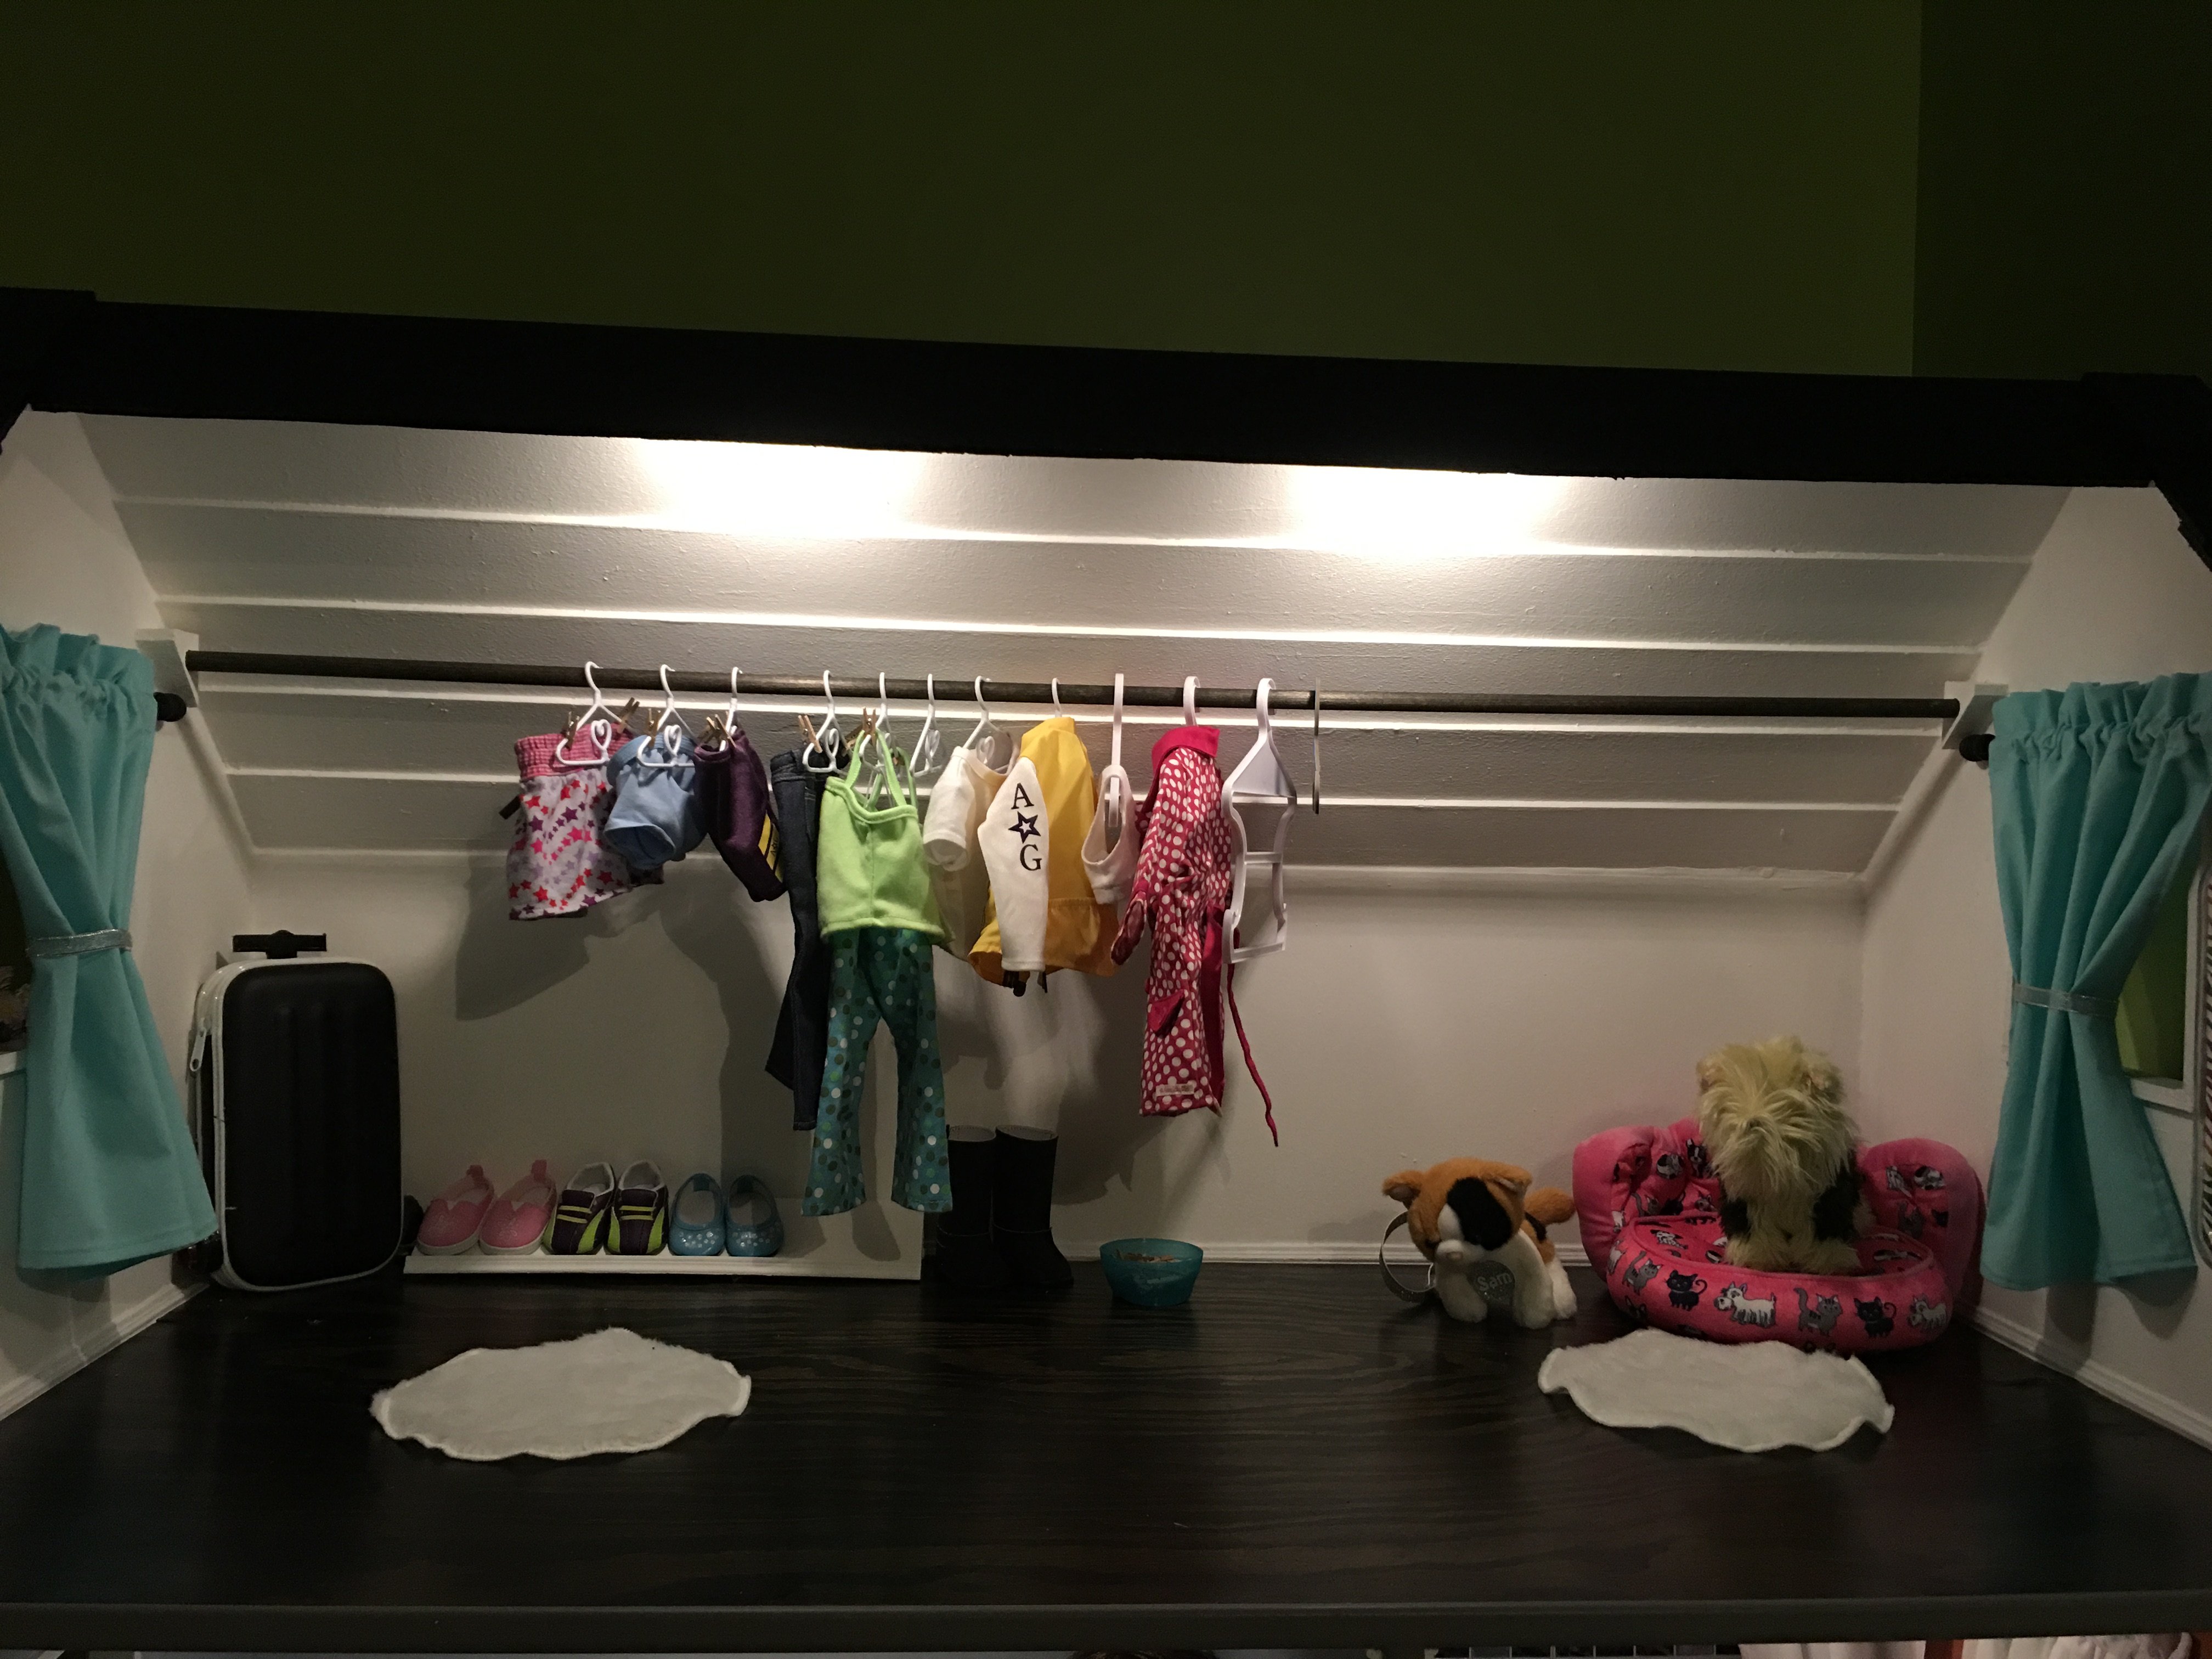
American Girl Dollhouse Masterpiece!
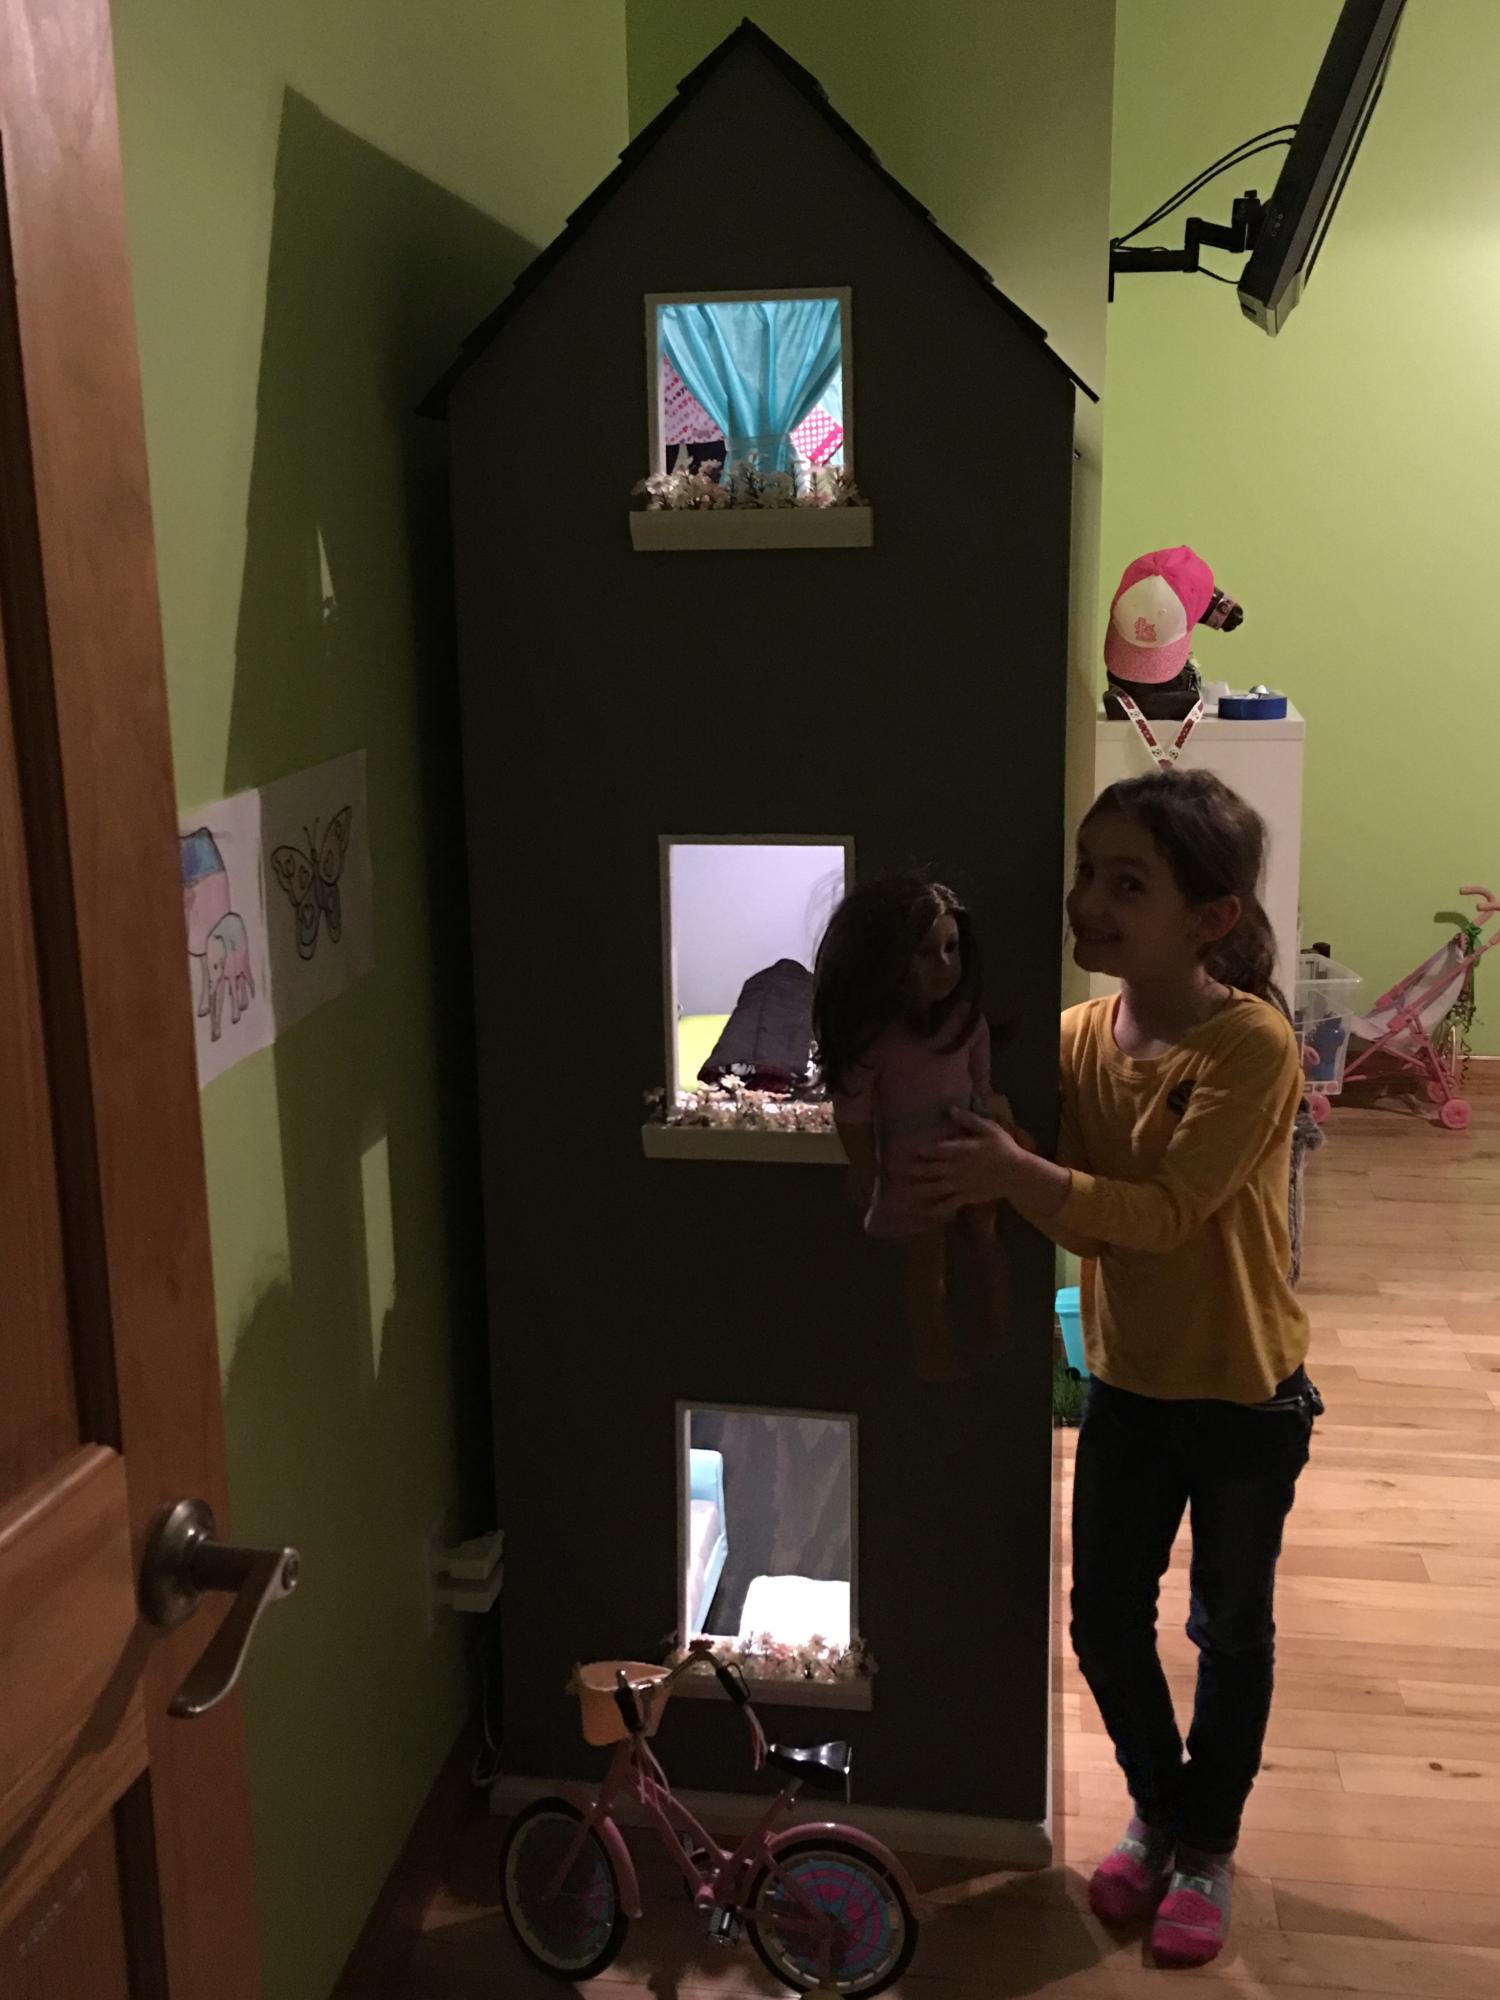
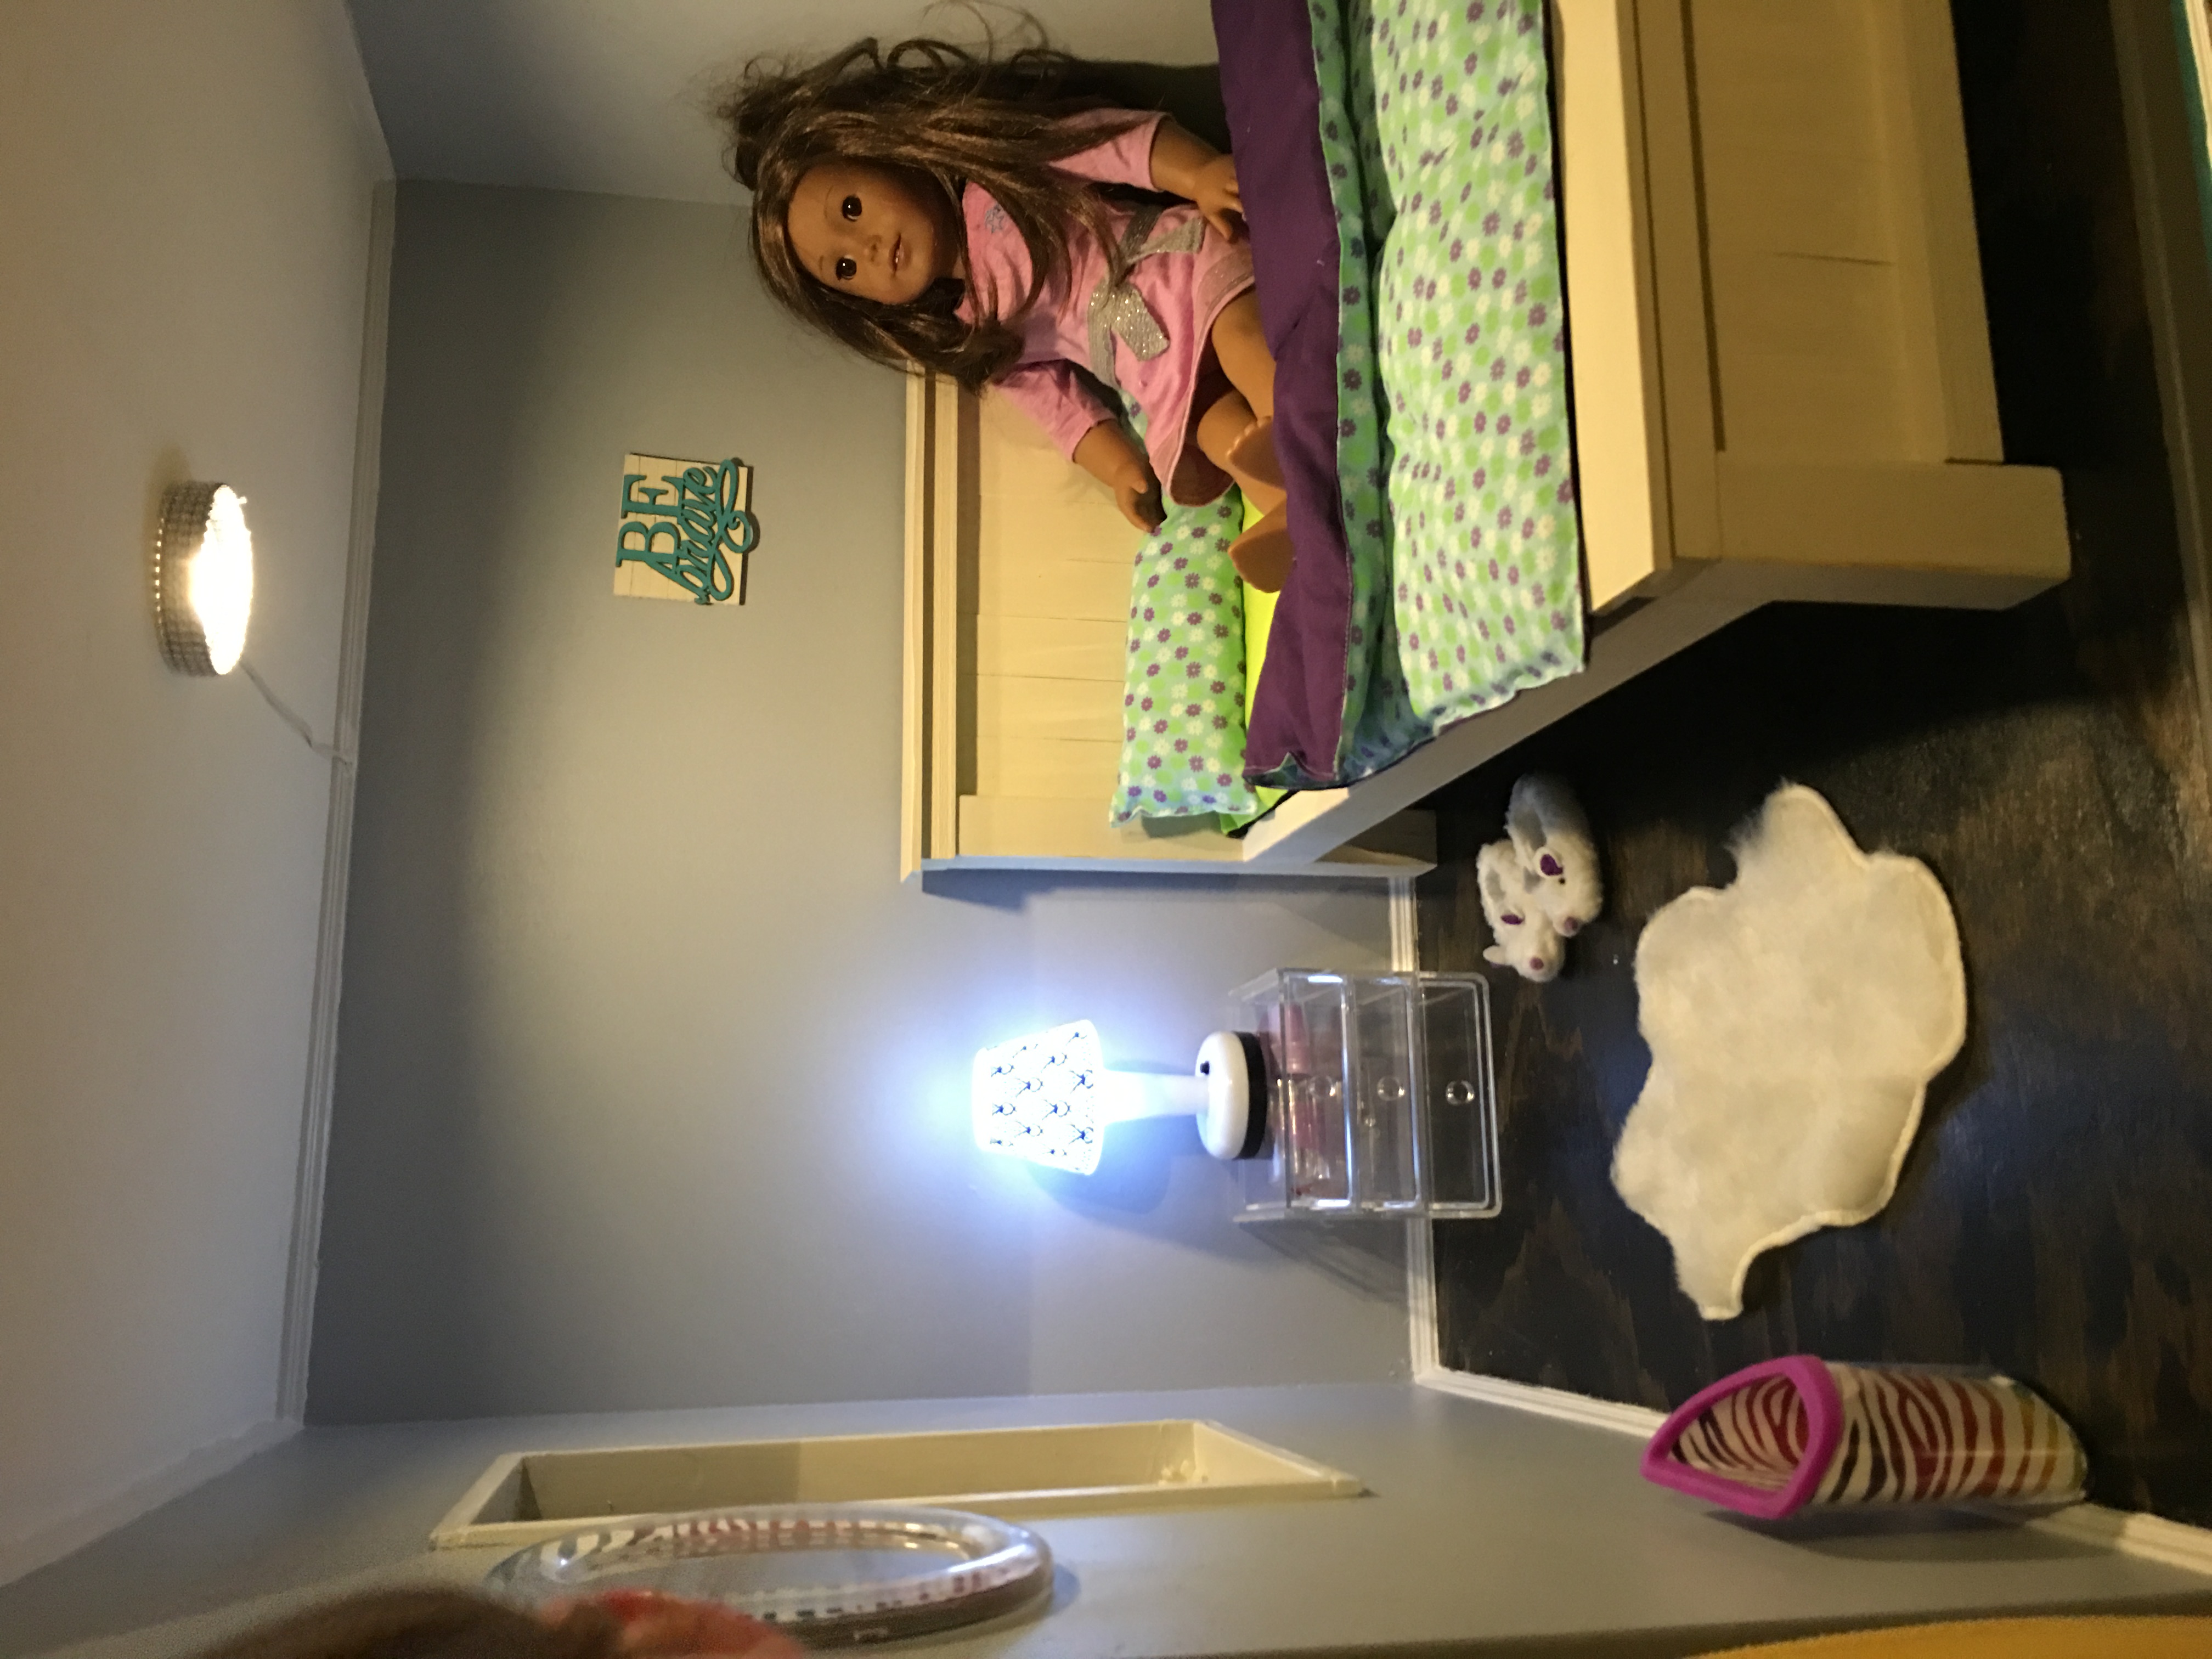
This dollhouse was super easy to make! Harper (the doll) wanted an open concept living/kitchen, and that is the first floor. Second floor are the bedroom and bathroom. Top floor is the closet. The roof is made from 3.5" slats of luan glued together and painted with black sanded paint. Notice the baseboards and crown molding? My granddaughter helped cut windows out with a jig saw. I still owe my granddaughter a garage and patio with pergola, and kitchen appliances and chairs, but that will wait until summer when she can help craft/build them.
Harper's bed is modeled after the farmhouse bed plans available on this site, but I used smaller scrap lumber. I wanted milk paint but was unwilling to pay the high price, so I bought a sample jar of antique ivory paint and watered it down. It turned out great!
Built from Plan(s)
Estimated Time Investment
Week Long Project (20 Hours or More)
Finish Used
Kilz primer, Behr satin indoor paint (leftovers from our house)
Recommended Skill Level
Intermediate
Simple Side Table

I built this for a friend who needed a small side table. All the cuts were made with a chop saw. I used 1X3 furring strips and 2X2's. It was a little tricky to get all the table slats to match up. I used the Kreg jig to conceal all the screws and get stronger joints. I love that thing!
Built from Plan(s)
Estimated Cost
$10
Estimated Time Investment
Afternoon Project (3-6 Hours)
Finish Used
I brushed on two coats of Minwax Polyshades in Honey Pine Gloss, then rubbed in a coat of Howard Feed-N-Wax.
Recommended Skill Level
Beginner
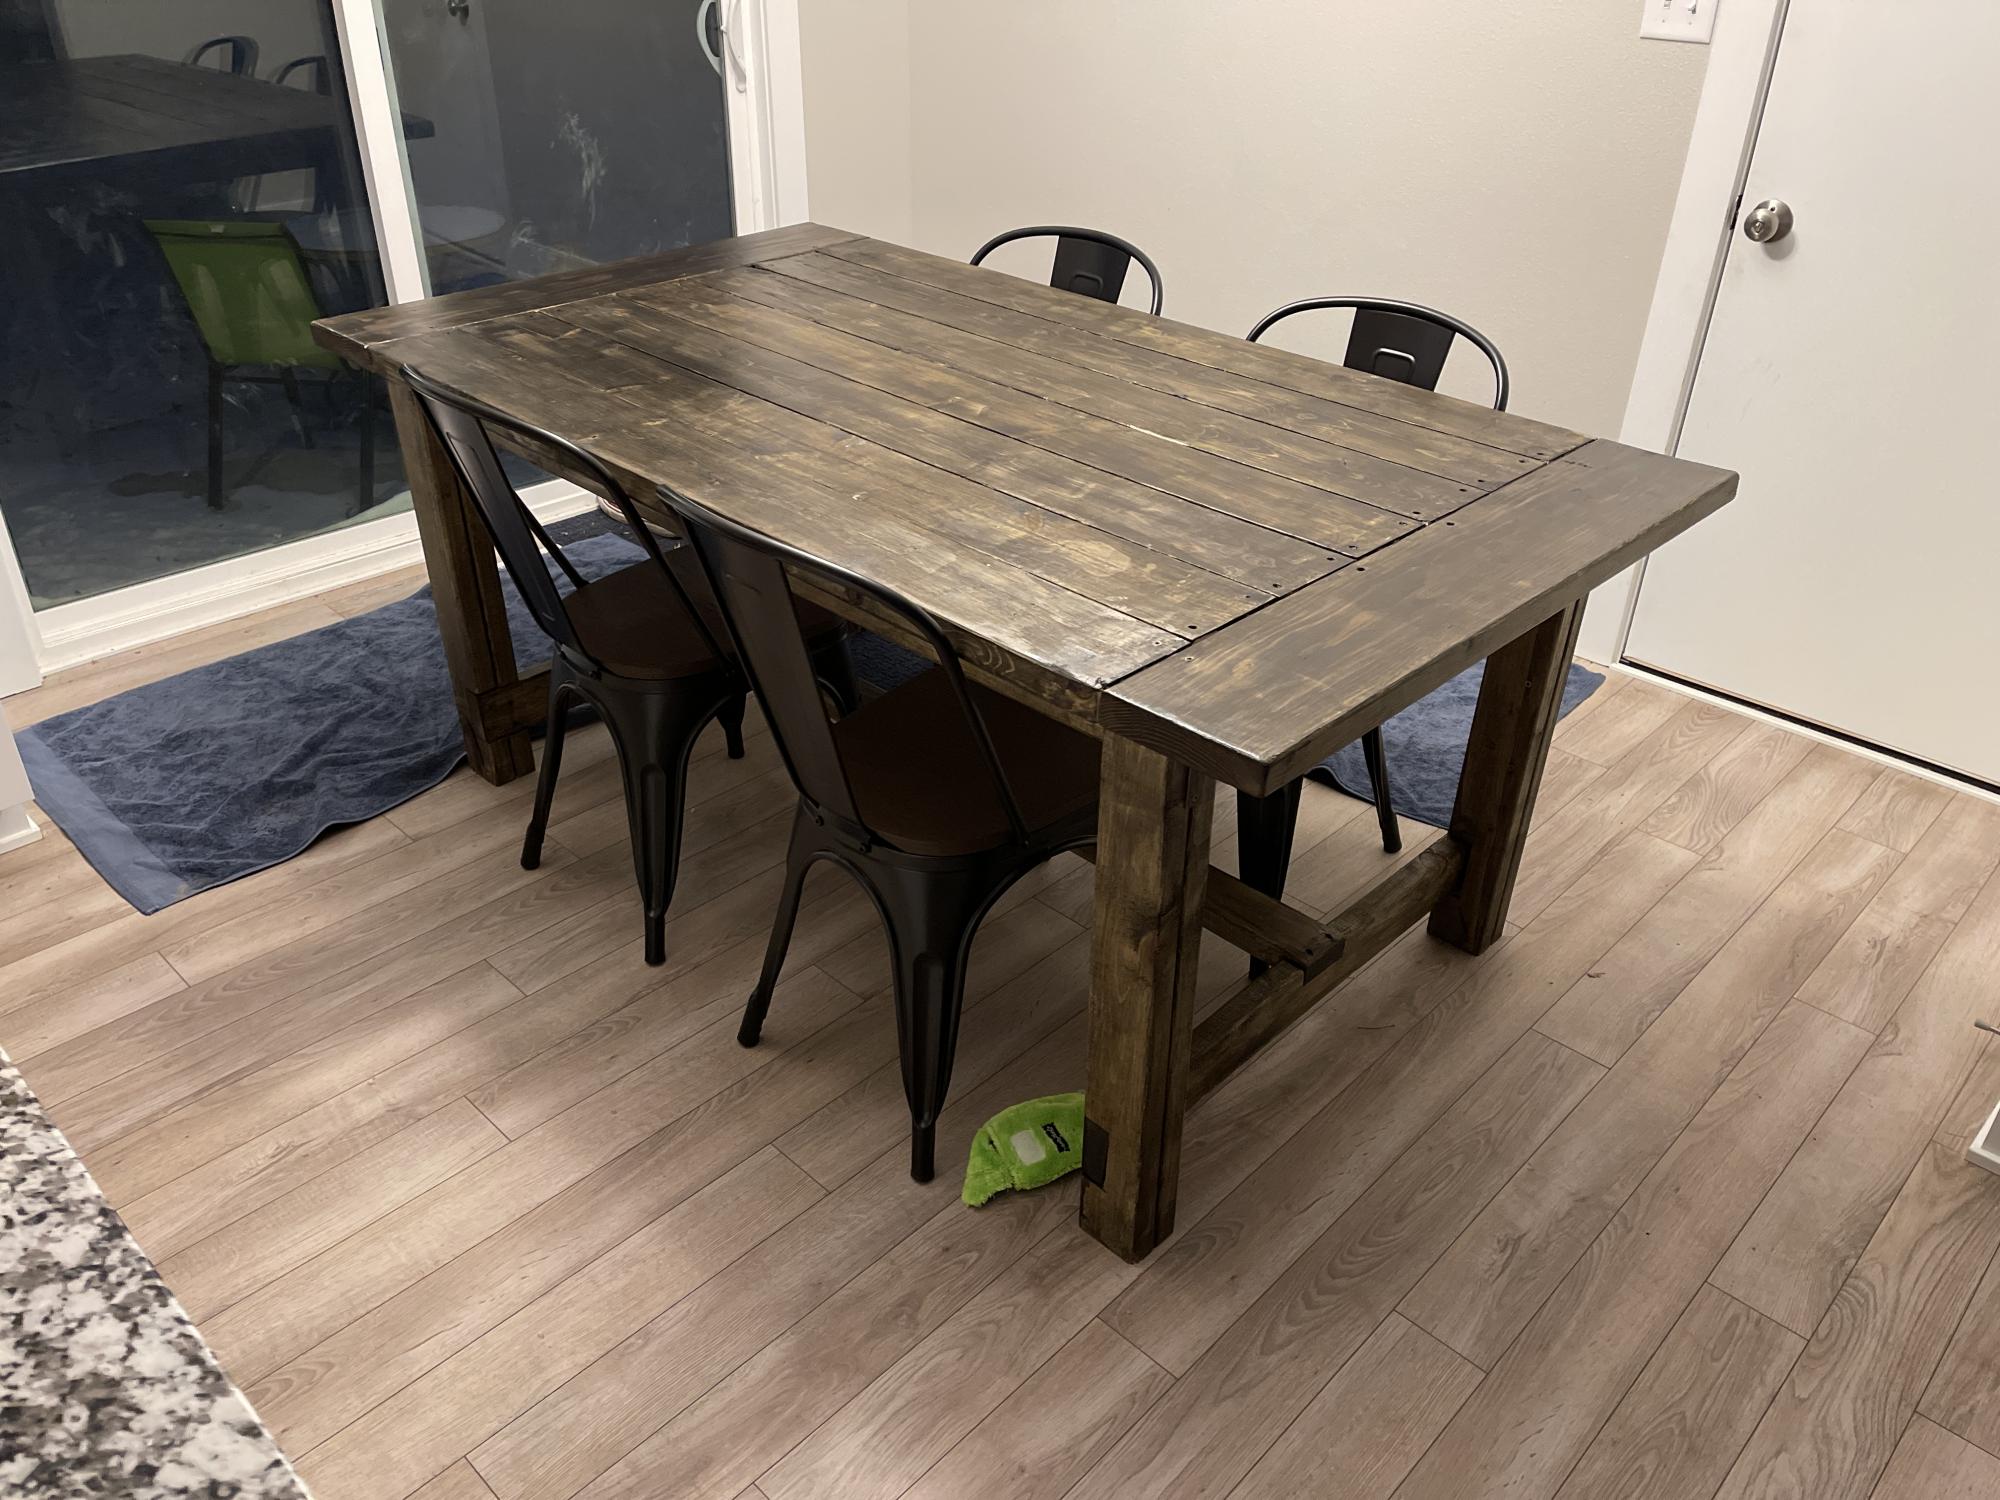
Benchwright Farmhouse Table
This has been our largest project yet! We build this table over the course of several months. Just working on it here and there when we were in the mood or had the chance. You can check out my blog for more details and pictures of the project.
Built from Plan(s)
Estimated Time Investment
Week Long Project (20 Hours or More)
Finish Used
Rust-Oleum's Dark Walnut and Minwax Wipe-On Poly
Recommended Skill Level
Intermediate
Comments
Madison Dresser with a new look :)
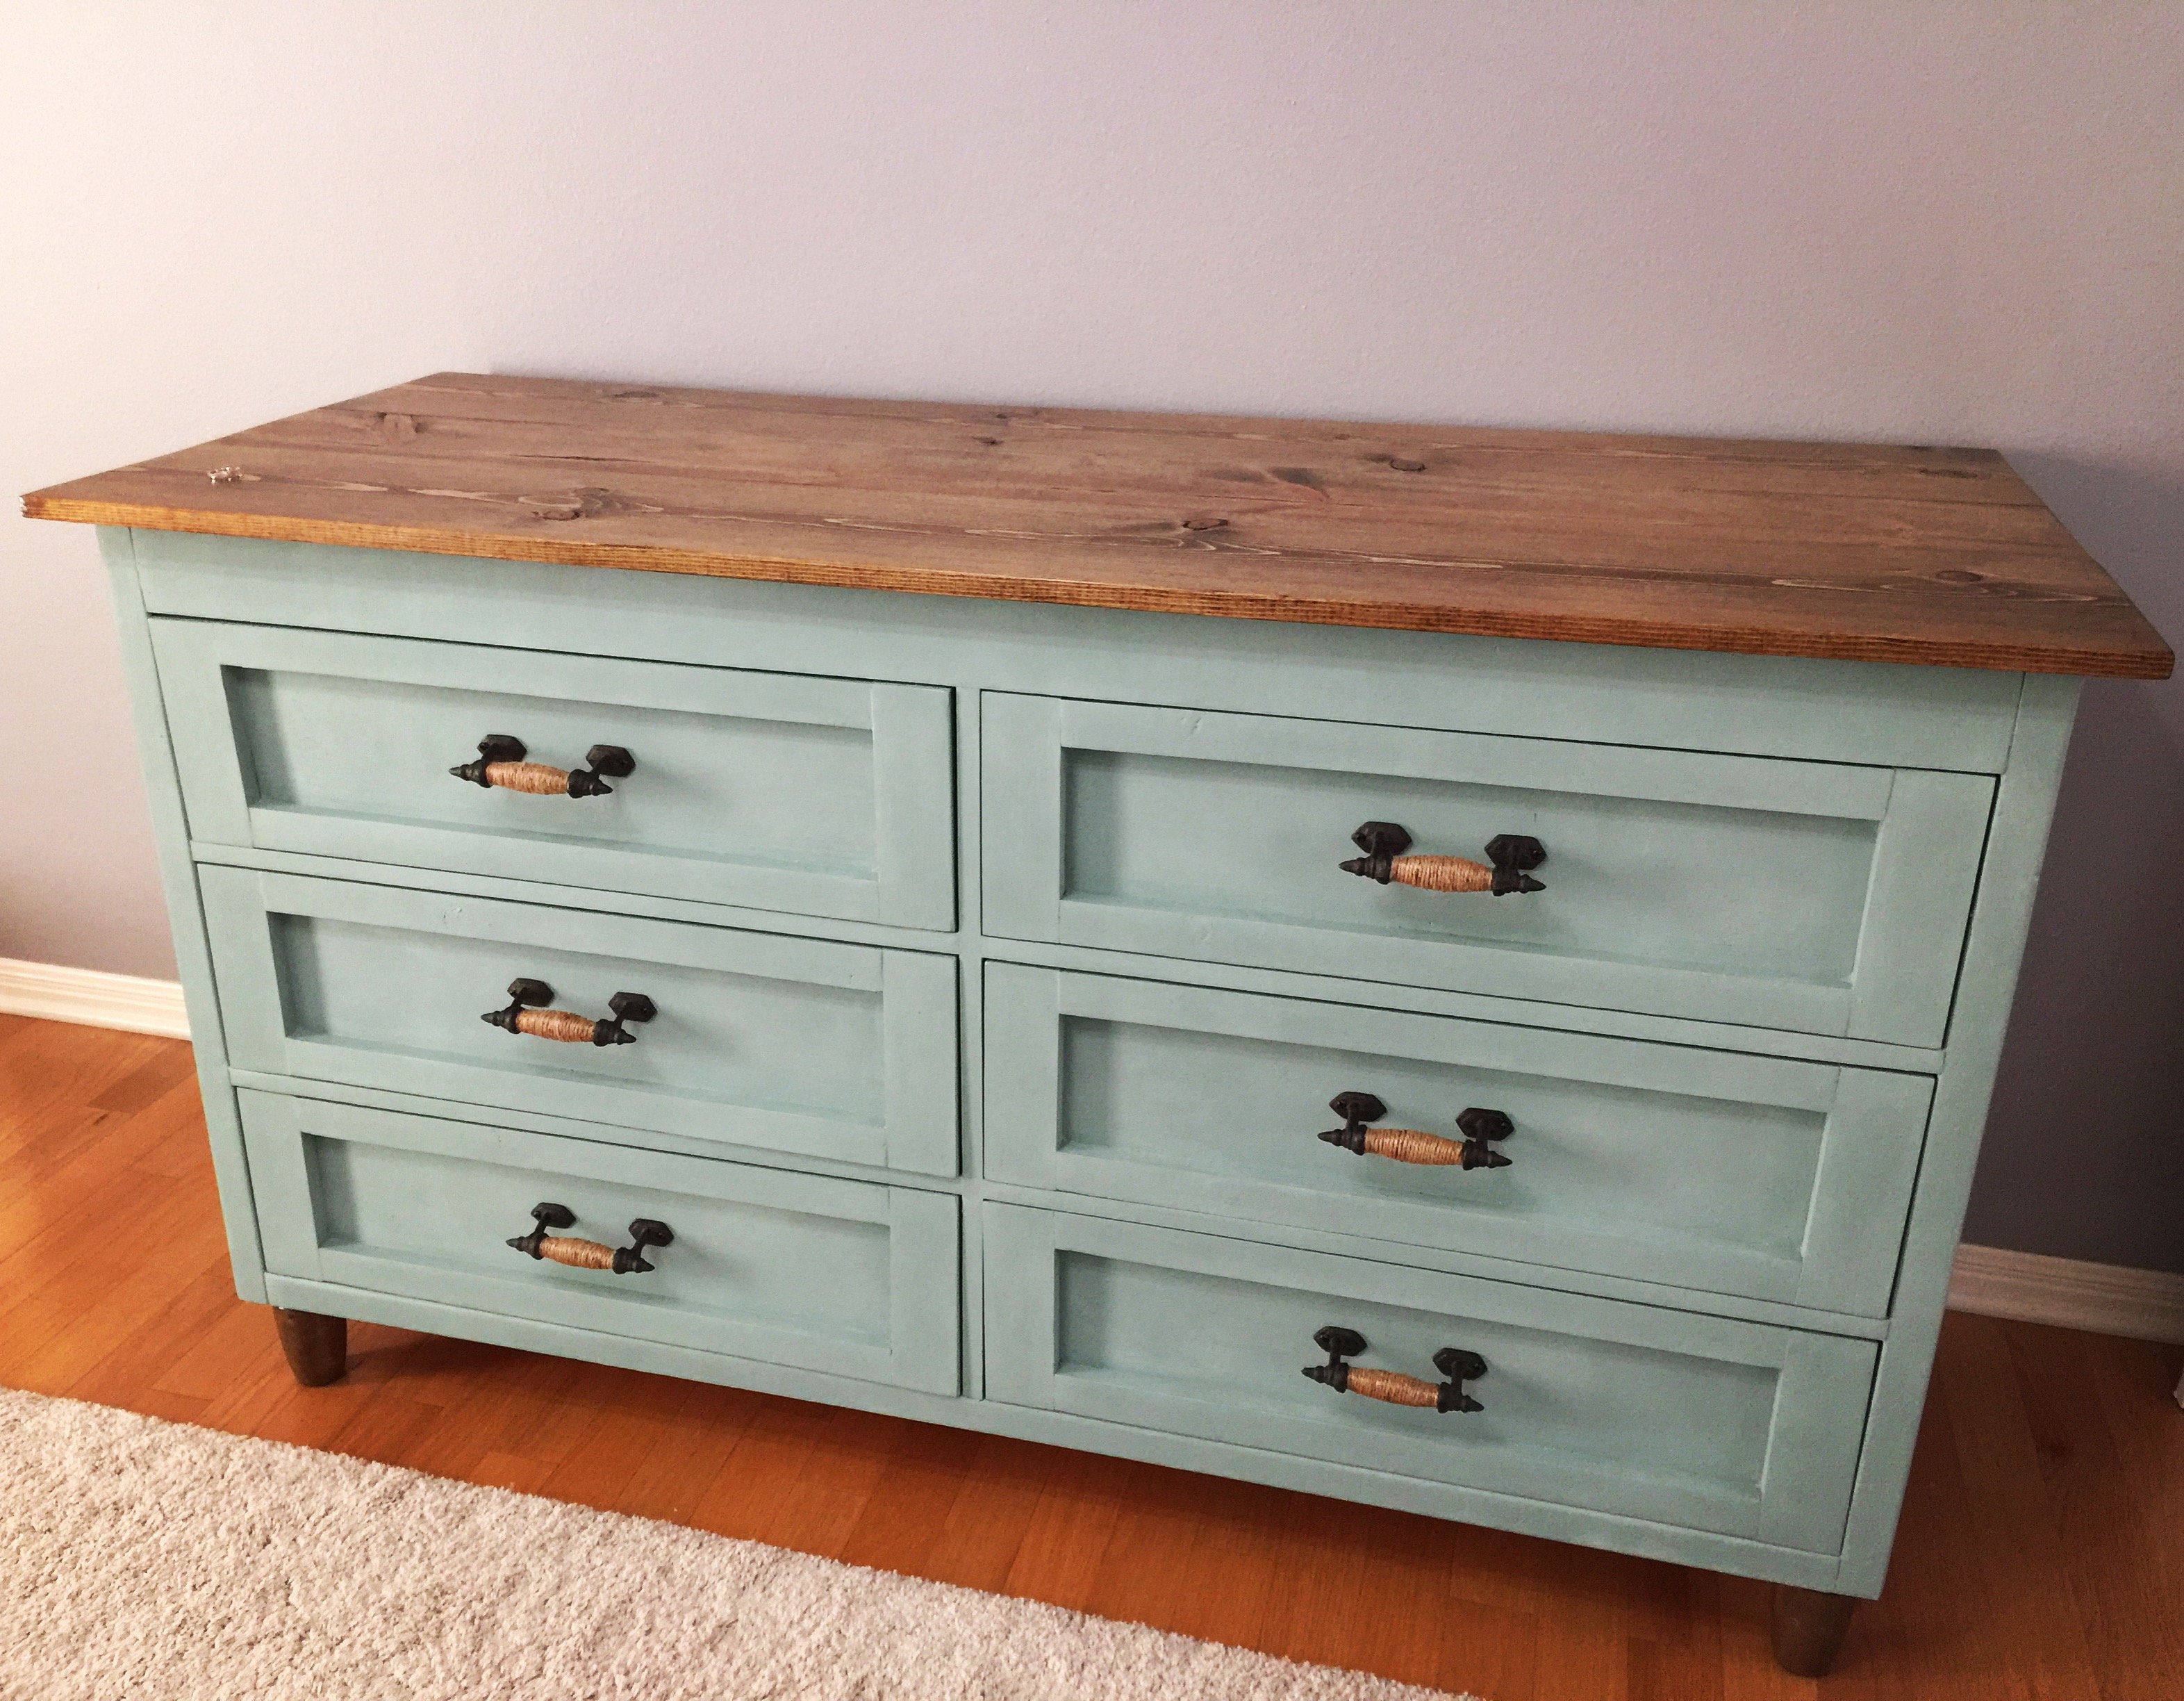
Hope you like it! We used Duck Egg Chalk Paint and a dark walnut stain for the top and legs. We also put in drawer slides instead of doing it the normal way the plans said. (That was harder than we expected but the pay off is well worth it.) Knobs are from Hobby Lobby and we wrapped them in twine to brighten them up!
Built from Plan(s)
Estimated Cost
$350-400 total
Estimated Time Investment
Week Long Project (20 Hours or More)
Finish Used
Duck Egg Chalk paint and clear wax
The top is Dark walnut stain and satin poly
The top is Dark walnut stain and satin poly
Recommended Skill Level
Intermediate
Comments
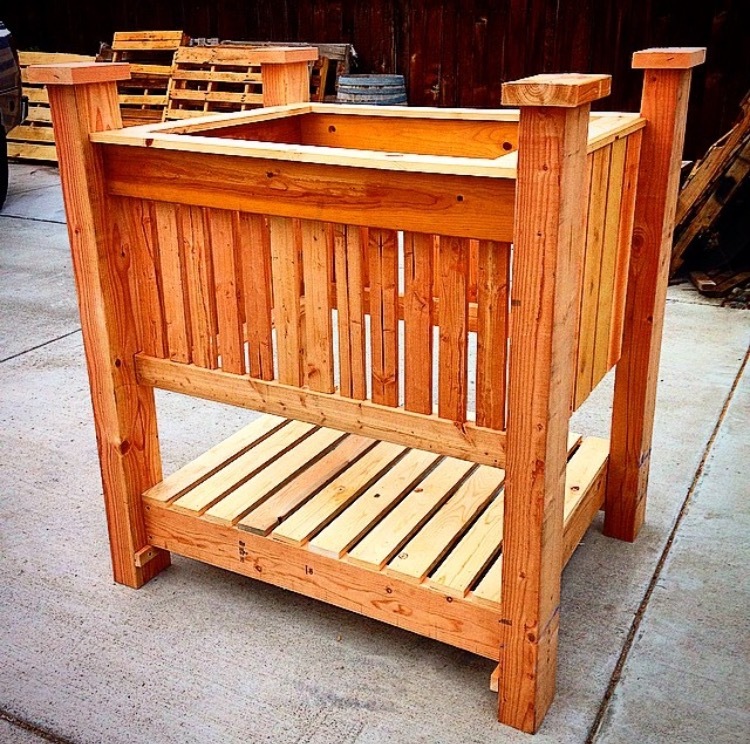
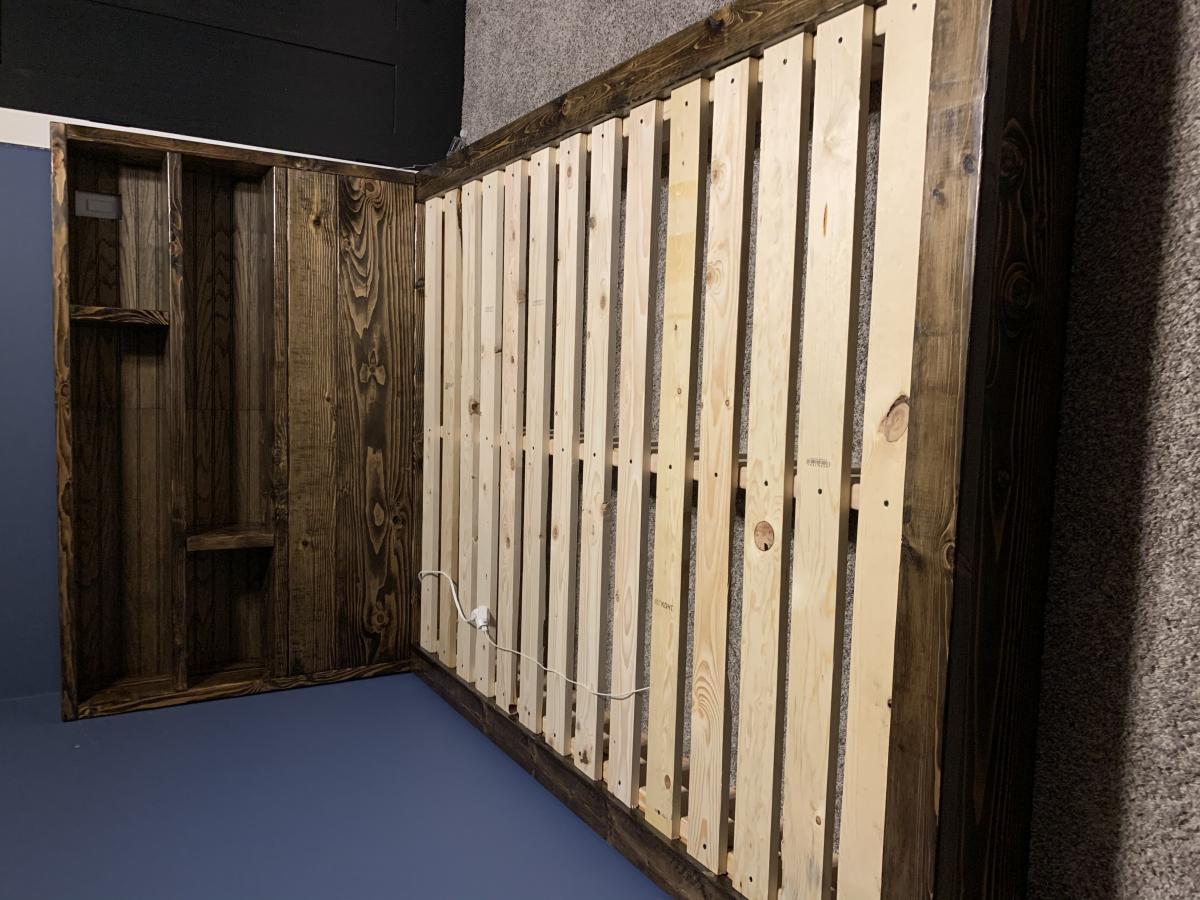
Mud room bench
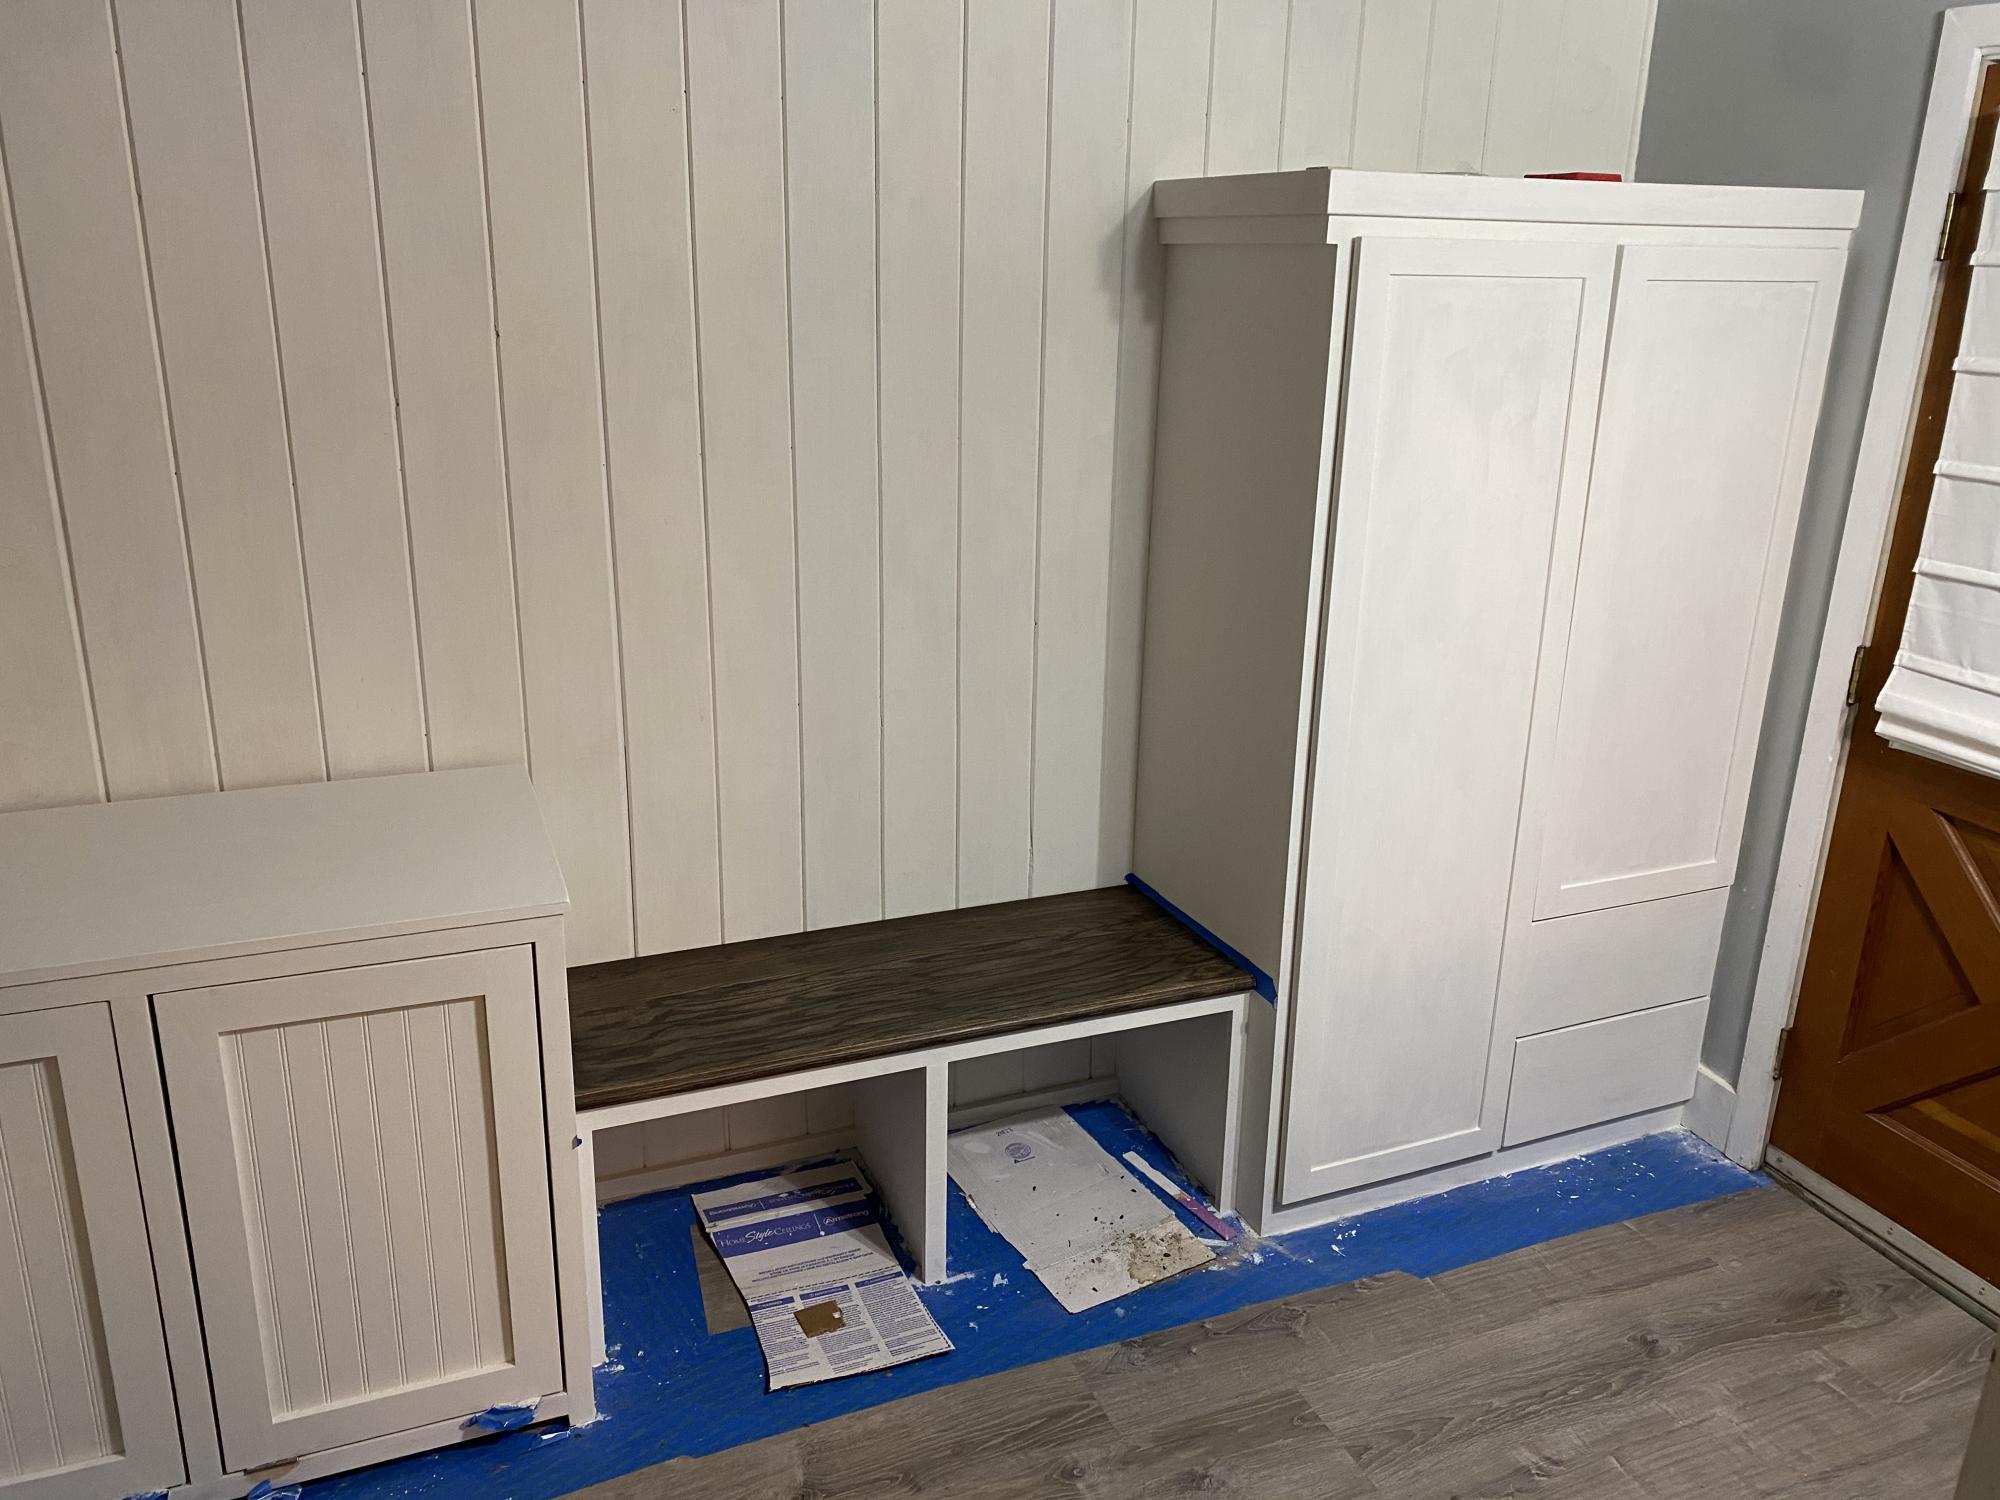
Built-in mud room bench attached to the cabinet
Built from Plan(s)
Estimated Cost
$200
Estimated Time Investment
Day Project (6-9 Hours)
Finish Used
Miniwax ebony , behr chalk farmhouse white
Recommended Skill Level
Intermediate
Comments
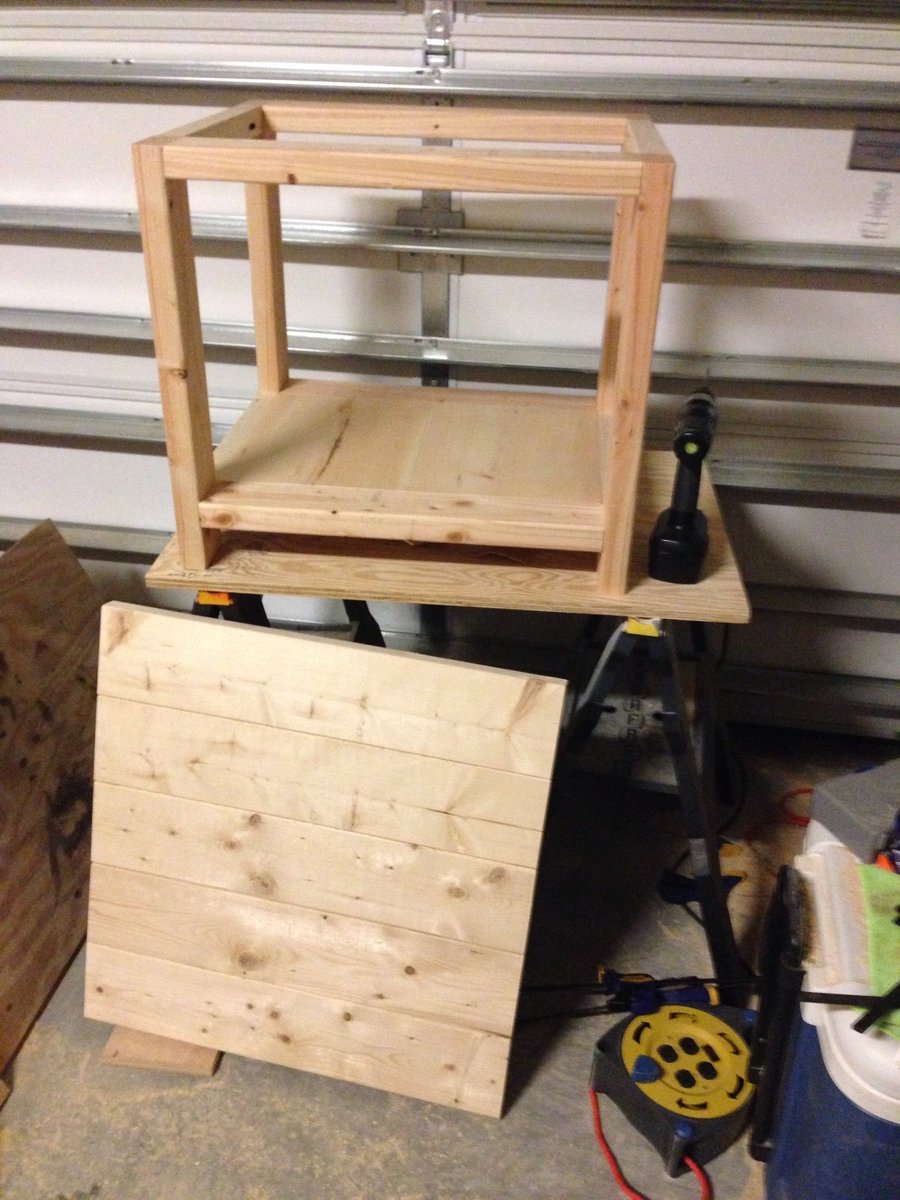
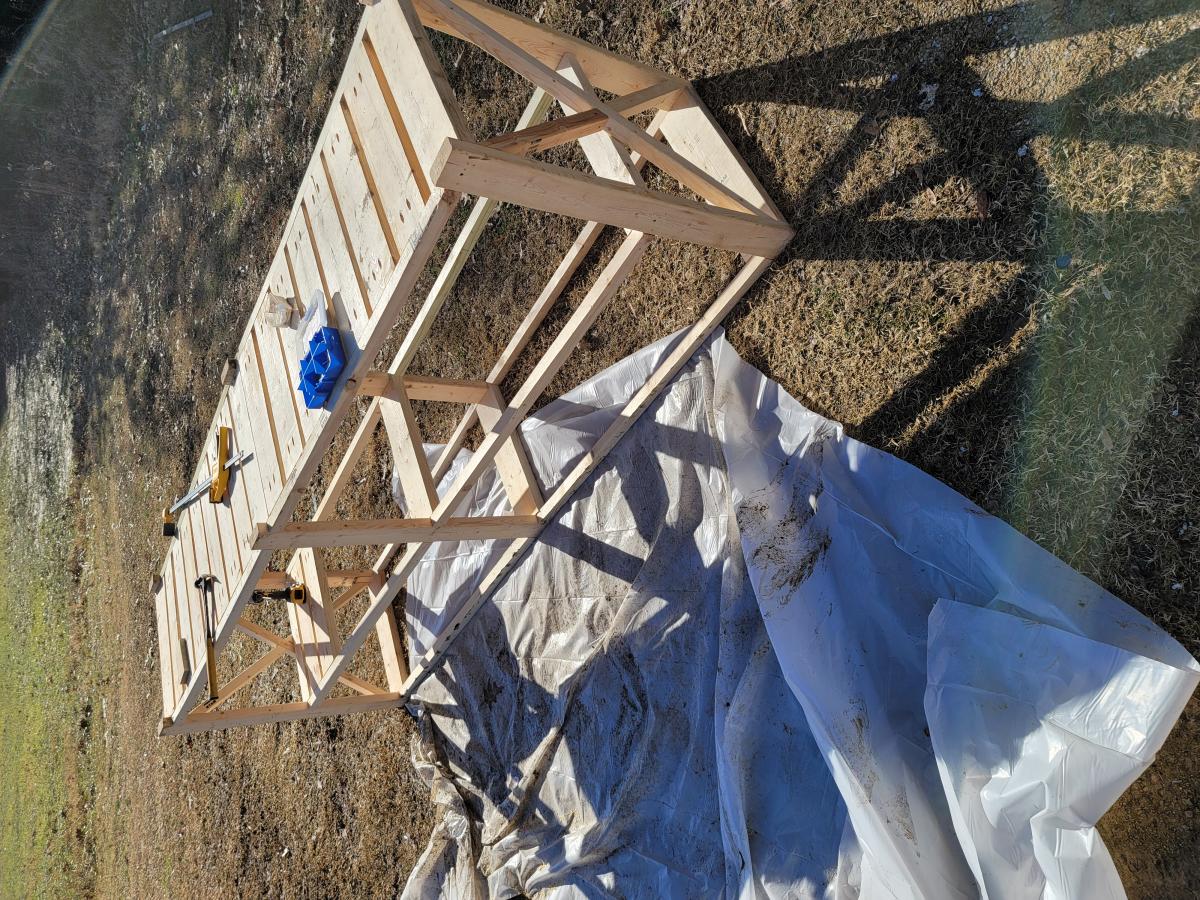
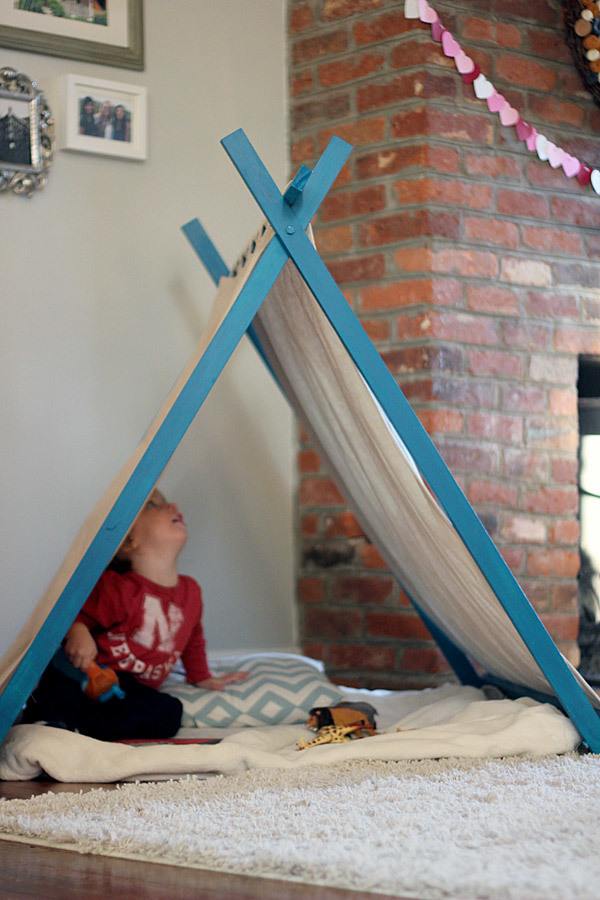
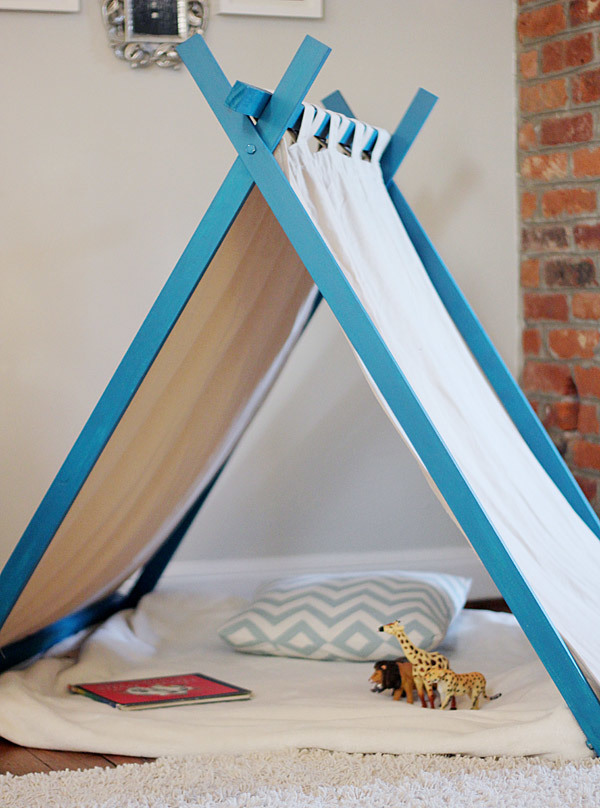
Foolproof Fort
Ethan and I did a little project last week.
It’s been windy and cold outside and we’ve been running out of indoor activities. We made Valentine decor, heart-shaped food, colored, met friends at museums and toddler-rock’n-roll-playing coffee joints, played trains and kitchen and dinosaurs, read a hundred books.
One super fun source of indoor entertainment we’ve never successfully completed is building a fort.
When I was young, I was the fort-making queen. My parents had this incredible 80′s-style glass-and-metal table with huge leather and wood chairs (it was insane), each piece weighing what seemed like a million pounds—PERFECT fort building materials. Blankets, pillows, books, and toys made a wonderland of imagination for me and my friends. I remember supporting corners of blankets with this heavy old clay jug and other skull-crushing items that could have crashed down at any wrong movement. How we make it through childhood is beyond me.
I guess our furniture selection is just not fort-worthy. At least, not in the sense that doesn’t pose the risk of a chair toppling on him, undoubtedly leading to suffocation and/or a concussion.
So a few minutes spent reading Ana White’s website, a little trip to the hardware store (where a visit to the “big saw” was requested only to end in wimpers of “no saw, I’m scared!”), about $25, and a little sweat later, we had a perfect little “fort” with no chance of injury, one that doesn’t need to be disassembled…ever.
We had everything cut down at the hardware store. Paint was leftover from Ethan’s train board, side panels made from Target tab-top curtains I’ve had since college. Really.
It was Ethan’s first construction project so I started him off right—with sanding.
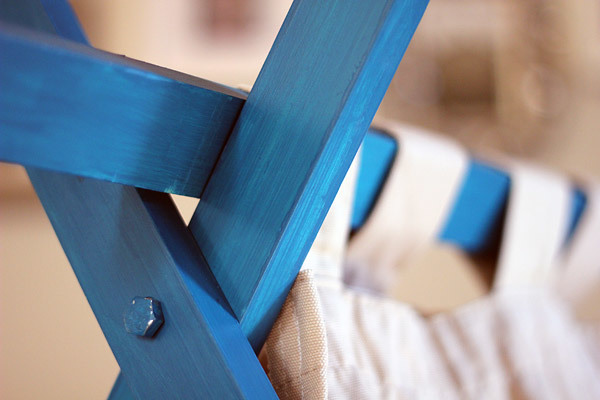
When everything was nice and smooth, we had lunch and the Peanut hit the hay while I took out the “big mama bit collection” and started drilling. As usual, Ana’s plans were very well illustrated and straightforward…we used her oven door plan for Ethan’s kitchen and it worked perfectly.
By the time Little Man woke, we were ready for paint. I wondered if painting with a toddler was the smartest idea…but we just went for it.
He did GREAT. Thank you Ikea for the $2 smock.
As I’d feared, the (almost) finished product was about four feet too tall. It was massive in our living room!
So a few days later the Hubs helped me cut it down with our chop saw. So much for making things easy by having all the wood pre-cut. I guess Ana’s house is much bigger than ours.
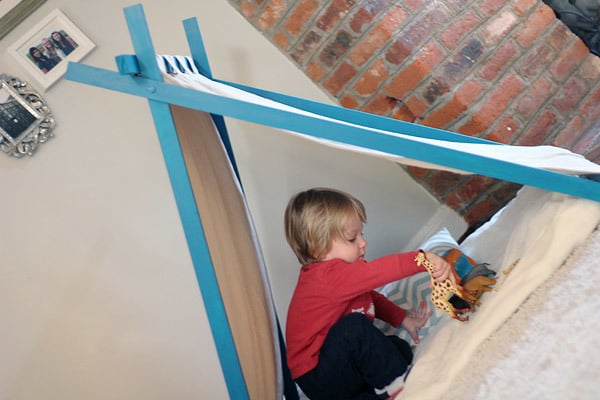
My next task was hemming, narrowing, and velcro-izing the panels. With a much shorter tent, my trusty old curtains were way too long. Plus, I wasn’t so sure about Ana’s suggestion to staple curtain to tent…it seemed much too permanent What if we want to add a stamped pattern? Or a window? Or change up the fabric? Velcro seemed safer.
Sure, it’s not the fastest way, but I think it was worth the time. And my $20 craigslist sewing machine handled it like a champ.
We’ve already done some good lazin’ around in the new fort. Or nook. Or tent. Whatever, Ethan seems to think it is pretty cool.
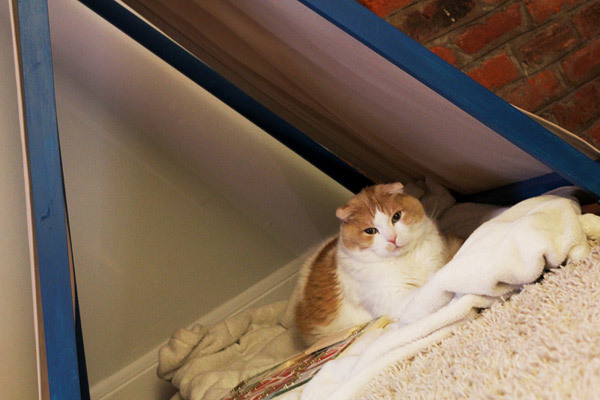
It’s also pretty popular with our furry friends.

Built from Plan(s)
Estimated Cost
$25
Estimated Time Investment
Afternoon Project (3-6 Hours)
Finish Used
Valspar sample paint
Recommended Skill Level
Beginner
Comments
Mon, 06/10/2013 - 12:19
Final dimensions?
So, I'm curious how long and tall everything ended up. I'm thinking I need a smaller version of the original also, and yours looks just perfect. How long are the boards now? And how tall is it?
My adirondack stool
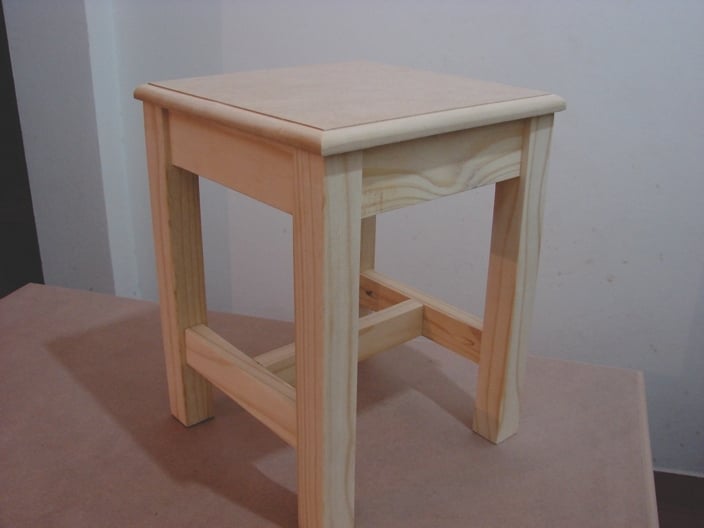
In my country there aren't Kreg jigs; i.e. no Kreg jig, no pocket holes. I obtained a Kreg Jig mini and this is my first build (really, I made four of them)
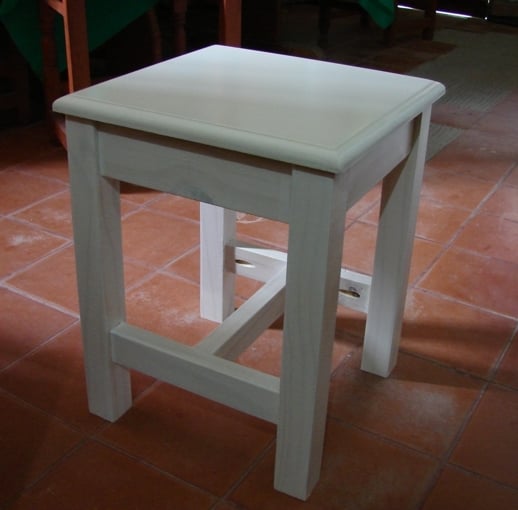
Built from Plan(s)
Estimated Time Investment
Day Project (6-9 Hours)
Finish Used
Acrylic paint and water-based polyurethane
Recommended Skill Level
Starter Project