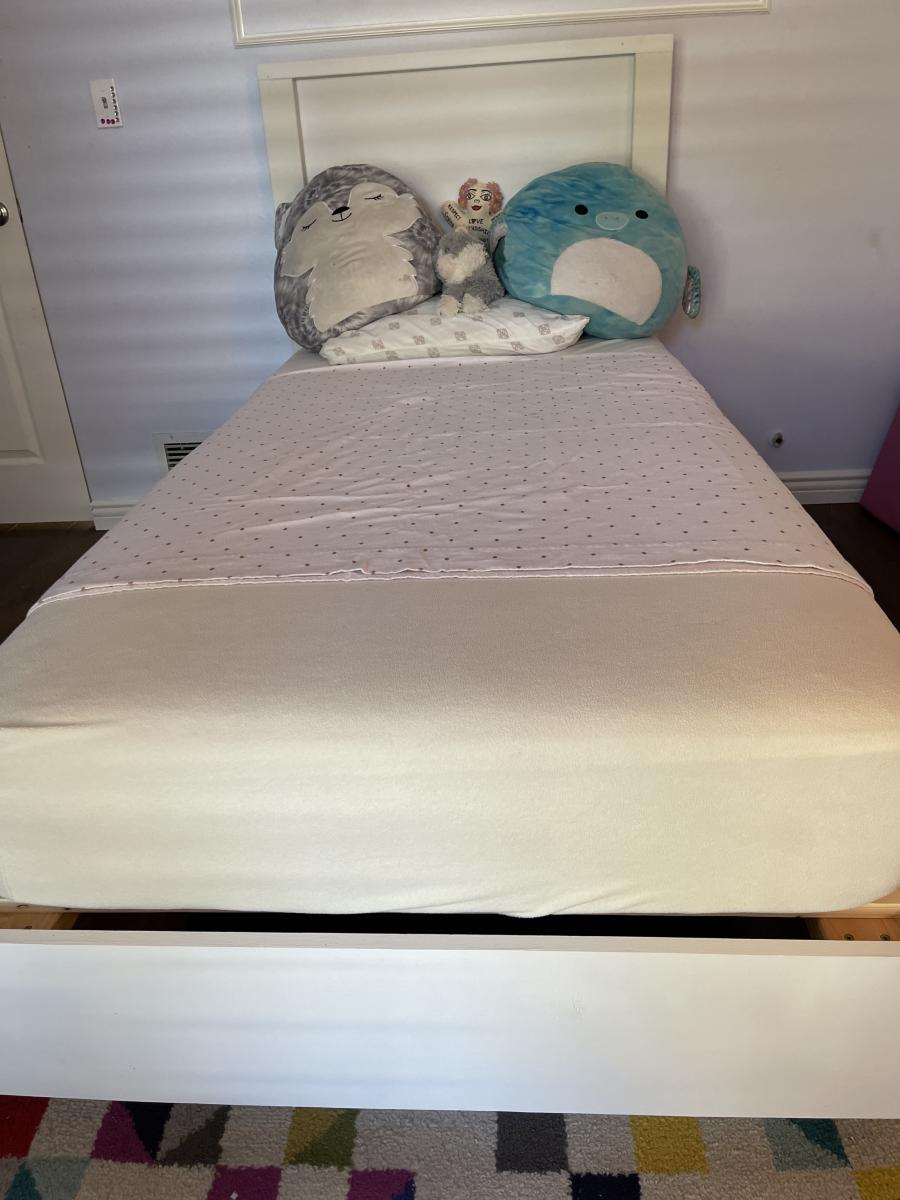
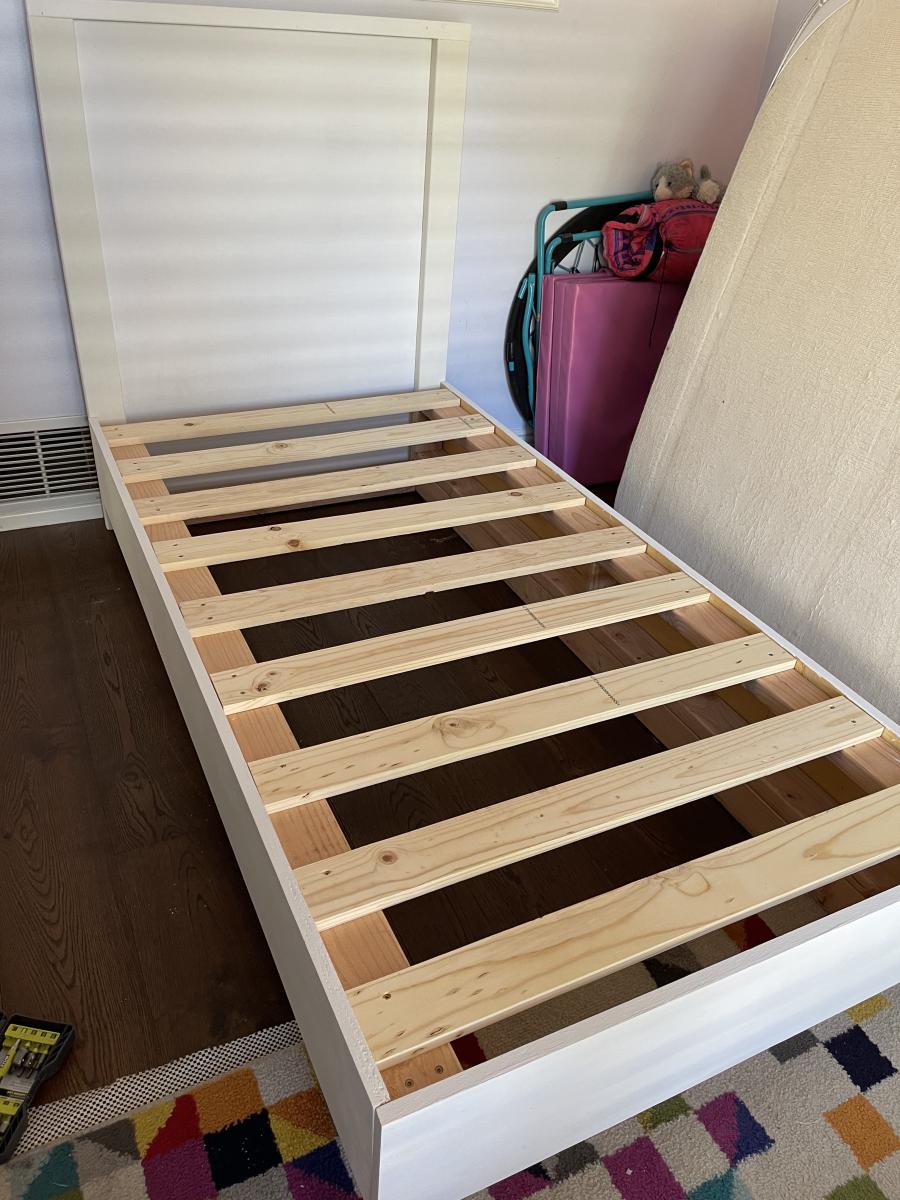
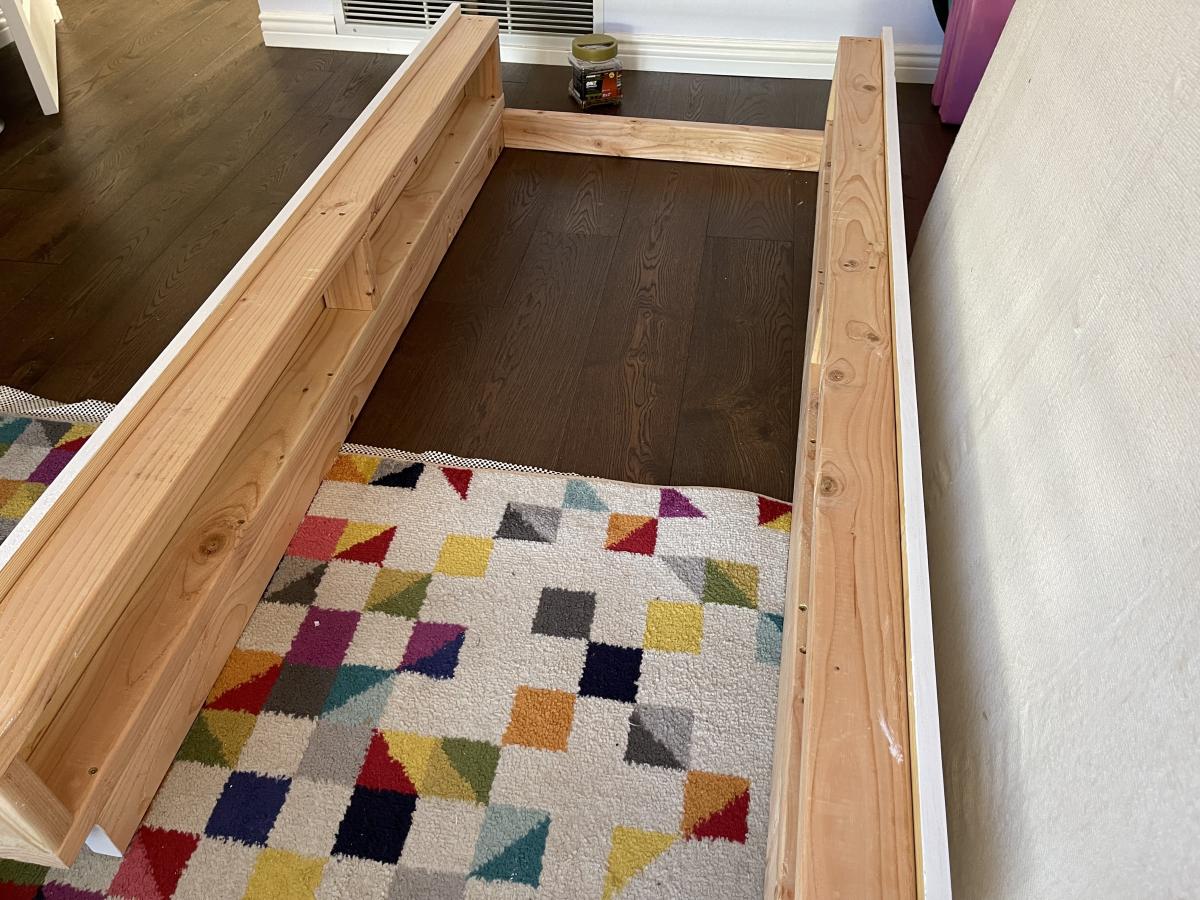
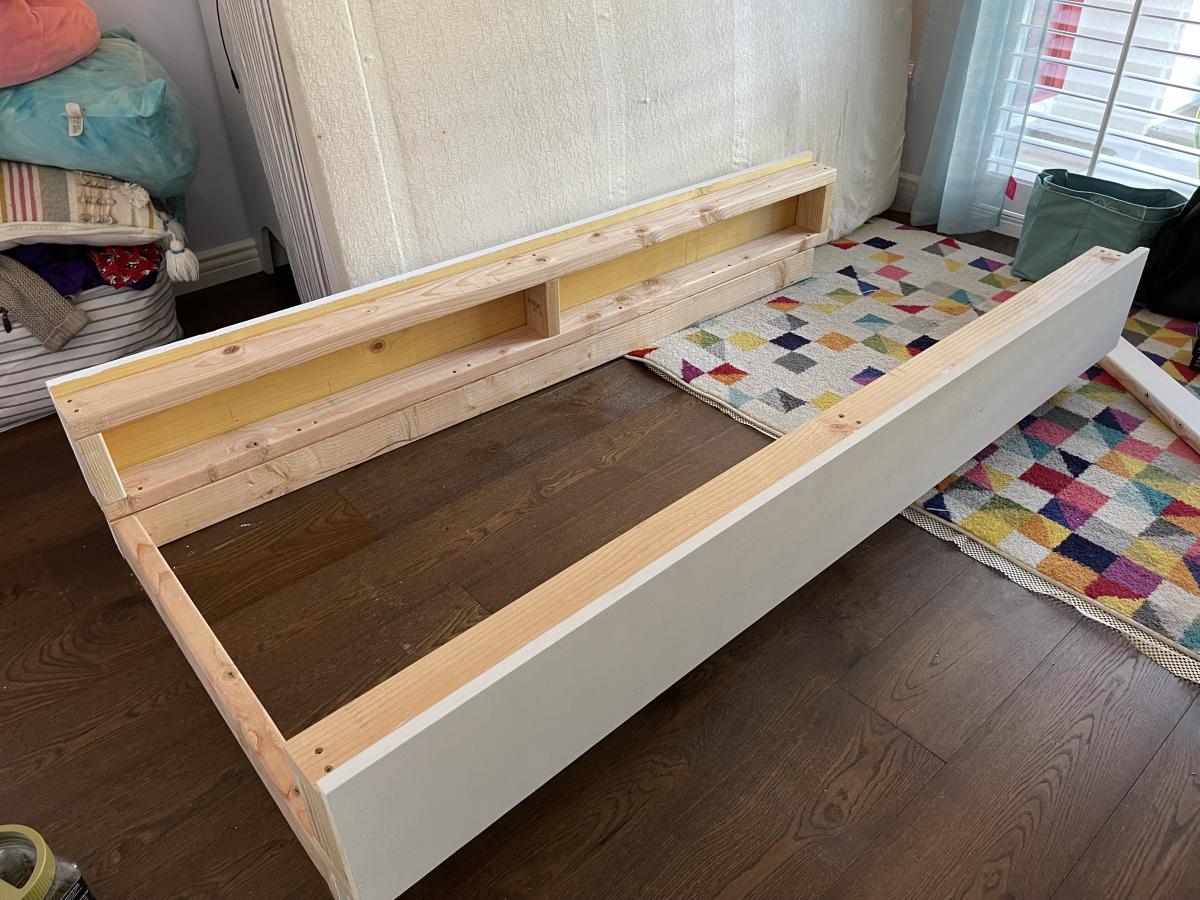
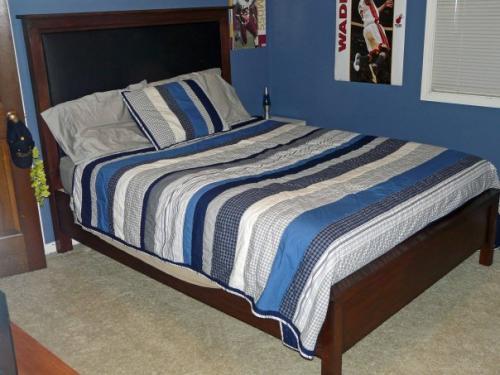
Floating bed
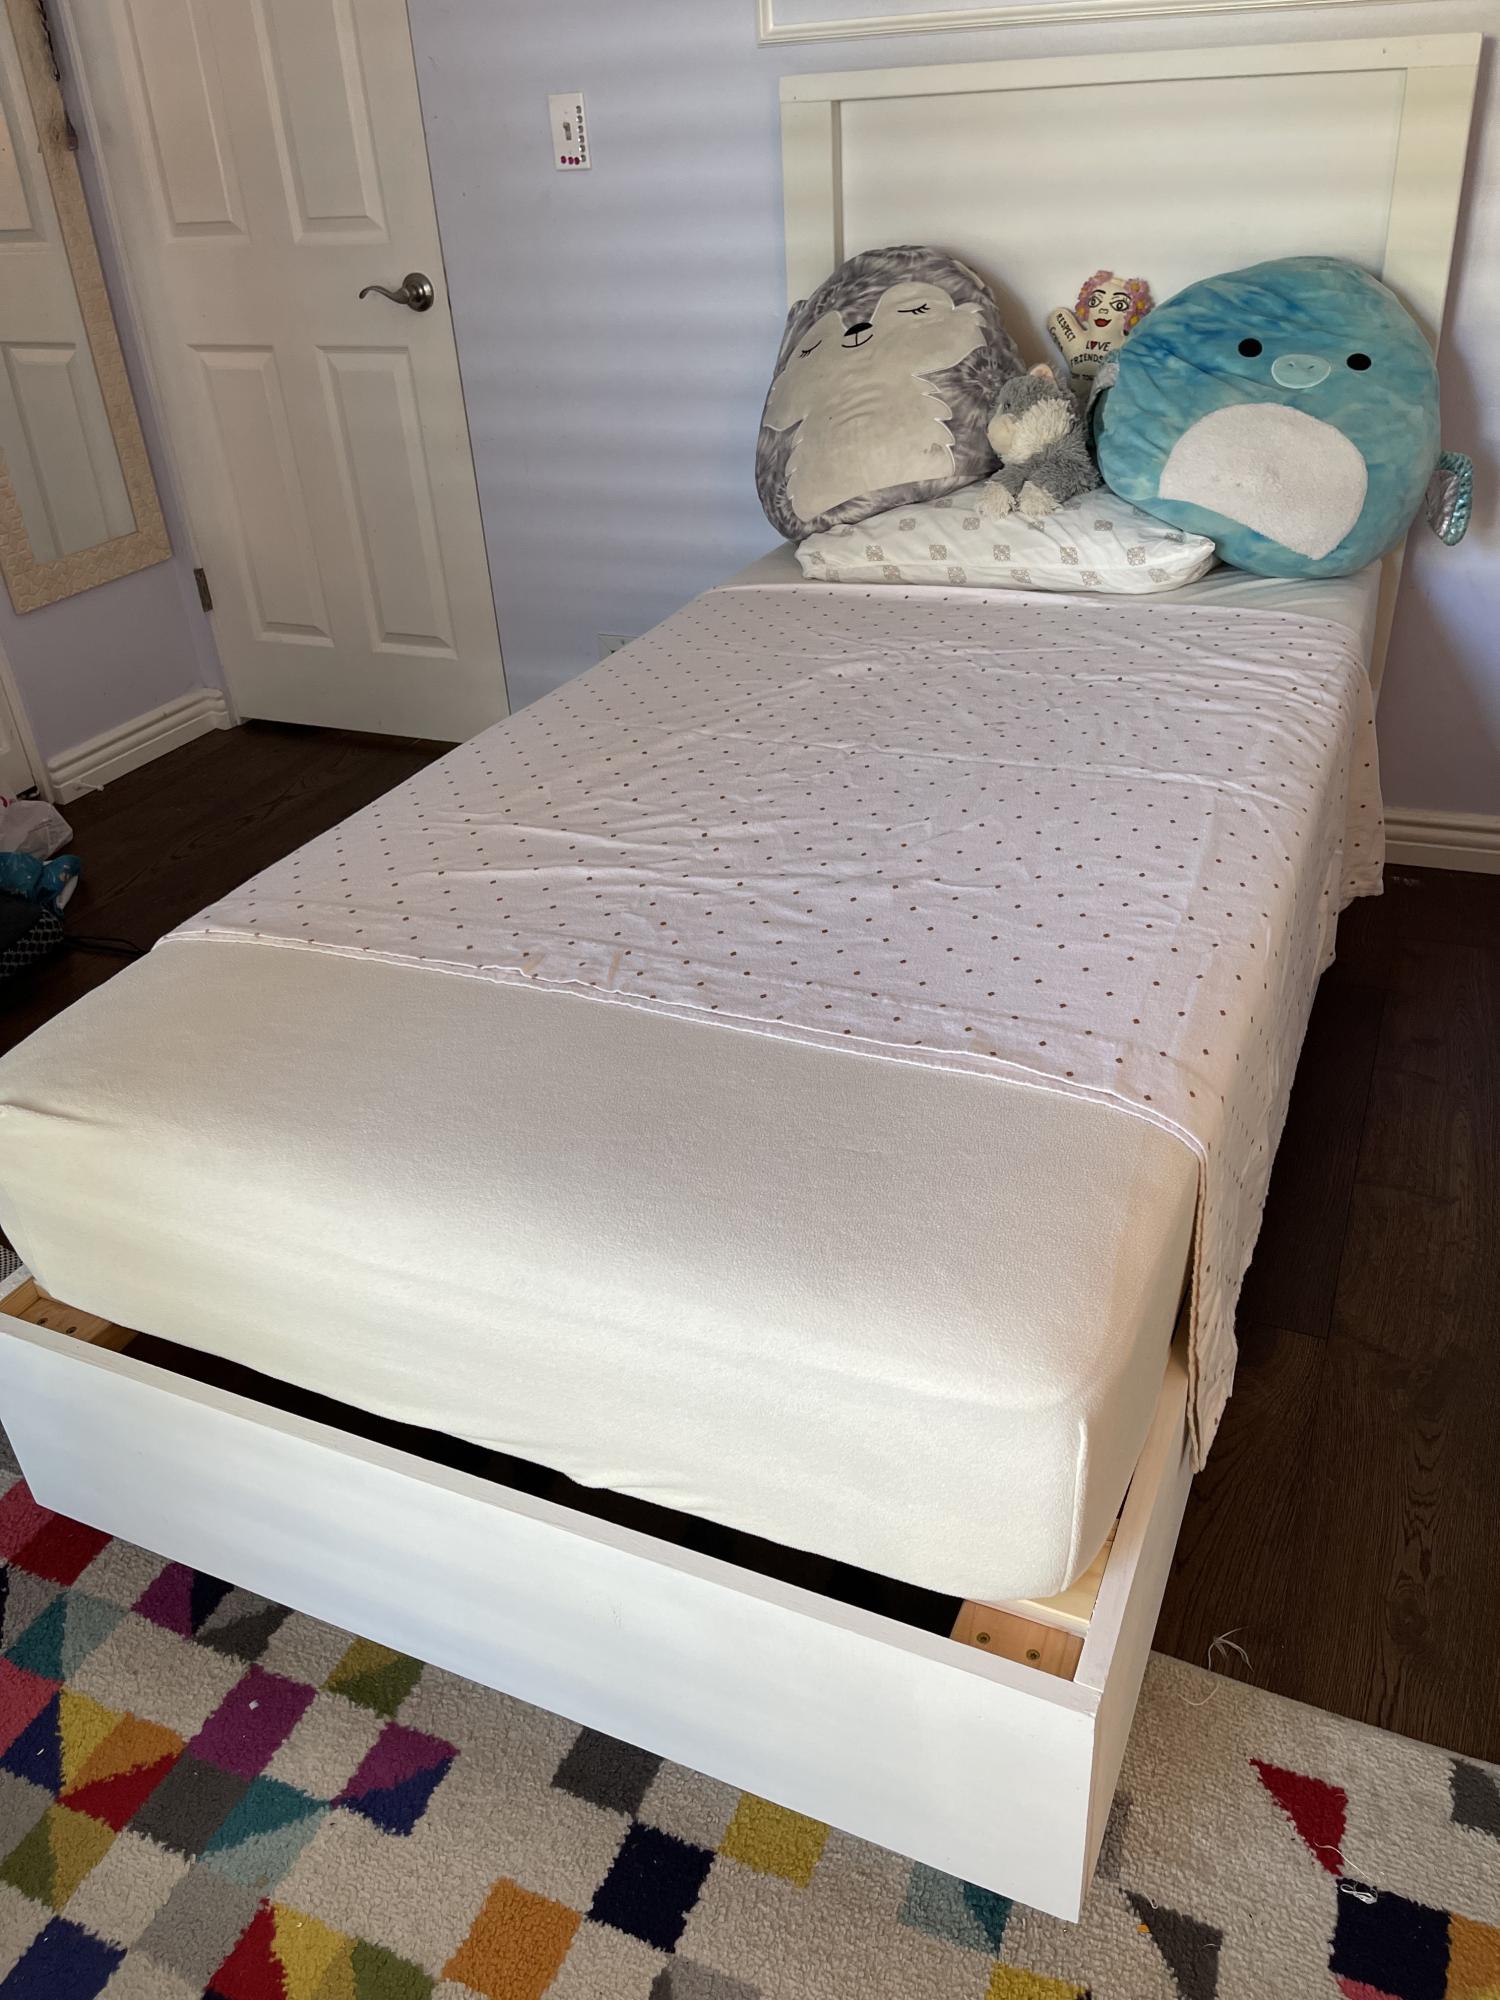
I built a floating bed using Ana's plans. In my case, I built a twin size bed which now my daughter enjoys every night. The bed turned out beautiful and very sturdy.
Built from Plan(s)
I built a floating bed using Ana's plans. In my case, I built a twin size bed which now my daughter enjoys every night. The bed turned out beautiful and very sturdy.
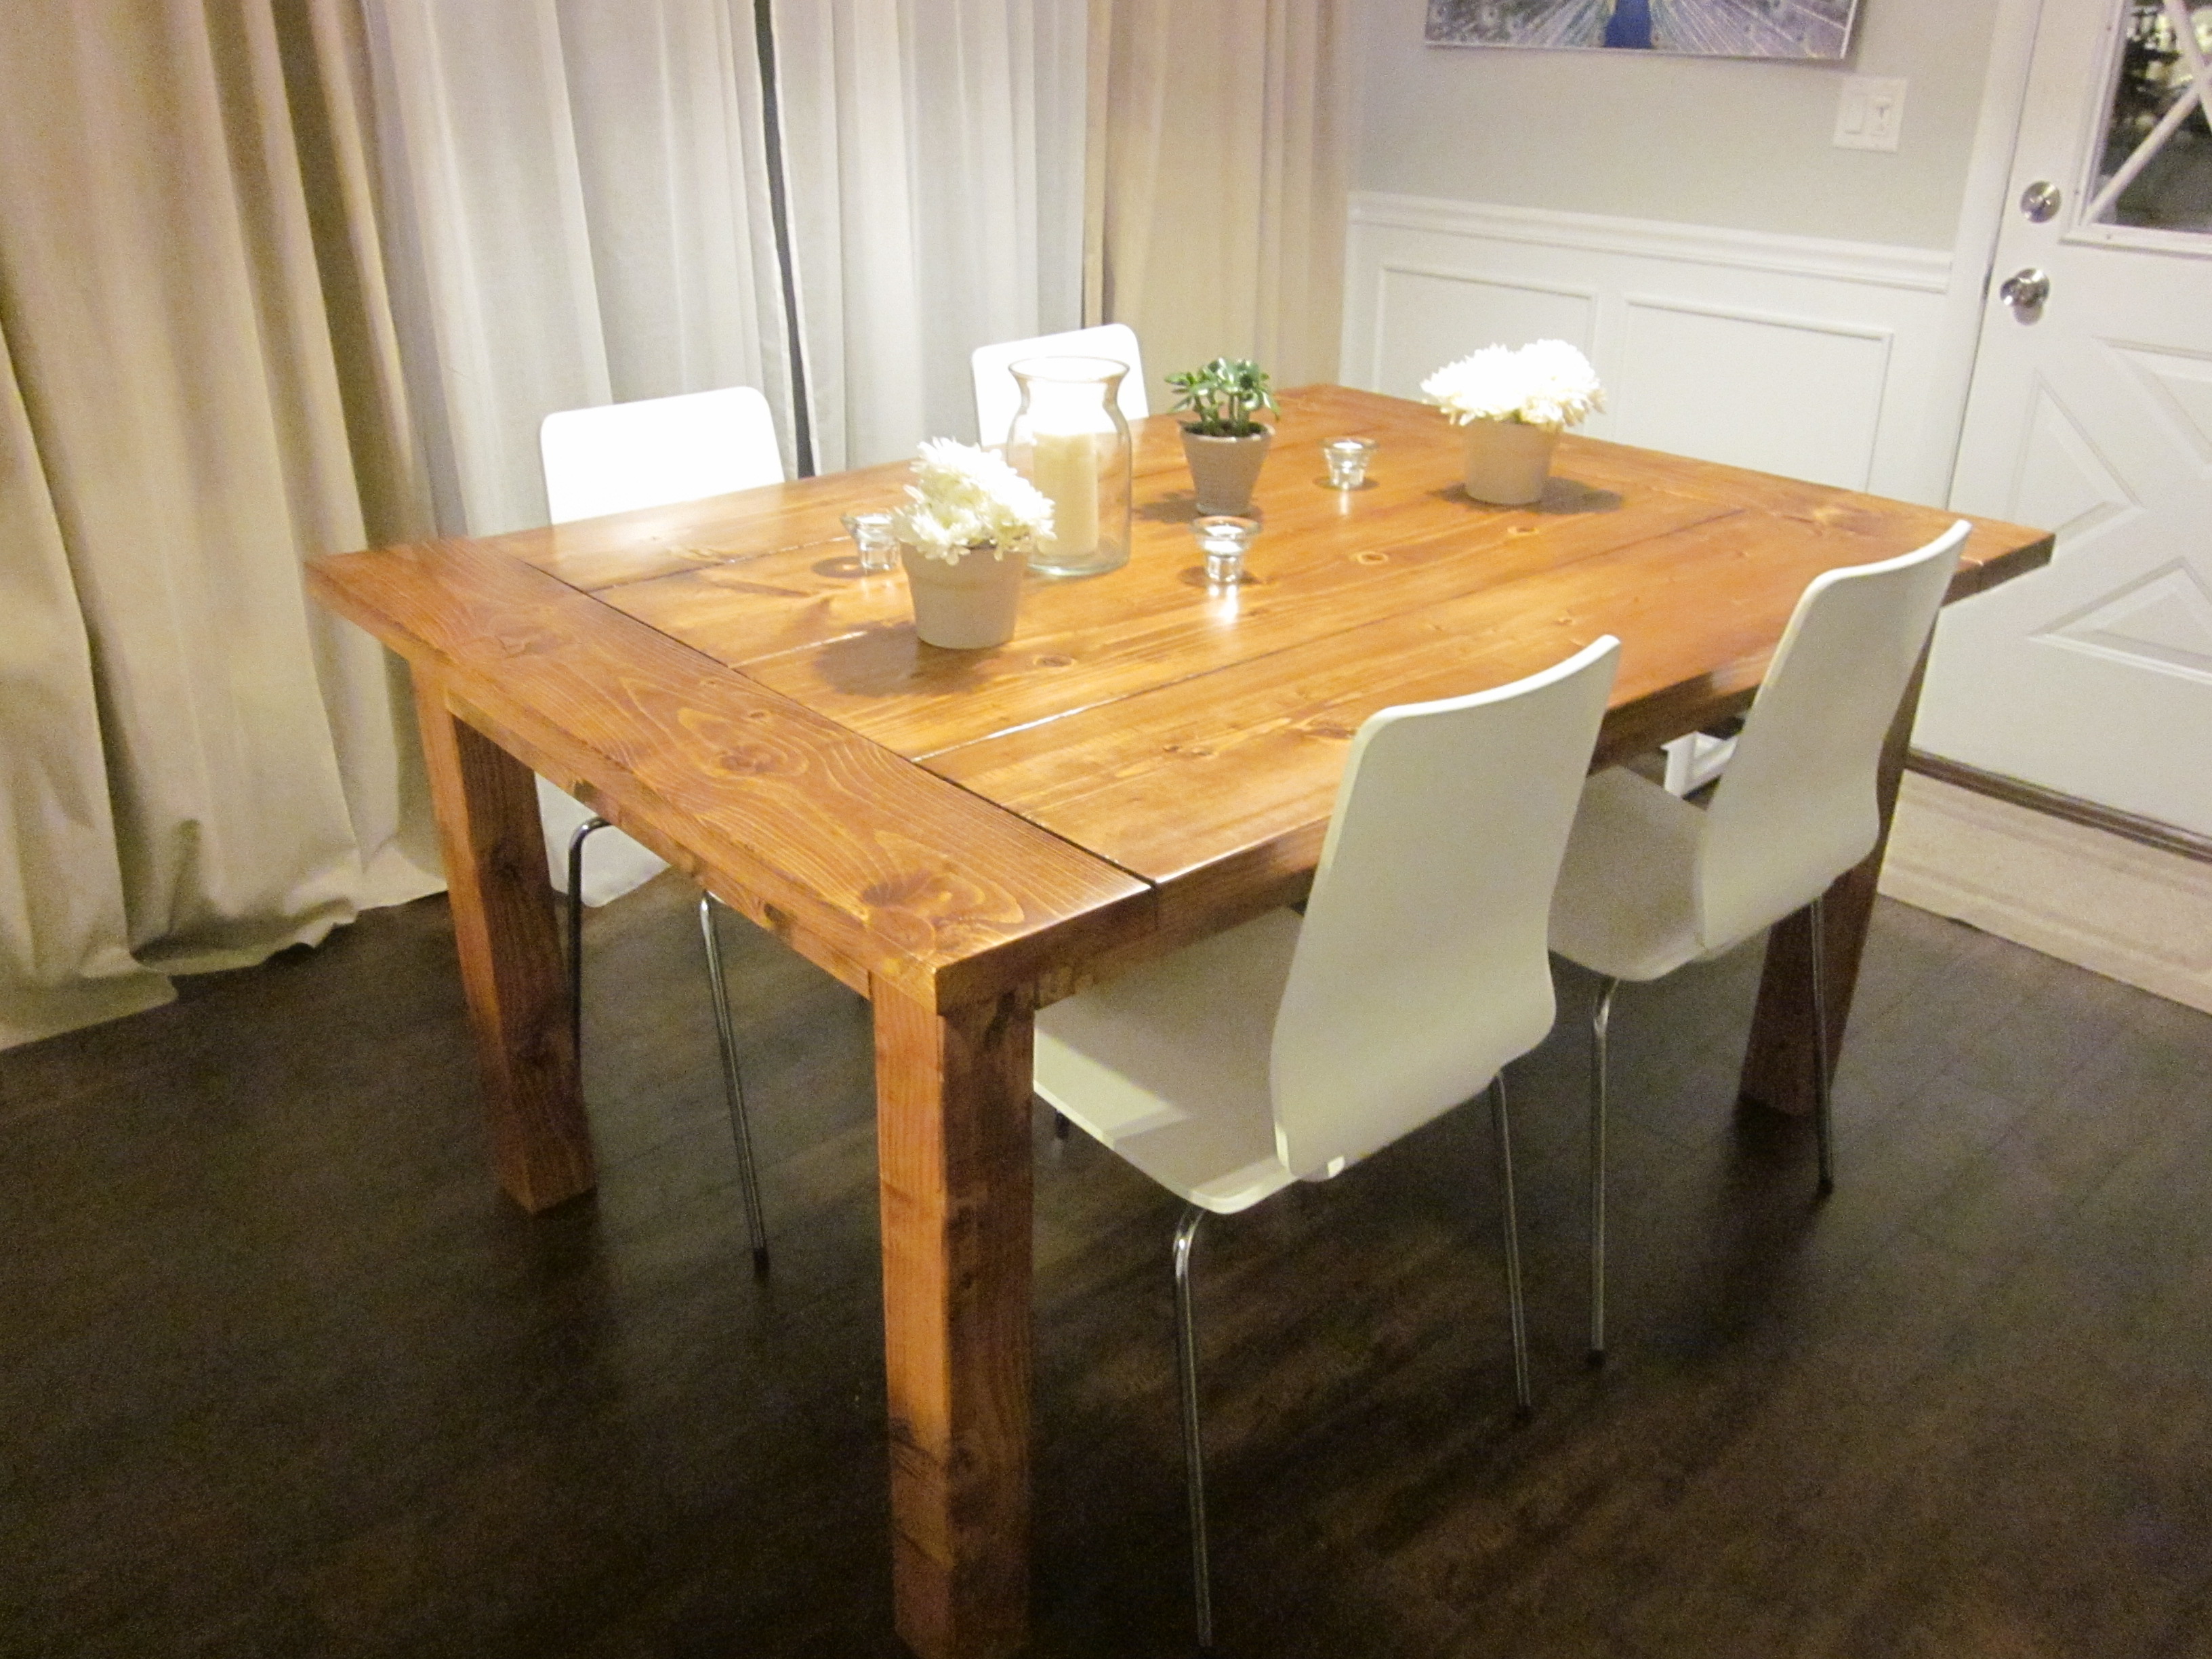
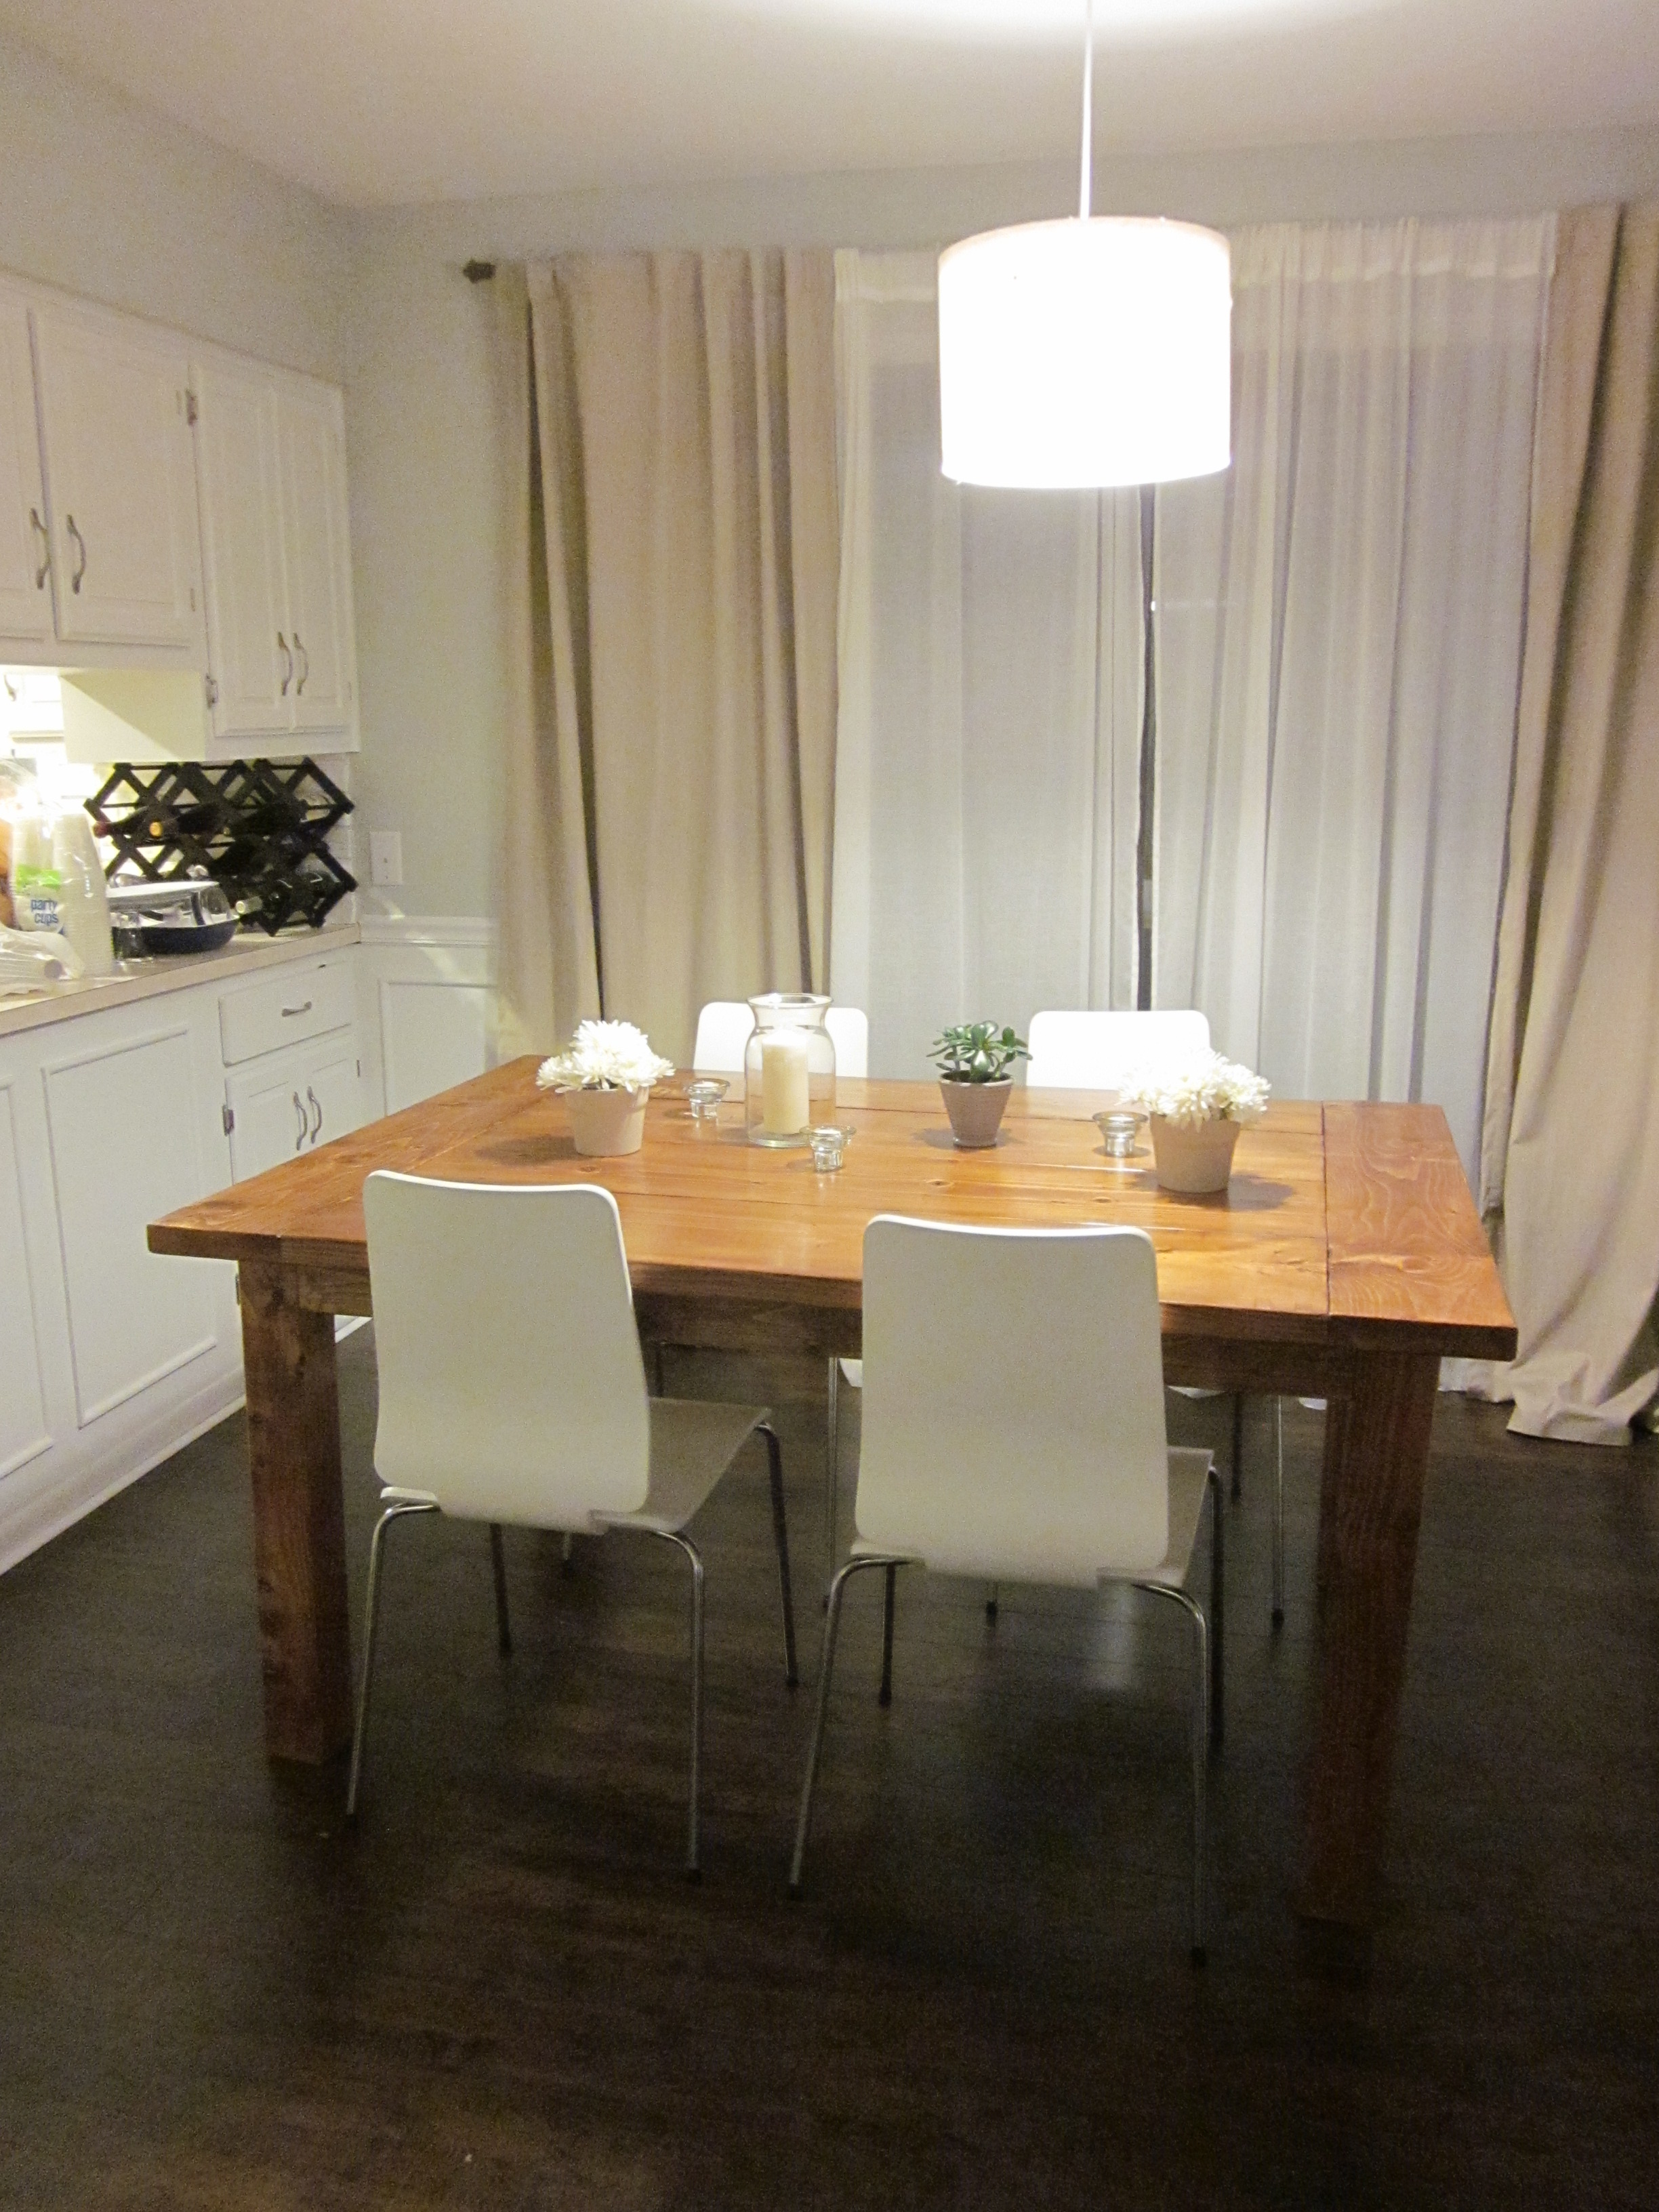
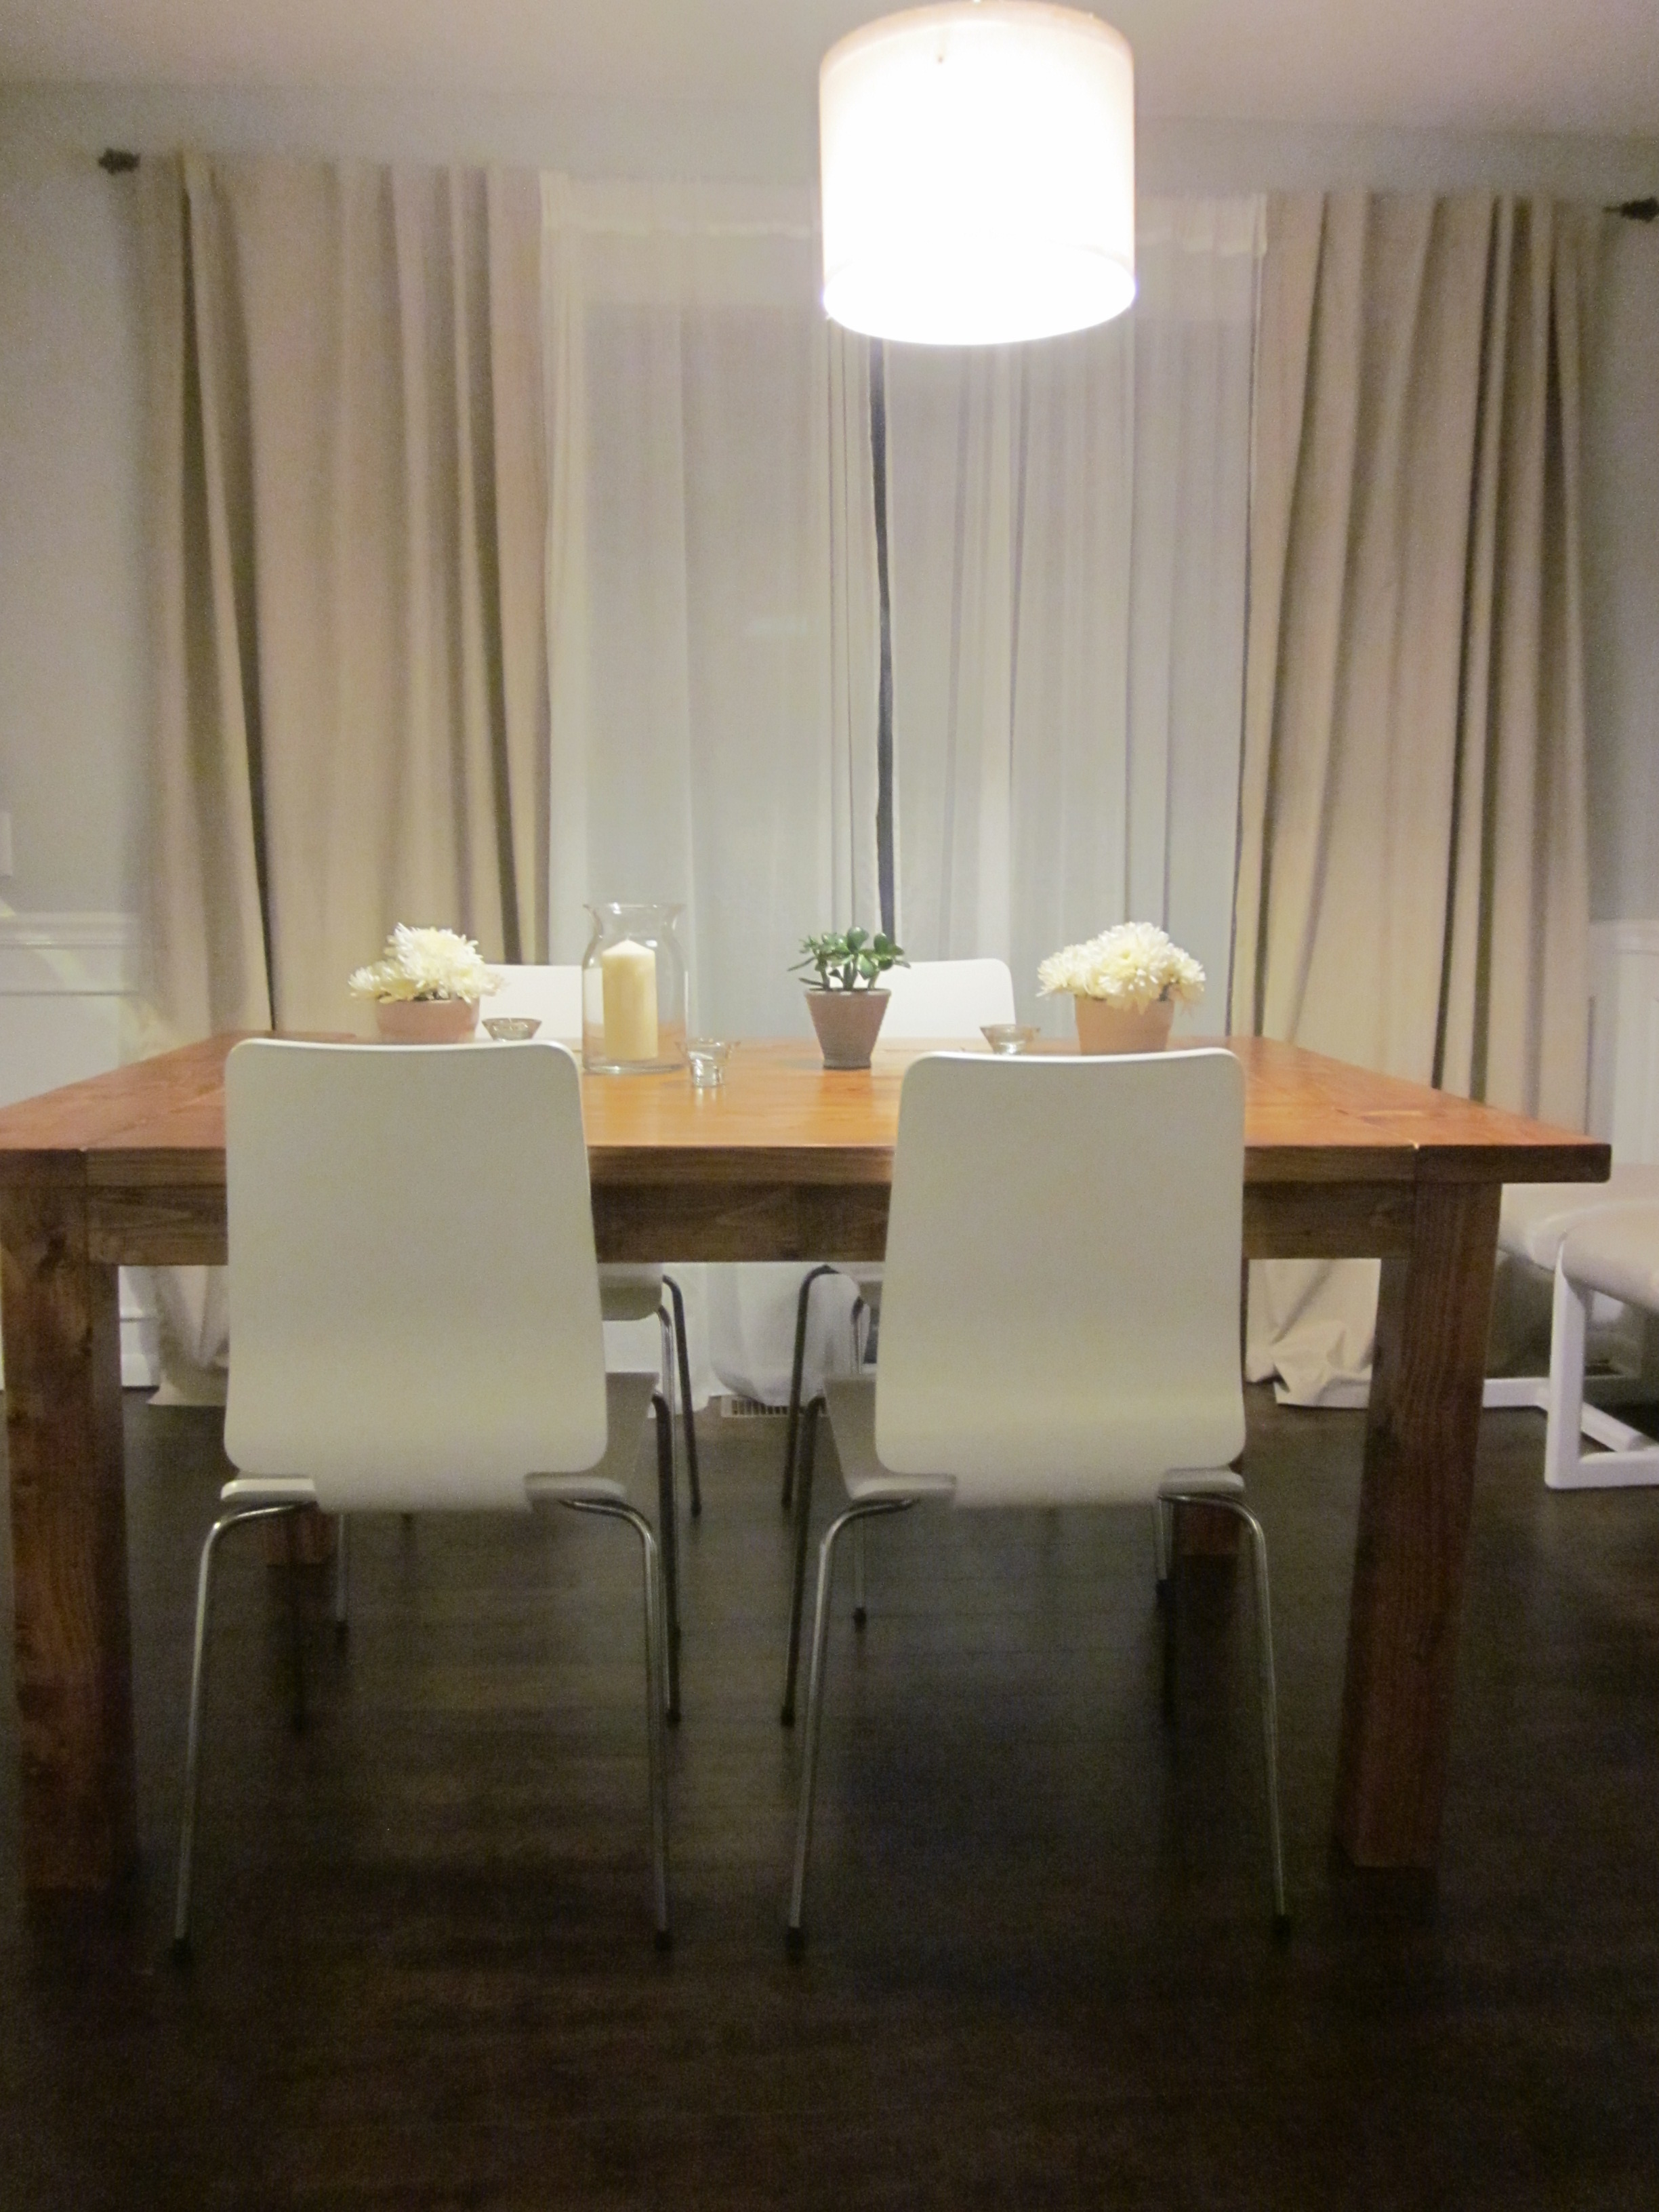
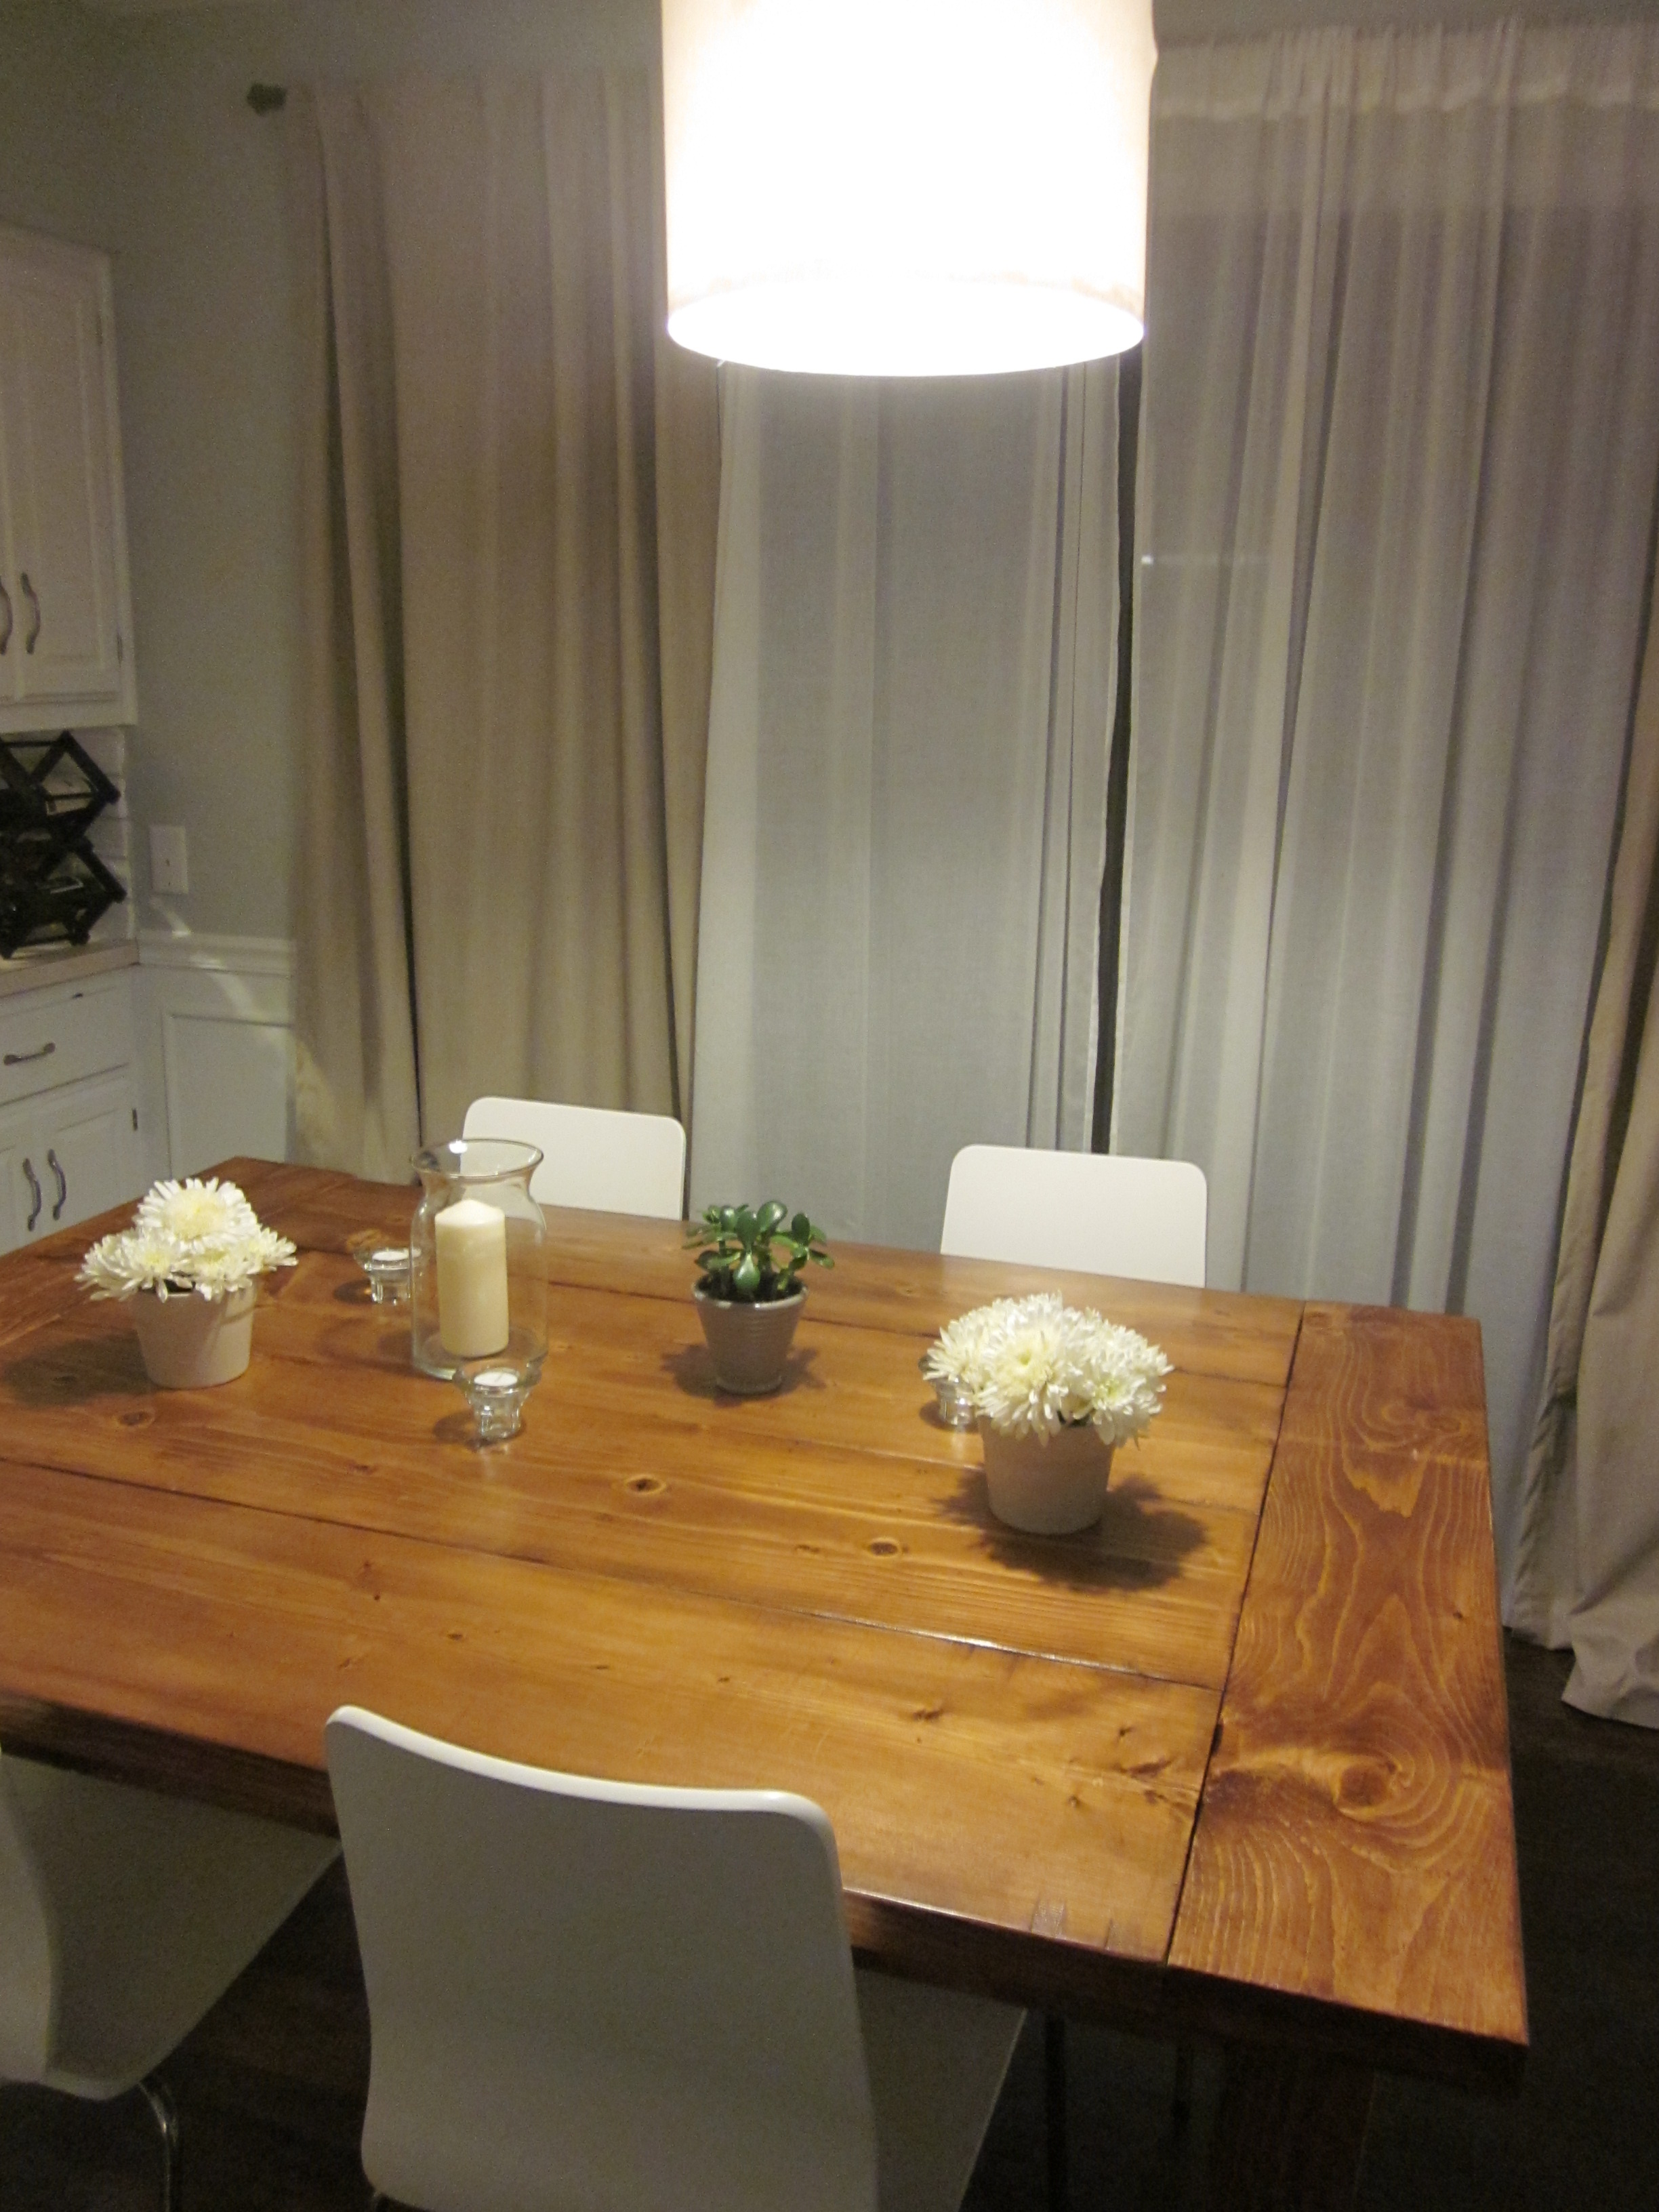
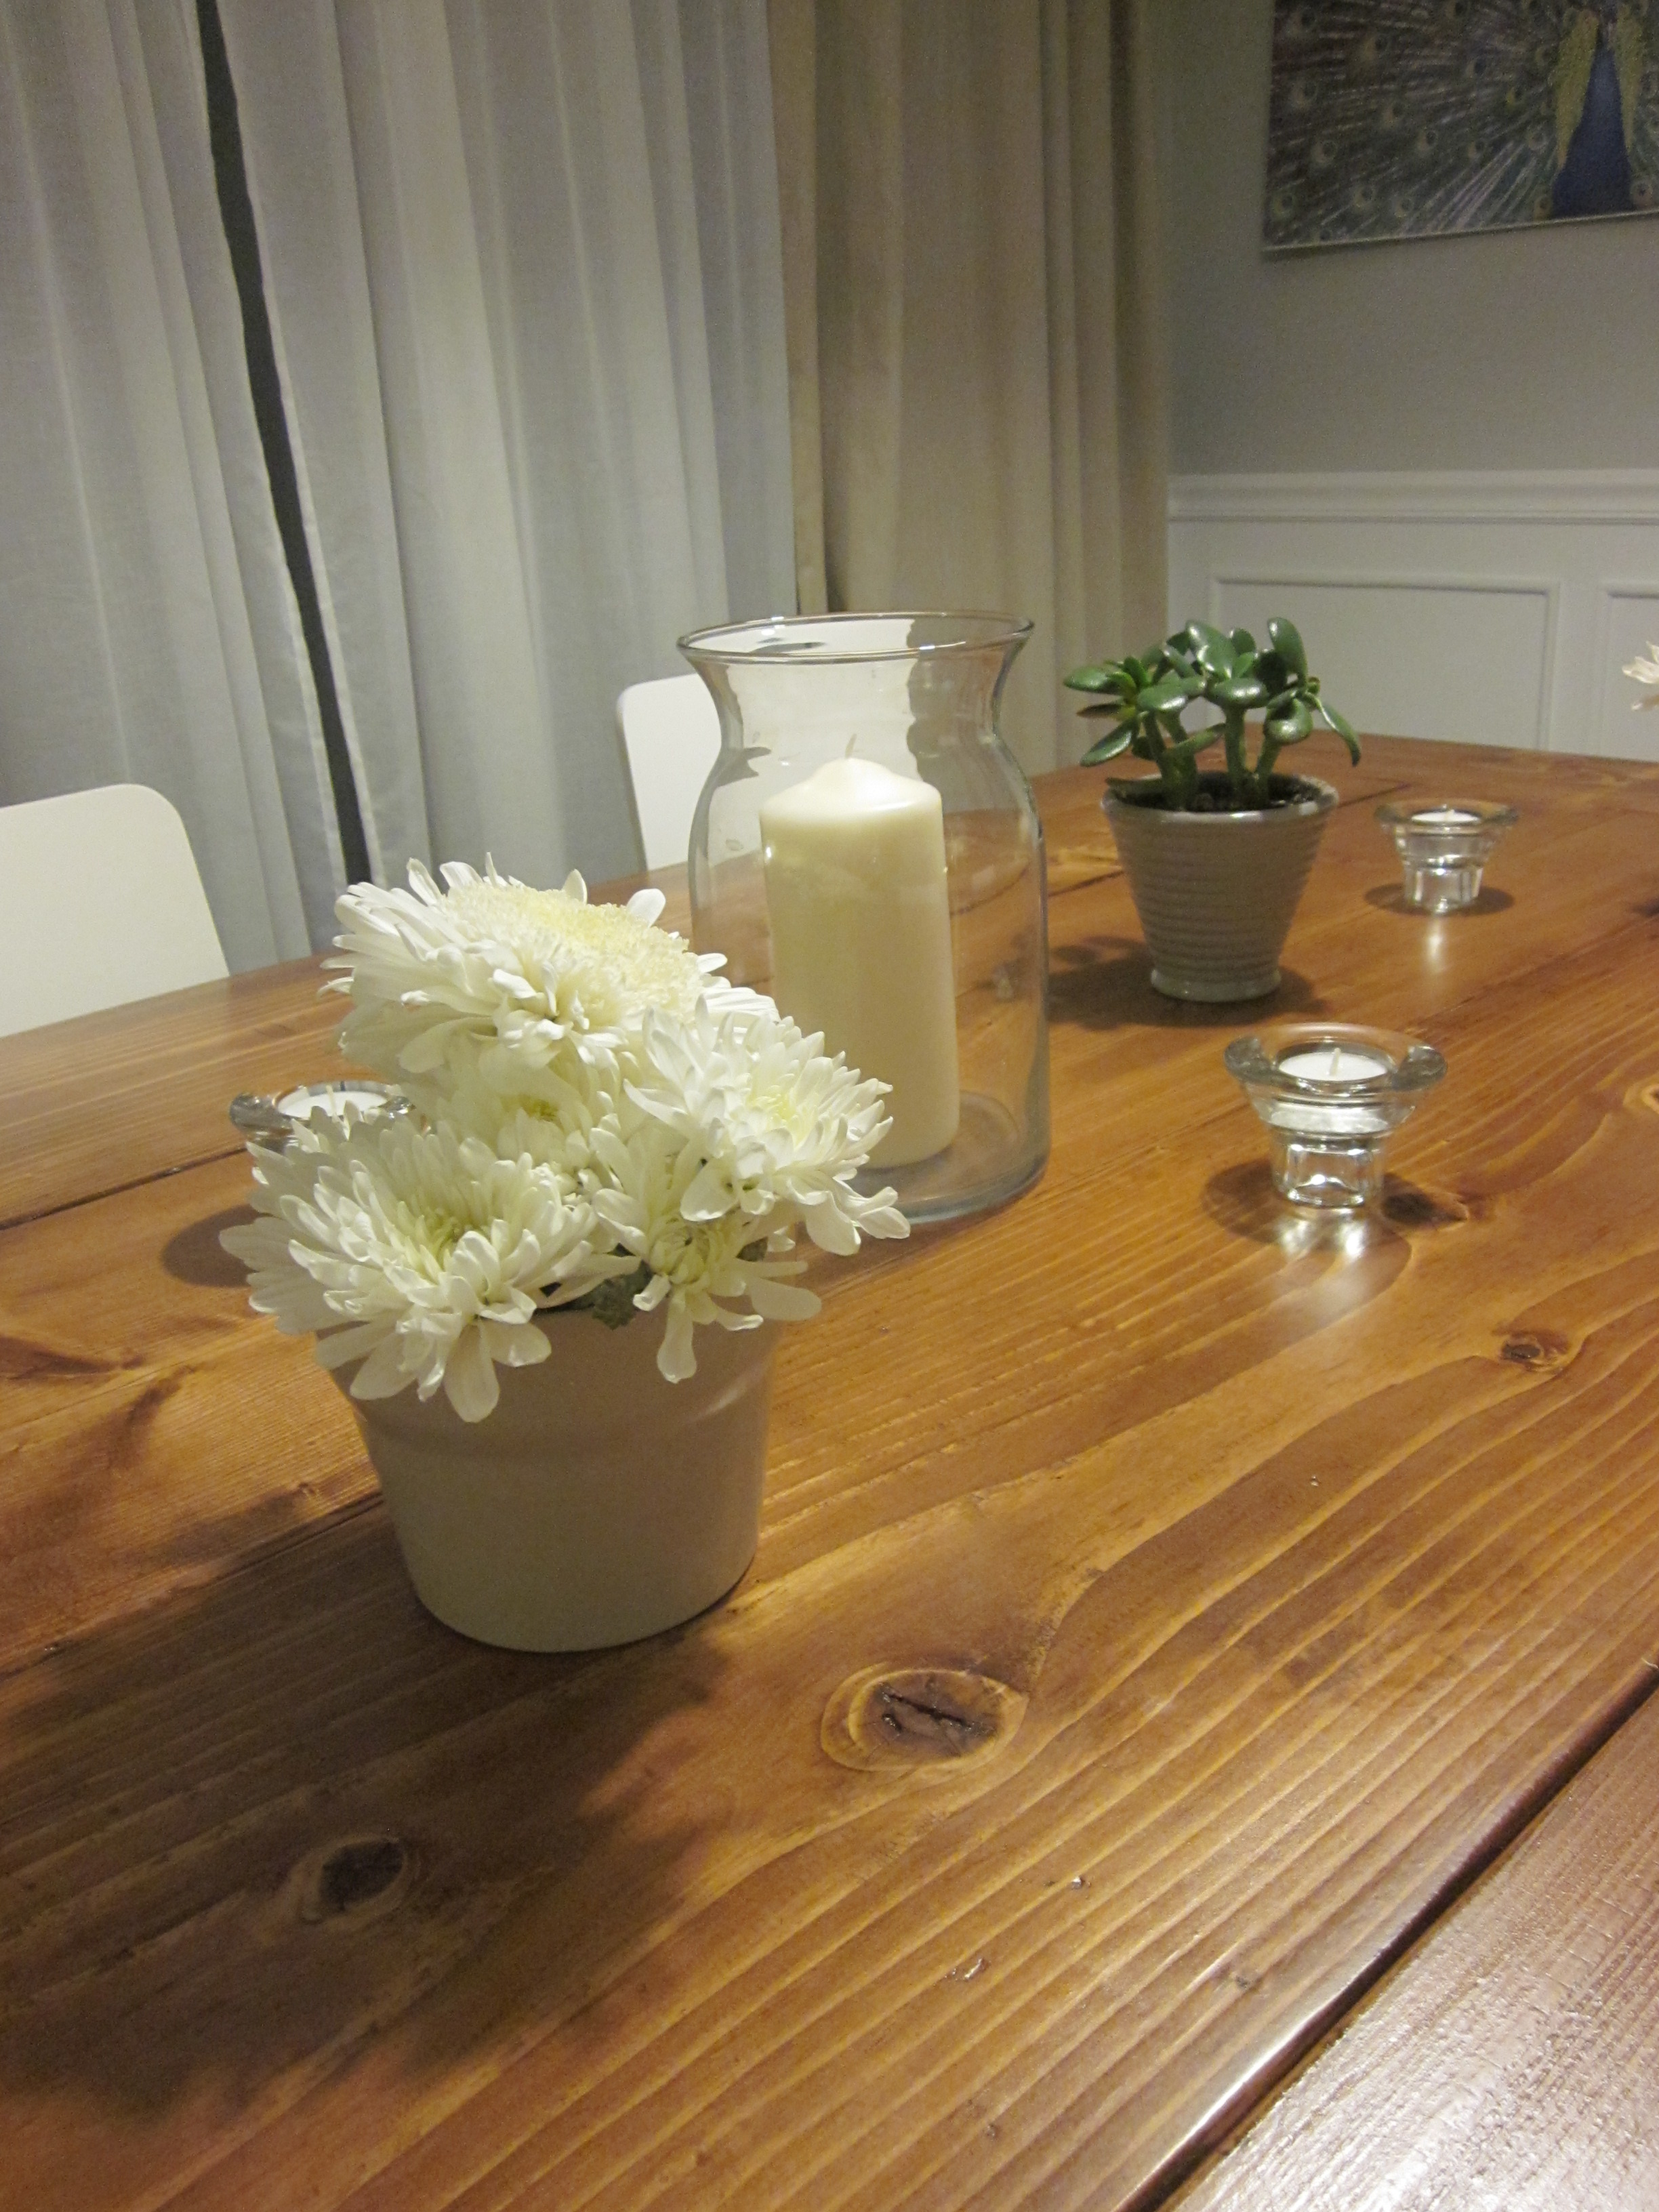
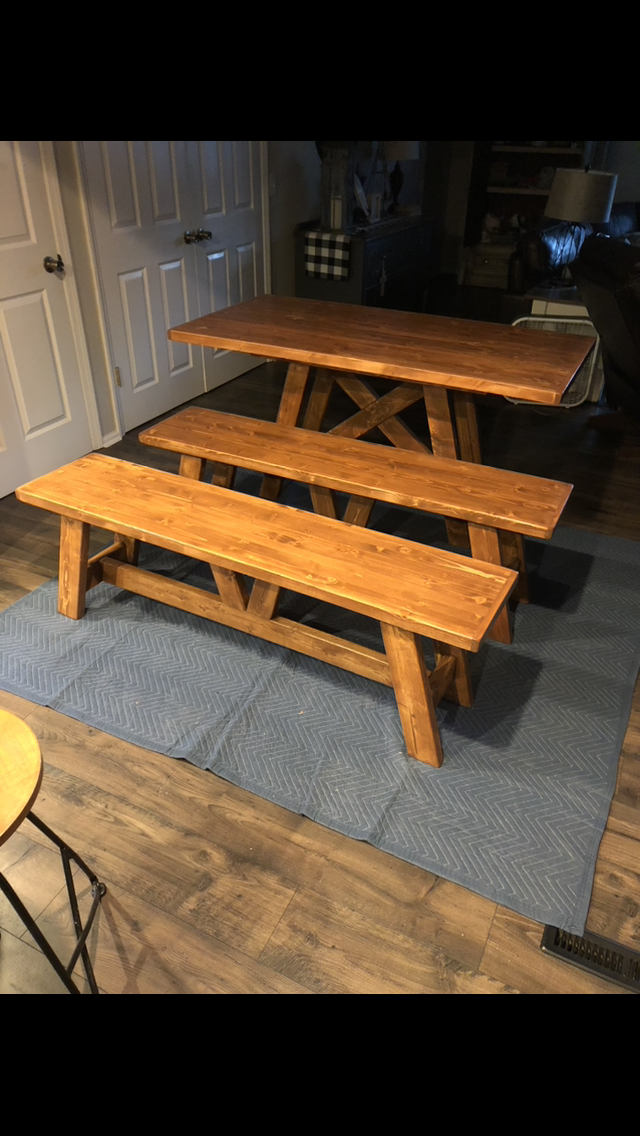
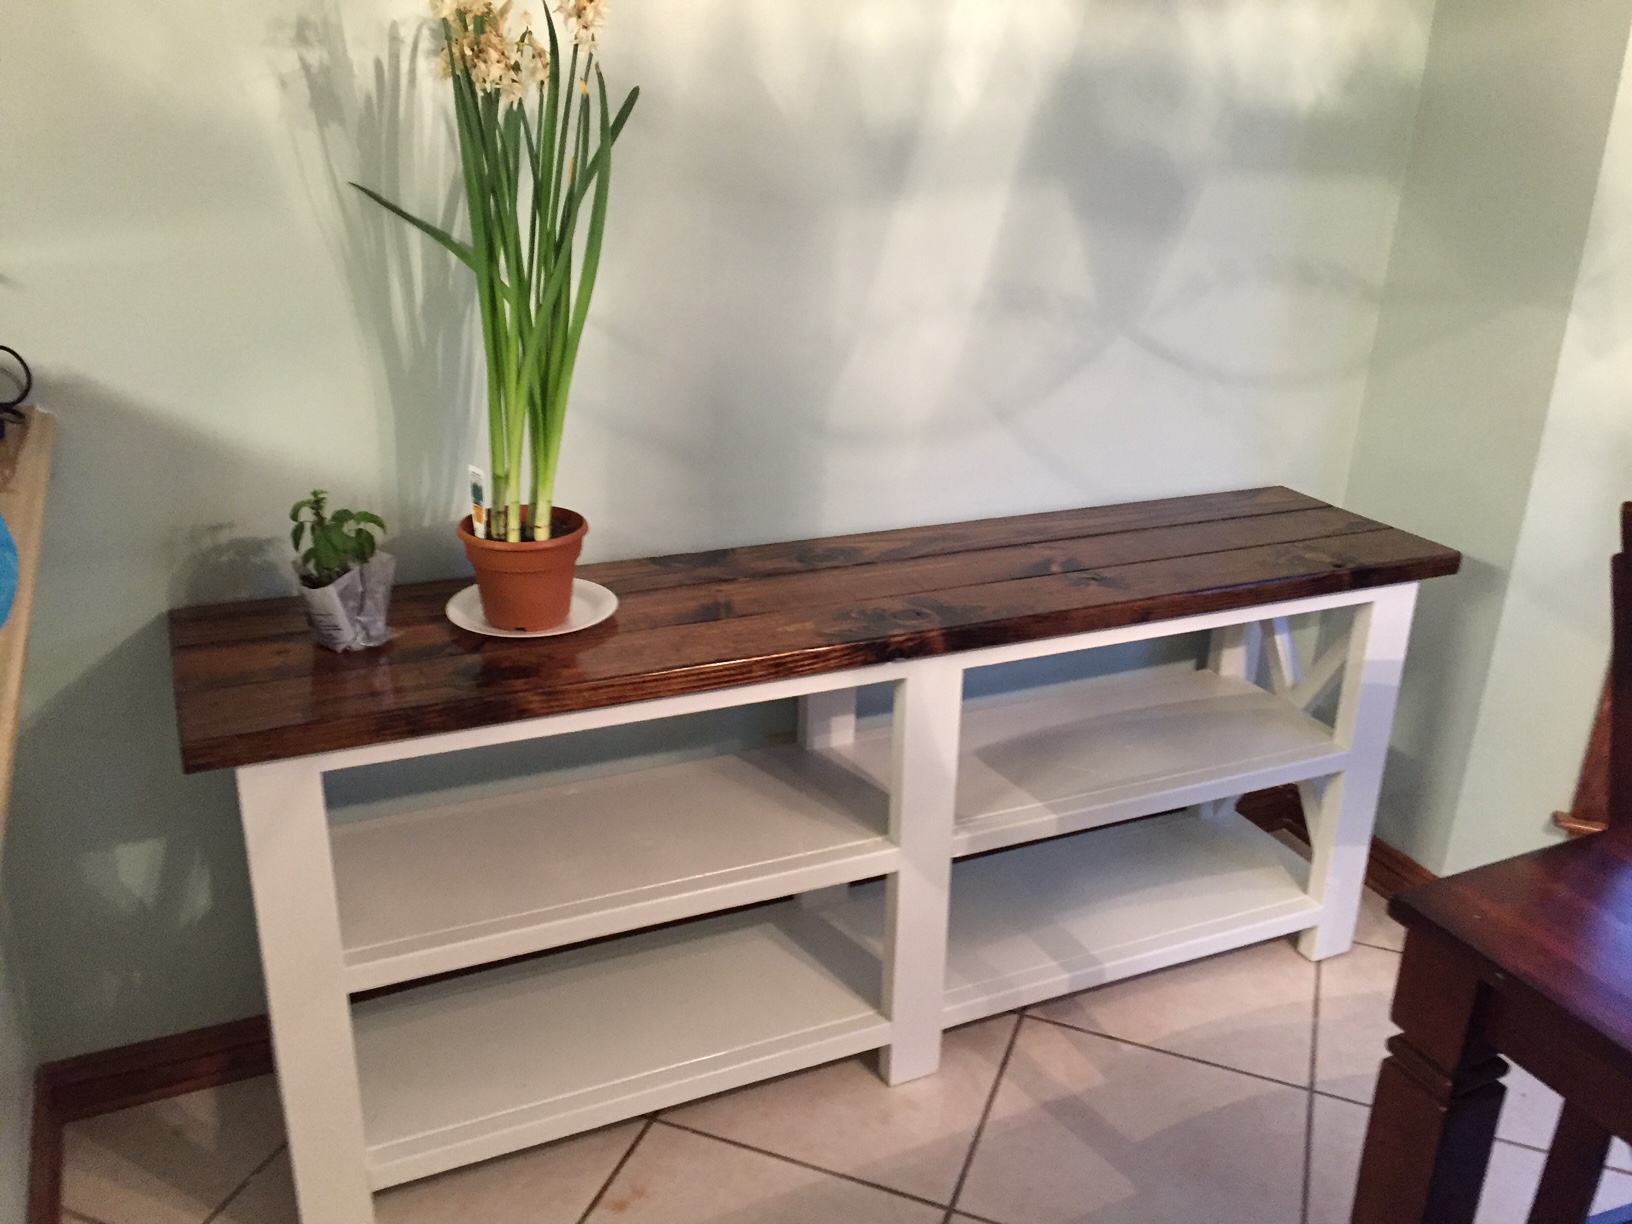
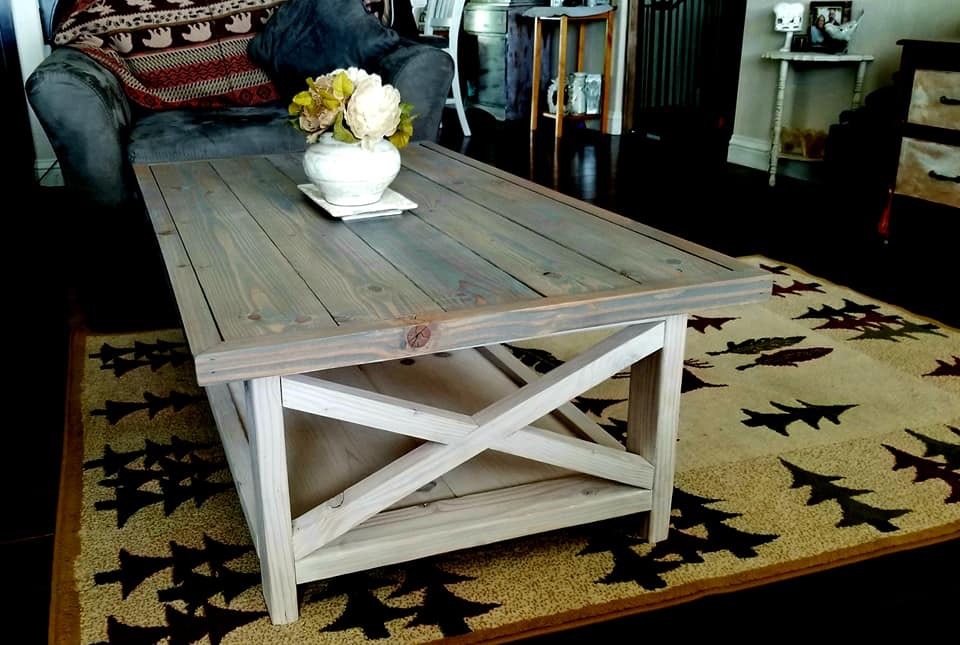
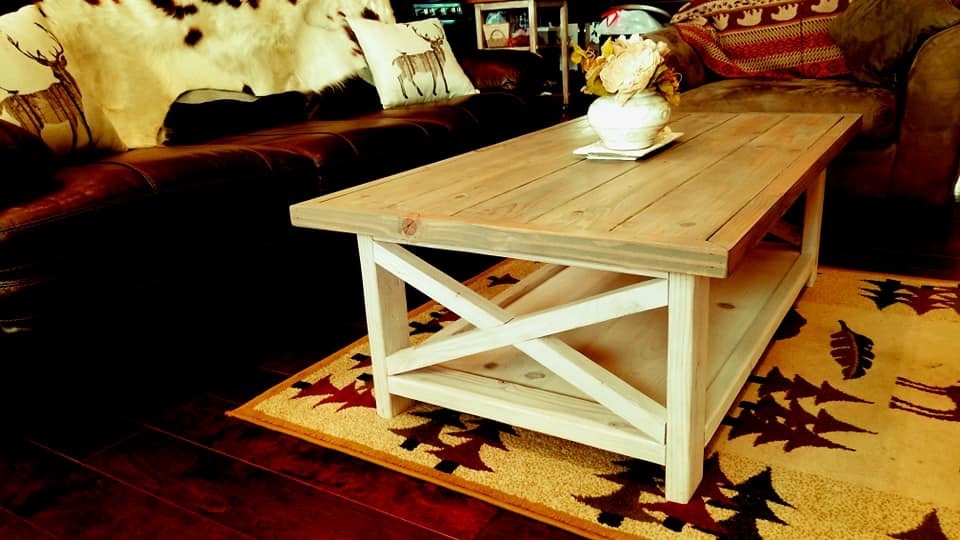
For this project, we combined plans from the Farmhouse table and also the Tryde coffee table. We have a smaller dining room so we had to modify the plans to fit our ideal size (44"wide x 62"long). I did not want the stretcher underneath as it would take up leg room and it is very sturdy without it. We used 2x12s for the tabletop & 2x8s for the breadboards. We used 4x4 posts for the legs and 2x4 for all the other support pieces. We constructed the table in 2 pieces: the frame and then the table top so it would easier to move into place then do the final assembly. This was our first time building furniture and first time using the Kreg Jig. I think the Kreg was easy to use and worth the investment. Overall, we were surprised at how well it turned out and will look to Ana for more plans in the future!
Mon, 09/26/2011 - 09:29
This looks so cute with the wood contrasting the white! :) I wish I could do a white pallette in my home. Good work on the table, I love it :)

Thu, 11/17/2011 - 10:04
I'm doing this exact project right now. Just bought the wood and am about to start the cuts today. I'm using the Tryde plan, but making it kitchen table size. I love that you were able to find 2x pine! My store doesn't carry that, only 1x pine. So I had to go with the UBER cheap 2x hemlock. It's ok, but I would have preferred pine.
ANYWAY, I'm wanting to build this in two pieces too. I'm assuming you Kreg Jigged the tabletop pieces together. How did that go? That's what I was planning to do... I bought 2 1/2" pocket screws for this part of the job. Is that what you used? My tabletop is all 2x8 boards. Just curious how it "felt" edge joining boards this size together. Did you use extra screws or just follow Kreg Jig recommendations (2" from ends, then every 6")?
Thanks for your thoughts! My table is going to be so similar to yours! LOVE seeing your picures!!! :) Great job!
Jennifer
Wed, 02/29/2012 - 13:14
Sorry, I wasn't notified there were more comments!
Yes, we used the Kreg Jig, it was our first time and pretty easy to use. We did not drill from the top down on the tabletop, only used the Kreg Jig on the underside and this table is STURDY. On the table boards-Yes, we did the 2" from the ends and every 6" or where we thought they should go. Hope your's turned out well and thank you for the nice comments!
The chairs are Ikea's Gilbert. We've been happy with them. They support some of the 6'4" men in my family, no problem.

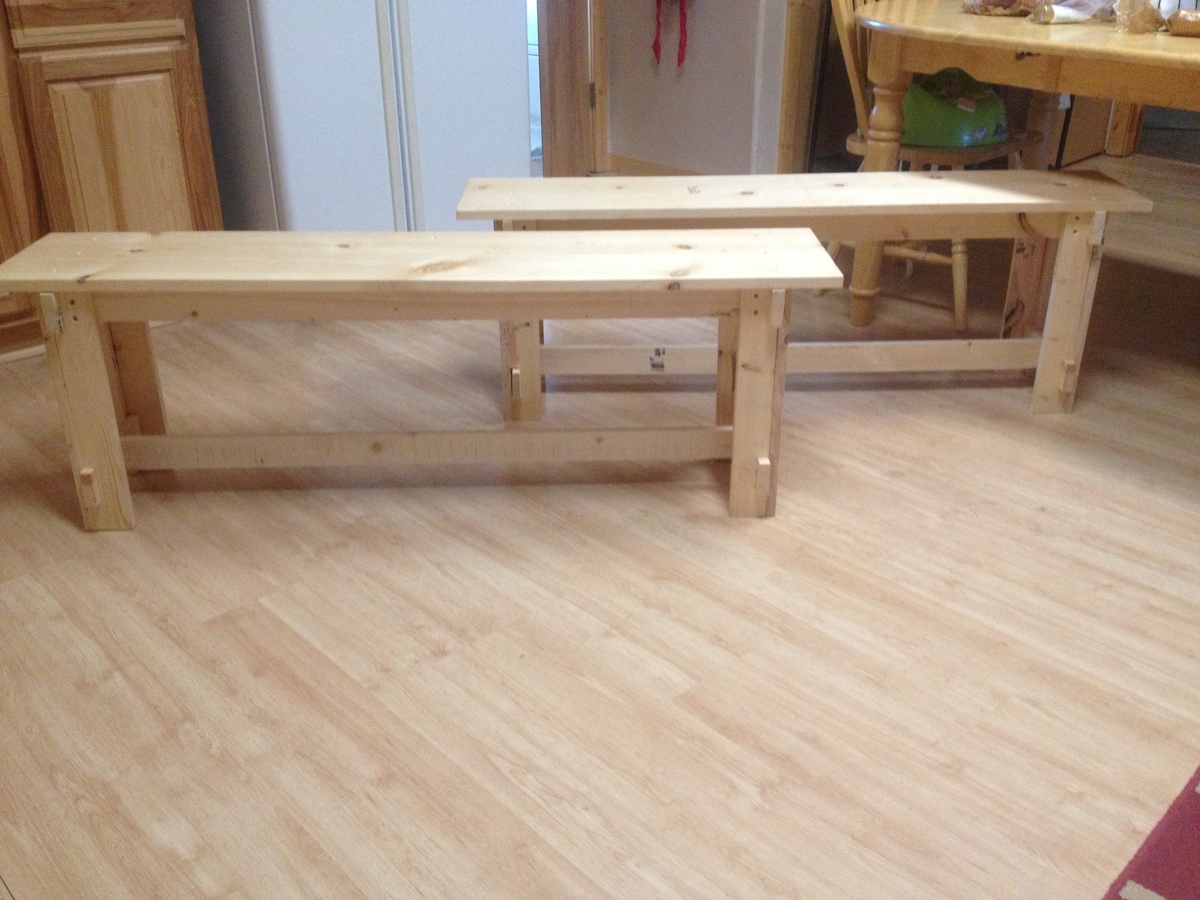
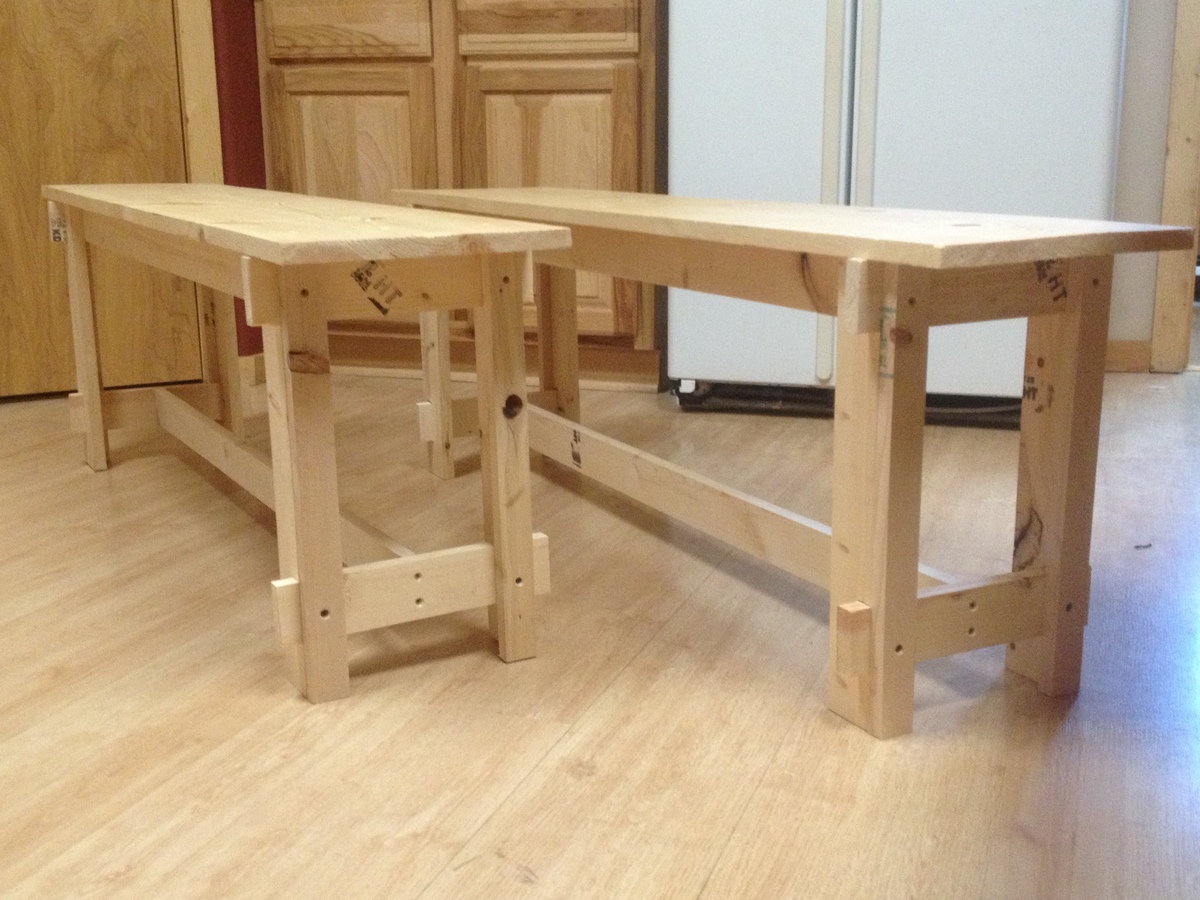
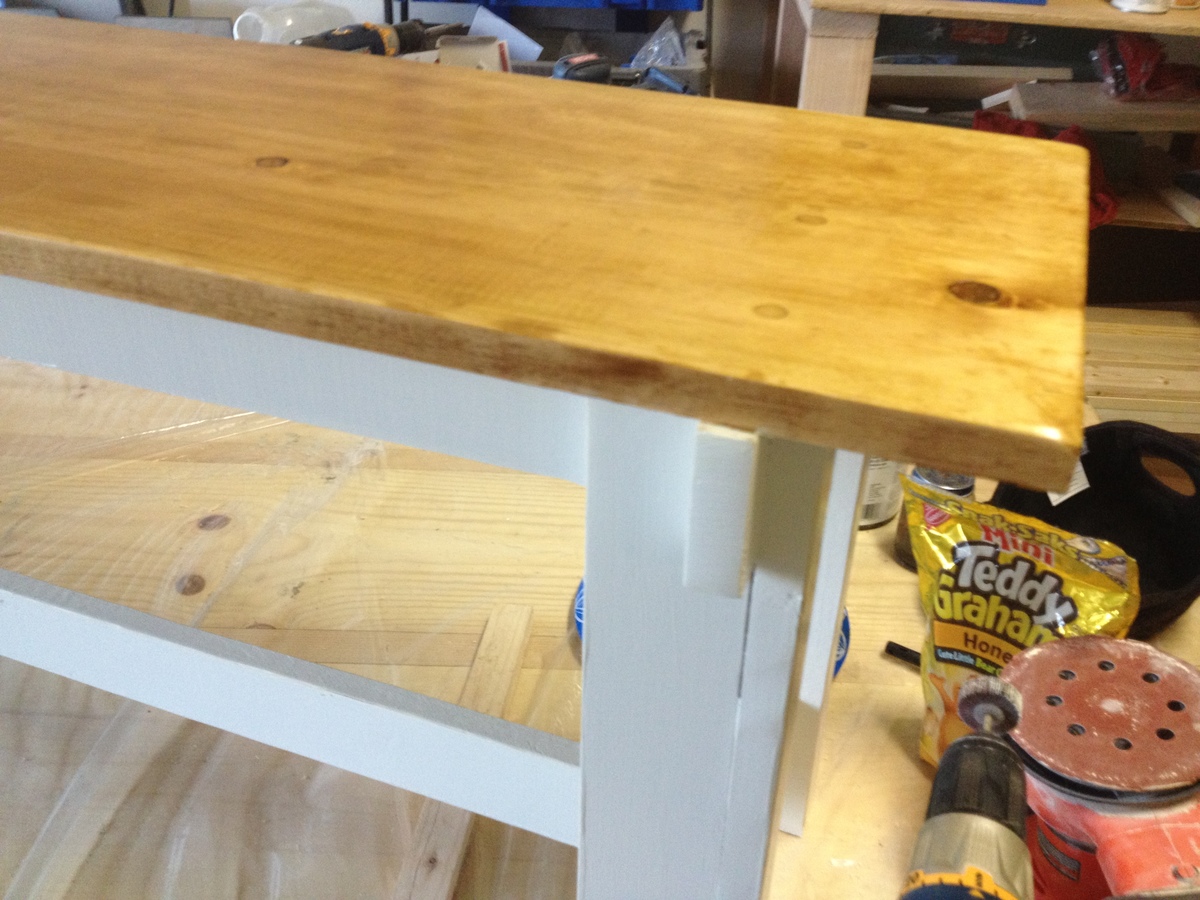
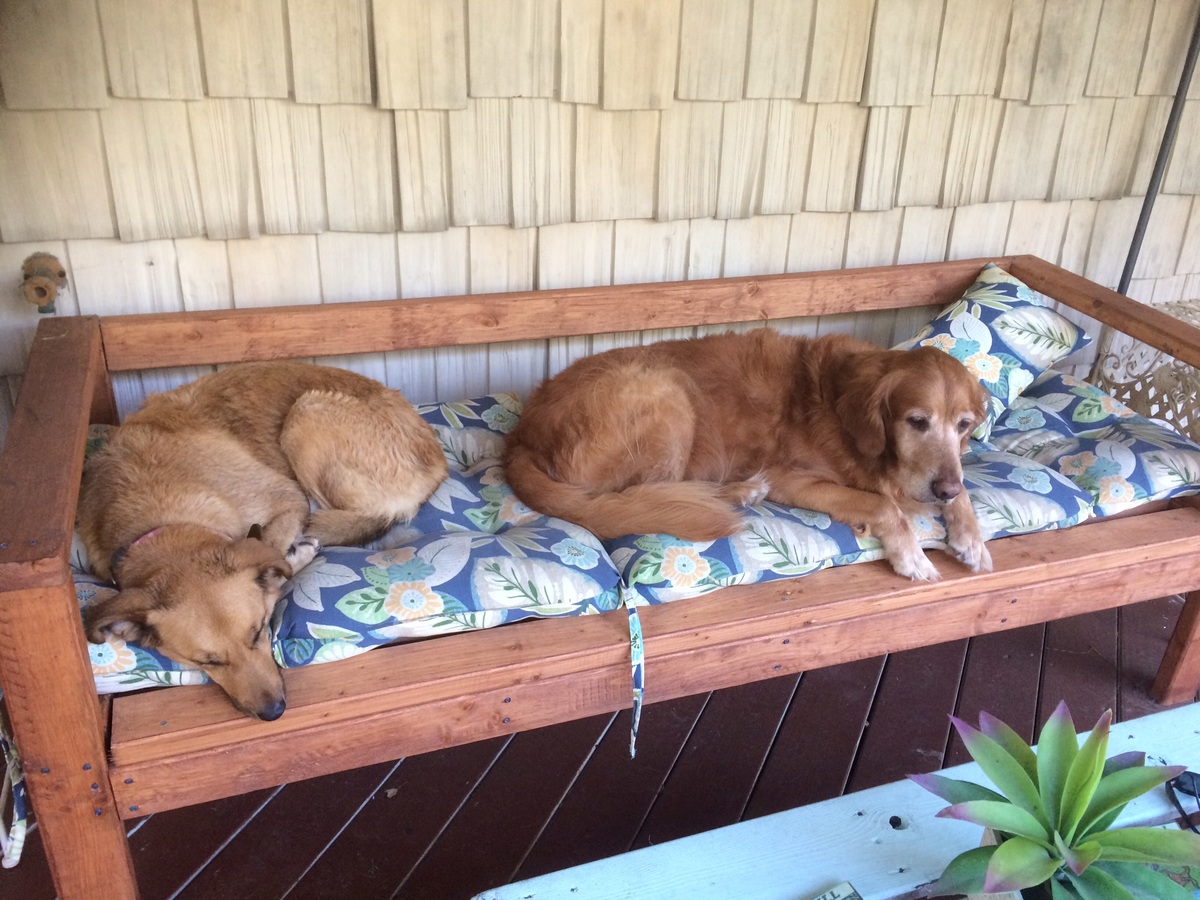
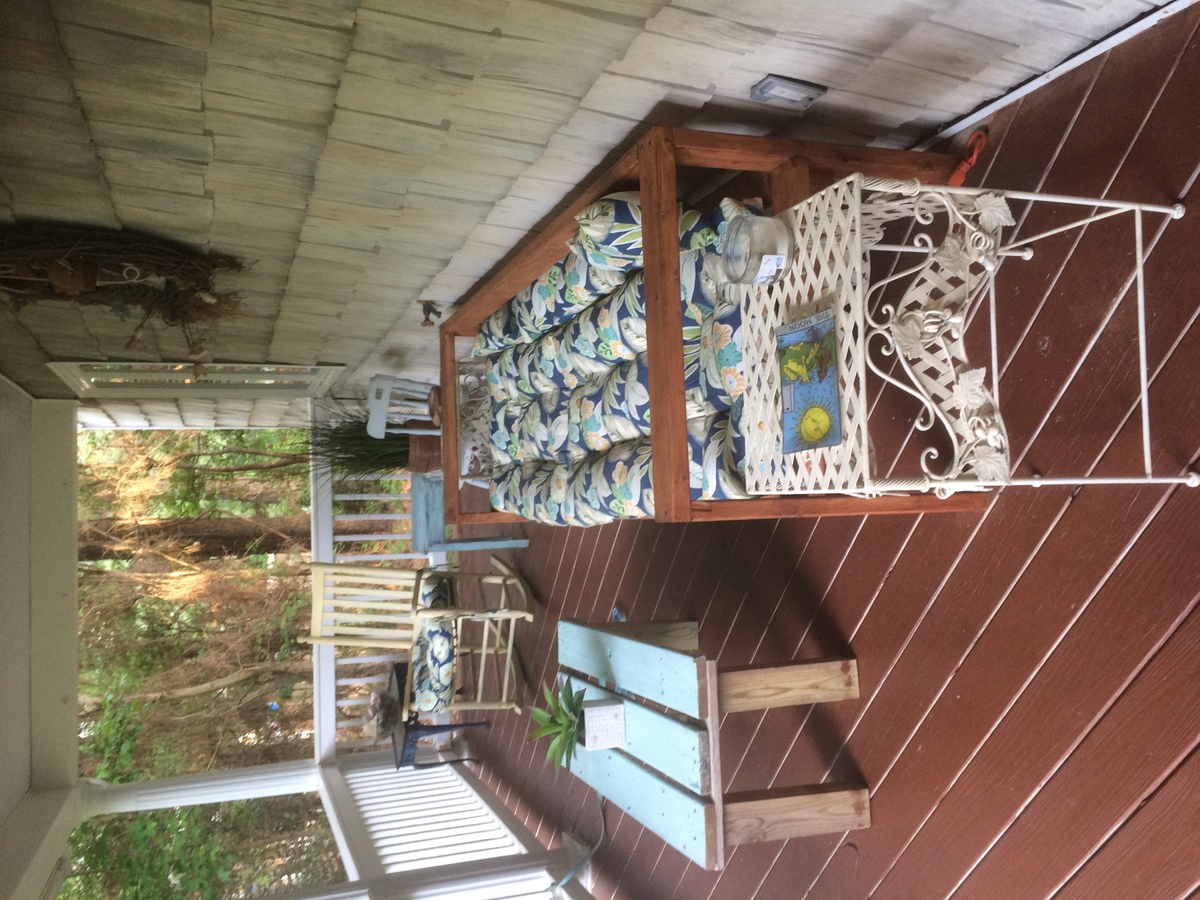
I have always loved benches at the dining table. They are so practical for cleaning, kids, and for cramming extra people at a table! We are (mostly) happy with our current table, but I was so sick of 6 clunky chairs floating around my kitchen, and these benches were the perfect solution. They were very simple to make and are exactly what I wanted!
I mixed my own color of stain for the top board from two Cabot colors (Golden Oak and Walnut) to create a color that break up all the oak in the room, while still fitting in. I painted the bases of the benches a creamy ivory for the same reason, to break up all the oak, and distressed the edges lightly.
I omitted the "x" feature in the plans because I was happy with the look of just the board along the bottom.

I decided to build the art table and use it as a lego table instead. I had a piece of 3/4" maple plywood left over from a previous project, so the only thing that I had to buy were the 1x4's and lego plates.


Thu, 02/02/2017 - 10:42
This is an awesome build! Your little one is too cute!
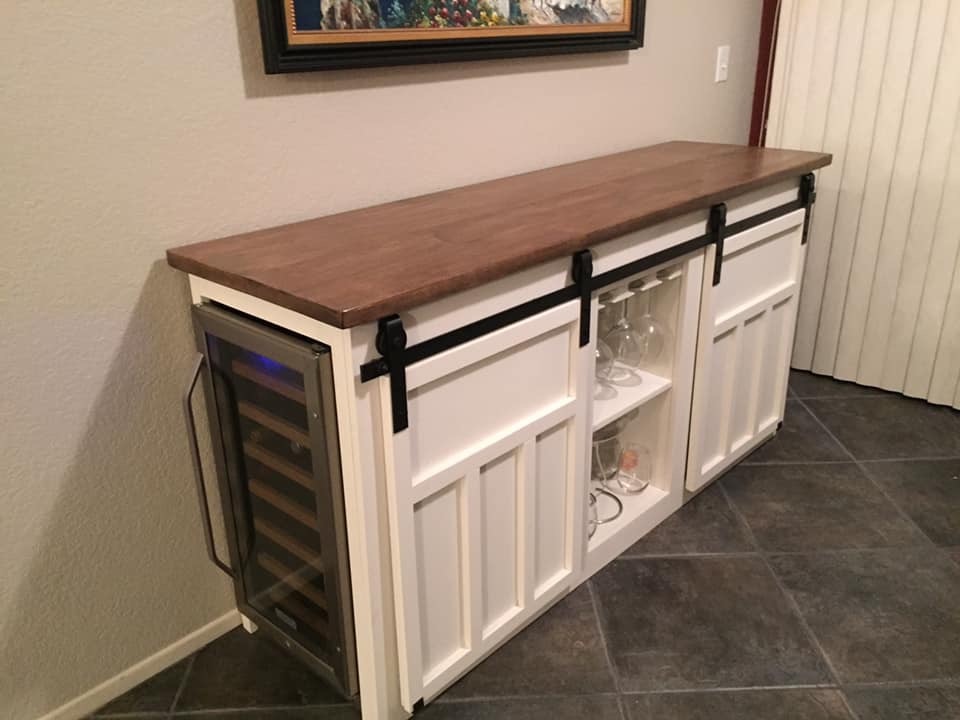
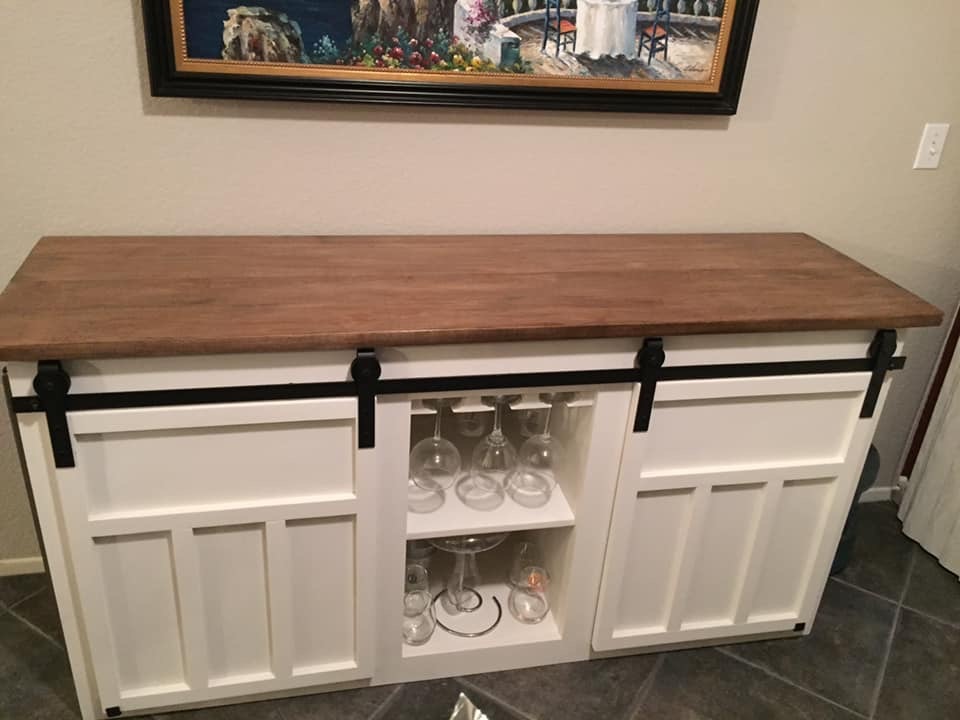
Used Maple on top with pine for the frame. Thanks Ana-White!
Mon, 07/01/2019 - 14:05
Oh wow, I love this version of this console! You did such a great job customizing it to your needs ☺
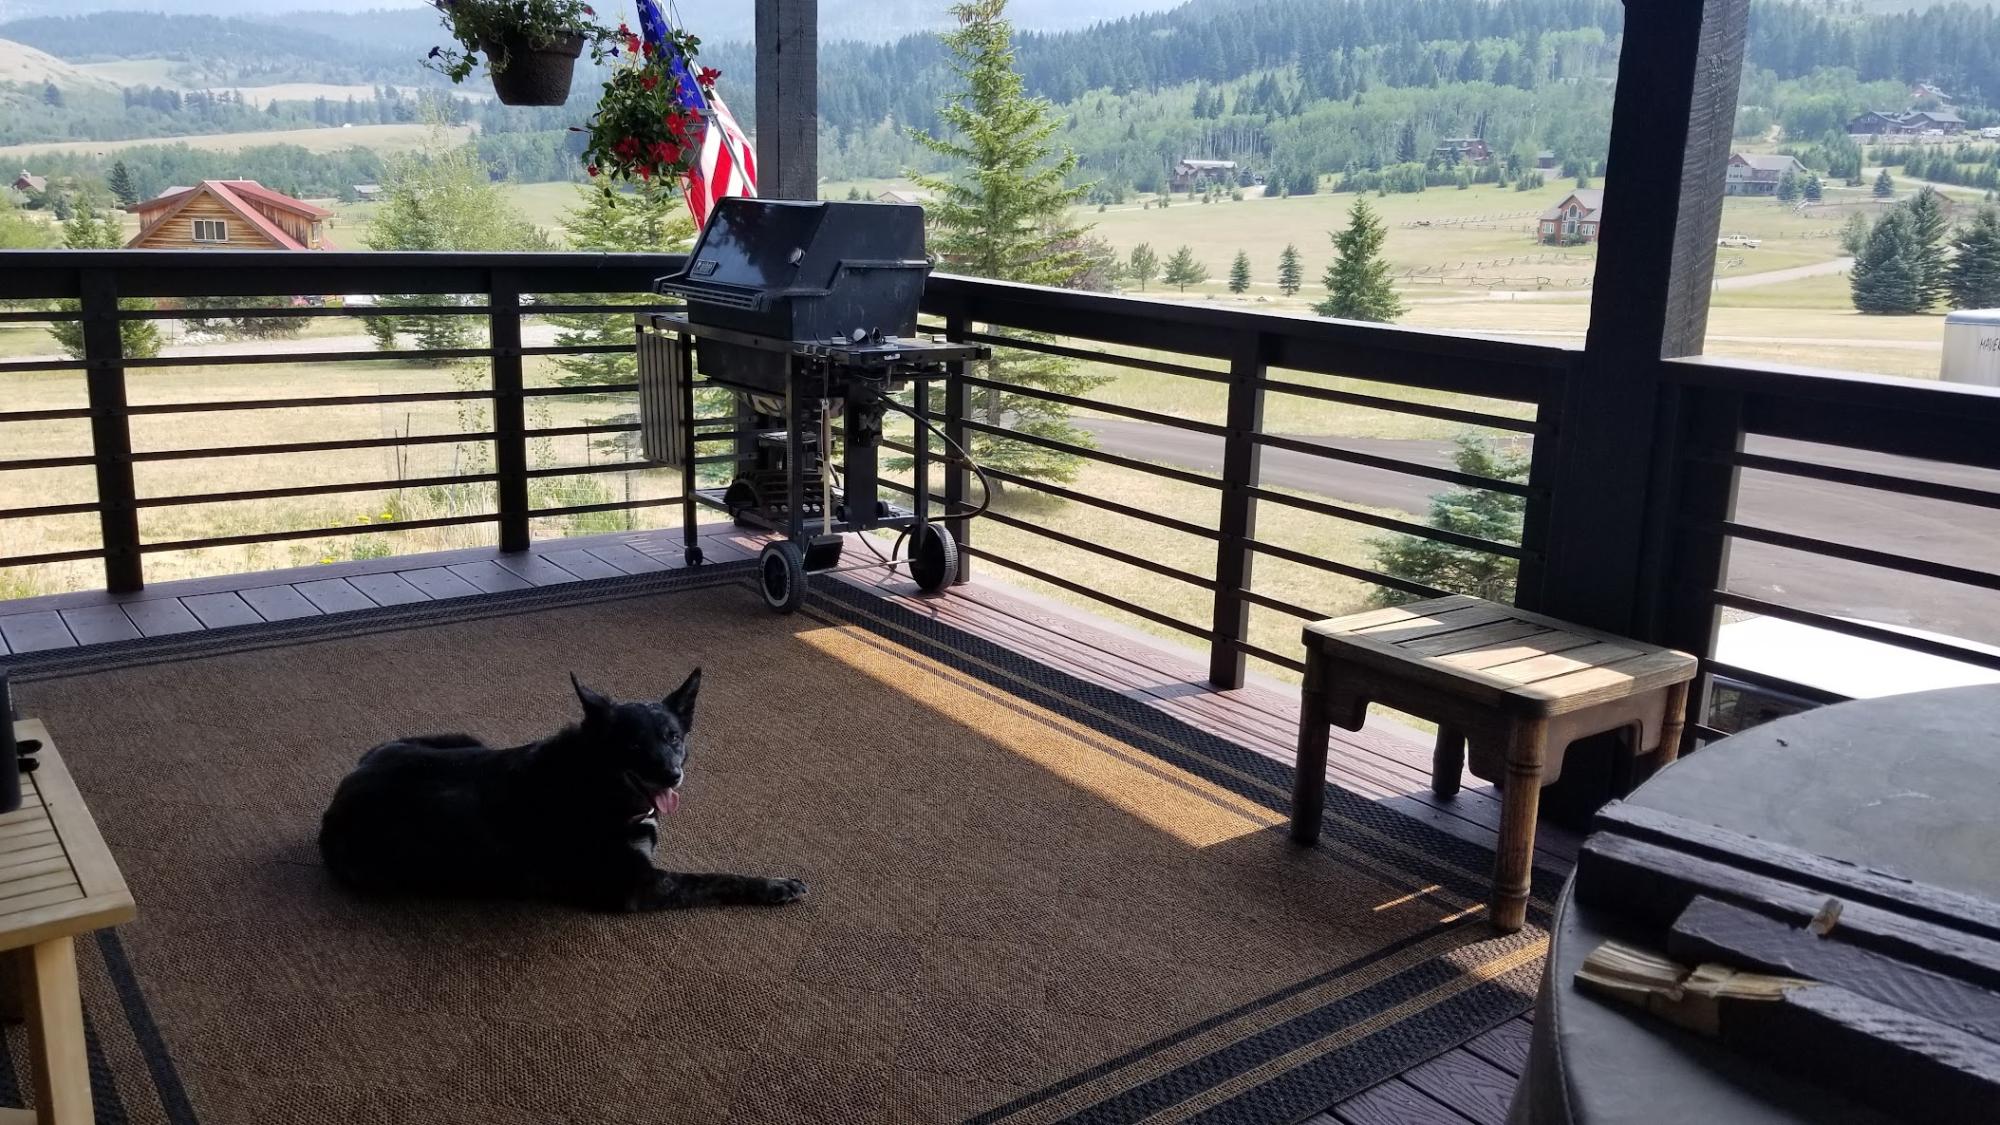
Inspired by the modern farmhouse railing we decided to install the same style on our deck. Our old railing was aged an deteriorated. The project took about two weekends, one to treat the metal with black magic, another to build the actual railing. We love how it looks!
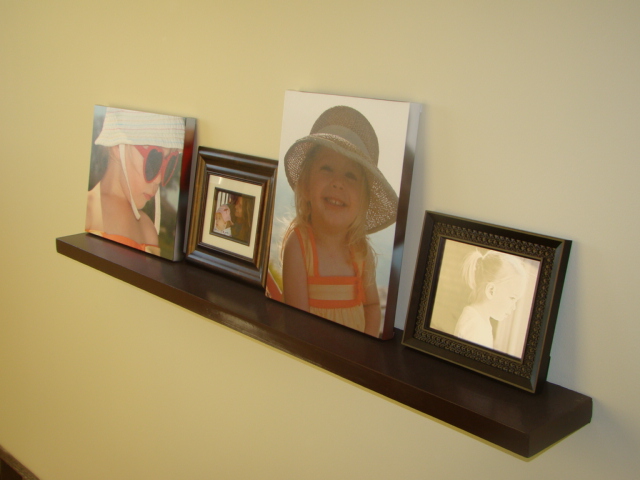
When I saw Ana's post within Young House Love's blog, I thought this would be great for pictures. We have a large wall that spans two stories in our entry way. This shelf helped make a dramatic impact when we have visitors over.
Tue, 11/29/2011 - 06:07
I know this is going to sound stupid but what did you use to mount the shelf?
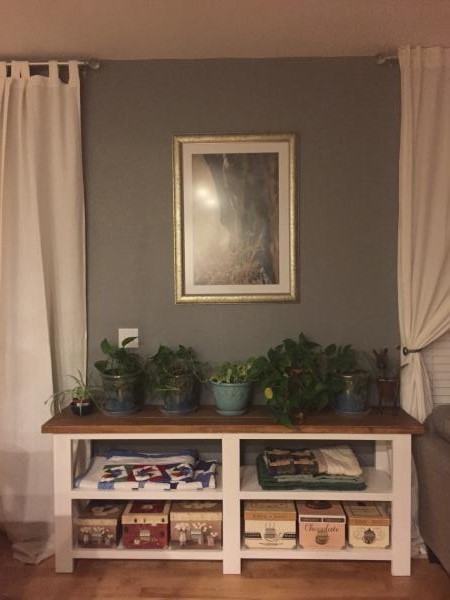
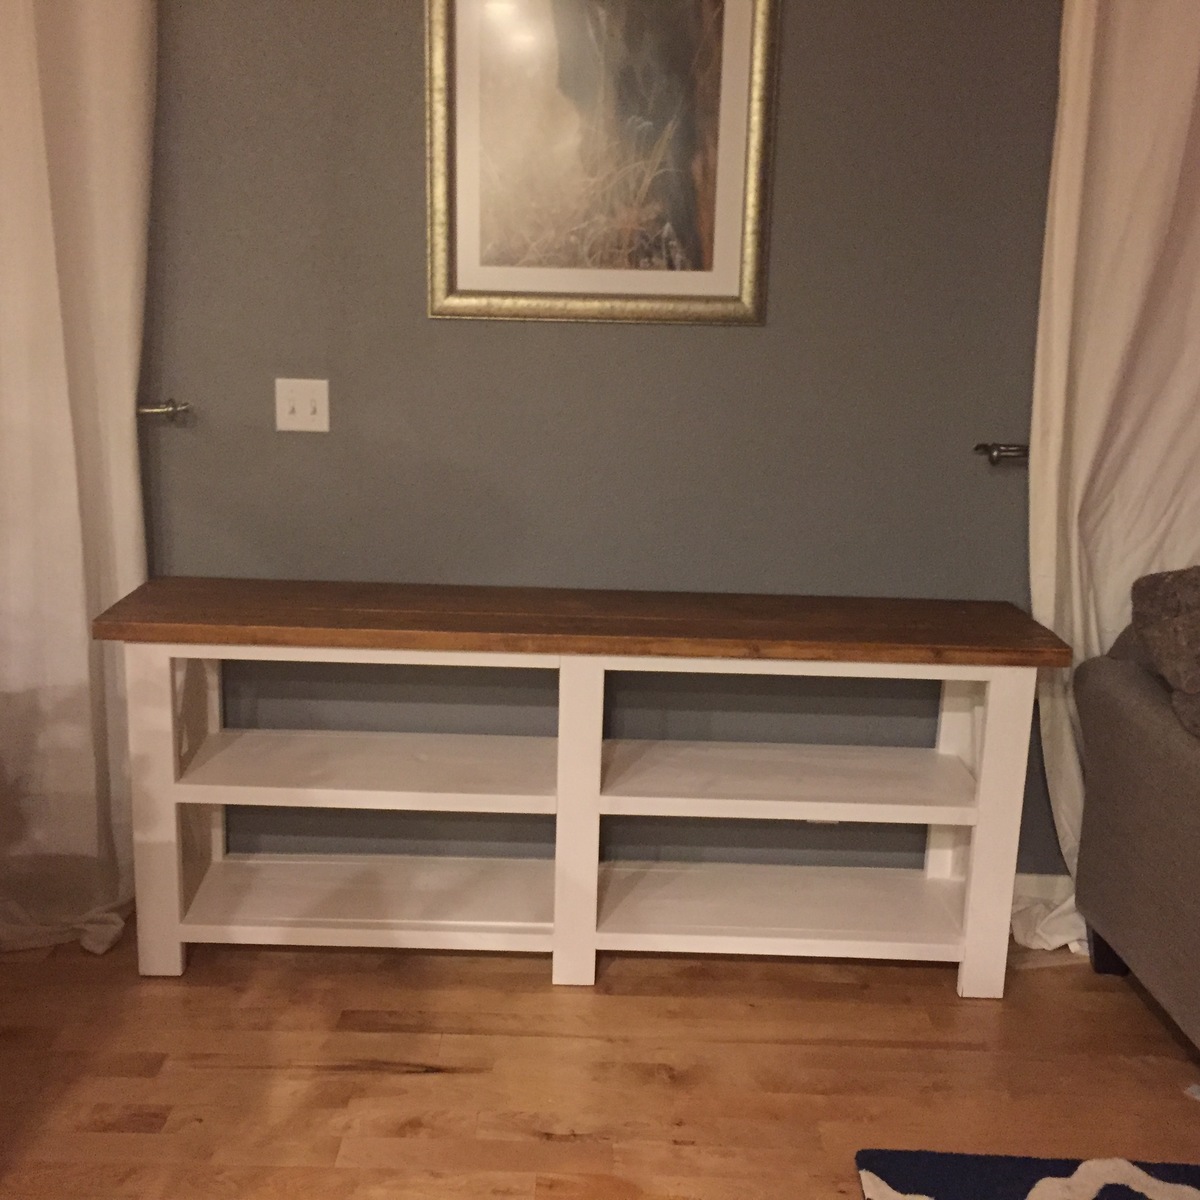
One of my first projects and I really felt like I had good cuts, however it was still a real challenge for me. I ended up doing the bottom in white to hide some of the errors. In the end I am happy with the resultes.
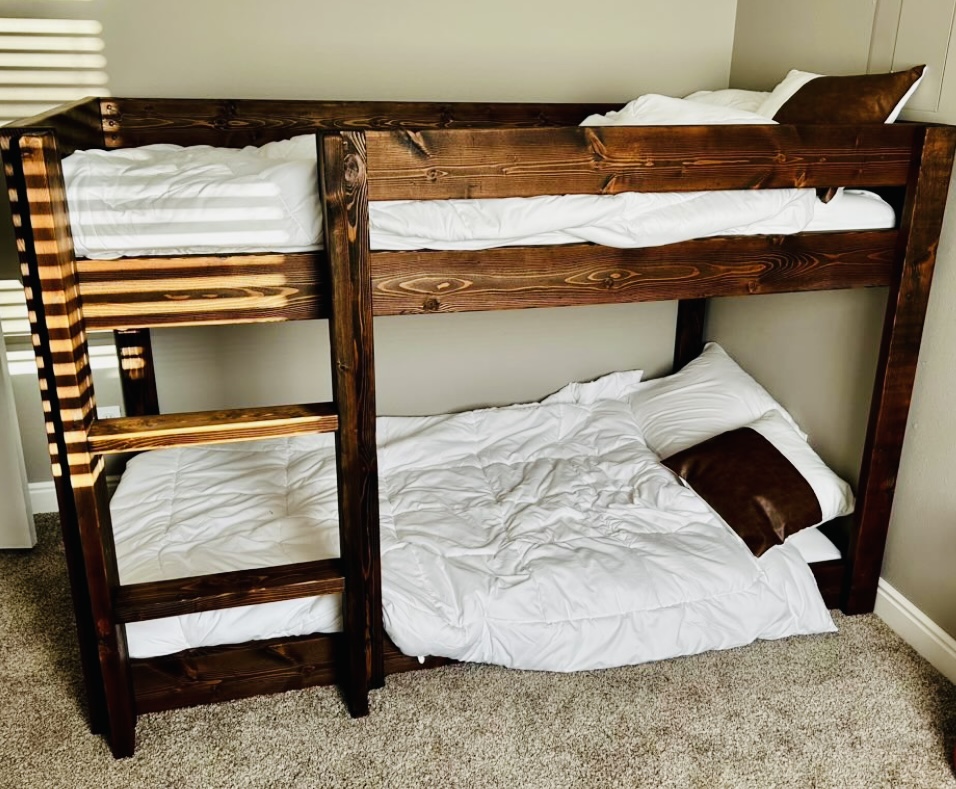
Essential Low Bunk Bed by Brian James
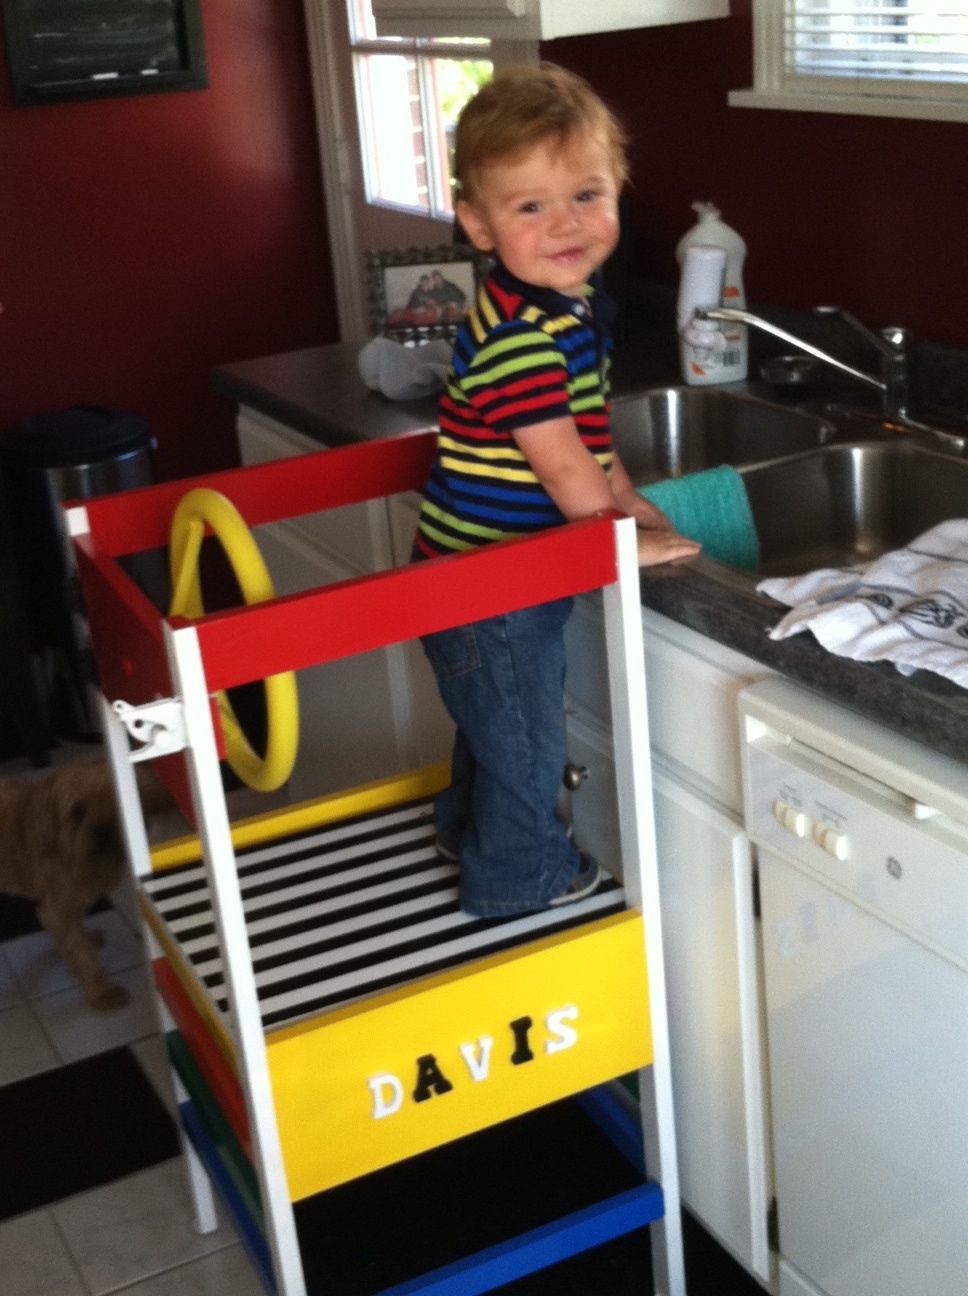
My son loves his tower! We didn't attempt the curved sides, but made it work by adding a door with a toy steering wheel instead :)
Fri, 10/07/2011 - 06:24
So Cute! I wish my guys were this little again - enjoy him!
Fri, 10/14/2011 - 19:16
I think the added steering wheel is a great idea!
Wed, 12/05/2012 - 18:58
I love the paint and steering wheel! I'm making this now and, first time using a jigsaw, my arches look awful! I think I'll just go with them but this was a good innovation.
Sun, 02/10/2013 - 17:57
We're actually going to drop the arches so ours will fit underneath our counter when not in use. :)
Solid wood is an amazing material because it can be cut, re-shaped, extended, filled, sanded, stained, painted, and essentially re-used almost endlessly.
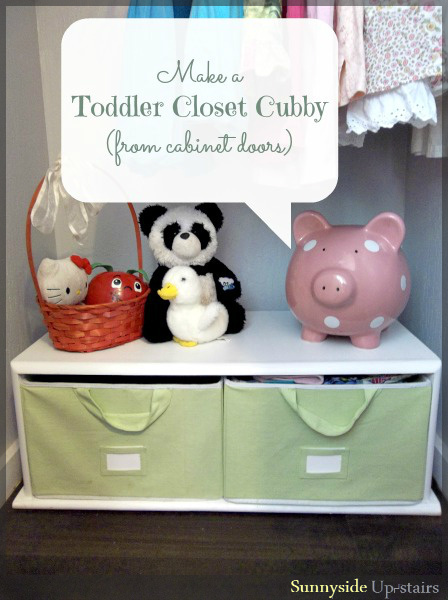
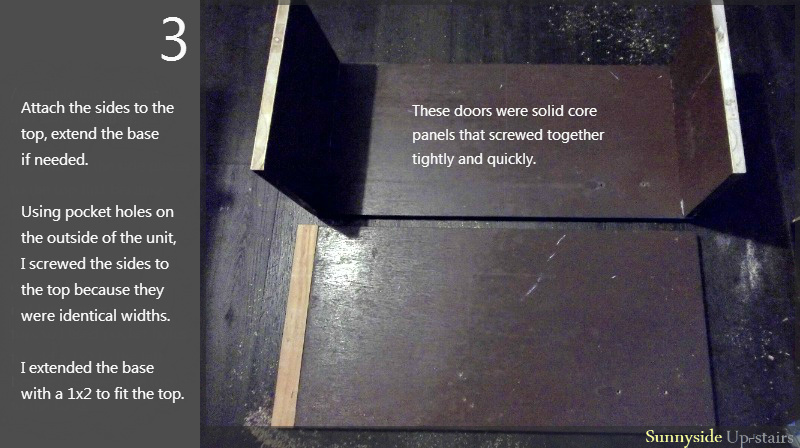
Last week, I took old cabinet doors (from when we gutted the mouse-hole kitchen cabinets that used to be in our apartment before we moved in) and turn them into a free cubby for my daughter's closet. :)


Mon, 10/07/2013 - 19:43
Beautiful Cubby from old doors! The trim adds elegance with the white color and it fits perfectly. Looks adorable! :)

In reply to Great project! by JoanneS
Tue, 10/08/2013 - 19:30
Mahalo, Joanne! :) I'm looking forward to your great builds coming up! =D

I used Poplar for the top and Pine for everyting else. Only took about two hours from start to finish. This is my first project using a Kreg Jig and now I don't know why I didn't get one of these years ago!
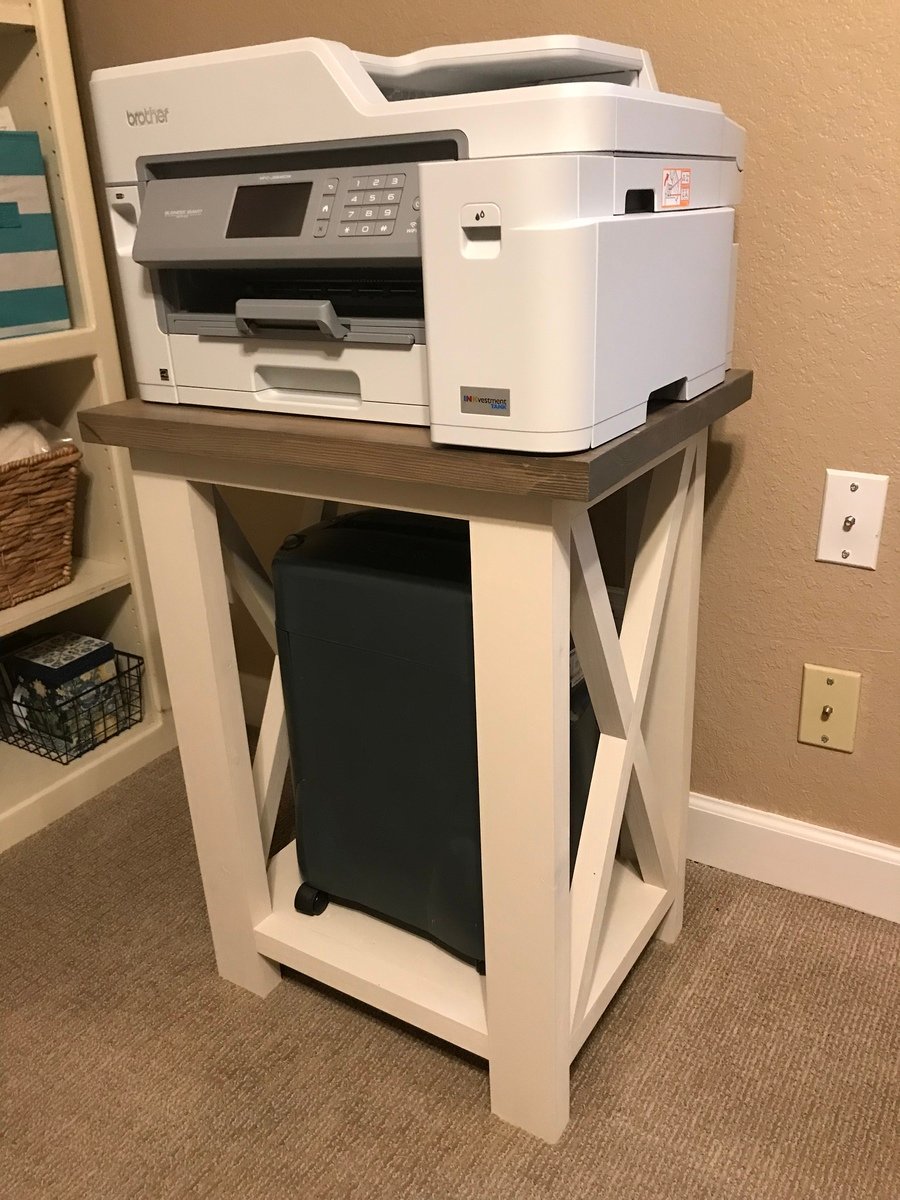
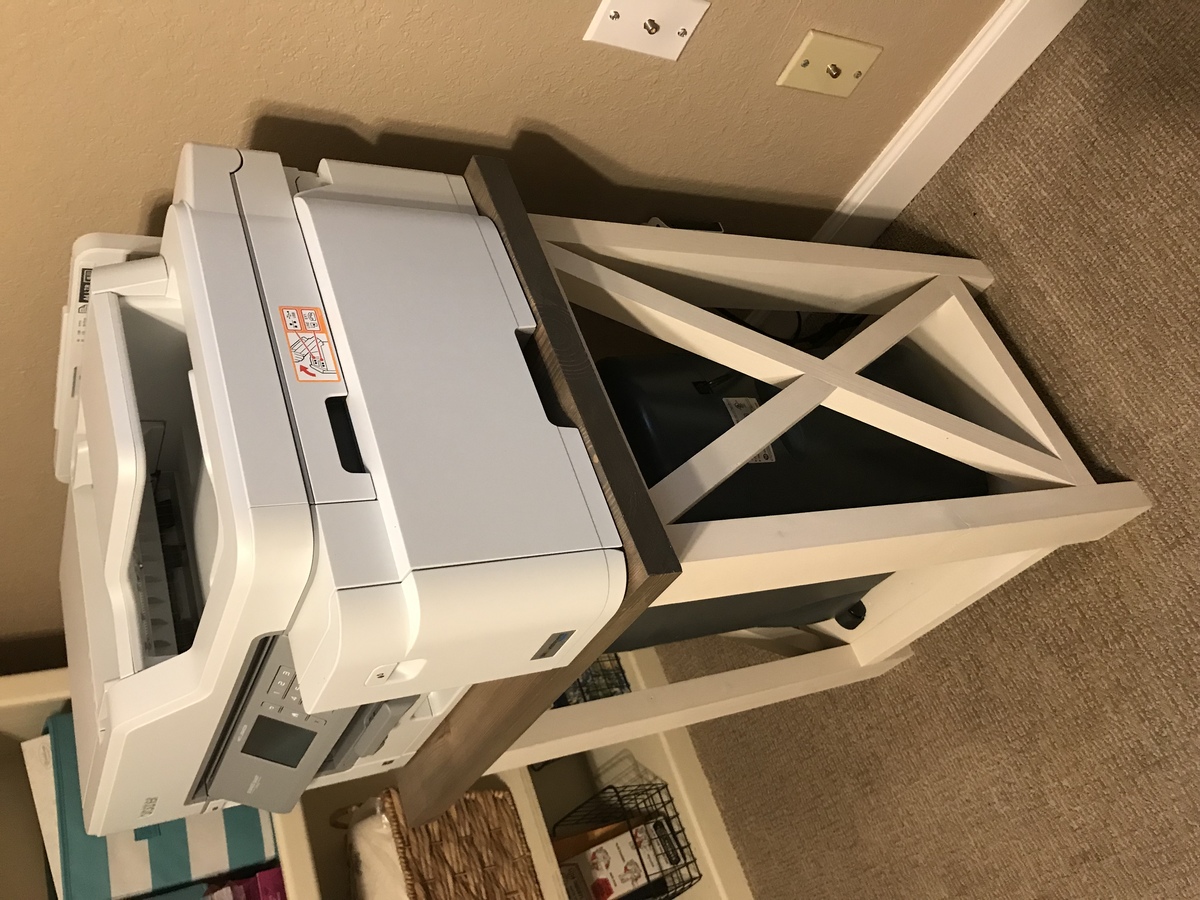
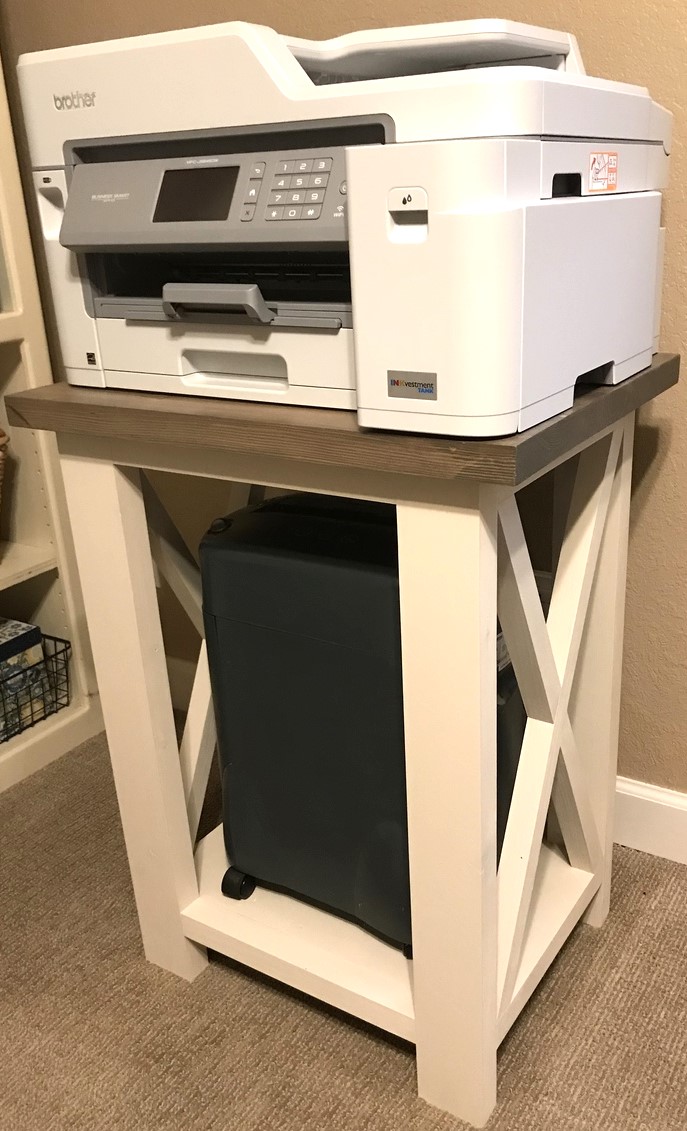
I adapted the plan to make a stand for our printer and shredder. Except for one board, I was able to use scraps so my total out of pocket was $9! I did plane the 2x material to 1 1/4”, and also used 2x material for the base to add a little strength to hold the shredder. Thank you Ana White, for generously sharing your plans!
Dinning Table in honey brown finish!
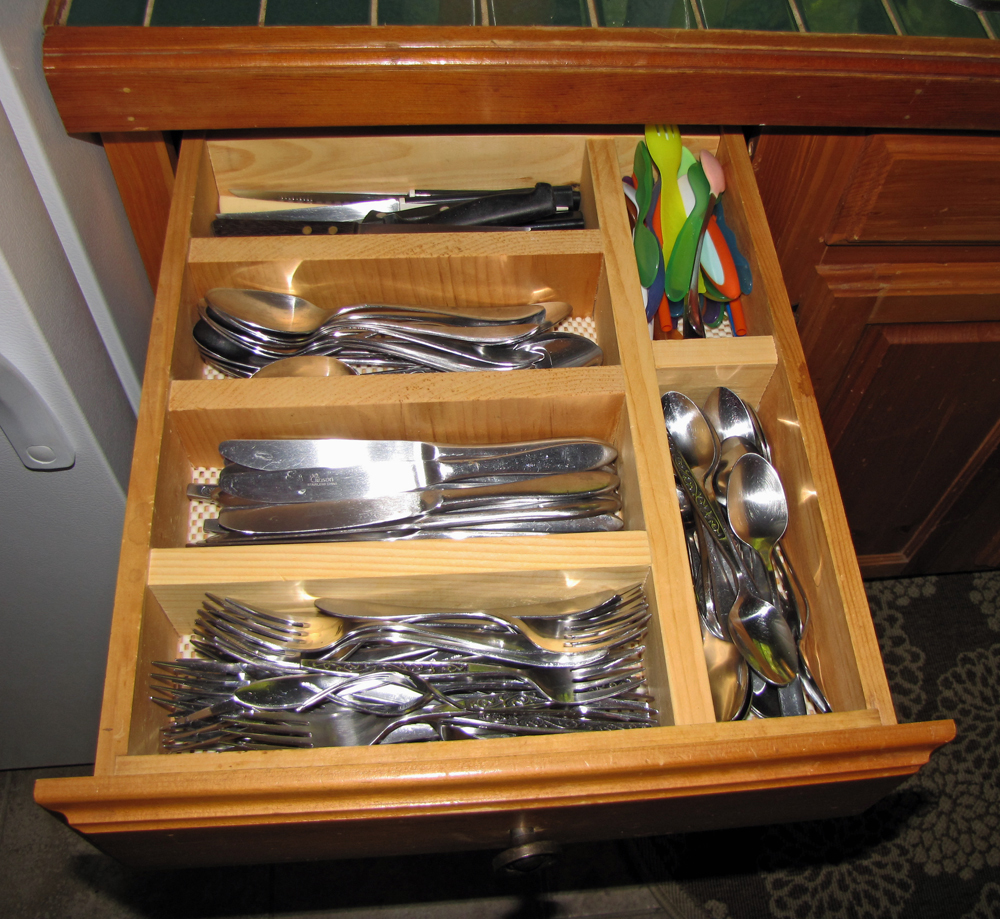
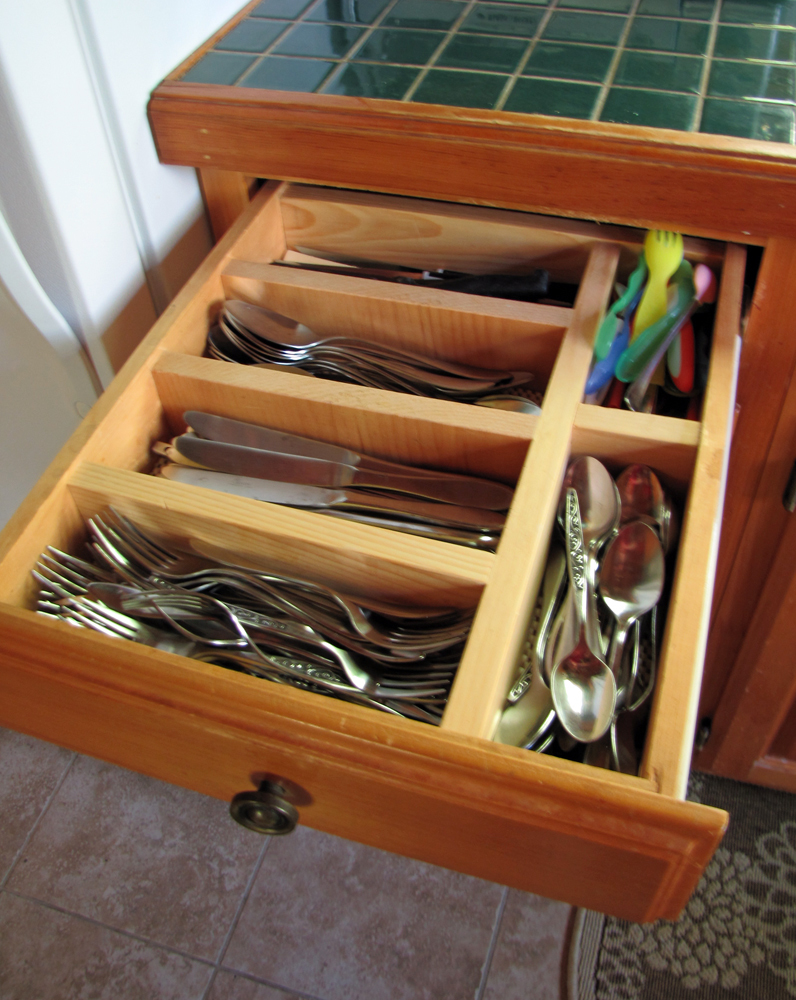
Had some scraps hanging around and thought I would try using Ana's plan to organize the mess. Wow. What a difference. So nice to build something to fit your space rather than working around a preformed, plastic or metal utensil holder. Thank you Ana!
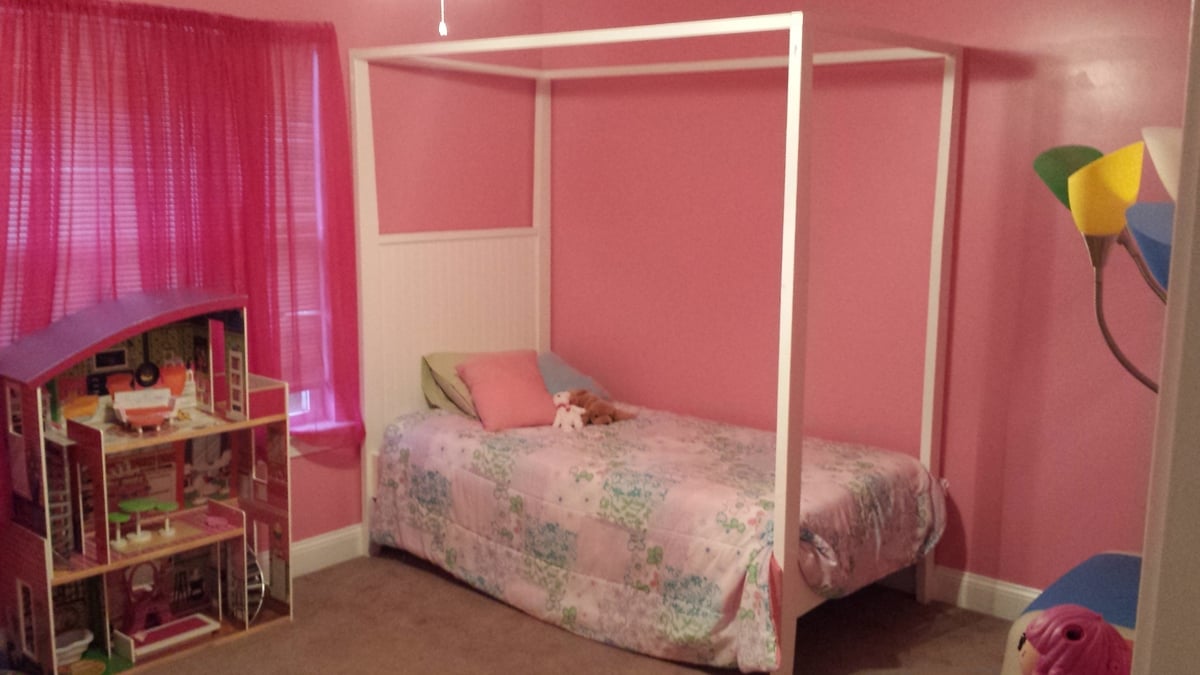
Utilizing the Hannah Canopy Bed plans, I made 2 changes that I am really glad I made. First, I added bead board to the headboard to give it a little style instead of the flat plywood. Second, I used 2x4's on all 4 corners because I could not find any 2x3's that were anywhere close to being straight. Overall I love the final project! It was nice, simple, and quick to get it all put together!

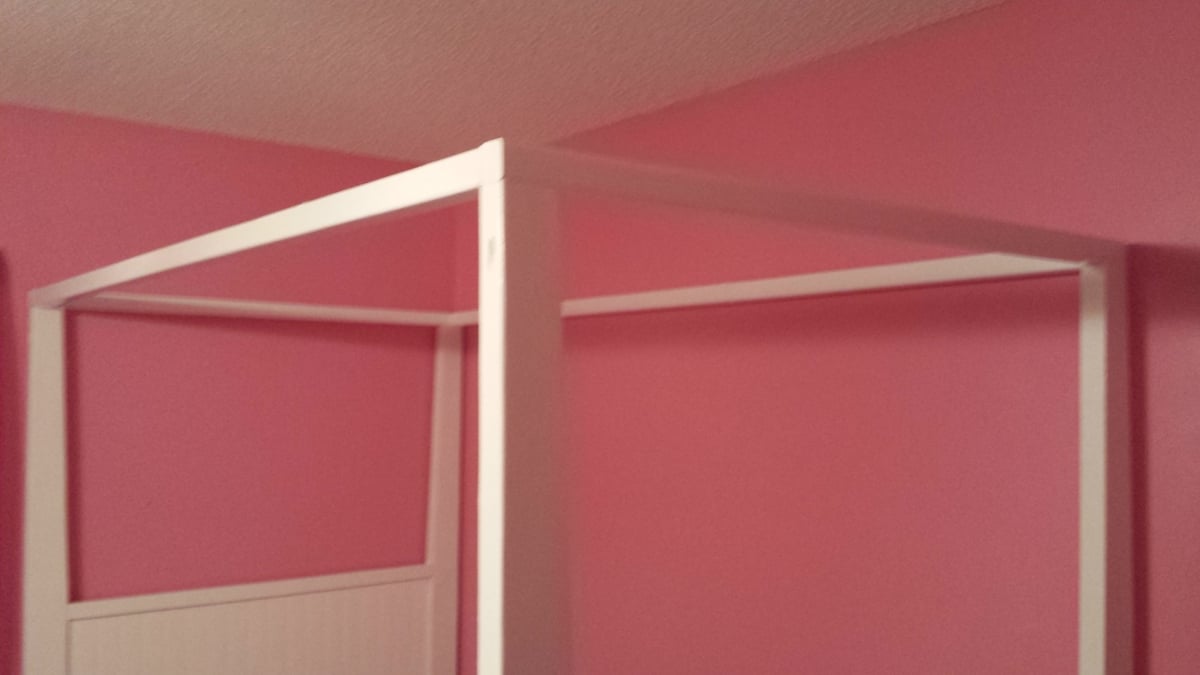
The only difficult part of this plan was making sure all the cuts were precise and fit together as they should.

This is my first wood project, and first time using a Kregg jig. A HUGE THANK YOU TO ANA! Next is the matching end table and then outside chairs and a pagoda.
Jeff F.
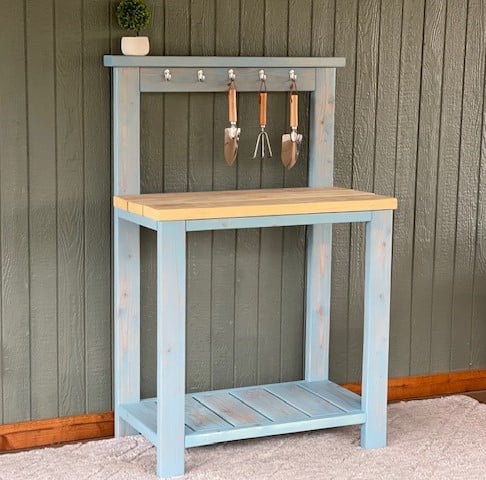
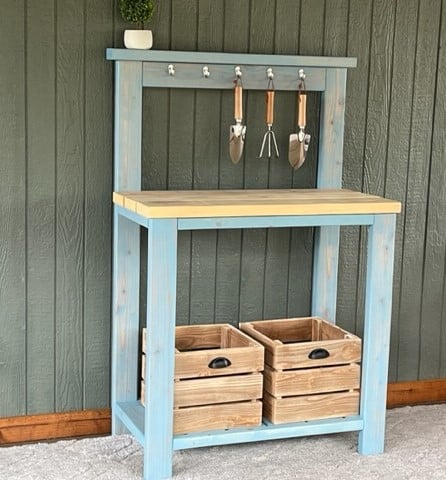
I used Ana's Farmhouse Potting Bench plans and modified it to be more compact and left out the x detail. I built it for under $40 in material.
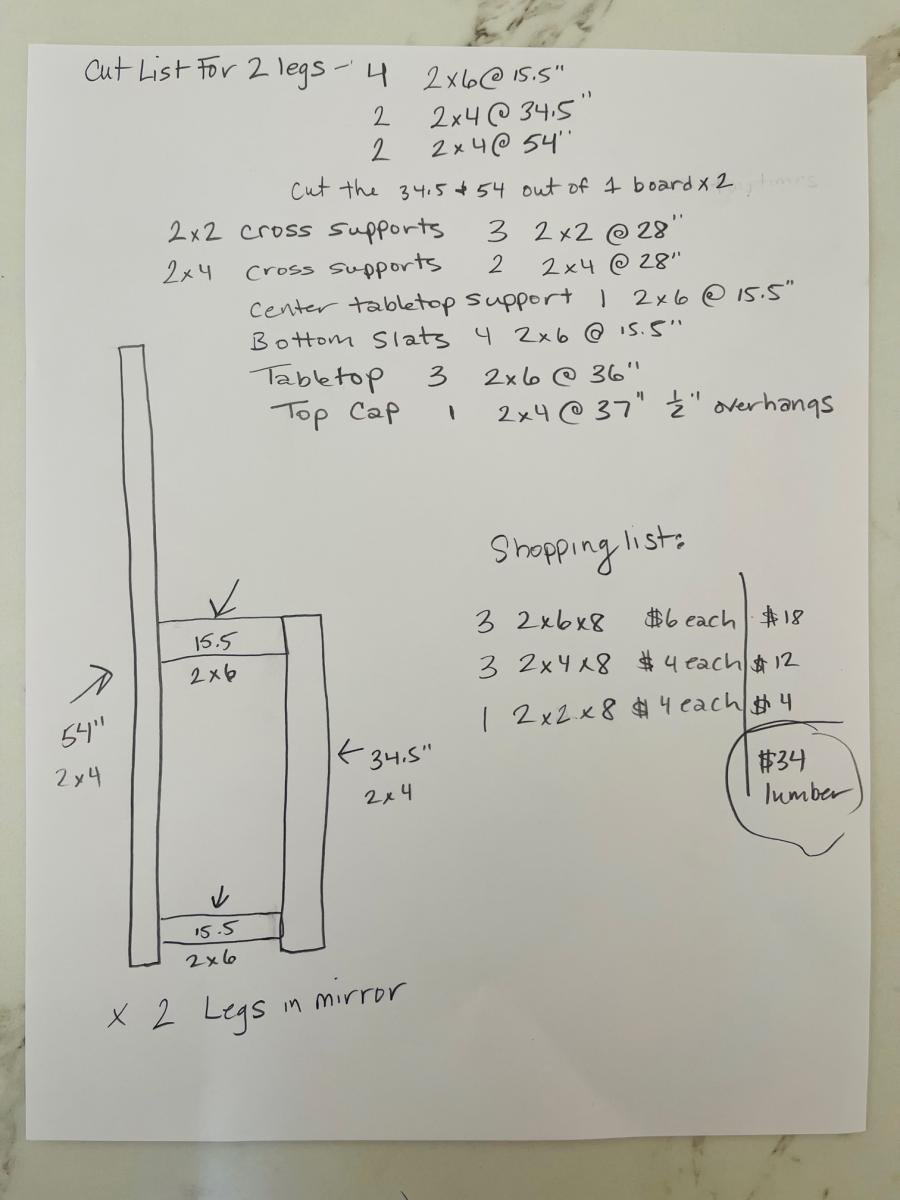
Modifications for Shopping and Cut List - Construction and placement is same as Ana's original plan, so make sure you look that over.
3 - 2x6x8
3 - 2x4x8
1 - 2x2x8
FOR 2 Legs
4 2x6 @15.5"
2 2x4 @34.5"
2 2x4 @54"
(cut the 34.5 and 54 out of 1 board and repeat)
2x2 Cross Supports
3 2x2@28"
2x4 Cross Supports
2 2x4@28"
Center Tabletop Support
1 [email protected]"
Bottom Slats
4 [email protected]"
Tabletop Boards
3 2x6@36"
Top Cap Board
1 2x4@37" leaving 1/2" overhangs

Comments
Ana White Admin
Tue, 01/10/2023 - 09:59
Super Cute Bed!
Thank you for sharing, it looks fantastic!