Community Brag Posts
modified version of X Desk with Drawer
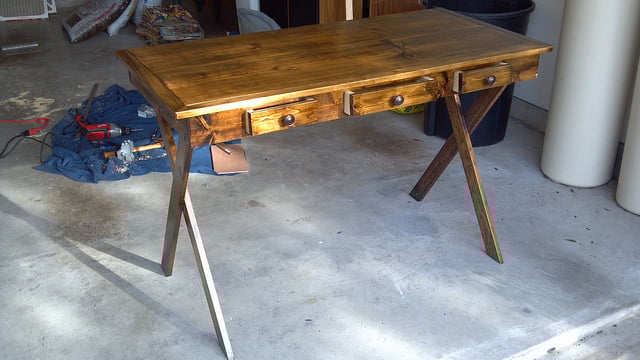
I was looking for a desk with sort of a "campaign furniture" style feel to it, and came across Ana's plan for the X Desk with Drawer.
I made a lot of changes from that starting point, some of which worked well, some of which didn't. In the end, my desk varies pretty drastically from the original, but I definitely have to give credit for lots of helpful tips and inspiration from Ana's plan!
It's a little rough, but it's one of my first real builds, so I'm pretty happy.
Note: picture does not show spreader on back legs, added afterwards. Drawers are out while guides dry, they normally sit flush with front face.
Made from pine, with poplar edging on front. Mostly pocket hole joinery. Finish is a light version of the Minwax Dark Walnut (looks lighter in picture than real life.) Lacquer coating. Pulls are from Home Depot.
To give it an antique, campaign look, the edges are roughed up a little, the finish is left a little streaky/worn, and the holes for the drawers were cut out of the board by hand, and then hand-fit to the drawers.
Built from Plan(s)
Estimated Time Investment
Weekend Project (10-20 Hours)
Recommended Skill Level
Beginner
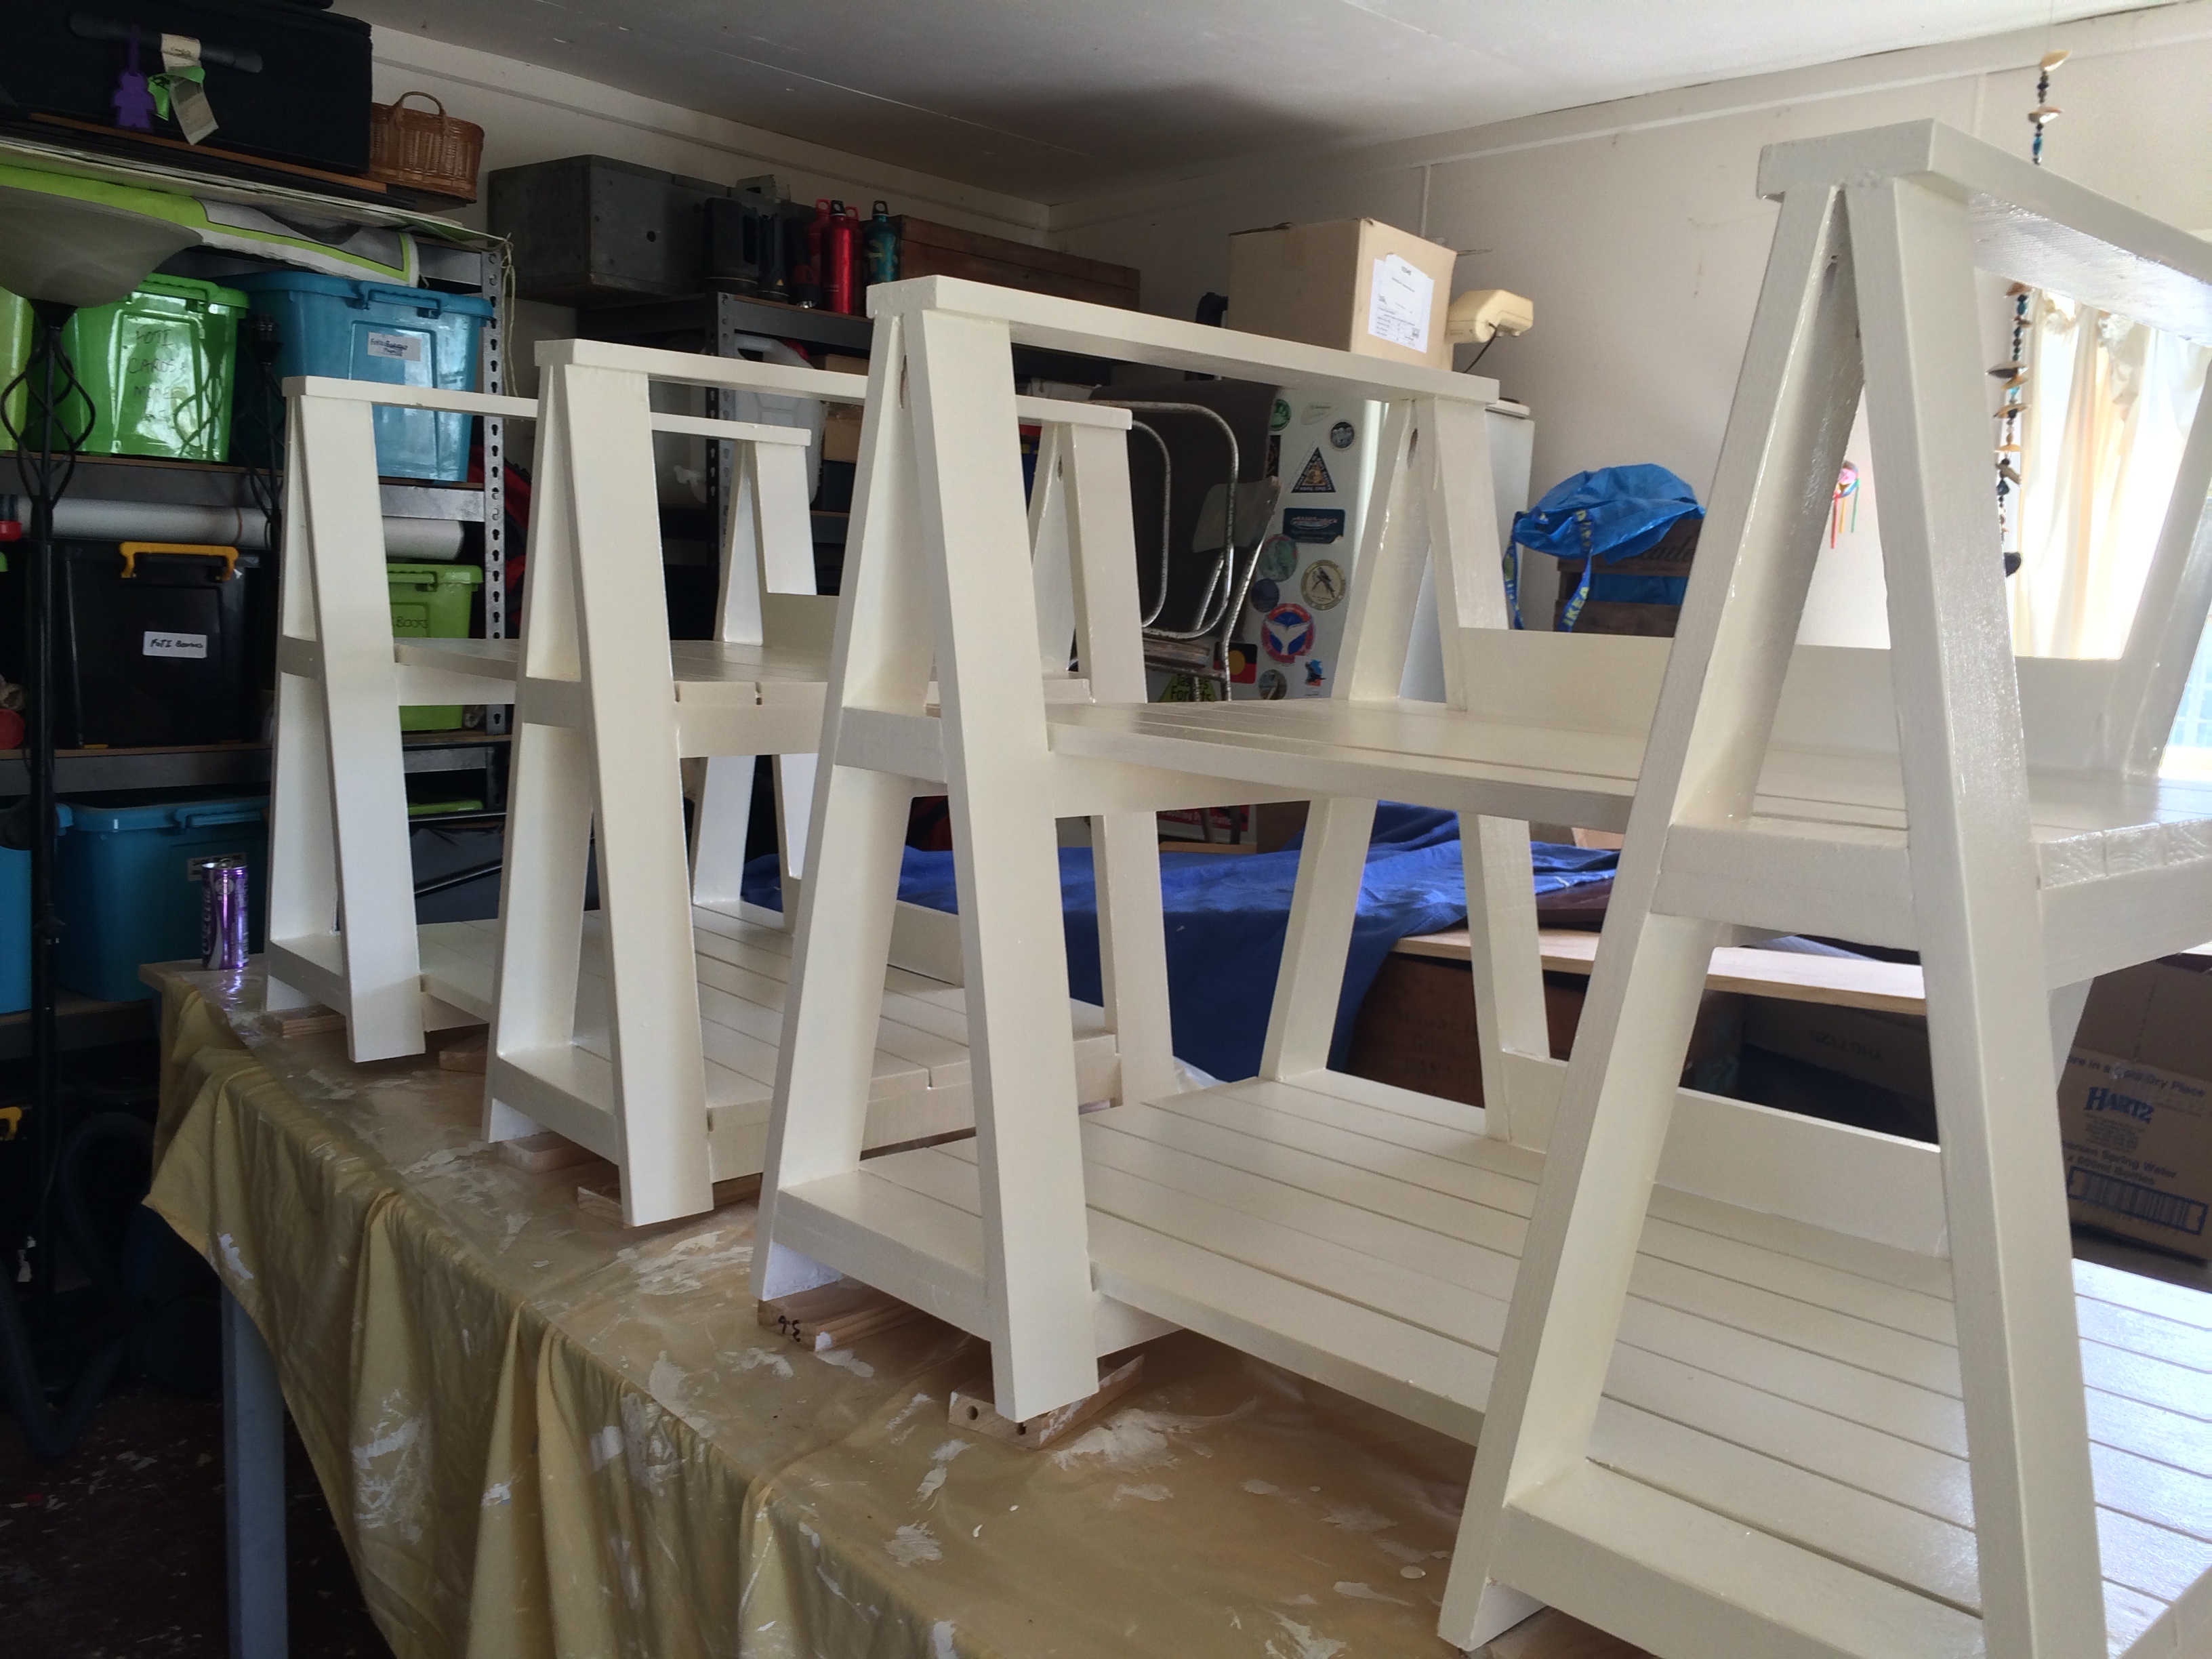
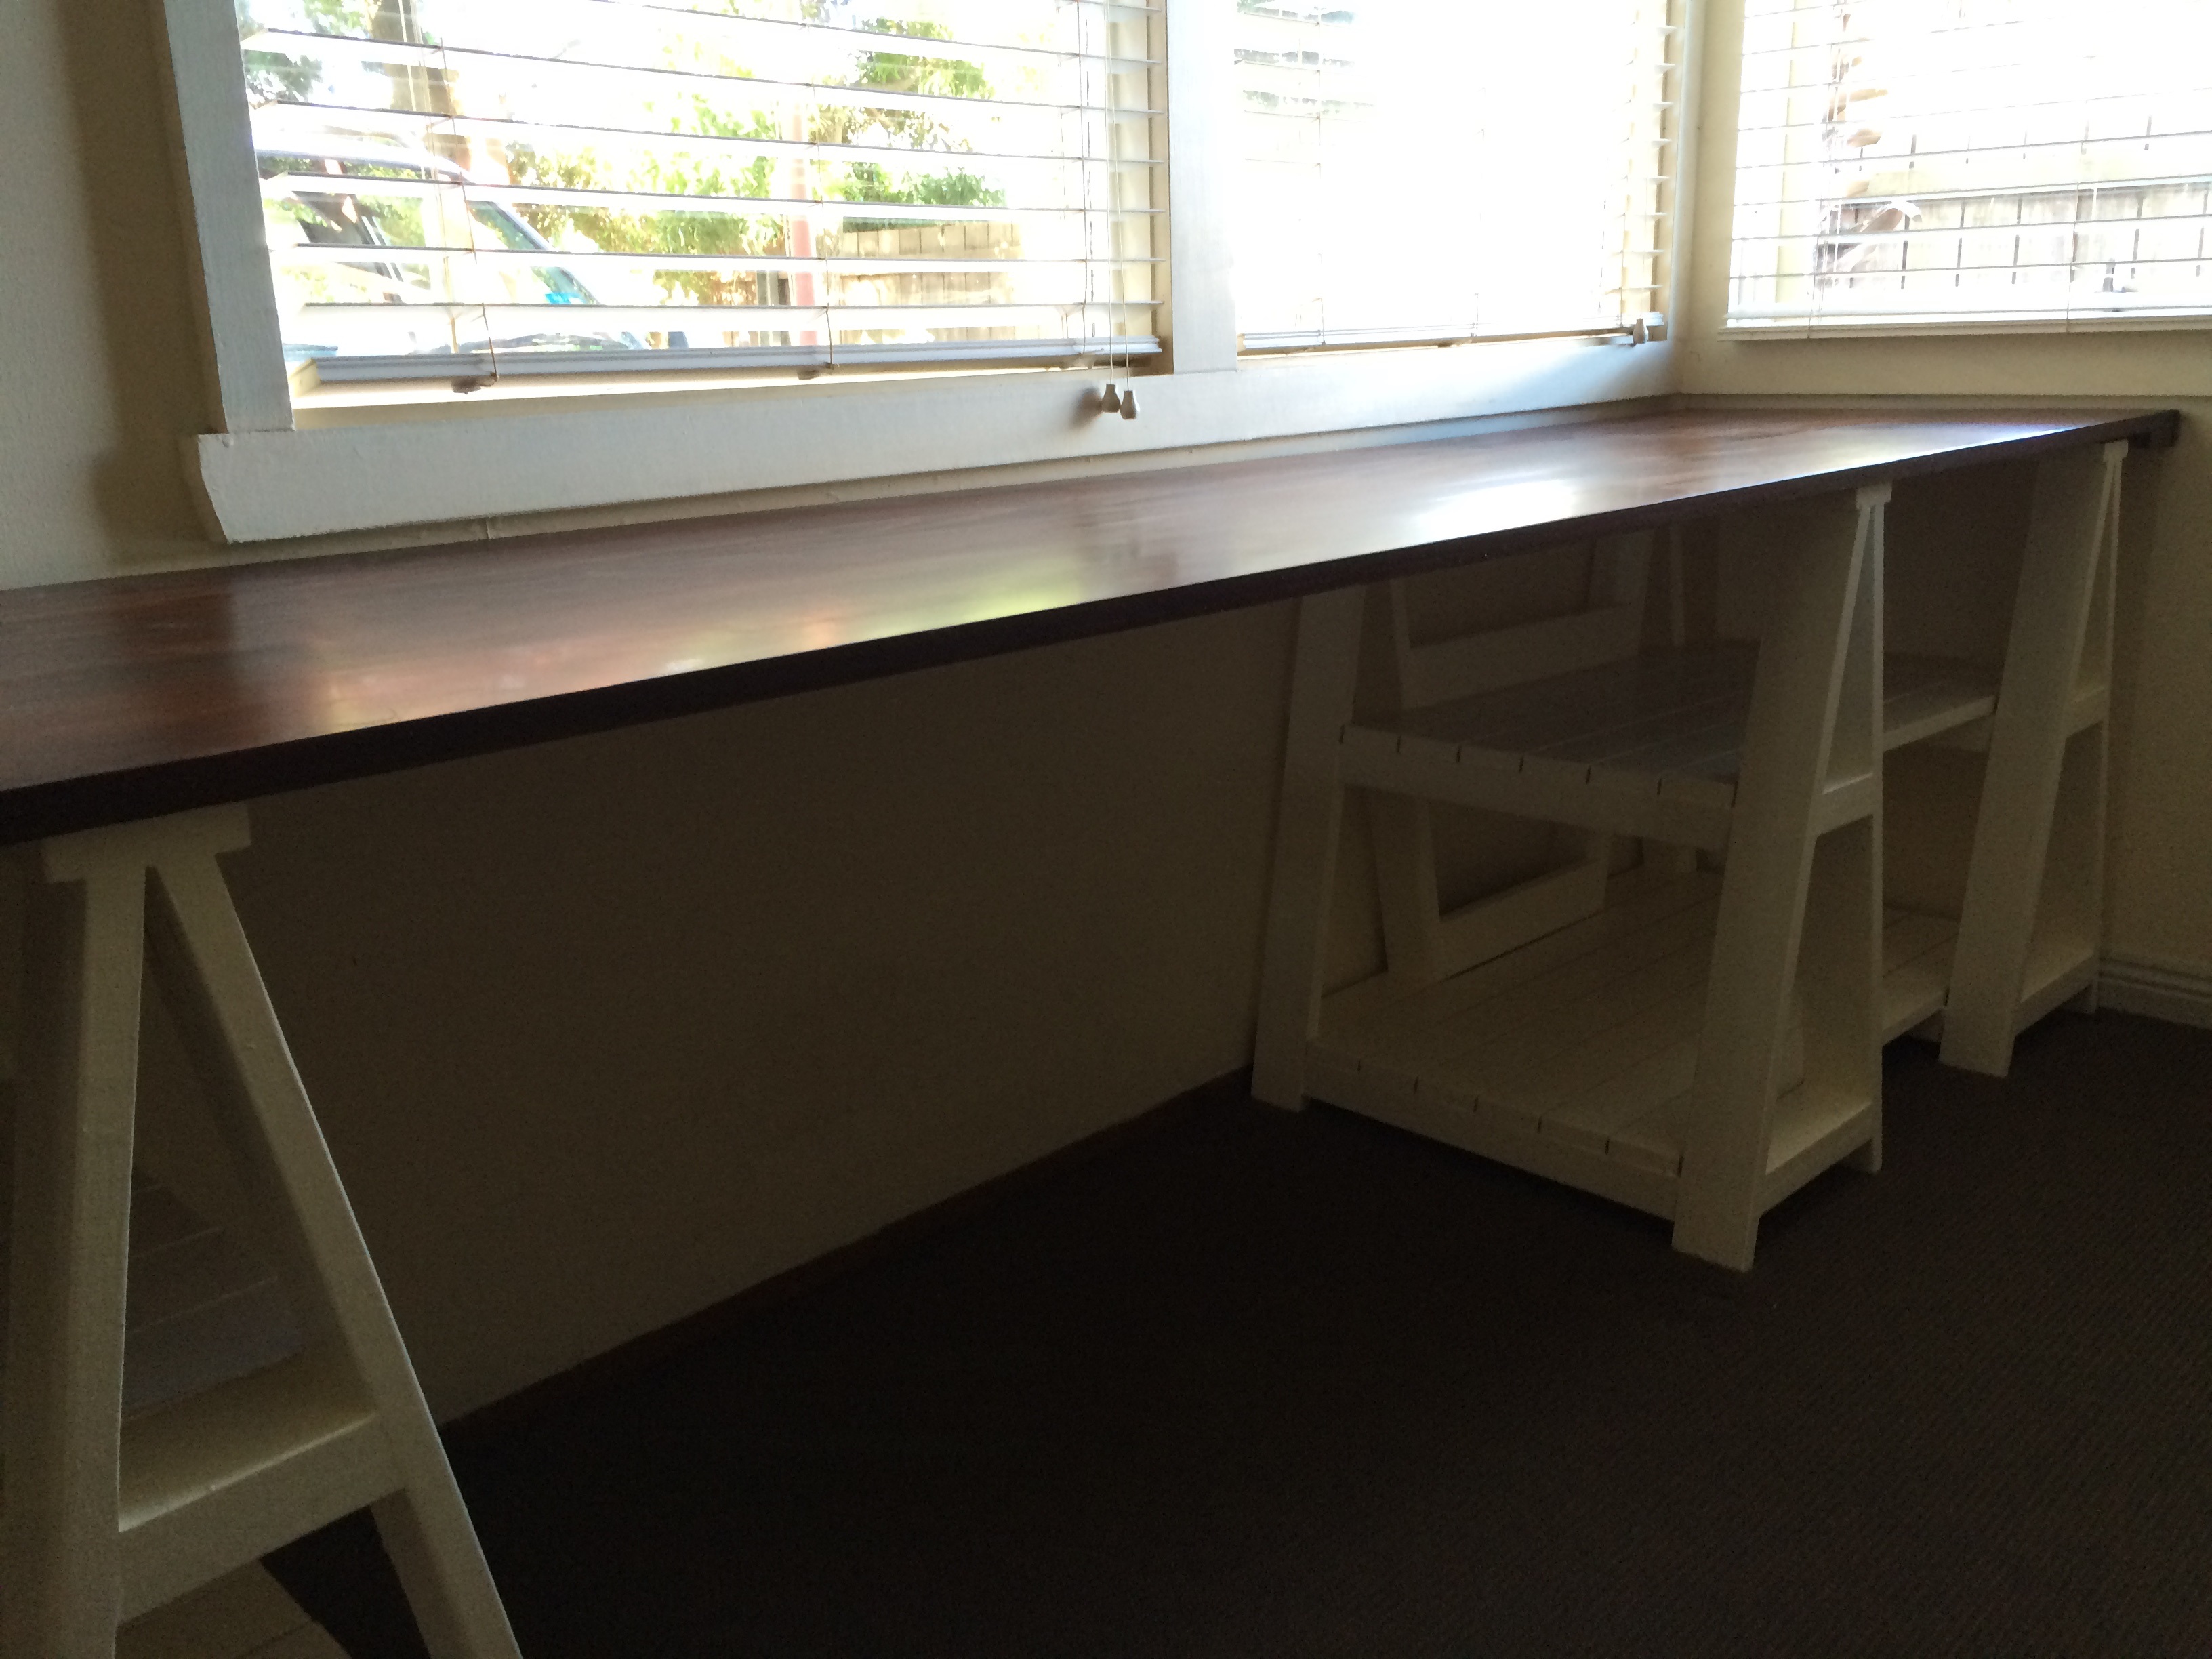
A Long Desk for My Beautiful Sister
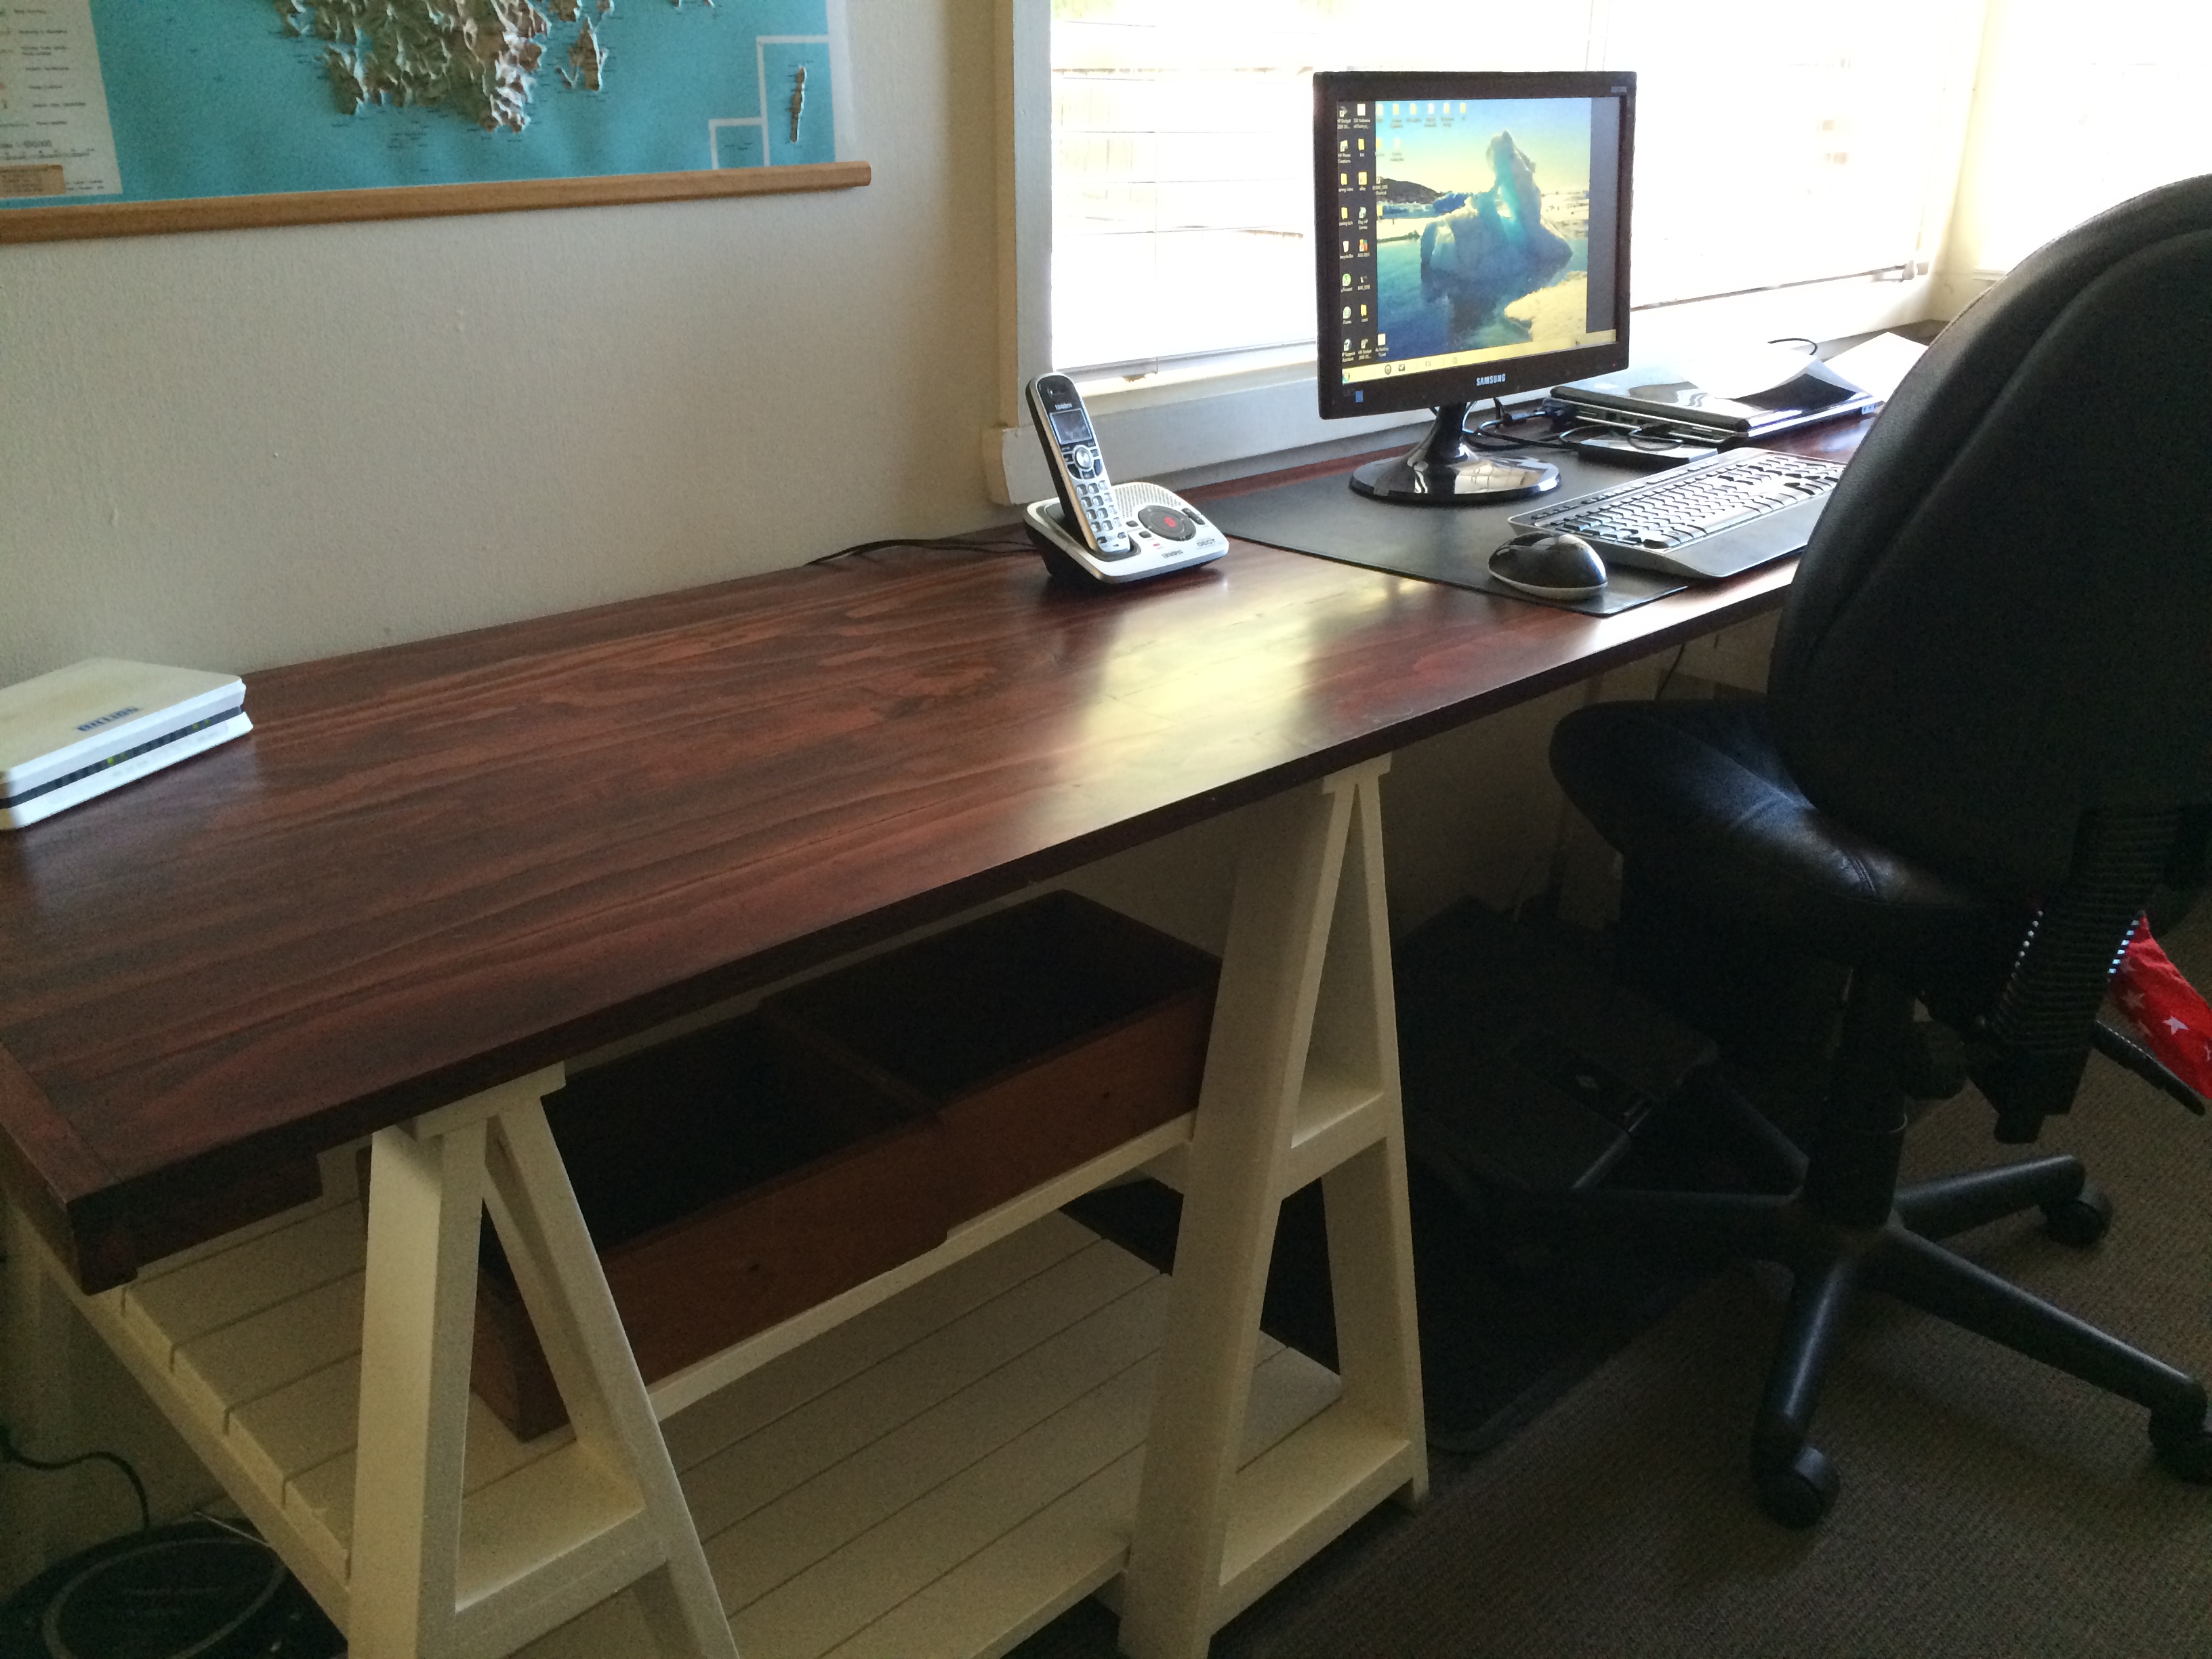
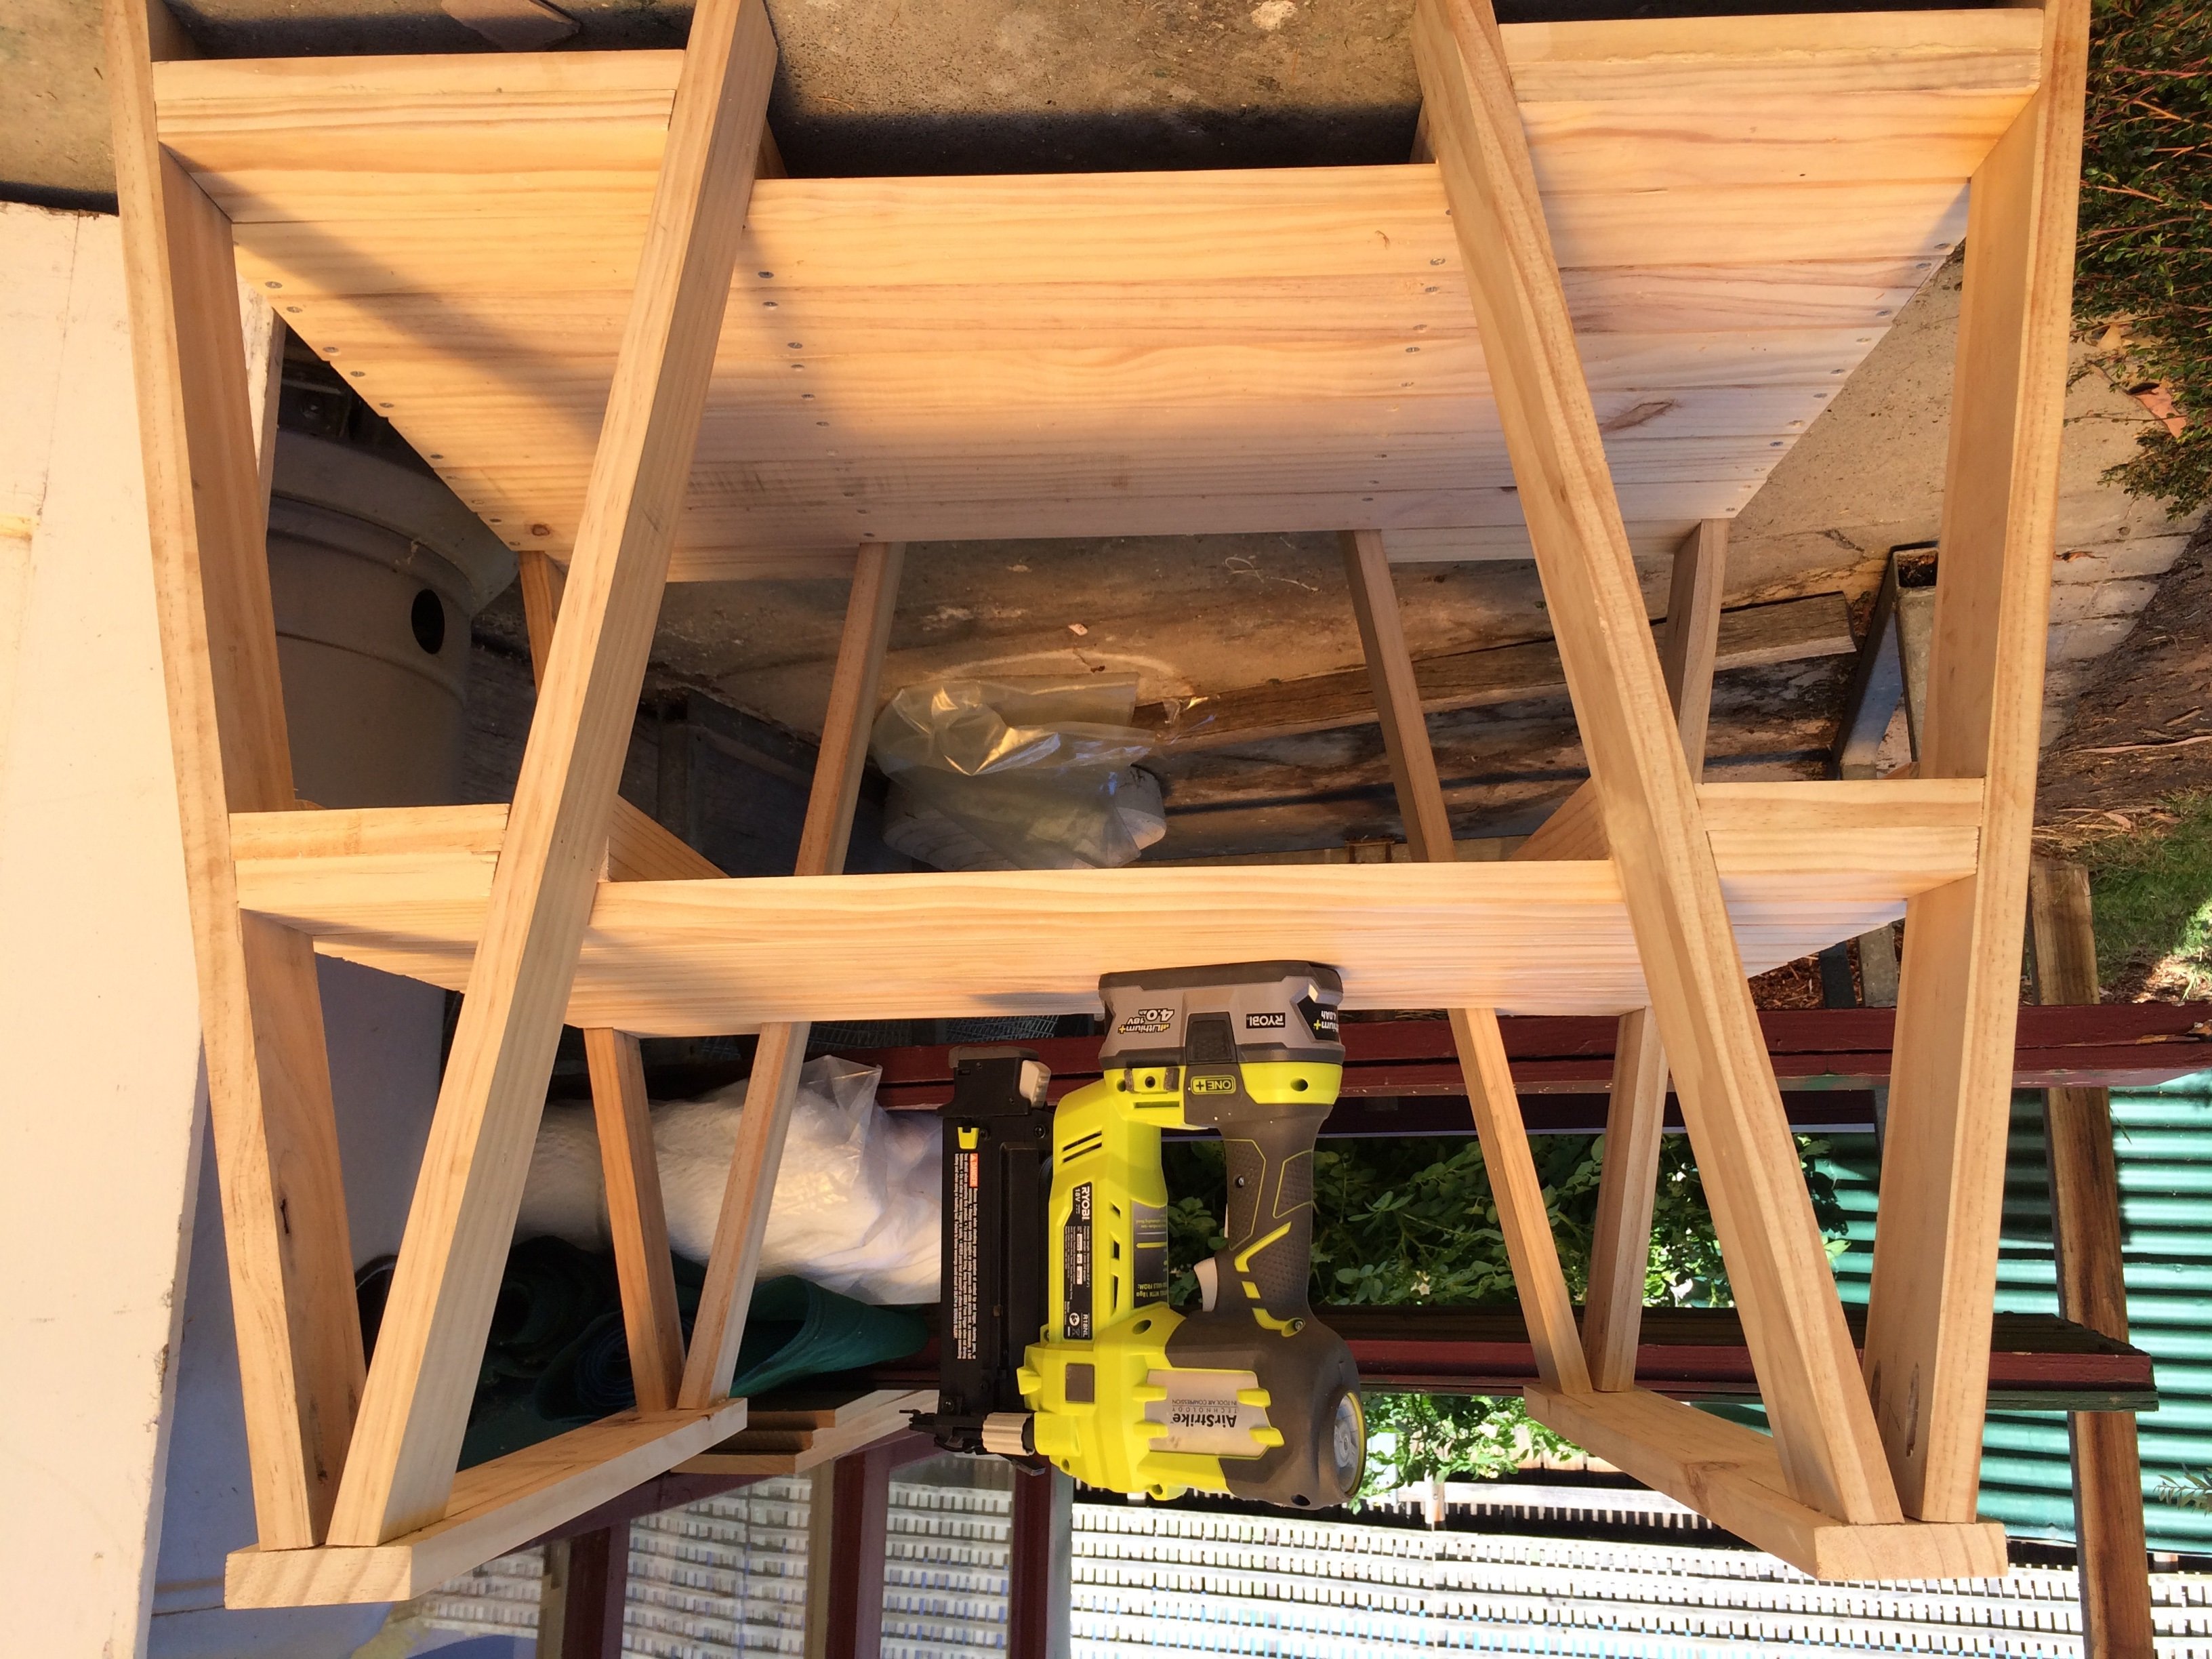
I made this desk for my sister ( it is 3 metres long - sorry I am an Aussie dont know what that is in inches).
I glued 3 metre radiata pine together, planed, sanded, stained and varnished with polyurethane.
I made 4 sawhorses and then joined two of them together to make shelves.
Very happy with the result


Built from Plan(s)
Estimated Cost
$250 AUD
Estimated Time Investment
Week Long Project (20 Hours or More)
Finish Used
Wattyl Cedar Stain and Varnish
Recommended Skill Level
Beginner
Comments
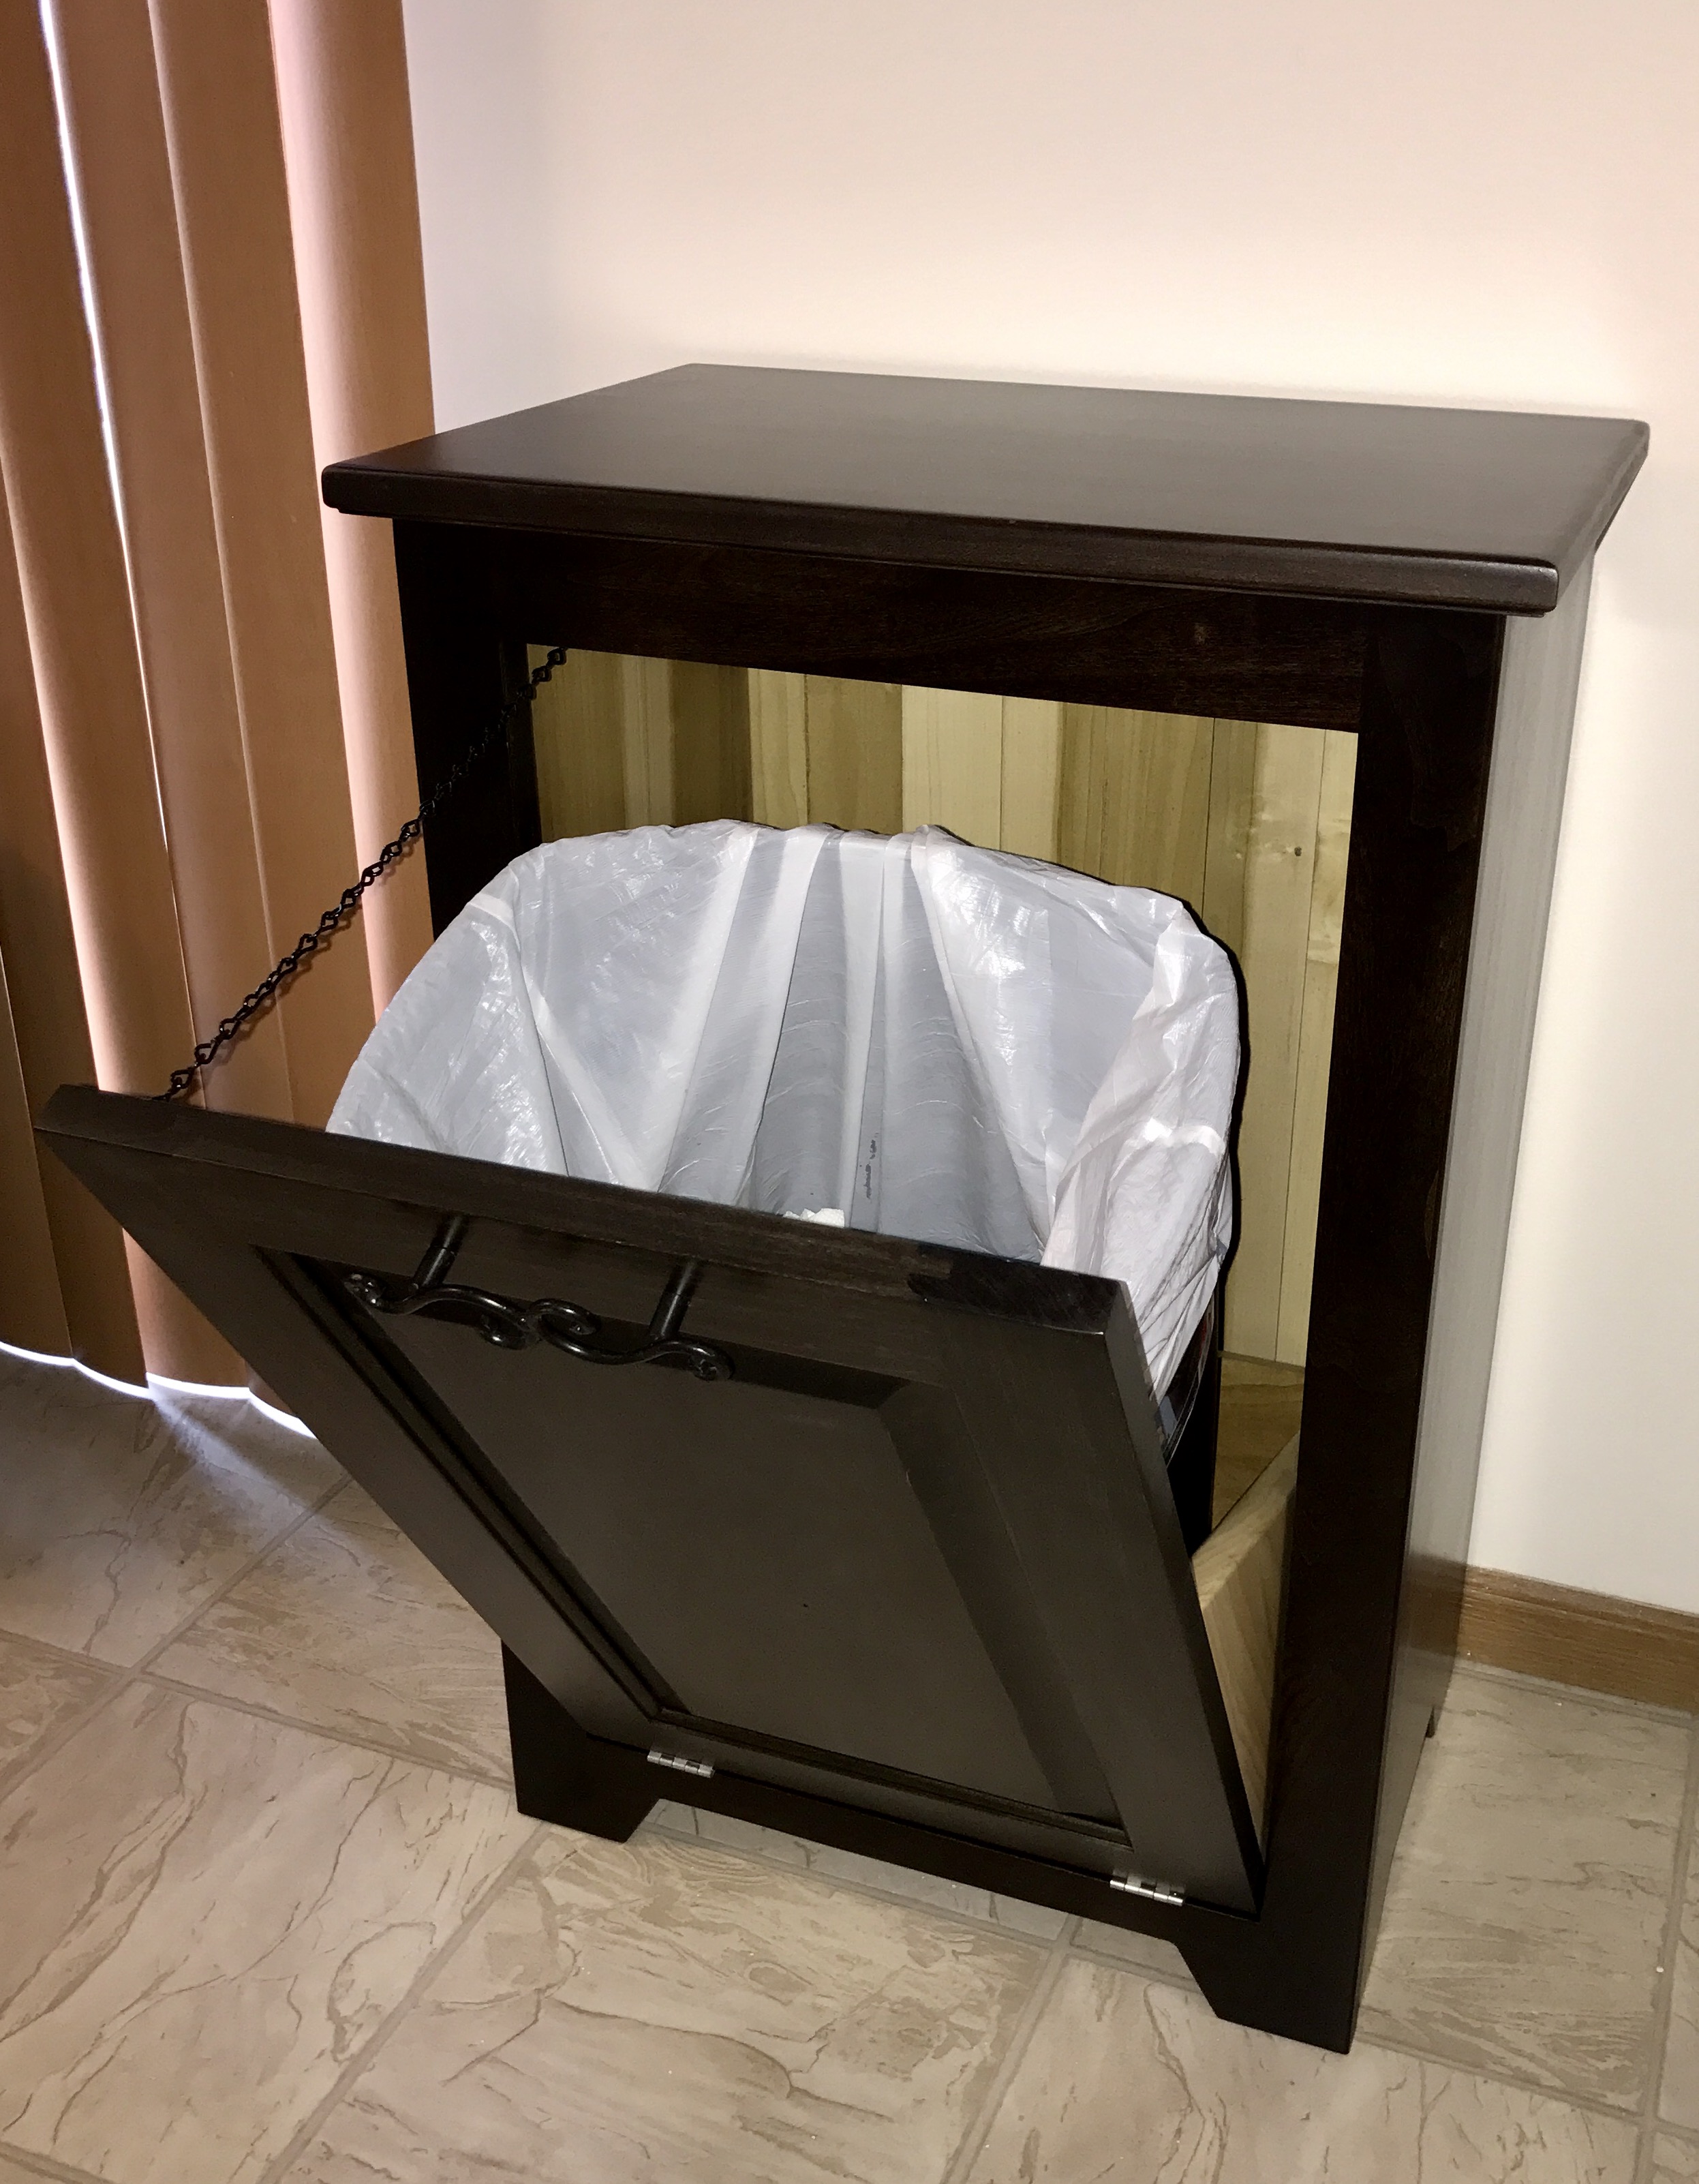
Tilt out trash can cabinet
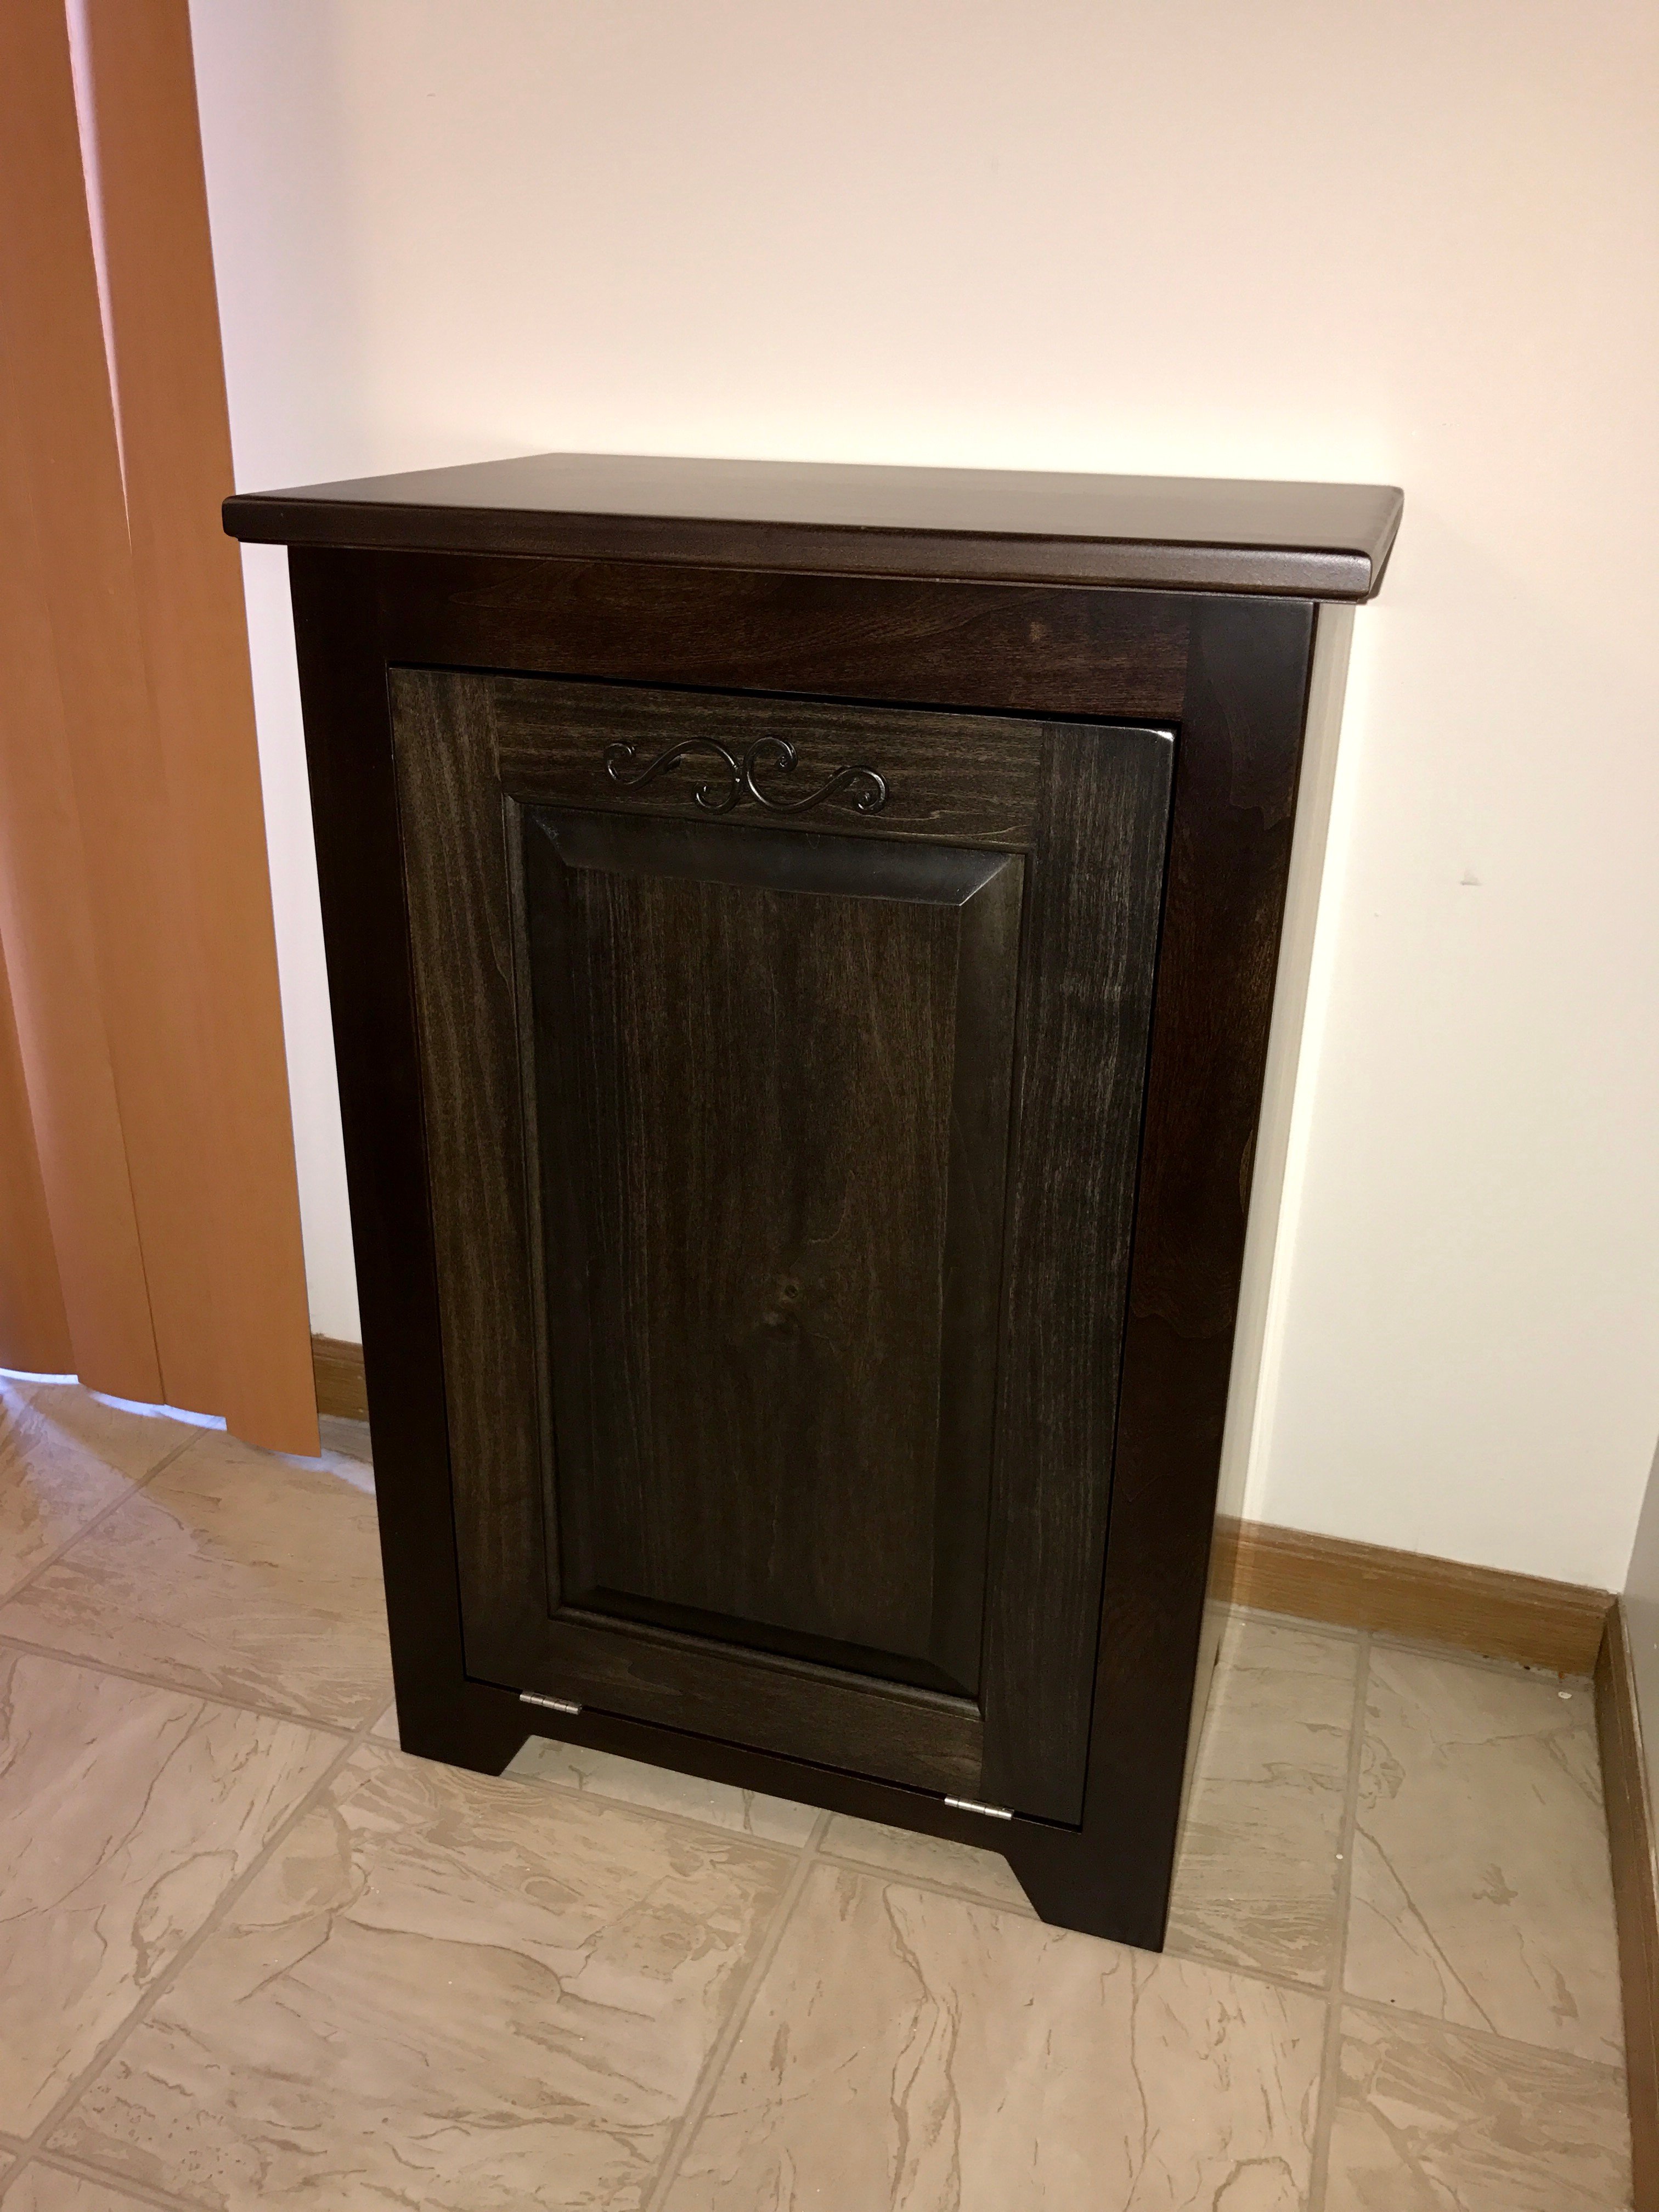
Wood tilt out trash can cabinet made from this plan, with some changes. I did a fancier cabinet door, along with a top that overhangs on the sides as well as the front.
Built from Plan(s)
Estimated Time Investment
Weekend Project (10-20 Hours)
Finish Used
Old Asphalt stain
Recommended Skill Level
Intermediate
Chicken coop

This is a coop I built from plans on the site. I modified by covering the ply with old cedar boards and used tin for a more rustic look. I opted not to add the planter just covered it with wire.
Love your plans! So easy to follow!
Built from Plan(s)
Estimated Cost
Since I used recycled materials the overall cost was about $50
Estimated Time Investment
Weekend Project (10-20 Hours)
Finish Used
I just did the outside like a jigsaw puzzle. Cutting to fit as I went. Be sure to use nails or staples that do not protrude the inside when attaching siding.
Recommended Skill Level
Intermediate
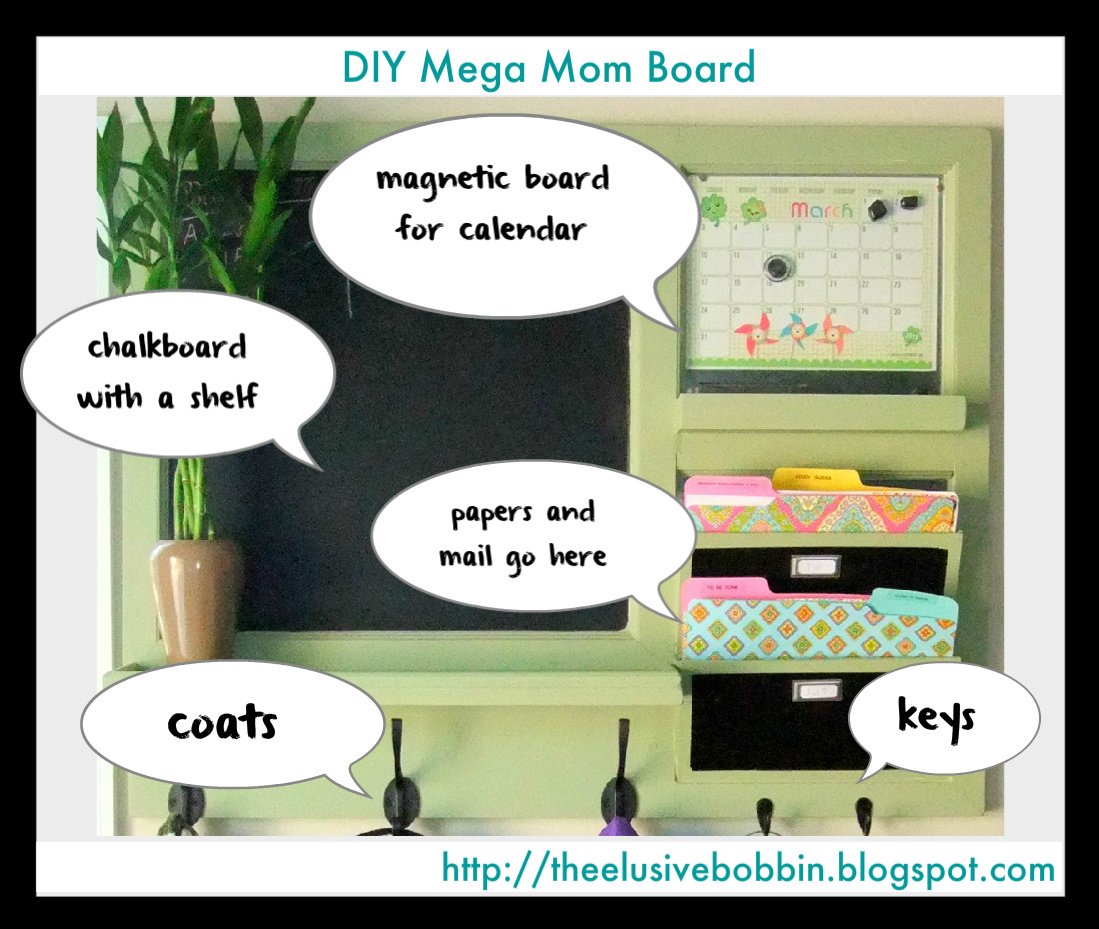
Mega Mom Board
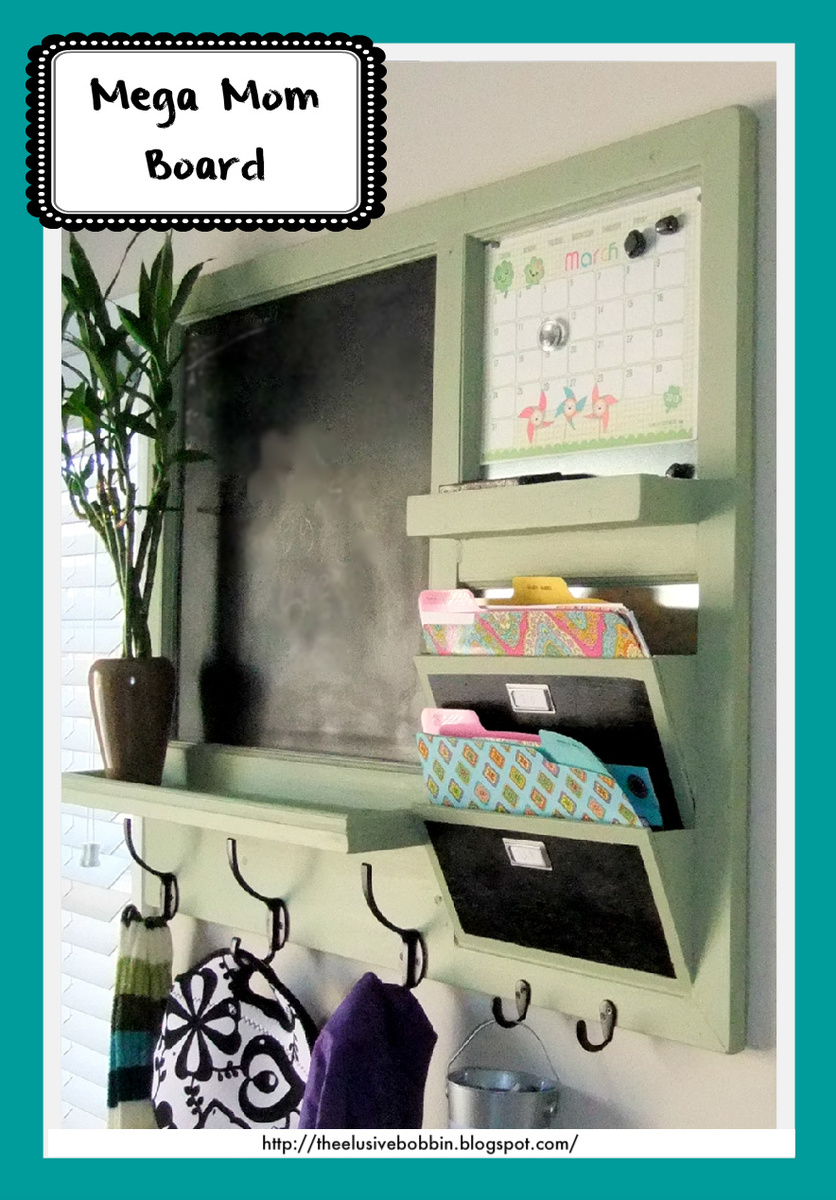
Inspired by many projects here on Ana's page, my "Mega Mom" board is not just a pretty face, it's also great at multitasking. It helps calm the chaos and juggle the daily influx of papers with the same ease that it manages a quick message or coats.
The "Mega Mom" board has a chalkboard, shelf, and hooks for coats. It also has letter bins for important papers, a magnetic board to hold the family calendar, additional hooks for keys and a bucket to hold chalk or loose change. Our ceilings are 9' and I'm 5'10", so I made it big and hung it high to make the best use of the space. The finished board measures 37 1/2" wide by 30 1/4" tall. If you like what you see, you can find a materials list and more detailed drawings on my blog http://theelusivebobbin.blogspot.com/2013/03/plans-for-mega-mom-board.h…
Built from Plan(s)
Estimated Cost
free-$50 depending on what is in your craft stash/scrap pile.
Estimated Time Investment
Afternoon Project (3-6 Hours)
Finish Used
Chalkboard paint and flat latex
Recommended Skill Level
Beginner
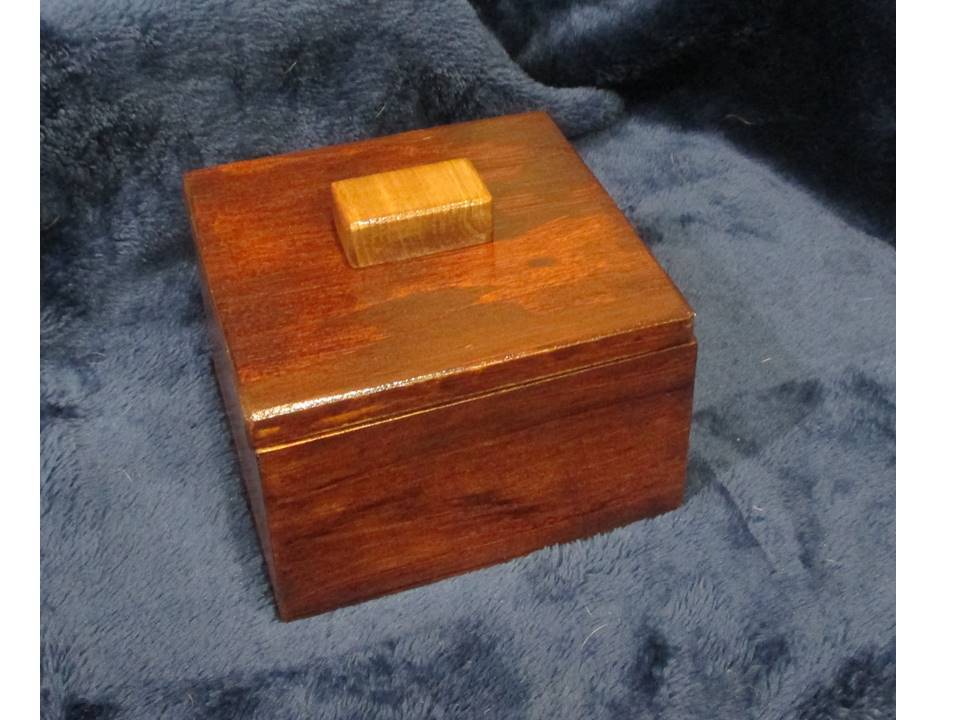
Sunday Trinket Box Assortment
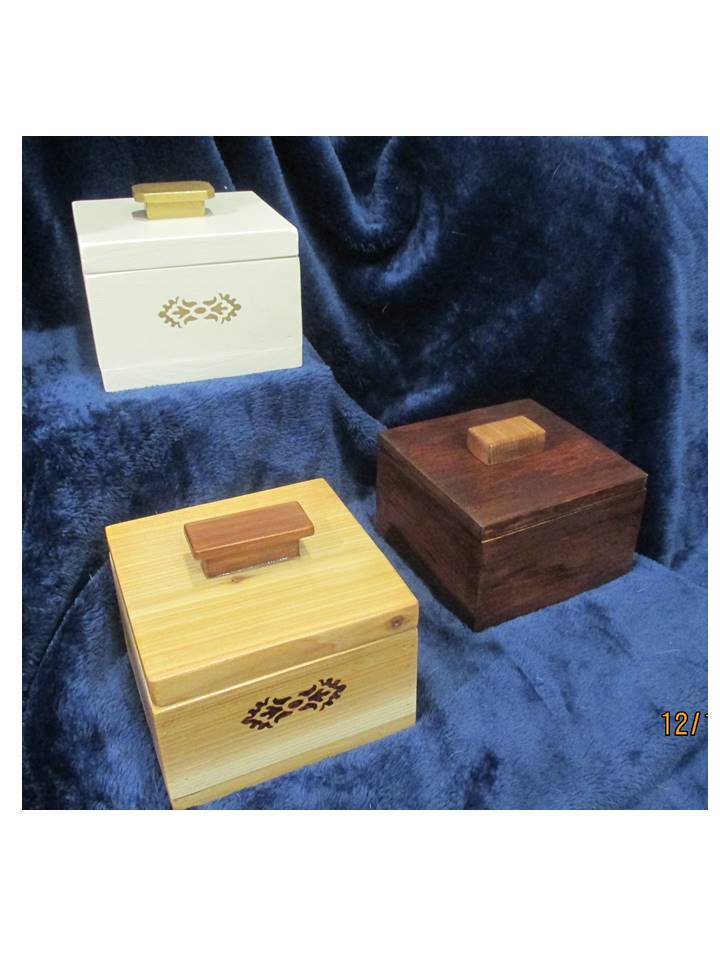
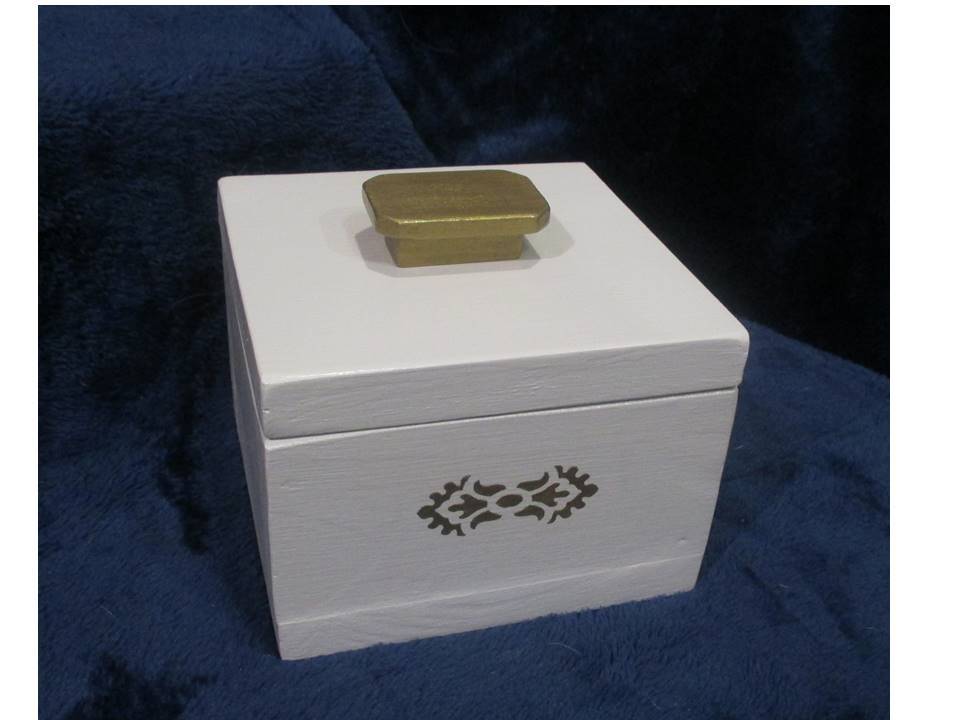
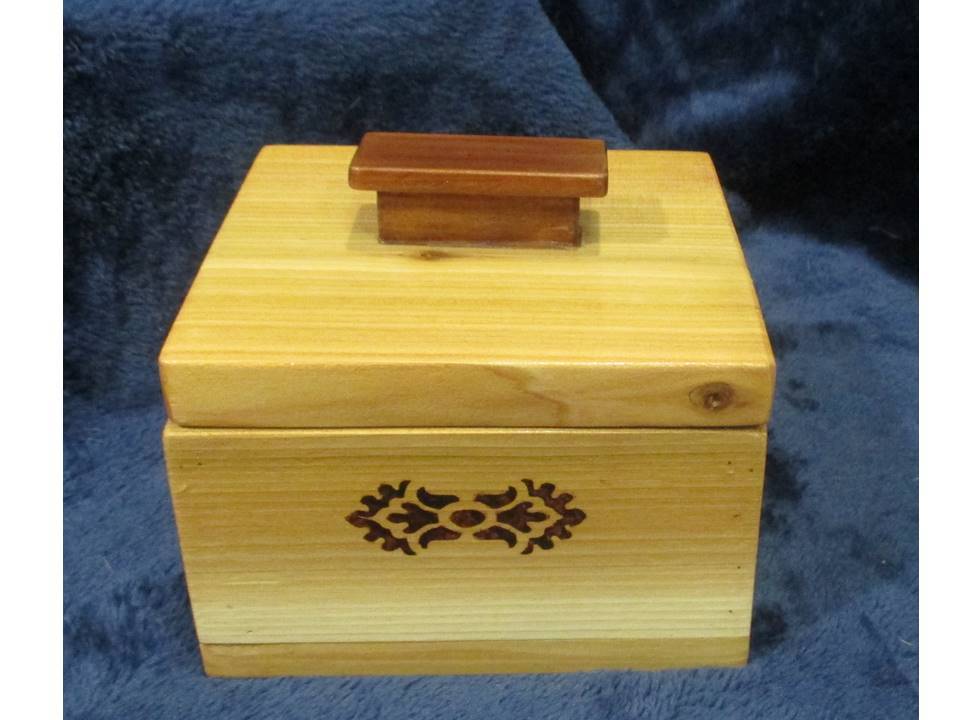
These were built to demo the Sunday Trinket Box plan using 3 different wood types – 1/2" thick craft board, 1x scrap wood, and cedar 1x. On the 2 that I made with 1x boards, I used some ¼” hardwood plywood scrap for the inner lids, which kept the top nice and light and worked very well. I think I prefer this for the inner lid when working with the 1x material and would recommend that for the build. My craft room work table looked like a mad scientist’s laboratory with all the cans and tubes of finishes I’ve been trying out, and projects at different levels of completion.
The craft board box is finished with 1 coat of Rustoleum Stain + Poly in Walnut (the kind in the tube, I had picked this up at Michaels to try it out), and 3 coats of gloss polycrylic. The radiata pine craft board took this stain really well, even without wood conditioner. The inner lid for this one is the same ½” craft board used for the box. The pull for this one is a rectangle of cedar, with a light coat of Varathane stain + poly in Walnut, and a coat of gloss poly. Cost: Wood: $8.47 for craft boards, Finish: $0 (used finishes already on hand).
The scrap wood box is finished with 3 coats of Clark & Kensington semi-gloss in Crushed Peanut, a stencil design added on the front in gold craft paint, and a DIY pull made from a ¾” wide “slice” of the ½” thick craft board, topped with a scrap of ¼“ x 1 ½” poplar craft board, super-glued and pin-nailed together, and finished with 2 coats of gold craft paint and 2 coats of gloss polycrylic. The pull is attached with crystal clear super-glue. Cost: $0 for wood (scrap), $0 for finishes (left over), $4.99 for the stencil (which I am re-using) and $4.99 for a pkg of 4 stencil sponge brushes (also re-using these).
The cedar 1x box is finished with 3 coats of gloss poly. The knob is another DIY – a ‘slice’ of the 1x cedar, topped with some ¼” aromatic cedar, glued and pin nailed together. This received 1 coat of Rustoleum Walnut Stain + Poly on the top part and 2 coats on the bottom part, topcoated with 2 coats of gloss poly, and was super glued to the top. The inner lid for this one is a piece of ¼” plywood, glued and clamped in place. The front design re-uses the stencil, in the same Rustoleum Walnut as the pull. Cost: Wood: about $5 worth of a cedar 1x8 (cut down to size on the table saw). Finish: $0 since the finishes were already on hand.
These were a super easy and quick build – I built and sanded all three in an afternoon. I’m sure the finishing could all be done in a day too, but I spread mine out a few minutes here and there as I had time to work on them, while changing my mind several times on the pulls and embellishments. These were all given as gifts.
Built from Plan(s)
Estimated Cost
$0-10
Estimated Time Investment
Afternoon Project (3-6 Hours)
Finish Used
Craft wood box: Rustoleum Walnut Stain + Poly, Minwax gloss polycrylic
Scrap wood box: Clark & Kensington semi-gloss in Crushed Peanut, 3 coats; stencil/knob: gold acrylic paint (2 coats on stencil, 1 coat on knob)
Cedar box: 3 coats Minwax gloss polycrylic; stencil/Knob: Rustoleum Walnut stain + poly
Scrap wood box: Clark & Kensington semi-gloss in Crushed Peanut, 3 coats; stencil/knob: gold acrylic paint (2 coats on stencil, 1 coat on knob)
Cedar box: 3 coats Minwax gloss polycrylic; stencil/Knob: Rustoleum Walnut stain + poly
Recommended Skill Level
Starter Project
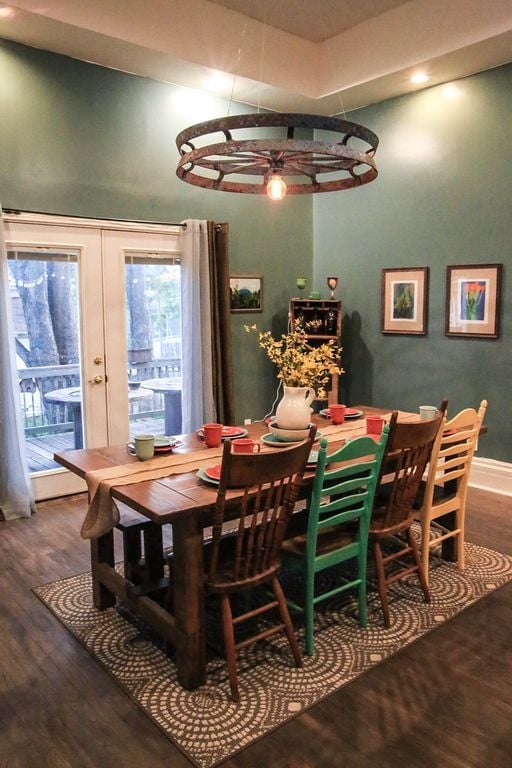
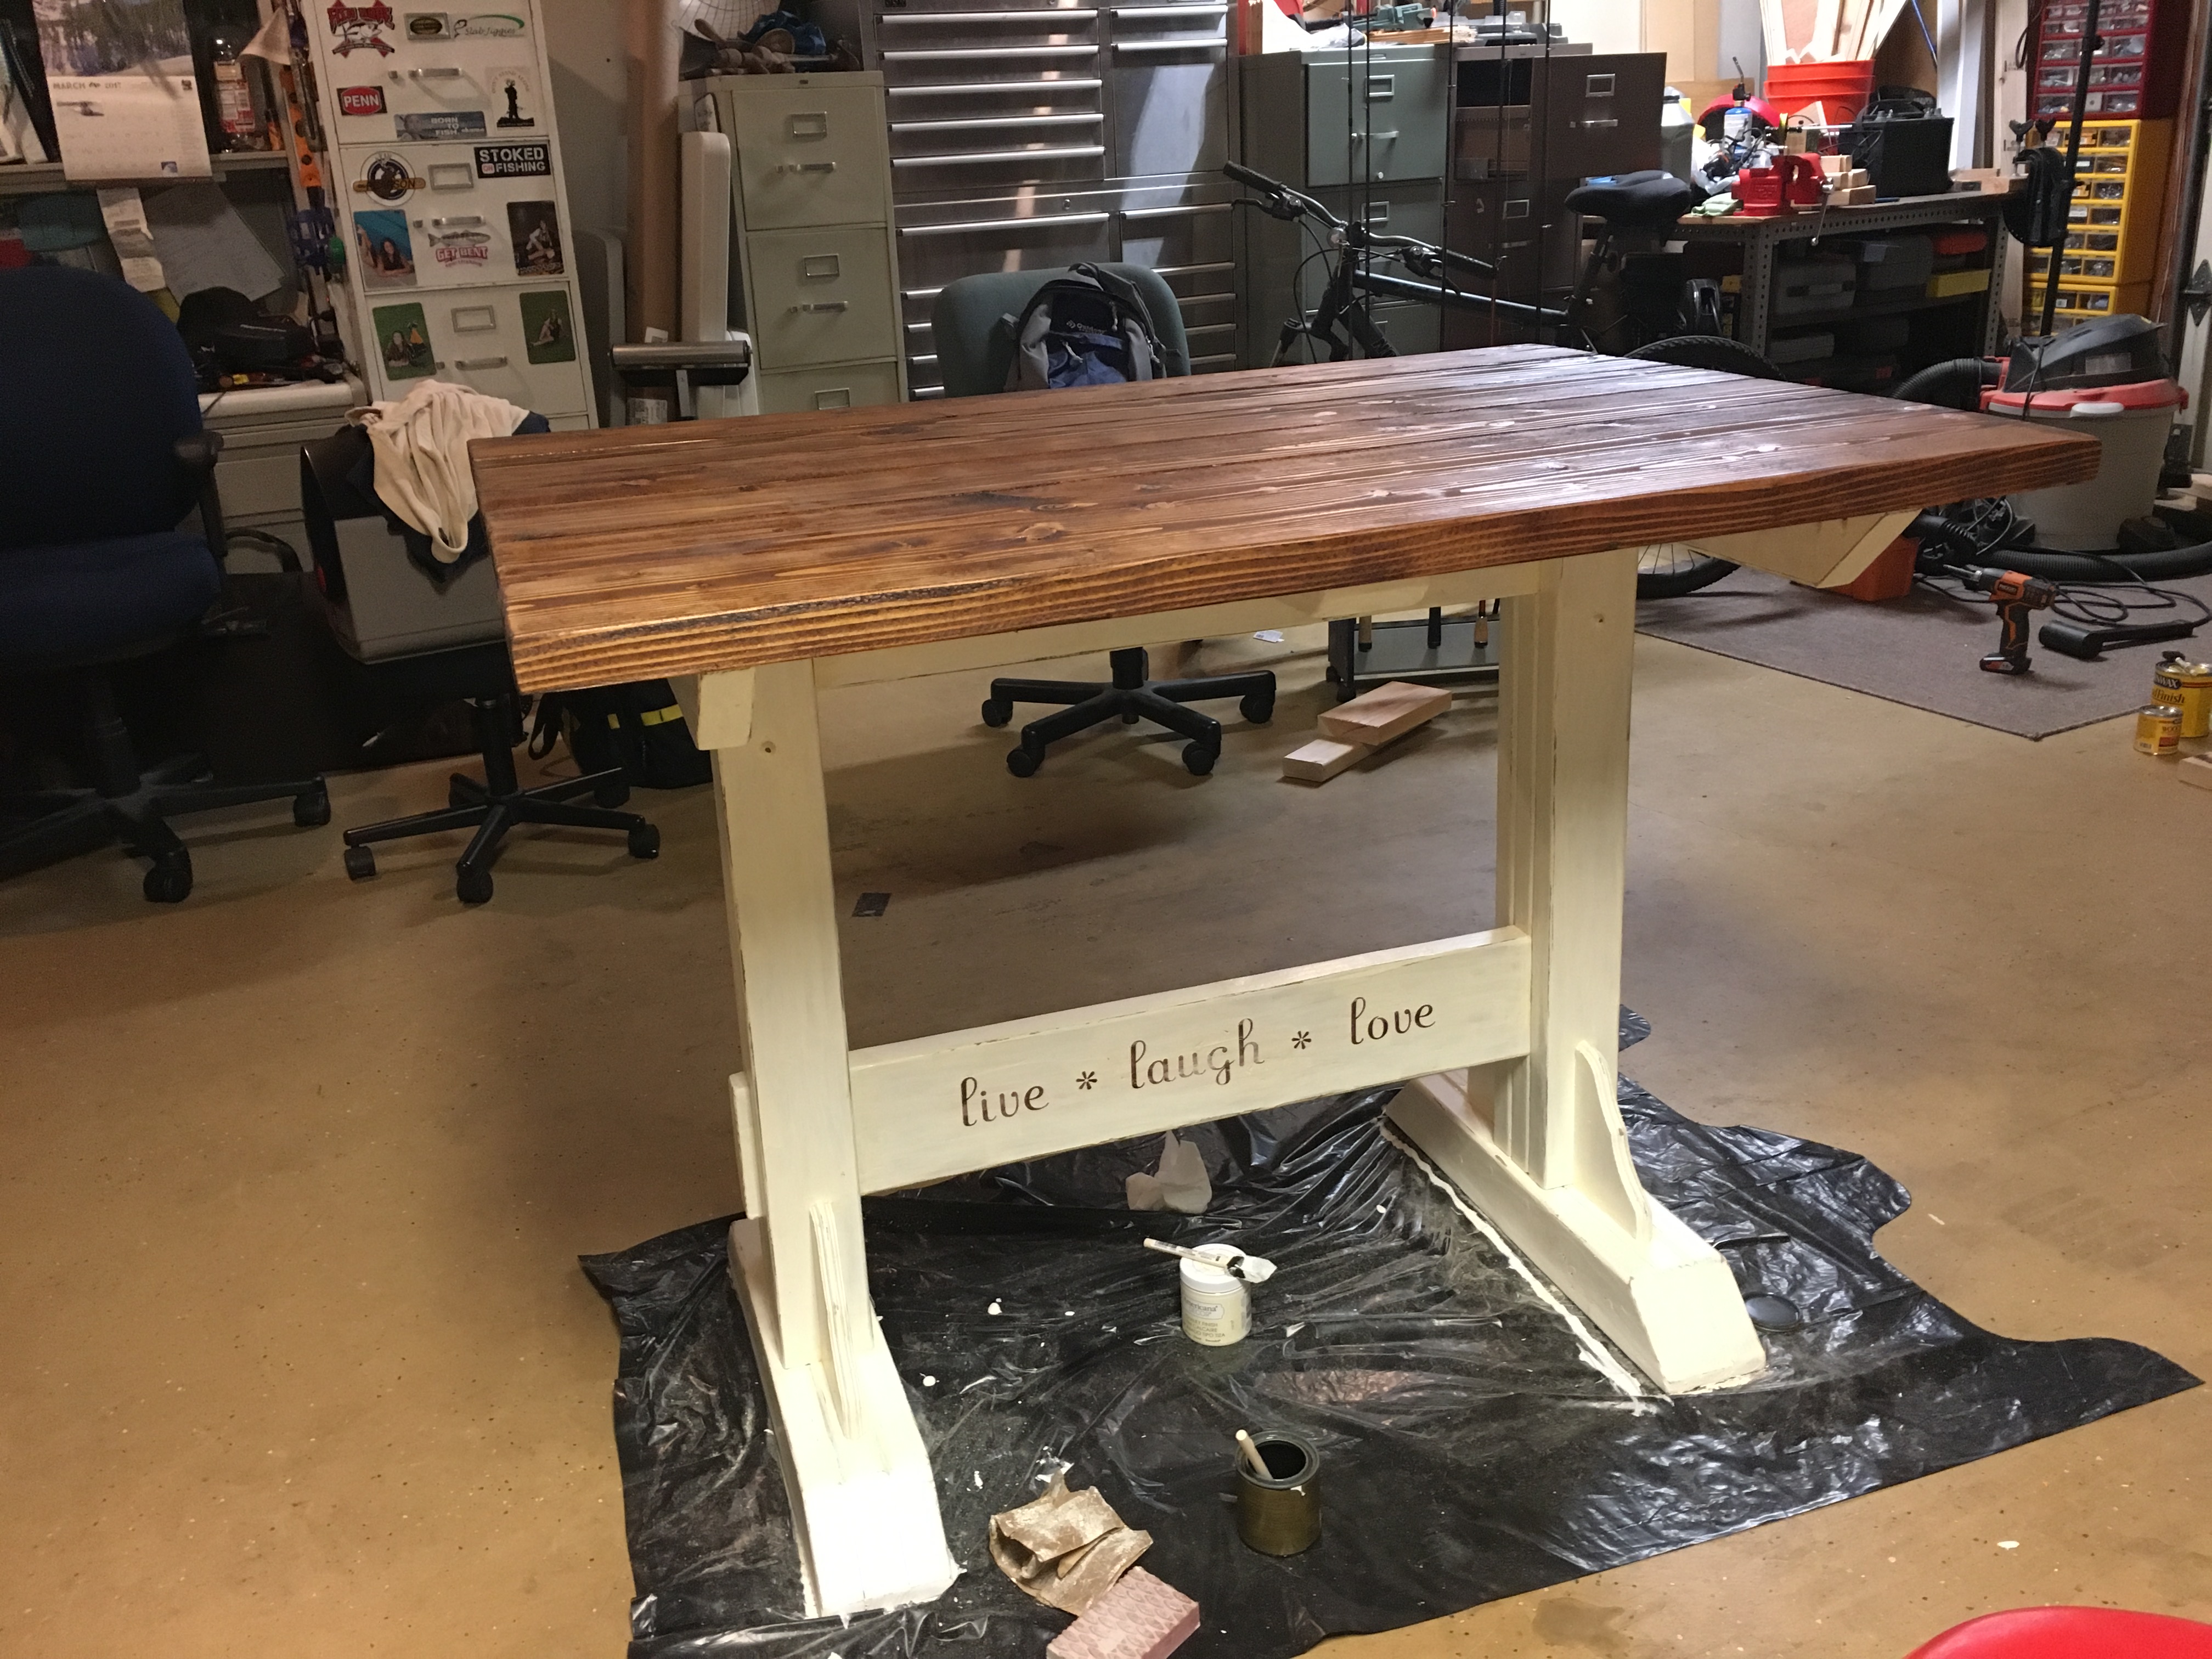
Piper's Dining
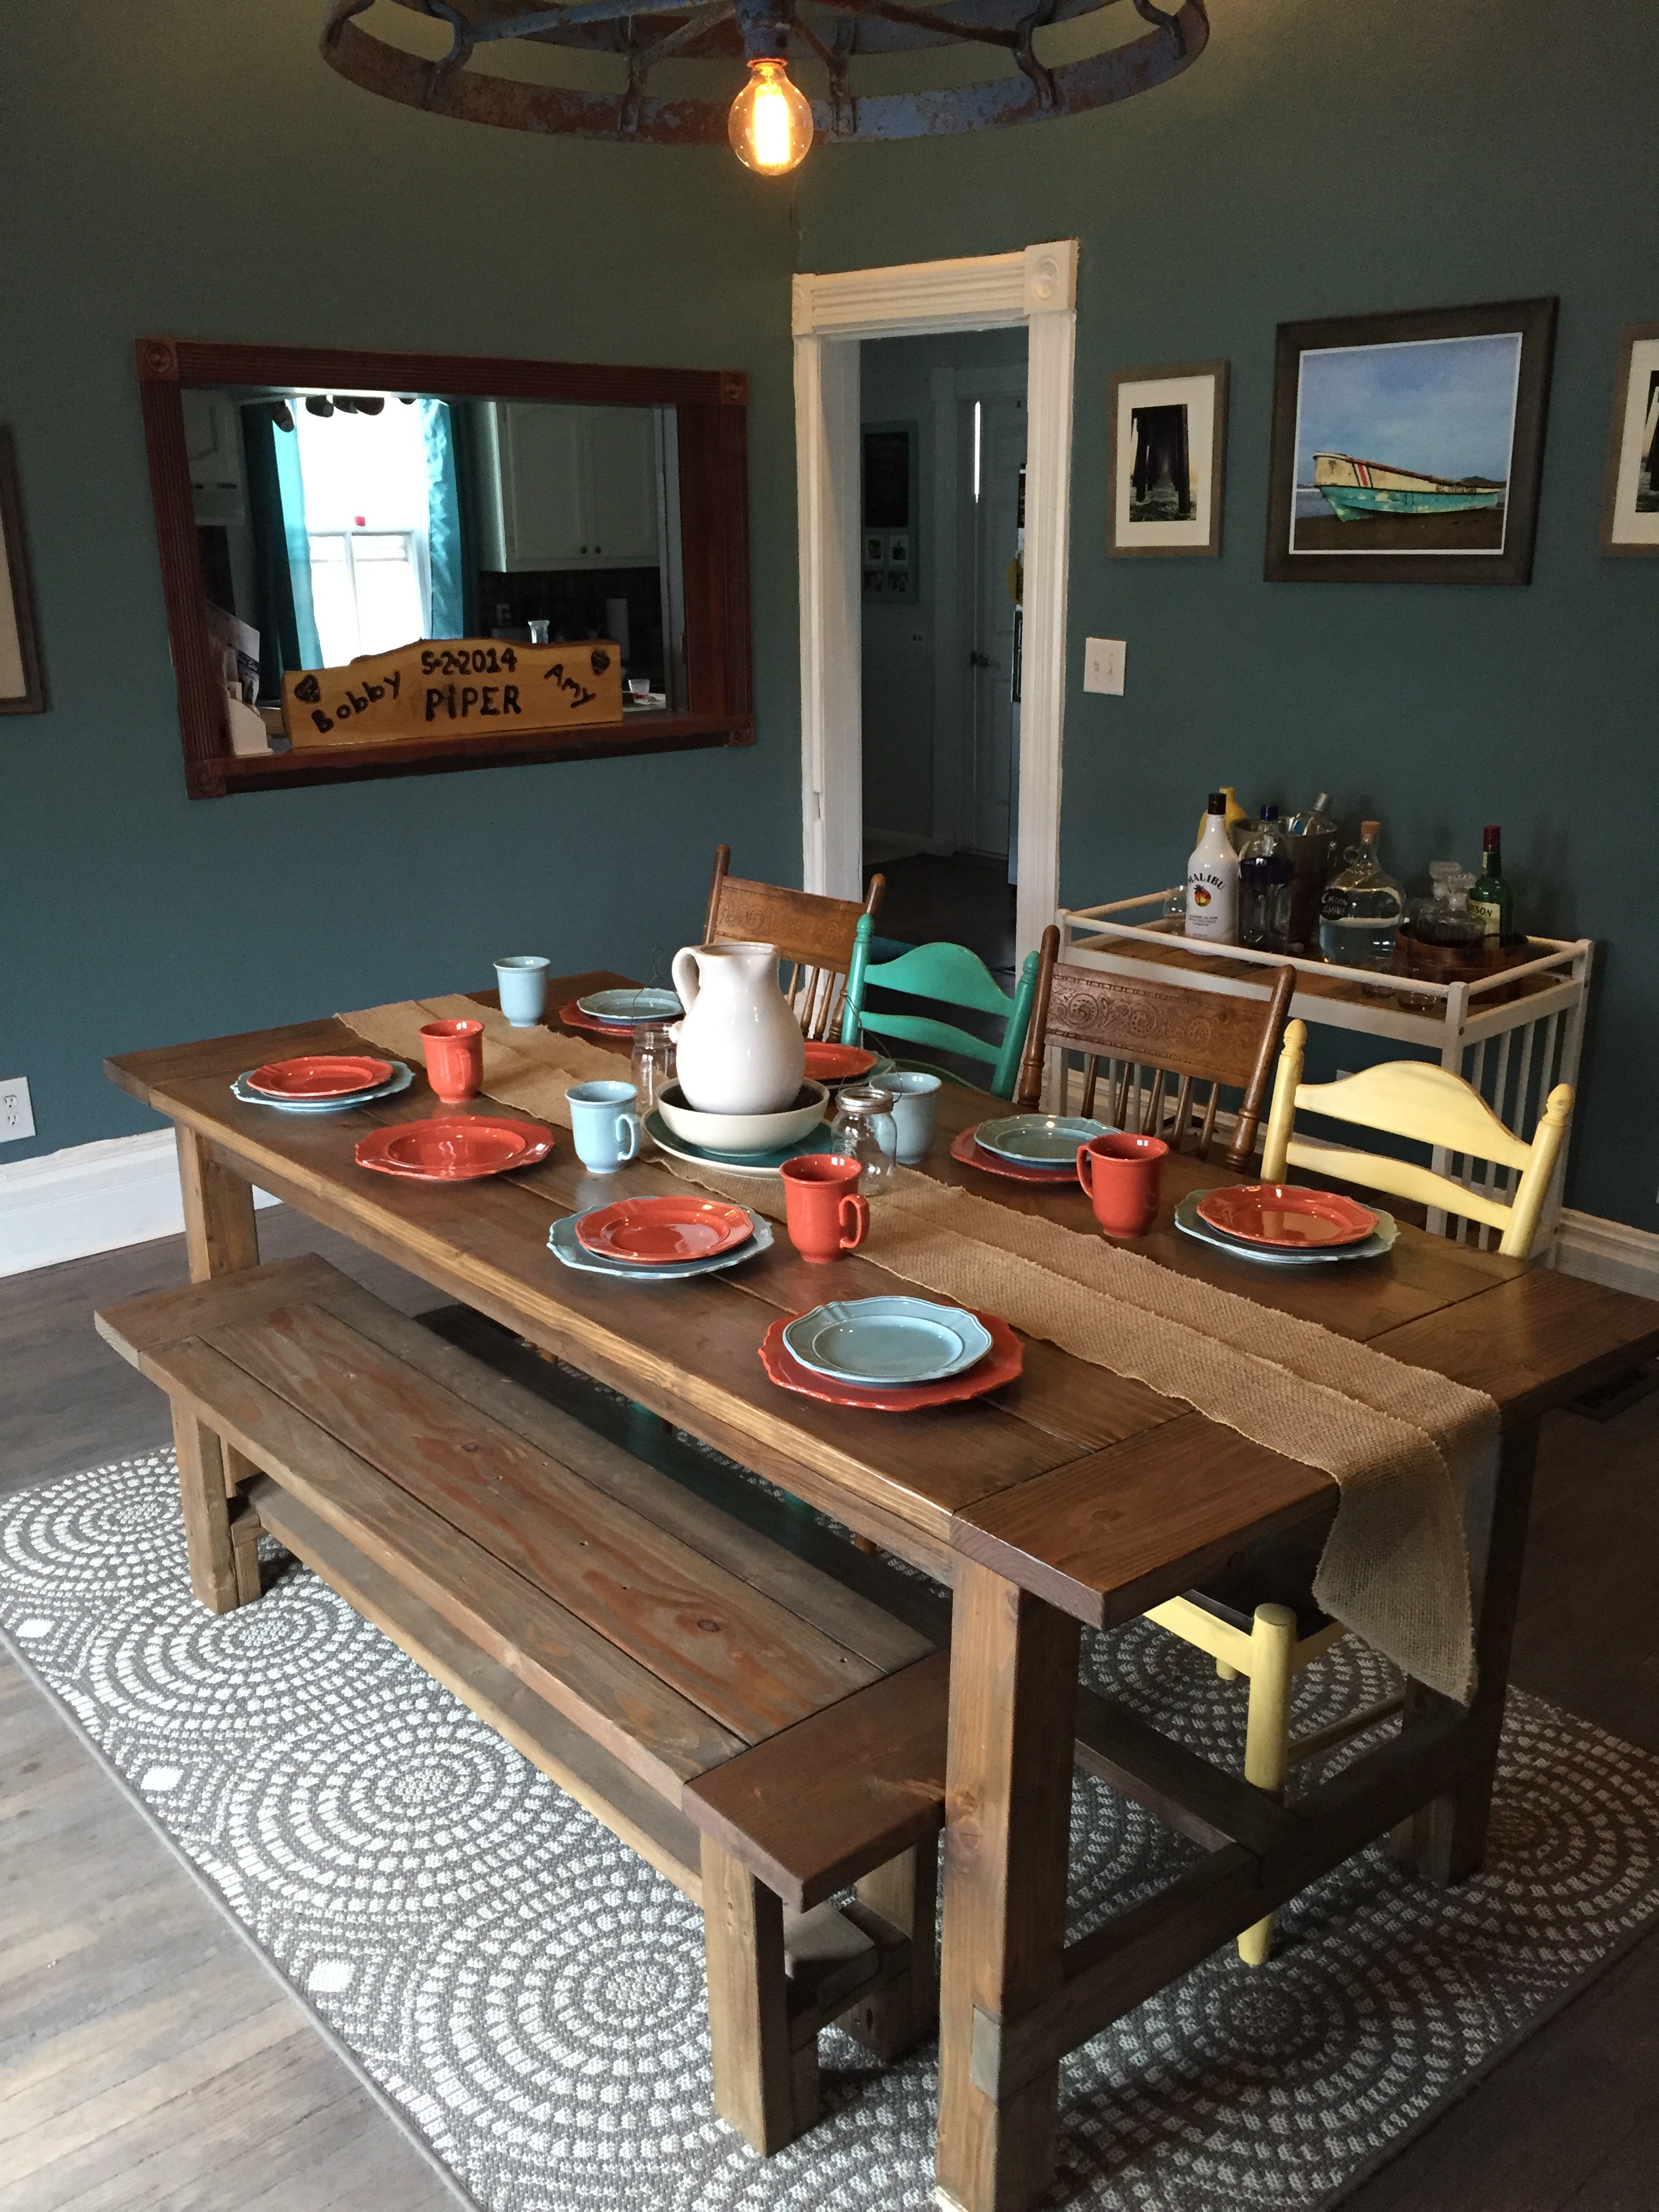
This was just the right table design for our history home built in 1880! Love the plans and easy to build!
Built from Plan(s)
Estimated Cost
Table- $95 without Kreg Jig cost($20) or screws
Bench- $24- screws
Bench- $24- screws
Estimated Time Investment
Week Long Project (20 Hours or More)
Finish Used
Wood primer first on all surfaces,SW Rustic gray, minwax mahogony low lights and satin minwax poly finish(5 coats)
Recommended Skill Level
Intermediate
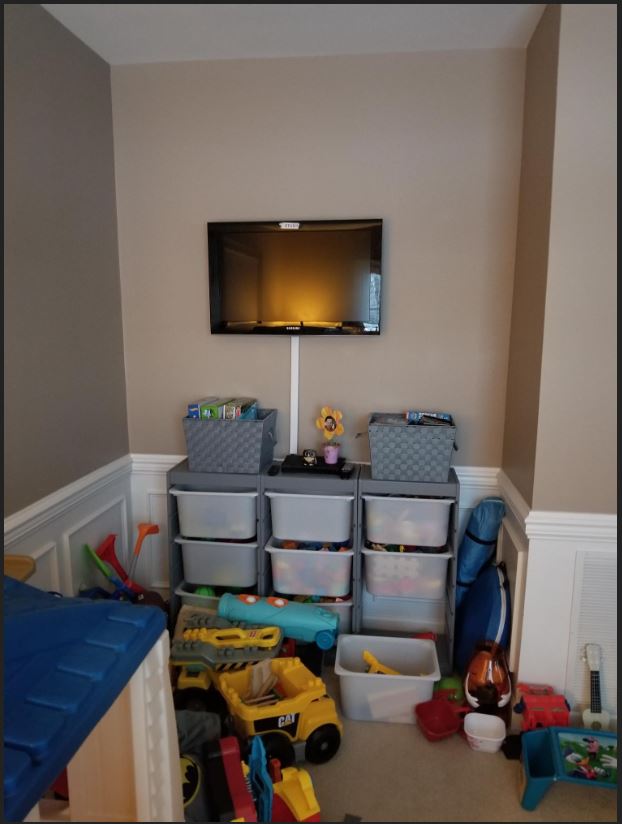
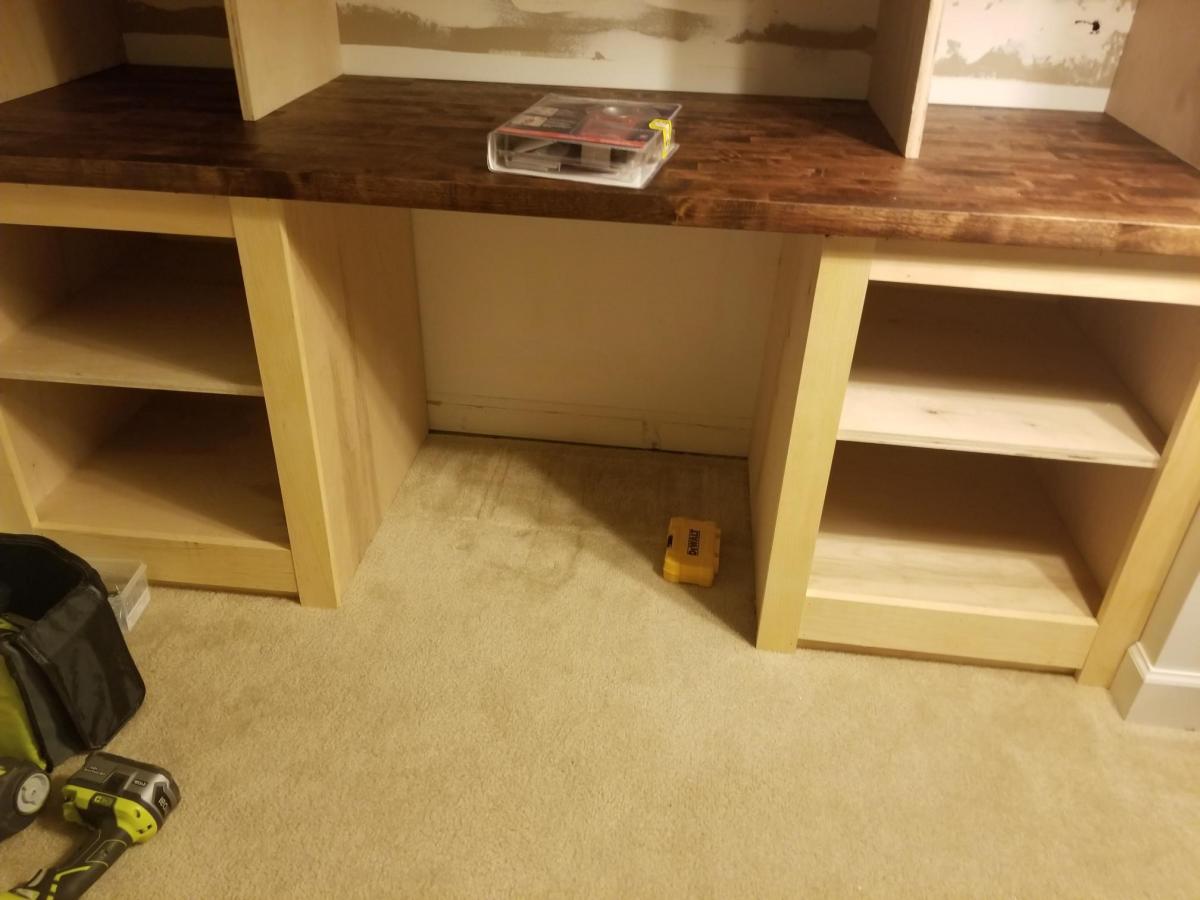
Playroom Desk

My son is growing up to be a big boy and wanted a fancy new office like I have at home so now he has a big boy desk and some storage for him as he gets older! Used some inspiration from a few other plans from AnaWhite and have started branching out a bit! The latest does not show the finished painted cabinet doors and handles but overall it looks great, and is ALREADY filled with toys!!

Built from Plan(s)
Estimated Cost
$700
Estimated Time Investment
Weekend Project (10-20 Hours)
Recommended Skill Level
Intermediate
Comments
Wed, 03/17/2021 - 05:41
Thank you! Your website has…
Thank you! Your website has given me a lot of great ideas and tutorials that i've used to learn some of this stuff!
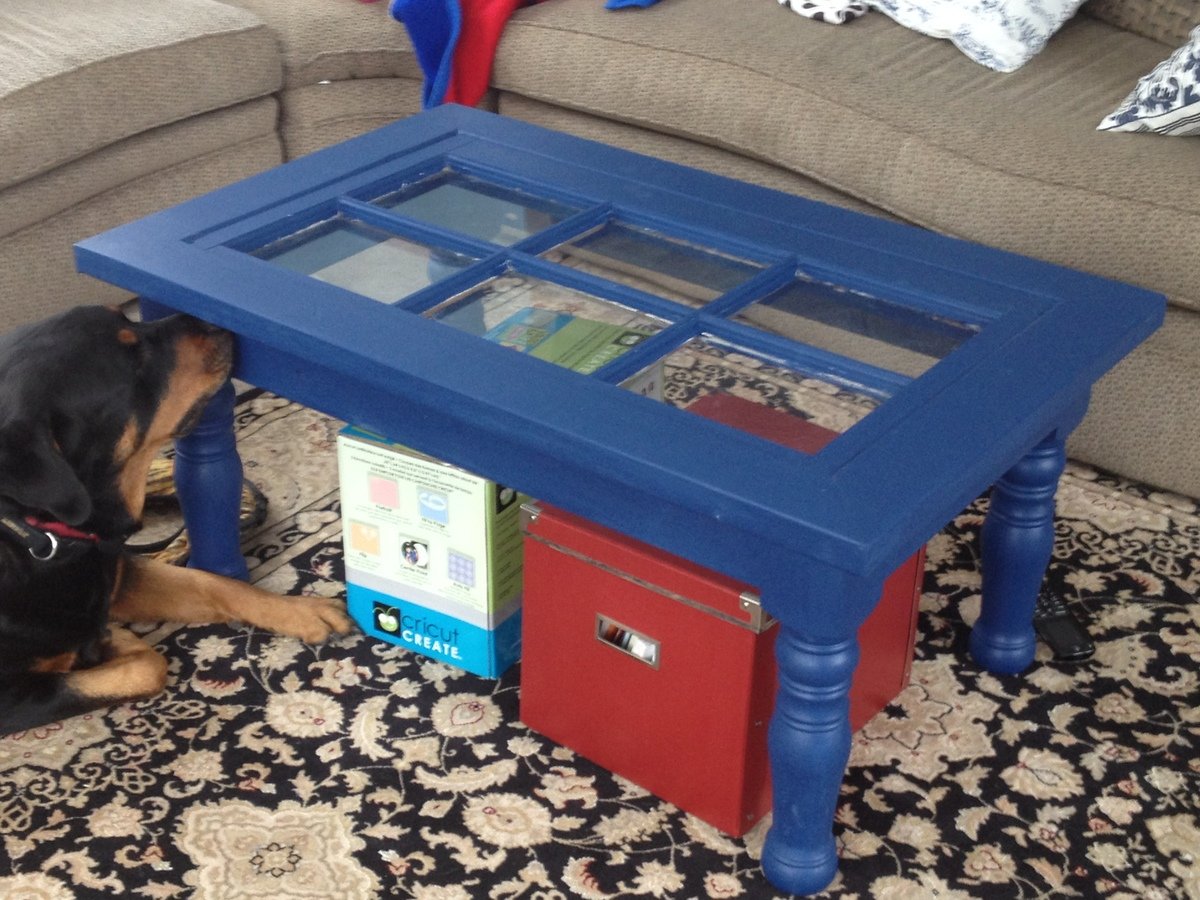
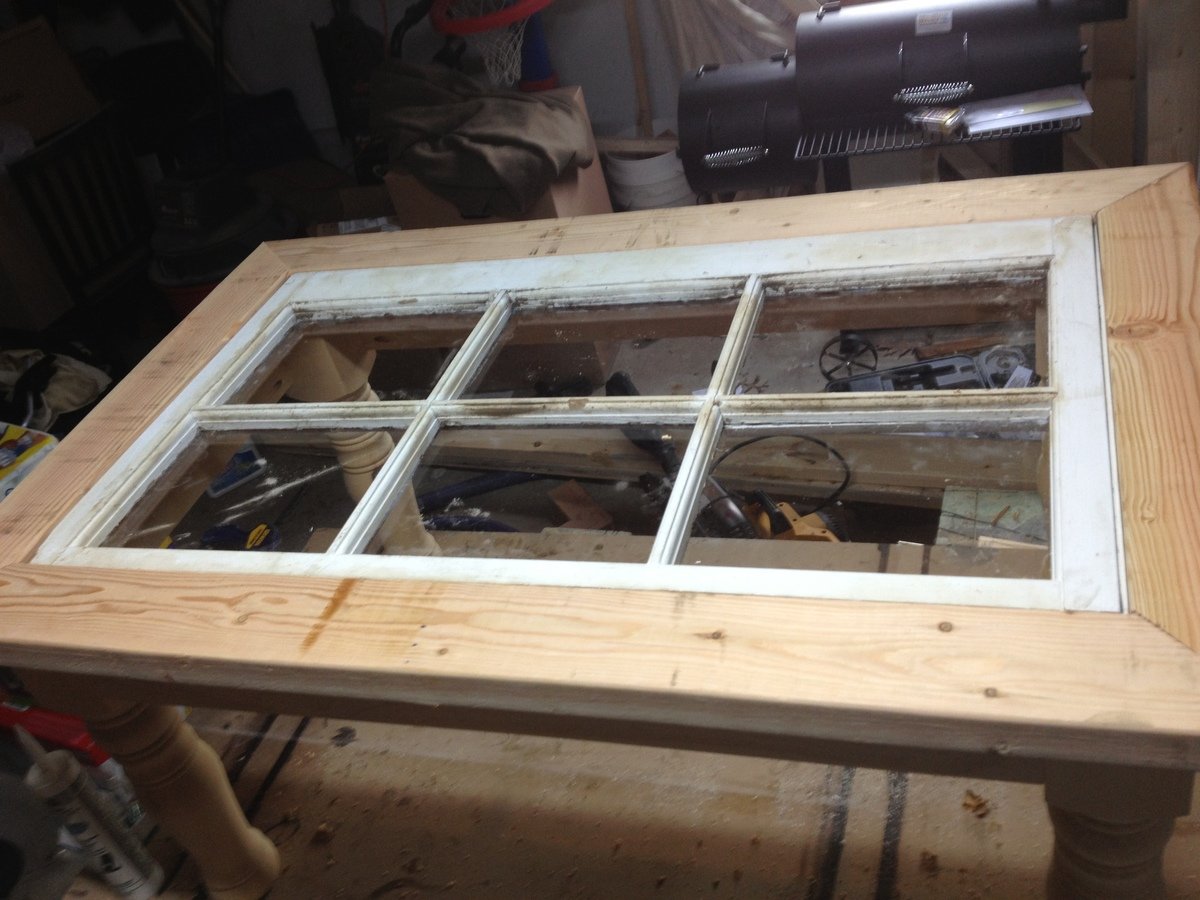
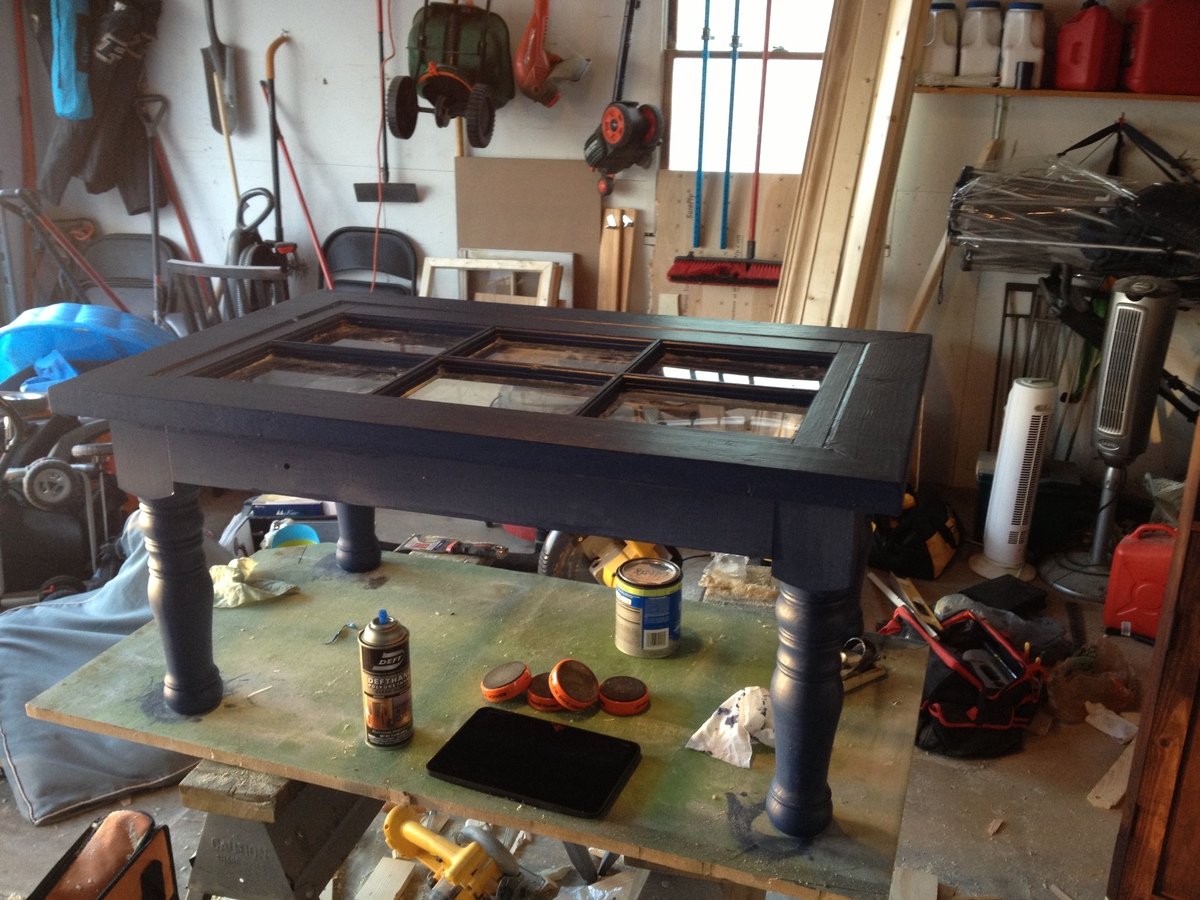
Window Coffee Table

We needed a new coffee table in the family room, one that went with the ever changing decor. One of my neighbors threw out a rather nice, but older wooden framed window that they had been holding onto for who knows how long. My wife actually grabbed it out of the garbage with both the kids sitting in the car while she loaded it into her SUV in dress clothes.
Anyway, I broke down the window into two sections and used one of the sections to build this table. The area around the window is made out of 2x4 and the table skirt is 1x4. I bought the turned legs from www.osbornewood.com (colonial coffee table leg). This project was made a lot easier by using my kreg jig to attach the skirt to the table legs as well as the top to the skirt. Knowing that I would have two young kids playing around and setting things on the table I placed the glass panes with plexi that I bought from Lowes. This will be safer as well as more durable in the future.
Estimated Cost
100.00
Estimated Time Investment
Weekend Project (10-20 Hours)
Finish Used
Royal Blue Satin paint
Recommended Skill Level
Intermediate
Comments
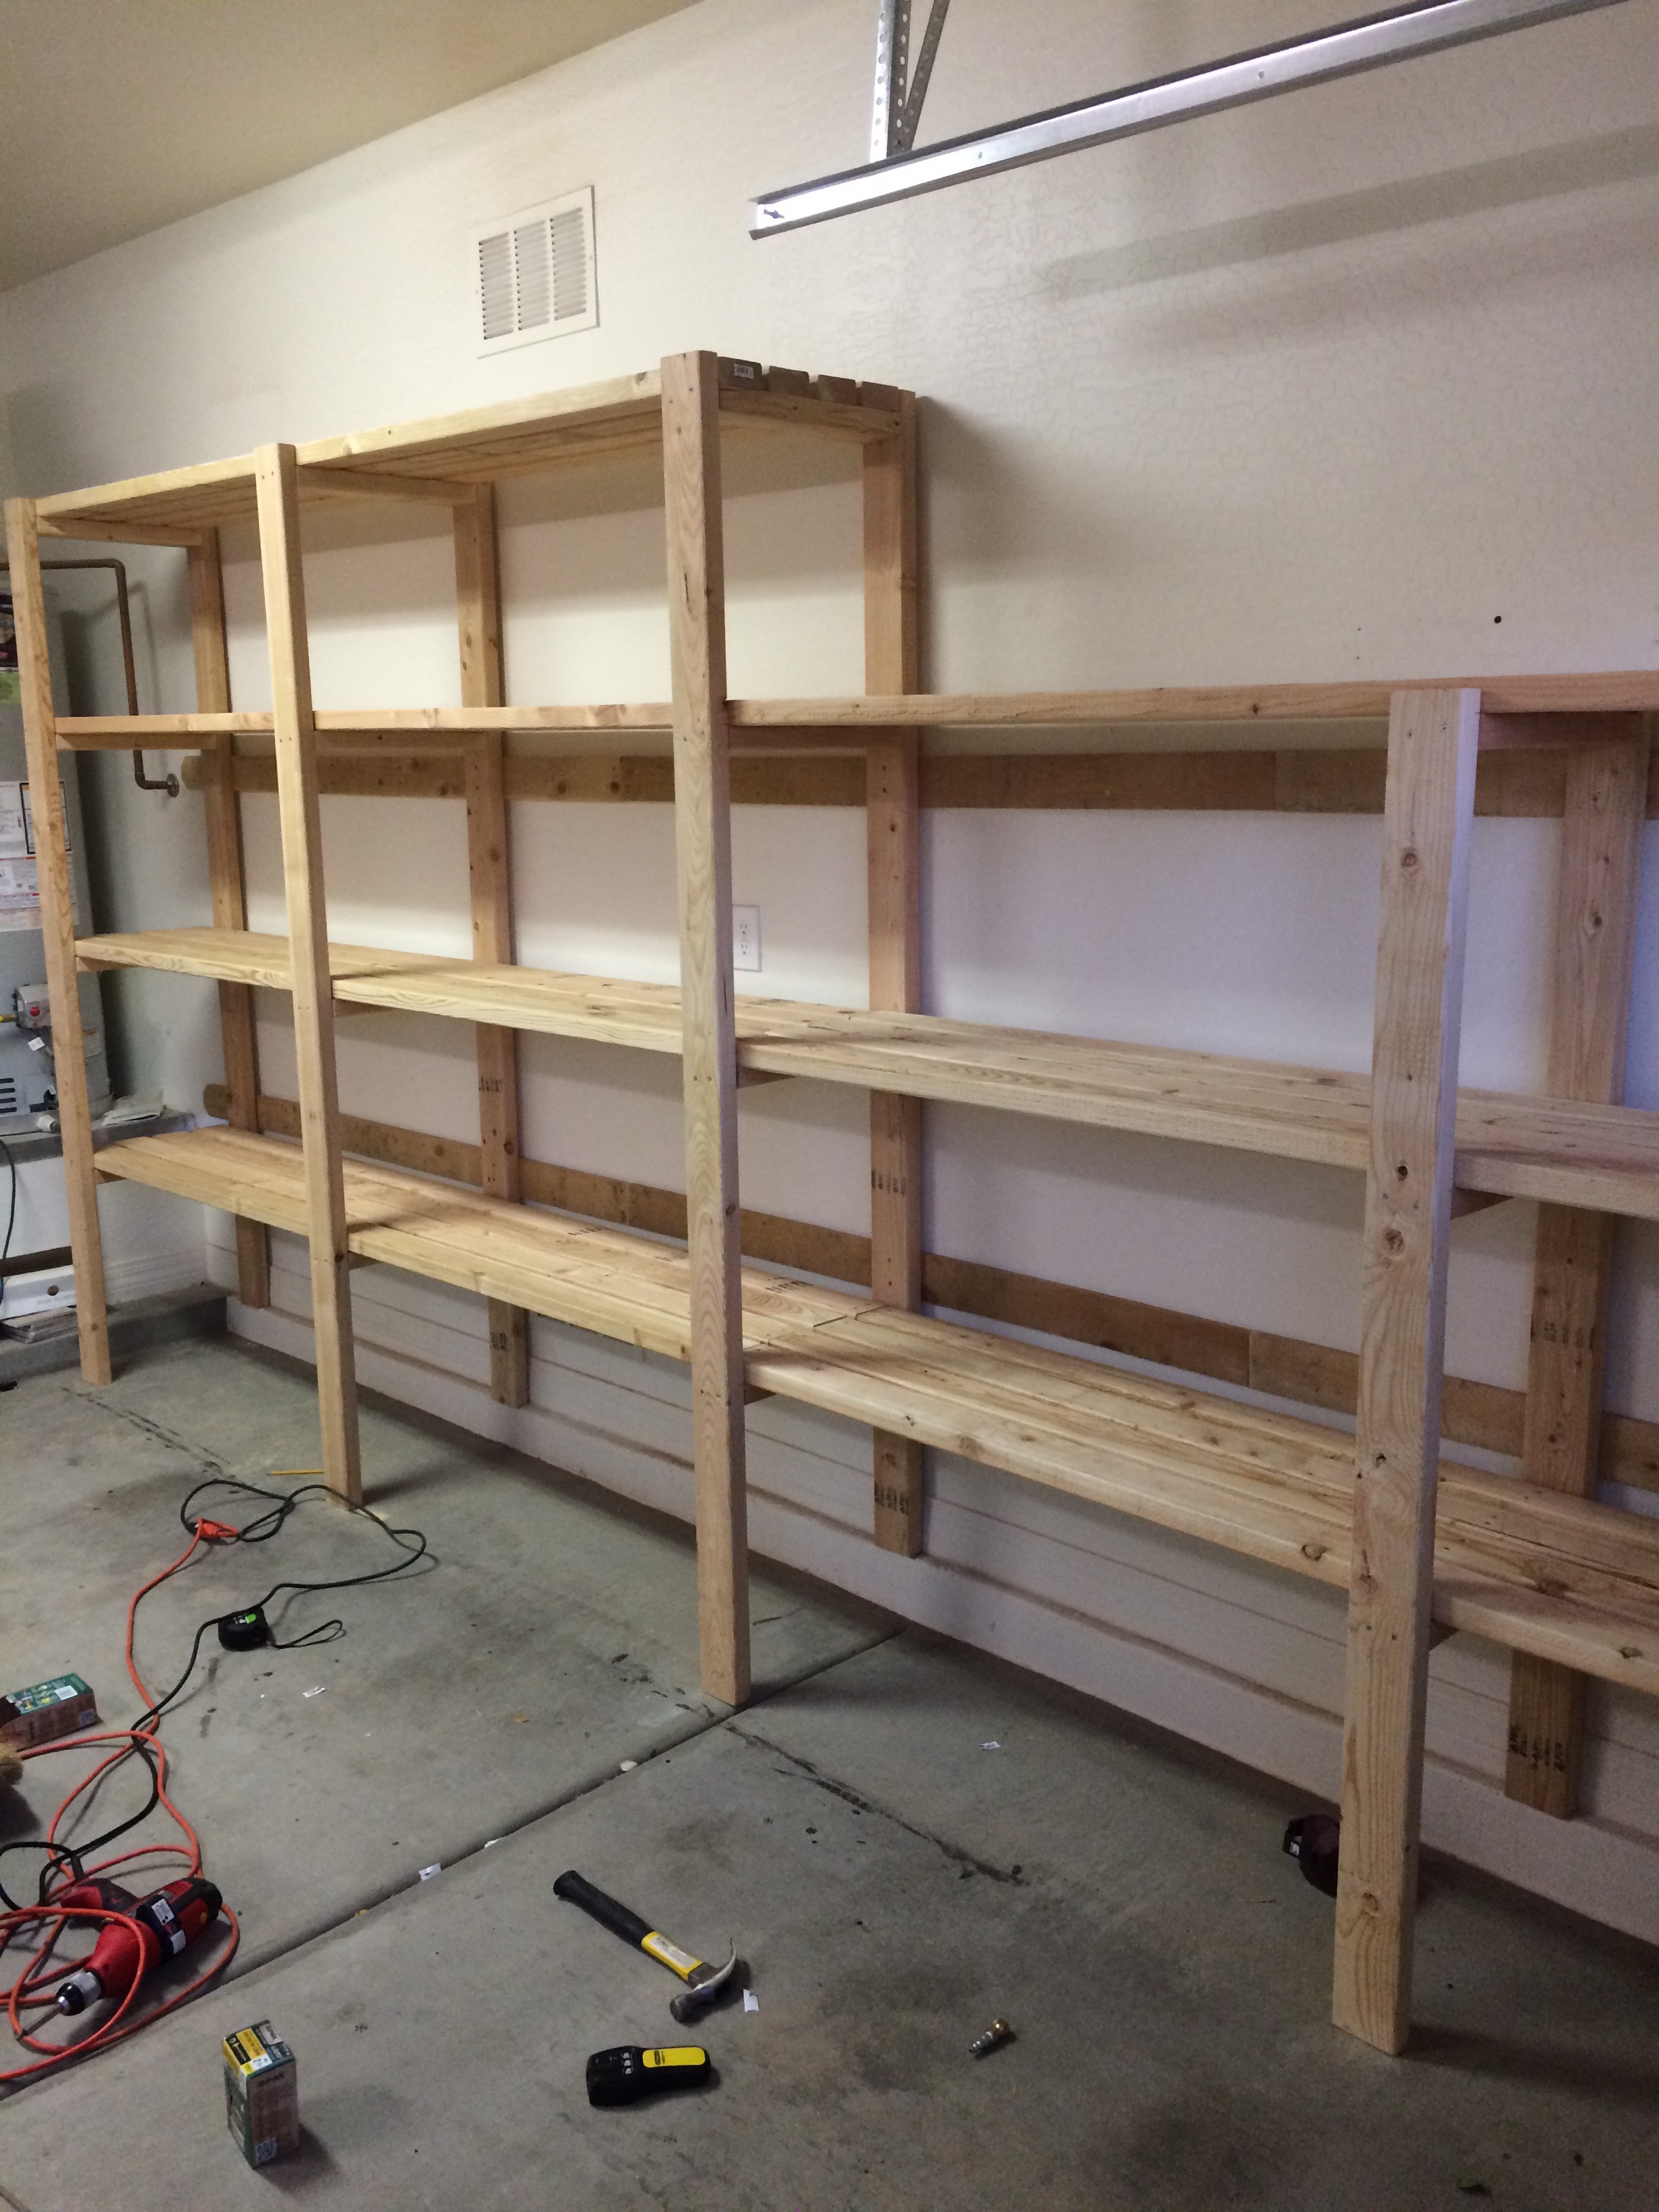
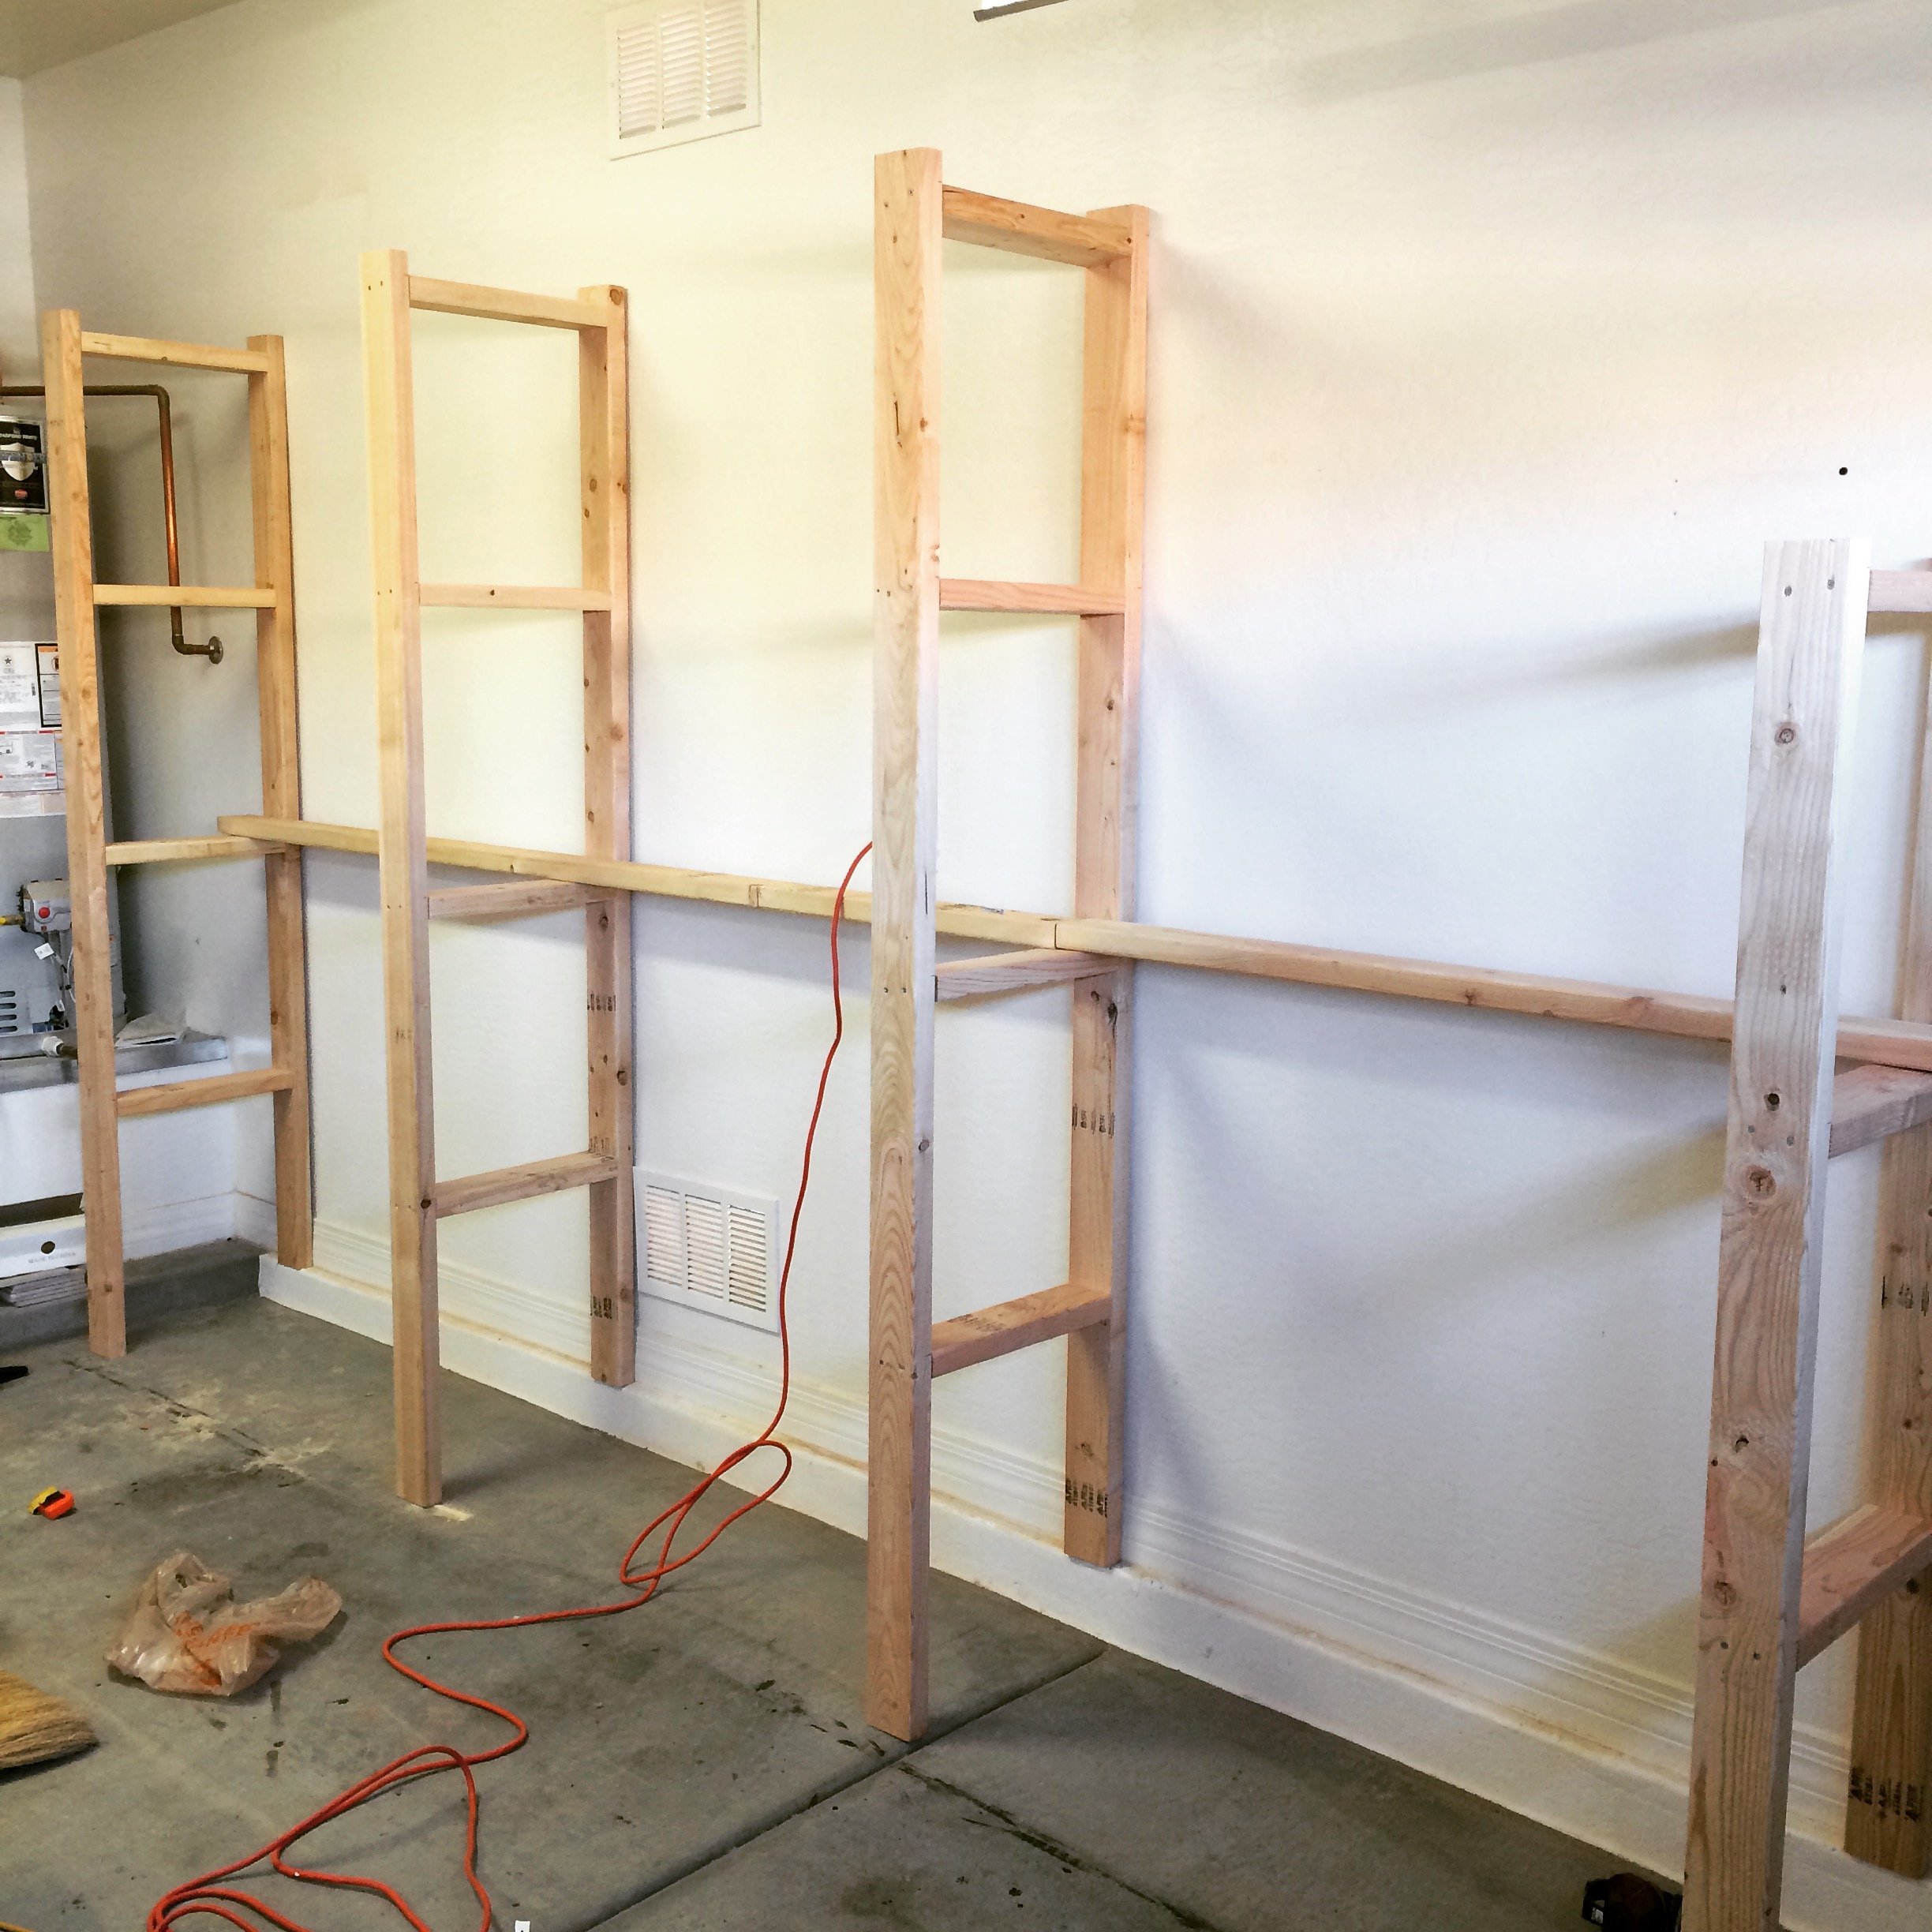
Loving These Shelves
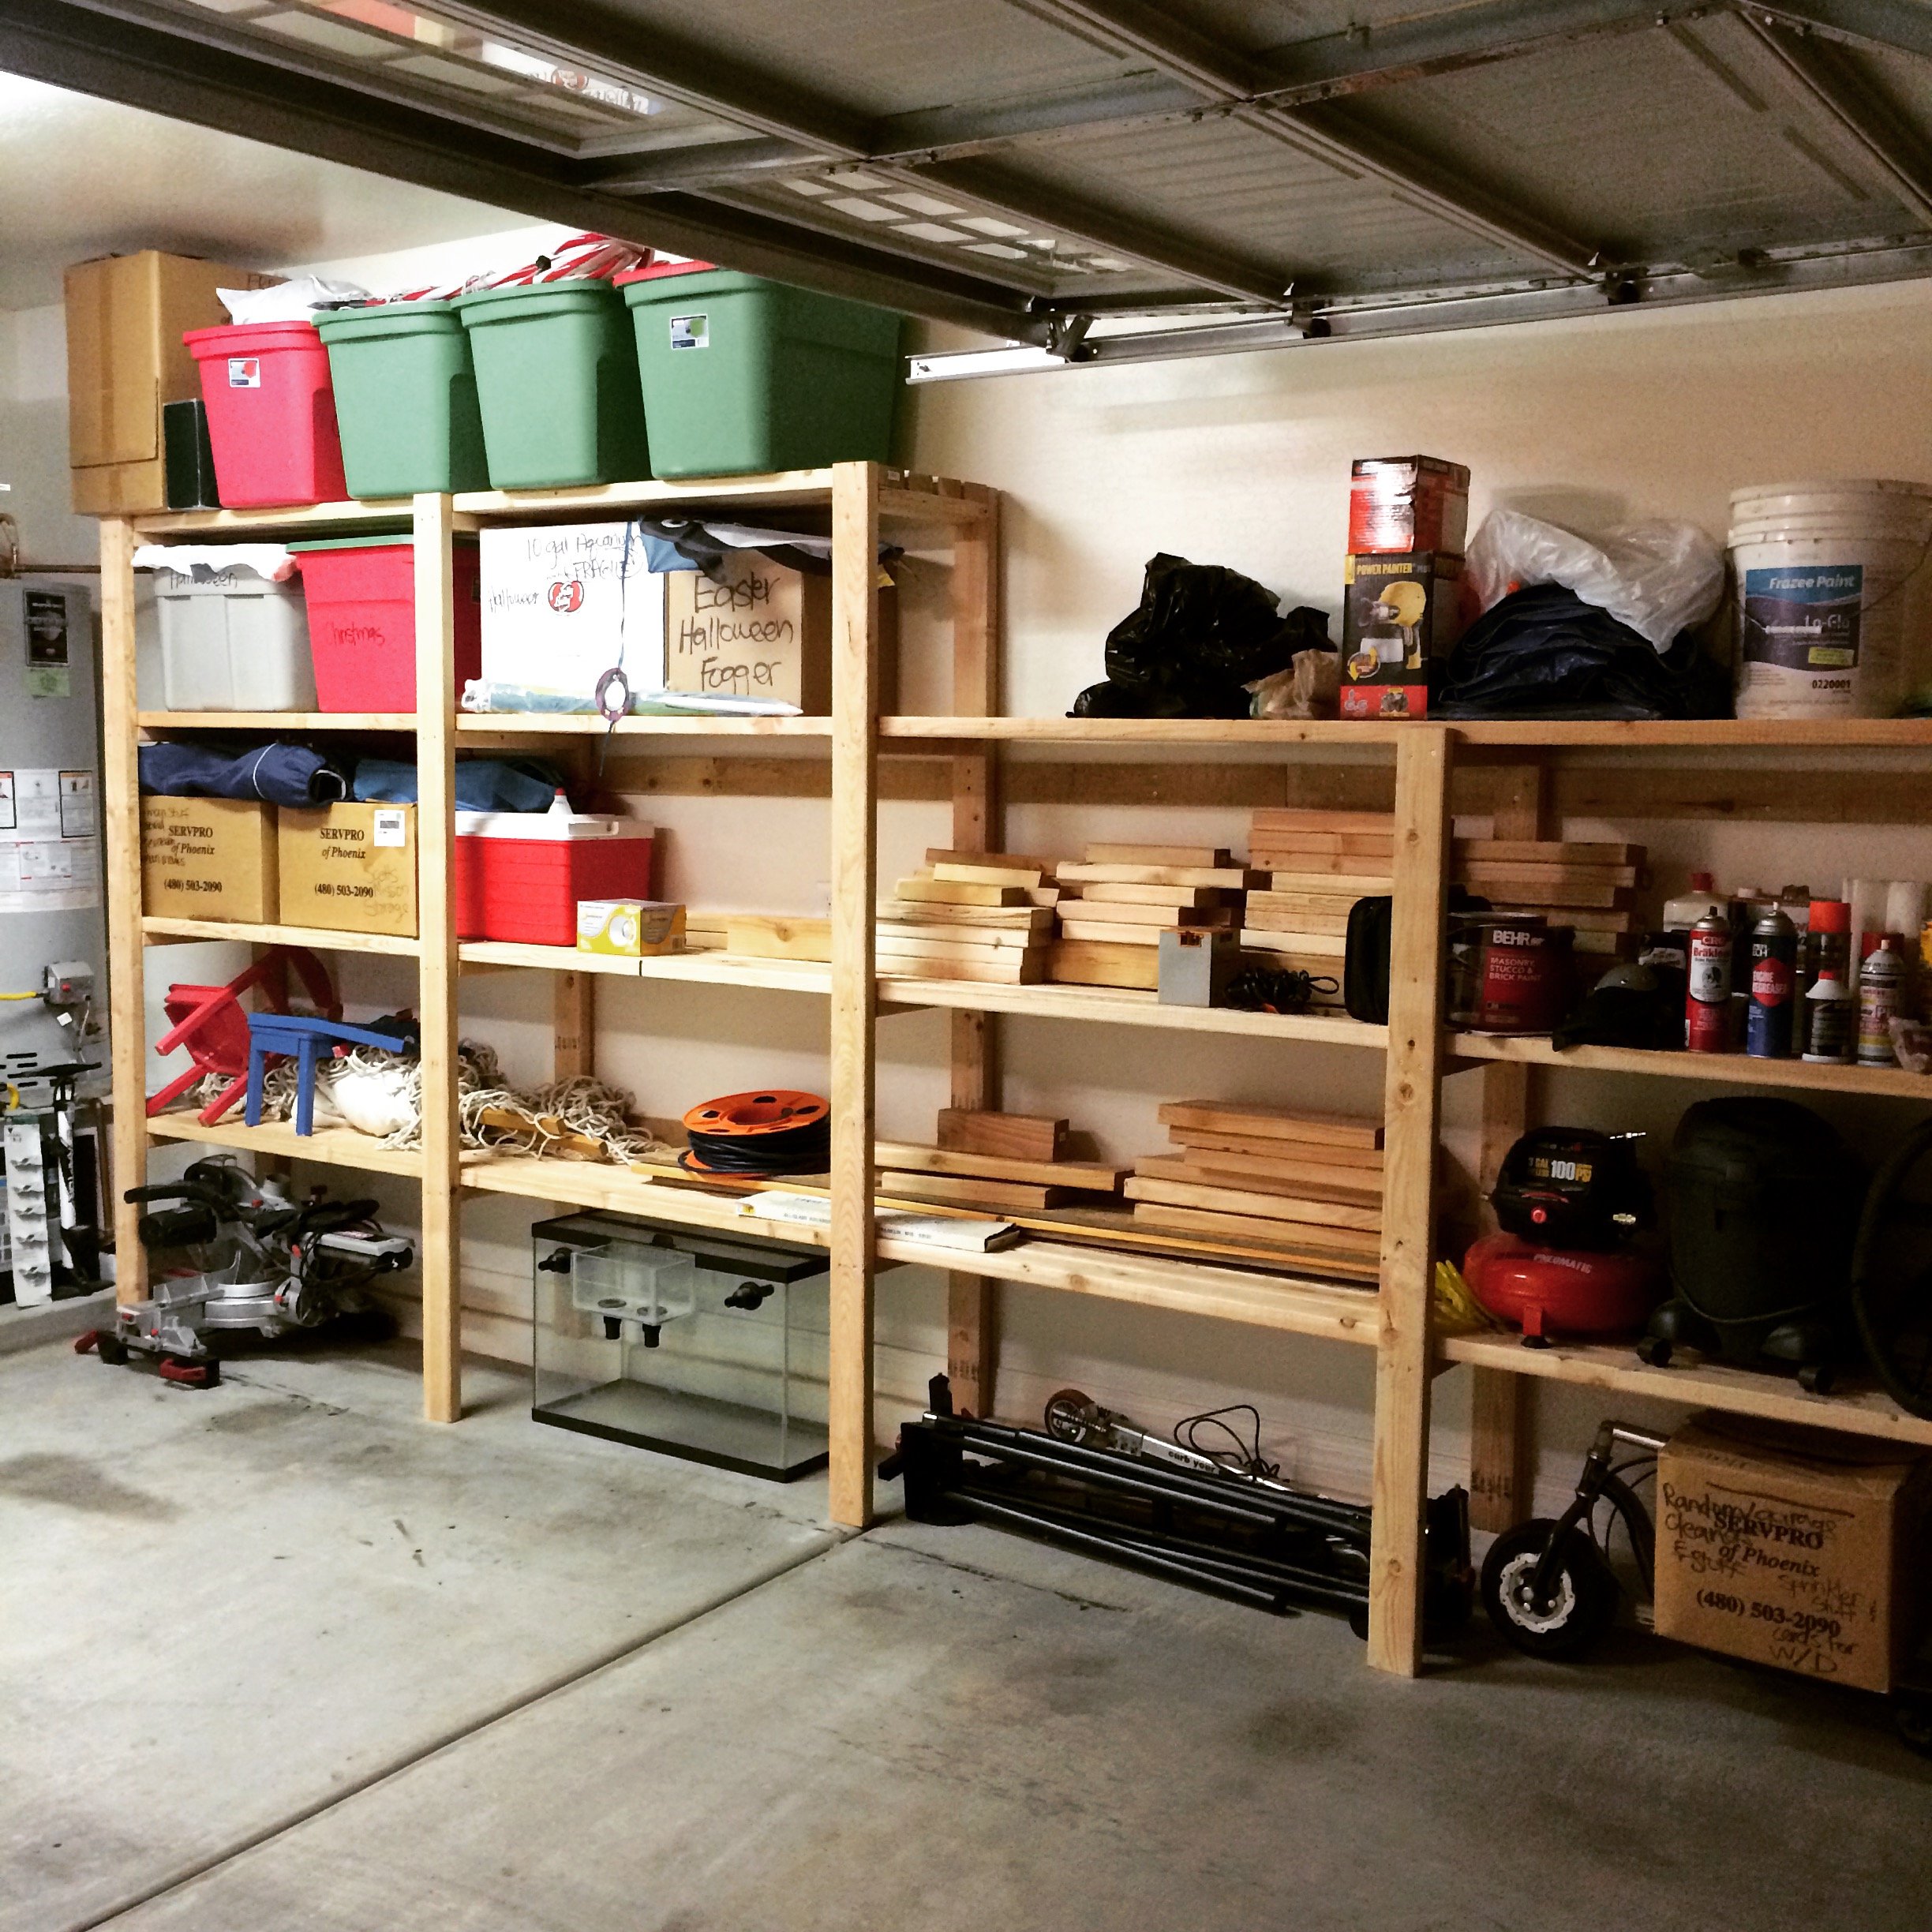
I changed the plans a little bit to add on the extra shelf on top as well as making the shelves an inch narrower than the plans. The project was actually pretty easy and really only took me about a days worth of work.
Built from Plan(s)
Estimated Cost
$160
Estimated Time Investment
Day Project (6-9 Hours)
Finish Used
None
Recommended Skill Level
Beginner
Comments
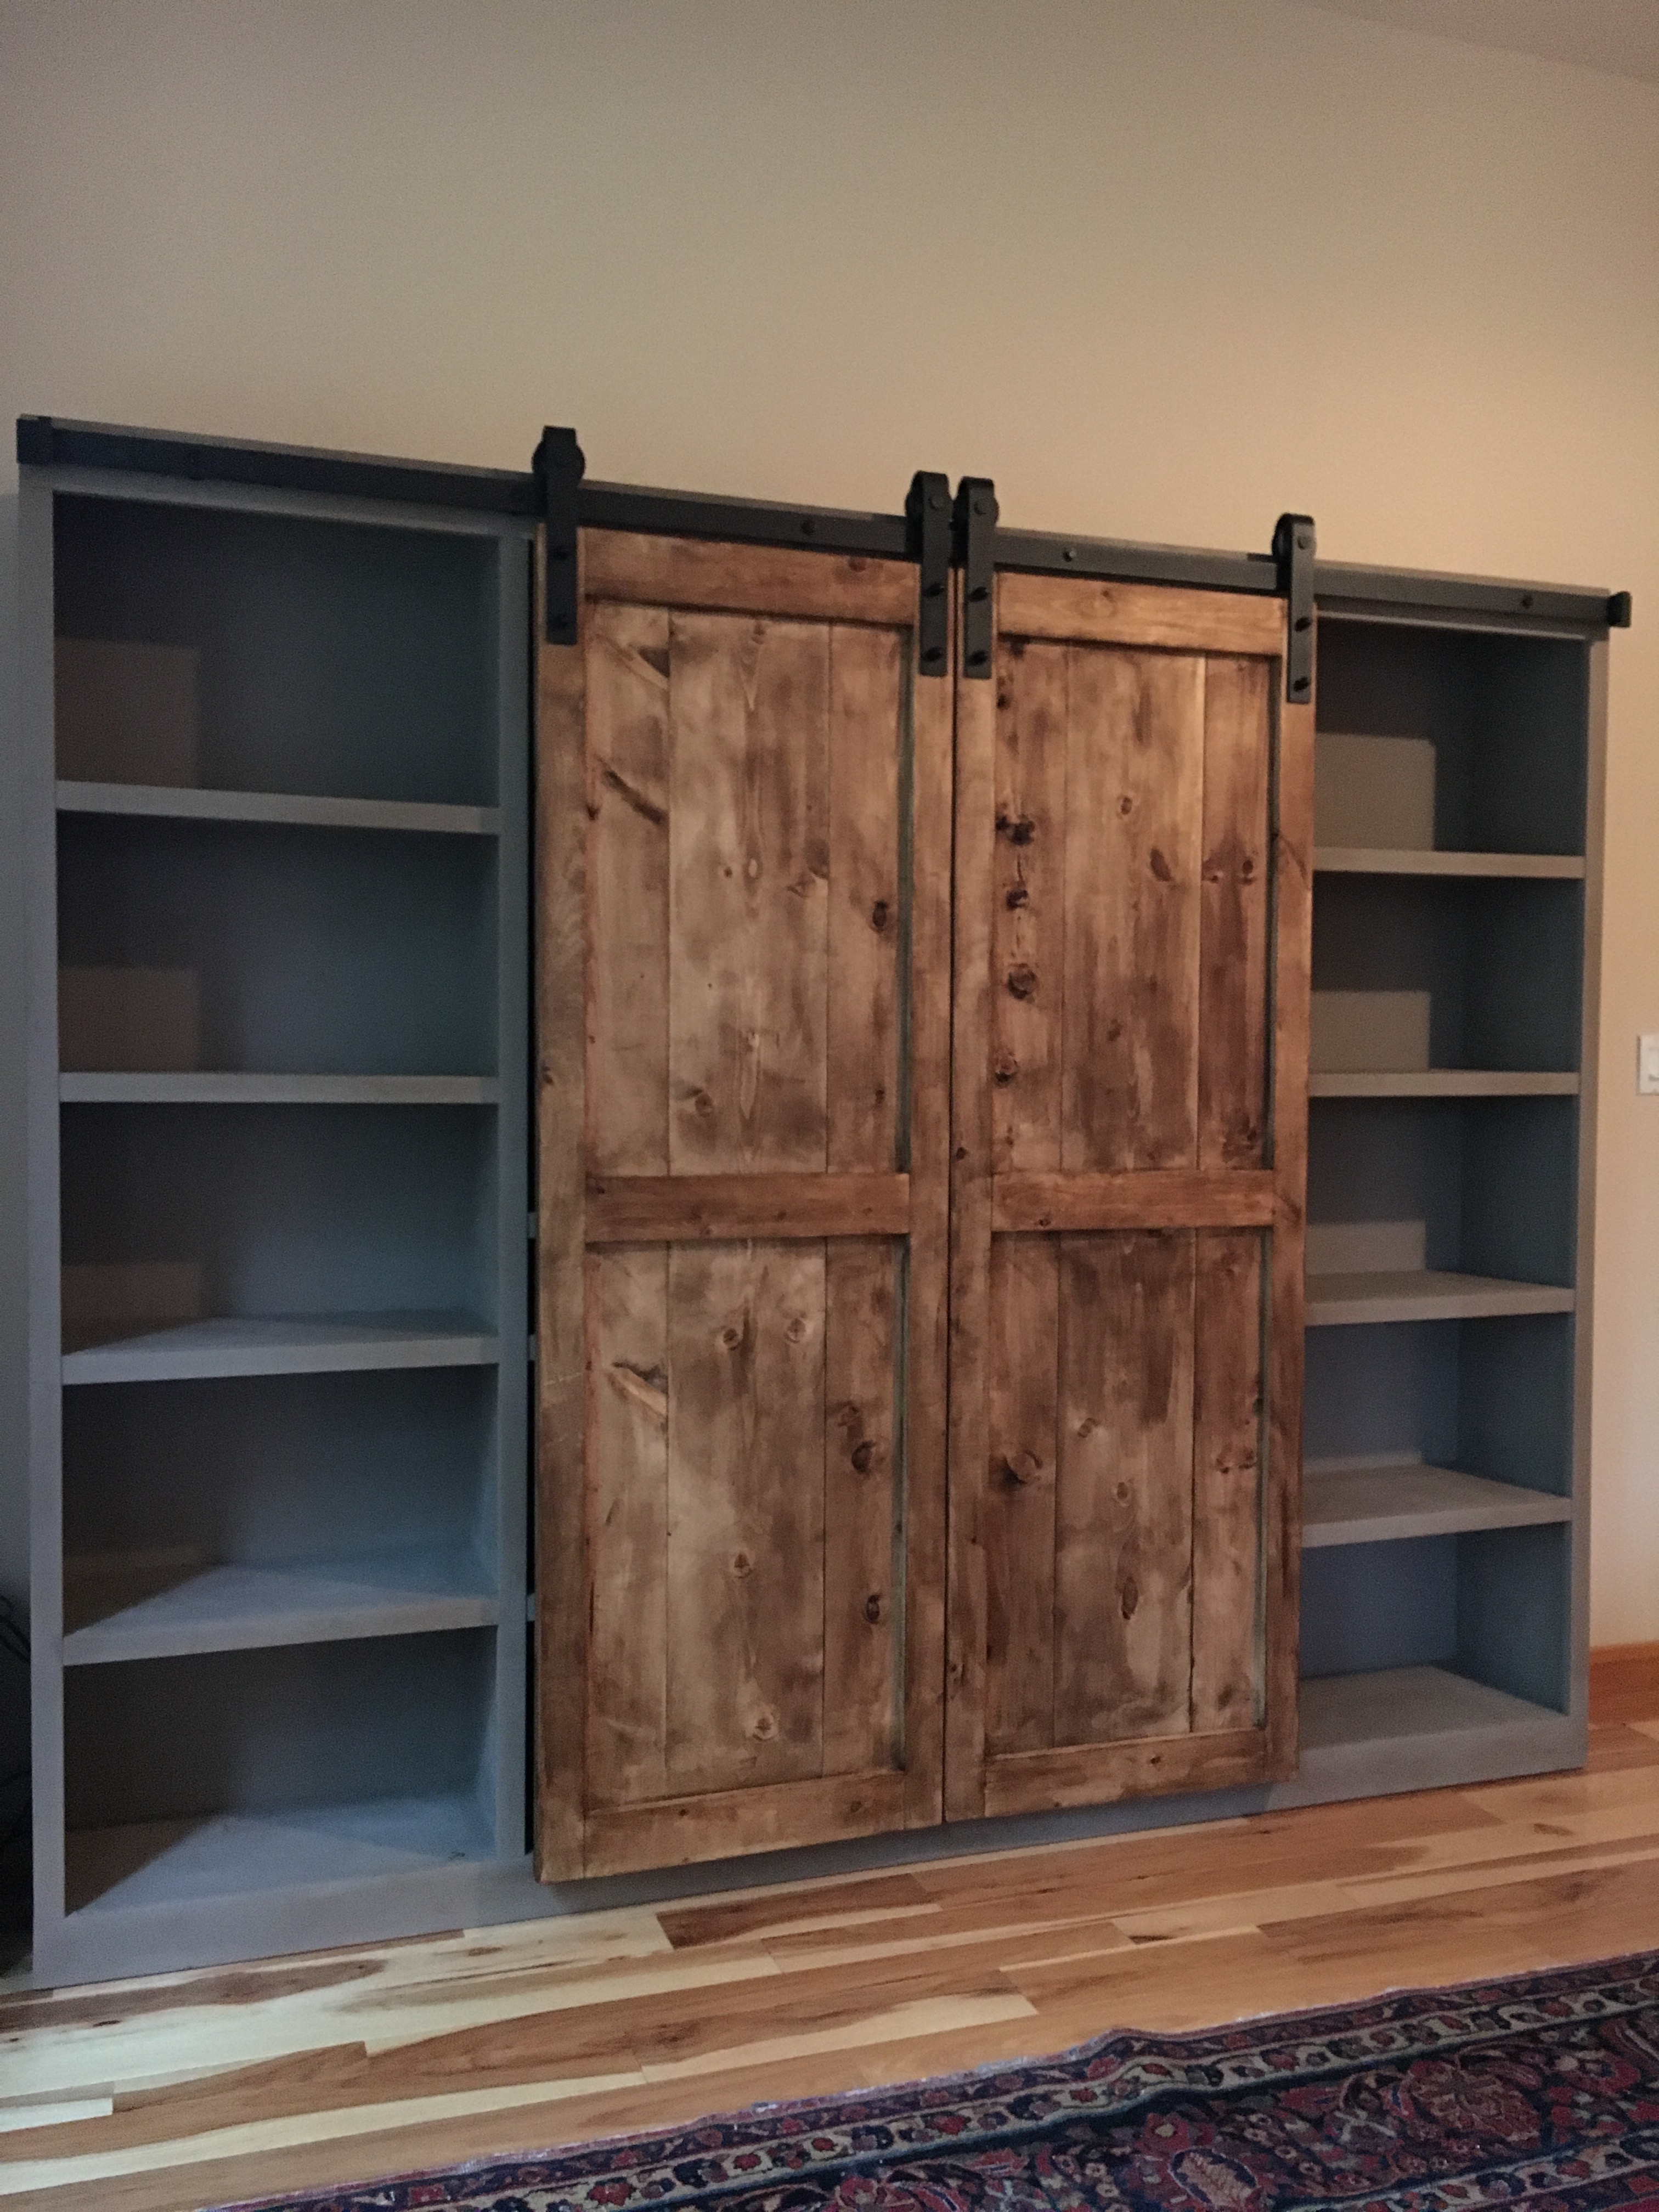
Barn Door Entertainment Center

My husband and I built this together. It was a fun project!
Built from Plan(s)
Estimated Cost
$500
Estimated Time Investment
Week Long Project (20 Hours or More)
Finish Used
Annie Sloan Chalk Paint and Annie Sloan Dark Wax.
Recommended Skill Level
Intermediate
Comments
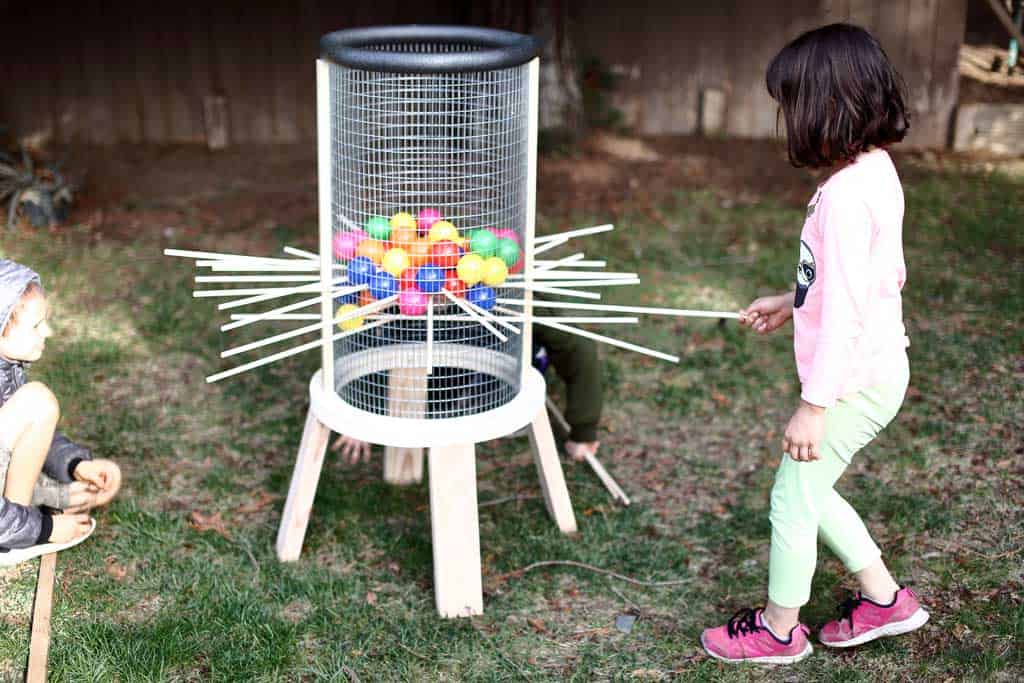
Kerplunk Game for Outdoors
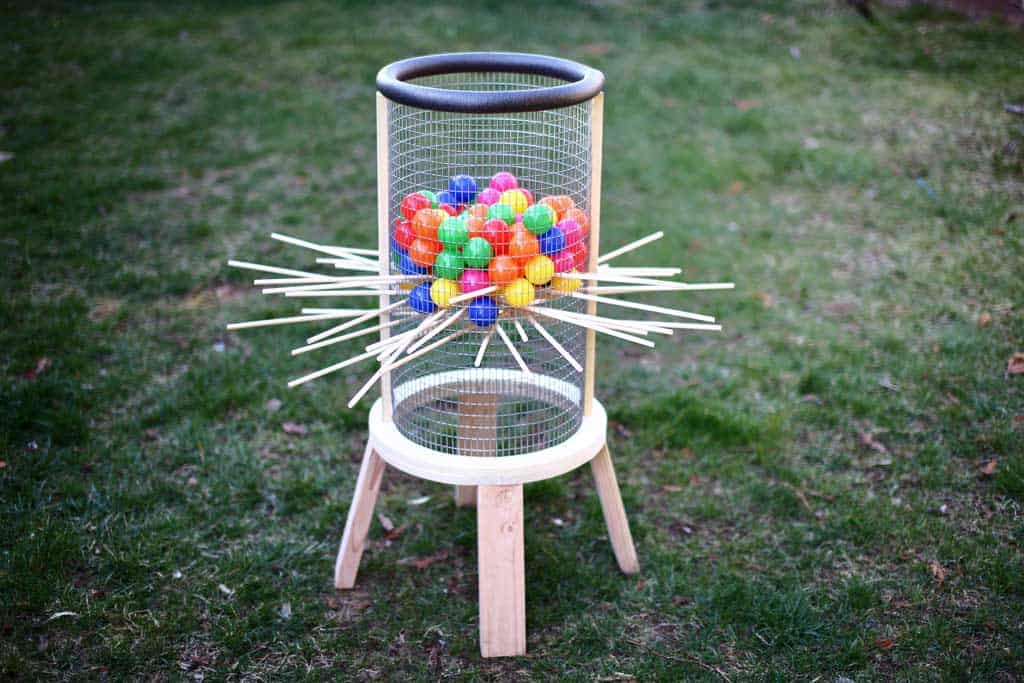
Here’s another fun game to play for all ages, especially for kids. It’s called a Kerplunk Game. The original Kerplunk game is small, made from plastic, and is mainly for indoor use. But to make it more interesting and to encourage kids to spend more time outdoors, I’ve built a Giant DIY Kerplunk Game with a wire mesh screen. This is a great backyard game for any occasion or a party.
See my website for additional pictures and how I've built it, TheDIYPlan.com
Estimated Cost
$70
Estimated Time Investment
Afternoon Project (3-6 Hours)
Recommended Skill Level
Intermediate
Comments
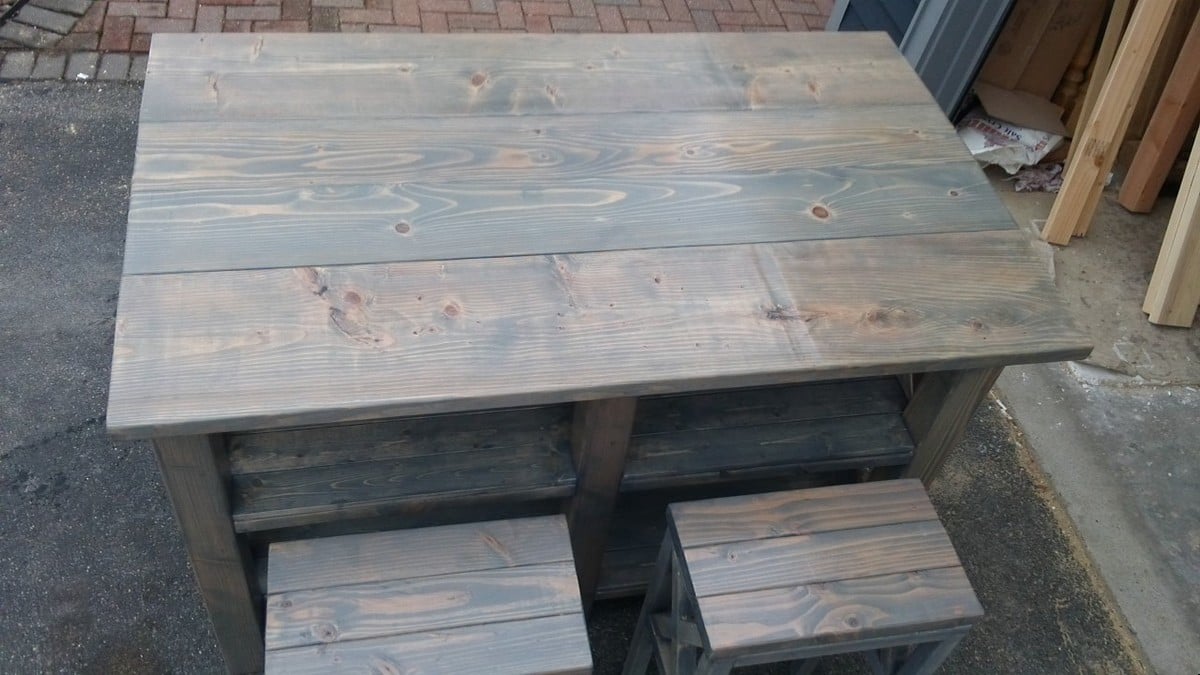
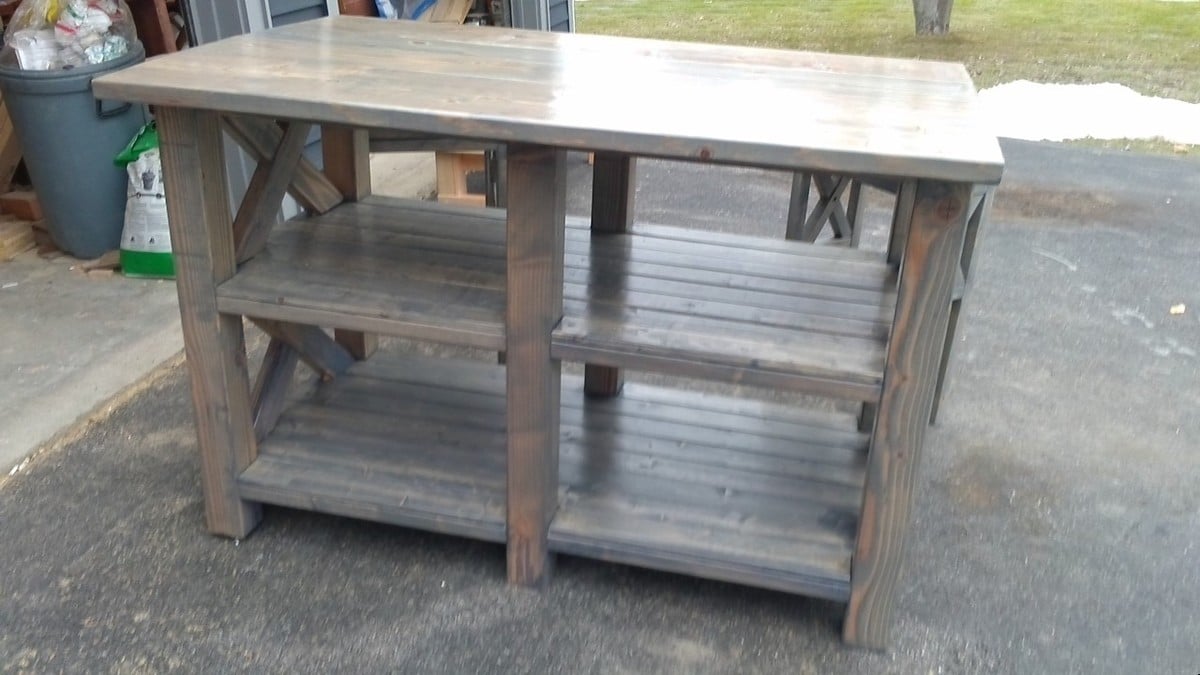
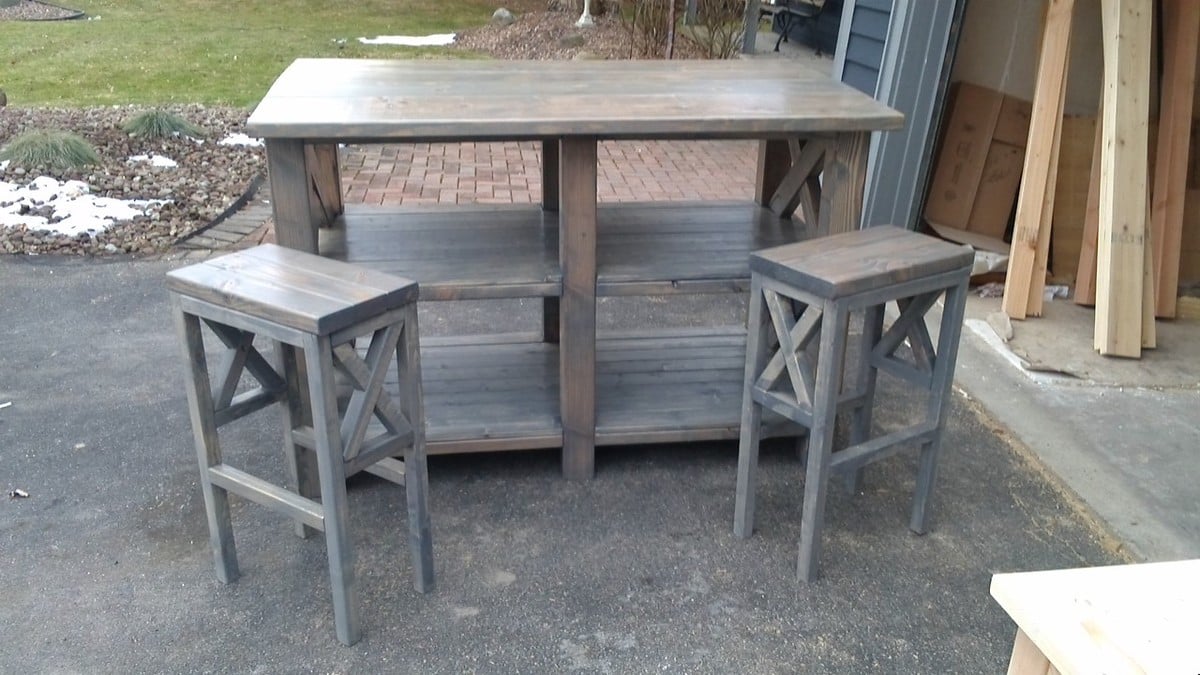
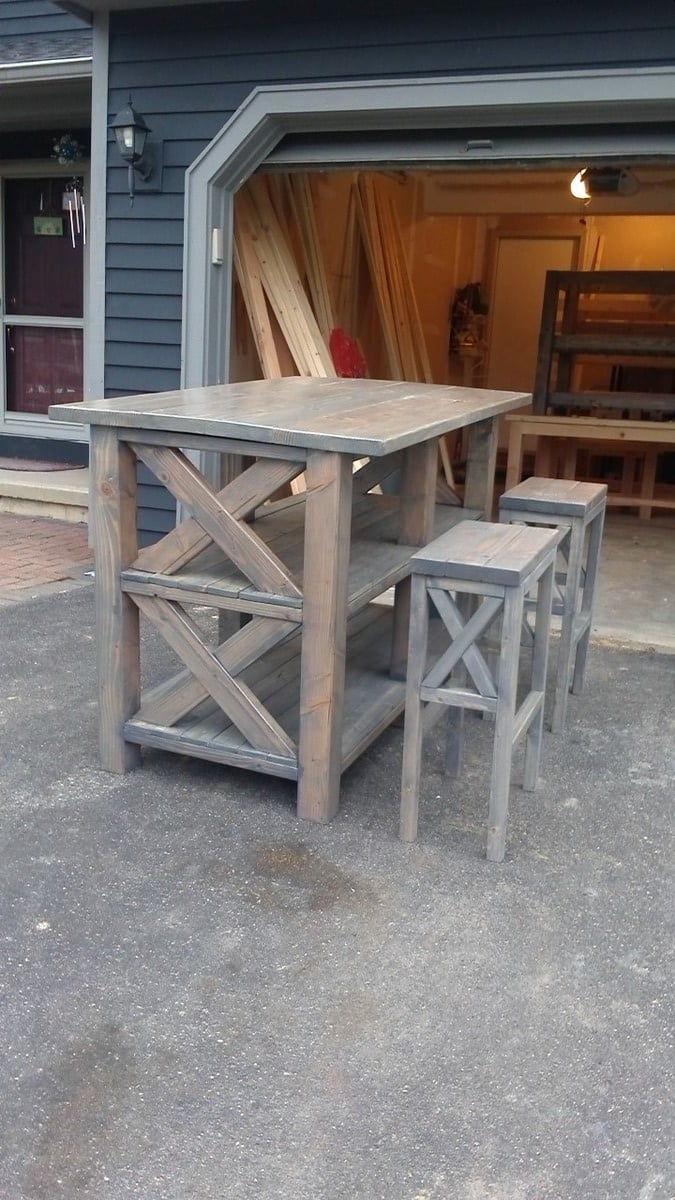
Easy Street Breakfast Bar
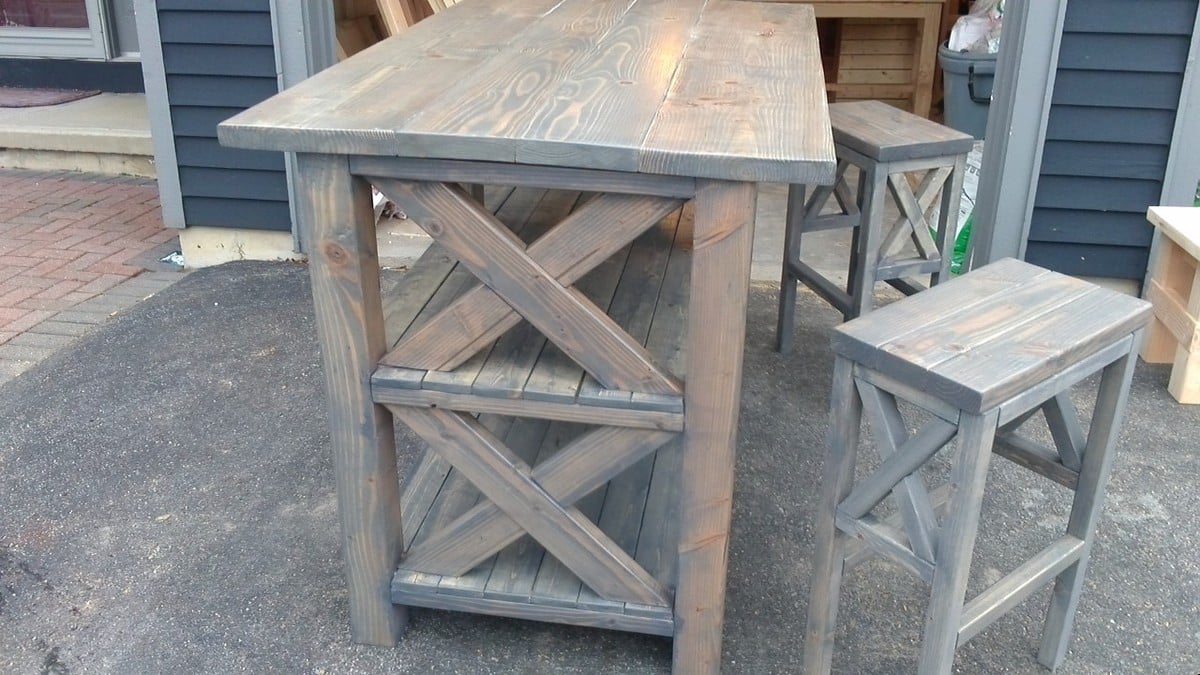
cross between a kitchen island and the x frame console table. LOL
Cross breeding furniture, gotta love it! :0)
Built from Plan(s)
Estimated Time Investment
Day Project (6-9 Hours)
Finish Used
Classic Gray minwax, and poly
Recommended Skill Level
Intermediate
Comments
Thu, 08/04/2016 - 13:03
Need Plans
how do I get the plans for this? I'm ready to get started already

Tue, 08/20/2019 - 00:05
I love this, a mix of some…
I love this, a mix of some of our favorite plans! I'd love to do a plan like this!
Modified Fillman Dresser
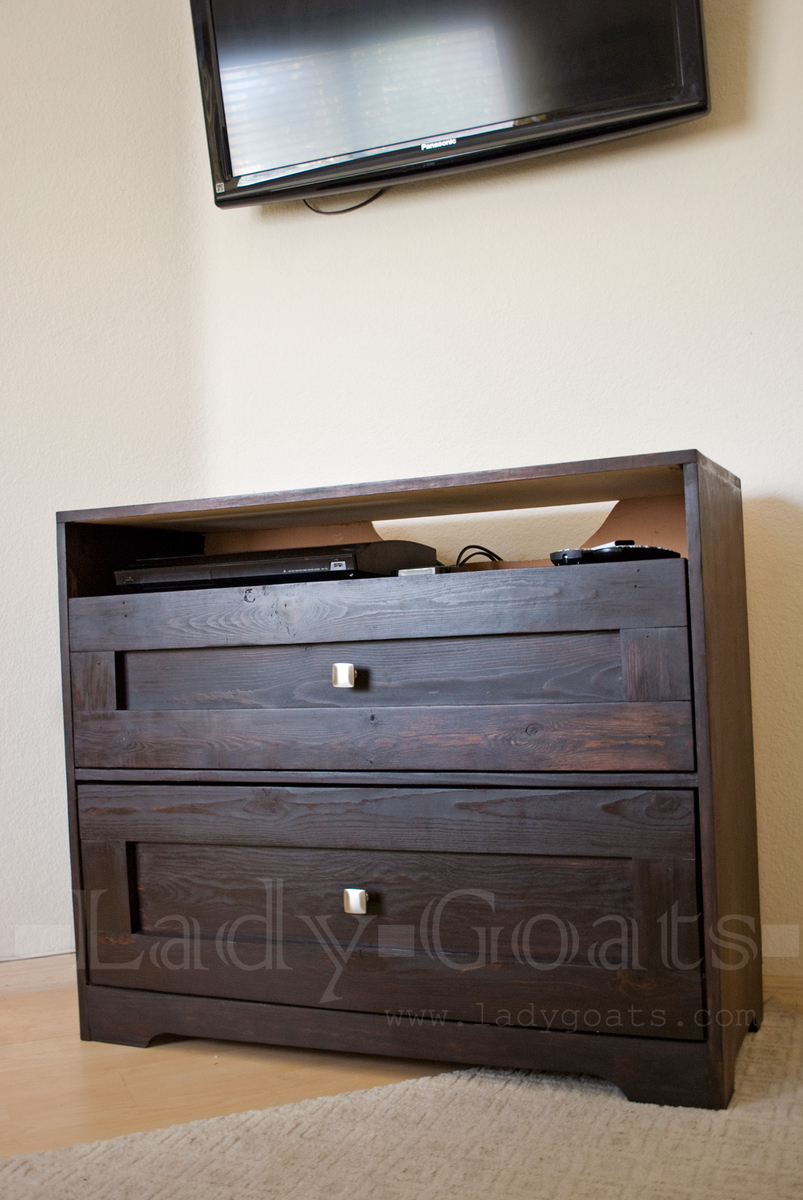
Spent forever building this modified version because I couldn't figure out what kind of drawer faces I wanted. Finished with General Finishes gel stain and Minwax Paste Finishing wax.
Built from Plan(s)
Estimated Cost
Used scraps, so all that I paid for was the knobs and finishing wax.
Estimated Time Investment
Week Long Project (20 Hours or More)
Finish Used
GF gel stain in Java and Minwax Finishing wax
Recommended Skill Level
Intermediate
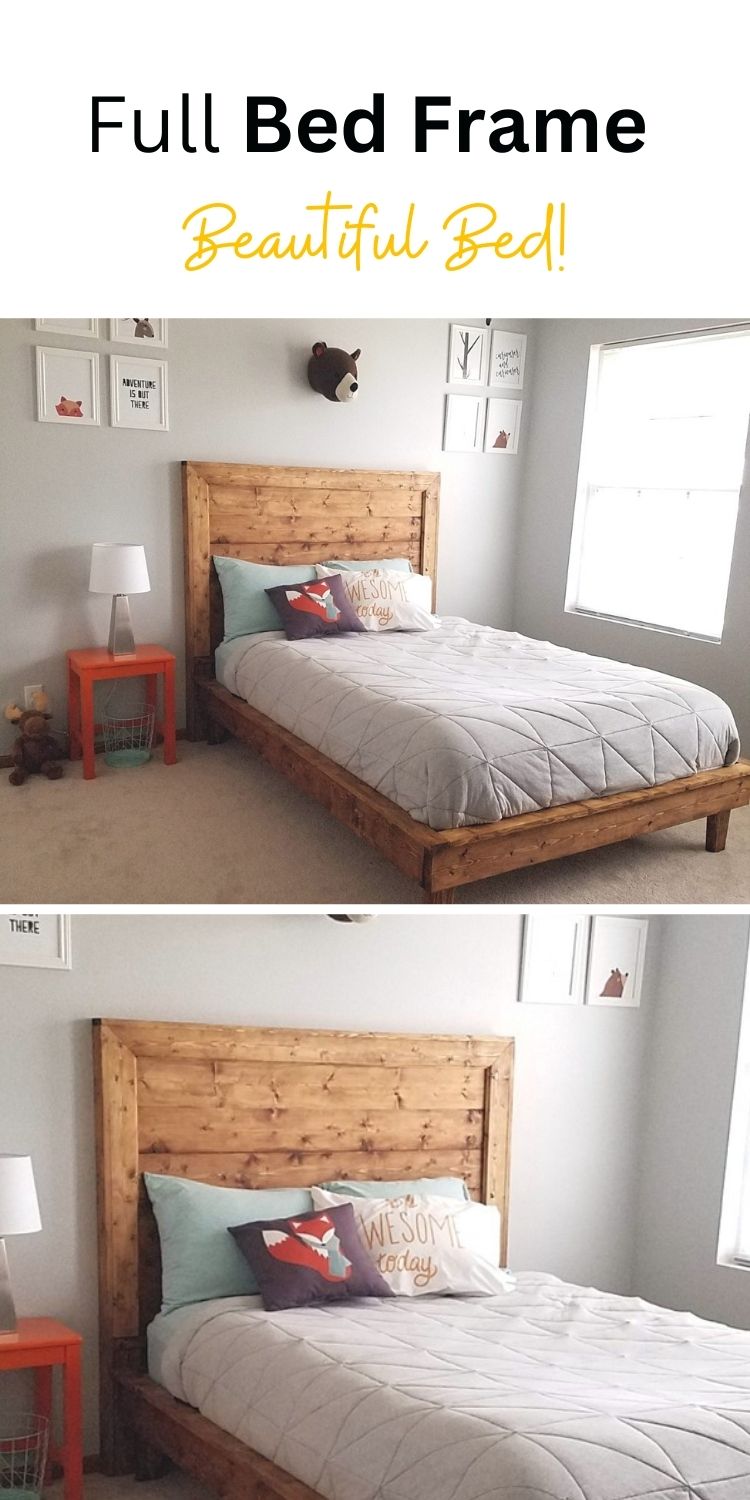
Beautiful bed!
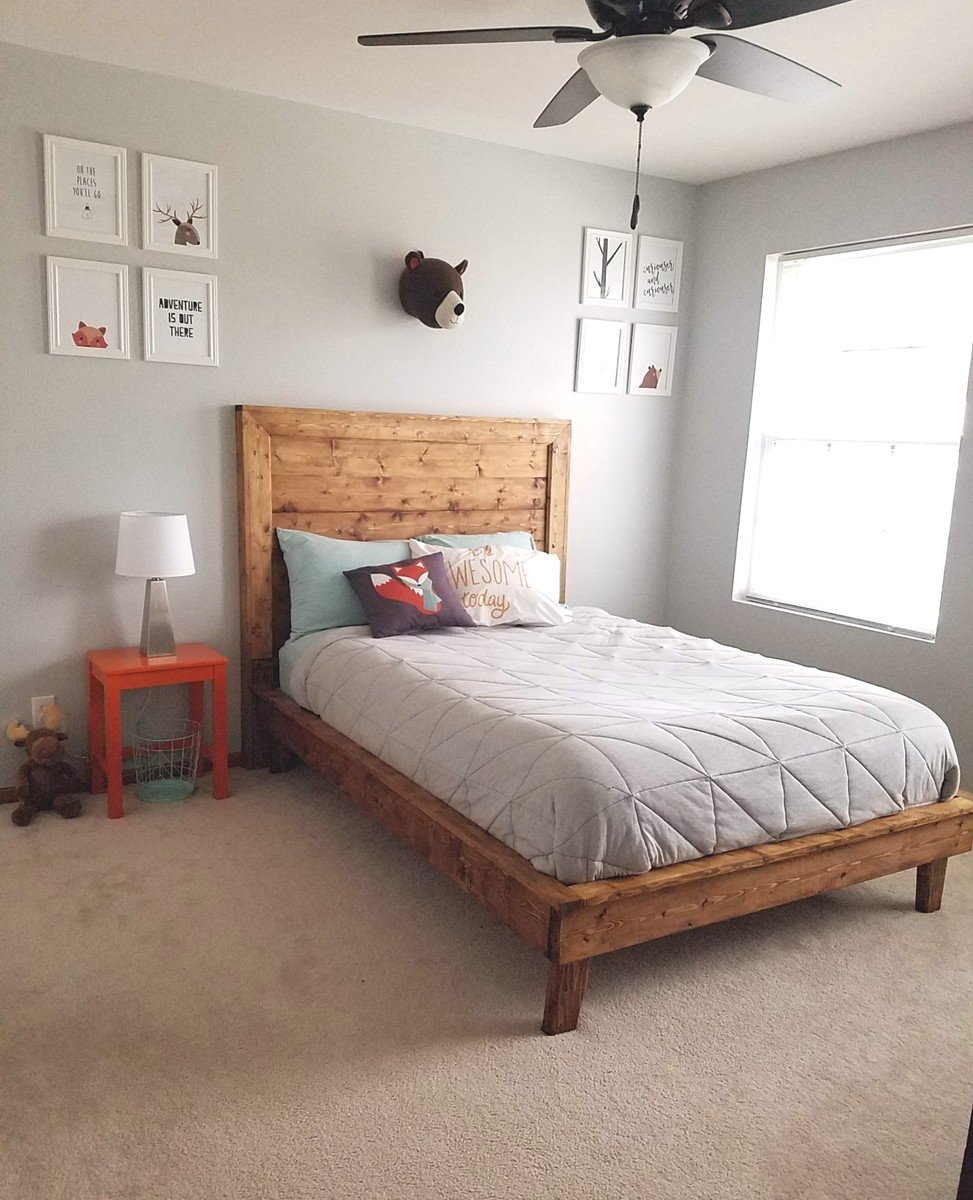
This bed is gorgeous and the plans are perfectly laid out for even a beginner to use. We were making a full bedframe, so we used the exact measurements given in the cut list and it fit the mattress just right. We made the accompanying headboard with a few changes. We were using pine and wanted the headboard casing to match, so we just used 1x4's and routed the edge with an ogee bit we had on hand. We also wanted the platform just a tad bit higher and made the legs 10 inches instead of 7. We also ended up making the platform slats out of 1x4's instead of 1x3's as they were cheaper.
Pin For Later!
Built from Plan(s)
Estimated Cost
$80.00
Estimated Time Investment
Weekend Project (10-20 Hours)
Finish Used
One coat of Minwax Honey stain, finished with flat spray poly
Recommended Skill Level
Beginner
Comments
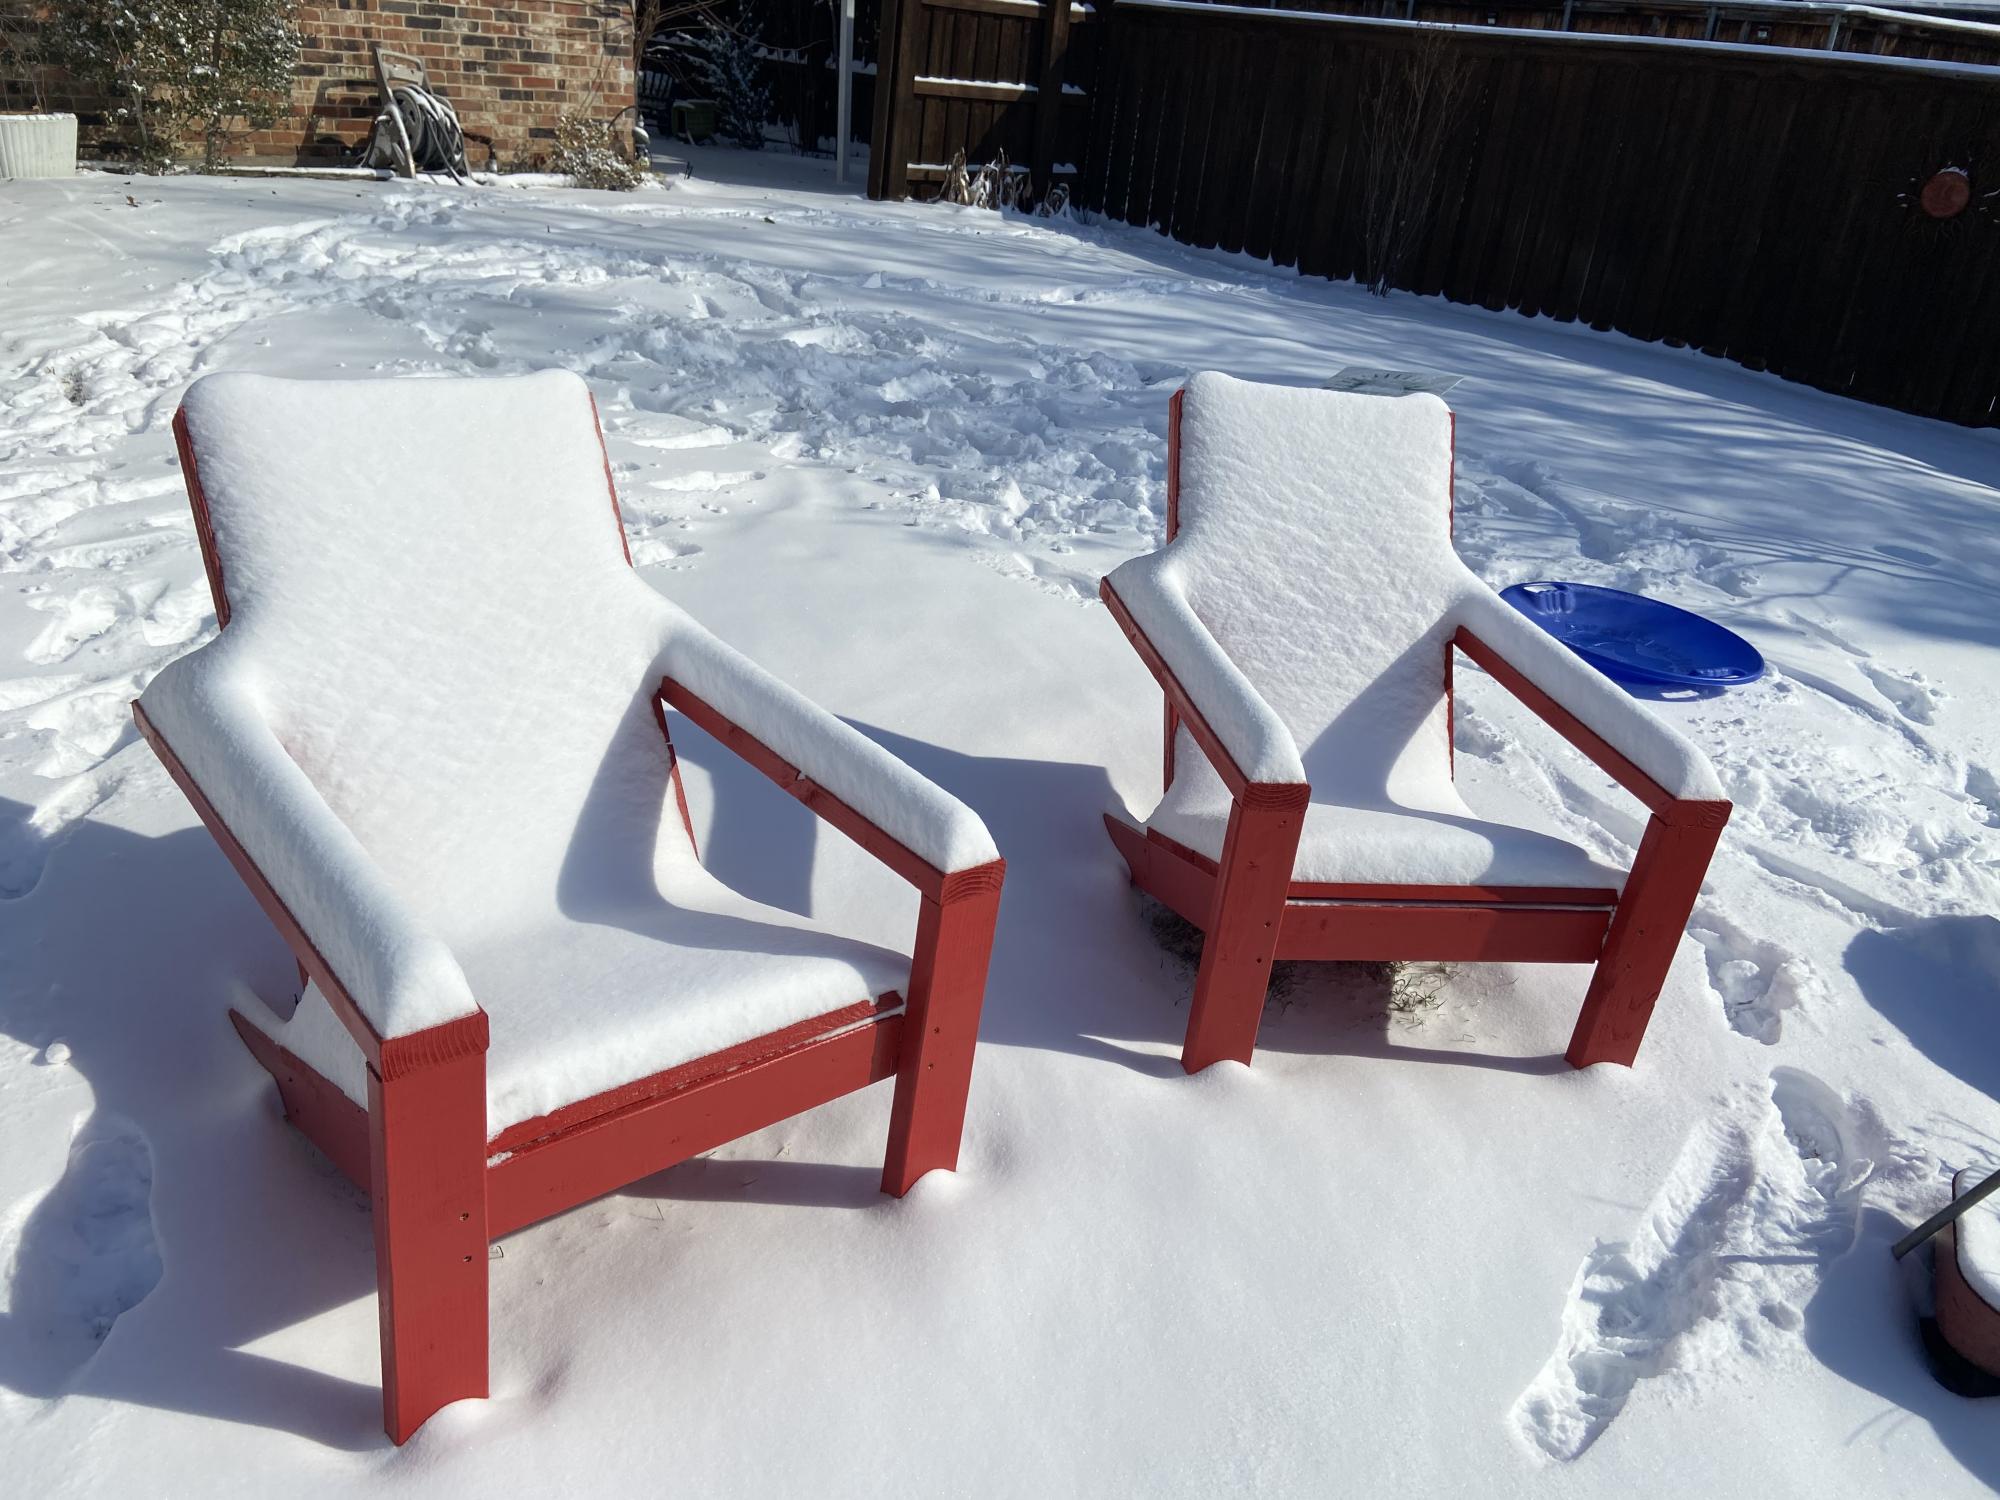
Outdoor Seating
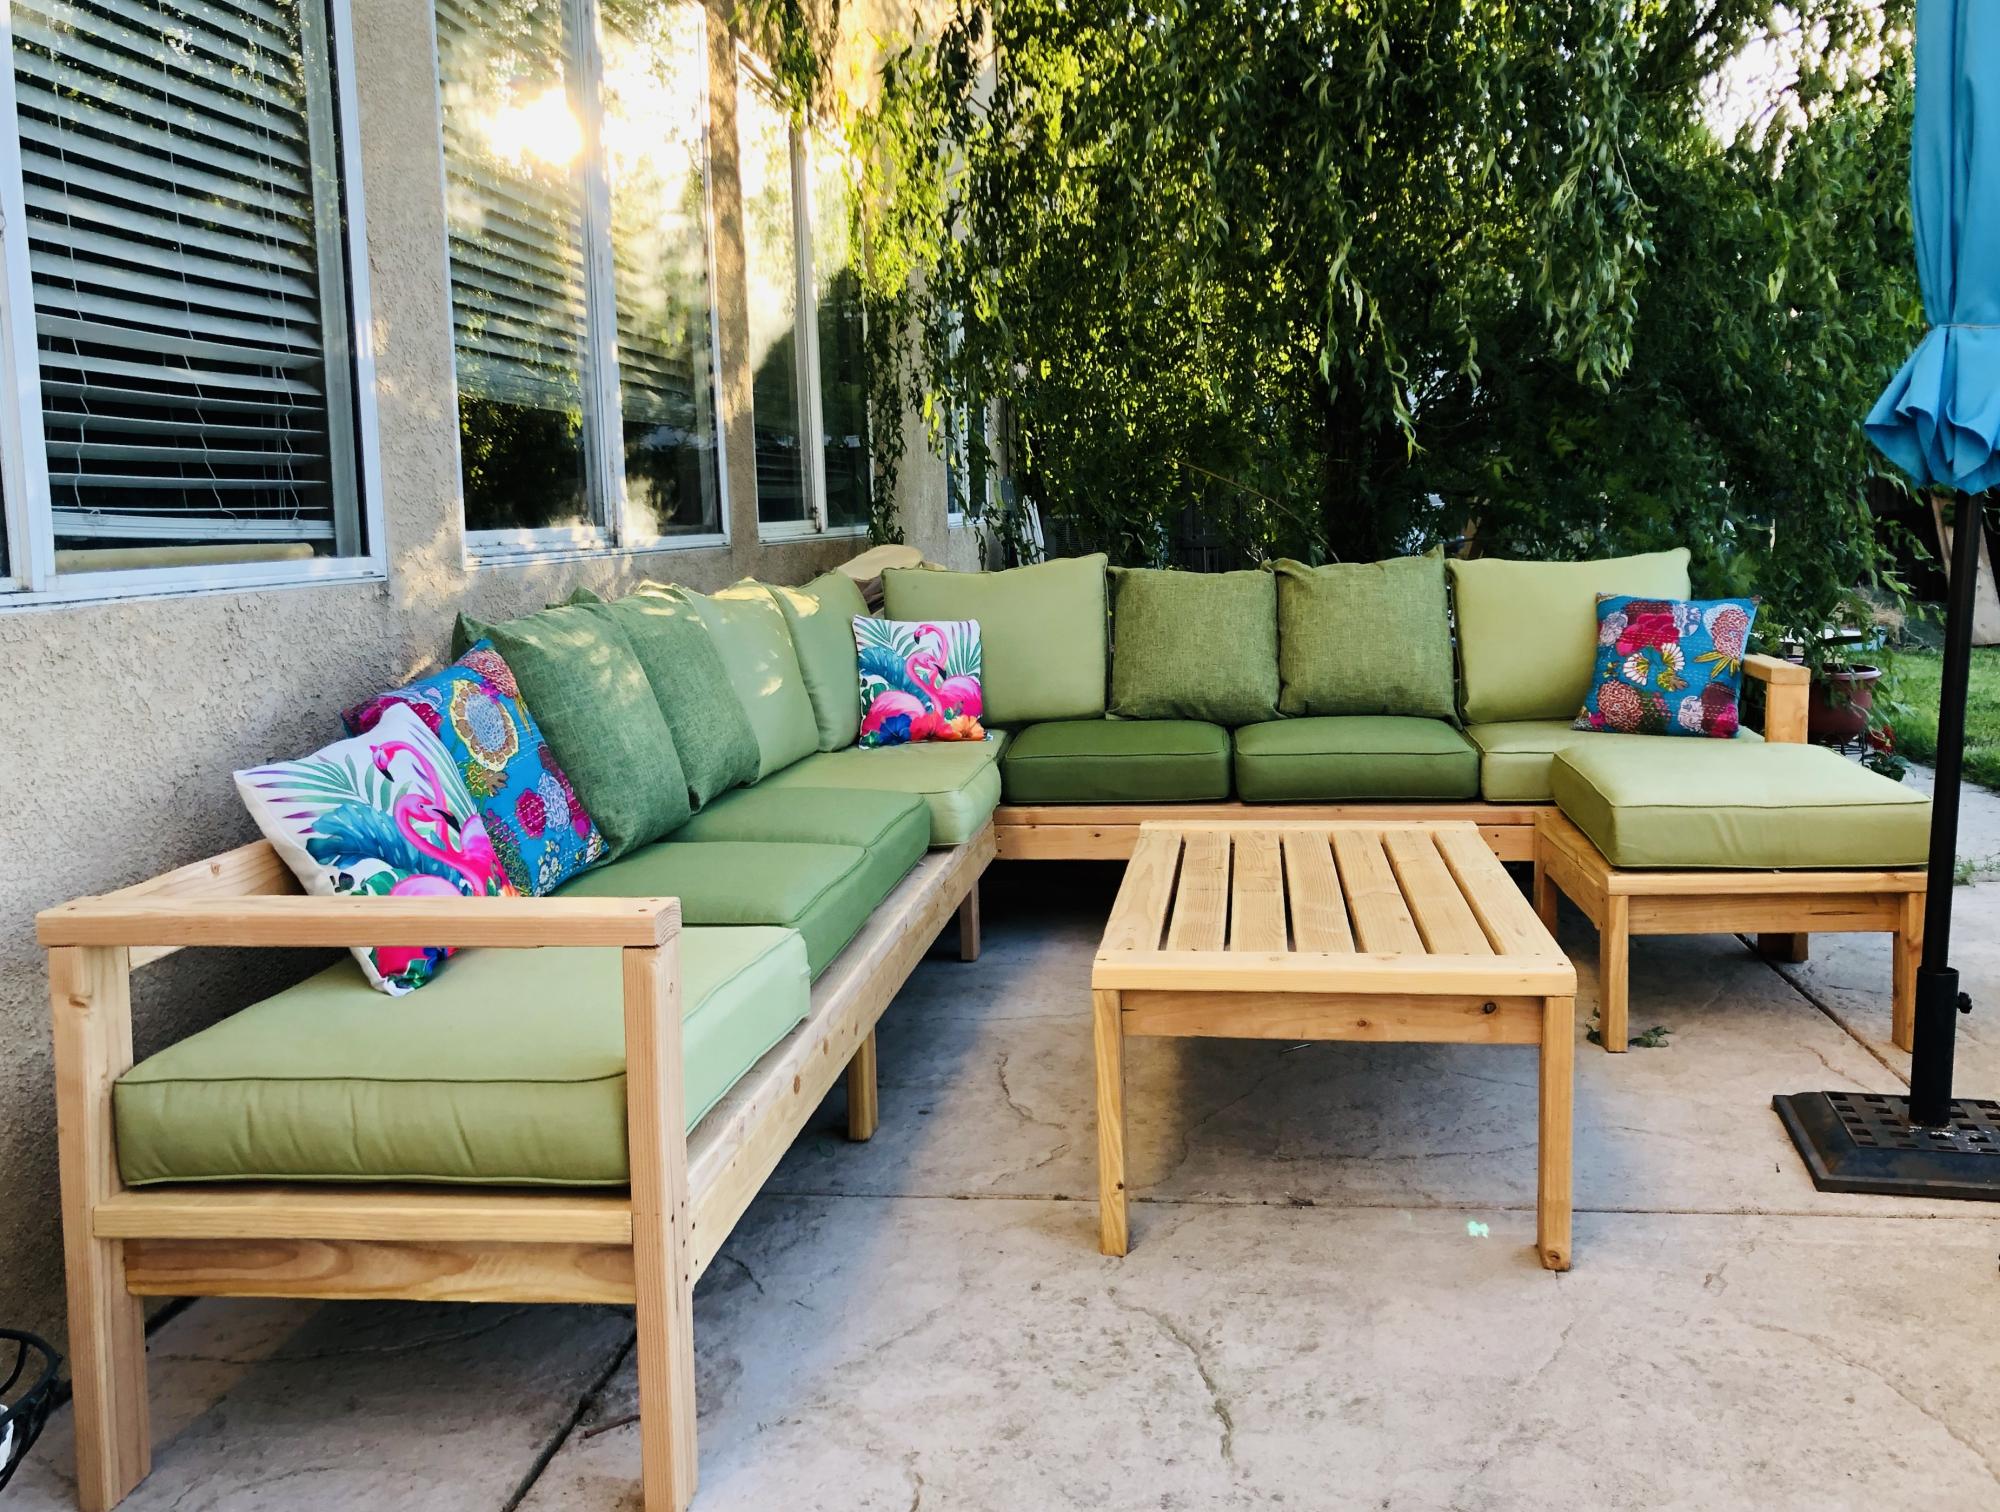
I made this in a weekend to add seating to our back patio area -- I AM IN LOVE WITH IT!
The whole family hangs out here, it has given us a great place to spend outdoors during lockdown.
I picked up the cushions on craigslist, so the cost of the entire project was kept super low.
I will be staining and sealing it soon, I am so happy with how it turned out! Thanks Ana :D
Built from Plan(s)
Estimated Cost
$300
Estimated Time Investment
Weekend Project (10-20 Hours)
Recommended Skill Level
Intermediate
Comments
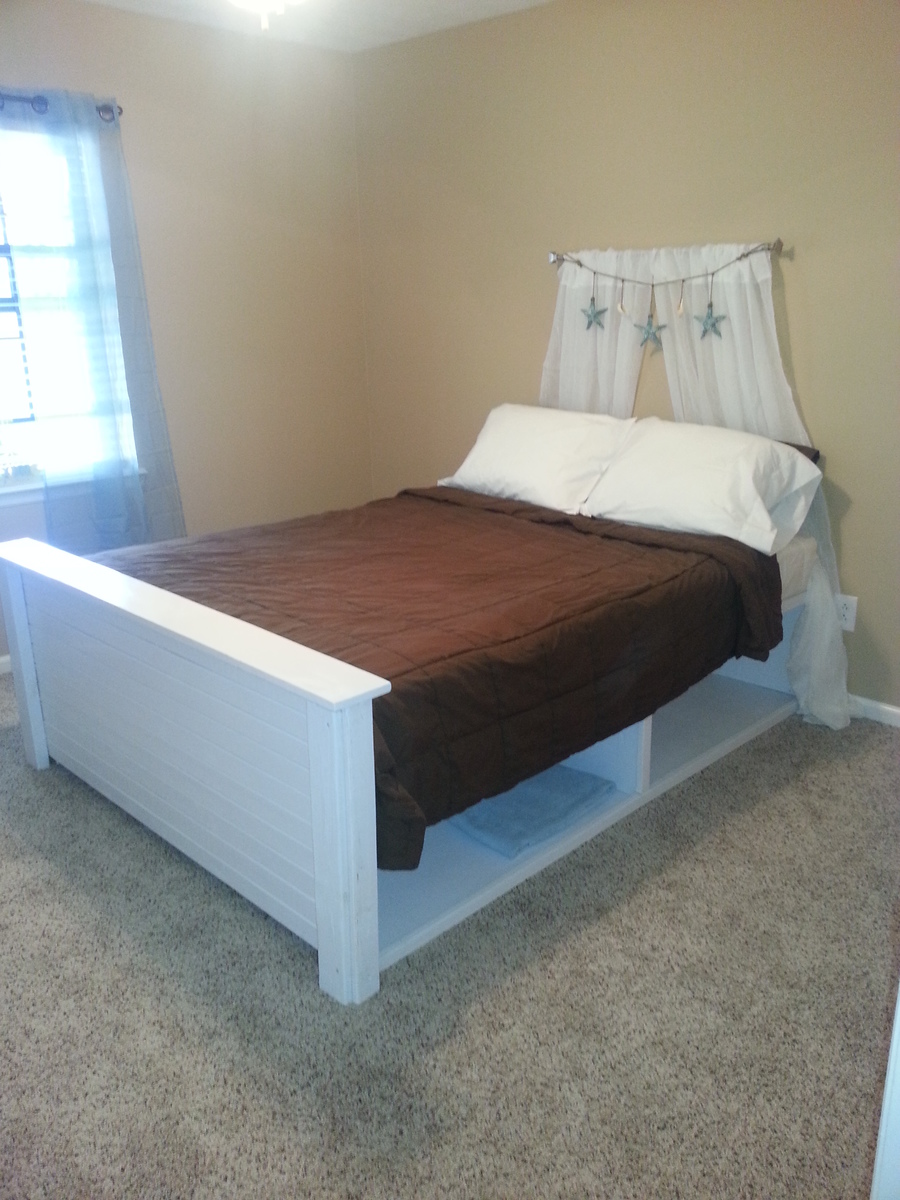
Storage Bed

We needed a guest bed for our guest bedroom. So I built the storage areas under the bed out of plywood and boxed them up. The bed would probably look better with a headboard, but we decided to just do that curtain style headboard.
I had seen different beds similar to this, and I just had those in mind when I started. I didn't follow any specific plan except for what I had in my head.
It was painted with an oil-base white paint.
Estimated Time Investment
Weekend Project (10-20 Hours)
Recommended Skill Level
Beginner
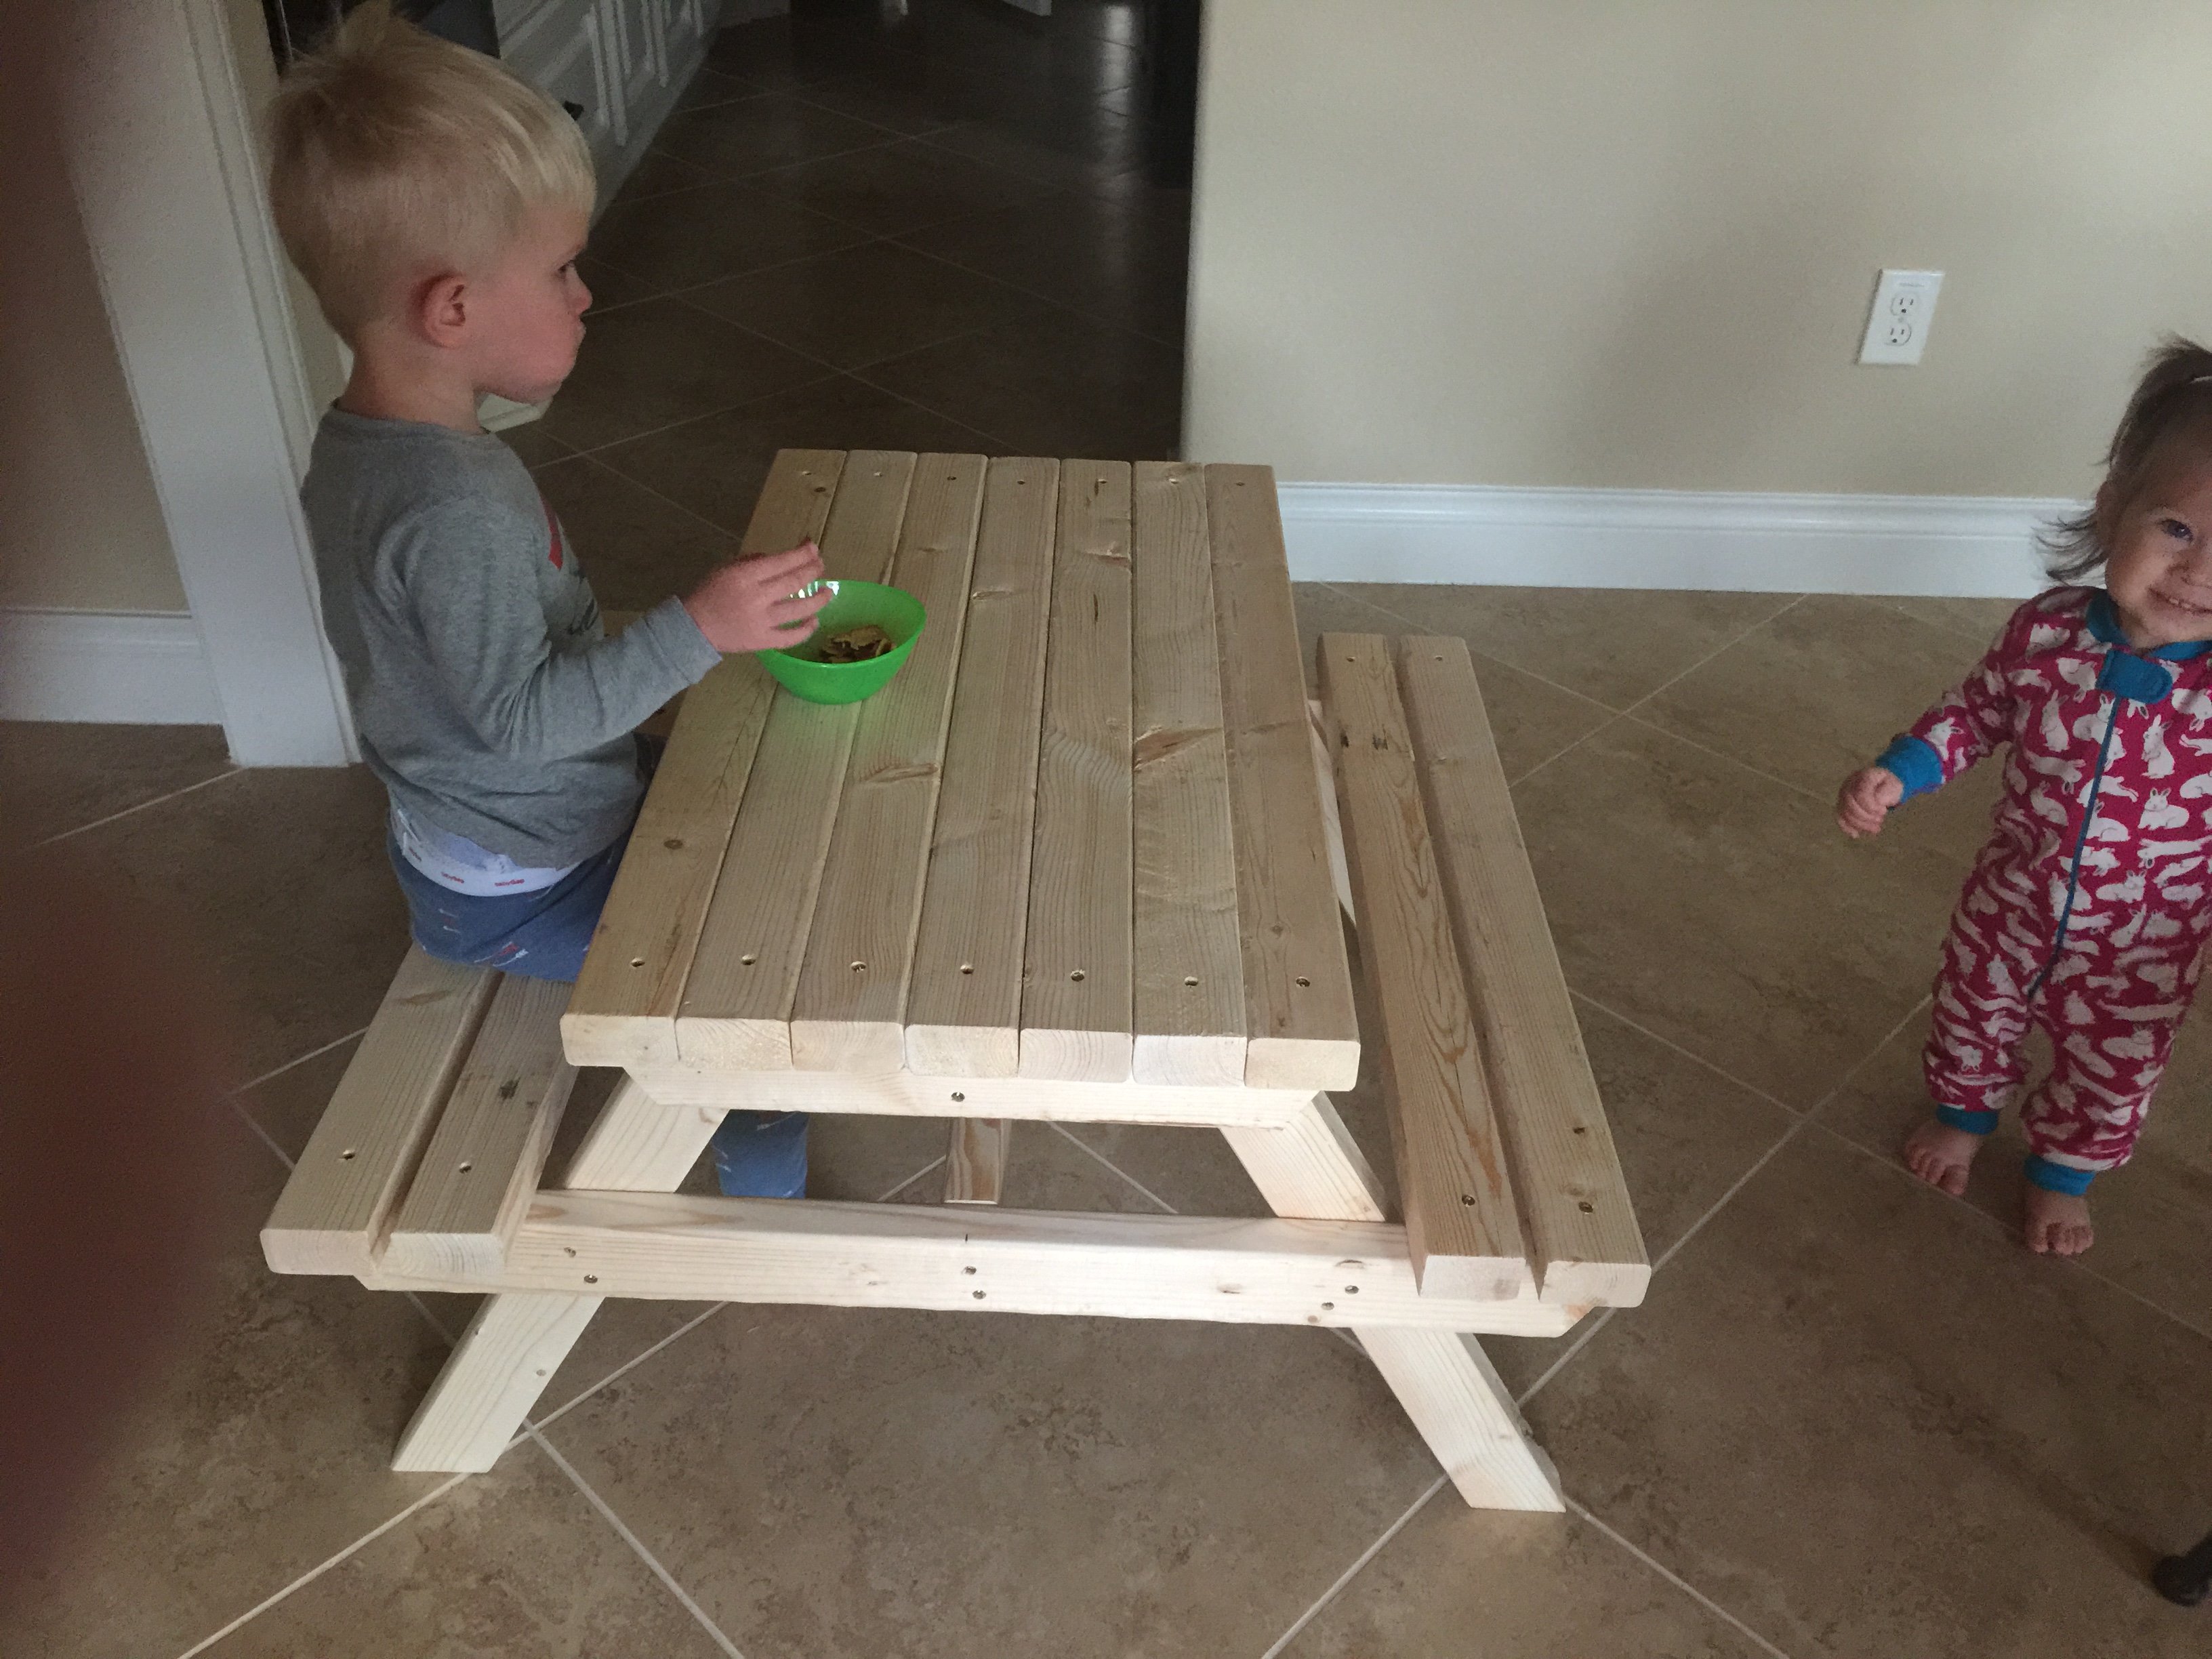
Toddler Sized Picnic Table
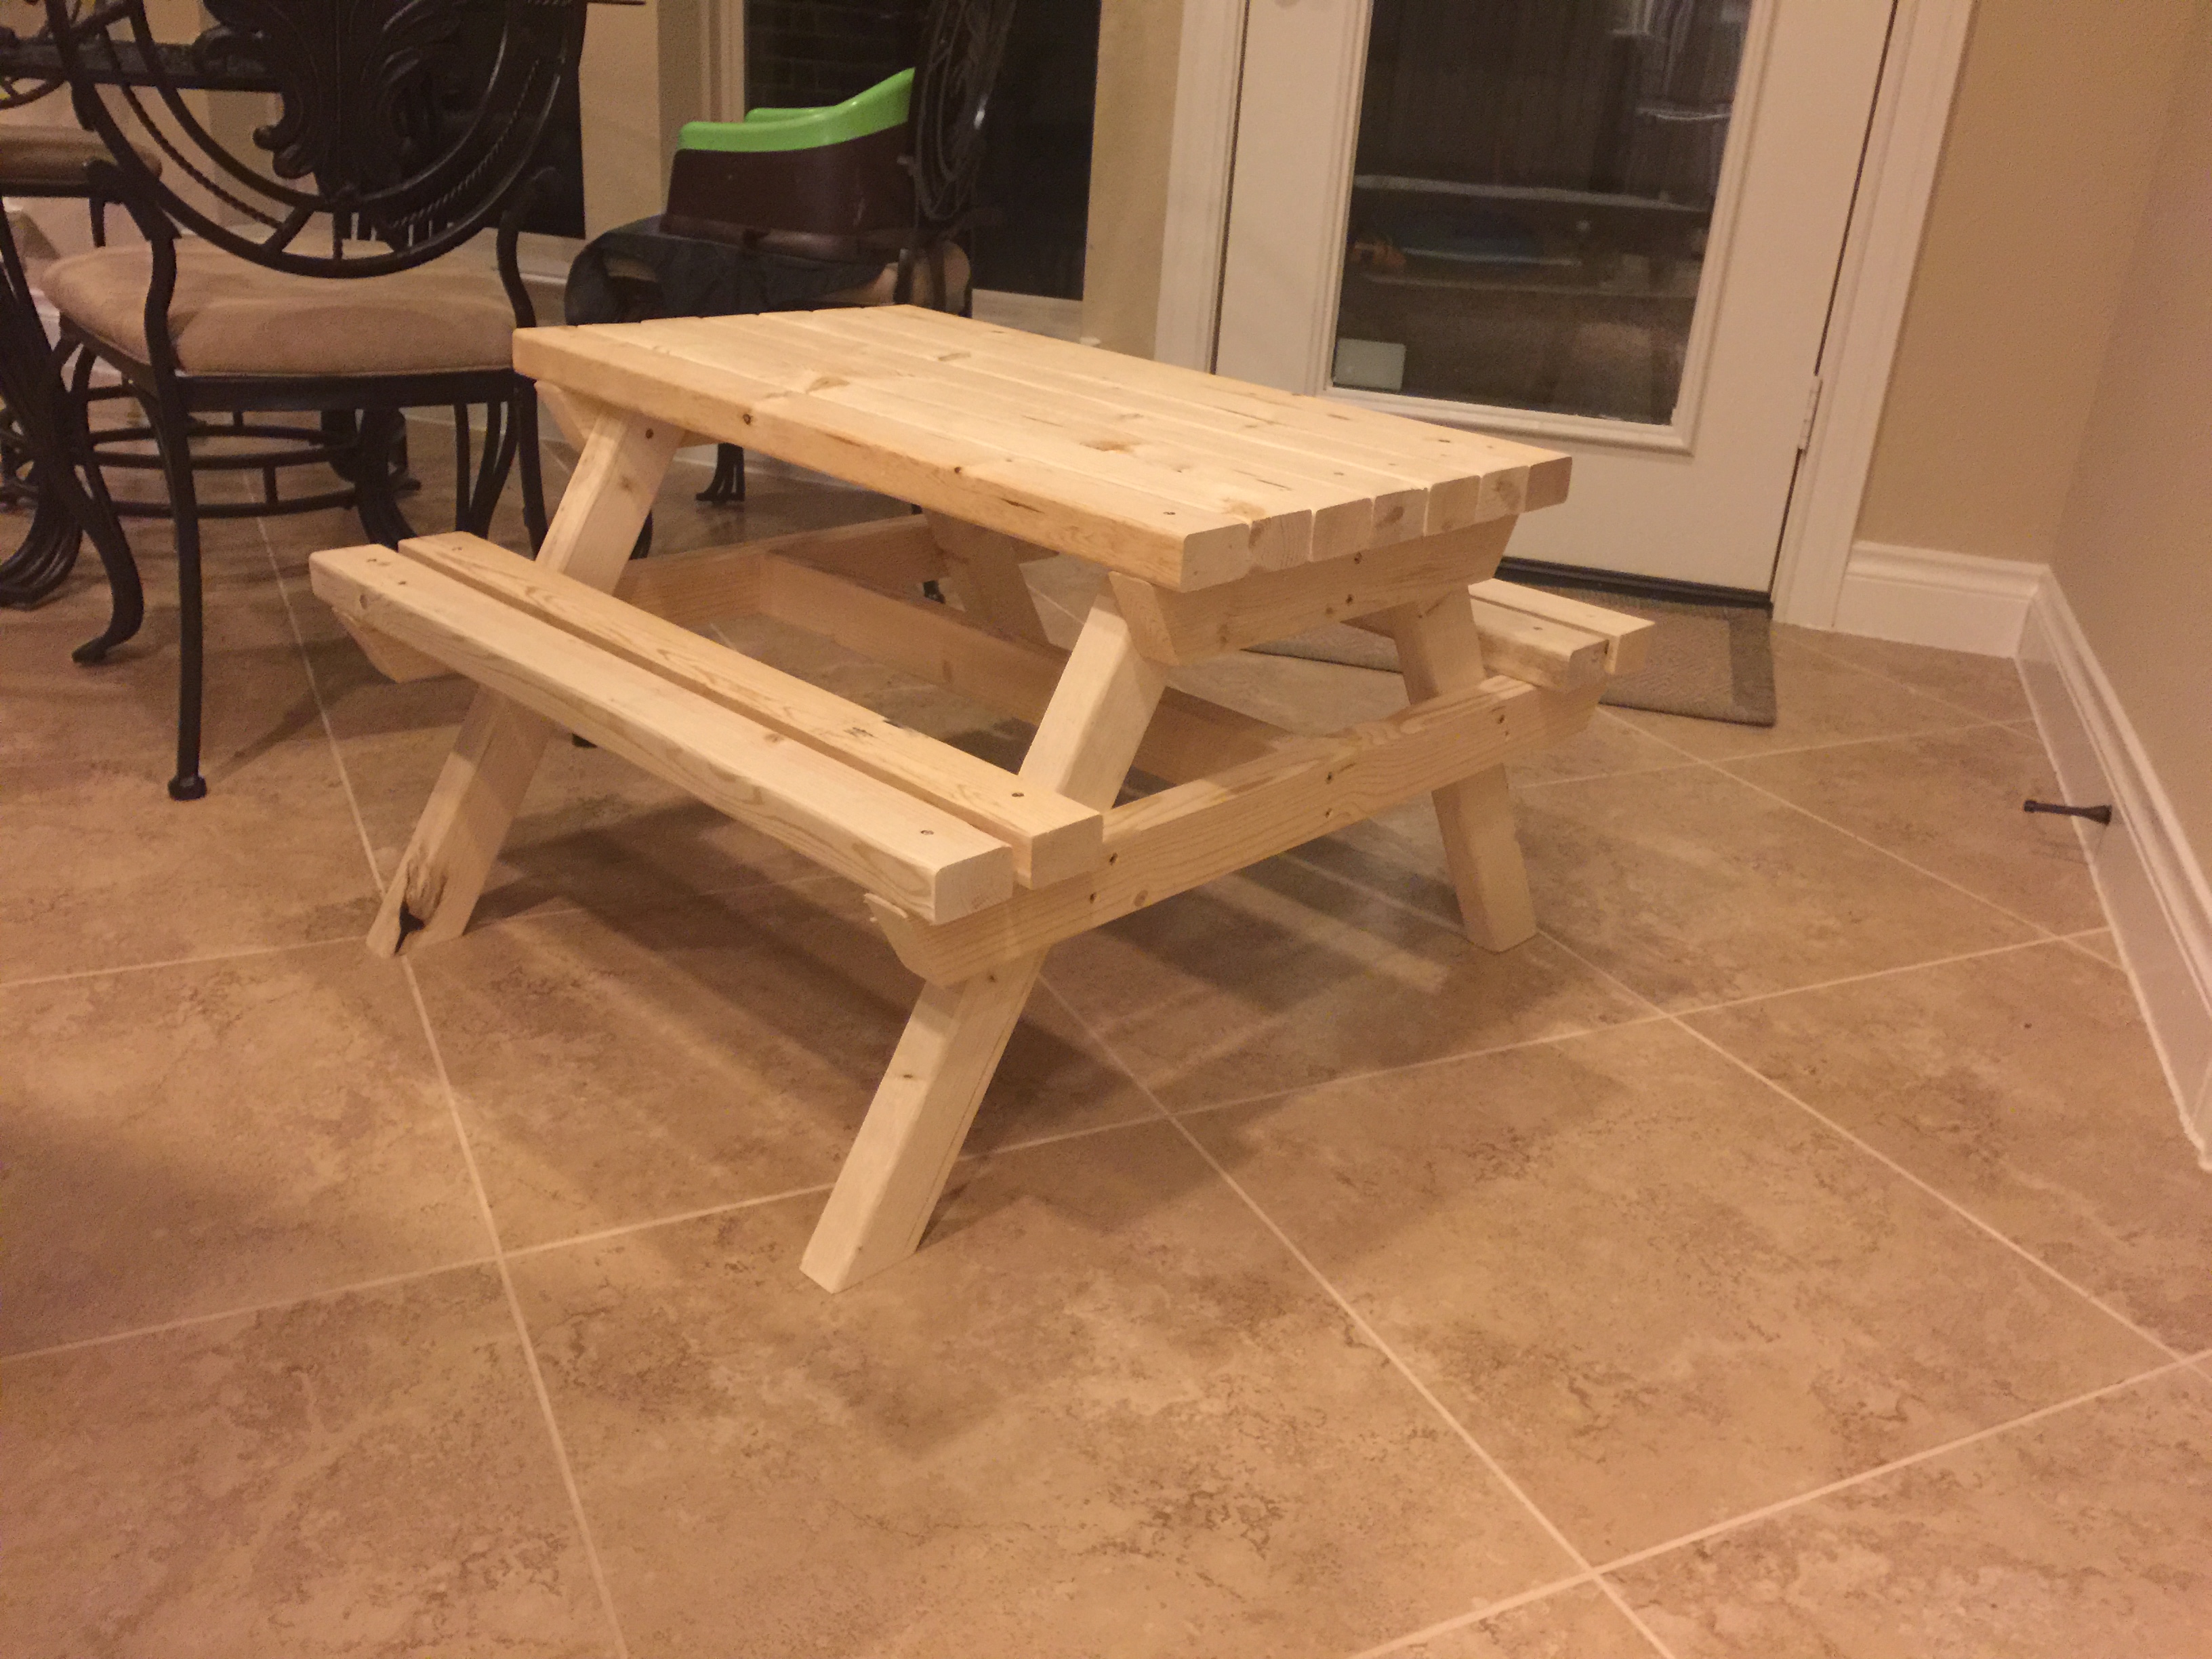
I love this plan. I made this for my toddler and he loves it! My daughter is too small to climb on but she's always trying. She loves it too.
Built from Plan(s)
Estimated Cost
15
Estimated Time Investment
An Hour or Two (0-2 Hours)
Finish Used
None yet. To be completed
Recommended Skill Level
Beginner
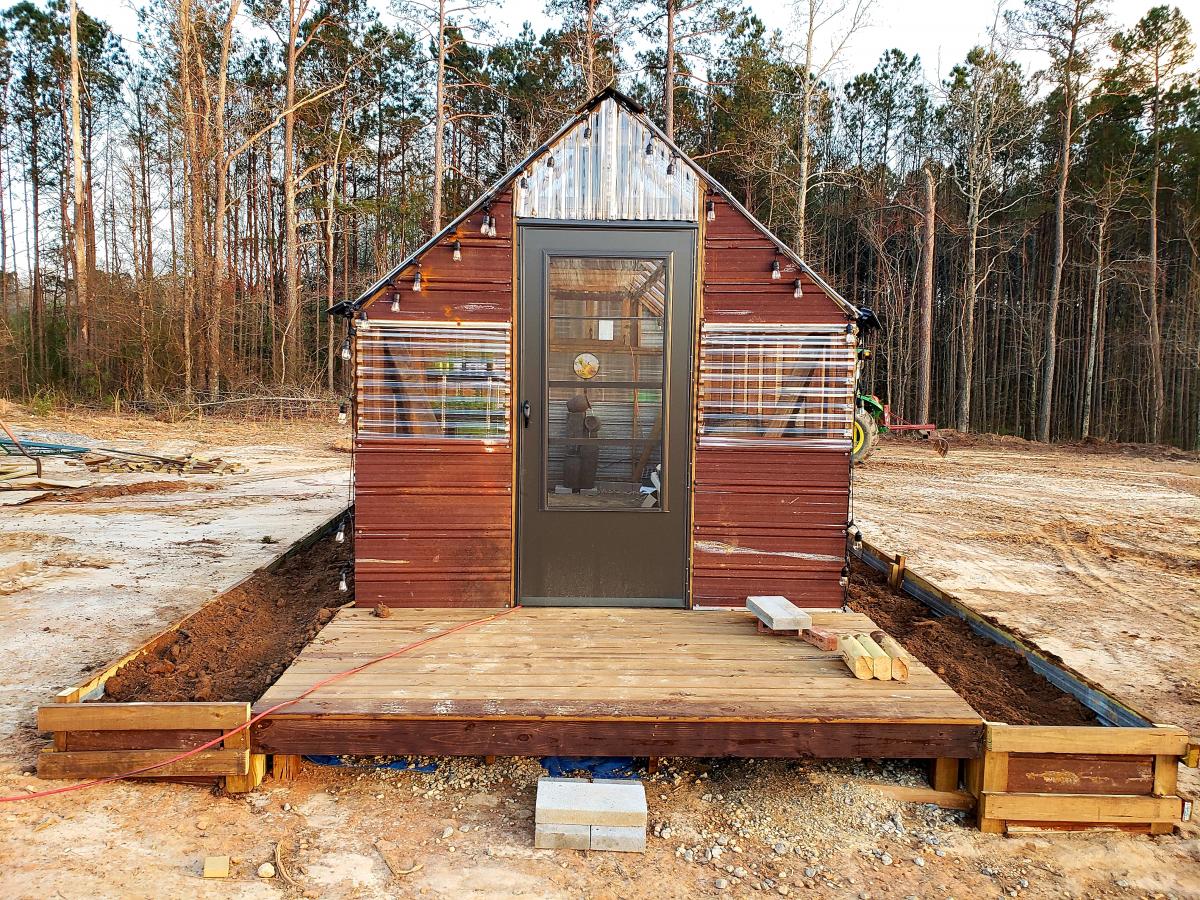
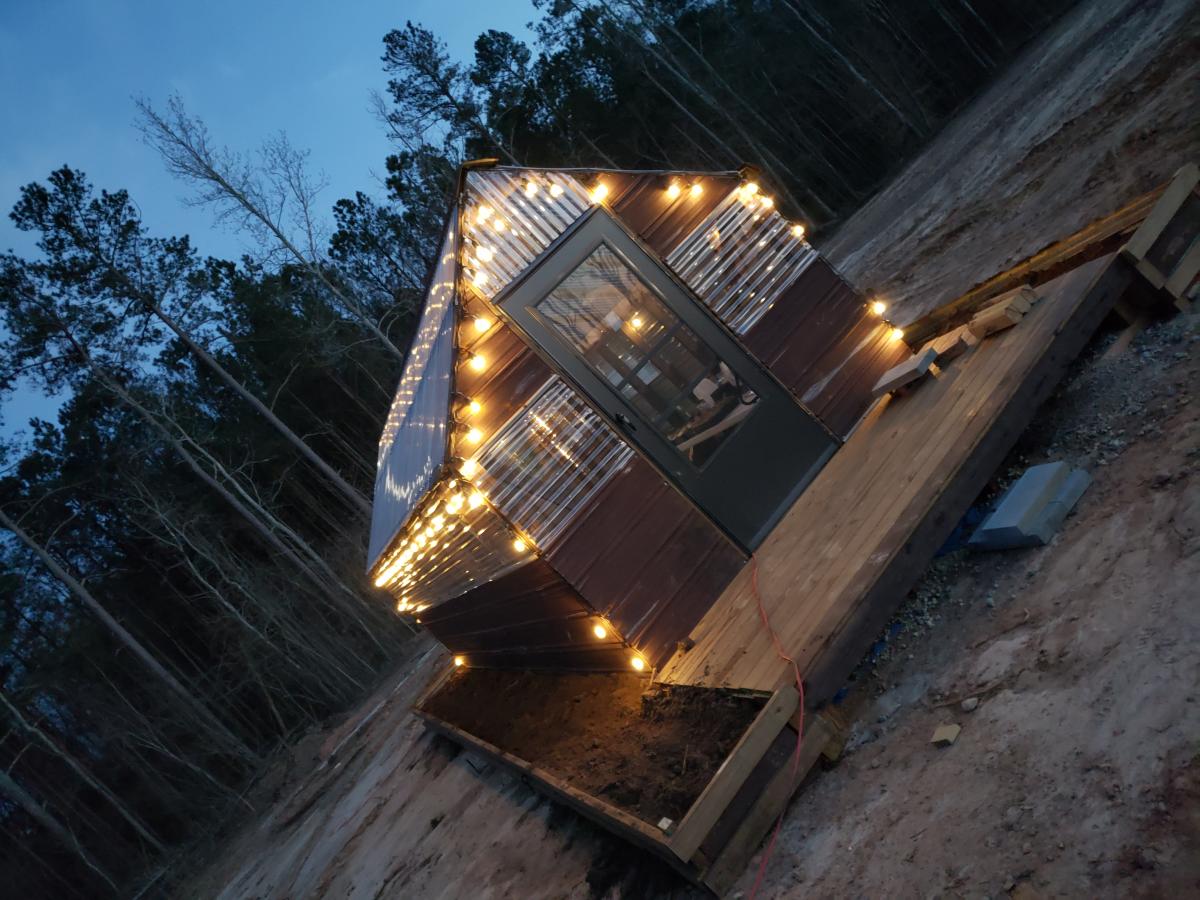
Greenhouse
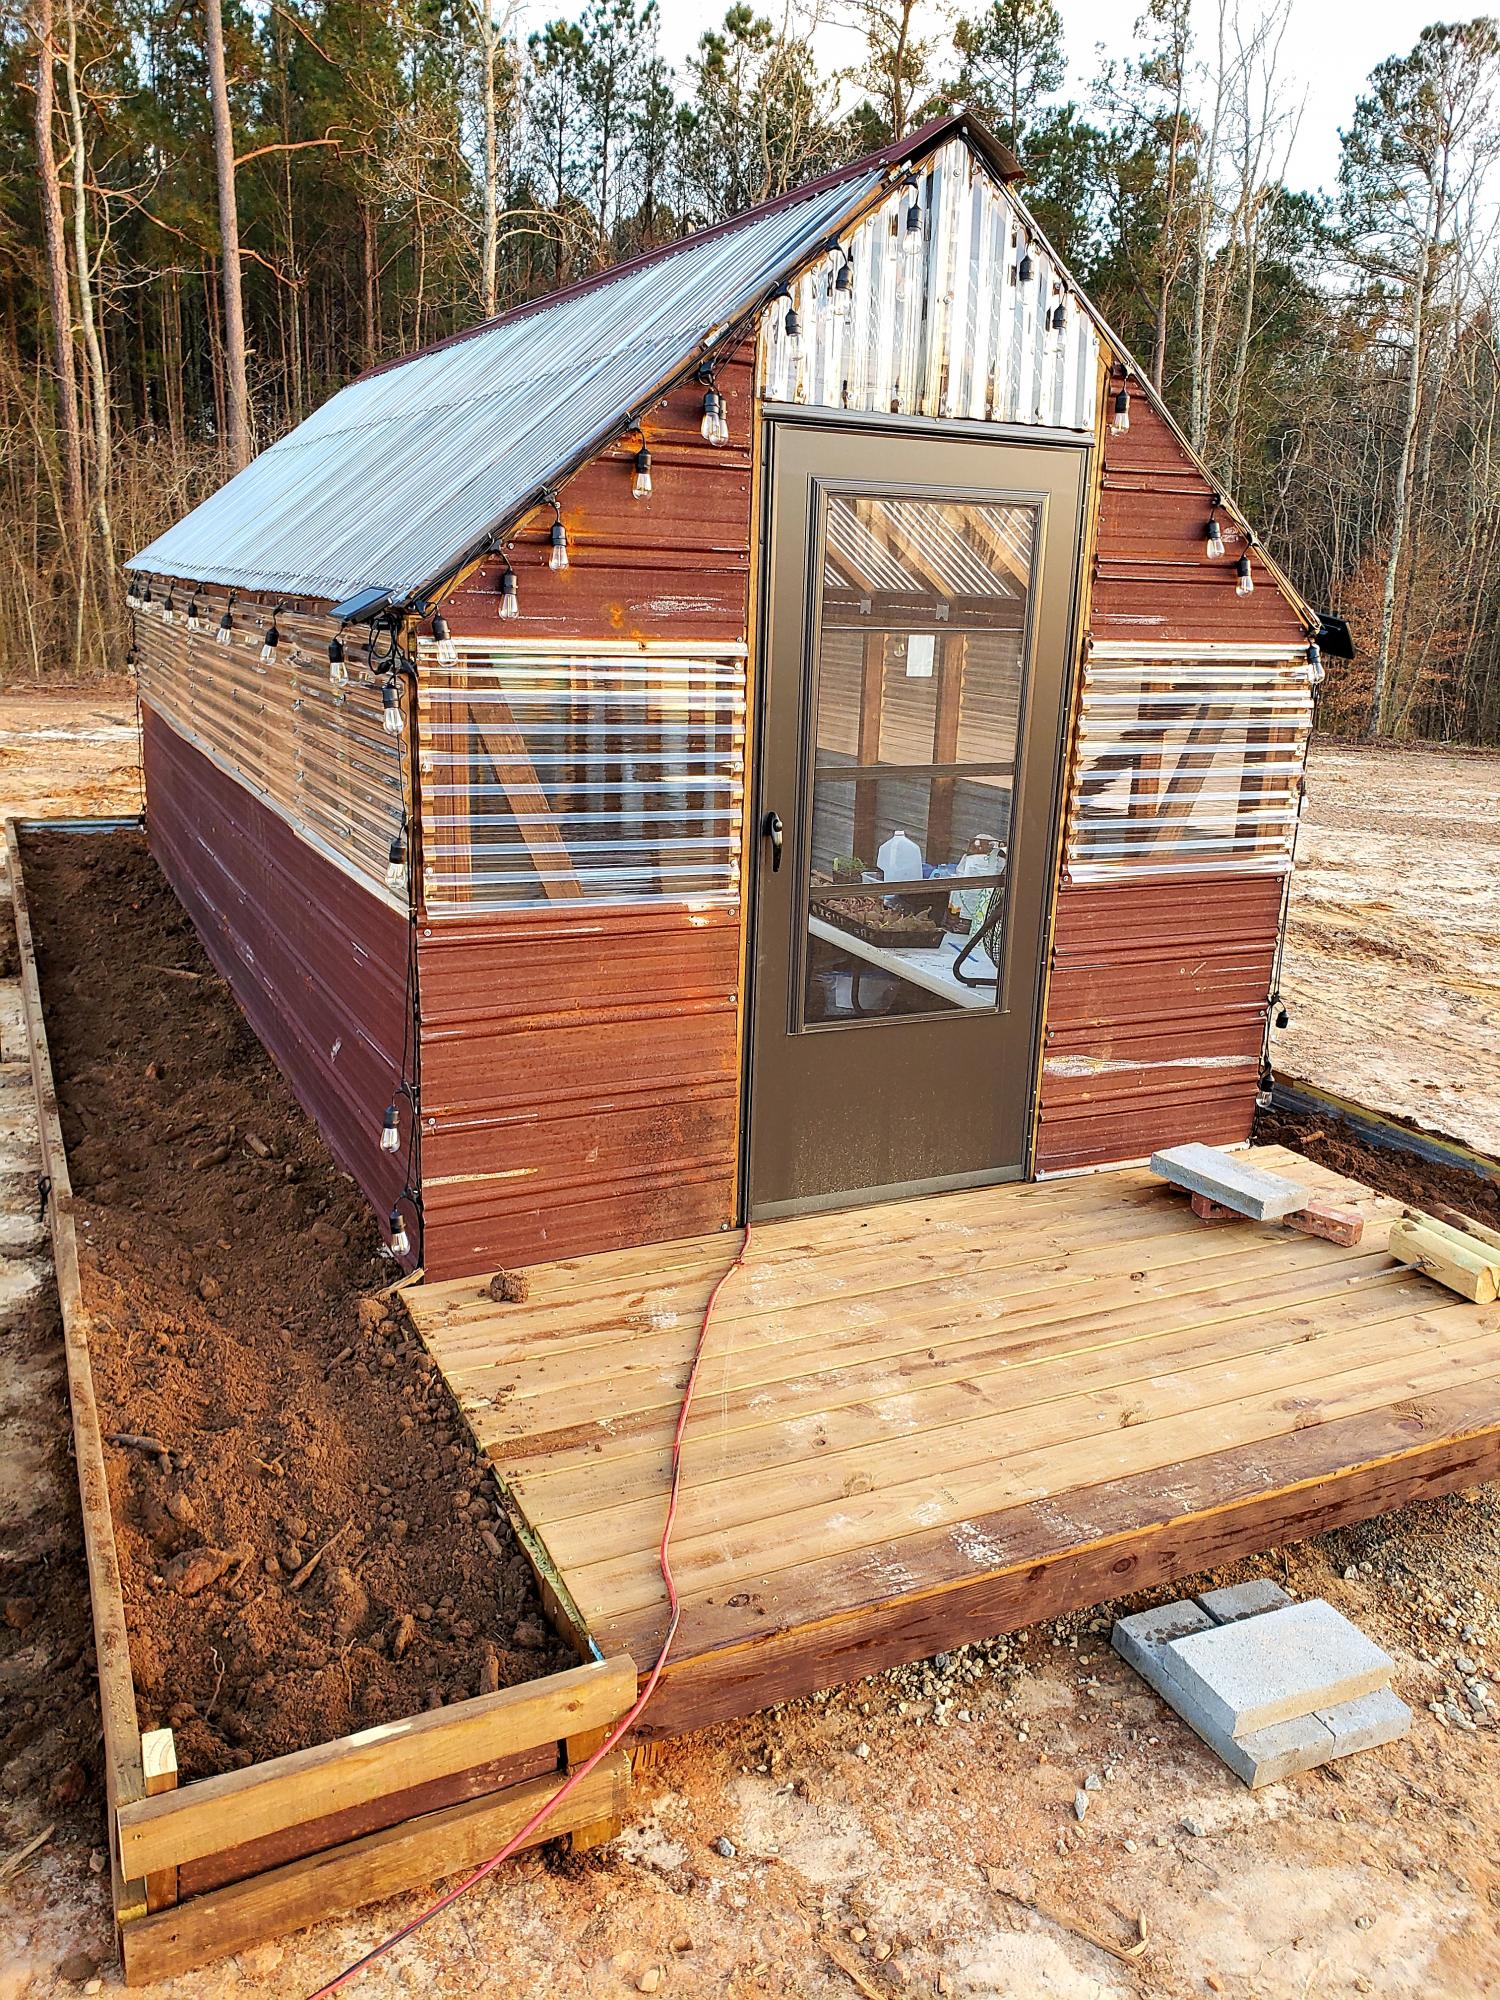
Gabled Greenhouse completed with upcycled tin roofing. Extended the greenhouse to a 20' long structure.
Comments
Thu, 04/01/2021 - 16:59
Superbly done!
Love this, excellent use of the tin, the outside beds are a great addition!
Comments
Ana White Admin
Fri, 03/05/2021 - 11:02
That's something you don't see everyday!
Looks refreshing, lol! Thanks for sharing, love the color choice!