Community Brag Posts

Christmas 3-tier cookie stand

Submitted by calcowoods on Thu, 12/31/2020 - 12:51

Inspired by Shara of Woodshop Diaries, created this 3 tier tray for displaying cookies for Santa. Added a 3 dimensional star as the topper and simply followed the excellent photos and schematics on Shara's website.

Estimated Cost
$5
Estimated Time Investment
Afternoon Project (3-6 Hours)
Finish Used
Minwax paste wax
Recommended Skill Level
Beginner

Comments

Classic Bunk Beds Re-Imagined With Stairs

Submitted by edeboode on Mon, 04/03/2017 - 07:57

I modified the plans for the Classic Bunk beds by making them 74" tall instead of 63" and added a fourth slat all the way around to add more protection from potential falls.  I created one opening in the front for my youngest to get into the bottom bunk, and built slats about 2/3's across the front to act as a gaurd rail. I created another opening on the side for my oldest to get into the top bunk with stairs instead of ladders to again prevent falls.  I had to modify the Sweet Pea stairs to accomodate for the extra height in the bunk beds, simplified the railings, and I created each cubby to be big enough to use cloth storage totes that were 11x11x11.  Sanded the whole bed and stairs so the corners and edges were all rounded and smooth, and put two coats of white Deck and Porch paint to stand up to the the boys running up and down.  I used brackets to secure the stairs to the bed, and sixteen 3" bolts to bind the bed together.  Precut and drilled 17 slats for each bed seperated them 2" apart.  Spent a few hours every night during the week measuring, cutting, glueing, drilling and assembling the bed and stairs.  Spent an entire weekend sanding and painting.  Very happy with the way these beds turned out.  Overall cost of the project including the paint was around $400.  

Estimated Cost
$400
Estimated Time Investment
Week Long Project (20 Hours or More)
Finish Used
Porch and Deck Paint
Recommended Skill Level
Beginner

Comments

Patio couches

Submitted by Anonymous (not verified) on Thu, 04/27/2023 - 19:14

This project was fun to build with hubby said the shopping list and the cut list was perfect! Love all your designs! King bed is next!

Comments

Seasonal And Holiday

Rustic Queen Sized Wall Bed

Submitted by ldo2626 on Wed, 06/25/2014 - 09:09

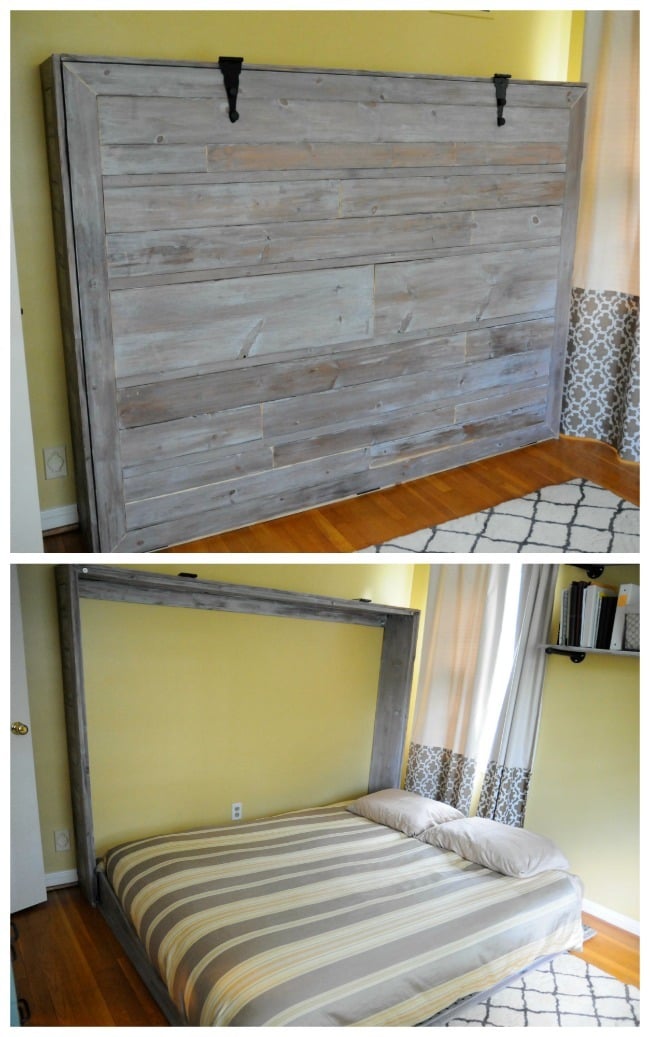
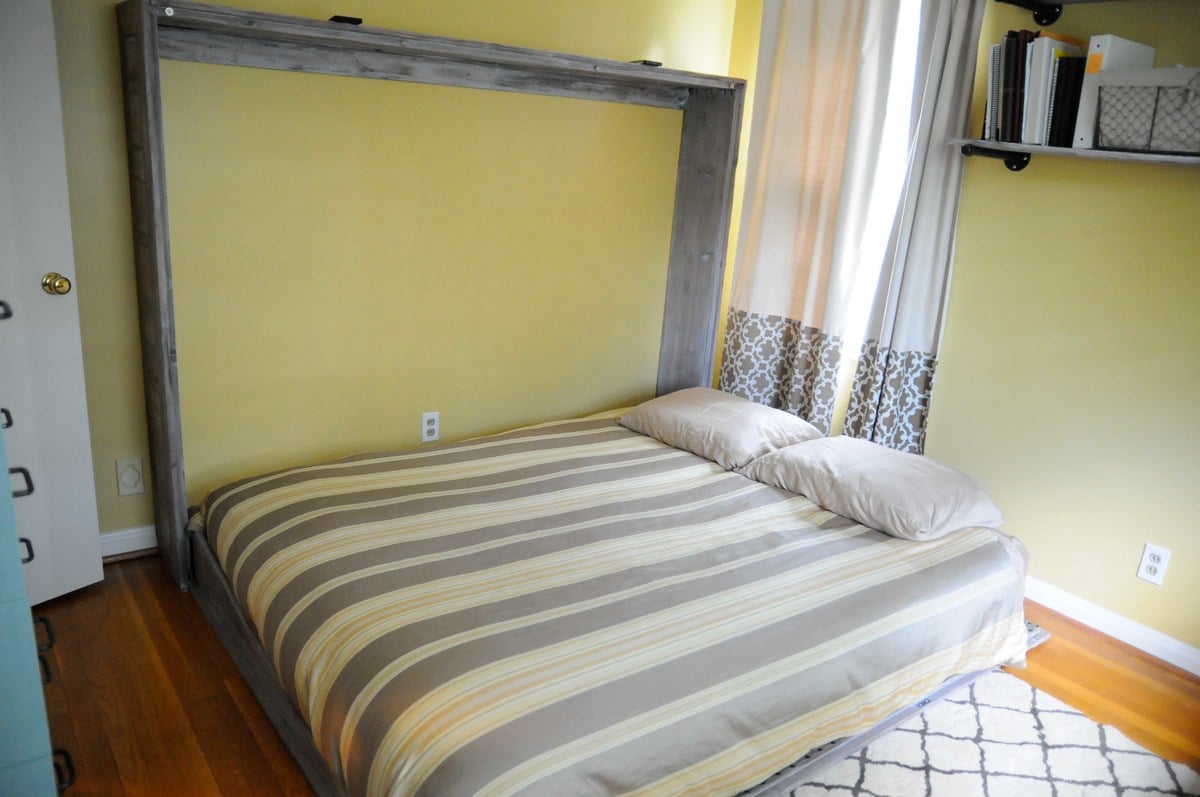
Expecting our second child, my wife and I decided to do away with our guest bedroom and combine it with our office. The only problem was our queen bed took up way too much space and it didn't get enough use to justify the sacrifice. We looked at the wall bed options available for purchase and decided they were way too blah and very expensive. I then found the "A MURPHY BED YOU CAN BUILD, AND AFFORD TO BUILD" post on Ana's website (thanks for the inspiration)! 

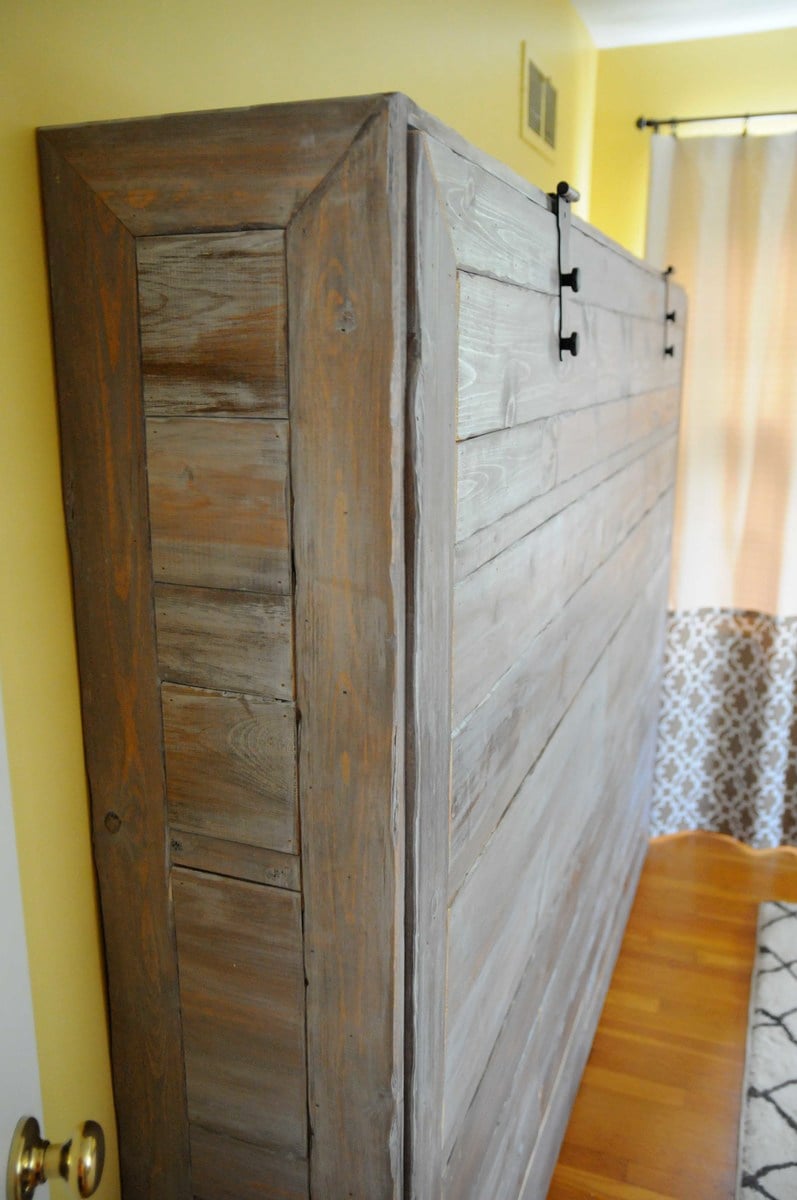
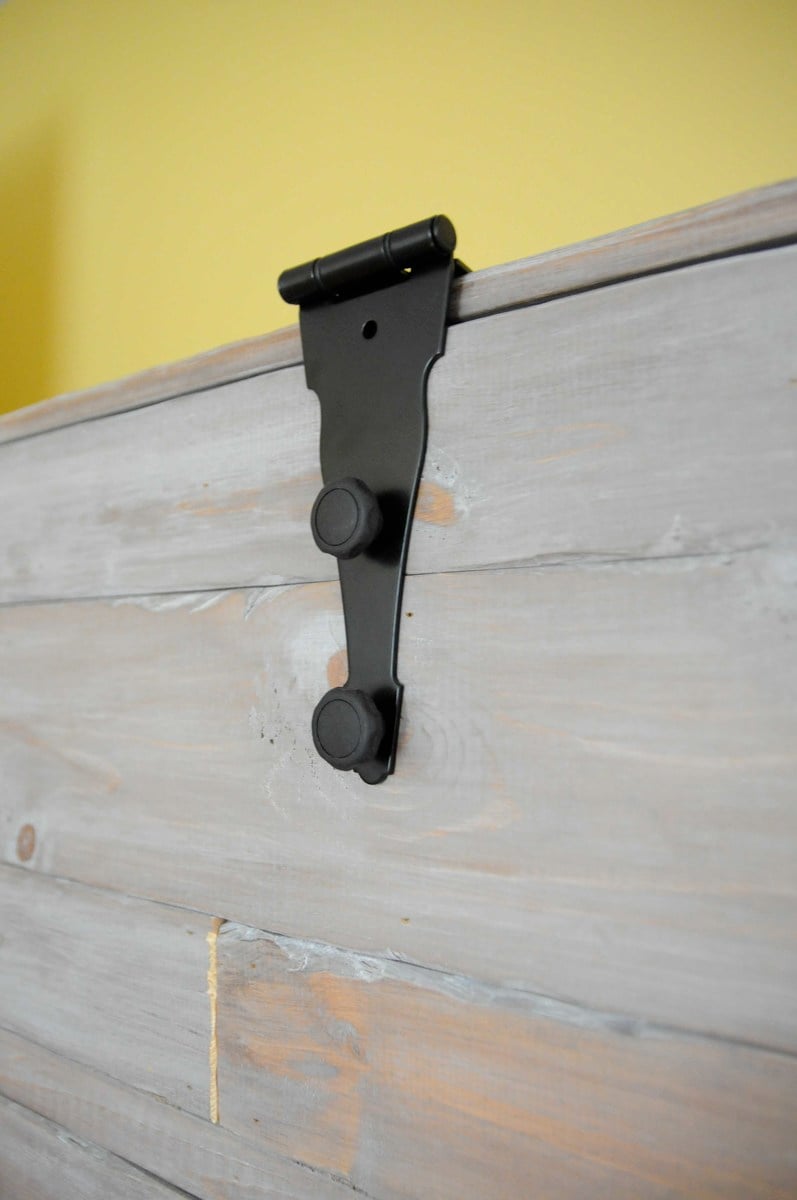
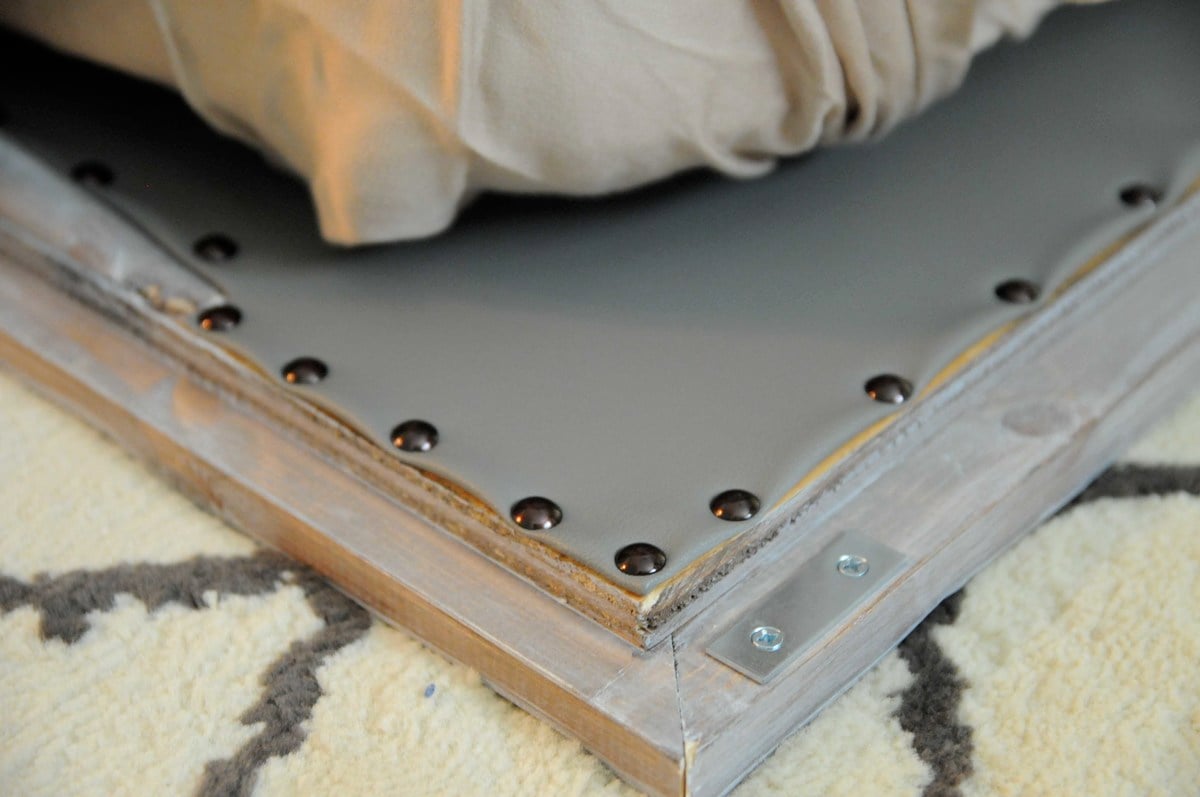
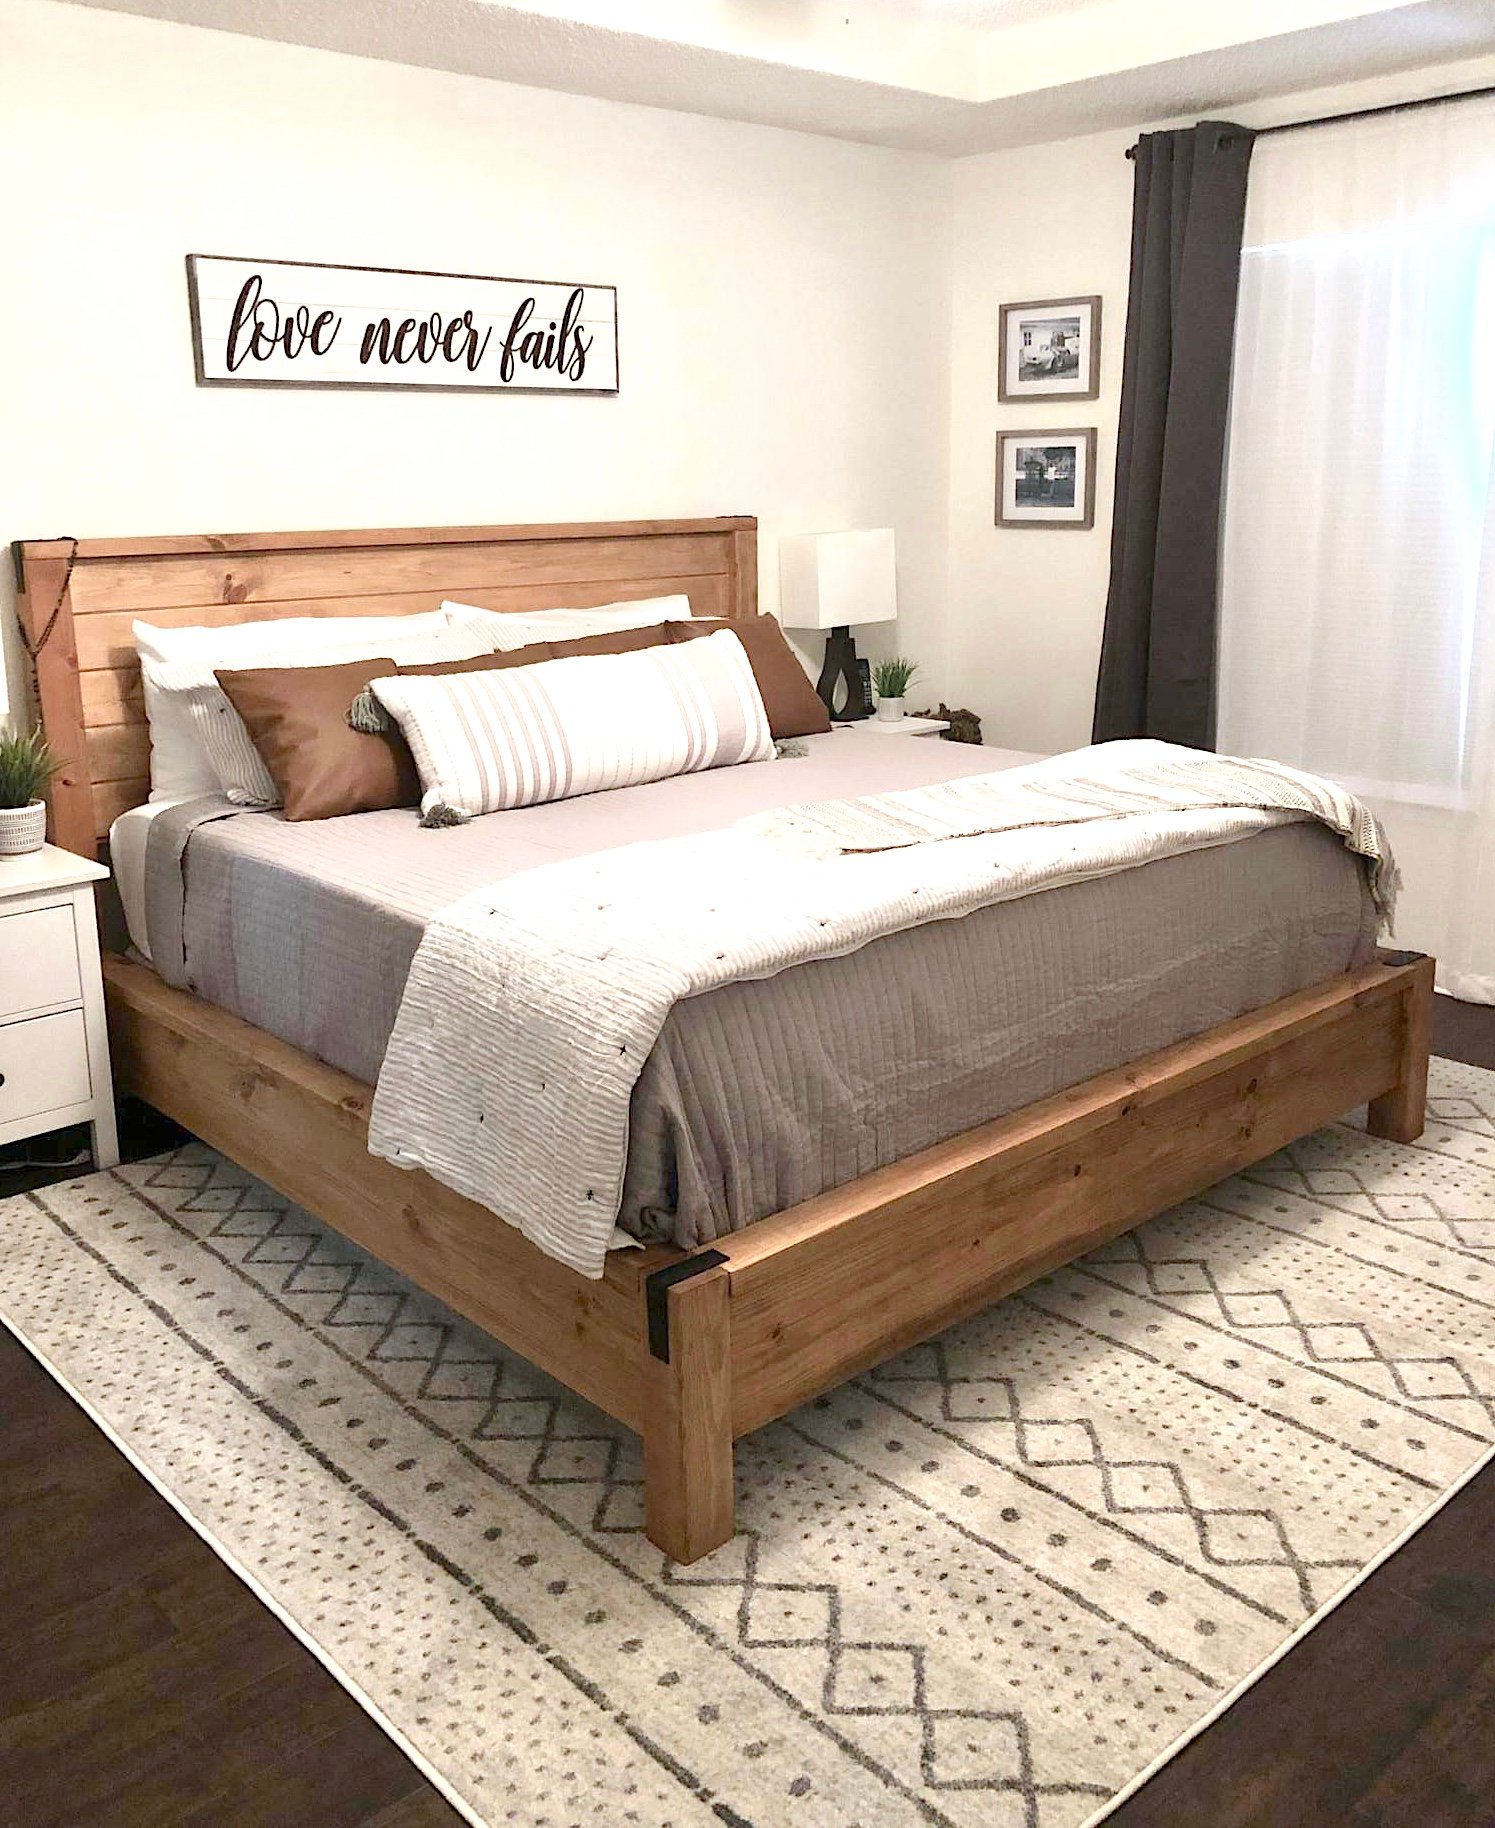
 Using cheap pine boards, plywood, door hinges, vinyl upholstery and stain I constructed the wall bed you see here. It really wasn't that difficult but facing it took the most time. To give the boards a more rustic look I used a utility knife to shave off the edges/corners and stained them with the Minwax American Walnut water based stain and the Minwax White Wash Pickling. When this started we thought we were going to have to settle for something unattractive and less than desirable. Seeing it in our office now, we love our new bed and actually think it makes the room look much better!  I didn't keep track of costs, but it couldn't have been more than $150.


Estimated Cost
I didn't keep track of costs, but it couldn't have been more than $150.
Estimated Time Investment
Weekend Project (10-20 Hours)
Finish Used
Minwax American Walnut water based stain and Minwax White Wash Pickling
Recommended Skill Level
Beginner

Comments

jwm816

Tue, 07/08/2014 - 08:08

Looks great! May I ask what the final outside dimensions were? Curious to see if this would work for me.

Thanks!

ldo2626

Wed, 08/06/2014 - 09:23

I would have to measure it when I get home... at work currently. Looking back, I think the best approach is to take the measurements from the plan, find the difference between standard mattress and queen mattress dimensions (check wikipedia for standard sizes), then add that difference back to the plan. I cut it real close on mine and could use a little more space. It would be nice to make it a bit deeper and with some head room to store comforters and pillows.

lopixy

Sun, 11/30/2014 - 18:10

I love this!  Could you give more details about how you did the facing?  Are the pine boards just nailed onto the plywood? 

chefrgk

Sun, 12/28/2014 - 12:59

I am dying to get started on this wall bed project. I keep getting this message when trying to open the Plans.

The page you are looking for is temporarily unavailable.
Please try again later.
can someone help me find them.

chefrgk

Sun, 12/28/2014 - 12:59

I am dying to get started on this wall bed project. I keep getting this message when trying to open the Plans.

The page you are looking for is temporarily unavailable.
Please try again later.
can someone help me find them.

nicolanala

Tue, 08/09/2016 - 15:24

Hi. I would love to try this. Looking to build in the next month before parents in law come over. Is there any working links to the plans??

josheli

Thu, 01/25/2018 - 13:06

click on the bed picture above and it will take you to the plans


Grill table with stainless steel top

Submitted by krochelle on Tue, 08/20/2013 - 08:00

I made this table to go next to an outdoor grill to be used as a food prep area or just a surface for holding ingredients (instead of using the deck railing!). The top is stainless steel which fits tightly over 2 3/4" pieces of plywood laminated together. The bar/handle in front is made out of galvanized pipe. All wood was treated.

Legs - 4x4 posts
Bottom shelf - 1x6's
Sides - 1x4's
Top - 2 pieces of 3/4" plywood laminated together with a stainless steel top (custom fit) over top
Towel bar - galvanized pipe (cut and threaded to size at Lowe's), floor flanges and 90 degree elbows

Estimated Cost
$120
Estimated Time Investment
Day Project (6-9 Hours)
Finish Used
I used Kona stain but since it was over treated wood the stain did not take as dark as it should have. I will have to restain this piece after it has completely dried out.
Recommended Skill Level
Intermediate

Comments

spiceylg

Tue, 08/20/2013 - 09:07

Love this. Where did you get the stainless steel top? Did you have to special order to fit?

In reply to by spiceylg

krochelle

Thu, 05/15/2014 - 10:33

Sorry about the late reply! Yes, I just gave my dimensions to a local steel supplier and they made the top. I think I have about $40 into the stainless. They didn't weld the corners but I've never had an issue with them.

krochelle

Thu, 05/15/2014 - 10:46

No...I didn't have any plans when I built it but it's a very simple concept. I chose to use all treated wood since I knew it would be sitting outside unprotected. However, my 4x4 posts weren't square so this caused a lot of problems and everything was built to fit. I believe I just used 4x4's, 1X6s (for the bottom shelf) and 1x4s for the sides (top and bottom). For the top, I just laminated 2 pieces of 3/4" plywood together to bulk it up and then had the stainless top built to fit. It fit perfectly so I didn't glue it to the plywood. This makes it easy to remove and clean, if necessary. For the galvanized pipe (towel bar), I bought it at Lowe's and had them cut/thread it to fit my dimensions.

Recessed cabinet

Submitted by Anonymous (not verified) on Fri, 09/02/2022 - 14:14

My bathroom has very little storage space. So during our recent remodeling of the room, I decided to add this cabinet. Changed the plan a little to make it recessed in the wall. I love how it turned out!

Comments

Paulieboxer

Ana, First time I have every attempted any kind of woodwork/building furniture other than building Ikea stuff. The plans were very easy to follow and now I want a chop saw for xmas. I roped my daughter in to help me and we completed the project in 2 days. Husband was totally blow away by our achievement. I love it and feel accomplished. Away to work on the table and further benches/seating over the next few weeks. Pauline

Estimated Cost
£200
Estimated Time Investment
Day Project (6-9 Hours)
Recommended Skill Level
Beginner

Farmhouse table and bench - white base with stained top

Submitted by Anonymous (not verified) on Mon, 05/15/2017 - 19:36

We went off the Farmhouse table and bench design but had to customize the length of the table and bench so that it fit in our kitchen space. The table was our first ever project and we made a few mistakes but learned from them and built the bench and are hoping to move up to the Farmhouse bed and then the fullstorage bed. 

Estimated Time Investment
Afternoon Project (3-6 Hours)
Finish Used
Used everlasting in chalk paint for bottom and top then brushed blue over the top let dry then stained the top with minwax dark walnut and wiped off. Applied a few layers until desired look. Dry brushed more blue and white in between stain layers then used polycrylic semi gloss finish
Recommended Skill Level
Starter Project

Large 6 X 8 Sandbox

We wanted to make a large sandbox for lots of kids. We love that it has an easy cover and two large benches to sit.

Supplies and Steps are shared at http://myhomedonemyway.blogspot.com/2013/07/building-6-x-8-sandbox.html

Built from Plan(s)
Estimated Cost
$250
Estimated Time Investment
Day Project (6-9 Hours)
Recommended Skill Level
Beginner

Comments

Outdoor sofa with table and matching chairs!

So, we decided after not finding any outdoor furniture, that why not make them! So this is the result, made a few changes to the size and measurements so the pillows from IKEA, would fit perfectly. Now we are waiting for them to be ready to oil/paint. We also made the chairs with the sofa plans, so happy we did that. Thank you so much for the plans! We are so happy! IKEA pillows name are: Sitting pillow - FRÖSÖN/DUVHOLMEN 62cm by 62 cm. Back pillows - FRÖSÖN/DUVHOLMEN 62cm by 44 cm.

Estimated Cost
$240
Estimated Time Investment
Day Project (6-9 Hours)
Recommended Skill Level
Starter Project
Seasonal And Holiday

Modern Outdoor Patio Set

Submitted by dlangford on Sat, 09/05/2020 - 16:08

Built this over the weekend for my girlfriends sister. It was a great project and the whole family was able to work together on it, sanding and waterproofing it before assembling. The loveseat plans need a little tweaking. We ran ran the slats the same direction as the chair plans call for so we added a middle support for extra stability. We also pitched the seating down towards the back by 5* to make a more natural sitting position.

Estimated Cost
$300
Estimated Time Investment
Weekend Project (10-20 Hours)
Finish Used
Behr Cedar Natural Tone Waterproofing Stain and Sealer
Recommended Skill Level
Beginner
Seasonal And Holiday

2x4 sectional outdoor sofa

Submitted by Anonymous (not verified) on Tue, 05/12/2020 - 08:10

My first Ana White project. My friend Shelley and I are RN's, and she got me hooked on woodworking. I started with cushions from Lowes ( in the sizes that you recommended)to see if I loved the sectional for a few years. I loved it so much I decided to have custom Sunbrella fabric ones made. Even though the custom ones were more expensive, it has been worth it. They go perfect with my California Mission style home. Now I want to add the armless one and make it a U-shape. I did add a piece at the bottom back of each sofa to hold the cushions in. The seat cushions would slide out the back when sitting on the sofa. I made the coffee table to match. Our family loves it!

Estimated Cost
building materials for sofa $250. Custom Sunbrella Fabric cushiosn $2000
Estimated Time Investment
Weekend Project (10-20 Hours)
Finish Used
Stained with Carrington Minwax and sealed with spray Shellac
Recommended Skill Level
Beginner

Comments

Closet shelving for sloped ceiling.

Submitted by kellystern on Mon, 01/09/2023 - 16:22

I used Ana’s Shelf Help Configurator to build these shelves for a deeply sloped ceiling. None of those well known Closet Organizer Companies could come up with a decent plan for this closet and they charge a small fortune.

Comments

Full length sliding mirror cabinet

Submitted by mltdblack on Tue, 10/16/2018 - 19:25

I built this for my daughter after building a ladder shelf for my kids bathroom. It took more time to install and adjust the drawer slides and paint the project.  

Estimated Cost
$65.00 - I used a slightly larger mirror.
Estimated Time Investment
Day Project (6-9 Hours)
Finish Used
Exterior - Valspar Black Flat Latex
Interior - Valspar Filtered Shade Flat Latex
Top Coat - Minwax Gloss Spray Polyurethane
Recommended Skill Level
Beginner

Comments

akagracegallag…

Sat, 09/07/2019 - 03:32

Hi mltdblack

Really nice finish on the cabinet.  

It looks like there’s molding on top of your mirror.  

Did you buy a mirror with a frame or buy molding and put it on over the mirror?  

What molding did you use an how did you secure it?  

What size mirror did you use?  Thanks

mltdblack

Fri, 01/07/2022 - 14:14

I am so sorry. This is the first I am seeing your question. The mirror came with a frame and I carefully nailed thru the frame to attach with my 18 gauge nailer. I bought the mirror at Lowe’s and I believe it was 15.5” x 50”. Also, I used full extension soft close drawer slides.

Outdoor Wooden Cooler

An Outdoor Wooden Cooler is the perfect way to accent any deck, patio, or garage. Can be made from Cedar, Pressure Treated, Cyprus, etc. Sizes can vary from small 28 qt coolers to Large 120 qt coolers capable of holding hundreds of drinks. These coolers can be themed for your favorite sports team, favorite hobby, or anything of your choice. Engraving or wood burning is available.

Built from Plan(s)
Estimated Time Investment
Weekend Project (10-20 Hours)
Finish Used
Stain, painted, distressed, etc.
Recommended Skill Level
Intermediate

Comments

sgilly

Fri, 08/31/2012 - 09:52

Well, actually, two. My beer loving son-in-laws would love this, and Christmas is coming! Do you happen to have any "step-by-step" directions you'd be willing to share? I can figure out the dimensions but it would be really helpful to read - or see - the components and how you put it all together.
Thanks for sharing!

Adam_Scheetz

Fri, 09/28/2012 - 11:41

I had to make a new page because of some password issues. Thanks for comments. I have no plans yet, I've built so many it's sort of muscle memory now. Shoot me an email at [email protected] and perhaps I can help.

And no, the lid style I like is nothing more than some tongue~n~groove boards cut to length, attached with pocket holes and nailed to the lid frame. Tongue~N~groove is optional of course, you could just use regular boards.

sgilly

Fri, 09/28/2012 - 11:58

I really appreciate your response. And, I did indeed send you an email!
I have a bunch of cedar milled and planed by one of my son-in-laws. He'll be thrilled to see that I've made something he can use for his favorite beverage!

Playset Addition

Submitted by Derek S on Wed, 06/10/2020 - 08:27

Decided our old play set needed an addition, landed on these plans of Ana's. Sat on them and mulled them over for months. Once the wife said something about adding on to it I made the purchases needed. Connected the two platforms with a bridge. I used 4"x4"x10' for the runners, same boards as the decking for the platform of the bridge(5/4"x6"), 2x4's and 1x4's for the railing. If you look at the 3rd photo, I had to chisel out the 4x4 post to get the 2"x6"x12" support to fit correctly. This should measure 2"x6"x13". Another change I made was to cut the bottom and top trim pieces longer on the front and back sections so that the trim would cover the framing of the gable end walls (see last photo). my son wanted windows so I faked in some windows with scrap 2x2's. I used 2x6's as supports from the 4x4's to the 2x6 framing (see photo 3) I added the monkey bars about a month before deciding to do the platform/deck and playhouse. The ladder is based loosely off of a couple of plans I found online. I was able to do all of this work myself except for the roof. Need my dads help to lift the plywood, he then helped me with the rest of the roof.

Estimated Cost
$1000
Estimated Time Investment
Week Long Project (20 Hours or More)
Finish Used
I used a dark wood stain fore the house, green exterior paint for the trim and white exterior paint for the interior of the house.
Recommended Skill Level
Intermediate
Seasonal And Holiday

King Modern Farmhouse Bed

Made this bed from Ana's plans. Modified it with rail so I can add my box spring. Cost was approximately $160 for lumber, screws and stain. Absolutely loved the plans and easy to follow or modify if needed.

Built from Plan(s)
Estimated Cost
160.00
Estimated Time Investment
Afternoon Project (3-6 Hours)
Finish Used
Minwax wood conditioner, Minwax Special Walnut Stain
Recommended Skill Level
Intermediate

Comments

My incredible chicken coop and run!

This was my first attempt at building anything....ever. It was so incredibly fun and I certainly learned a lot. My 8 little chickens are loving their new home and I can't wait to build my next project!

Estimated Time Investment
Week Long Project (20 Hours or More)
Recommended Skill Level
Intermediate

Comments

GreenLaLa

Wed, 06/19/2013 - 11:51

Hello! Could you repost the picture / info on your chicken run? I keep getting "page not available" and I've been trying for days :O) I think I want to build that chicken shed (too big for 3 hens?? It's just so cute!) and a run like that to go with it! Thanks! Have a great day!