Toddler SIzed Easel
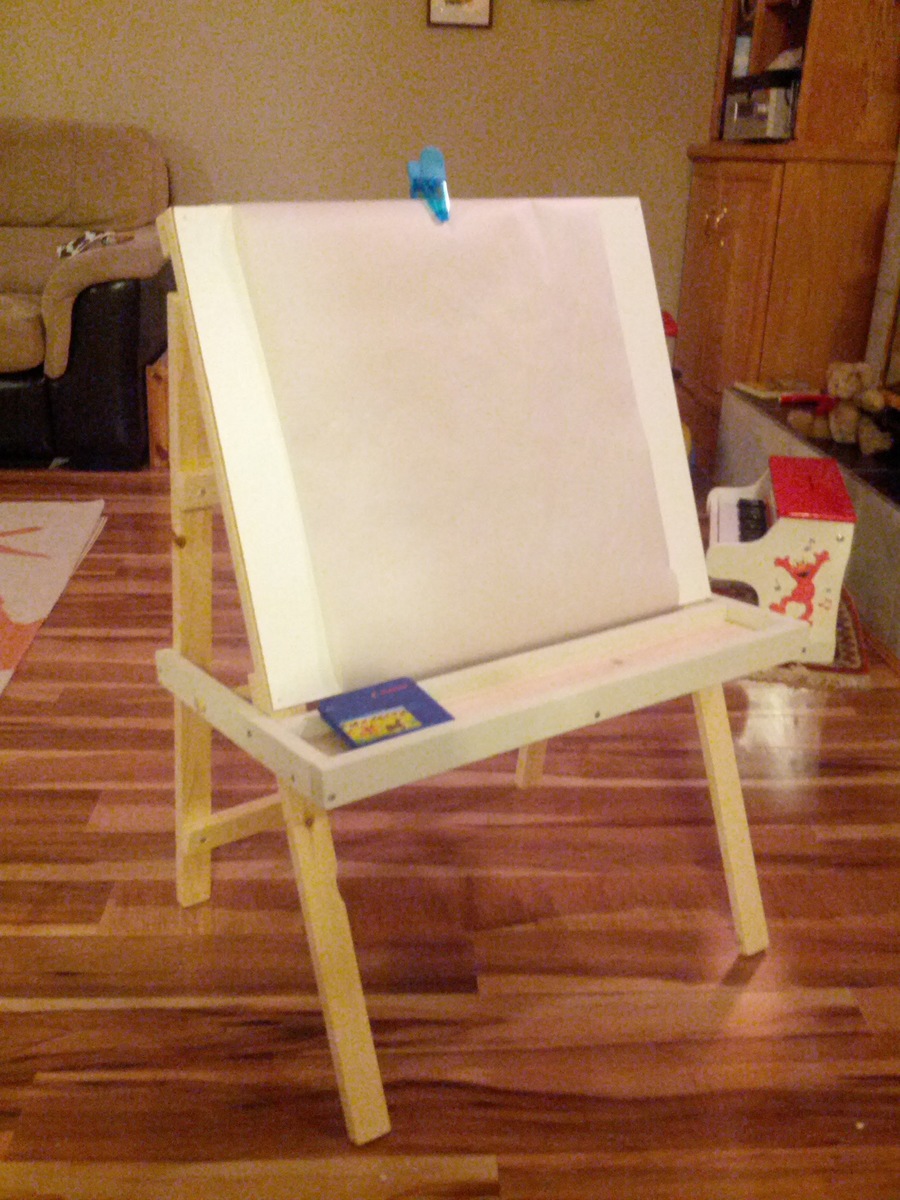
We opted to make this a regular easel (no chalkboard) and just used a sheet of paneling as the background. It's perfect, our toddler loves it. Thanks Ana!
Built from Plan(s)
Estimated Cost
$10
Estimated Time Investment
Afternoon Project (3-6 Hours)
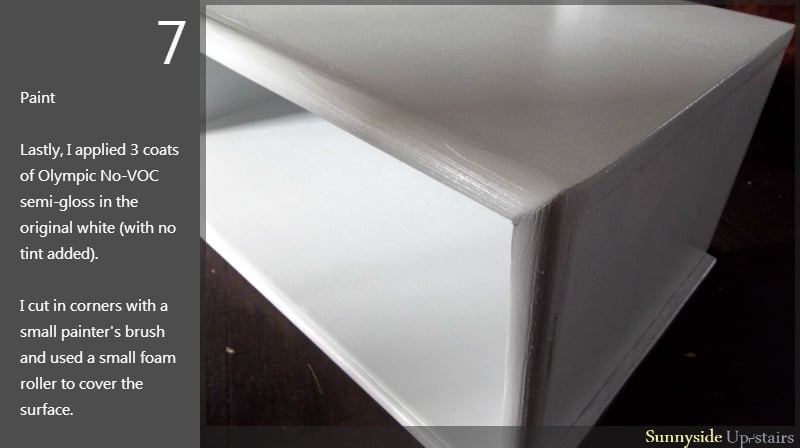
Finish Used
unfinished
tray painted with milk paint
tray painted with milk paint
Recommended Skill Level
Beginner