Community Brag Posts
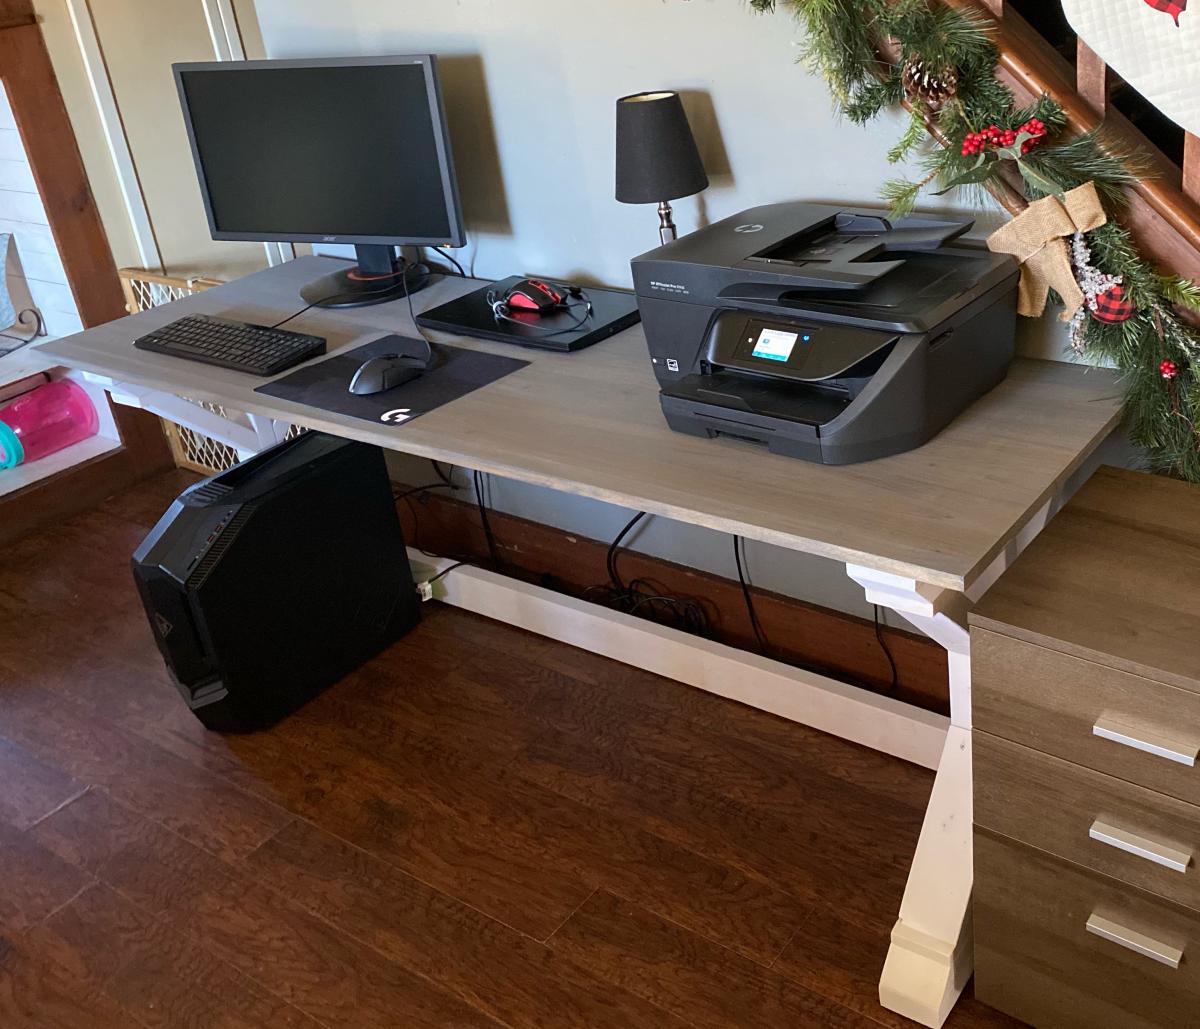
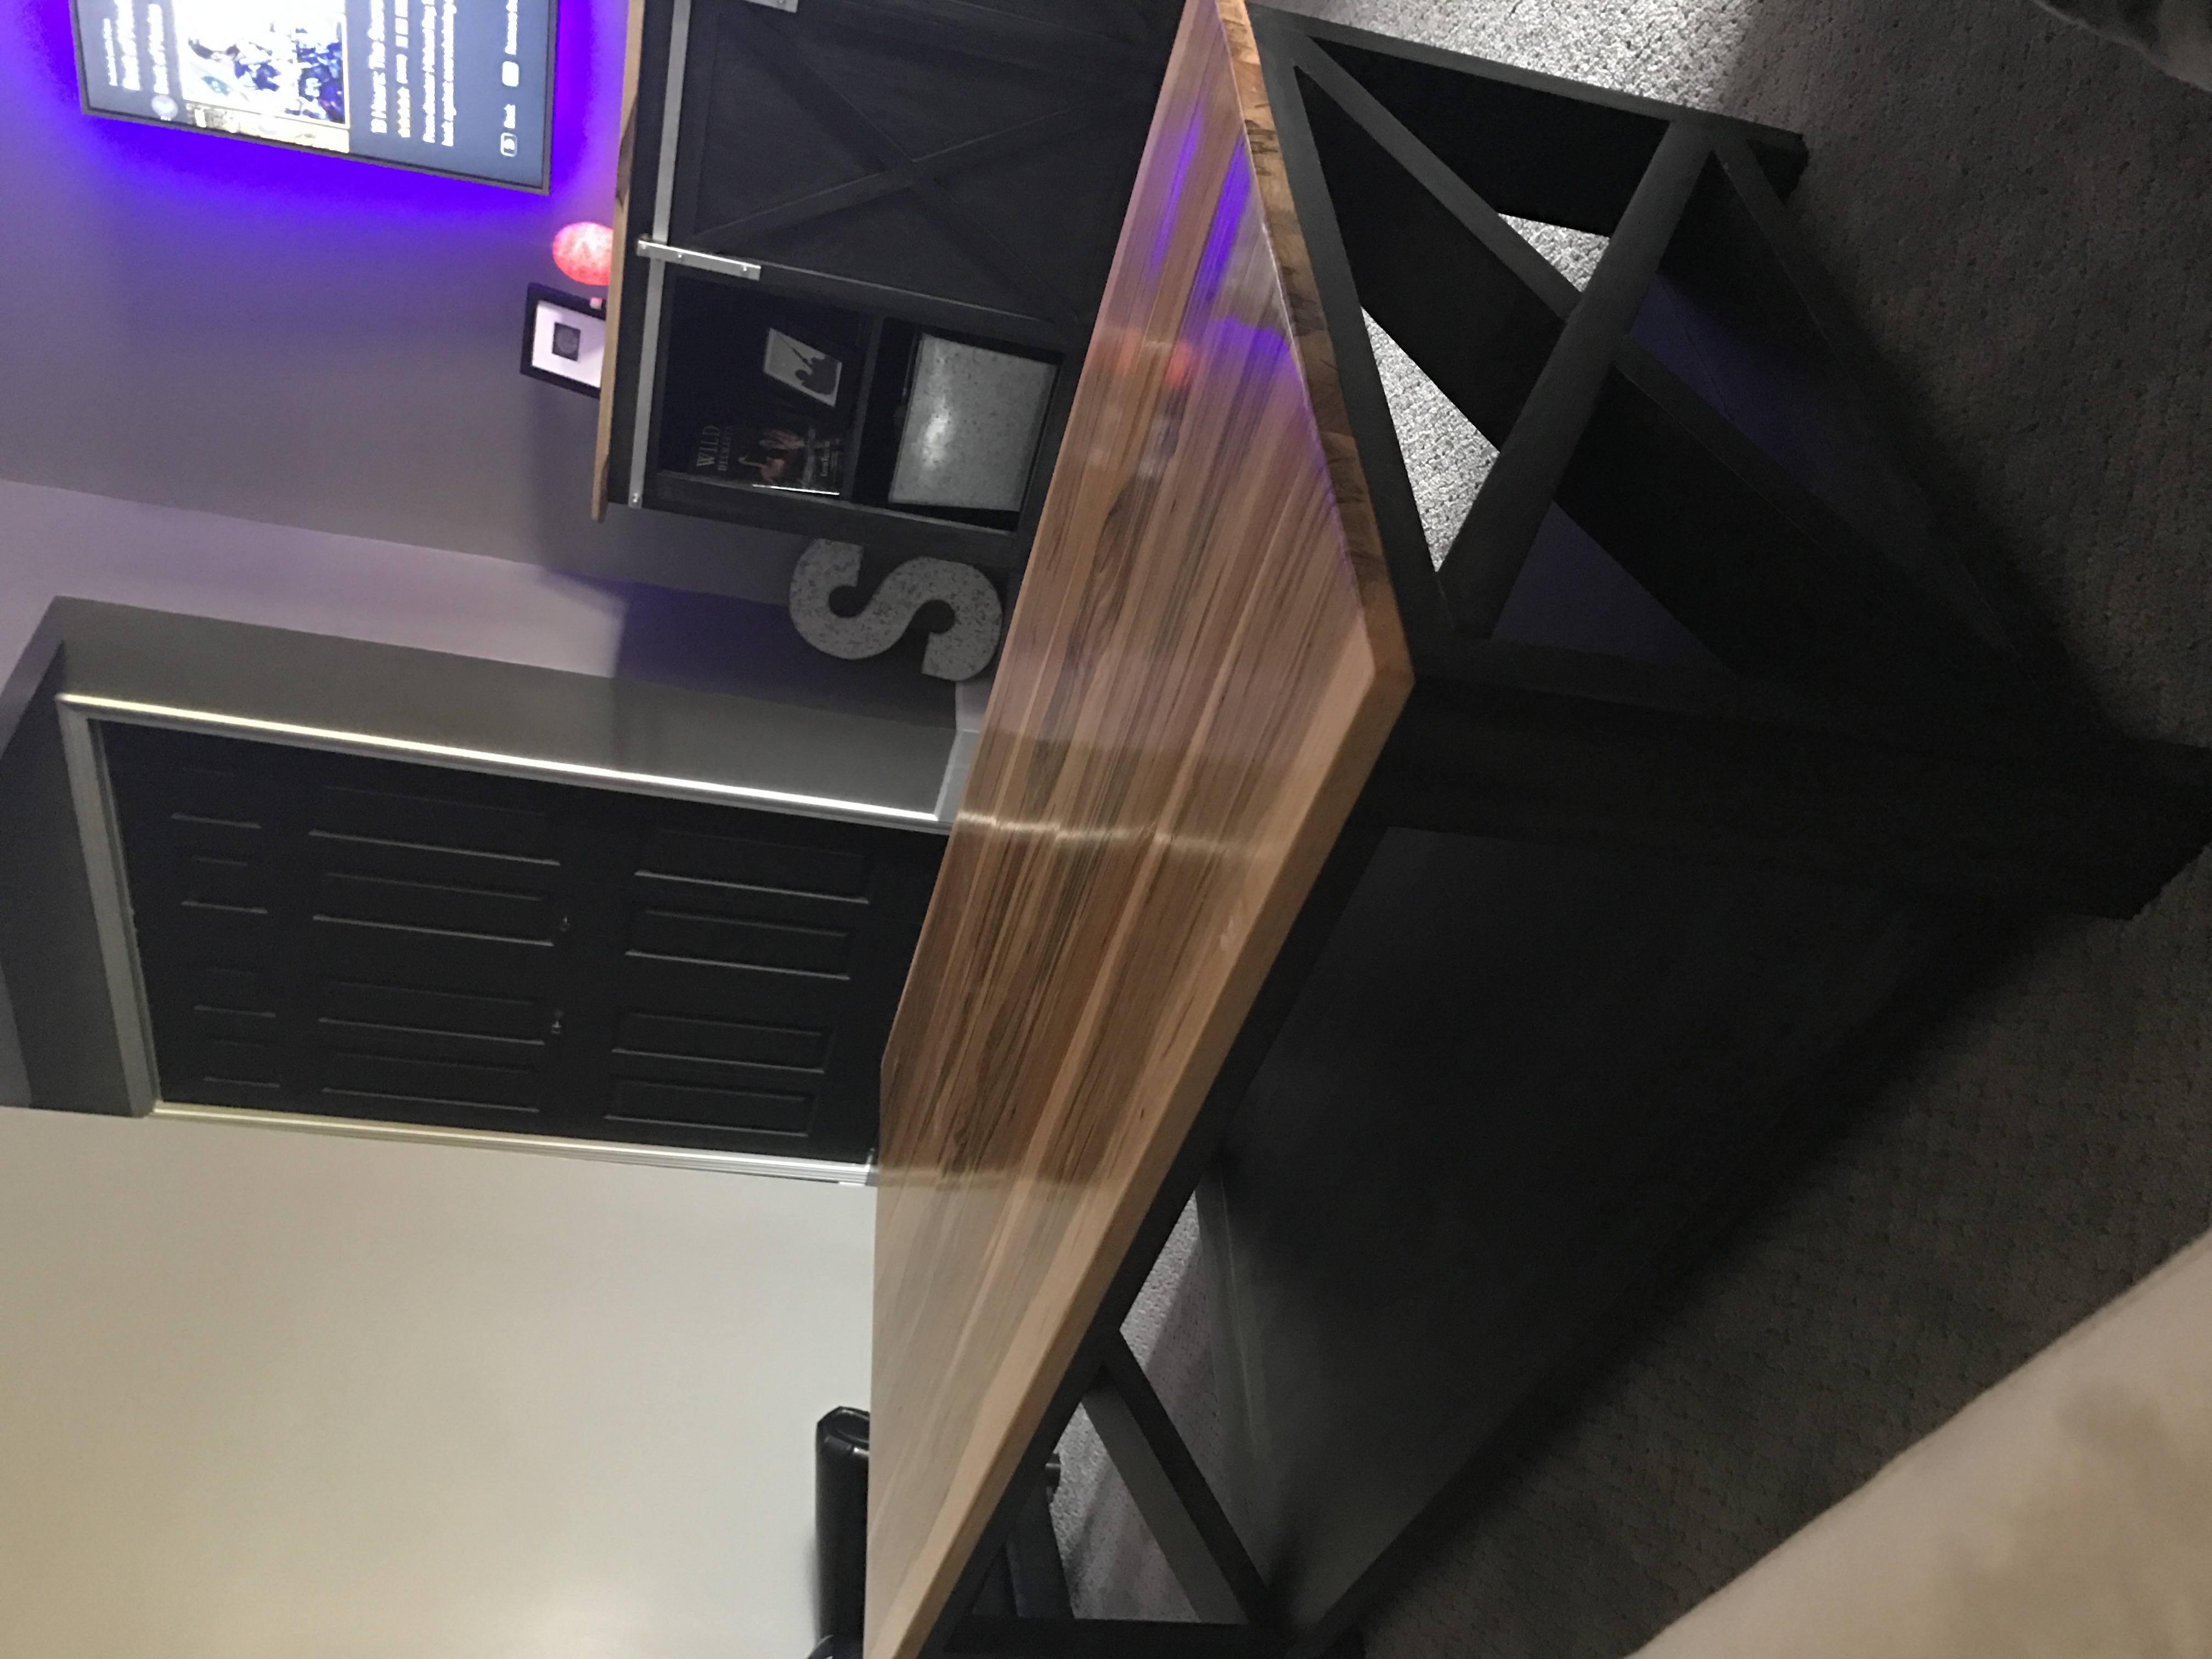
X Farm House Desk

First time trying one of the plans from here. Absolutely loved the desk when the wife and I seen it. And shopping around for a desk we liked was way out of the prices we were looking for. Instead of using the pine boards and pocket holing them together. I purchased a top the exact size the boards would have made. The top is made of poplar. Sanded and stained. Waiting on the epoxy to arrive to apply to the top for a harder top to work on. Pine and poplar are soft woods and if writing on them it would groove the wood.
Thank you so much for the beautiful plans.
Built from Plan(s)
Estimated Cost
Around 110 dollars
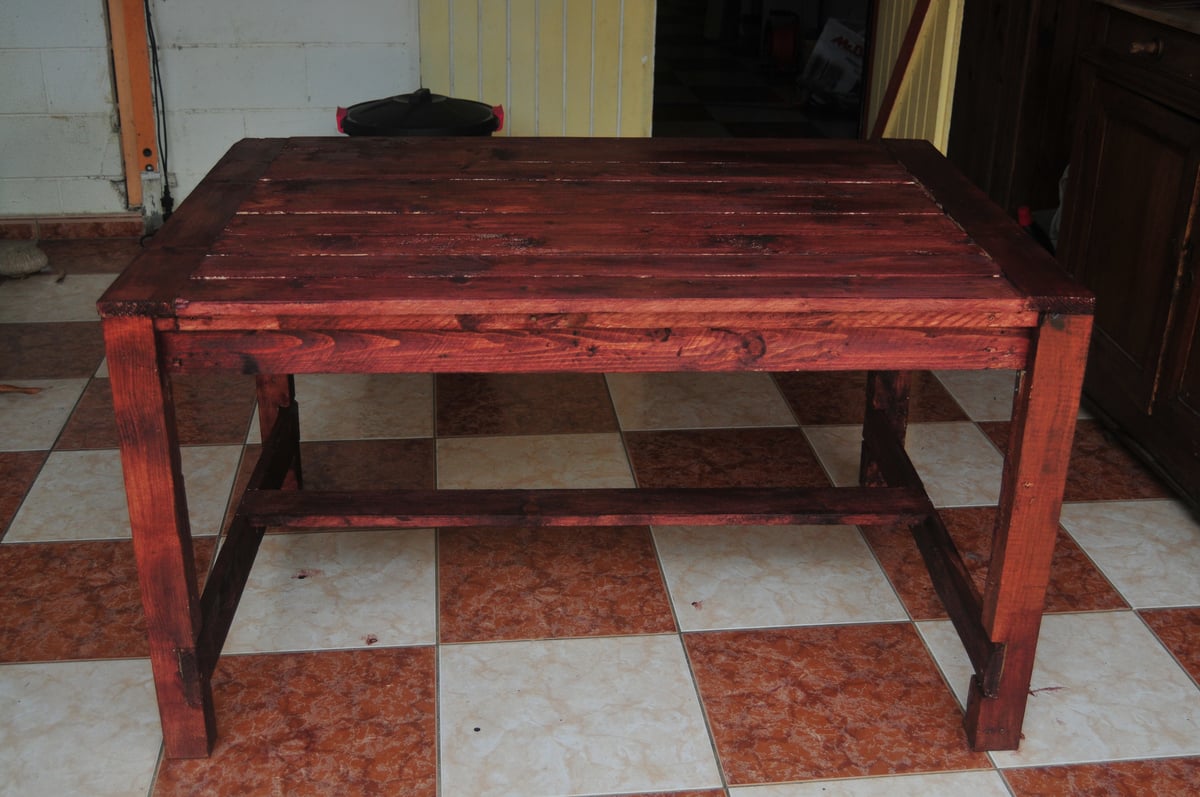
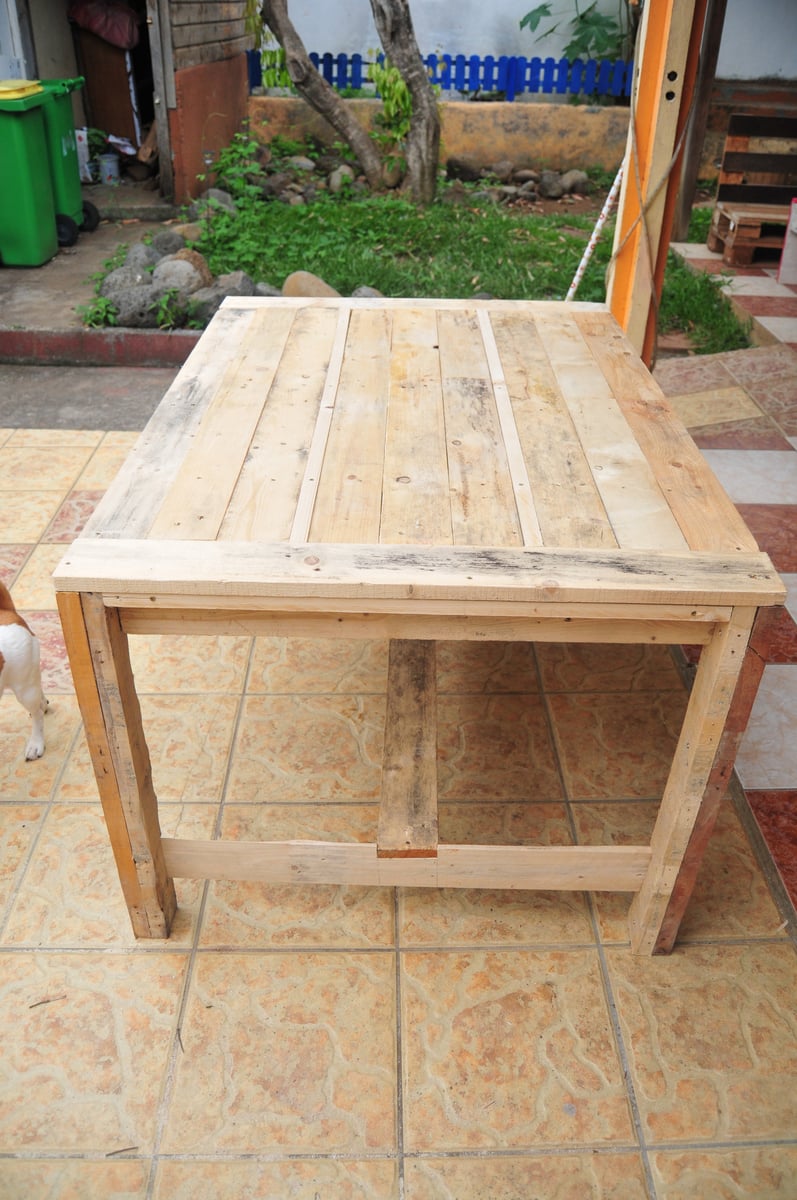
Farmhouse Table (wooden pallets)

Hello, I'm doing furniture with wooden pallets and I found your awesome website with nice explanations and plans so I decided to make this nice farmhouse table but with wood from shipment wooden pallets.
Thank you very much for all your work and plans !
I will make other furnitures from your plans with wooden pallets :D and post the brags here soon.
Built from Plan(s)
Estimated Time Investment
Afternoon Project (3-6 Hours)
Finish Used
mahogany wax
Recommended Skill Level
Beginner
Kids Lounge Bench
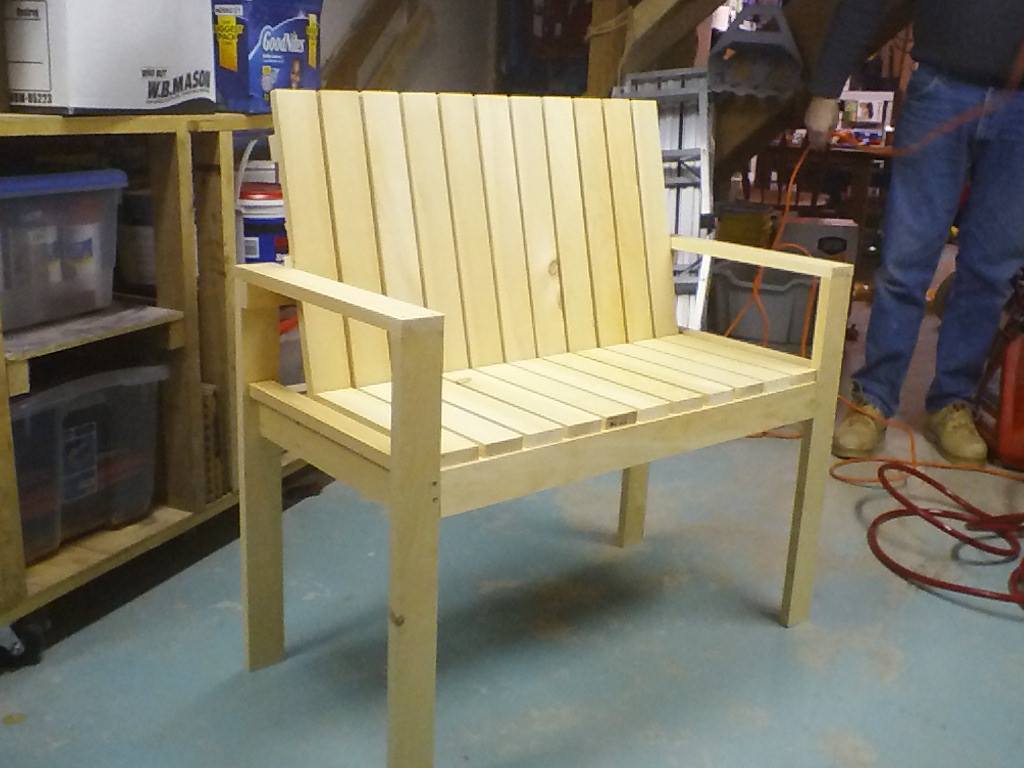
We made this in just over 2.5 hours with the kids "helping." We made it a bit taller, with the seat at 19 inches, so the leg pieces were 25.25 inches instead of 18.25. Because of this, we will probably add two supports across each side as it seems a bit wobbly when the kids all wiggle on it. Now we finally have a seat where all 3 kids can sit together to play on the computer. Thanks for the plans!
Built from Plan(s)
Estimated Cost
$54 for all the wood and #100 screws.
Estimated Time Investment
Afternoon Project (3-6 Hours)
Finish Used
for the kids
Recommended Skill Level
Beginner
Comments

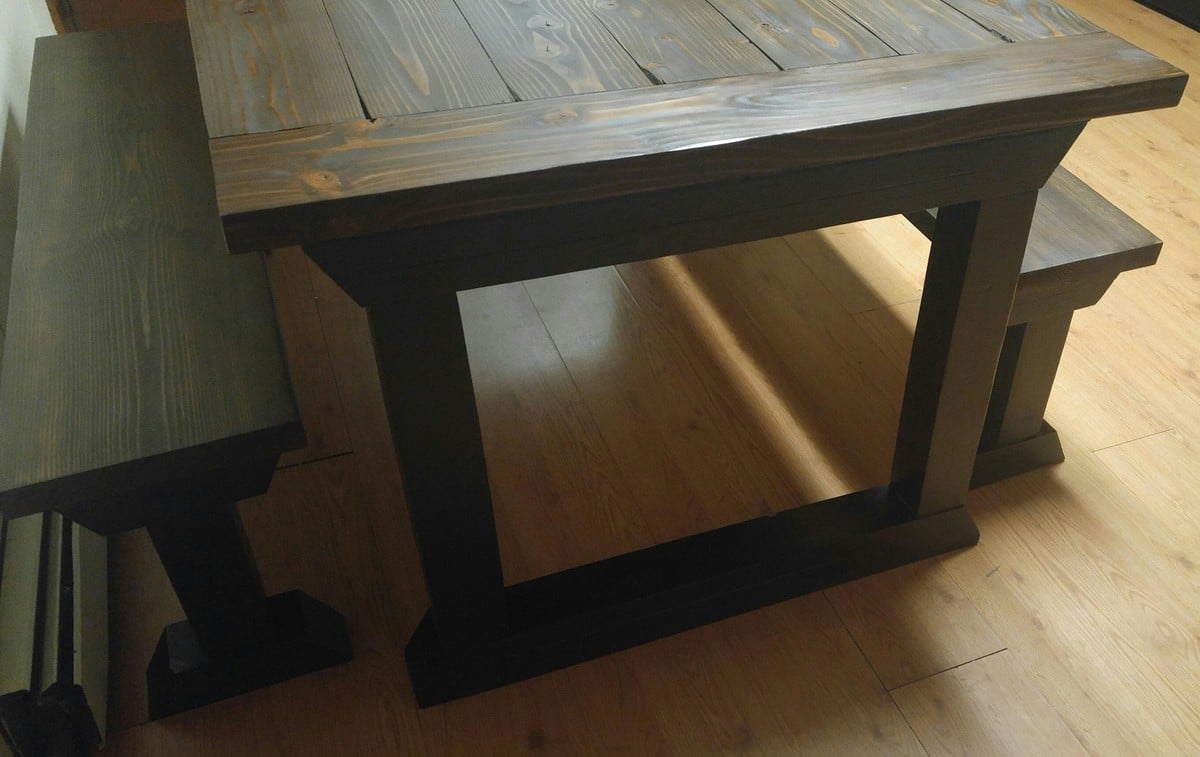
Rekourt Dining Table and Benches to Match
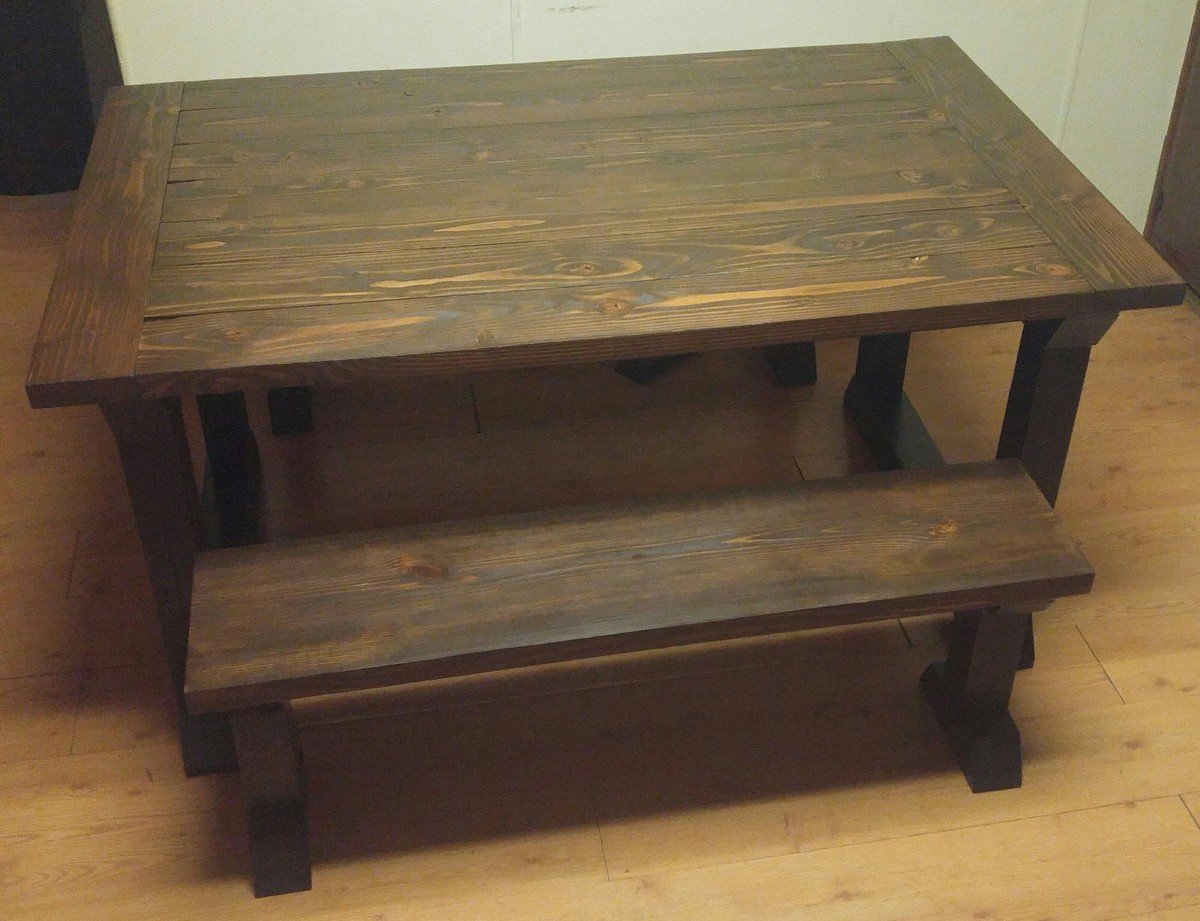
I used the Rekourt plans for the most part, but I did change it a bit. I needed a smaller table, so I adjusted the plans to accommodate this. The table is 5 feet long with matching benches that are 4 feet. I eliminated the 2nd cut on the 2x4s used to construct the table base to simplify the look. I also made custom benches to match, as I could not find any plans that were an exact match on the site. This is the first time I've built anything, and it took some trial and error and a lot of muscle. It was well worth it though!

Built from Plan(s)
Estimated Cost
$200
Estimated Time Investment
Week Long Project (20 Hours or More)
Finish Used
Glidden High Endurance in Black Onyx Eggshell
Minwax Wood Finish in Dark Walnut
Minwax Fast Drying Polyurethane
Minwax Wood Finish in Dark Walnut
Minwax Fast Drying Polyurethane
Recommended Skill Level
Intermediate
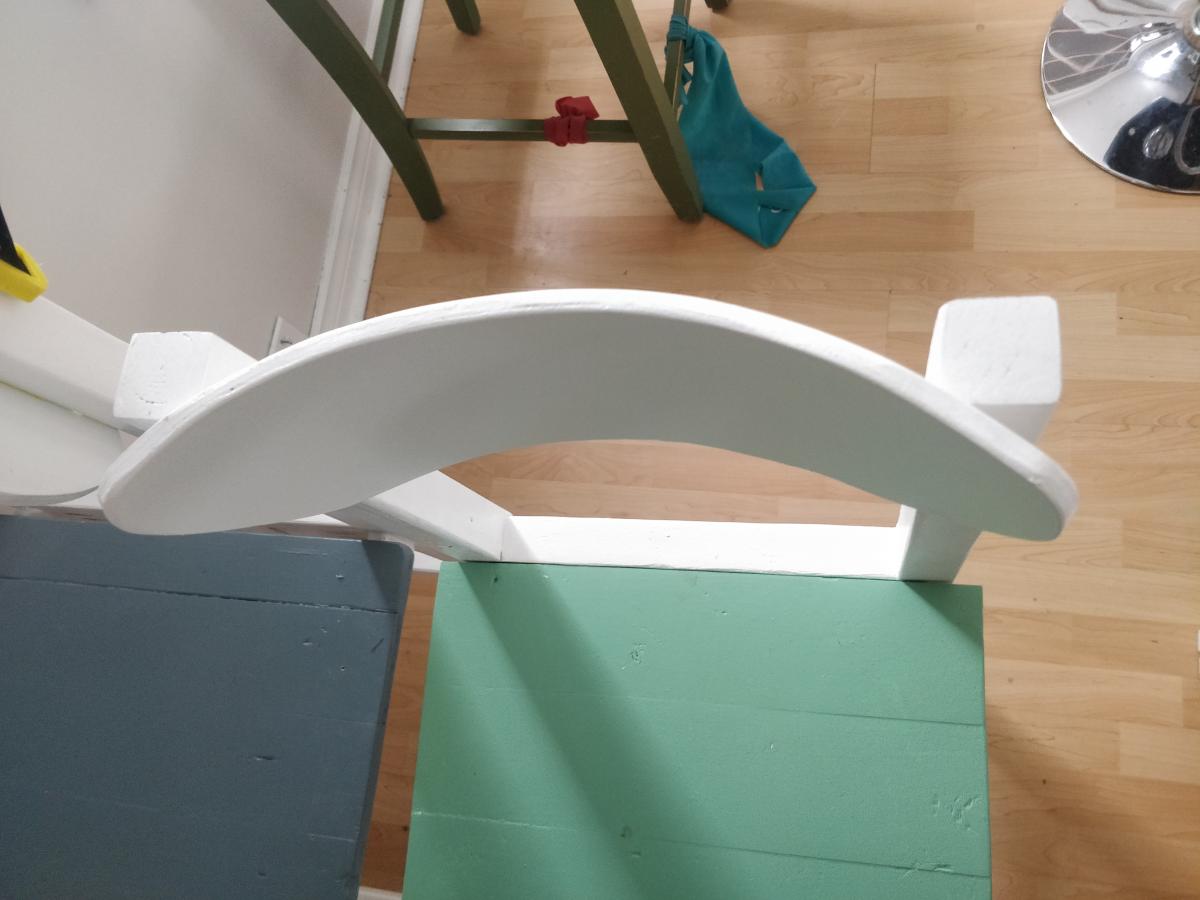
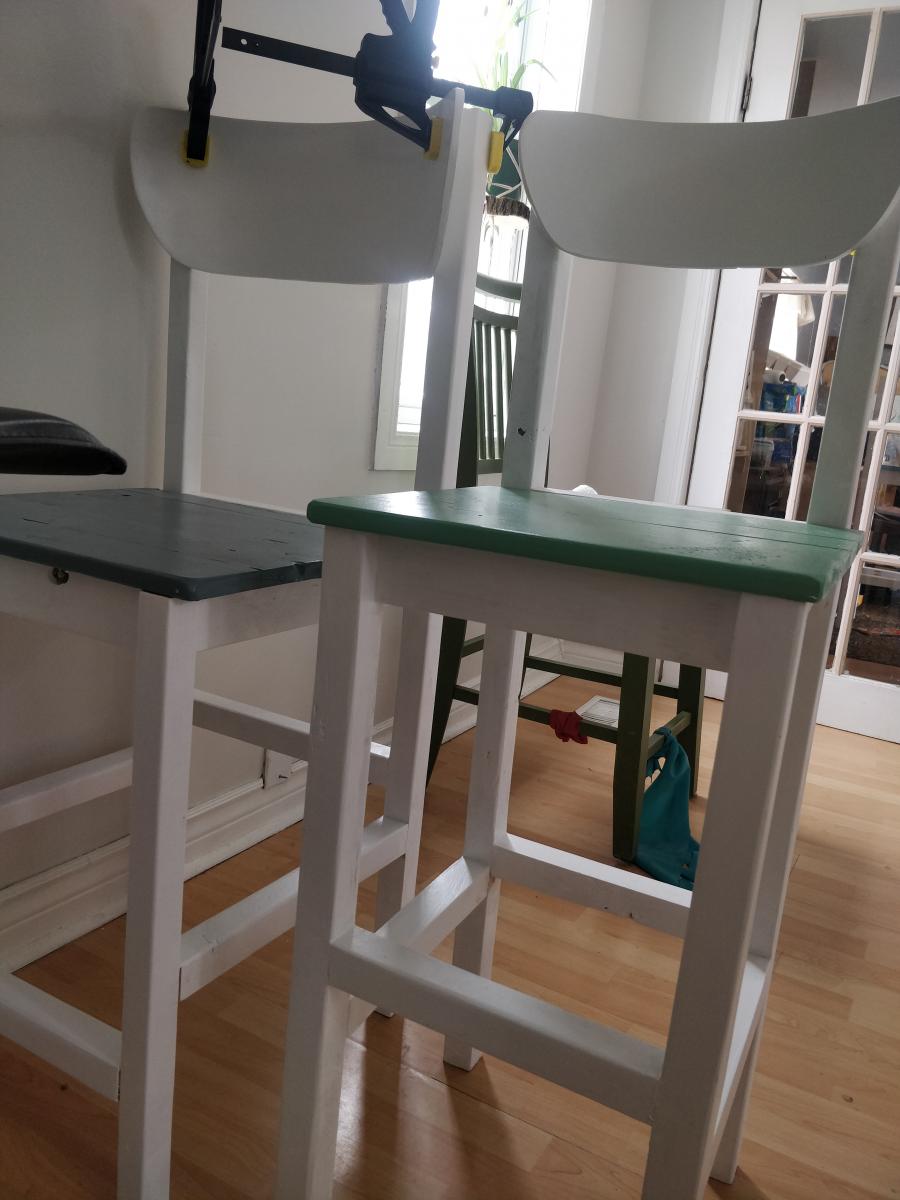
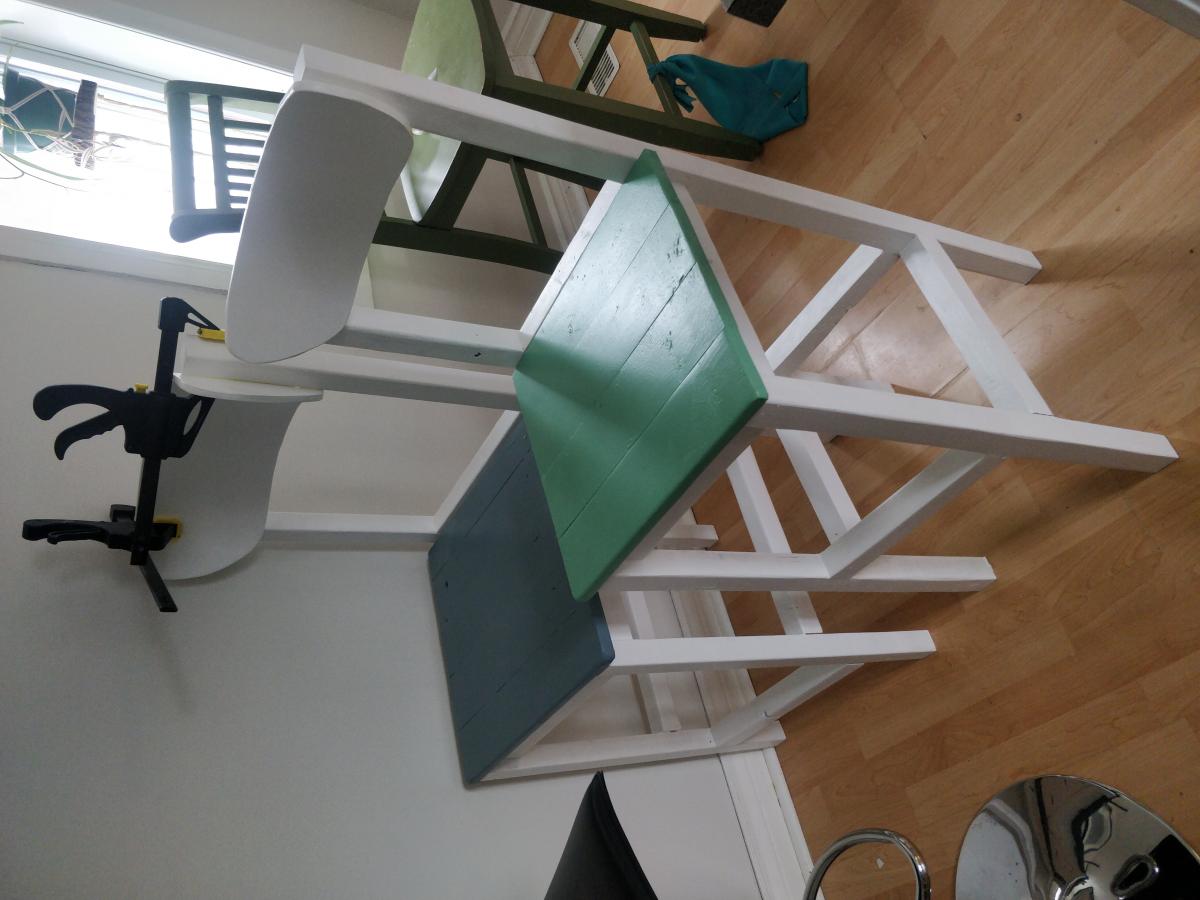
Stool with molded back and sized for kids

I use the counter height bar stool plan but changed for the kids to make their seats smaller 15x14 and taller about 27 ". I used an old wooden office chair and Birch or Beach 1/8 plywood veneer to mold the back using wood glue and clamps and then I cut out the shape with a jigsaw instead of doing the ladder back.
Built from Plan(s)
Estimated Cost
20$ per stool + paint
Estimated Time Investment
Day Project (6-9 Hours)
Finish Used
Behr below zero, green bank, and Norwegian blue for the seats. Ultra pure white satin for the rest.
Recommended Skill Level
Beginner
Comments
Sat, 12/26/2020 - 19:07
Great mods!
Very nice and functional, they look great! Thank you for sharing:)
Laundry Orgainized
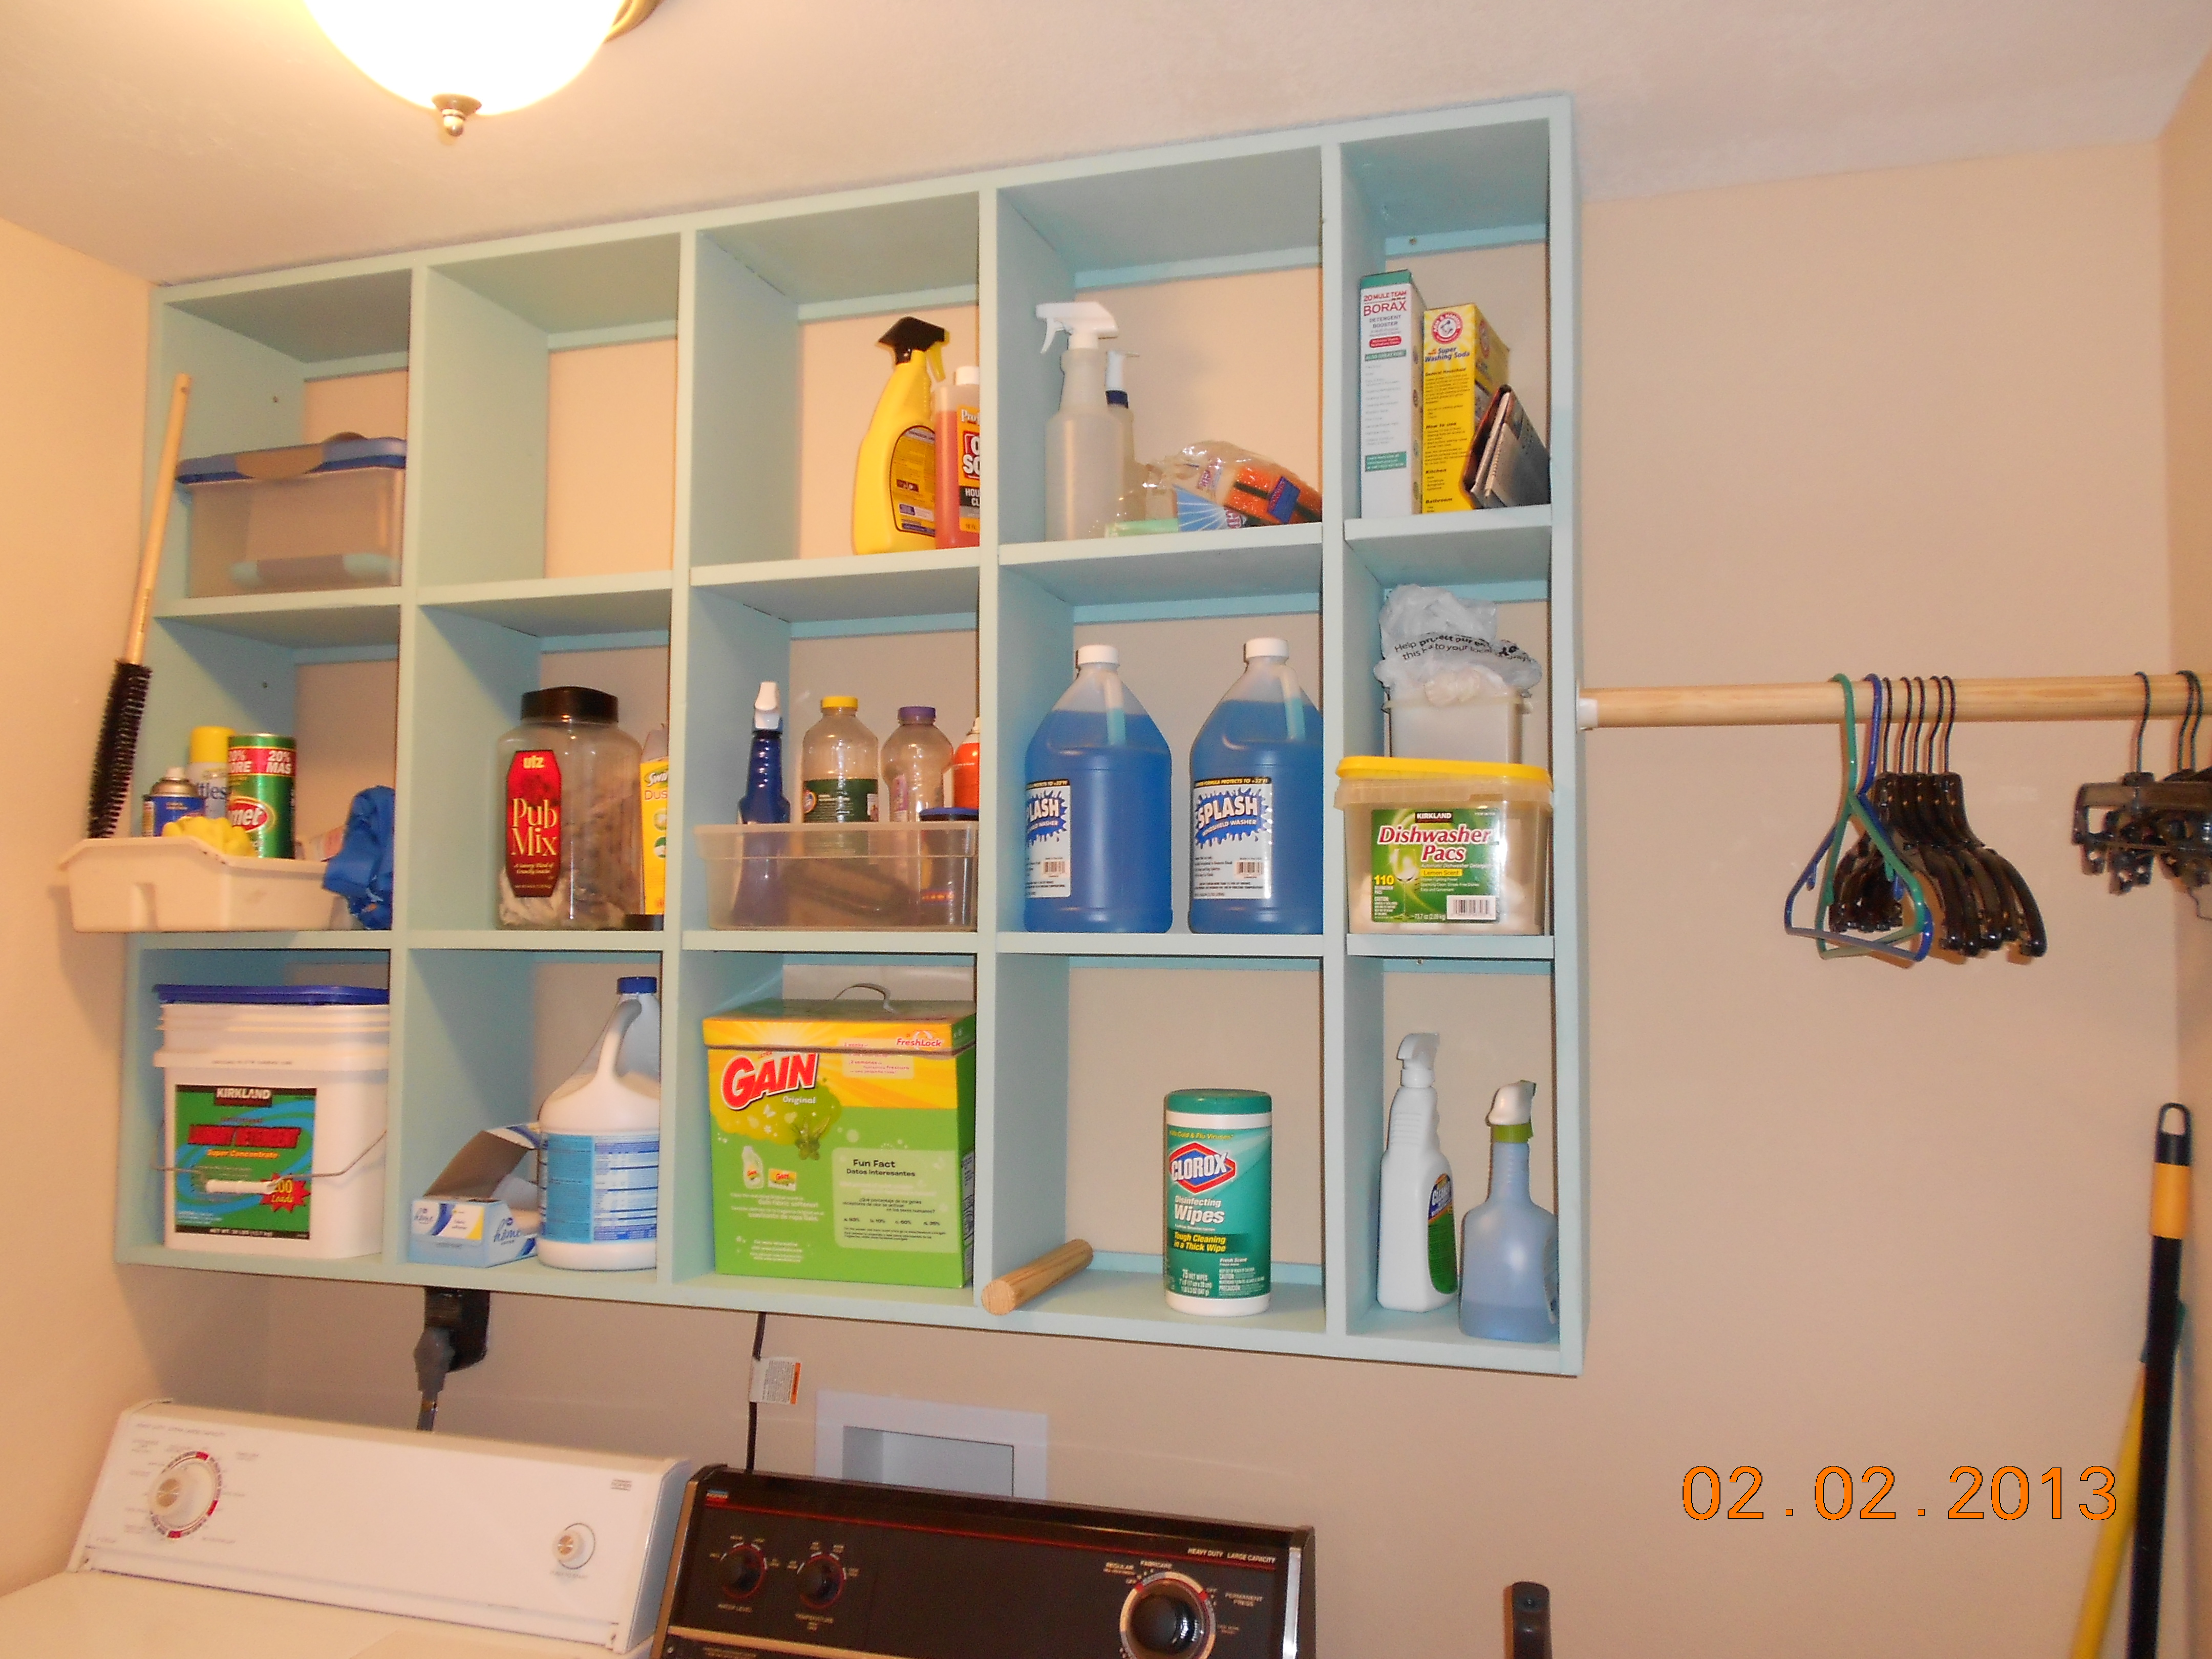
We needed to organize in the laundry room. This was the perfect idea.
Estimated Time Investment
Weekend Project (10-20 Hours)
Finish Used
This was easy and fun to do. My husband and I worked on it together and we are both alive to brag about it.
Recommended Skill Level
Beginner
Comments

Sun, 02/03/2013 - 18:50
Nicely done! Makes me wish I
Nicely done! Makes me wish I had room in my laundry area for one like it.
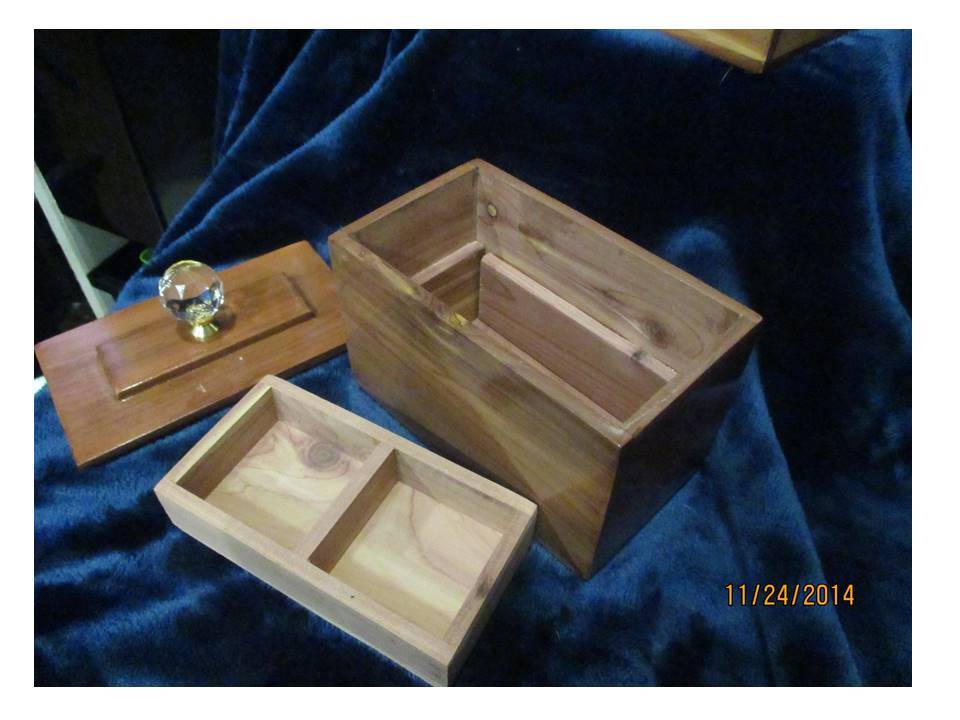
Aromatic Cedar trinket box

This was a project to use some pieces of left over ¼” thick aromatic cedar closet lining board. I cut off the tongues and grooves with the sliding miter saw, and calculated the measurements for the box to fit the size of the wood. For this build I used the micro-pin nailer with compressor, and ½” headless pin nails. The finished box measures 4 1/8” tall, 6” long, and 3 3/8” wide.
Inside, a divided lift-out tray sits on rails made from small pieces of the cedar board glued to the inside. The addition of an extra decorative board to the top made it ¾” thick, to work with a regular knob. The inside of the box stayed unfinished to preserve the cedar fragrance. This was an afternoon project.


Built from Plan(s)
Estimated Cost
The cost of this build is just for the knob, since the wood and finishing materials were already on hand.
Estimated Time Investment
Afternoon Project (3-6 Hours)
Finish Used
On this build I ended up with some discoloration from the glue. I re-sanded and touched it up with some Minwax express color in Mahogany on those areas to even up the color and make it all look natural again. Then everything received 3 coats of gloss polycrylic, topped off with an acrylic crystal knob from Lowes.
Recommended Skill Level
Beginner
Comments
Fri, 12/05/2014 - 17:56
Trinket/jewelry boxes
Joanne, you are the queen of trinket/jewelry boxes! I love all of your posts which show how something simple can be so different and special. These would make wonderful Christmas presents for loved ones, friends, or co-workers. Thanks for sharing.

Sat, 12/06/2014 - 04:58
Thank you!
Linda, thanks so much for the nice comment! I have such fun doing hand built gifts for Christmas! Thinking up how to decorate them and what to make them from is a big part of the fun! 
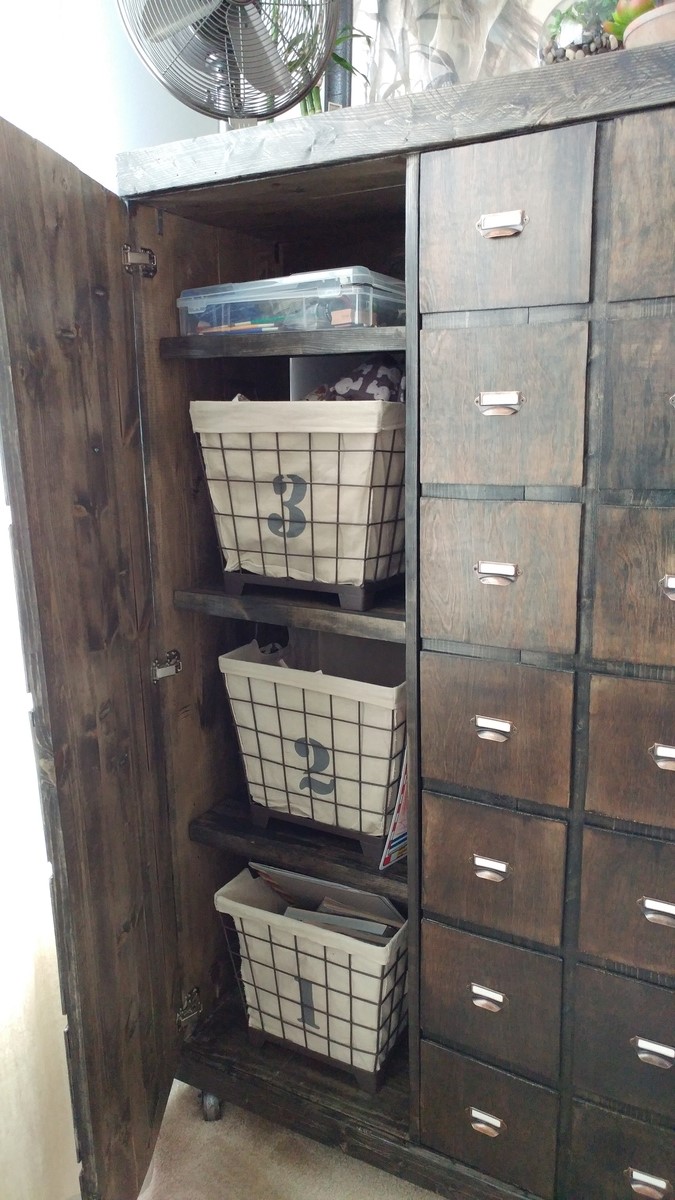
Apothecary cabinet
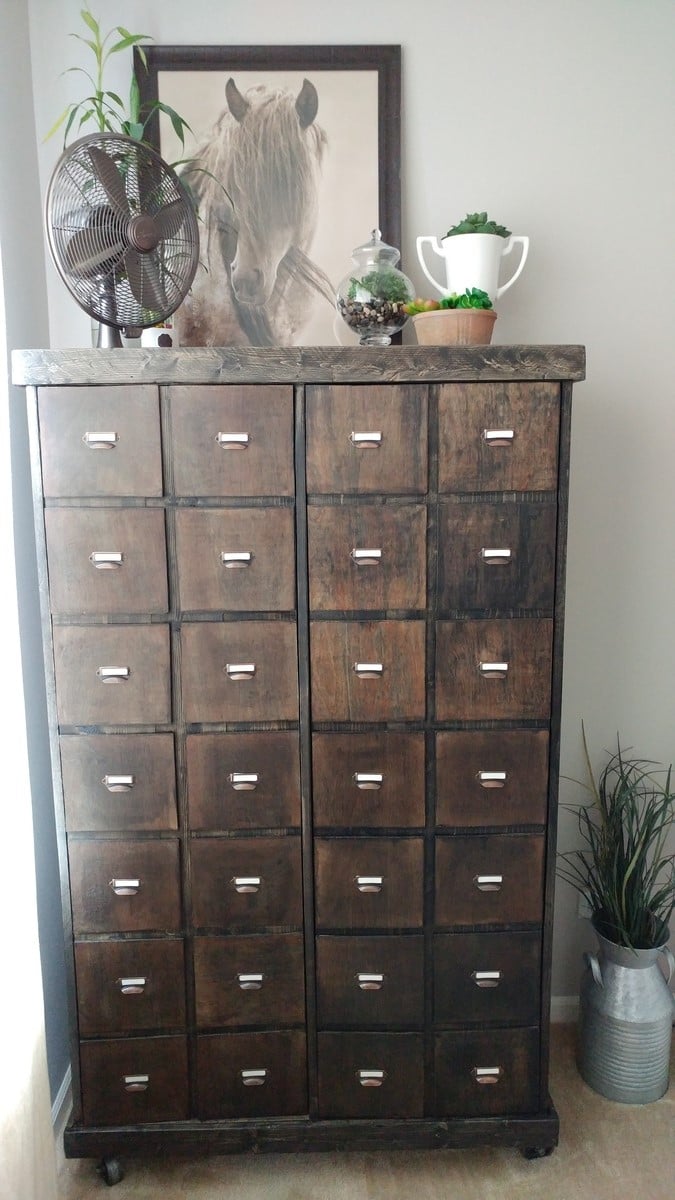
I've wanted to build one of these forever! I changed the plans a lot to accommodate my needs, but I loved the idea of faux drawers on the doors to have an authentic look. It fools most people! Took 2 weeks for me to complete, working on and off. It has great storage inside for all the kids' stuff I didn't have a place for previously. The stain is ebony by minwax and the hardware pulls I purchased for under $10 for 30.
Built from Plan(s)
Estimated Time Investment
Weekend Project (10-20 Hours)
Finish Used
Minwax ebony stain with varathane poly in satin
Recommended Skill Level
Intermediate
Hanging Wall File
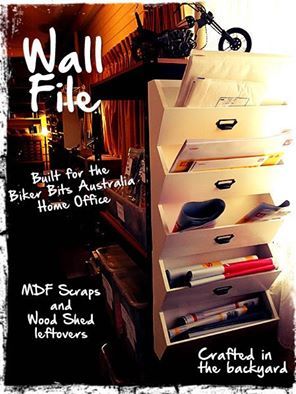
This was just a quick little project as we decided we needed a bit of organisation in the office.
I just used scrap mdf and leftover bits and pieces from other projects for this wall file. We now have somewhere to put all the postage stuff for our online sales site.
Cheers... Nay
Built from Plan(s)
Estimated Time Investment
Afternoon Project (3-6 Hours)
Finish Used
White enamel paint
Recommended Skill Level
Starter Project
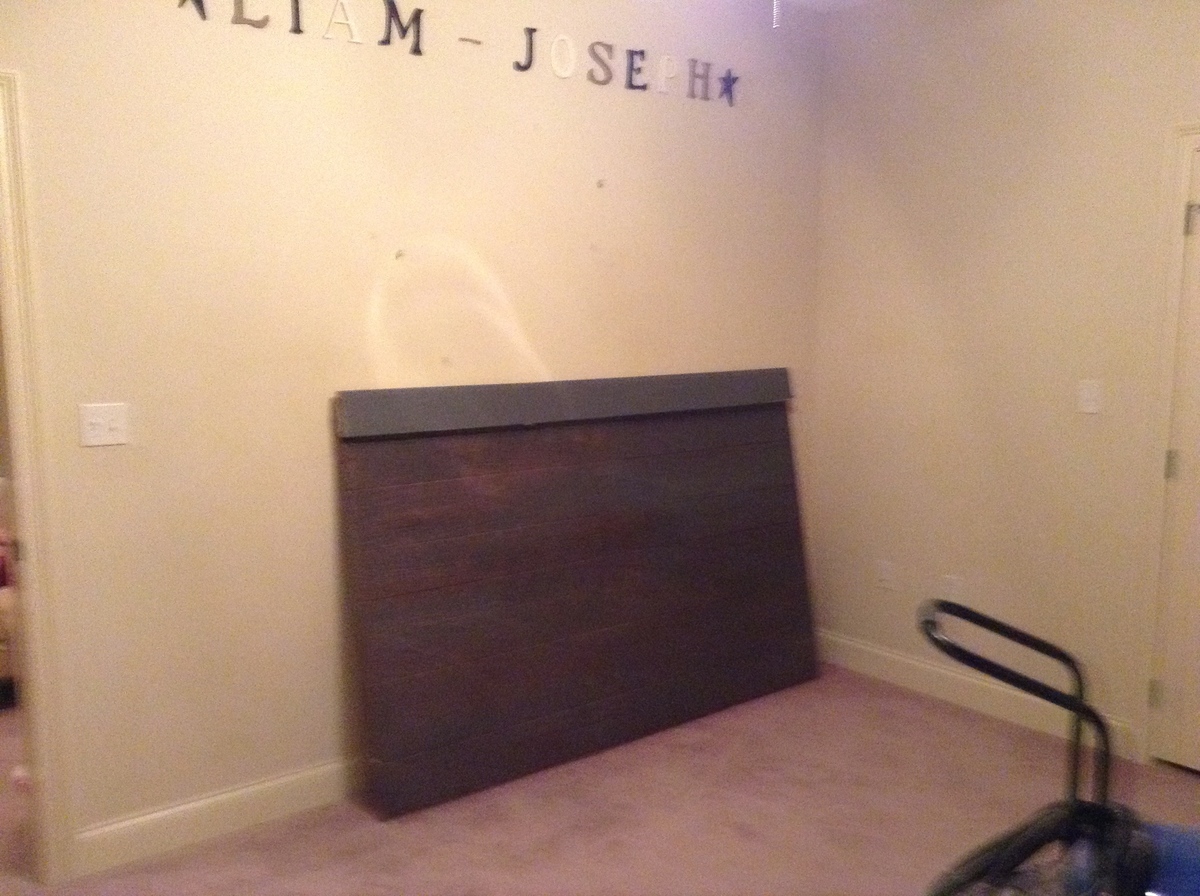
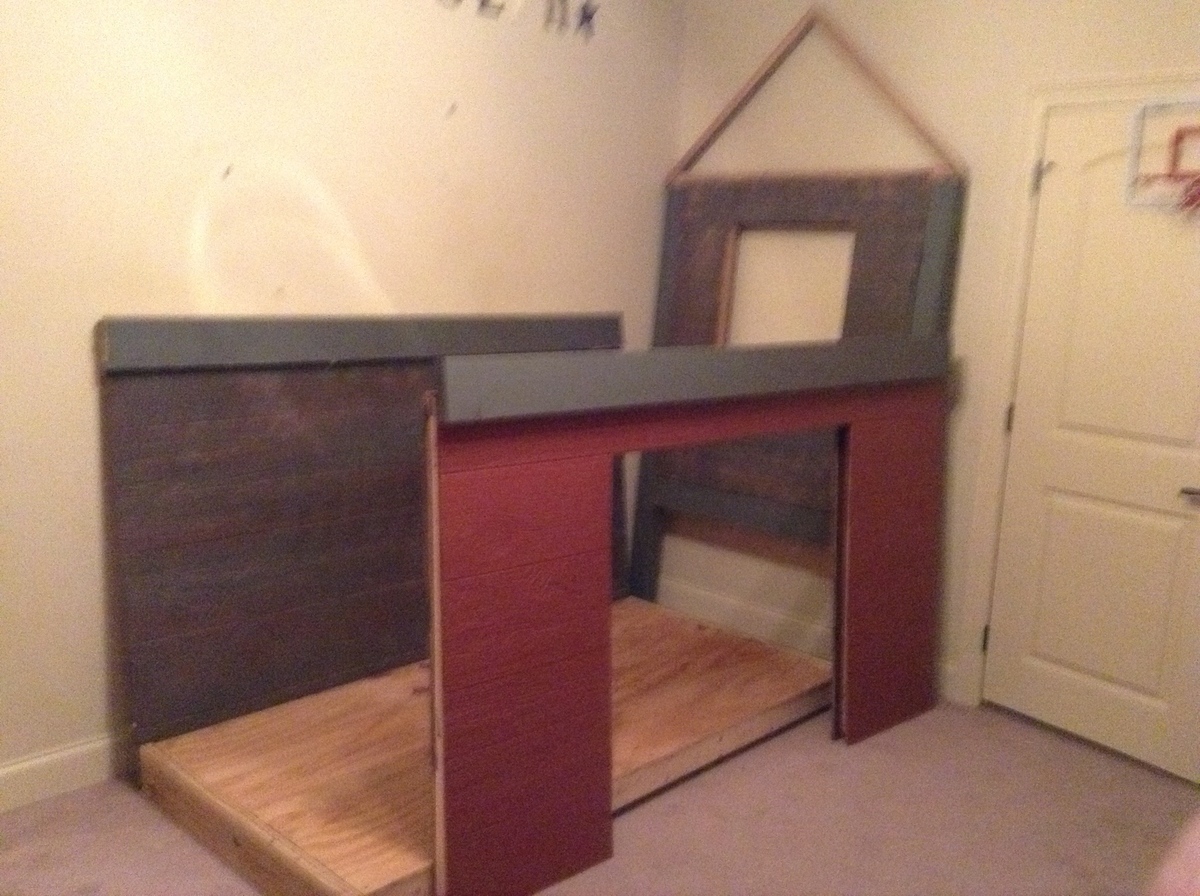
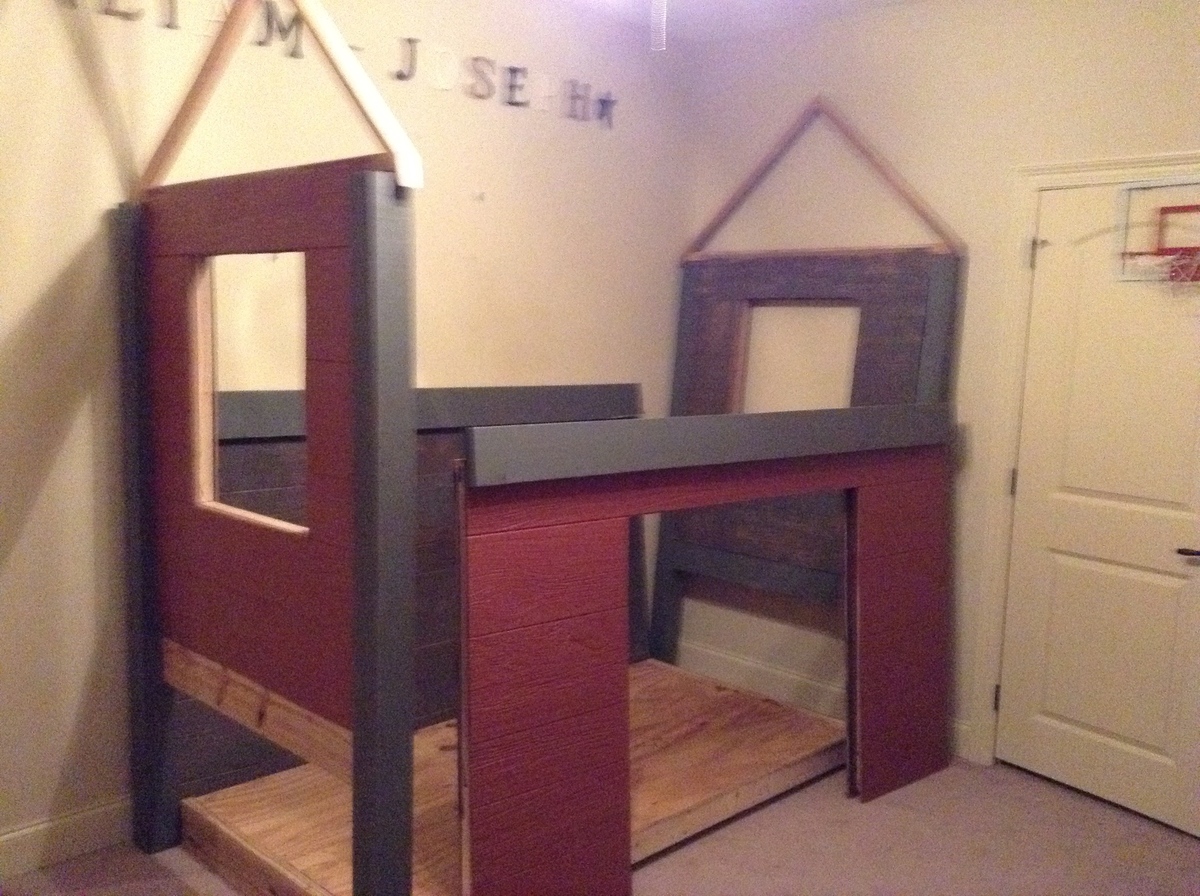
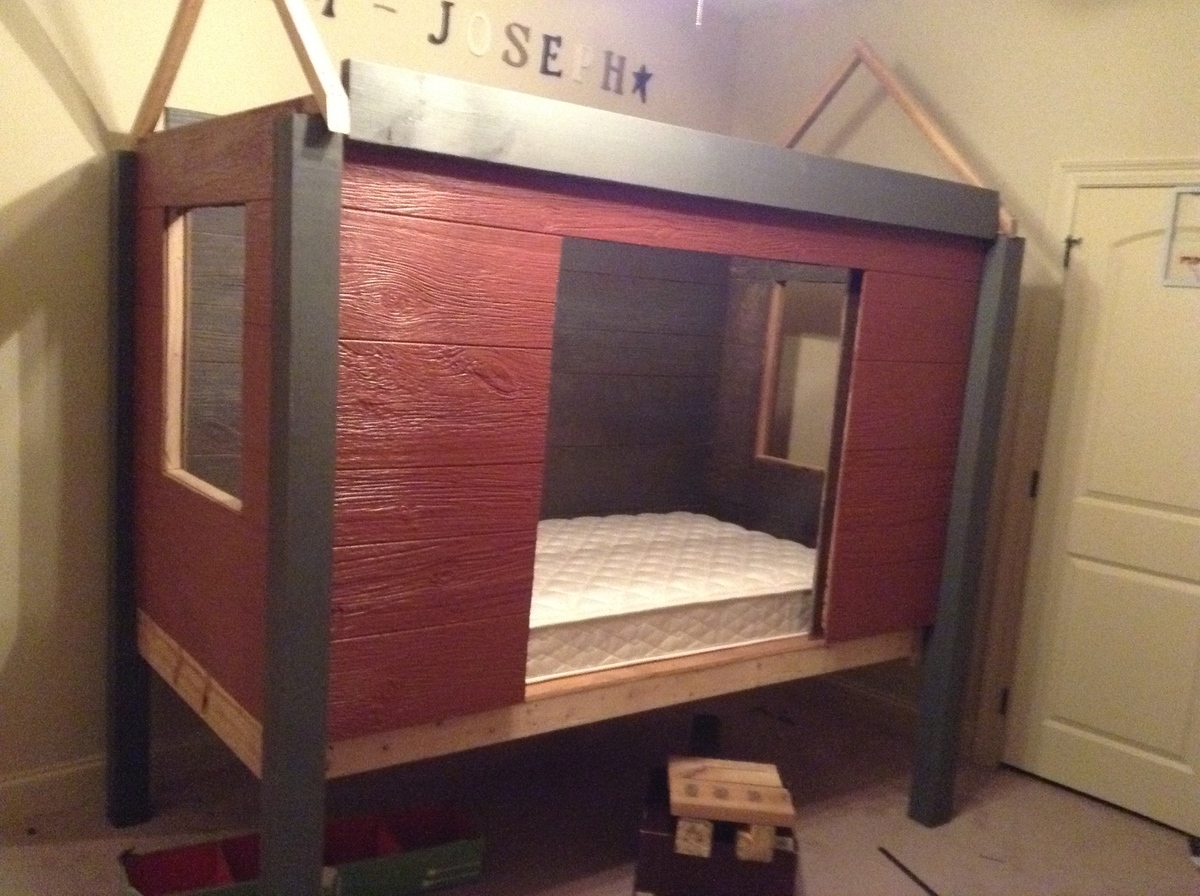
Liam's Christmas Day Barn Bed

Our son Liam-Joseph wanted a "Big-Boy Bed" and then he added "I want Daddy and Santa to make it". Well "Santa" and my wife Jacques looked all over the internet and finally found your Cabin Bed via jennwoodhouse.com. Jacques altered the plans demensions and she realized the bed could be barn-like so she came up with the red and gray paint job. She actually wanted a cupola but I thankfully talked her out of that. Well somehow we keep the construction from Liam 2 weeks before Christmas. On Christmas Eve Liam's Grandparents keep him at their house while "Santa" and I put the bed together (I never did a trial run so I was relieved when everything fit right together). The next day after opening his presents he ran up to his room and saw his bed for the first time.
The project isn't completed. I recently finished the roof with wood pallets but I need to finish the trimming of the interior of the bed walls.

Estimated Time Investment
Week Long Project (20 Hours or More)
Recommended Skill Level
Intermediate
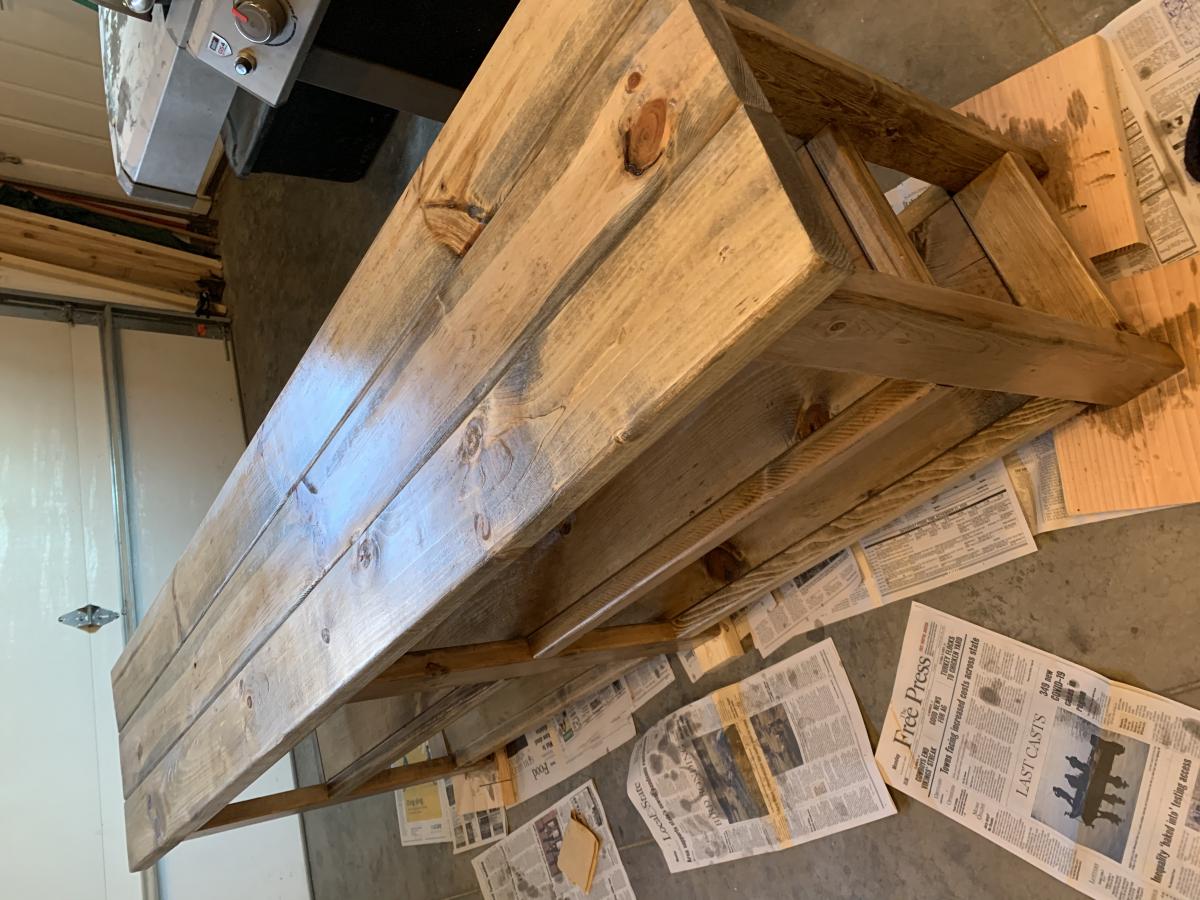
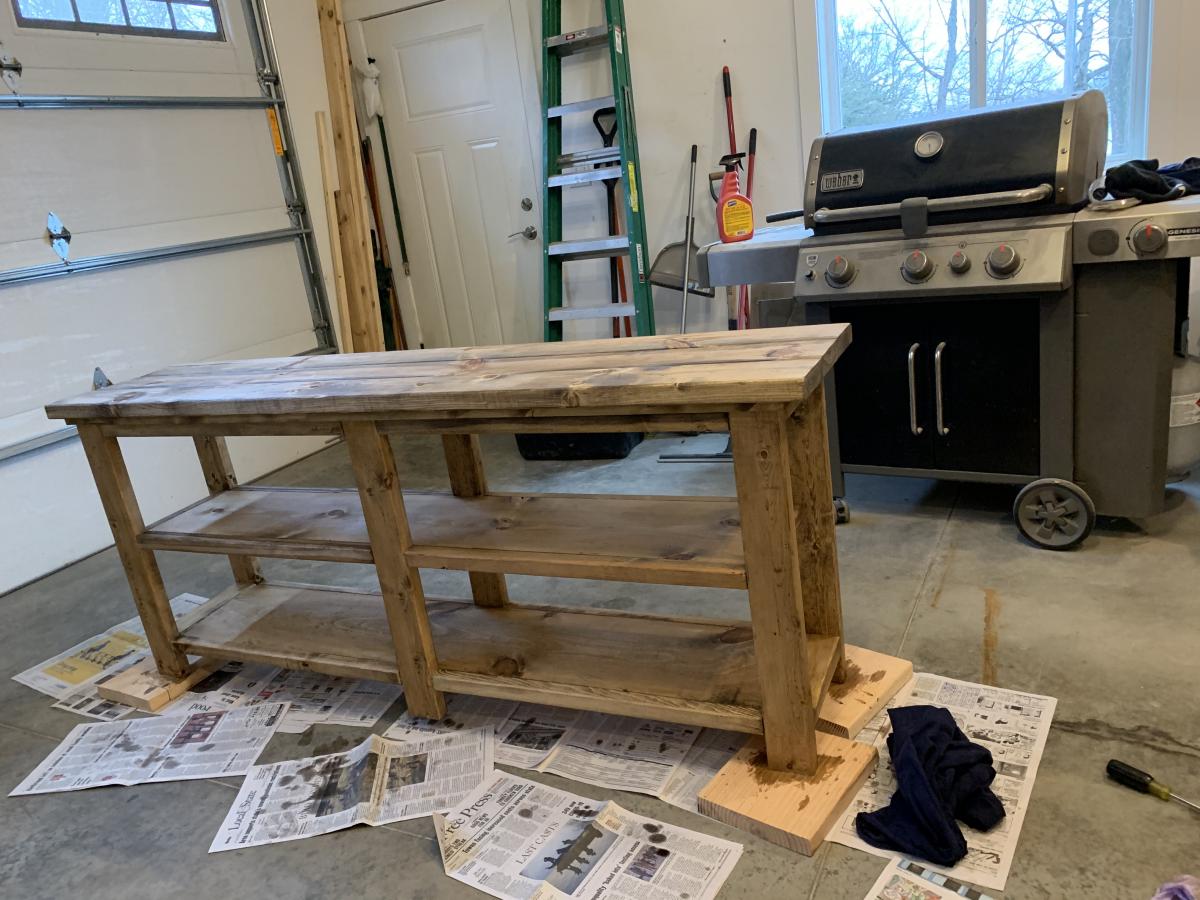
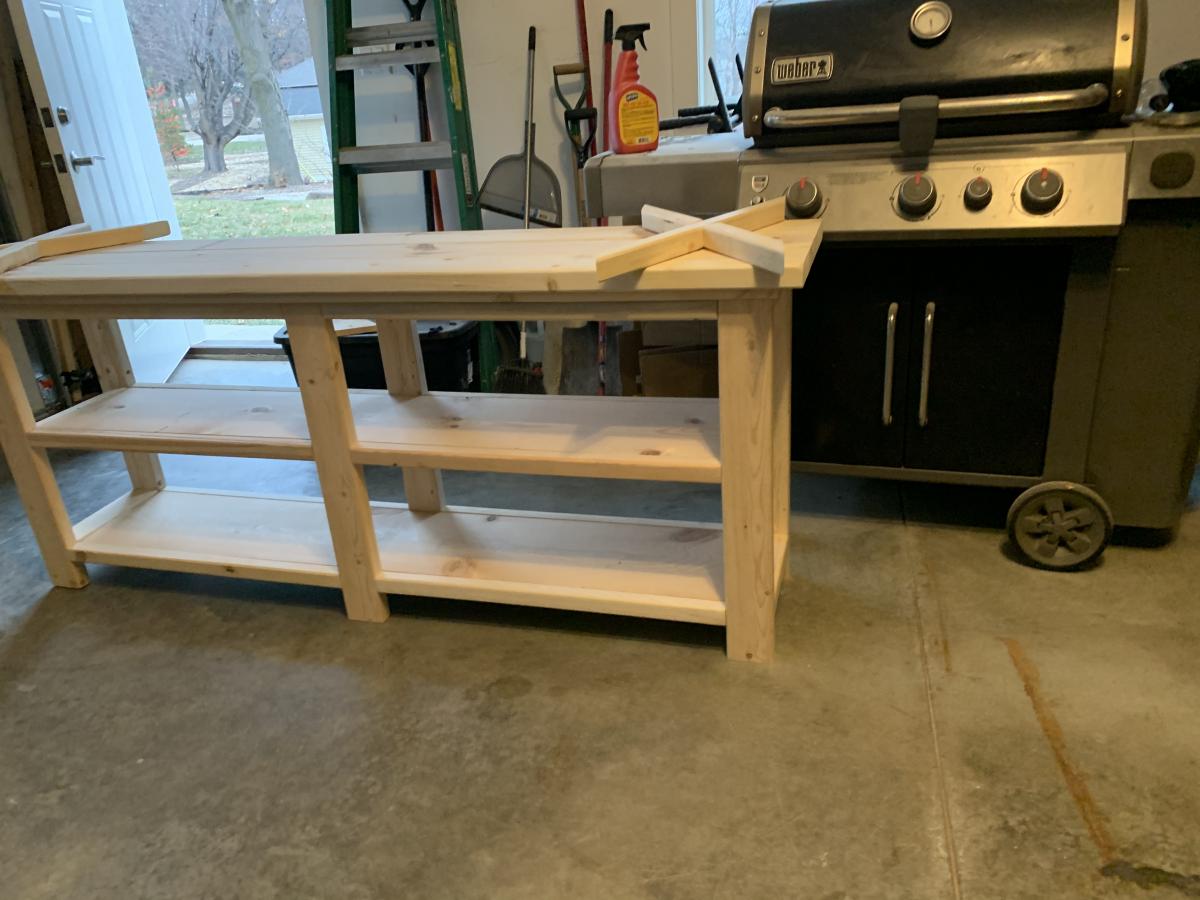
Rustic X console table
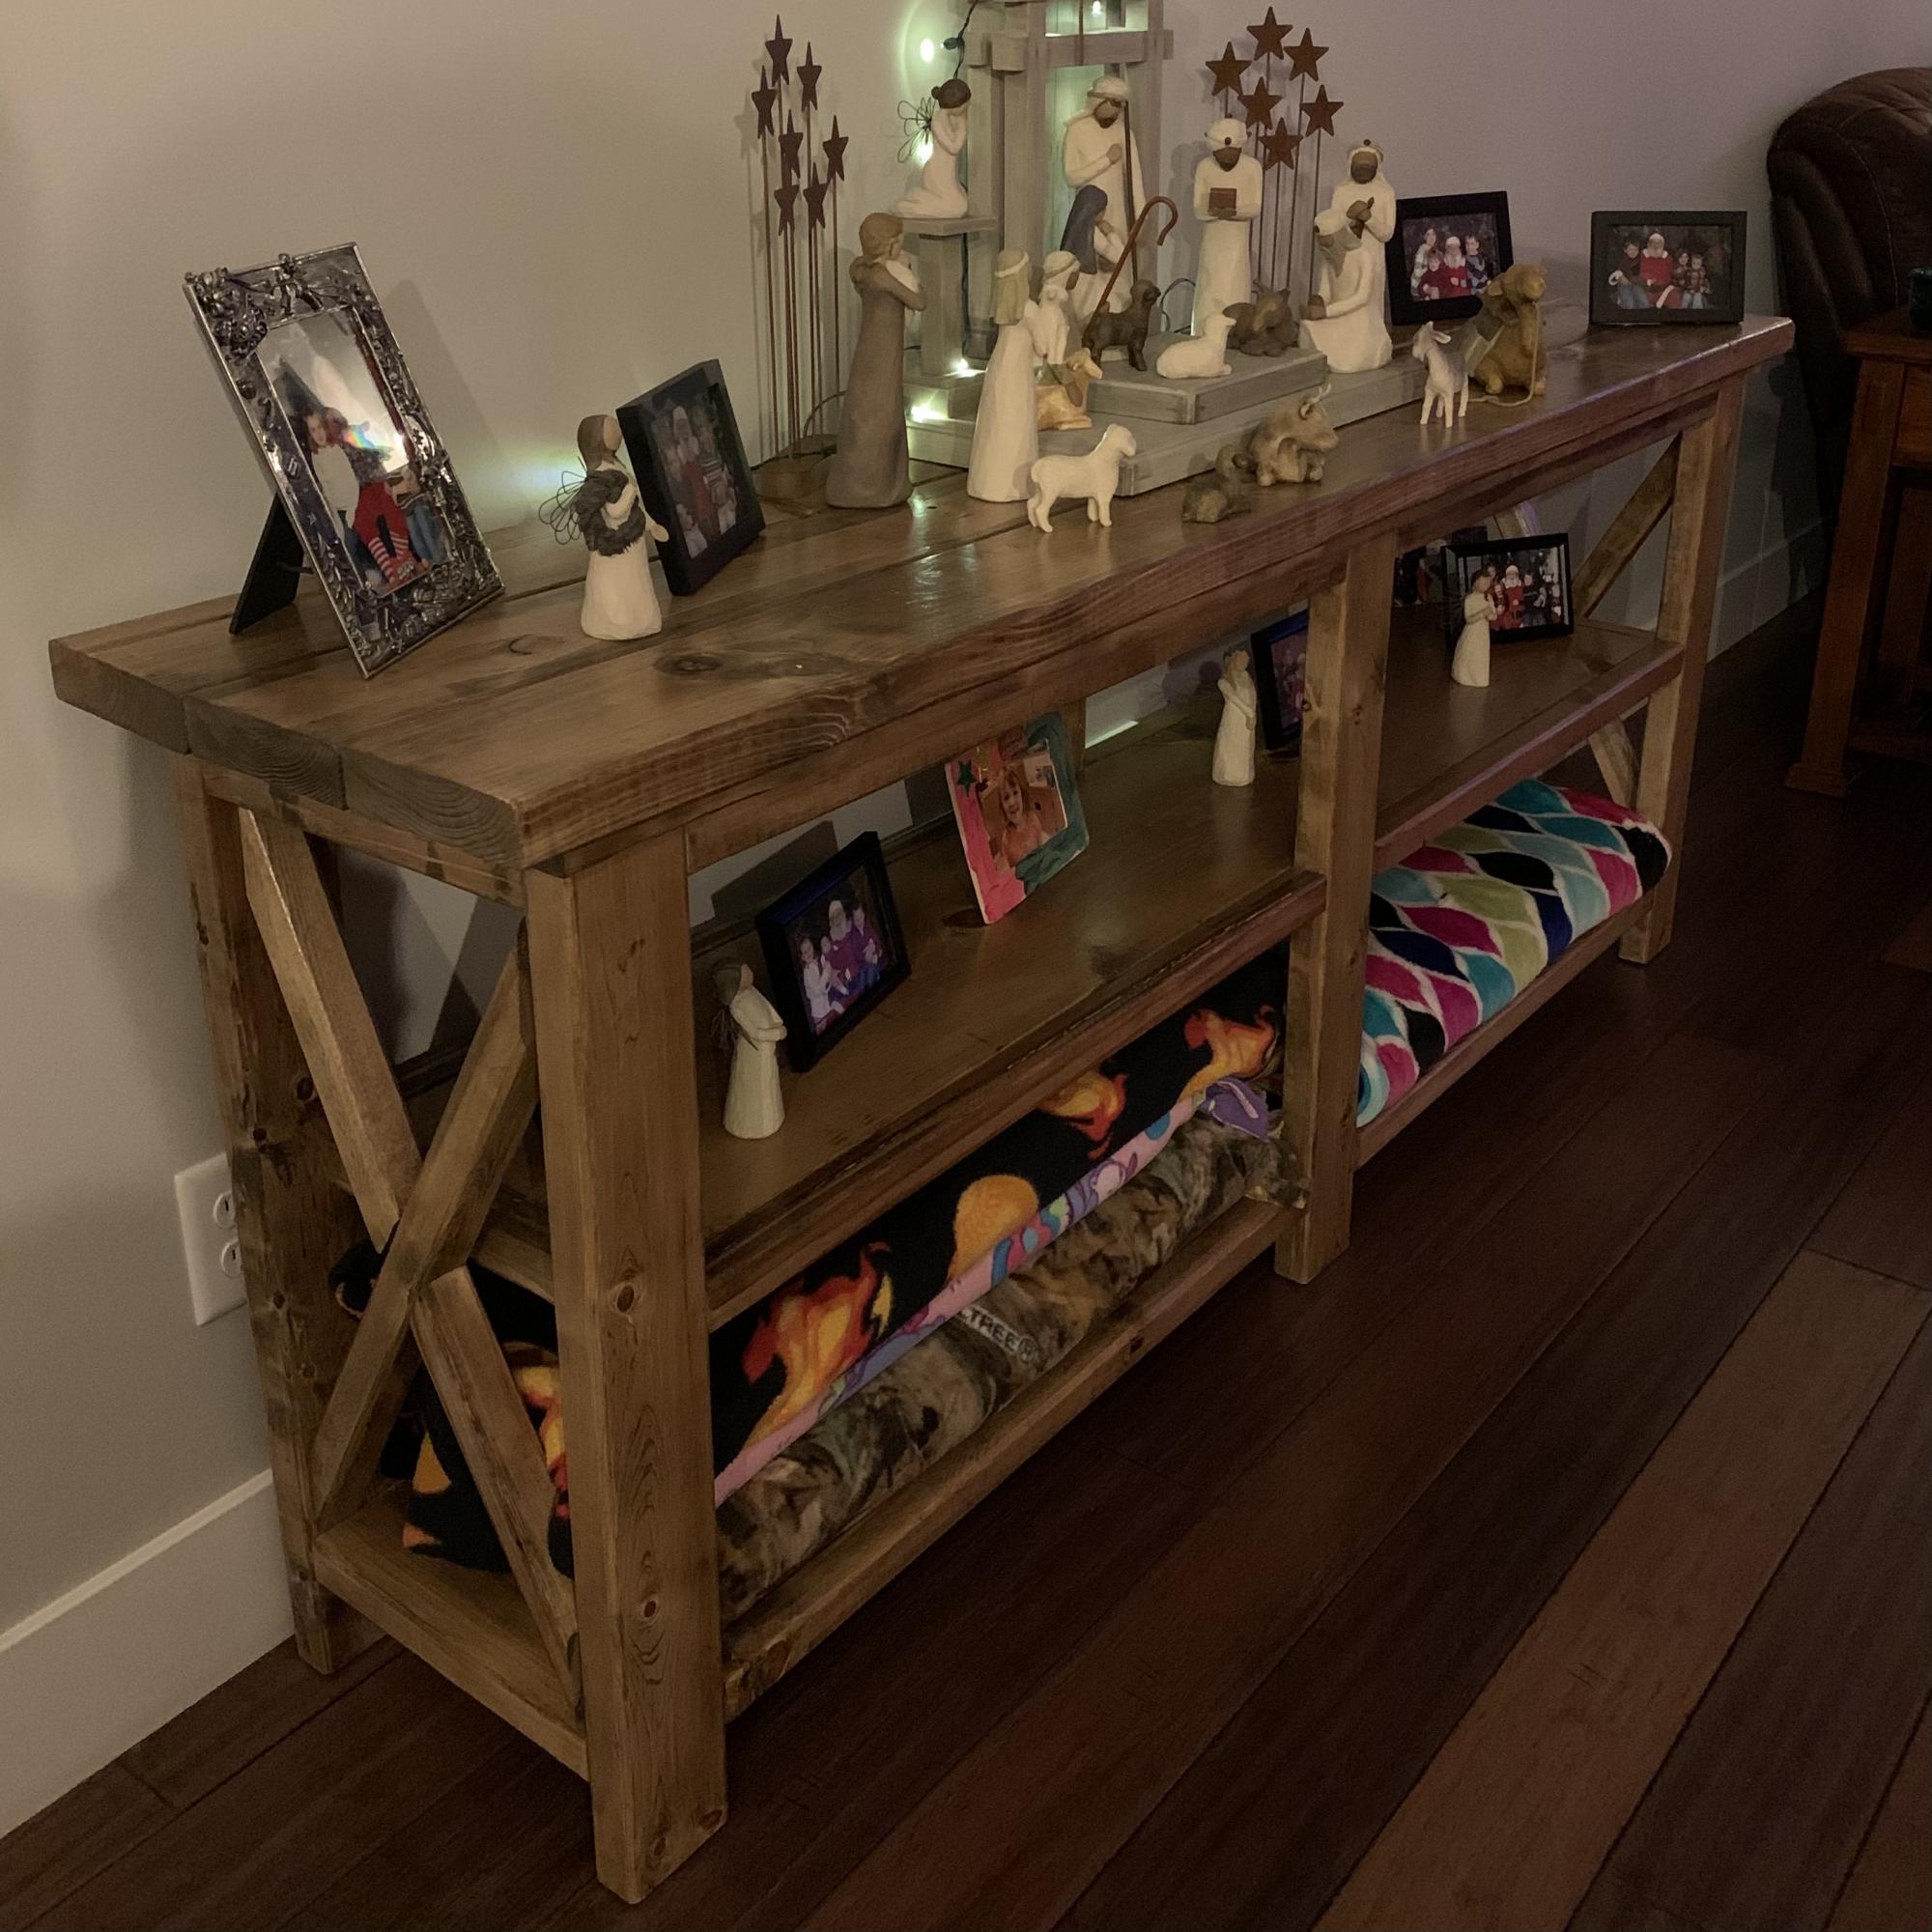
So excited with how this table turned out!! I absolutely love it❤️ My daughter helped me build it. It’s been fun teaching her how to build things!
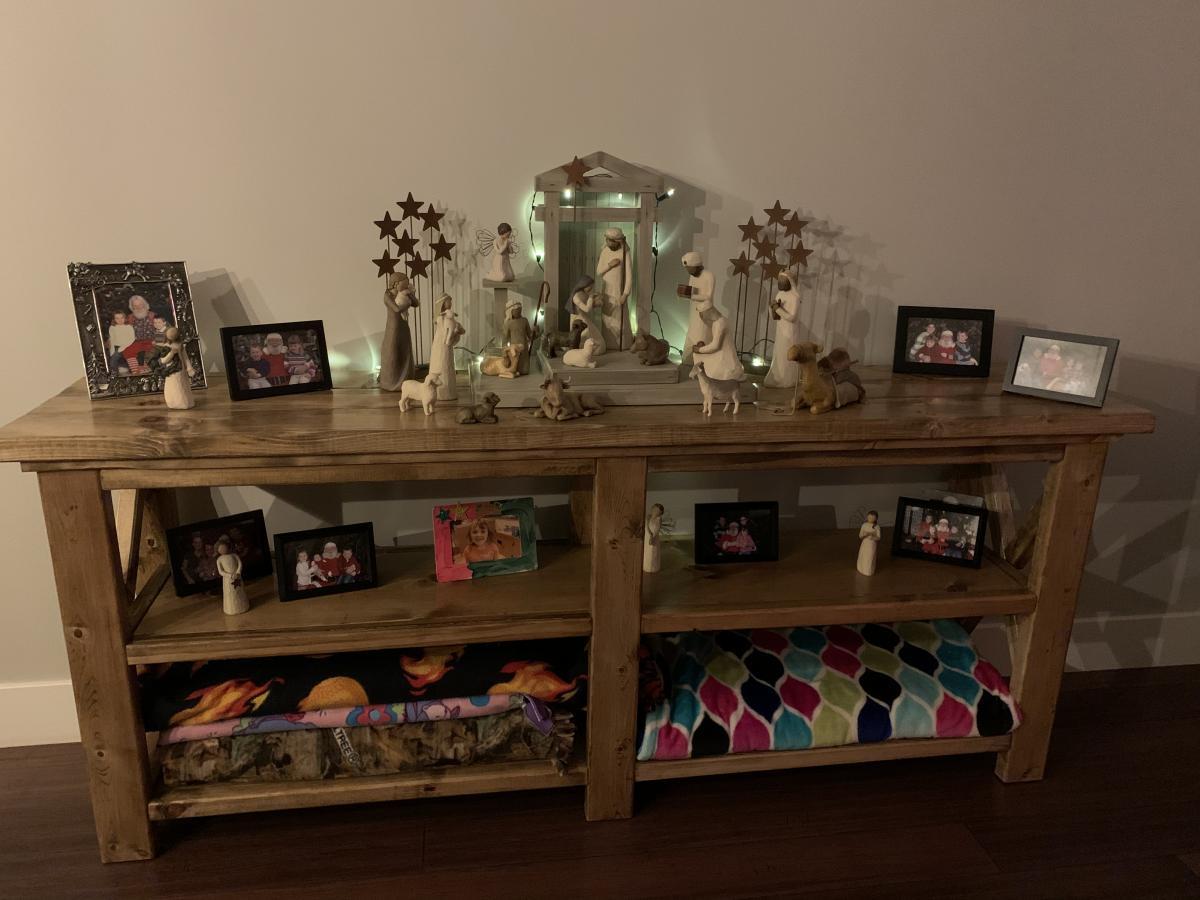

Estimated Cost
100
Finish Used
Minwax Special Walnut stain and polycrylic
Comments
Sat, 01/02/2021 - 13:18
Great build!
Love your project and that you are getting your daughter involved!
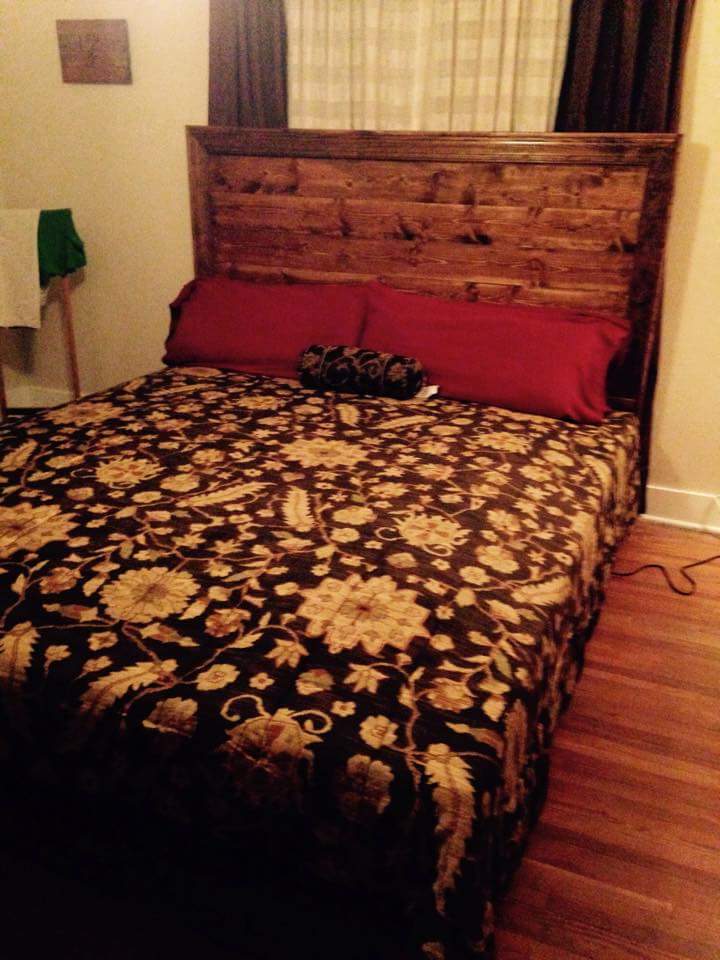
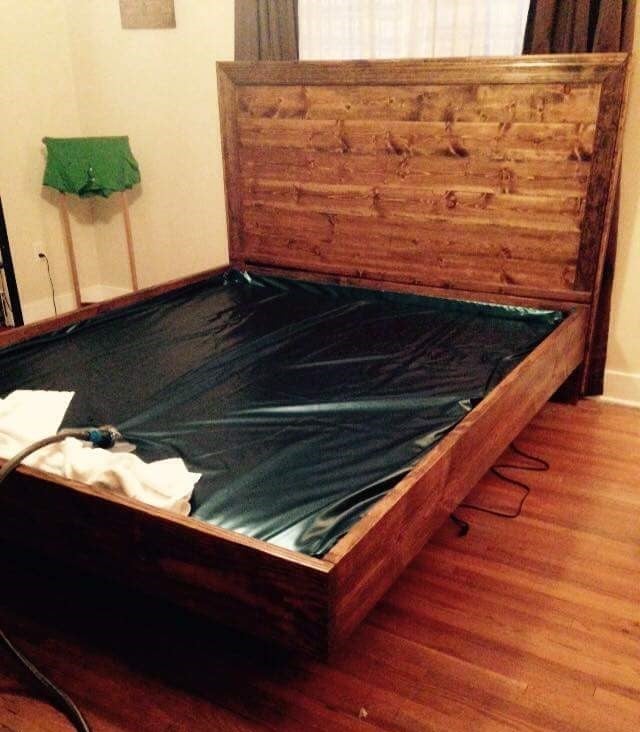
Planked Headboard / Waterbed Build
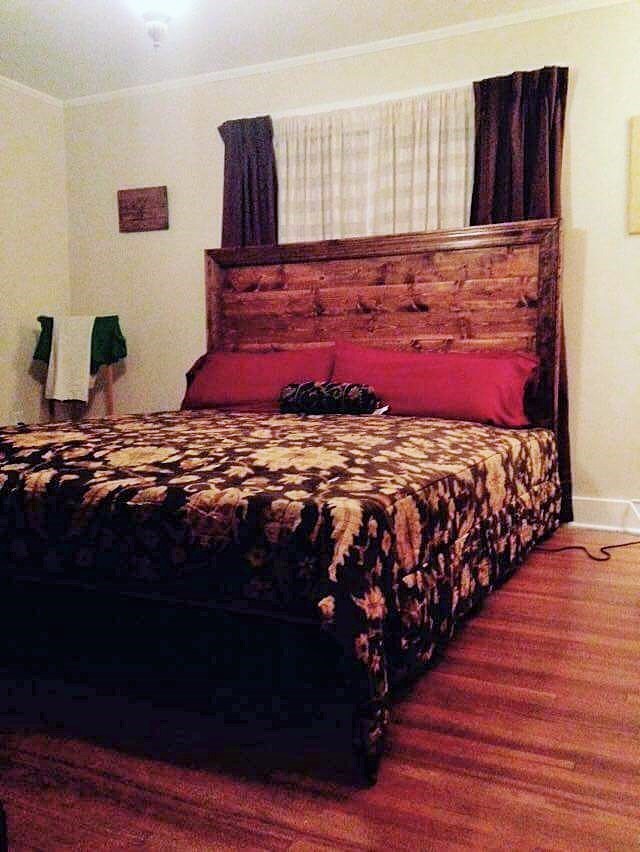
I don't have photos of the build but I did acquire some pictures of the assembly.
What we added to the shopping list for a king was 3 1x6x8's (he bought 6 total instead of 1x6x10's) and 1 1x4x8. To build it in a king or California king just take a measurement of the top or bottom of the bed frame to find the length to all of the horizontal boards. This takes care of the headboard. For the frame we simply built it to fit out of four 2x10x10's.
I also used my Kreg Jig to attach all of the center horizontal boards together with pocket holes instead of adding supports to the back.
Built from Plan(s)
Estimated Cost
$150.00 for the entire bed.
Estimated Time Investment
Weekend Project (10-20 Hours)
Finish Used
Rust-Oleum English Chestnut
Recommended Skill Level
Beginner
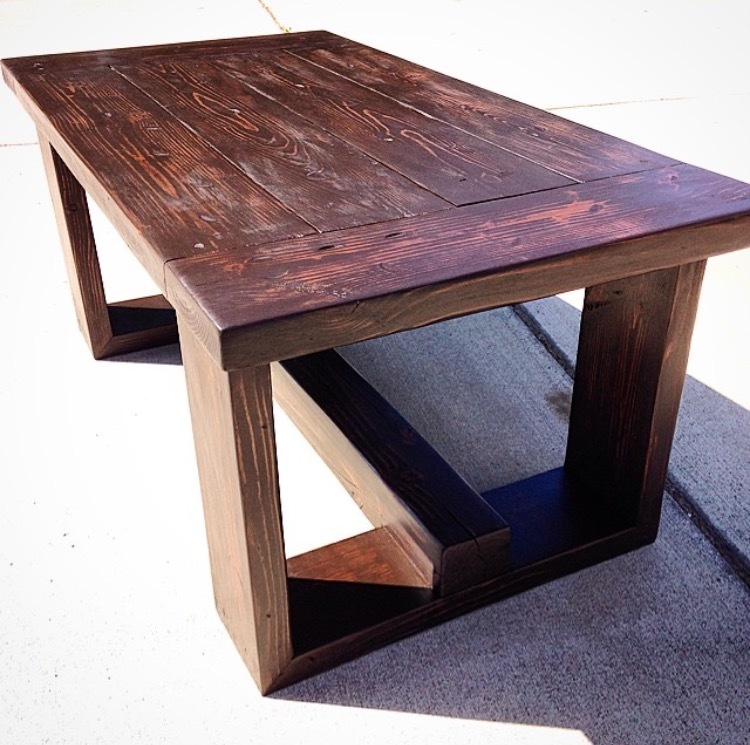
Farmhouse Coffee Table
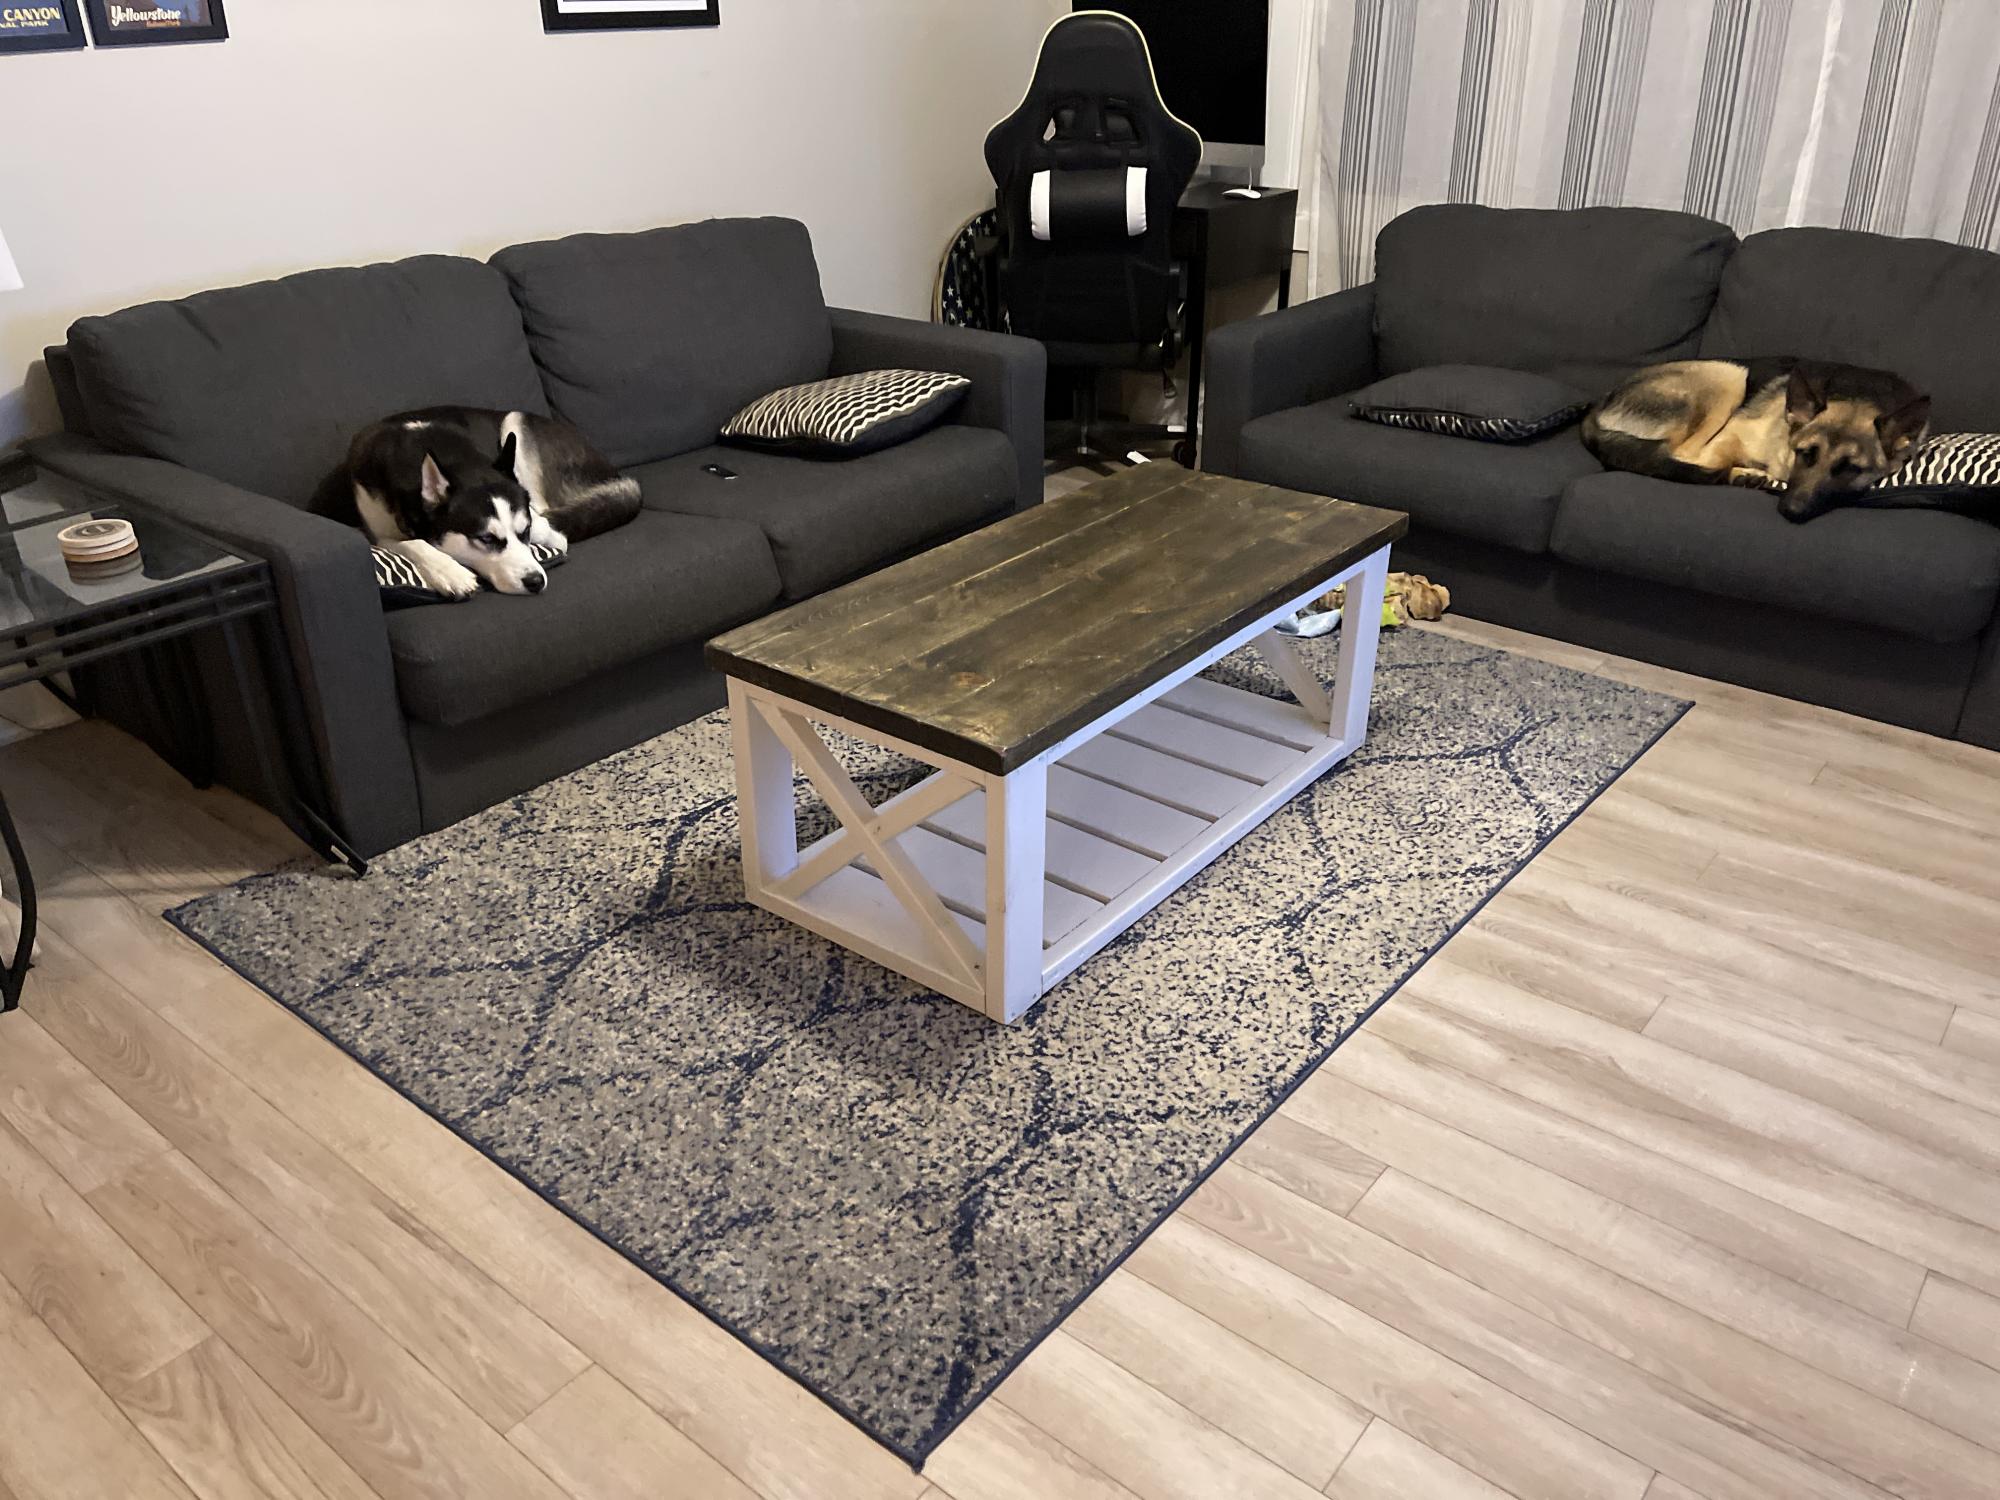
Farmhouse collection
Built from Plan(s)
Estimated Cost
65
Estimated Time Investment
Afternoon Project (3-6 Hours)
Finish Used
Jacobean and white paint
Recommended Skill Level
Beginner
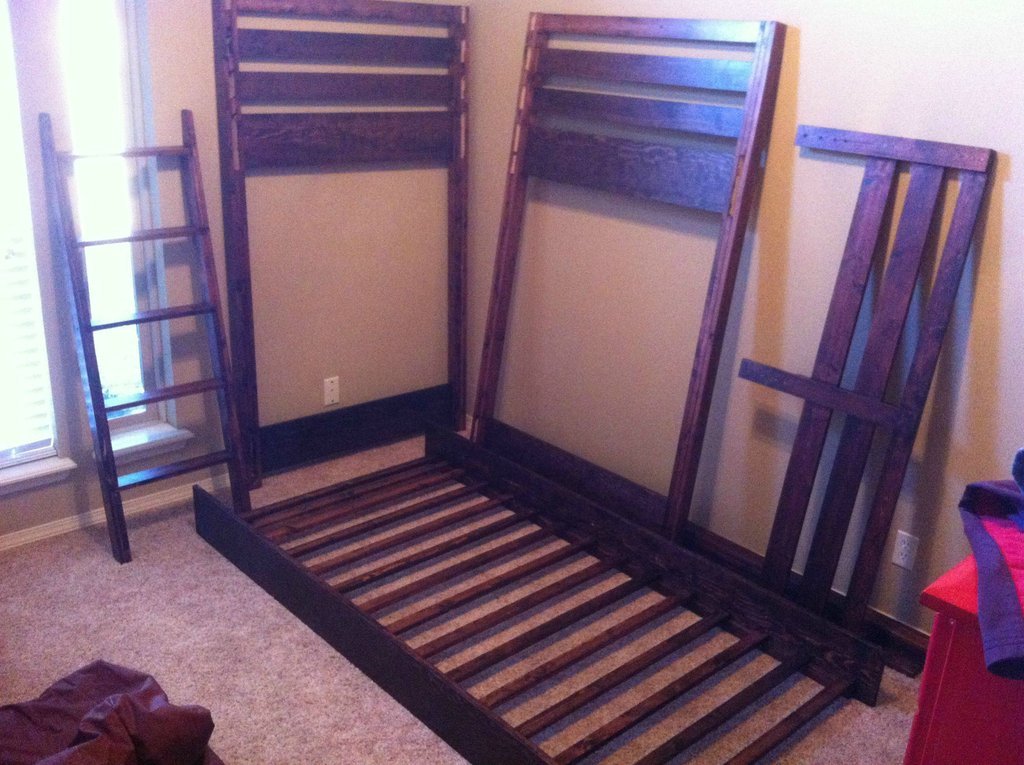
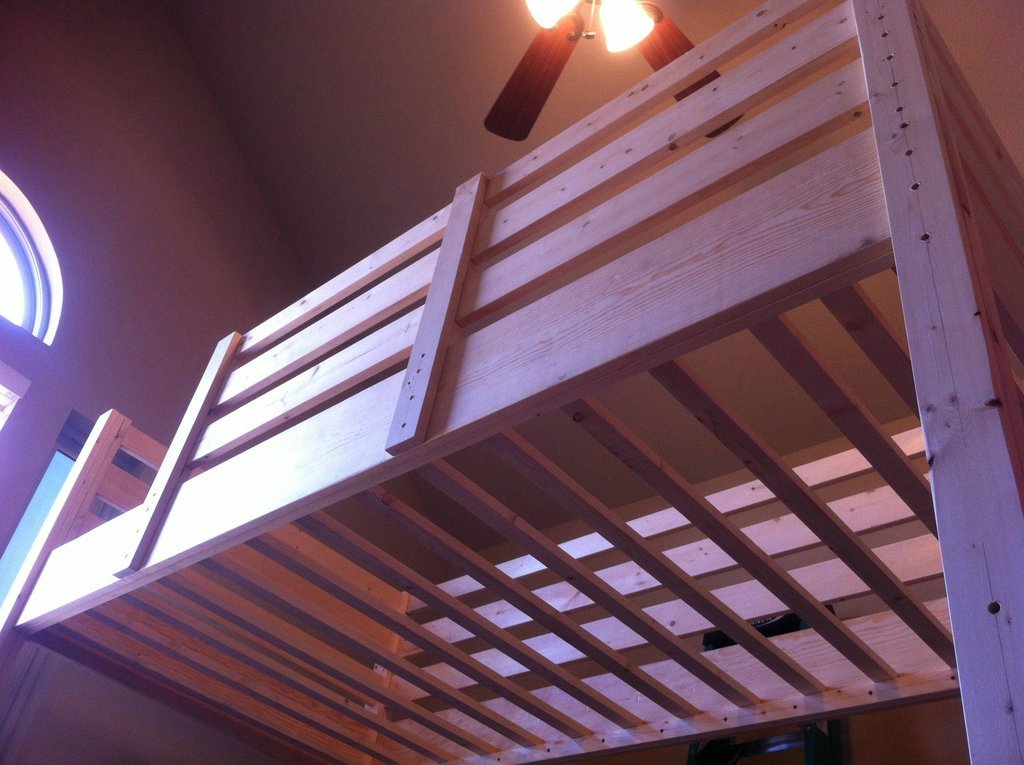
Loft Bed
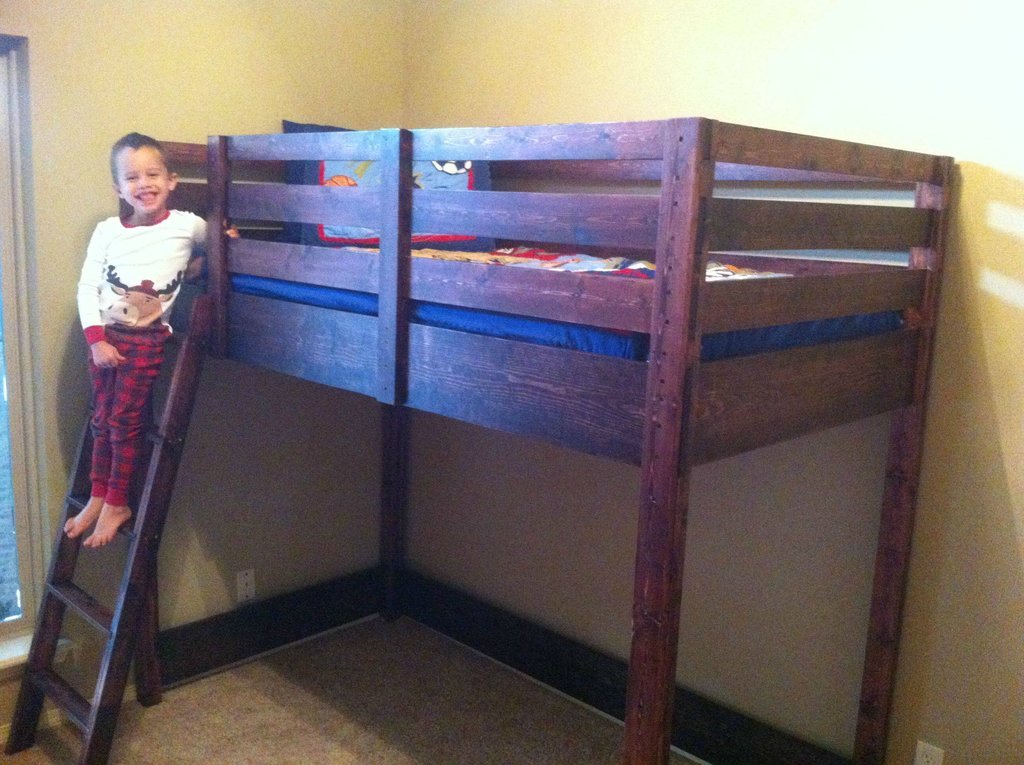
My wife and I completed our son's loft bed in December for his Christmas present. My wife found this bed on Pottery Barn's website and I found these plans on Ana White. Everything was pretty straight-forward. It was a great project and we had a lot of fun building something together. We made a few mods to the plans like height and the railings. I really like how it comes apart for moving and our son loves sleeping up there! Protip: Be careful with the wood glue where the bed is designed to come apart. I got a little sloppy and had to do some hammering to disassemble for staining/sealing. Everything went back together very easily, though.
Built from Plan(s)
Estimated Cost
$275
Estimated Time Investment
Week Long Project (20 Hours or More)
Finish Used
Minwax Red Mahogany stain and Minwax Clear Satin Polyurethane. Sand before sealing then wipe down with mineral spirits repeat between coats. We only did 2 coats.
Recommended Skill Level
Beginner
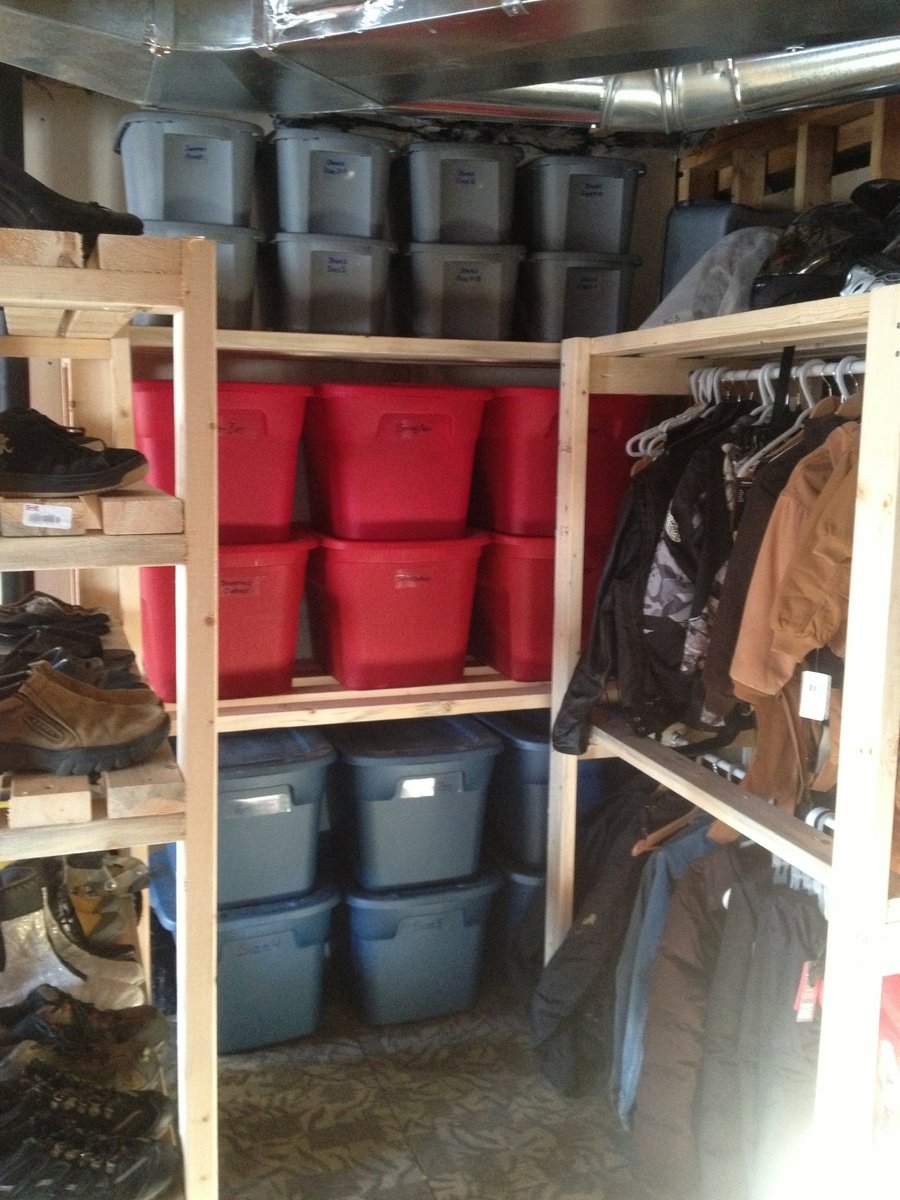
Economical Basement Shelving 2
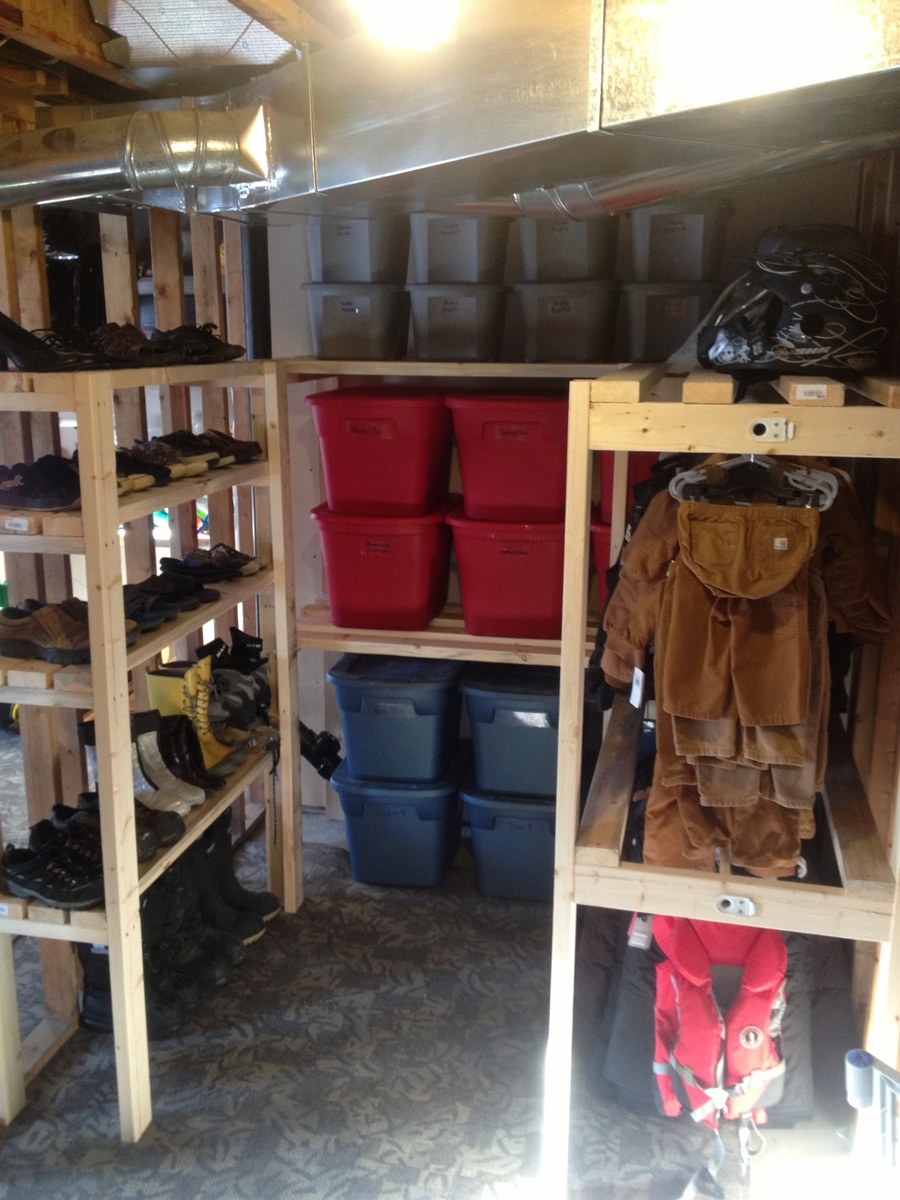
I've been organizing our unfinished basement so that my boys have more space to run and ride their bikes over the winter. I needed something to organize our off season clothes and bins of clothes that my boys are growing in/out of. This plan was perfect. It's not my prettiest build but it's soooo functional!
Built from Plan(s)
Estimated Cost
$100
Estimated Time Investment
Afternoon Project (3-6 Hours)
Finish Used
None
Recommended Skill Level
Starter Project
Comments
Joe Shape
Fun and easy project. I couldn't be happier with the end results. Great plan from Ana White.

Estimated Cost
$83 for coffee and end table.
Estimated Time Investment
Weekend Project (10-20 Hours)
Finish Used
Waterlox on top and Sherwin Williams furniture paint on frame.
Recommended Skill Level
Intermediate
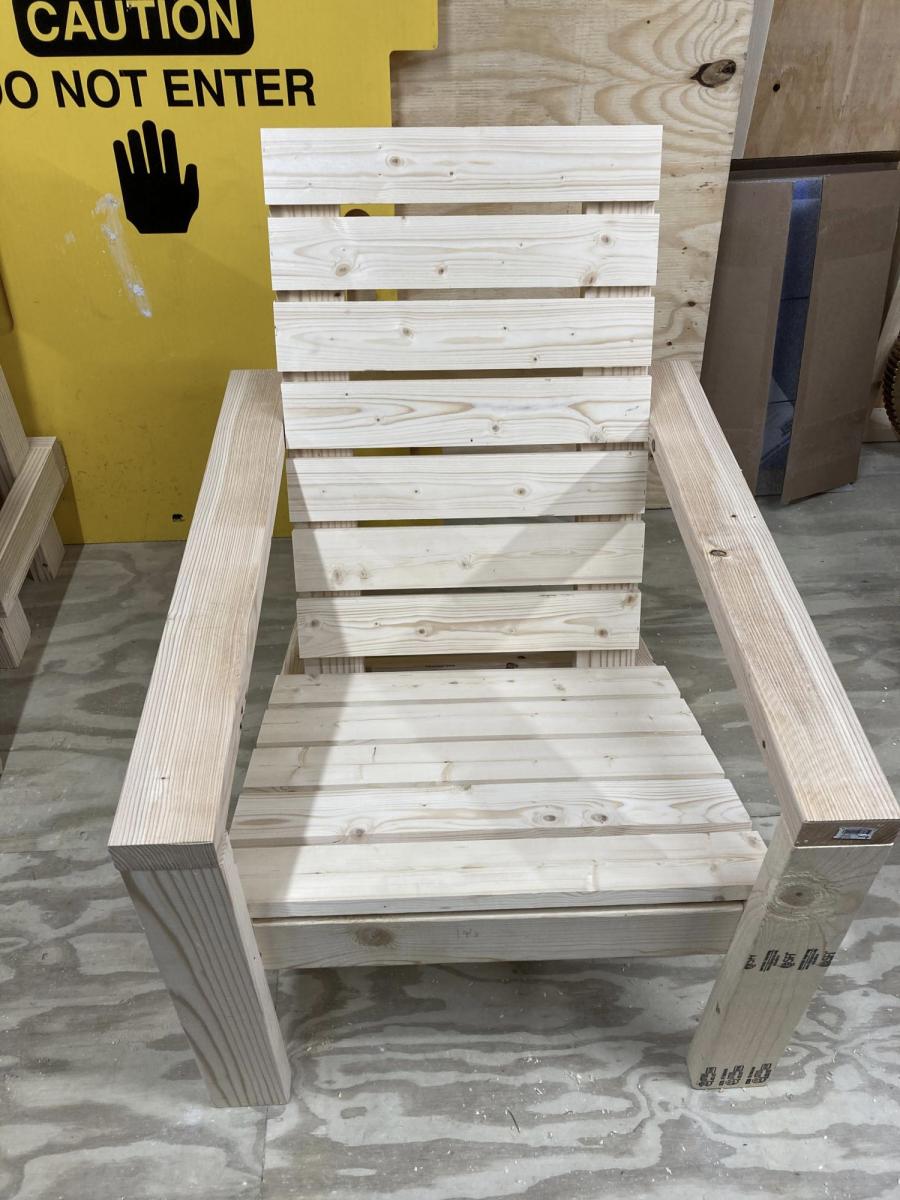
2x4 Adirondack Chair
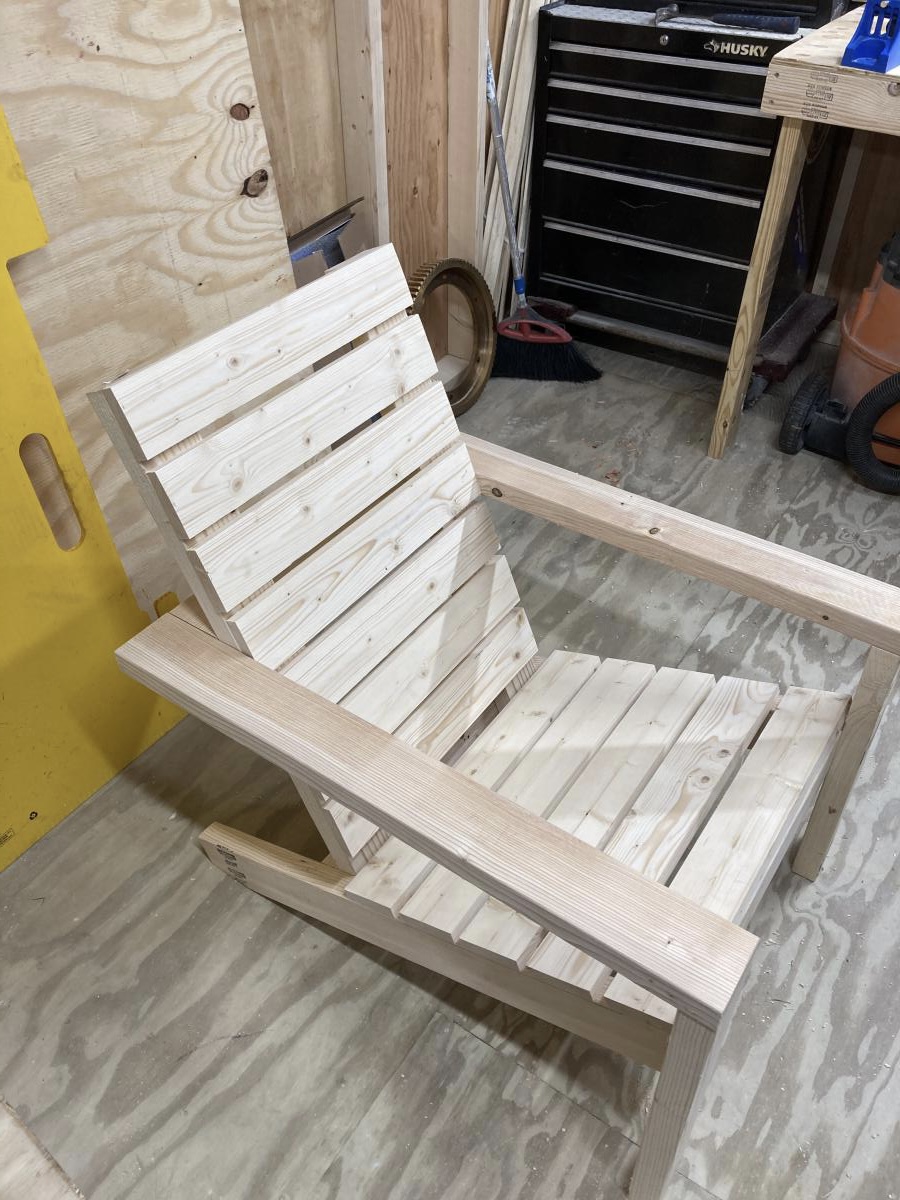
Built this with my son after watching tutorial. Very comfortable need to sand and stain. Thank you for the info.

Built from Plan(s)
Estimated Time Investment
An Hour or Two (0-2 Hours)
Recommended Skill Level
Beginner
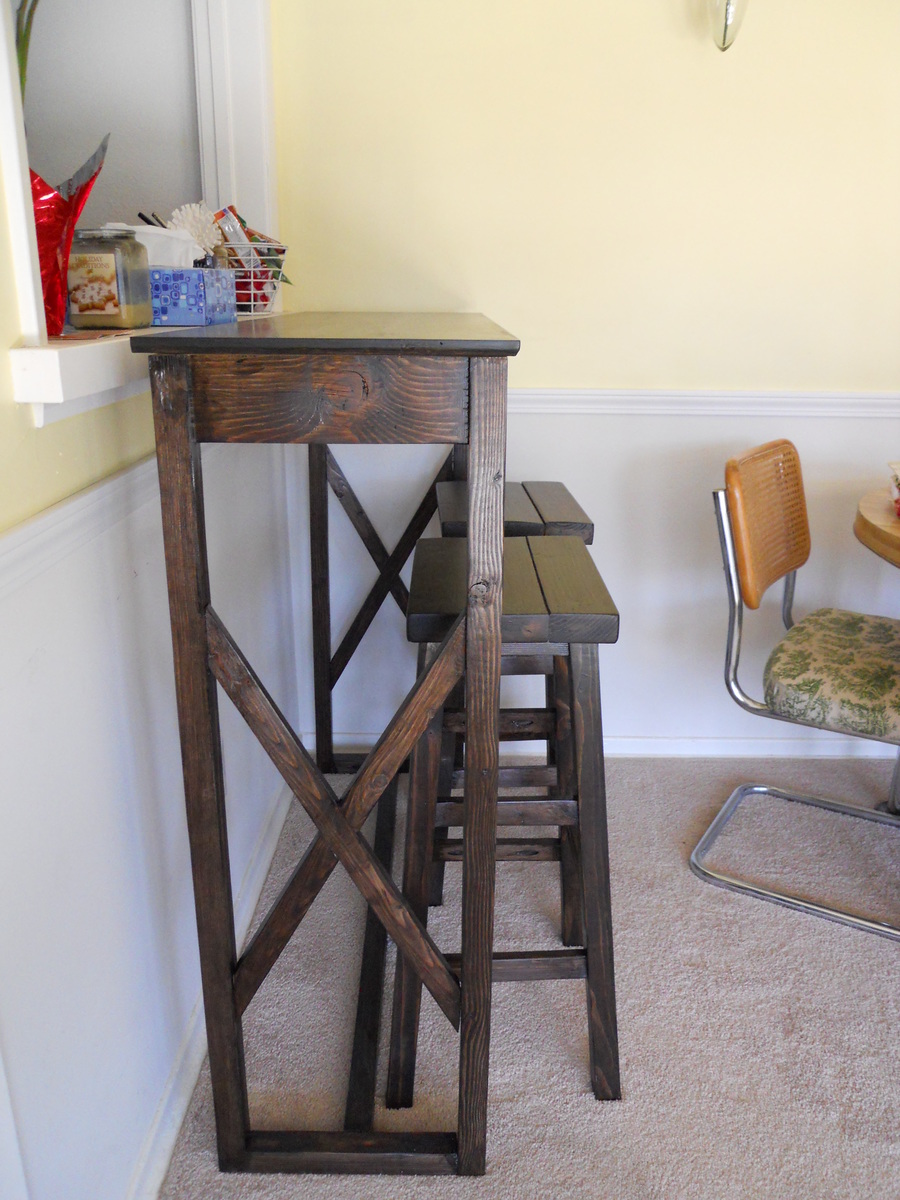
Pub Table and stools
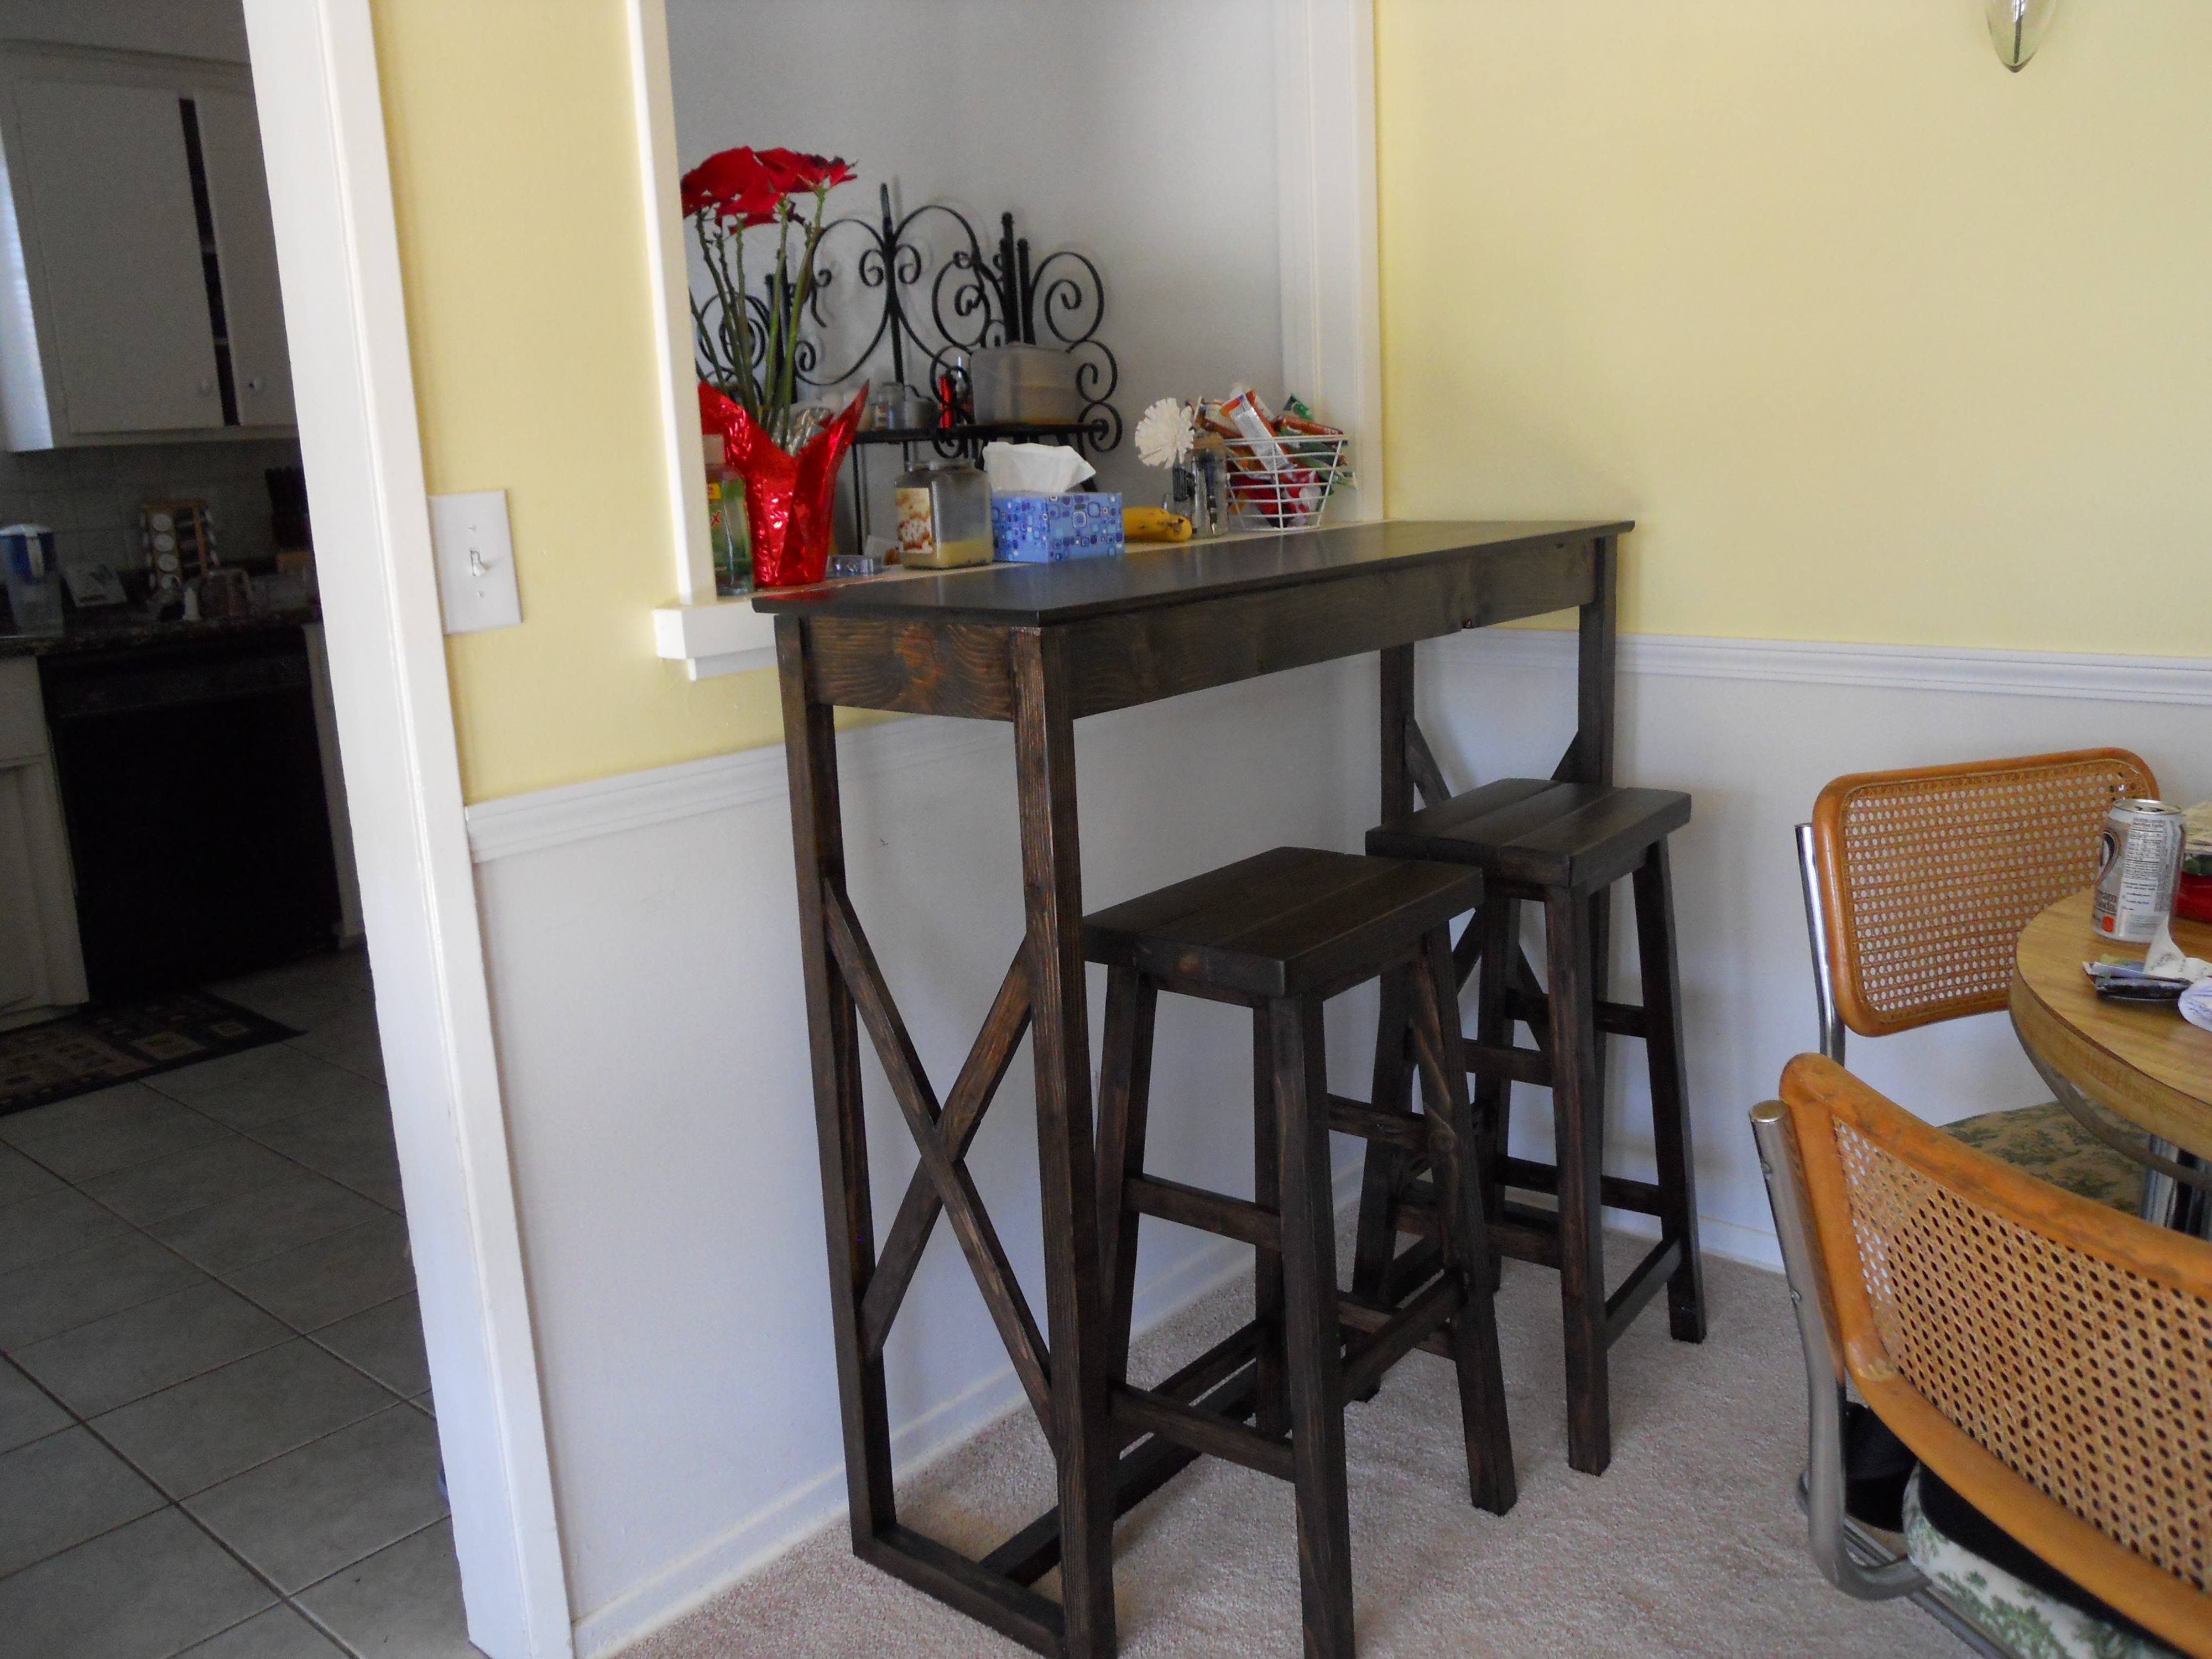
Using the plans for the modern table and simple stools, I made some modifications so it could be a bar height pub table and stools. The stools took the most time, with all the supports and keeping it level. The table was easy and I am super happy with the addition of the x's on the sides. I think it gives it a more professional look. Turned out that the angle I wanted them at wasn't possible on my miter saw, so I just had to mark the angles and cut with a jig saw. Screws were overkill for them and split the wood, so finishing nails did the job. The top was salvaged from an old ugly mdf topped coffee table. I sanded it a bit and with many coats of stain, achieved a match to the rest of the wood. Yay! Breakfast nook, complete!

Estimated Time Investment
Week Long Project (20 Hours or More)
Finish Used
Varathane Kona stain + poly
additional coats of clear matte poly on tops of table and stools for protection.
additional coats of clear matte poly on tops of table and stools for protection.
Recommended Skill Level
Intermediate
Comments
Sat, 09/14/2013 - 12:34
What are the dimensions here
What are the dimensions here for your table? I'm looking to make/get one very much like this and trying to figure out the best yet least amount of counter space needed, depth wise. Hoping 15" is enough but I love the look of yours.

In reply to What are the dimensions here by morgo614
Thu, 06/04/2015 - 10:00
So sorry for the delay! I
So sorry for the delay! I don't get notified when there's comments, so I'm just now seeing this. The width is 4', the depth is 15" and the height is 42". Good luck!
Rekourt Dining Table in Distressed Dark Walnut

Hey all my DIY friends!
This is my first build of the Rekourt Dining Table. Big thanks goes out to Ana and Jen for providing these awesome plans.
I think I achieved this table quite well, except for a minor detail where I forgot to sand two pot holes. It actually created a very rustik look to this table. I decided to try the steel wool and vinegar solution combined with the black tea for the finish of this table. I realized it adds so much richness to the wood, it's incredible. The stain is Minwax's Dark Walnut and I topped it off with a Satin Oil-based Polyurethane. The top and legs were also physically distressed using a variety of tools I found in my tool chest. Those included screw drivers, lag bolts, worm hole puch I created out of a leftover 2x4, chains, sanding disc, knife, hammer and much more! That part, although tedious, was fun as it gave me the permission to bang stuff up intentionally :)
For the finish, I first started off by sanding very well, talking hours for the entire table. I then went out and distressed the tops in a very random fashion, trying to not repeat any patterns. As I was doing this, I was waiting for my black tea to seep and be ready for application. I poured boiling water in a large Mason jar and added 4-5 bags of black orange pekoe tea bags. I waited about 2 hours before applying it with a foam brush, very liberally. I allowed the tea to dry overnight and the following day, I applied the steel wool and white vinegar solution. My solution had been sitting for about 5 days, enough to start seeing a bit of rust in the Mason jar. The rusty solution ended up giving the wood an orangy/redish tone, which when seen under the dark walnut, added lots of depth and richness to the color. Once dry and the wood had turned greyish/orangy/redish, I stained it using Minwax's Dark Walnut stain. I did section by section, leaving the stain no more than 3 minutes before wiping dry. I followed this (once the stain was dry) with two coats of oil-based polyurethane in satin (Varathane (Canada's version of the Rust-Oleum poly). I sanded the poly in between coats with 220-grit sandpaper using my orbital sander.
Since then, I have gone out to build about five of these, all in different lengths and sizes, including some with removable bases. The angles in the X's are a little tricky when you don't have plans for a specific size, but I have noted these down based on spacing between legs. If any of you need andgles for specific table lengths, let me know and I may be able to help :)
Let me know what you think and happy building!


Built from Plan(s)
Estimated Cost
Table ($100) and bench ($30) in lumber.
Estimated Time Investment
Weekend Project (10-20 Hours)
Finish Used
Orange Pekoe Tea
Steel Wool (#0000) and White Vinegar
Minwax Dark Walnut Oil-based Stain
Varathane Pro Satin Oil-Based Polyurethane
Steel Wool (#0000) and White Vinegar
Minwax Dark Walnut Oil-based Stain
Varathane Pro Satin Oil-Based Polyurethane
Recommended Skill Level
Intermediate
Comments
Tue, 12/16/2014 - 12:22
One more thing!
I just clicked on your other images, boy would we love to see the turquoise island and that amazing rolling console up close:)!!!!

In reply to One more thing! by Ana White Admin
Tue, 12/16/2014 - 12:31
Island
Thanks Ana! Can I post pictures in these replies?
Dresser with Removable Changing Station Topper
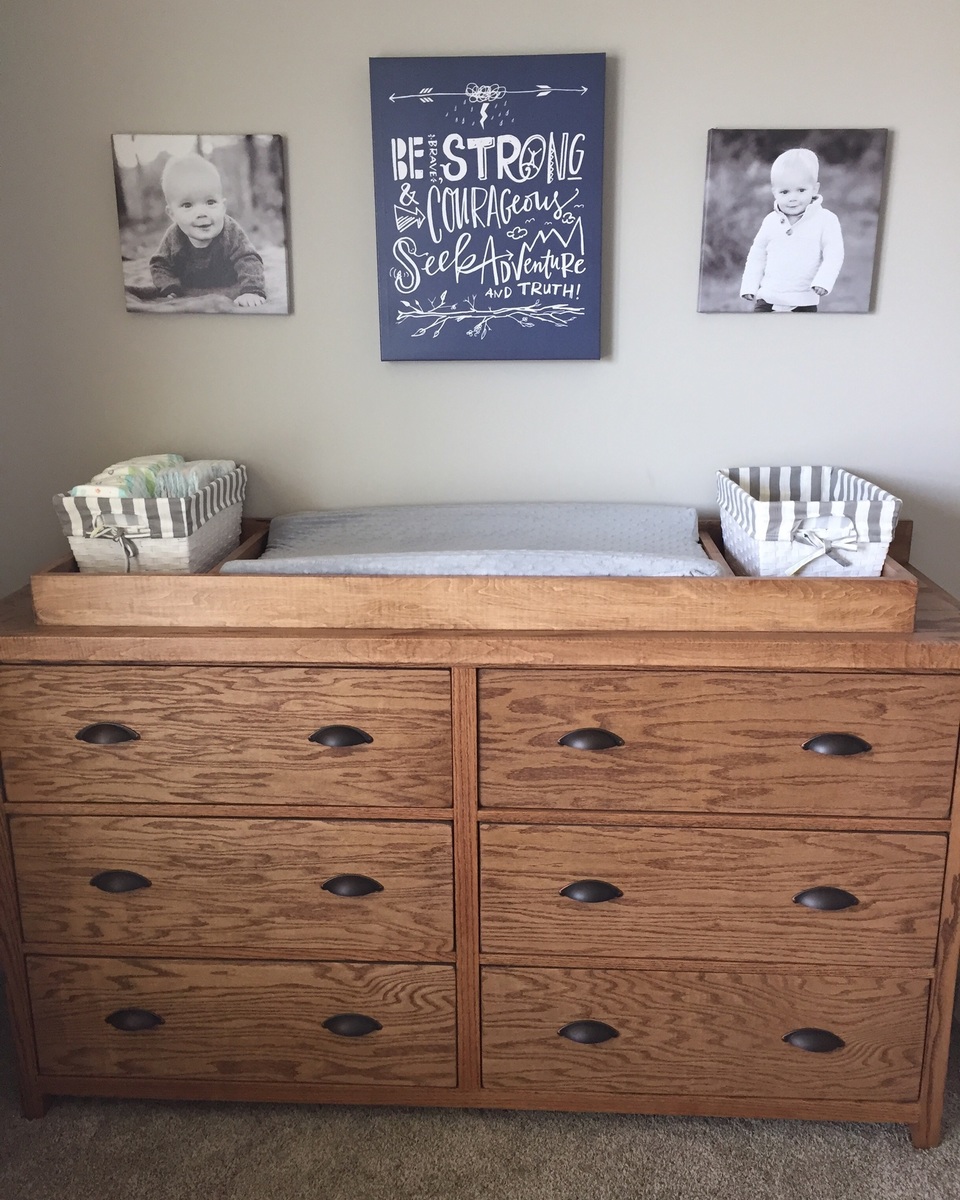
My wife and I loved the look of the Rolling rustic wood dresser. We didn't care for the wheels so instead I opted for legs, 2.5" long. I simply made a couple of tweaks to the frames (the bottom 2x2 was shortened to 59.5" and the side 2x2's were extended to 34"). I then built a really simple topper that fits a changing pad and a couple of baskets my wife bought for miscellaneous supplies. The topper is removable so when my son is no longer in diapers, we can simply take the topper off and he can have a flat surface on top of his dresser. All-in-all, we are all really happy with the end product!
Built from Plan(s)
Estimated Cost
We used Oak plywood and boards so about $200
Estimated Time Investment
Weekend Project (10-20 Hours)
Finish Used
Minwax Early American Stain
Recommended Skill Level
Intermediate
Comments
Sun, 03/19/2017 - 11:54
Wonderfully Made!
Excellent idea! This will last for years to come, thanks for sharing!